HOLIDAY DONATION DRIVE - SUPPORT MSW - DO YOUR PART TO KEEP THIS GREAT FORUM GOING! (Only 20 donations so far - C'mon guys!)
×


cookster
-
Posts
416 -
Joined
-
Last visited
Content Type
Profiles
Forums
Gallery
Events
Everything posted by cookster
-
Thanks Dave!! I actually built a couple Star Wars Legos a few years ago when my son was young, but I gotta admit as cool as they were I got bored with them, so I gave them to him and he finished them. My son's the type that can have a few left over pieces and not mind as long as the Lego (or model) looked good to him. Me? I'll obsess over one missing part until I figure out where it goes.... That should tell me something but I won't admit to what it is!!
-
Thanks Augie, but your builds are just as impressive! I haven't tied one knot, or rigged one gun, or stropped one block yet. When I get to that point I may want to go back to Legos!
-
I used my true sander to trim down the hatch end of the plank to get a tight fit at the hatch. Added a few more planks... And many more to go...
-
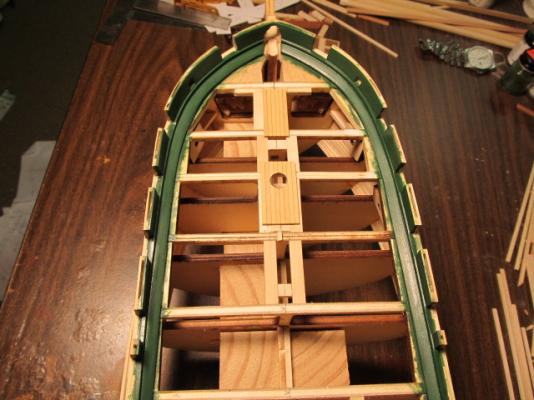
Main hatch coaming is finished, except for the trim around the outer edge. Now, back to planking. I put my steel rule back on the stops I glued on to maintain the center line. I cut and fit the planks around the galley stack. I chose to put a plank joint here so I could fit around the hatch coaming in two pieces instead of having to cut the entire gap in one section. Next section of planking was the section between the galley hatch and the main hatch. I wanted a plank joint here so I made it off the model on a section glued up. Again this section was made long then trimmed to fit. That was glued down, then I made up the section for the other side and glued it down. Next the other end of the plank around the galley hatch was cut. I cut the notch a little further away from where it should go so I could trim the end to get a tight fit. I used a steel rule laid on several planks so the rule would lie steady, then used a #11 blade to cut the notch out. The corner notch needed to be squared up with a triangular file.
-
Harvey I did think of wood, and even styrene (Oh the horror!!) I bought some brass and styrene rod to practice on my drill press using files and sandpaper - not very exact but it gets the idea across. I did not think of ebony, but if used wood I'd probably get boxwood and dye it, or paint it. I actually plan to use either the brass or styrene barrels from this test in my false gun ports. If I may ask what lathe do you have? Obviously I'll look at Sherline first, then work my way down to what I can afford. As an aside, I still work on cars and other metal stuff so being able to turn full size items in steel or alum would be an added benefit. And yes I plan to buy many of chucks blocks, I'm gonna need them. I've seen several people make here their own, but not me, gotta draw the line somewhere!!
-
Ya know, I'd like to build a Victory, but not sure my heart is in that particular ship. It sure would be impressive though. There's a 1/72 Victory out there that's 54" long. THAT would be something!. But, part of me wants to scratchbuild something one day, maybe in 1/48 scale. I'm not really into POF though, POB would suit me fine, just have to find the right ship. I do want to build an English ship though, so that narrows it down some.... The HMS Surprise is pretty interesting... Ah well, I've got plenty of time to think on that one.... As far as metal work, I've done a lot of that too, but never in miniature. I have a full size wood lathe and am pretty good with that, but I've never used a metal lathe so I will have to learn. But that's part of the fun, right?
-
I've started thinking how I want to build my carronades. The kit supplied parts are out. I could spend hours and hours on them and they'd still look bad. Of all the things we build and put on our ships, I think the cannons/carronades are one of the things that draw people in (If they're rigged properly that is) so they have to look good! So, I pretty much have decided to replace them. Question is do I buy them or attempt to make them? I've never been the type to go out and buy something ready made if I can do it myself, even if that means buying another tool or two (surprise??) I've done a little price checking and seeing that I have 3 ships that need fitting out, that's about 80 guns at probably 5-6 bucks a pop - so figure 400-500 dollars just in cannons. With that money I can buy a lathe and make my own, and whatever else I need along the way. Sure there will be a learning curve, but I'm 95% sure I can do it. So, guess I need to add a lathe to Santa's wish list. Hmmm, Santa needs to plunder some pirate booty to pay for all this!
-
So sorry to hear that Andy... Take care of yourself and your family.
-
Looking good Bob! You and Augie both are flying right along.... Looking forward to you planking the lower hull, hope I'll learn something...
-
That's OK Andy.... We all have "brain fart" moments... As for the Christmas gifts, I would suggest *accidentally* leaving a wish list in obvious places so your gift givers will see them. With of course parts #s, web sites, pricing etc. Don't want to leave any detail to chance!
-
Hi Alexi. There are several of us Conny builders on here, you're sure to be able to find any help you need. I assume you have Bob Hunt's practicum. Since this is your first ship model I think you made the right choice. I too am a newbie to wooden ship modeling (but not to working with wood) and there's no way I could build that kit without it. The kit instructions are NOT a practicum. Lucky you to live close to the real deal and be able to visit her. I'm jealous.... Please post pics, we love to look at pics Good luck!
-
It's this one Augie posted the link to. http://www.micromark...-rite,6453.html It's not the sturdiest as Augie said, but it works for what we model ship builders do. I'd still like to have a miniature power miter saw, but the Jim Saw, a mill, and other stuff comes first. This gets the job done for now... TIP: There is no positive locking mechanism on any of the angles, so you have to use the protractor gauge on top to get the angle needed. I ALWAYS use a square to set the 90 degree setting whenever moving it away to some angle, then back to 90. If there are any other angles you always use (45,22.5, whatever) you can make blocks to use to set those angles as well. "Your technique of doing half at time is nice as the mortise can still be seen to make sure all is being lined up - that's a nice benefit." Yep.....
- 188 replies
-
- 1
-

-
- constitution
- mamoli
- (and 2 more)
-
Andy, I started my planks at the front where the steps are, glued several planks together ran long, then trimmed to length, used the true sander to true them up, and glued them in place using the steps to positively locate the planks. Then a hatch went in next (not glued though). The next section of planks was glued up to only cover half the mast hole. I glued them together long and trued up one end, placed the hatch in place, placed the planks down, got the needed length to the next hatch, cut them and then trued up. Then I marked where the mast hole would be and used a #11 blade to carefully carve away the hole until the fit was just right. Glued together 3 more planks to that section, trimmed and trued, then cut the second half of the hole. Looking back at my pics I could've added a few more to better show what I did. I'll try to do that when I get to the main mast. Hope that helps! Oh, the true sander is "da bomb".... Err, did I really just use that term?
-
Hey Andy, just accidentally found your build... Looking good! That scale will be quite the challenge. As far as your mast hole question, I glued up sections of planks, then cut the hole out for the mast, glued that section down, glued up another section, cut the hole, etc etc. Sounds confusing, but look at the pics and it will make sense. Doesn't mean this is the best way to do it though.... I thought of your method (which worked well for you) but my anal retentive engineer mind was too chicken to try it. My masts were already mortised into the bulkhead so no wiggle room. Plus, they're raked and there's no way I was gonna file that angle in by hand, in an (almost) perfect circle, in the exact center point AND hit the mortise perfectly. Looks like you did it though, great job! Augie, guess what I use for a miter-box? The same one you have
-
Happy belated birthday Bob!
-
Hi Bill, looking forward to your build! i hope to start my Confed by Christmas. Good luck!
-
Thanks Dave! I'm gonna try and give it a few days, maybe the sheen will grow on me. It just seems in our "model scale" the sheen should be almost flat. Maybe I'll get used to it... or not Thanks for dropping by!
-
Thank you Wacko! Augie, I have some model master clear flat enamel and acrylic, but not any lacquer. I did think of overcoating it with that, so I may experiment with it and see. I guess one more coat of *something* won't hurt... Thought your Syren log was gone (never mind, that was Chuck's - brain fart!) but I just found it, I'll take a look at what you did. Thanks for the info!
-
Looking good Augie! at this rate you'll have yours planked before I ever lay the keel on mine....
- 2,191 replies
-
- 1
-
-
- confederacy
- Model Shipways
- (and 1 more)
-
Well I finally got the bullwarks green finished. What a pain in the butt..... The color wasn't the problem, it was the finish. I used satin wipe on poly and for what ever reason the poly dried with a sheen I would call semi-gloss, not satin. It's not the poly's fault, I tried it on several sample pieces (no paint though) and the sheen always came out very nice. All I can figure is the poly over the floquil paint dries to a different sheen. I was finally able to get the sheen I wanted (almost) by rubbing the poly down with a cotton swab just at is got tacky. Not dry, not wet, just the right stage of tacky. I'm still not 100% happy with it but it's as good as I'm gonna get it so it will have to do. Hopefully when the deck is planked, furniture added etc, it won't bother me as much. I am looking forward to trying acrylics down the road for the gun carriages to see how that turns out... Looking back I wish I had used dye, but I would've had to mix a custom color and I didn't want to do that. Lesson learned....


-
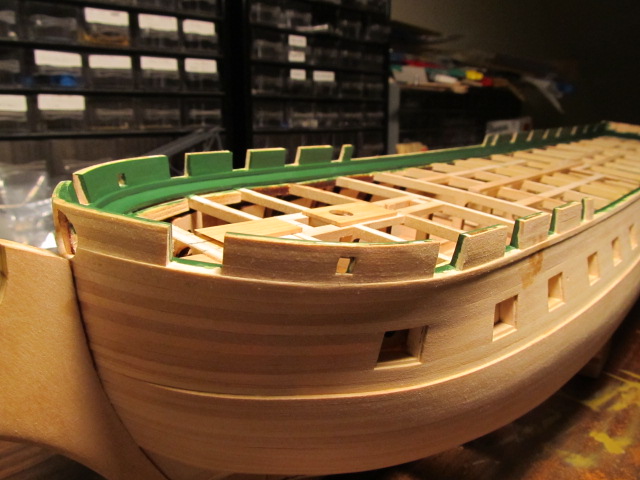
Thanks Augie and Patrick! Yes the hatches look much better as separate pieces. I'm thinking of leaving a few out and installing ladders down to the gundeck, which means I'll have to scratch a few ladders. No easy task without a "JimSaw", but I think I may have found another way to do it. I need to check my ATOS book and see if I can find some ladder drawings and get some guestimate ladder dimensions...
-
Rich, be aware that there are differing versions of the constitution's configurations through the years. I don't know what the configuration of the Constructo kit is, but the model shipways kit is based on how she sits today, which was mostly done in her 1927 rebuild. The Anchor port/gunport you refer to is an anchor port on her current version, and is also how the MS kit is configured. This was a gunport (but in a slightly different location) in her 1812' era configuration. I went back and changed the anchor ports on my model to gunports as I'm trying to build to 1812 as much as I can. Sounds like your plans my have conflicting configurations. The best thing you can do is exactly what you're doing, verify everything on the plans before you commit to them! You may want to pick up some reference books depending on how particular you are about any certain configuration. I bought the Constitution Anatomy of The Ship book and it is full of images, and some text, (it's not text heavy) that will help you understand the differences. There are other books out there as well and lots of images on the net. Look for pics of the Hull model, she was built by the crew for Captain Hull in her 1812 configuration. If you're not stuck on historical accuracy, just go with what makes you happy, that's all that counts anyway!! Good luck!
-
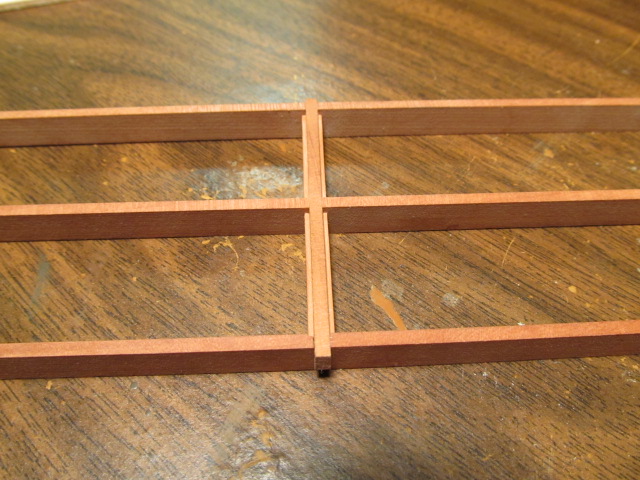
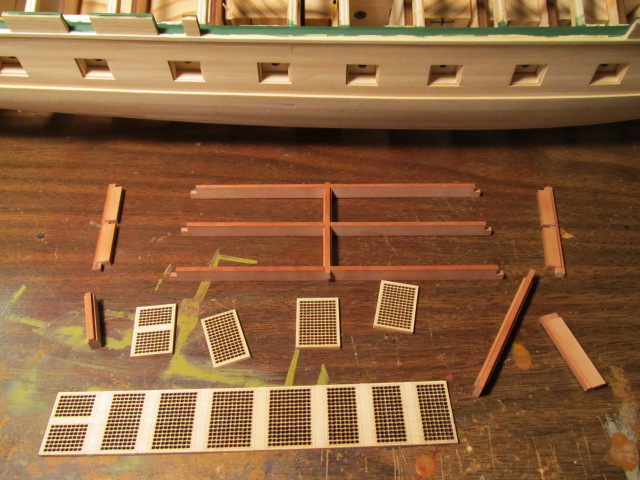
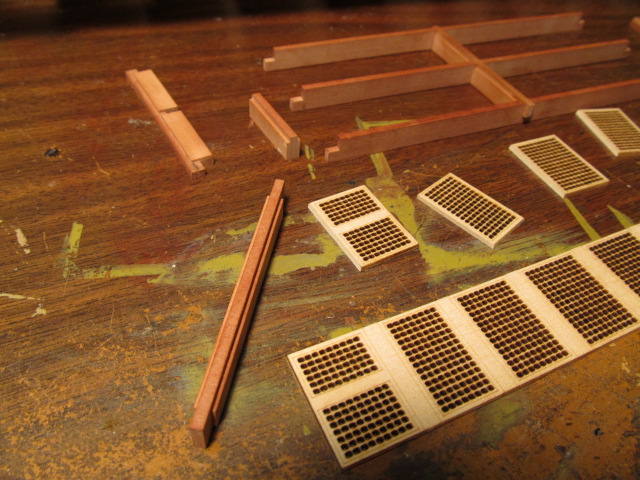
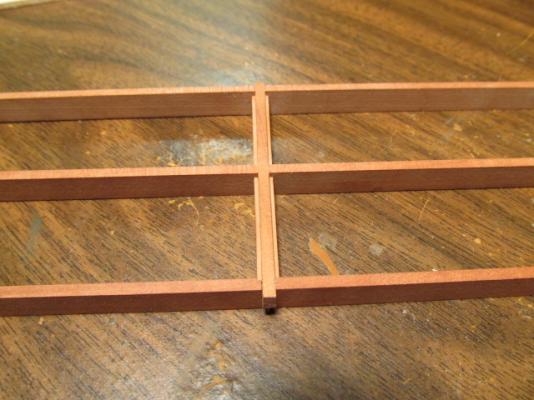
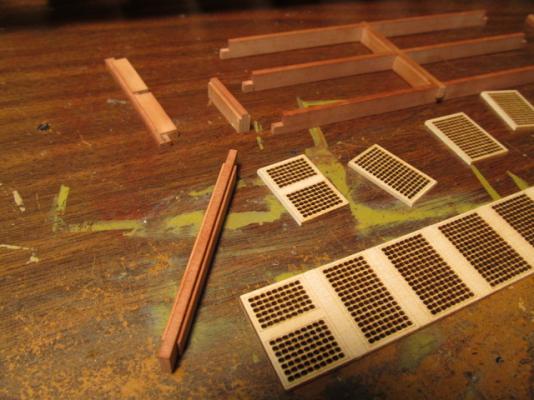
Work continues on the main hatch coaming. Putting it together. Also here's the other side of the grates before being cut into individual pieces. I made up the center beams with the grate supports as an assembly and will be cut to fit the individual openings.

-
Dc, I'm also attempting and 1812 Conny, but I'm calling mine "in the spirit of 1812" as I'm sure i'll get some details wrong. Love what you're doing with yours, scratching the windows out of wood is a challenge I did not want to take on, you're doing a great job! I hope all of us that are attempting 1812 Connies can pull it off successfully! Great work, looking forward to more!
-
NIce Augie! Are you using Winsor and Newton acrylics?