Wintergreen
-
Posts
1,002 -
Joined
-
Last visited
Content Type
Profiles
Forums
Gallery
Events
Everything posted by Wintergreen
-
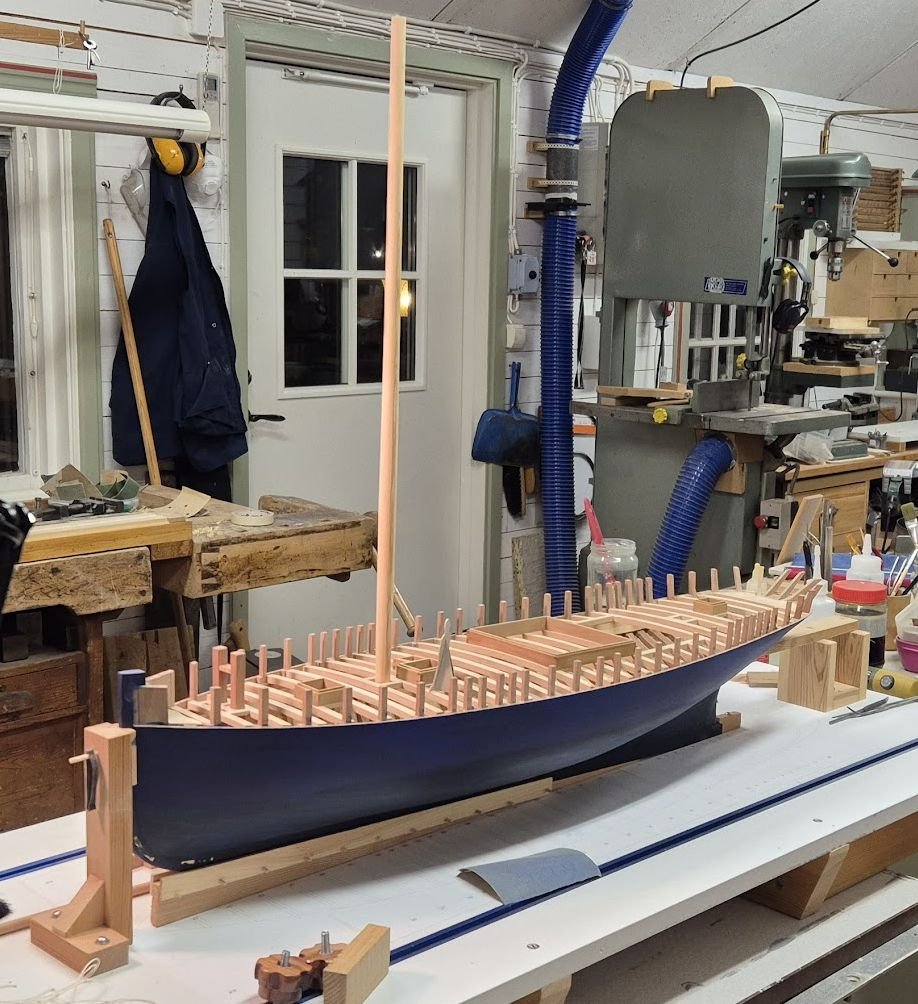
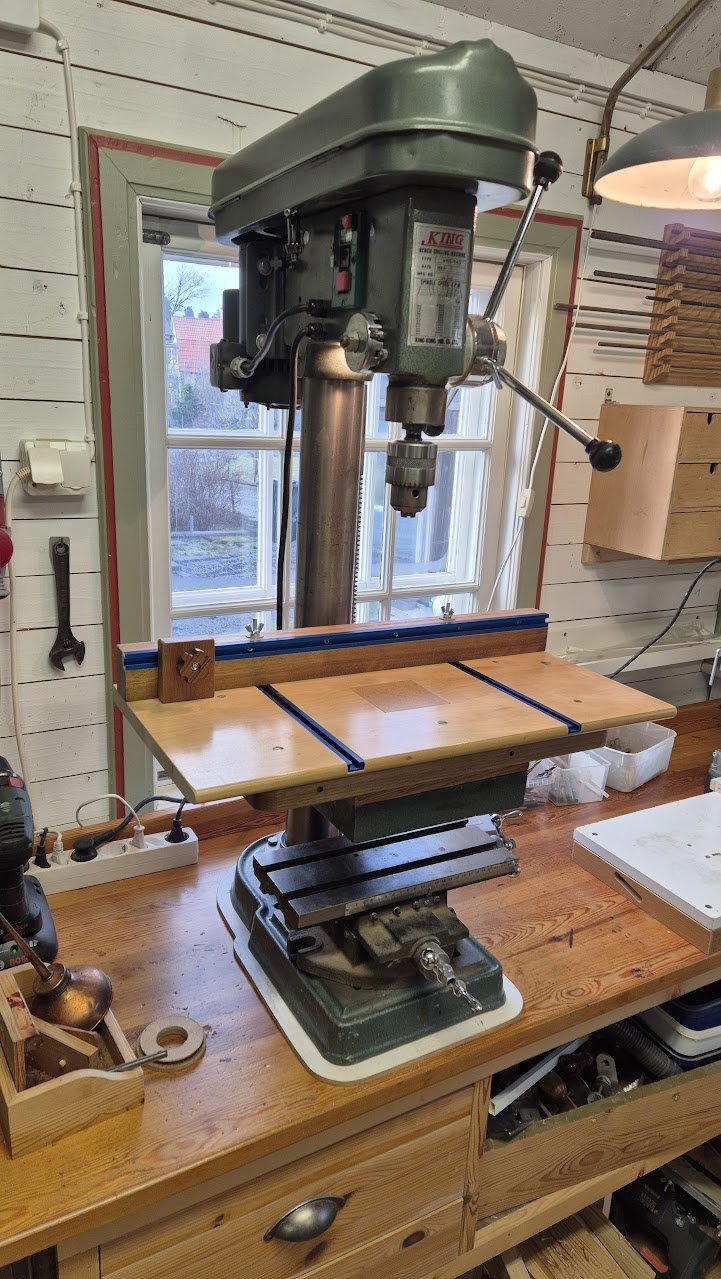
Hi guys! Well, filing on those covering boards had me thinking of another project that I've put up for too long time. So, I got a bit sidetracked from the Atlantica build and went all in. A drill press table. Some might argue that it is too pretty. But knowimg how I function, I know that the first quick-and-dirty ugly solution that I slap together will usually last a long time. So, doing it properly the item of focus will probably last me a lifetime. Hence, why not also make it pretty? One litttle hickup about the finish of the fence though. The table had two coats of floor lack, very durable, but the fence I thought would look nice with the Osmo oil. Well, it does look nice, however the oil refused to harden. You see, the wood used in the fence is some quite oily species from central Africa (Zaire). My parents brought it back from their stay there a long time ago in the form of some crude looking furniture. So I planed it down to save some later project, and here we are. Anyway, I wiped the surface with acetone and that seems to take away the ickiness. All good. I made the top table easy detachable with machine screws so I can switch it out for some other, unbuilt, auxillary item in the future. The sub support is from solid oak (sourced from old 60s church benches that also was given to me a long time ago). Back to Atlantica. Cheers!

-
Thank you Mark! The mast is of ordinary pine, very straight and fine grained.
-
Quality before quantity - that is always appealing. We like that. Must say that I continue to be amazed of your build and your addiction to details. Could be affection, but I think addiction comes close 😉 Your Bellona is such an inspiration with its clean lines and flawless joinery. Apart from praise I have nothing to add to the discussion. But oh, is that a Tormek wet stone sharpener in the background? No wonder you can produce such fine joinery 😉 Keep it up!
-
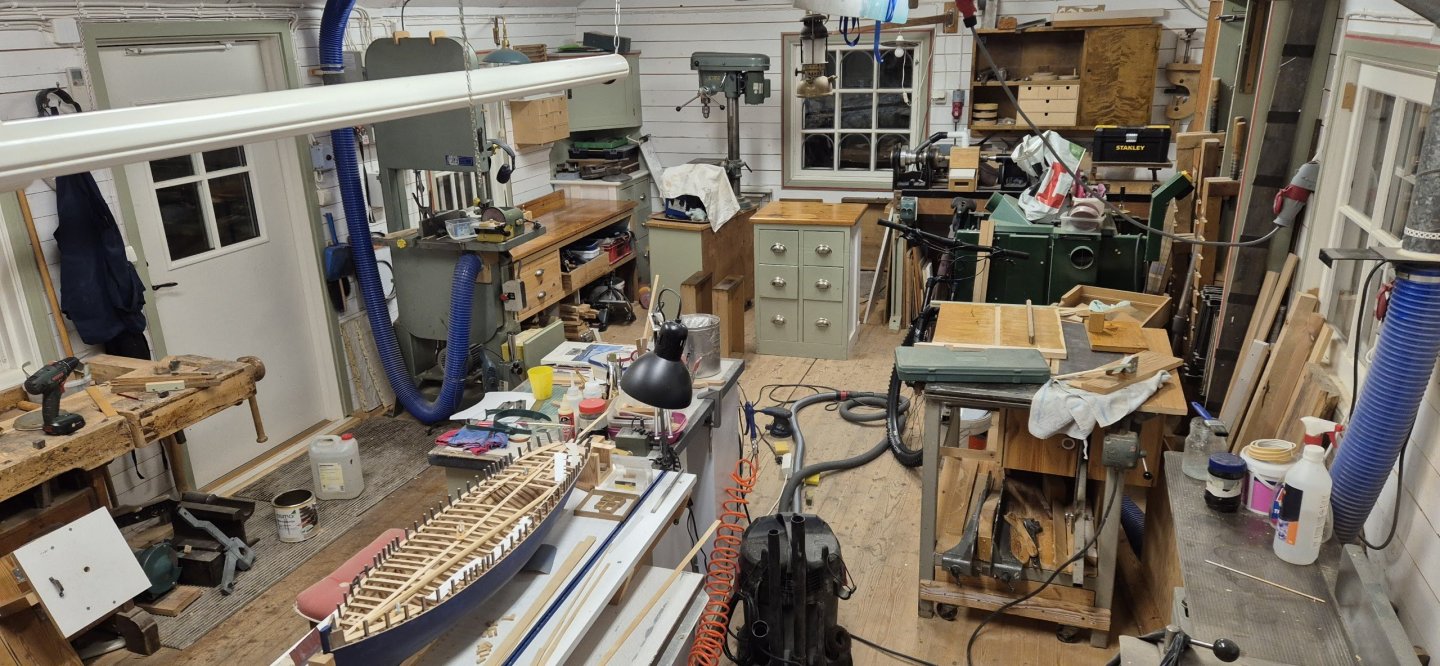
True @vaddoc, there is not so many peculiar items. The lamp is a kerosene lamp (I think it's called), the type you need to preheat before light it up. Bright as day when burning. Above the lamp, the aft end of the rudder from my sailboat can be seen, hangs from the ceiling. Then there is the mechanical tiller under the workbench that will get a couple of layers of rust proofing before going back into the boat. But yes, it is a very nice workshop. And for every corner I tidy up it gets every so slightly even better. The plan is to stay here a loooong time. All the kids have suffered from been moved around too much during their early years, so our message to them is that grandpa and grandma stays here. They know where they will find us.
-
Snow shovel? Off course there is John! The equation is always like: "the tools you need" = "the tools you have" + 1 Same with bikes for a cyclist 😄 (I have four, haha) Jokes aside, I'm happy with how it turned out. Storage for sanding papers and belts in the drawers. Table saw discs on the side in the narrow compartment. Large shelf for Dremel or whatever I choose. Lockable swivel wheels for easy moving around. In the background you can see the old stool with caster wheels, red cushion, that takes me to a perfect height for using the sanders. Note though, I did take several years to reach this final state of the station. With a couple of repurposing done over time.
-
Thanks Keith and John 🙂 Yes John, I have. I am very fortunate to have an entire workshop to mess around in. About the supply of timber... you should see my garage... what is in the picture is only a fraction of the supply available to me. Quite a lot of birch, however lot of it is curly grown. Decent amount of apple (own harvest) and then the common pine. Some fine/slow grown, which can be used to spars, I have salvaged from old furniture and railings and stuff. Here is my organized sanding station. Shopvac is connected to the aft end of the box. I might redo the contraption witht the white top. At present it can hold a Dremel, but I'm contemplating using a power drill instead, that can take larger cylinder/drum sanders. Future will tell. The two drawers came from a scrapped desk. I still have one door and a larger drawer at my disposal from that desk to use somewhere in my shop. Haven't figured out where just yet. And the power outlet from the shopvac is used so it starts simultaniously as the tools. Now back to the build. Cheers!

-
The devil is in the details, right? I just want to add "what the others said" 😮
-
Well, thank you Gary! Most appreciated. At the moment the build is somewhat stalled due to an sudden, unexptected bout of organizational frenzy energy that I got. (plus the fact that I noticed that my rediculously expensive Osmo oil had started going off in its can, had to find something to use it on). So I made a mess of the workshop in order to organize it. Makes sense, yes? You can see the shiny benchtops in the background where I used some of the precious Osmo oil. Hint, the six drawer cupboard and the table behind the bandsaw. Still over a liter left so I poured it into a more suitable jar instead of the original 2.5 liter one it came in. What is hiding is my newly organized sanding workstation. Picture to come tomorrow. Also happy to answer any questions of peculiar, out-of-place items in my shop 😄 Cheers to all!
-
Slipping wiht a sharp chisel either makes a hole in the boat or in oneself. The latter is messier... pls avoid. Good catch of the twisting structure and a sensible choise to rip out att correct. If not, it would haunt you later in the rebuild I think. Keep it up!
-
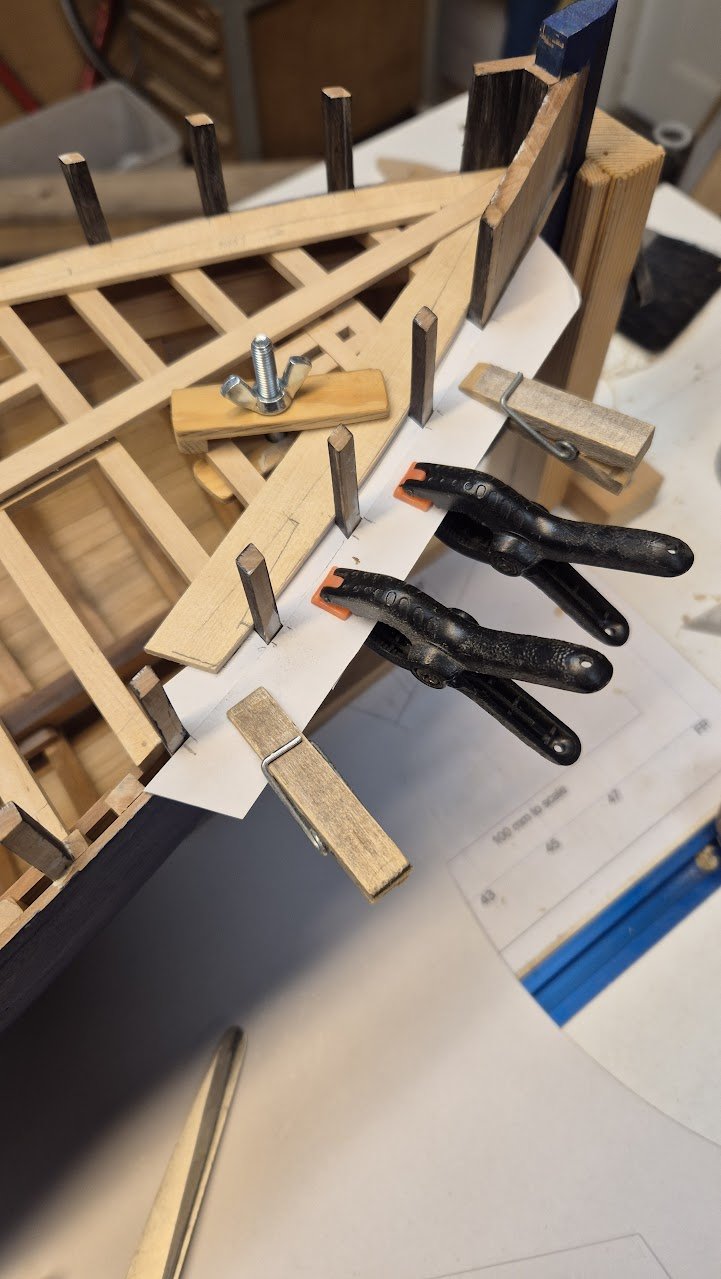
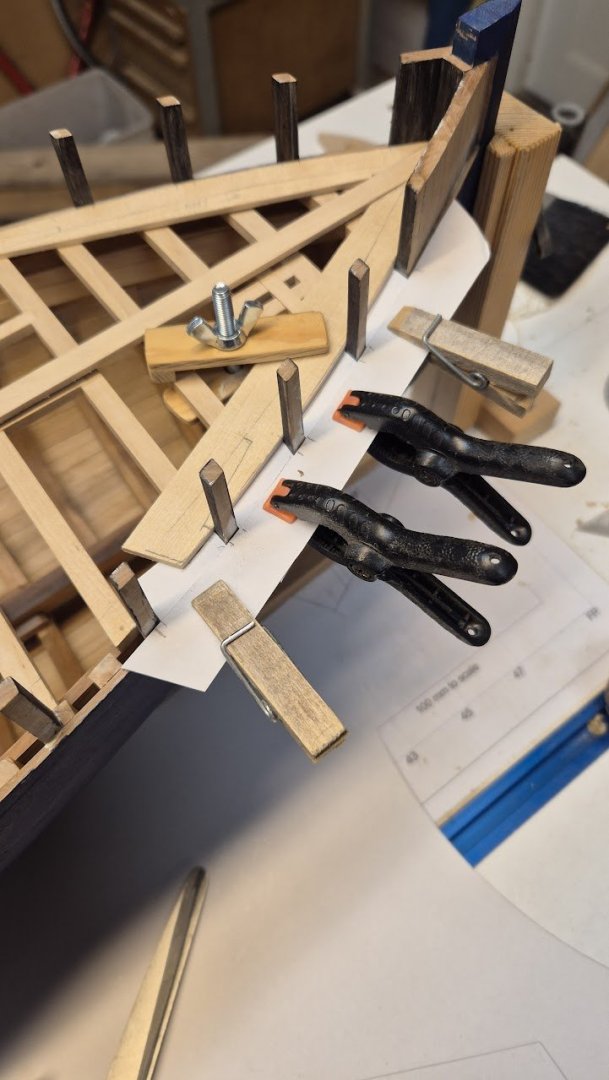
Thanks Keith, yes, as part of this community it is easy to get addicted to the perfect fit or the exact representation... Just a short update. Another couple of boards are filed and dry-fitted. Glue will have to wait a fair bit still. When it is time for glue the inboard plank will be fastened first. Then I can do the final fine trim of the outboard plank against it. "I worked all nitght, then it dawned on me" ... well not that it matter now, but I think I planked the hull with aspen instead of birch. And how did you come to that conclusion. Well, I scrapped a veneered cupboard and used the bulk wood for planking. But when I thought of it now, it seemed pointless to use birch as bulk when the veneer was birch... so some searching the www gave me the plausible wood aspen instead. Similarly light coloured and the grain is not obvious. However, aspen is lighter and softer than birch. So, a quick comparison on the scale of similarly sized pieces gave that what I thought was birch (ie the aspen) was a fair bit lighter than actual birch. But as I said, not that it matter now. Will however be 100% consistent in using birch for the deck. Hence, the covering boards (or margin planks) are my 2nd attempt... Thanks also for all the likes, fellows!
-
Thanks John 😊 It is a delicate puzzle to file enough but not too much...
-
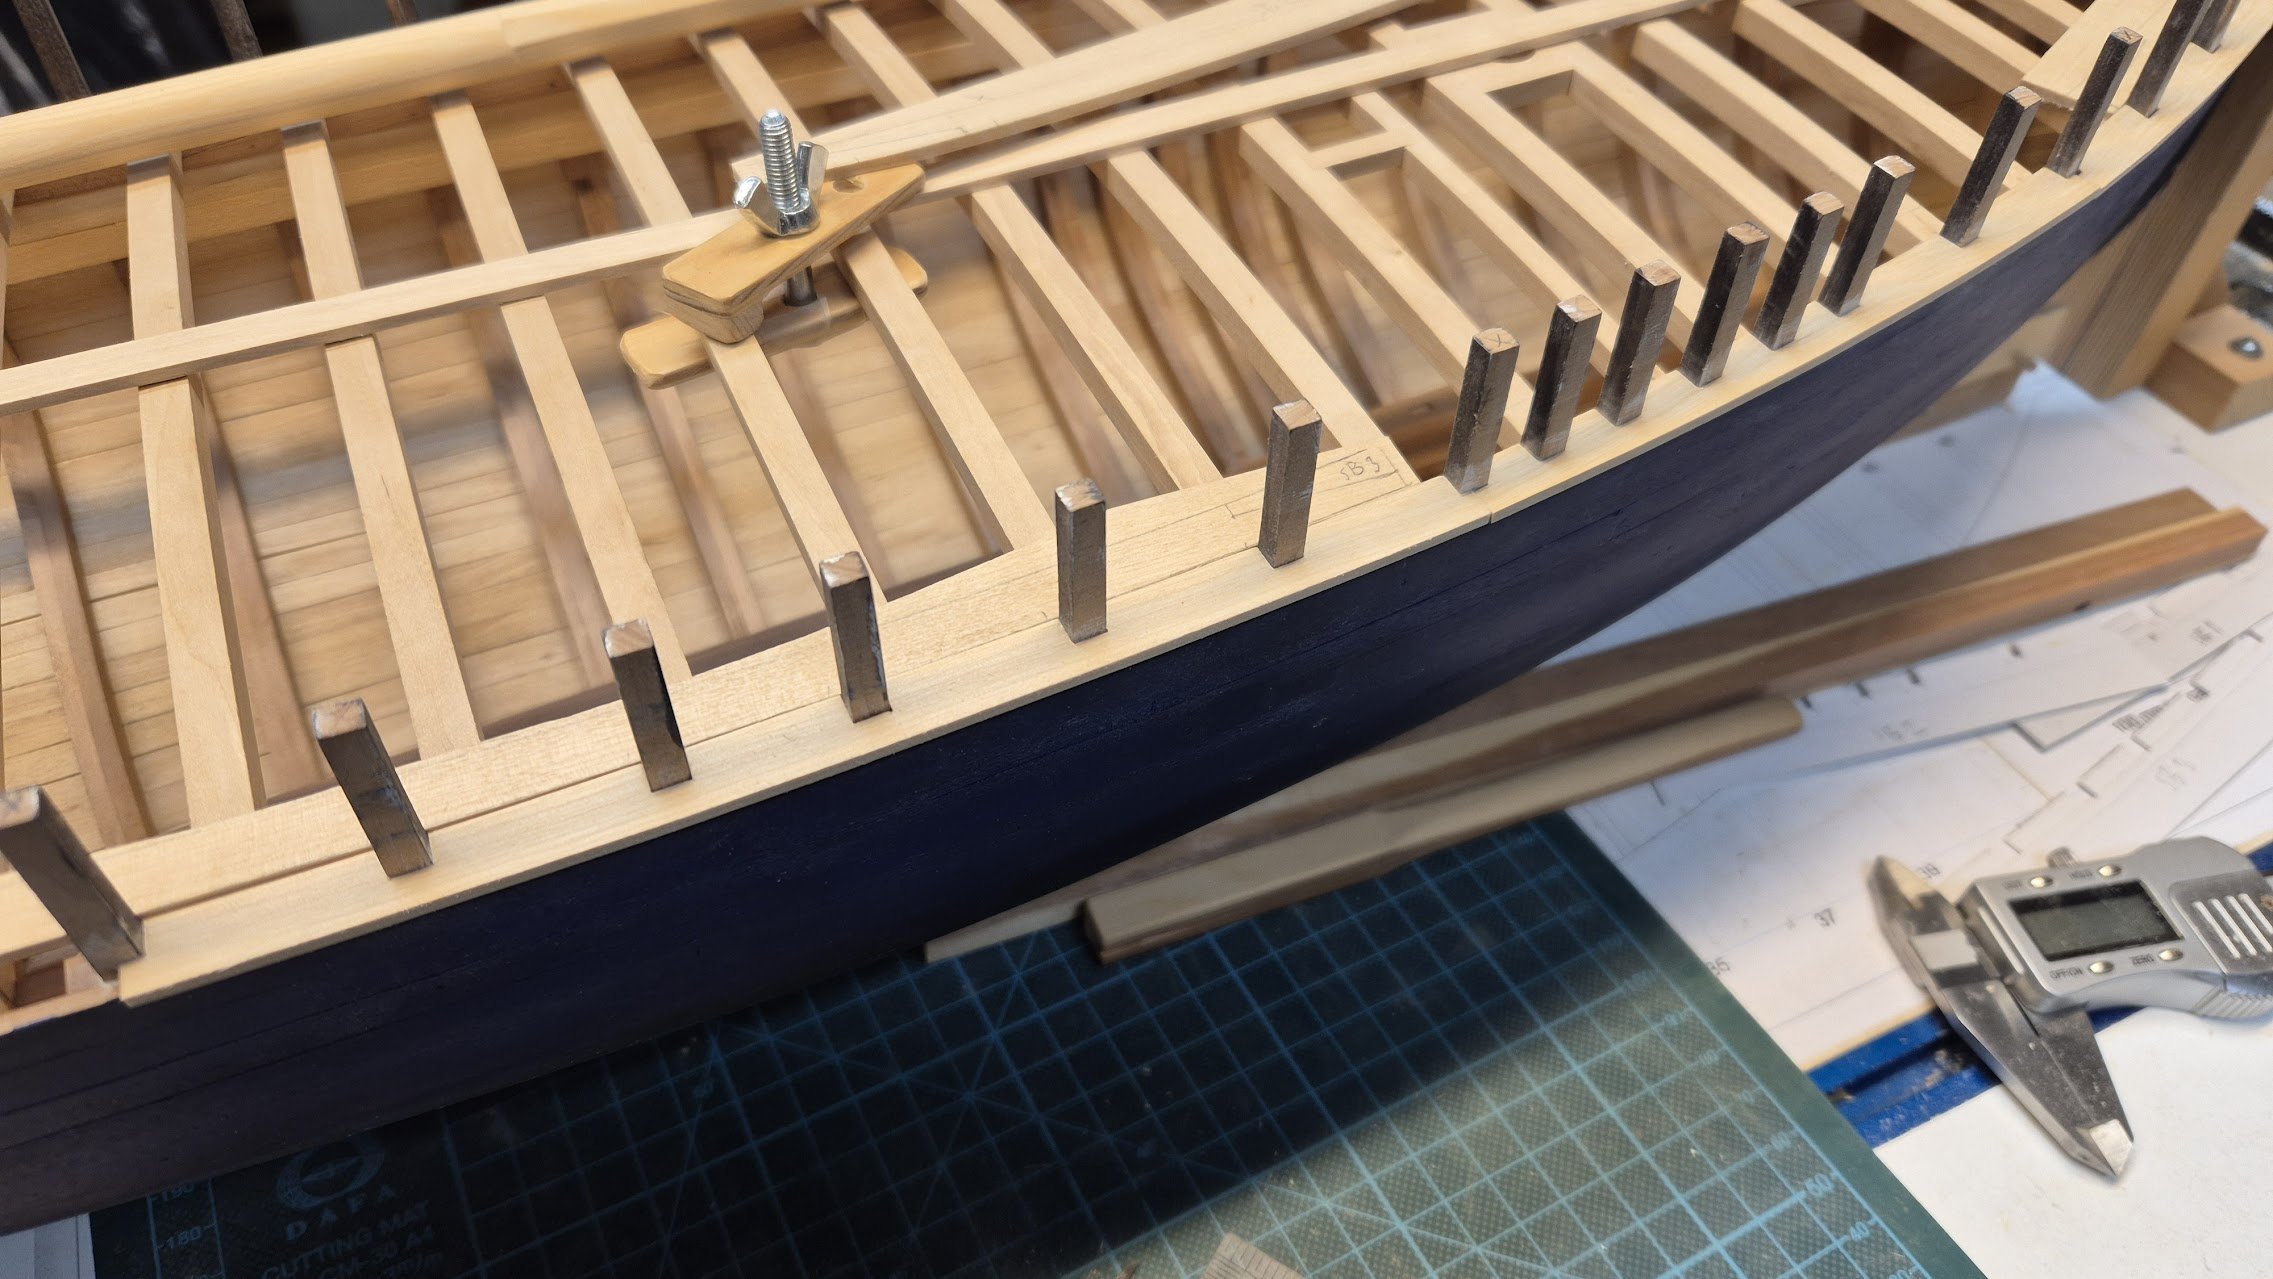
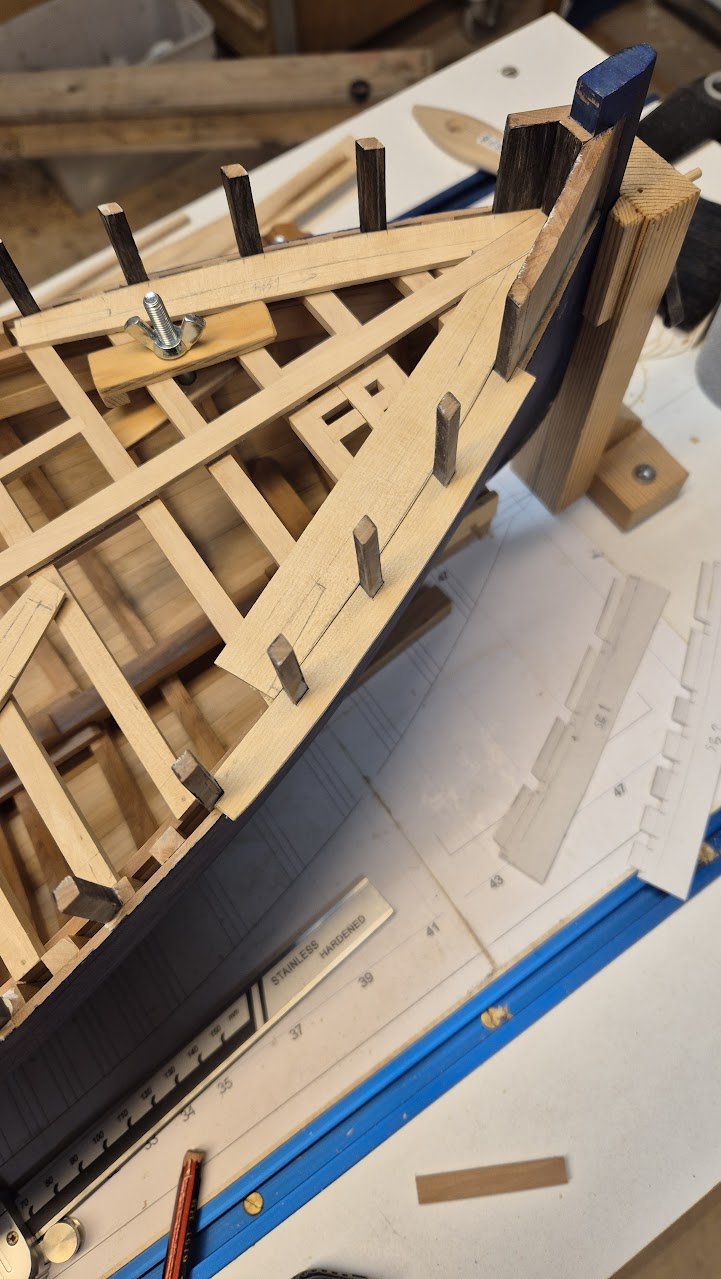
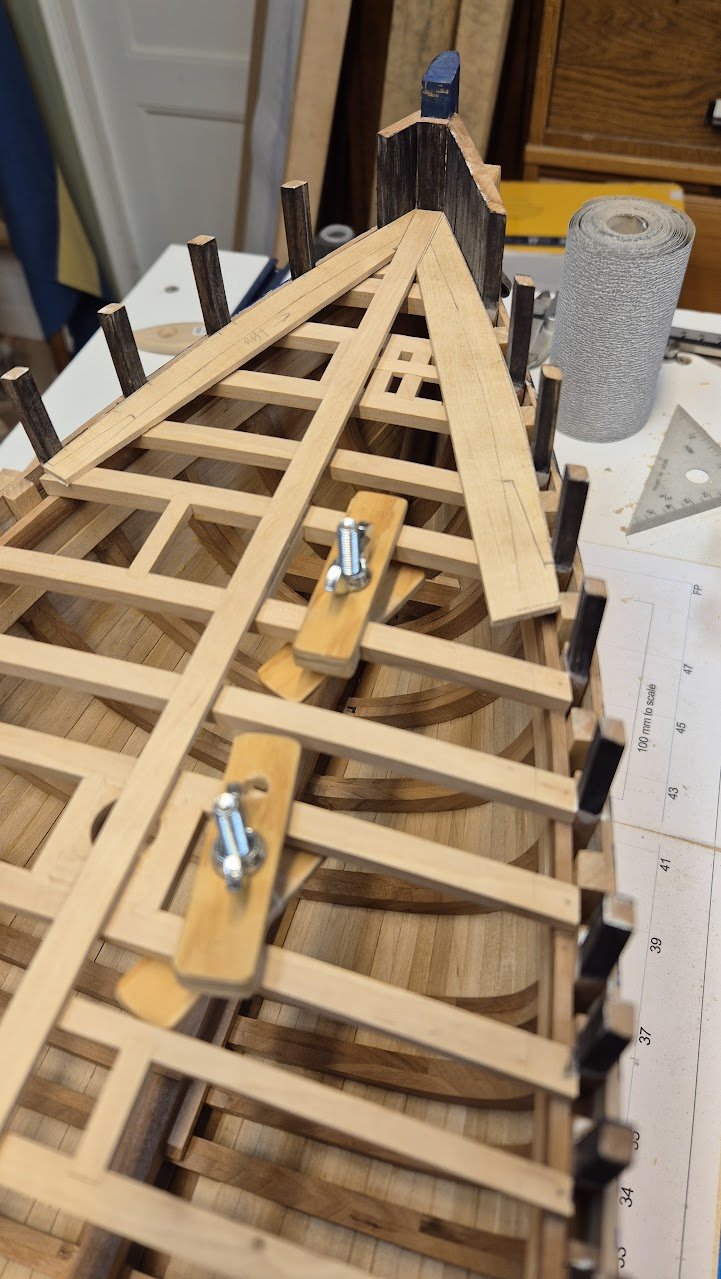
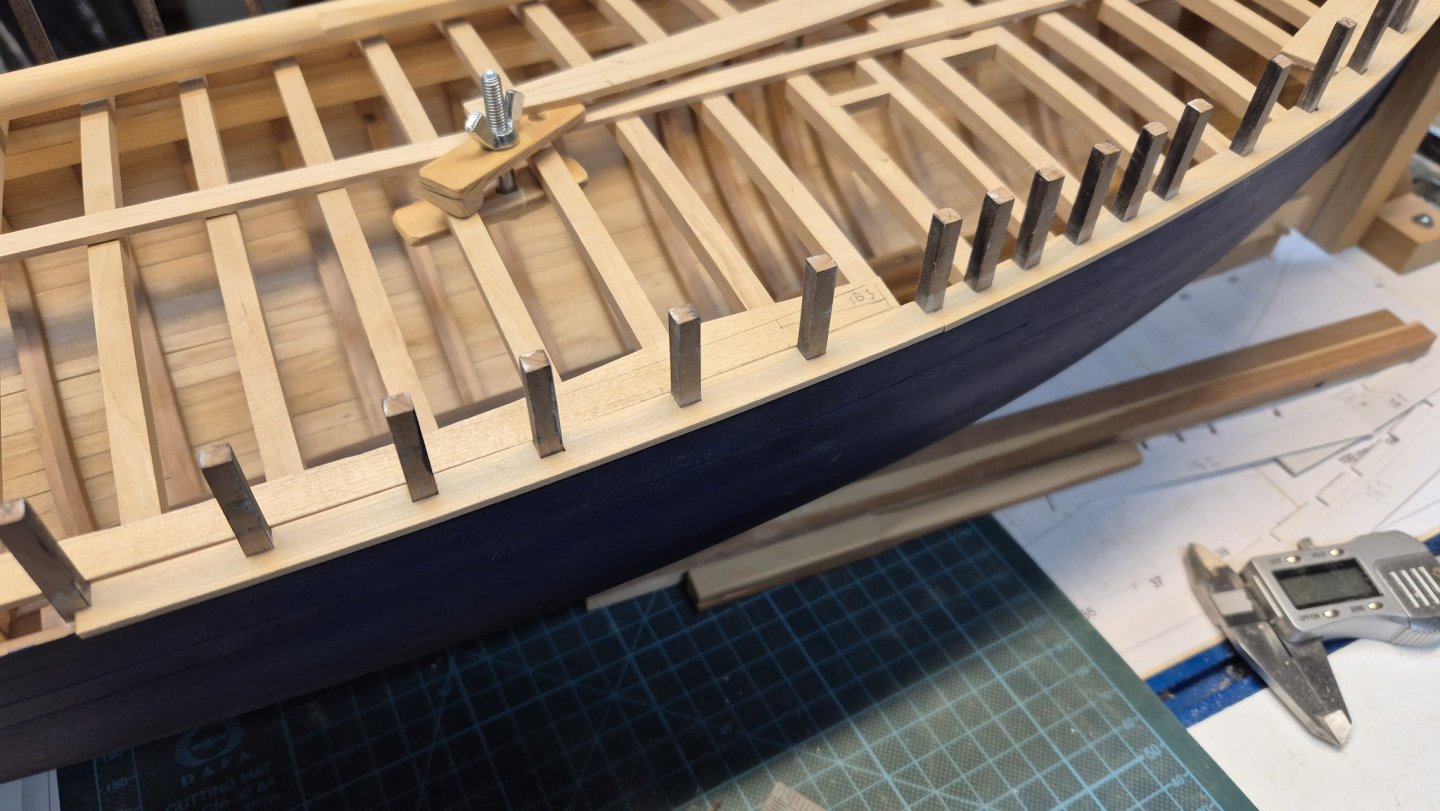
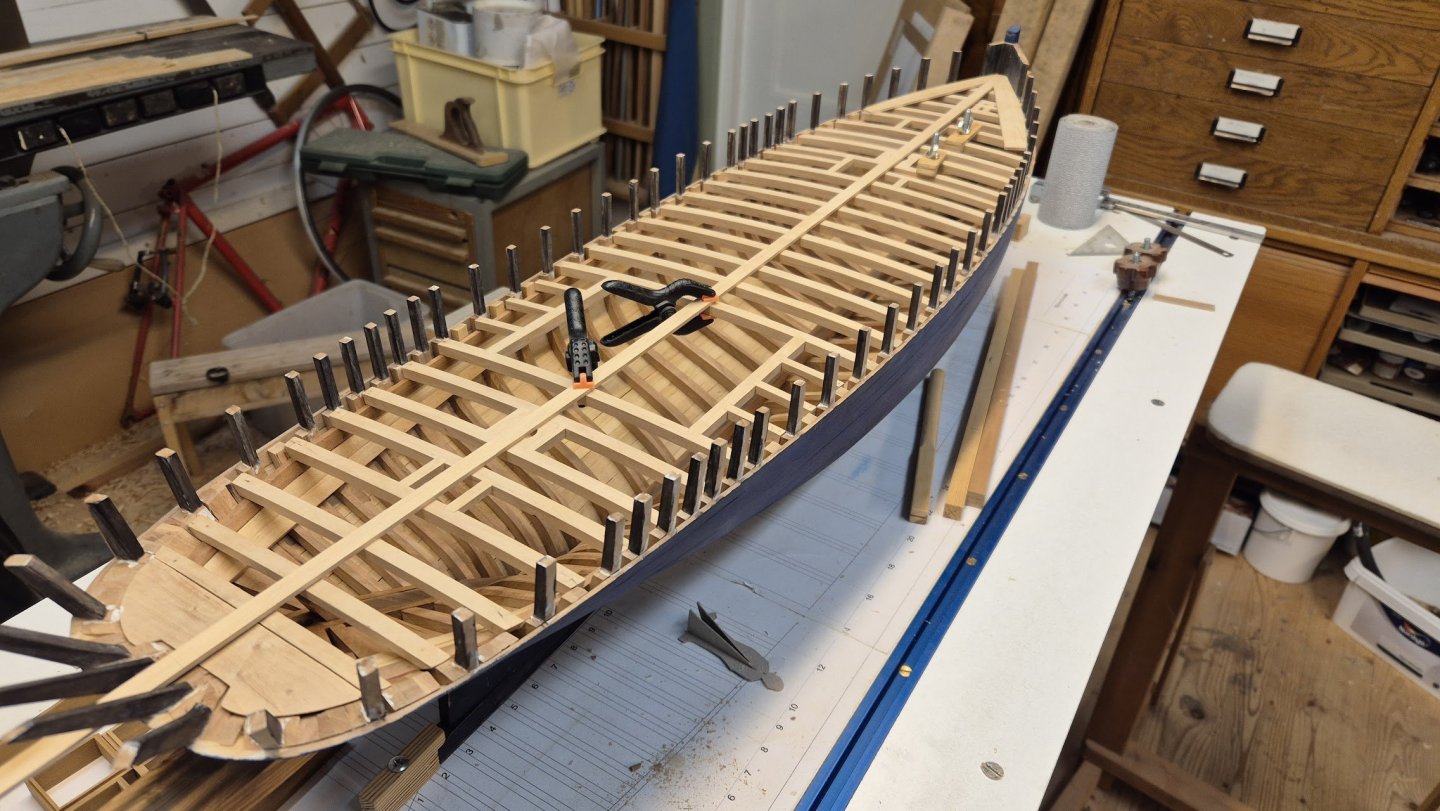
Thanks for likes and visits! Progress is steady and slow. Slow because the do and then the undo habit.. I thought to plan ahead and paint the bulwark stanchions white while they were unobstructed. Turns out it was a bad idea. They are left unpainted on the real ship... so I had to scrape of the paint... instead I dug around my selection of stains and found a suitable colour to mimic weathered oak. Then there is a lot of fiddling around with the plank sheer inside and out. Inside the stanchions it is quite straight forward bar the lapped joints, which will be handled later. Outside is a lot of templating and then careful sanding and filing to get a good fit. Pictures in order of work. I am particular happy that I did not go ahead and glue the king plank in on the entire deck because it will only be found in front of the bollards up front. For the remainder of the deck there will be regular deck planks all the way to the centerline. Although I will keep the plank in full length when I actually glue it down to have the short piece up front to be dead centered. The overhang will be trimmed down to just about an inch (0.8mm in scale) later on. And this picture I just let in here for I find it wholesome. 😉 More templating to come... Cheers!

-
Yep, that'll do it 😂 Honestly, it was not ciritisicm, just an observation. Your launch is definitely a piece to admire wherever you place it. It looks gorgeous!
-
I obviously missed some posts here due to my habit of sailing in the summer. What a nice looking platform Mike! And since it's new years eve I take the opportunity to wish you a prosperous 2025 with lots of hours at your workbench! Keep it up!
-
Dear all, I wish everyone passing by here a splendid 2025! Lots of hours in the shed or workshop, whereever it is and of course, lots of hours with the near and dear. Yes @KeithAug, nearly three years now. Three years you wonder? This build started april 2021, which is more than three years. So what's with the three years? Well, during winter 2021-2022 I went through a cancer treatment. The whole shebang with radiation (dec -21), chemo (dec -21 to feb -22) and a final surgery (end of March -22). Don't worry, all is well with me. Yearly checkins with the healthcare to monitor that I stay free from the cr**p. But since I posted somewhat of a diary on Facebook, I get reminded every winter (like I could forget, right?). But still, memory fades over time and my updates on FB reminds me of how crappy I felt from the chemo. And also how lucky I am to actually writing this. "Lest we not forget!" as the saying goes. So, to end this update and year (yes John I know you already write 2025 atm), apart from the previous well wishes I also wish everyone a healthy 2025! Take care and let's continue in 2025!!
-
"Always look on the bright side of life!" 😄 Fair thought though. Keep it up, Keith!
-
Oh, I've always thought tugboats looks nice. I'm sure this will too. And even though the Occre is RC, the kit prop just looks awful. We are confident that you can do a better job Vaddoc 🙂 Keep it up!
-
Excellent Vaddoc! It came together beautifully, your launch. I get it that you were in a bit of a hurry to source a prop for your boat and had to take what you got in order to meet the launching day 😉 However, I think you might want to save up for a little bigger prop for next season to get a bit more drive through the tidal streams of your coastline. Nevertheless a very nice looking model it is! "unusual project" - you say... how's that for a cliffhanger 😄 Well, since you so handily linked your new build in your signatur I found you new project. Meet you there. Keep it up!
-
Very true for the first kit that was produced. A lot of guesswork. My kit is from the 1980s and my Wasa was finished in 1989. All details are more or less correct but not the colour scheme. It was believed she was Royal Blue but later science reveals she was painted in a more traditional 1600 style. Lots of vivid colours. Now back to your HMS Lion 😉
-
Oh, a re-comission. Interesting. I have an old Wasa (Billings) that I ponder doing the same to. Well, not RC, just rebuild to some higher standard than mine teenage me mastered. I must say your teenage you did a darn good job with that hull Ian! Okay it lacks details but the lines are there. Well done Sir! Keep it up!
-
Just had time to casually look around here on MSW and this pops up. I read your first post and then skipped to last page. I find it fascinating the level of ingenuity to produce small scale items and have them resemble life size objects, like the tire fenders above. Also at 1:160 scale one have to admire the cleanliness you acquire. I mean, it is even further than Johns, aka Jim Lad, usual 1:96. Keep it up!
-
You are all too kind. Cluttered or not, I guess I loose a little faith in myself when I see other builders staged photos. It looks so pretty with a calm backdrop and nice, ambient light.
-
Andy, didn't your mother tell you not to lie?? 😄😄😄
-
Just one more note, I will repurpose this made main mast to mizzen or some other spar due to it being a object of practise and also since I omitted the square section at the cheeks. I haven't decided if I will use pine, birch or apple yet for the mast and spars. TBD.
-
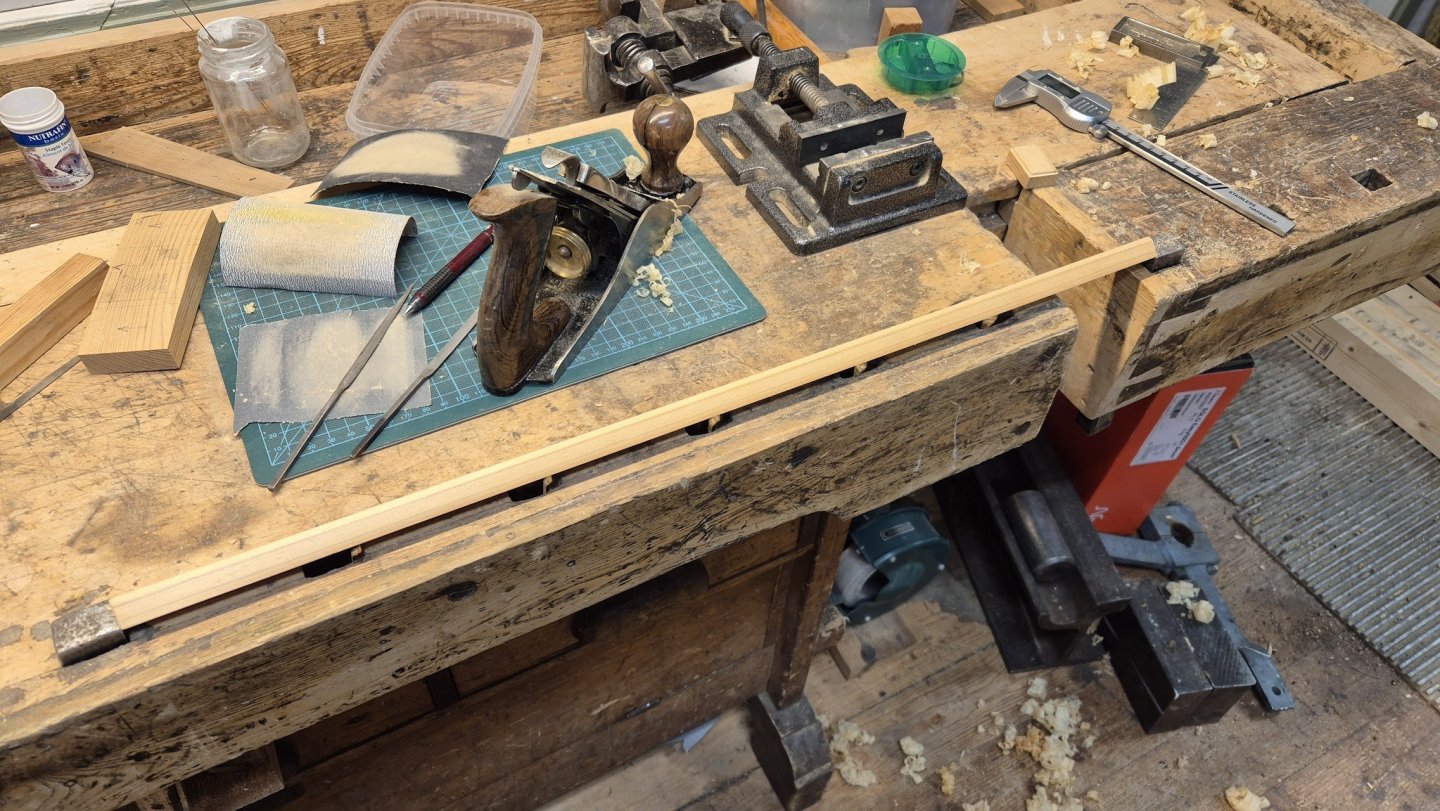
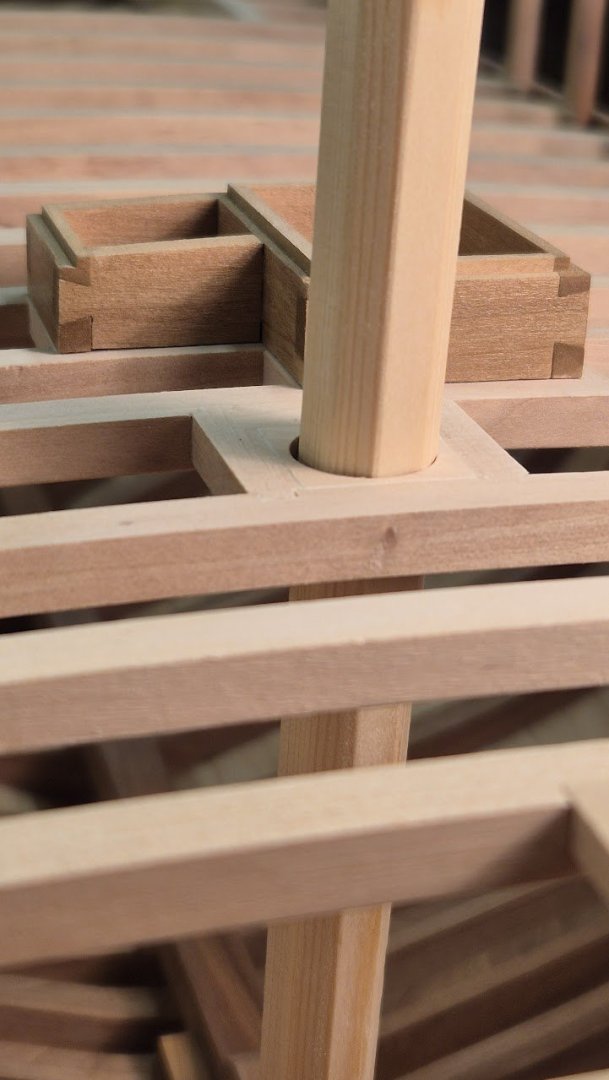
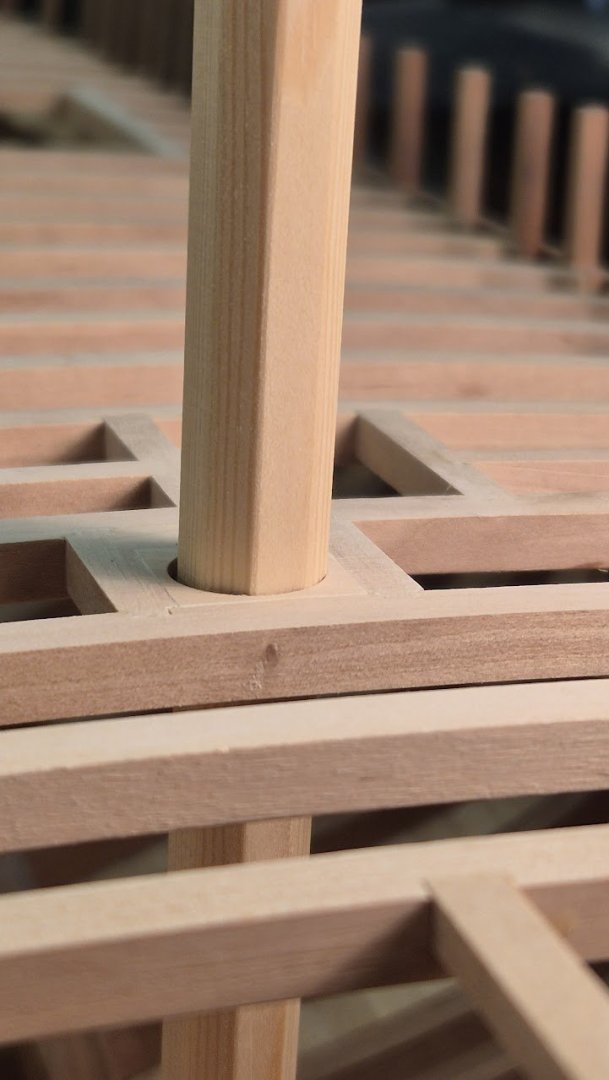
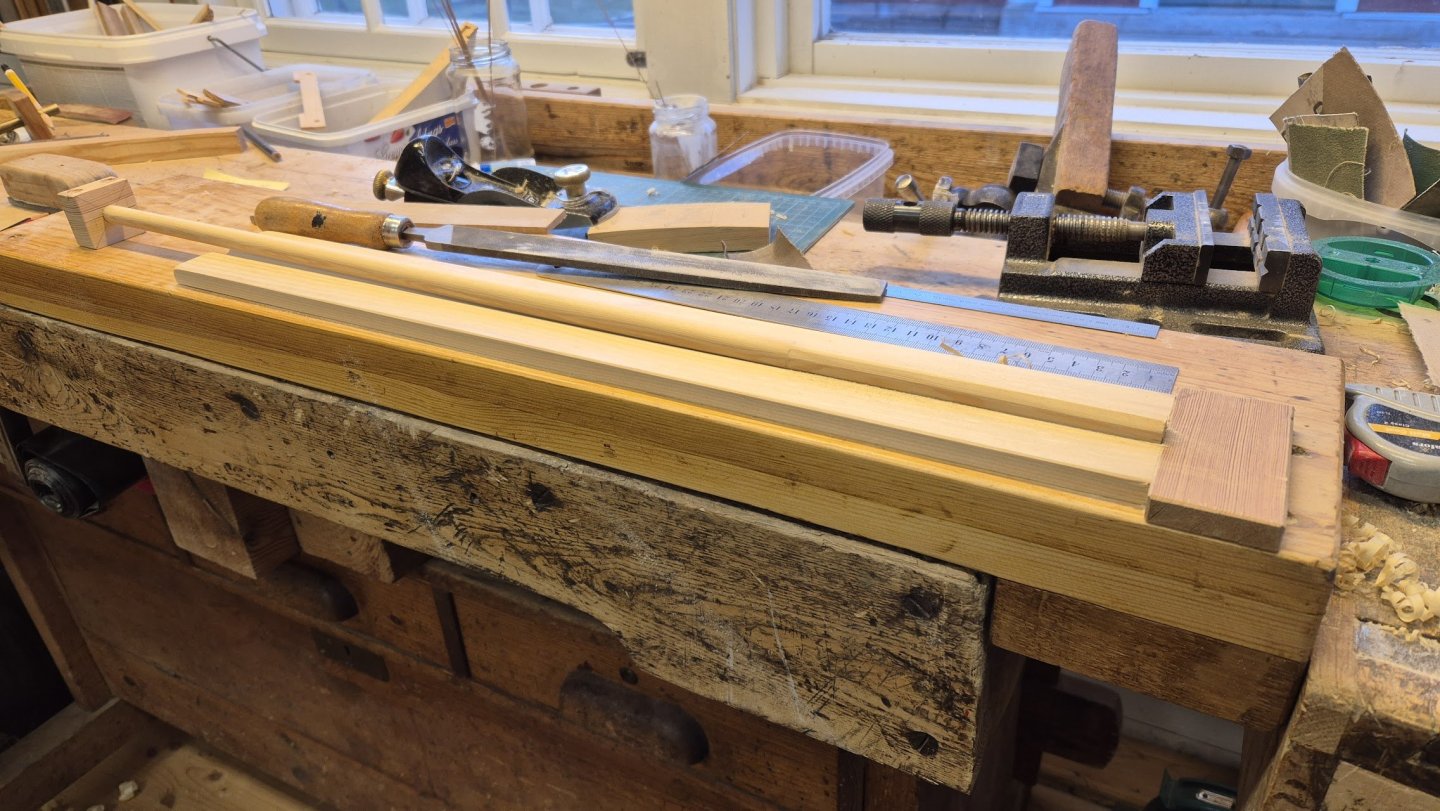
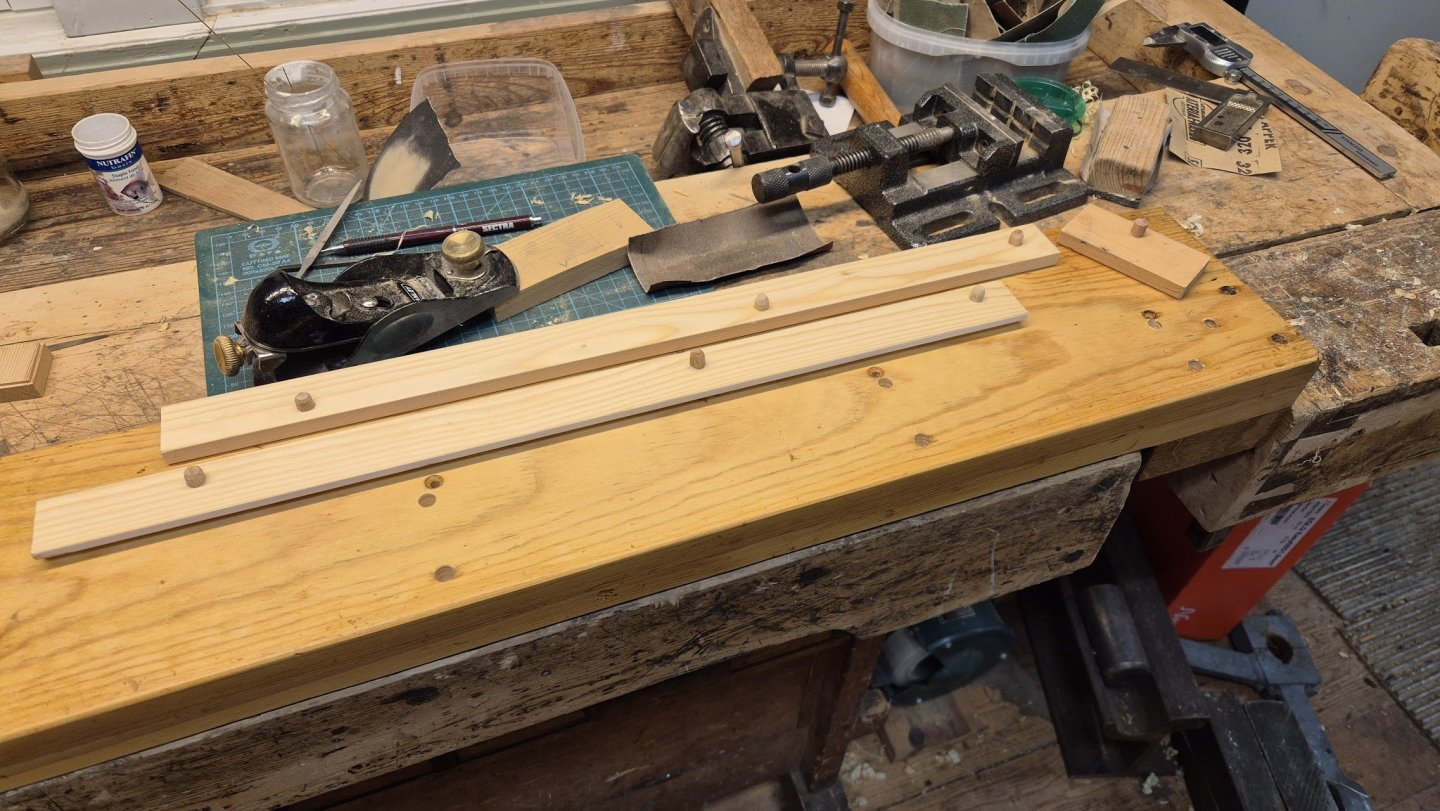
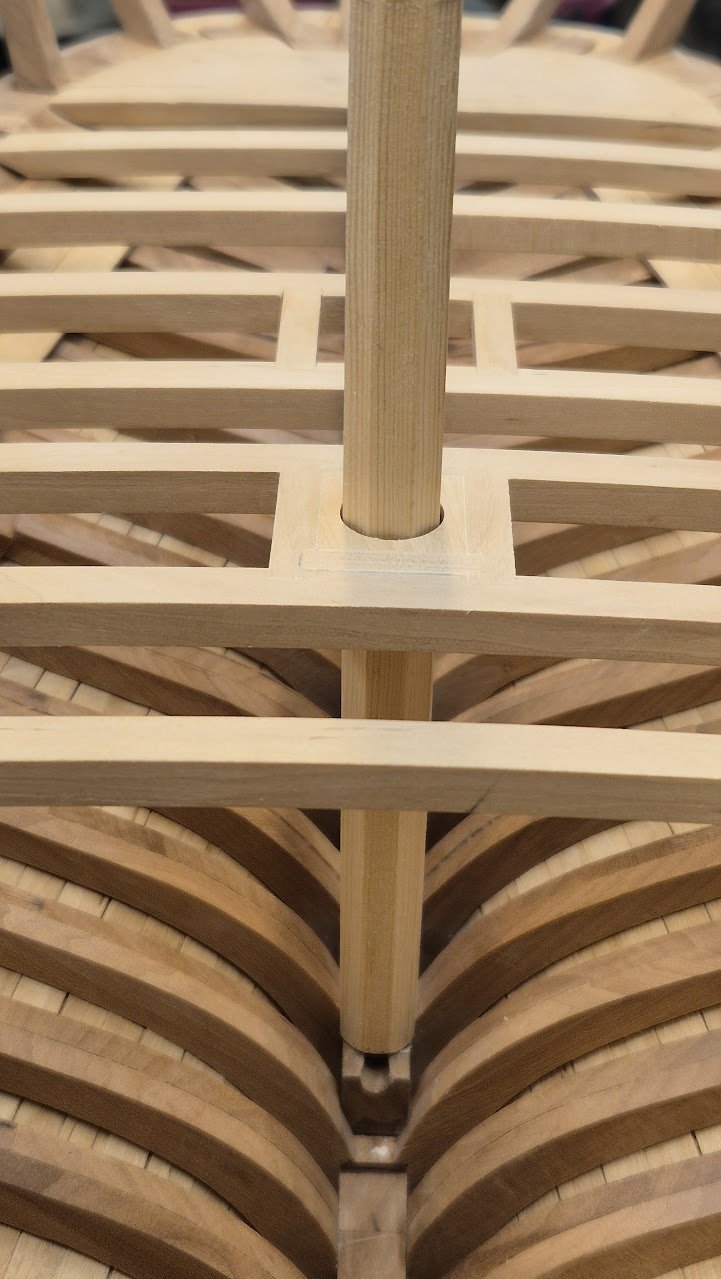
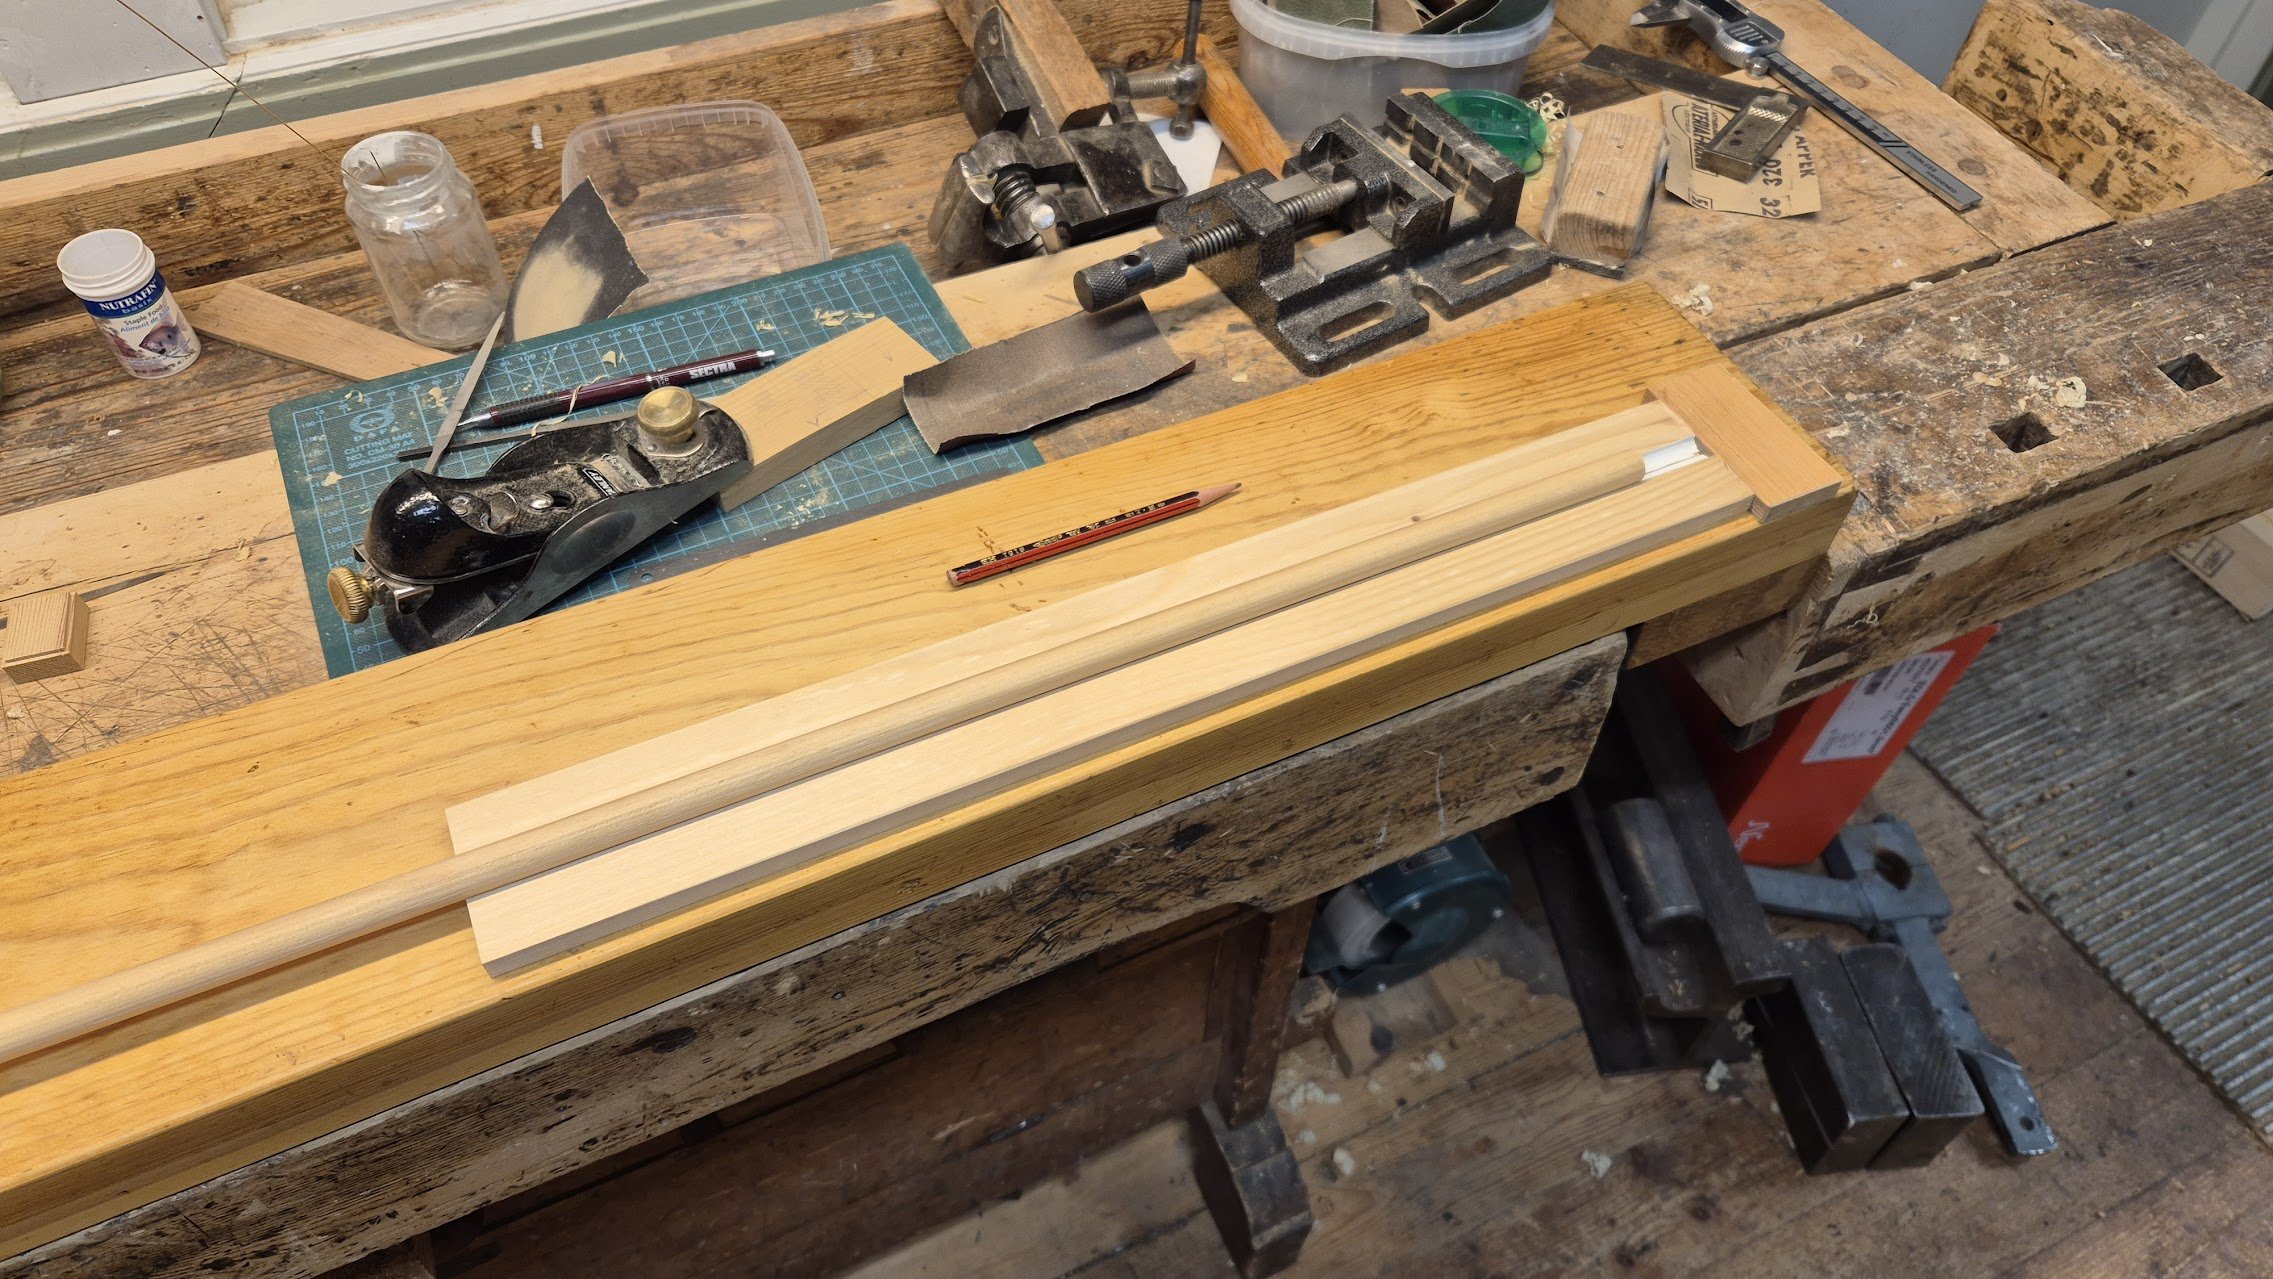
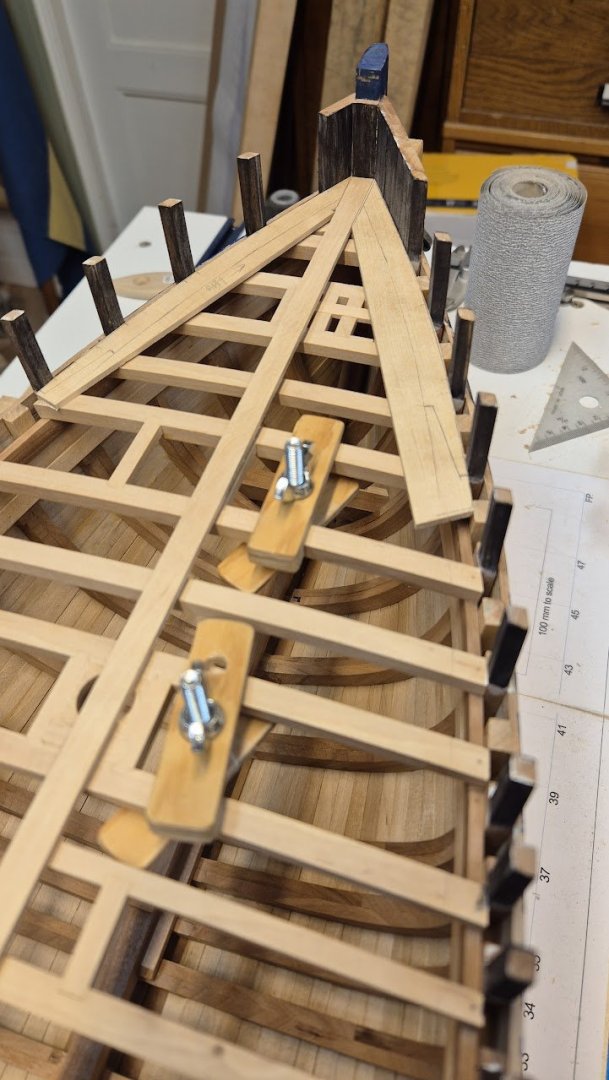
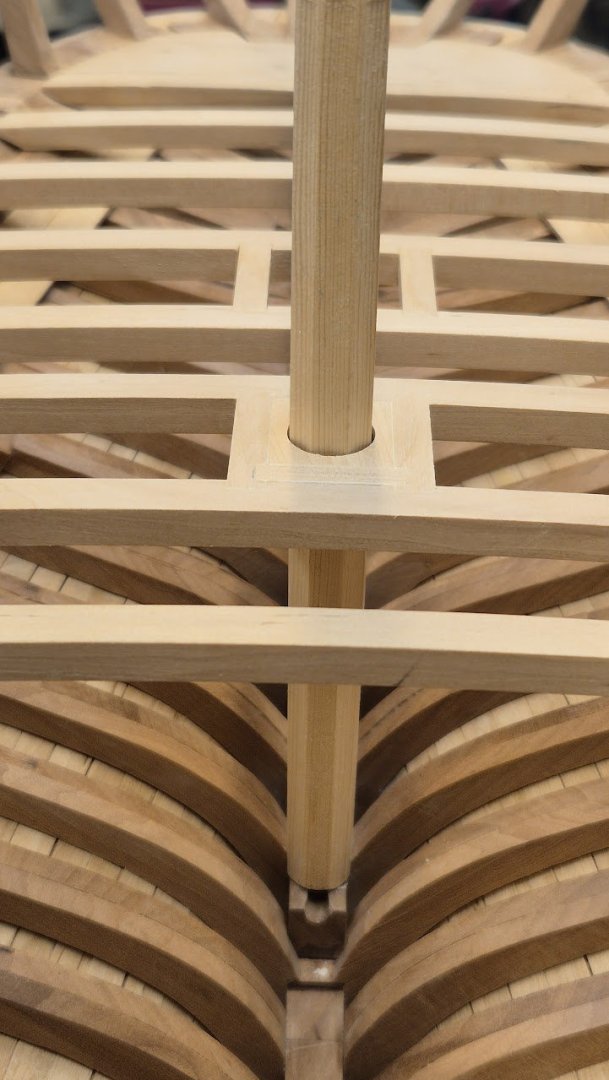
Thanks Andy and John. 🙂 About joinery, I have found out there is no shortcut to a perfect joint. It's down to time, patience and perseverance... So, another wee update before other shores and priorities takes precedence over scale model boat building. (they say it's Xmas time. Really? Already?) Mast partner, or in layman terms, the hole where the mast pokes through the deck. A delicate little piece whit not much "meat" on it. I short - found a blank, drilled an appropriate sized hole (13,5mm) and trimmed it to fit. Whacked it in place with some diluted glue and chiseled/sanded flush to the deck beam. Mast making then. Actually I did the mast first to se if the hole should be centered in the opening, which it should be. The usual way, square stock planed to an octagon, planed even further and finally sanded. Care taken so to not sand too much. Sounds easy enough. Of course mast making got me thinking. This was not my last mast or spar to build so better do some planning ahead. Found and old shooting board that I don't use. Planed the underside flat and beautified it with some tung oil. Next guides for the stock. Made these removable if I ever need it as a shooting board again and also to fit shorter guides if necessare. With the stock raised slightly over the board it is easy to grab and turn the stock while planing. Next question - how to do the square or octagon shape if the mast has one. The main mast on Atlantica is octagon shaped at its lower section. A small giuding block solved that and a long file which makes it easier to aim a somewhat horizontal face while filing. Someday I will get rid of all the clutter in my shop. Some day... Happy Holidays and Very Merry Christmas to you all!