Wintergreen
-
Posts
1,002 -
Joined
-
Last visited
Content Type
Profiles
Forums
Gallery
Events
Everything posted by Wintergreen
-
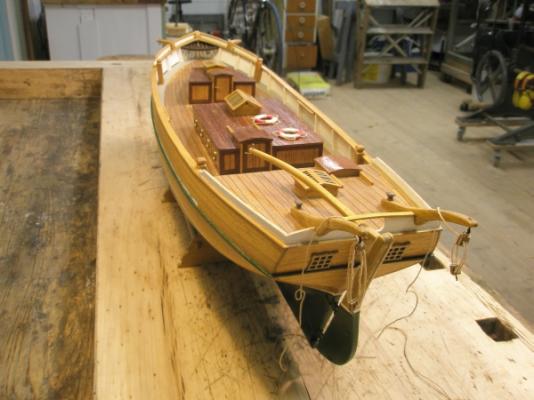
Some one said on the old log - its almost like the real thing until you see it sitting on top of the table
-
Another Rope Walk
Wintergreen replied to michael mott's topic in Rope Making/Ropewalks's Rope Materials and parts resources
I can't really see how it works until you have something in three dimensions. Note, I don't say that it don't work, I just can't figure it out from the plan. -
Montanes by pnevrin - OcCre
Wintergreen replied to pnevrin's topic in - Kit build logs for subjects built from 1751 - 1800
it comes with a sigh,here we go again, but Glad your back Per! I will continue to watch you progress and chime in a nice work here and there /Håkan -
The ships boats are just (like the rest of the build) exquisite (Mozilla's spell checker helped me with that word ) a silent "oh, my gosh" sips through my lips when I browse all you images. Great!
- 1,215 replies
-
- 1
-

-
- sloop
- kingfisher
- (and 1 more)
-
Yes, the common truth, "you don't know what you've got until you loose it" was very apparent during MSW's downtime... Michael, I did an ordinary search for my log, using some keywords, like Regina, Wintergreen, and so. In the resulting list, there was some kind of preview pane that had a link called "cached". It was the full first page of my build log. I now tried to find yours and Google came up with this: http://webcache.googleusercontent.com/search?q=cache:4tYLYwcToxEJ:modelshipworld.com/phpBB2/viewtopic.php%3Fp%3D346150%26sid%3De3072b6fbd26850c1dd798e1389e7f17+&cd=1&hl=en&ct=clnk&gl=se&client=firefox-a Looks like the last page of your log...
-
Thanks Carl! I'm not done with the rebuild of my log yet so there will be more to follow later (read tomorrow). /Håkan
-
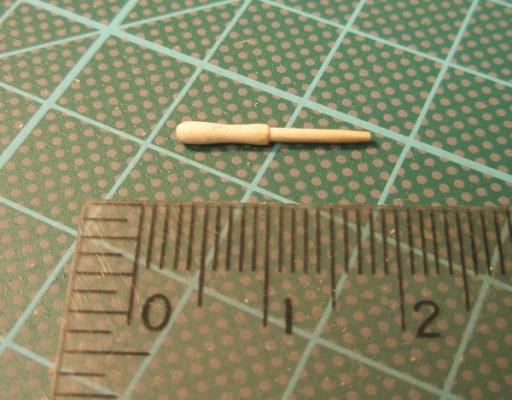
Hi Robert, thanks for the kind words about the pins....boy, which wood? The first attempt was from ordinary tooth picks, but they turned out to be too soft. The 2nd and final attempt was made from the same wood as everything else scratch built on my Regina. Unfortunately I'm not 100% sure of what it is since I inherited the slabs of wood with the workshop...my best guess is pear (probably Swedish though). It is very close grained and hard. /H
-
Robert, glad you are back! If you keep this speed you will be done in no-time Orestes looks great in that soft light. Cheers! Håkan
-
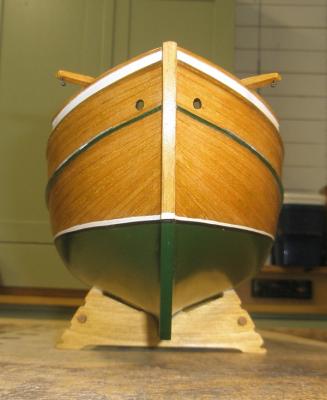
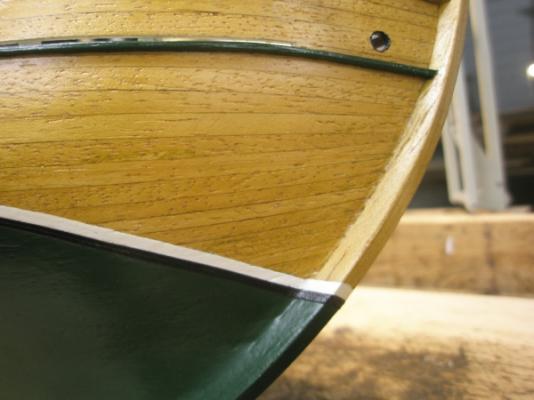
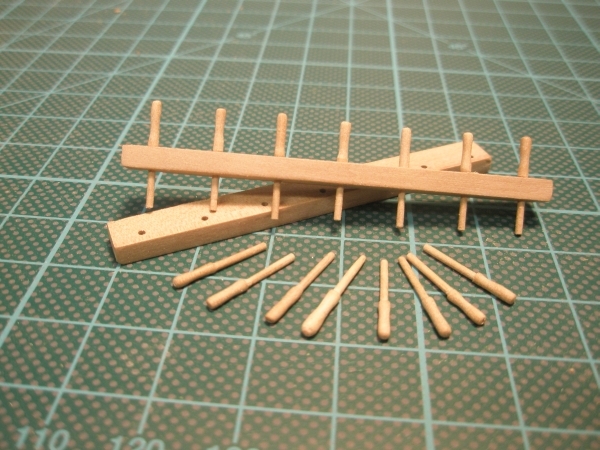
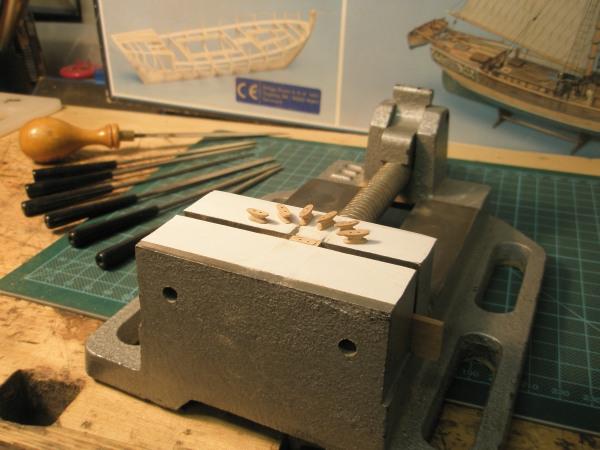
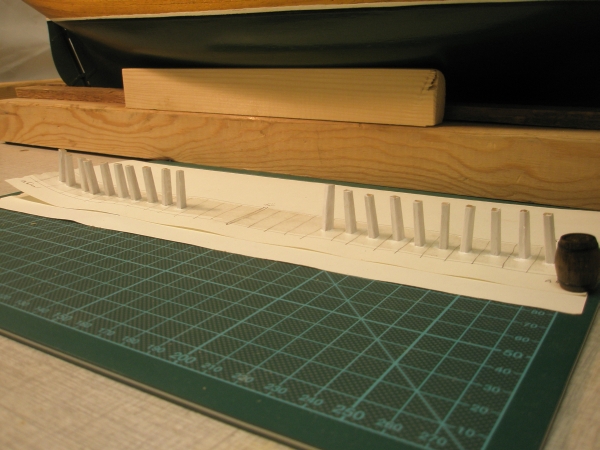
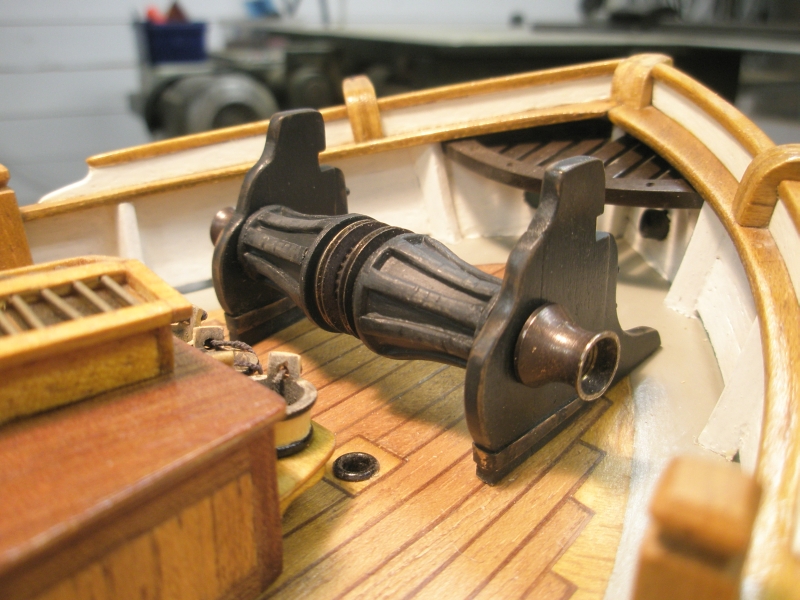
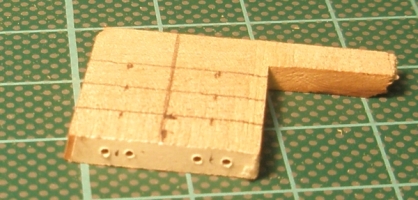
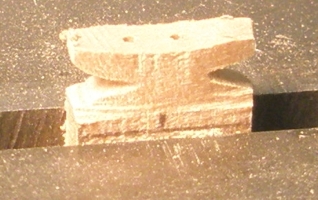
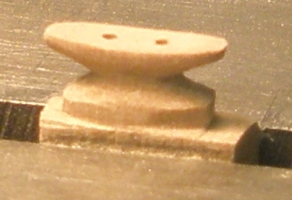
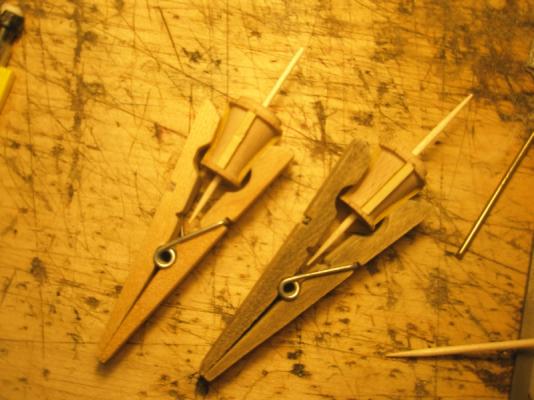
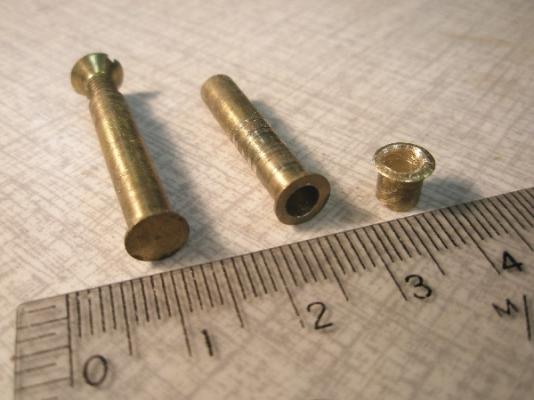
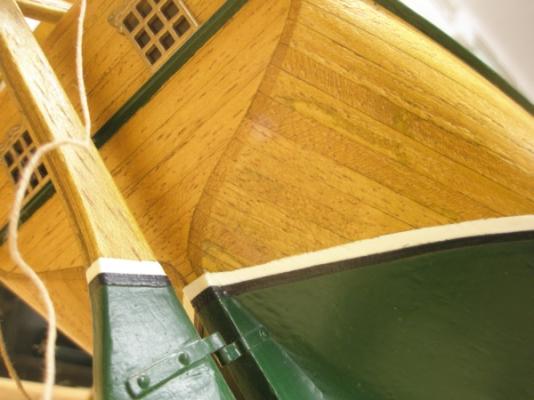
What I also replaced was the pinrails. I did not use the very soft supplied strips of wood or the turned brass pins. The scale is 1:30 (close to 3/8" - 1'), and easy to work with. A long way down the road I realised that I was too close in tolerance between the pin and the hole...some careful work with the Dremel's flexi-shaft and a small hammer solved the obnoxious pins though. A insane close-up of cleats I can only take credit for the actual performance of the work, not for the steps of doing things. All the ideas I picked up through various logs on the old site, through work of others.


-
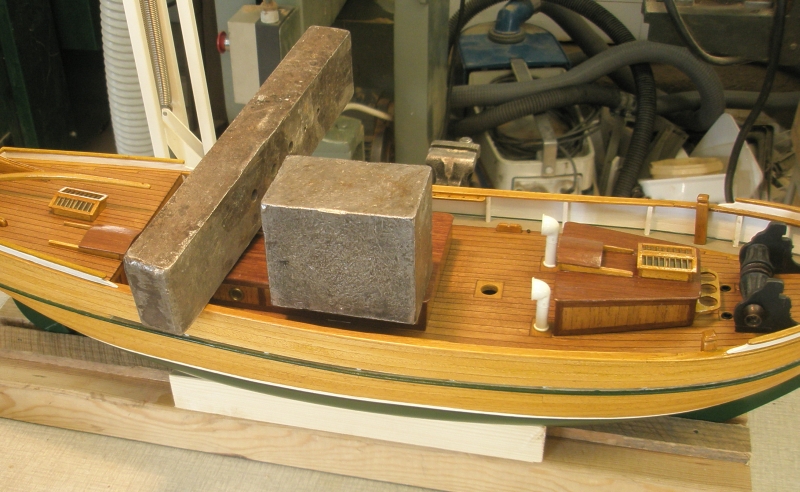
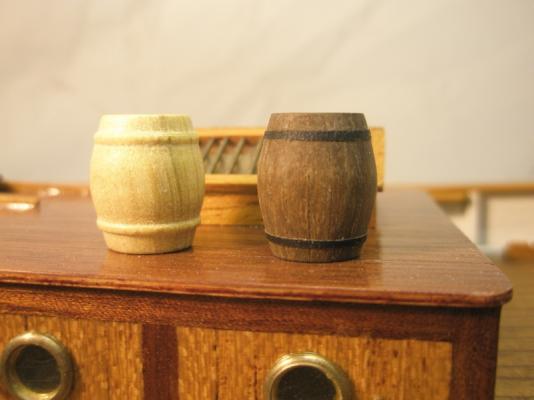
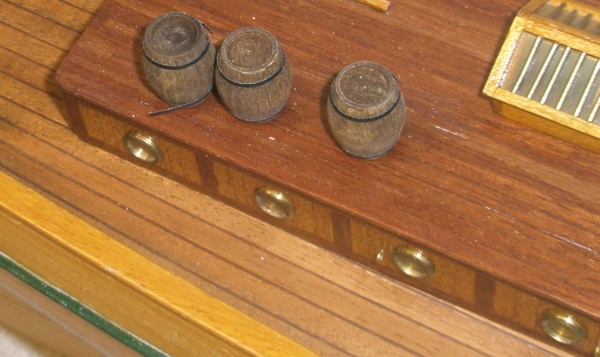
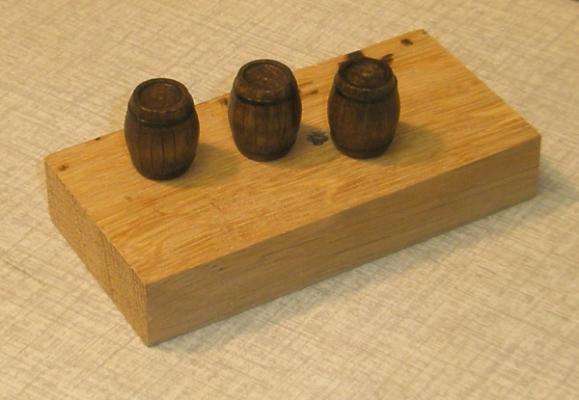
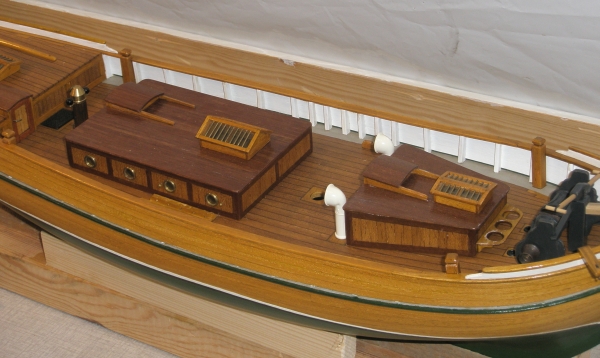
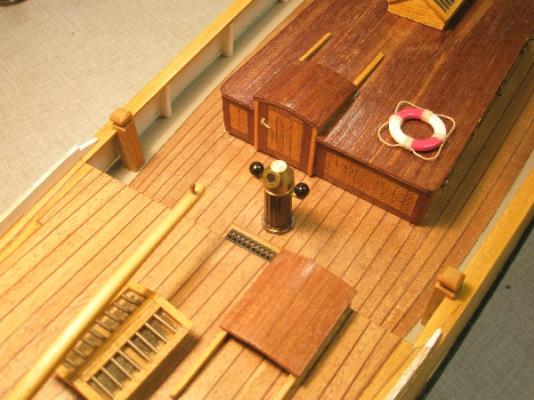
On the theme: "Is the hull strong enough?" Not that I've build to any of Loyds or Norske Veritas certificate, but I can assure you, yes, the hull is strong enough... Those are iron ingots, iron has a specific weight of almost 8kg/litre, that is somewhere around 10kg (18pds) laying on the deck house... Now a short episode about enhancing supplied parts. The water(?) barrels, could well be brandy barrels filled with single malt for that matter... The Before-After shot: Further enhancement lead to a couple coats of clear flat varnish. The reason for that is in the picture below. And varnished. Next enhancement of the build was to add more bulwark stanchions. Since it was only the frames top timber that made up the stanchions and these were quite few I thought it should look good to add some extra.


-
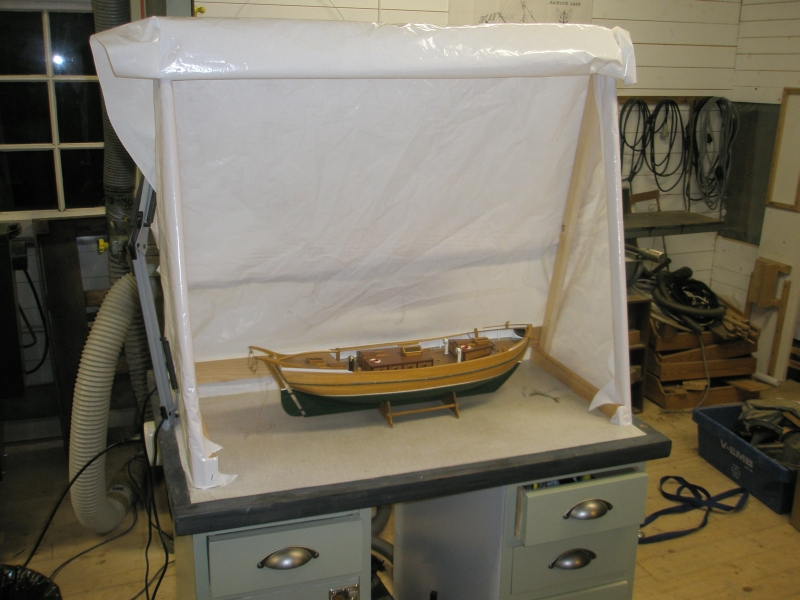
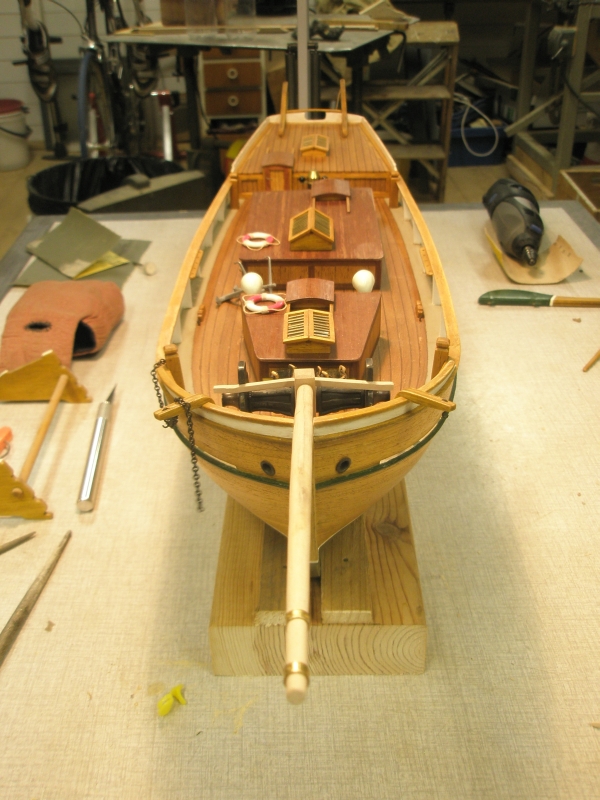
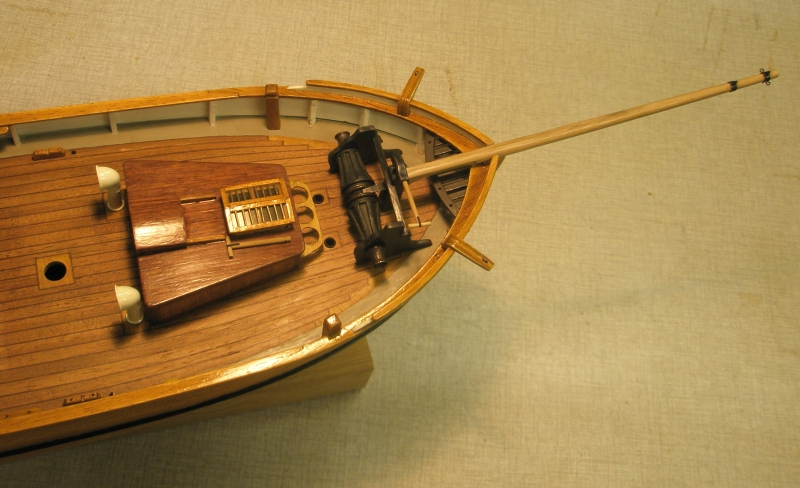
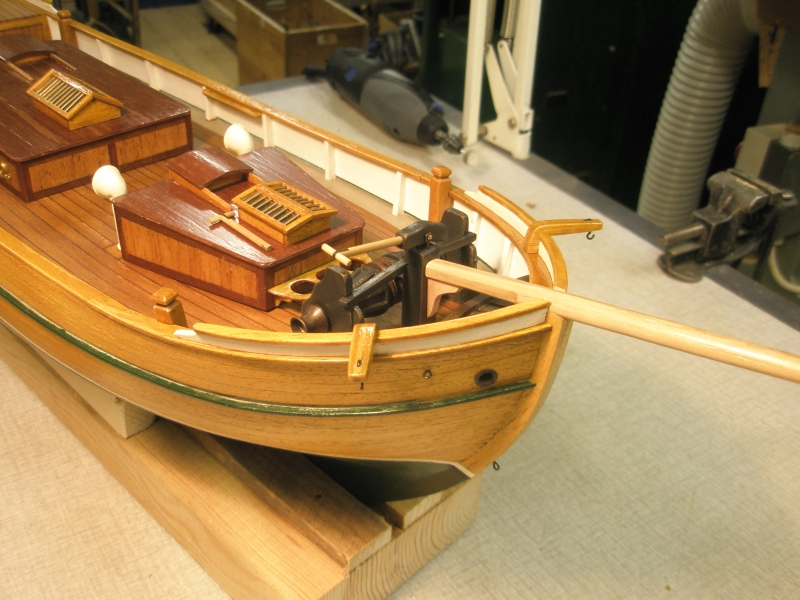
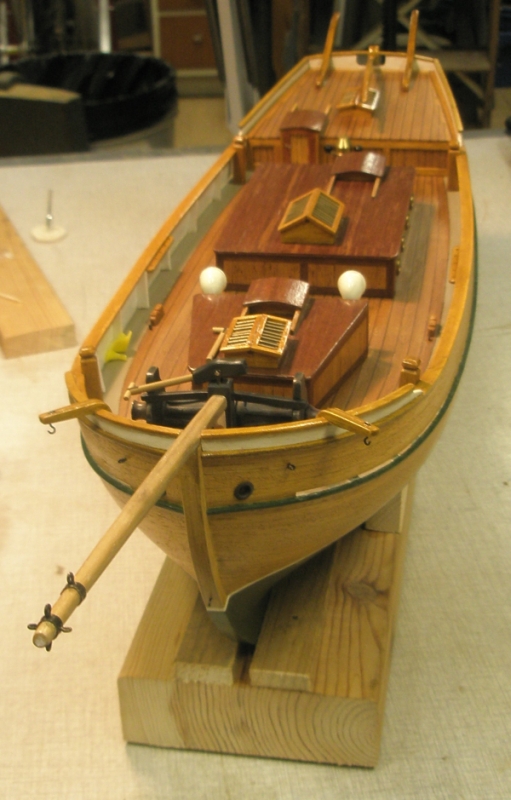
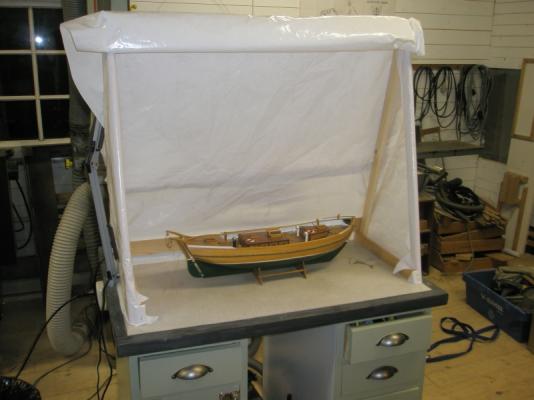
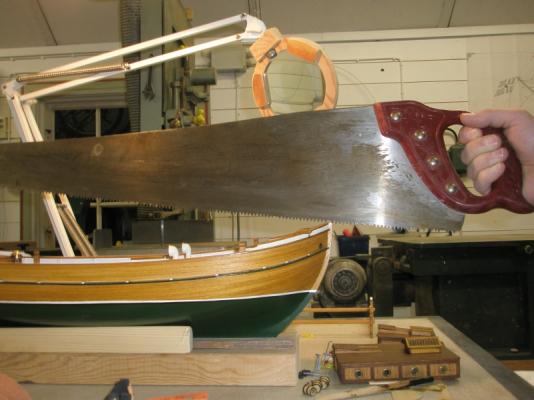
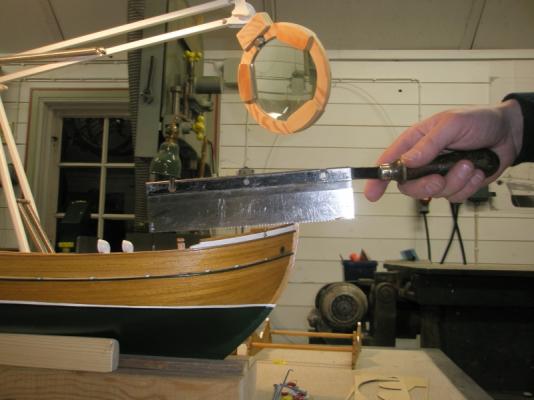
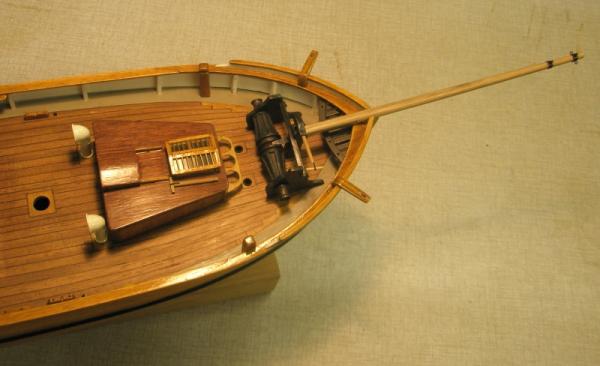
After this I started with the bowsprit. Long time afterwards I understood that this is highly NOT recommended. Think like this: Why would you attach a spear to your precious model, a spear that most inevitably will catch something and snap, leading to an oral expression worthy of Cap'n Haddock from TinTin... Well, I can say today (201302015), when the ship is finished only waiting for its stern boat, that the bowsprit is intact. One reason for that is the tent I made for the build. My man-cave is my wood working hobby shop, and with a lot of heavy machinery the dust fog is sometimes intense... Back to the bowsprit. The first thing I had to do was to cut a notch in the stem for it to sit in... Just kidding, this is the saw I used And here it is dry fitted. Building a ship is kind of a 15 game, you know the small plate with 15 movable small plates, once in order they will make up to a picture or something. On a ship build, there is almost always something that depends on another thing, in this particular case the bowsprit and the windlass. Here I remember that I posted a question whether to leave the knee under the bowsprit natural or paint it like the windlass. The consensus was to paint it. So I did. Only to receive the next cheerful update from my friend John that said that it would have been better unpainted...


- 89 replies
-
- 1
-
-
- billing boats
- regina
- (and 1 more)
-
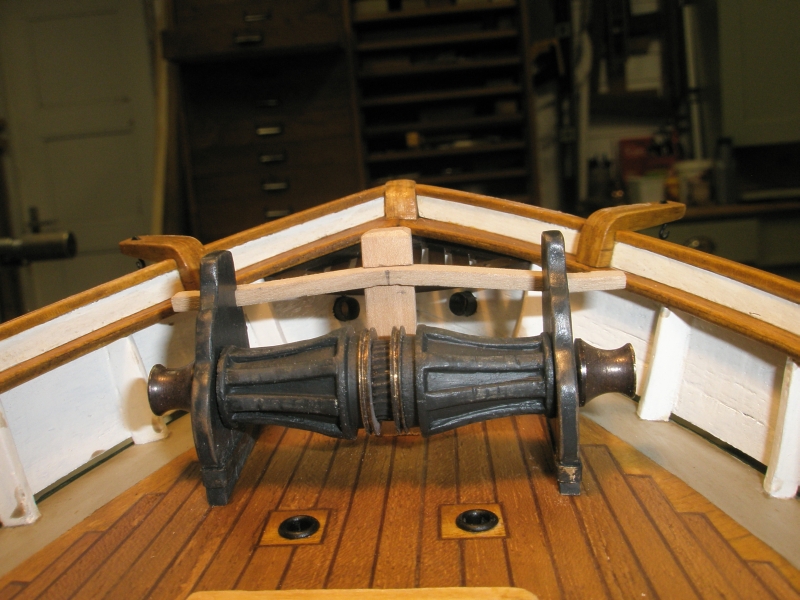
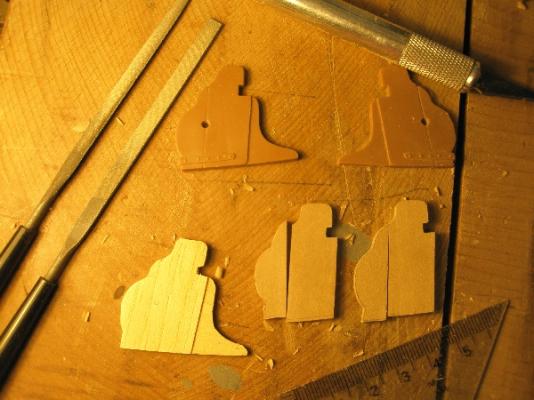
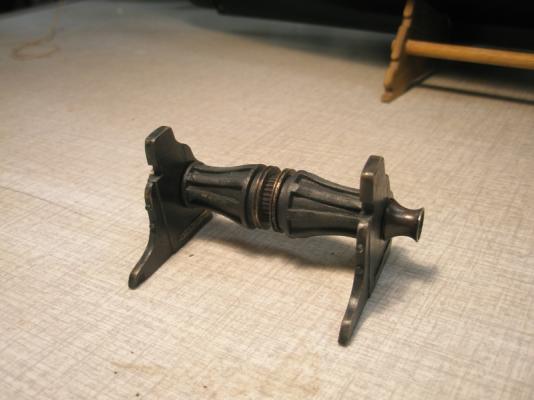
I realise that this will be kind of a picture-diary, a word here and there and mostly pictures. Next set, the windlass parts. On top the supplied plastic ones, to the bottom left my attempt from many years back, and to the bottom right the newly made ones. Assembled, painted and ready to be mounted:


-
Yepper, yours was one of the logs that really brought the true joy into model ship building for me. Will watch this 'til the end. /Håkan
- 1,215 replies
-
- 2
-
-
- sloop
- kingfisher
- (and 1 more)
-
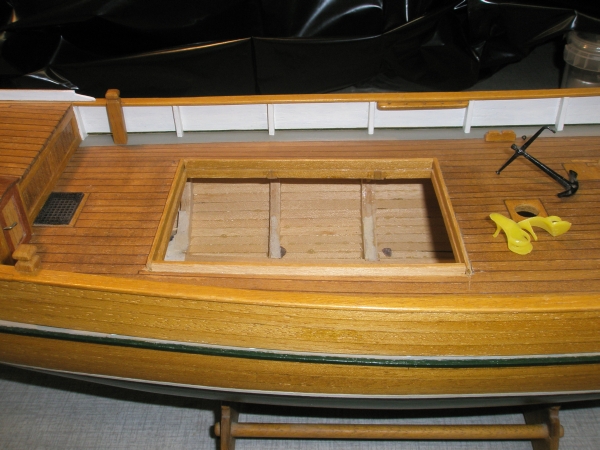
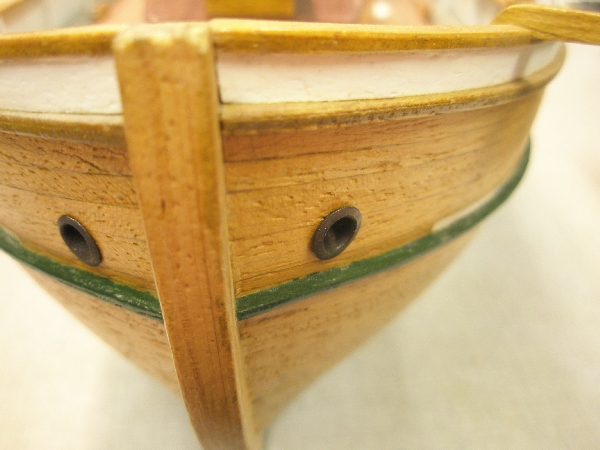
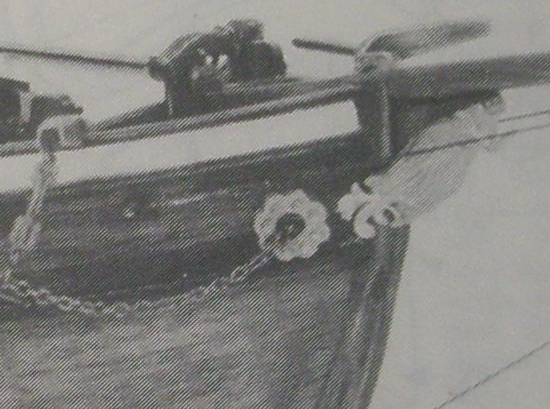
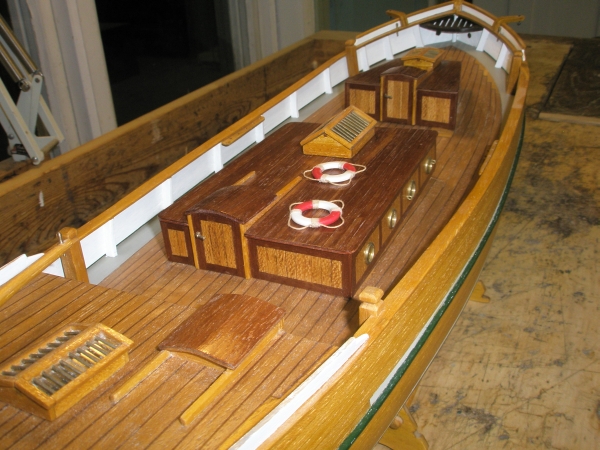
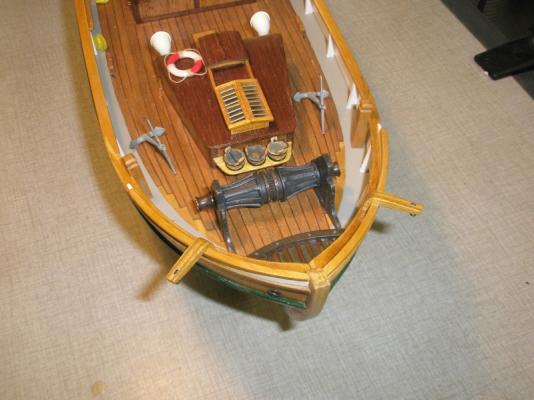
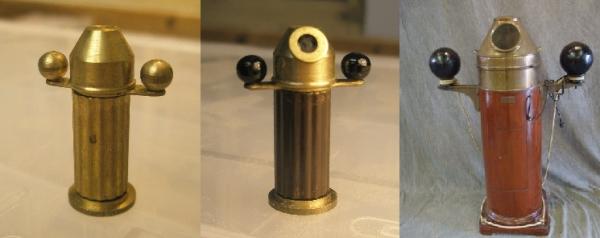
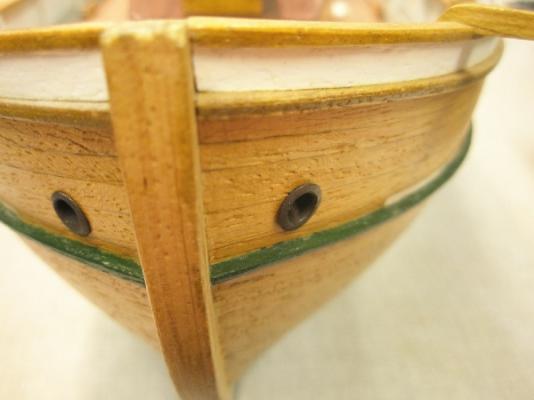
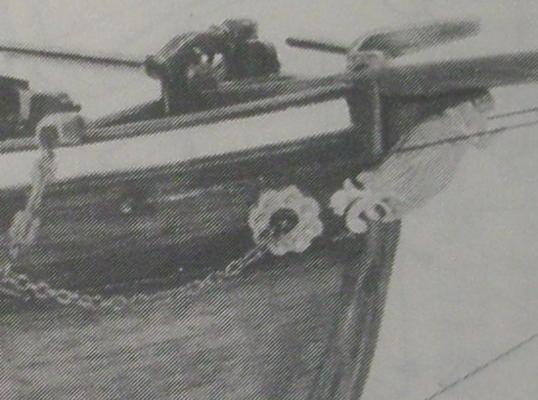
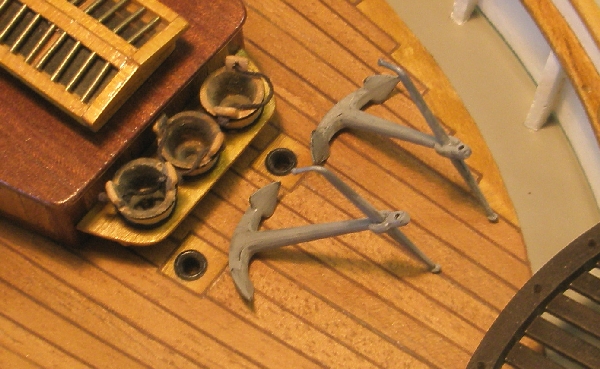
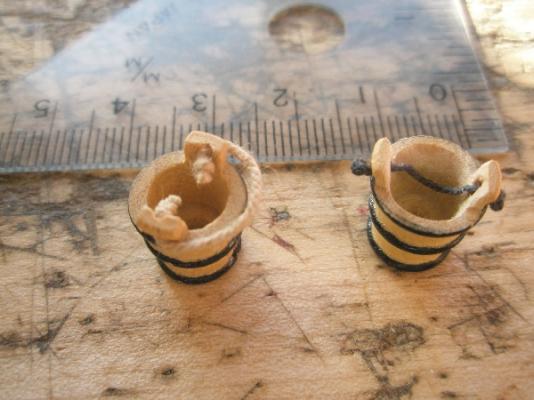
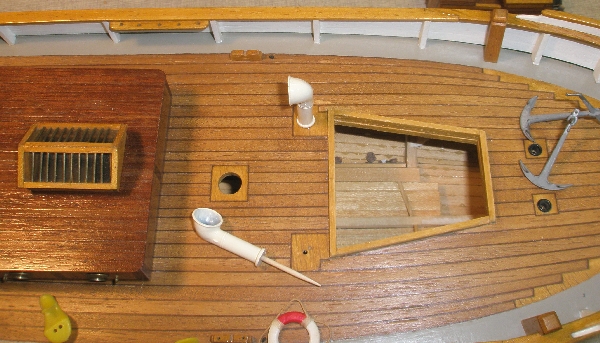
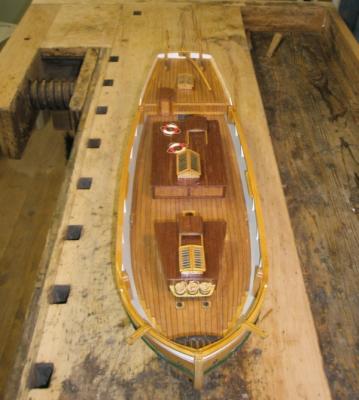
A bit dusty she was, but in remarkable good shape after sitting 20 years on a book shelf...and surviving 7 (seven!) home relocations. It has been the apple of my eye all the time and I've treated the hull with the greatest respect. The next picture is wee bit funny. I decided to remove the ballast (she will never sail any seas) and turned the hull up-side-down. My now 20 year old daughter smiled ear to ear when she saw what was hidden inside...she admitted to almost having a memory of putting them there in the first place... The anchor is a spare one from my first build of Dana. Next up is the binnacle. From left to right; as supplied, finished, a real one found on www And here in place on deck, just forward of the poop deck, within sight for the helmsman. More work, the hawse holes. From the booklet: And how I turned some furniture nuts and bolts into decent looking ones: After blackening and mounting: More bits 'n pieces, now on anchor and buckets. Before some touch up: And after, along with the first version of the anchors. Ventilators, I did not drill out the interior, just painted them. Mounting aid is clearly showed below. It felt good to have the life-buoy laying around, I never knew when the owner of the shoes might turn up, hollow eyed and dizzy...

-
As most of us now, I will just write shortly about the various steps of the build and repost the images. A few more of the state of the build when I restarted early Jan 2011.


-
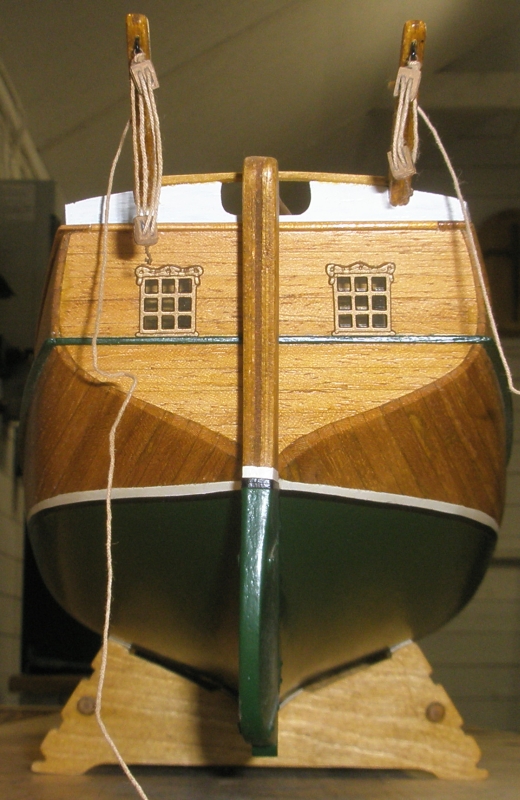
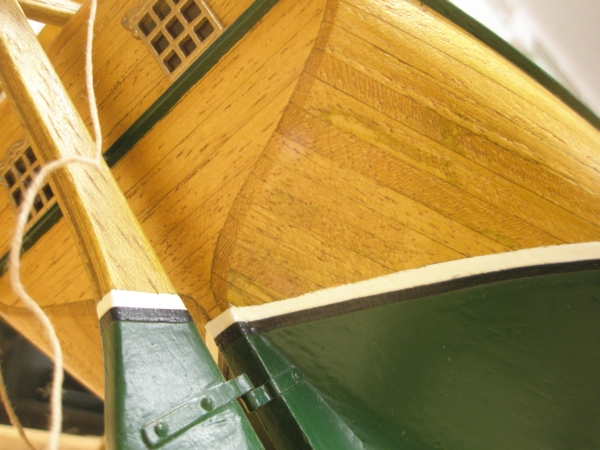
Hi, here we go again! What Google remembers of the old log: ____________________________________ Hello dear friends! Not that I know any of you in person but the climate on this site the best I've ever found So, after 20 yrs of neglect time has come to continue a POB build. The kit as such is discontinued by BB. I started the kit right after I finished Wasa 1628 but it came to a halt when it was time to do the ships boat. Well, there was this thing called raising kids also, and well a few other things too... Unfortunately I have no pictures of the build until now. Pictures seen here is here present state. I realize that even way back then I did some bashing. F.ex, the skylights, are build ups instead of the supplied blocks of wood. The panels on the deck houses sides are an addition by me. Note, the deck houses are not glued in position yet. What really did not came out that good is the caulking of the deck. But what the heck, I will not redo it now. About the hull, it is ballasted and floats on here waterline Single planked also as is BB's standard for kits. It is possible to see where the bulkheads go, but it is not that easy. No putty here, just good old sandpaper. There are a lot of plastic fittings that I already back then thought of replacing and now I have the skill (I hope! ). It will be cutter rigged, meaning single mast and bowsprit. Sails will be main gaff, stay sail, jib, flying jib and gaff topsail. Dont know if I will set them all. Time will tell. And please, any criticism, constructive ideas or just plain old praise is appreciated! Cheers Håkan ________________________________ The story behind the build. At the age of 10 I received a boat kit from my dad. It was the Billing Boats Dana. While I did most if it on my own, my dad helped me out with the tricky parts. After that it took some five years before the urge to build something arose. The Kings ship Wasa of 1628 was a BIG story in Sweden (and worldwide I guess) back in the 70s. I remember the first time we went to see it, it was when it was still housed in a corrugated sheet metal shed. We went to see it a couple of times. Well, back in my early teens the only kit manufacturer I knew about was Billing Boats. Quite handy the also had (and still have) a kit of the Wasa of 1628. So, after a summers job with money in my hand I went to the local hobby shop and lifted the kit from the shelf. Four-five years later, after a lot of struggle, it was finally finished. We now write 1990 in the calendar. One thing was clear to me, with the next kit, I was to do a better job. It did not completely turn out to be a pigs ear or so, (only close) but I confessed I bit off too much for me to chew with it. So, after scanning BBs catalogue my eyes stuck to a kit called Regina. It was a plank on frame construction, but the frames were spaced very long apart I see now. Work commenced quite quickly in the beginning, the superstructure, deck, hatchways and the planking. Yes, about the planking, on Wasa I did not really know how to handle the stem and stern. On the edge of giving up my dad stepped in to rescue me, again. Not that he knew much about building boats, be he saw the problem and understood the sparse instruction better than I. So this time, I was very careful about the planking. Reading books about how to build full scale English smacks and so. It was a tedious job but the result was well worth it. And another close up From the pictures name you can read the day when I first uploaded the images. In a way you can there fore follow the build in time. More to follow