Wintergreen
-
Posts
1,002 -
Joined
-
Last visited
Content Type
Profiles
Forums
Gallery
Events
Everything posted by Wintergreen
-
Hi Dan, nice to see a modern yacht here also! Thanks for posting
-
Ah, haven't realized until today that this little beauty was back online Good to see you back here David! Keep it up mate
-
Very neat as always Alfons Hope your switch of living area will goes smoothly, because I assume your moving to a bigger/better suited place. We'll wait for your updates, be assured!
-
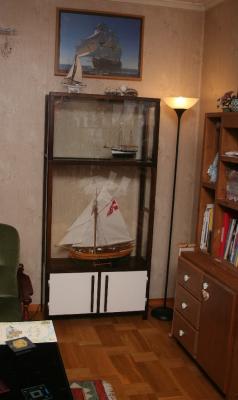
Hey guys, know what? I have a display case worthy its name! It took a while to figure it out (how to get the most out of the old windows I had and so..) And with this I can close this chapter that started ca 1991...and get on with my life as a shipwright You can't image how relieved I feel right now, it feels soooooo good to sit in my favourite armchair and look at the two boats in their decent new home. The case is how we say it "a heavily kit bashed", very old IKEA Ivar storage shelf. The doors are from a wardrobe that we ripped out some 4 yrs ago The wood is actually pine, but stained of course. Now I'll just add handful of photos to the completed gallery and update my signature. A big thank you for the company along the way
- 89 replies
-
- 2
-

-
- billing boats
- regina
- (and 1 more)
-
Robert, how about cropping the image to get rid of the lesser wanted objects? I do that a lot...often makes for a more interesting image also And I do agree on the looks of the rail and cats - excellent!
-
A BIG thanks for reposting your log. Excellent work all together. Now, get that back of yours all sound again so you can treat us with more fine details Take care mate!
- 237 replies
-
- 1
-
-
- cutty sark
- revell
- (and 2 more)
-
Touché! But it says "Upcoming" right?
-
Looks good Robert! Very precise work (as usual). About making holes in the hull, check out Ron's build of the Oneida from TheLumberyard...he redid the upper part of the whales "in place". As they say "viewer discretion is advised"...
-
figures...I thought it to be a wee bit odd for an pom to be named like that
-
Not that I've worked 30 years in front of a monitor (closing in on ten though) but I do agree on that! And for your build Sven (I have Sven as a 2nd name ) when I saw the first pic of your early try I thought to myself, hmm, that looked rather crude, but when you explained it was a very old sin I smiled And now, that little Vic is just excellent!
-
Dan - master of miniatures! wow....
-
Robert, that looks ever so good! Thanks for the update mate
-
Yup, that soldered joint looks good Alfons. Q; where did you source the soldering paste? Domestic or abroad?
-
hm...perceived size vs real size...it is not until you toss in a cloth peg (or two) that the viewer realizes how small this build is. Its like John's Stag, no objects of reference any where near until sudden ....great work Mark!
-
Good luck with the turning! As always, sharp tools are a must If I may, a couple of tips on the way... I used my lathe for the spars on Regina, and since those tapered from centre out I finished one end at a time. To treat the spar gently I used a rubber hose when I clamped it in the chuck. Be careful with the sandpaper, I still have marks going in cross grain on the boom since I was a bit eager with the coarser grits... But...you say you have a bag of blanks..so a couple of try and you'll figure it out
- 169 replies
-
- 1
-
-
- BlueJacket Shipcrafters
- Gloucester fishing schooner
- (and 1 more)
-
Yes, I have. I'll meet the captain this weekend and I'll ask (if I remember...) if there exist any plans or measurements of her. But with a load of photos and some easy measurements like boom length, all other dimension can be derived from that. No cannons, limited rigging, almost free from carvings...how hard can it be. Question is scale...about 34m LOA gives ca 53 cm at 1:64. That's manageable I think. Not too small, but small enough. We'll see...thanks for the reminder
-
A big thank you! For your support, guys. John - absolutely, I've learned how to not plank a dingy... Mark - I'm sorry, the dingy is gone. Only the backbone remains for now. Ron - thank you, yes, I think the next try will be a success. Alfons - it will go on display with no fuzz. It will sit on the supplied stand in a temporary case that I'll put together. popeye - the photos are not telling the truth, the hole truth and nothing but the truth...in reality it looks worse...and thanks for the warm words about the "mother" Robert - yes, it IS so. And yes, I will post a bunch of high res photos in the gallery. And I assure you, I will give the dingy another try. But not now. So, the reason for my unwillingness to reveal my possible upcoming project was that I had no clue myself. A choir mate came up to me and said that her father-in-law had left an unfinished ship behind when he went on the journey without end. I agreed to at least give it a look before I turned the opportunity down. I mean, "unfinished" can be a wide variety of things...She arranged for me to visit the mother-in-law. Today, I went to the house and a lovely old lady came and opened the door. After a few seconds of "WHO are you?" she showed me the way to the old man's workshop in the far en of the basement. It was a bit like a maze in the basement. A lot of space for a lone old dame. Well, "there it is" she said. I usually tell my kids to "expect the unexpected" and this was that kind of moment. What was presented to me was basically a hull, nothing more. A bit over 100cm or 3'6". It was a plank on bulkhead construction. To be honest, it was really crude. It was one of these adorable father and grandson type of work. The bulkheads were spaced about 5cm apart and from what I could see, square to the centre line. However, the upper line, on which the deck should go, tilted in all directions. It was like being seasick without the need to go to sea... The old lady told me there were a sister ship build before this one. And that was currently at her other sons house if I wanted to have a look of how it should look like. Three masted also. From the lines of the hull I'd guess it was supposed to be a merchant man of the mid 19th century. To add to the story there were no plans.. The old lady thought it is a pity that the "ship" just lays in her basement. I can agree on that. But from that, to actually finish the build (of which there are no plans) and of that immense size, without a home port to go to, I will turn this "opportunity" down. That was the reason for my silence. So now I will just sort through the bits and pieces that is left of the Regina build and then go on with my next project (of which it actually exists plans)
-
Hammarby-backen? Well, excellent dingy and oars Alfons! And your paint job is flawless. So nice to look at.
- 169 replies
-
- 1
-
-
- BlueJacket Shipcrafters
- Gloucester fishing schooner
- (and 1 more)
-
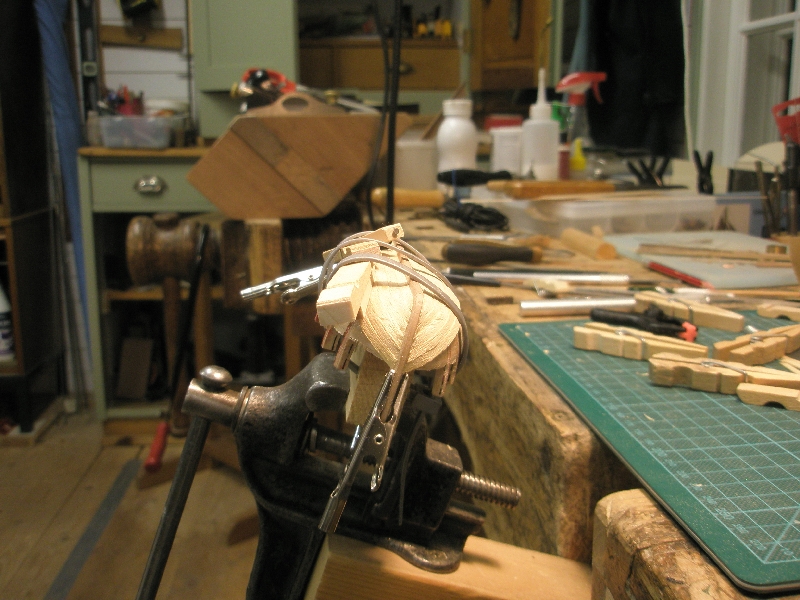
Okay guys, a bit of a troublesome announcement will be given now...its about the dingy. While I most probably have the skills to pull off such a thing, I don't have the mind for it now, and probably not in the near future either. Or as Bilbo Baggins says in the first LOTR film - "I've put this up for far too long". The psychological resistance was greater than my limited power. No "use the force" here I'm afraid. So, I've tweaked the mother ship a great deal and she will go on display without here stern boat. (maybe it was stolen recently and the owner have an ongoing dispute with the Insurance company. Or maybe the owner is at the nearest dockside pub while Regina is anchored in the haven...I don't know actually.) Maybe in a distant future I will a the dingy, but not now. In fact, I will try to rip of the planking done so far, and save the backbone for later. My hat is off for you. popeye, that pulled this one off. I didn't. Here are some picture of the soon to be buried try on this item. The only good this "dingy" will serve as, is a screaming example of HOW TO NOT PLANK A DINGY! Gaps between the planks - "Elvin, I've seen the light! The band Elvin, the band!" (from a completely different story...) Clinker effect - "Stairway to heaven" Eagles is it, right? Non smooth run of planks. "Brute force and ignorance" works in a lot of cases, not here though. Not enough stations to rest the planks on, hence the fold at the last station line aft. And even broken planks... So, to finish off this for now here is what I will do; In a day or two I will put Regina up for her "Completed" photo session and publish them under the completed kits section here on MSW. I will add a note that *maybe* there will be a dingy hanging from the davits in the future, but not now. And guys, thanks for following along both here and on the old forum! Your support has been greatly appreciated. "Then what?" Well, to be perfectly honest - I have not got the faintest idea! And how is that, you wonder. I'll tell you tomorrow on a different place here... -=< END >=- _/) _/)


-
I agree with Mark. Since I wasn't with it from the beginning in The Old Days, it is a true joy to see the ship develop now And those pics of the empty hull, it looks like a cathedral
-
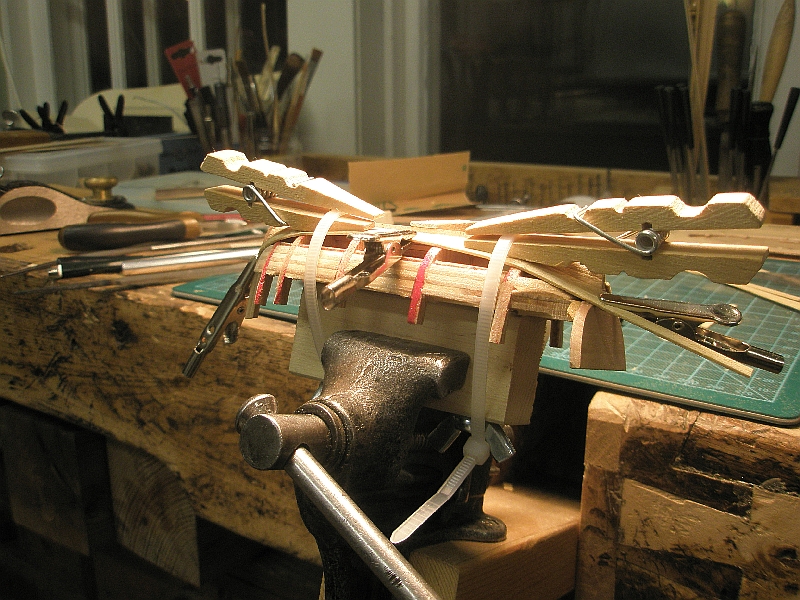
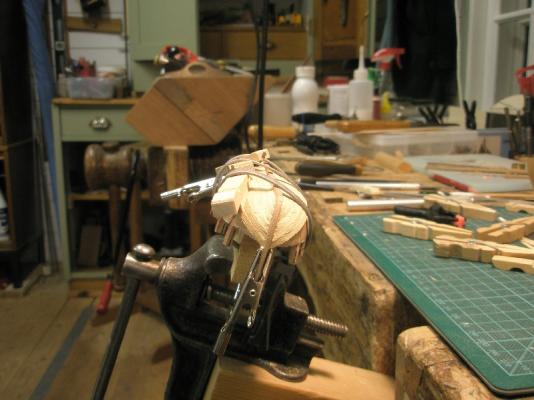
Crutch? (you had me thinking there) No, it is one of the legs of the tripod! I use the tripod for all my indoor photos. I don't like what the flash brings to the colours or depth of focus. The veneer is about 0,6mm and the obechi is closer to 1mm in thickness. A bit more time (AND patience) and a better plug, the veneer would have done the job beautifully. (Add spiling and all that also of course). With the obechi I taper the planks a bit and then it is brute force and ignorance to get them in place... I can assure you, the state of the planking is as if the boat had been lying in the sun for a couple seasons. In more than one place it is possible to see through the seams. Well, off to work now...
-
Thanks fellows! The workbench yes, it's an ordinary carpenters workbench. Solid and steady. I get jealous when I see Mark's (sjsoane, building Bellona), he made it himself to suite him, left handed as he is (me too). However that only comes into play when one need to plane boards and so and since I can do almost anything with my right side that I can with my left, the problem is little. Have you ever tried to brush your teeth with the "wrong" hand. Some experience I can say About the dingy, I am pleased that I'm under way with it. I am not pleased with the outcome, but I will not redo it, just touch it up and hide whatever needs to be hidden. I really want to finish this build now!
-
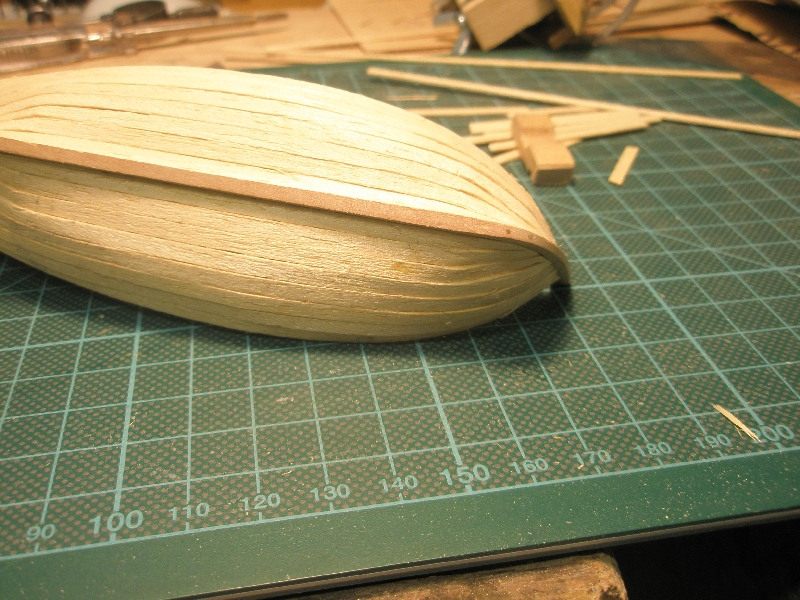
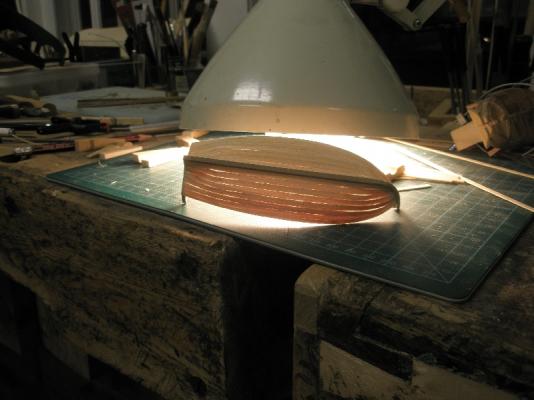
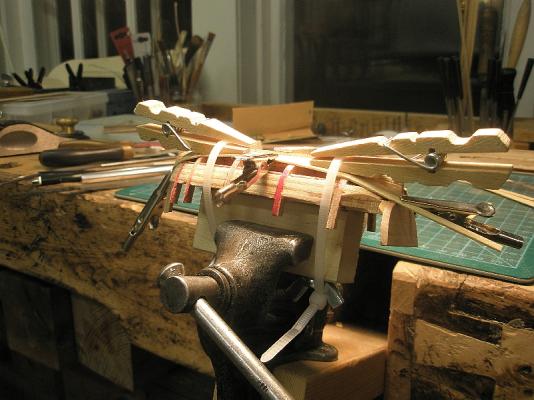
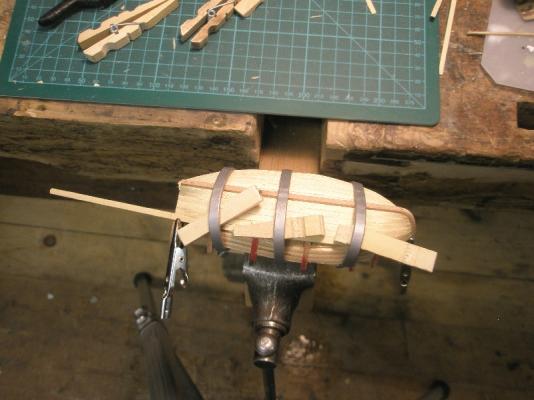
Admittedly being a bit silly in the last few post (my apologies Robert!) here is a proper update... The job on this dingy will not make history apart from being the item that concludes this Regina build. First I opted to use some veneer which would make true to the scale thickness. This proved to be above my present skill level (or I just was a bit off). So I fell back to use the supplied strips of soft obechi. Easy to bend once wet, but also easy to make marks in (be it finger nails, crocodile clips or cloth pegs...) HOWEVER, it is enough material to take some sanding. (*pfieewh*). My set up for this planing experience is not the best, which the first shot reveals. After some light improvement this is how it looks now. With current status of the planking. I will give you the ugly truth (macro shot) of the first 4 strakes later and also how I opt to "hide" them... Until next time (which will be some days in the future, as always) T'a!
-
Excellent Michael What a delight, and then you fool anyone that does not know that the block that looks 1:1 is actually a 1:8 making the little cutter appear bigger than it is! Sweet
-
Don't be sorry, I've learned a lot and will pass that knowledge on when time comes and the opportunity given. Onwards, upwards!