


clloyd
-
Posts
153 -
Joined
-
Last visited
Content Type
Profiles
Forums
Gallery
Events
Posts posted by clloyd
-
-
Jason,
My favourite alternative material - paper. That's a 250g tan coloured cardstock. Getting wood to be that thin and bent is a huge effort, and some people do that, but I'm not interested in that level of frustration.
Similarly the hoops are black cardstock. At viewing distance you can't tell the difference.
C
-
Arthur
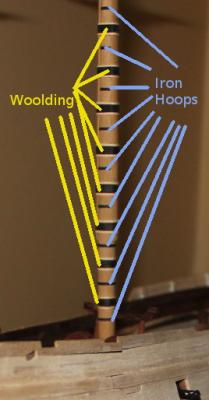
Just so we are on the same page.... My mast has both hoops and wooldings. the hoops struturally are underneath the cheeks, and the wooldings wrapped around the whole lot.
for placement and number I'm working off McKays drawings - and he works from Steele.
Colin
- WackoWolf, Beef Wellington, mtaylor and 1 other
-
 4
4
-
Thanks guys
Arthur - the bands going under the cheeks aren't woodlings - they are the iron hoops that would have been put on a "made" mast to hold it together. These were put on before the the cheeks....
From Steel
The mast is then sixteen-squared, rounded, and planed smooth from the heel to the hounds, except the surfaces left for coaking on the cheeks, which are rounded a little at the lower part, one-third their length.
The mast, thus far compleated, is hooped, the upper mould hoop is placed in the middle of the hounds, and the others equally spaced between that and the lowest mould hoop, which should be eight inches above the lower end of the cheeks.....The hoops are heated nearly red, then driven on the mast to their stations by long round bars of iron, called pokers, flatted on the feet. They are swung backwards and forwards, by the working, striking the edge of the hoop on each side the mast, which is well greased with tallow to facilitate the driving the hoop, and prevent the mast from burning. The hoop, when driven to its station, is cooled with water, which shrinks it and increases the tension........Then follows about 4 paragraphs describing how to make the cheeks, including hollows for the hoops.
I have course have cheated and made something that looks right but is manufactured for ease of construction.

Colin
-
That's pretty much what Lees illustrates. Good job.
Colin
-
Wefalck - thanks - acetone is not commonly in the house so that one hadn't even entered my thinking.
Vossy - I'm aware of those products, but I'd much rather keep the natural brown patina it's developed by itself over the past couple of years, so I'm going to try and not have to go down the artificial road.
Thanks Guys
Colin
-
I'd agree with your assessment.
Colin
-
The topic title pretty much states the question
I just want to check with the people who have the experience or mettalurgy to guide me. I have left my copper plates to age with air exposure, with no particular concern about handling. Now I'm at the point that I'd like to seal the copper away and get it under a hard protective layer, but want to make sure there are no organic oils on it, but obviously I want to leave the patina intact.
What could I use to take off any oils.
I'm leaning towards isopropynol - a lightly damp cloth rubbed over copper. Any other options?
Colin
-
To further what David said - basically when you have only a tiny amount of paint on the brush and lightly brush it across a surface - the paint goes onto areas that are higher and stays out of recesses. This is a technique to highlight areas that may normally reflect more light.
Colin
-
- Duh, should have though of that, I'll give it a go tonight and see how I get on. I can't find much guidance on this but looking at picture it seems like the line used to strop blocks needs to be somewhat proportionate to the size of the block otherwise it just just doesn't look right. The block in question here is an 8mm violin/sister block for the lifts. Anything smaller than the CC 0.75mm line looks too small to my eye (The CC line sizes seem to be err on the large side, the 0.75mm seems closer to 0.5mm, and so on...)
Yes - the size of the block was proportional to the line going through it. Larger lines took more stress, so the strop holding the blocks needed to be as strong.
You had me confused there too - you do mean eyebolt not deadeye? On the cap?
- You are so right - but I'm going to need to leave turning my own spars for 'next time'. For the main yard, the central section is 6mm and tapers to 3mm (per plans), haven't got as far as painting these yet so will wait to see how they appear
Turning - who needs turning?! Sharp pencil, sharp chisel, some maths and sandpaper is all you need.
The taper on the lower yard was to 3/7 it's width (before battens).
- A specific example (though there are more) is for the mizzen topmast stay (there is no topgallant on Snake) and it shows the stay seized around the top mast ans then seized to a ringbolt on the the main top. (On the plan, its really just a line, I'm inferring it should be seized).
per Lees: prior to 1773 deadeyes were used for the mizzen topmast stay. "About 1773 the deadeyes were replaced by thimbles...." so the CC diagrams would seem to be correct. The line is probably small enough that a fall lashed between two thimbles would be sufficient for tensioning.
Colin
-
Hi Jason,
looking good.
in response to your questions:
1: if a knot is out of the question then seizing is the way to go. If you are unsure about the strength, then two tricks I use are to pass the seizing through the line with a needle first - essentially sewing the line together before wrapping it tight, then flood the sieze with diluted white glue. Just out of interest which block to which deadeye?
2: though shalt not use dowels for masting
This will also go to something I wanted to say about your yard. My experience is that CC tends to over dimension their masts and yards - probably to protect against people breaking things too much. When I look at the yard my eye screams that it needs more taper. You've done so much in the rest of the build that I wanted to encourage you to look at the dimensions in steel and compare. (my mainyard starts at 6.5mm and tapers to about 2.4mm)3: if you want to specify which stays I can double check in Lees. Peterson doesn't neccessarily cover all ship types.
Colin
-
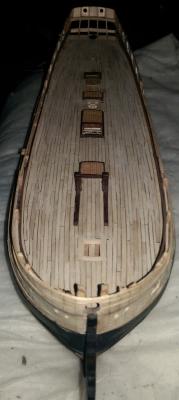
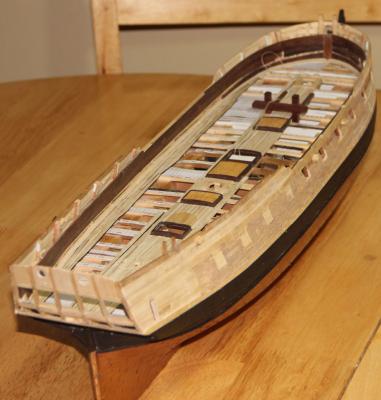
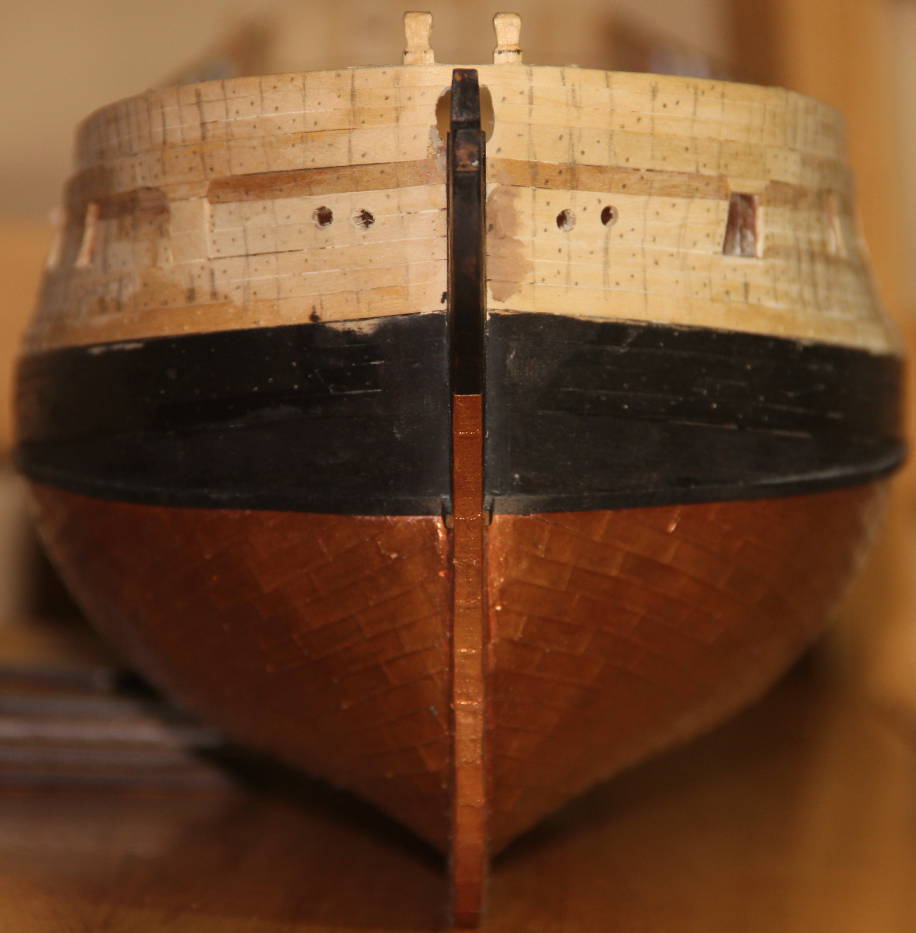
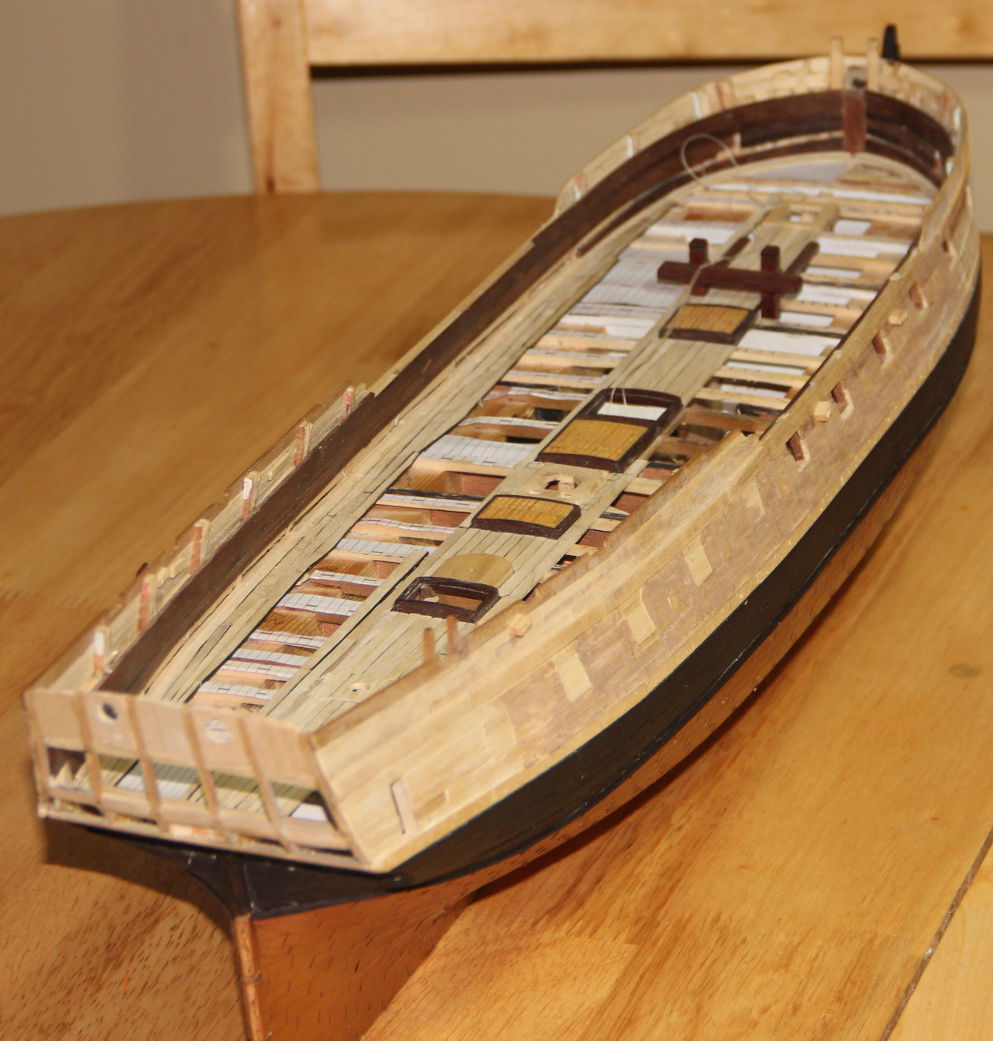
Further work!
I got a calm sunny day - so got the chance to take her out and sand the upper hull - that job is 90% complete. I can still see a couple of places that need smoothing down a little more.
I've been working on the interior (most of this is not glued or varnished - just placed for assessment).
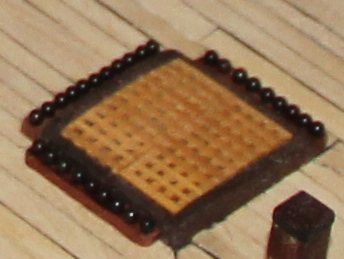
Shot racks mostly done. I ran out of 6lb shot, so need to get some more
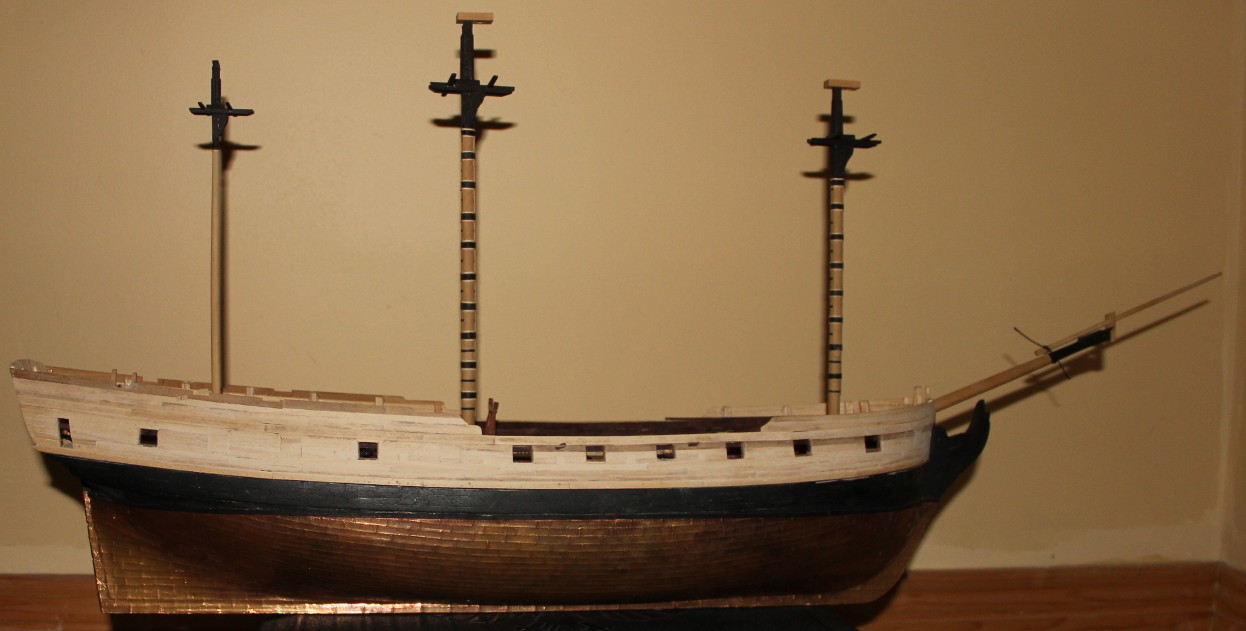
Jeer bits are well under way - the decorative bar at the top cost blood to make.


after redoing the gunport height it's nice to see the trial gun sitting nicely in the port.
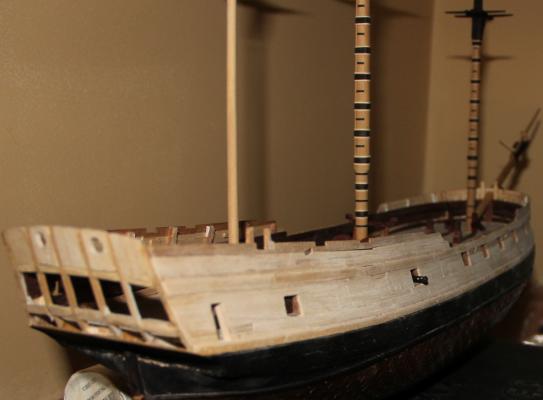
Which gives us my latest full hull picture!

Colin
-
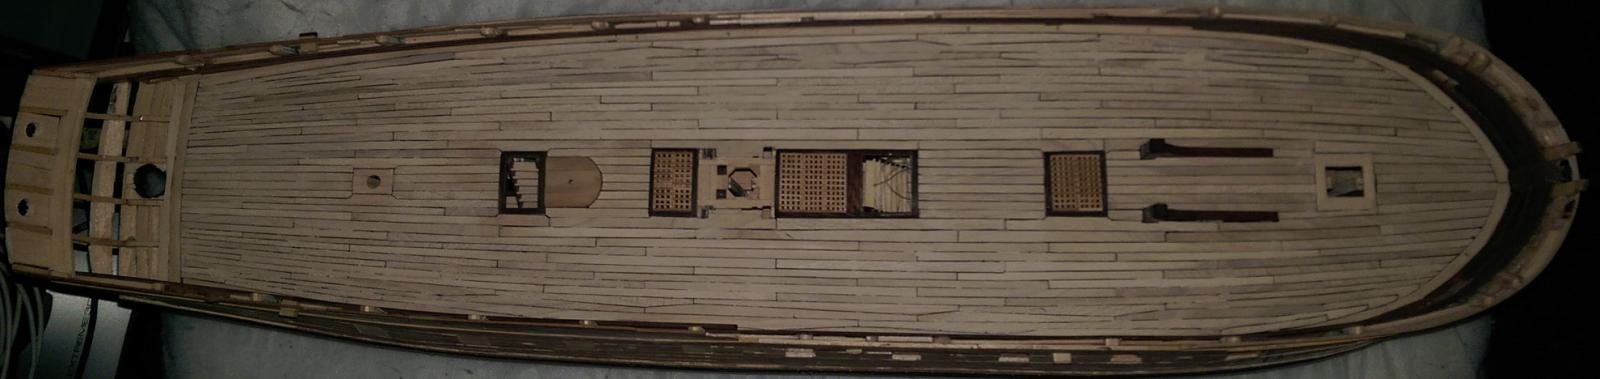
Where did you find the detail to allow you to replicate the complex planking patterns? I'm sure that was quite the project but well worth it.
Jason,
It's a bit of working from first principles.
We know from numerous sources that straight planking didn't start until well after this time so curved planking is the order of the day.
Equally then we know that hooked plank ends rather than nibbling was the order of the day.
The swan ships (built about the same time as Pandora) had top and butt planking under the guns for strength.
There are rules for how the butts in the margin plank relate to the butts in the side planking (this is where my head began to hurt)
We know well where the beams were.
McKay uses a 5 butt shift, but that gives a really long plank as it crosses across the midships area, so I chose a 4 butt shift.
Then I took my scans into gimp (free photoshop alternative), scrubbed out the illustrated planking and started dividing up the width of the deck into bands much like you would for side planking, using the Swan deck plans as a rough guide (and any errors there are entirely mine not as a result of copying anything David Antscherl did
).I printed out the result at full scale and away I went to try and replicate that, keeping in mind that when the other decks go on, most of it is going to be lost to sight.
Colin
-
It continues to shape into a lovely build Jason.
I'm with you on the ratlines. There is so much detail in one of these ships that things like that just don't stand out.
Colin
-
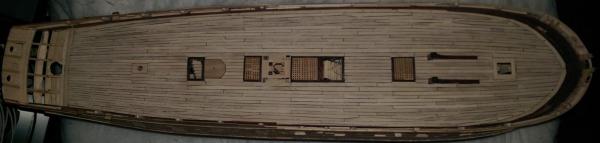
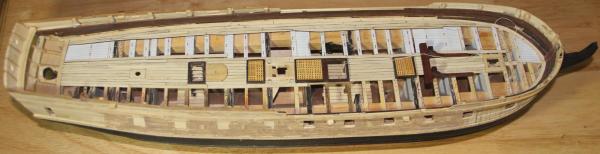
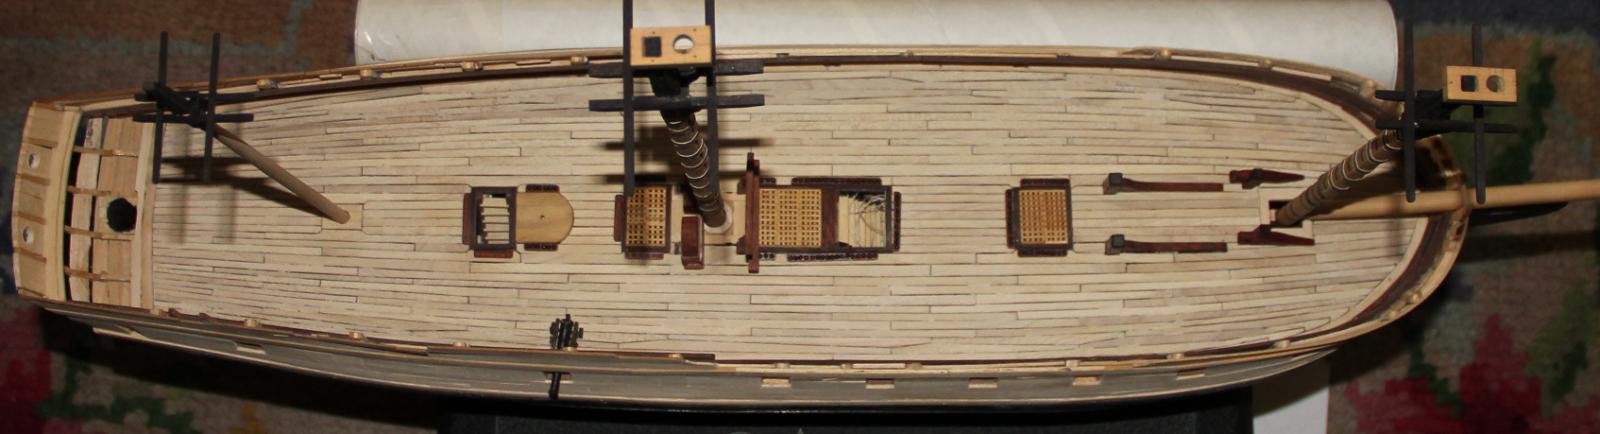
Finally got the main deck planking finished. Crappy mobile camera shots - sorry.
Sanding is about half way through - it's mostly smooth, but I can still see and feel a few irregularities in the deck.
Not being able to see into the guts of the ship also gives it a much more finished feel straight away.
Short term to do list:
Finish sanding exterior hull.
finish interior planking.
install main deck fittings. I have a few things built, but just need to get down now and install ringbolts and cleats and work my way down the deck. I'll probably leave guns until the very last minute before installing upper deck beams.
Colin
- Elmer Cornish, Padeen, gjdale and 5 others
-
8
-
Deck planking was usually a bit narrower - at 1/75 you'd be more looking at 3mm. Most people use holly or another species of silver/grey wood for decking.
Colin
-
Lovely danny.
They look good in place too
The V groove takes a lot of effort out of making octagonals!
Colin
-
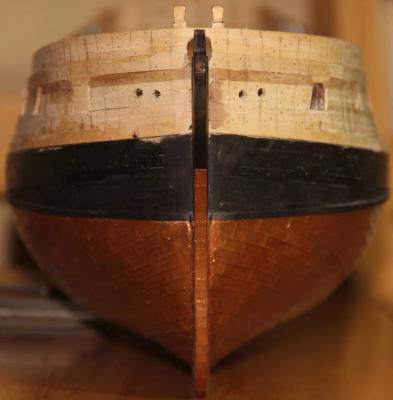
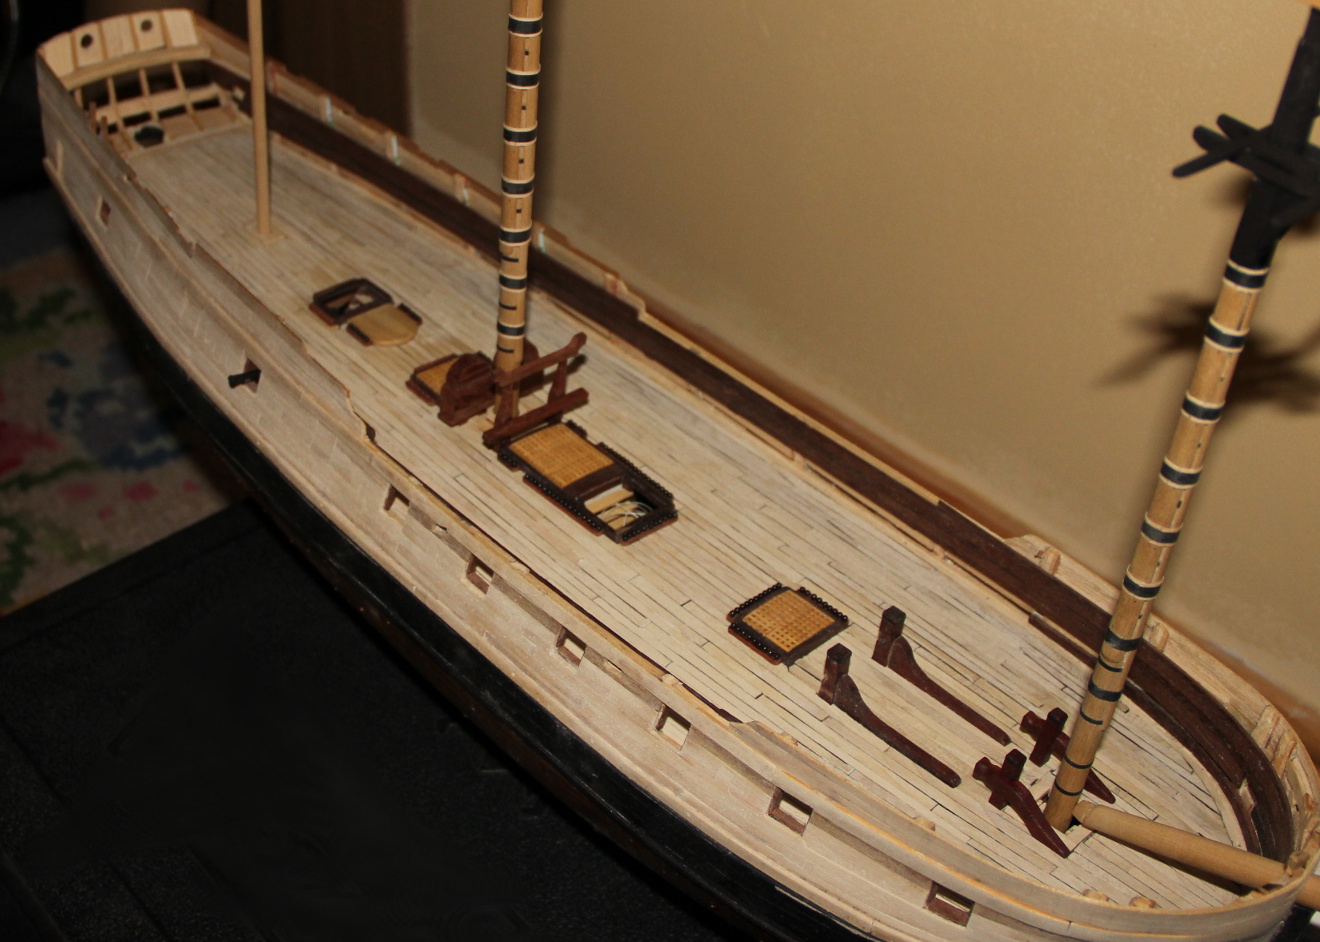
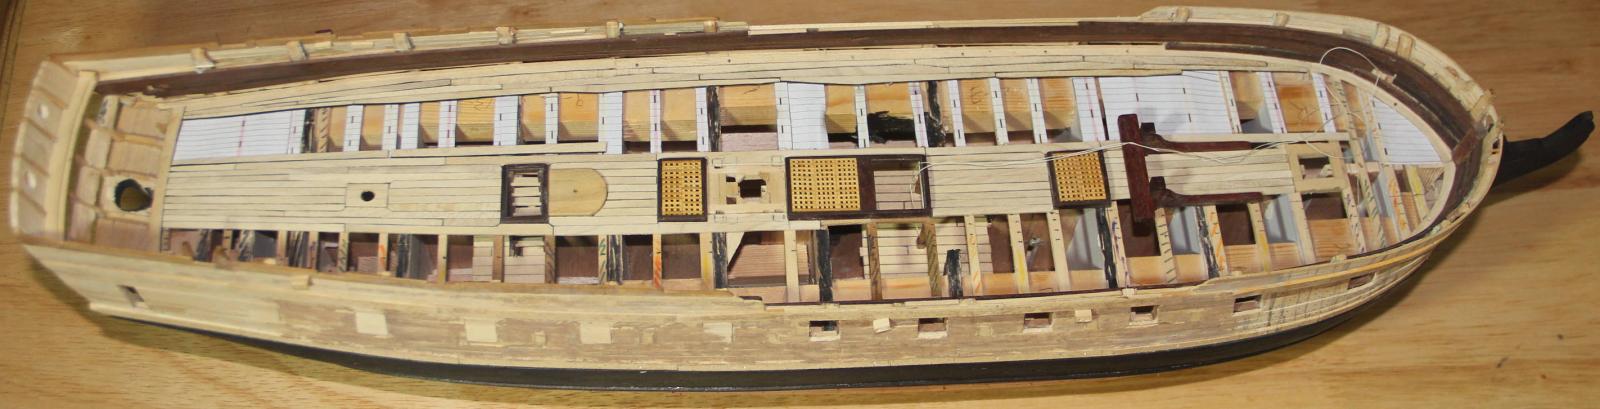
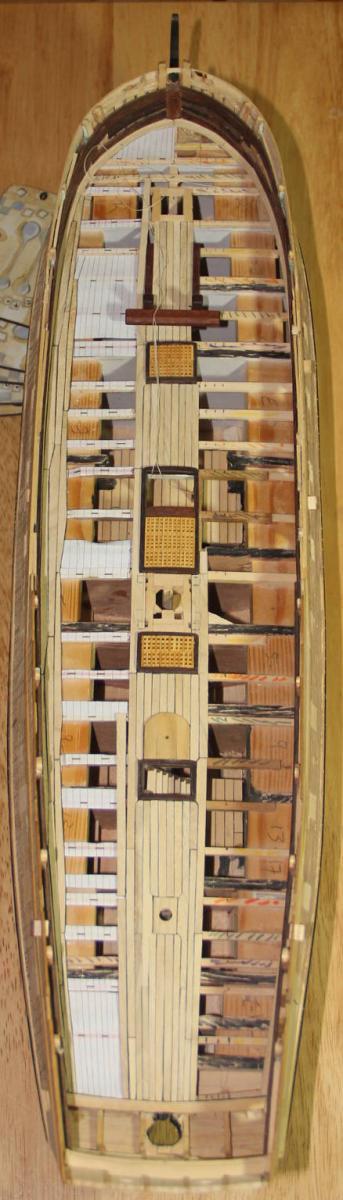
Finally got a chance to get out the camera and get some photos for an update.
I've made a chunk of progress, and after being static for so long it really feels good to be moving forward again.
I work on different aspects of the ship depending on location and how much noise I can make after the kids are asleep.
Hull:
Starboard side finished planking. I marked out for trenails, but on rereading McKay I've tossed the idea of trenailing the whole hull, since the historical records show she had painted sides. Since you can't see real trenails under paint, I've decided against that headache (hence the filler on much of the rest of the hull). There is one plank sitting low, and for the moment it is filled. If I'm unhappy after sanding I can still replace that one. I've reworked the gunports and am much happier with the line they take.
Sanding awaits nicer weather.

Gunport lids are shaped and just dry fitted in place at the moment. Sheaves done, and are temporarily in place until the inboard works are complete.
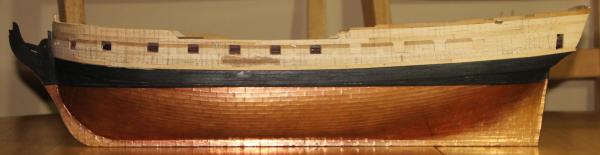
I got out my holly and have gotten on with the job of planking the gundeck. Looking at top and but planking and a curved layout had put me off doing it for a while, but it's turning out to be an ok job. Mckay shows straight planking, so I've had to redraw myself. It's probably wrong in how butts lay in respect to hatches, but my head was hurting even trying to figure this out, so I'm just happy that it's probably a slightly more historically accurate rendition.
Caulking is paper. I like the effect but may go with a grey for the upper deck.

My late night quiet task has been to shape more masts.
Jib - fairly straightforward.

Main topmast - still WIP, awaiting sheaves, ironwork blocks etc, but the basic shape is there. What was nice was to take the topmast and be able to run it up through the lower trestletrees and mast cap the way it was supposed to work.

Colin
- Beef Wellington, rafine, archjofo and 7 others
-
10
-
Nice Jason.
Hearts were one item I chucked out of the bounty kit and made my own - circular holes were one of the reasons I did that.
Colin
-
You'll just need to be aware that you have slightly less thickness when you are sanding, so don't sand down too far
Colin
-
Whoo! Time to make sawdust!!
Colin
-
-
-
With bulkheads that are on a station line, make sure that you put one edge of the bulkhead on the station line (aft edge of the forward bulkheads, fore edge of the aft bulkhead. That way the station shape you have defines the widest point of the bulkhead, and you can sand down from that as you fair the hull.
I have a print on demand version of Steel, but find myself going to the HNSA site more regularly.
Colin
-
The rigging tables in AotS bounty and AotS Pandora (both by McKay) are straight copies from the applicable tables in Steel (and are referenced as such).
There is an online version of Steel here http://hnsa.org/doc/steel/index.htm
The table for a 28 gun ship is http://hnsa.org/doc/steel/tables/pages/091-ShipOf28Guns.htm
including a table that establishes the mast dimensions .... http://hnsa.org/doc/steel/large/pg050.htm
Echoing what russ said - between Lees and Steel you'll be able to rig nearly any English ship without depending on others plans.
Colin


HMS Pandora 1779 by clloyd - Scale 1/64 - POB - 1790 configuration
in - Build logs for subjects built 1751 - 1800
Posted · Edited by clloyd
Arthur - now I realise the source of the confusion....
These.....
are the cheeks on my mast. As you can see they go all the way down the side of the mast and the hoops do go under them , and the wooldings over.
The wooden bands above and below the woolding are (and I've just looked up TFFM IV because I couldn't think of their name) aparently called woolding hoops (logically enough).
Problem sorted. Brain no longer confused.
And thanks for the compliment.... I'm enjoying doing the masts more than the hull at the moment.
C