SkerryAmp
-
Posts
809 -
Joined
-
Last visited
Content Type
Profiles
Forums
Gallery
Events
Everything posted by SkerryAmp
-
 Hey Josh, I know I am late to the party - been in home remodeling limbo; but your Willie looks awesome!! Nice to see more of them cropping up; maybe we can start a Skipjack armada !! -Adam
- 23 replies
-
- 1
-

-
- model shipways
- Willie L Bennett
- (and 1 more)
-
Decided to poke my head up from the house renovations and WOW have I lot to catch up on. Rocky mountain water skiing lobsters and I know I saw a comment or something about an enima back there - but really; don't wanna know. So i will just pop in, say Great work Popeye, the bouys look really nice and the sail was an education - I have never seen a sail on a lobster boat; learn something everyday!! -Adam
-
Stain for deck?
SkerryAmp replied to Rich_engr's topic in Painting, finishing and weathering products and techniques
When working with basswood (and most hobby woods really), you want to use a conditioner on the wood before applying the stain. Minwax makes a good one which I have had success with. It gets into the wood so when you apply the stain it evens out the color and reduces/removes blotchiness, giving you a nice even finish. -
Coloring Basswood
SkerryAmp replied to JPett's topic in Painting, finishing and weathering products and techniques
Am not totally sure what you mean by abysmal with the darker colors. However, I can take a stab at a couple of the possibilities. 1) Is it that it is TOO dark? If that is what you mean, you can mix whatever stain you are using with a bit of "natural" stain to lighten the color but still keep the character of the tone you want. You almost create a "scaled" stain color. You can do different ratios of course and mix and match to get the tone you are looking for. 2) Blotchy? (which I think is what you are talking about since you mentioned it in there) Basswood, heck hobby woods are very prone to blotchiness for a variety of reasons. The best way to combat this is using a prestain conditoner. If you do that pretty much straight as the instructions say, you will get incredibly nice even color that comes out really nice. Then, when done - either with one or the other or sometimes both; a quick hit with some satin sealer and you have some mighty fine looking wood finishes. This, by the way, is all from the reference of using Minwax brand stains and sealers. -Adam. -
Bring on the box shots!!!
-
Augie, the full pic is perfect - nice to see the ship as she sits overall and what a job it is. Your work is most certainly top notch!!! -Adam
-
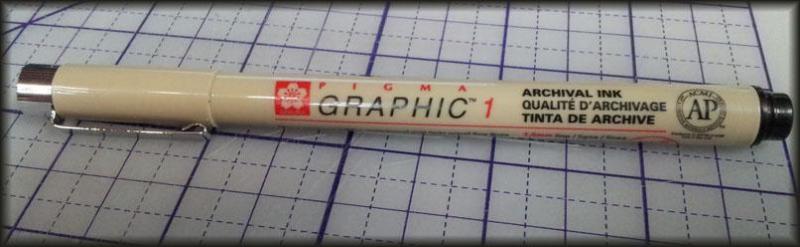
Thanks all! It is a great deal of fun. Kind of a mix of fun and fear hehe. No mental scars yet Chuck - this really is a great kit, one of the reasons I picked it up was all the build logs here for this very one, including yours which I read many many times and was a driving influence behind picking it up!! (My wife by the way may want a word with you since I told her this one was so good that I have already eyed my next one....your Syren ) Anyway, I have been checking hoping you had put that one back up, but I know that is a lot of work. If you have any shots of the bow 1st planking, vs 2cnd planking, vs with beak I would love it. I am having a hard time seeing where what I am doing is going to end up looking like what it is supposed to but moving forward with blind faith in what I am doing. Sjors - Thank you sir, I am using a lot of faith on this one - trust me!! Keel, Russ - Thanks for the kind words, I am pleased with how it turned out and kind of gave me that - hey, this won't be so bad after all. The pen was good, I wish I could say it was my idea, but I read it here in the multitudes of log before the shut down, I believe it was Dan Vadas who was talking about it. Gerty, thank you sir - i see you are posting on the willie again, I may have to switch back over to keep up with you And Wayne, hate to say it - but up until a year ago when I started this hobby I didn't even know what a Tiller was I may be a couple of days before another update; the Admiral has informed me that she couldn't help notice I have two boats moving right along but the office which was supposed to be redone by end of winter was only barely started . So, I must attend to that some I think!! Till later! Enjoy!!! -Adam
-
In seriousness. The images used as examples are not infringing on copyrights. As none of them, in their context, are being passed off as the authors but rather a reference to the original. Now, had someone posted a picture of a completed ship and posted it under the headline - look at my latest ship! Making us all believe that the ship and the photo was theirs; that would be dipping into copyright murkiness. Also, taking a photo of a box is not breaking copyright; mainly because the photo is yours - you took the picture, and the box is (as Mark pointed out) advertising the ship which you are about to build. No company is going to complain about that. However, if you took the contents of the box, removed the box (because you would have to be silly not to in order to try this) and said, look at the parts I made to build my ship! NOW we are into stealing someone elses work =) Guess that is just a wordy way to try to help clarify fair use. Pretty much as long as you are not making money or noteriety off the picture or work, passing the image or work off as your own original work, or using the picture or work in a harmful manner to the original owner - they really are not going to make much a fuss over it as it doesn't benefit them and costs money for nor reason. Another very large misconception to the interwebs, and I have been doing this a long long long .. oh my gosh a long time...while techincally internet copyright CAN be enforced; it rarely is as it is incredibly cost prohibitive. If you really want to protect your work - watermark it, just make sure you use a GOOD watermark, because watermarks are not hard to remove unless you make it hard to remove. This is why the majority of the time if someone is really bothered by it they send a cease and desist letter which in most cases ends it right then and there. Then escalate it if it is financially profitable in some way. Which to major companies with money to spare tend to escalate it to the end more so than your average joe as they are protecting their copyright which in the long run is financially viable. You also run into the hardship of enforcing it overseas. How many copyright infringement claims have you seen won against foreign countries? Not many because most do not care about copyright laws except their own. So, it is great to bring it up. It is good for folks to be aware. However, in reality, it is a post at your own risk kind of internet world Where the villains have the upper hand, and the good guys are happy being the good guys Enjoy! -Adam
- 20 replies
-
- 4
-
-
- IPR
- right of use
- (and 1 more)
-
Yup, in works with our neighbor Vito, Vito "The Fish" from Southy. He runs a charter fishing boat out of the back bay, funny though - I always swear there were more passengers when they left port. Must be memory issues on my part.
- 20 replies
-
- 1
-
-
- IPR
- right of use
- (and 1 more)
-
Sadly, Chuck is dead on. The internet has done wonderfuil things, but one of the worst things it has done is completely devalue copyright and ownership rights. Unless you are localized to one particular country, any kind of lawsuit or legal action is a giant ball of pain in the *** and hardly ever goes anywhere. It is indeed the wild west - and 90% is on the honor system. If someone is going to be a jerk and steal someone else stuff as their own; no verbage, agreement, eula (which nobody reads and hardly stands up in court anyway) - writte, implied or otherwise is going to stop them. Although, Uncle Pauly's method sounds like a pretty good one.
- 20 replies
-
- 1
-
-
- IPR
- right of use
- (and 1 more)
-
The traps are outstanding!! Excellent job on the weathering. I used to that sort of thing when I was into building plastic kits, especially armor and planes etc. I see people doing that on these wooden ships (frank and the barnicles) and they look outstanding, but I am far to afraid to do it . Although, I figured if I ever really mess one up, I can weather it and say it was on purpose Can't wait to see some lobsters in the traps! -Adam
-
Bleaching your wood
SkerryAmp replied to JPett's topic in Building, Framing, Planking and plating a ships hull and deck
Ah, better modeling through chemistry. I would bet you stumbled on a nice way to "age" some woods as well. Stained wood, little bleach would give it that washed out/driftwood look. Hmmmmmm... I digress. Nice job!! -Adam -
Nice solution with the rudder. I had the same problem on the Phantom and ended up burnishing and burnsihing and burnishing and burnishing and oh yeah, more burnishing - I must have flattened the rudder by 1-2mm by the time I was done. Surprised I didn't start a fire from all the rubbing. I like your idea better!! and looks good!! Glad the beads worked out for you! -Adam
-
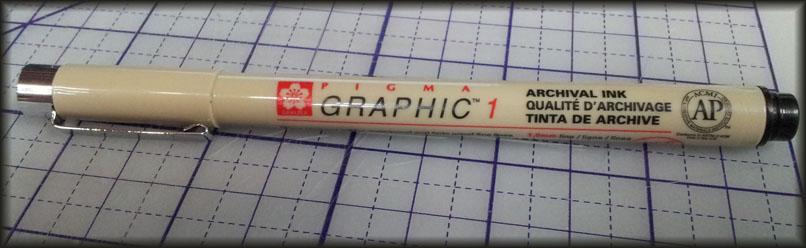
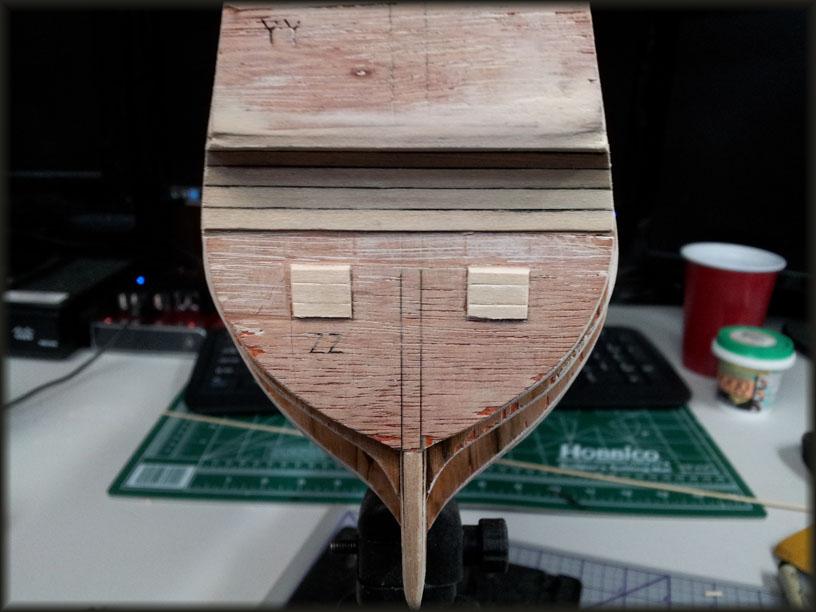
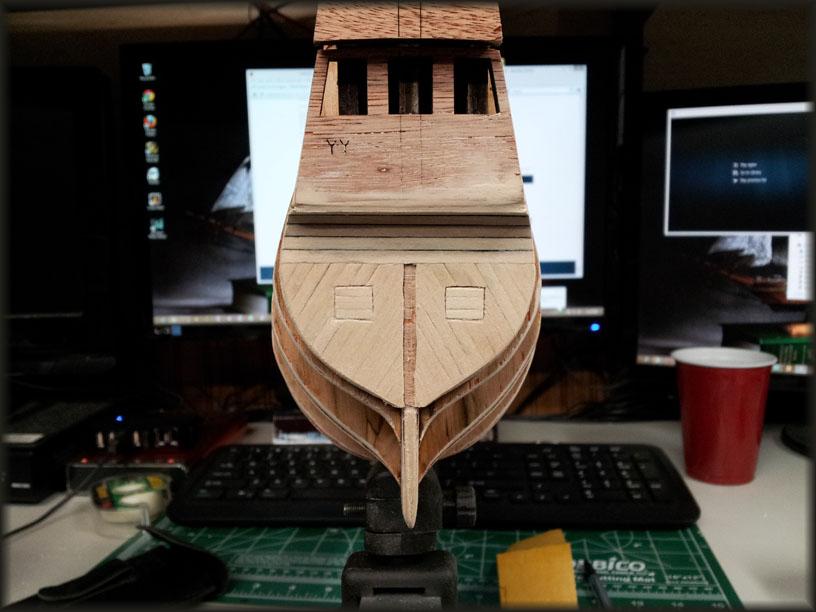
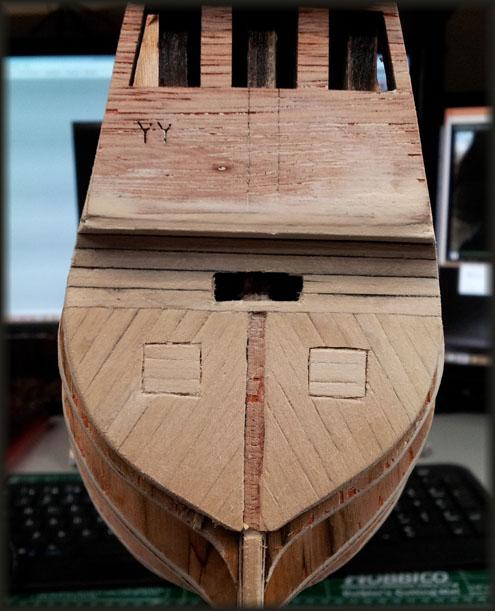
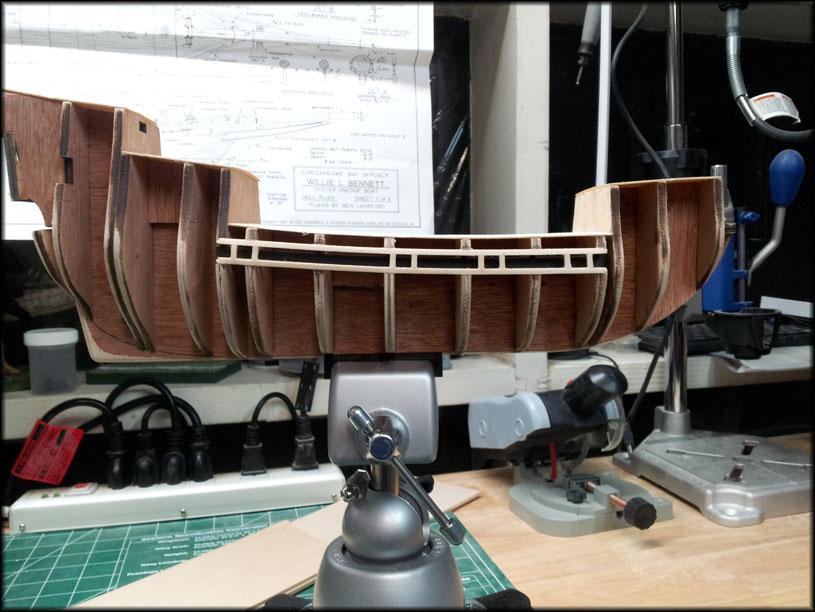
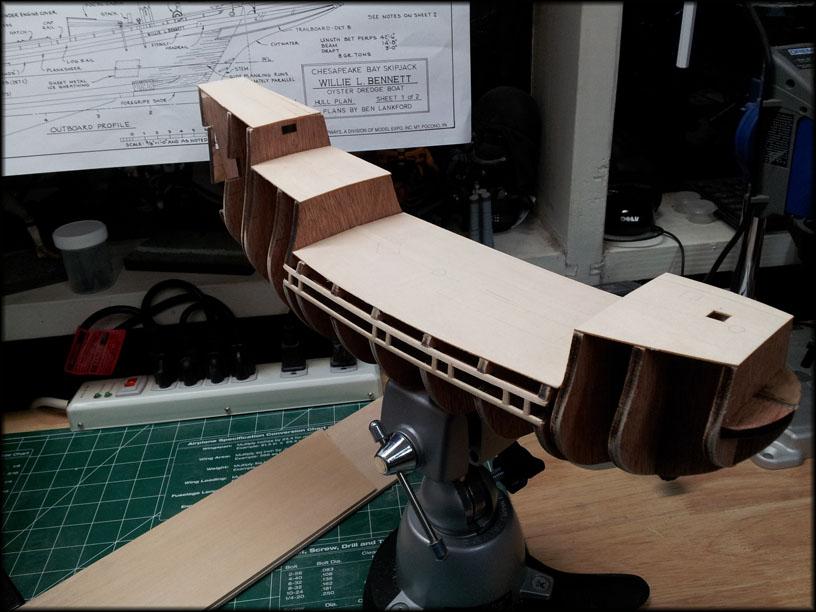
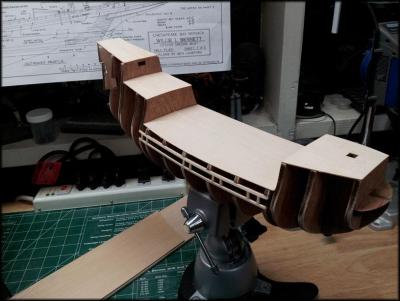
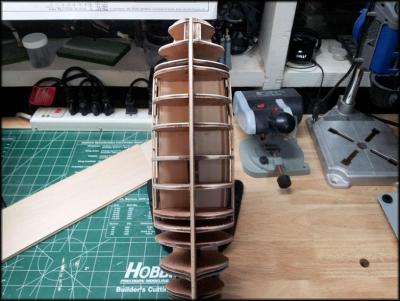
Well, I have managed to stall the port and starboard planking by working on the stern =) I did the first planking on the counter and was actually pleased with the result. Up until now the only real "planking" experience I have was with the Whitehall tender (which was a nightmare and am sure left mental scars) so entering into this stage is a bit nerve-wracking. The counter was filled and sanded and ready to take the next layer!! I used an archival ink pen to do the caulking on the 2cnd planks. I had seen this as a suggestion some time ago and gave it a shot and it works great!! No bleeding into the fibers of the wood and a nice solid black. Worked great!! The type of pen that I got also has a brush style in addition to the pen and marker style tips. With the caulking done the planks went up!! Starting to feel kind of good about this whole process. I do realize it is not perfect by any means, but a heck of a lot better than I expected!! I then went at the port lids. 3 planks would not fit in full and if I started even with the top of one lid I would have a sliver at the bottom. So I overlapped the first plank such that half the board would be on the port lid, which then left a partial plank, full plank, partial plank pattern which worked out pretty well. I then trimmed them up square and let them dry and cleaned up the counter a little bit. To finish off this process I went through and finished planking the transom. To cut the patterns in the diagonal plank around the port lids I used I used a piece of scotch tape and traced the outline of what the plank would do then transferred it to the plank itself and cut it out. Worked pretty well!! Doing this I laid down the final planks, gave a little sanding and that step of the planking was complete!! You may notice I did not do the caulking in this section. This was a conscious choice since I knew i was going to be painting this area I opted to skip that part. I sat back and thought - heh cool, this is coming along but something just isn't right.... Oh yeah... Forgot the tiller... NOW we are cooking with gas!!! Well, so far this has been pretty fun. It is nice to learn new techniques and new things in general, however am still nervous about the rest of the planking but will be giving that a shot today. I also need to clean up this current work a little, especially around the port lids as well as add in treenails before I stain it. All in all I think it came out okay. Thank you for stopping in, as always comments critiques and suggestions are welcome - until later!! Enjoy what you do and do what you Enjoy!!! -Adam


-
Looking good Wayne!!
-
Very nice work Sarah, The funnel came out great! looks terrific installed. Enjoying the little details you are sticking in there; not sure I will have the patience come time but they are working for you!! -Adam
-
Enamle vs Acrylic
SkerryAmp replied to Timothy Wood's topic in Painting, finishing and weathering products and techniques
I have been doing models for years (not wood mind you , very new to that) but plastics etc. In my opinion, acrylics are the best bang for the buck. Enamels have the benefit of drying quite hard. However, drying time tends to be longer, just by their nature they tend to have a powerful odor, and clean up can be a pain and cost money as you need special cleaning agents to properly clean your brushes - which in turn has a pretty strong odor. They do thin well, and do airbrush well however... Acrylics are much more user friendly. They have a much quicker drying/curing time, they higher quality paints tend to self level quite well (Model Master Acryls, Polly-S, Humbrol to name a few) and they can clean up with soap and water. They also airbursh equally well and can be thinned with water (although not the best) or alcohol, windex etc. They also tend to be more resistant to orange peeling. A drawback however is that because they do dry fast you want to be careful about working the paint to much; a few strokes is usuall all you need, too much and it will begin drying and clumping. You will in most cases want to seal acryclis when done with some kind of finish, but in most cases that is good practice regardless of enamel, stain or acrylics. Cost wise I think they tend to be comperable so no real benefit there. Back in the day you had much more selection in enamels over acrylics, especially with metallics; however advancements over the years in acrylics really have produced some very nice metallic formulas. Blending paints, acrylics blend very well even across brands. Enamels sometimes can have some issues mixing brands depending on the carrier/base they use. Also if you mix types, make sure you don't put enamels over acrylics unless the acrylic is completely dry and even then don't work it to much - you run the risk of lifting the acrylic with the enamel. Hope that helps a bit; again just my opinion but over the years I have really moved towards acrylics and really havn't looked back They just are much more versatile and friendly and don't smell anywhere near as bad Enjoy!!! -Adam -
Horray!!! Congrats Wayne
-
Thanks Russ, I am going to be doing just that tonight before i lay any planking (heck, it helps me stall a little bit as well ). Going to run the battens along the edges a couple more times an then (shudder) lay that first plank.. -Adam
-
Hey there Wayne, that sort of thing is exactly what I tend to do. I try to keep 1 or 2 sitting on the shelf as "inspiration". And, in my humble opinion, the best time to put them on the shelf is when they are on a good sale. Model Expo does have those sales quite often though, so it isn't usually a one shot deal - but regardless, if it is a subject that interests you and you have the means - go for it! (Course, like me - just have to be careful ; buying kits can be addictive. I have 2 on the shelf and am eying the Syren which is on sale at the moment). -Adam.
-
Now THAT is creative AND practical!!! Nevermind the cool factor as well. -Adam
-
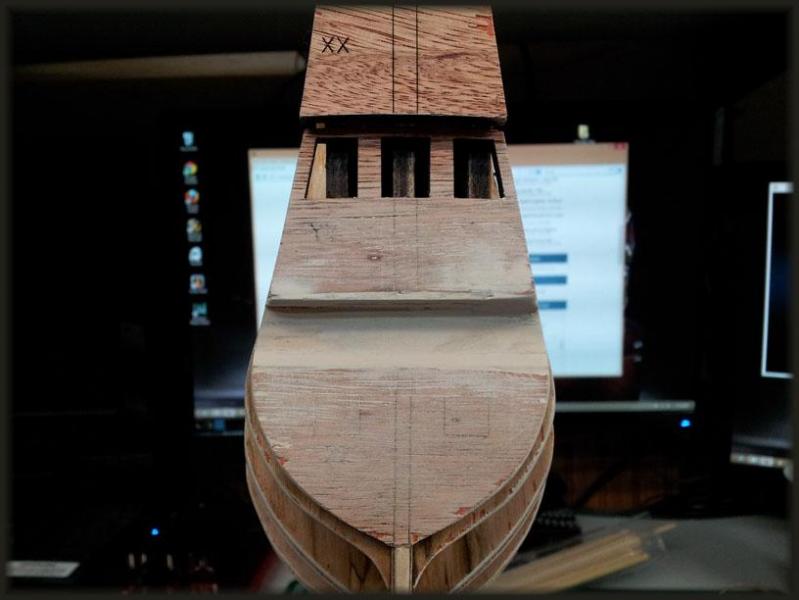
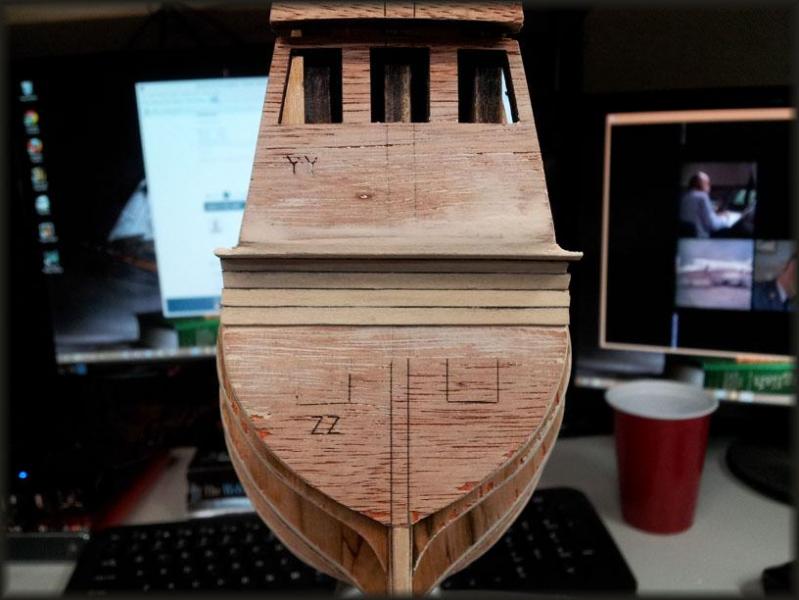
Thanks Russ, Popeye, Frank - it is indeed a VERY well done kit; I am very impressed so far with the instructions, the fit and just how enjoyable it is to put together. I would highly recommend this kit to anyone wanting to give one a go. It, so far, has been a very enjoyable time! I have done a little more; really just trying to get myself setup for the (/queue sinister music/) Planking! I went through and finished up the gunports; not really a lot to say there. Used a tick strip as suggested to transfer the spacing from the plans to the ship and framed up the gunports. I think I may do a mix ,a couple open a couple closed - but still will see. Once that was all set I went through and did my best to fair up the buikheads. I hope I got them done right, I have to say I was expecting a lot more to be needed but the battens are laying pretty darn well across them all - so it seems to be pretty good. I figure when I lay them exactly in place I may come across some oddities but will fine tune it then. In addition to fairing the bulkheads went through and sanded the gun ports to follow the curvature and lay flat with the heads so the planks will set nicely over them and then faired up the deck areas. Once all that sanding was done I just layed out the false decks and have her set aside to dry overnight. Tomorrow - I guess..... :gulp: time to plank. Don't mind saying - a bit nervous.. but, anxious as well =) So until then!! Thank you all for taking interest, it is greatly appreciated!!! Enjoy!!! -Adam.

-
Augie, the rigging is looking fantabulous (yes that is a word, my wife says so). And judging from the other updates and things along the way I would hardly say your rake is the first thing you got right . She is coming along very nicely!! Kudos!! -Adam
-
Love it Sarah!! That funnel looks terrific! And now my 2 sources of Harriet inspiration (yourself and Wayne) are now both back - things are now complete!!!! Can't wait to see how you progress; the little details you add really make a difference! As a side question; that sheet in one of your pictures of scale rivets? What else is on there and where would one find it (and what it's called) ? -Adam
-
Will add to the nice to see your stuff back Sarah! This one came out terrific!! Nice extra detail! Looking forward to seeing where you go with the Harriet =) -Adam