
HOLIDAY DONATION DRIVE - SUPPORT MSW - DO YOUR PART TO KEEP THIS GREAT FORUM GOING! (Only 75 donations so far out of 49,000 members - C'mon guys!)
×


popeye the sailor
-
Posts
16,007 -
Joined
-
Last visited
Content Type
Profiles
Forums
Gallery
Events
Everything posted by popeye the sailor
-

Porsche 356 A by Papa - Arena Modelli - 1/43
popeye the sailor replied to Papa's topic in Non-ship/categorised builds
I recall building a few of these models back in the day.....not this particular brand, but there were a fair selection of smaller car kits available in the 70's. there were quite a few military models out there too, but at least they had an outlet for survival........wargame enthusiasts sweet littler car.......brings back memories -
superb looking model..........amazing, right down to the rigging! very well done!
-
I sent away for the conspicuity tape decals.........got 'em just the other day getting some pictures together. won't be long
-
hey Mike very nice project you have here! the interior looks really sweet! look'in forward in seeing how all this gets put together
-
something to experiment with perhaps?
-
WOW.........very nice progress you've made on the Goshawk! truely a colorful bird! it had a rather short life though. it was ordered by the navy in 1933 as the XF11C-3. twenty seven were built, and near the time of delivery, (in 1934} their designation was changed to the BF2C-1. you did a really nice job on the Cyclone engine..........the engine was the main cause of their short life. at crusing speed, the vibration from the engine cause the plane to shake badly enough, to cause problems with the wing structure. a remedy that Curtiss came up with, was to replace the wing with a wooden one, but it was shot down by the navy, and plans for future planes was scrapped. the cowl coloration shown on the box, designates the plane as a carrier plane.....could be plane #1......or plane #2, depending where the {in this case} red is on the cowl. I painted the cowls on the seagulls, on the Arizona, in this way........red was the color for the Arizona if memory serves me. I haven't checked when the seagulls replaced the Neuports....likely around 1937. what carriers recieved the Goshawks?
-
look'in really good Thomas! I also have a log going on this model.......I'm at the railing stage too, before I tabled it. one thought I had was to cut the top and lower parts of the railings to length and come up with some way to slot them, so the photo etch fills would have something to sit in. I haven't had the time to try it, but I would imagine that the slot wouldn't need to be too deep.......all I think it needs is a guide the spiral stairs were a trial as well, but I managed to get 'em done. I hope to pull it back out one of these days.......... I also have parts for the Roberet E. Lee, but that is going to be a total rework project I didn't run into the problem you seem to be having at the moment, but if your not going to motorize it, you can simply cover it over. keep it up.....you doing great!
-
I built the model........not an easy one with all it's short comings. the closest ship that can be derived from it is the Le Flore. I'm sure you'll find what your looking for with enough research
-
thanks for the head's up......I'll check them out tomorrow not too sure what I'm gonna do with the decaling, but there are too many 'coke' models out there. I was a bit awed that there were chrome parts in the trailer.....that is a no go for me. I'm in the process of de-chroming for the time being.........I have made a start. I think a log is in order
-
following along as well.....very nice start
-
hey there! good to see others enjoying old kits I built the Monogram kit when I was a teenager. there are some kits that have been reproduced by other manufacturers.......the 1:72 stukas I posted a while back is a good example. molds travel. I've made my own decals from time to time............it would be hard to do your though due to the white areas. you could use white decal paper, but cutting them out is a drag! I bookmarked that site that was mentioned.......can't have too many avenues look foreward in seeing more!
-
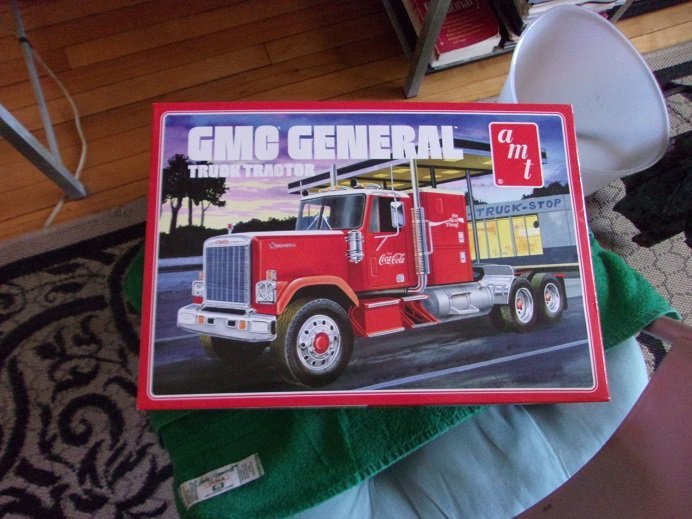
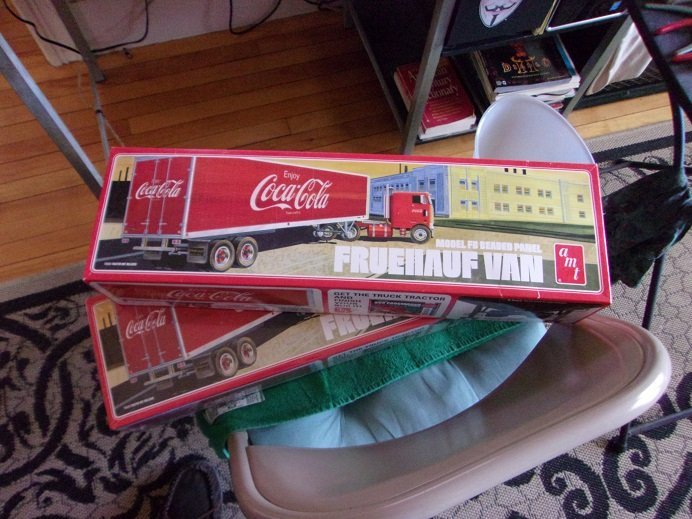
breaker.....breaker.......good buddy..........any takers??? ran into a deal I couldn't pass up. quite a few folks mentioned buying models at Wal Mart...........I have never seen Wal Mart stocking 'em. we were at our local Wal Mart a while ago and I saw an entire selection of model kits!........most of them though sported the Coke motiff {pick ups, cars, ect}. I bought a few during this time, but I saw that they also had a tractor and trailer kit {sold separately} available. the display disappeared after a couple of months, making me think that this was merely a test display to see if they had any viability......a marketing interest. they ended up in the clearance asile at a reduced price. so, I picked up these two: I picked up the second trailer just last week.........bought them @ $25.00 a piece! I think that's a Peterbuilt day cab, but the GMC will fit the bill just as well. one question I do have concerns the conspicuity tape. searching for these decals has been tough........no one seems to carry them. the trailer is likely the same as yours....produced by a few companies. Round 2 picked up the molds and produced these kits. DOT requires conspicuity tape on trailers.......there is limited use on tractors {mud flap brackets mostly}. if these were 48 foot or 53 foot trailers, I could try and do Wally trailers. early Wally trailers were 48 foot and nicknamed Circus trailer because of the distinctive lettering along the sides. they are also too long to be Pup trailers. do you have an idea on where to find conspicuity tape?
-
Hmmmmmmm,,,,,,a Howitzer to a gun range? kinda negates hitting the bull's eye....the whole target IS the bull's eye!
-
US 6” gun by RGL - FINISHED - Panzer Concepts
popeye the sailor replied to RGL's topic in Non-ship/categorised builds
sweet! -
can you imagine..........if that gun can actually fire!
-
1951 Chevy by Papa - FINISHED - AMT
popeye the sailor replied to Papa's topic in Non-ship/categorised builds
I use Testor's for plastic.....only in isolated cases will I use something else. I've heard that in time CA becomes brittle and breaks apart easily.....of course most of the time. models aren't moved around too much. cleaning and packing is usually the OMG time for drag, the wells around the engine compartment are modified to some degree.......usually to allow more room for the exhaust. no harm nor foul in auto racing -
touching ! again, I thank you all for your concern. might be coming to an end, 'cuz I'm starting to get that nagging feeling. I do have something in mind, but I'm having trouble finding 1:25 scale conspicuity tape {decals}. I won't say it's impossible John........the M&M Fun Ship was a 'seat of my pants' build. the moment must have been right for it though, because thinking up all the ideas for it was so easy and without any real thought. it also went together faster than any project I have done in the past. the Andrea Gail was the other really fun scratch build........no one would ever know that the basis for her was the Boulogne estapale {Billing kit}.........Jeepers, I still have the rest of 'em to complete! I'm glad to see your well....and I hope your admiral is the same......tell her I sez Hi browsing though sites, I saw garage stuff kits........made me think of you Gary. your Auto repair and Mack boxes are really cool where I have been mess'in with HO buildings, I had an idea to try something along those lines, although at a much larger scale it's not a moot thought yet.........one never knows. I have a couple of life projects to do in the meantime {auto & home}..noting that involves blood {I hope}......and then.......
-
sharp look'in plane Rob......very nicely done!
-
1951 Chevy by Papa - FINISHED - AMT
popeye the sailor replied to Papa's topic in Non-ship/categorised builds
some models are scored to show how much to remove for the wheel wells. if it doesn't, it's a scratch builder's dream good idea to remove the chrome trim.......it was considered extra weight on the drag strip! -
Anzio Annie got it's name from the seige at Anzio Italy..........I believe the Germans actually named it Richard. Richard and Leopold were sent over to Italy to aidse in the seige........they expended their ammo, but failed to do much damage before they were moved to Cititaveccia, ahead of the allied forces. when they saw that they couldn't get the railguns out of Italy, they scuttled them........Richard was badly damaged, but Leopold had minor damage. Leopold was brought to the U.S. and on display in Aberdeen, Maryland.....but there is another K5 on display in Petersberg Va. might be a mix up........Leopold might have been named Anzio Annie, and Richard was named Anzio express. these are the nicknames that the allies called them, because of the sound the shells generated. I bookmarked some sites if you would like them. I need to get back to Leopold one of these days
-
thanks..........the feeling is mutual I enjoy being here. it will be better when I can get moving on something!
-
1951 Chevy by Papa - FINISHED - AMT
popeye the sailor replied to Papa's topic in Non-ship/categorised builds
submarine races? how do you know who's ahead -
US 6” gun by RGL - FINISHED - Panzer Concepts
popeye the sailor replied to RGL's topic in Non-ship/categorised builds
WOW Greg! this is one awesome project very well done indeed! are you going to add canvas to the truck? -
1951 Chevy by Papa - FINISHED - AMT
popeye the sailor replied to Papa's topic in Non-ship/categorised builds
this is likely a reproduction from Round 2 models.........the molds they are using are the old molds. MPC was another company that had some poor model kits. the mold seams and pin marks are terrible! I've got a small stash of these kits amassed at the time being. it blows me away that you have the L6 engine! I've got the Monogram 59 & 60 Chevy Bal Air, and NEITHER of them came with the stock engine! I had to order a pair from Shapeways. Atlantis is another company that sprung up in the past few years.......they bought up some of the old molds too. nice to see the nostalgic kits again.........but they should have revamped the molds before using them I should show you what I'm doing to a 57 Chrysler 300............OH, the evil in it all! swell job on the model by way!!!!! 👍 -
hello all! I do apologize for the extensive hiatus, but I thought I'd make an appearance to let you all know that I'm well and not knock'in on Heaven's door. so many things to think about..........so many thing I want to do.......I seem to be in the clutches of some sort of builder's block. I've started a few projects, but so far, I haven't found anything to peak my interest....I tend to drift back into the hole at the moment, I'm in the middle of revamping the shelving in the living room, so I can add more finished projects. I've also been selected to attend Jury duty the end of this month....I really don't want to do it.....but we'll see how it all pans out. for those who know me, I have always tried to put as much into my models as I can........some even exceeded my envisions. but the last few builds haven't shown my visions, and that is disheartening......great expectations, but they seem to fall short. imagination has always been the mother of creativity for me. I thank you all for liking the model I'm glad that I was able to find the model in the box...........opening a box, you never know what your gonna get. to open a model this old, especially a wood kit, is a crap shoot. you find one that you can utilize most or all of the parts, or you get one that needs a lot of love and replacement wood. I have been lucky in this respect, although I did add some basswood into the model to make it look more complete.....the upper plane of the wing and fuselage. added missing aspects added to the model, but I feel that the absense of rigging knocks it down quite a bit I know I sound like my own worst critic, but it stands as an example of what I'm talking about.........my vision of adding it wasn't realized in the finished model. I either goofed in adding the provisions for adding it, or I overlooked what it would take for adding it.....could even be a mix of both. don't get me wrong......I like the way it came out, but this one aspect subtracts from the overall apearance of the model. the wing was a bit warped.....but looking at the finished model, I was correct that it wouldn't be that noticeable in the finished model. it was fun adding the cockpit, even though it's just the basic....anything is bettter than staring into an open cavity the machine guns were another fun thing, even though the plane went into service near the end of the war, and most were not fitted with them {mine is going to go down fighting}. an open cowl without an engine was blasphomy!.........even though it doesn't stick out as far out of the opening as I would have liked, it fills the openness perfectly flying models......if you intend to fly them, does tend to leave out some detail.........could be that it might make the model harder to balance. but as a static model, one can go totally mental in adding the most trivial of detail, to arrive at a more complete representative of it's subject. I feel I did that.........not 100%, but enough that it will sit on display with my other models I like it........and I'm glas you all agree! I hope to be back soon, just as crazy as ever
- 79 replies
-
- 12
-


