HOLIDAY DONATION DRIVE - SUPPORT MSW - DO YOUR PART TO KEEP THIS GREAT FORUM GOING! (Only 36 donations so far out of 49,000 members - C'mon guys!)
×


popeye the sailor
-
Posts
16,007 -
Joined
-
Last visited
Content Type
Profiles
Forums
Gallery
Events
Everything posted by popeye the sailor
-
 the wood looked really good........but what you've done here looks better. it does keep with the overall look of the model
 -
I'll post them today.........thanks for reminding me
-
WOW! I was shocked........we only went 1/4 of the block. he doesn't like to go down to the field anymore, so we've been going from one street to another...and back again. he acts like such a 'toughy', but if he gets leary of his surroundings, he'll lay down and won't go any further.......we end up going back the way we came. I got him to the point now, where we can go the entire city block. for some reason, this morning he didn't want to......we'll go later I'm still planking that second hull........one strake here.....one strake there. I'm almost done...so anyone following the Clotilda......please be patient. so where was I?????? the cockpit.......not much more. putting the frame together was a little tedious.......I wanted to make sure everything goes where they are supposed to. it's still a little tweaked in spots...if I had any of that thin rod, I'd try to reinforce the frame to bring the shape back. I'm not sure how it all fits together, so this would make it hard to judge. spreading the sides apart a little bit makes it easy to slide in. well.....gibbs is badgering me to go back out........opps.....the admiral just went out with him. I'm sure this will be the walk he didn't want to do earlier, so I'd better gt out there. I hope this isn't going to be what the day is like

-
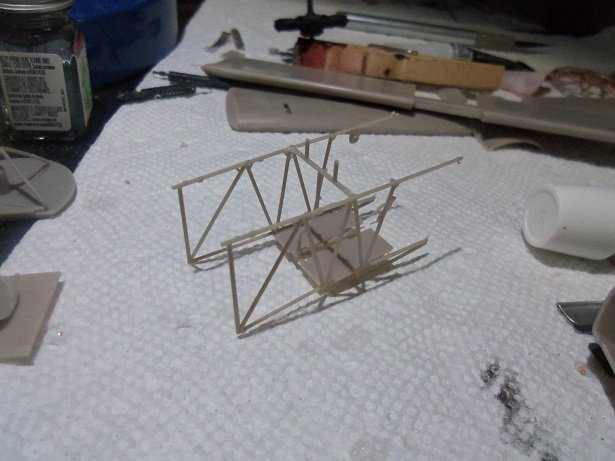
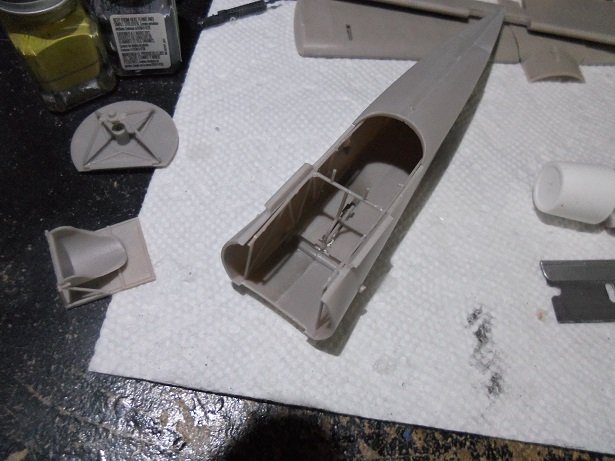
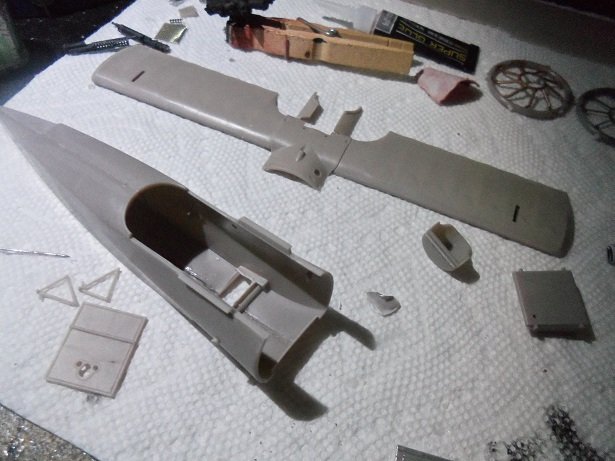
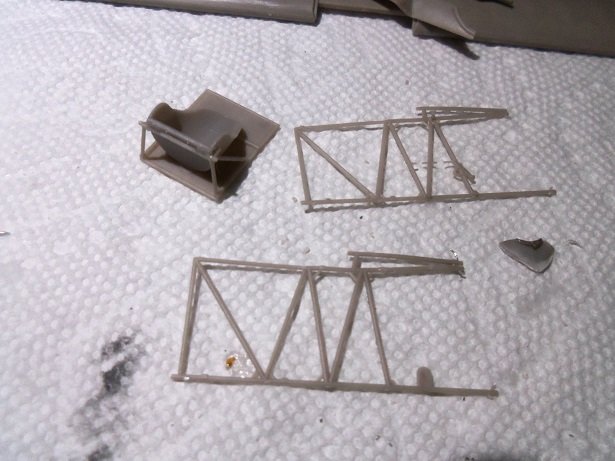
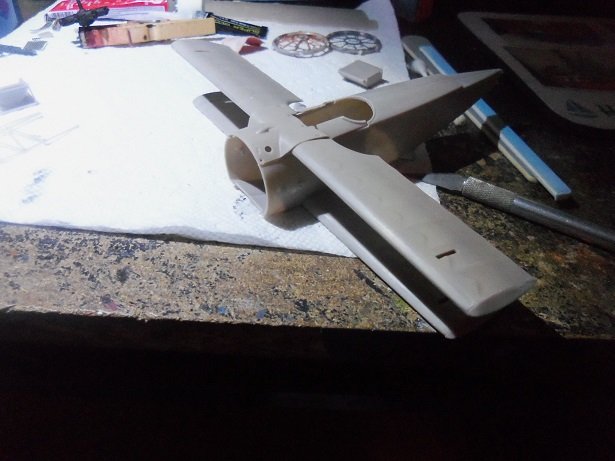
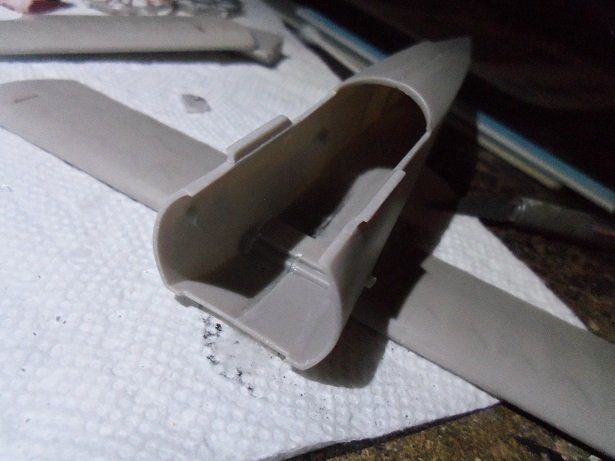
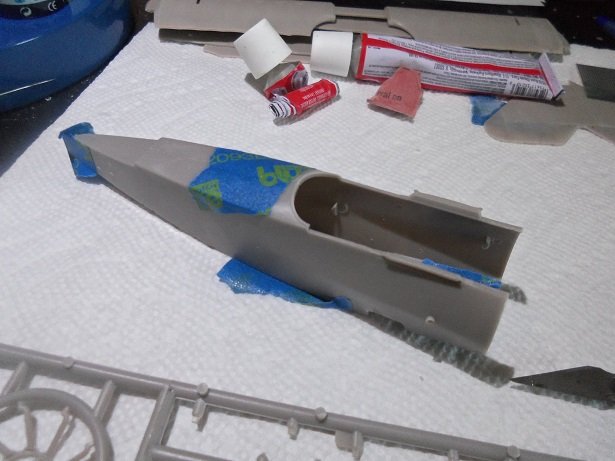
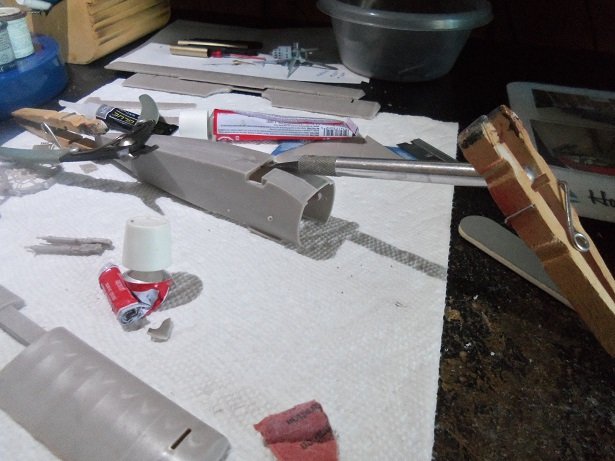
another thing I was curious of, was the center wing root. there is only the flat shelf.....no slot for it to fit into. the top part of the body encases it, hugging the wing without too bad of a seam. there is nothing to guide it's location otherwise.......it's simply sandwiched between the body and the upper body cover. this is fortunate though.......this gives me a wide open bay in which to fit the cockpit. because of the body issue, and the insult of the heat fiasco, the fuselage halves had to be cemented together to correct the combined issues. I was glad to see that the floor of the cockpit doesn't rely on the bottom wing tunnel to sit on.......it cements to the internal cockpit frame. even if it didn't do that, it's nice to find that that an alternative can be done. the engine mount bracket was cemented to the firewall. trimming the flash off of it, one of the bars broke, reminding me that this plastic is brittle. it's fixed with little trouble. this plastic makes me recall of some of the real old car kits in the late 60's/early 70's........it wa a very cloudy plastic, and very hard too........AMT or MPC perhaps. I may need to cut off these pin marks. I though they there as locators, but so far nothing seems to go in either areas. the seat is assembled, and here are the side frames for the cockpit. they are a little bent and twisted........one bar is broken..........likely from the way the sprues were packed. I'm trying to be real careful with them, knowing how brittle the plastic is. I was looking on the site last night......play'in with the plane as I looked and typed. progress? you can see that I've pretty much cut out all of the root tunnel.......that's the wing root bar your seeing in there. it can be seen how adding the top fuselage part closes the huge opening. those two 'shelves' can be seen on top of the opening, on which the center wing root sits on. kinda weird.........but OK .....got to take gibbs out....I'll be back....
- 157 replies
-
- 10
-

-
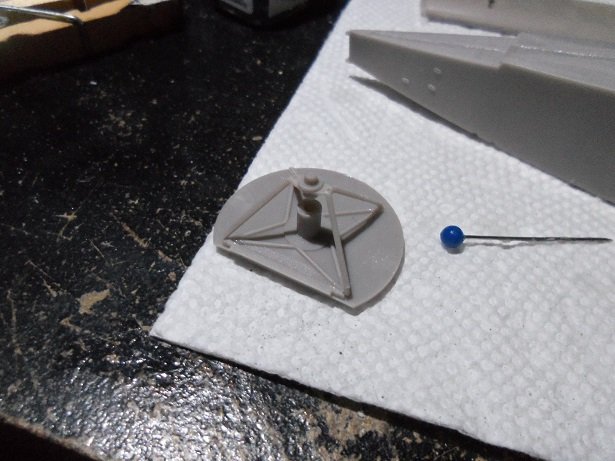
hello Craig...welcome and I hope I can do somewhere near your incredible work. I was looking through the instructions last night, and I noticed that they specify this model to have the Oberursel Ur II rotary engine. I read that it was used later in the production....learning that only 320 planes were built, I wondered when it took place. I've always know this plane to have used the LE Rhone engine, so it was interesting to me. since the first two were produced, and even the prototype, the Le Rhone was the power plant for this plane. the first two planes {102/17 & 103/17}.........all the way to {I would say} serial Number 212/17 { Lt. Kempf flew 213/17 im March 1918} came out with the change over. probably what led to this change over, was the fact that back then, they oil they used wasn't as refined , as we have today. castor oil was the lubricant, derived from castor beans from the Ricinus plant. Vegetable based and not very refined, was somewhat acidic, which may have been a detriment in it's intended use. it was likely not as thick either, an extremely light oil, near impossible to deter leakage, that was a constant problem. it's still used today......advancements have improved the quality, with the idea that it could become a solution for pollution. additives to it improved the viscosity to be used as the light oil it was intended for. but back then, they might have been better to have discovered canola or corn oil "OK, we'll just throw some land o lakes in the farm tractor and get mov'in! another thing I noticed, was there must have been a lull somewhere in the serial numbers. Ltn. Kempf's beint 213/17, Rittm. Richthofen's being 477/17 {both in March 1918}, Ltn. Jacob's was 450/17 {summer 1918}, and Ltn.Udet's was 586/17 {june 1918}....given the fact that only 320 were built...... they really jump around. the thought here is that this might be the way that they numbered their military aircraft at a given factory. the Fokker Dr 1 was built at the Fokker - Flugzeugwerke factory........I haven't checked, but there may have been others. the D VII for instance, was built at three different factories.........Albatros Flegzeugwerke {ALB}, Ostdeutsche Albatroswerke {OAW}, and the Fokker factory. as the planes rolled off the assembly line, they were given the number of the plane built at the facility. the second number {17}, may indicate the type of plane built........Dr 1's being conceived in 1917, the 17 {year} suffix was added to the serial number. curious, I checked out the Albatros D III, but their serial number designation wasn't too clear......if they did, theirs would look like 000/16. anyway.......enough with the lecture.......I'm beginning to lose gray matter I did quite a bit last night.......made a few changes, along with almost making a big mistake {and I'm even gonna show it to ya}. I started with a little painting. the machine were painted flat black, and the lightly gone over with gray. when I have the silver or aluminum out, I'll dry brush them along with what I'm doing. I should add locator pins on them to make adding easier {the other one have them}. I have some 'crosshairs' in the PE pack for the Hood that I will add as well. the engine was painted as well in the flat black, which I will dry brush later. the exhaust and wiring rings were painted in bronze {exhaust} and gray {wiring} might add more to them...... I worked with the bottom wing fit to the fuselage, since I ended up cutting out most of that root tunnel.......removing more of it and cleaning up the slot. the blemish doesn't look too bad, but it is still slightly detectable. I added more Ca to it and sanded it some more.....looks better, but it can still be seen to a degree. I may never totally get rid of it. adding the ailerons to the top wing, I made sure that the tiny slot would accept the actuation levers. I set it aside afterwards and removed all the parts not needed from my desk. coming back to the desk, I noticed something ws odd with the top wing............. thank god that the glue had not set long enough!........it could have been a nightmare! I quickly changed the port aileron.

-
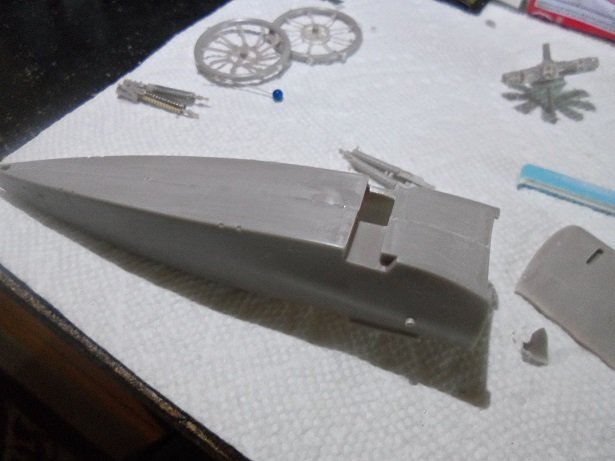
thanks all happy to report that the fuselage is together and the blemish on the bottom is almost undetectable. I should add another layer of CA on it and then sand.......probably would make it look even better. no Carl.......I have no furniture in there yet......gonna have to build her a different way. this was the best way for me to get the fuselage together......got it matched up really good. I figure I can build the cockpit and then slide the whole she-bang in there, with the way the front area is so open. {just added more CA on the blemish}. nawww, admiral doesn't even flinch.......only holds her breath when I lose something. she even helps me look every now and again. just for fun, I tell her that I'd need to get another kit, so I can get the part I need. she knows me too well though.......she tells me to scratch build it! thanks Ken & EG.......the cooling cans are just a tiny bit on the larger side......they slid onto the end of the gun breech {round area where the barrel comes out} I started to do some meager painting. I'll have something tomorrow
-
yea....I like the swiss........I've never done one......but I'm partial to ken's choice. something about that camo that gets me hot I dunno.......I think your gonna have fun if your going swiss......the paint looks a bit complicated. really nice work I've got problems with the Dr 1........quick at putt'in the fires out though
-
I thought you'd be build'in the engine on the bench?! my brother tore his down in his living room.....he no longer has Linda for a wife looks sweet!
-
she look'in good EG........are you gonna put her in a case?
-
my ear was burning......what?!?!?!
-
sorry....couldn't help it. it is a cool figure though. great weathering.......looks like he just came out of a battle
-
I wasn't gonna go that far into it.......about the bomber...but OK?!?! I've been wanting to catch up on my friend Batman......watched every episode I think I have a small collection going.....still have the batmobile to decal and the Batwing to build. as for the H.S.K....that was the early form of twister you get right down to it.....we look at pictures of aircraft and armor...and most think that it's camo........little do they know don't know inslee.......if it's what I think it is.......I don't do sports......I model
-
I think Greg was starting to build this plane.......wonder if he's seen it?
-
I've always said that there are many lesser known subjects to model.......many kits out there today are suitable to fit the bill this is a perfect example.......you definitely had the desire to achieve this level of replica. it's nice to have such resource too
-
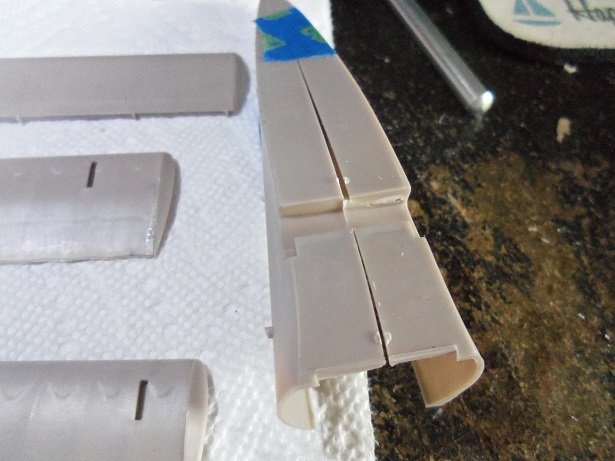
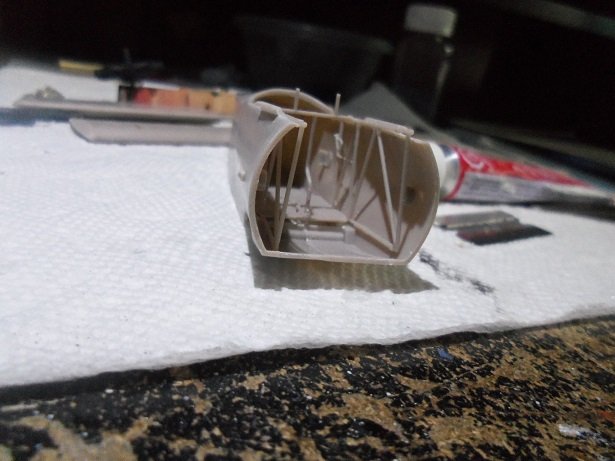
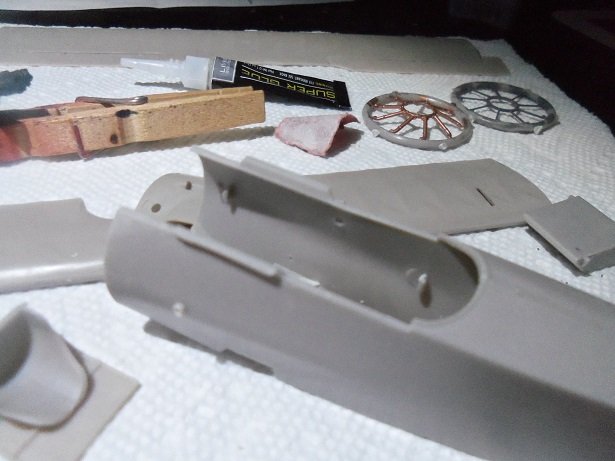
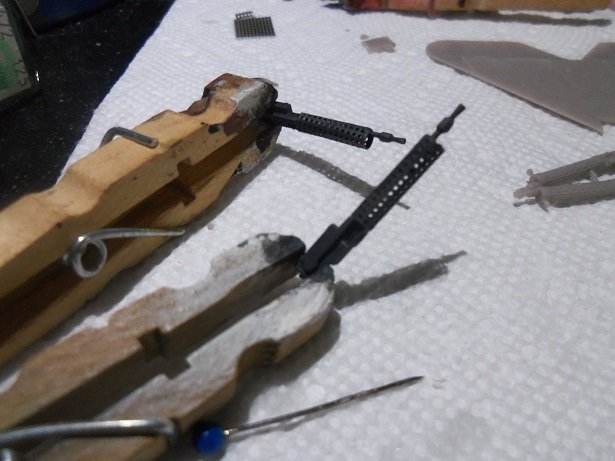
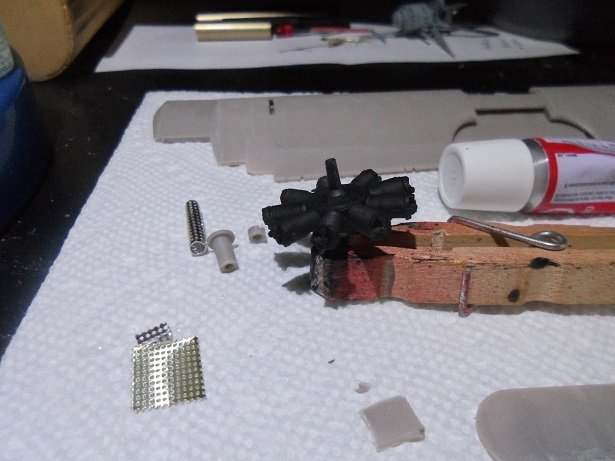
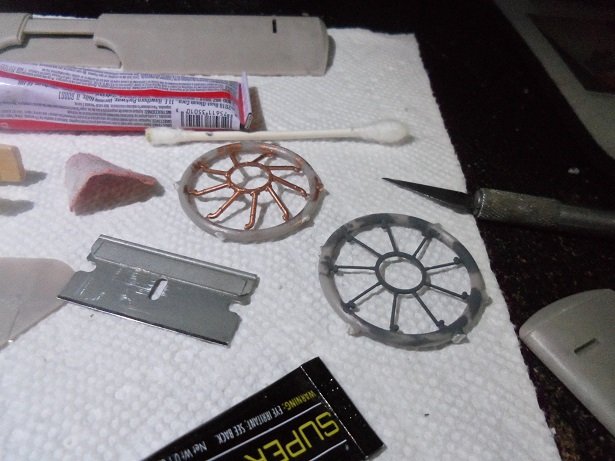
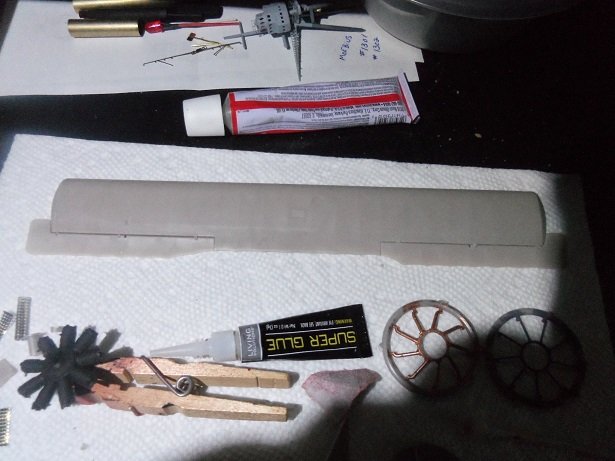
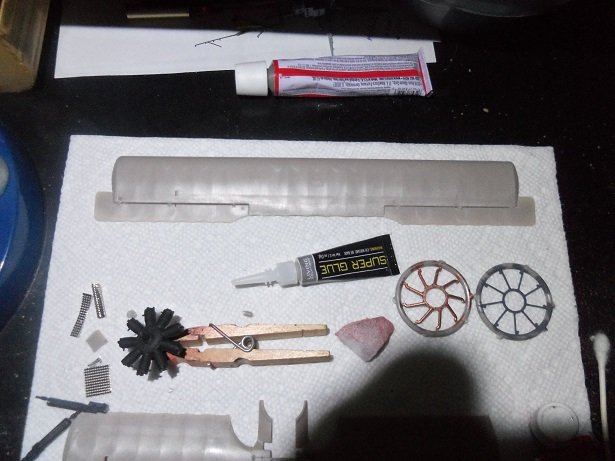
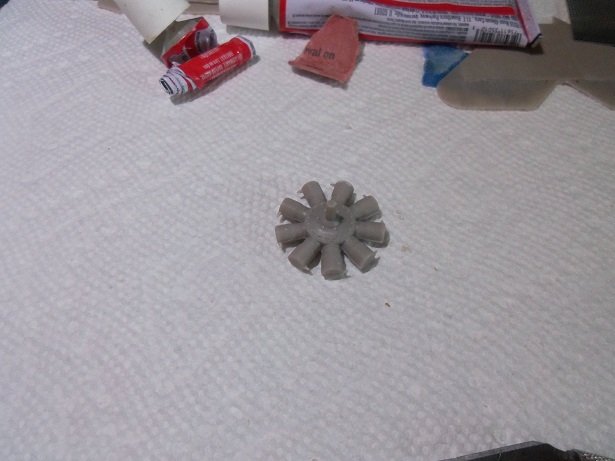
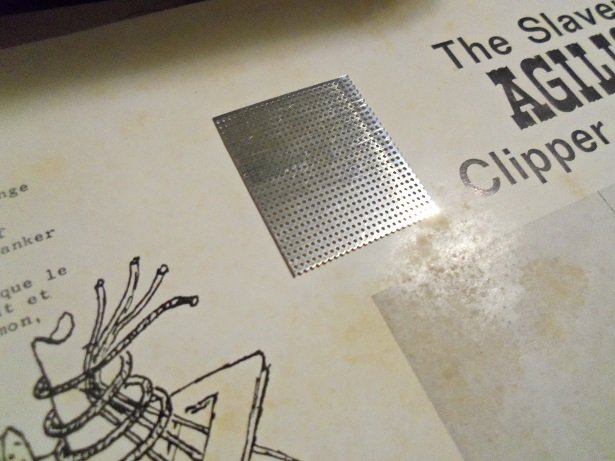
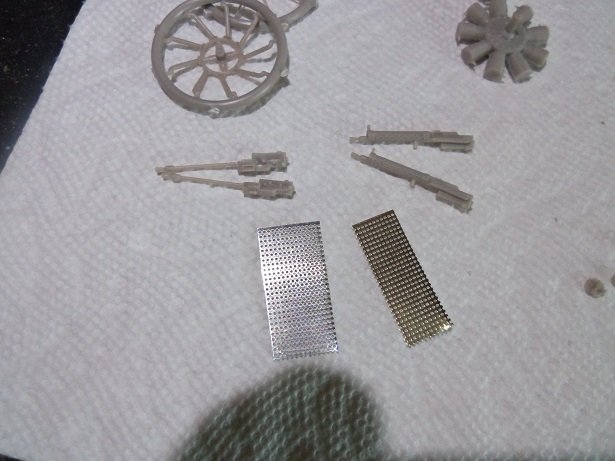
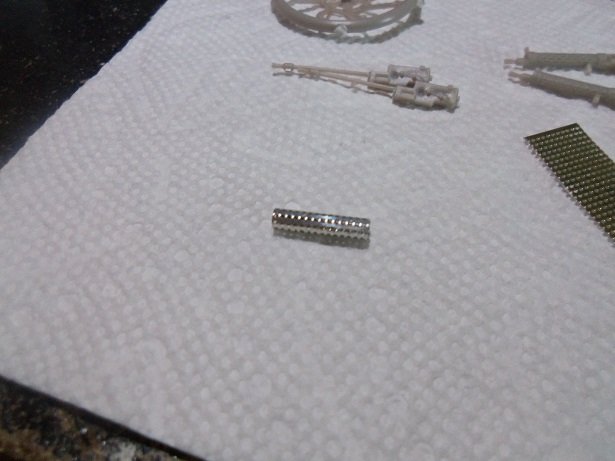
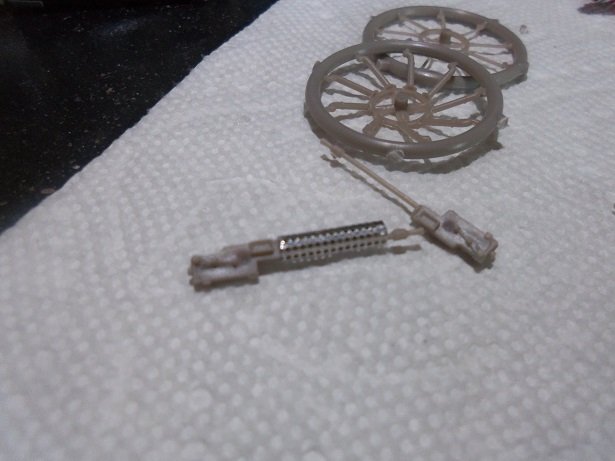
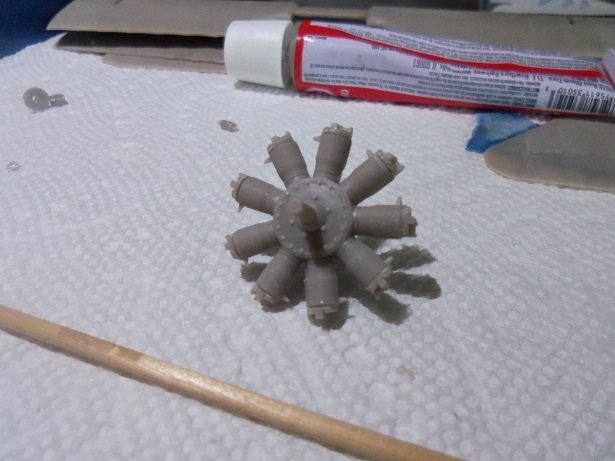
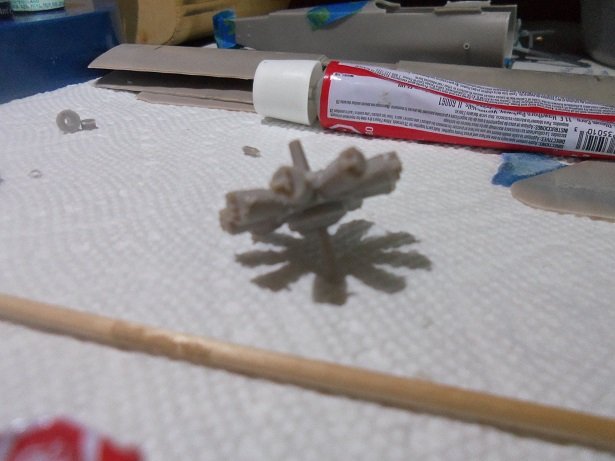
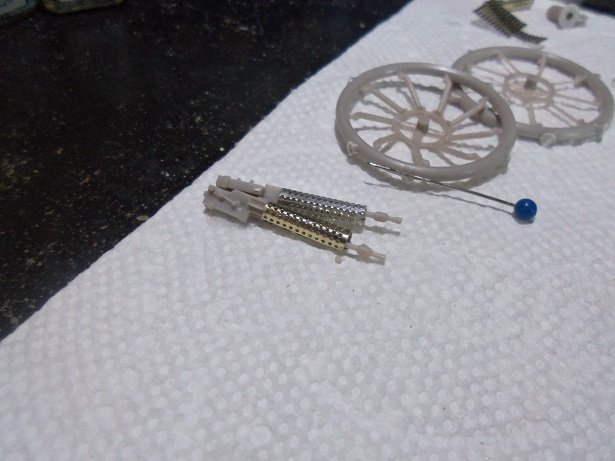
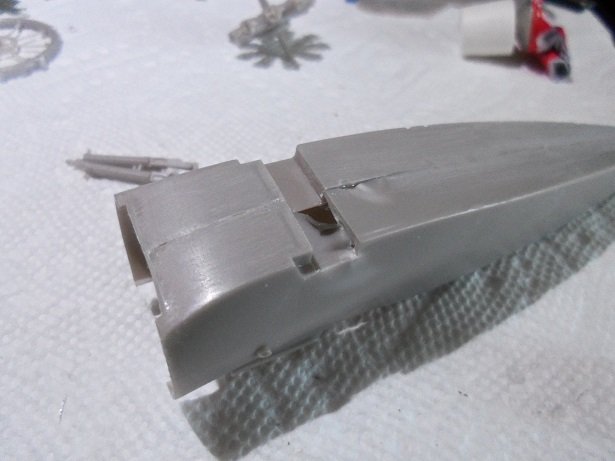
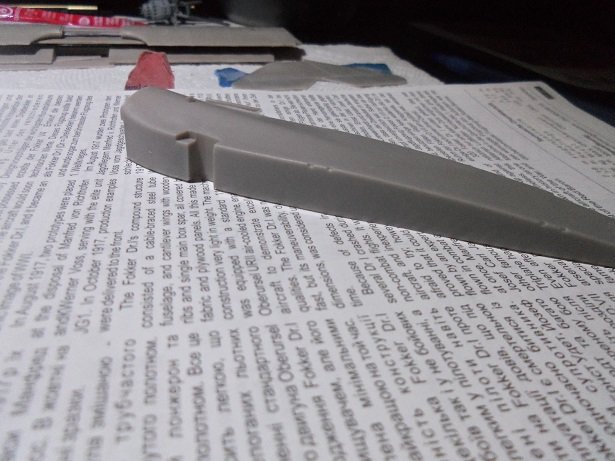
fiddled with the fuselage this morning, while looking through logs........which reminds me. you know......I went through every log I watch last night......cleaned them all up. I come in this morning, and it's all clogged up again! you guys gotta slow down.....or I gotta speed up........you darn folks are soooooooo prolific! keep it that way! anyway........I knew heat would be needed.......and I was going to get the admiral's hair dryer....... but it's like going to get a screw driver, and com'in back with a hammer.......I used my lighter! it was like a flame thrower!......I moved it around quick enough, I thought.....till I saw the bottom panel of the fuselage half starting to curl .....oh ph........ I got most of it to conform, but the damage was done..........I'll just have to see how bad. so I cemented the halves together, except for the area at the cowl.......got to let it dry while I was waiting, I figured I'd assemble the engine. the Dr 1 was powered by a Le Rhone 9J engine. later planes were equipped with Oberursel Ur.II engines....both of these engines were fairly equal to one another, putting out around 110 Hp. started by assembling the two halves together I also thought about the machine guns. thinking of what to do with the naked guns, I though of that piece of grating came in the Agillis kit {the Clotilda}. I thought this would be perfect! measuring and cutting the strip needed for the guns........ finding a suitable dowel, it was cut and wrapped....made round by press rolling it on the table and what you have is this........ happy about how it came out, I cemented the 9 heads and tail shaft on the engine. the other machine gun was finished........ now dry....the body joints were sanded with two different grits. the melted part of the slot was cut out. the short section by the cowl was cemented and taped........the admiral and I took Gibbs for a good walk. when we got back, that area was cleaned up some and sanded. at this point, it's down to fitting the bottom wing root and seeing how much more I'll need to do. I thought I still had that old tube of filler, but I must have thrown it away. that stuff was plenty old......it had begun to separate. I thought of auto body filler....but that's a tiny bit......not worth dealing with. saying the heck with it, the other side of that slot was trimmed out. the lip wasn't flush at the edge of the slot.....it wasn't cemented either. so, I added cement to the joint there, and created weighted 'prying' situation for it, to bring the joint flush with one another. the extra tot of cement should fill in the void now I guess I'll write this log, and then go shopping {make the admiral happy}. I'll check this out when I get back.
- 157 replies
-
- 10
-
-
thanks for all the kind comments I'll show you where I'm at in a bit.........I think it'll be alright I'm kinda look'in towards Kempf's plane Ken.........I will do one of Udet's planes soon. tried to smooth talk the admiral.........put out the suggestion that I could do one for her M&M collection. can you imagine it???.....I can! hello ED! welcome...... no EG.....it was torture........by FIRE!!! yes....here I am Carl already found one mistake in the kit, and now beating down another one. this problem though had to come from the molds. the ejection time must have been off.....too early. my days of injection molding......waxing the molds {wipe as needed}, material injection......the stuff is at it's melt point, the cool cycle.....depending on the material, time matters, molds open and parts {sprues} are pushed off. might have stuck due to lack of wax. I think I have it in hand........build'in it come hell or high water Ltn. Jacobs plane is a bit bland, but would be essential if your doing a collection. I do like the artwork. I will likely do Ltn. Kempf's plane......more decals I need to get the right masking tape to do Ltn. Udet's plane. I've been work'in on it.......see............🔩 🔧
-
I've been say'in that for a while now.......there are so many lesser known ship that are begging to be modeled. there are kits that can be bashed......but sometimes takes a lot of work......if you want it bad enough. there is enough aftermarket out there to do a fairly decent job.
-
M4-A1 Sherman Tank by Osmosis - Italeri - 1:35
popeye the sailor replied to Osmosis's topic in Non-ship/categorised builds
I do notice that the saddles are are in different positions......I hope they are movable. all I can say about armor is ....yup....all green with accented colors........mud optional some kit will have molded detail like tools, rope, cable and stuff. there are accessory kits out there, where you can add them back on. gives it a whole new look. -
I noticed the 'camo' on the rudder OC.........we call it camo..........they call it 'patched bullet holes' !
-
I looked up the number OC........it's not in the list of surviving B17's. it is listed in this other compilation I've got. I'll check it out further it's not uncommon for a B 17, crippled after a bomb run, to have landed at a friendly airfield....if they could make it. some had the misfortune to land at a hostile airstrip. the number also belonged to a Vought F4U Corsair named 'Annie Mo' flown by Lt. Guy Bordelon Jr. during the Korean conflict, he was credited for shooting down two Yak-18s and three La-11 fighters on three separate missions. on his third mission, he was awarded the Navy Cross for what went down during the mission. the plane didn't see another mission though.......a reservist crash landed it....total loss the B 17 in question went by three names it appears......the bearded lady, the bearded beauty, and Mitzpah. I think I decoded the hieroglyphics......it doesn't give a date.......listed in Mayen Germany, under 2 Lt. Everett Kenner....must have crashed, since it says that 5 were KIA and 5 were POW. it's a pretty extensive list......the Nine o Nine, the Memphis Belle, the Wulf Hound, and others we've either discussed of the kits offered, are in here it's all a jumble, until I realized that they are going by bomber group....it makes sense now. not a problem robert.......I'm guilty too. I do believe it's up to us to keep things runn'in smooth. I dunno EG.......I keep think'in back to that old Batman episode where King Tut had Batman {and I think Batgirl} locked in urns, dropp'in pebbles on their heads {kinda like a water torture}. it was driv'in then nutz, but they managed to get out of it more soon
-
I recall a time when I never had a stash......but getting back into the hobby, this changed. I don't have a huge stash, but what I have will keep me busy till the end of all things. what I think up........well, that just complicates the matter ...........or anti-matter
-
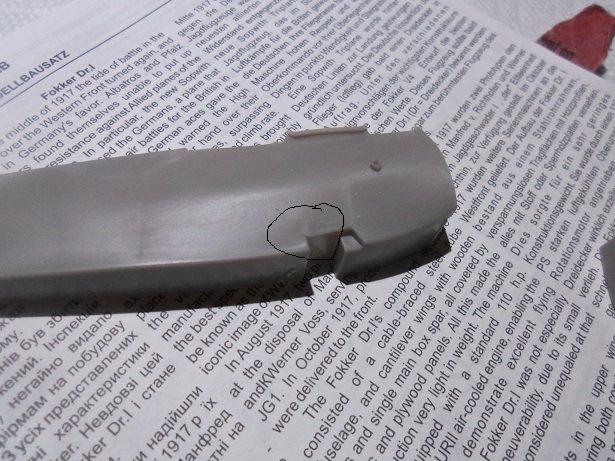
well.......if this don't beat all. I guess I have another problem...... I was mess'in with the fuselage, cleaning it up and fitting the halves together......I found that the starboard side is warped. port side is OK. but the starboard side is kicked in quite a bit where the cowling fits. likely cause would be at the factory......it's appears pushed in to the left of the slot. I tried to press the parts together, but I stopped when I saw the appearance of the white stress line of death. the epicenter is where the left side of the circle is. I'm gonna try heat to bring it back out.......it should alleviate the problem. if not........I'll still try to build it, but I'll have to take another direction. tell ya more tomorrow. I'm gonna go sleep on it.
-
yup.....as I've read, the plane had very good response banking to the right. duct tape wasn't invented at that time .....could have saved a lot of lives! welcome Mark
-
welcome to the fray EG, OC, and Ernie. Carl's squadron knocked me over the edge.........the D VII's and Dr 1's are among my favorite aircraft. glad to have ya aboard no PE Ernie......the detail in this kit is pretty good. hopefully I can be just as creative with the paint
-
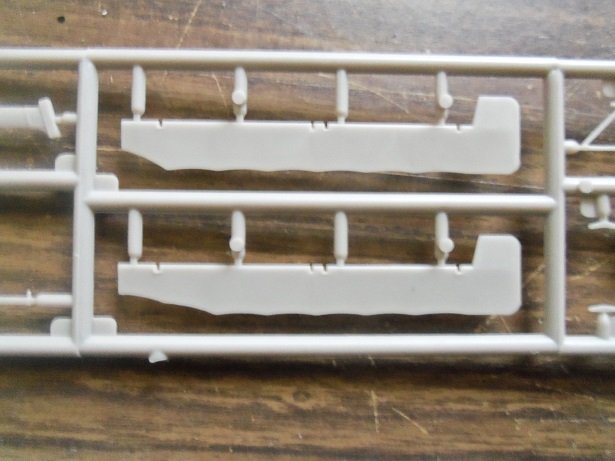
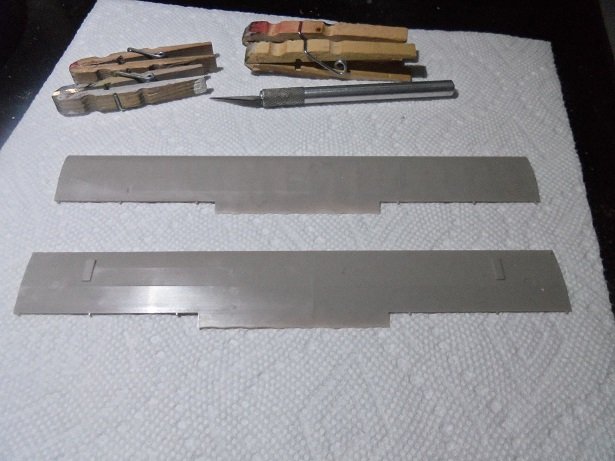
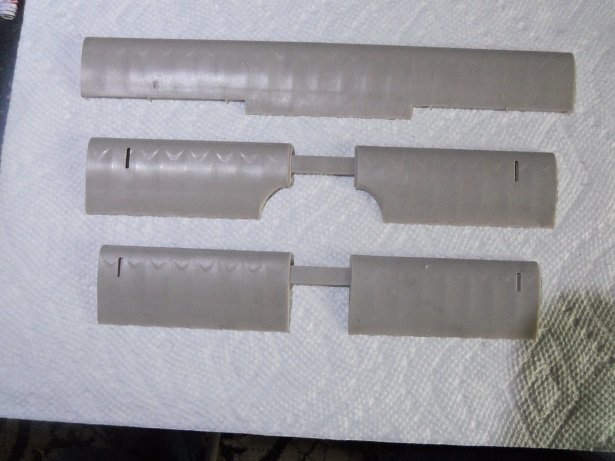
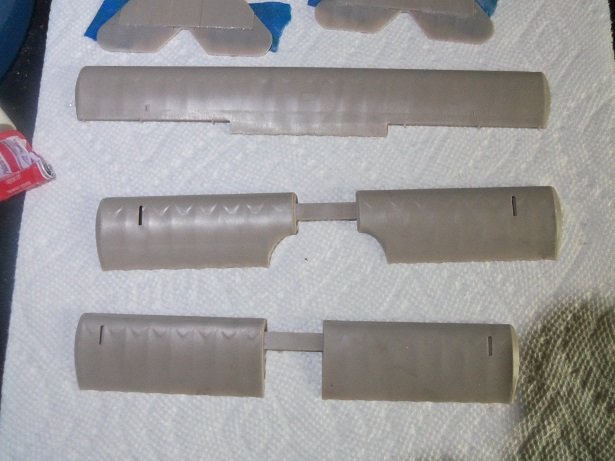
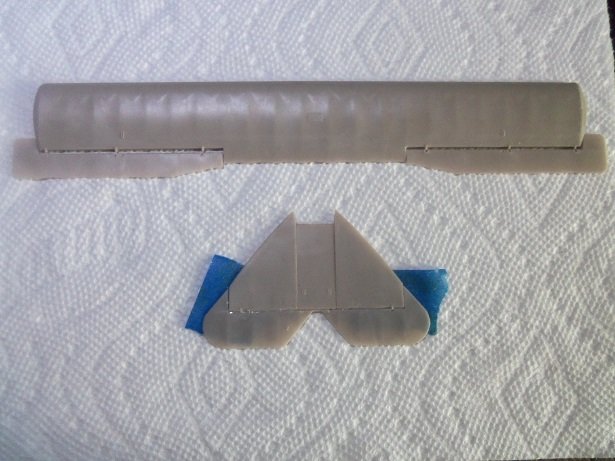
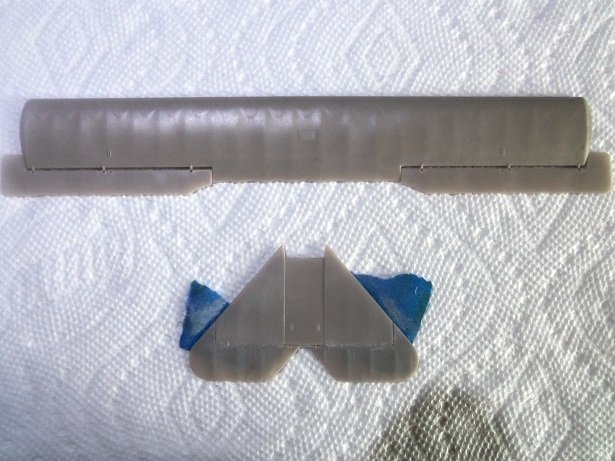
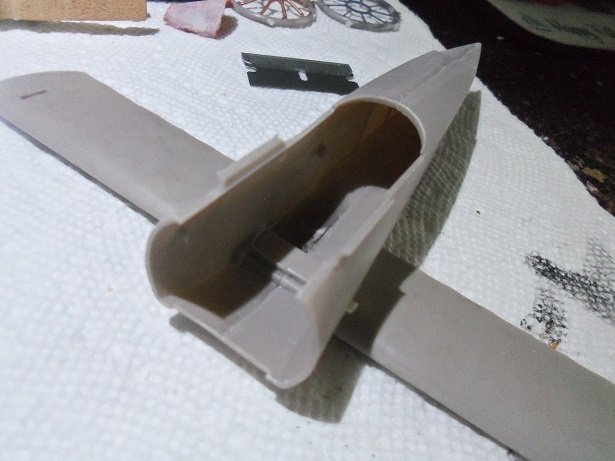
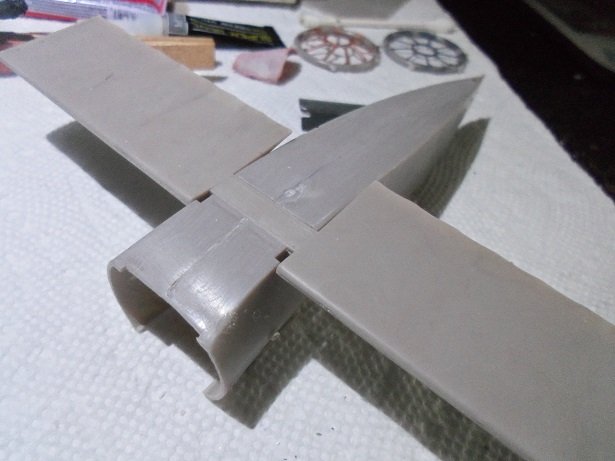
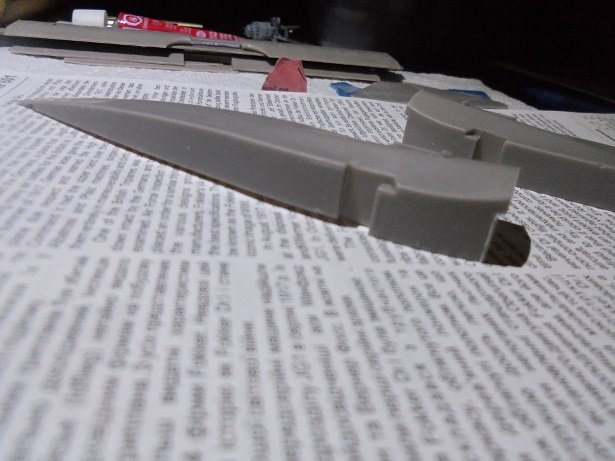
on Sept 1st the first prototype was rolled out to test fly. Anthony Fokker instructed Reinhold Platz to build a triplane........what he came up was the V4. test flights were poor, citing poor handling and couldn't control the forces of climbs and turns. they came back with the F5 prototype which featured balanced ailerons and elevators........and they made the wings longer. they also added interplane struts to aide with the extra wing load. the retest proved to be much better, and Idflieg ordered 20 of them to be built. meanwhile, they took 101/17 and literally tested it to destruction, to see if it could take a beating. ailerons and elevators.....hmmmmmm, so where does these changes occur. I don't see any difference in the elevators {these parts are about 1mm thick}.....but the ailerons show a difference. my guess, with what I've found, the bottom one is the V4 protype, and the top one is the V5 prototype. first I began to assemble the wings. there aren't pronounce tabs or pins to guide you in the assembly...not that they are really needed. it's plain to see how they go together. there is some flash to contend with......sanding will be needed to smooth out the leading edges of the three wings. I found that it wasn't the elevators that were in question, in the initial tests, it was the stabilizer fin itself. if you look real close, there is a slight curvature to the leading edge to the one on the left. that is the stabilizer fin that's designated not to be used in the instructions. I have never seen a model of a V4.....could be interesting to build one. as mentioned......I've seen this in past kits, but never understood or read anything pointing to these changes. for all I know......I could have been building them wrong all along. I looked at my other Fokkers....they are all correct with my findings thinking of past kits made me thing about the D VII's I've built, so I did some reading on them as well. the D VII went through the same changes, including adding length {1 bay cell} to the rear section of the fuselage. this tells me that the fuselage of the D VII was about the same length as the Dr 1 prototype. by mid August, two V5's were delivered to Idflieg {bureau for German Military Aviation}. these two planes {102/17 & 103/17} were the only two plane to be renamed F1. one {102/17} was sent to Jasta 10, and the other {103/17} was sent to Jasta 11. Manfred Von Richthofen flew 102/17 and shot down two planes the next day. pleased with the planes flyability, he reported to the commander his assessment of the plane, suggesting that more should be built. he made that assessment on the 1st of Sept.........it was dampened when Oberluetnant Kurt Wolff, flying 102/17, was shot down and killed on Sept 15, and Luetnant Werner Voss, flying 103/17, was also shot down and killed on Sept 23 {a very interesting bio of him I read}. I digress.........there's so much to tell. after the leading edges were sanded, the wing tips were added. here there is a mistake in the instructions. starting with the top wing, they tell you to use parts 11D. I cemented them in place, and found them to protrude past the aileron cut outs. thinking that this was correct {or they wouldn't have printed it}, I did the other wings...the center wing took a pair of 11D's too.....that was OK. it wasn't till I added part 7A {8A is for the other side}, that I noticed the problem.....it fell short of the trailing edge. seeing the solution right away, I removed the tips off of the top wing. they came off without too much damage, and I swapped them. there's a little sanding to do, but there was really no harm done. the fuselage is another story......I need to remove some flash. there is some to deal with....this is probably the worst of it. it looks like all that needs to be removed, but looking at the instructions, that shelf may be needed for the cockpit floor. the bottom wing root will cover it, so if I cut too much, it won't hurt. I'll do some test fitting to see the impact, and what I can get away with. matching up the top wing and stabilizer configuration, this is what they look like: the V4 prototype the V5 / F1 prototype all future planes that were delivered, 104/17 onward, was renamed the Dr 1. there were three other variants built......the V6 prototype, given a longer fuselage {like the D VII} and equipped with a Mercedes D II engine, the V7 prototype, equipped with a Siemans Halske SH.III engine.........and the Vogel Grip Sp.5 Grief, a two seat observation plane built after the war. one last note......all Dr 1's were fitted with wing skids to help prevent ground looping. in landing the plane, the force of the engine rotation would cause one wing to pitch and touch the ground. this resulted in a bad outcome.