
HOLIDAY DONATION DRIVE - SUPPORT MSW - DO YOUR PART TO KEEP THIS GREAT FORUM GOING! (Only 27 donations so far out of 49,000 members - C'mon guys!)
×


popeye the sailor
-
Posts
16,007 -
Joined
-
Last visited
Content Type
Profiles
Forums
Gallery
Events
Everything posted by popeye the sailor
-
 you got that right........I've abandoned the original wood on the second hull. the darn stuff is simply too stiff! what made it worse though, was that I planked up the transom too early. so....the bulwarks are Obechi, three strakes are the original wood, and I'm gonna finish with the Obechi. I may elect to use the original wood when I get near the bottom......but I'll wait and see if I feel like being annoyed again this kit does build to a nice looking model.....but I feel that there are quite a few rough spots with it that can be fine tuned. she's look'in good though.......you've got a good color scheme going on her, and considering the instructions, fleshed out well. it is funny though....here I was shagg'in ya outta bed to built it...even build'in one with ya.......and your the one finishing first! hey....what can I say.....it was like that with the half Moon too. here I was going by pictures doing all that crazy decal stuff, and there you were finishing her by the time I was done. I guess if there was a project to be done in pairs.......I'd want to be paired up with you but you gotta slow down though......I'm not as young as I used to be at 63 I like to smell my coffee
- 211 replies
-
- 2
-

-
- agilis
- steingraeber
- (and 1 more)
-
I have the Sergel Thermopylae, and this same procedure is required. basically, I didn't put glue to the posts, but I did run some along the planking that will join together. it works out to the same results
- 129 replies
-
- 1
-
-
- armed launch
- panart
- (and 1 more)
-
rigging looks great Jens........amazed with the amount of chain it really makes the rigging look more interesting. wonderful job!
- 188 replies
-
- 1
-
-
- cutty sark
- billing boats
- (and 1 more)
-
rigging looks great J......almost to the finish line! I'm not even halfway yet you built her really fast!
- 211 replies
-
- 2
-
-
- agilis
- steingraeber
- (and 1 more)
-
WOW! great buy I have the same kit in my closet....just looking for the right time to bring 'er out. mine has been started though........the original owner passed away. but what he did on it looks good, so I'll get my bearings and go from there. judging from your picture, it appears as though it hasn't been started.......good chance that it is intact the glue suggestion is good......I've not tried it myself, since I'm a sworn Testors user. you'll find that there are quite a few different glues out there devoted to plastic.......just read the labels to be sure your getting the right stuff. one thing I'm going to do, is download a Tamiya paint chart....their numbers are different than others, and it will be a big help to cross reference the paint. if you choose to use Tamiya paints, you should be alright, unless they've changed their numbering system, since the production date of the kit. other than that......your in good company here...I think most of us have dabbled in plastic before turning to wood. if you decide to change your mind on upgrades, I'm sure you'll get plenty of links......ModelMonkey, Pontos, and the like look'in forward to the start!
-
thanks John.........I really gotta go through all these bins and bottles.....stuff is everywhere! I've got stuff from other projects that I couldn't bear to toss out.......I've acquired quite an assortment of dead eyes and blocks too. it would be good to get them all together........organization life's little pleasures J ........been thinking of doing another M&M boat........perhaps racing this time. still more for the deck, but I am pleased how it's look'in so far as for the second hull.........using that wood is a no go, so I will continue it with the Obechi. it's easier to manipulate. with what I have on there already of that wood, you can say that it has a built in armor belt thanks to everyone for the likes. I appreciate your interest
-
I have a bunch of those metal parts.... they can be found in many of the Billing kits. you found a really good solution for them..........yea.......looks like a lot of work love the way your deck is coming along.
- 207 replies
-
- 2
-
-
- billing boats
- cutty sark
- (and 1 more)
-
.........you'd have to come up with one hell of a good 'pick up' line with the ladies
-
awesome rigging.........did you use Petersson's book? looks very good.......even with those blocks nicely done.......I'll have to remember that tip!
- 211 replies
-
- 1
-
-
- agilis
- steingraeber
- (and 1 more)
-
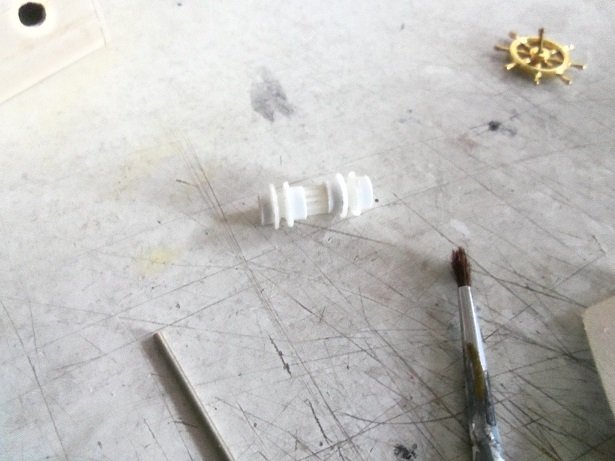
thanks J.......the real heroes though are the health care workers, nurses and doctors. some of their stories are really heartbreaking. they are the front liners.......... doing what I can OC.......... update............turned out to be a good session. M&M has been putt'in out these candy bars that are really big............very, very, addictive! just ate half of it...........must leave it.....ALONE!!!!!!!!! the session started out with searching for parts to make the windlass mechanism. I got some of those gears, but they are too big......... I looked in my little blue assortment tray rack, and I found some small plastic gears and a couple pulleys, from some stuffed toy that had broke a while ago. fitting them together.......they needed spacers.......again, searching through the big inventory bin, one of the bottles had the slices when I was trying to make mast hoops. in these slices was plastic tube slices.......popped a couple out and added them to the mix. this works out pretty good.......glued together with CA, fitting it between the brackets was a perfect fit! off to paint it went........... the portholes were painted gold....I have bronze, but it was an afterthought. painted the handles on the ship's wheel, the aft cabin, the wheelhouse, the windlass mechanism, and planked the roof on the wheel house. by this time, the port holes were dry enough to fill in with window maker. the fore deck was planked and painted...later to have the mechanism fitted in and glued. the ends were touched up with paint........came out look'in the part the aft cabin roof was planked as well. the portholes were not ready to install.......still need to flesh out the companionway door. the deck layout is beginning to take shape. it was time to go grocery shopping.........we got there, the line was all the way to the other end of the building! the new norm is hard to get used to..........it is what it is........hopefully it will end soon

-
thanks Michael.......this is my slow speed should have seen me when I was younger thanks J ........it is what it is........I see both sides.......they gotta run a business, and I gotta make a buck. I'm glad that I am able to work through all this.......and I feel the pain of those who can't. while I do hope that it ends soon, I don't want to see this come back worse than it started. I count my lucky stars that I haven't gotten it yet.......I'll do what it takes to make sure it doesn't either. there's an update.......just that the admiral is impatient to stand in a line at the g. store I'll be back
-
I'll be looking at this as well......I have bombs for the Memphis belle too. freehand might be the way to go about it..........but I wonder if there are decals to be had.
-
the gantries look impressive Greg! that is a tremendous amount of detail I have the same pin vises....both of them
-
thanks Kevin and Ed........and to all who hit the like button. I've done a little towards fitting out the mechanix last night..........entered a contest from Eduards {win a free model kit...and what a kit it is}......and solved a problem with my printer in the process. but hey......what's life without a few chiggers in the armor? but this is key to continue. I hope to have more to report today almost forgot: if anyone goes to the Eduards facebook page on the 17th through the 20th...........please vote for me 🙏 the model kit is a three pack of Fokker planes flown by Ernst Udet in 1:48 scale! it's a really awesome kit!
-
you've made some really great progress since I last looked in lots of fine detail....and it all looks so real. nice to see the sub assembled to the point your at now....really shows how much work you've put into her! really great job! this is one huge model!
-
looks cool Jack! but.....you gonna tie that sh__ down back there?? don't drive on da hyway ya know the EQ looks ya just bought 'em at the local Wal Mart! don't spare the mud but really..........shermie looks great!
-
grilled imitation Swiss...........never had it, but I'll tyry it want a Baloney & whipped cream sandwich.......a three stooges treat! {tried it when I was a kid.....it was pretty good!}
-
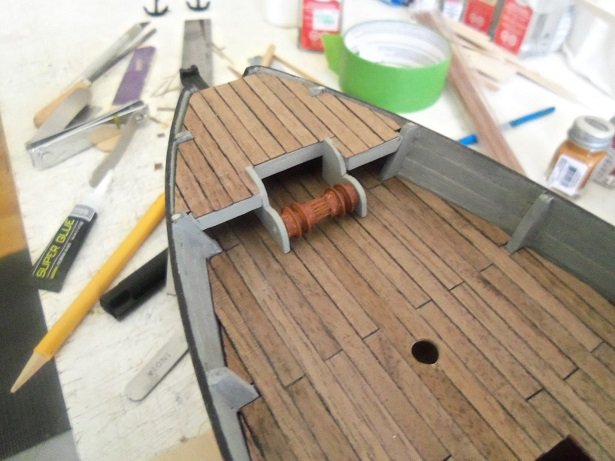
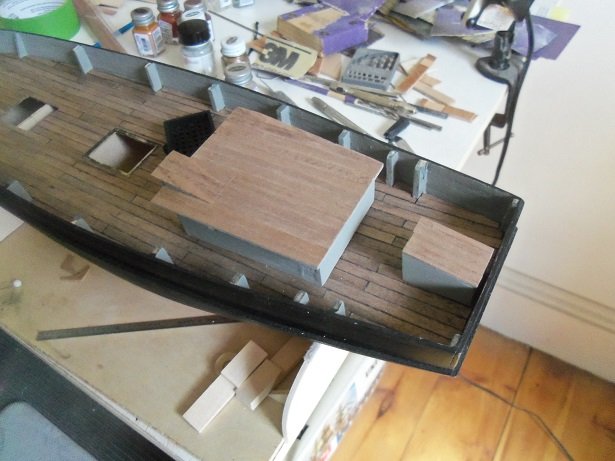
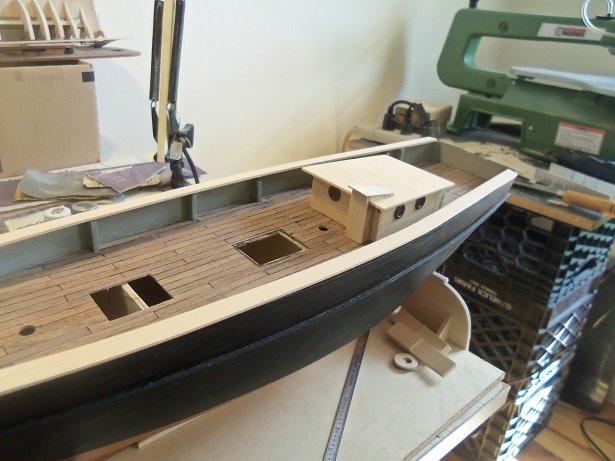
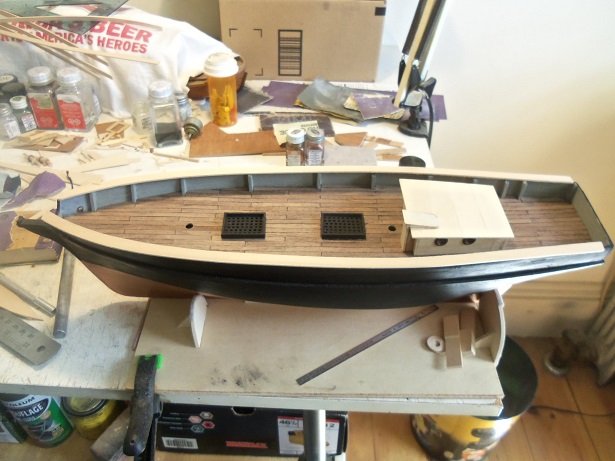
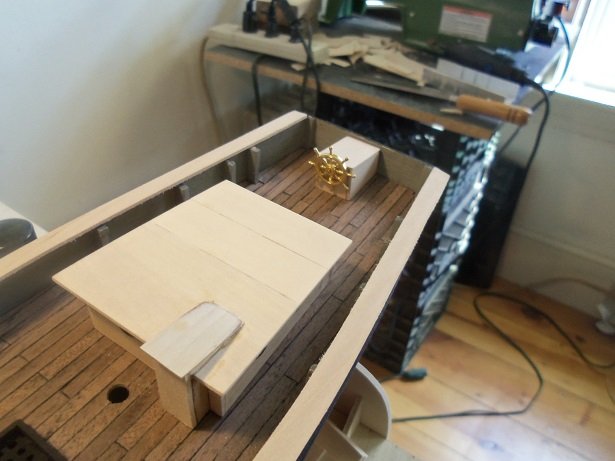
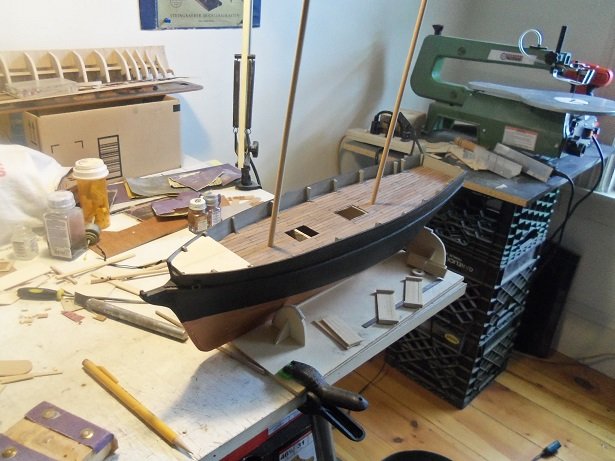
thanks for the kind comments Richard and John. to envision how this vessel looked in her day is tough, only having one real picture to work from, but I think I have a good direction to come up with a decent model of her. today I did a bit more. thanks J.......not really building two at the moment.......still spinn'in my wheels on how to plank the counter. I laid one plank, and that one was OK........but I laid another one today, and right now it's sticking out like a sore thumb. I gotta remove it and try something else. as far as the work front goes........two have been confirmed positive in the warehouse, which is a separate building on the same property. the shop has seen one driver come in with a fever...but so far has not been confirmed to have it. they are fools to think that we can work six feet apart ALL the time........and their guidelines {to me} are less than adequate. if we have a 100 degree temp, they will send you home and pay you for the day. your out for three days........if this just an isolated spike and your fine the next day, you still can't come back...your to rely on your PTO and PPTO to pay yourself. to compound the issue, you have to get clearance from Sedwick, Walmart's care provider....you will need to be tested. the stumbling block here, is that you have to have the symptoms to be tested. now.......if I had the virus, they would pay me for the time out.........but when we transitioned to the PTO program from what we used to have, they took our sick time and put it in a sort of limbo. the only way I can use it, is if the admiral gets sick, or I need to be out to care for her........even them I can only use 80 hours of it.........I have all my sick time....all 192 hours of it! I get it........this is some terrible stuff.........but when I have a manager that treats me like I have the plague, and I have to comply with their petty rules {even though what I do in the course of the day won't allow it}, and I hear the general manager preach the six feet rule {but if I'm OK with it, we can be close to one another}, it just tells me that all they care about is keeping the Walmart engine running, and they don't give a sh__ about me! sorry to vent folks......but if I said this to them, they would tell me to go home {and pay myself}. they don't hear us and they don't care. the news I'm hearing is not good, and everyone know what the problem is........and I'll drop it right here, because one crazy New Englander doesn't know what goes on in the Ce-ment building *hic* so.........on with the update the aft cabin was assembled again........it was given a slanted roof and a companionway. the portholes were also drilled out and fitted. I still need to do more to it as well as paint. as for the fore deck.......seeing that it is in the picture, I cut out a section for the windlass. it's still in the planning stage. I got held up for a few moments during all this.......somehow the tube of CA got close to my little hand drill and cemented the mandrills together. .....had a great time cleaning it out. so on the deck, the aft cabin looks like this: and with the grates instead of a tiller, the Clotilda had a wheelhouse. that is the next aspect I made...... there's more fleshing out to do back there.......I know it looks a bit bland. the last thing I did was add to the fore deck..........I didn't get back to it until later.....I did get some ideas of the mechanism I don't think it solves the problem, but it does expose the windlass and its workings. I will likely run the mast down through the forward cabin to retain its size. one thing here is I can't do the cap rails until the fore deck is done, so I will continue to flesh it out and go from there.
-
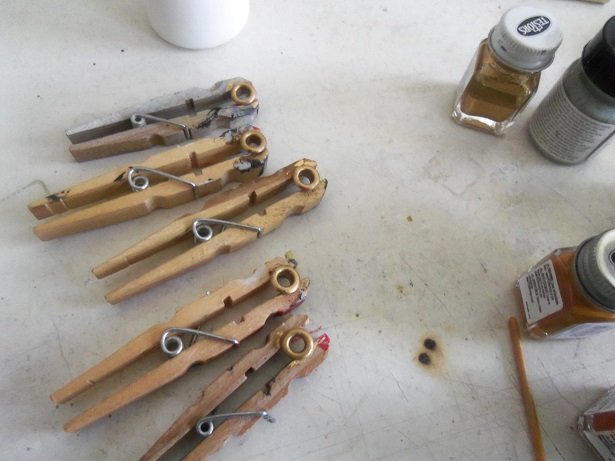
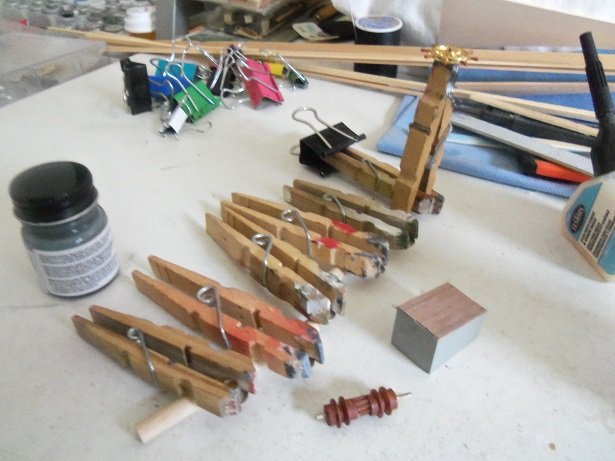
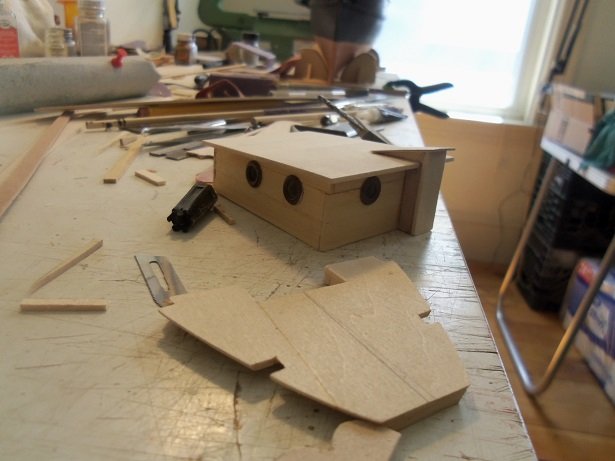
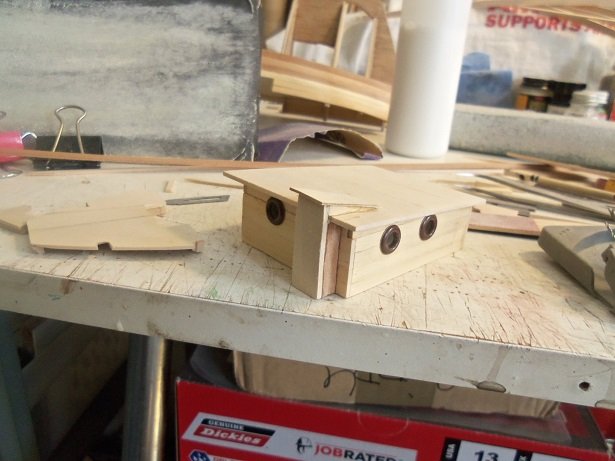
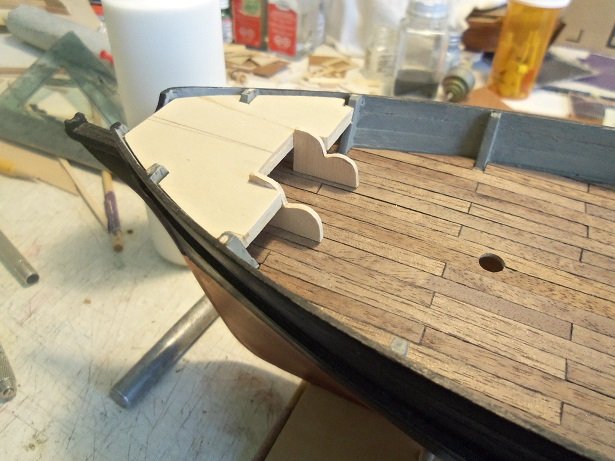
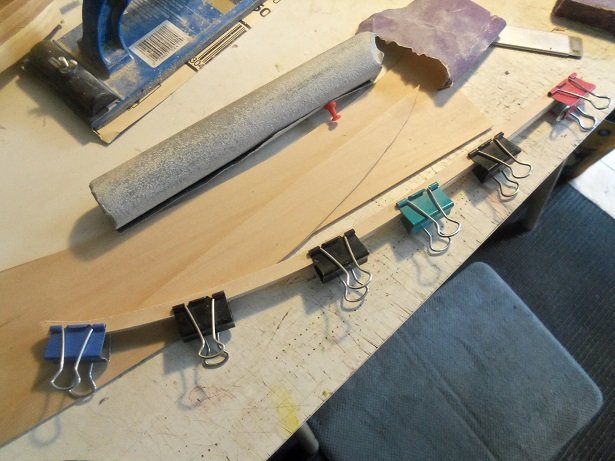
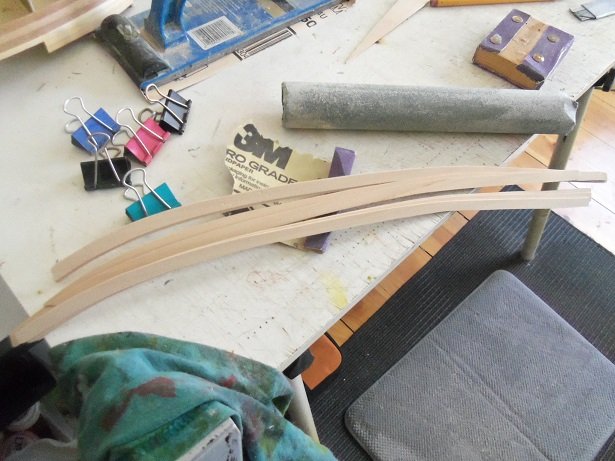
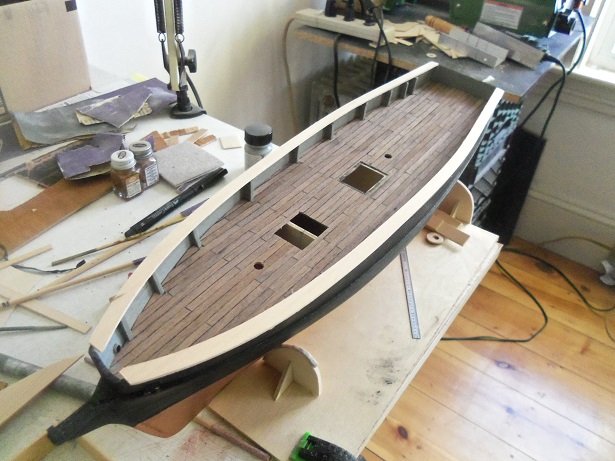
hello all.......here's another thrilling update while my colleague leaves me in the dust {jealous how yours is coming out J}. I'm finding that the location of the masts is making it hard to do a good representative of the Clotilda; the grates are not accurate, and adding the fore deck and windlass, there really isn't enough room for the forward cabin. altering the fore deck will give me enough to have some sort of cabin there, but it won't be proportionate to the actual ship...........it's like this particular hull is a few feet shorter than the Clotilda. the build goes forward ---> tracing the shape of the bulwark, I made up the parts that will become the cap rails. I cut five of them seeing that I have the two hulls....one is an extra. bundling them all together, they will be sanded to take down the high spots and make them all look alike. that is a roll of some demonically rough paper...takes them down in a hurry first........the inside edge, then turn the clips around and do the outer edge. between sessions of sanding, I was looking and thinking over the fore deck issue. you can see how much room there is between the fore deck and the mast hole. I've also thought about running the mast through the cabin roof.......if push comes to shove, that's what I'll do. the pieces below the hull are the walls for the aft cabin....I still need to put it together. I tried earlier, but it fell apart when I began to sand it....just crumbled in my hands.....the pieces of 1/8 strip glued to the side parts will thwart that from happening again. arriving with an idea for the windlass, I finished sanding the cap rails.....this time using finer paper. they were unbound and fanned out....light brushes with the paper knocked off the residual hairs that the hard sanding left. dry fitting one.......I was saddened to find that they possessed too much of a curvature and were way out of whack....totally unusable back to square one cutting another bunch and bundling them up, sanding commenced again. these are not as wide as the first batch. I guess you could call this 'aggravated sanding', 'cuz it didn't take long to bring'em down to shape. these came out much better.......they will still need to be fine tuned here and there, but they match the bulwarks. all I need to make now is the section for the transom. the first two pictures were taken on the 5th..........these last two were taken today. amazing what five days will bring I did more today.........don't have the pictures out of the camera yet, so there will be another update later. thanks for look'in in.....thanks for the likes stay safe 😷
-
she's a sweet looking vessel James! I've always wanted to do colored sails.......I have many pictures in my library. the rigging is not too terribly complex..........the sails really enhance her
- 100 replies
-
- 5
-
-
- zulu
- vanguard models
- (and 2 more)
-
awesome job J! I'll have something to follow when I get to the rigging 😎 the deck layout looks very good.
- 211 replies
-
- 2
-
-
- agilis
- steingraeber
- (and 1 more)
-
don't kid yourself........the cockpit and instrument panel looks good. sad that once the halves are together, a lot of it won't be seen, but you'll know that it's all there
-
nice work with the instrument panel........looks good