HOLIDAY DONATION DRIVE - SUPPORT MSW - DO YOUR PART TO KEEP THIS GREAT FORUM GOING! (Only 36 donations so far out of 49,000 members - C'mon guys!)
×


popeye the sailor
-
Posts
16,007 -
Joined
-
Last visited
Content Type
Profiles
Forums
Gallery
Events
Everything posted by popeye the sailor
-
 let the fun begin good for you!
 -
oh god Pat........I was shocked to find that I last worked on this ship in 2015! it's been up above my main table all this time. naturally, it's still on my to do list, as they all are......currently, I've been lurking 'round the miscellaneous models forum, and the slave ship Clotilda. don't put your seat away though.......usually when my cage gets shaken, the model sometimes resumes. appreciate ya look'in in
-
I usually give them a jot of CA......but if the rod fits tight enough......you can get away with it railings look nice!
-
it hardly ever is Kevin.......just one {kinda} important bit of detail they seem to leave out
- 337 replies
-
- 3
-

-
- finished
- mountfleet models
- (and 1 more)
-
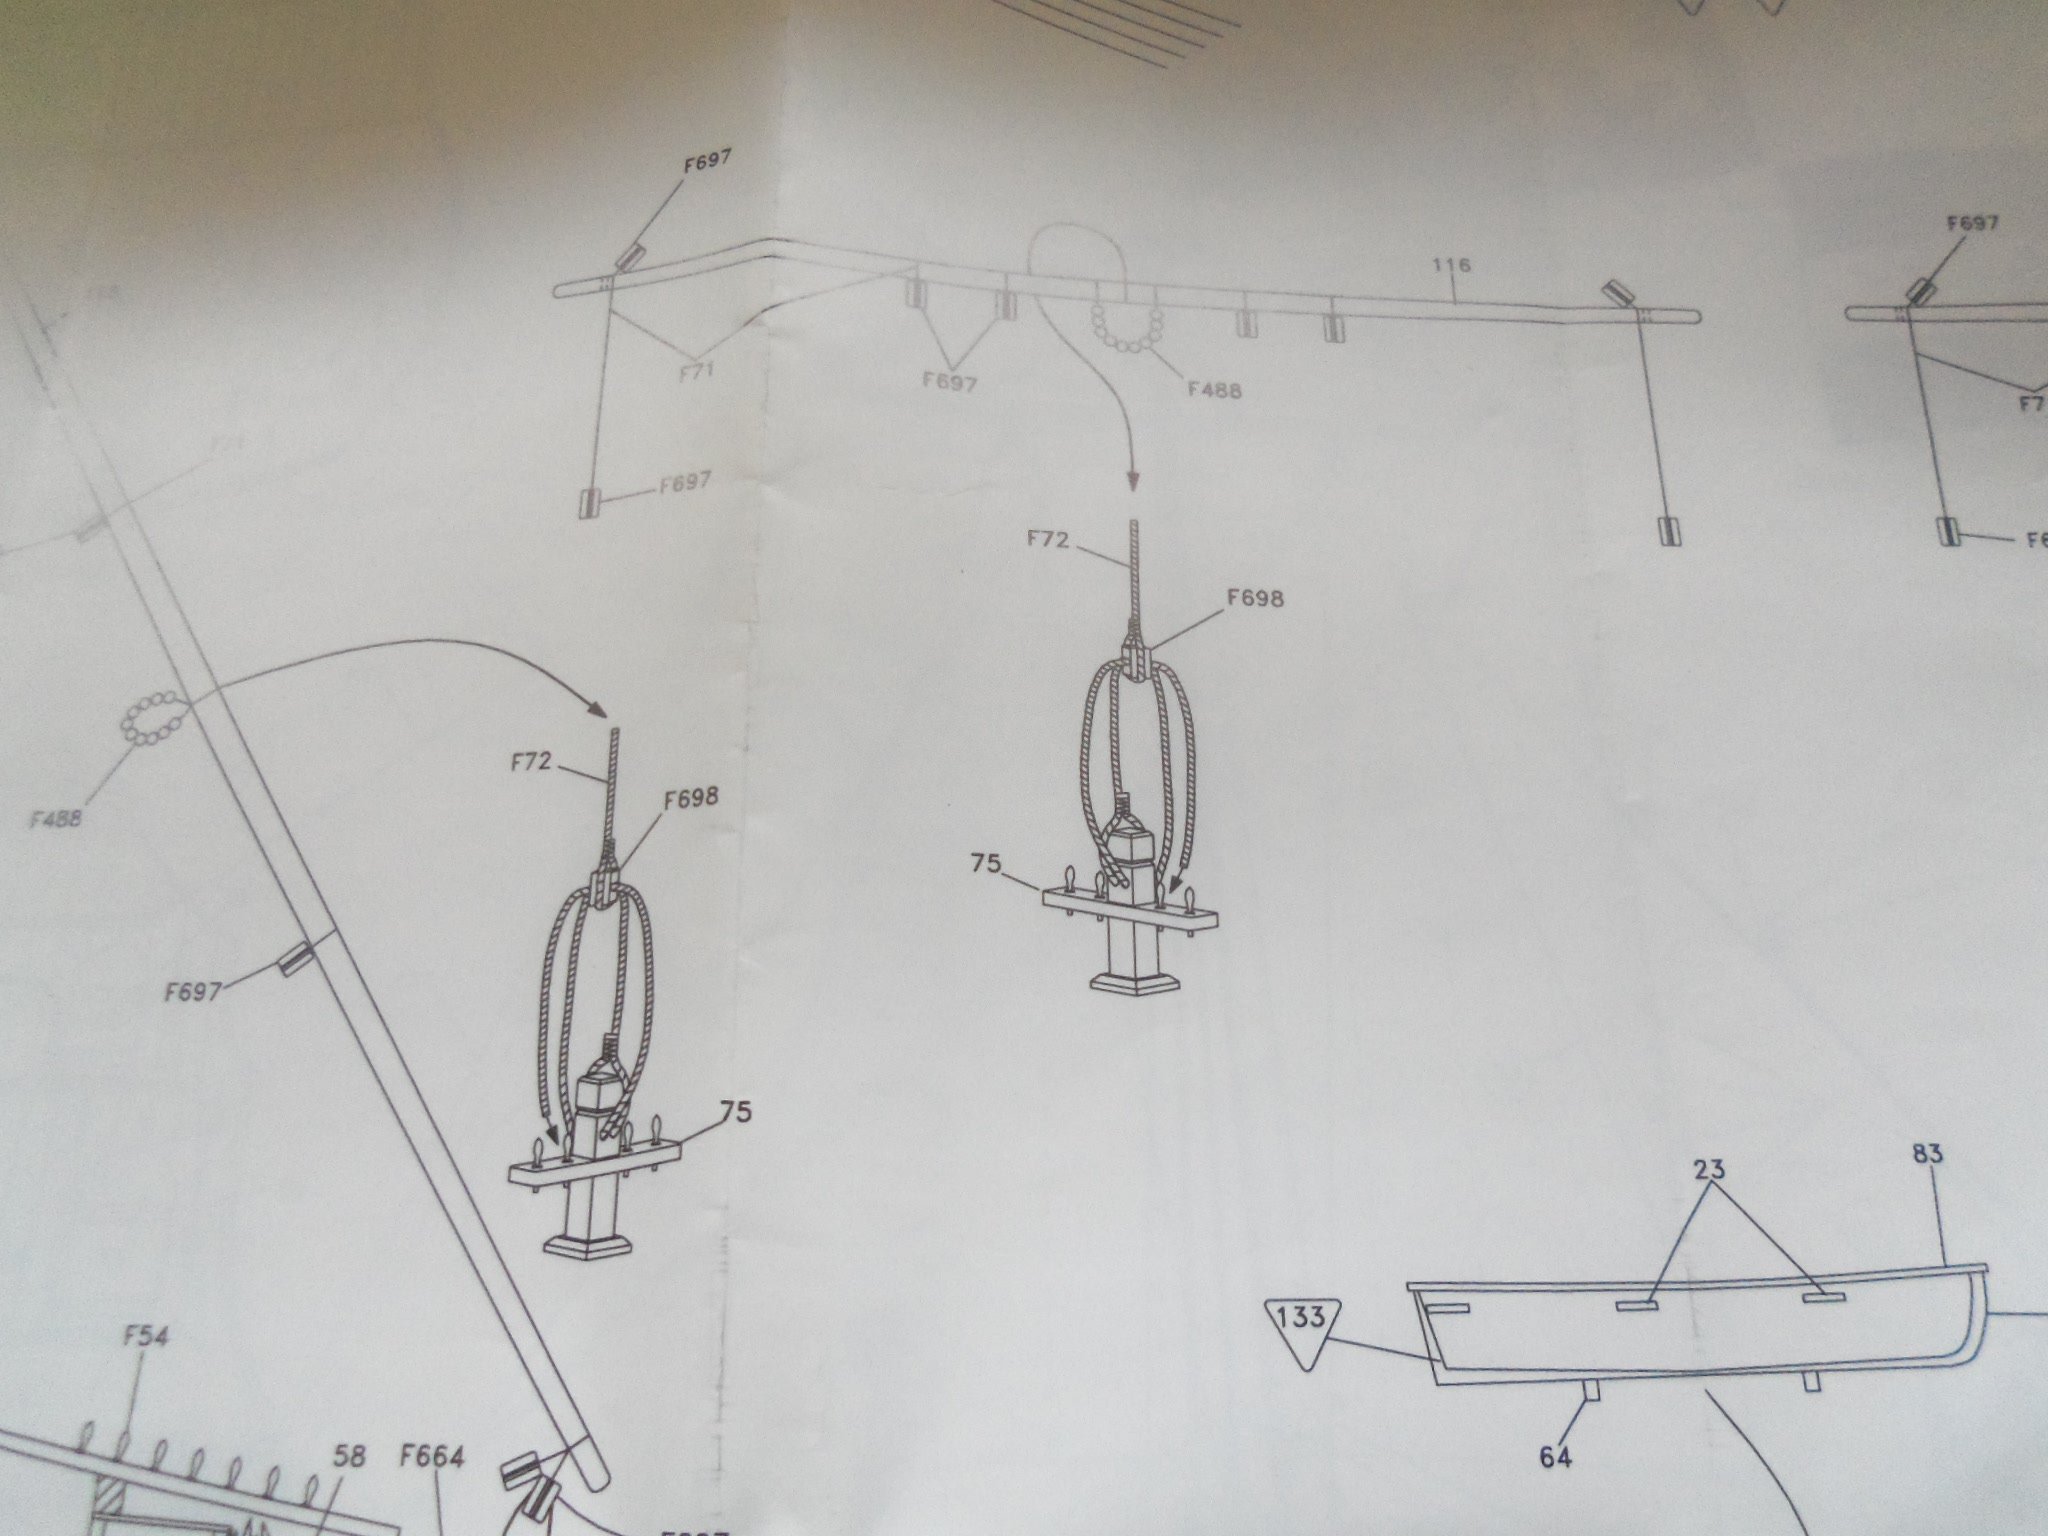
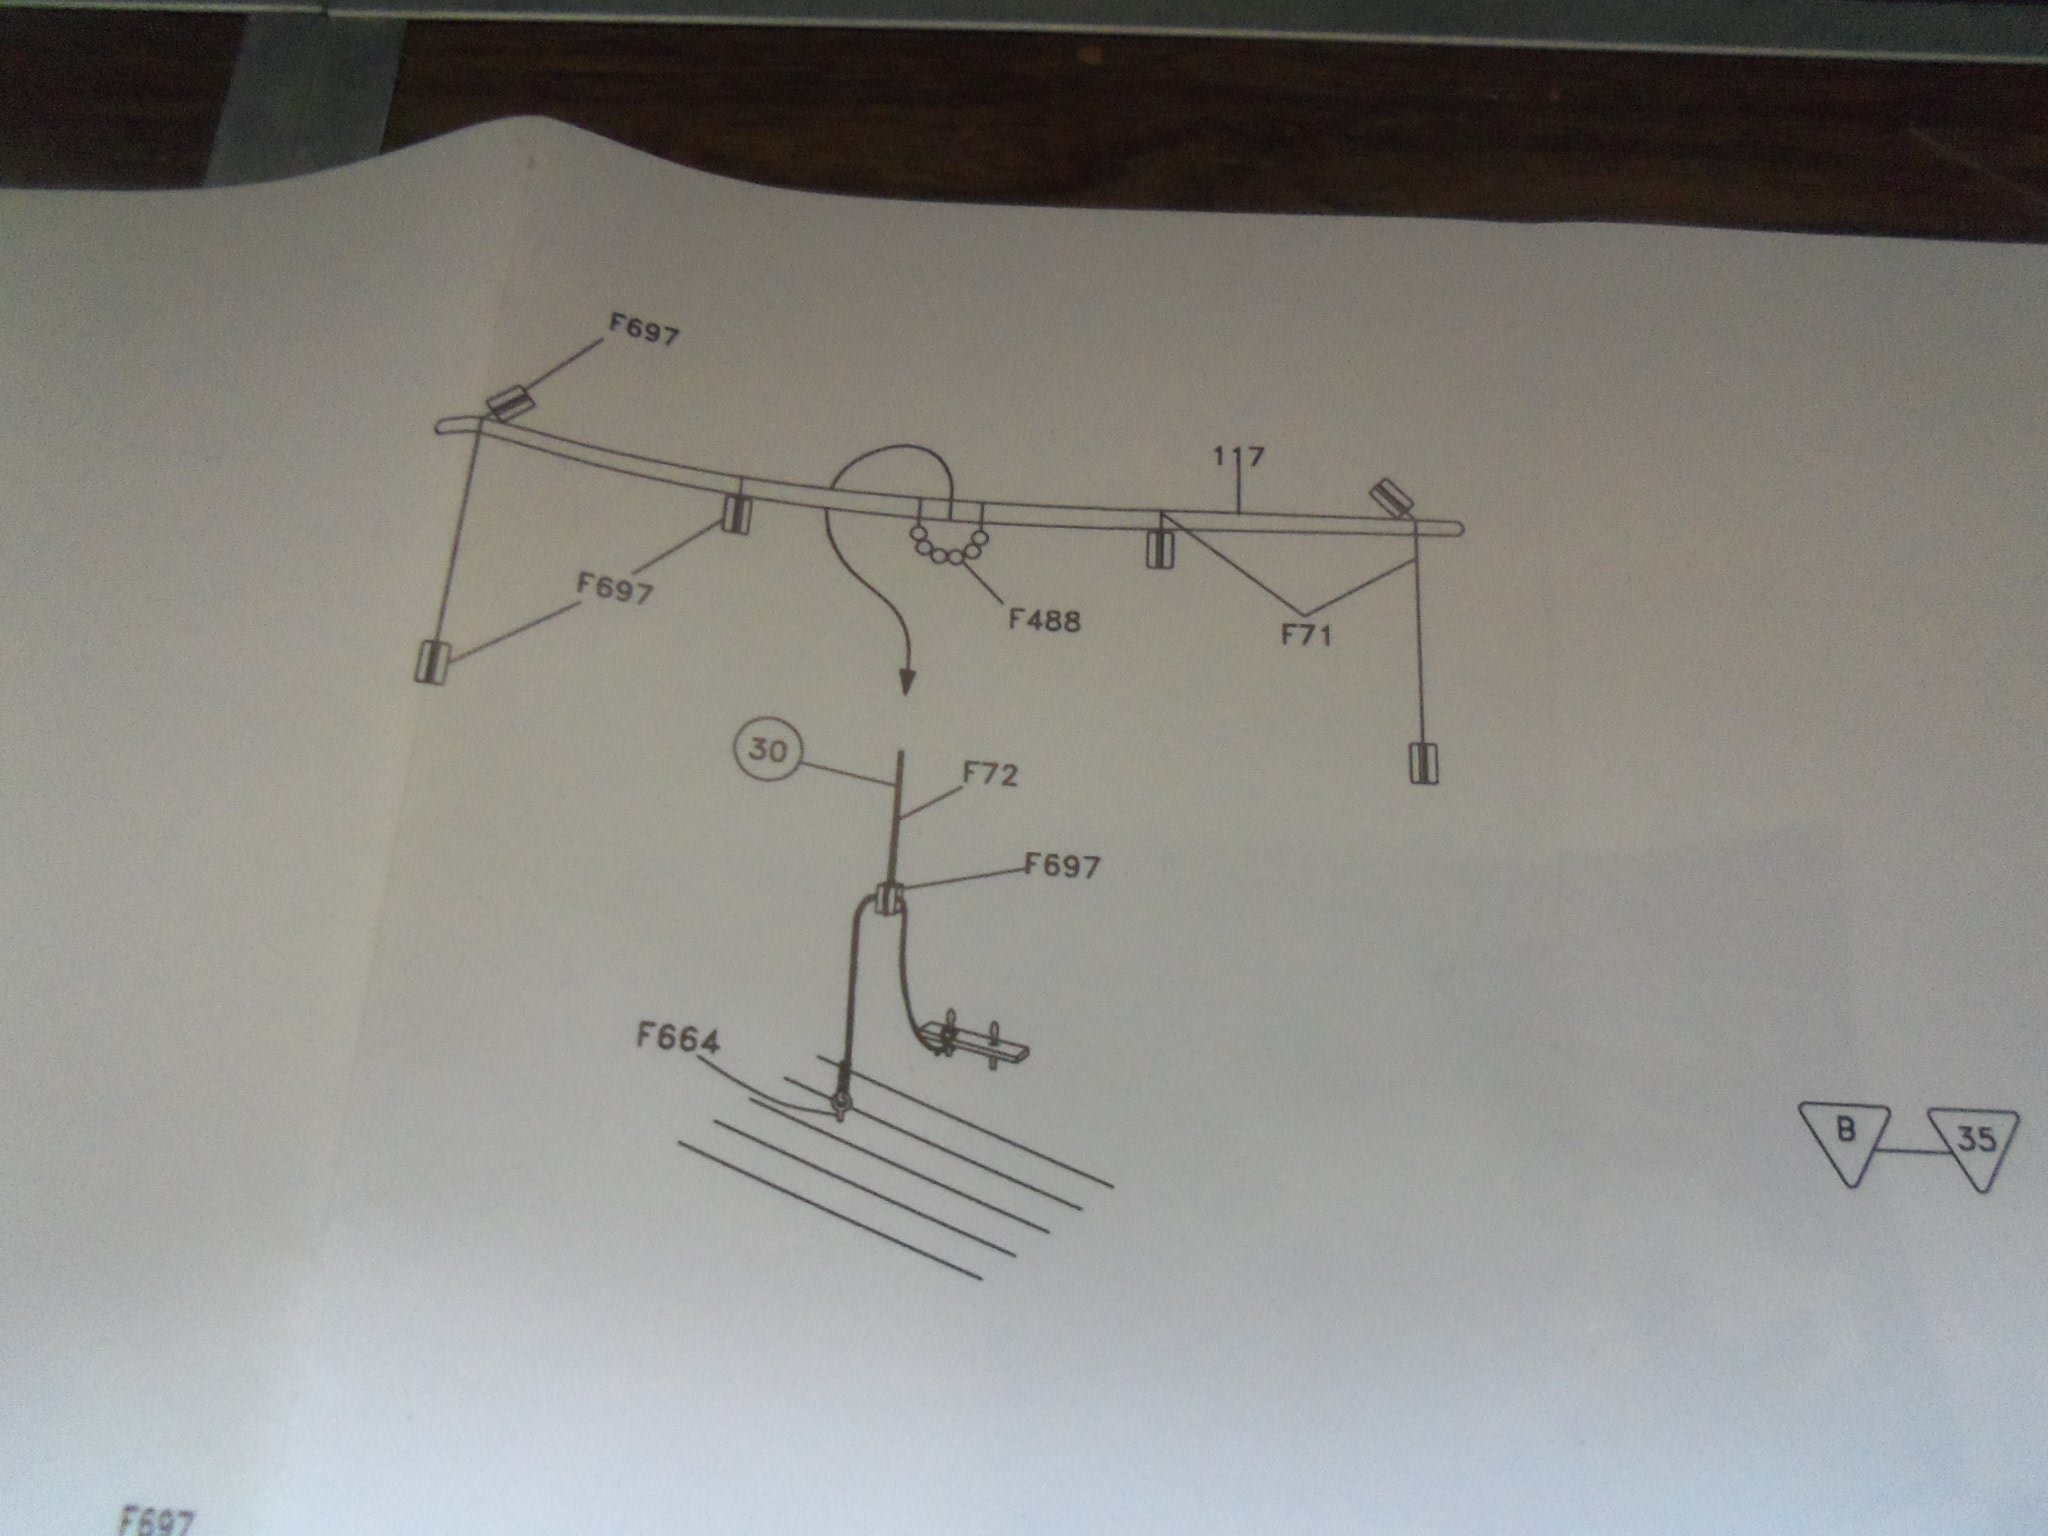
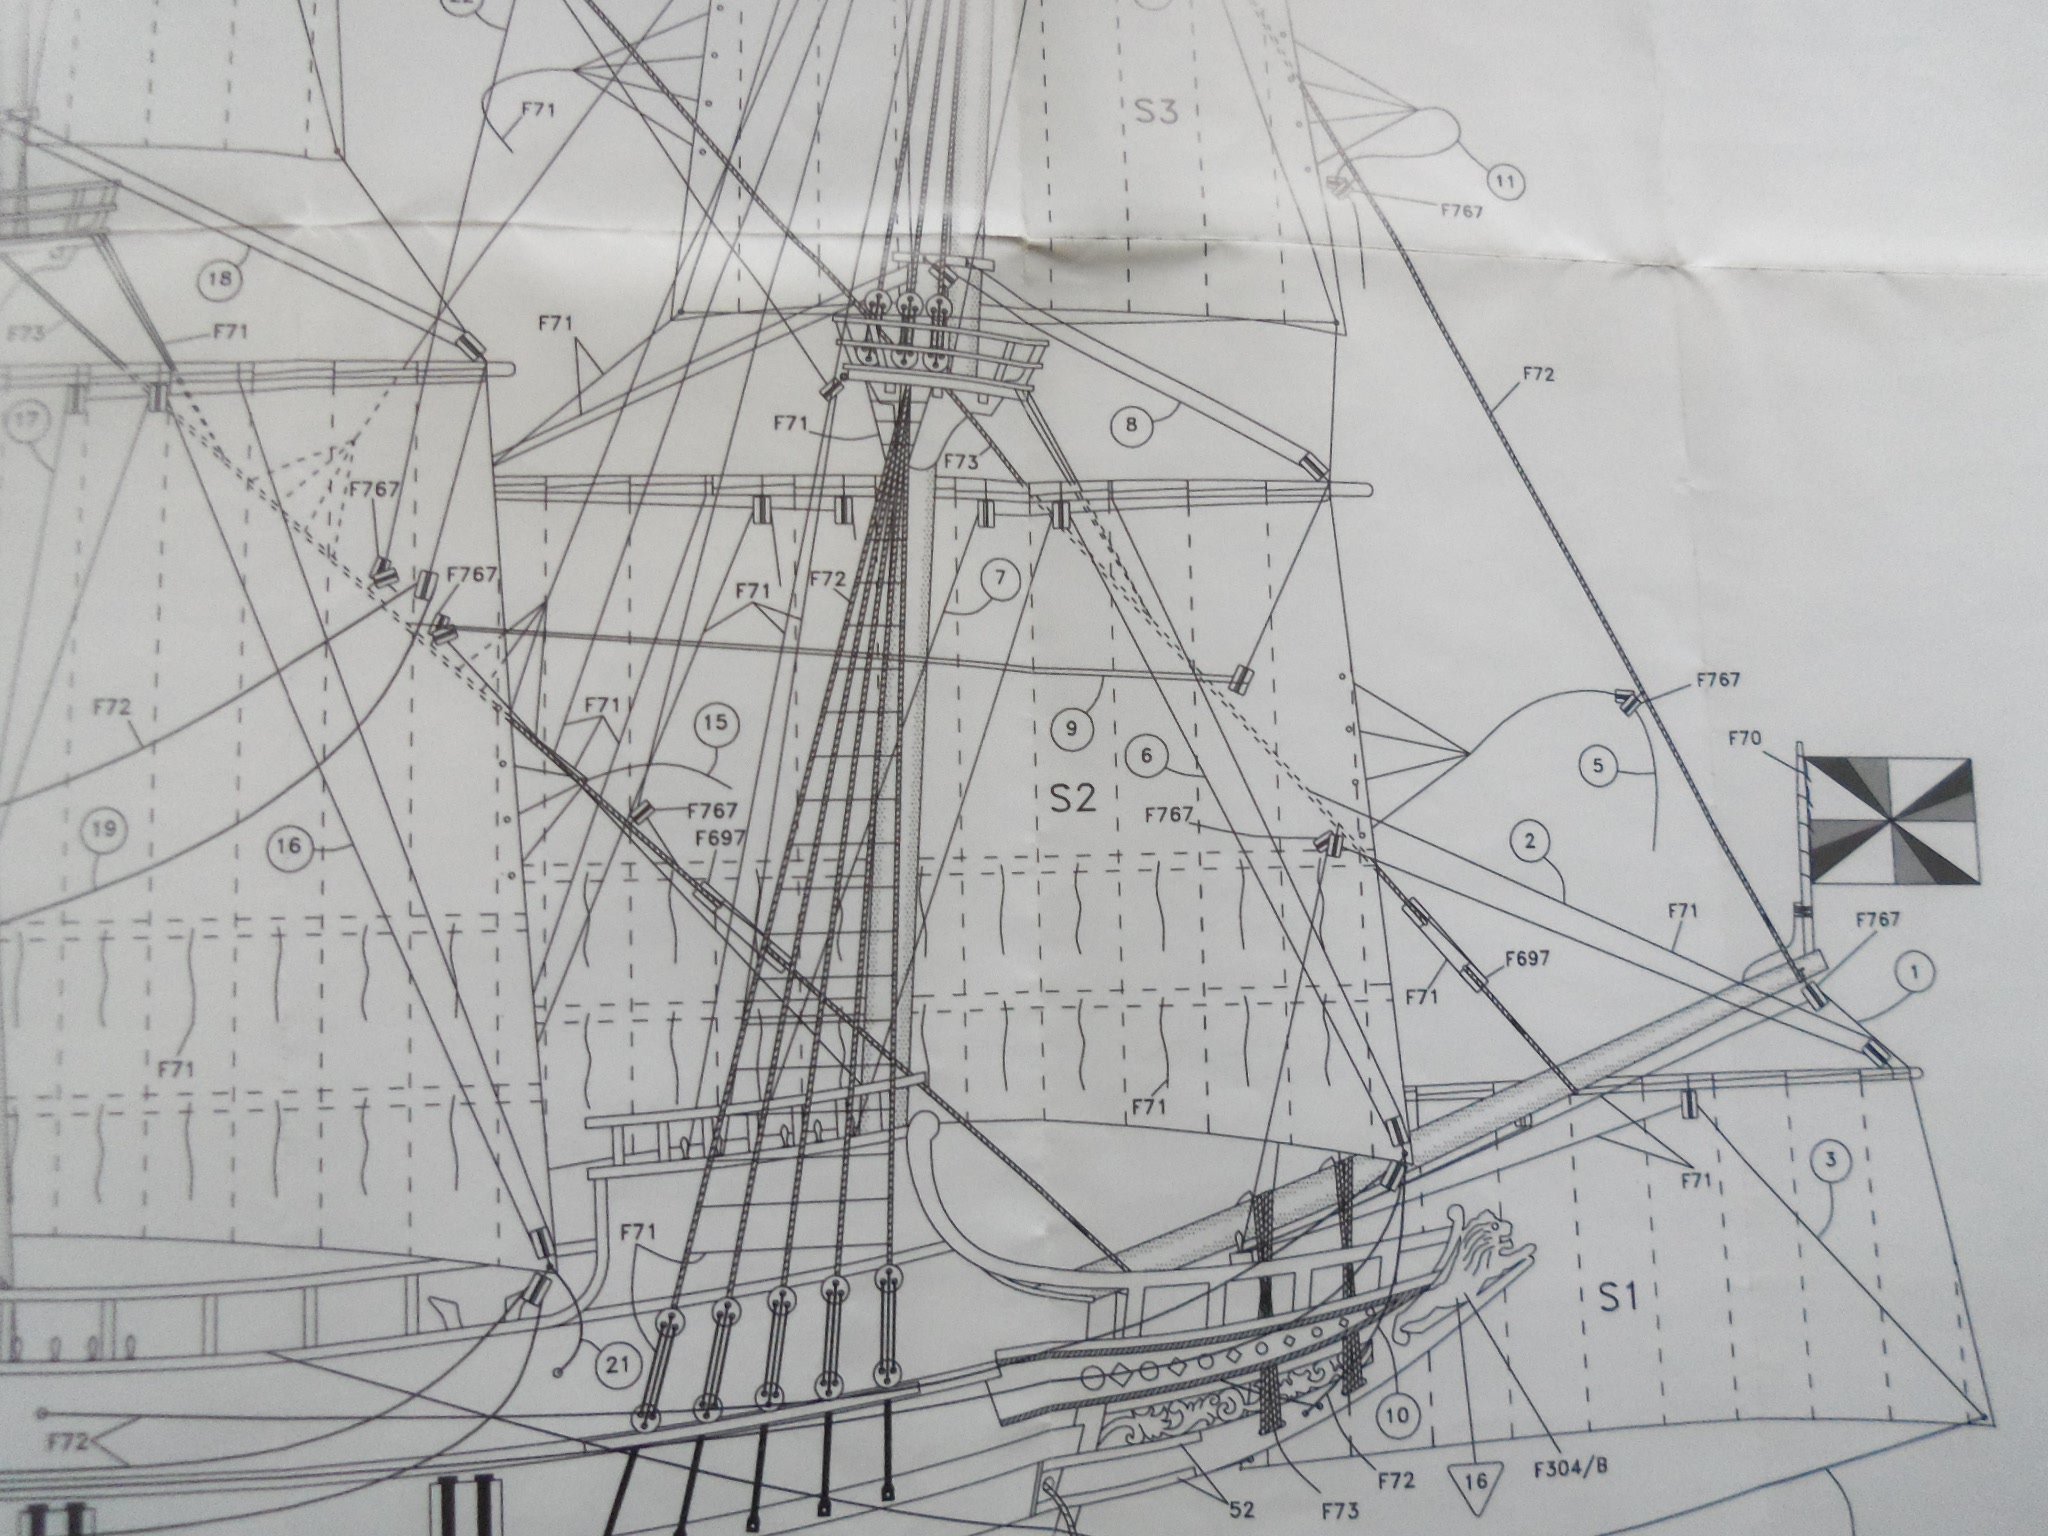
hello Bill......every kit manufacturer is different. I was building this model along side another building the Corel kit. one difference between our kits, was that Billings doesn't supply the decorations for the tack line sheaves. Corel sent them to me for free I'm sure Bluejacket will help you......haven't heard a discouraging word about them
-
that's quite a jungle you have there. ...an even bigger feat to get all the sails on......looking fantastic!
-
from what I've seen Jan........what you folks do with these models is way over my head and daunting enough. your update looks very good
-
is that the proper rake for the mast? I see you have it shimmed. if not, then perhaps adjusting the length of those two braces for the gallows will allow the mast collar to sit flush. if the rake is correct, and seeing that adjusting the collar itself looks impossible, perhaps closing up the three sides will enable it to appear flush with the deck. your progress continues to look really good
- 337 replies
-
- 3
-
-
- finished
- mountfleet models
- (and 1 more)
-
nice work on the gear work. Micro Mark sells an assortment bag of watch gears and stuff........craft stores also sell wooden and metal gears as well, but some of them are too large { I have an assortment in my inventory}. the detail your adding to the model is astounding.......I just mention this to give an easier alternative
-
they make a glue for fabric. when I make sails, after they are cut out, I atomize them with diluted white glue. after they are sewn, I get them damp of repeat the process and lay them on a rolled up towel to billow them out.
-
sorry I'm a bit late......catching up on all the logs I follow is a daunting task {we have a very prolific bunch of modelers here}. I would imagine that this vessel is lanteen rigged. if I'm correct, the yards would be in the lowered position and the sails would be 'gathered' on the yards. they would be removed when at port, where they can be repaired if needed. sounds logical the sails came out super........you had to make another yard too. I recently lost a part too.......the first one that I have no idea where it went. it isn't the fact that I had to order another set of wheels {bomber}, but the idea that there may be a black hole in our computer room
-
very nice progress Mustafa.......the rigging looks superb fantastic model
- 54 replies
-
- 1
-
-
- mantua
- santa maria
- (and 1 more)
-
looks fantastic Greg.........another of your superb renditions the guns..........the netting is awesome.......something rarely seen on a model!
-
hello Julian, I left the pictures full size. if you need anything further, let me know. hope this helps


-
they look fine........the wings look great.
-
does this kit come with a stand?........noted the hole on the underbelly. very nice look'in model
-
serious masking going on..........look'in good
-
WOW! very nice.........makes me think 'game of thrones' very nice work! the village looks awesome
-
glad to hear all is OK.....home life first.......no rush
-
thanks all.......I should have an update soon. more painting going on at the moment.....and I've still been plank'in that hull. I also did a bit more with the Memphis Belle.......kind of a boo boo as well. I'll see what's in my camera in painting some of these parts, I normally do them on the sprue. this model has a number of sprue connections to the parts......equal injection for lessening the flow marks, I try to cut them down, by removing them from the equation in the critical areas, so that when the part is painted, these points won't be noticeable. this plastic is a bit hard to work with.....but it's coming along
-
North American P-51D Mustang by Asat - Airfix - 1/48
popeye the sailor replied to ASAT's topic in Non-ship/categorised builds
I have the grab handle tool from Mission Models.....I did have a hold n fold, but I traded it away. to add to your question earlier, $20.00 and up.........the more you pay, the more it's worth. cheaper kits don't have a lot of detail that isn't molded to the parts........basically, they are easier to build. the higher priced kits have more detail......the parts count is much higher, and are more complex. cheaper kit are more apt to be inaccurate. I haven't paid much attention to it, but there are quite a few model manufacturers that I've never heard of.........stuck in my rut I suppose. it does pose the question concerning the viability of the hobby. at the time, I didn't see the hobby as a dying star.......and I still don't today. cockpit looks good.......love the wear marks on the floor -
look'in good OC
-
good look'in diorama........more than meets the eye
-
....the resurgence of flower power very nice!
-
quite a bit of detail.......very real nice 'n grungy