
HOLIDAY DONATION DRIVE - SUPPORT MSW - DO YOUR PART TO KEEP THIS GREAT FORUM GOING! (Only 36 donations so far out of 49,000 members - C'mon guys!)
×


popeye the sailor
-
Posts
16,007 -
Joined
-
Last visited
Content Type
Profiles
Forums
Gallery
Events
Everything posted by popeye the sailor
-
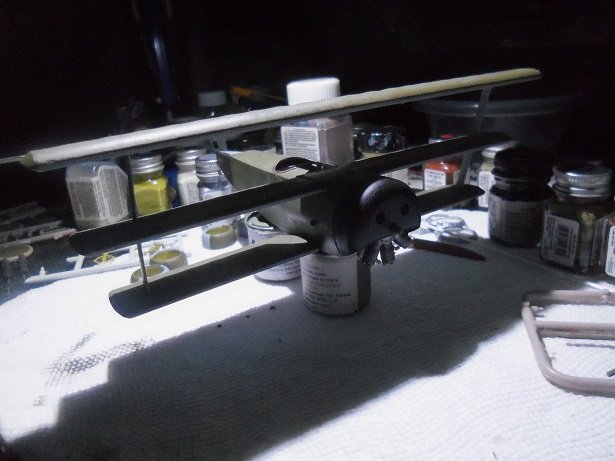
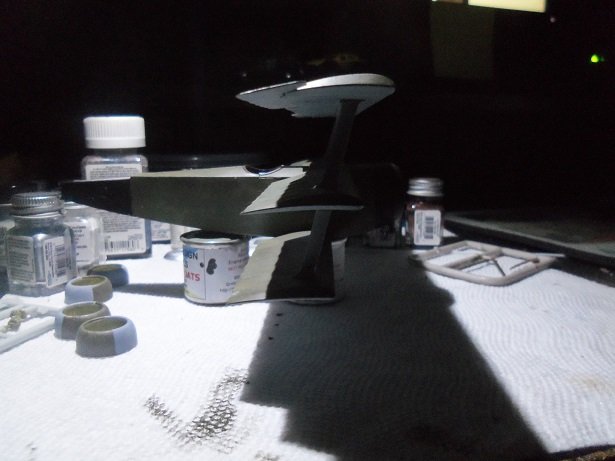
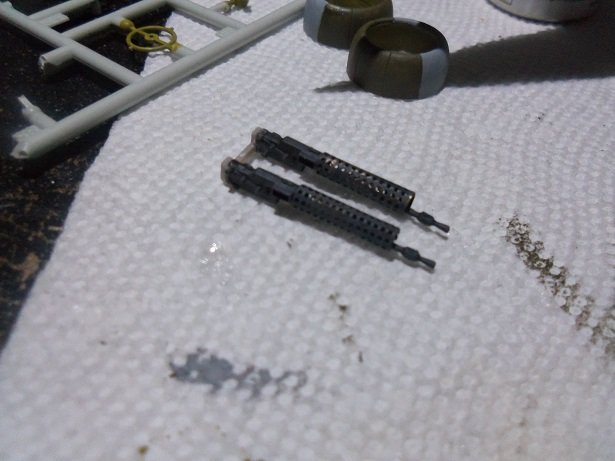
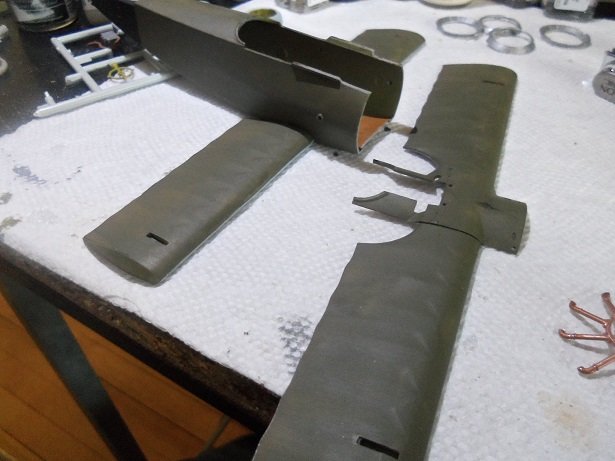
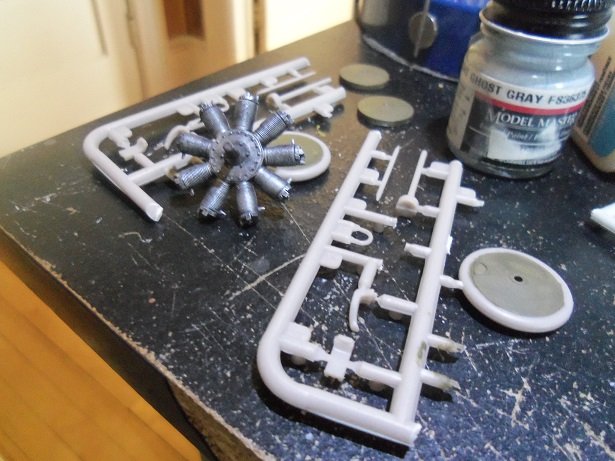
 heck no........anyone who thinks larger is easier, would be spend'in their days in a rubber room the whole logistics of the project is compounded! I do like the larger models though......a bit more detail, but still can't say much about the tiny parts, since the tiny parts are usually the added detail {I plea insanity again.....I'm just crazy 'bout that stuff!} hey....while I'm here..........I'll post a tiny bit of progress. I mentioned that the interplane struts might need to be fitted. I opted to sand the mounts on the struts down to fit. the first one went Ok......got it so it would go through the center wing, and into the bottom wing slot. the engine / cowl assembly is installed.....but at a price. I had to trim the front of the cockpit, and remove the engine mount from the back of the firewall. not being able to assemble it according to the instructions is the reason for it....I knew this would cause issues. had I not been able to fix the warped fuselage, I might as well thrown it out.........but I couldn't do it {after all........this is a Dr 1 }! anyway........the port strut wasn't as quick 'n easy........in my stupidity, I broke it this plastic is brittle....good thing........the break was clean and I was able to repair it. I'll just have to be careful with it until the top wing is on. sanding the mounts down, I got it to fit, and the top wing was dry fitted into place. the dehydral shot shows the wing positions are pretty good........spot on with the mounts firmly seated with all I had to do to get the engine assembly on, it will never be seen.......the ammo boxes blocks everything out. I did more assembly to the machine guns. I'm kinda happy with myself.......this was done during my work week! usually I'm too tired to do anything. I'm off for the next three days....fun time, except I promised the admiral that I'd mow the lawns {did everything but that during my two weeks off}. this next week when I go back to work, I should have enough time in my PTO to have a four day week end. guess who's tak'in a day off...........this guy! ---> <---
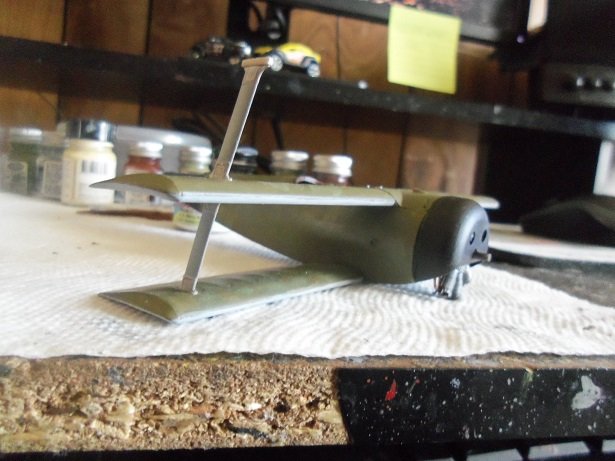
- 157 replies
-
- 10
-

-
I recall a Mustang model I did years ago.....I believe it was a 3 in 1 kit, but can't remember the maker. it had all kinds of customizing parts for the body......fit was terrible, but it looked good at the time I've yet to find that kit again. good start
-
nice progress on the paint Carl.......looks really good!
-
F-5F by ErnieL - Kitty Hawk Models - 1/32 - PLASTIC
popeye the sailor replied to ErnieL's topic in Completed non-ship models
you lived in my neck 'o da woods? -
nice progress Andy....paint looks really good
-
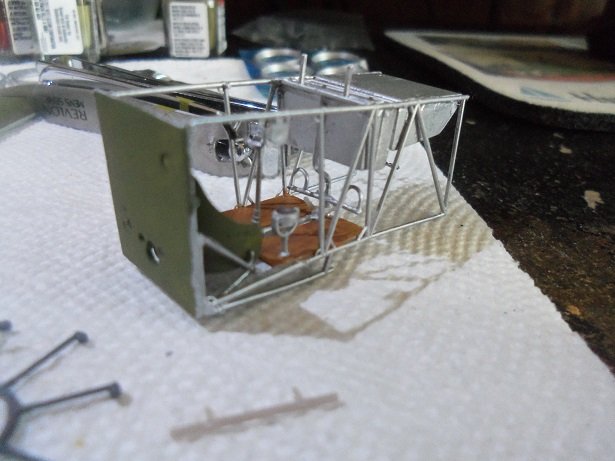
they are another of my favorite planes....built a few in my youth. I had built a large scale model of one, but my siblings destroyed it on me. I tried to fit the interplane struts....but I see I'll need to either trim the thickness of the mounts, or make the slots larger. same deal with the cabane struts and the landing gear struts......I'll need to drill holes.
-
it's a wonderful card model Dan.......hopefully you'll be able to show more that what you've already compiled. very nice it is good to see you again........
- 29 replies
-
- 8
-
-
- hmw
- Hamburg Harbor
- (and 2 more)
-
now....now.....no more talk about filing it......it'll take more than missing locator tabs to make me want to shelve it this is now a bash build as a matter of fact...... the engine / firewall assembly is already on the fuselage. I'll do something with the paint....I think it's too late to try stripping it. I'd have posted a while ago, but errands took me away. I was going to order a 1:48 Memphis Belle yesterday......it was going for about $60.00, but when I saw the postage, I did an about face! would have added another $30.00 to it! I did order two other planes though.........a stuka ju87 G2, and a Marcel Block Aero MB200 Bomber......the Stuka is by Fujimi, so it ought to be interesting, since I've never built one of their planes. we just had a storm pass through here........there was even a threat of a tornado. something you don't see up in these parts........quite a bit of rain and T&L.
-
T-28s by ErnieL - Kitty Hawk Models - 1/32 - PLASTIC
popeye the sailor replied to ErnieL's topic in Completed non-ship models
sweet look'in planes -
F-5F by ErnieL - Kitty Hawk Models - 1/32 - PLASTIC
popeye the sailor replied to ErnieL's topic in Completed non-ship models
nice looking plane and pictures.......wicked good camo job -
nice!
-
the A.M. came out super.........I never can get the frames looking that good, no matter what I use nice job
-
.........very impressed!
-
Suzuki GSX 1100 S kpnuts 1/6 tamiya
popeye the sailor replied to kpnuts's topic in Non-ship/categorised builds
sweet job! -
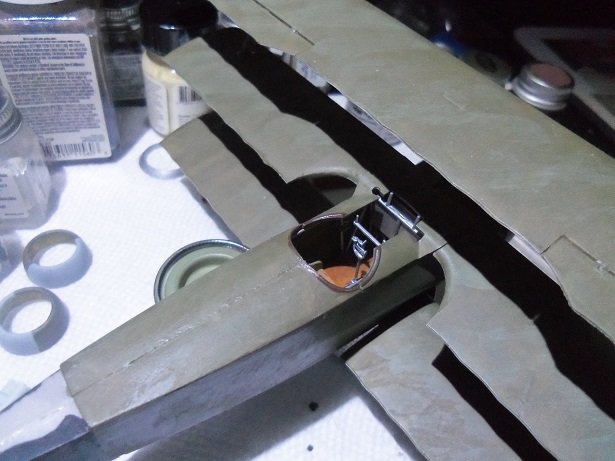
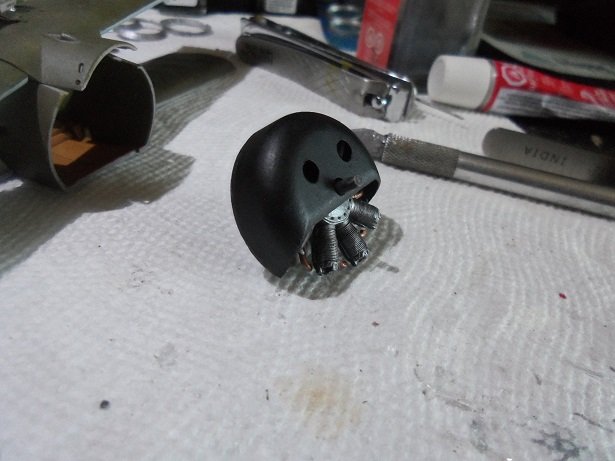
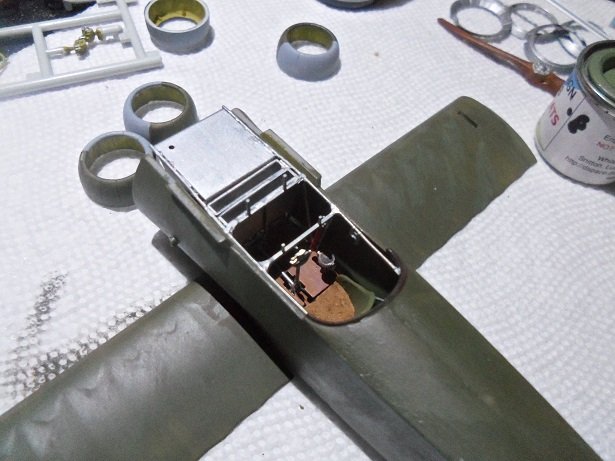
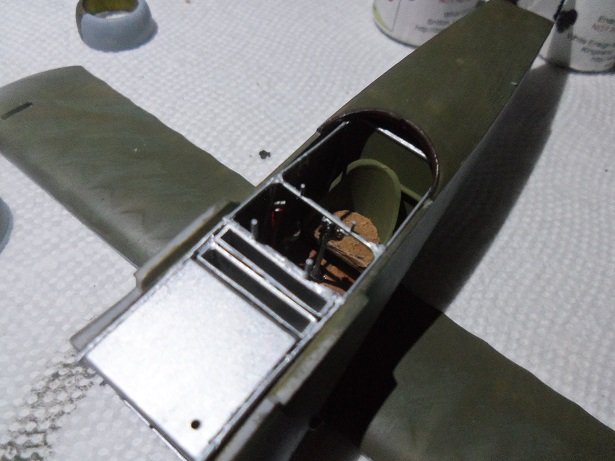
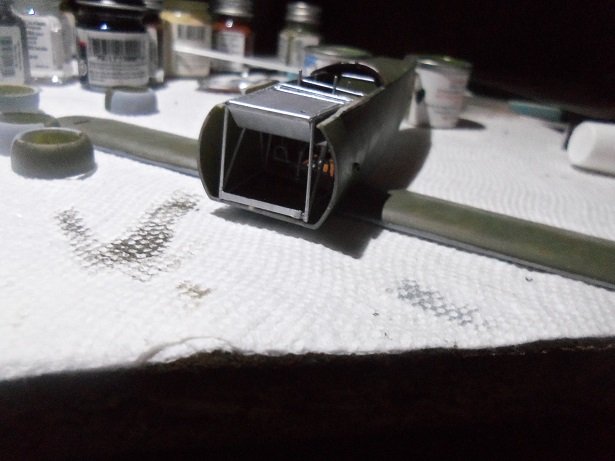
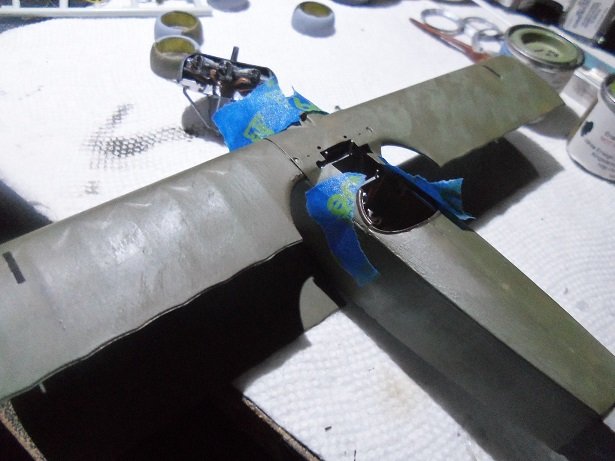
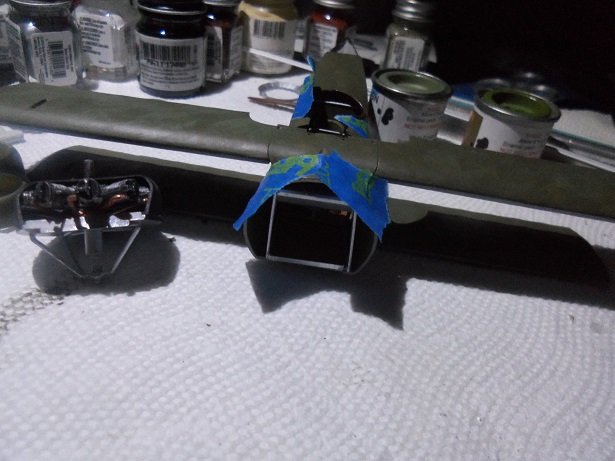
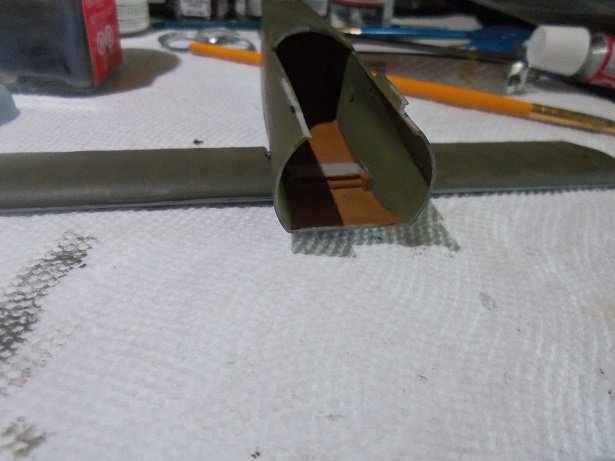
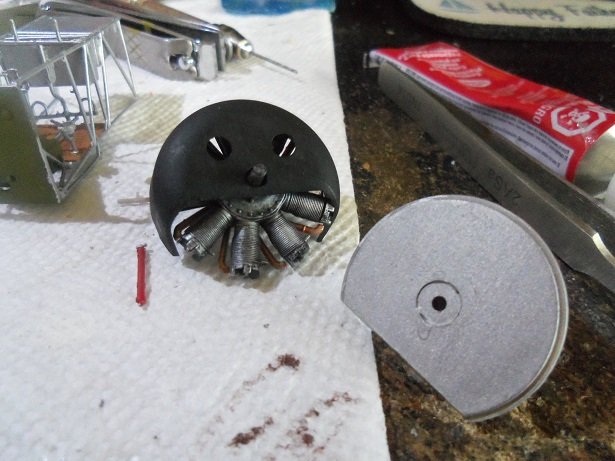
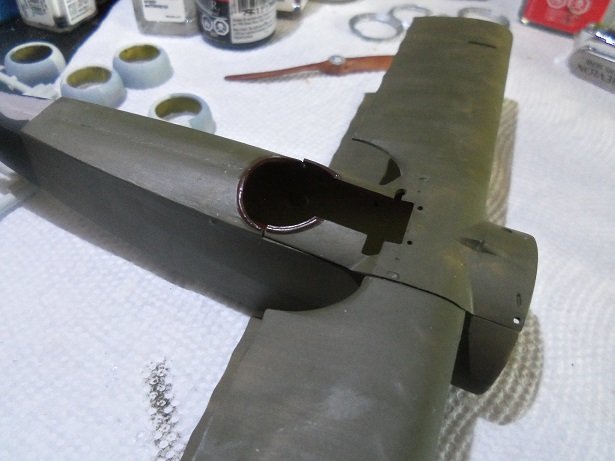
....in continuing on.......there were more fit issues with the engine / firewall.........the cowl would not seat on the firewall. it had to do with the cylinder heads and the curvature of the cowl......kept it away from the firewall. so I had to trim the front edges of the cylinders that won't be seen to conform to the curvature. I also added a brace to the bottom front of the cockpit frame. it won't be seen, and it will help strengthen it when I slide the assembly into the fuselage. another cross bar was added to it as well. when dry enough, the cockpit assembly was slid into place. the fuselage sides were spread out a little to aide with this.........it worked out reasonably well and fits tight in there. the second cross bar can be seen. with that being done, the center wing assembly was cemented into place. paint looks to be another problem.......I created. the camo is supposed to be light green and Olive....I should have done the light green first, and streaked the olive after. the result is that the light green is hardly noticeable........I have to do something about it. I've made minimum progress with the Memphis and the second hull.......I have been preoccupied with a problem I've been having. nothing serious........a problem with my left foot......saw the doc and we're in the beginning phase to find out what it is. more soon
- 157 replies
-
- 11
-
-
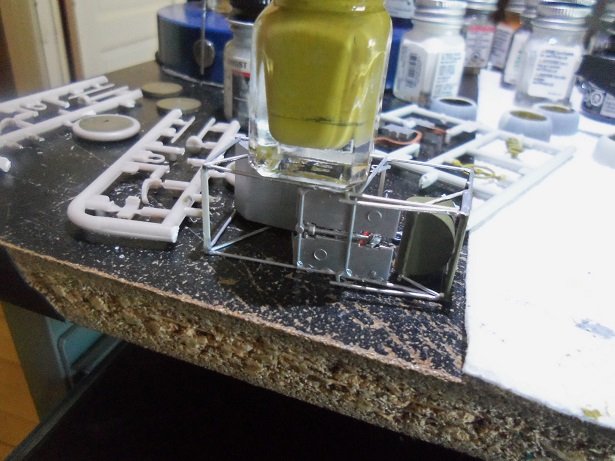
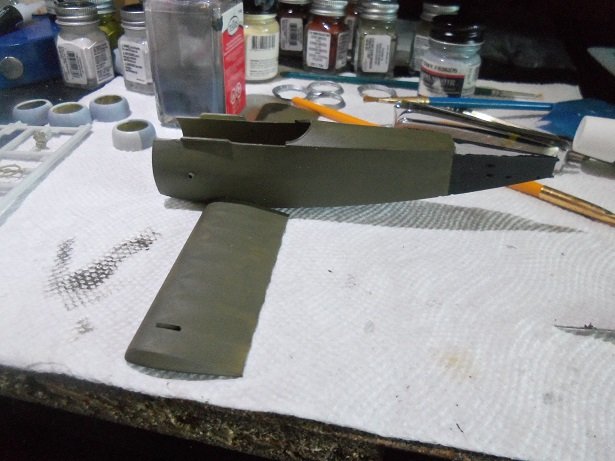
hey there......here a bit more progress on this ill fated Roden build. the deformed fuselage has altered not only the sequence of the build, but the location of some of the parts as well. the base color is olive green with gray under belly........first thing here was to add the bottom wing. the area I cut out reveals the root of the bottom wing......this will be paint the wood color. the holes were drilled for the elevators and rudder...I still need to drill out the upper cable holes in the stabilizer in test fitting the upper part of the fuselage and the center wing, I found it beneficial to cement these two parts together, later to be added to the model as a whole once the cockpit is in place. the engine was dry brushed in aluminum....... the wheel and tire assemblies are also being painted. the instructions only point out one color, but I'm sure that the rims are a different color. more was added to the cockpit....the foot pedals and stick.... engine and firewall being fitted together and painted. this assembly is bad fitting as well.......had to do some sanding to the back ring of the engine for it to fit properly. a good thing here is that the center wing assembly doesn't fit too bad........ I painted around the cockpit with a flat brown color........looks like I'll need to use a stir stick to be sure the pigments aren't settled to the bottom..........gotta repaint it anyway

- 157 replies
-
- 10
-
-
haven't seen a laser printer that can do it..... I wouldn't say disinterest........more like the futility in looking at something I wouldn't be able to afford in the first place this is why there are decals out there that require the different color fields to be laid over one another...... such as British insignias. the color palettes cannot be printed as a single decal. I have found ways to thwart it, but I still deal with transparency......most printers max out at 600 dpi
-
nice looking truck........nicely done! about the finish.......I think it's different ratios of thinner used in the camo colors. your lighter green likely got a higher ratio, since the sheen factor is less than the darker green. it would lend a more 'dead pan' sheen........I do it a lot with flat black, especially if I have to paint tires {hate it when it's a car kit}.
-
I've never seen anything from Pocher........huge!
-
they can be addictive............those two packs make it hard to resist it is futile
-
love what your doing Jack......the tank and figures look super the walls look real good too!
-
back when I started making my own decals, I looked into the printer stuff. there aren't many printers that will do white. they are out there {Alps printers} , but prepare to pay a high price for them. I did read of a place that refurbishes Alps printers.......can't seem to find the link.....must have deleted it.
-
good to see her finished ......a real classy looking lady
-
your really taking off with these planes.......aren't you?!?!?! off to a good start as usual .