kscadman
-
Posts
258 -
Joined
-
Last visited
Recent Profile Visitors
1,477 profile views


-
 GrandpaPhil reacted to a post in a topic:
Sao Miguel by kscadman - Mamoli - 1:54 scale
GrandpaPhil reacted to a post in a topic:
Sao Miguel by kscadman - Mamoli - 1:54 scale
-
AON reacted to a post in a topic:
HMS Bellerophon 1786 by AON – scale 1:64 – 74-gun 3rd Rate Man of War - Arrogant-Class
-
 It would be the beer in the mug. I'm a CAD man so I know
 -
Knocklouder reacted to a post in a topic:
Sao Miguel by kscadman - Mamoli - 1:54 scale
-
Robert Taylor reacted to a post in a topic:
Sao Miguel by kscadman - Mamoli - 1:54 scale
-
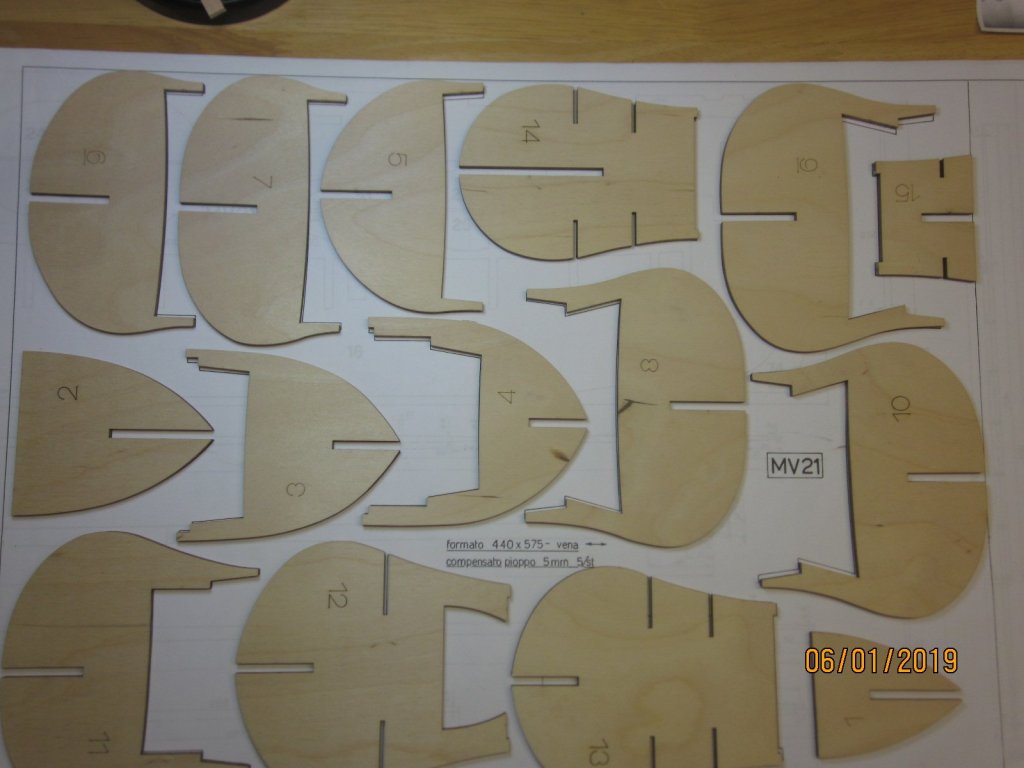
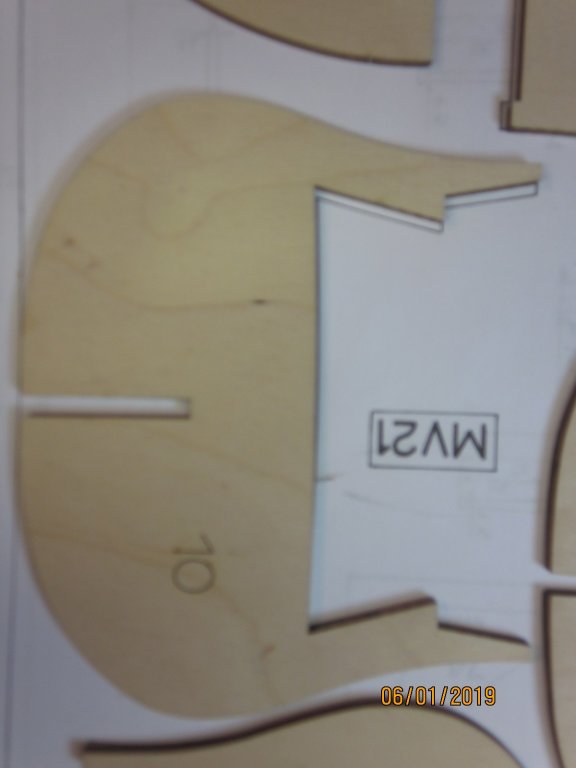
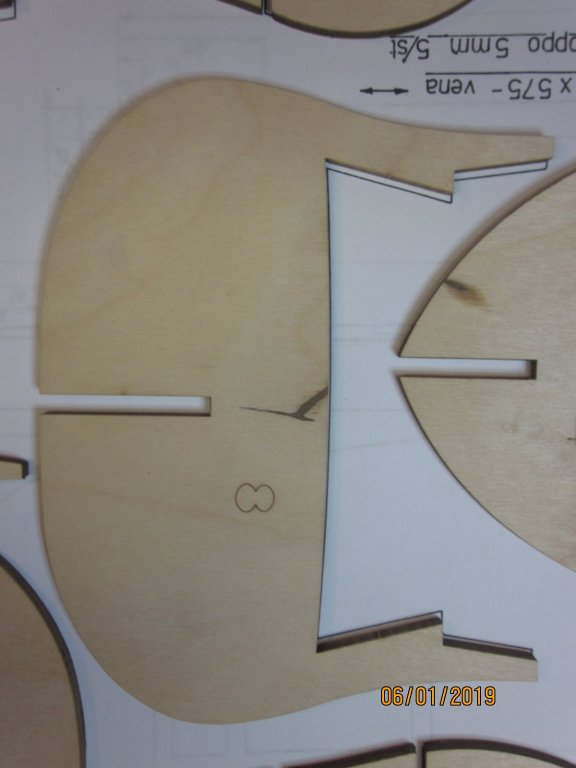
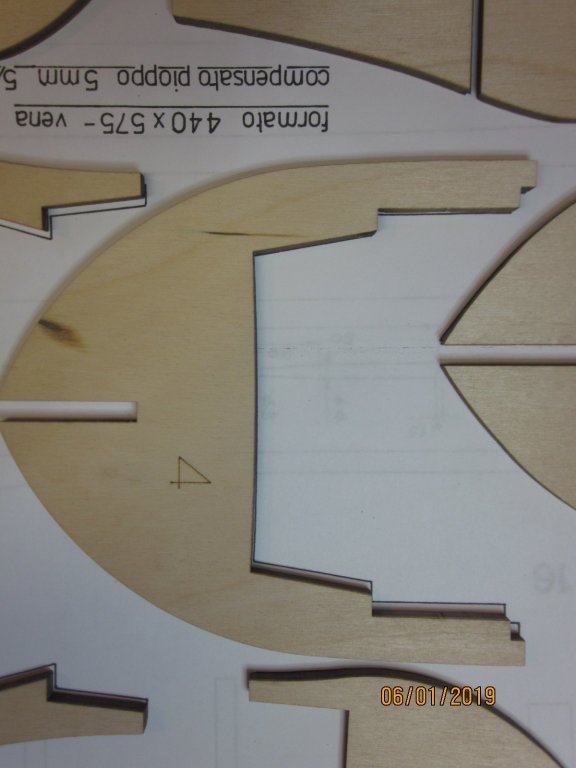
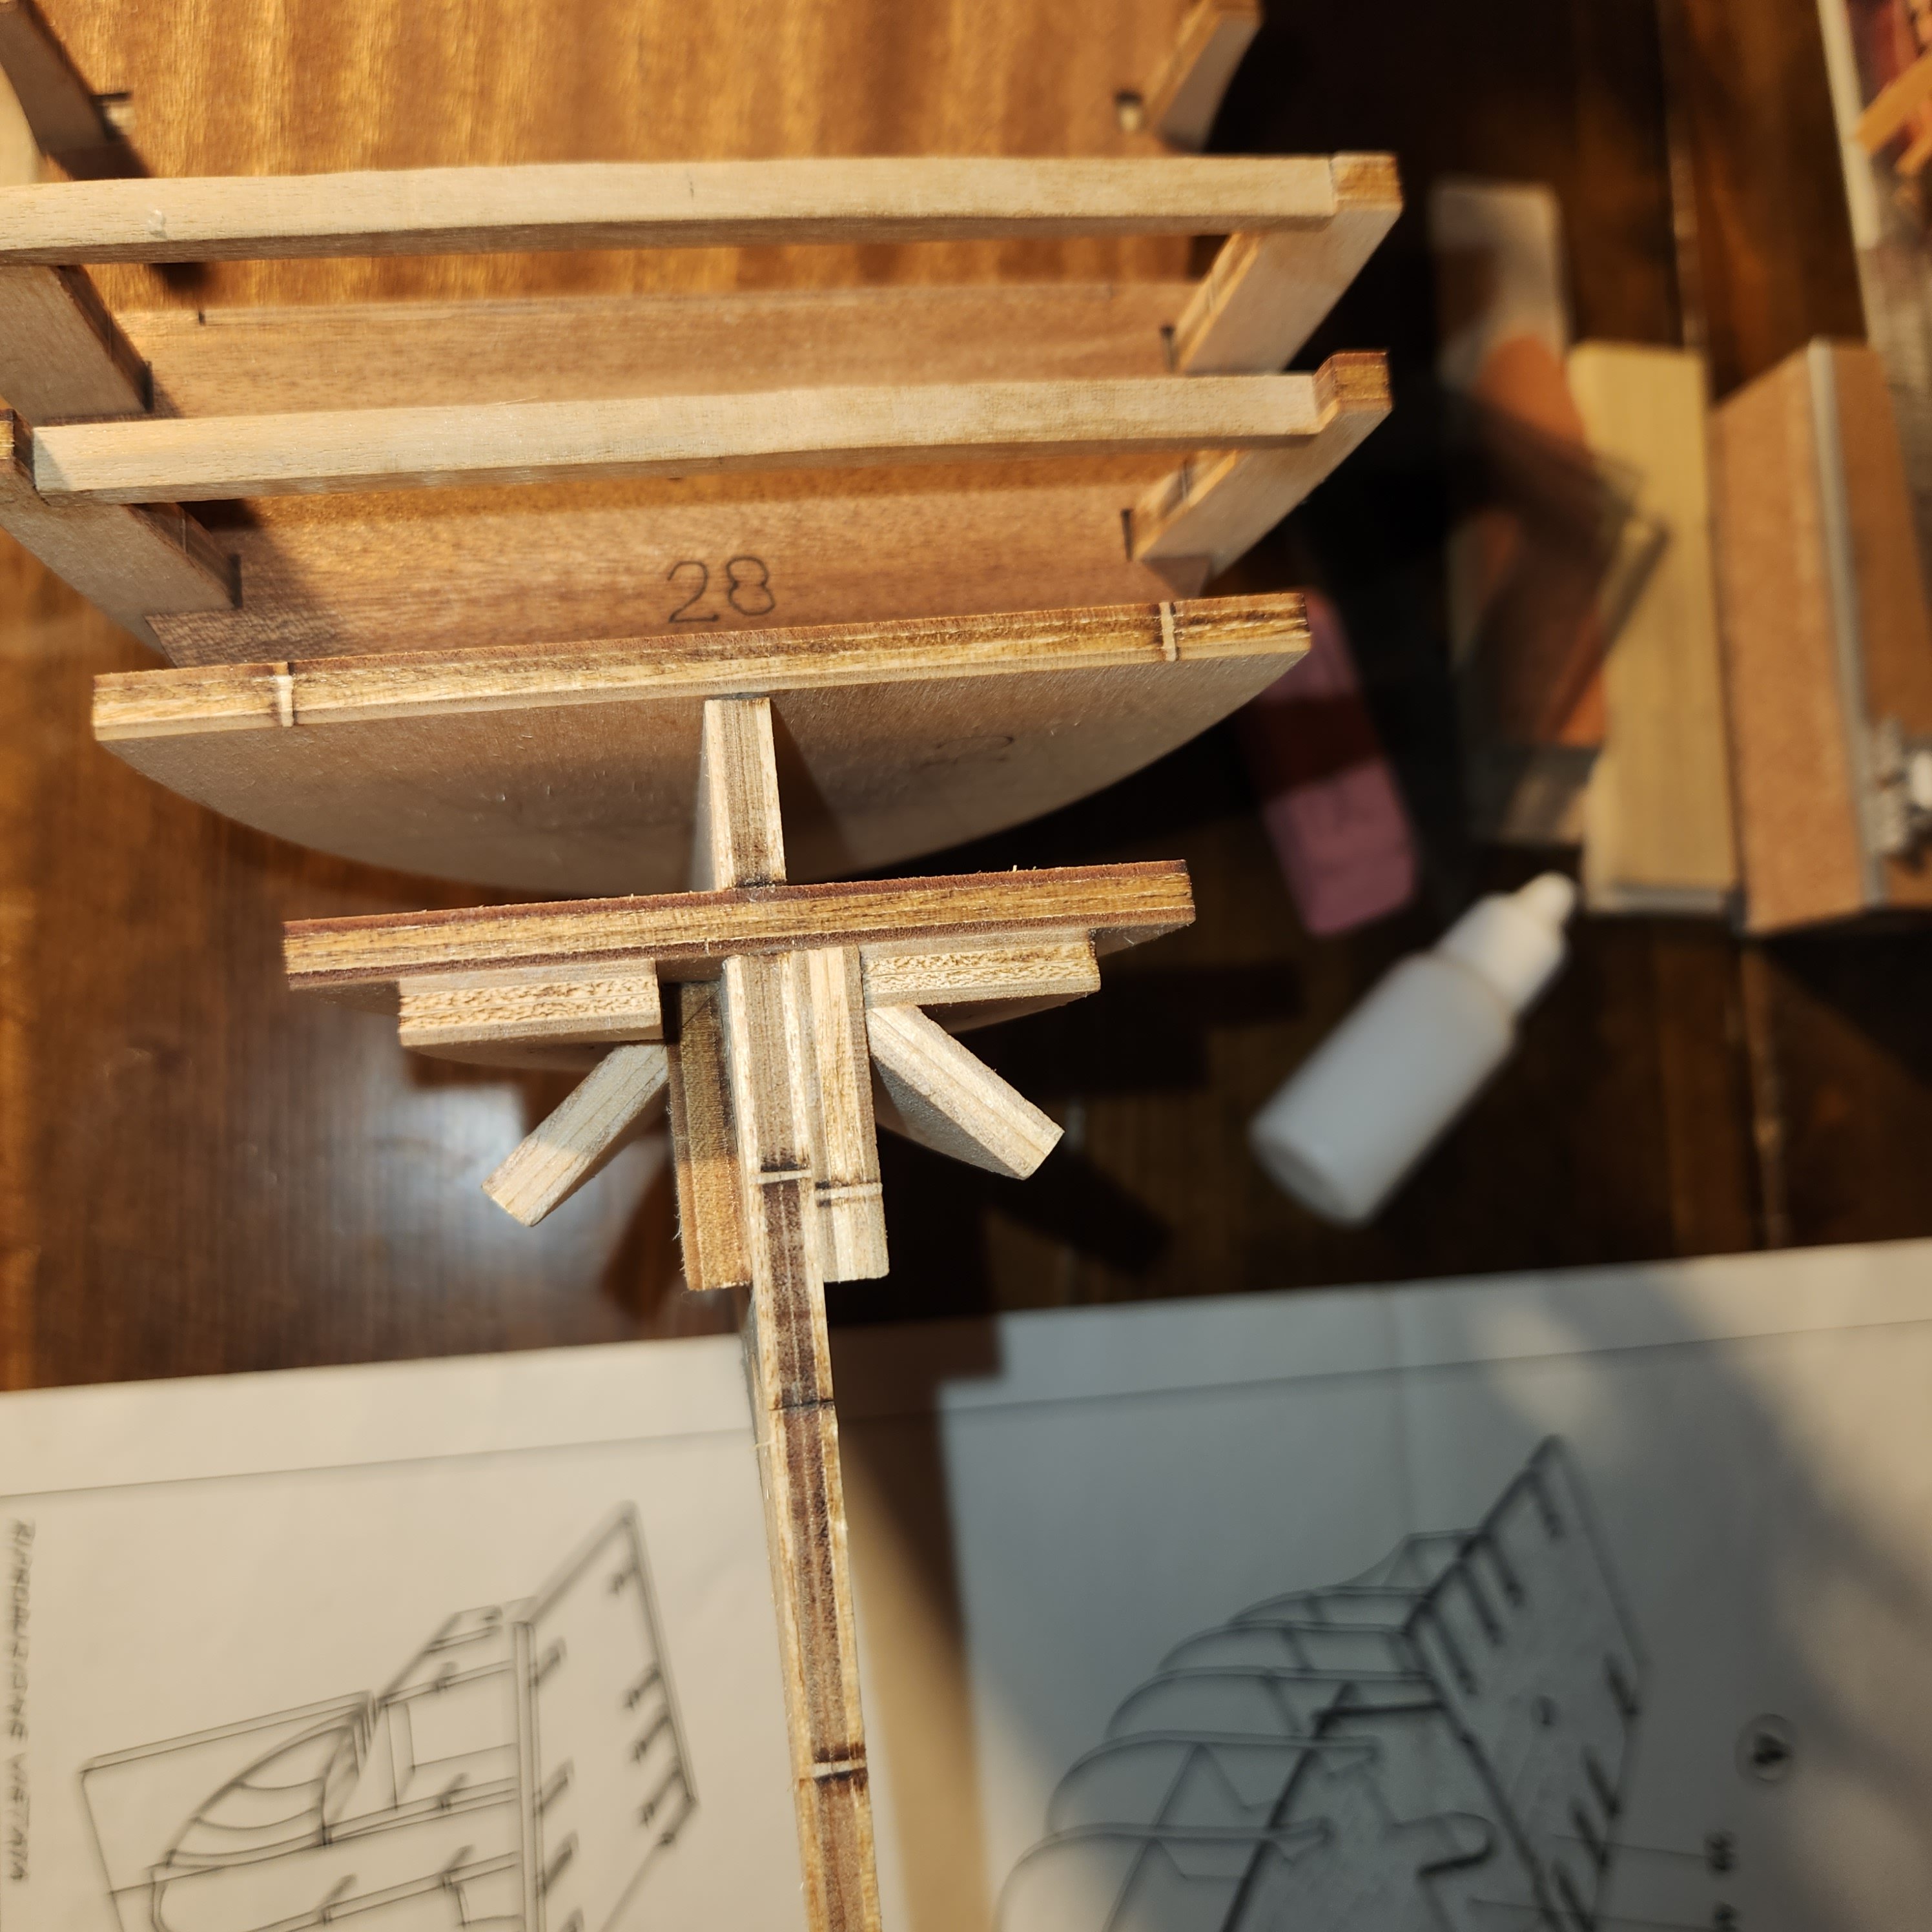
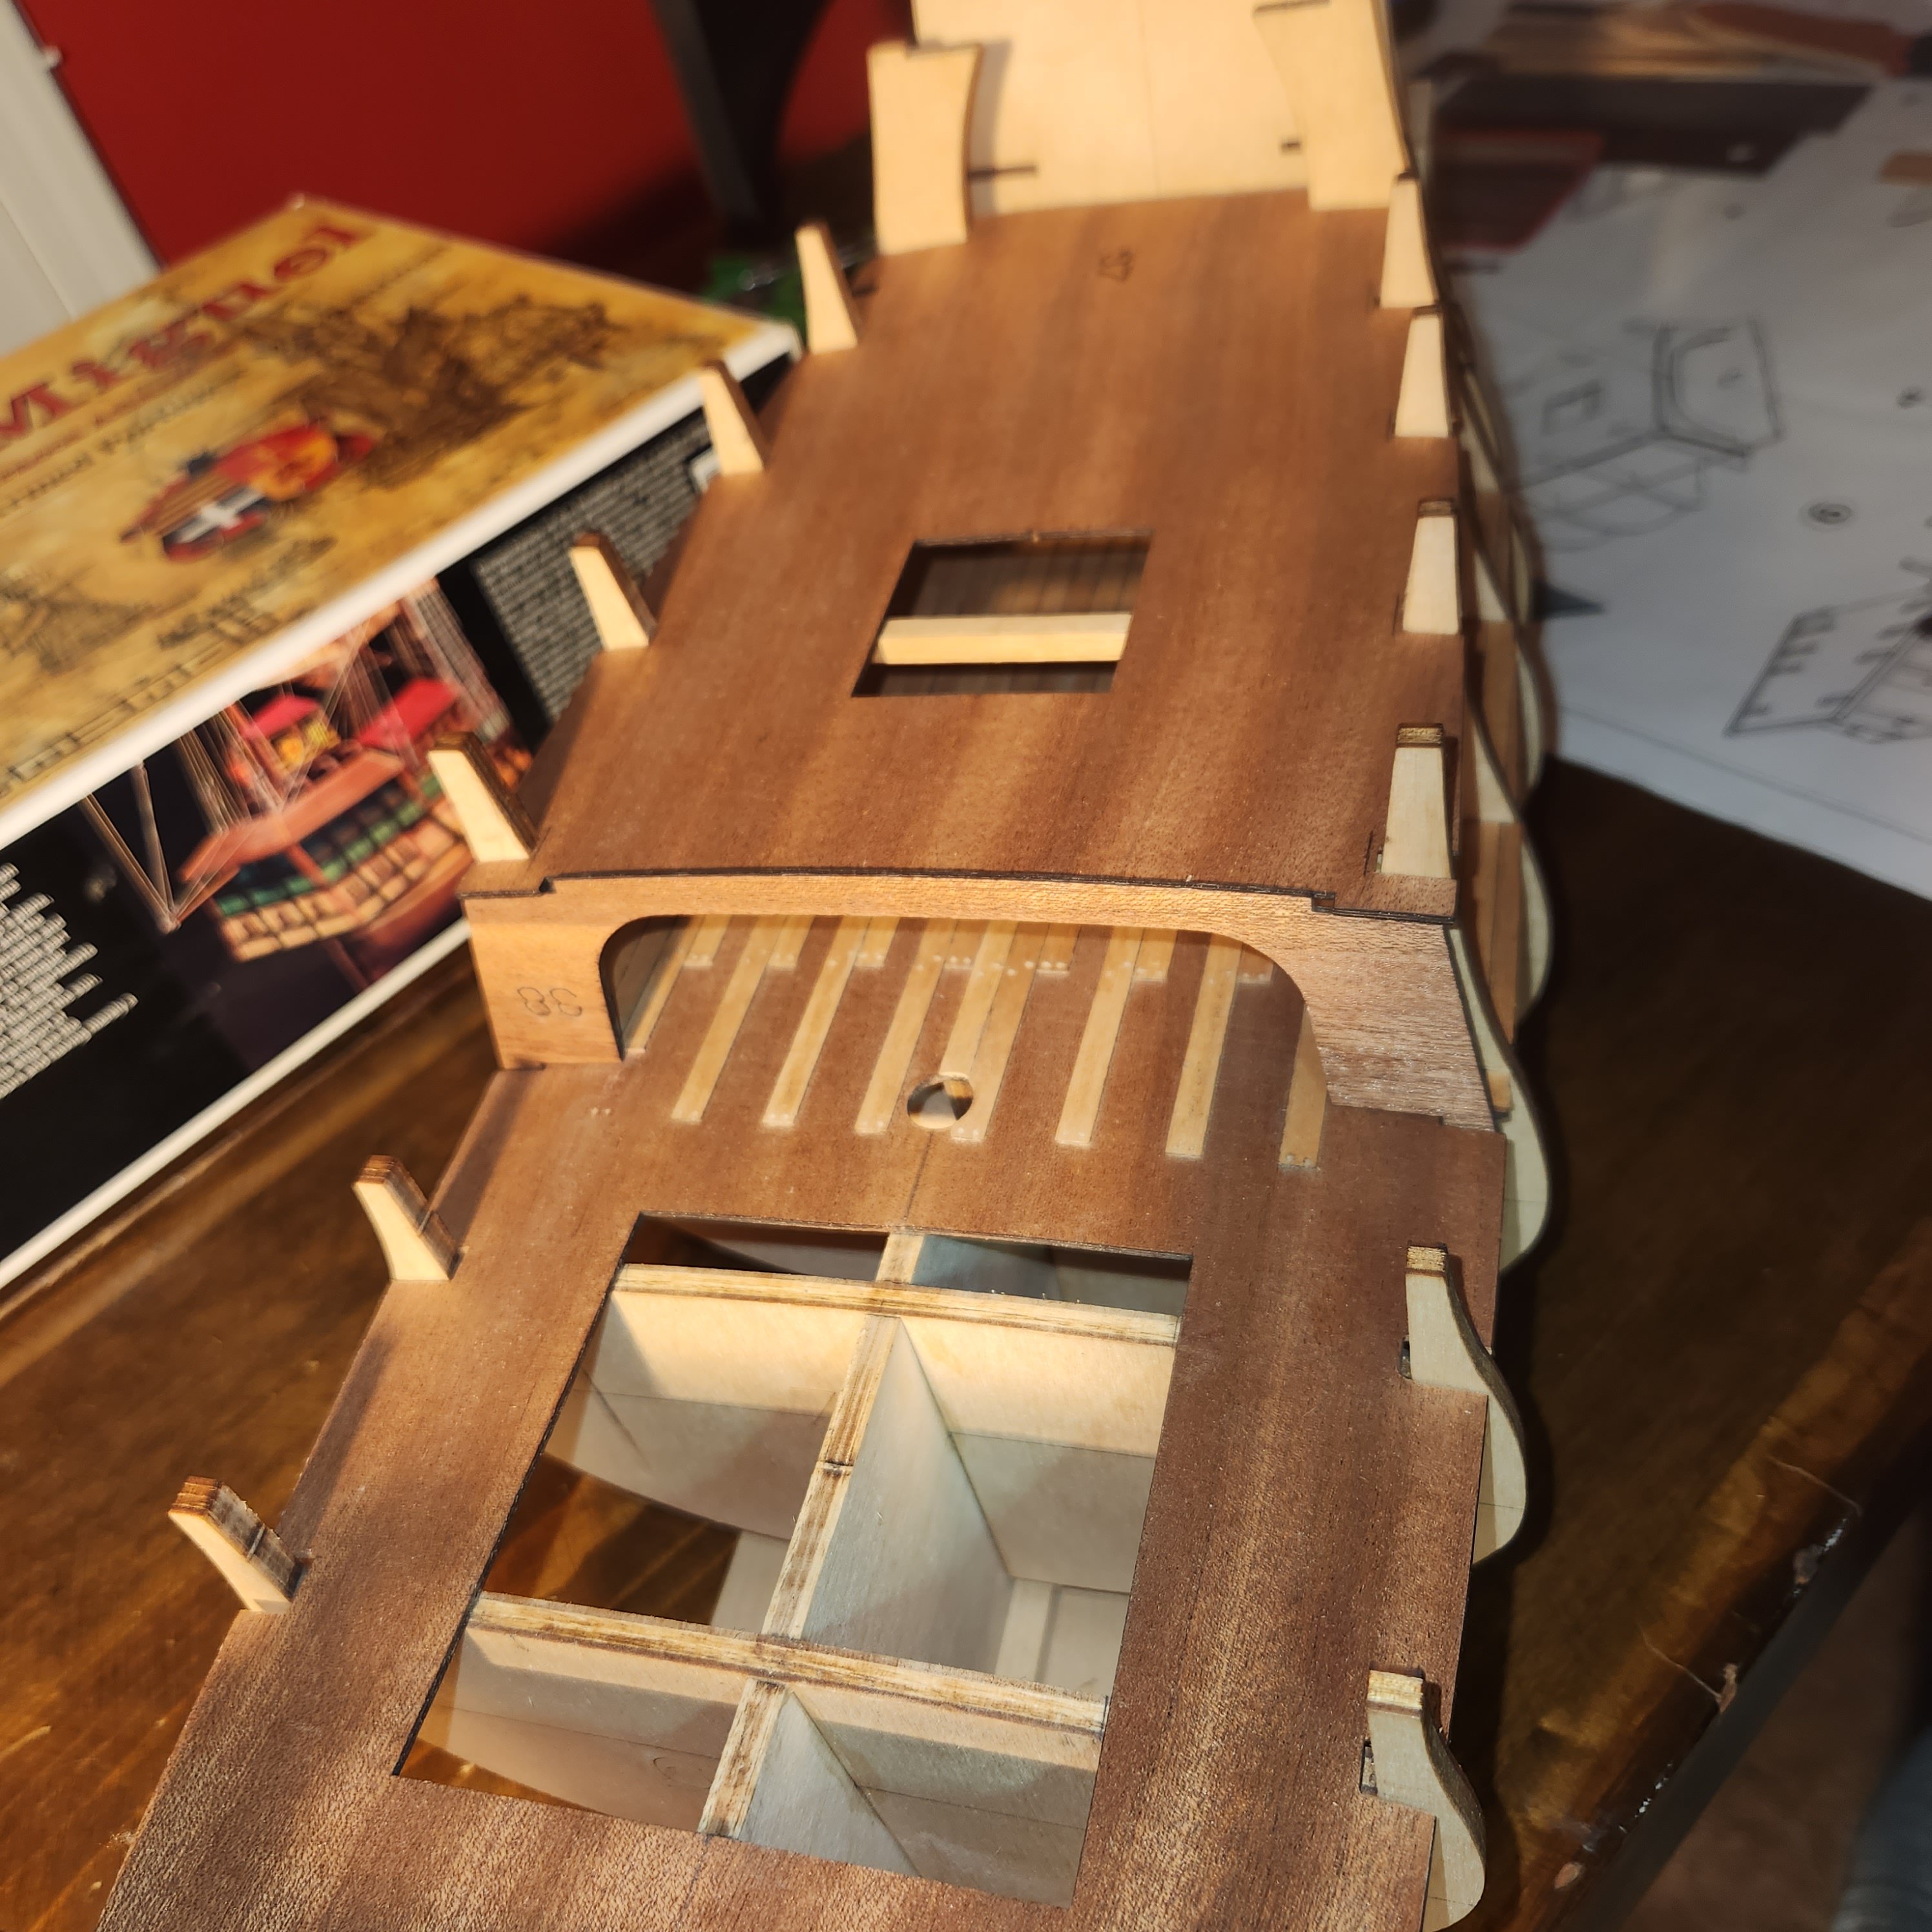
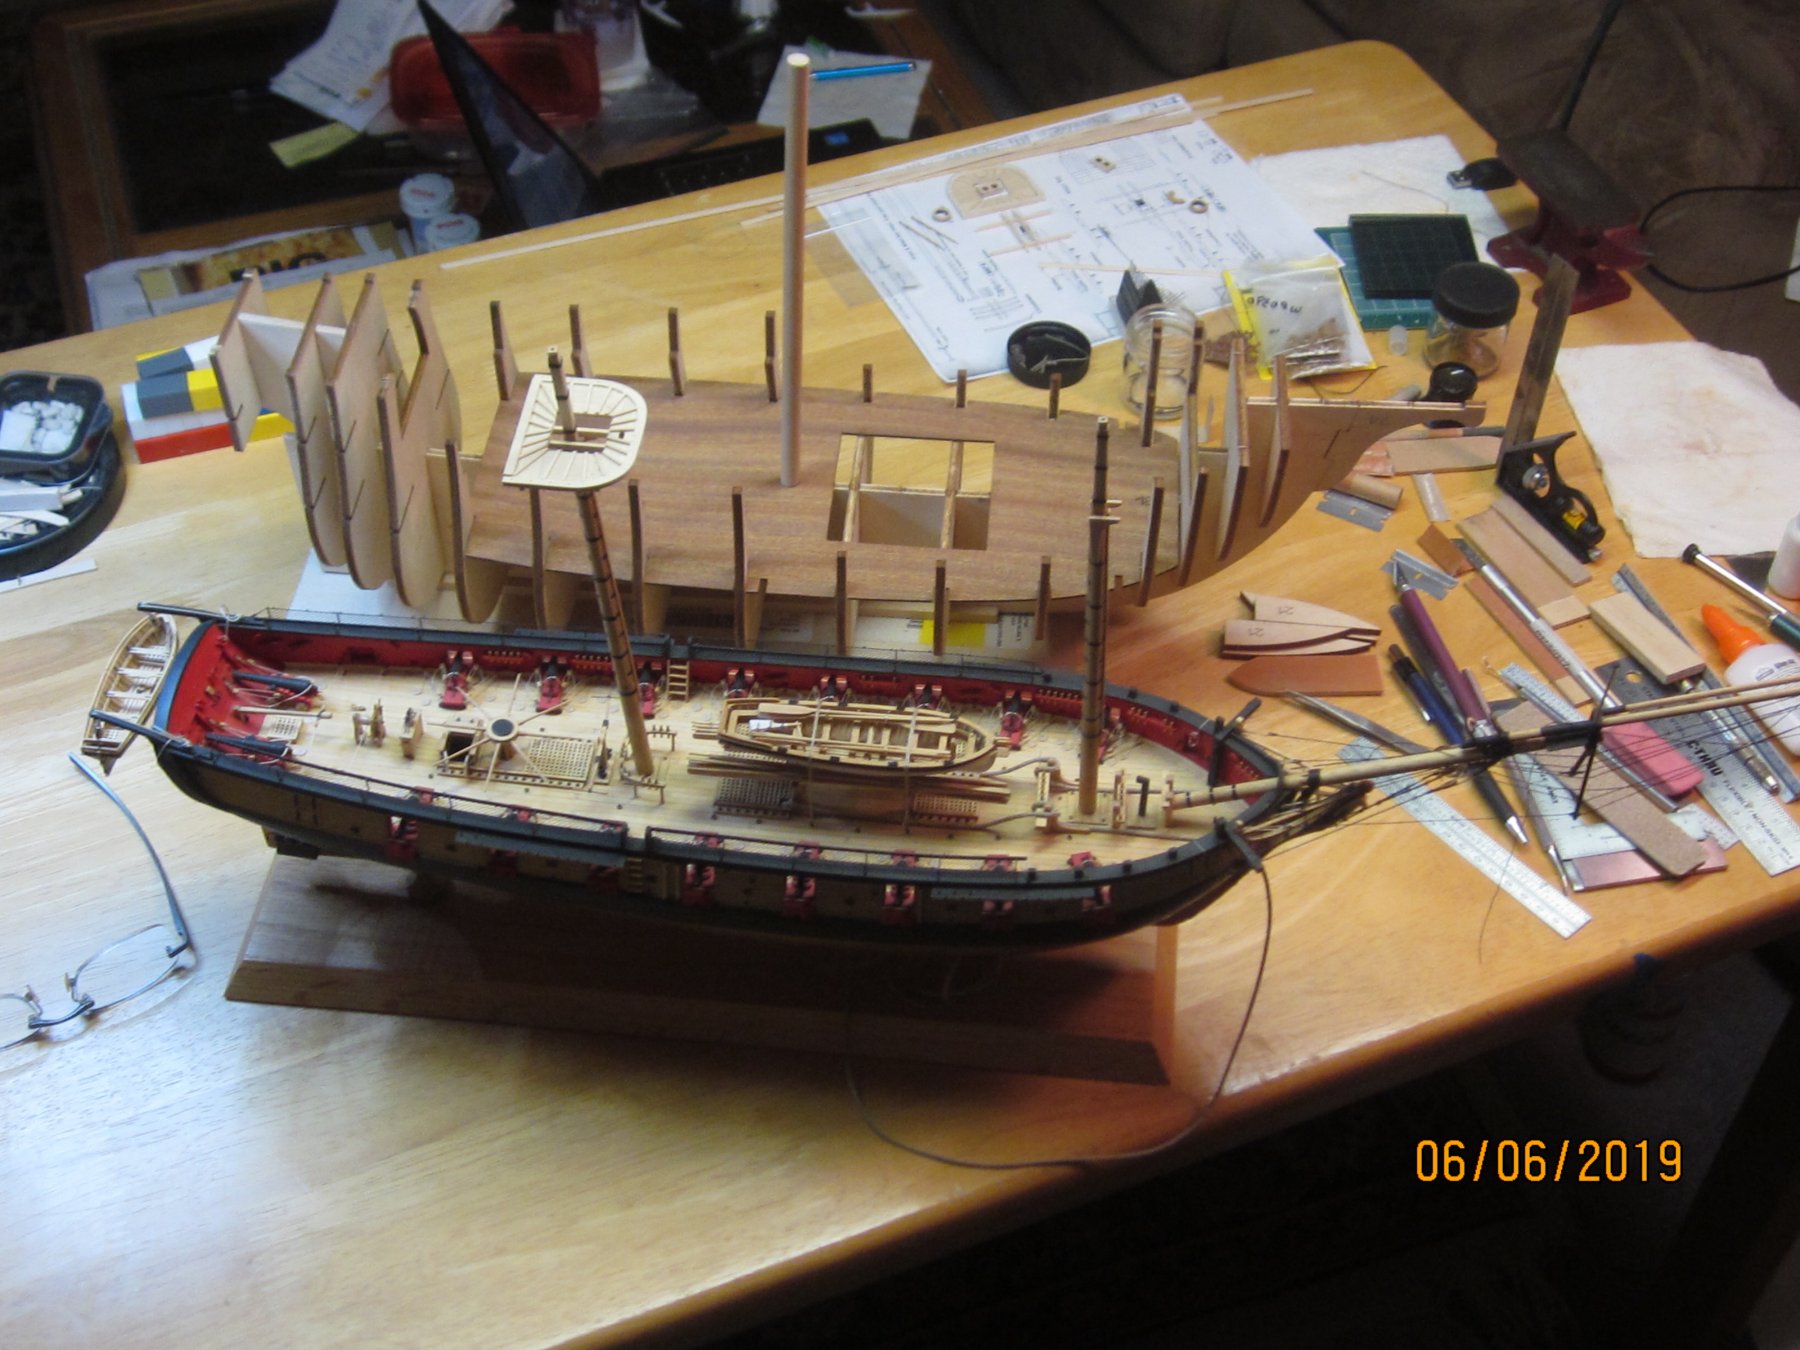
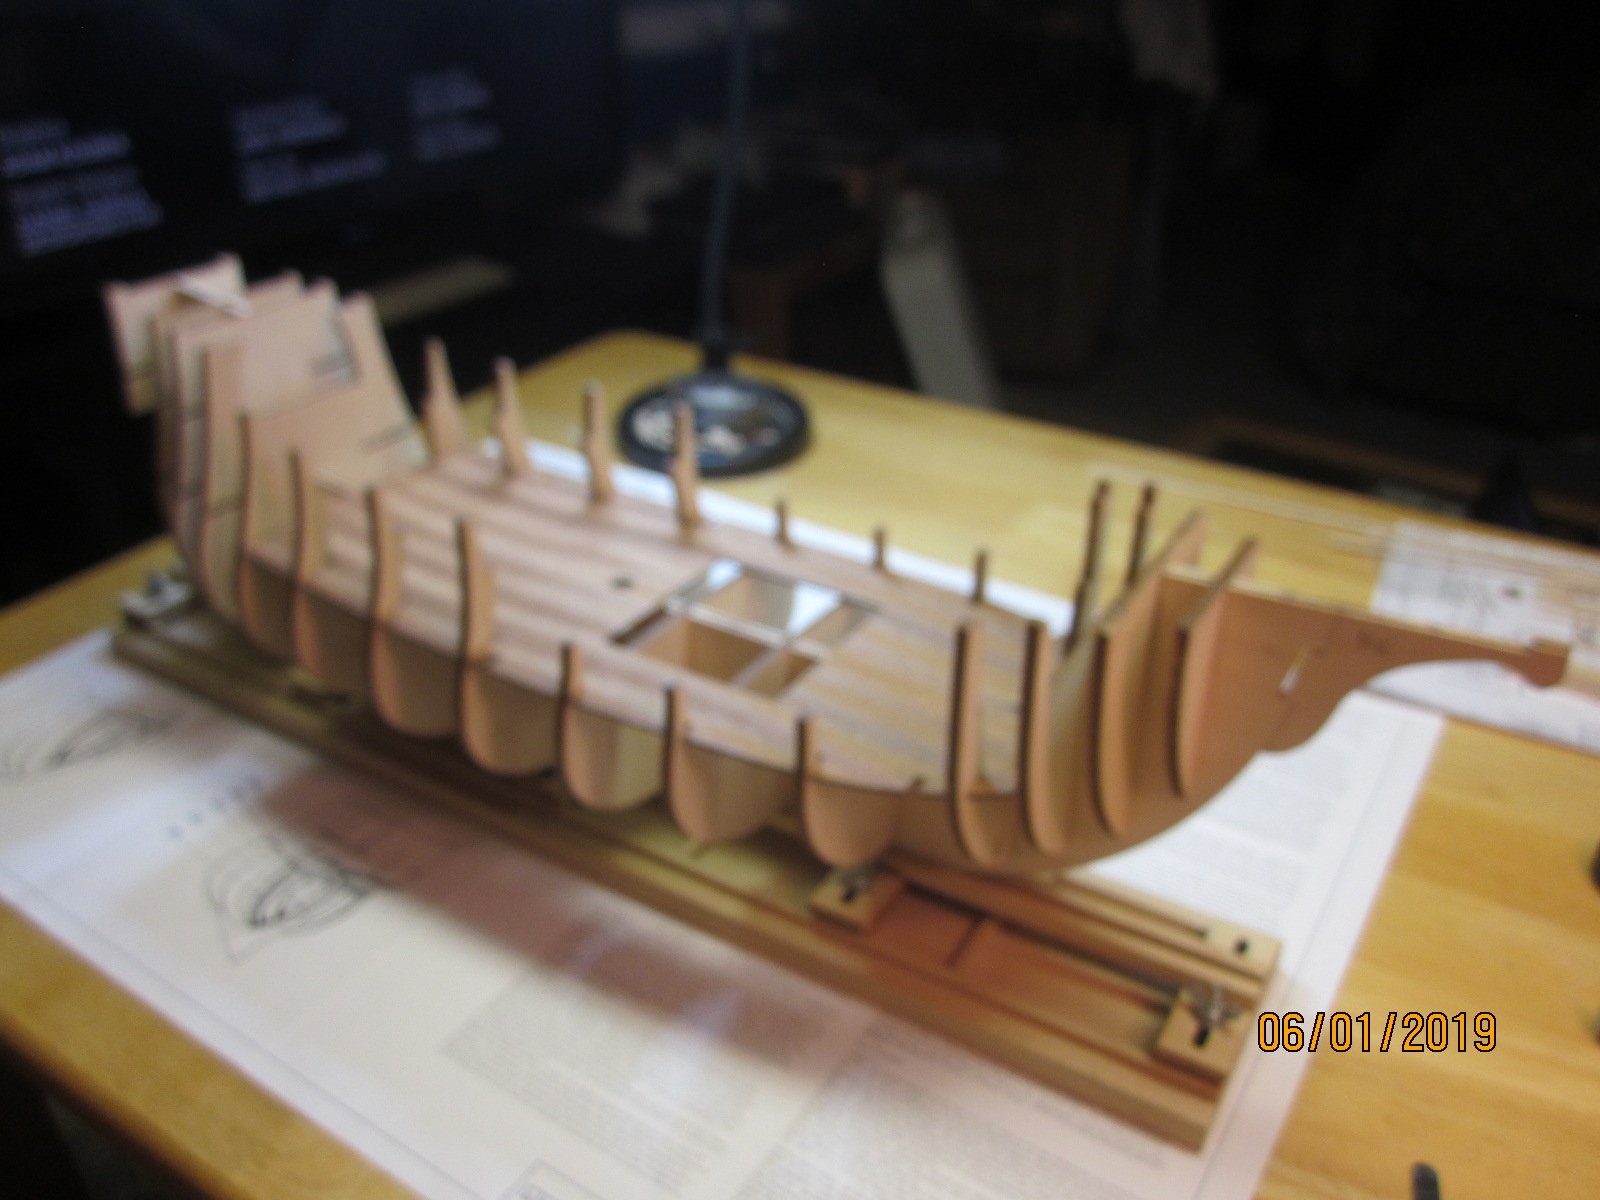
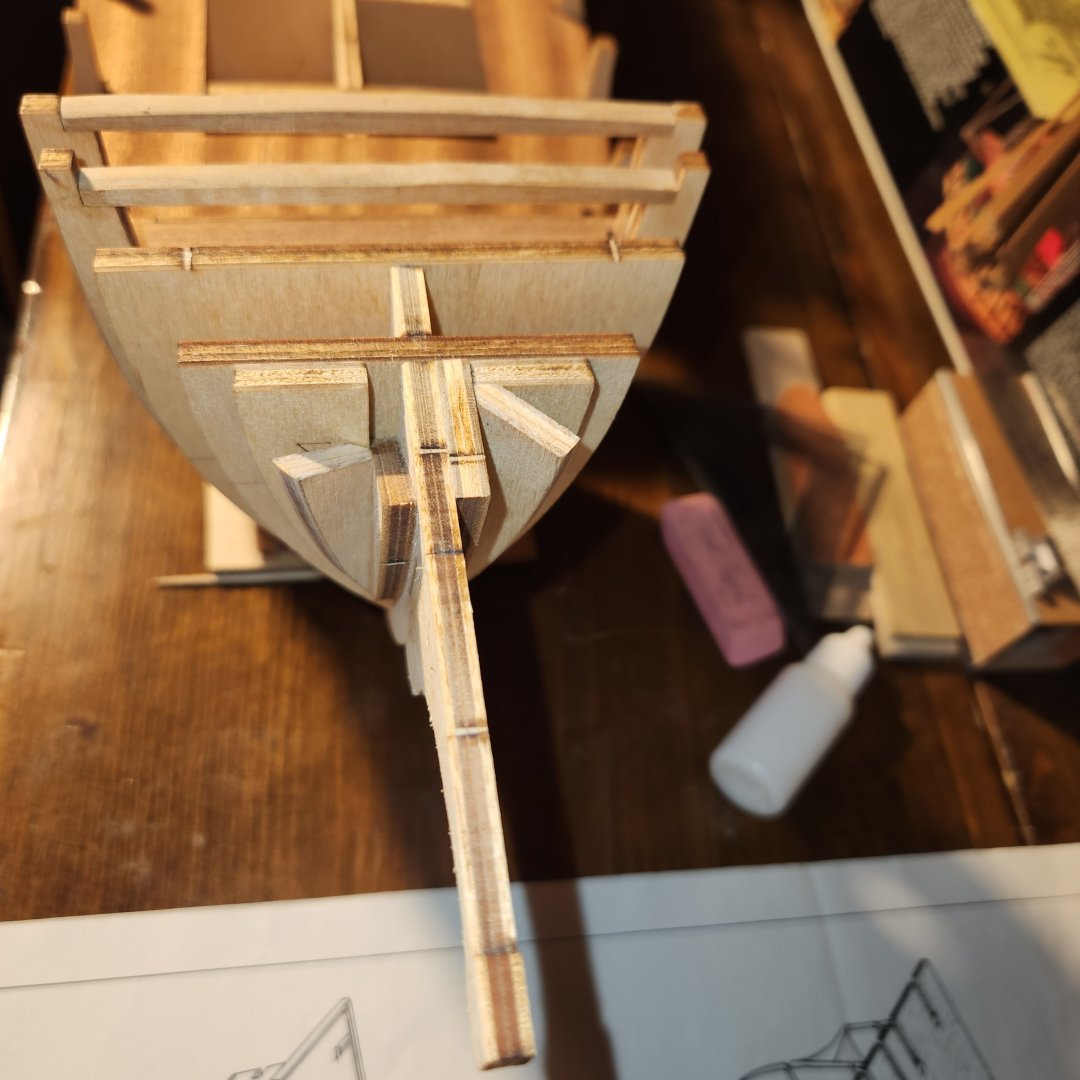
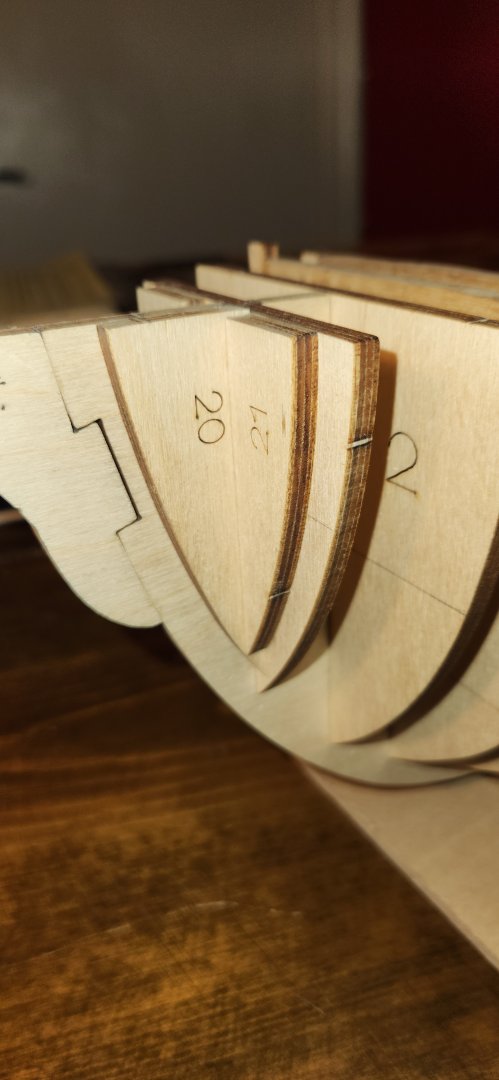
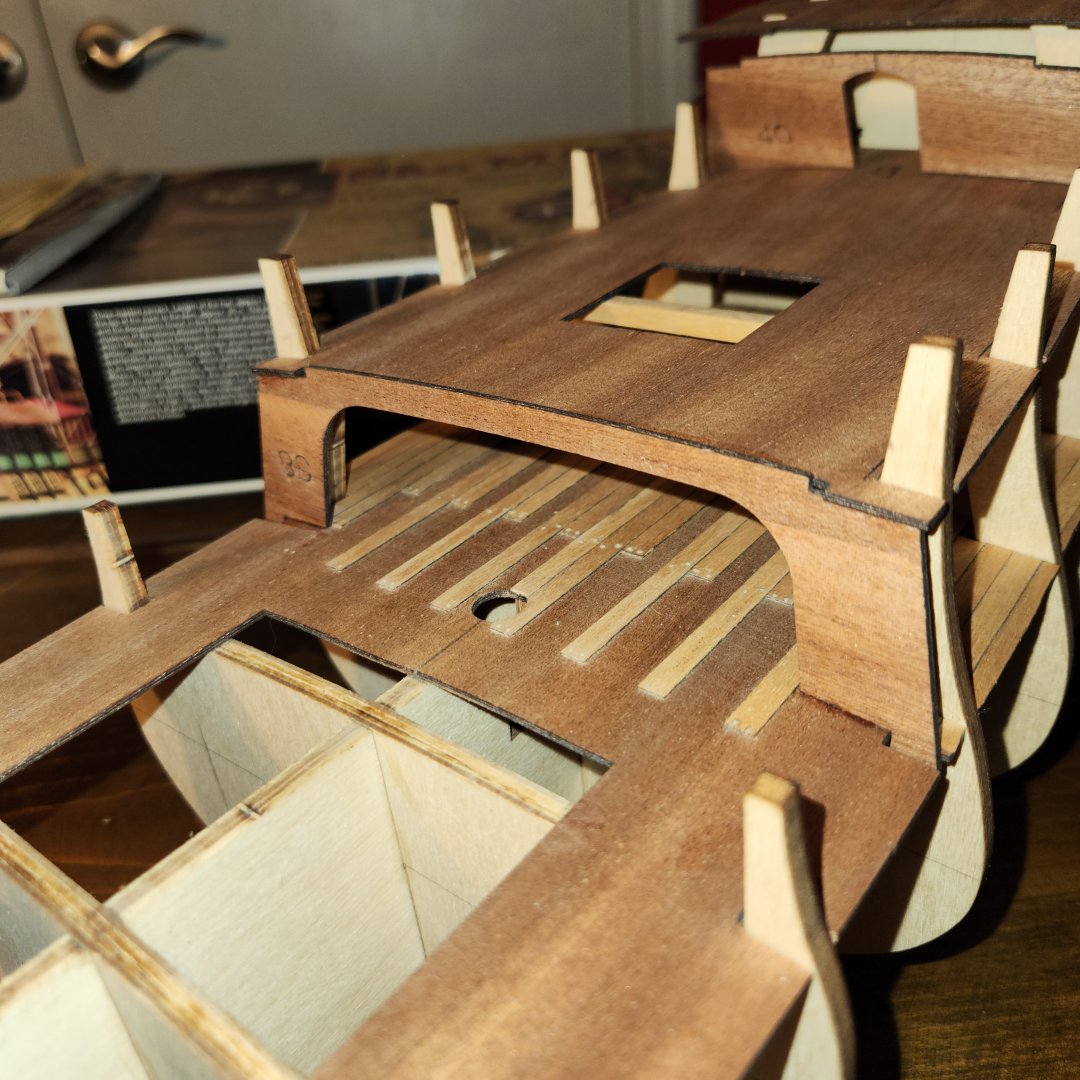
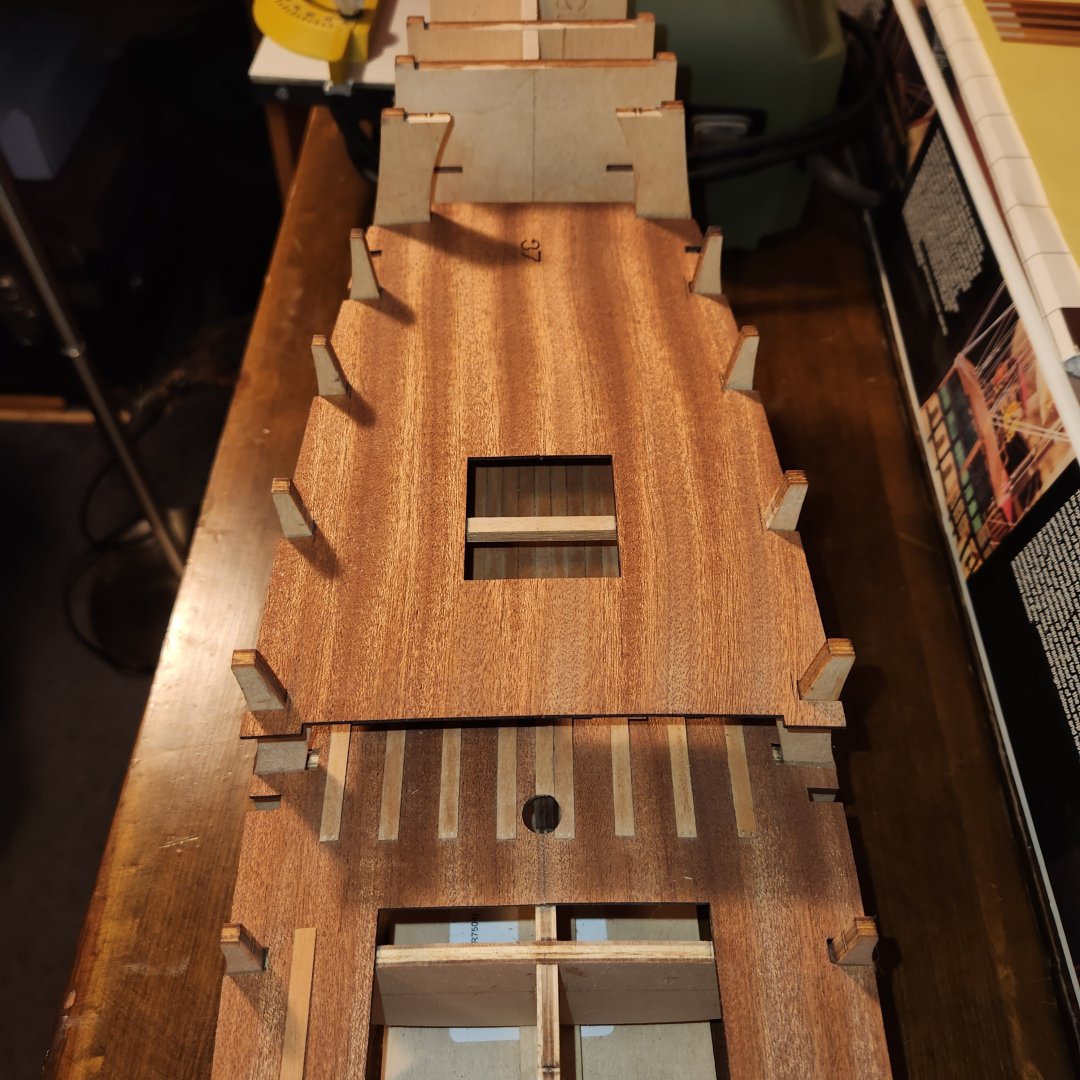
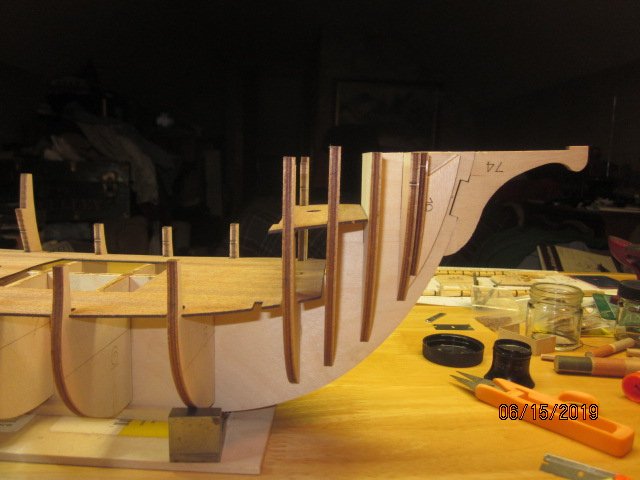
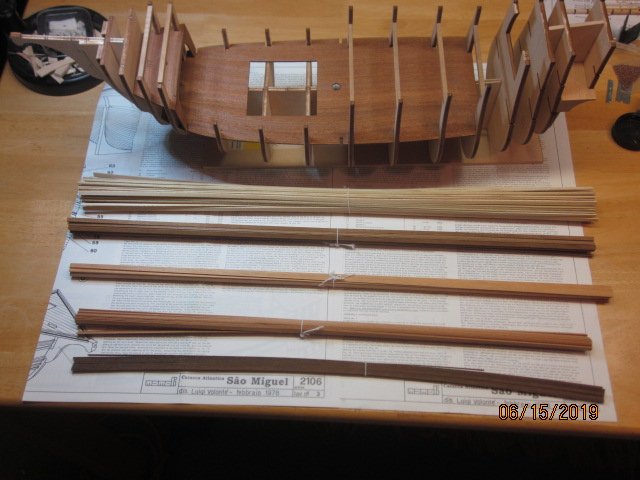
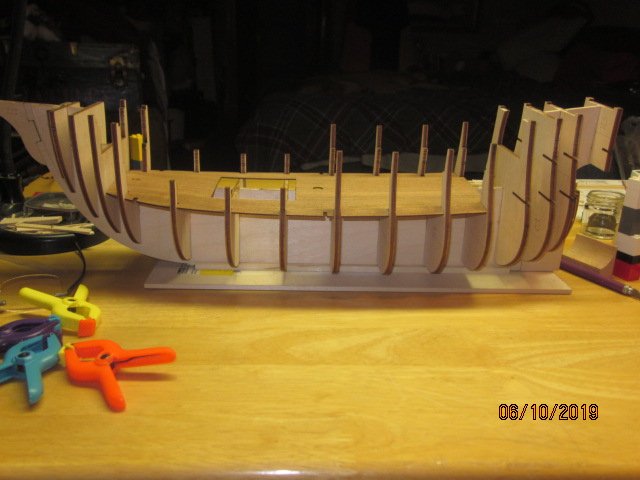
It's been a while since I've been able to progress on my ship. Work and life seem to get in my way, lol. Anyway, I made a couple of pieces to put in between parts #20 & #21. I traced around the open slots that held those parts and cut them down to a reasonable size to fit. It should help, at least I hope, with the fairing which will come soon. As I've read thru the instructions I found where the deck is to be planked once I have the inner and outer planks installed. I'm thinking about constructing the grates that go on the main and half decks, installing them then planking the center portions of the decks. I don't believe it will screw up anything and make the planking go smoother. While I was reading thru the instructions to find out when the decks were to be planked, I read that the prow wasn't supposed to be installed until after the hull planking. Looks like I will have to work around that mistake.


-
GrandpaPhil reacted to a post in a topic:
Sao Miguel by kscadman - Mamoli - 1:54 scale
-
GrandpaPhil reacted to a post in a topic:
Sao Miguel by kscadman - Mamoli - 1:54 scale
-
GrandpaPhil reacted to a post in a topic:
Sao Miguel by kscadman - Mamoli - 1:54 scale
-
GrandpaPhil reacted to a post in a topic:
Sao Miguel by kscadman - Mamoli - 1:54 scale
-
GrandpaPhil reacted to a post in a topic:
Sao Miguel by kscadman - Mamoli - 1:54 scale
-
GrandpaPhil reacted to a post in a topic:
Sao Miguel by kscadman - Mamoli - 1:54 scale
-
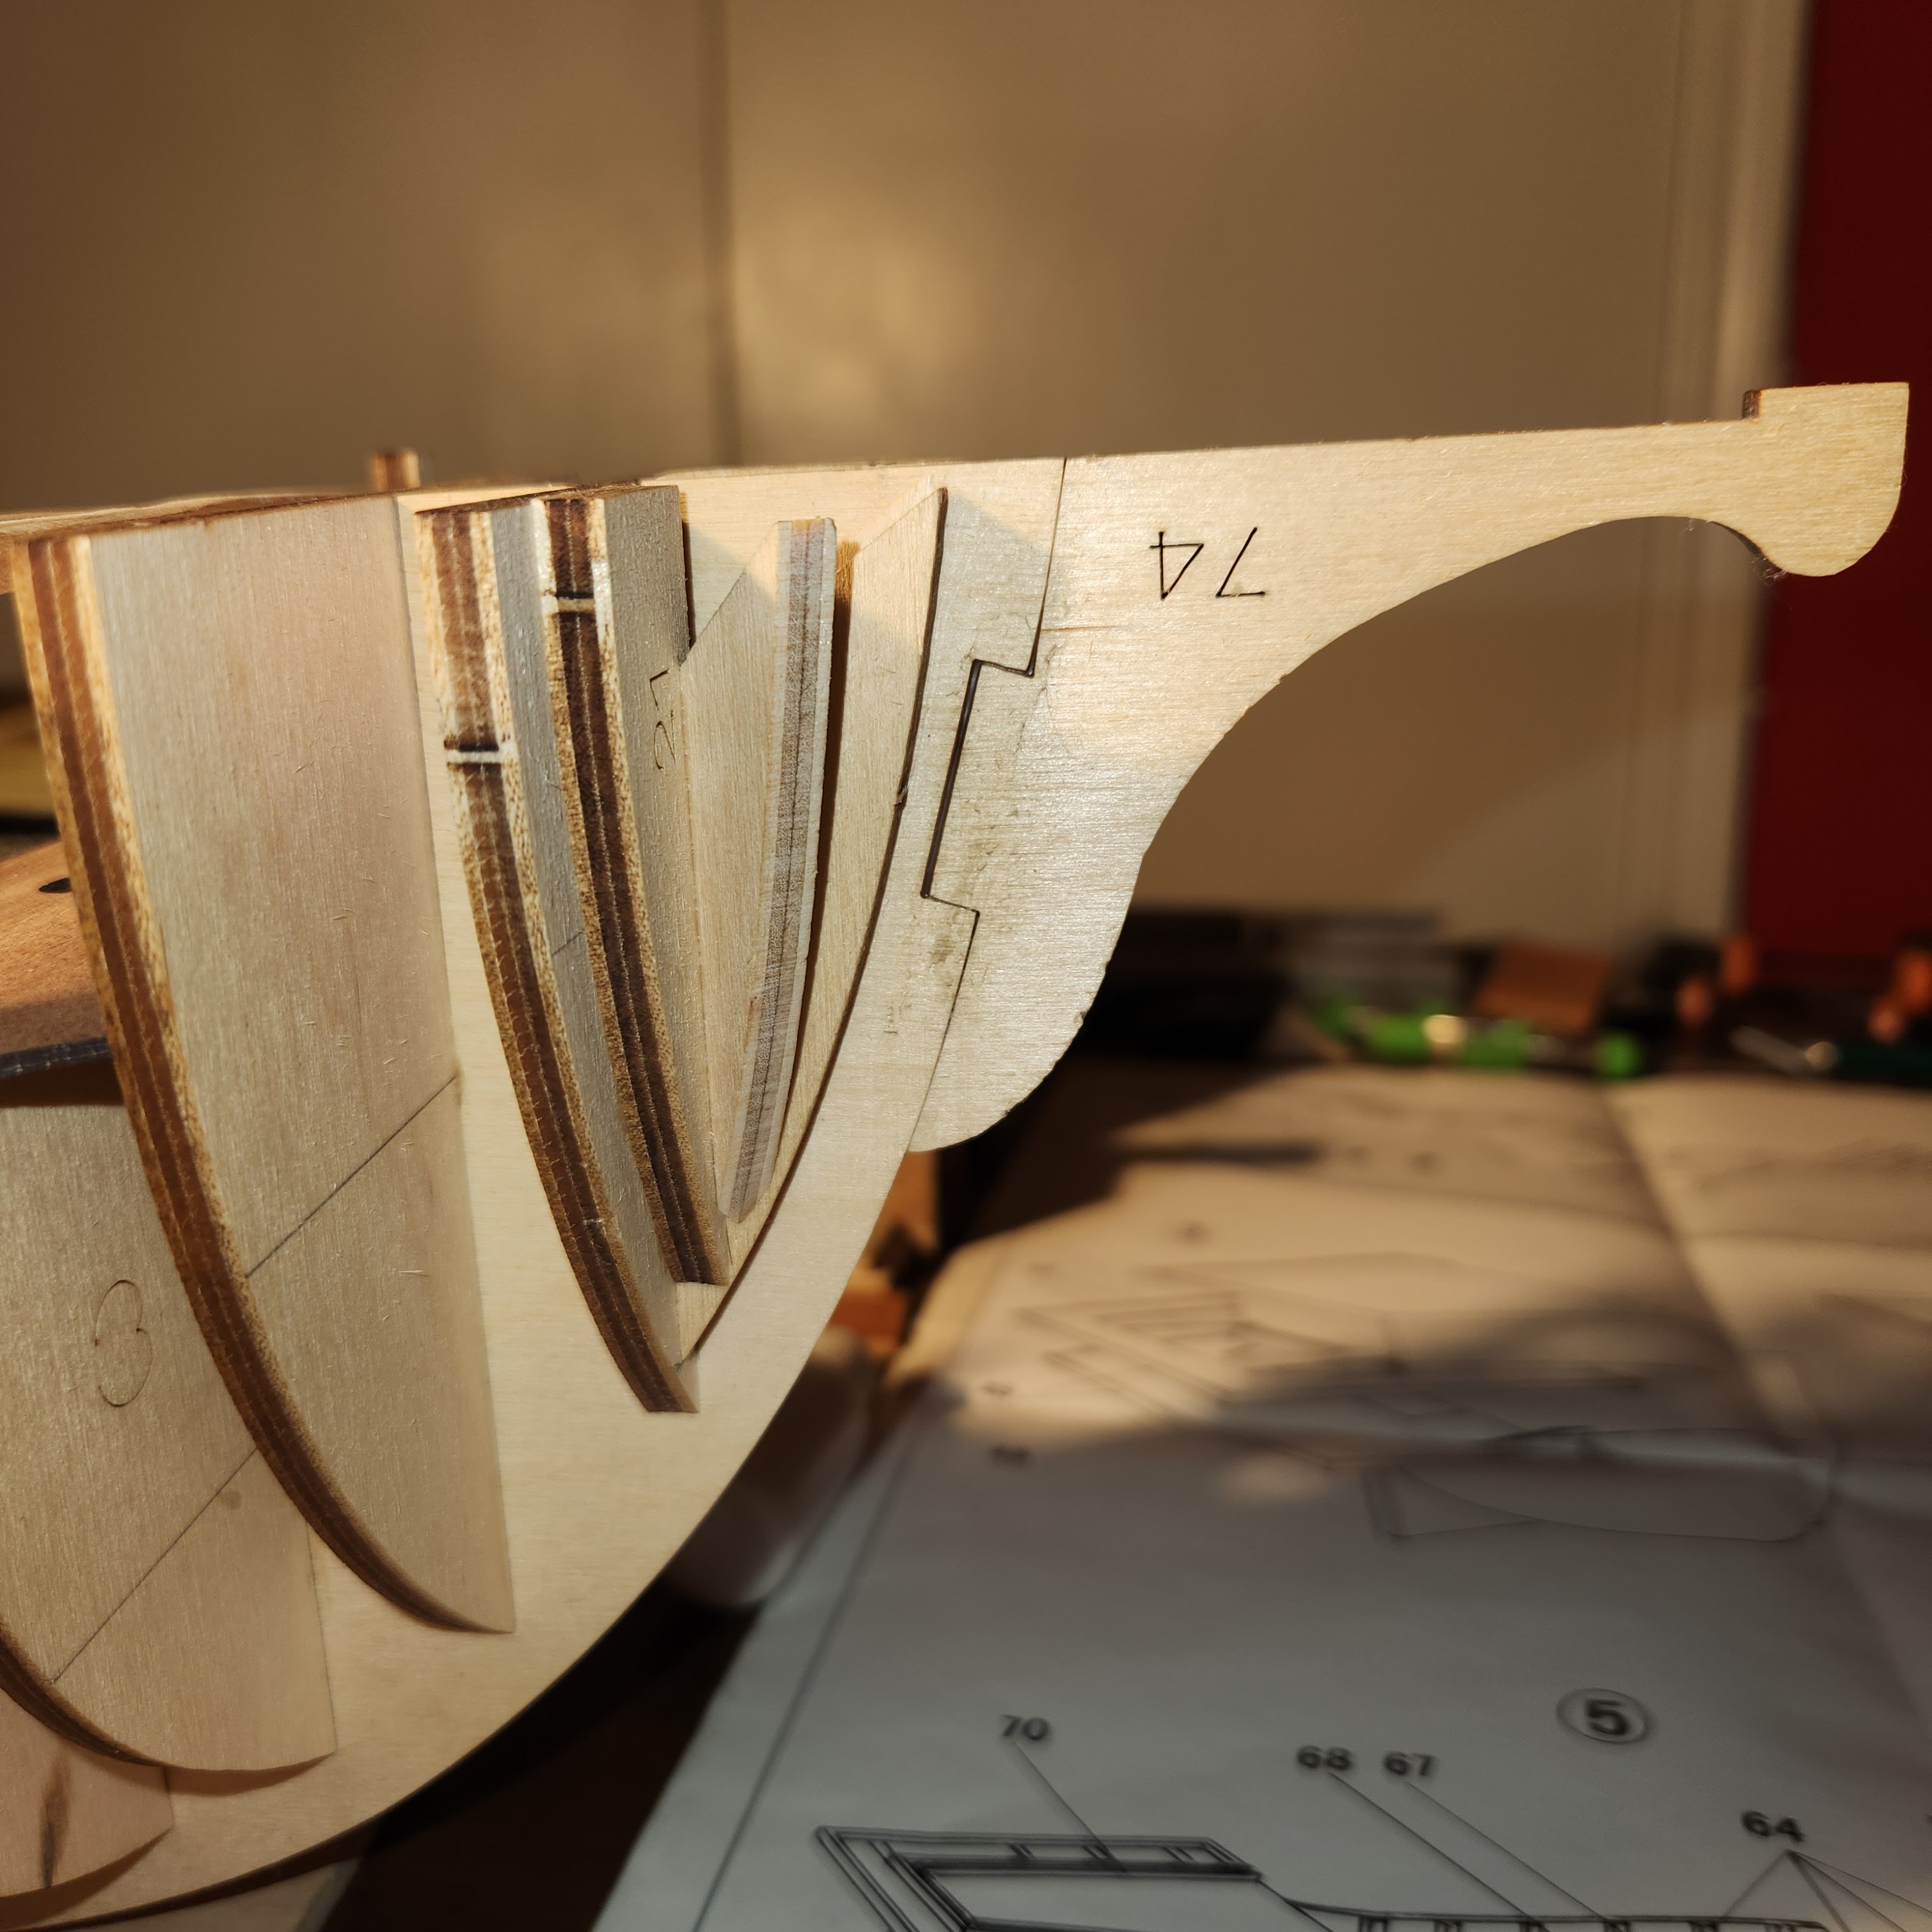
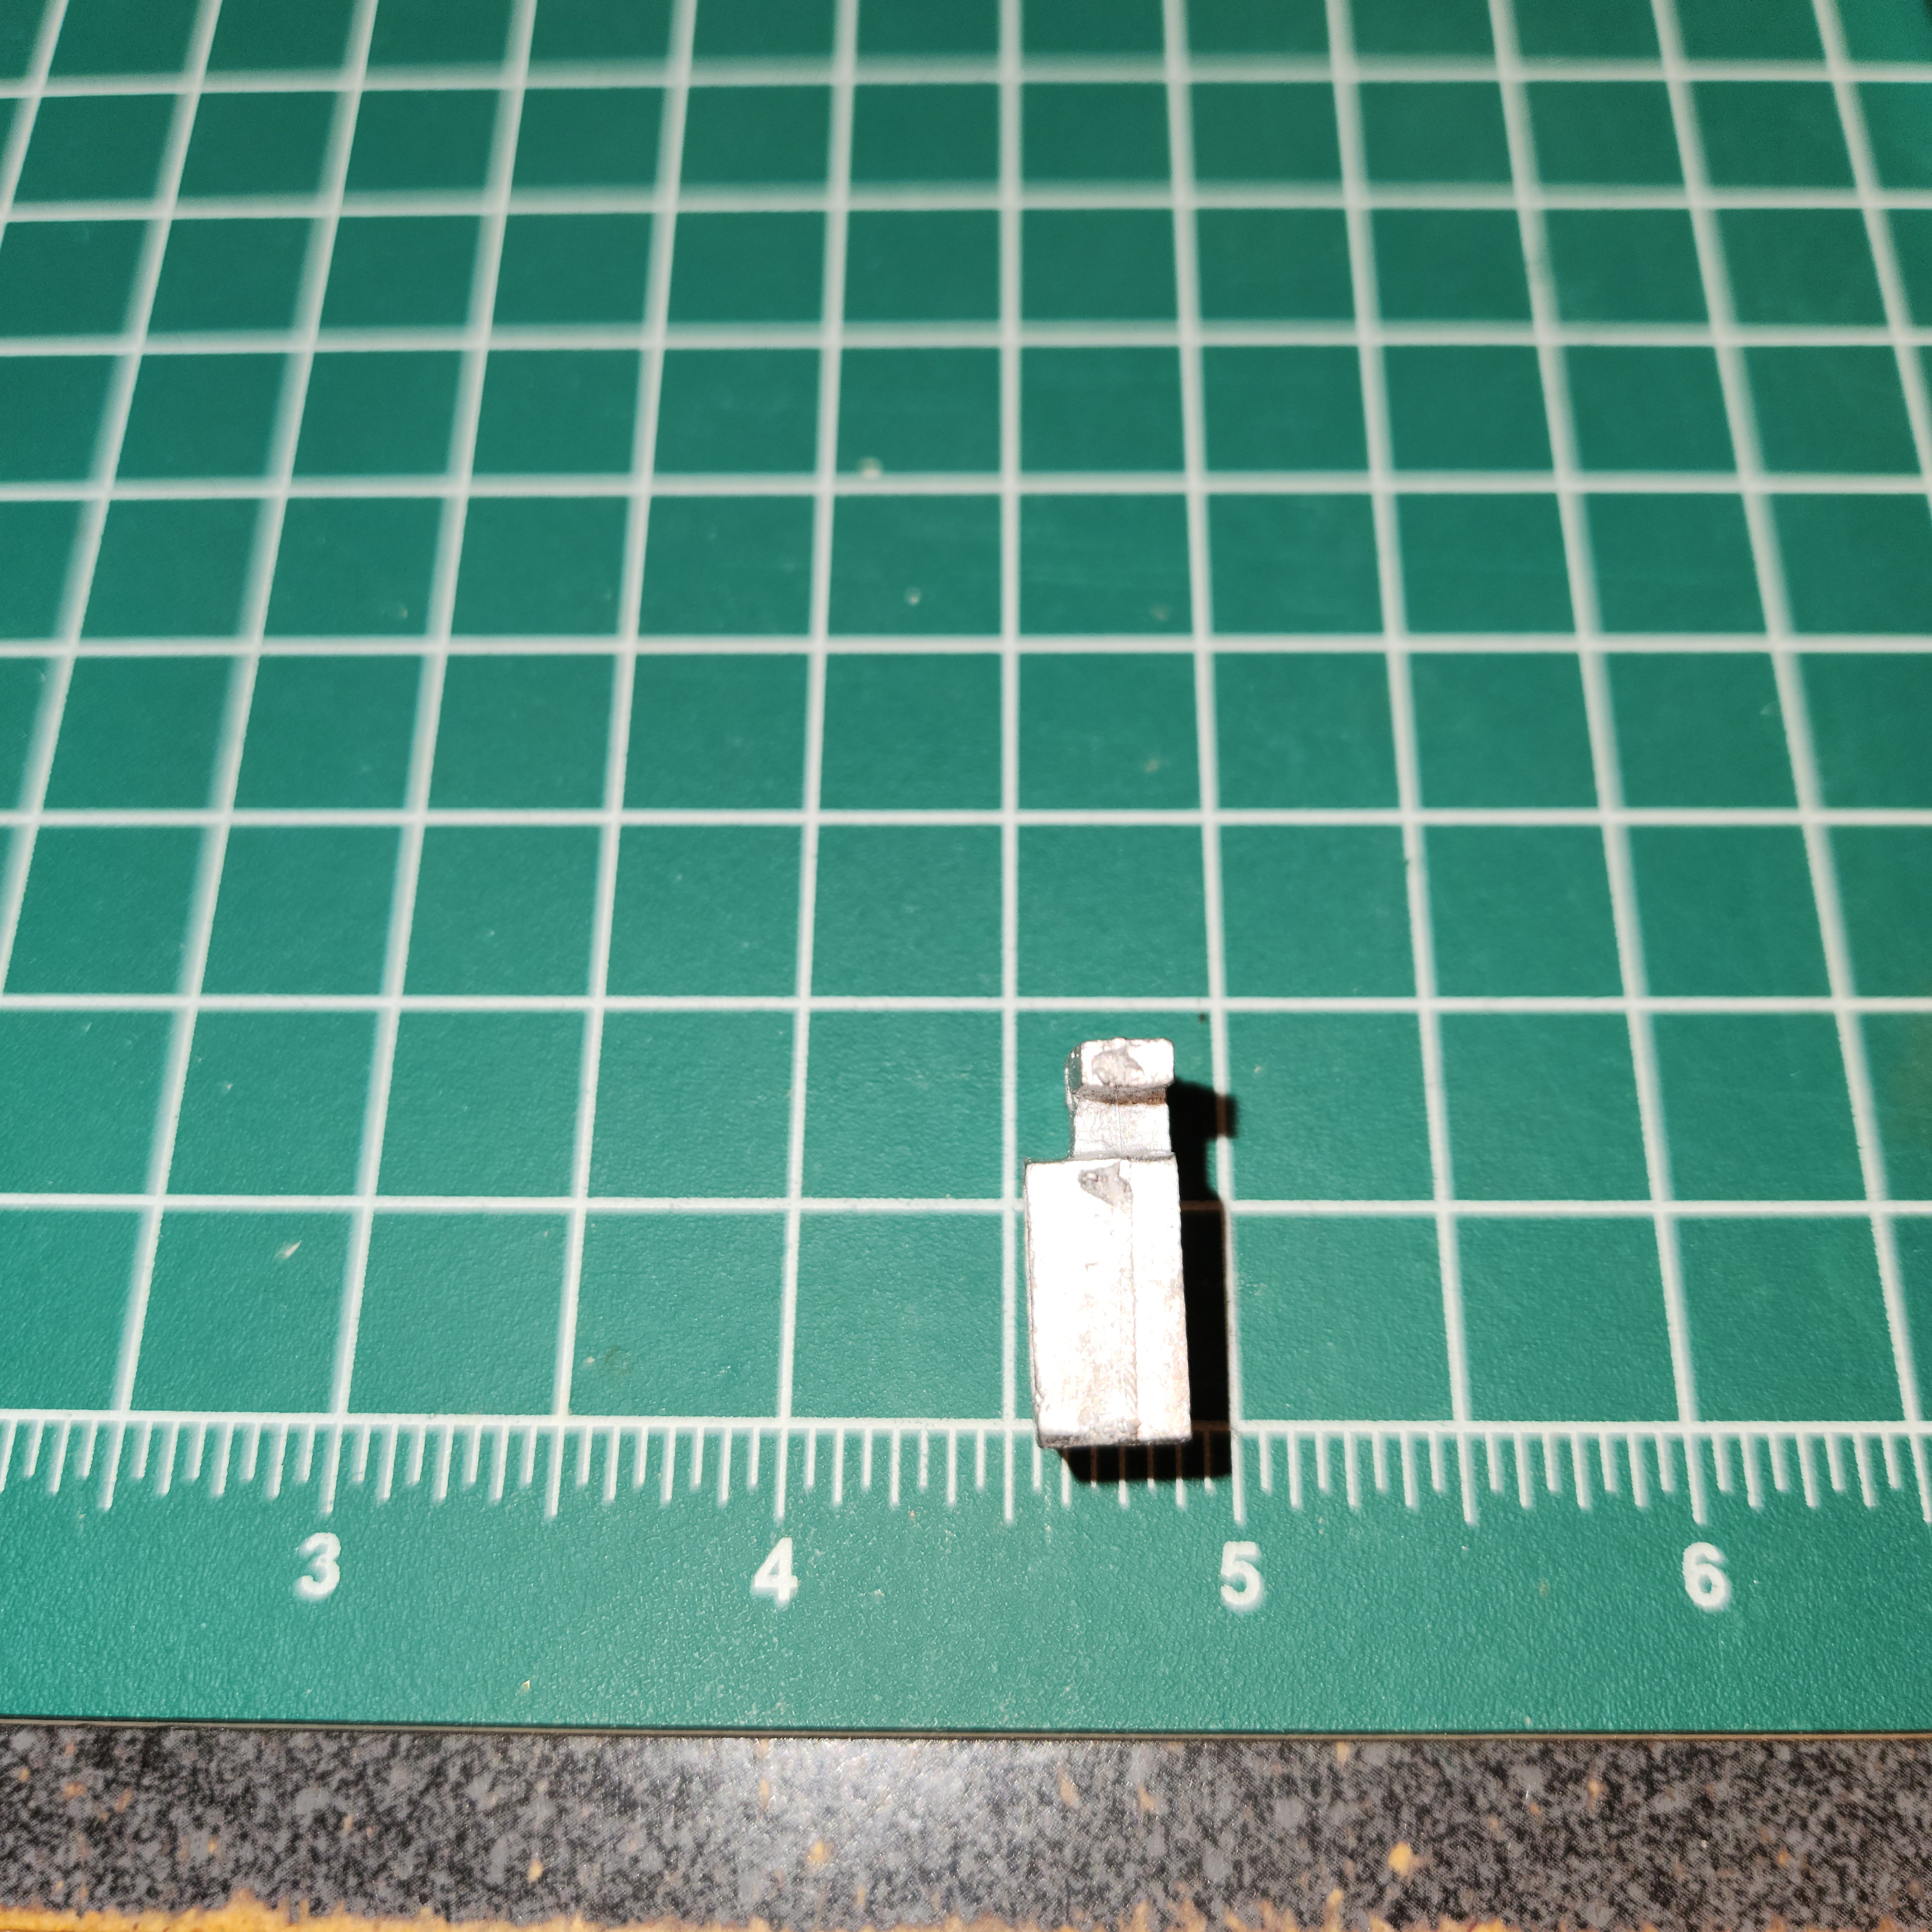
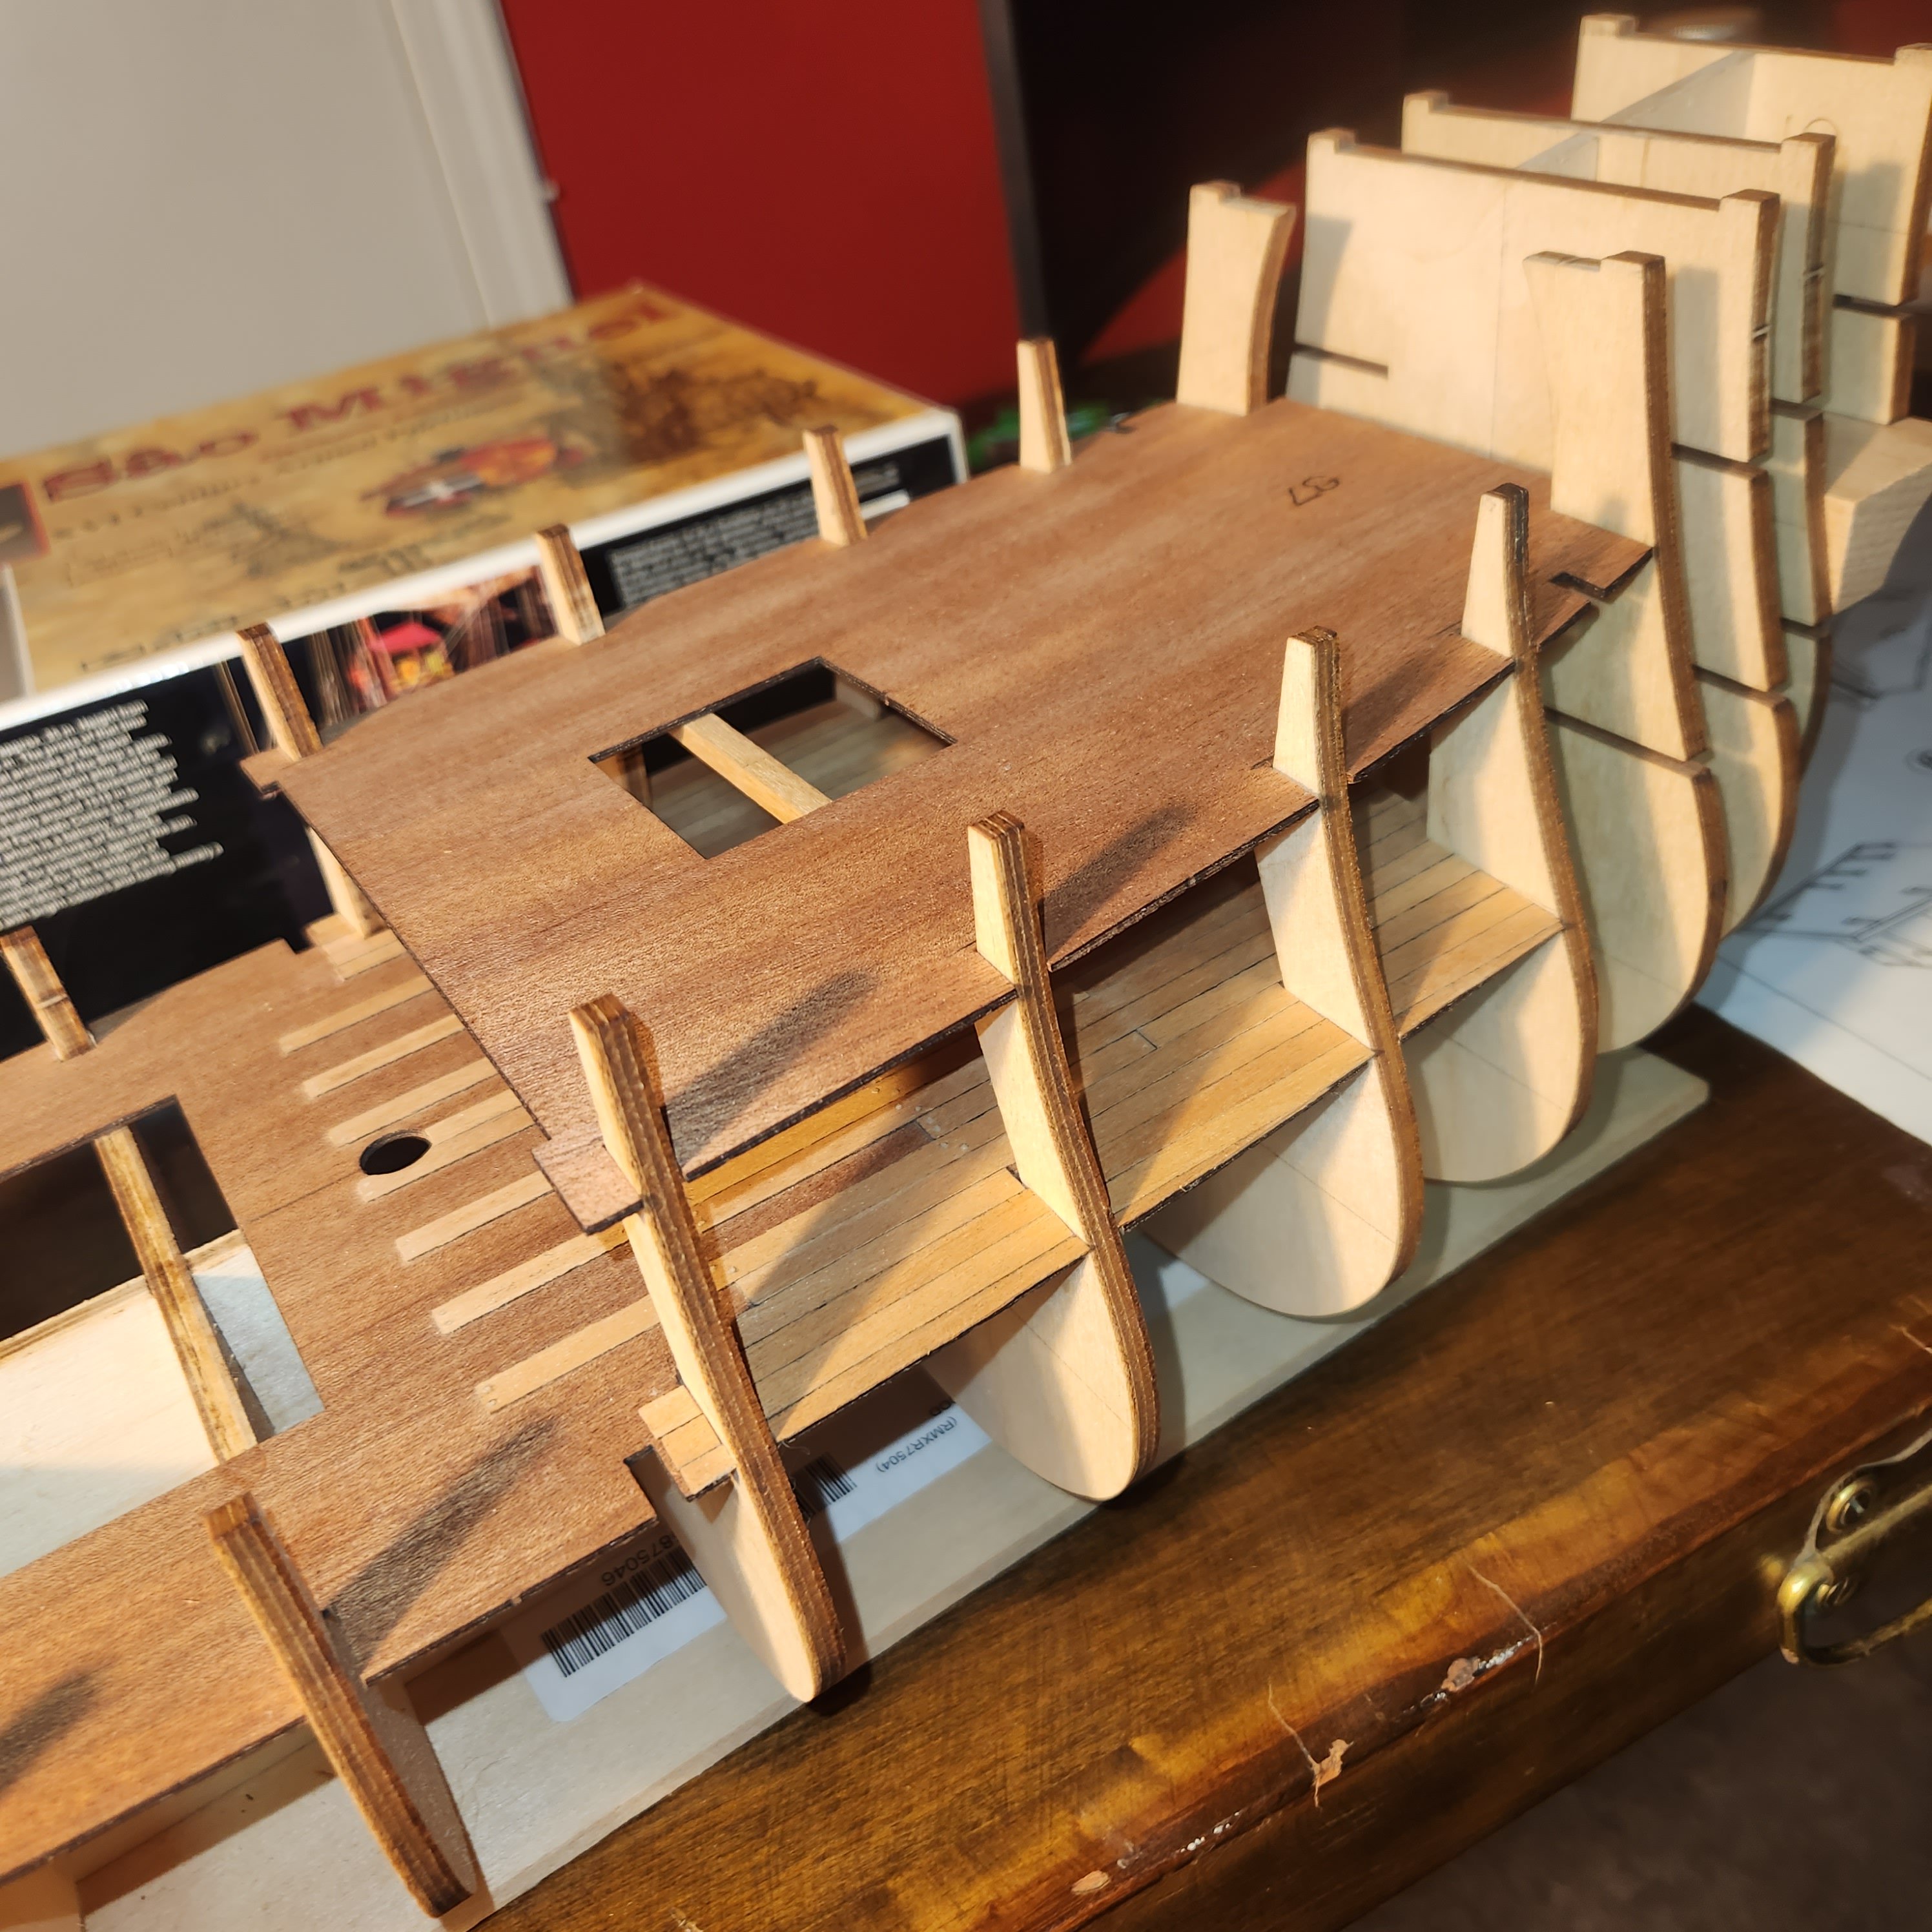
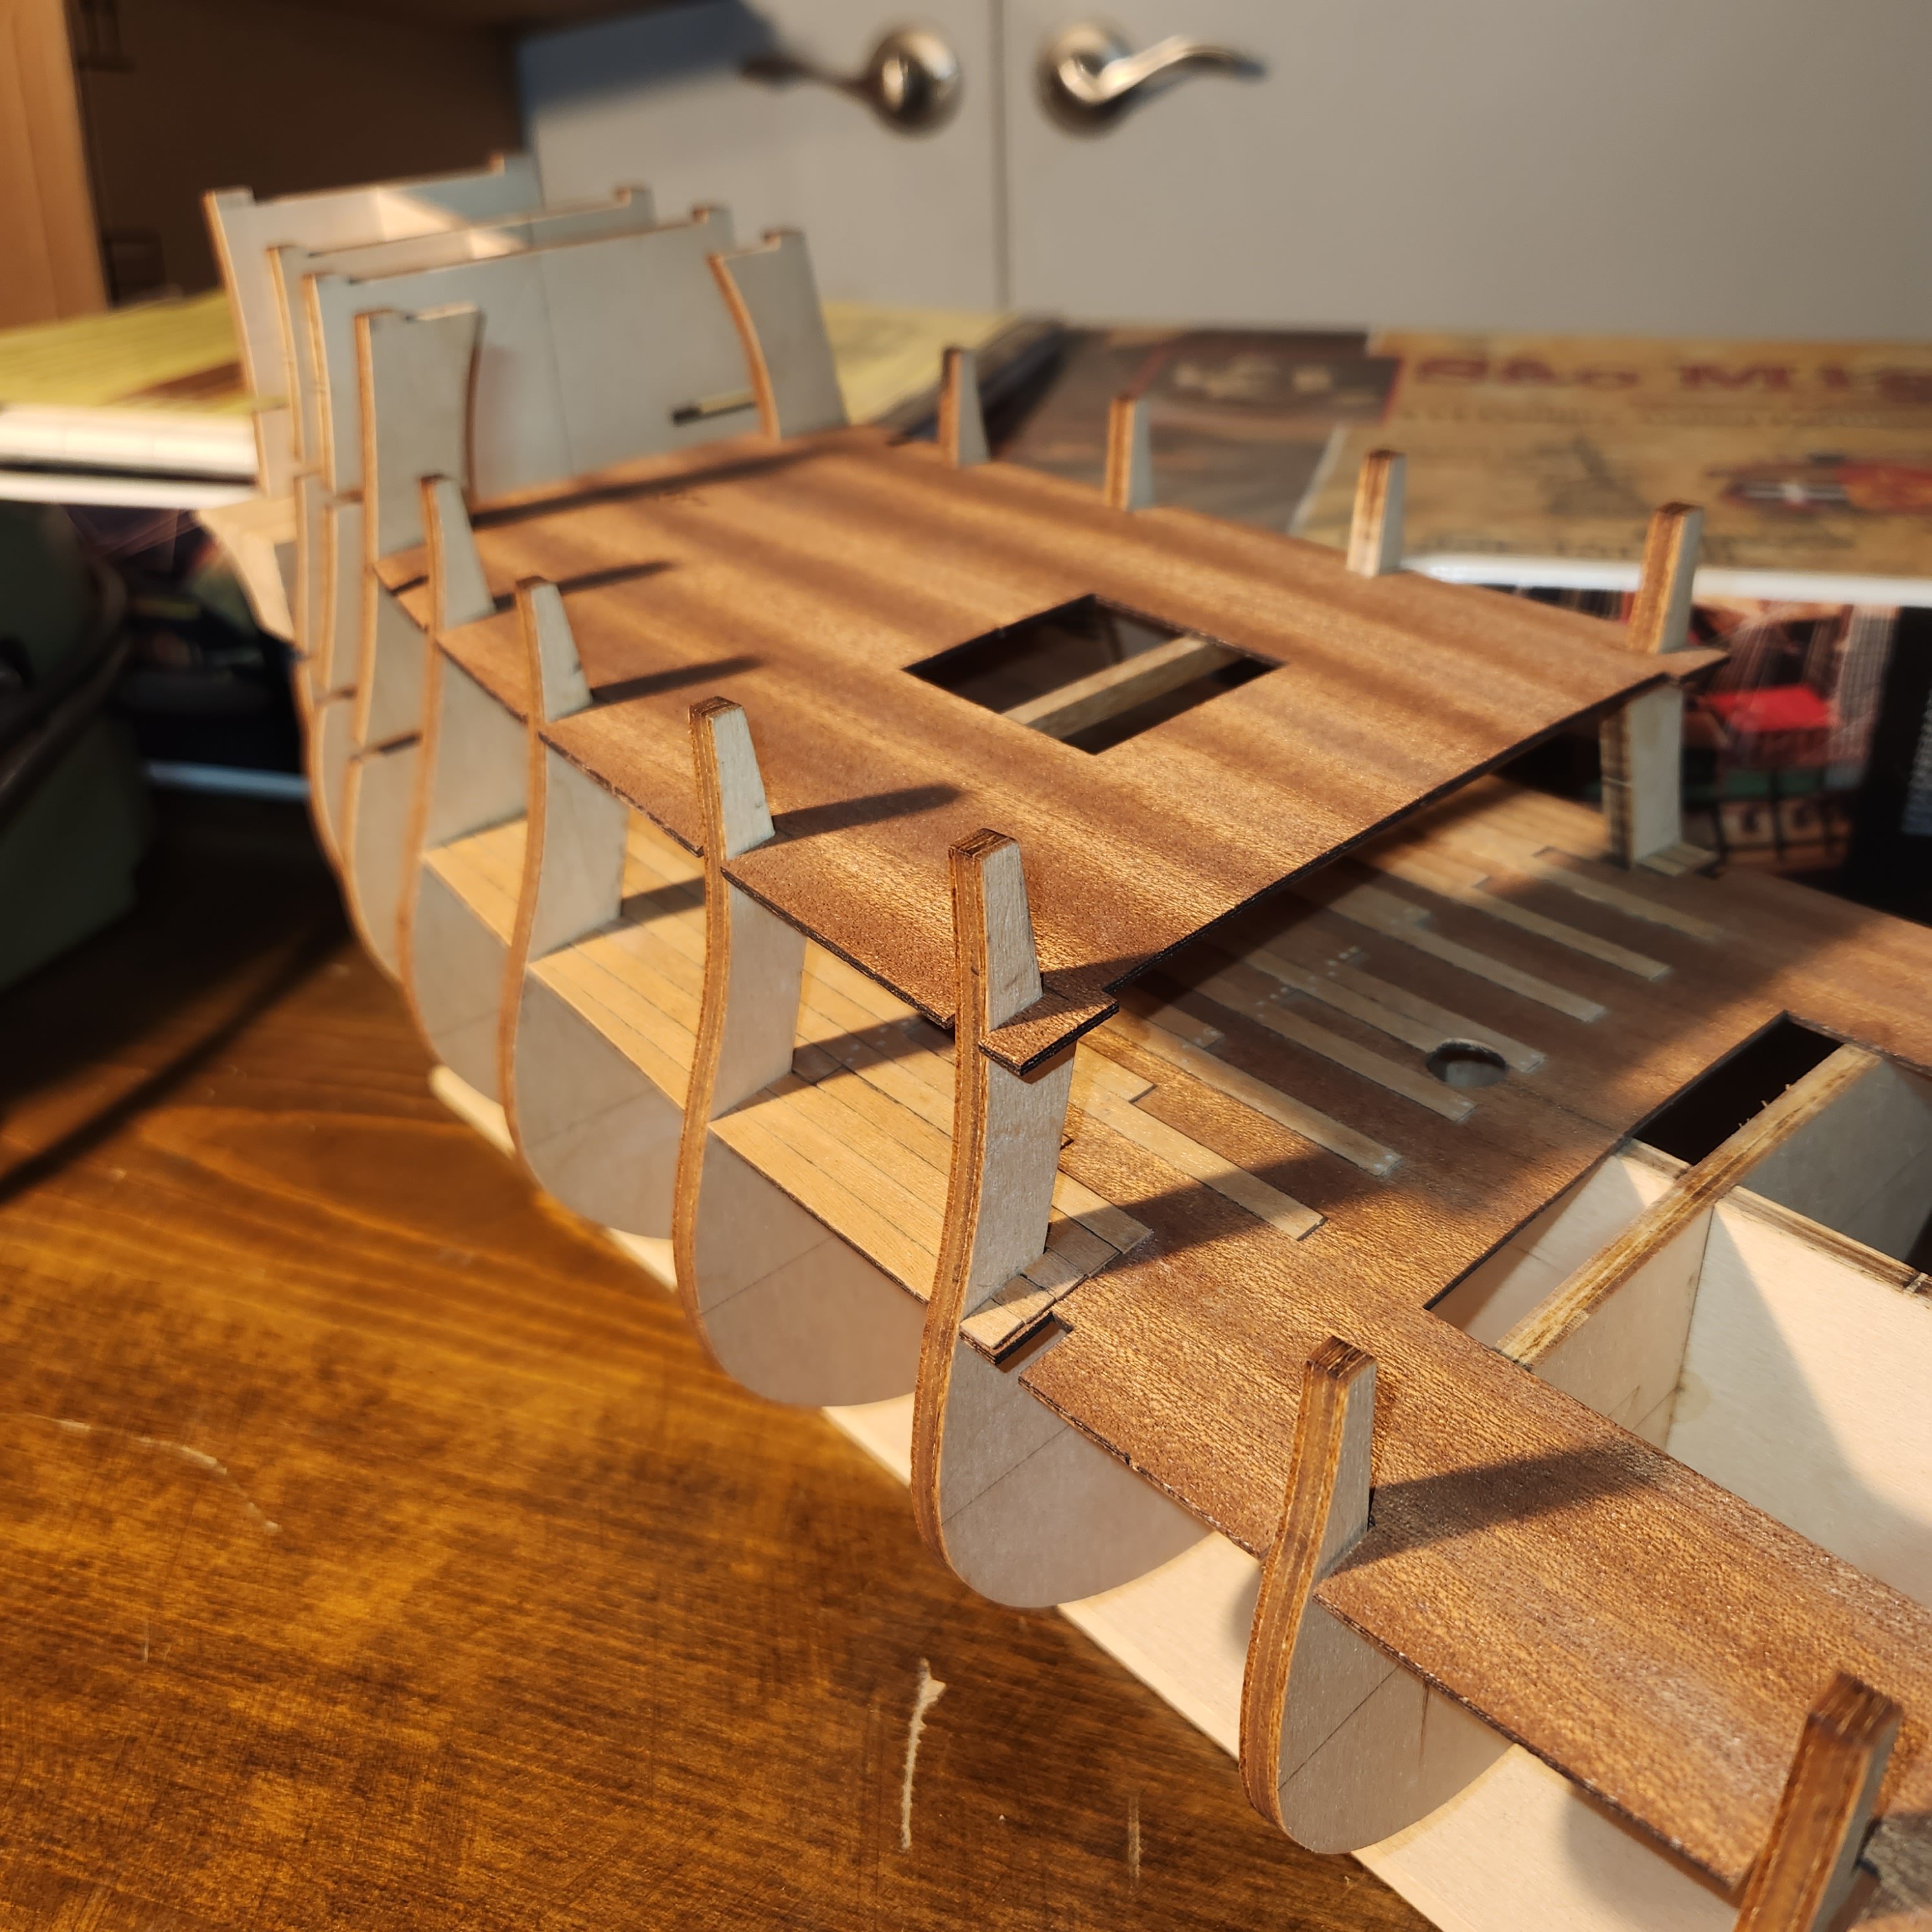
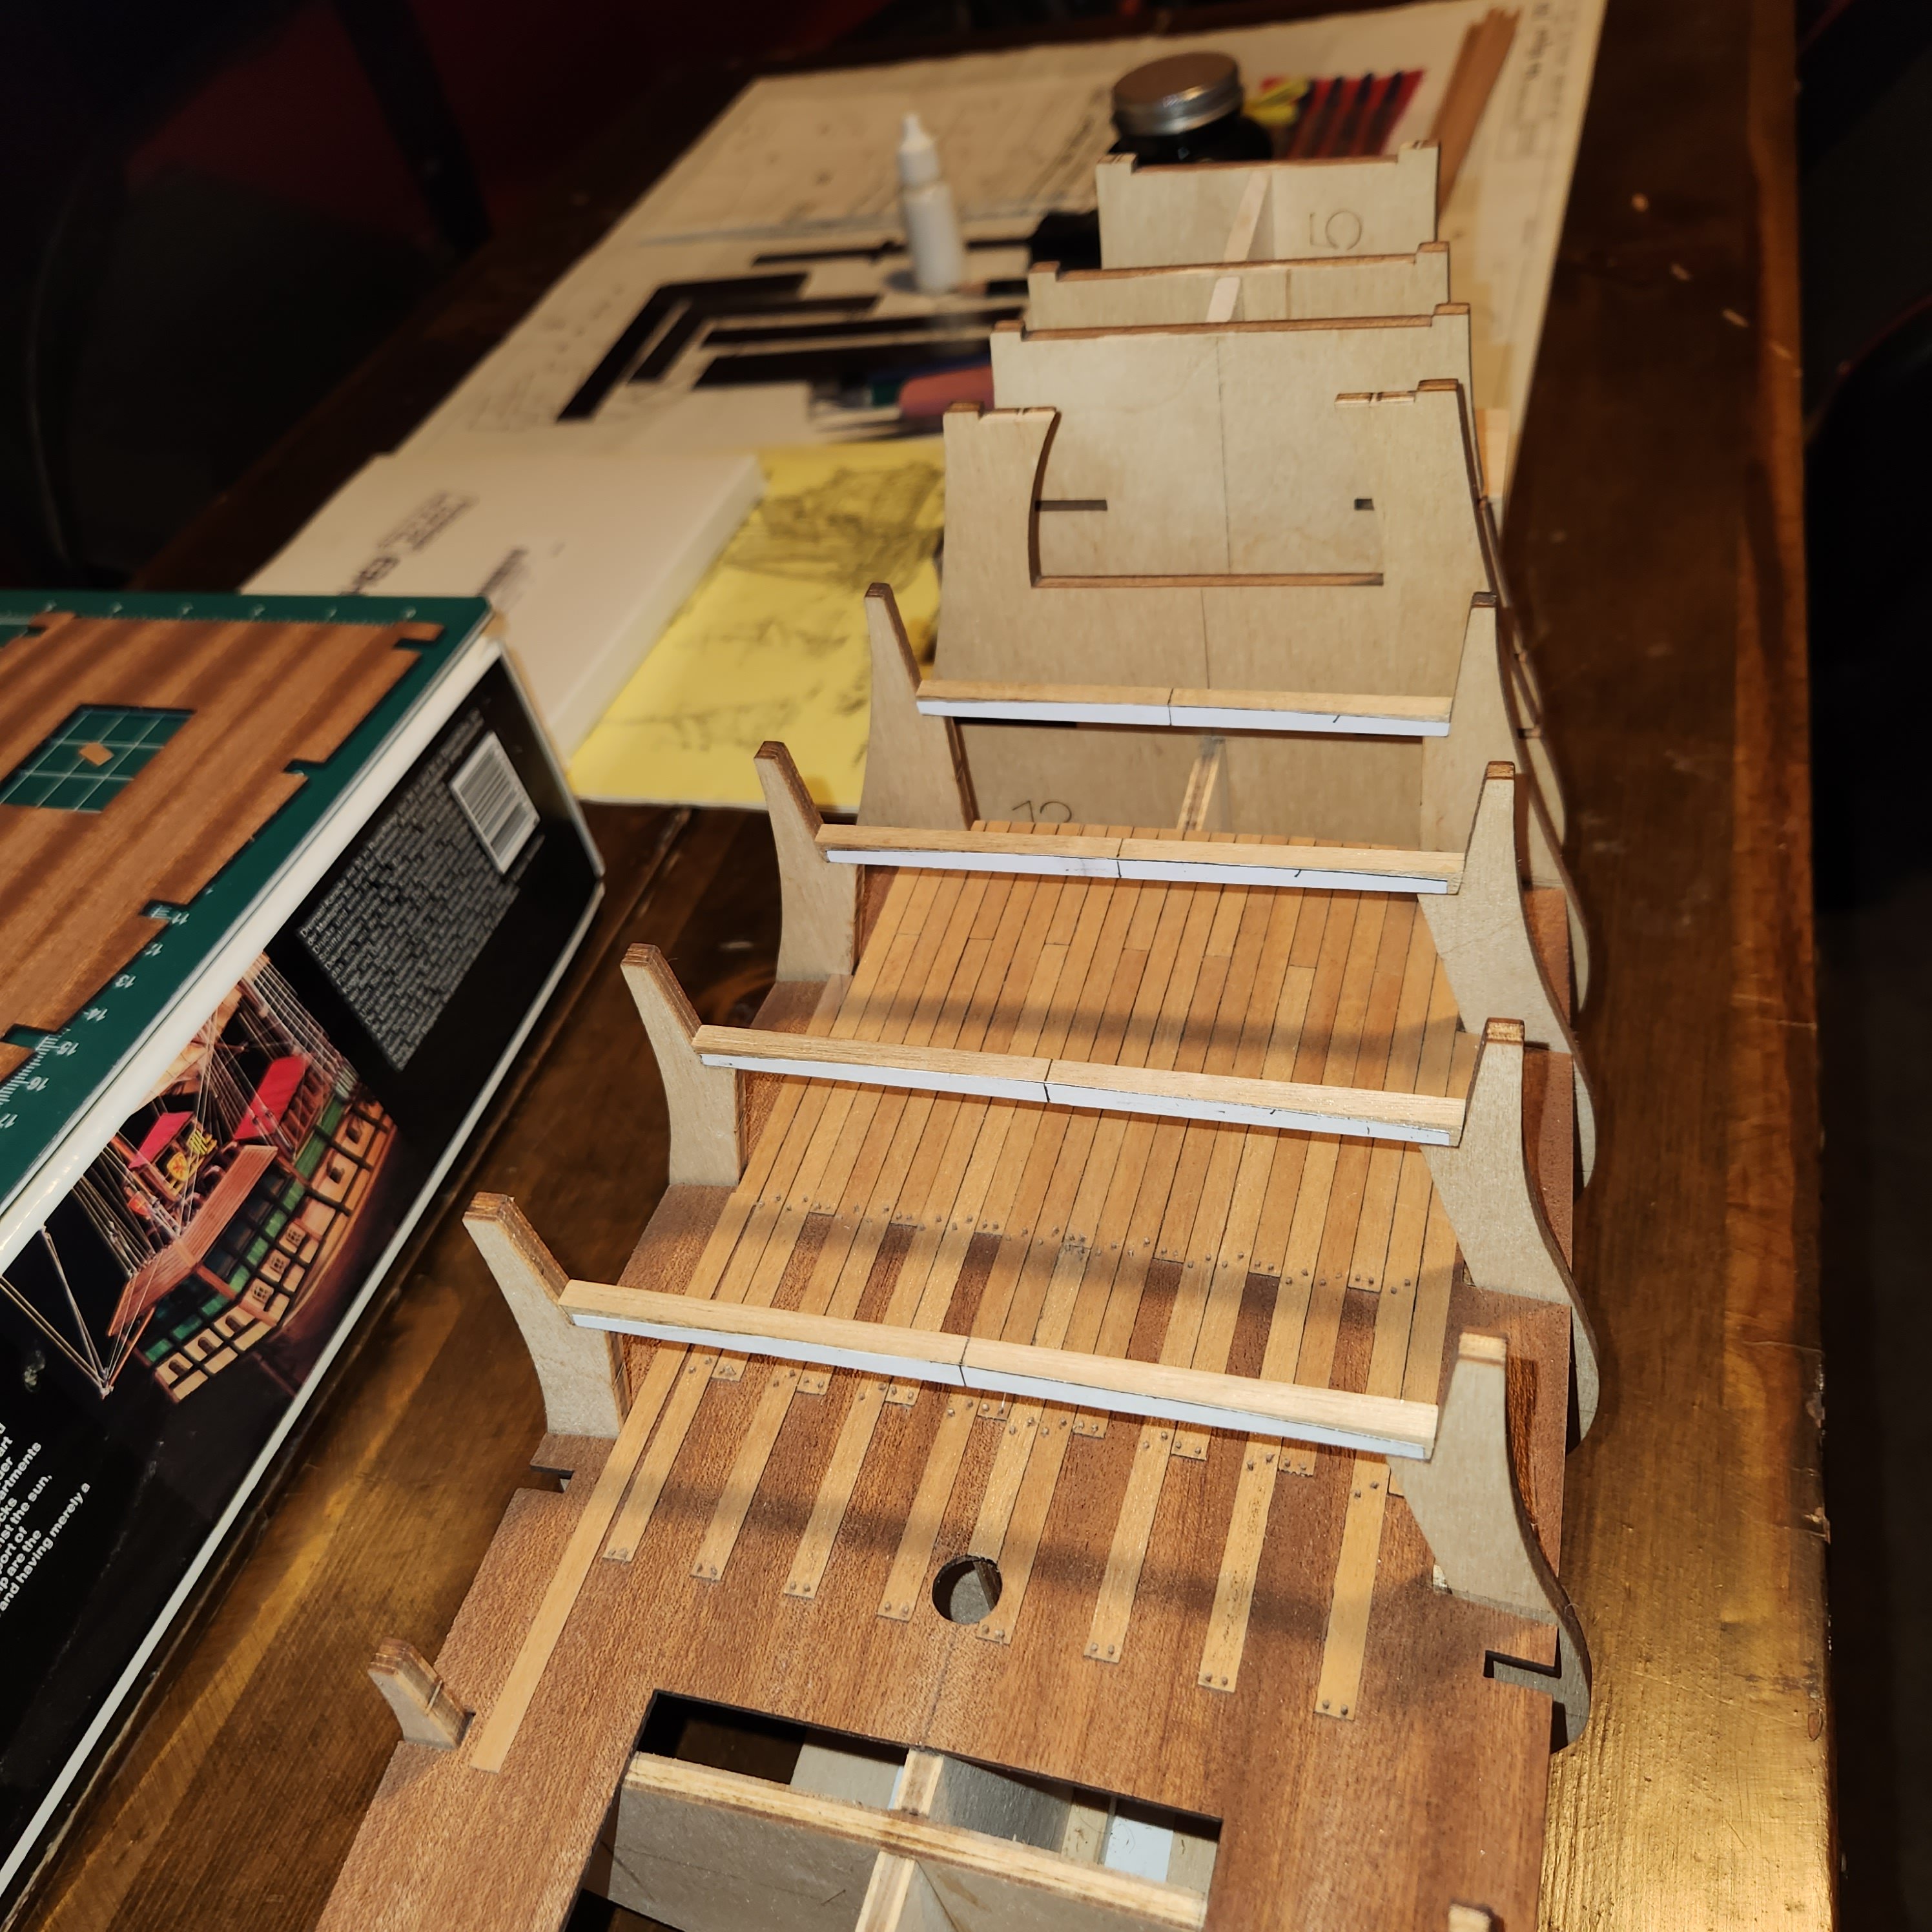
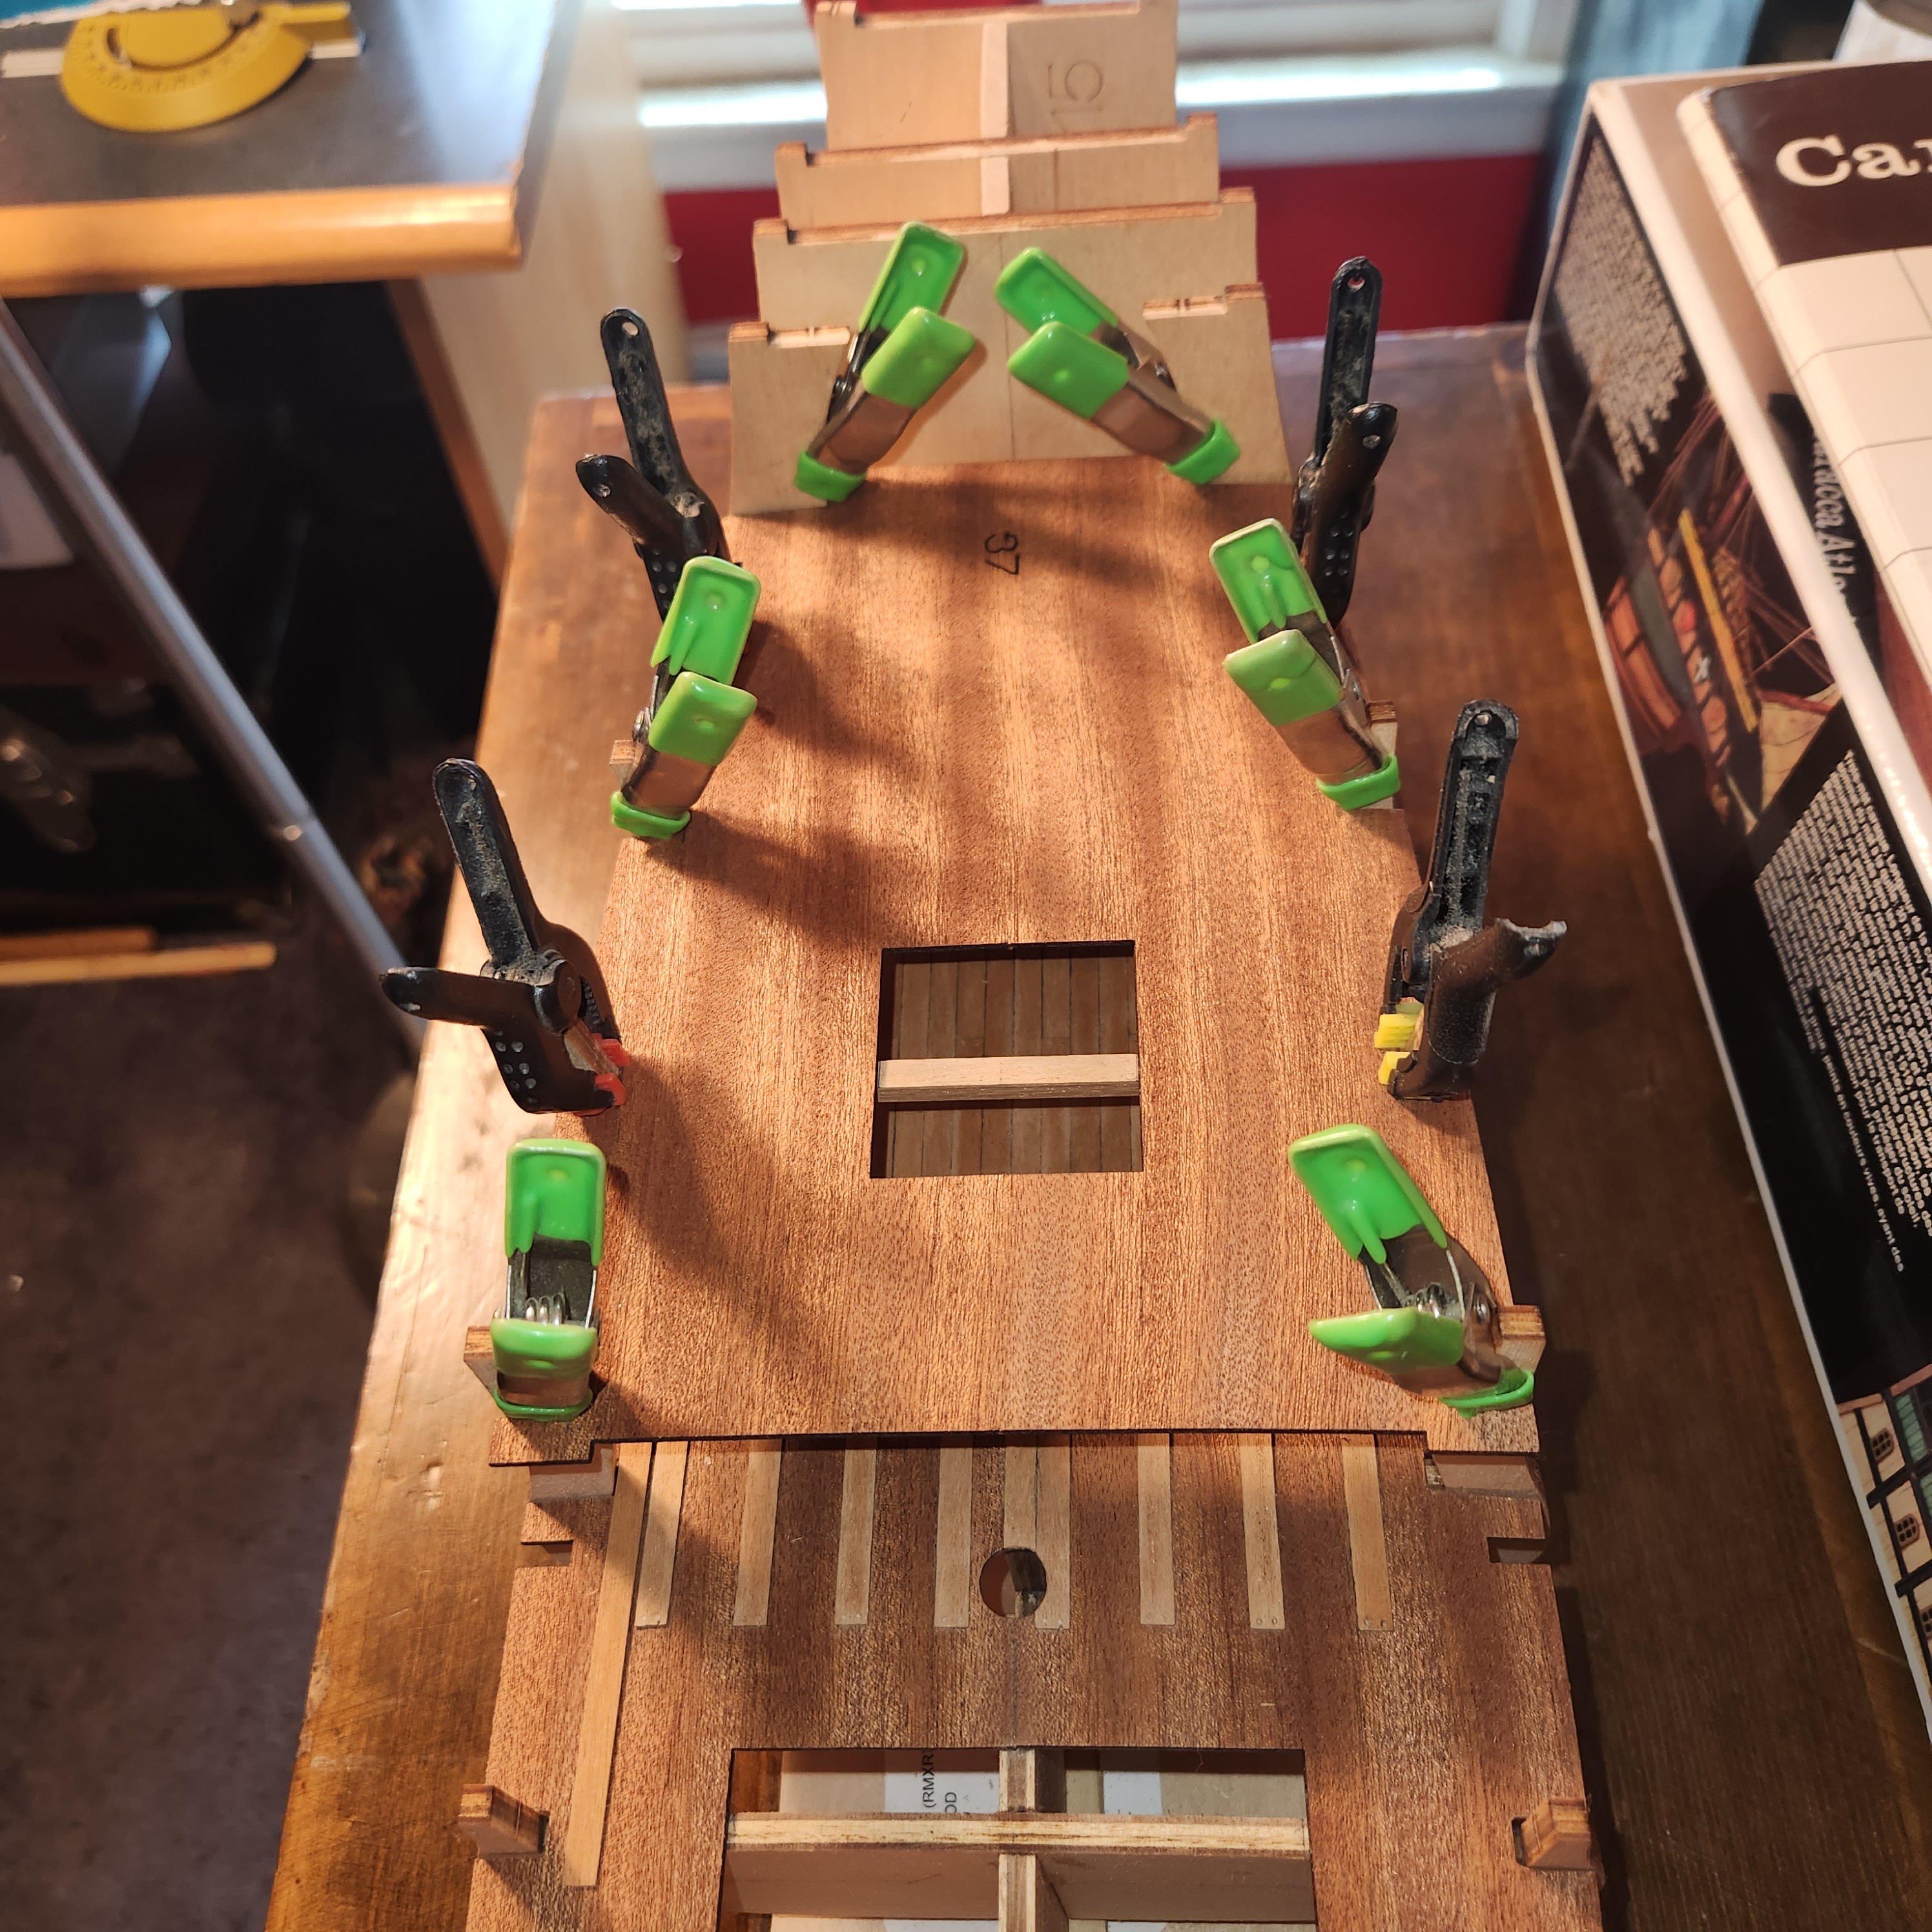
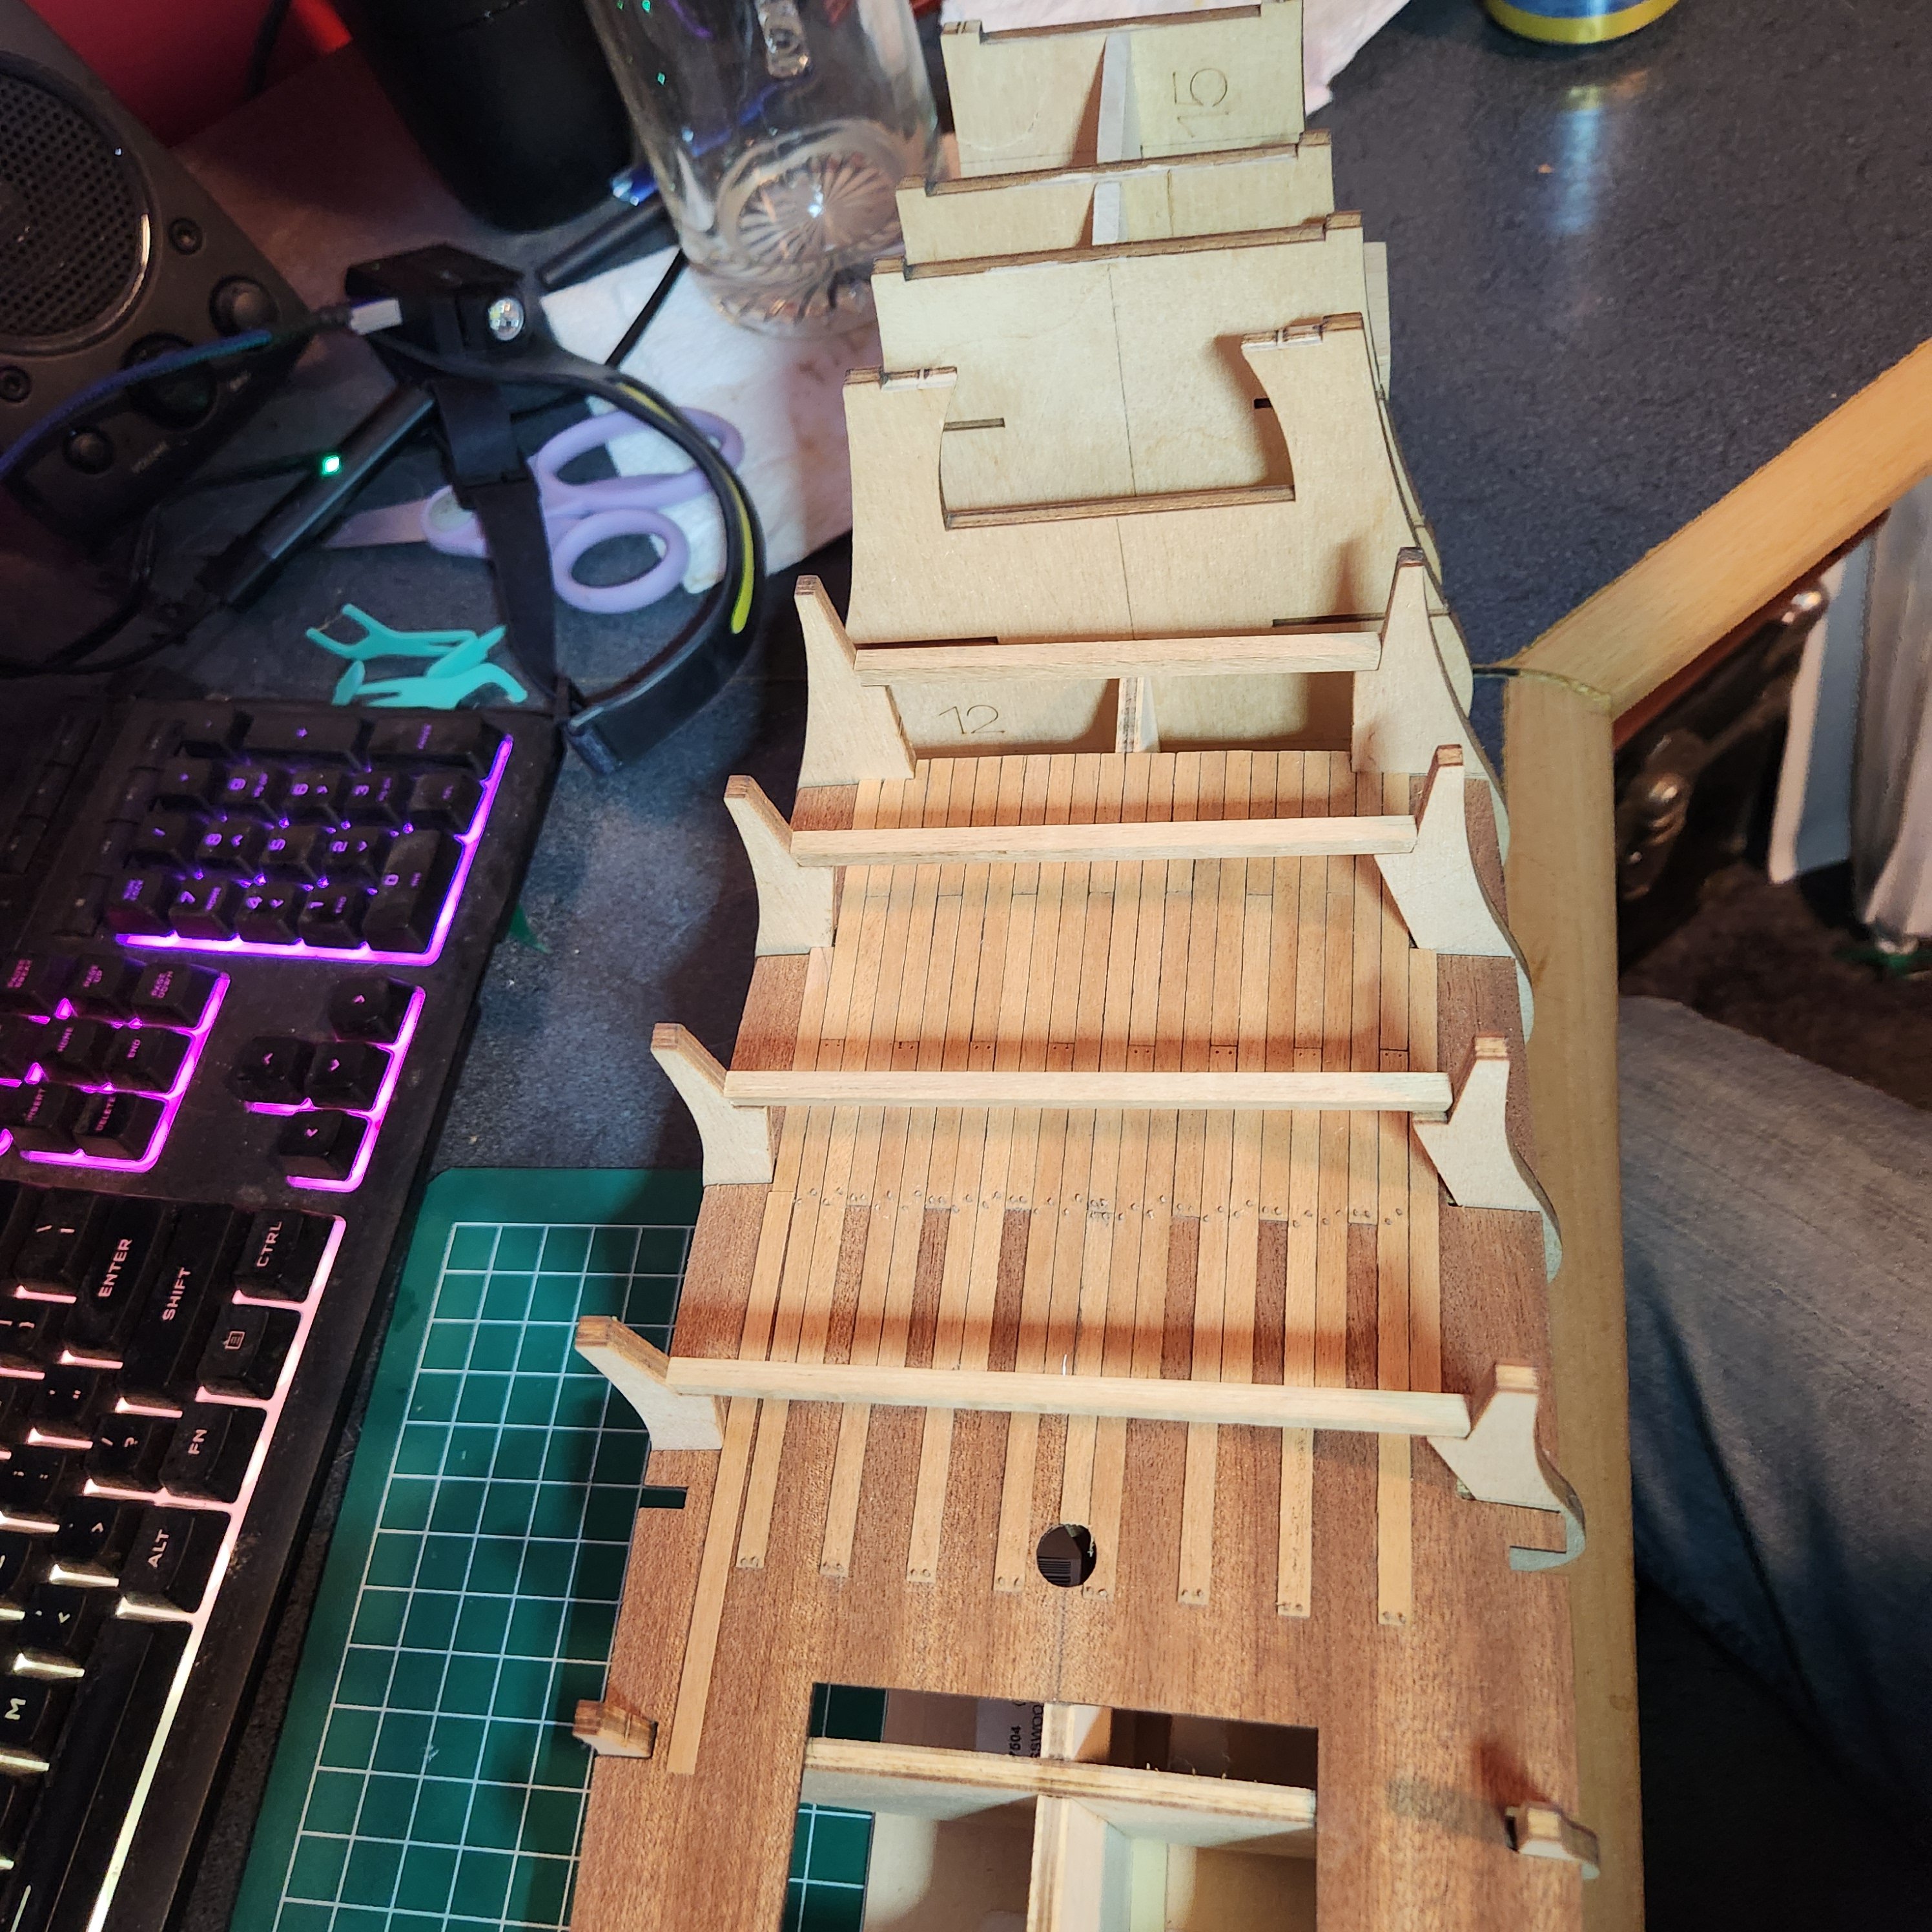
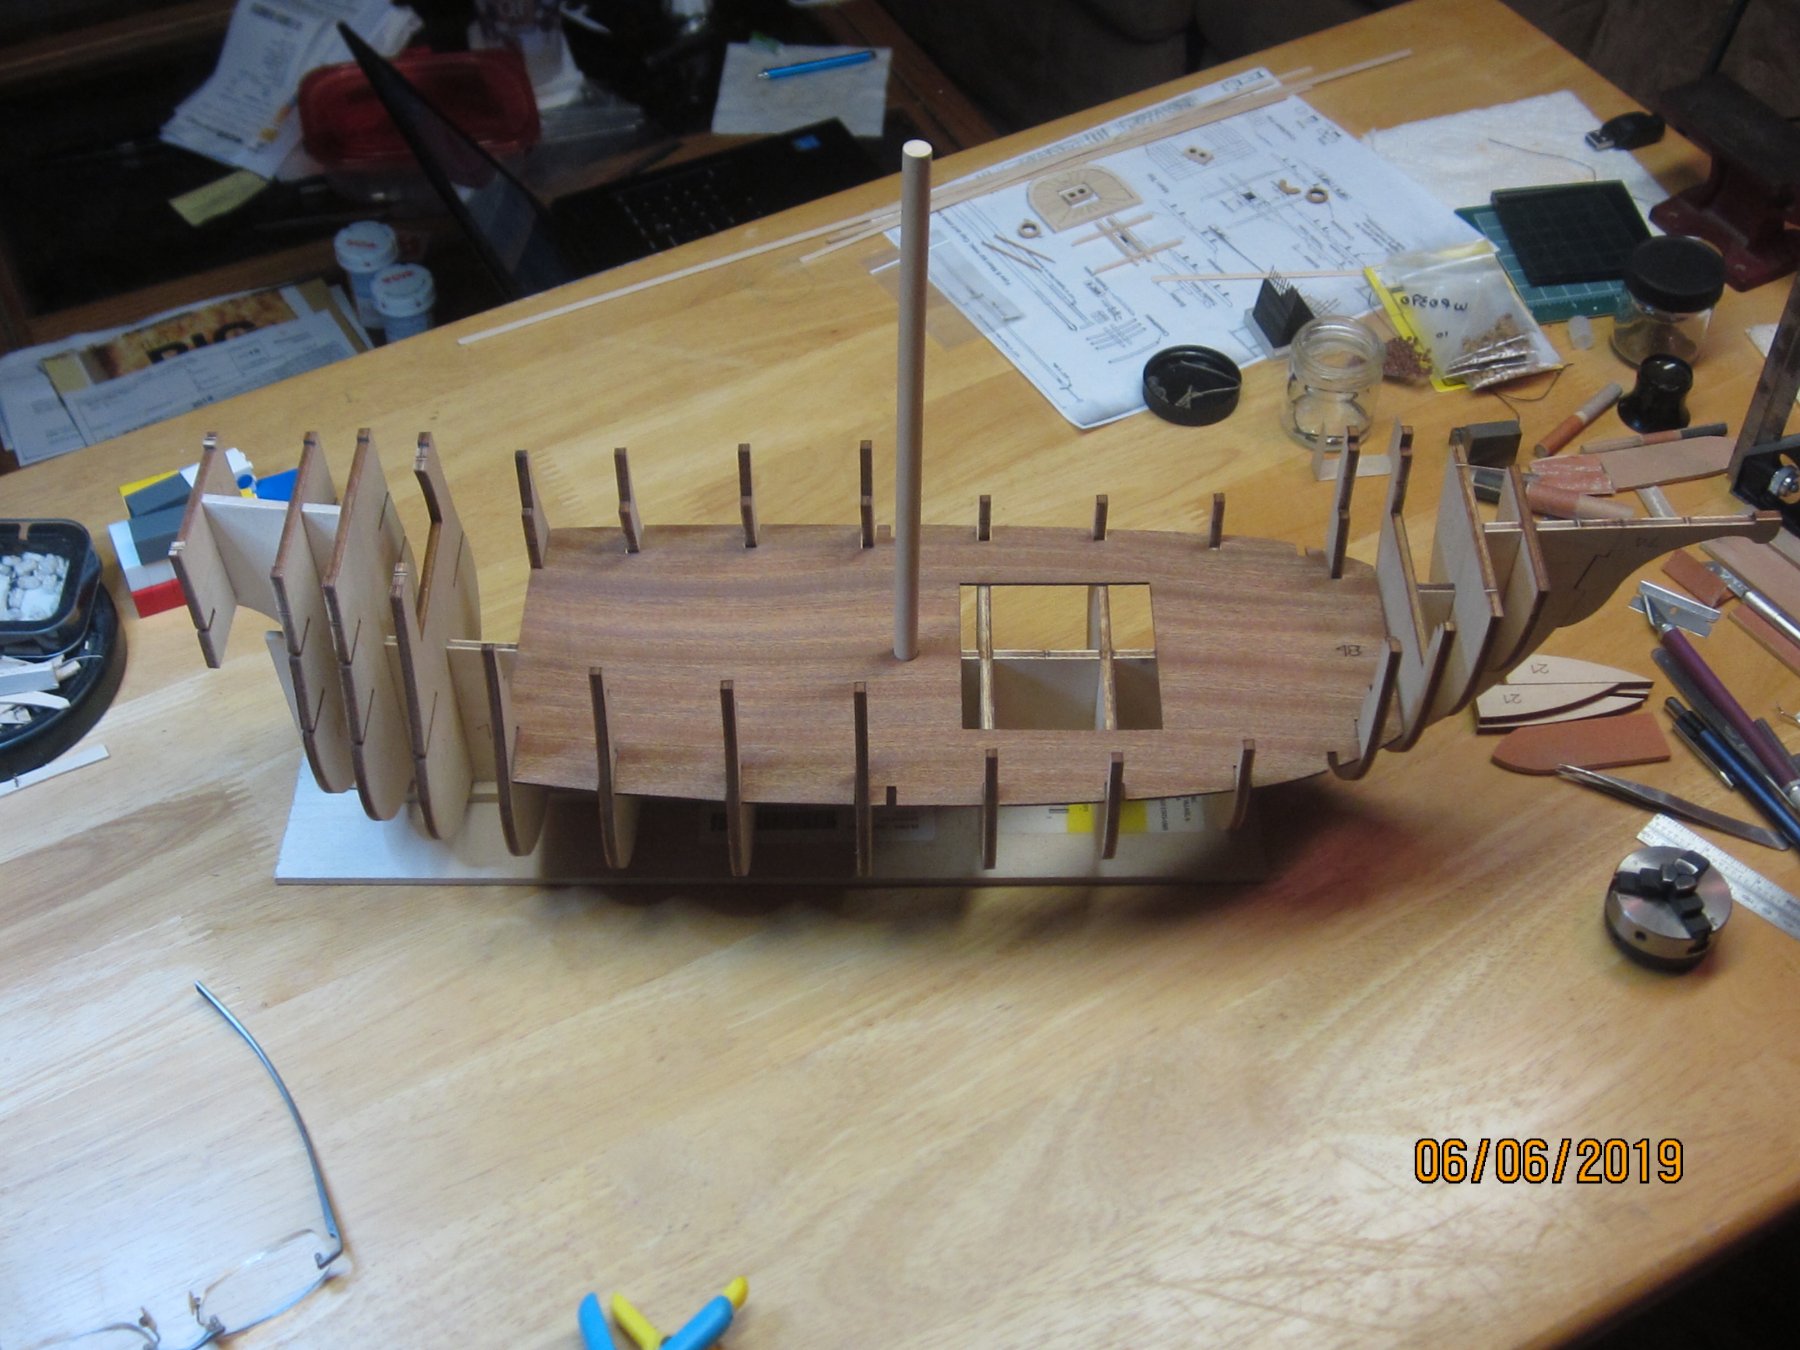
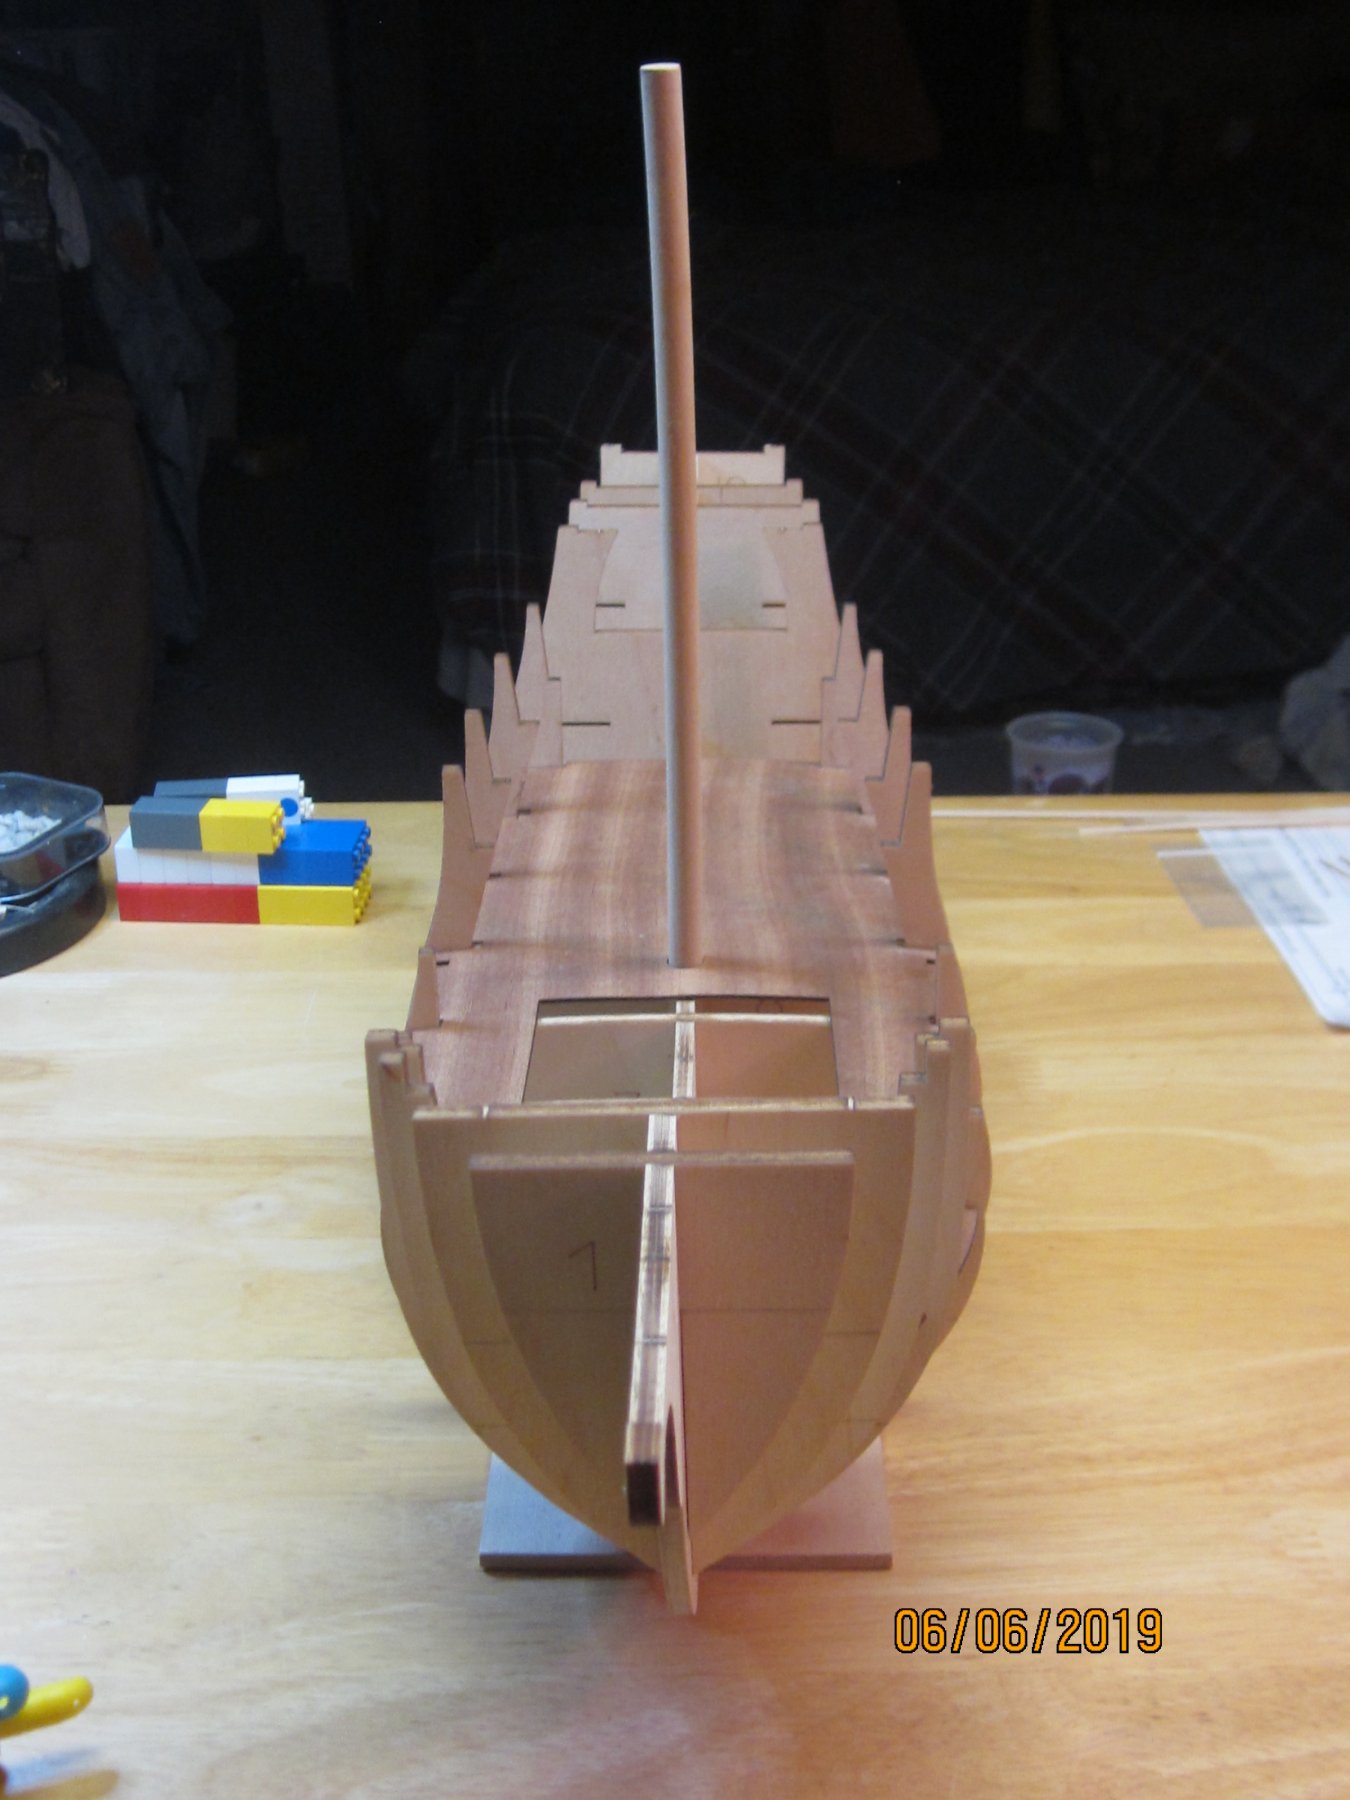
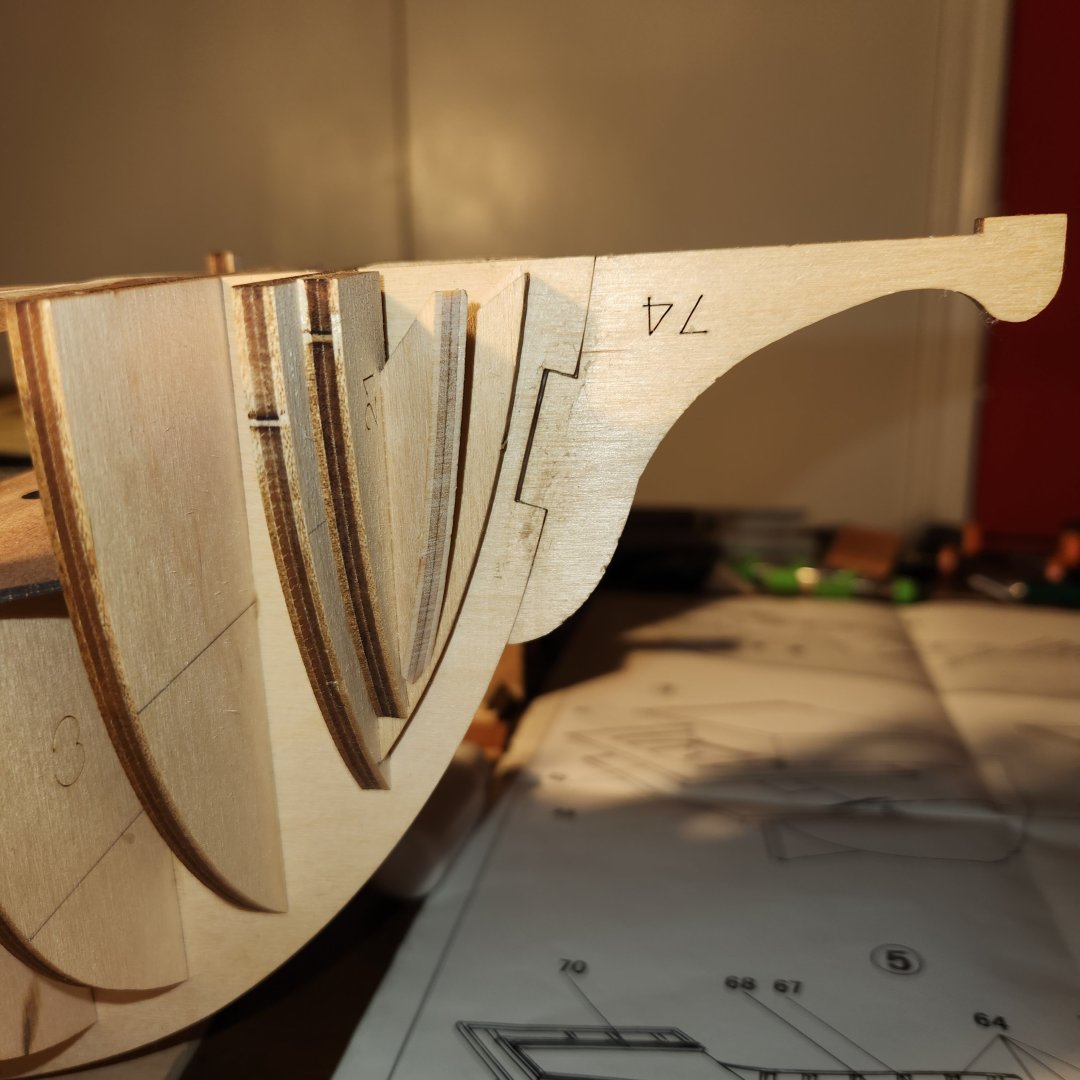
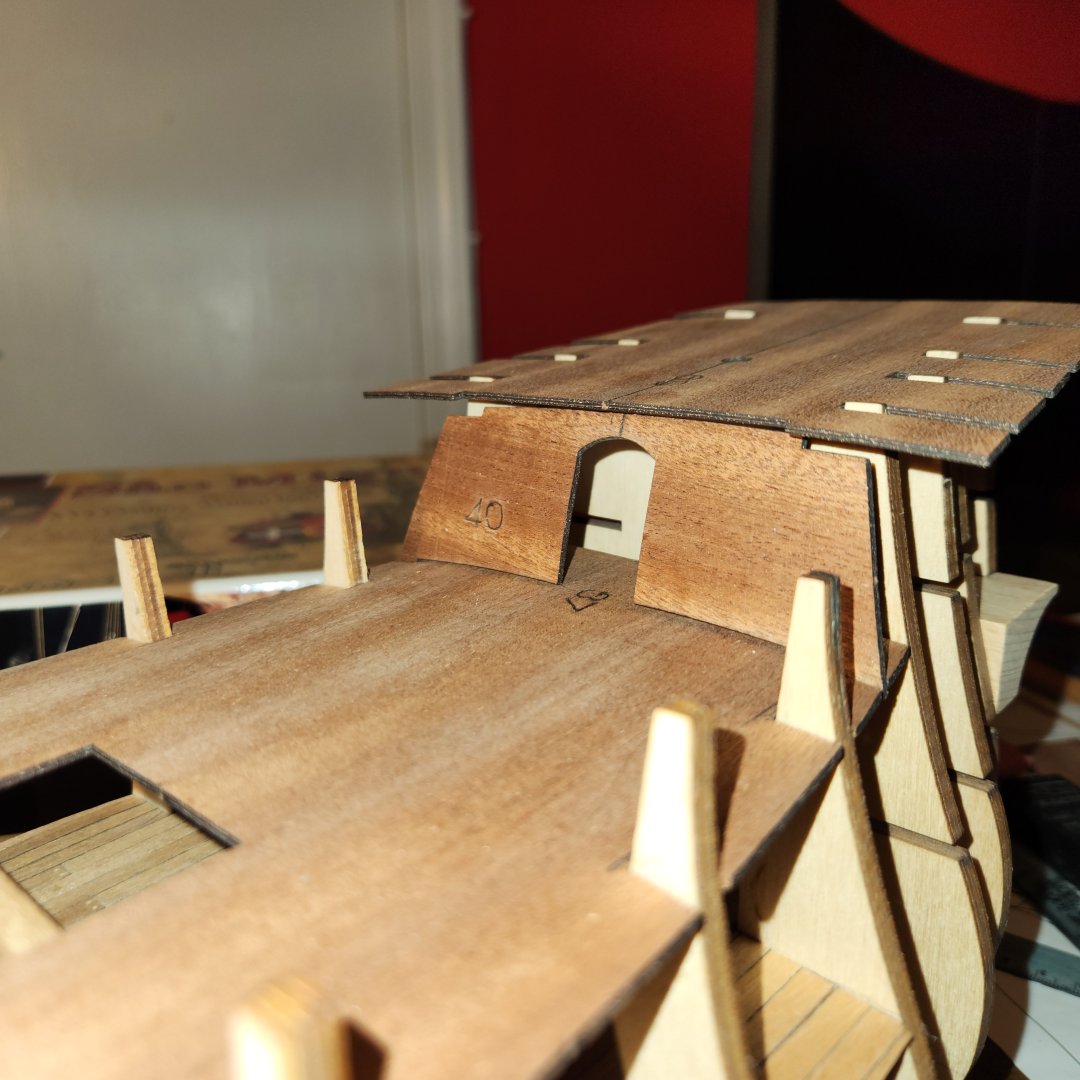
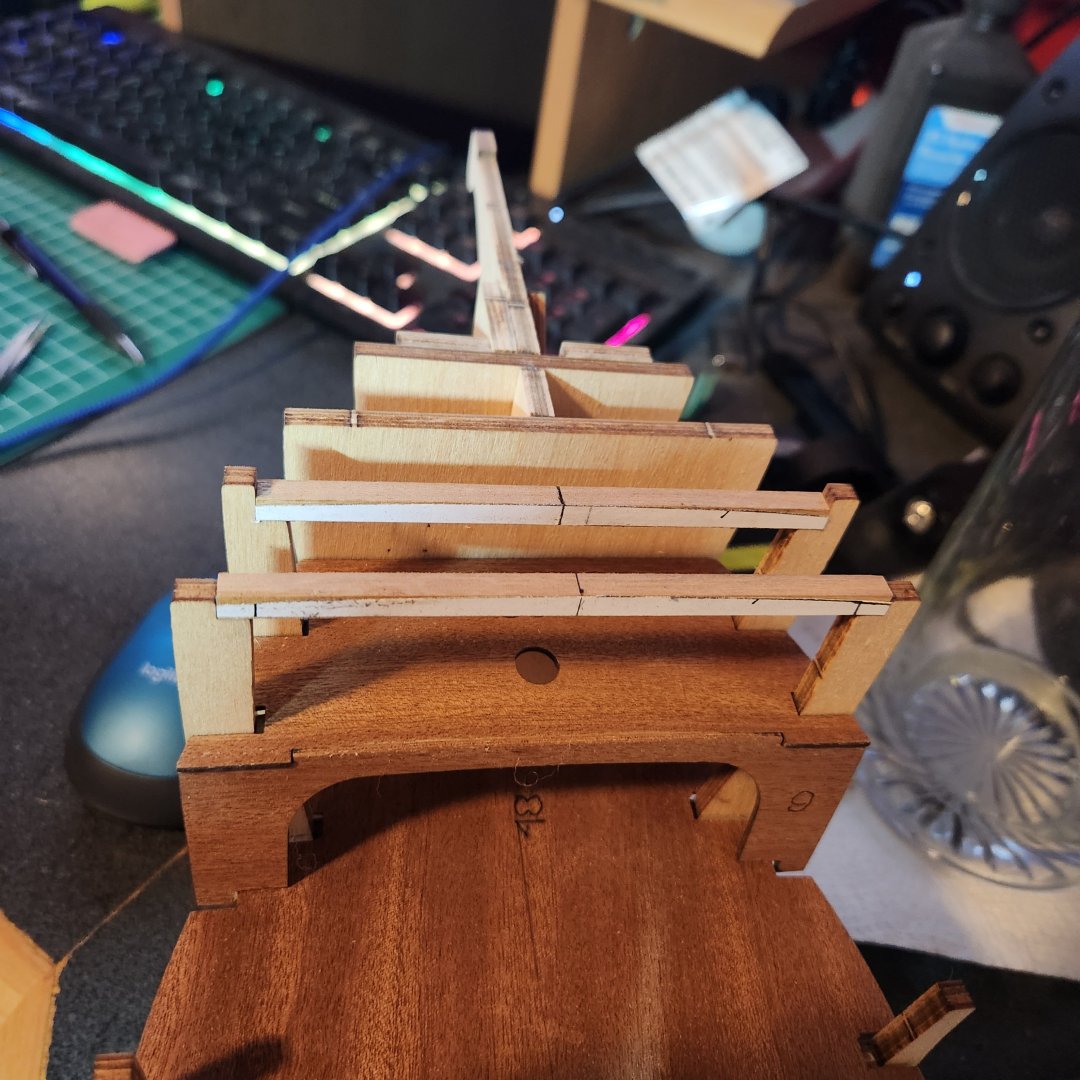
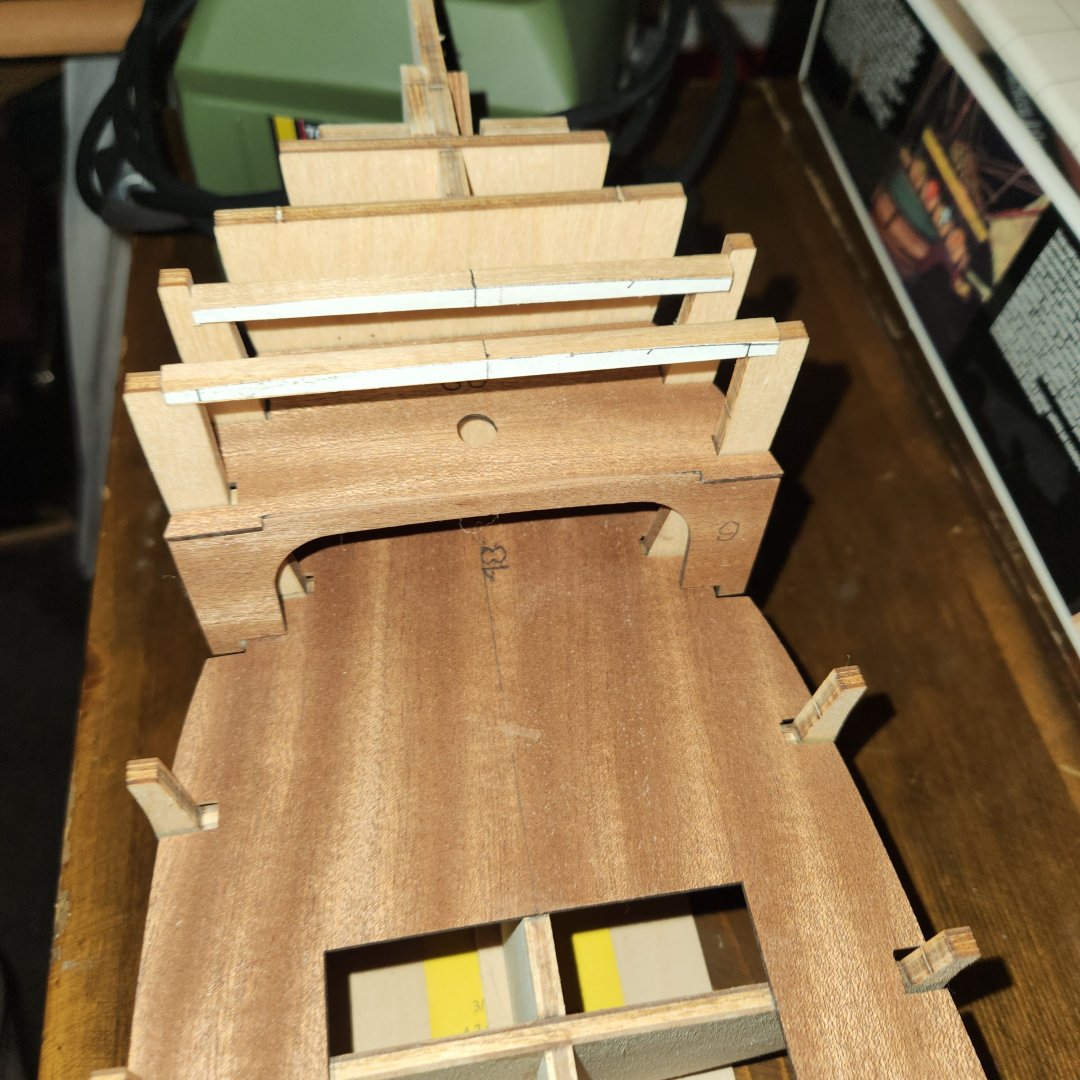
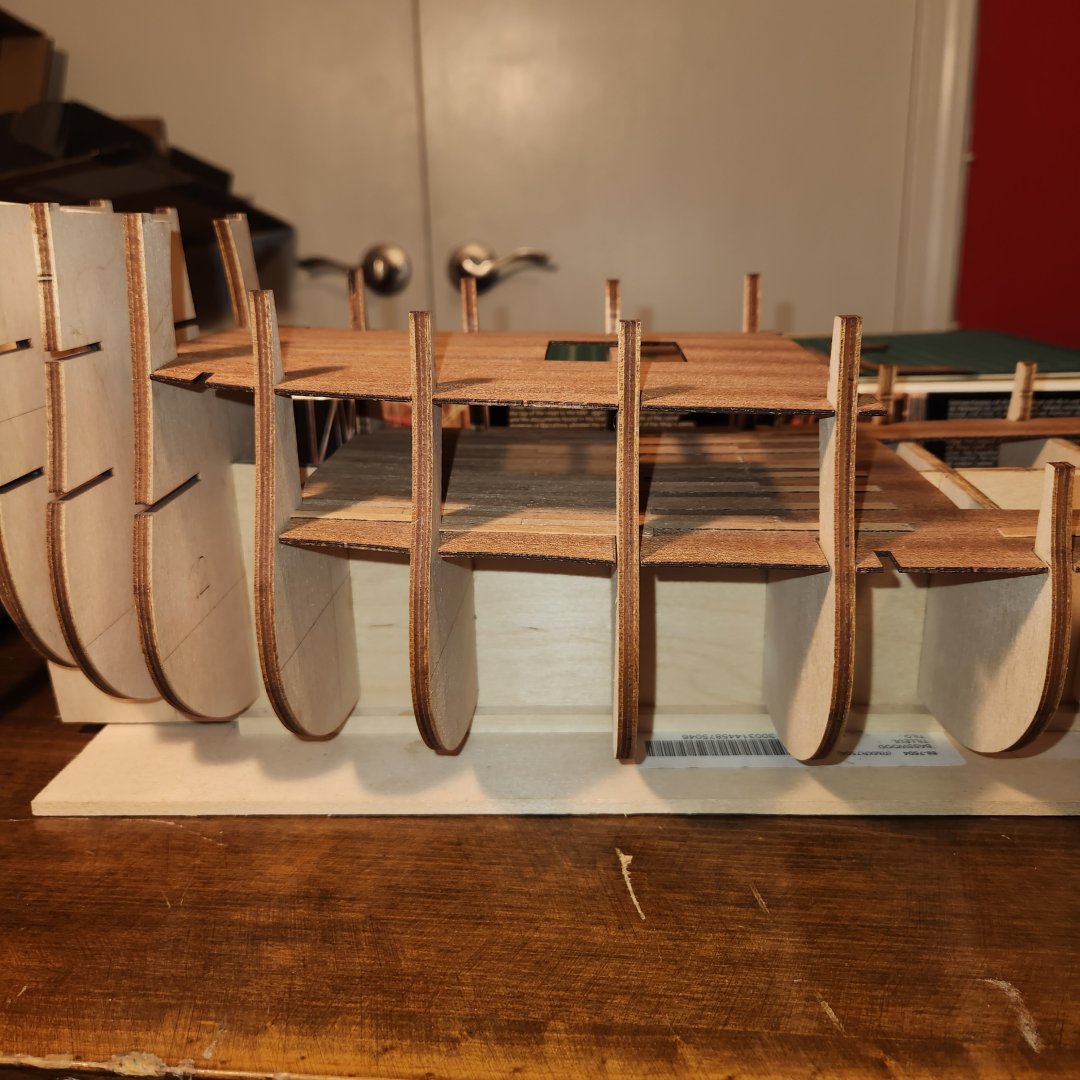
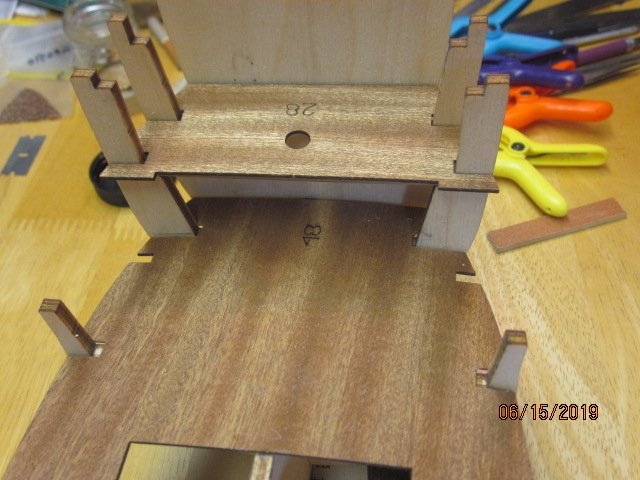
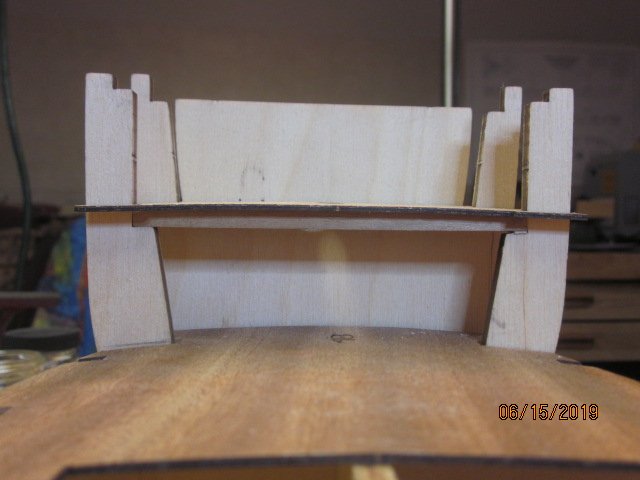
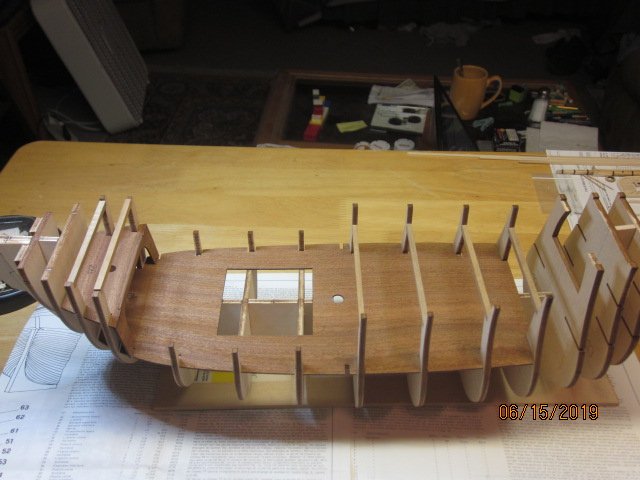
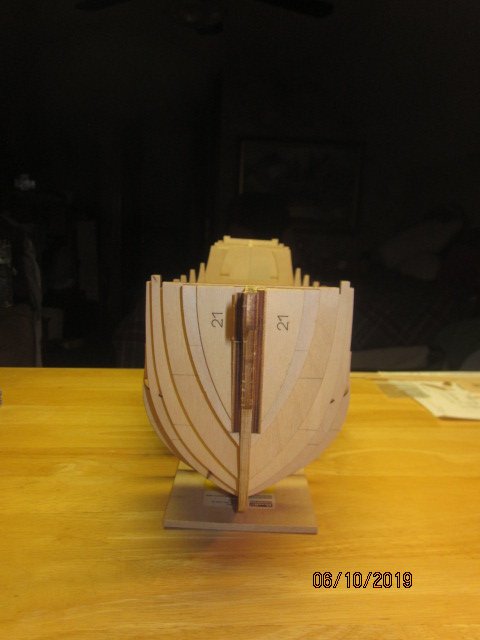
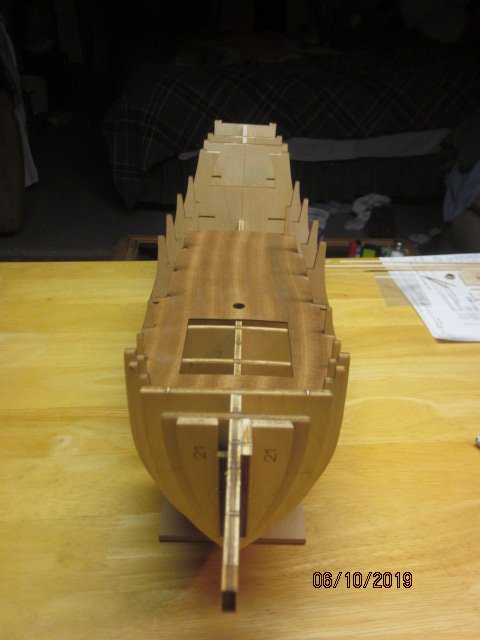
After installing the bulkhead to the main/quarter deck i worked on getting the poop deck to fit properly. I tested spacers and it threw off the symmetry so I trimmed the upper bits on each side until it fit nicely. After test fitting the bulkhead for the quarter/poop deck I realized I have much sanding to do to before I can install it. I'm looking ahead to the fairing of the bulkheads. I feel my best bet is to get the fairing done before installing the poop deck. Knowing my luck, if I install it then start fairing the first thing that will happen is that I will break it. The Mamoli kit doesn't have a rabbit so I believe I need to take the fairing down to the bulkhead former at part #20. (Am I correct in this assumption?) Also I'm thinking about installing an extra piece at a 45 degree angle between parts #20 and #21 or possibly adding a block of basswood as filler so I have enough surface area to glue the planks. I have some holly logs that have been drying for a couple of years and I want to use it to replace the gunport castings that were included with the kit. My only concern is whether or not it will be too thin once I get it shaped to match the supplied castings. (Any thoughts?)

-
kscadman reacted to a post in a topic:
US Brig Syren by Redshadowrider - Model Shipways - Scale 1:64 - First wooden ship build
-
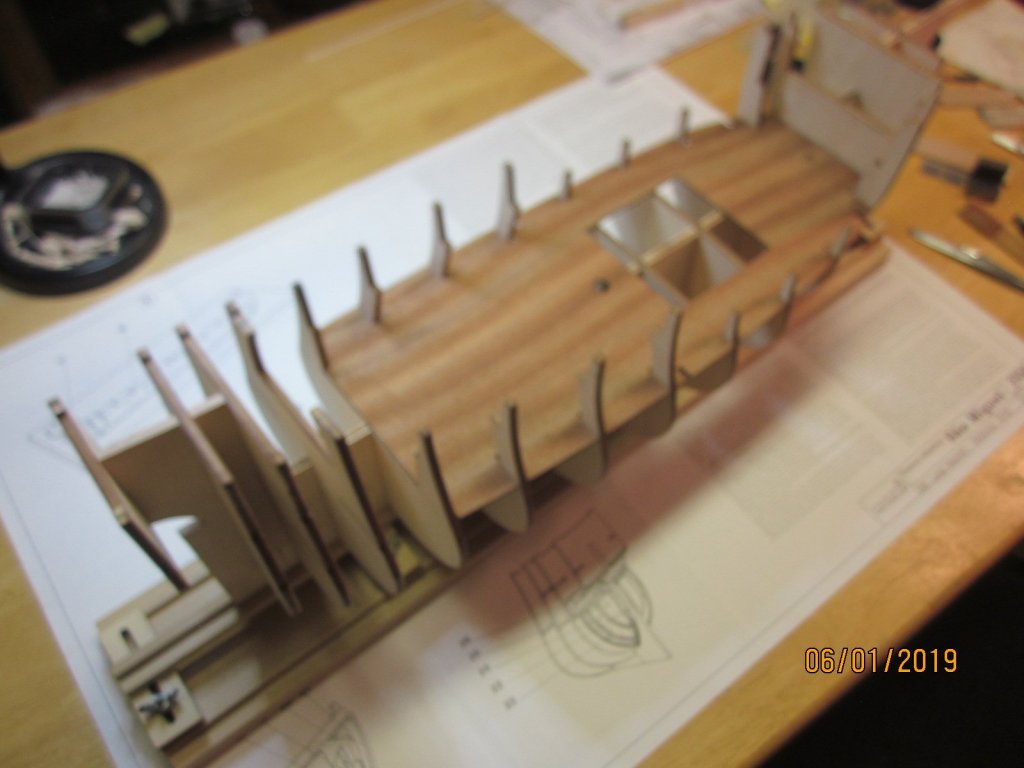
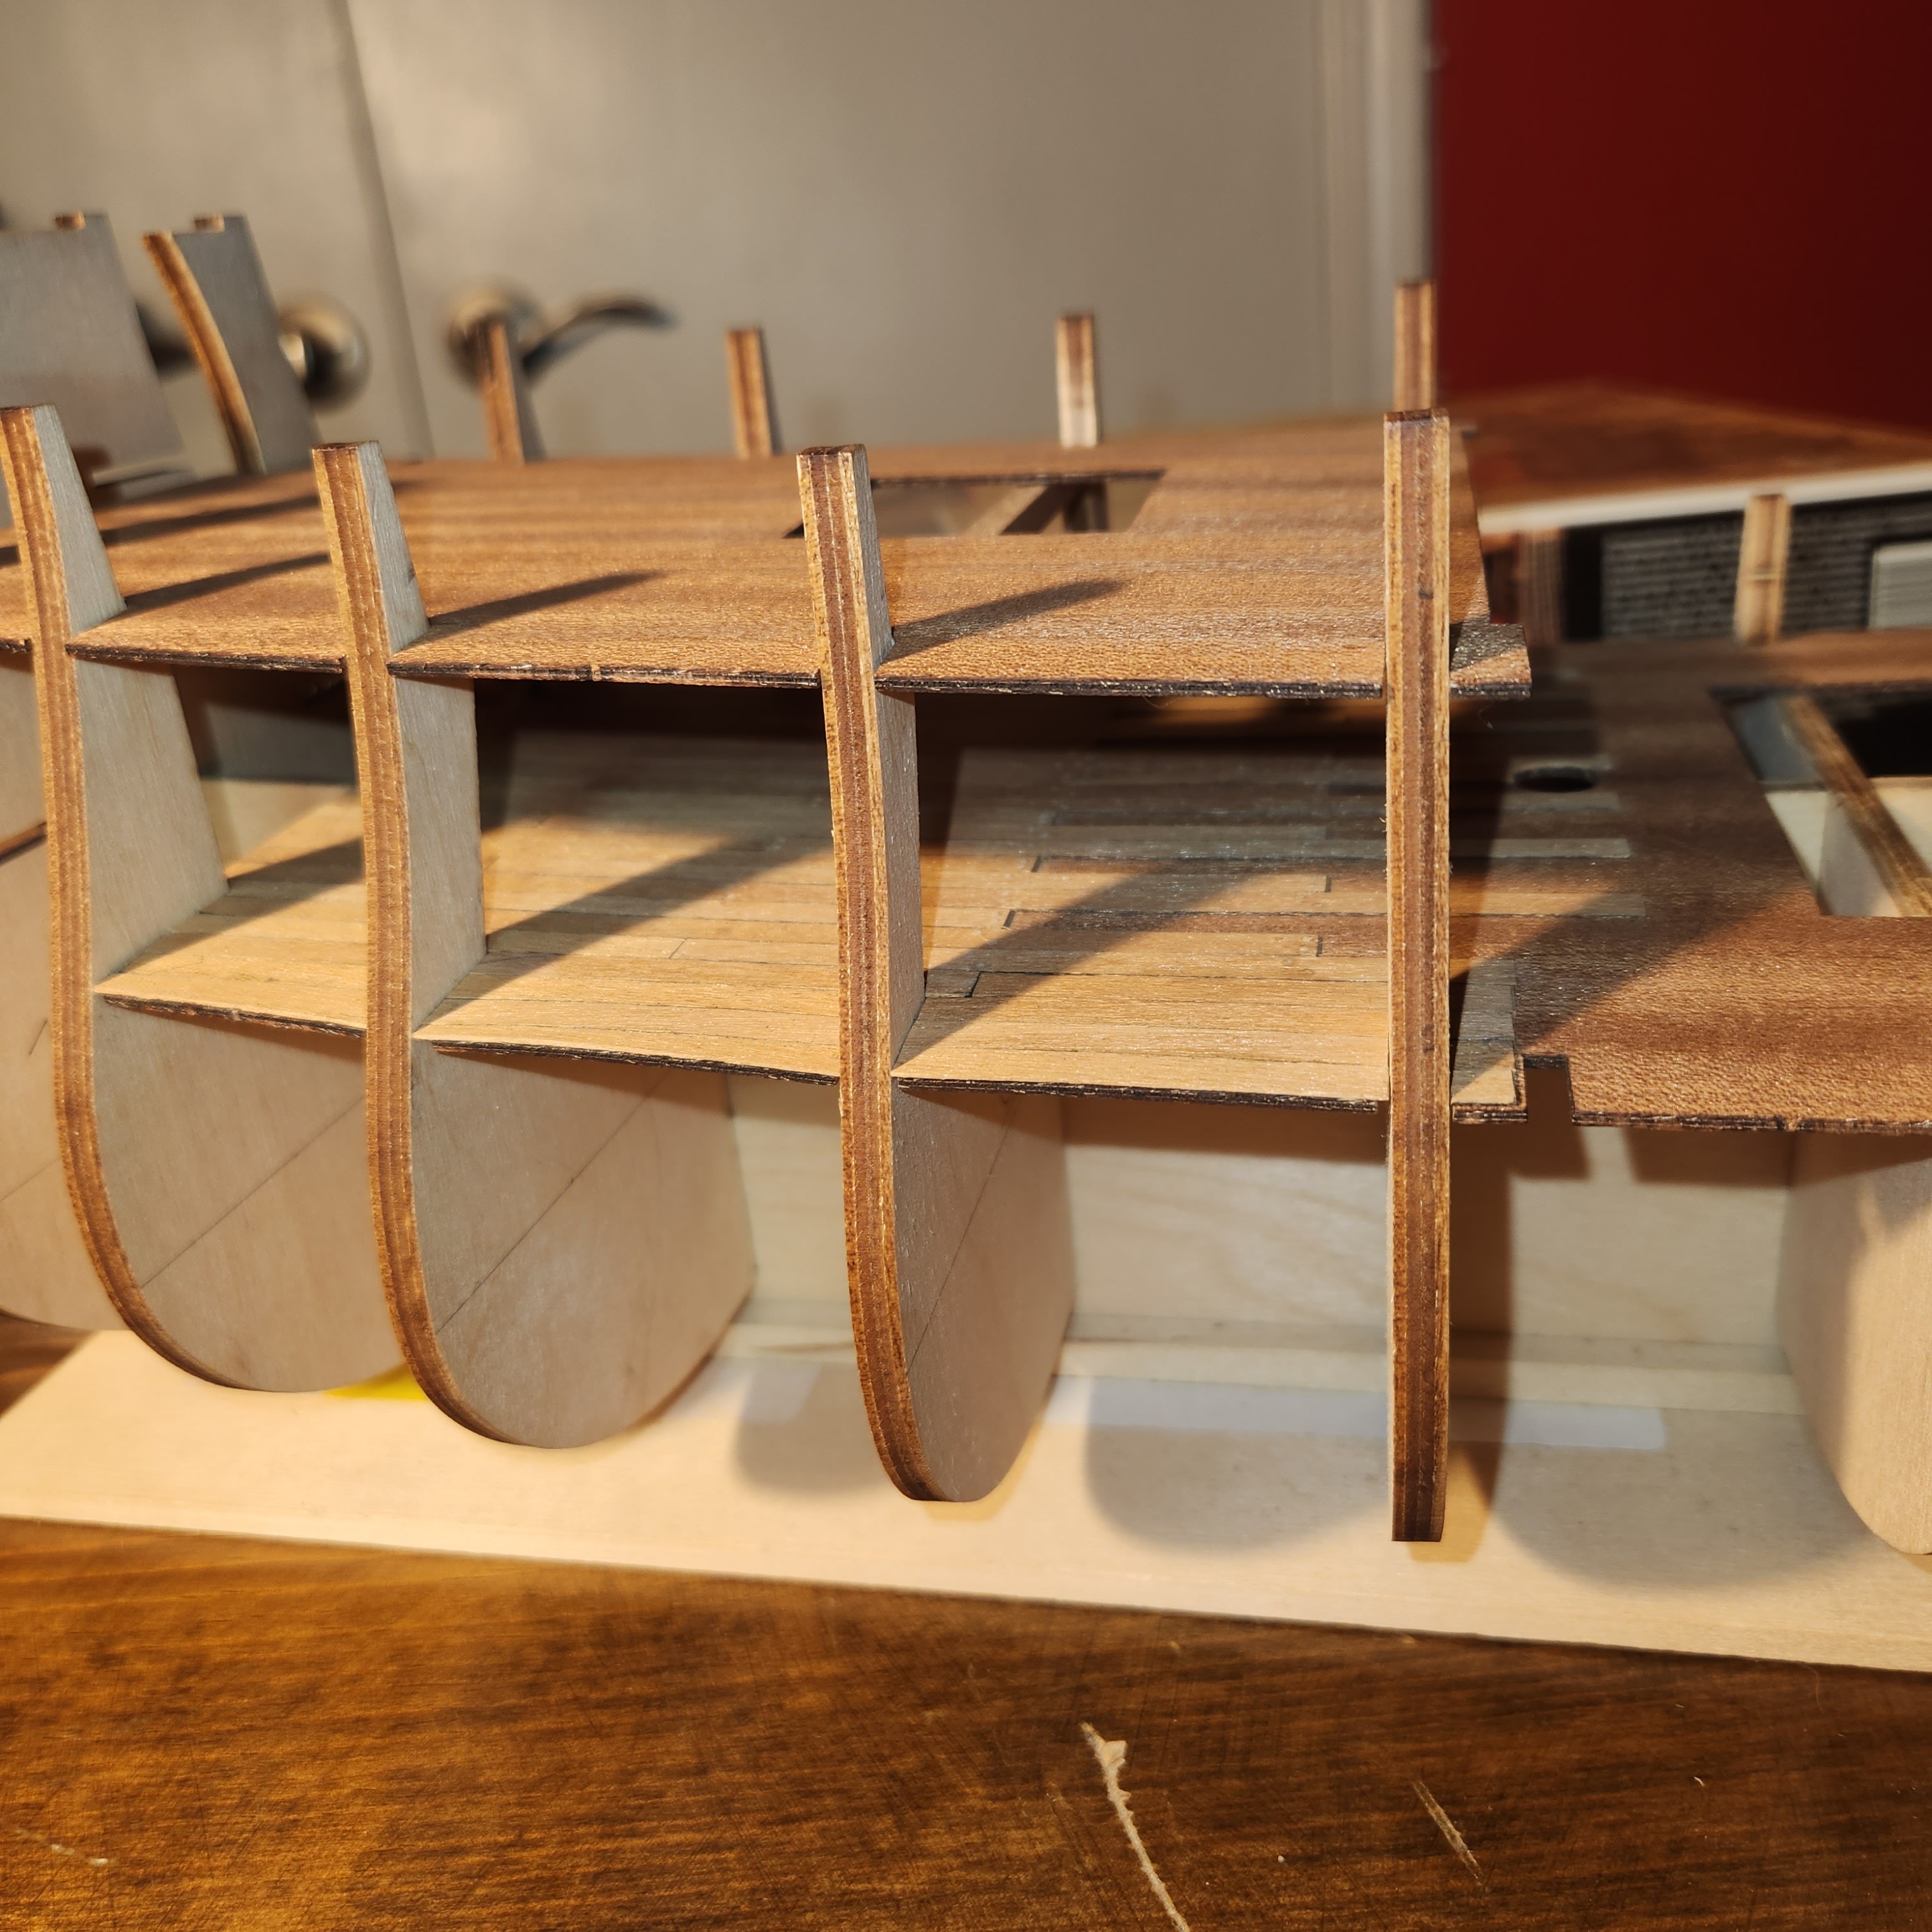
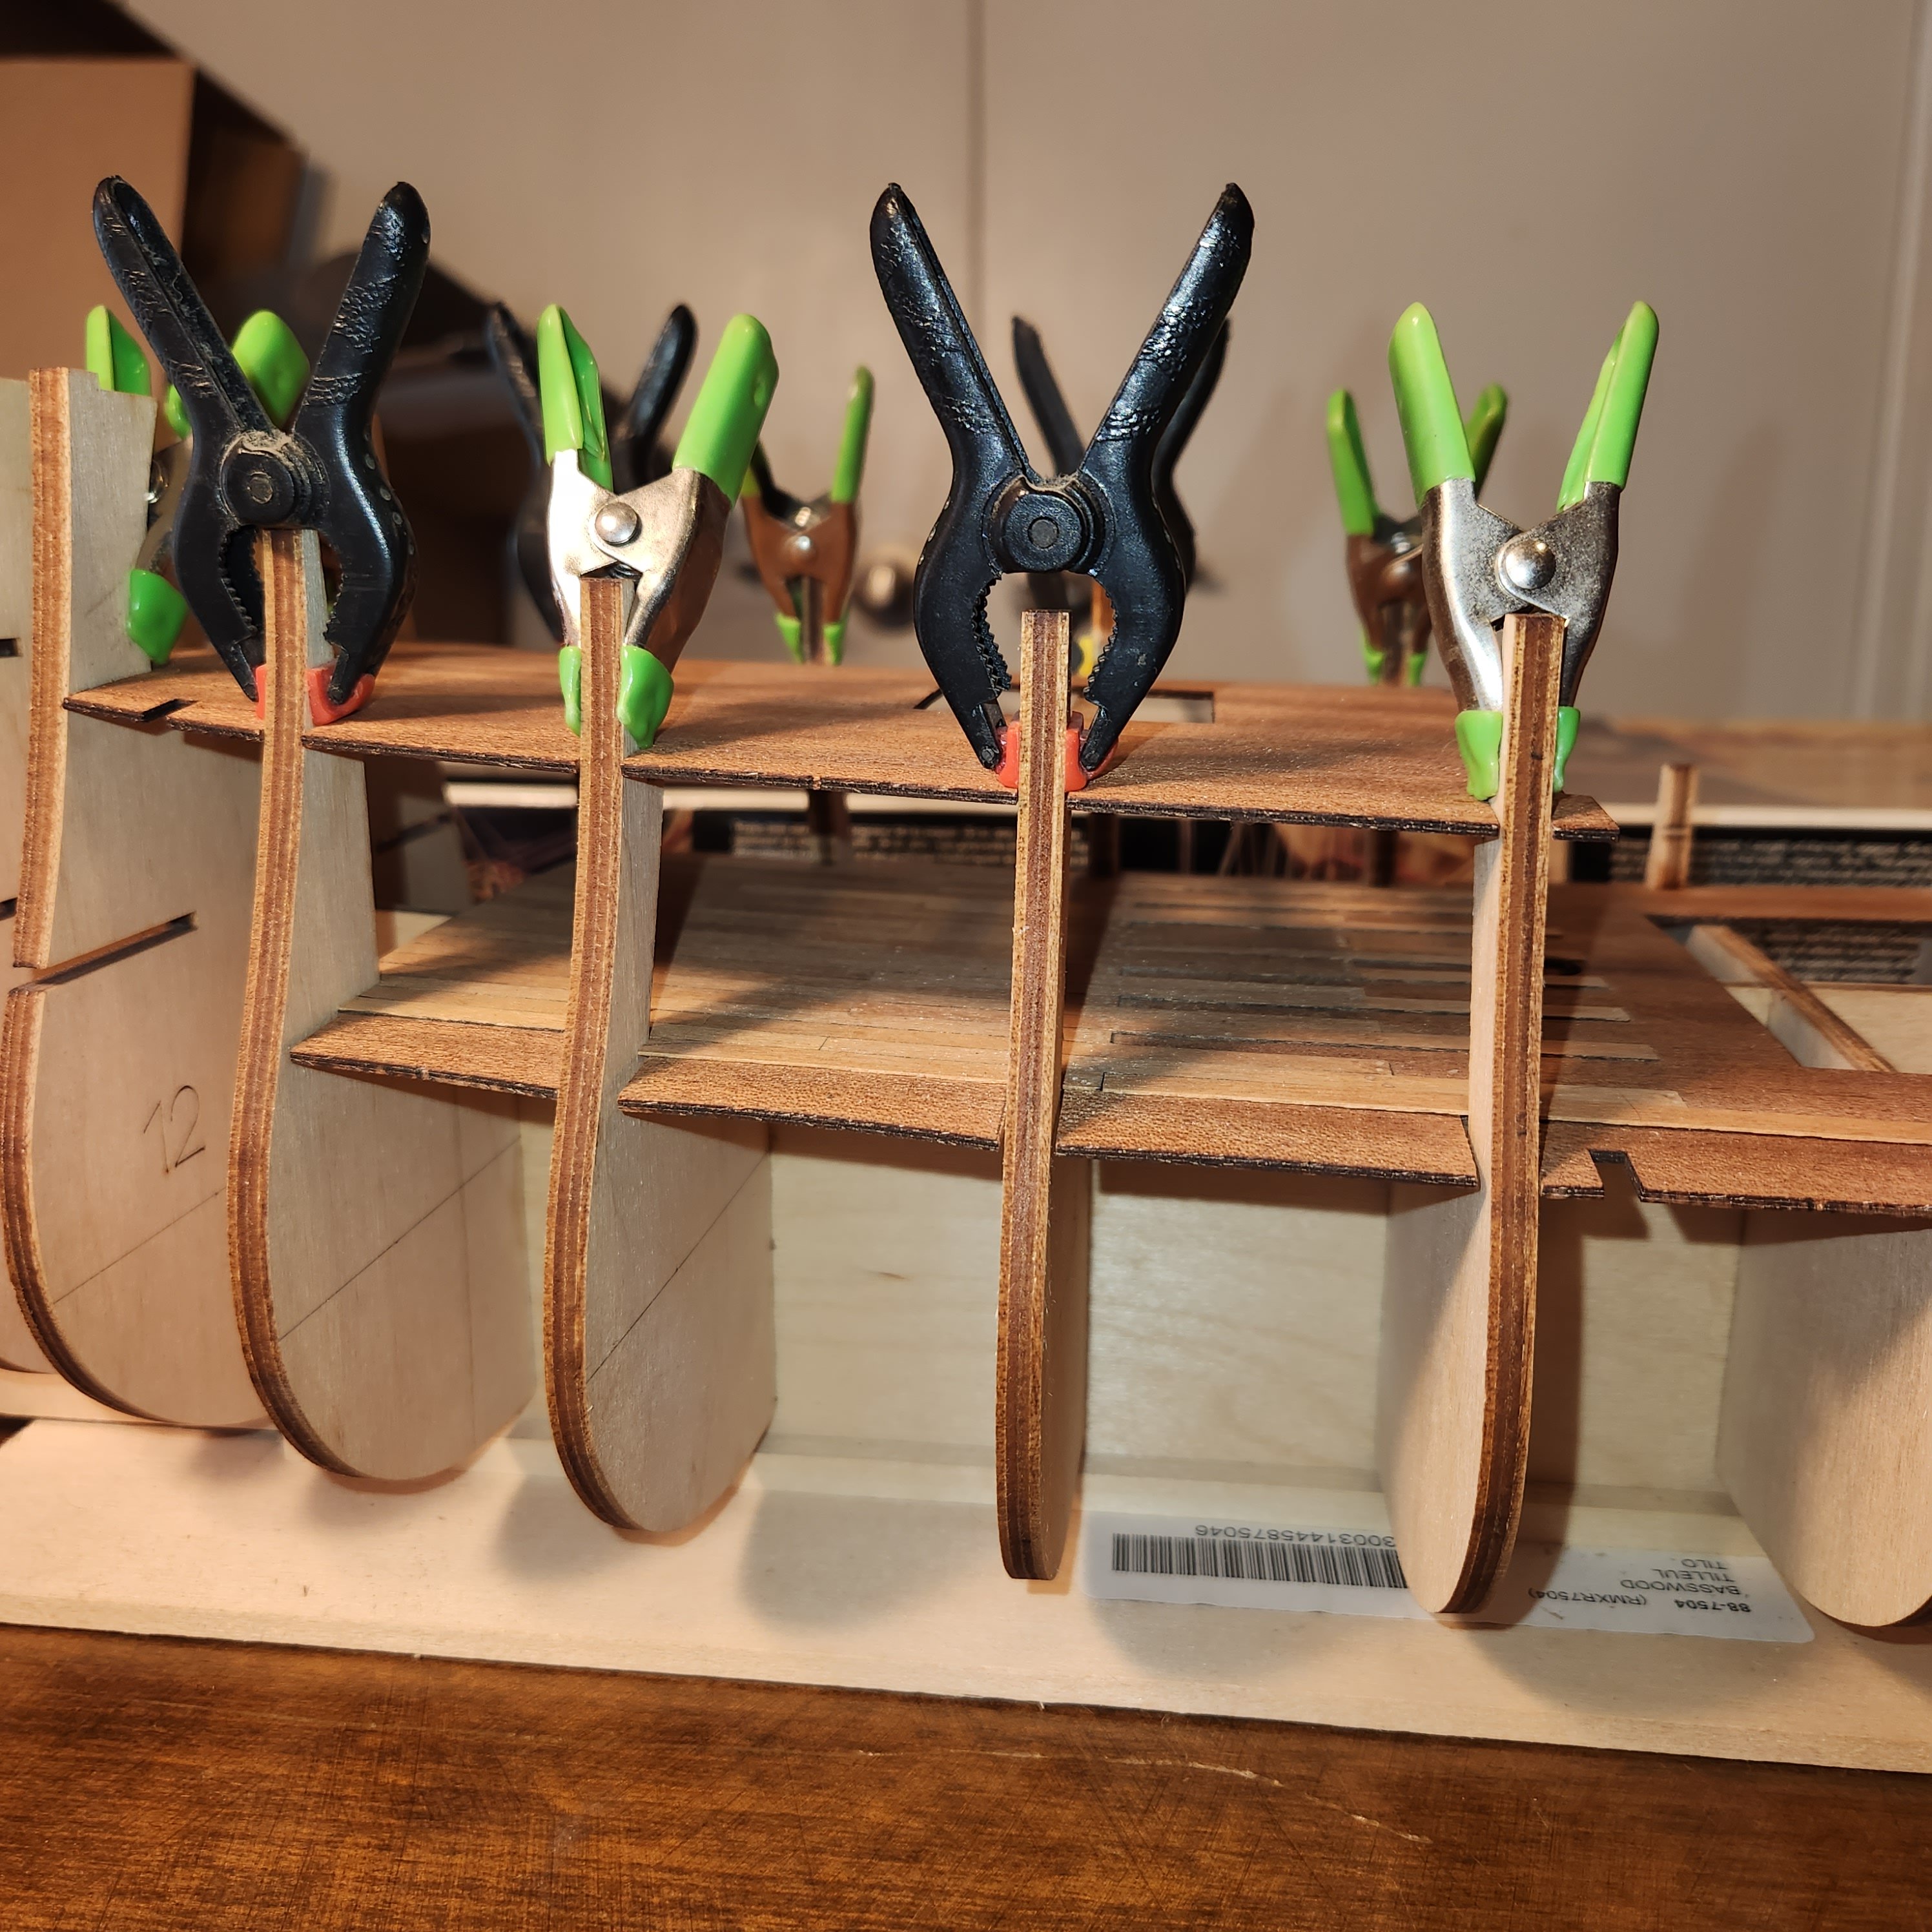
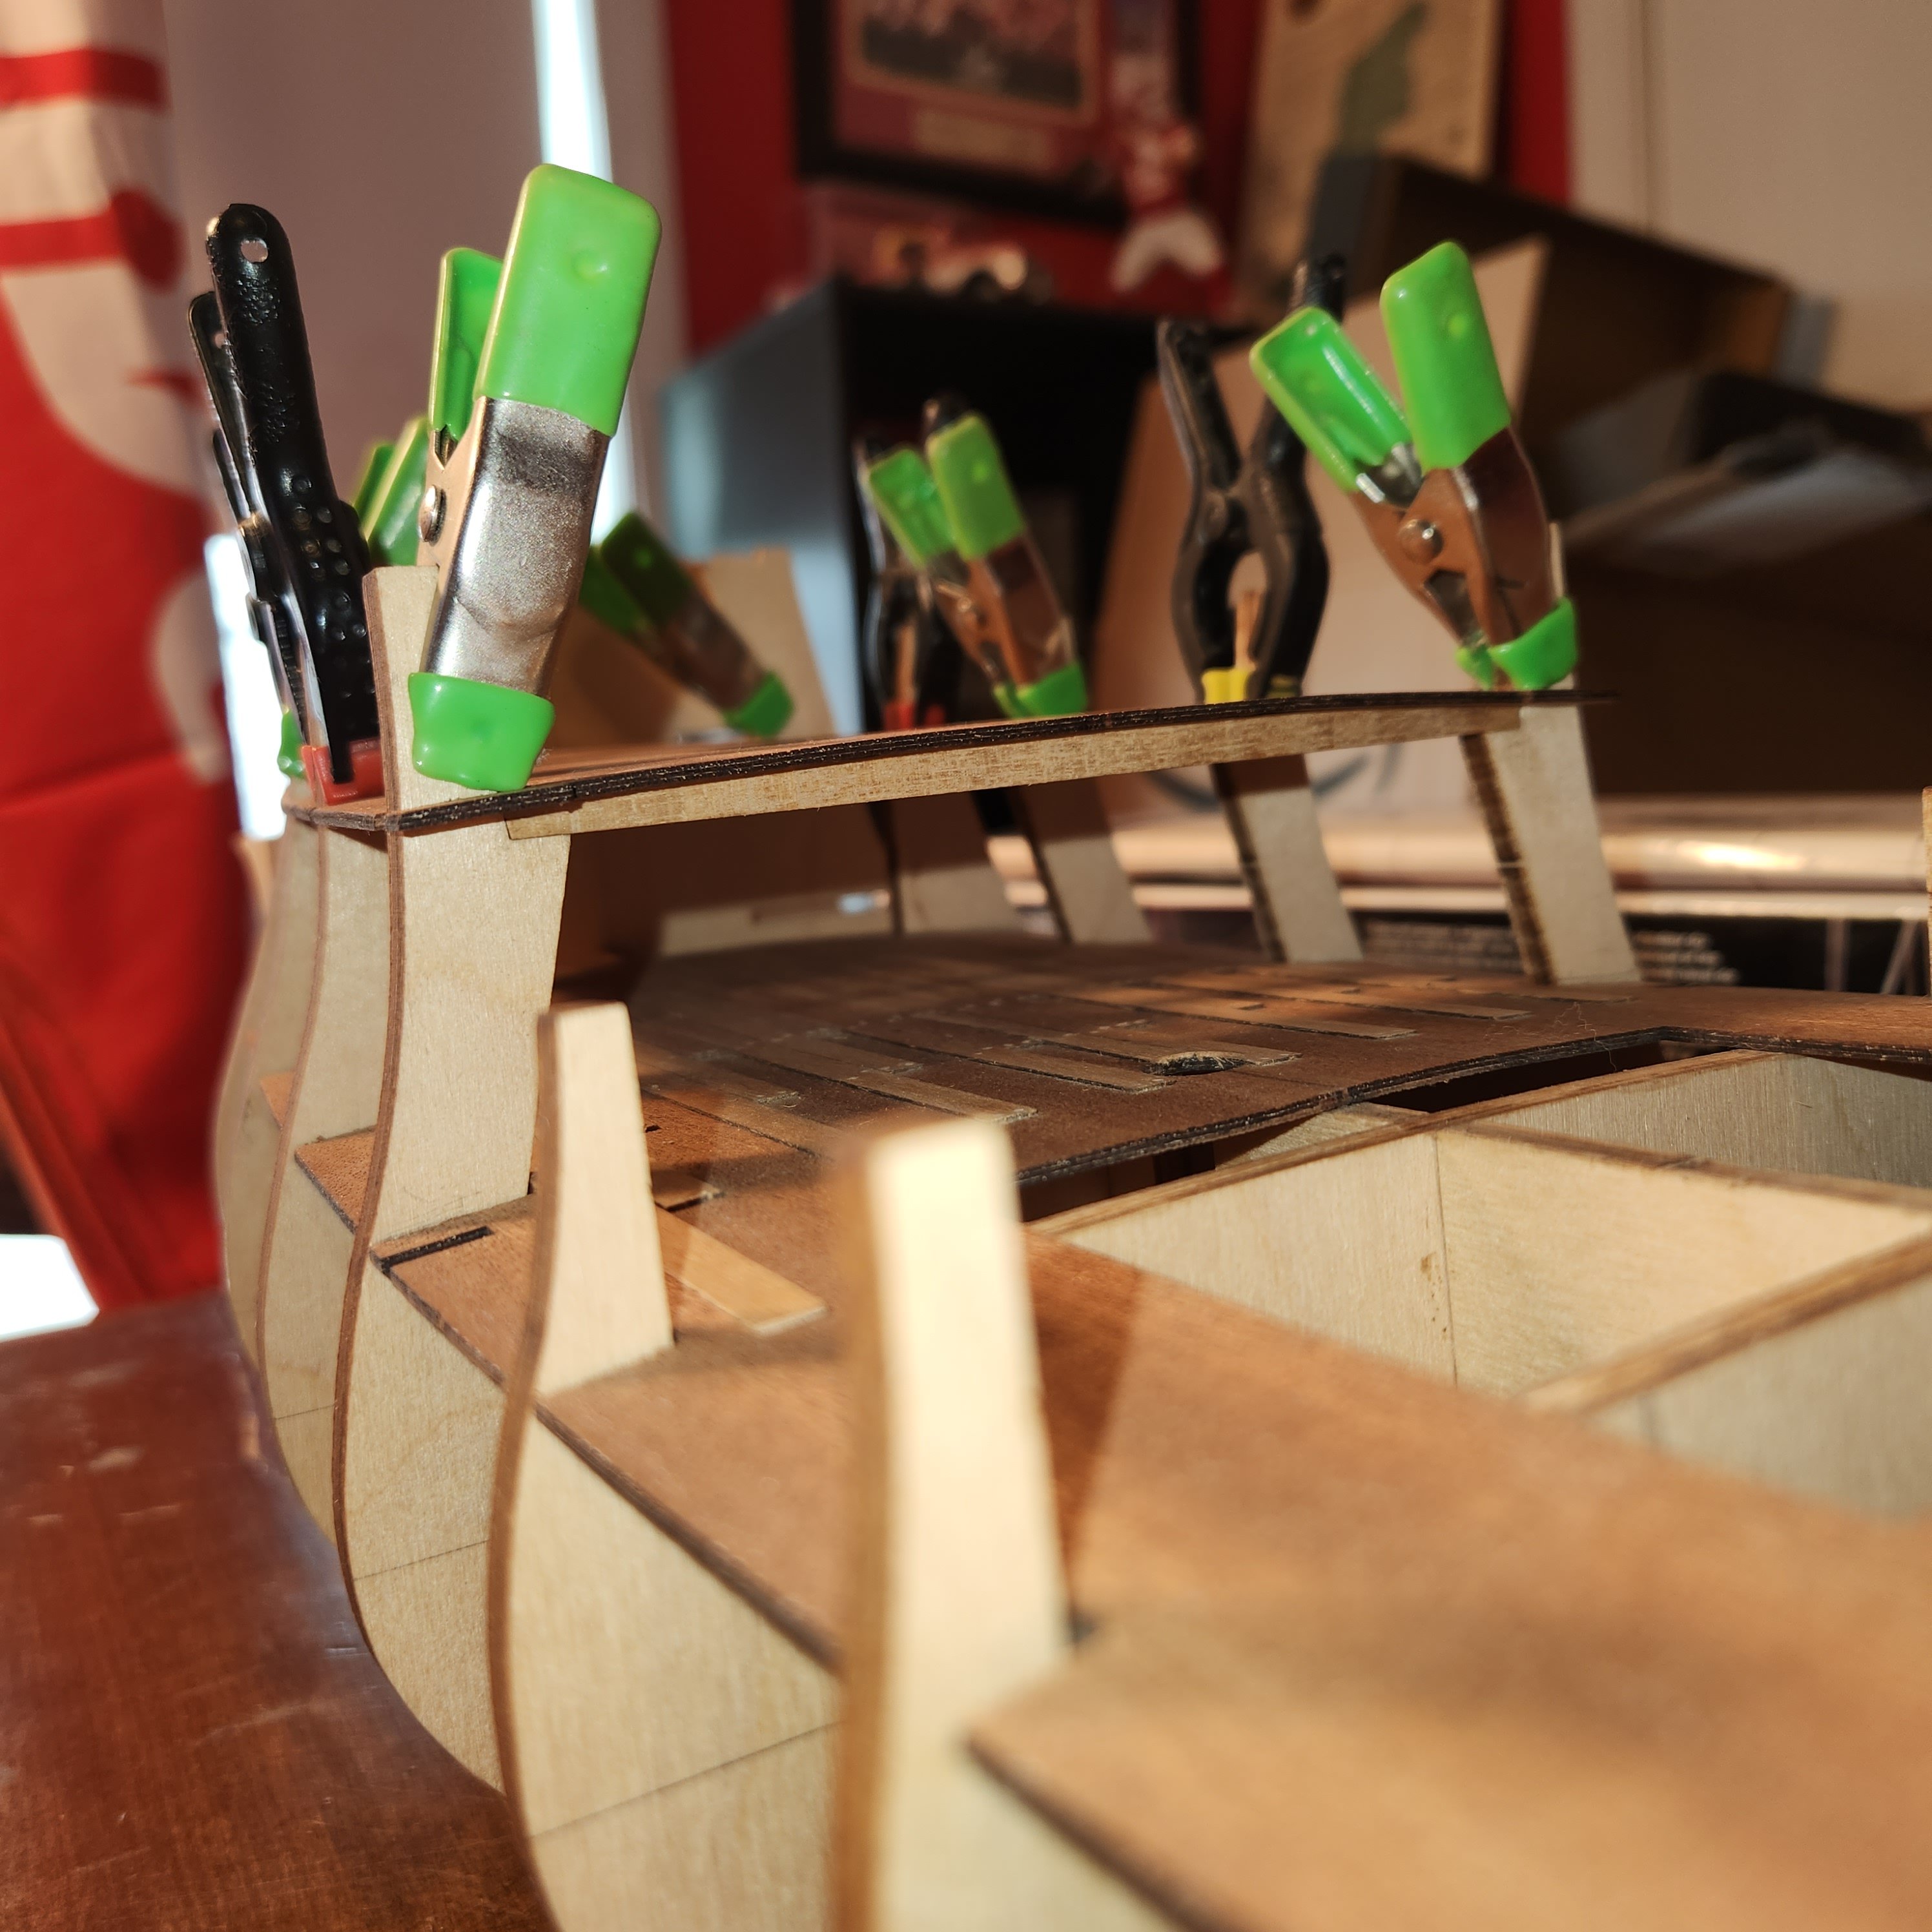
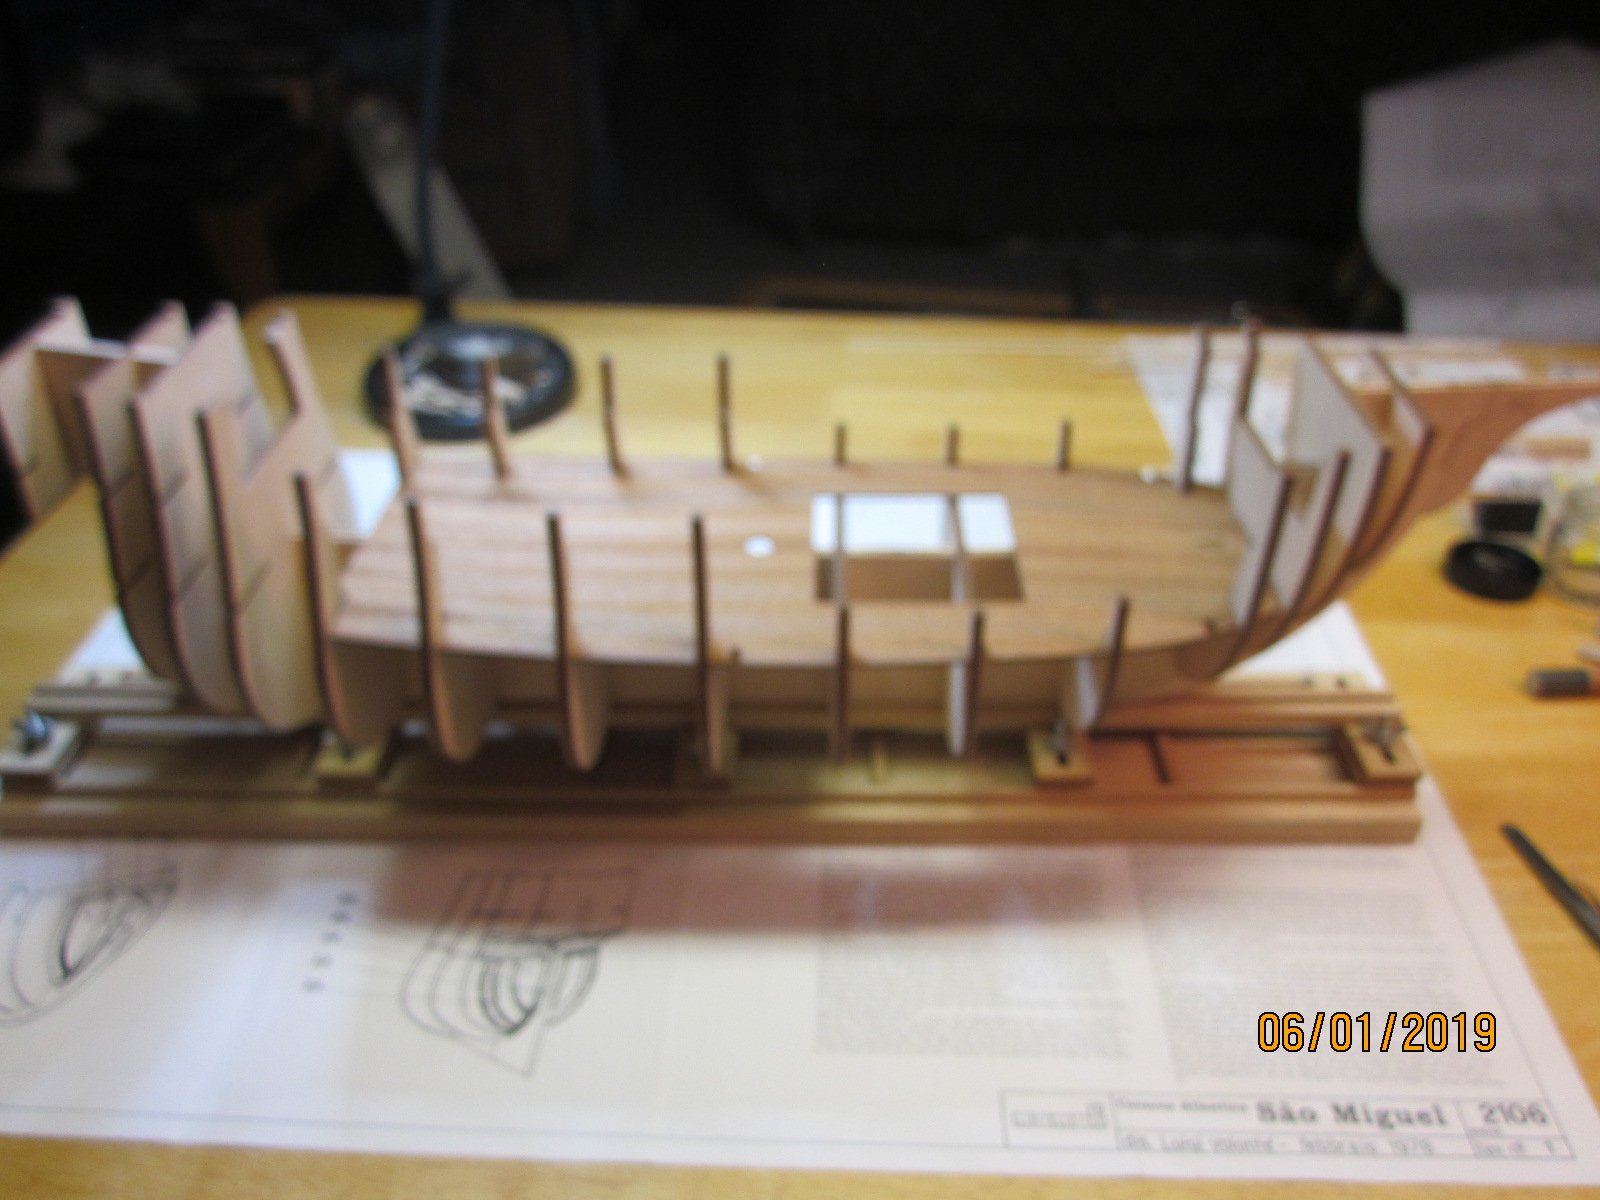
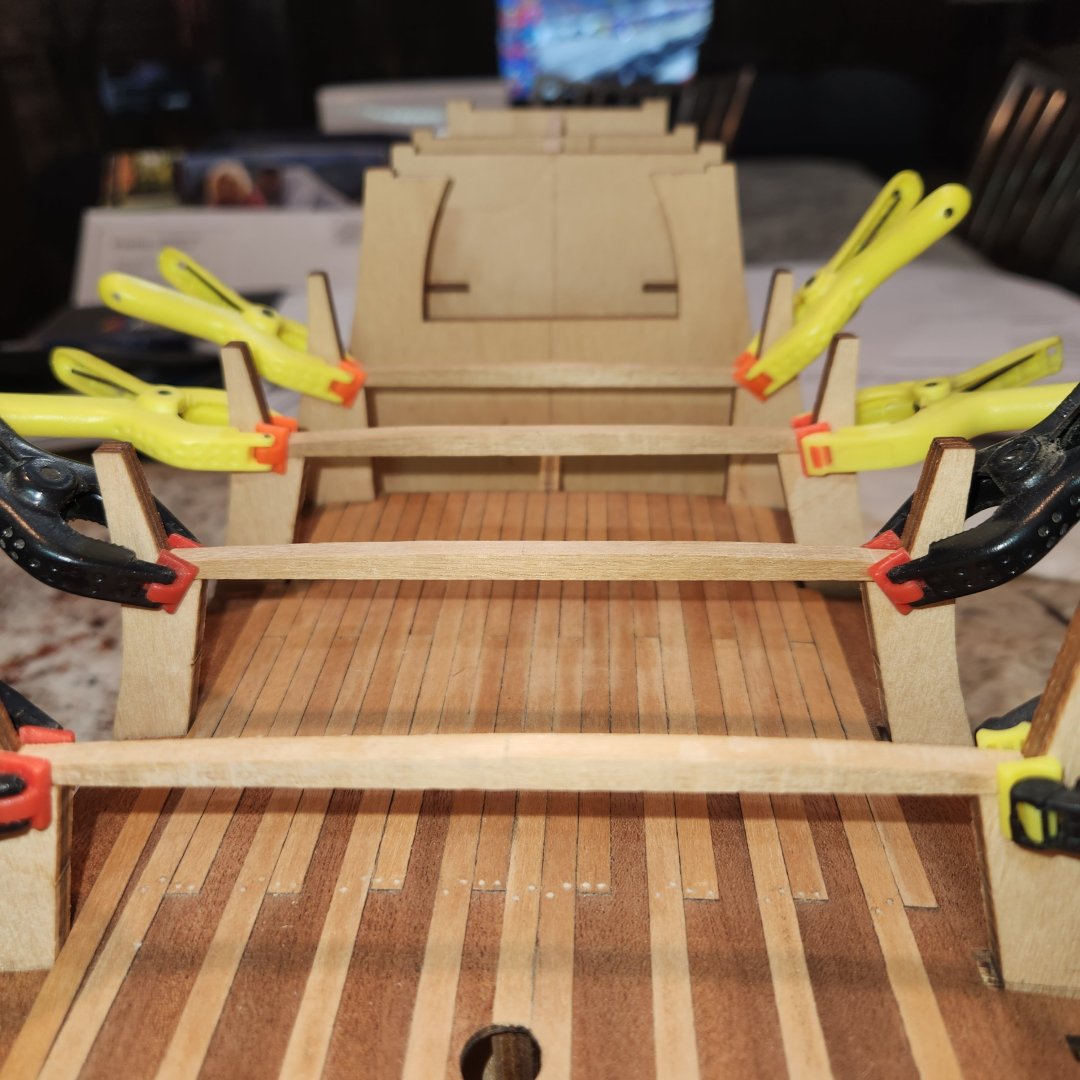
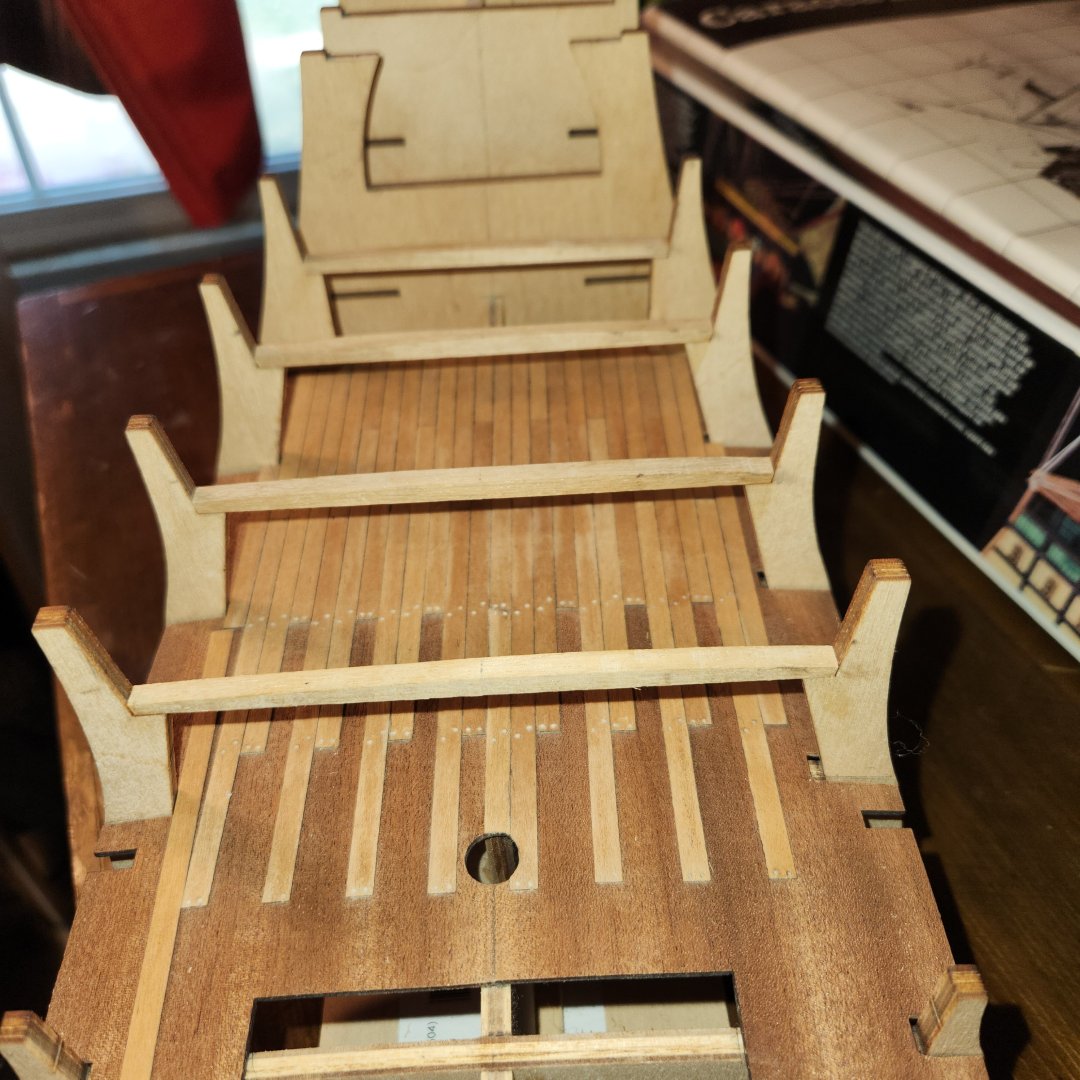
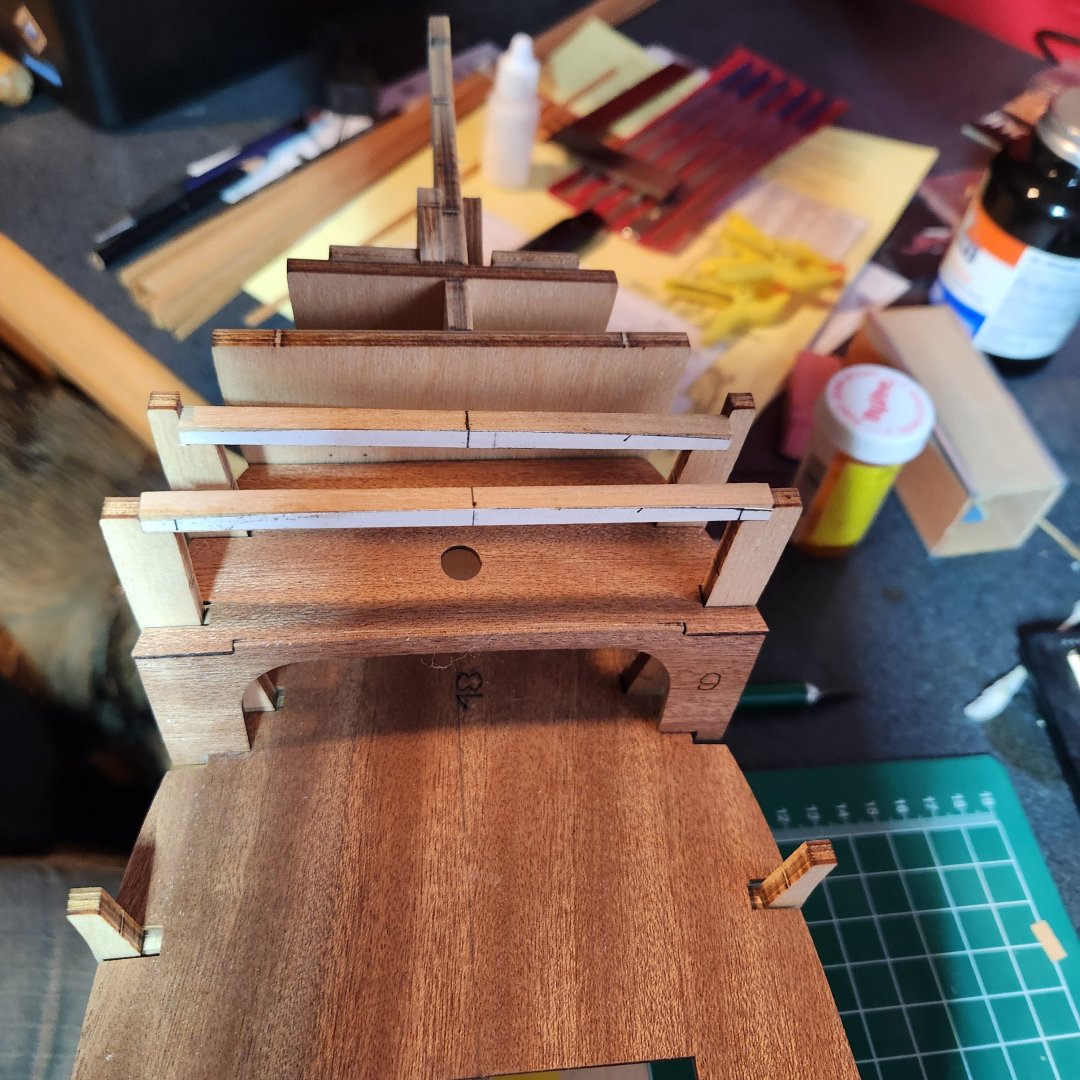
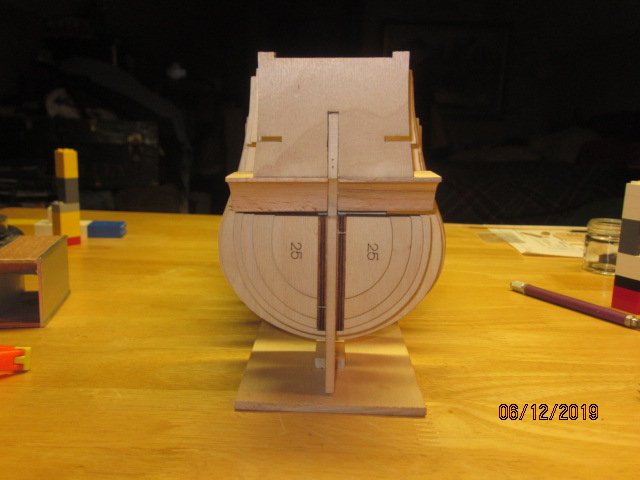
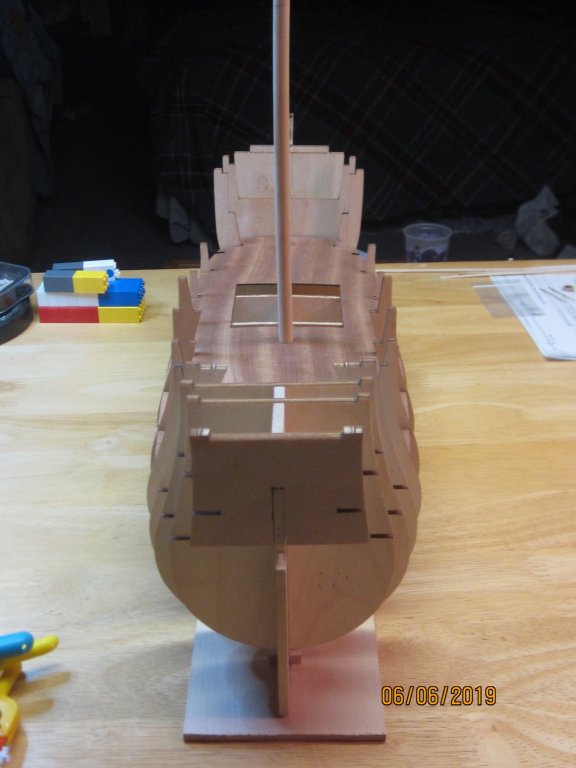
A little more work done. I've completed the planking below the quarter deck and added a few bits where the bulkhead will be installed. There was no mention of planking to the edges except in the drawings it showed the planking. I test fitted the bulkhead and will be installing it. Next i will be working on getting the poop deck installed. After taking some measurements on the bulkheads it looks like two of them have warped at the top by about 1mm so I might try to add a couple spacers to correct the warpage.


-
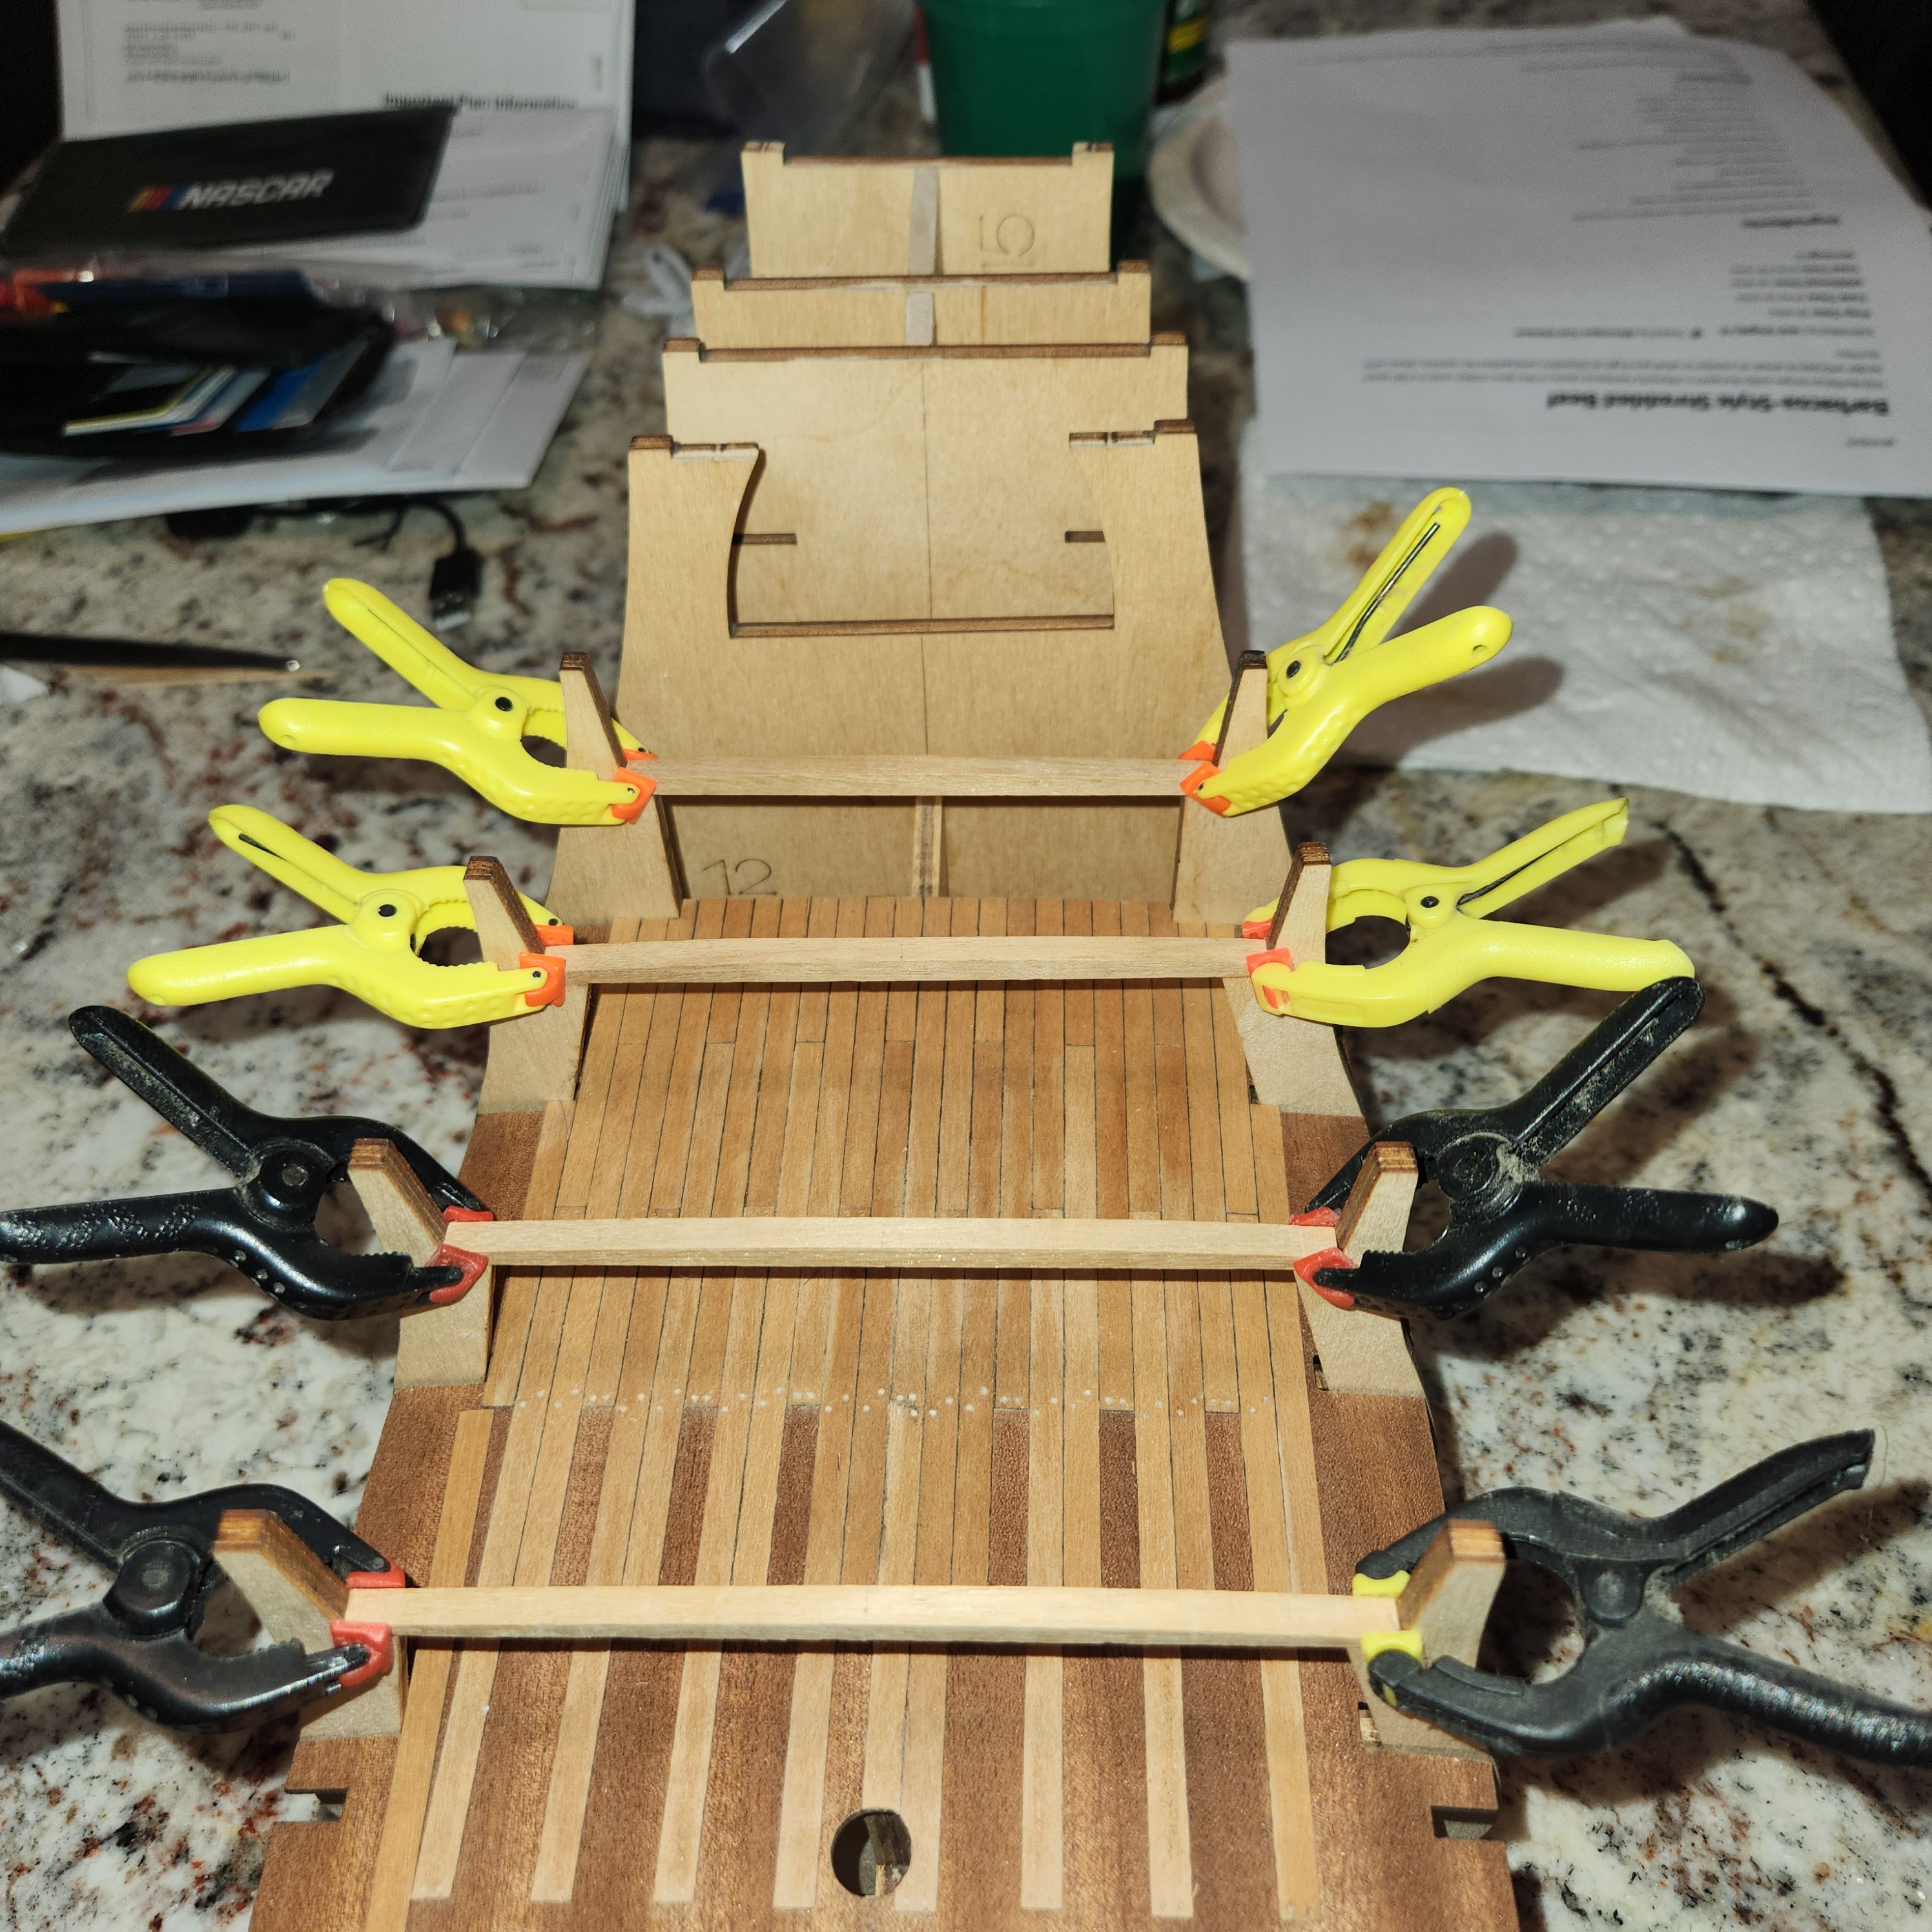
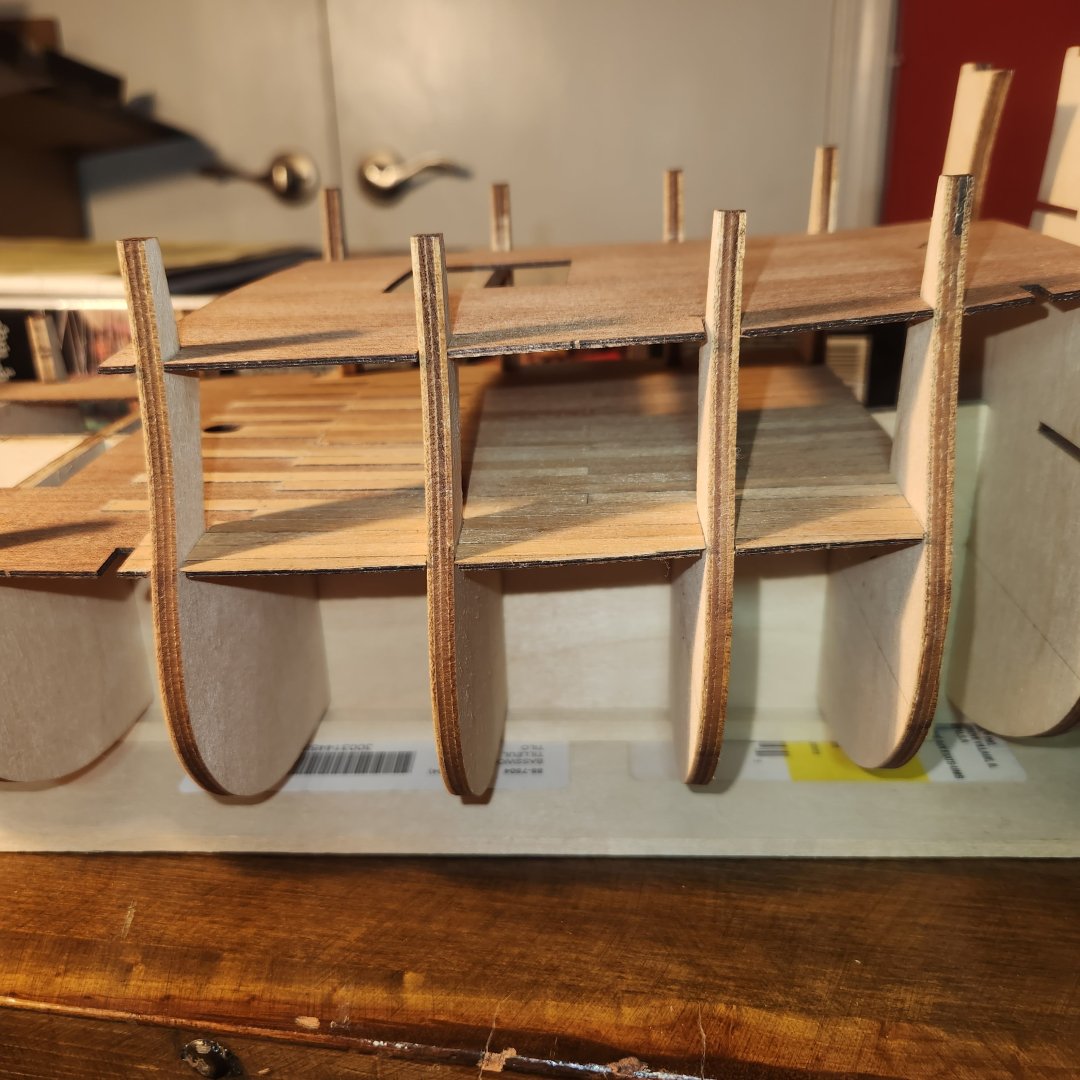
Got a bit more work done. I sanded the tee nails and after installing the beams I installed the quarter deck deck to the ship. Having a little trouble with the poop deck. (I haven't found the definition of decks for a carrack yet) For some reason it is off on the port side. The quarter deck went in fine, so I know my bulkheads are true and perpendicular to the 'keel'. But I will see what I can do. I checked the distances between the lower & quarter decks and it is equal on port & starboard.


-
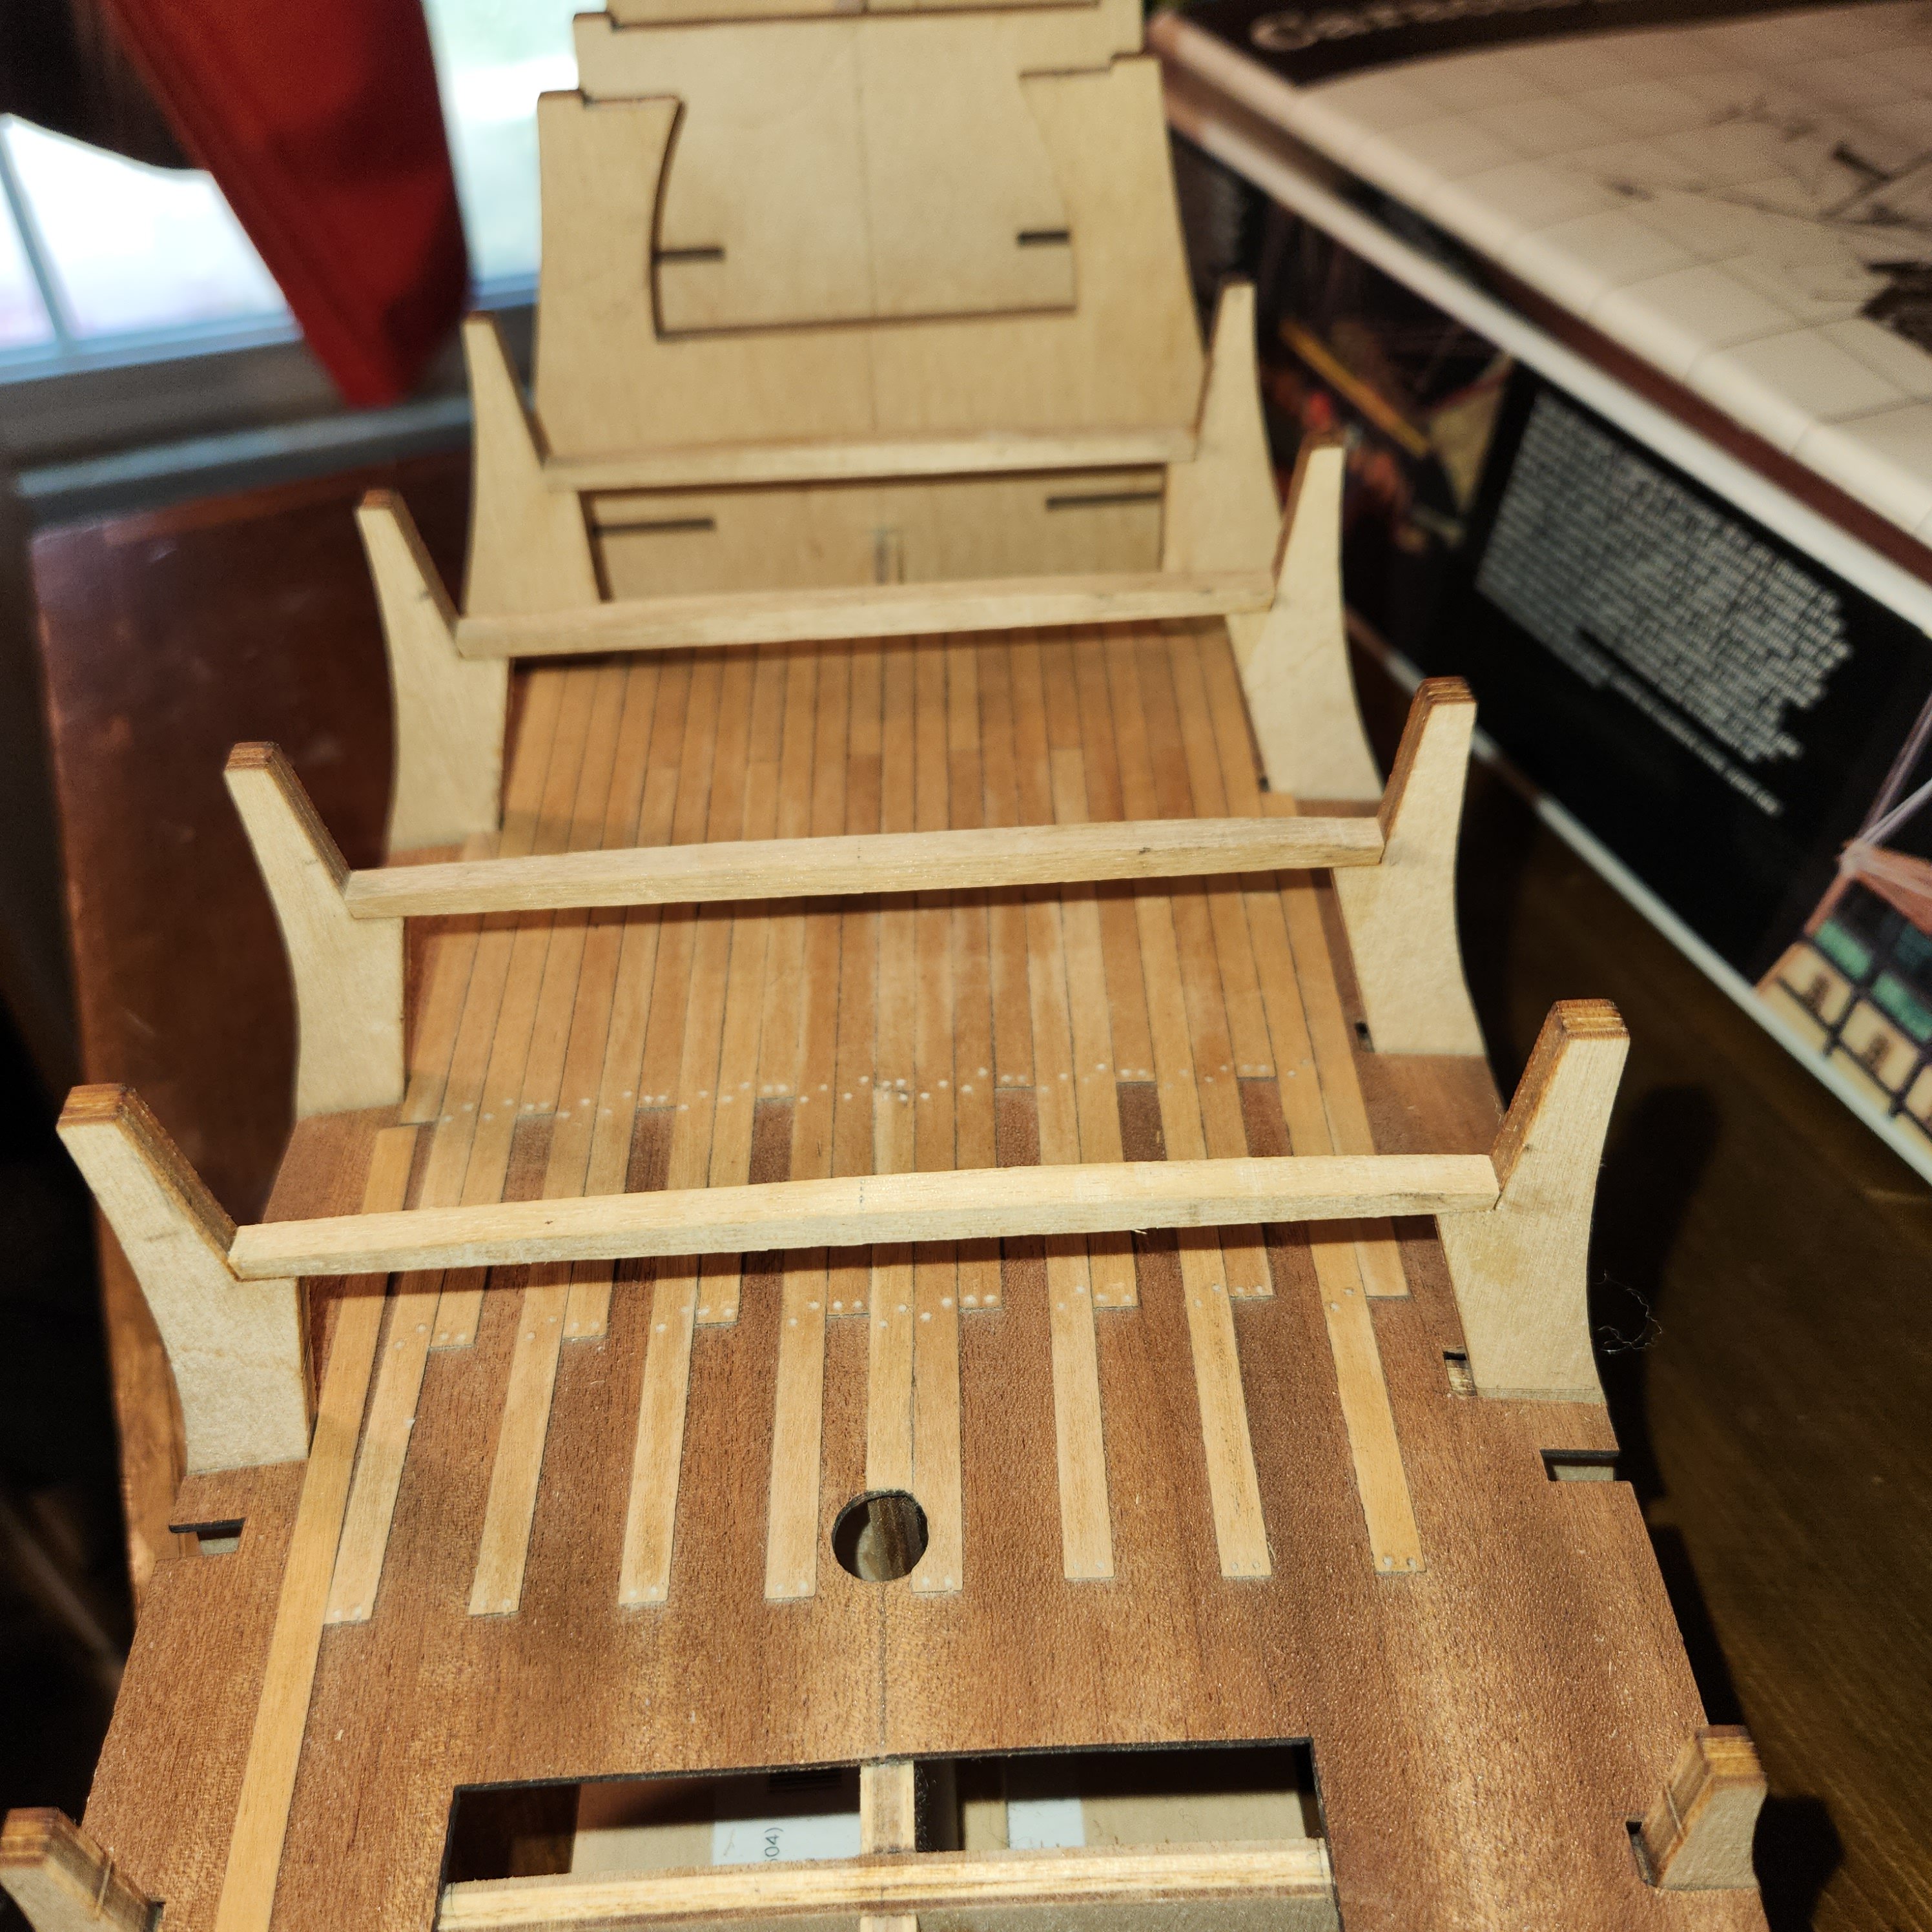
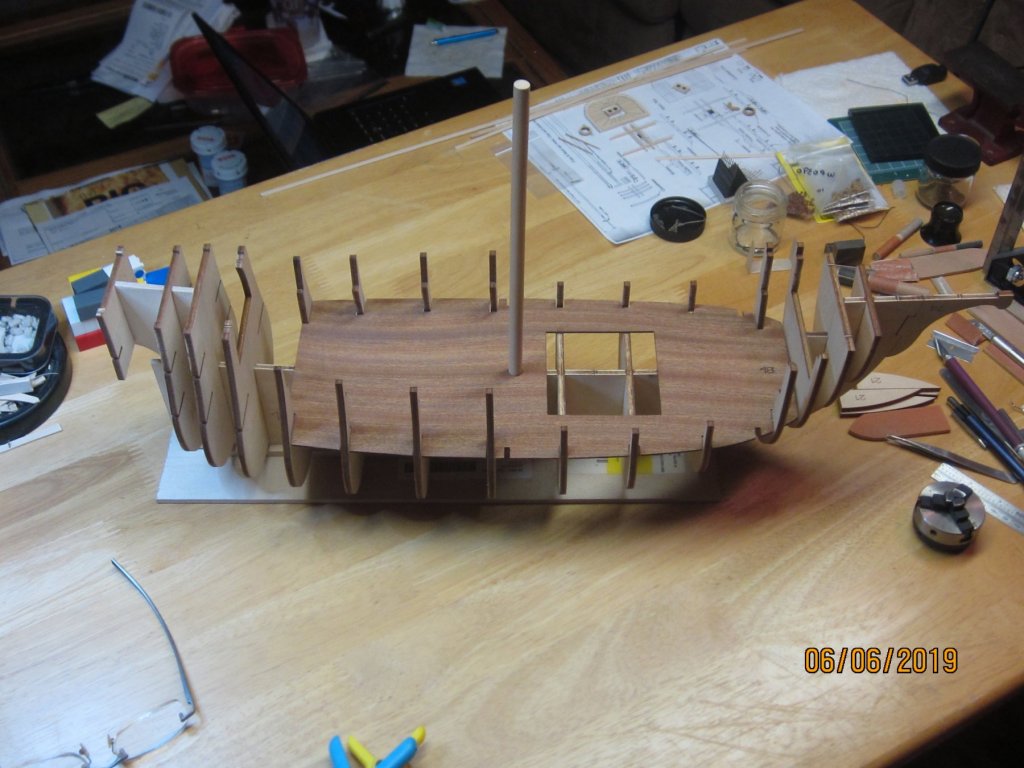
Greetings all, I'm finally back to working on my ship. I've added more planking and tree nails (a little bit of sanding and they should look good) to the section that will be seen once completed. I have my beams cut, sanded and test fitted and will begin to fair them to the proper slope. It's good to get back to it!!


-
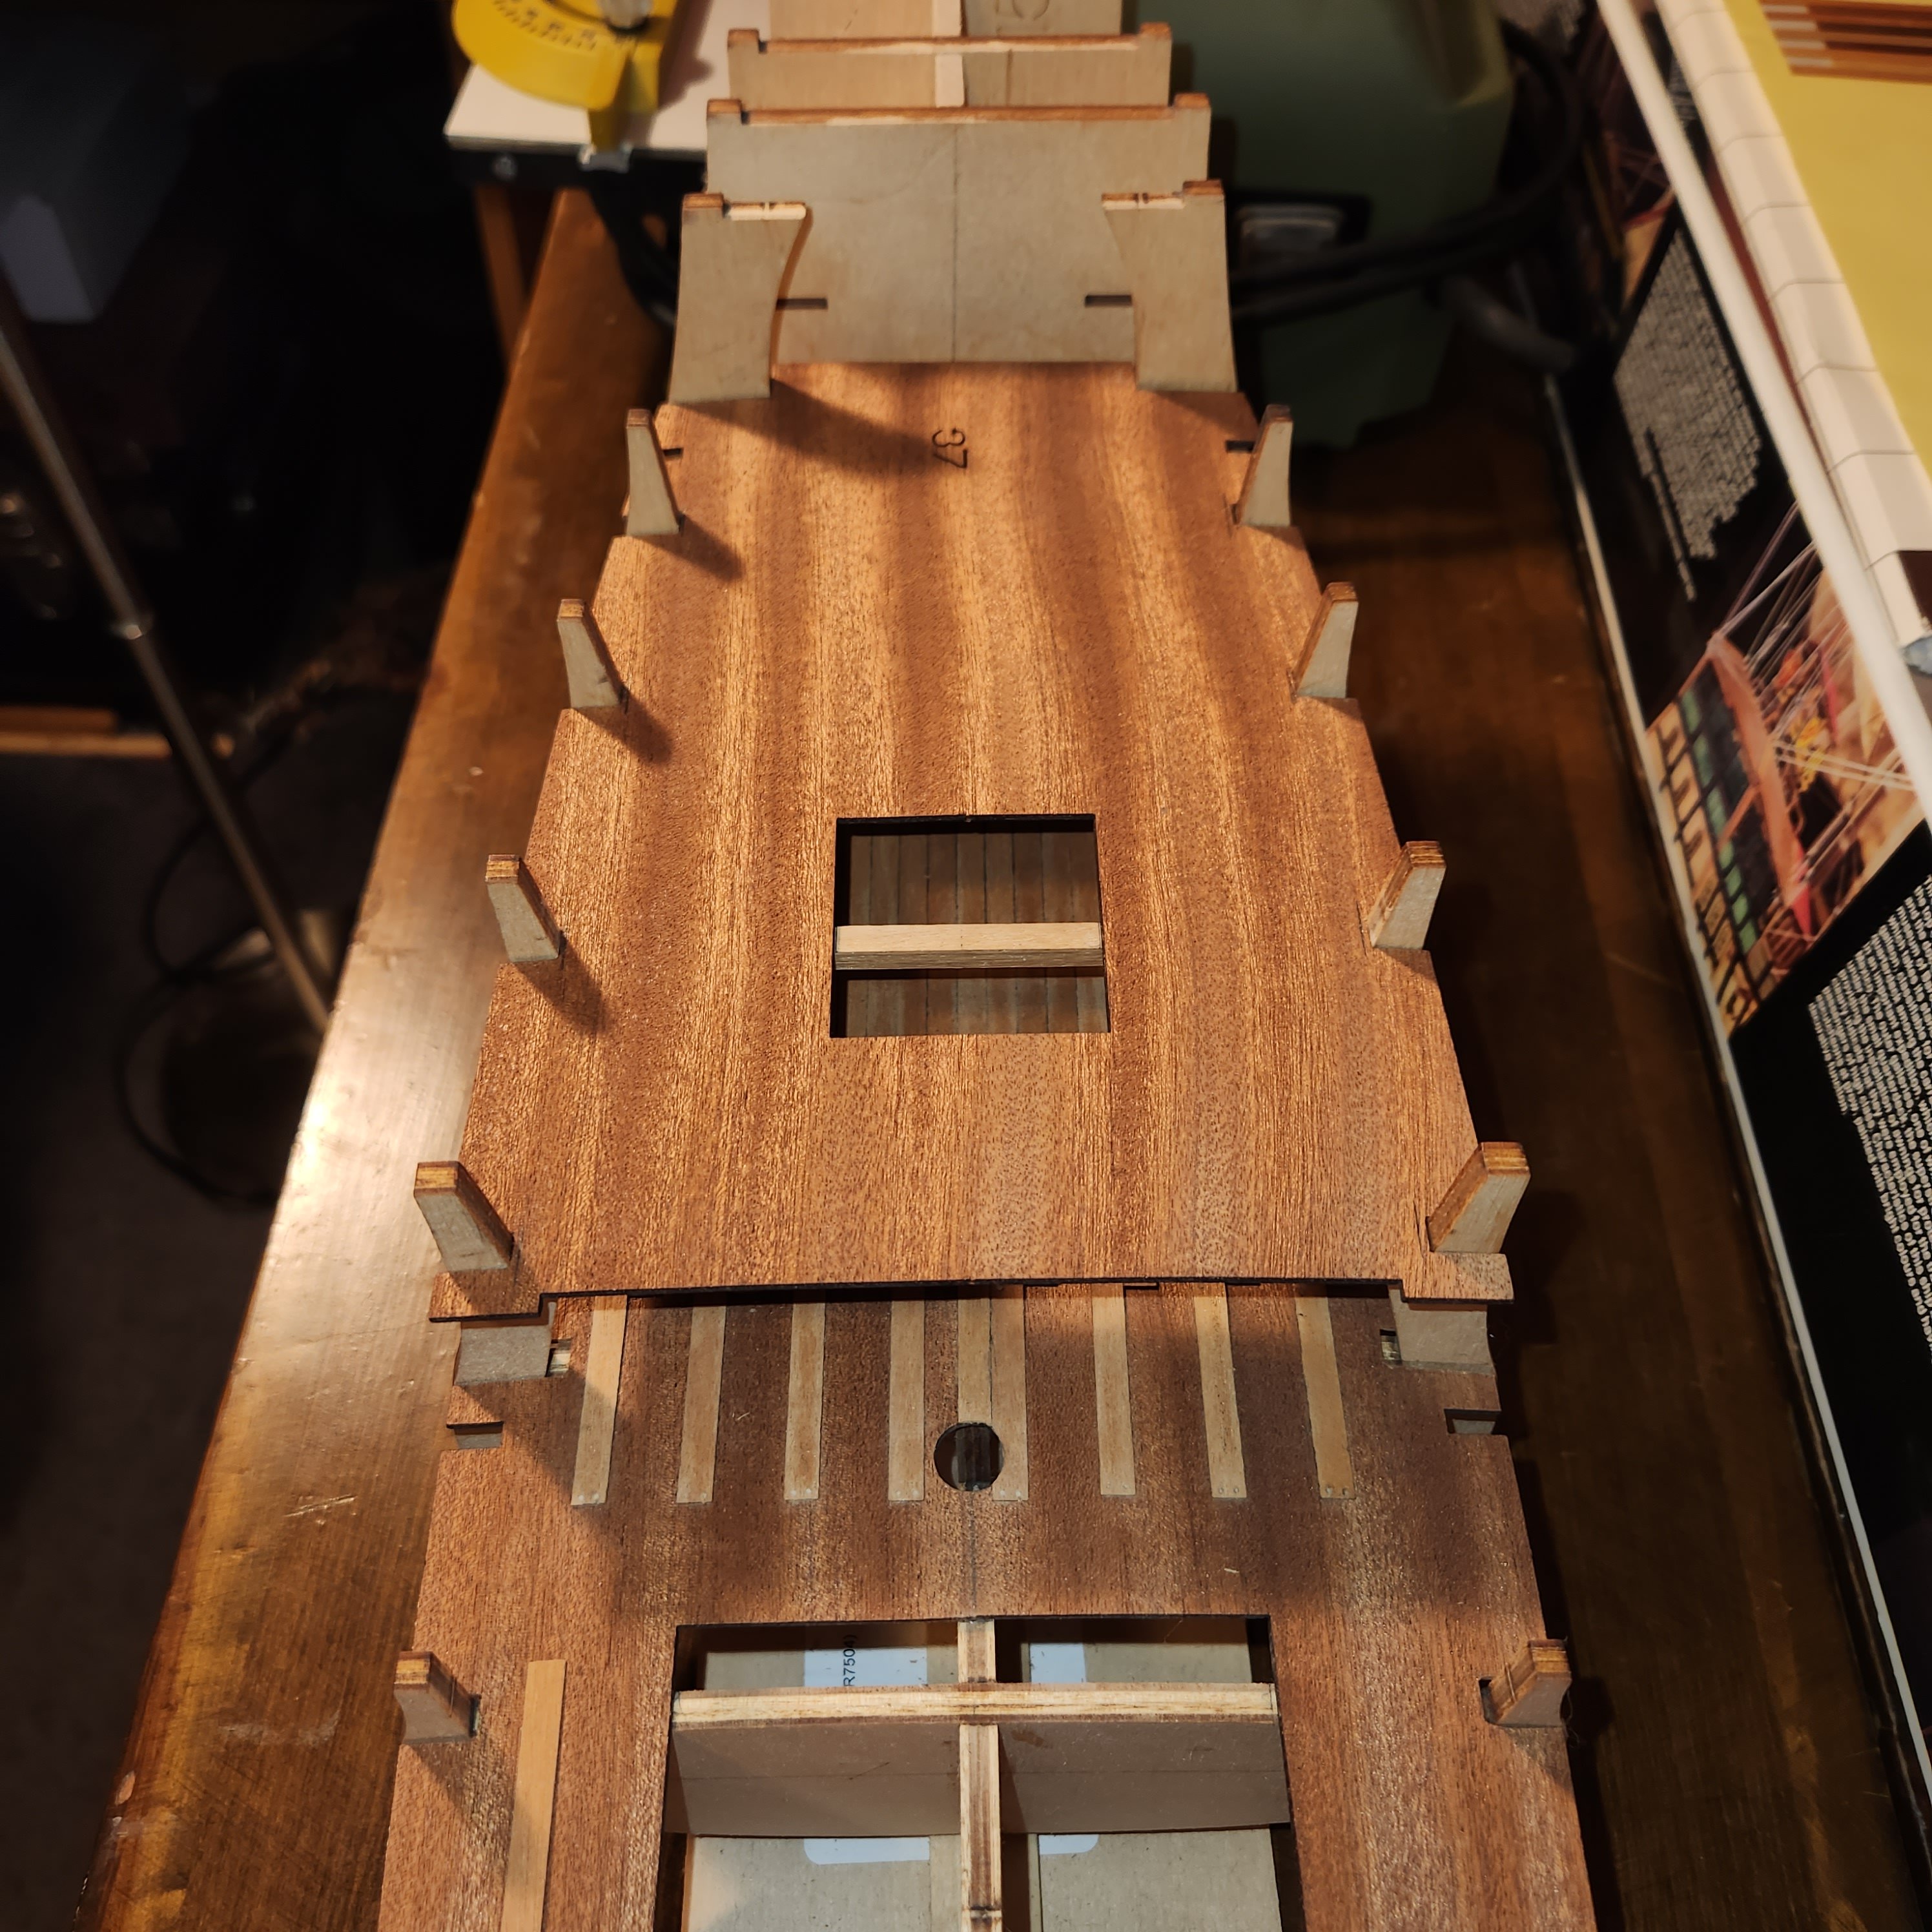
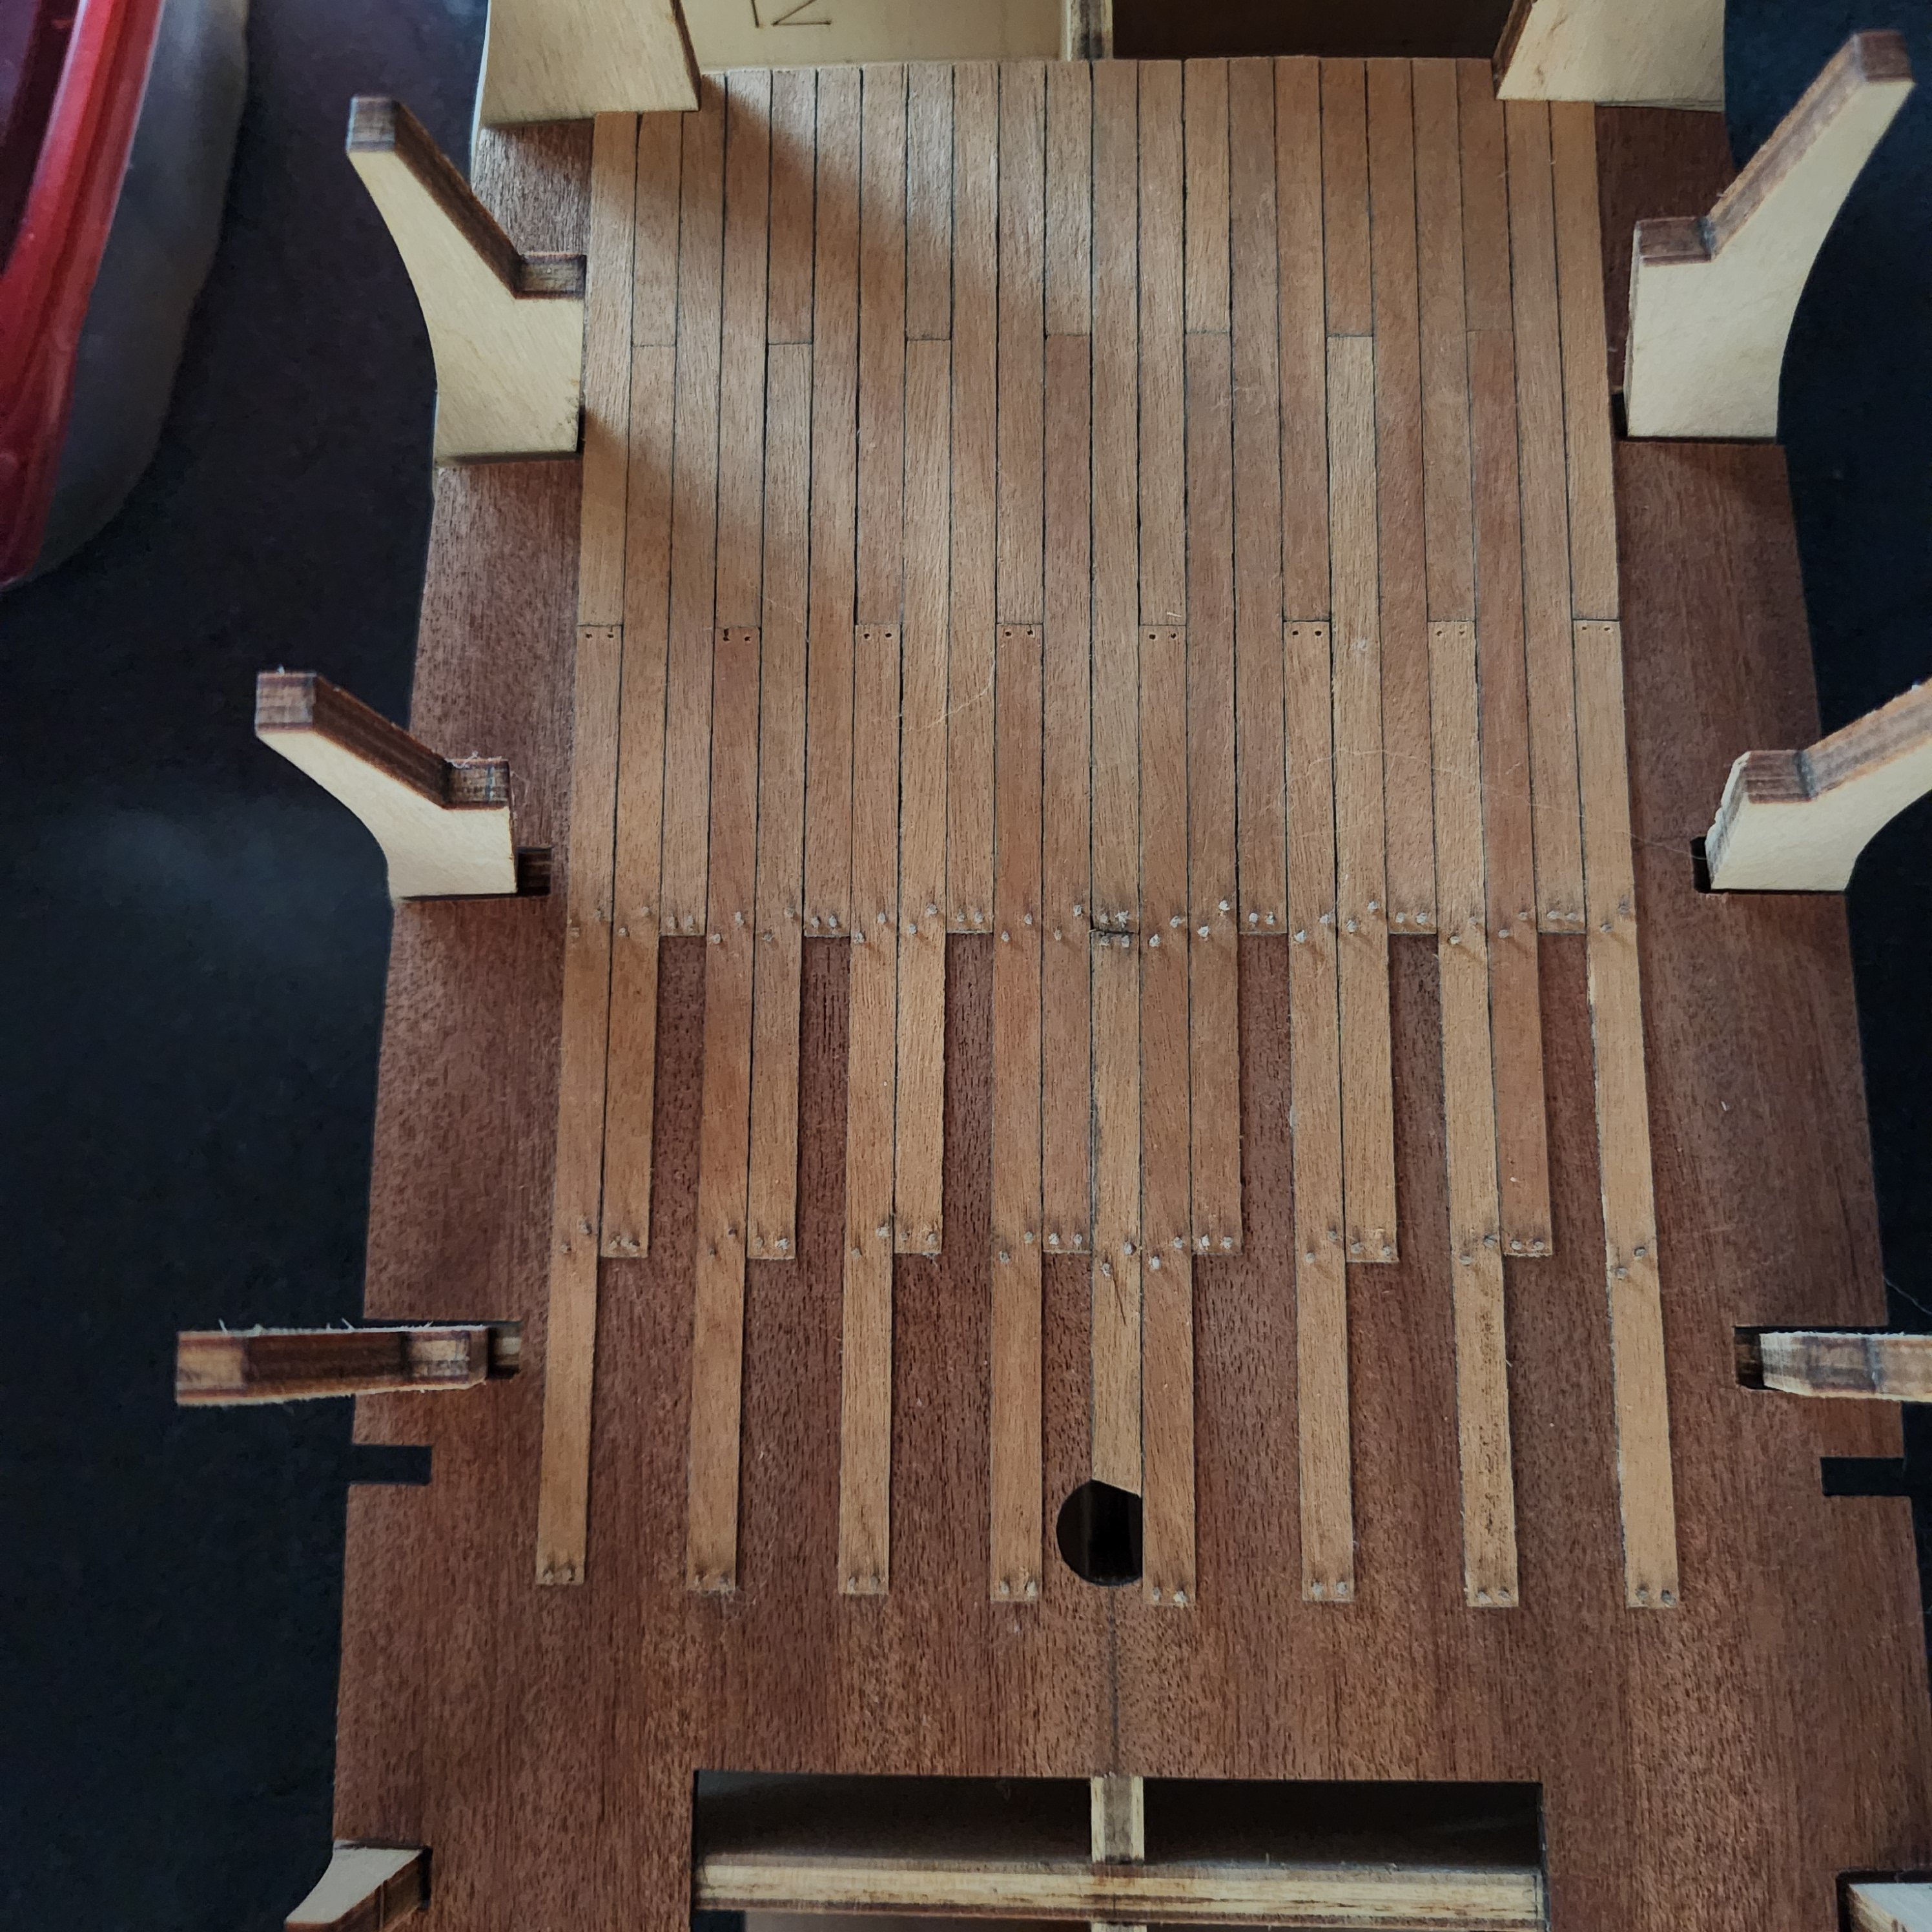
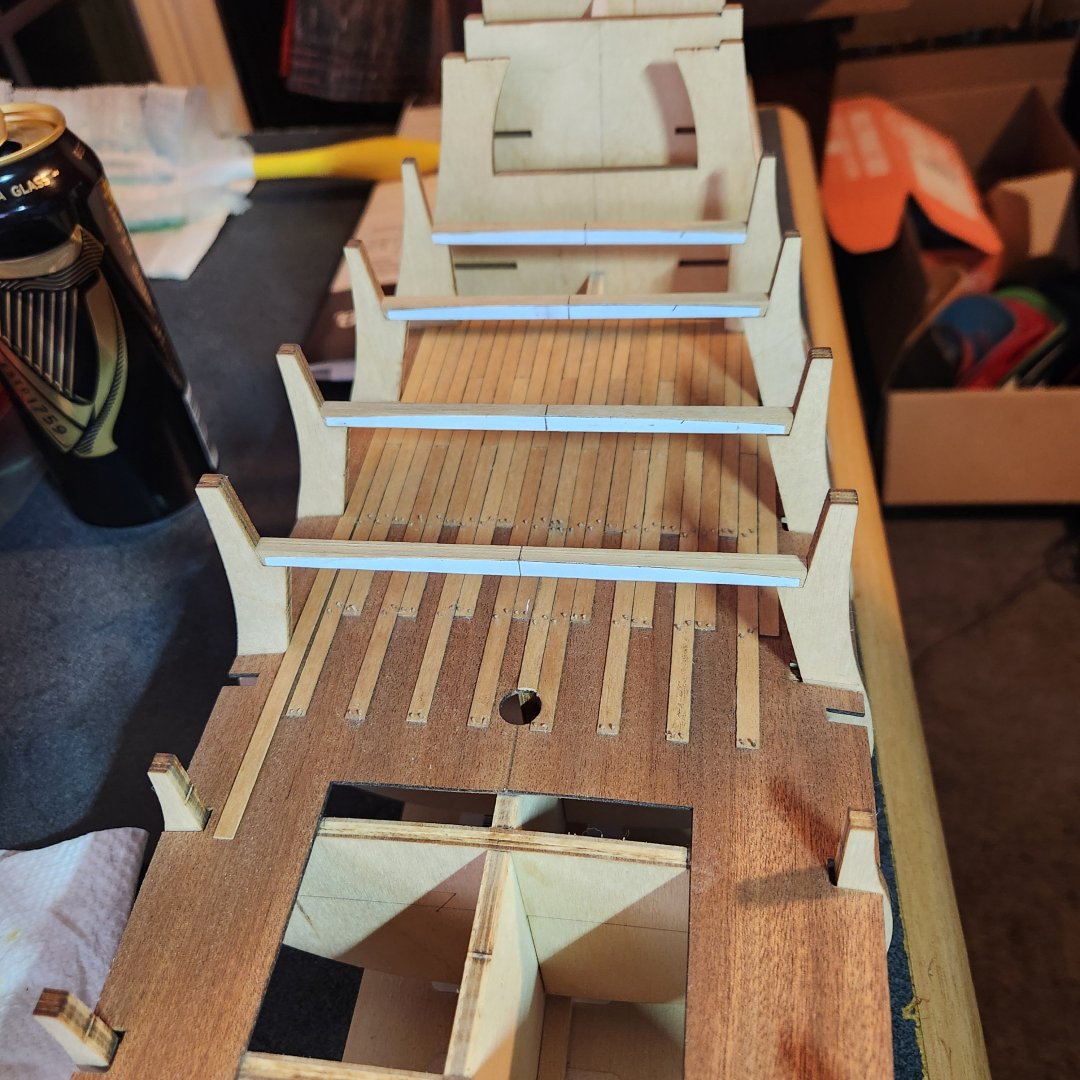
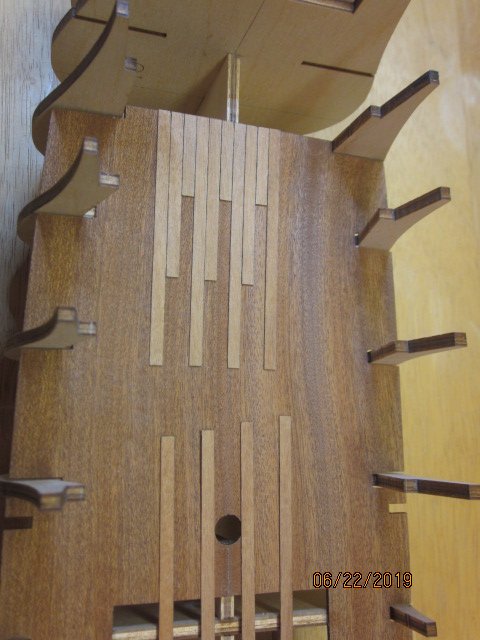
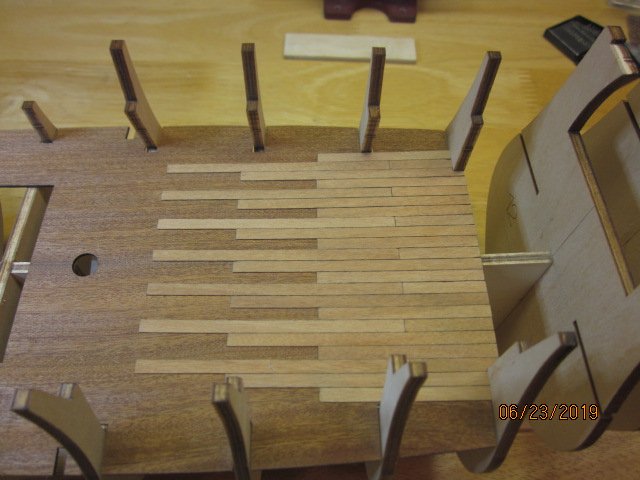
I've started planking the main deck and cambering the beams for the upper decks. I went with a three plank shift. I wasn't quite sure what the correct way of doing it was, so I settled on the 3 plank. I looked at the drawings and there was no organized shift, it seemed random. Now the question..... do I treenail the exposed sections of the deck?? Richard

-
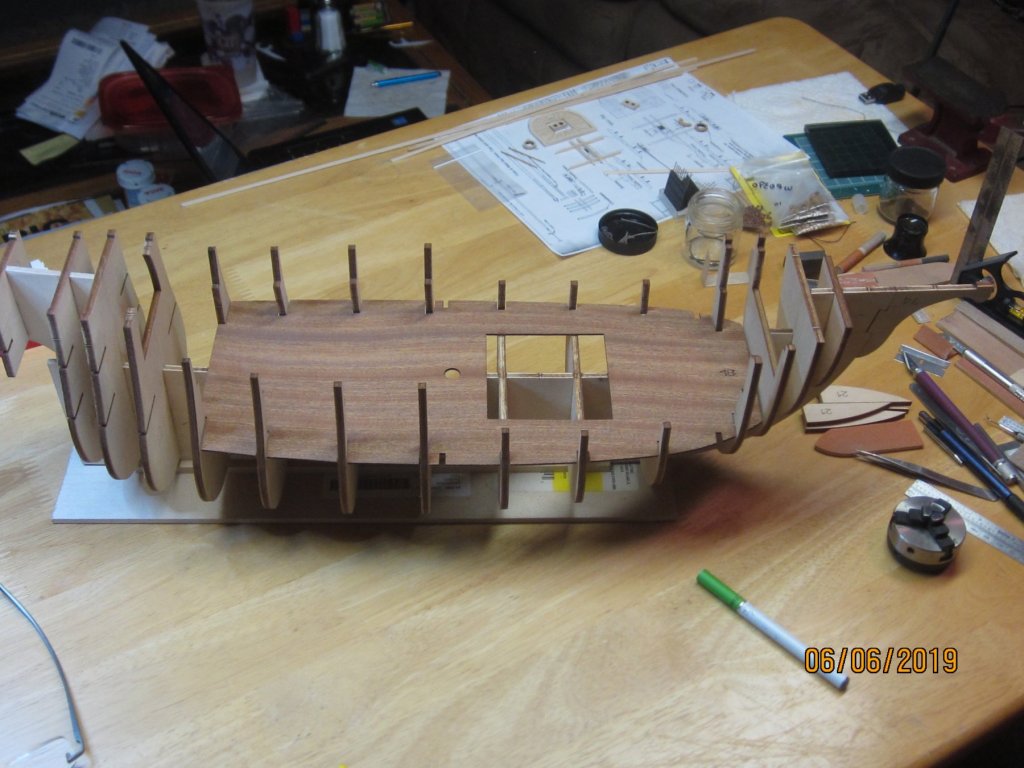
Some work has been accomplished today. I fitted and glued the fore deck and bulkhead and cut and fitted the 6 beams for the other decks. Now I just need to put the camber into them and glue them in place. Currently I'm trying to identify the woods I have in the kit. I've found the color chart on the inside of the box top and also the initials in the instructions calling out the different types. But as I look at the wood it looks like I'm missing the type called out for the deck planking. As I look at the photo on the box, it doesn't seem like the same. My lack of identifying wood types is making it difficult. I've attached pictures of the woods that are .5mm x 5mm. Thanks, Richard

-
Thanks Scott, it's my first Mamoli kit. I have a question for you if you don't mind me asking. I noticed that there is no mention of cutting a rabbit or creating bearding at the stern. Is it needed for a double planked hull? Thanks, Richard
-
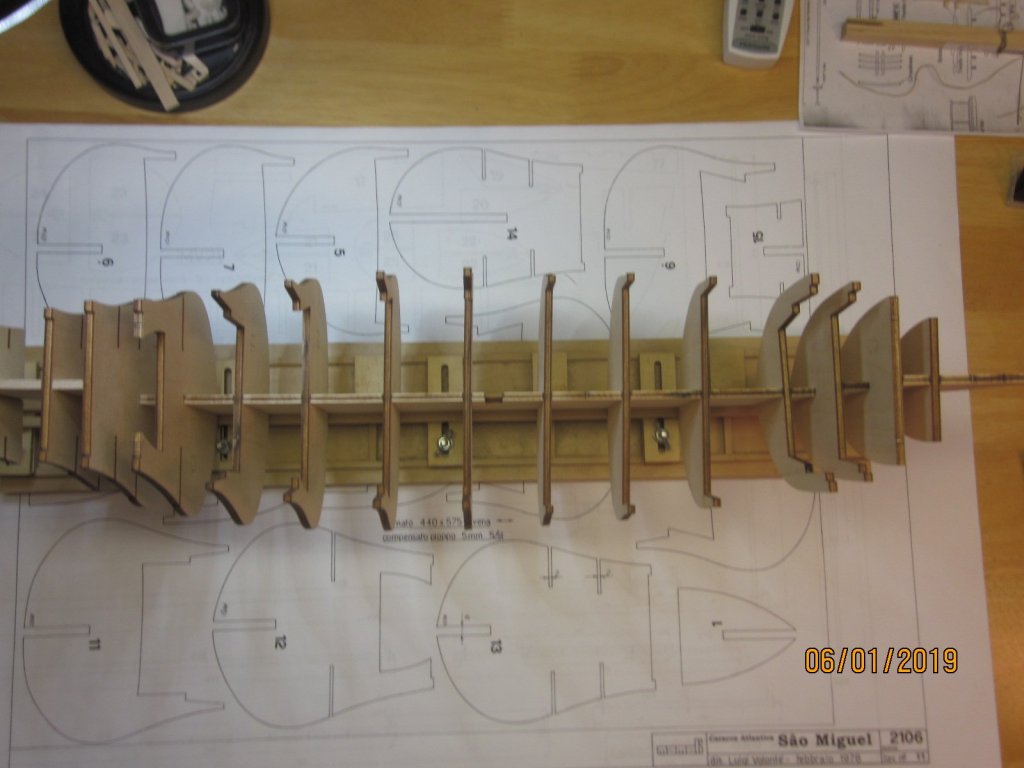
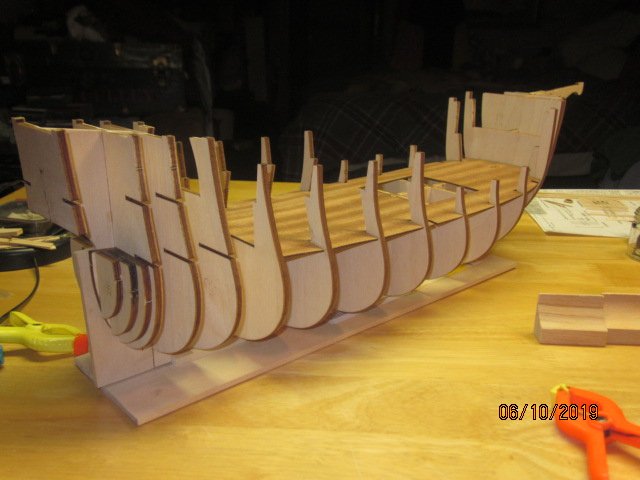
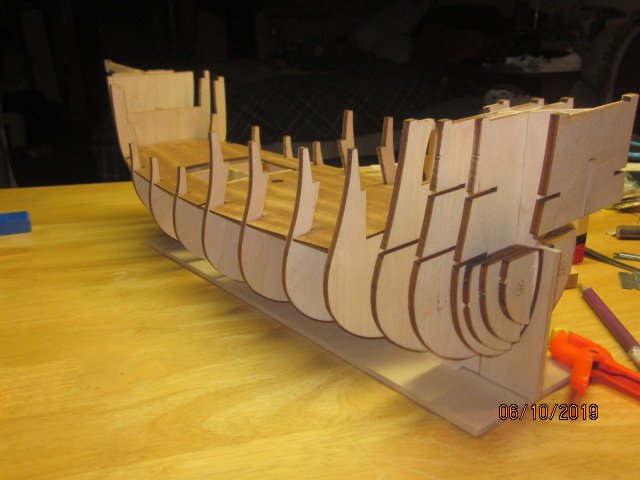
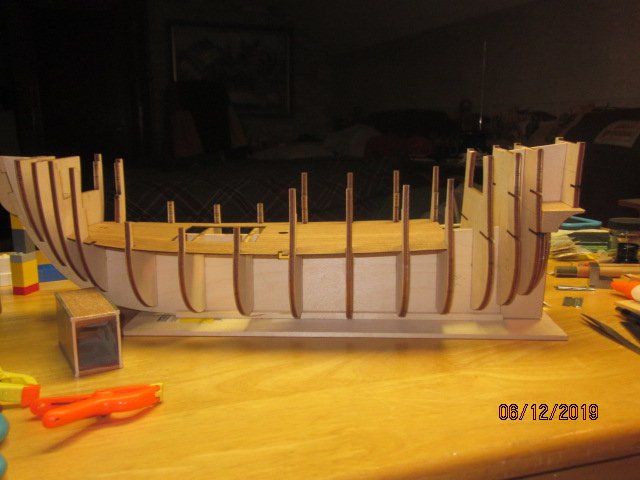
I've finished gluing all the bulkheads and filler pieces in place. So far the build has been enjoyable. I'm really liking this kit.
-
Hello from a new builder in Oregon
kscadman replied to Spike1947's topic in New member Introductions
Welcome aboard. You should find lots of help here from the members. Richard -
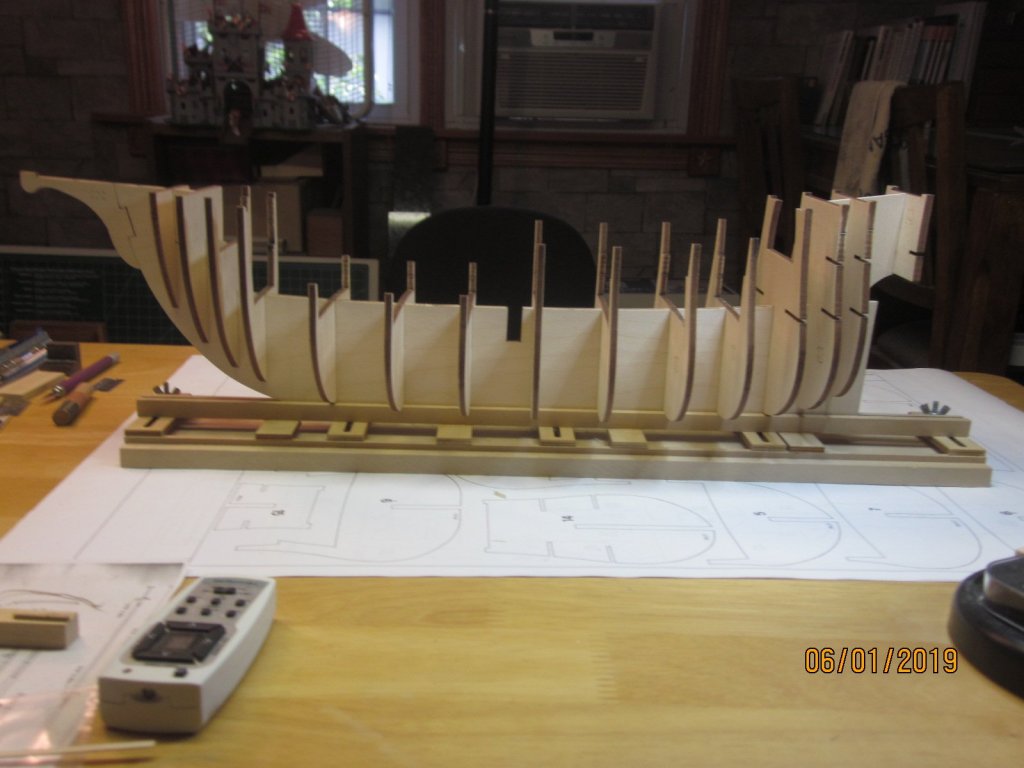
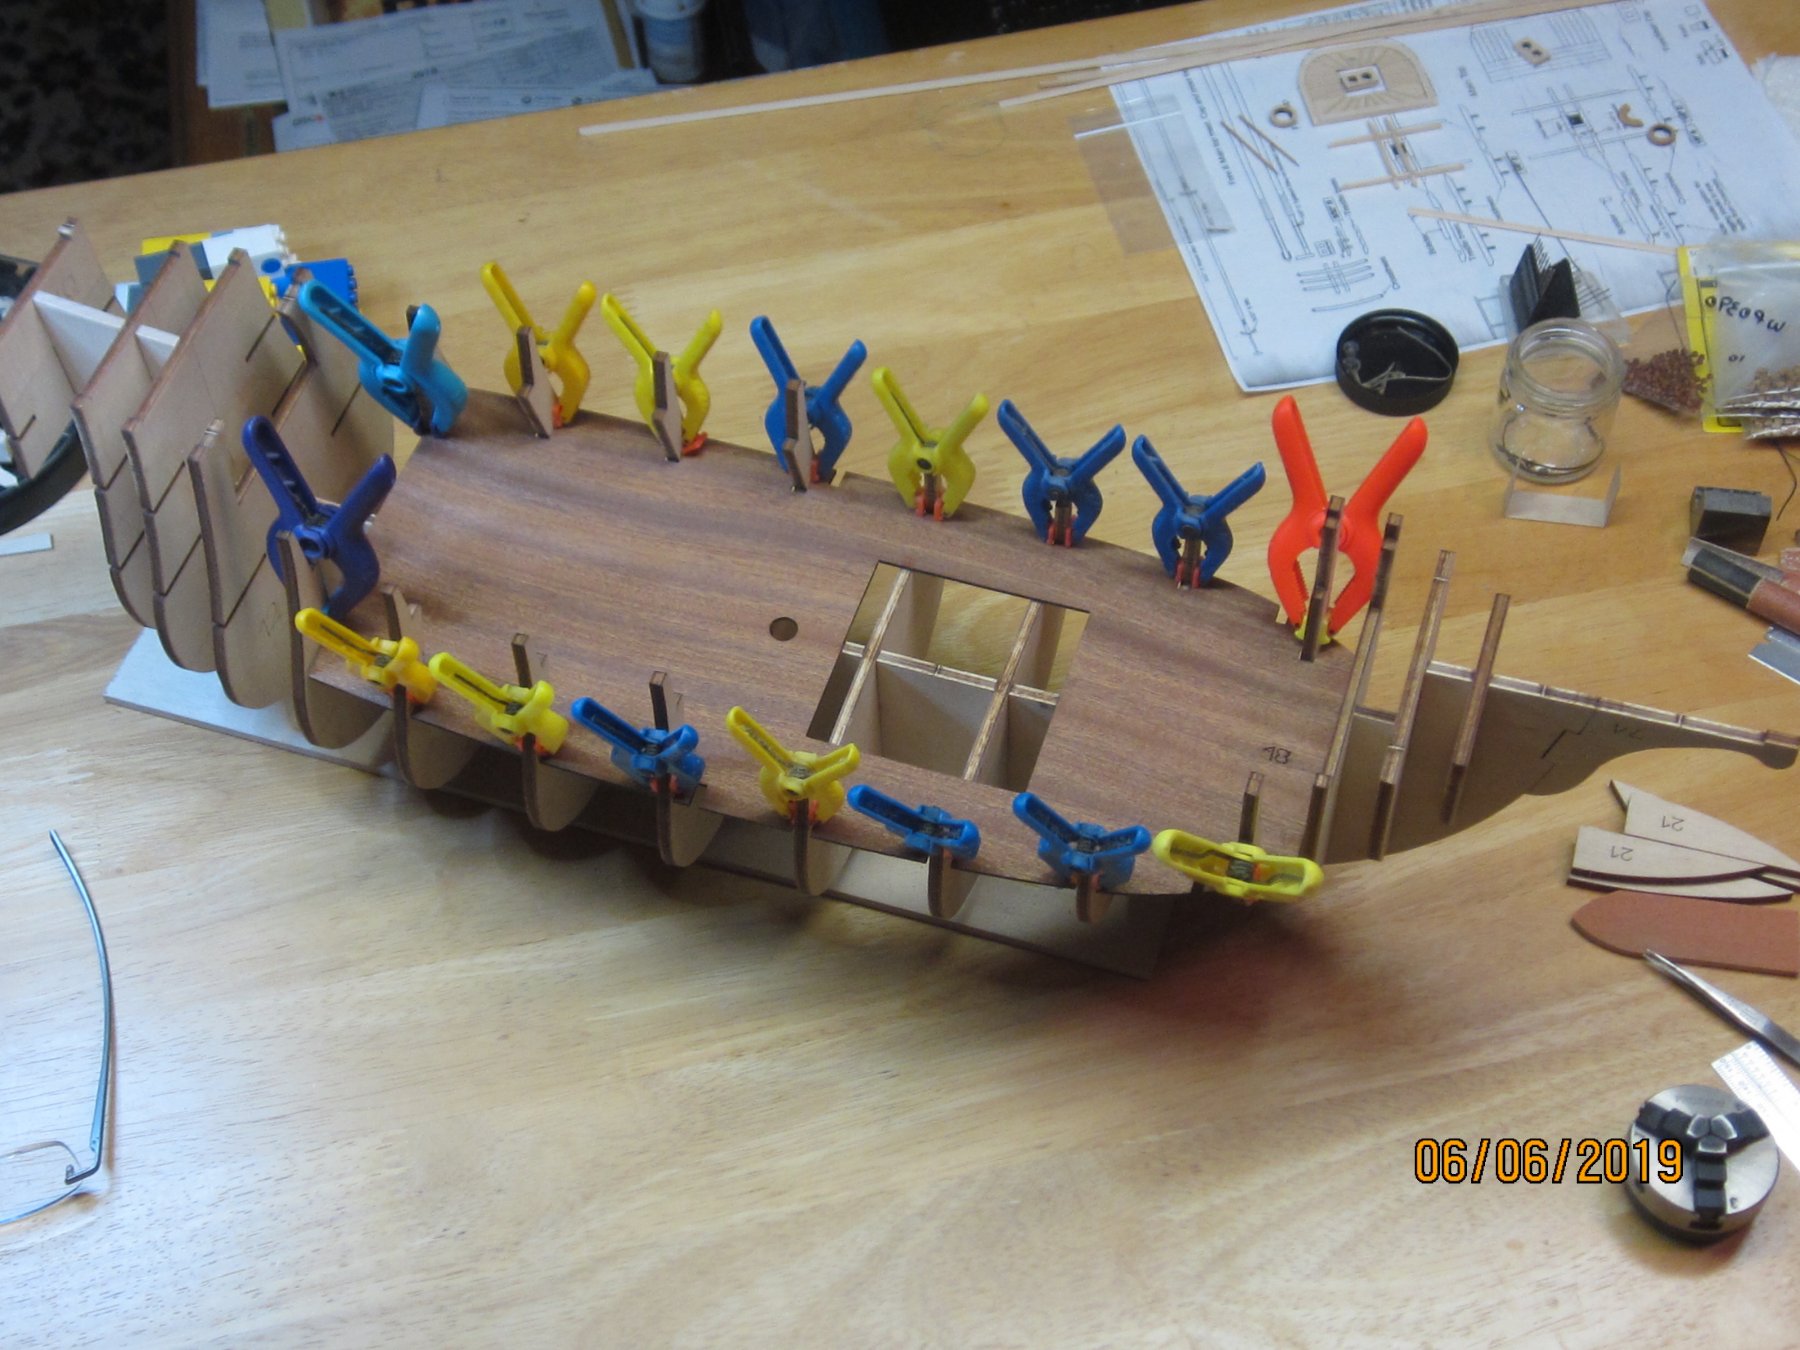
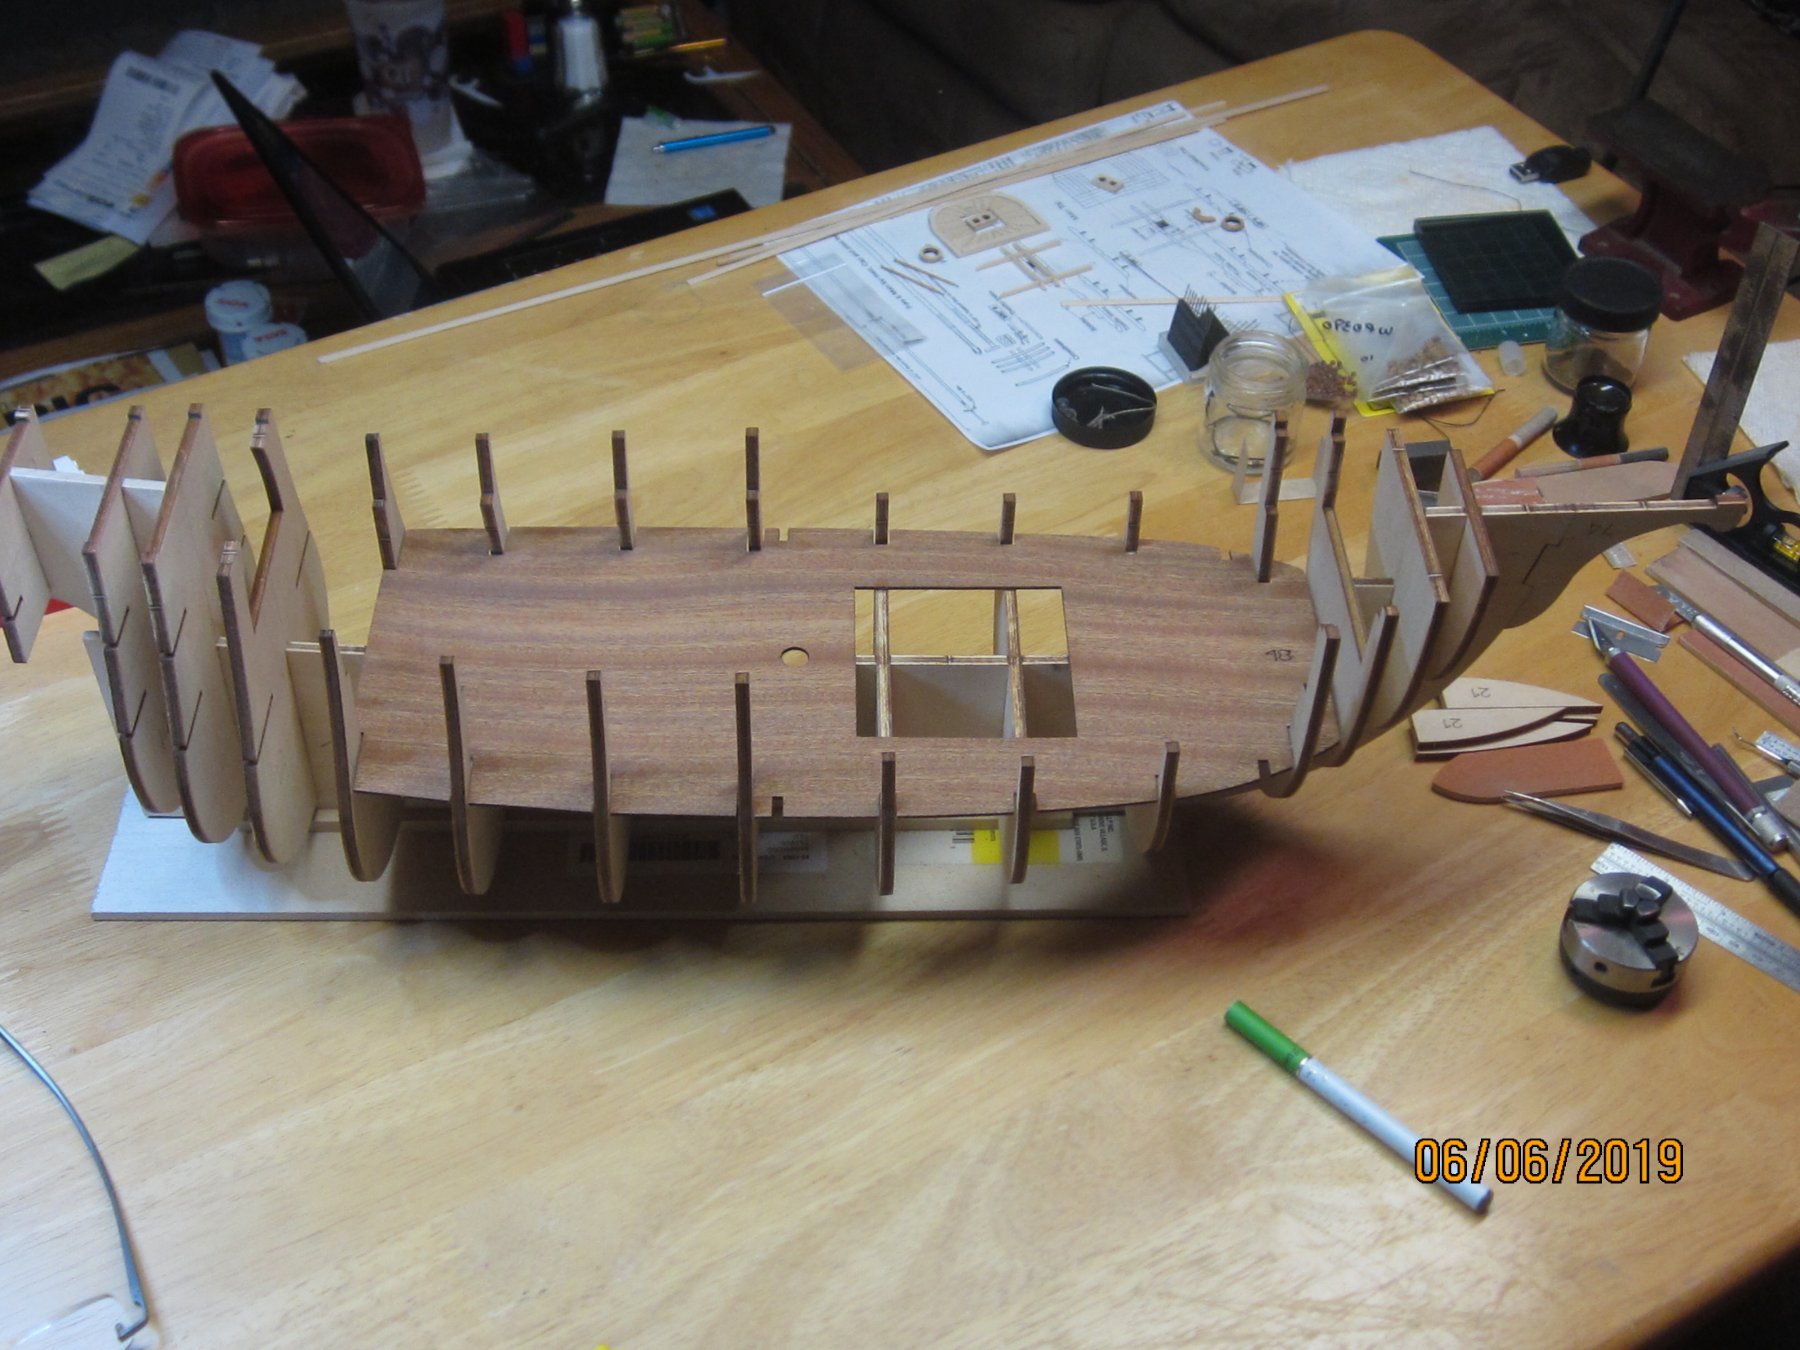
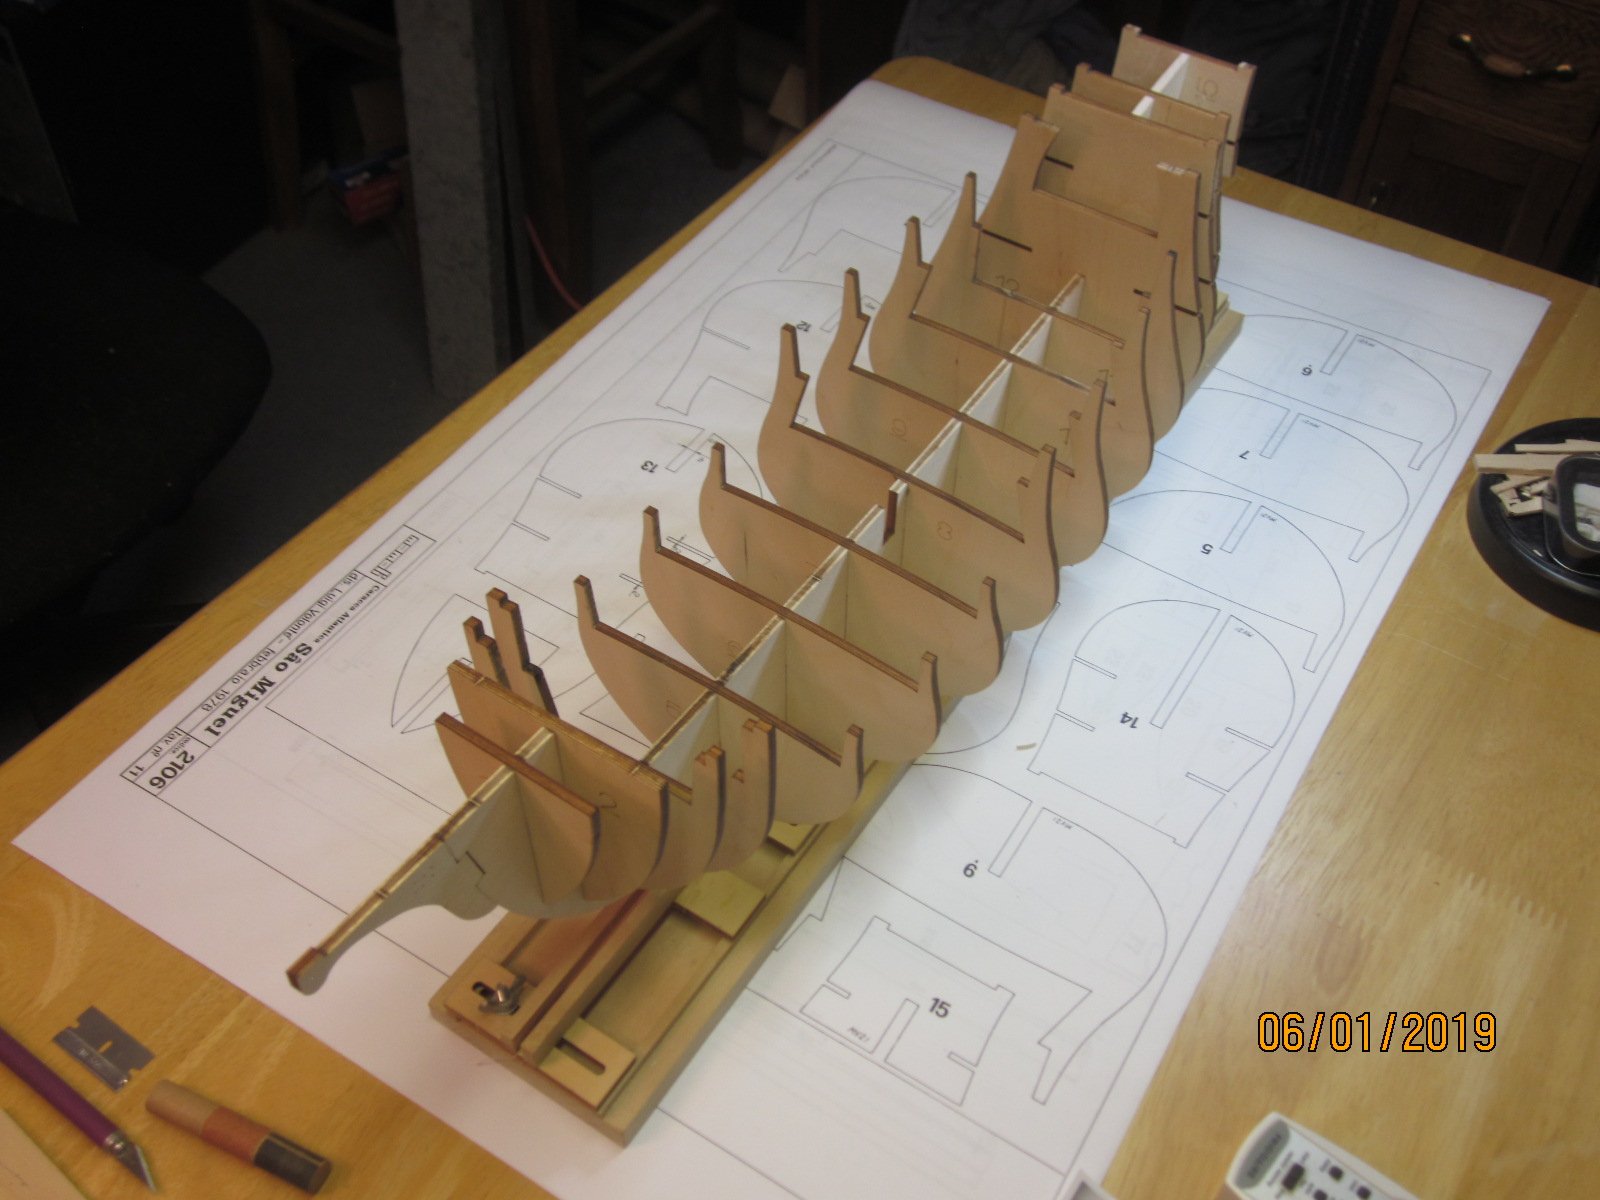
I've glued the bulkheads and false deck to the keel after some sanding to fare up the small bits and remove the charring. Also I noticed that some of the keel was interfering with the hole for the mast so I trimmed the slots on the false deck so it cleared the keel and aligned it with bulkhead 11 toward the stern. I used the "lego" method to square the bulkheads and it worked very well. I would recommend it to anyone. But I did use my square to double check and found it to be correct. Wow, all that money I spent on my son is coming back to reward me. I've test fitted the fill pieces and was surprised how well they fit. Hardly any sanding was needed. Just for comparison I put my Syren next to it and realized just ho large this ship will be. Richard


-
I have found that the bulkhead plan drawings are for reference only. I used the center of the top of the slot in each bulkhead as a centerpoint. from there I made perpendicular lines to set my base. Then I took measurements at all major points on each bulkhead and found that all my bulkheads are even and symmetrical. Now I feel comfortable enough to start gluing the bulkheads.

-
Beautiful start Rob, I wish you the best. I too am a first timer with a Mamoli kit. Did you make any changes to the bulkheads when you discovered that they didn't align with the plan drawings? Richard
-
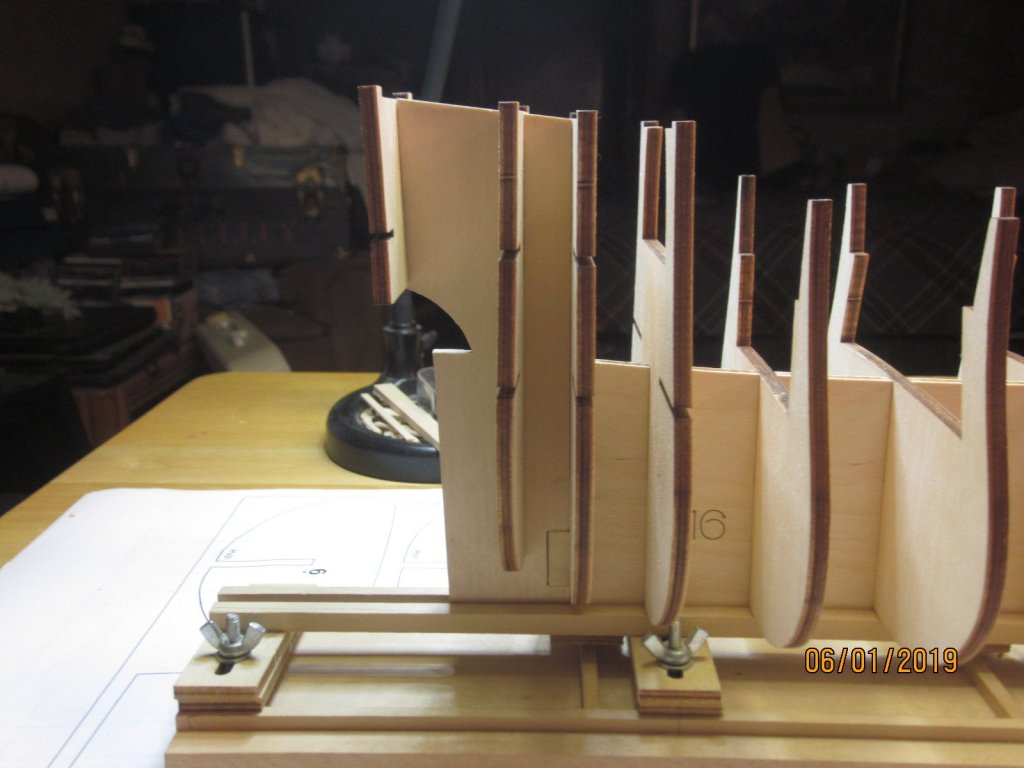
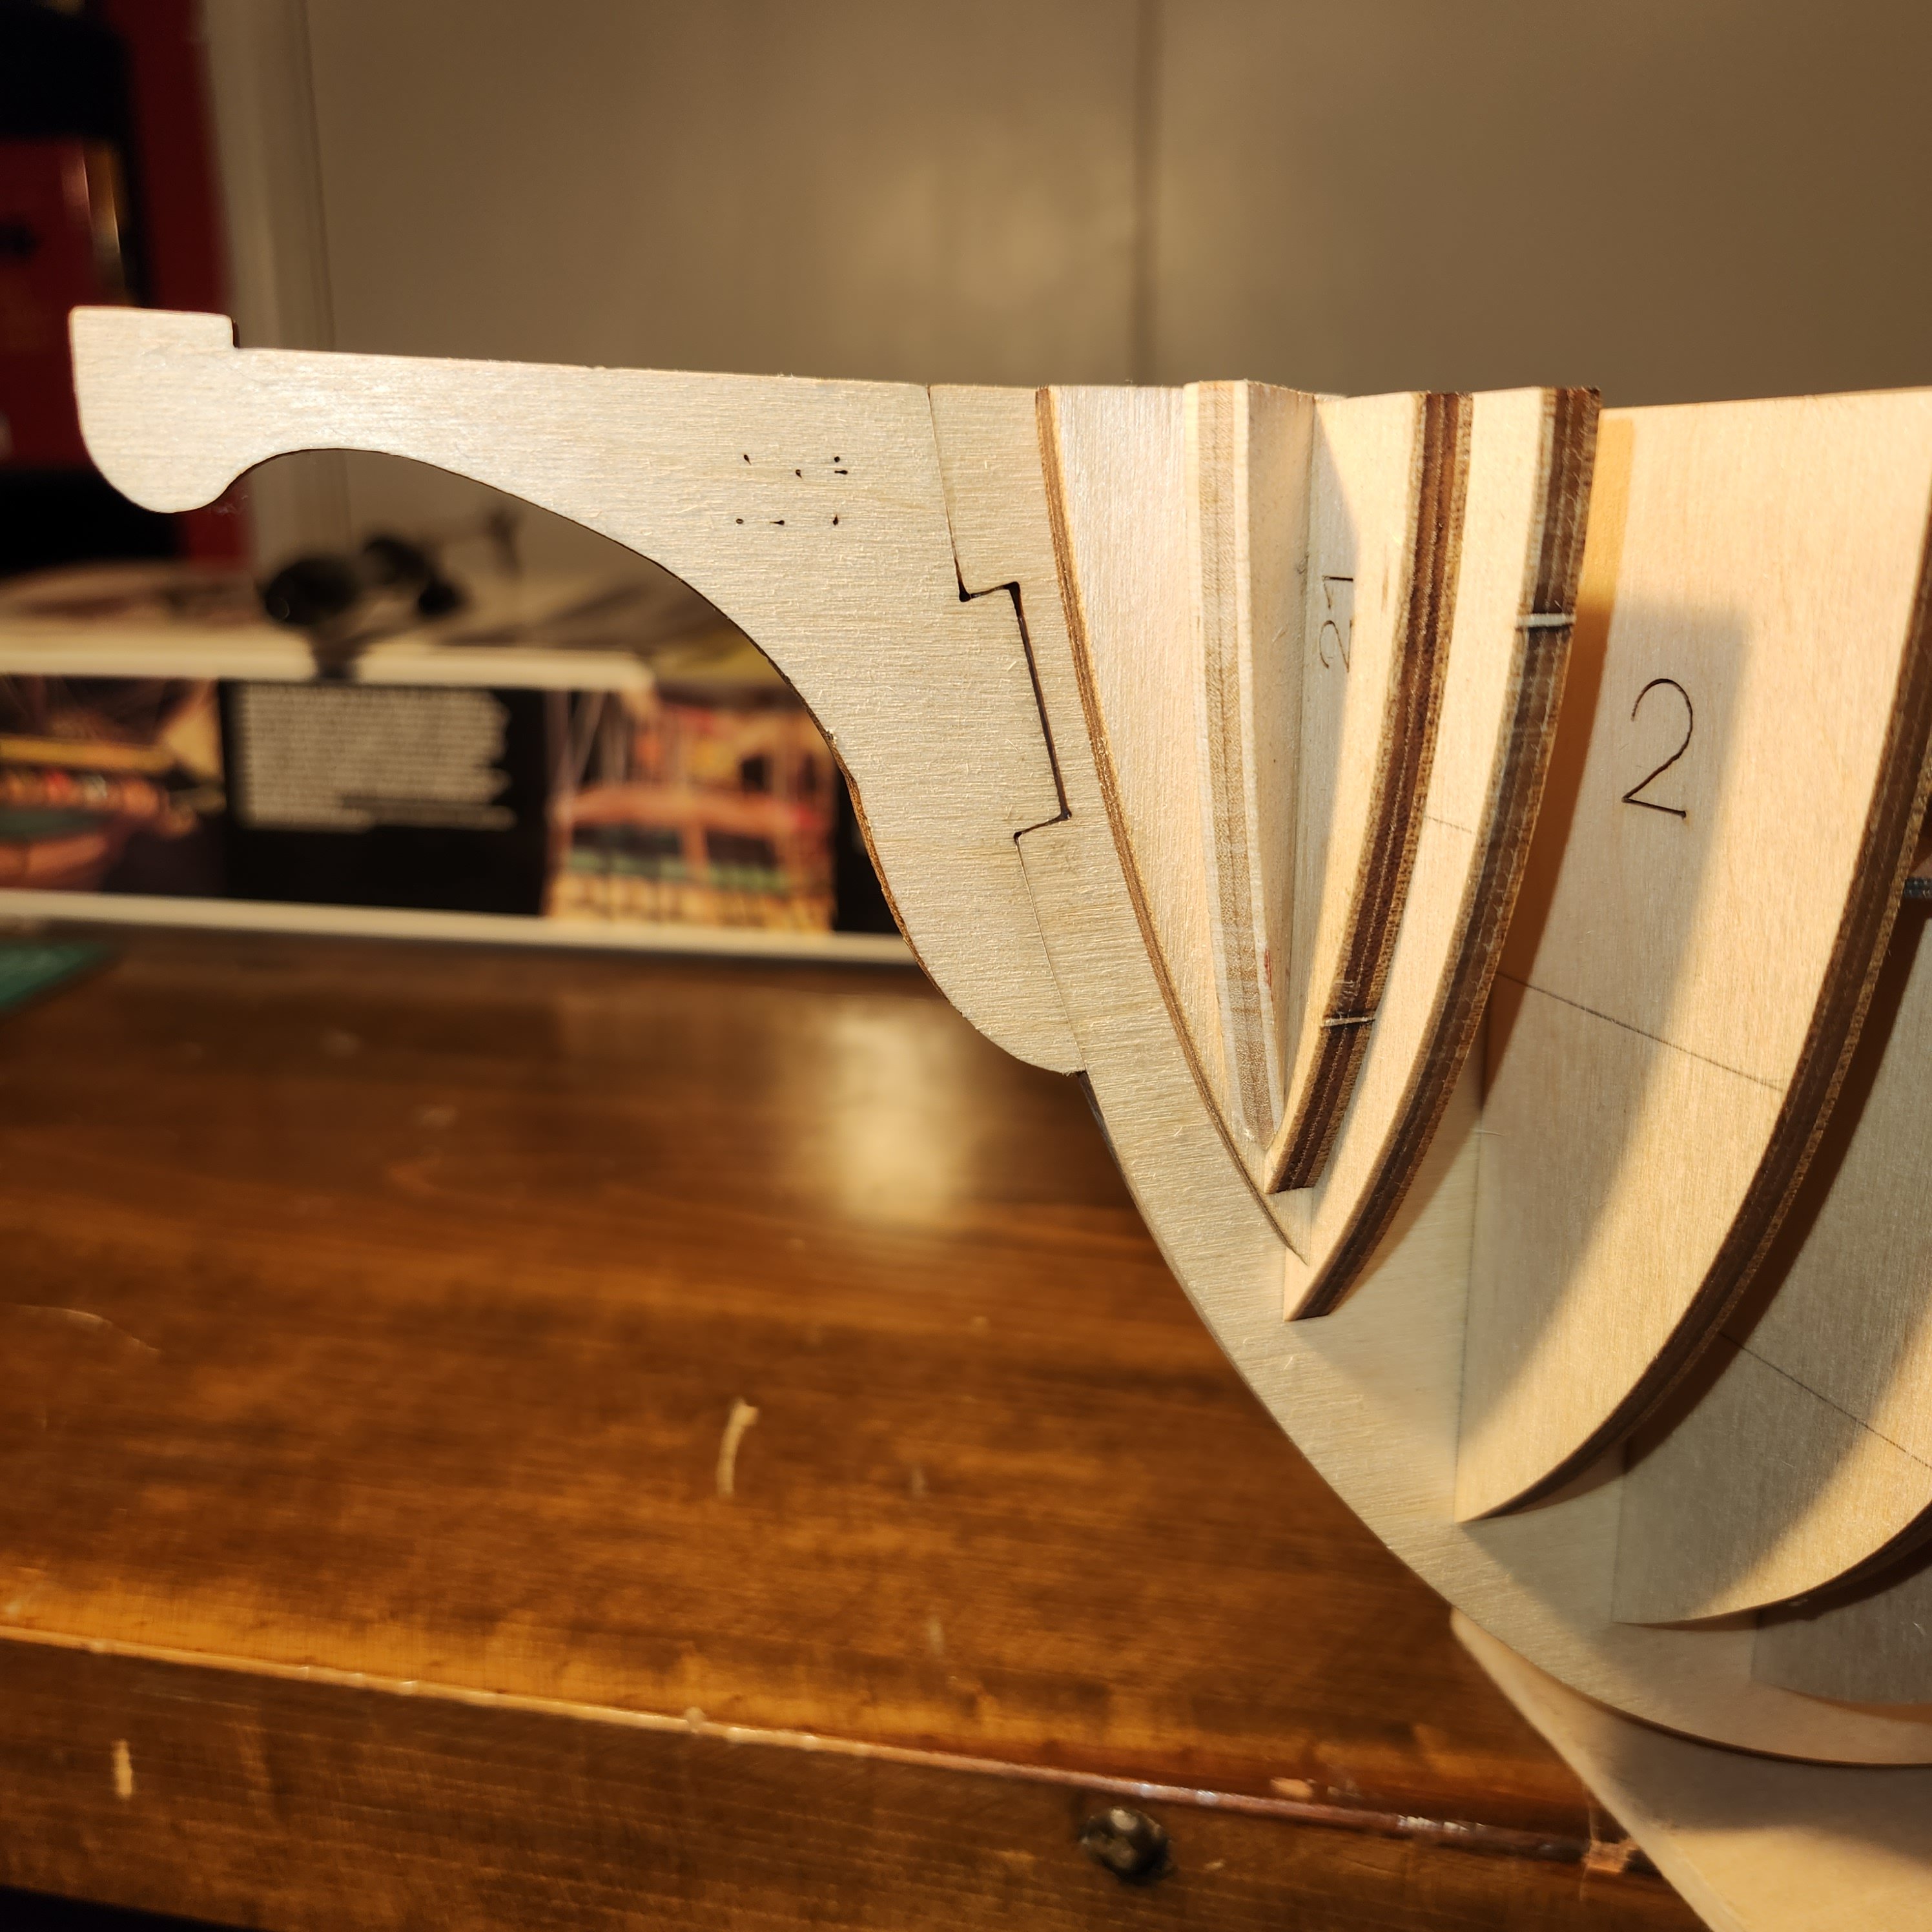
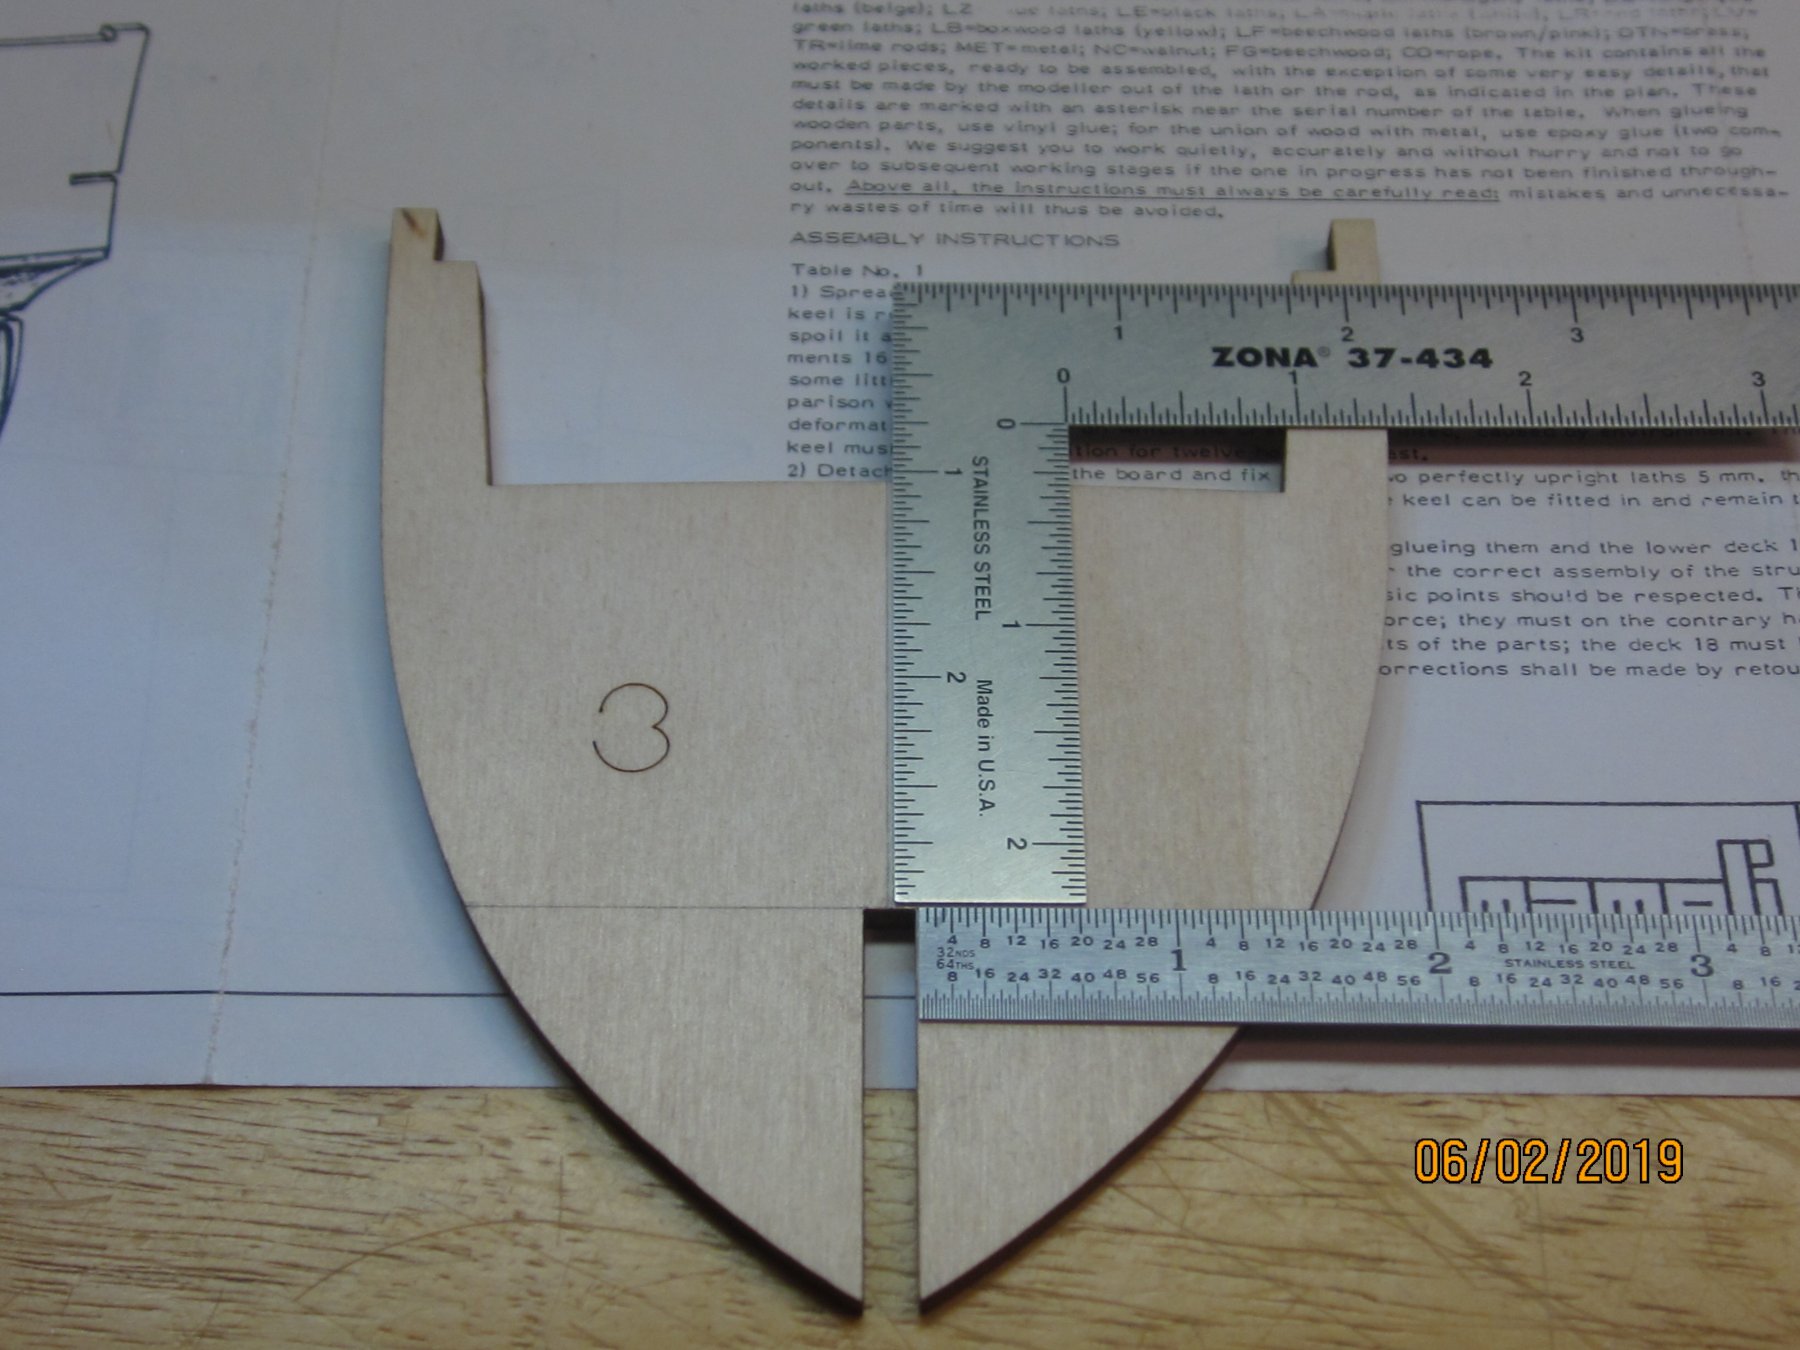
Thank you Kevin, and yes I agree, 1:54 is very unusual. I'm not sure how or why they came up with it. I made some progress today, I was able to get the bulkheads and false deck shimmed, trimmed and dry fitted. My worry at the moment is with the drawings, specifically the parts sheet. I'm not sure if its for reference only or if the bulkheads should fit in the lines. If they are to fit in the lines then I'm in for a lot of reworking. I aligned all the bulkheads using the center groove. I've tried to show the discrepancy's in some photos. Sorry about the camera work, I think my autofocus is going bad.