Some Idea
-
Posts
1,154 -
Joined
-
Last visited
Content Type
Profiles
Forums
Gallery
Events
Everything posted by Some Idea
-
 Hi Nils and thanks very much mate 👍 I can't get much more done now until the weekend. I'll start installing the frames towards the stern next and fingers crossed they fit as well.
 -
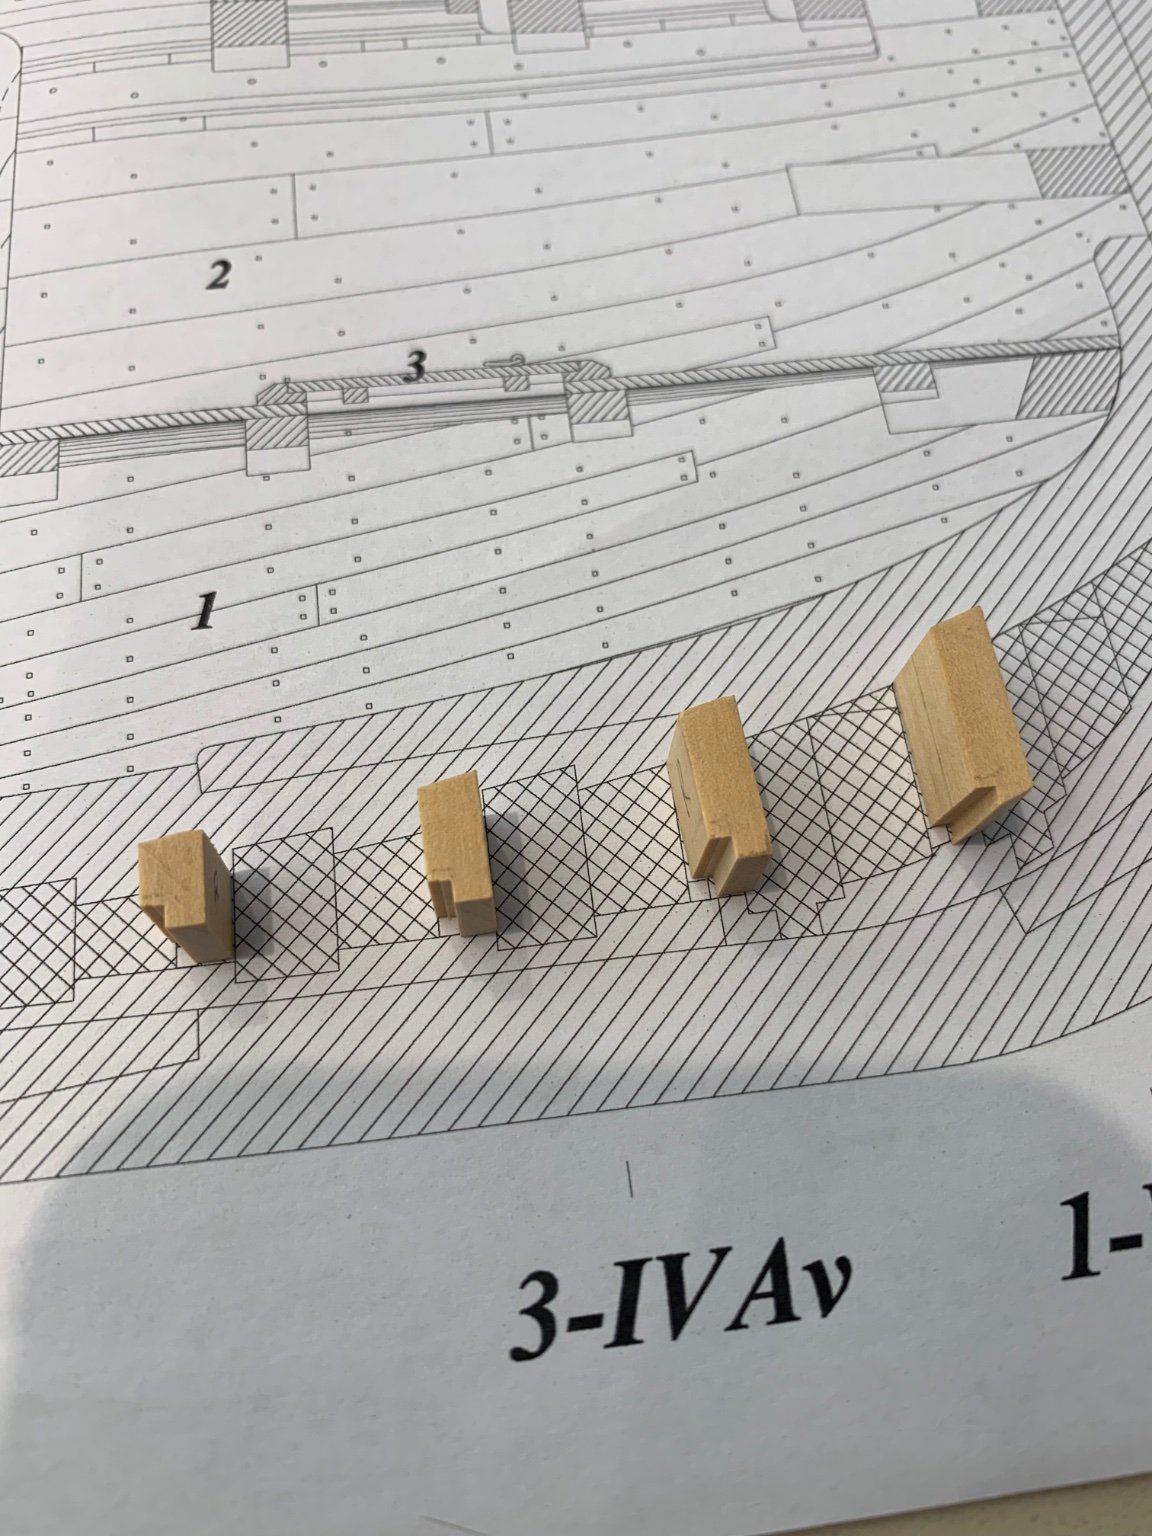
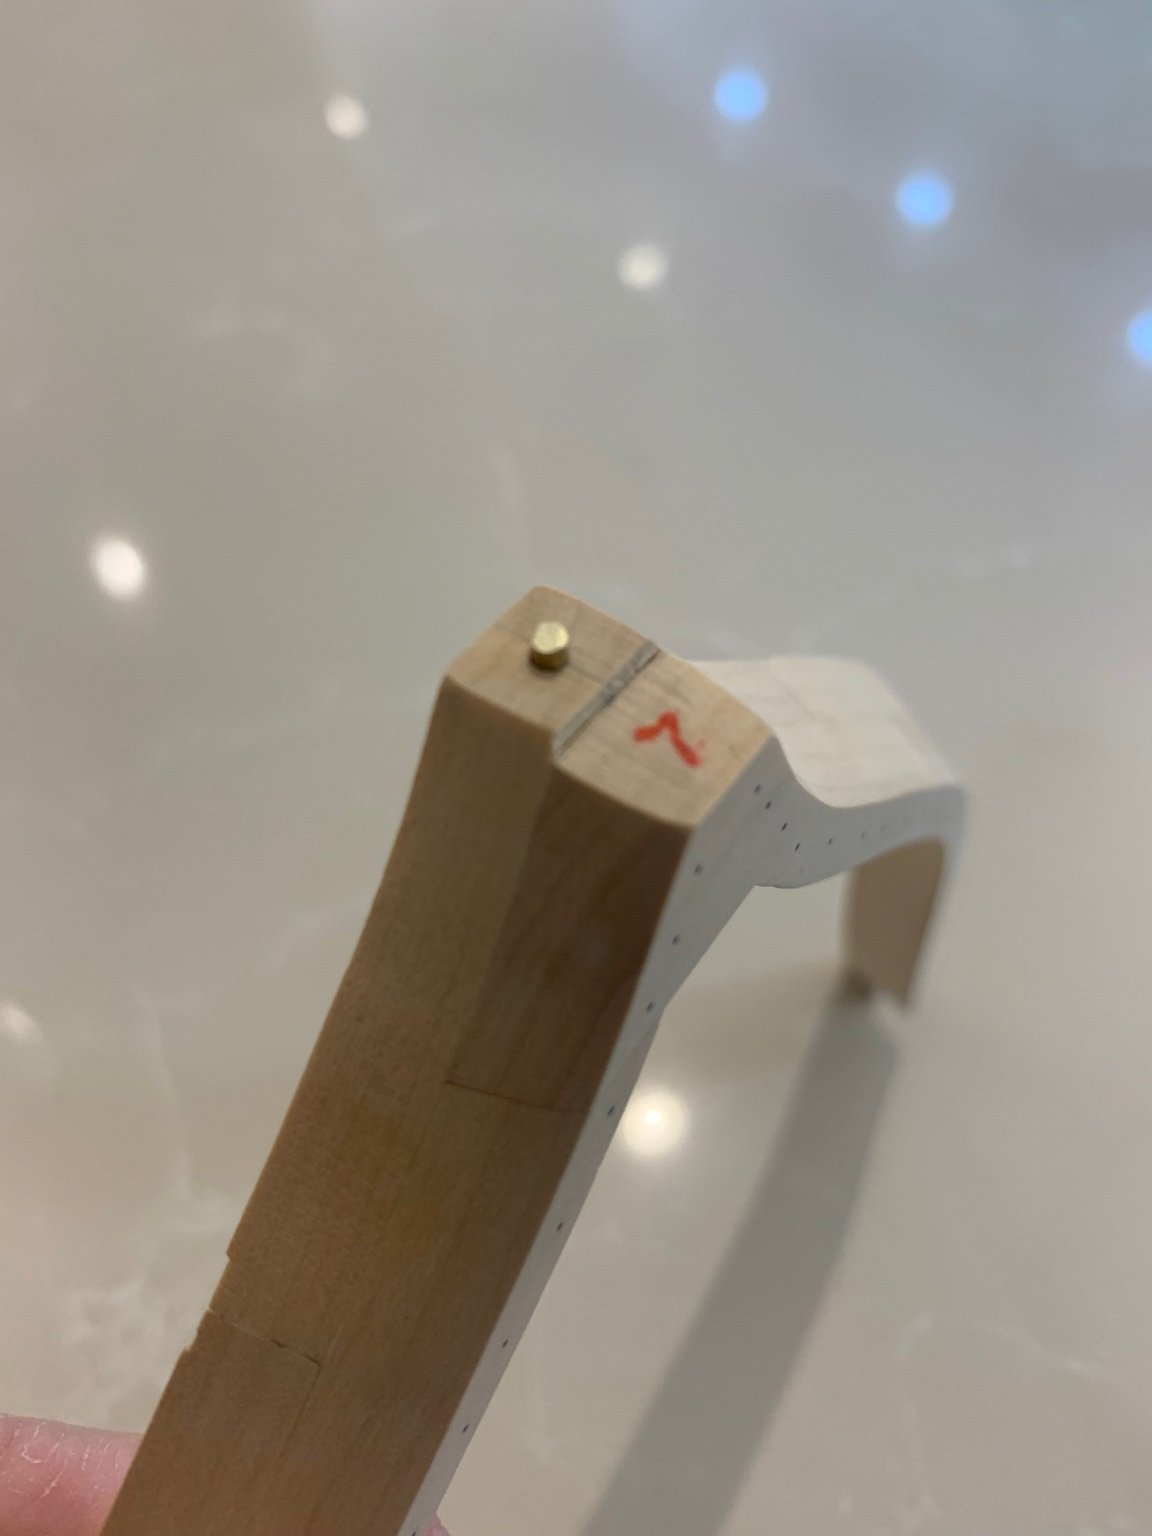
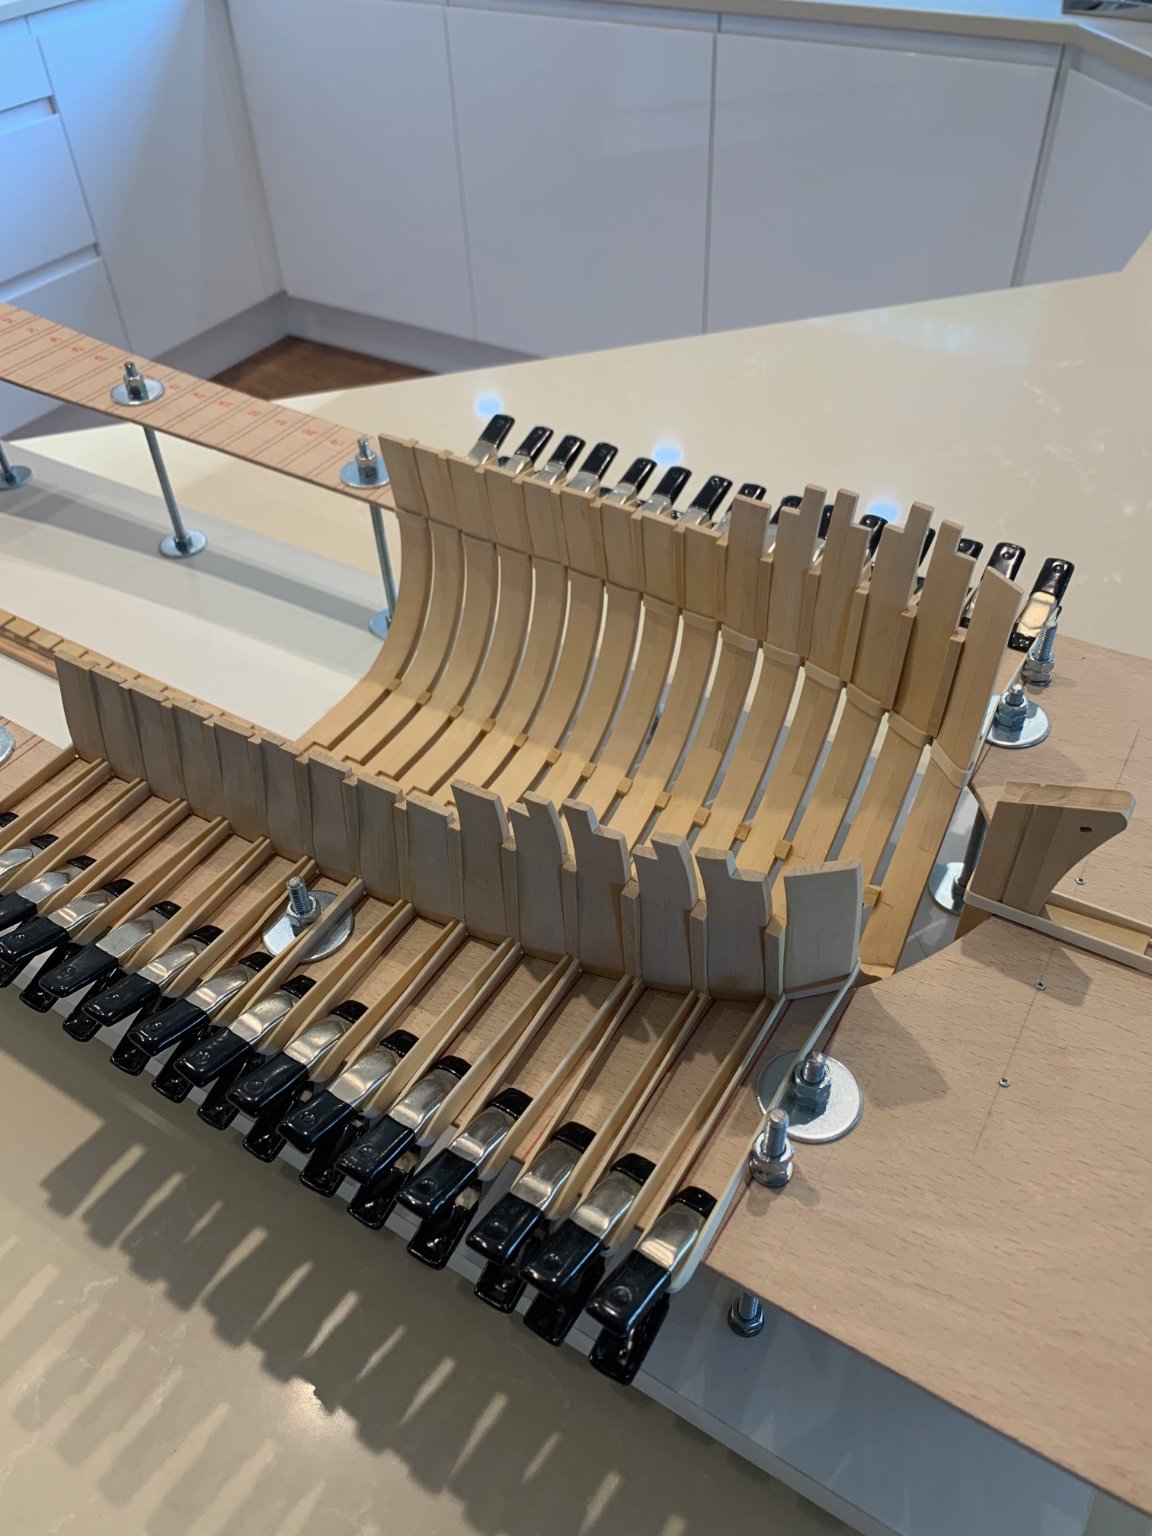
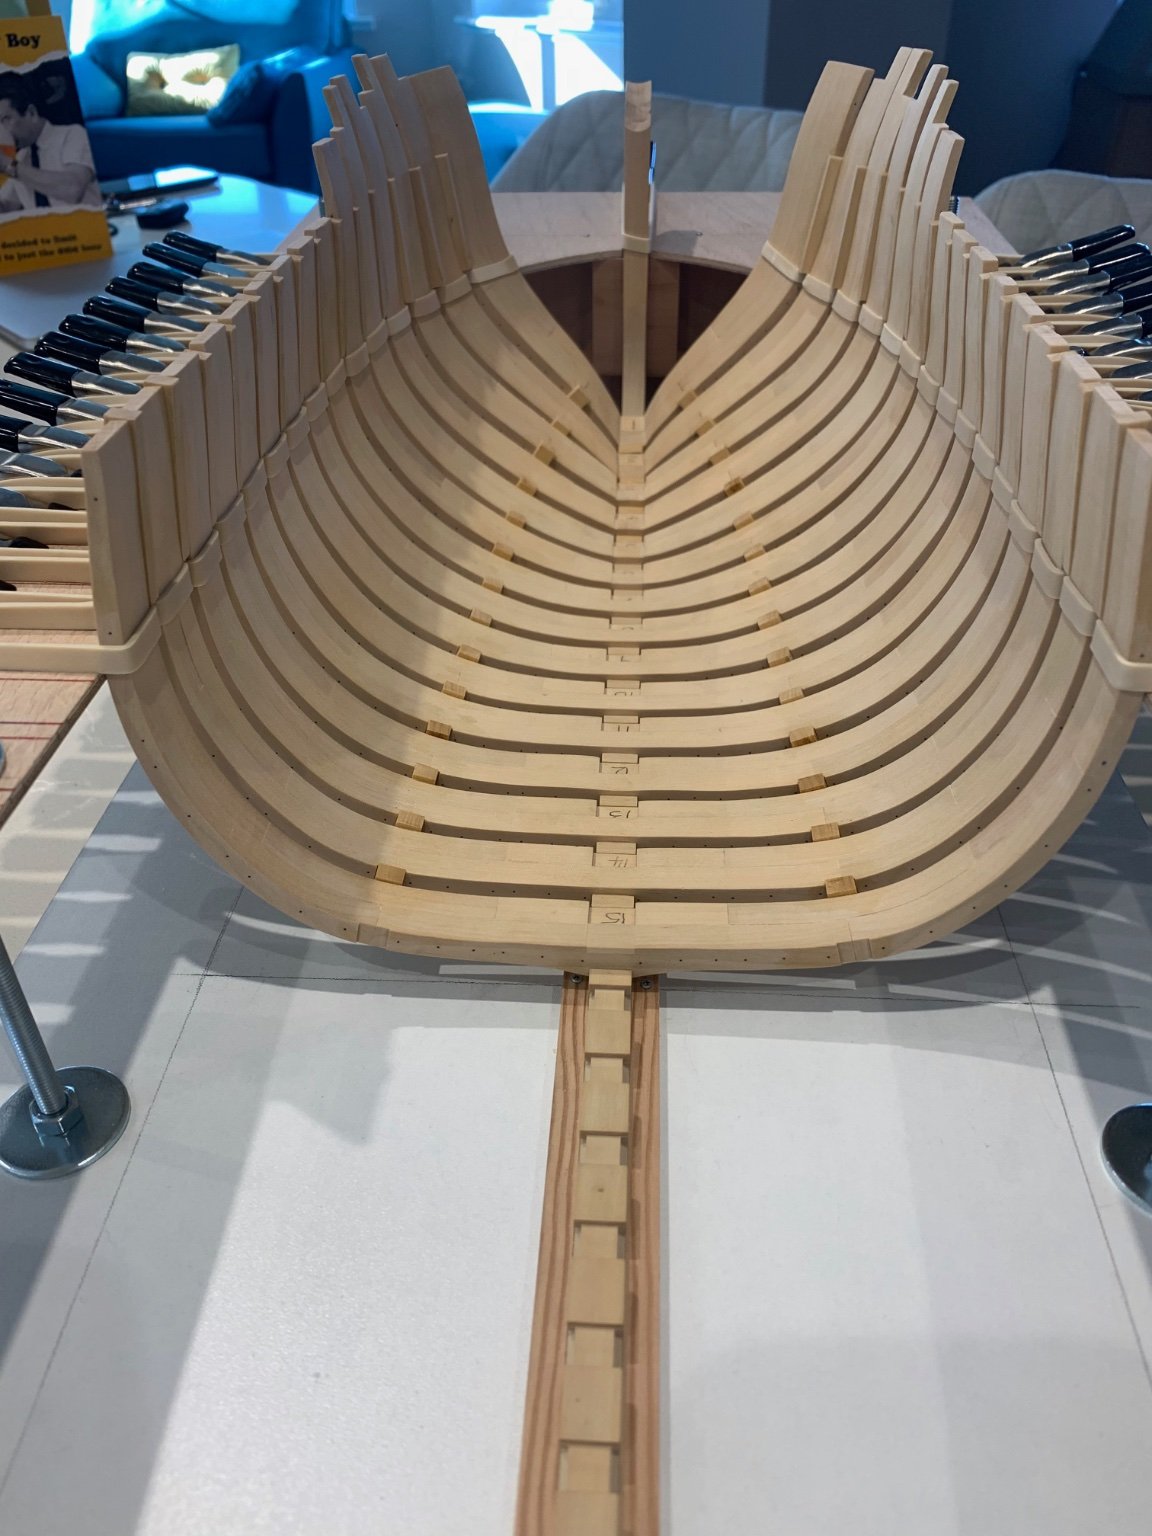
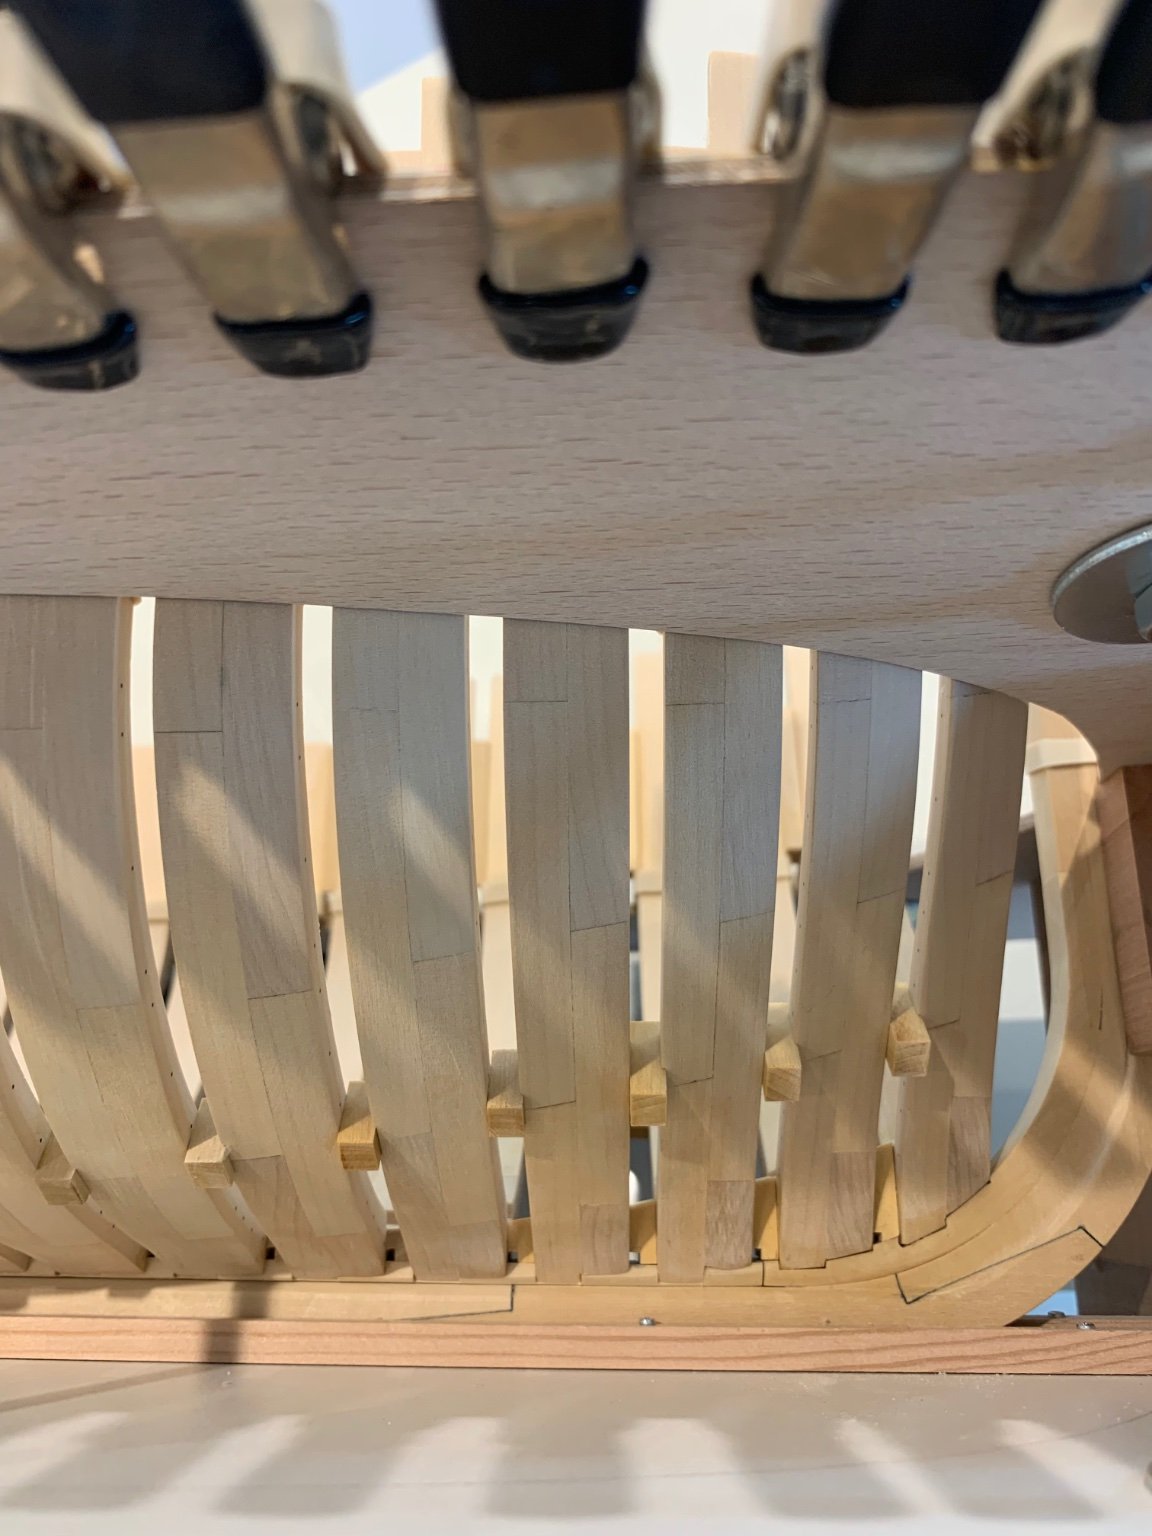
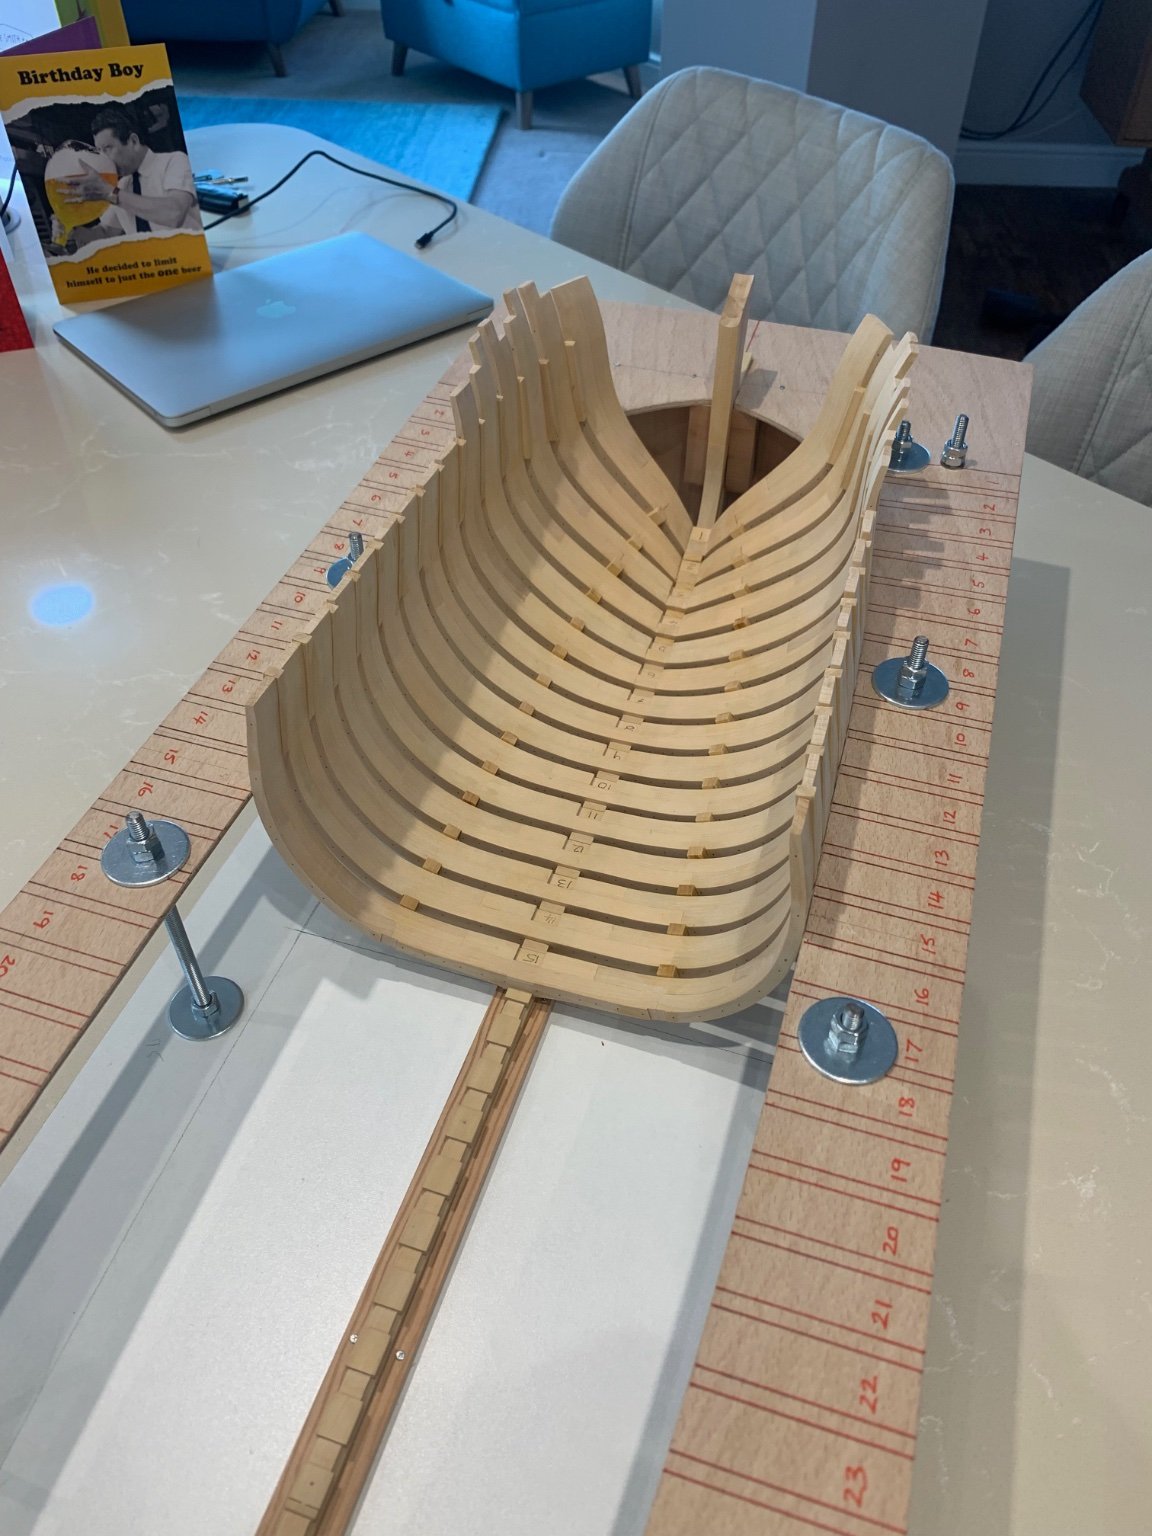
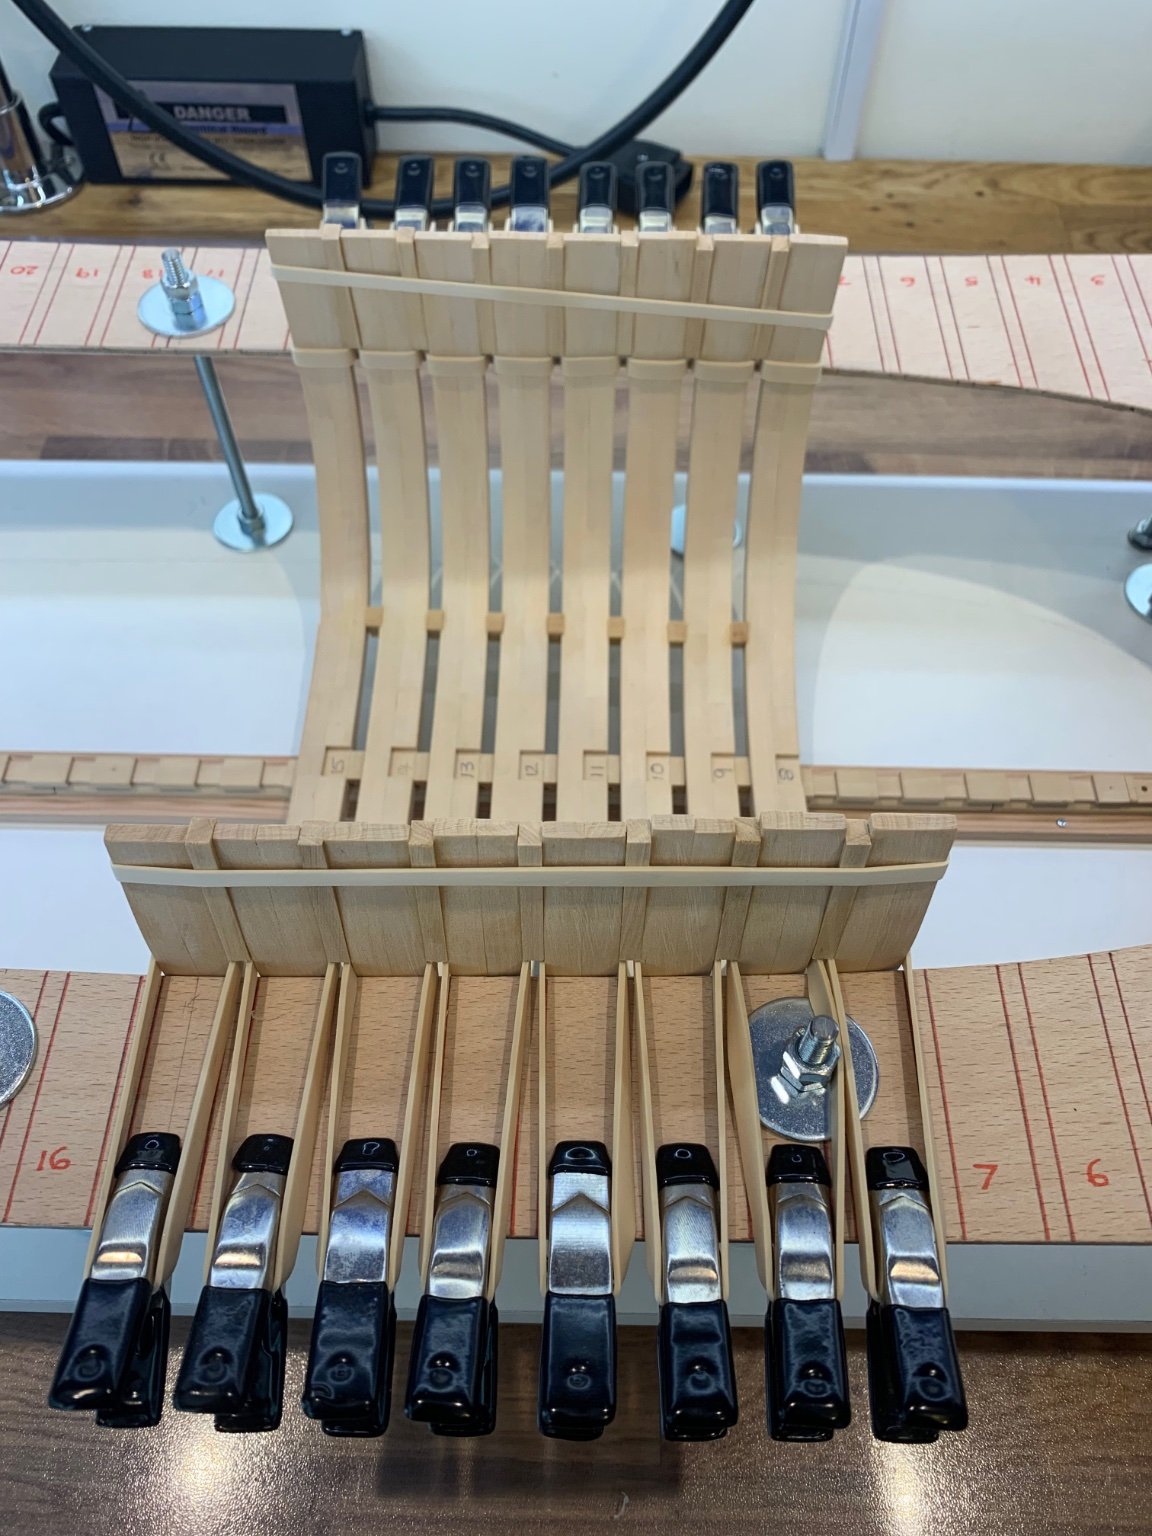
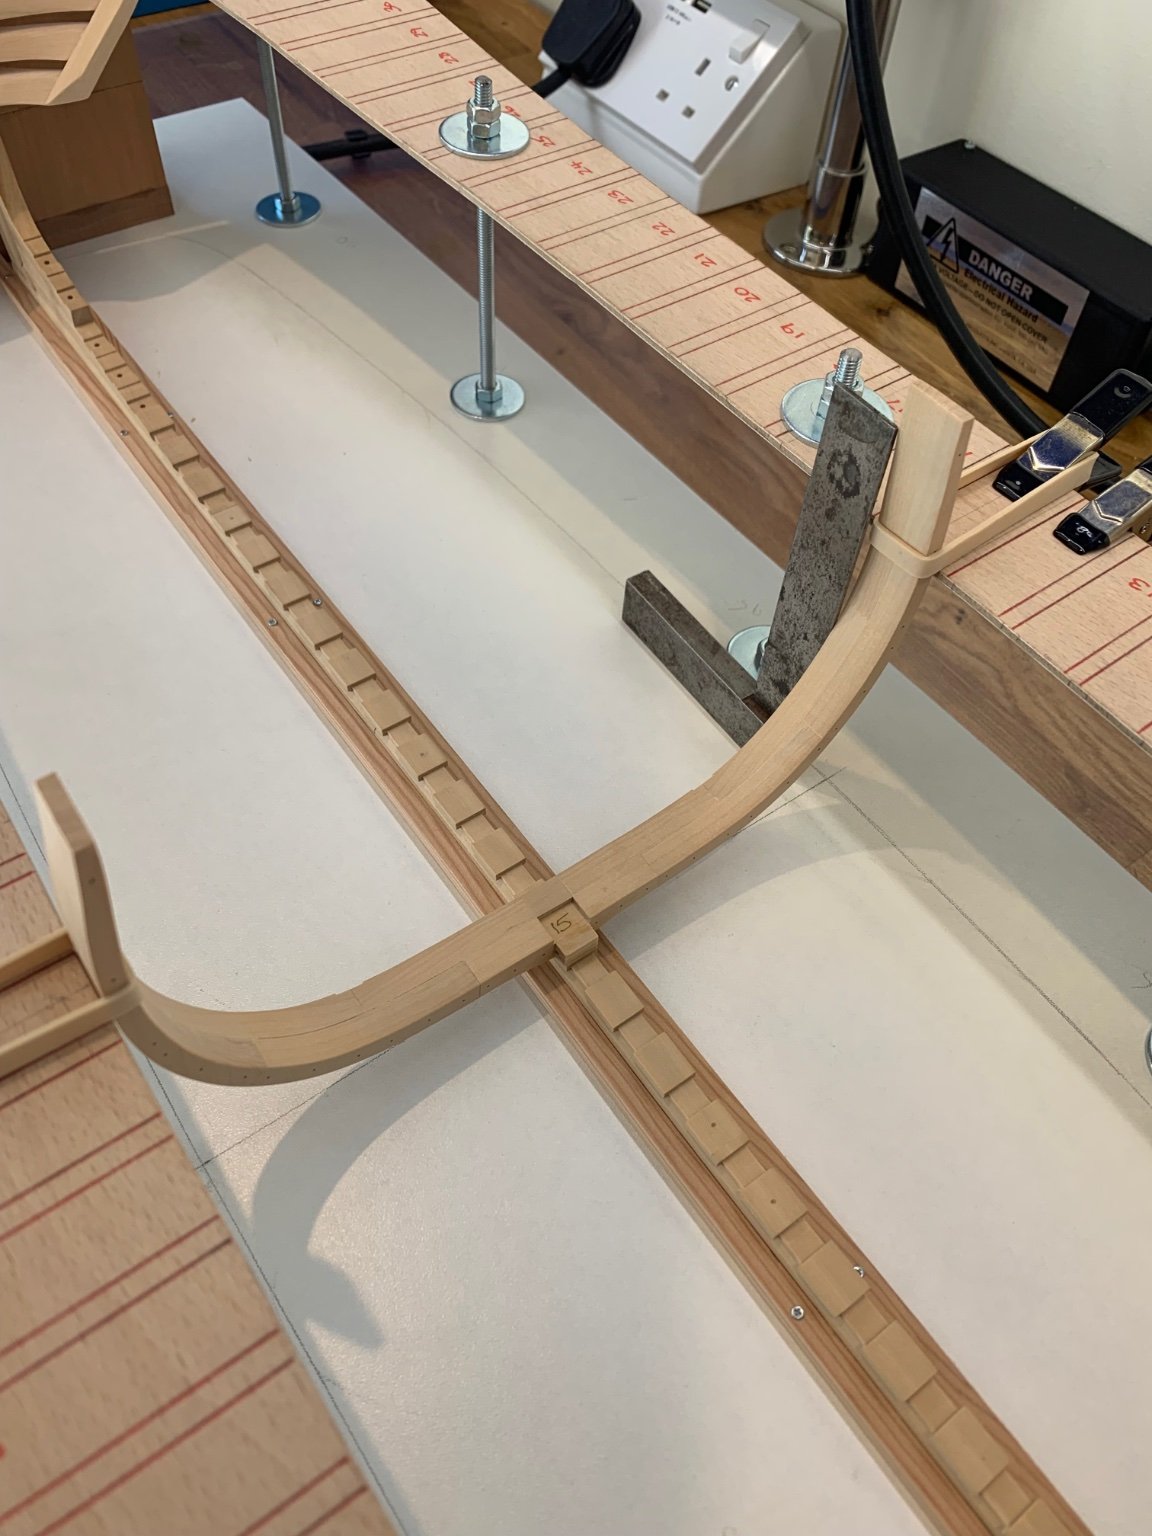
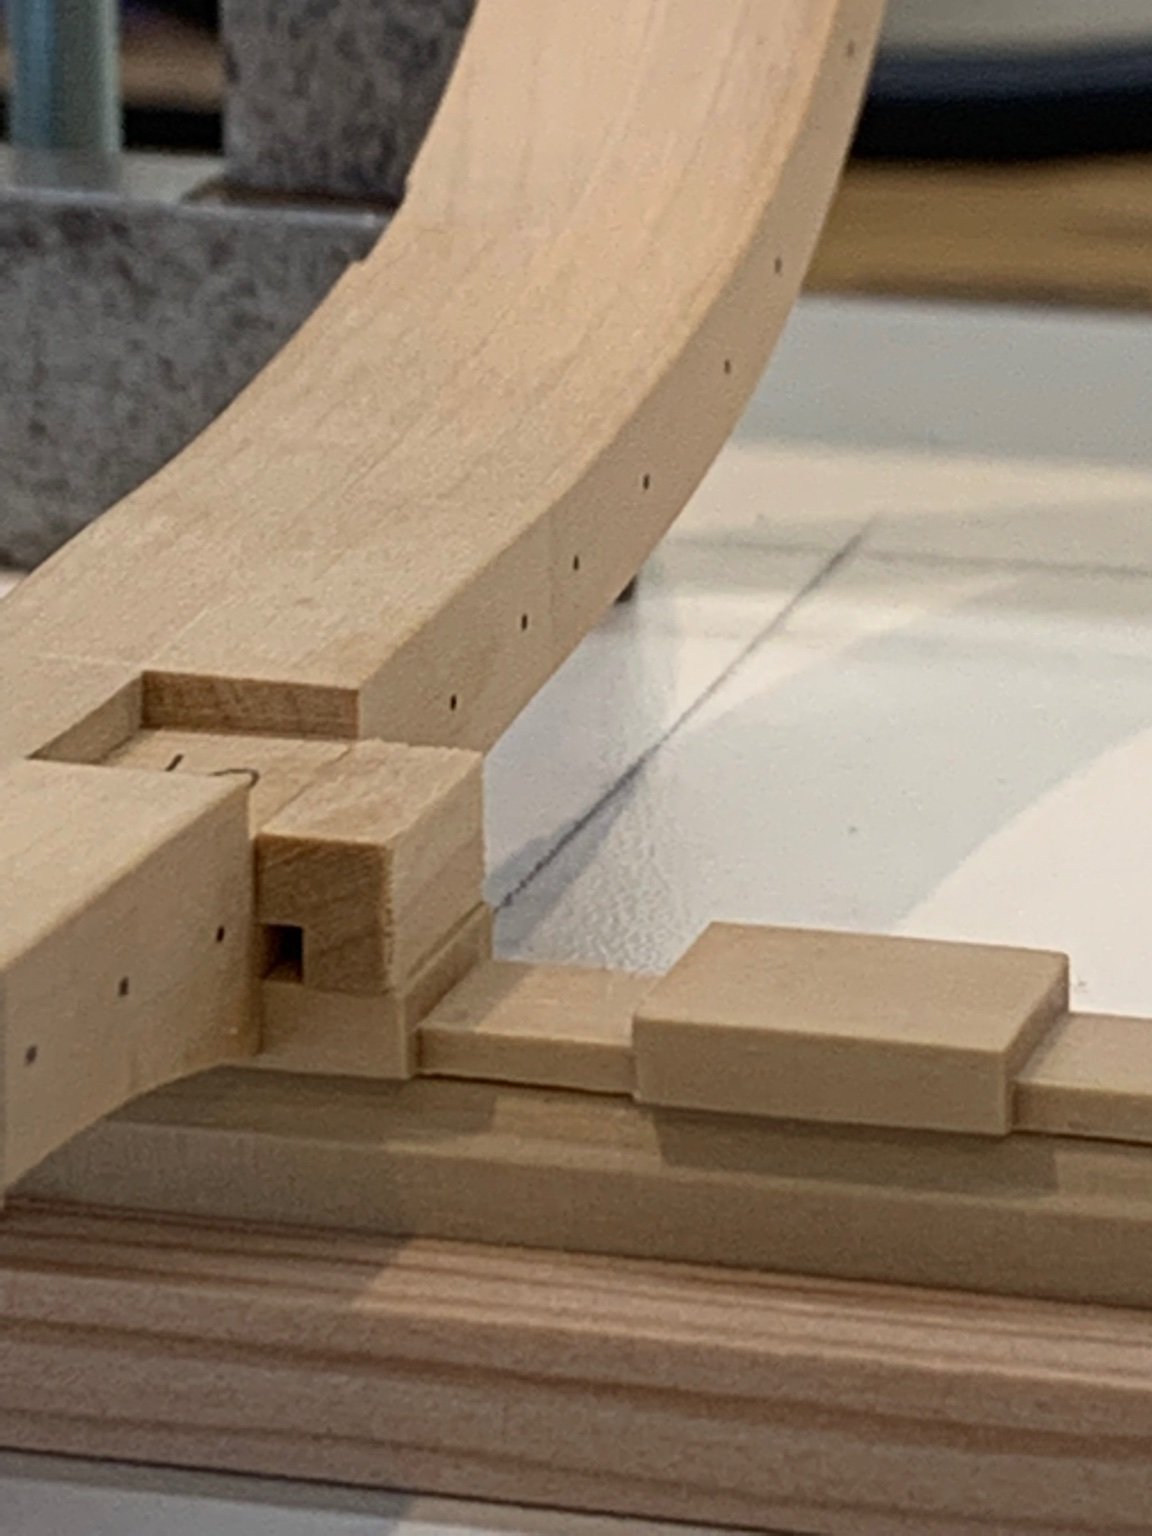
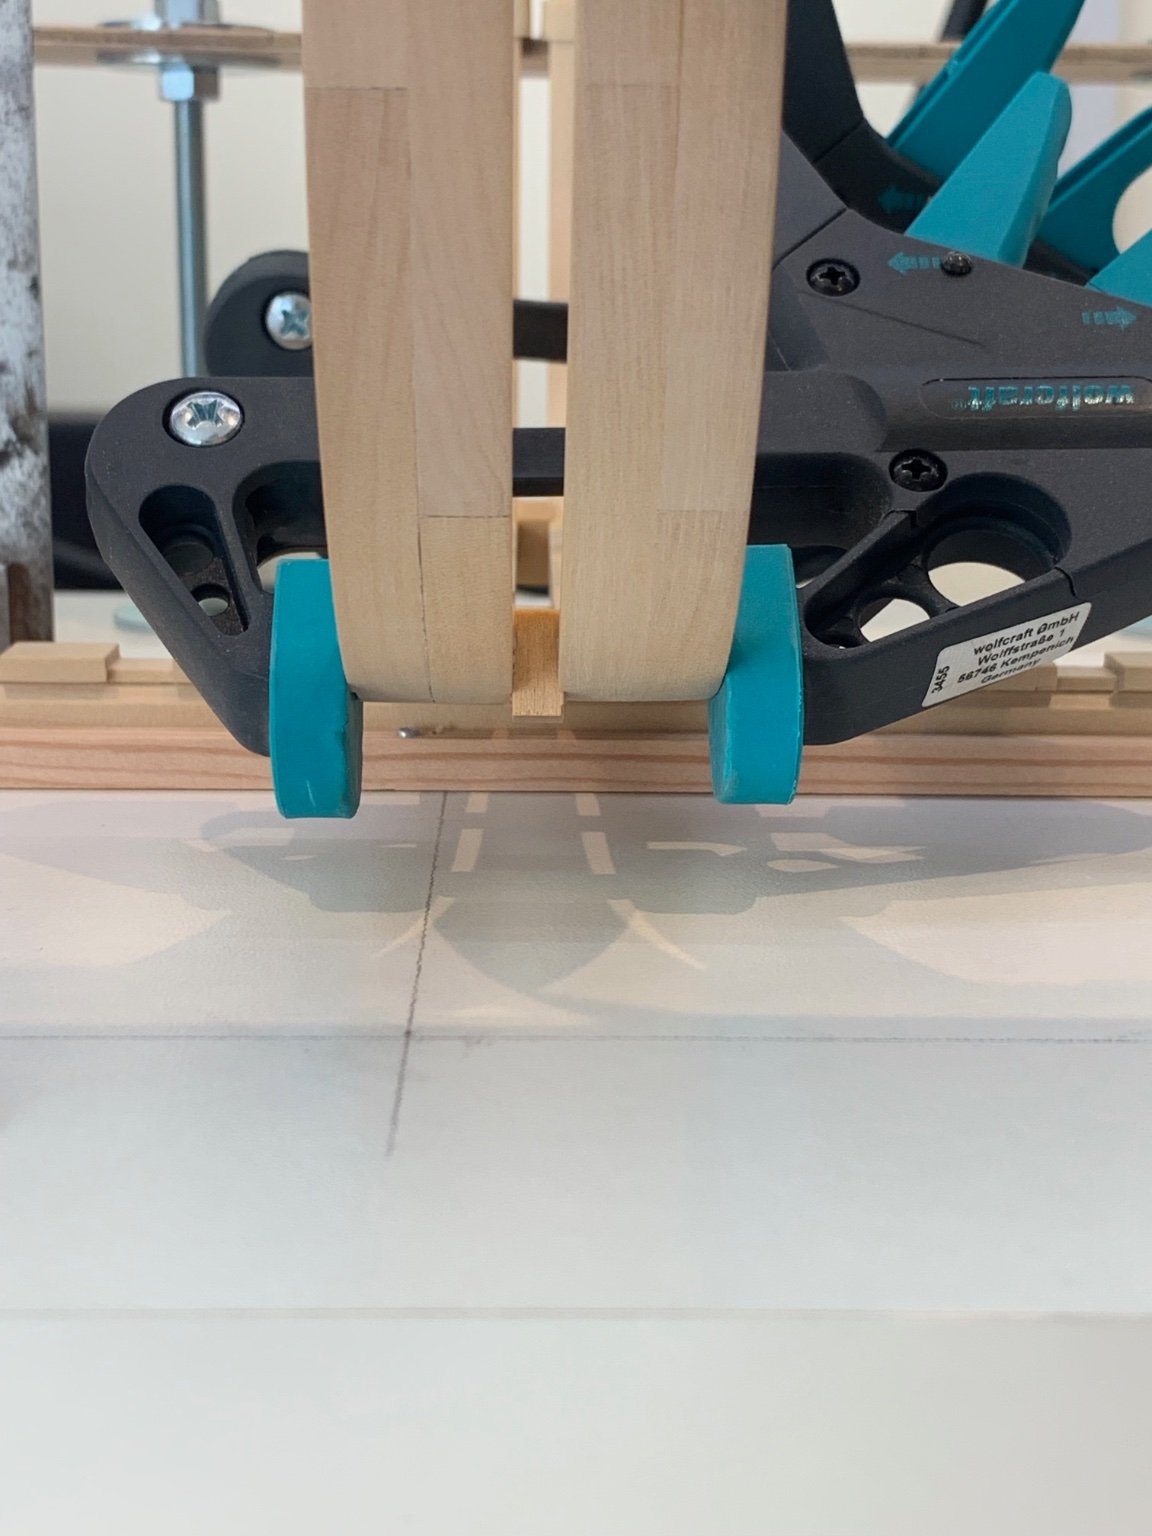
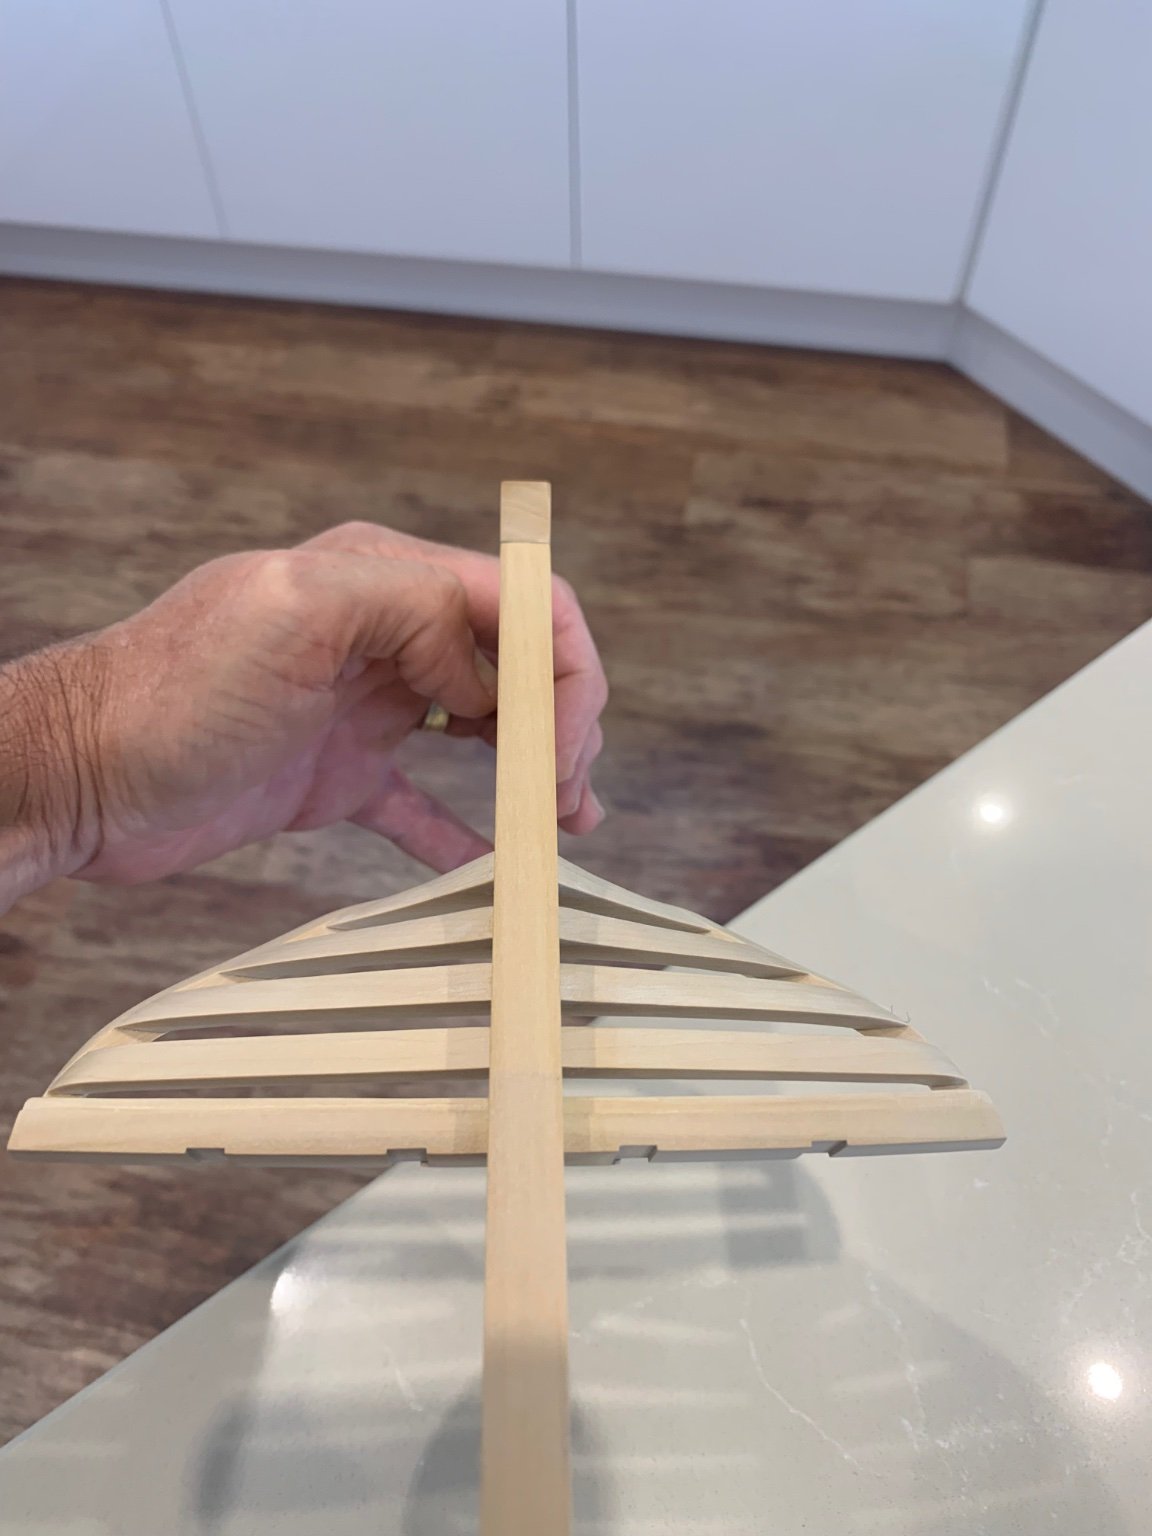
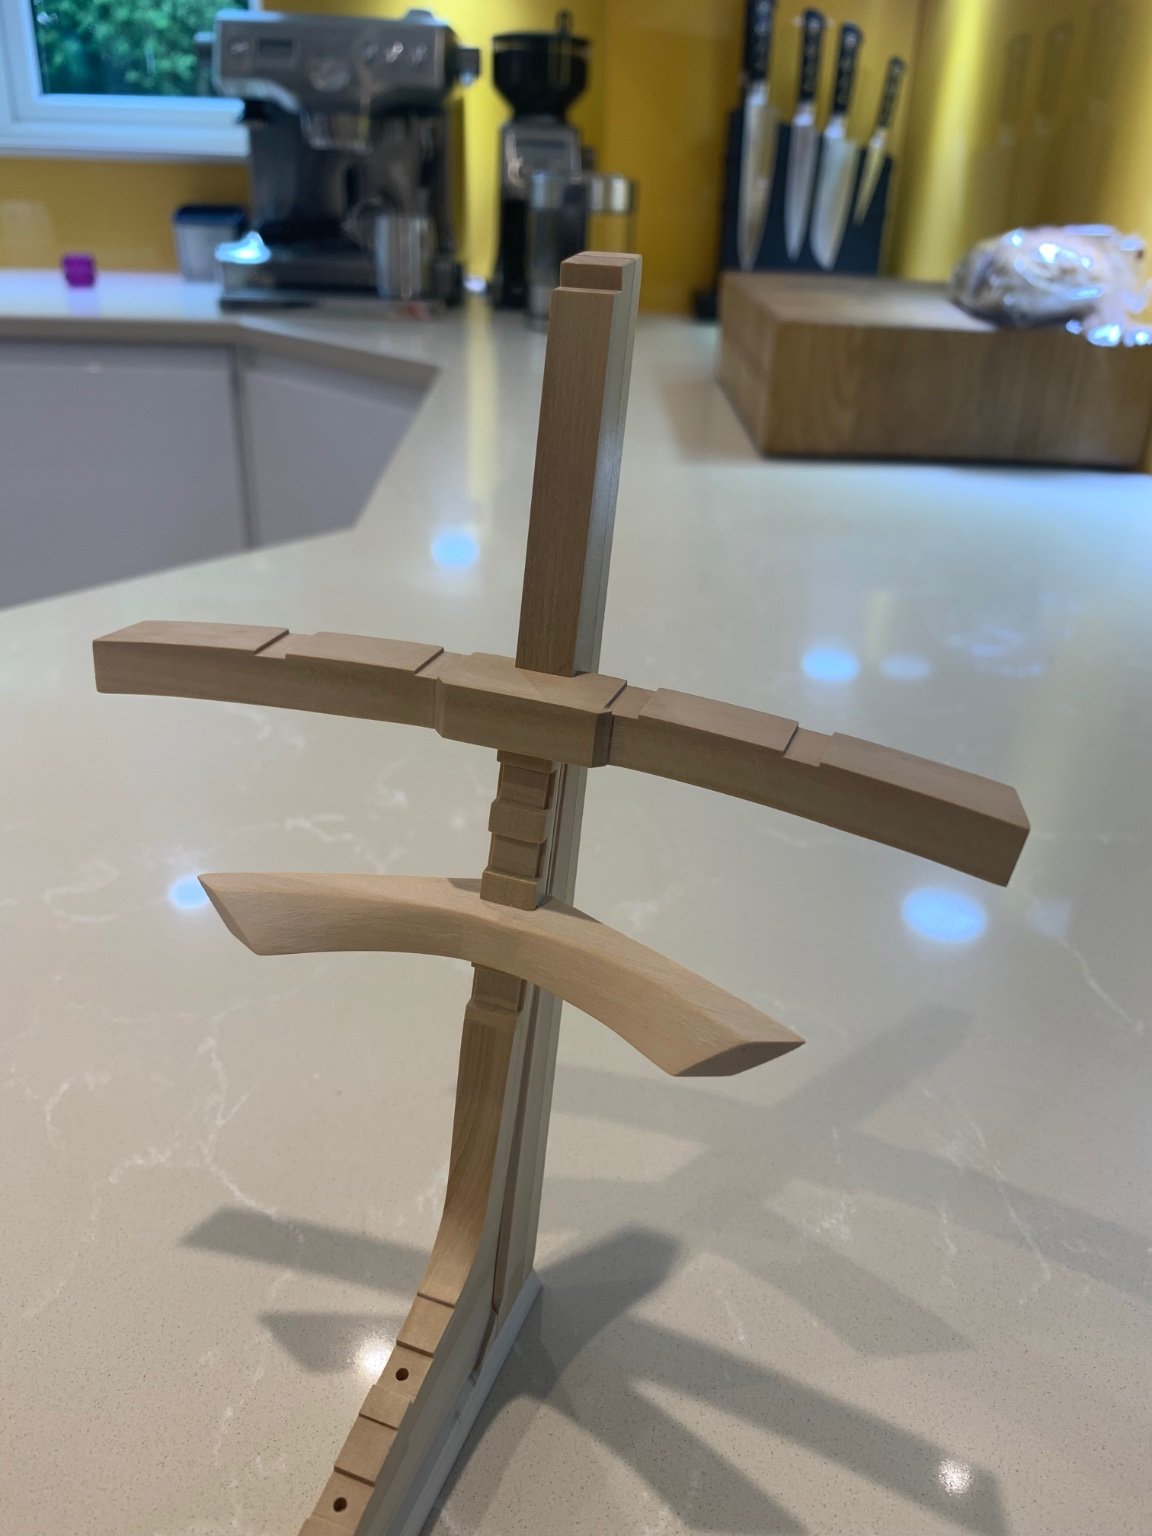
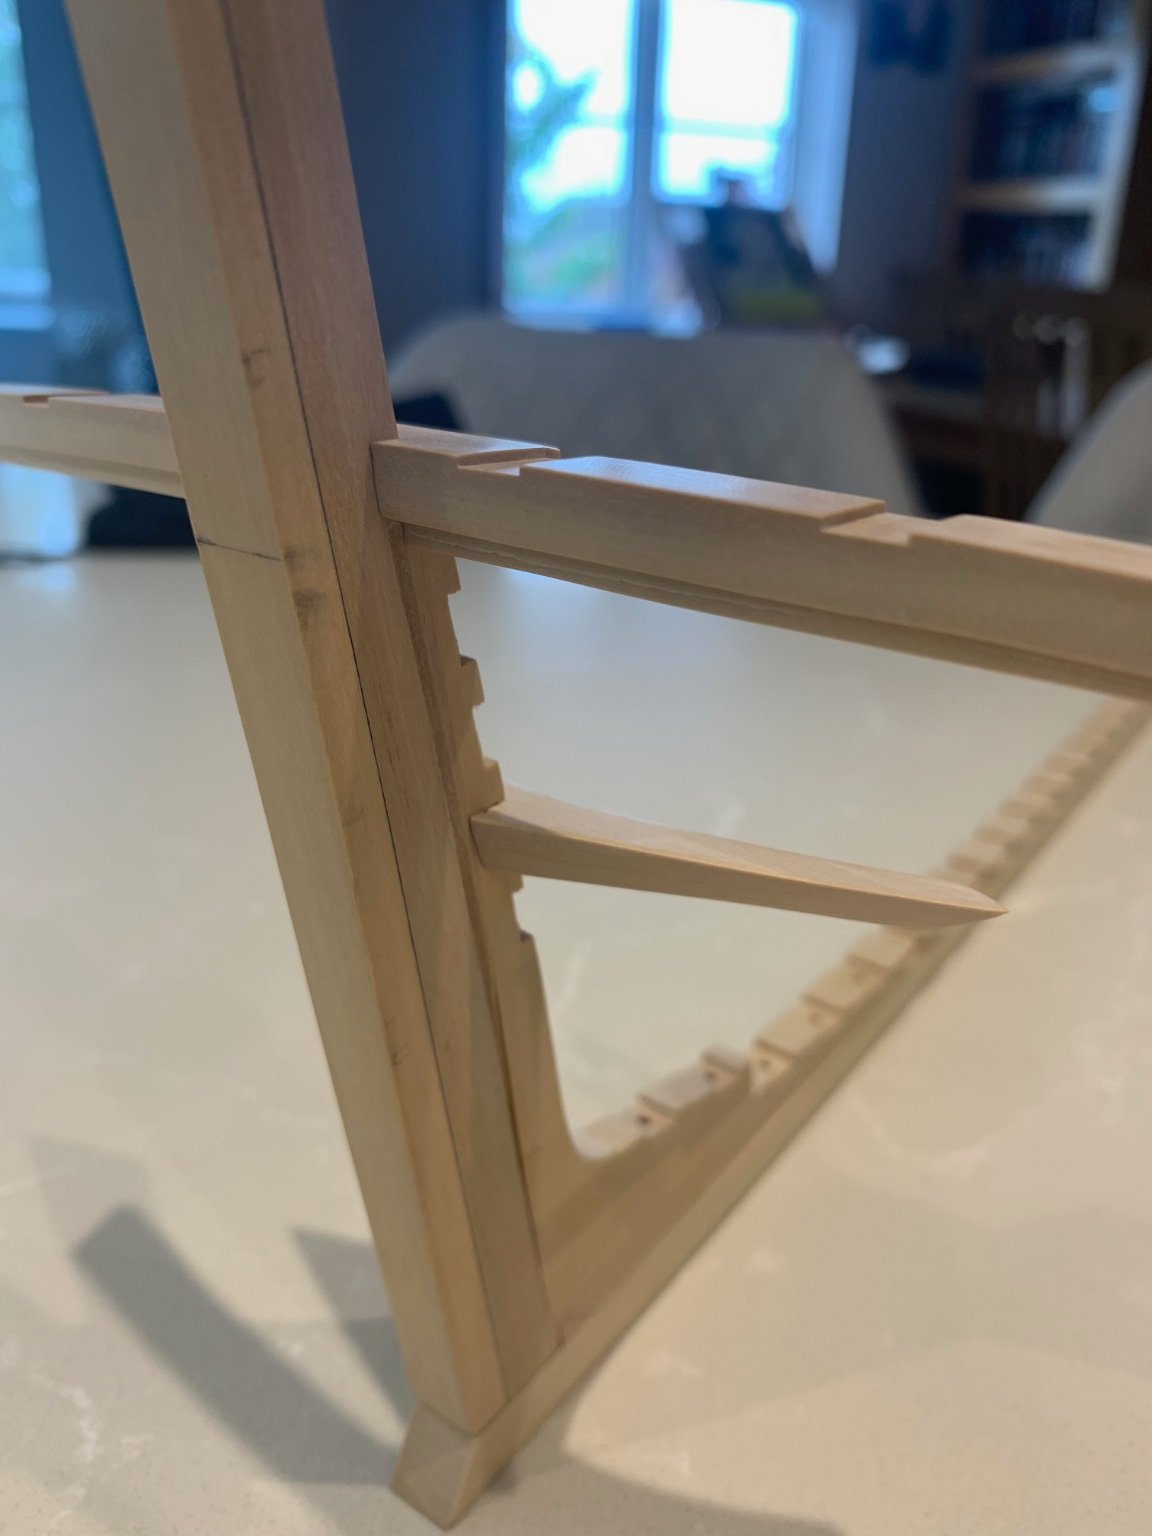
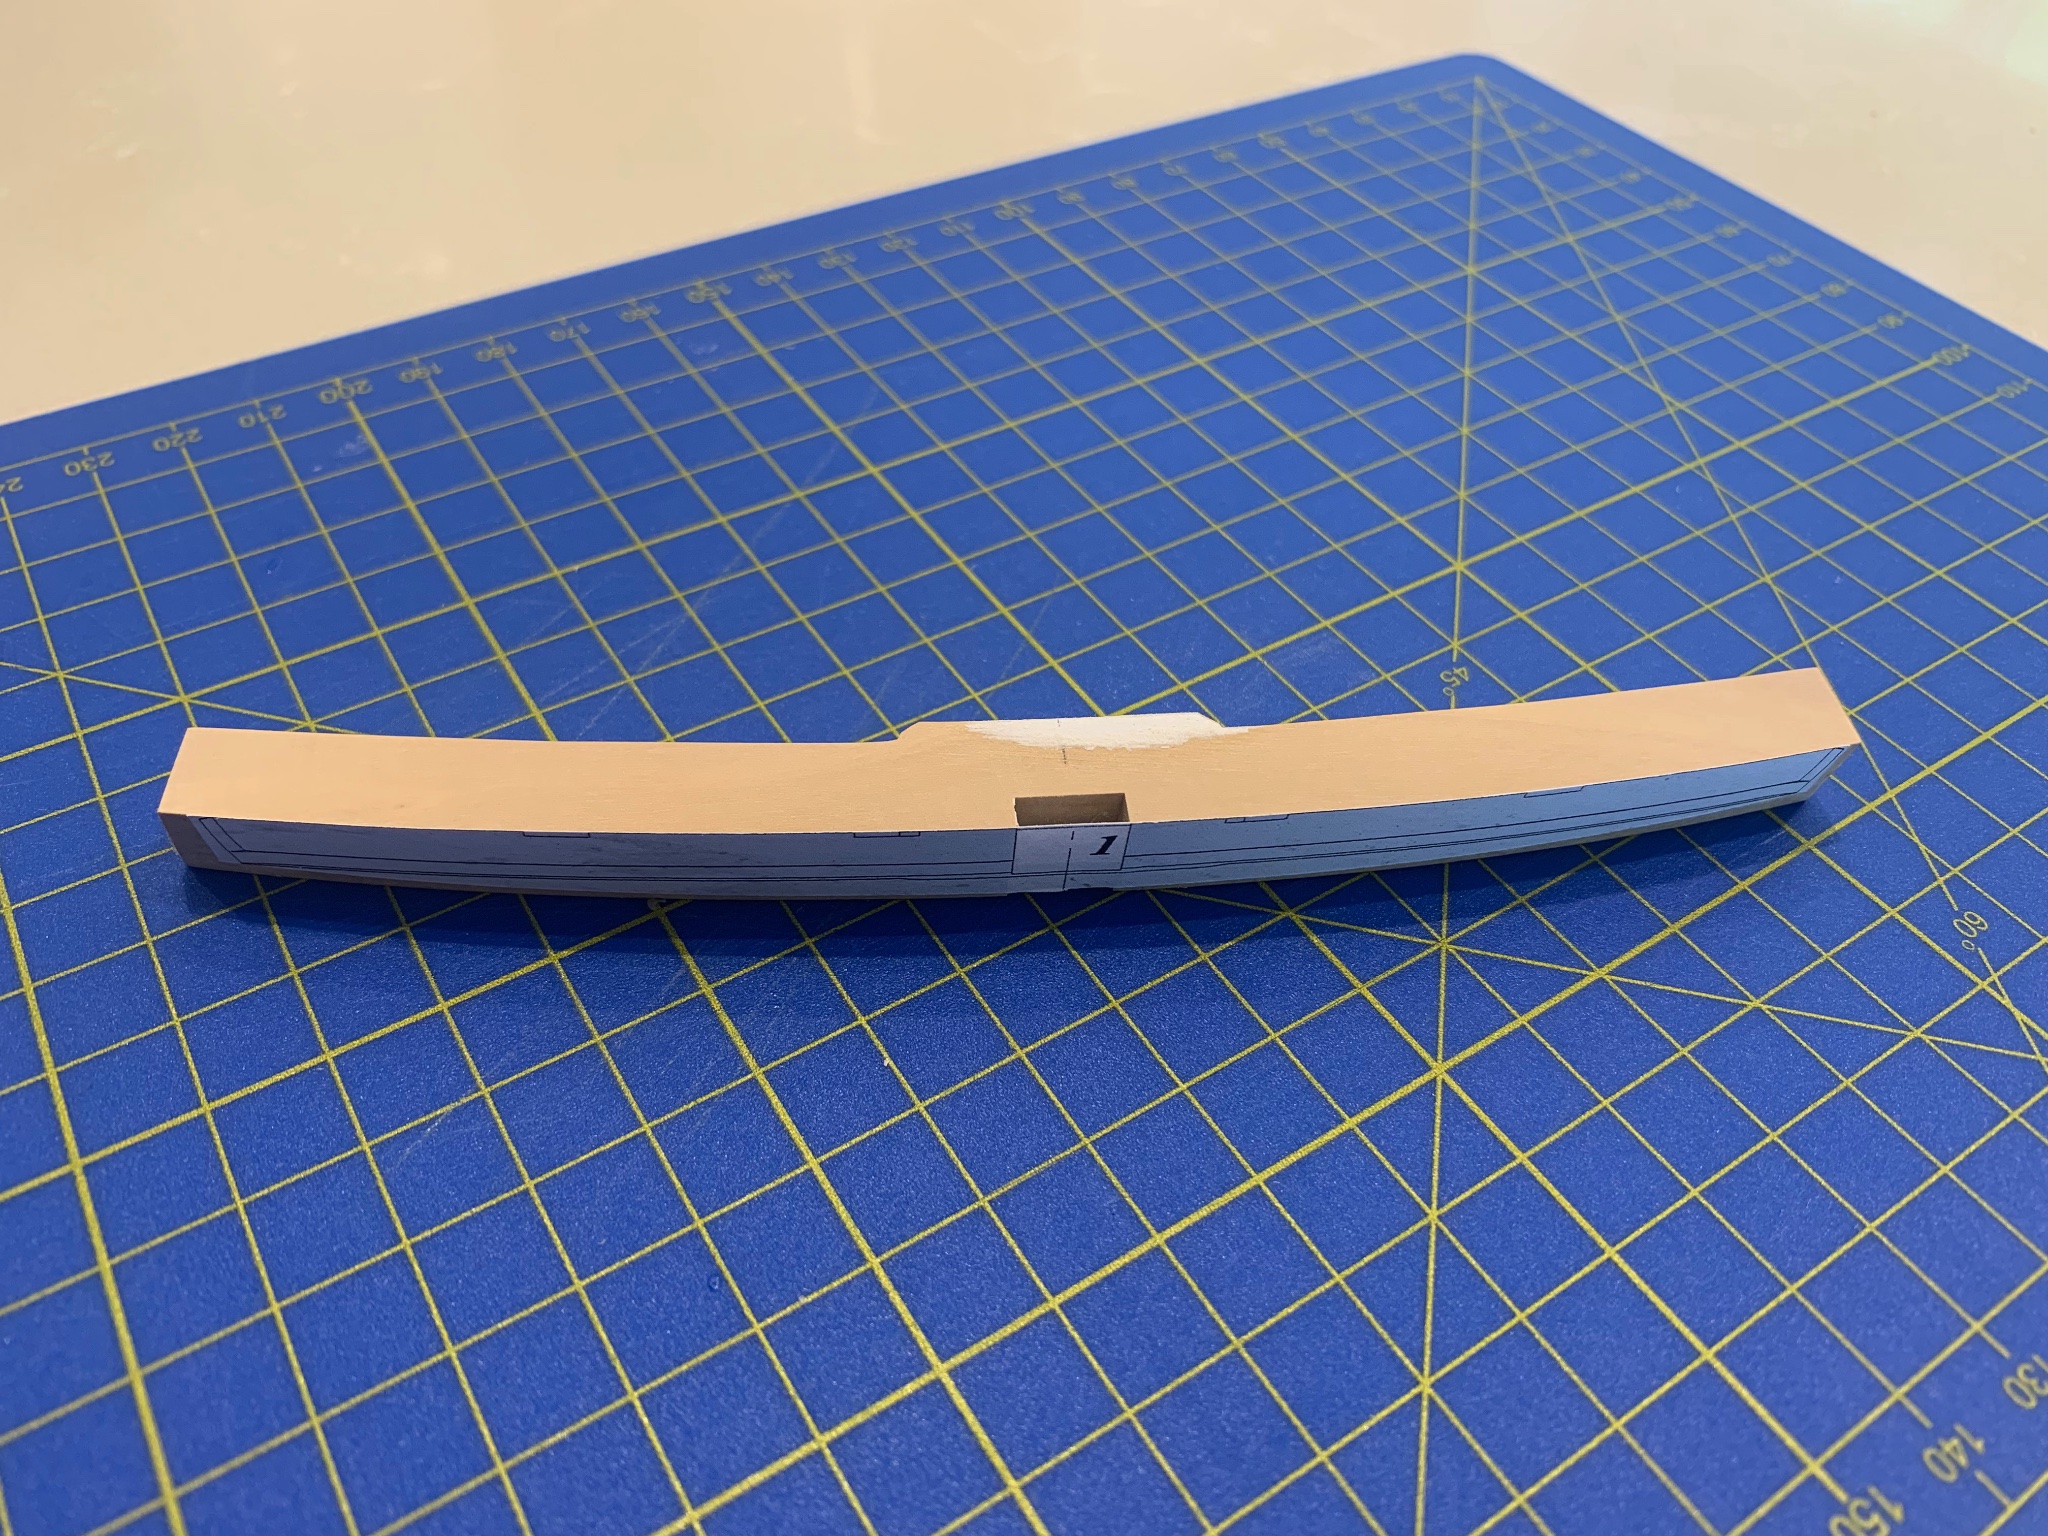
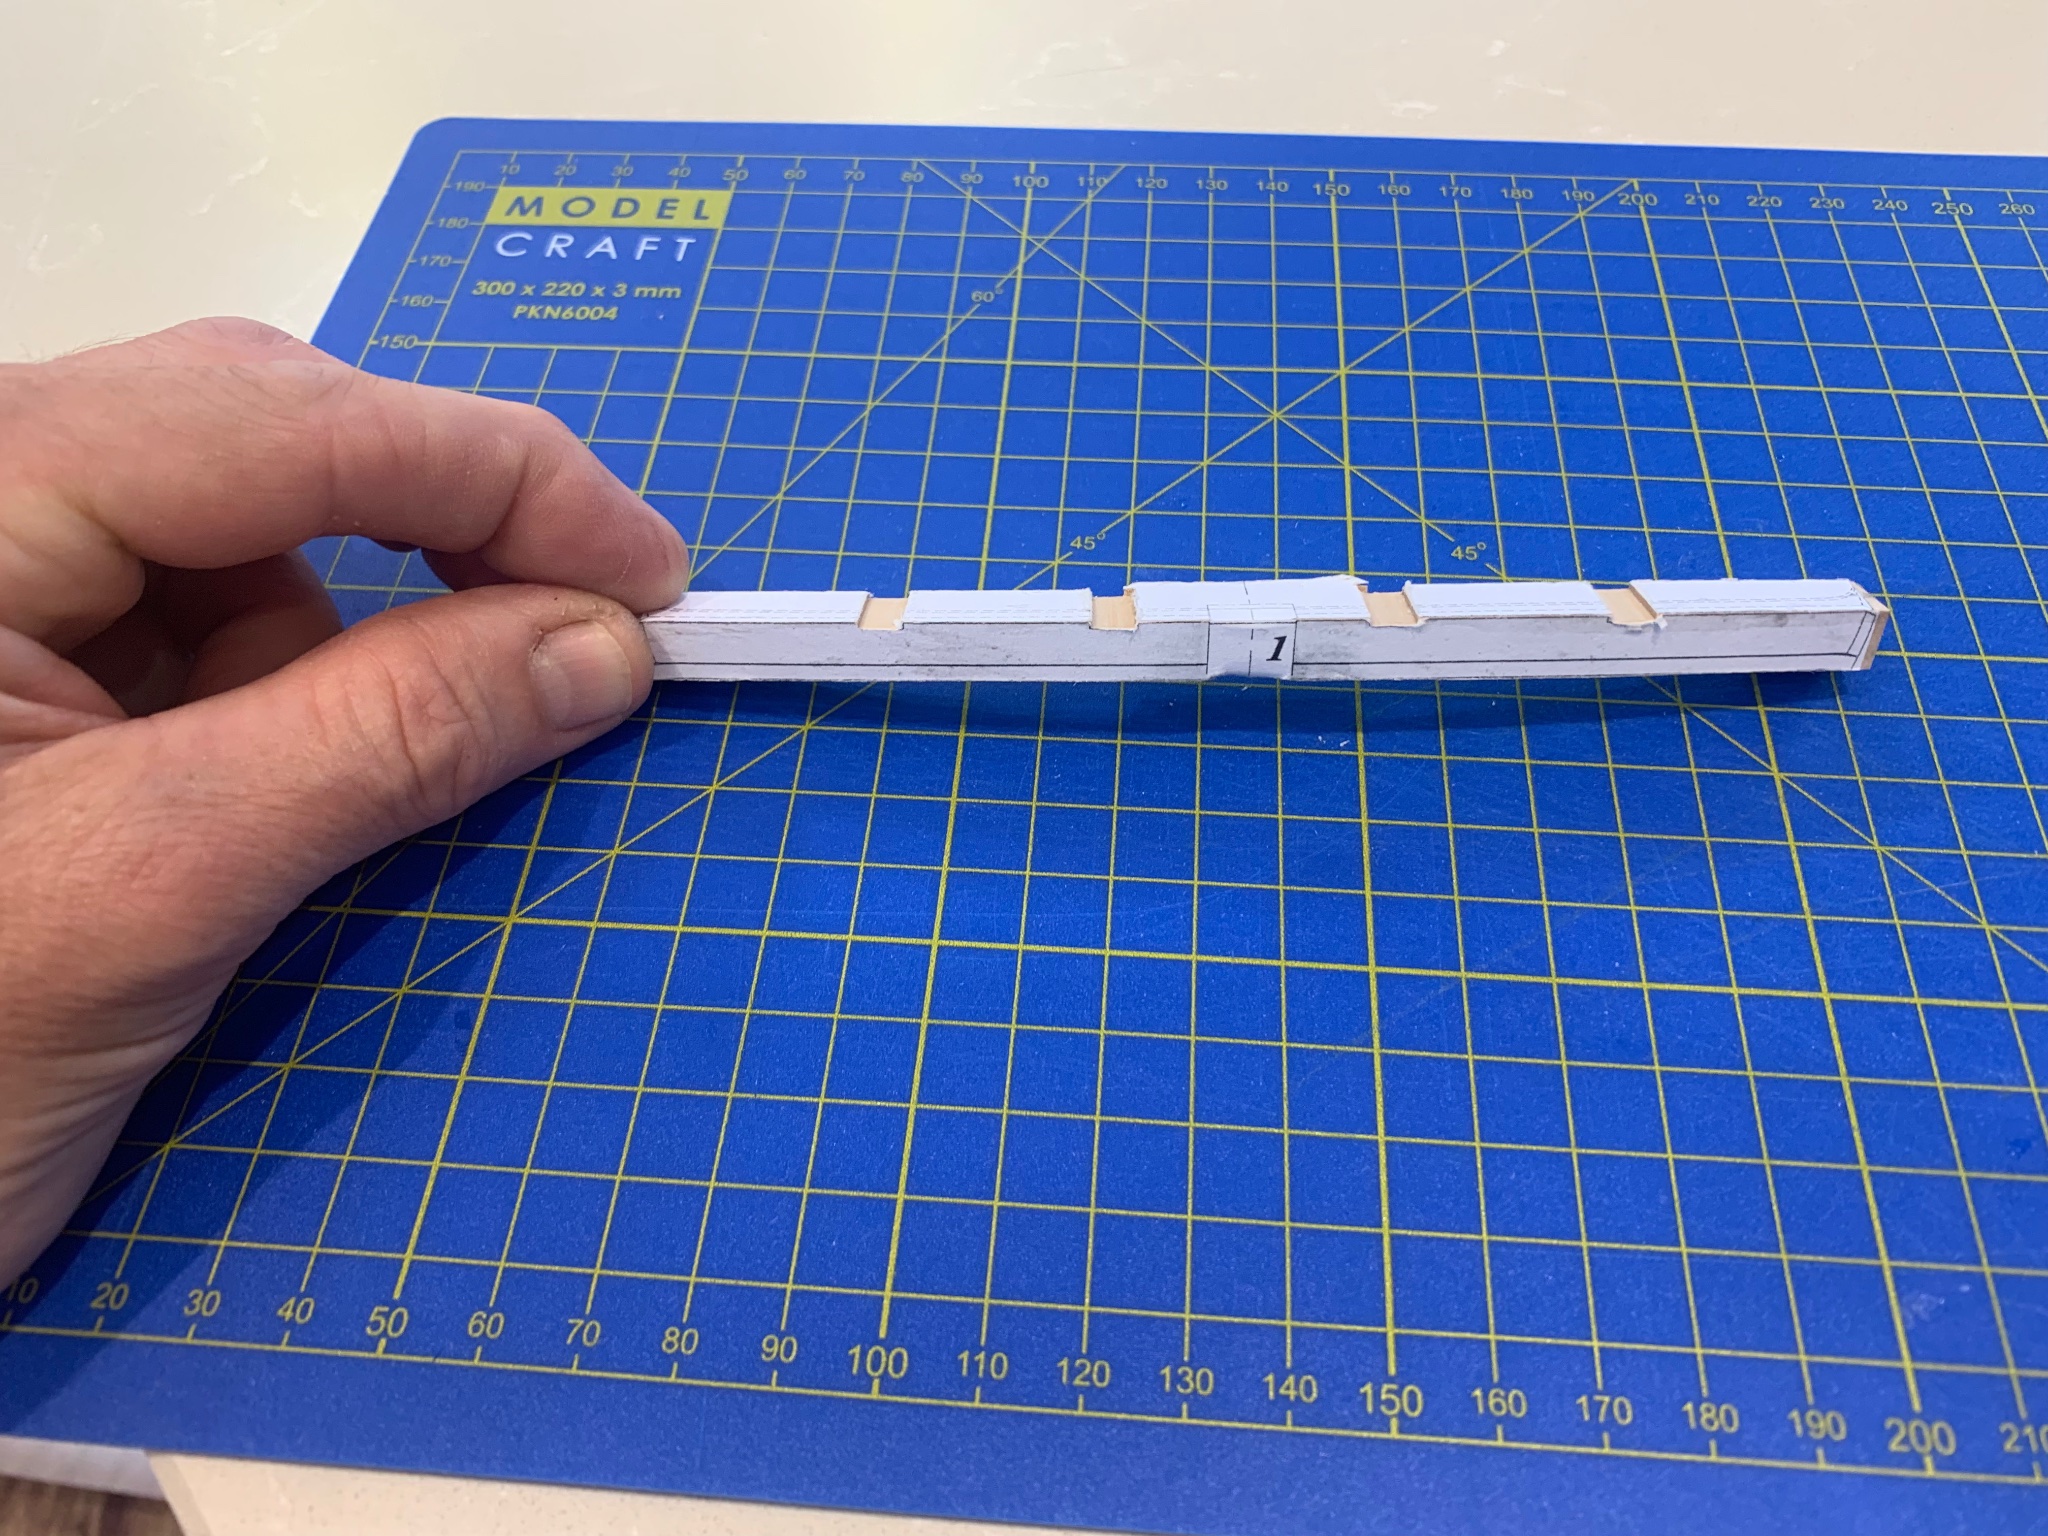
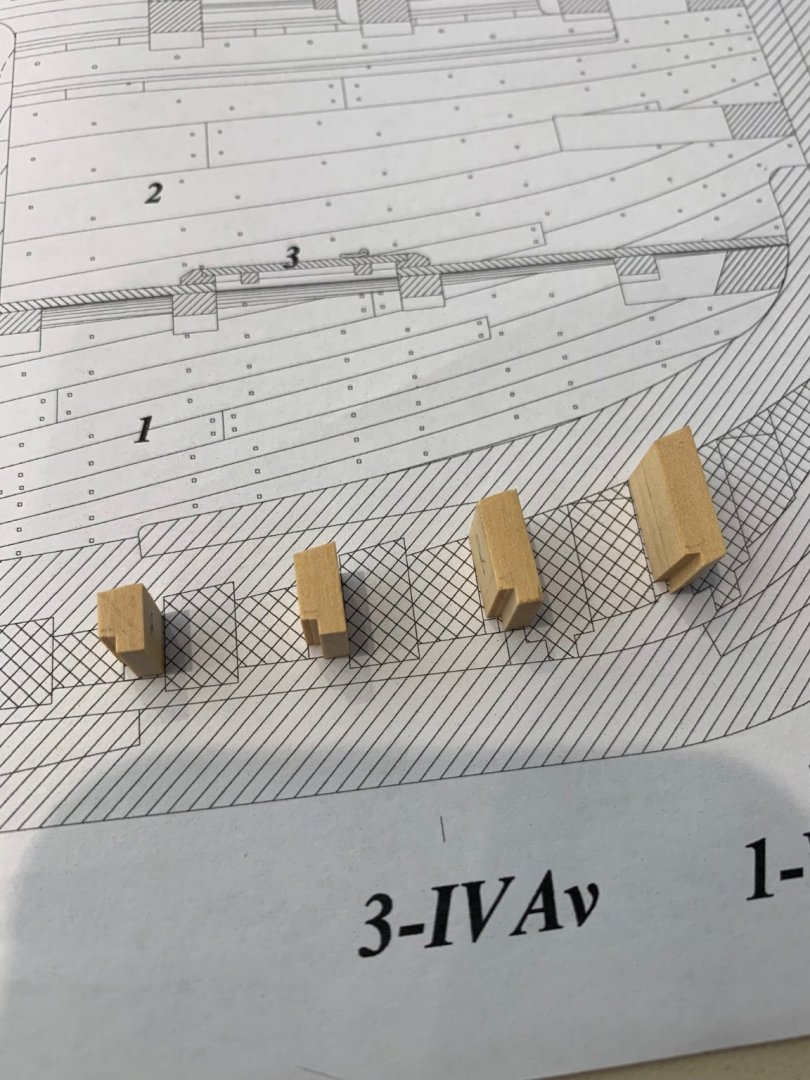
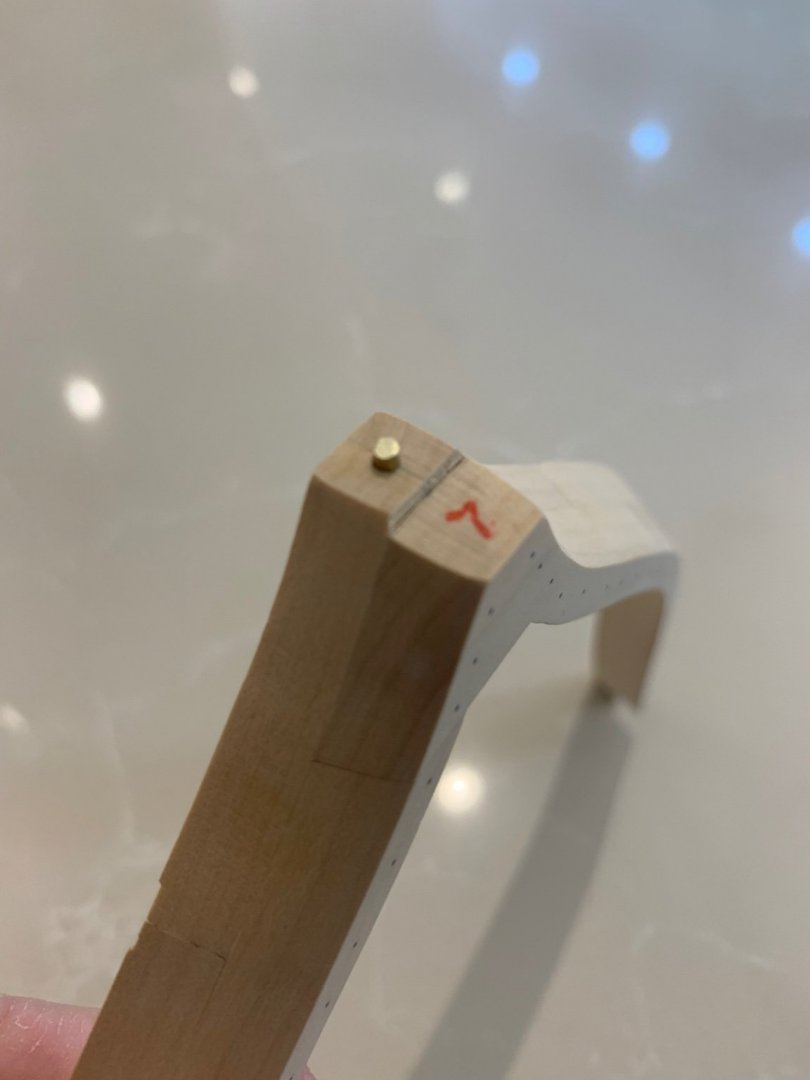
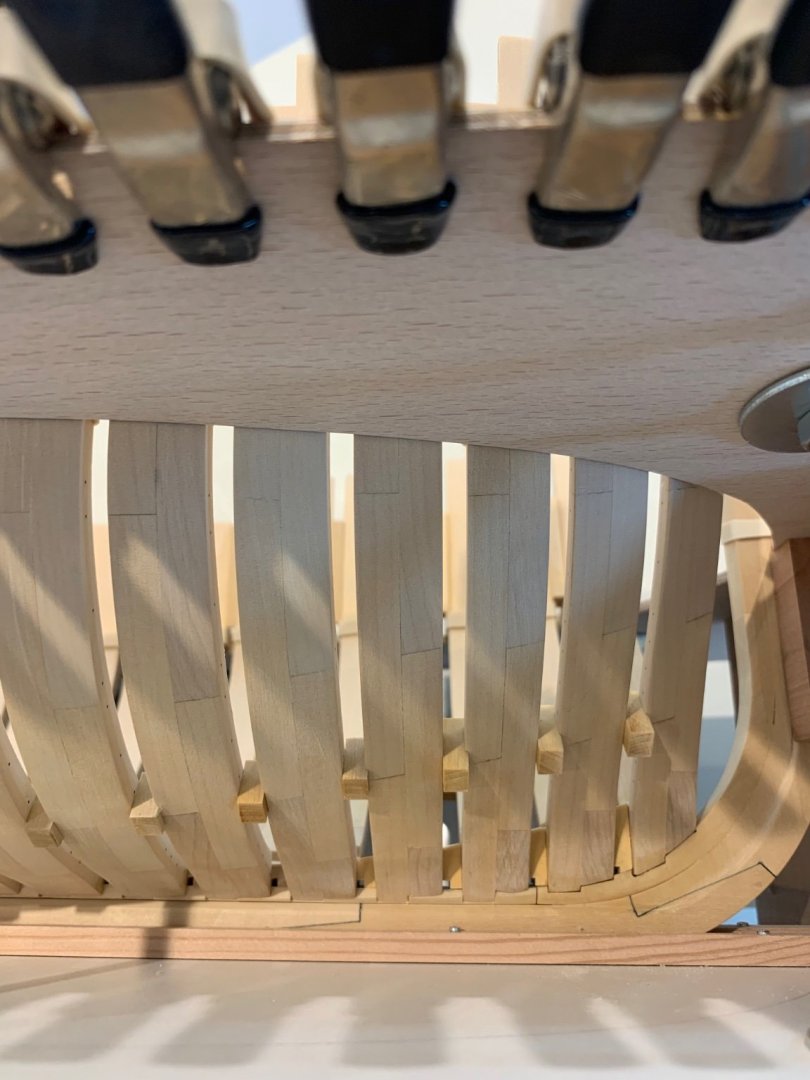
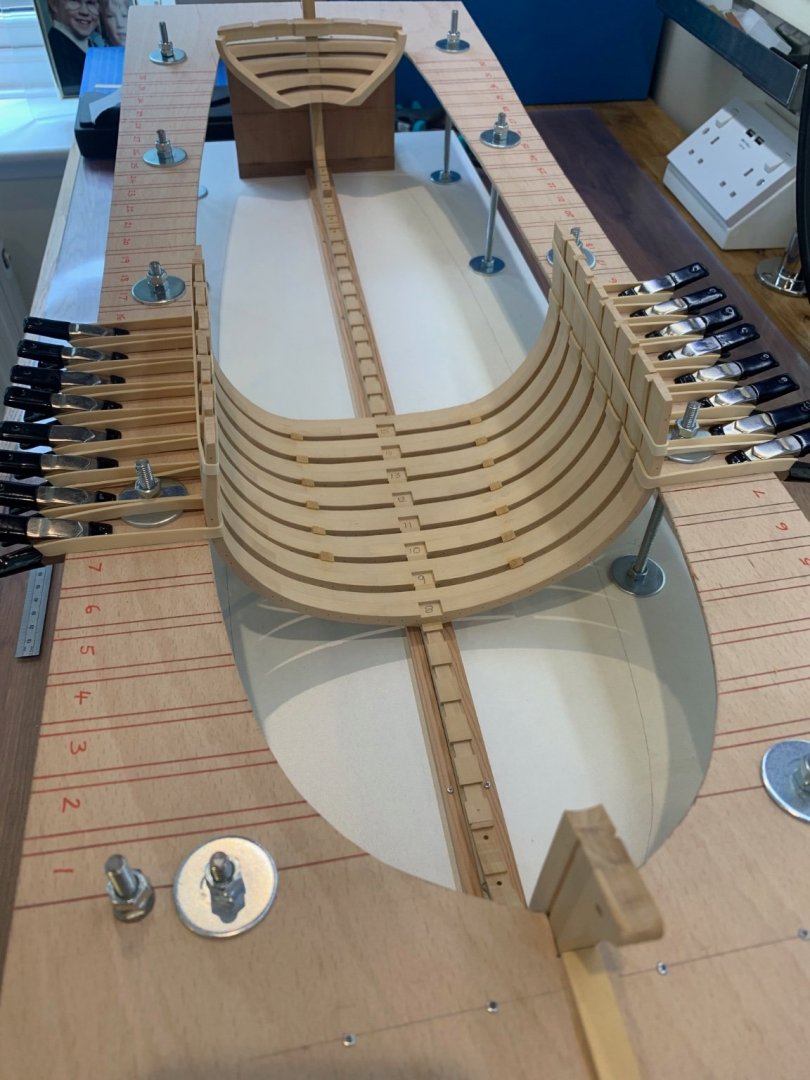
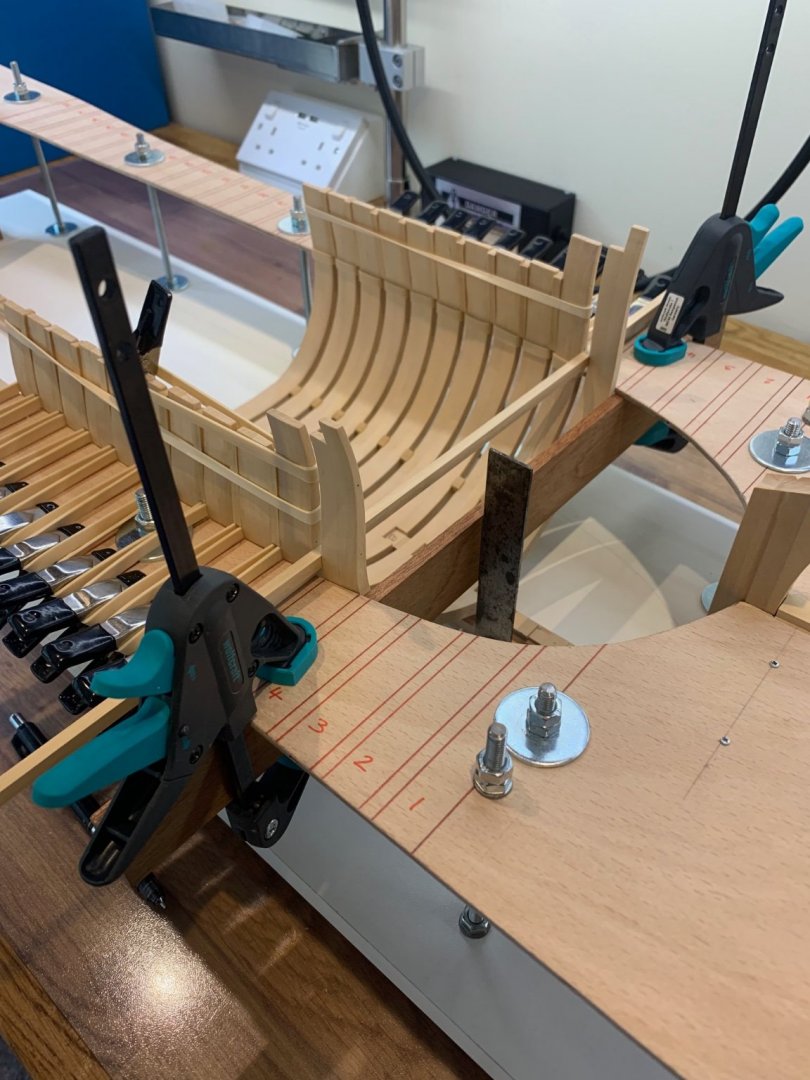
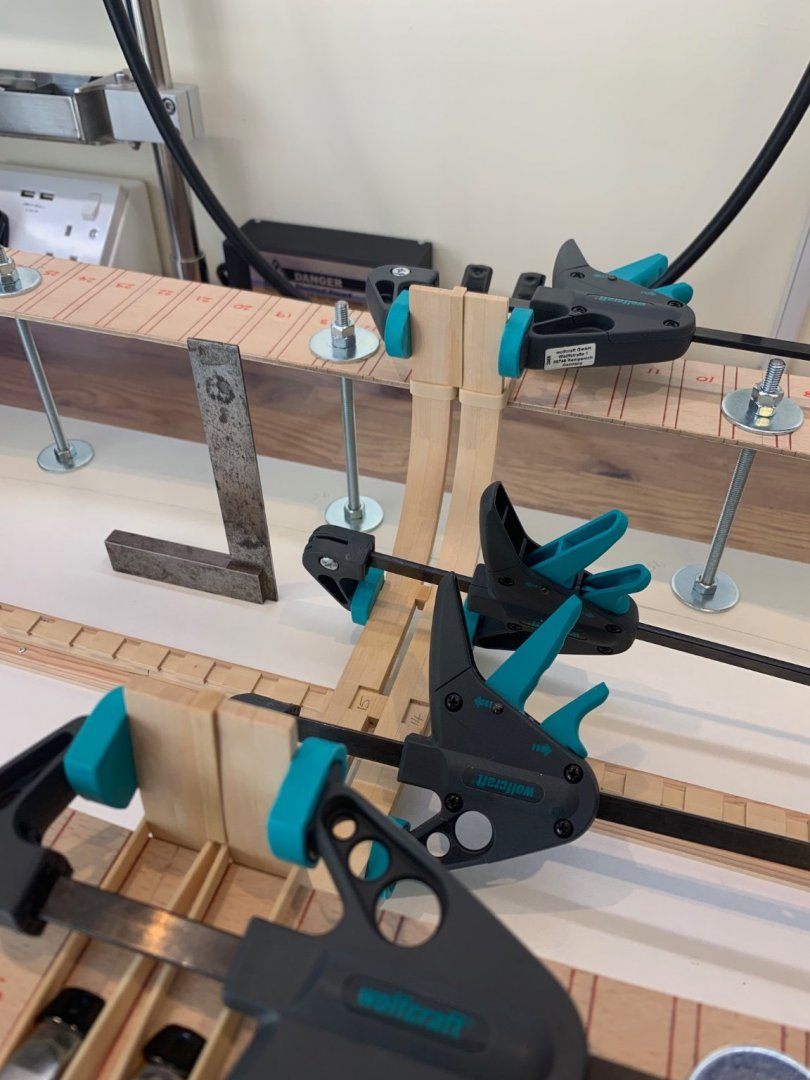
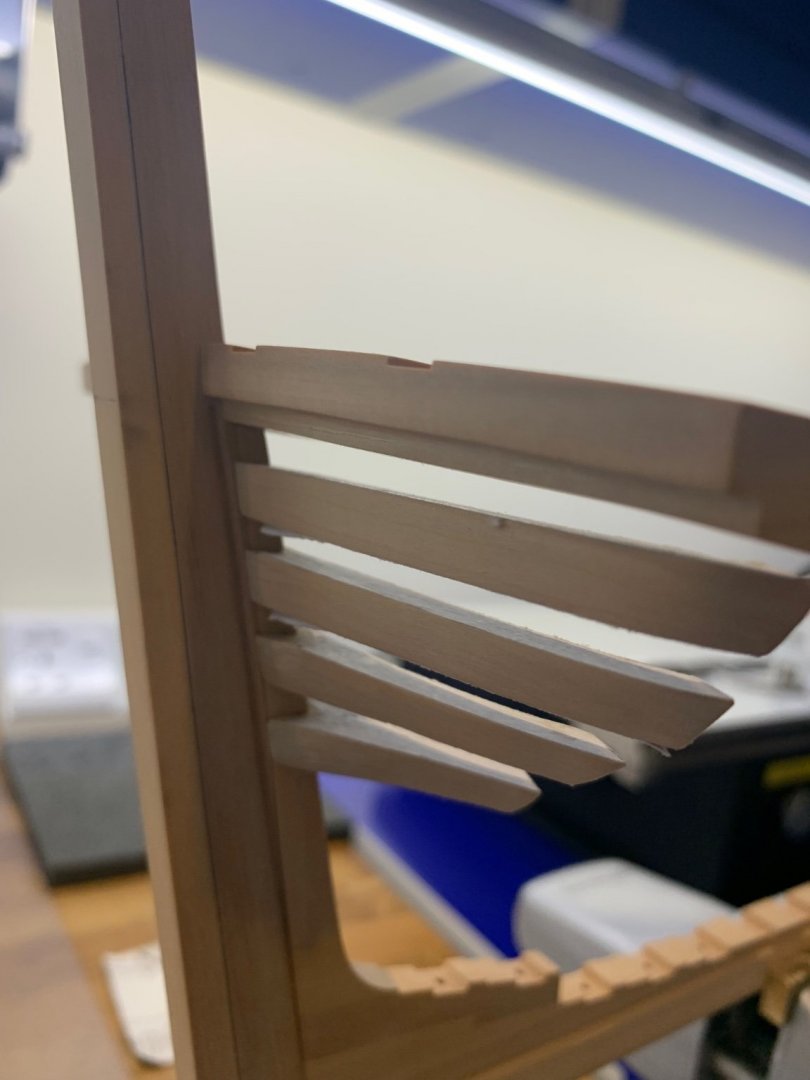
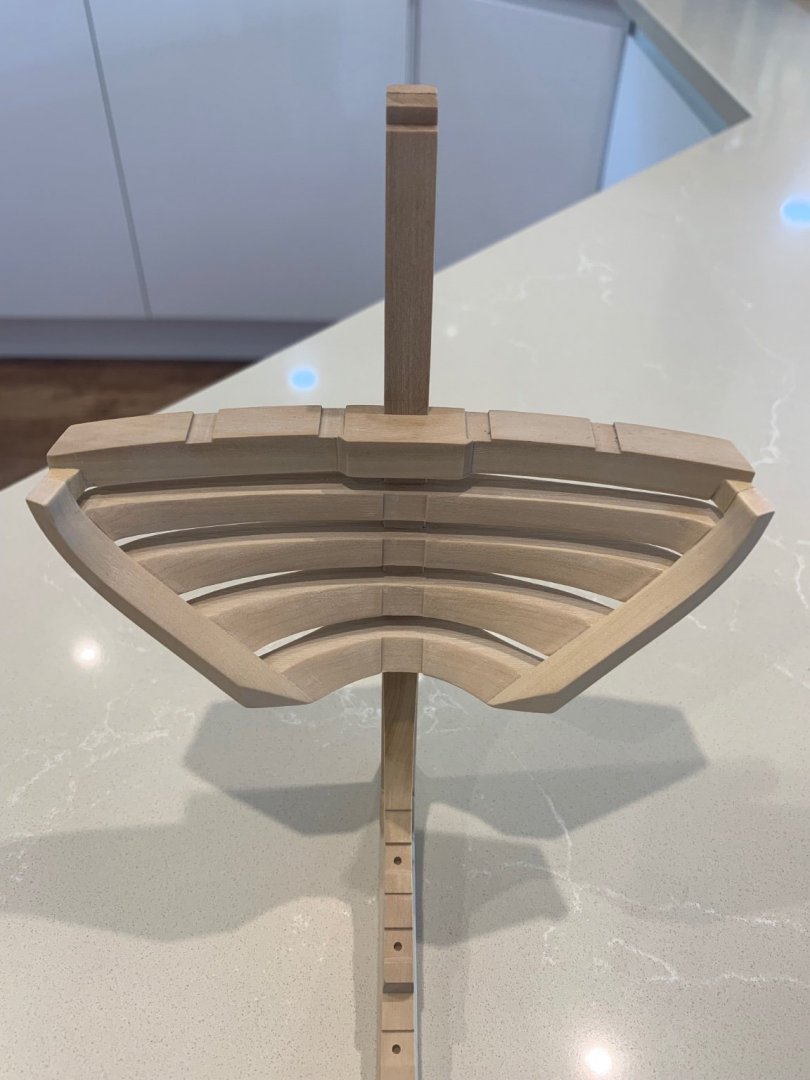
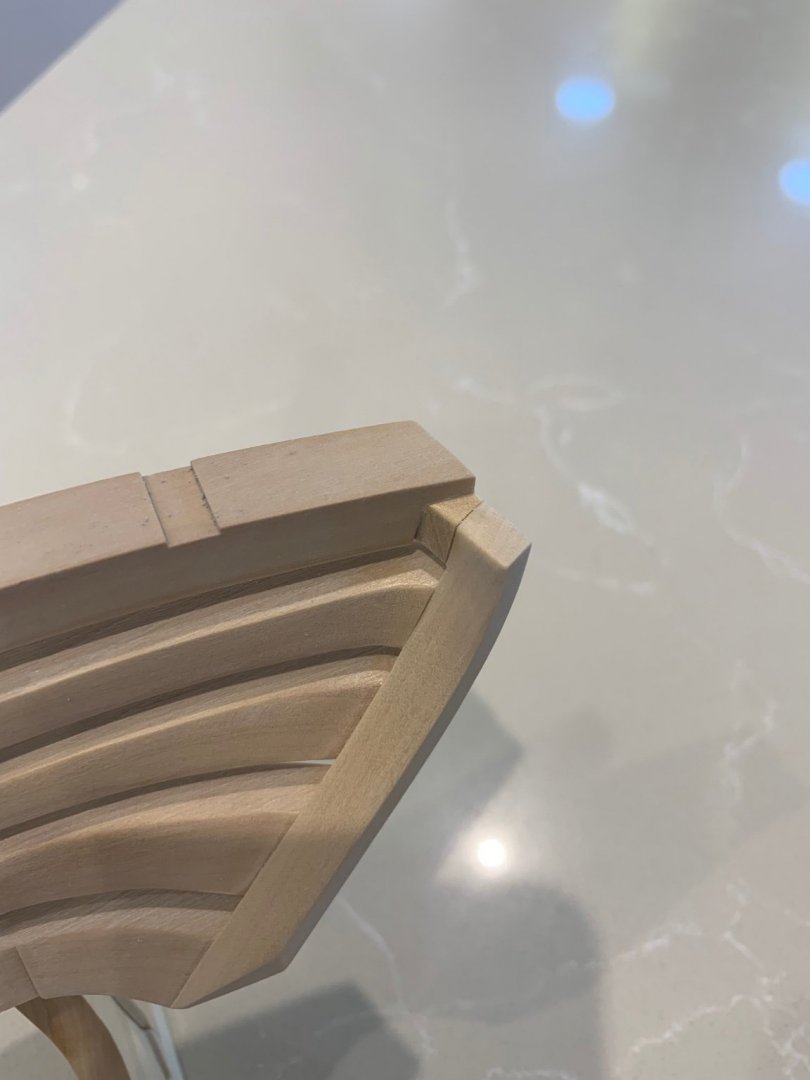
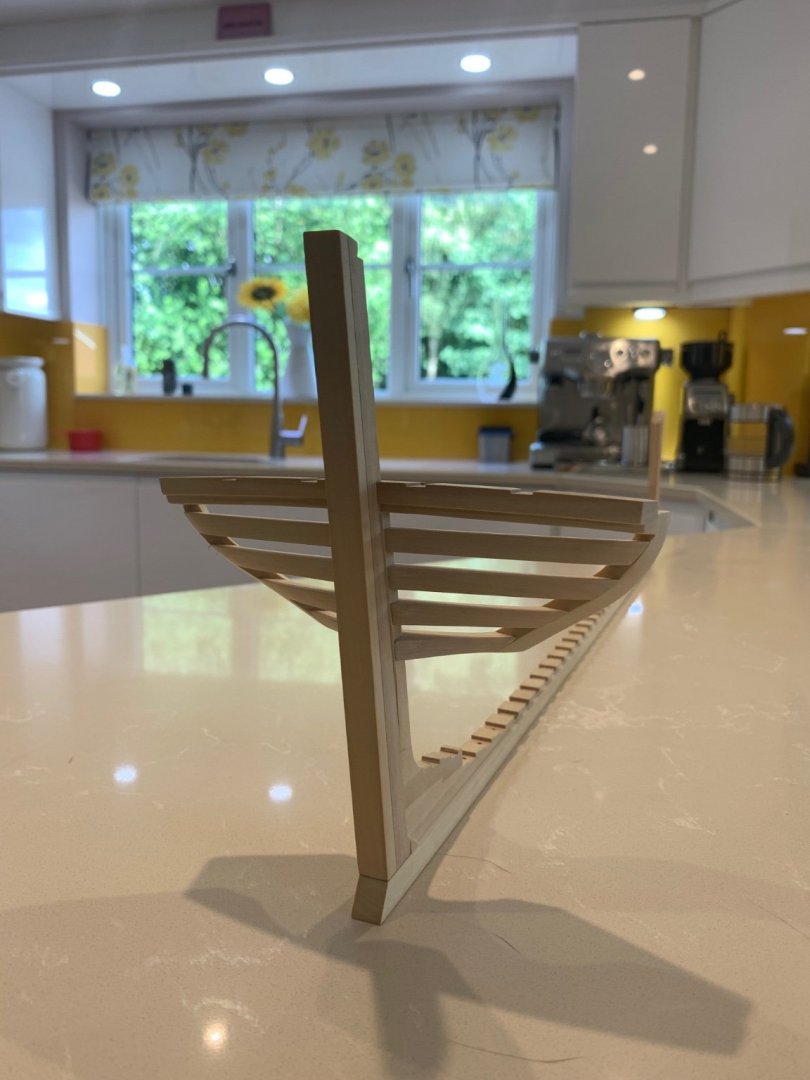
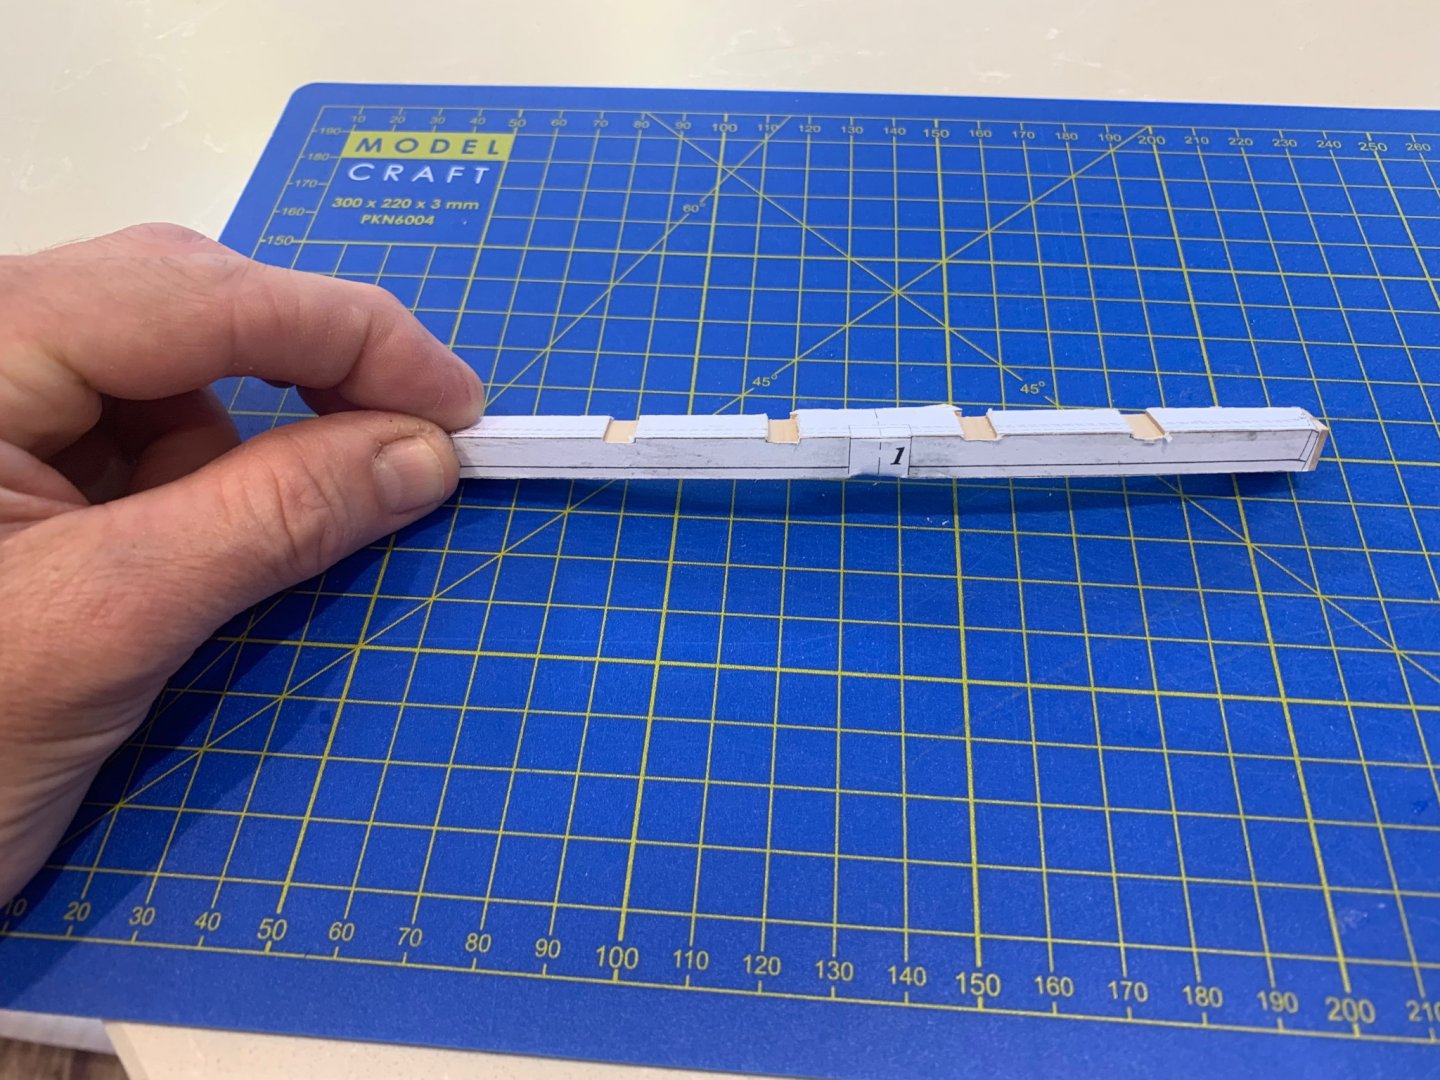
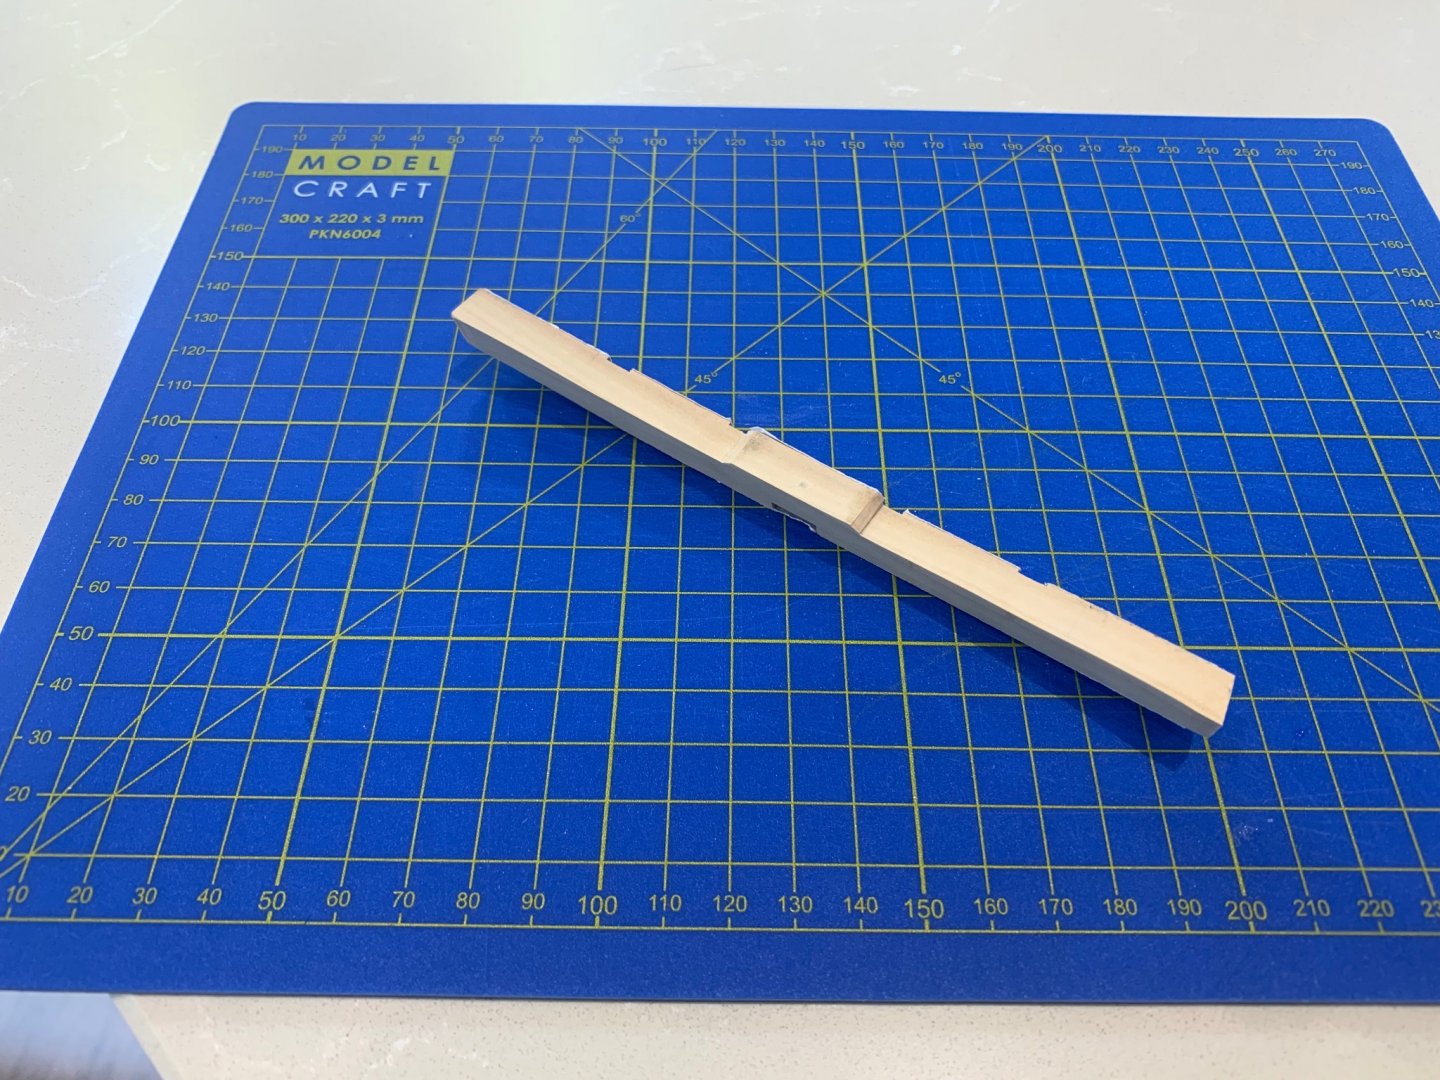
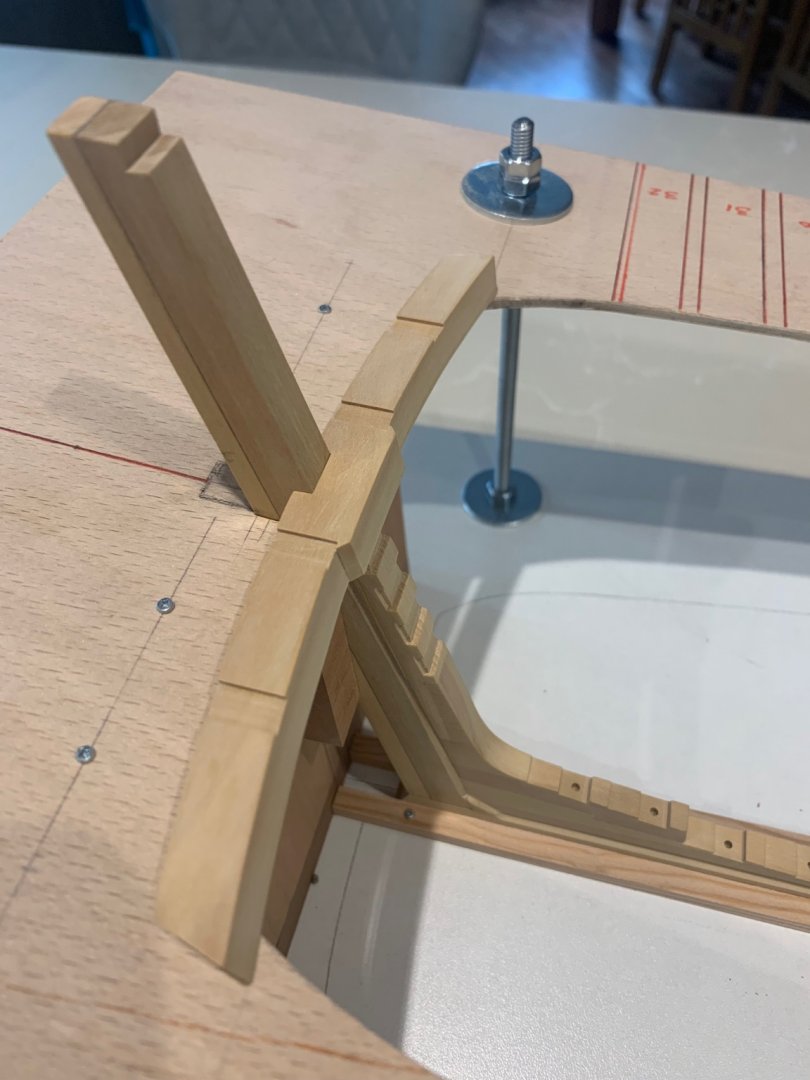
Hi All Thanks for the likes 😀 I've got some more work done in between decorating. I made the rising chocks as per the plan and have now installed the final four forward frames. I like the way if you look through the frames underneath the way the chocks rise up to meet the stemson. One is slightly high but its nothing a quick shave with a chisel won't sort out. Frames 1 and 2 have a small 2mm dowel to hold them in place - I didn't have any wood of this diameter so I used a small piece of brass instead. It all seems to have gone together ok. Here's a few pictures - with and without the holding bands Mark


-
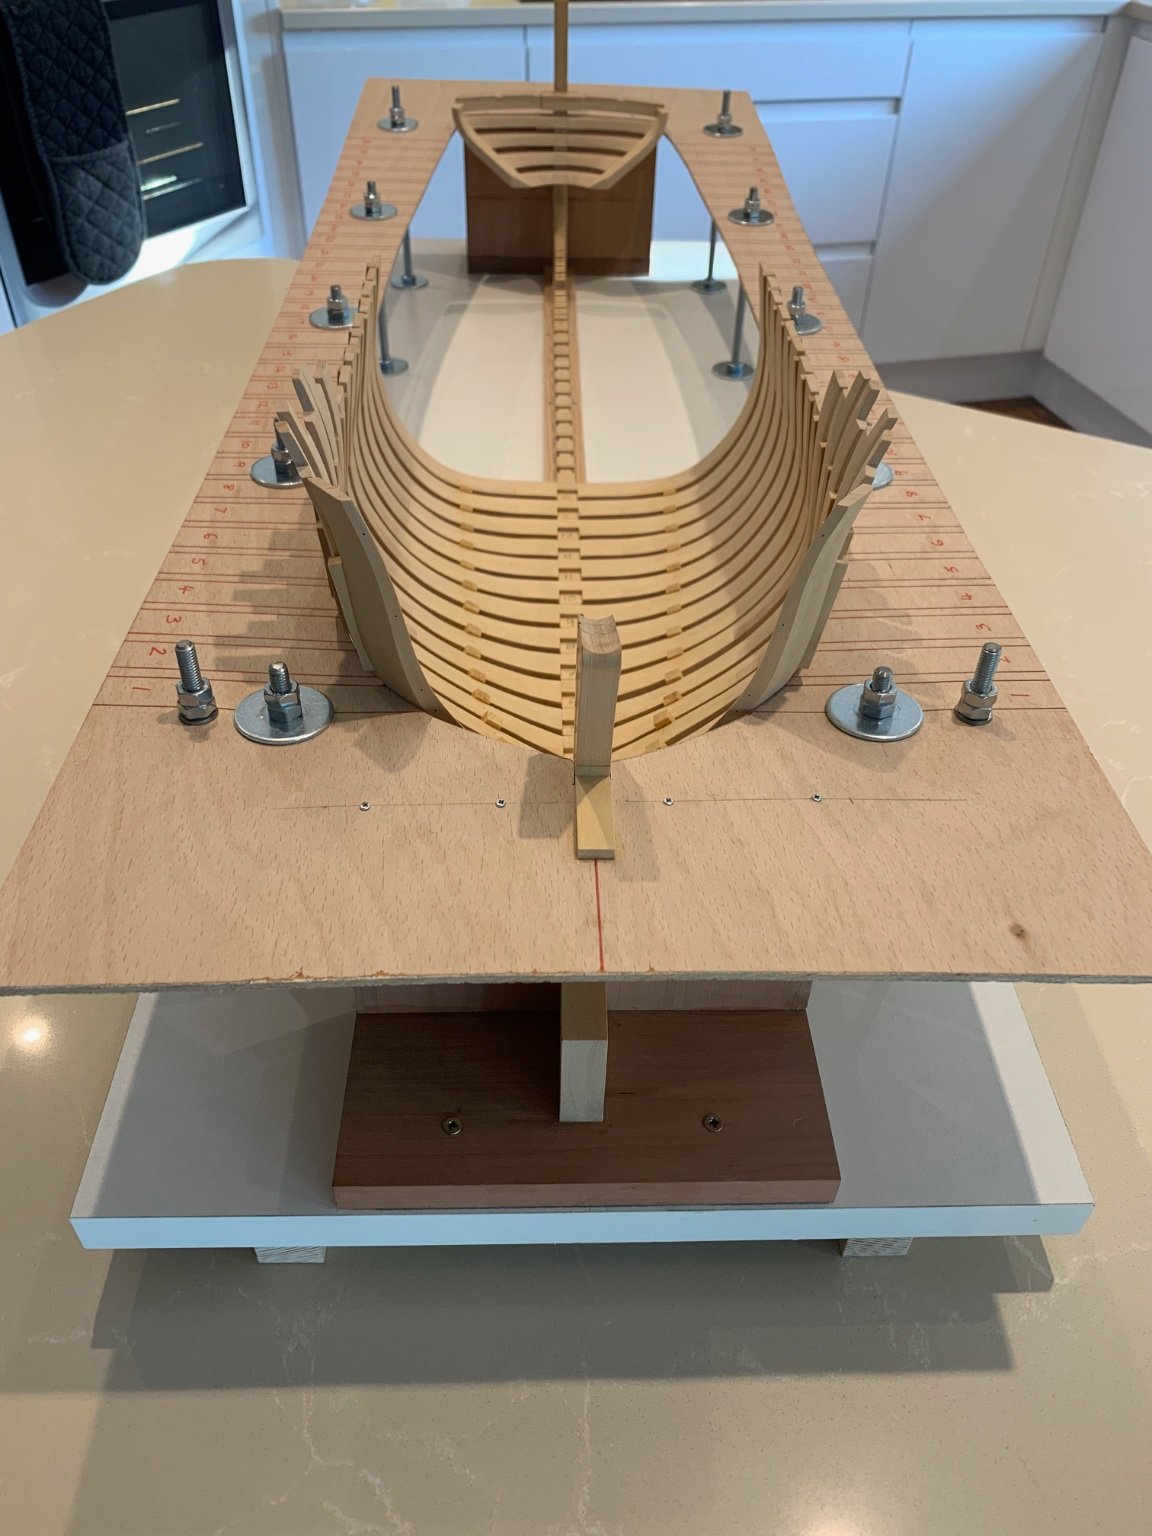
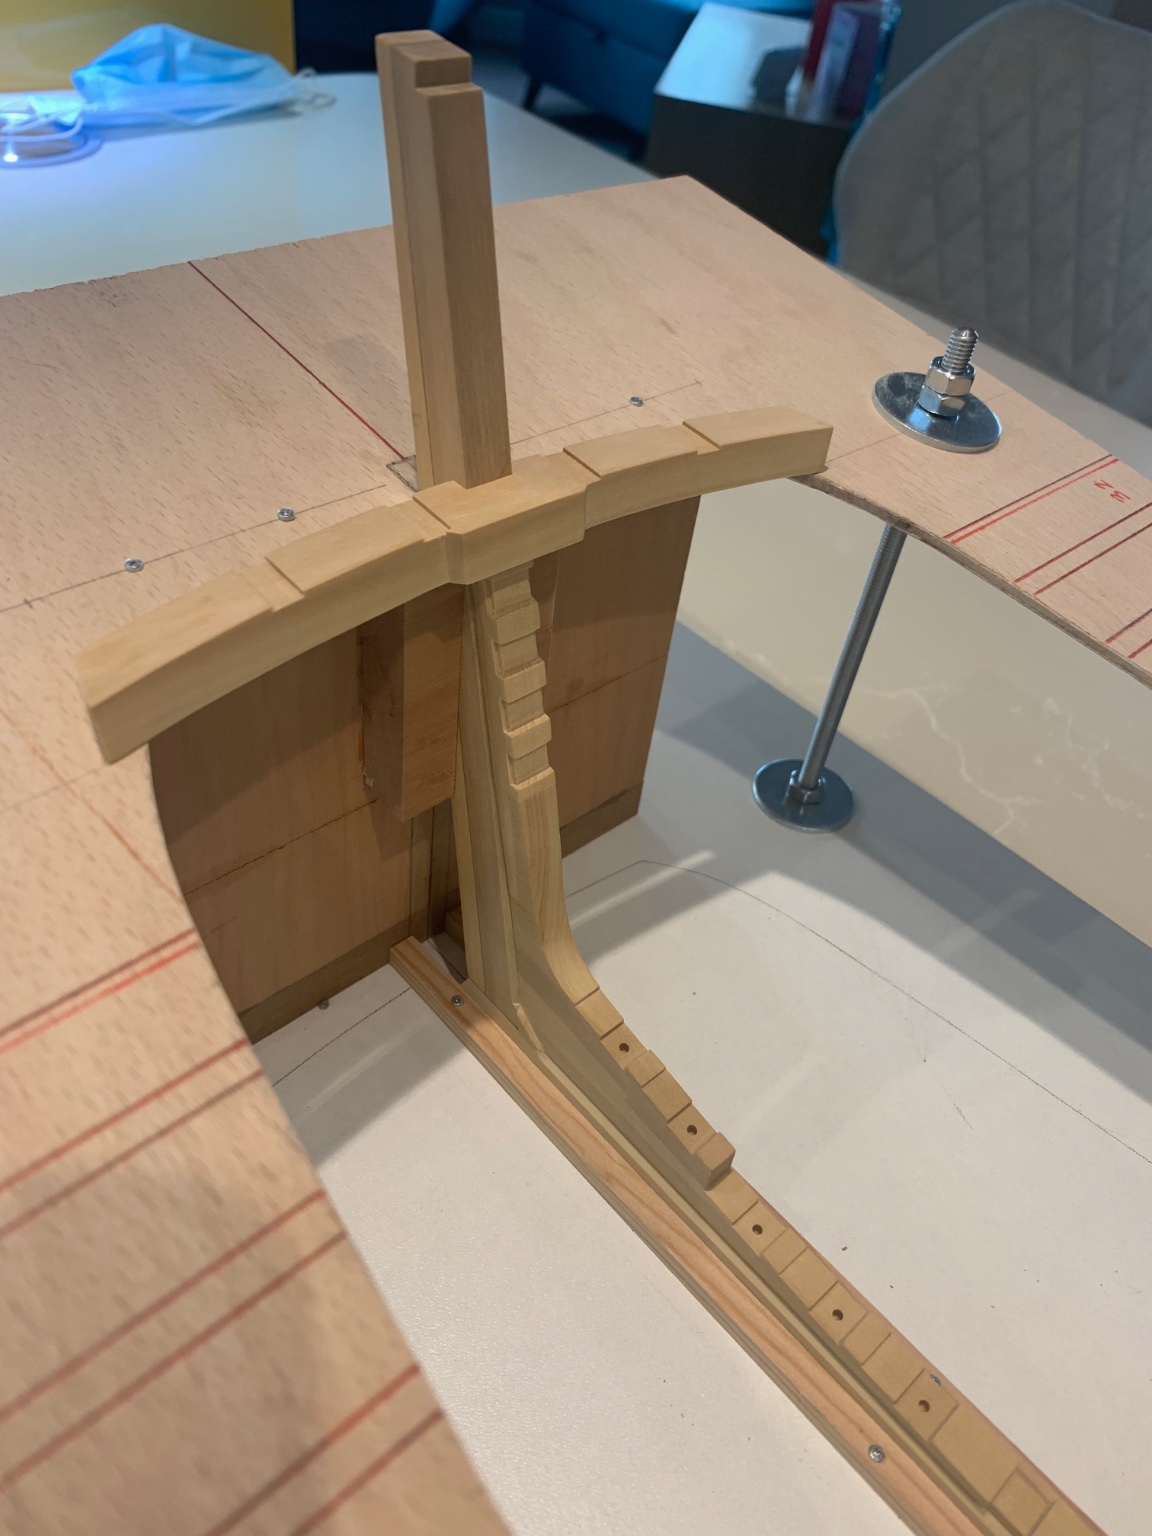
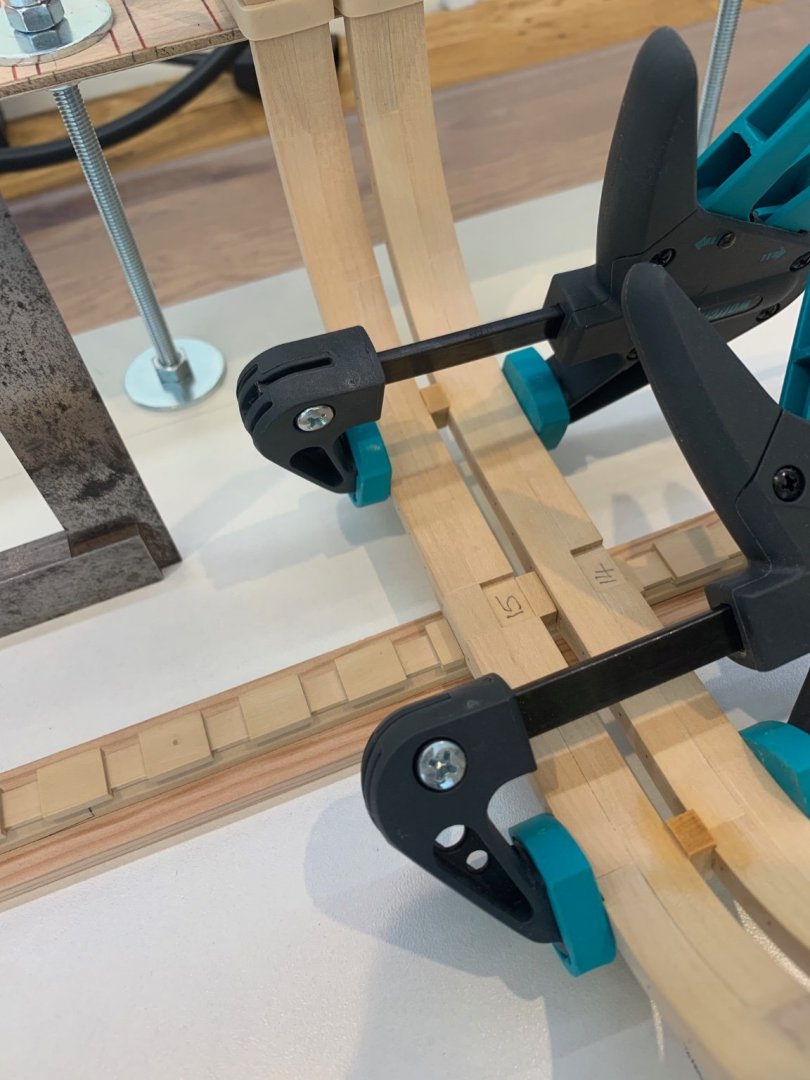
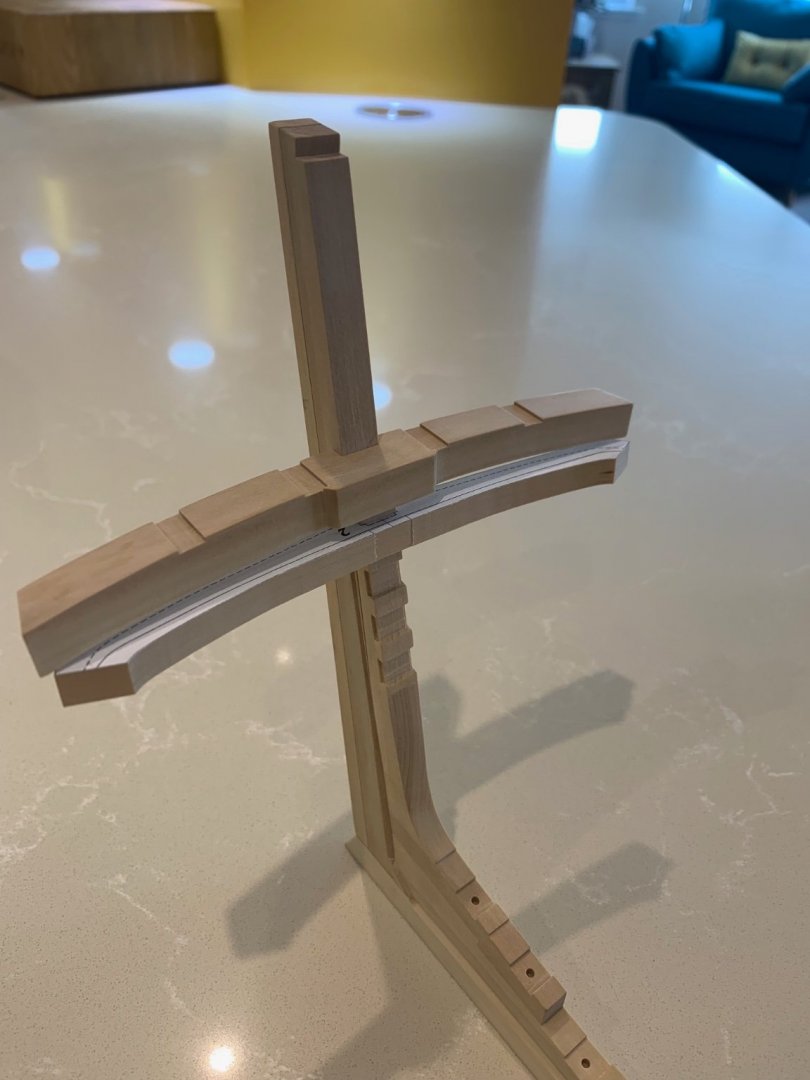
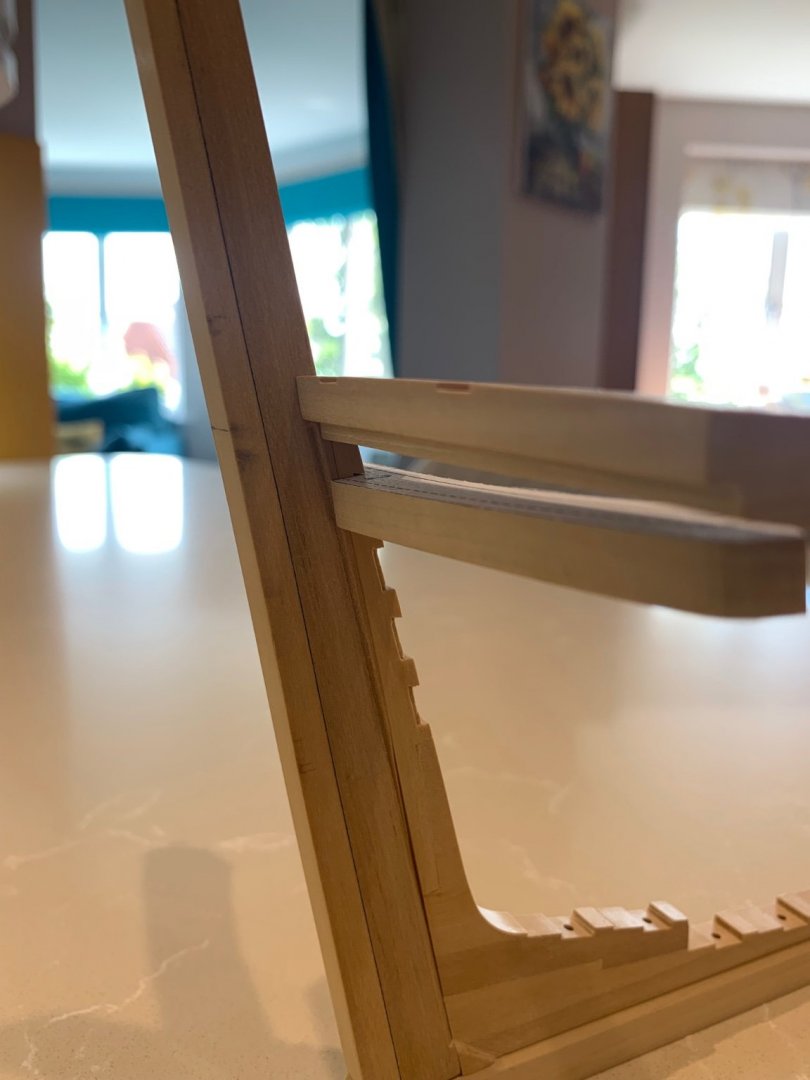
Greg and bitao thanks for the words of advice it really does help me learn. If I was starting over again I would have certainly left far more on the frames than I did. That's one for my next build 👍 I've got some more frames raised today and it seems to have gone to plan. I have found though that my frames are not quite matching the guidelines that I made on the building board. I have been checking the frames for square to the base board and they definitely are. I trust my engineers square far more than I do my marking out. Its a bit basic they way that I check for square - just a flat piece of timber clamped to the face of the frame; it seems to work. The next forward frames require me to make bespoke chocks off of the rising wood. As the frames rise up the apron the chocks follow. I don't think this will be too hard to achieve. Here's hoping

-
Thanks Greg - I love this forum as it gives me the inspiration to try harder. I have to be honest - I just don't know any better which maybe in my favour. I have been so aware of cumulative error since raising the frames and I think that I have been correcting this starting the process. I try and rely on the plans - wow this is still my first POF build and I'm learning so much. However - what a great challenge eh!!!!!!
-
Hi Mark and thank you - so far I have found that its my milling that is causing me issues. The top timbers have not been cut to their final height and the chocks between them seem to fit very nicely at 4.5mm. Its keeping the frames nice and perpendicular which is a positive sign. The small lower chocks are slowing me down simply because their width varies due to the rebates that I milled. I have had to make some very very fine shims to make sure that everything fits together tightly - I'm talking about 0.01mm shims but I think its worth the effort. If I had used my Sherline mill that I have now I think that my efforts would have been reduced as I used a Proxxon mill to cut the rebates that I am talking about. There is no comparison between these machines and I would also say that my abilities have reflected this too. We all get better as we move along. Thanks again - Mark
-
Thanks Hubac's Historian for the kind comment. I just use my iPhone as I don't actually own a camera. Hopefully the rest of the frames will locate where they should but based on my experience so far I think I may have a few issues ahead to overcome.
-
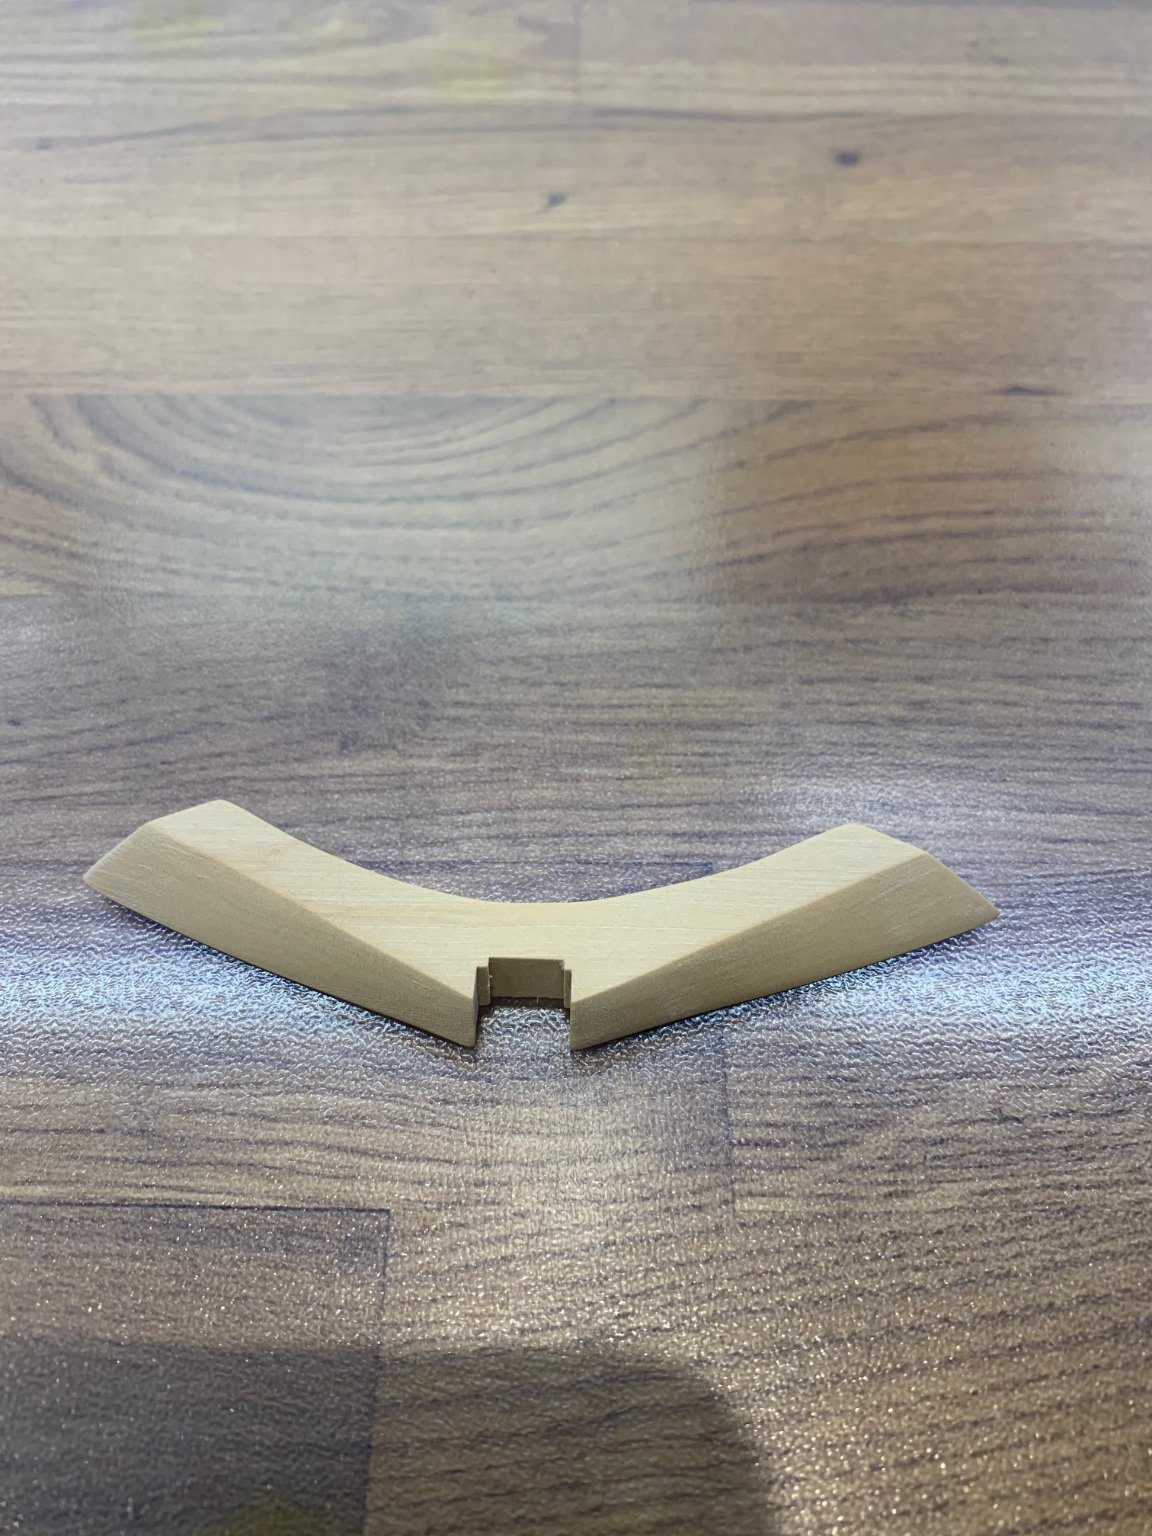
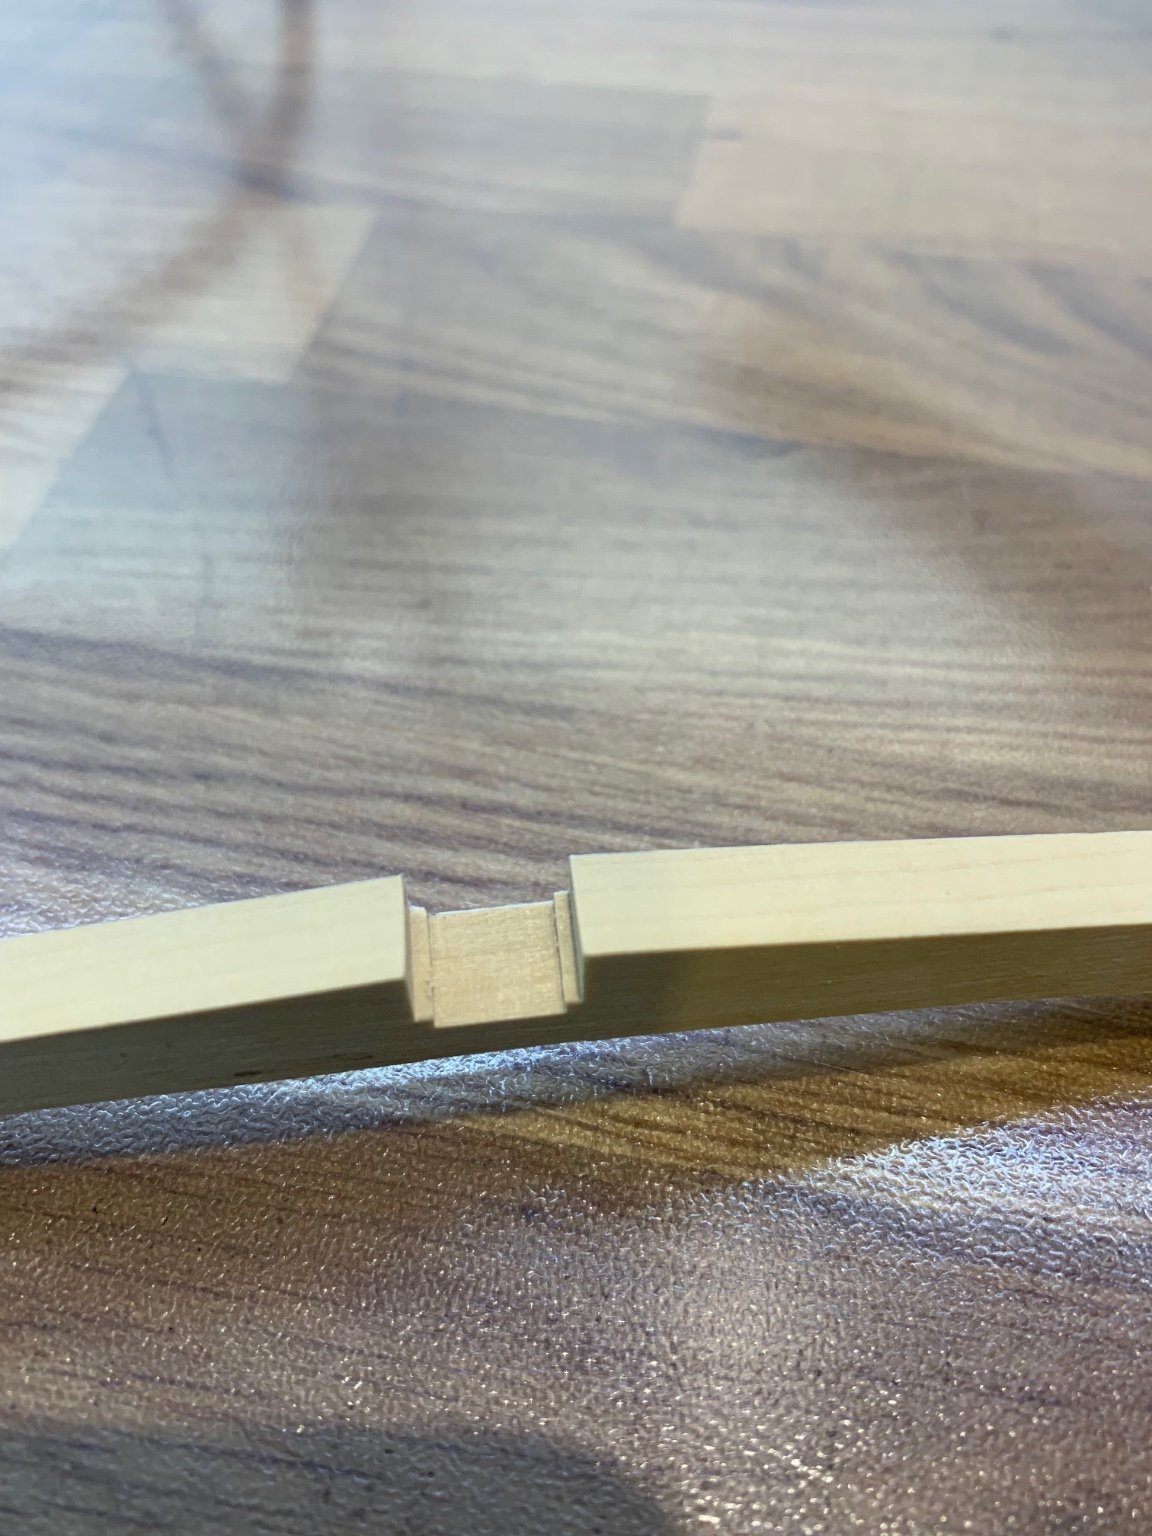
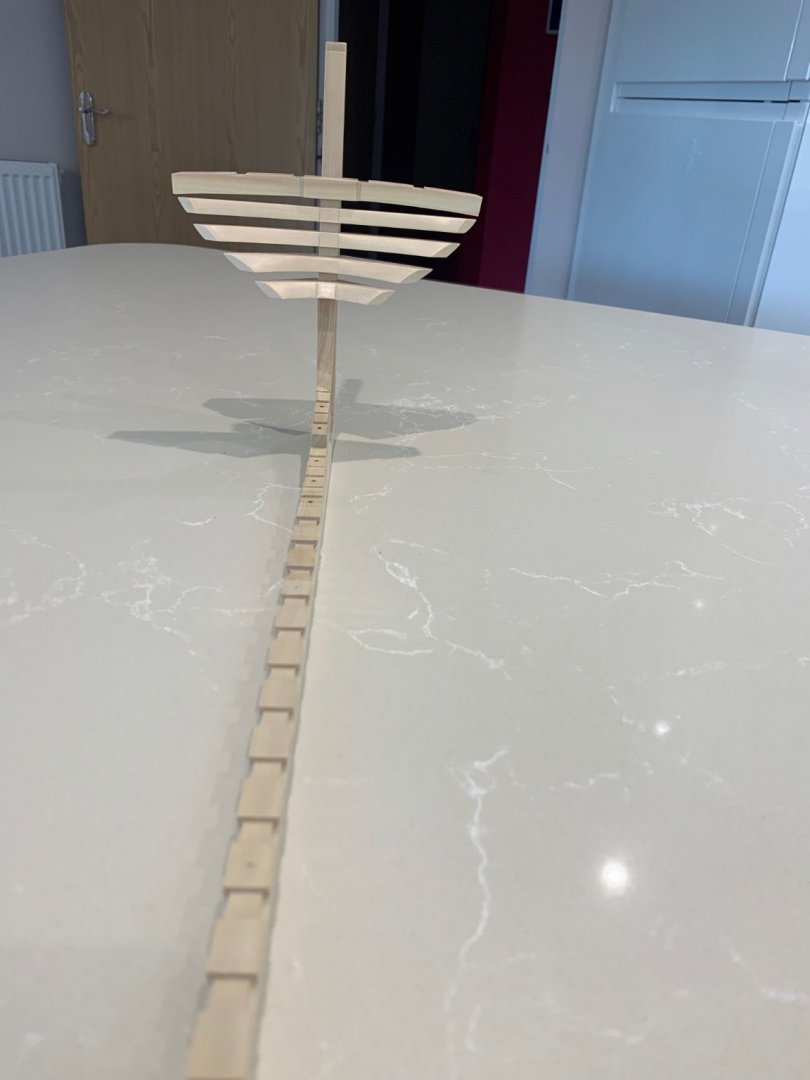
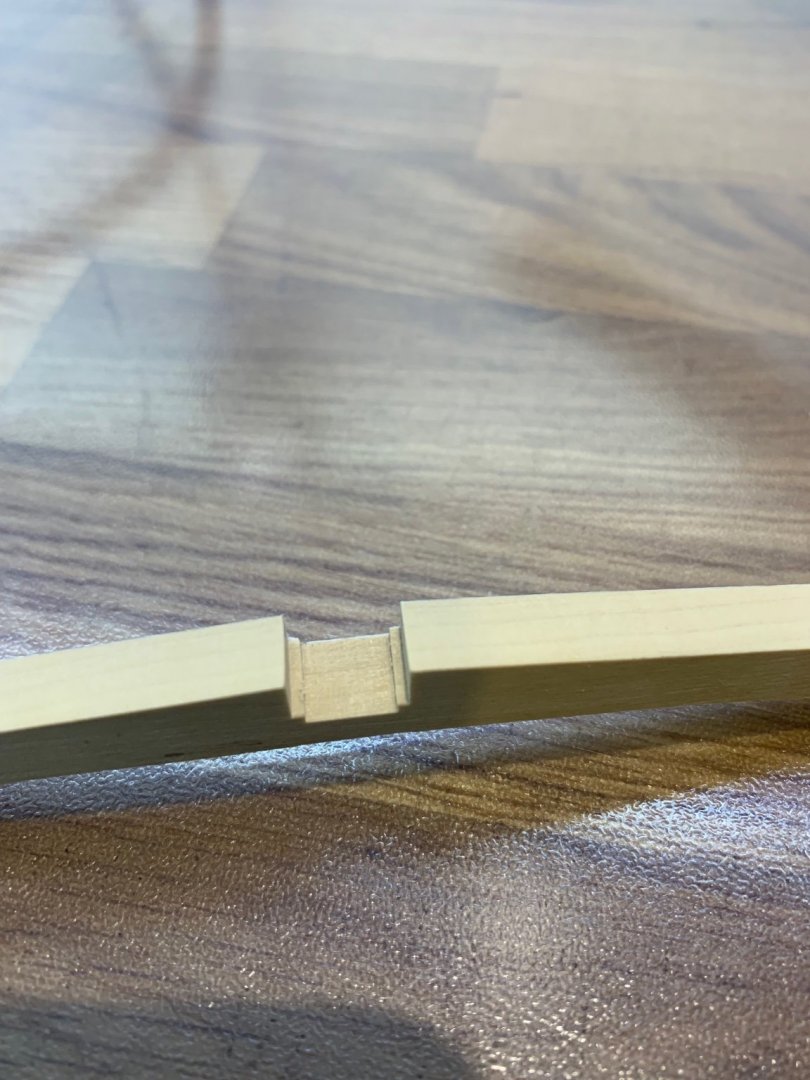
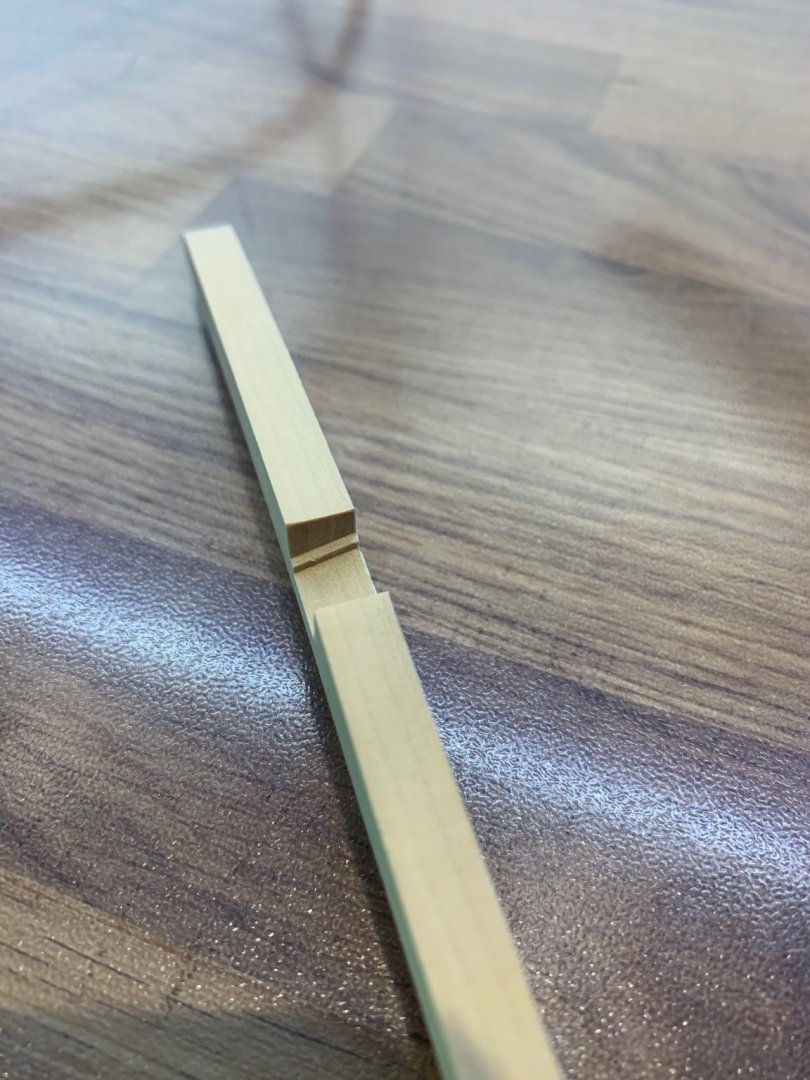
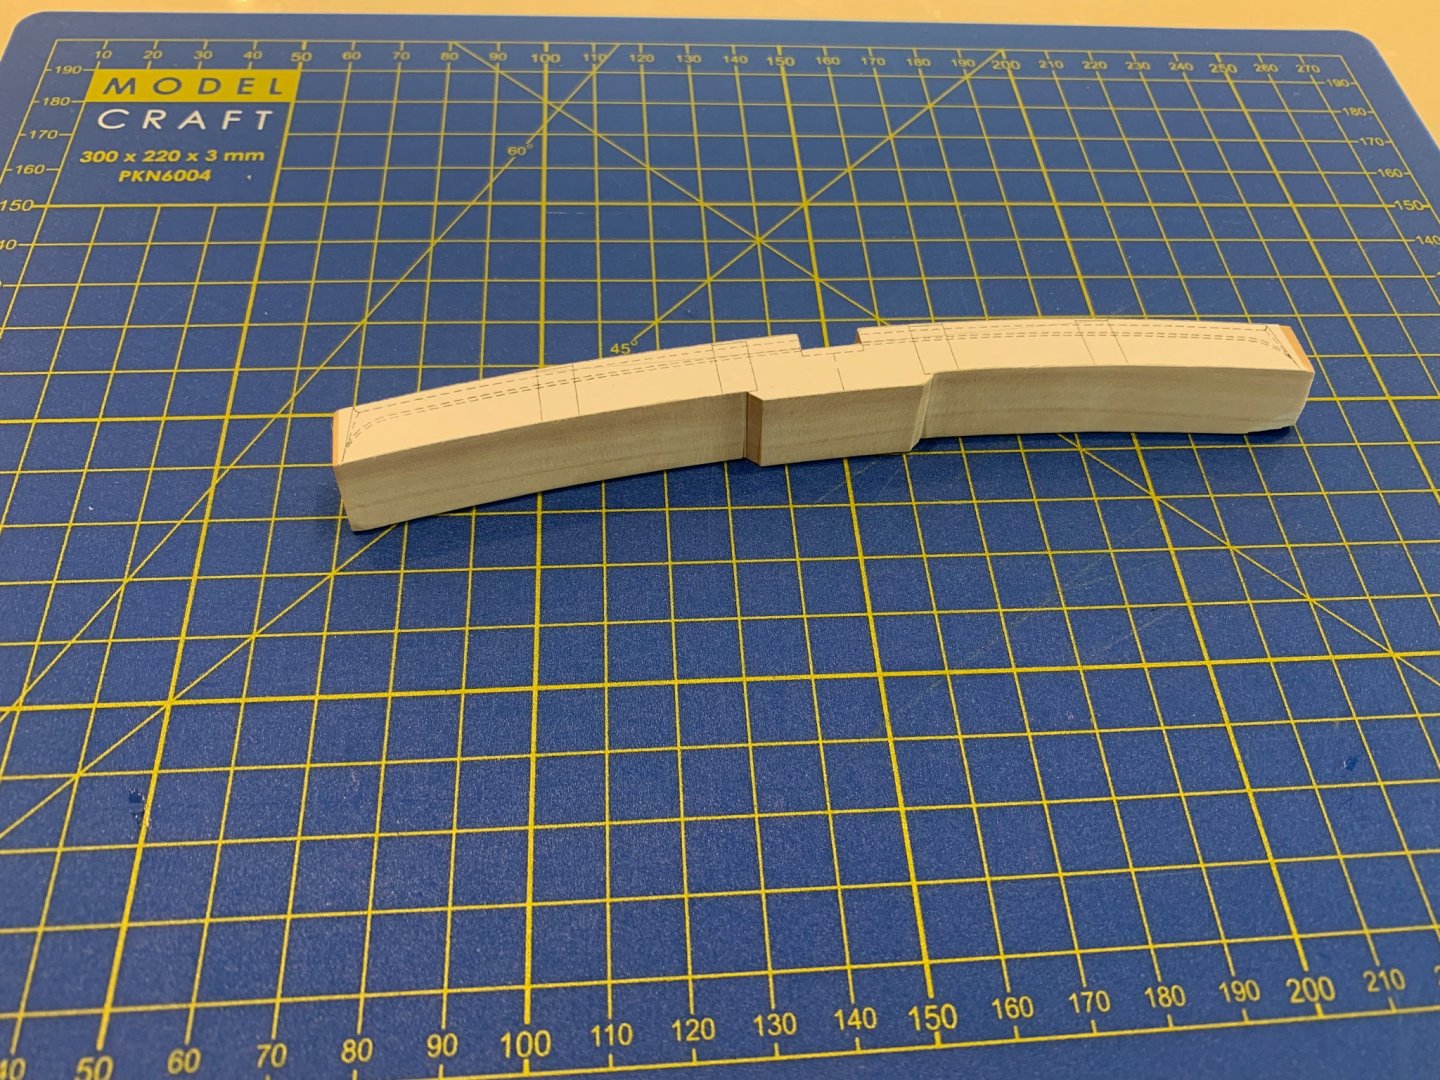
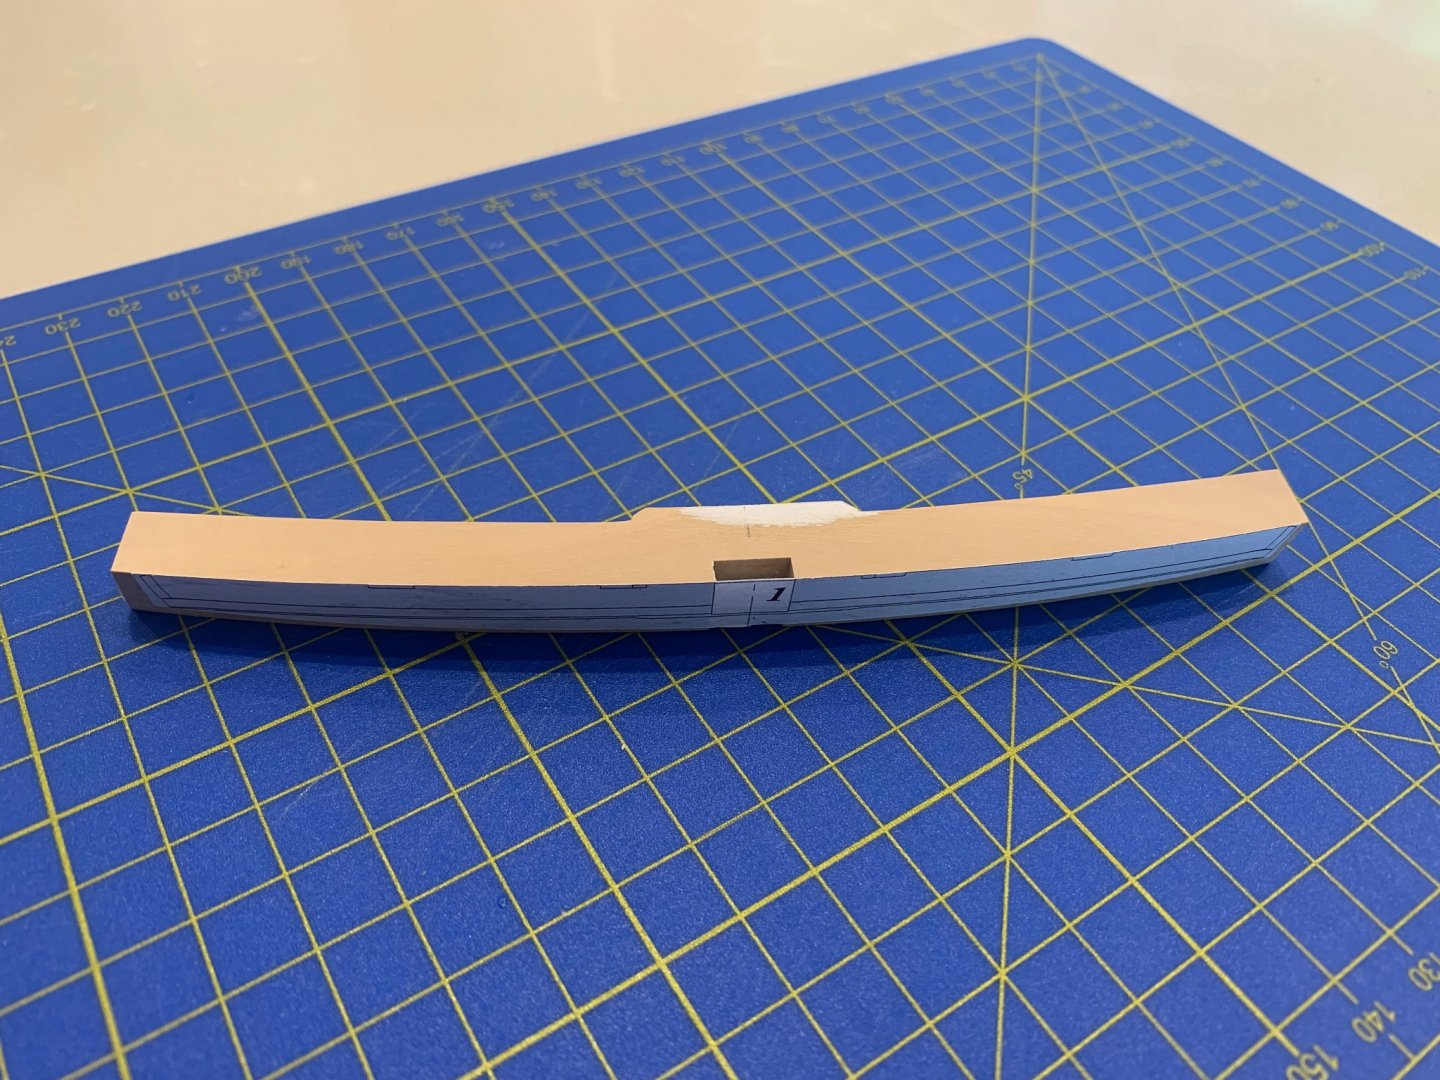
Hi Everyone I've at last made a start on installing the frames. I had to make a lot of adjustments to my building frame as I realised that I had adjusted it to follow the line of the whale rather than the line I required. I just misread the drawing but thats all sorted now. I've made up lots of chock blocks for between the frames so hopefully it will all go ok. A few pictures below of the first two frames complete with keelson chock with the limber channel and the upper and lower chocks too. I'm sure that I will need to make some alterations along the way but so far so good. Mark


-
I actually have no idea - thats not a pun - but I have never used an x acto blade. I use surgical blades and I can use up 10 a day as they blunt very quickly. However they are also very cheap so as many as I throw away I always have a sharp blade at a very low price. I also like the different shape of blade that I can get with surgical blades and I know that I can swap them out at any time and not worry about the cost.
-
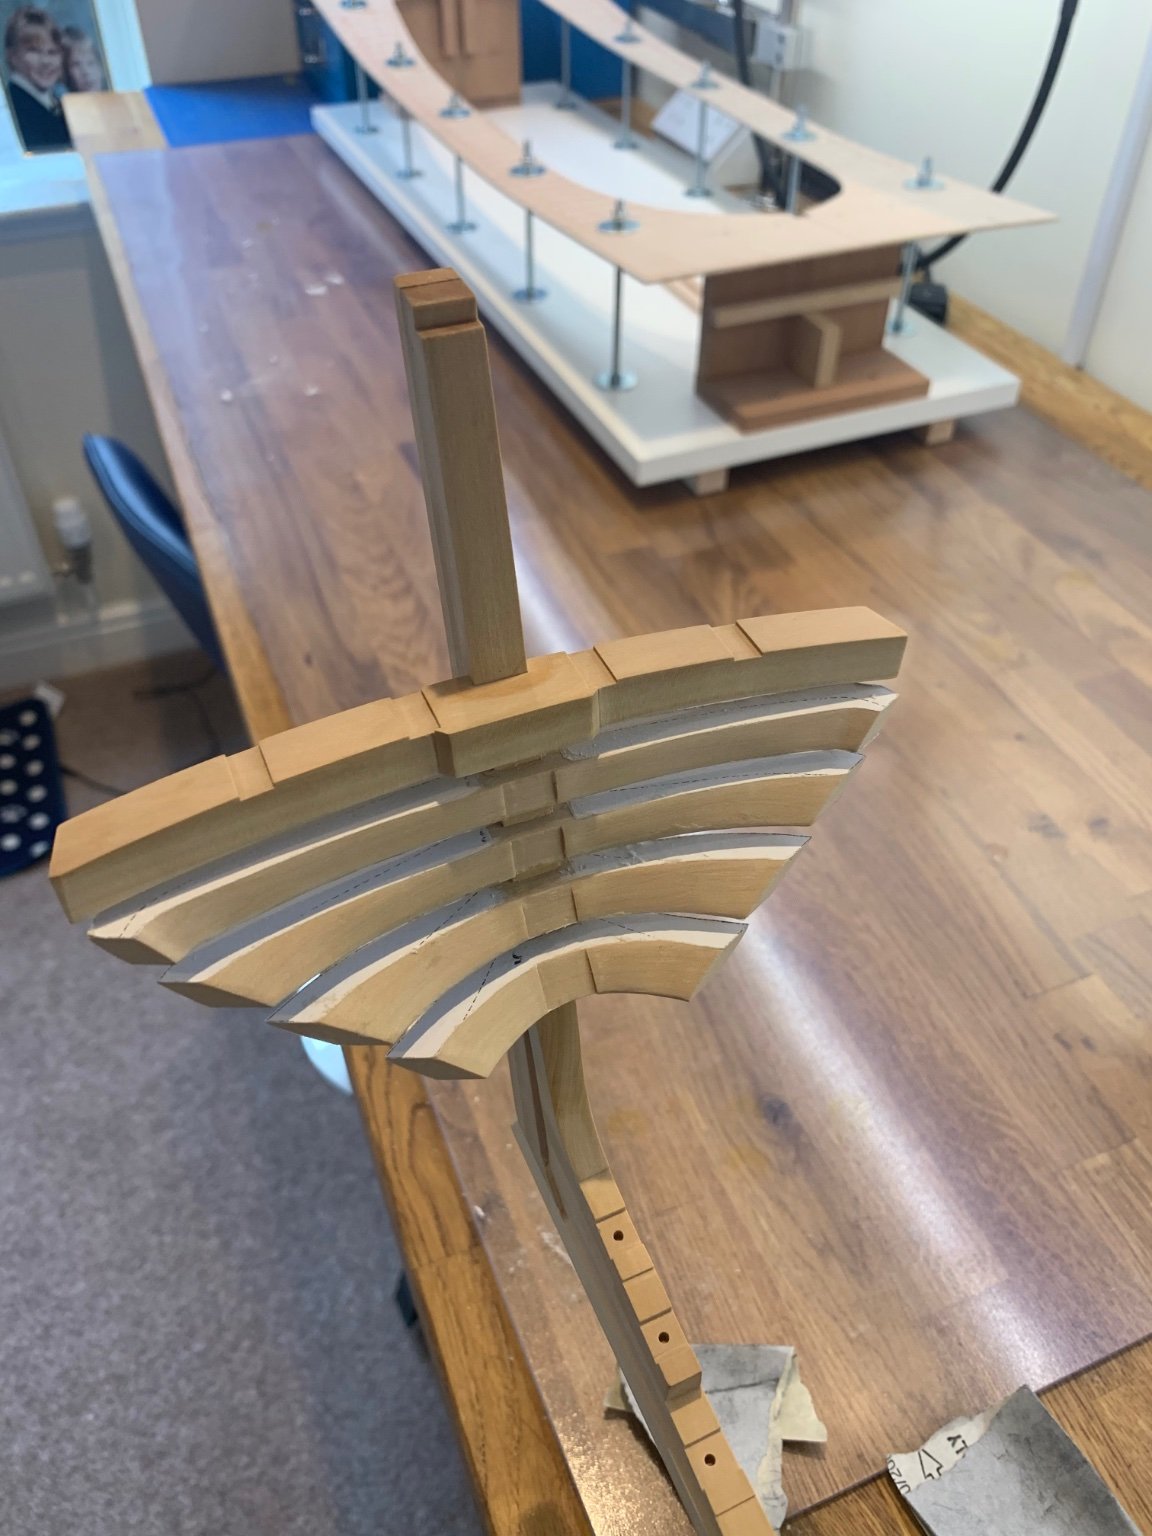
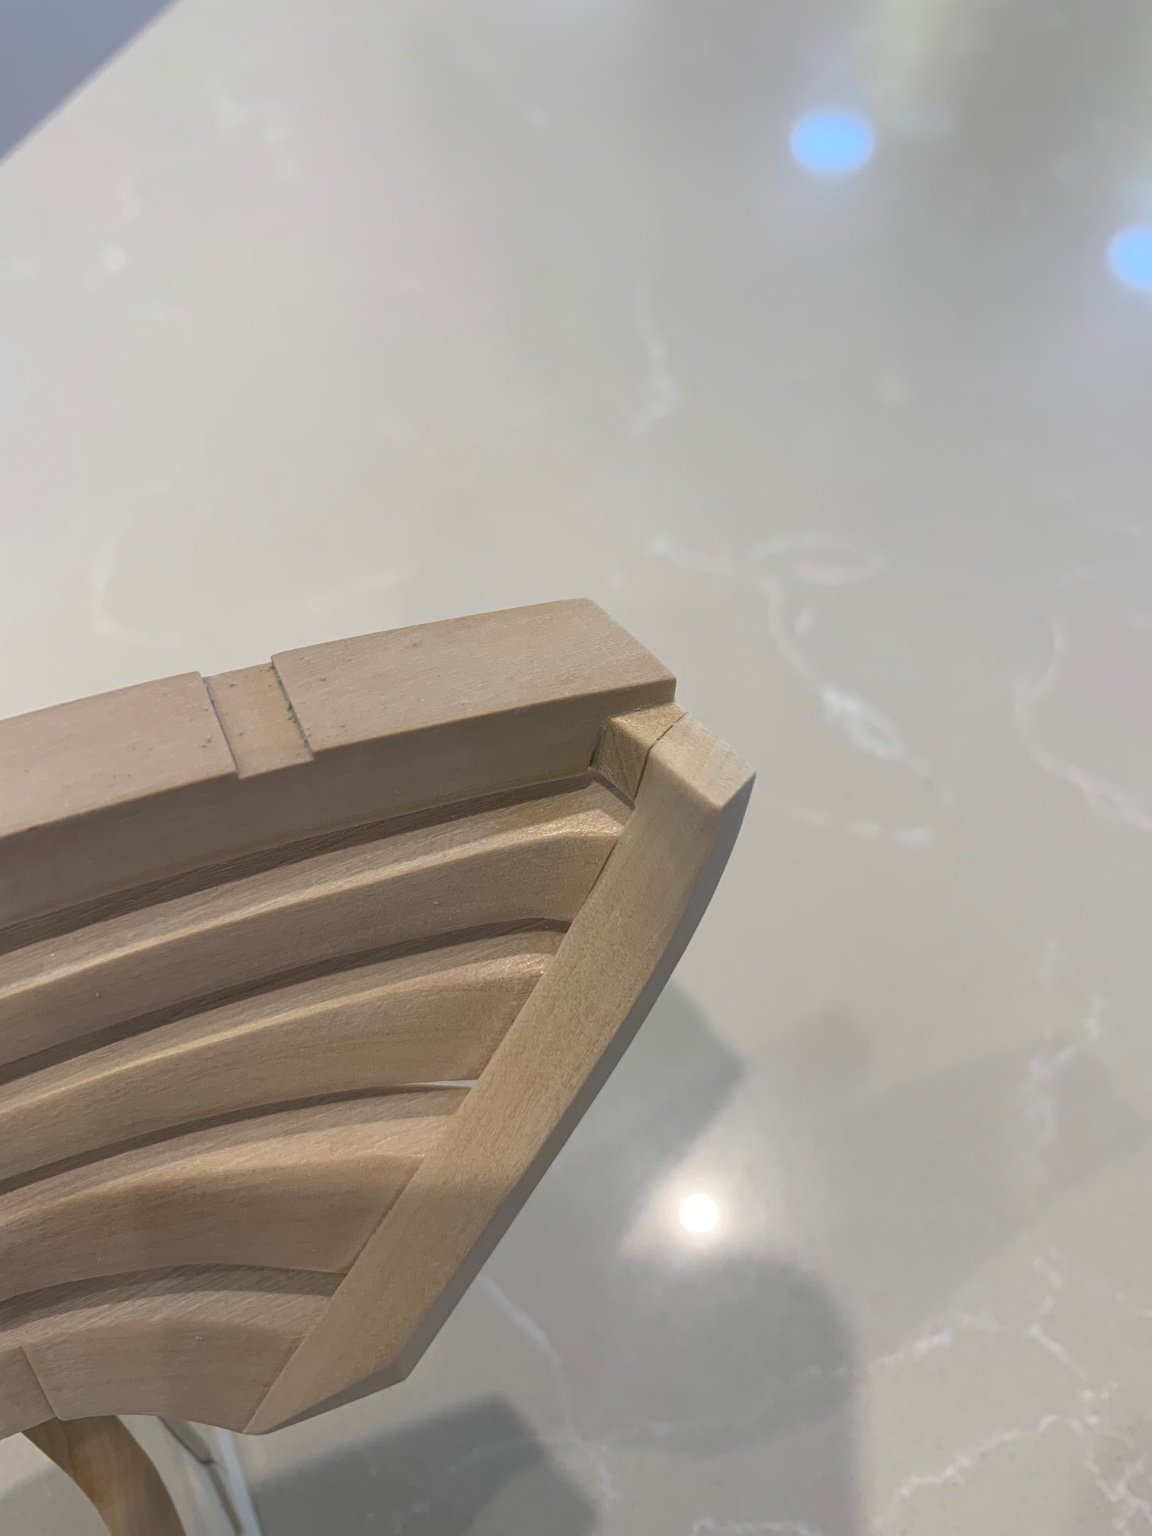
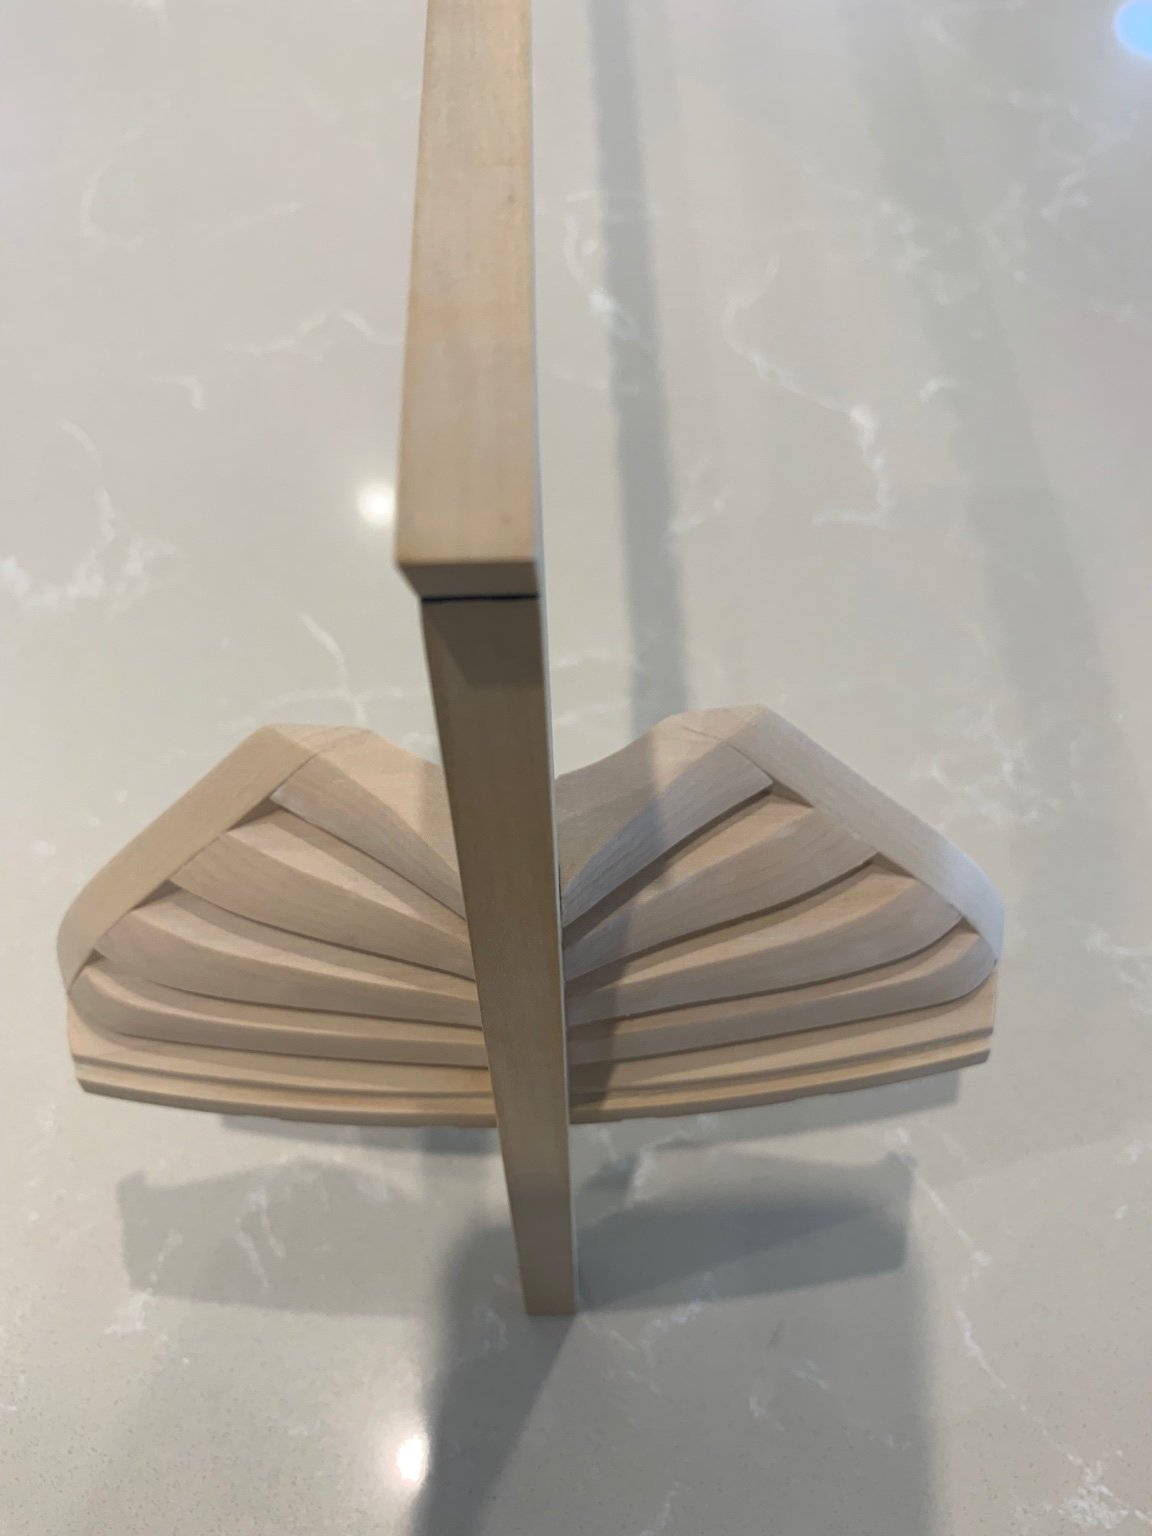
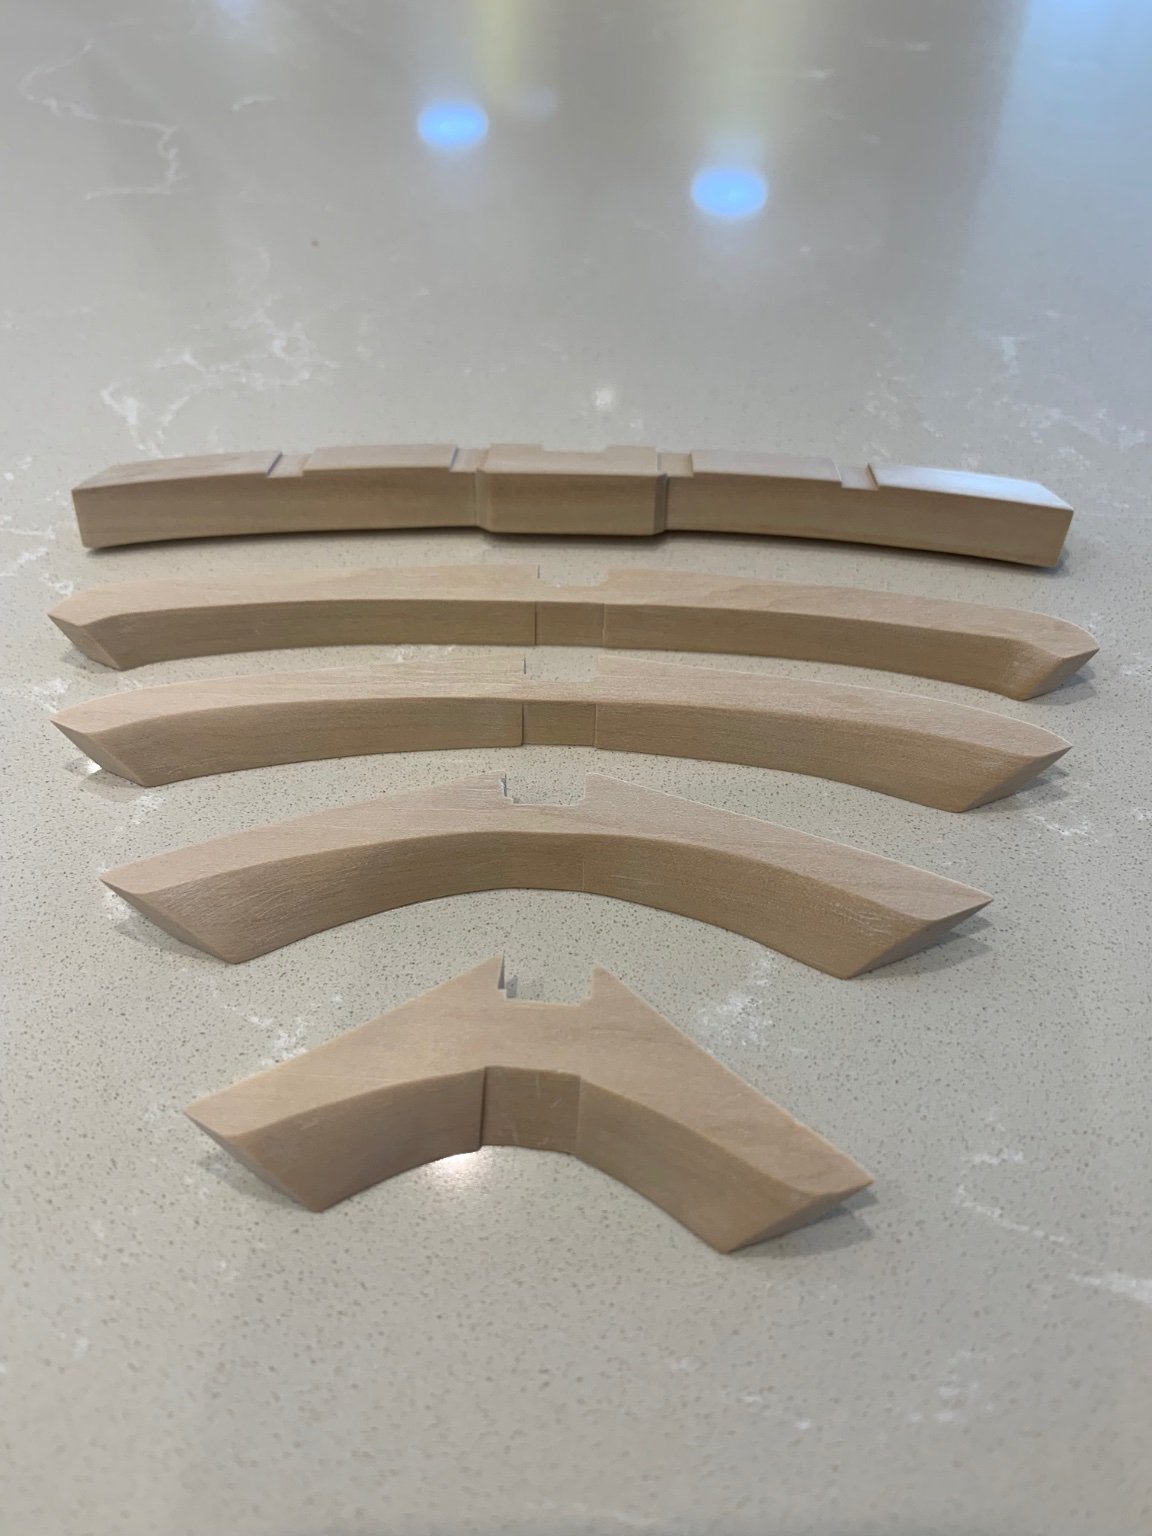
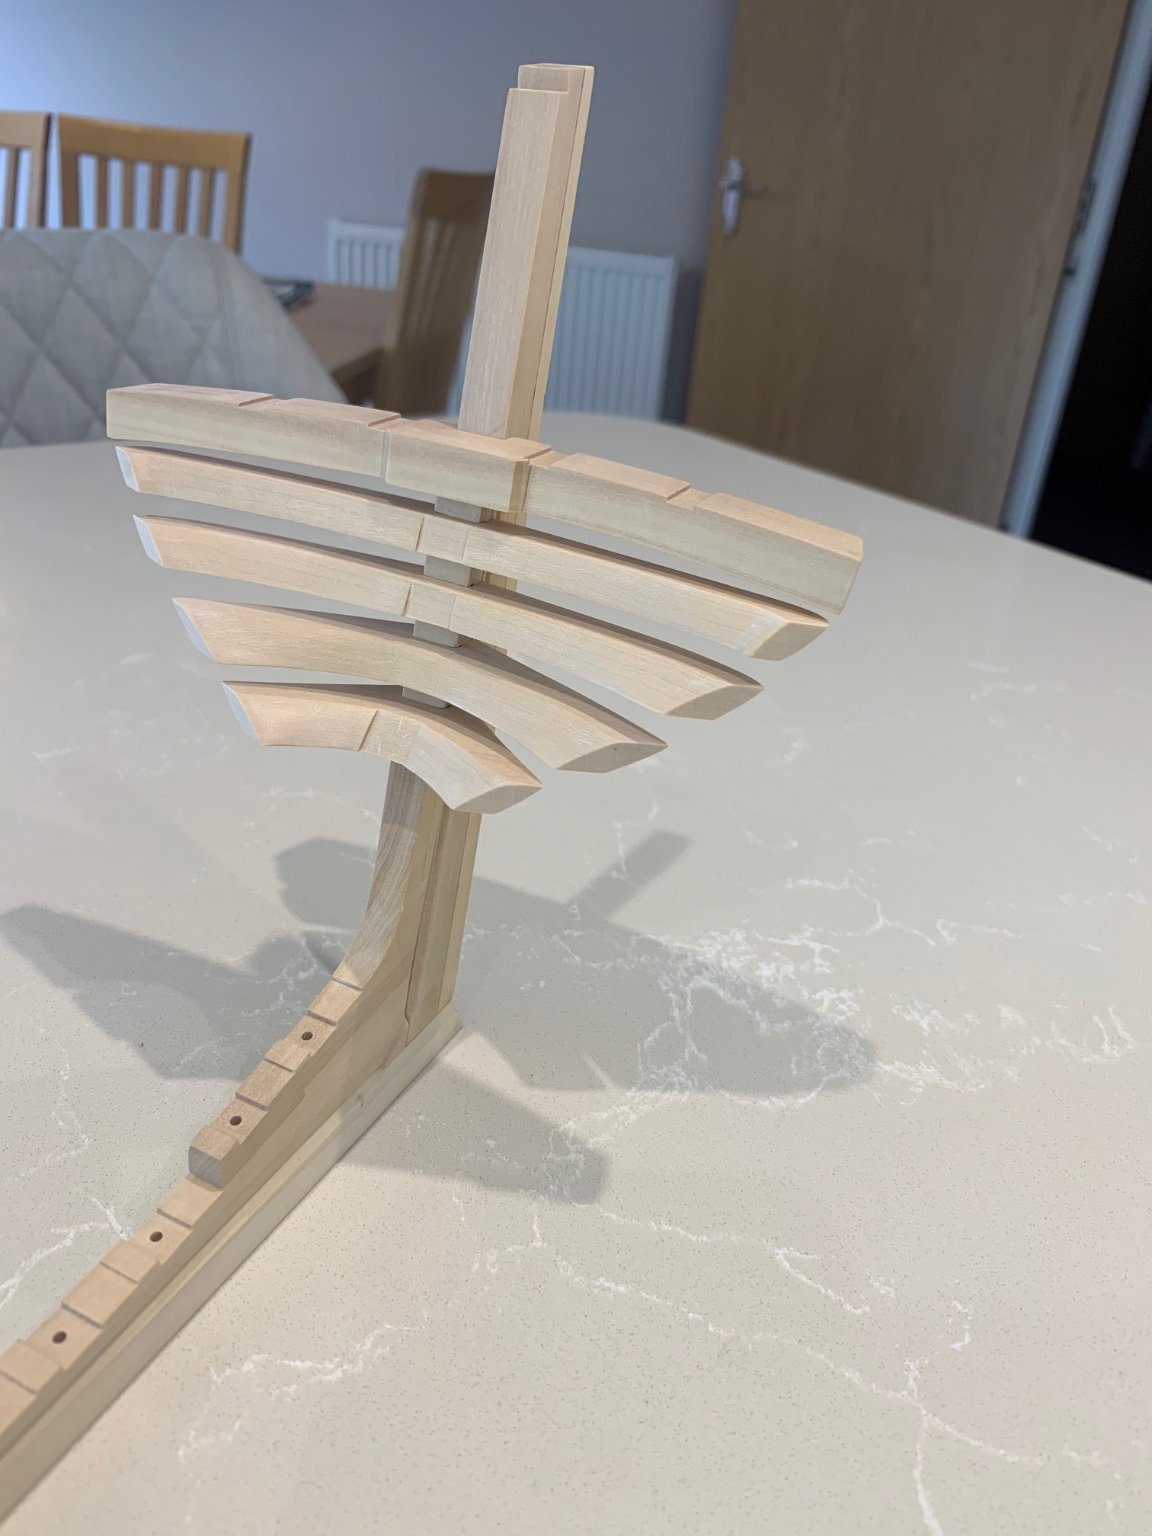
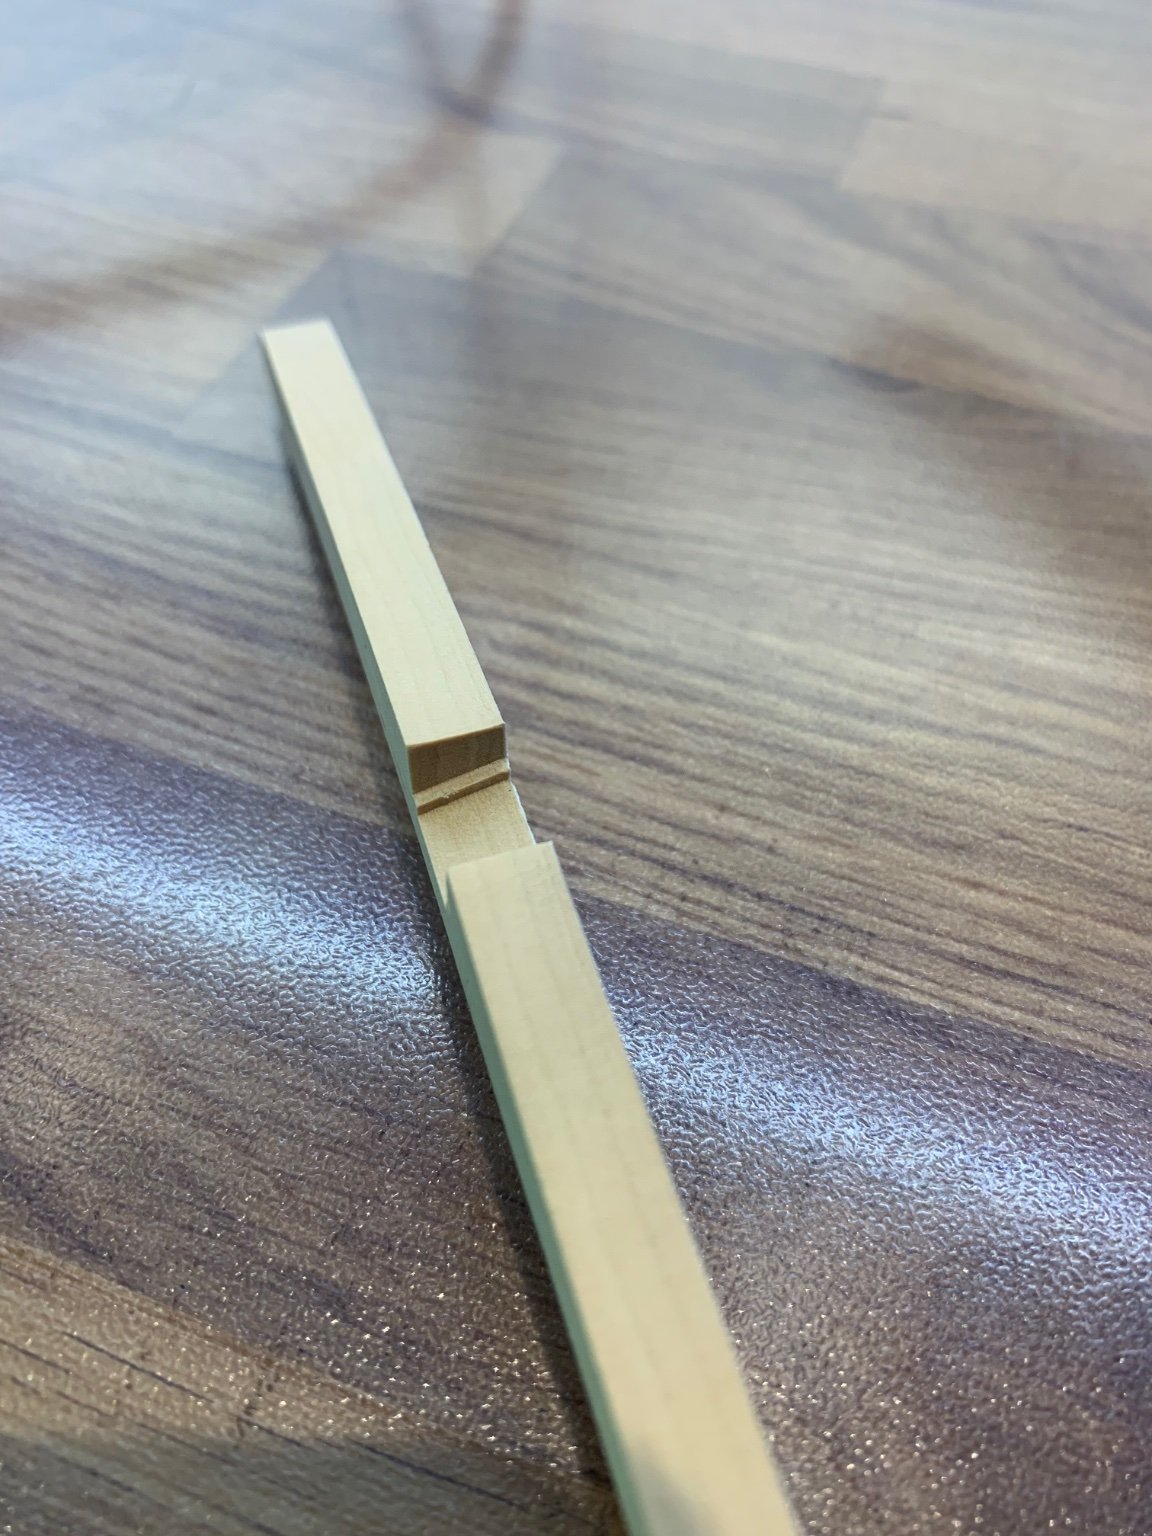
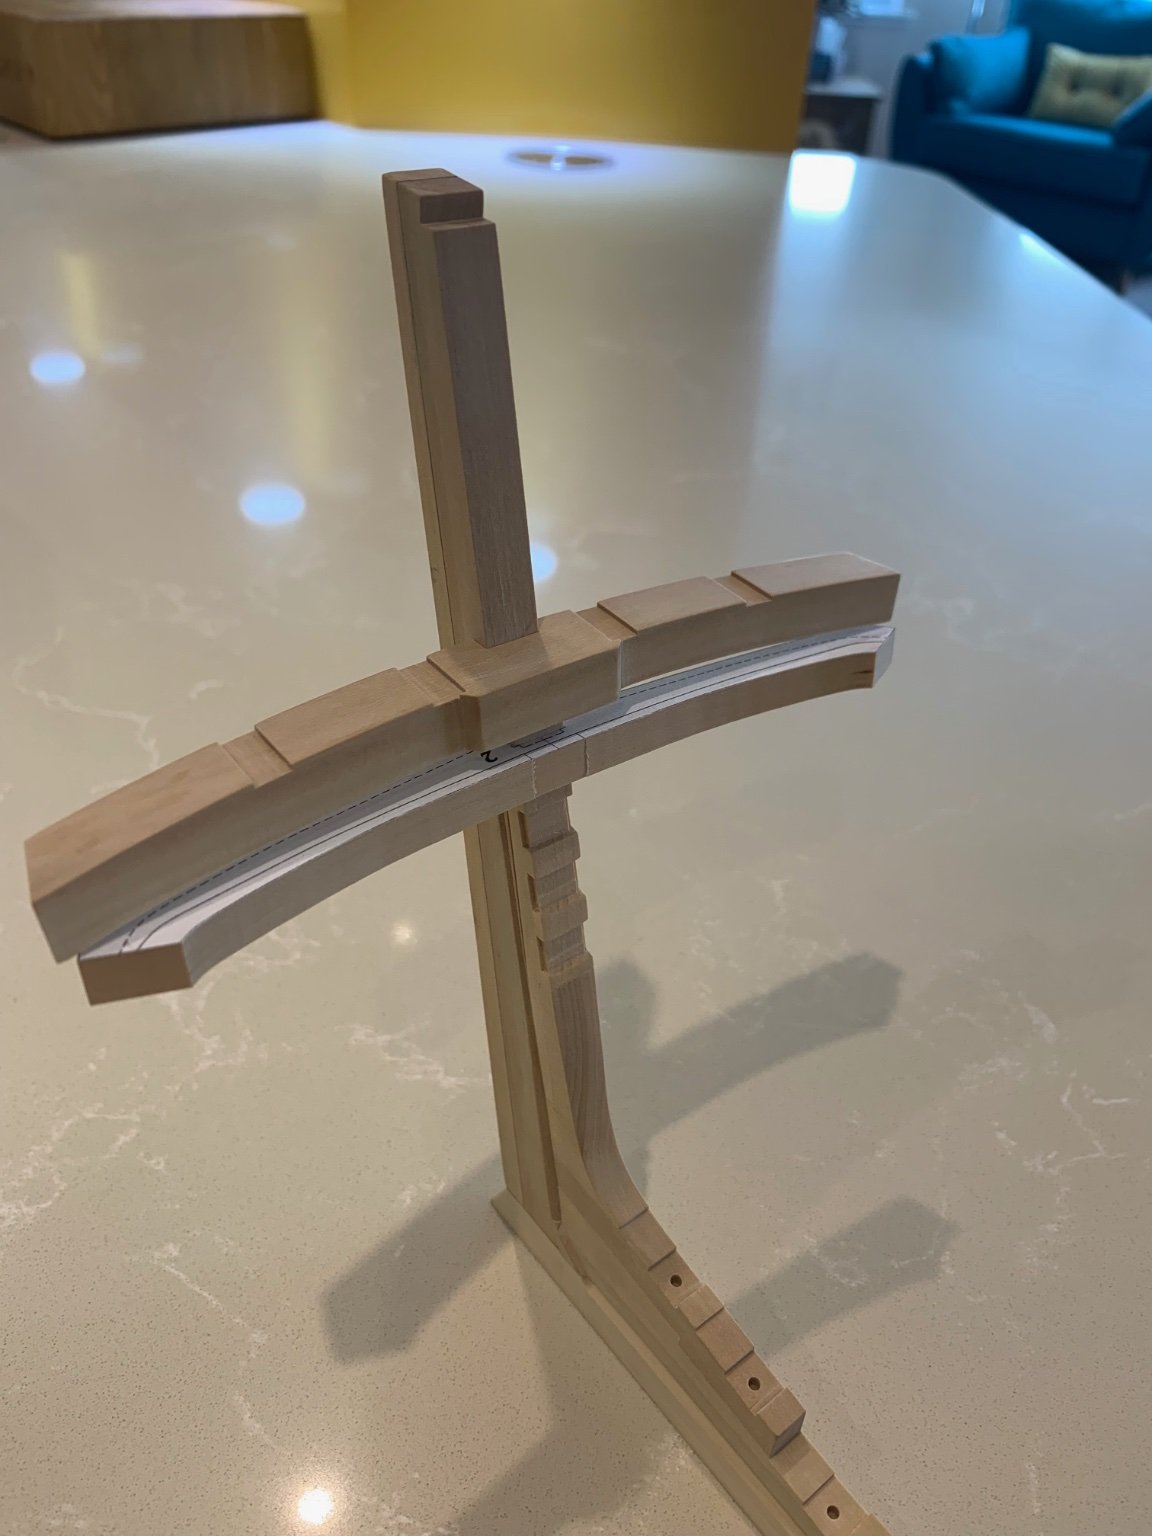
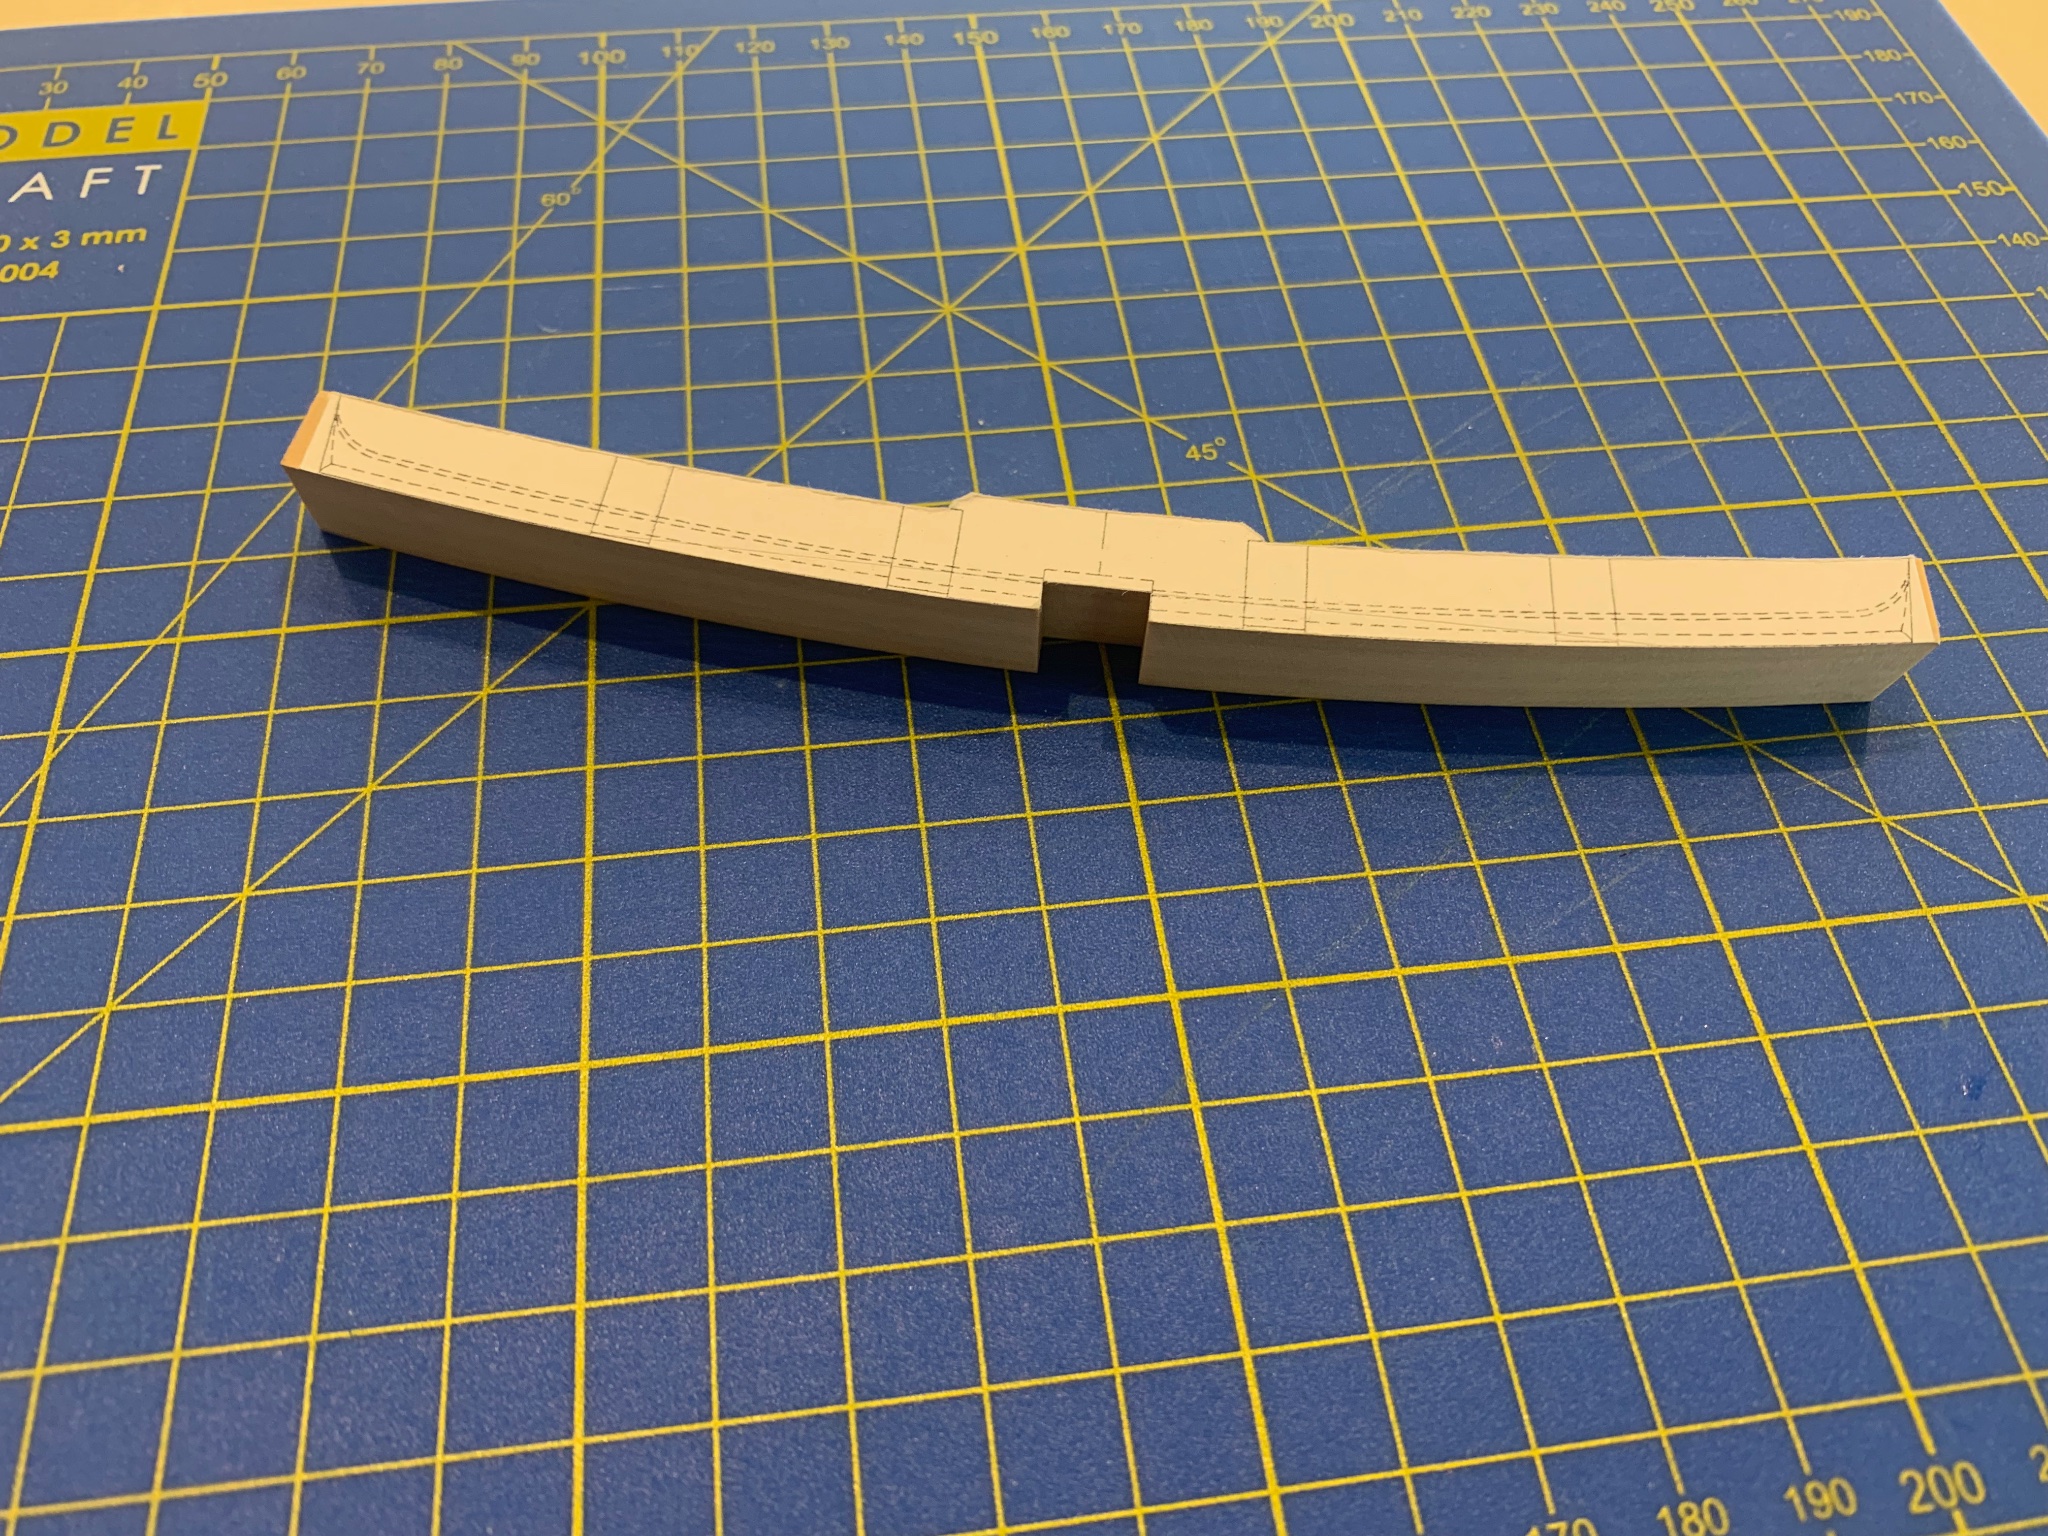
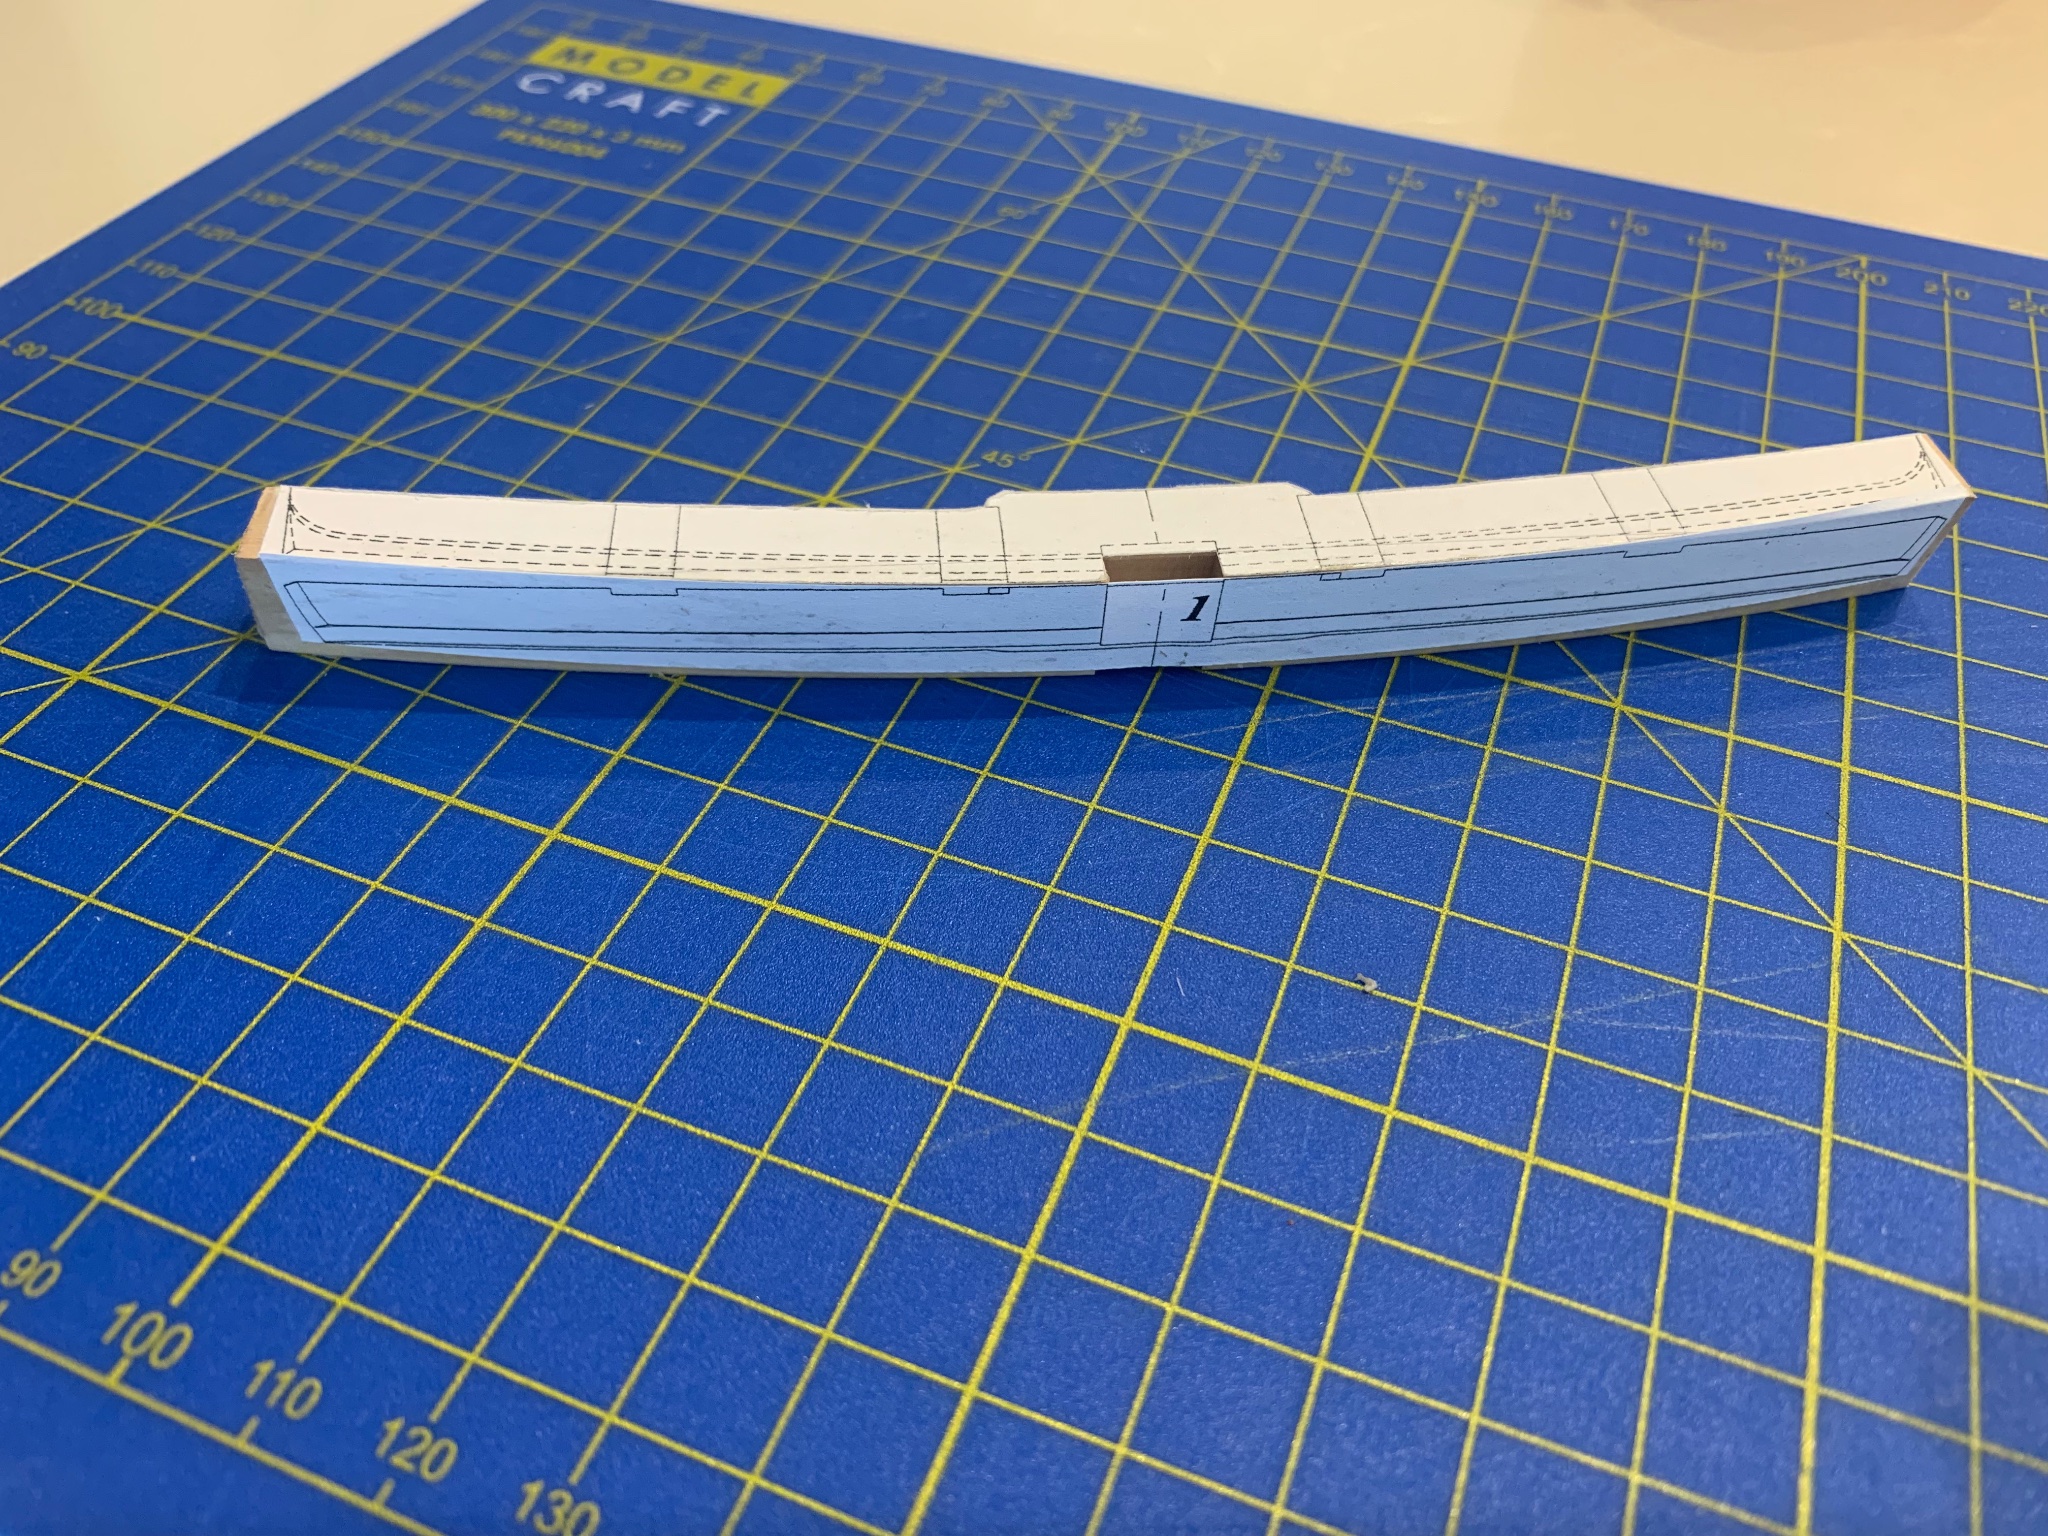
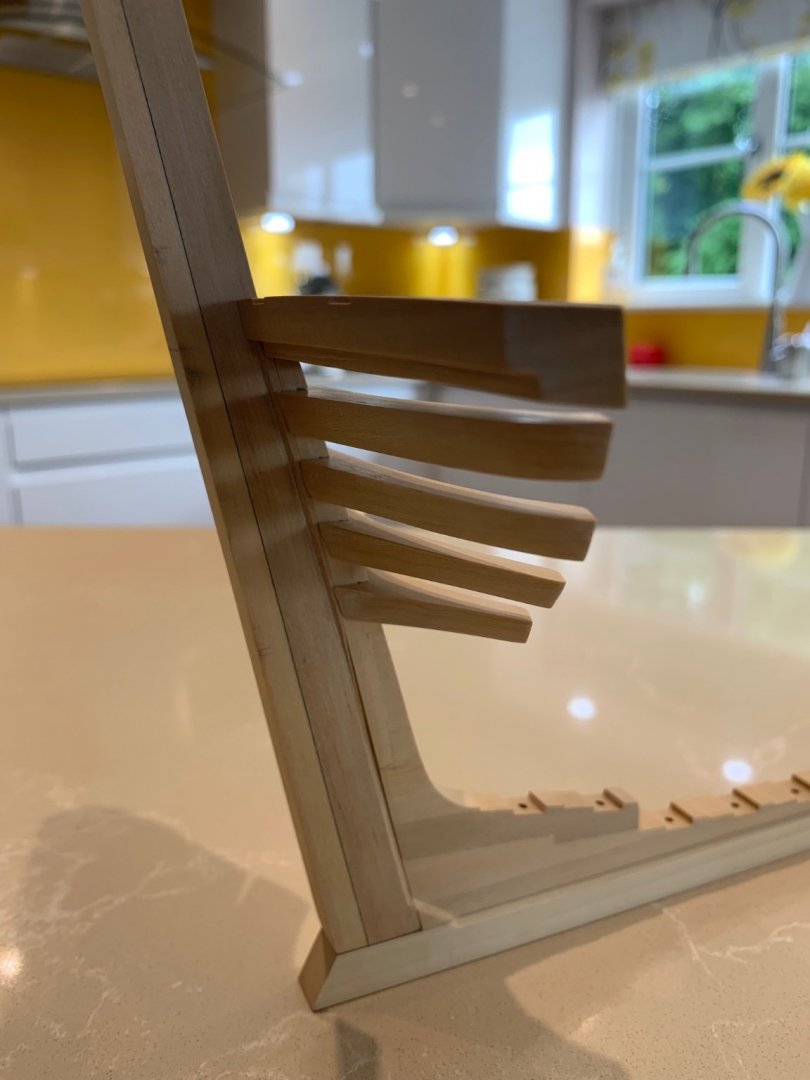
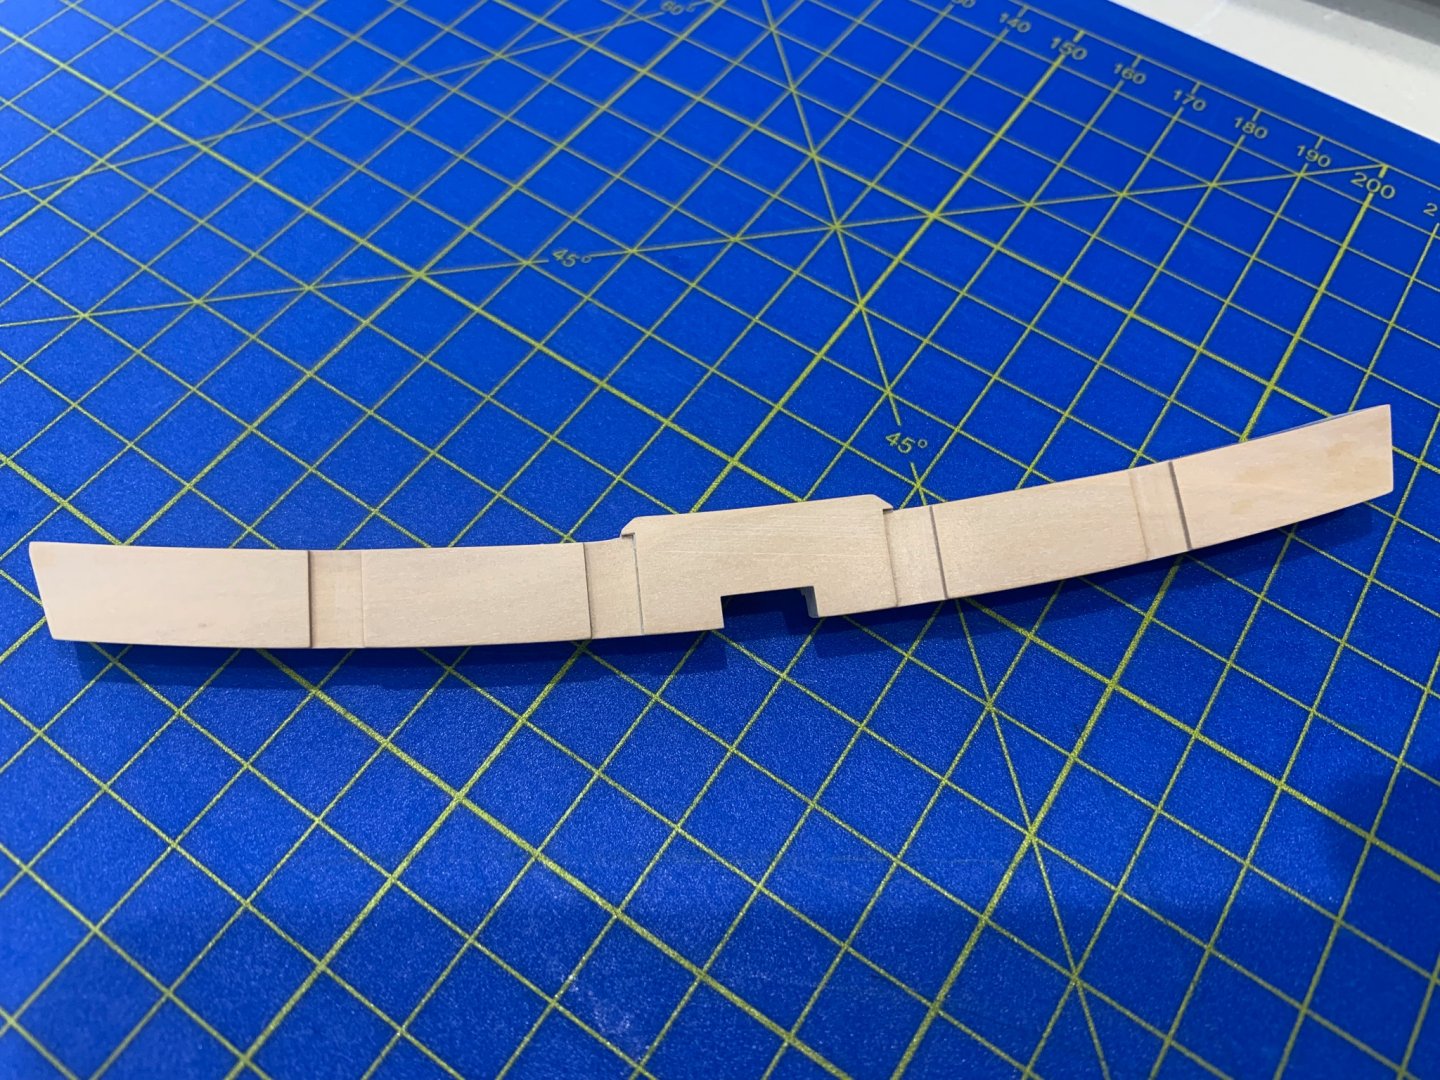
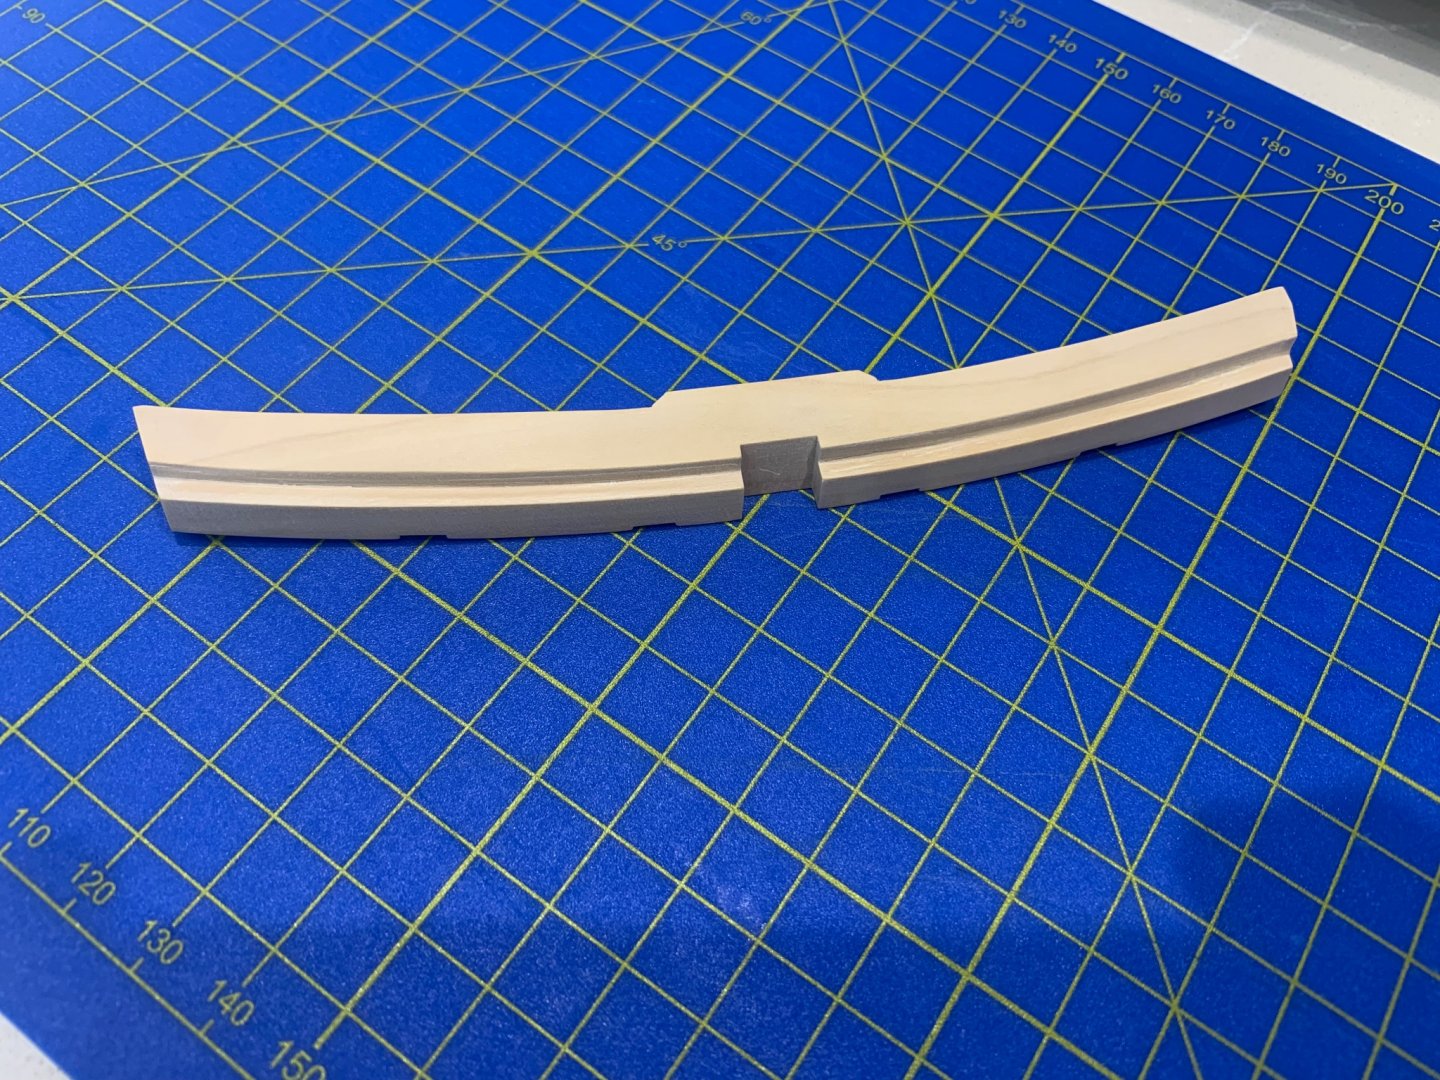
Hi all - sorry for the lack of updates but I started some decorating at home which has turned into a full blown building job so I'm fitting the ship building in-between. So what have I been doing - well finding more patience than I thought that I would ever have. I discovered that just because I had made the parts for the transom did not mean that they would all fit perfectly together. Wow what a challenge this turned into for me! To get all of the parts to line up so that all of the joints were nice a square and that the shape of the transom was also correct was far more difficult that I thought it would be. I managed to pretty much ruin the first set of lower transom parts that I made in my efforts to get the fashion pieces to fit correctly. It then took a week of soaking in IPA to get them unstuck as the joints were tight without the glue. So here is what I learnt - leave the templates on all of the parts after gluing them together so that you have a reference to what you are trying to sand too. Without them I was just sanding blind which just made things worse. Also leave enough on the parts for the fairing of them - I'm starting to get better at this. Anyway the results are in the pictures below and quite frankly I think that this is about the best I can do at this stage of my ship building experience. I have also added the small wedges that are required between the wing transom and the fashion pieces. I hope that it's all ok and if anyone can see something that I need to alter please let me know. If not the next job is to start installing the frames. Wow what a few weeks this has been and now I know how Kevin Kenny felt last week! I have to admit I did enjoy doing it though!! Cheers Mark


-
The honesty in your build Kevin is really inspiring mate - thanks for sharing such a fantastic build 👍 I could see in your video just how disappointed you were but you bounced back and got it all back on track. That takes real determination which I can only admire.
-
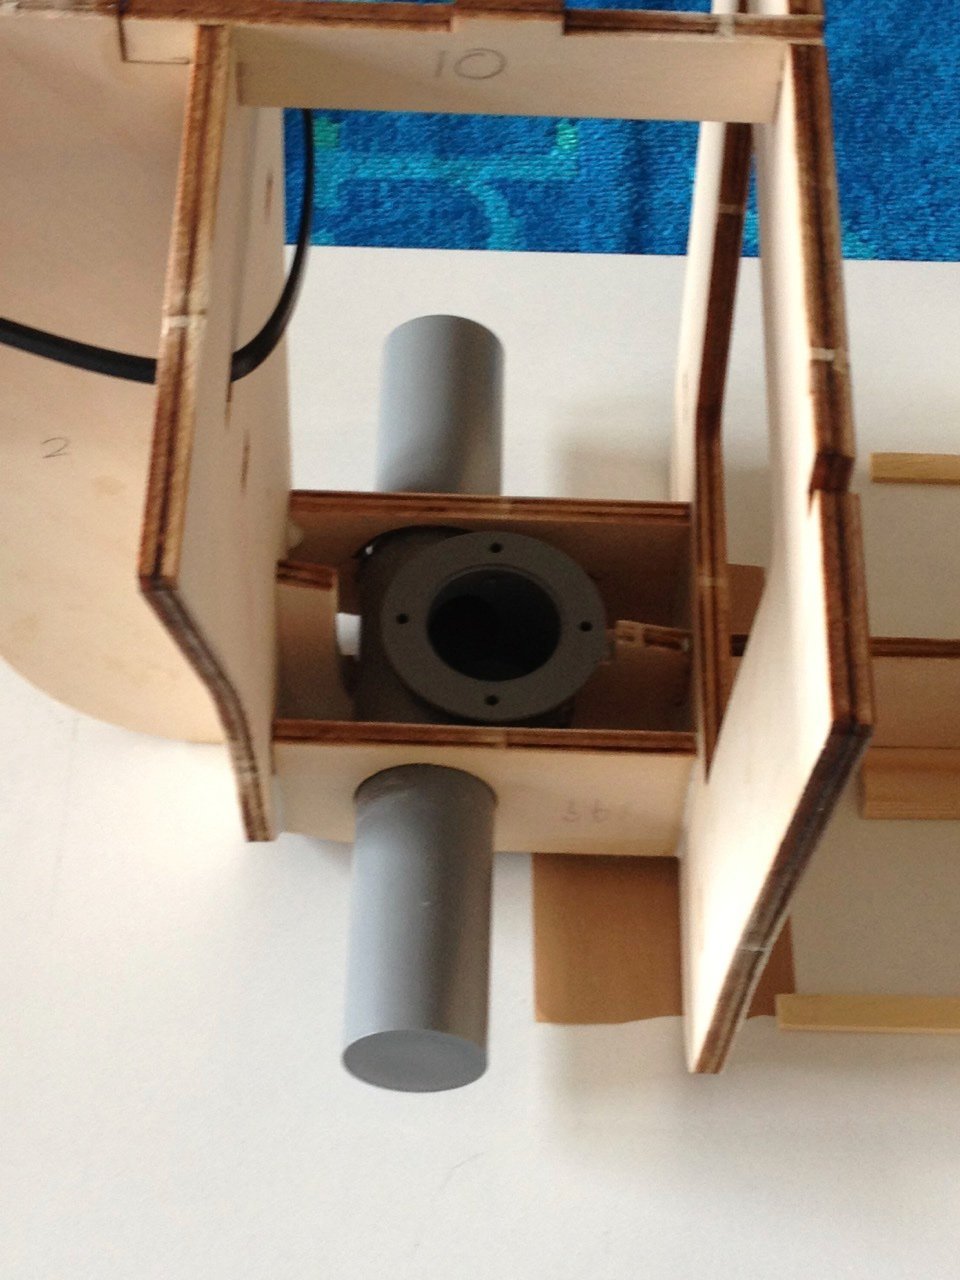
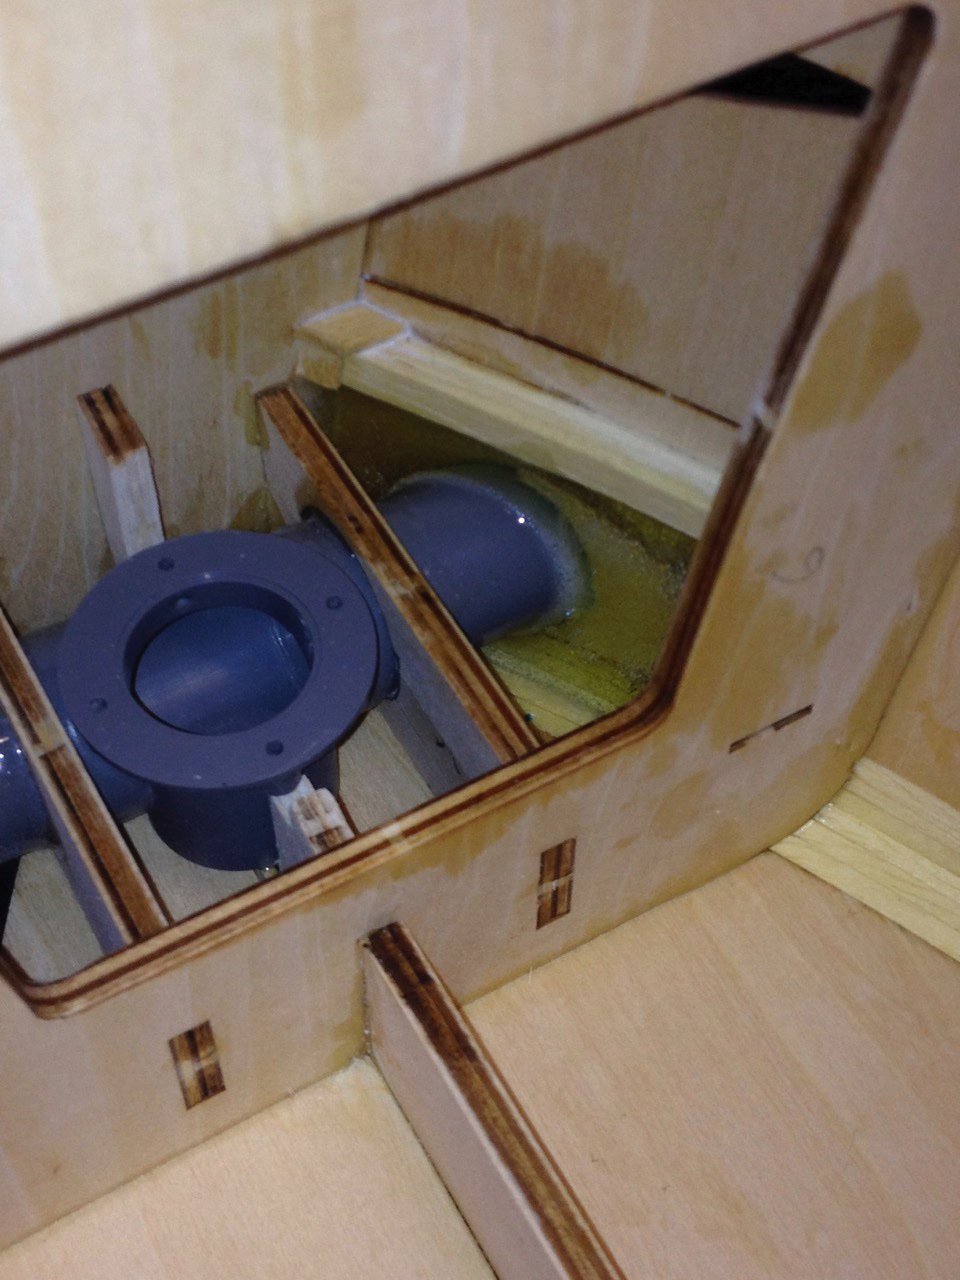
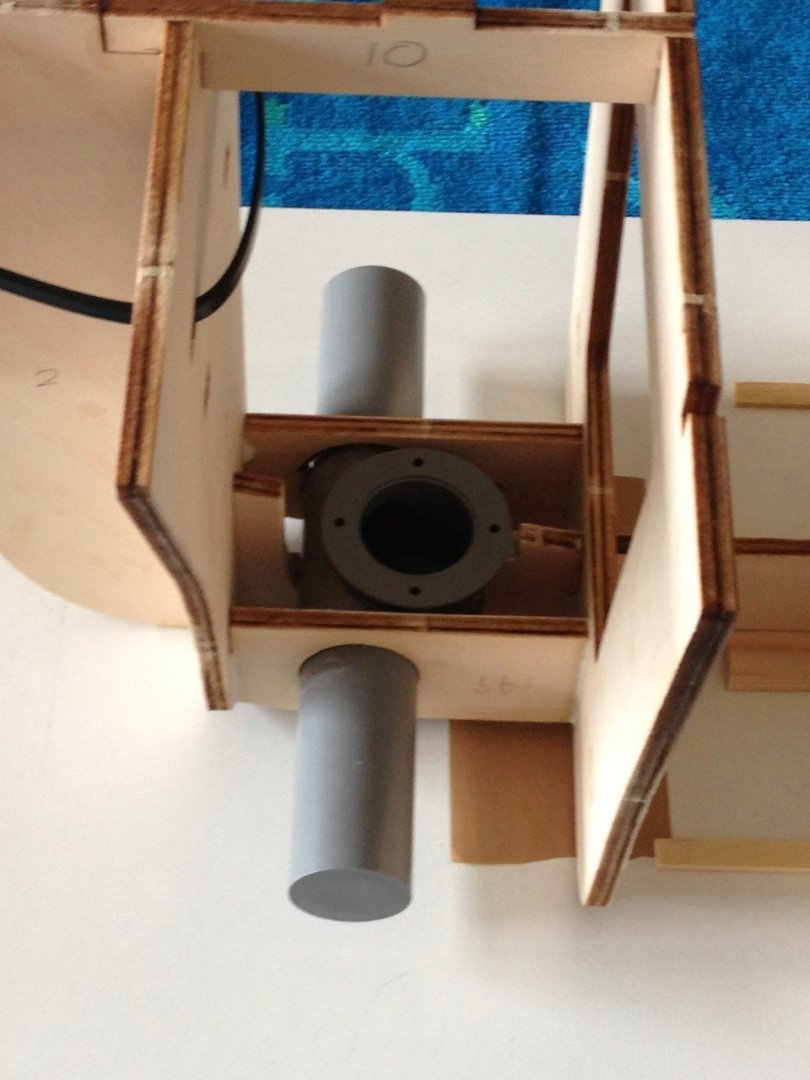
Kurts advice is absolutely spot on. Just remove as much material as you need and fit the thruster. What a lot of builders do is then make a false very low bulkhead and then back fill the entire void with epoxy resin. Here's a couple of pictures of the thruster that I fitted in a Fairmount Alpine which didn't need that much backfilling but I could of completely filled the space if I wanted too. I hope that this helps.

-
Give these people a ring and they will tell you exactly what you need https://www.cornwallmodelboats.co.uk/acatalog/bow_thrusters.html
- 1 reply
-
- 3
-

-

-
Pin Vice Help Needed
Some Idea replied to Ed Gibbons's topic in Modeling tools and Workshop Equipment
I bought the set of 4 vices and found them to be very well made. In the UK they cost about £80 which I guess is about $110? Starrett tools over here are more expensive than in the USA. The smallest vice will hold a micro drill and the largest one will hold a 4mm drill. I’m glad I bought mine. -
Pin Vice Help Needed
Some Idea replied to Ed Gibbons's topic in Modeling tools and Workshop Equipment
Same here they really are worth the money 👍 -
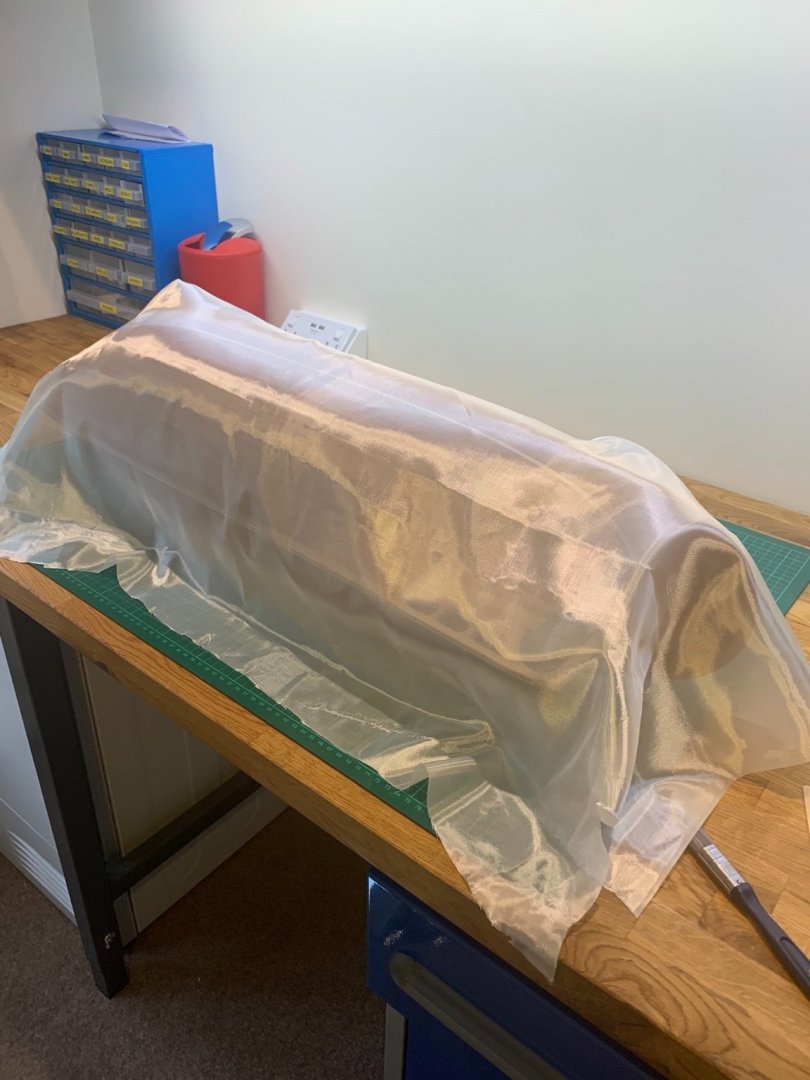
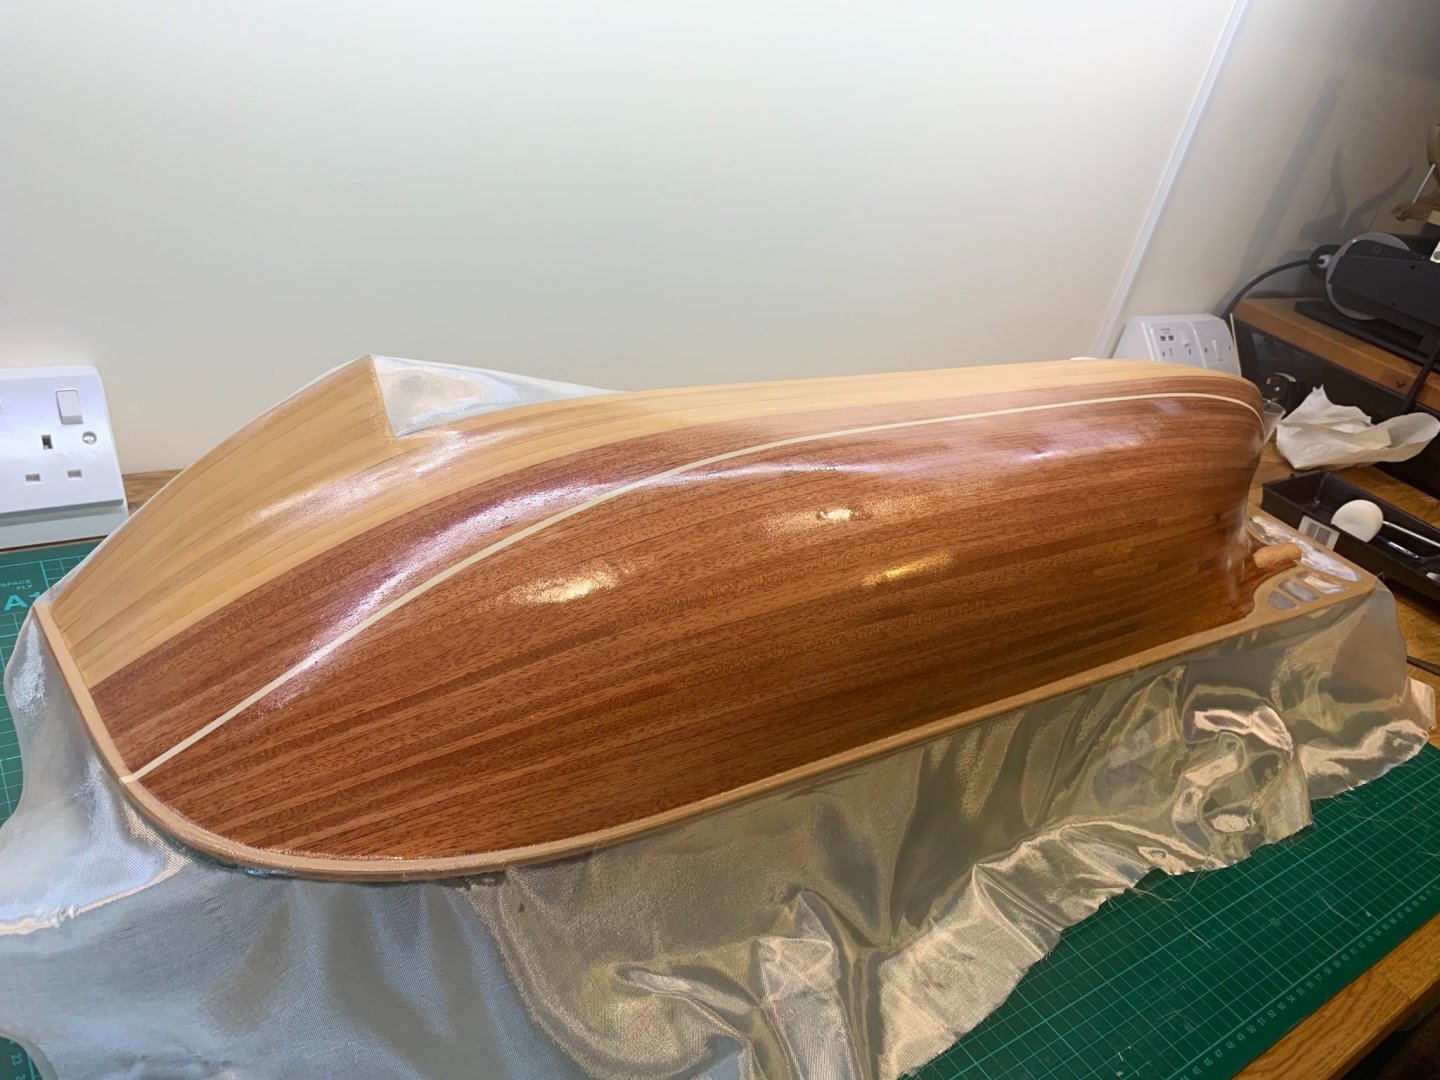
I would recommend using 49g fibreglass cloth and a good non blooming epoxy finishing resin. You will need to apply 2 coats of the resin and then spend time sanding it flat. The cloth will take just about any shape and it’s an easier process to do rather than explain. It will give you a glass like base for your paint. Here’s one I made earlier using exactly this process.
-
Thanks druxey 👍. Leaving parts fuller is one of those things that I need to get a feel for. I never really expected this ship to turn out perfectly as it’s my first pof build. I’m learning with each piece I make. Loads to learn but I am enjoying the process 😀
-
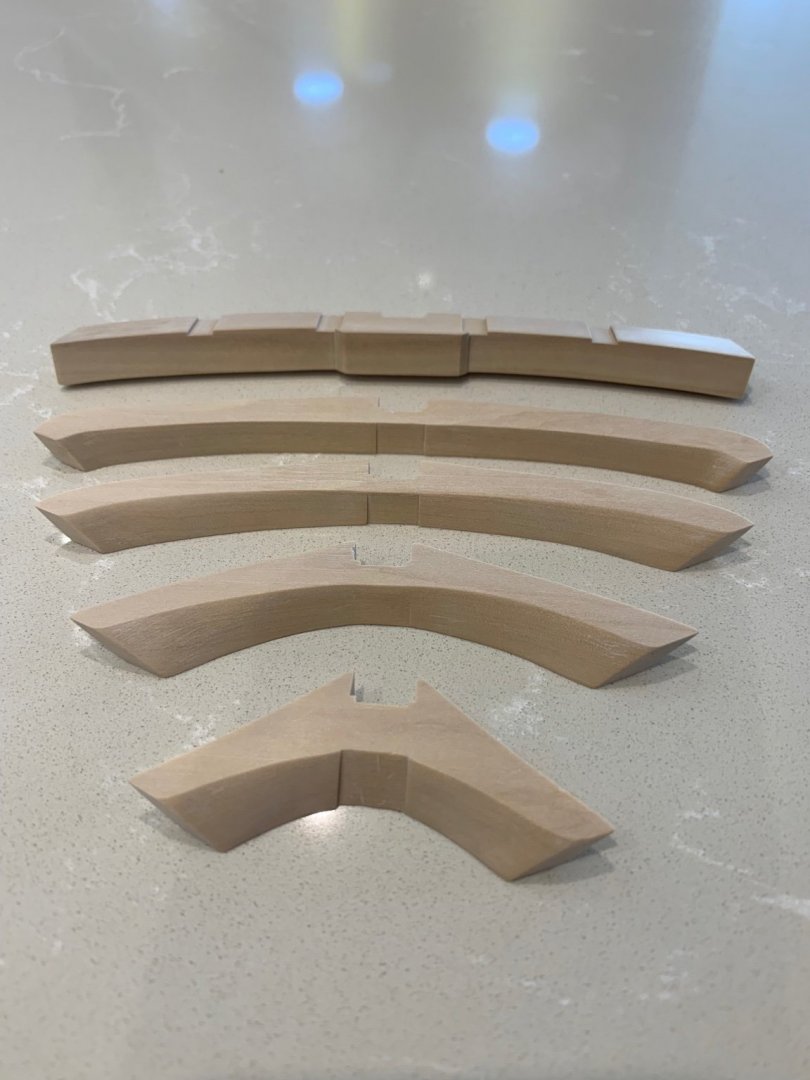
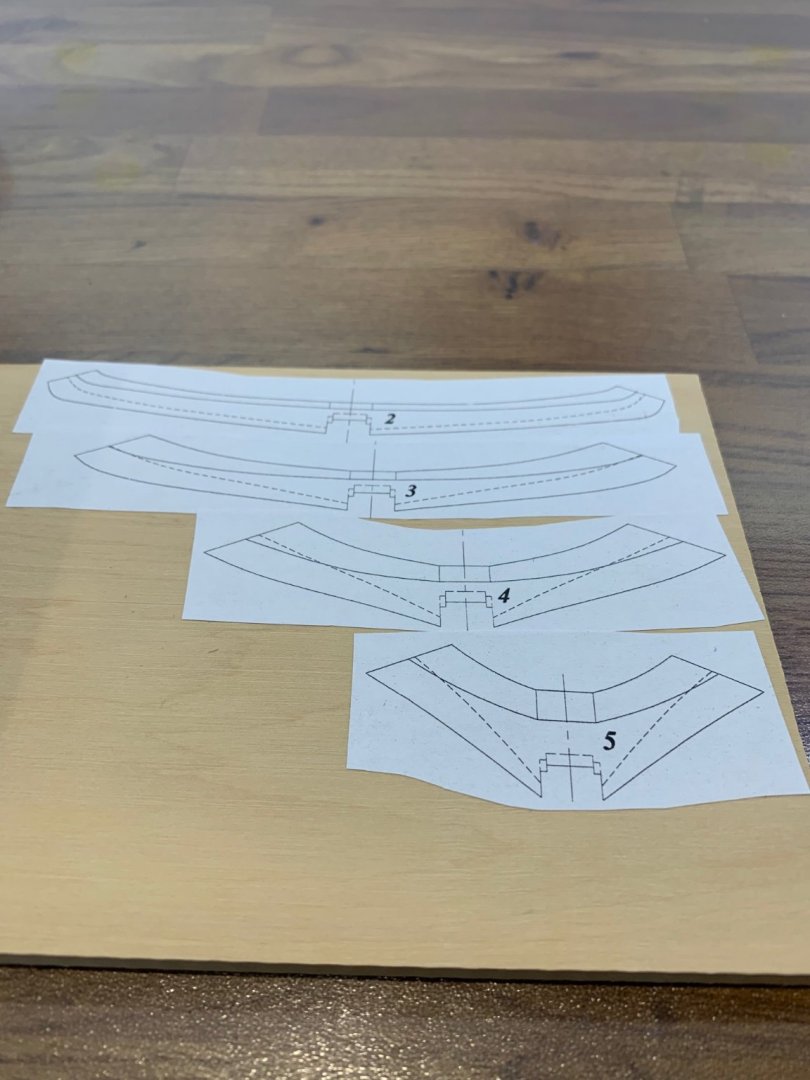
Hi All I got a bit more done this weekend and have now finished shaping the transom pieces. I think the advice that Adrian Sorolla gives in his excellent book is spot on with these parts. He recommends just taking your time and getting them right and I agree with this. I'm hoping that they are as they should be but I guess I'll find out when I make the fashion pieces which is my next task. They look particularly tricky but I'll give it my best shot. A few pictures of the progress below Cheers Mark

-
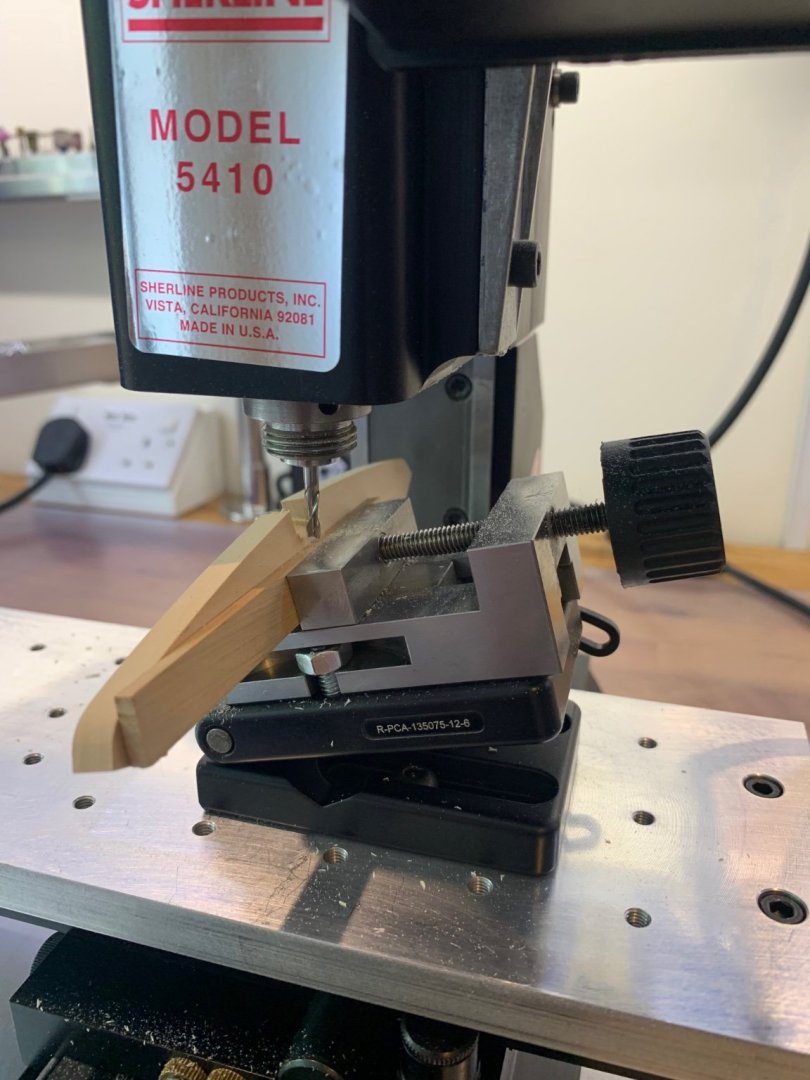
If only it was clogger but we try our best 😄 I've now finished milling out the rebates and then did the same on the other side of the transom pieces where the sternson joins onto them. I've also bevelled my first piece which seems to have come out ok. I found that the bevelling was quite a difficult task to do and took a lot longer than I thought it would. I'll have a go at the three remaining parts next weekend and I'll see how they go. Mark


-
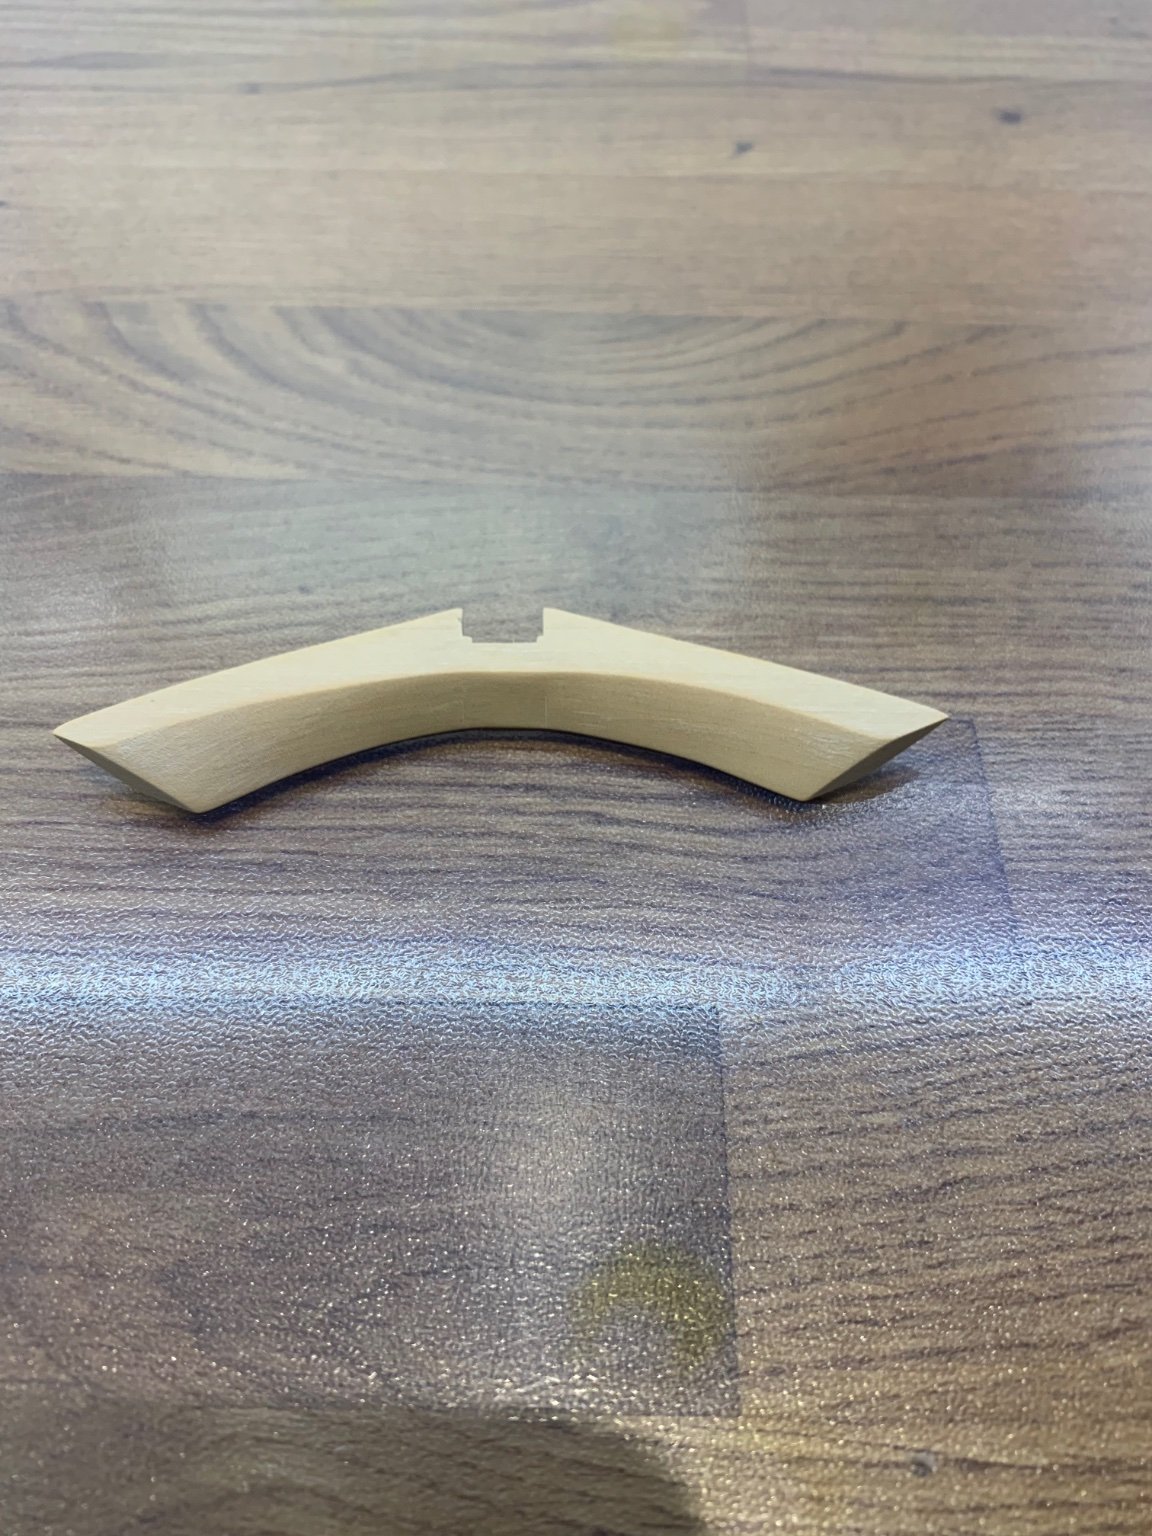
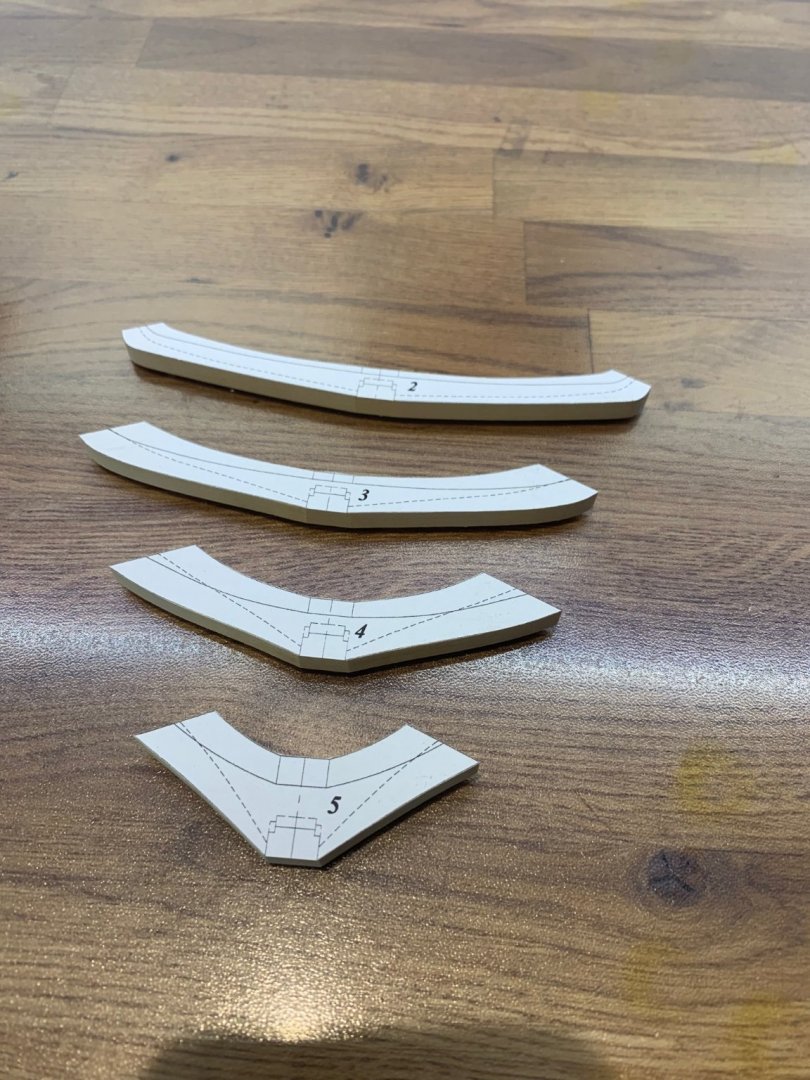
Mark and druxey thanks very much - I did accidentally catch one of the corners on the sander and took the tip off of the wing transom but I reckon that it'll be ok. I've made a start on the next 4 transom pieces and so far so good. These are made from 6.75mm thick wood so they are quite a lot thinner than the wing transom. I've so far cut them out and shaped them to their outer edges. I have also made a start on cutting the angled and stepped rebate so that they can lock onto the sternpost knee extension. I think you could leave out the step if you wanted to and no one would be the wiser. I decided to give it a go and found that it gives an extremely strong joint. I've not shaped them yet so thats one of my next jobs. Cheers Mark
-
After a few lovely weekends catching up with the family I've at last got around to having a go at the wing transom. So what did I discover? Firstly its quite a complicated piece to make and requires a big piece of timber to make it. Its a shame that about 40% of that piece of wood is turned to sawdust but thats just the way it goes. It took a lot longer to make than I thought it would due to all of the angles involved. A few pictures of the process below and for a first attempt I think that it came out ok.


-
Sherline Mill Essential Accessories?
Some Idea replied to Some Idea's topic in Modeling tools and Workshop Equipment
Your right there equipment really is nice but eye wateringly expensive . Lucky I have a friend who’s company use a lot of their tools so he managed to get it for a reasonable price for me. Amazingly it fits the Proxxon vice with no modification required -
Sherline Mill Essential Accessories?
Some Idea replied to Some Idea's topic in Modeling tools and Workshop Equipment
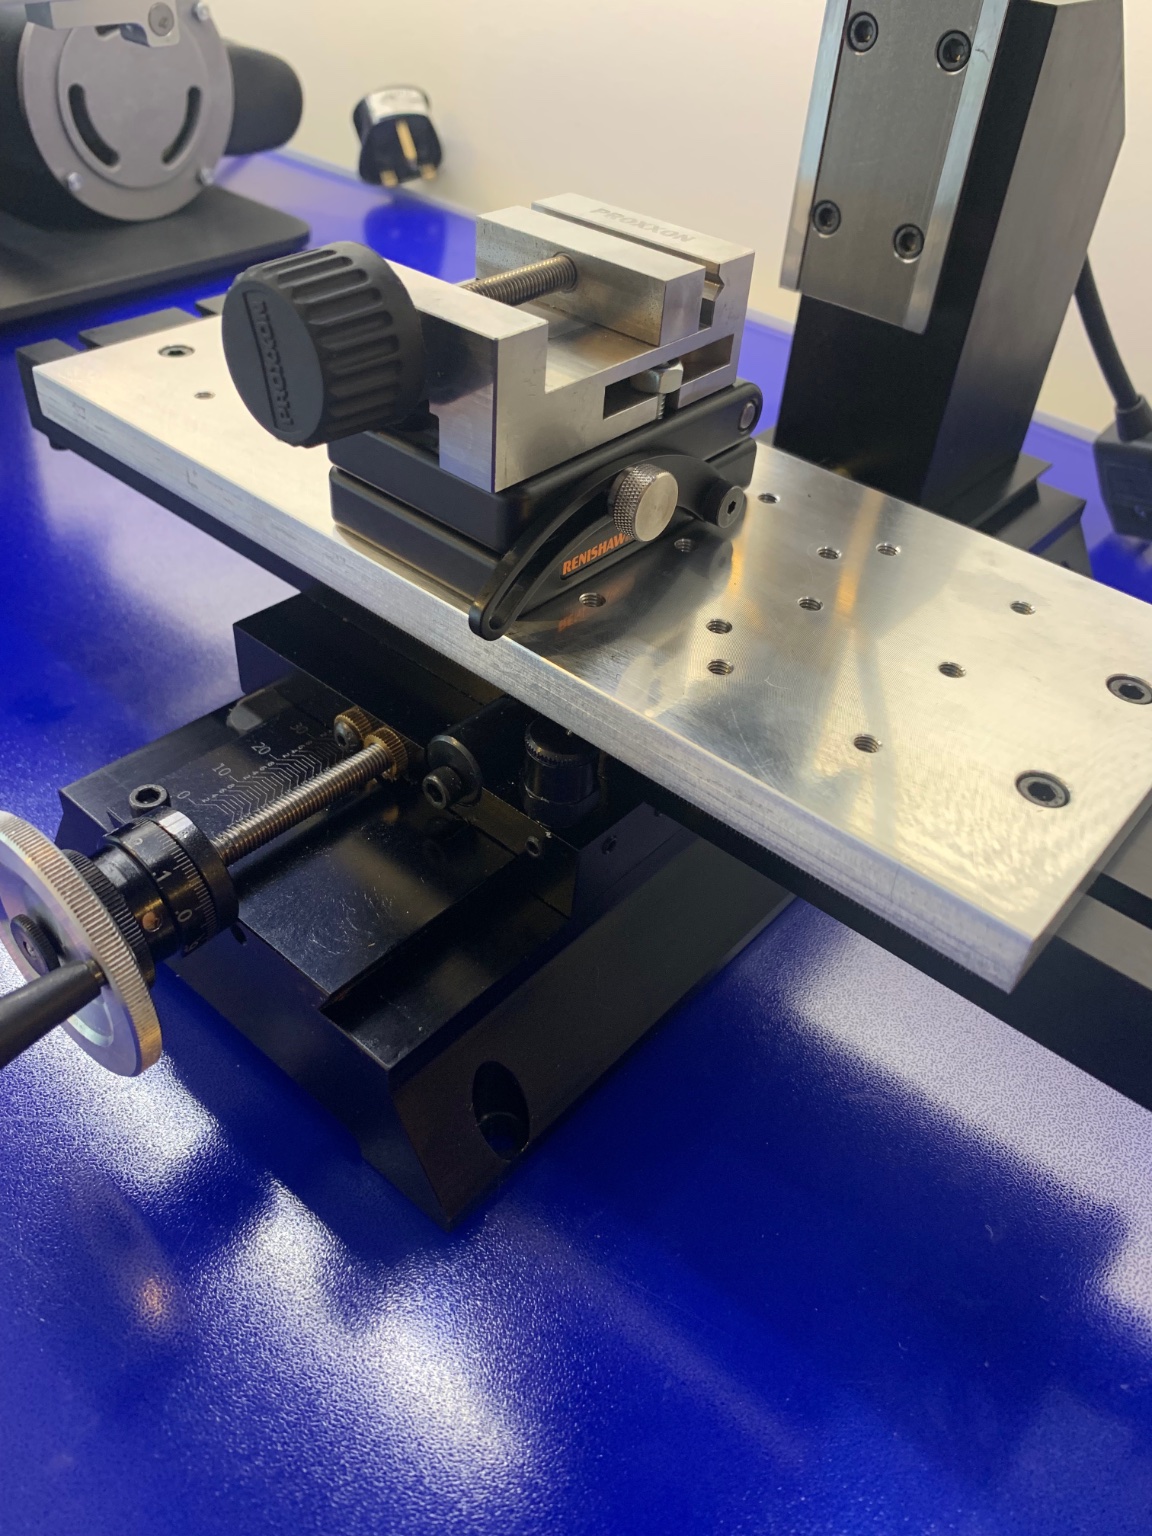
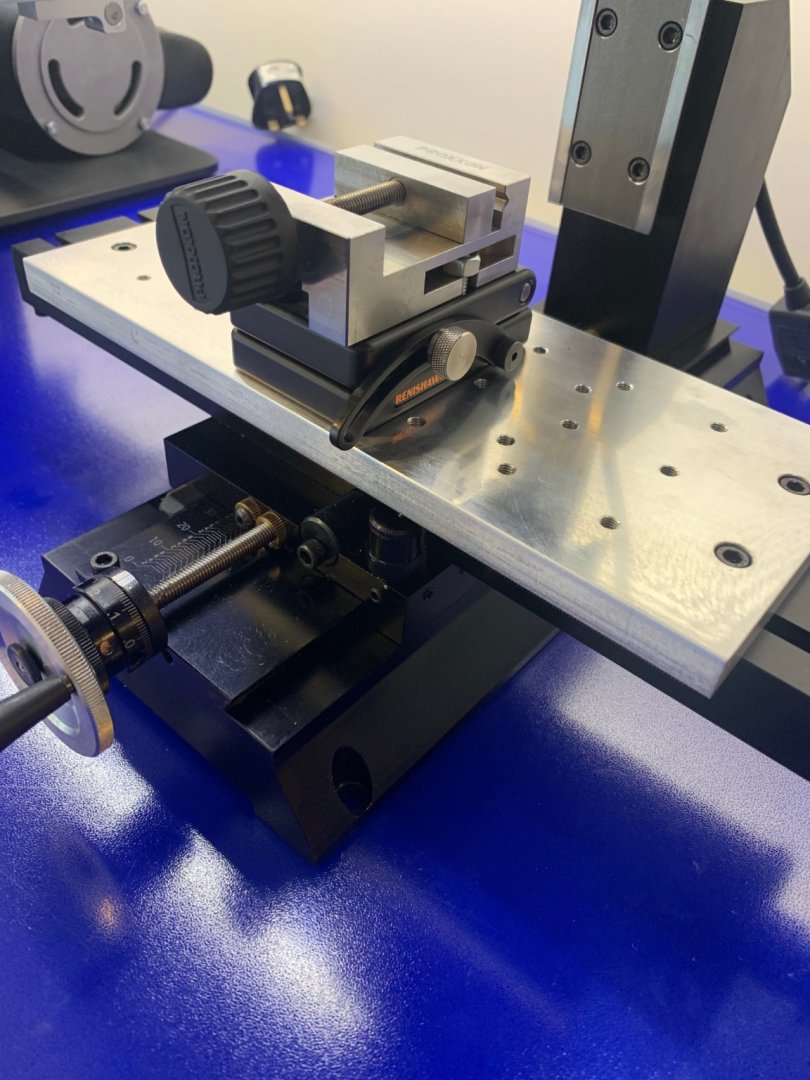
Just a couple of pictures of the tooling plate which will be better for my needs as I only mill wood. I like the way I can just unbolt the vice and then have loads of points that I can use the hold downs with. Its quick and simple and also protects the bed.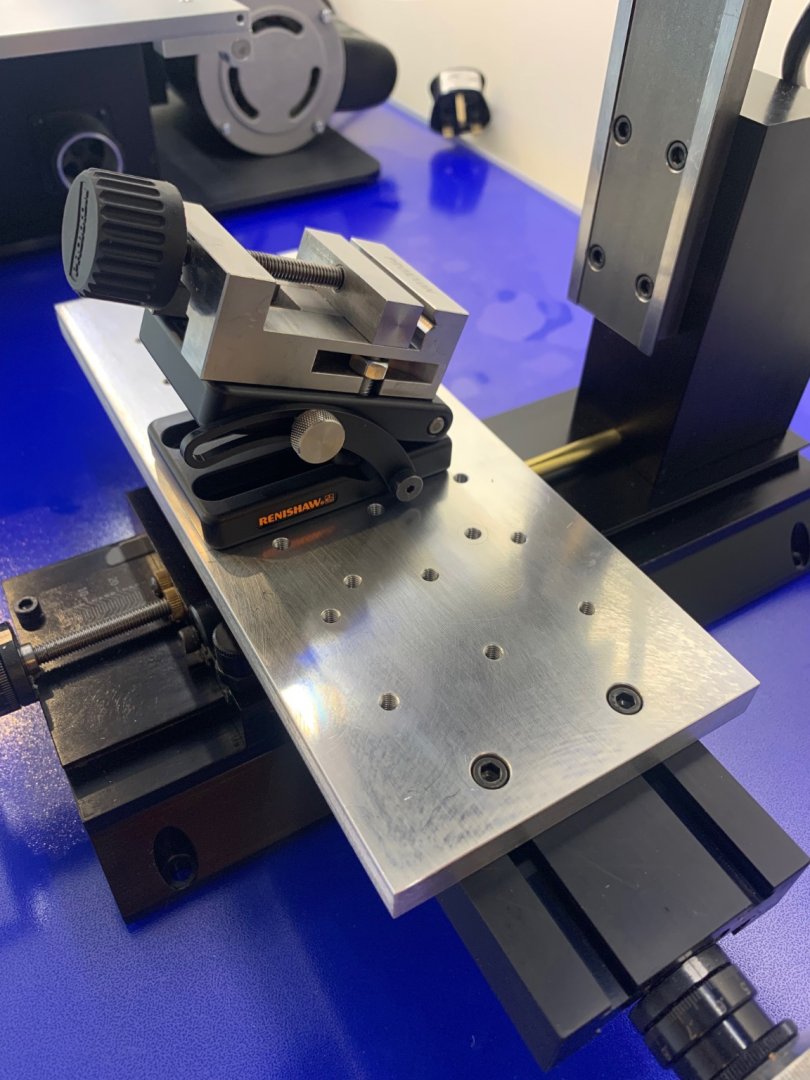
-
Sherline Mill Essential Accessories?
Some Idea replied to Some Idea's topic in Modeling tools and Workshop Equipment
Its a Sherline 5410 - I've been really impressed with it so far. -
Sherline Mill Essential Accessories?
Some Idea replied to Some Idea's topic in Modeling tools and Workshop Equipment
Bill I never would have guessed the age of your mill it still looks great. I don't understand why though T bolts have the thread all of the way through. If they were blind holes we would get less marks on the table and probably less man made distortion too. Thanks for the pics -
Sherline Mill Essential Accessories?
Some Idea replied to Some Idea's topic in Modeling tools and Workshop Equipment
Hi Roger - Luckily I've found a supplier in the UK so my shipping costs this time are minimal. But as I ordered the standard and stepped hold downs I have quite a few T nuts etc. The quality are very good and I'm glad that I bought them. Thanks Jim - I do have two draw bar collets and they are quite expensive and yes the cutter has to be within .001" to fit correctly according to the instructions. Any chance you could recommend a make of collet chuck or two that I could have a look at. I did make a mistake - I ordered a tooling plate as I have used these in the past. Anyway after paying for it I realised that I have a mill and just could have made one. I've been out of the game for too long but I did laugh at myself. I'll get some pictures up next week but it is a good bit of kit which is easily dialled in with a DTI.