


Boccherini
-
Posts
376 -
Joined
-
Last visited
Content Type
Profiles
Forums
Gallery
Events
Posts posted by Boccherini
-
-
Just caught up with your build....... looking very good, clean & precise.
Lathe chucks: get both, you'll use them. Horses for courses.
Regards,
Grant.
-
Mark & Christian, Pete and Wacko Wolf,
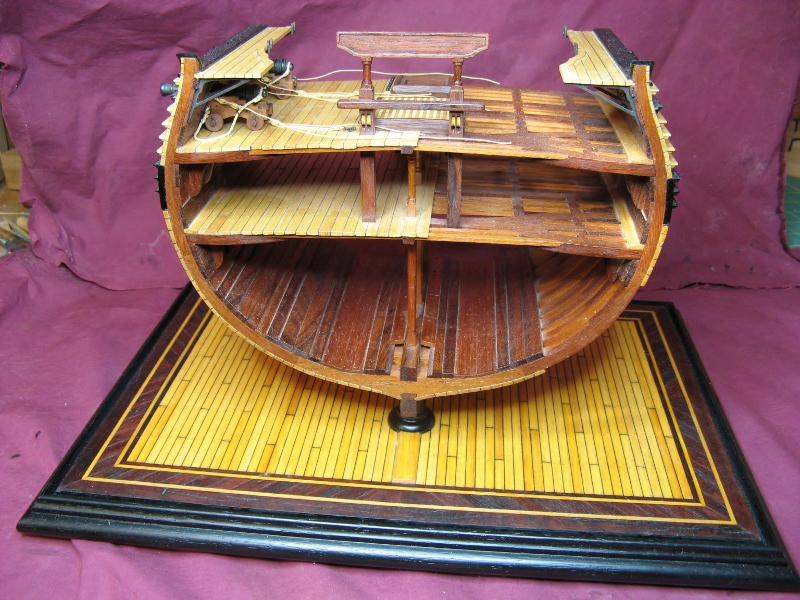
thanks for your interest/comments. I'll be returning to my model of the "Harriet McGregor" from Underhill's plans, shelved due to loss of interest brought on by some mistakes made early in the construction requiring fiddly fixes that depart from the plans. I'm now ready (and better equipped) to deal with the results of my ignorance/lack of understanding and finish her.
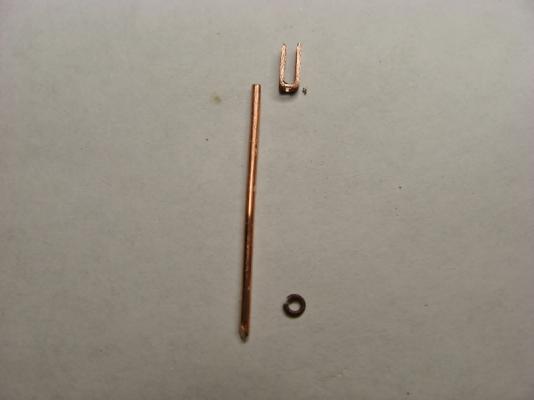
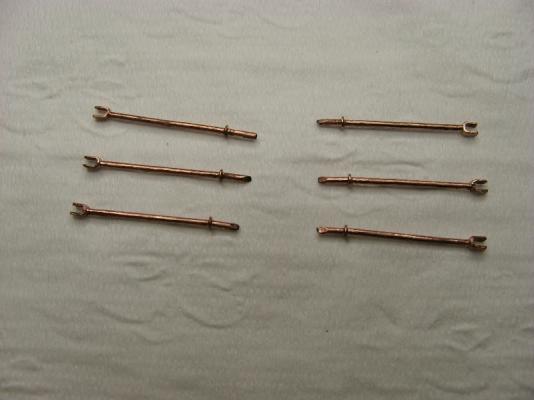
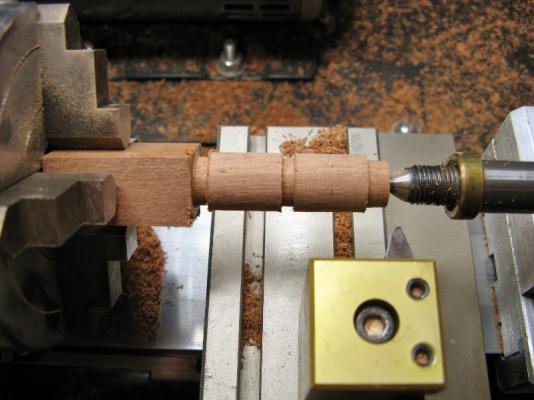
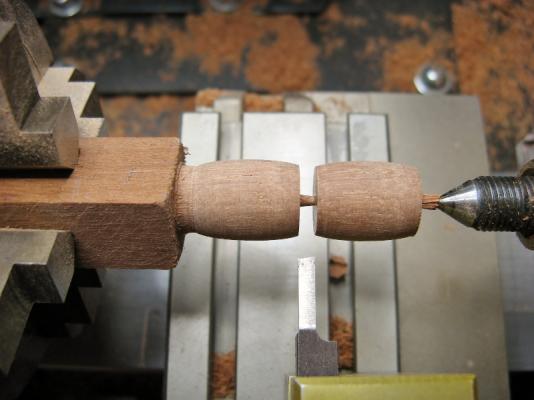
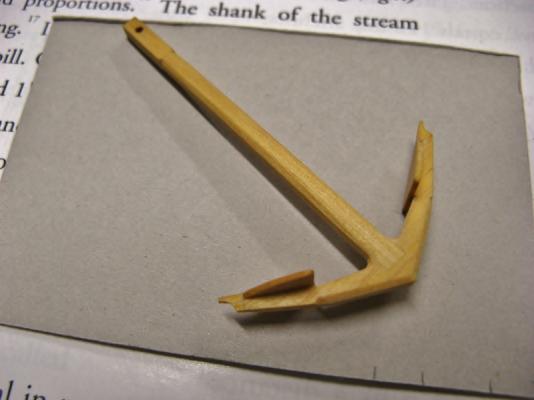
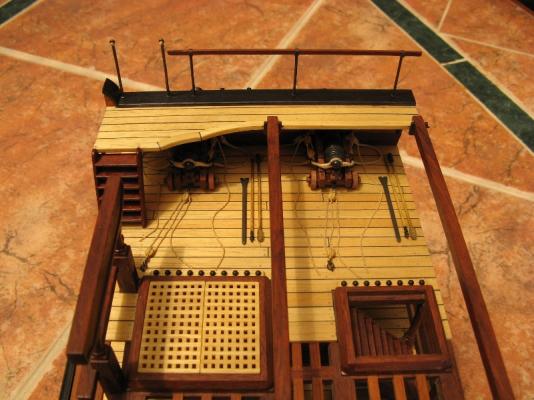
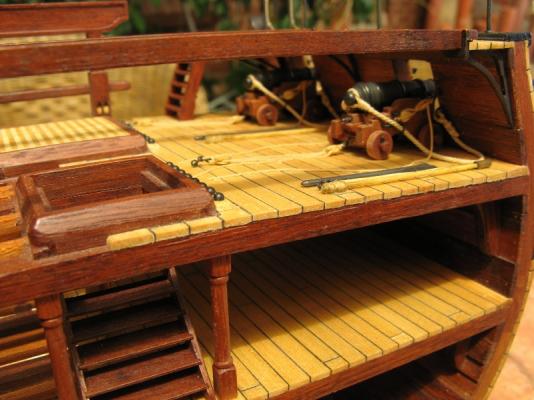
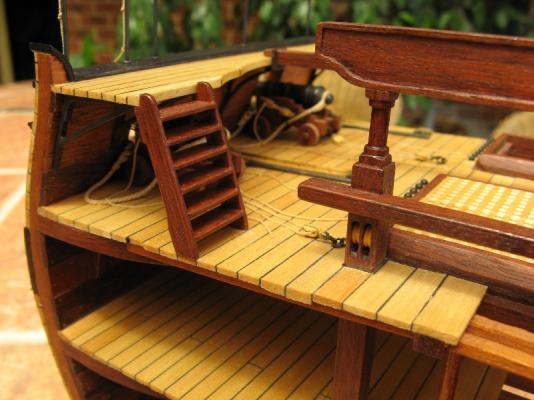
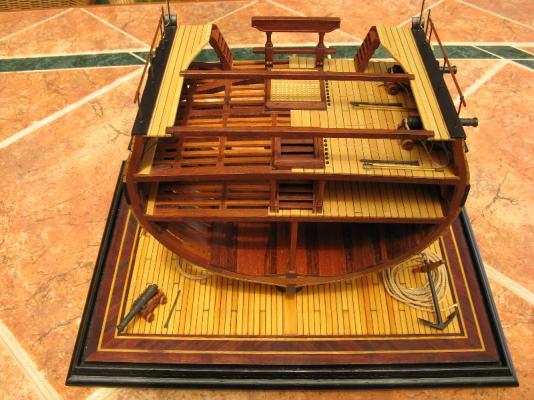
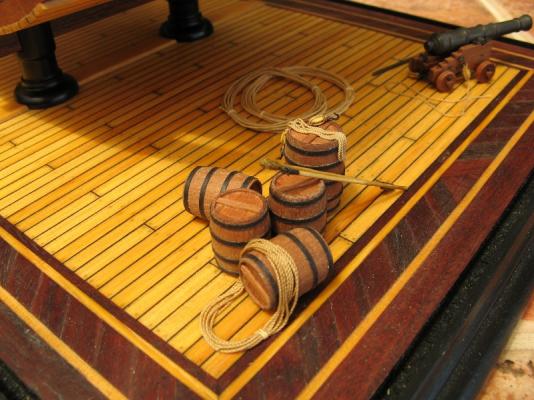
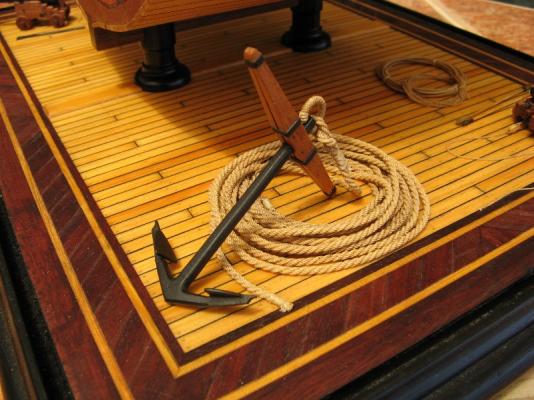
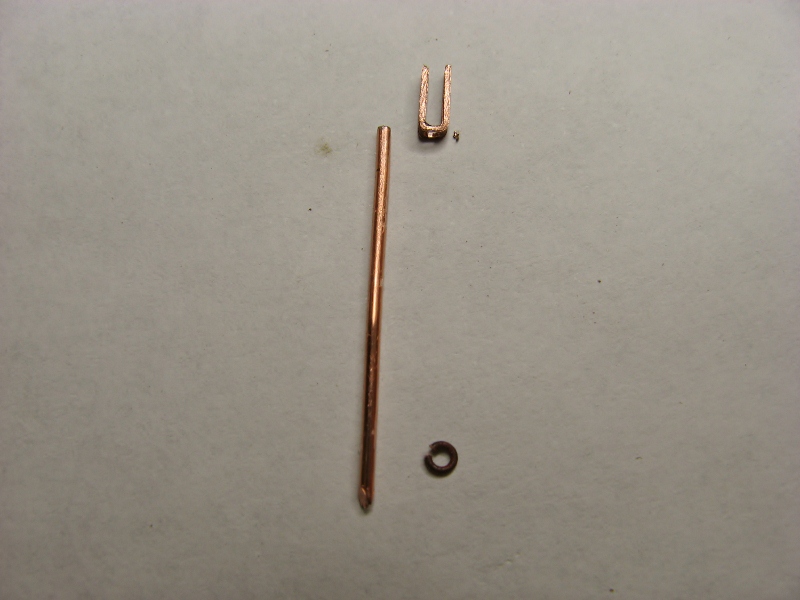
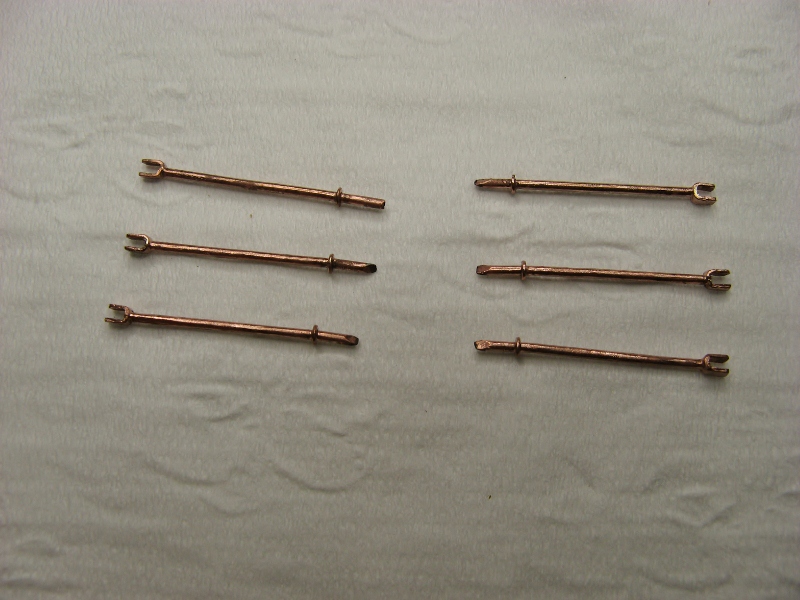
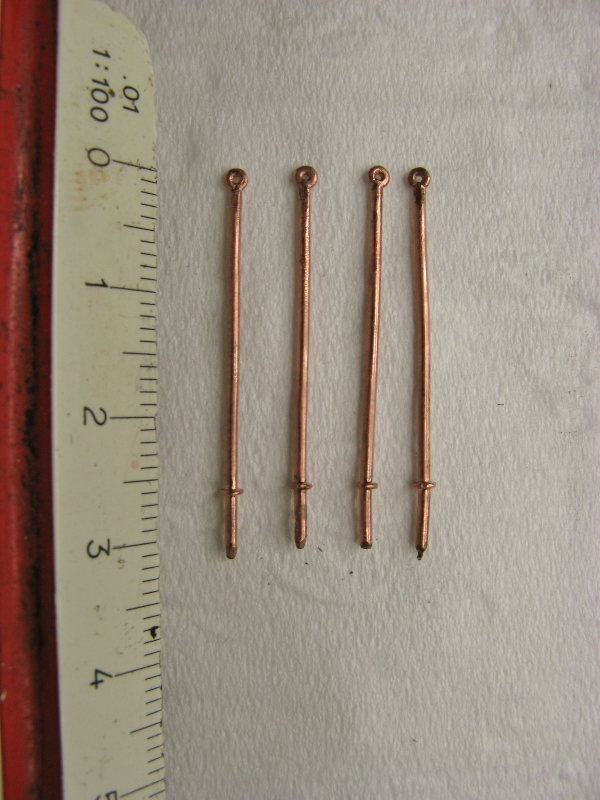
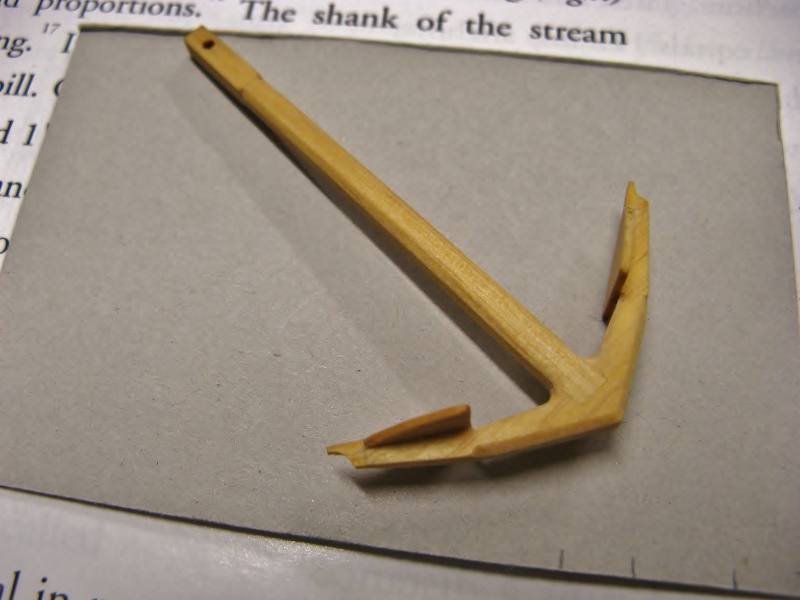
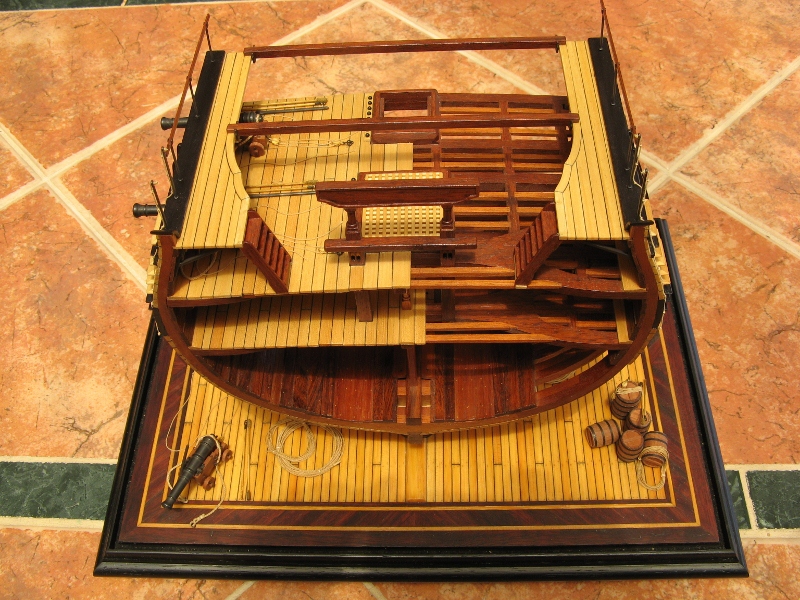
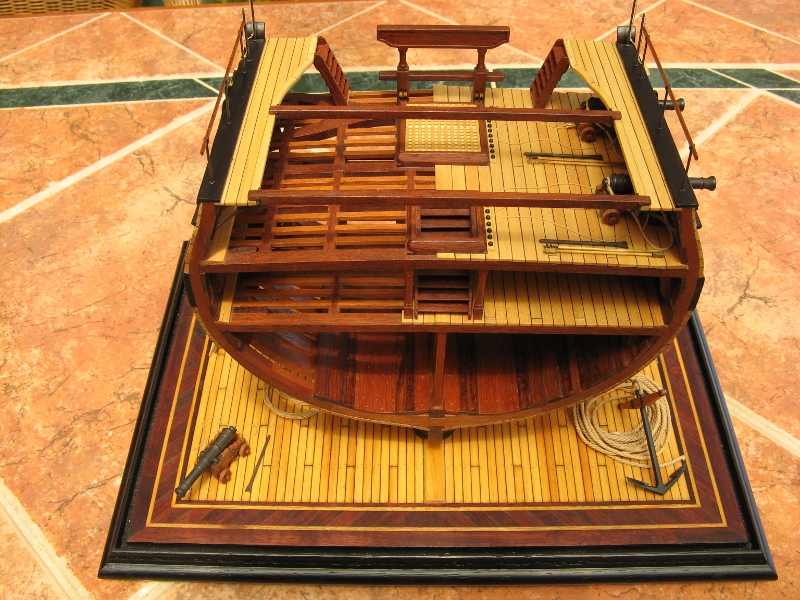
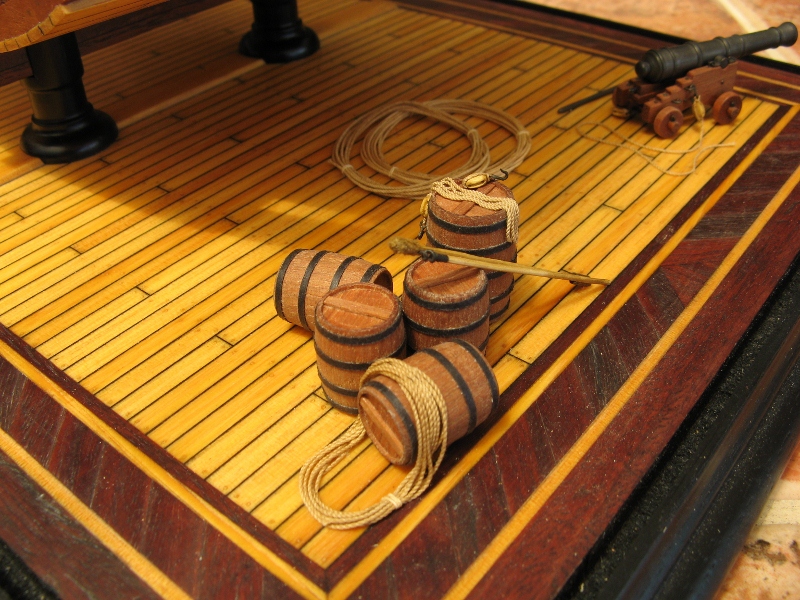
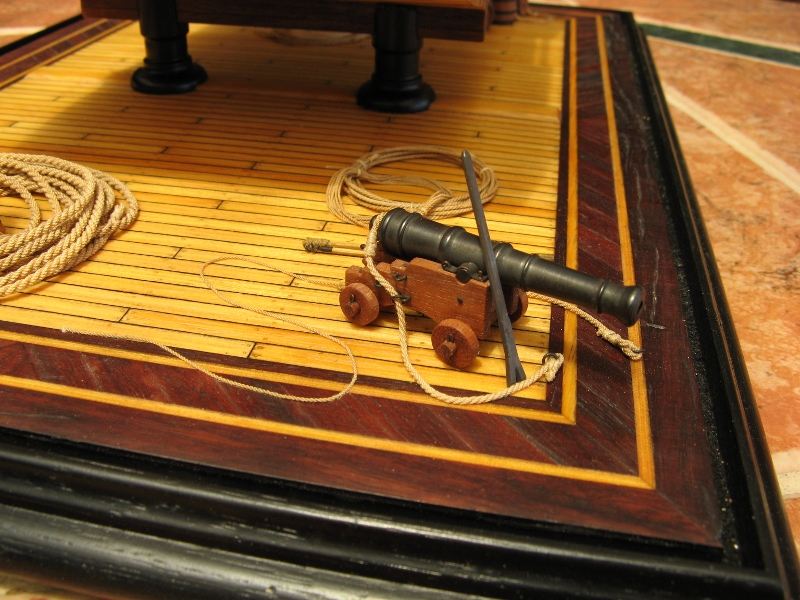
For general interest, here are some construction pictures for the stanchions, barrels and anchor.
A word of warning, before soldering the ring to the stanchion, make sure the fit is tight. Any wobble will allow the ring to go skew when soldering. The entry rope stanchions have an eye soldered on top instead of the bracket.

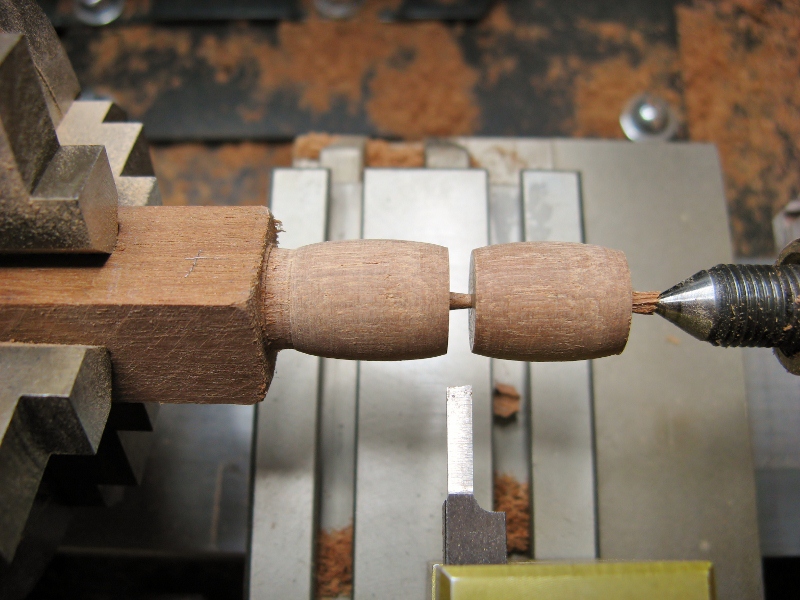
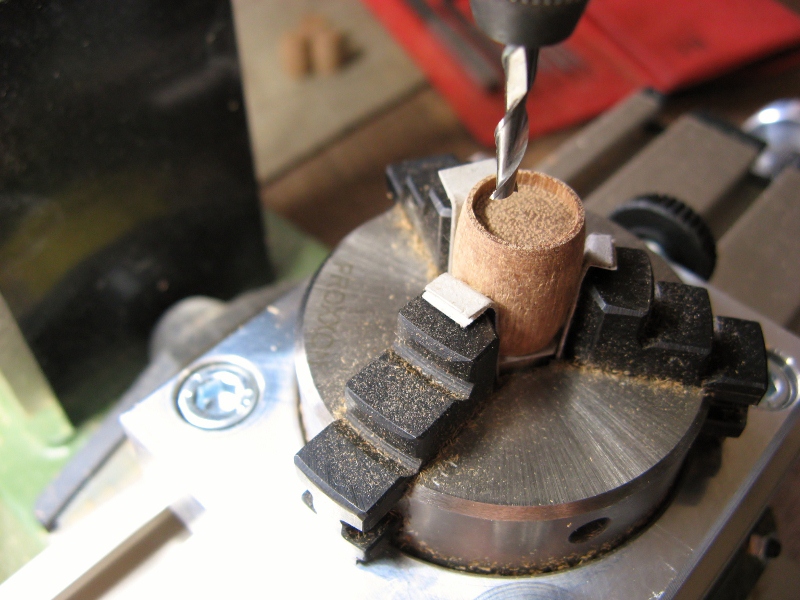
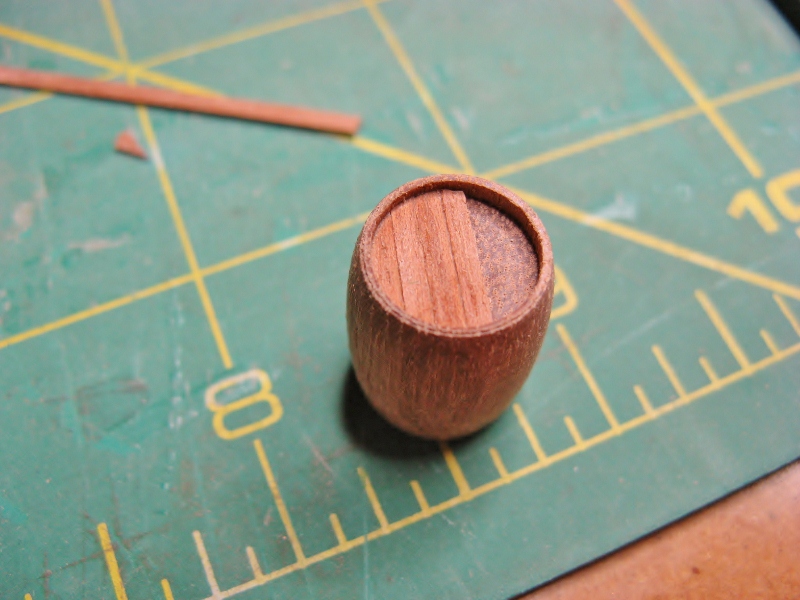
The barrels were turned from solid timber, I couldn't figure out how to cut the wedges required to show the staves. The ends were hollowed out to allow the installation of the barrel ends. I used paper strips for the hoops.


The anchor was made from wood and sprayed. The method is in the MSW data base, I modified it slightly, the results were better than expected.
- Paddy, AntonyUK, harvey1847 and 4 others
-
 7
7
-
Continuation.......


Grant.
- WackoWolf, Long9Ron, GrandpaPhil and 8 others
-
11
-
Anthony & Joss,
thanks for the kind words. It did work well, not my idea though, this was borrowed from a Russian model of the Victory ( I think), from quite a few years ago.
It is finally complete and with the new owner.


Grant.
- mtaylor, GrandpaPhil, harvey1847 and 6 others
-
9
-
Bugra,
nice start. You appear to have done a good job with the frames, despite the lack of machinery. Lot of tedious work cutting out frame components with a fret saw. You must be a very patient man.
Regards,
Grant.
-
Pete & Ron,
thanks for the comments.
Regards,
Grant
-
-
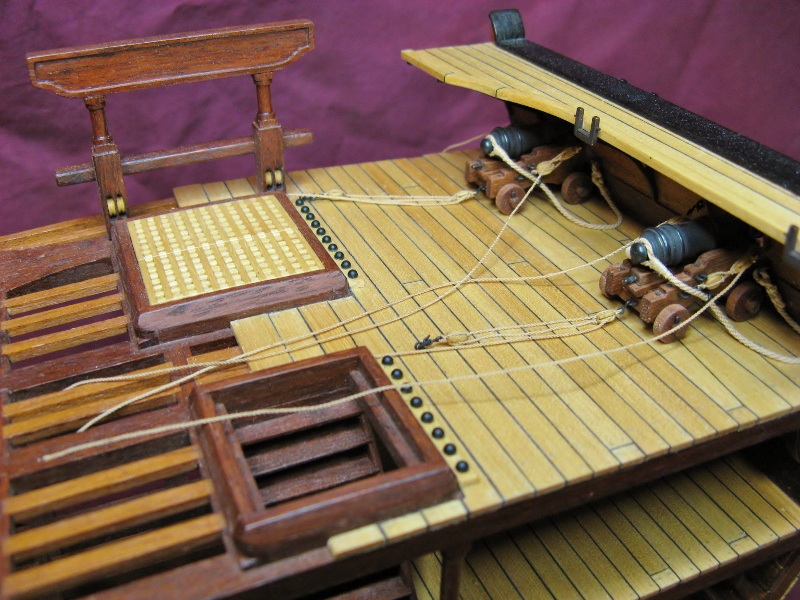
I have nearly finished my Triton x section, and am considering putting in shot racks around the main hatch. Is this legitimate or just fanciful decoration?
Regards,
Grant.
-
Rowan,
if your are close by, this is where I obtained mine: Roy Alexander & Sons 8th Ave., Maylands. Nice bunch of guys.
Regards,
Grant.
-
Paddy,
the taper jig is the way to go. Sounds like you have it pretty well worked out, I found it is easiest to do the wales first, then the top & butt strakes and finally fill in with the standard planking. I look forward to seeing you bring it all together.
Regards,
Grant.
-
-
Paddy,
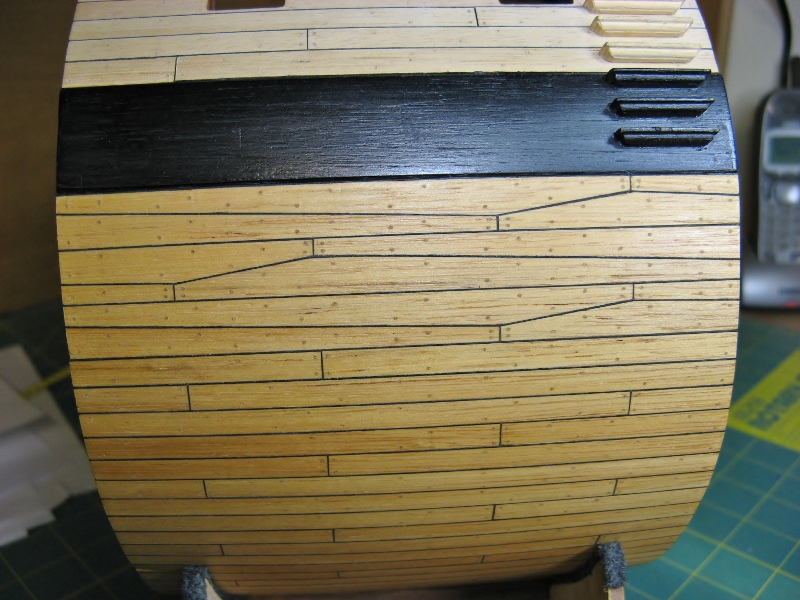
I used top and butt planking below the wales. The thickness of these strakes tapered down to the thickness of the normal planking below. Above the wales, the thickness tapered as the planks rose up to the sheer rail. I believe all the planking dimensions were from TFFM books. I don't explain myself very well sometimes, so I apologize if this is unclear. Pictures are better, I can send you a couple (or clutter up your log with them), to illustrate if you like.
Regards,
Grant.
-
Joss & Rusty,
thanks for the comments. Indeed, the end is nigh.......at last.
Regards,
Grant.
-
Thanks for the kind remarks gentlemen.
Antony, I can't claim the credit for the ammonia, I read it somewhere else. I strongly suggest you test it on the timber you are using before doing it on the model, the ammonia can potentially bleach the colour.
Regards,
Grant.
-
Marius,
you've been busy the last few weeks, quite a bit has been done. Nearly finished, a good looking model. I not sure I understand you corectly, but if you are looking for a decent draw plate, the Byrnes (Model Machines) one is top quality. You have my sympathy with regards to exchange rates and shipping costs (we cop it here), but the article is well worth the expense.
Regards,
Grant.
-
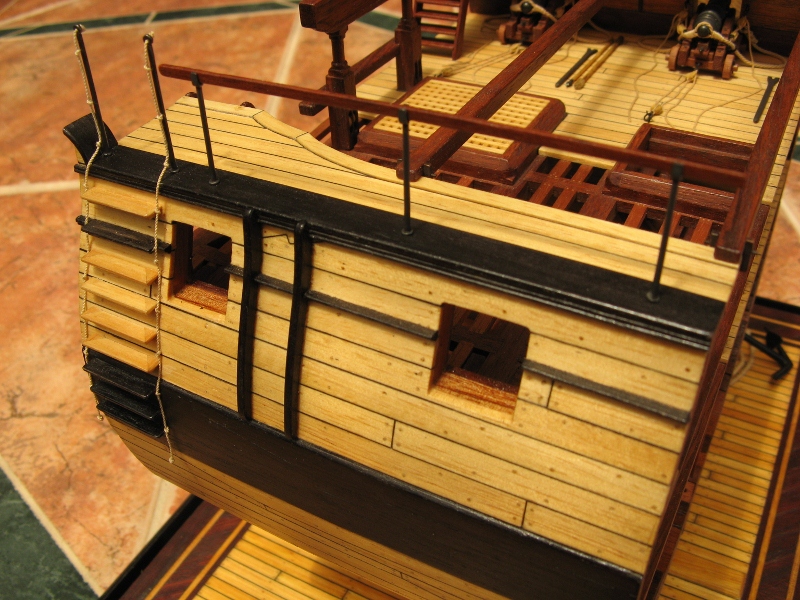
Paddy, Antony and Rusty, thanks for your comments.
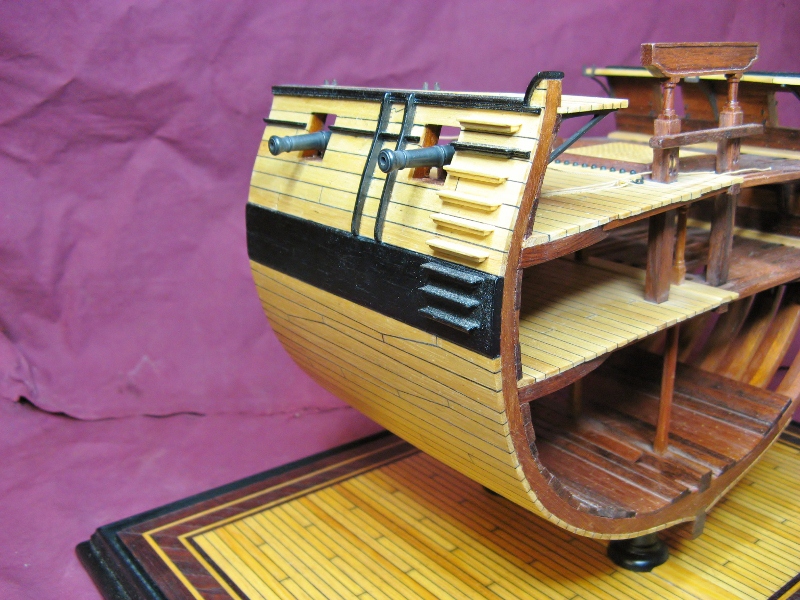
The gangways are in, along with the sheer plank. I decided to try something different with the drift rail, by producing a curved section instead of straight as indicated on the plan. The curved section is made up of 4 pieces of 0.5mm stock soaked in ammonia for about 5 minutes, carefully pulled into a curve around a former (18mm diameter), then clamped in place for 24 hours until dry. The pieces were then separated, pva glue applied and reclamped for another 24 hours. The result is a very stable, strong curved piece. This was cut in half, and shaped to provide the 2 sections required. I considered cutting these in one piece, but was concerned that they would either break during fabrication, or split some time in the future. There is a slight difference in the colouration due to the ammonia, this is not an issue, as I will be staining them black.


Grant.
- Paddy, freewheelinguy, Pete38 and 6 others
-
9
-
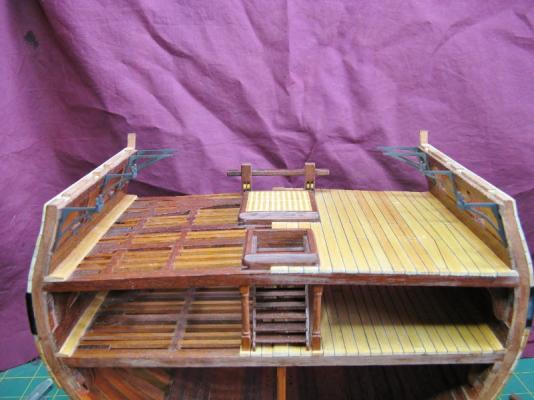
The limber boards worked out well Paddy. I had the same problem with my garboard strake, left it at the size the plans indicated and put it in. It looks ok, but not really noticeable with all the other detail on the model drawing the eye
Regards,
Grant.
-
Bob,
congratulations on your completion of the x-section. You have done a great job, kudos on doing it all with hand tools.
Regards,
Grant.
-
Thanks Ron, hope you rediscover your motivation quickly.
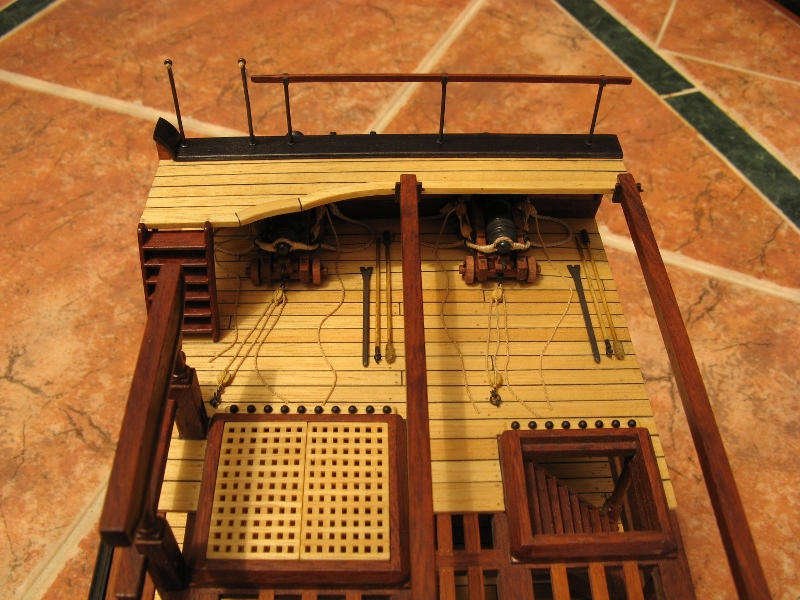
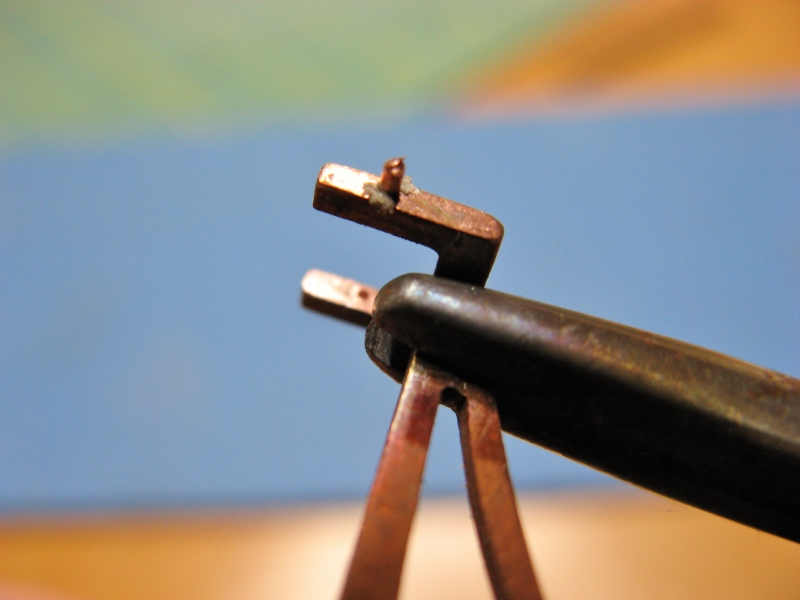
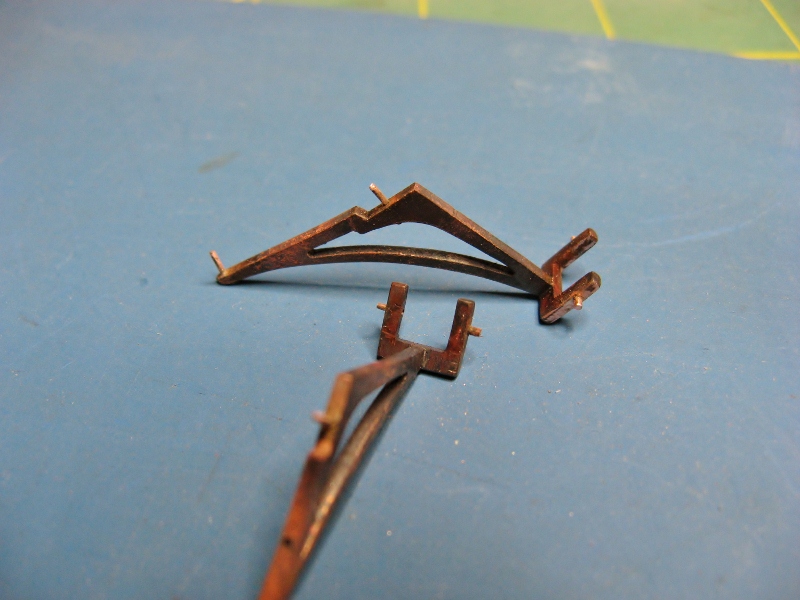
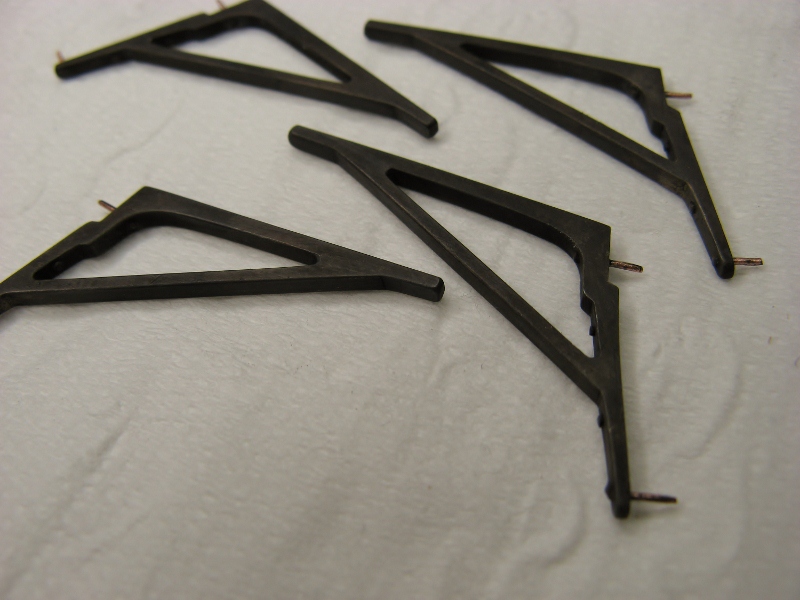
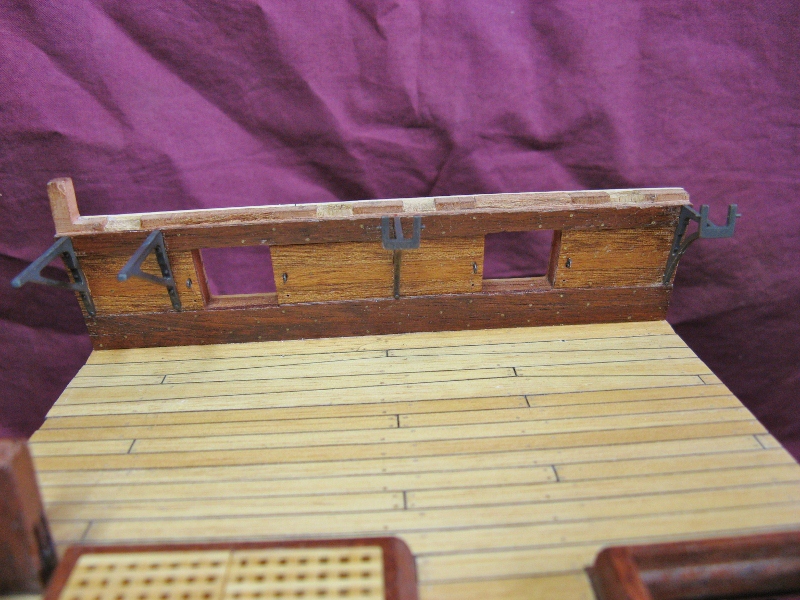
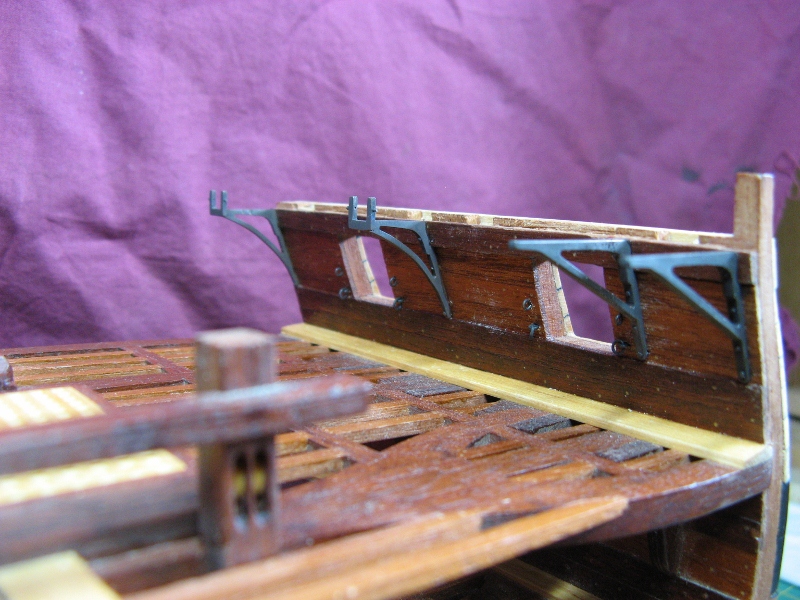
I decided to fake the pins through the skid beams, one side from a slightly larger diameter with a shoulder filed onto it, the other was the correct size. Clamping the bracket in the manner shown provided a heat sink to protect the solder in the joint from melting and the crutch dropping off the bracket. I soldered the pins into the brackets thinking this would make the installation easier, not having to fiddle around trying to line up holes whilst glueing the brackets to the planking (with 5 min epoxy). There are also some dummy heads that don't go right through the brackets for the sake of appearances. The construction method has worked well, the brackets are very firmly attached and are not going anywhere, I expect they will get a few knocks prior to the gangways being installed.
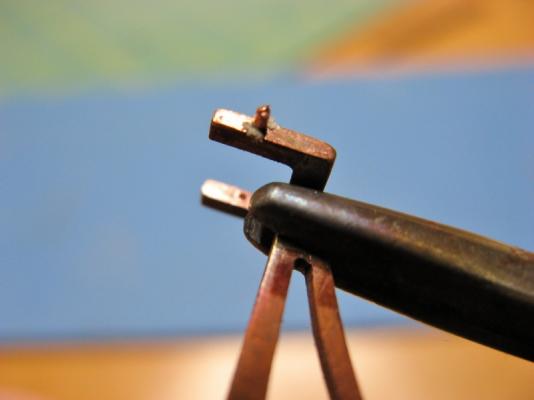
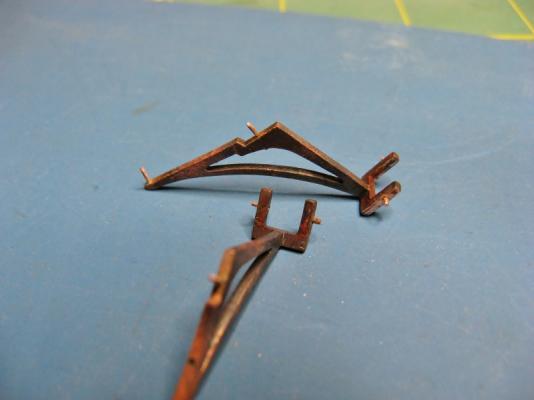
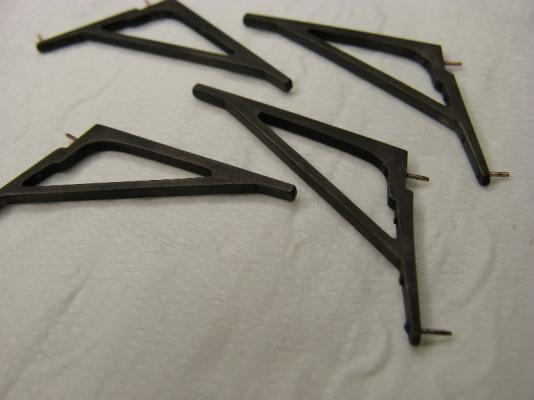
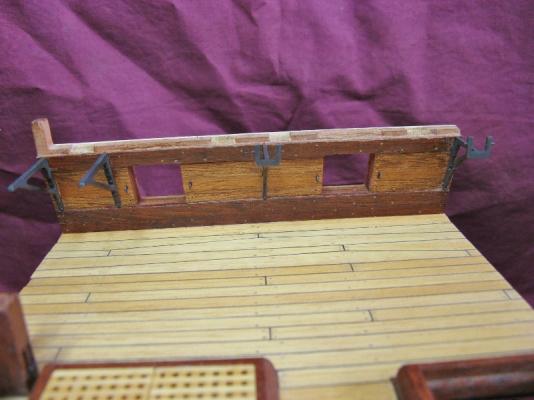
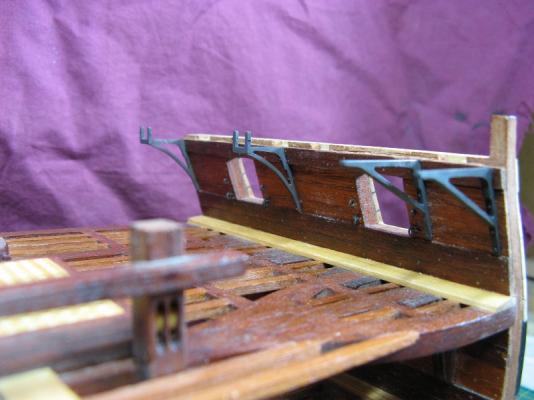
Grant.
- AntonyUK, aykutansin, mtaylor and 2 others
-
5
-
Bob,
the guns have come up a treat, you've done a good job on the metal fittings. Congratulations on some more good work.
Regards,
Grant.
-
Paddy,
nice job on the fairing from where I'm sitting.The raw colour of the timber frames looks good. As Rusty said "Only one?", you are doing a great job.
Regards,
Grant.
-
-
Thanks for the comments gentlemen. I wouldn't worry about your pencil torch Paddy, mine worked well for several years. It started playing up earlier this year, giving me some frustrating moments. Considering it's meagre cost, I definately got good value out of it.
Regards,
Grant.
-
Bob,
nice work on the bitts, particularly like the work on the hatch coamings.
Regards,
Grant.


Proxxon MF70 opinions and accessories
in Modeling tools and Workshop Equipment
Posted
Keith,
I purchased an MF70 last year through Chronos engineering supplies in the UK, even with the freight costs it was still several hundred dollars cheaper than anyone in Australia, I can't vouch for their current price. The service was good and came with tracking. Just needed to swap the plug on the power cord. The machine comes with 3 cutters, some clamps and a set of collets. In addition, I purchased the precision vice, dividing head and the adjustable chuck. The adjustable chuck is ok, not fantastic. Better to stick with the collets wherever possible.The chuck and collets will take drill shanks up to 3mm. I have purchased some additional Kyocera cutters (0.5 - 0.8mm with 3mm shanks) from My Tool Store in Qld. He provides a reasonable service, shipping/delivery is good.
I have used the mill to make some blocks, the dividing head was useful to ream out the ends on some barrels. So far, the MF70 appears to be a useful tool. It is particularly useful if space is a problem, being easy to pack up and store. It is vital to bolt it down on your bench before using.
Regards,
Grant.