


CaptainSteve
-
Posts
1,857 -
Joined
-
Last visited
Content Type
Profiles
Forums
Gallery
Events
Posts posted by CaptainSteve
-
-
Andy,
That's quite a good start you've made there. I certainly understand why you are proud of it.
Once you've clipped those nail-heads off, given her some filler and sanded her down, then she's really going to be looking good.
I've never done an Artesania kit in the past, but I'm gunna guess those left-over nails should look quite striking later on.
Nice work with the deck-nailing, too.

I (somehow) managed to stumble through two POBs before finding this site, and I'm absolutely POSITIVE my first planking attempt didn't look anywhere near as good as yours. If you haven't already, then check out some of the tutorials available on-line here at MSW. There are a couple which deal with planking - both for deck and hull - which I found particularly useful. If you're anything like me, you'll find the information they provide very interesting for your next POB.
-
-
Thanks, Sport.
To be honest, I am merely using (plagiarizing ??) and developing so many of the ideas I have picked up from other builders since joining MSW.
That, I believe, is the true beauty of this site !!
(Has it been 12 months already ?? Must be DONATION time again !!)

- Captain Slog and GLakie
-
 2
2
-
Whilst I feel absolutely certain that we all feel your pain, Jay, I must thank you for detailing just some of the pitfalls that those, such as I, (following yourself and other Connie builders here on MSW), may encounter.

-
-
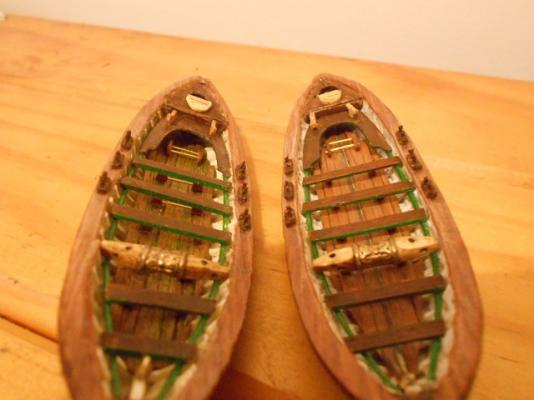
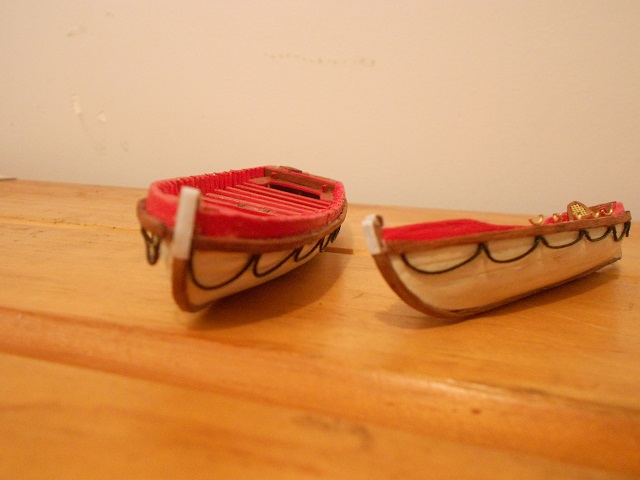
I made a start on the rudders this weekend. Since I had added the little cabinets at the back of my boats, taking a direct impression from the plans, especially for the tiller-arms, wasn't going to do me much good.
First step was to give the rudders a minor touch-up. A thin veneer was added to each side.
This was to give them a wood-grain effect to line up later with the wales.
My main consideration here, however, was to add extra thickness so that I could drill holes through the rudders in order to fit the tiller-arms.
Most of the additional thickness will be cut/sanded away.
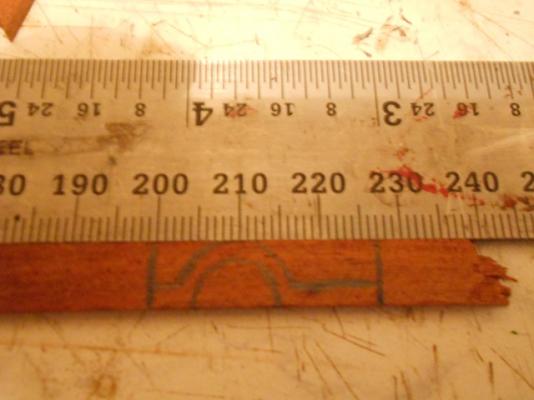
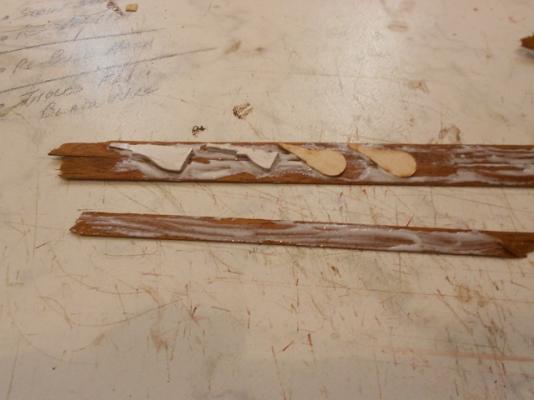
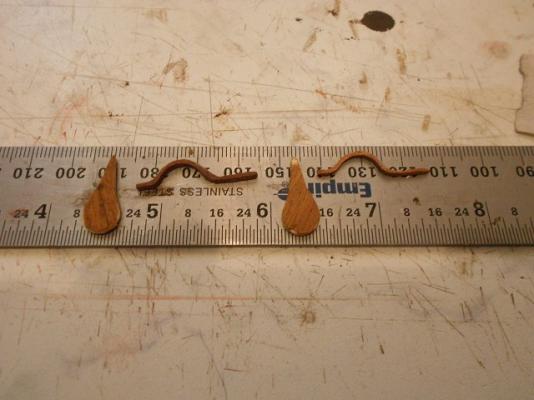
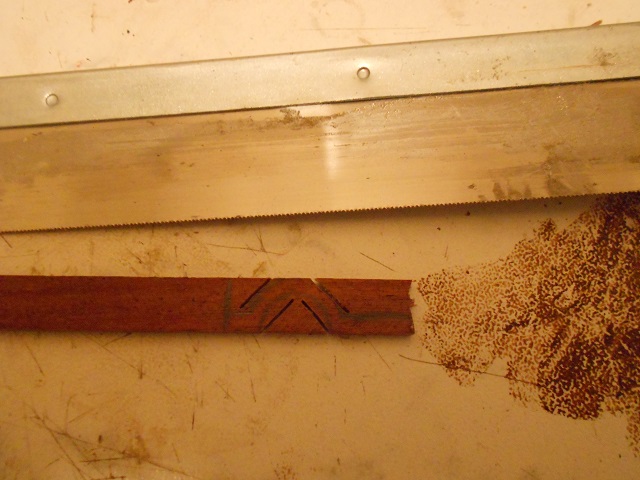
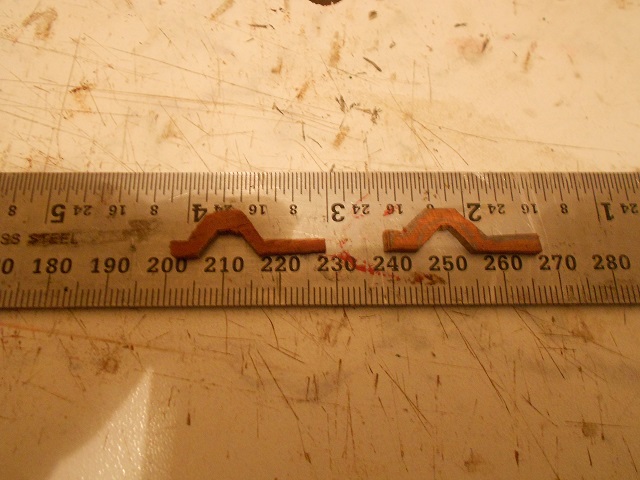
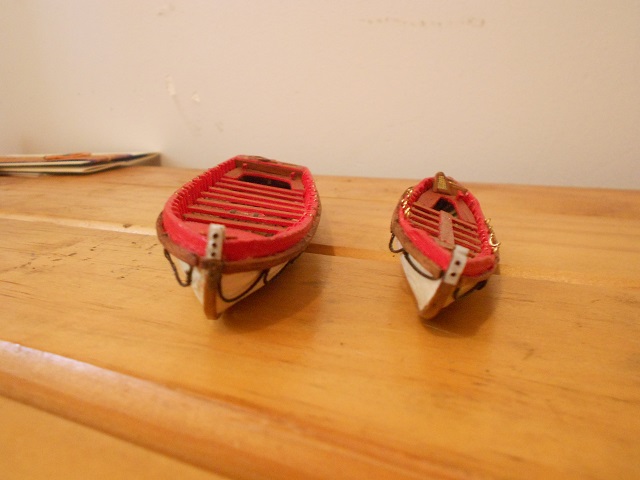
I had to consider the tiller arms for the two whale-boats. Not sure how correct my solution would have been, historically, but I wanted it to appear that the hatches could be opened and closed, no matter what position the tiller was in.
I started with a spare piece of wood-stock 8mm wide and 2mm thick.
The shape was marked out ...
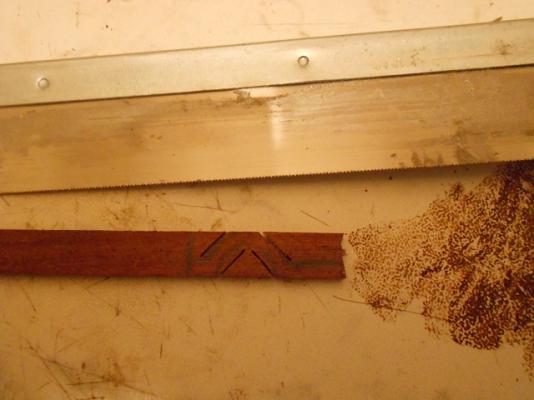
Then a couple of cuts using my razor saw ....
Some work with the Dremel followed ...
To finish, some delicate sanding ... they still need a minor bit of work.
Then - somehow - I'll need to attach the tiller arms to the rudders

-
Dan,
I'm trying to wrap my head around the concept of sitting under my camper annex, out the back of NSW somewhere, swatting away flies whilst chewing on a well-done steak ...
... And knowing the guy in the caravan next to me is one of the world's most eminent ship-modellers !!!
Damn !! But you are good !!
-
-
-
You're a perfectionist, Jay ... and it shows in your work.
I'm certain that Mike Landlubber's work will prove very useful to me when I get up to that stage.
-
Lookin' real good there, Harv. Glad to see you are soldiering one.
Just ONE little question - why is there a solitary, unpainted cannon on deck (starboard, near bow) ??
-
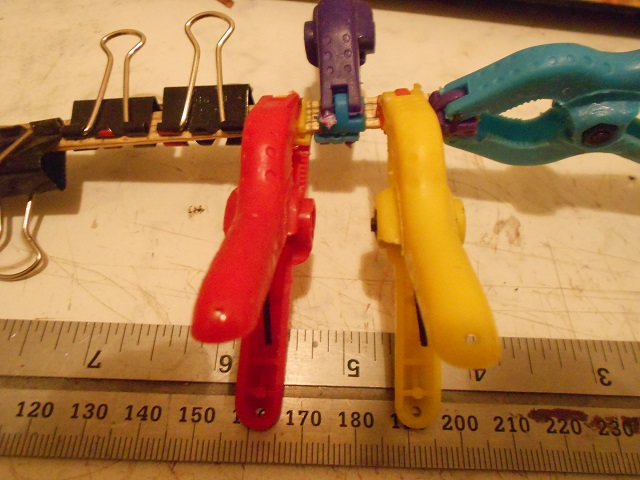
Incidentally, my oar-locks were attached this morning.
At around 5am ....
Before work ...
Arr !!
"I owe, I owe ... it's off to work I go ..."
EDIT: With regards positioning, I opted to line up the centre of each thole-pair with the corresponding foot-rest.
My reasoning being that I figured a rower's hands and feet would be aligned vertically in order to gain maximum power from each oar-stroke.
Anyway, that's MY story, and I'm sticking to it.
The glue has set now !!

-
Hello Steve.
For the ore locks all I did was run some thin pieces of wood through a Byrnes Draw Plate to make them round and then drill and glue them in place. Boats are looking good. Keep making sawdust and you will be done before you know it.
Hmm ... I'm thinking that I might have made a LOT more sawdust than you, Geoff.
I actually do have a draw-plate, but the smallest hole was waaay too big.
Obviously mine ain't a Byrnes.
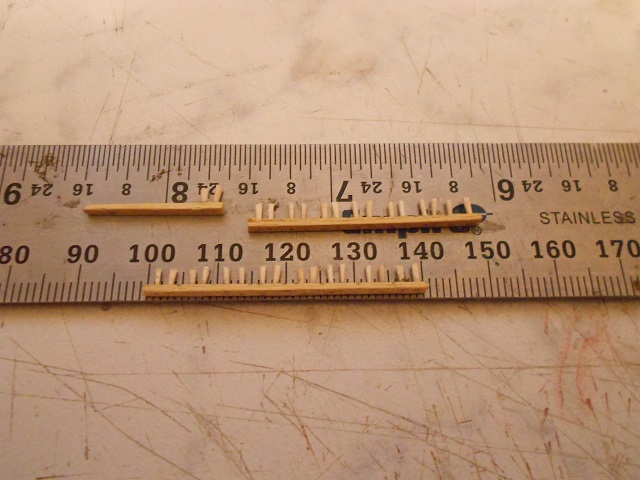
I ended up hand-sanding some 32 toothpicks from 2.05mm reducing them down to approx. 0.8mm (mostly). The 24 clipped-off tips eventually used are all under 0.5mm thick, and came to very sharp points that were then inserted into my pre-drilled holes.
The rest of the toothpicks will mostly be used as oars.
BTW, thanks for lookin' in and keeping me honest through this, Geoff !!
-
In that case, please keep on reading, Moonbug ...
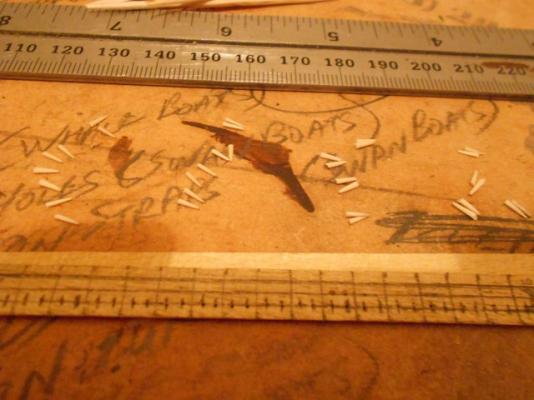
Although I didn't get much of a break from work over Christmas/New Year (just the public holidays), things were pretty slow which actually gave me a chance to work on my next mission: making tholes/oar-locks for my whale-boats.
I tried out a few different ideas. At first, I was planning to cut short lengths of wire. However, this idea was scrapped after the first lot were simply too thick (a massive 1.5mm !!) whilst the second batch (using the innards from twist-ties left over after making the swan-boat prow re-inforcements) were too flimsy.
Arrrr ... The Goldilocks paradigm !!!
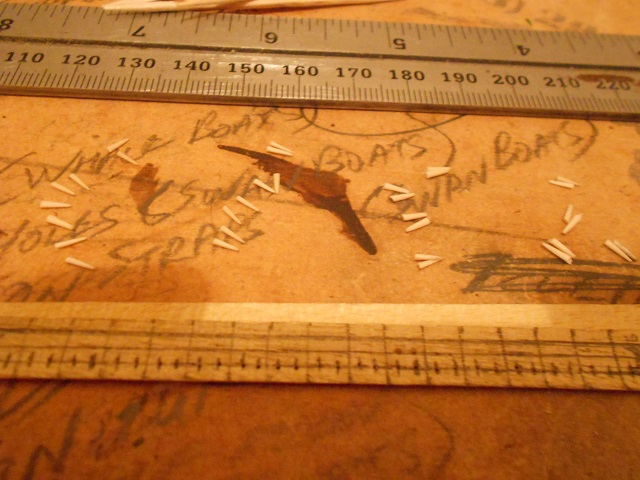
Looking back at Geoff Matson's pictures it appeared he had used miniscule wooden pegs for his (at least that's what they look like - correct me if I'm wrong, Geoff). Deciding these actually looked rather nice, I proceeded to spend a few days sanding round toothpicks from a massive 2mm thickness down to approx. 0.8mm. The very tips of these were then measured and cut to become 4mm long wooden "spikes".
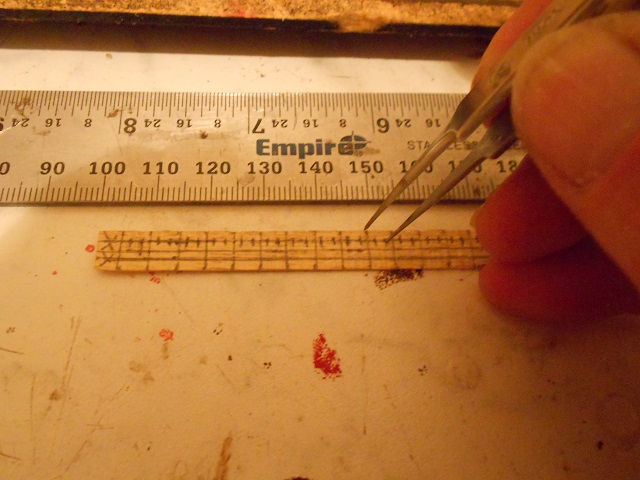
Two thin strips of wood veneer were cut. One marked into segments 5mm long with a pair of holes, each marked 1.5mm in (first scored using the tips of my needle-nose tweezers, then drilled using a 0.2mm bit). These two strips were glued together and clamped.


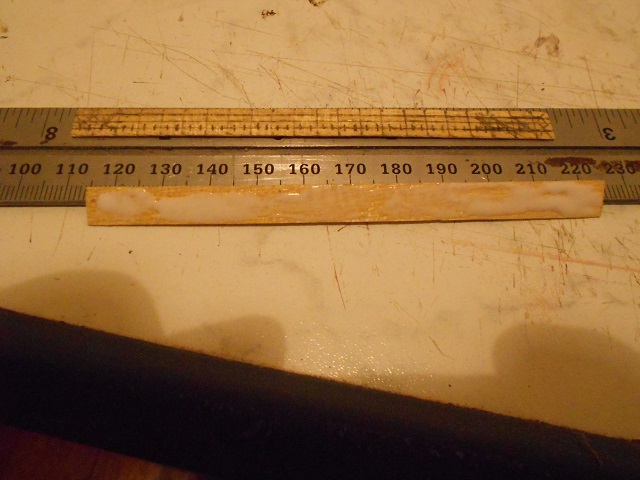
Once dry, I proceeded to insert the spikes into these strips ...
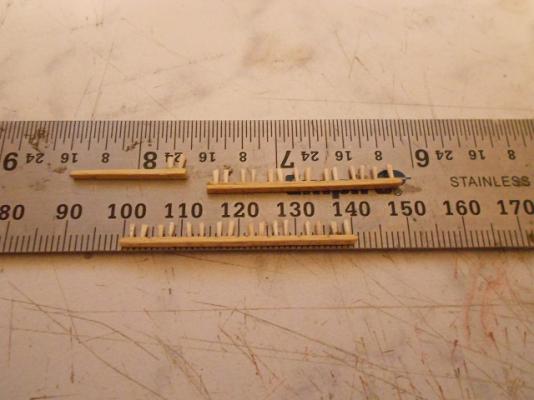
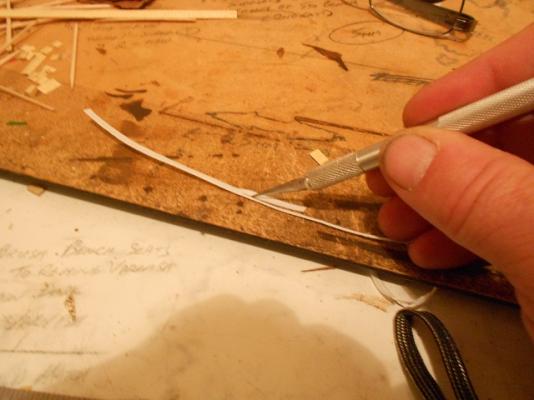
To finish up, I will thin the assemblies by sanding (to approx. 3mm wide), trim the lengths of the spikes using nail-clippers, stain the assemblies with a dark wood-stain, then separate each pair before attaching to my whale-boats.
-
Something to be very proud of, Vince.
Congratulations !!!
-
-
-
-
Dan,
She's a gorgeous looking little boat. I really like the little barrel and bucket you've added up-front. I only regret your build wasn't around when I started building my ship's boats. I reckon I would've used your work to make mine a lot better (but I still like 'em).
I notice you saying you are having difficulties with rigging. I do not know whether or not you have tired, old eyes like myself, but might I recommend getting yourself some magnifying spectacles. In Oz, these are available over-the-counter at any pharmacy for around $10. You'll see 'em labelled +2, +2.5, +3 etc. I keep a pair on my ship-building table exclusively for shipwright purposes.
Hope this helps and lookin' forward to seeing your finished build !!
-
You too, Crackers !!!
-
Can I quote this idea for the Kitbasher's thread I started ??
Or, better yet, could you post it there ??
-
Bummer, Kevin.
What happened ?? Did the keel repairs not hold ??
Re: Bending planks. I find that a hair-curling iron does the trick. Borrow one from your Admiral, if you can. Depending on how thick the piece of wood is, I usually only need to soak it in water for 30mins to an hour. Apply pressure gently to form the curve you require and move the wood across the hot iron. Works even better if your iron has a clip.
And, yes, you can produce quite good ribs ... heck, when working on my ship's boats, I once made a (completely and utterly useless) wooden spring !!!
-
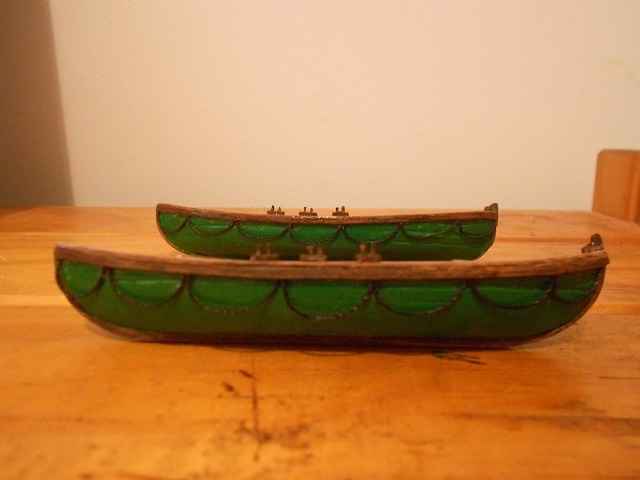
TWIST-TIES - These versatile strips of plastic-encased wire could have many uses. Here, I have sliced down the tie along the wire length to make the re-inforcing strips at the prows of two of my USS Constitution boats (1/76 scale).
To represent the bolt-heads, simply make a series of very small indentations (with drill or knife), then add a tiny drop of black paint using the sharpened end of a toothpick.


- dgbot, flying_dutchman2, IgorSky and 1 other
-
4
-
Thanks, UTS.
So, you like detail, huh ??

Well, another feature I saw on Chuck Passaro's 18th Century pinnace build which I quite liked, had me re-visit the two "swan-boats" last night.
Originally, I had thought that the iron strip affixed over the prow as a re-inforcement was white in colour, but after having another look at Chuck's build yesterday, I now see that this will be black.
As I would like to leave mine white, with a vertical row of black dots to represent the bolts, my question is this:
In the days of "If it doesn't move, paint it!!", would it have been possible that this strip could have been painted ??
These strips started life as twist-ties from a pack of freezer bags. See "Kit-Basher's" for more info.

EDIT: OMG ... You're the guy who puts a sabre, some mangoes and a half-cut coconut in his Bounty launch !!!
Very cool, UTS!!!
- GLakie and Captain Slog
-
2


USS Constitution by Modeler12 - FINISHED - Model Shipways
in - Kit build logs for subjects built from 1751 - 1800
Posted · Edited by CaptainSteve
Getting better and better with every post, Jay !!
Just my personal opinion, but, on my pre-MSW builds, I absolutely loved doing the rigging part !!
As each group of lines were added, I would stand back and admire the whole ship to date - especially focusing on the latest additions.
Ahhhhhhhhhhhhhrrrrr !!!