.jpg.f26acc9a74319261612561bfa7da1303.jpg)
vaddoc
-
Posts
1,600 -
Joined
-
Last visited
Content Type
Profiles
Forums
Gallery
Events
Everything posted by vaddoc
-
.thumb.jpg.6fd4c1b78768bb3efd745ab810936005.jpg) Just finished going through the log Phil, highly enjoyable read! Interesting to see the boat still lives on and after your stories, I am happy it does. Very nice job on her you are doing. I like the epoxy coating on the inside - I do the same with filler but thin epoxy is a much better option. Best wishes Vaddoc
Just finished going through the log Phil, highly enjoyable read! Interesting to see the boat still lives on and after your stories, I am happy it does. Very nice job on her you are doing. I like the epoxy coating on the inside - I do the same with filler but thin epoxy is a much better option. Best wishes Vaddoc- 409 replies
-
- 1
-

-
- minesweeper
- Cape
- (and 1 more)
-
Just finished going through the pages George, nicely done. Really interesting ship and a very enjoyable log - you clearly are having a lot of fun! I think your choice of color for the hull works well. Best wishes Vaddoc
-
Pear wood and Tung oil work really great, brings out the beauty of the wood. Get the polymerised Tung oil version, cures much faster.
-
Yes, it does. I usually sand to 320 or 400, then apply the sealer using a brush. As it is water based it dries fast. One coat is enough but I may apply a second coat or sand lightly with 400 grit and then apply the second coat. After it is dry I smooth the surface with fine steel wool (or sand very lightly with 400 grit sand paper) and job done. The wood is very smooth and completely sealed. The sealed surface will accept any paint or finish. Very fast and easy process that can't go wrong.
-
Honestly, there is no reason nowadays to use Shellac. I know that it is widely used by modelers and it does work. However there are are better alternatives. I ve been using for many years this water based product https://buddlycrafts.com/gb/shop/product-19210/decoart-multi-purpose-sealer-ds17-236ml/?gad_source=1 Dries in 15 min, sands great leaving a very smooth surface, seals great and is not affected by any thinner/paint. No need for methylated spirits. Self life is years. What's not to like? Just my 2 c Vaddoc
-
Very nice drafts Arthur! Nice surfaces and offsetting. You ve fallen down the rabbit hole of CAD - I suspect you ll never find the way out! I think Rhino is fine for our purposes, which is basically lofting boats and getting patterns to cut frames etc and is very user friendly. But I think any CAD can do this. For advanced rendering maybe other options are better but to build a boat, this is not needed. In the 18th century plans were not hugely accurate and thy did not to be - just shim any gap. However paper gets distorted after all these years and CAD is very unforgiving so some lofting is still needed but not too much - the wood will correct lots of tolerances. Perhaps have a look at my longboat, maybe you ll avoid some of the mistakes I made. Best wishes Vaddoc
-
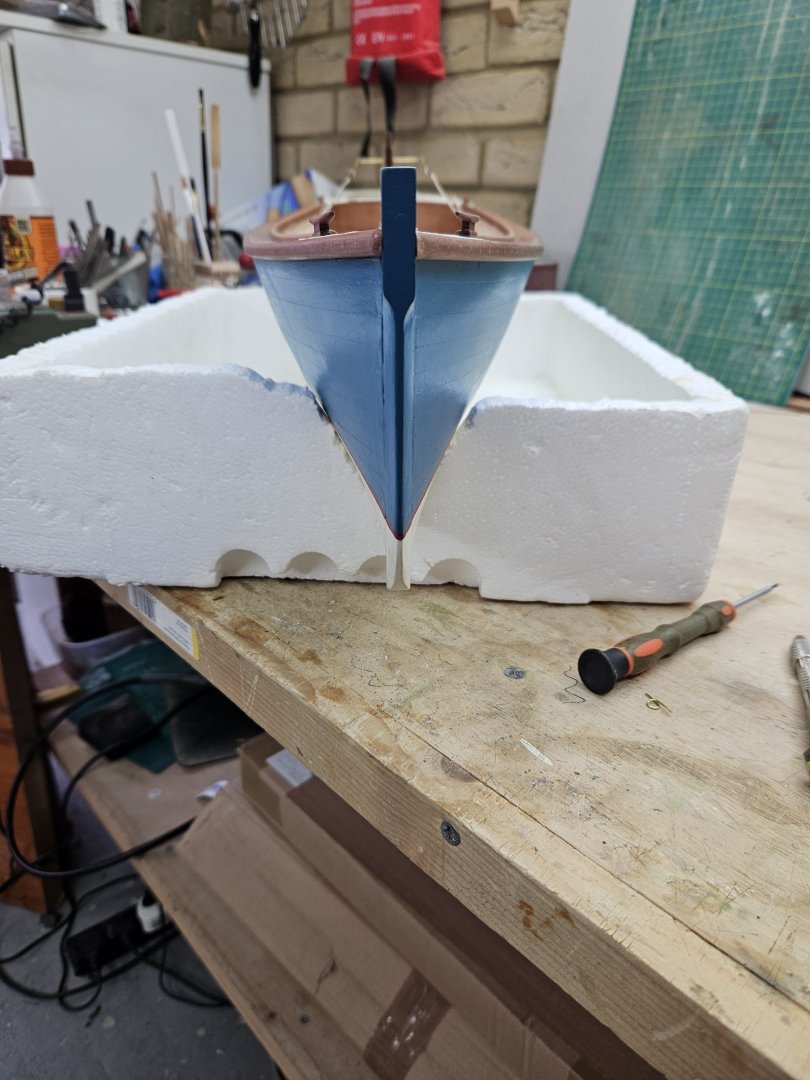
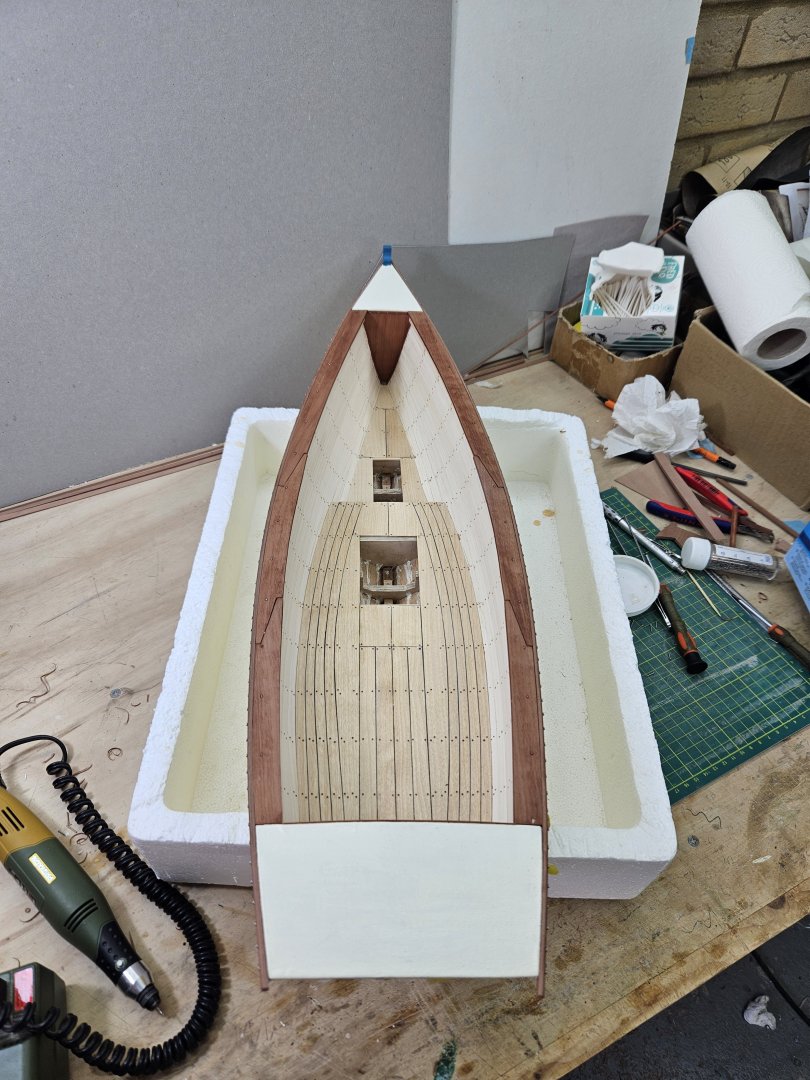
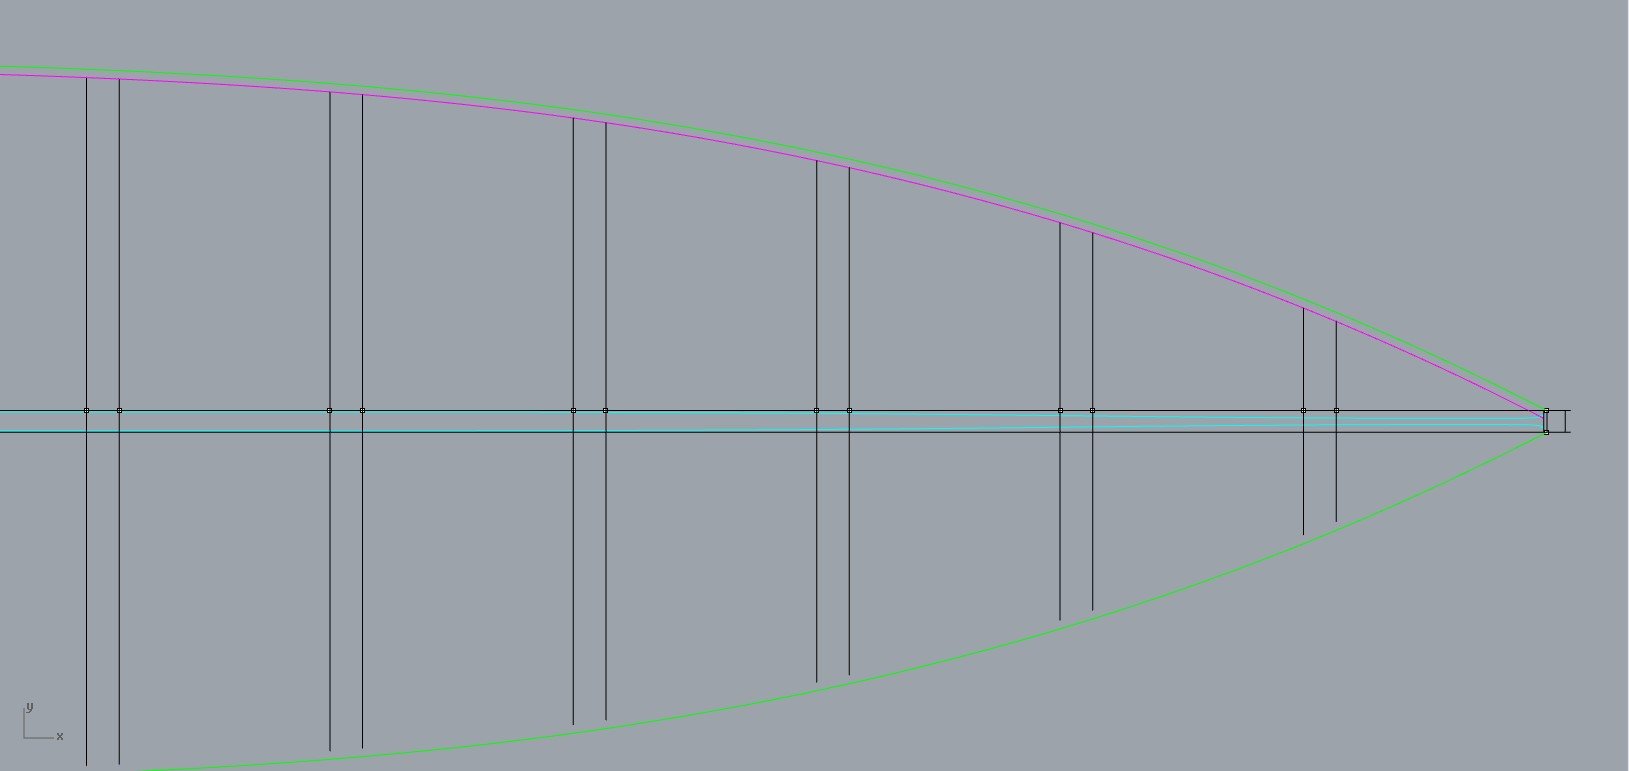
These are just little feet to help keep the keel horizontal! They will be cut off in the end.
-
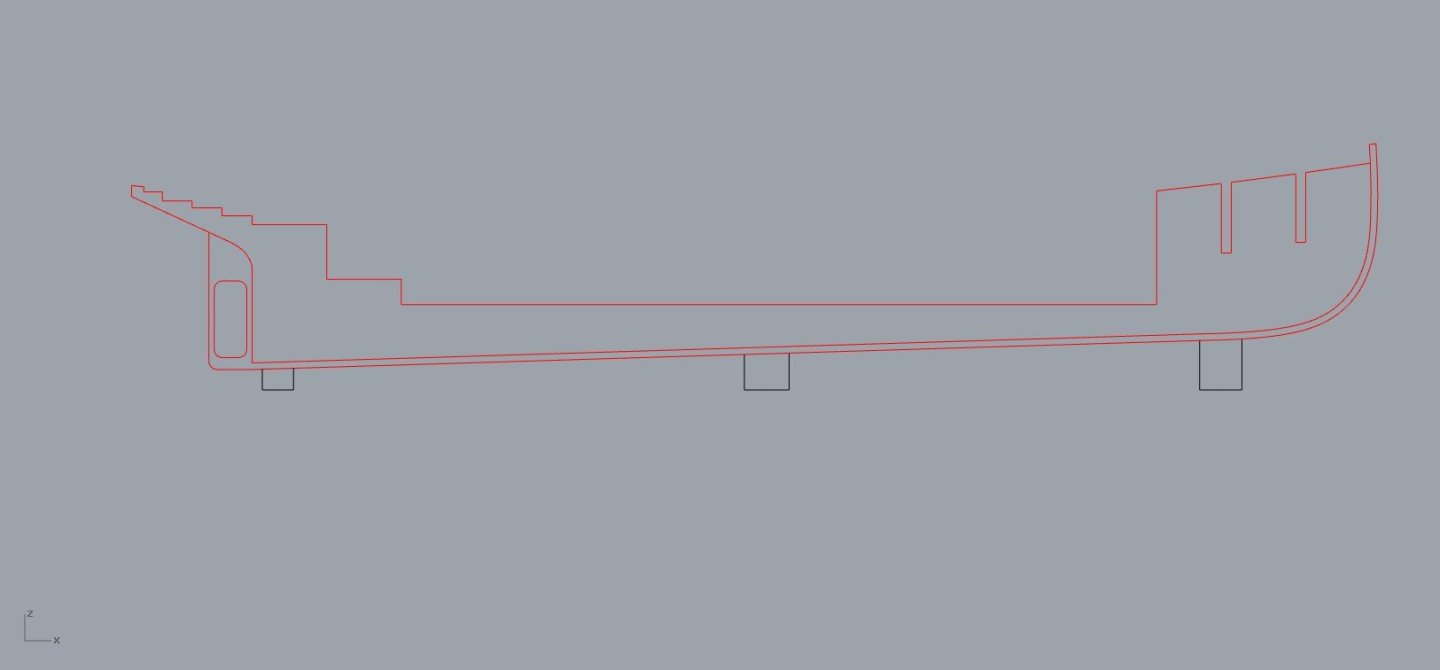
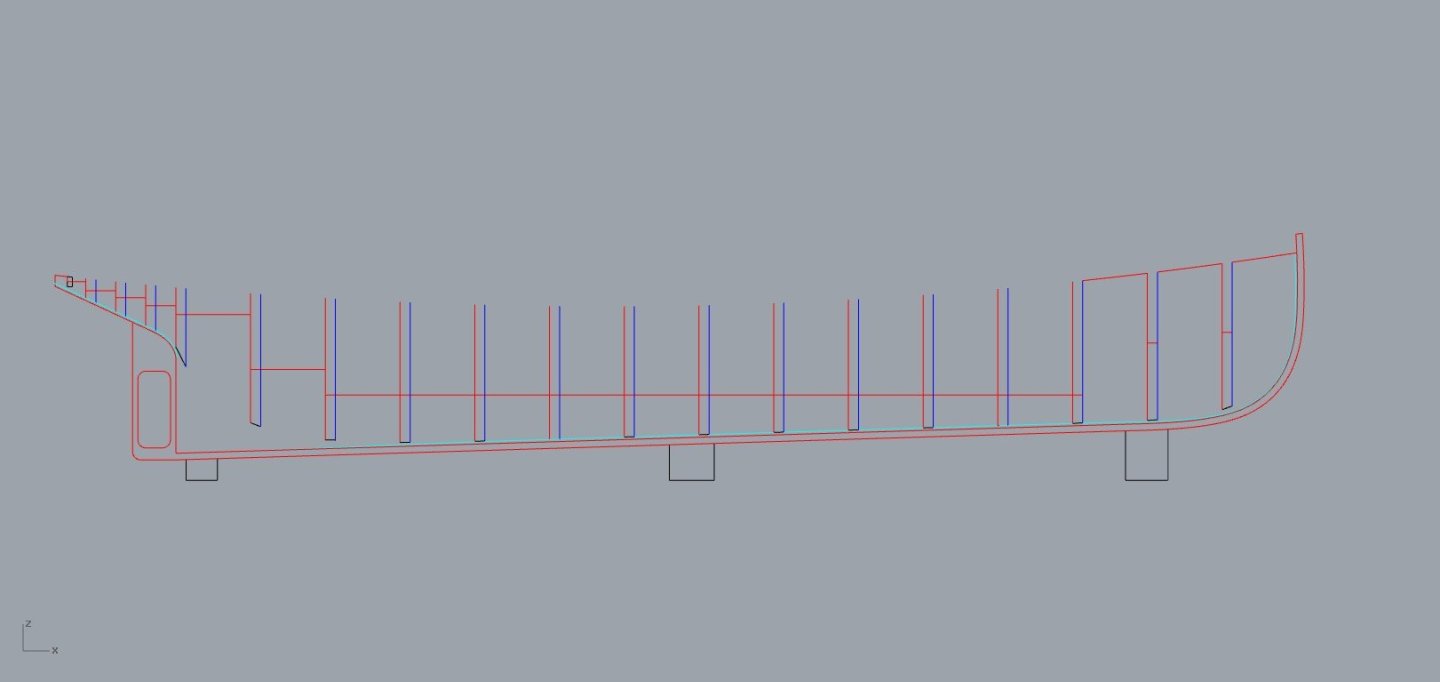
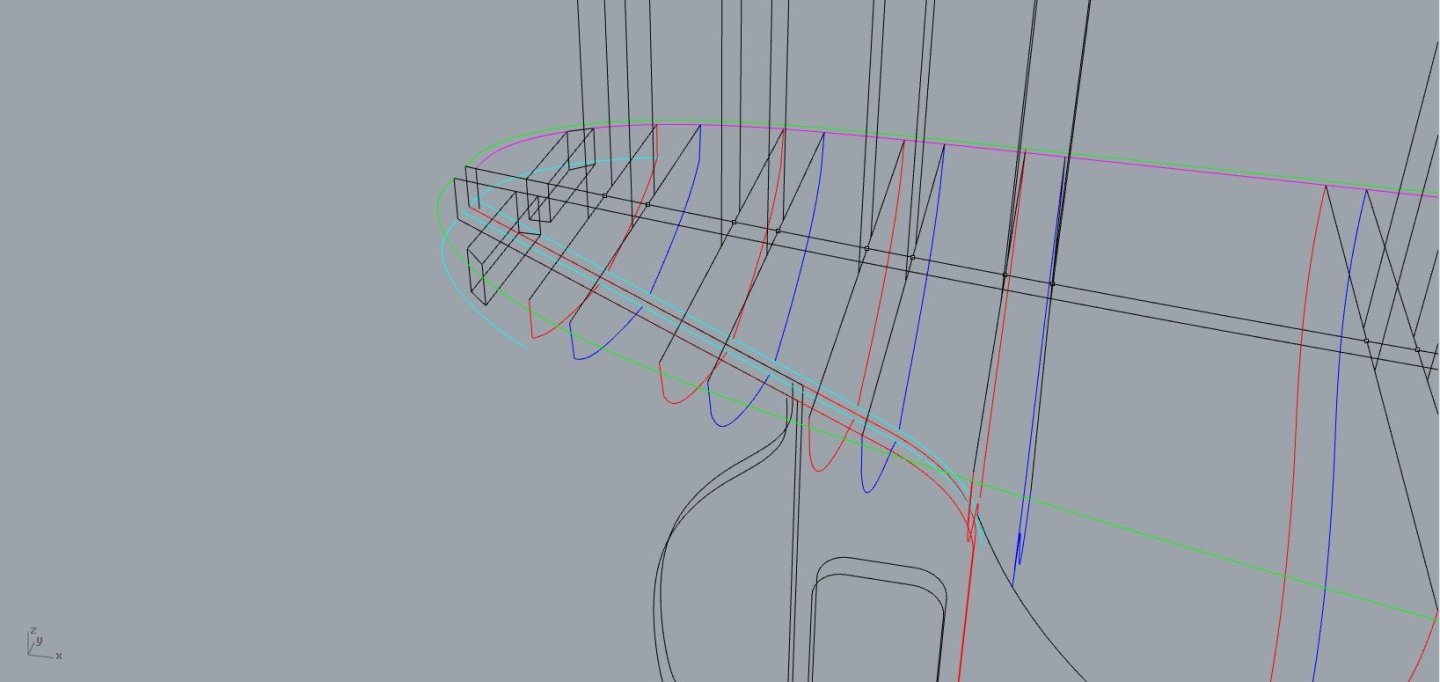
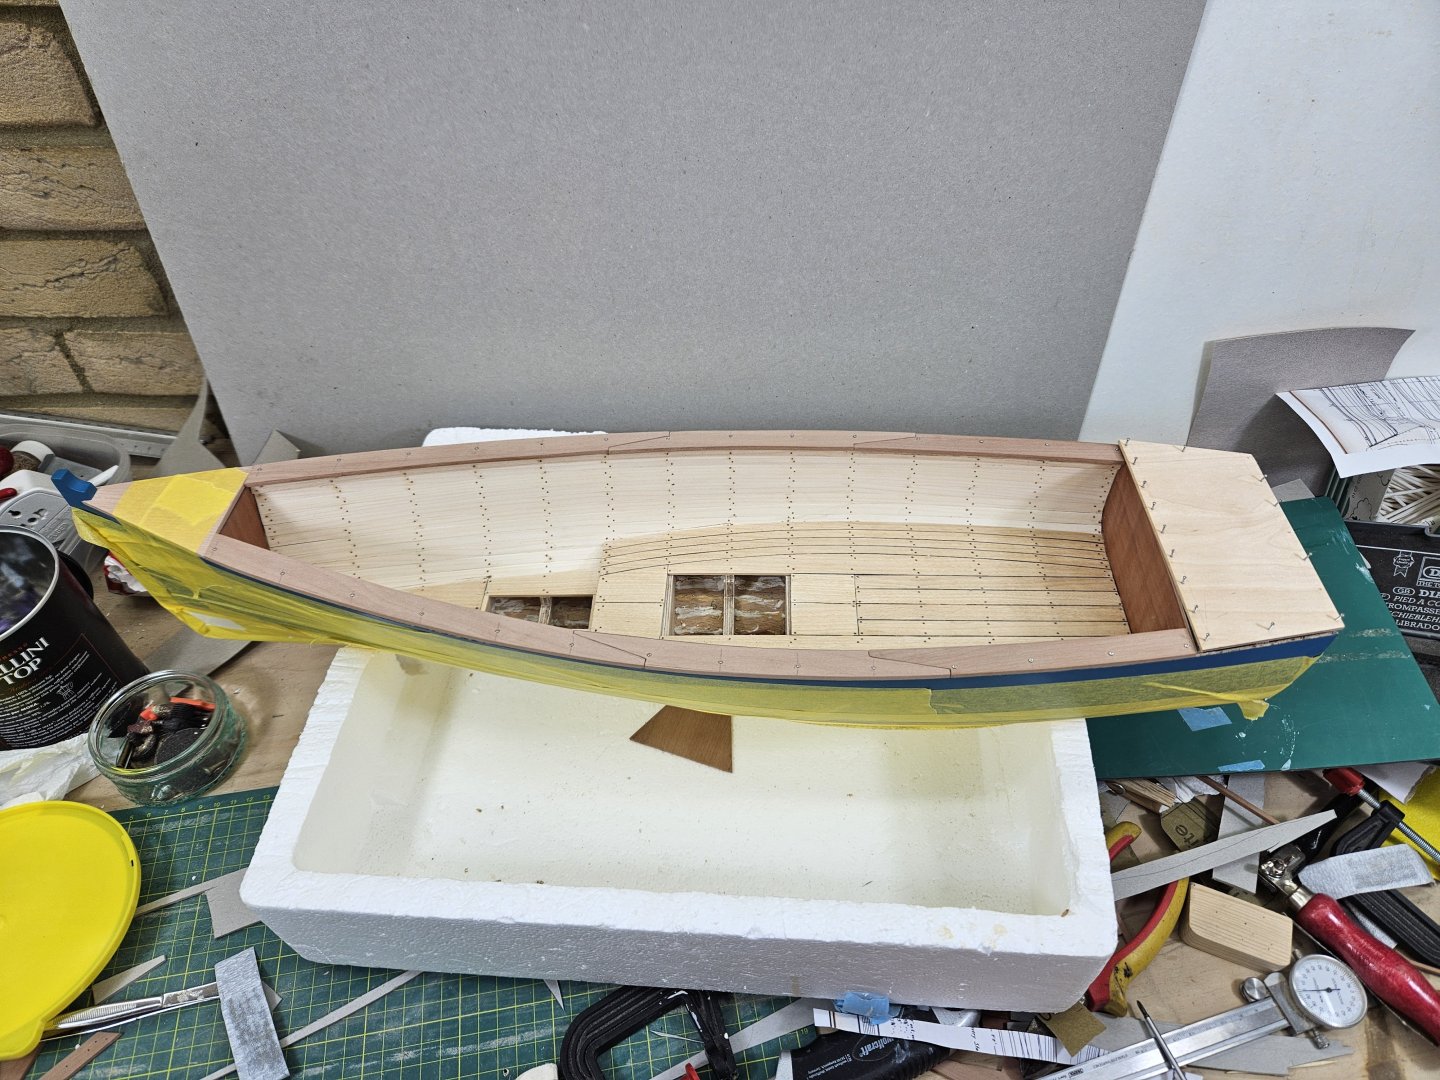
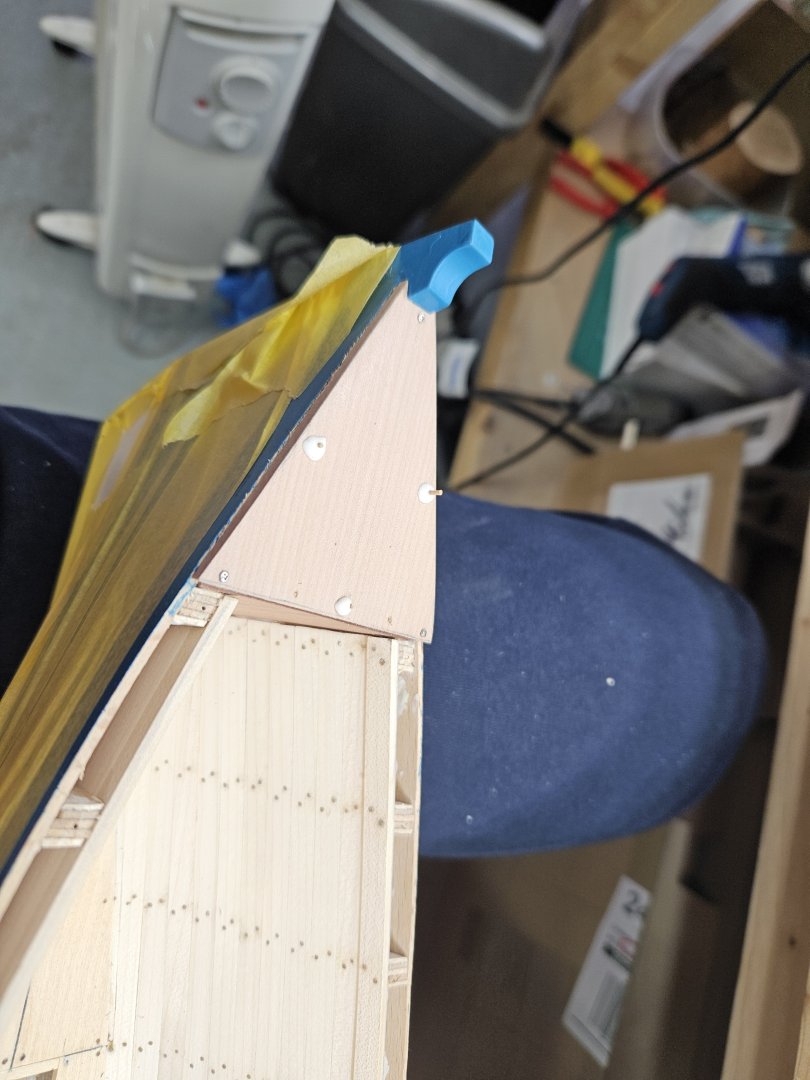
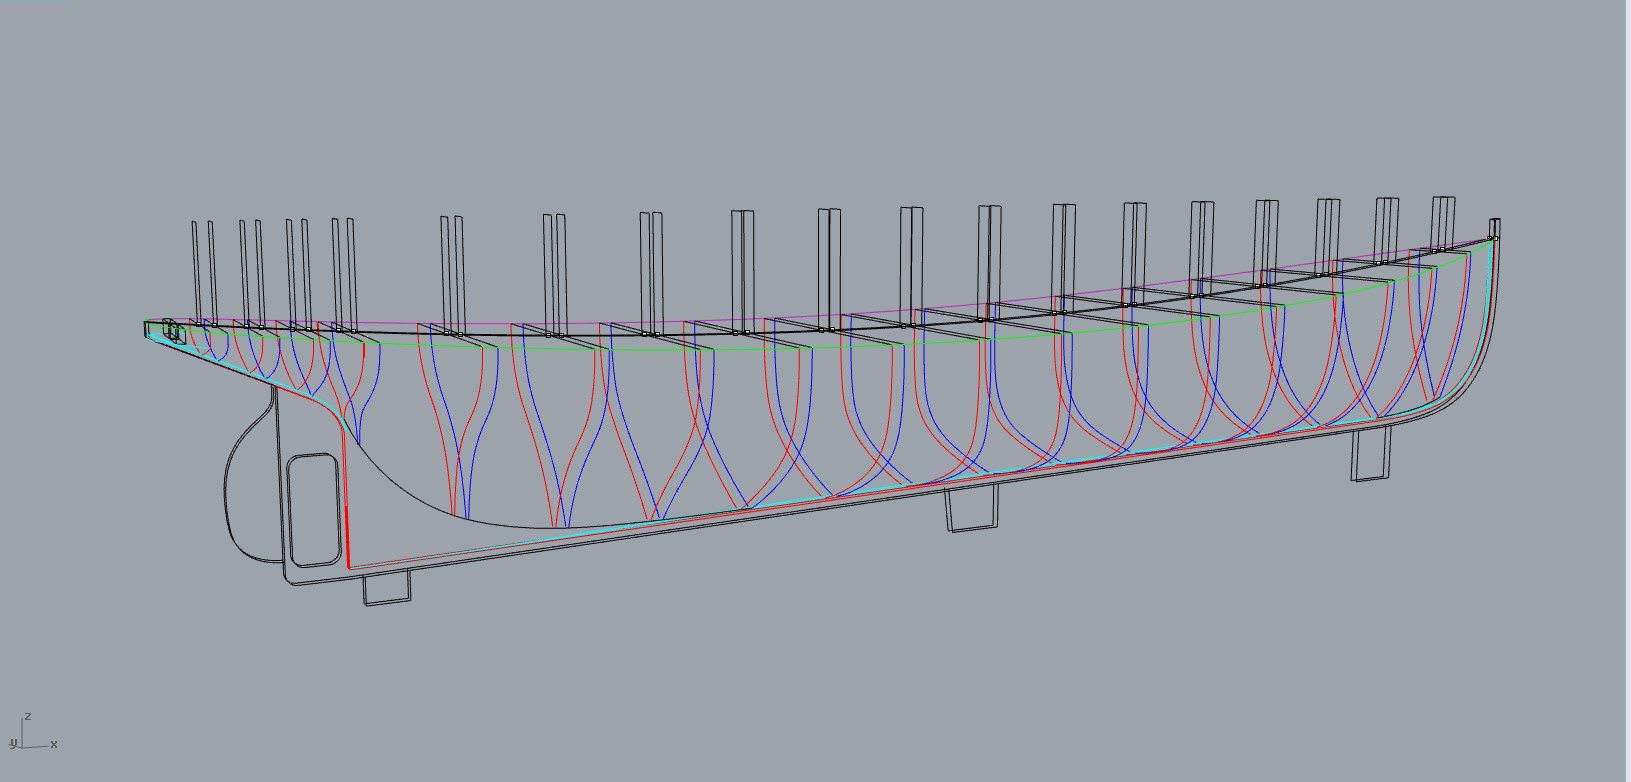
Dear all I just spent a small fortune in plywood, so should not be long before some wood dust is made - so time for another update. I also have been unable to work due to creaking bones so an opportunity to do a bit more work on Hercules. So I ve been thinking how to arrange the keel and frames and what material to use. As I always do I will laminate my own plywood to make sure it is strong and dead flat. Also, I will use plywood for planking - Hercules hull was made from steel sheets welded and riveted together without much care for aesthetics so planking the model in the usual way is not appropriate, I will use sheet material without being pedantic about fairing - the seams probably need to be quite visible. I decided to use 1.5 mm ply - quite an overkill but it will be a big model and I think it needs this thickness to be stable and for the fasteners to hold well. The hull will be 3.9 mm thick, laminated from 2 pieces of ply 1.5 mm each, 0,9 mm should be the thickened epoxy layer. I will measure it though and if it is less, I will adjust the lines The frames will be very wide, 5.8 mm, laminated from 2mm and 3 mm ply - again, if the new ply has different dimensions I will readjust the frames (which will be a big job) So a few photos The hull is finished! I suspect there will be some pretty large tolerances and gaps but I hope that as I will not be cutting the wood accurately, one mistake will correct the other - of course may make it worse but lets be optimistic. The stern was tricky to get as there is no transom. In the original design there were many metal beams spreading out at the stern to give the correct shape to the sheer which aft is a vertical wide zone. There will be a lot of pressure at this point to convince the ply to take the turn so I overbuilt the area. There will also be more reinforcing pieces of wood connecting the frames inserted during construction. The frames are offset to accommodate the hull thickness of 1.5 mm. This is a wonderful feature of CAD - press a button and a complex surface is offset to whatever thickness within 2-3 sec! The frames should fit a 900 x 300 mm piece of ply The keel is a bit complex and pretty large at 720 mm The deck will also be 1.5 mm to hold fasteners well - I did not account for this thickness but I think it will not make any difference. I will start work on the superstructure after I will have laminated the ply, so I will have accurate dimensions of the actual hull. Till next time Vaddoc

-
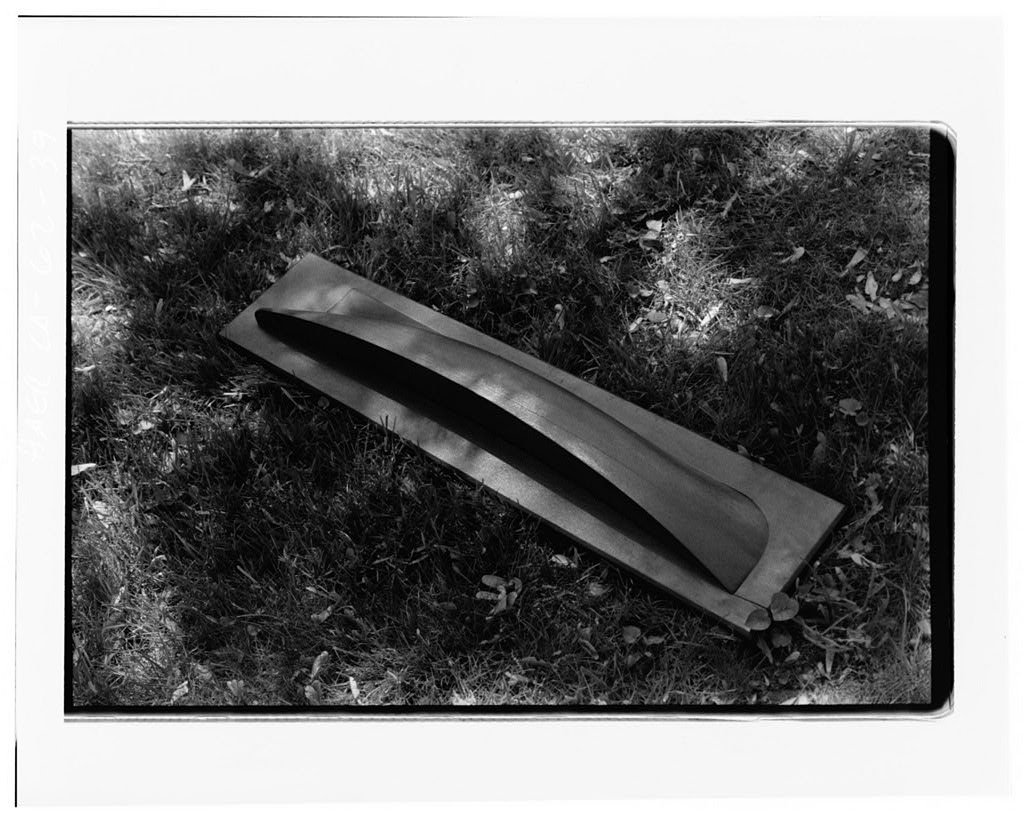
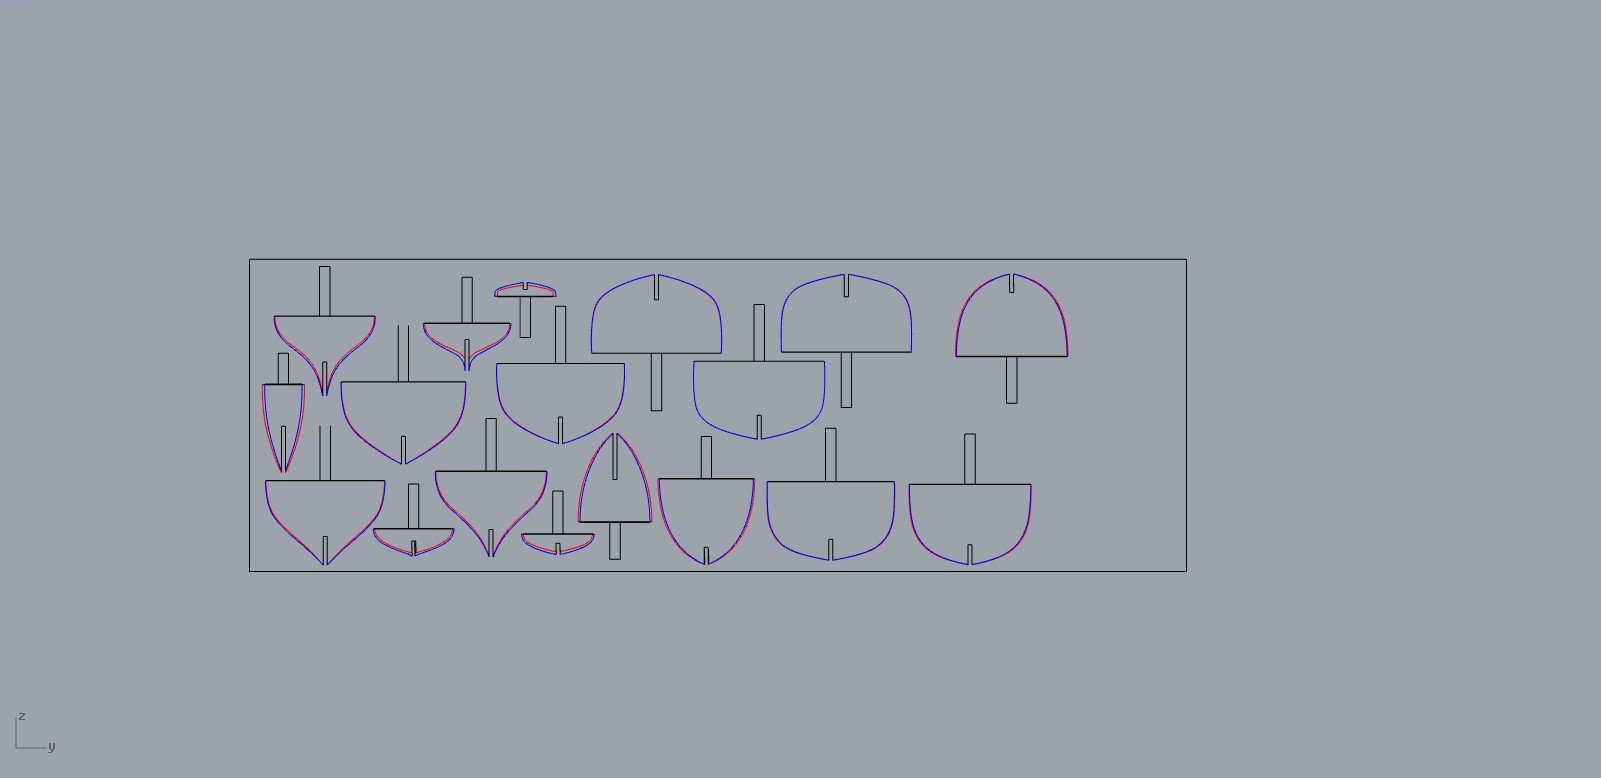
Dear friends Please accept my apologies for the huge delay in revisiting the log and replying to your comments - you all know how it gets... Although I did not find time to visit the log, I did do some work on the boat. So here it goes. @Dr PR Phil you are absolutely right. I could not make the numbers in the table of offsets work and in the end, I gave up. More on this bellow. @KeithAug It can certainly be done with a pencil and ruler and actually it is easier to get fair curves with a batten. However, despite having a professional draftsman (woman) for a mother, I cannot draw - I need a computer to help me draw a straight line! @FriedClams Many thanks Gary, I was not aware of the links! @Bedford Excellent, as always a pleasure! @bricklayer Michael, any version is fine. It is actually not too complex - Analysing the curve shows its fairness. If it is not fair, use the fair command. A bit of eyeballing and a bit of manually adjustment of the curves is needed. I use many check points to start with, when the curves are all over the place and as the get closer and fairer, I use less so that the curves get fairer but without allowing the curves to wonder too much off the originals. The lines do need to interconnect when going through a lofting cycle - they do no longer connect after the lofting cycle finishes and the lines are corrected and faired but this is ok. With every lofting cycle the lines get closer but in the end, it does not need to be perfect, just close enough - the wood will correct the rest. So, I initially used the table of offsets - These were apparently taken directly from the boat when it was in drydock. I started over a number of times as I could not really make things work. Finally I decided to give up on this table. Something did not add up - the keel, the numbers - something. However, there is also this: This is the half model of the boat and lines were taken of it So I decided to use these line, tracing over and importing into CAD. Immediately it felt better. A couple frames at the bow were wrong and the stern needed a bit of work but overall, these lines appear better and closer to the actual boat. So after a few cycles I ended up with a reasonably fair surface and frames that are reasonably fair and pretty close to the original tracings. I think it is ready to move on further - I hope that tolerances will be corrected with a bit of shimming, bit of filler, bit of sanding. So, next I made the deck which unrolled gives us the shape of the plywood - I though about adding camber to the deck but I think it will be fine without. Now, I ve never built a POB boat before and for this project of course I had a look at the Occre model to get some ideas. Now, Hercules is 151 feet long and the Occre model at 1/50 scale makes a pretty huge model 920mm long. I think I ll go with 1/64 which will produce a more manageable 718mm model. Till next time Vaddoc

.thumb.png.86f00122ce7d9a34510978f8a5765418.png)
.thumb.png.9937fc8e3434b457e19e580694f043ff.png)
.thumb.png.5b2084295a813bdab886461e2506cc76.png)
.thumb.png.9d60a868f043845ba7196826ca701a79.png)
.thumb.png.f7db802eae2ea5969d4fd7f5535de072.png)
-
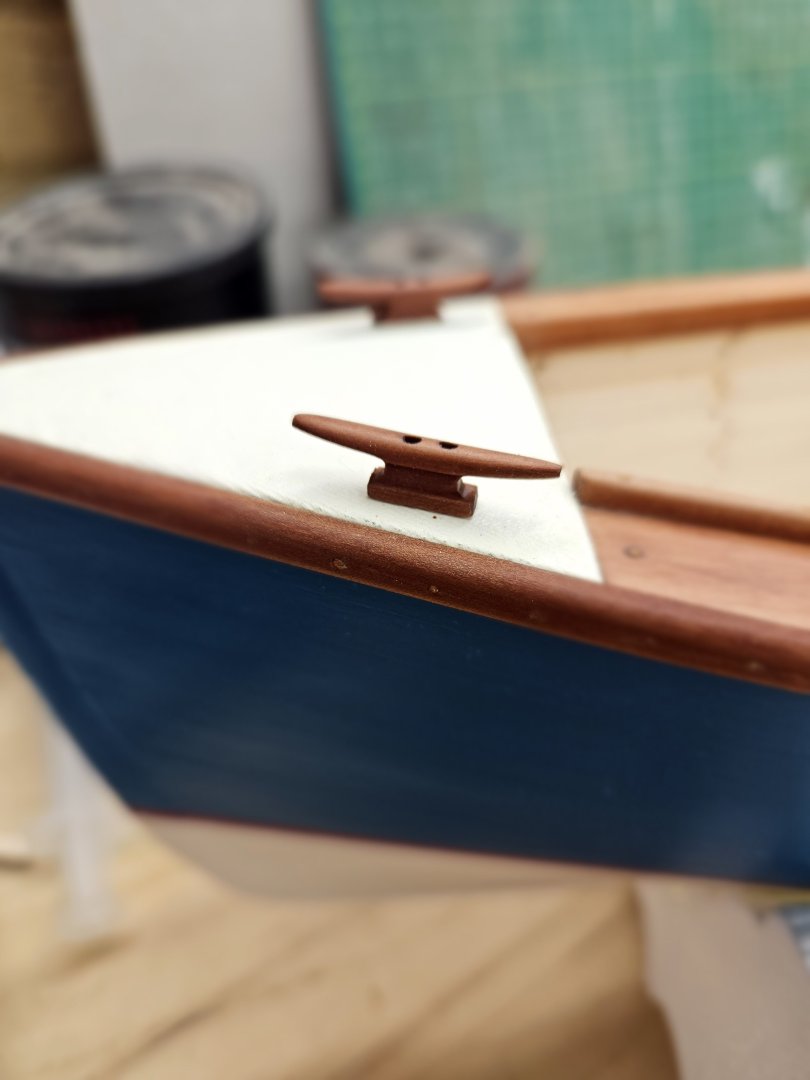
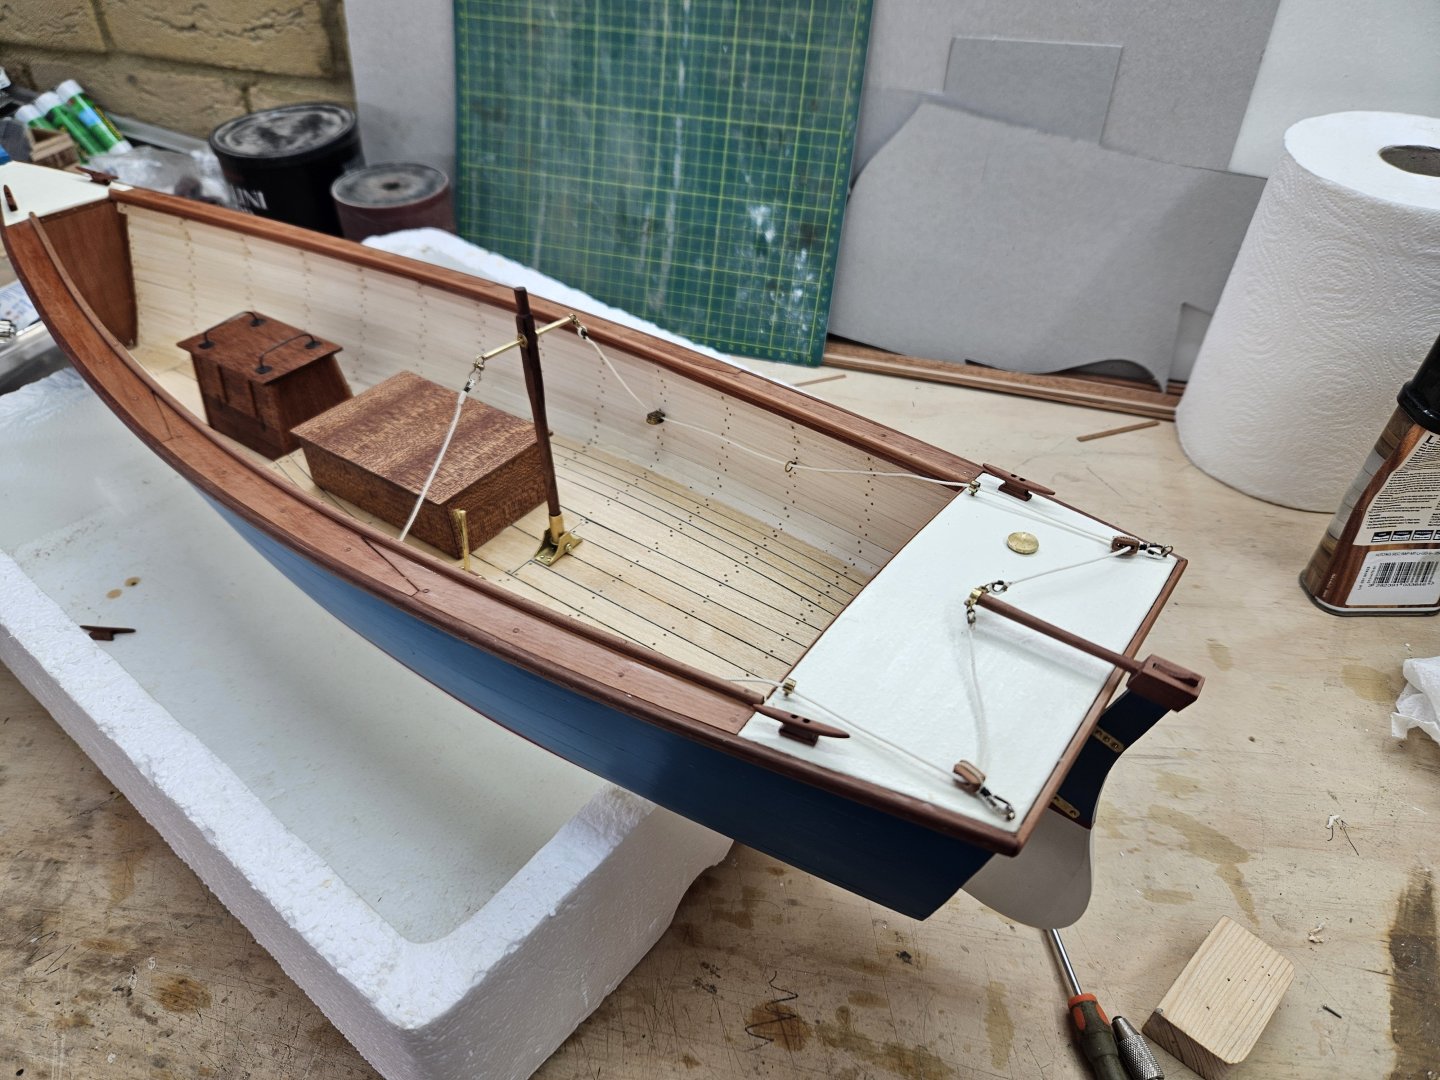
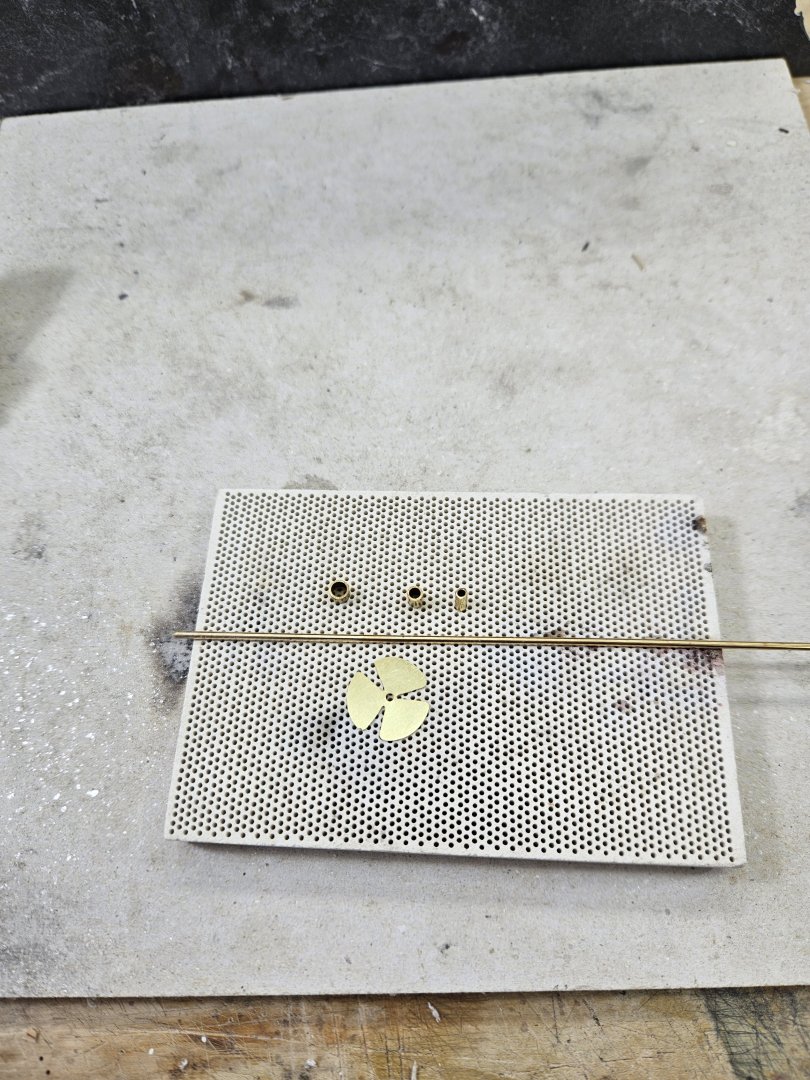
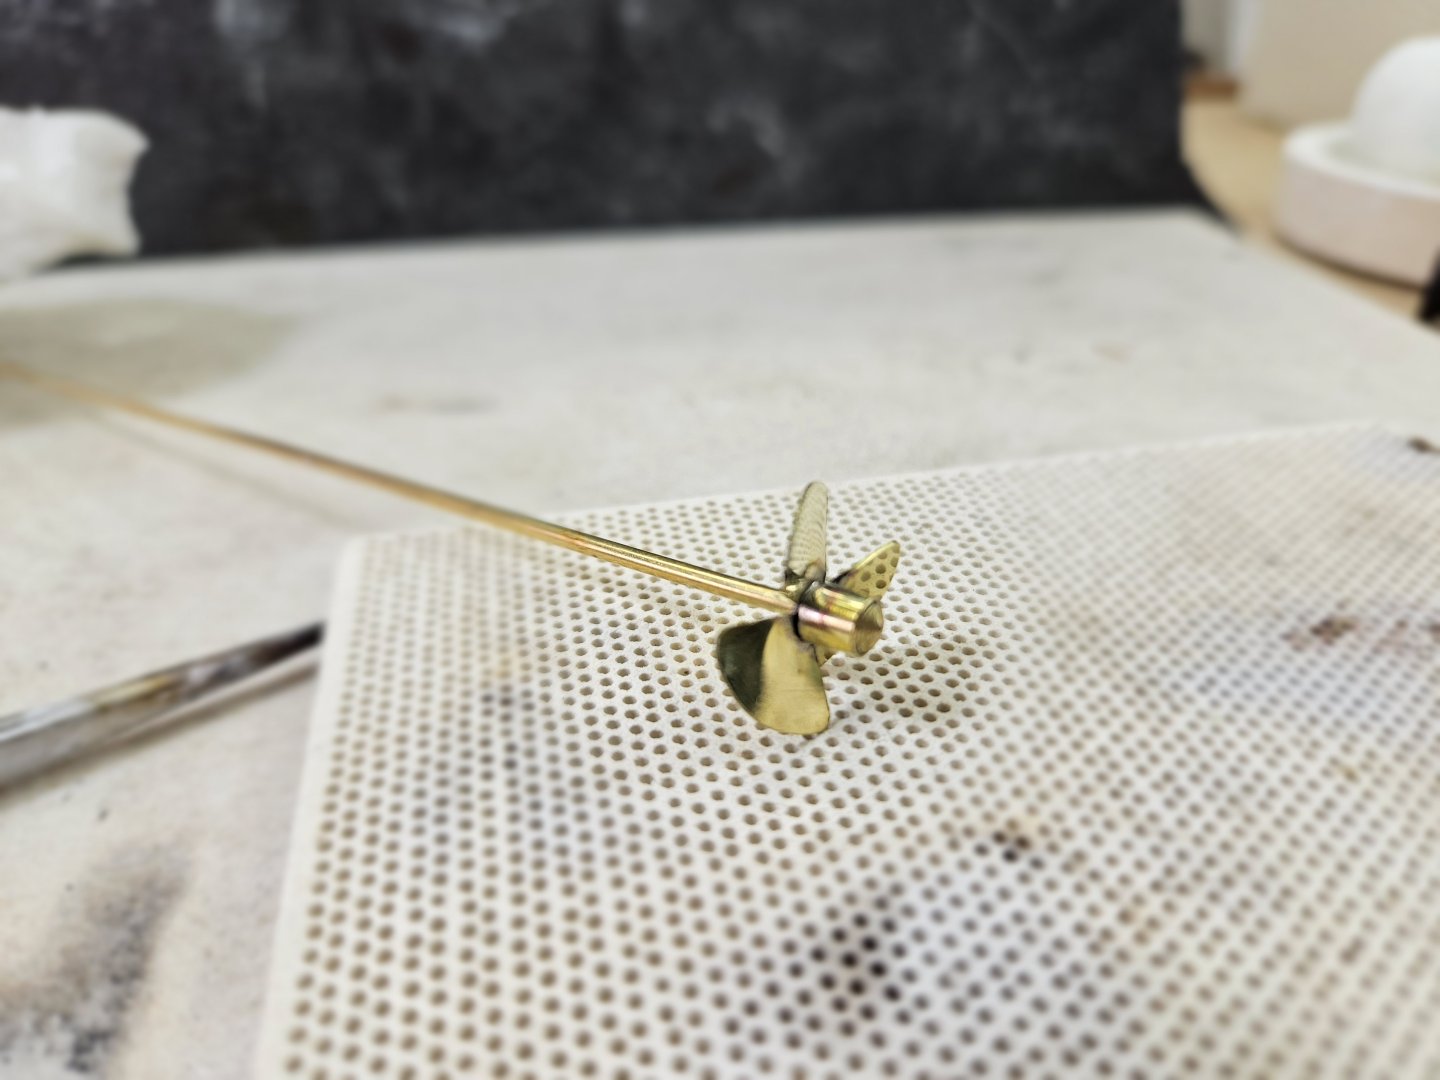
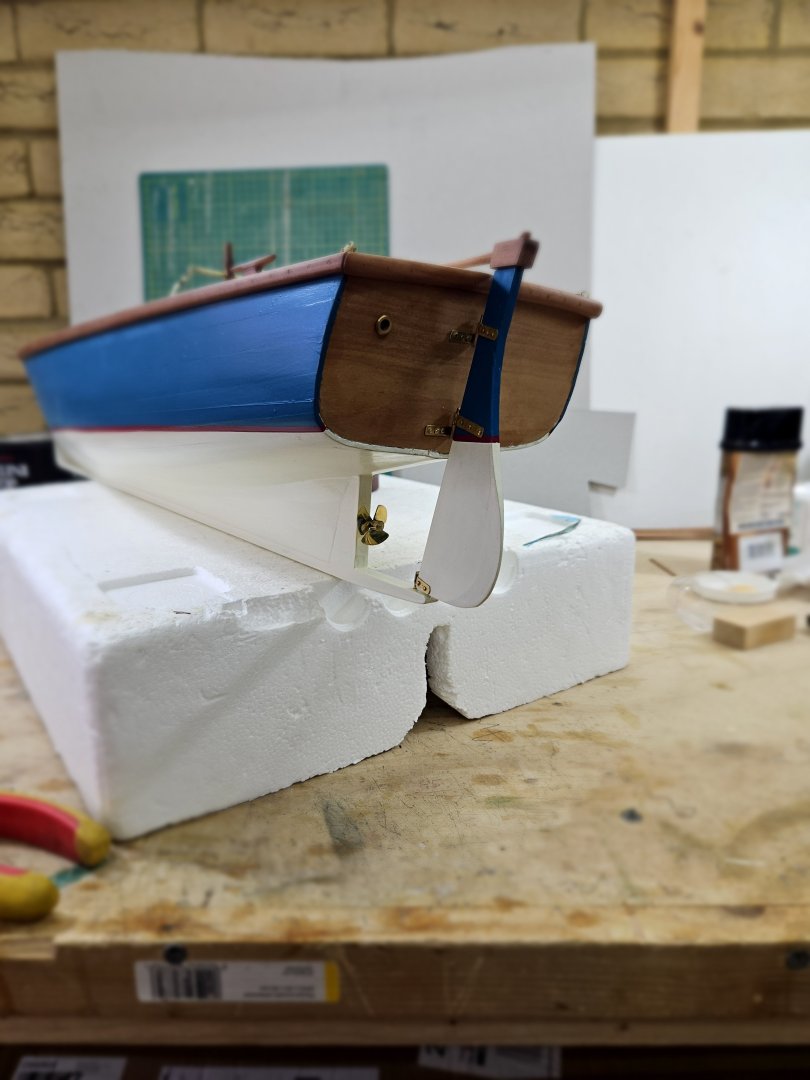
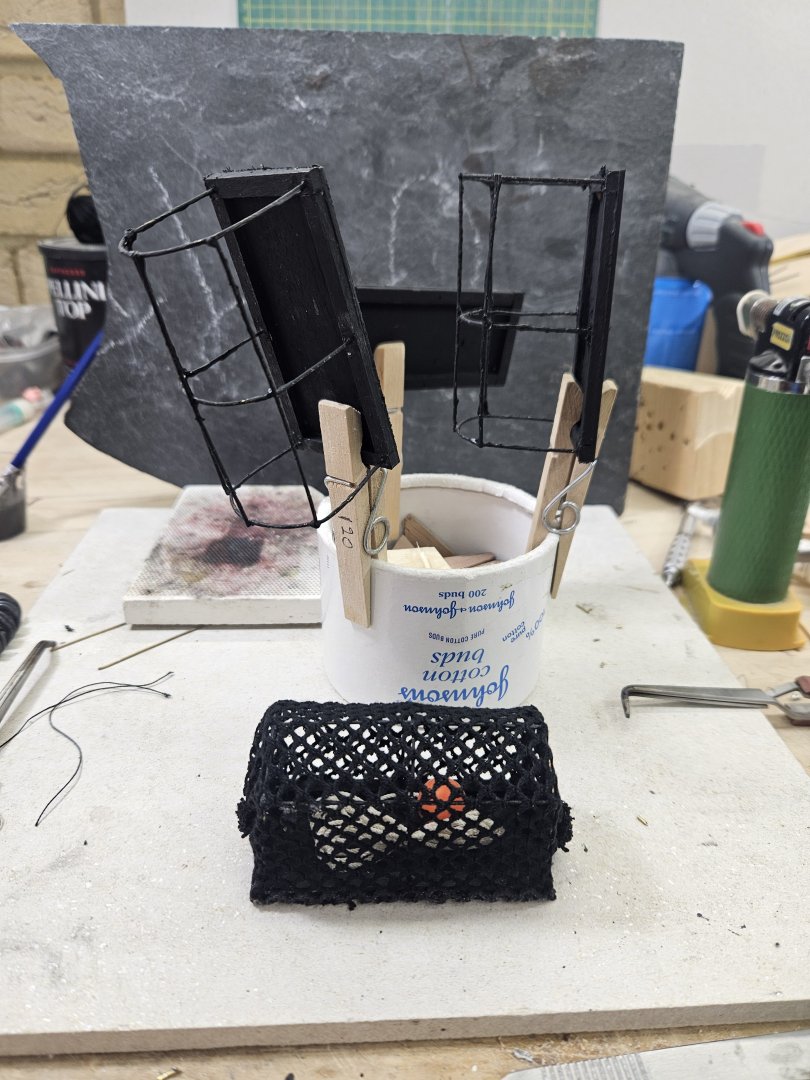
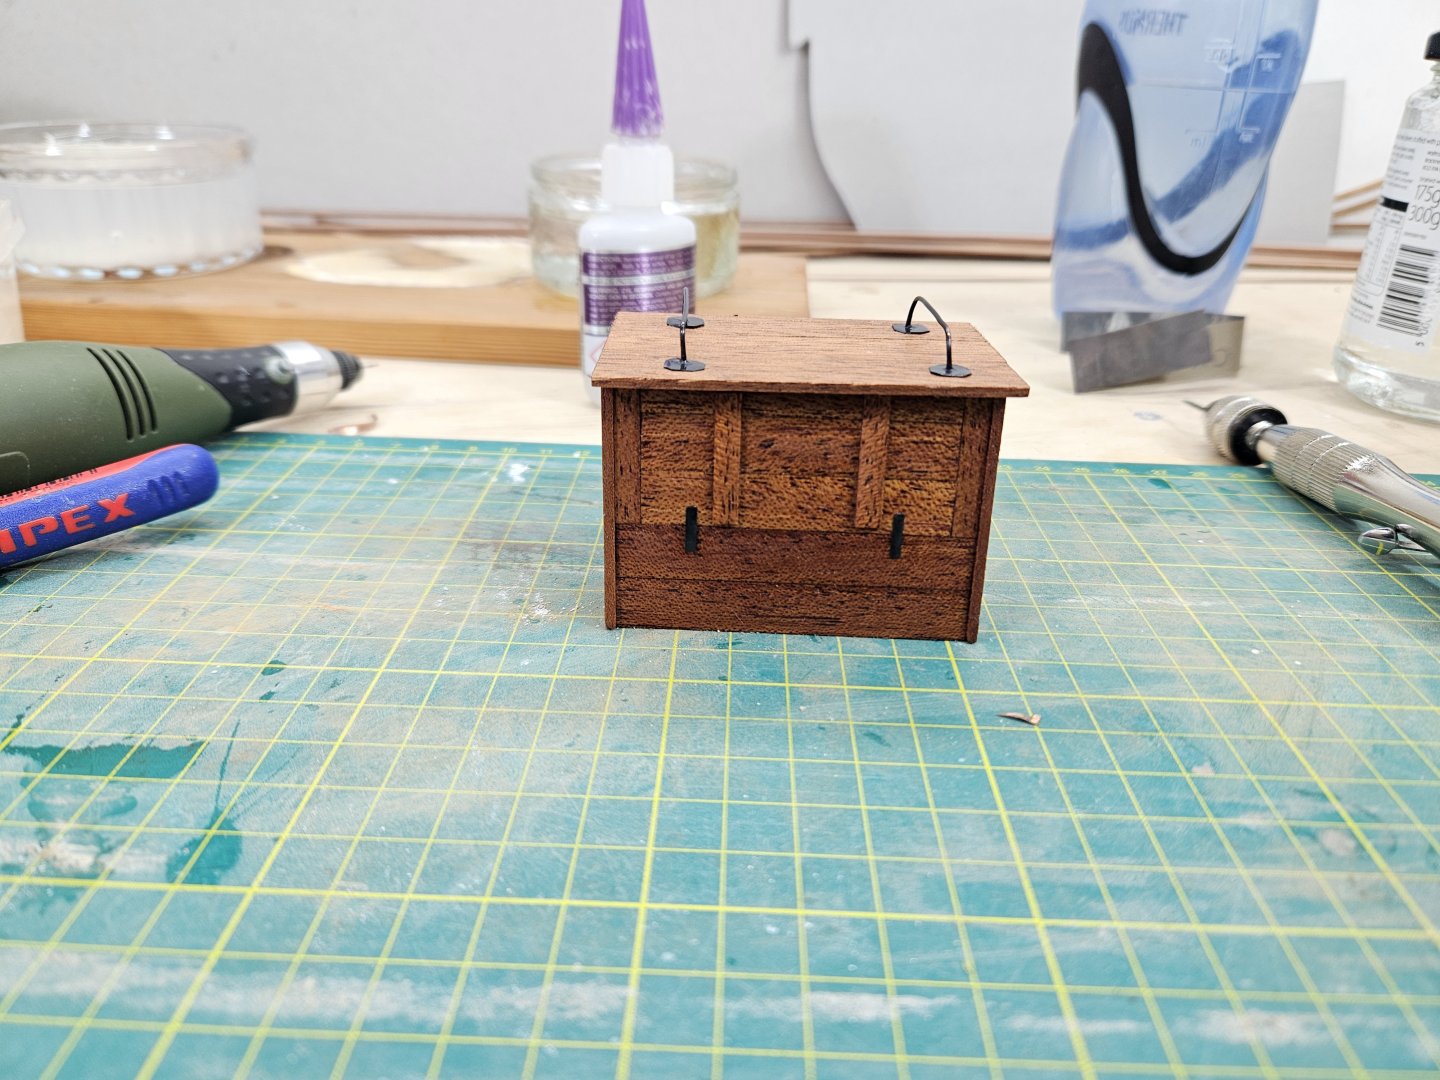
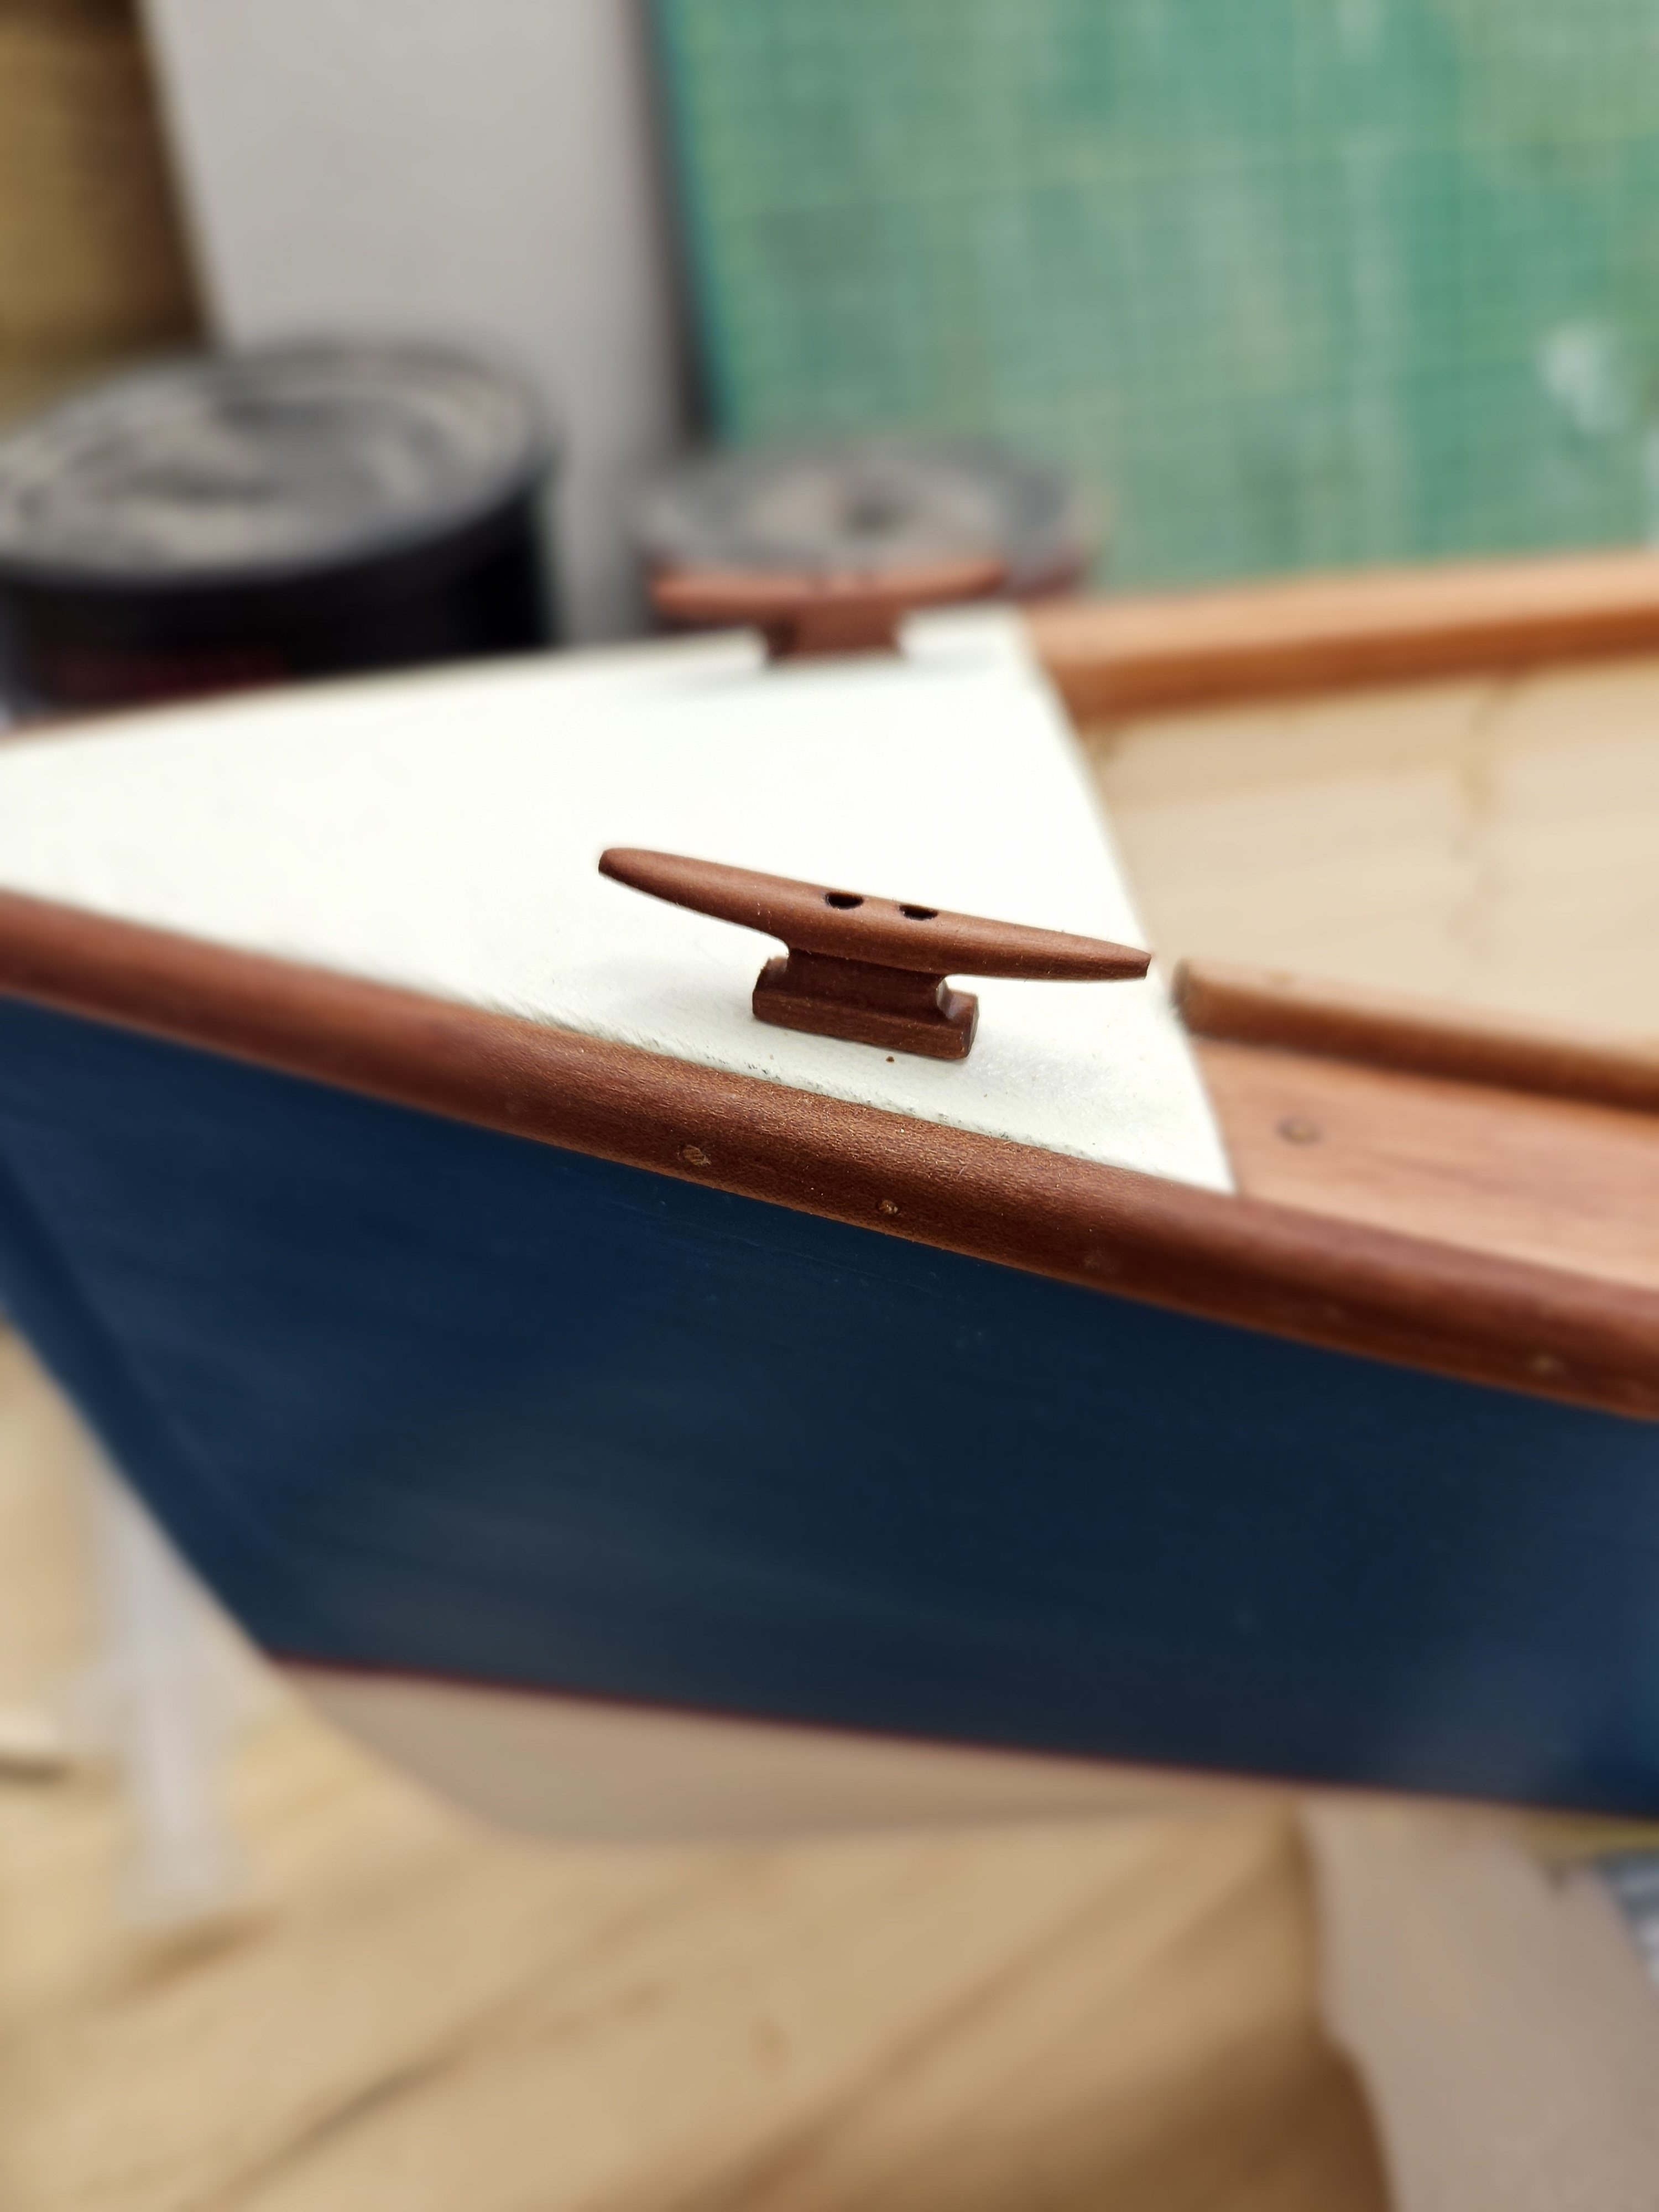
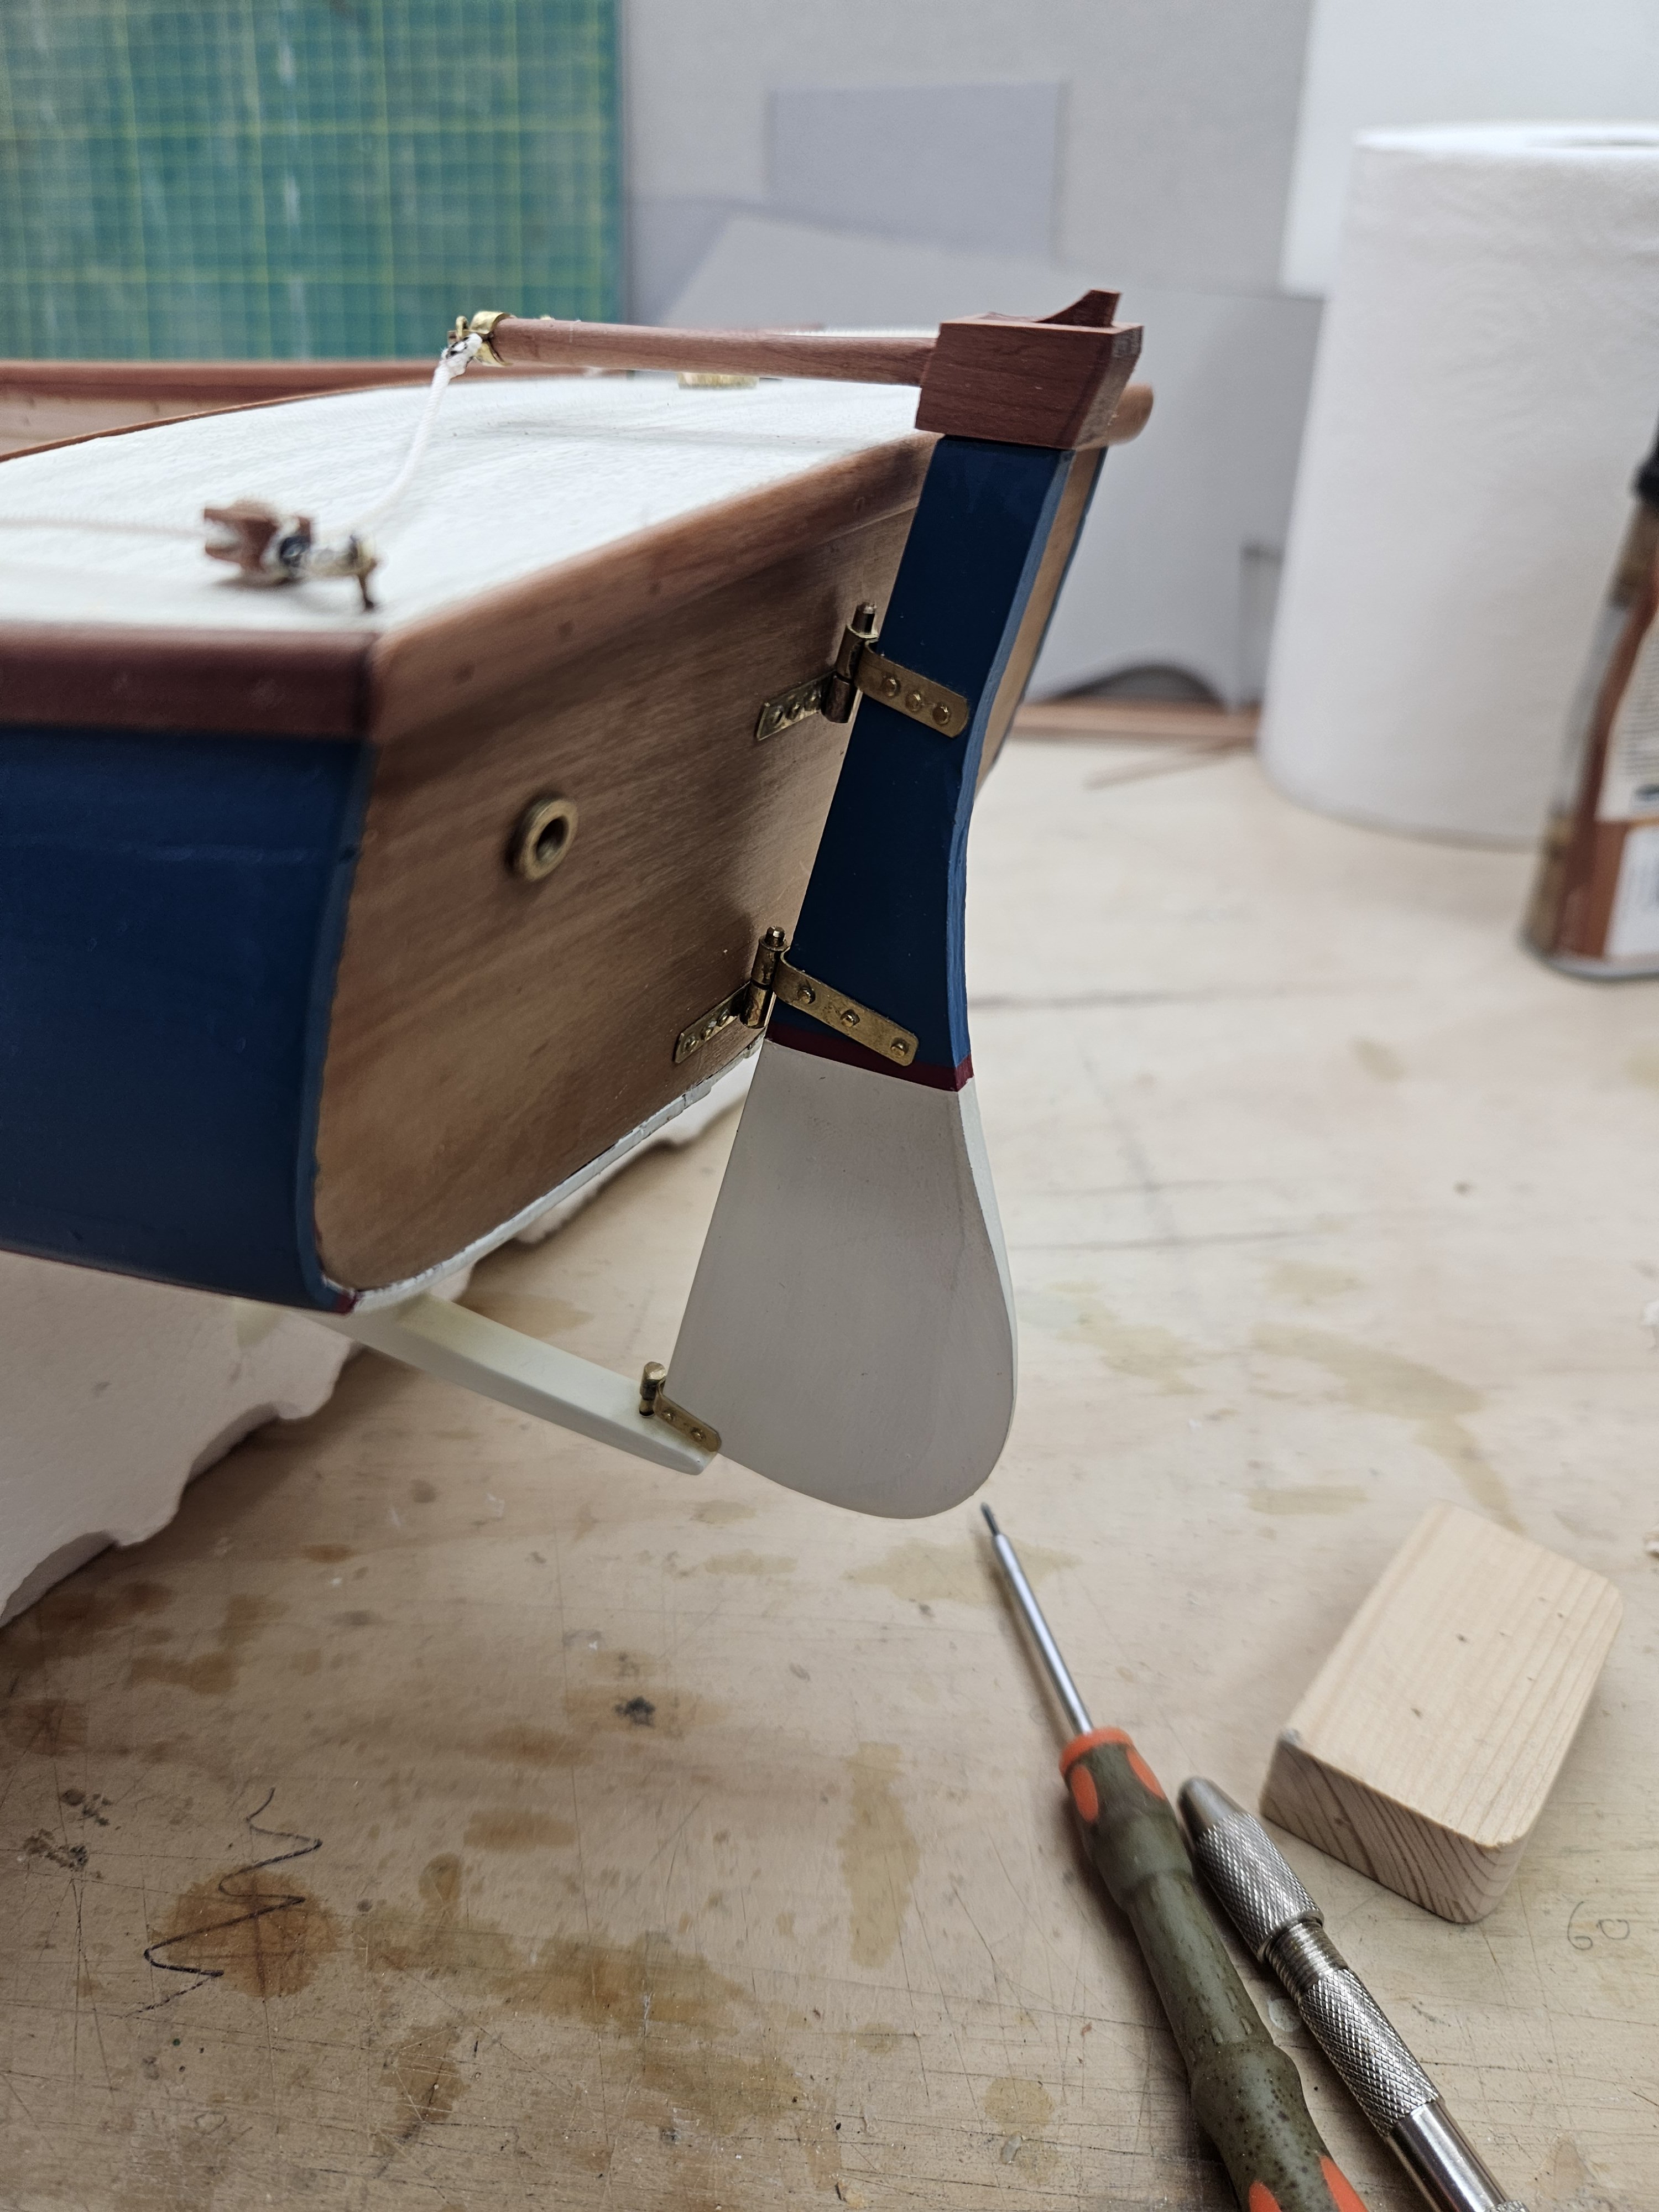
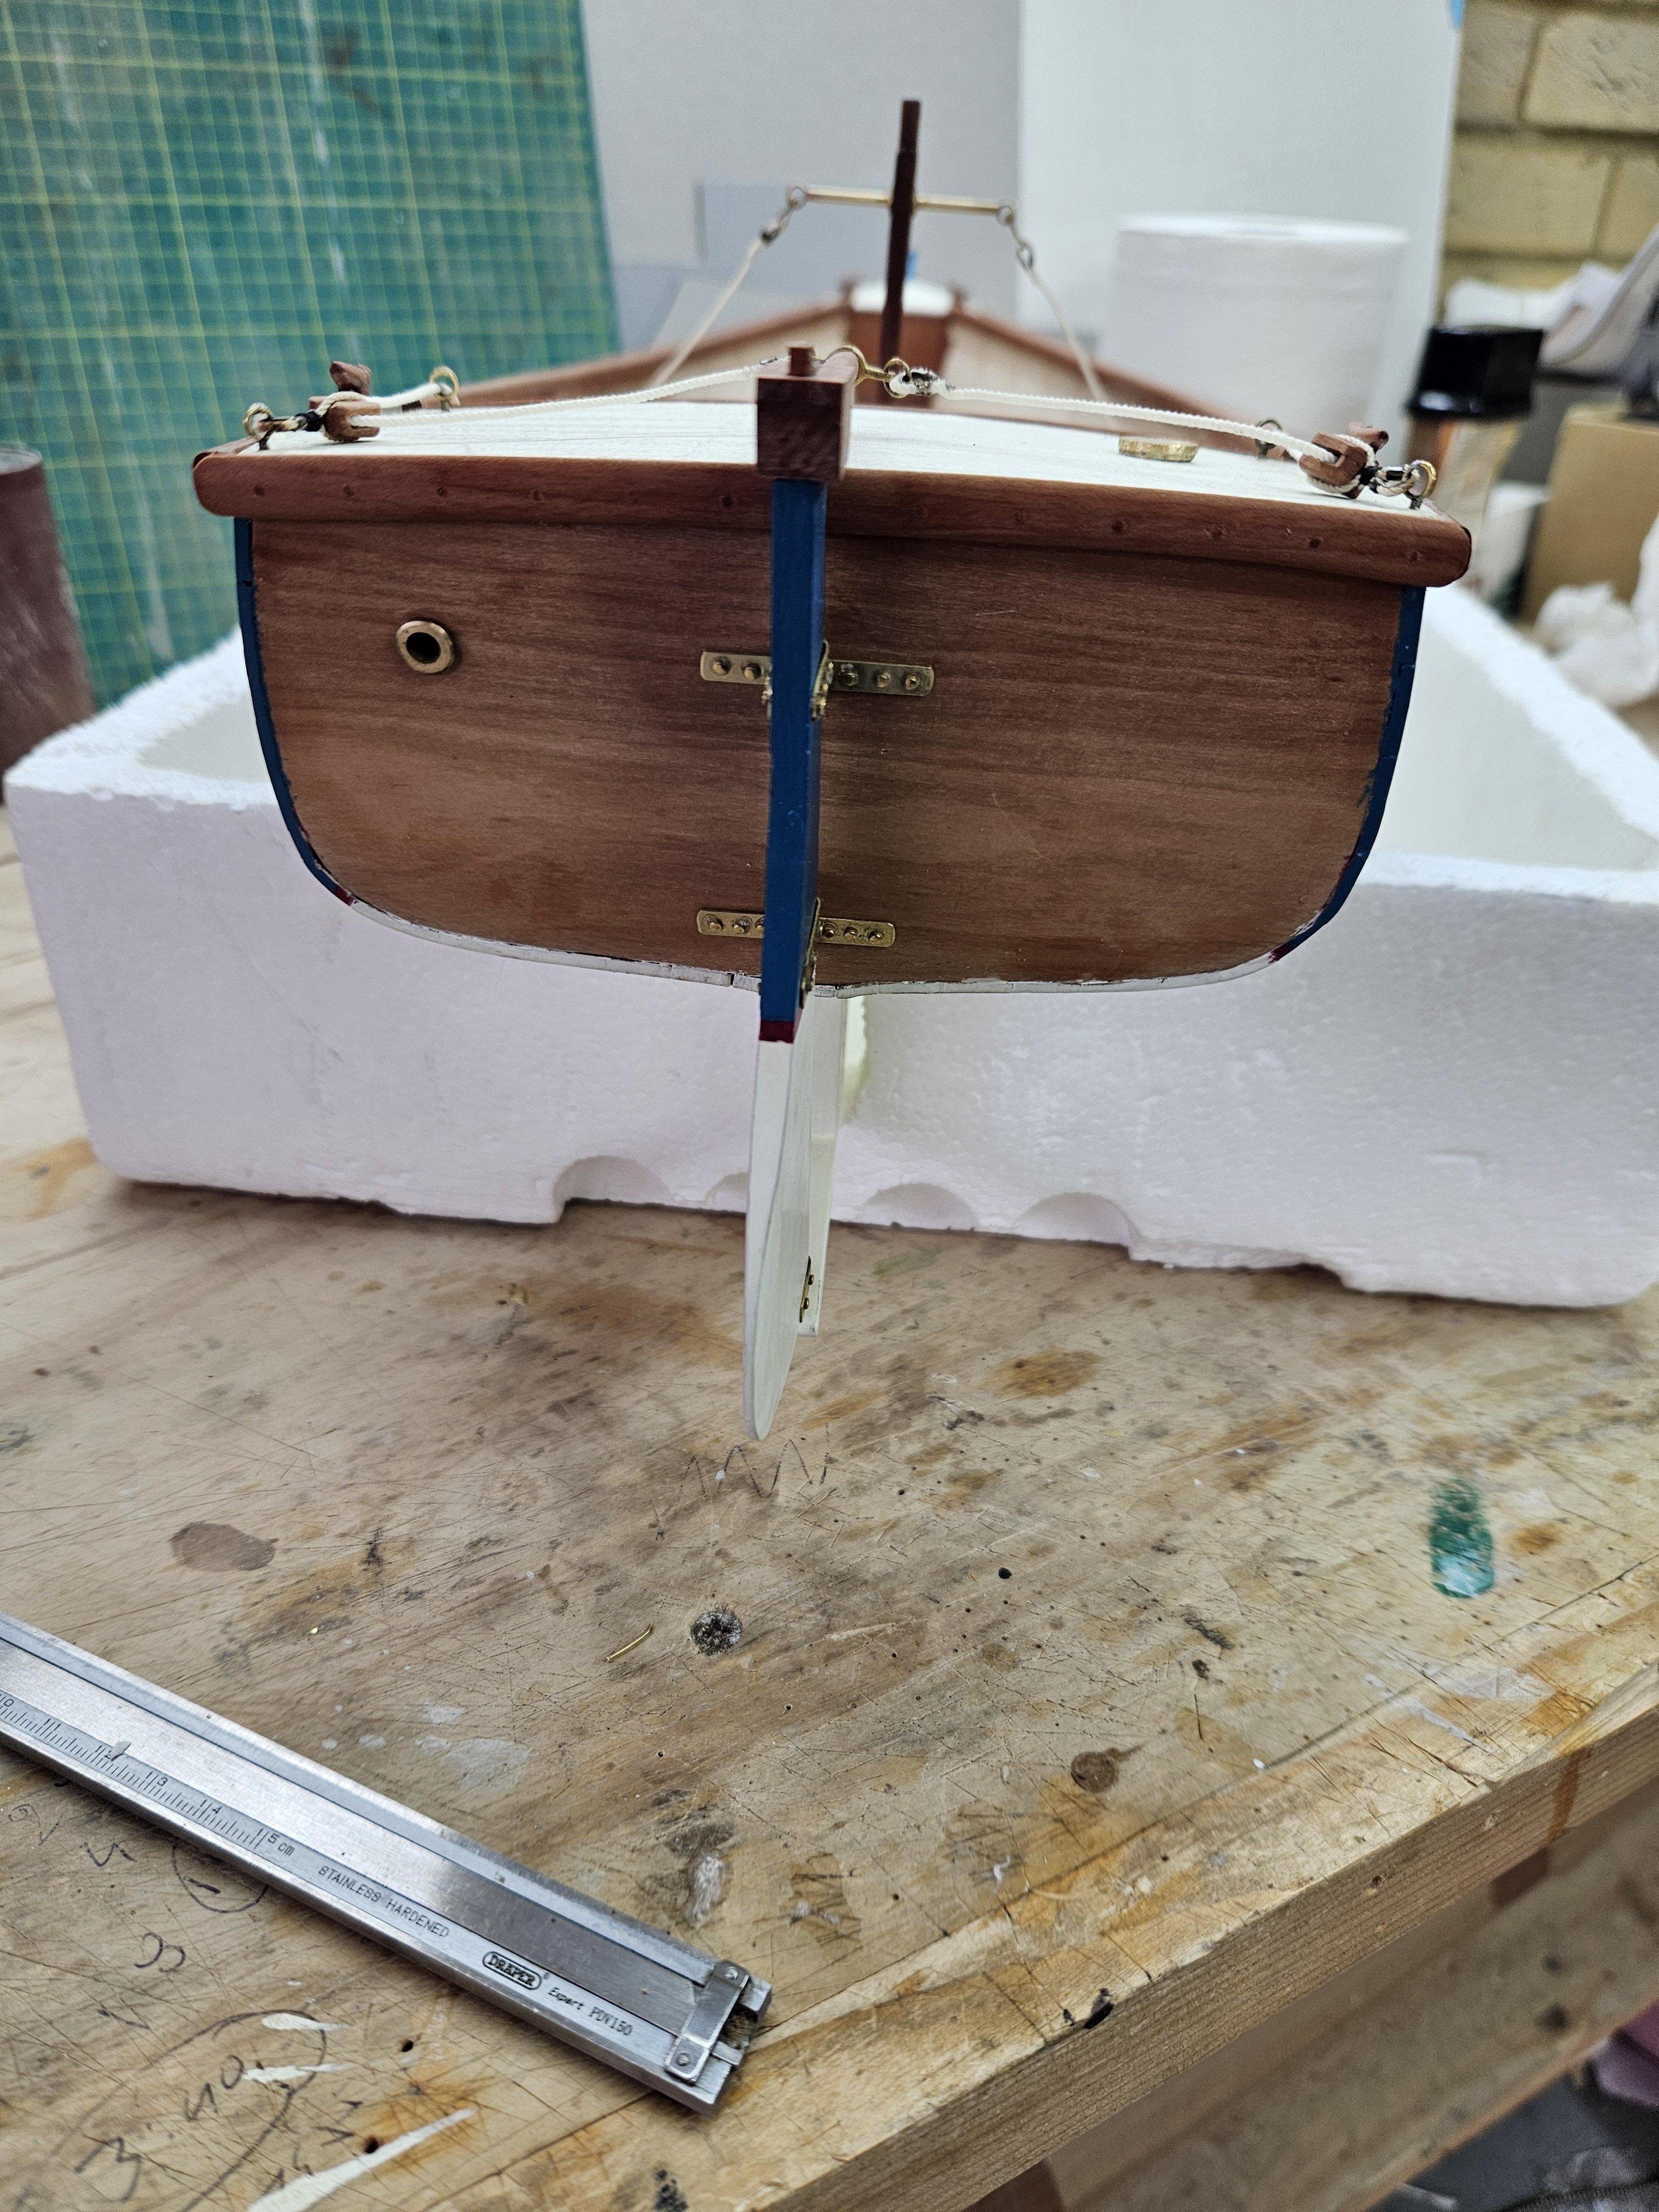
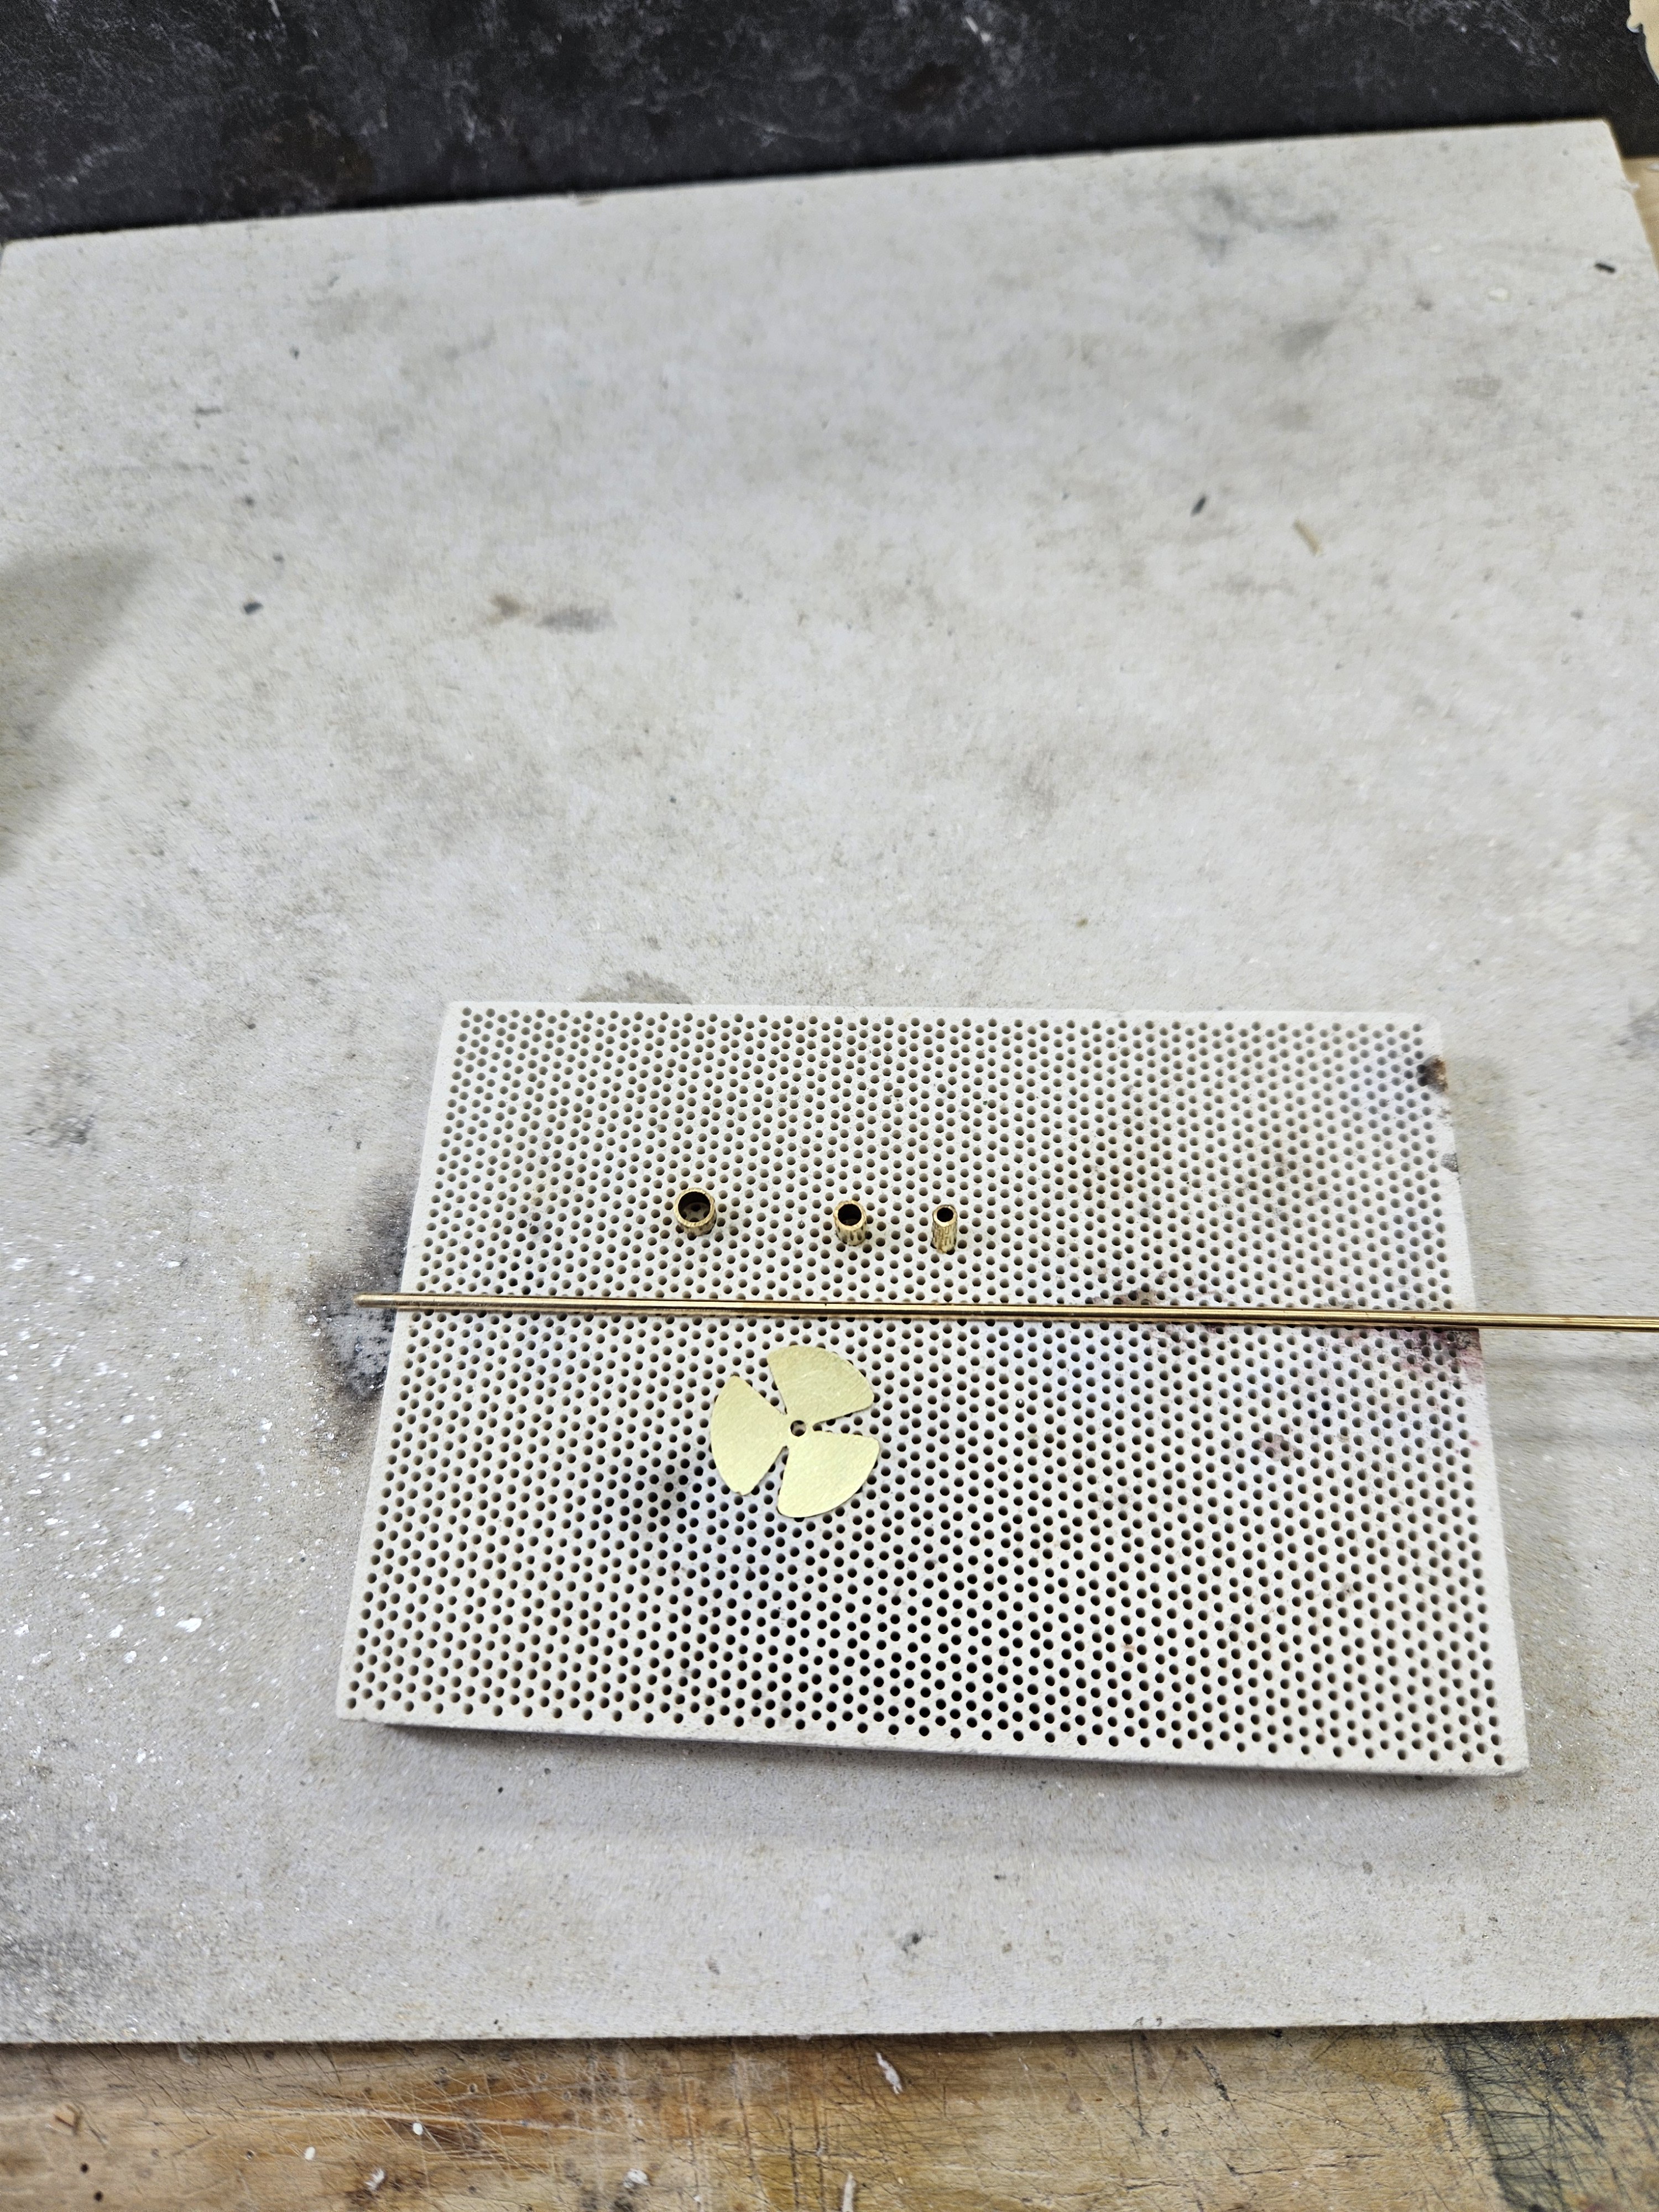
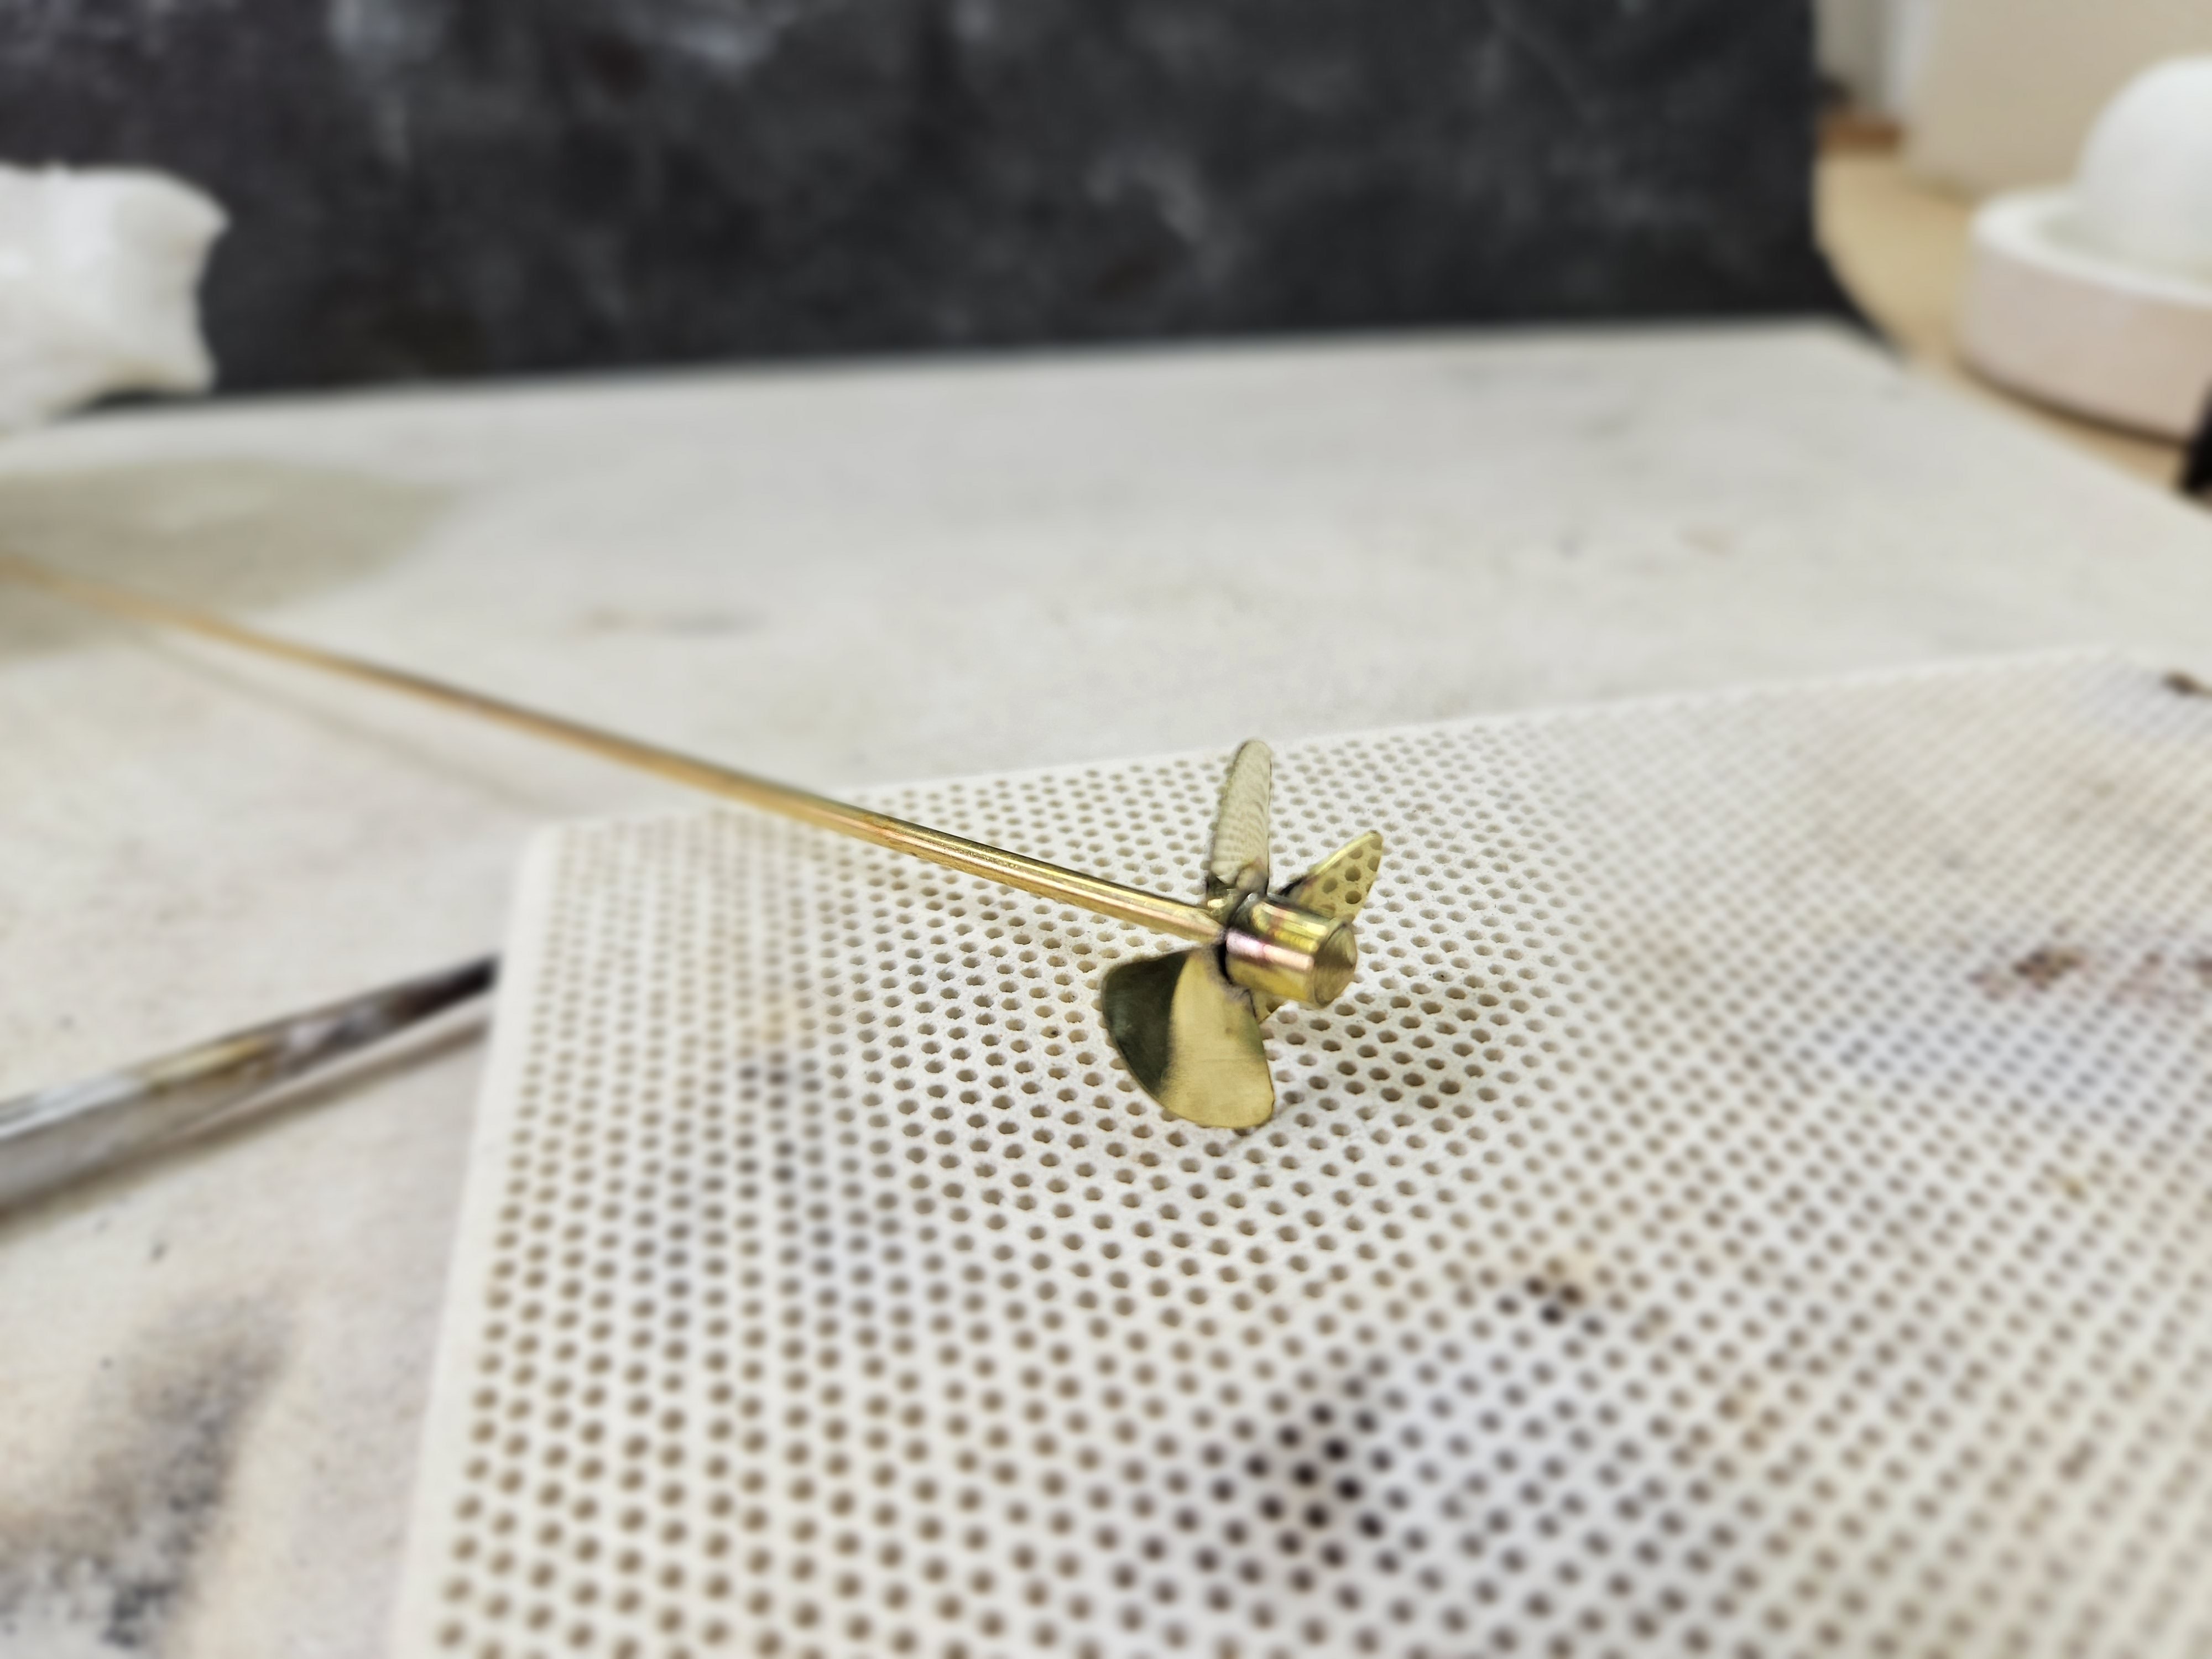
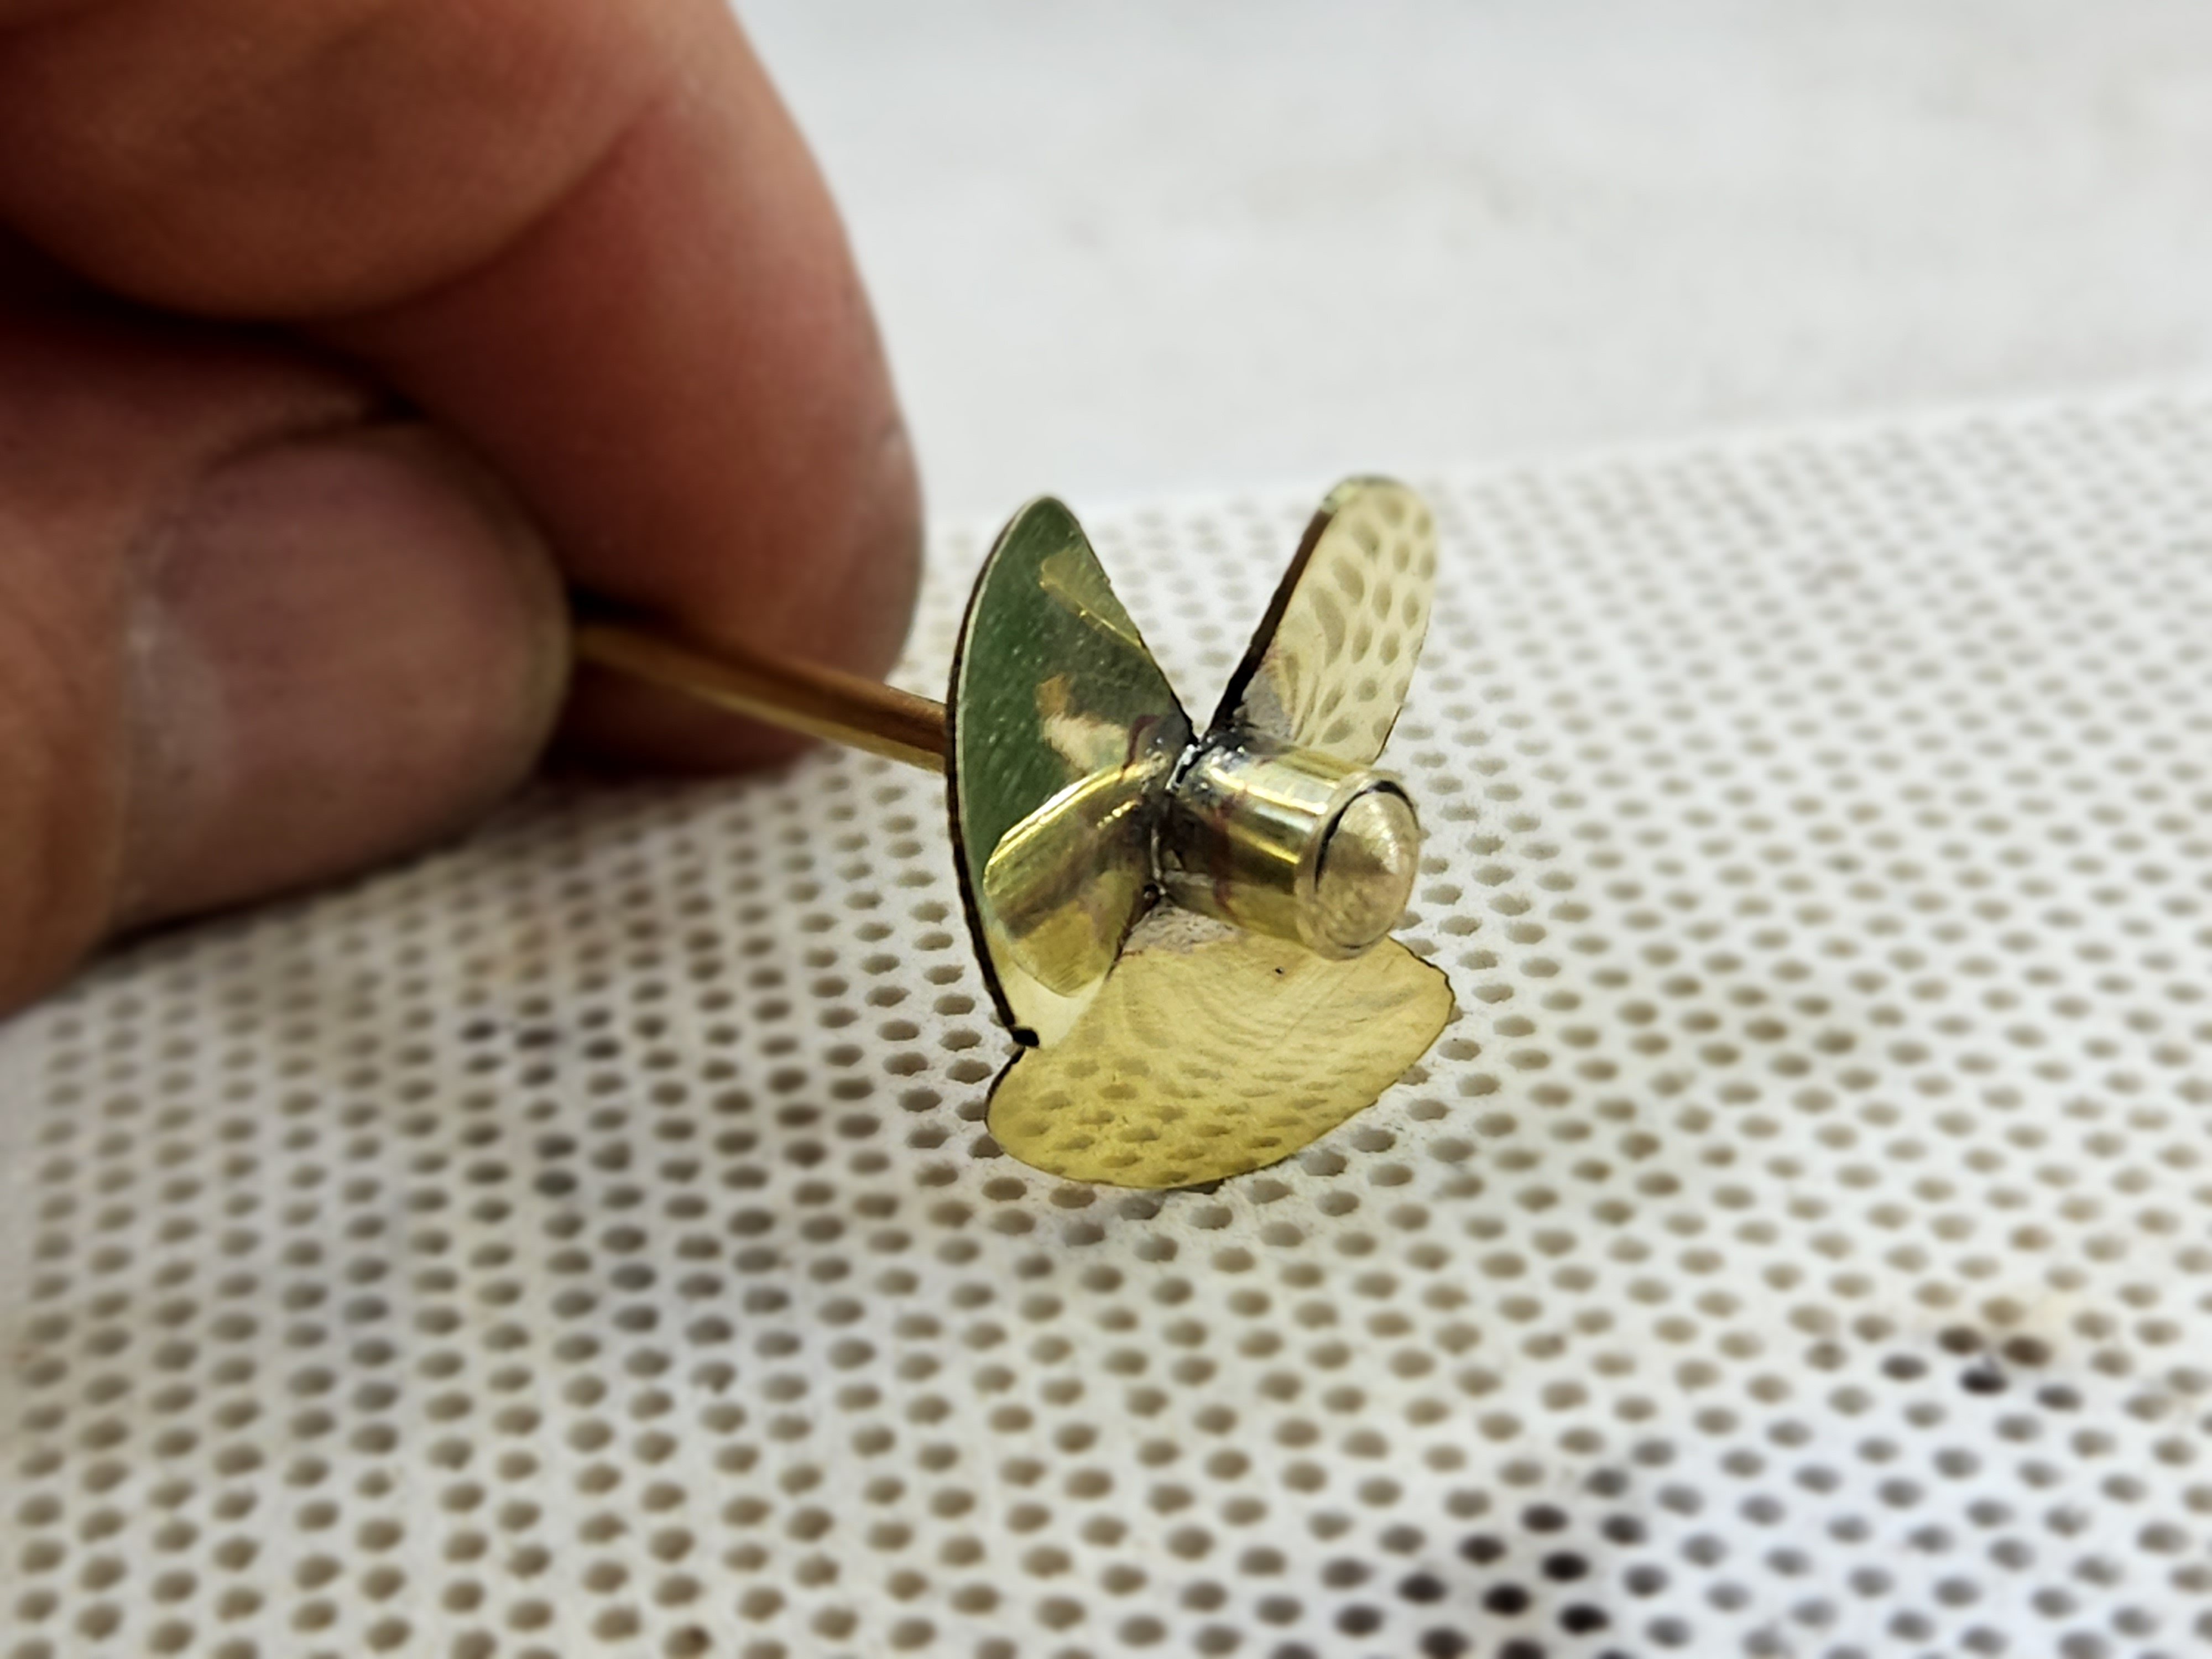
Dear all It has been such a long time since my last post! Family, work, bit of health issues that are slowly getting sorted - no time to post or keep up with your logs. But I have not given up - I did manage to do a bit of work. So let's start. I replaced all the screws in the rubrails with wooden nails and added a rail on the sheer self. I also made and added a few cleats. Then, I made the hinges for the rudder, the short tiller, the metal work for the ropes of the vertical tiller and a few shackles. Apologies, I accidentally deleted the photos! Then I made and assembled the vertical tiller. In the end of the day it would be an unsophisticated stick that would move the rudder fast from one side to the other - and this is what I made! I also added an exhaust port in the transom, an air intake port in the engine cover, A fuel filler camp aft and the gear level next to the vertical tiller. Then I made a propeller. My brass inventory is not great but I managed to scavenge a few bits and come up with a pretty acceptable result. All the polished brass parts have been treated with Renaissance wax - they should stay shiny for a very long time. Well, the actual boat is pretty much finished but could use a bit of fishing gear. So I thought I d start by adding some nets and a few lobster pods. I started with the pods - just wood and brass wire and some cloth. I used some of my rope and a few orange beads of Amazon. I used black Gesso to blacken everything - no reason for this, I just have a lot of it. I need to make six of these pods and the family have been alerted not to bin the plastic nets we buy our onions in - I hope they will make a reasonable net. I also would like to make a few more items and also perhaps add a pump of some sort. Till next time Vaddoc


-
Please do!
-
Oh, so many reasons I have itchy hands - I HAVE to have something to keep them occupied and a boat guarantees years of work Working with wood is so nice and the tasks along side like rope making etc are very rewarding Boats are so beautiful but also so challenging to built - there is not a single square thing on them You can build absolutely anything. And is a bit easier than building the real thing. I work in large scales which makes errors larger and increases the challenge I do not like the melancholy that sets when a model is completed but this is balanced by the excitement of what to build next Makes you a better person and you learn a tremendous amount about everything and anything - certainly you master patience in all its forms and expressions. Vaddoc
- 36 replies
-
- 10
-
-
First attempt at rope making
vaddoc replied to SiriusVoyager's topic in Rope Making/Ropewalks's Discussions about Rope Making
Nice rope! Lots and lots of posts in MSW for rope making. -
Indeed, great rope! My experience with polyester thread is that it produces quite stiff rope, especially if multistrand but yours looks fine.
-
Do consider having a look at the Dark Side! It can be great fun.
-
Just wonderful Gary!
-
An absolutely amazing read Eberhard, just finished going through the log. True work of a master, thank you for sharing this journey. Wonderful!
-
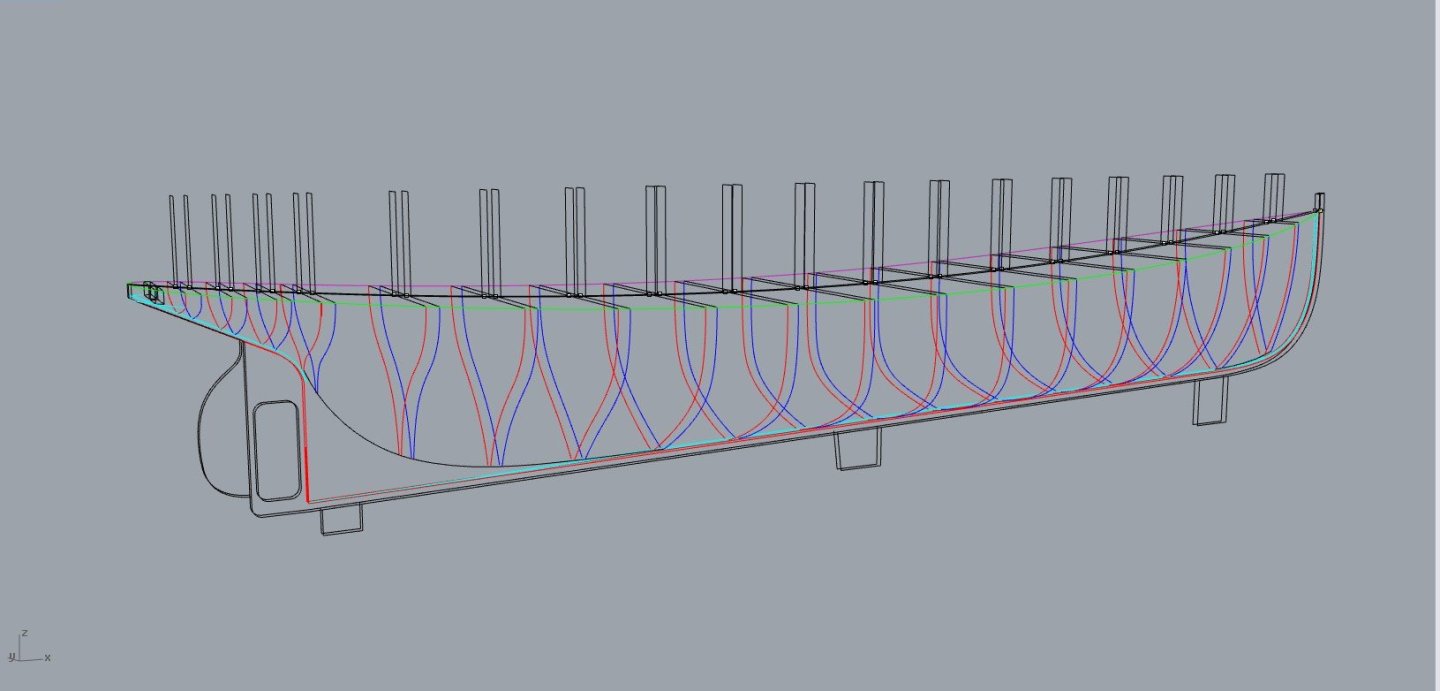
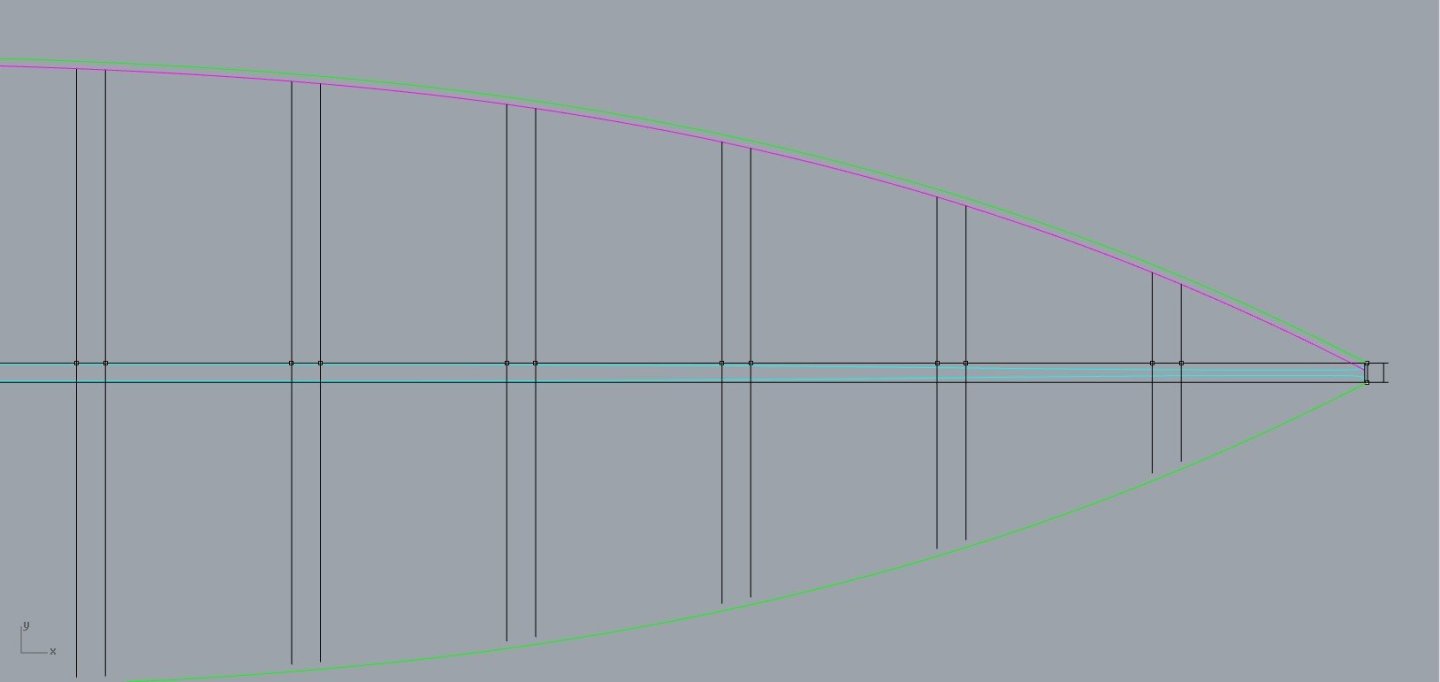
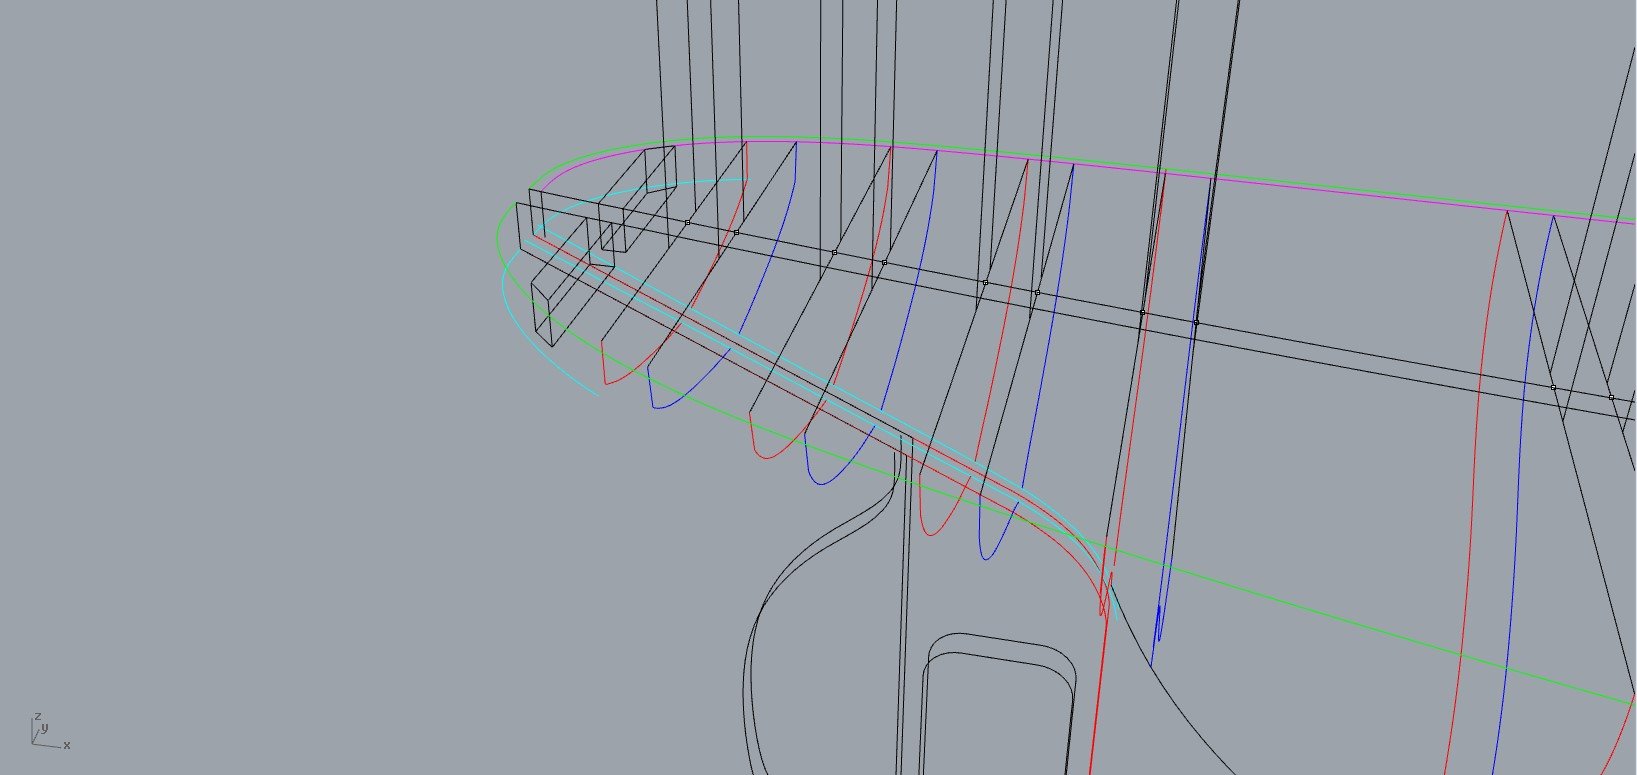
Ok, so I have been playing a bit with the lines on CAD and first impression is that this is not going to be straight forward. First we need to define the sheer. This is the first line according to the table of offsets: It looks fair but it is not. With a bit of attention, we get a fair line Same for the second view And combining the two we get a sheer (not THE sheer - this will come later) We can create a bit of surface, just for fun Now, this is incomplete as the stern is missing, it does not reach the stem and is not clear how wide the keel is but it is a start. Then, we get the waterlines and buttocks - All needed a bit of work to become fair Combining everything we get an idea of the hull. This is not the actual hull - A lot more work will be needed to get there. I also added the keel which is not given in the offsets. Next I actually used the plans to draw the frames and all other lines by putting the image sized appropriately as background and drawing lines on top. I combined all and this is what came out It actually seems pretty close, it even gave a smooth hull. But it is not ready yet. After a lot of work, the hull and lines were getting tighter but far from true. A lot of eyeballing was used, moving lines were it seemed they wanted to be. Now that I had an idea of the shape, it was time to start again. I first faired the diagonals which I had not used at all so far. Then I rearranged the buttocks to reach the keel where they were supposed to. Finally, I tweaked all these lines to make sure they were fair and interacted at all intersections. This took a lot of work. But when I added a couple of waterlines, these diagonals and buttocks had to be adjusted again to interact with the waterlines and with each other. Only the upper waterline is completed. There are 7 more and incorporating these into the hull will certainly need revisiting every other line. There are also a few areas in the hull that are of concern, the first frame near the bow where so far the hull is taking a bit of an acute turn, the cut out for the propeller, the curve at the bow but these bridges will be crossed at a later time. This is all I ve managed to do but so far it looks promising. Till next time Vaddoc
.thumb.png.089686370d3218befe65fc8459cdf460.png)
.thumb.png.173d81a388b893c104d826e6107ca40b.png)
.thumb.png.40a4bb42953388461b9097f0dc660165.png)
.thumb.png.9f303973a6114d4890712619336dea71.png)
.thumb.png.ee63880420a5e219a0ba4beb7366c542.png)
.thumb.png.41a15764e81462aa2808bf6db9c746c8.png)
.thumb.png.7ae3e0faff3adf7fb08a691bcad1b040.png)
.thumb.png.34fde559b30d658fdbf08e0e803a65f7.png)
.thumb.png.91caf23774aceea05be2872128b0596f.png)
.thumb.png.cfdd70e6d6b1535ecac3c2d2888b65be.png)
.thumb.png.3644beada5cee88c006b55d643752277.png)
.thumb.png.4595691cd5a98e9f5556c3735bb857e7.png)
.thumb.png.79ecc615645ea3d087f159e4c15f3a9f.png)
.thumb.png.e0acb680e3c567eee95a97b4ef76d2d9.png)
.thumb.png.ddff02439e152083609ae21ca3ee856c.png)
.thumb.png.5e7ac1da0f5a1447bac1474a40f448ea.png)
-
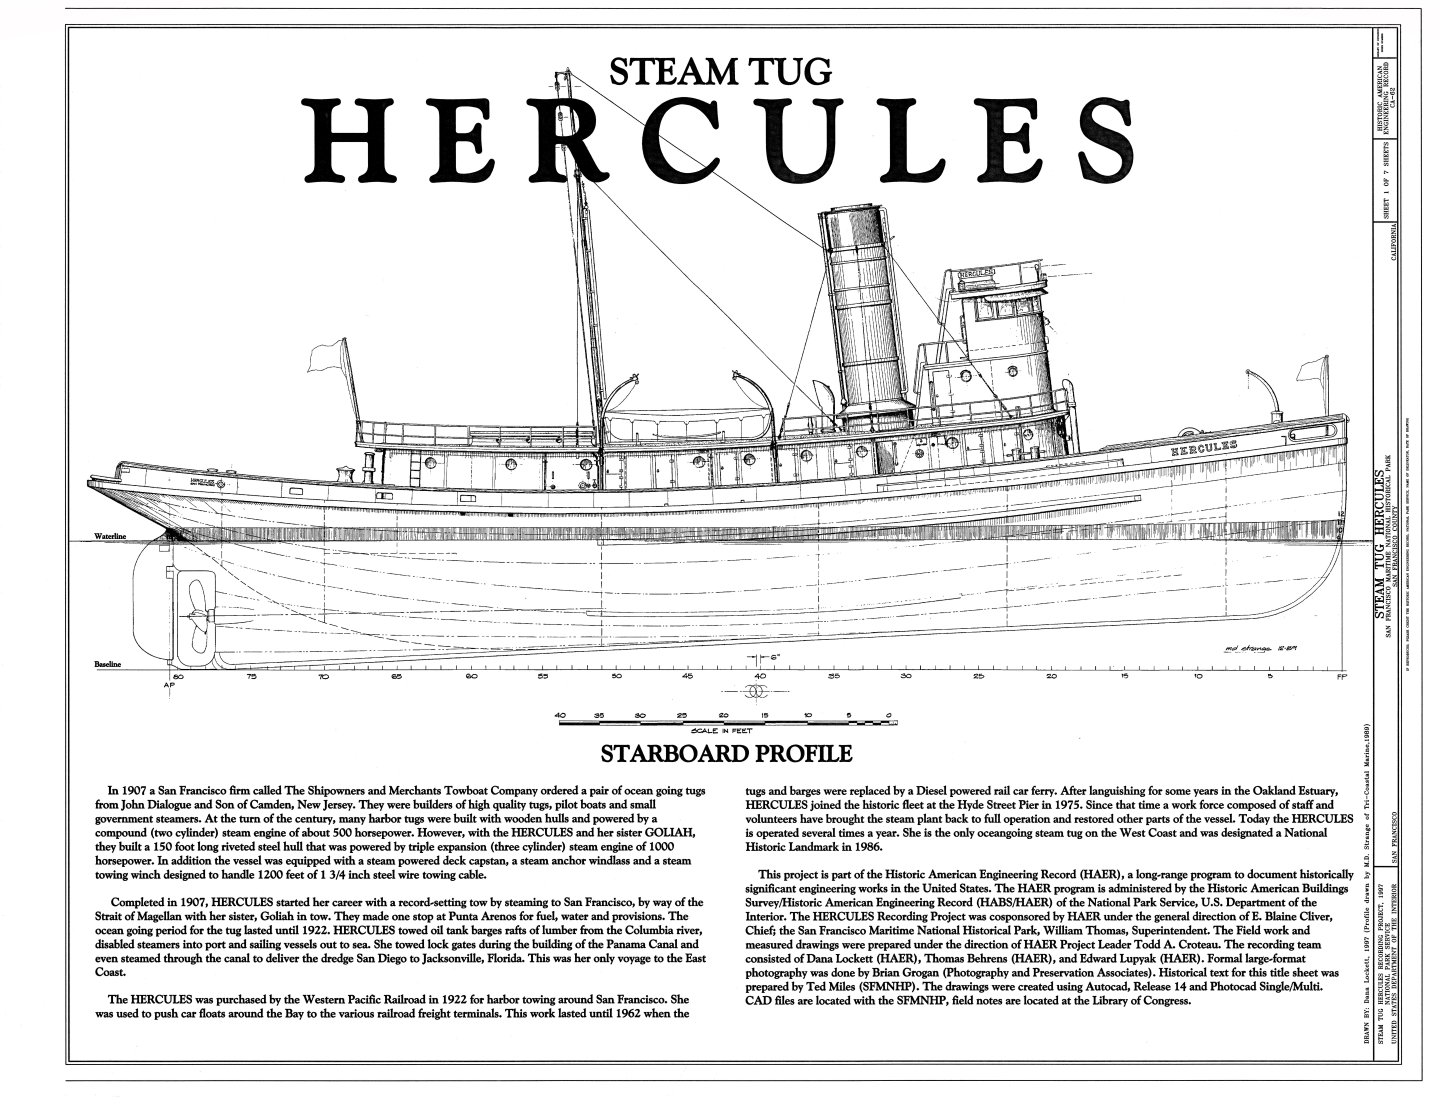
Dear all The Launch is not far off completion so I have been thinking what might be the next project. I really wanted to embark on a long journey, 10 years or more, and built something with many masts and frames etc. Certain funding issues though came about so this journey will have to wait. That same day though I came across a lovely boat in the gallery by @Kevin. I 've always liked Tug boats and looking at this wonderful model I was immediately sold. I would build Hercules! Now, there of course the kit by Occre but I should be able to scratch build it, shamelessly guided by the images on their website. This would be my first POB boat. But of course, some lines would be necessary so off to the internet to get any boat lines that would be close enough. To my surprise, google returned a wealth of information - a specific site https://www.themodelshipwright.com/high-resolution-ship-plans/cargo-ships/steam-tug-hercules/ was of great help. This site had everything - offsets, info, photos and lines. Apparently the boat was in dry dock for repairs and they took the opportunity to lift some lines. Indeed a wealth of info but of course serious lofting would be needed. First thing to do was to get everything onto CAD (I am hopeless in drawing with a pencil) and see whether I could get a hull out of this ocean of numbers. So a brief hibernation period for the Launch to get this project under way. I am not sure how it will work, what scale or the level of detail but we ll figure it out along the way, at my usual snail pace. I hope you ll join me on this new journey and thank you for visiting. Best wishes Vaddoc

-
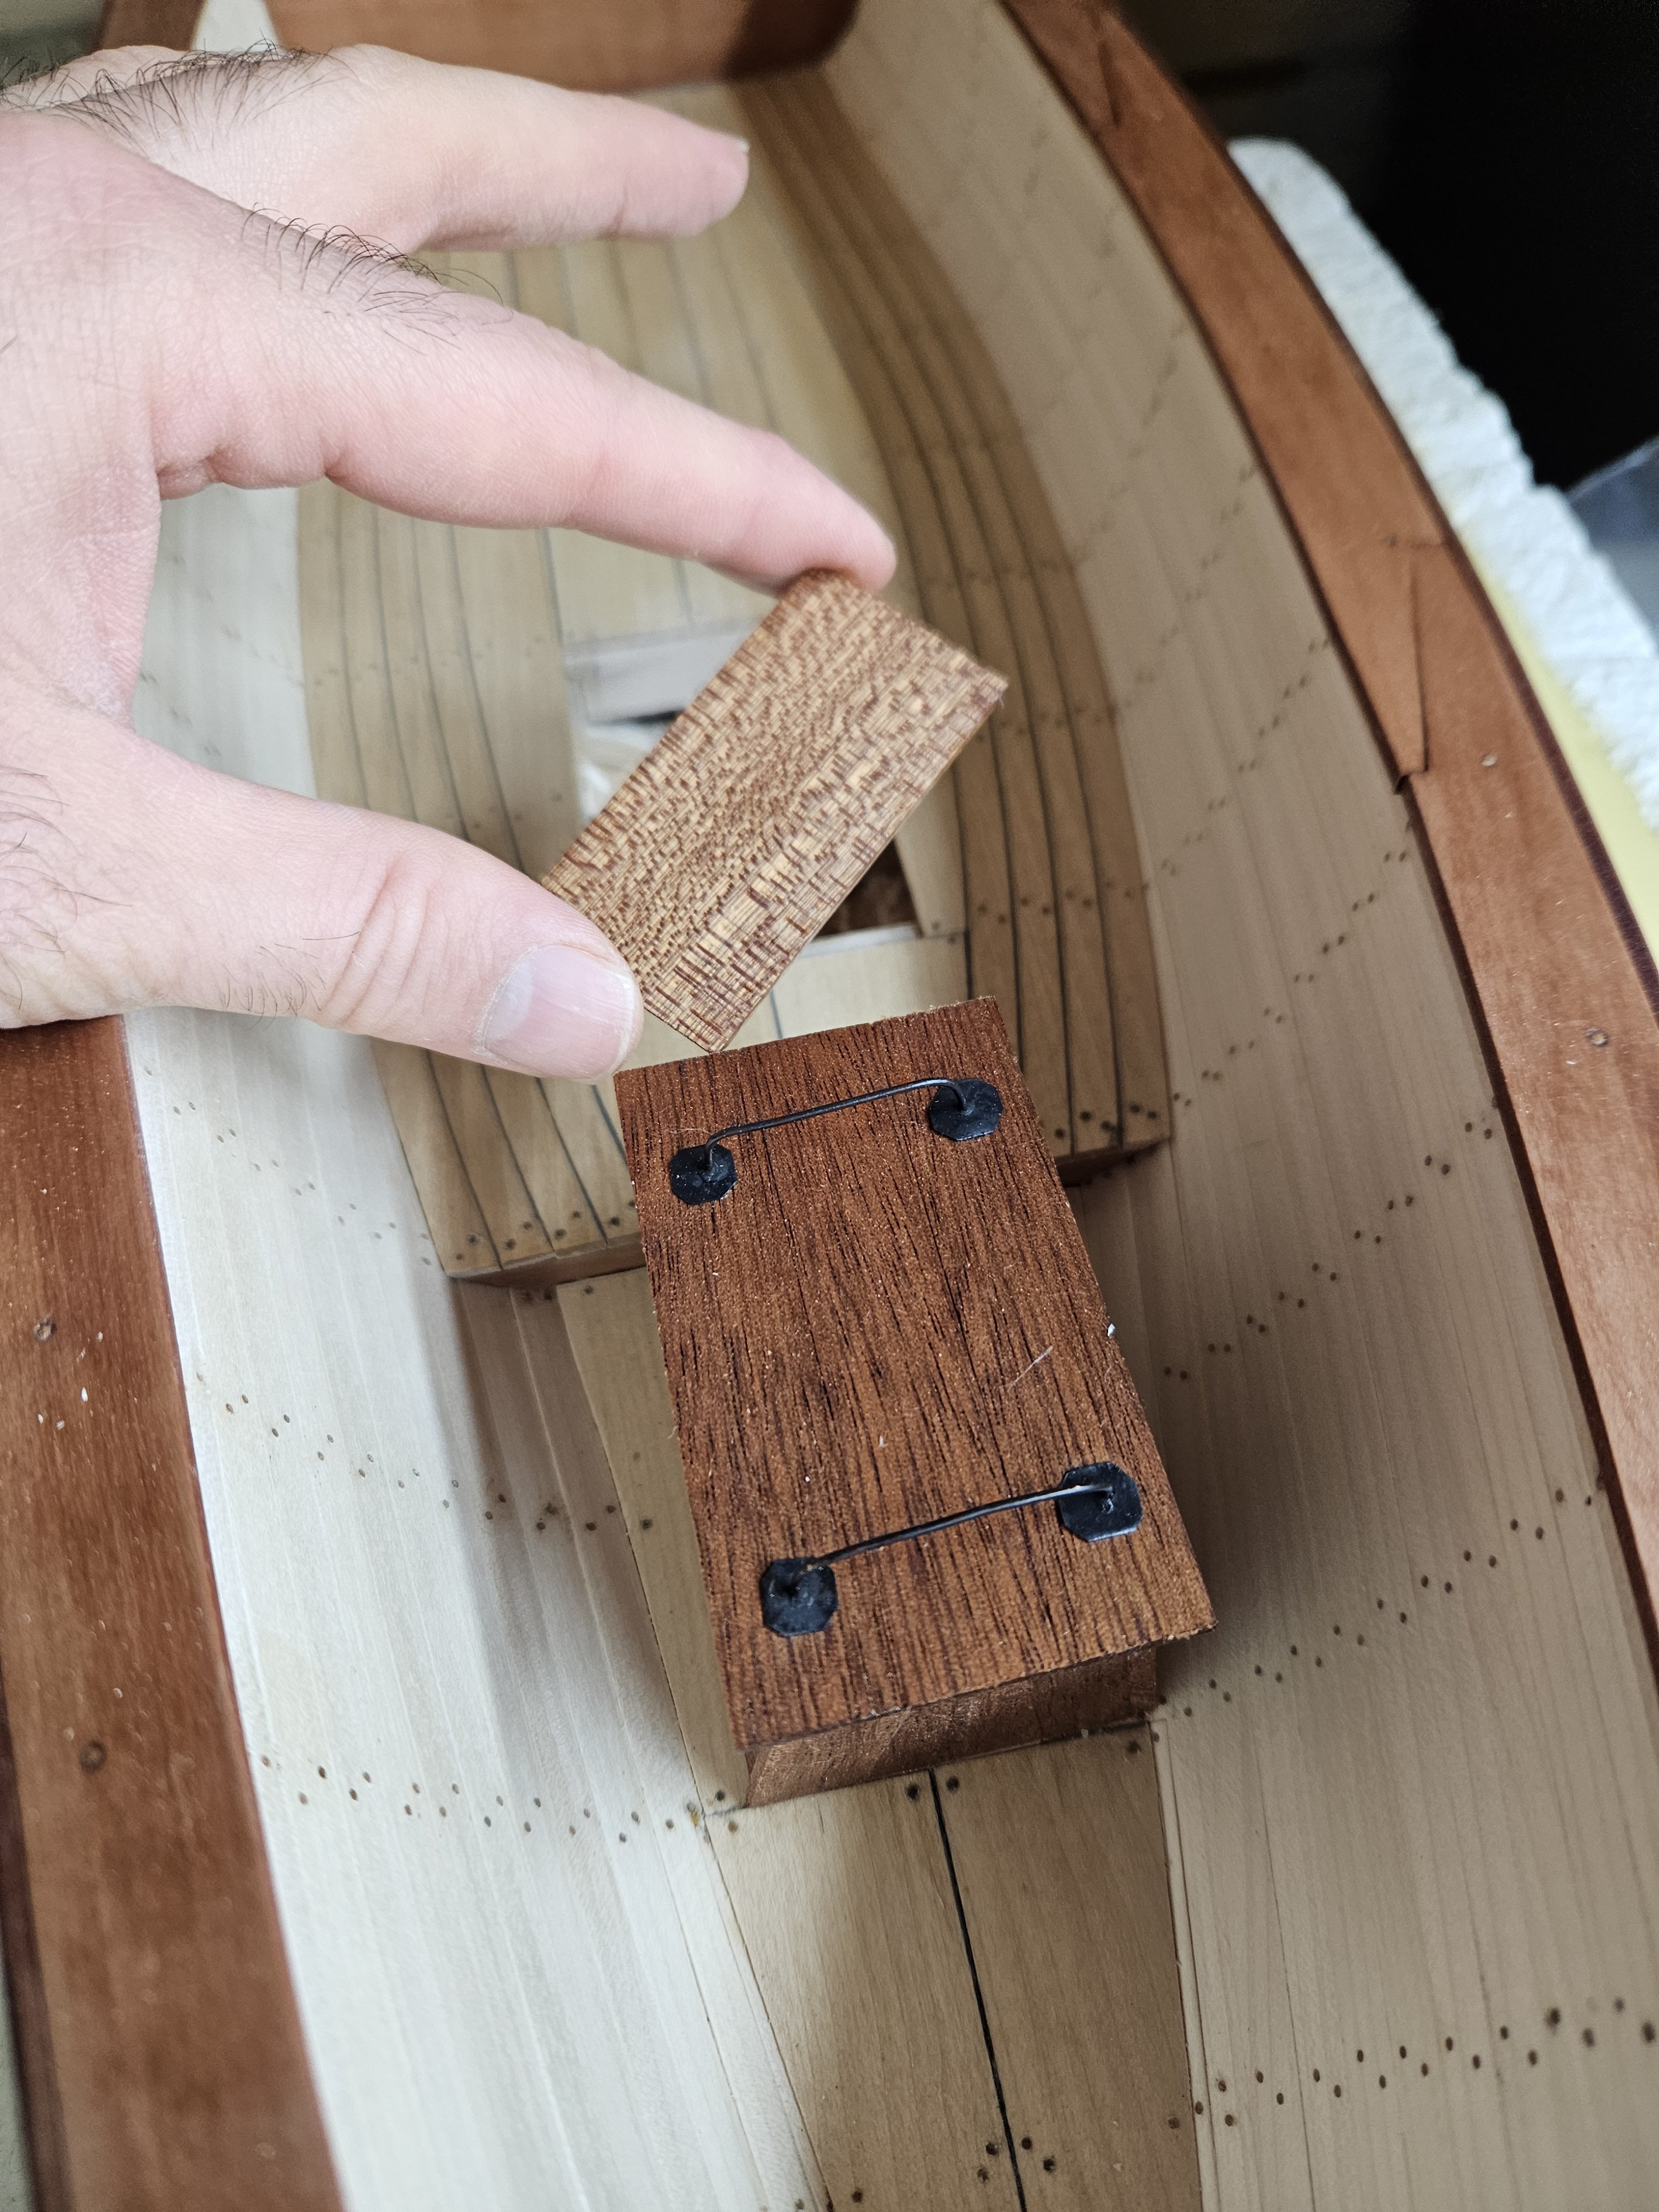
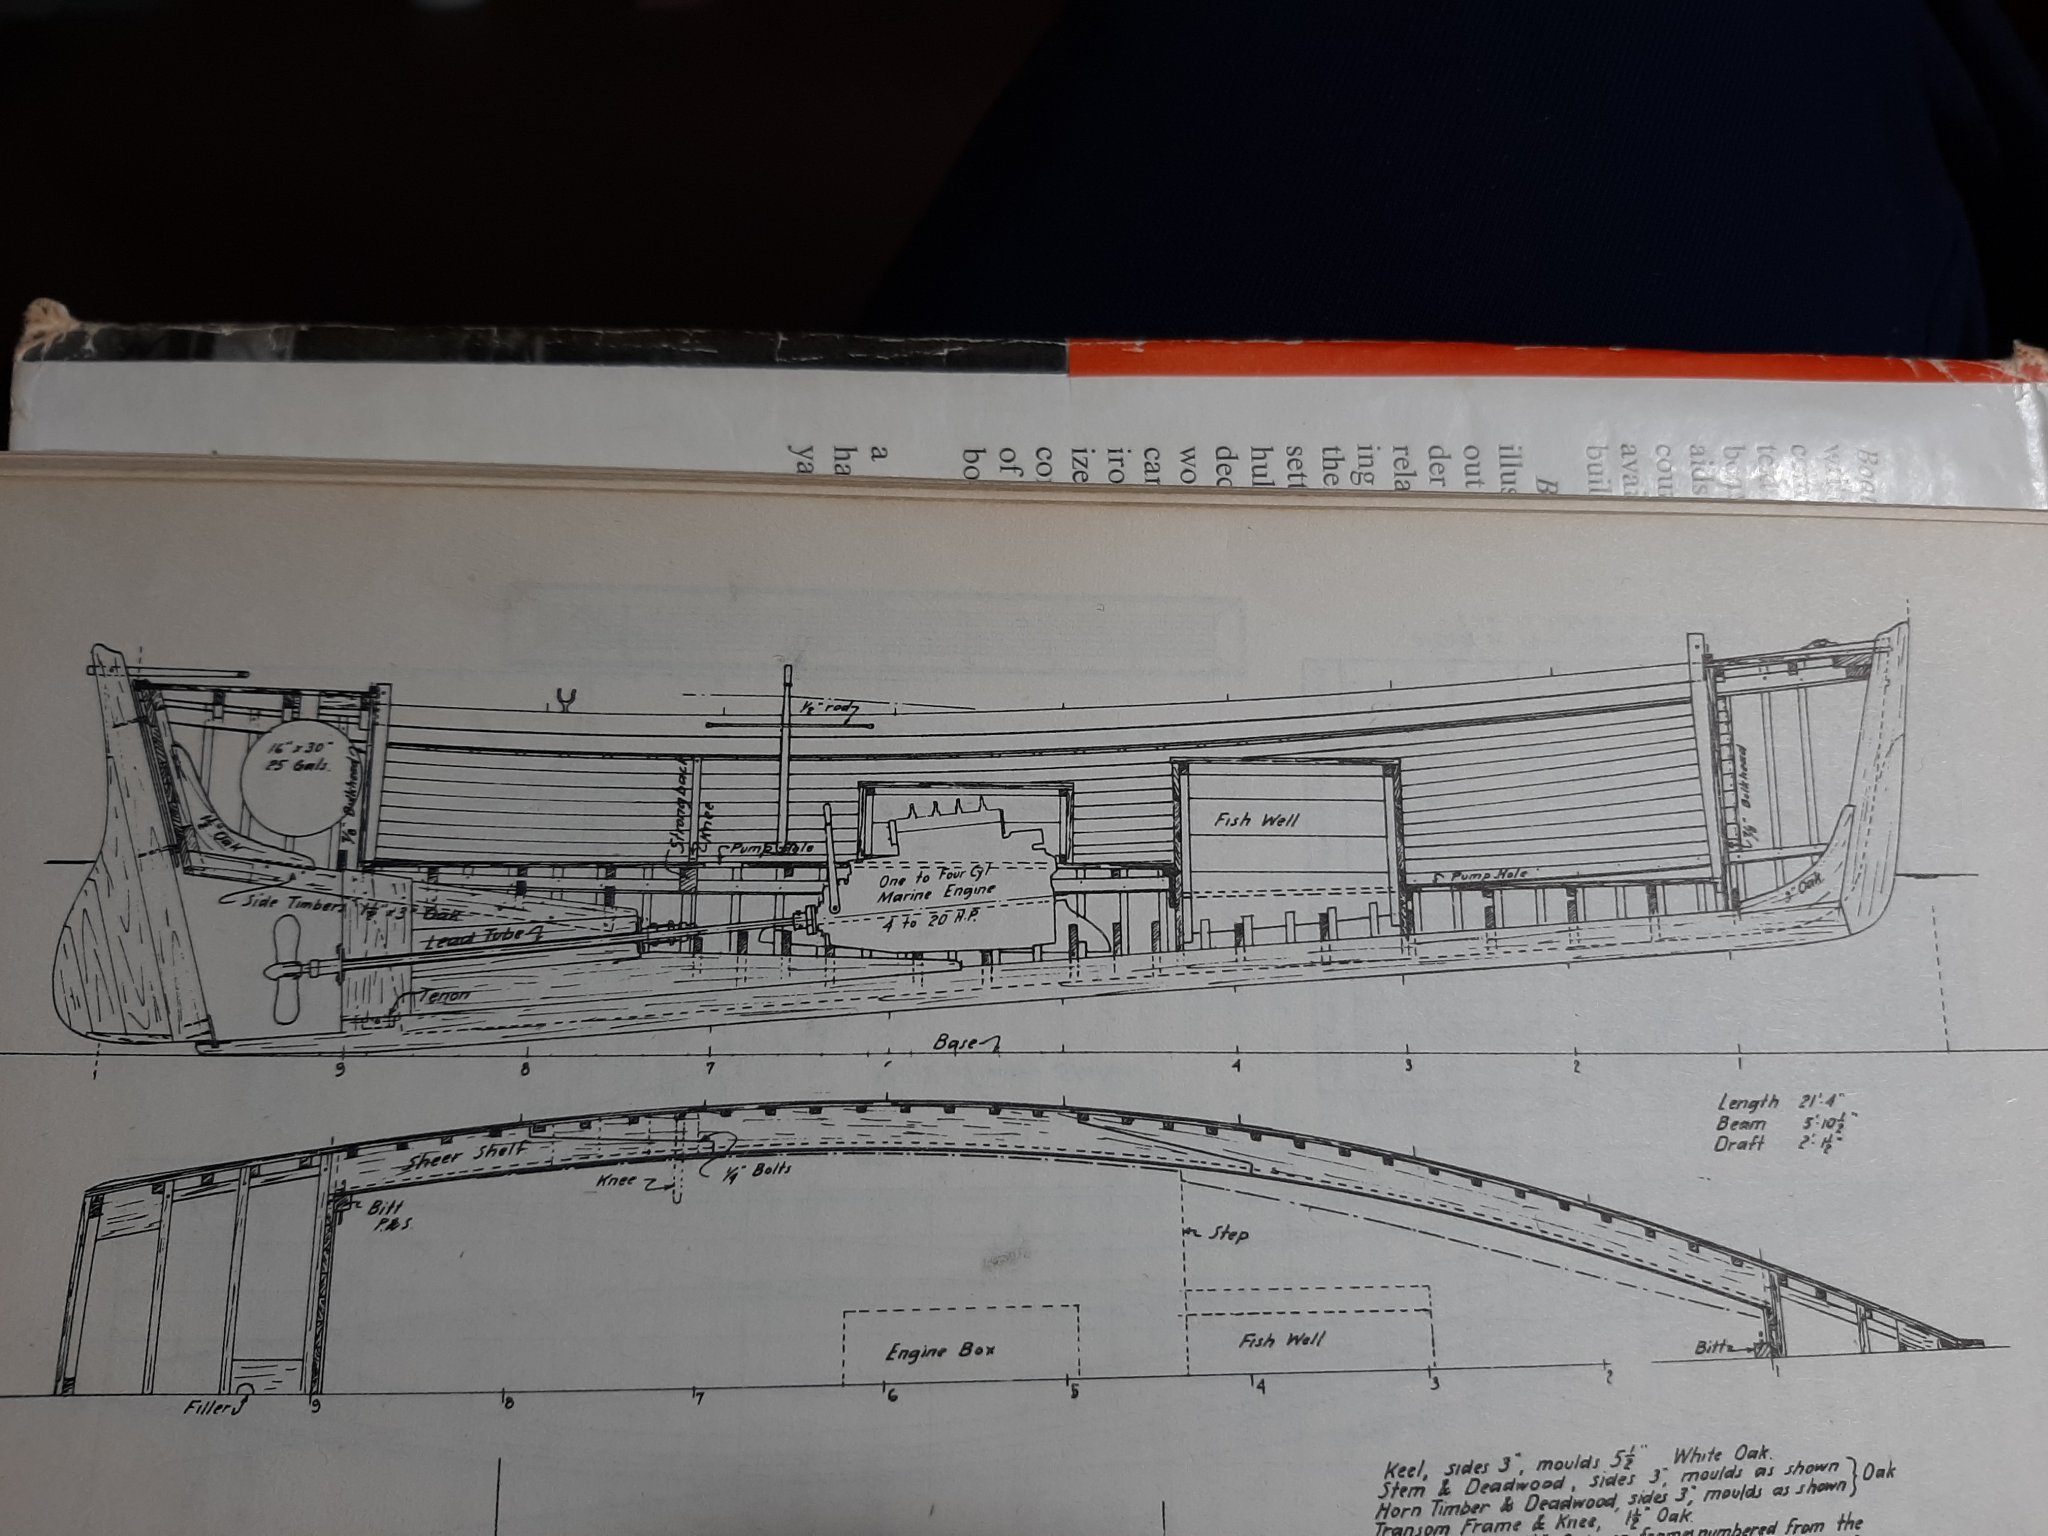
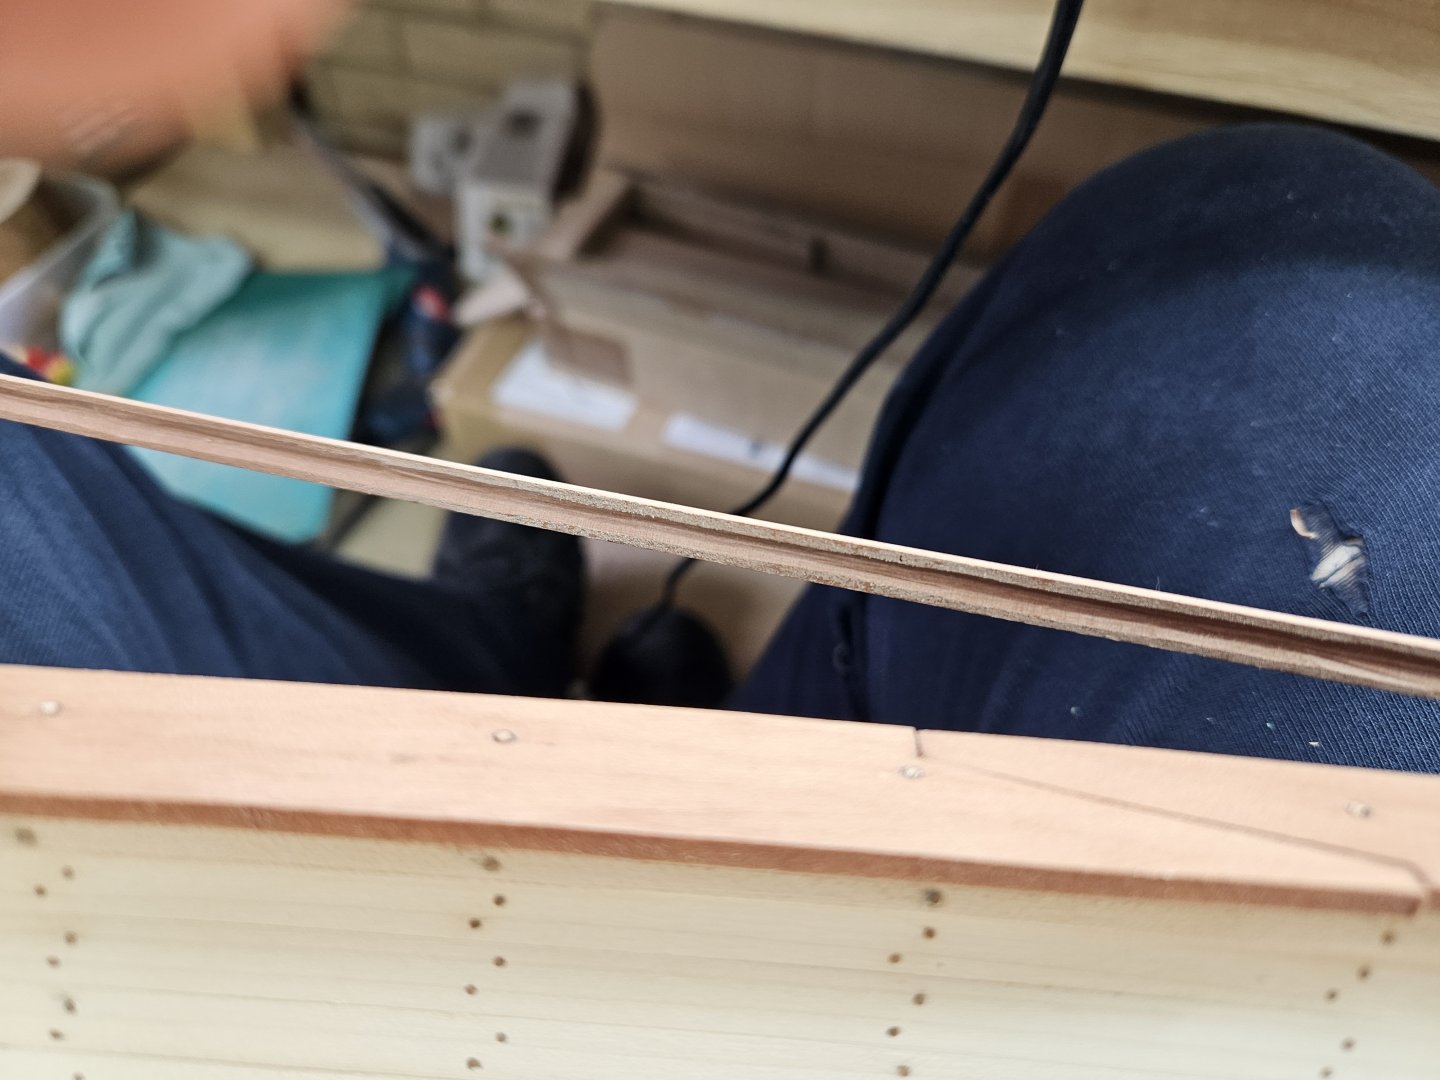
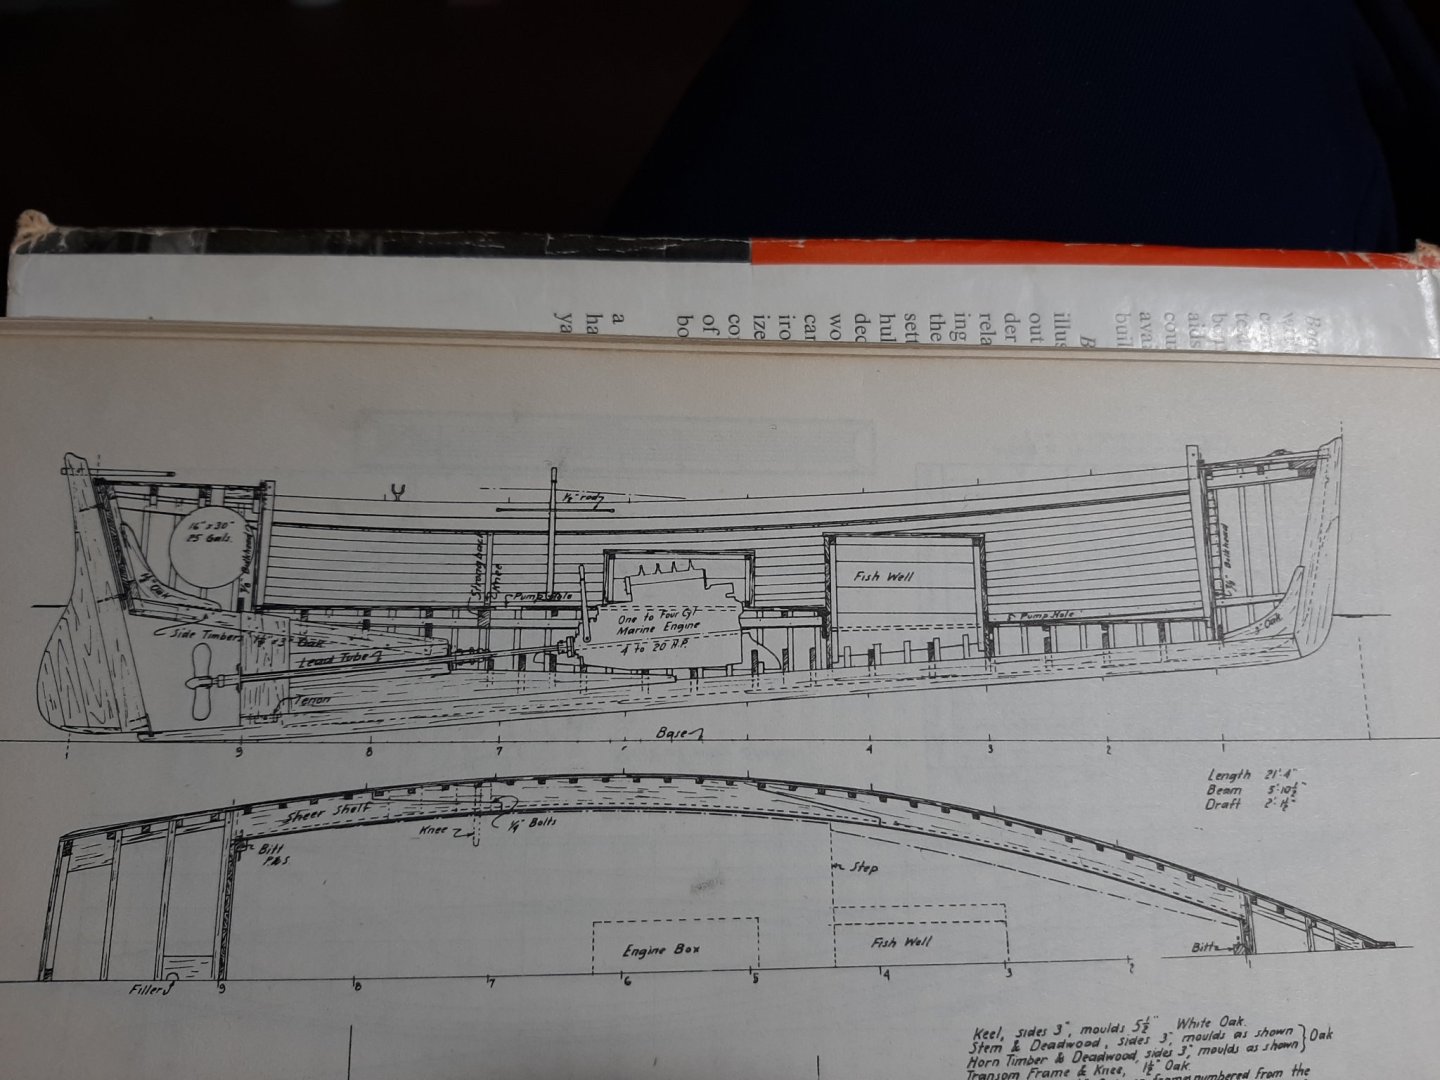
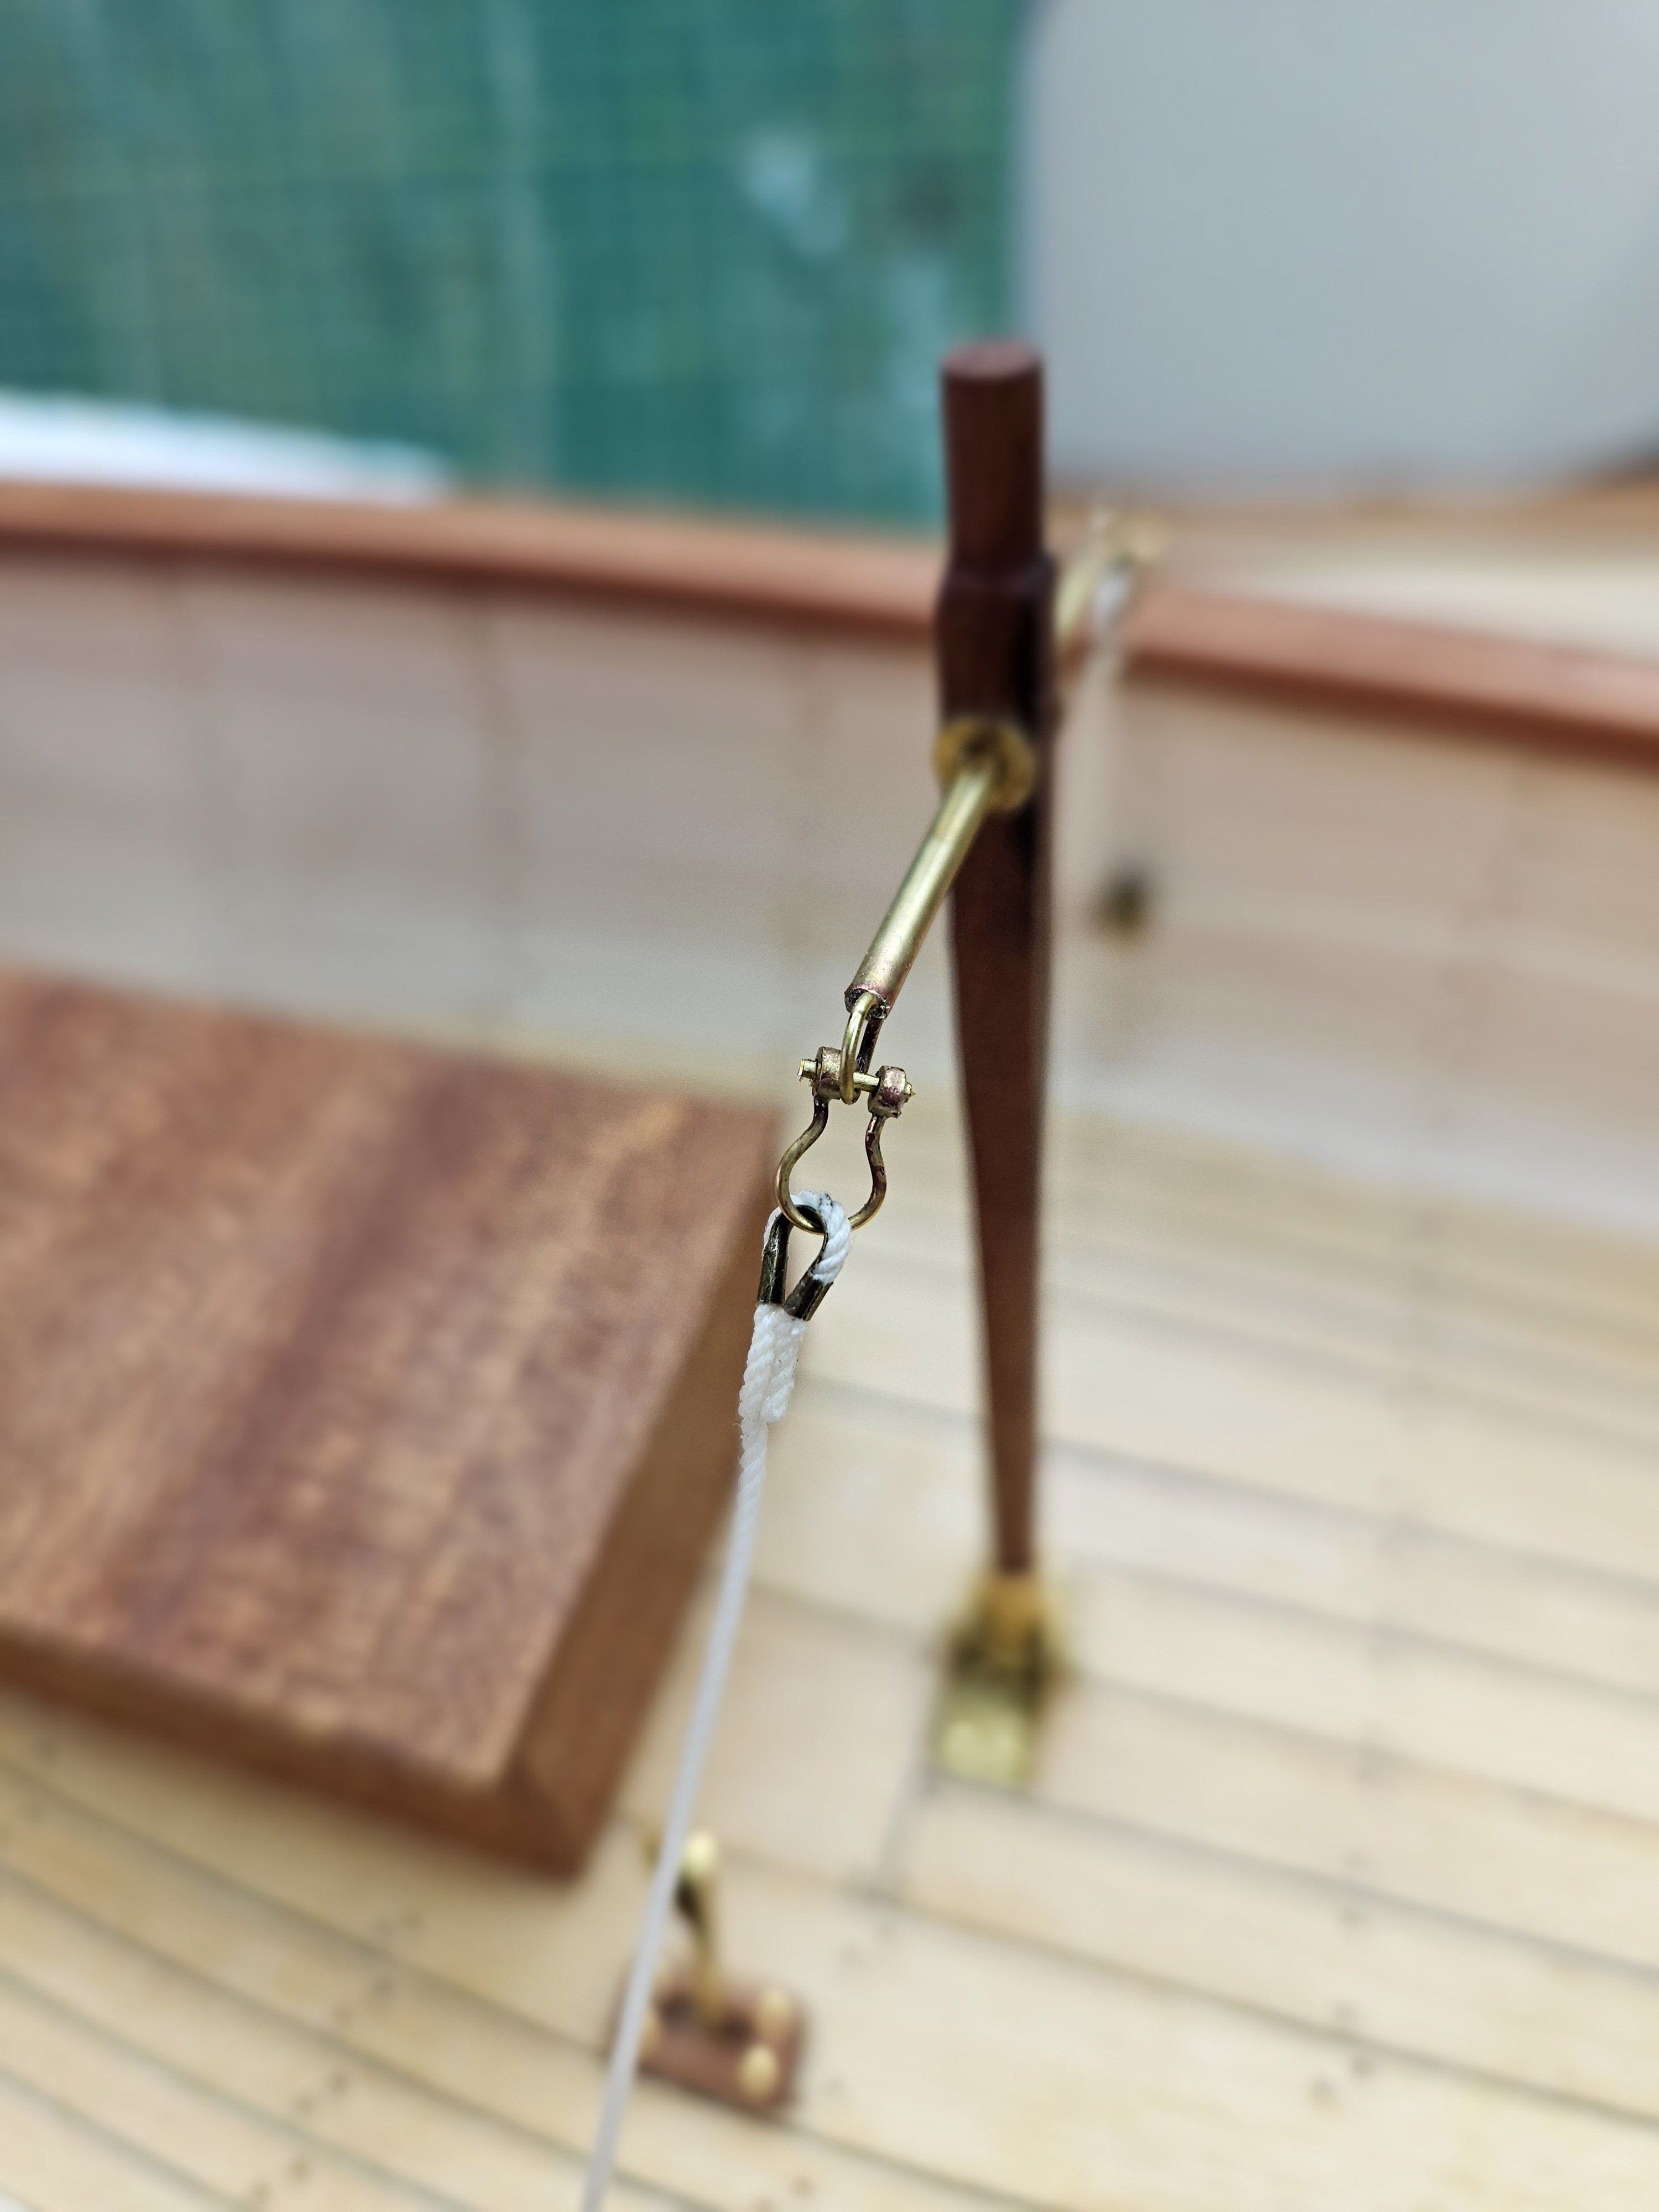
To all that visited and hit the like button, much appreciated! @KeithAug All in good time Keith! Many thanks @Bedford Thanks for the good words Bedford, please have a look at the photo bellow. The note writes "1/2" rod". I simply cannot figure it out. The lines cannot go straight to the gunwales as this would be pretty inconvenient. Getting the lines towards the floor does not provide enough leverage as tilting the tiller will only pull the rope so much, not enough to turn the short tiller at the stern all the way.

-
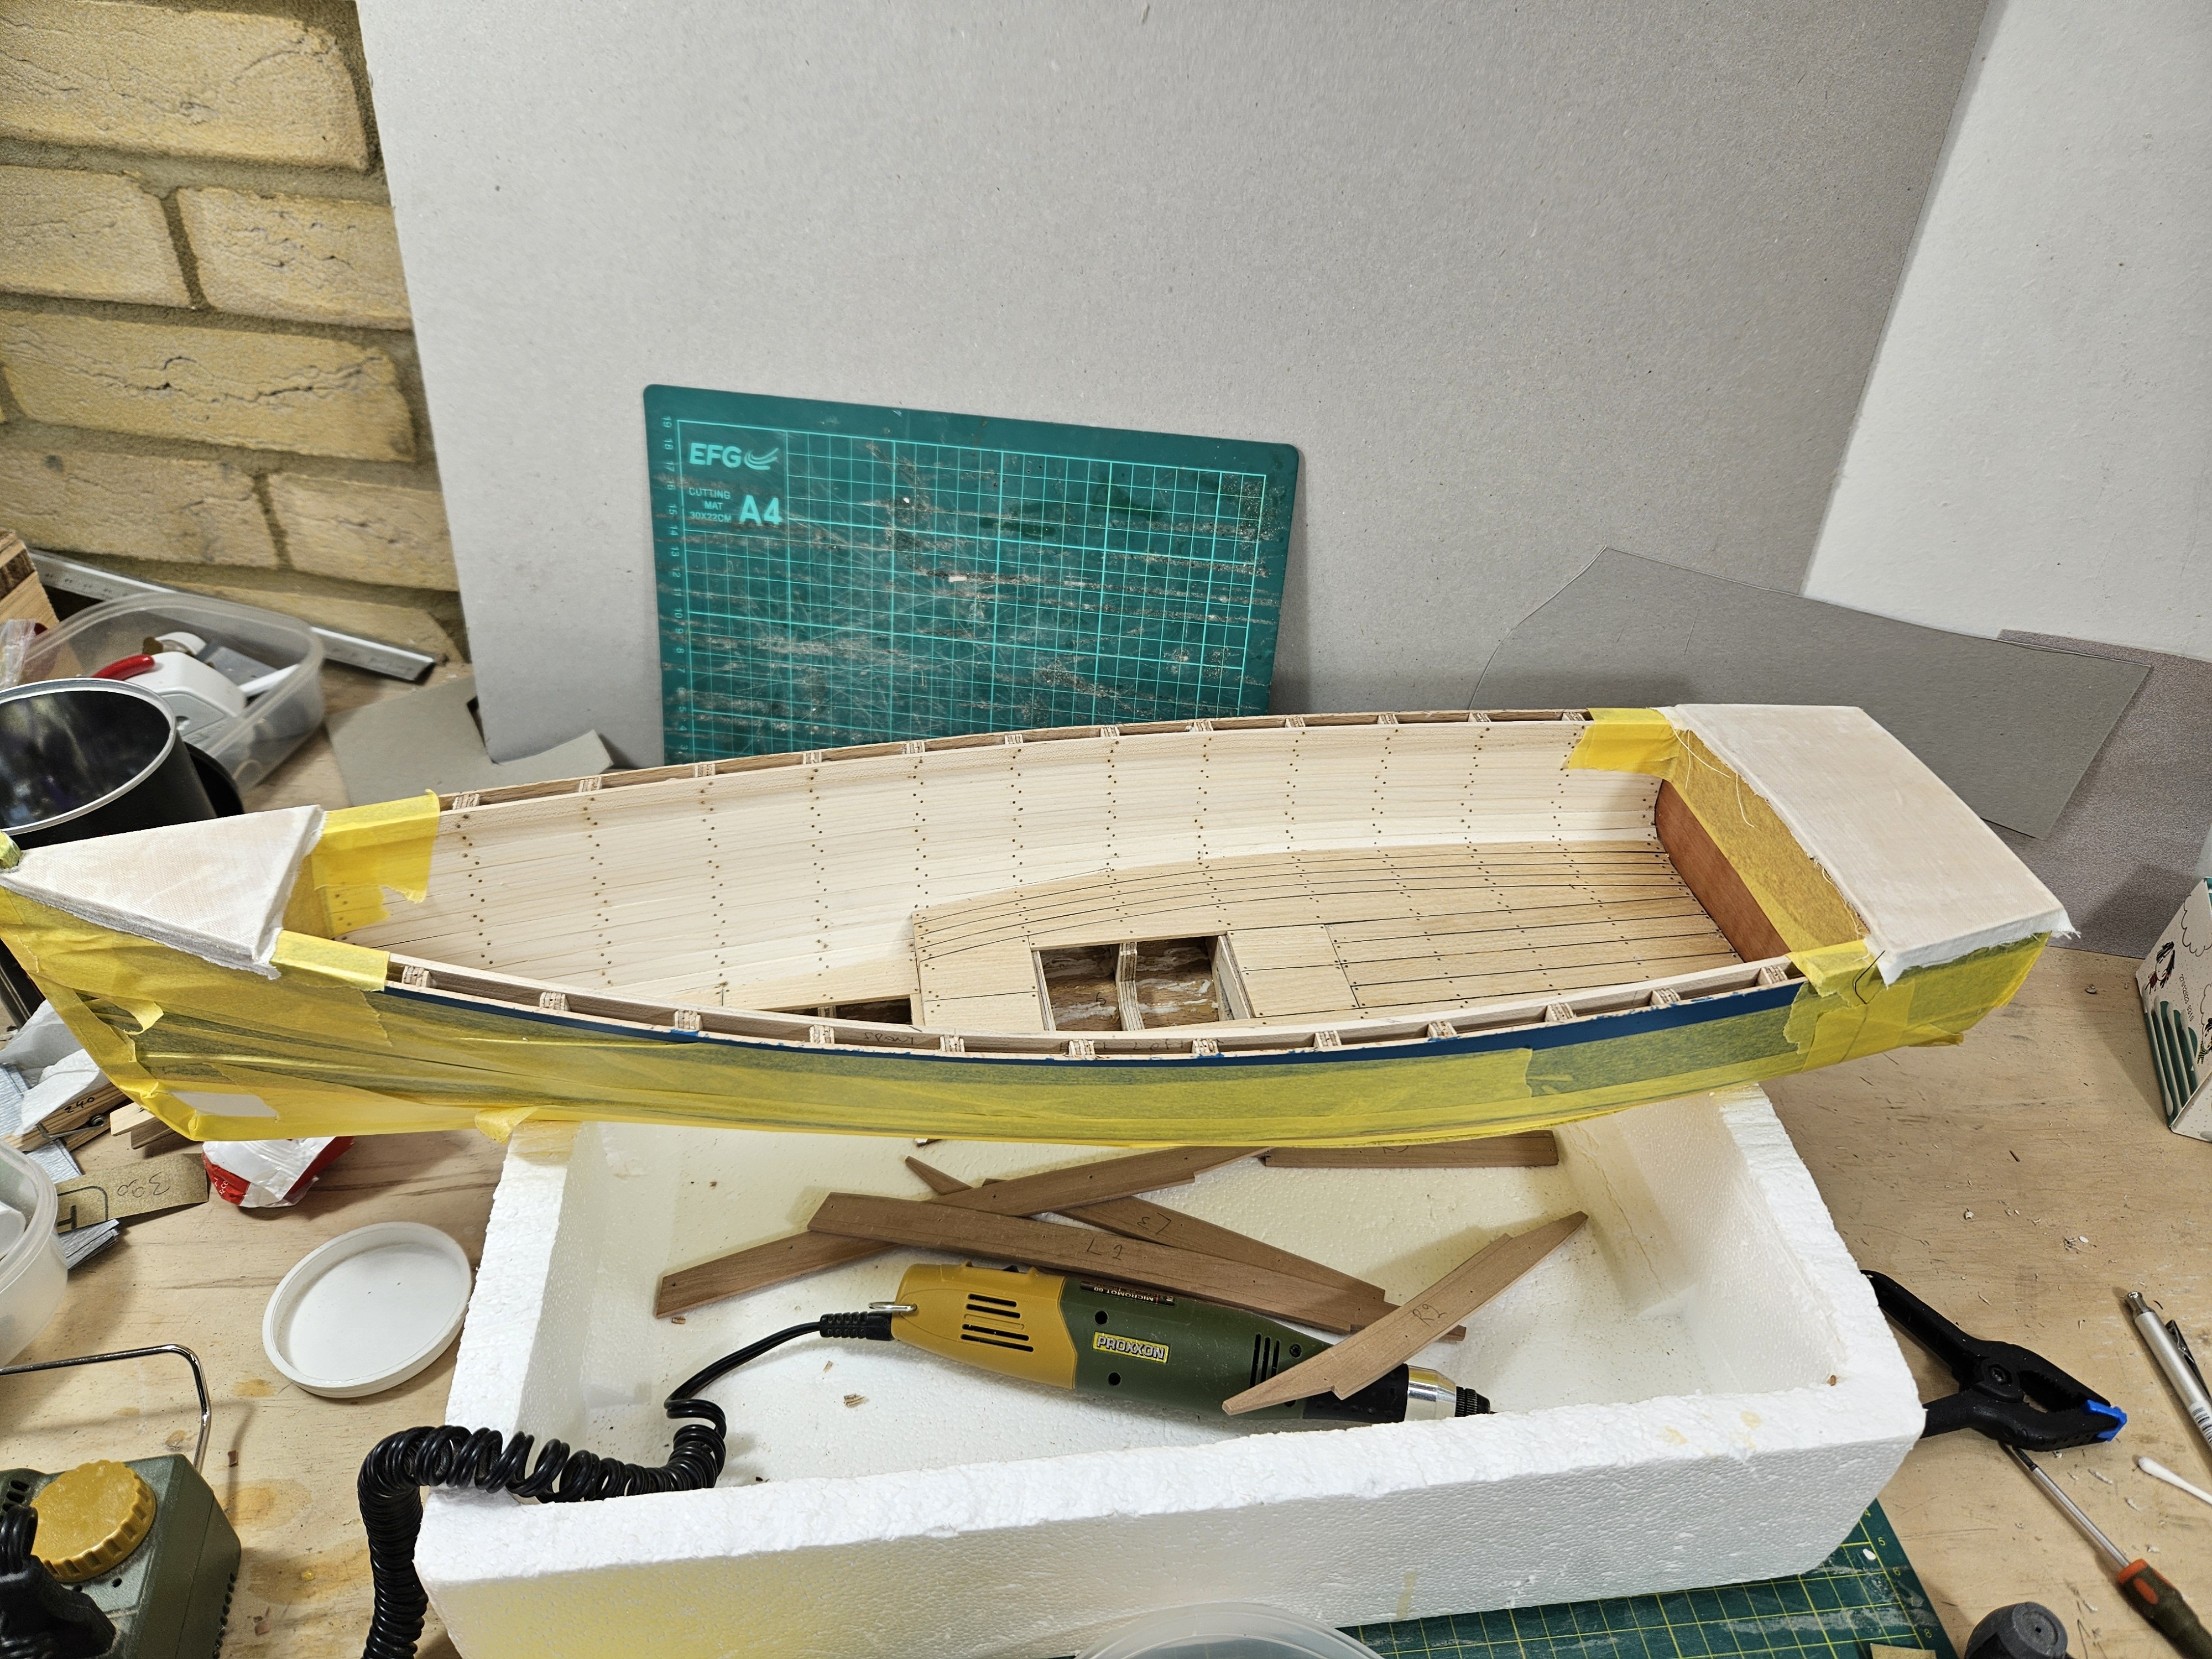
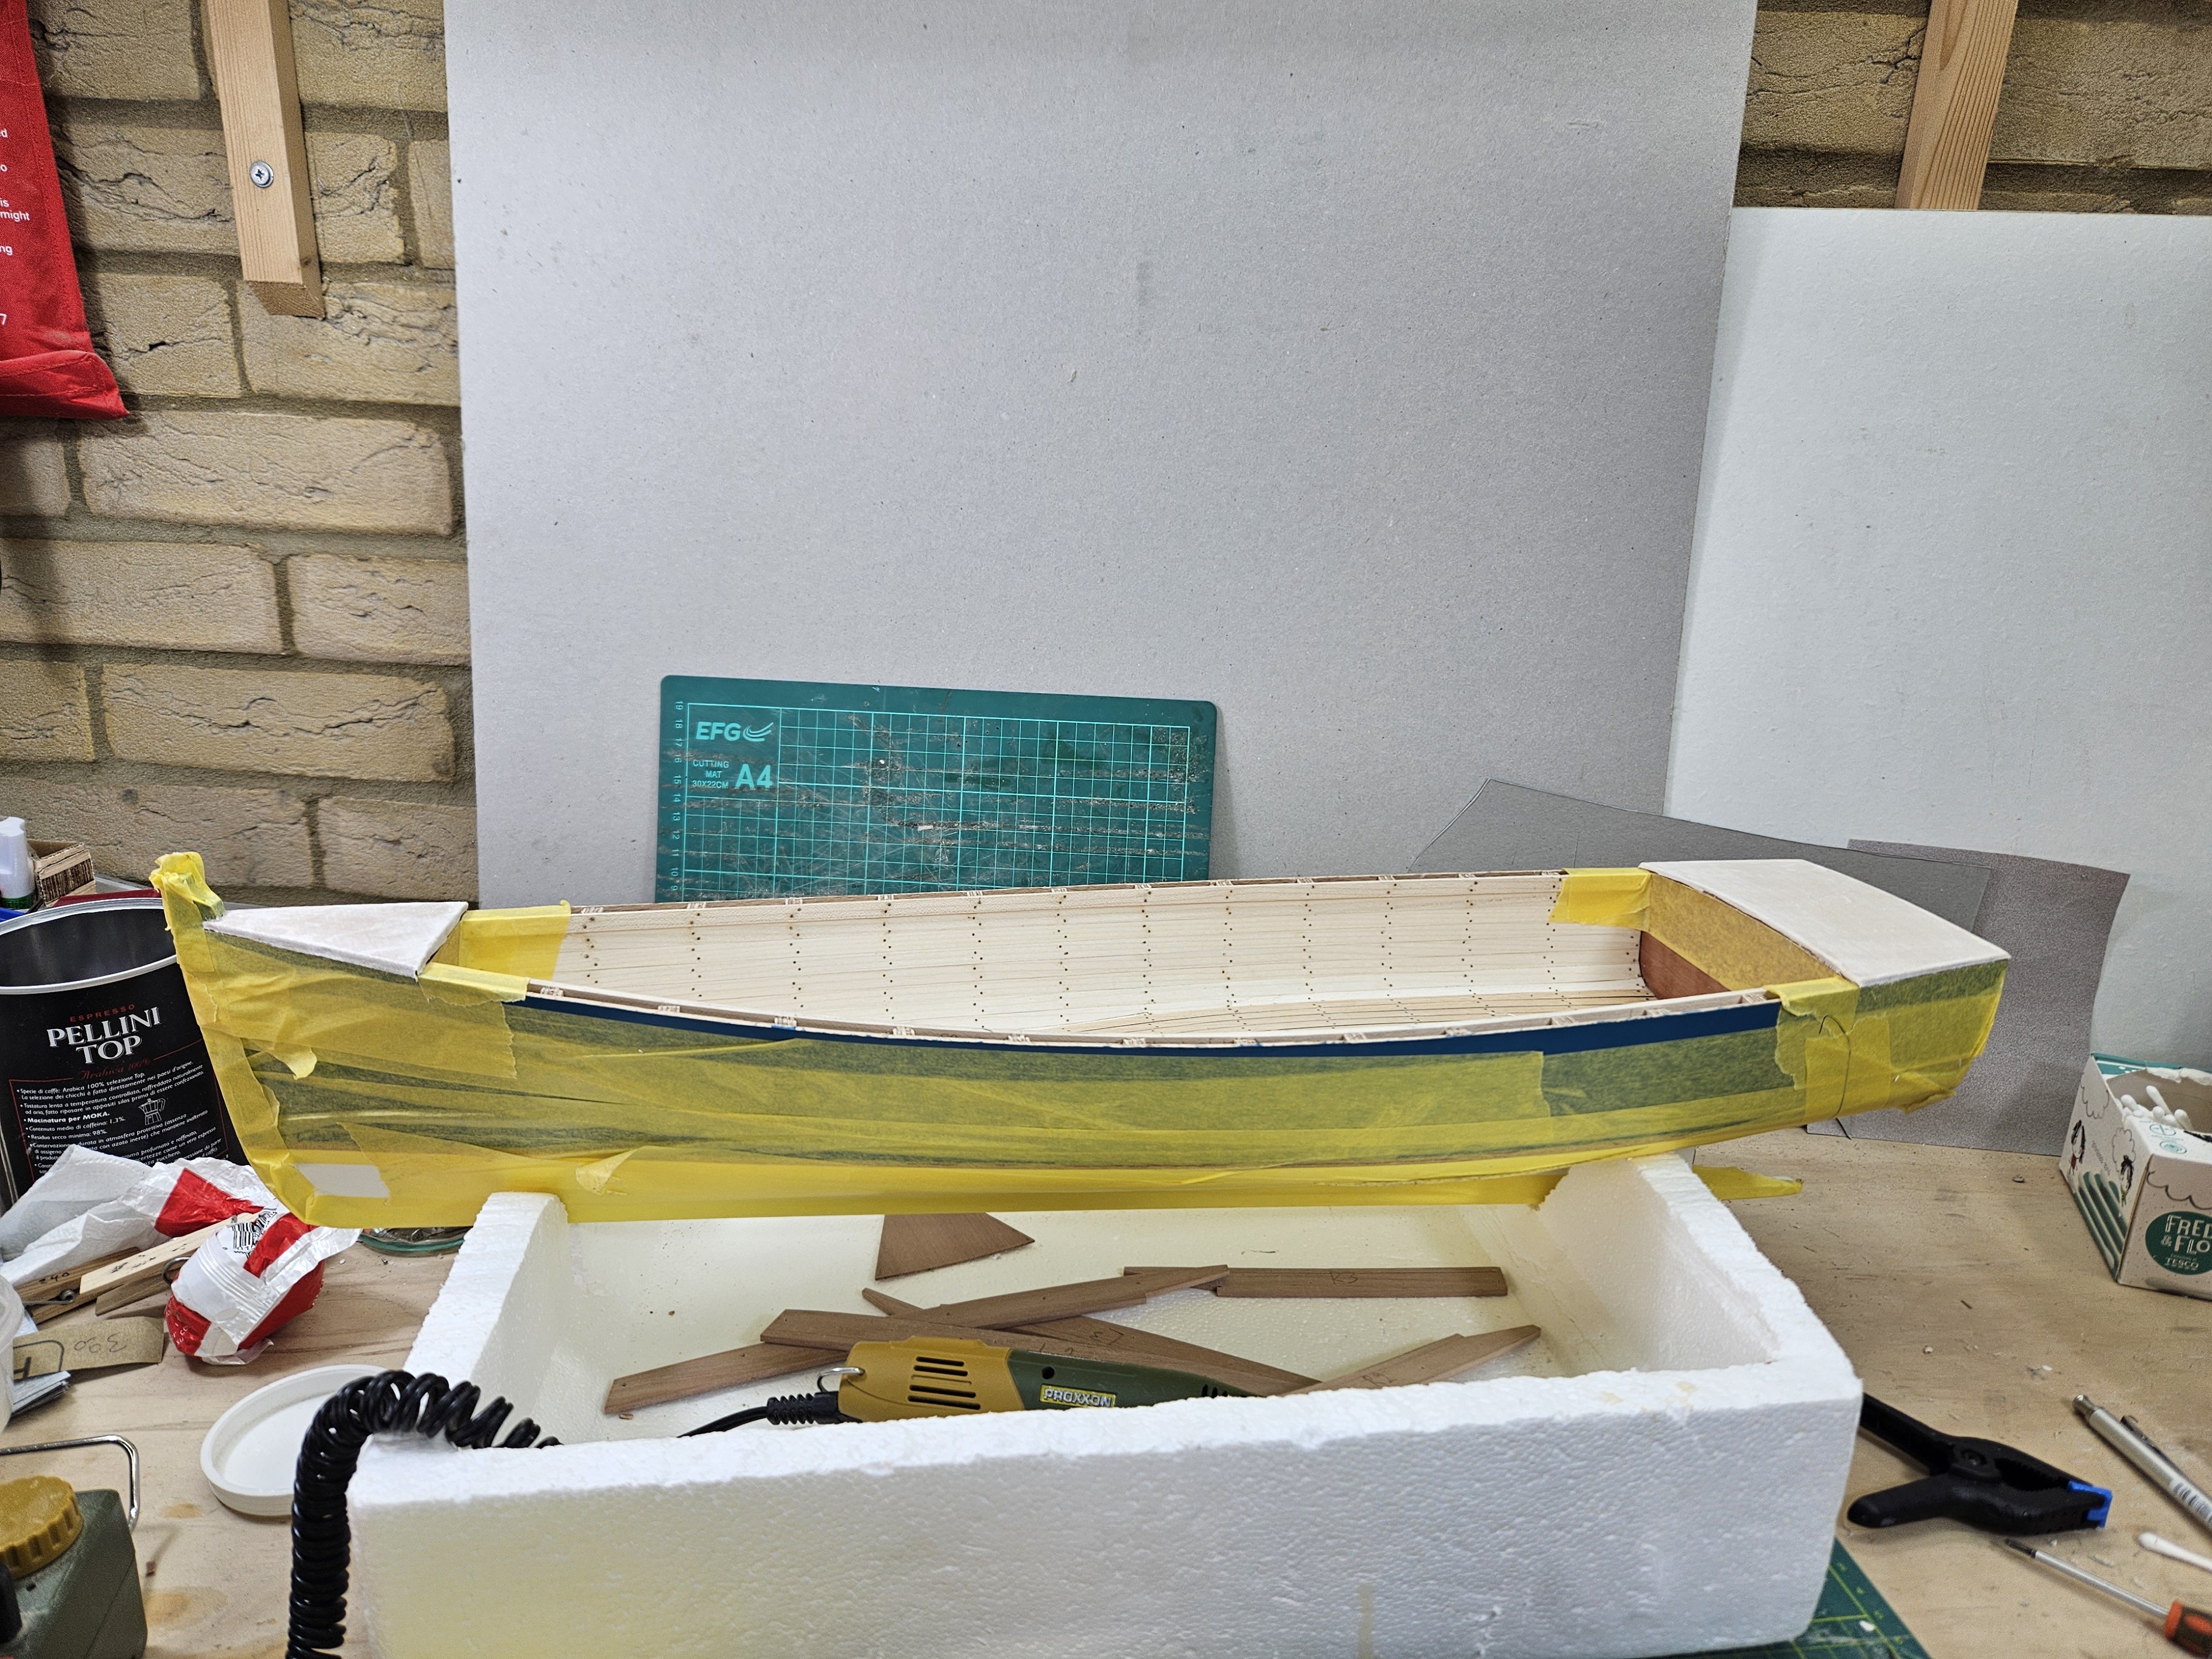
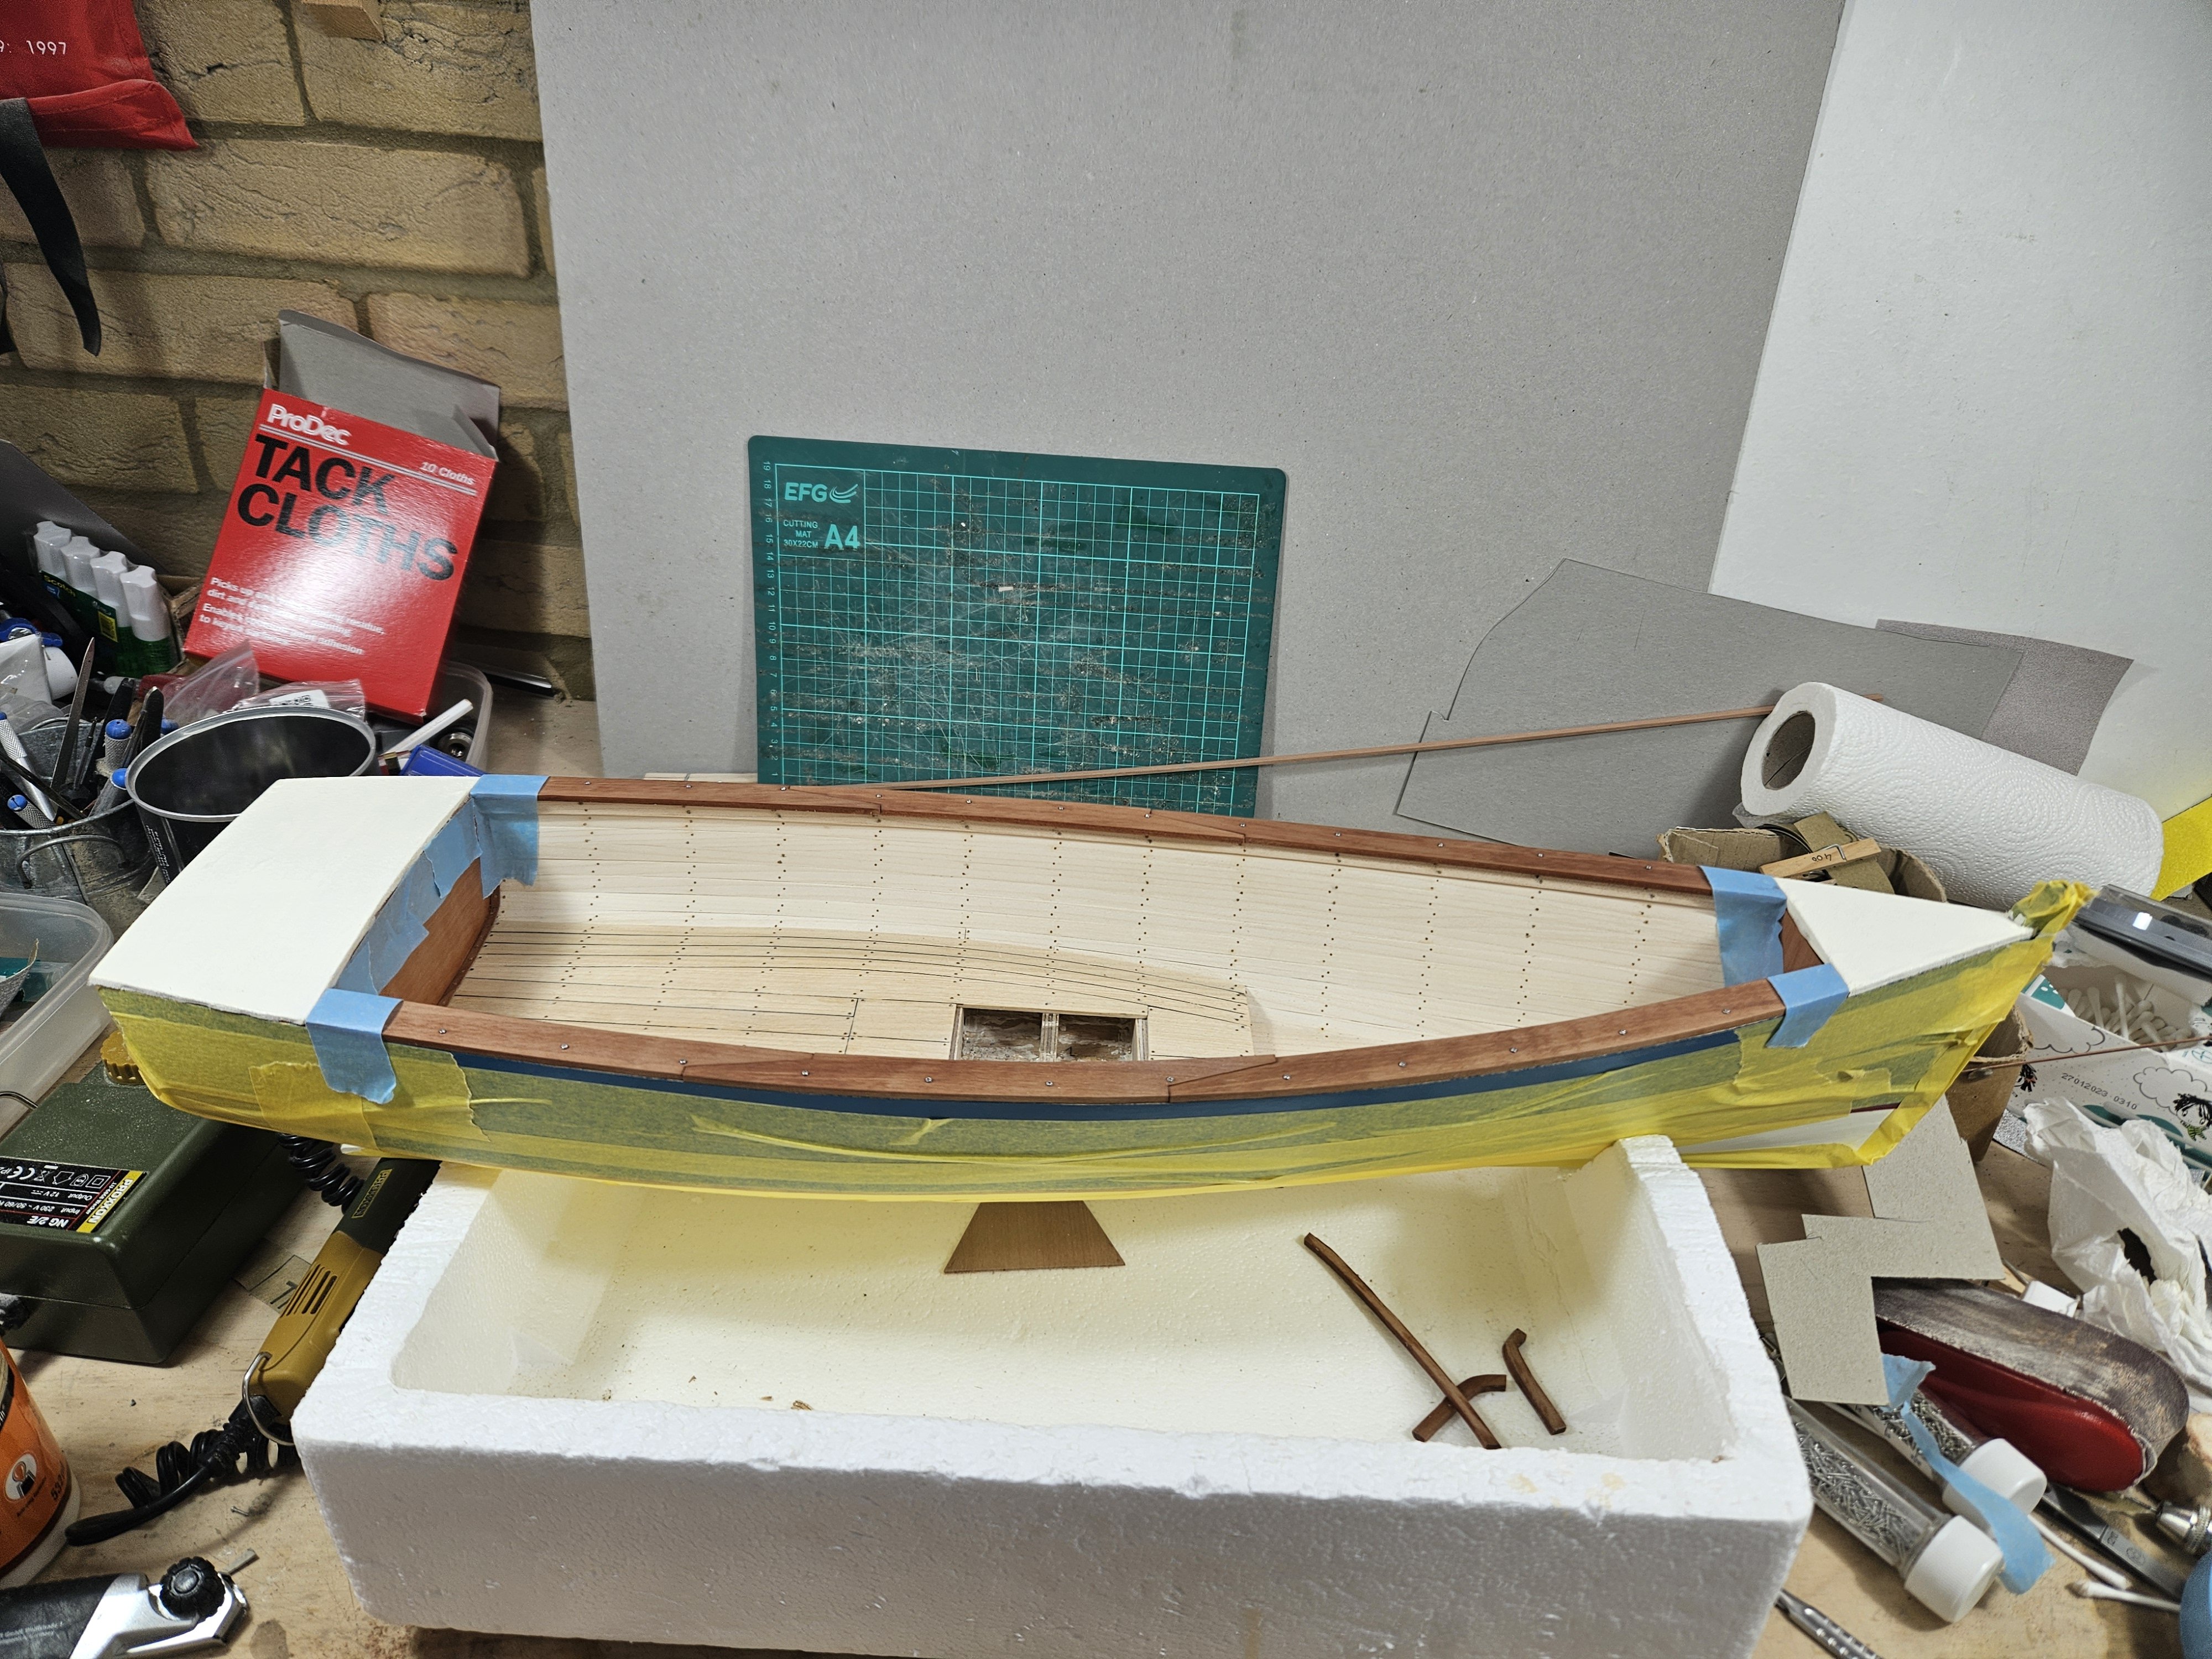
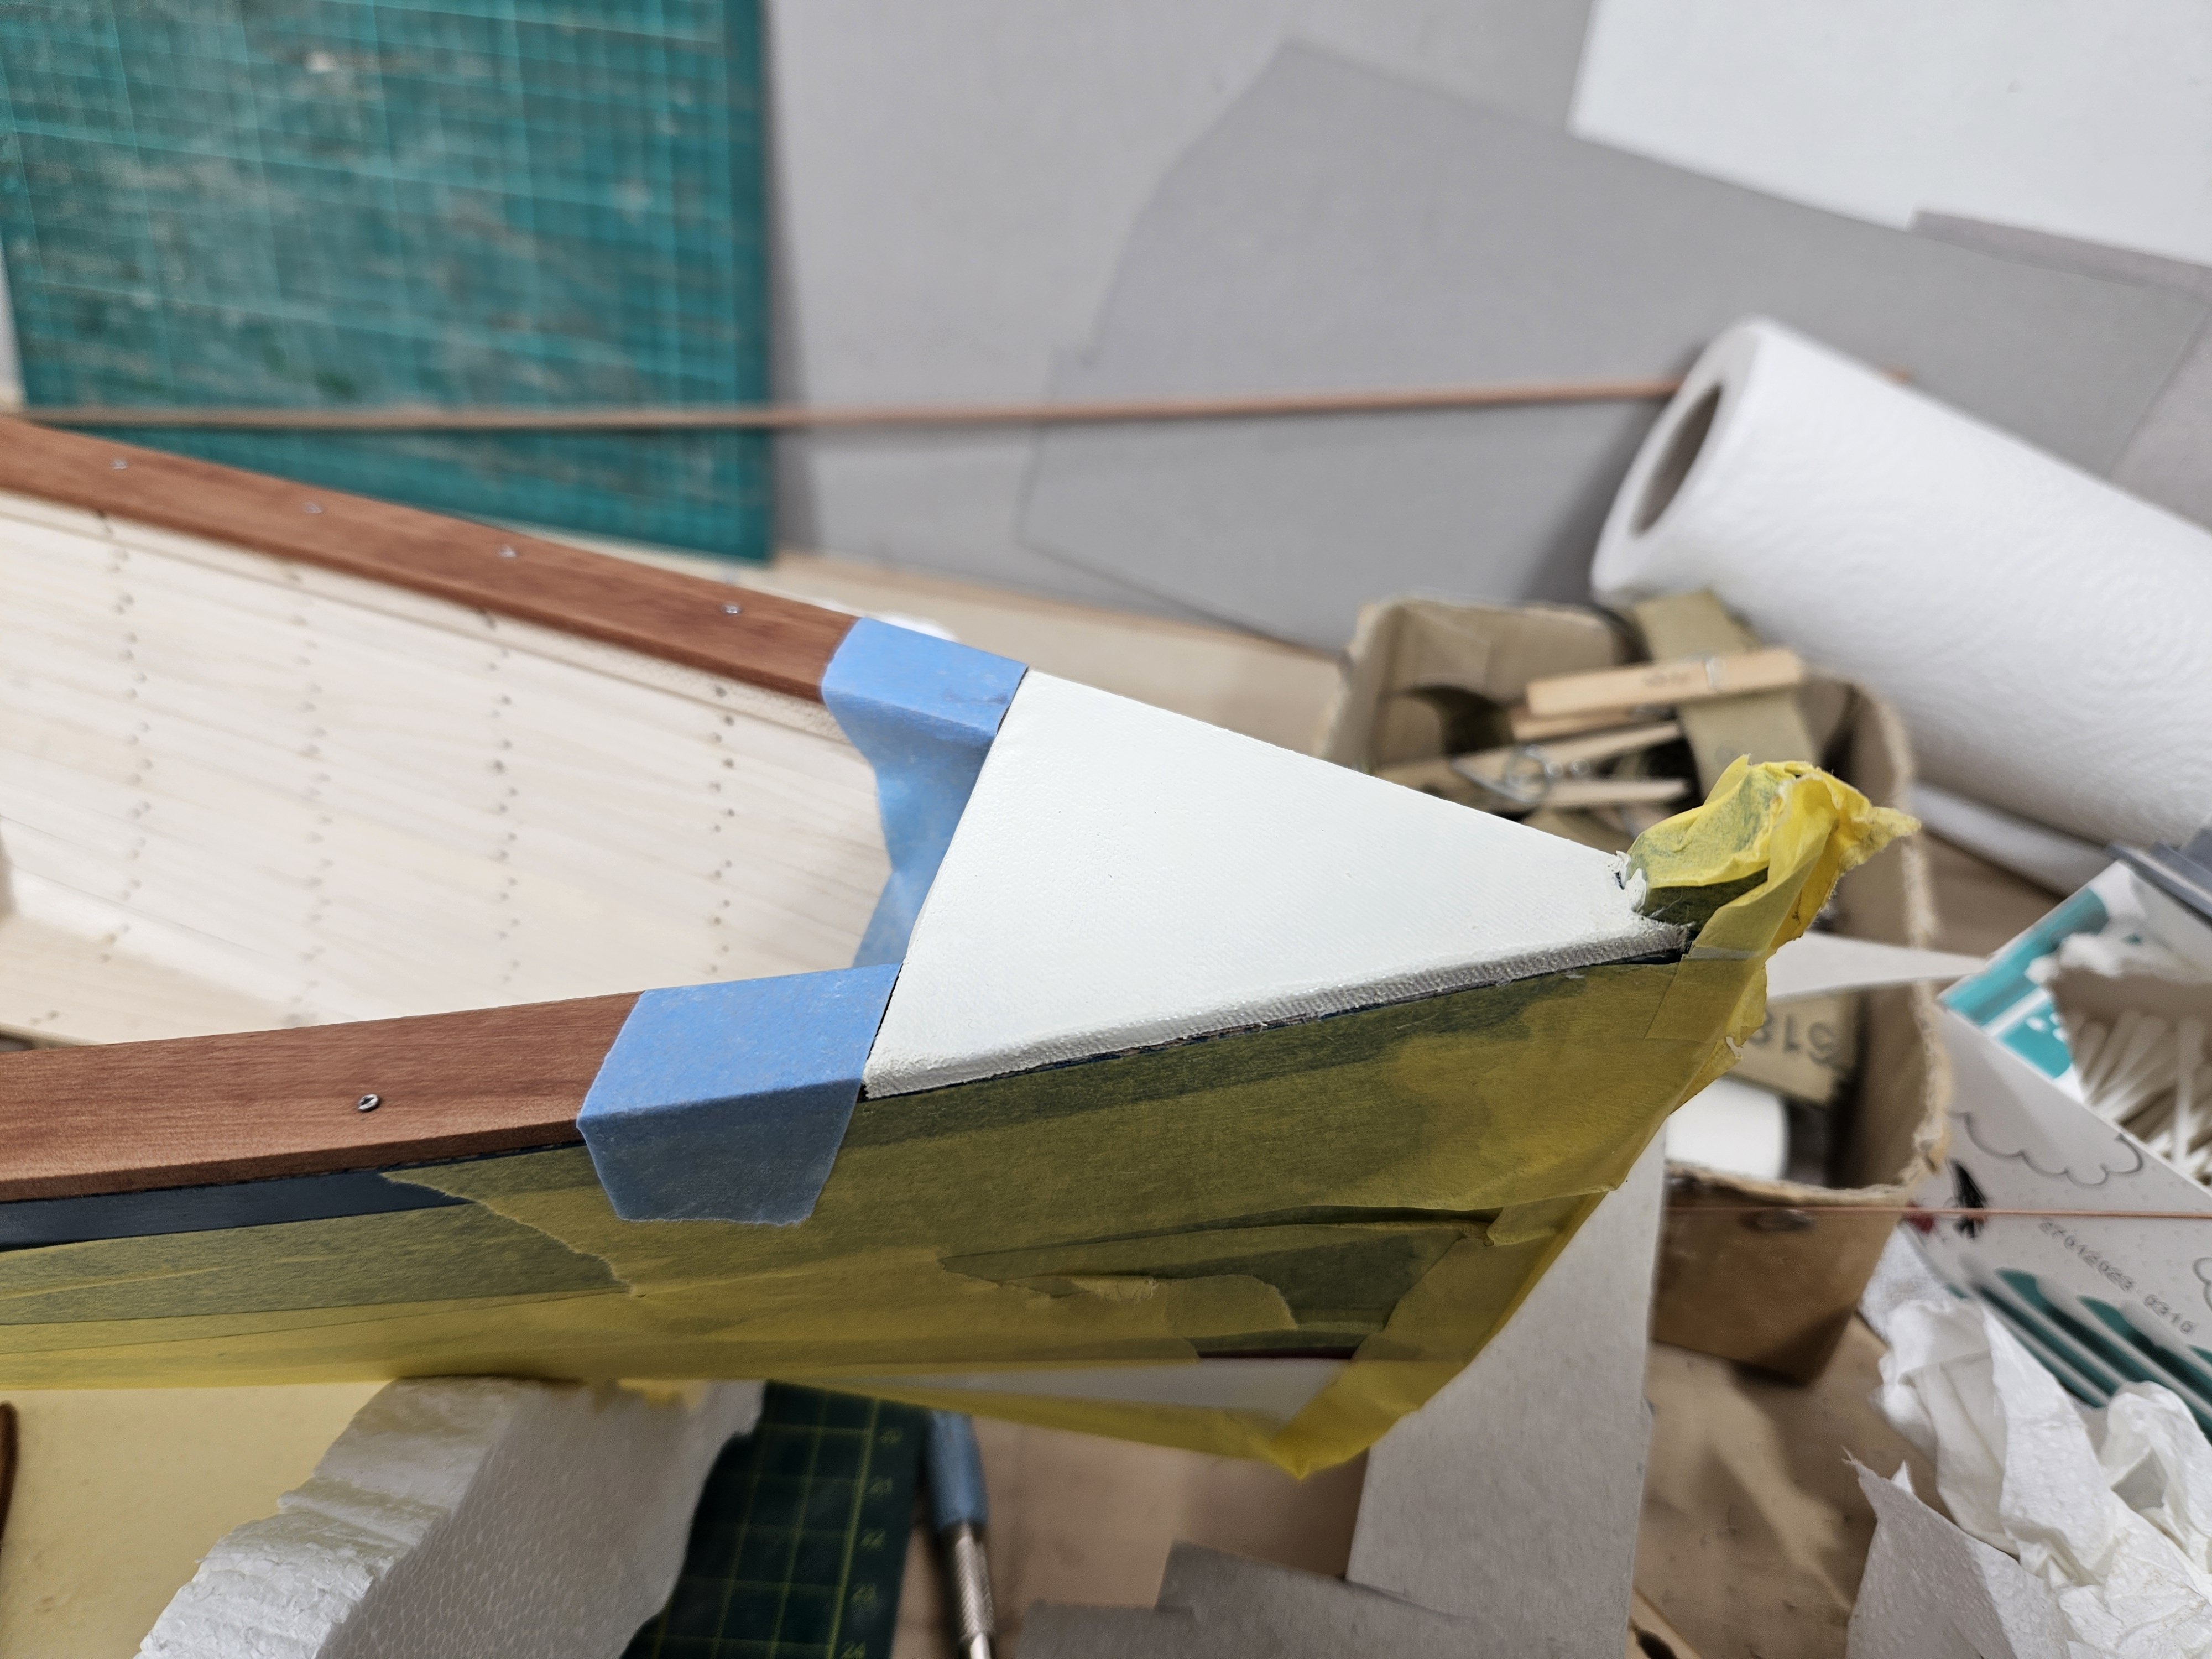
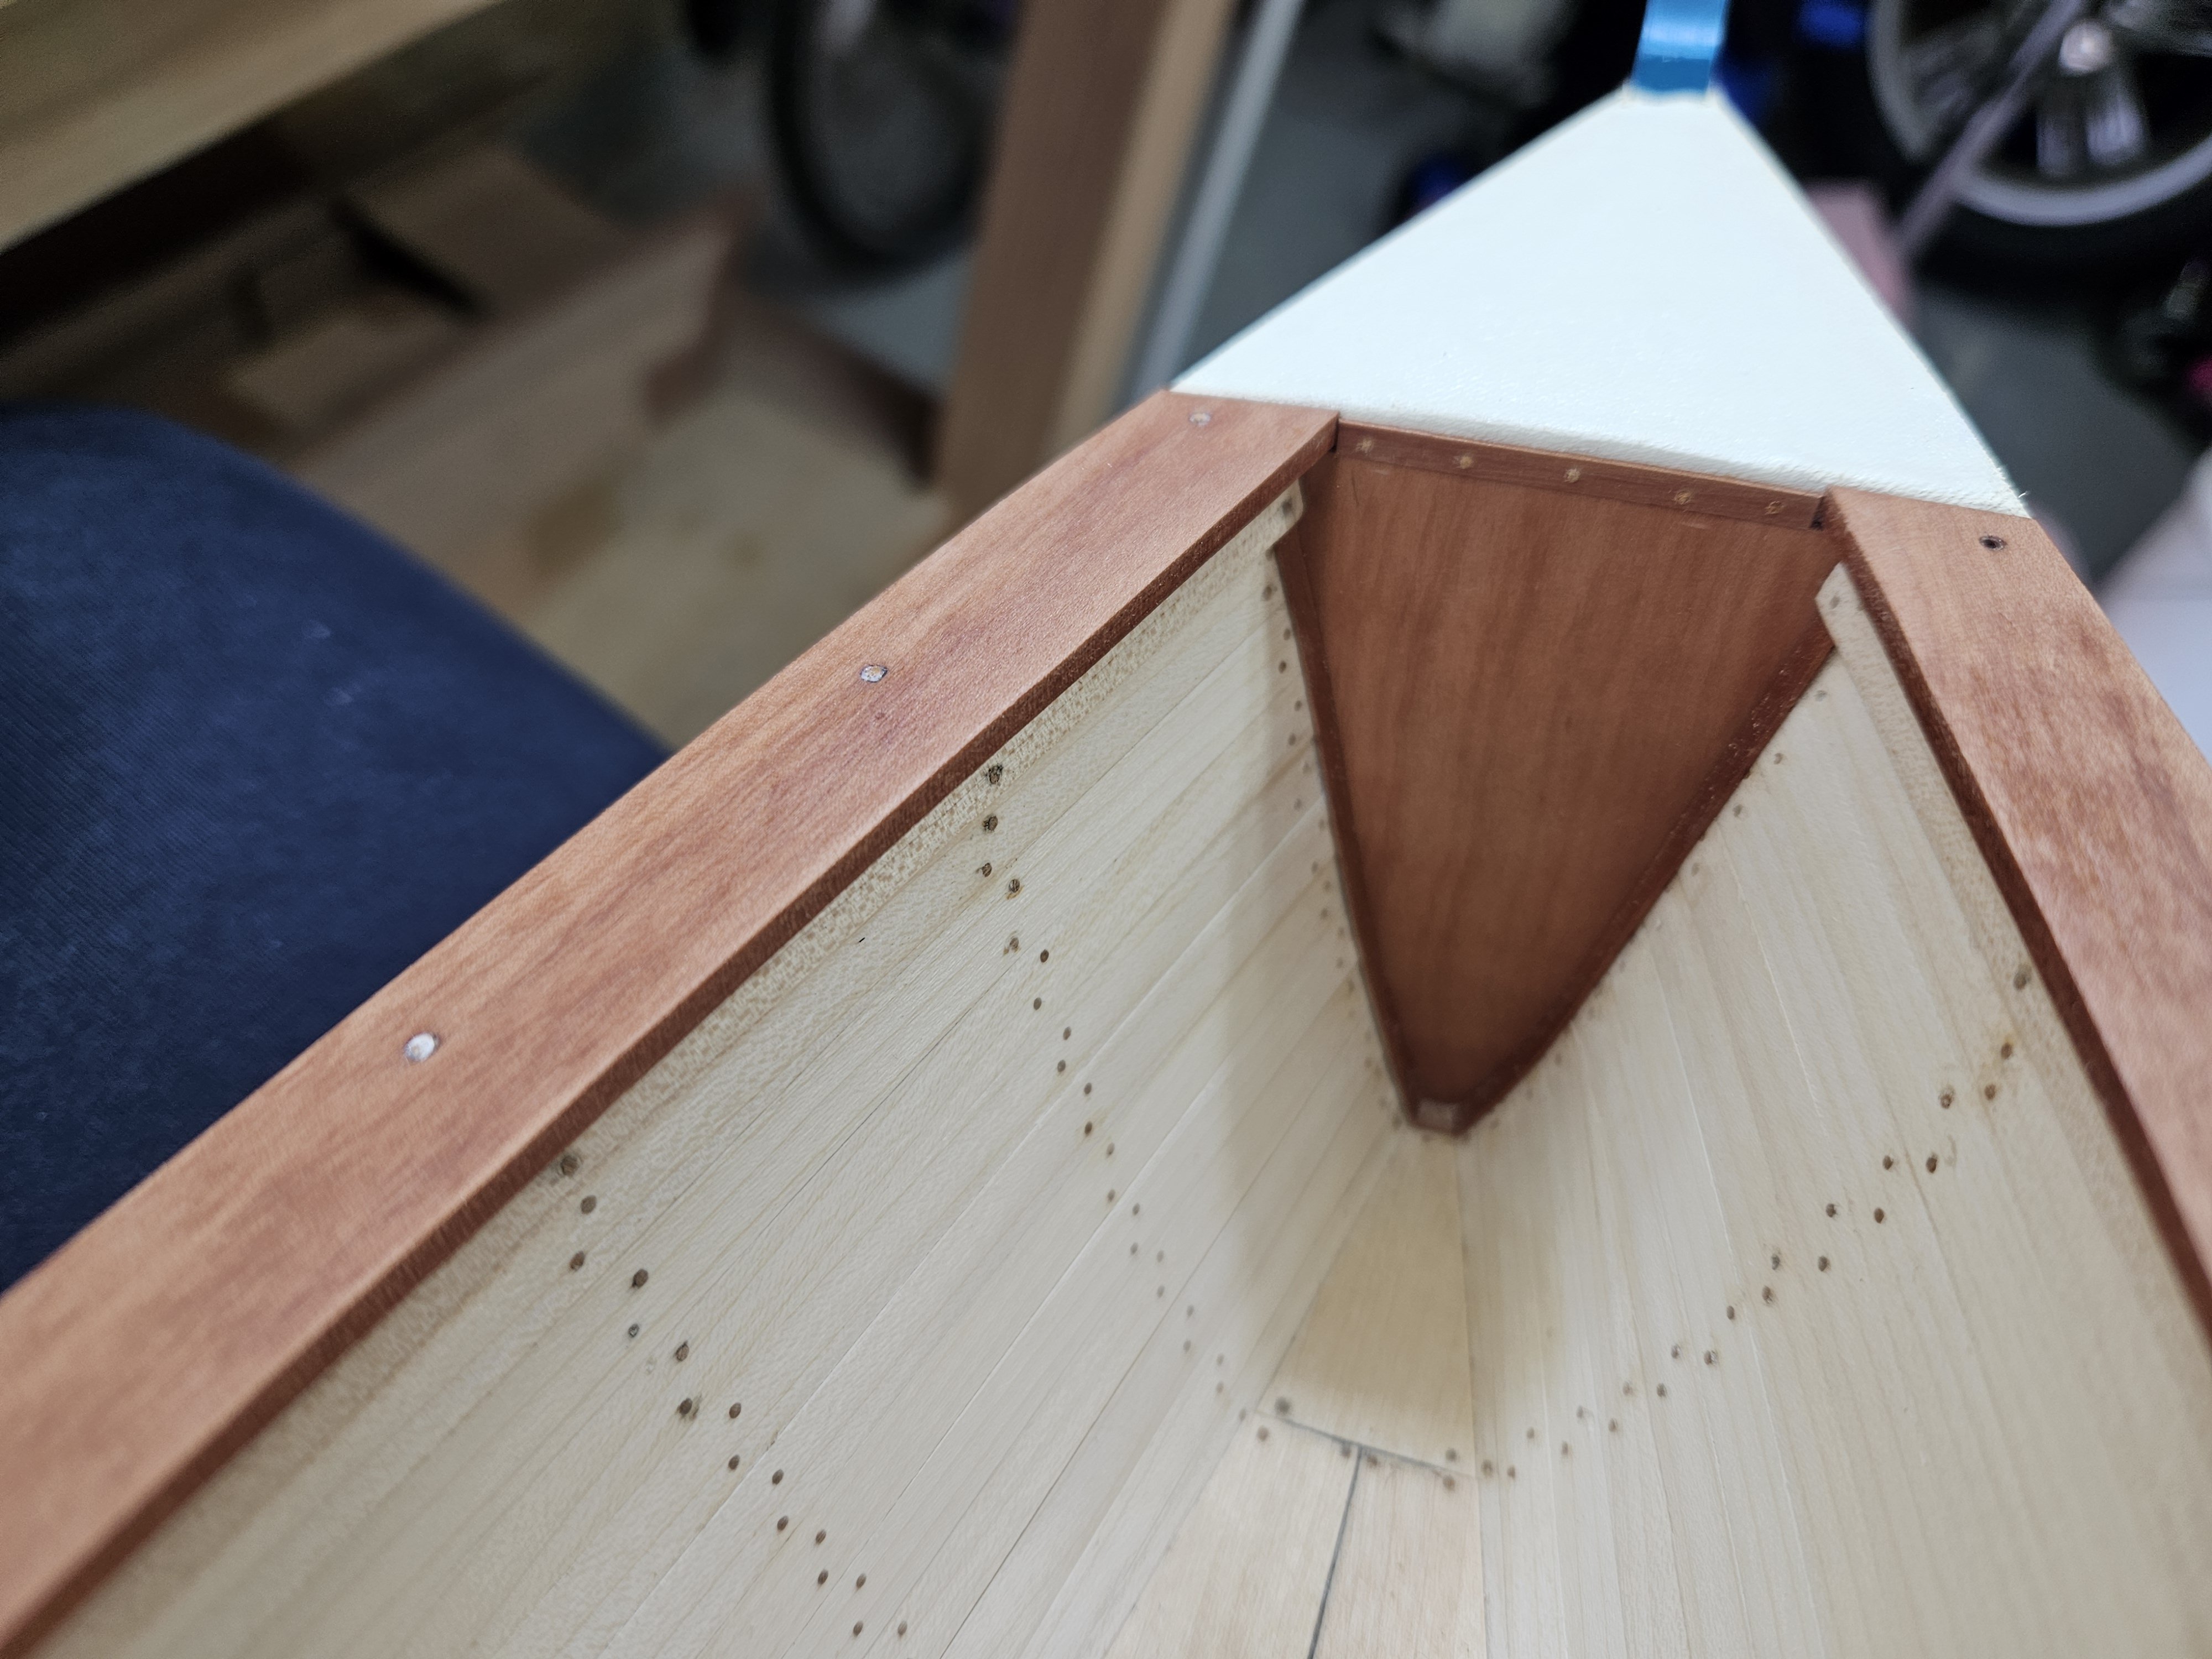
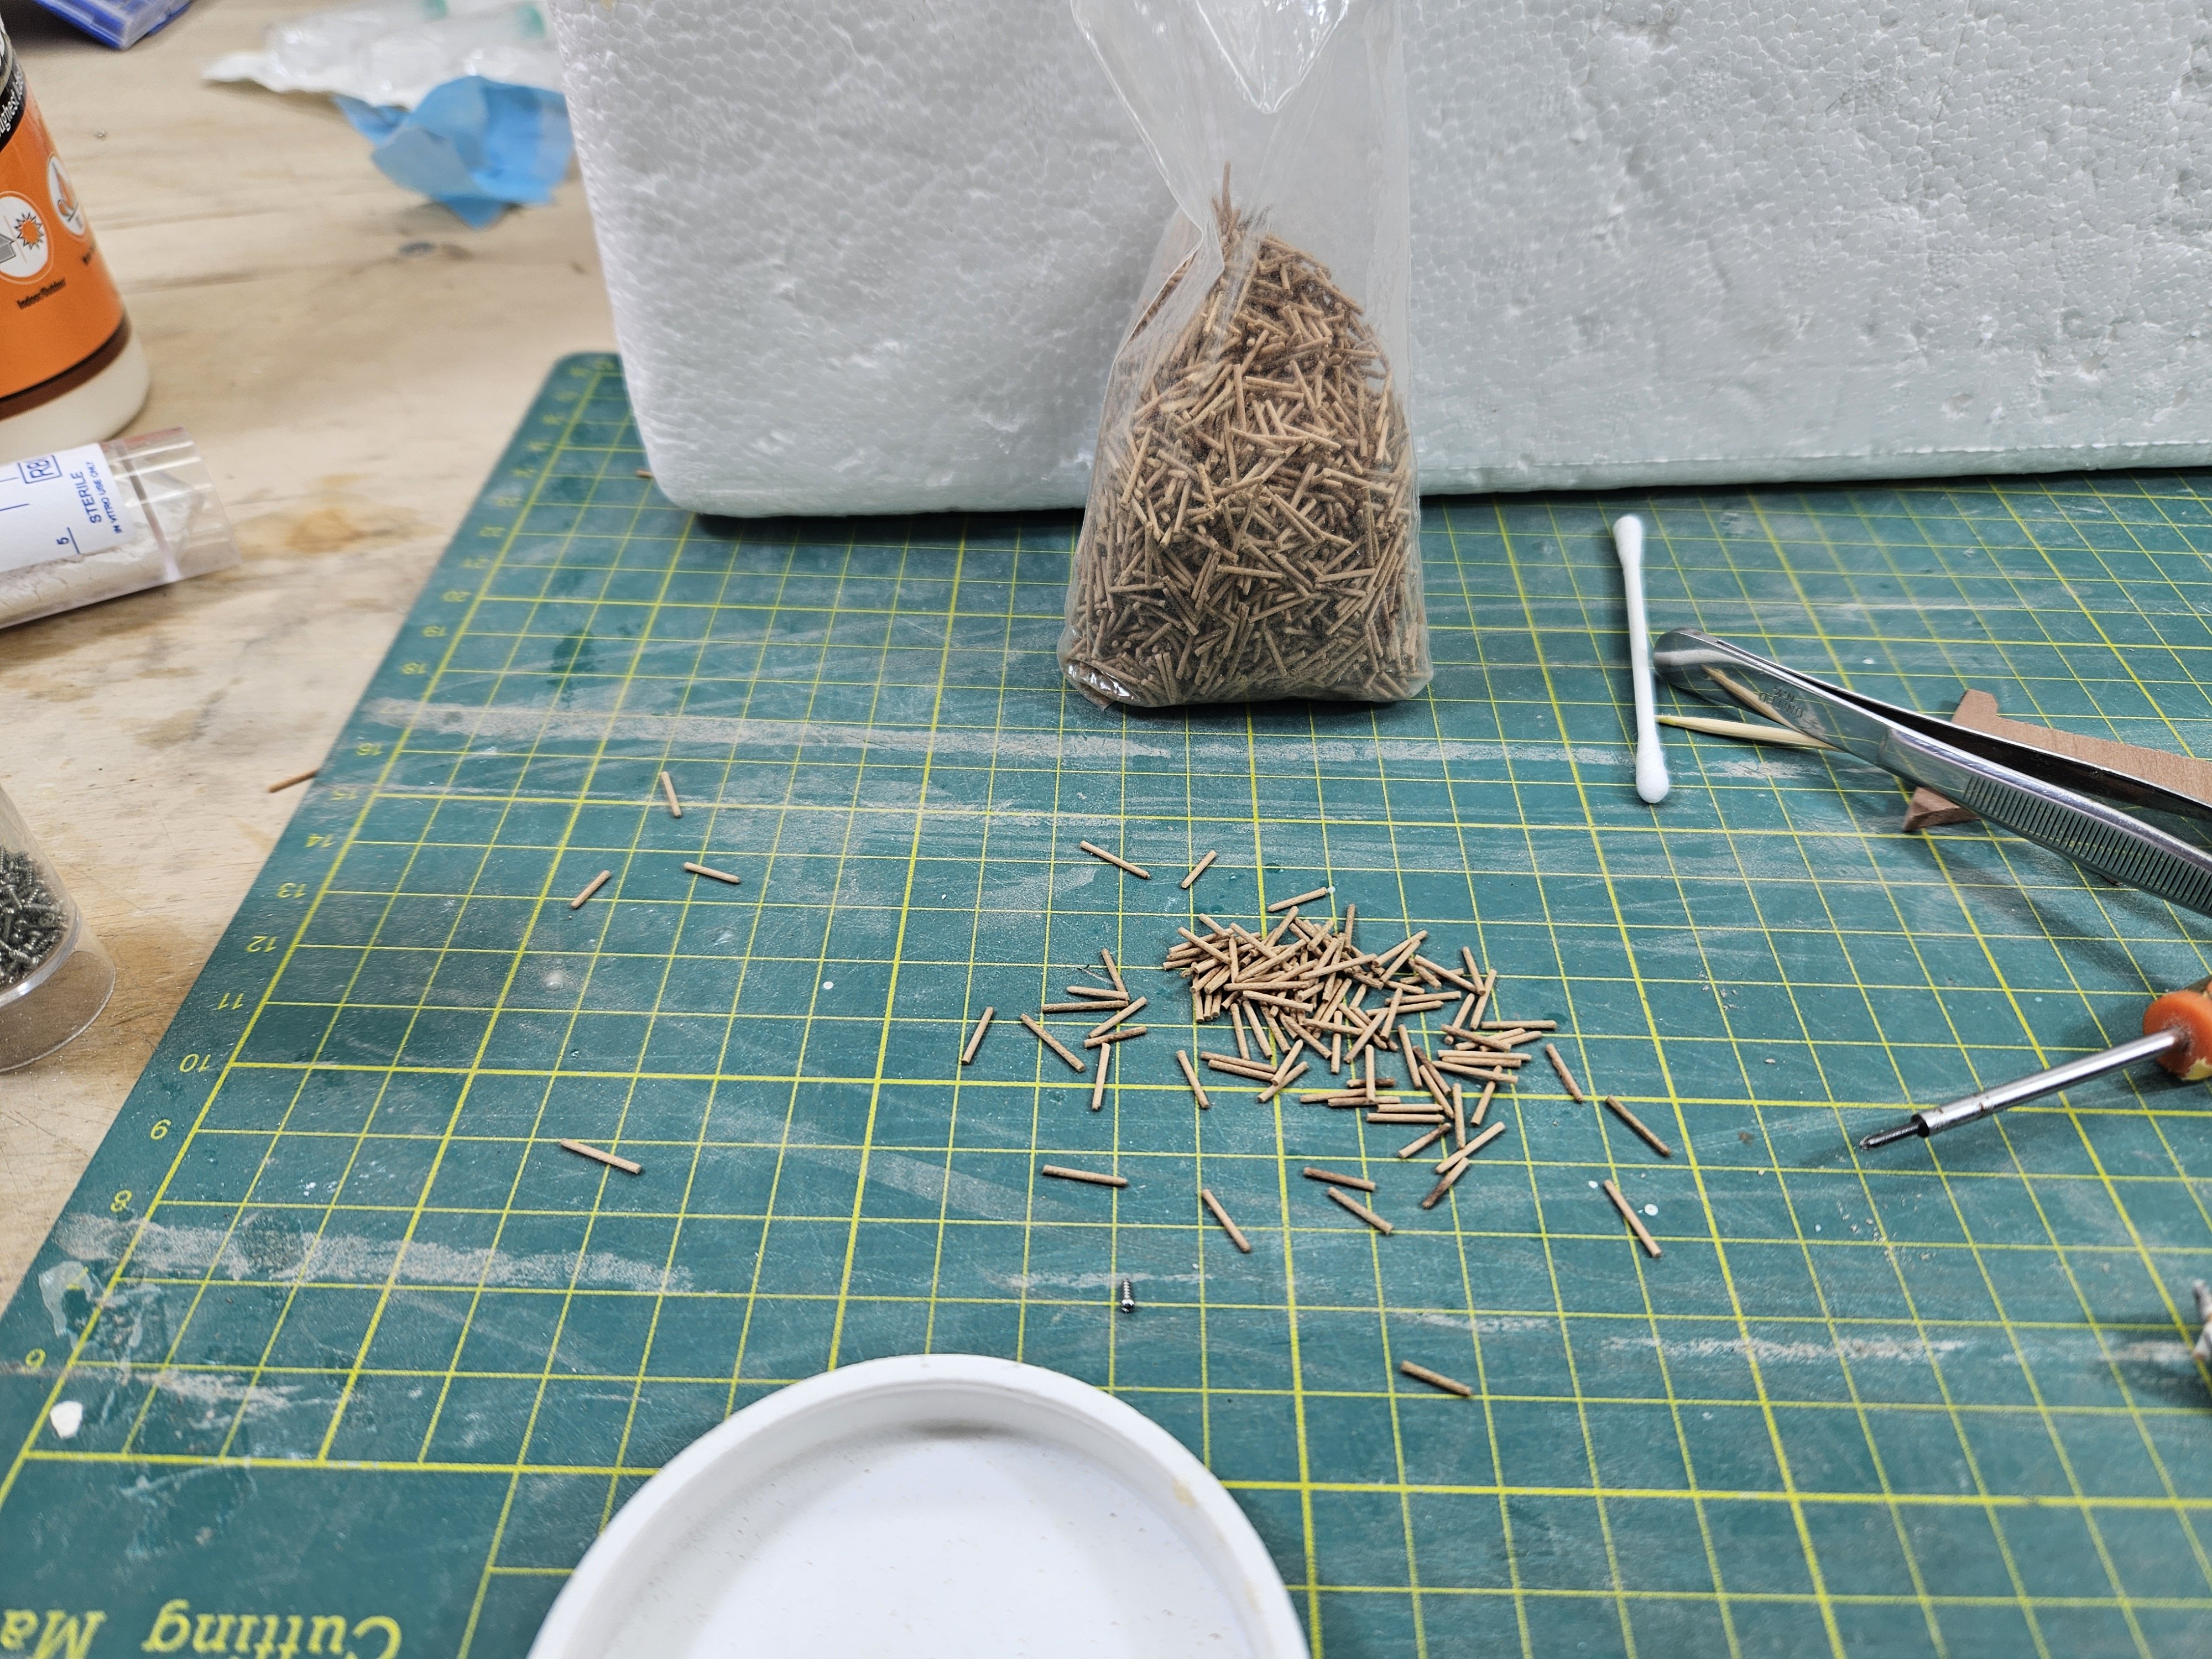
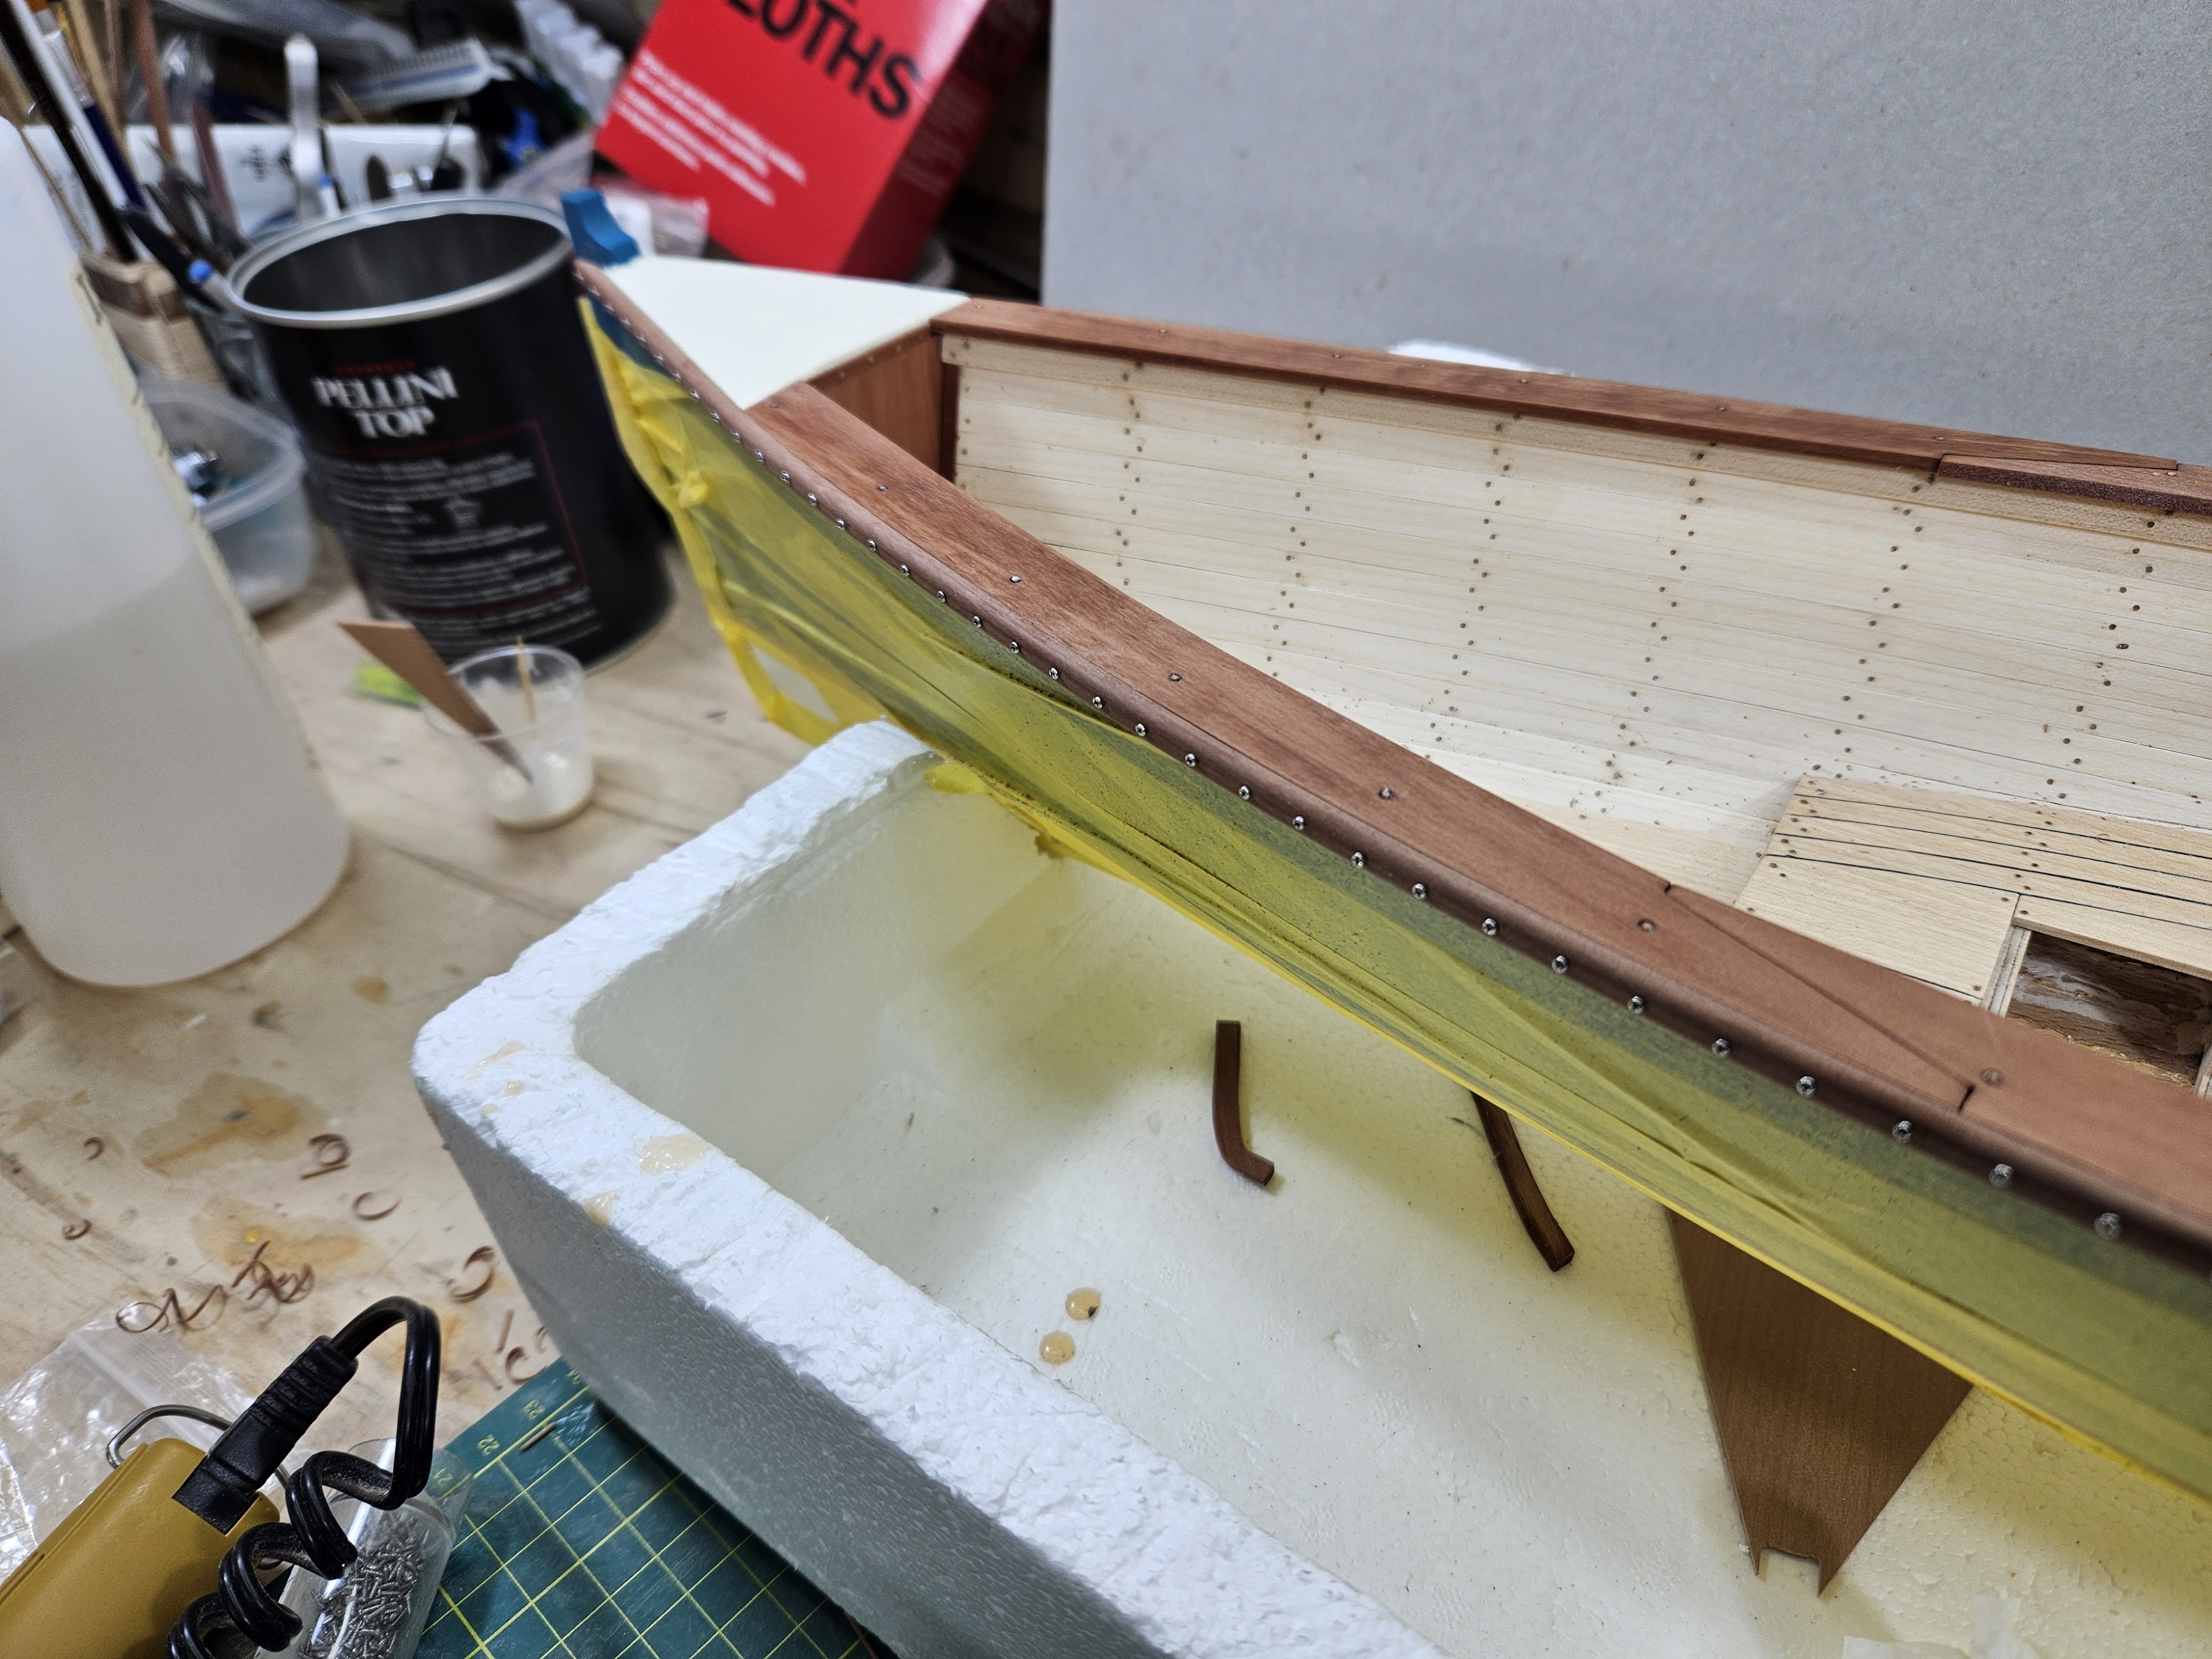
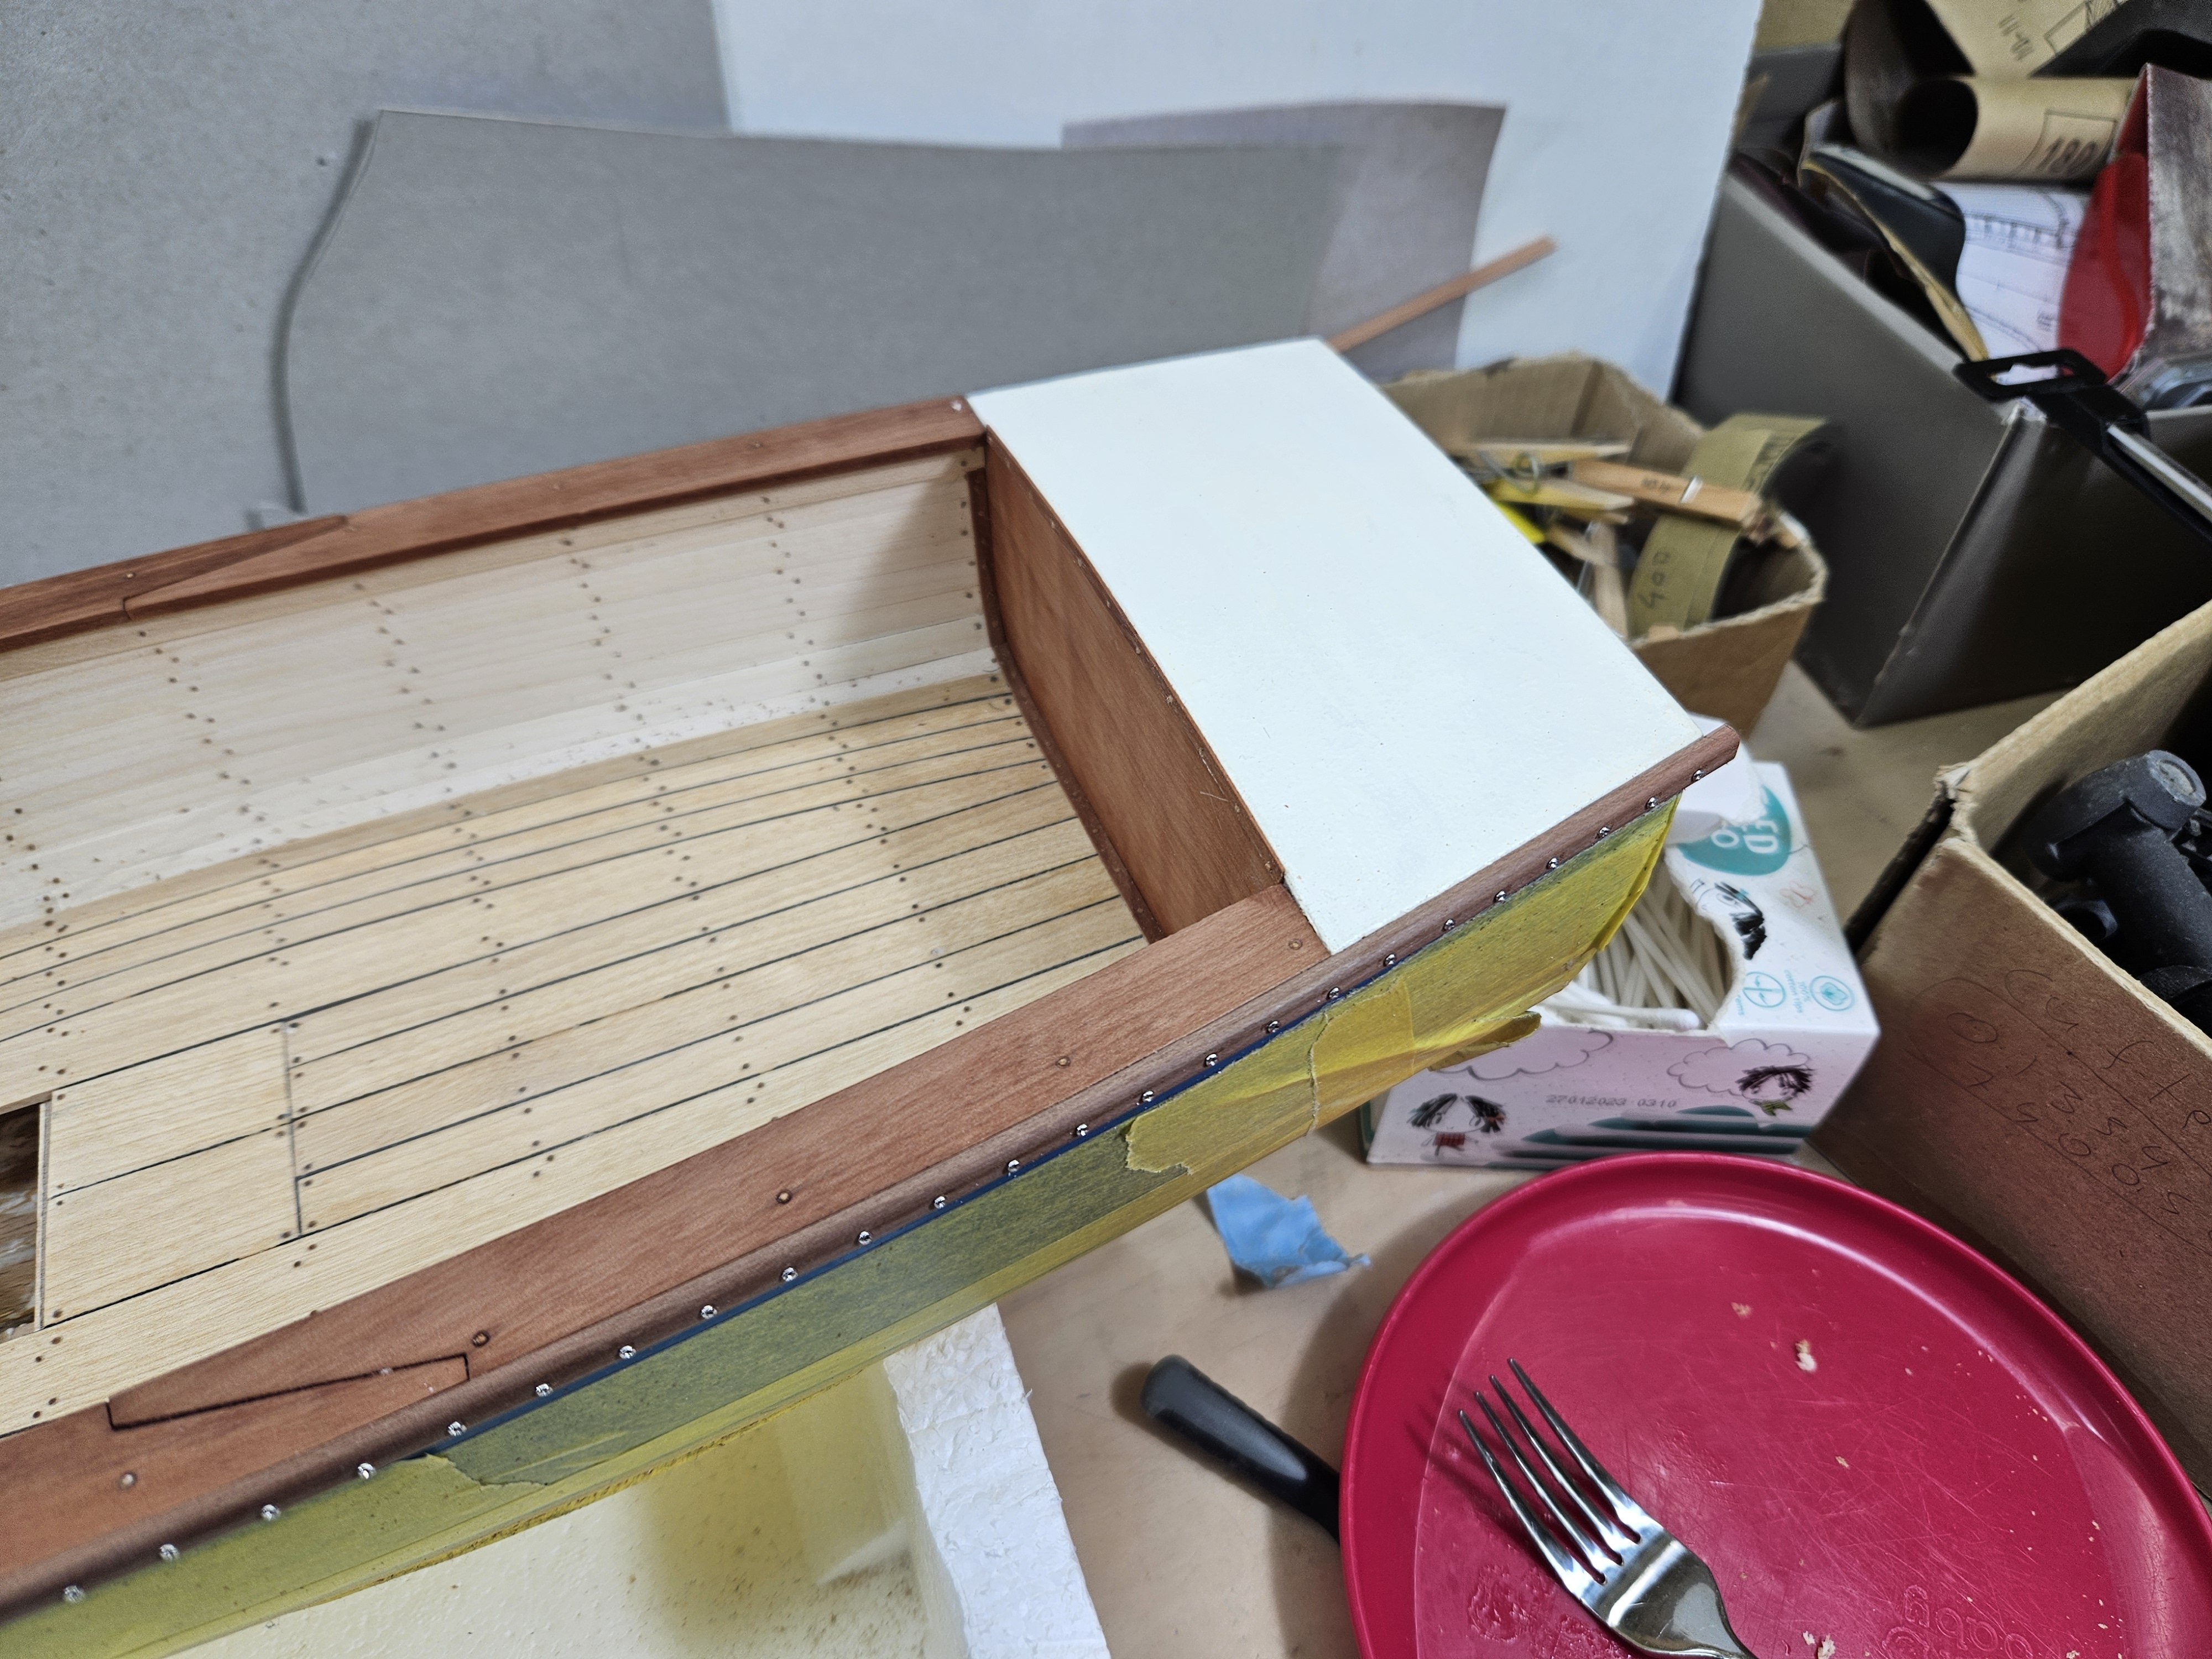
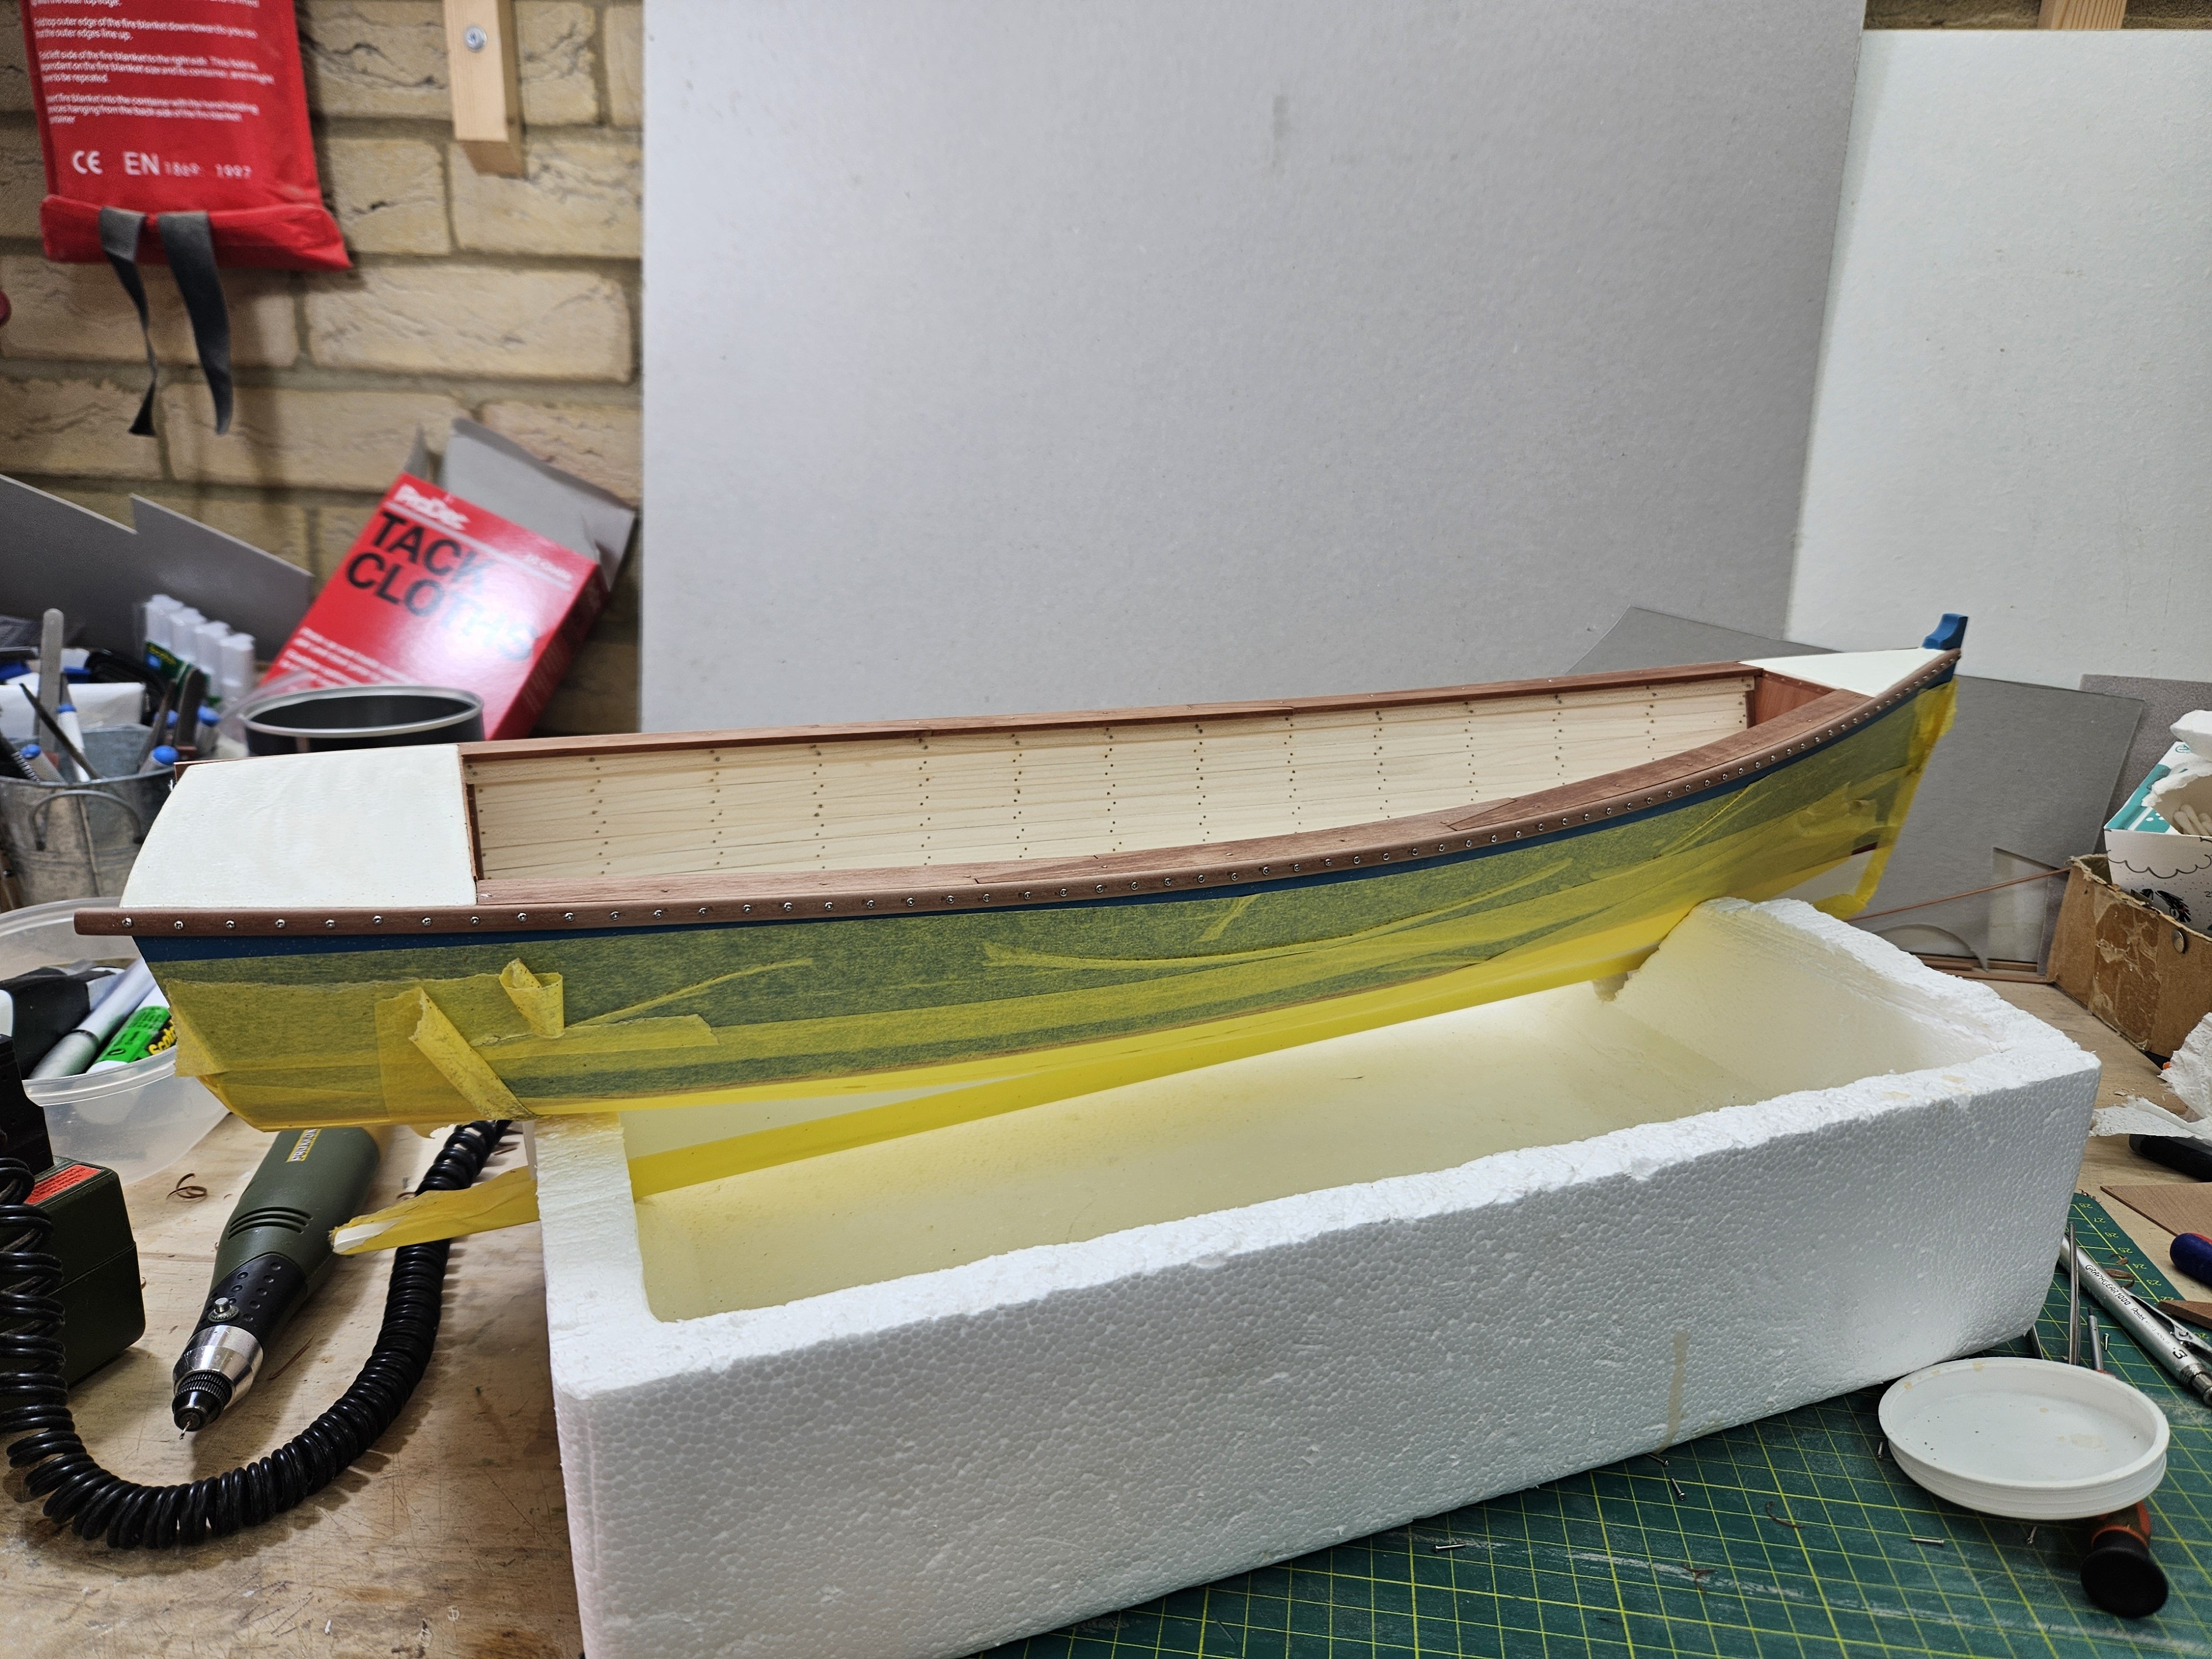
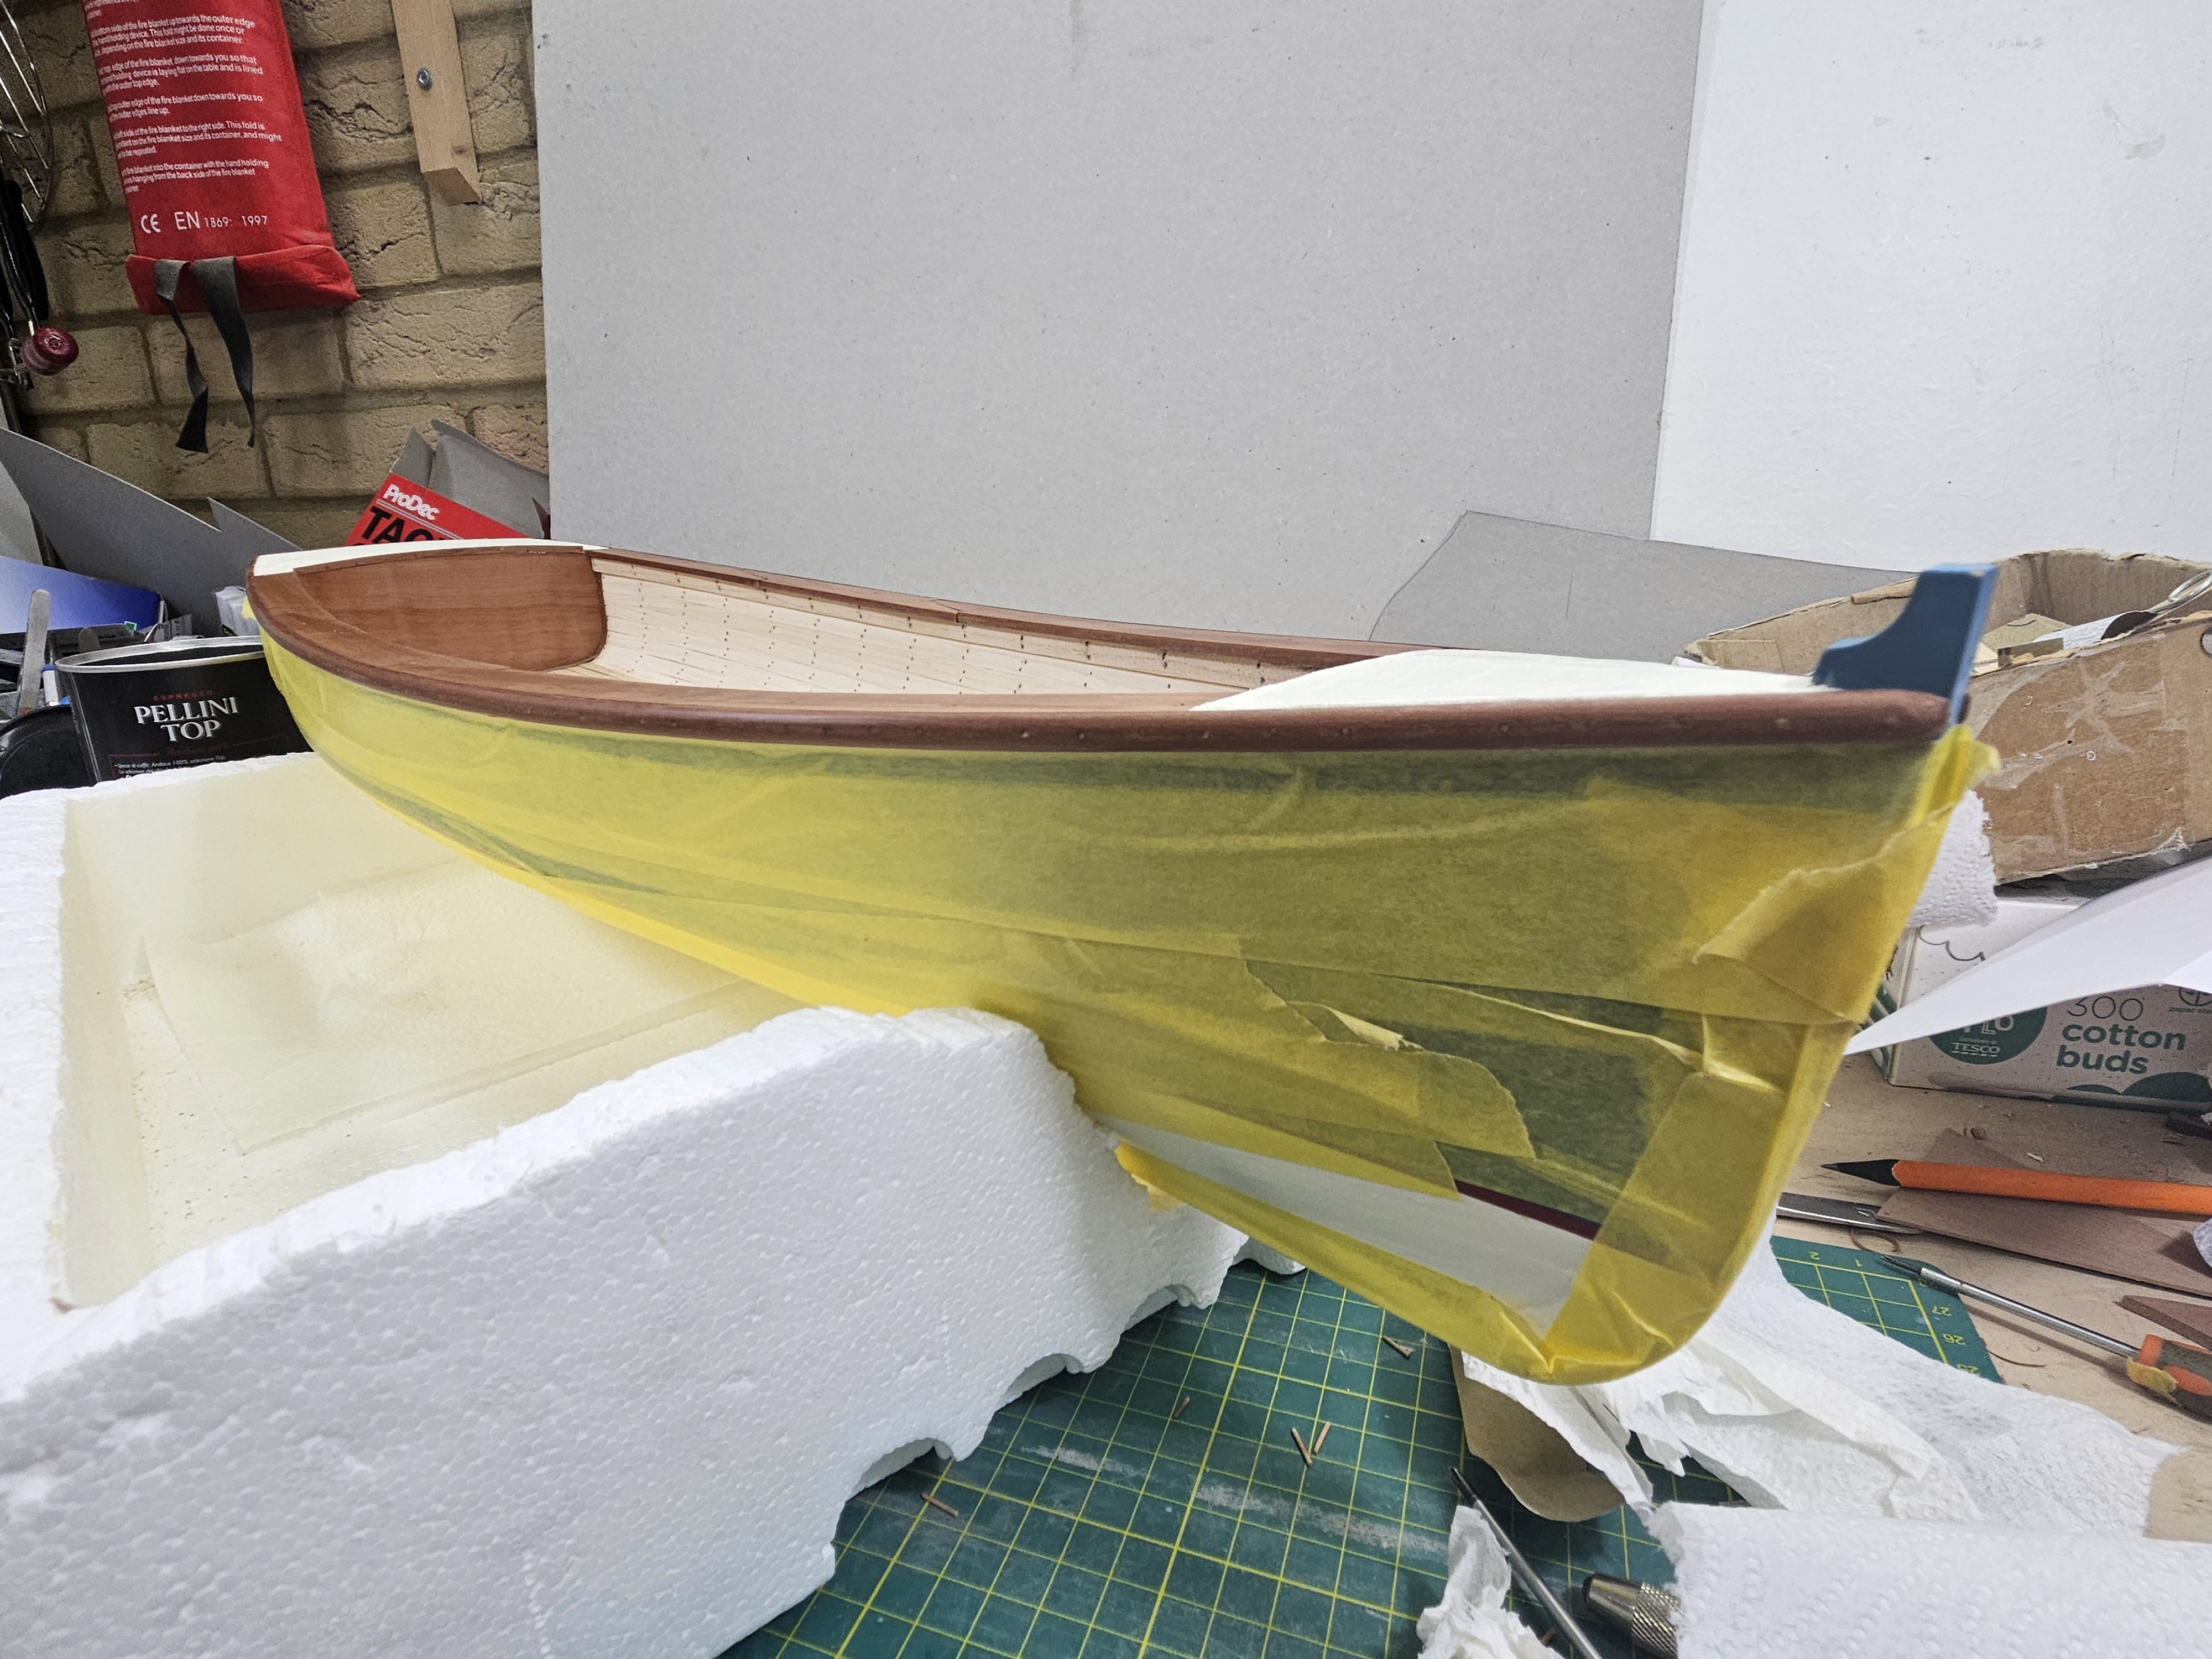
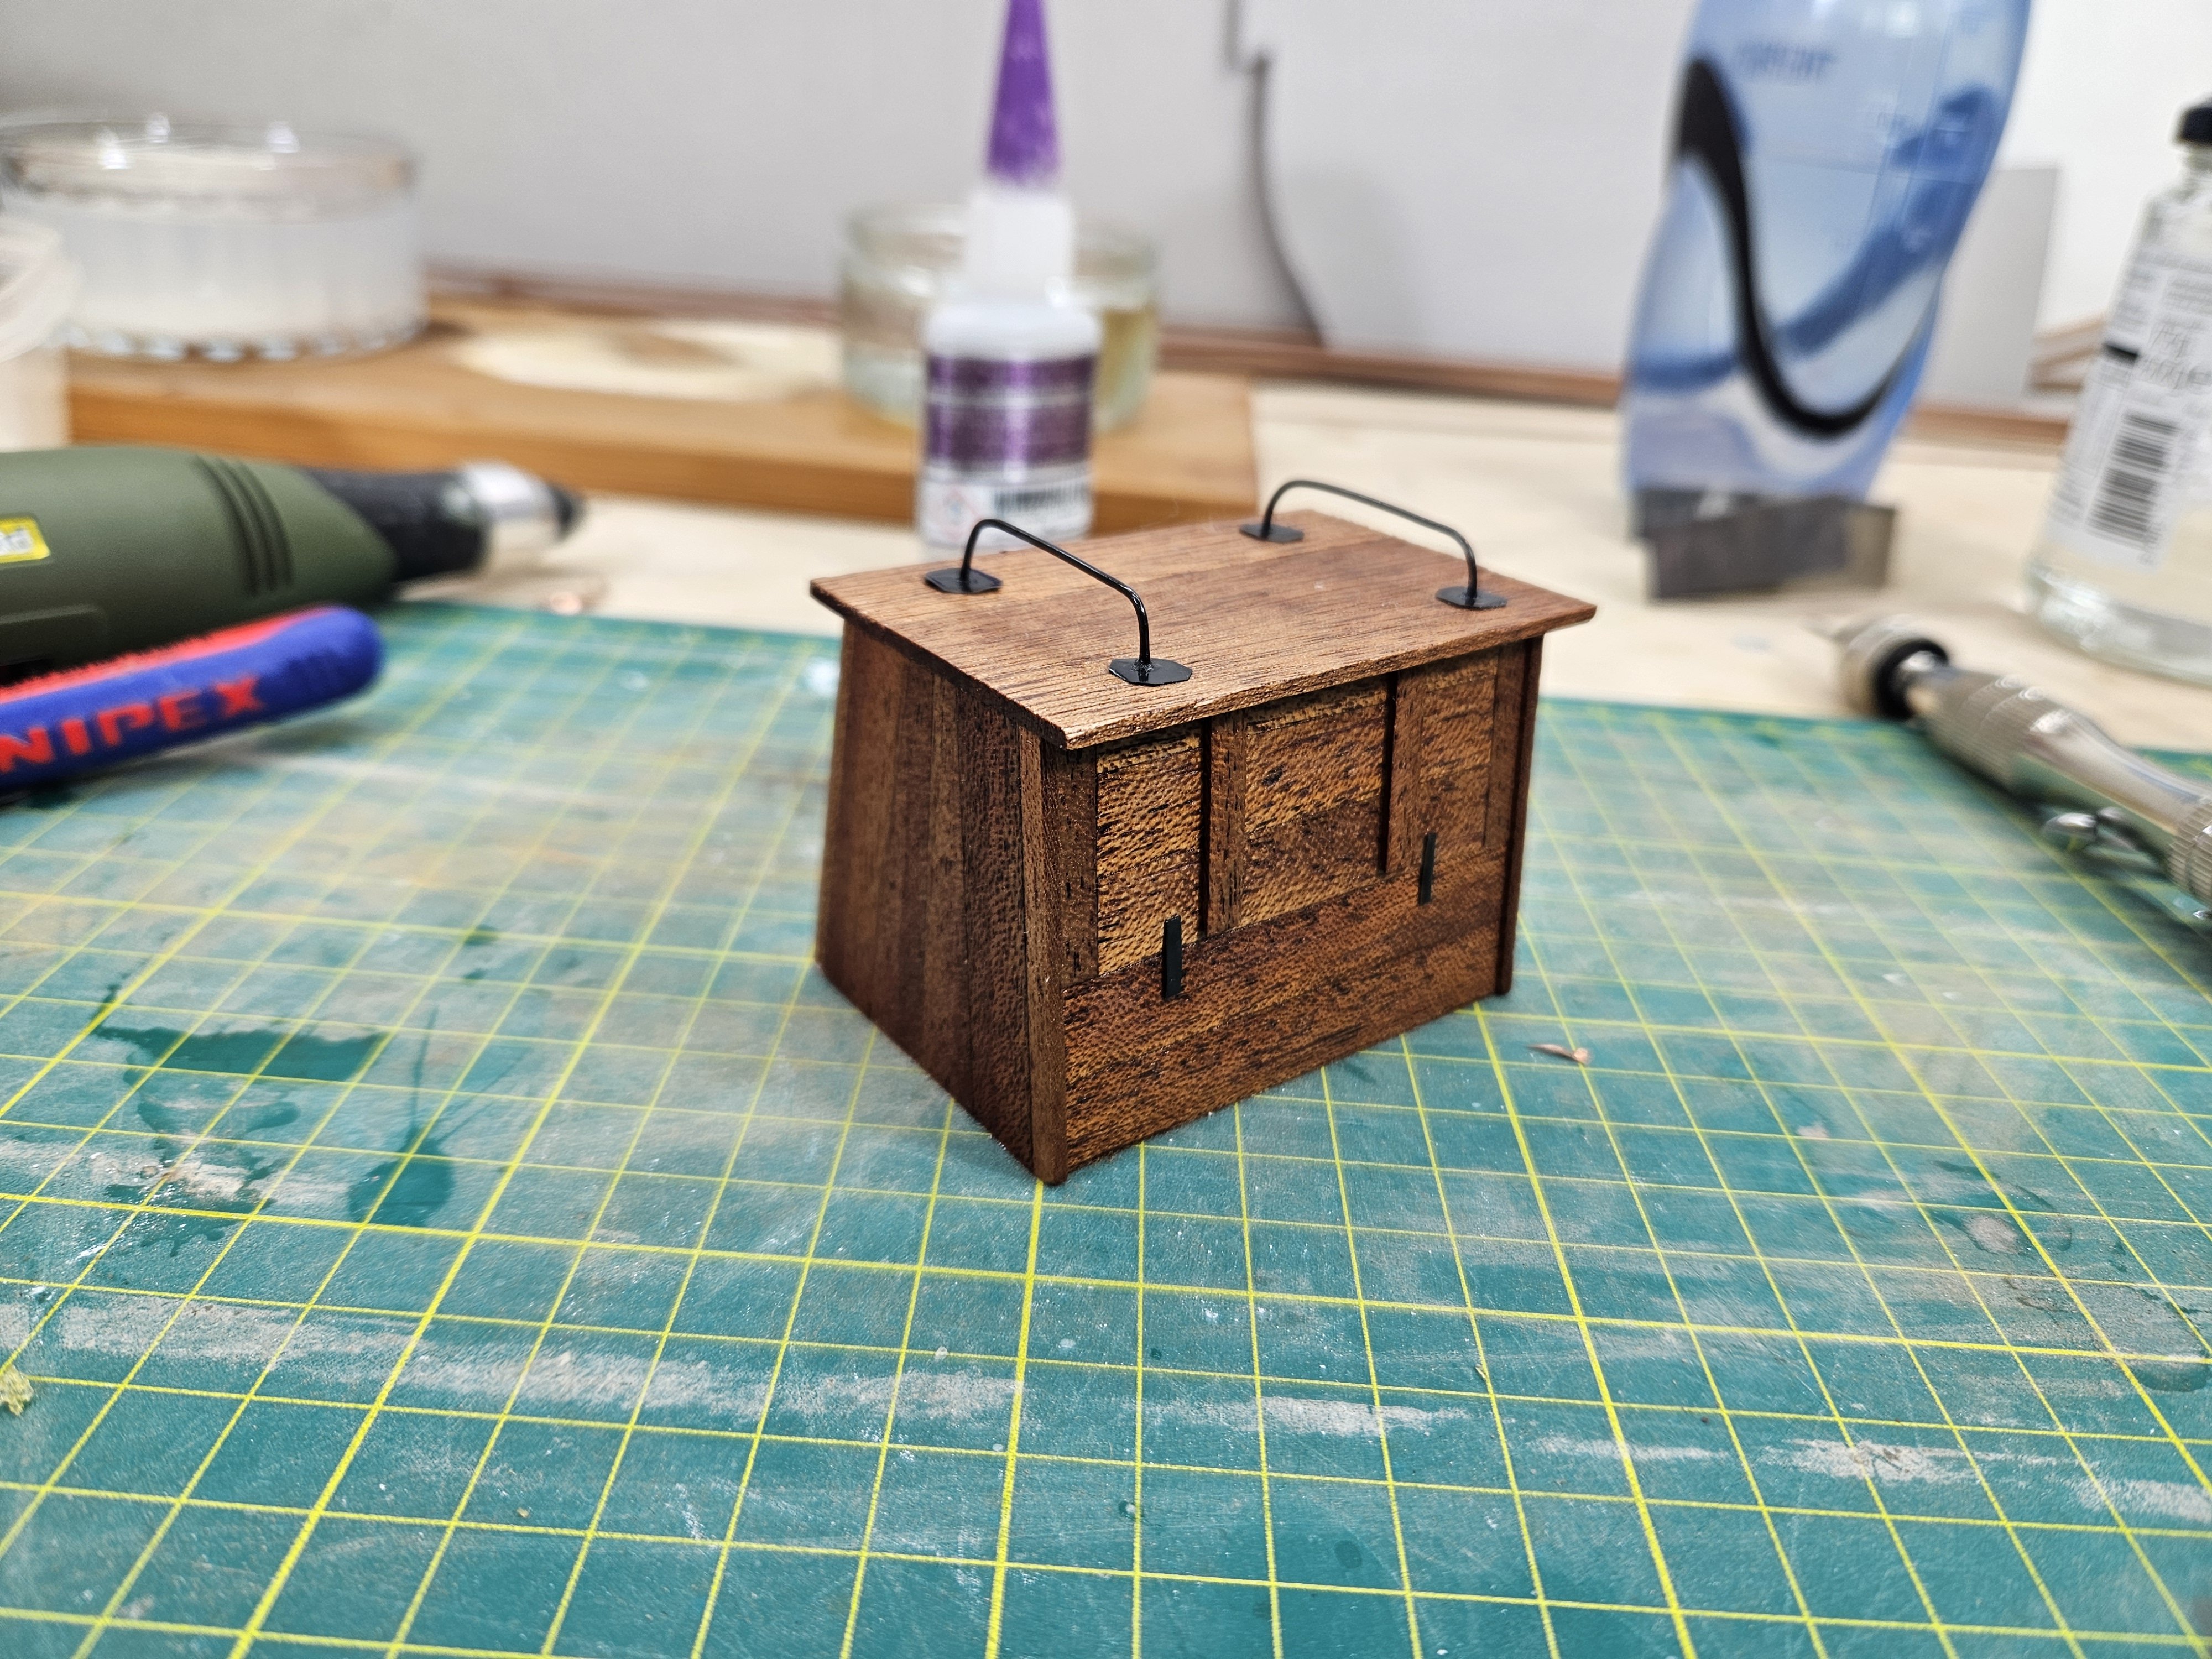
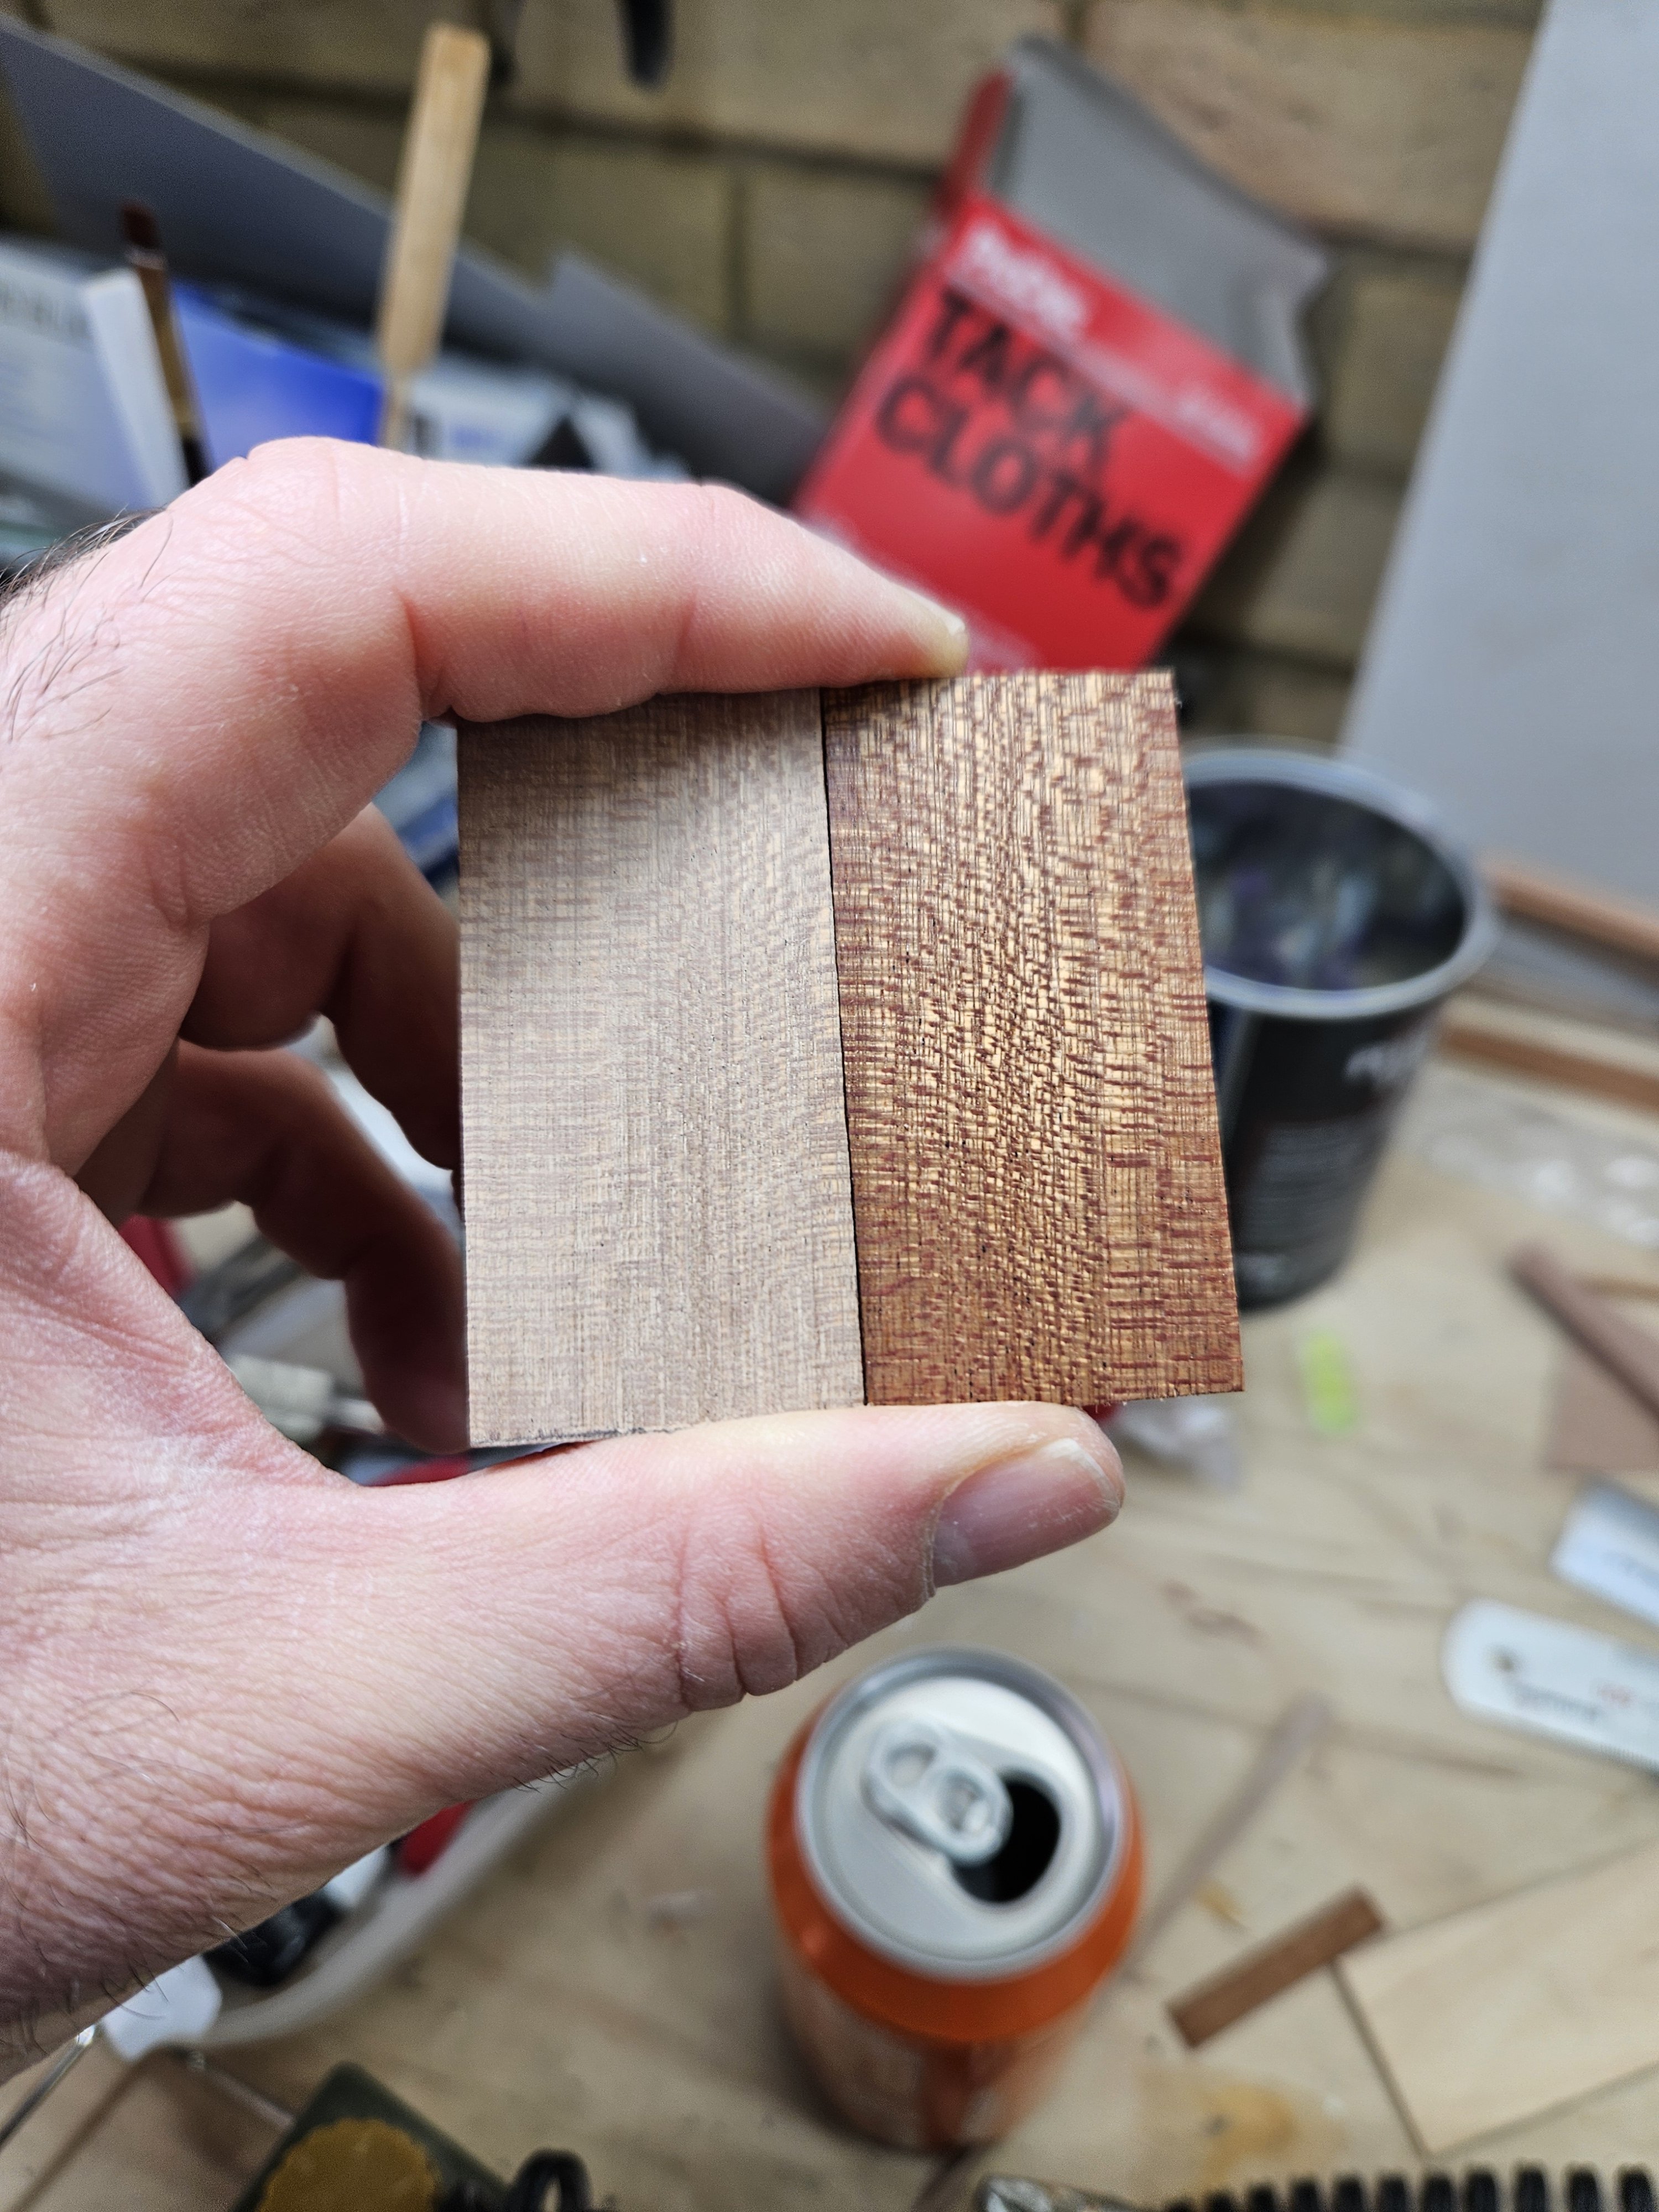
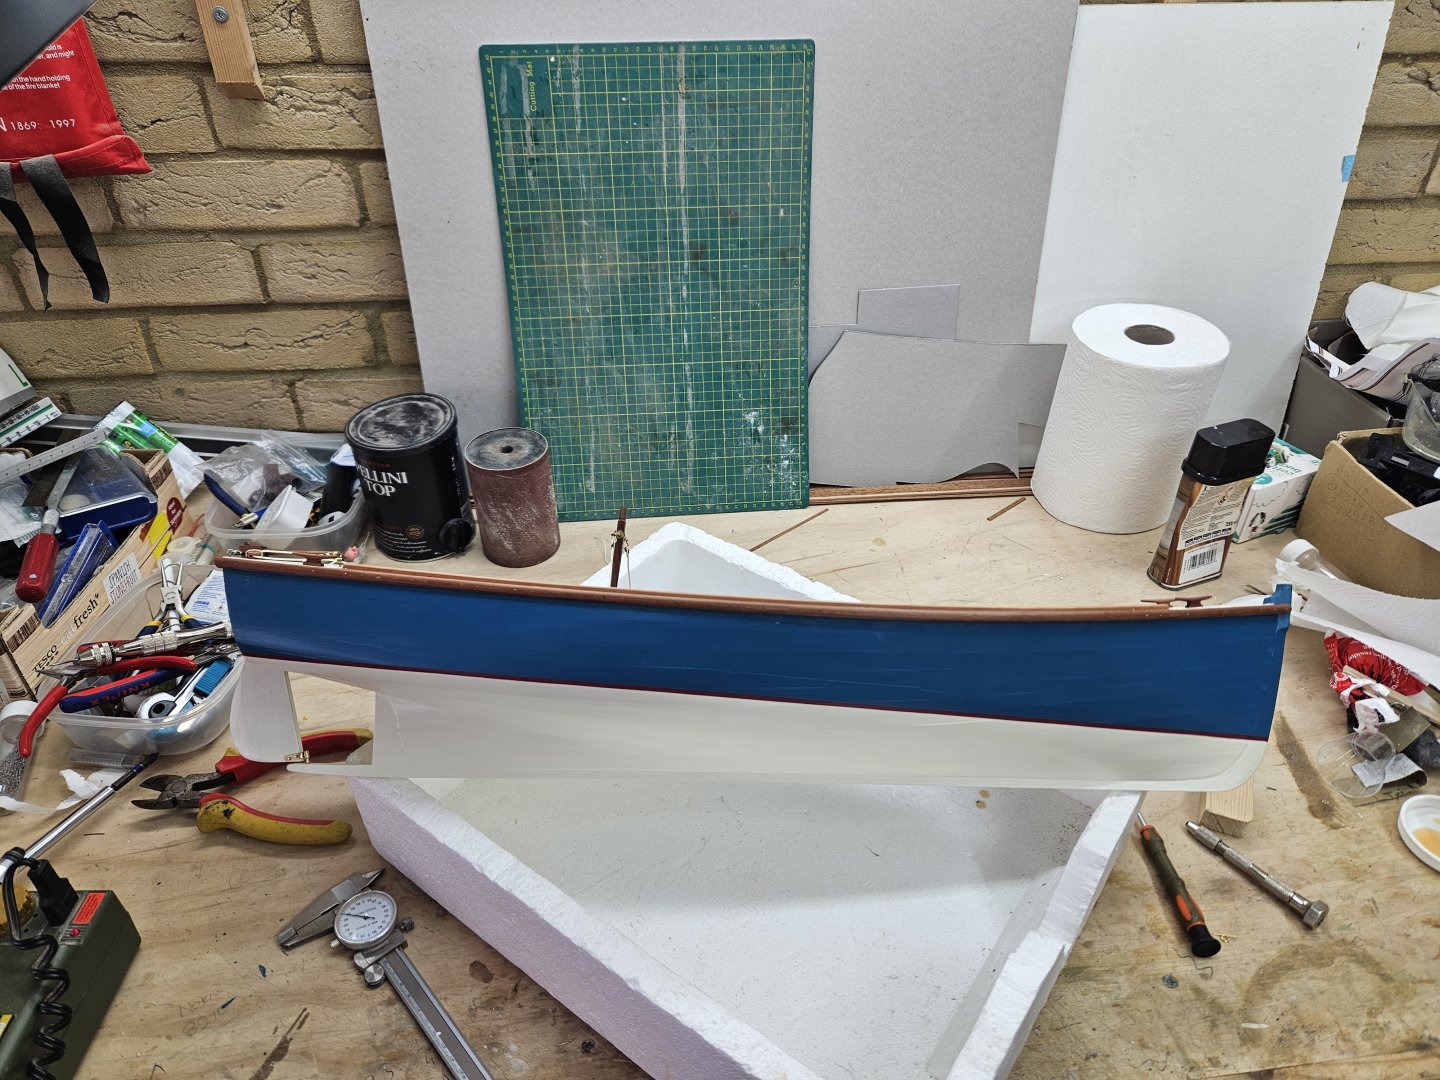
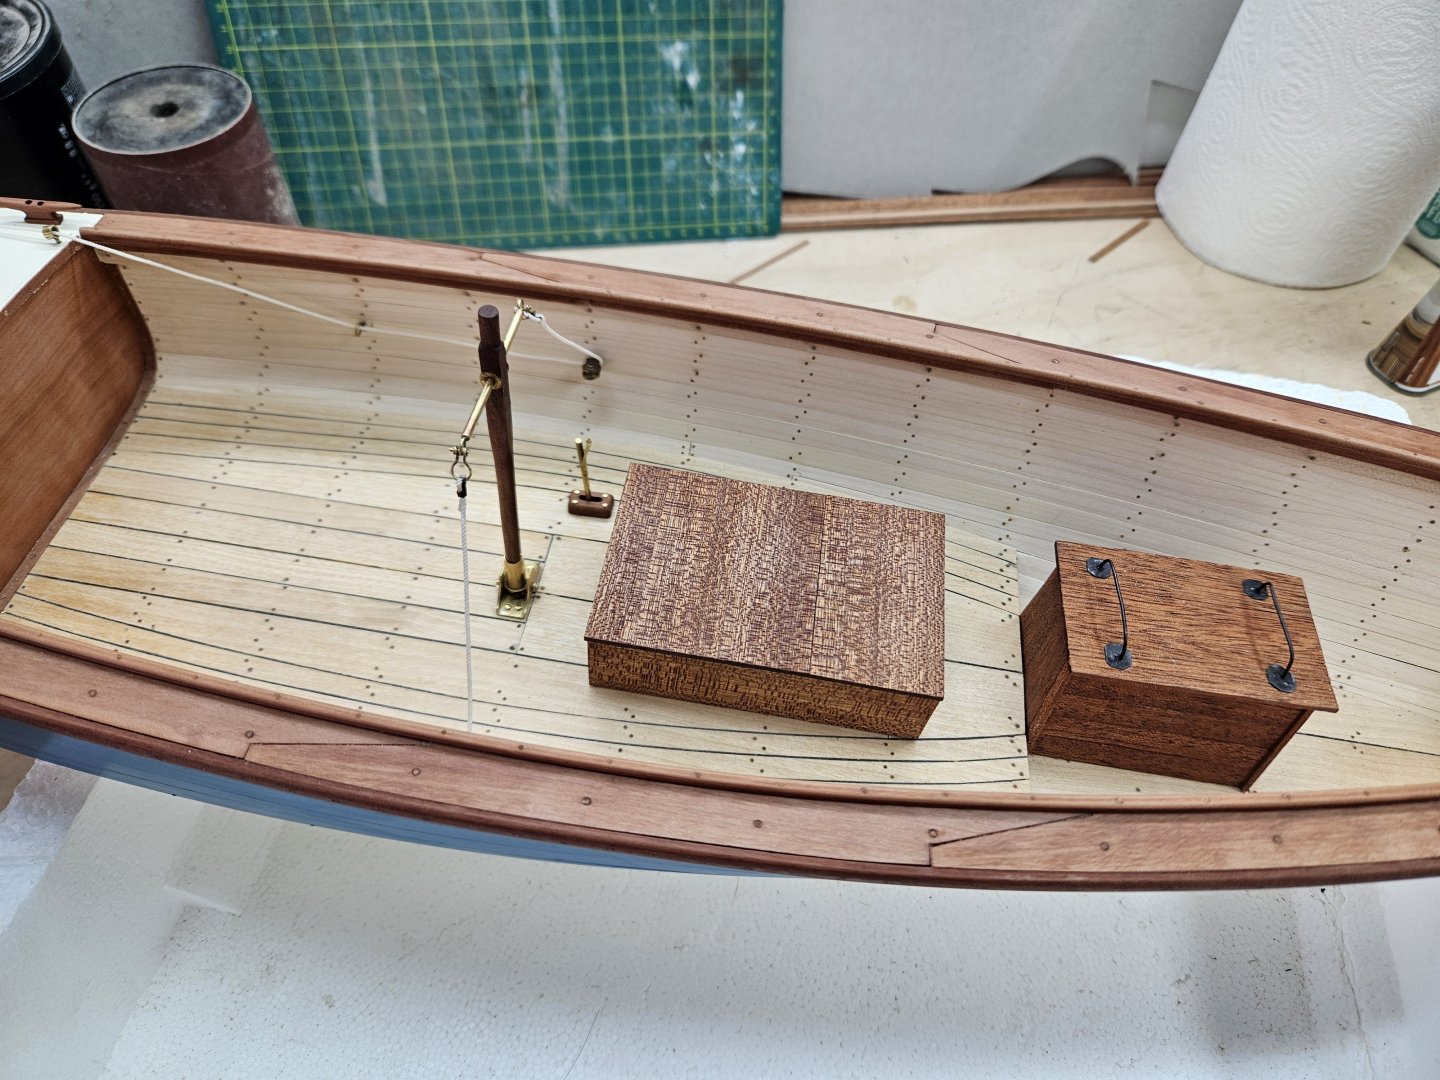
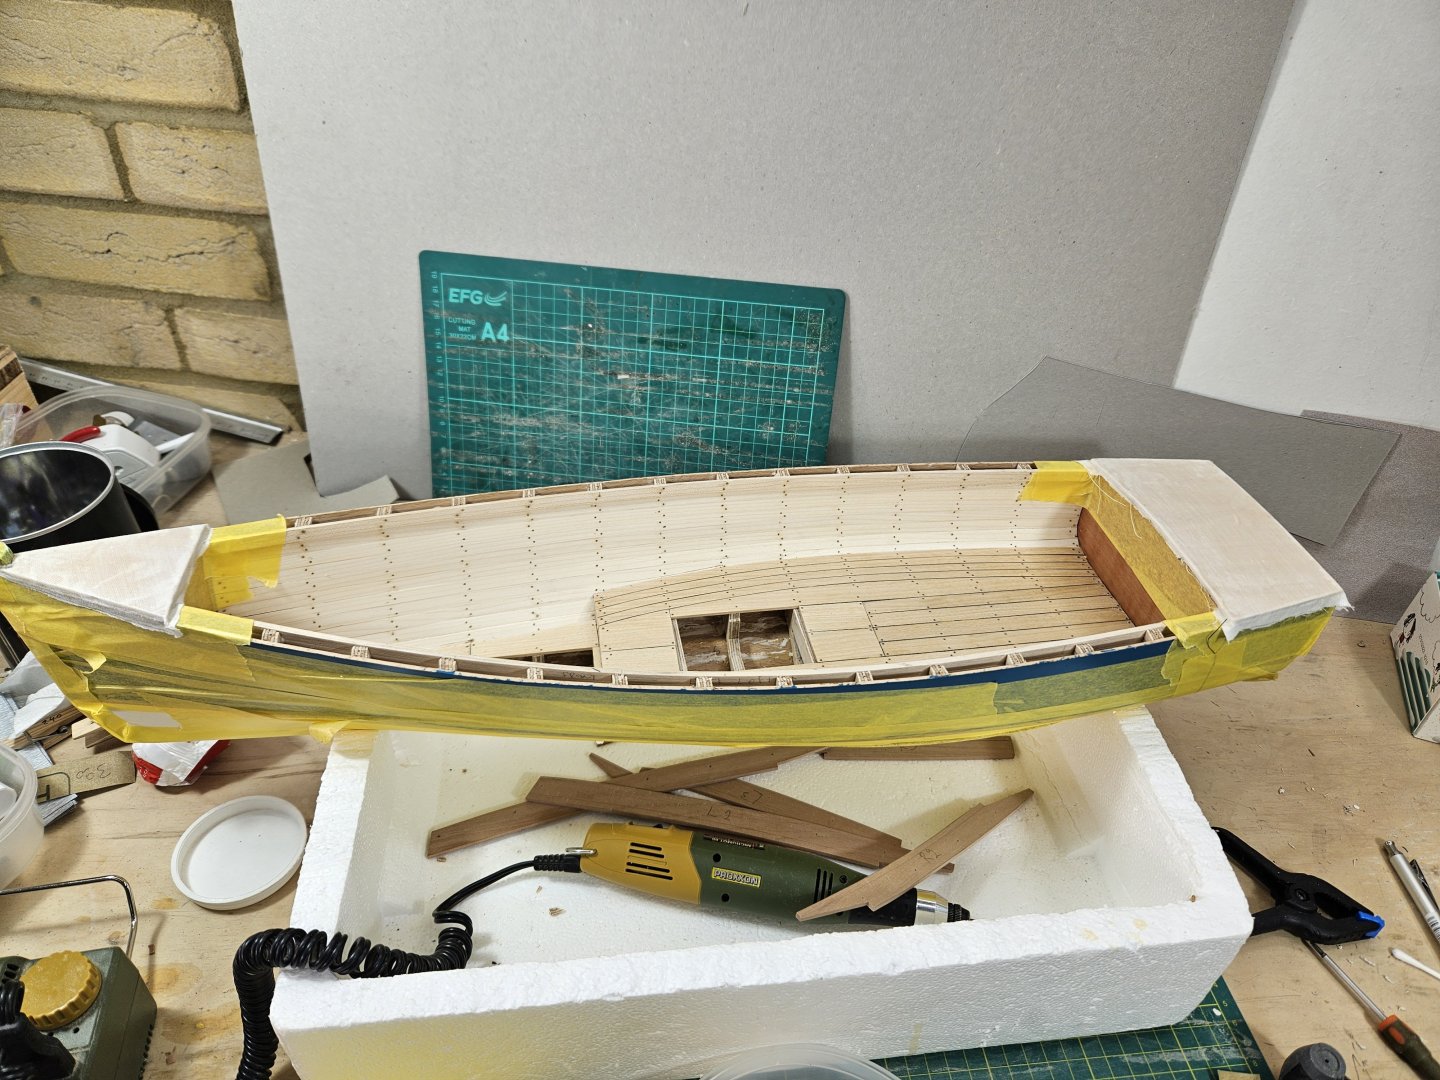
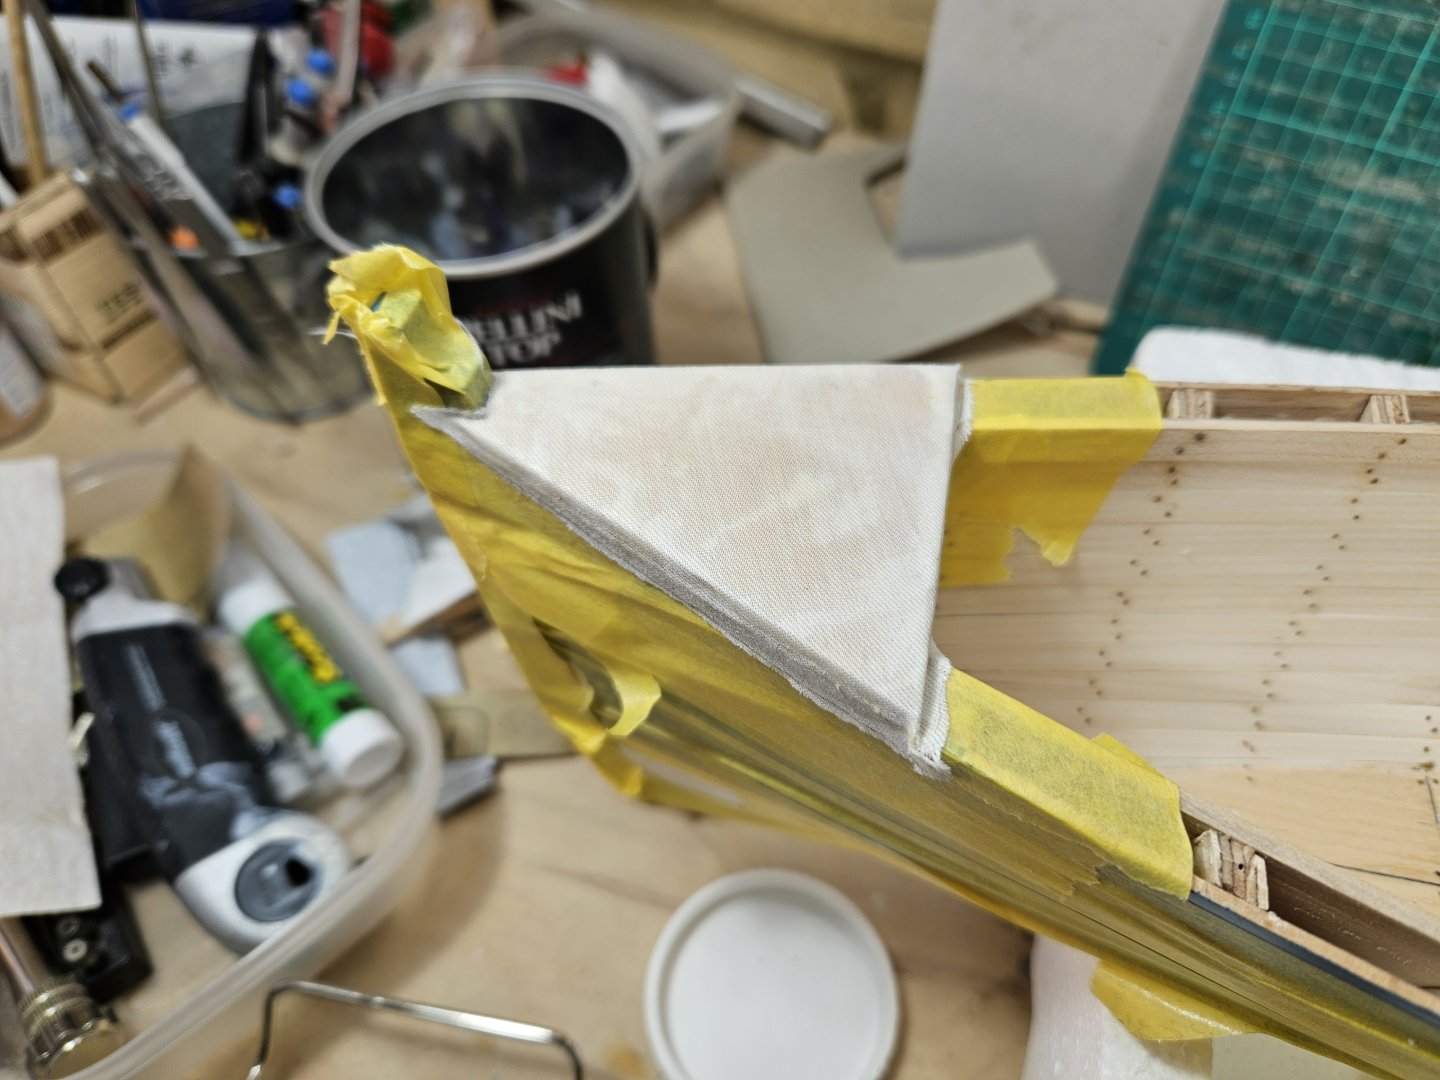
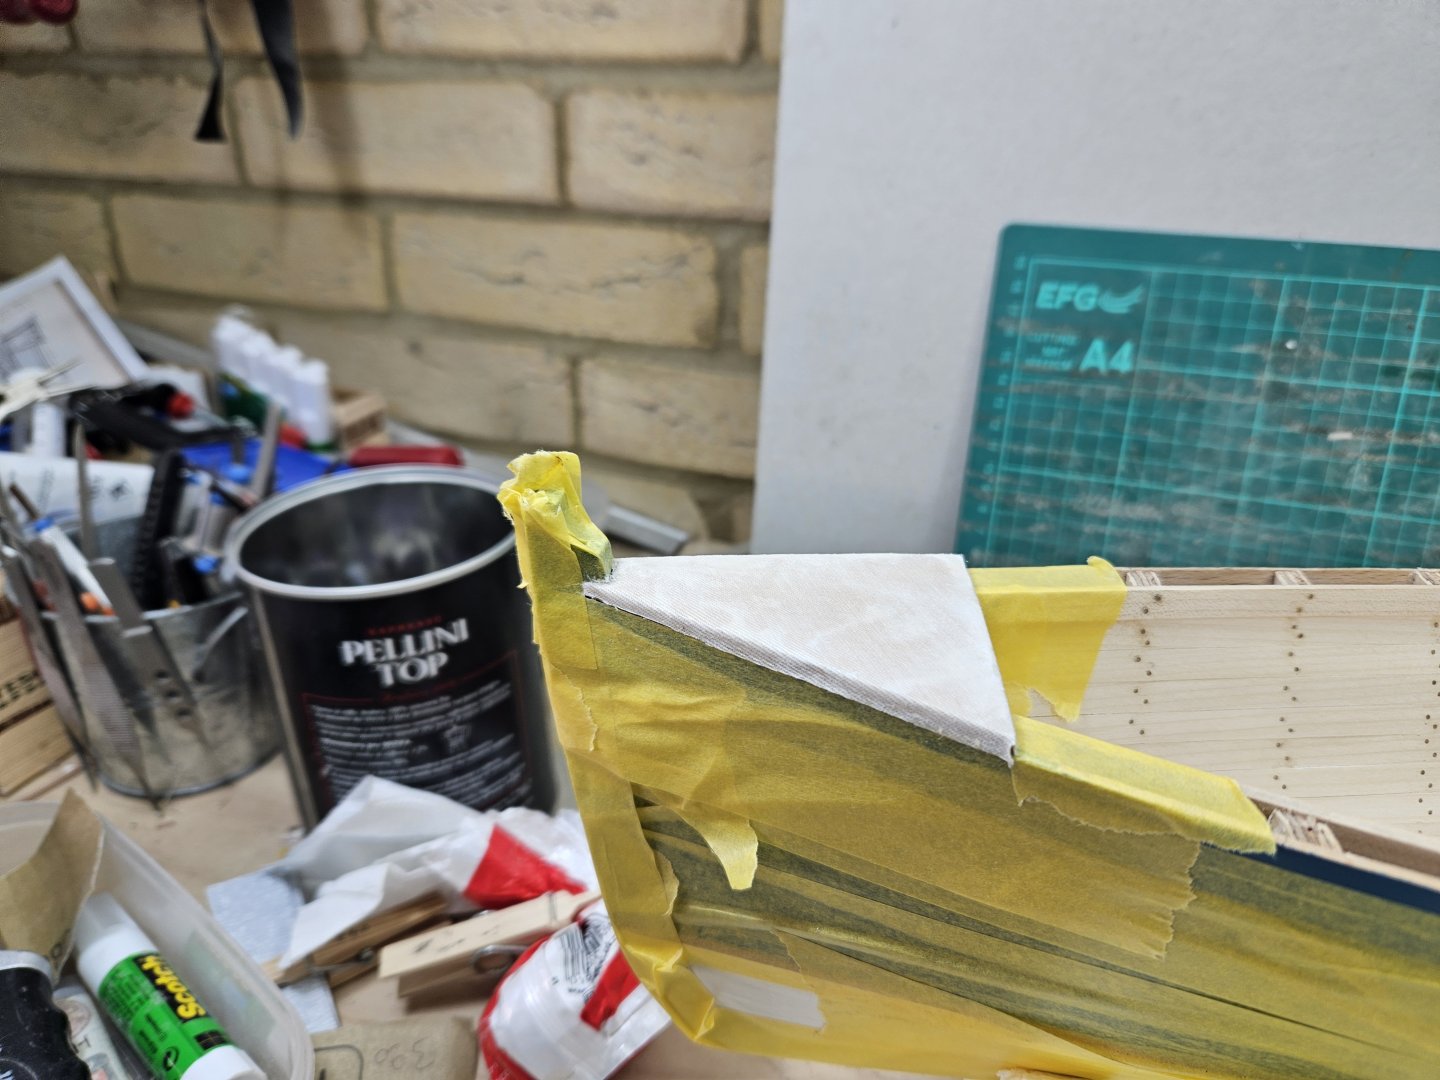
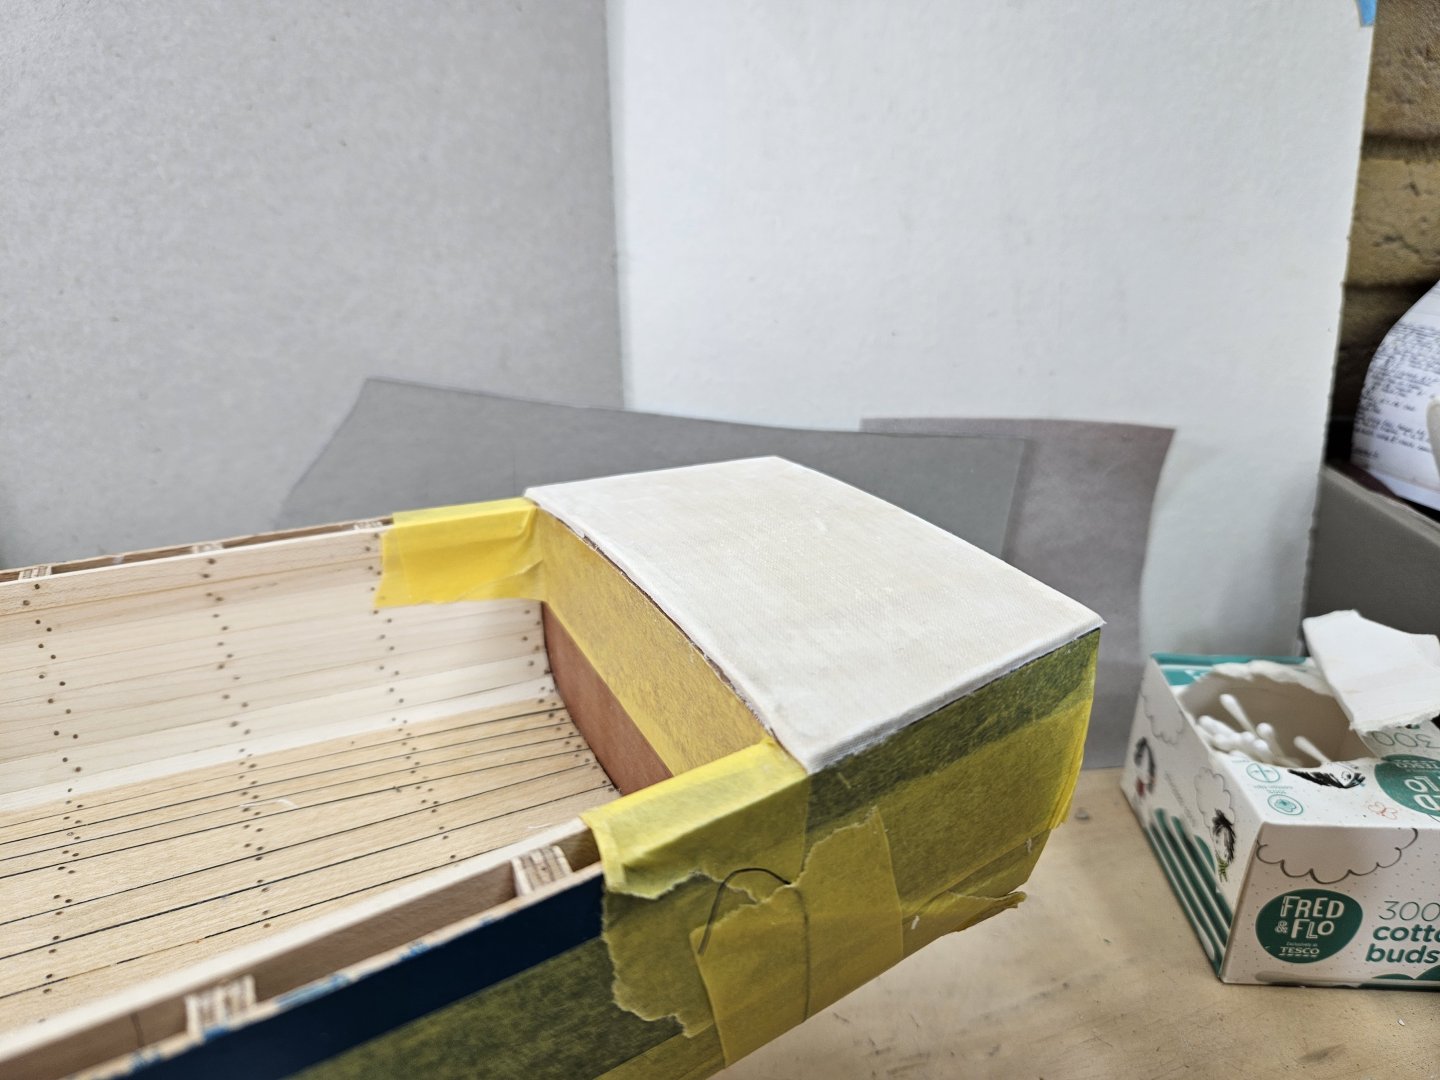
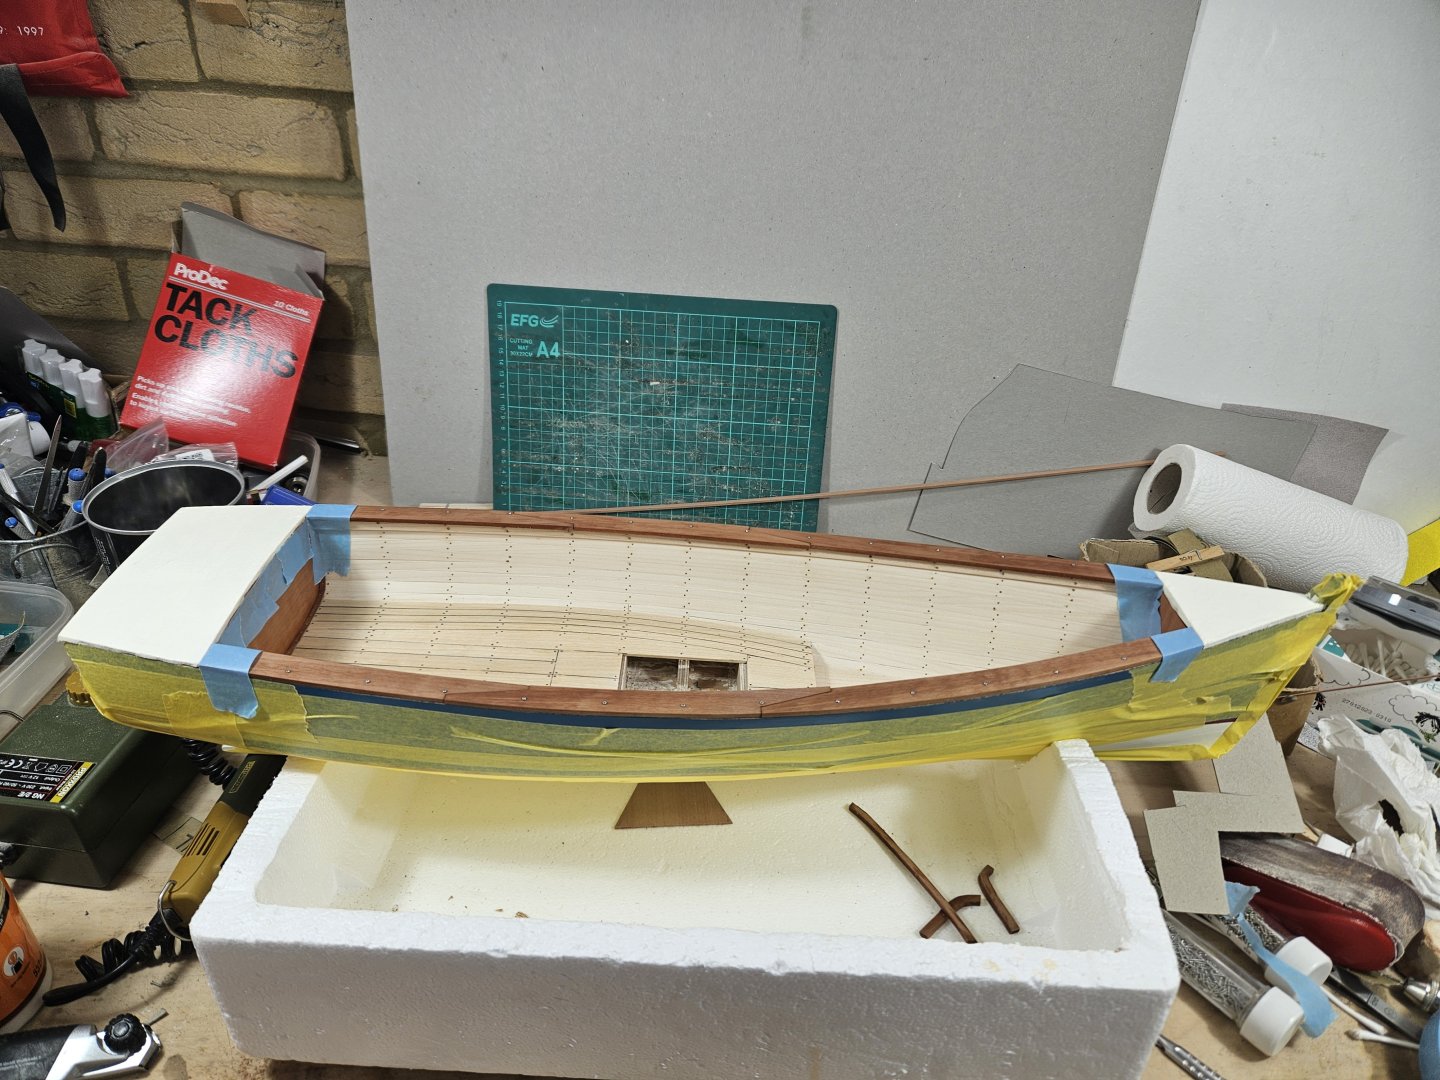
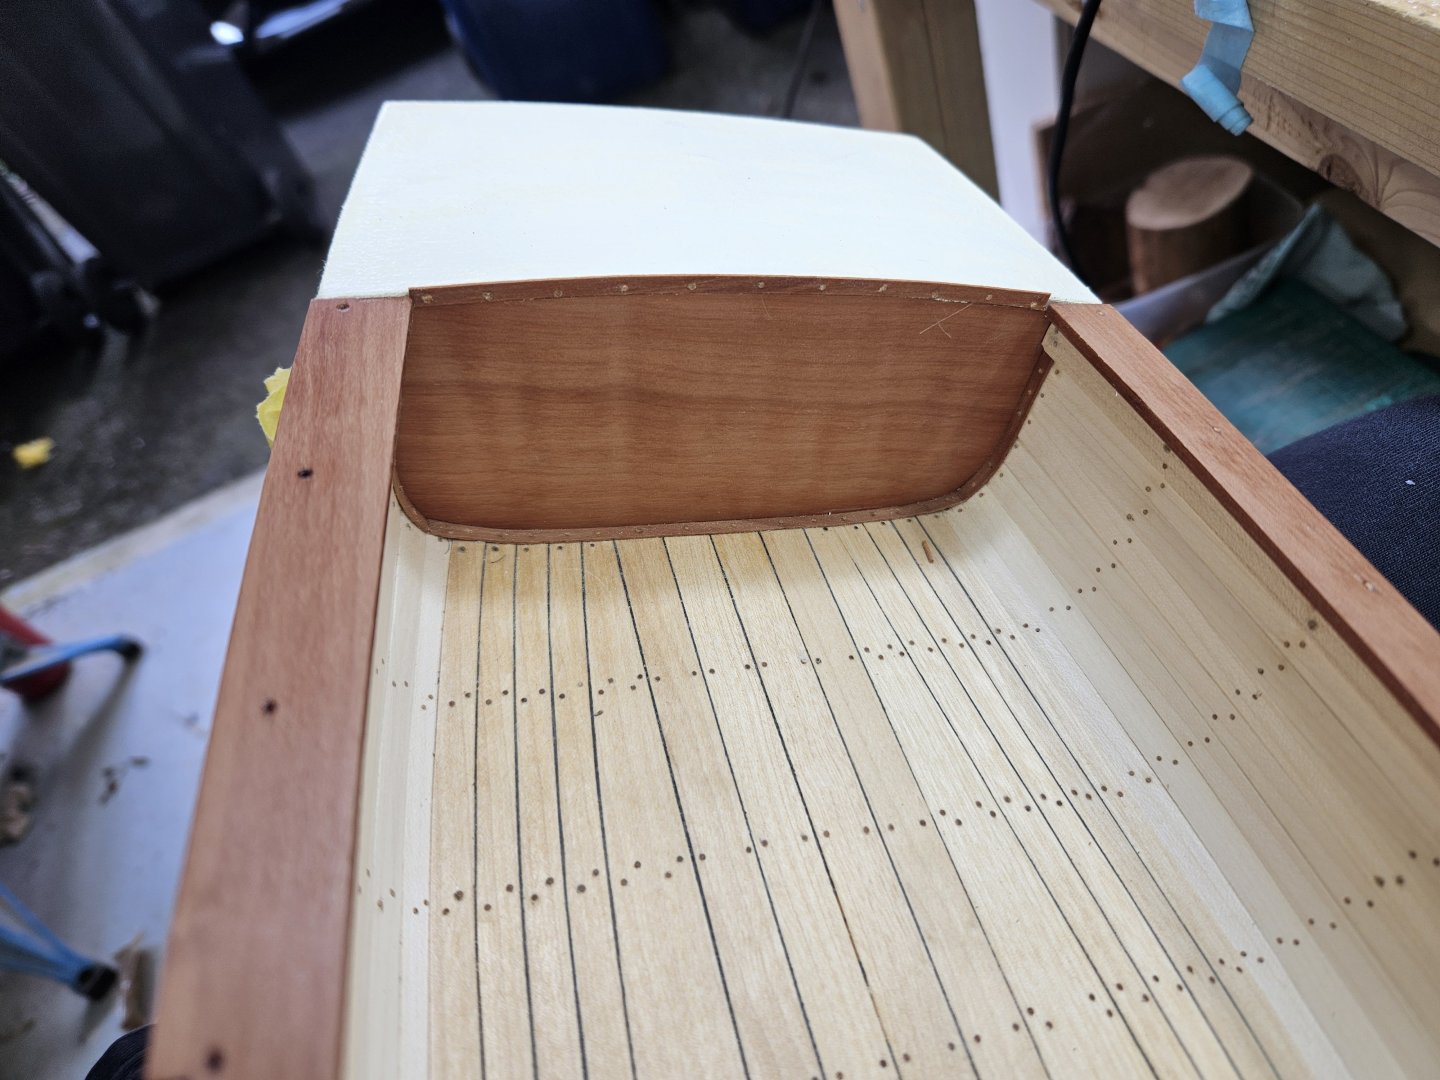
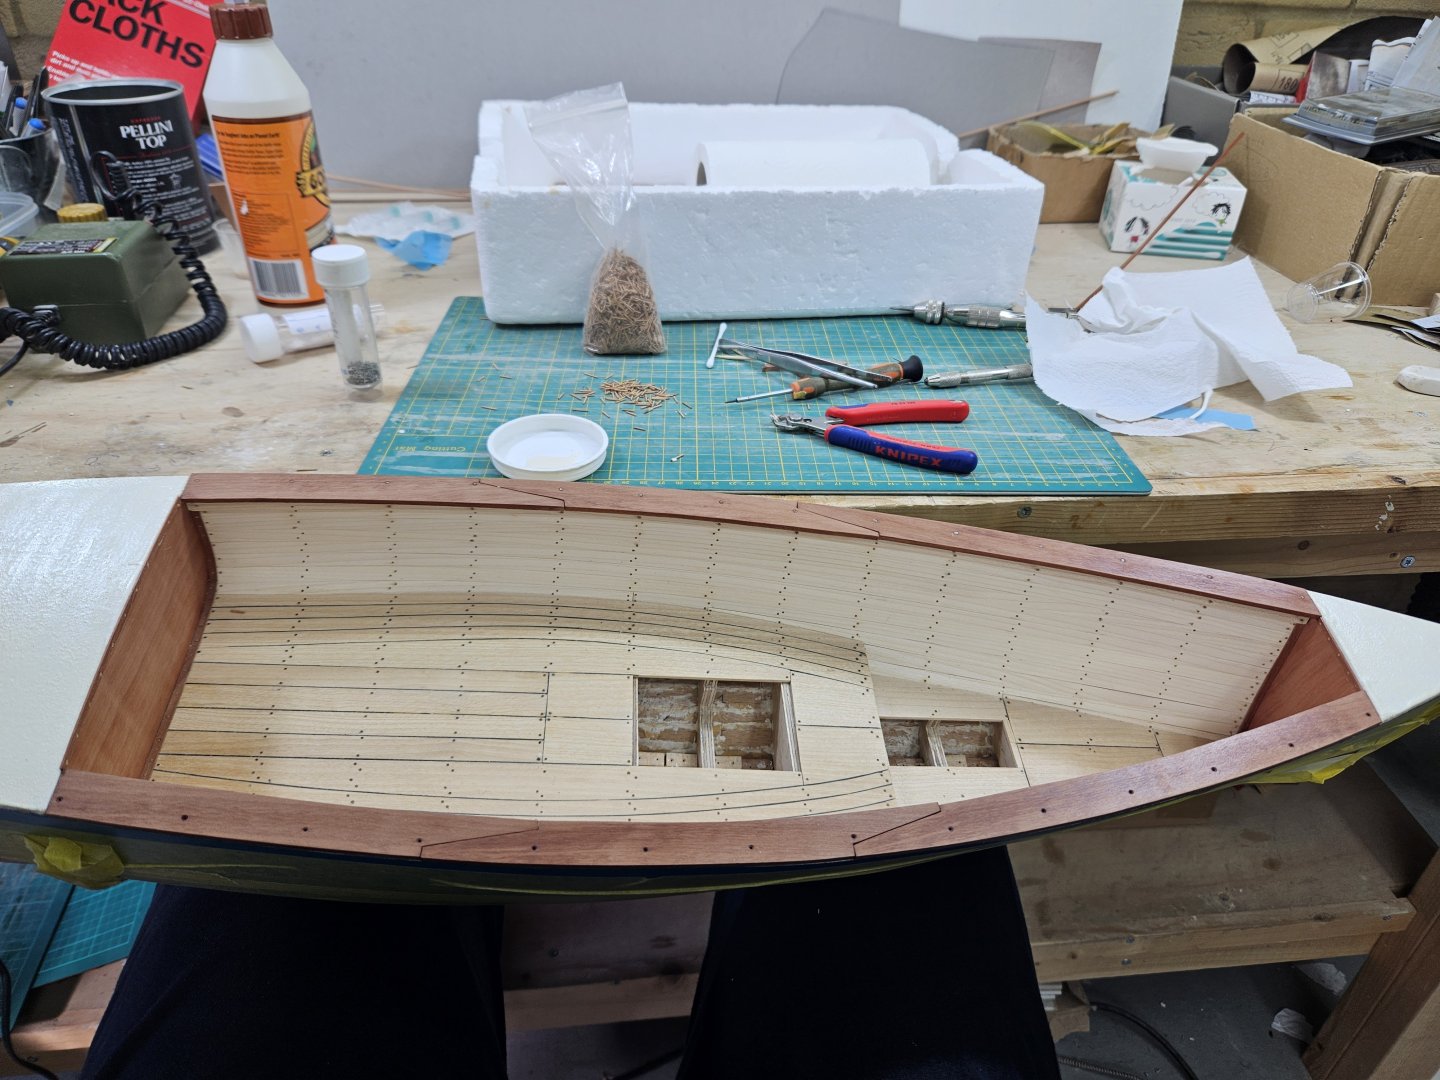
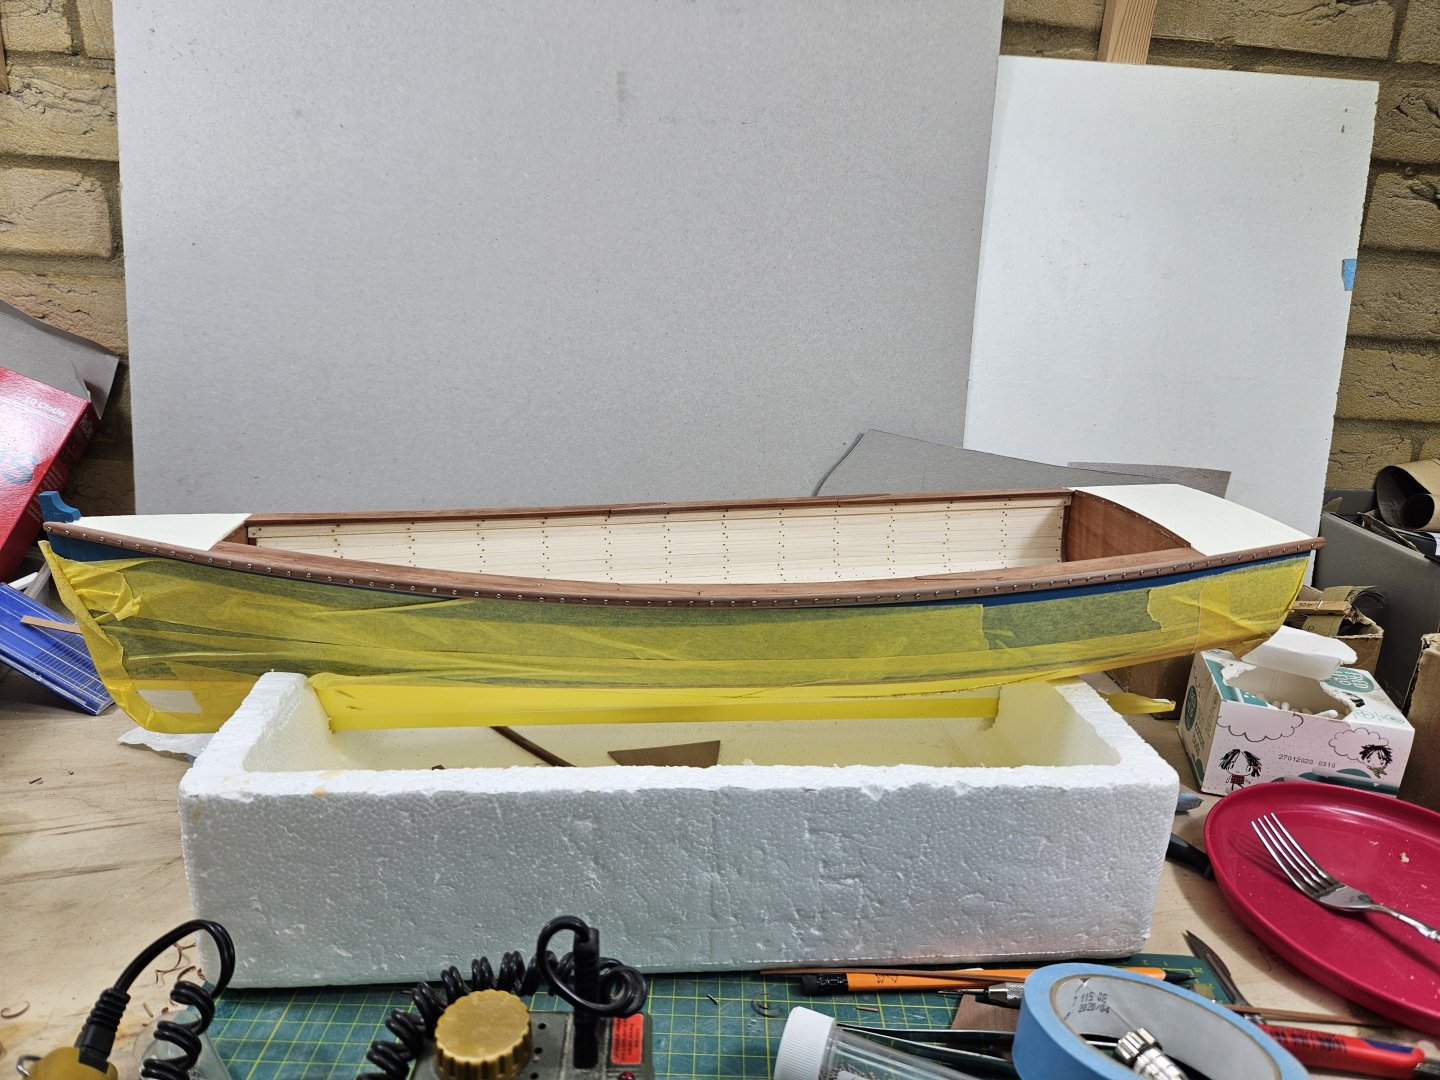
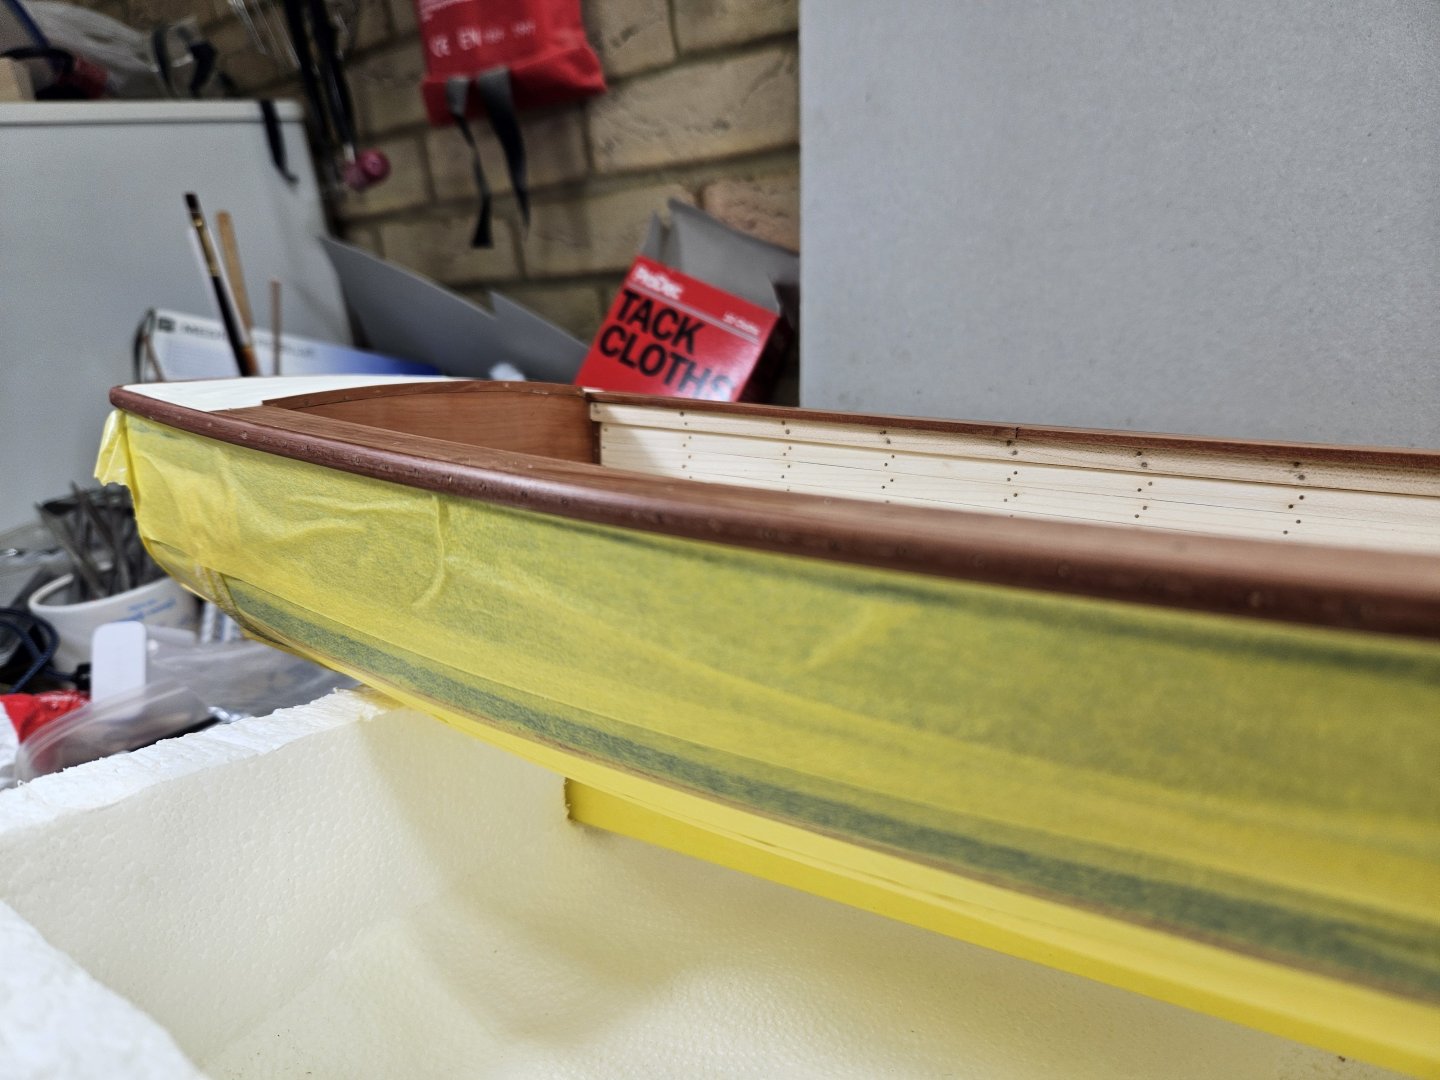
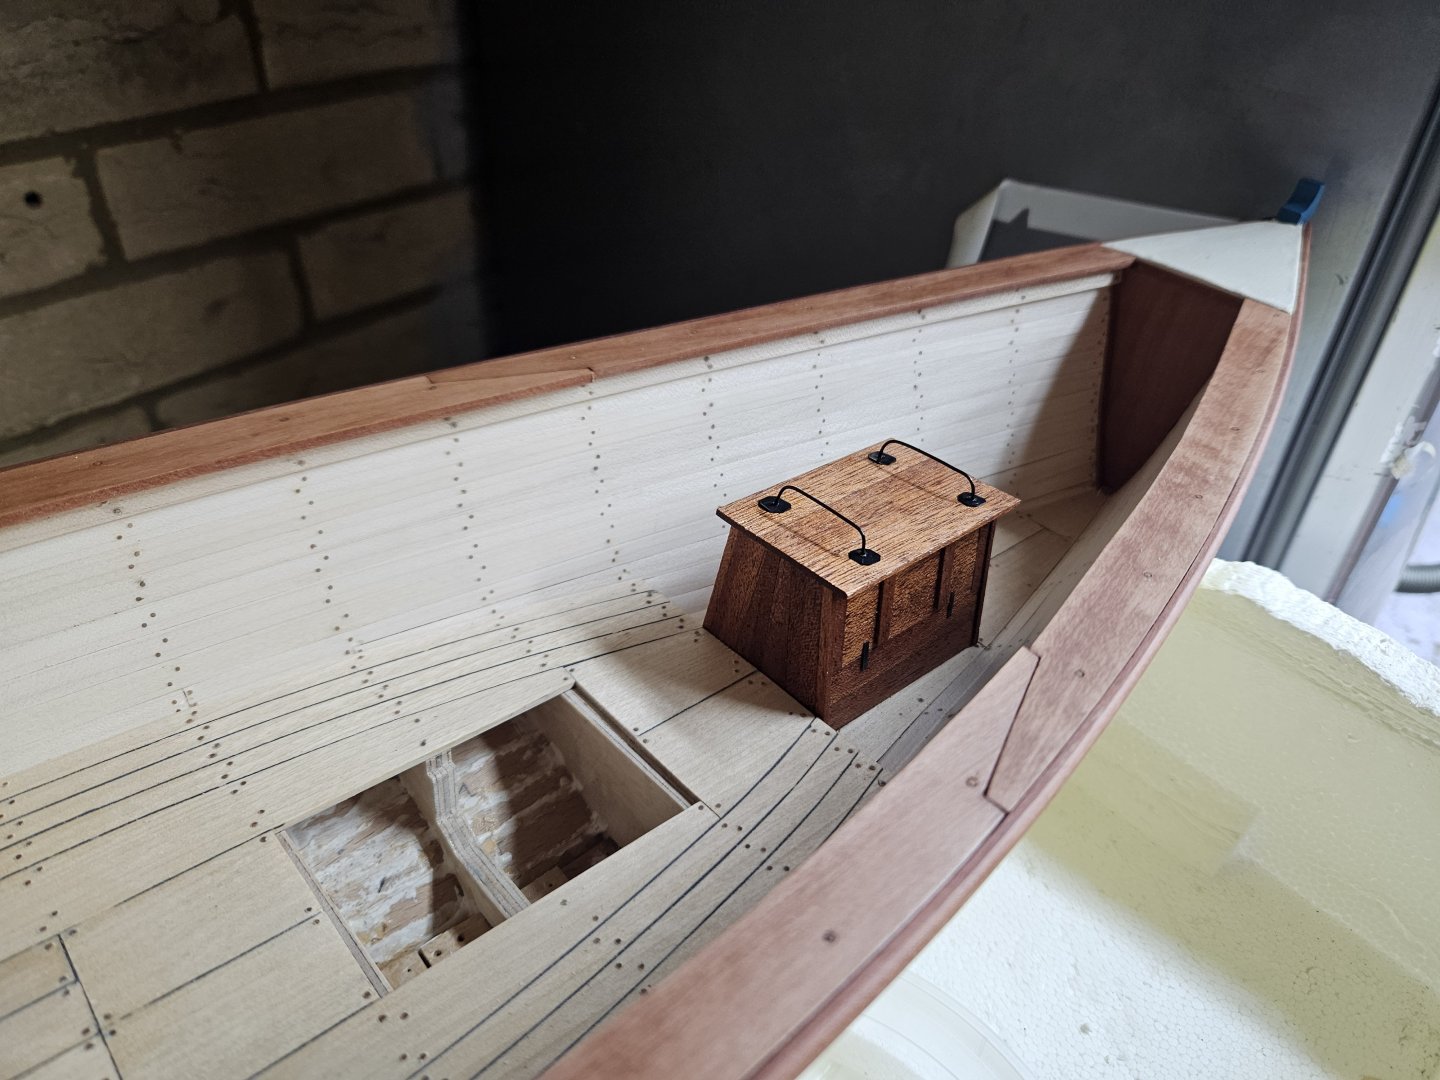
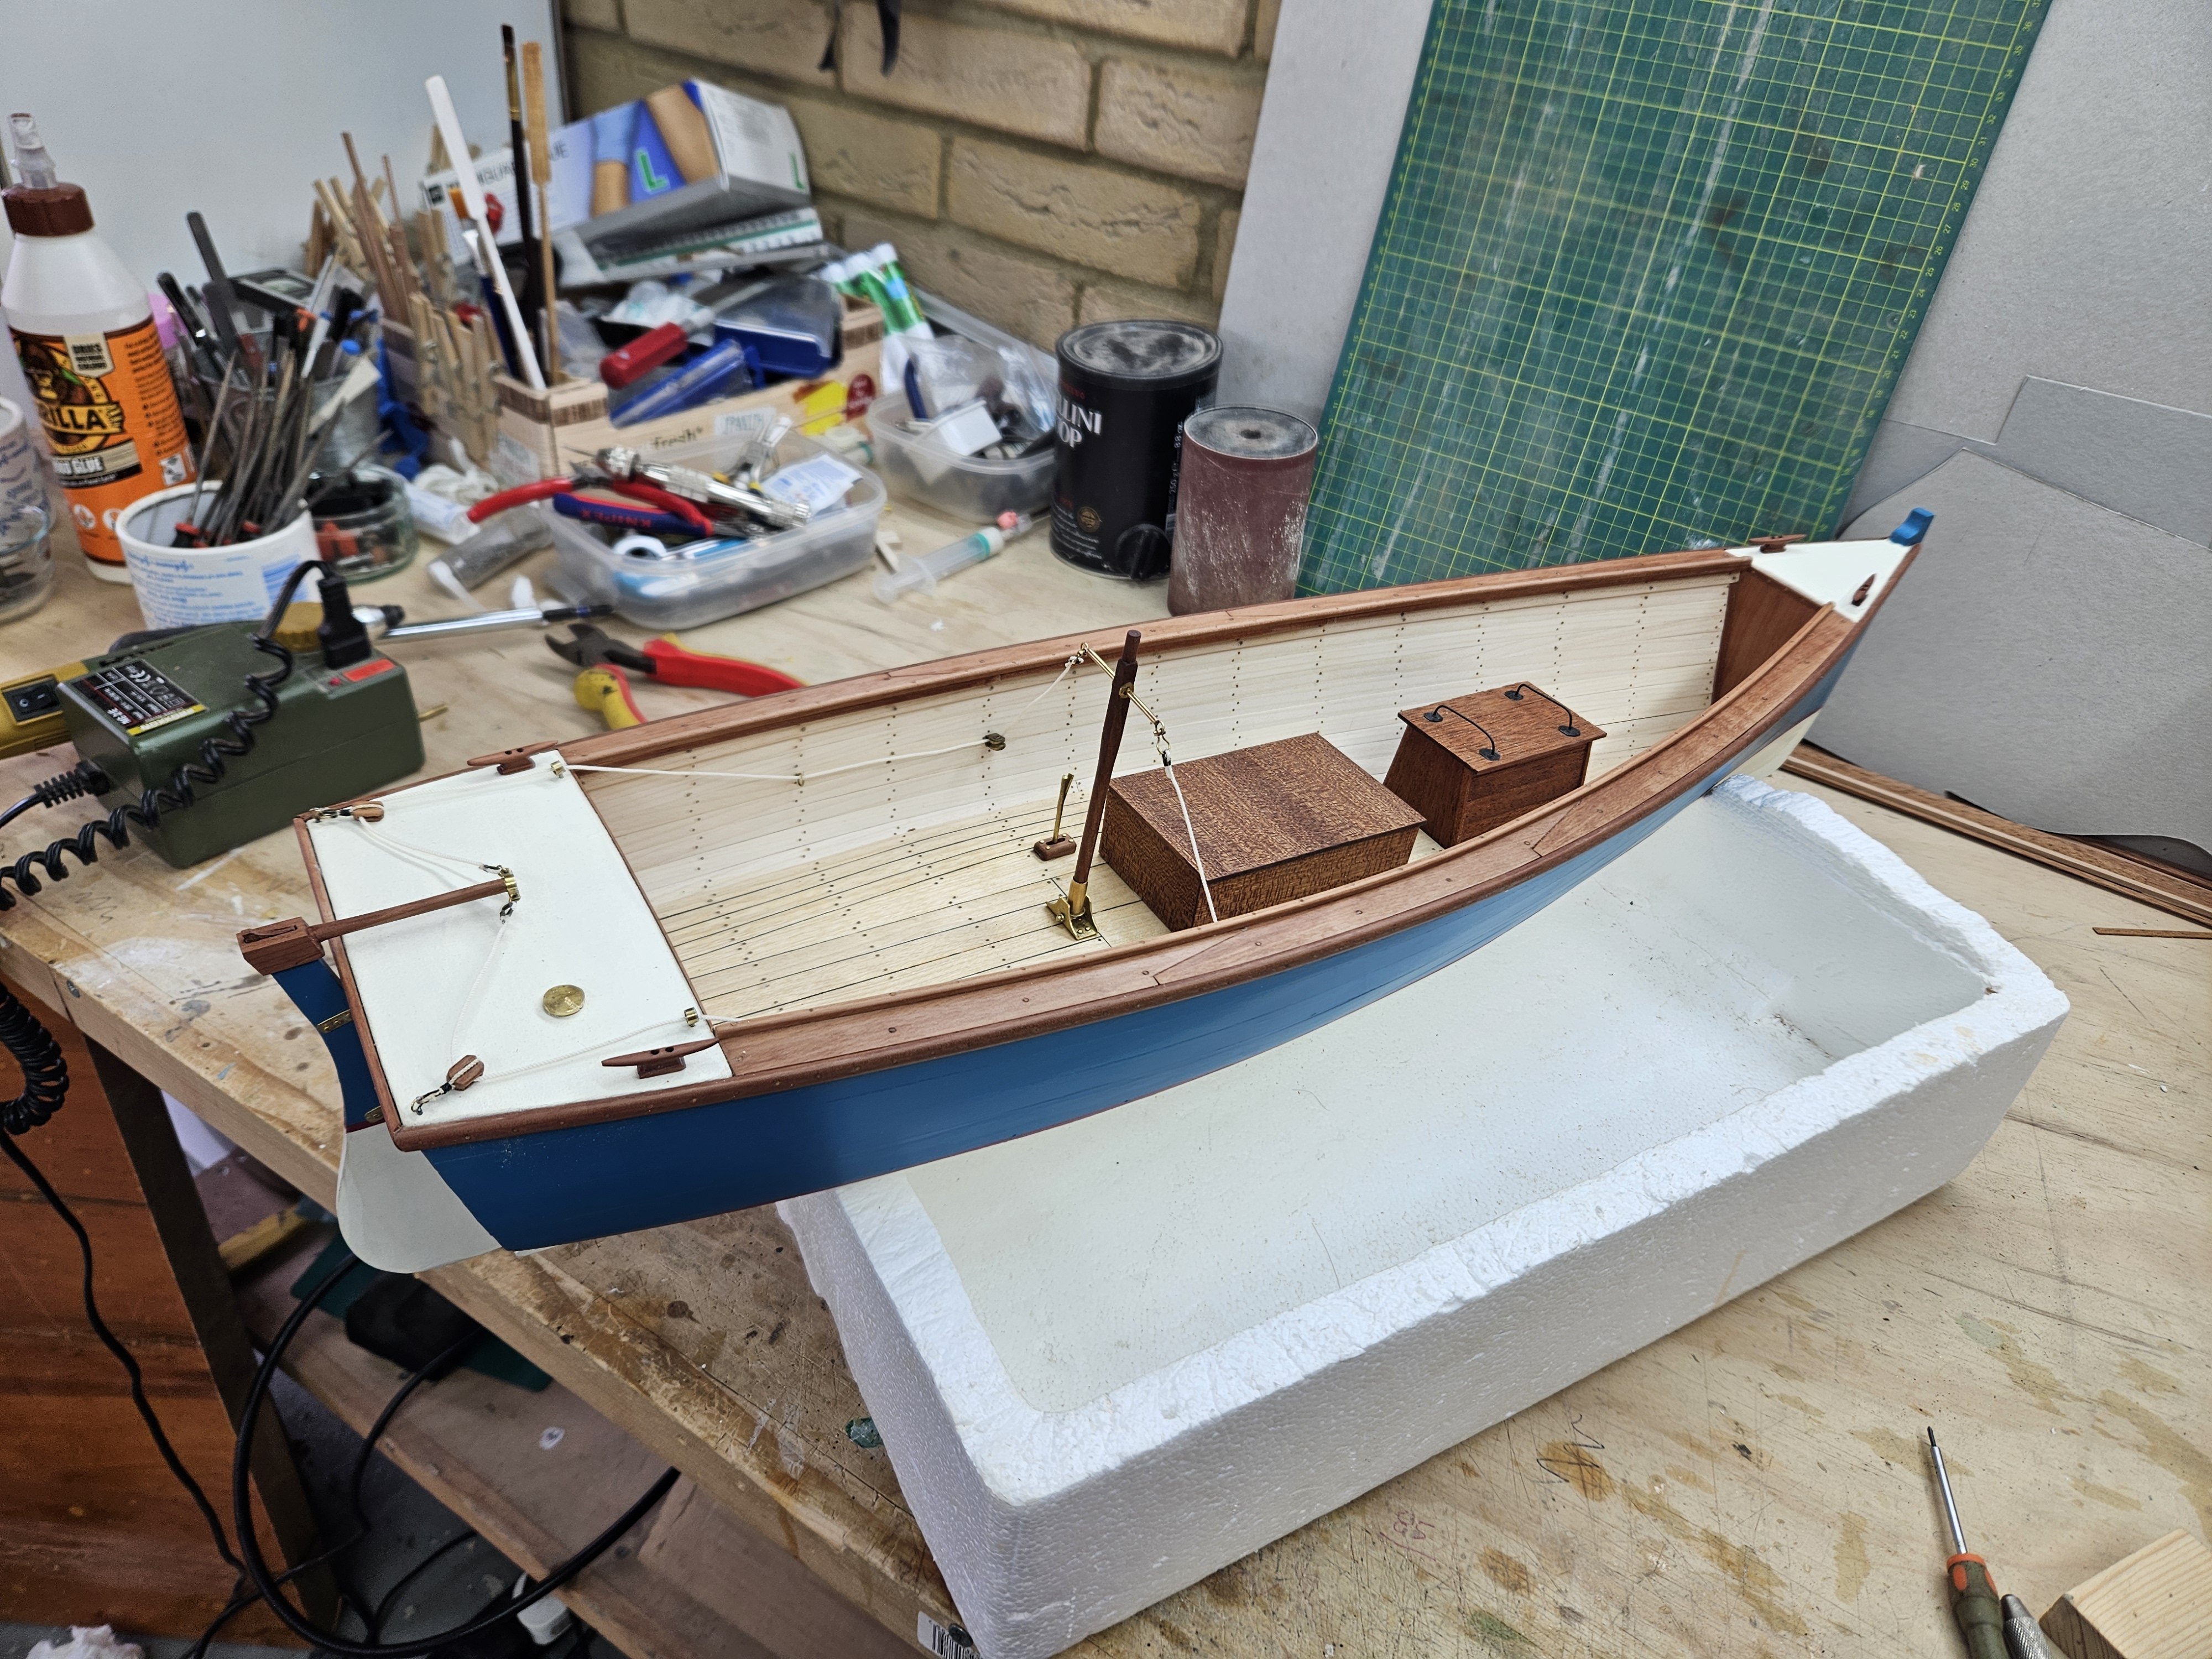
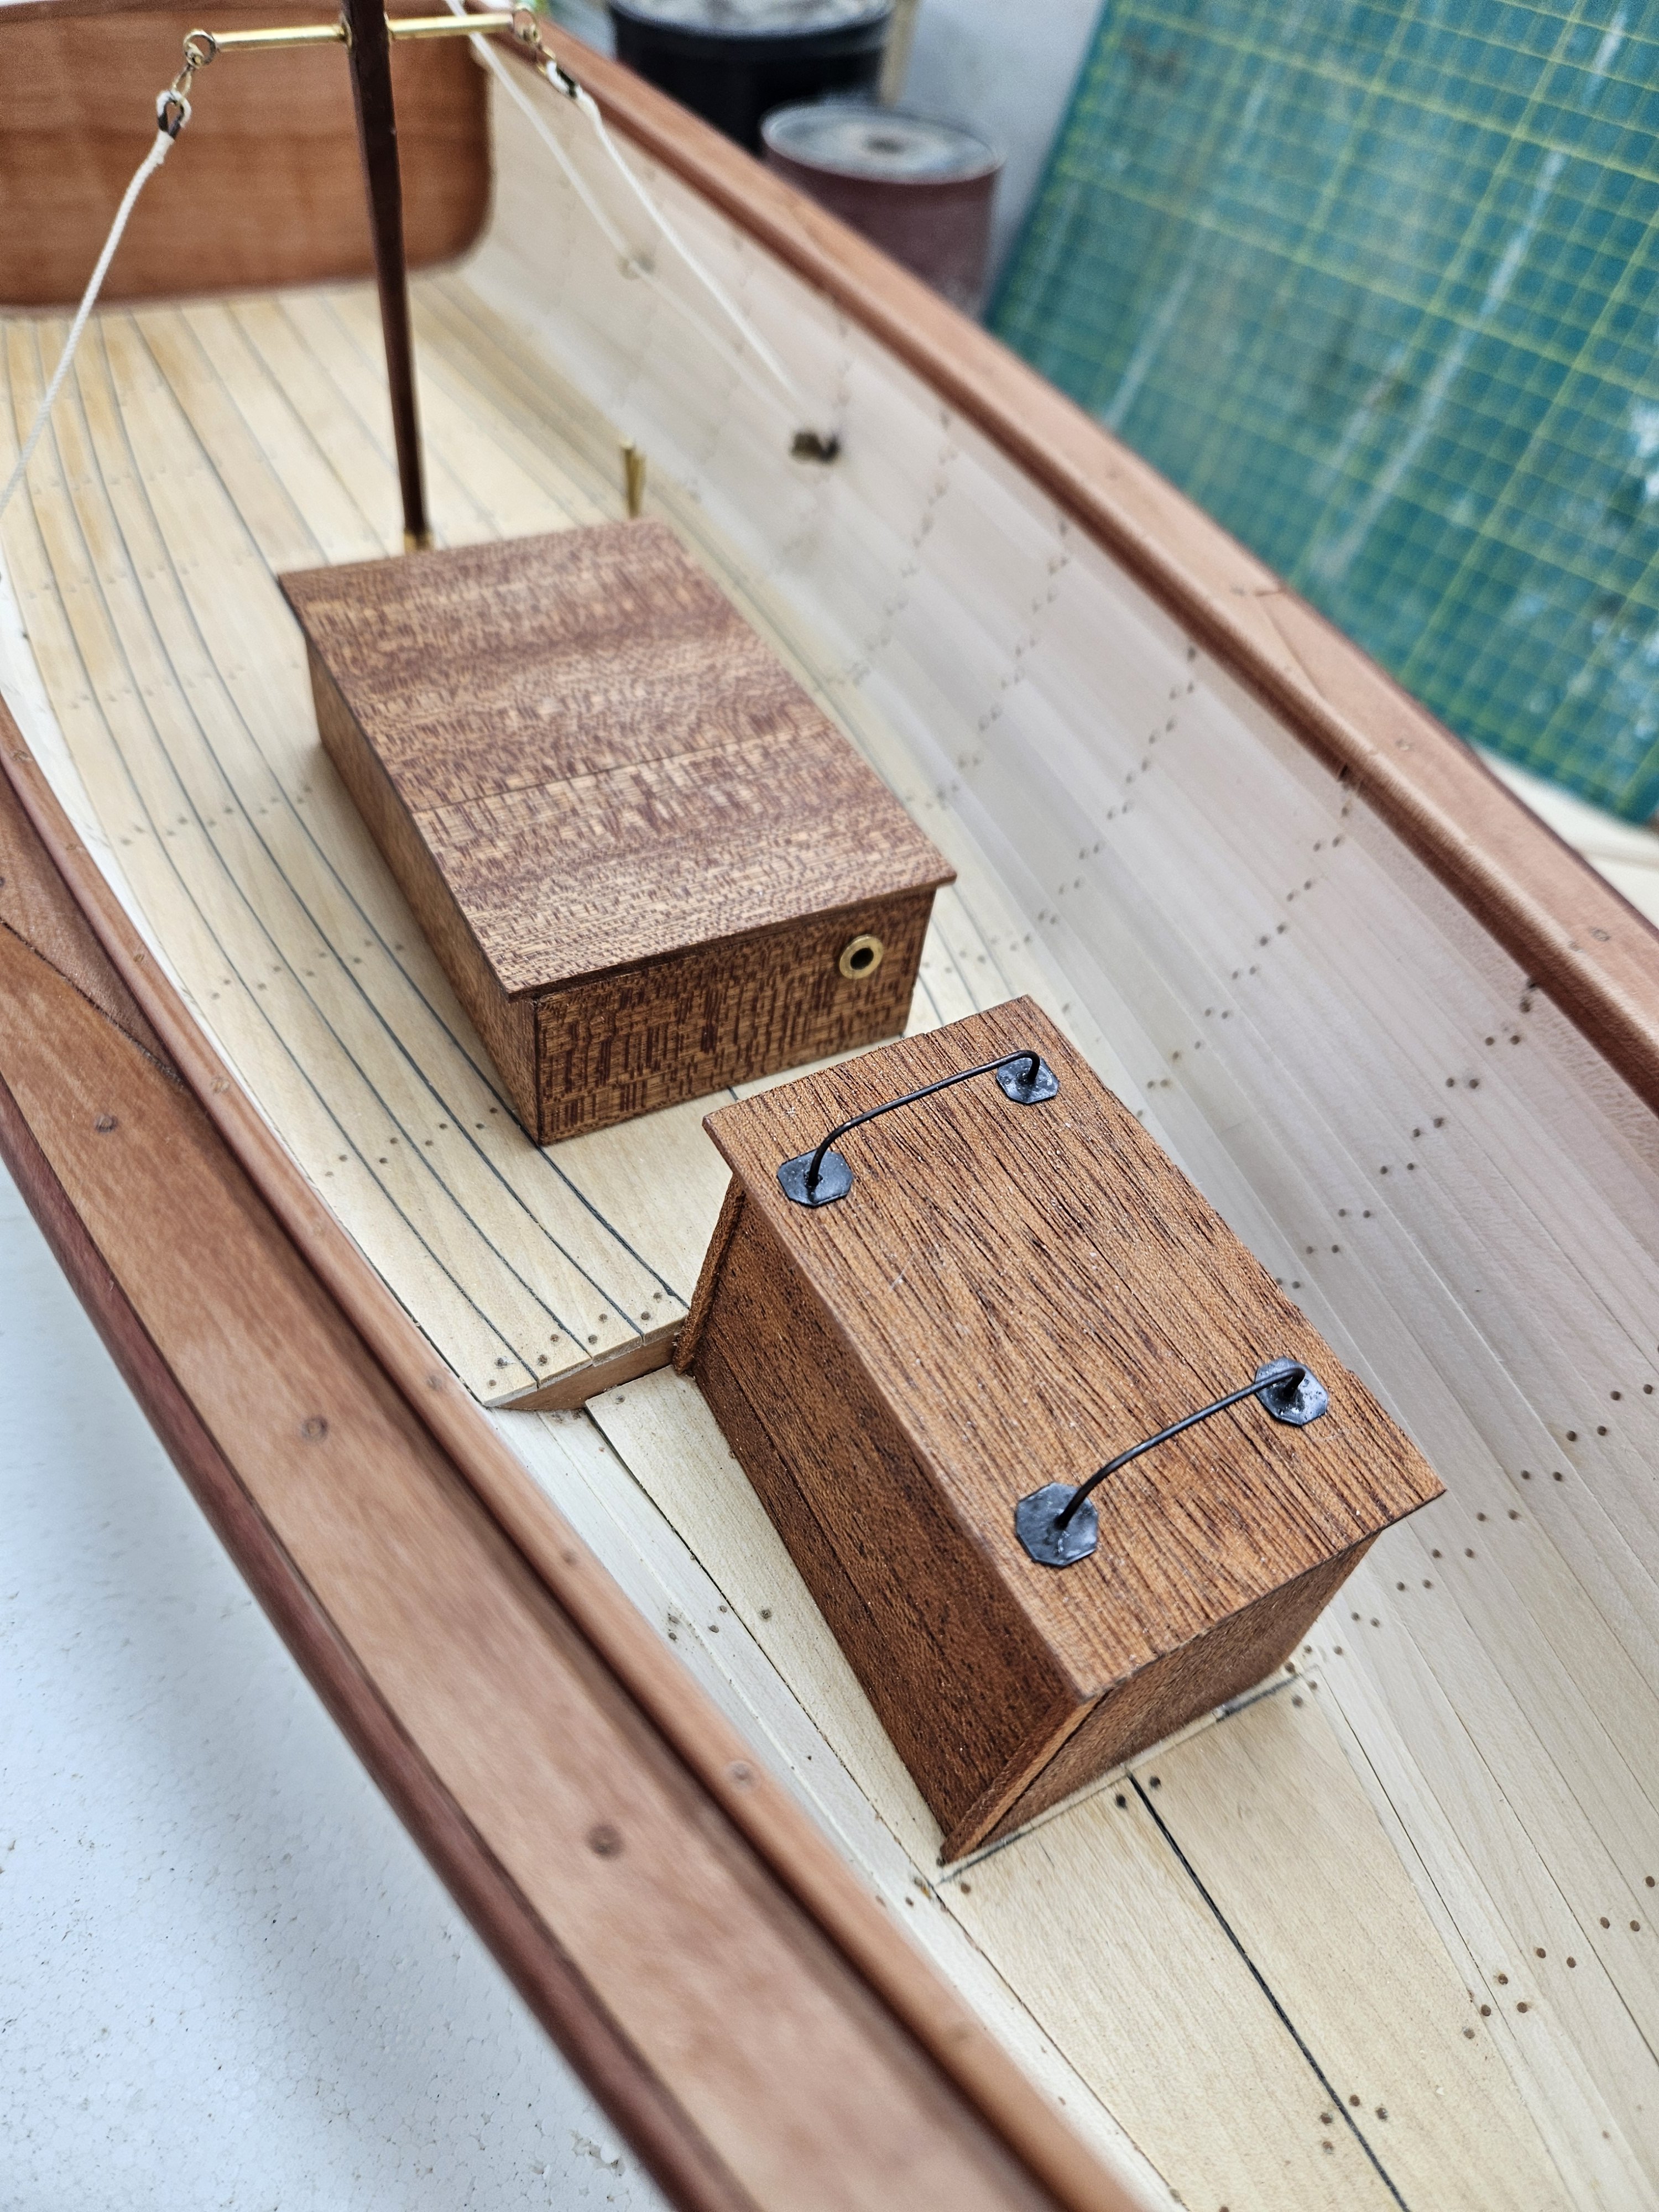
Dear all Time flies - it's been two months since my last post! I have not been idle, there is progress and I do have a few pictures to share. To start with, the hull has had two coats of humbrol enamel satin varnish. I had forgotten how good this is - very tough varnish, very easy to go on, no brush marks. I am done with water based varnishes. Then the gunwales went in which was a fiddly job, more difficult than I expected. I also installed the two bits of decking fore and aft. Everything is held in place with treenails. I decided that my boat will have canvas covered decks, not sure whether this was actually used in America back then. It did not come out as nice as in the Deben, not sure why, I suspect the fabric I used being synthetic did not glue down as well as the cotton I used last time. Edges trimmed, then the canvas was painted with ivory acrylic paint and then got two coats of Humbrol enamel Varnish. Then the gunwales went back in and were epoxied in place. Some trim pieces were also added. Those scratch marks were later removed. I ve used a few thousand tree nails on this boat, I have a couple thousand left but I need to sit down at some point and make a few. I got a small log that seems a nice dense wood. The cherry log I had was nicer but unfortunately I ve used it all. All done! Now time to fit in the rub rails. They had to be hollowed to fit nicely. My V chisel was very useful but needed constant sharpening. Screws exchanged for tree nails I added a strip at the top of the transom but forgot to take a photo. Next the fish well. It was fiddly to make! I had some very old mahogany strips, bought about 15 years which I thought would be nice to use. Finished with Tung oil, it looks absolutely stunning! And epoxied in place Next was the engine cover, I again used mahogany but this was a recent purchase so very different. I again forgot to take a photo of the finished article but again, Tung oil really brings out such beauty! I am now struggling with the vertical tiller. Chapelle mentions that the ropes would go round under the gunwales but I am struggling to figure out how this arrangement would work. Also, the plans bellow show a metal rod through the tiller - no idea what purpose this serves. If anyone has any thoughts, please do share - I am a bit stuck! Note to myself: I need to remember to buy a propeller. A final note re: future build. I have an ambitious plan but the investment in money and time will be very substantial and due to unfavorable current financial circumstances, I decided to postpone it a bit. However, I have kind of started working on something else, quite unusual project for me - If it shows potential, I ll go public with it! Many thanks for taking the time to visit! Vaddoc


-
Welcome Max! The "bad result" bit made me smile. Nothing some filler cannot fix!
-
Keeping my head in the game.....
vaddoc replied to Egilman's topic in 3D-Printing and Laser-Cutting.
Very nice EG. Now, this is a beefy speedometer mechanism! -
What a nice subject Nils and truly enjoyable to follow, although your pace is lightning fast! Never heard of a mushroom anchor.
- 300 replies
-
- 7
-

-
-
- lightship
- Feuerschiff Elbe 1
- (and 1 more)


.png.ae42aa4909ea7c6195e87862c63e03ab.png)
.png.a16eebe5ff4f2cff4d4d599cf9a808c9.png)
.png.8836174d2a2172f08392be83179329d3.png)
.png.c74ac07215811ef58d31984b4735f4a5.png)
.png.c8e46d4fdcf0f4668f6c5ec025cd73ec.png)


.png.c21eb59b5e289b60048917cb8dd42580.png)
.png.a11ef07df76bc9cde989fadecded8bf5.png)
.png.601f24fe889d16469de93fd6de7a217d.png)
.png.28702640dc95a53f1b7f1685266b9e21.png)
.png.b75af6b1c8807690916087977bcc58c6.png)
.png.909194e45cbf904188b5287775d990e8.png)
.png.8955da7cb0b7efd1f9517f60be4ed48d.png)
.png.53181876fa013a45fe4eee199ebf3c48.png)
.png.94eca34c7a02b7cd0f854e2b0047061f.png)
.png.453bfce8cd956fcc8ae479acbd4a3aee.png)
.png.9cbc1954a7973d7a461cf4039a616e18.png)
.png.30d568489f0ba33bf8983baad3550159.png)
.png.e70e8a571e65cc7a20aa6558f2199e9a.png)
.png.7f7b674a79ae2d3eb8cb421eabde3385.png)
.png.528e558c19c1c194408c76efdce2e938.png)
.png.15150db71c09cae74104328543001df9.png)