DONATION DRIVE - SUPPORT MSW - DO YOUR PART TO KEEP THIS GREAT FORUM GOING!
×

.jpg.f26acc9a74319261612561bfa7da1303.jpg)
vaddoc
-
Posts
1,605 -
Joined
-
Last visited
Content Type
Profiles
Forums
Gallery
Events
Everything posted by vaddoc
-
.thumb.jpg.6fd4c1b78768bb3efd745ab810936005.jpg) As Keith said. PVA is white or yellow. Amber would be gorilla original which is not PVA. Either way though, it makes no difference. It needs to be removed so test and see what works best.
As Keith said. PVA is white or yellow. Amber would be gorilla original which is not PVA. Either way though, it makes no difference. It needs to be removed so test and see what works best. -
Then it was gorilla original. This is not PVA glue. Gorilla original activates with water and is an expanding glue, filling gaps. I tried it years ago but made a big mess. It probably would be good for wood working when parts do not fit well, like gluing chairs but maybe not too good for modelling. I am not sure if this glue can be dissolved with chemicals. Maybe best to experiment, apply some glue to a scrap piece of wood and use heat or either IPA or acetone, what ever you can get, and see how it reacts. Scraping with a sharp blade may actually do the trick and leave a smooth surface.
-
Randy, which exactly gorilla glue did you use? Was it the white glue or the amber gorilla original?
-
Just finished going through your inspiring log, fantastic work! I hope all is well Drazen.
- 487 replies
-
- 2
-

-
- ship of the line
- 80 guns
- (and 1 more)
-
Hopefully your hand will heal quickly Hakan! You have come out wiser from this incident but also we are all more aware of the risks now. I have the small Proxon table saw but early on I realised it is by far the most dangerous tool I own. I ve actually stopped using it, I am just too careless! @michael mott Grabbing the opportunity, Michael I hope your hand is also healing well!
-
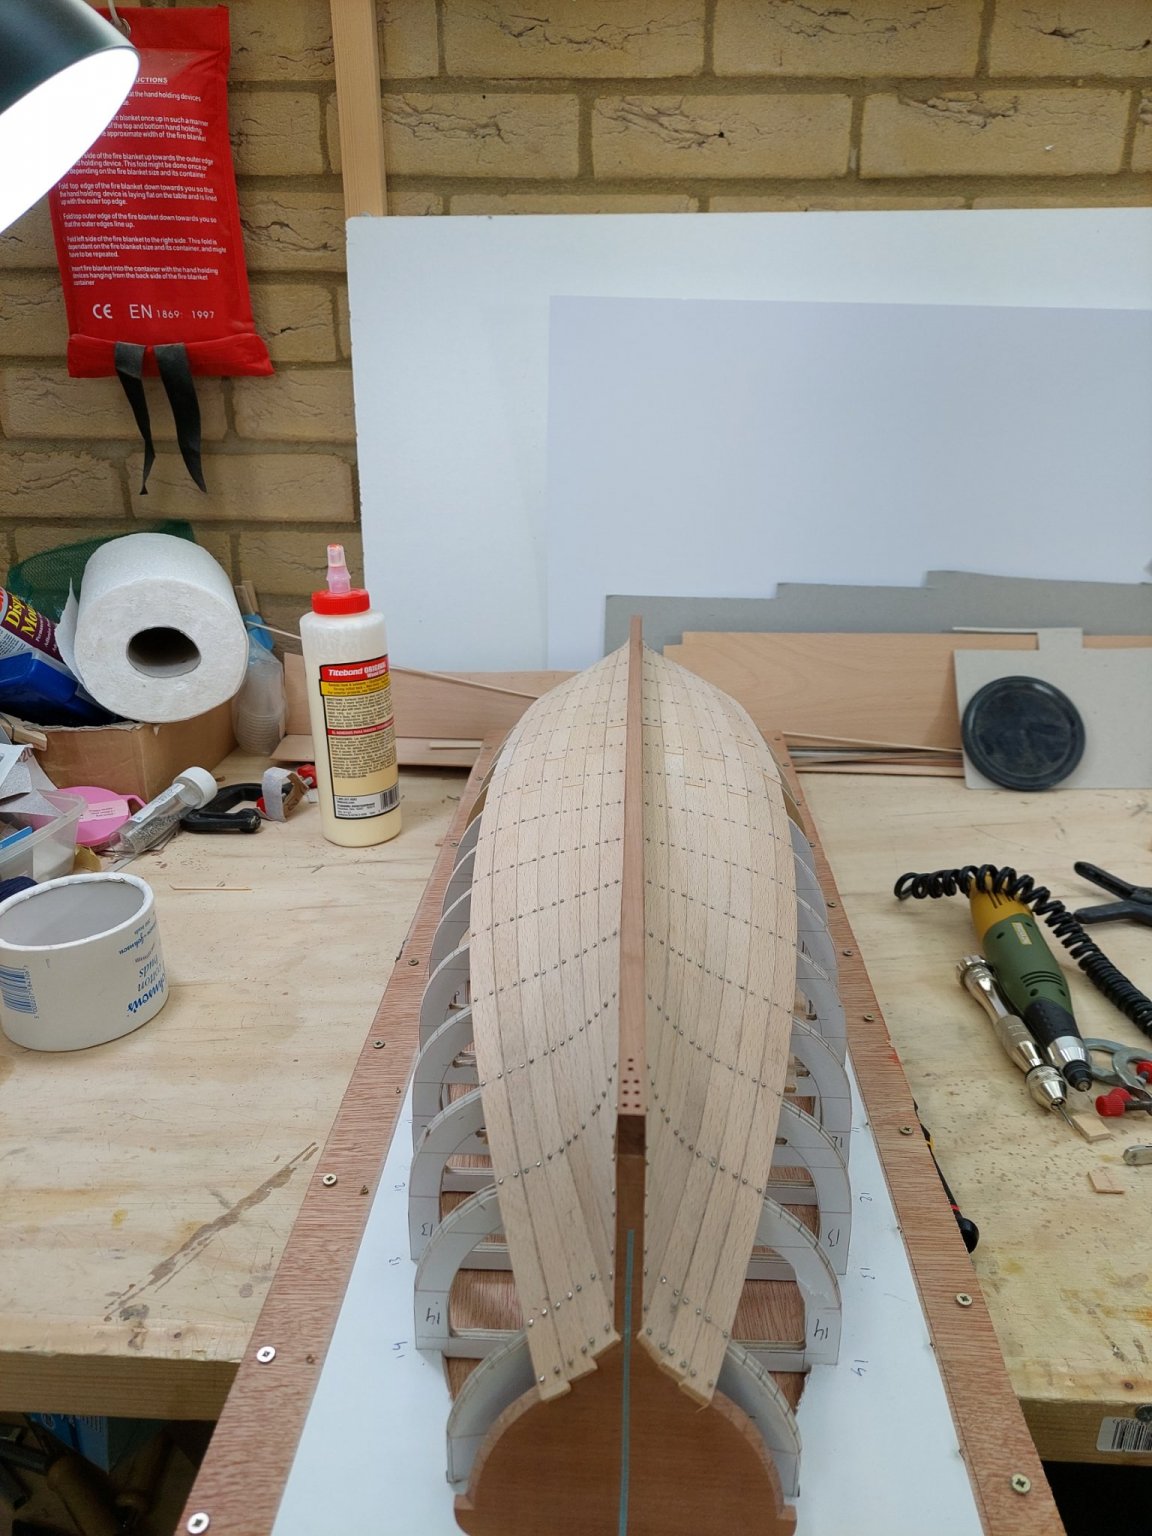
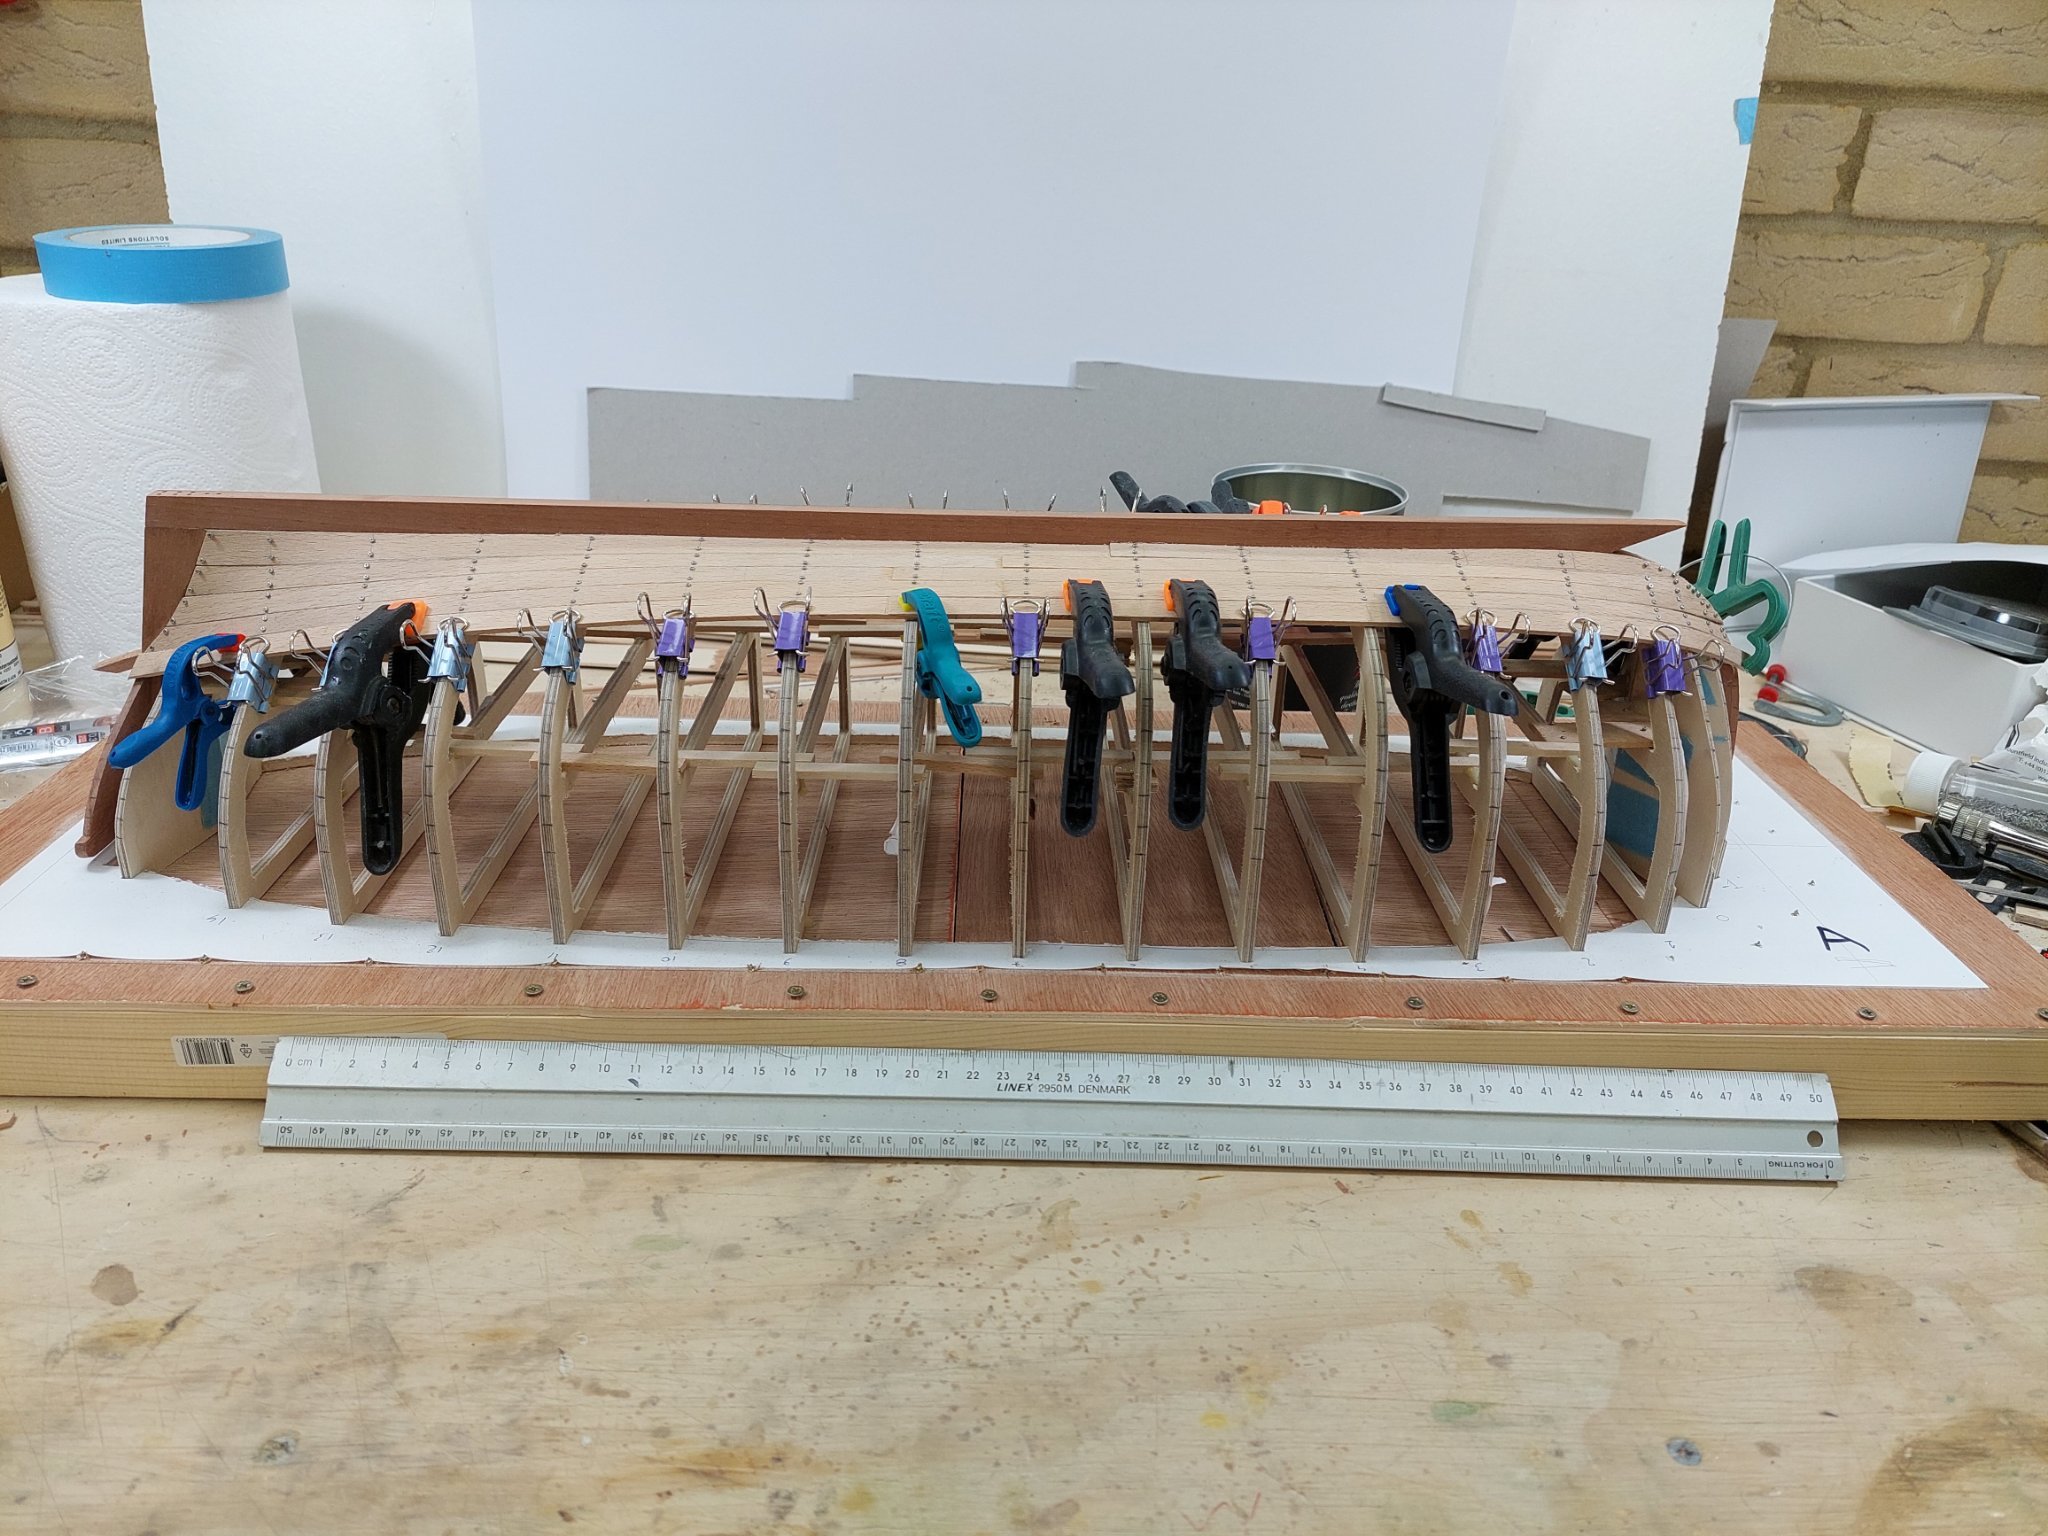
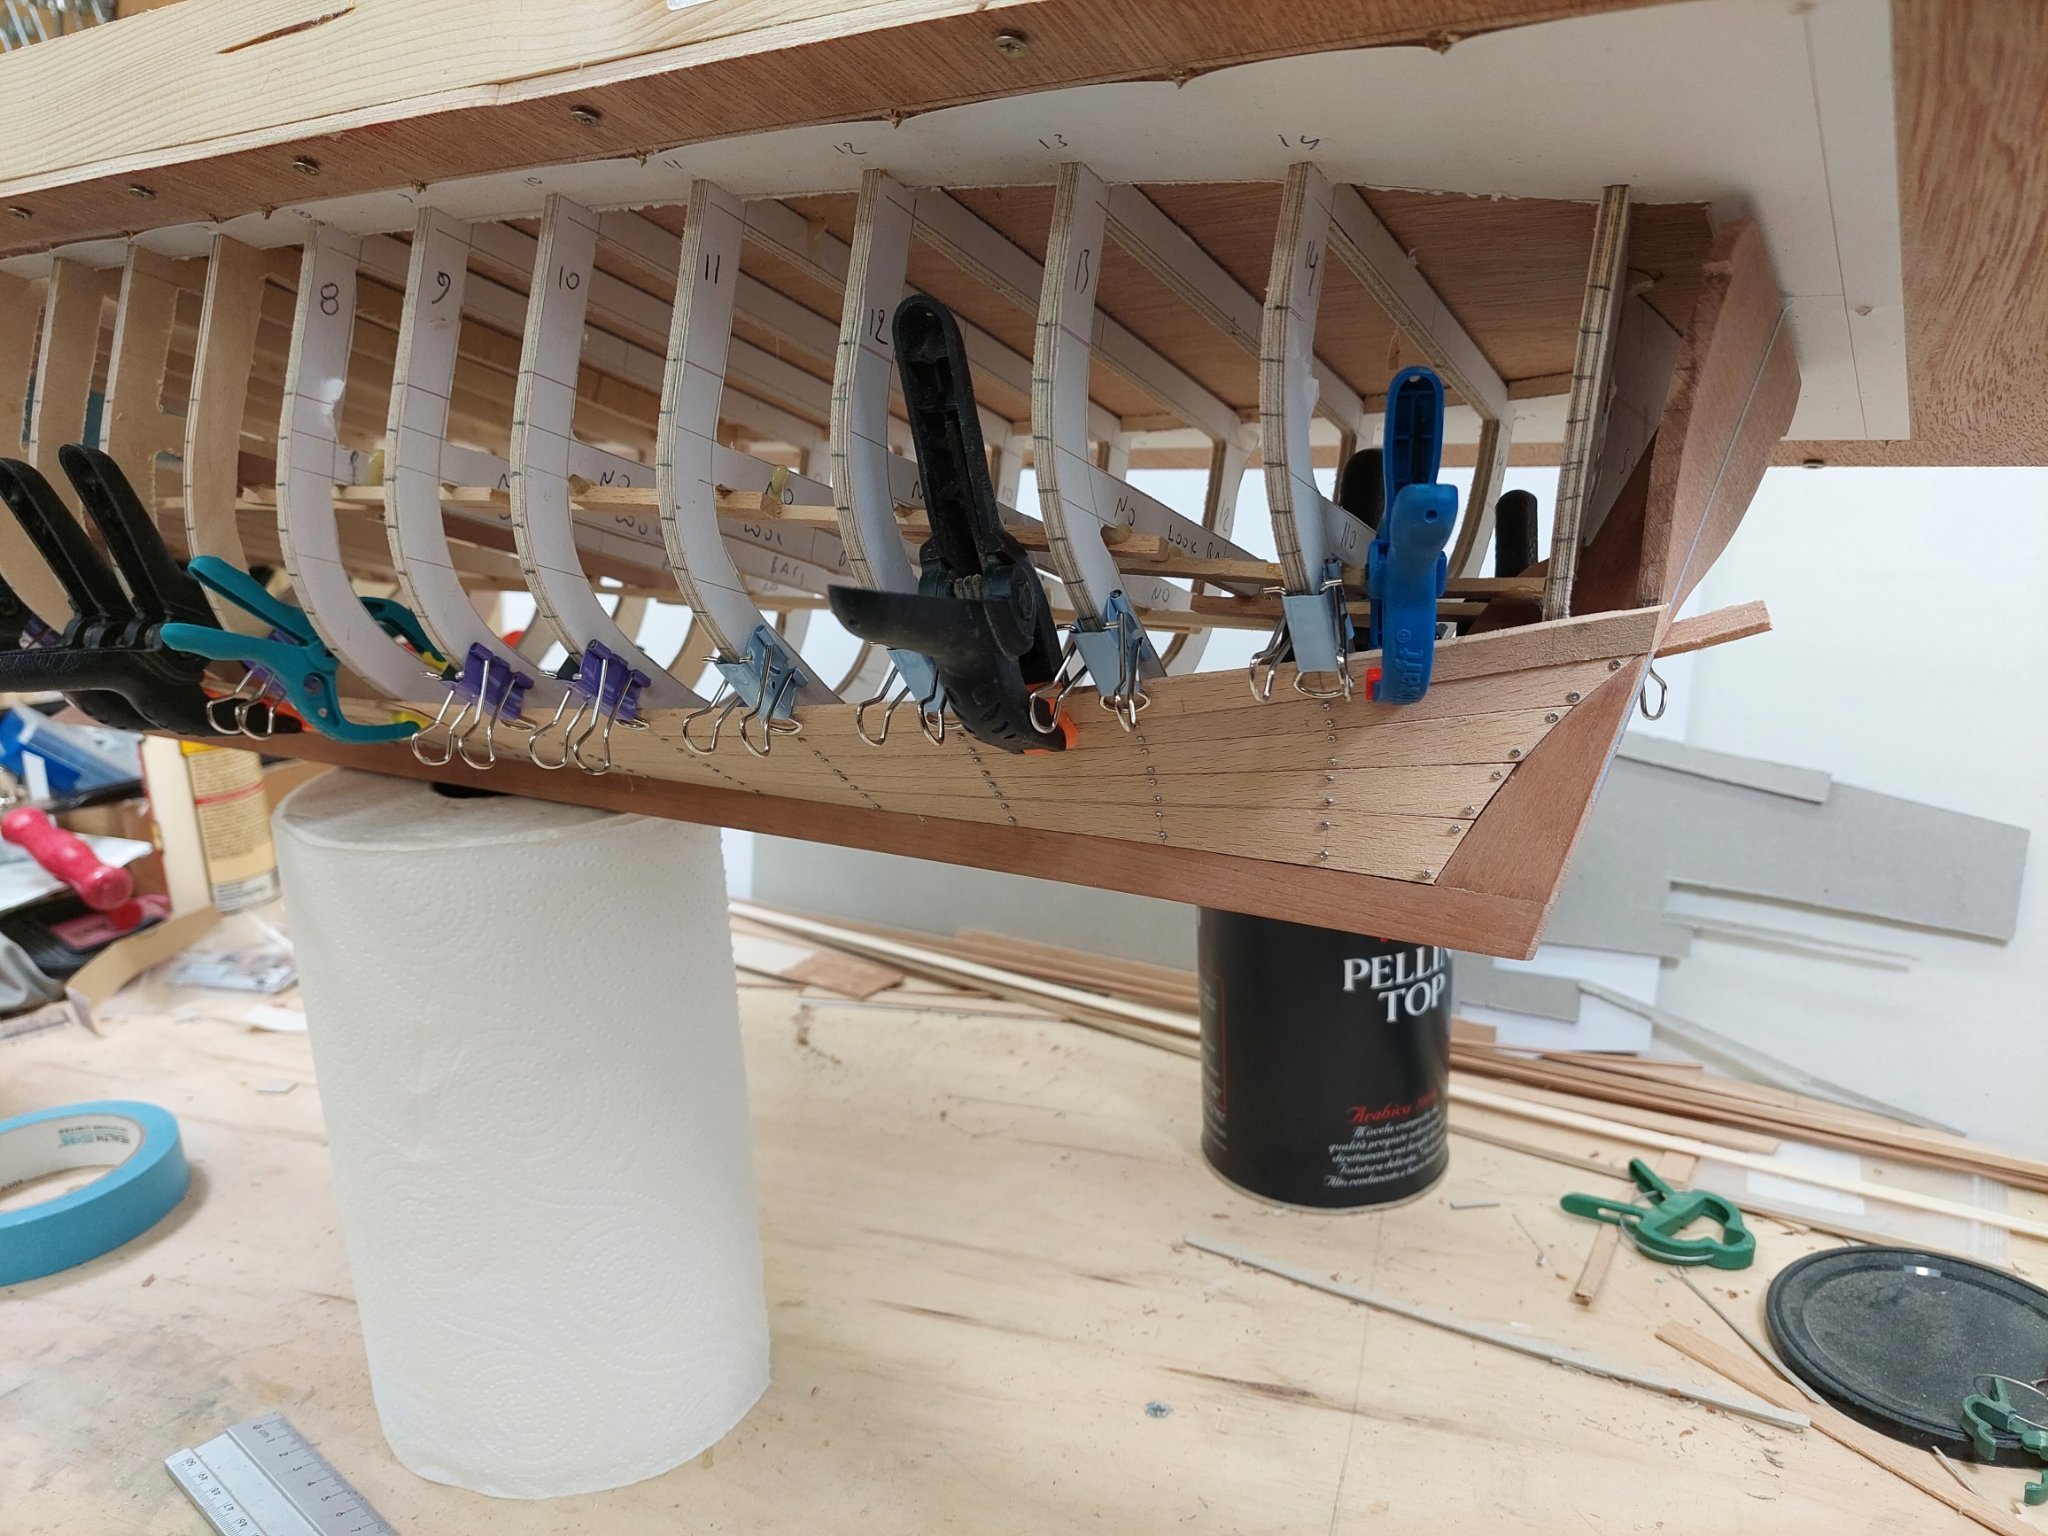
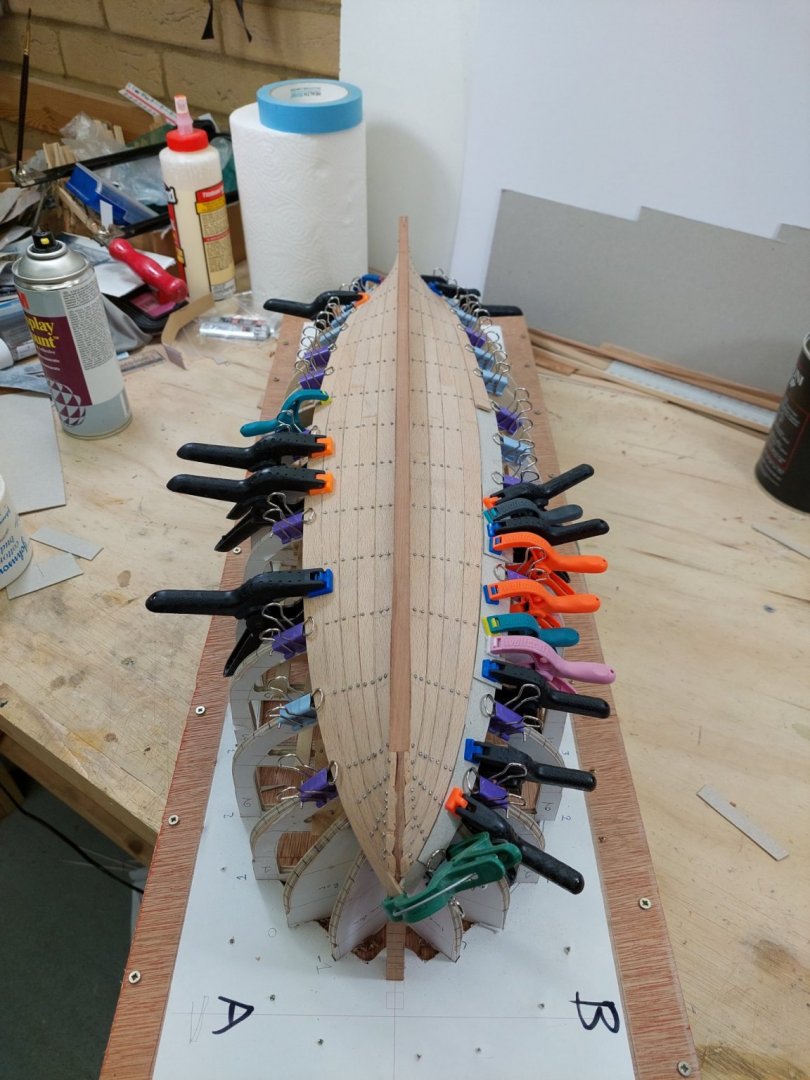
Brian, Gary and to all that hit the like button - many thanks! Indeed, thankfully the family seems to be on the mend. Planking continues at a very slow pace. I thought the bow end of the planks would get easier as I get closer to the sheer but this is not the case, it is still difficult to get the shape right and convince the planks to bend and twist. 20 seconds in boiling water though does miracles, beech really responds superbly to wet heat. A few photos, still some way to go.


- 233 replies
-
- 14
-
-
Always test on scrap wood, not the model!
-
Trade products like West system are usually not appropriate for modelling as they are very hard when cured. I run into a similar issue years ago when I used a large amount of trade filler that dried rock hard. It took a very long time of difficult sanding to rectify things. I use Zpoxy and when needed thicken with gypsum, much easier to sand. I used to use talk powder but I have concerns it may contain asbestos. As Druxey said, for your purposes filler/sealer might have been a better option. Cured epoxy can only be removed by sanding or chiselling away the excess material. 3M silica carbide sand paper are indeed amazing
-
Completely missed this Richard! Unlucky! Also looking forward to the recording being released. Many thanks and Merry Christmas!
-
Could I also add a couple of potential challenges with large scale. The planks get pretty thick and resist edge bending. Tolerances need to be tighter as gaps will show. Bevelling edges will be needed. The building starts to get closer to the real thing which is something I enjoy very much! The requirements in timber, supplies and tools grow geometrically. I remember a picture Gaetan had posted with the pear wood that was delivered to his house. Must have been a few trees in that pile!
-
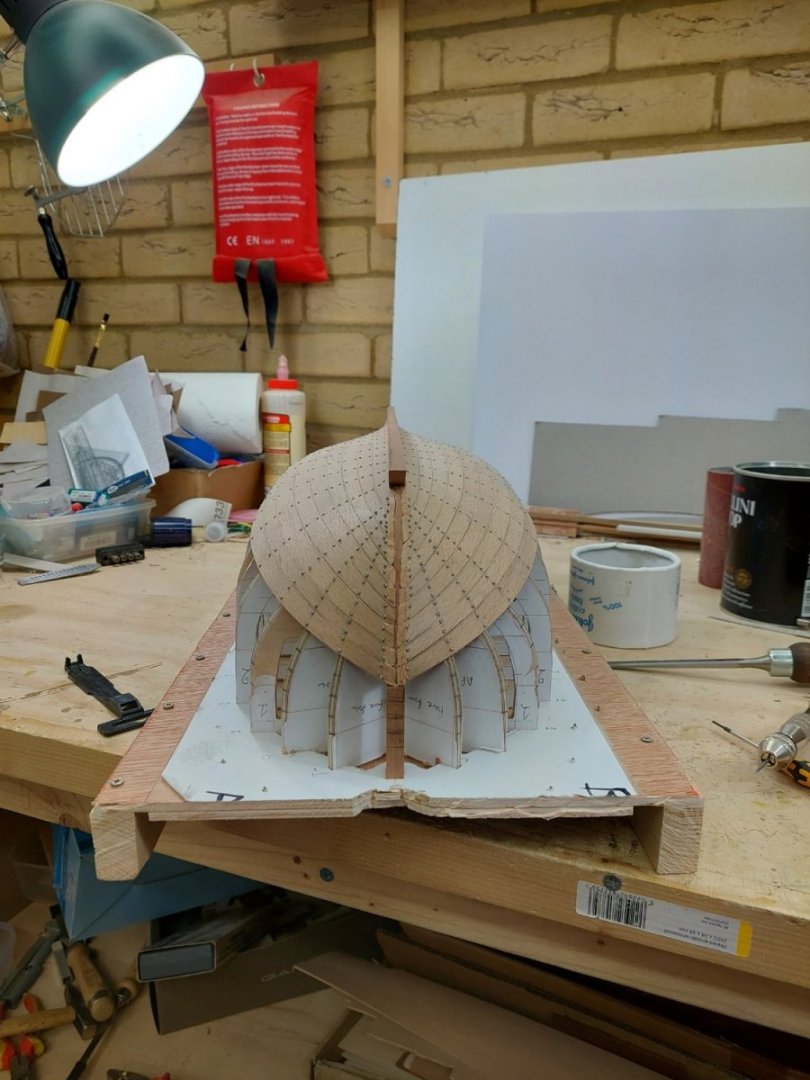
A quick update. Little progress due to fevers and aching throats with the whole family out of action. Not Covid! A few pics, I think it is going reasonably well.


- 233 replies
-
- 12
-
-
@allanyed The thickness of the planks is 2mm (Actually 2.2 as they came a touch oversized), spot on 7/8 inches! Now, in regard to the width, these are my amateur, non-educated thoughts: The widest planks are 1/2 inch, you have a good eye! Honestly, I think 0.8 inches might be too wide. Maybe the upper planks near the sheer could be made as wide but the rest I think not, as the turn of the bilge is quite acute and needs more narrow planks. Also, replacing the garboard and the next 3 planks with only 3 wider planks, I think this would be a struggle. And I like all planks to be reasonably equal in width. Despite the above, I suspect you are actually correct. My planks always end up on the narrow side, irrespective of the shape of the hull!
-
One of the proposed alternatives to the Panama Canal
vaddoc replied to bruce d's topic in Nautical/Naval History
I think this is a great idea that makes every sense today. We will offset the carbon footprint of the construction by building many wooden clippers which will be the only merchant ship allowed in the oceans. Where do I sign? -
Just got scent of your log Kevin, enjoyed very much reading through it! Not much to contribute but I ll be watching from the back of the room.
-
Very nice Hakan. Looks like there is plenty of room in your shop for a ropewalk, if you ever felt like making your own rope. Just saying! Alternatively, I should have plenty of very small diameter rope if you think you could use it, could fit easily in a nice Christmas card! PM me if interested.
-
My models tend to need thousand of holes each. Hand drilling is not only tedious, it can also lead to problems. It is easy to brake a drill which gets stuck in the hole and then cannot be removed. Using a rotary drill and flexible steel drills, this risk is minimised. 300 rpm I think is too slow to drill wood. I switched from Dremel to the DC Proxxon, which I find much better overall and with more torque. Drilling wood, it is always in the highest rpm setting.
-
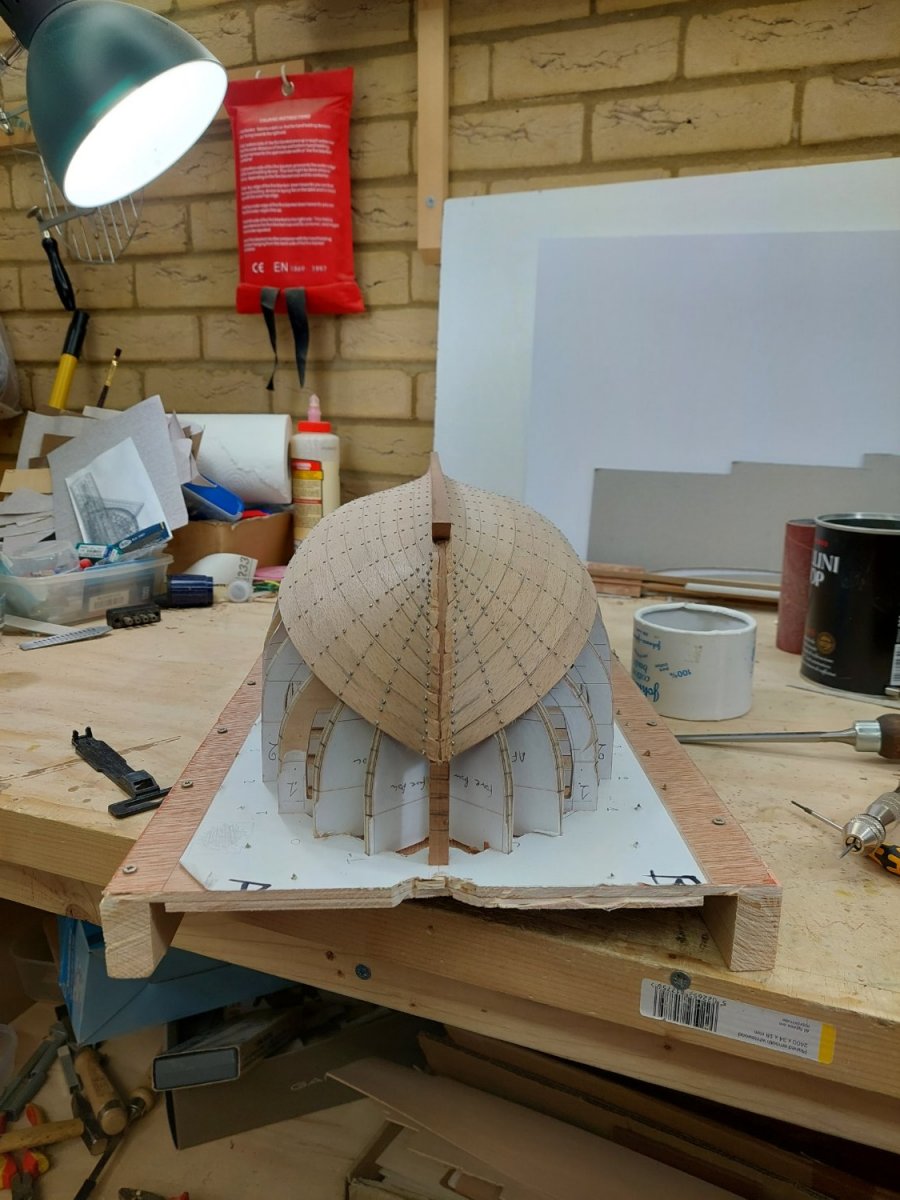
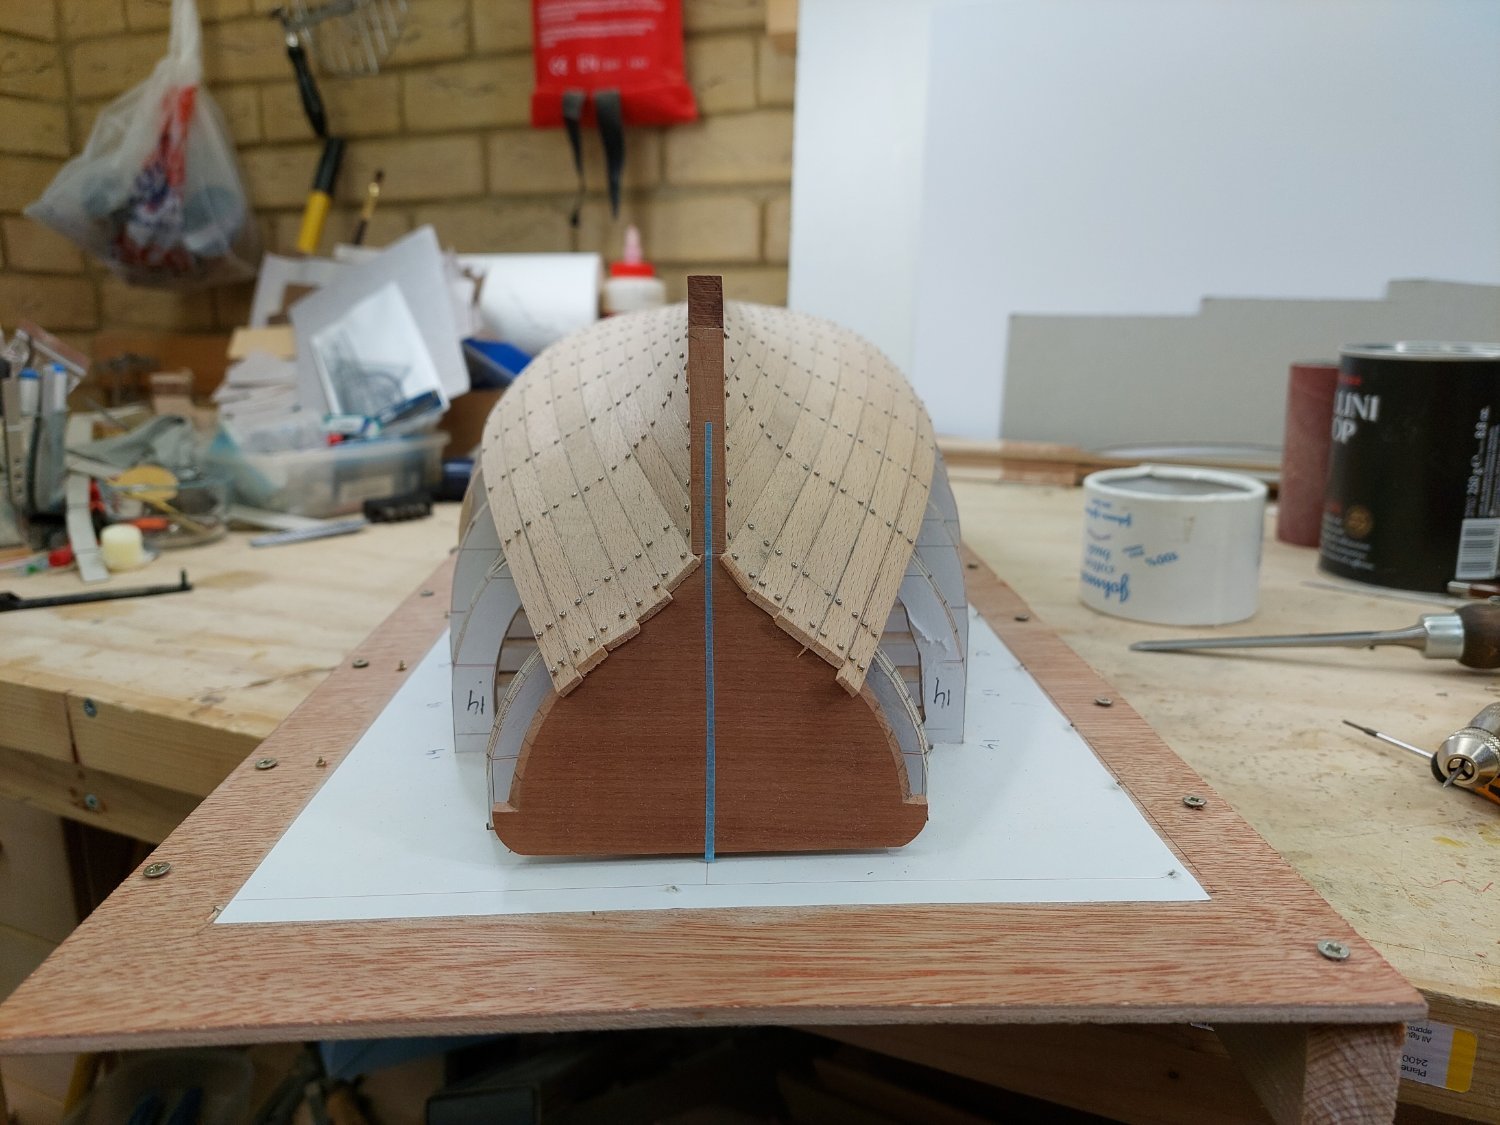
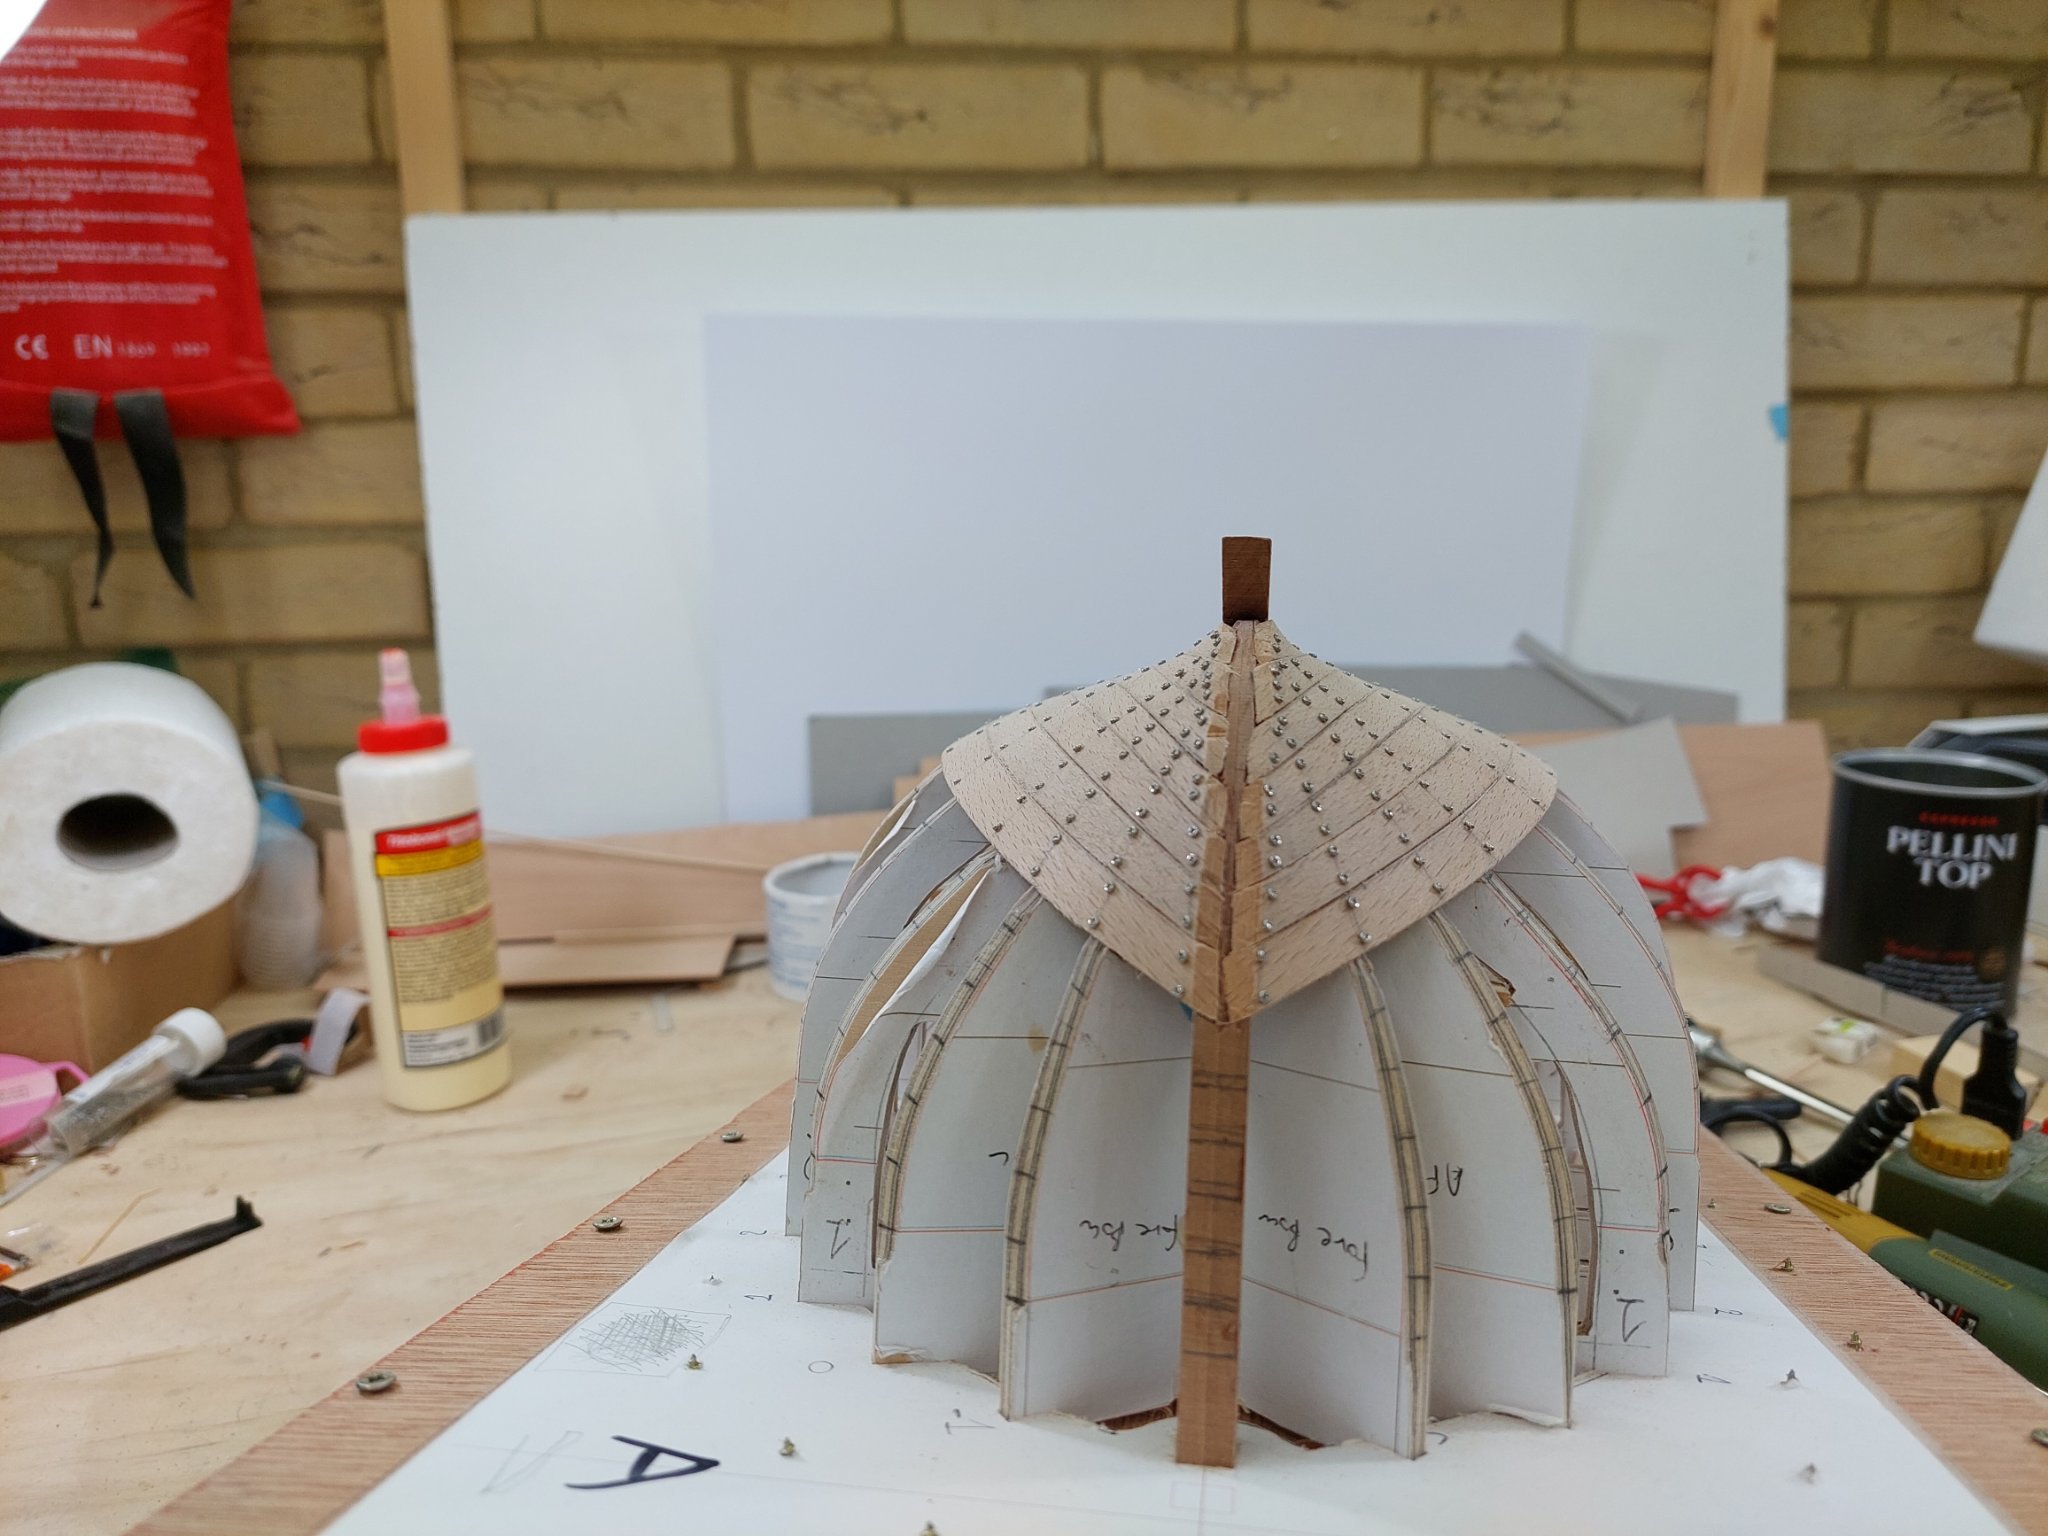
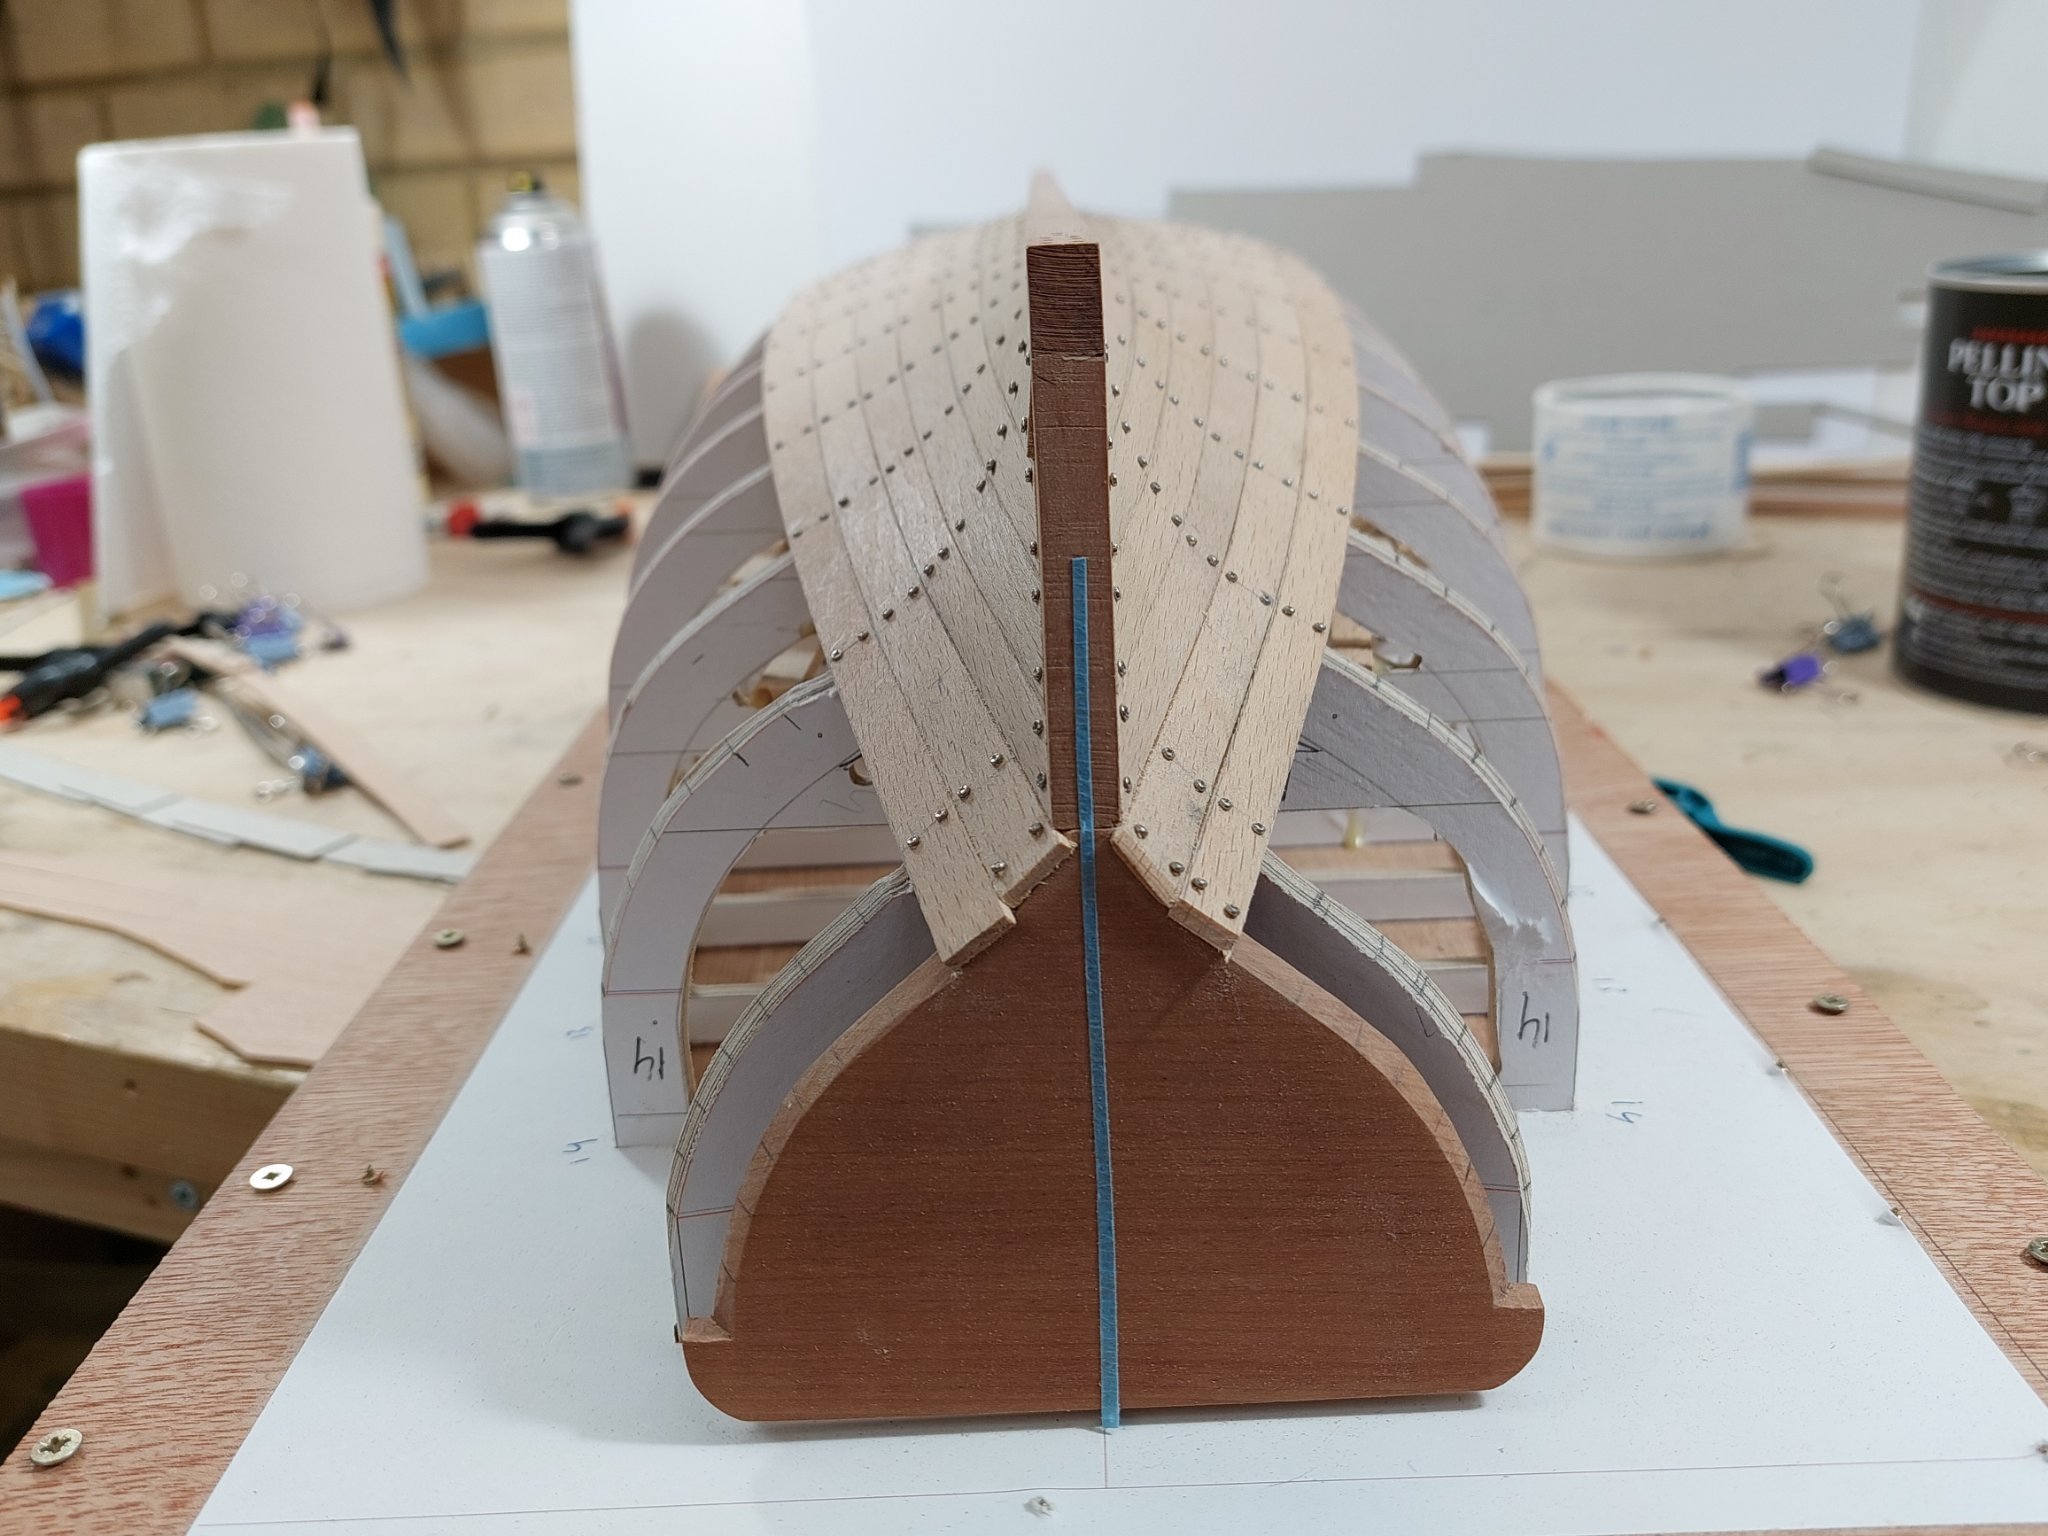
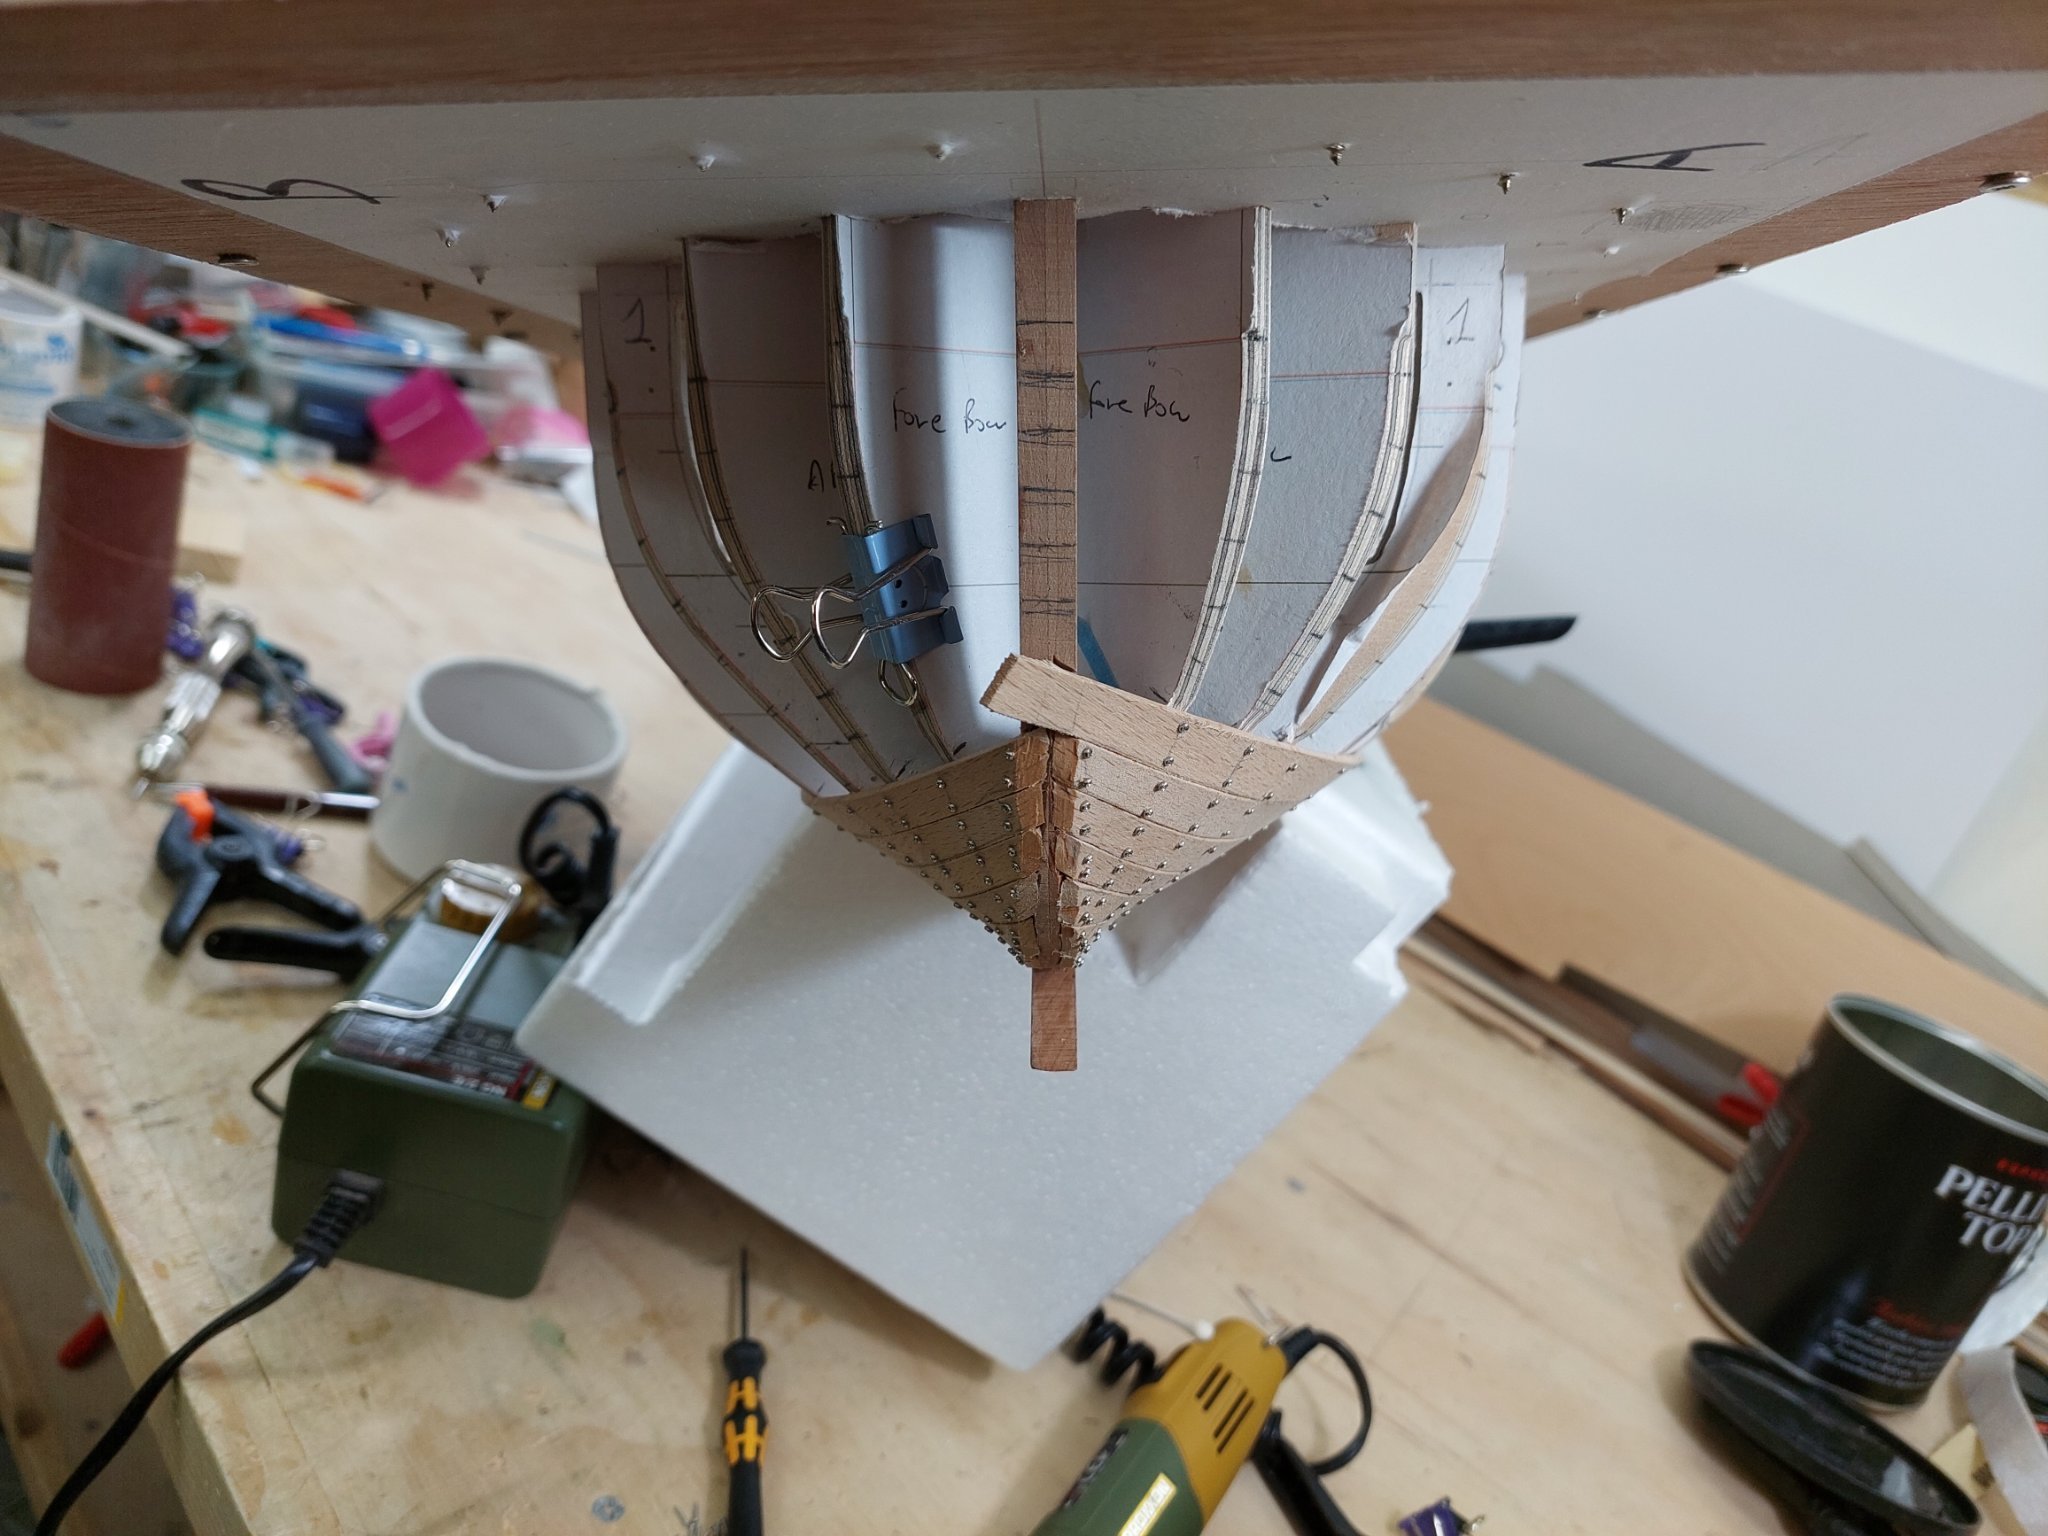
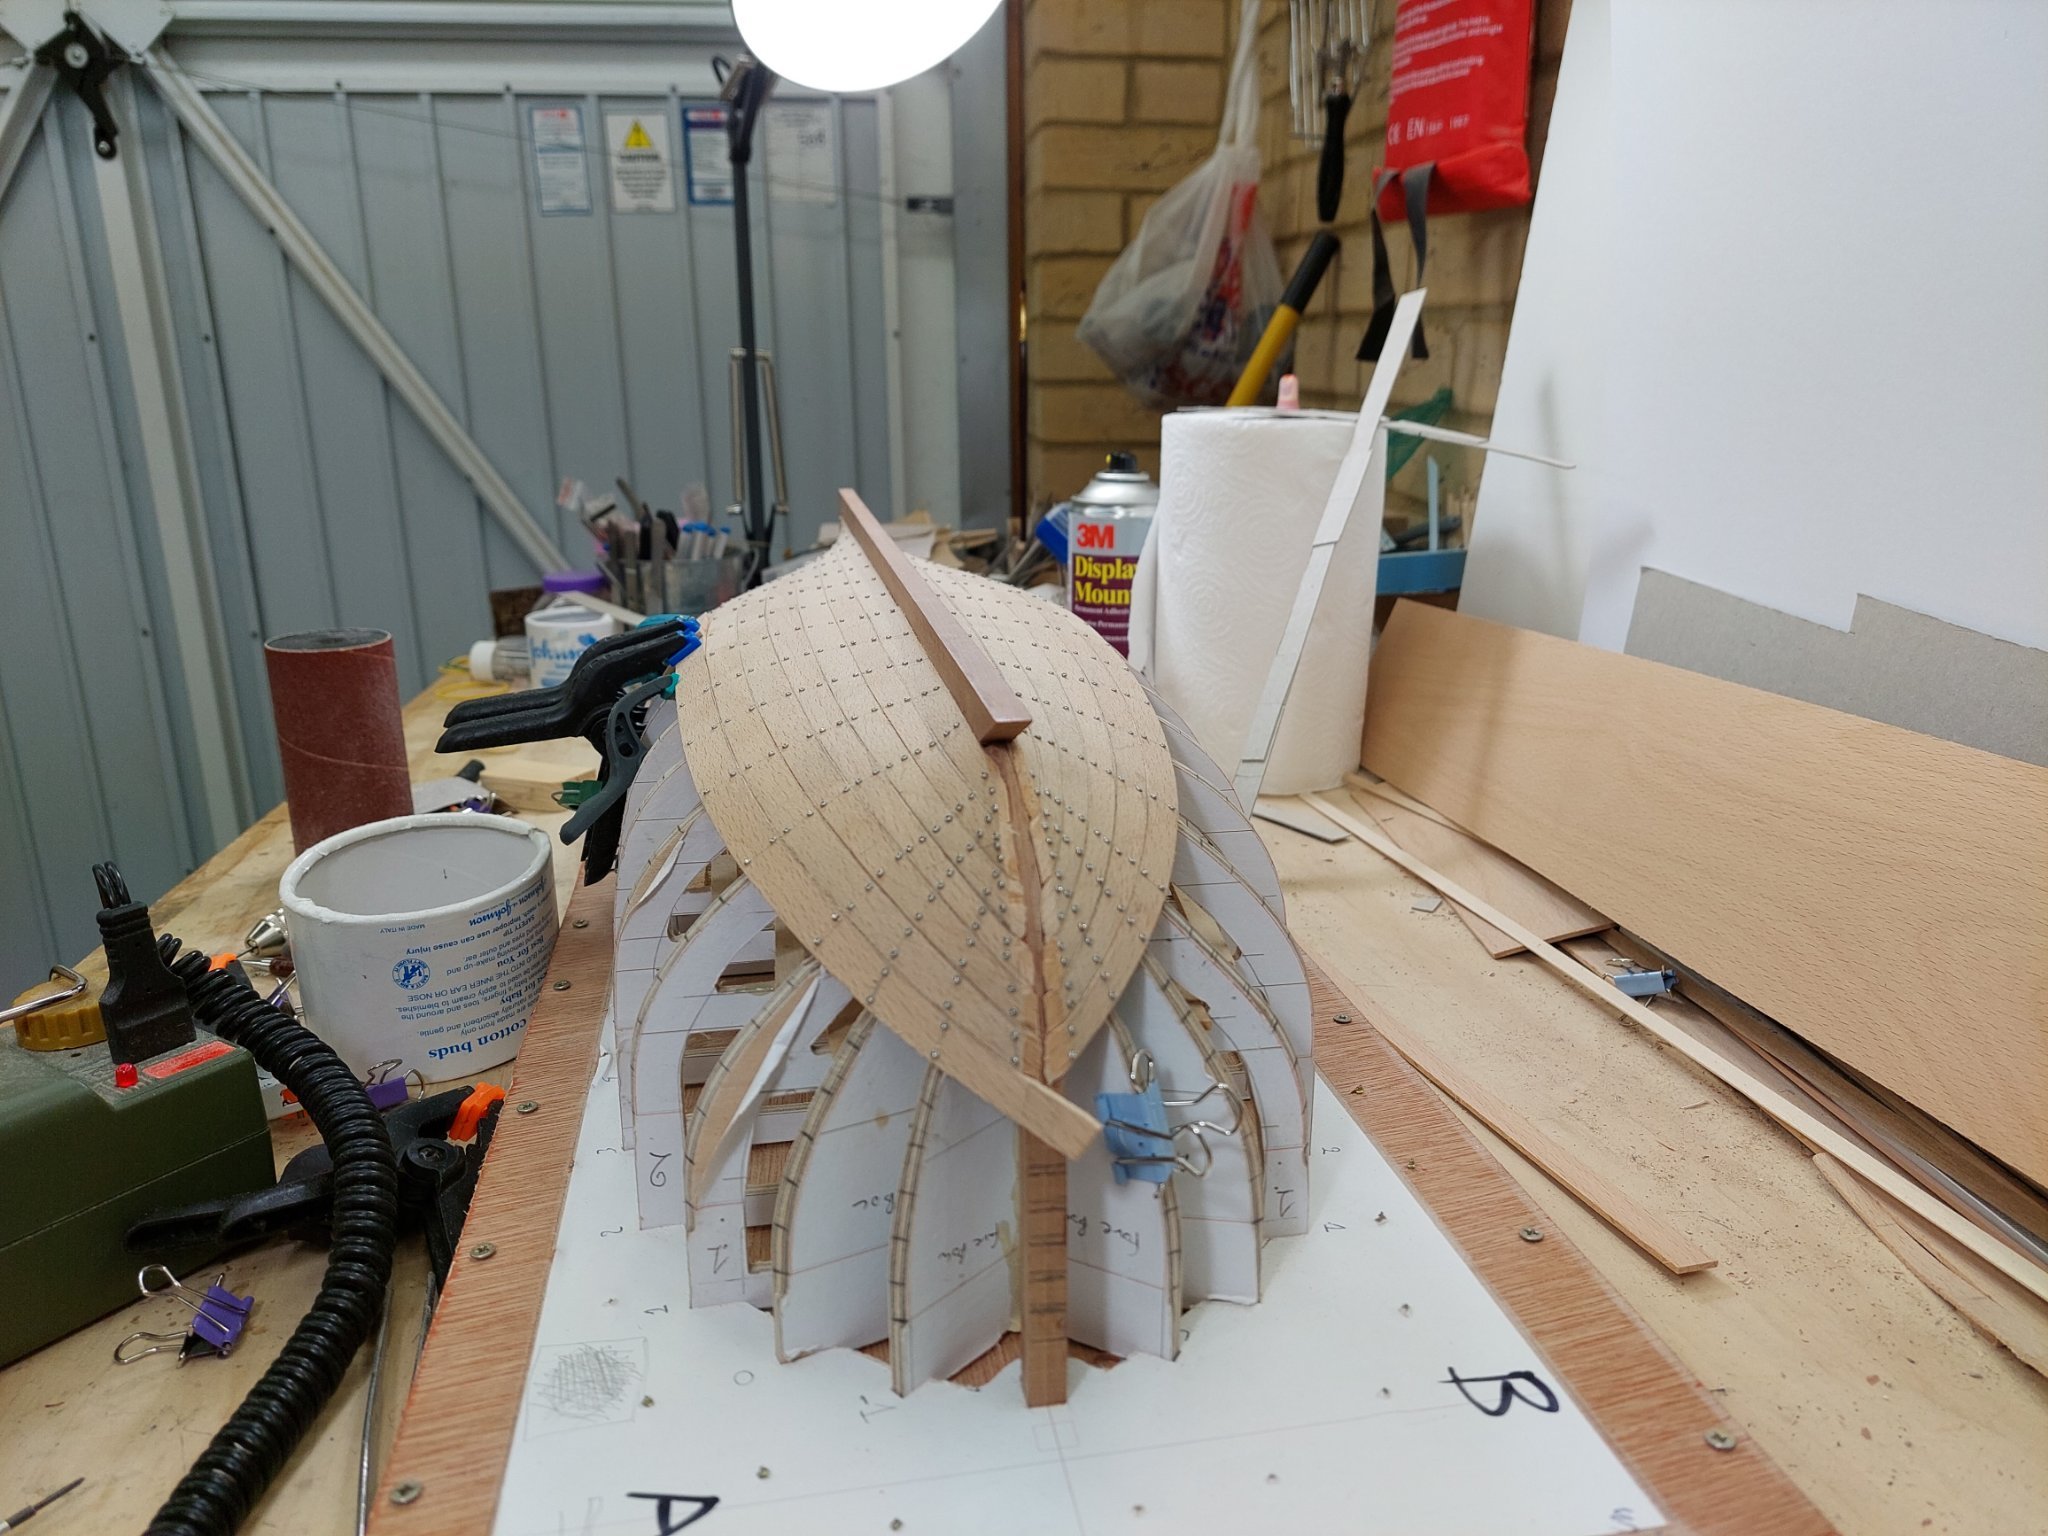
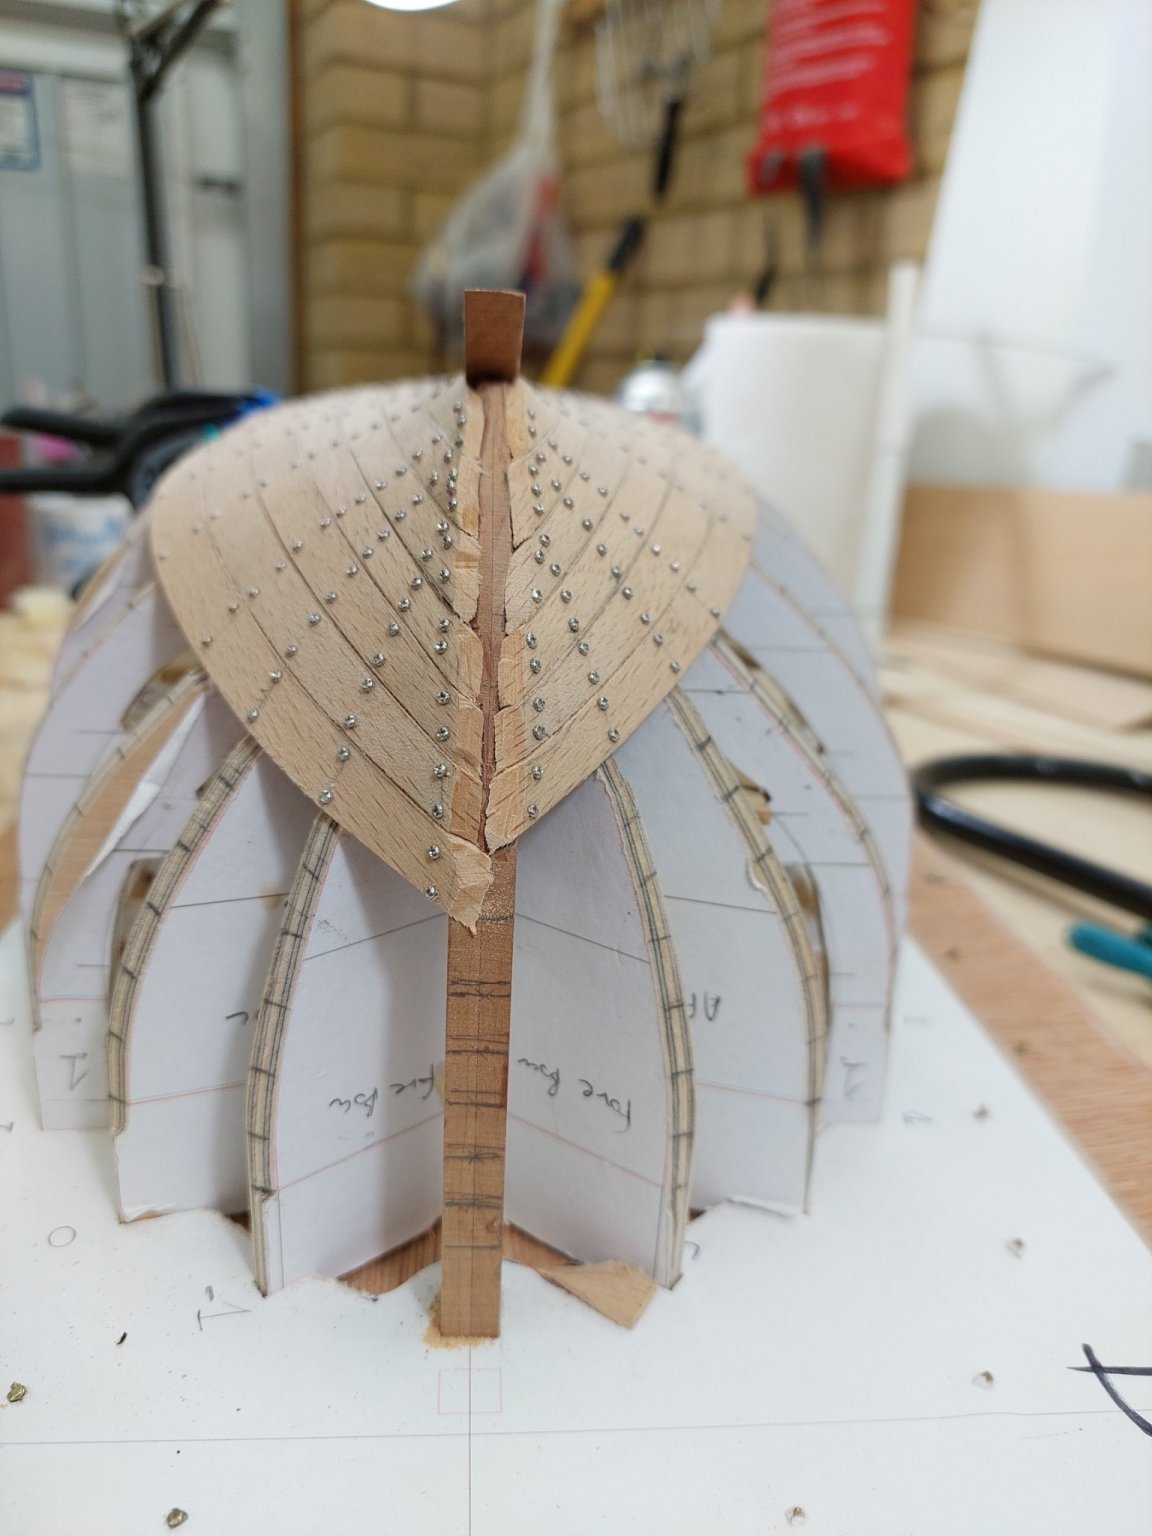
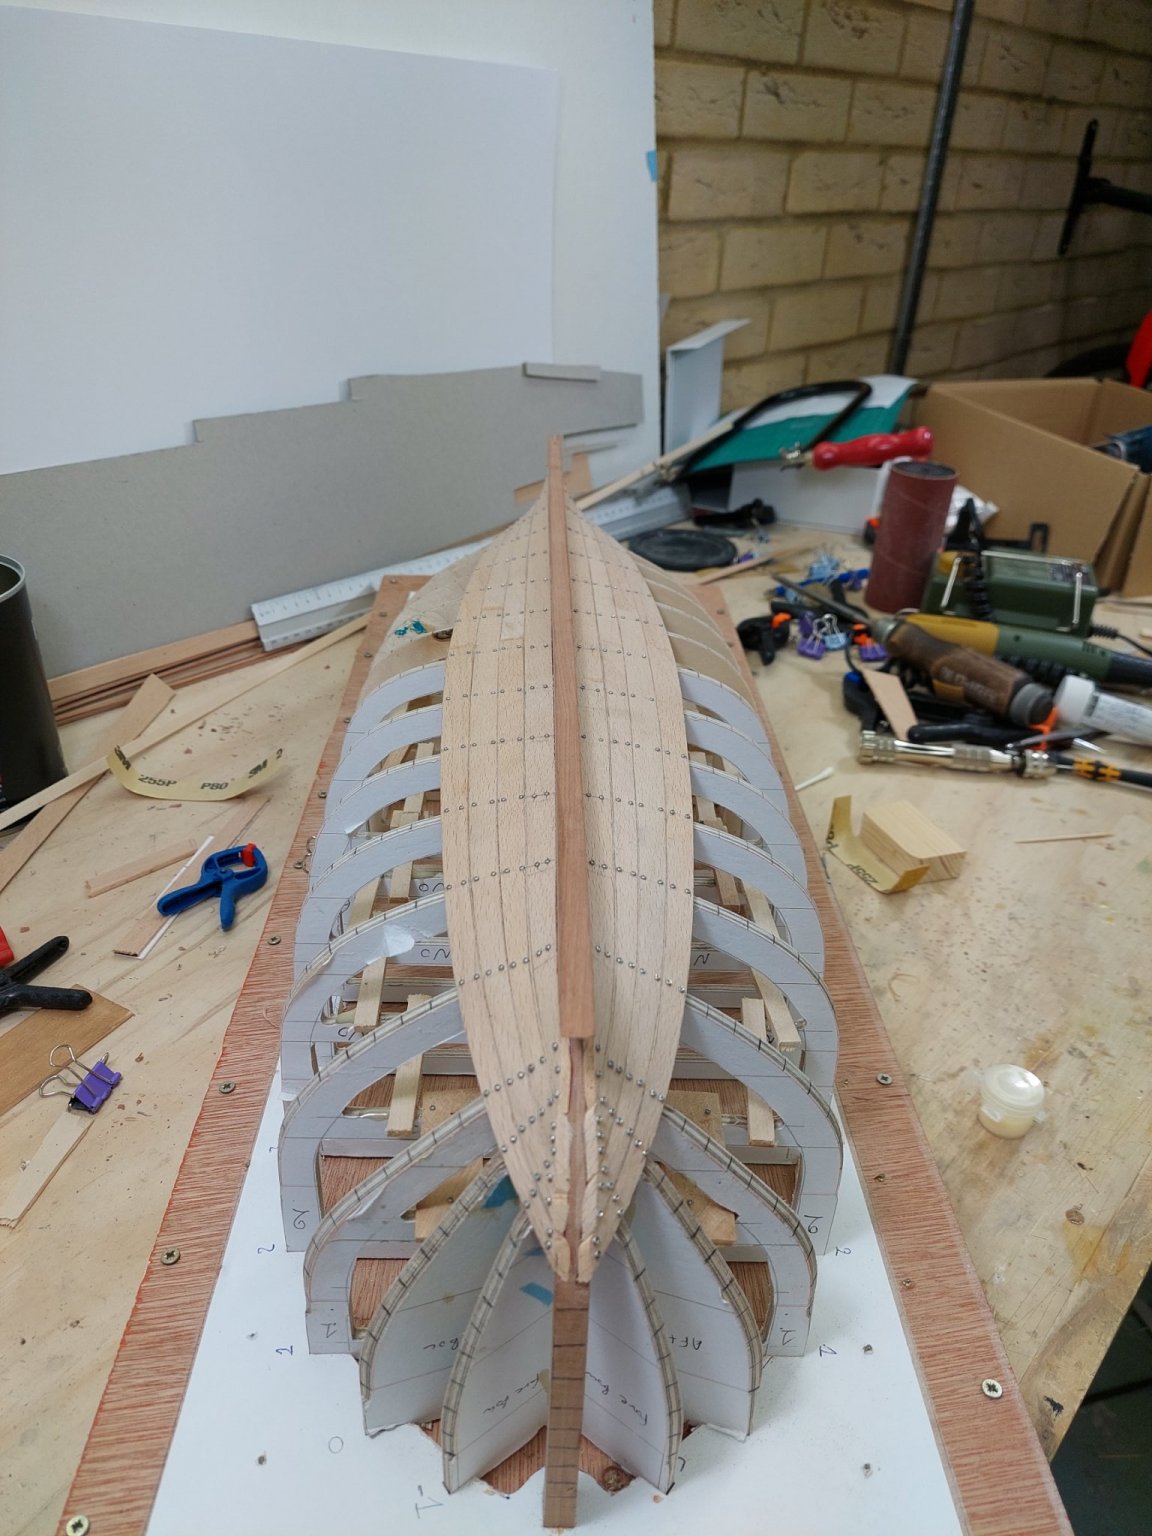
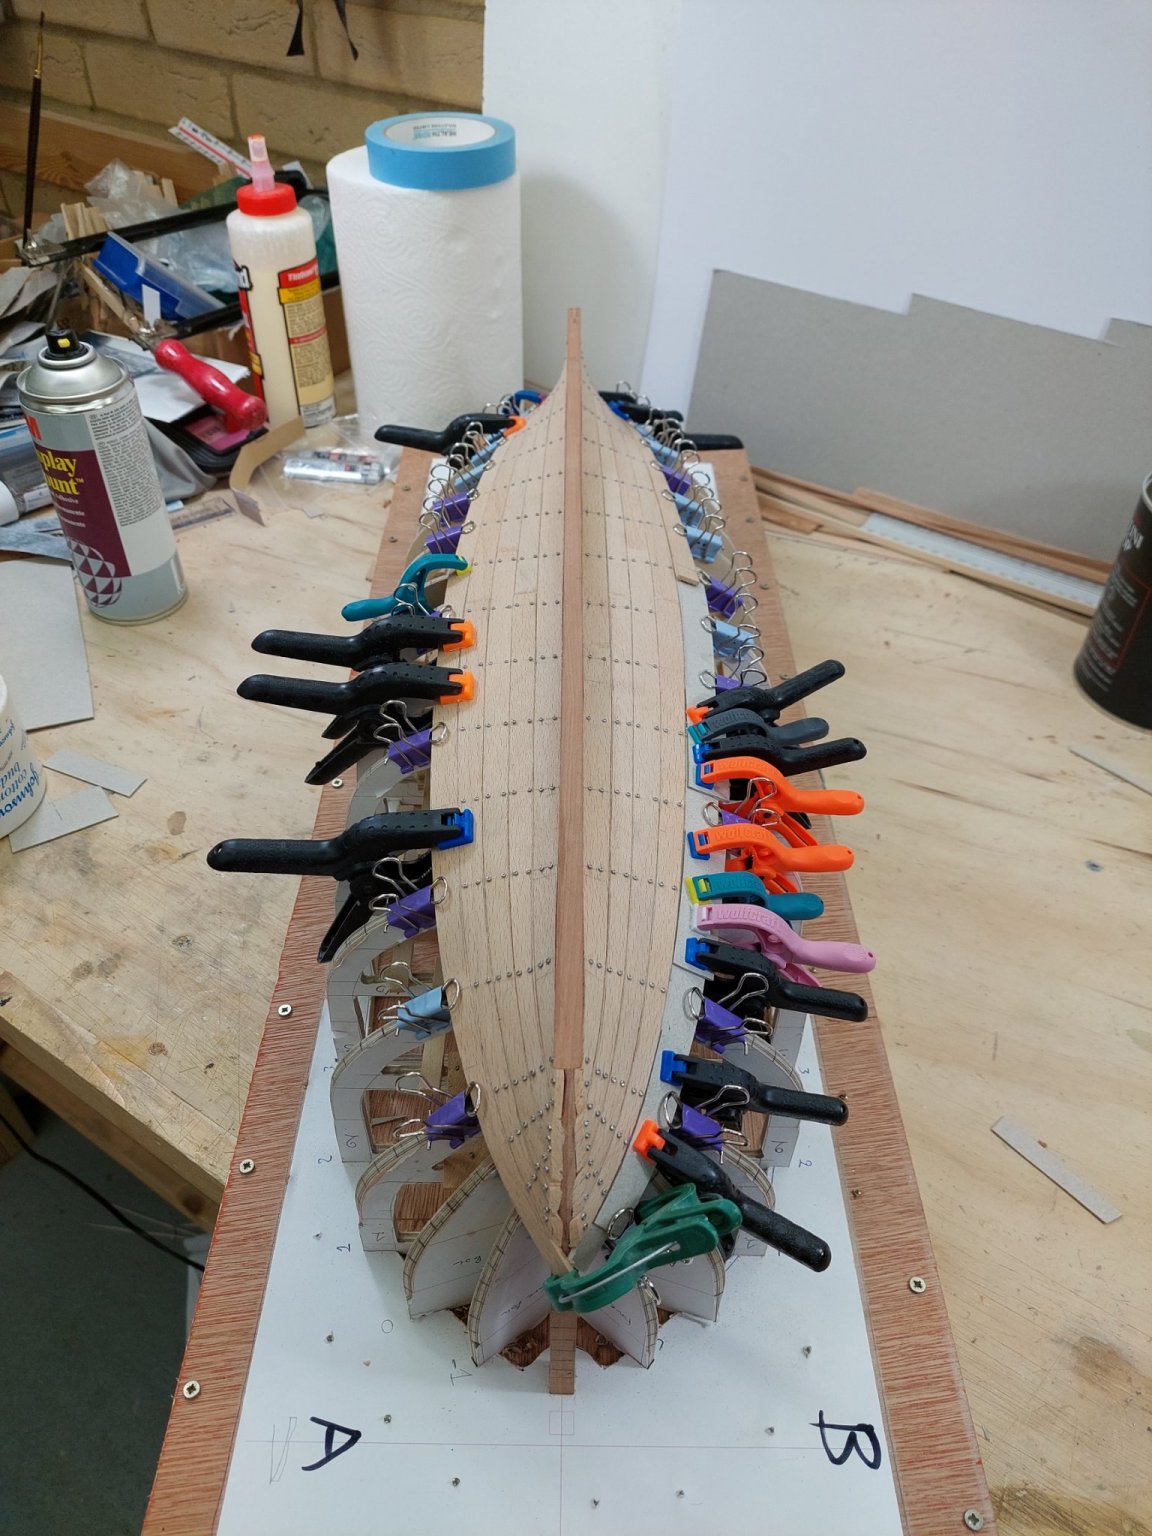
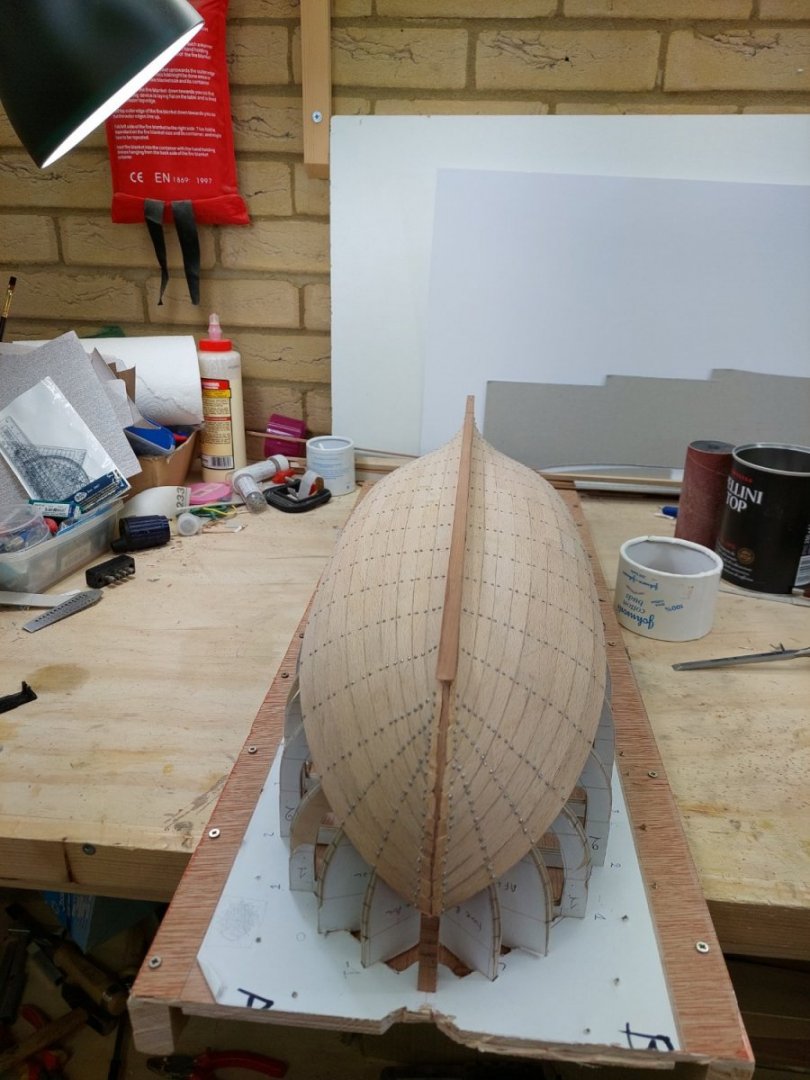
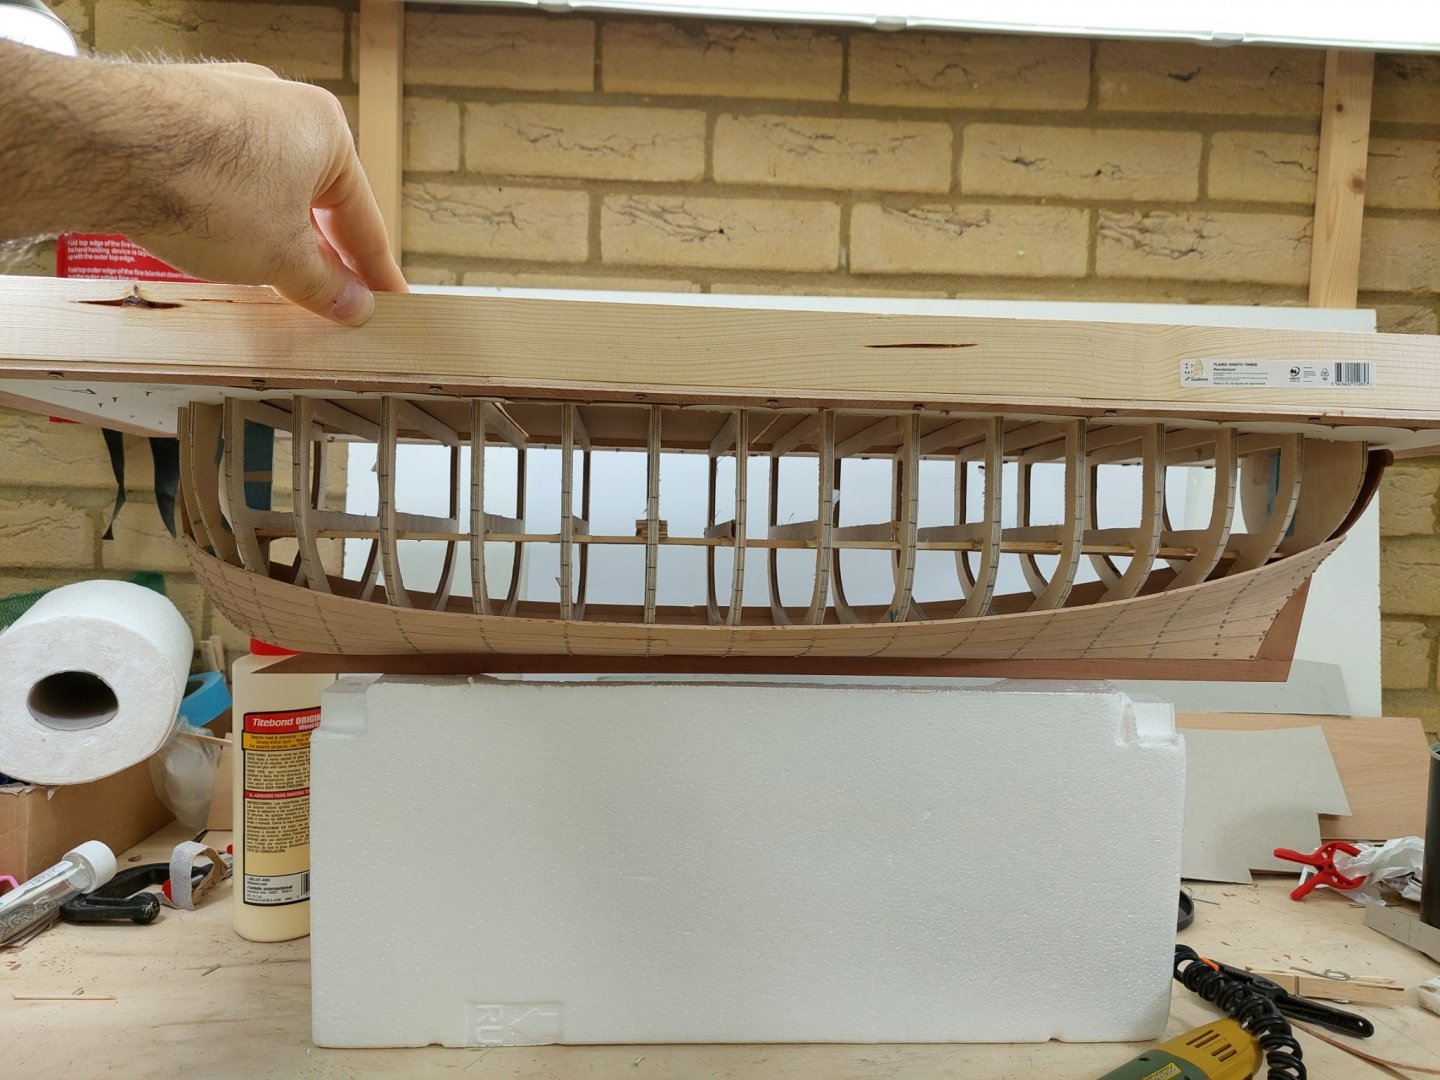
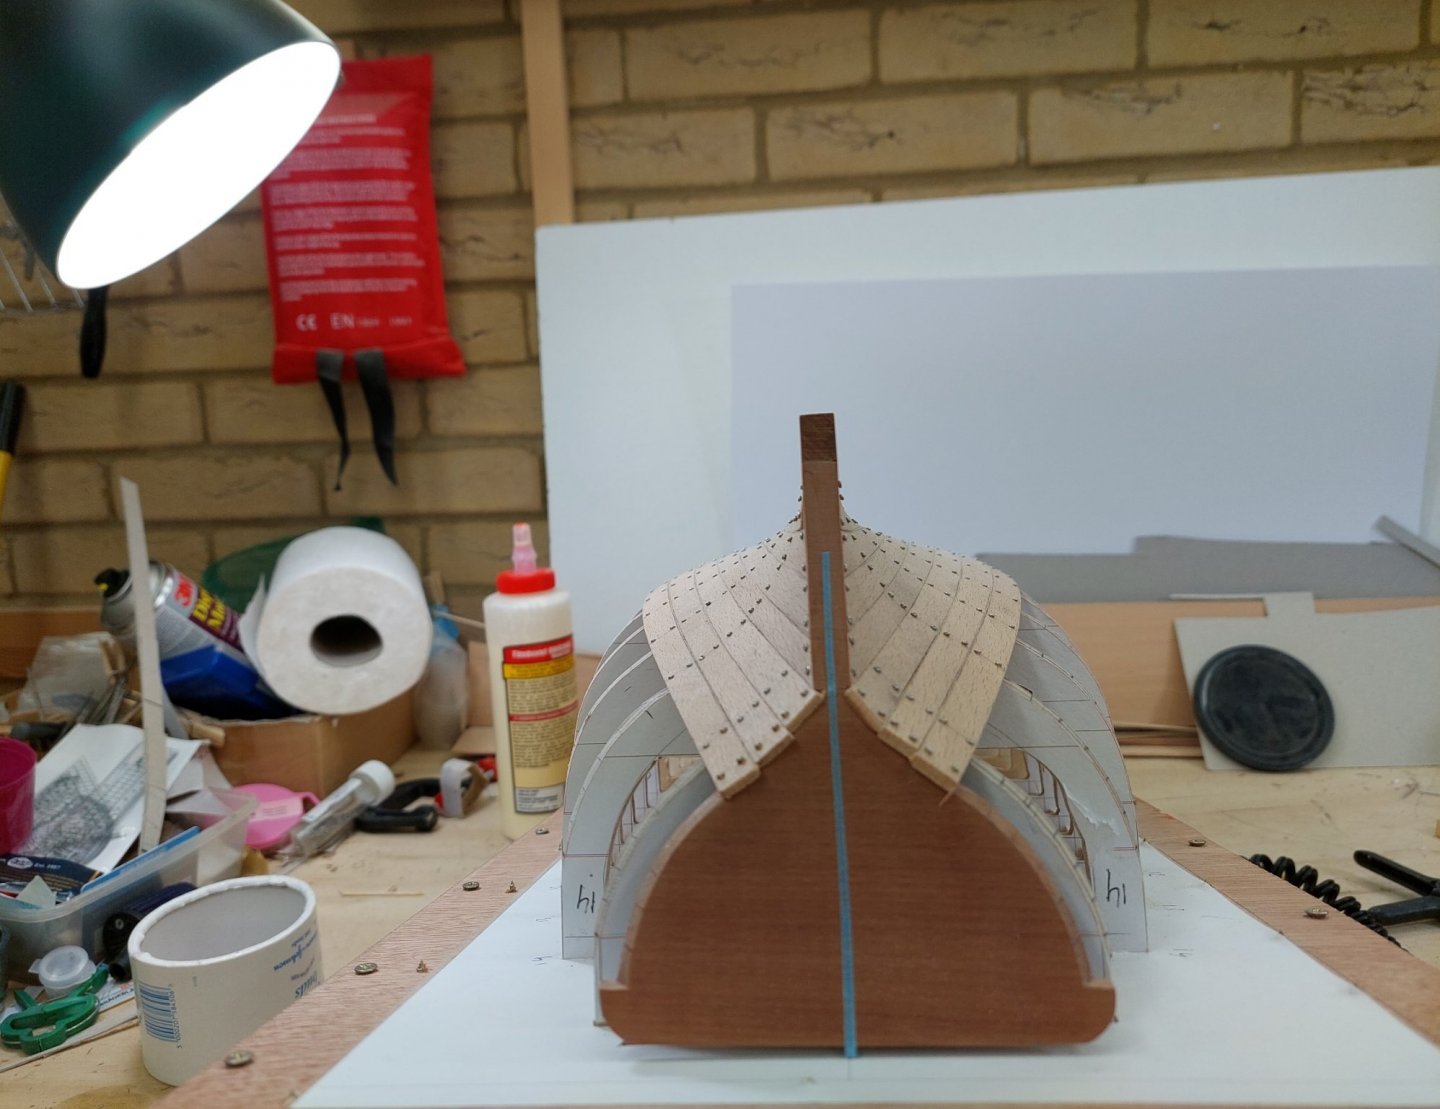
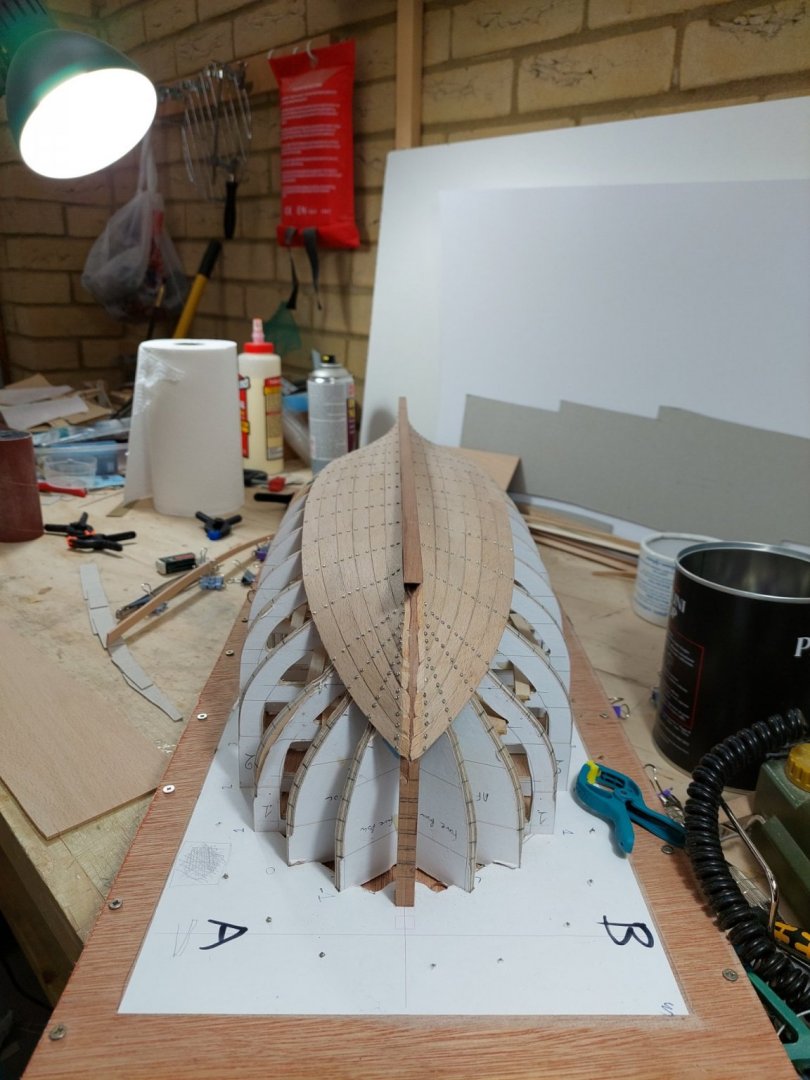
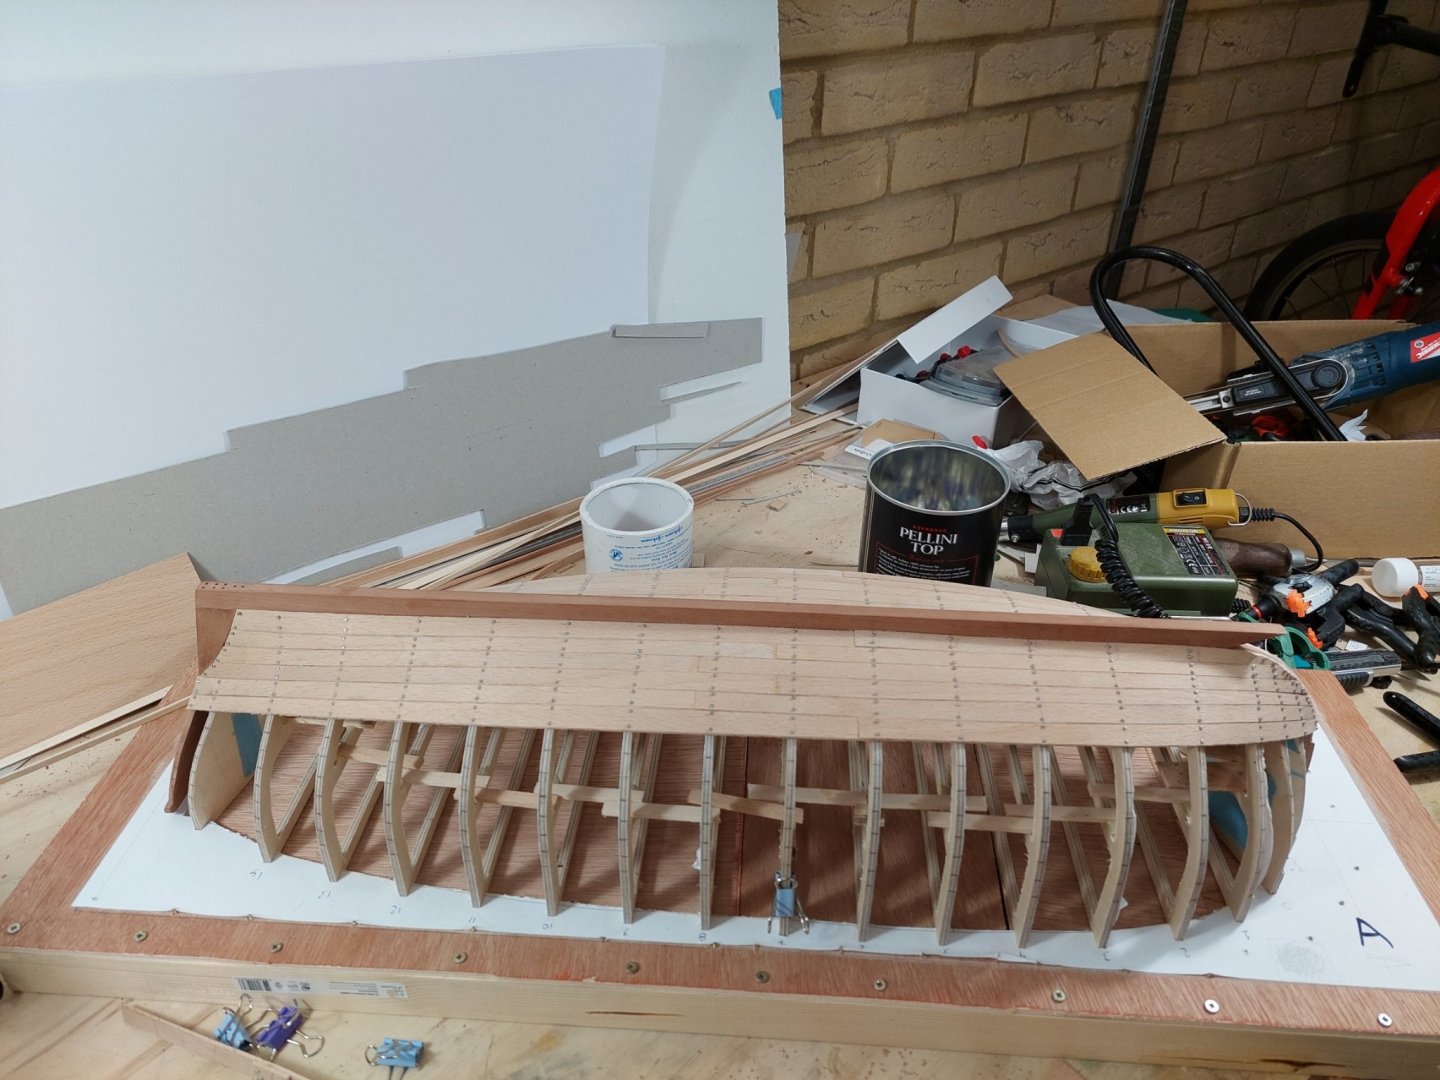
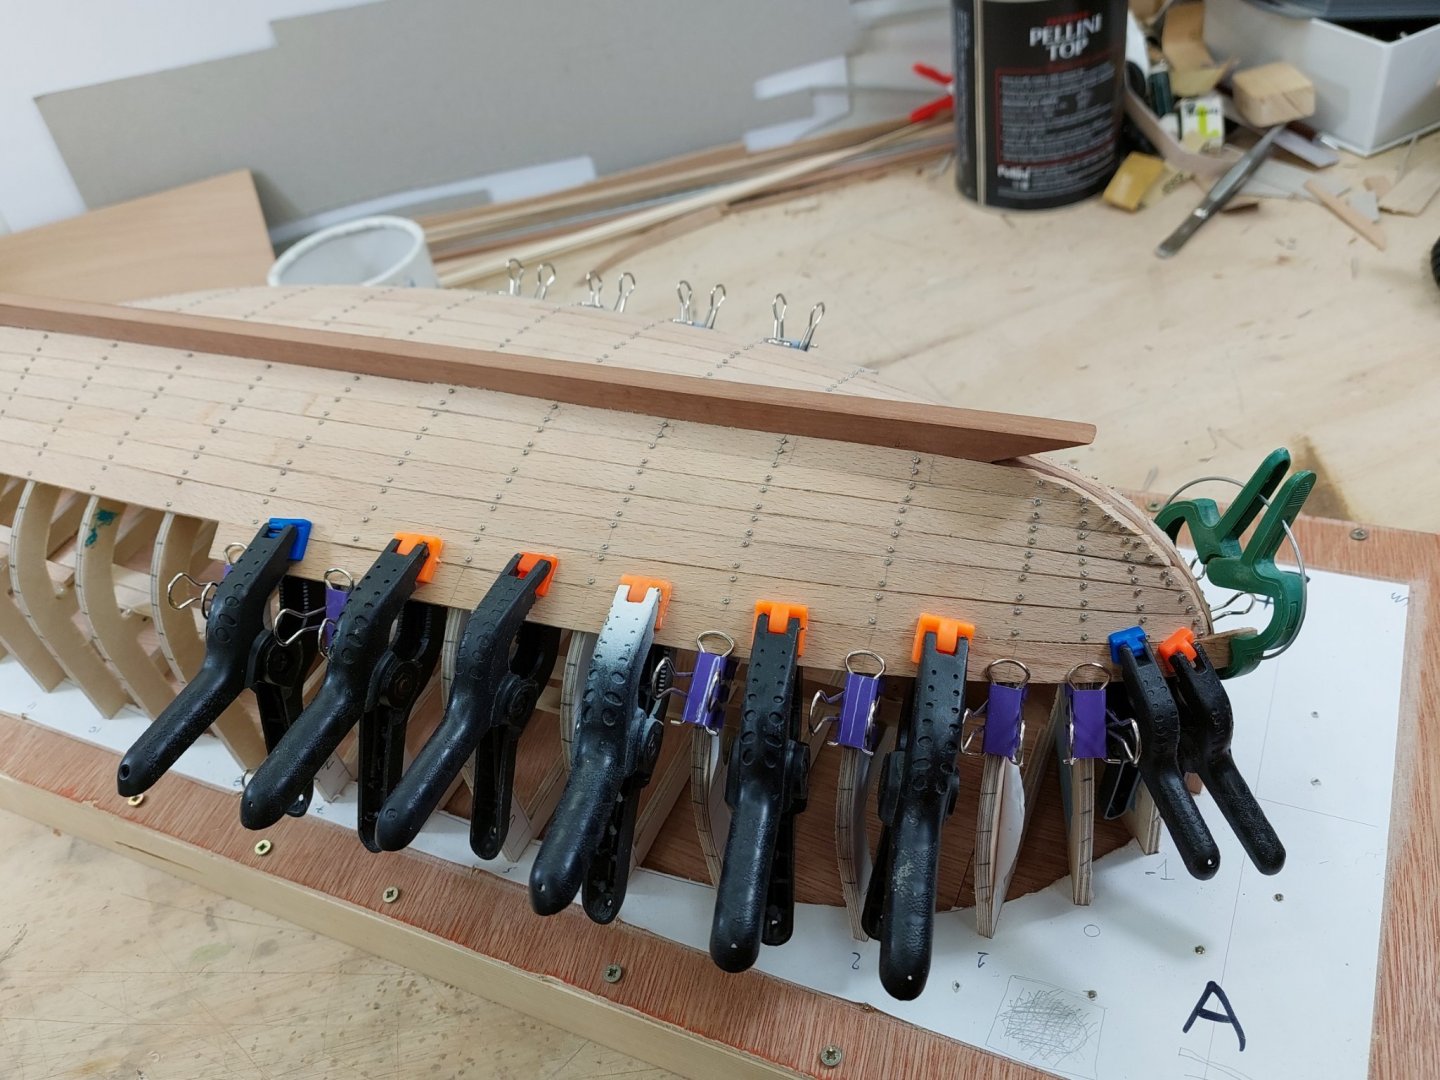
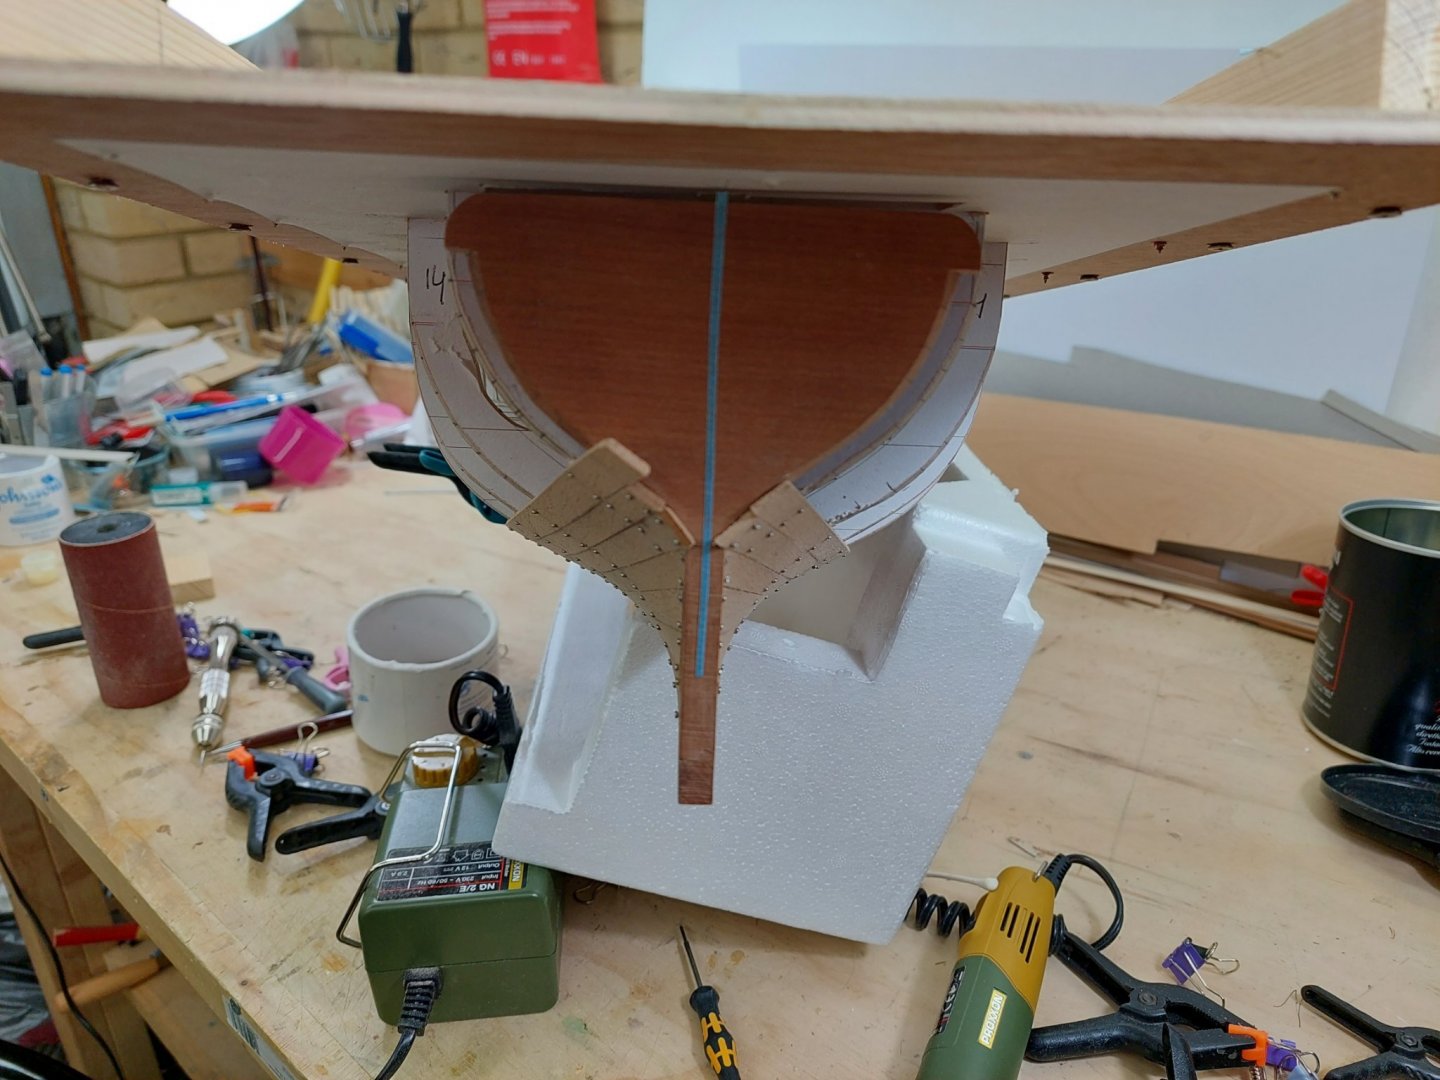
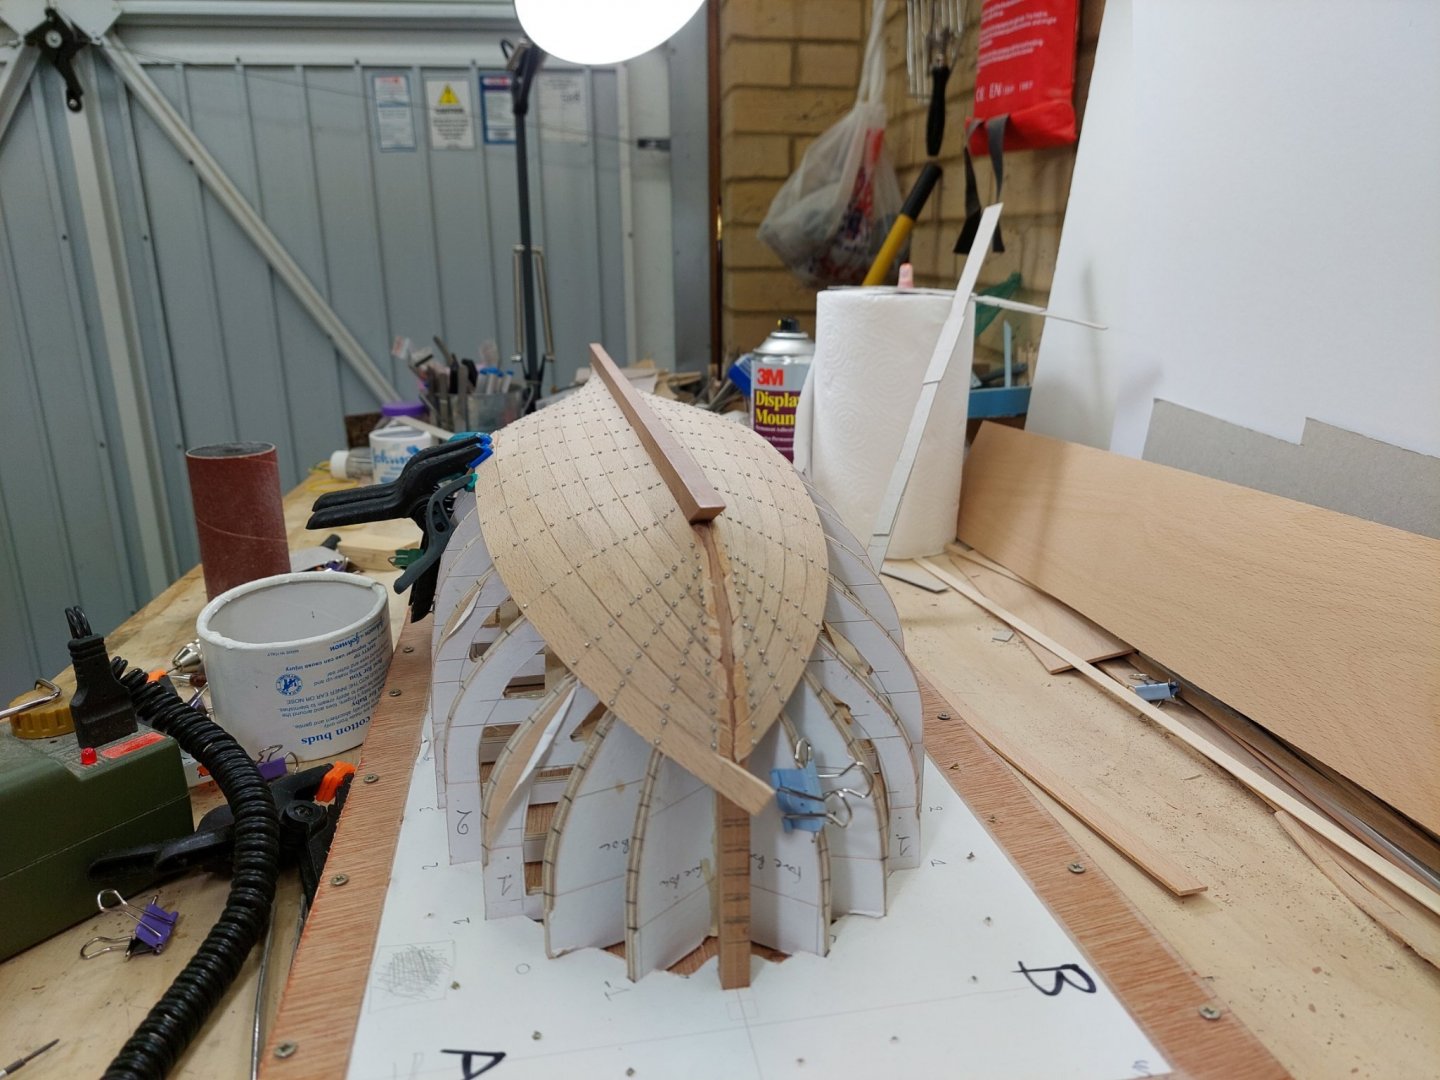
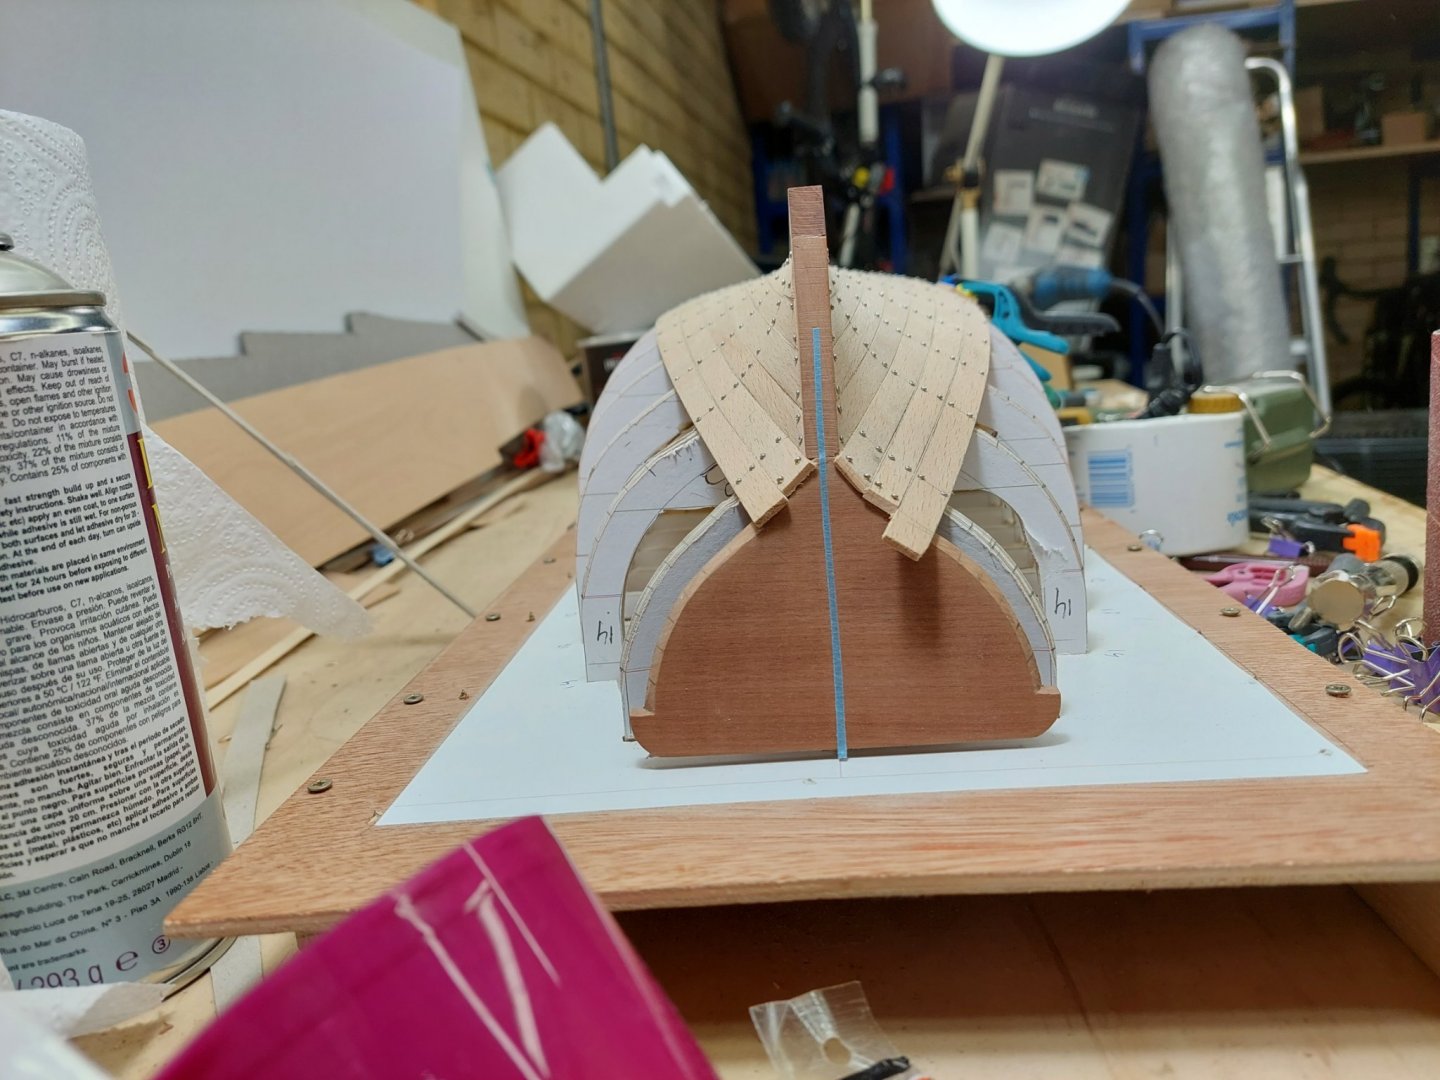
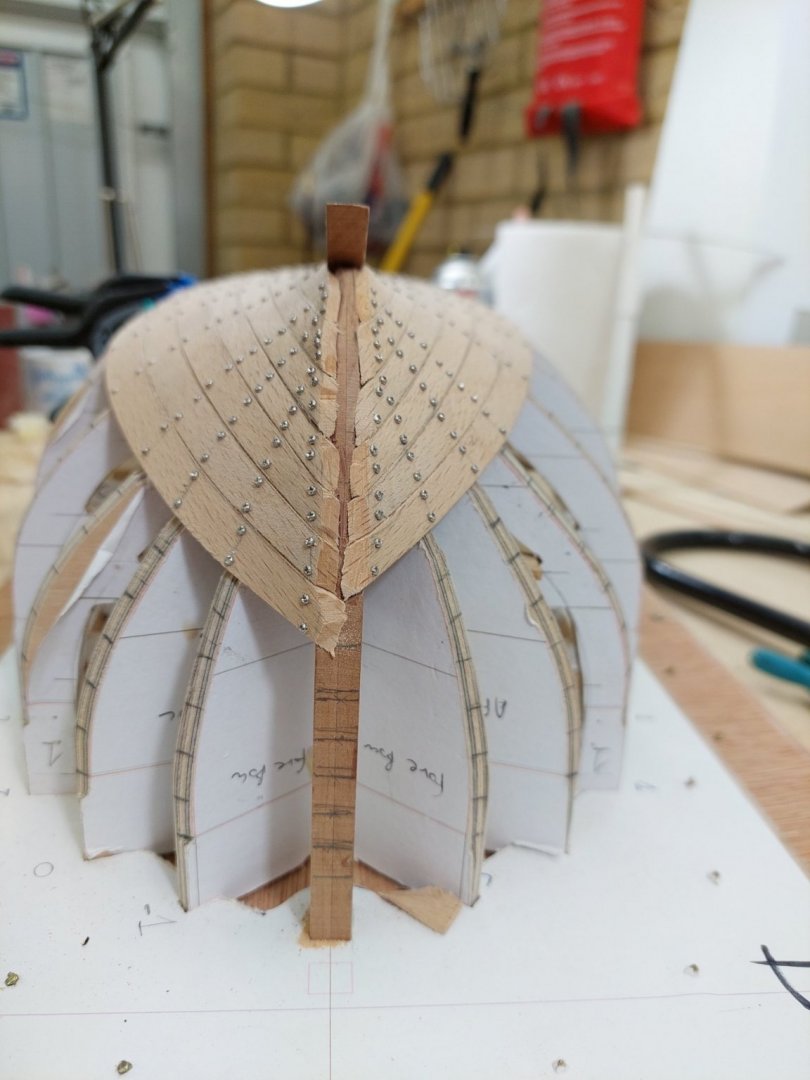
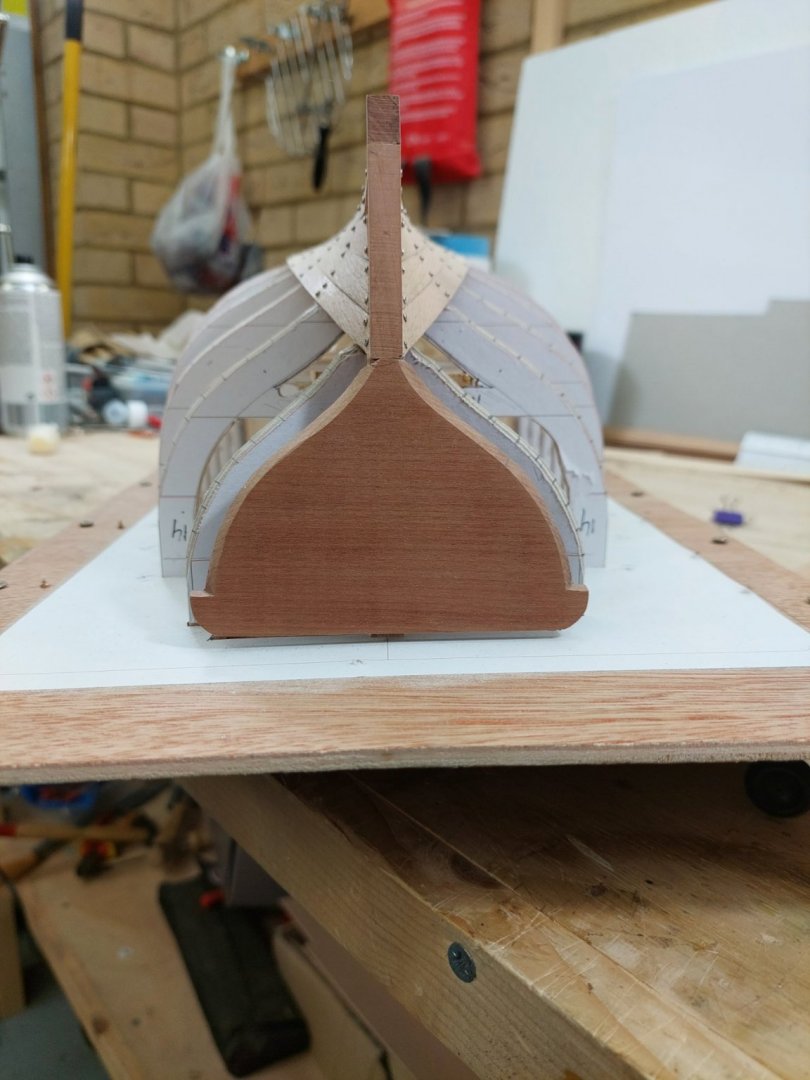
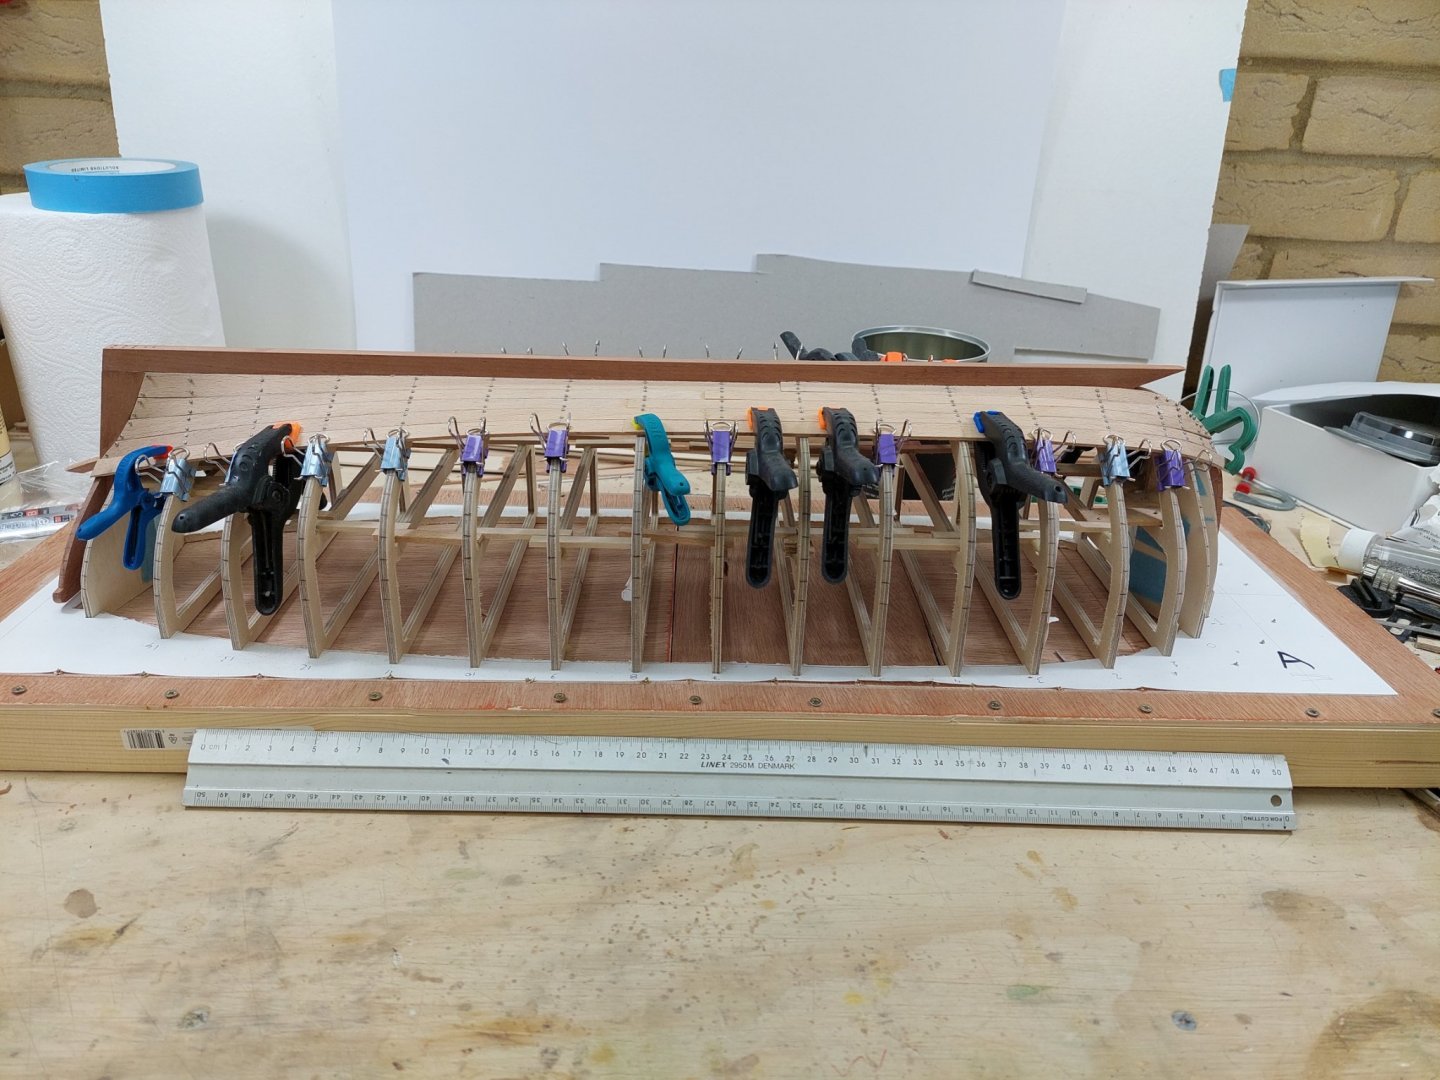
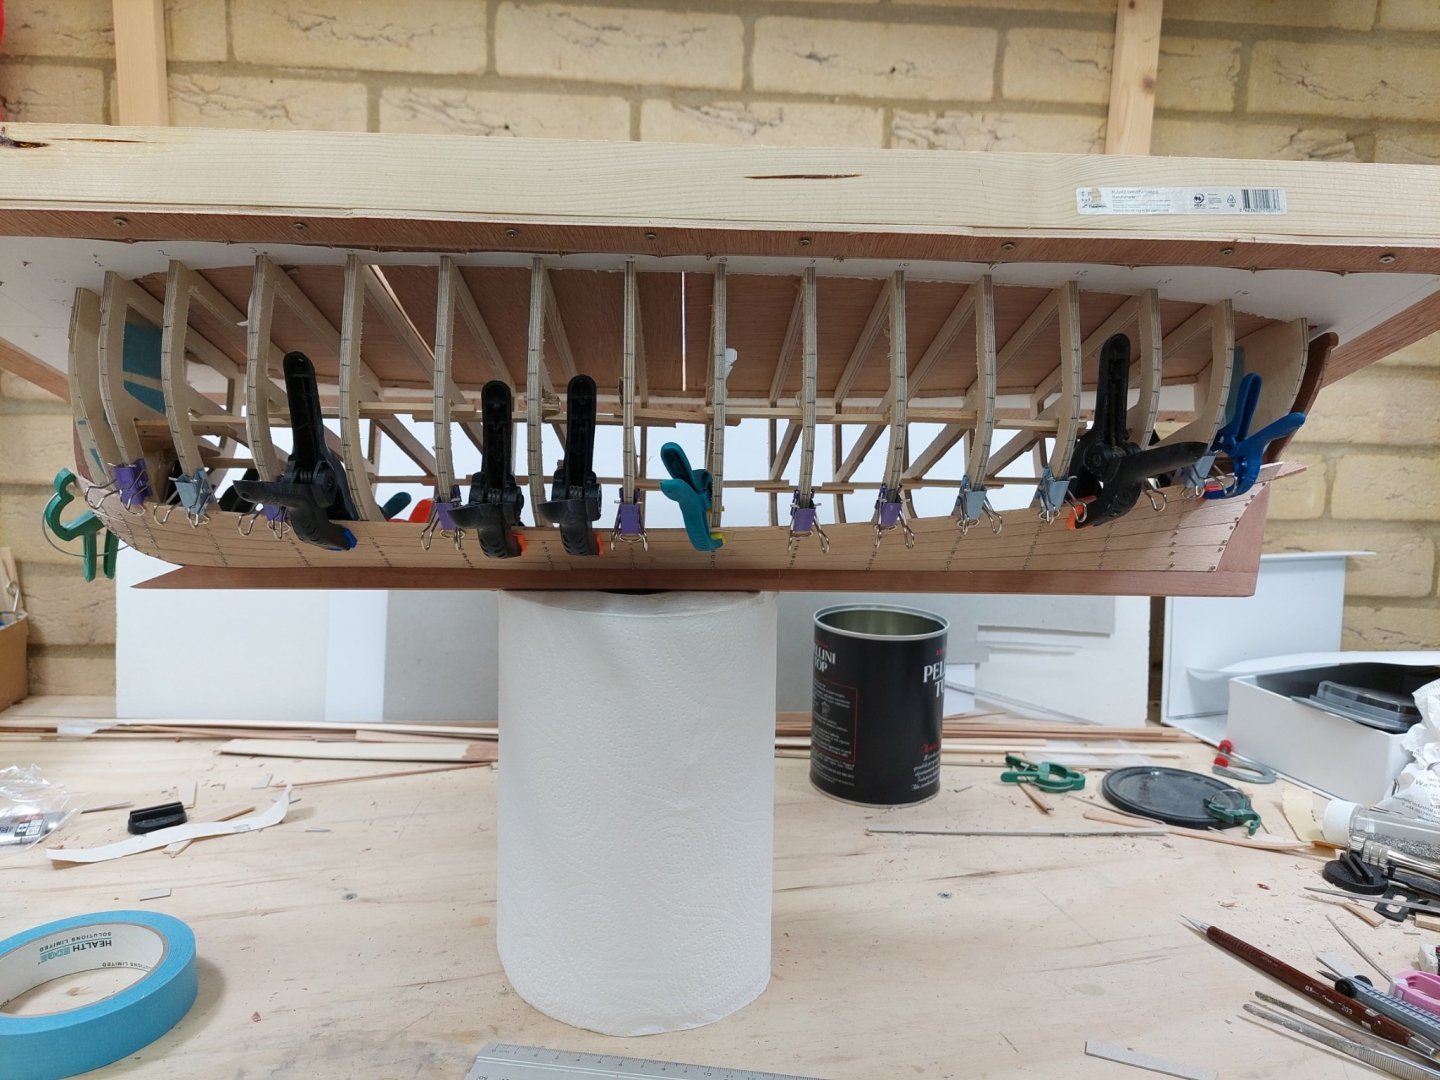
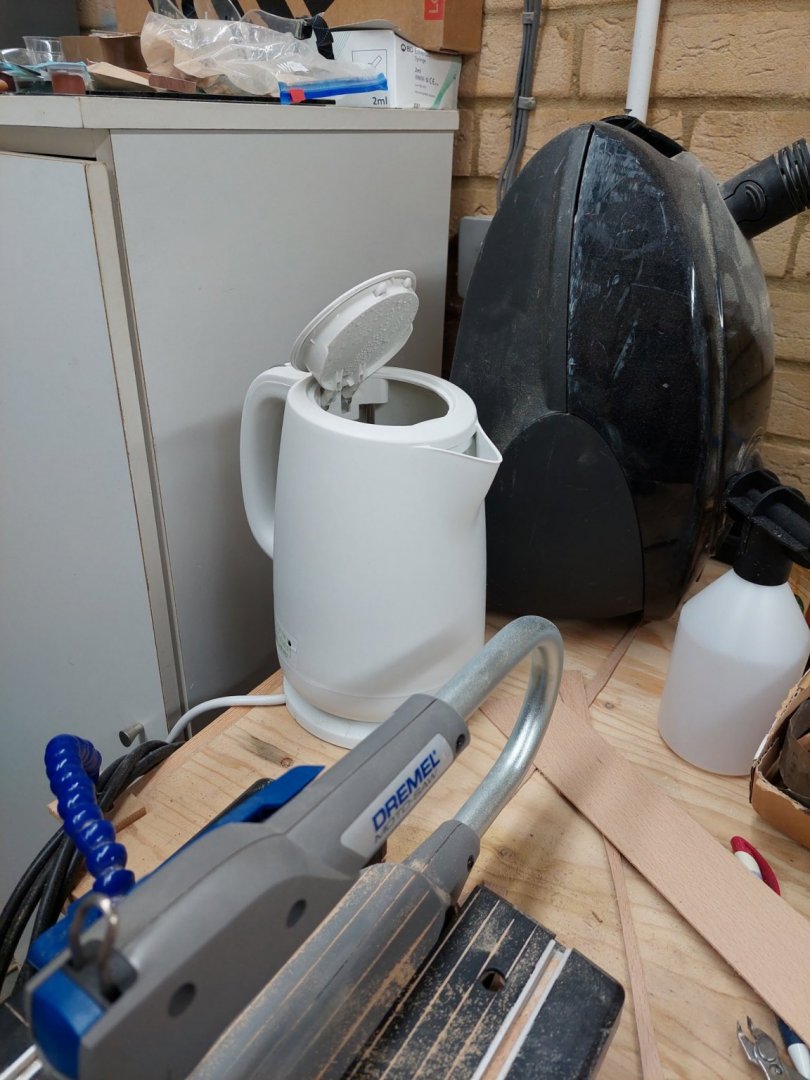
Many thanks to all! Things move on slowly. Although planning the planking was easier than the launch, getting the shape of the planks particularly at the bow is a bit tricky as the planks follow a large curve but also twist along the axis a lot. Also, the planks absolutely need to be steamed (or boiled for 30 sec in the kettle as I ve ended up doing) to be convinced to bend into position. Then, they also need to stay clamped overnight to retain the shape but also to dry and return to the original dimensions. Beech swells up a lot when boiled! My fore and aft frames are wrong and material needs to be taken off. This is surprising as I really thought my CAD plans were very accurate. I think however I know the reason. I believe the transom for some reason was made a bit more narrow in its bottom half. Not sure about the bow but then again I was never happy with the shape of the first two frames. It does not matter though, the planks very nicely show the natural curve so that that material can be chiselled away from these temporary frames. The steam bend ribs will just follow the curve of the hull later on. Enough talking, a few pictures: Till next time Vaddoc


- 233 replies
-
- 10
-
-
Don't worry too much Avi, just experiment! Take some wood and paint it, seal it, prime it, you ll figure out what works for you. Have another look at the tips thread, should give you lots of info.
-
I applied Renaissance wax to polished brass fittings. Many years later, they are still as bright! This wax is also completely invisible and very hard. I vaguely remember reading somewhere that this is what museum use to keep metals from tarnishing.
-
Hi Avi Nice hull! You could consider using a sealer. If it is a water based one, it will raise the grain. Sand it back lightly with 400 grain, reapply, lightly sand again and you have a smooth sealed wood surface. This will reduce the number of coats needed but as acrylics have poor coverage and depth of colour, you ll need many coats. Thin to a consistency of milk. It does not matter if it is too thin, as long as you use the Valejo primer, but avoid thick paint - it will cause may issues. Any imperfection will be 100 times more visible after painting so now is the time to correct these. Good luck, have fun painting your hull Regards Vaddoc
-
The sealer will fill the pores, seal and smooth the wood, stopping it from drinking too much paint, also there will be no problems with the water based paints raising the grain. It is a much better experience painting sealed wood. The primer is not to solve adhesion issues which are pretty much non existent with wood, it is to give you a nice uniform colour, close to the colour you d like to use. So for a black hull, I d use grey primer. The primer will not fill any imperfections in the wood, however you can use a filler under the primer coat as it will not be visible. Thin to a consistence of milk I d say I think a varnish layer will always give some protection. However it needs care as gloss varnish can be very gloss, and matt needs extra stirring and care in application so that the matt medium does not leave streaks. In the past I have used Renaissance wax on wood, which is completely invisible. Nice on brass as well, keeps it shiny for years. Try out these products on scrap wood, not on the model! Best of luck with your hull!
-
I like this last photo Hakan. A small model boat, on a massive shipway, in a workshop that looks adequate to build a full scale boat!
-
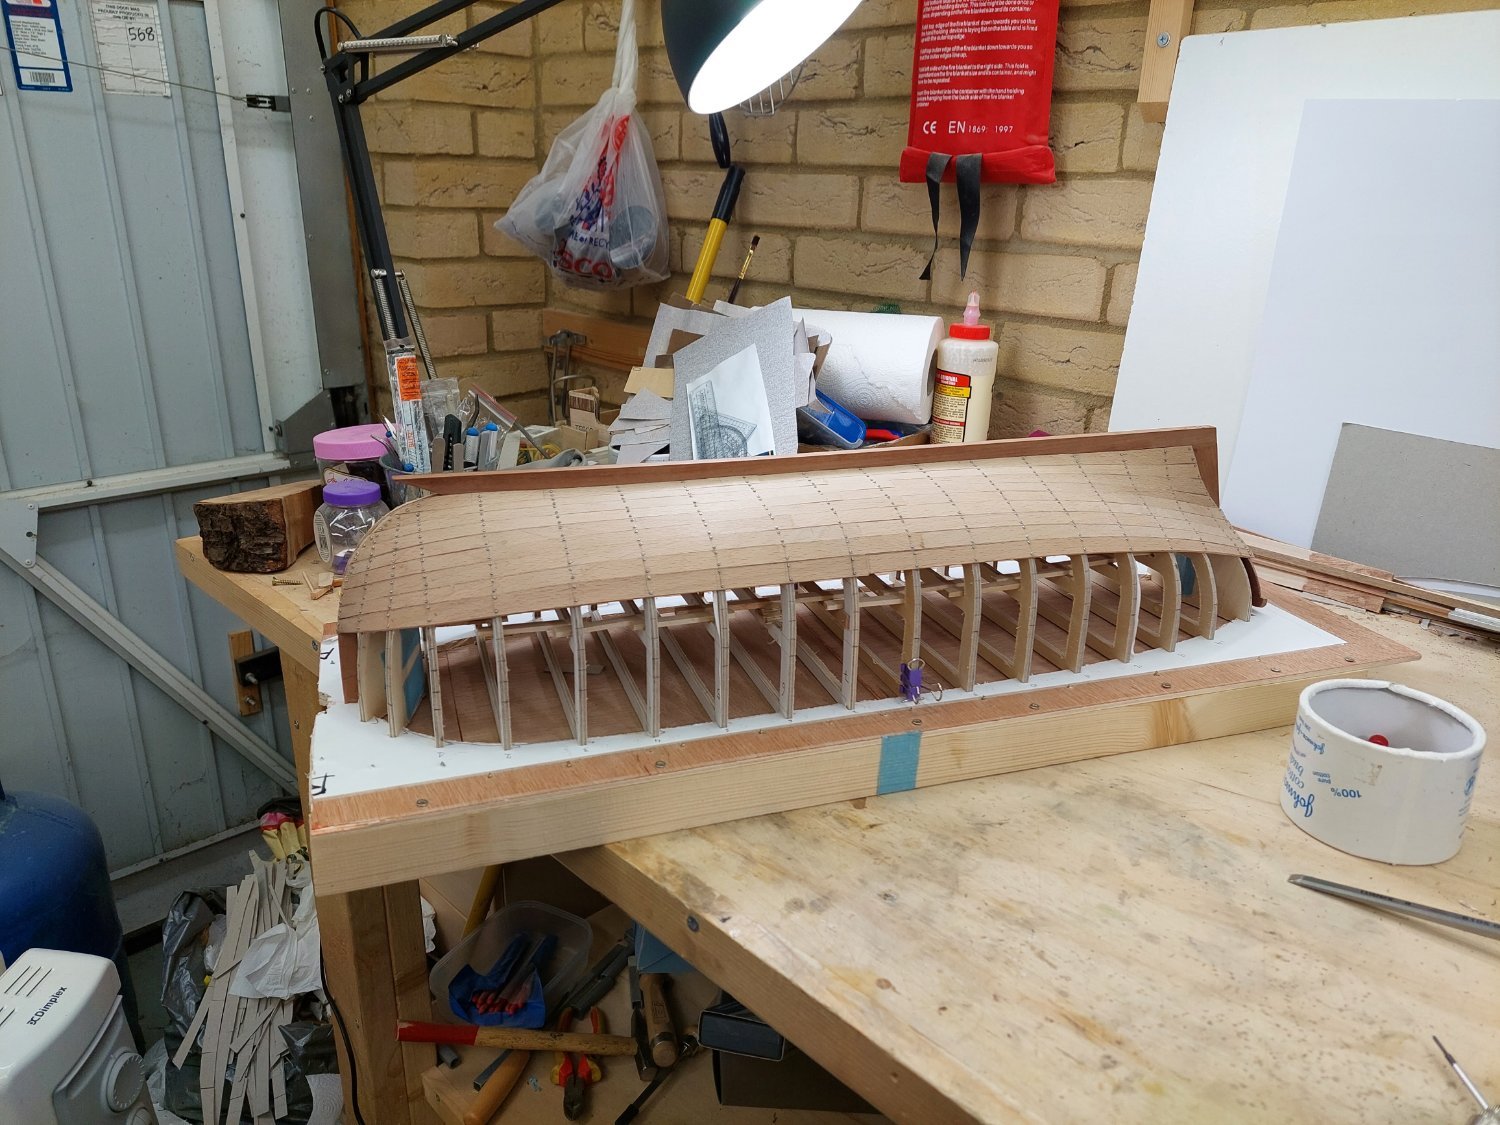
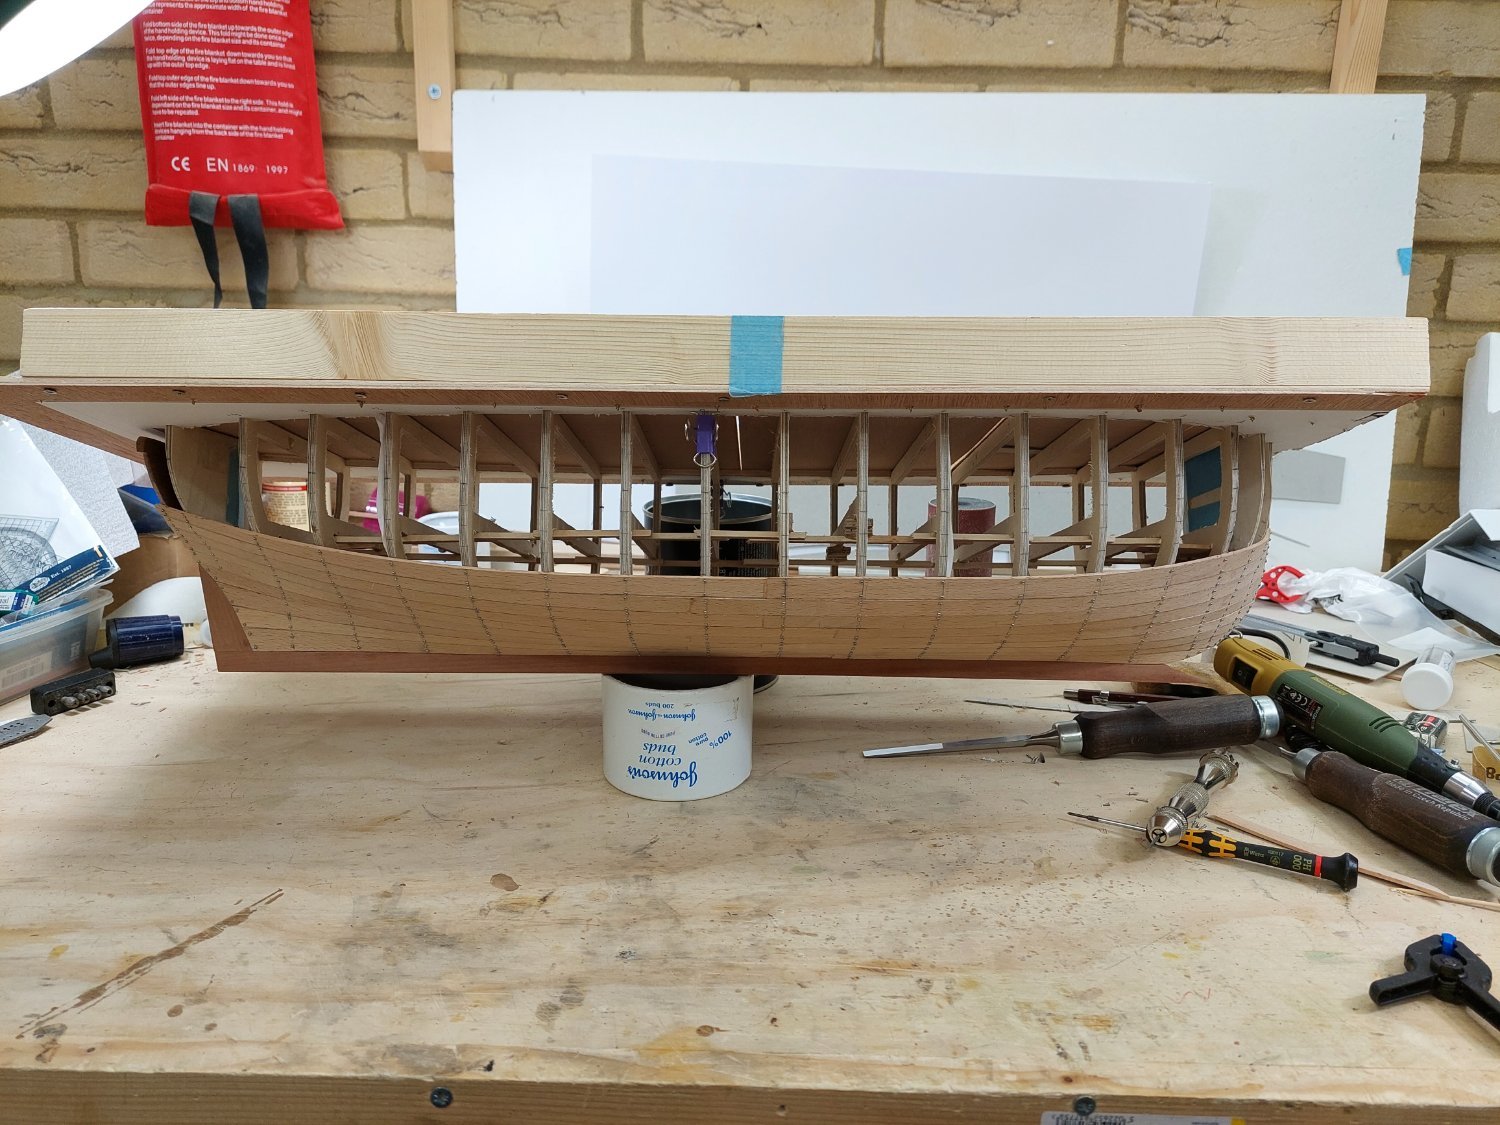
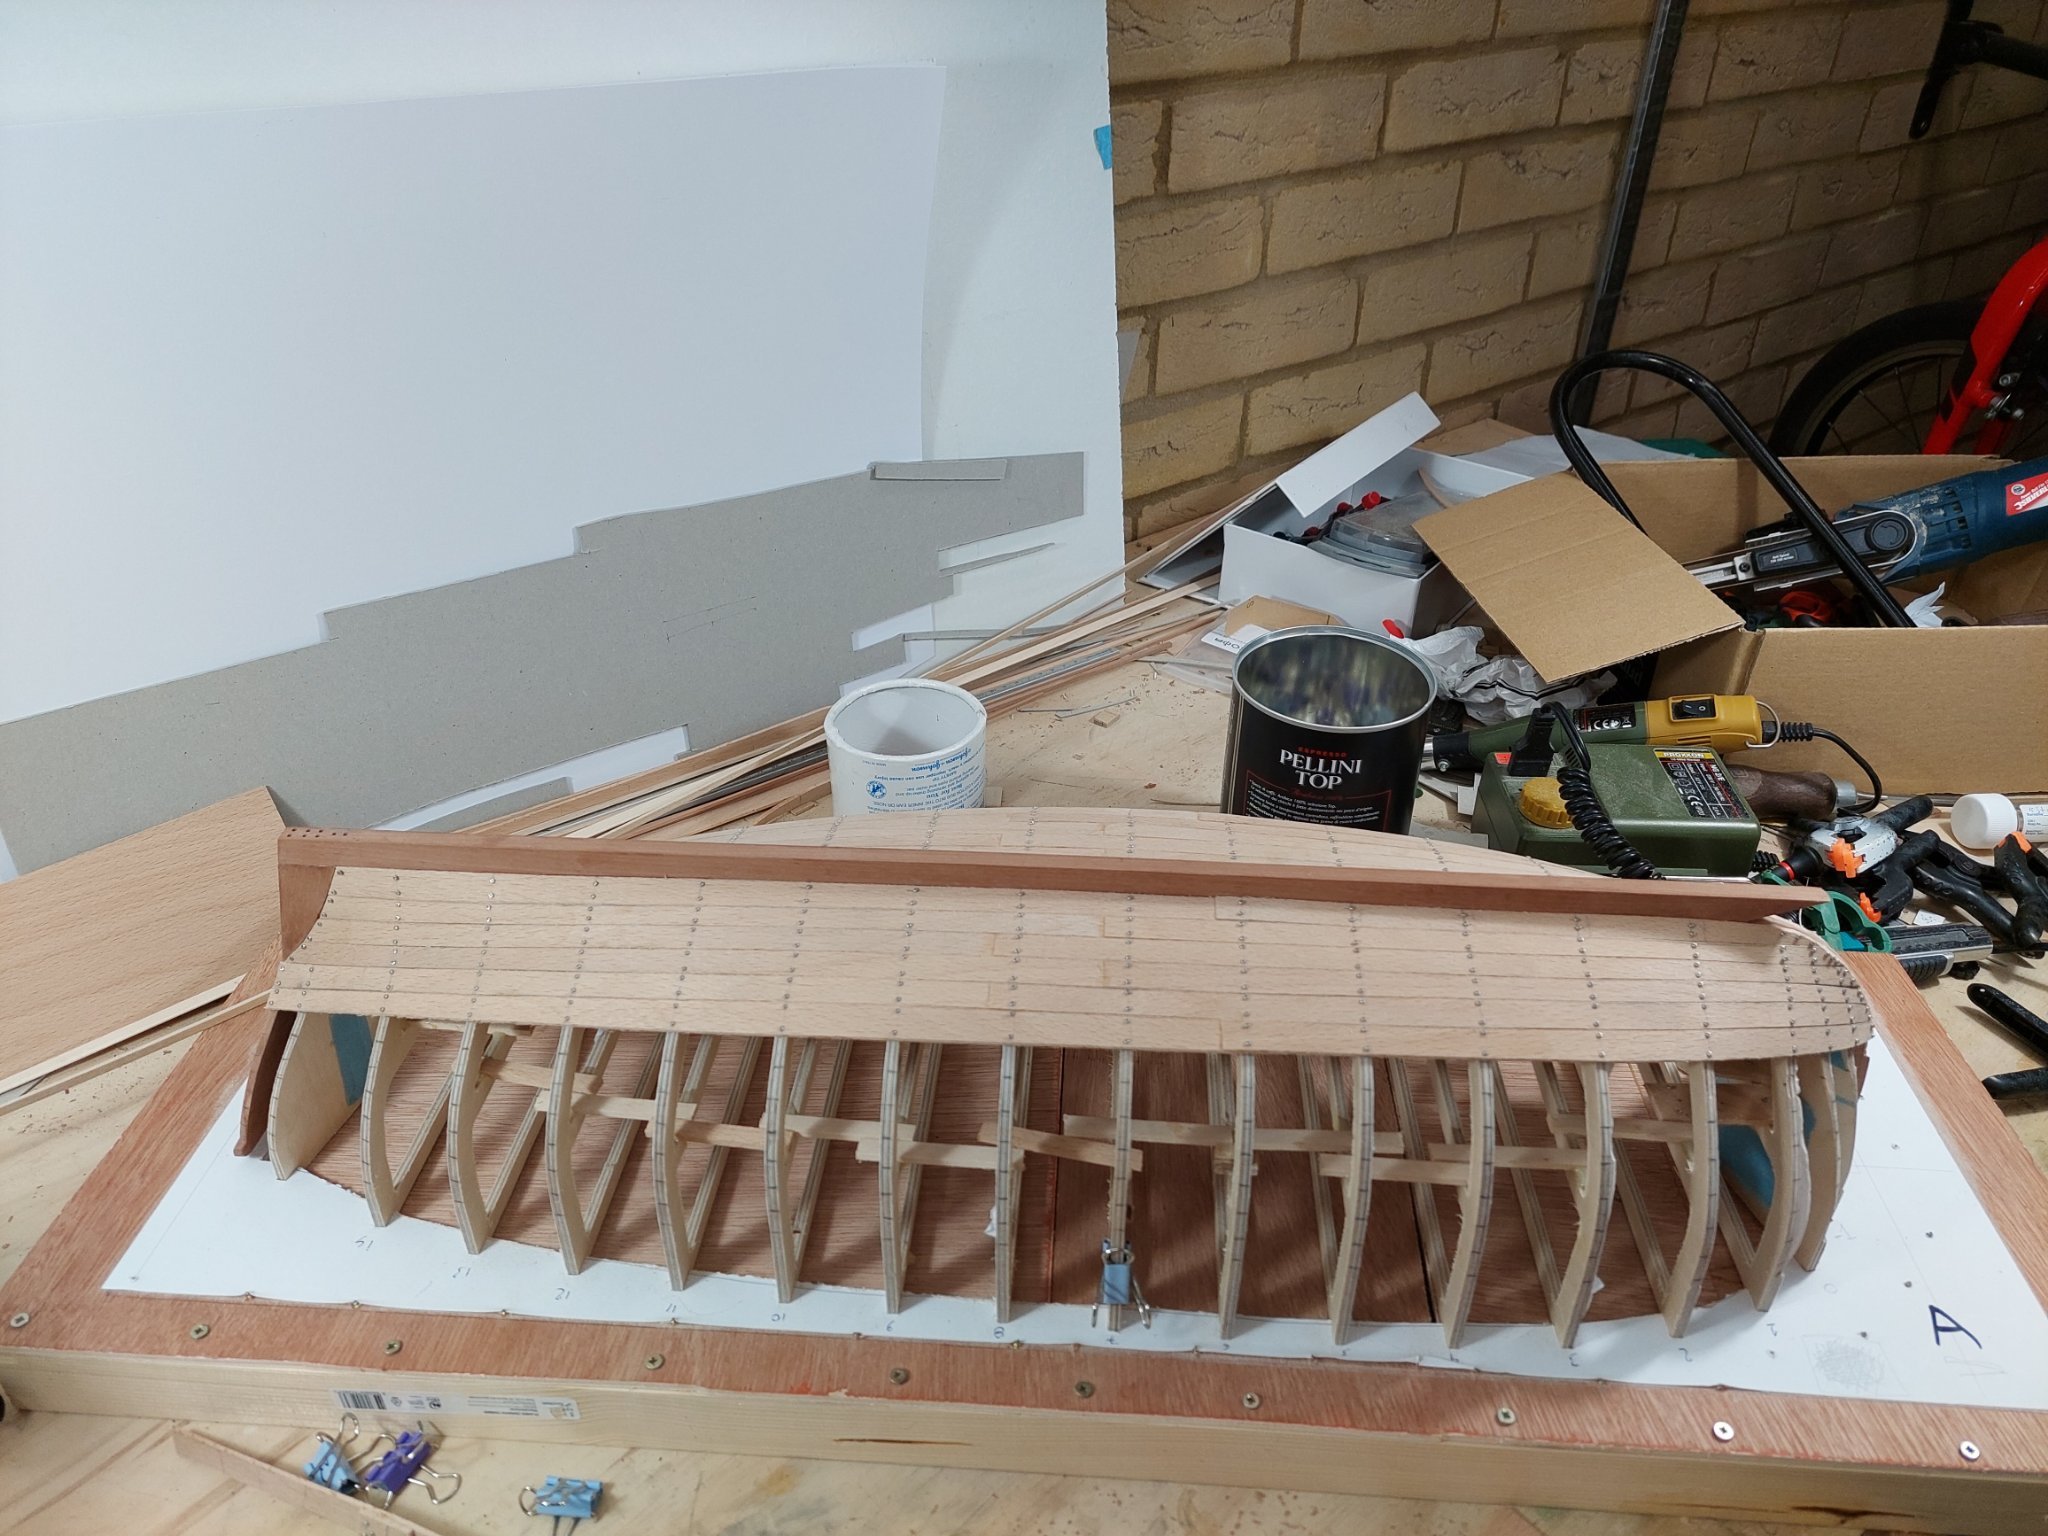
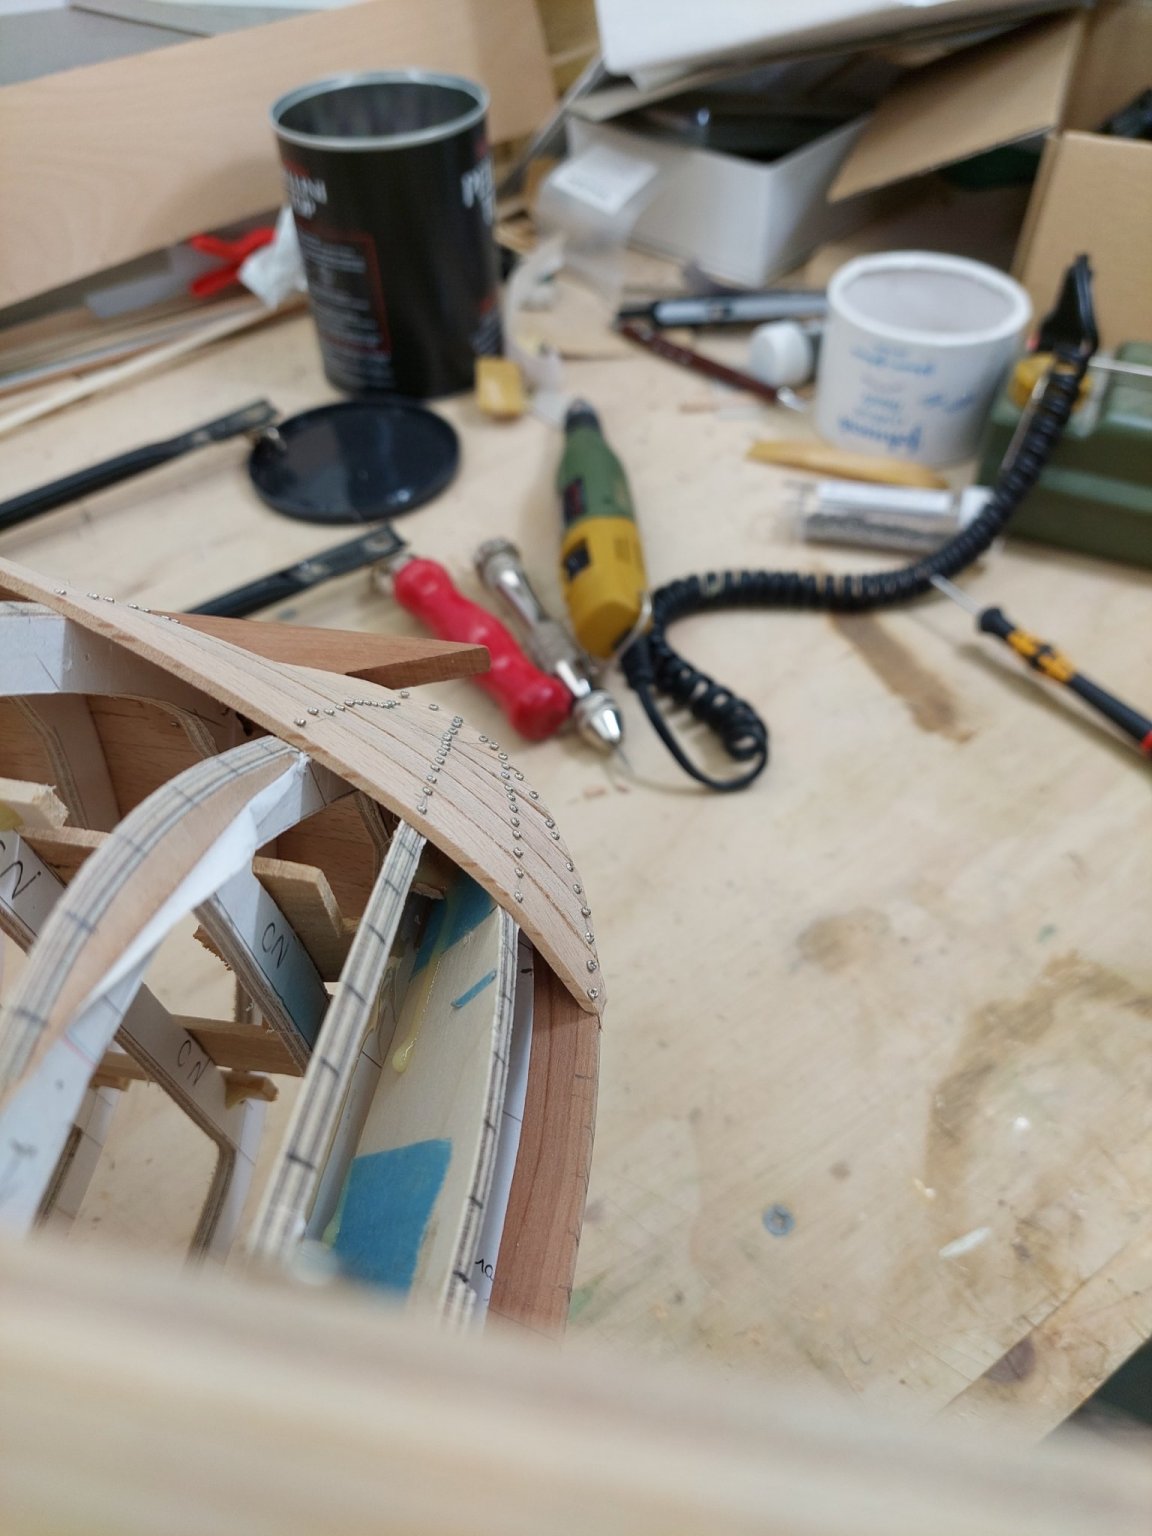
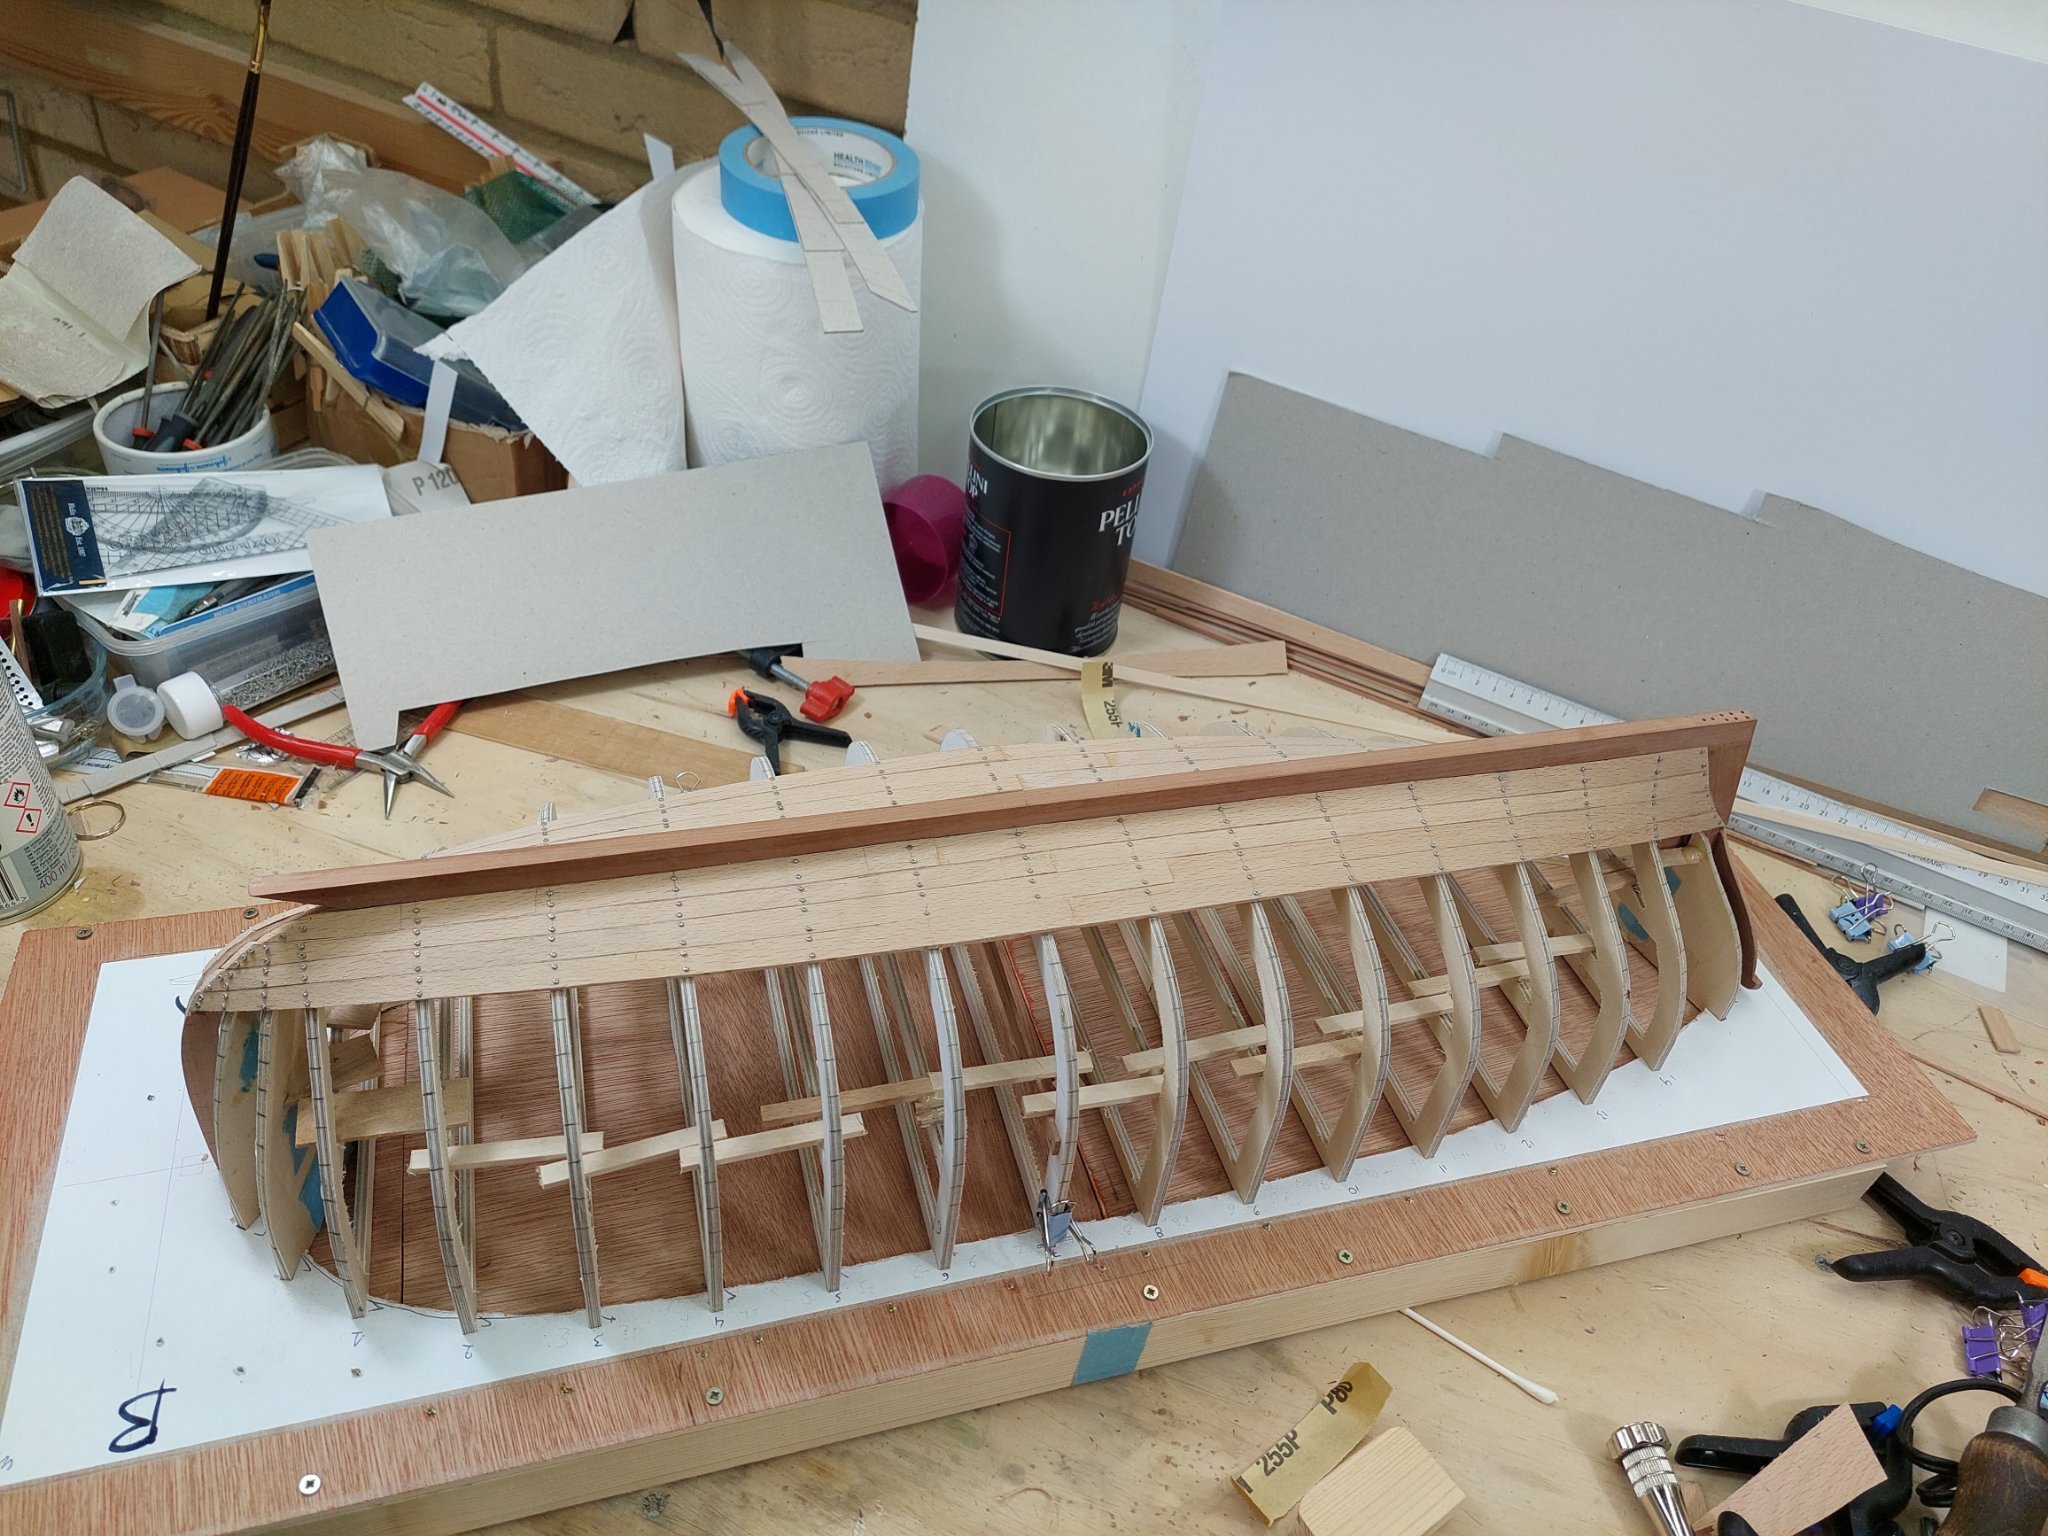
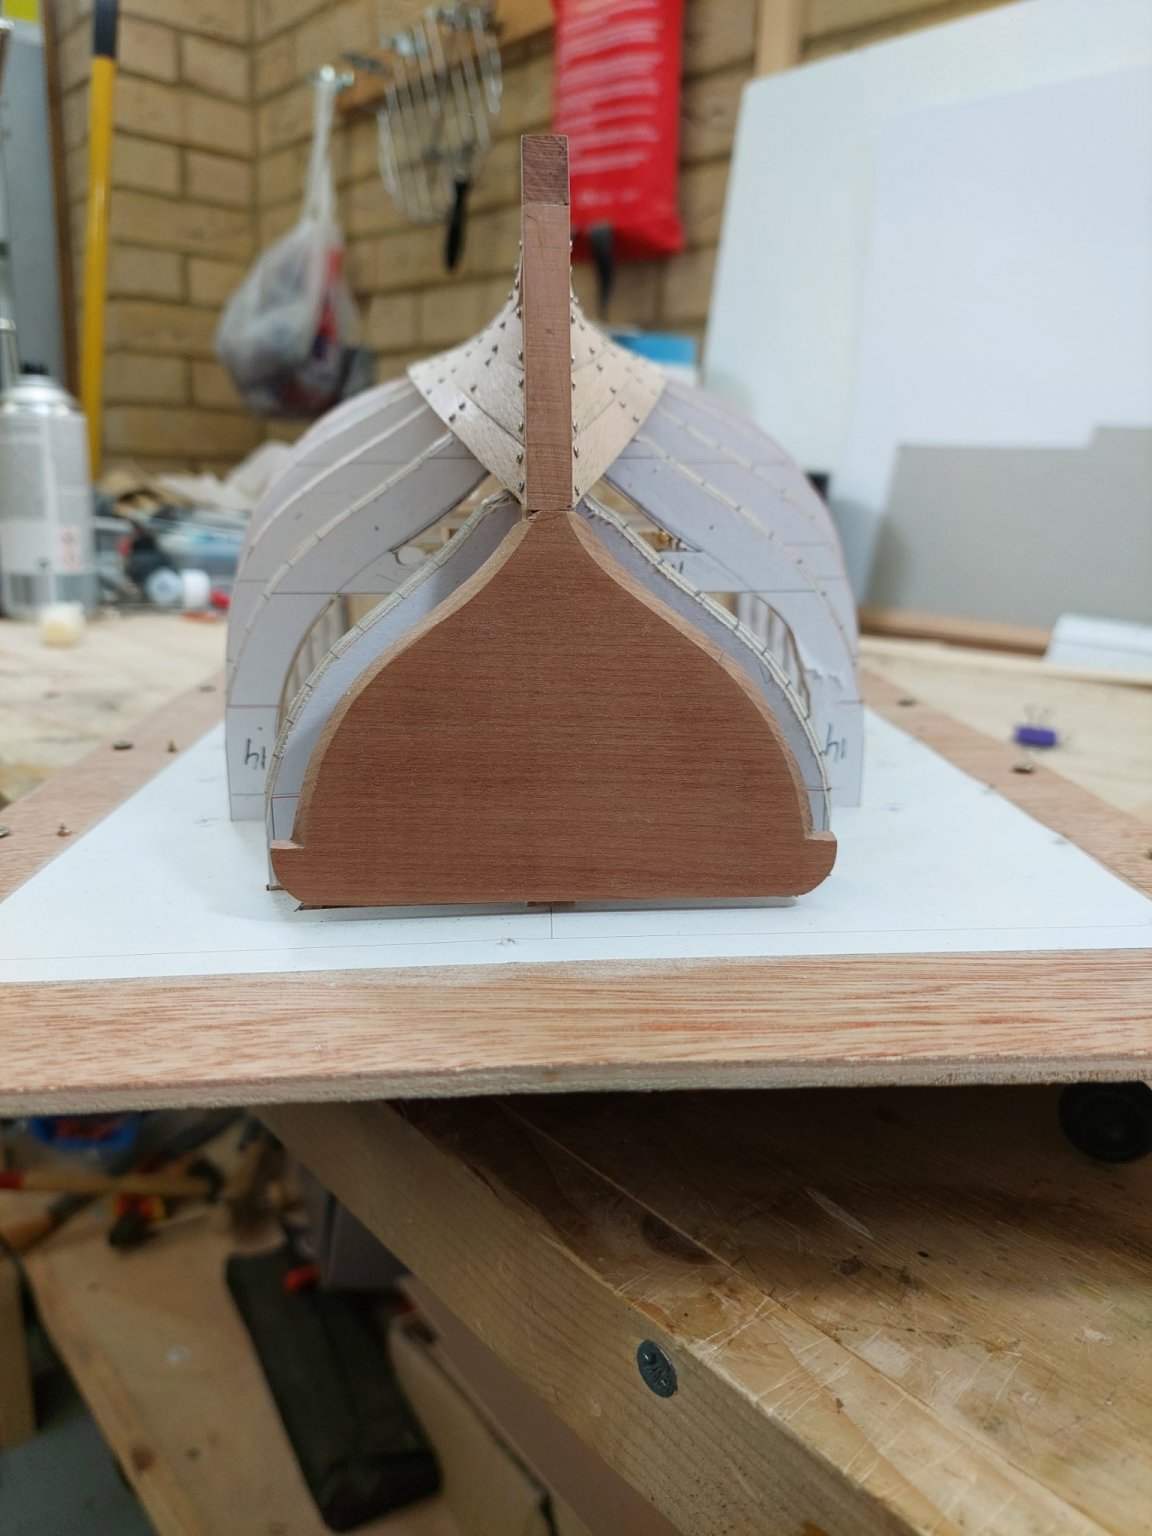
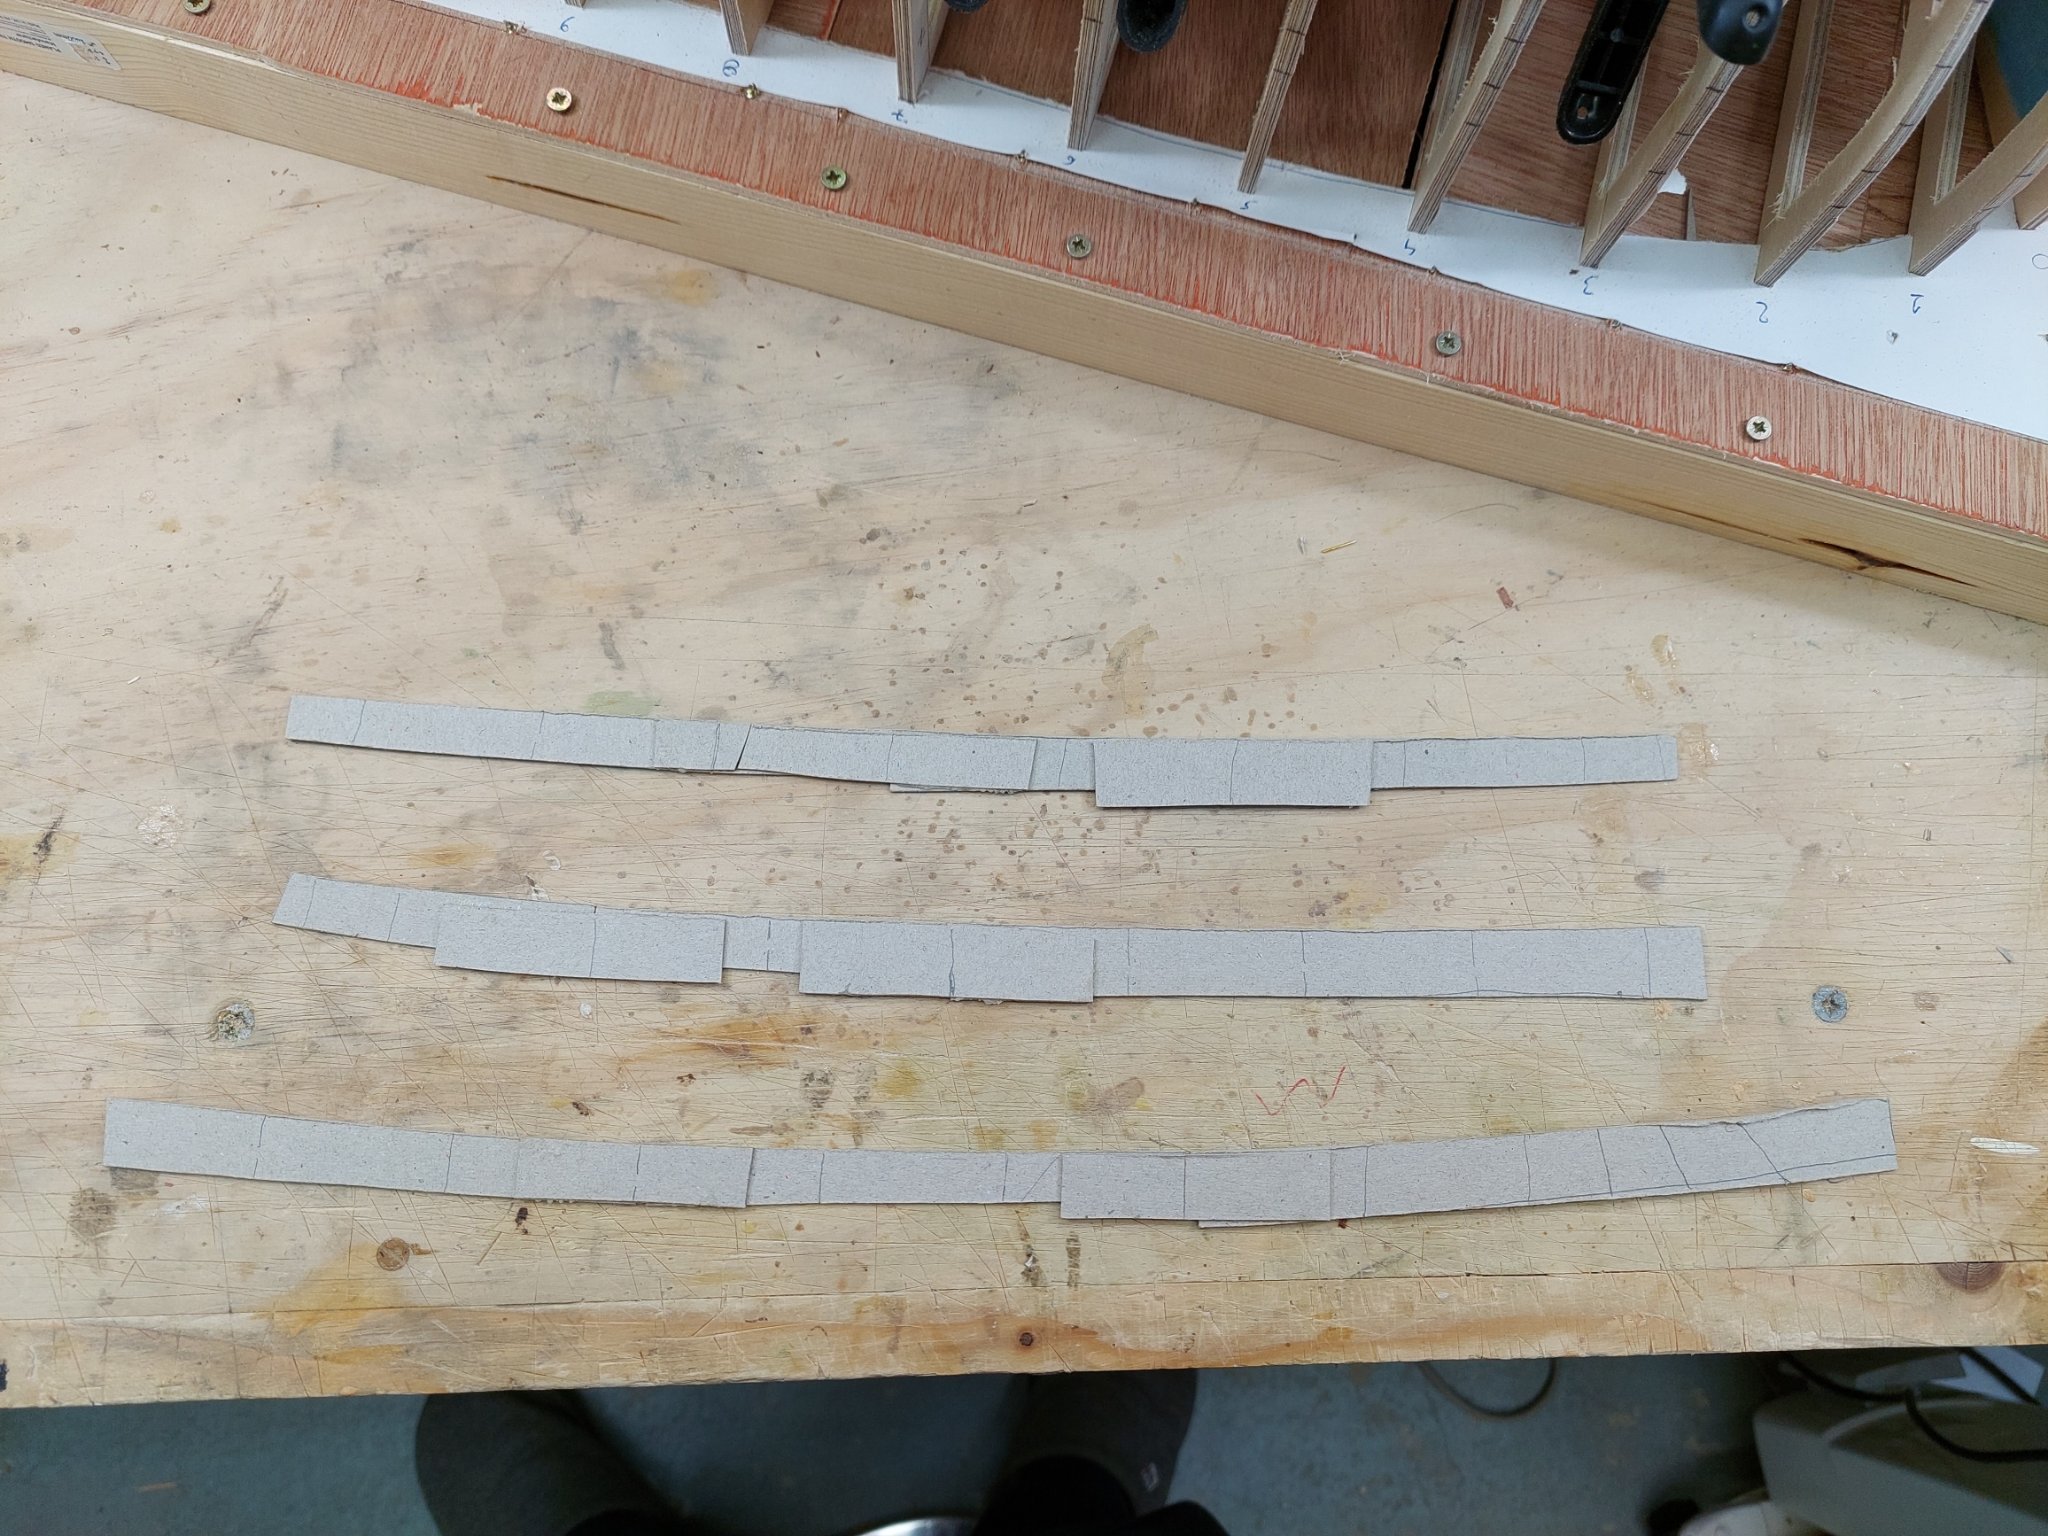
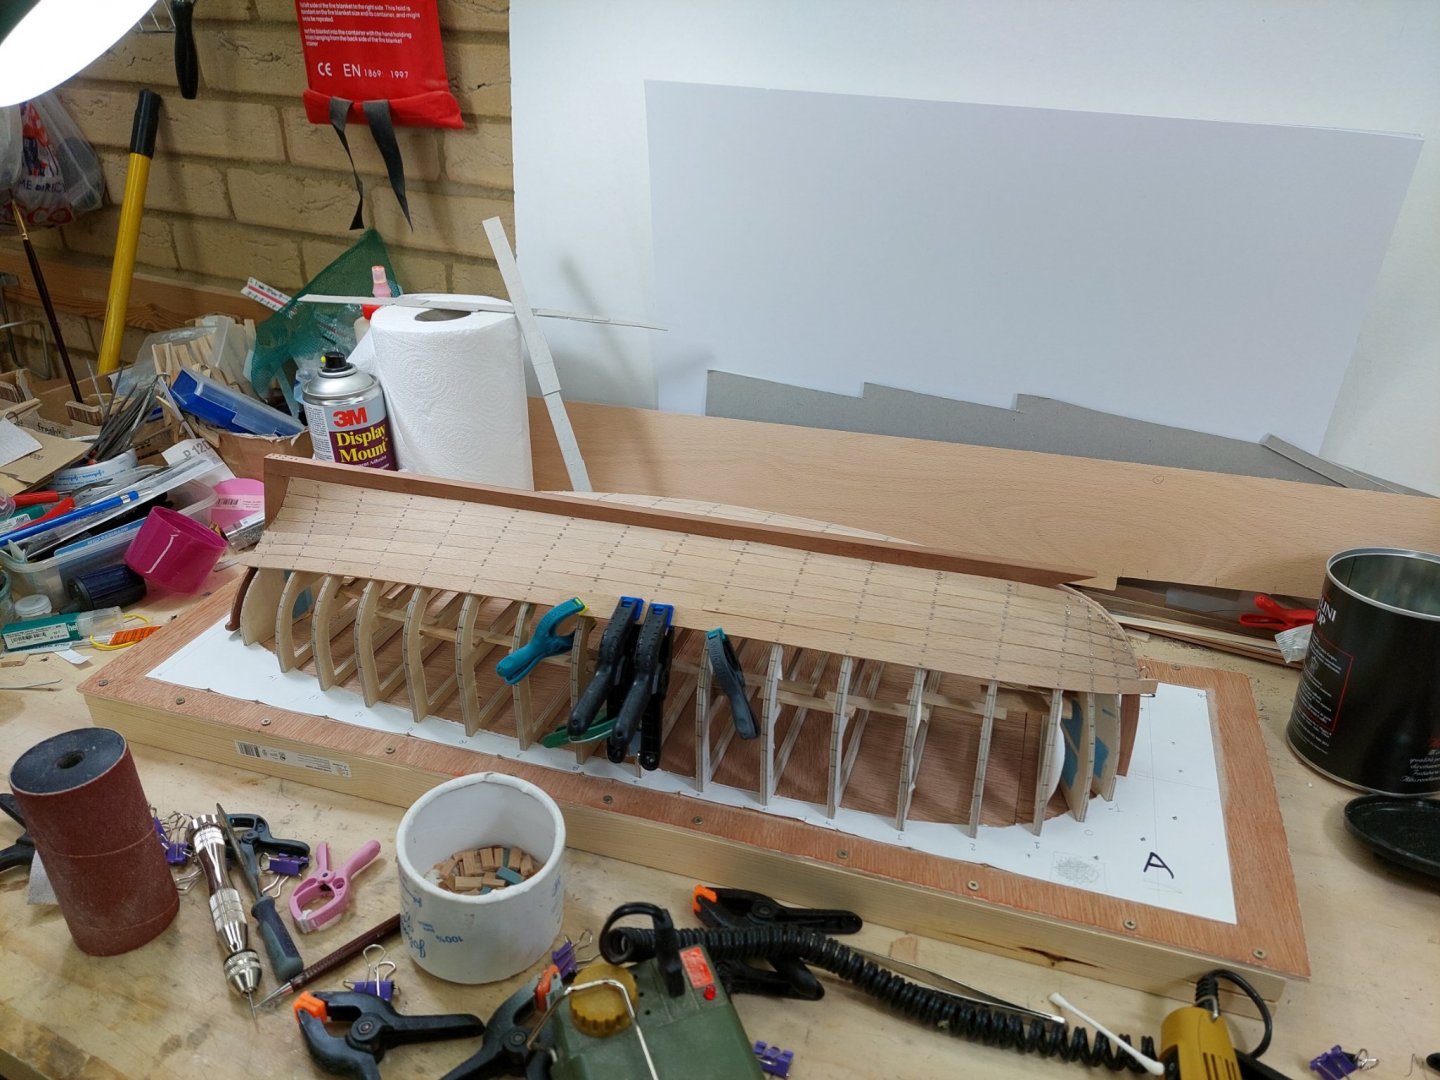
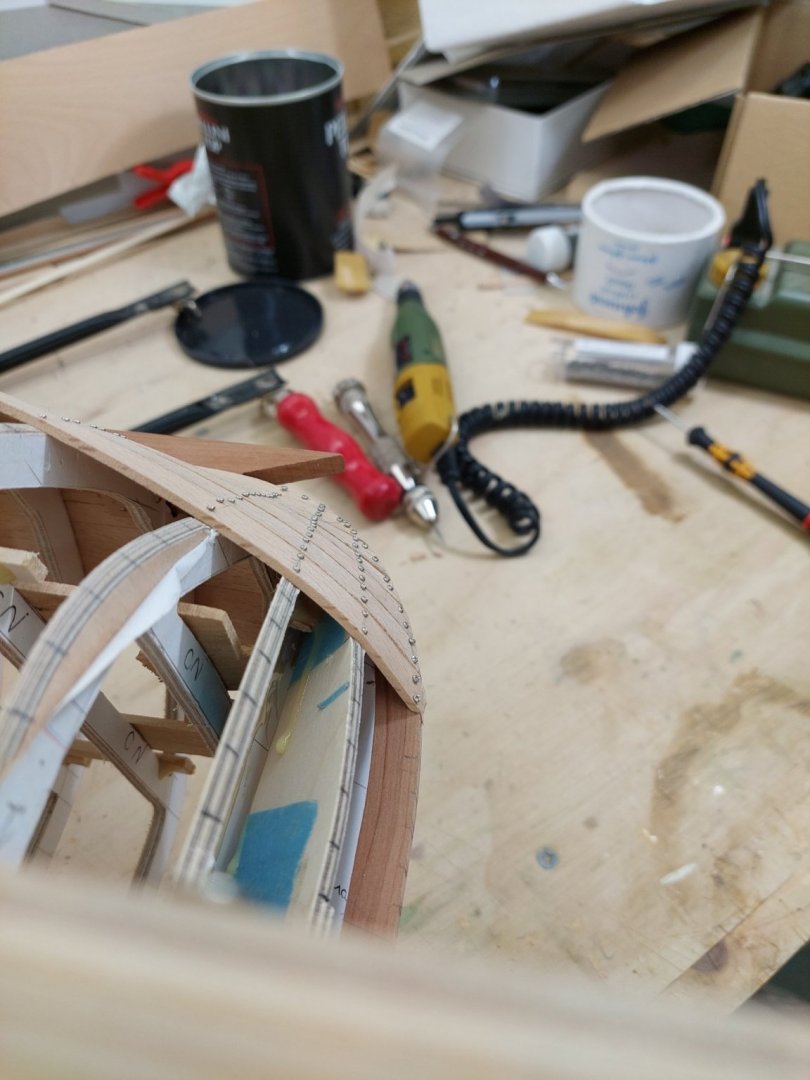
Dear all Many thanks for your likes and good words! Planking continues, I am making an effort to get the planks to sit nicely without big gaps. It seems to be going well so far and the most difficult planks are behind me. I did not have to remake any plank, they all came out fine on the first attempt. One thing that surprised me was the amount of adjustment I had to do on the frames. The two more forward and the two more aft frames had to be trimmed quite heavily, despite my CAD drawings looking good. I am not sure why, however: the two forward frames were the ones I had problems with at the drawing stage and I suspect I may have sanded the bevels at the Transom wrongly. It does not matter though as the planks do act as batens and show where wood needs to be taken off to have a fair curve. I think it is all fixed now. A few pics: All planks up to the level of Transom finished. The next plank sits at an angle at the transom and needs extra care to sit handsomely. These are the paper templates for the next plank. And the process is repeated. This is a difficult plank but I think it is coming out fine and fits well with the previous plank on both sides. This is how I steam my planks now, I just stick them in the kettle for a few seconds and then immediately place on the boat. The beech will take any shape with ease. Till next time Vaddoc


- 233 replies
-
- 14
-
-