DONATION DRIVE - SUPPORT MSW - DO YOUR PART TO KEEP THIS GREAT FORUM GOING!
×

.jpg.f26acc9a74319261612561bfa7da1303.jpg)
vaddoc
-
Posts
1,605 -
Joined
-
Last visited
Content Type
Profiles
Forums
Gallery
Events
Everything posted by vaddoc
-
.thumb.jpg.6fd4c1b78768bb3efd745ab810936005.jpg)
Work bench width and height - any recommendations?
vaddoc replied to Dr PR's topic in Modeling tools and Workshop Equipment
I used the design of the fellow in the link bellow. Heavy and super solid bench, cheap to make too. The selves underneath are very practical. I made a large one and then I made an even larger one. Go big, longer and wider than you plan. I think my benches are 90 cm high but I like to sit in tall stools. -
Perhaps take two pieces of plywood half the thickness minus 1 mm and laminate them with thickened epoxy (hence the 1mm). Let it cure with lots of books on top. You ll get perfectly flat plywood and you can cut a new bulkhead.
-
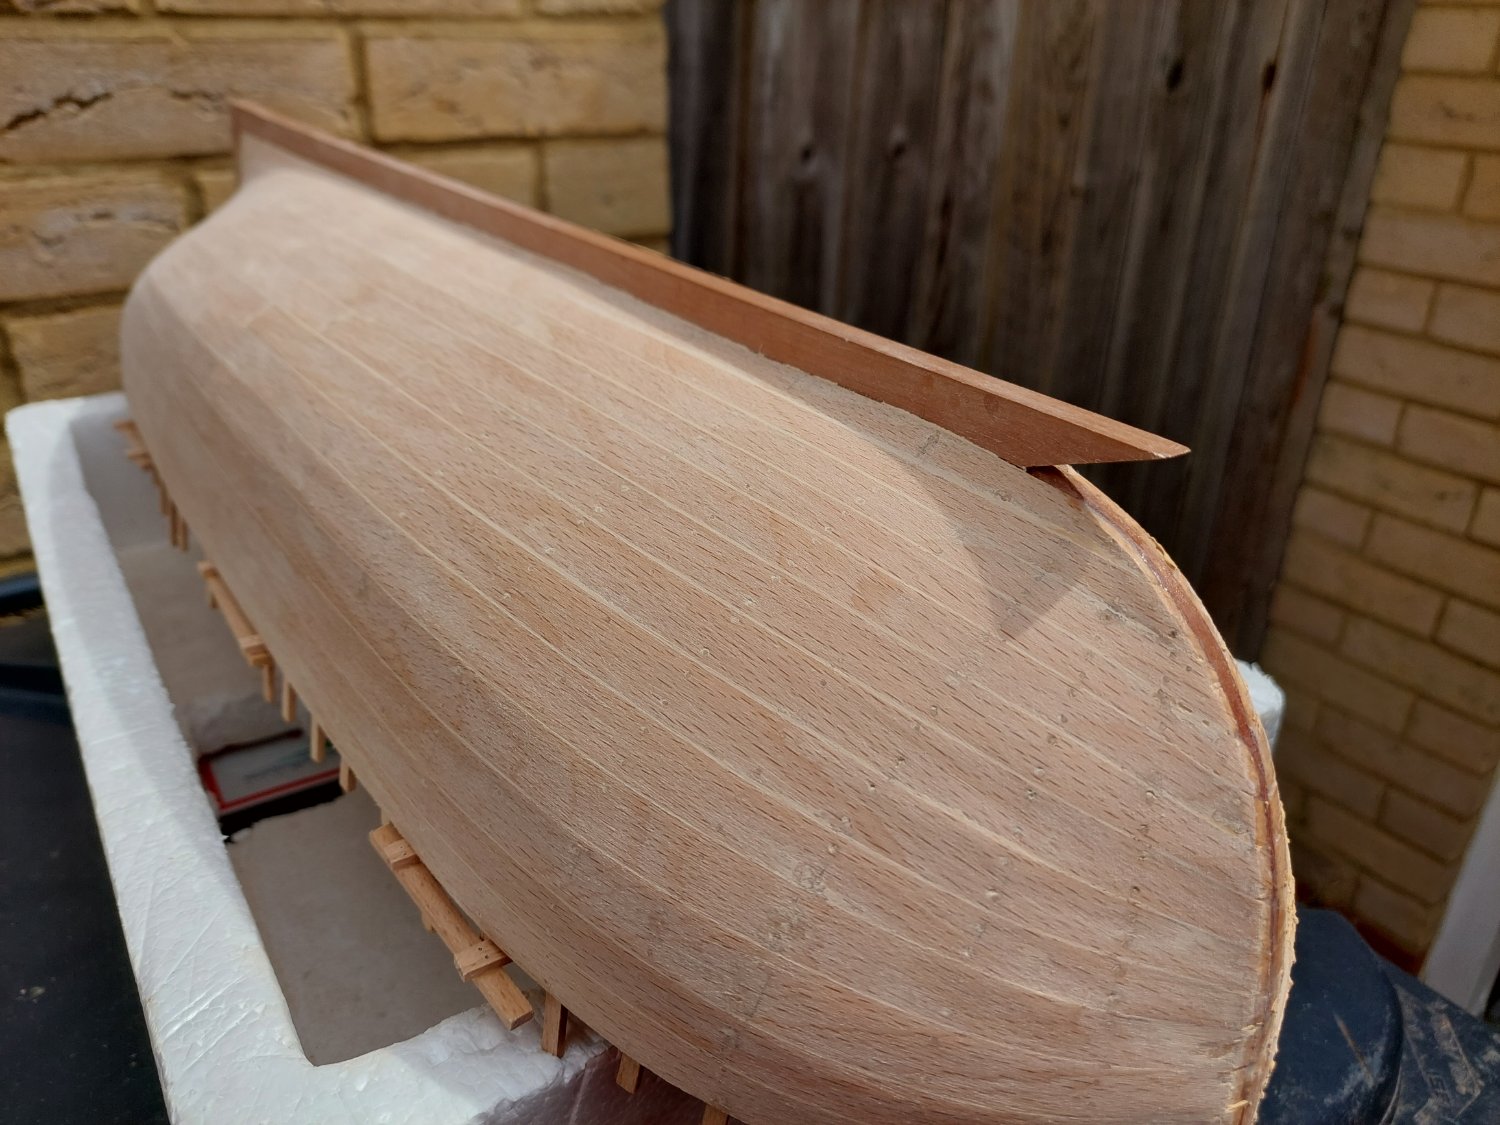
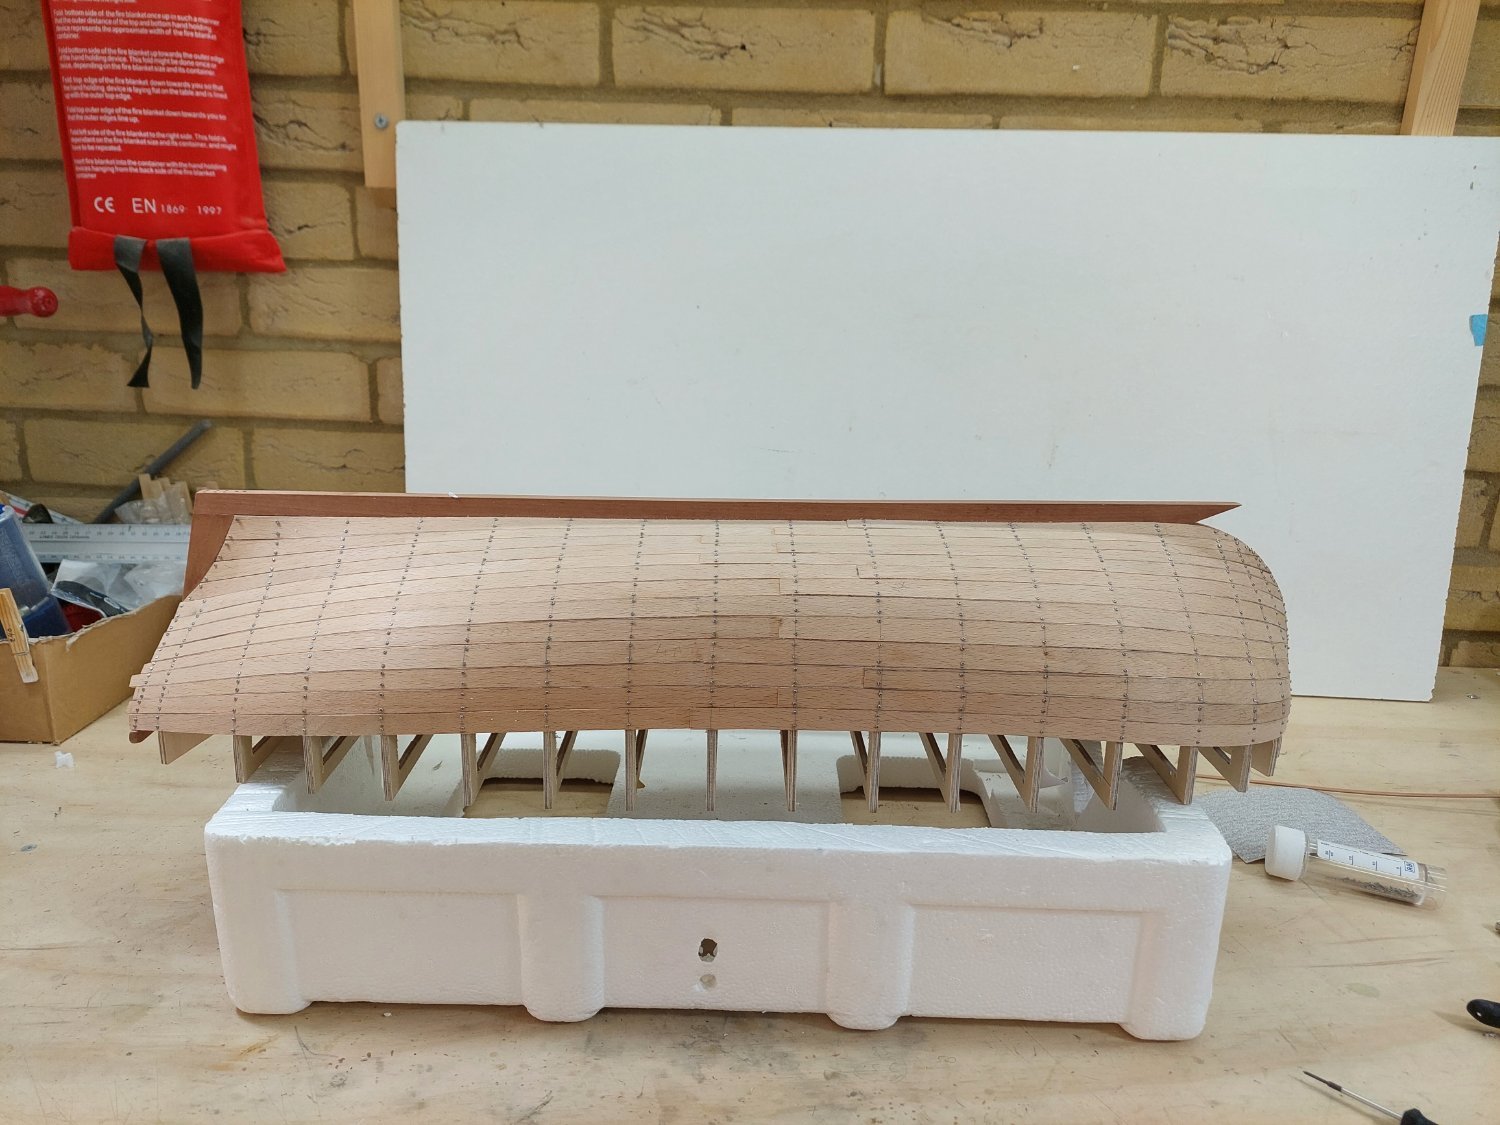
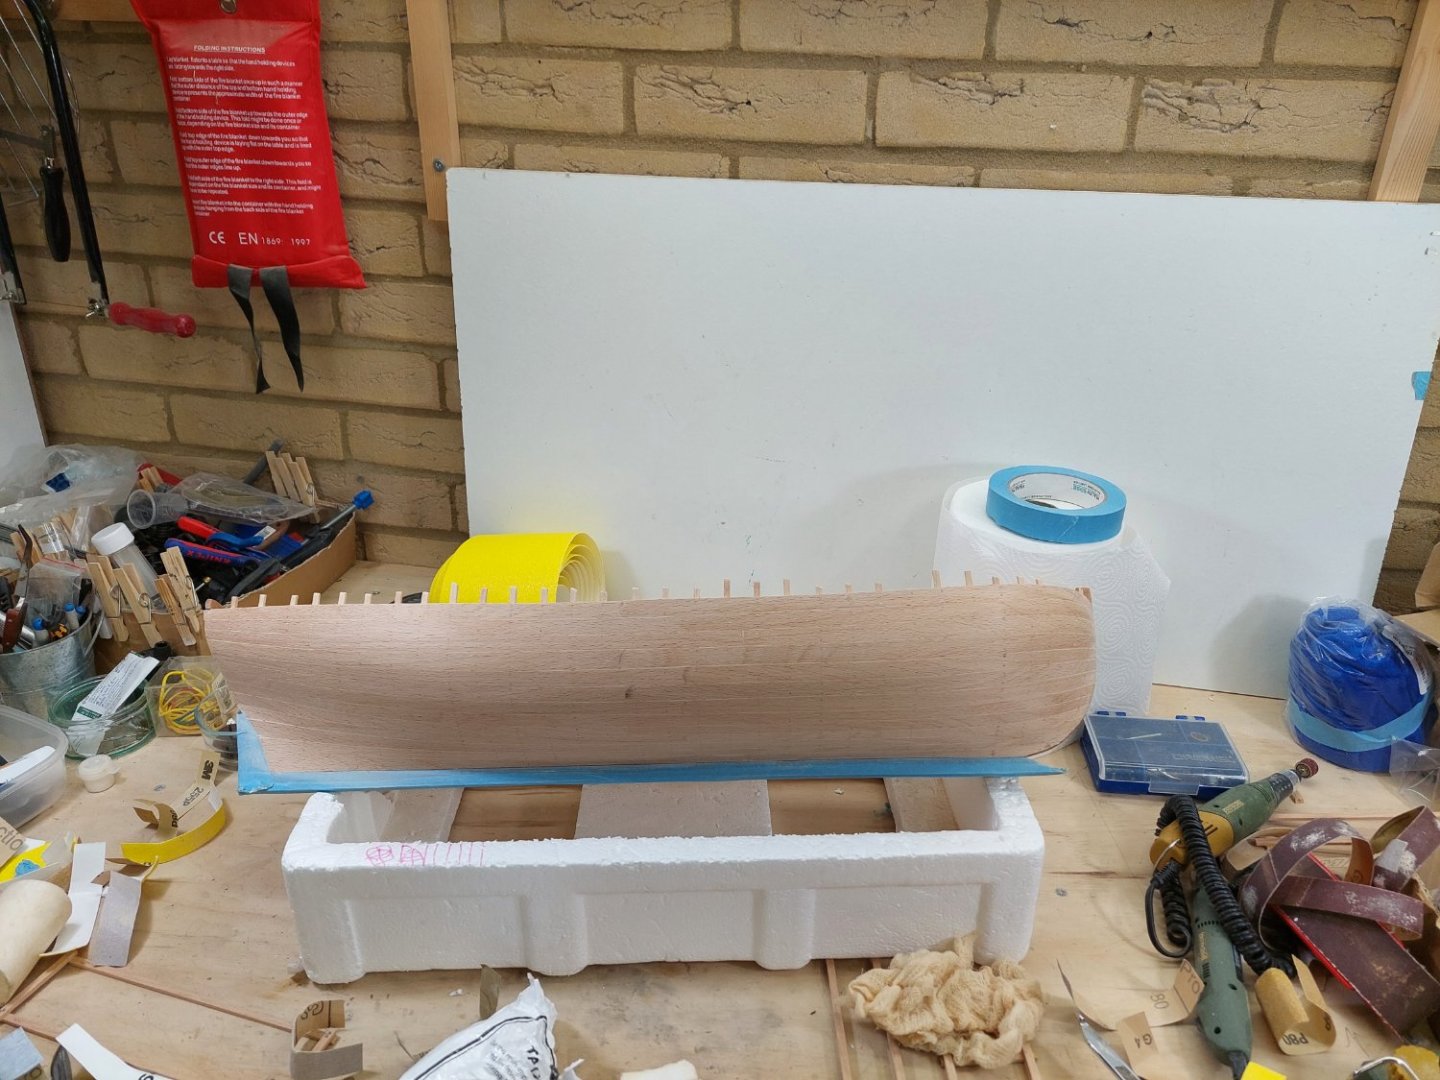
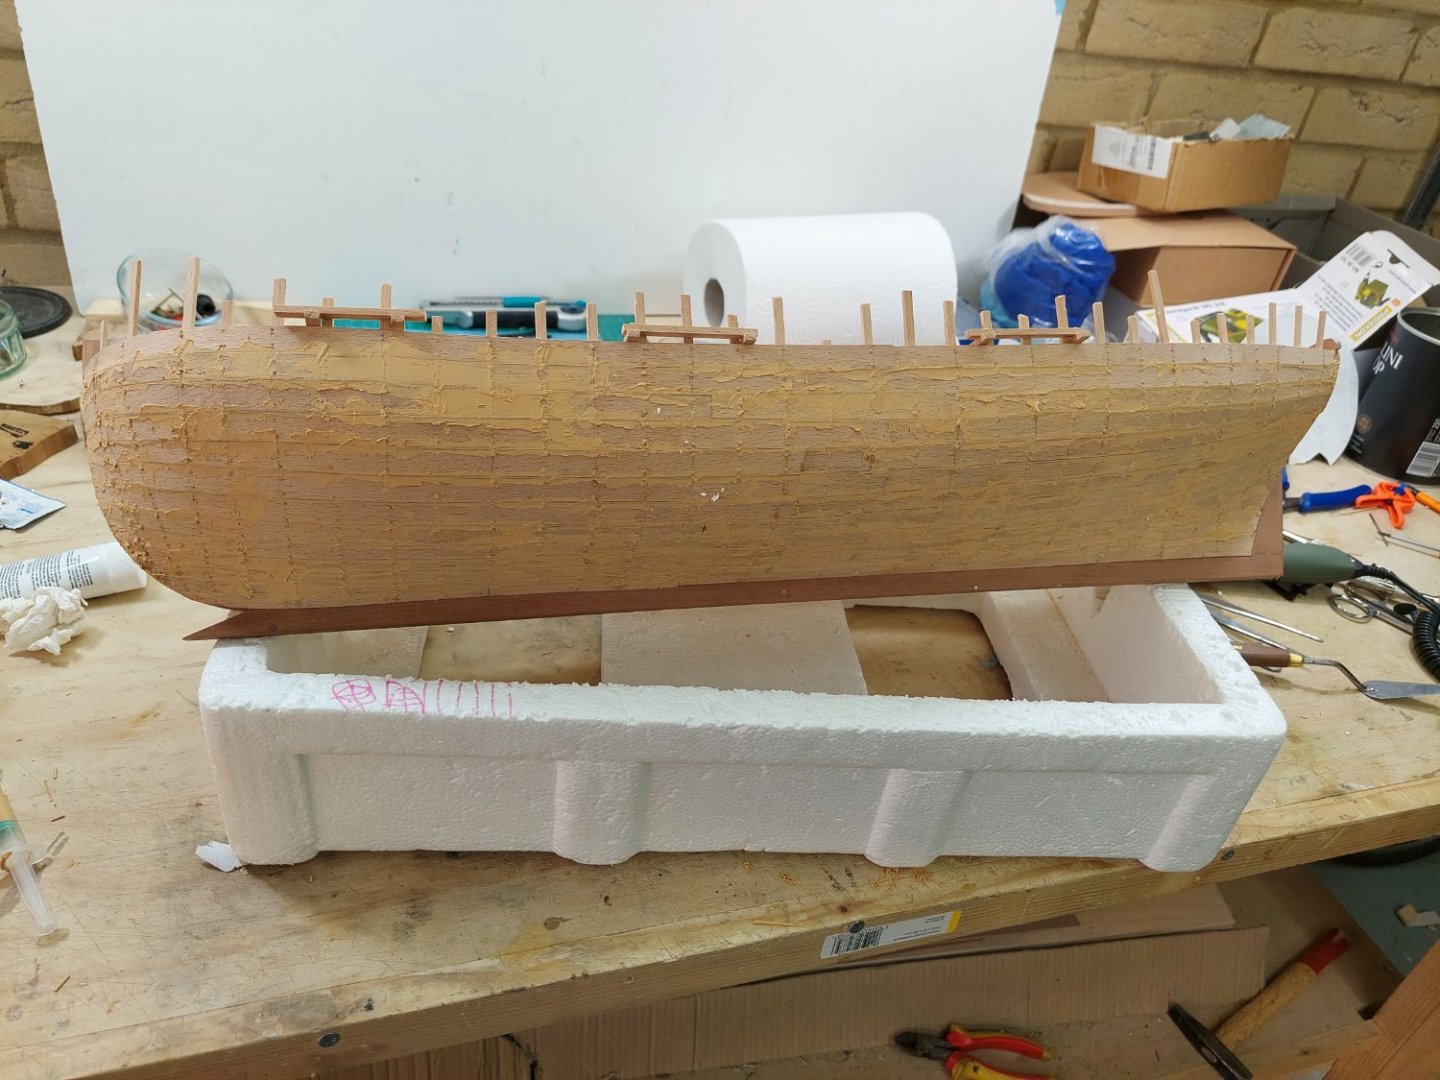
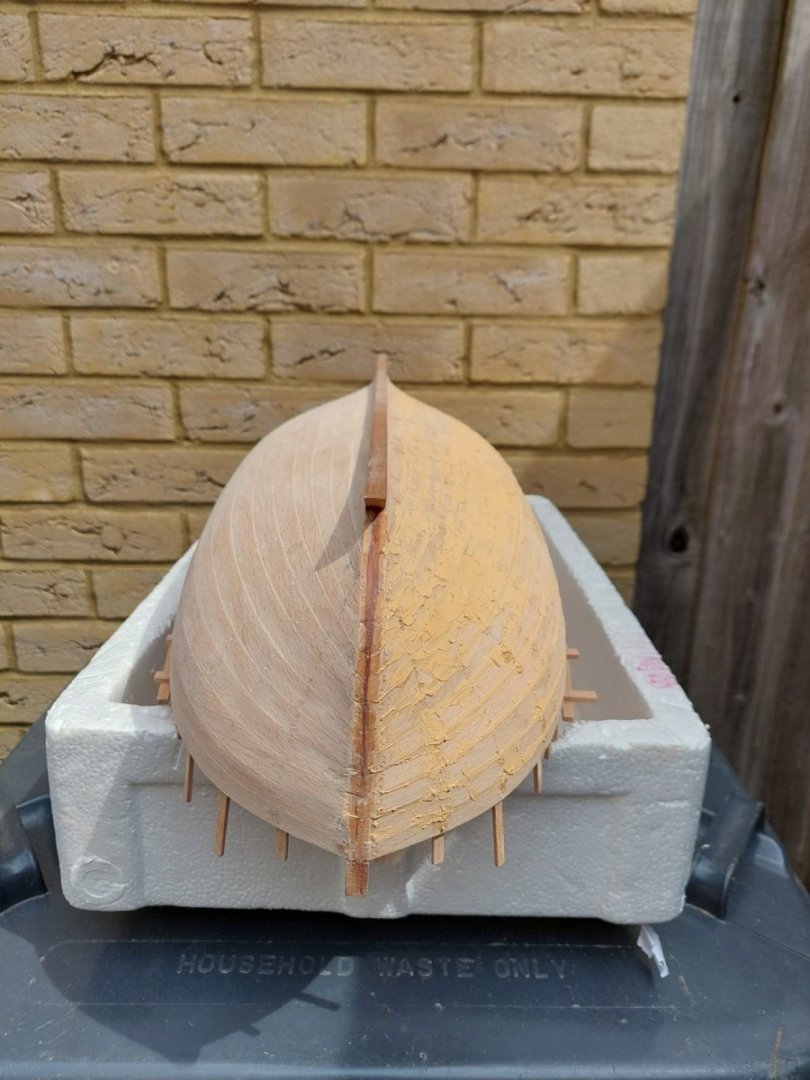
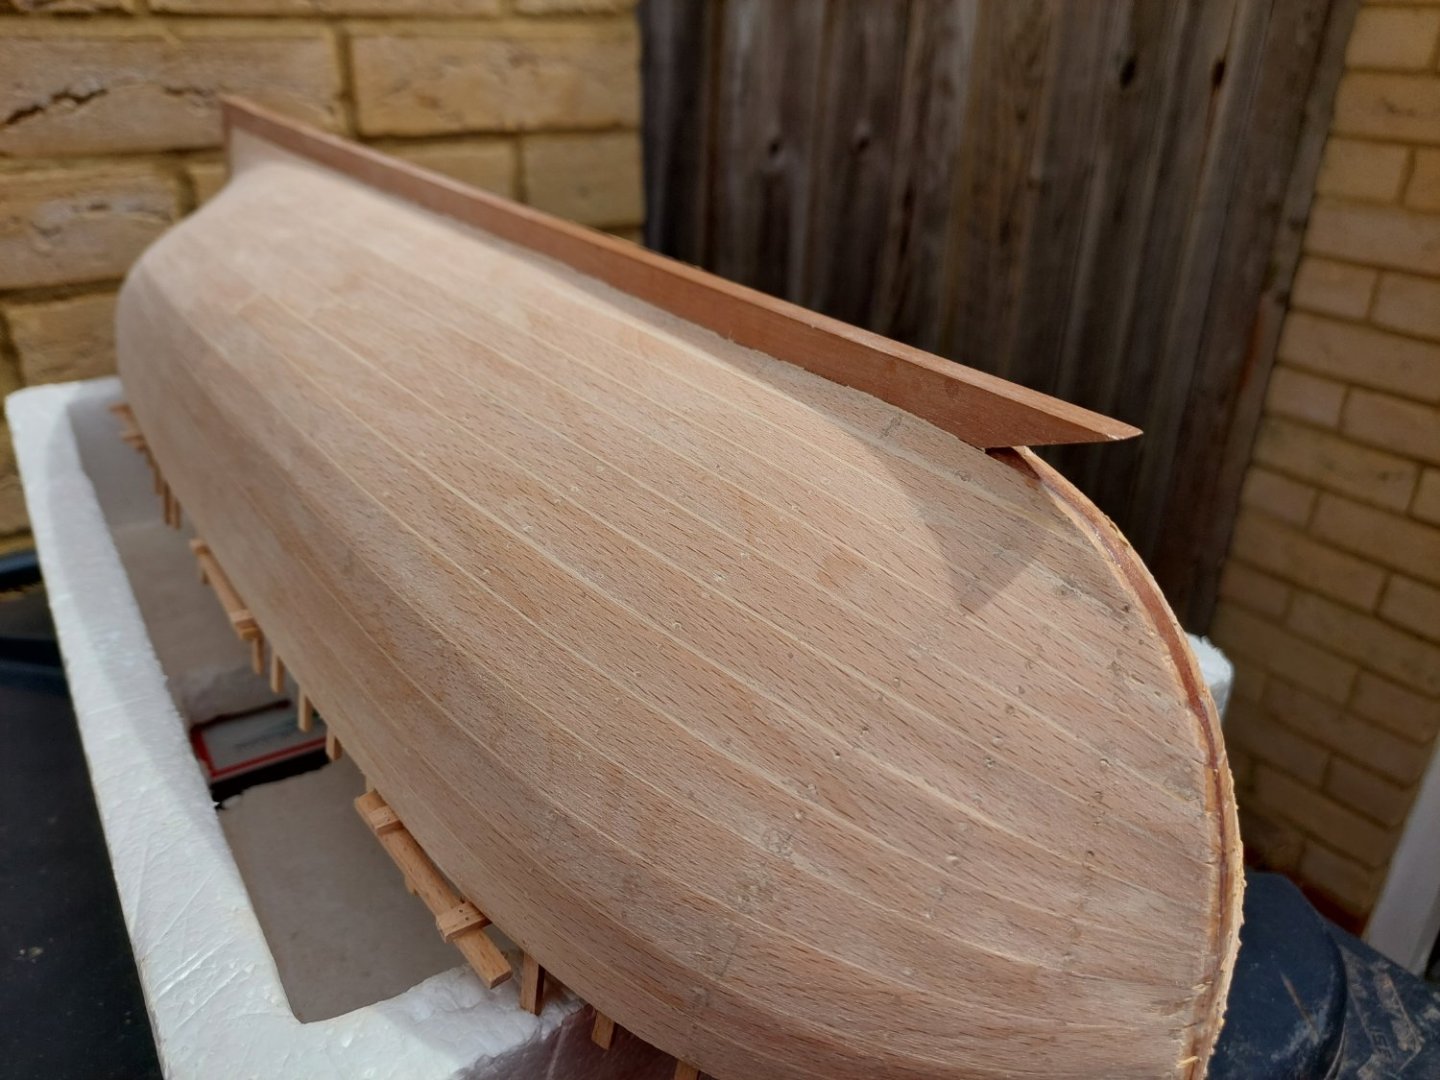
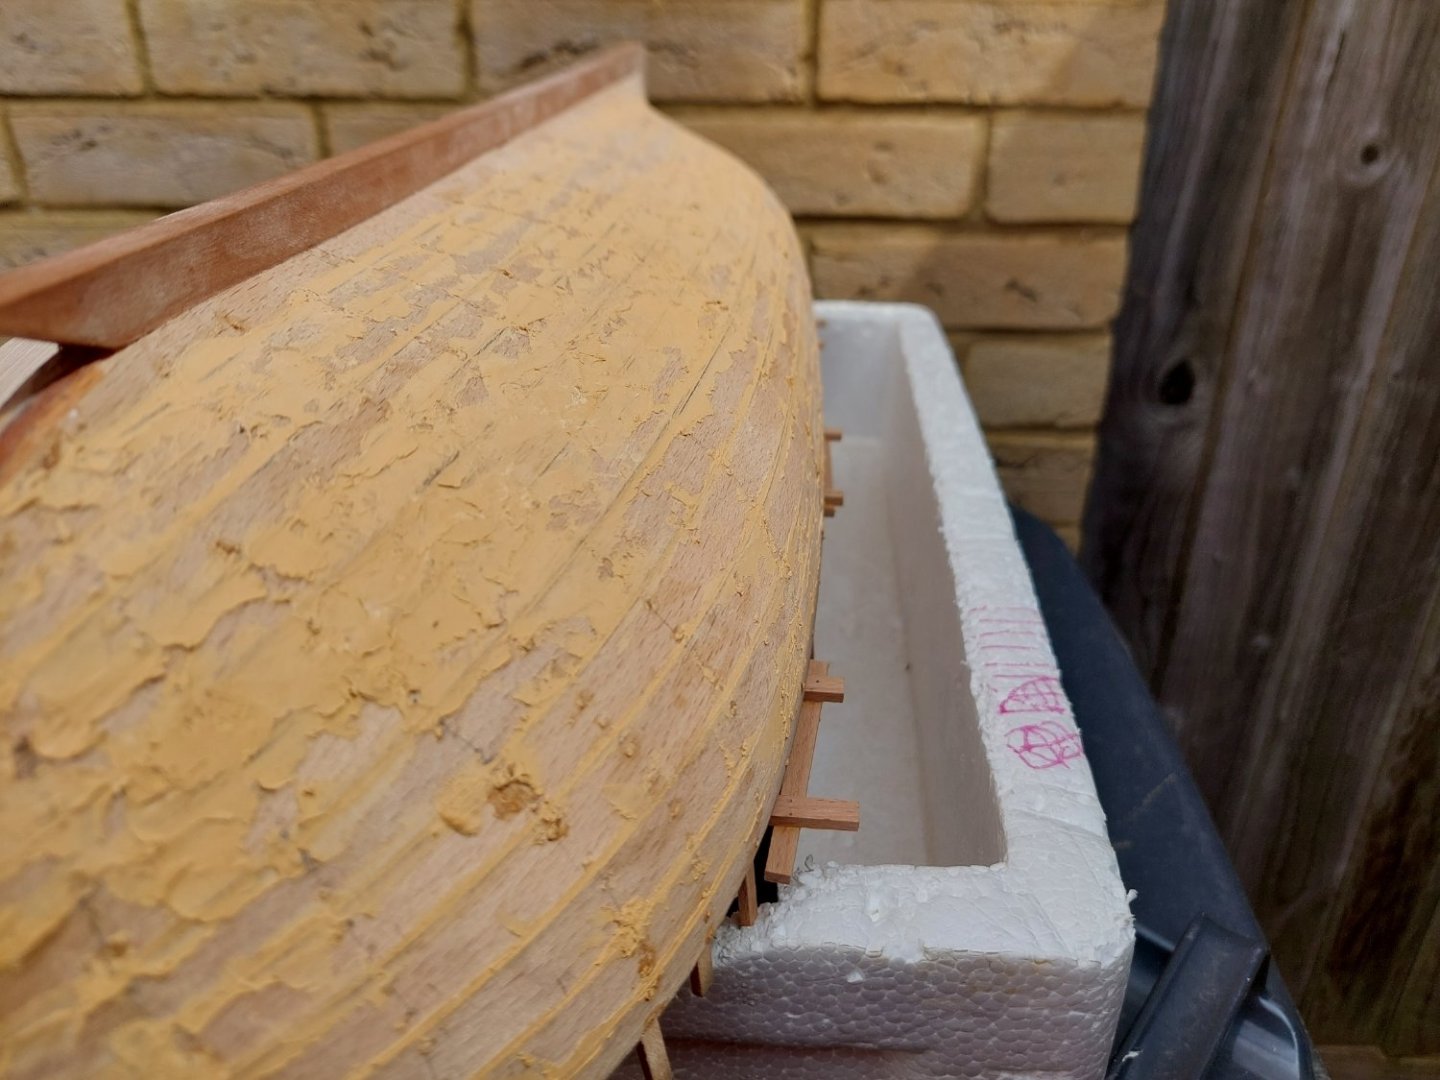
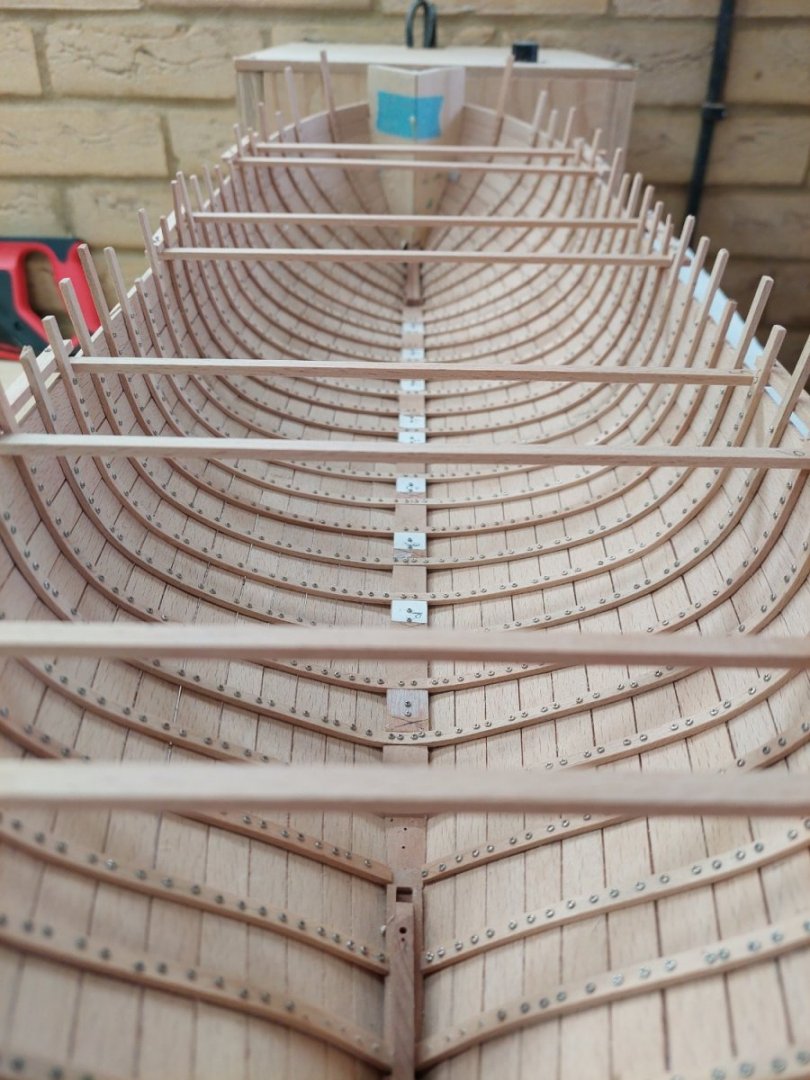
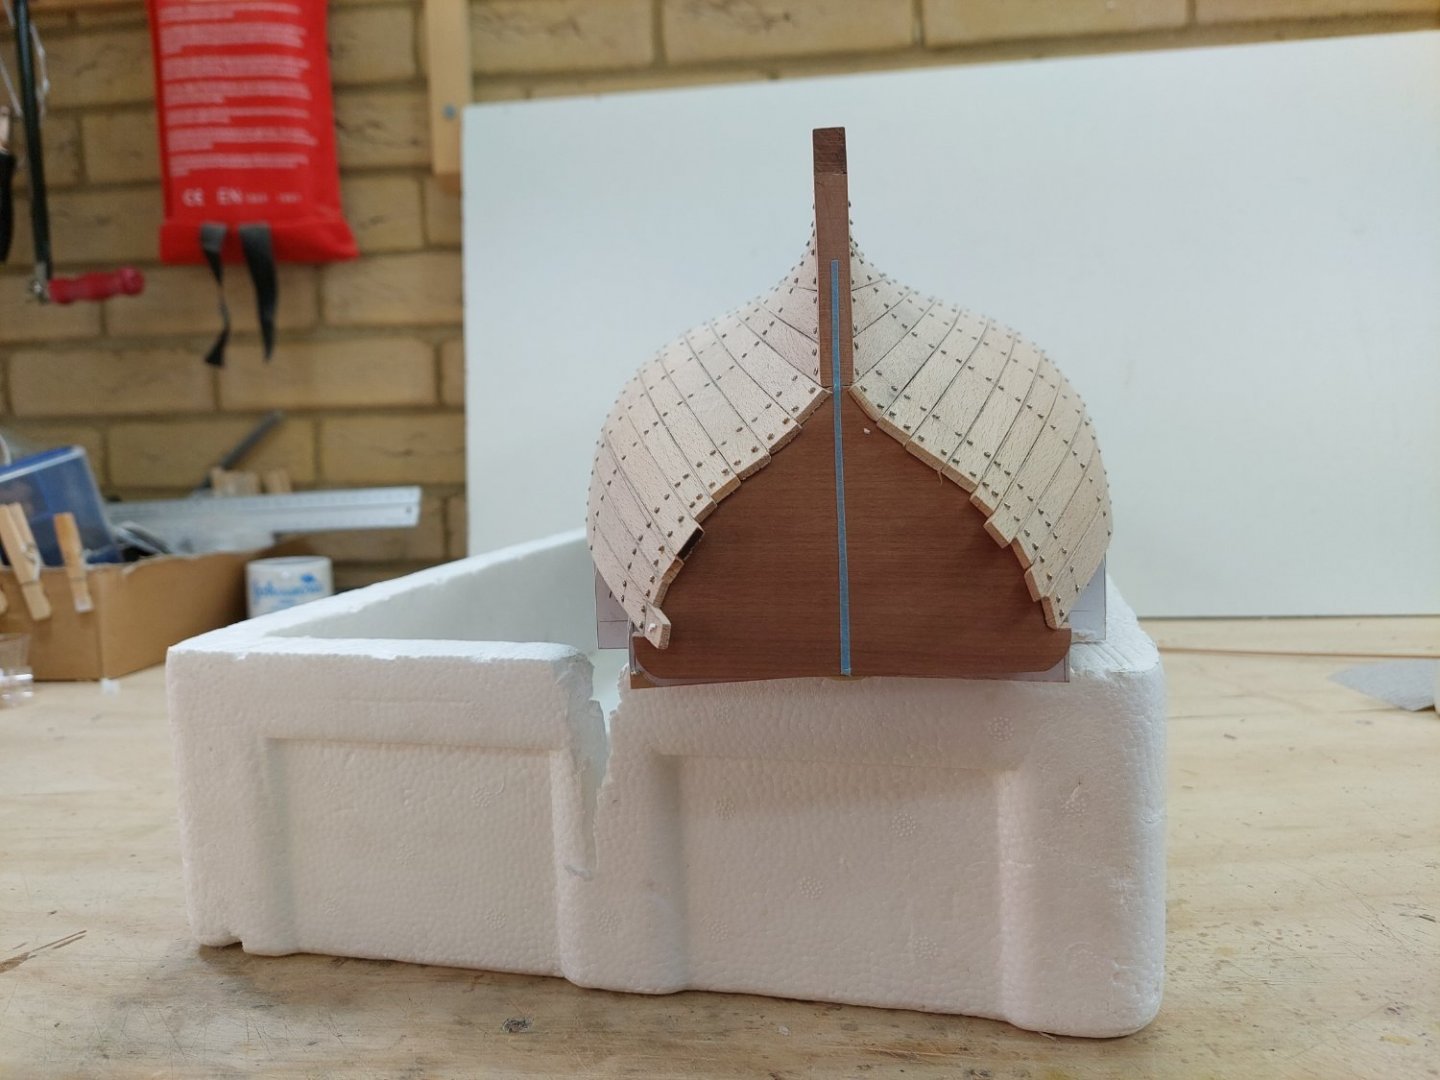
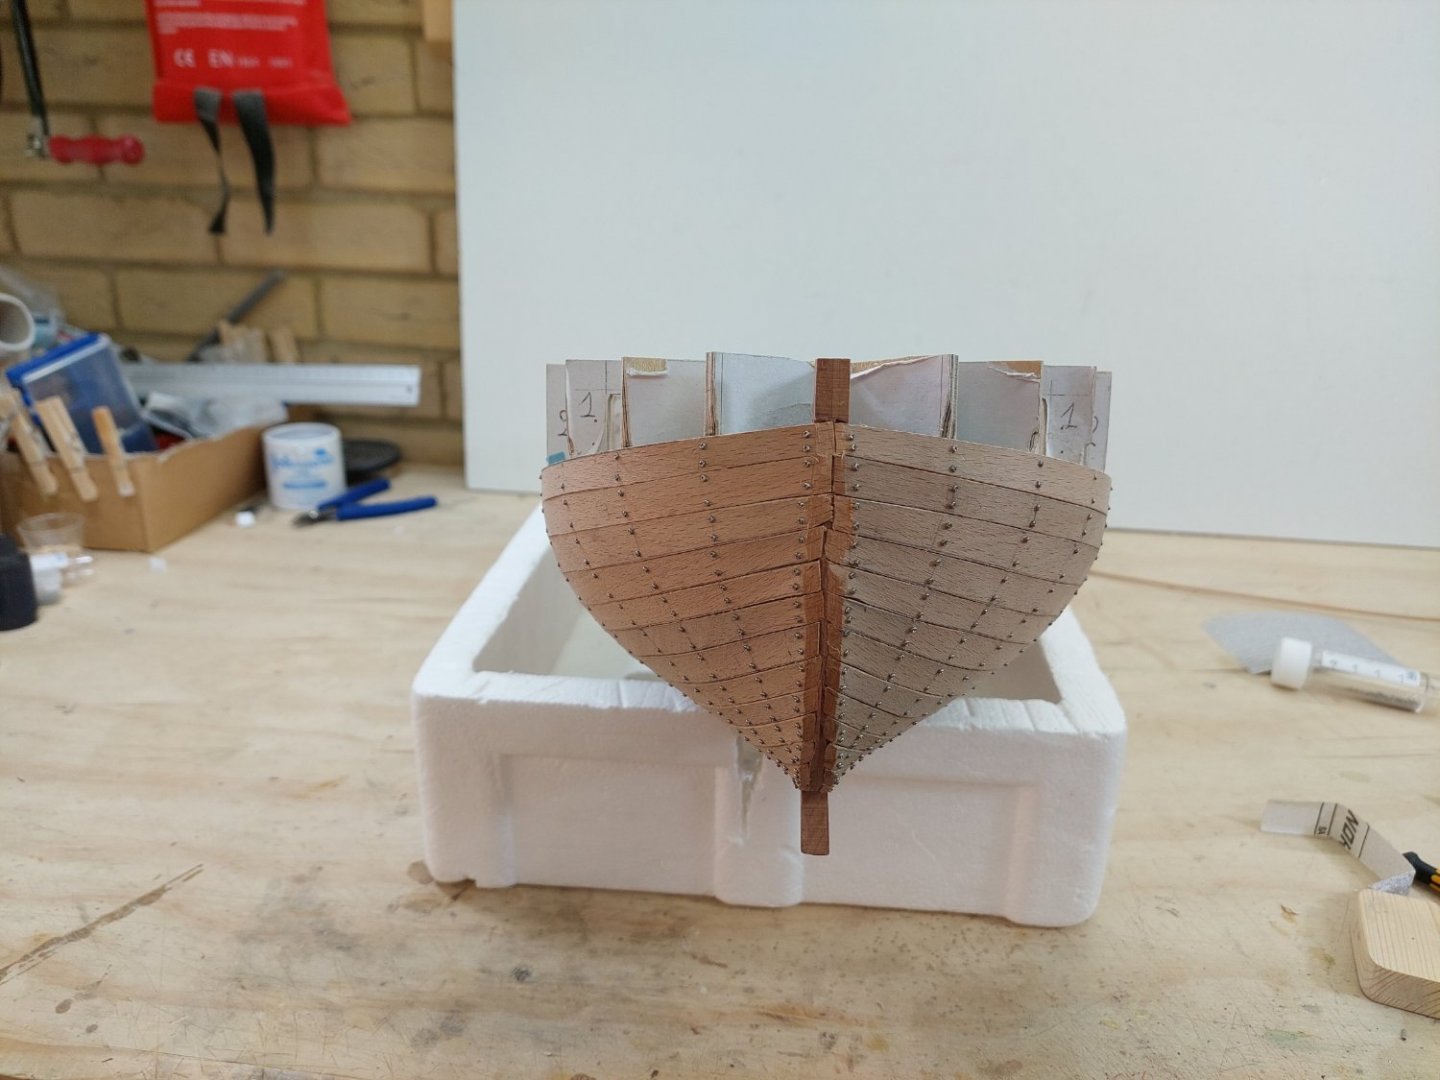
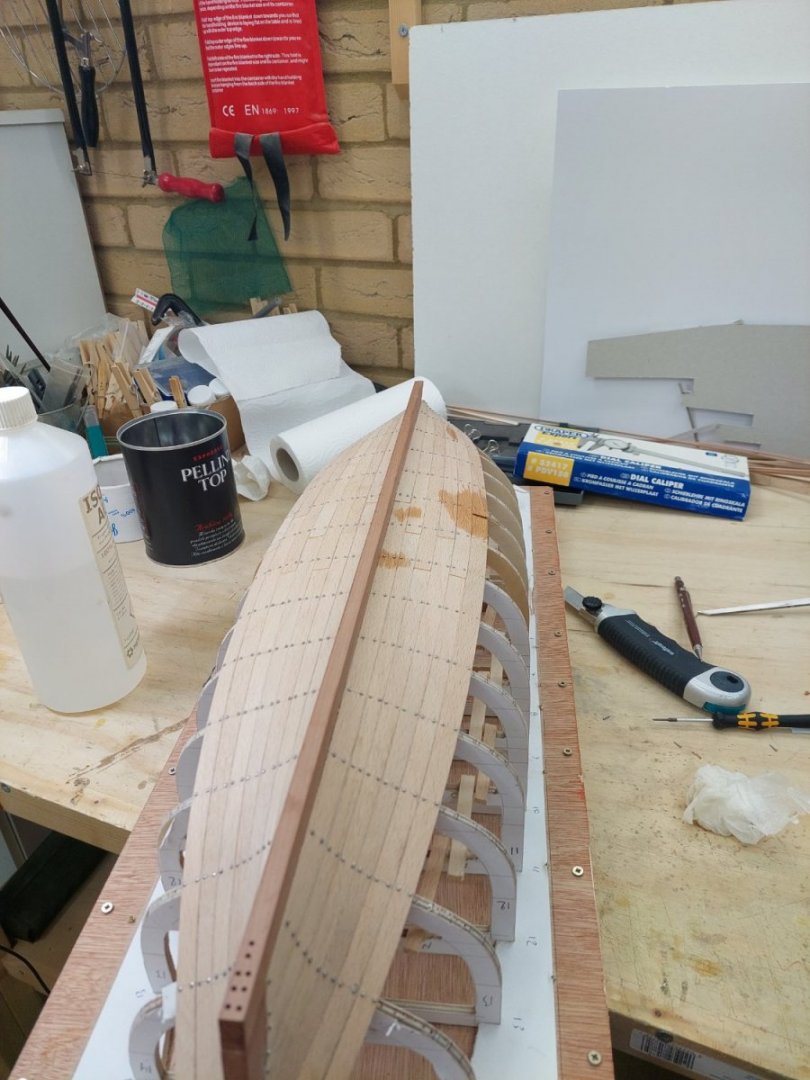
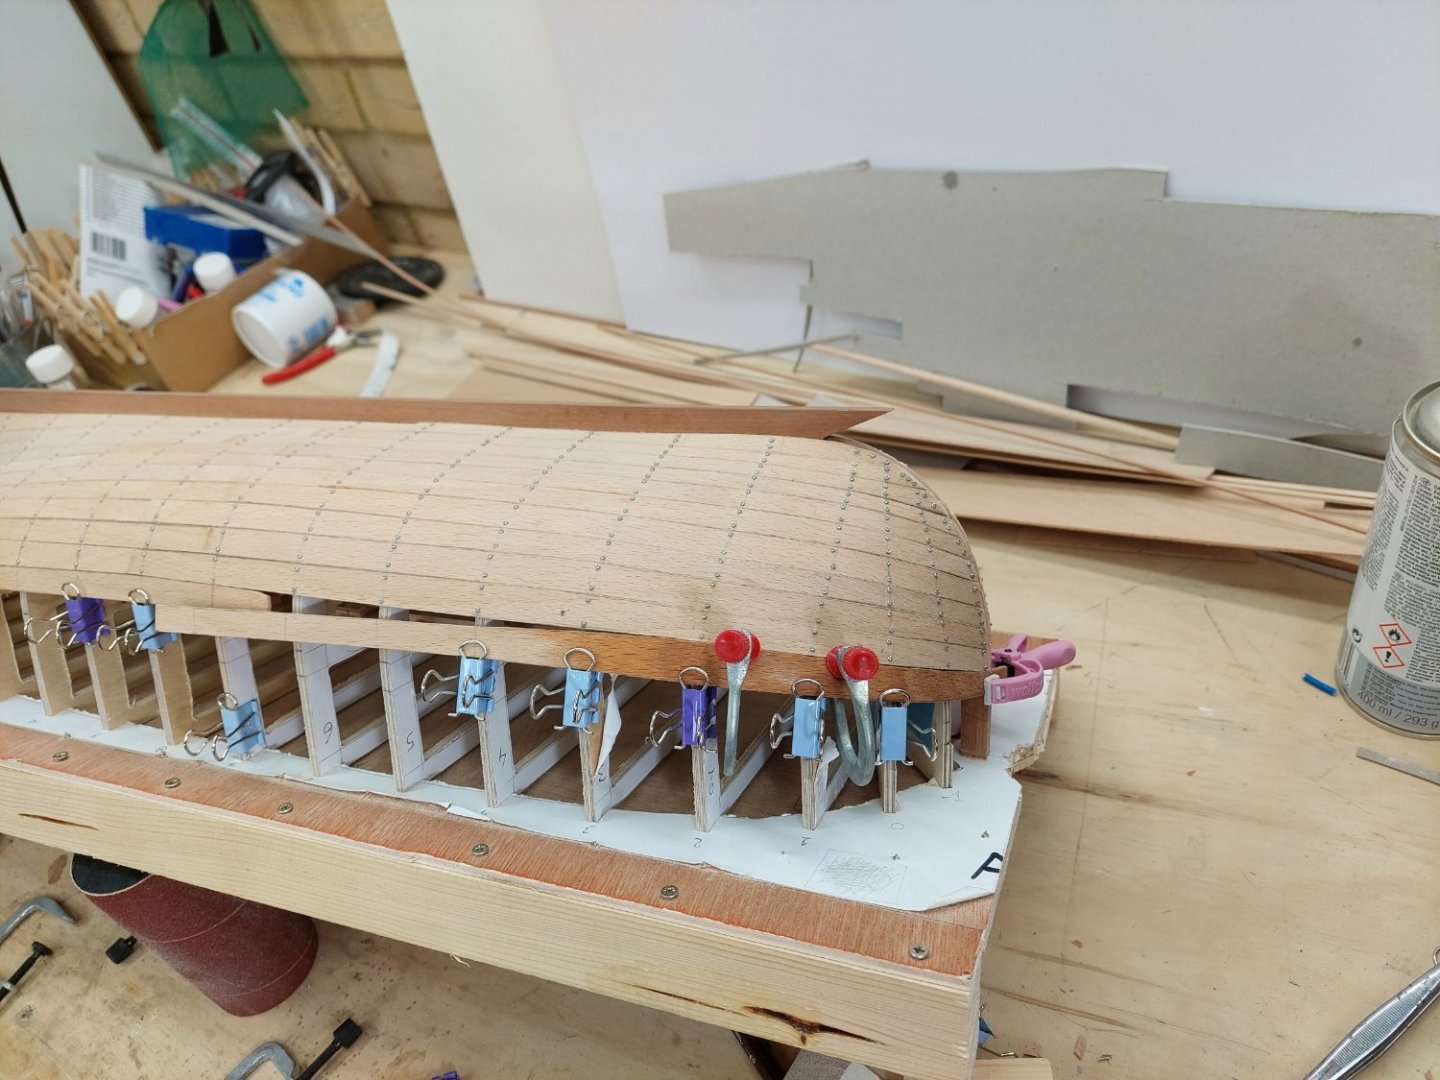
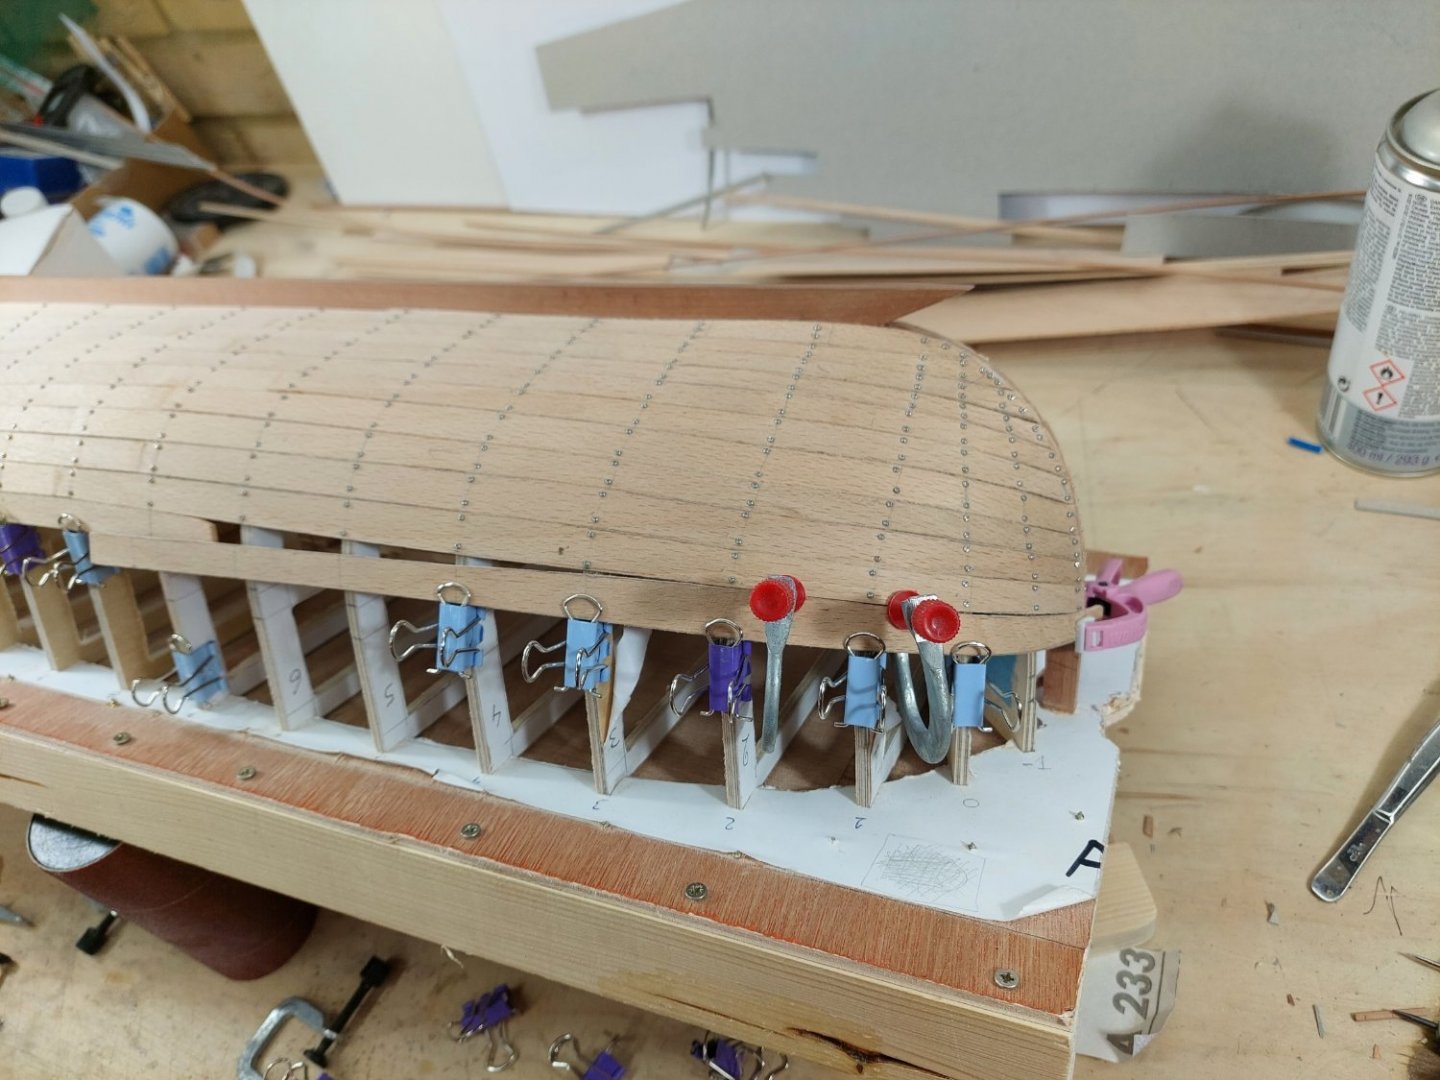
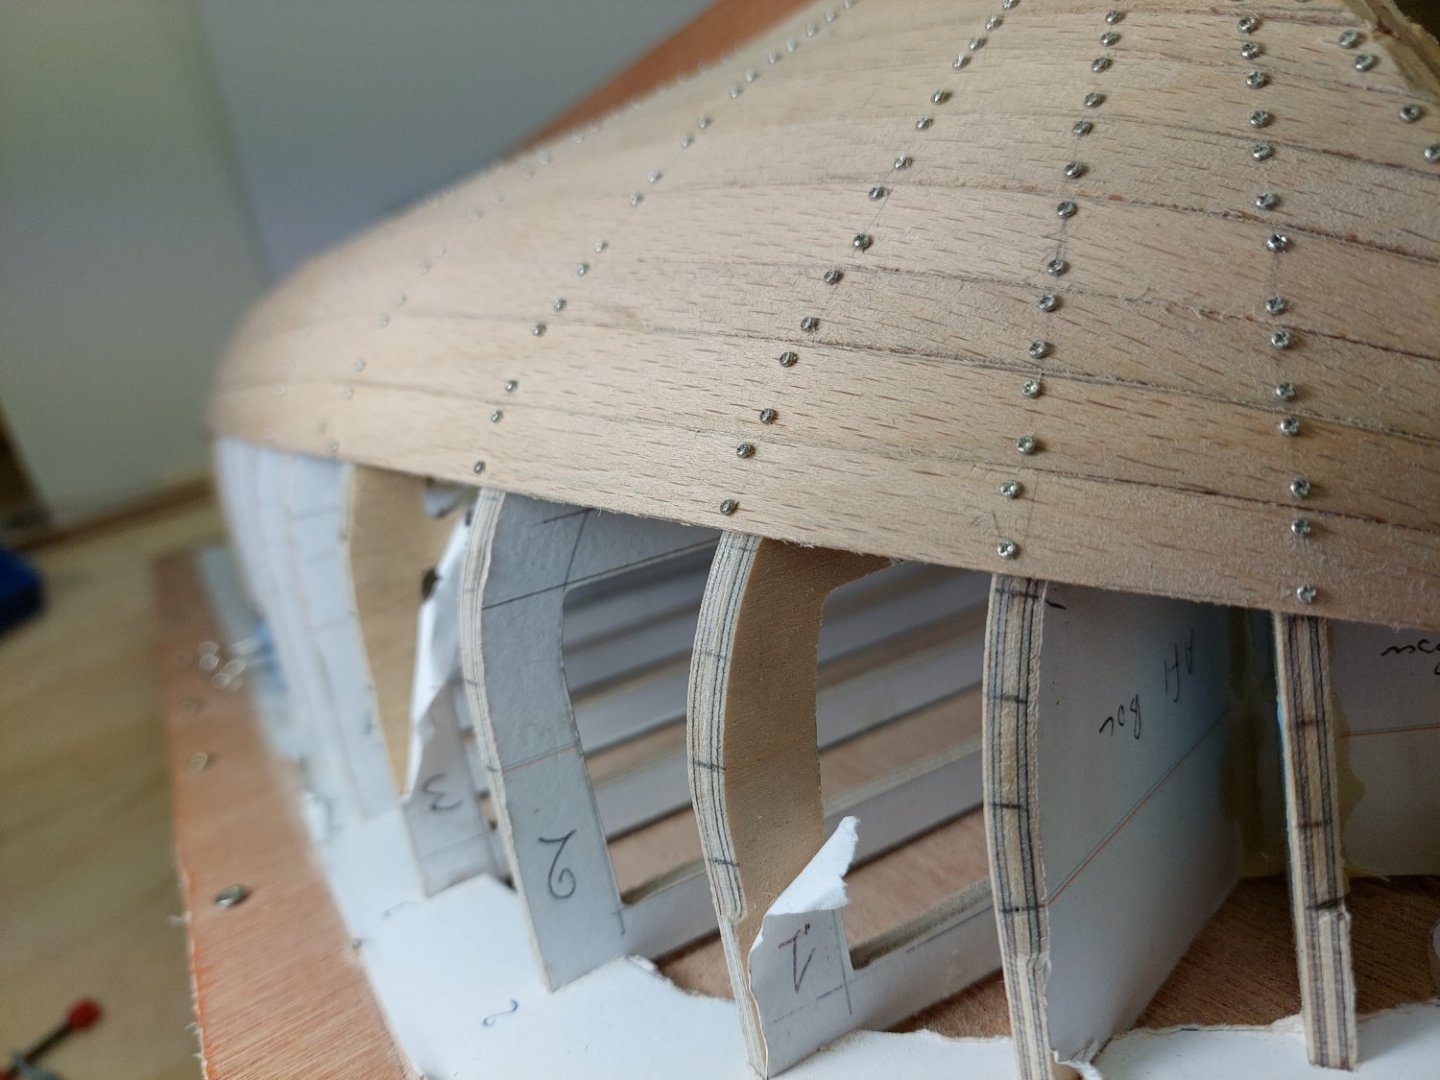
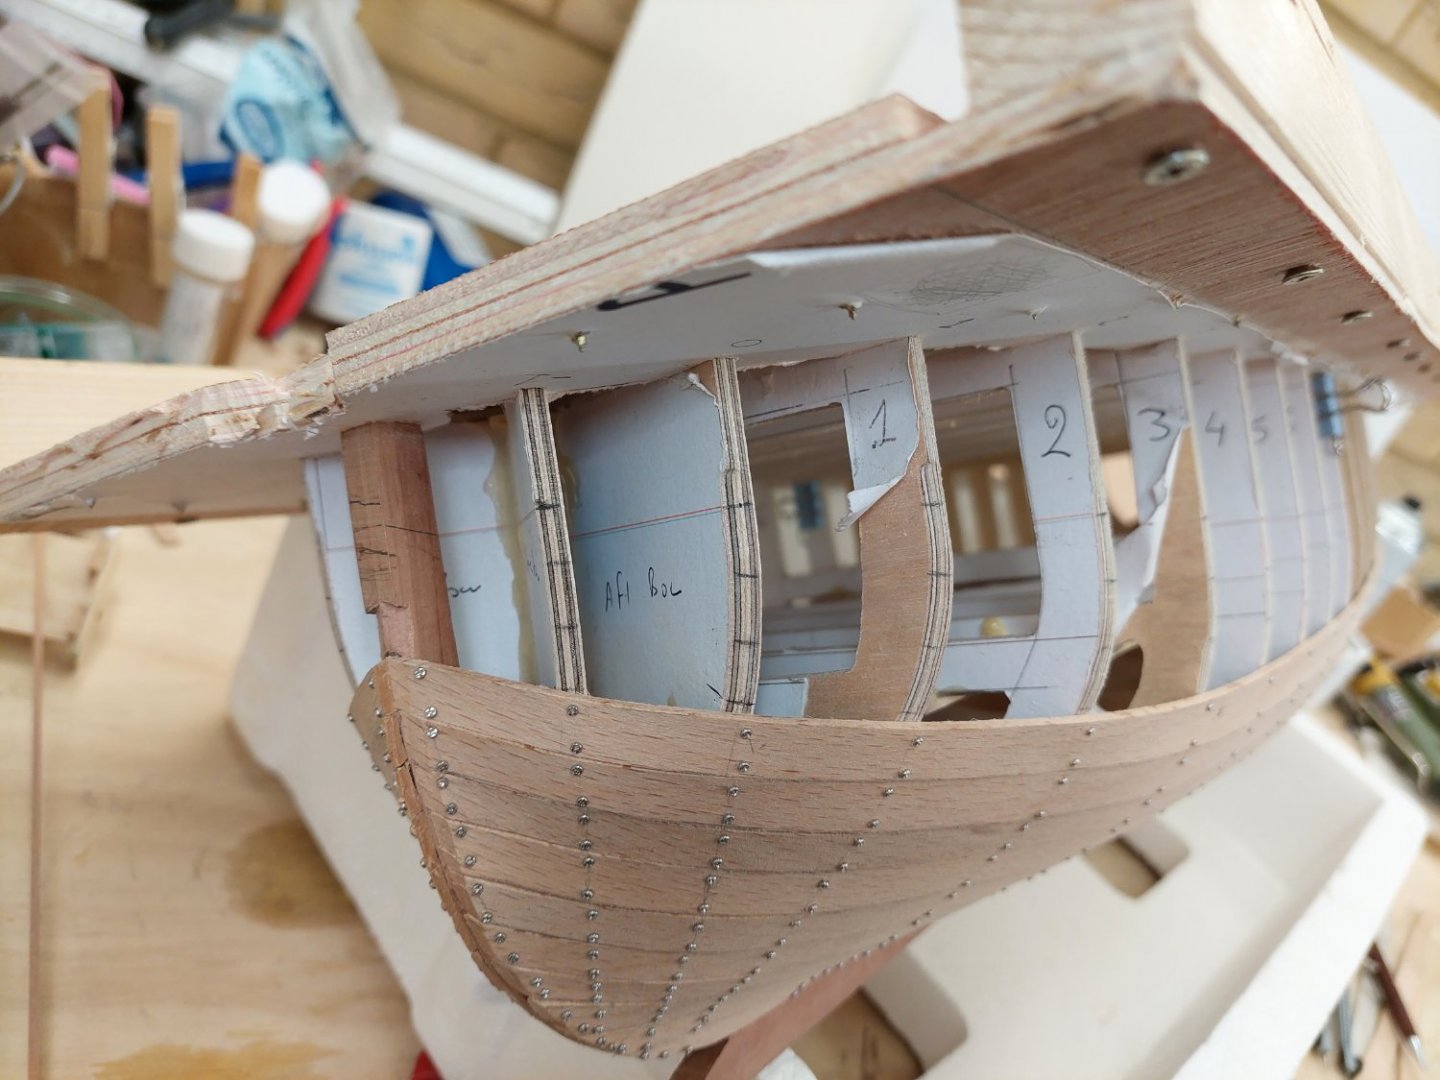
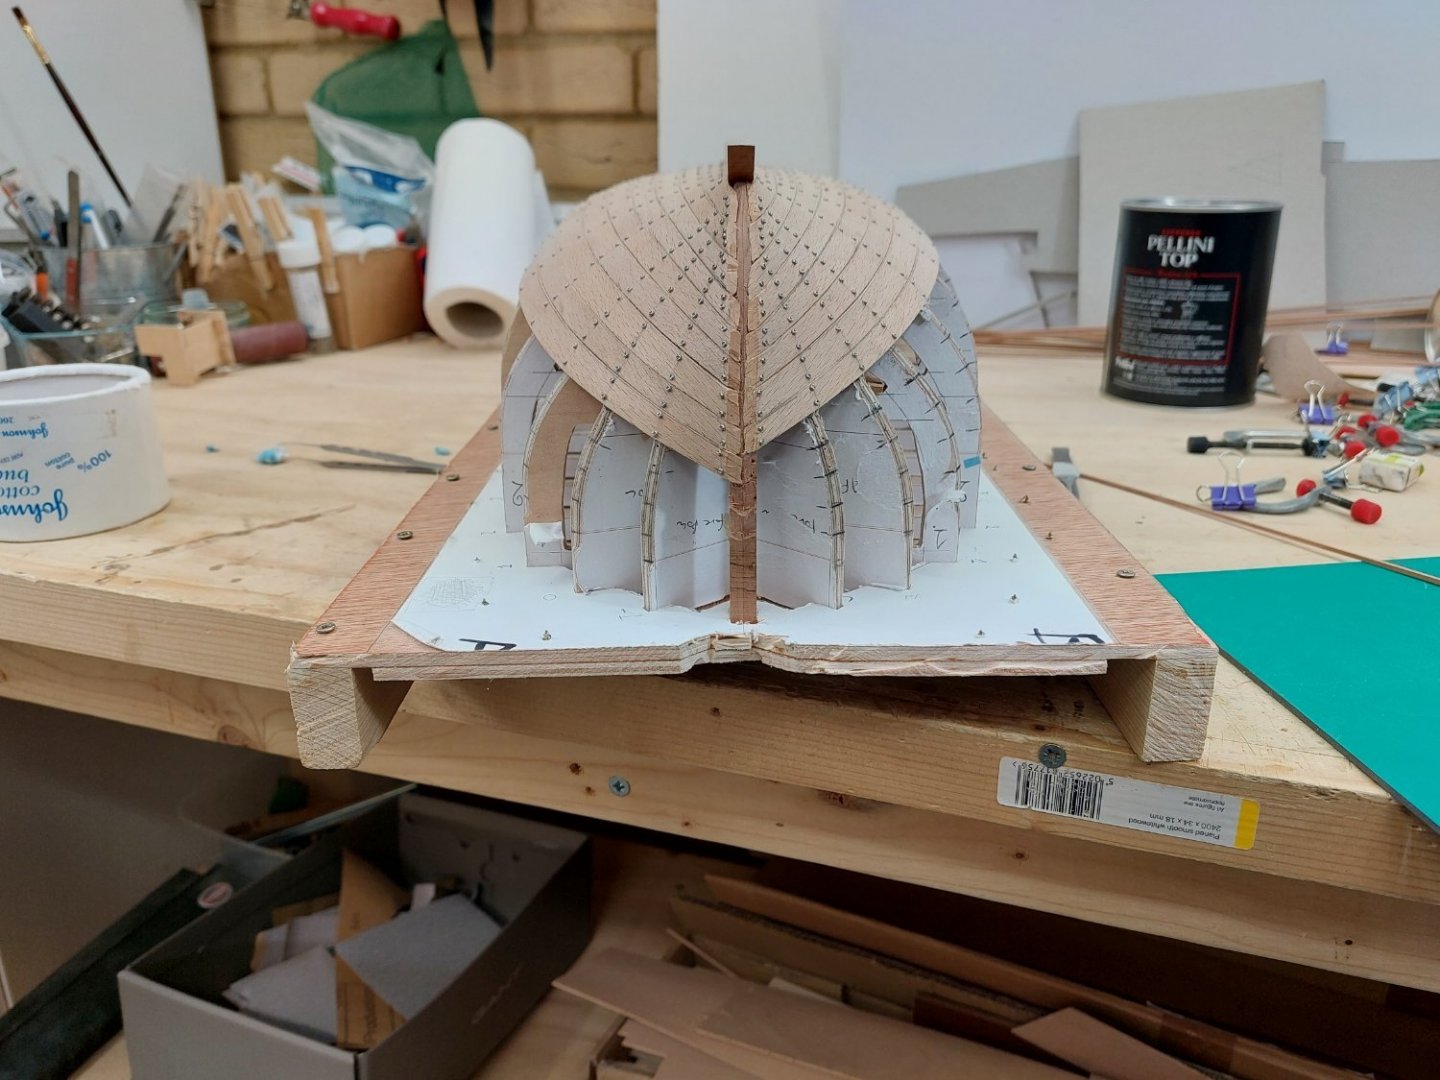
Dear all Thank you for your likes and for visiting. I certainly have missed MSW! @Bedford I will seal the wood Bedford both inside and out. I doubt though this will stop the beech changing its dimensions and I am certain the paint will crack along the plank edges. But it's ok! @Wintergreen I will paint the hull Hakan and I ll fill the few dimples at the bow. Not sure if it will look authentic though! I was actually thinking of using enamel paint for this boat not sure if the wood moving makes it a worse or better choice. In the last two months the only thing I have been able to get done is sanding of the hull. But the amount of sanding needed has been epic: starting at 60 grit, then 80, 100, 120, 180 and finally 240. It is a big girl and both the filler and beech wood are hard so hard work. The photos bellow show the hull as it is after the 240 grit sanding. I ll do a bit more filling, then sand to 320 grit, seal and re-sand to 320. The hull will be painted after the interior is complete so that it is rigid. The hull is very smooth and started to reflect light. A long way to go but it is getting there. Regards Vaddoc


- 233 replies
-
- 12
-

-
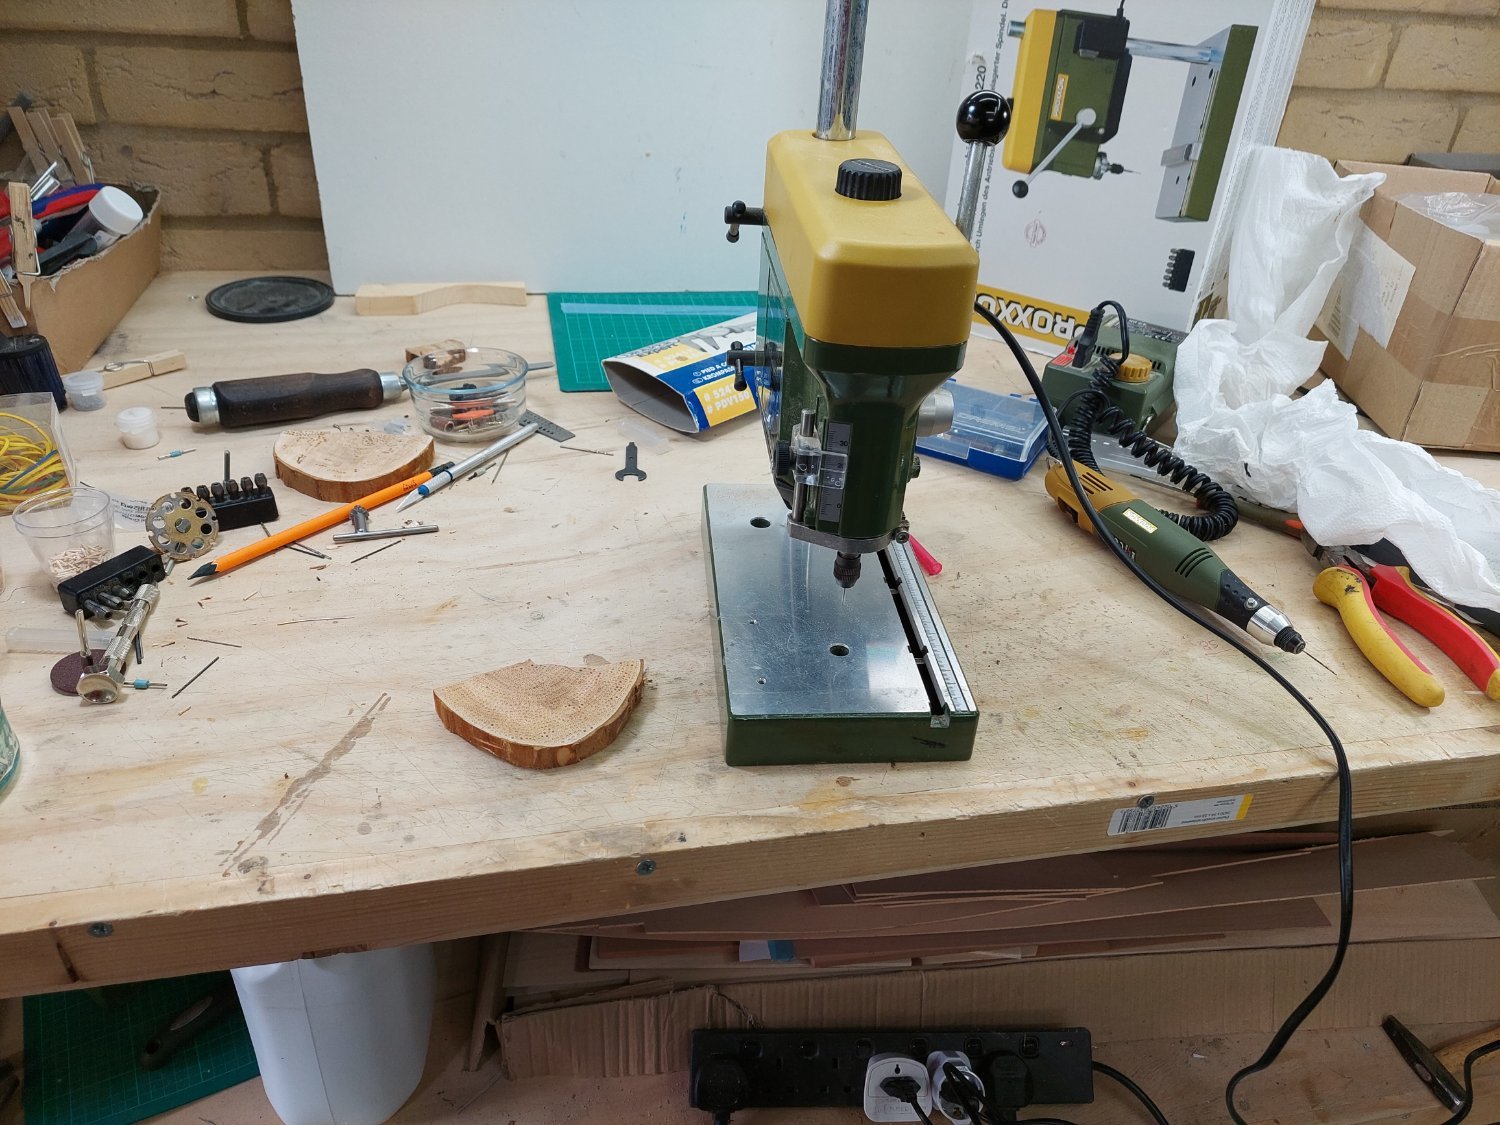
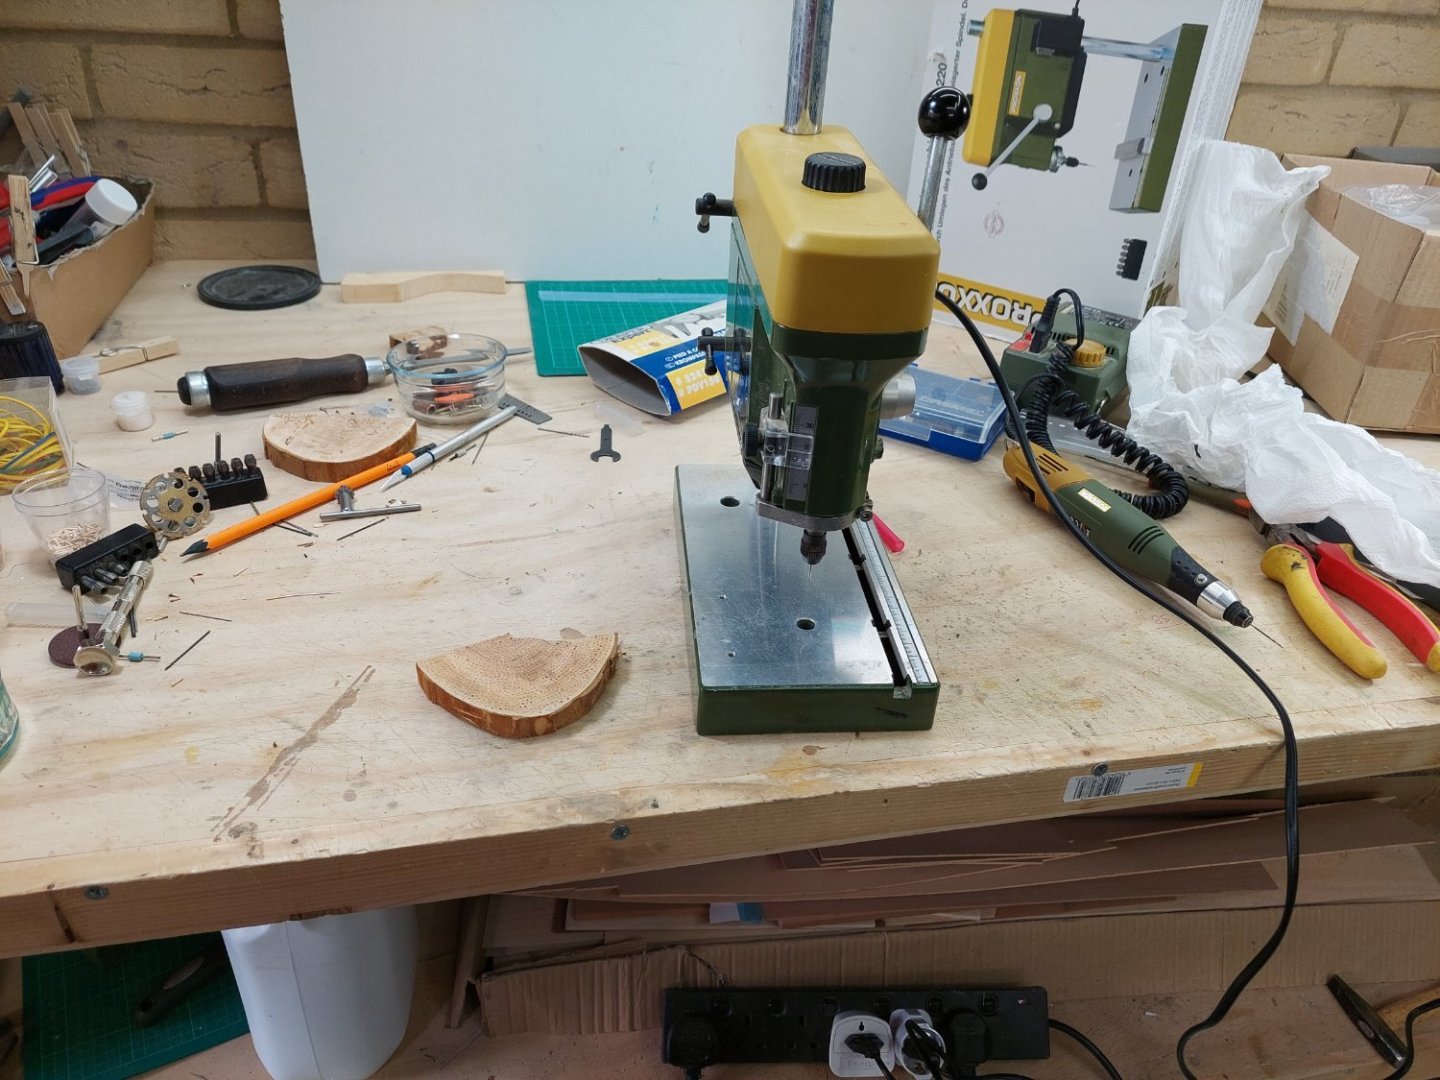
The small proxon one is very good. Very precise, very robust, small foot print. Combined with cheap carbide drills is a wonderful tool.
-
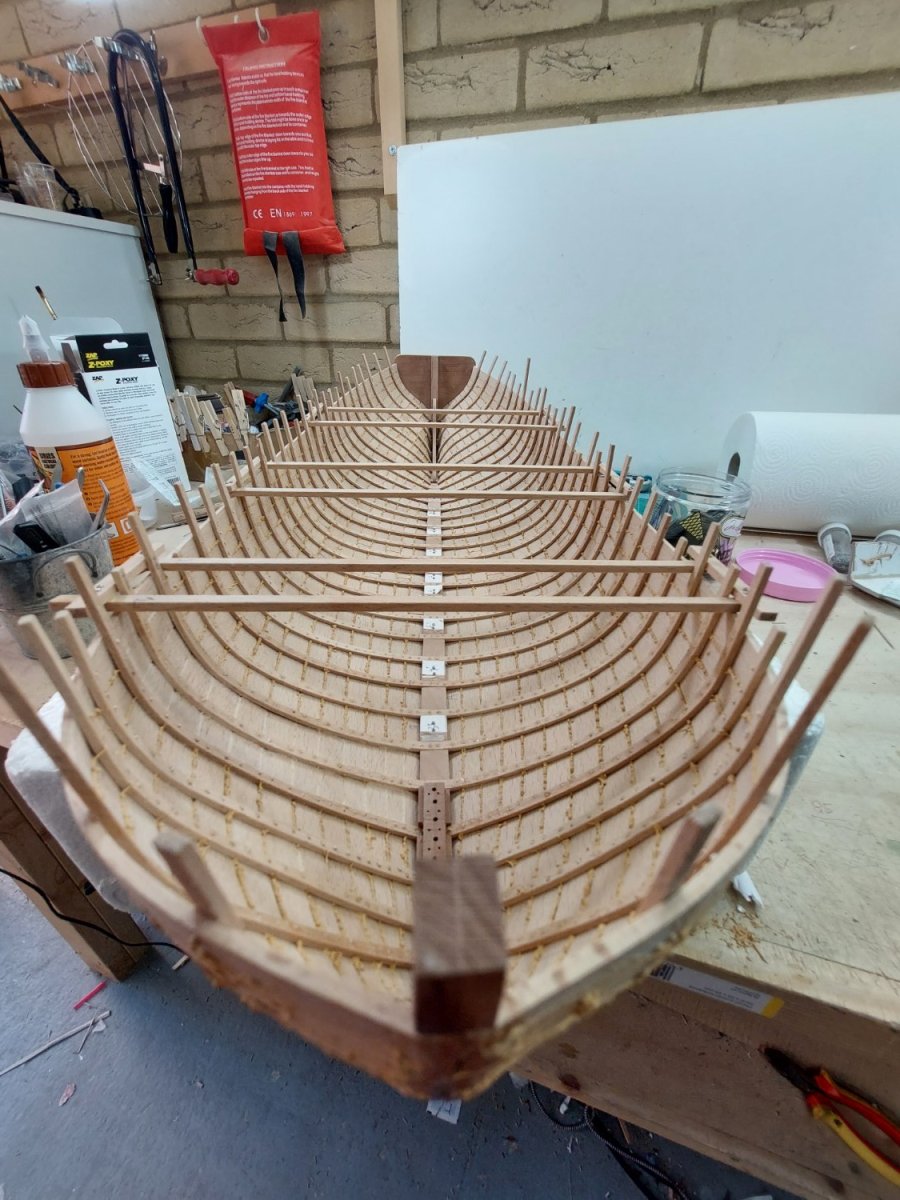
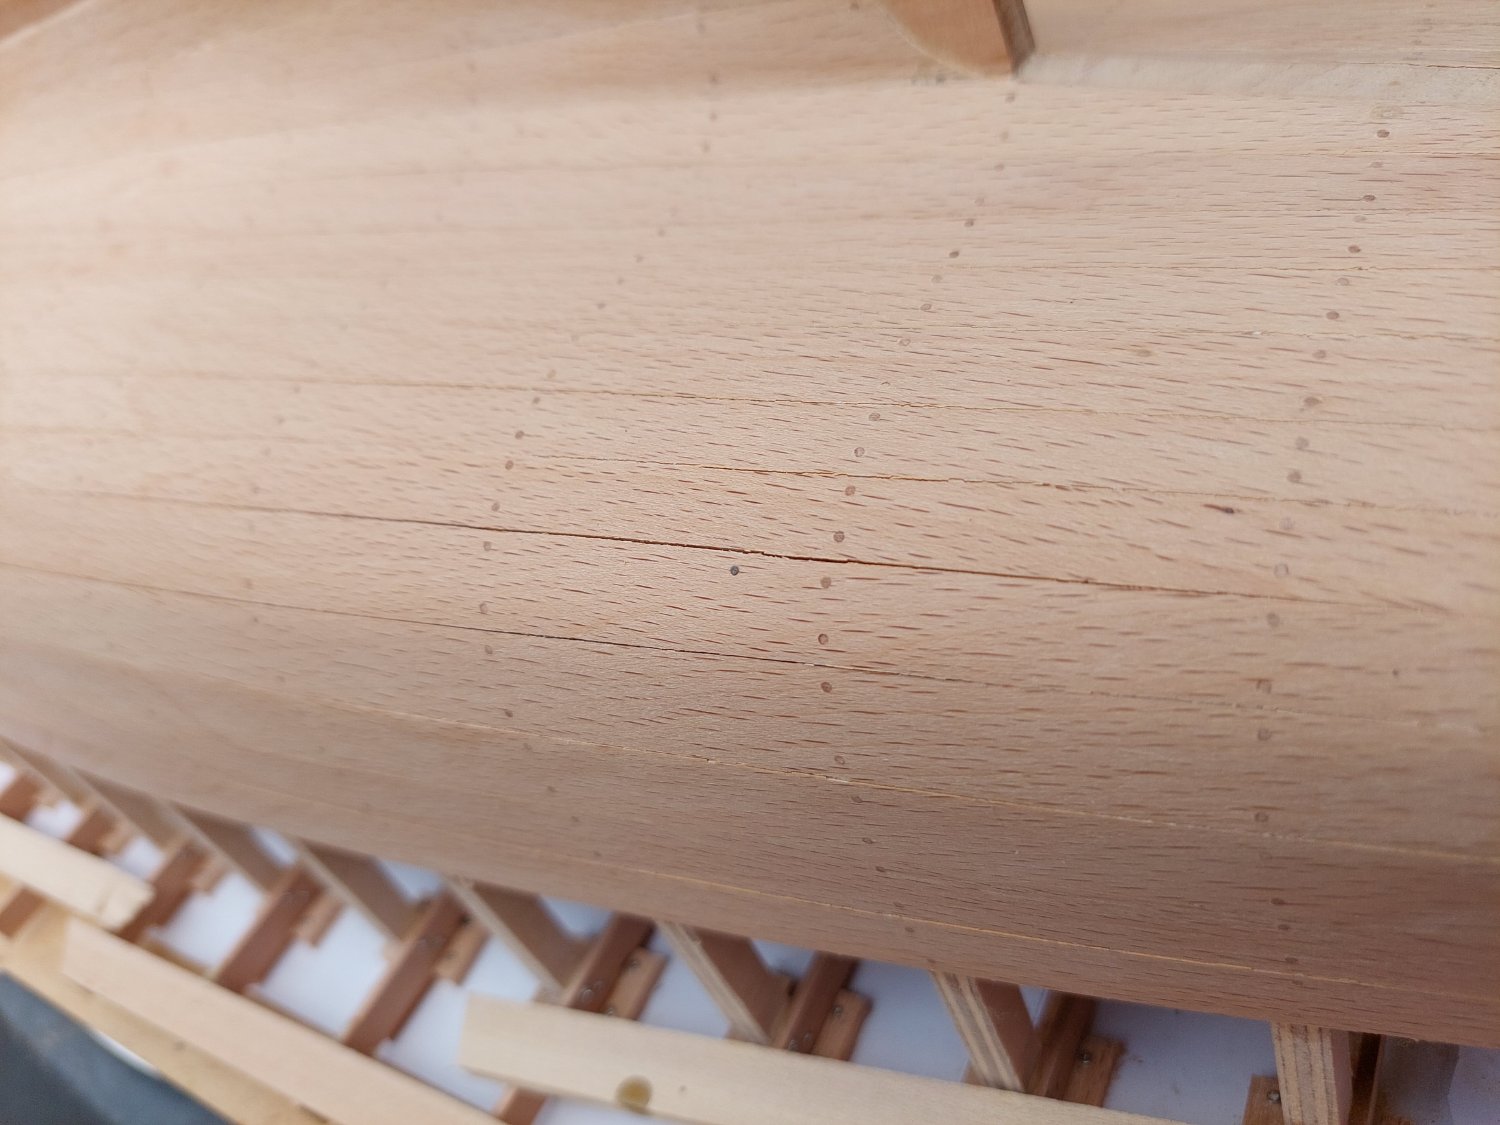
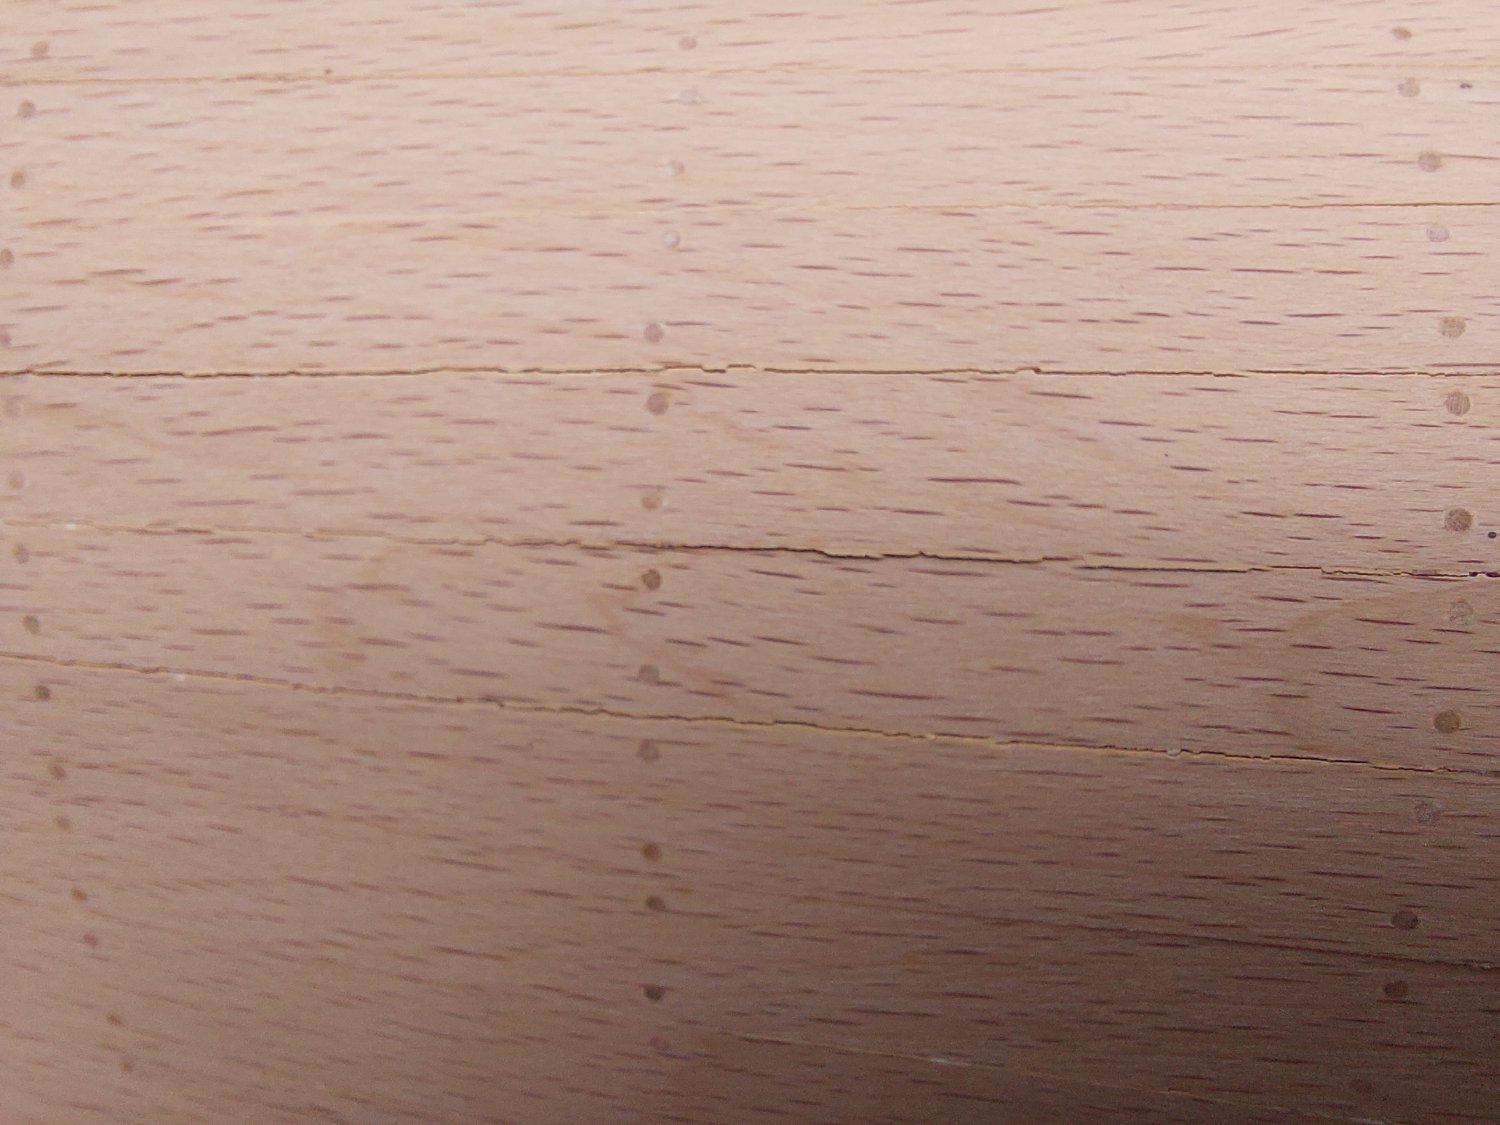
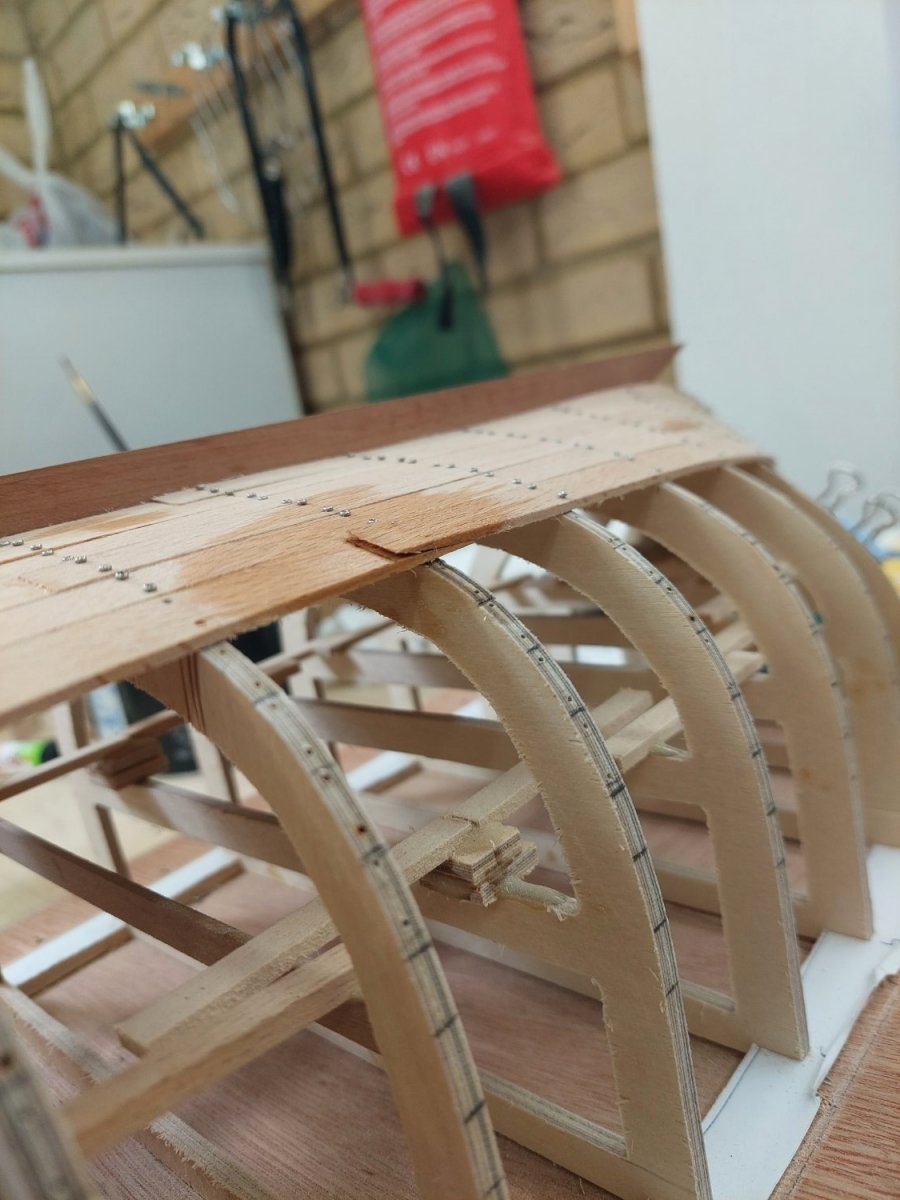
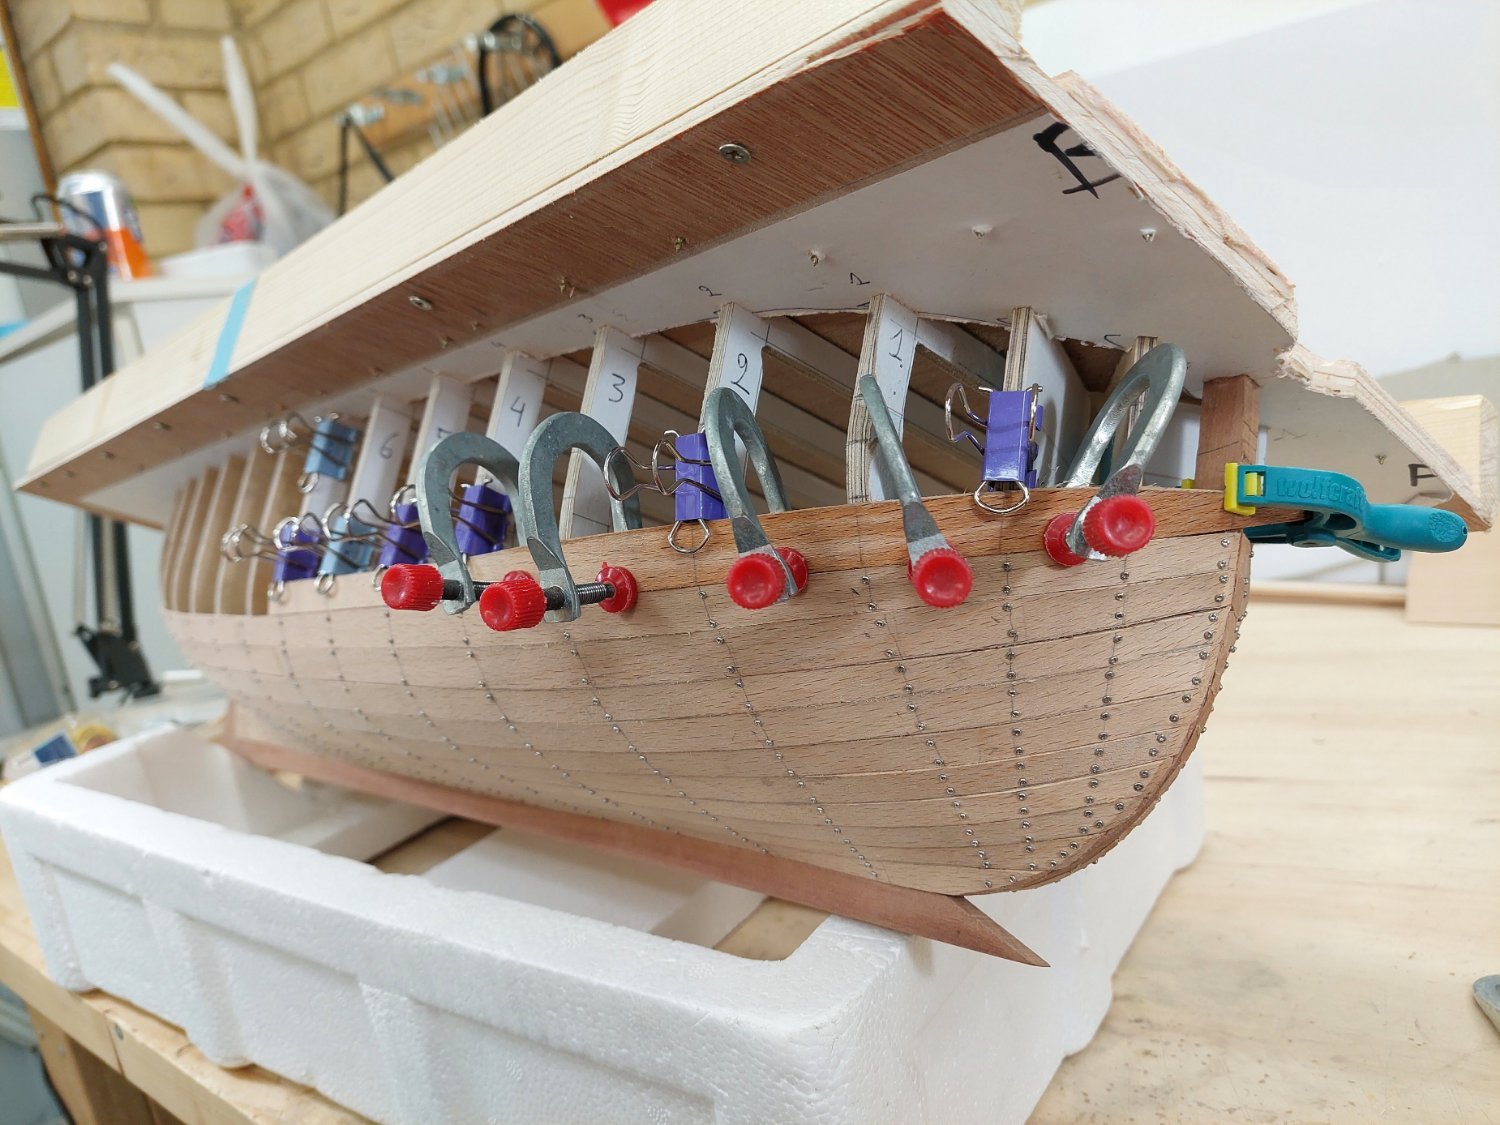
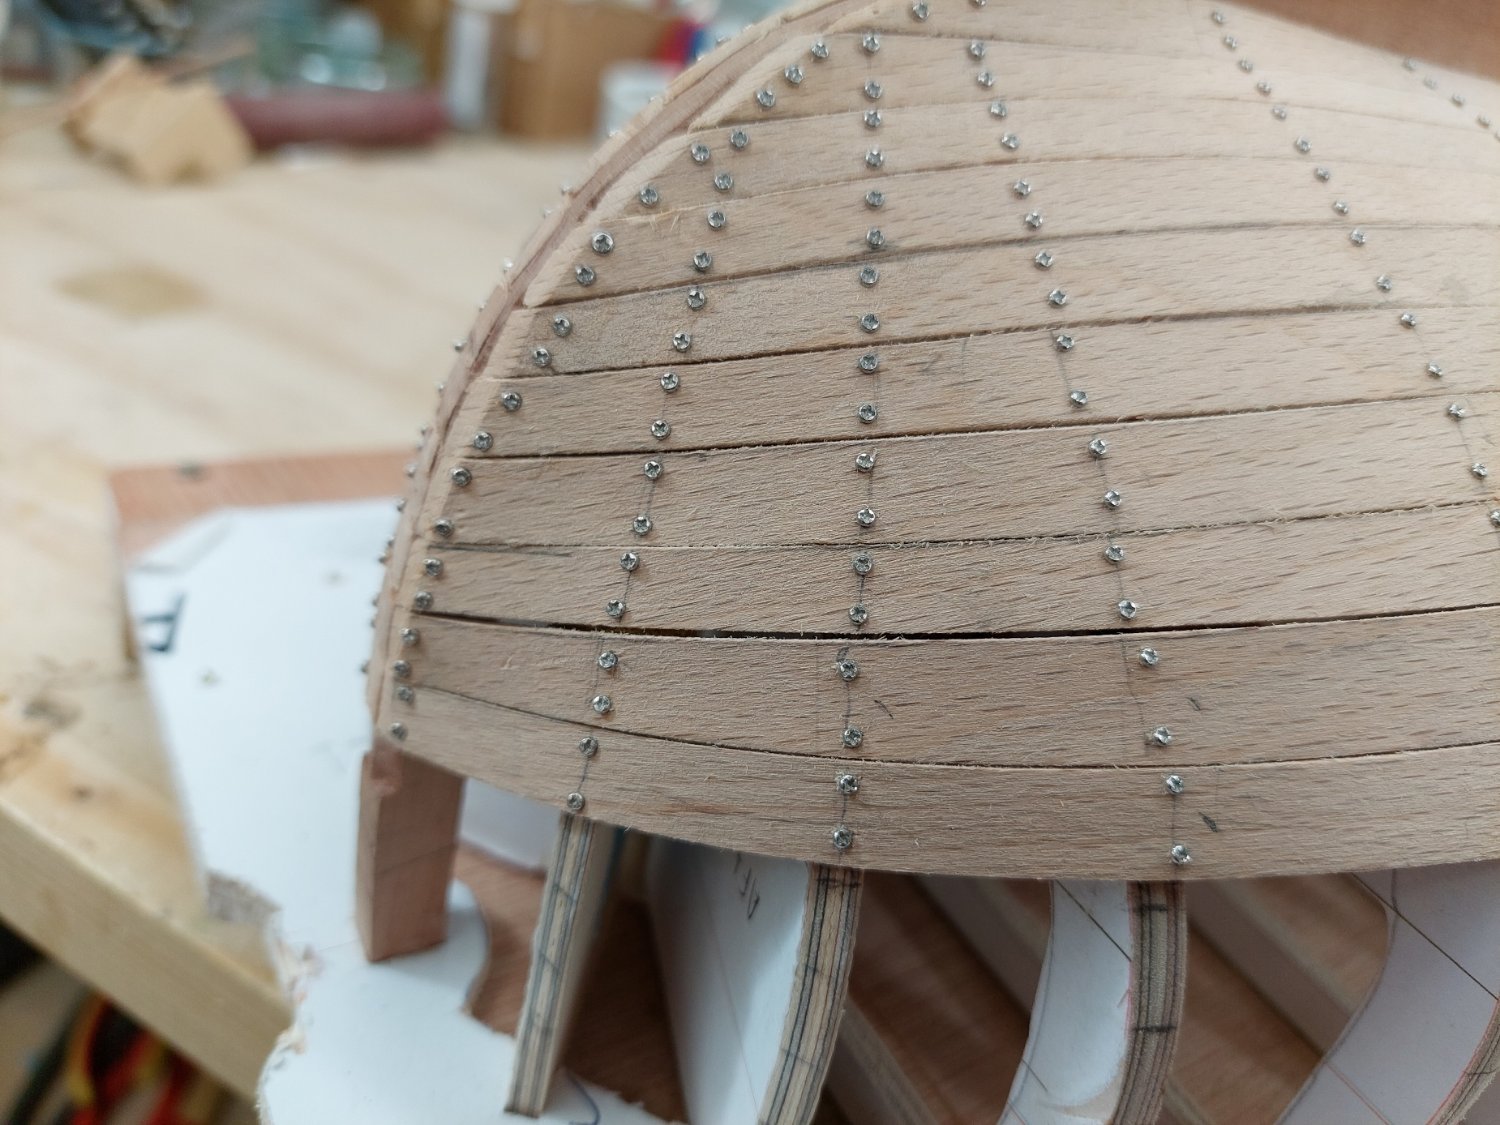
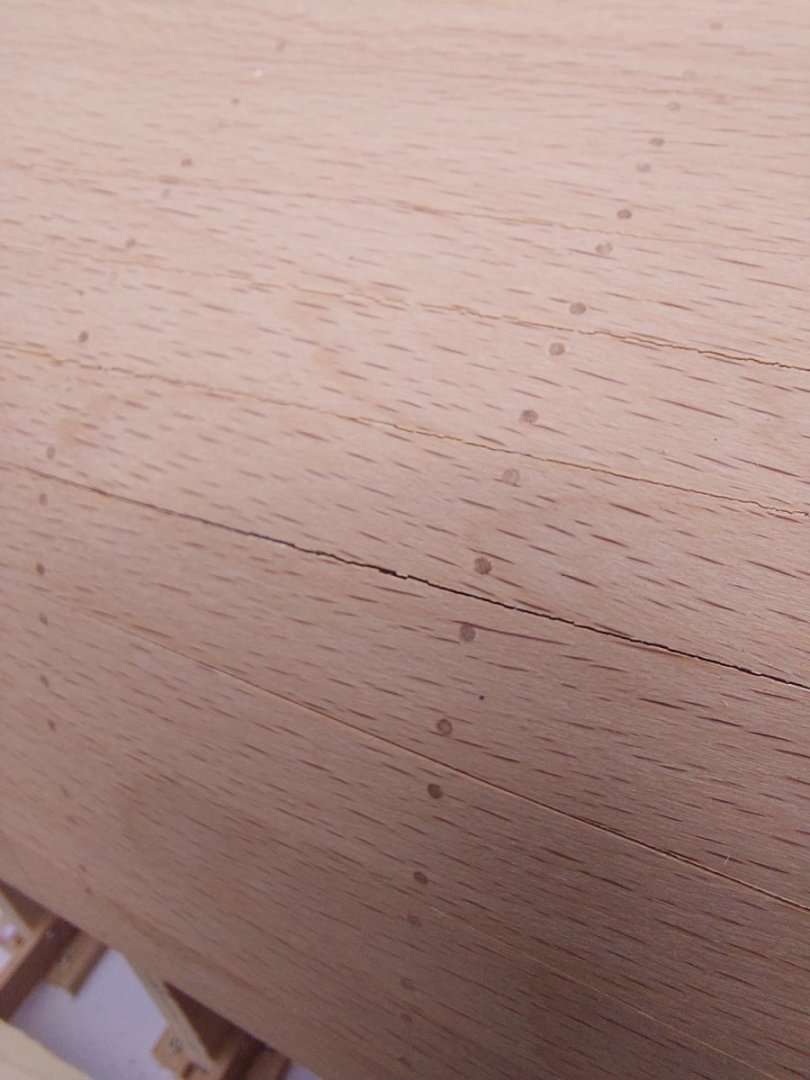
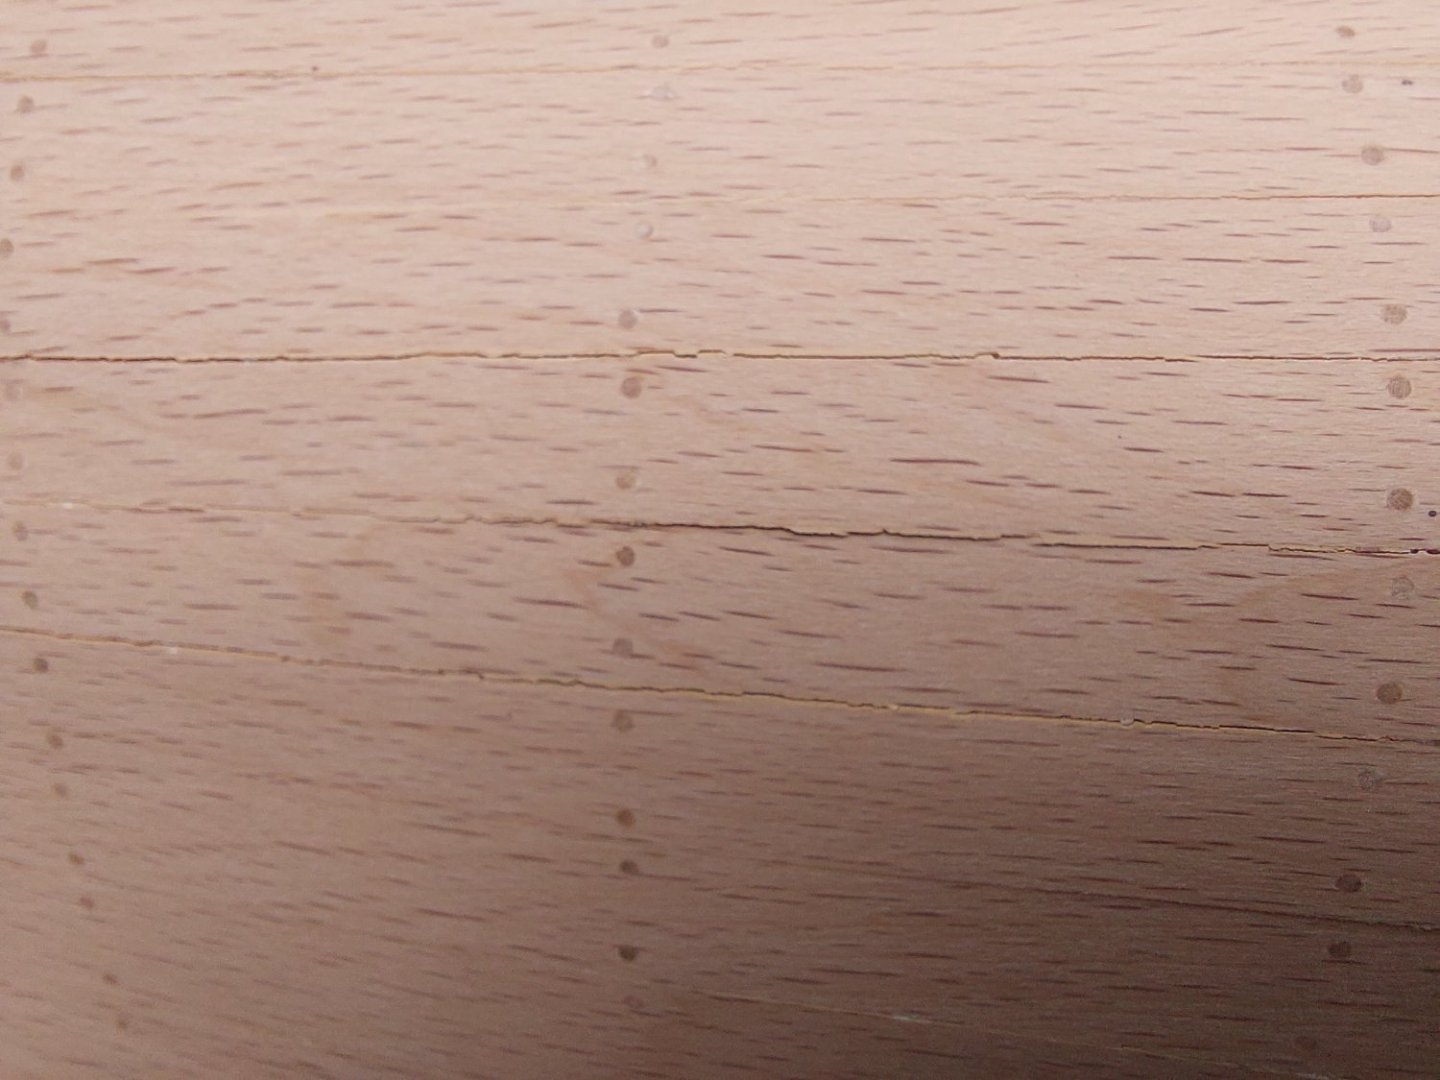
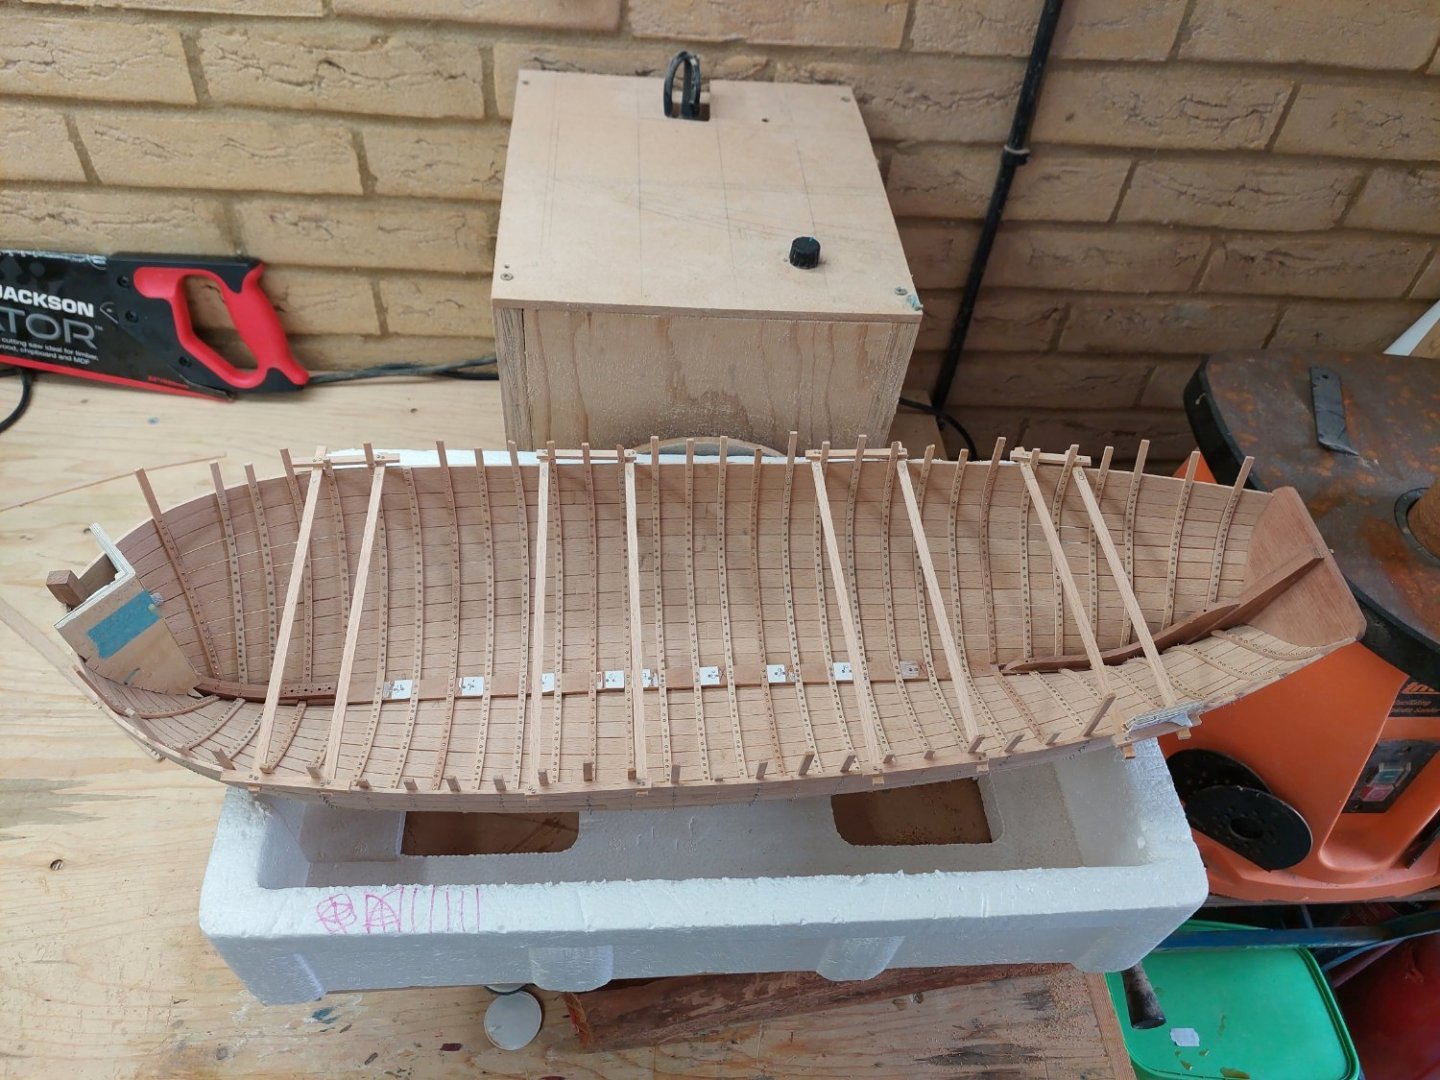
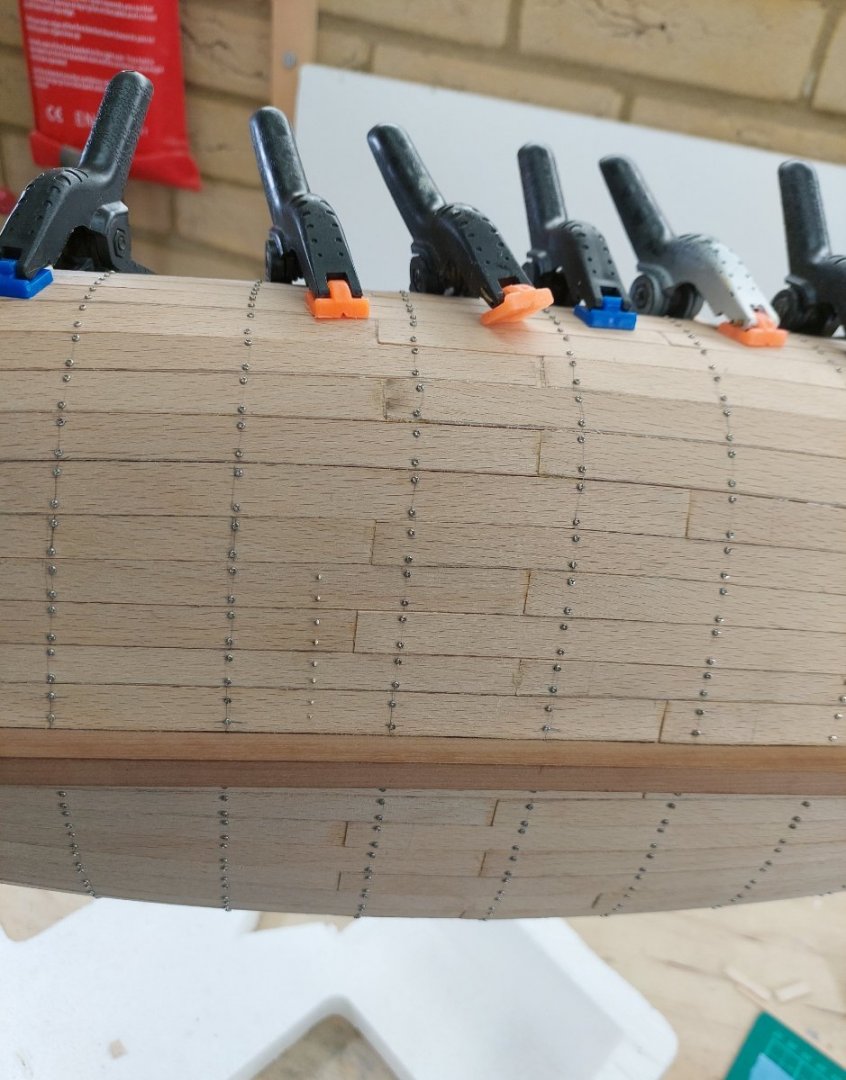
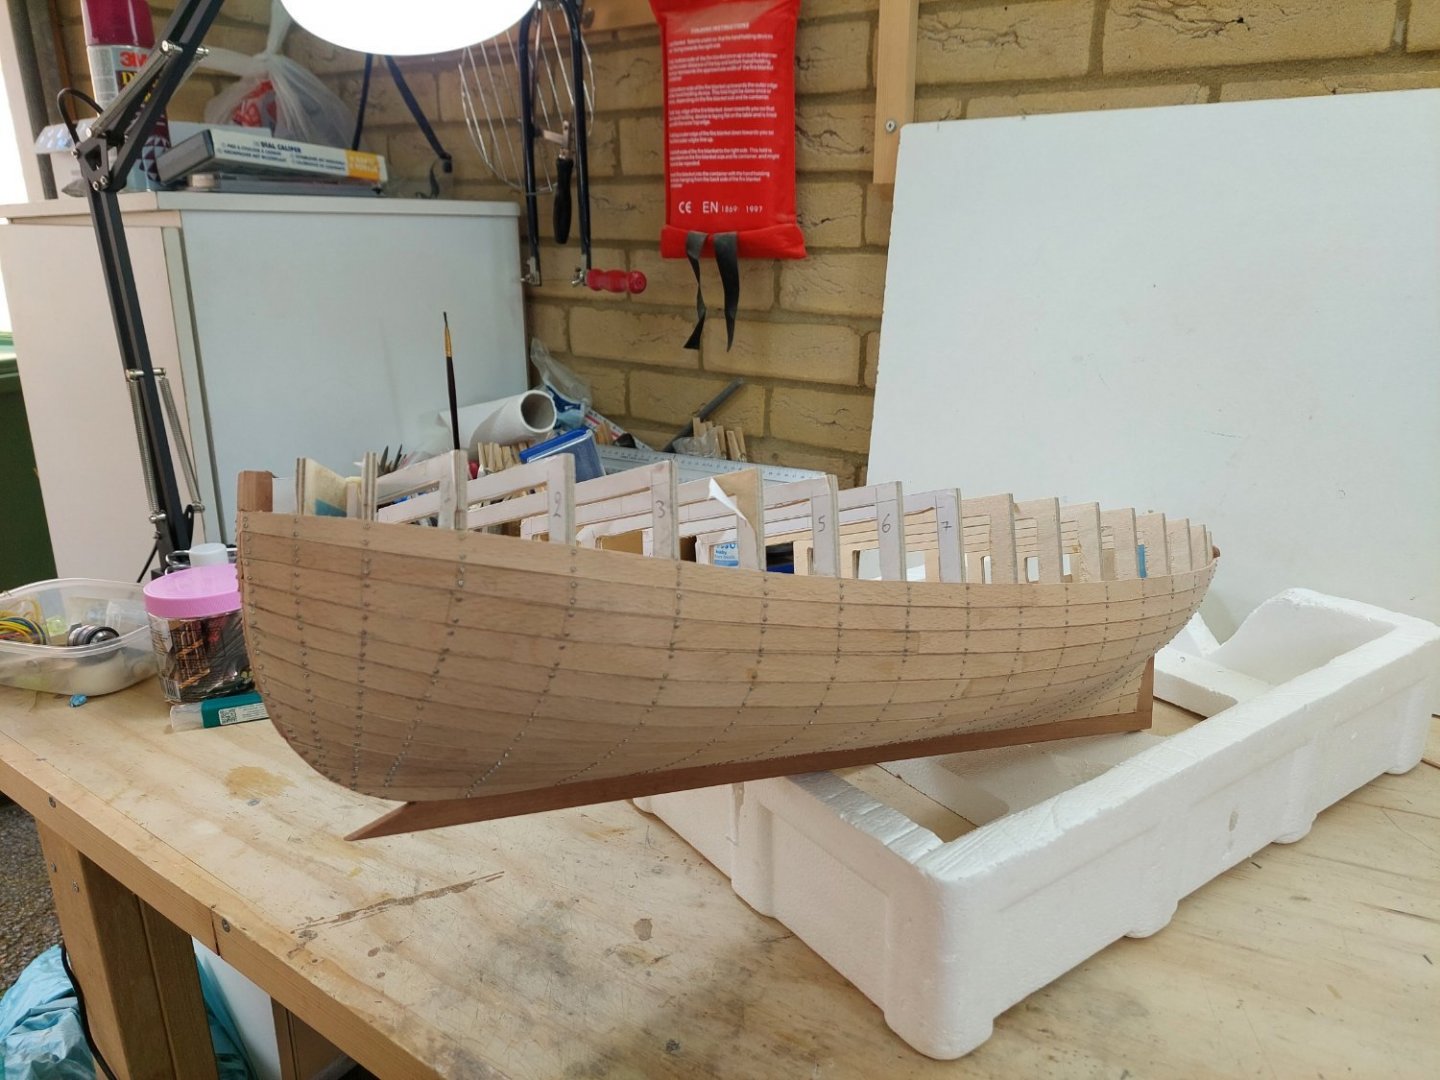
Dear all It's been almost two month since my last post. I have been working on the boat when life permitted - which was not too often. But even so, there has been progress. To start with, all the screws have been replaced with tree nails. Unscrew the screw, re-drill the hole by hand, dip the tree nail in glue and insert in the whole, wipe the excess glue and trim the nail - then repeat many hundreds of times. Then, I started filling the large gaps between the planks with filler, both from the outside and the inside. It is a shame really, these gaps are due to the shrinkage of the wood. When I cut the planks they were tight against each other. However, beech really has a tremendous movement in service and huge changes in dimension with changes in moisture. I will not be using beech again! So here is how the hull looked like after the filler liberally applied. Not an elegant sight! Then I started sanding inside. The little Proxon pen sander was very helpful. Then I started sanding the outer hull. This is how one side looks, this is with 80 grit. Beech is very hard wood. There is a dimple in one of the planks at the bow. I think I ll paint this hull so it will be filled. Now, just to show how much the beech moves, this is the hull of the Launch. There are cracks everywhere! I think I will not repair it, I ll just leave it as is. Till next time Vaddoc


- 233 replies
-
- 12
-
-
Epoxy glue
vaddoc replied to mtaylor's topic in Painting, finishing and weathering products and techniques
A couple of things on epoxy Mark: It can be very messy, uncured epoxy though can be cleaned with vinegar (Epoxy is alkaline) Different epoxies can be very different, some flexible and some not, however they are generally all brittle. Epoxy thickened with something (I use gypsum) is far stronger. It also fills gaps very well. In cold weather, if the 2 parts become very thick, a few secs in a microwave restores them. -
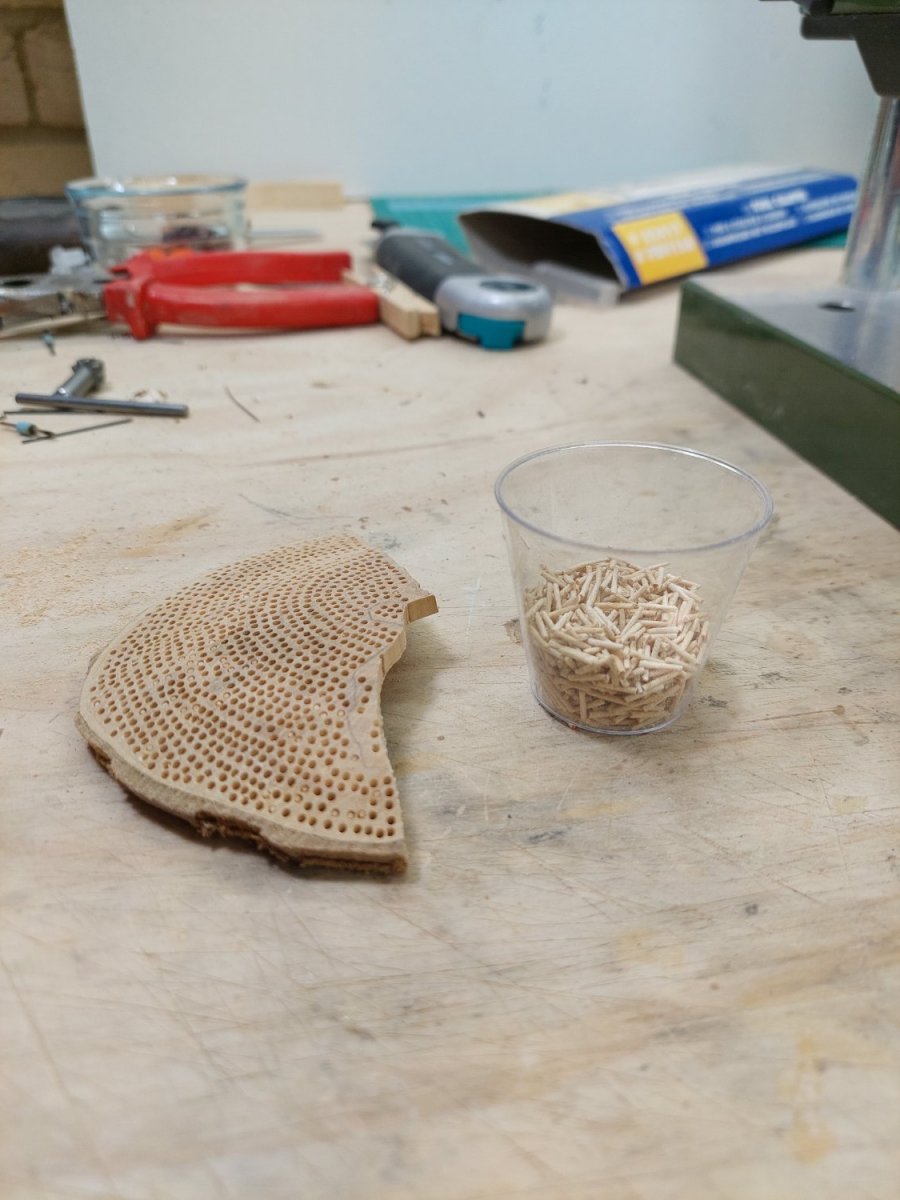
Dear all Thank you for your likes. Indeed Bedford, there are some tasks in model building that are certainly therapeutic! So the first bunch of nails came out just about acceptable, still trying to standardise the process and solve issues. However, from then on things went much better and lovely tree nails produced This is about 2000 nails. I ll make another 1000, and since I am at it I ll process that slice of cherry for future use. Then I ll be ready to start replacing screws. I had make a thread on making nails, I ll update that as well. Regards Vaddoc
- 233 replies
-
- 13
-
-

-
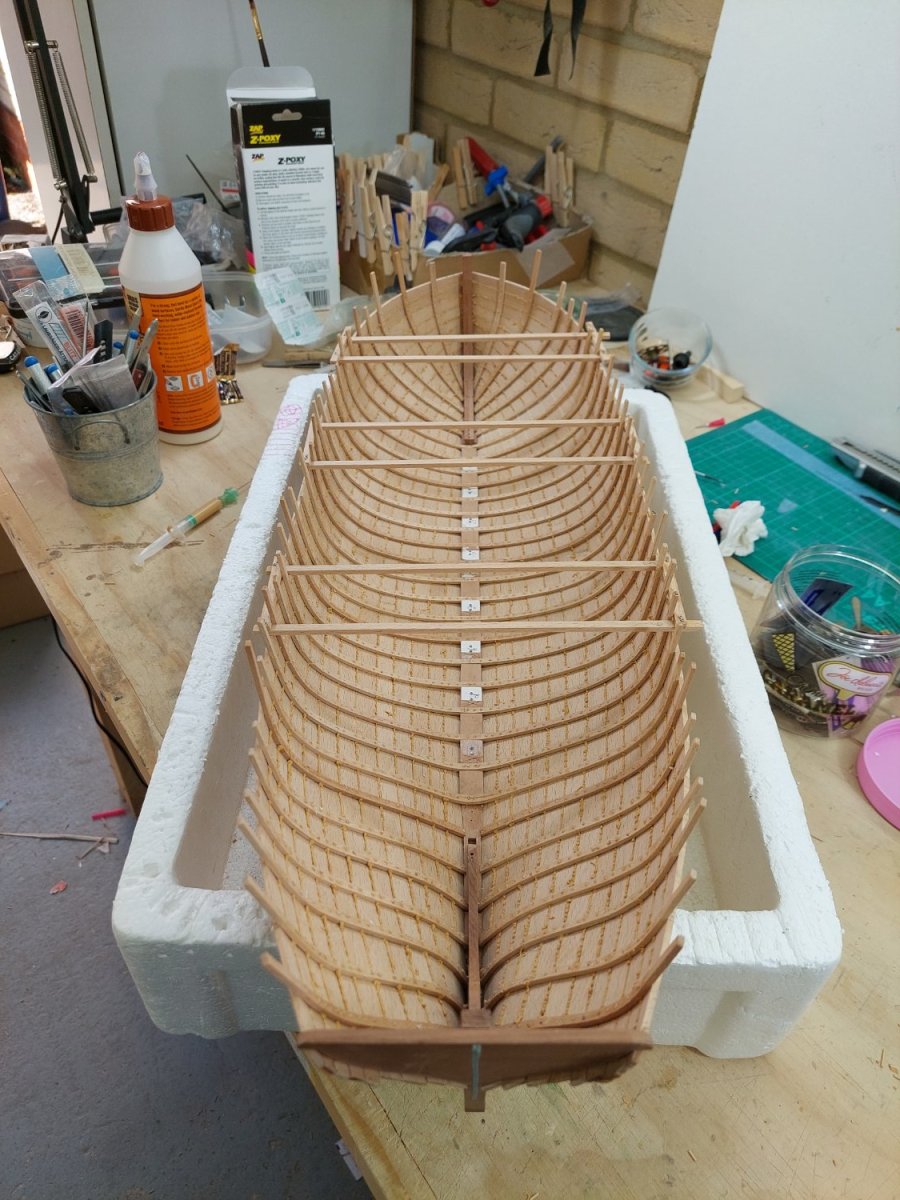
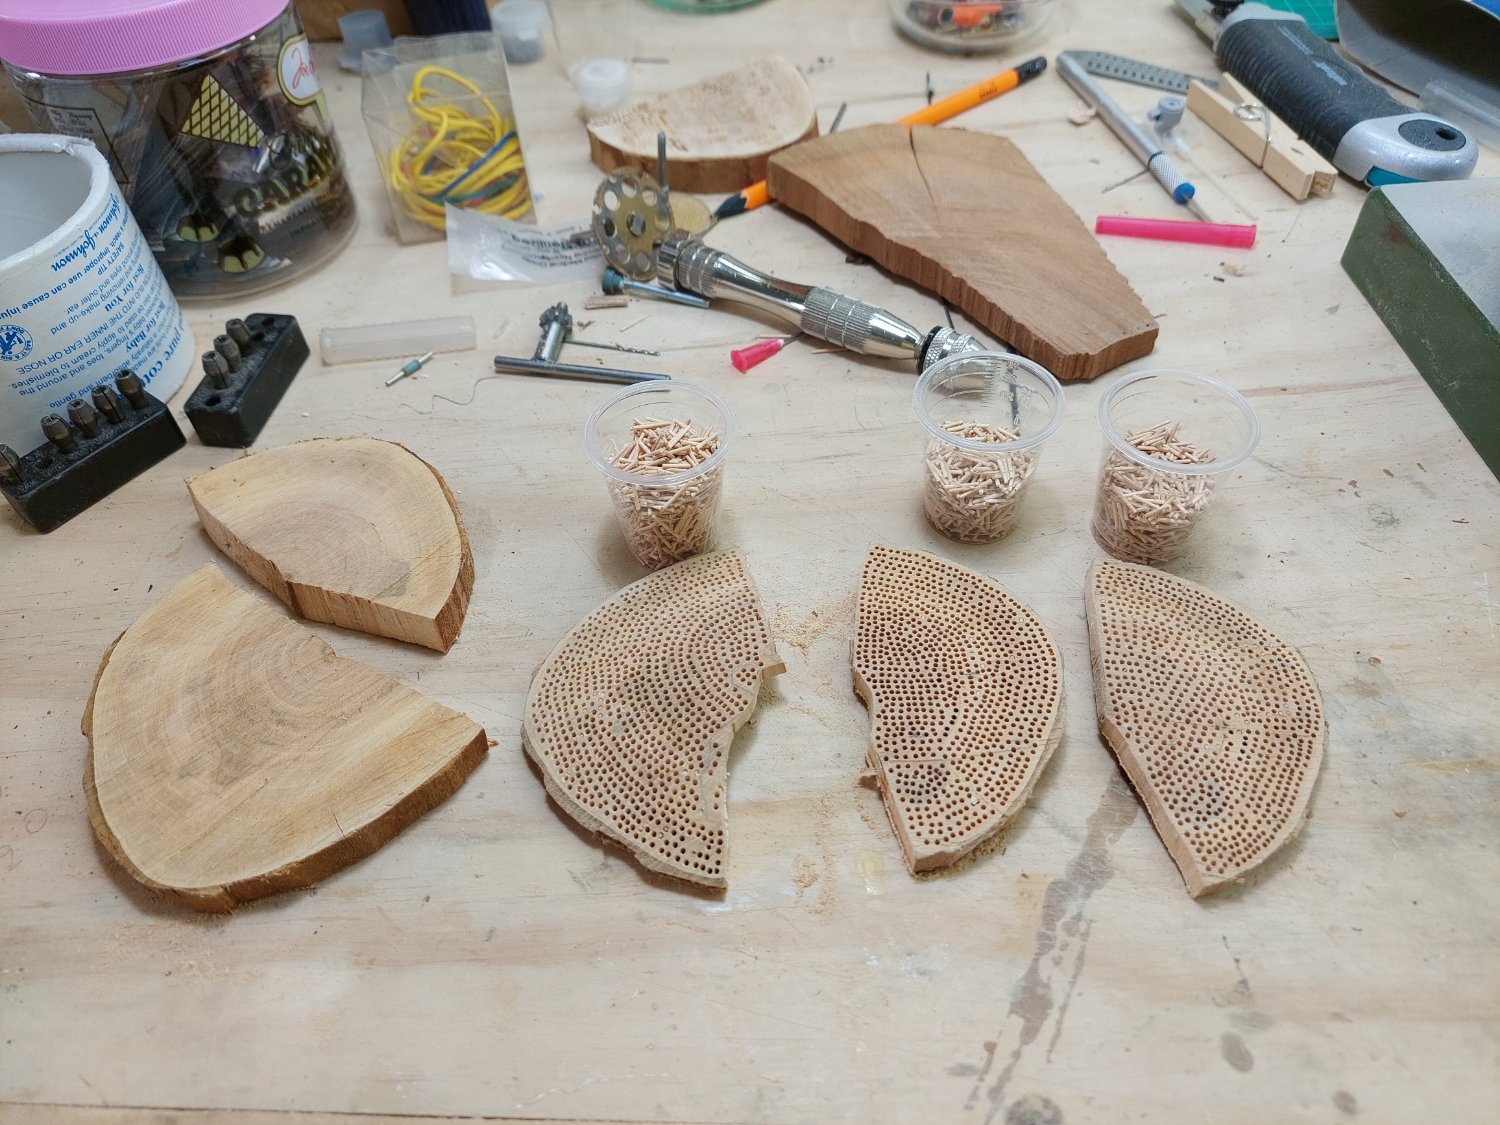
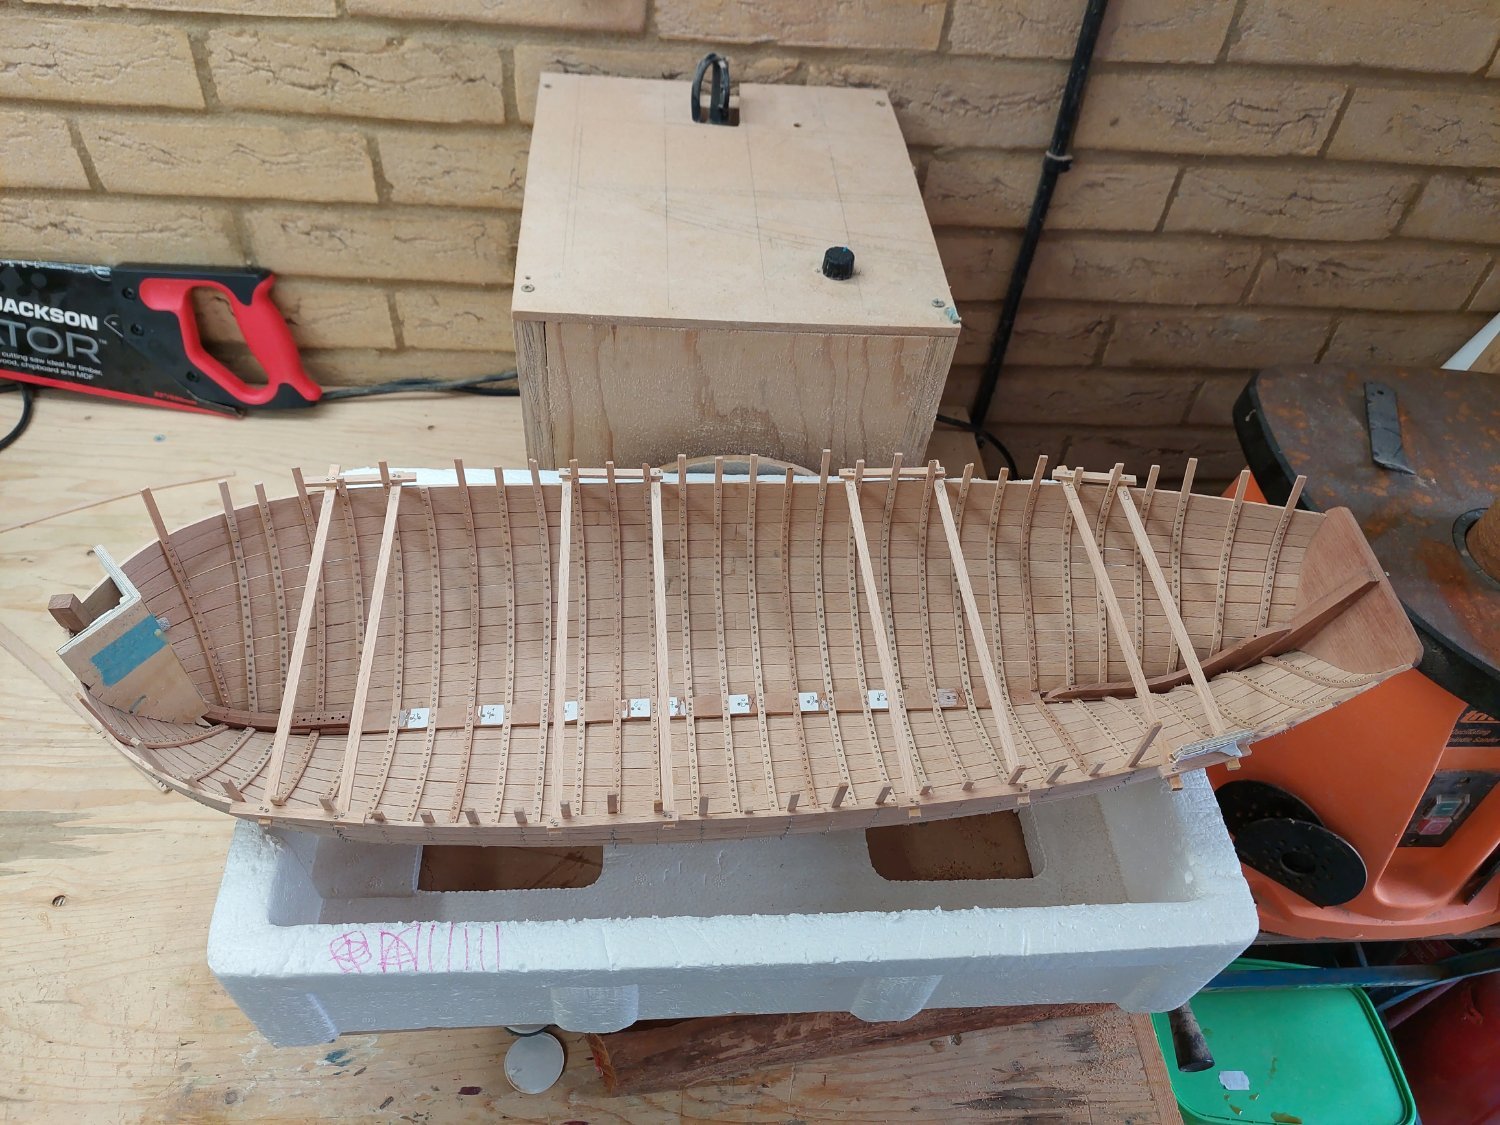
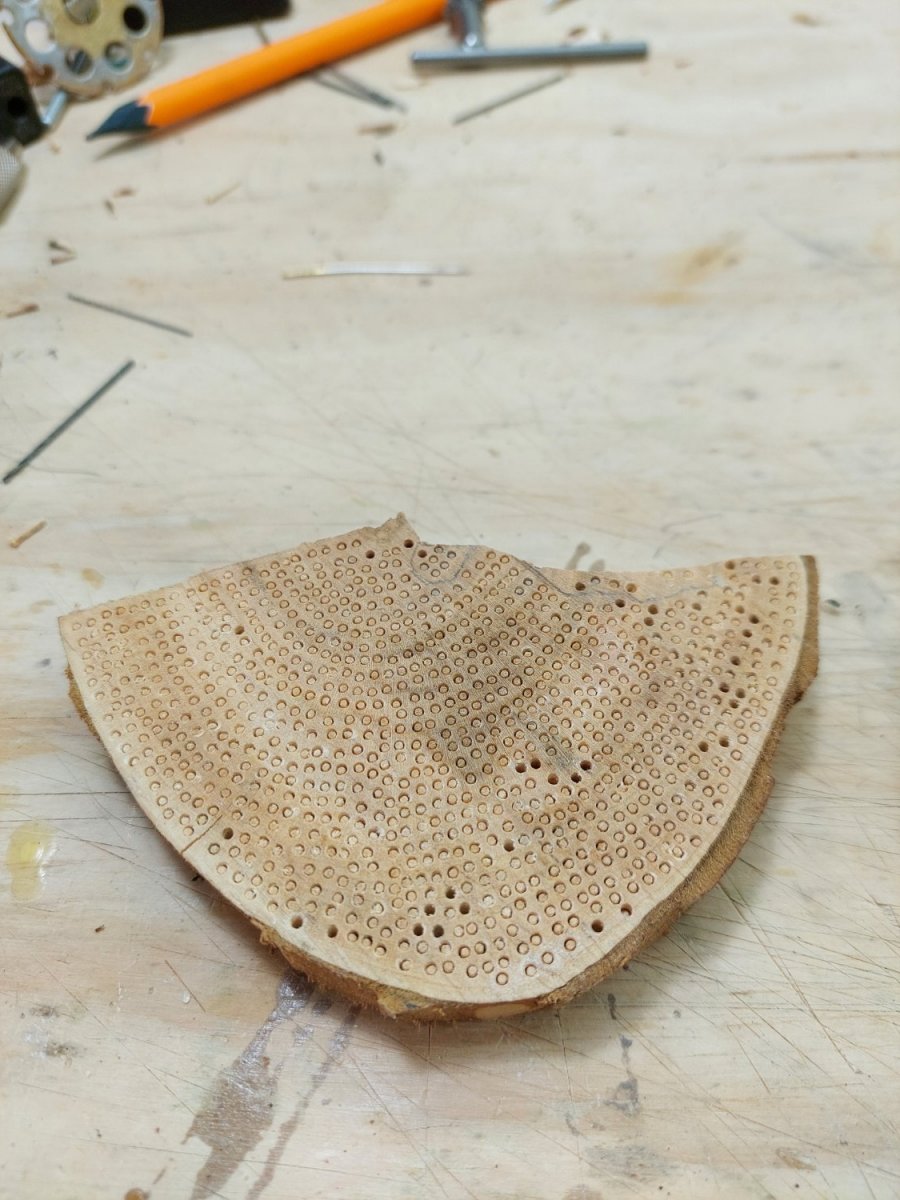
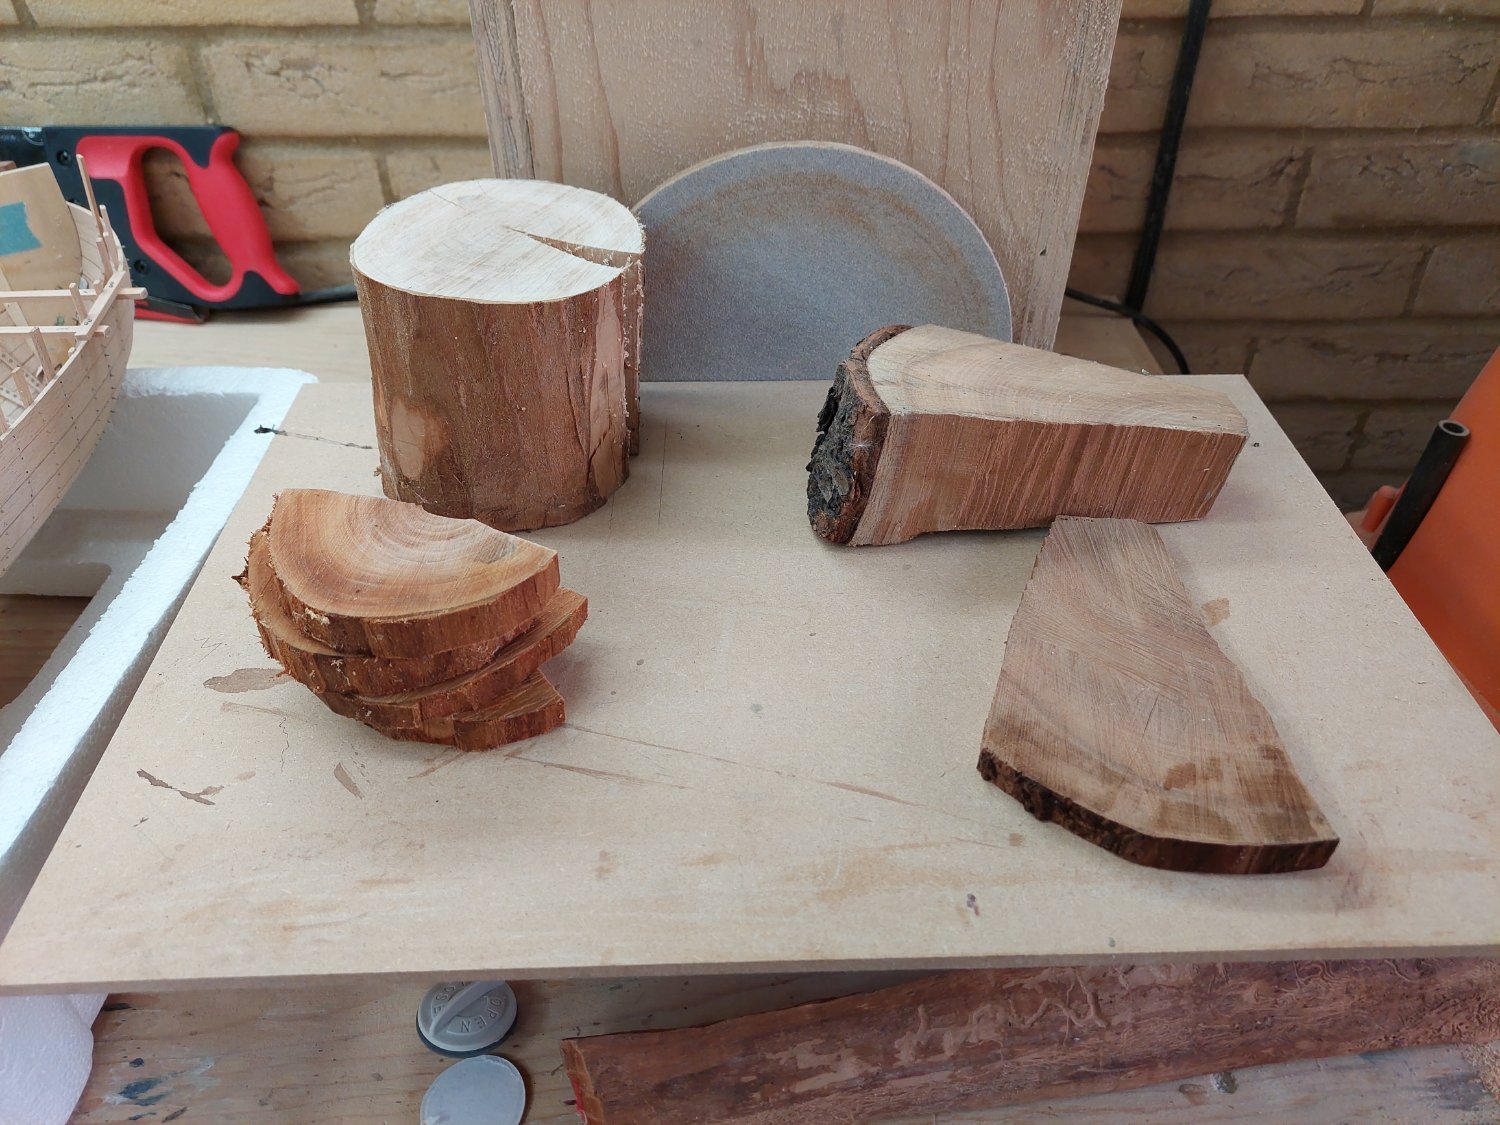
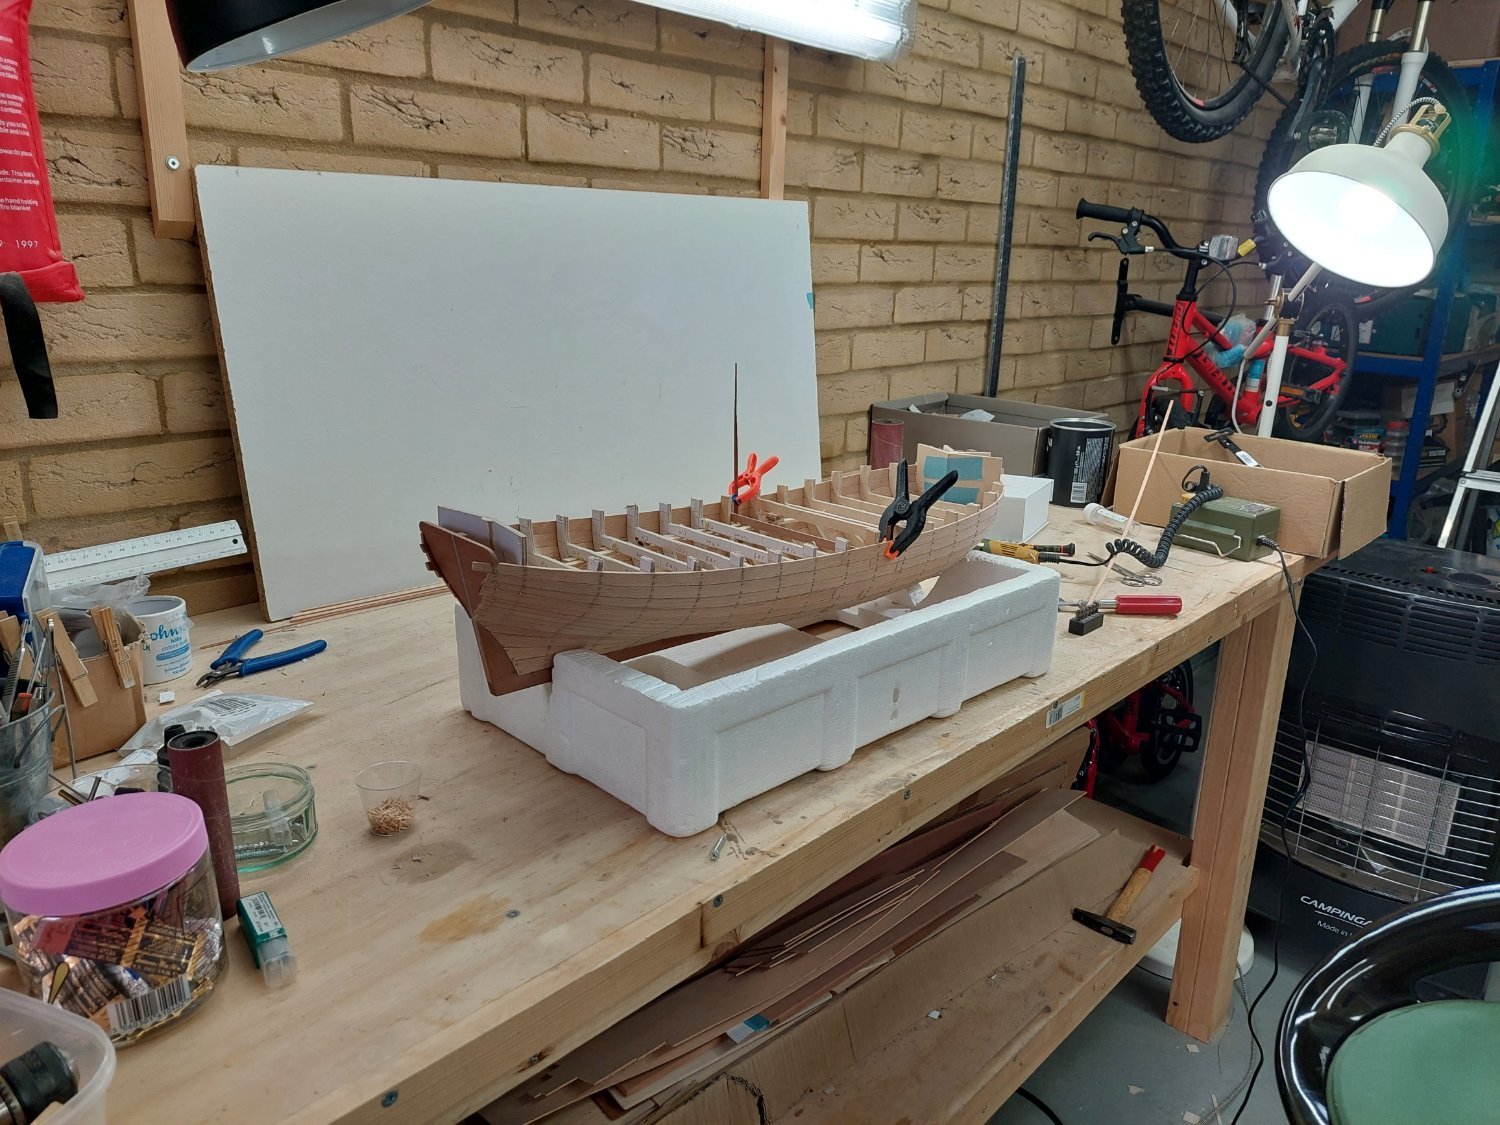
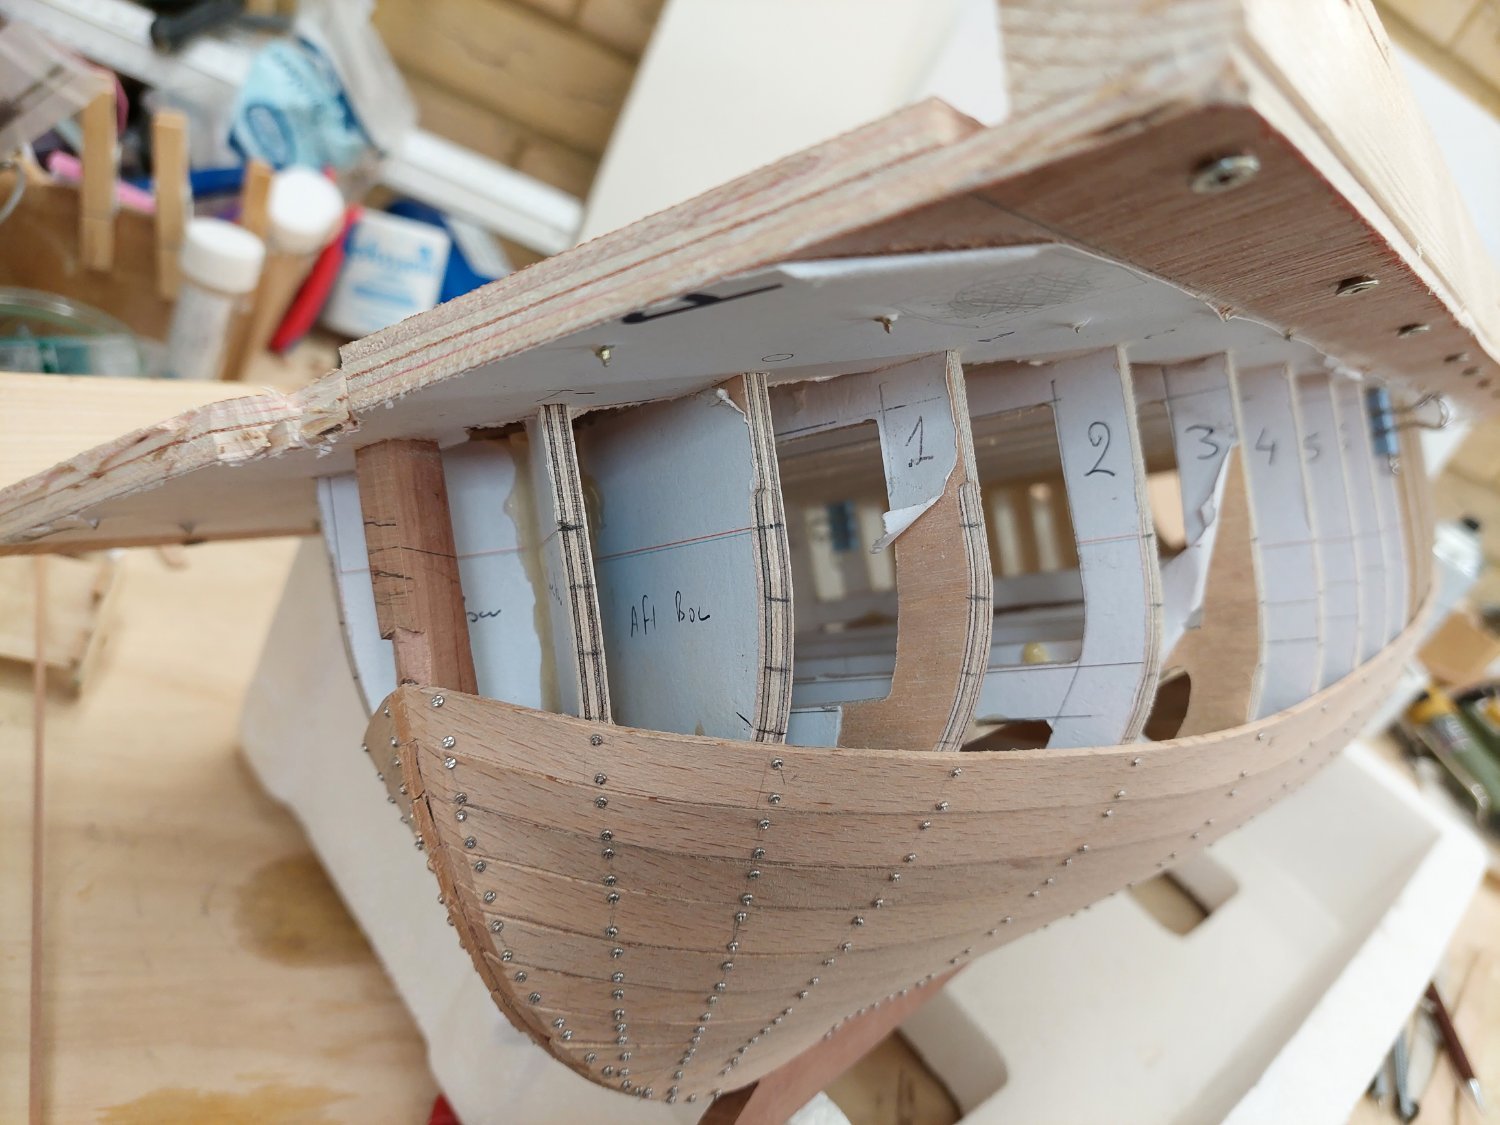
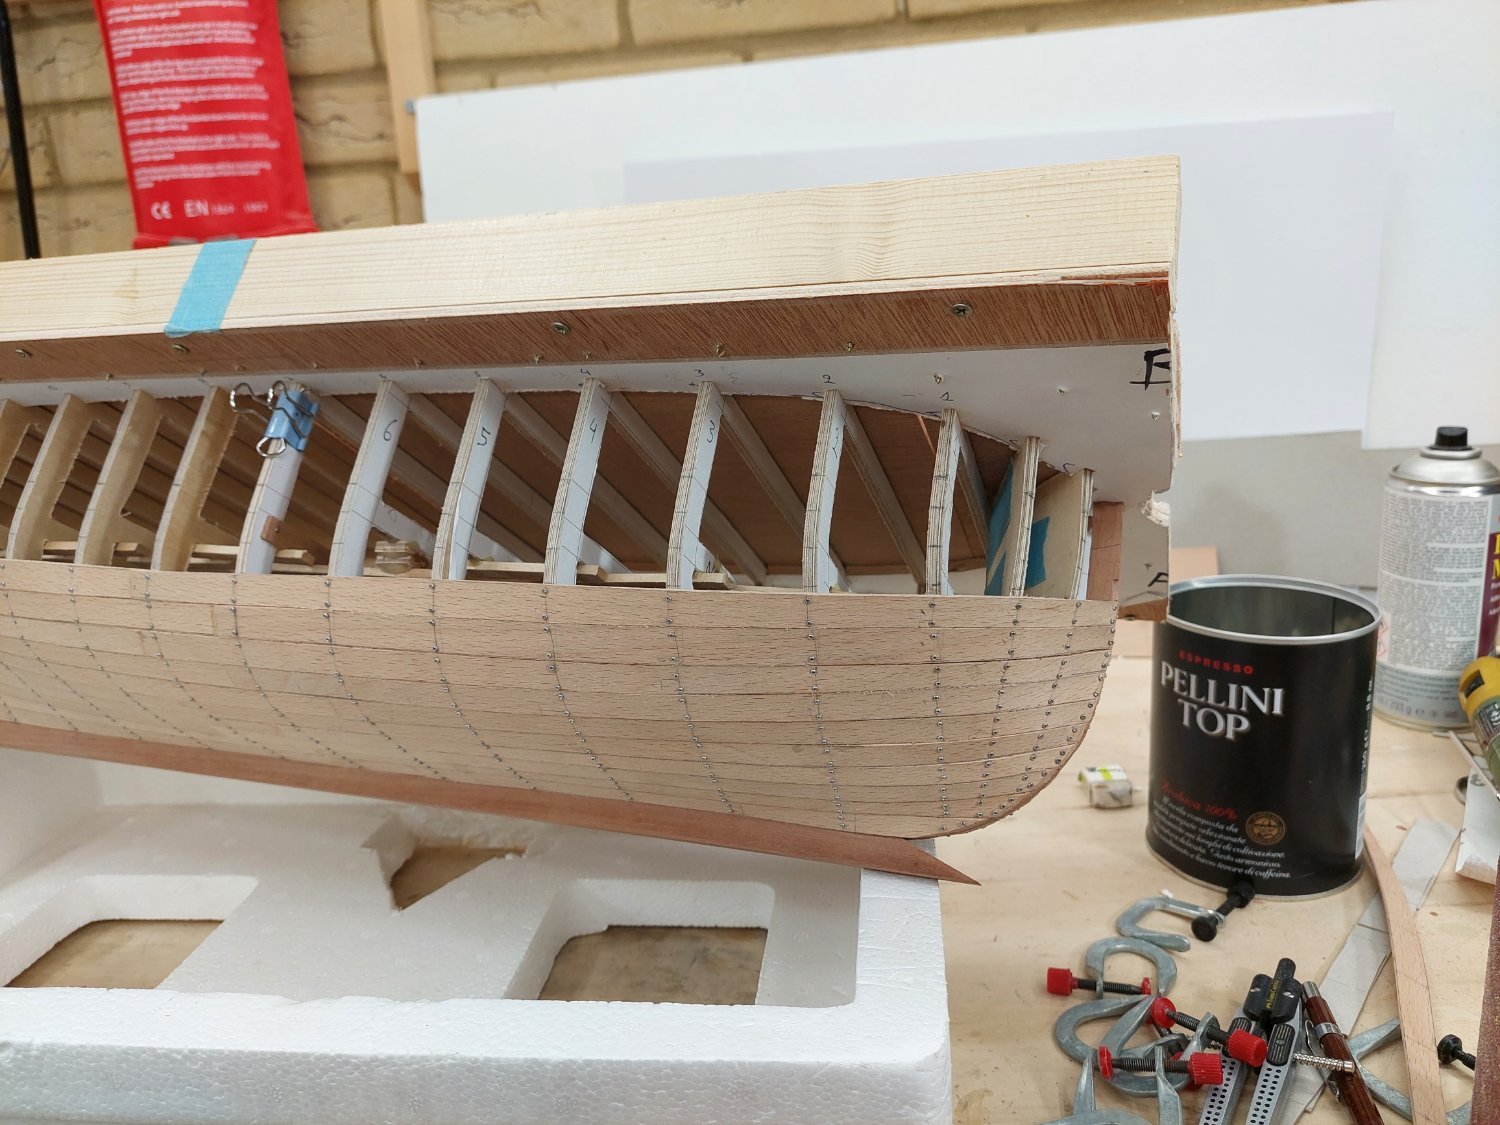
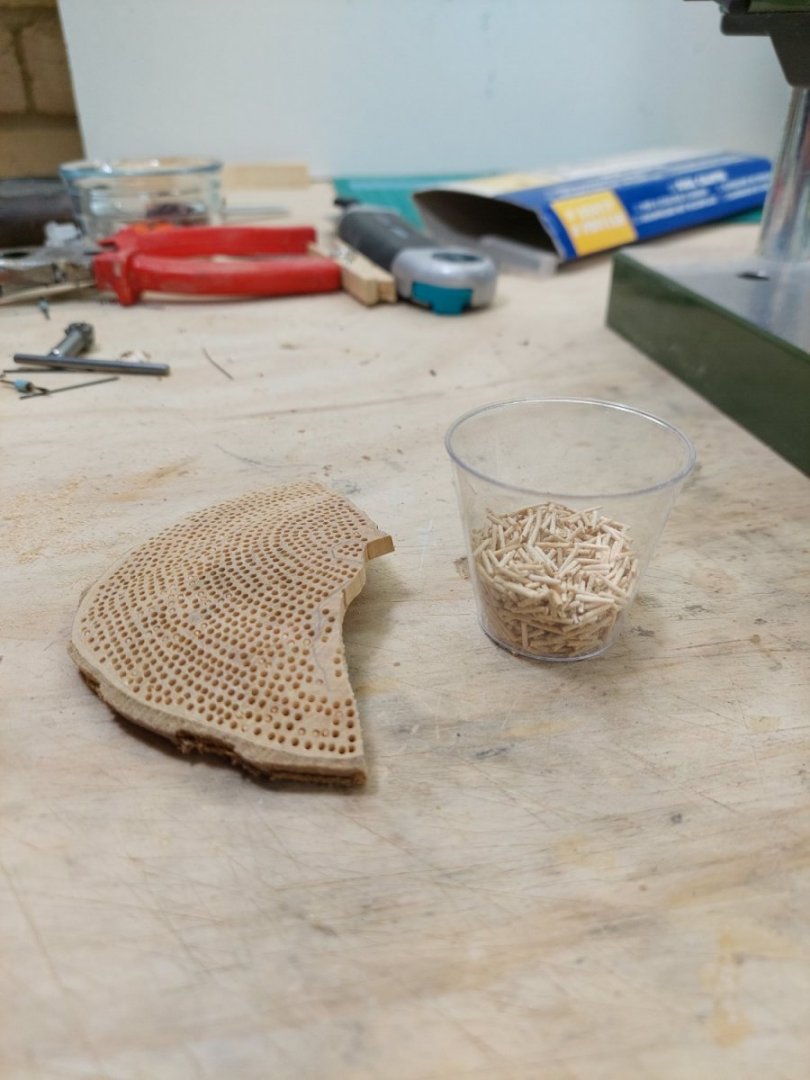
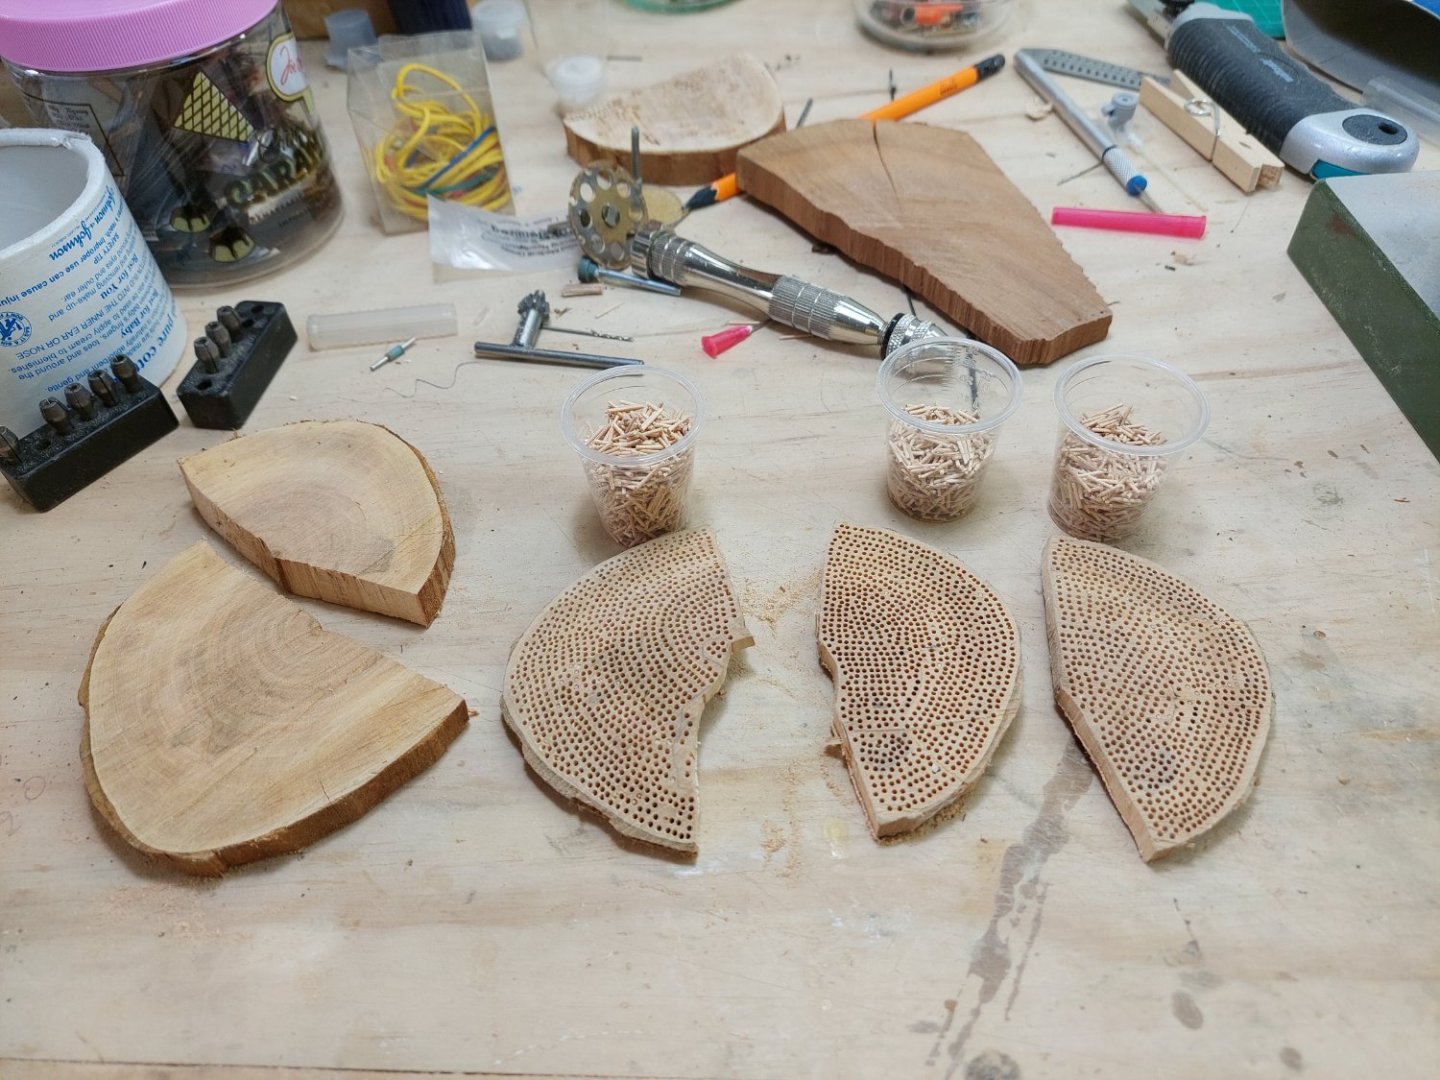
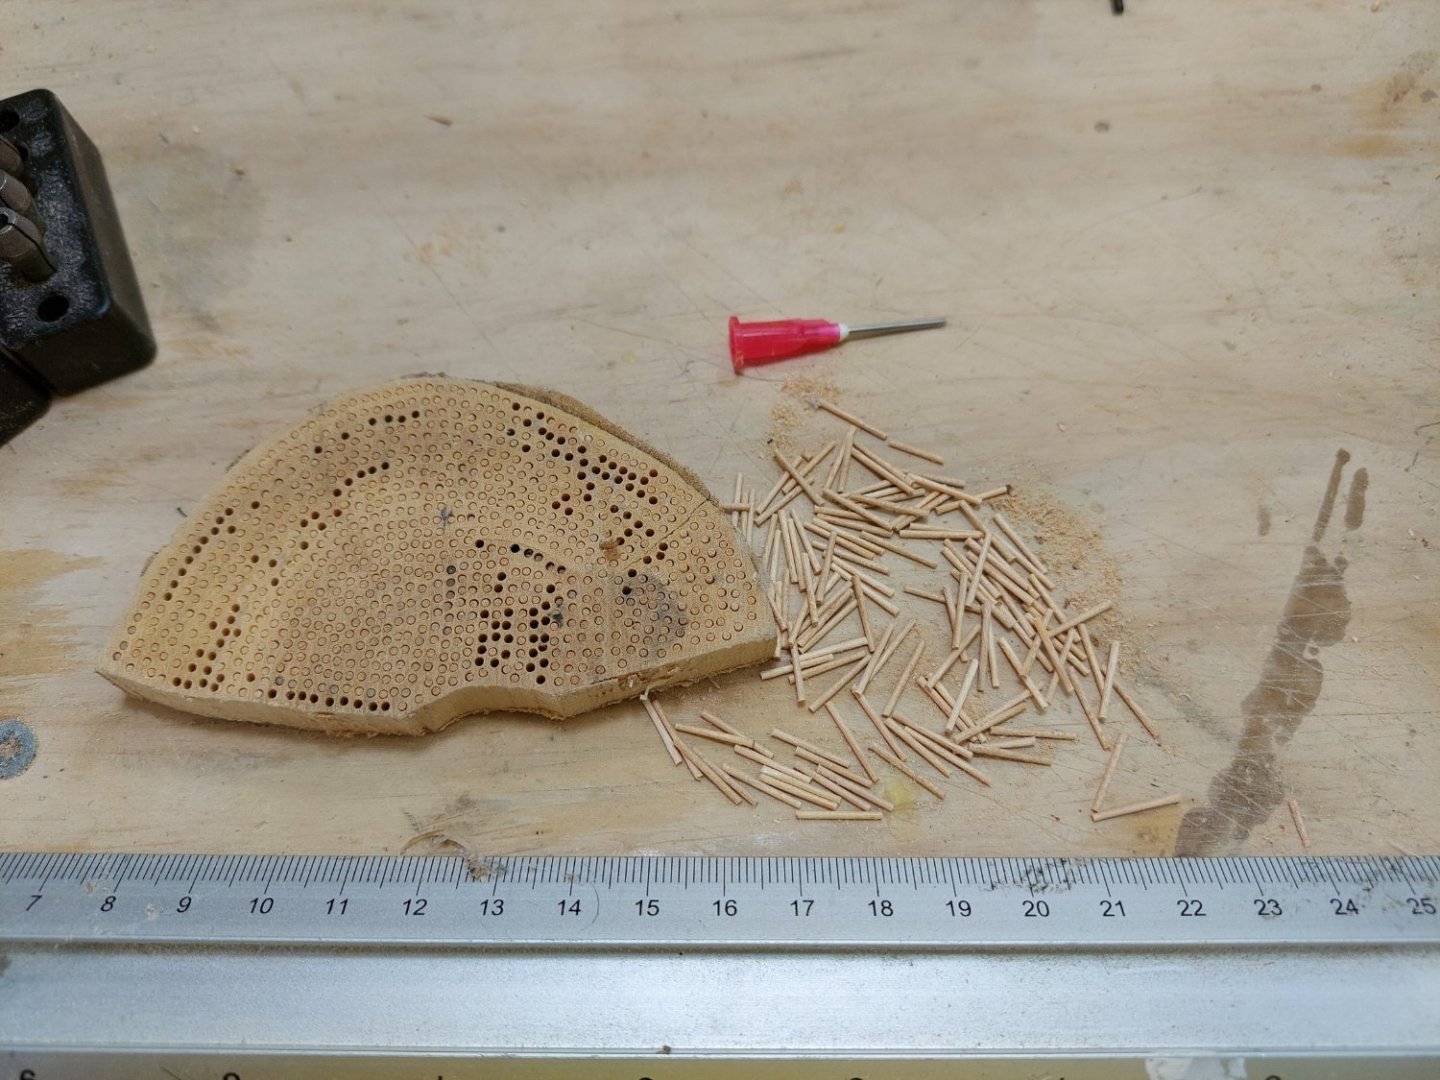
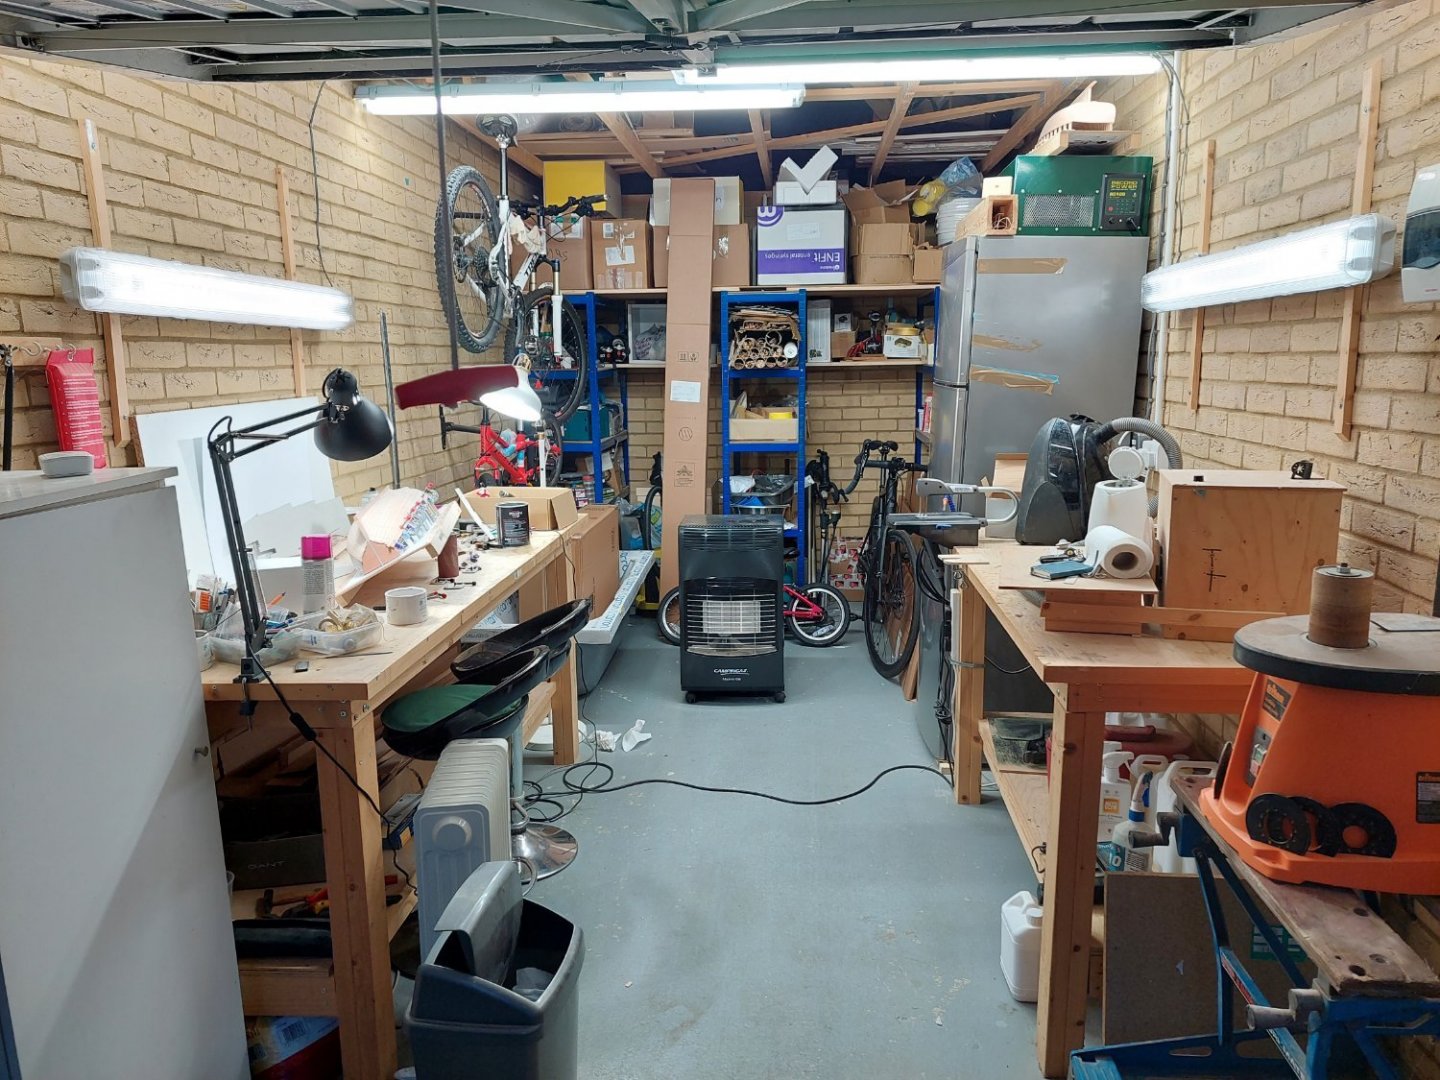
Well, it has been so long since my last post, I had to look to find my log! So a lot of things have come to pass: I lost some more weight, gained a belt in Tae Kwon Do, injured my hamstring and converted to an electric car to name a few. In the shipyard though, progress has been far more modest - I have been very busy lately. I finished all ribs but the foremost one. This was left in place until the screws at the stem are replaced with tree nails. There were a few ribs that needed a lot of twisting and bending but steaming the ribs worked miracles. Most of the ribs are beech but I think I must have mixed my strips a bit and some birch and alder may have sneaked in. Also, I think I should have had more cant ribs at the bow - it's ok though So, each screw holding the plank to the temporary frame had to be removed, the rib installed, the hole re-drilled from the outside in, through the rib now, and a new screw inserted from the inside to push the rib against the planks. 13 planks x 2 sides x 2 screws each x 32 ribs( +stem) + a few here and there = 1700 screws. So, 1700 screws to attach the planks to the temporary frames, then another 1700 to attach the ribs to the planks. But now, all these screws need to be removed and replaced with tree nails. So we need 1700 tree nails + wastage. I have a fair few left from other projects but there is no consistency in colour, material and size. So I need to make them. The photo bellow shows my tree nail making station: Now, I have made many thousands tree nails using the needle method but I really struggled. The needle burned the wood, the nails constantly broke off inside the needle, couldn't find the right size needle, in short mayhem. I spend a lot of time experimenting and finally got things to work. These are the tree nails I made today, ready to be released by aggressively sanding the underside. I think there are about 600 or so. Every missing nail was a blockage in the needle that had to be cleared. So, these were the changes I made that fixed the problem: I used a needle with thin wall. I slowed the speed of the drill press from high to medium (low speed led to breakages). I realised the wood was too dry so I soaked it in water overnight and allowed it to dry. Finally, I made sure the end of the needle was sharp. Now, the best nails are made from hard wood with straight grain. This is the wood I am using (slices already soaked): The right wood is cherry. Very nice wood, I ve already made thousands of nails from these wood but lately it has been playing up. The wood on the left is either Howthorn (most likely) or apricot (I had two logs but I could find only one in the garage, so it is either or). It is a hard wood though so it does not matter. (The little piece of wood at the bottom of the photo is indeed apricot. I tried a slice but it is too dry and did not work.) So, next few sessions in the shipyard will be devoted to tree nails. Best wished Vaddoc


- 233 replies
-
- 11
-
-
-
It will still stretch. I found Mara threads very good alternative as suggested by Chuck. A lot of discussion in relevant threads.
-
The good quality cotton threads will produce excellent rope. The only problem is that if there is any tension, the rope will stretch.
-
Work Table Recommendations ?
vaddoc replied to DanB's topic in Modeling tools and Workshop Equipment
Have a look at this. I actually made two of these benches. Made a large one and then an even larger. Very heavy, very solid. -
I hope all will settle soon Hakan! If they did as good a job as you do with your boat, you ll be back to normal in no time at all. I like very much your generous rabet at the horn timbers, very nice. I cannot follow it further down the hull though.
-
I think this is why Highfield levers were invented
-
Hi @USNCHief013107 These are the clips, they come in various sizes. You can never have enough clamps! Rapesco 1492 19 mm Foldback Clips, Assorted Bright Colours, Pack of 80 : Amazon.co.uk: Stationery & Office Supplies
-
Very interesting boat GL and very nicely done so far! It was a pleasure to catch up. Looking forward to the rest of the journey, it will be interesting to see how the rigging will be laid out Vaddoc
- 153 replies
-
- 2
-
-
- Ancre
- Bruno Orsel
- (and 2 more)
-
These are indeed good news Hakan! Hopefully you ll be on the mend in no time at all. Your boat also seems to be progressing very well. I am very impressed that you can create a three dimensional fair hull from just 2D plans, I am really looking forward to see how all will come together. I presume you will use birch for the planks? What wood did you chose for the frames? Vaddoc
-
I do not use glue for the planks Allan, I initially screw the planks on the frames with 1 mm screws and then replace the screws with treenails (dipped in PVA). These clamps will not dent the wood, this is 2 mm beech which is very hard but even with the softer maple, denting has never been an issue.
-
I have been continuously spilling and planking for the last 12 months, maybe the following thread might be of help.
-
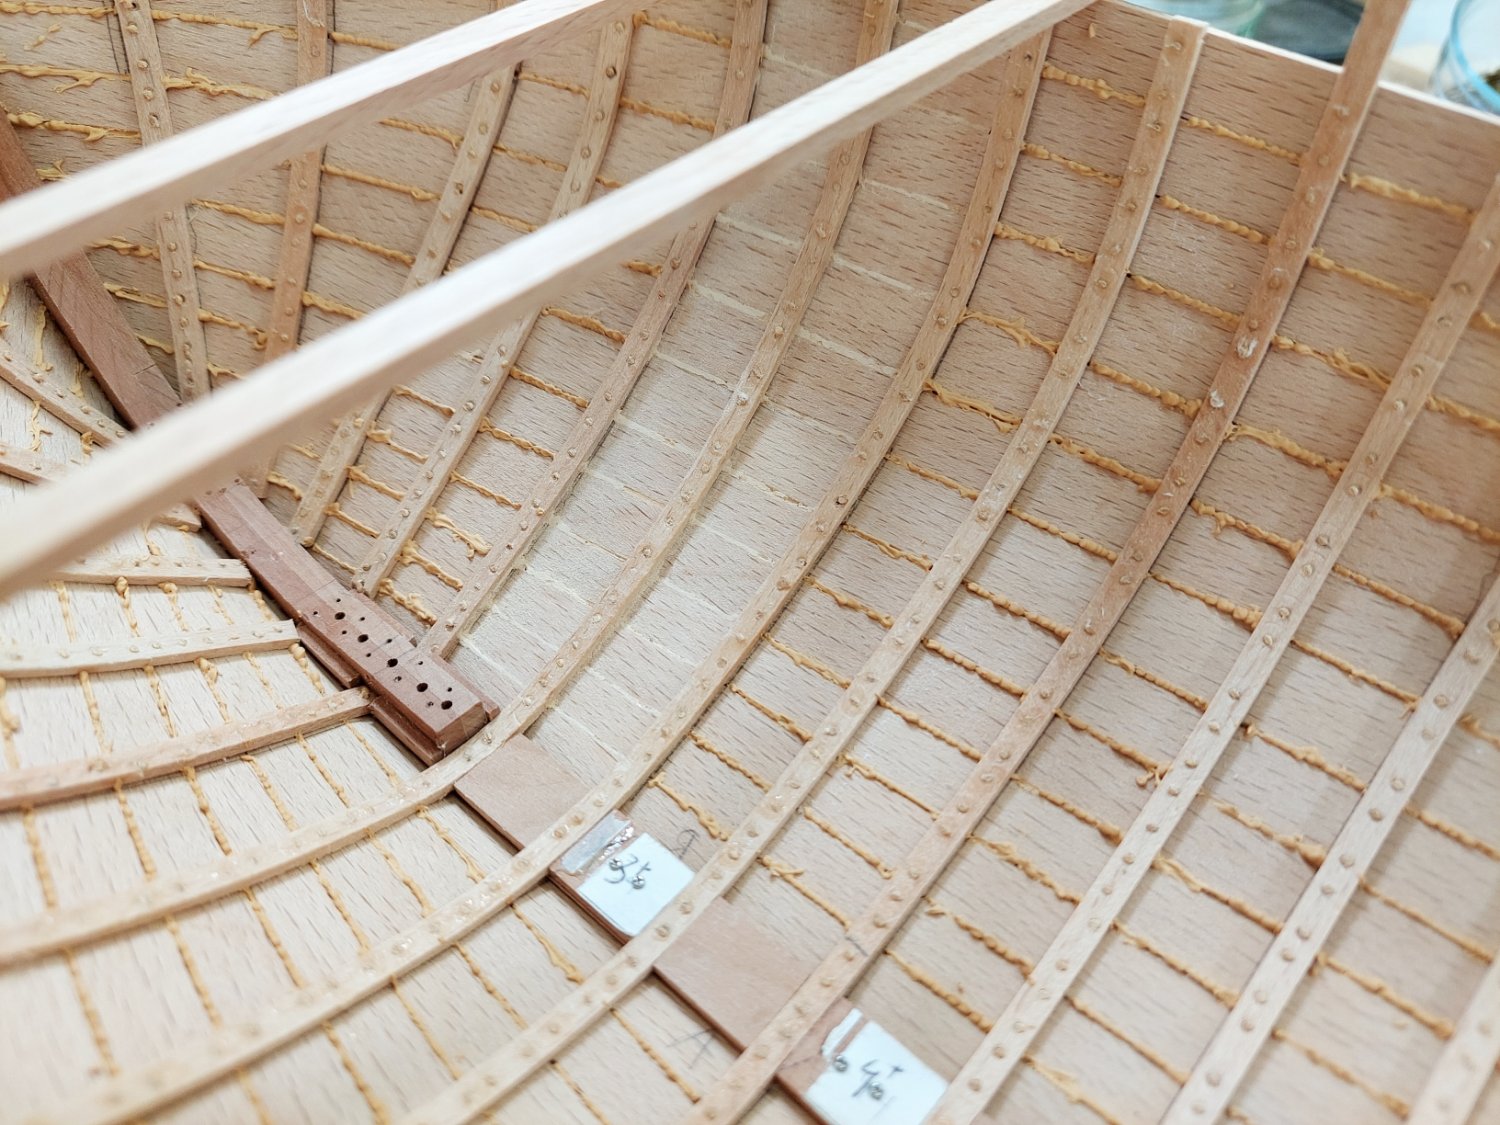
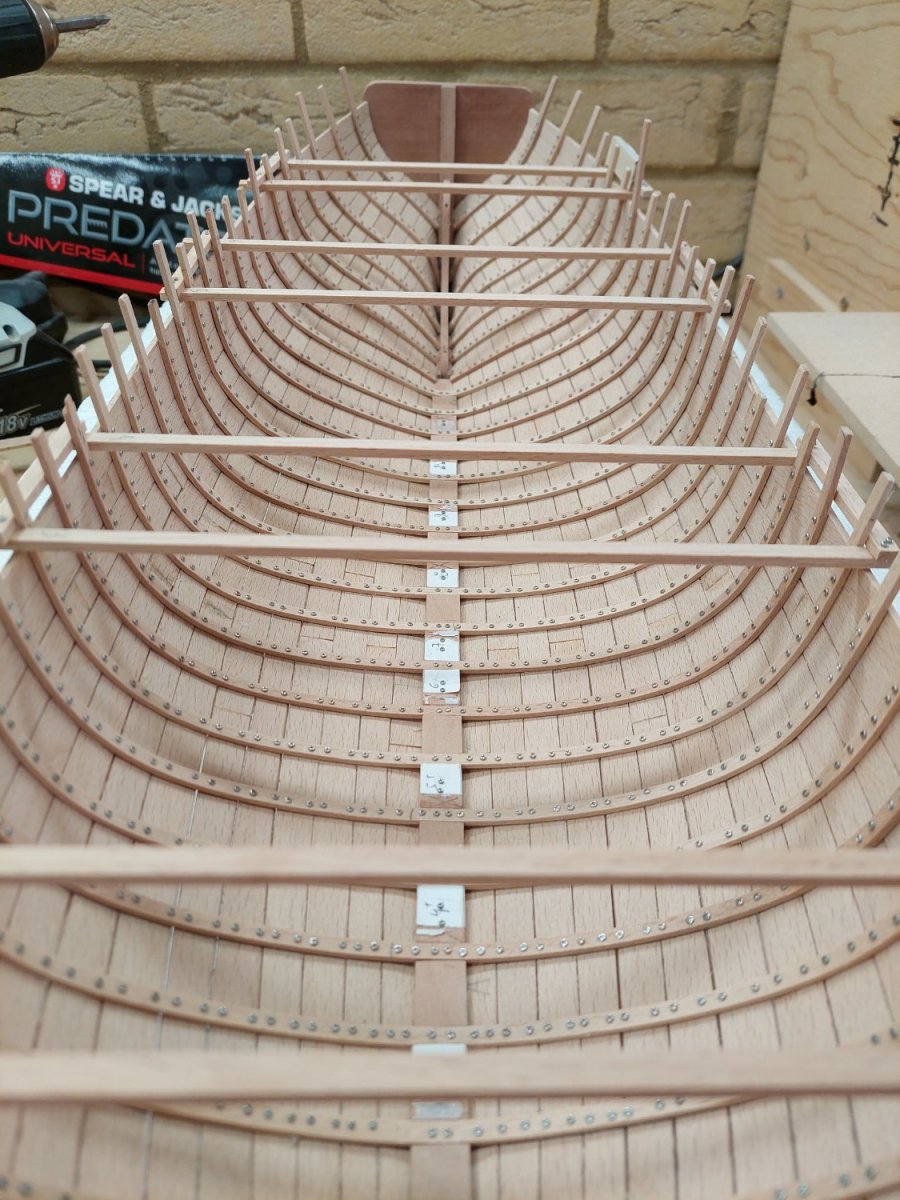
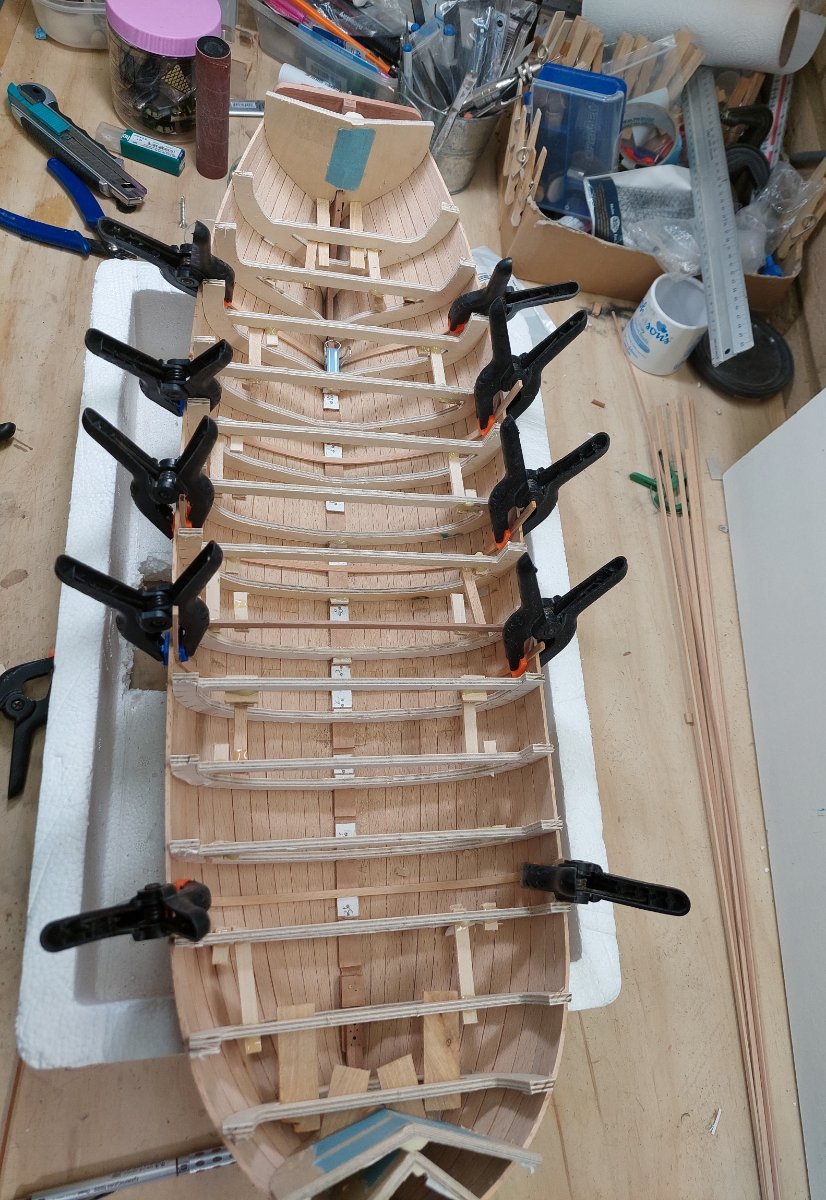
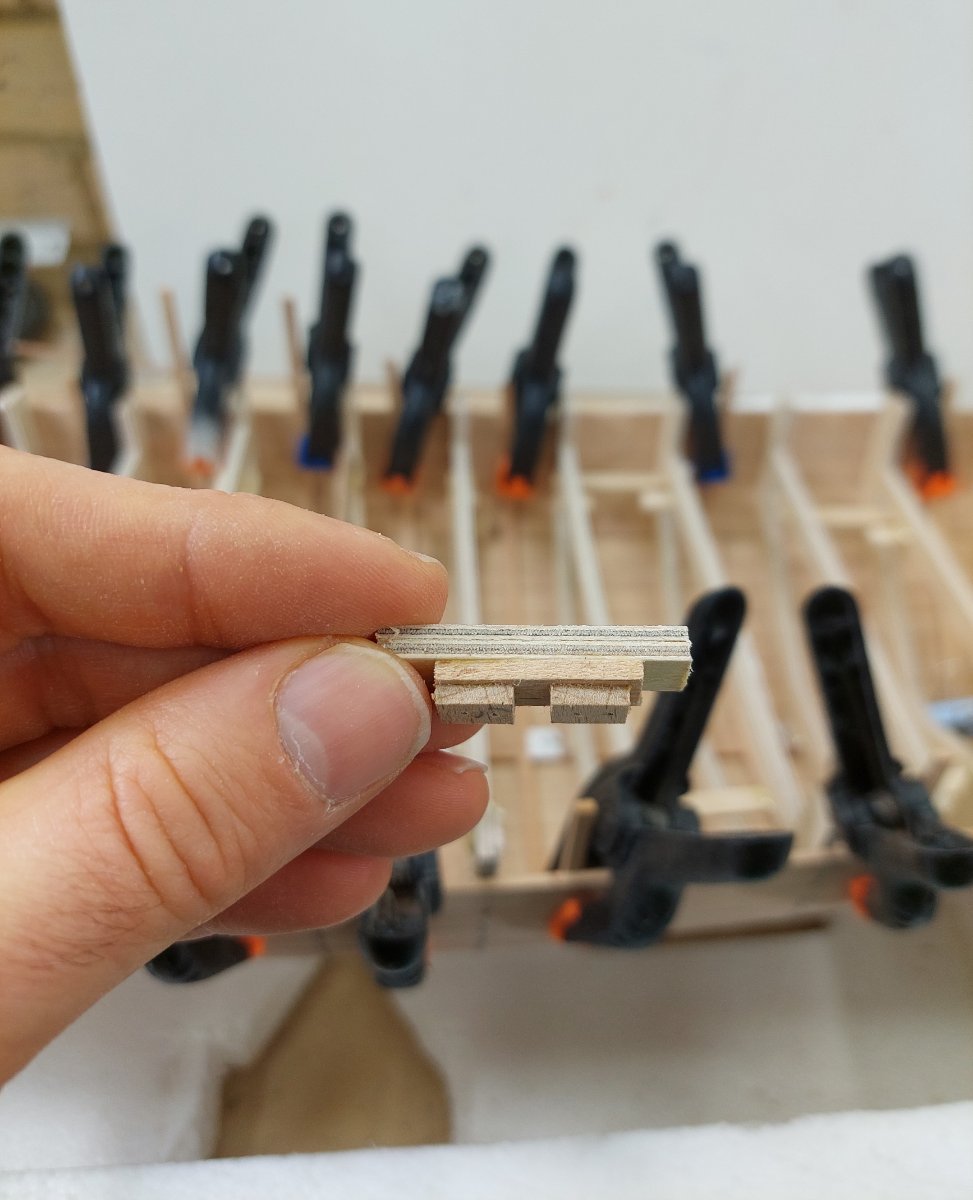
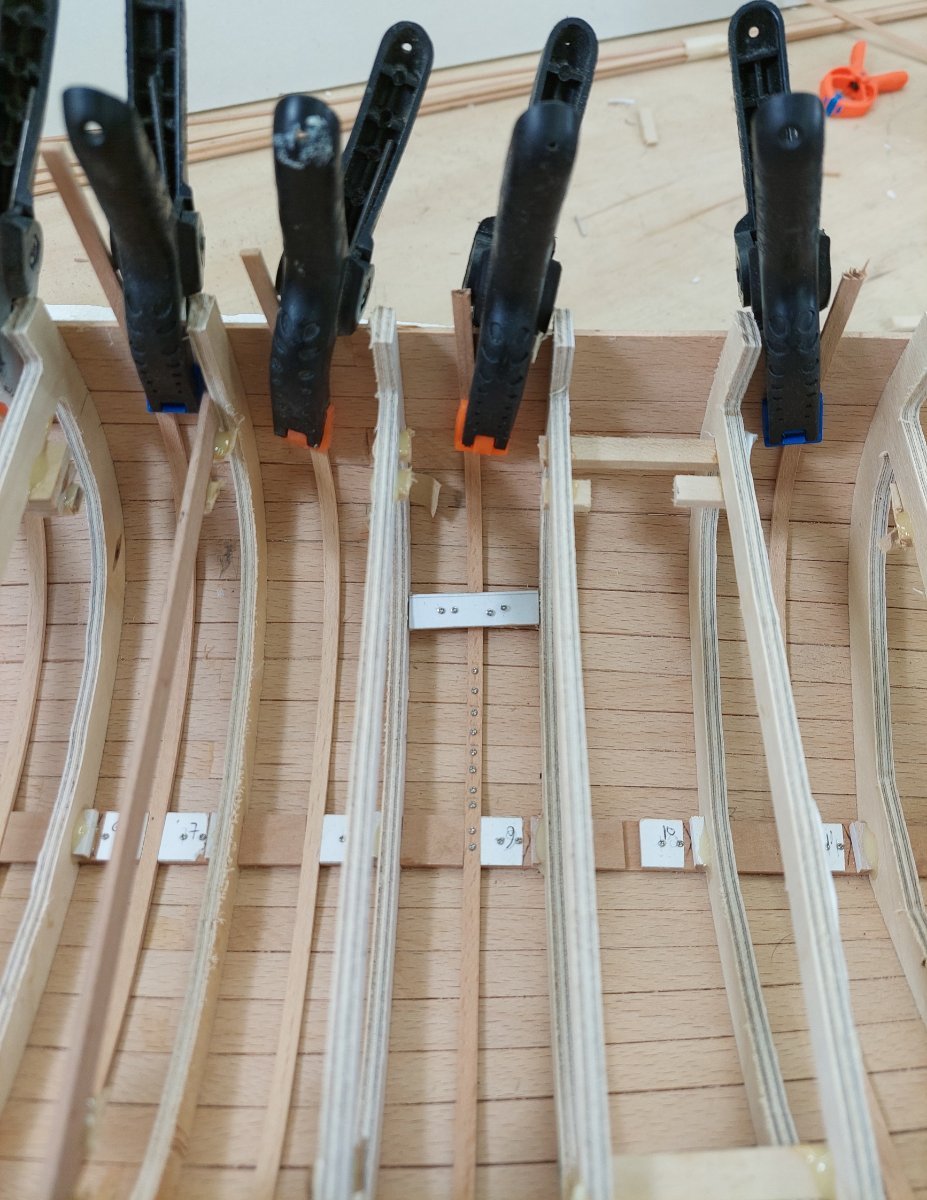
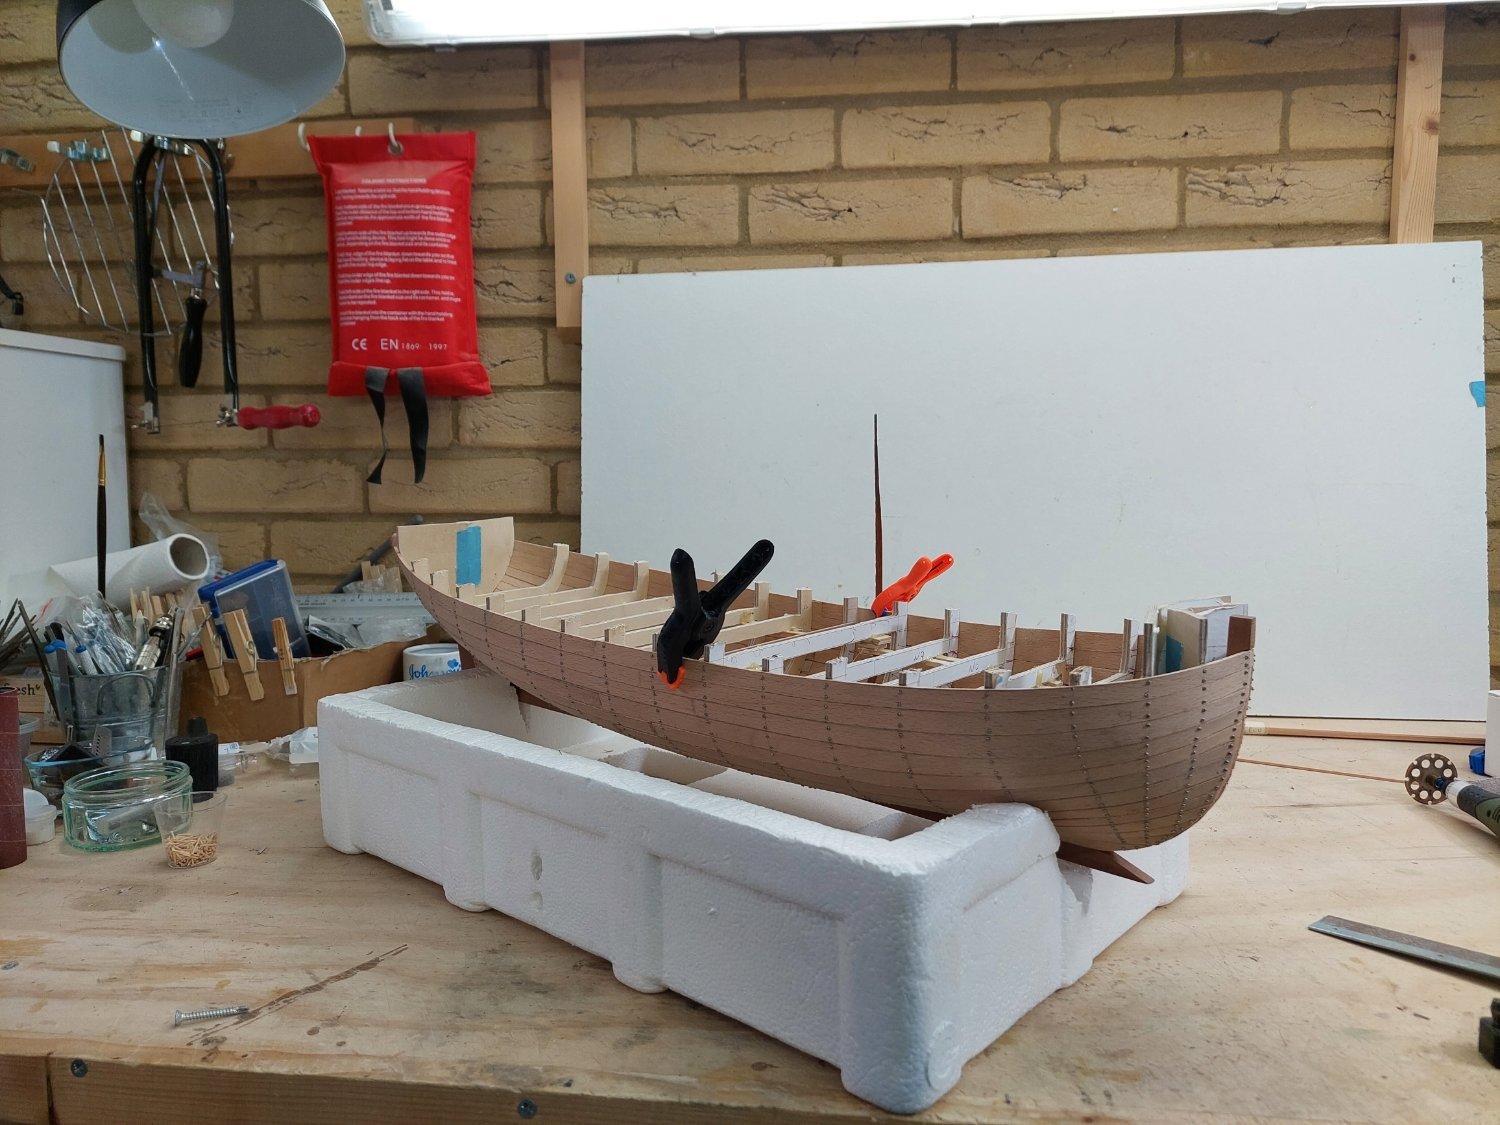
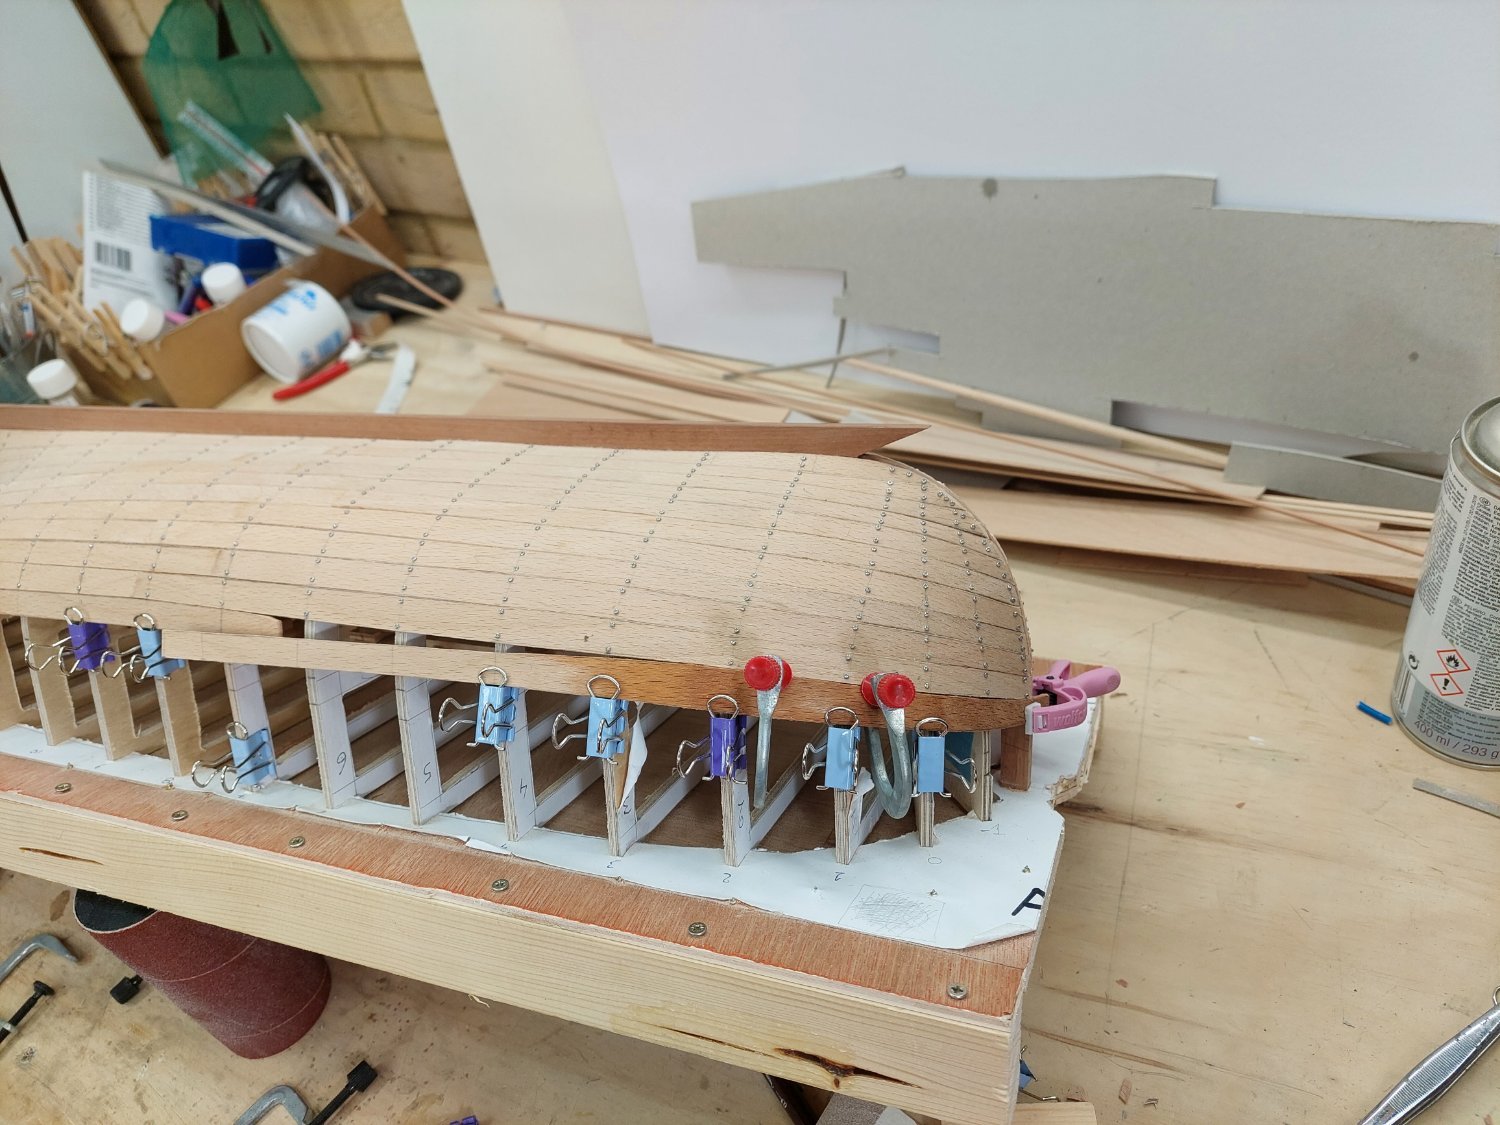
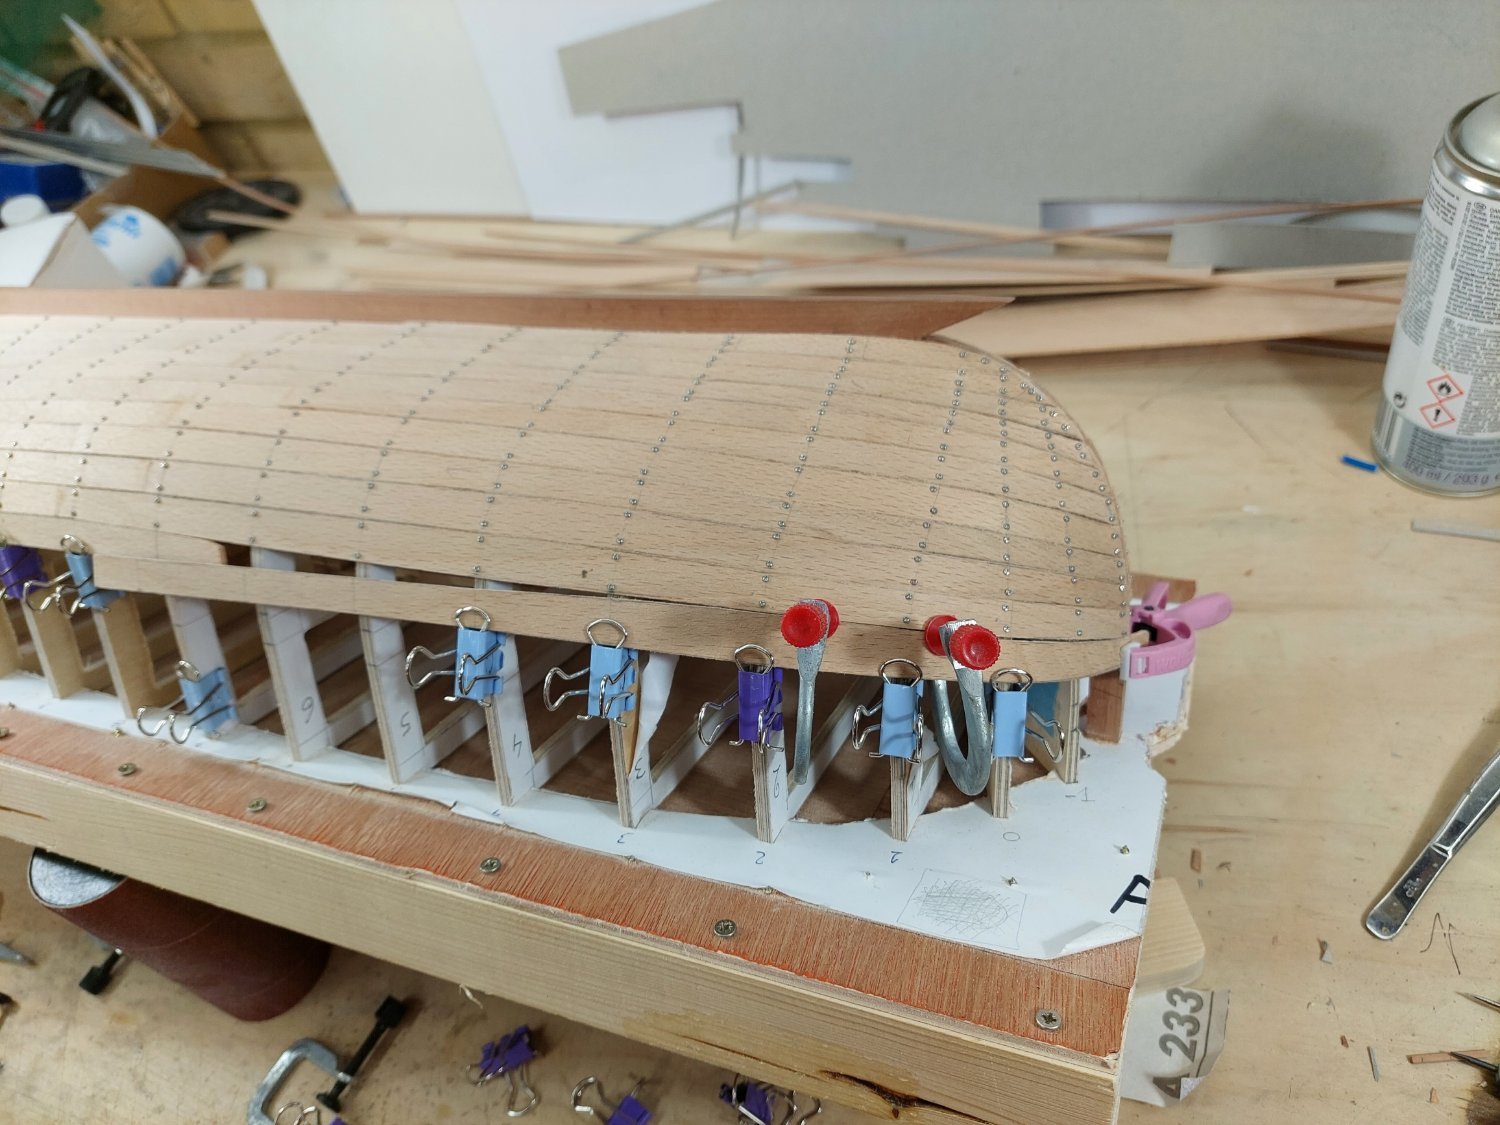
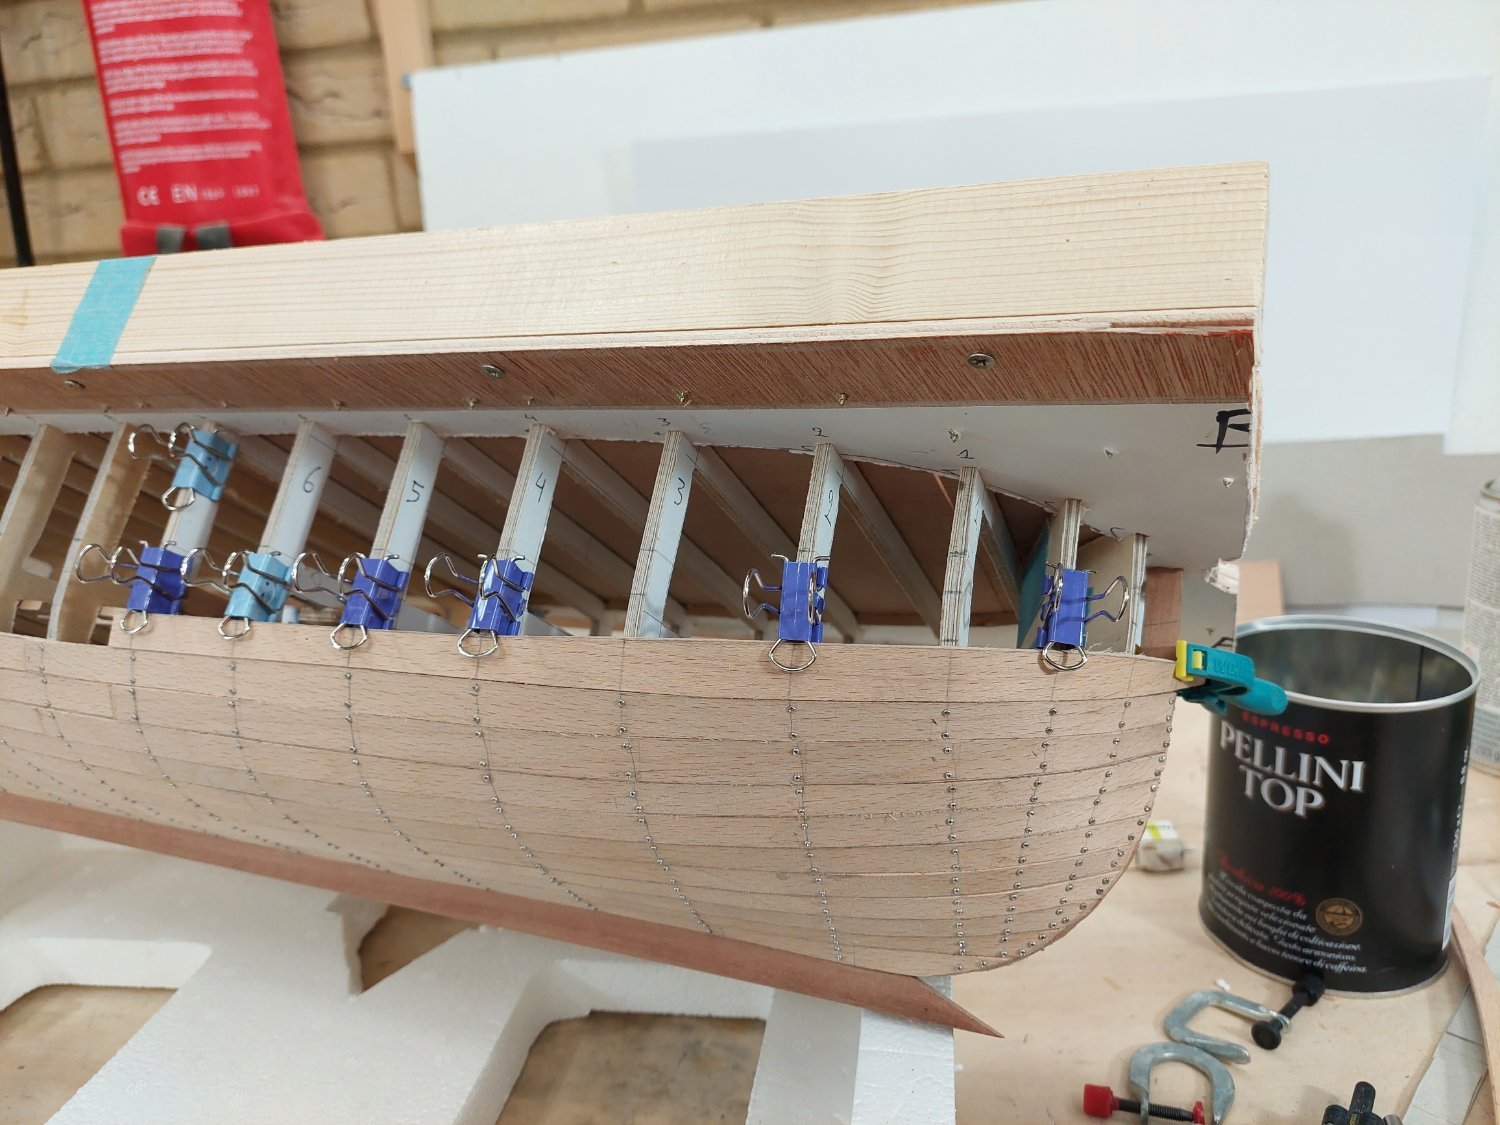
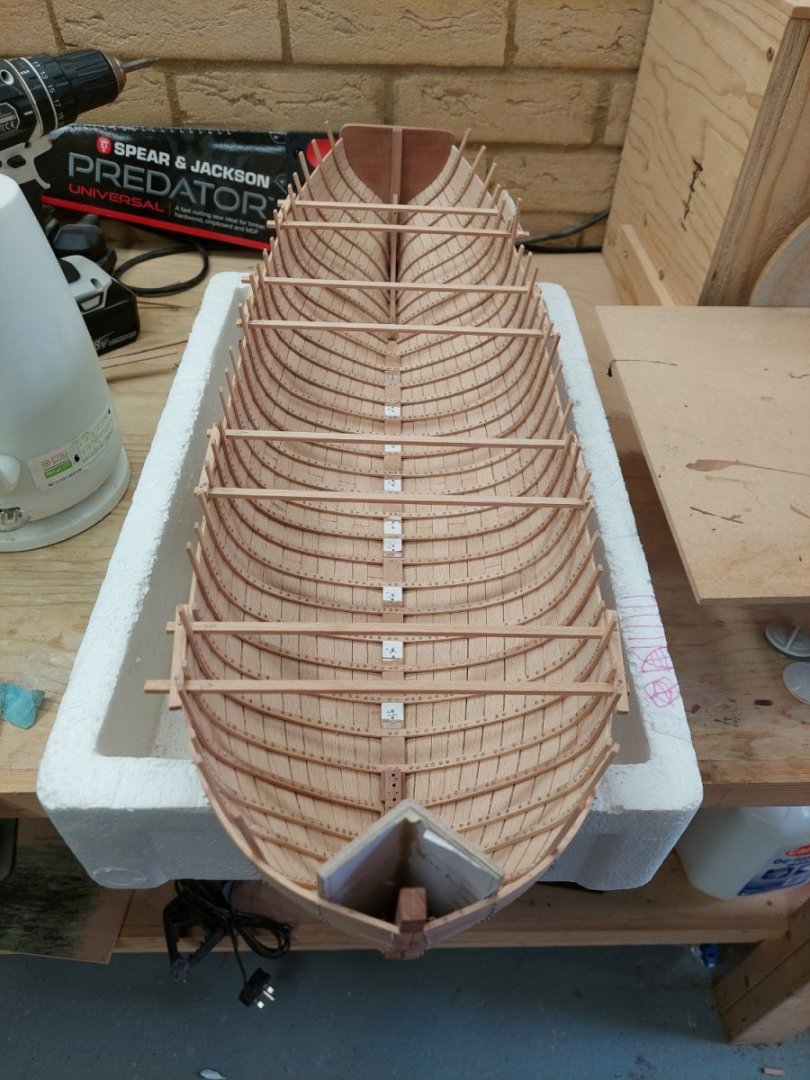
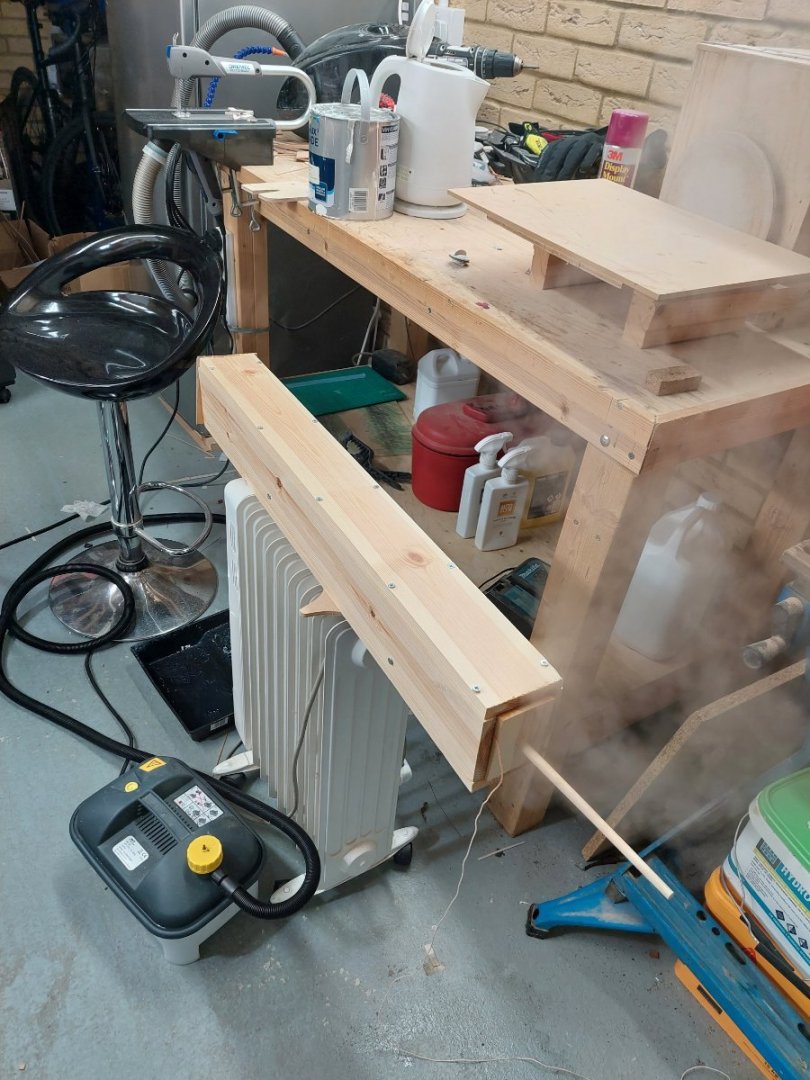
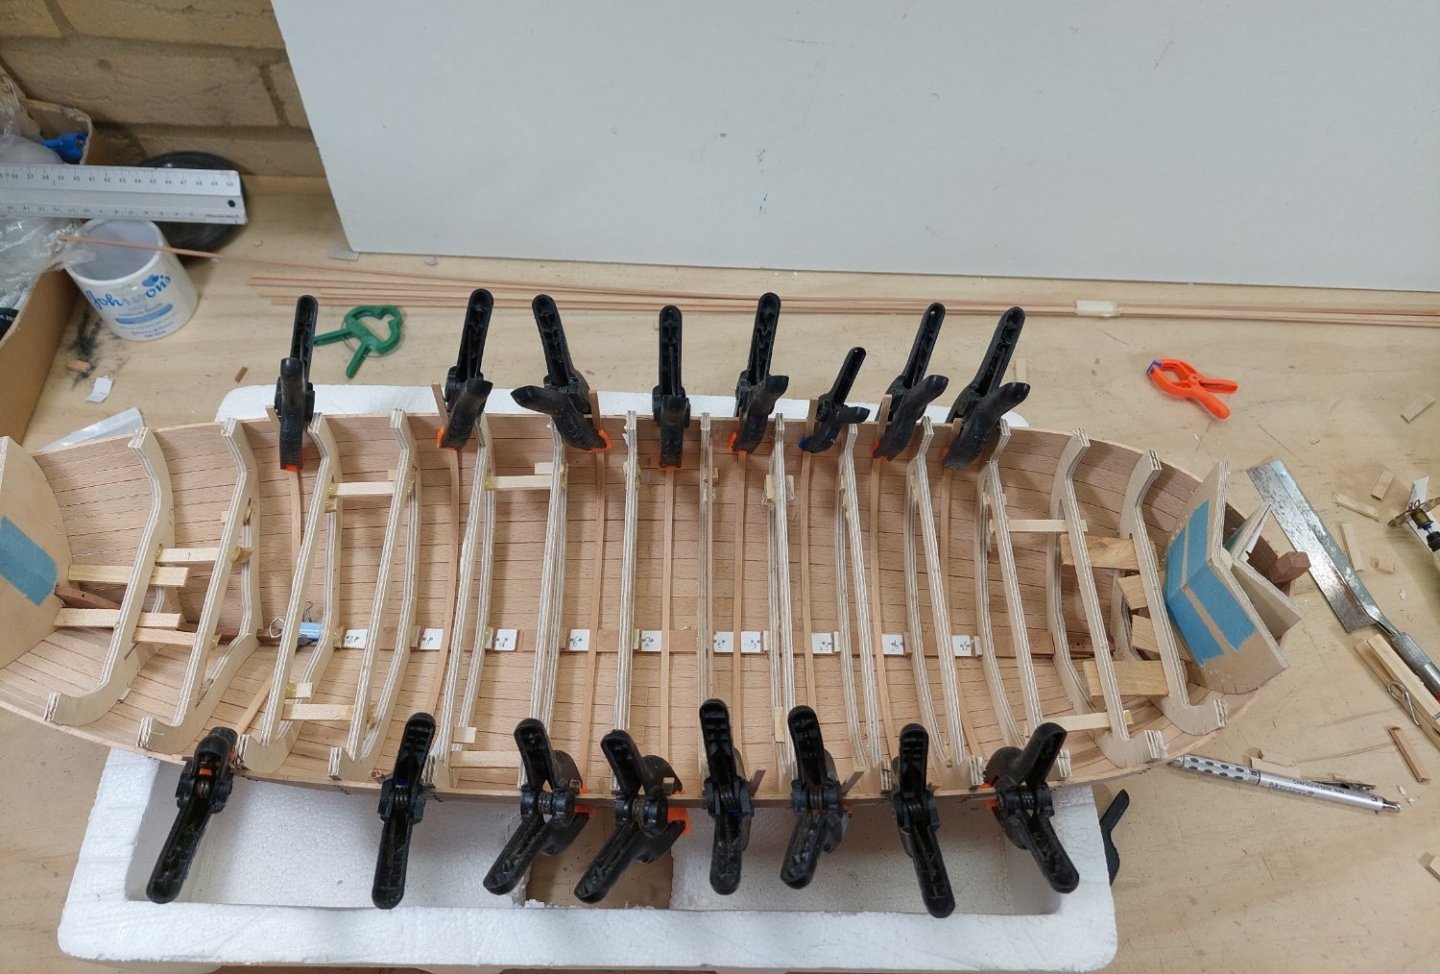
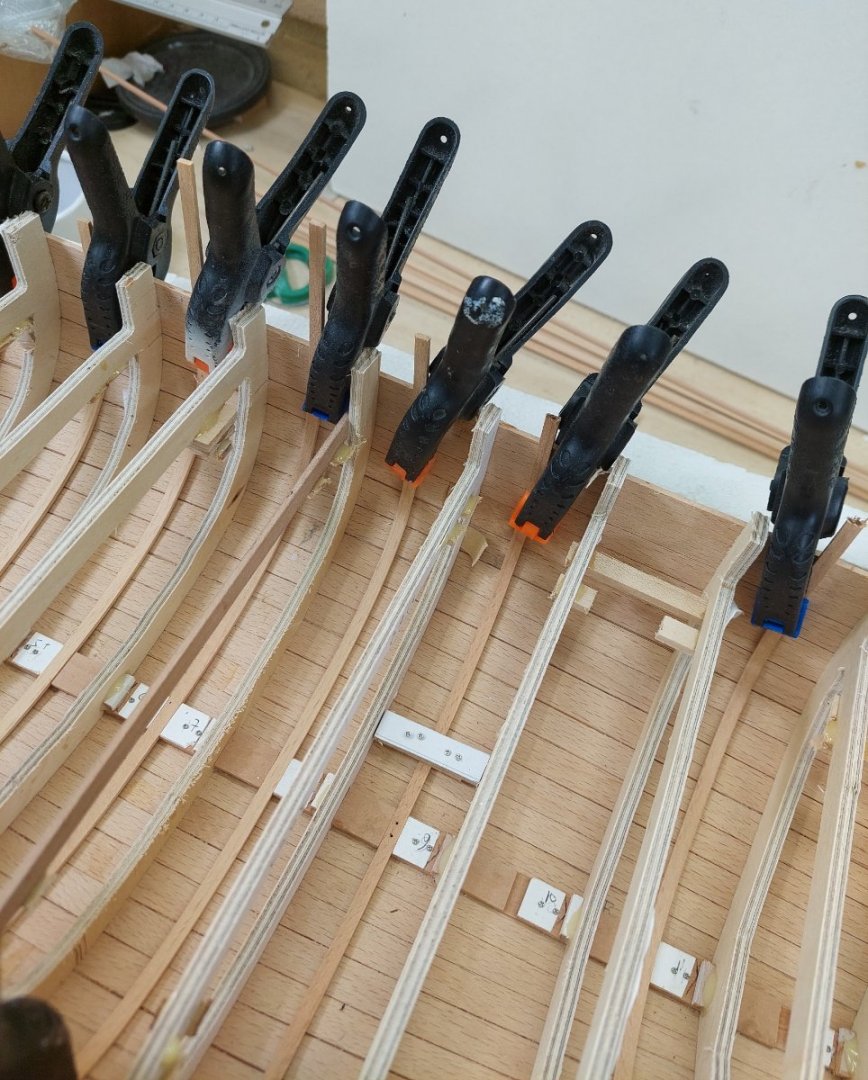
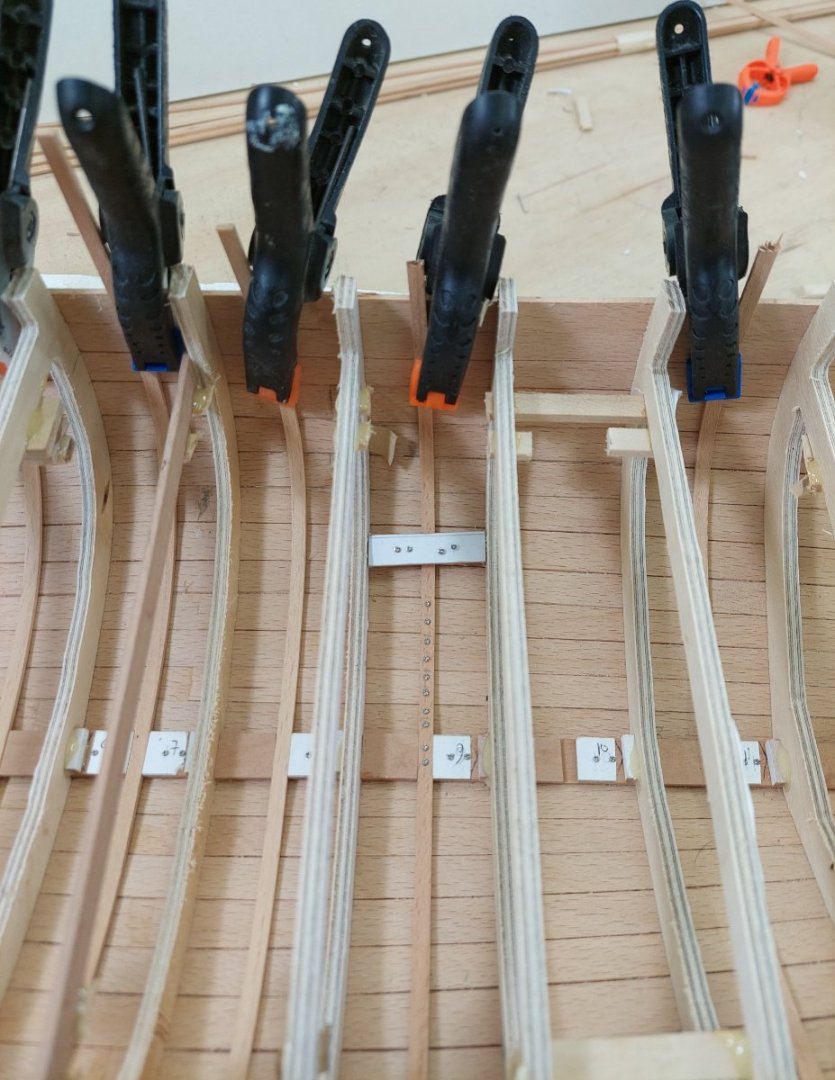
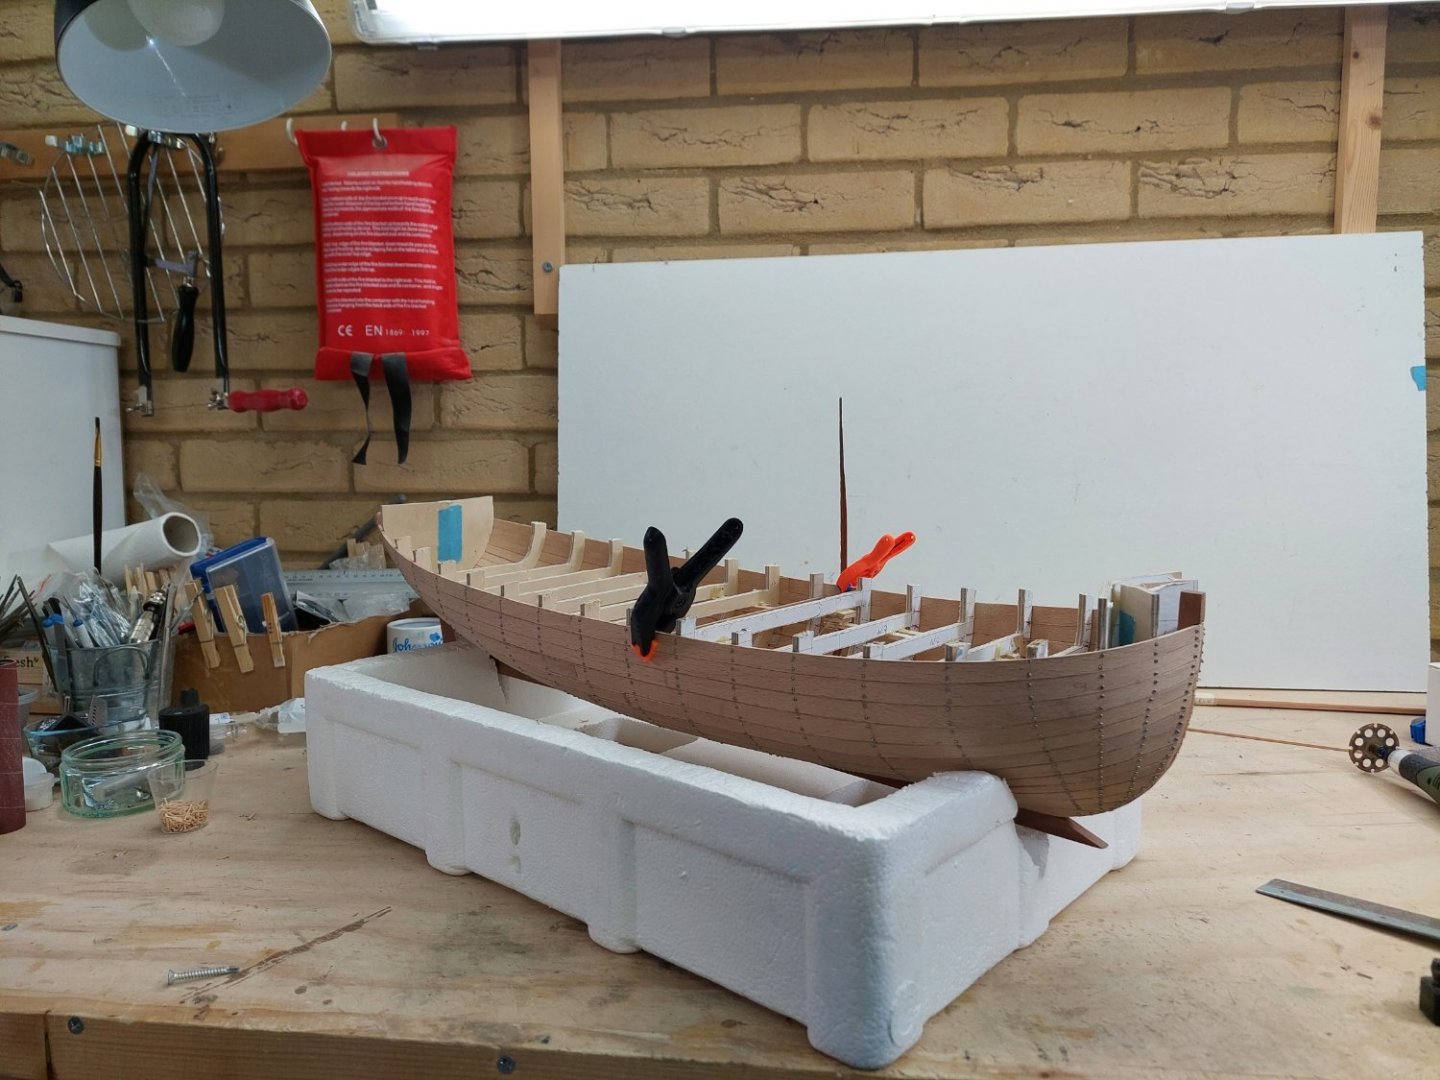
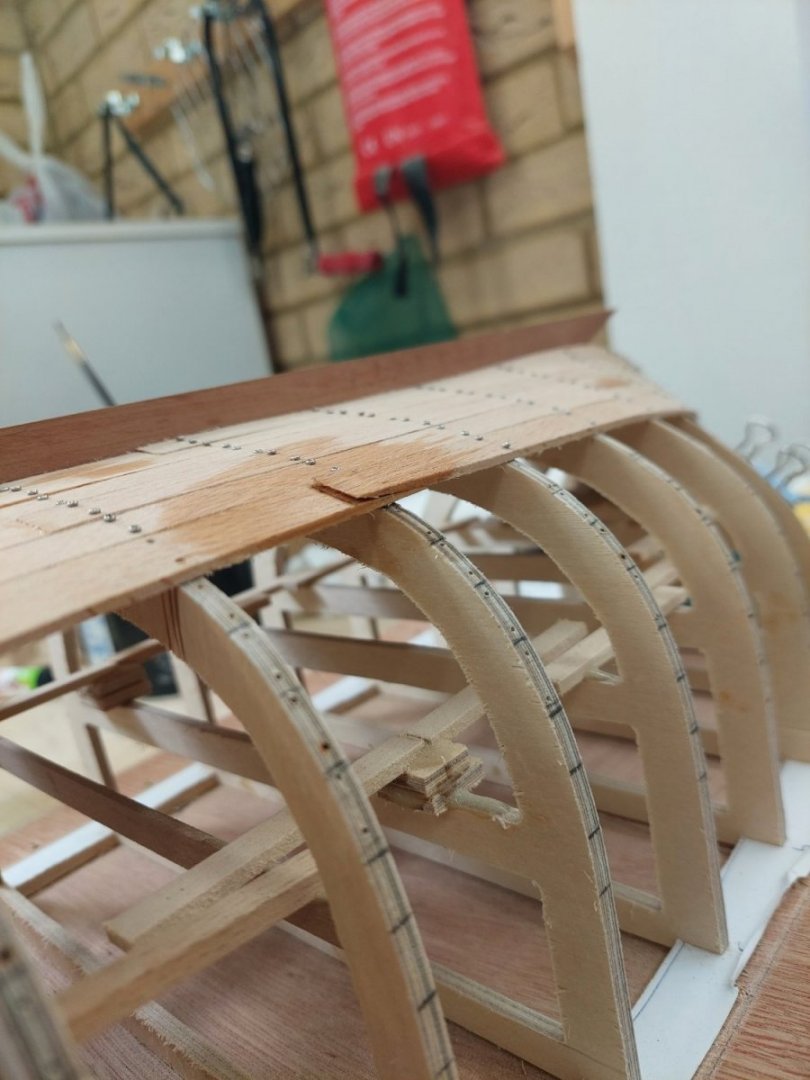
Another quick update I started steaming and installing the ribs. As expected, beech responded wonderfully to wet heat becoming as pliable as boiled spaghetti. My steam box is working great and in no time I had bent half of the ribs. I made a simple spacer to make sure the rib is placed at equal distances from the frames Then I started screwing the ribs to the planks. Regards Vaddoc


- 233 replies
-
- 12
-
-
Hi @Gregory I do not come across any specific information, but these are my thoughts: Probably transoms were made from a few pieces, edge to edge like the planking but thicker. It is much easier to find very wide short segments so maybe it would only take 3 pieces to make a Transom. Most of the transom is well above the water line so no caulking would be needed. I do not think any particular framing would be needed as usually there would be a sternpost or at least a knee, and also the planking, to keep the transom securely in place. In the boat I am building, each transom piece would be nailed to three planks on each side. In more modern larger vessels, on top of the sternpost there are extra pieces of timber as the photo bellow shows. This would be easy enough to use also for boats and would result to a very strong transom. However in "The boats of men-of-war" by May, for a 22 ft long boat it states: Transom: Broad or moulded at the upper part 3ft 9 in, thick or sided 3 inch, knees sided 2 3/4 in. No mention of framing.
-
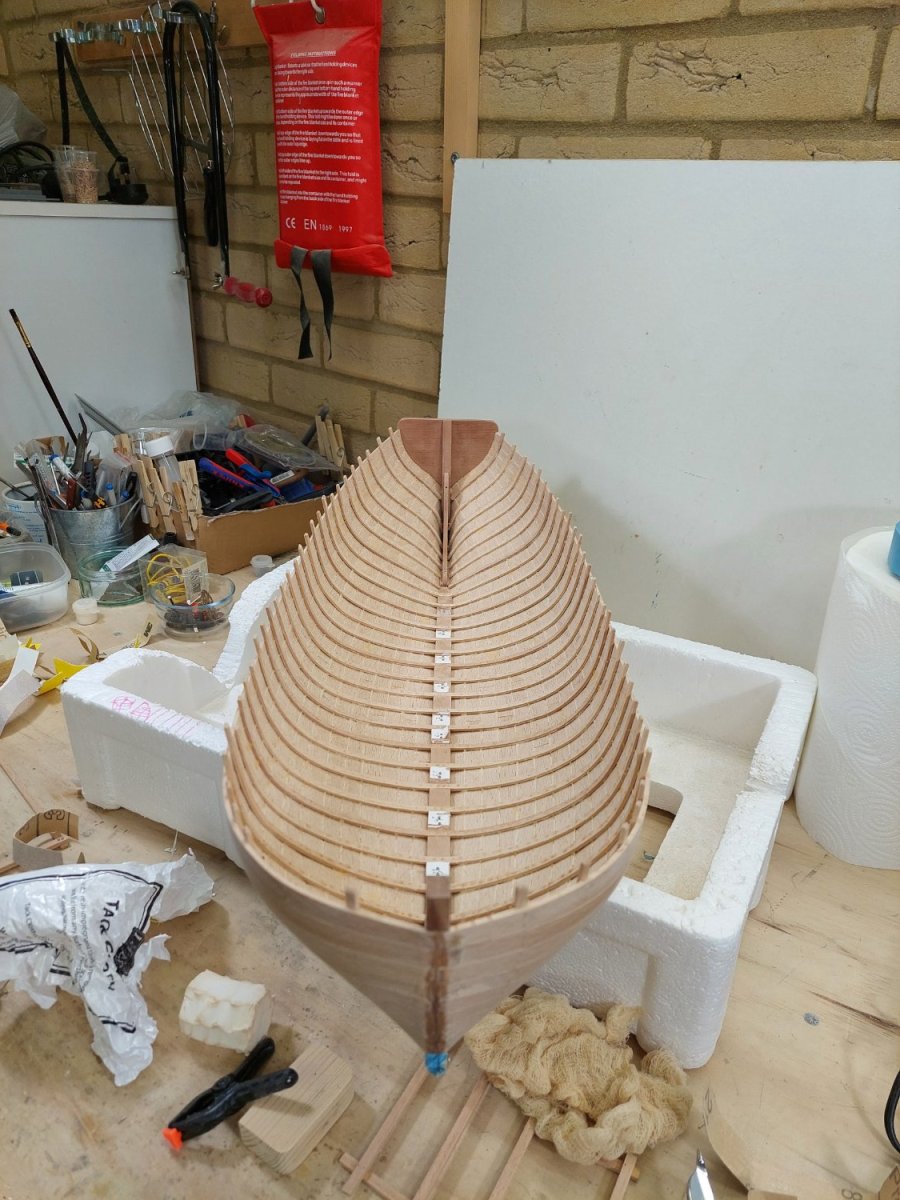
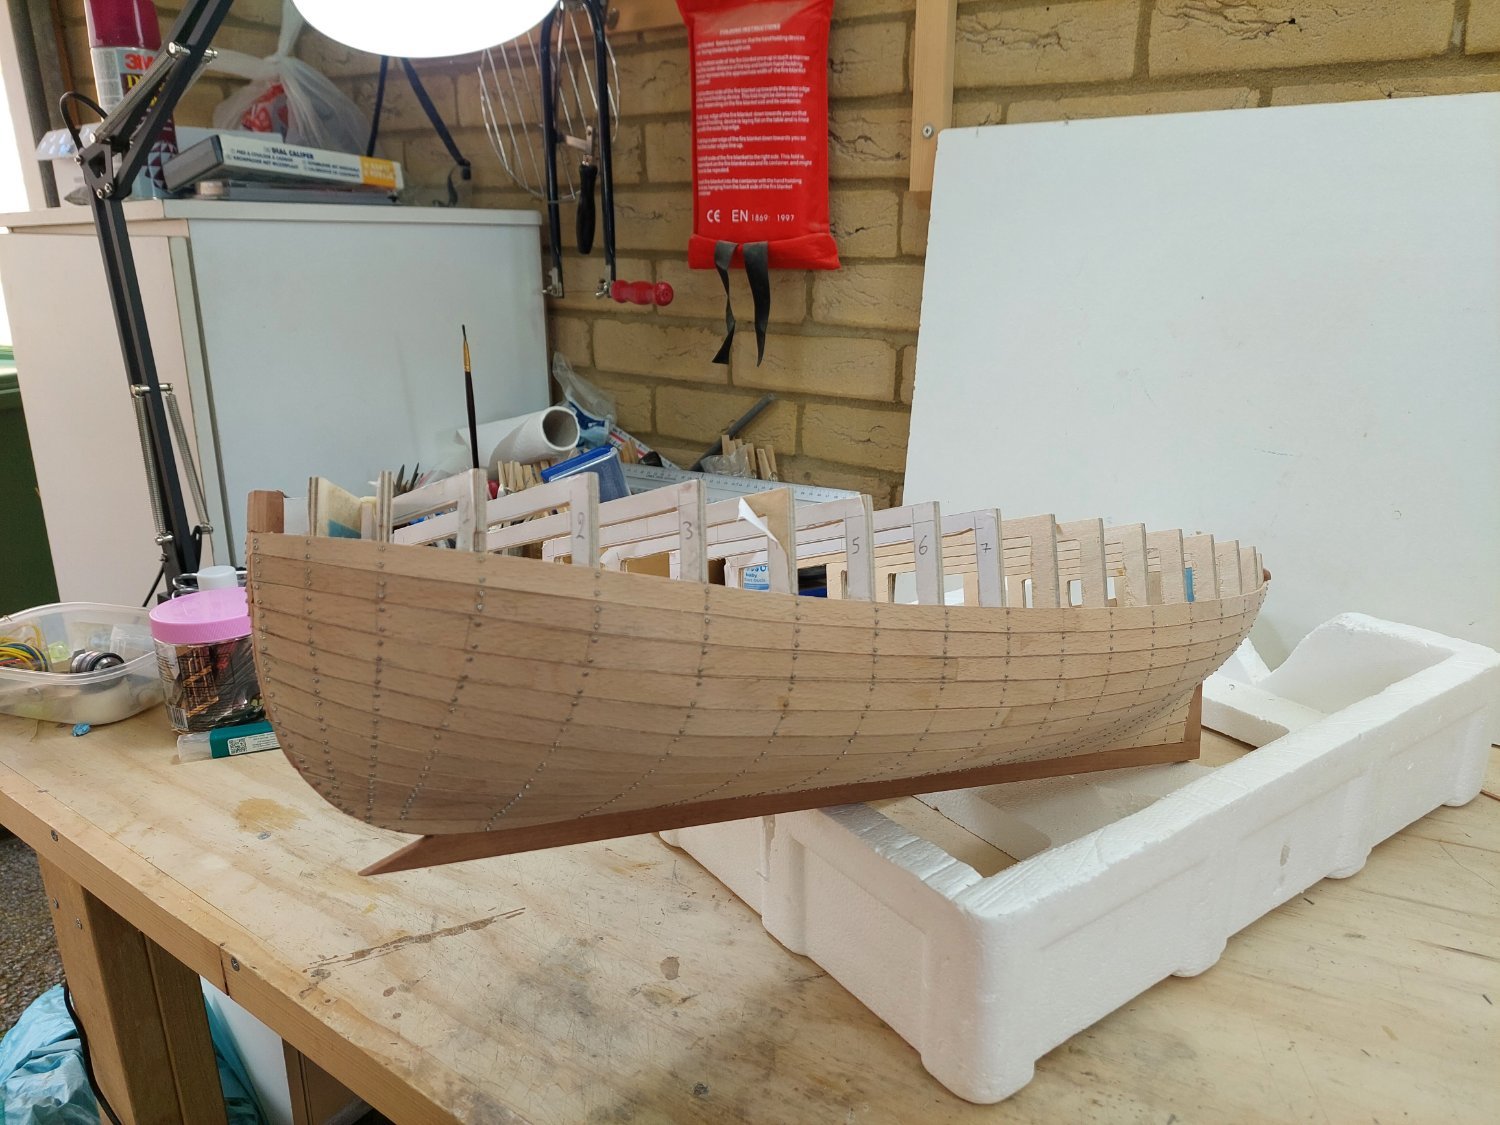
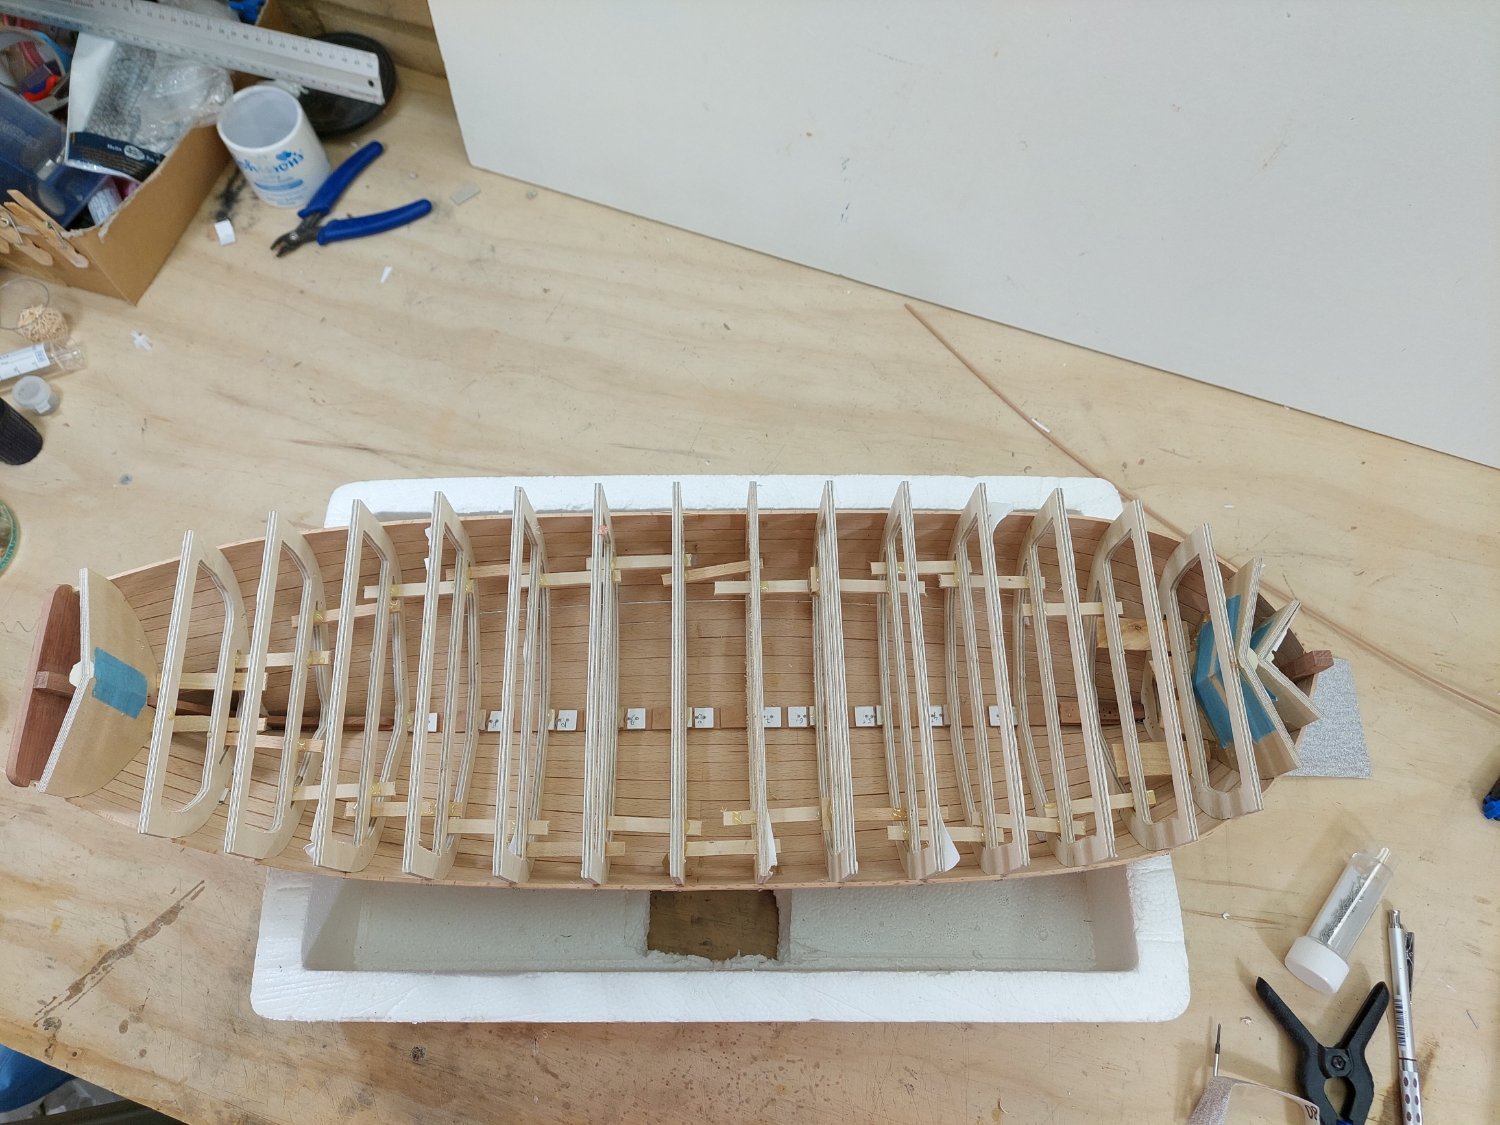
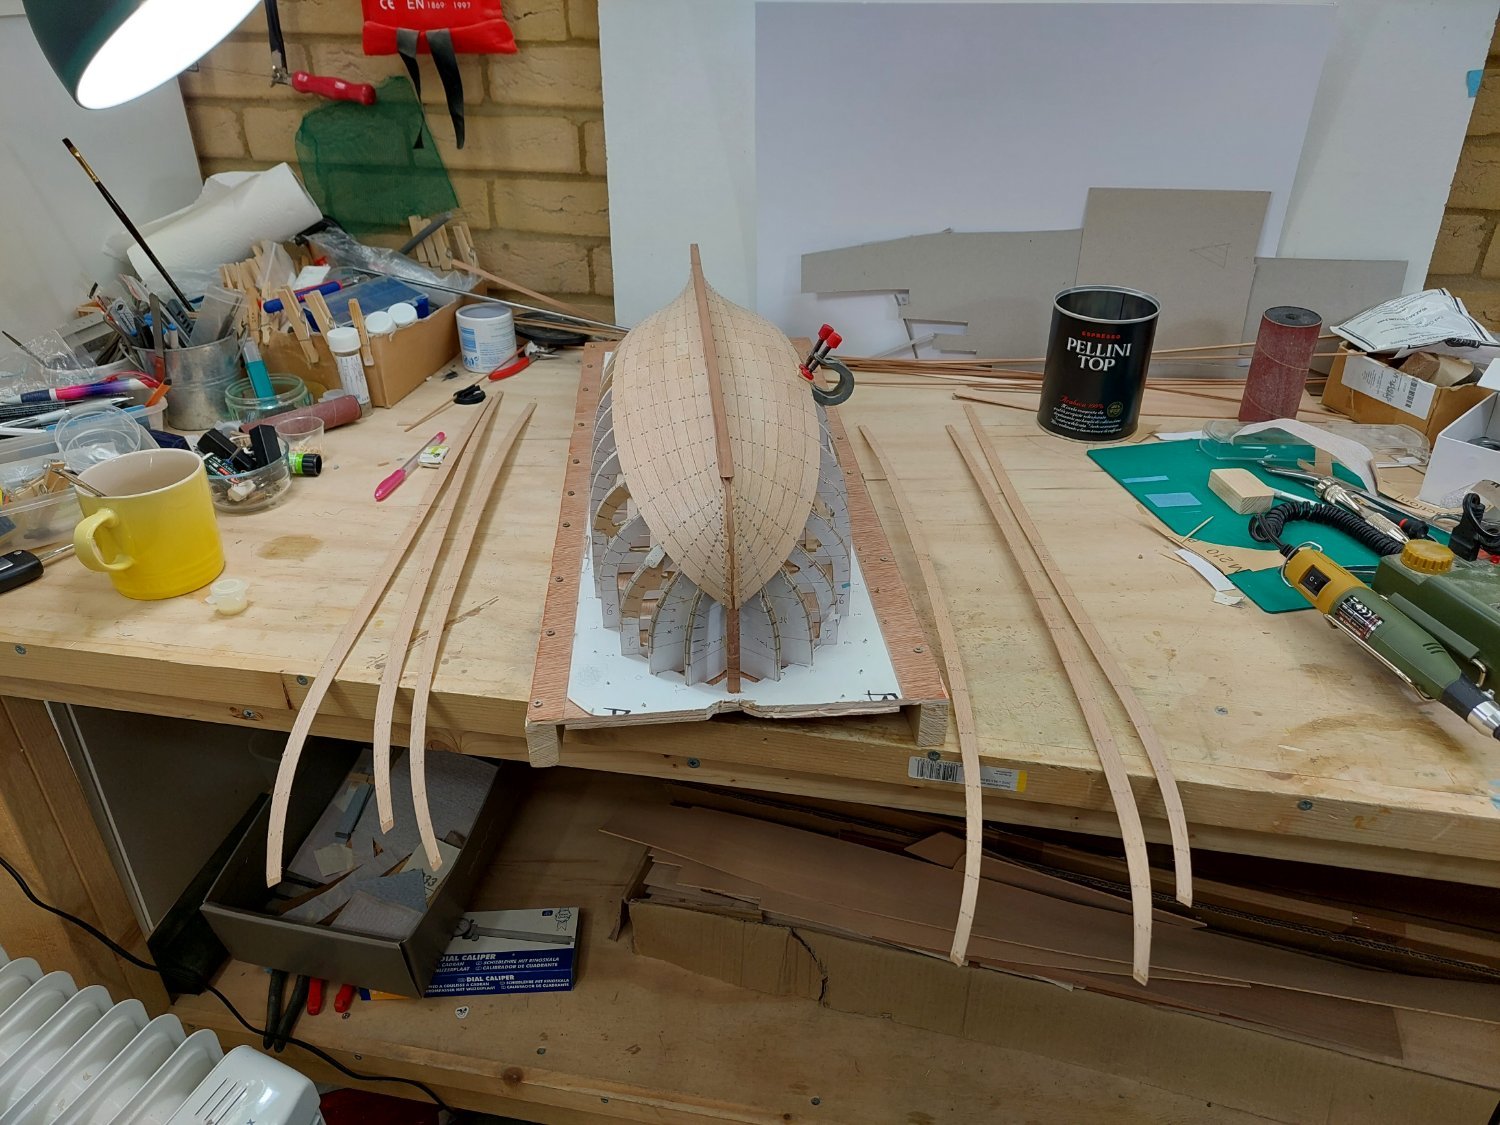
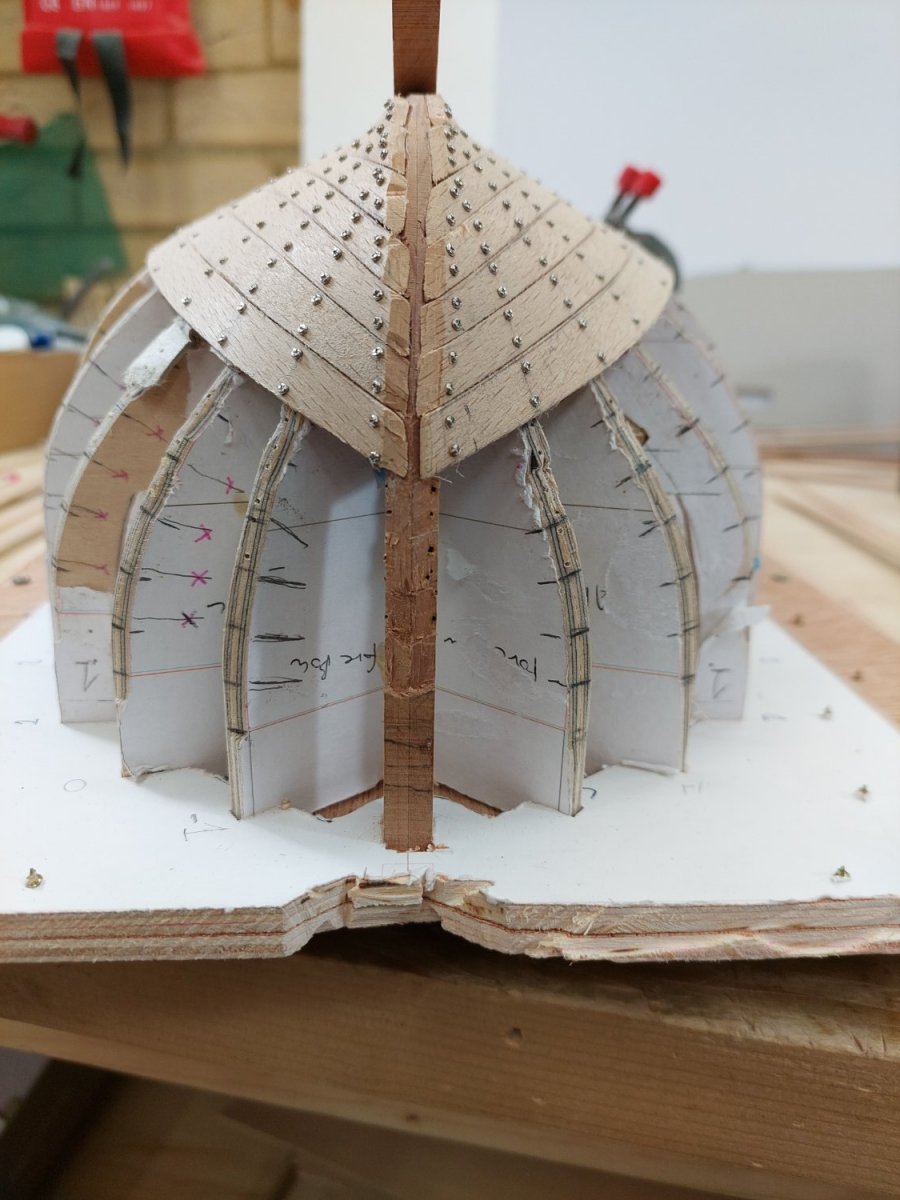
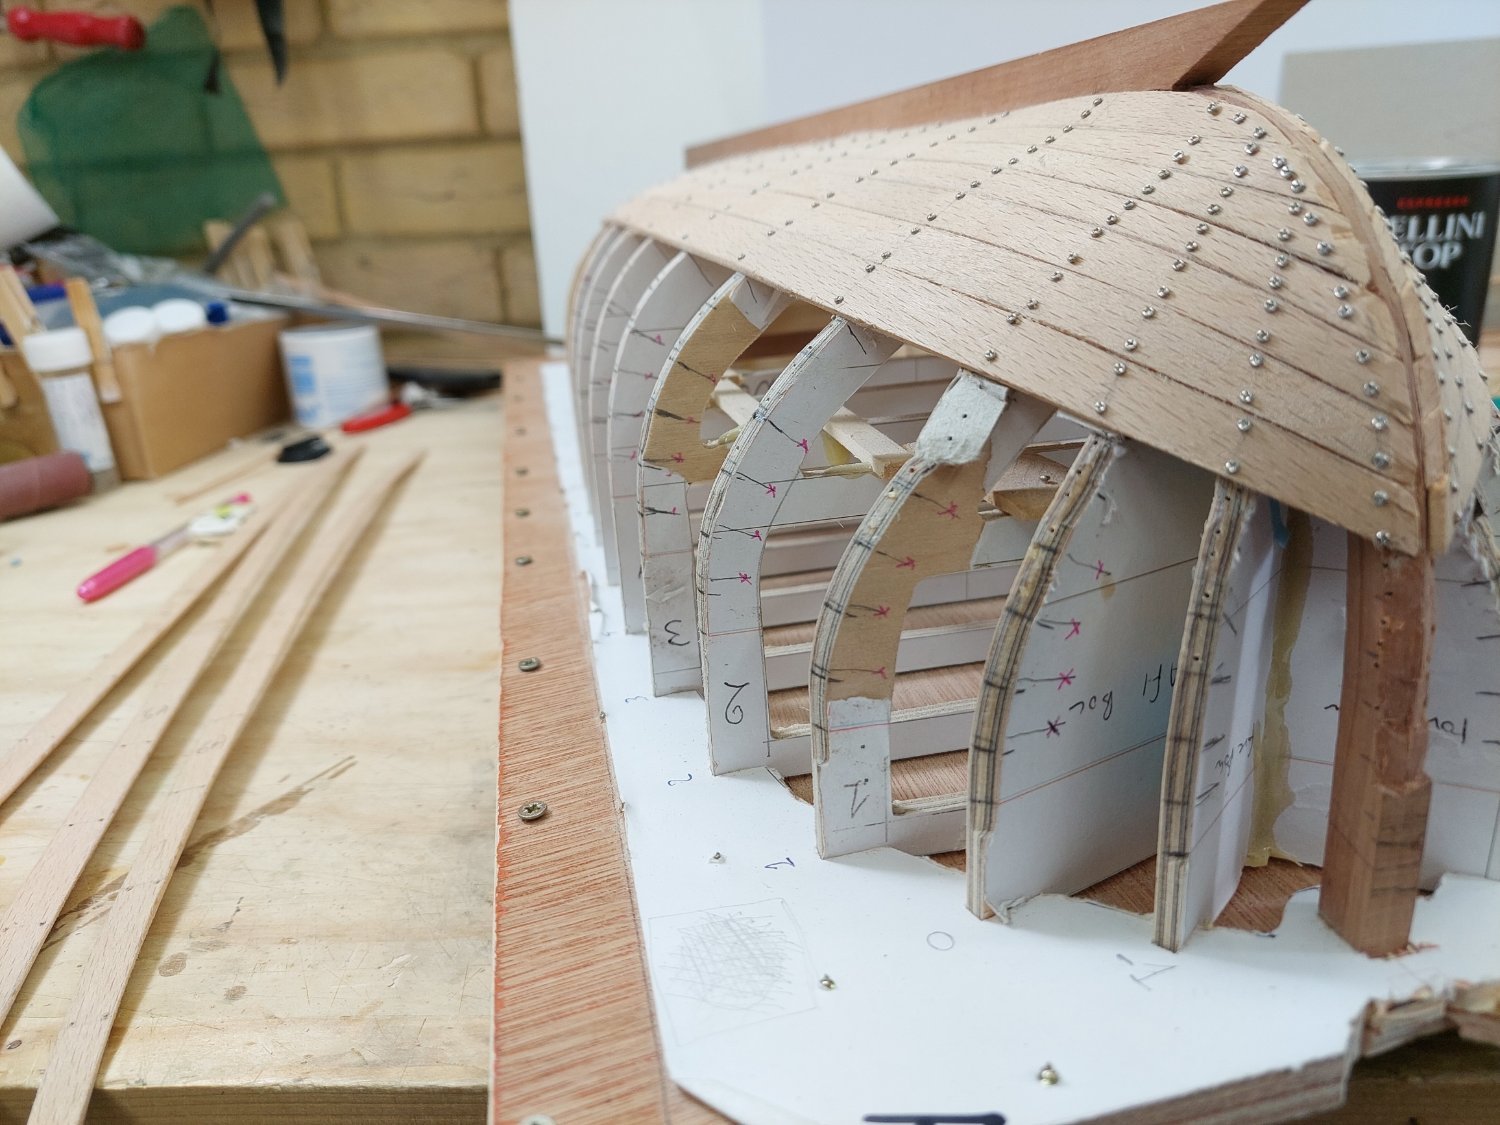
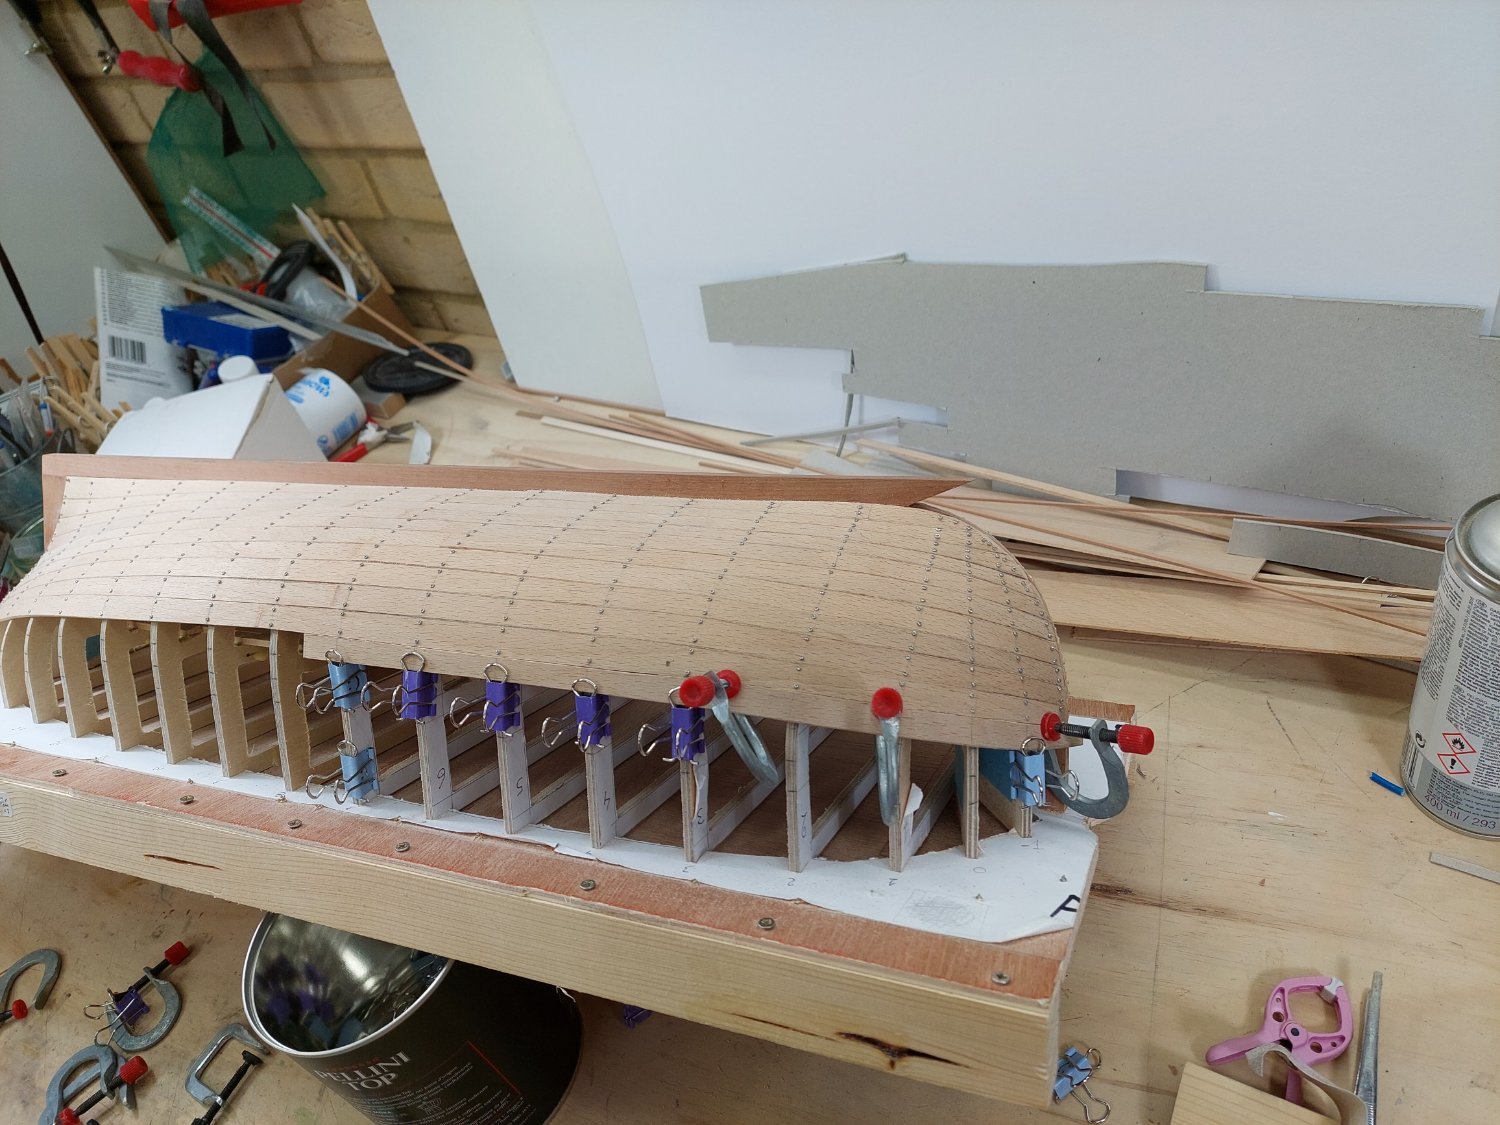
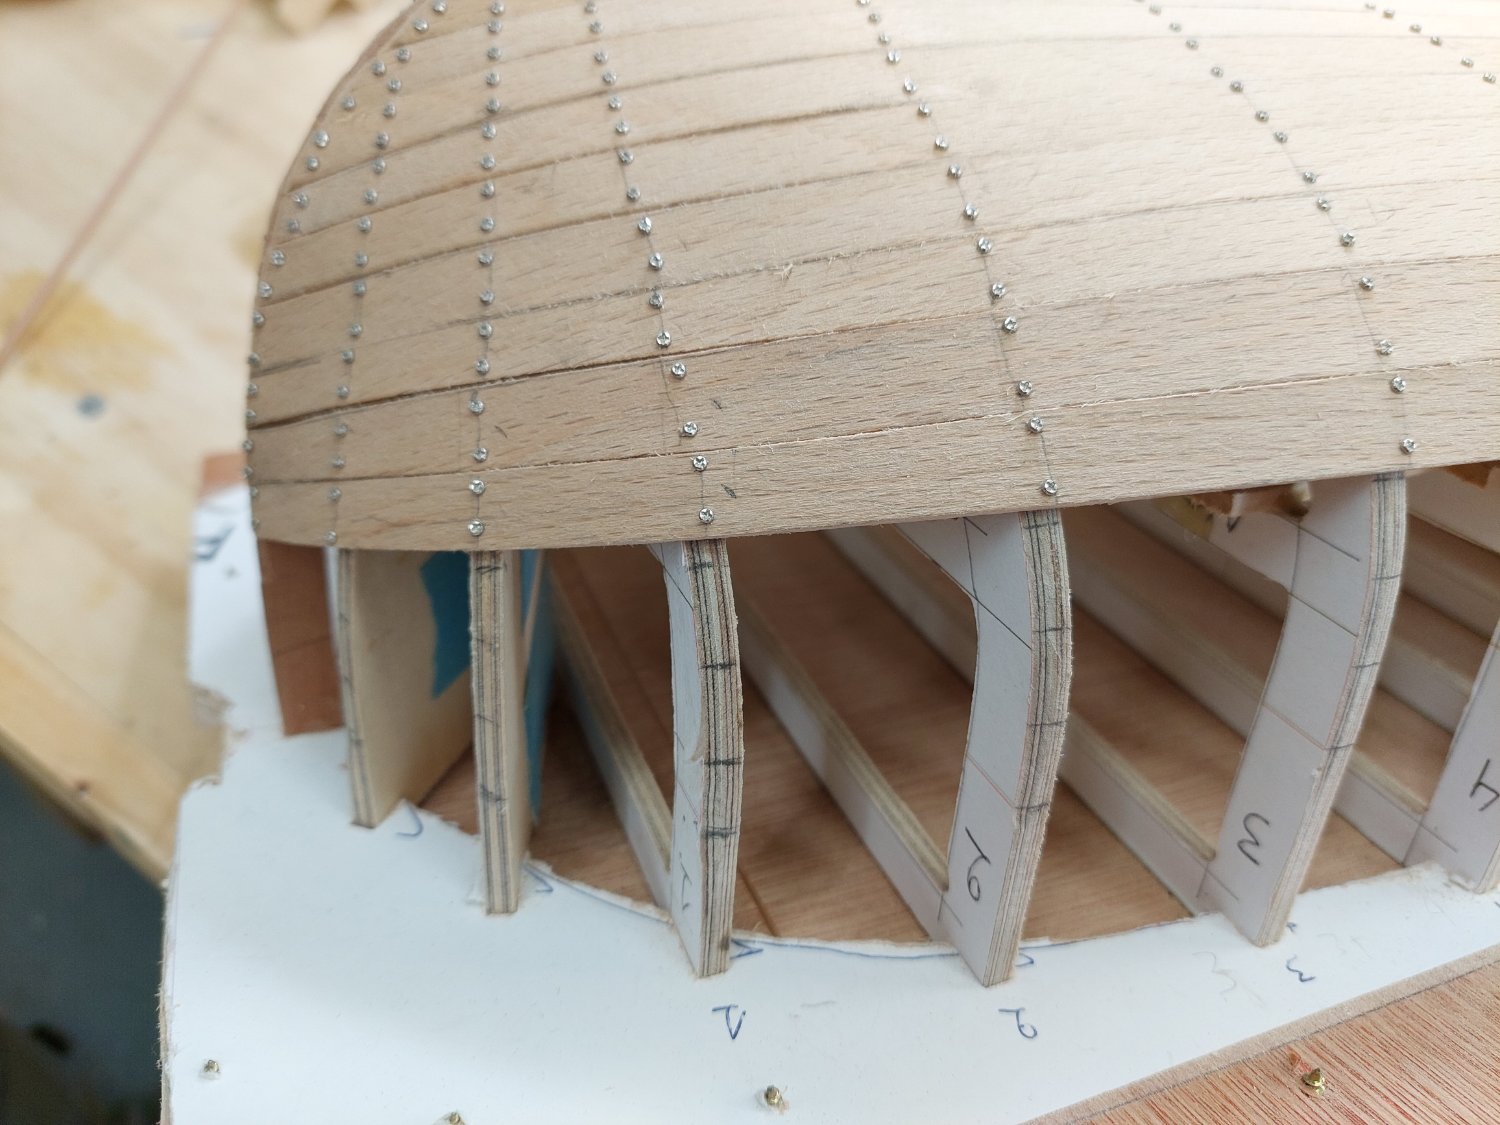
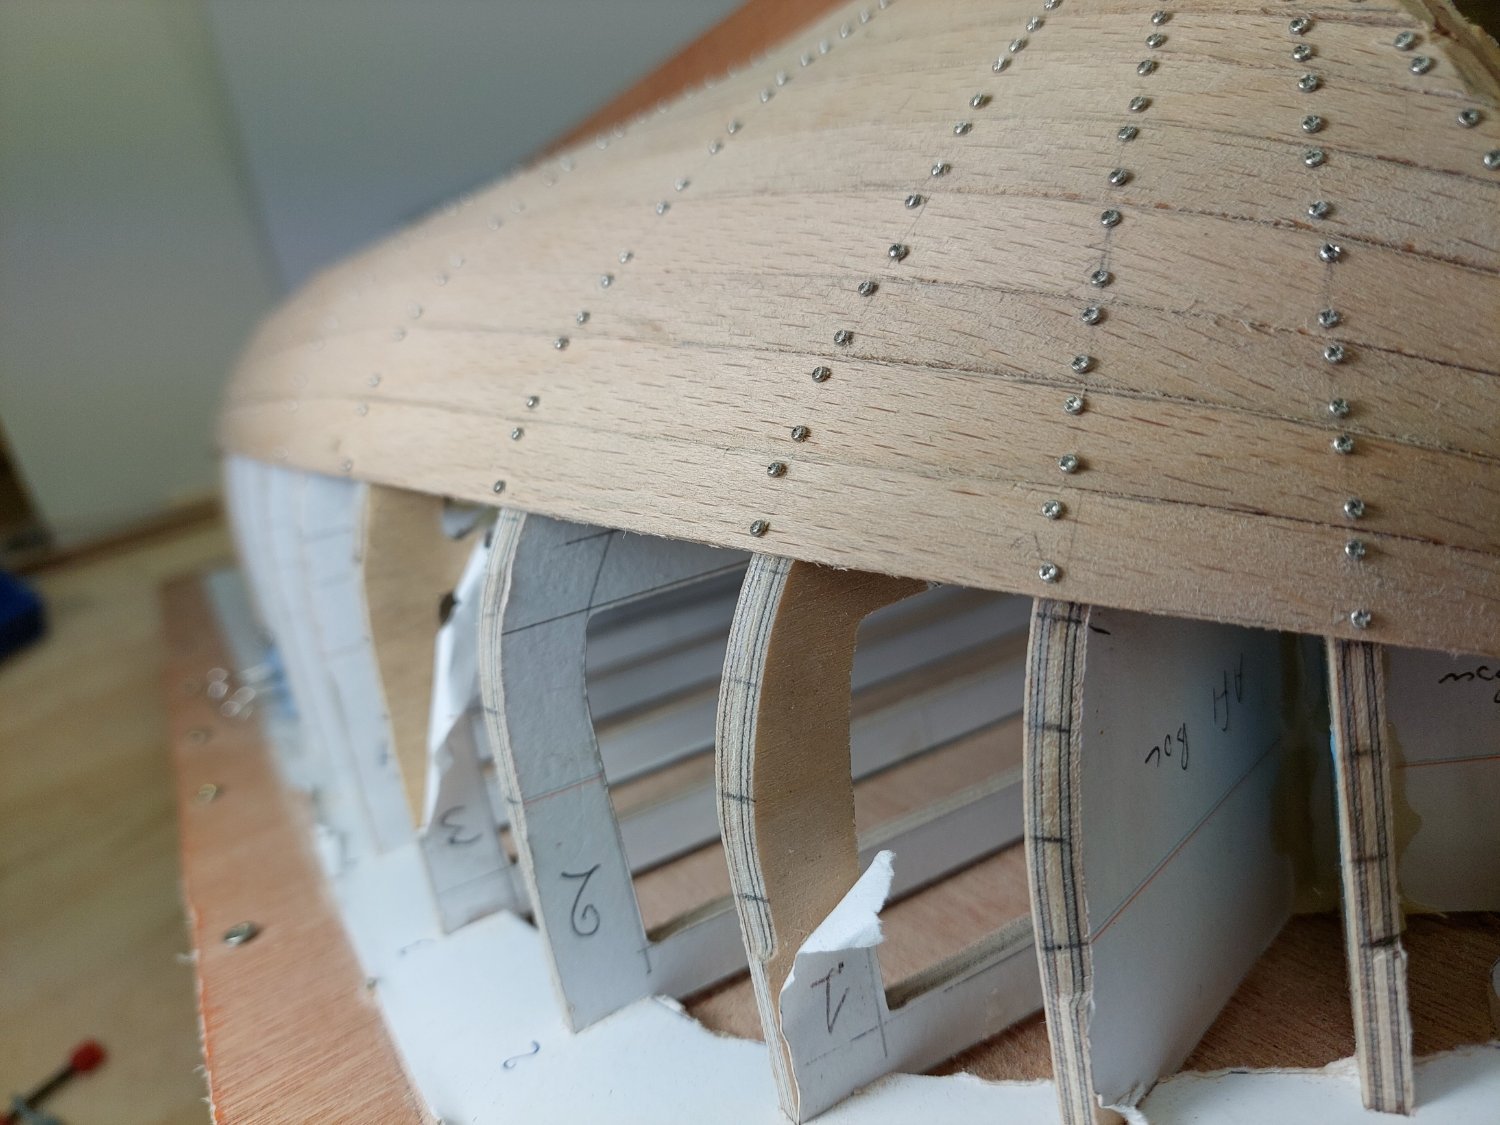
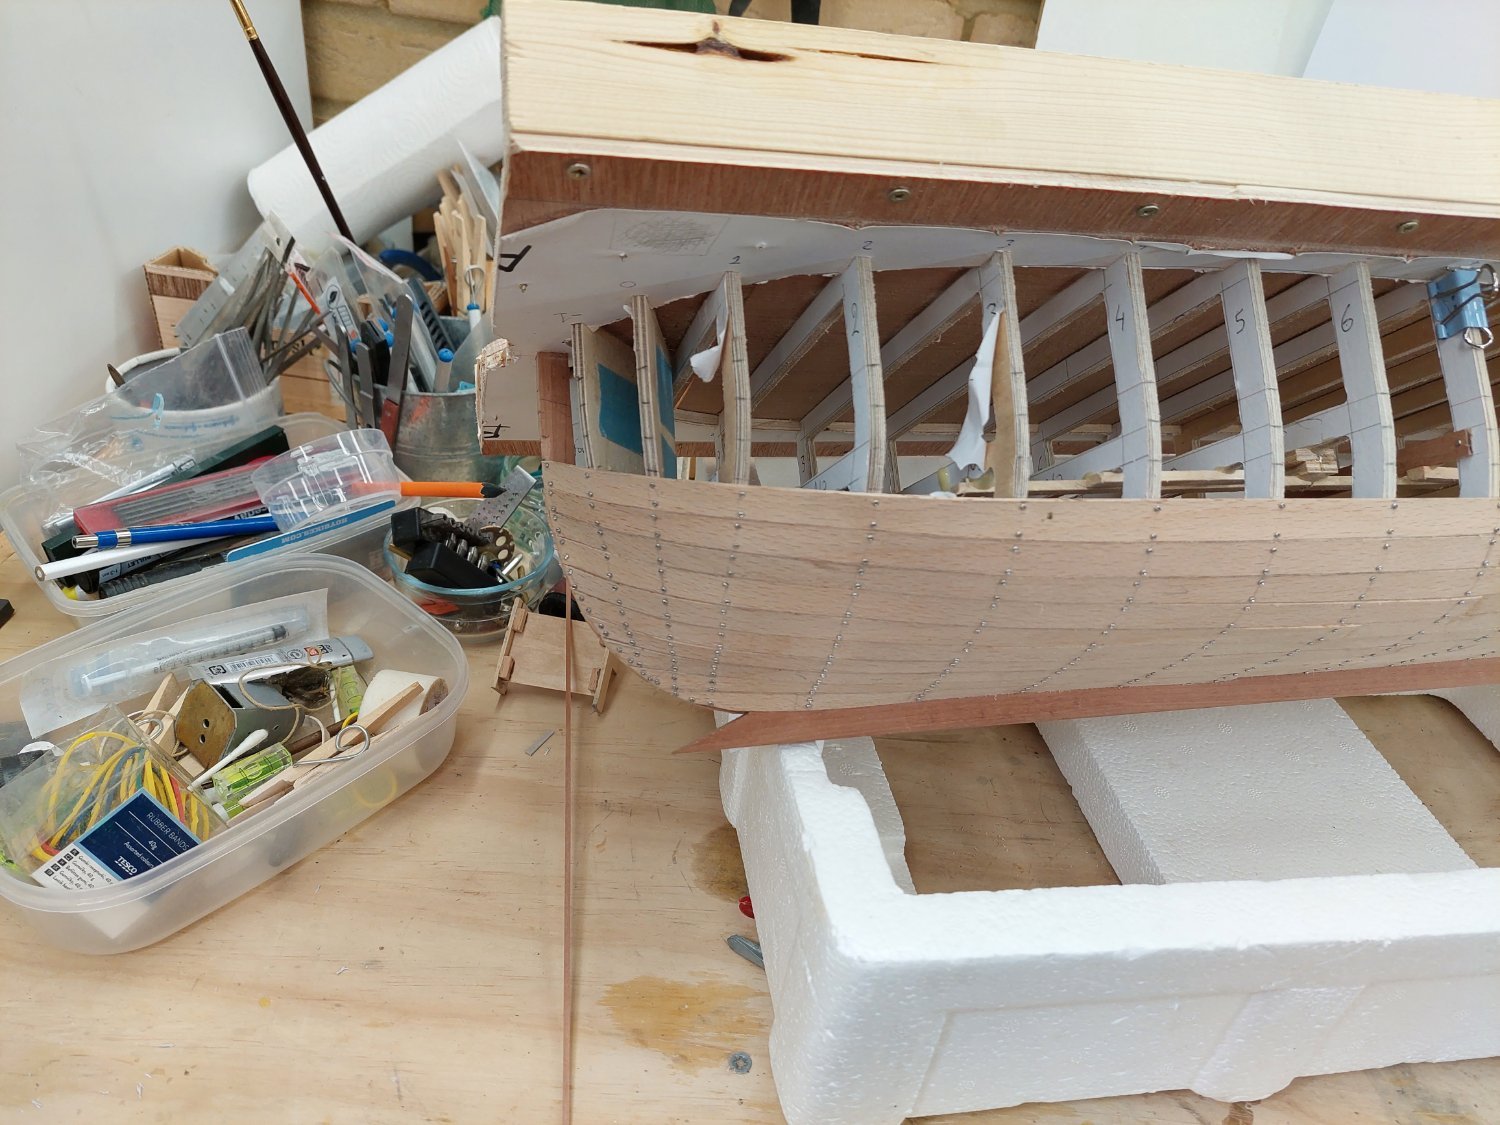
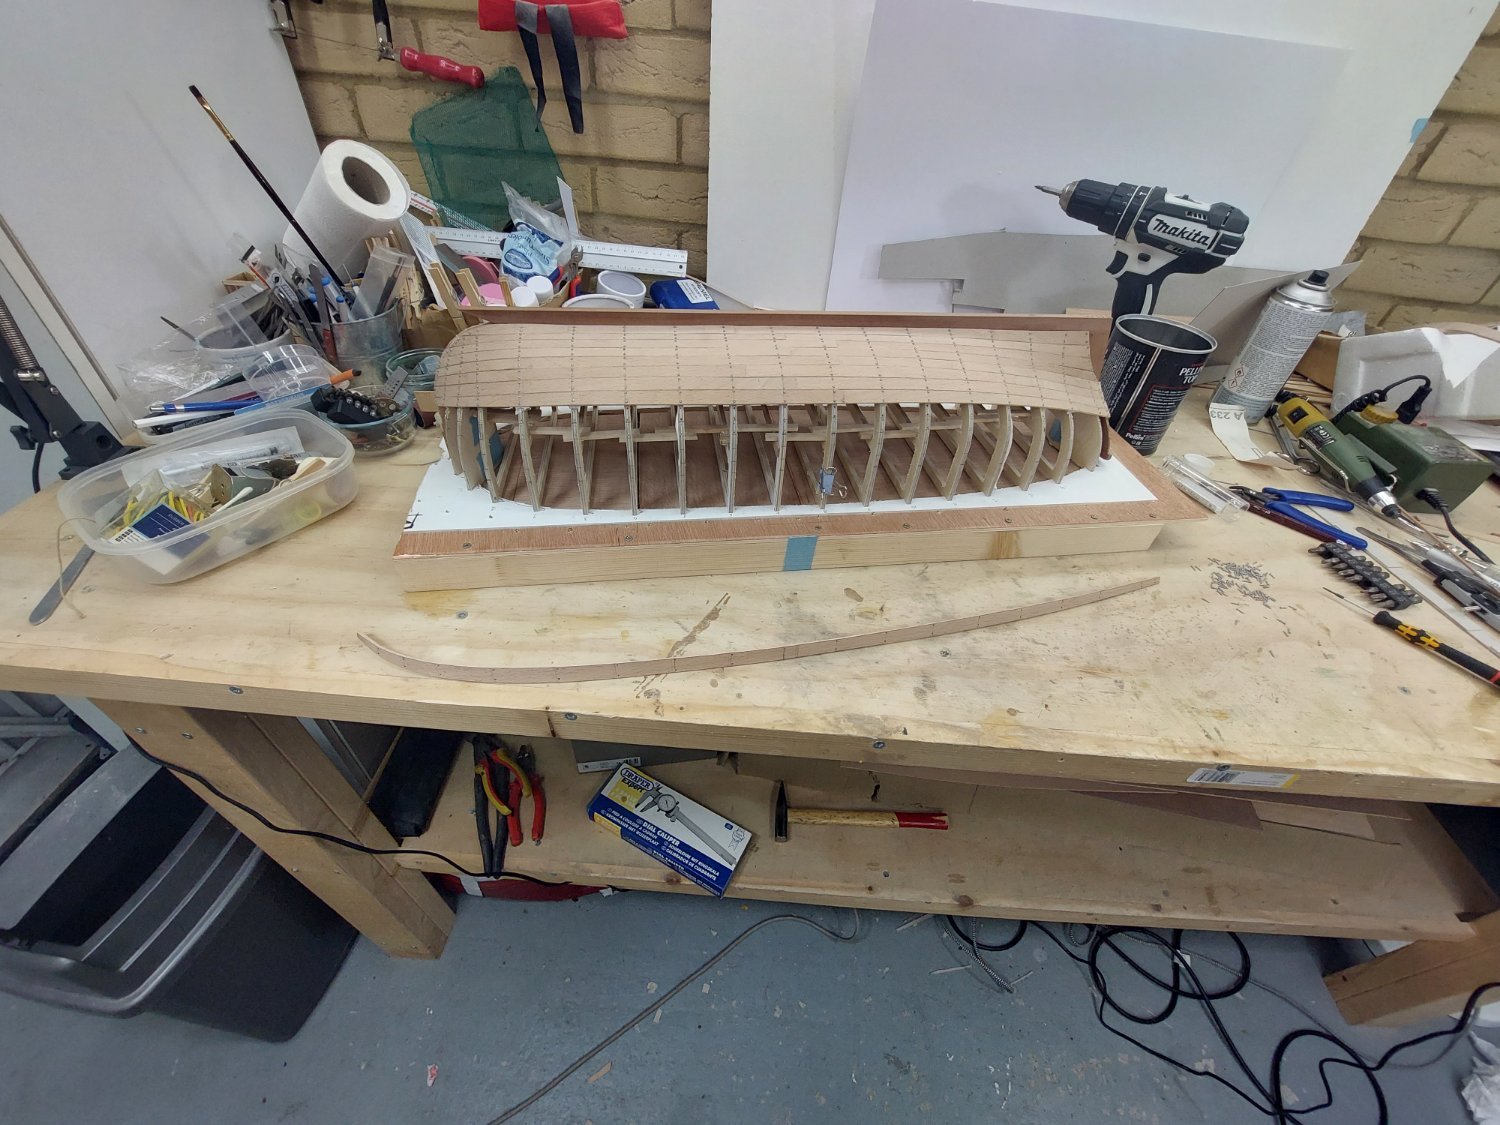
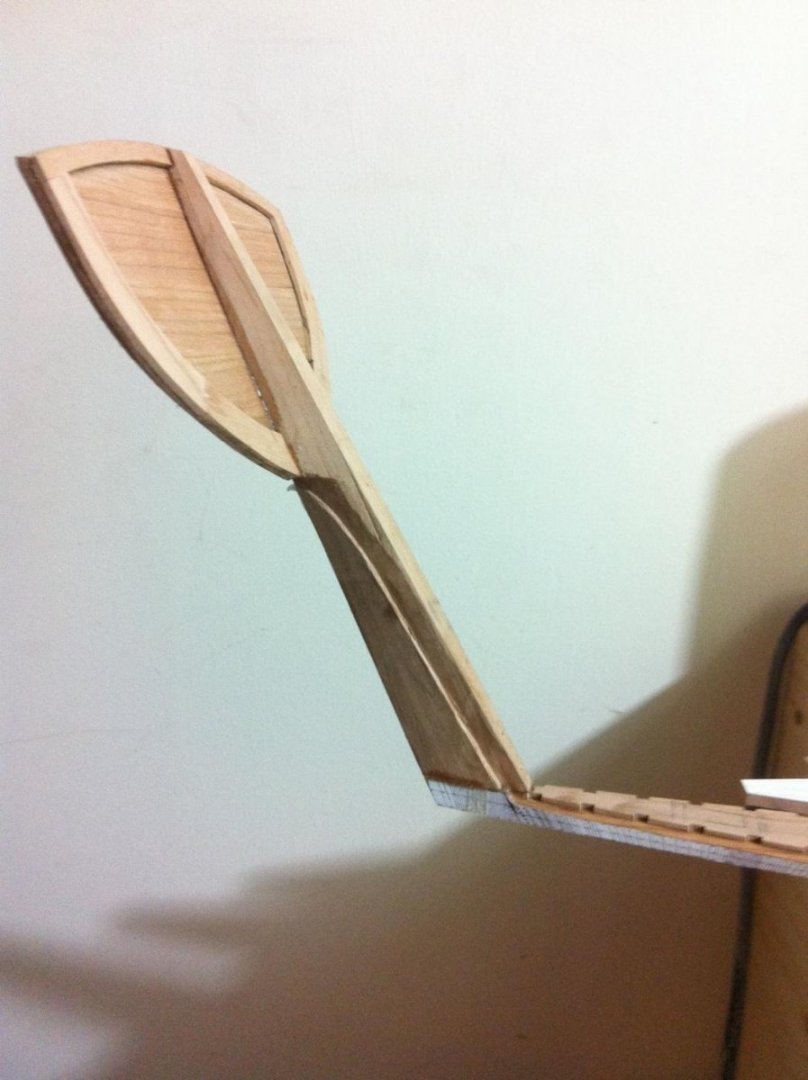
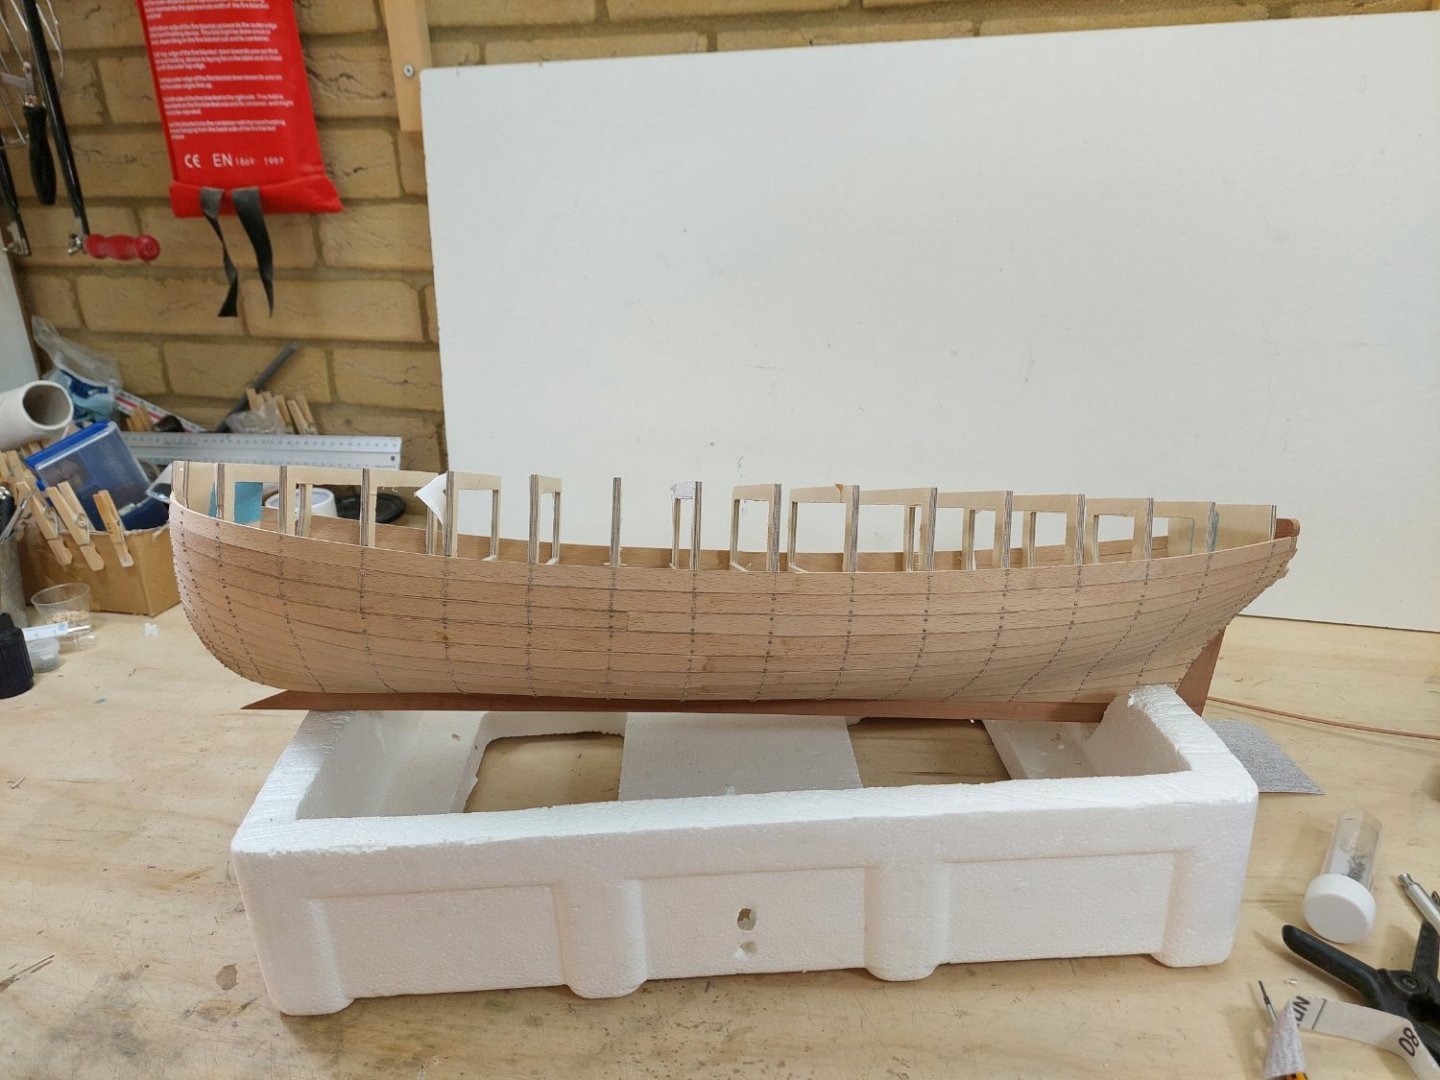
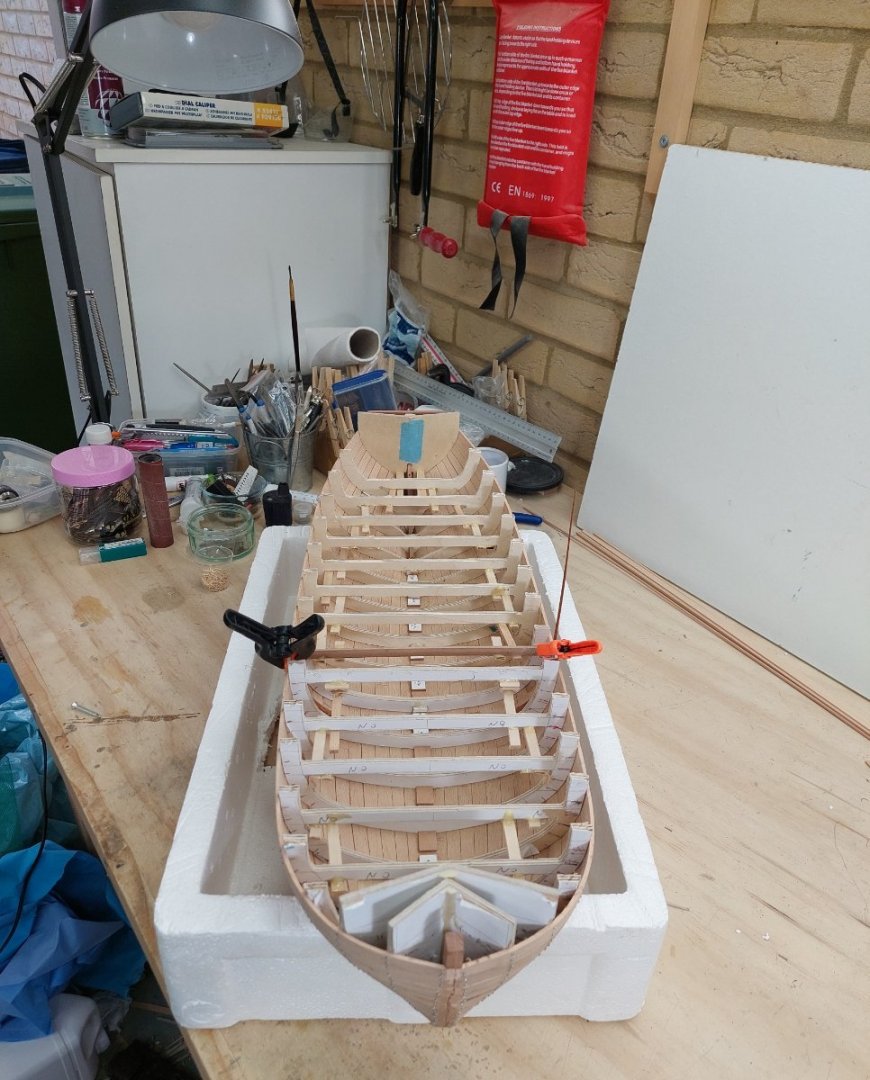
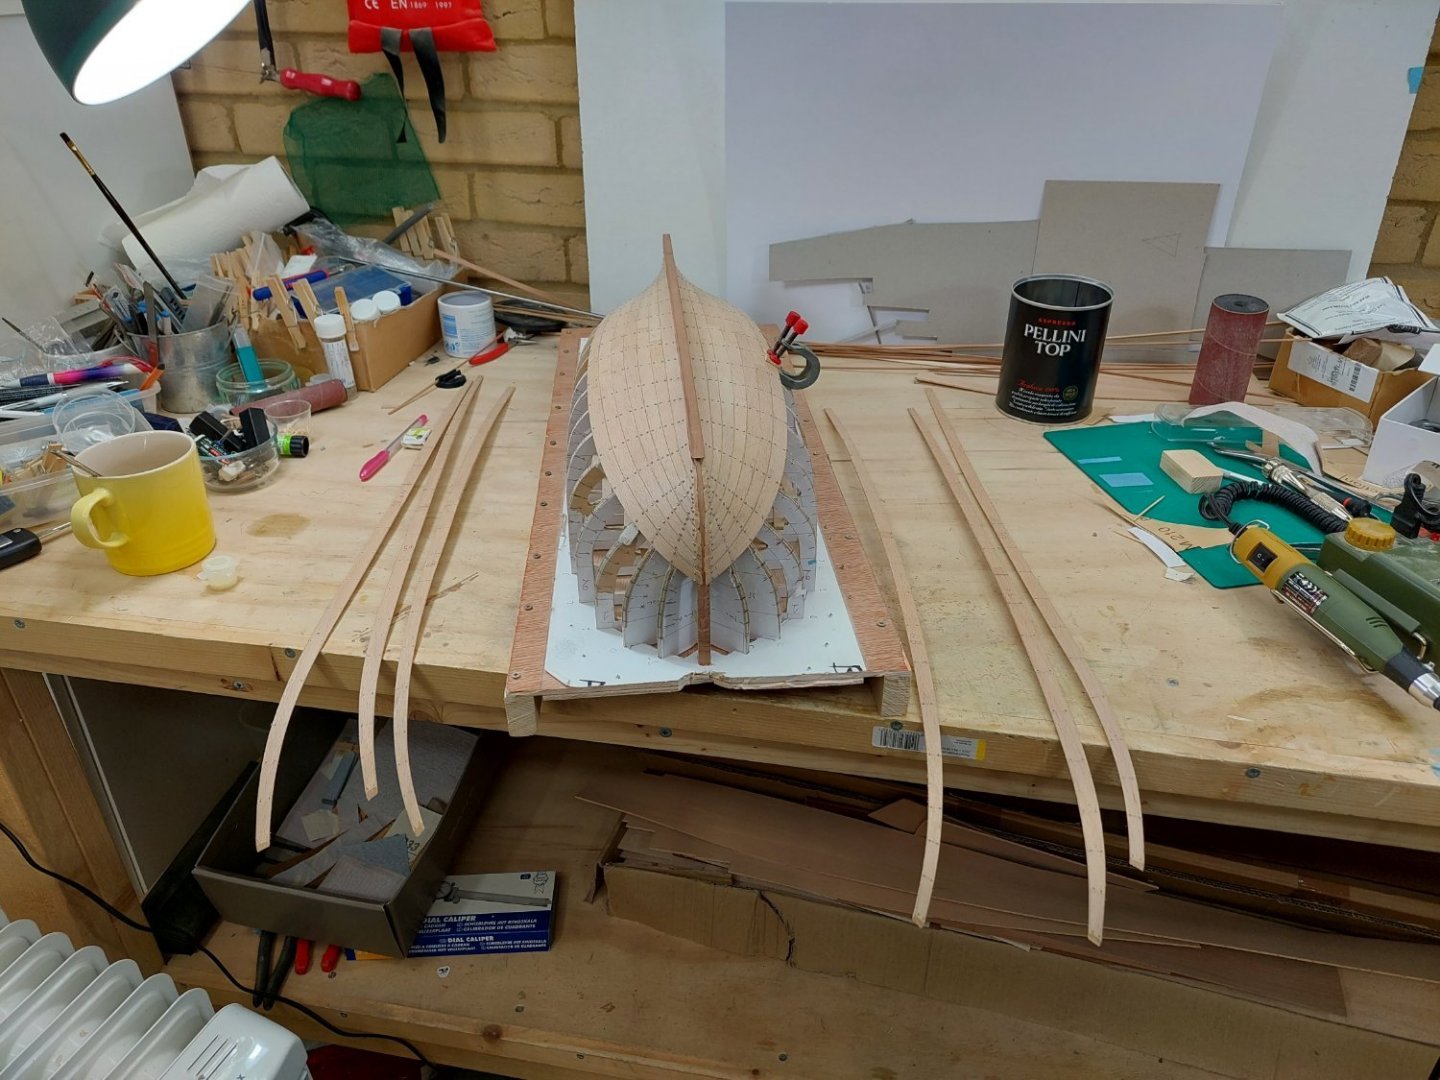
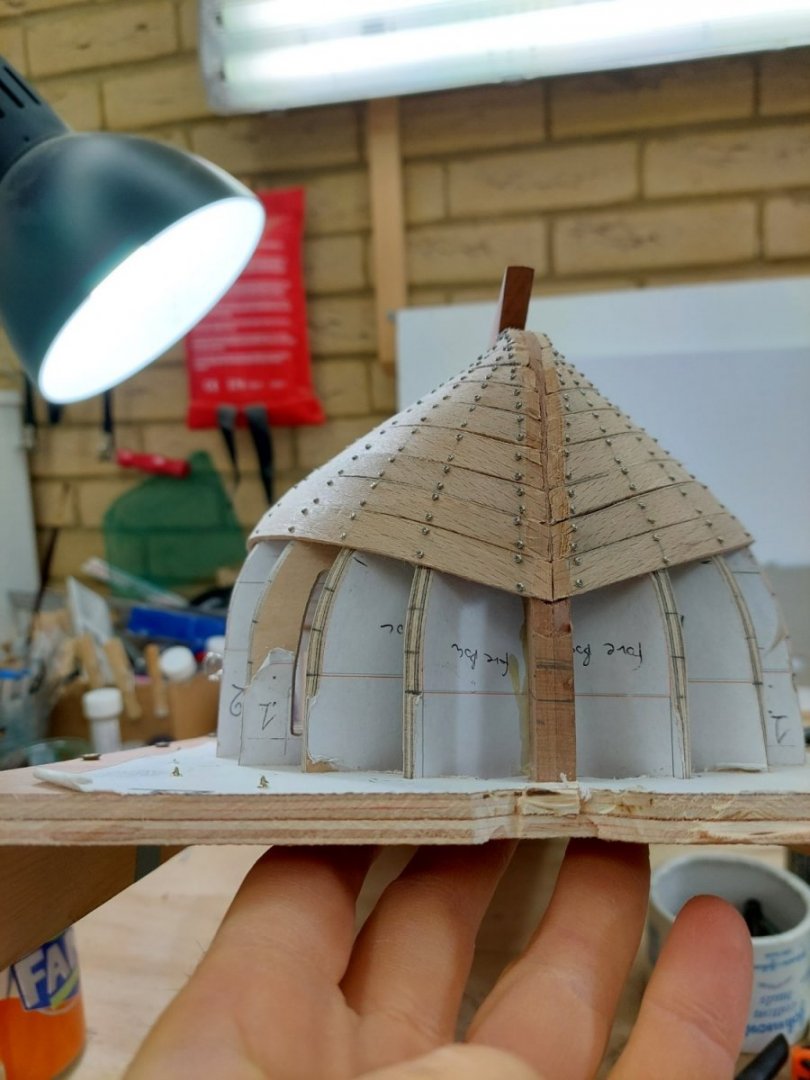
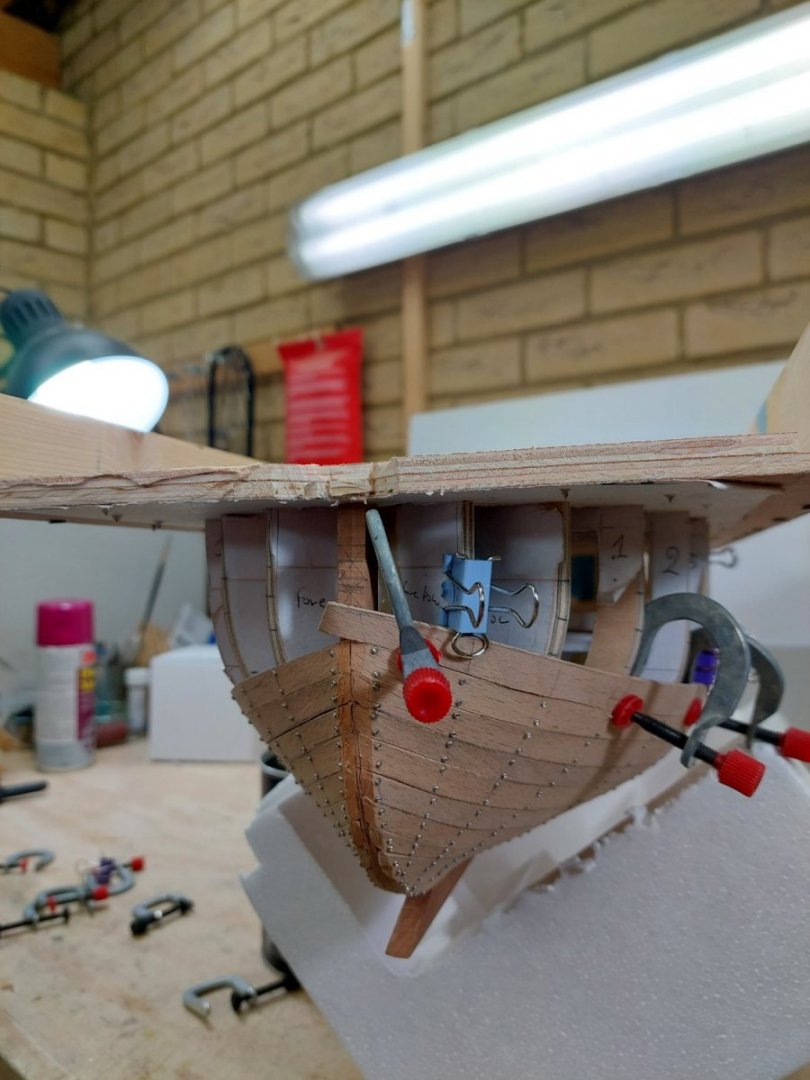
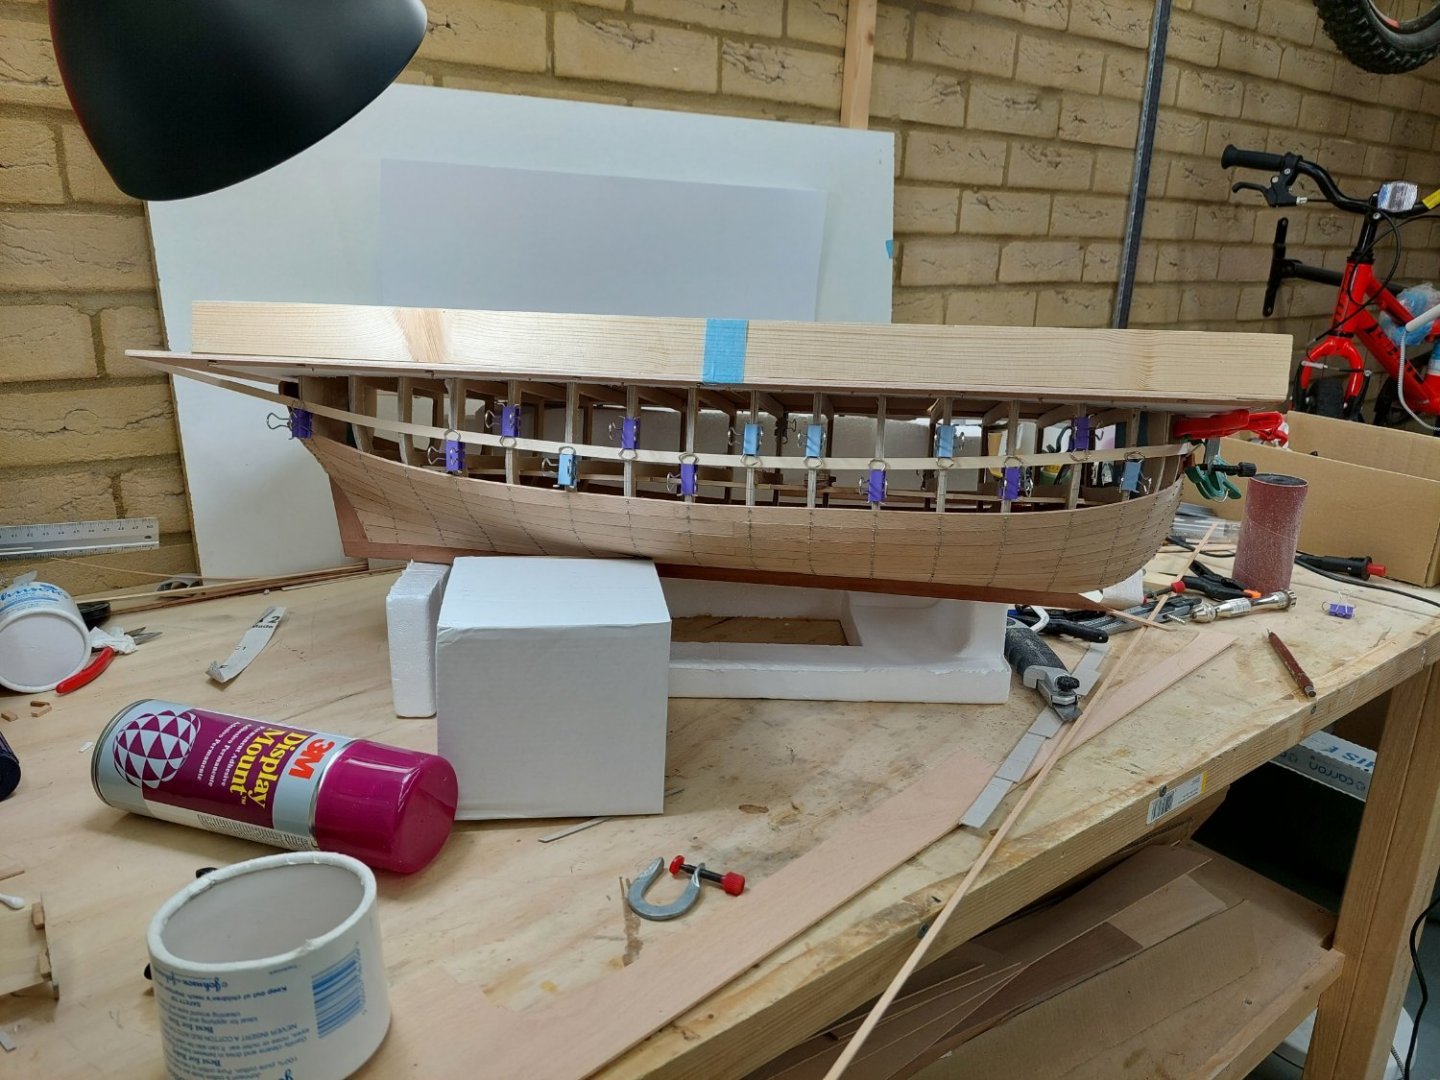
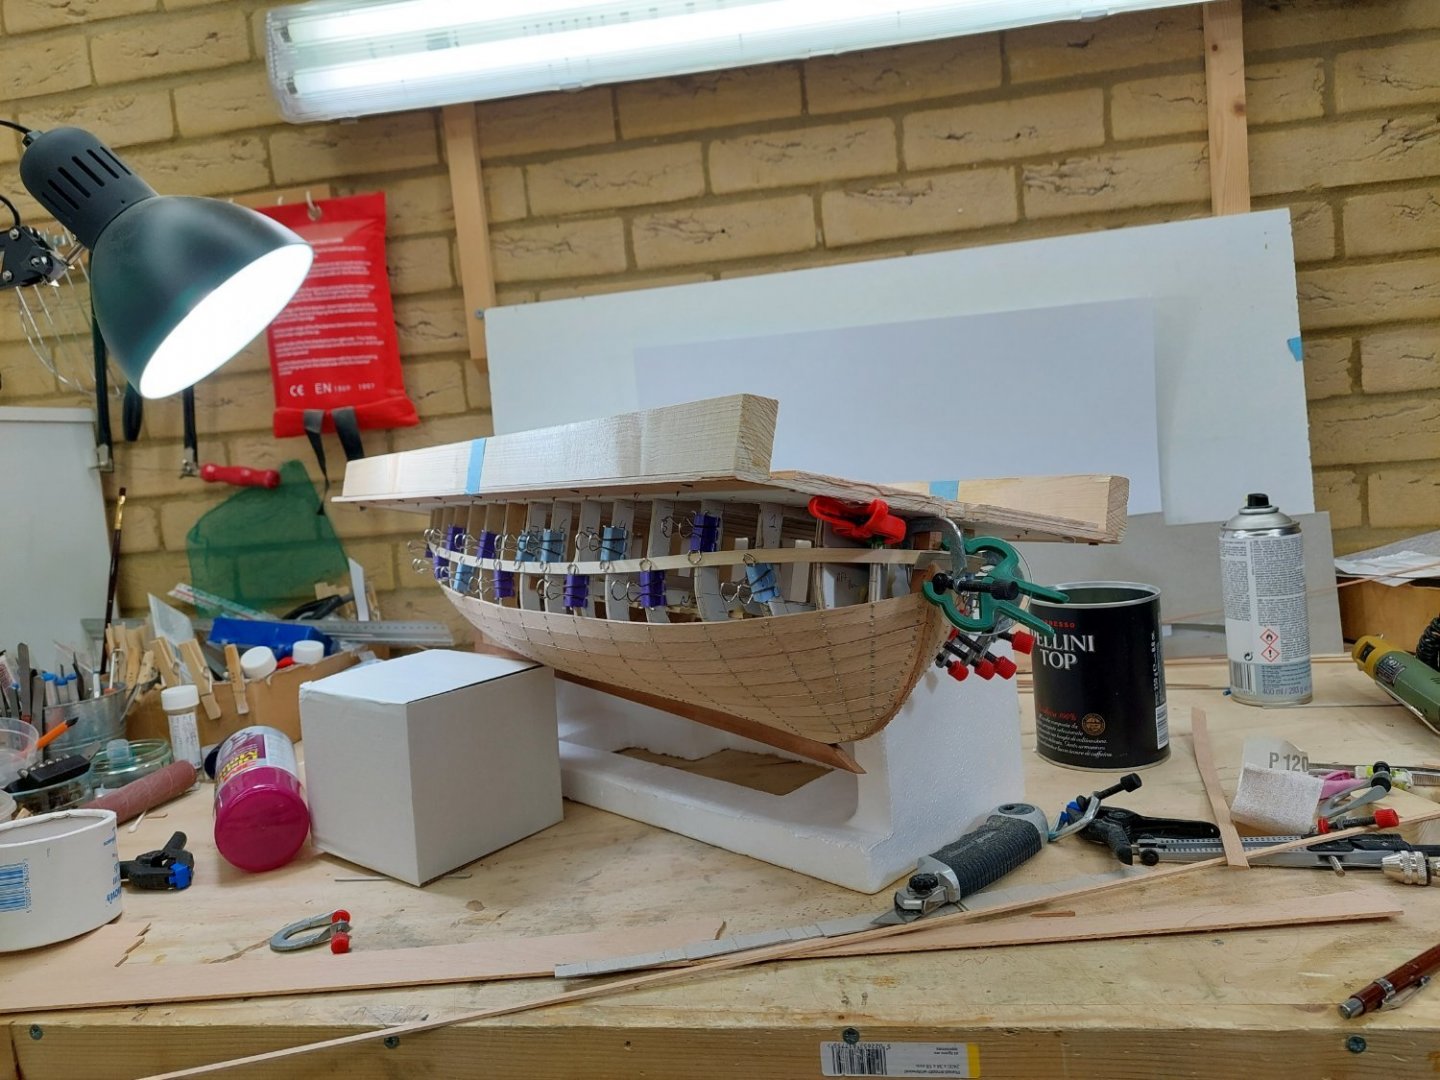
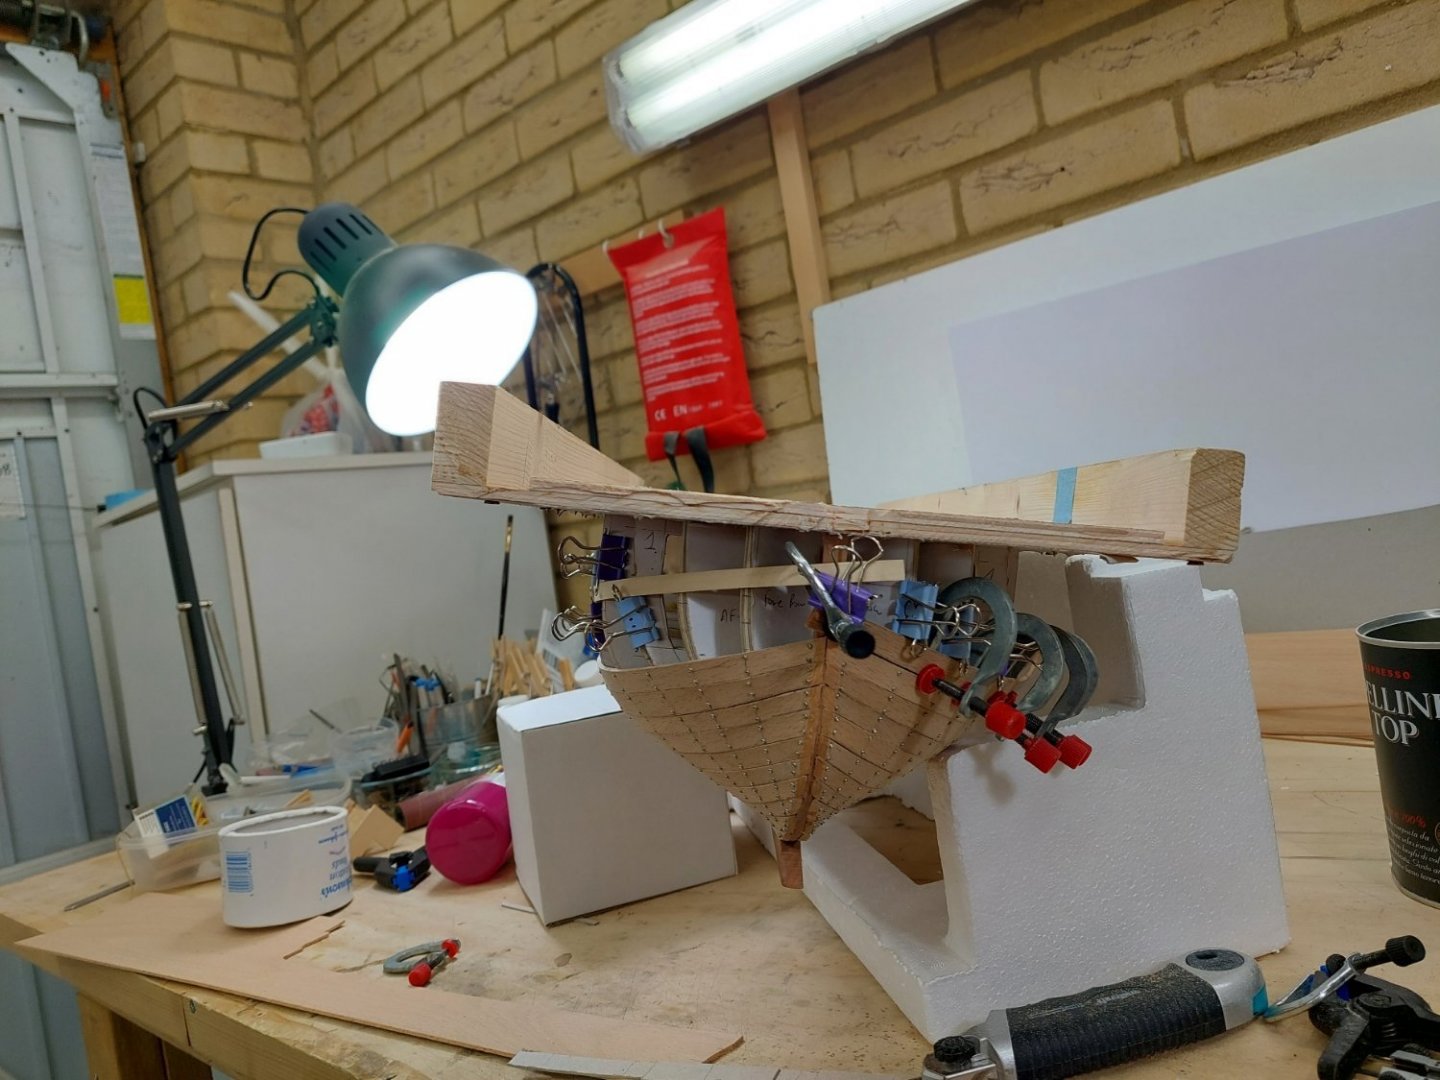
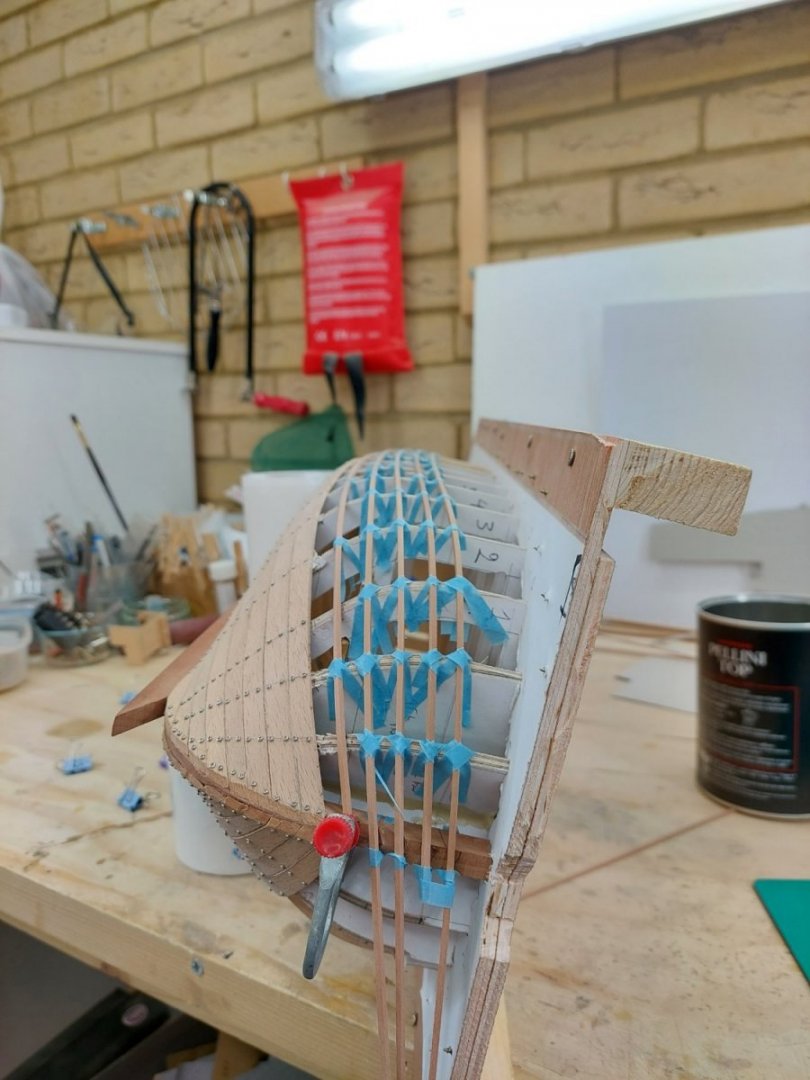
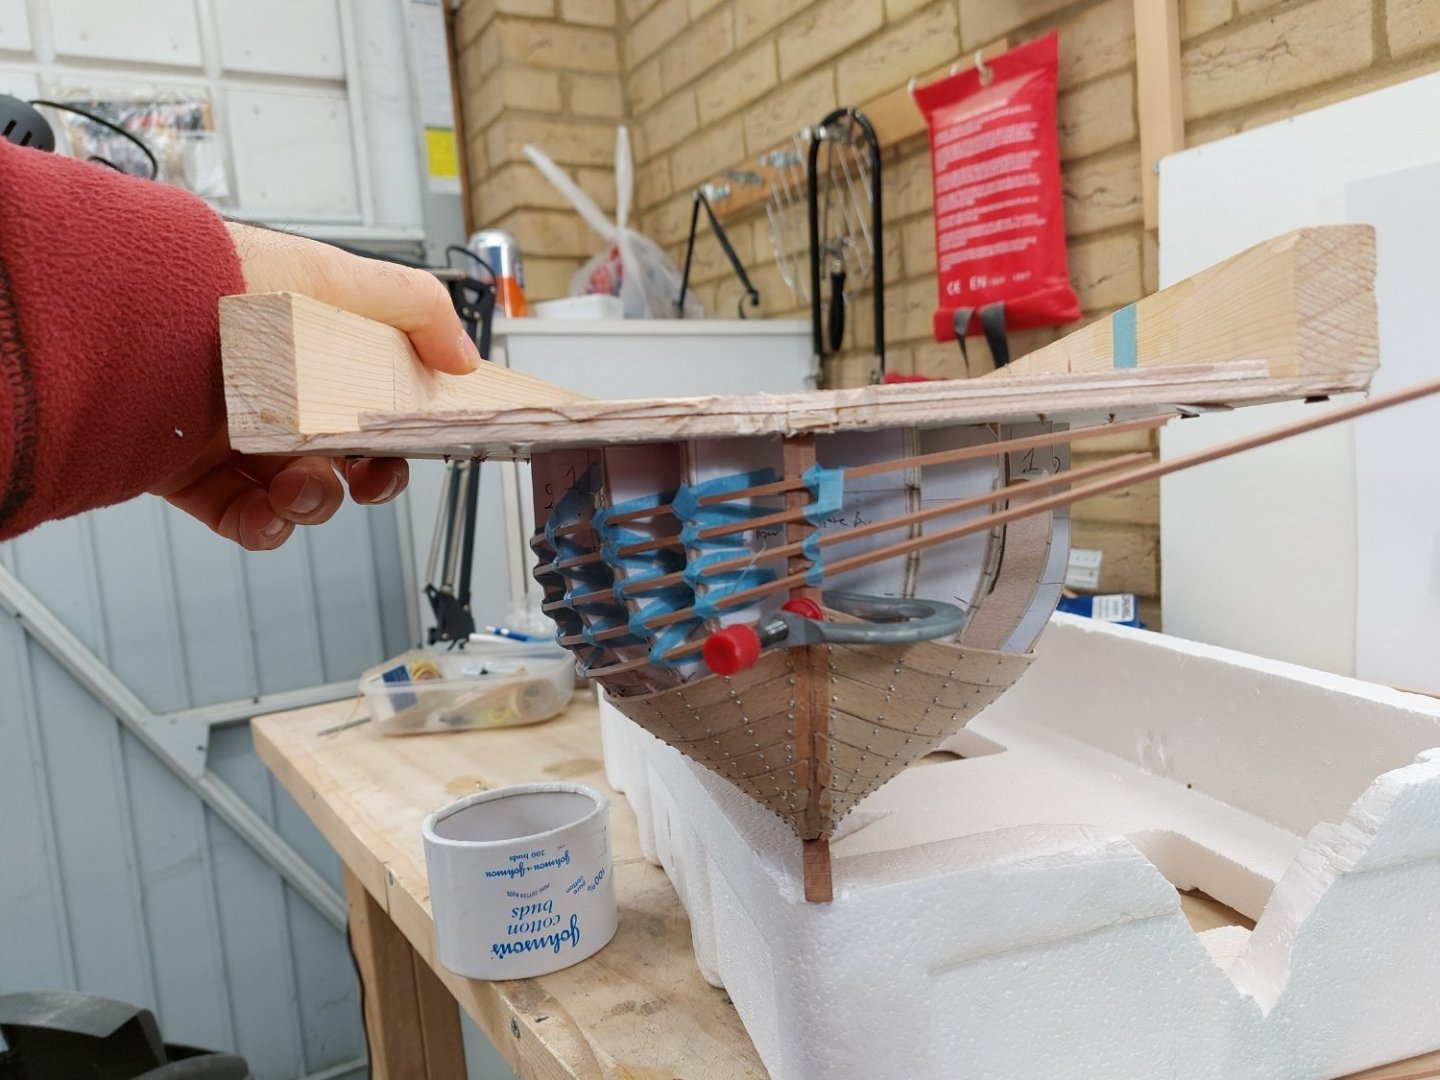
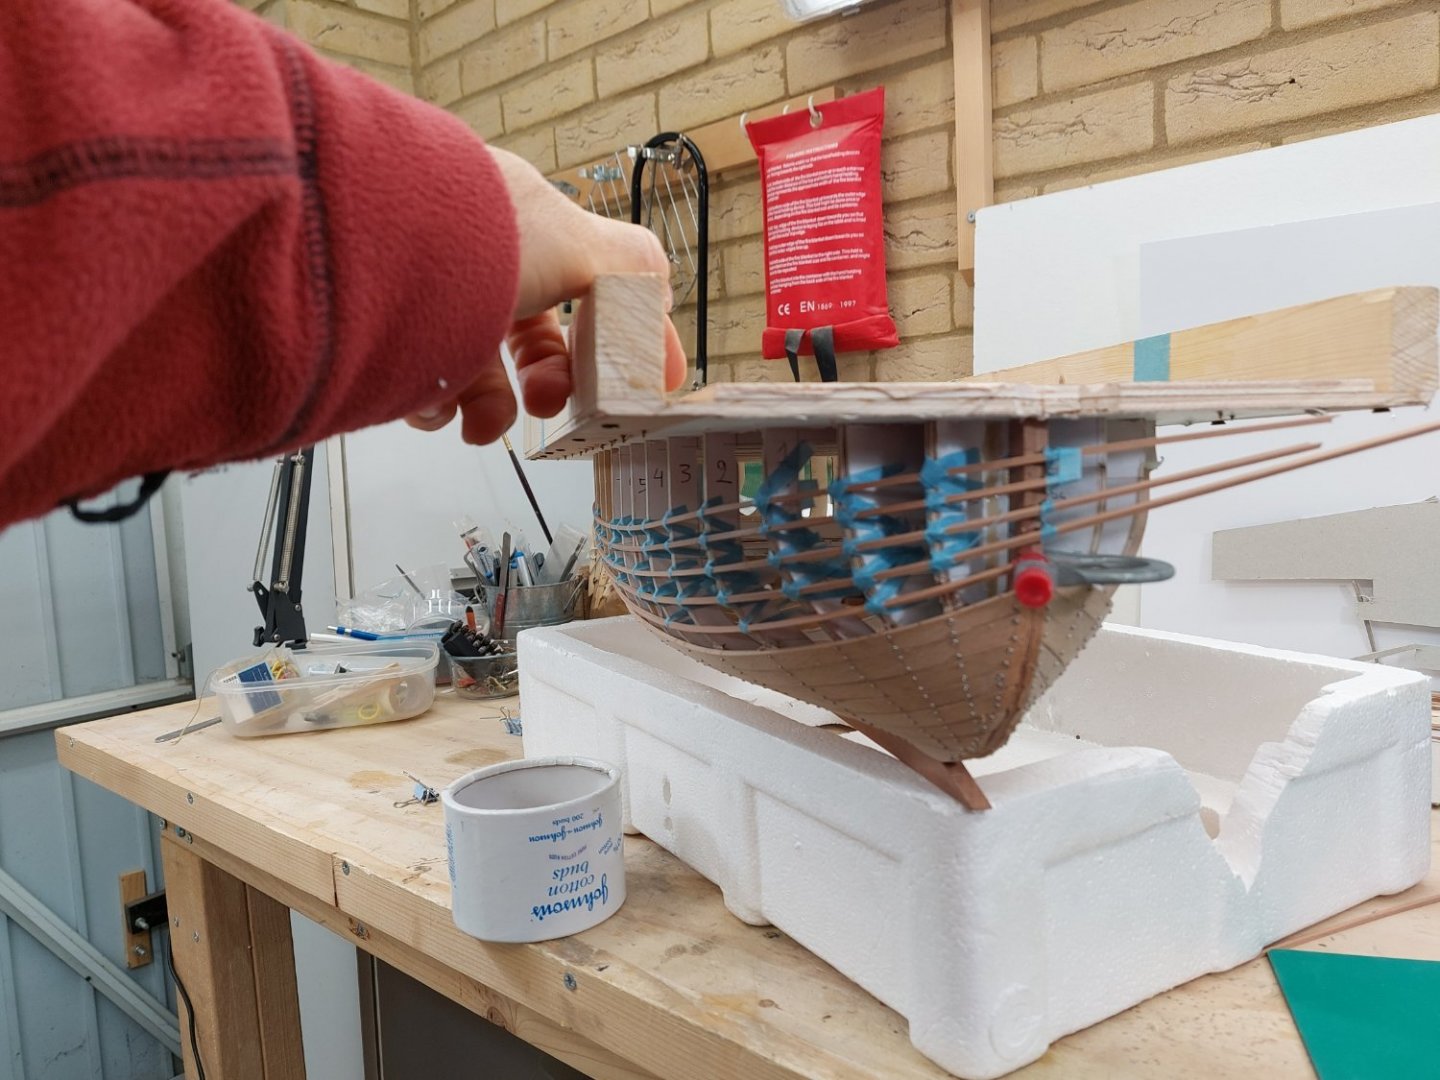
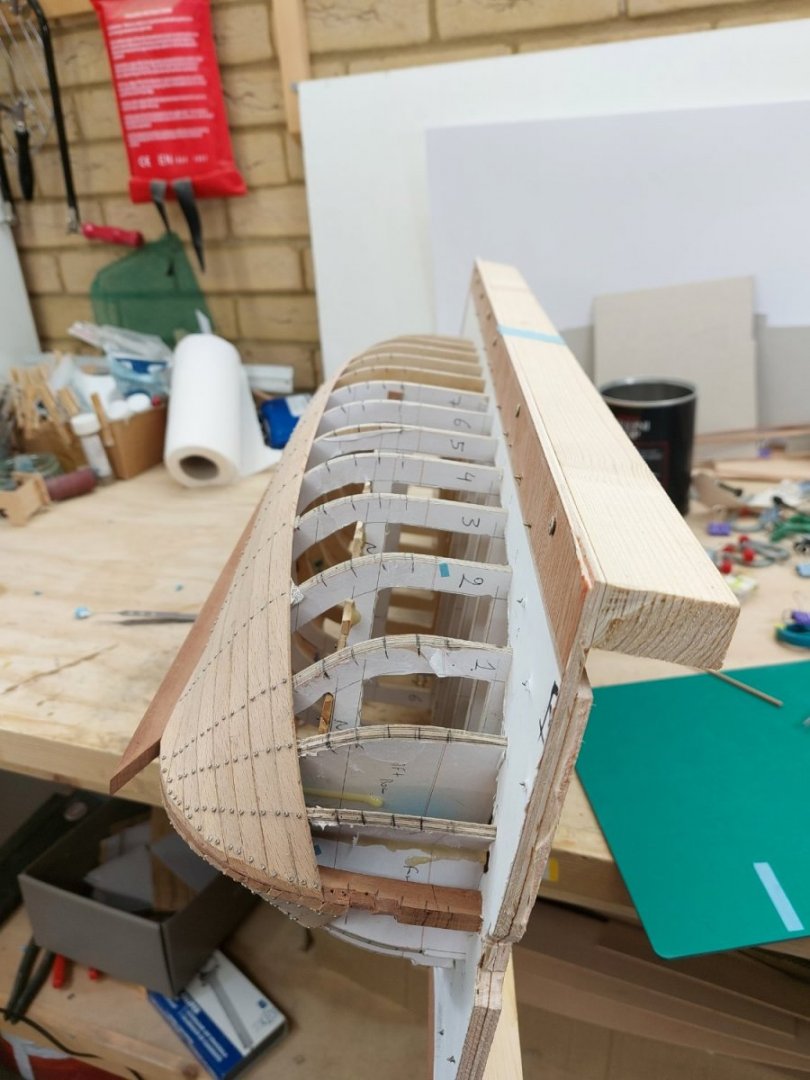
Dear friends Planking is finished! But what a difficult boat to plank! With great difficulty I managed to scrape a few moments here and there to work on the boat. My 3D plans I am pretty sure are correct, but I think they did not transfer that well to wood as some of the lines looked a bit wrong. In any case, with a lot of eyeballing and using the 80 - 20 rule, it all came together. But it was not easy! It is not only that the planks need to bend and more importantly twist a lot, it is also that the largest distance keel to sheer is near the bow and not midships. On top of this, batens cannot really be used due to the very curved bow. The scarfs also made a fair plank curve difficult. That was a mountain to climb. My planking I think is more or less correct but if I was to build this boat again, I would change the run of the planks a bit at the bow. A few photos: Perhaps the planks could end a bit lower at the bow but I do not think this is too significant, there is plenty of room. Another issue is that gaps have appeared between the planks. The wood database mentions that beech has large movement in service and indeed, the planks have shrunk considerably after they reached their moisture balance. I will use filler but I cannot sand the hull just yet, the screws need to go which means all the ribs need to be installed, the temporary frames to be removed and all the screws exchanged for tree nails. So we now move on to the next stage: steam bending ribs! And also making a few thousand tree nails... I started cutting parts of the frames to open up the space This is as far as I was able to get, at least I managed to not go into hibernation. But I am really sorry I have not been able to keep up with your logs and updates. Till next time My very best wishes to all Vaddoc


- 233 replies
-
- 15
-
-
Dear all Many thanks for your likes and comments. @BobG Yes Bob, for the scales I work at 1mm screws are fantastic. They hold things accurately and securely, can be removed and hole filled with tree nail. I ve used many thousands so far, go for stainless steel to avoid head rounding off. Modelling has slowed down as other priorities have stepped in. One is family, wife and two daughters 5 and 7. Work (of course) but also a need to increase physical fitness. During lockdown I put on a lot of weight that really started to affect me and something had to be done. So, spare time went to Tae kwon Do, cycling, gym etc. It did work, along side a sensible diet and I am 14 kg lighter - about 31 pounds and much fitter. Still a bit more to go though! Now, modelling has slowed down for two other reasons. One has been the very low temperatures, my garage at -1 C is pretty unpleasant. The other reason was that things have become more complex and difficult. Repair/restoration is much more difficult. I ended up taking more planks off, more than the photos bellow show, to correct gaps or defects but also because their shape was a bit off, collectively changing the run of the planking. The two plank halves had to be split as the aft part can be reused for some of the planks, Isopropyl alcohol dissolved PVA very effectively. I used the existing planks to re-arrange the run of all the other planks. This time I must stick to the markings, even if the planks end up with pigtail shapes. I hope the new markings will give a better plank run, we ll see Till next time Vaddoc


- 233 replies
-
- 11
-
-
Good job!
-
@druxey You are very right Druxey. A valuable lesson learned! I need to decide now whether I can continue or whether I should take all the planks out and start again. I think though there is enough space at the stem for 4 more planks.
-
Oh dear. One step forward, many steps backwards! But first thing's first. Many thanks to all for your comments and likes! Jan 6: I continued with the planking. I fitted the next plank which was wildly off. Still, I heated it up and fixed in place, to be sanded to shape later on. This is when I eyeballed the planks and thought: "Something is wrong". Jan 7: I tidied up the shipyard! And then continued with the planking. With some aggressive sanding, the plank fitted fine: Something was not right though. The plank had a funny S shape at the stem, did not look fair at all. Also, the general run of the planks is rising too acutely at the bow. Due to the very rounded shape of the bow, it should be a much more subtle rise, following the shape of the sheer to a degree. Something is not correct. See how after the last frame, the plank goes horizontal-this is wrong. At the most forward frames, the planks should rise a bit higher before meeting the stem. Jan 8: It is not possible to proceed with the planking. Something is really wrong. There is too much space to be covered at the first 3 frames, the planks do not have a fair run and become too thick near the stem, there is not enough space at the stem and it seems that the sheer should be going a bit higher at the stem - despite the CAD saying otherwise. Even following the current markings which are probably wrong, I have made this plank too narrow. This plank is clearly wrong. The next plank would need to be very thick at the bow to close the gap. I thought it would be ok having this plank a bit more narrow - wrong! Despite these concerns, I went ahead and made the next plank on both sides. The shape looks properly wrong! I tried to re-arrange the plank widths at the stem but I could feel the main issue was elsewhere. The new plank fitted in place. Looks absolutely horrible. It is very obvious that the previous plank is cut too narrow near the bow and is too thick at frames 6, 5 4 & 3. There is also this very ugly massive gap at the plank further down. Not sure how this opened up but it is not really acceptable. So decision taken: one plank from port side and two from strarboard need to come out. Here they are: This was painful but necessary. I should be able to salvage the aft parts of the planks and make again the scarfs. January 10: I redid the run of the planks again. I tried to make them equal width but my primary concern was to have a more pleasant run and to follow the sheer. I think it looks ok. The bow is so curved that it is very difficult to use battens and to eyeball the hull. Comparing the new with the old markings (not too clear on the photo), it is clear some of the frame were way off. So here is where we are now. I think the contralateral plank will need to be removed also. So next: transfer the markings to the other side, quite possibly remove the port plank, fill the screw holes and continue with the planking, hopefully I ll be able to salvage the aft halves of the planks. This is a very difficult boat to plank! Have a great new year everyone! Vaddoc


- 233 replies
-
- 10
-