.jpg.f26acc9a74319261612561bfa7da1303.jpg)
vaddoc
-
Posts
1,605 -
Joined
-
Last visited
Content Type
Profiles
Forums
Gallery
Events
Everything posted by vaddoc
-
.thumb.jpg.6fd4c1b78768bb3efd745ab810936005.jpg) With the model in your hand, its small size comes into perspective, looking at the full interior in the last close up photos I had forgotten just how small. Also, the wooden decks really bring the model into life and hide the bulk of the structure. Looking very good Patrick!
With the model in your hand, its small size comes into perspective, looking at the full interior in the last close up photos I had forgotten just how small. Also, the wooden decks really bring the model into life and hide the bulk of the structure. Looking very good Patrick! -
Thank you all, considering it is my second model I am happy with the result. I realised though that I forgot the reefing lines so one more loose end to tie. Patrick, houses in Britain are really small so no chance for a glass case! Bob, I used Aleene's glue which I think is just ordinary PVA glue which shrinks and dries virtually invisible. The cloth is synthetic but still it glued fine.
- 253 replies
-
- 3
-

-
- ketkch
- gaff-rigged
- (and 1 more)
-
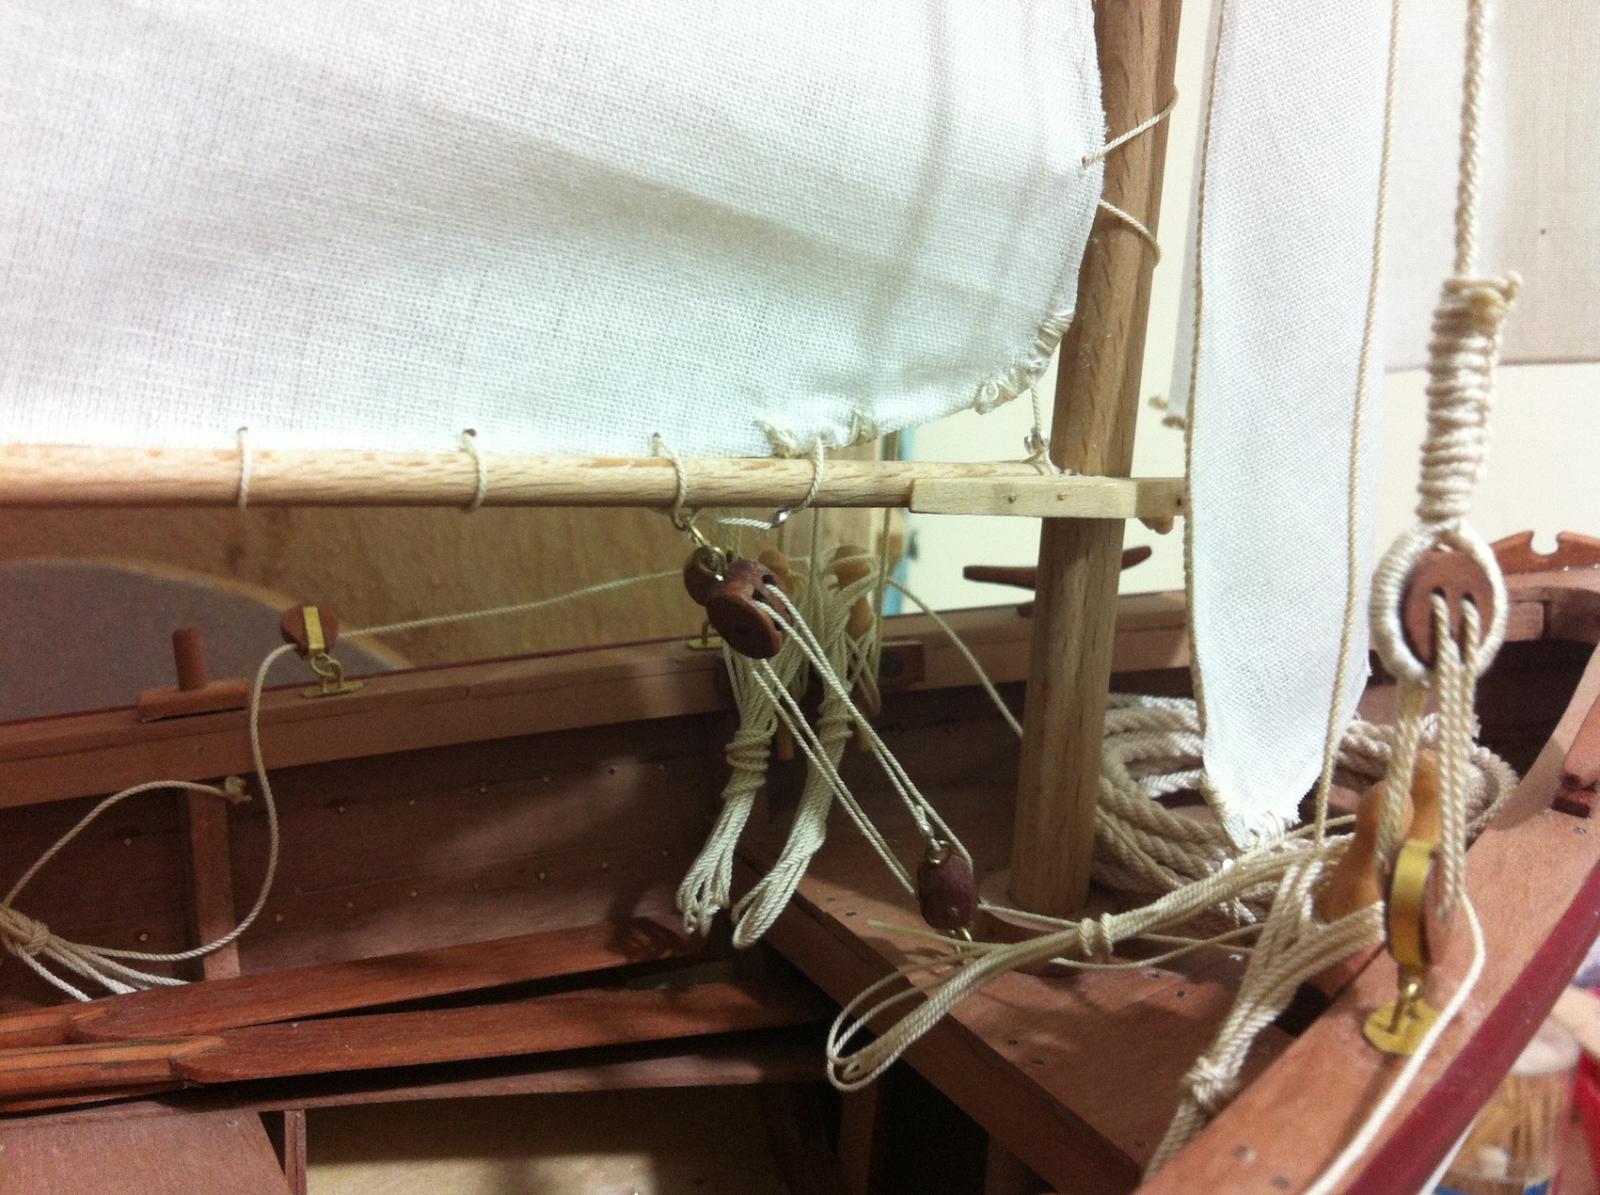
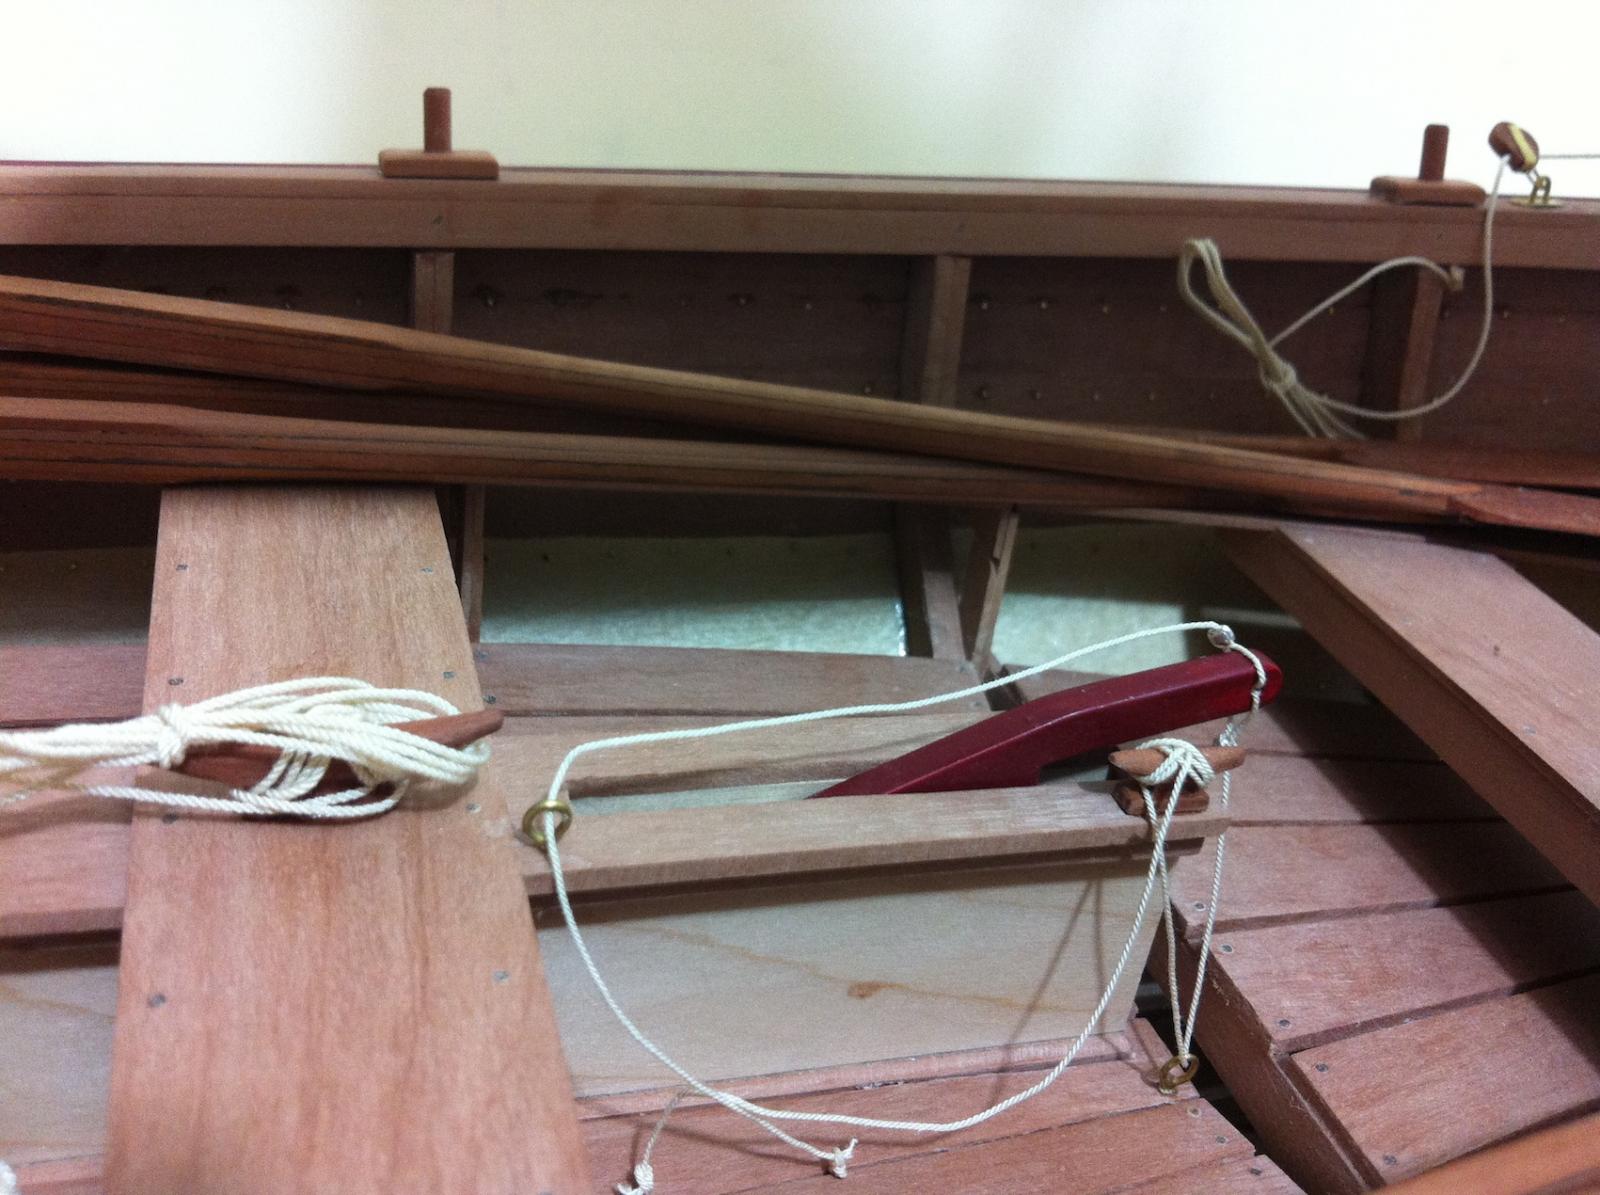
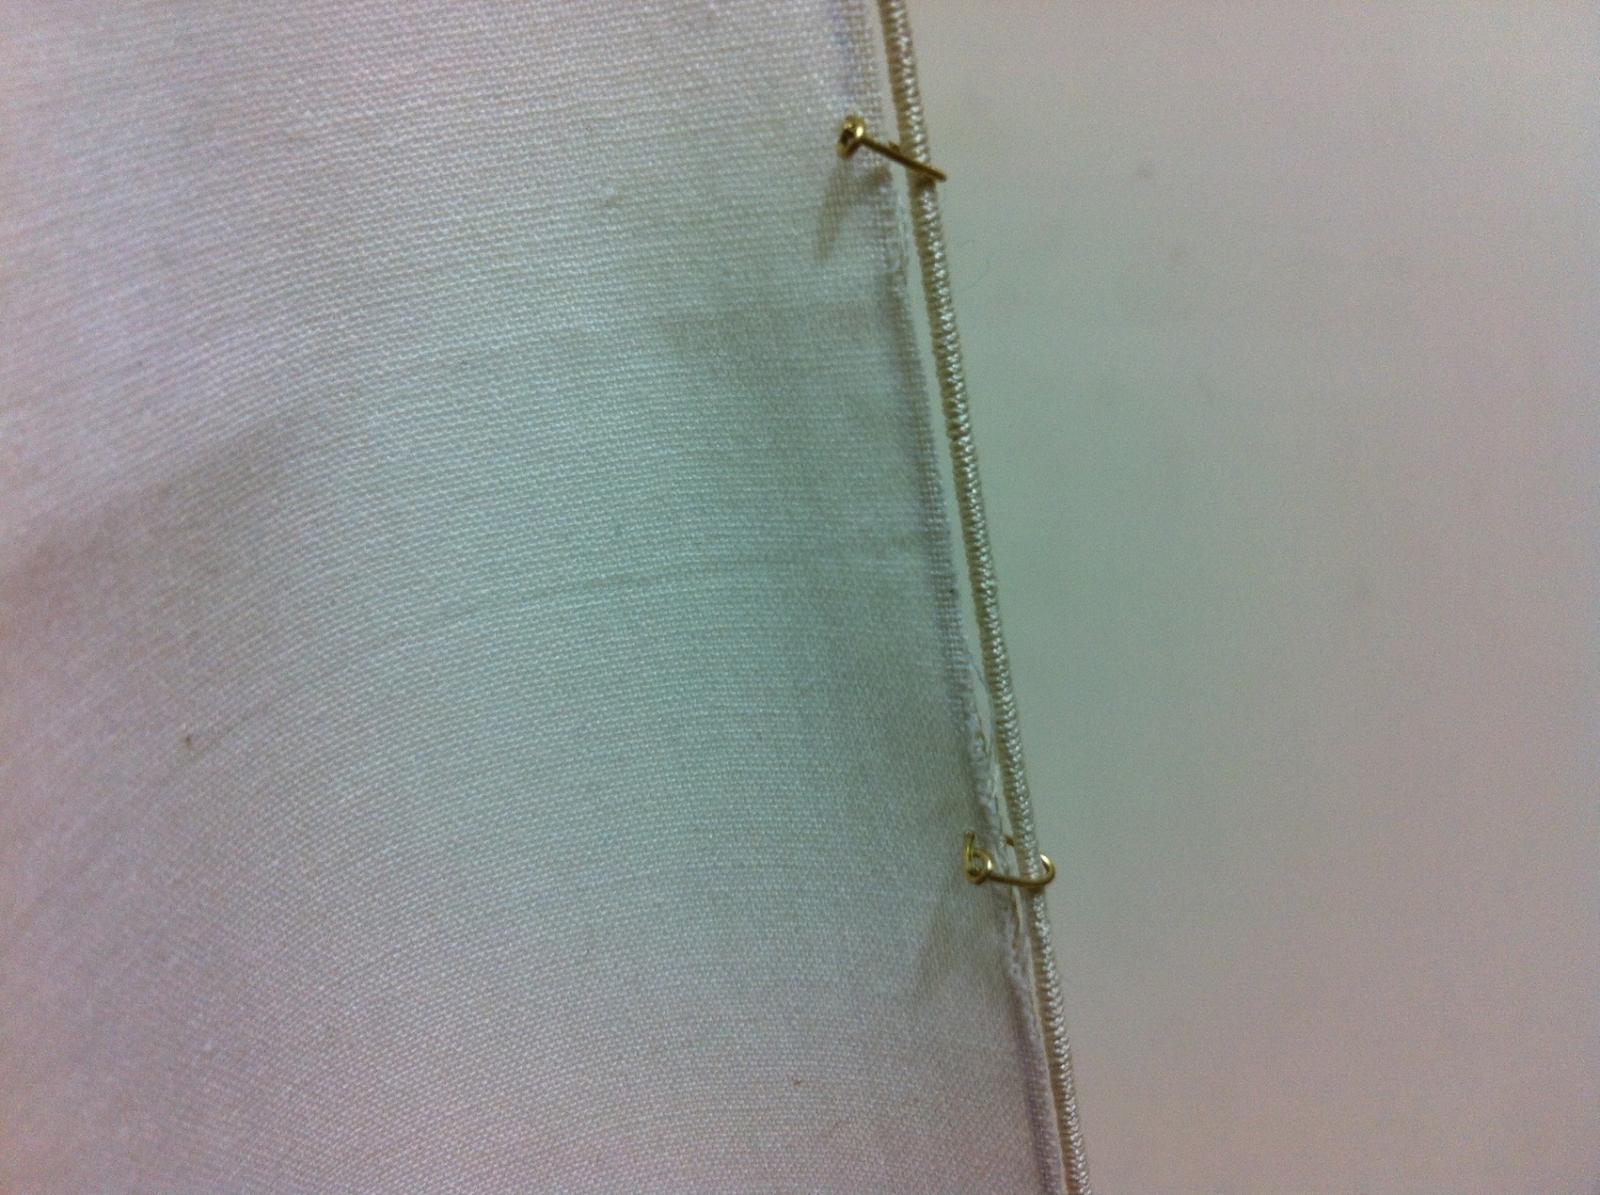
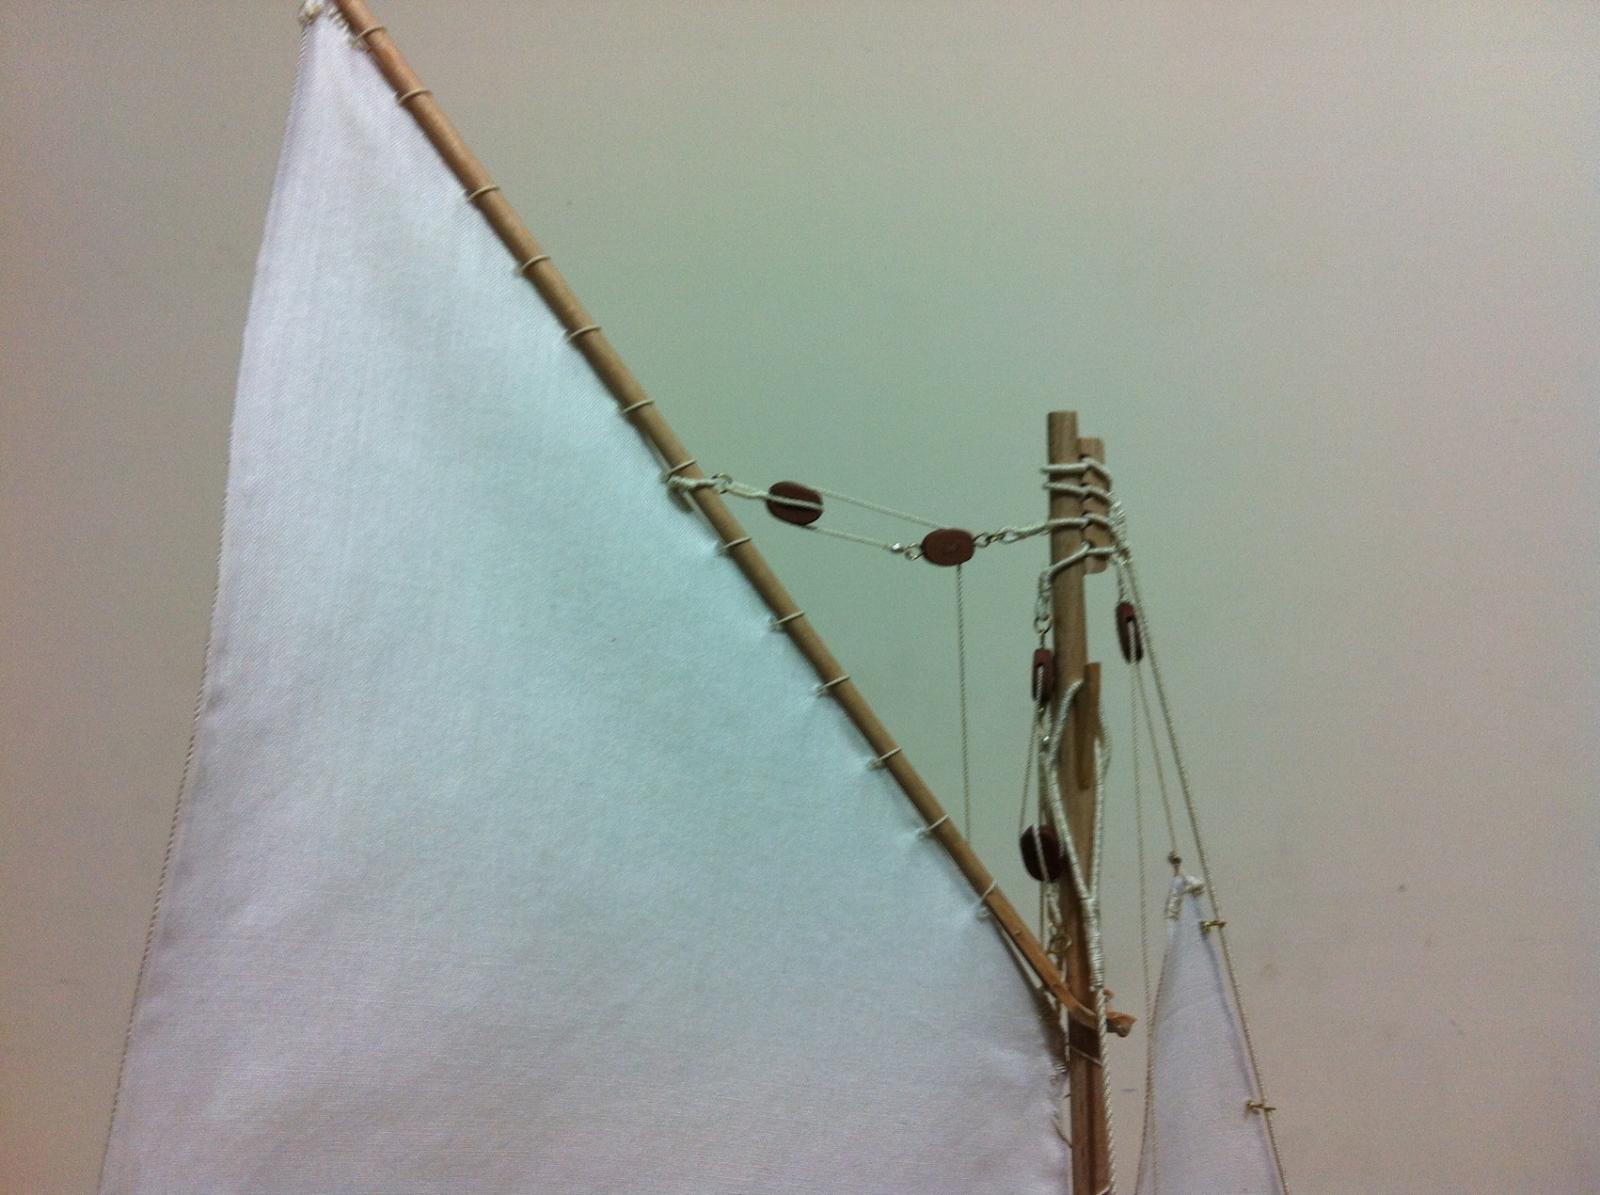
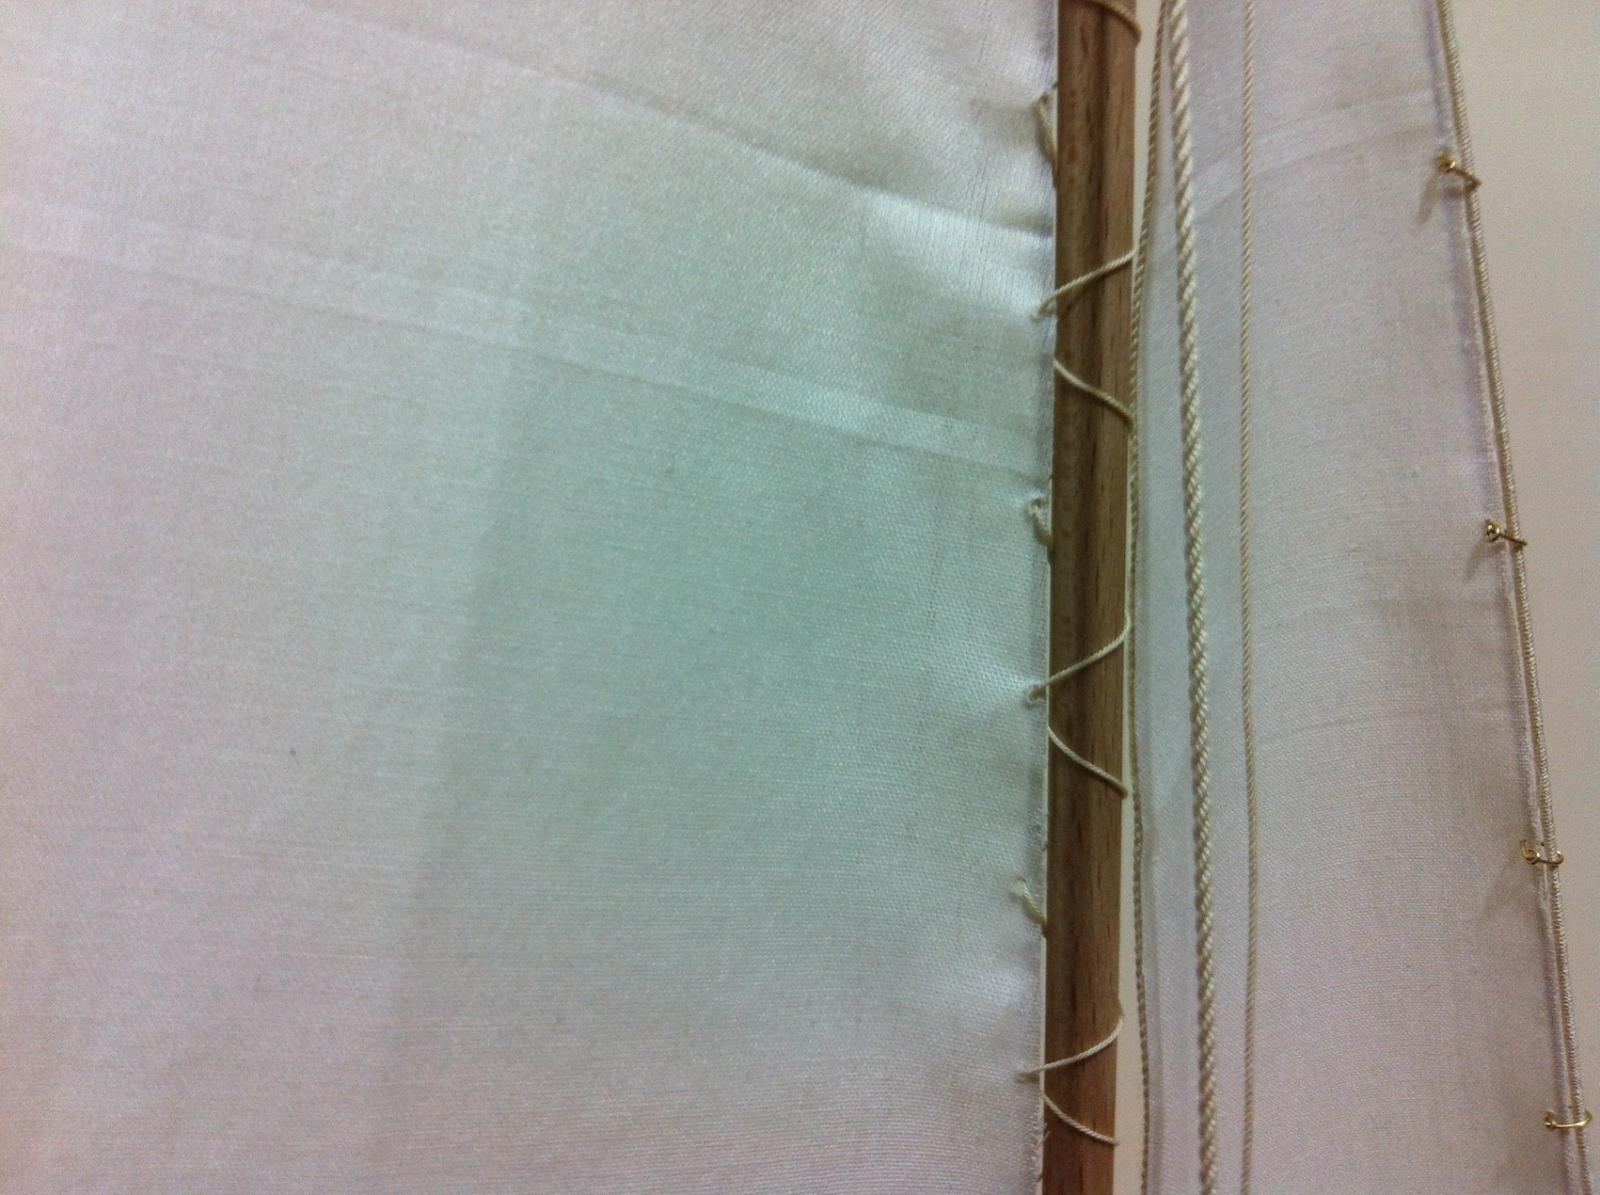
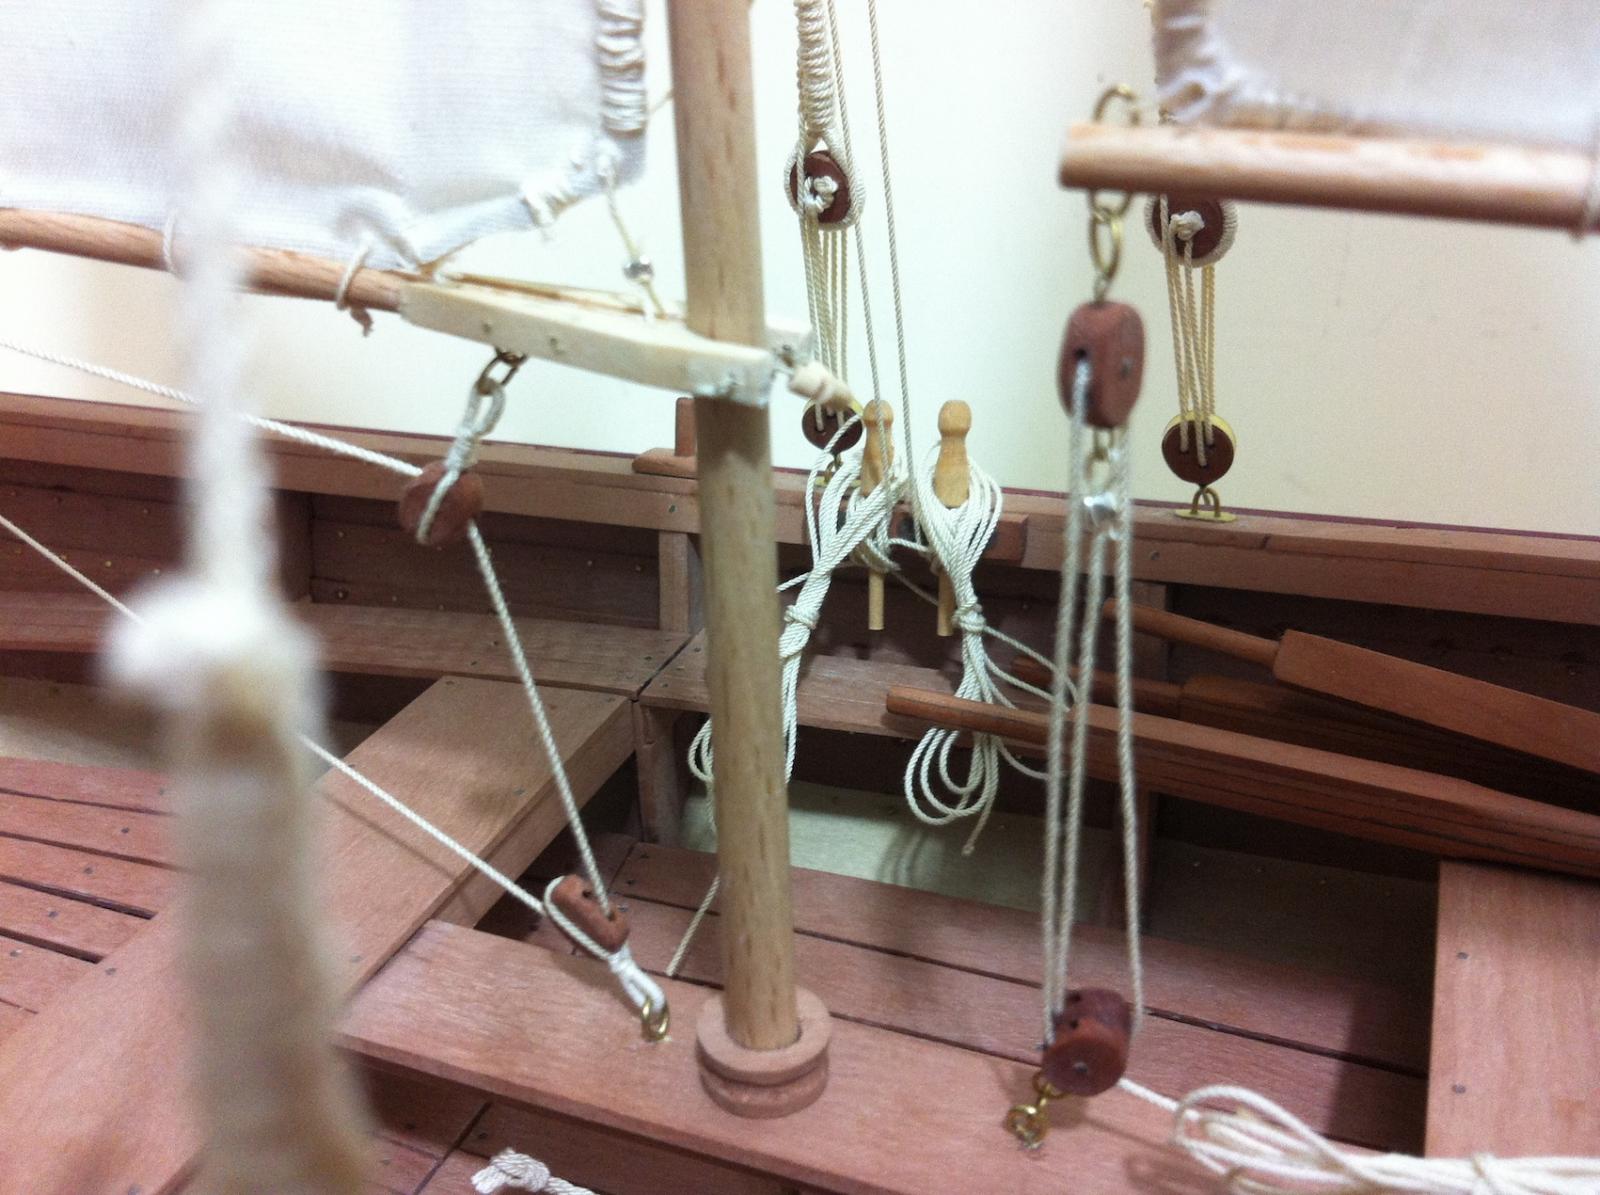
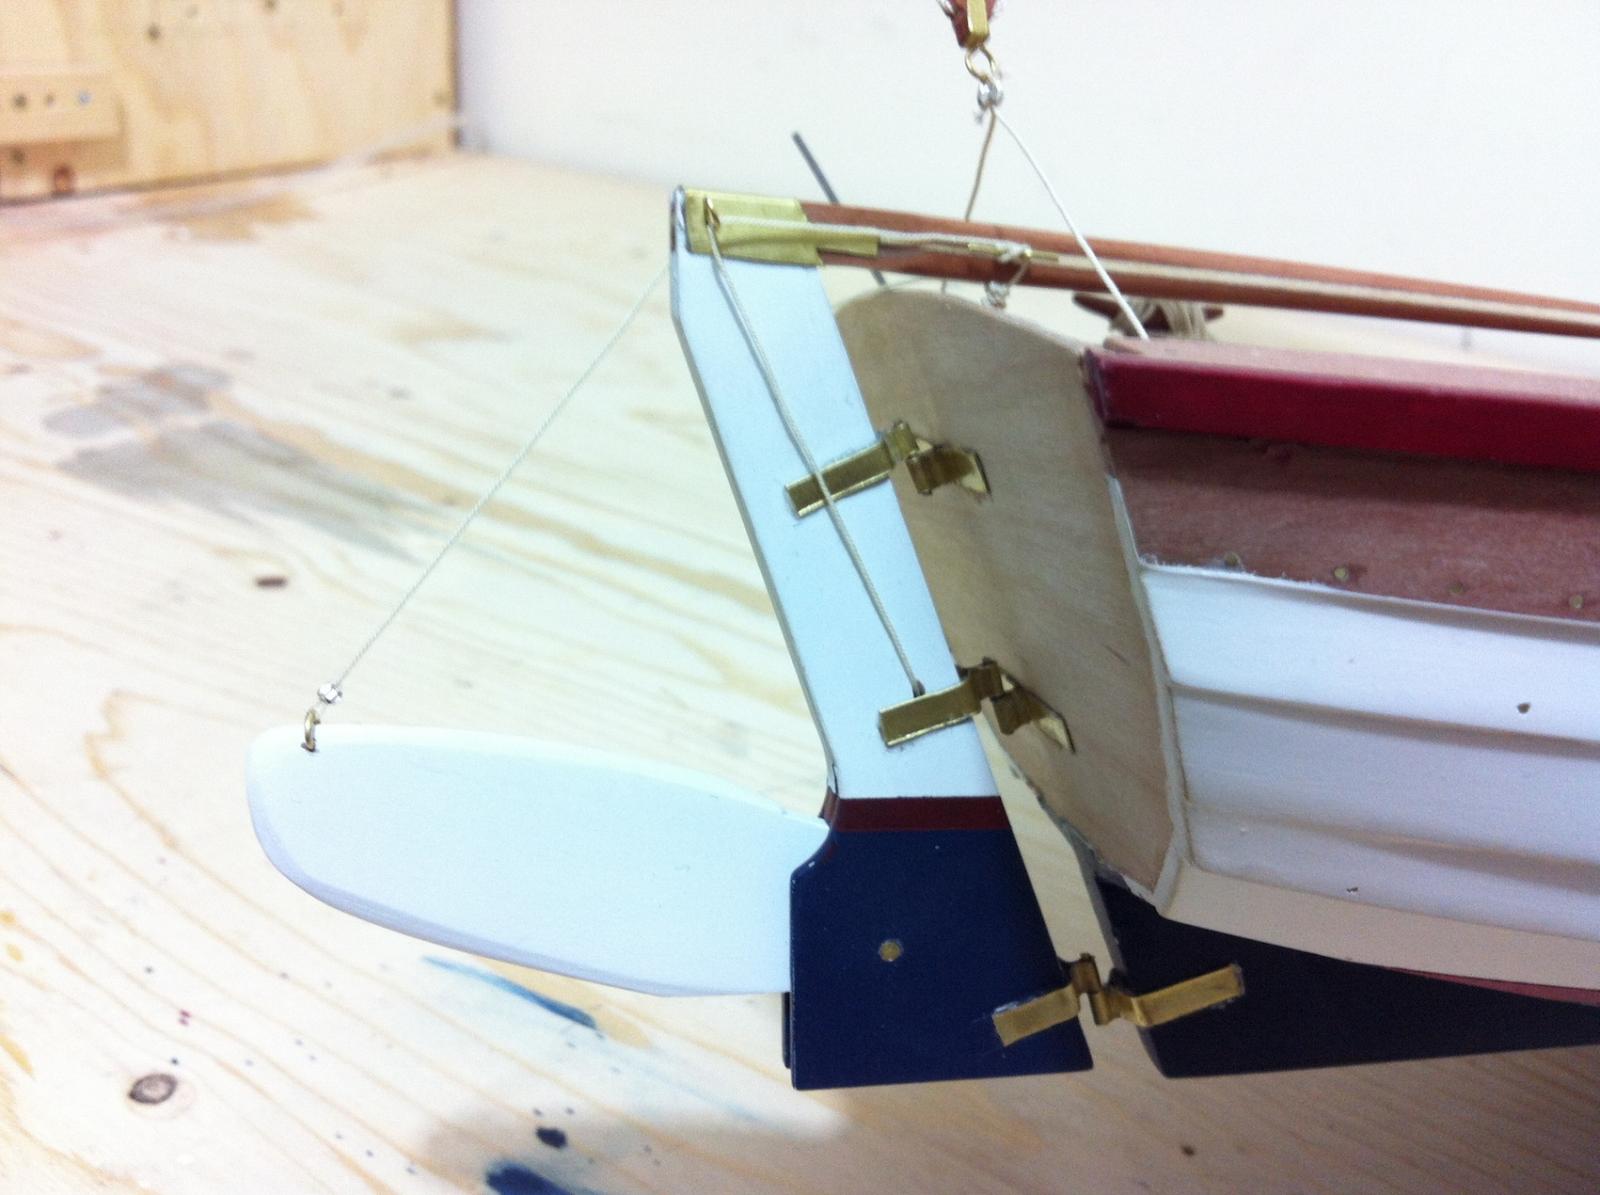
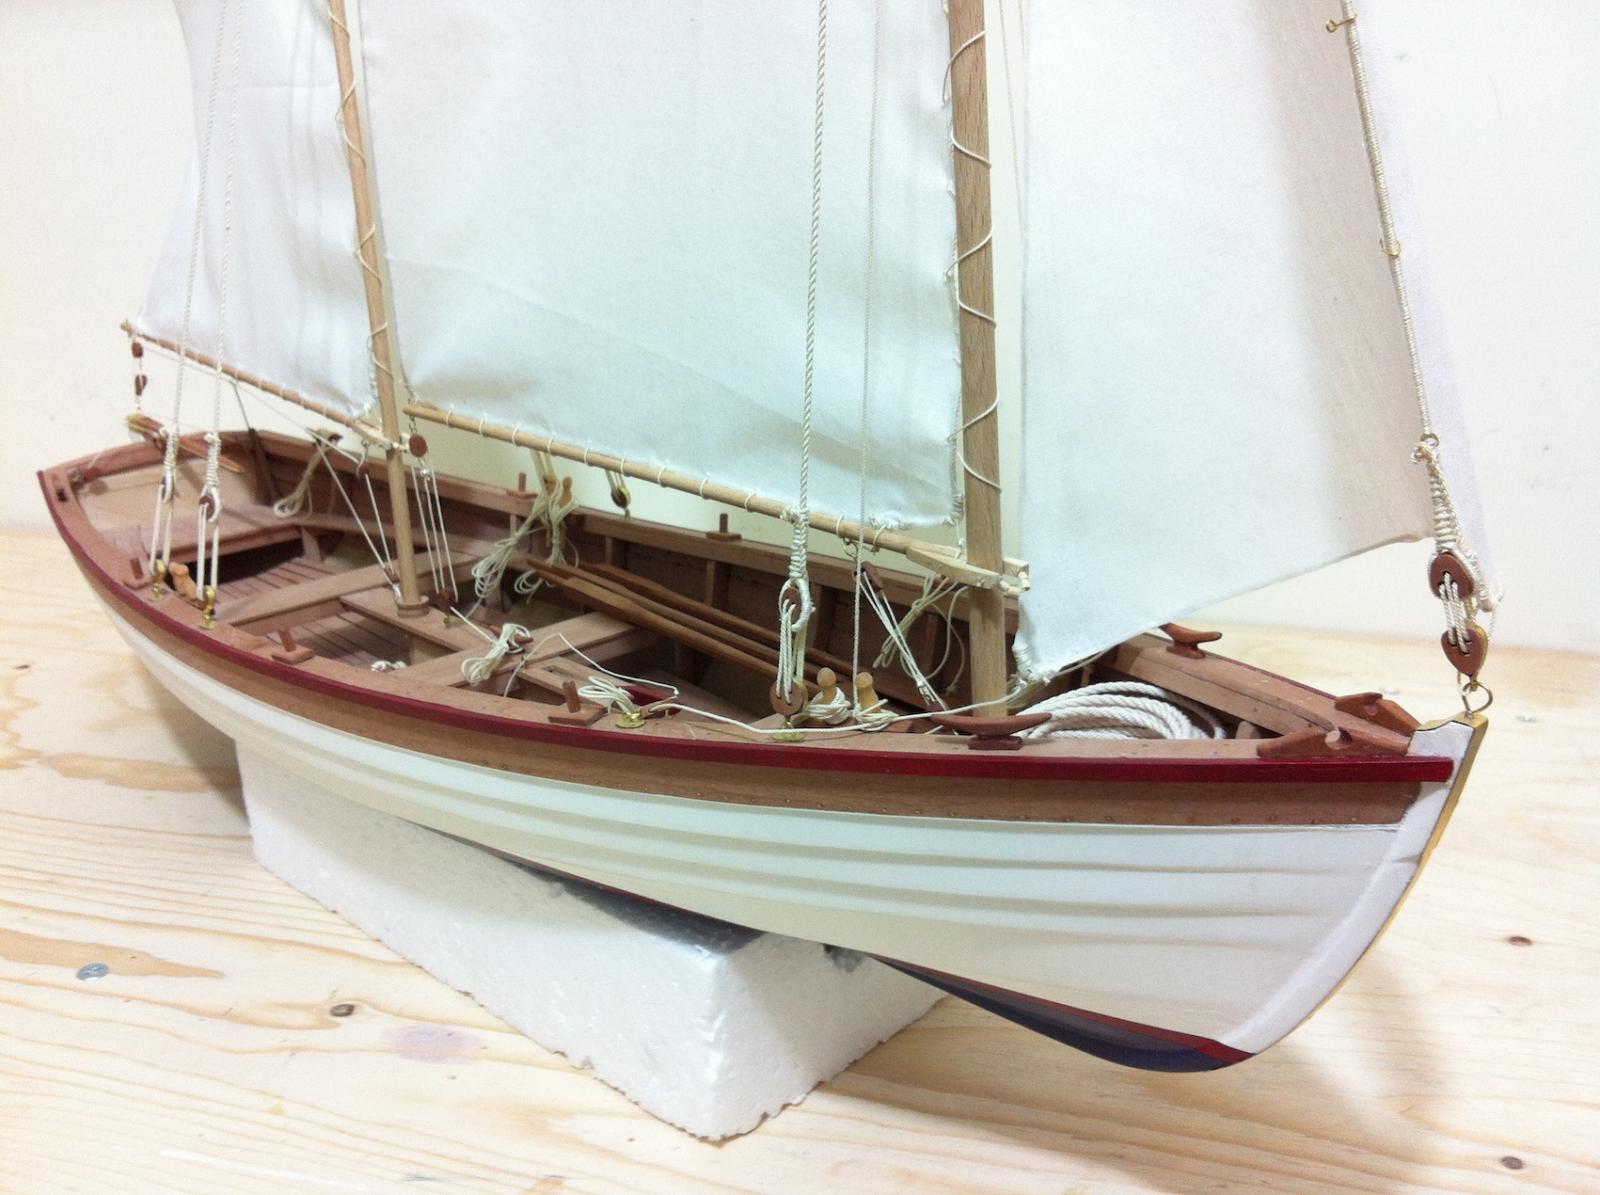
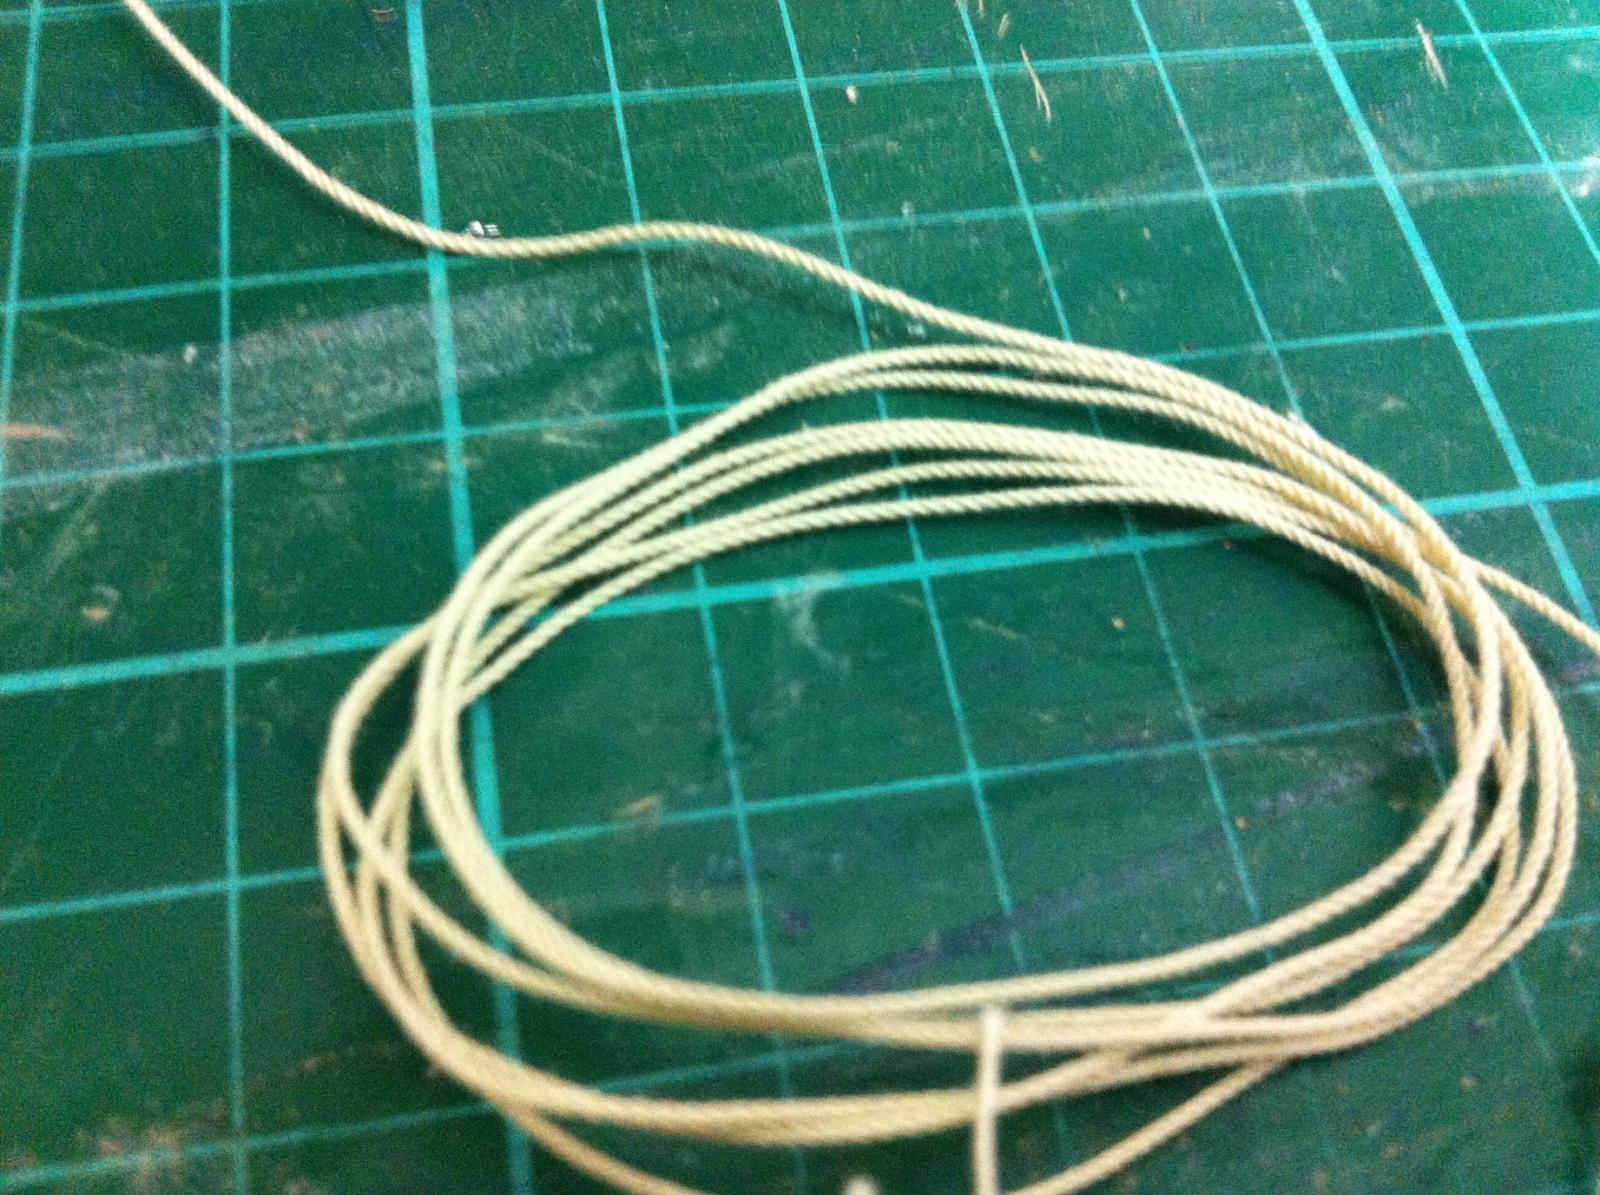
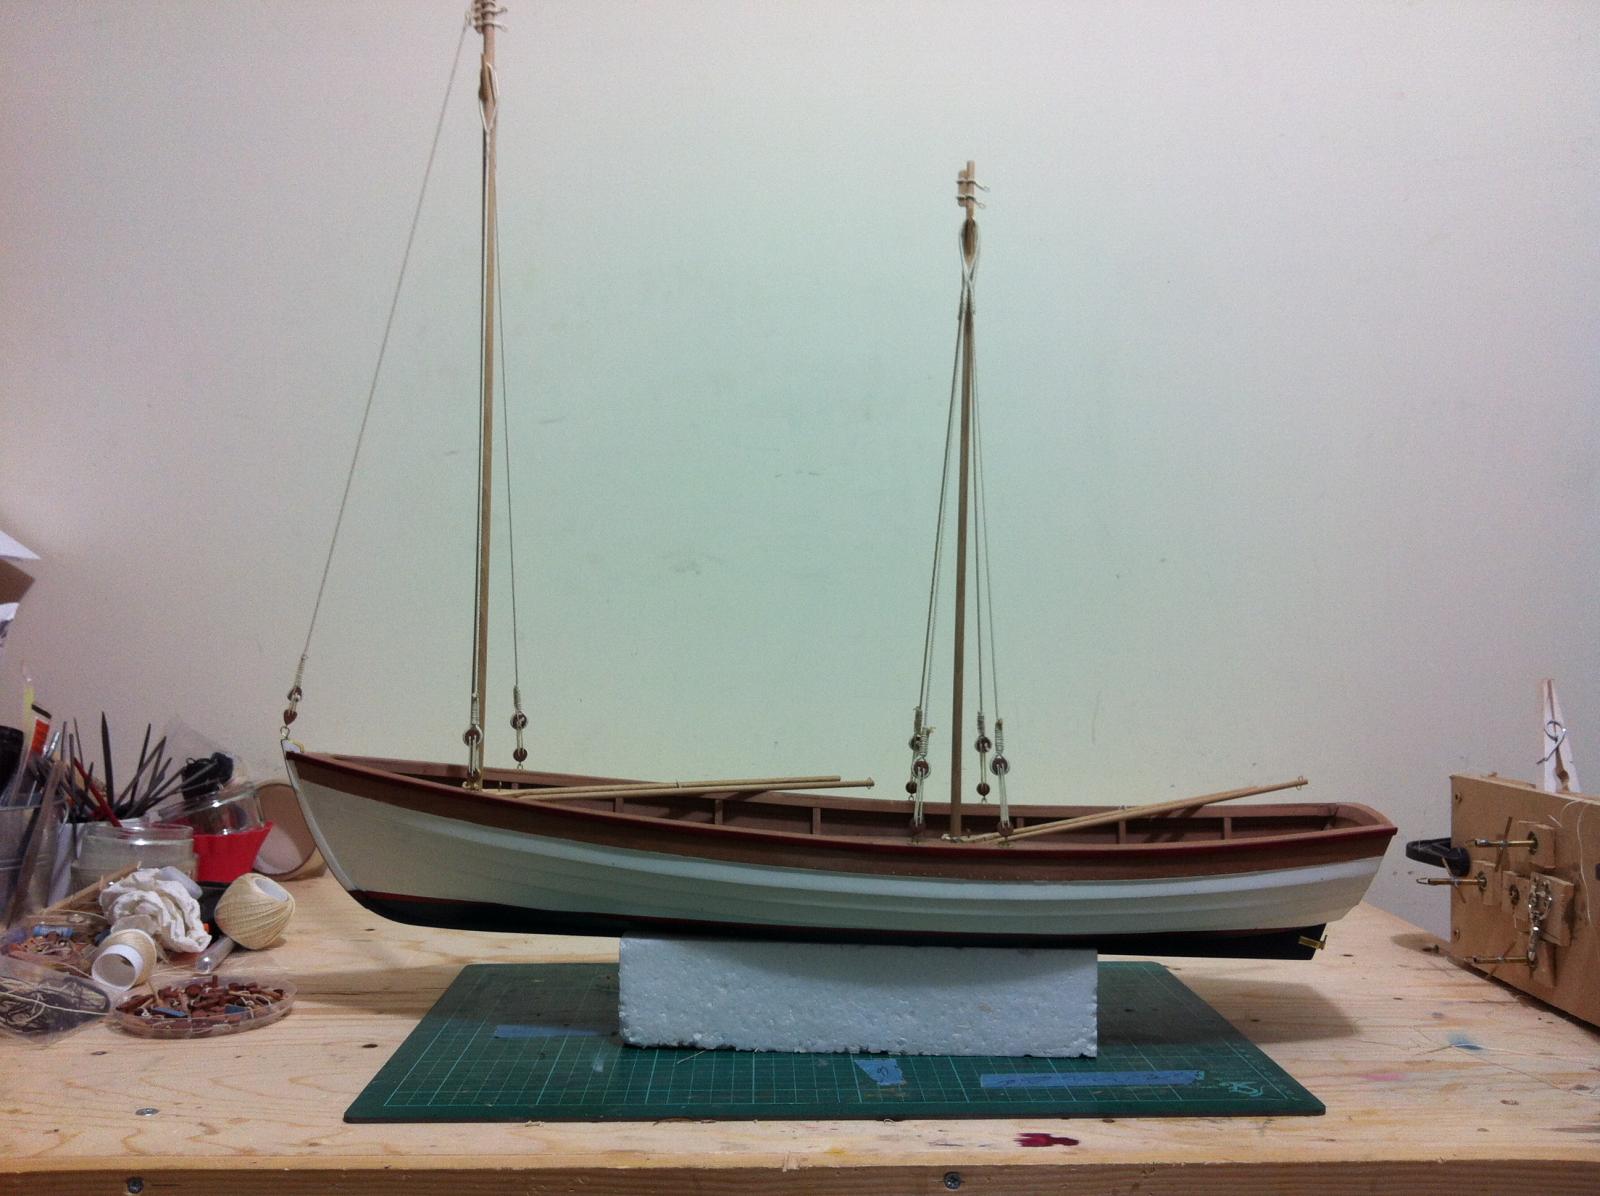
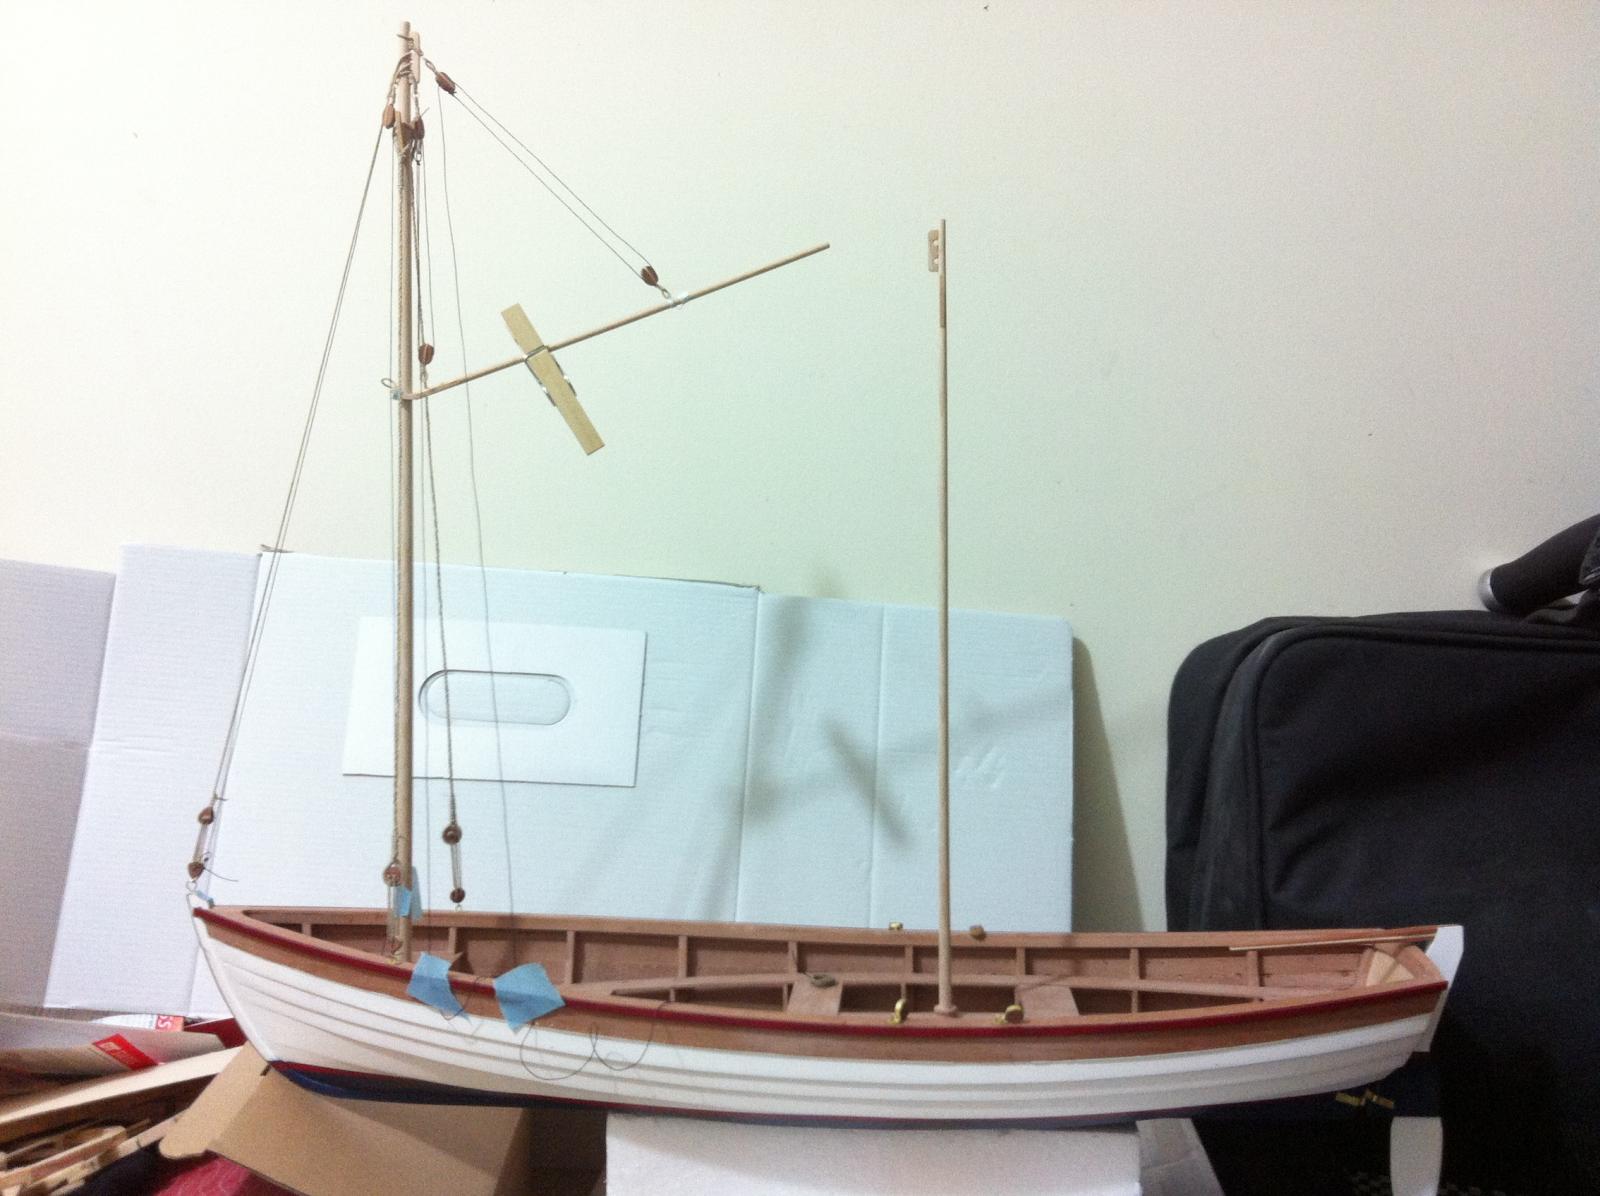
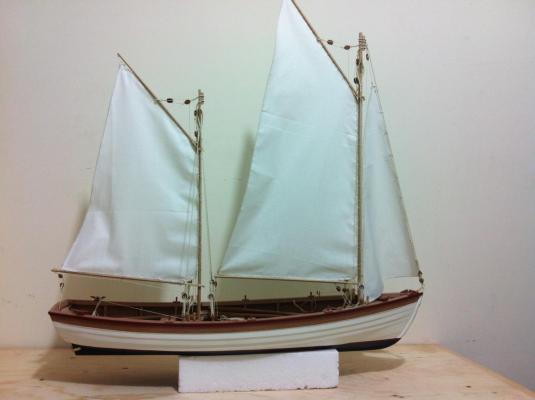
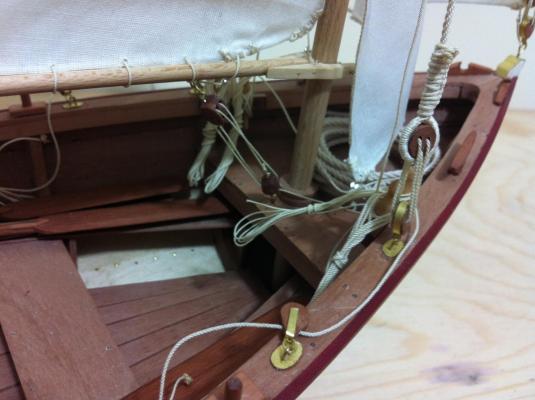
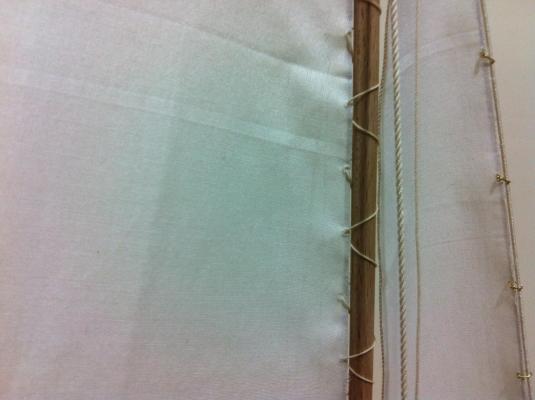
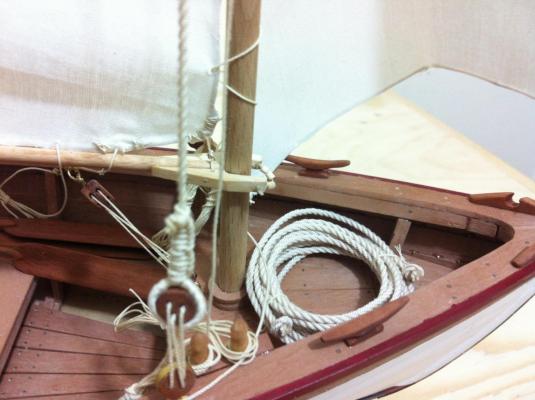
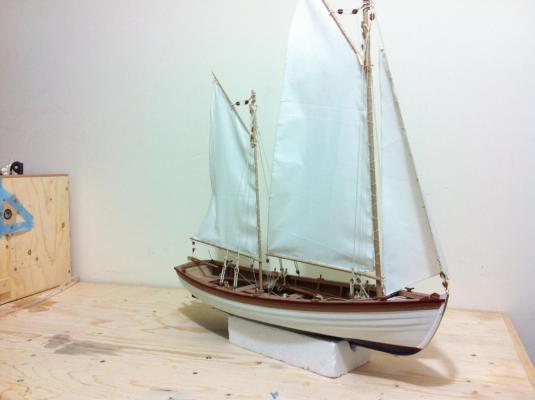
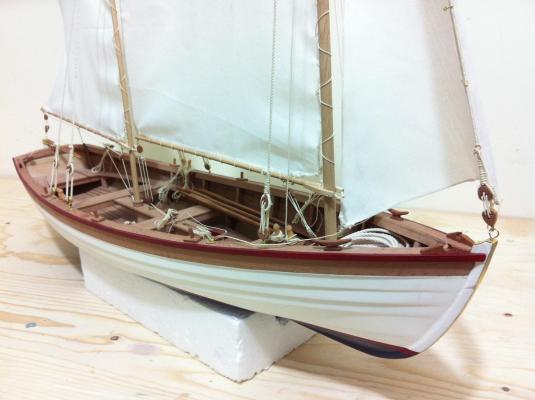
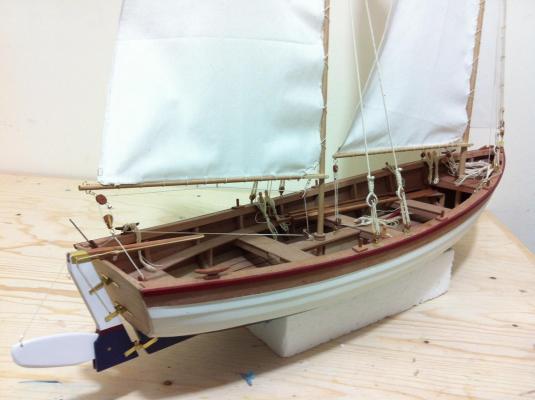
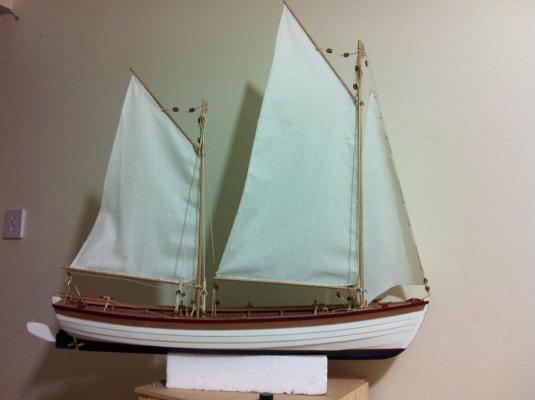
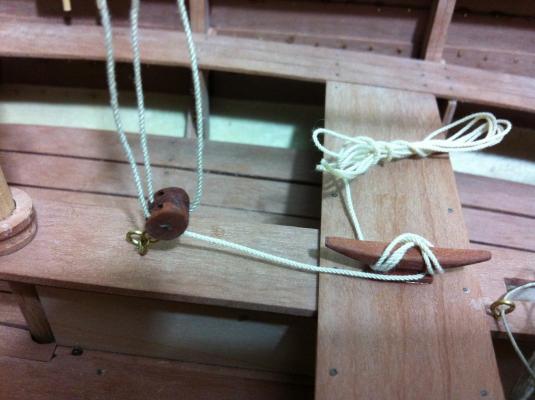
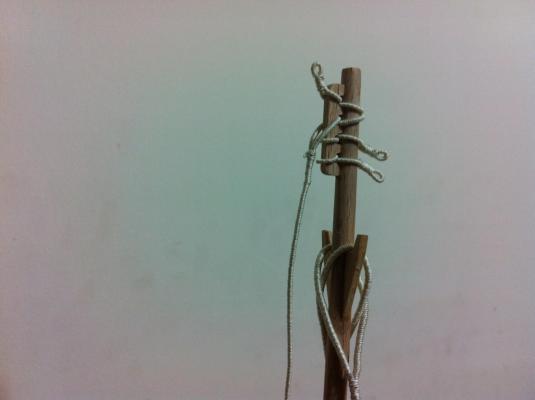
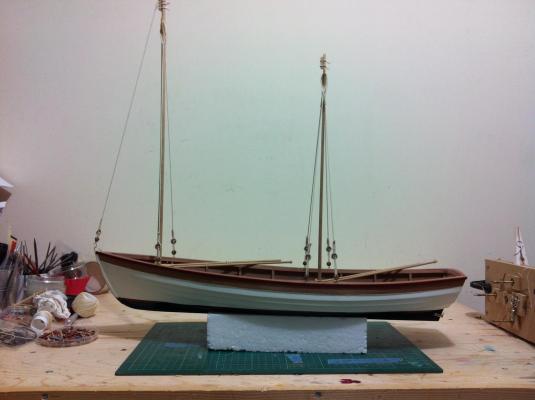
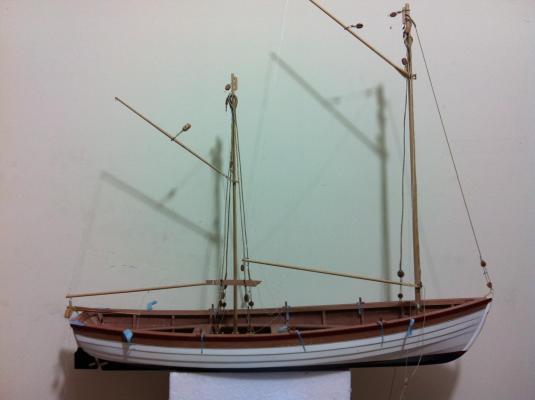
Dear all It is getting very difficult to find time to work on the boat but still I got a few more things done. I think the end is very near. First I made quite a lot of rope of different sizes. I thought I had enough but it is amazing how much rope even a small boat like this needs, in the end I had to set everything up again and make more. Also, the standing rigging has come loose, the cotton threads in the ropes have stretched but I decided not to tighten it. The search for sail material ended quite easily, I found in a box 3 feet away from my work bench some cloth I had bought a couple of years ago and forgot all about it. I made new sail templates and then spent days trying different ways of making the sails. All failed and I just glued rope to the cloth and cut the sails. It worked ok but I am sure there are better ways of making sails. I then added the running rigging and cheated a bit as I used beads to secure the rope ends. This was much quicker and cleaner than making knots. I also finished the rudder and found a realistic solution for the lanyards. The rudder actually works very well and there is good leverage to extend and lift the blade. The boat is too big for the phone camera to easily cover One more new skill I need to master is brass/coper blackening. I thought I had prepared the metal well but obviously this was not the case. The axe came out fine though. I was surprised that the solder did not blacken. All metal was coper and I used gel LoS. I would like to make a few more random items to put in and definitely have another go at blackening the barrels. However, the boat is almost complete and definitely needs some short of a stand.


- 253 replies
-
- 8
-
-
- ketkch
- gaff-rigged
- (and 1 more)
-
Patrick, what can I say, its always a joy to read your updates but this is just lovely. There is craft, there is art and there is also style!
-
I installed a motor to my ropewalk which made the process much faster and simpler. It is still dead ugly but I can produce 2.5 m of rope in minutes. I tried using silk thread but it brakes, a much thicker thread would be needed or maybe multiple threads per station
- 253 replies
-
- 2
-
-
- ketkch
- gaff-rigged
- (and 1 more)
-
Nicely spotted Frankie! The deadeyes were supposed to rotate freely in the brass ring but when I applied the Renaissance wax to protect the brass shine they locked in place! I tried to rotate the ones that are upside down but couldn't. Now that everything is soldered and epoxied, fixing this is a major job. Some times better is the enemy of good...
-
Love those cupboards and the bench Patrick, very nice work, can't wait to see the engine room completed!
-
Lovely details, so much affection radiating from your boat!
- 83 replies
-
- 3
-
-
- sponge boat
- finished
- (and 1 more)
-
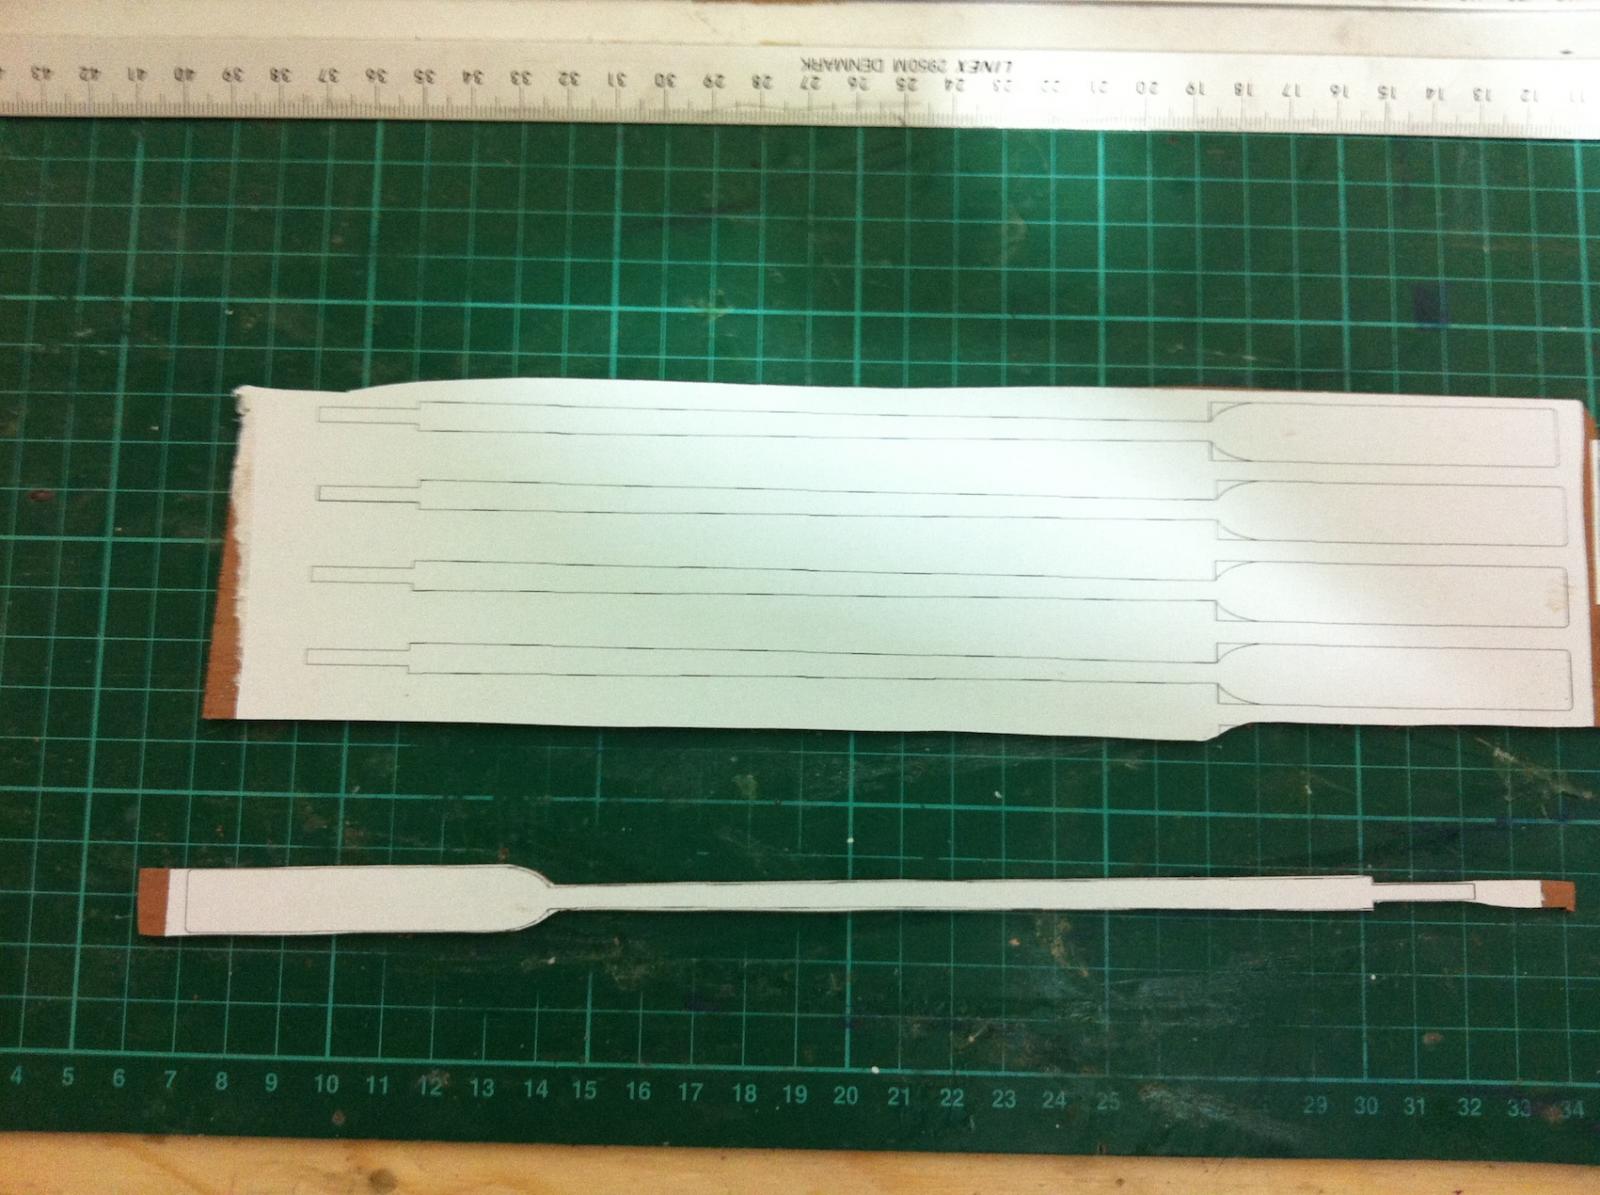
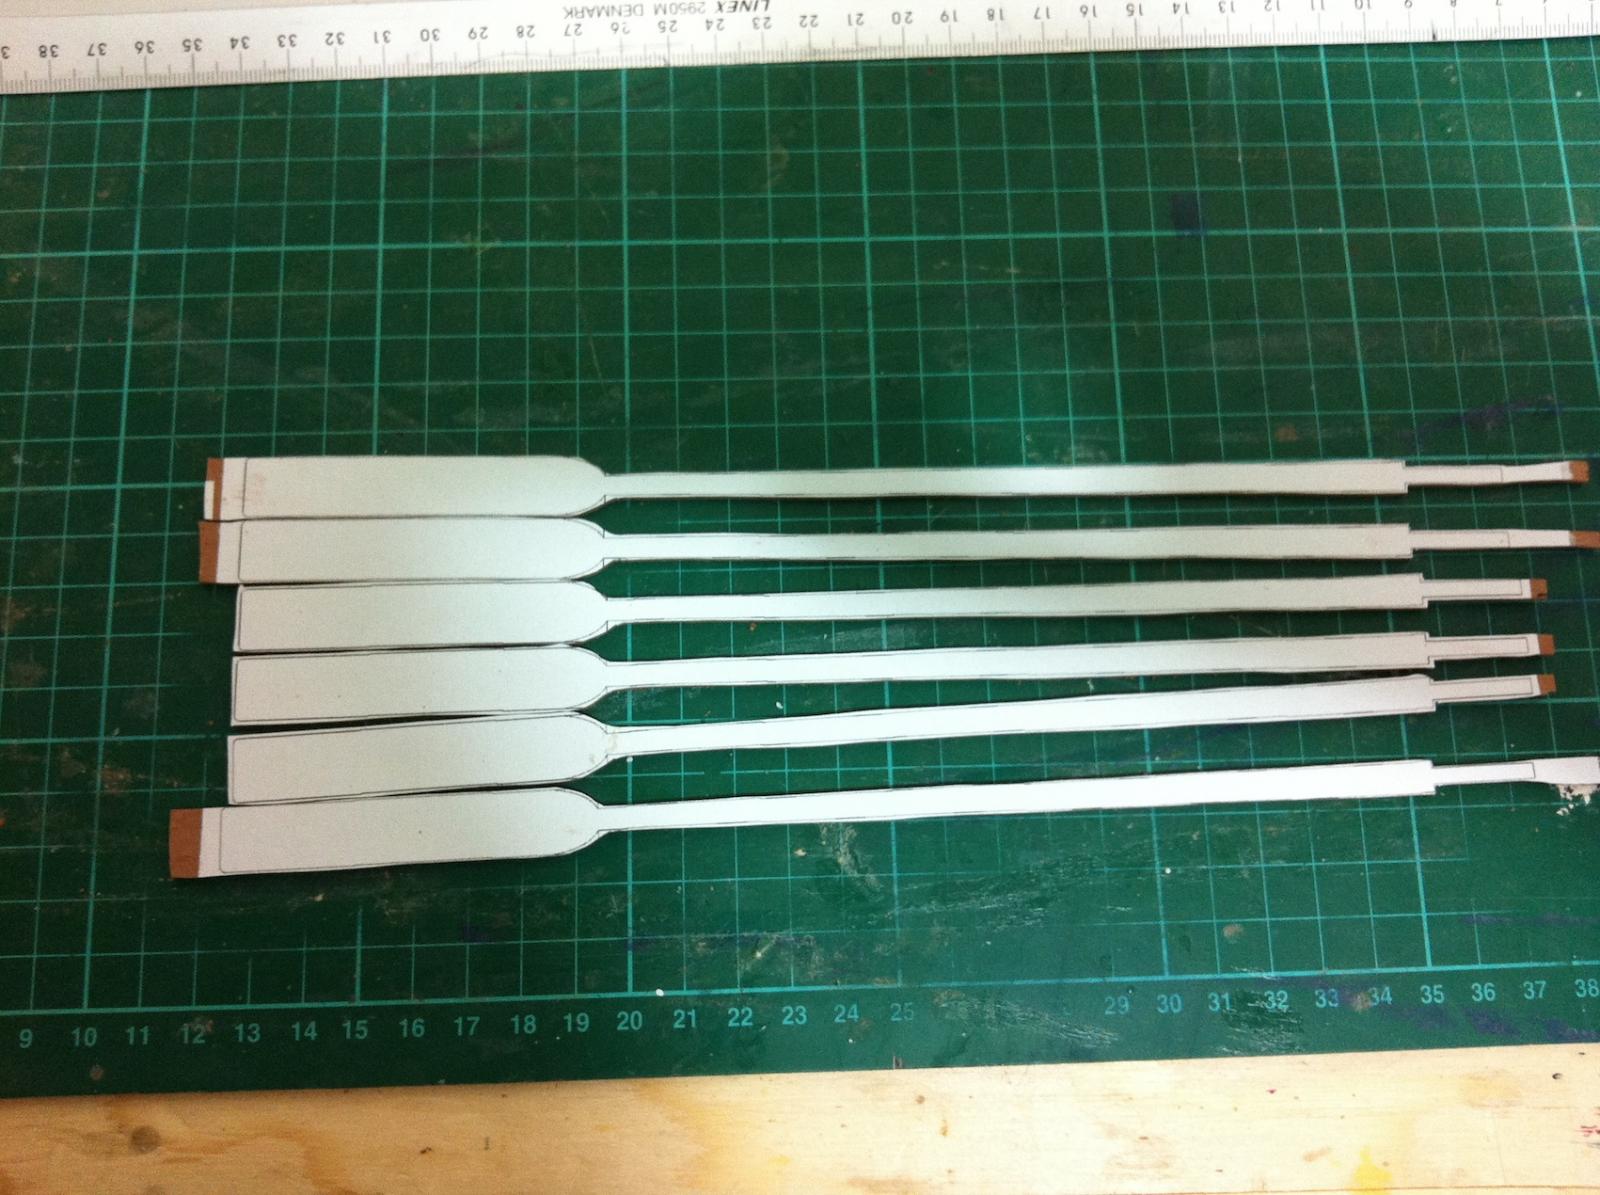
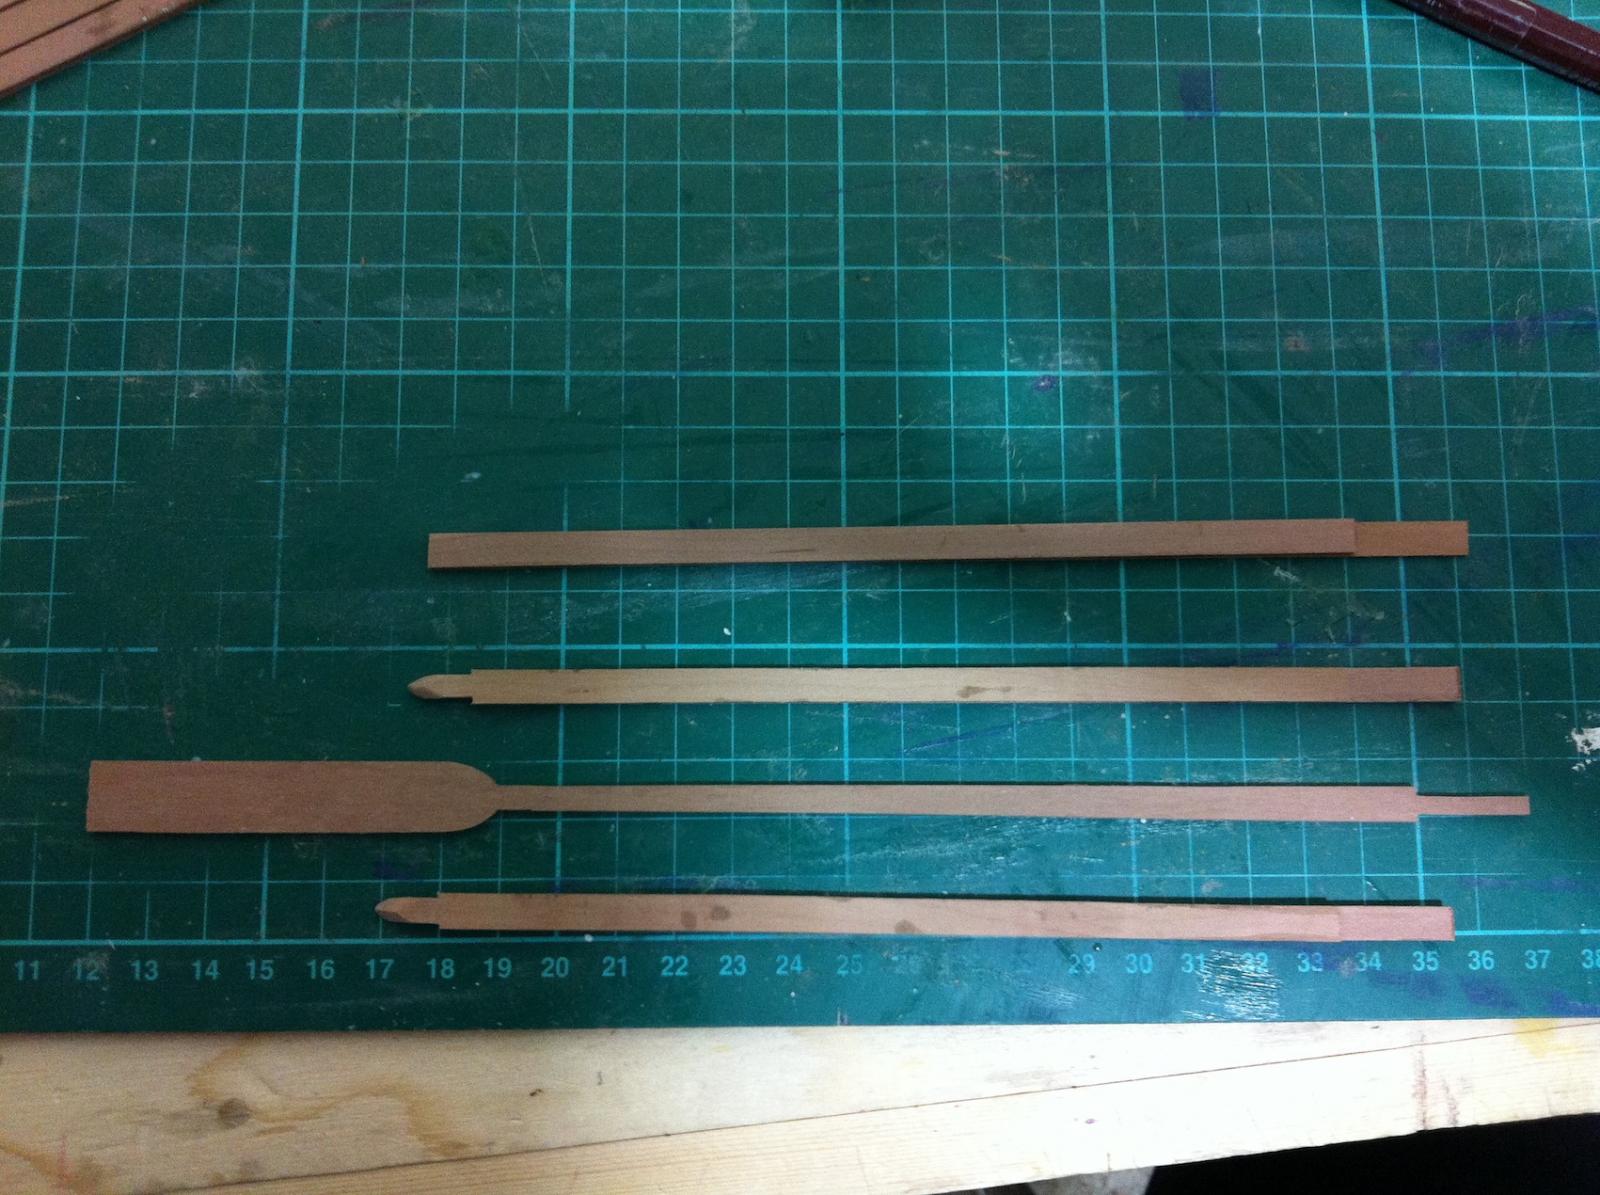
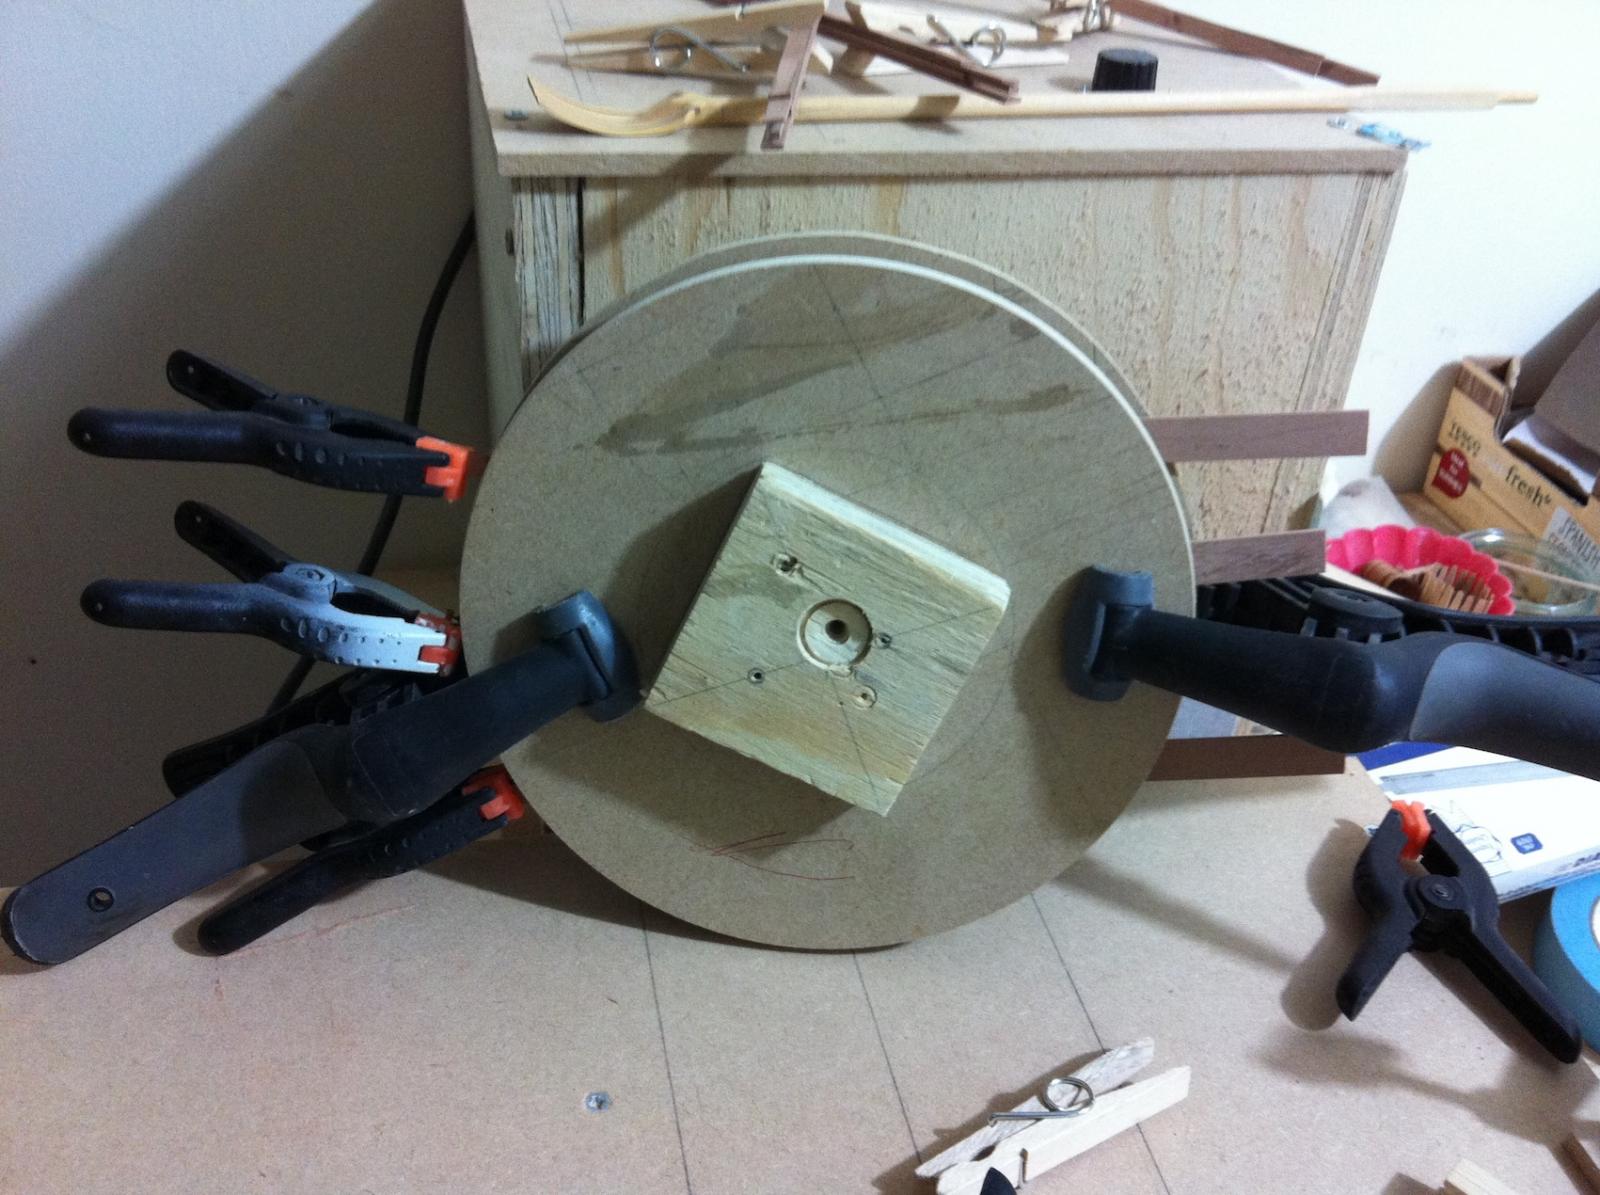
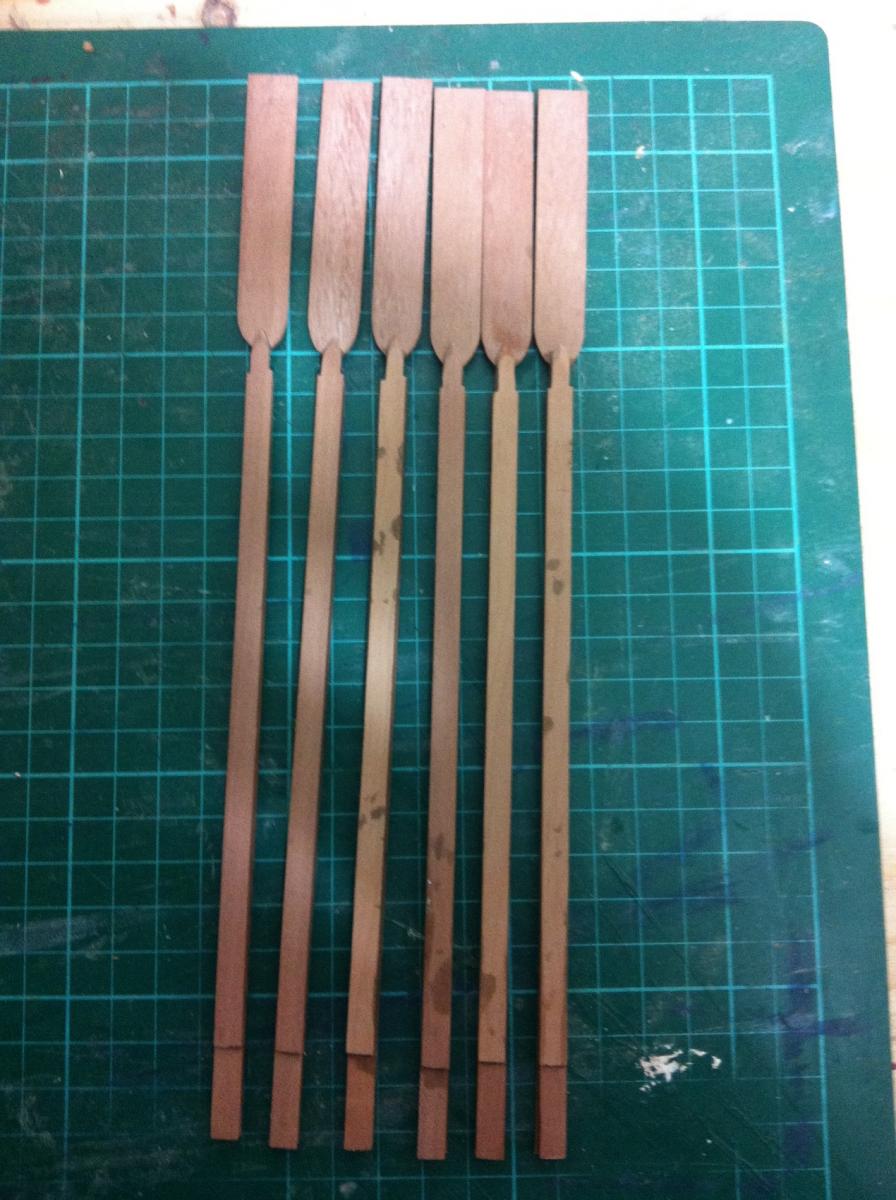
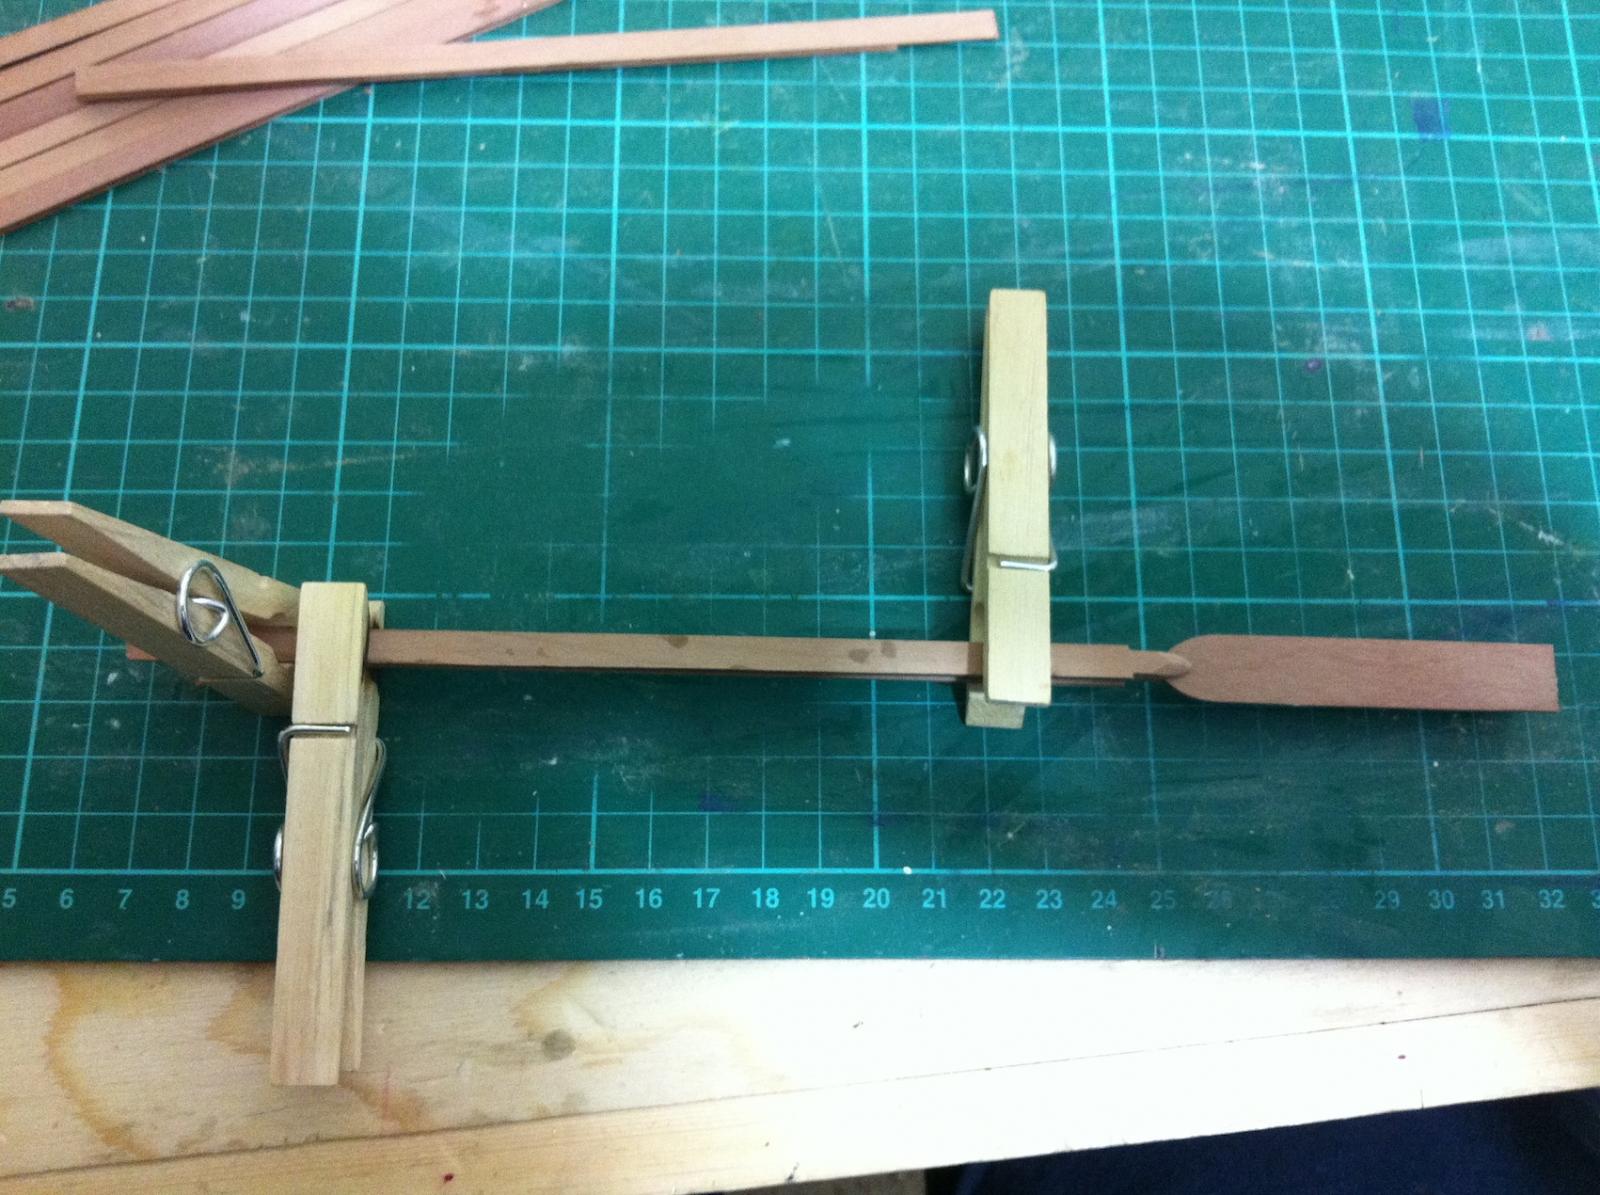
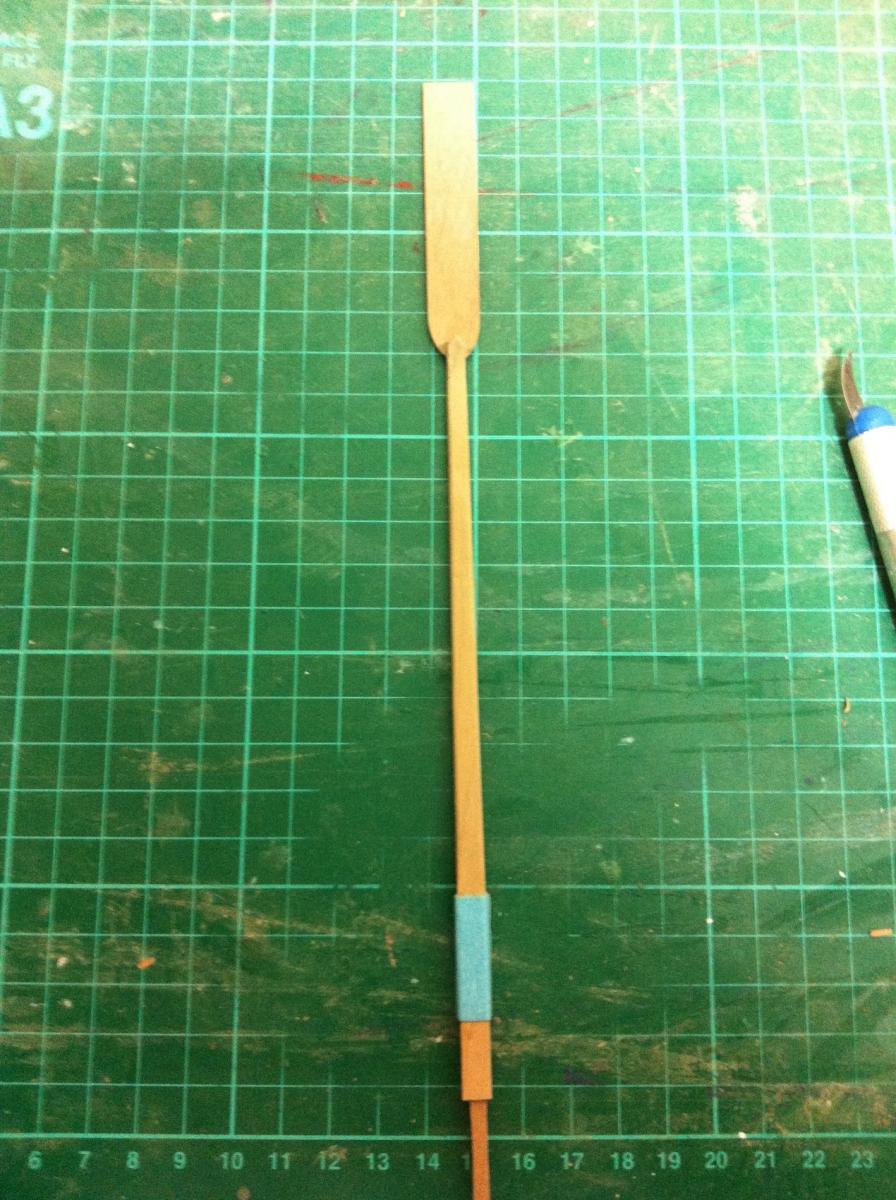
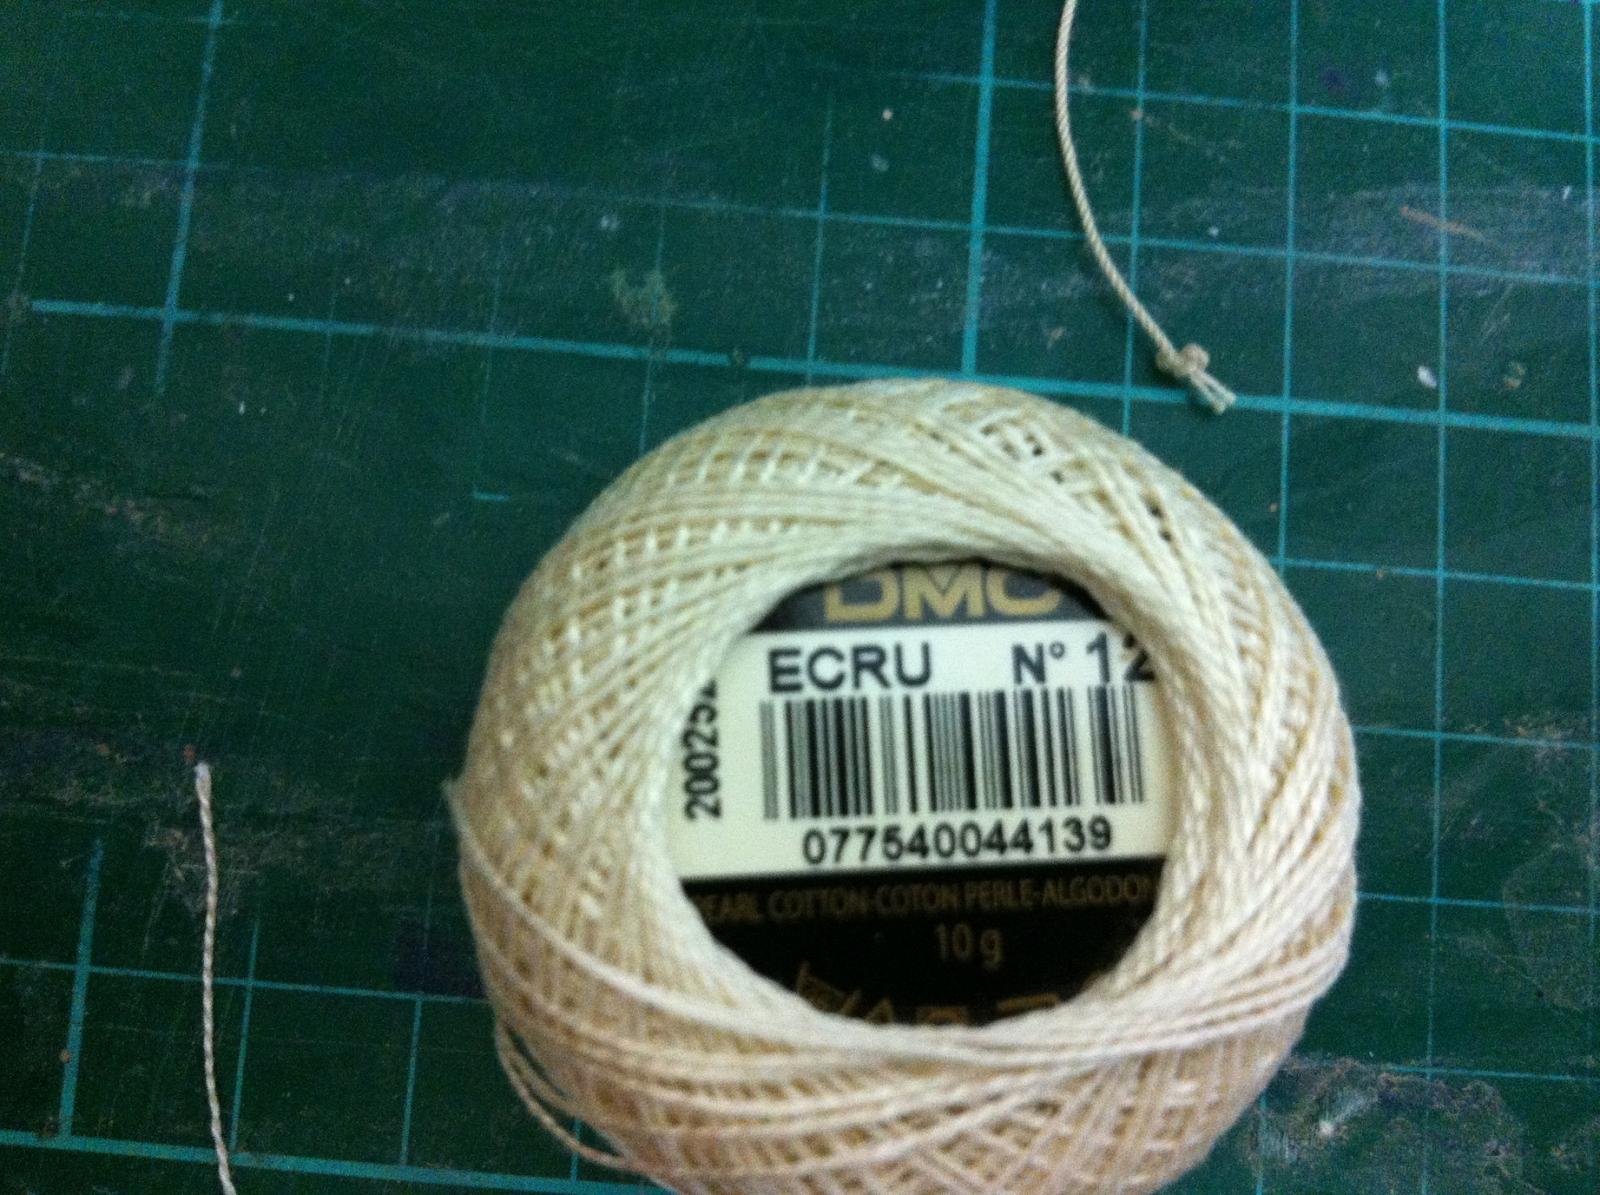
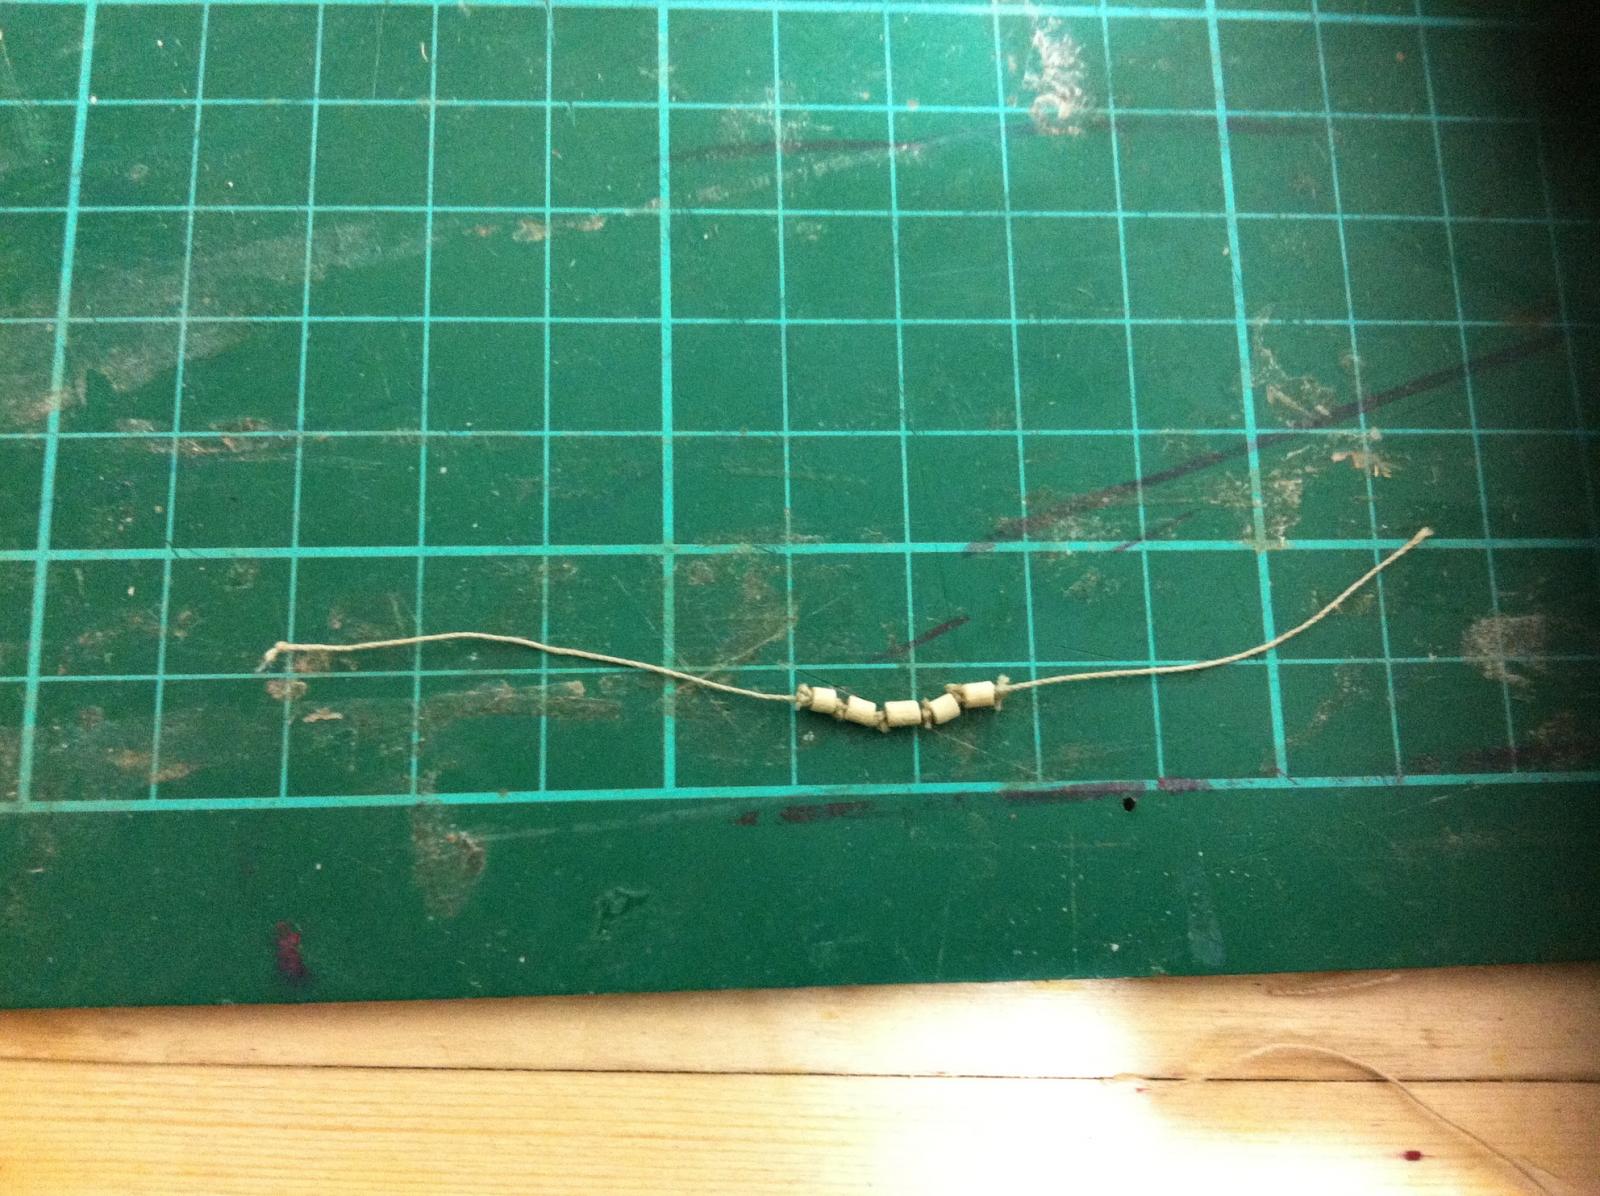
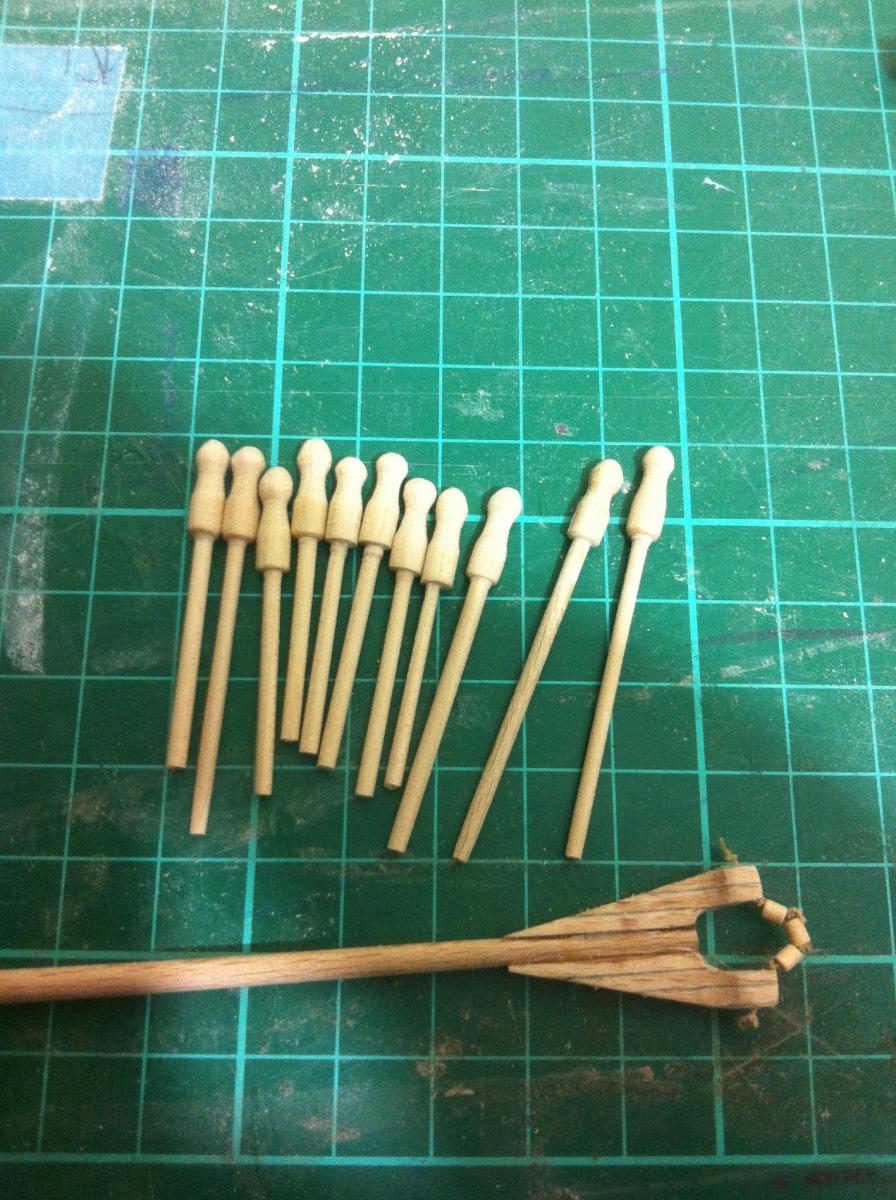
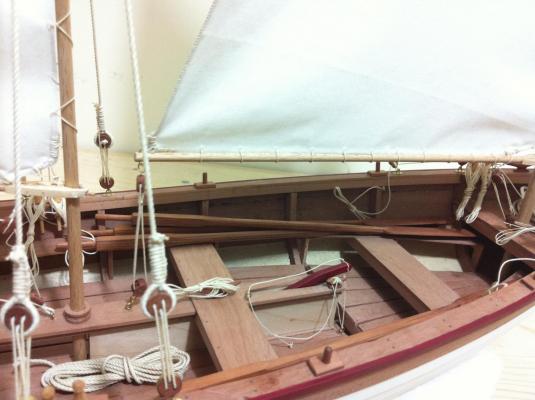
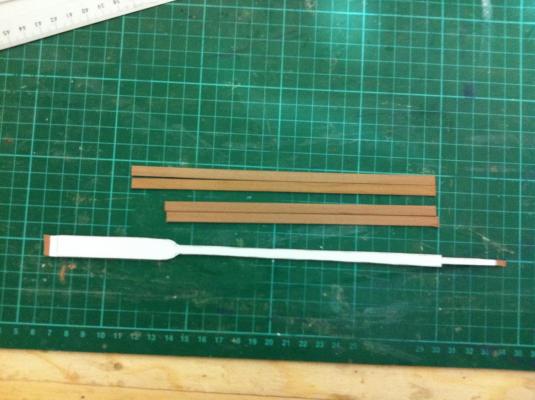
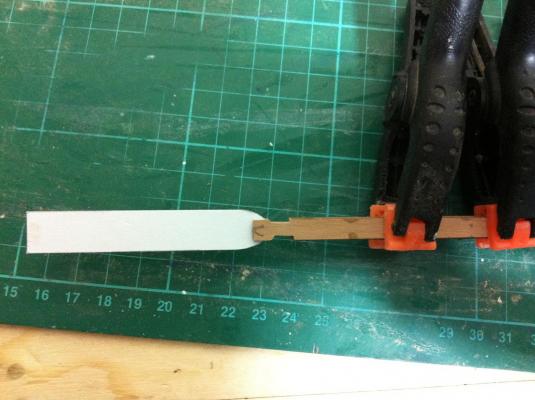
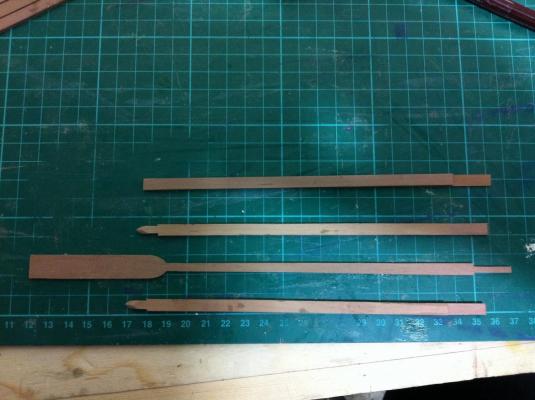
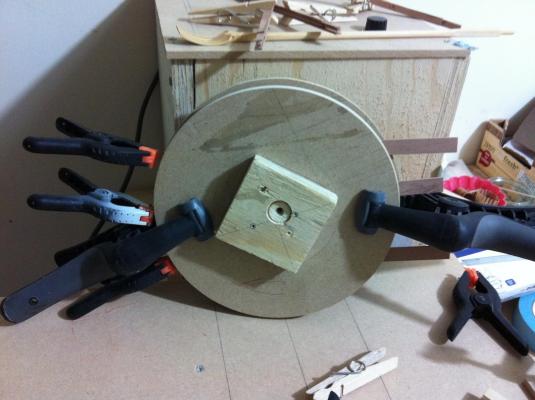
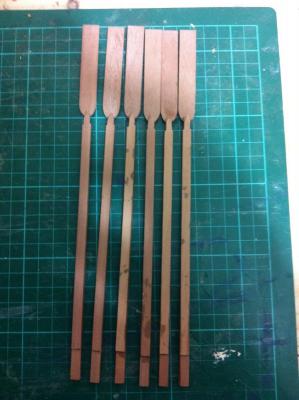
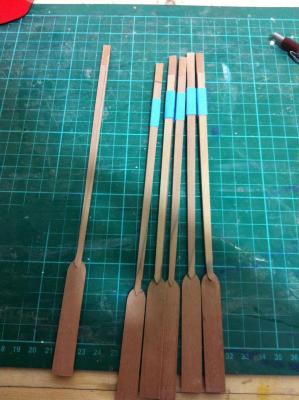
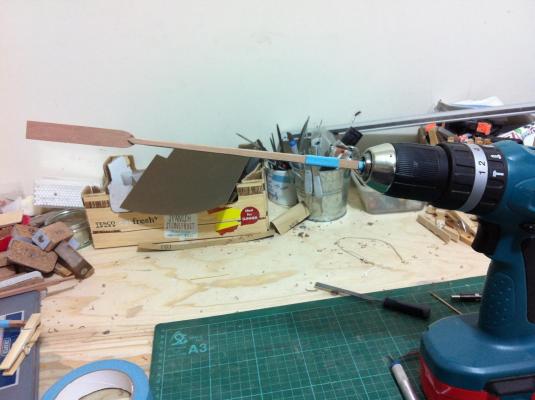
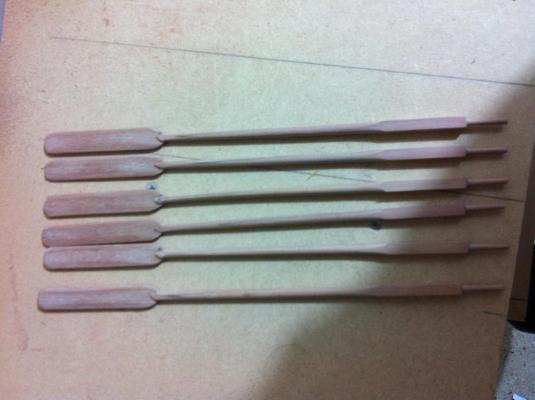
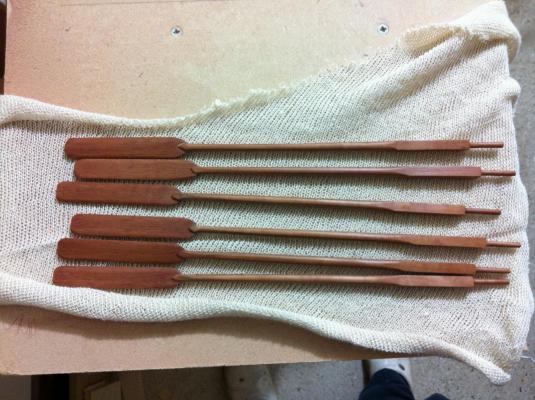
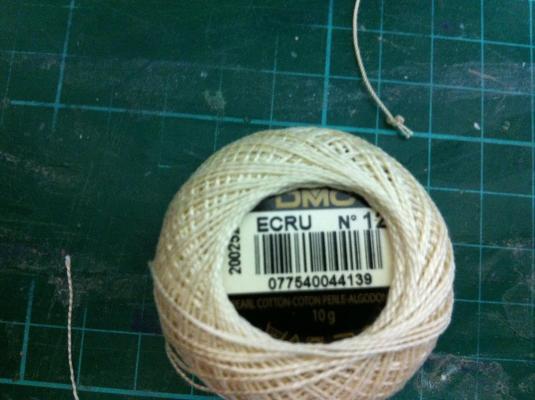
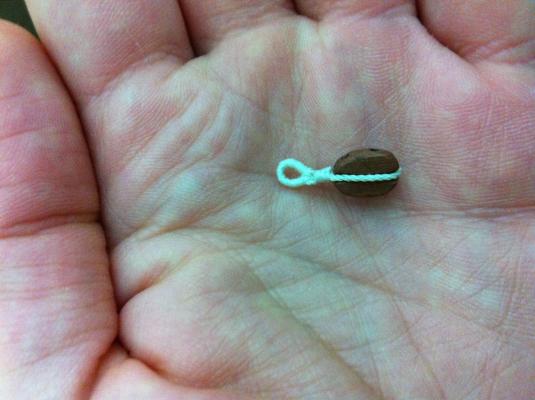
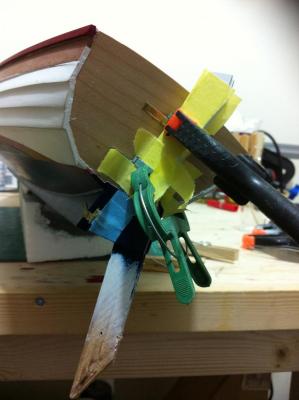
Dear all I had very little time to work on the boat but I managed to complete the oars. This actually has been a problem I was considering for a very long time and only recently I came up with a solution. As I need six oars, they have to be identical so I had to use a standardised and reproducible method of construction. The curved oars I made initially are totally inappropriate for this boat, as only Hercules could row for more than 10 min without reaching for the rum barrel. I really did not want to order new wood so I had to use my inventory of pear wood left overs. Also, the correct calculated length just looked too long and I shortened it a bit. So here it goes: First, I designed the oar in 2D, made several copies and glued on a 2 mm pear sheet. The oar will initially be 6x6 mm wide tapering towards the blade. All were cut as close to the line as possible to minimise the considerable amount of sanding Sanding completed and two more pieces added on each side. Each piece will be a laminate of two strips 6x1 mm but not to the handle where only one 1mm strip is needed on each side. These pieces will be sanded to shape when glued to the main shaft but the distal end needs to be shaped beforehand as it will be inaccessible later on Then all get laminated together. I often use for such purposes two MDF pieces from failed attempts at making my disk sander. The pieces are kept flat and compressed. All glued ready for sanding. They look identical as well. Sanding to shape was done carefully with the disc sander. One of the oars was sanded excessively and got ruined but I did had a spare one. Other than that it worked beautifully. Masking tape was applied over the area that will not be sanded round. The handle was sanded square with needle files. The handle was covered with masking tape and secured on a drill. 80 grit sand paper takes out a lot of wood easily. The oars were sanded to 400 grit. The handles were sanded round and then the blade edges. A coat of tung oil finishes the job. All oars are identical and there was minimal wastage of wood. I also worked on the rigging and spend a lot of time experimenting with rope making. I have not yet found sail cloth but I rigged the throat and peak halyards, the boom downhaul, the main sheet and the centreboard ropes. I still need to find a way for the ropes to lay nicely. To satisfy all pure modelling hearts please note the rope used has right hand twist. DMC has threads with a left hand twist so quite small diameter right hand strands can be produced. Pricey but very nice stuff.


- 253 replies
-
- 9
-
-
- ketkch
- gaff-rigged
- (and 1 more)
-
Thank you Ian and Michael, much appreciated. Michael, the wood is swiss pear with a coat of Tung oil.
- 253 replies
-
- 3
-
-
- ketkch
- gaff-rigged
- (and 1 more)
-
Tool for Shaping Brass Strip
vaddoc replied to mikiek's topic in Metal Work, Soldering and Metal Fittings
How do you keep the brass shiny? doesn't it get discoloured with heating? -
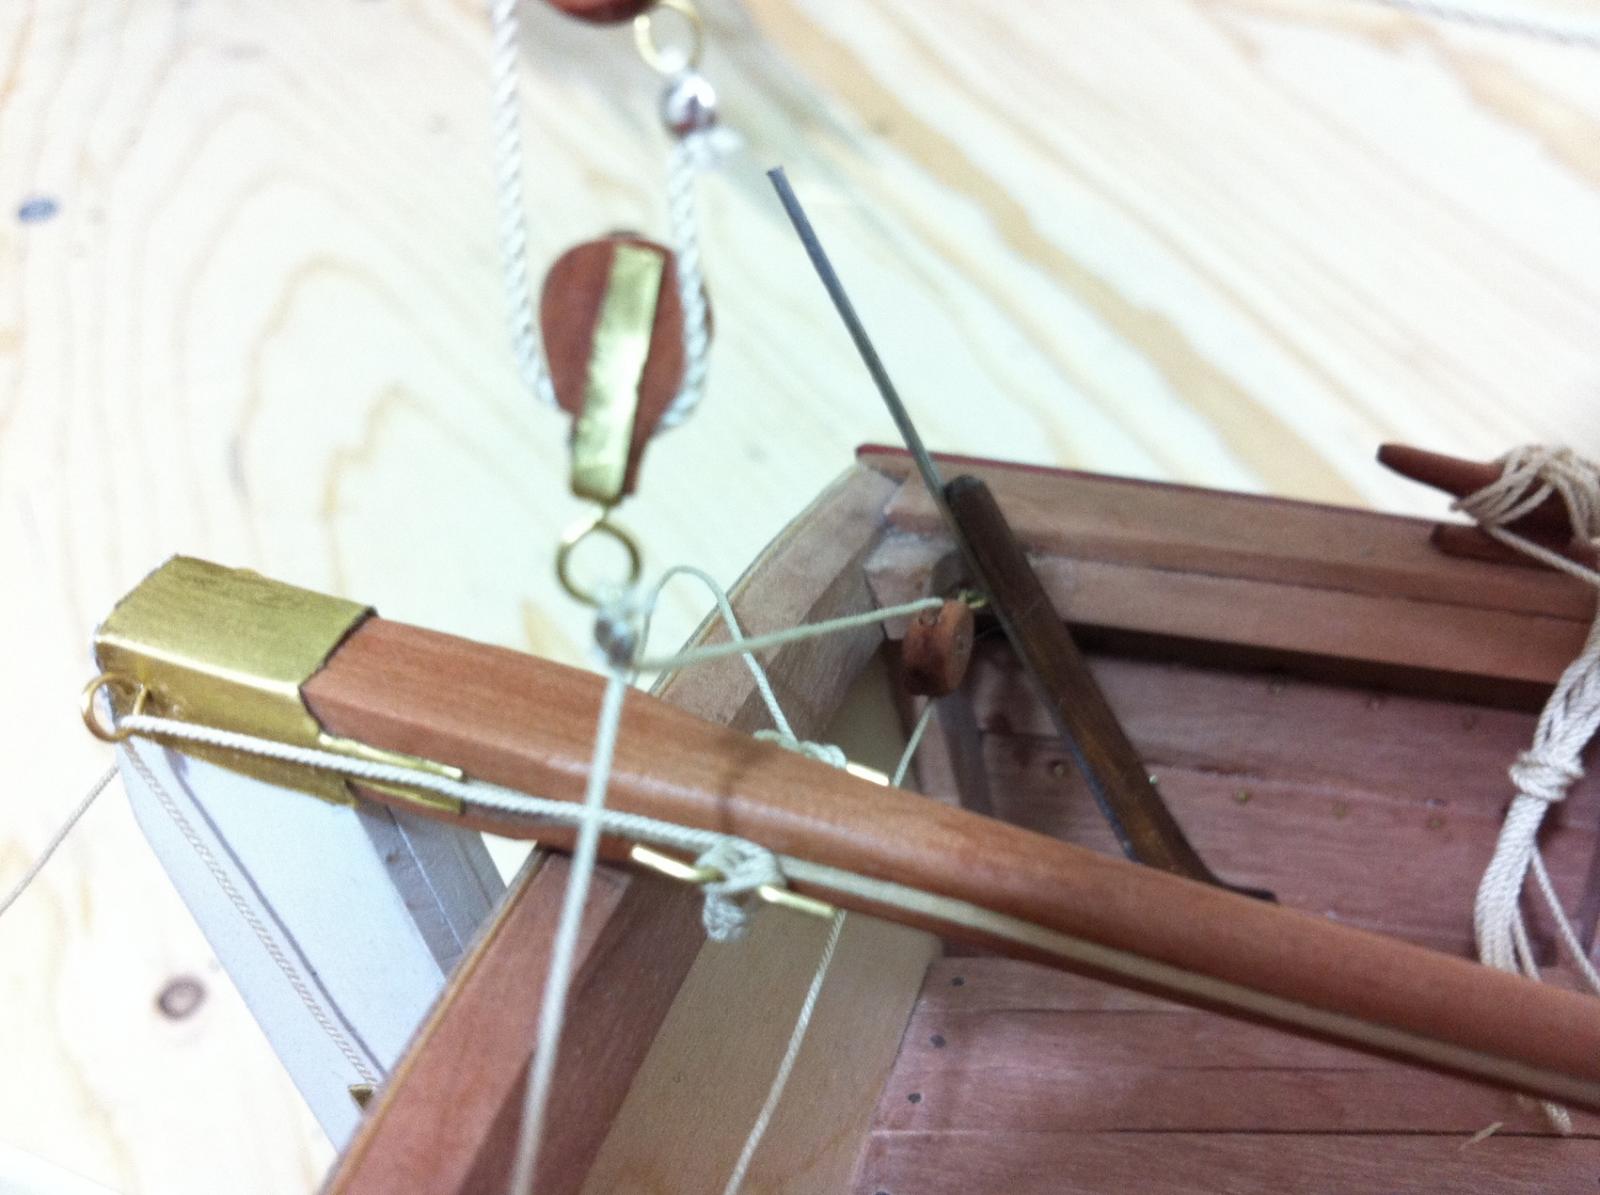
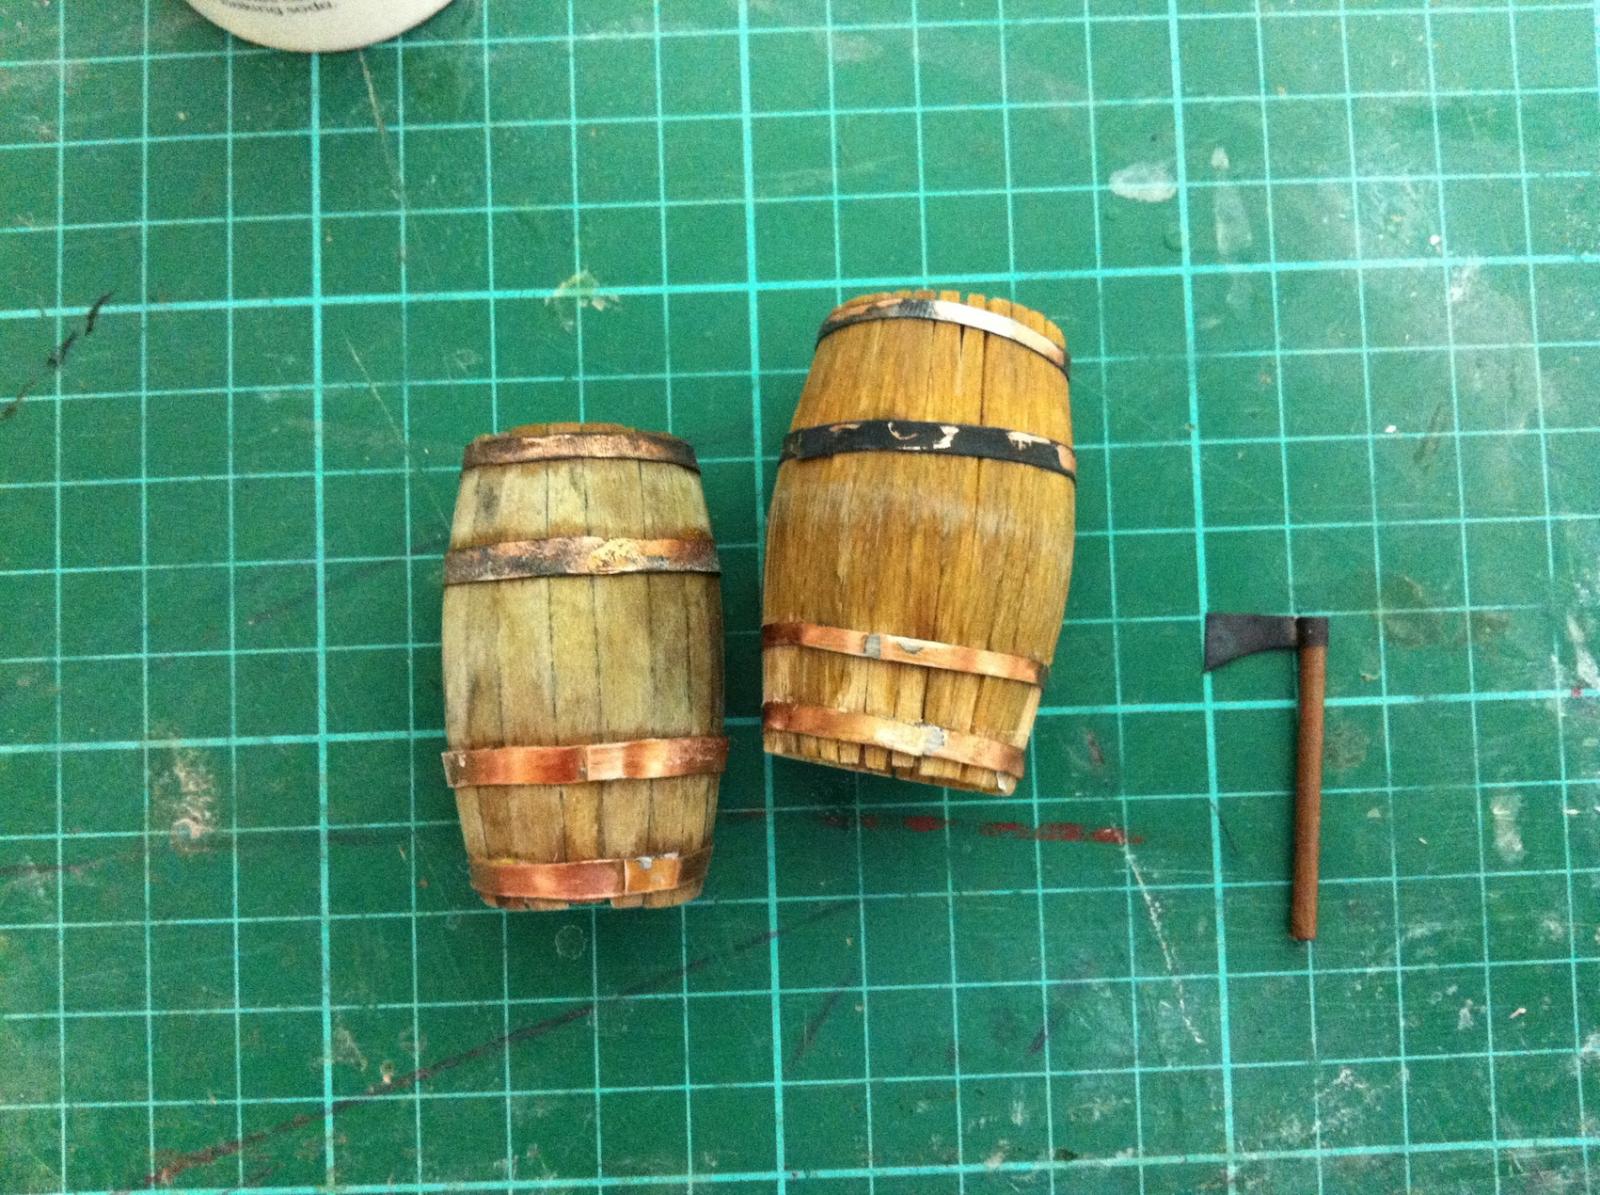
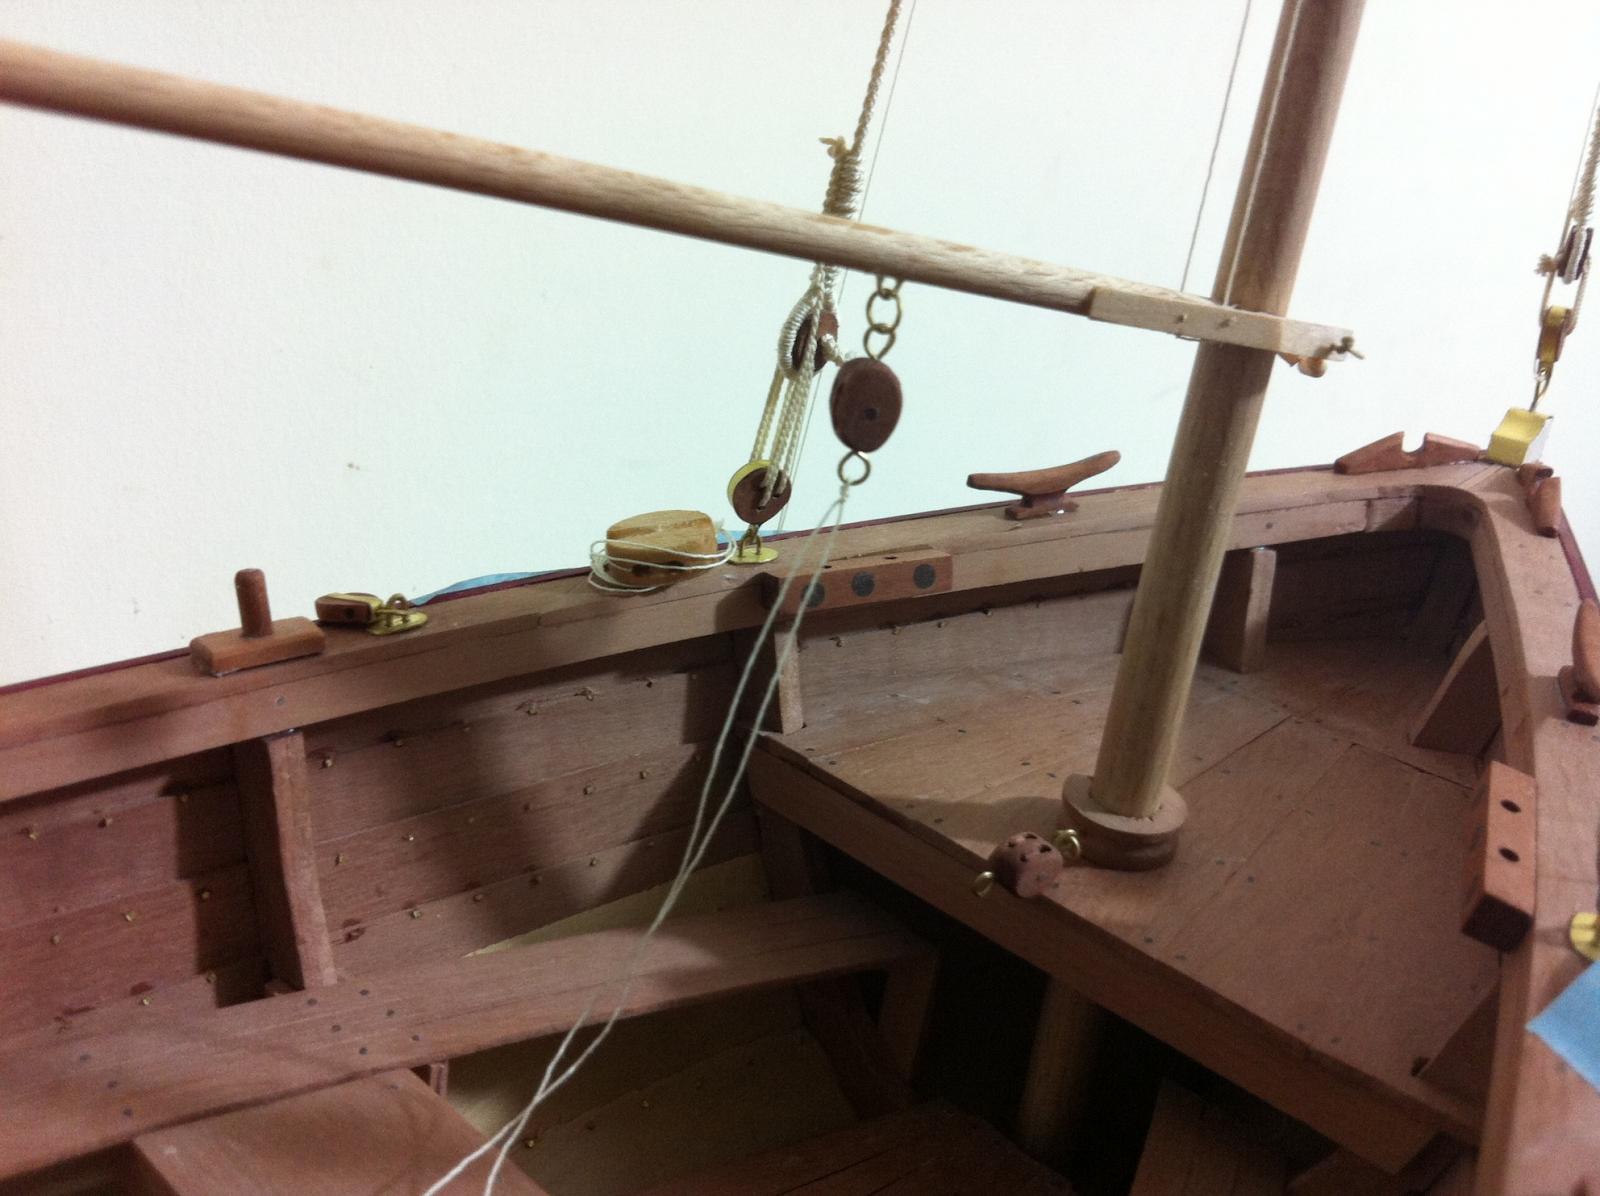
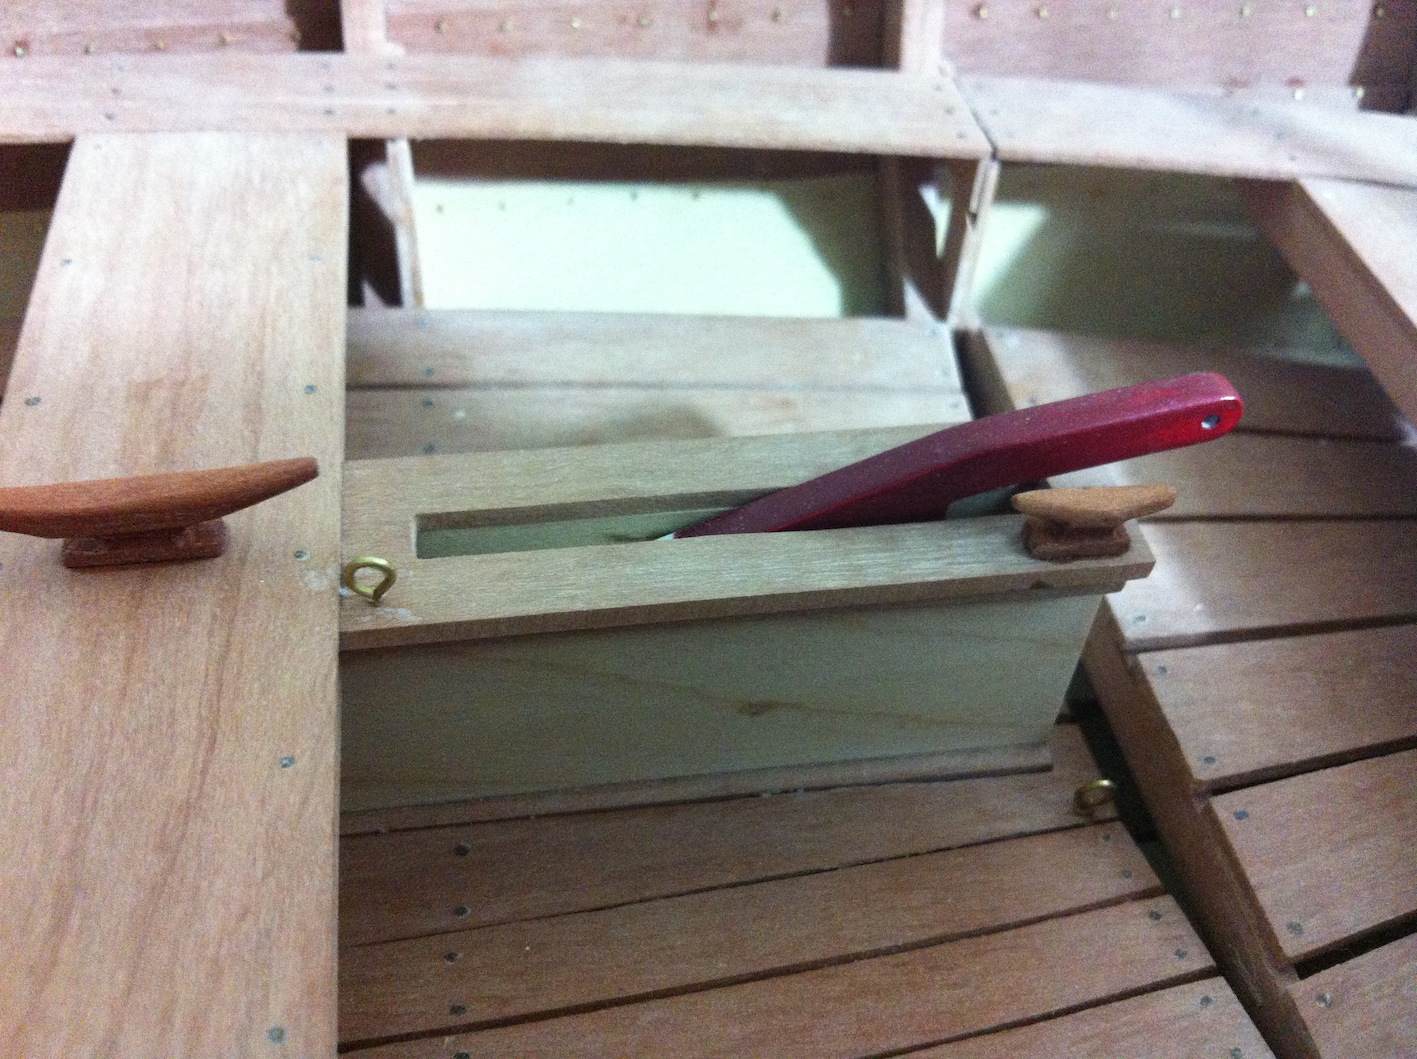
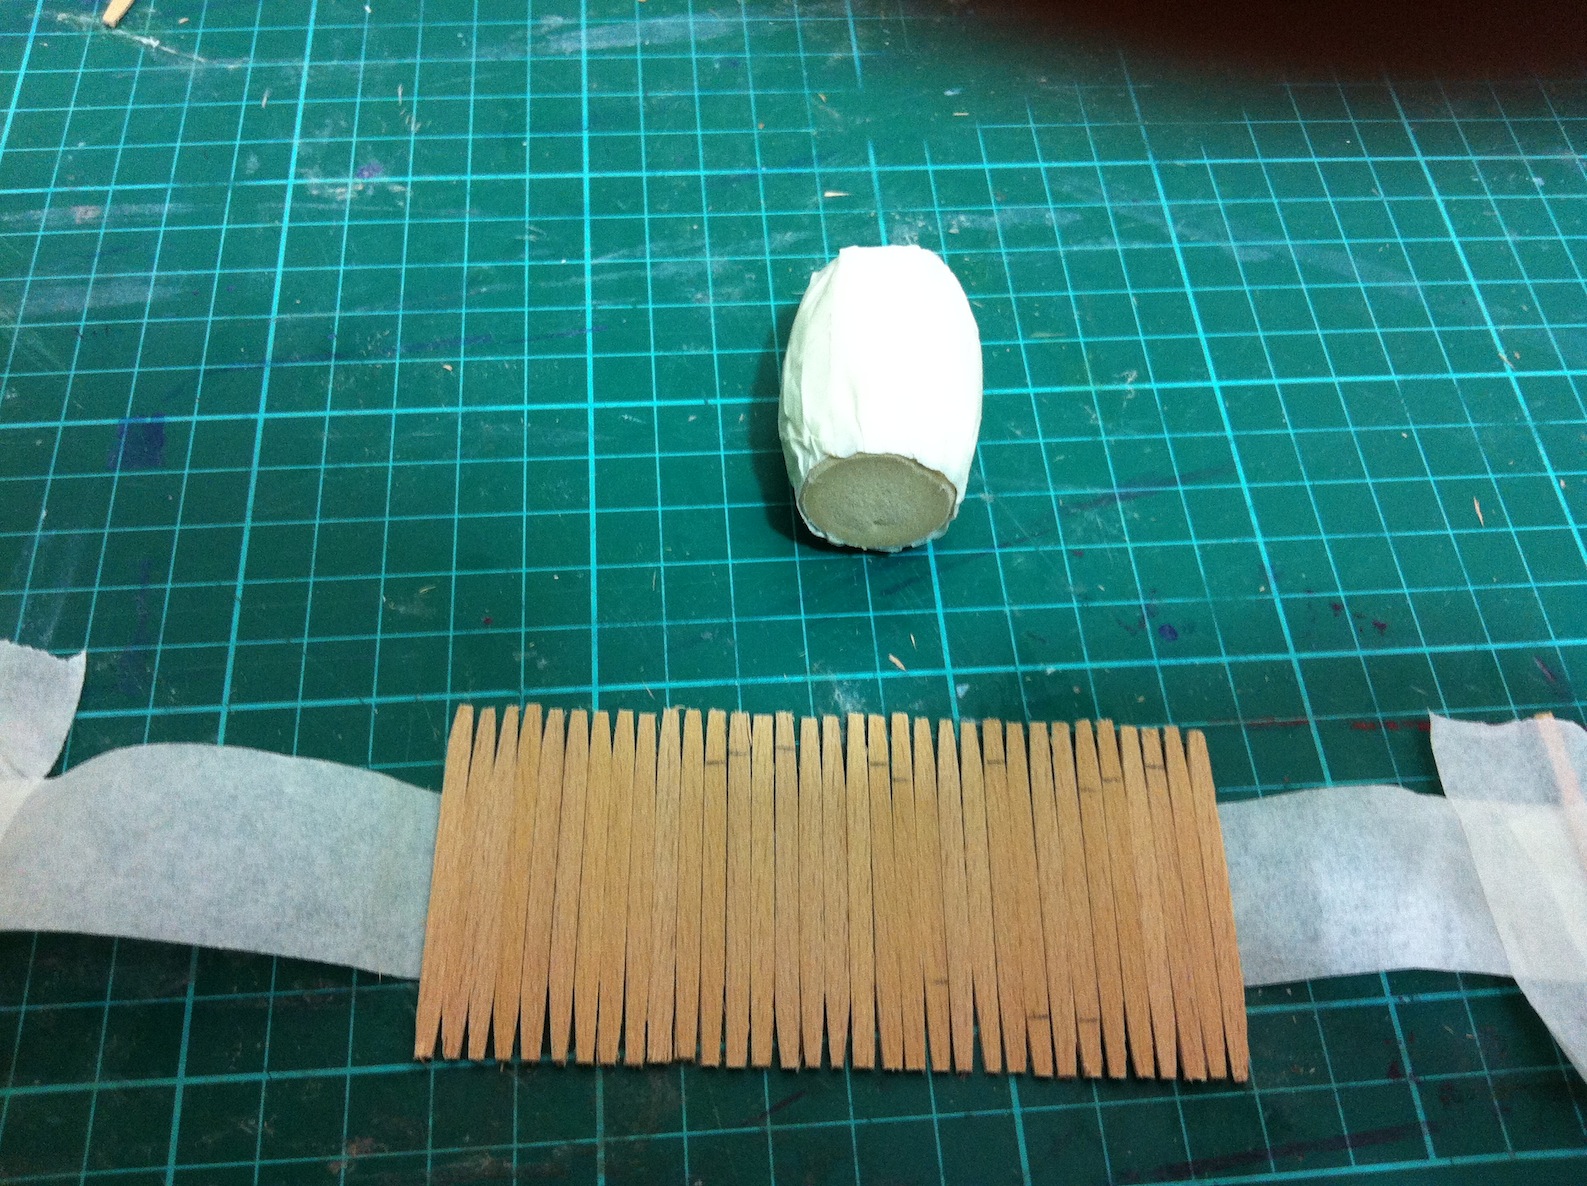
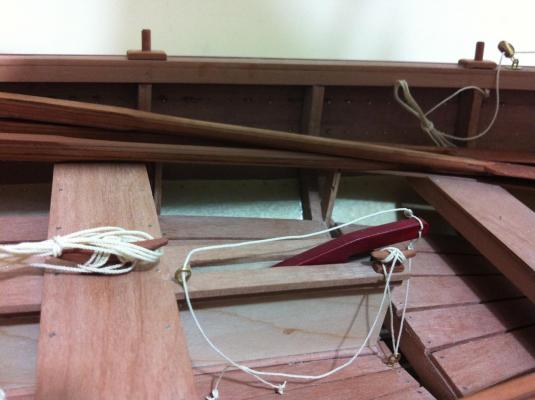
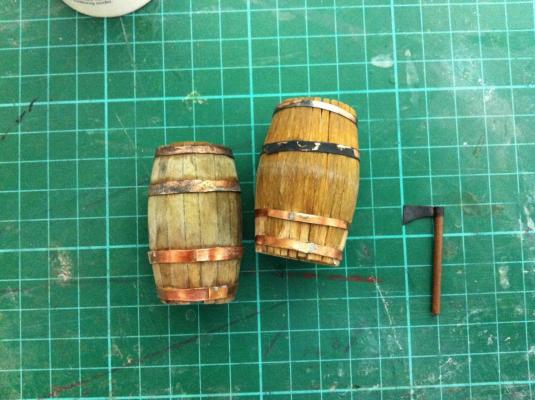
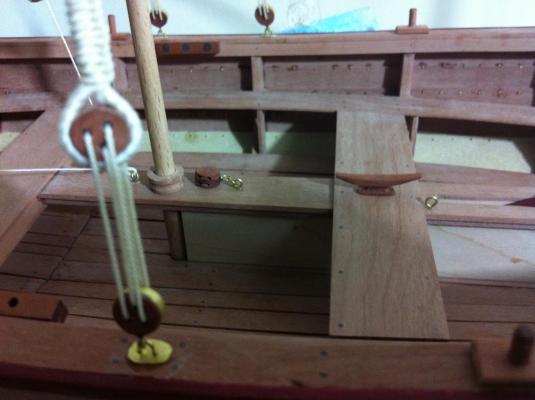
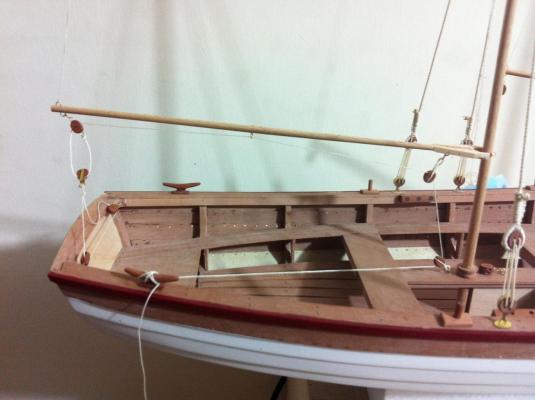
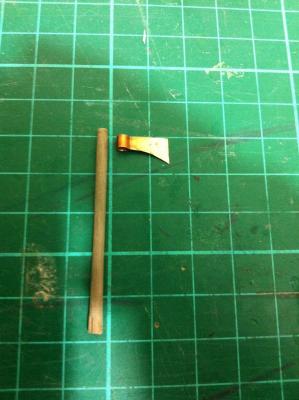
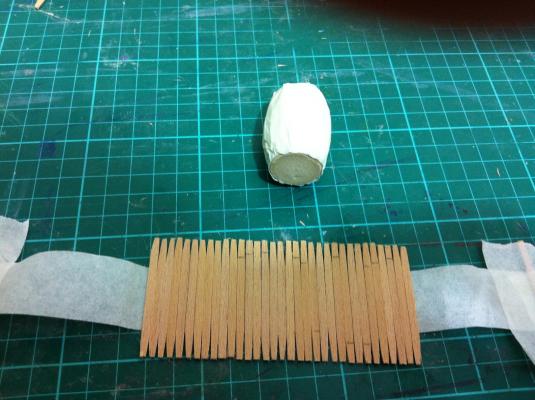
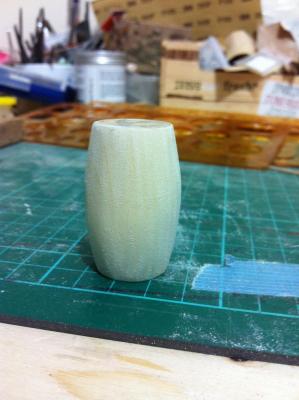
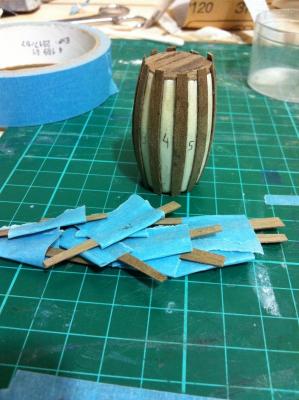
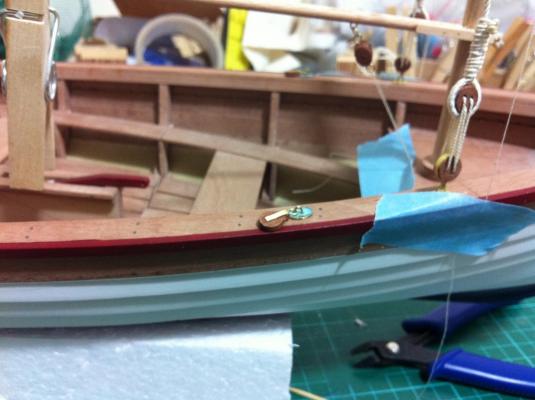
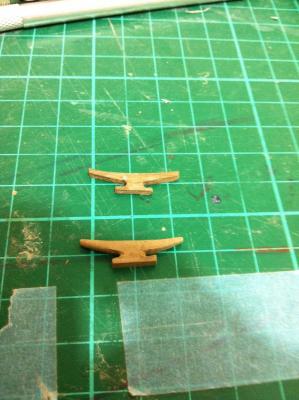
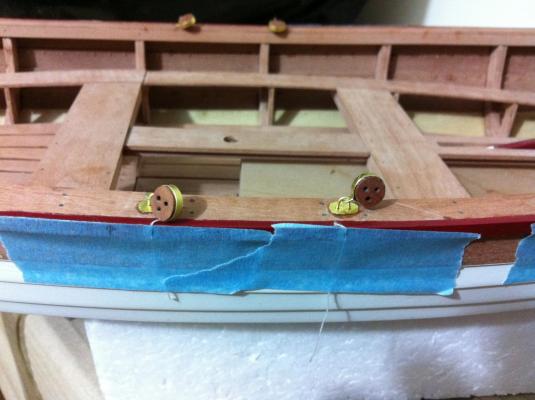
Some more work got done and I am a little closer to finishing. I made some nice bow chocks And I glued all the fittings I have made so far to the boat. I am still waiting for threads to make more ropes and still have no sail fabric so I used plain thread to simulate the running rigging. I also made fittings for the centreboard ropes and the downhaul for the main mast boom I also made an axe which needs gluing and blackening I also decided to address a critical issue. I had to make a rum barrel! There will be no shortage of grog on my boat! Barrel making generated intense work over three days. I used some leftover wood from a cheap curtain rail and the first attempt was rather terrible. I tried again this time doing things properly. I sanded the core wood, divided the circumference into sections, sanded and glued every other plank and carefully prepared all of the remaining planks to fit their spaces using walnut this time instead of cheap birch. I cut semi-circular pieces of copper sheet to create the hoops and soldered and epoxied everything in place. Despite all this, the new barrel does not look much better than the previous one! The new one is on the left. Anyway, I am waiting for some LOS to blacken the copper.


- 253 replies
-
- 10
-
-
- ketkch
- gaff-rigged
- (and 1 more)
-
Great work Mehmet, you can see boats like this in the Greek islands. I enjoy walking in the harbours and occasionally you come across an old boat, dirty and run down which stands out amongst the other better maintained boats. Some have been sitting idle for years or the owner has aged and is equally run down to really care. But to be honest your boat would be the worst I ve seen! Still, amazing work. Makes you want to take it on as a restoration project!
- 83 replies
-
- 3
-
-
- sponge boat
- finished
- (and 1 more)
-
The boat is coming along fine Patrick, it is a very impressive yacht. Superb work, I think it is very difficult to get this right and make all this massive superstructure look elegant. I must say I had not appreciated from the drawings how lovely it would look. On a different note, were the photos taken during actual work? After 20 minutes my workbench looks like having been hit by a hurricane.
-
Mary Christmas Patrick, happiness and prosperity in a stone-free 2016!
- 253 replies
-
- 2
-
-
- ketkch
- gaff-rigged
- (and 1 more)
-
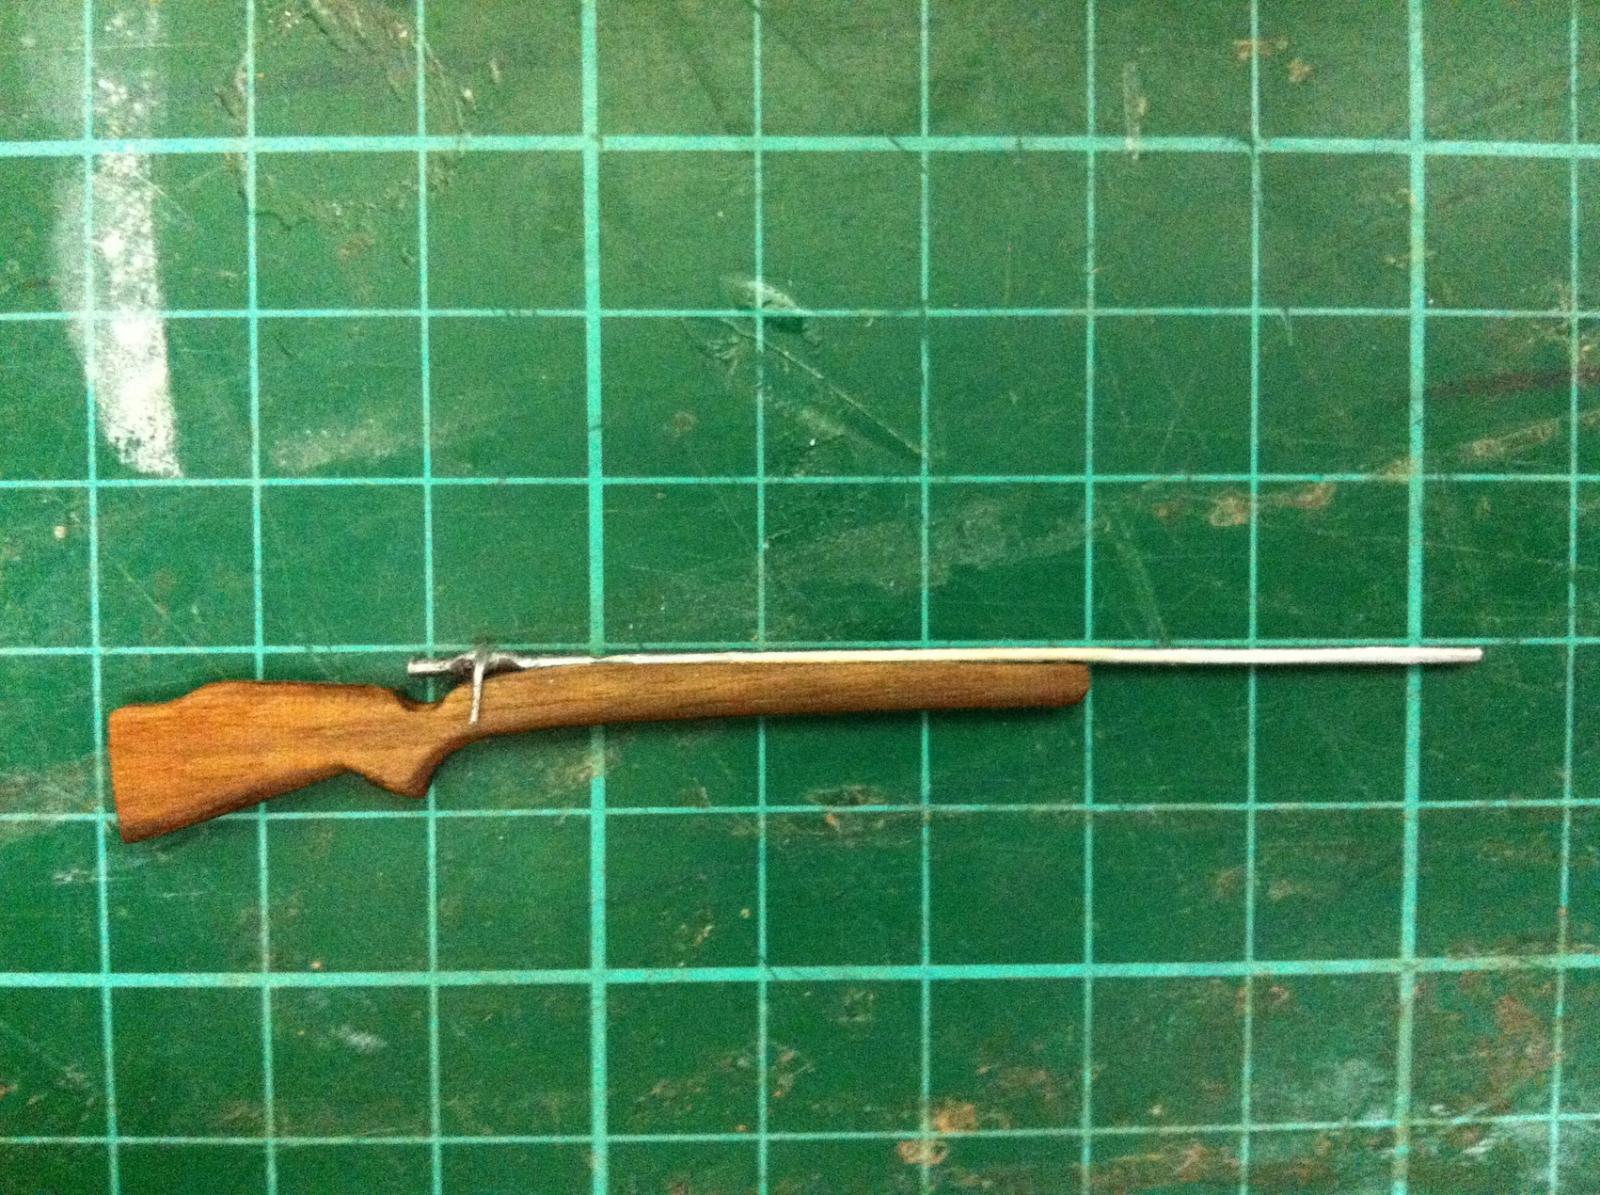
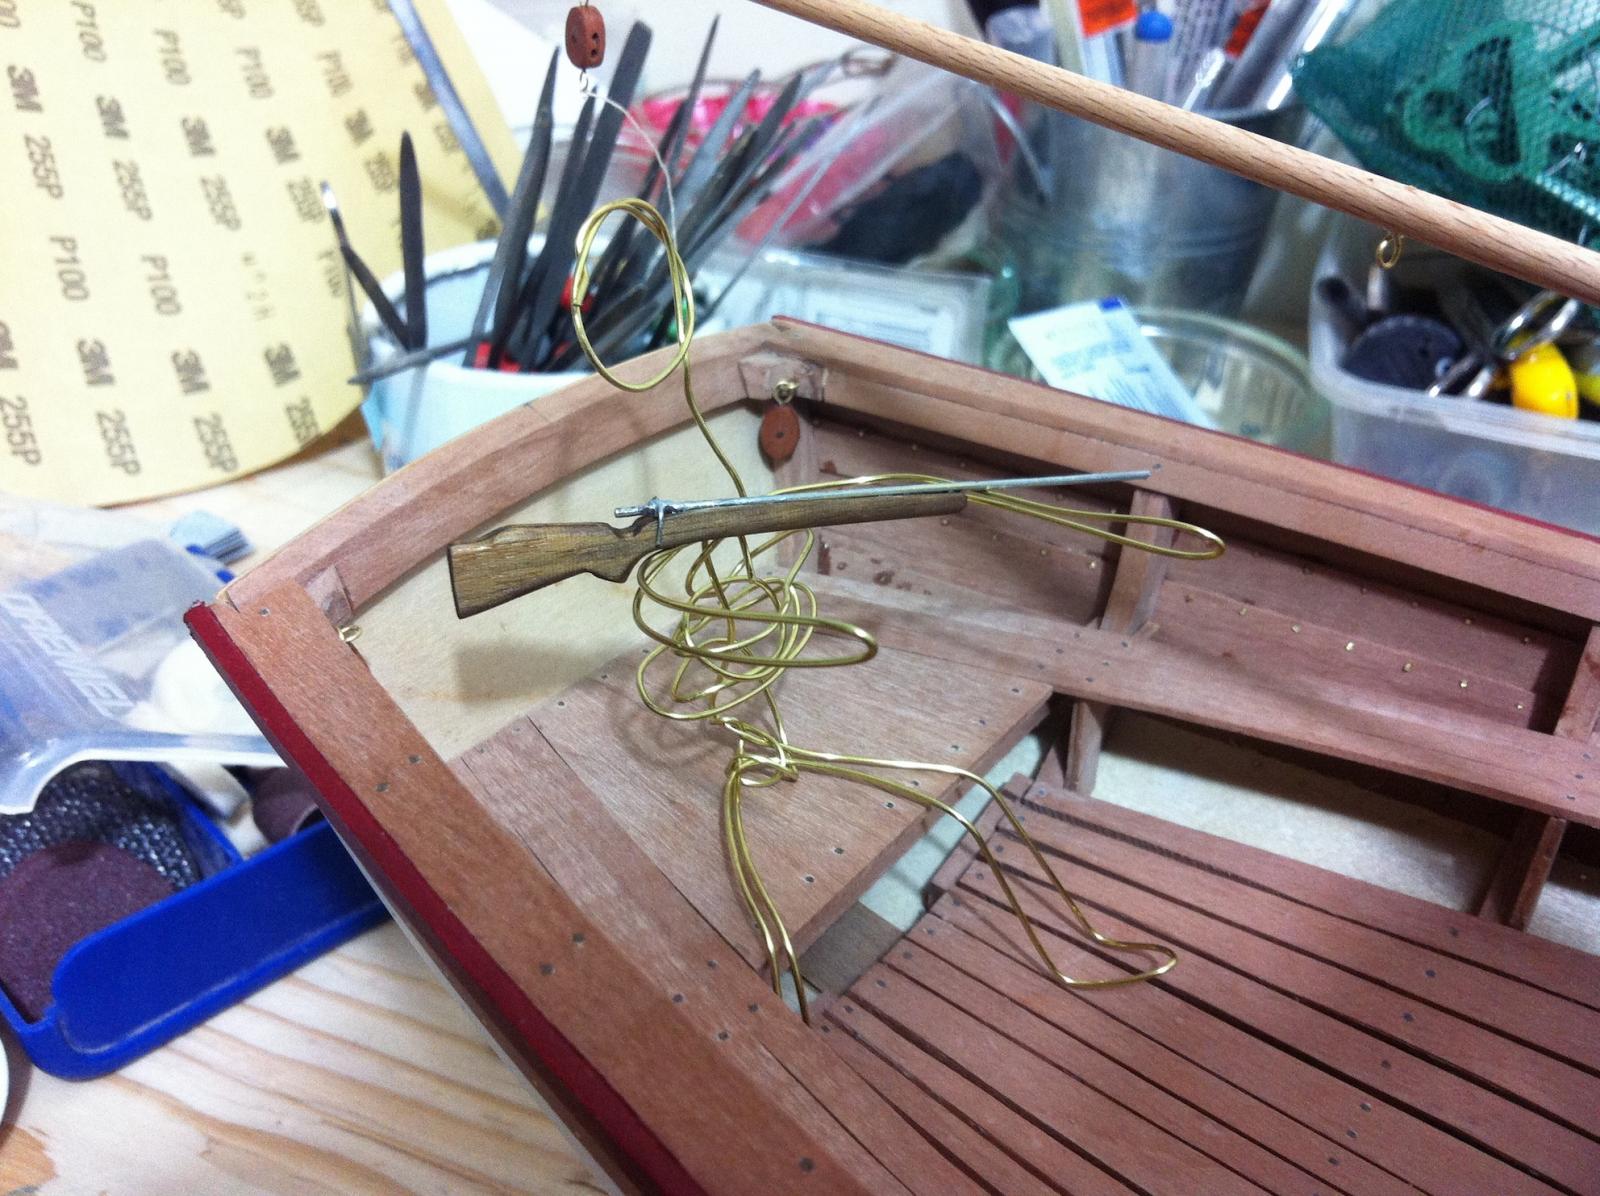
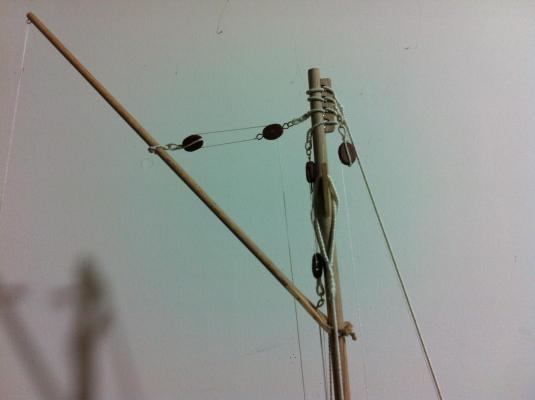
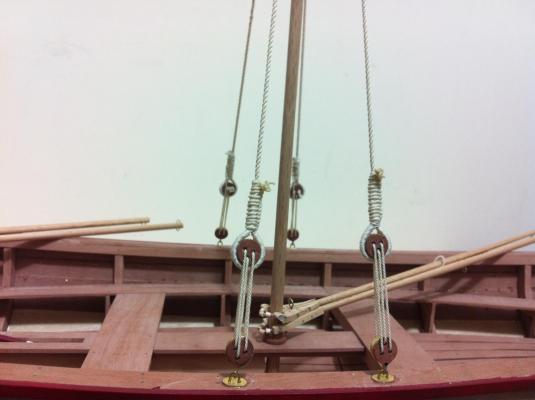
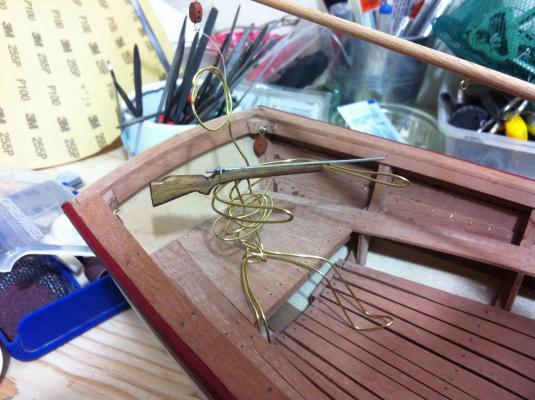
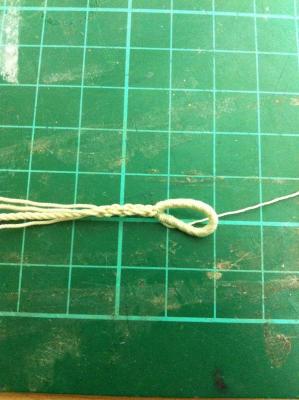
Little progress made, partly due to my daughters tonsillitis and partly due to many silly mistakes. The new ropes are a joy to work with. I am still waiting for a variety of threads as I need various rope sizes but at least I could finish the standing rigging. Splicing is very satisfying now. I also replaced the ropes in all the blocks and used Tang oil. They look now much nicer The new shrouds compared to the old ones are way better And of course the standing rigging has to come down once more as the forestay is in the wrong place, it should have been tied to the upper hole. All done! I must admit there is quite a bit of tension in that forestay! The deadeyes look good The forestay is served throughout its length as the jib rings will run along it I also made a few pulley blocks, for the jib sheet and the stern traveler I then took a break from boat building and made a rifle. After all this is an exploration ketch so one needs to be prepared. Oiled walnut stock, stainless barrel, even glass bedding (I used epoxy to glue the barrel)! The figure is roughly 1:12 scale. In the background the blocks for the rope traveller can be seen.

- 253 replies
-
- 6
-
-
- ketkch
- gaff-rigged
- (and 1 more)
-
Could be a replacement for some epoxy applications but only when light can get through so I think very limited usefulness for modelling. Looks very expensive also.
-
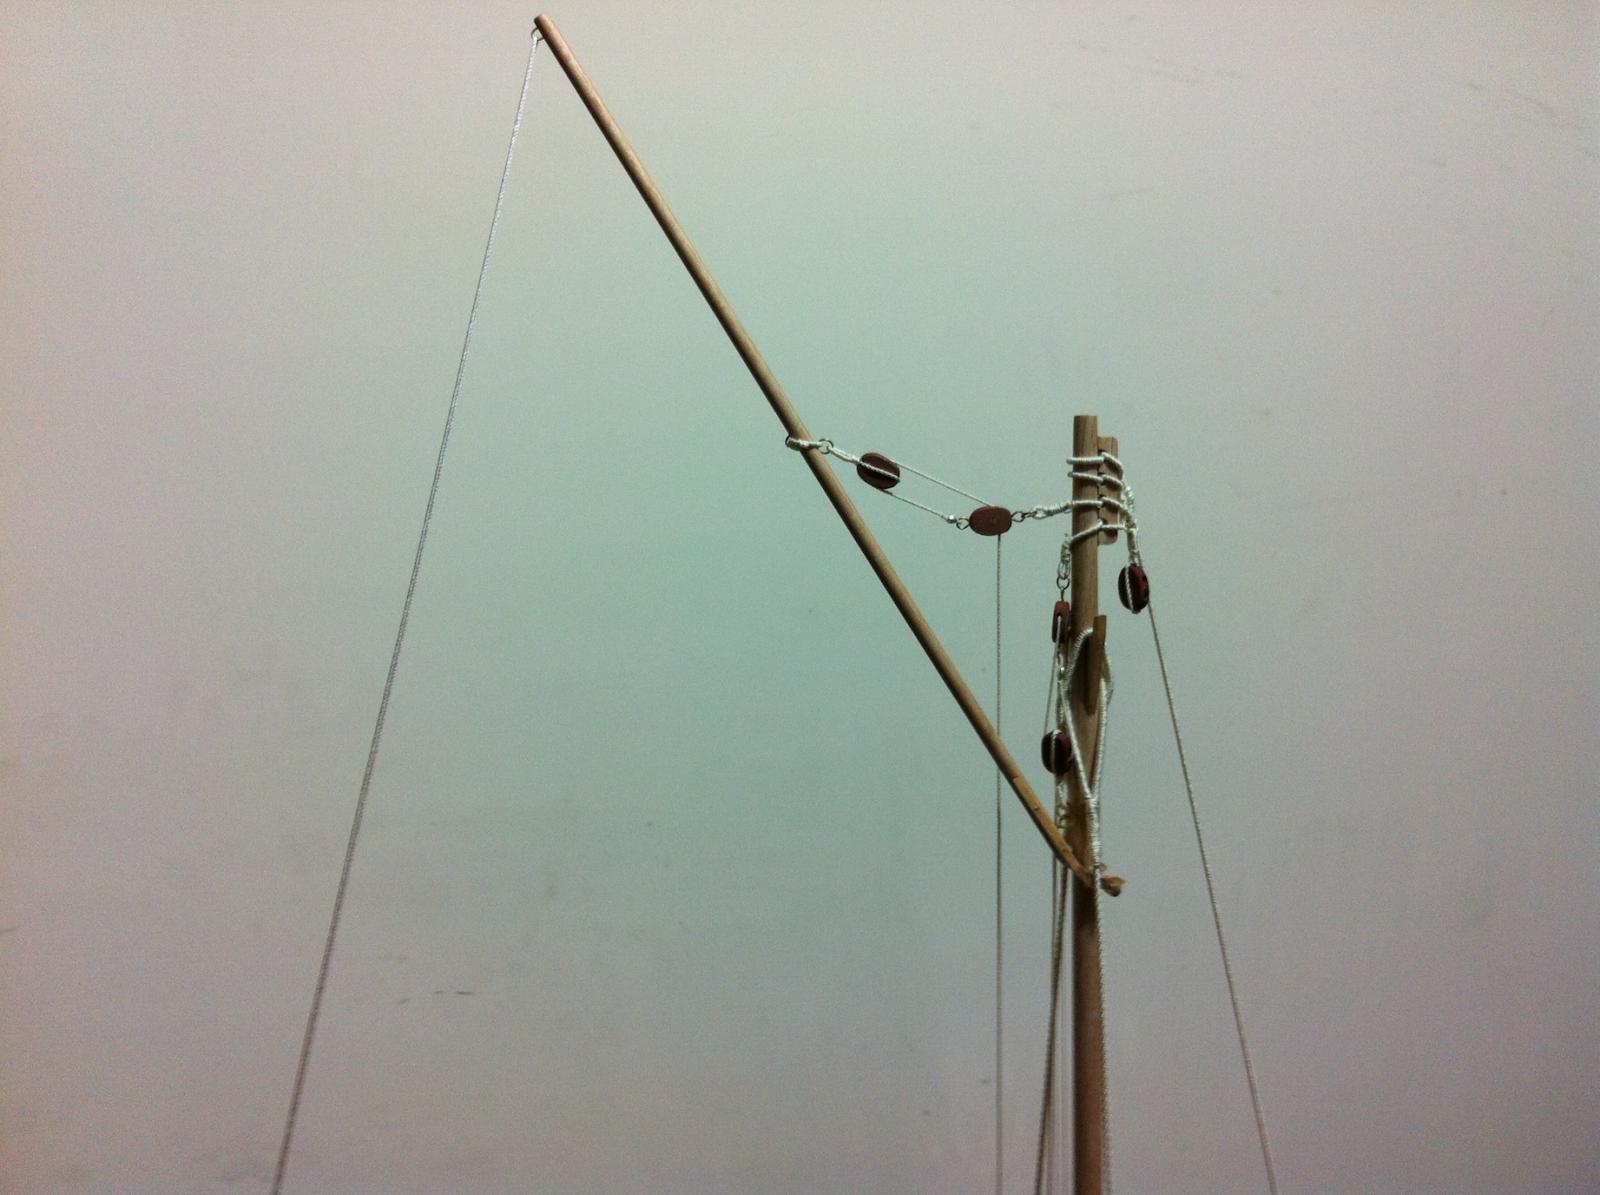
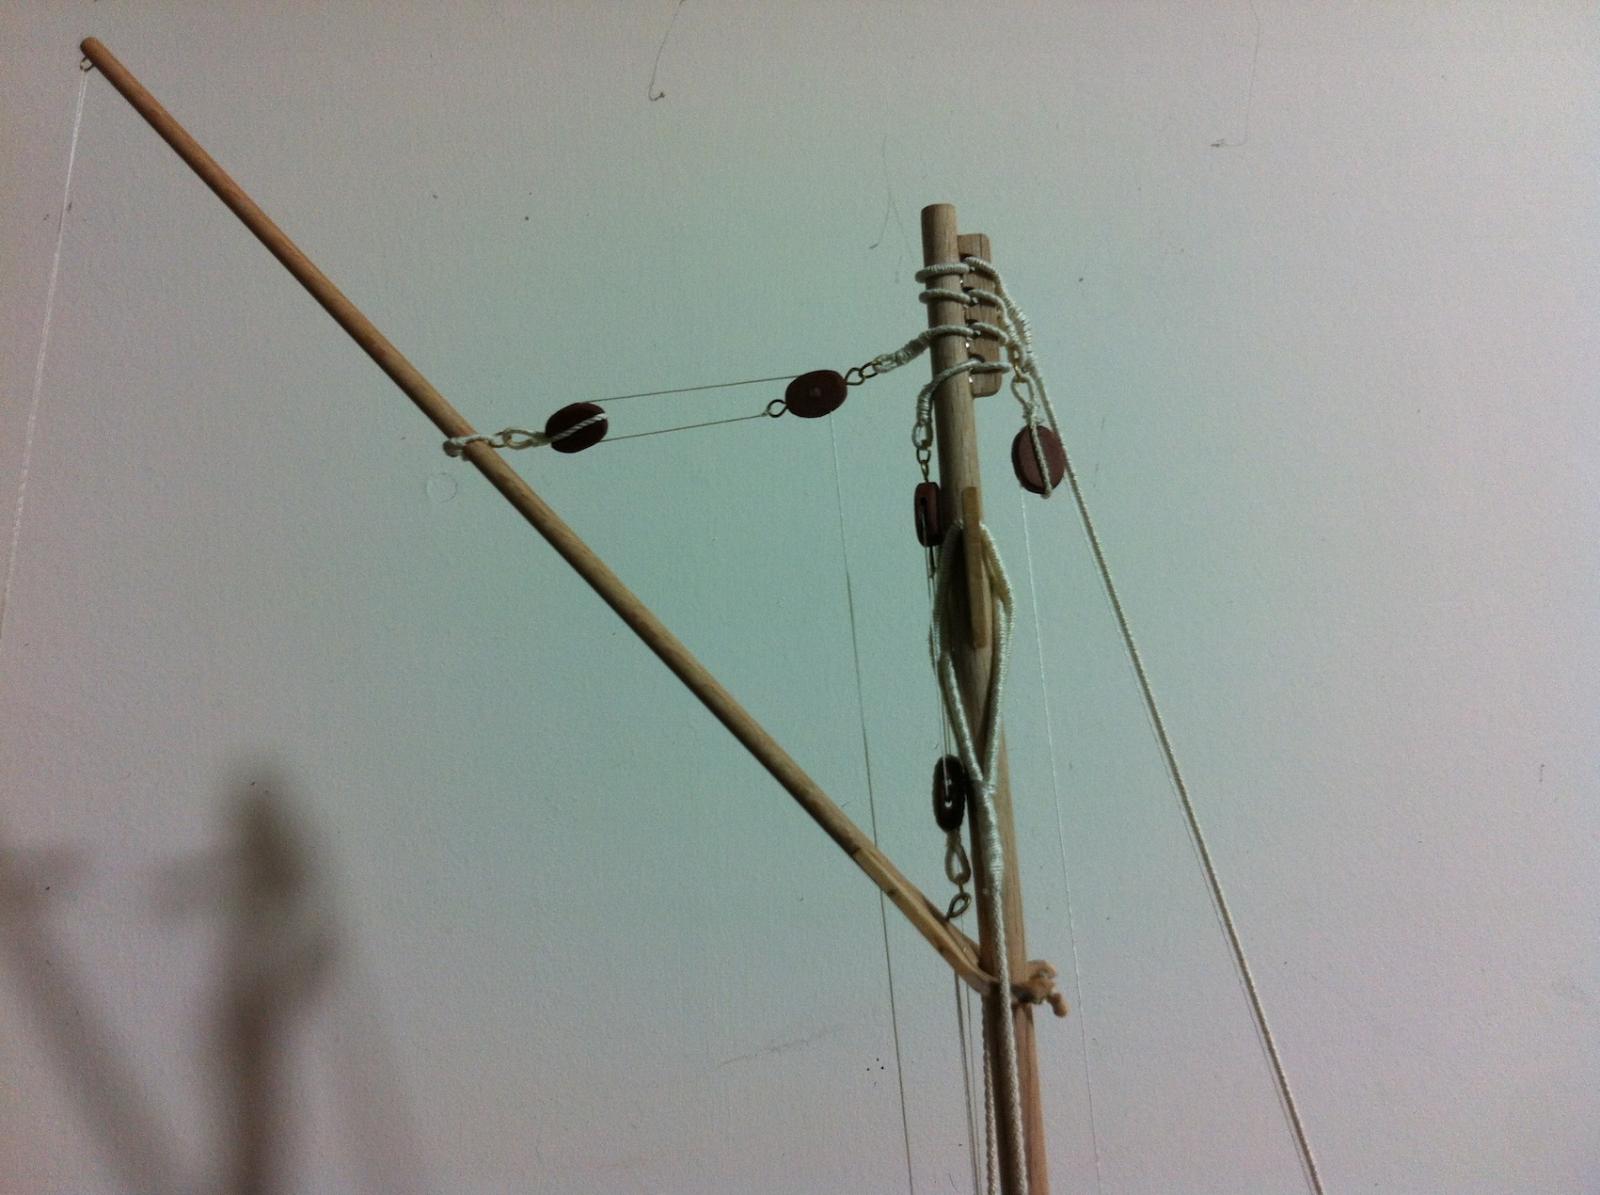
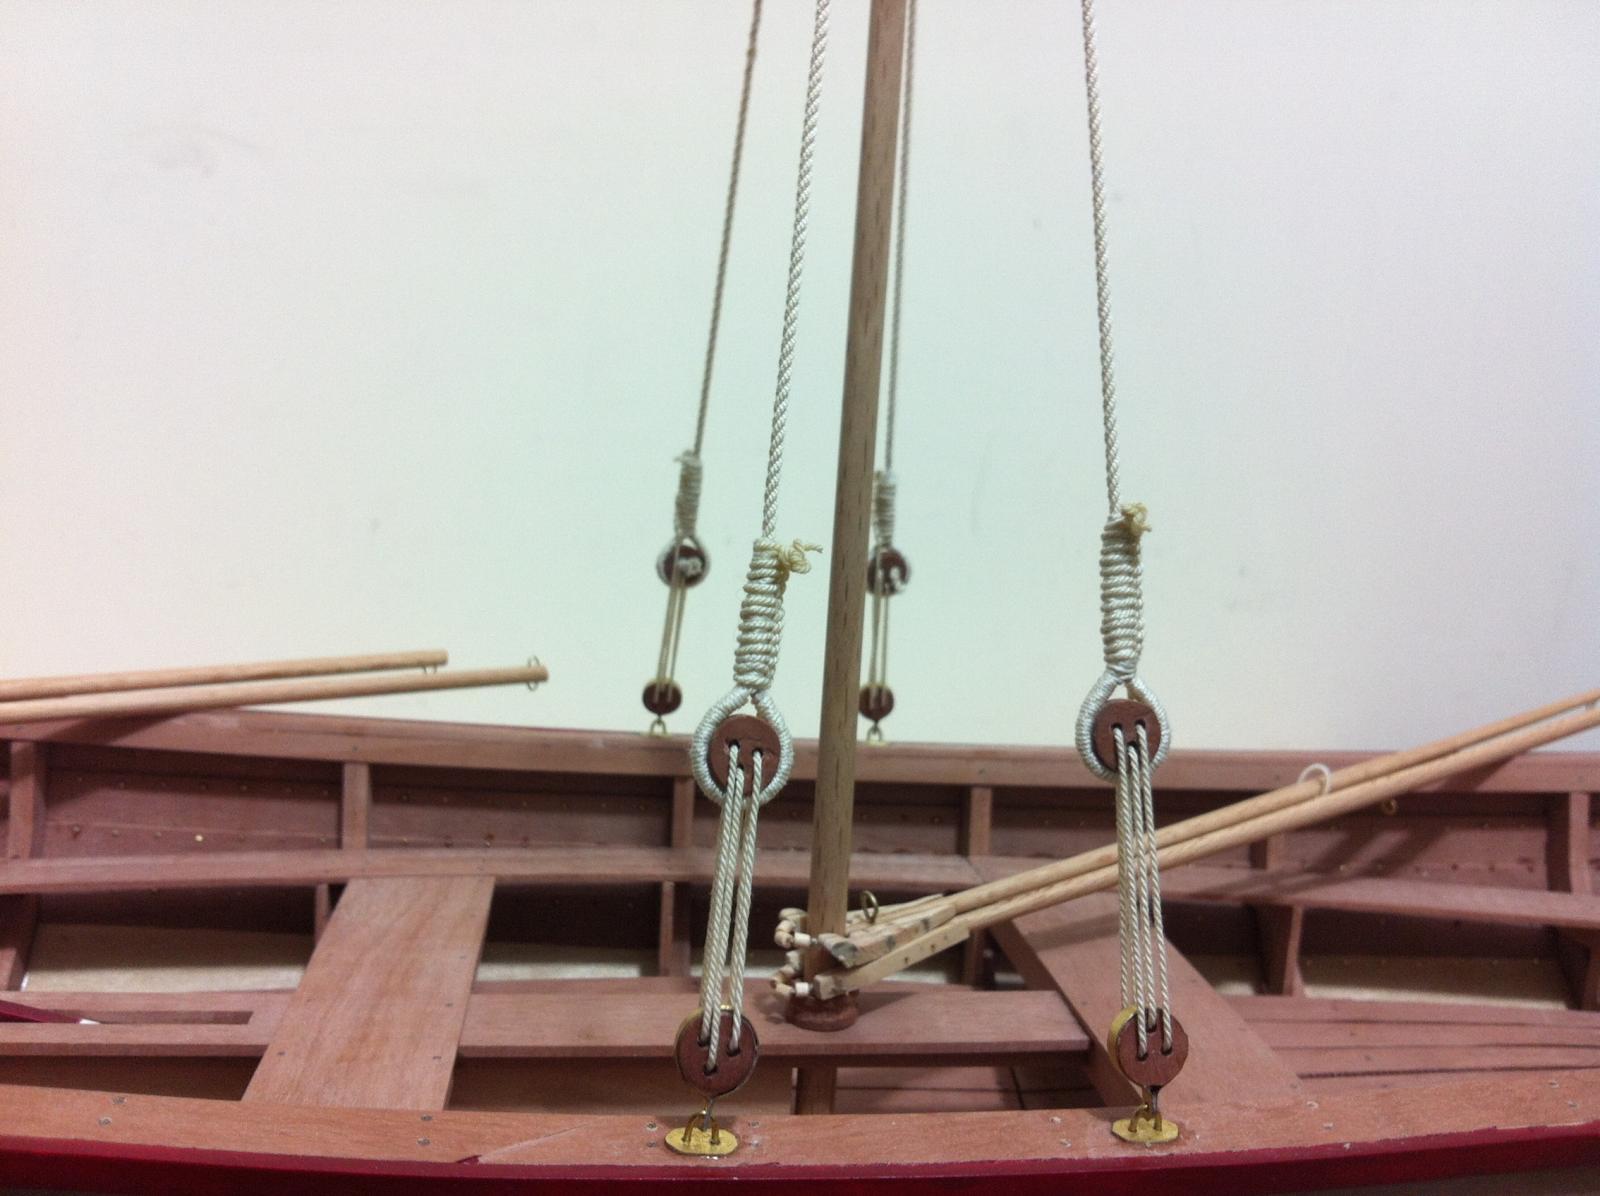
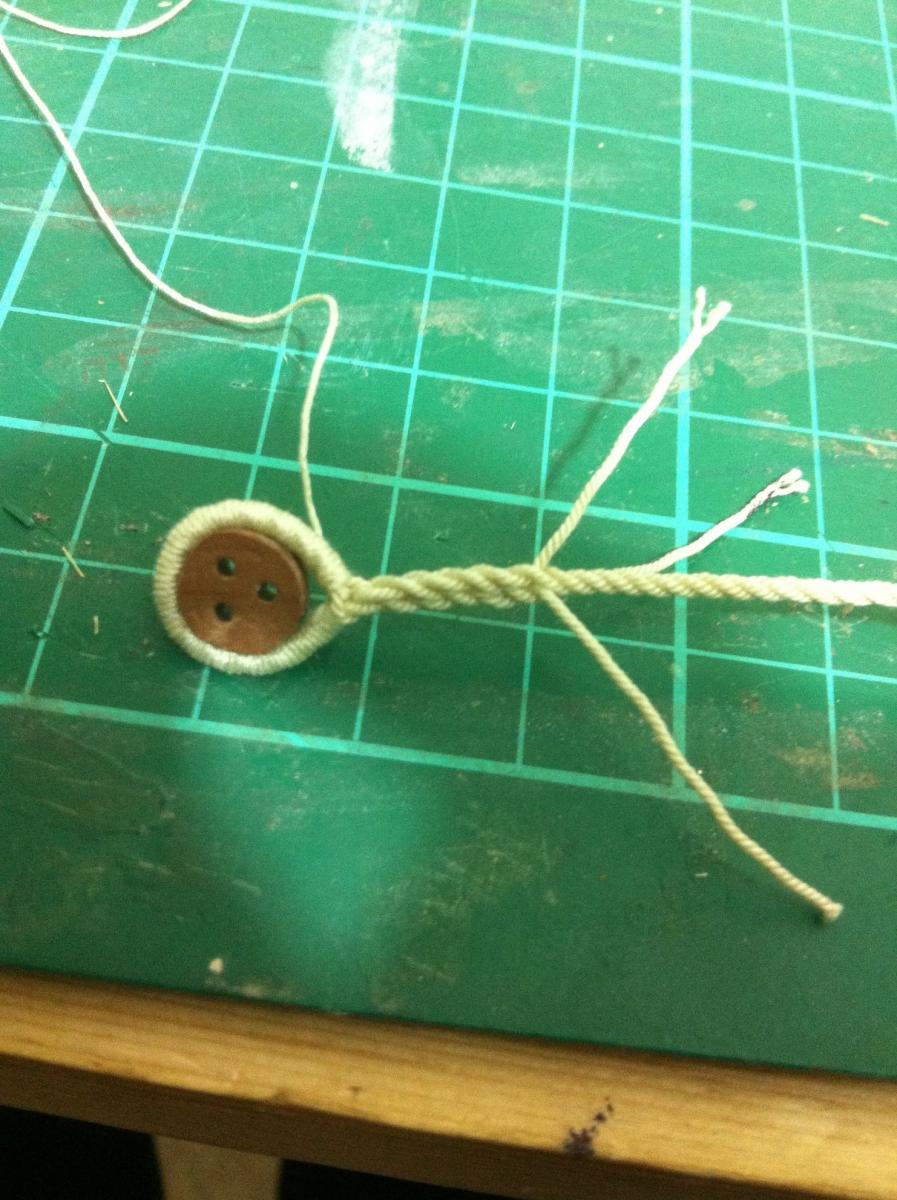
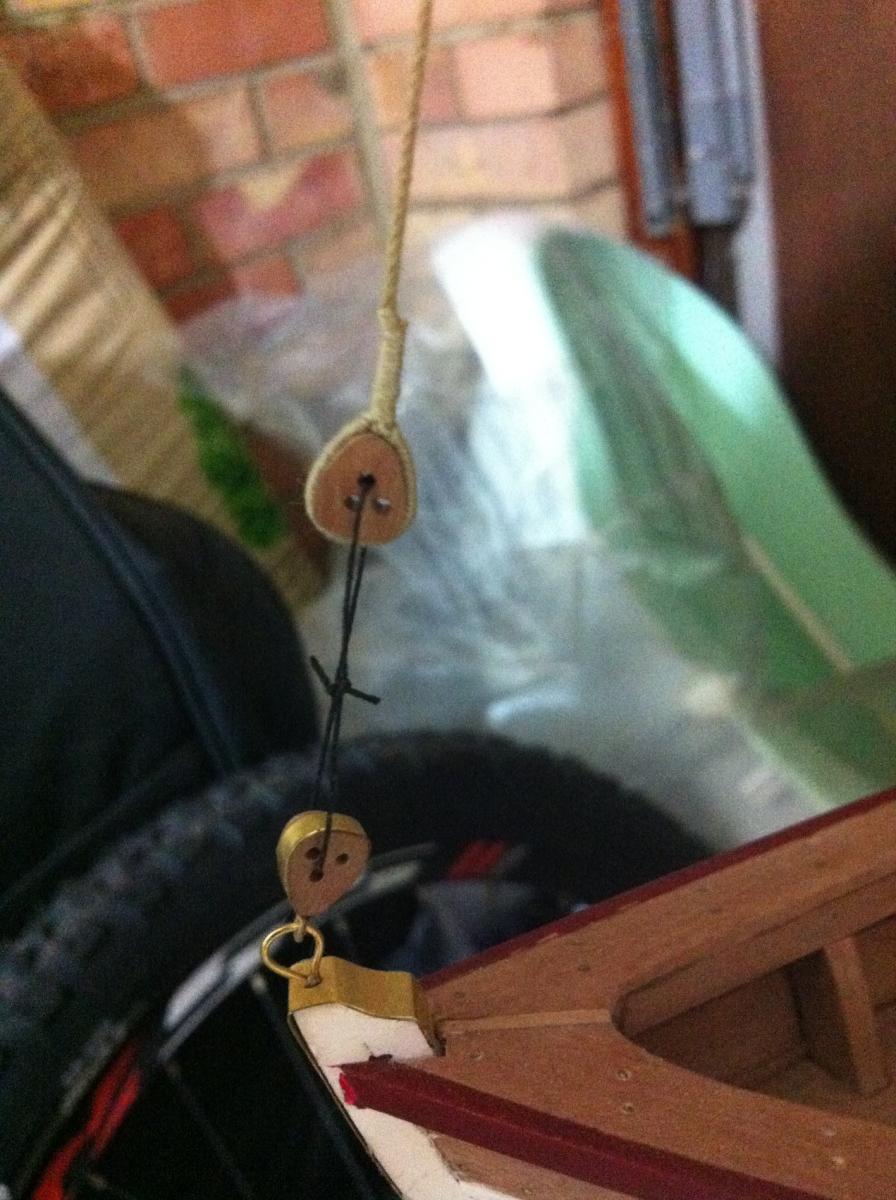
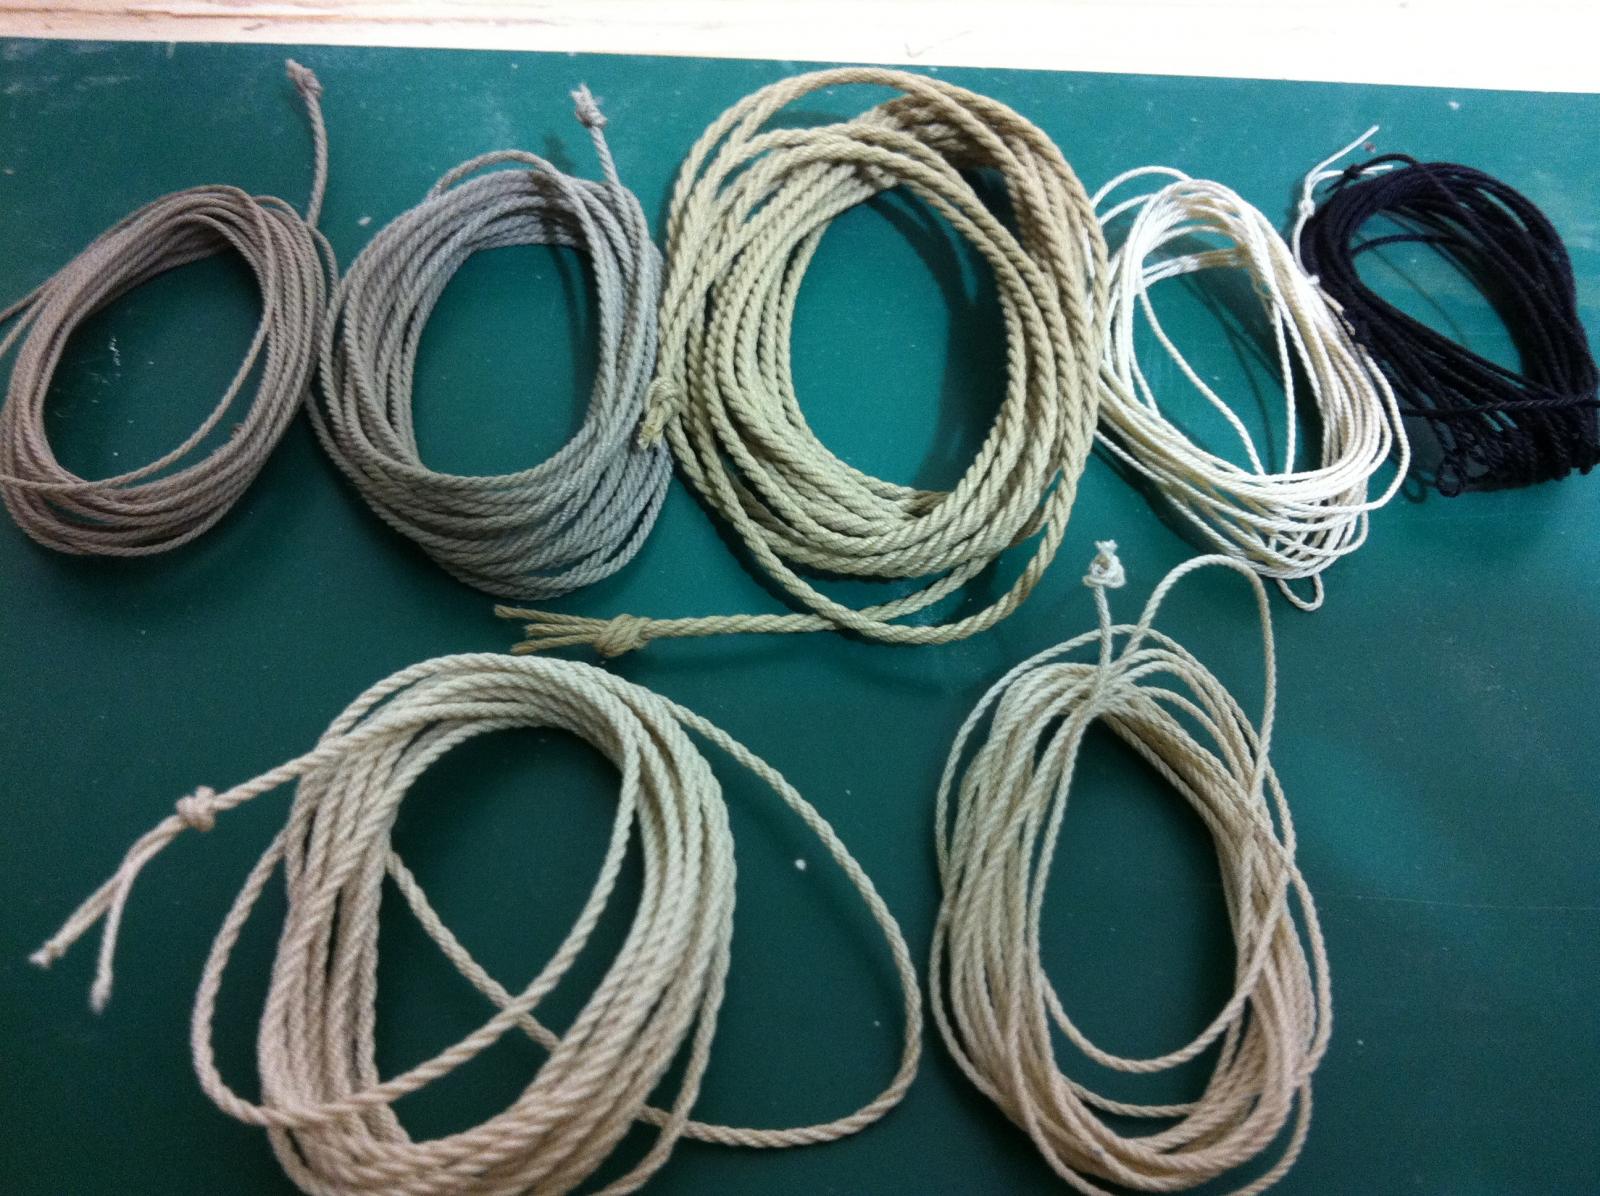
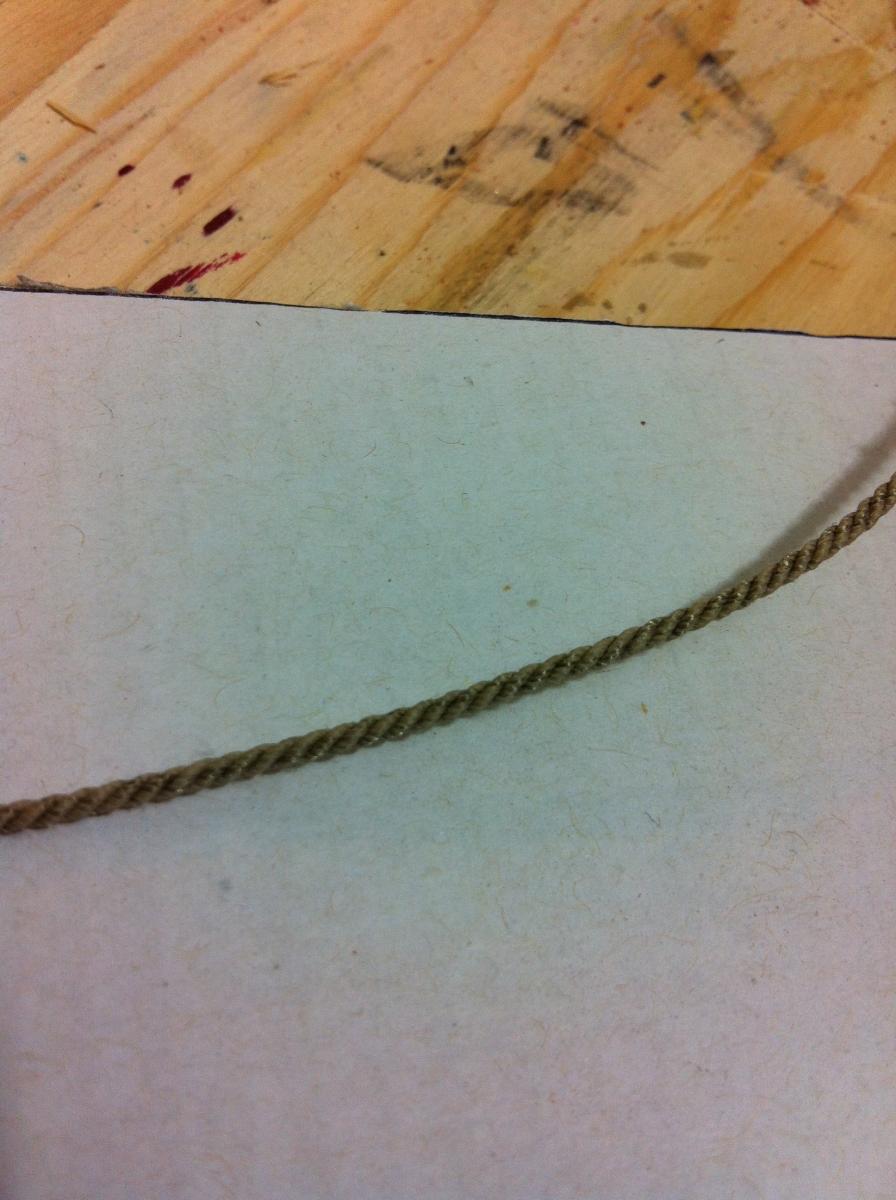
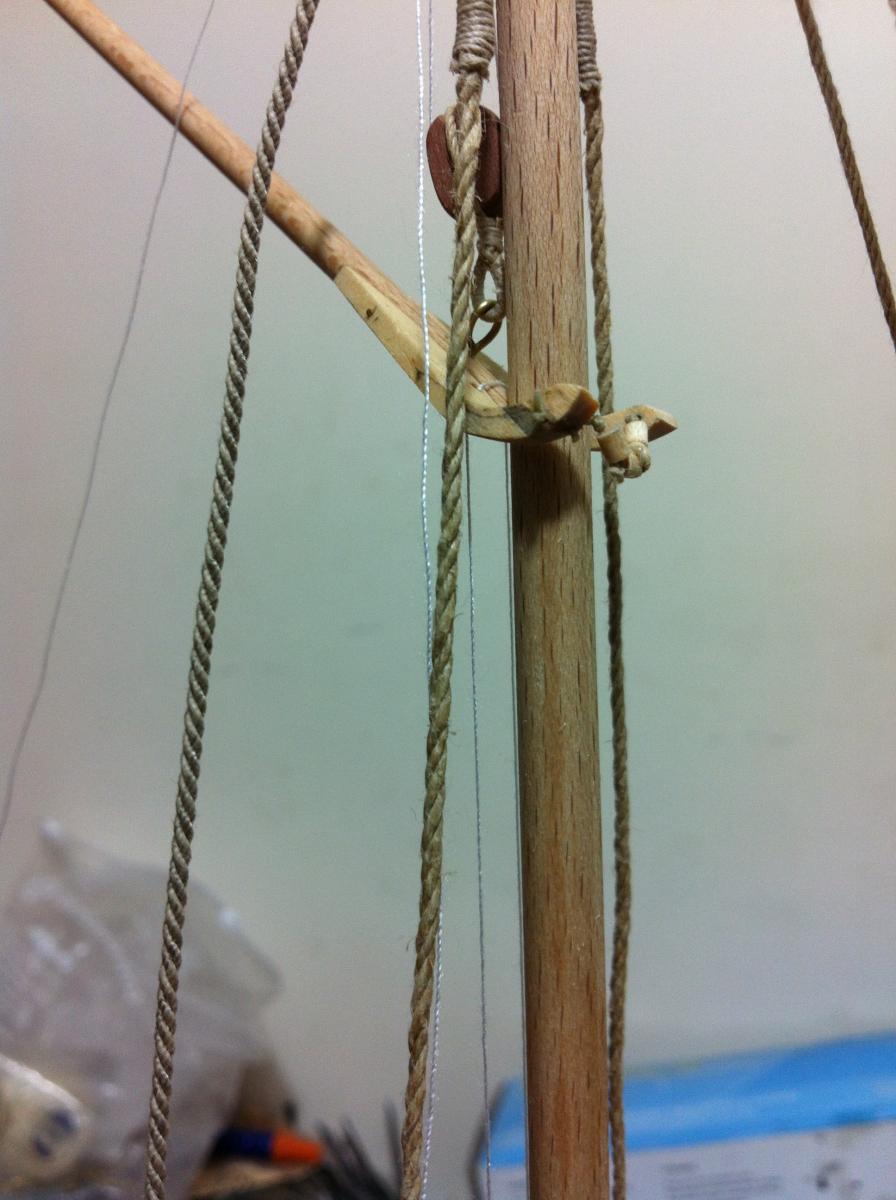
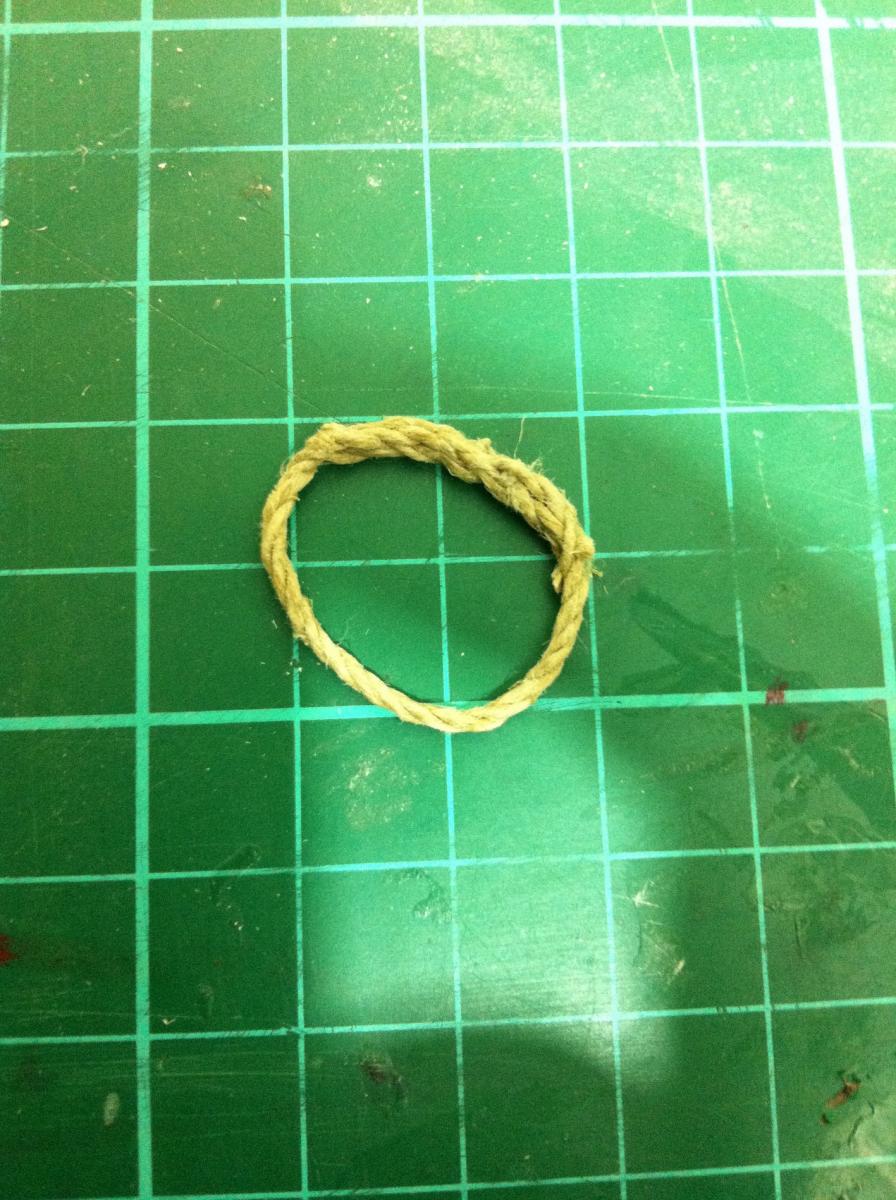
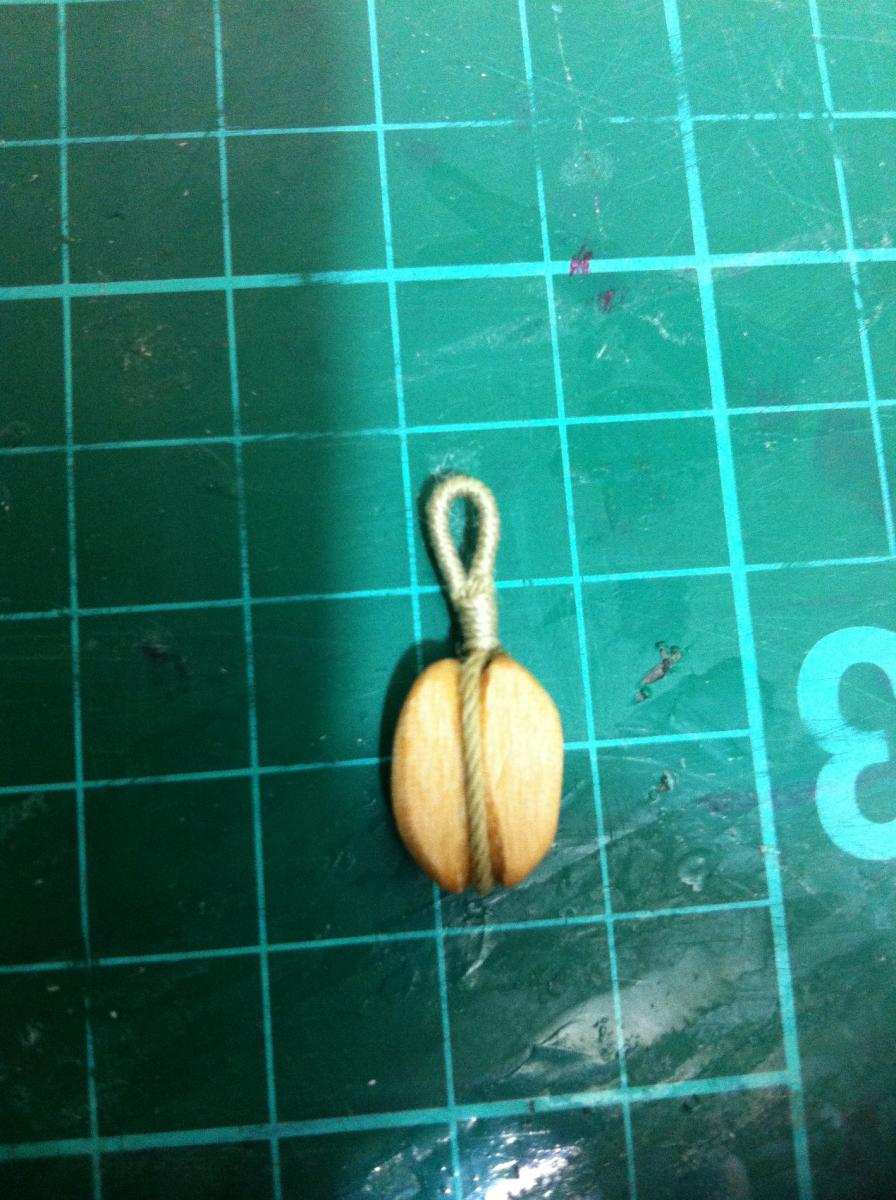
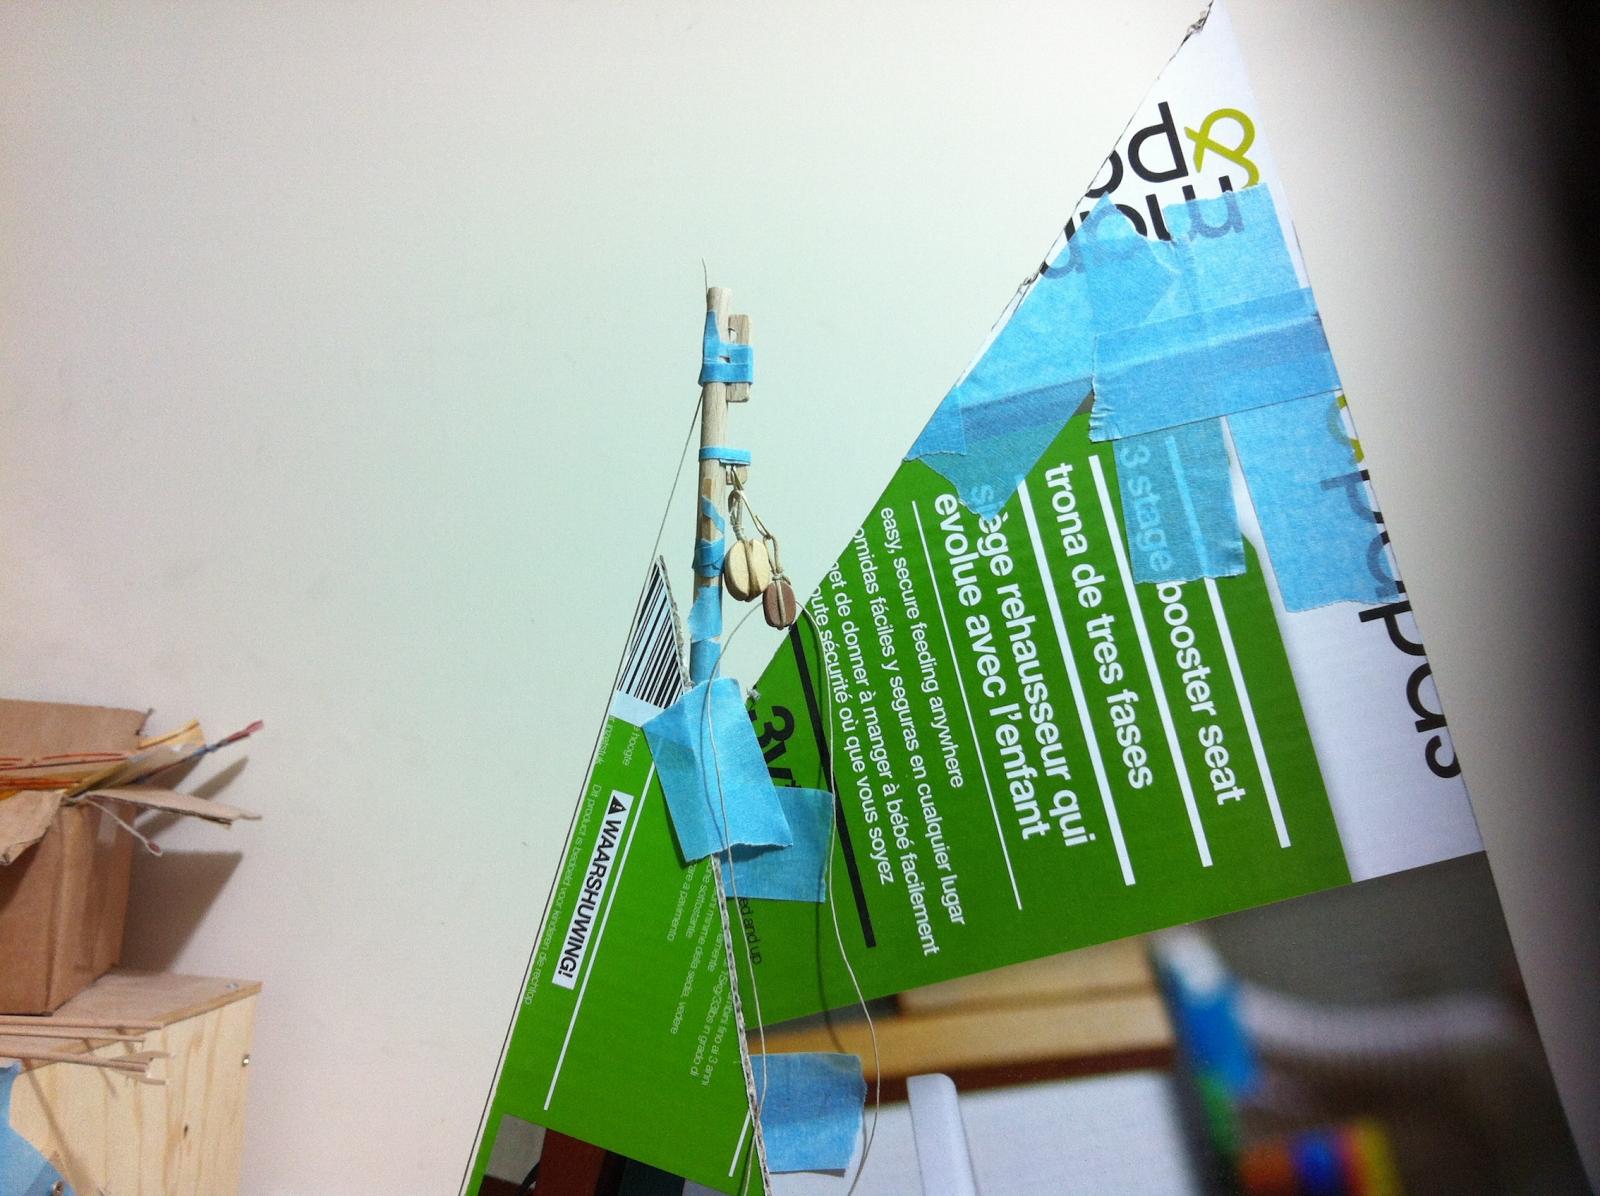
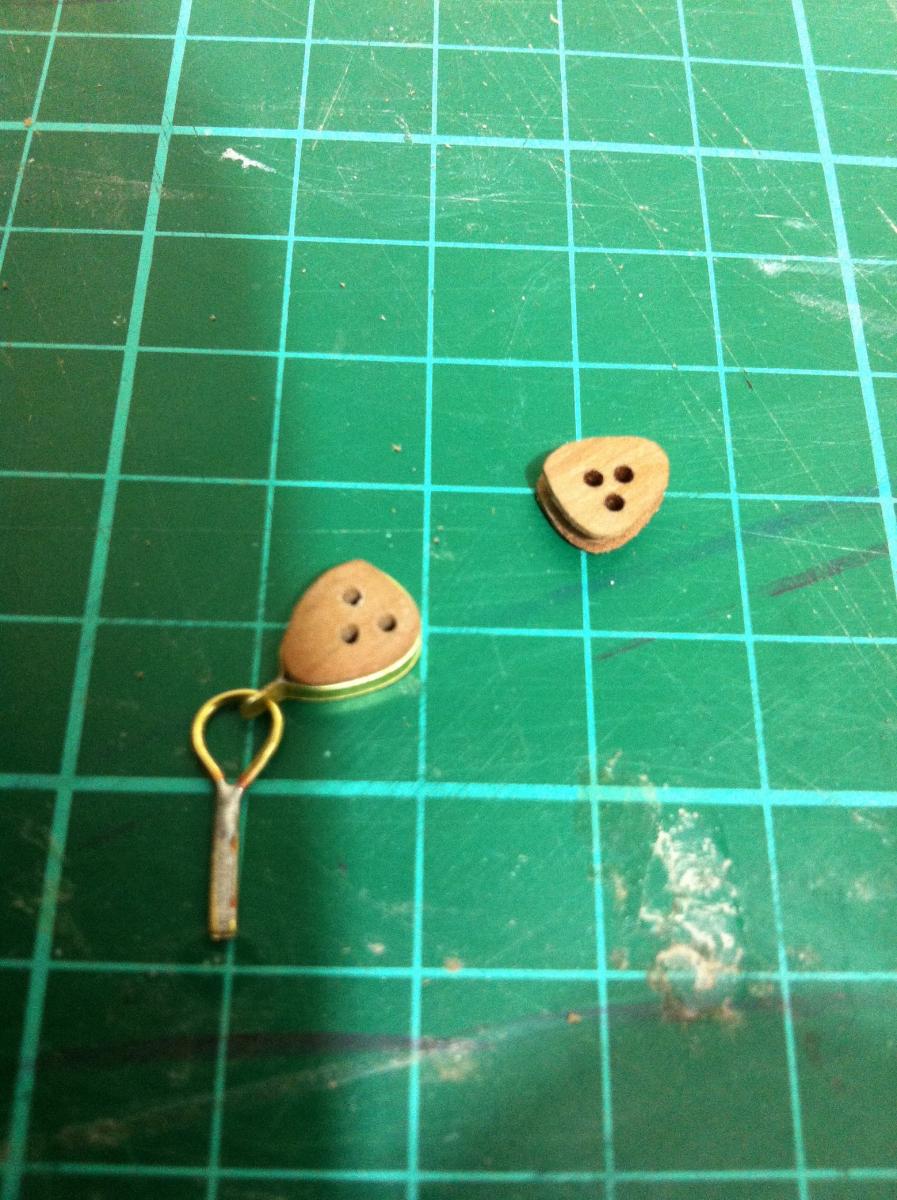
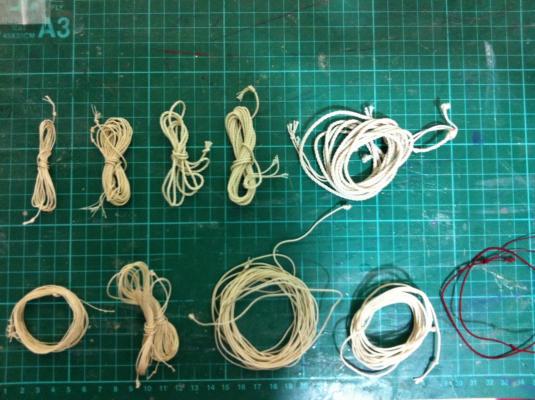
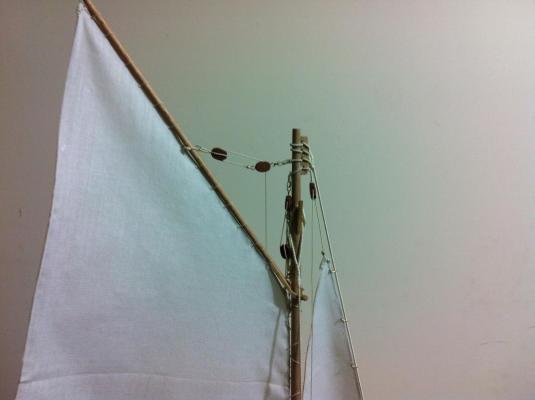
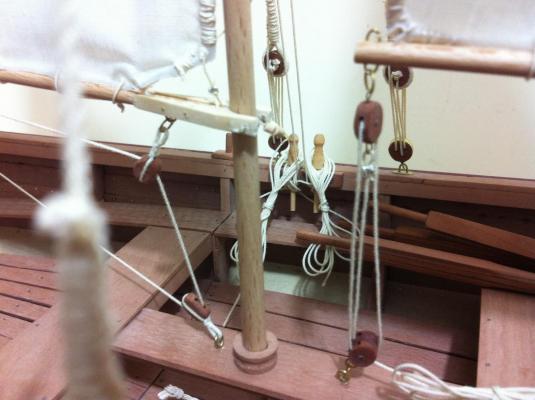
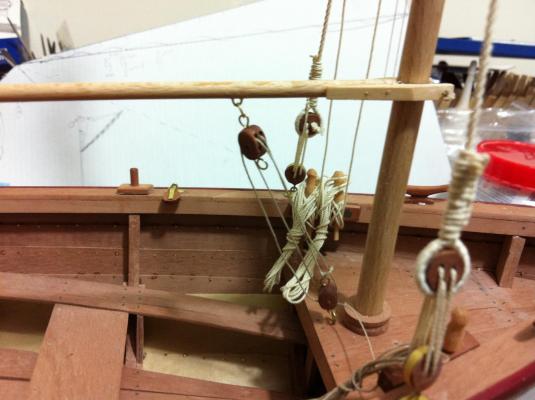
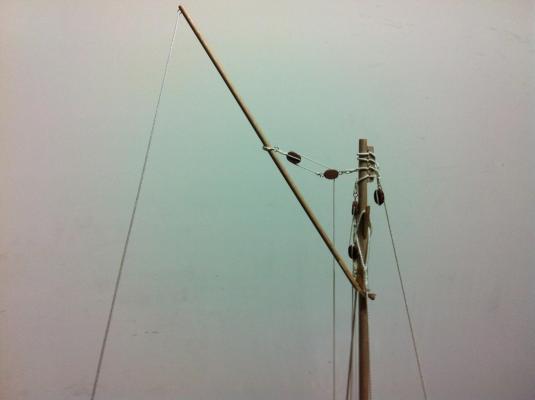
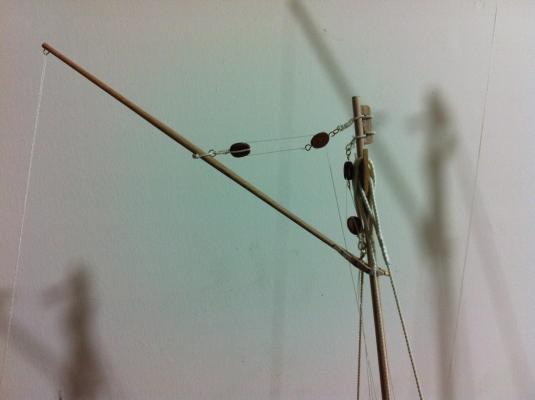
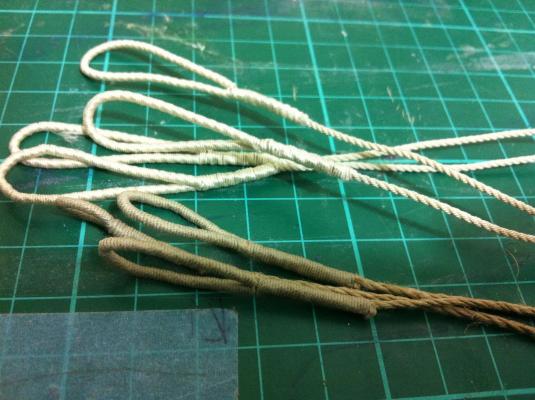
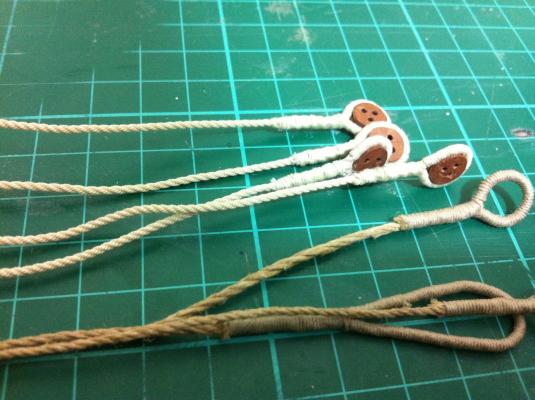
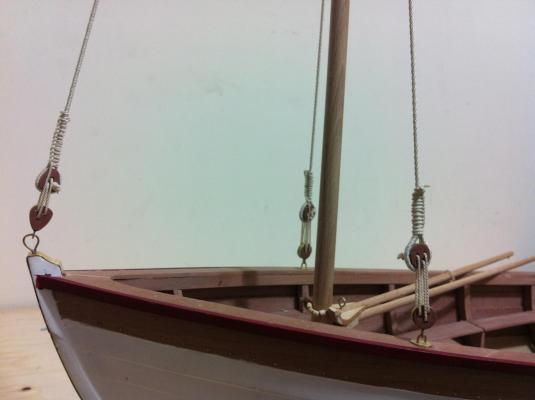
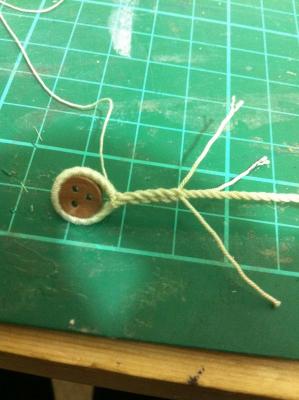
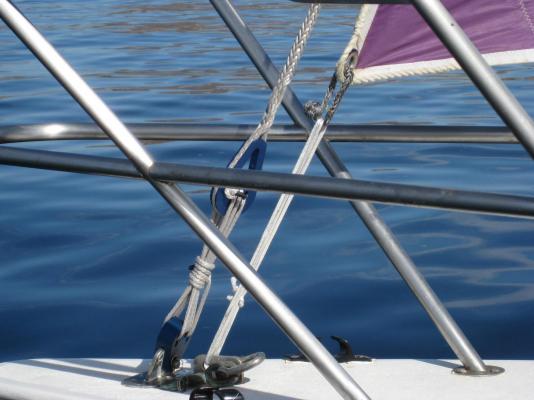
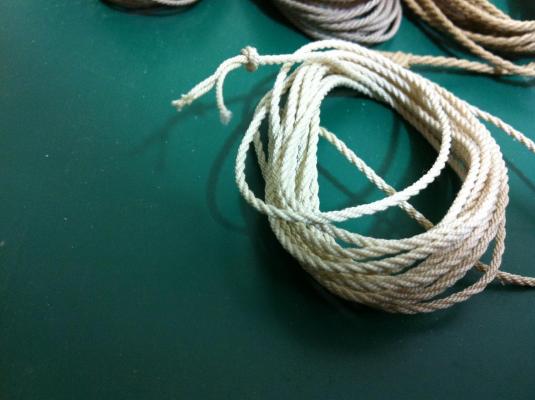
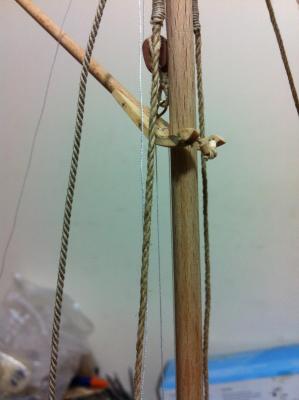
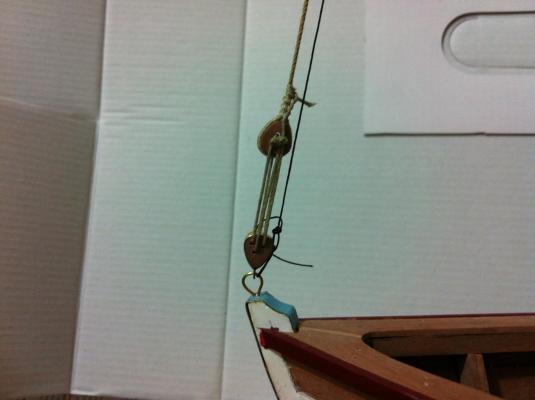
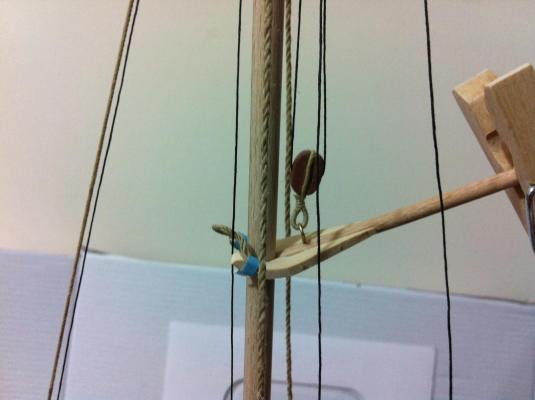
Dear all thank you for the comments and likes. Druxey and Michael, indeed that line was intended to be left hand as it was just a test line. However only now, after spending a couple of days rope walking I realise the difference. A left hand layed strand is stiff and rigid but the right hand rope is much more pliable. Mark, I think you mean that the forestay should not get tensioned too much. I googled "forestay tensioning" and it appears to be a true art obscure to the majority of sailors. It also seems that most people go for "reasonably tight" to get round this. The next photo is a close up of the forestay tackle, I copied this of actual rigging set ups I found on the net. I think that with a pair of wooden hearts it will be difficult to put a lot of tension, as a turnbuckle would. I experimented a lot and I think I have standardised my rope making technique. I used the length of my garage and was able to produce 2.5 m long strands. The problem is that even using the finest 100 weight thread, it produces a rather substantial rope. It is likely that for some applications were a thin rope is needed a strand may need to be used. In the next photo, the upper row are strands and the bottom one ropes. I used almost every thread I had experimenting. I also tried to make a cored rope but I just can't see how this could be done with this setting. The admiral was rather impressed and I order some silk thread to make some nice cords for her necklaces and pedants!


- 253 replies
-
- 8
-
-
- ketkch
- gaff-rigged
- (and 1 more)
-
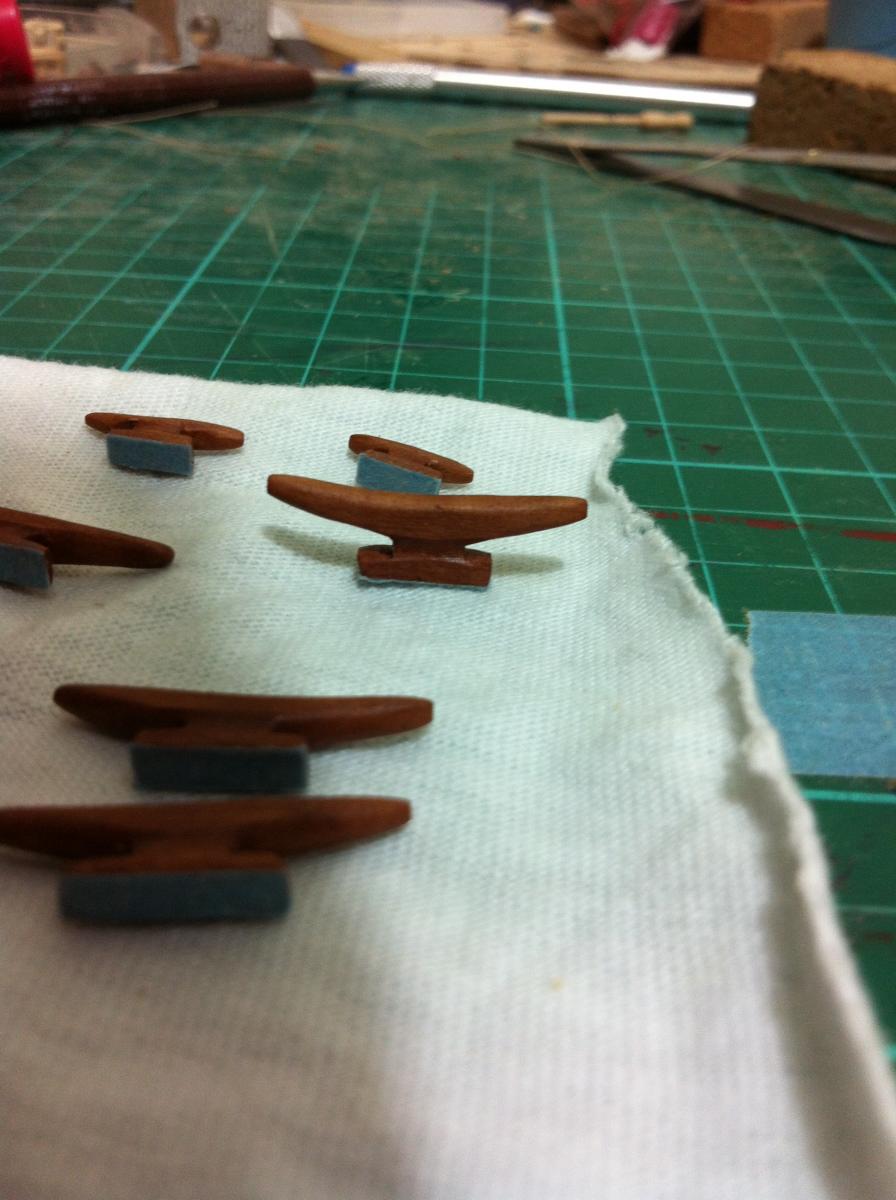
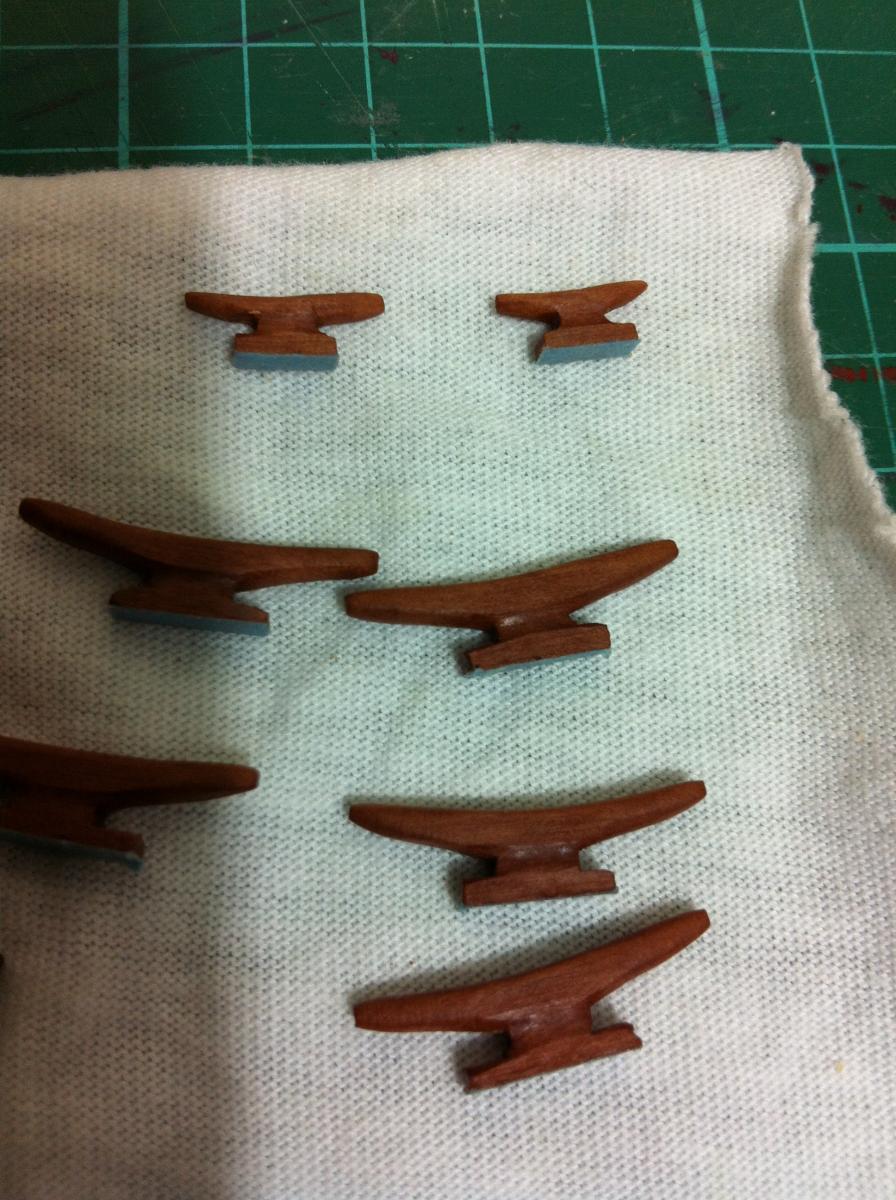
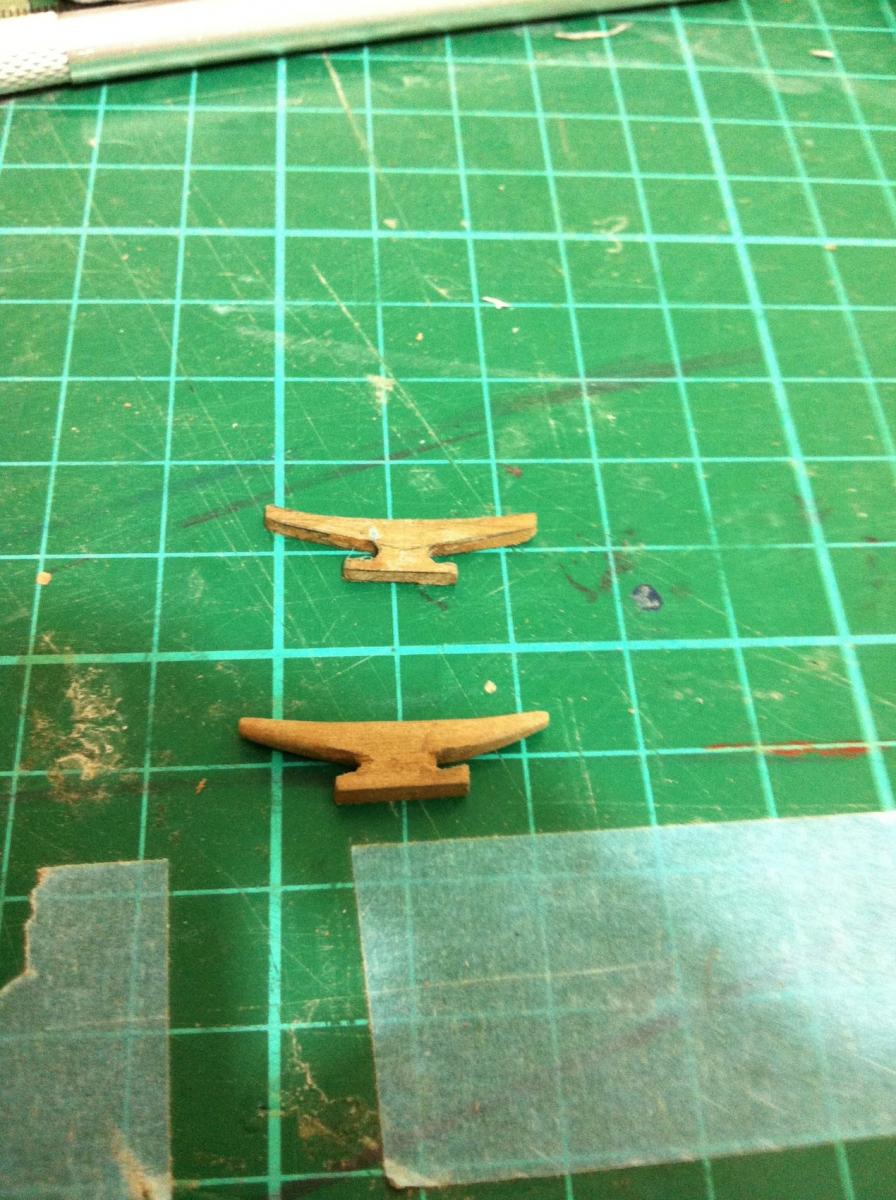
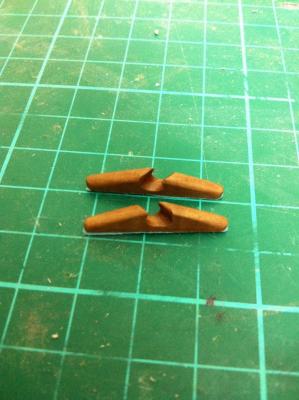
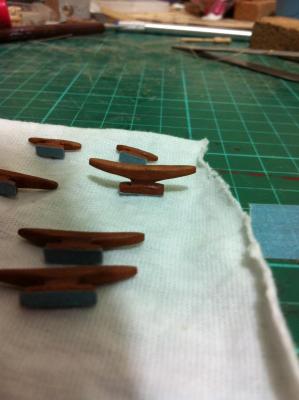
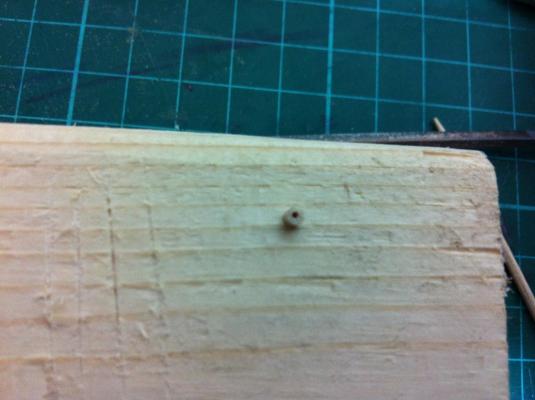
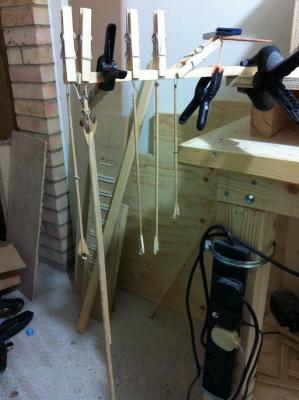
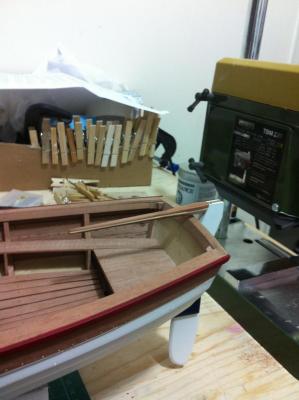
The search for the sail material was put on hold as other projects kept me busy. My homemade disk sander died as the (very) old drill gave up the ghost. I tried to fix it but finally I ordered a new very cheap drill to take its place. I also realised that I need lots of cleats so I made some. Again the internet provided all necessary info. The next photo shows the pattern I made above and a cleat still needing some sanding below I temporarily fitted everything on the boat to see how things would work and a lot of problems became immediately apparent. The main mast boom is too long and catches the mizzen shrouds, the intended spots for the pinrails are wrong as the lines are in the way of the boom etc. Unfortunately I forgot to take a photo at the time but the next pic shows most of the mock rigging still in place. I was however very unhappy with the ropes. For the last few days I have been trying to make a ropewalk, mostly motivated by the wonderful ropes Michael made for his Bristol Cutter. I used mostly scrap material so the end result looks horrible but I must say, works brilliantly! I made just a length of rope but it came out beautiful, much better than the (expensive) shop rope. The admiral was very impressed! My rope is on the left and the shop one on the right and a short video of the machine So now I have lots of rope to make which will take some time. Also, all the shrouds etc need to be redone, shame really as many hours of work goes to waste.


- 253 replies
-
- 6
-
-
- ketkch
- gaff-rigged
- (and 1 more)
-
That's an excellent suggestion Patrick, I will need some better quality pictures though than my usual terrible phone ones! Bob, that's really helpful. I will visit a couple of charity shops this weekend. I did ask the admiral to have a look at her dresses but sadly she would not cooperate. Regards Vaddoc
- 253 replies
-
- 3
-
-
- ketkch
- gaff-rigged
- (and 1 more)
-
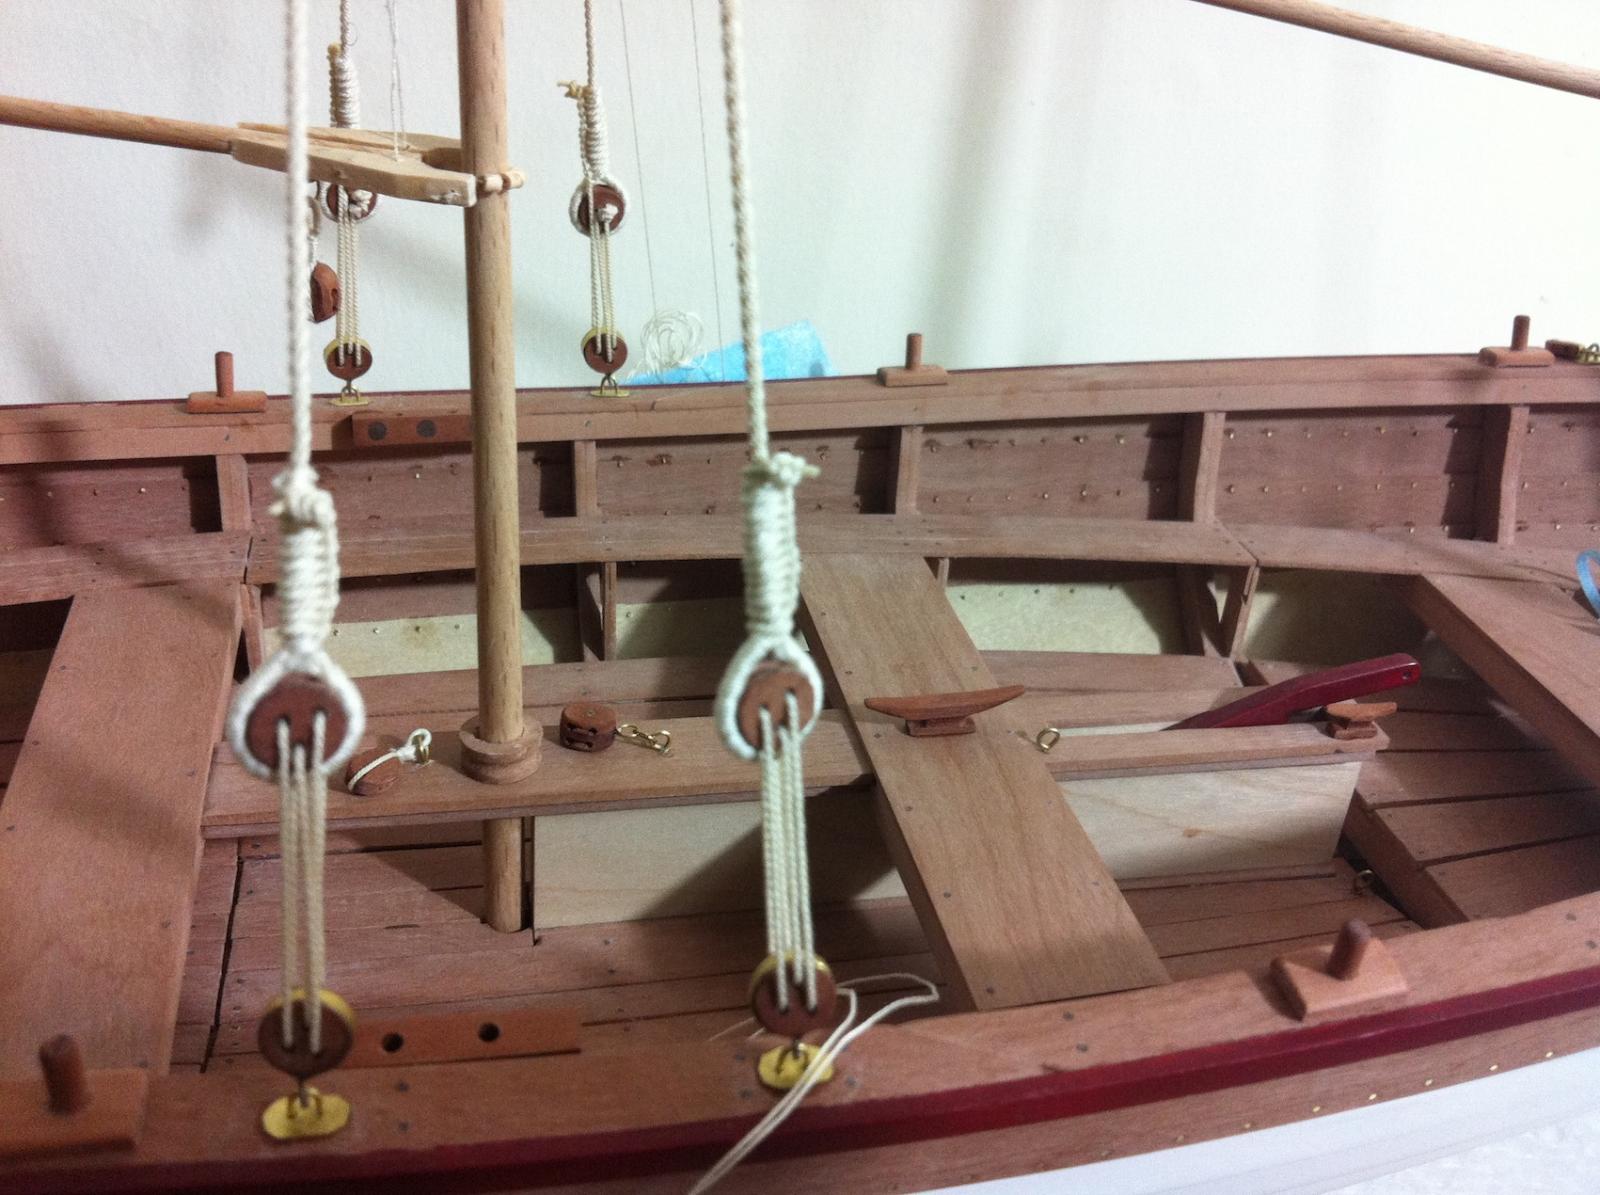
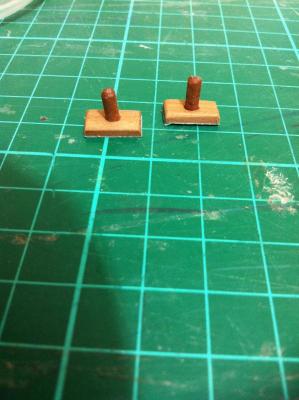
Thank you Bob, it's good to know that this is how it is supposed to look like! Patrick, I think you are right, one can choose how to arrange the rigging as long as it works. So lets just have fun! I finished all the spars and fitted the brass components. For the parrel lines I used good quality toothpicks. I also made some belaying pins. It was very easy to make using dowel secured in a drill and sanded against the rotating disk sander. The rest was done with hand file. I varnished the spars with matt enamel varnish to provide some protection. I also added some brass work on the rudder and then varnished the whole thing but this did not go very well. The rudder has caused me much frustration, it proved much more difficult than I though, needed a ton of work and still is not completely ready. Finally, I made some more blocks and the pin rail which will be attached on the edge of the fore deck to serve the main mast, where I also intend to install a downhaul for the boom. It is not really needed but then again, why not? I intend to make the sails but I have no idea what fabric to use. I would like something resembling a traditional sail but not too thick considering the 1:12 scale. This is going to be a difficult one.


- 253 replies
-
- 5
-
-
- ketkch
- gaff-rigged
- (and 1 more)
-
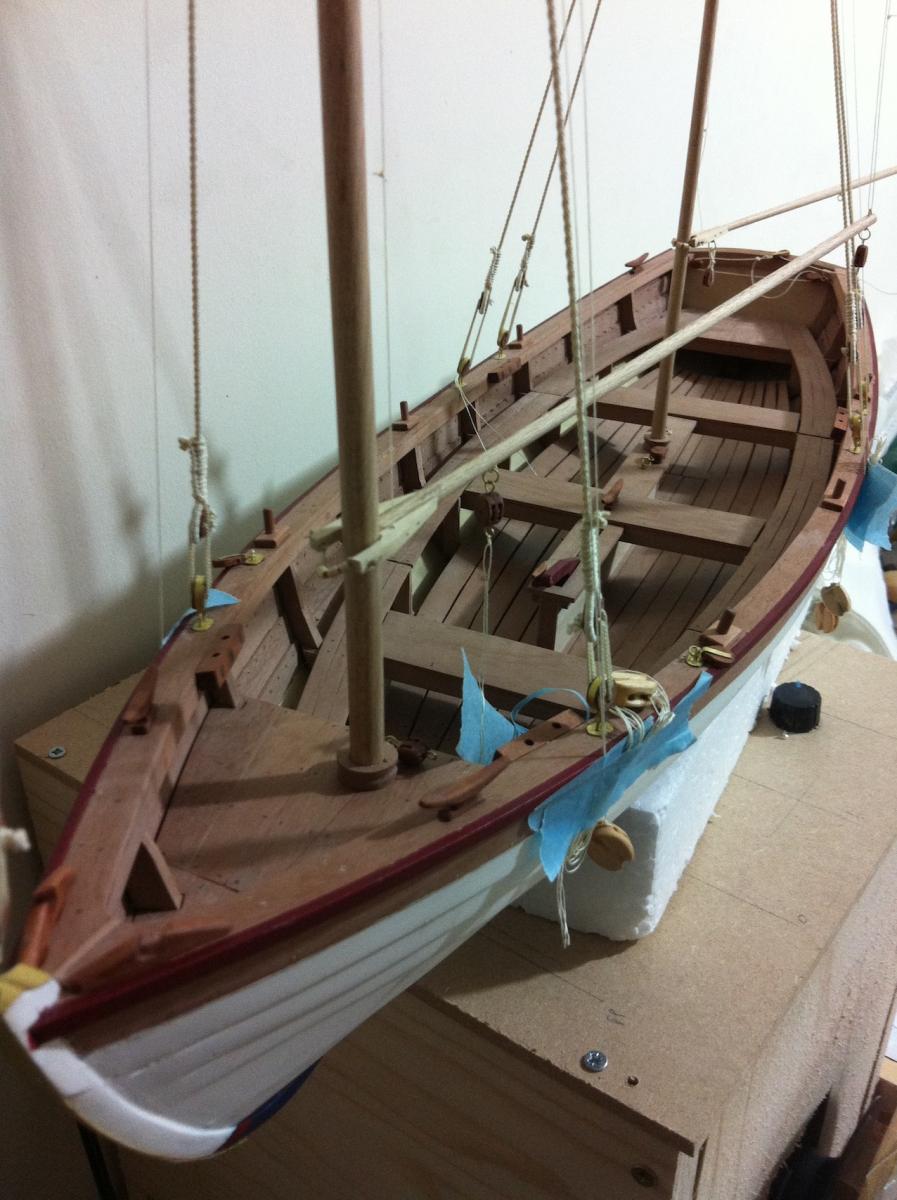
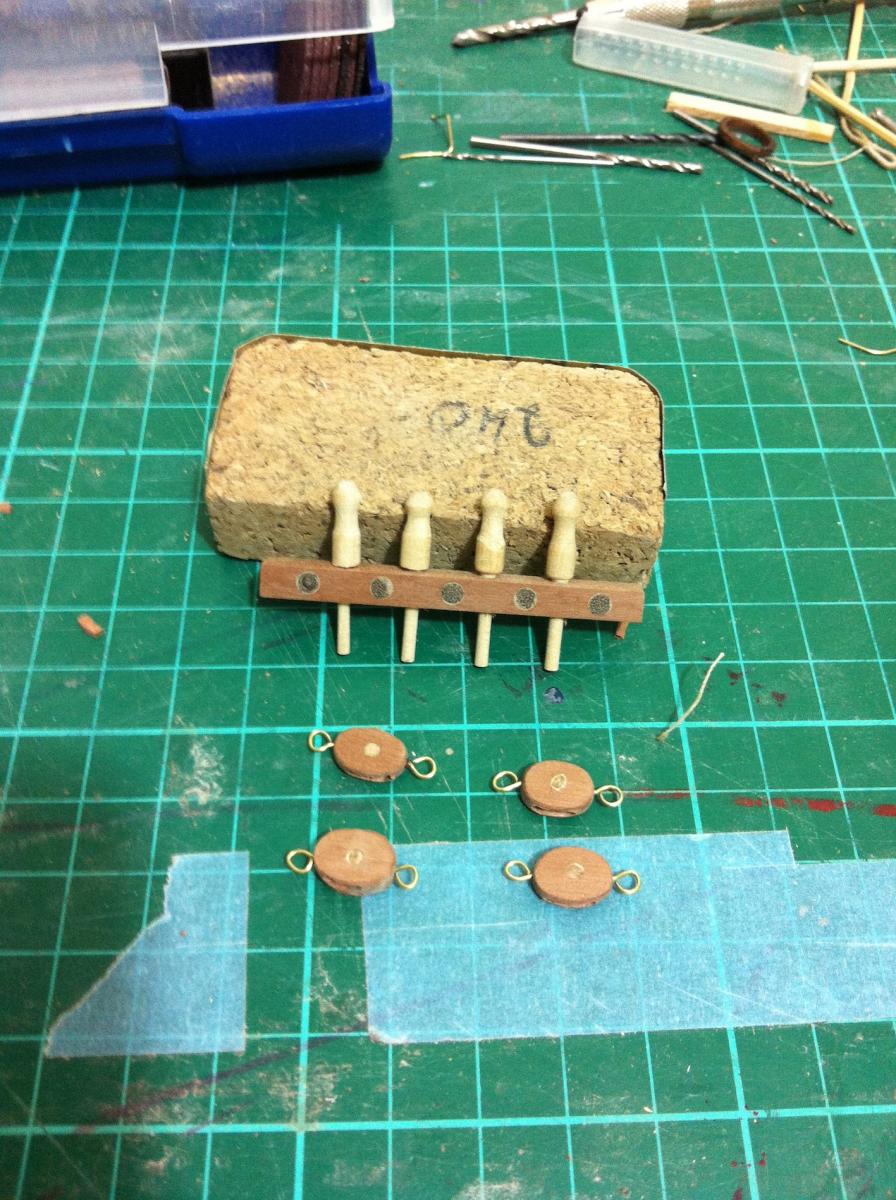
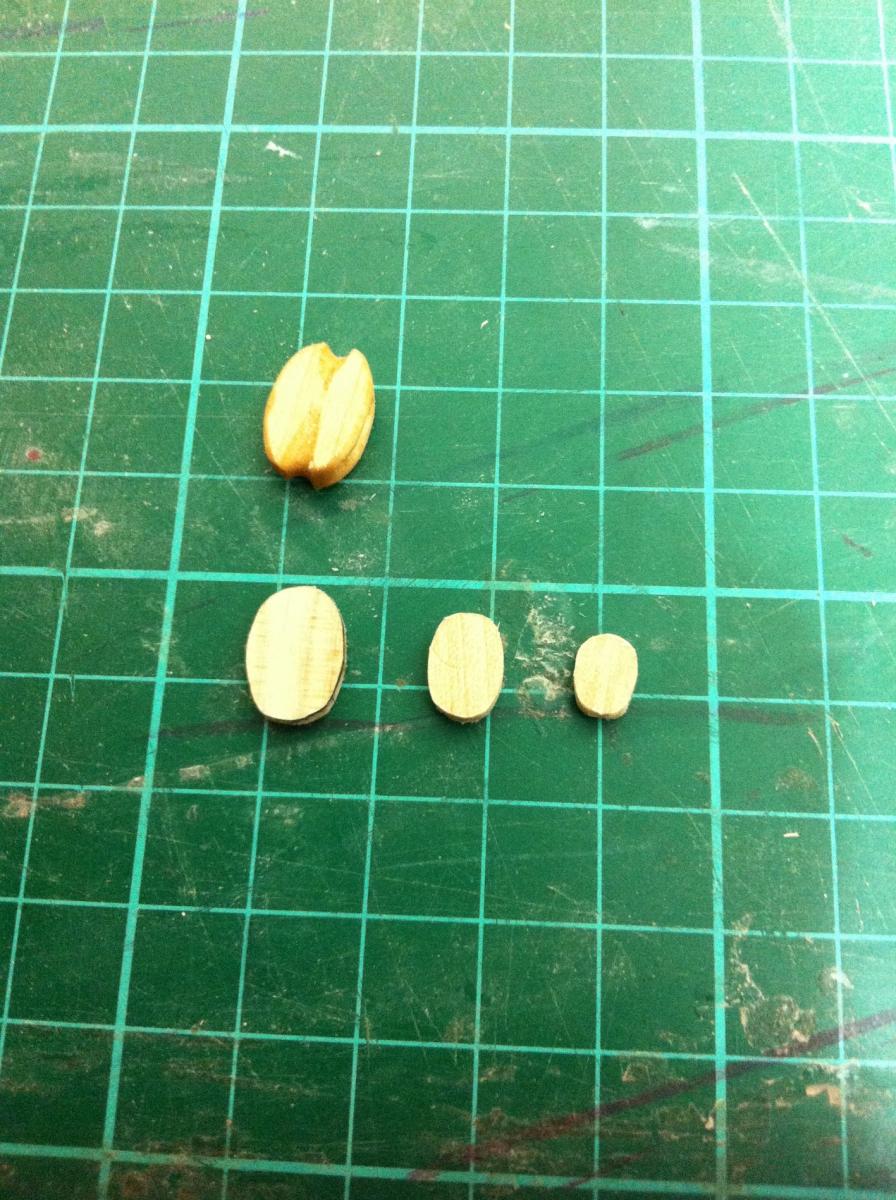
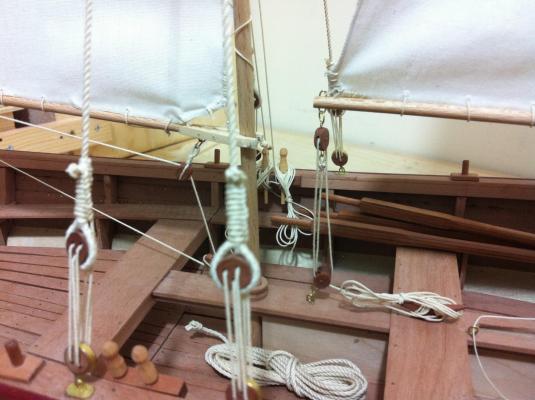
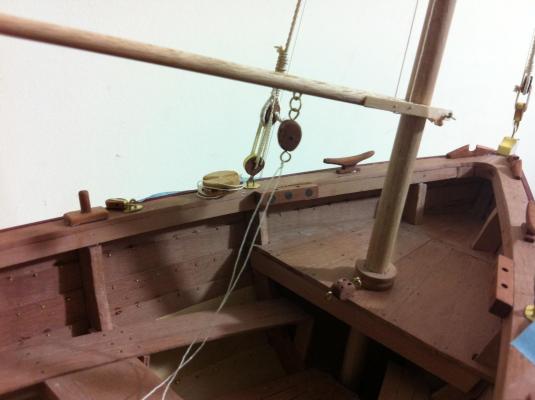
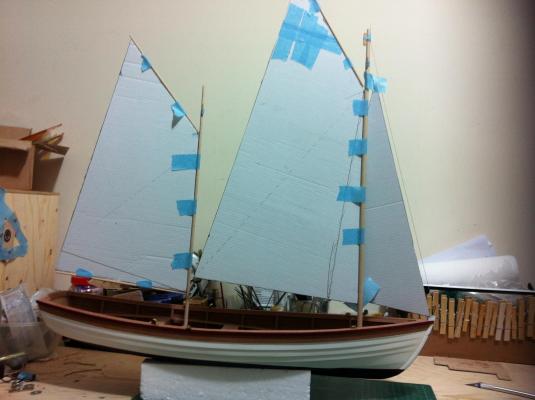
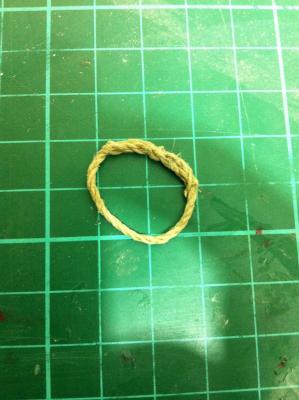
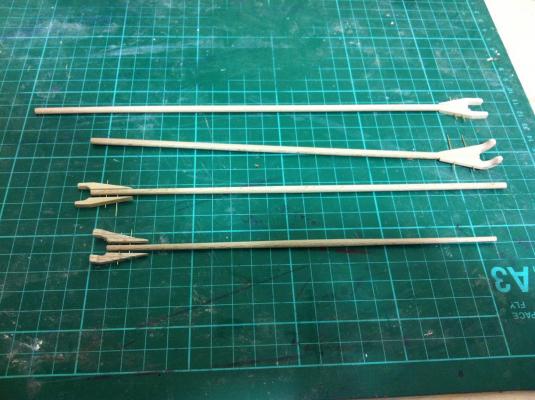
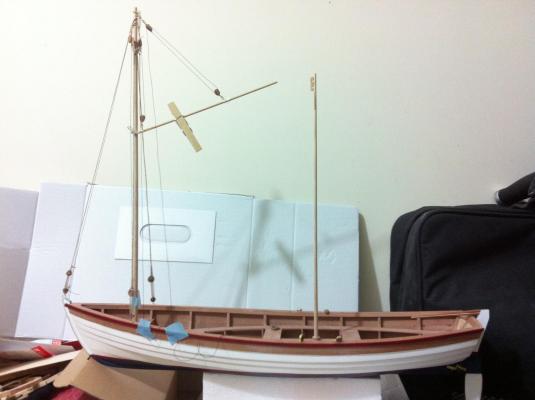
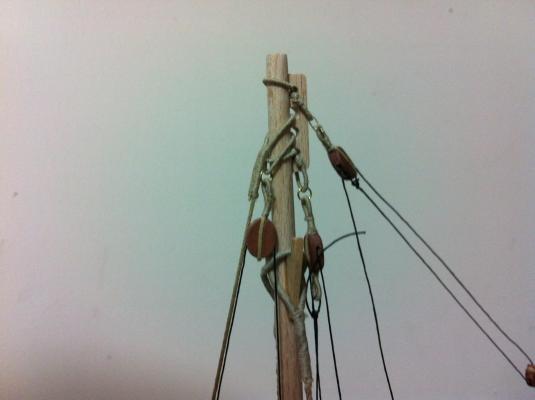
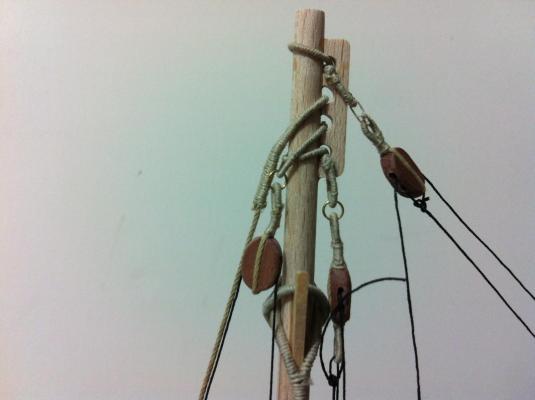
Despite actually working for many hours, I made only modest progress. I am really struggling with the rigging as I have no idea of how such a boat would be rigged and equipped. I spent a lot of time on the net and also got a lot of help reading the blog of a couple who have been building a sailboat for the last 6 years (a Northsea 29). Still, there are a lot of grey or totally black areas! I made a pattern of the sails. This boat seems to carry a lot of sail, I wonder how fast she would actually be. The way I am thinking of rigging the boat, I will need a lot of rope loops. Splicing does work but is very time consuming. I also discarded all the ropes from the blocks I had made and re-did them properly. It was only after many hours of work on the blocks I realised they were completely the wrong scale. They looked huge on the boat! I tried a few sizes and now they look much better. I also used pear instead of lime wood. I went for the middle size The wrong scale is obvious I also made the spars. Especially the gaffs needed a bit of 3D thinking as they were carved out of solid blocks of wood The rudder is almost finished, needs some more brass work, varnish and the blade to be permanently attached with the ropes that will extend and raise it Although there are lots to be done, I fitted whatever I have prepared to get a feel of the rigging. That main mast top looks a busy place! I think making some form of rope walk is a must, I would like a better rope than the ones I got from the model shops.


- 253 replies
-
- 10
-
-
- ketkch
- gaff-rigged
- (and 1 more)
-
Dear Patrick, this is really an amazing project oozing creativity. Really really nice. Is the paint enamel applied with brush?
-
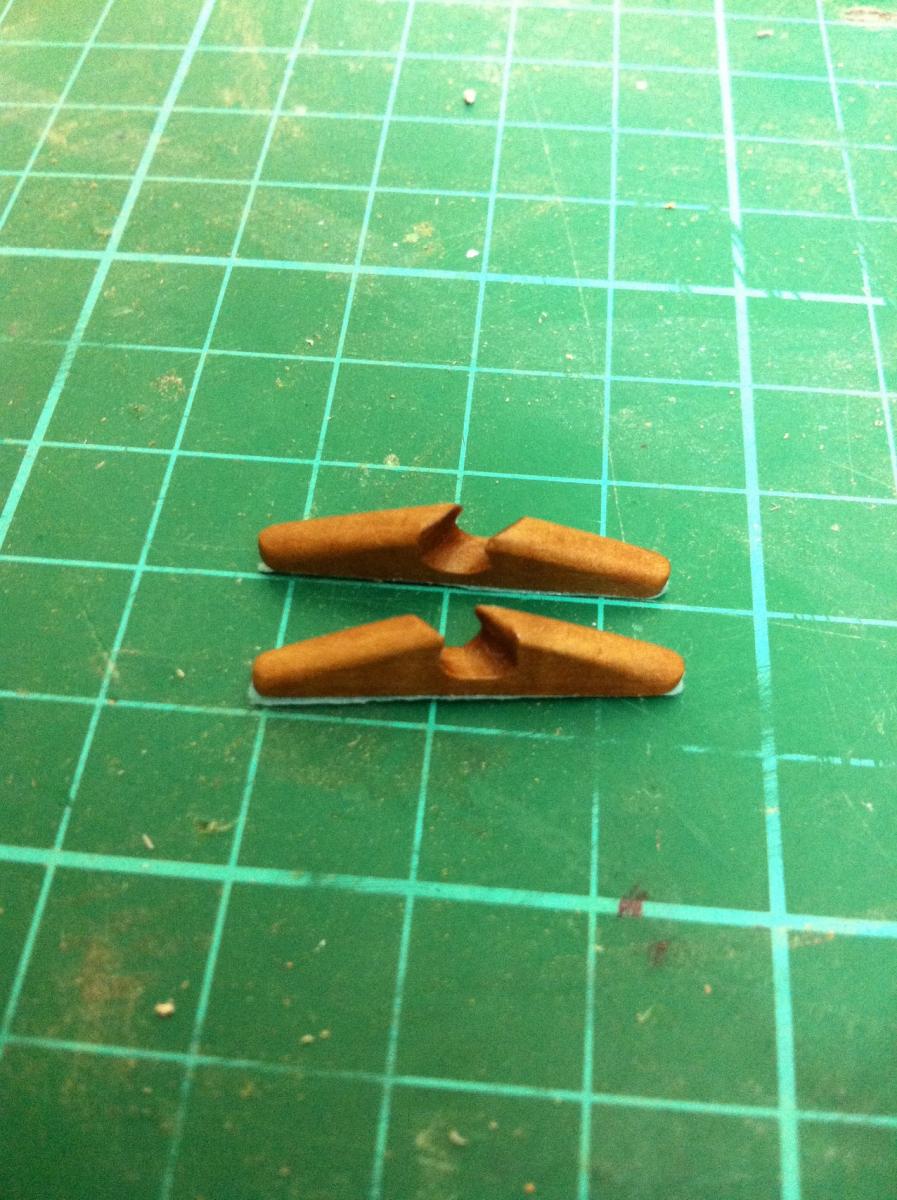
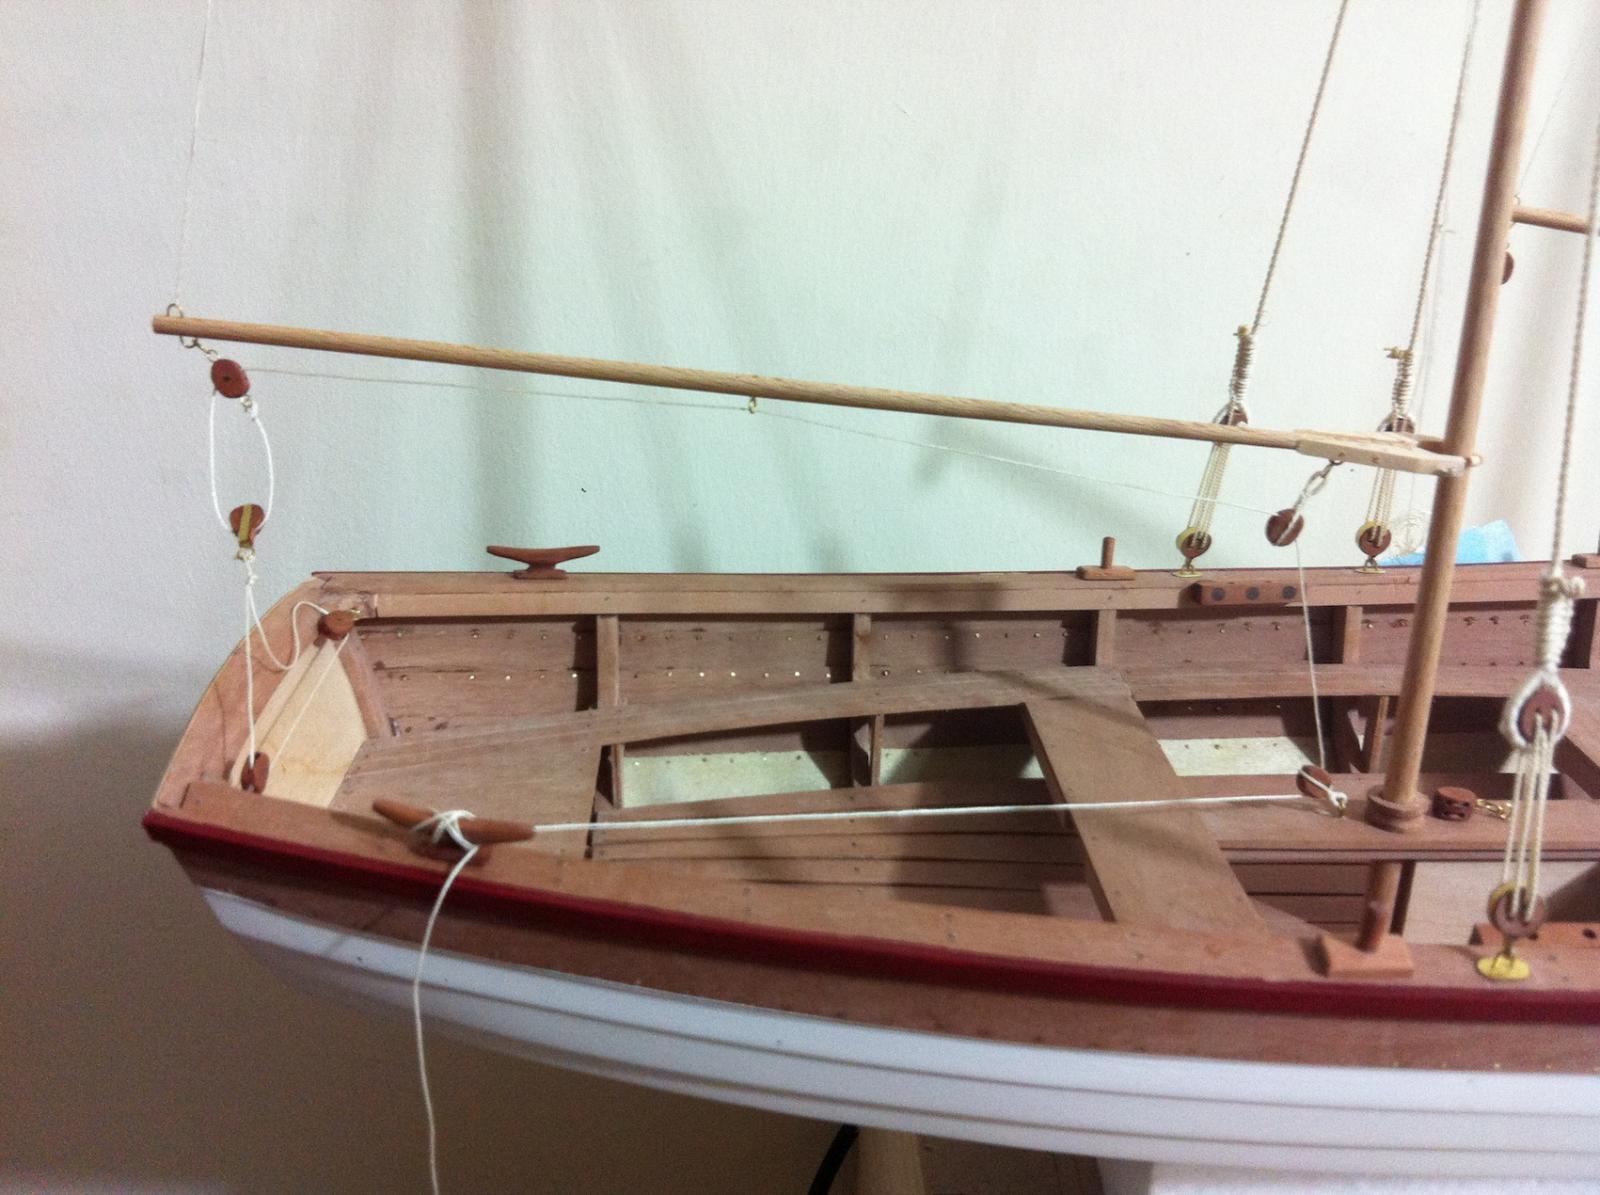
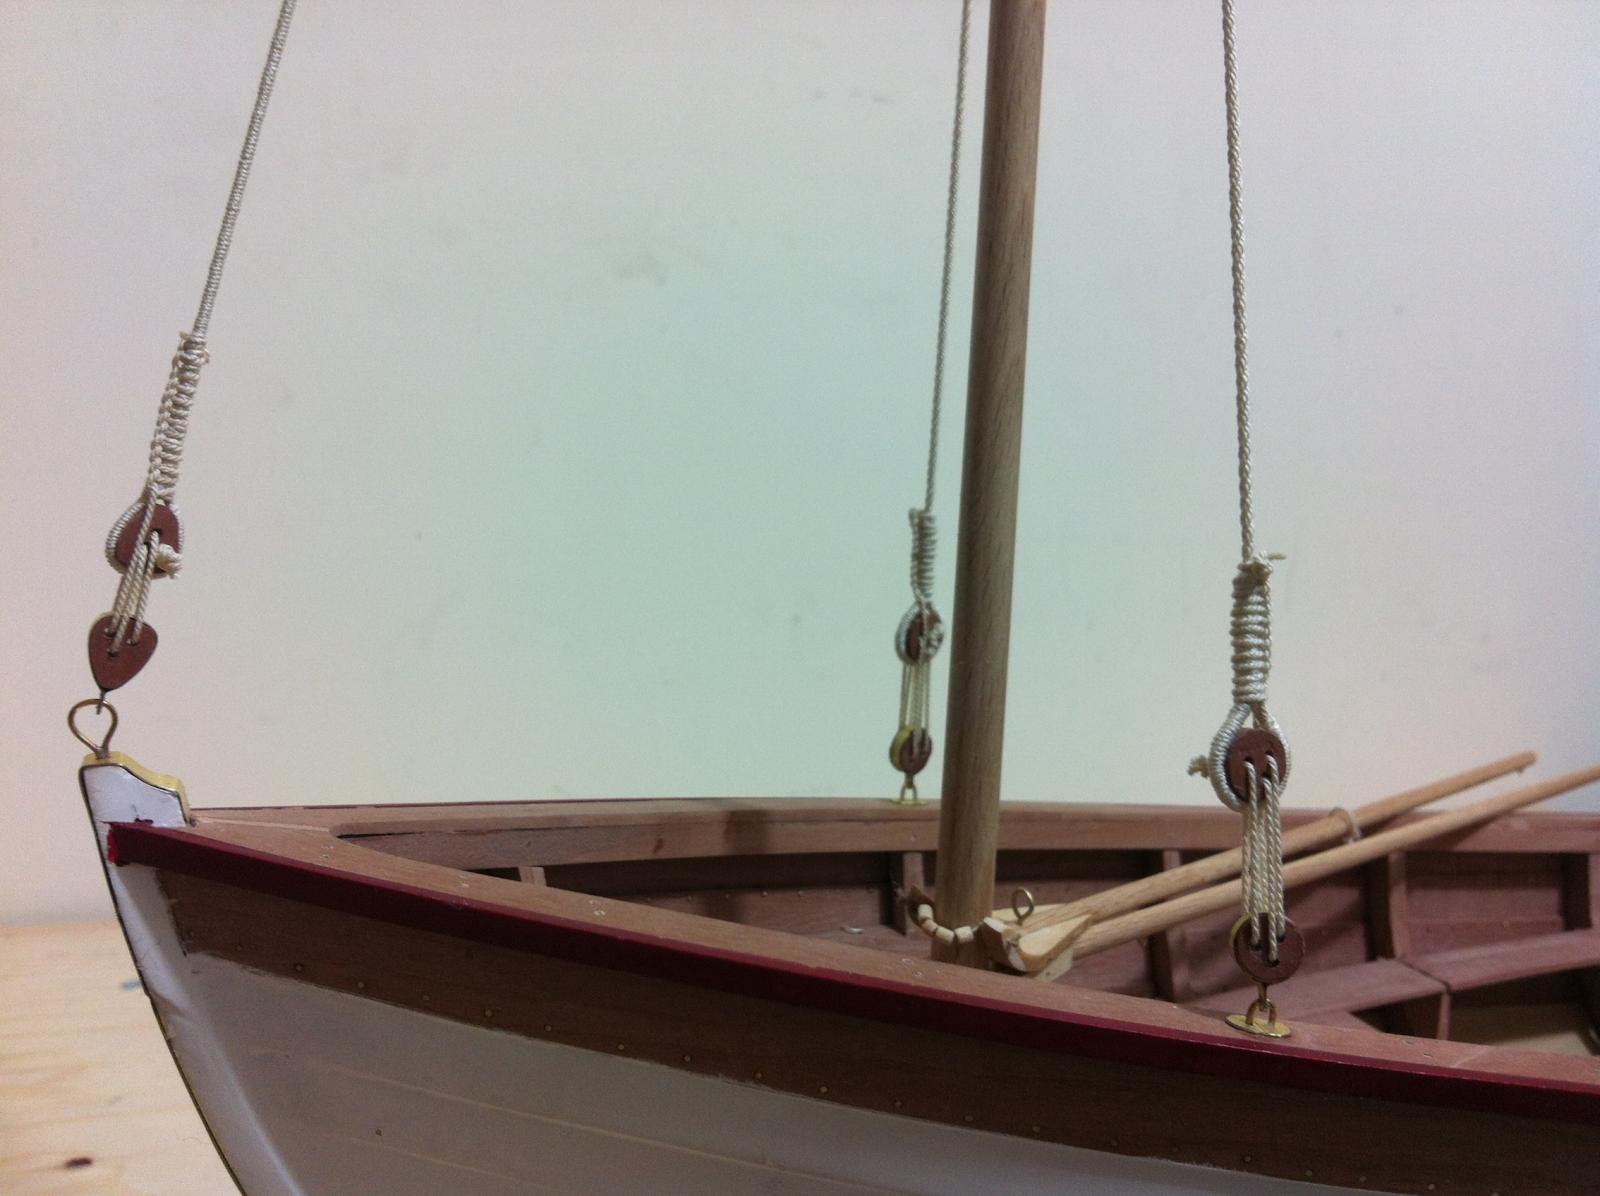
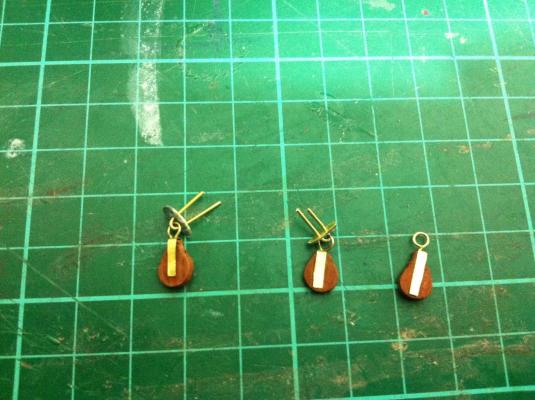
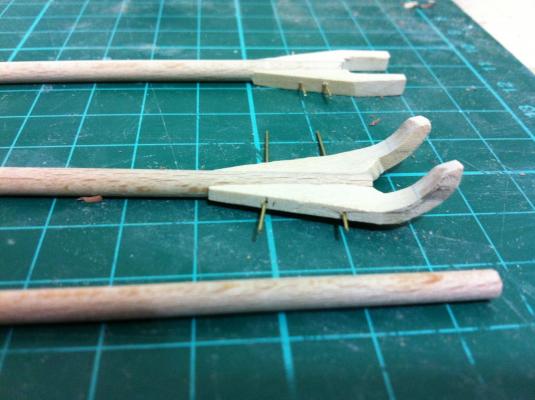
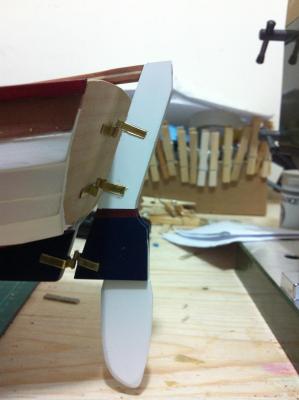
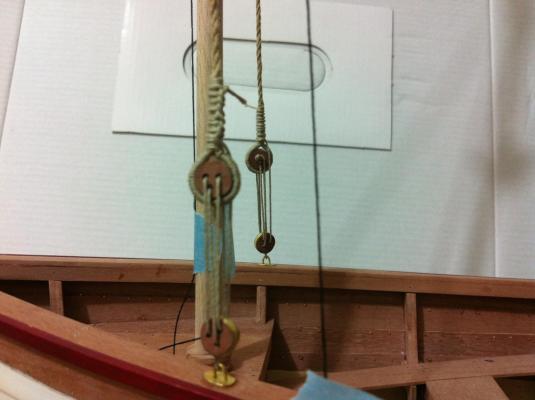
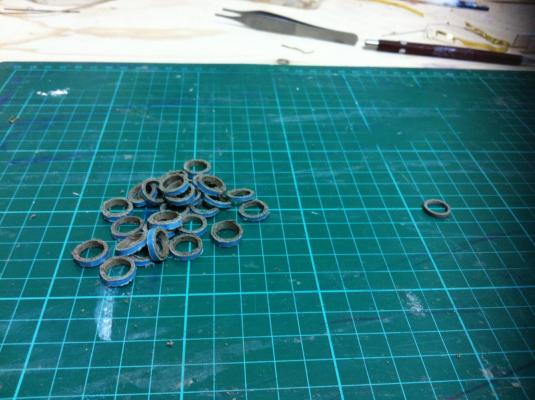
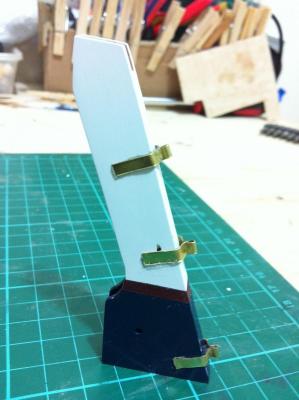
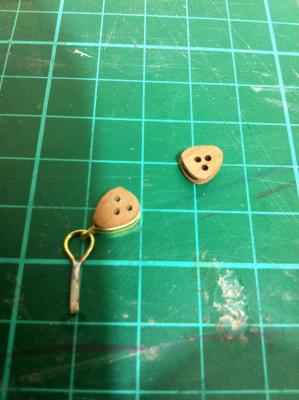
I managed to do a bit more work so time for another update. Patrick and Michael thank you for your comments, especially as you are so busy with your wonderful models. I made more hoops, my little method is very fast and works well. I also fitted the lower dead eyes for the shrouds I did a lot of work on the rudder, I new it would be a complex job but I really had no idea. Fitting the hinges was very fiddly. It did not came out as good as I would want but good enough. It still needs a lot of work, though! Interestingly, the epoxy on the middle hinge refused to cure, I suspect there was still some flux from soldering that reacted with the epoxy. I managed to glue it in the end but there is some more work that needs to be done at the lower edge of the hinge to fix things I also made the oar locks I have spent a lot of time searching for an accurate way of attaching the forestay to the stem avoiding a turnbuckle. I finally went for a pair of hearts which indeed is a traditional way of tensioning the forestay. I also made an eye pin for the stem Hopefully I ll be able to do some more work this week and at least finish the rudder, the standing rigging, and maybe do some work on the spars

- 253 replies
-
- 5
-
-
- ketkch
- gaff-rigged
- (and 1 more)