.jpg.f26acc9a74319261612561bfa7da1303.jpg)
vaddoc
-
Posts
1,605 -
Joined
-
Last visited
Content Type
Profiles
Forums
Gallery
Events
Everything posted by vaddoc
-
.thumb.jpg.6fd4c1b78768bb3efd745ab810936005.jpg)
comparison of masking tapes
vaddoc replied to vaddoc's topic in Painting, finishing and weathering products and techniques
Cheers both, very useful info -
comparison of masking tapes
vaddoc replied to vaddoc's topic in Painting, finishing and weathering products and techniques
That was certainly helpful Paul. I managed to finish painting the hull of my model using Tamiya tape and a combination of Humbrol acrylic spray and enamels hand brushed (brilliant results with enamels). My conclusions: 1. Do not use car paint sprays, they smell too much and create very (very!) thick coats 2. Tuck the tape down well. Then do it again 3-4 times and go over that little area you think does not matter. It does and leads to a sloppy mess. Cutting off a new edge with a ruler and blade as you suggest might be needed 3. Tamiya tape is brilliant, but still creates an edge that will probably need to be sanded as you said in your video to mate the surfaces. (600 grit?) 4. A flexible tape is sometimes necessary and Tamiya is not flexible. In your video you show a very flexible one, could you mention the brand? Regards Vaddoc -
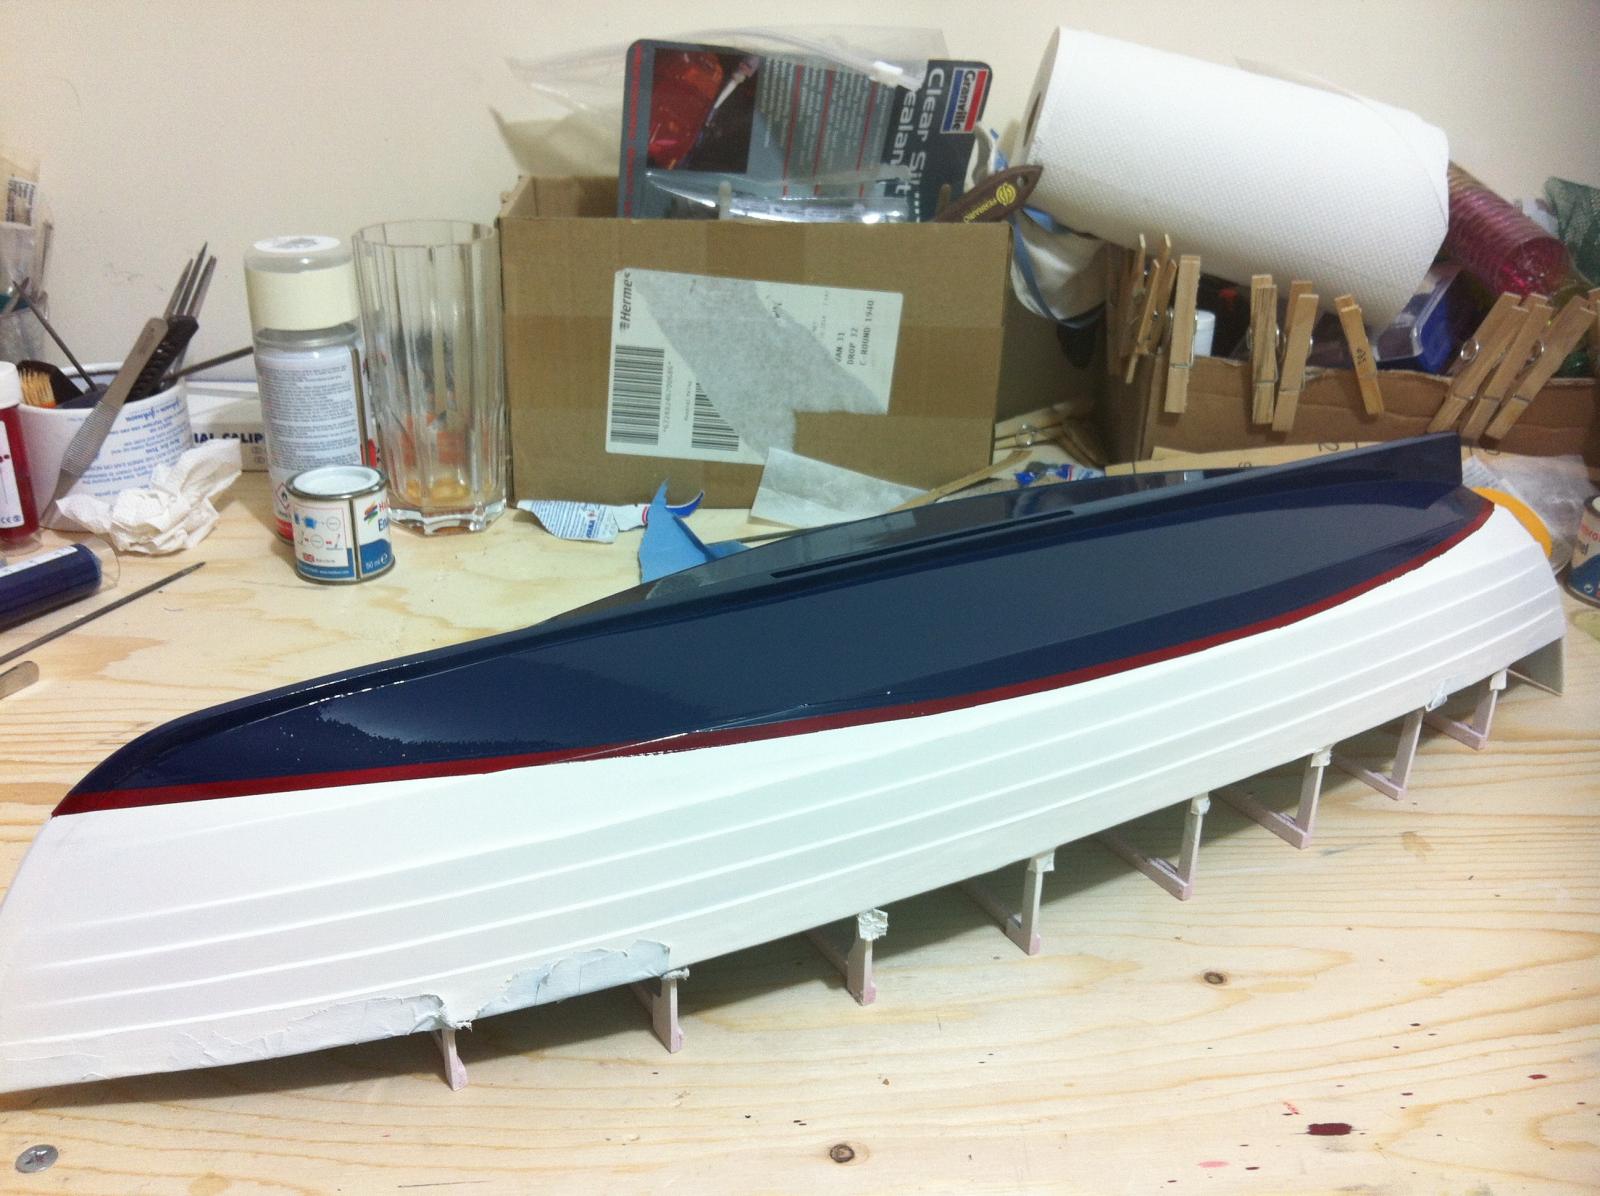
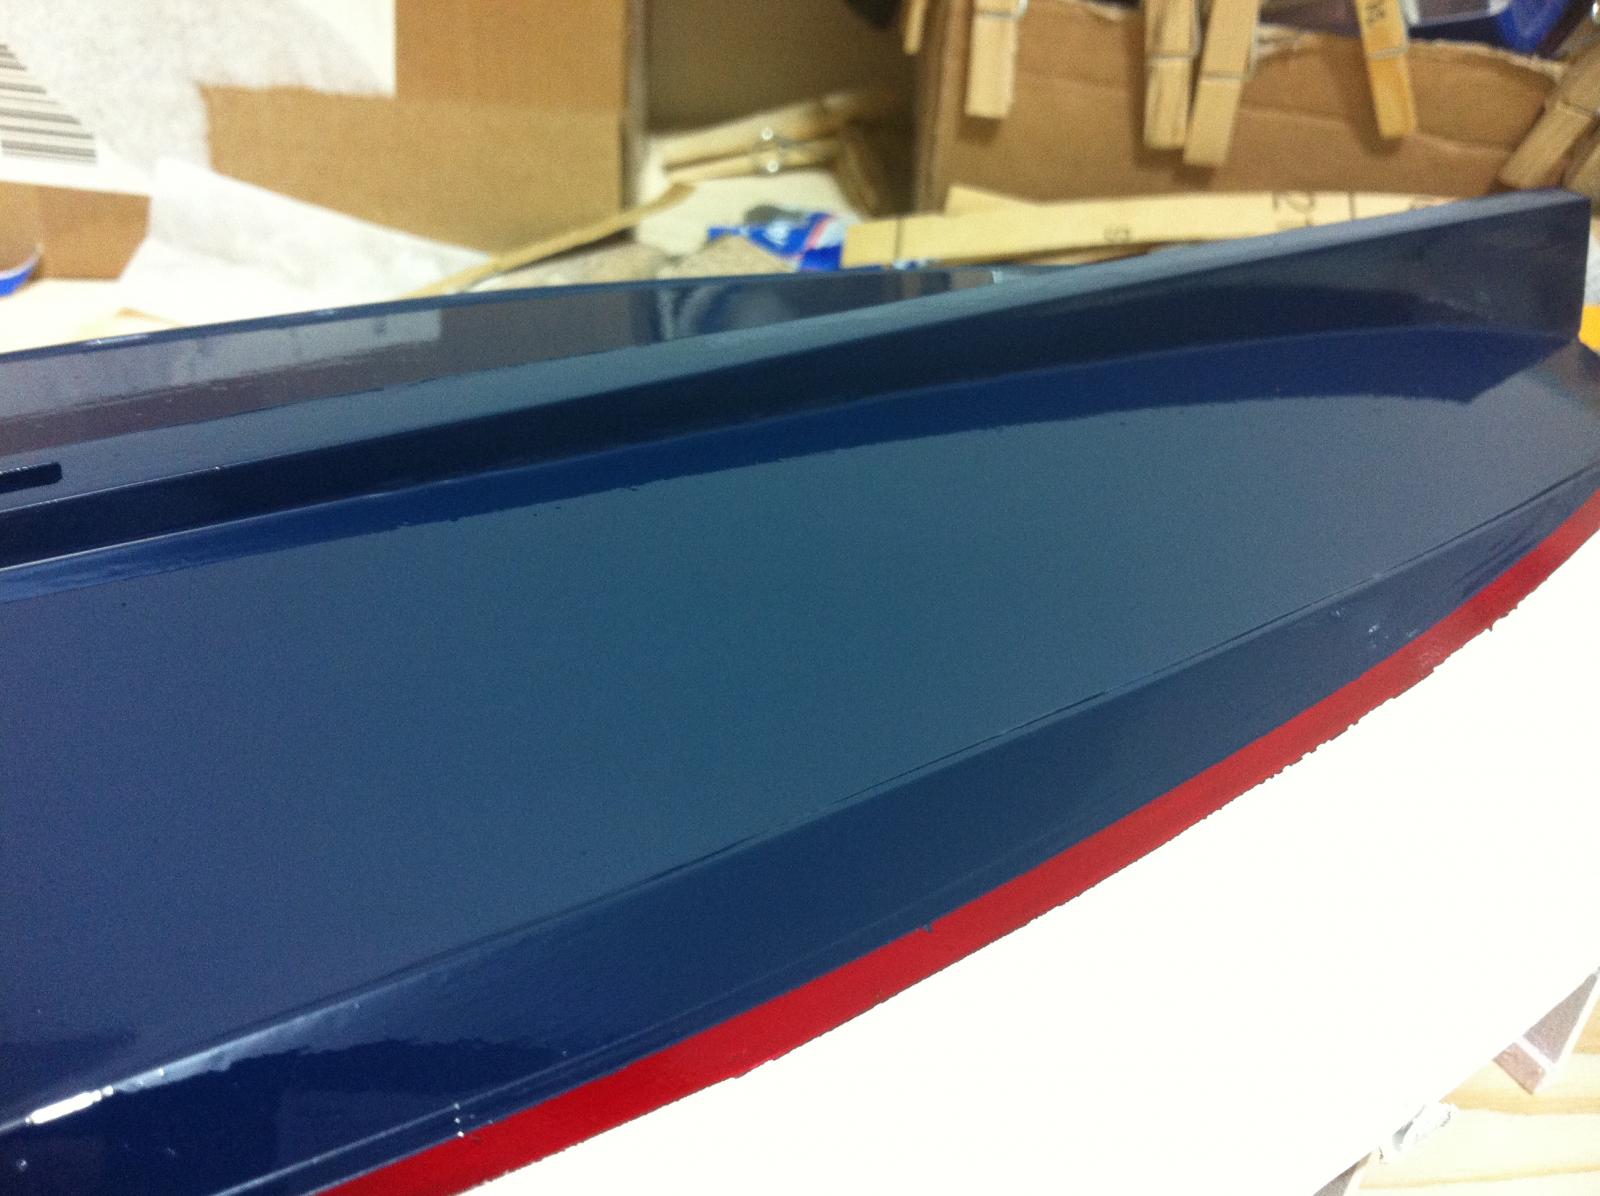
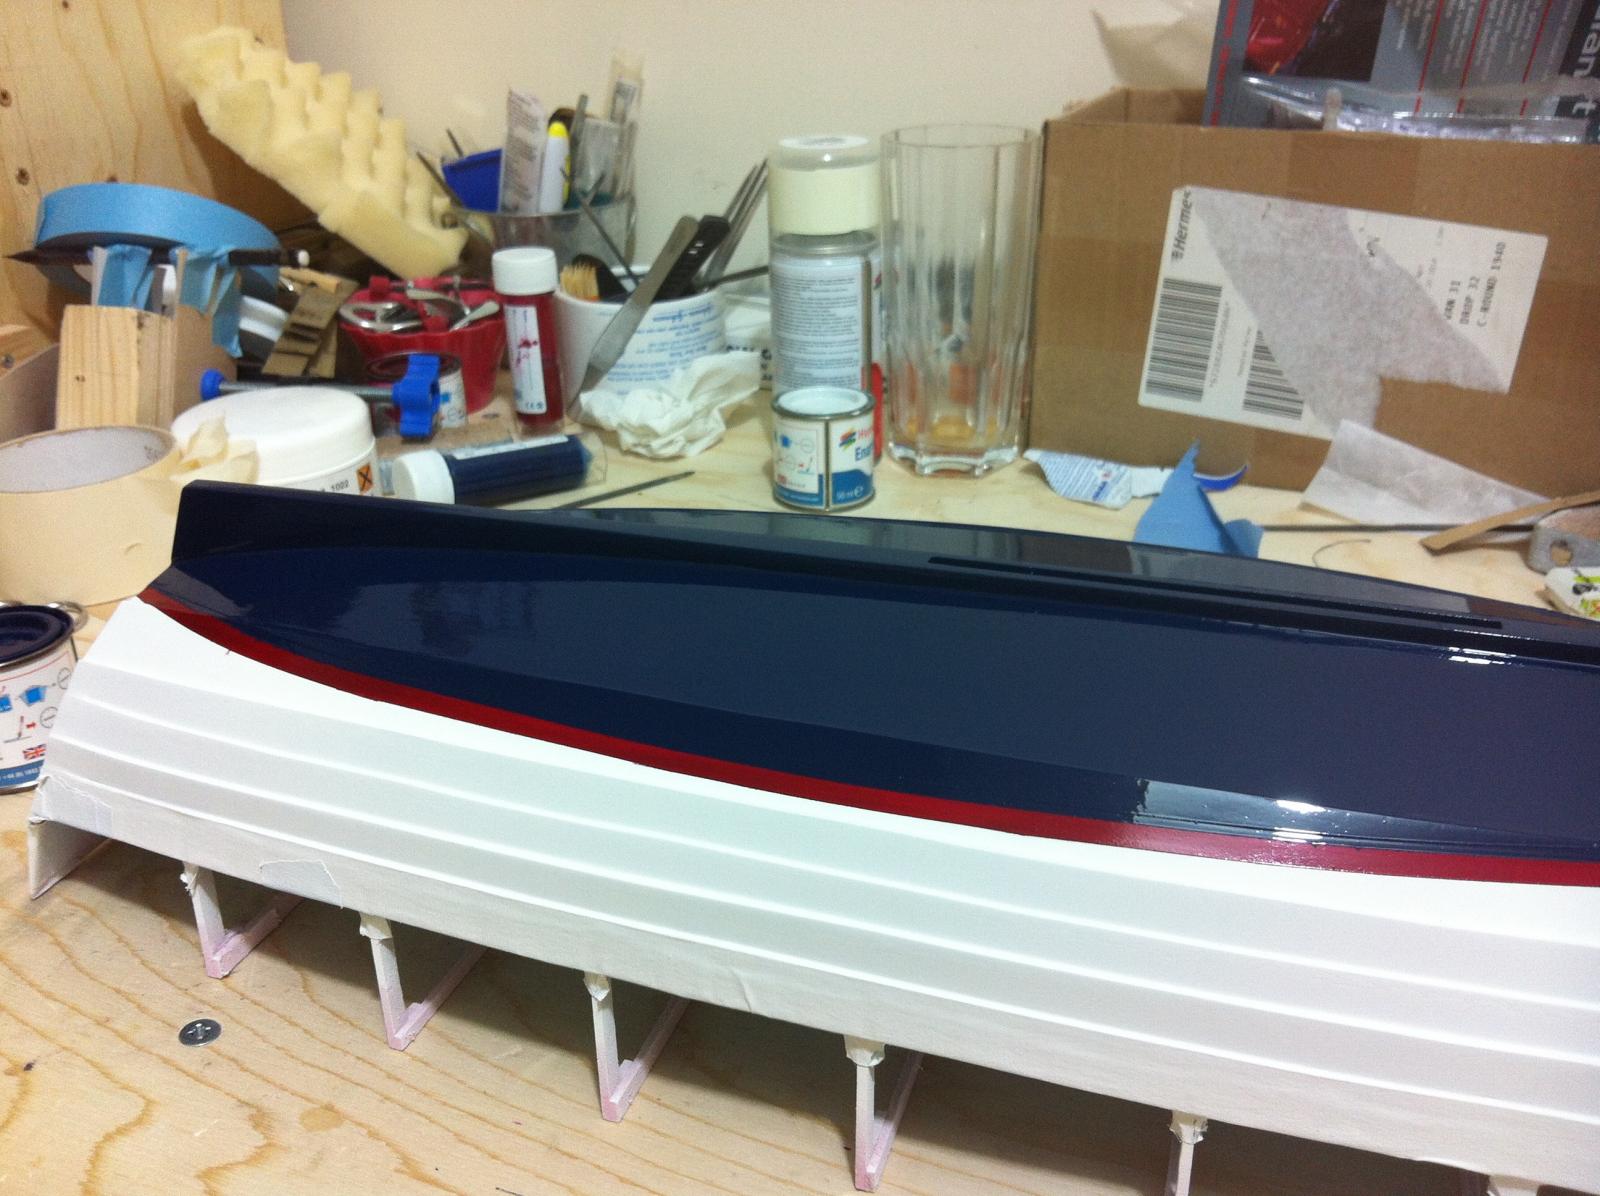
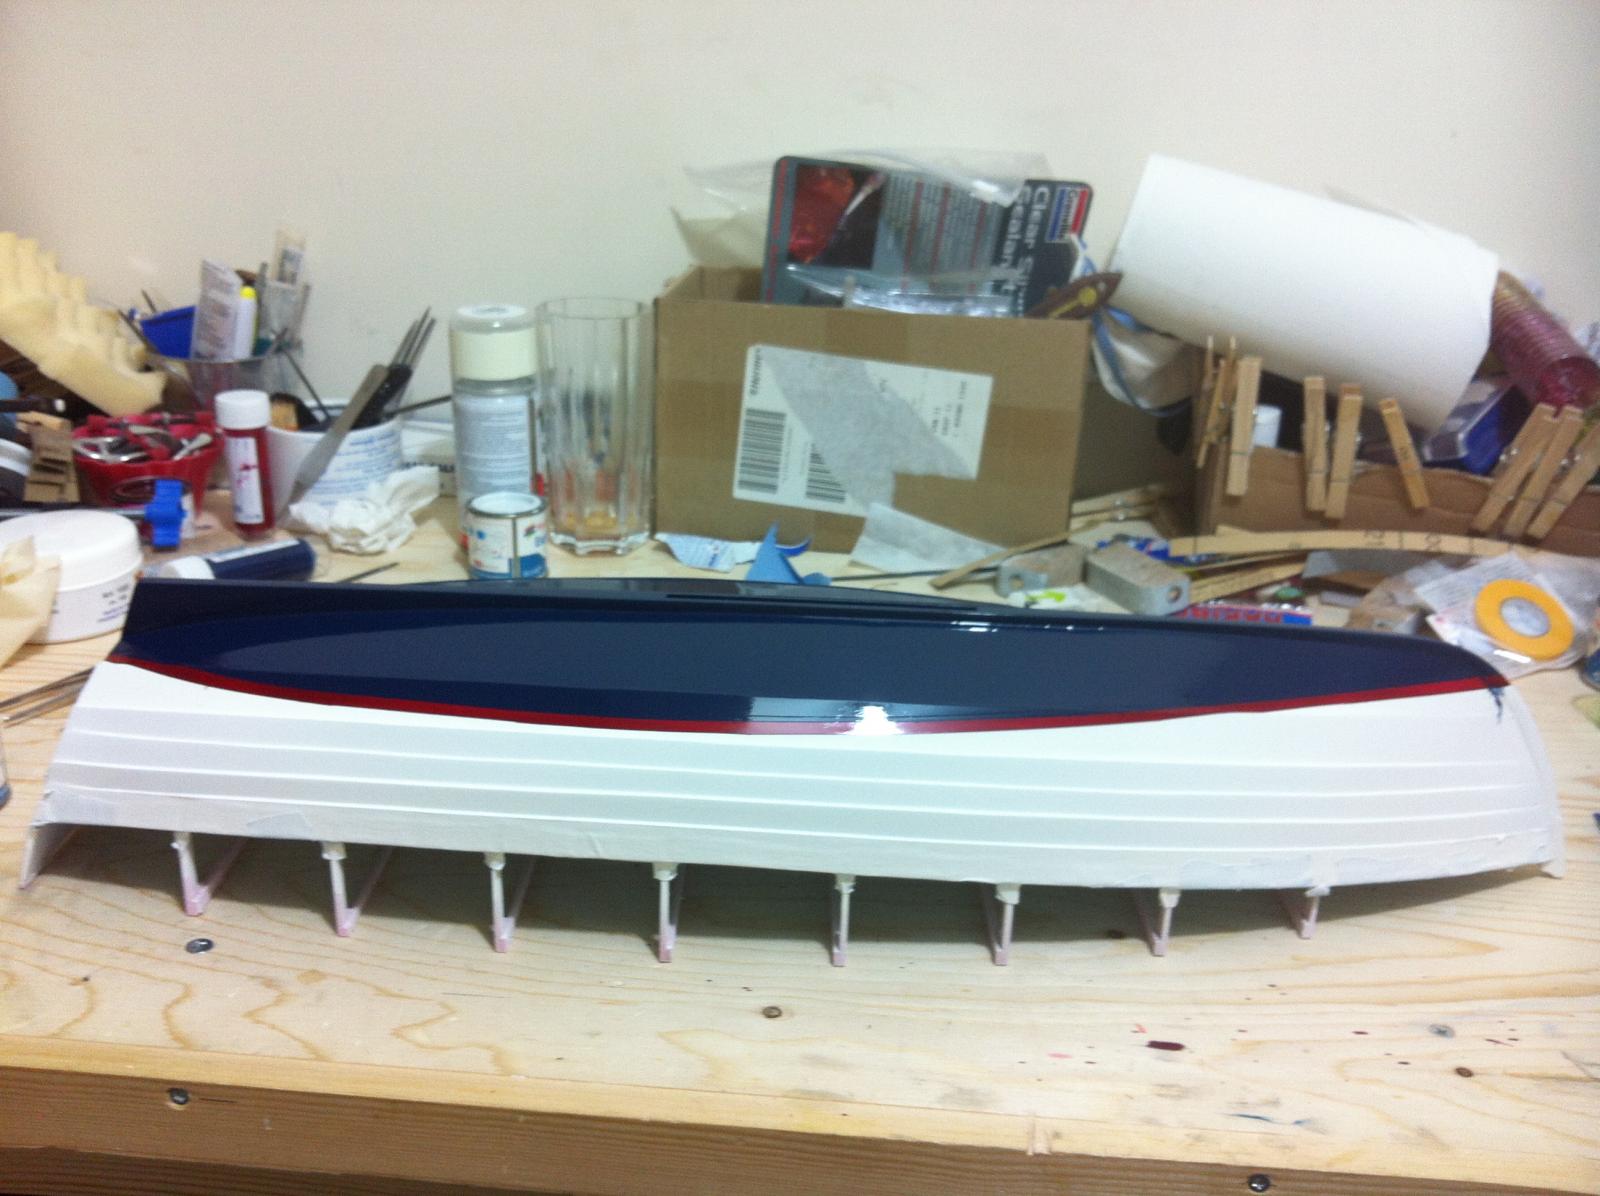
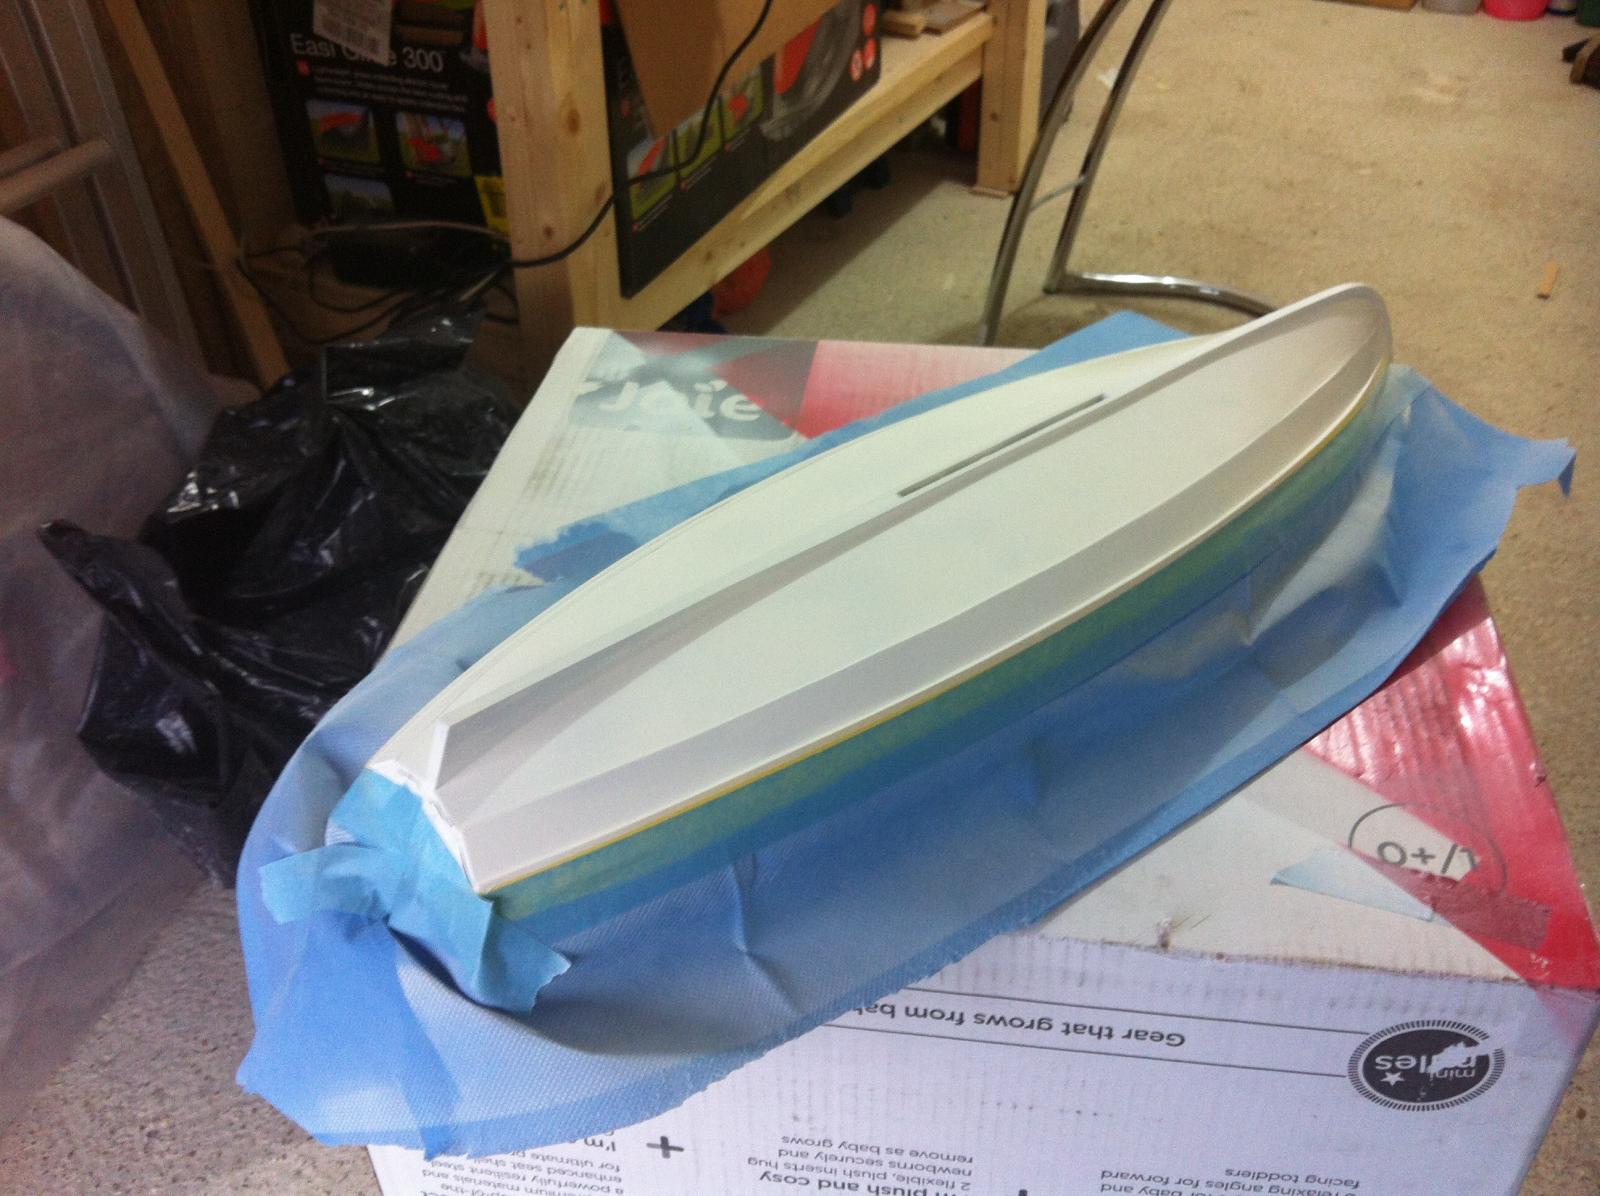
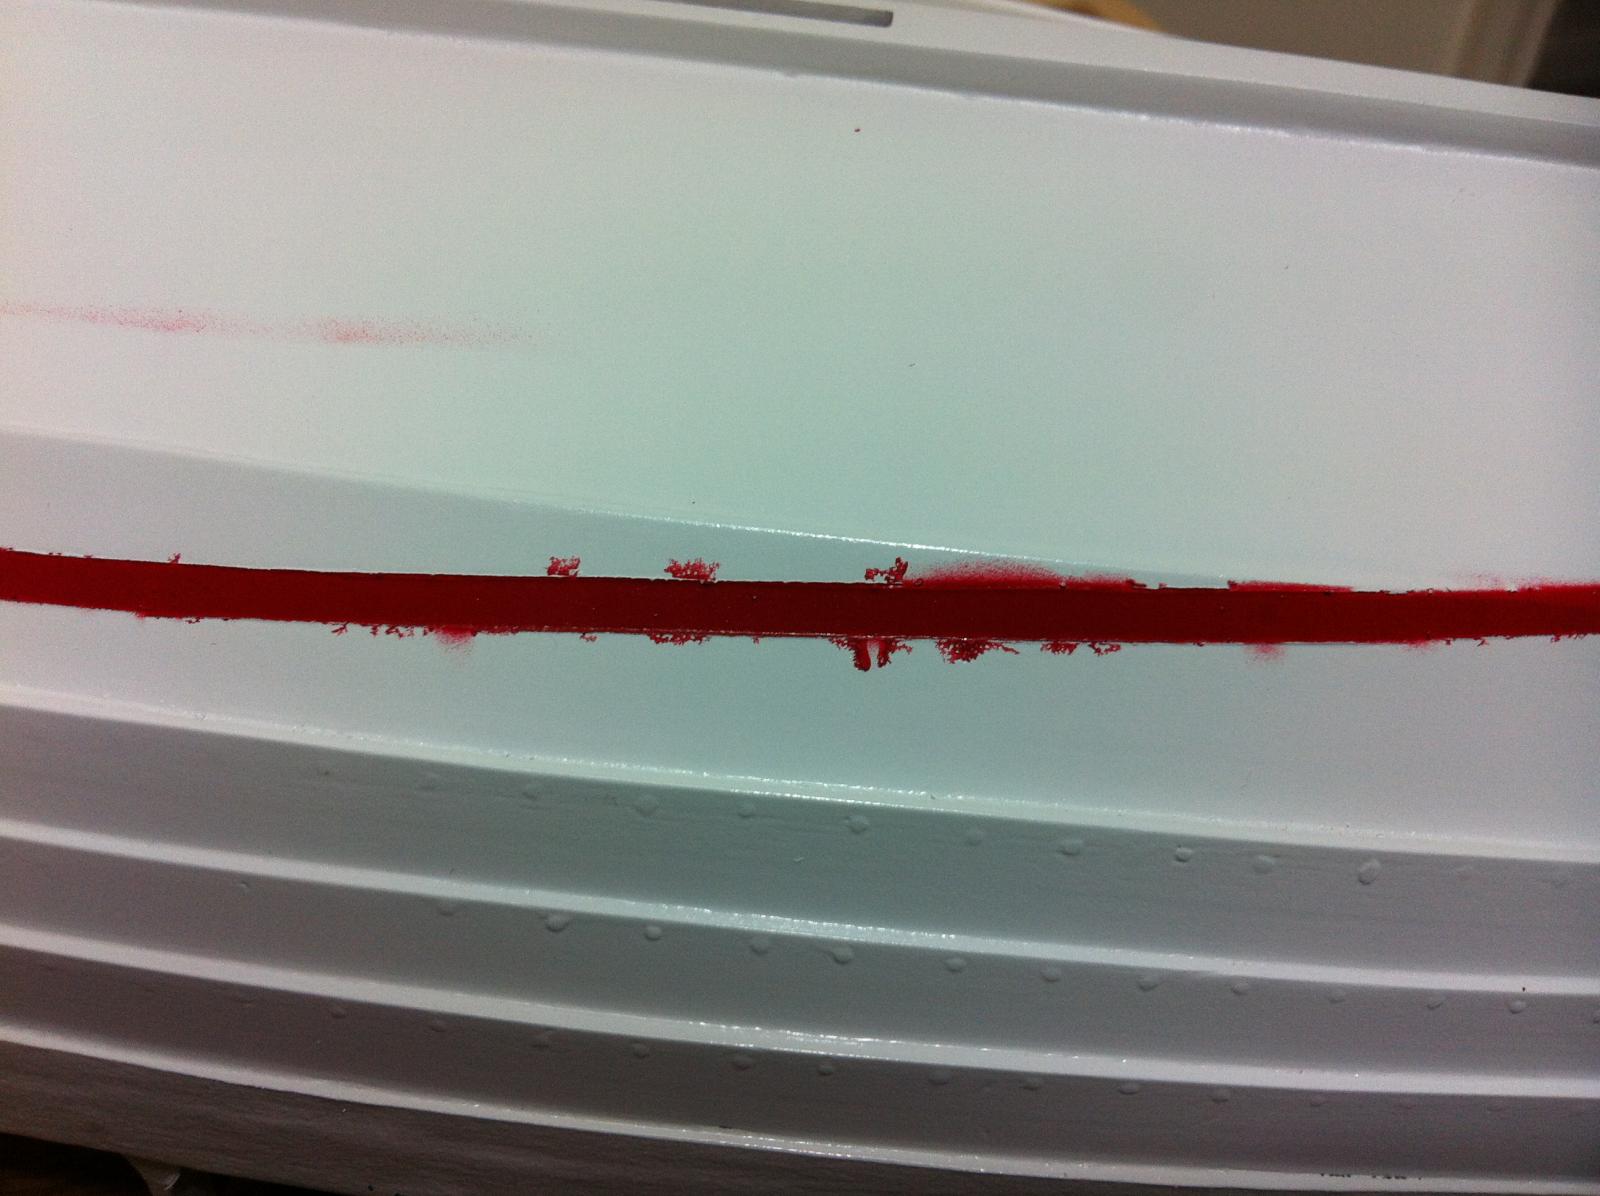
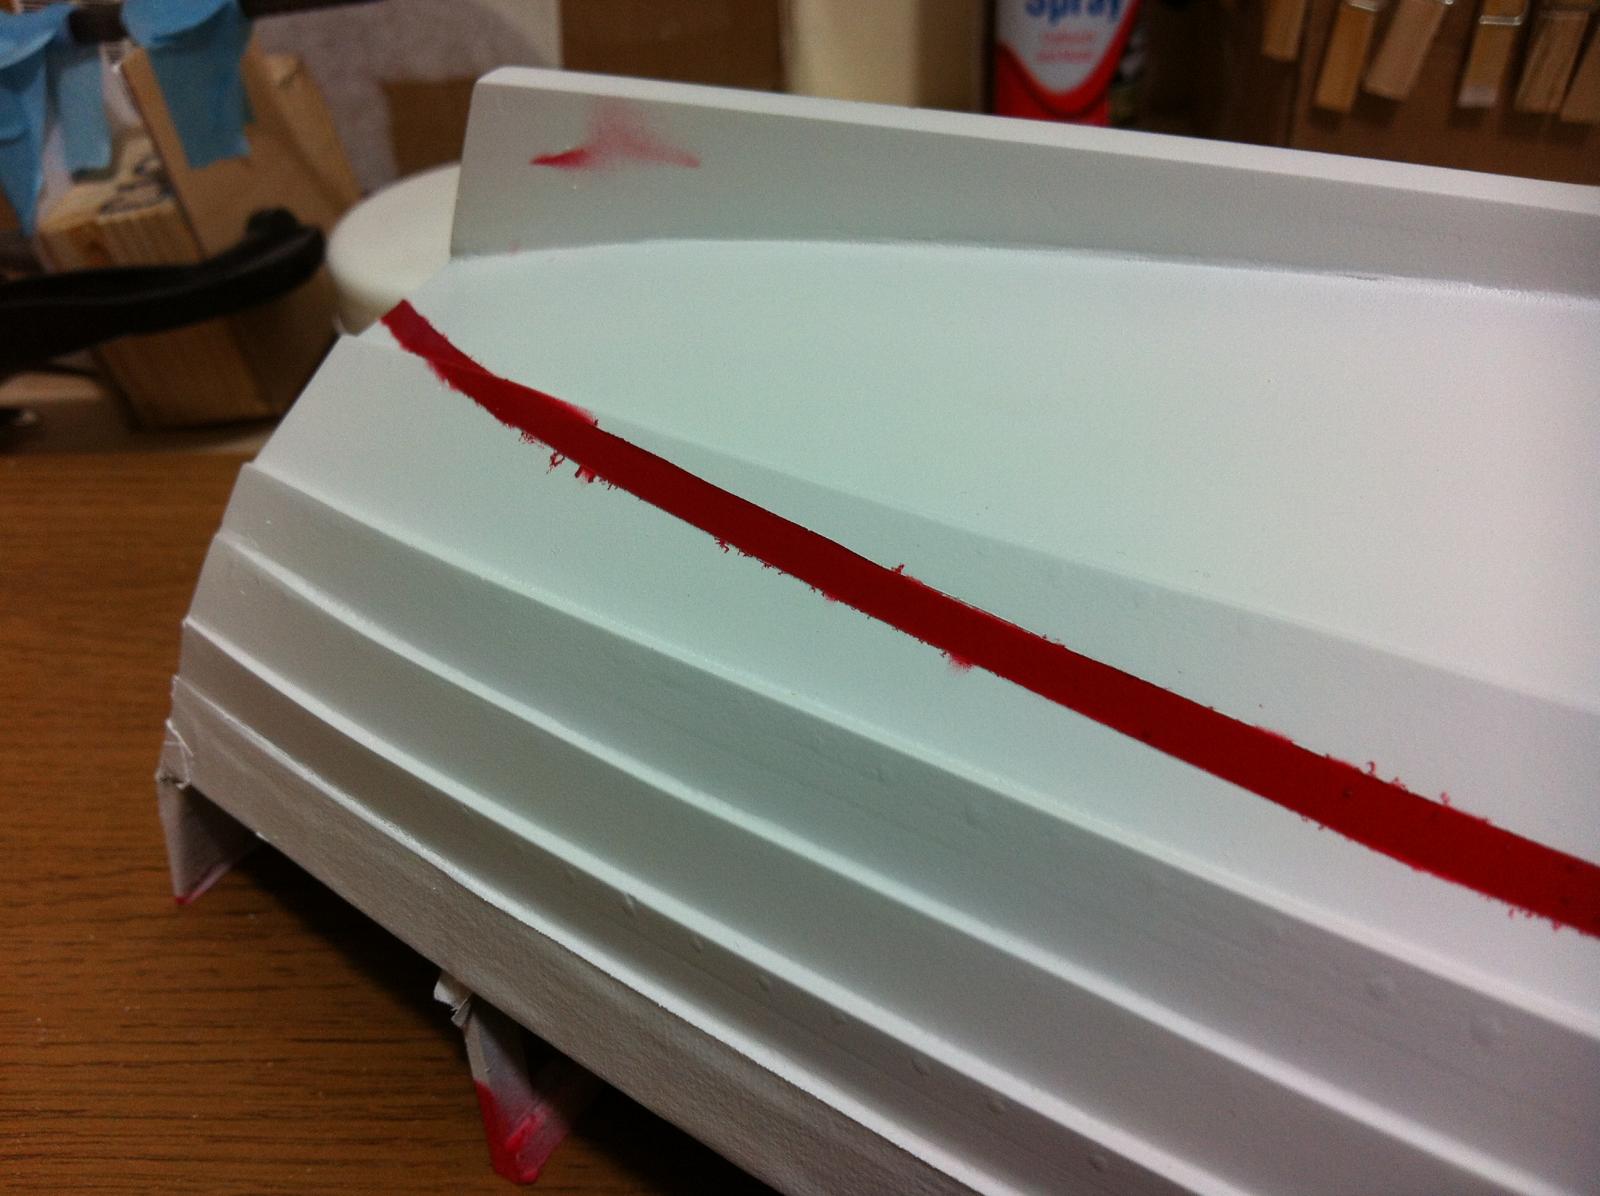
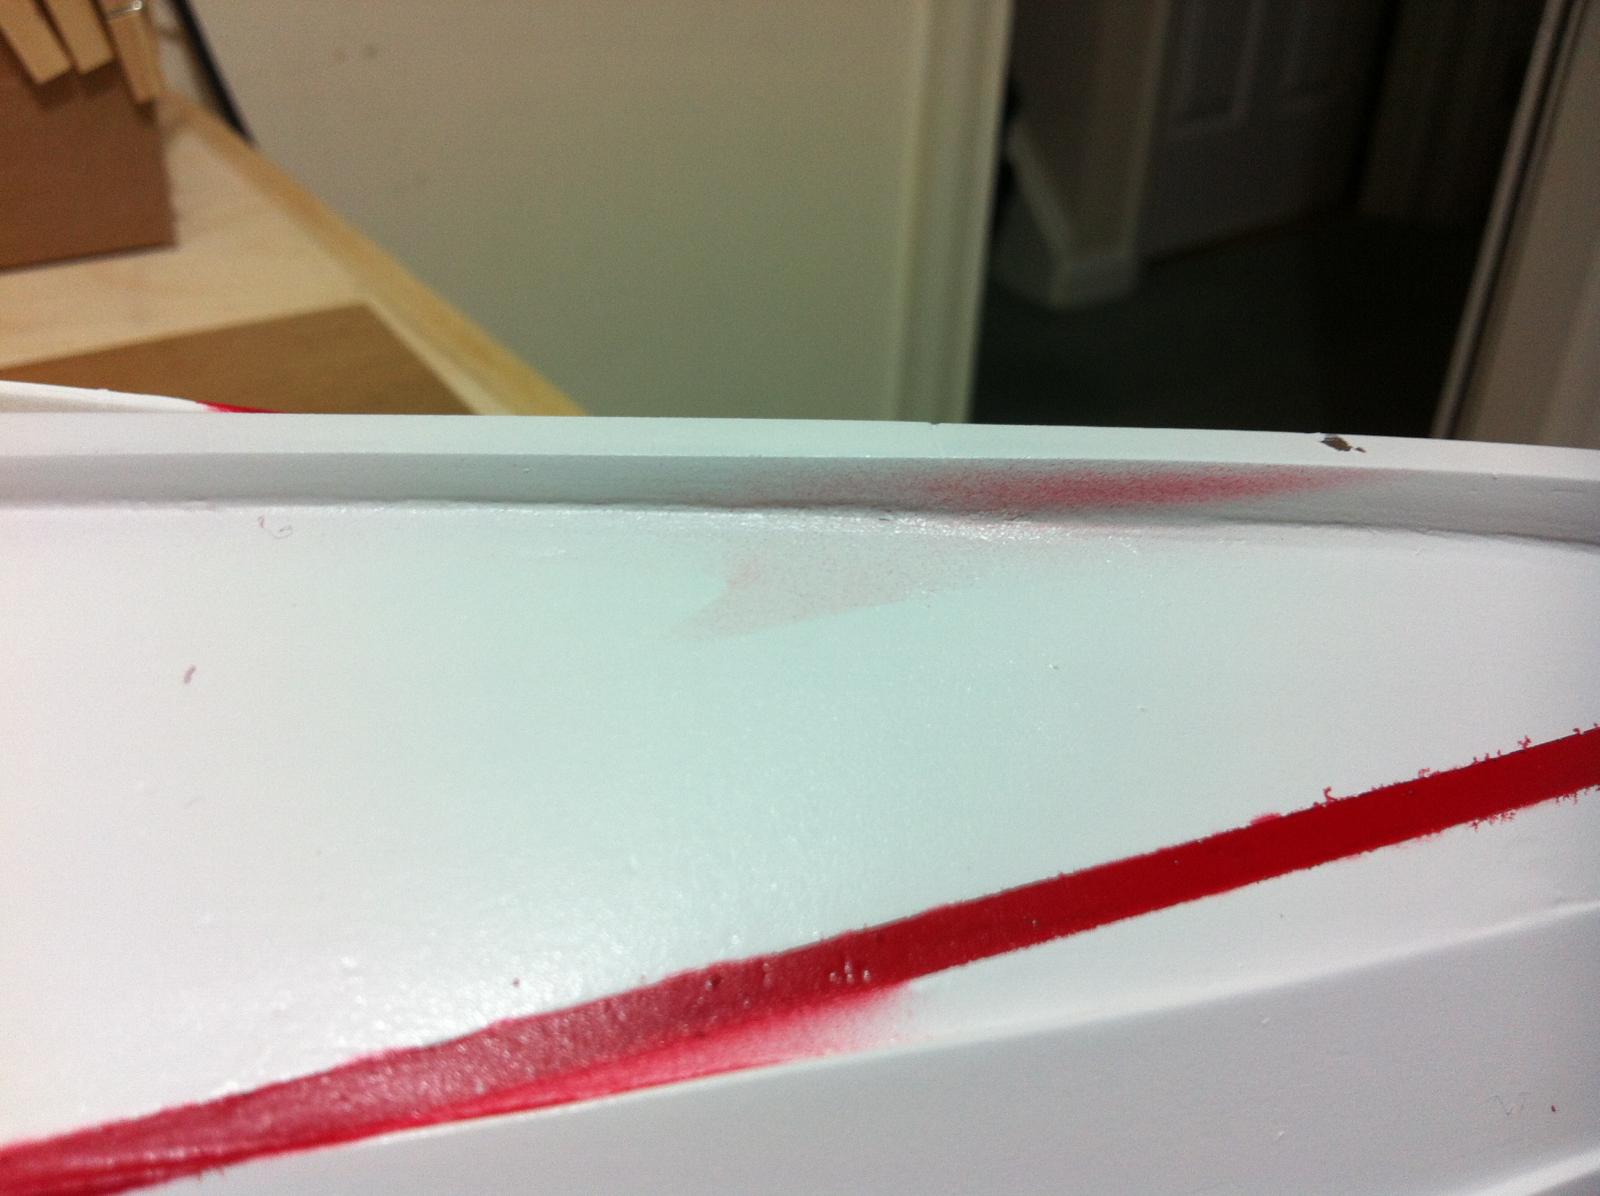
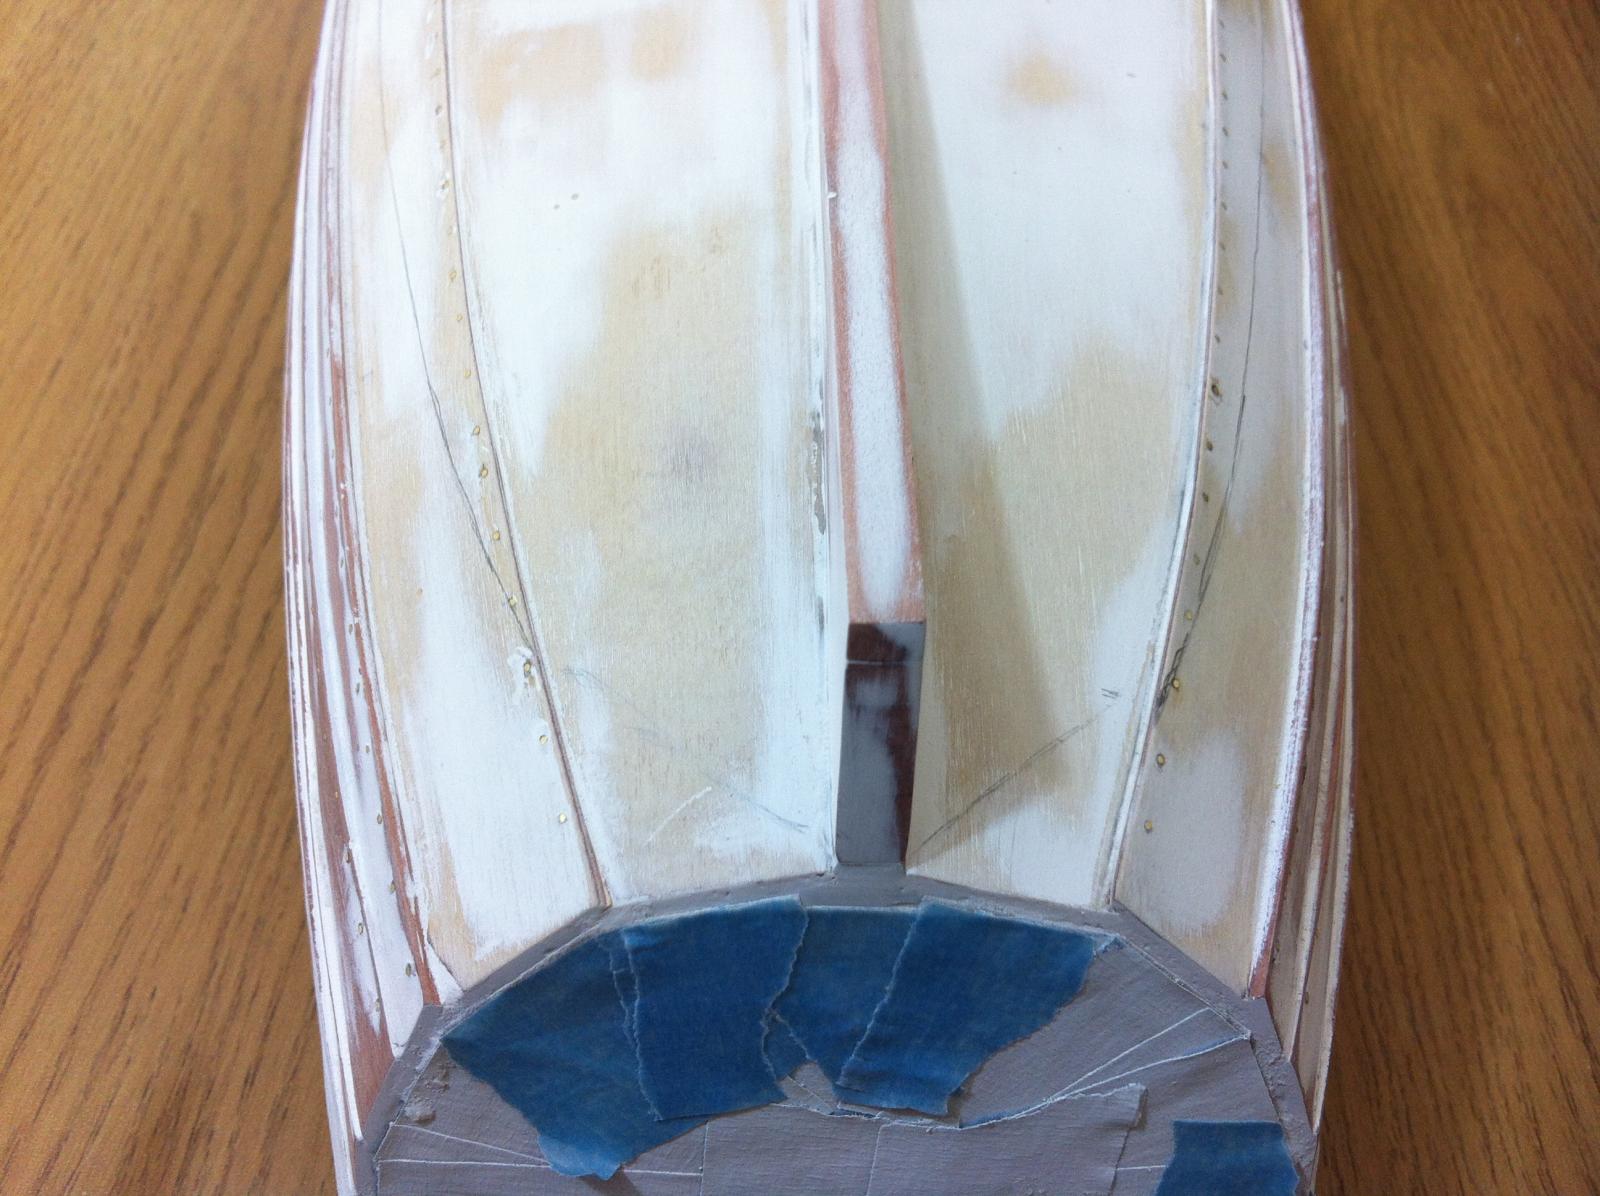
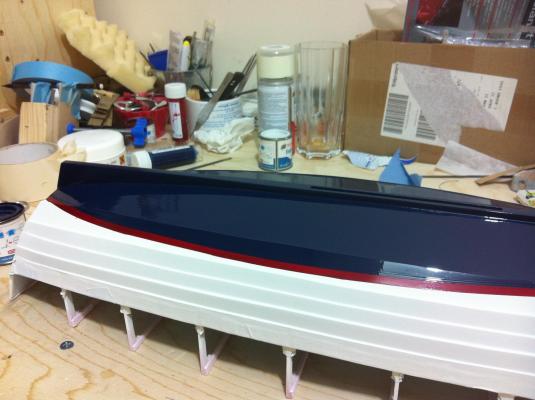
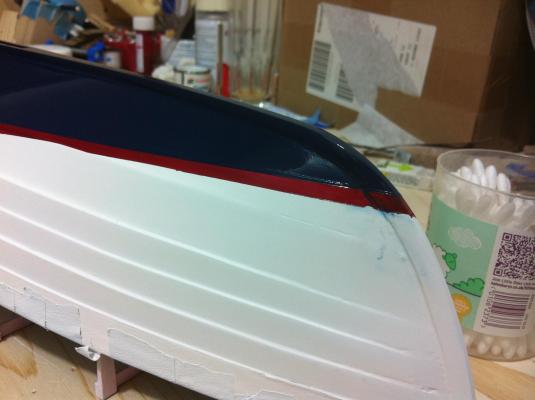
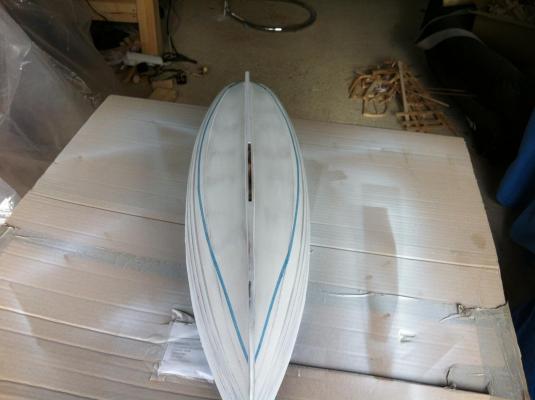
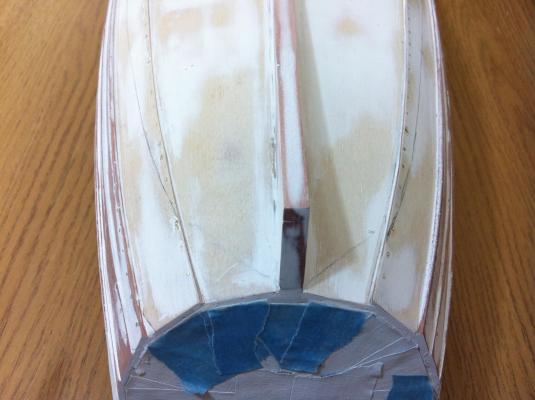
After a lot of work all old paint and primer was sanded away and painting is completed. It is miles away from perfect but considering my non existent painting skills, I am happy. I must say the water line was much more challenging than I thought. The white paint is Humbrol spray matt acrylic and the red and blue Humbrol gloss enamel (This is what I could easily find). The enamel paint is just gorgeous, no brush marks, huge coverage and with the low odour mineral spirits it actually smells less than the acrylic spray. Certainly this is the way forward for me. I should have also sanded the border of the red paint before adding the blue to remove the raised edges but I was afraid I would make a huge mess. There is the problem that the white is matt and the colours gloss and I am not sure whether to use matt varnish or gloss. I would prefer matt but the admiral likes the blink! It is very important to make sure the tape is well tacked down. There was a leak at the bow but I managed to largely save it although a bit more attention is needed. Another milestone reached I think


- 253 replies
-
- 7
-

-
- ketkch
- gaff-rigged
- (and 1 more)
-
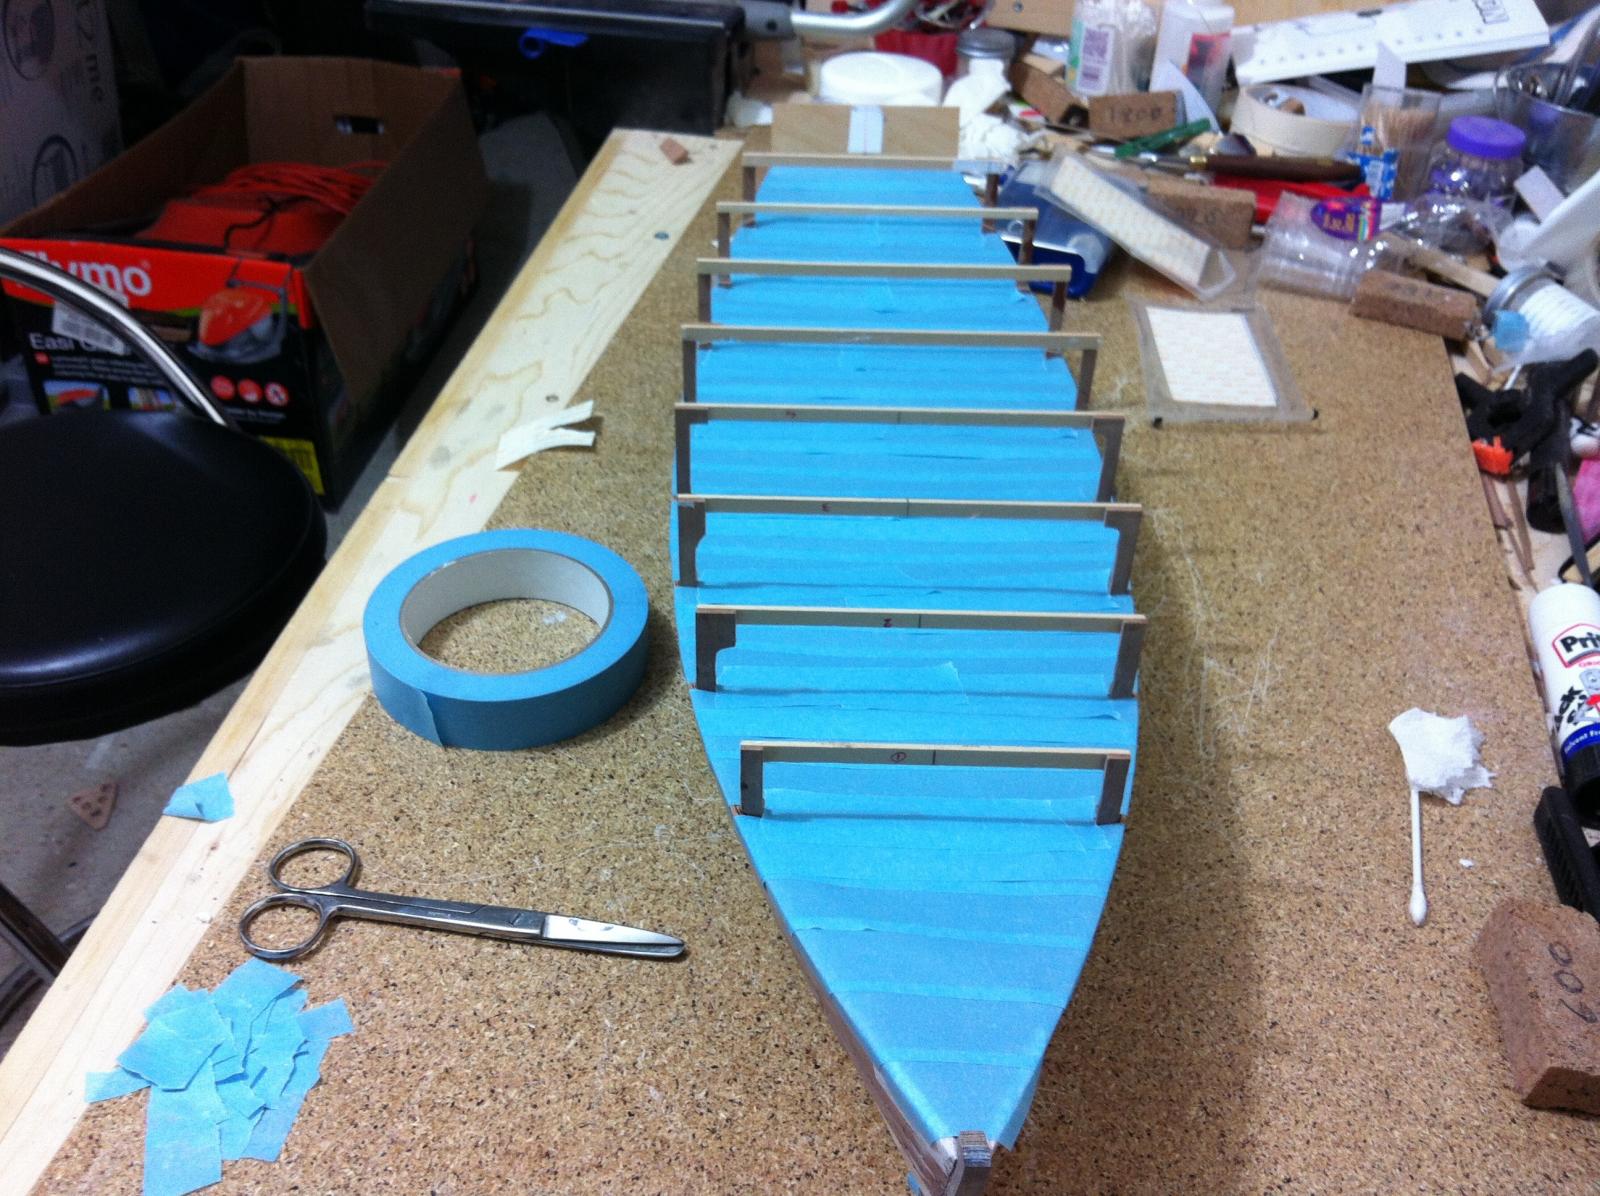
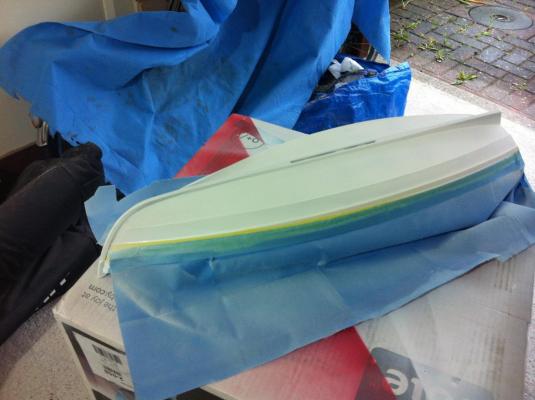
Life has again gotten in the way of model building so very little progress to show. After some thought and testing (results posted to the forum) I have a better idea how to approach painting the hull. Masking now is definitely more efficient. The hull is now masked, primed and ready to paint. I plan to have a red strip for the waterline and paint the bottom dark blue. I will probably use enamels and brushes as I find difficult to control the spray cans. They also leave a very thick layer of paint


- 253 replies
-
- 4
-
-
- ketkch
- gaff-rigged
- (and 1 more)
-
Wood Preservative/Stabilizer
vaddoc replied to robcg's topic in Painting, finishing and weathering products and techniques
I use Americana acrylic sealing sander, water based, one coat only and cheap. It works great -
comparison of masking tapes
vaddoc replied to vaddoc's topic in Painting, finishing and weathering products and techniques
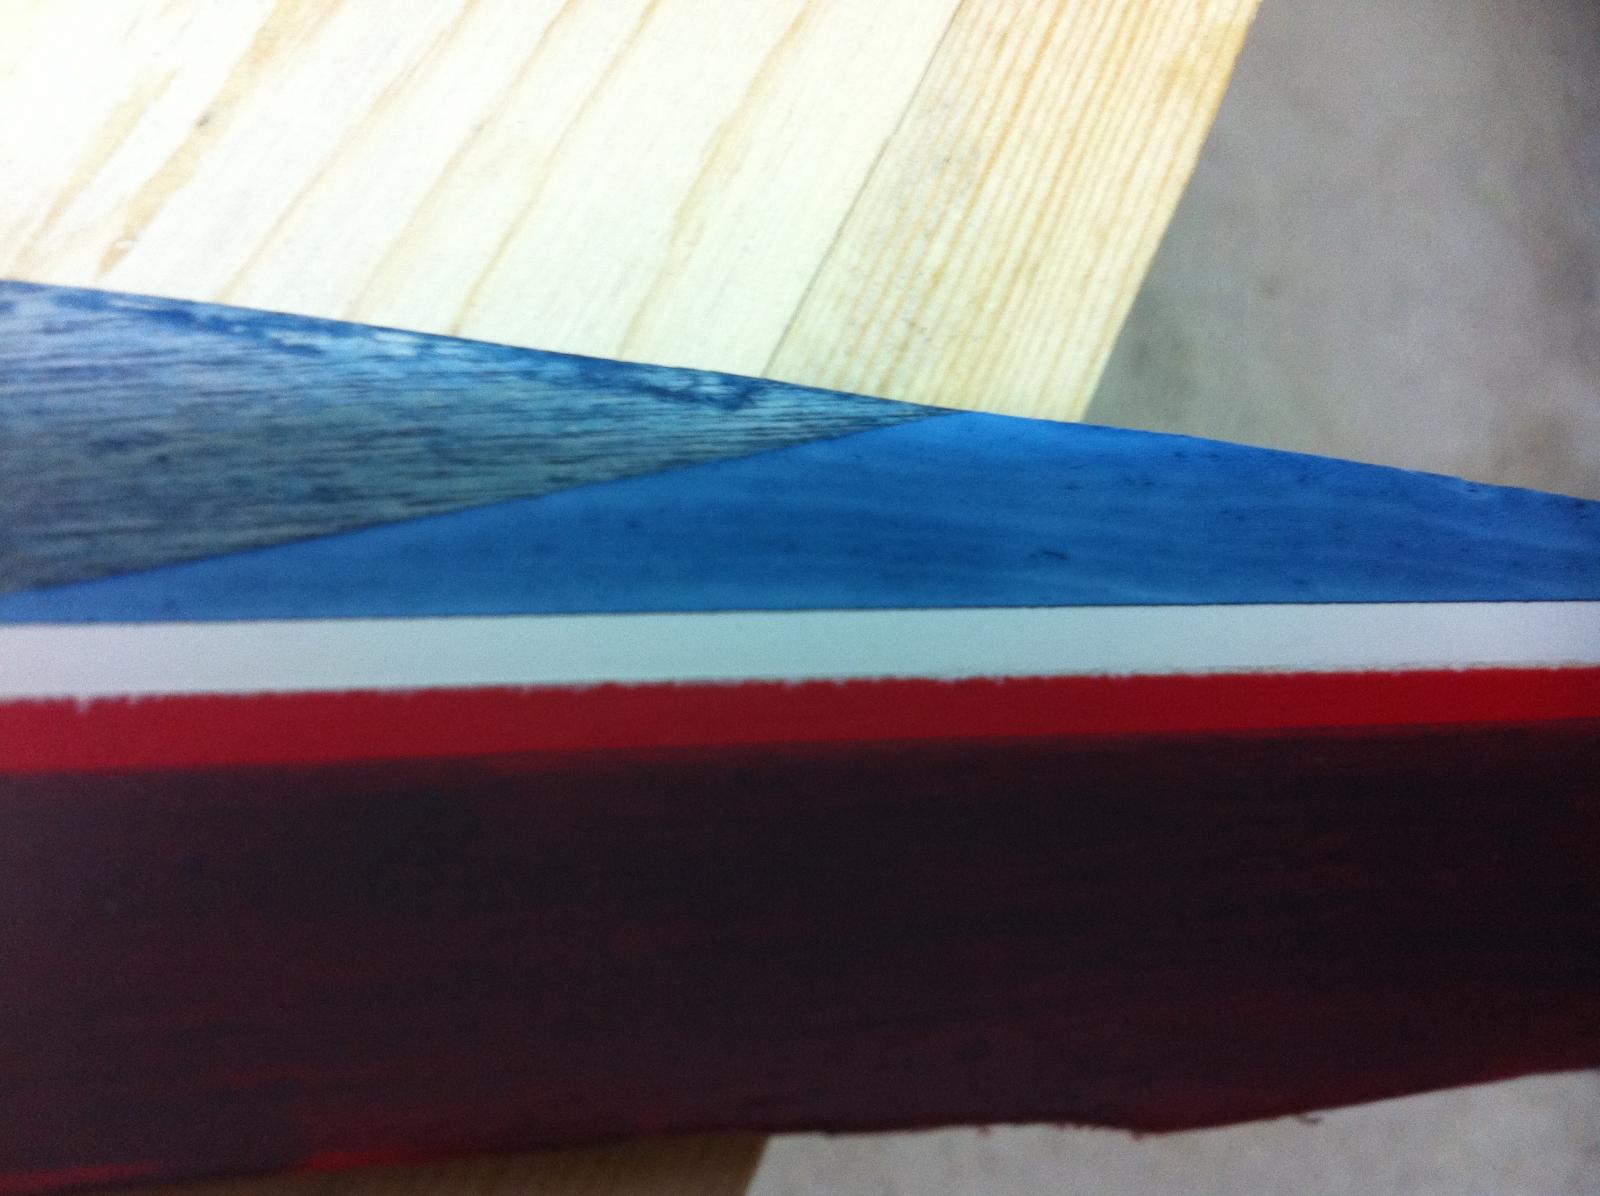
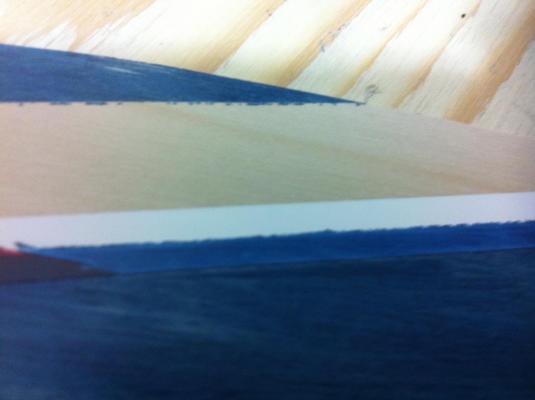
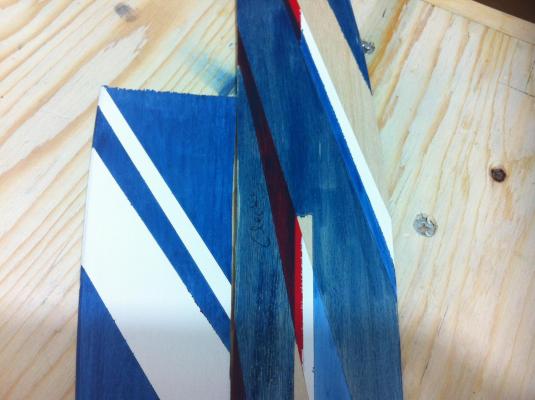
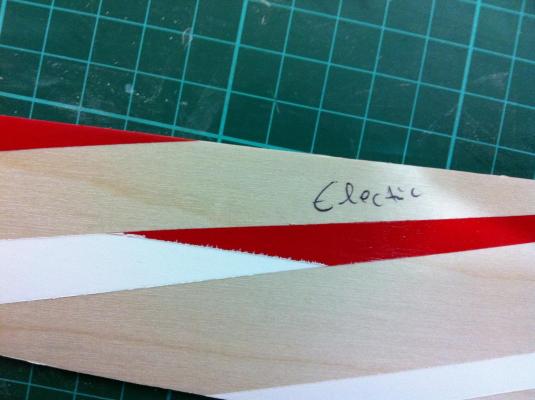
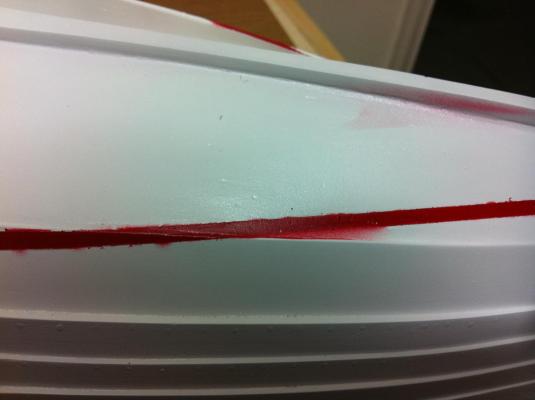
Thank you all for your comments. I finally found some time to complete this test. I got some Tamiya tape which seems to be identical to frog tape but as Kurt said Tamiya tape is thinner so much better for modelling purposes. I used the plywood sheet from the previous trials to see how the tapes behave on painted surface. I also prepared a new plywood sheet that was primed and sanded to 400 grit. I did not include the ordinary masking tape as it has already proved terrible. I used this time Humbrol enamel applied with brush Painted surface first The Tamiya tape left an excellent line (upper edge of white) but the electrician's tape bled (lower edge of white) Next the painted surface where I also used the frog tape. Same results really, Both Tamiya tapes were good with the wide frog tape showing some bleeding where it was not tucked down firmly And the electric tape bled Of note, the consistency of colour is much better when applied on primed vs just sealed wood Bottom line: Never use ordinary masking tape or insulating tape, Tamiya tape is the way forward, try and prime your surfaces. Masking film might be another good option. Regards Vaddoc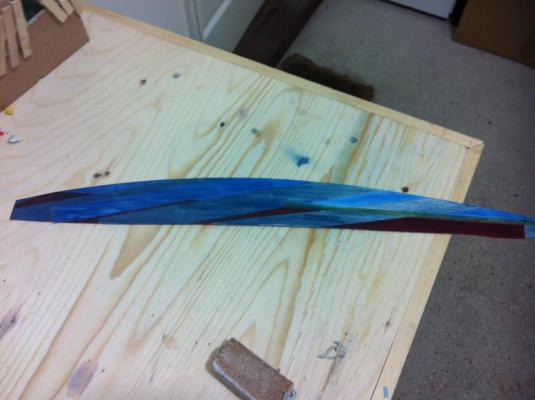

-
This is amazing work Thanasi. I feel the green monster of envy poking my side. Some more detailed photos would certainly help us poor amateurs, however you do it it certainly works
-
comparison of masking tapes
vaddoc replied to vaddoc's topic in Painting, finishing and weathering products and techniques
Thank you all for your suggestions. It seems that Tamiya tape is the most popular choice. The purpose of this exercise is to see the effectiveness of low tech widely available (and cheap) solutions. Grsjax, this should really work well, I however have never used or seen clear paint. It seems that extra care should be taken with the frog tape, it should be kept in the plastic case it comes with to make sure the edge does not get dirty and worn. I will try cutting patterns to see if the sealing properties are maintained. Tamiya and frog tape look identical, could they be the same product? More testing to follow when time permits -
I can see that having a fixed boom would make sailing simpler. Was there a centerboard or keel weight? It looks there is enough sail area to cause problems
-
Beautiful boat Thanasis. Any thoughts as to why this kind of rigging evolved? It does not look much simpler than a standard boom although probably it allows more space on the deck when not sailing.
-
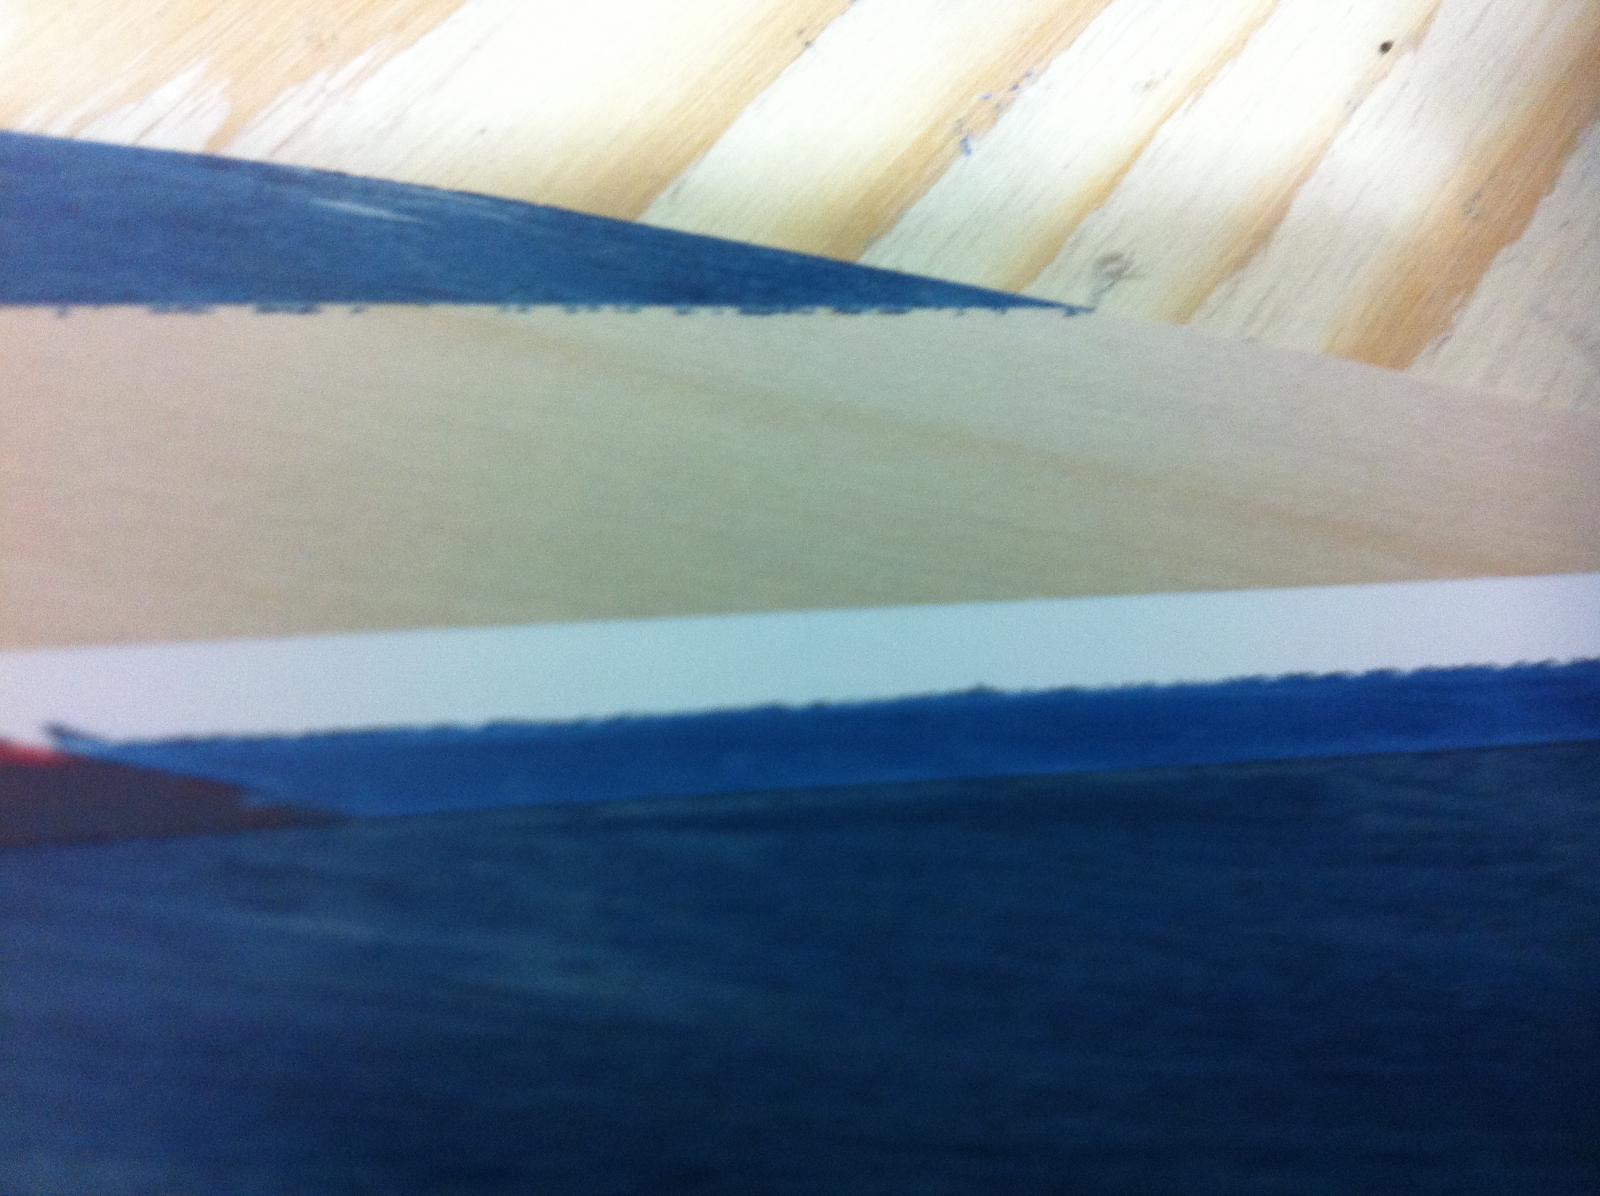
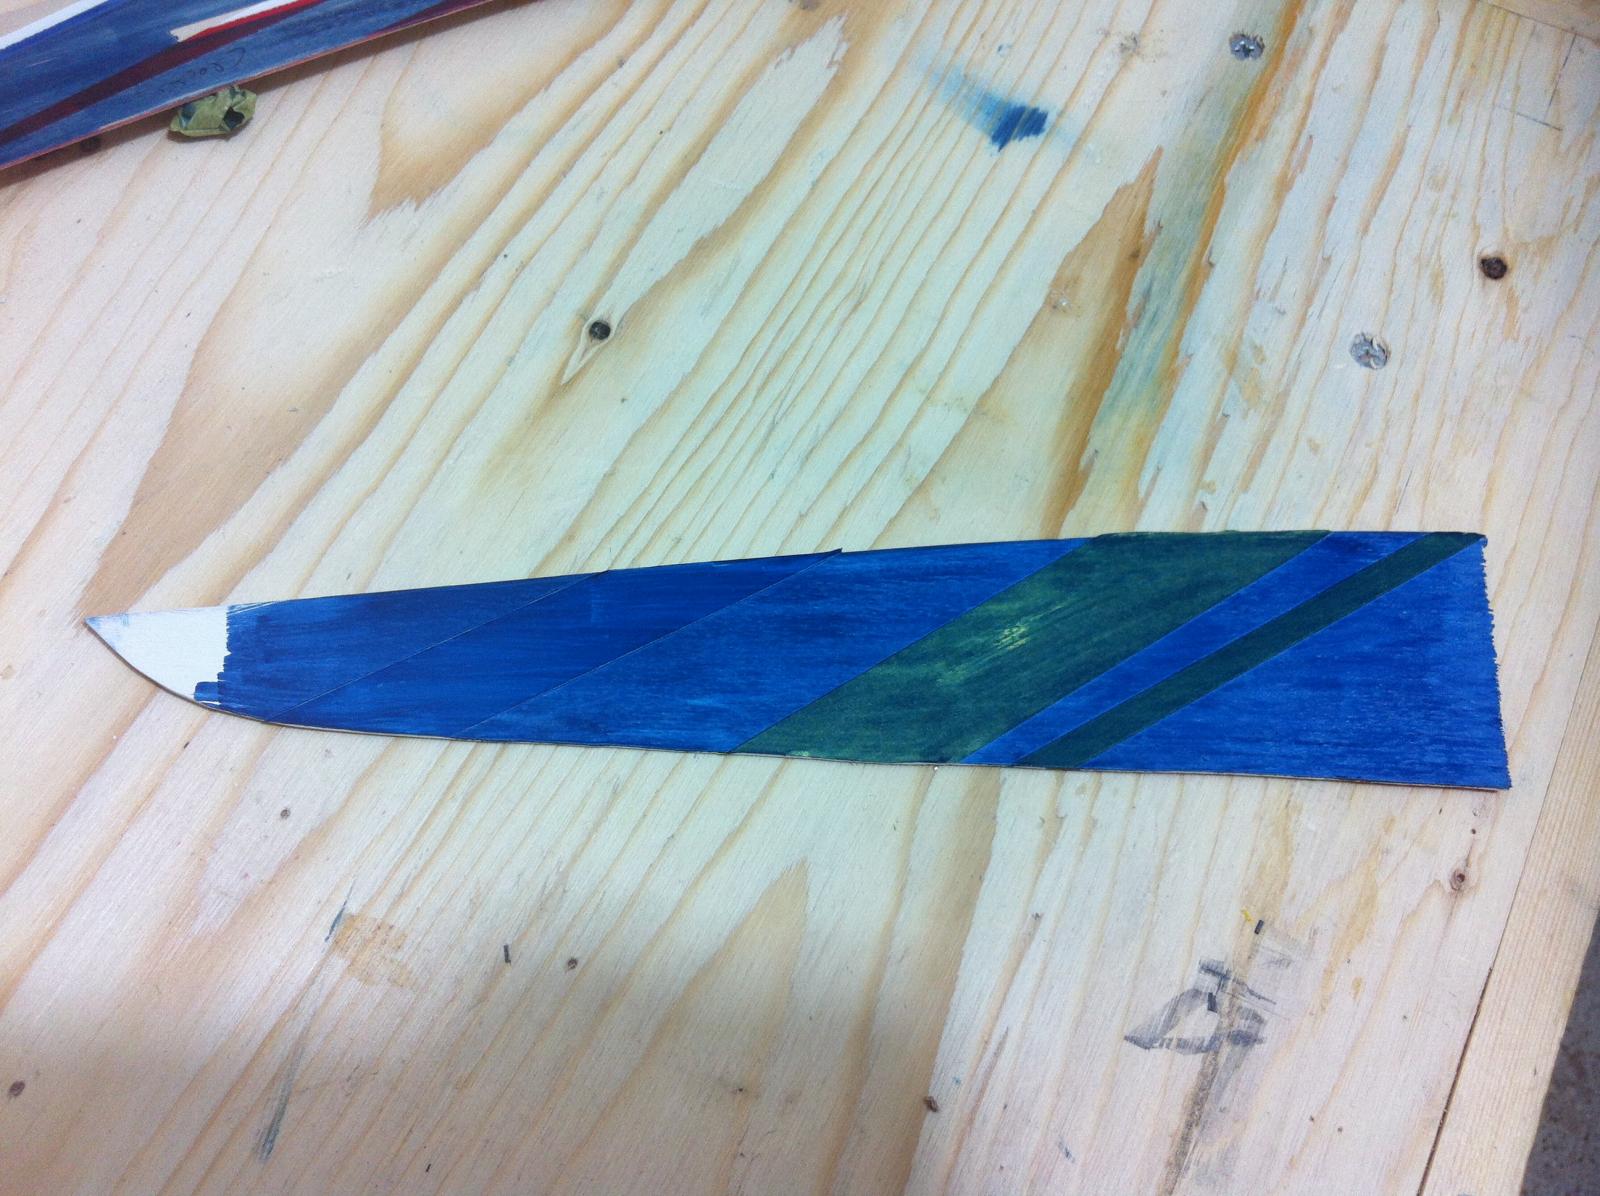
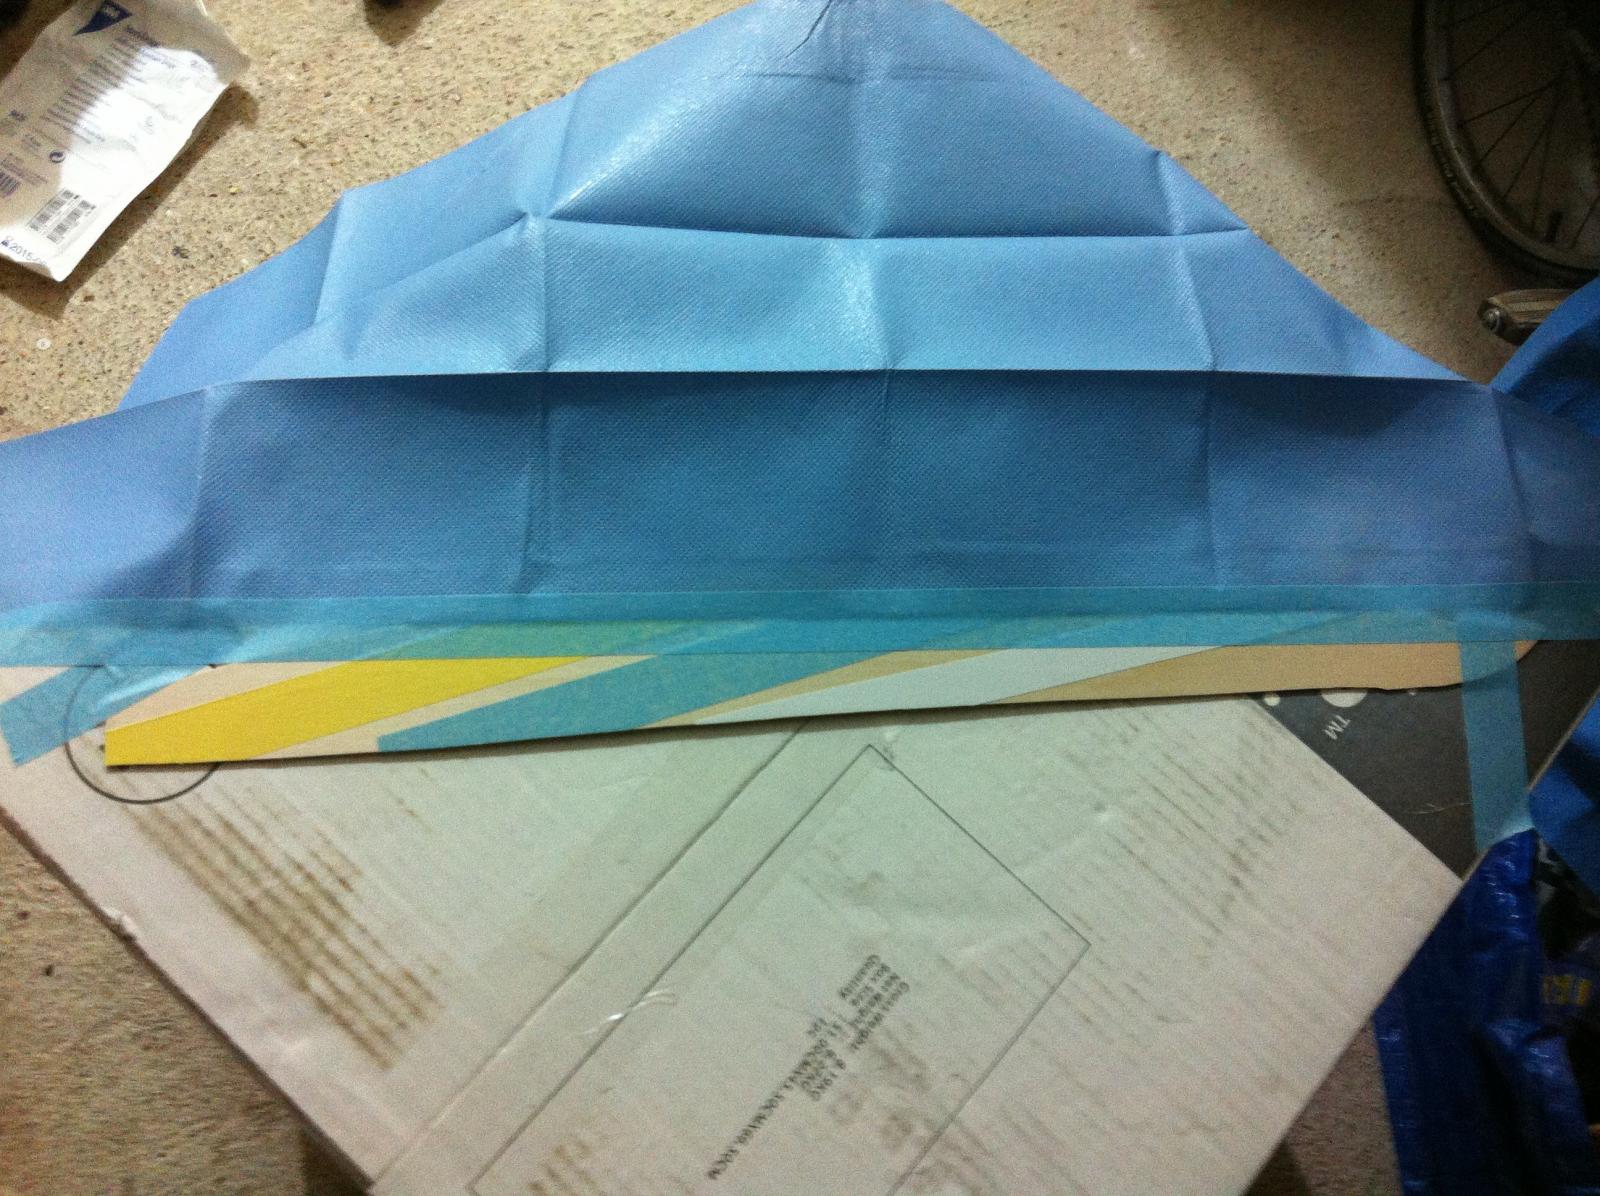
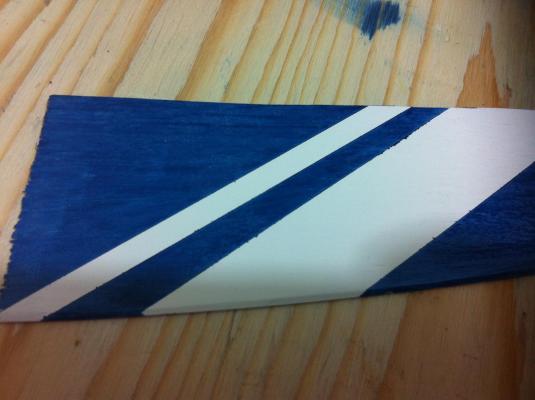
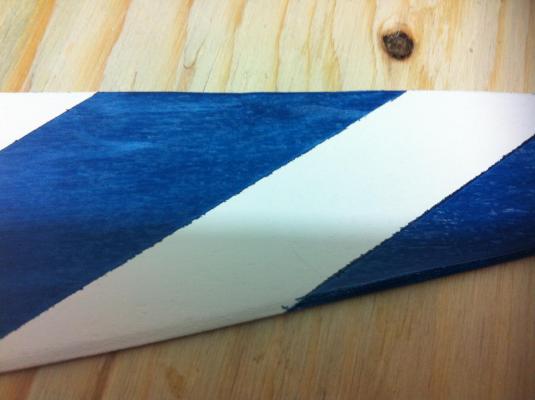
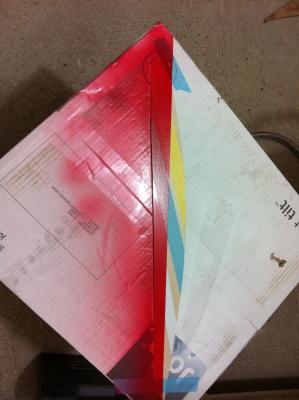
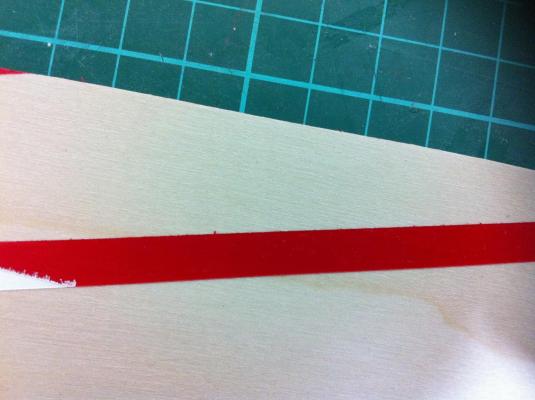
Dear friends following a disastrous attempt at painting the waterline I decided to take a step back and do a bit of testing. My main problem was bleeding of the paint under the masking tape. It seems that the consensus is that Tamiya masking tape works and it was also suggested to me to use masking film which seems a great but expensive option. However I first thought of testing tapes that are cheap and widely available, a general purpose masking tape by 3M, insulating (electician's) tape and frog tape (low tack). I intend to test these tapes on common modelling substrates, that is sealed and sanded wood, primed wood and cured paint. I will also use red auto paint (Halfords) and modelling acrylic white paint (Humbrol), both spray cans. It might be useful to post a few photos with the results. I prepared three pieces of plywood, (sanded to 400 grit, then acrylic sanding sealer, followed by sanding to 400 grit) First test is the sealed wood surface. I applied the three tapes, white is insulating, blue is masking and yellow frog. I painted one half with the red auto paint and the other with the white acrylic (2 coats each). The red paint was applied first and the two halves were separated with the 3M blue masking tape well tucked down. Although unintentional it is evident that a lot of white paint has bled and the line is not sharp. In the next photo the blue masking tape was top and the frog tape bottom. The masking tape bled a lot with both paints but the frog tape was almost flawless. In the next photo the insulating tape is top and the masking tape bottom. The insulating tape was better but still there was some bleed with both paints. Also, the tape left glue residue on the wood. On sealed wood the yellow low tuck frog tape is the clear winner and the only real option, allowing crisp lines for a cost of £6 for 41 m (24mm). The dead cheap insulating tape if extra care is used may have reasonable results but is far from perfect. The ordinary masking tape simply should not be used for masking purposes. Of note, the Humbrol paint left a raised edge when the tapes were removed but not the Halfords one. Next comes the same on primed and painted surfaces.


-
I somehow always smile when I see your photos Patrick, your models have this feelgood aura that is difficult to put into words. Vaddoc
-
Ok, the damage to the boat has partly been restored. Of course, pride and self confidence will take much longer to recover. Patrick and Mike thank you for your much needed support. Igor, I was not aware of the masking film but it seems good stuff. I think extra strong tuck is needed The way I am thinking of approaching this is: Fair, prime and paint the hull white. Possibly apply the film, mark the waterline and cut out the film. Use modelling acrylic spray paint, very thin layers, spray vertically. I really hope no paint has found its way inside the hull. I also am concerned that In order to cover the white paint, many coats of red will be needed and when the film is removed the red stripe will be raised and create a ledge. Clearly I need to do my homework!
- 253 replies
-
- 5
-
-
- ketkch
- gaff-rigged
- (and 1 more)
-
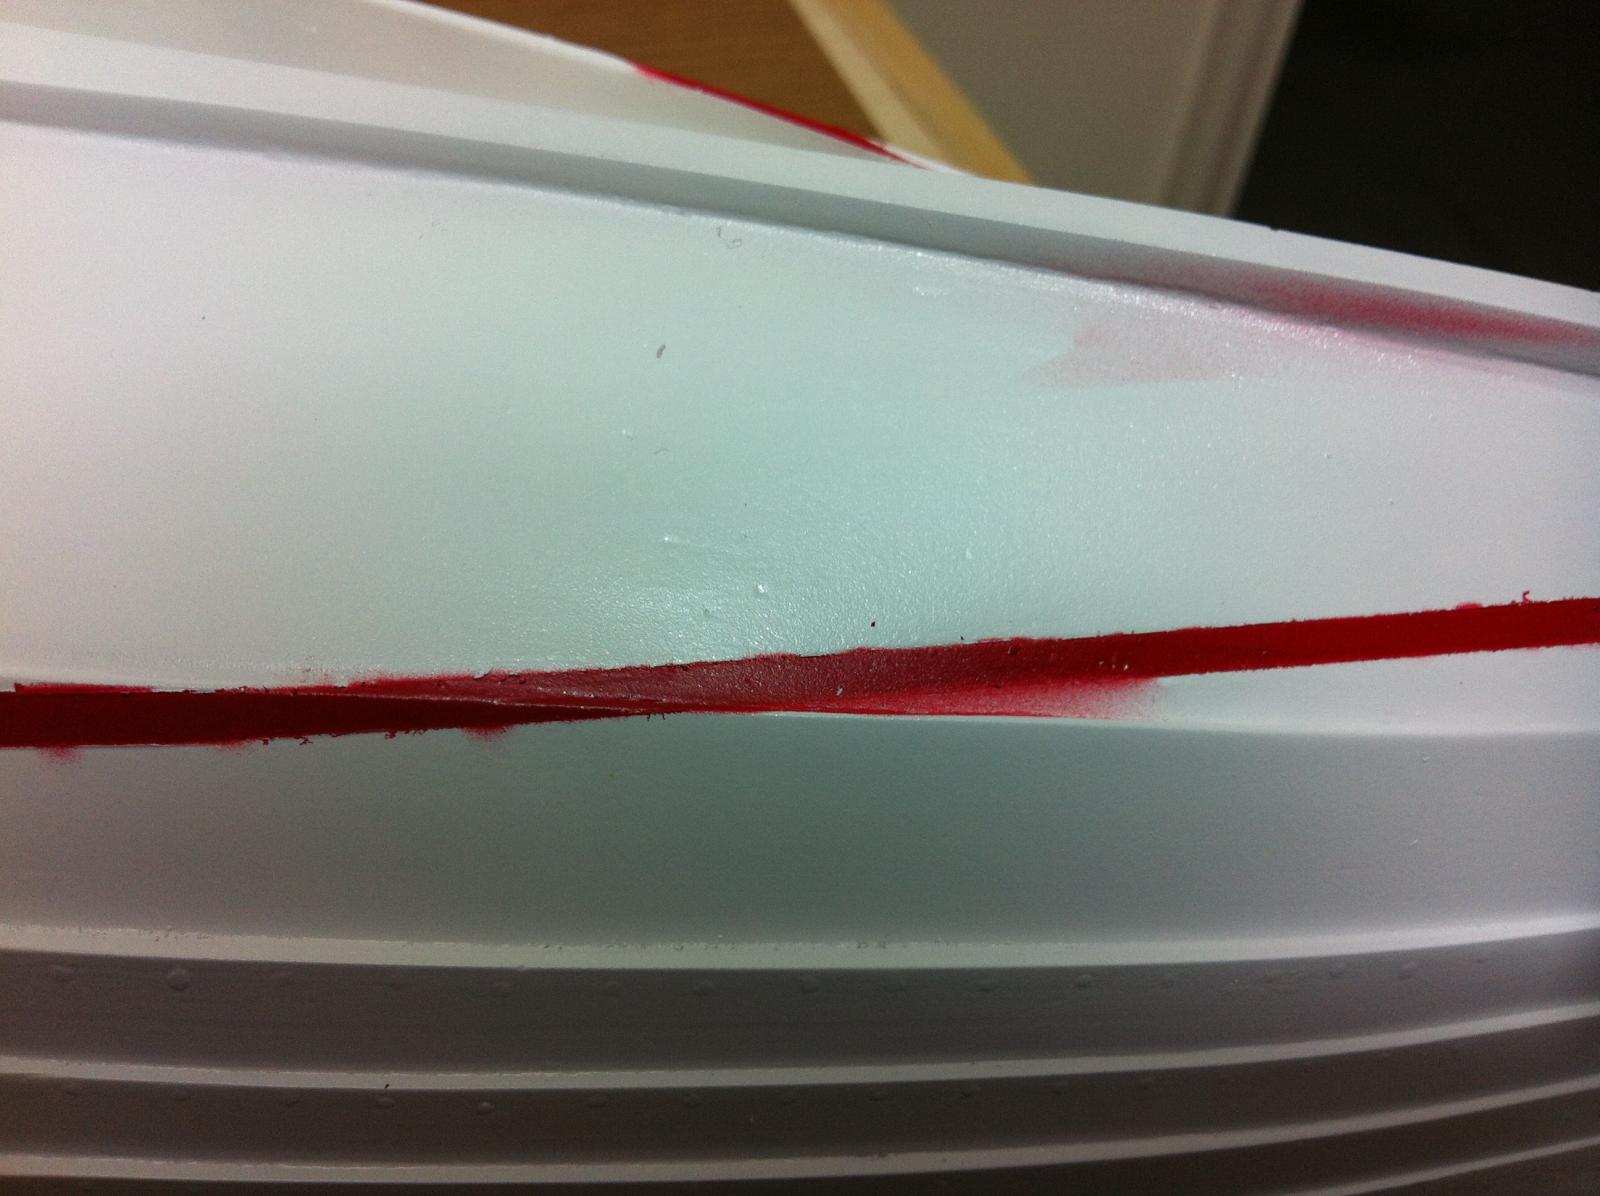
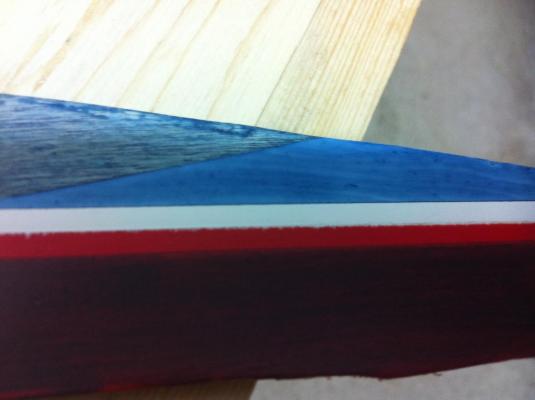
Indeed the result is horrible. I need to take a step back and think how to fix this. It might be possible to sand away the excess red paint. I should have been much more careful, lesson learned the hard way.


- 253 replies
-
- 3
-
-
- ketkch
- gaff-rigged
- (and 1 more)
-
Wow, your hull looks very good! I like how clean the plank-stem junction is, I spend a week trying to get this result myself and then gave up.
-
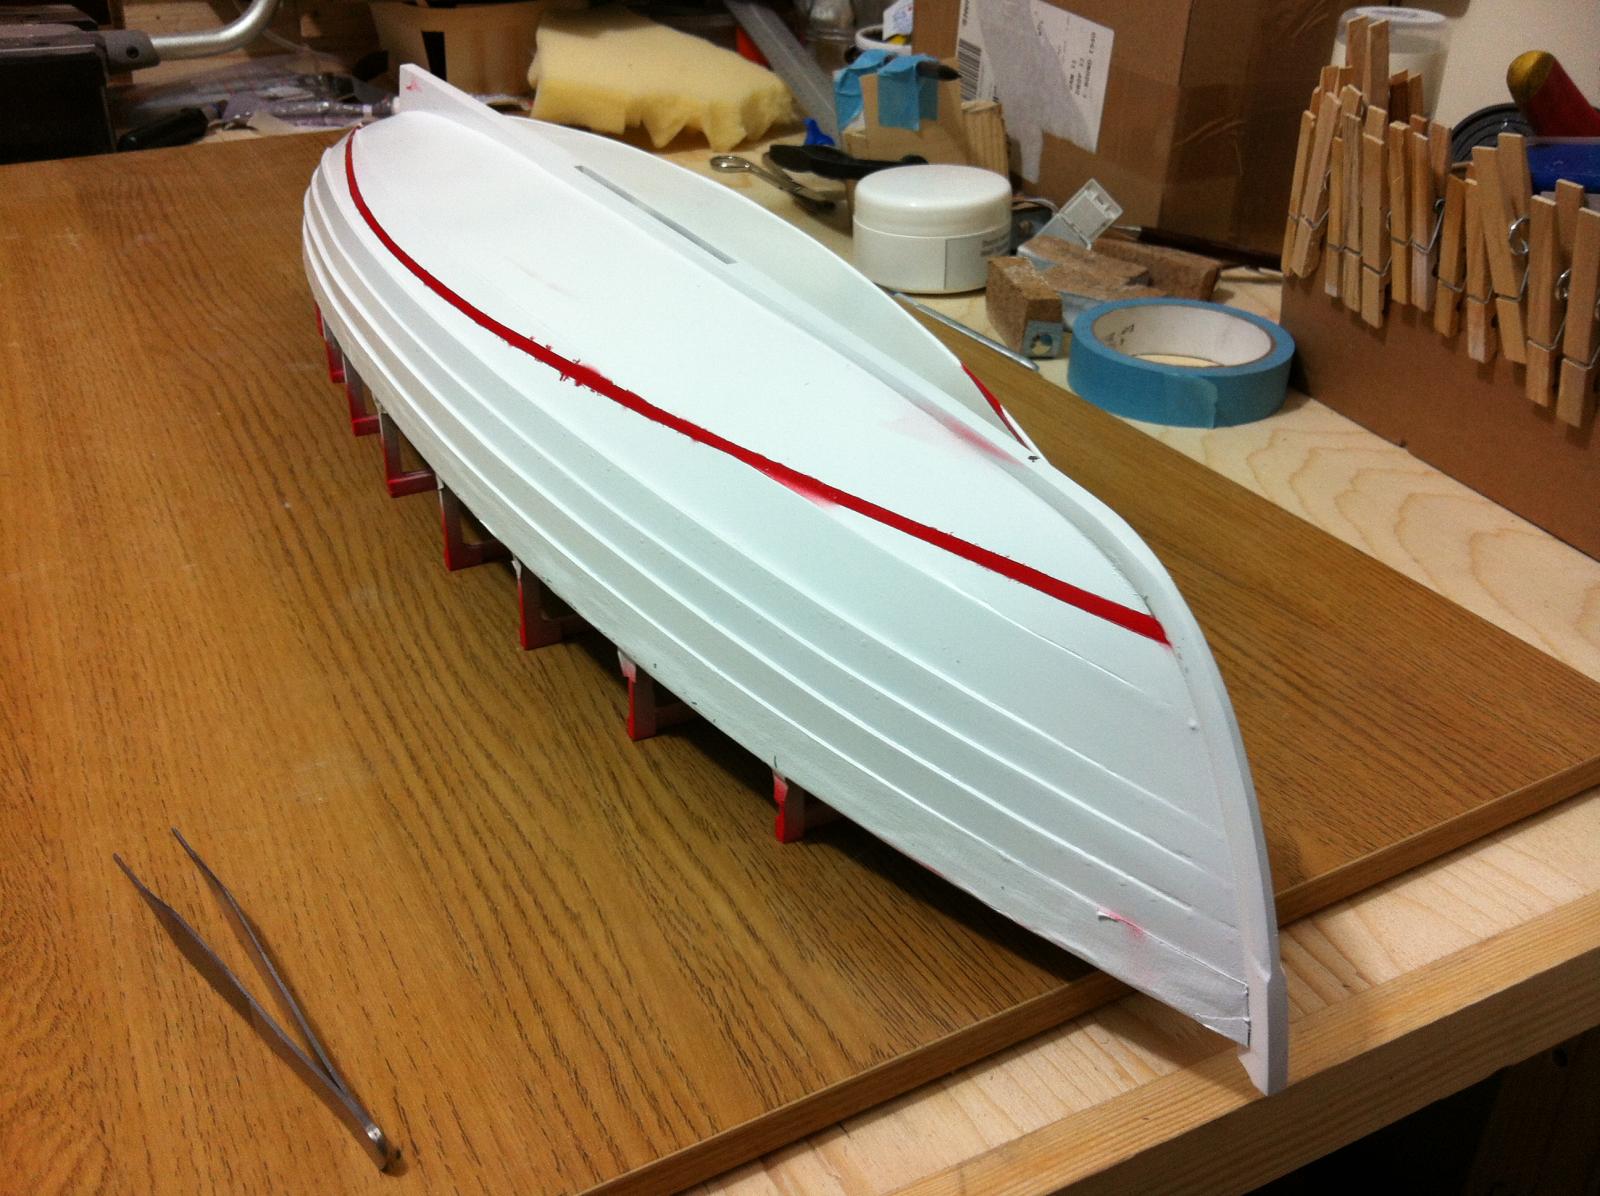
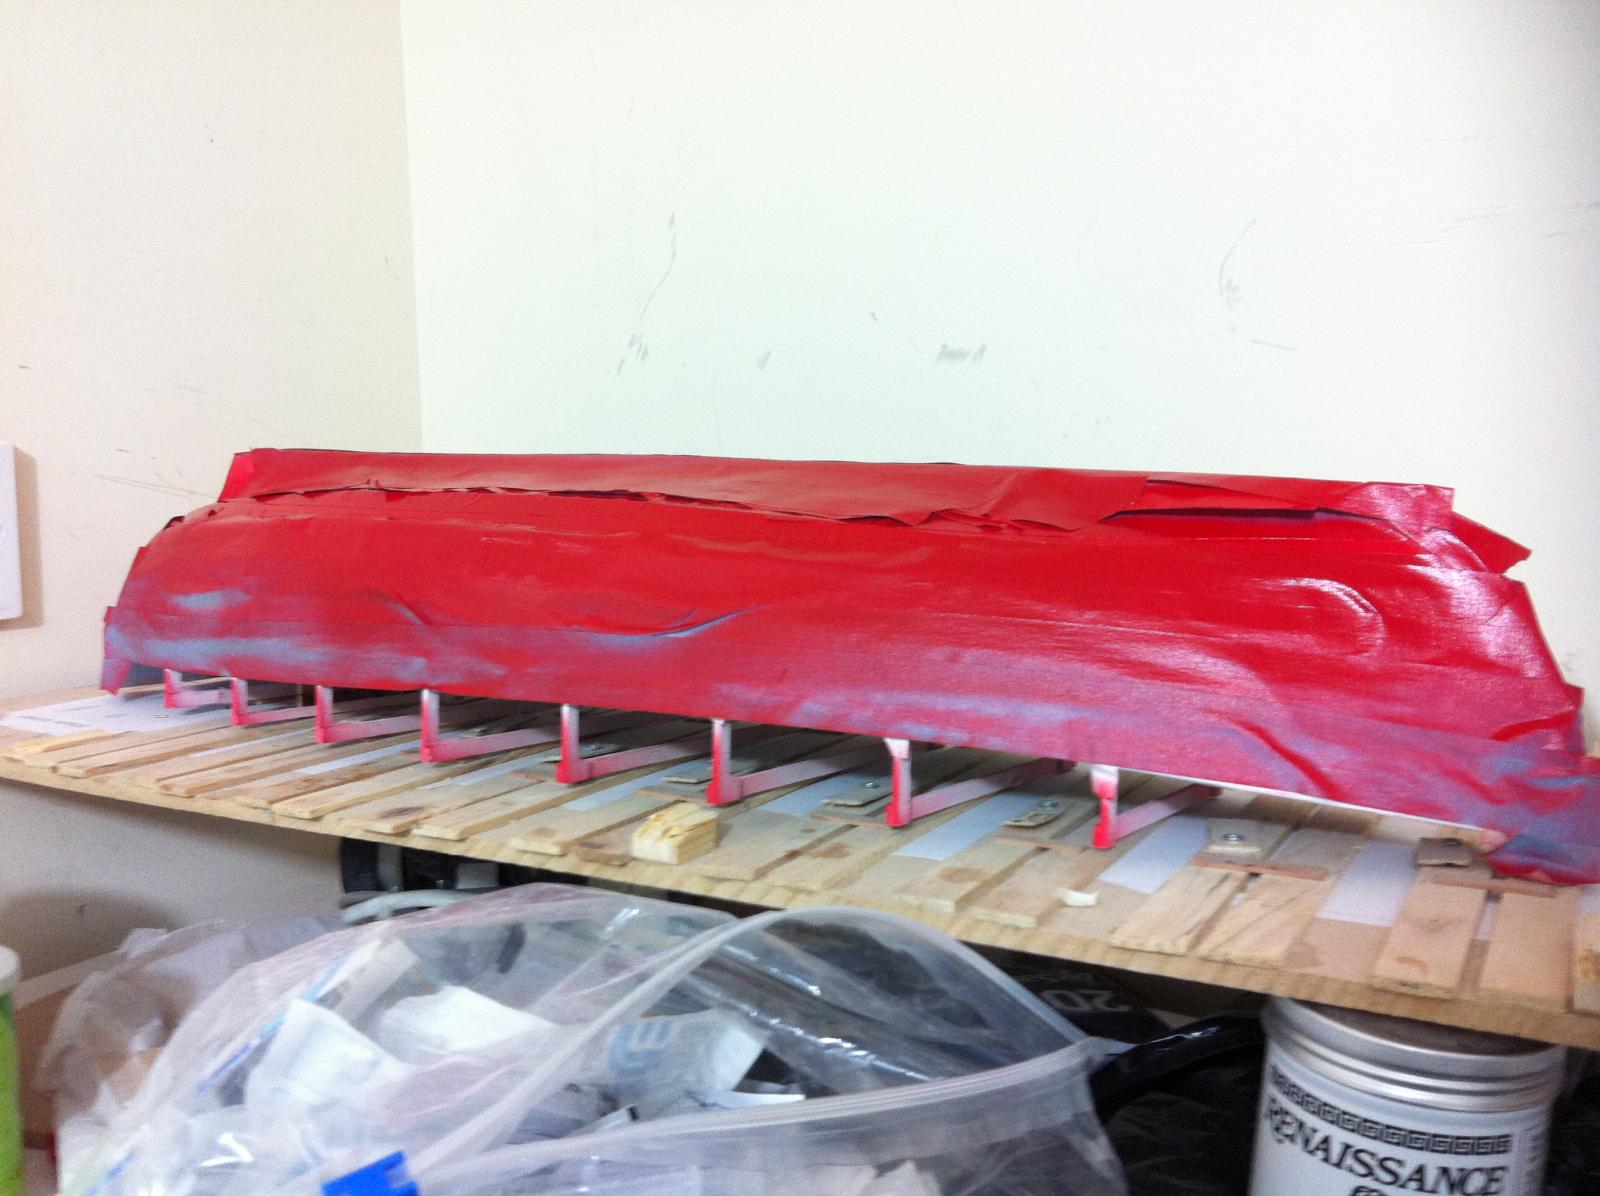
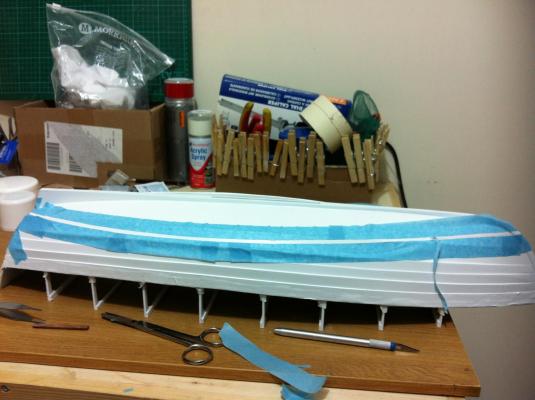
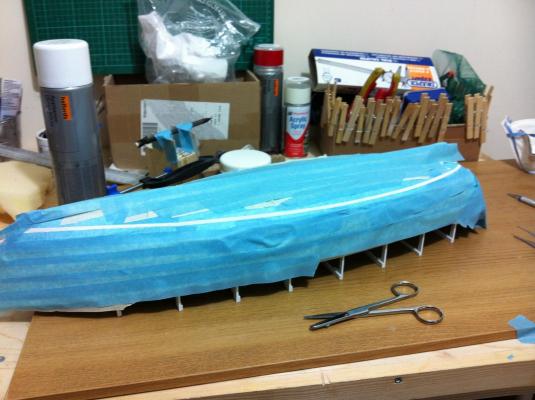
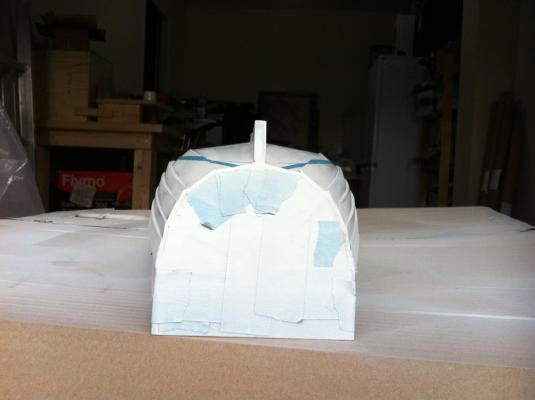
Thank you Pete, though I am not very optimistic it will continue like this, painting has turned rather messy. I have lost count of how many coats of white paint I applied, it took a lot to get good coverage. I taped off the waterline edges and carefully removed the strip, now heavy with paint but happily it did not peel. I then double-masked the rest of the boat... ...gave two coats of white paint to seal the edges of the tape and then went crazy with the red paint. I will wait for the paint to dry more and then remove everything. I am sure it will look terrible though because the tape at one area was not firmly attached to the hull so that area will be a mess. Also, the poor quality tape I used just lifted so the whole hull might be splashed pink. I must admit since the little one came my usual thoughtful preparation has gone out the window. But then again pink is very fitting, everything in the house is pink...

- 253 replies
-
- 6
-
-
- ketkch
- gaff-rigged
- (and 1 more)
-
This would be very interesting Thanasi. I have the excellent book "Greek traditional shipbuilding" by Kostas Damianidis and I will definitely build a trexantiri some time. I am also looking forward to the results of your research, there is I feel very little written information on the subject. Best regards Vaddoc
-
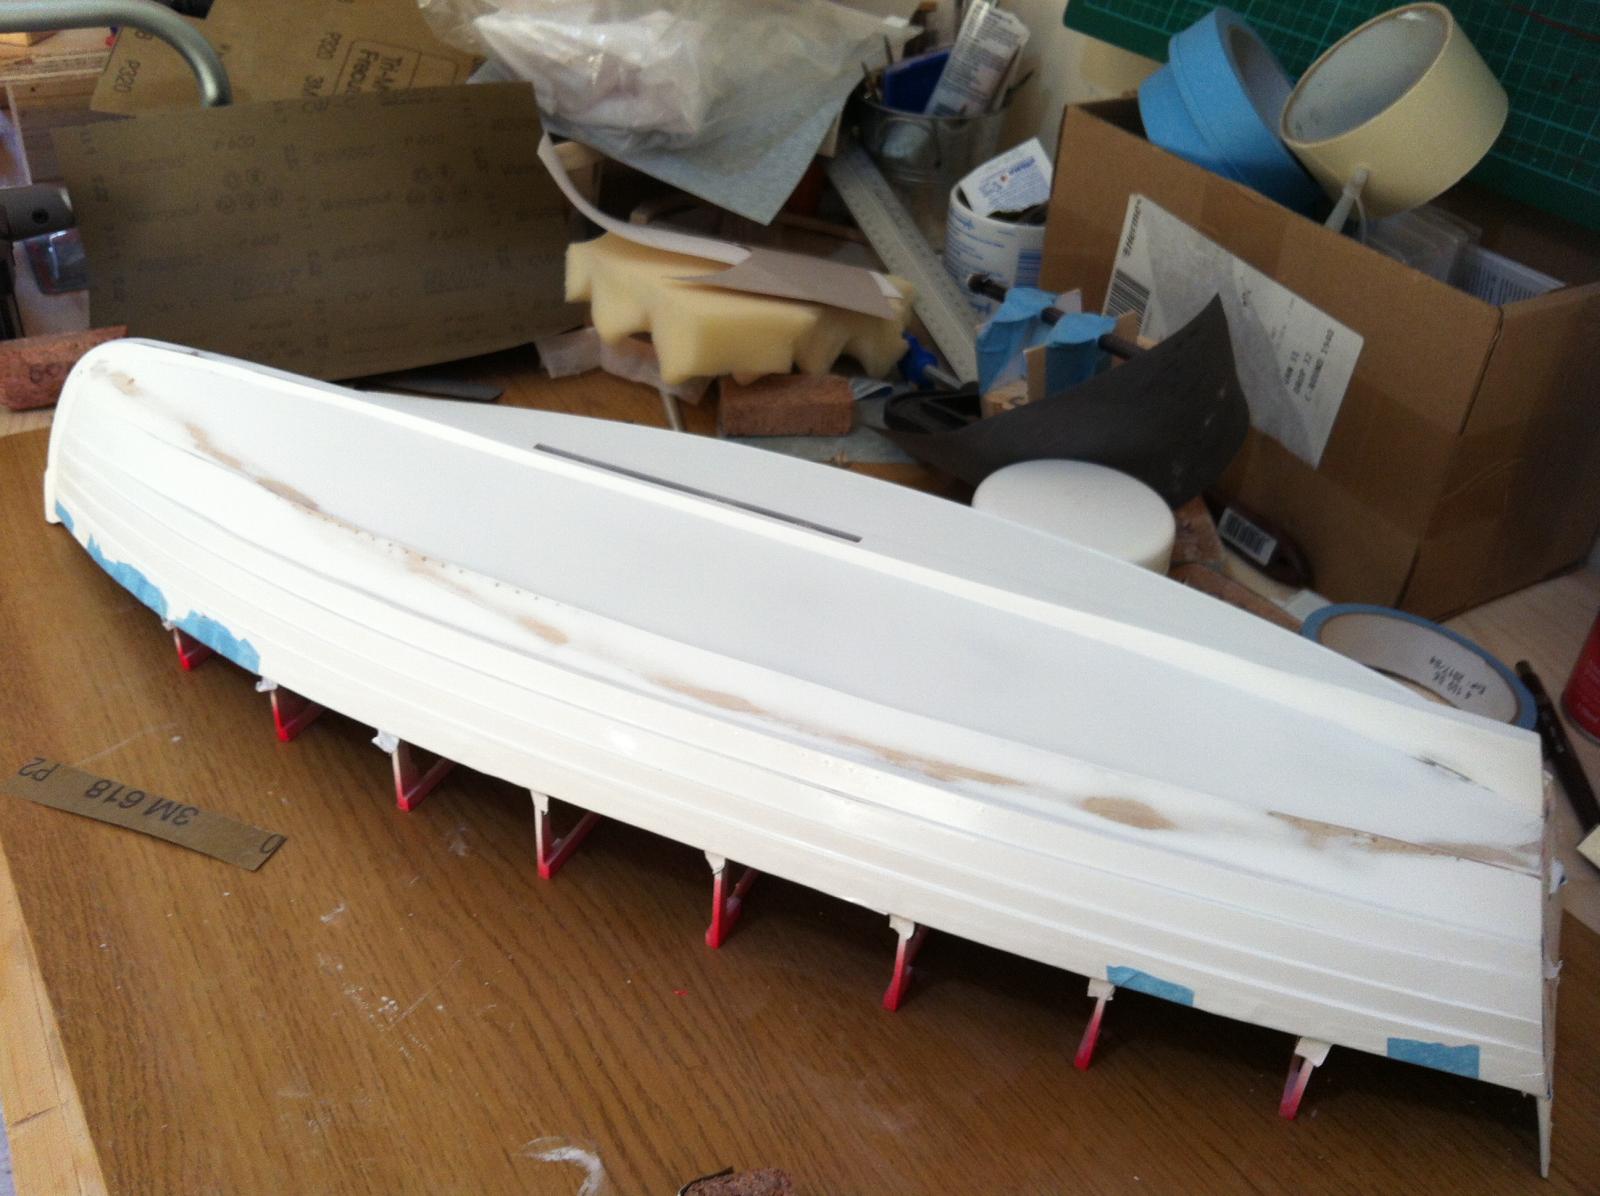
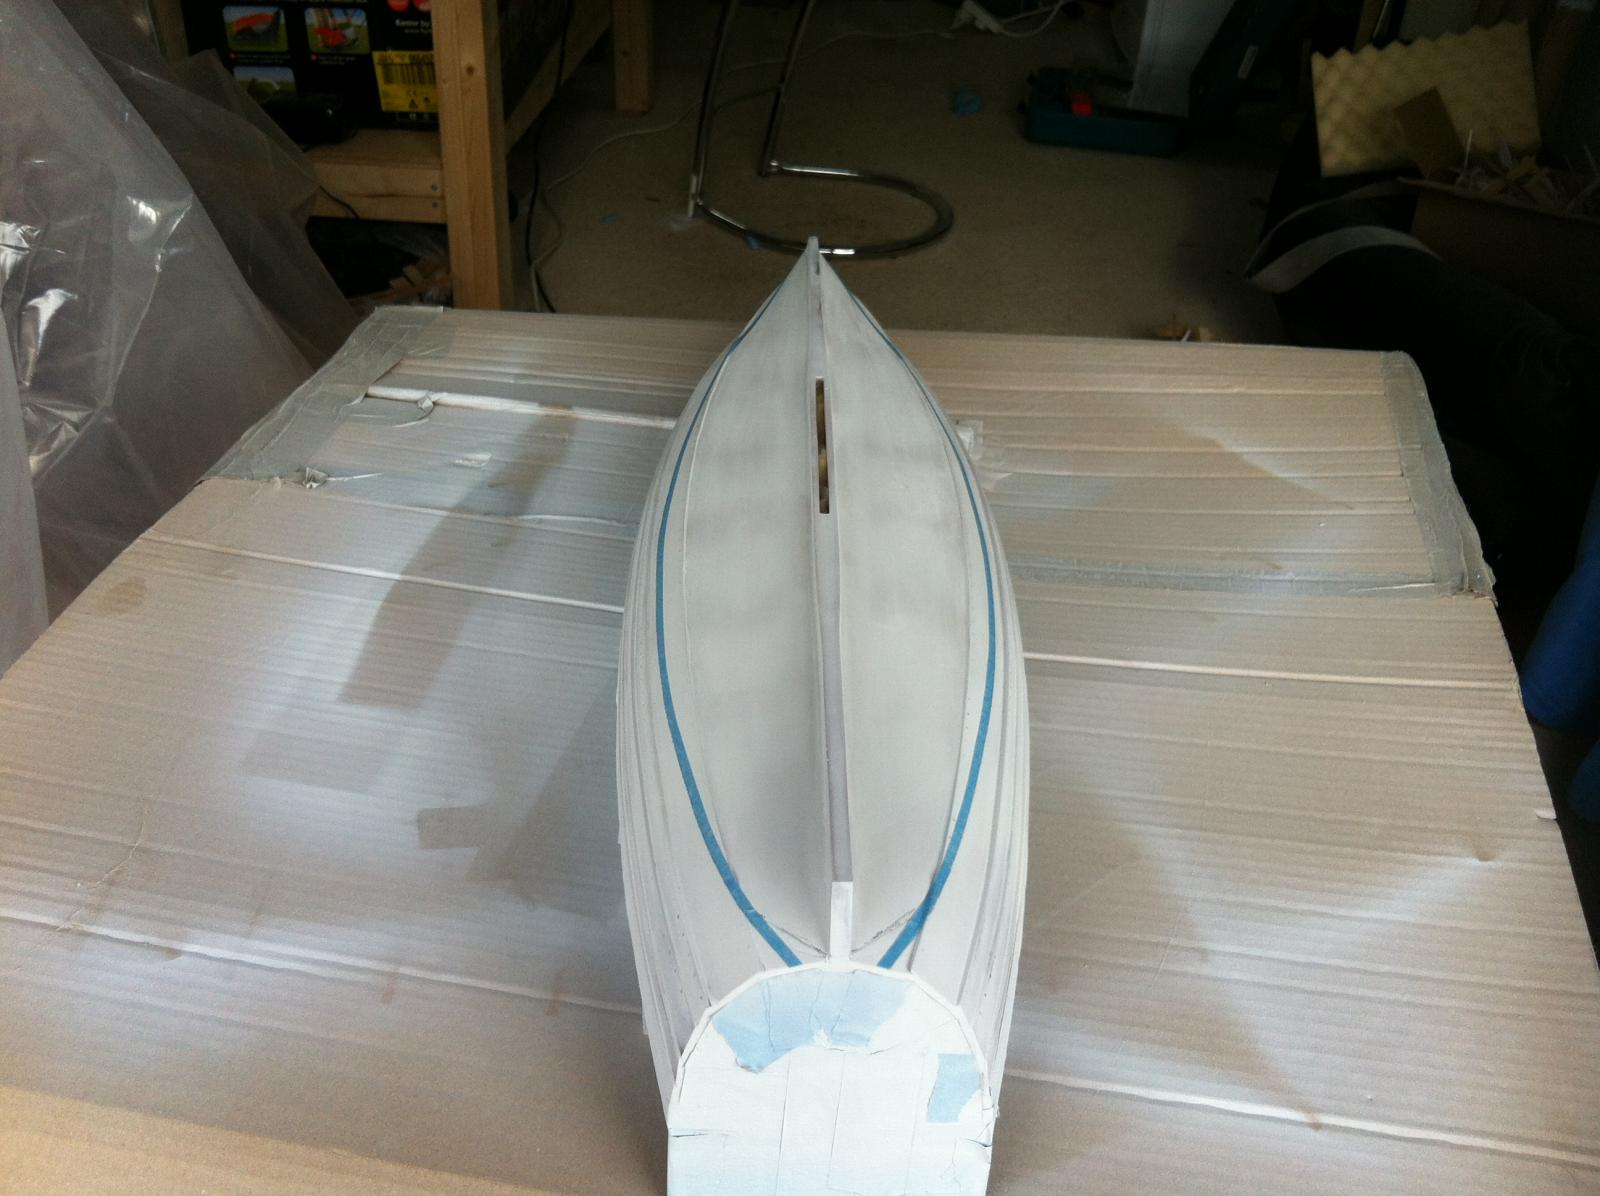
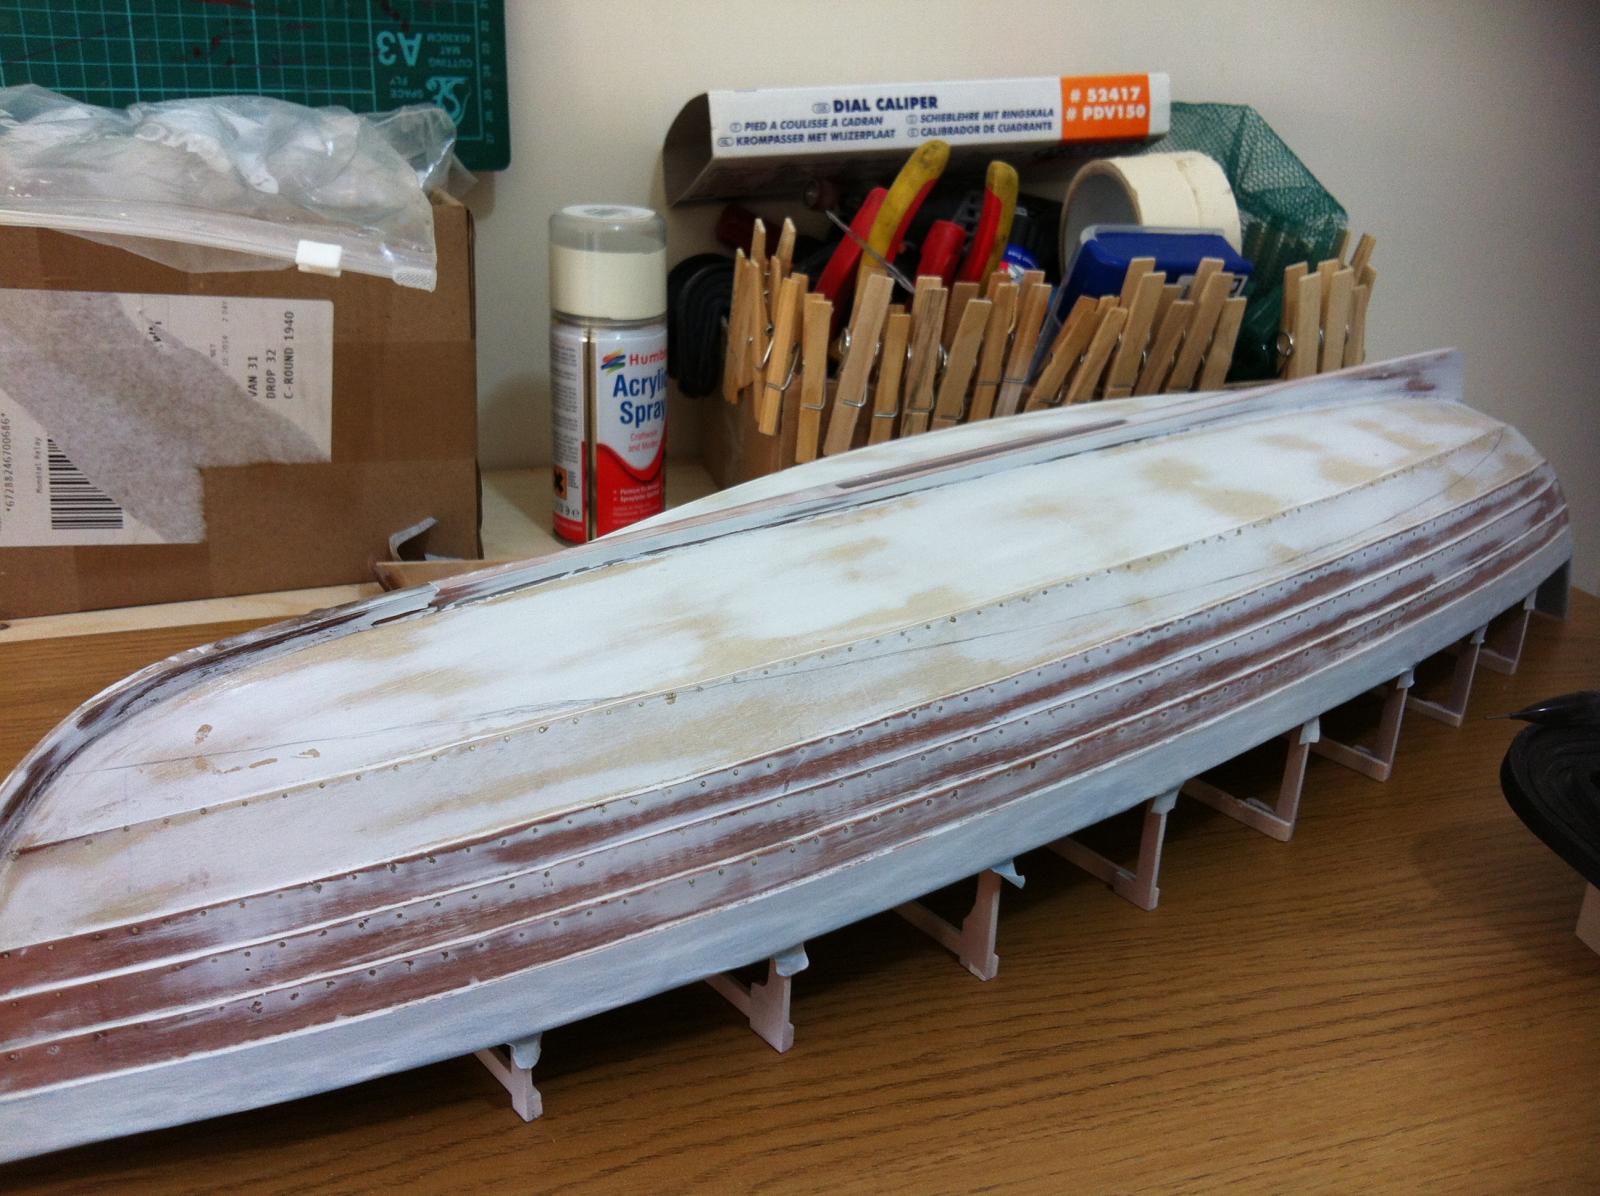
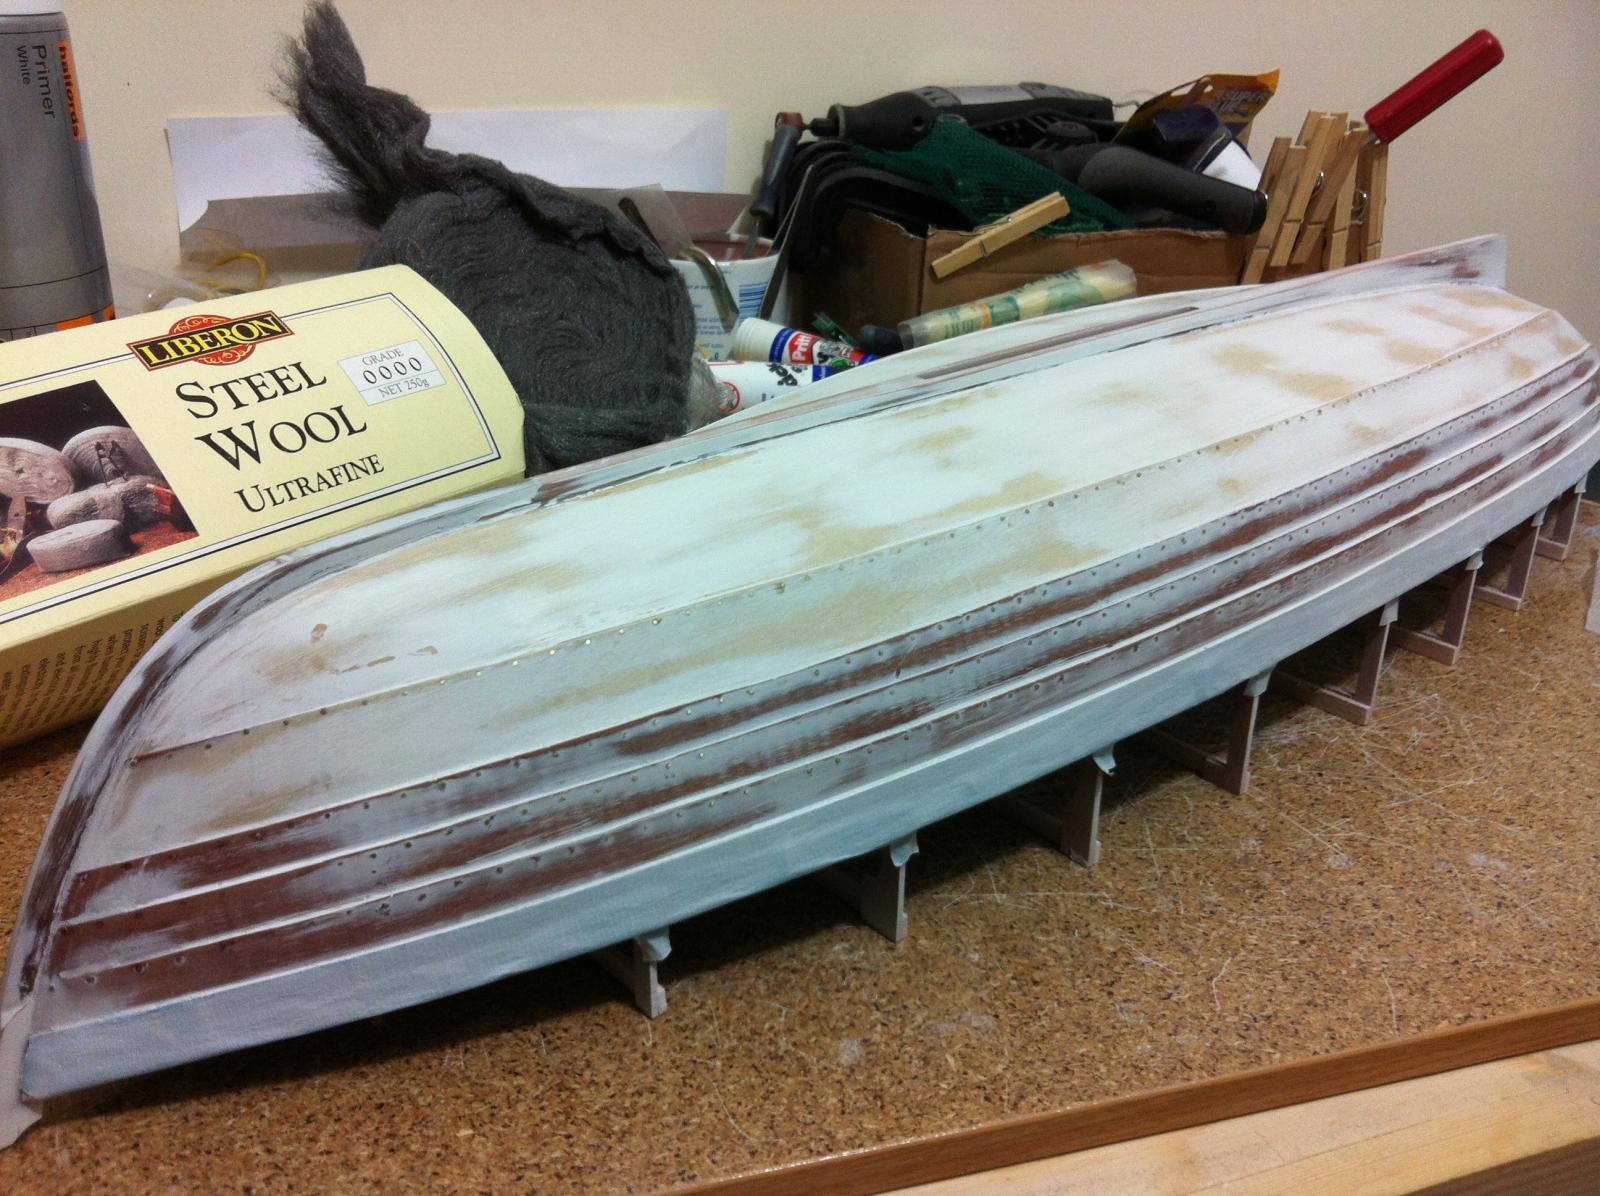
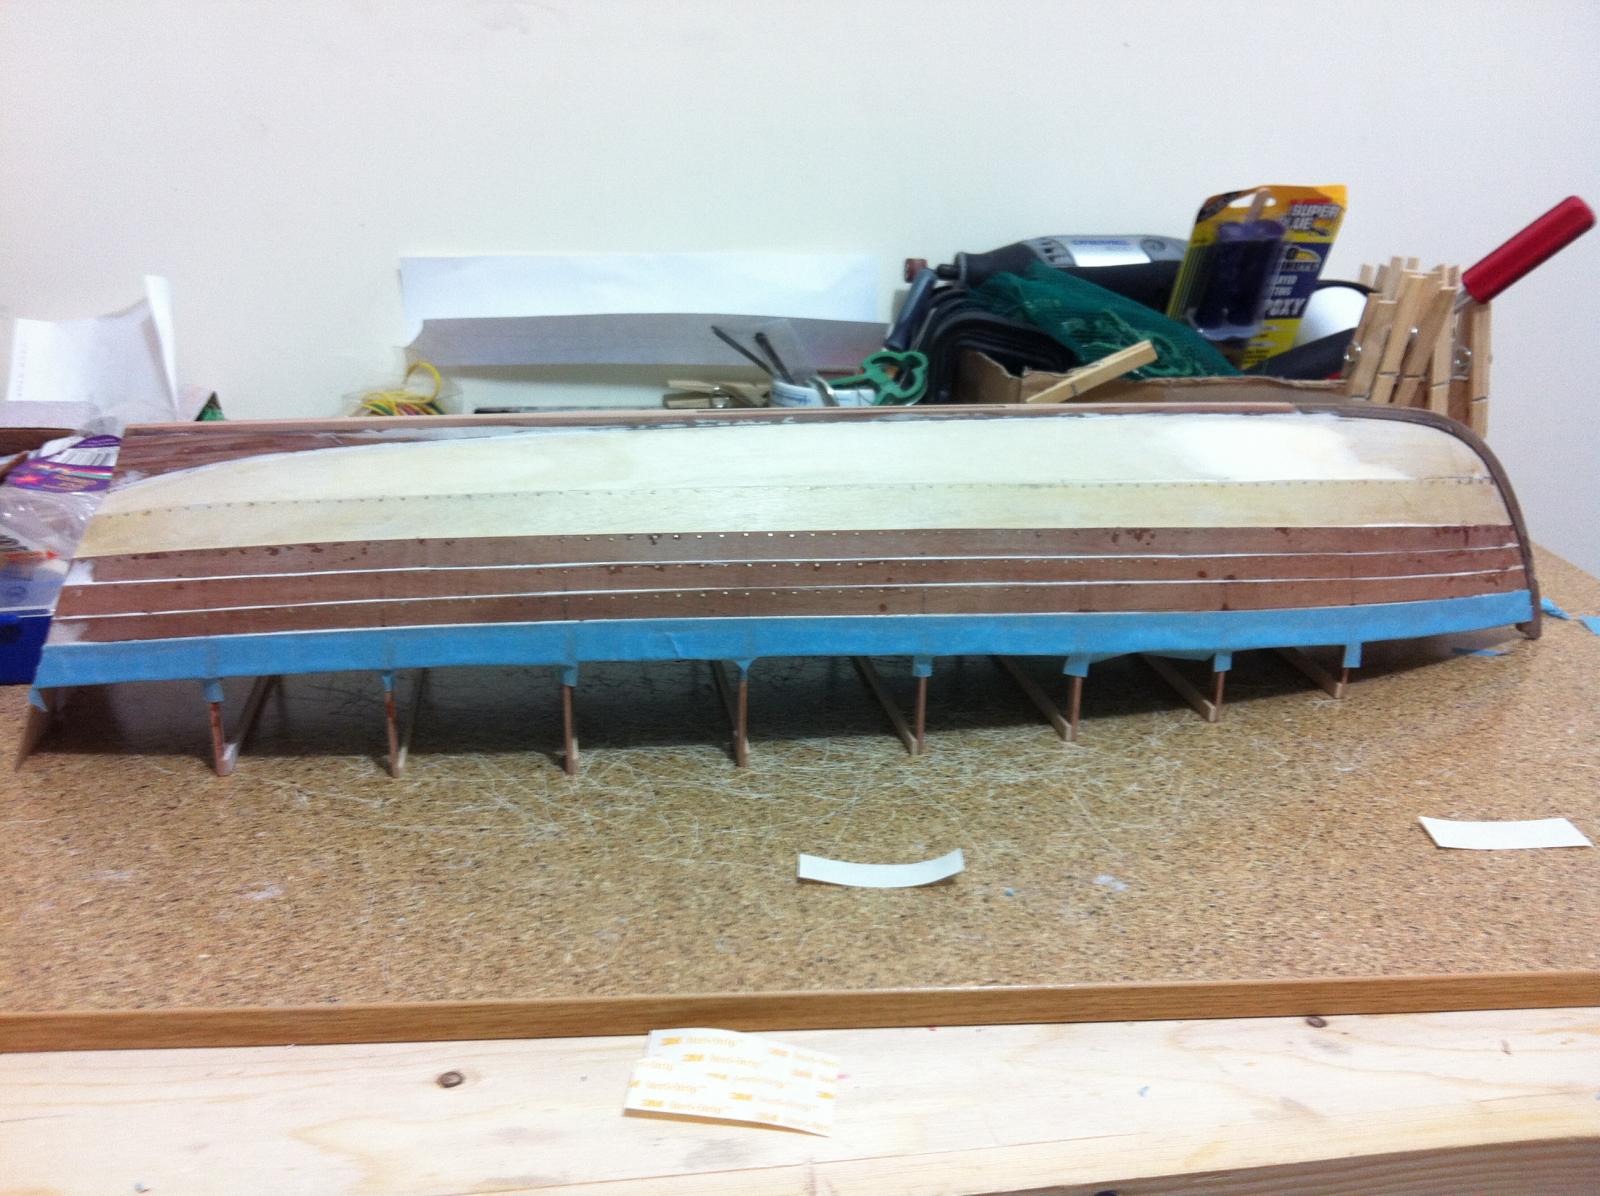
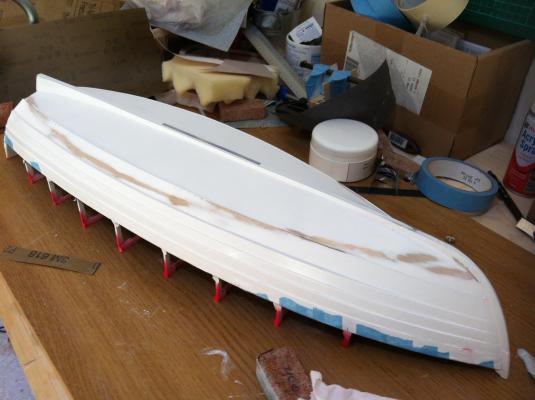
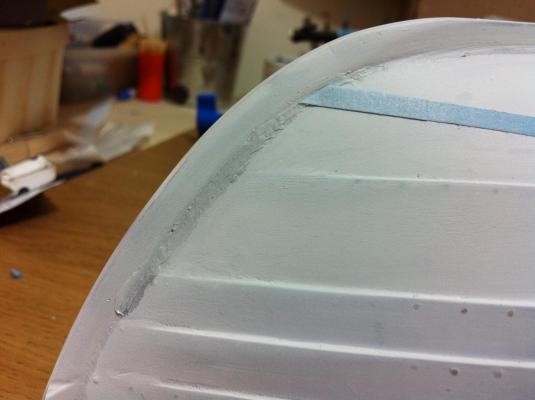
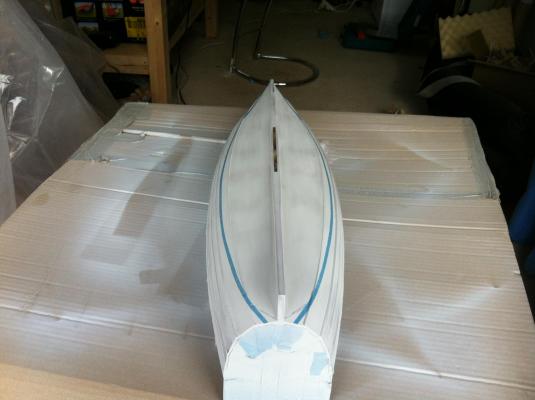
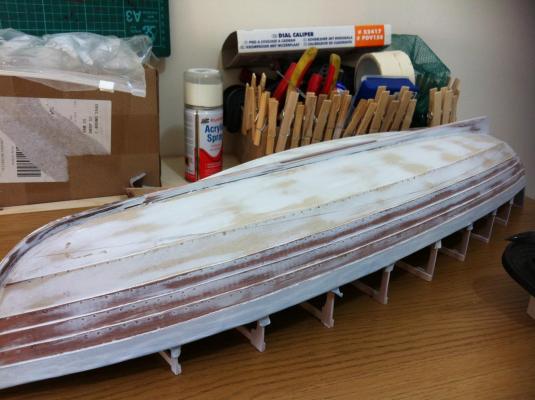
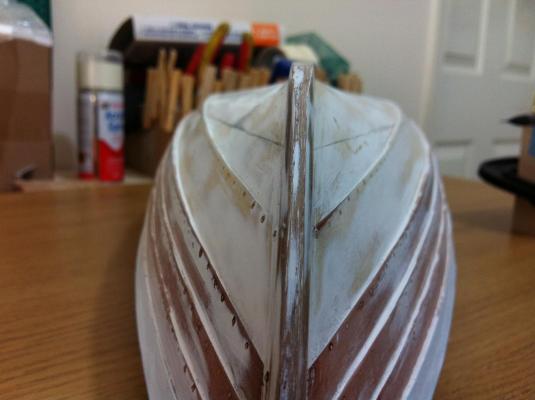
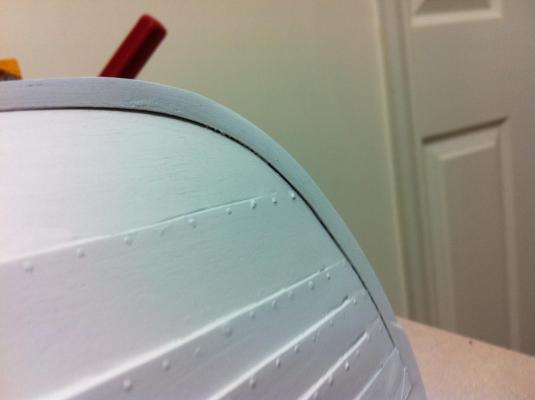
Thanks Bob, it came out better than I expected. The most difficult part I think was bevelling the edges so that the planks would sit flush to the frames and to each other. I re-did the stem plank junction and again the result was terrible. It actually looks acceptable up until the primer goes on. I had to again take the filling out and re-do it for the forth time. The next pictures were taken after many coats of paint and show the port side which is ok and the starboard one, which is better but still not ok. The good side is with the silicon caulking (thanx Druxey!) but even after 4 tries I cannot reproduce the result on the other side. I think I must accept defeat. Next, I marked the waterline. It looks near the bow to have a funny shape but actually it is straight. At the stern I added a bit of curve so that the line would be fair. I have started painting the hull, the spray cans are really easy, 15 min between coats and no clean up. The next pics are after 7 or 8 coats, the areas of unprimed wood still show through. It still needs another 8 coats I think, then re-mask and paint red the waterline. I will brush satin or matt (or gloss?) enamel varnish over, I wonder though if I should sand the paint with something like 1500 grit.


- 253 replies
-
- 8
-
-
- ketkch
- gaff-rigged
- (and 1 more)
-
Thanks Patrick, yes, the size is satisfying, 24" long! In contrast, I know someone who can fit 112' feet of boat in his palm!
- 253 replies
-
- 4
-
-
- ketkch
- gaff-rigged
- (and 1 more)
-
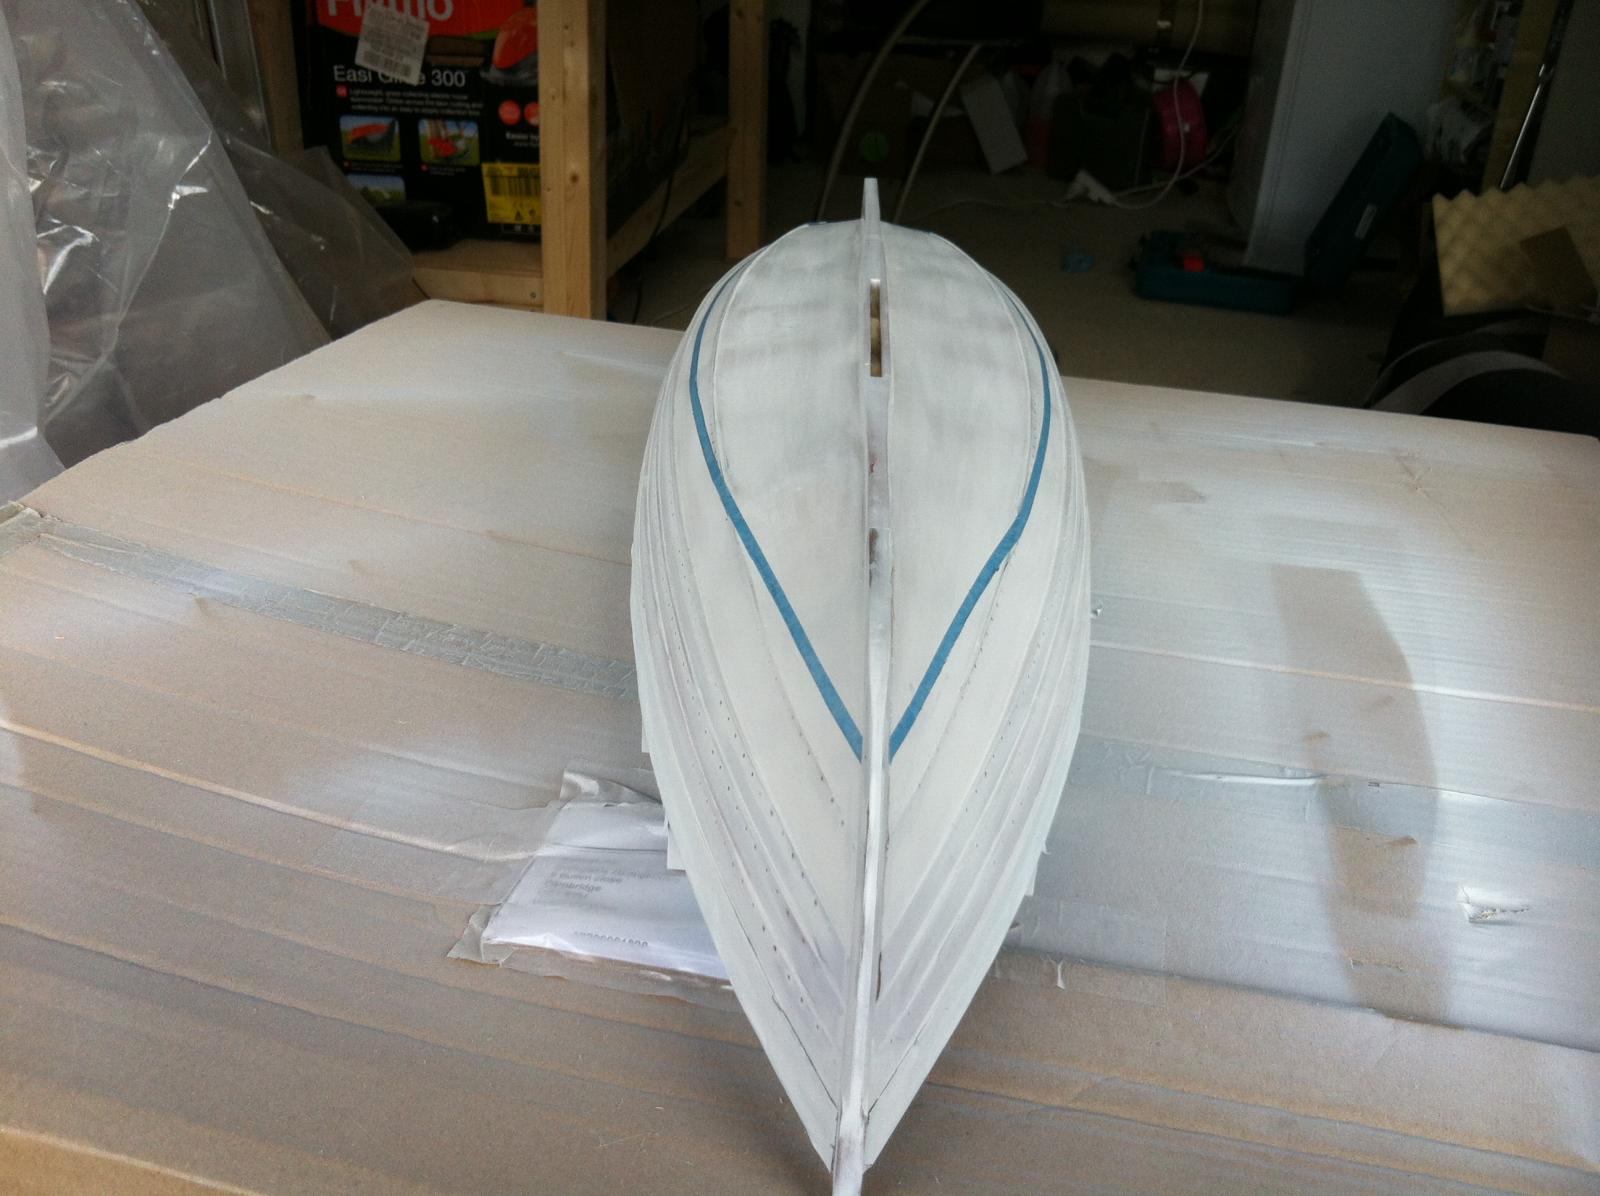
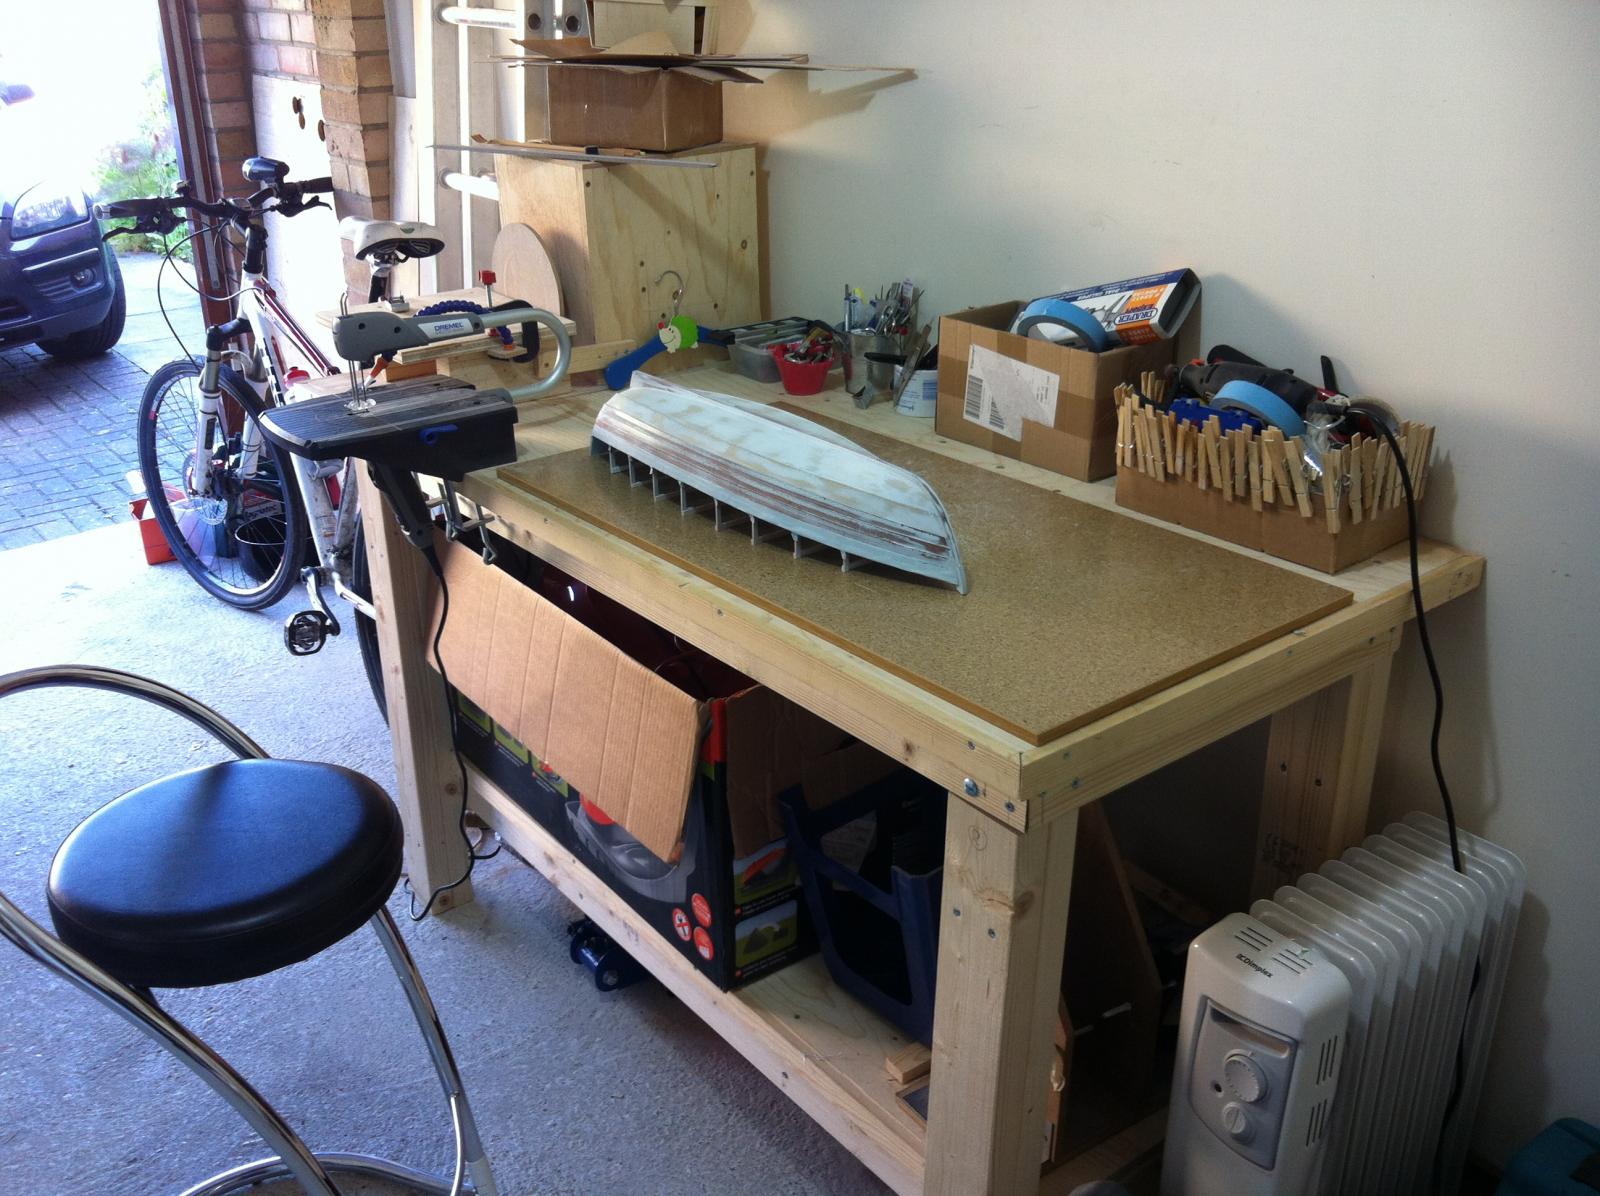
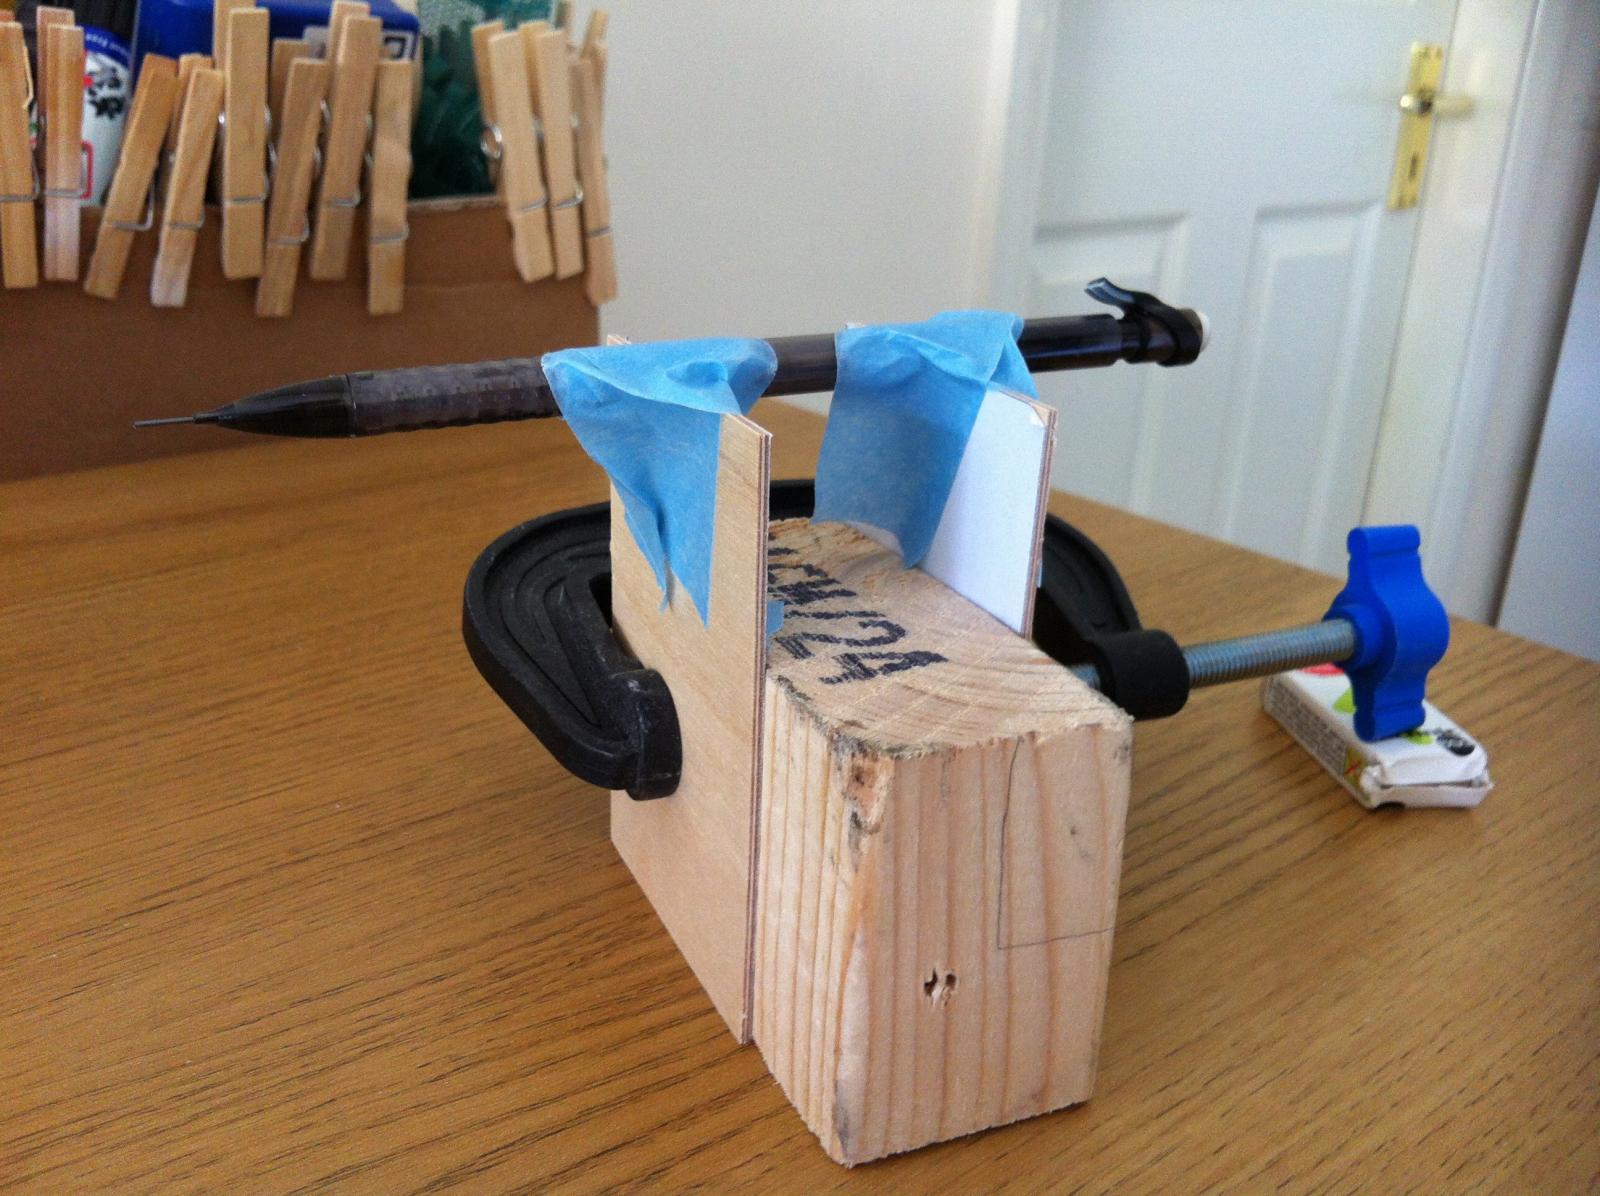
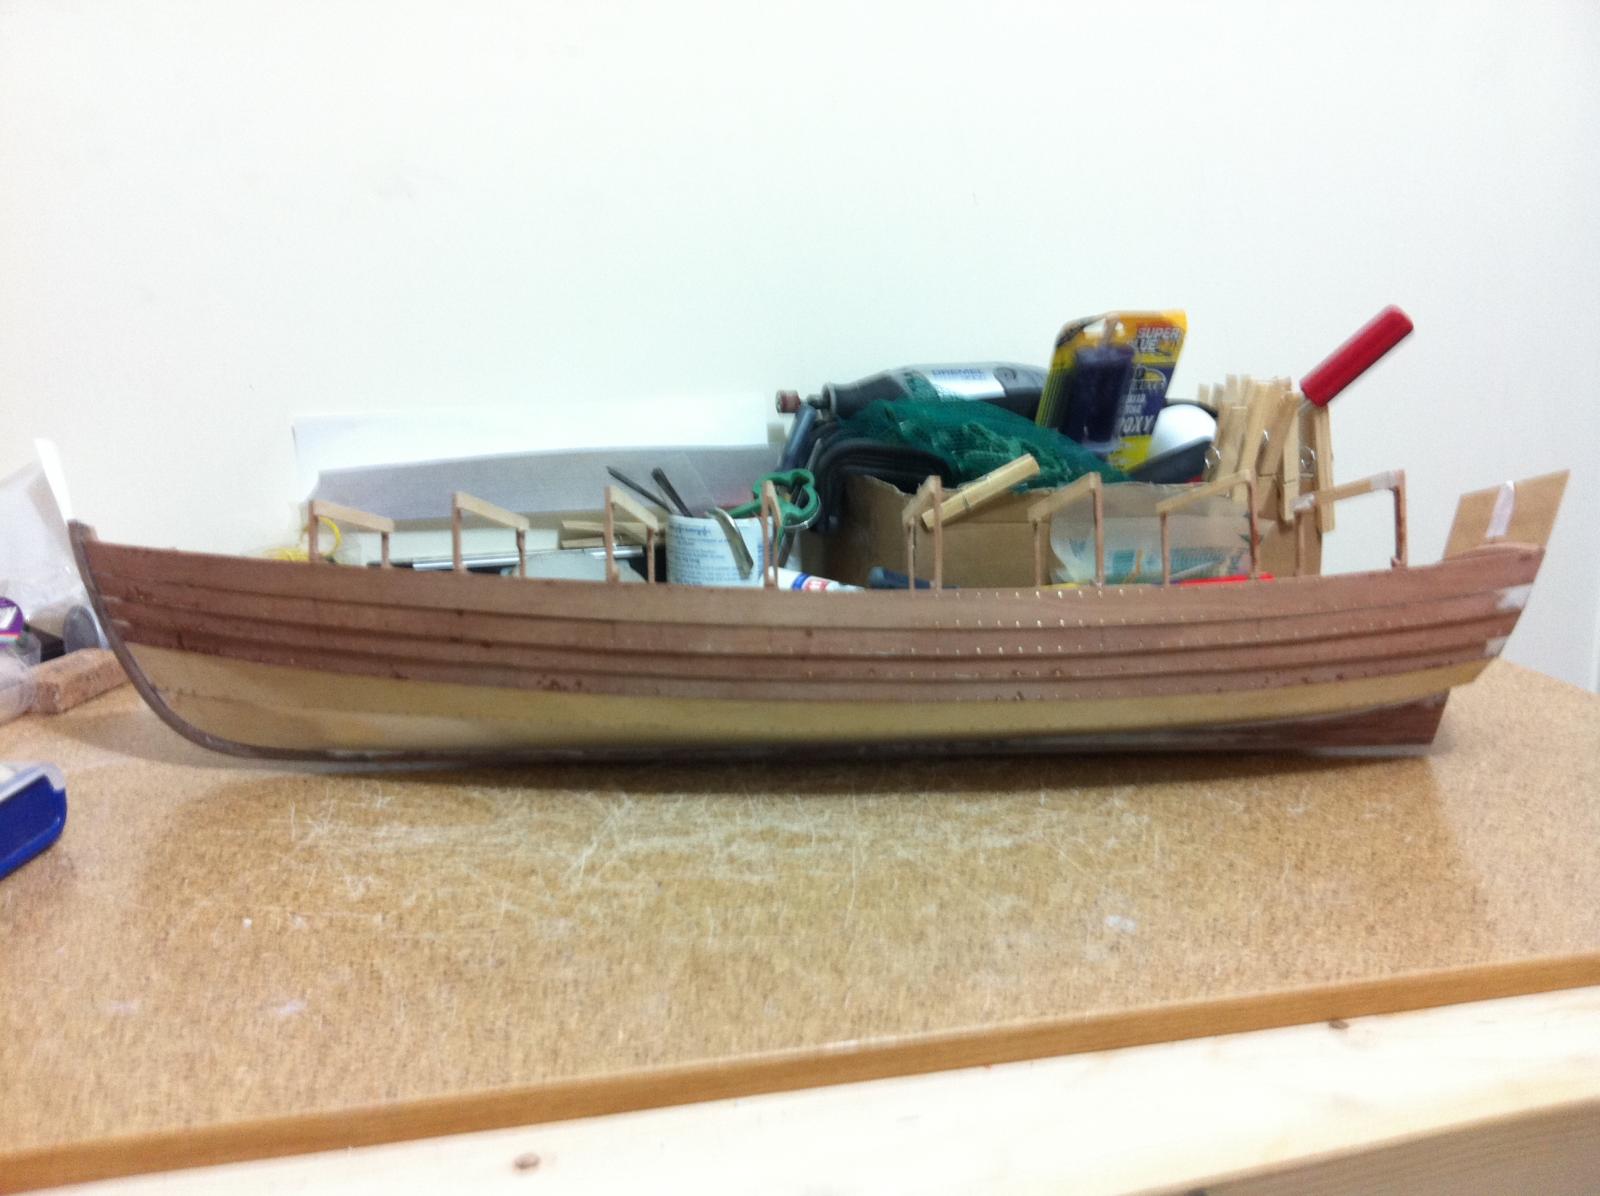
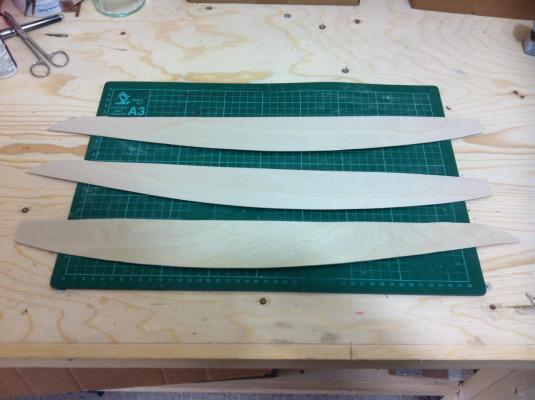
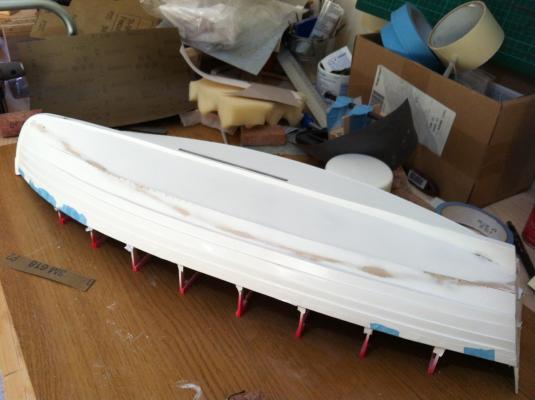
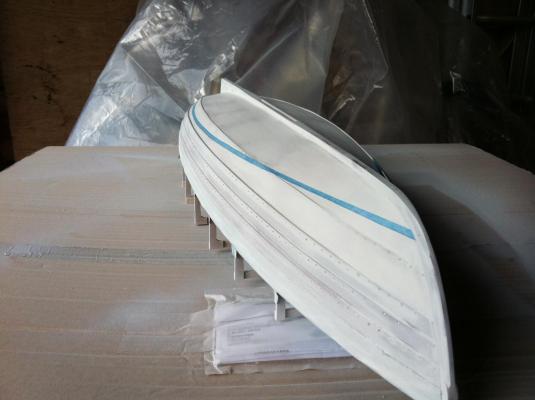
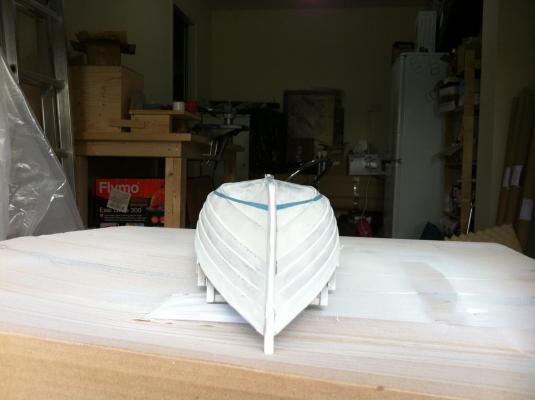
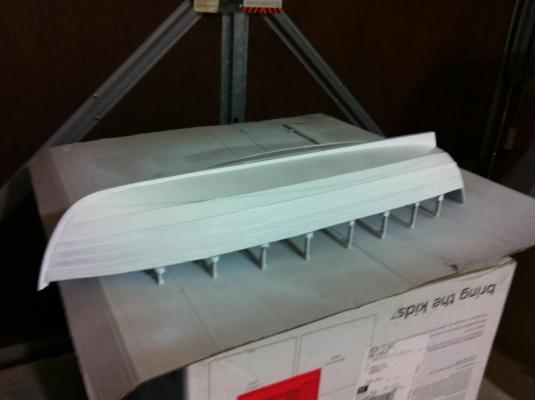
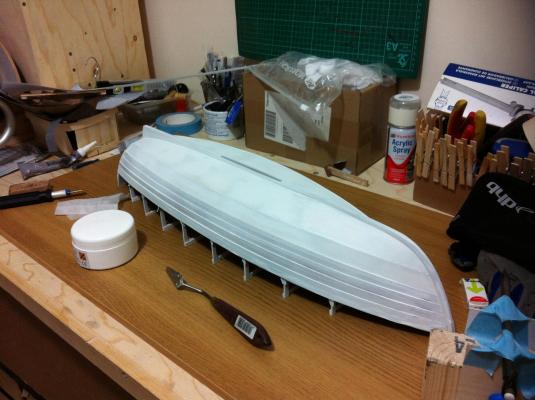
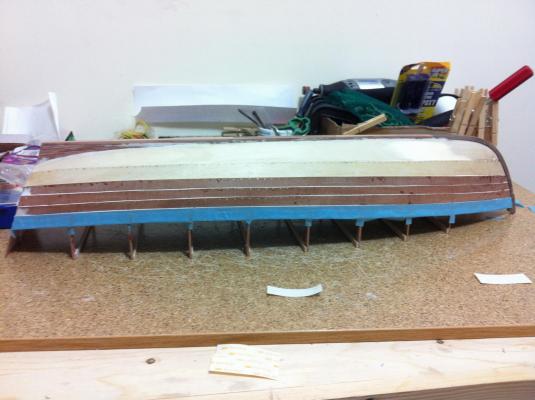
There have been no updates recently but really I was too busy changing nappies and singing lullabies. I did however clean the garage and my work bench! The silicon filler worked reasonably well, the stem-plank junction is somewhat smooth on one side. I think I need to redo the other. The hull has had 3 coats of primer with sanding in between and is smooth. Still, new imperfections appeared so some filling and another sanding and coat of primer will be needed. Hopefully, the last! Then I plan on using Halfords gloss white appliances can paint and matt varnish to finish. But first the waterline needs to be determined. I put together a simple tool. I marked roughly the waterline, it looks somewhat funny near the stern but it is nearly perfectly symmetrical in both sides This is how the hull looks at present, still lots need to be done.


- 253 replies
-
- 8
-
-
- ketkch
- gaff-rigged
- (and 1 more)
-
Looks really nice Patrick, especially considering the unforgiving gloss paint. Beautiful colour as well!
-
Thanks, I know what you mean. Never thought of using it for modelling!
- 253 replies
-
- 1
-
-
- ketkch
- gaff-rigged
- (and 1 more)
-
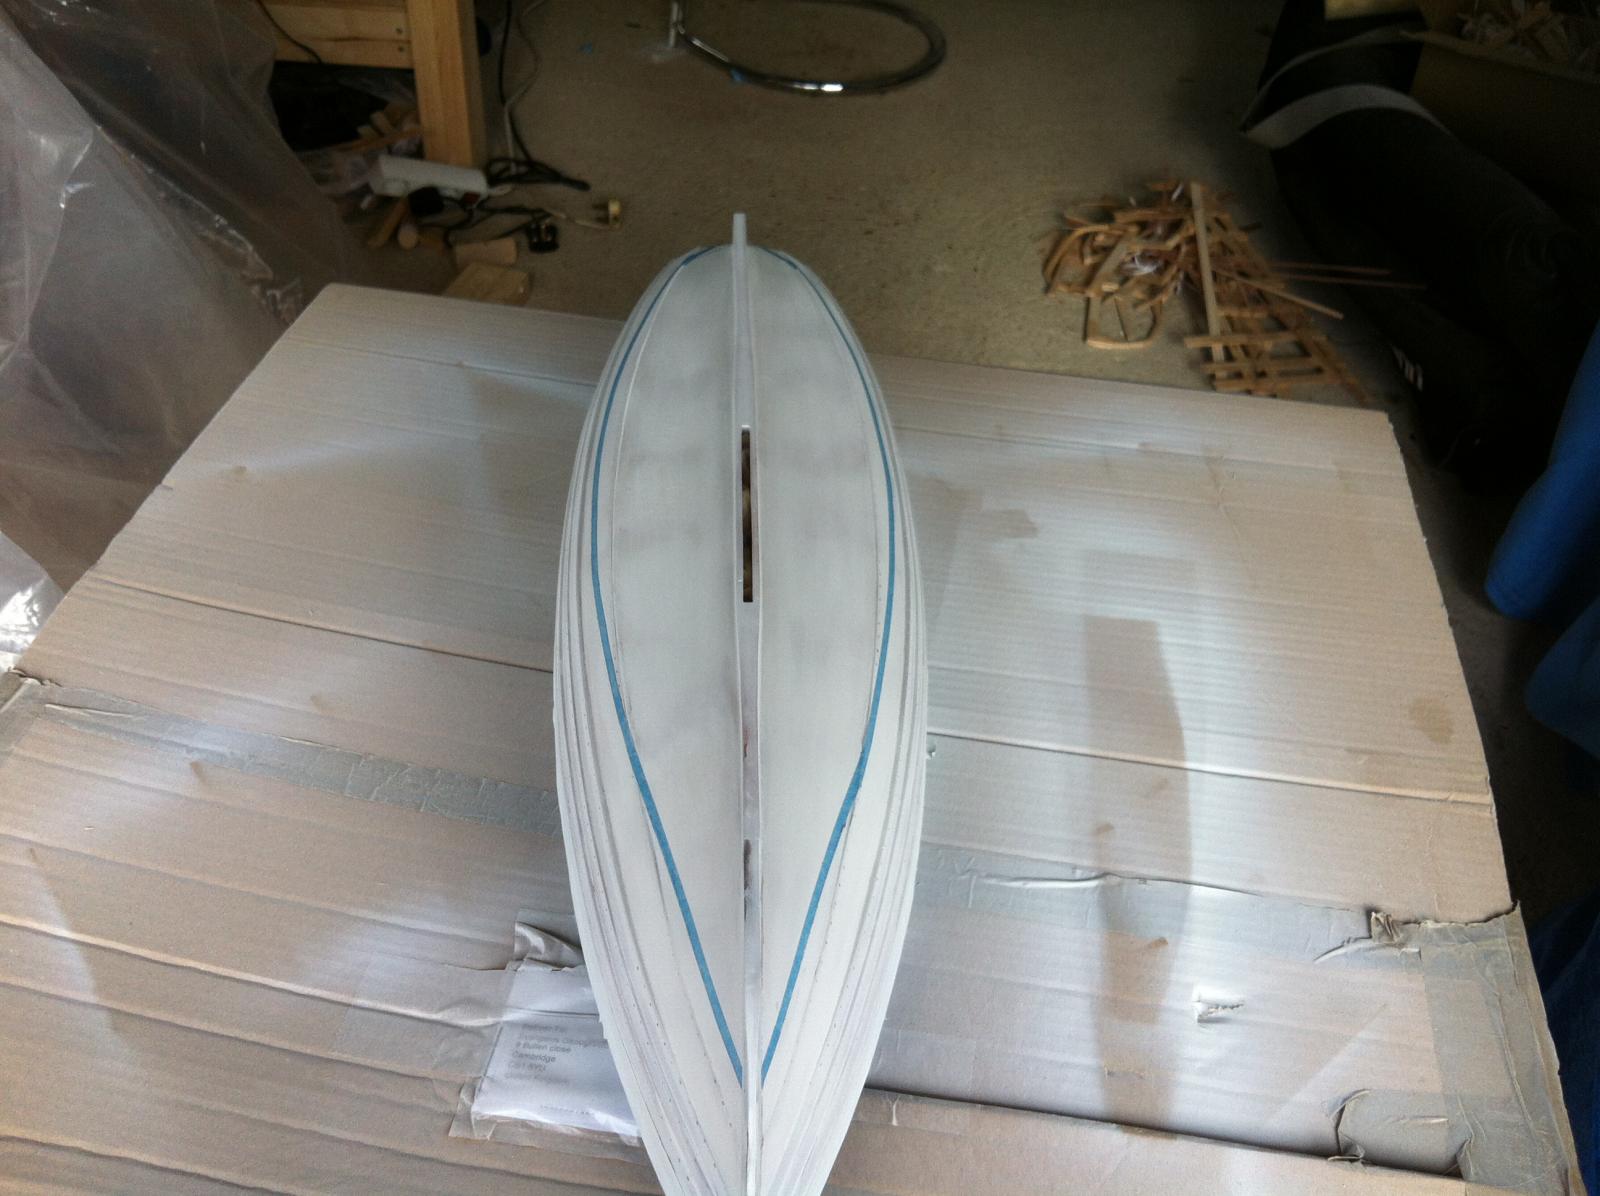
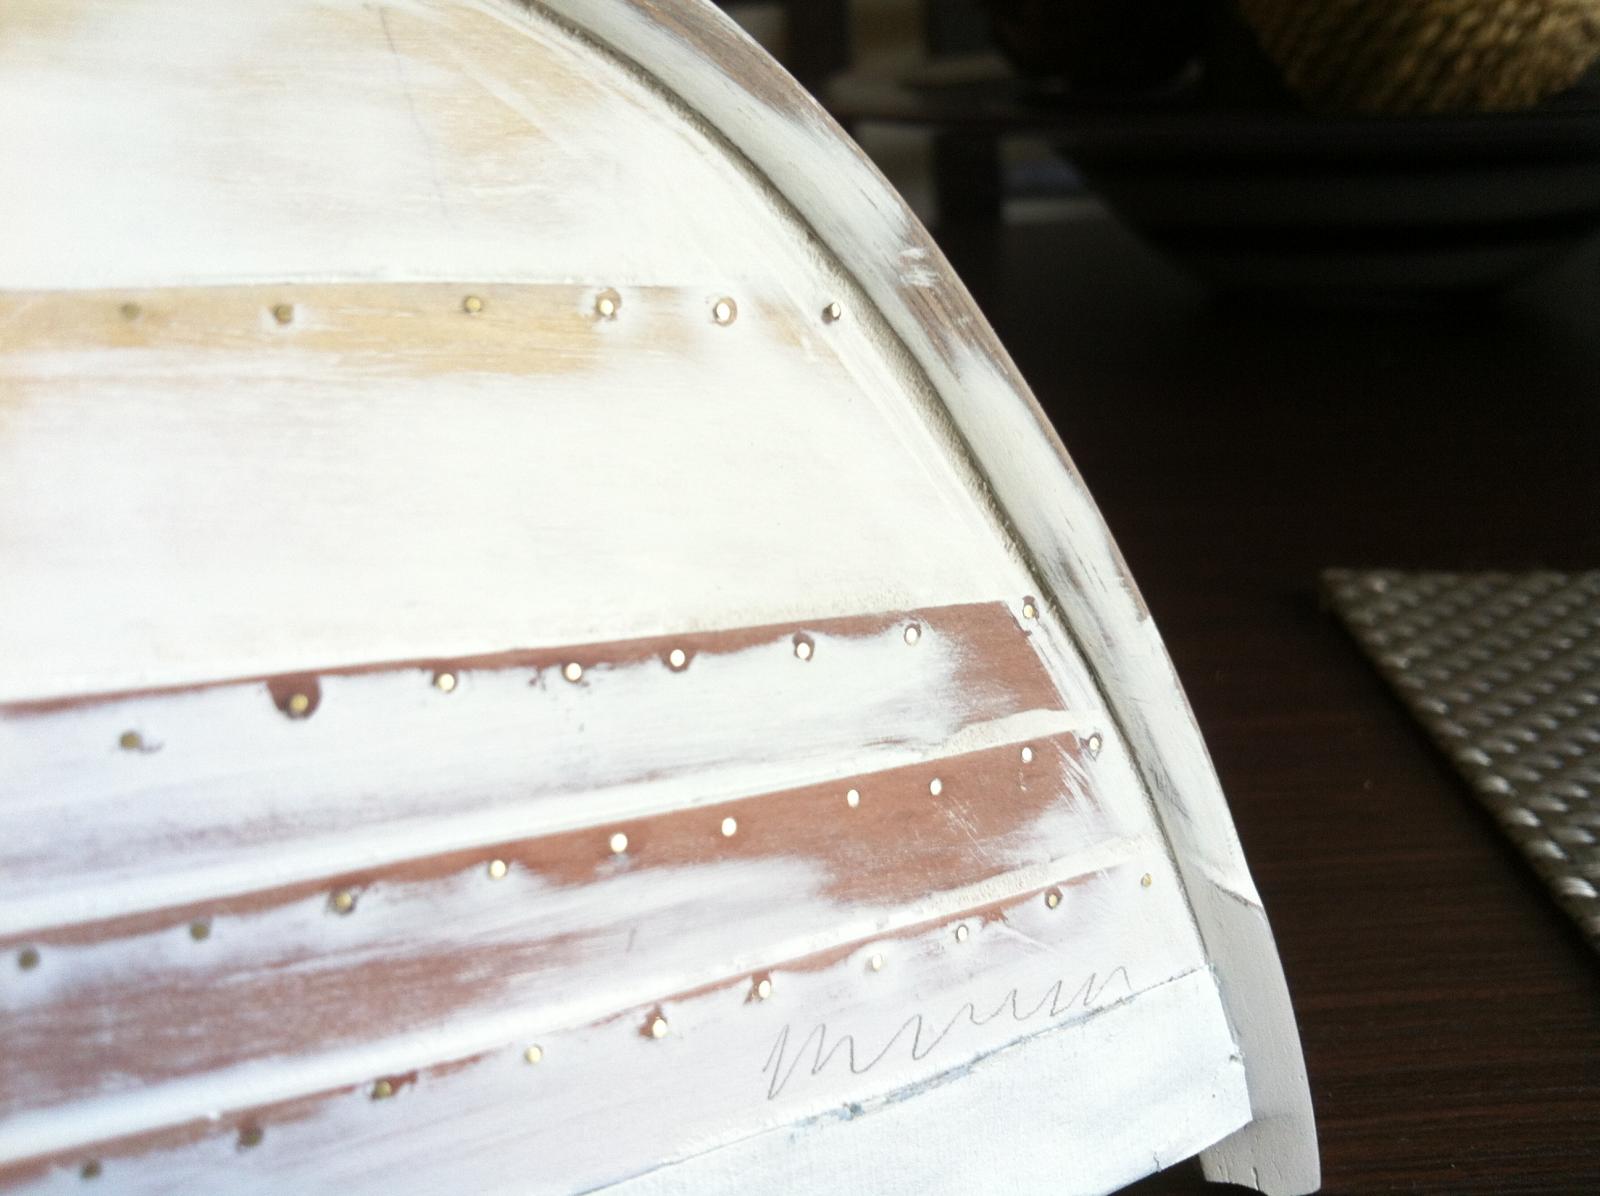
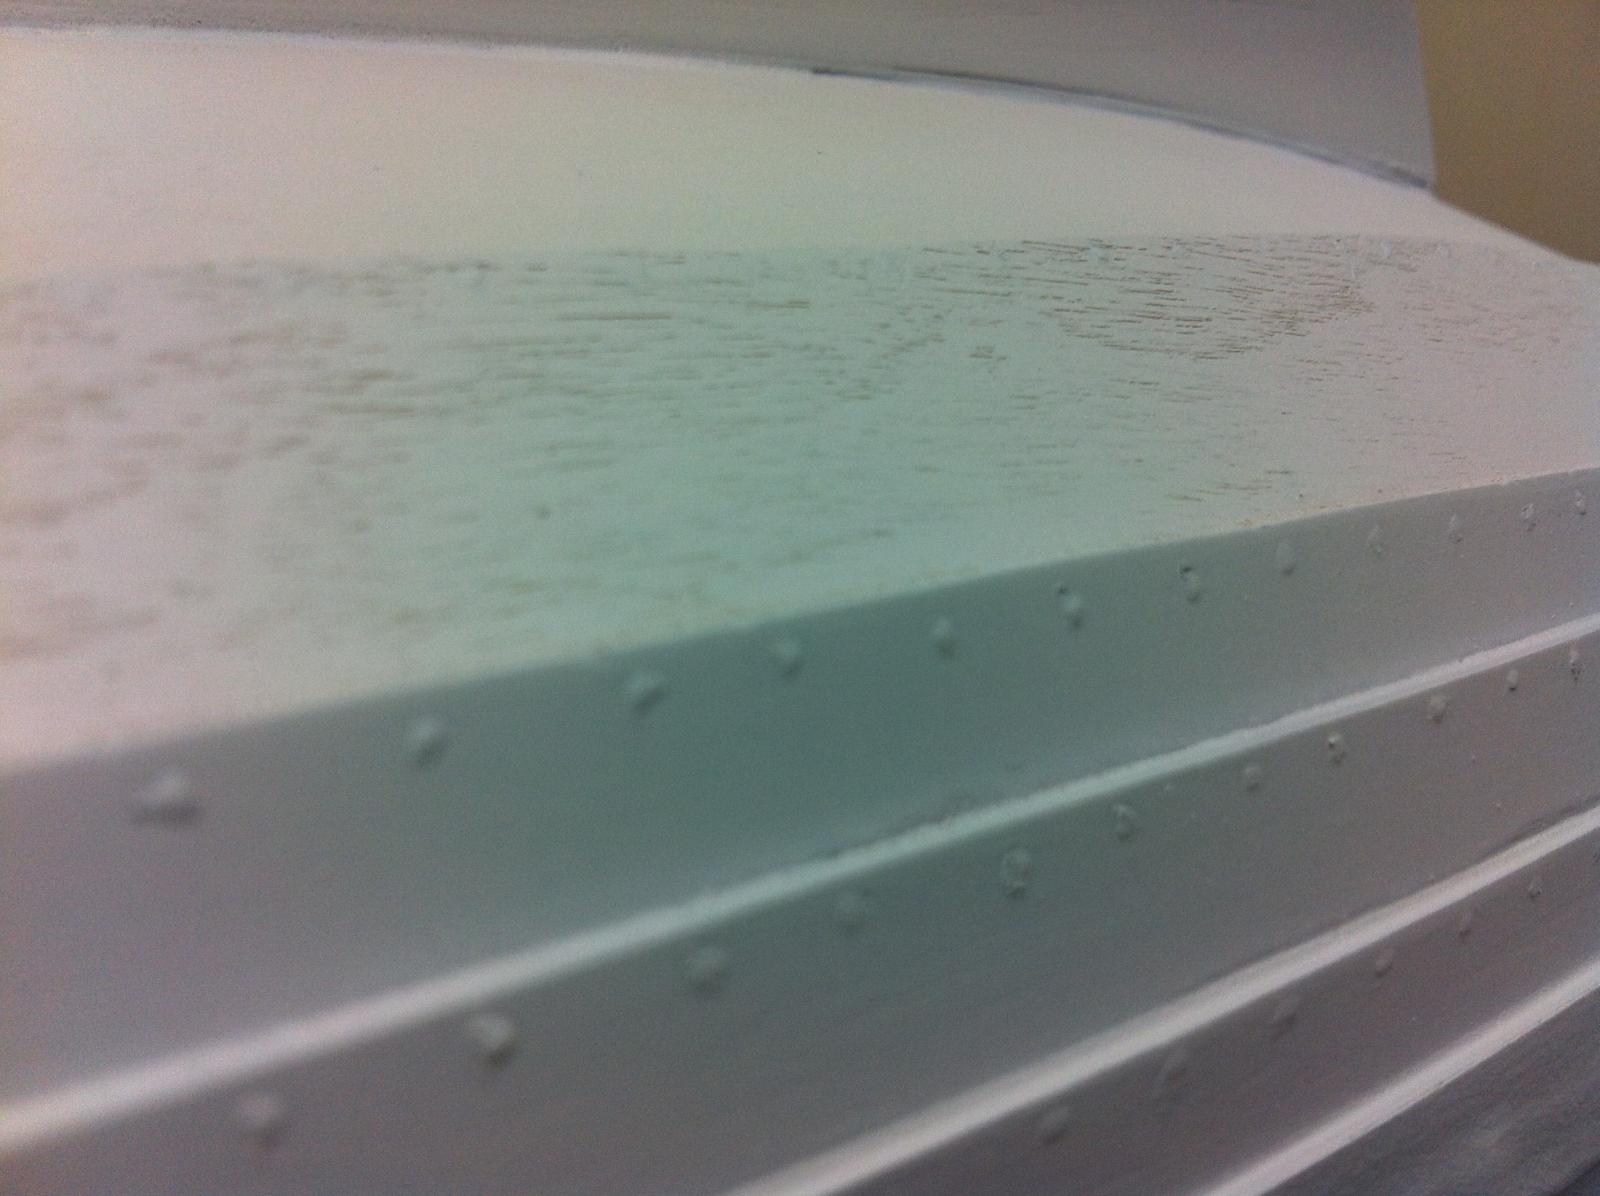
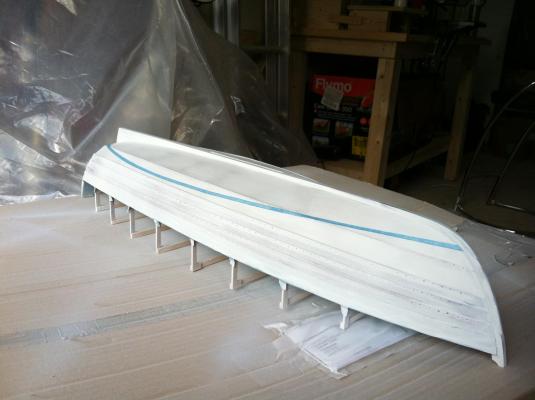
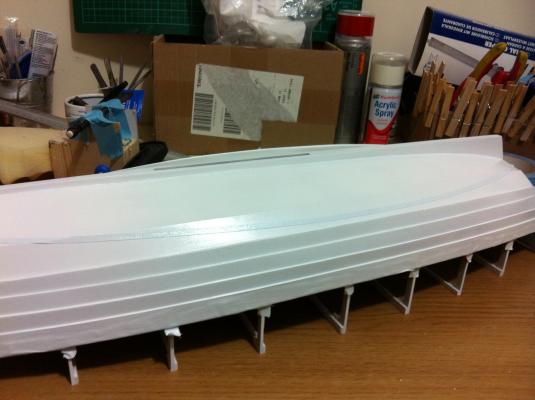
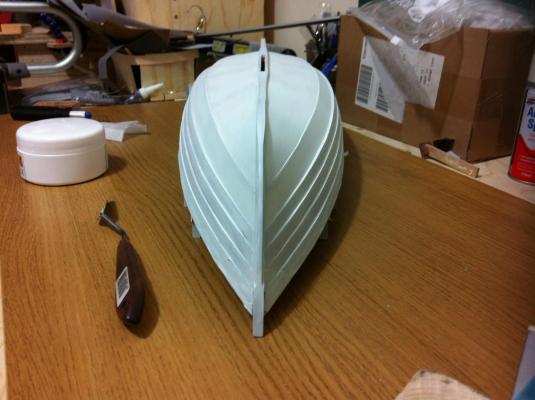
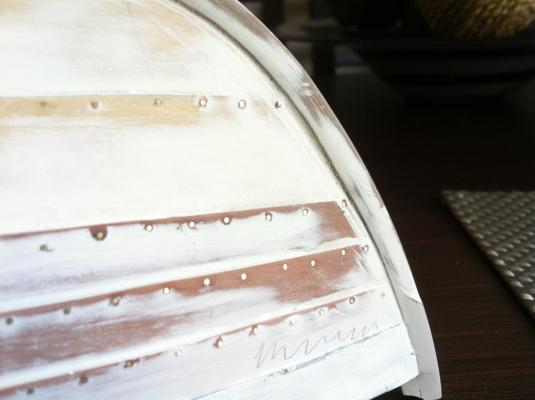
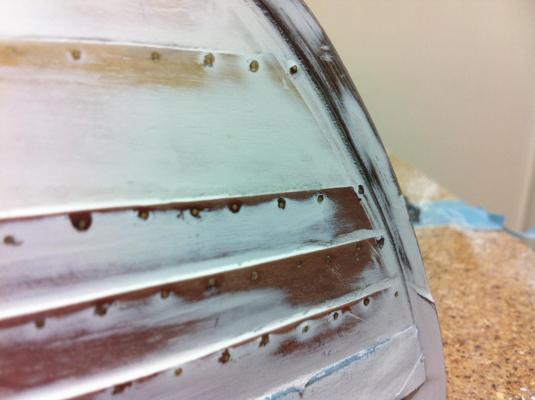
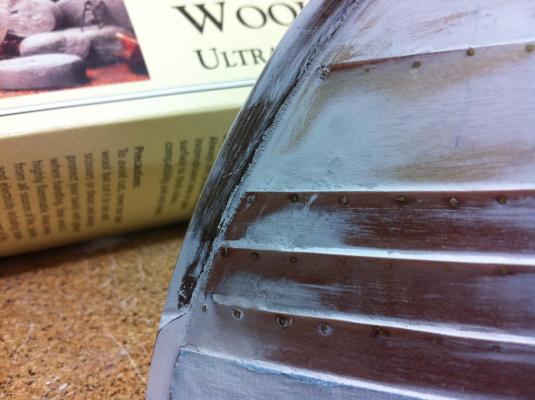
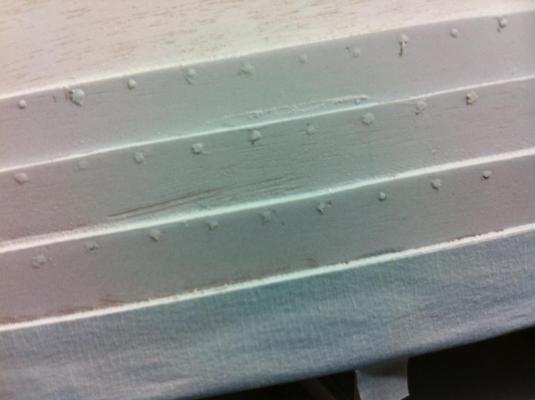
Yambo and Bob, the primer certainly did its job, but I was surprised how bad my carefully sanded hull actually was. Druxey, the caulking suggestion is an excellent one but I read your post after I had gone into a putty frenzy. Still, it might be needed as I can't get a clean edge at the joint. I tried steel wool but the improvement was marginal. What would you use for caulking? Would it need to be used also all along the keel and planks as well as the stem? This is how it looks after the final sanding to 320 grit. it looks smooth but still not perfect. This is a critical stage and time spent fairing will be paid back many times after painting. I am sure more sanding and fairing is needed. Also, I am concerned the edges of the planks might get rounded off with all the sanding.
- 253 replies
-
- 5
-
-
- ketkch
- gaff-rigged
- (and 1 more)
-
Your suggestions are always most welcome Mark, looking at the pics I feel you are probably right. It did not cross my mind to weather the boat but it does looks like it has had years of use already. I am afraid though I do not have the skills yet for a proper weathering job and would not want to try on this particular boat, it has taken me 10 months to reach this point! Besides, all the frames and interior woodwork have already been sanded to a shiny 400 grit. I ll give it a try to get a smooth surface and if not possible I will probably need to build another small boat out of the same wood to experiment with weathering. But I do agree, a model of a beat up worn boat is so much more interesting than a shiny new one!
- 253 replies
-
- 1
-
-
- ketkch
- gaff-rigged
- (and 1 more)
-
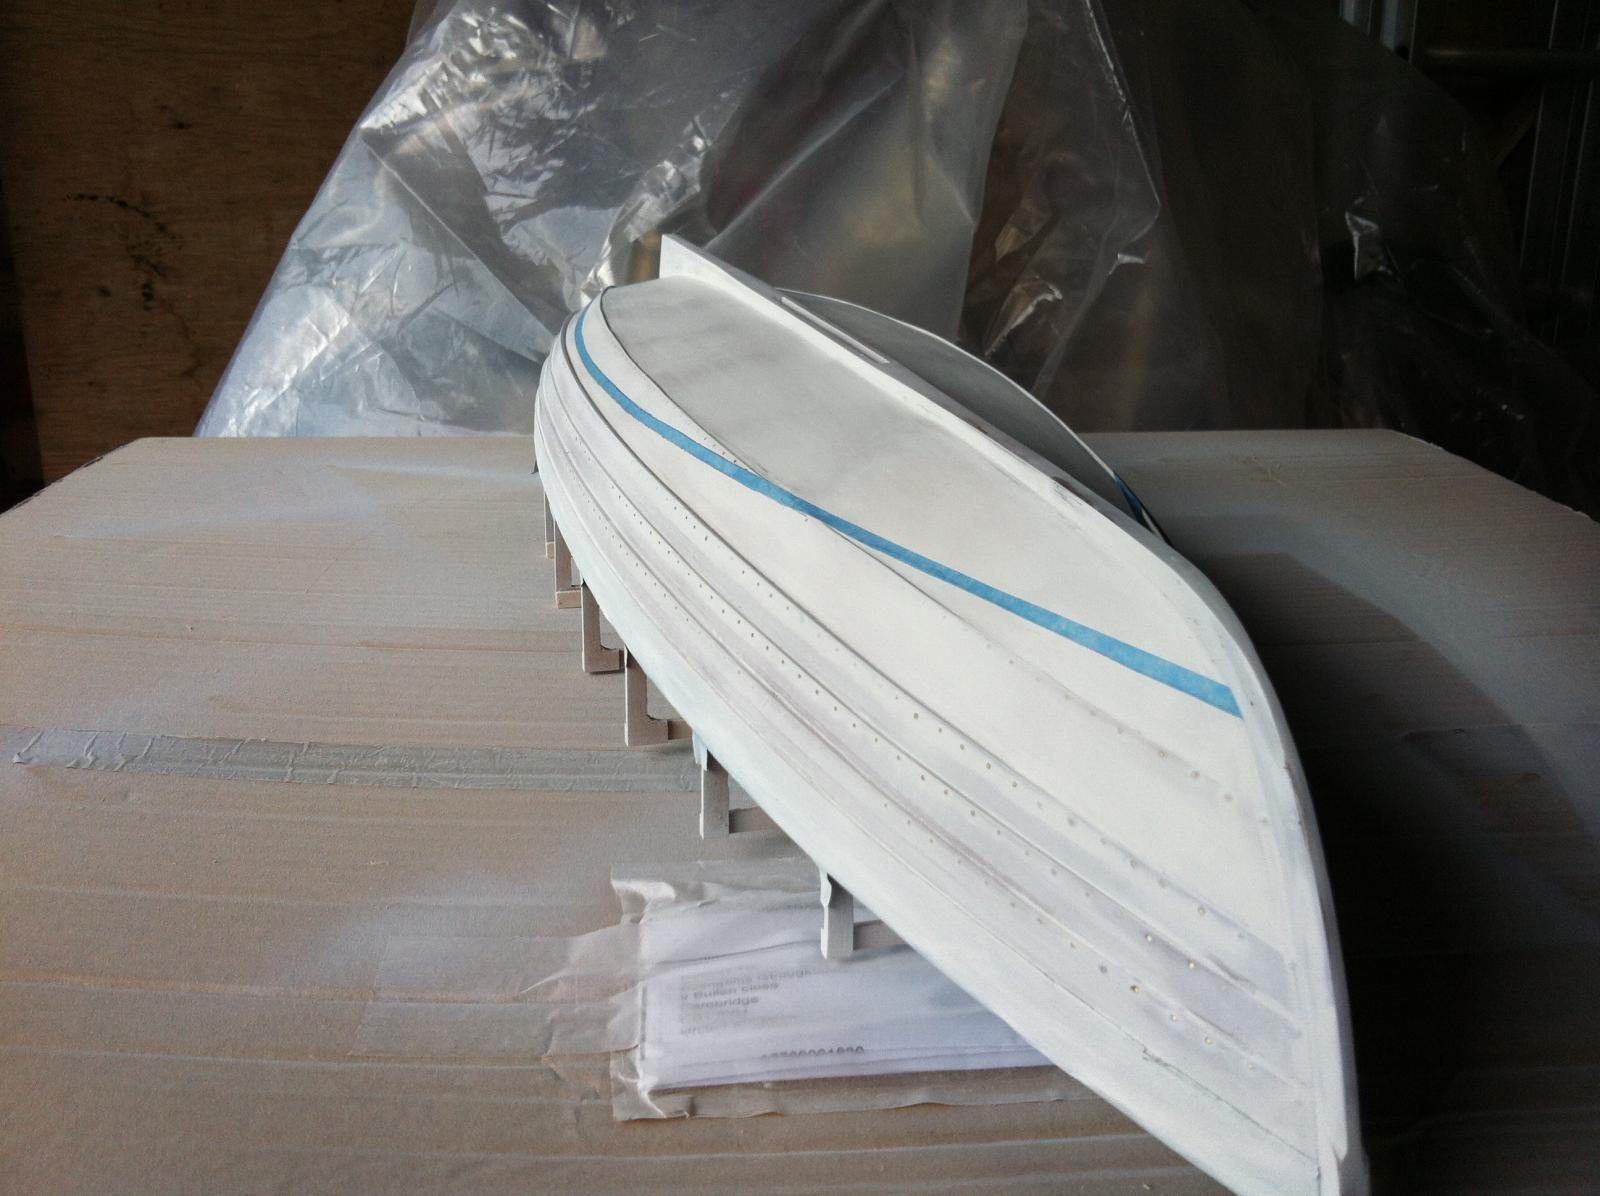
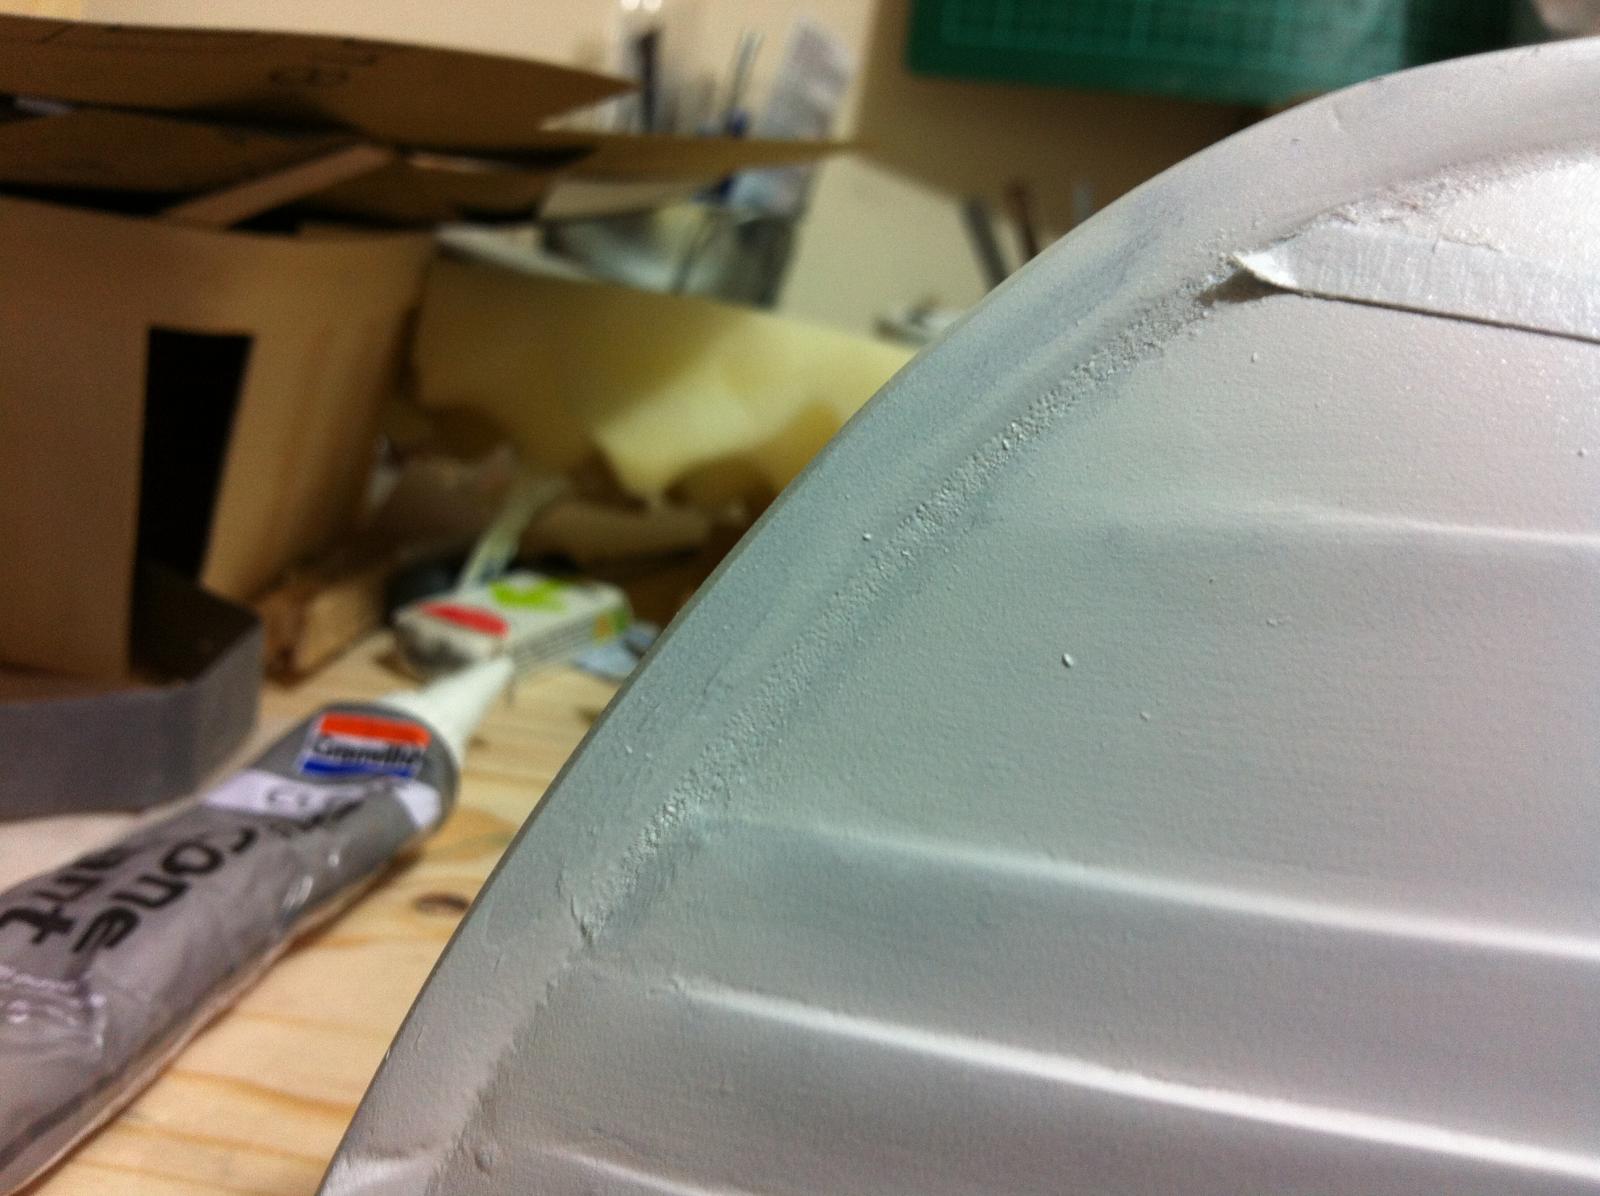
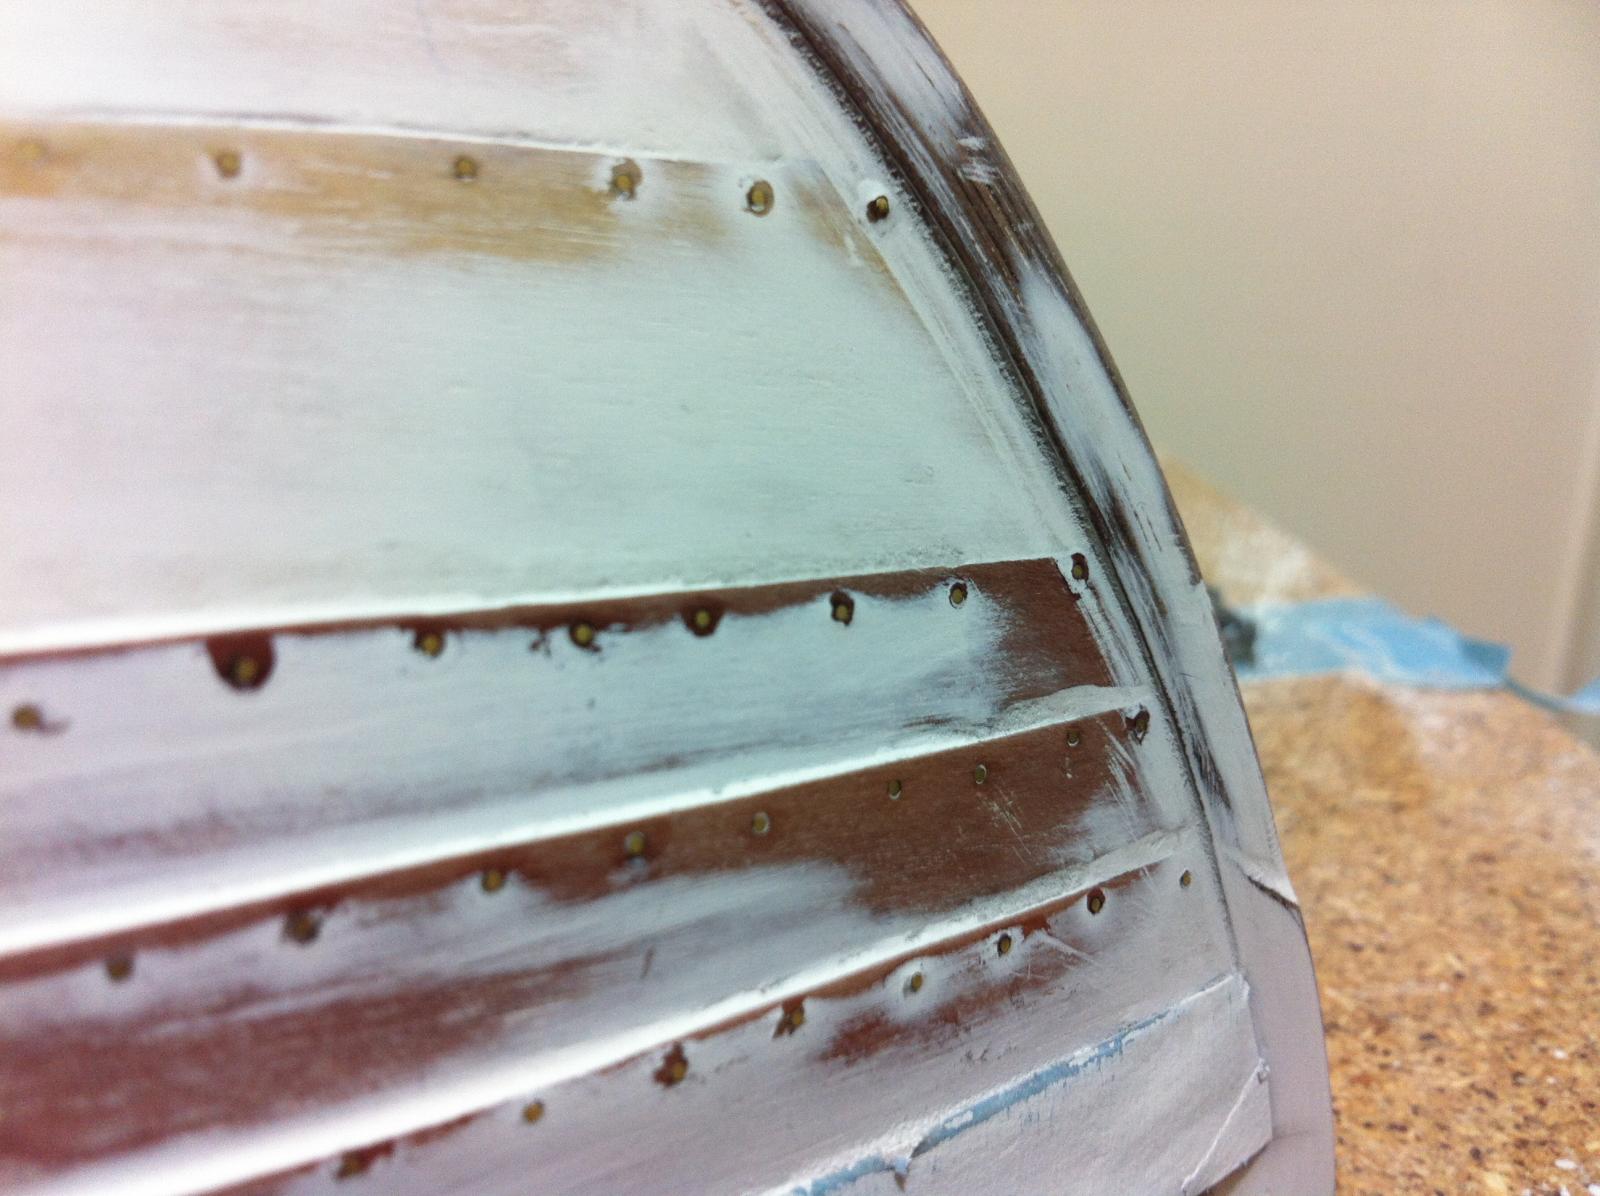
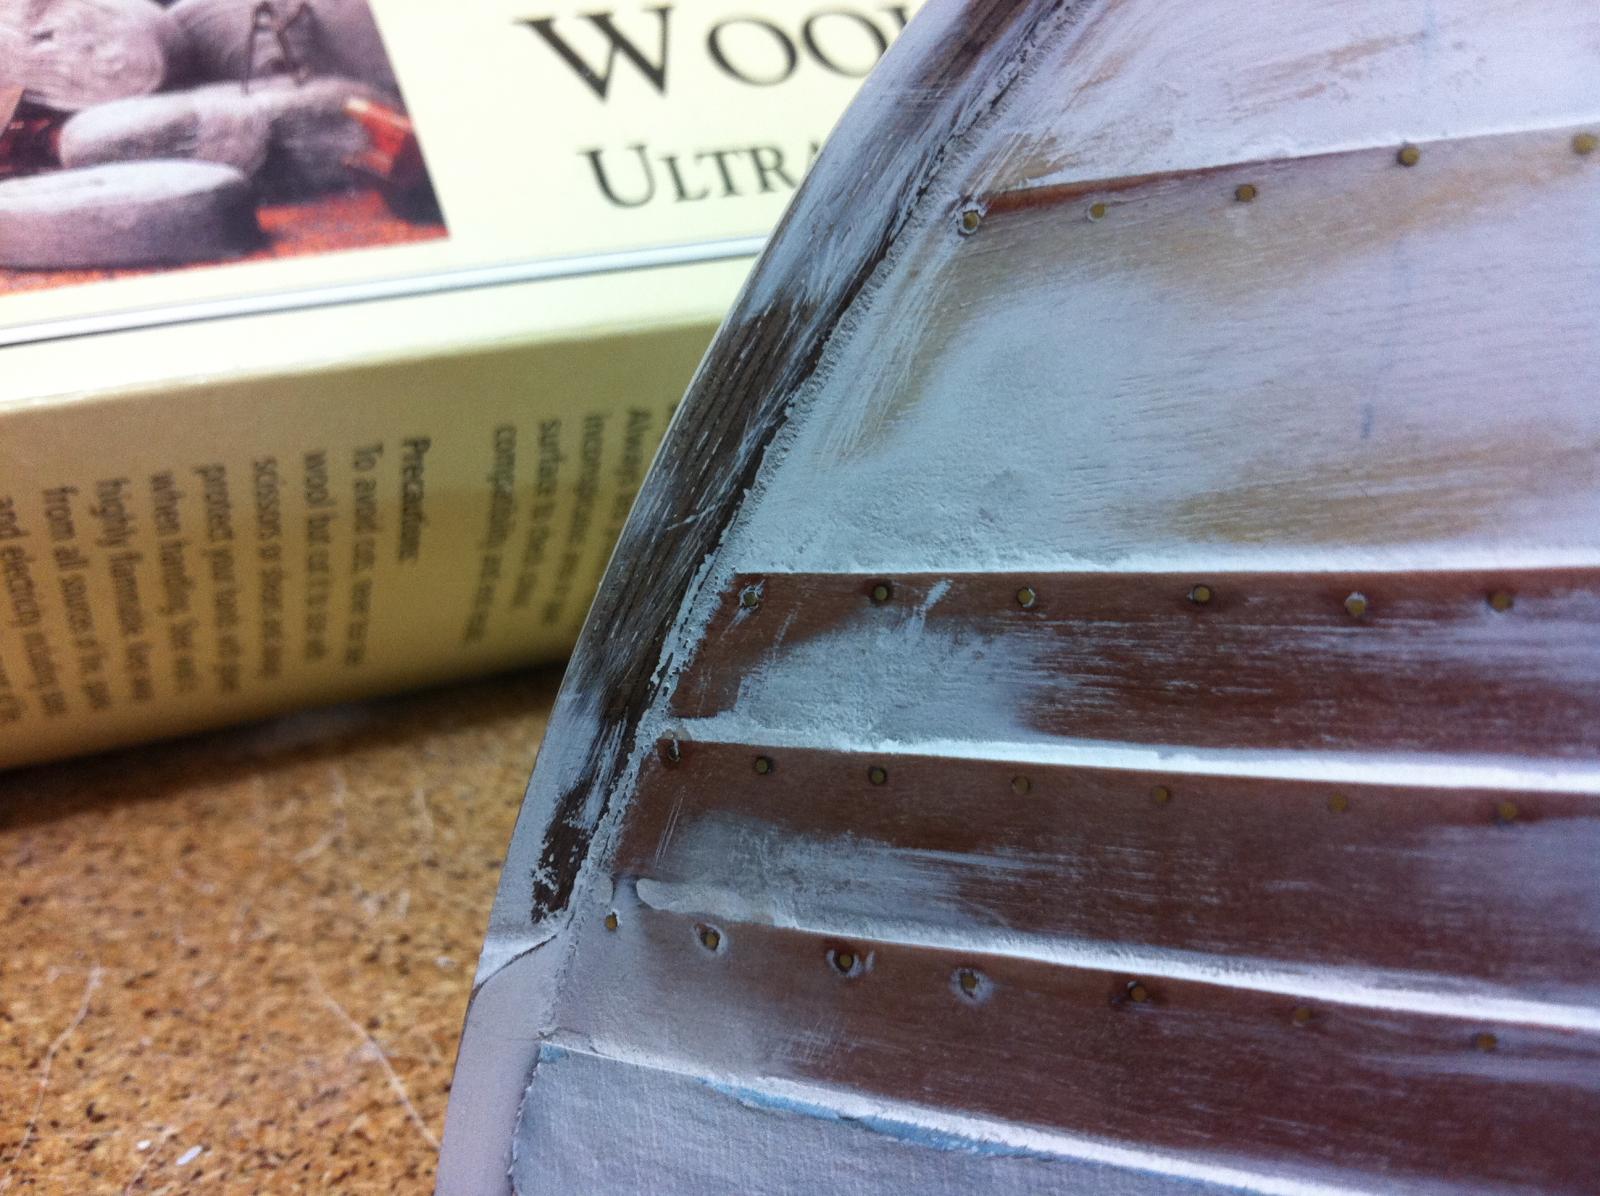
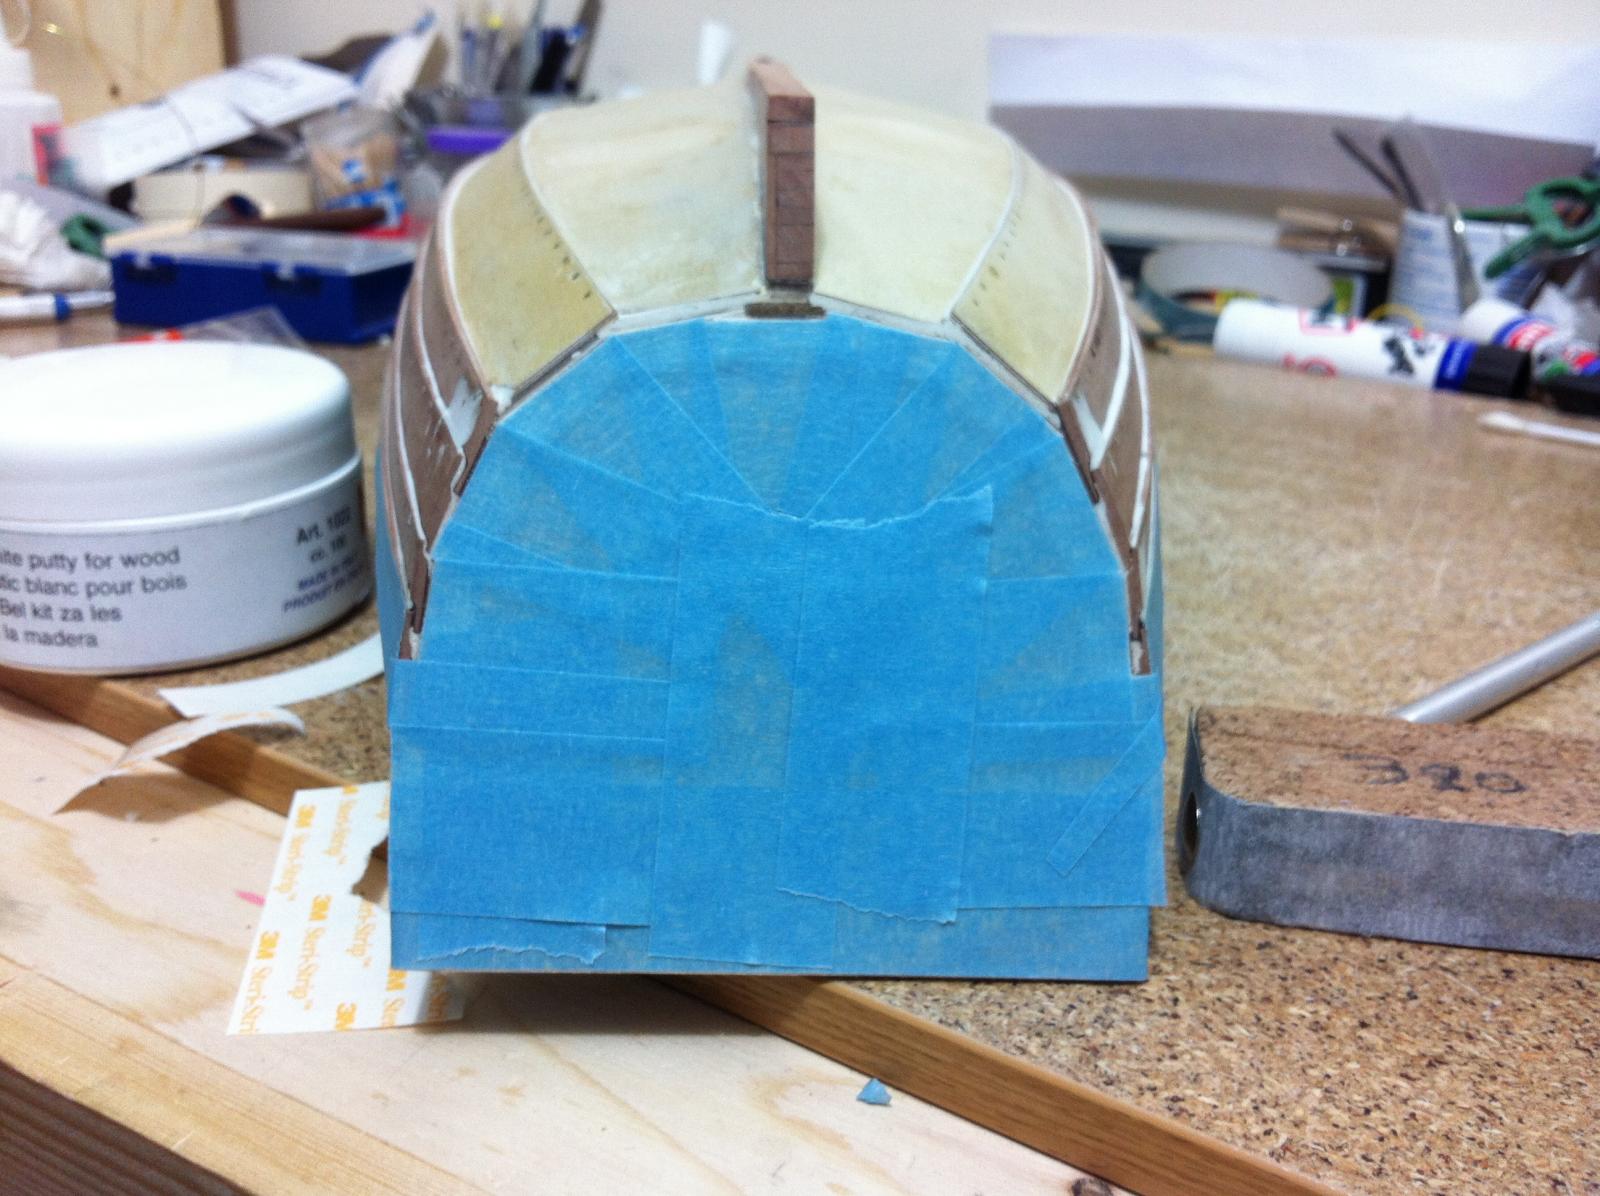
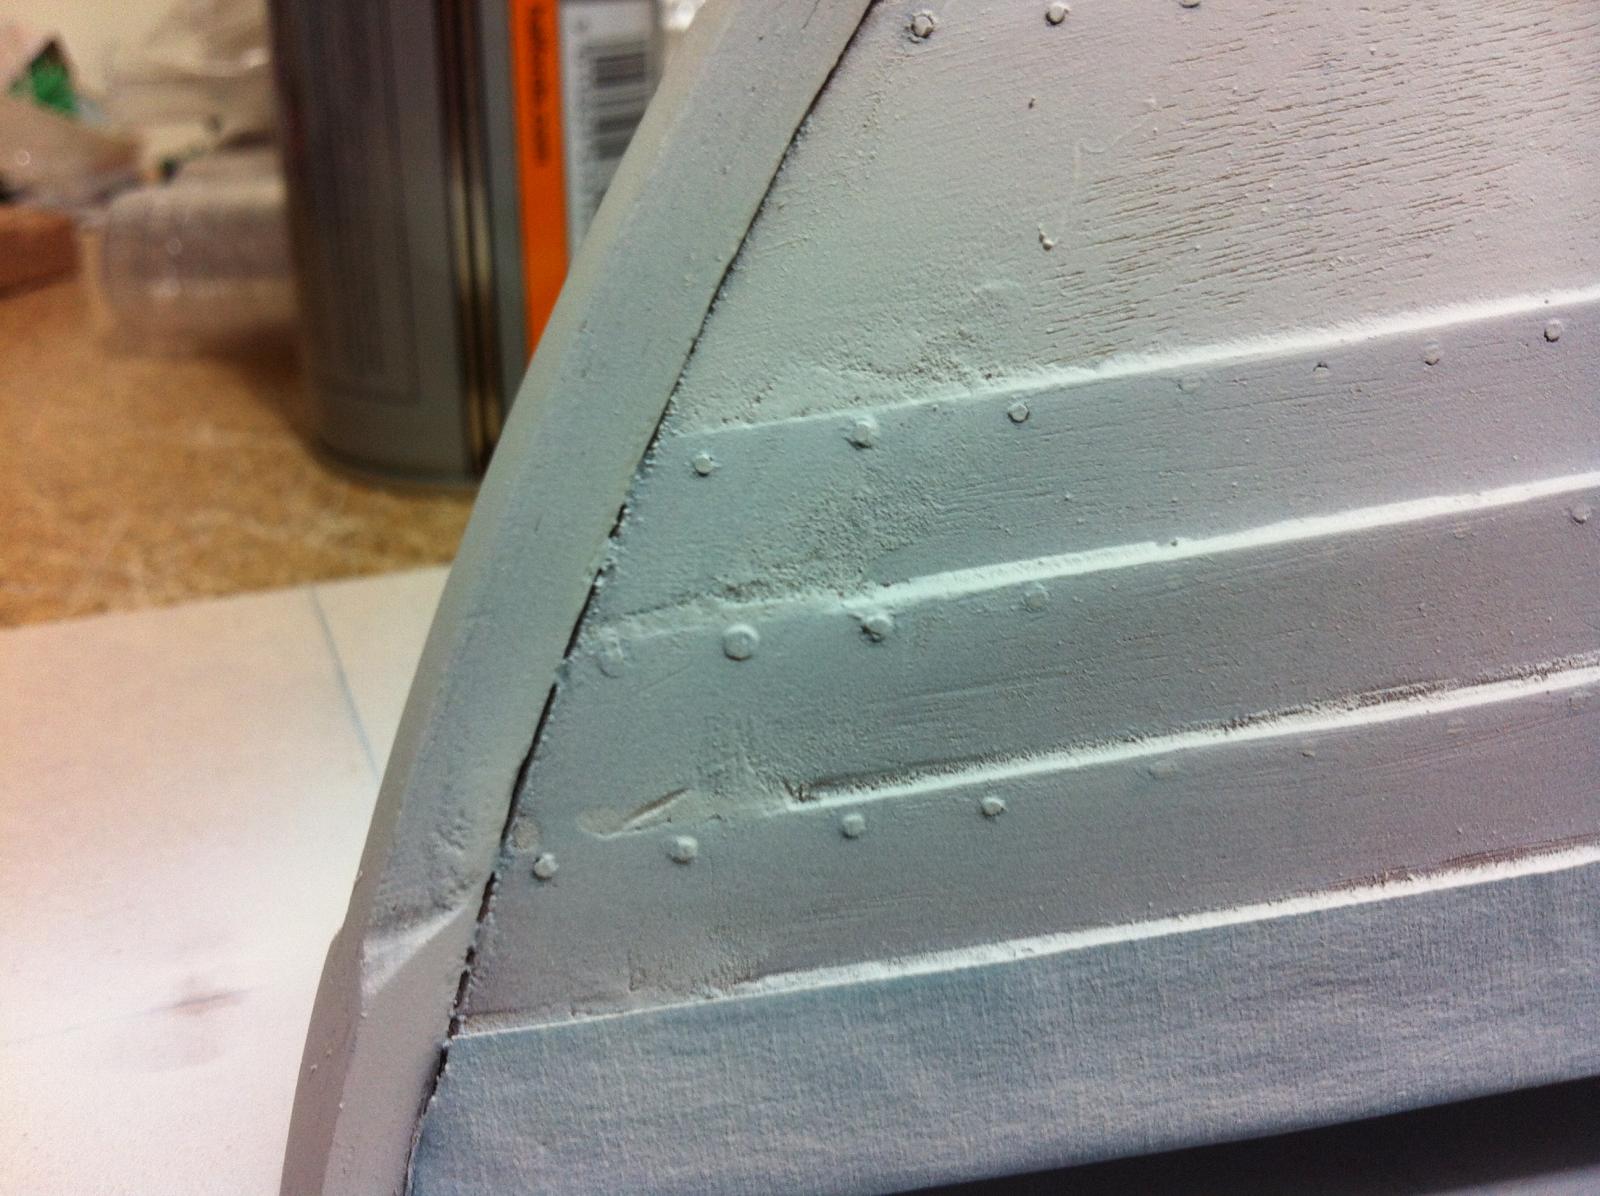
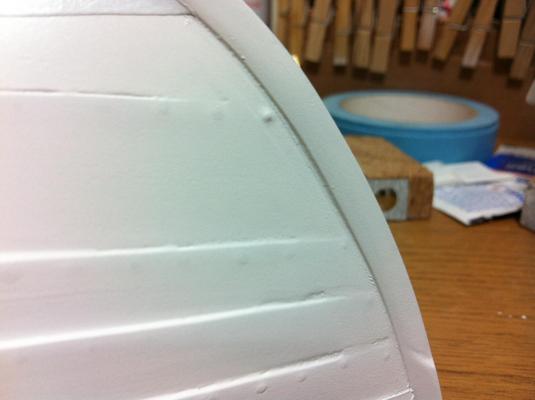
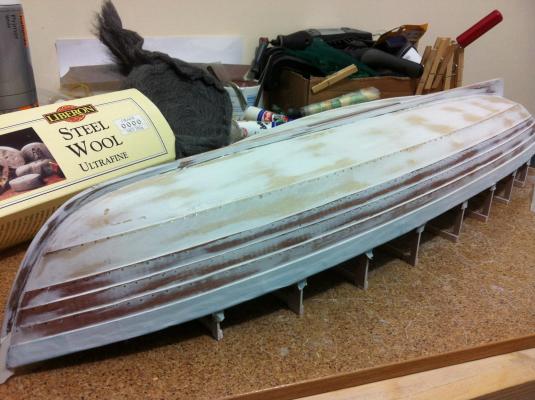
Many thanks to all for your support and comments! The built continues but problems start pilling up again! I am afraid the photos that follow are not that great. On the plus side, I seem to have avoided having a flat sheer towards the bow which I understand can happen if the plans do not compensate for this visual effect by increasing the curve. However the hull surface is far from ready to be painted. I did some fairing which I thought was adequate and I proceeded to shape the end of the stem and then mask the whole boat prior to spraying white primer. And then the primer went on which revealed how inadequate my fairing was. The bow looks rough and the rivets are standing out too much. Deep scratches were revealed in two of the planks The plywood has a rough surface despite previous sanding and finally the plank-stem junction needs some attention I think that with some putty and careful sanding will improve things. Certainly I will not (or should not) move on to painting the hull until I get a nice smooth primed surface.

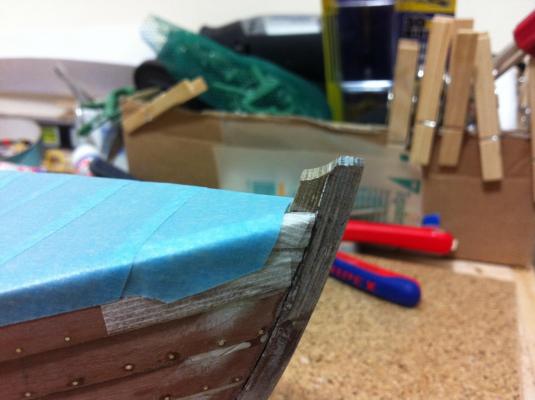


- 253 replies
-
- 3
-
-
- ketkch
- gaff-rigged
- (and 1 more)