.jpg.f26acc9a74319261612561bfa7da1303.jpg)
vaddoc
-
Posts
1,605 -
Joined
-
Last visited
Content Type
Profiles
Forums
Gallery
Events
Everything posted by vaddoc
-
.thumb.jpg.6fd4c1b78768bb3efd745ab810936005.jpg) Looks very good Patrick! I like the shiny paint in that superstructure! Now really, your hull needs also a bit of tlc and some nice gloss paint! Looks sell these boats, not seaworthiness! Vaddoc
Looks very good Patrick! I like the shiny paint in that superstructure! Now really, your hull needs also a bit of tlc and some nice gloss paint! Looks sell these boats, not seaworthiness! Vaddoc -
This is a very impressive built Elijah. Your hull has a lovely shape and I am very impressed by your attention to detail and the thoughtful way you carry out the different tasks. Looking forward for the hull and deck planking to be completed, you are doing great. Regards vaddoc
- 701 replies
-
- 5
-

-
- phantom
- model shipways
- (and 1 more)
-
Great project and very nice work Maury! I am working on a similar but much simpler boat and my concern has been that although CAD lofting may seem ok, still during the actual planking fairing problems or impossible angles will show up. I will be following with great interest.
- 525 replies
-
- 2
-
-
- anchor hoy
- hoy
- (and 1 more)
-
I think it is great having those who build masterpieces and those who put together the simplest of boats in one pot. Shows that you are competing with your self fand not with others. I love seeing my first plywood boat next to a fully framed victory. Plus, the drive seeing that the masterpieces are still made from wood by mortals is enormous.
-
Thank you David and Mark I am thinking cherry for keel, sternpost and stem laminate. Maple or beech for hull planking. Ash, Beech or Birch for the steamed ribs. I am a bit concerned that pear at 2 mm thickness may be prone to breaking. Plus, as I have used pear a lot so far I would like to try something else. I have ordered a few samples to have a better idea
-
Dear all I am about to buy timber for my current project but I am not really sure what to use. The scale is large (1:10) and it will be carvel-built with steam bend ribs. The cost will be considerable but I can choose from a large variety of woods. I will use Pear for the keel, sternpost, stem and beams but I am not sure what to use for the ribs and planks. Options (I think) Ribs: oak, ash or beech, maybe American cherry Hull planks: Maple, american cherry, beech, ?else Somehow I think pear would be difficult to use for hull planks. Could I have your thoughts and advice please? Regards
-
And building a simple boat first and progressively taking on more complex projects allows one to gradually buy the truckloads of necessary and "nice to have" stuff without the admiral realising the cost. Also, one can gradually expand and occupy space in the house that otherwise would be point blank denied.
- 241 replies
-
- 16
-
-
I think that the biggest problem is not just the complexity of the built but the time needed to invest. In my first two boats, on some days I could spent 7 hours building. Now, with work and familly commitments increasing I struggle to find any time at all and I am sure my current project will take years to complete. But it is a good idea to have a built log, I find it very motivating.
-
I actually like my Dremel saw. It is permanently attached to my work bench with a fish tank pump attached. It cannot compare with proper scroll saws and has lots of vibrations especially if you crank the speed up but it is very cheap and has performed well for me. It is also built well.
-
Your boat begs for a crazy party Patrick, bar men preparing tequila cocktails with straw umbrellas, ice cold beer and wine, waiters carrying platters of finger food and fruit salad, music…Brilliant work, really lovely!
-
The problem with this approach Druxey is that there will be a lot of wood to take out, and amongst all the battens and the building jig it will be very difficult to do it. I have accepted that a lot of the cutting will need to be done after the sternpost is installed but I want to try and get as much work as I can beforehand. The scale is large and I will probably need to use power tools. I have very little confidence I will not mess the whole thing up after it's been glued to the keel!
-
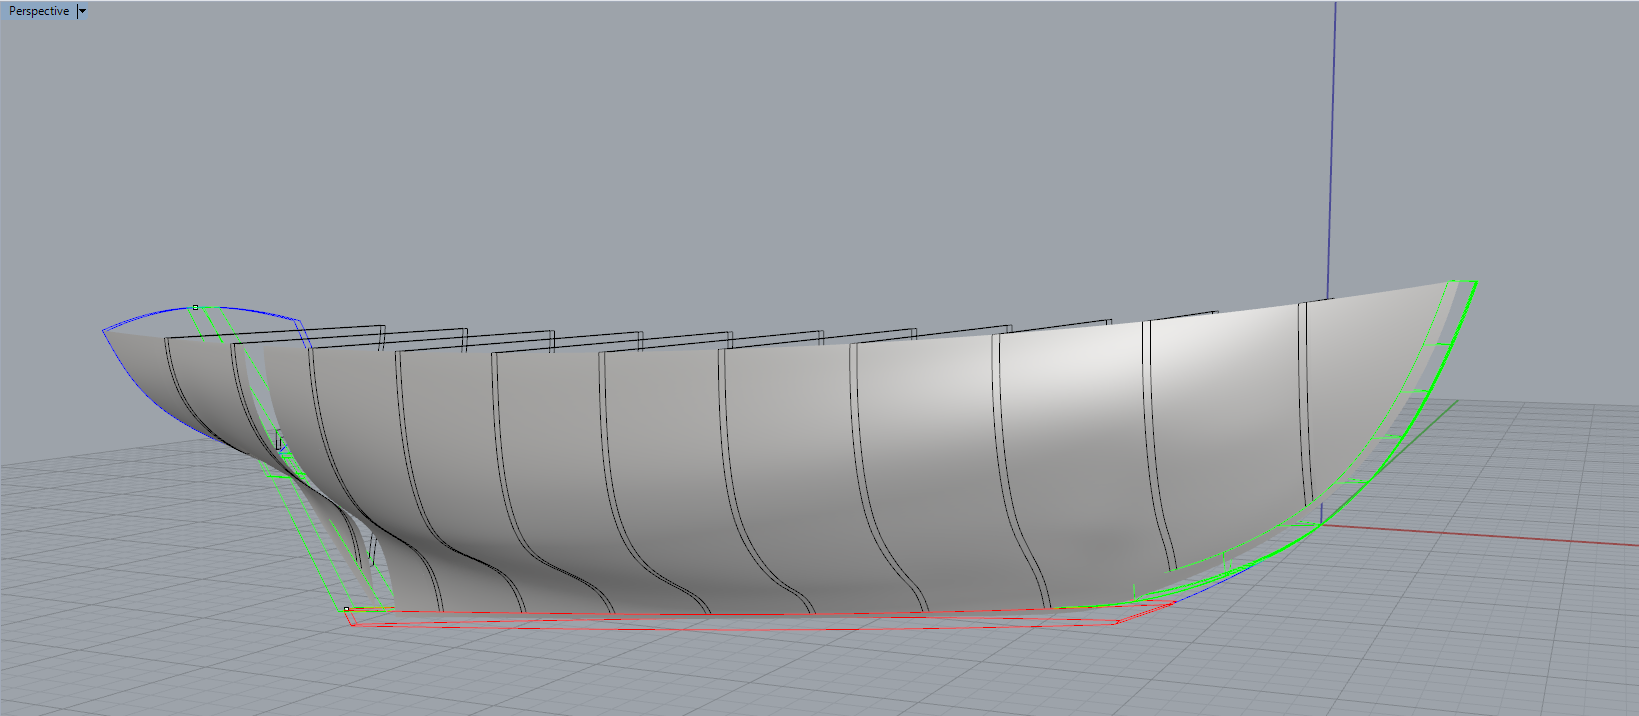
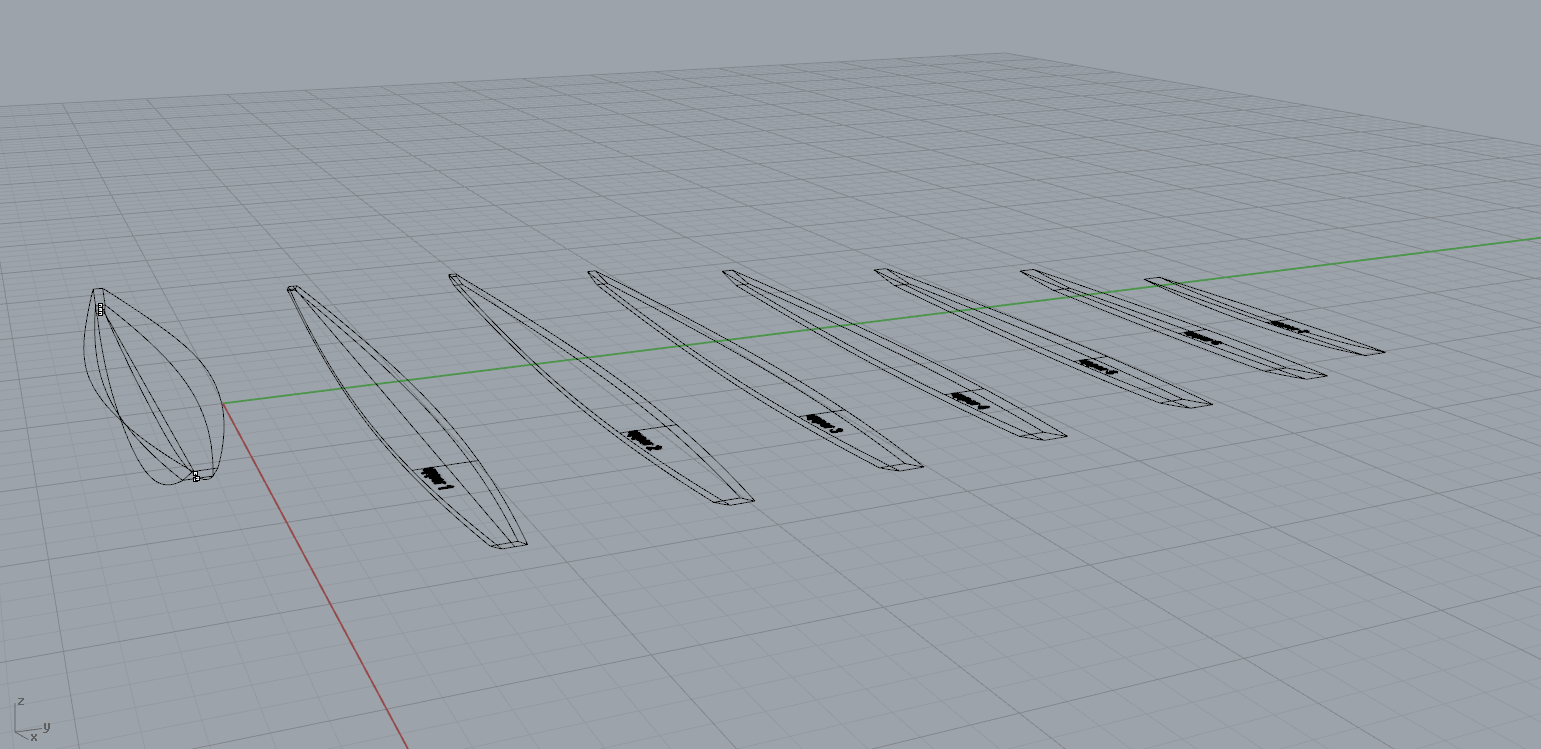
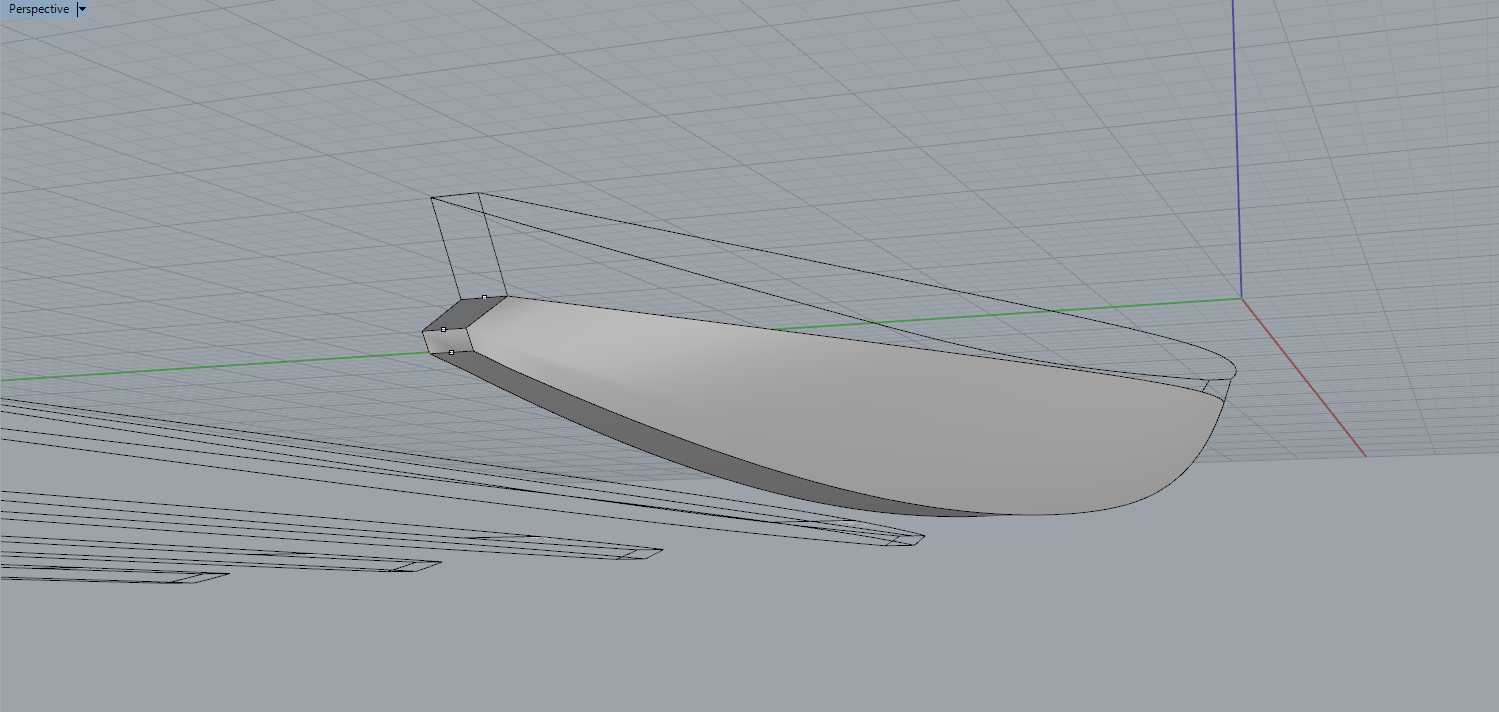
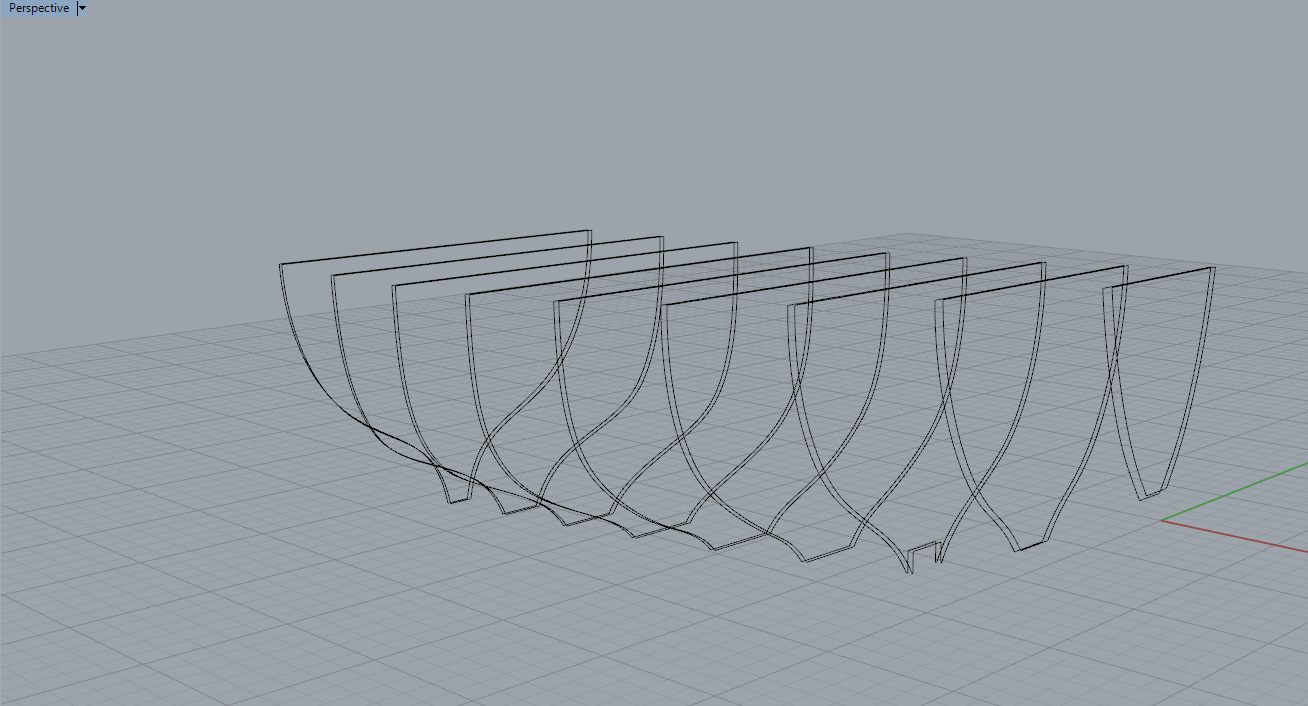
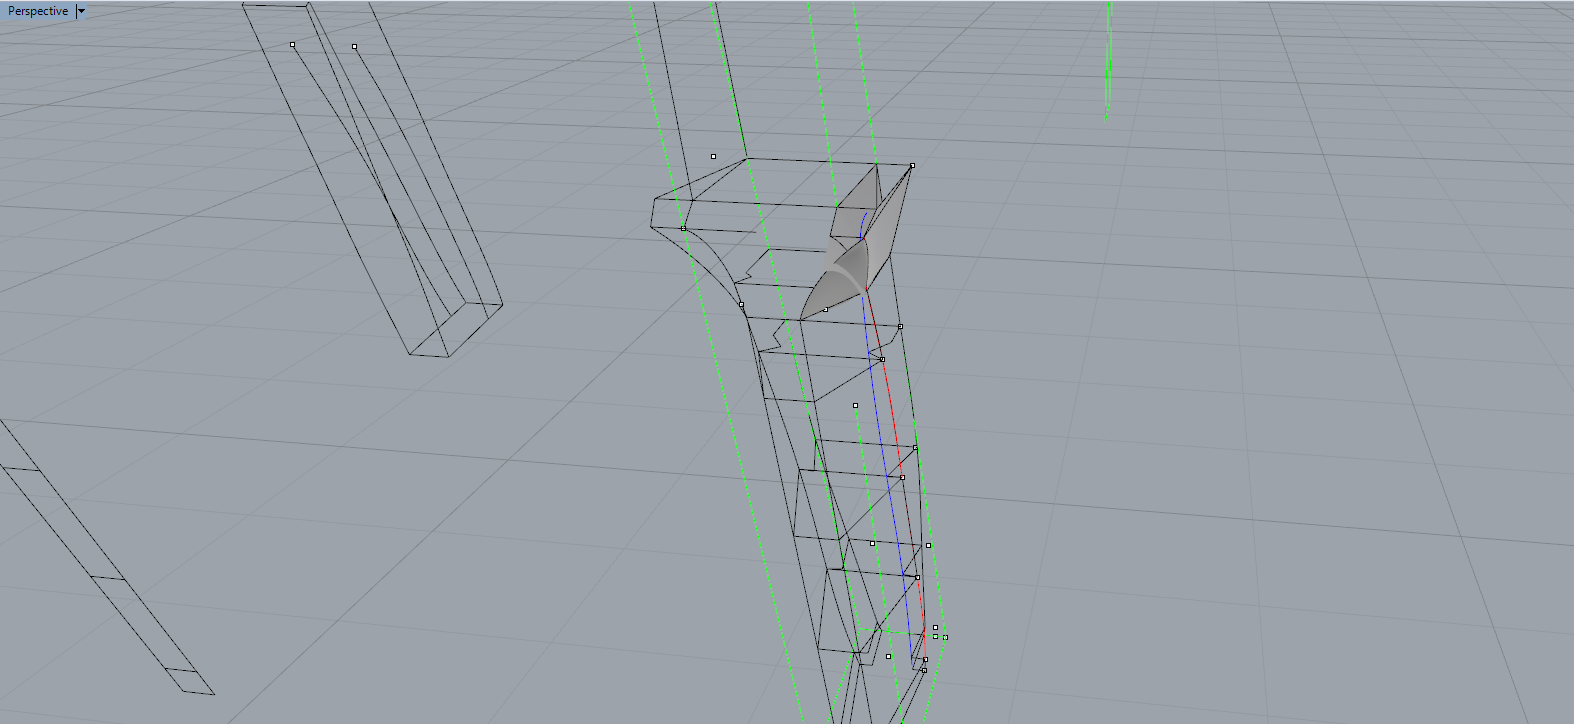
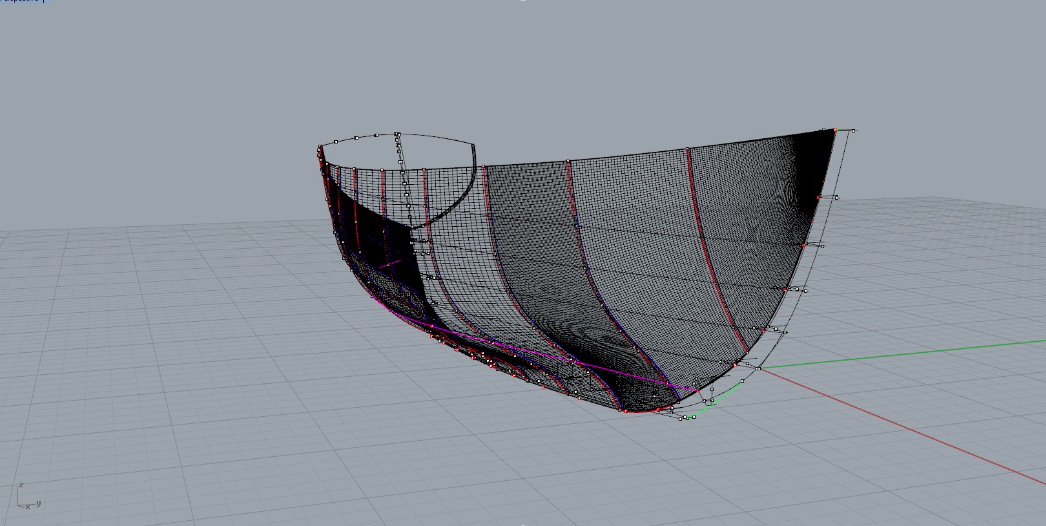
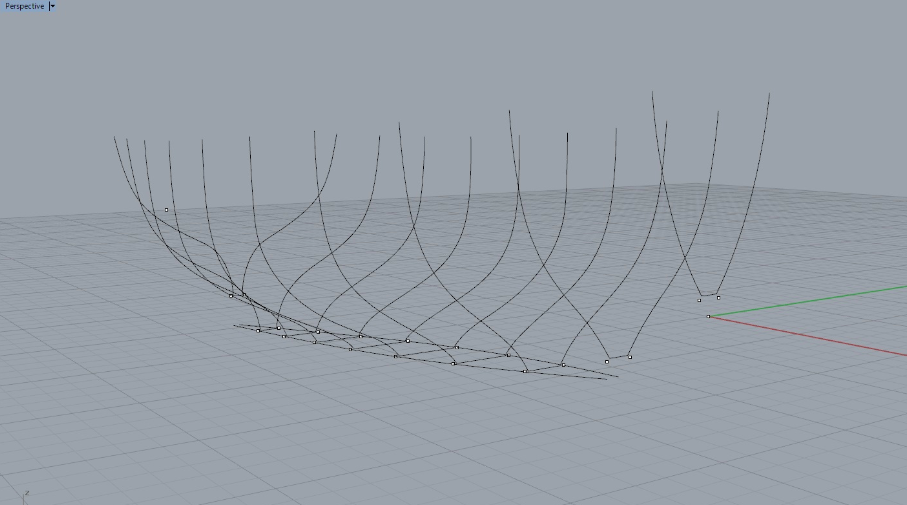
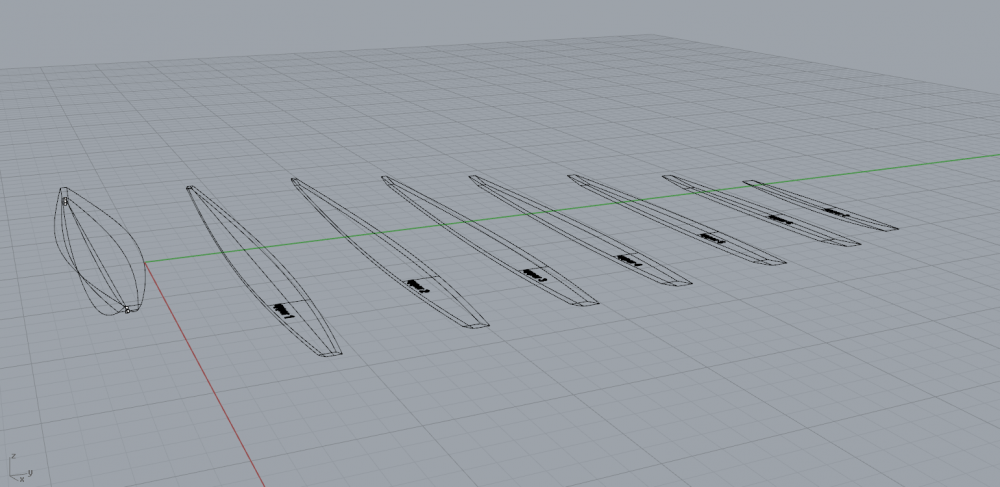
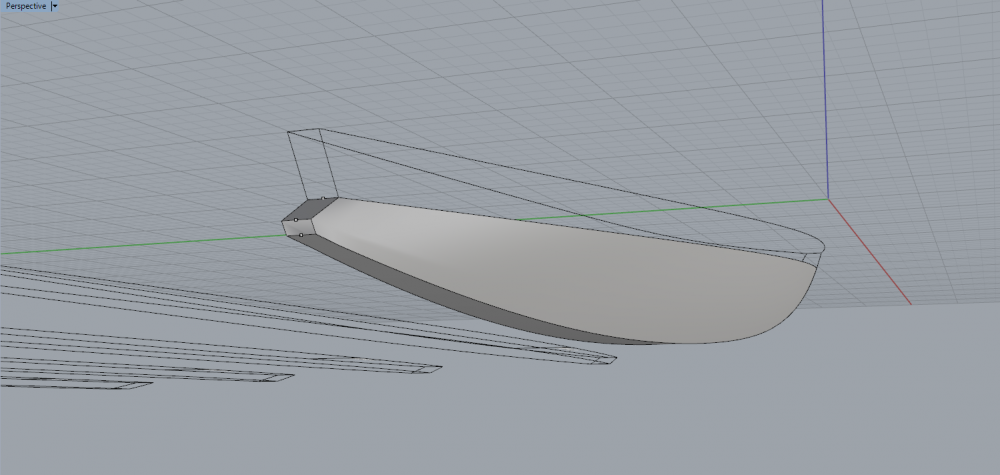
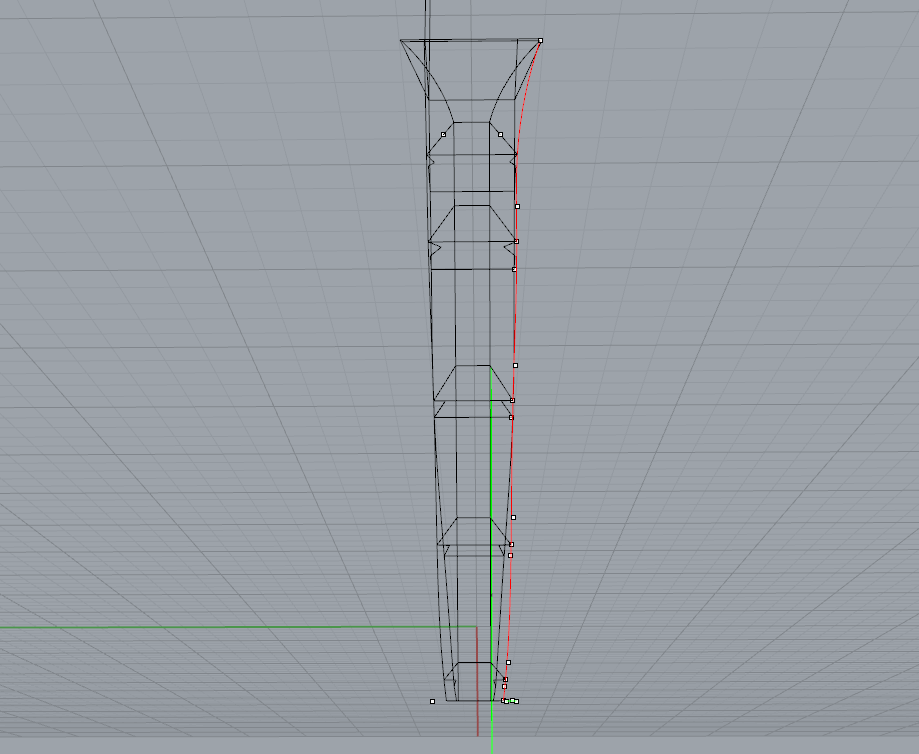
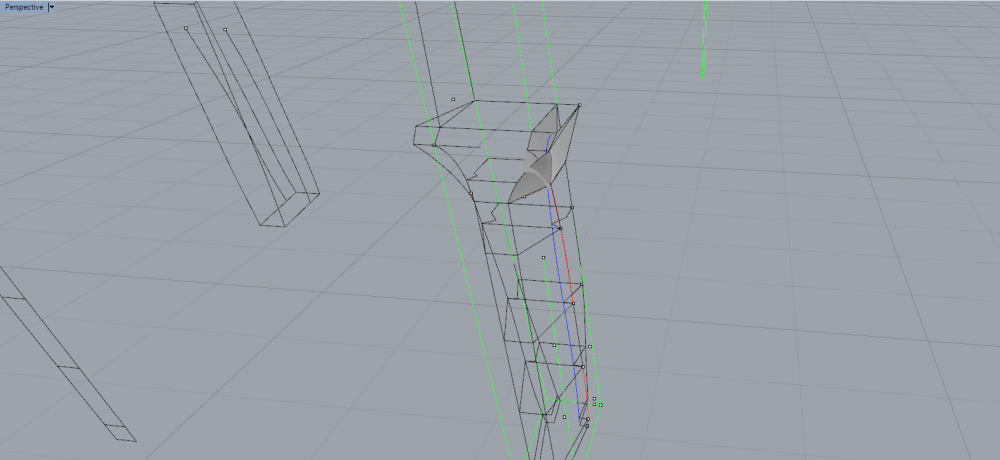
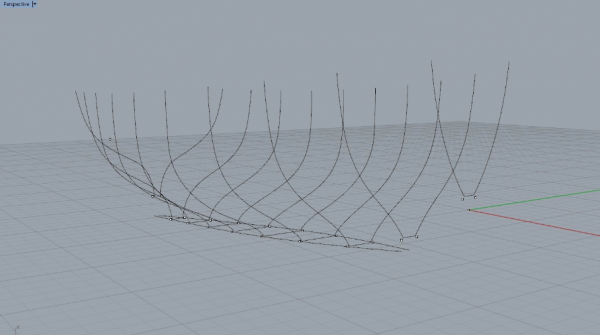
Dear all I now have very little time for modelling so this boat will be built at a very slow pace. Still, some progress has been made. I managed to figure out (I think) how the sternpost will work, at least on CAD but it will be really difficult to create this very complex part in the actual boat. I made an attempt using a scrap piece of pine, it came out horrible but I now have a better understanding and I think with extra care I should be able to produce something acceptable. Quite a lot of the cutting/scraping/sanding will probably need to be done after the sternpost is erected which I expect will also be a huge challenge. The inner skin is now faired and I have prepared the templates for all the temporary frames. I have also completed designing the transom, wood keel and the stem including all bevels and rabets. All these parts are complex and will need to be made of laminates. The following pics show an outline of the boat so far without the details. I also finished designing the keel, which also curves in all directions. In the full scale boat it is made out of iron. It will be made in a bread and butter construction, from several 4 mm slabs appropriately shaped. Plenty of time before the first piece of wood is cut. In the meantime no harm in silently getting a few things that will be very useful for the built later on. Hopefully the admiral will not notice!


-
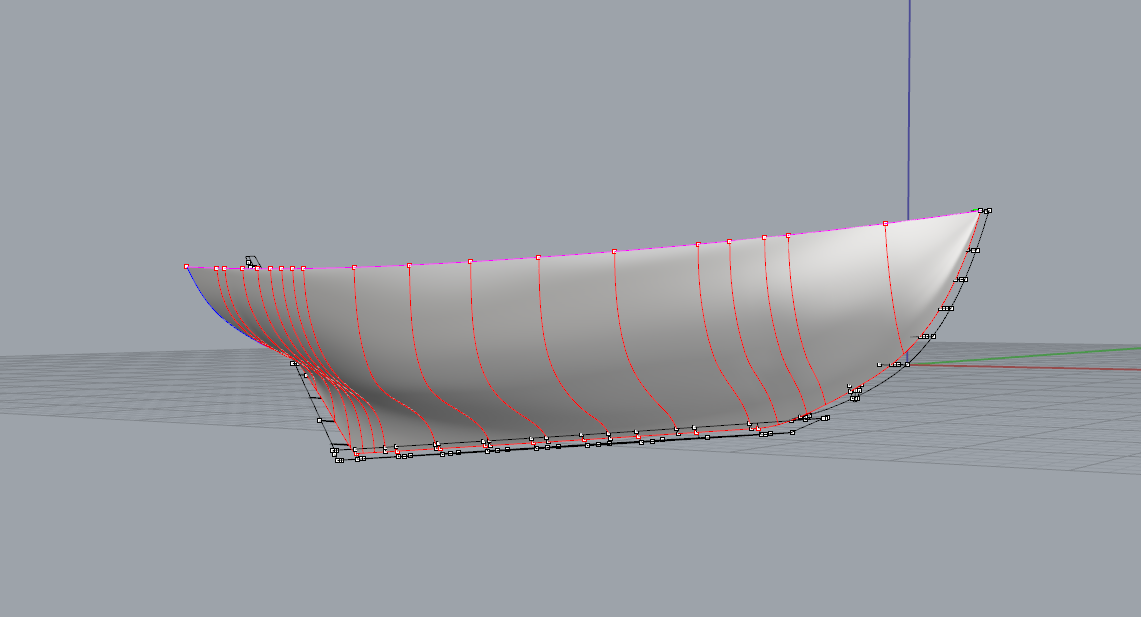
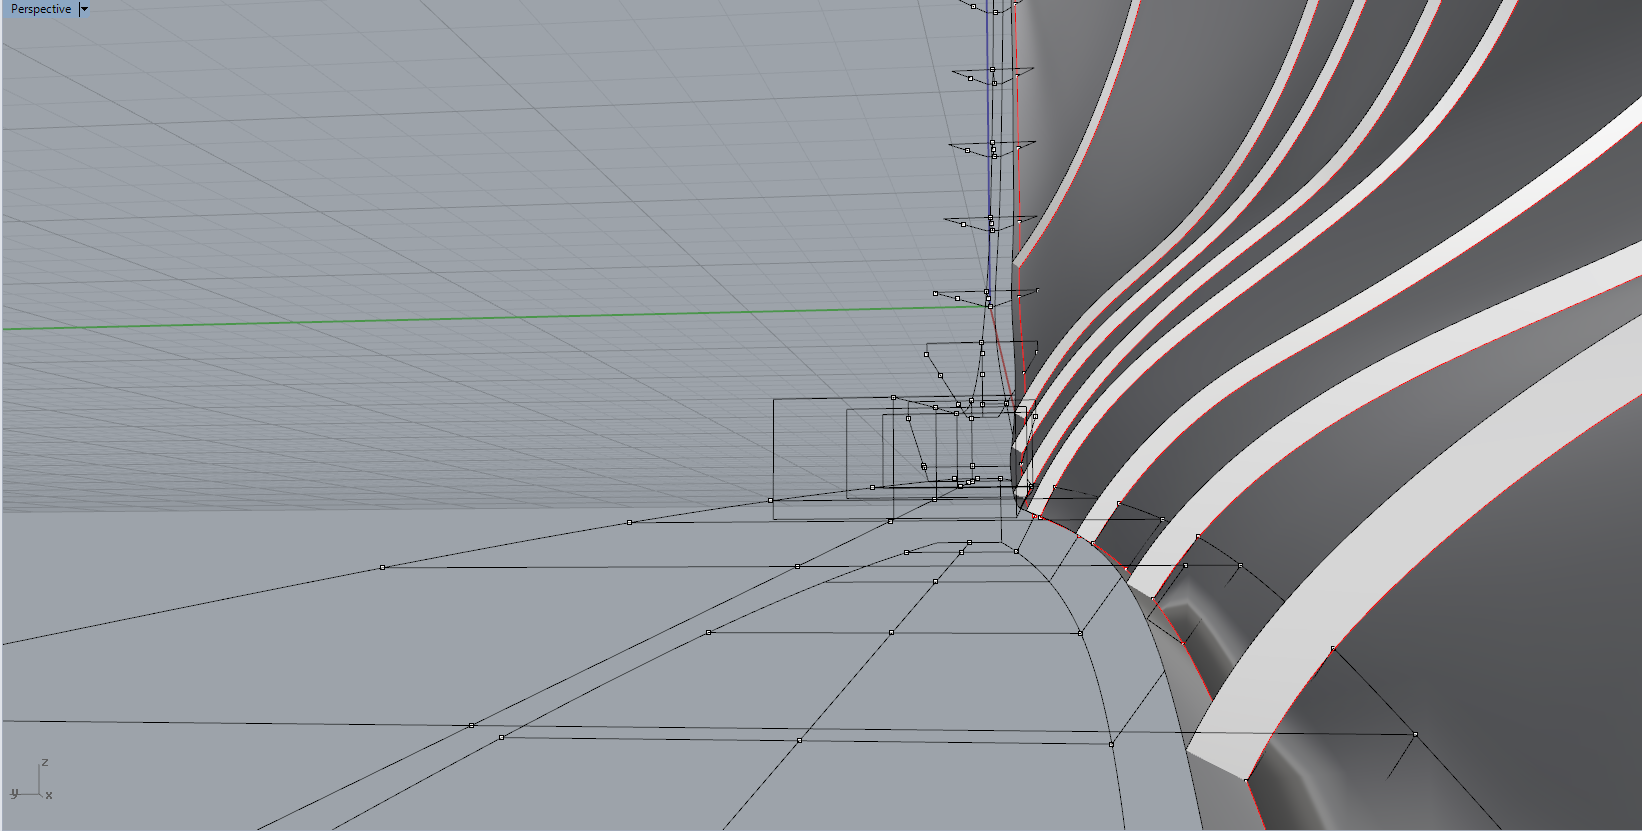
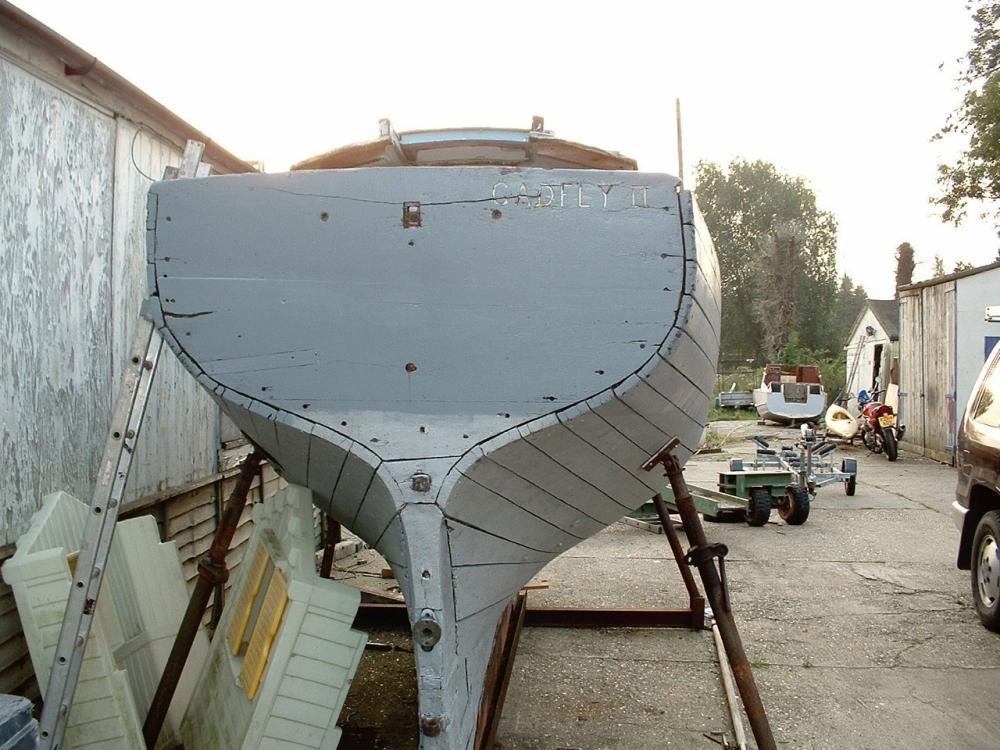
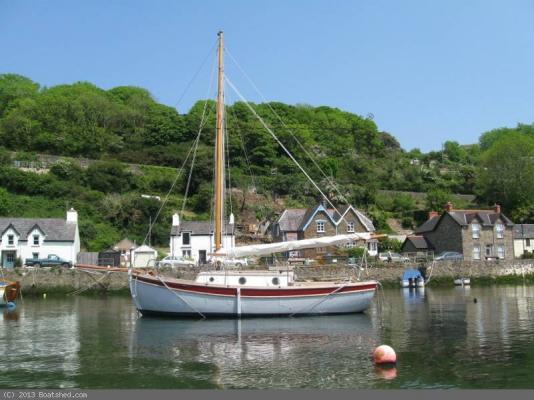
Dear all, I think it is time for a quick update. Patrick no sawdust I am afraid. Although for the last month I have devoted all my (limited) free time to the plans, I have produced only heat from the computer's fans. Jim and Bob, you may be right, it could make a beautiful model but I am struggling a lot so far, it is a much more complex boat than I thought. Hexnut, Rhino is great, but making it bend to my will is another matter. Your good words were, I am afraid, a bit premature. I realised that all my lines were wrong so I had to scrap everything and start again! After 5 complete lofting cycles I think that now I do have a reasonably faired hull that seems to work well. I have achieved a smooth outer skin and defined the inner skin. I also defined most of the temporary frames that will be made of 3 mm plywood All bevels and the shape of the rebate have been (more or less) defined as well By far the most difficult part of the boat is the sternpost. I see that usually this is a flat heavy timber but not in this boat. It curves on all sides in a massively complicated way. I had to do a lot of guessing as the plans are not detailed enough. Probably an experienced builder would have no problem at all but I had a hard time figuring out how things work. This photo from the internet was a great help, I think actually it is a Deben. This is the sternpost I have to make! The plans give the outside of skin but conversely the true dimensions of the Transom and this was particularly problematic. I could not figure out a smooth transition from sternpost to Transom. Furthermore, the sternpost near the Transom needs to widen a lot as the rebate line curves outward to meet the outside skin of the planking at the transom. This needs an added slice of wood. I wonder if I bit more than I can chew. I will try and make the sternpost out of cheap wood and see if I can have reasonable results. If I can't, another option would be to loft again starting with a simpler sternpost. I would not like this though as I would move away from the original design.


- 536 replies
-
- 10
-
-
Now, how nice is this! Patrick this is not an accurate model, there is no way the real boat would feel as good. Good to see fruit again in your photos! I ll have a gin and tonic in the sun beds thank you very much!
-
In my previous model I attempted to loft by hand and that was a disaster. I have a huge respect for people that can actually pull this through with just a ruler and a pencil. I started designing the boat on Rhino and soon I realised that the plans were difficult to figure out and that the offsets created curves far from fair. Maybe I made mistakes or did not interpret the plans properly but I struggled a lot to get a fair hull. When I checked with the diagonals, my lines were off but not by much. I do not think there is a point with re-doing the lofting, I am actually happy with the shape of the hull. After I had the outer skin, it took some effort to determine the inner surface of the hull and then it was very easy to determine the shape of the temporary frames. Actually, at this stage I can change the stations as I like. There are many things to consider, including: 1. I think I will raise the temporary frames, install battens, install all ribs and then plank the hull, removing battens progressively. 2. I need to figure out how to secure the frames to the sloping keel and keep them square without gluing or drilling the hull (not too much at least) 3. I am not sure how to bent the ribs and how to fix to the planks. 4. Some serious jig will be needed to secure all these and I think building the jig will be close in complexity to building the boat. Regards Vaddoc

-
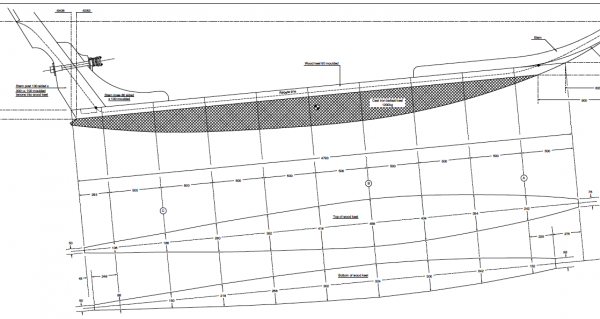
Dear all Following completion of my last boat about a month ago I intended to take a break from model building. Somehow however, I found myself lofting a boat on CAD having spent 3 weeks trying to figure out the interactions of the complex curves of the hull. So here we go again with another project! I really would like to scratch-built a 2 masted schooner but undoubtedly one or more in-between steps are needed . I searched on the net for a relatively simple boat that would still have some of the building features of a larger ship so I could get some experience on rabbet cutting, carvel planking etc and came up with a small single mast sailboat, the 5-ton Deben. The plans and table of offsets are provided free on http://www.whisstock.com I actually think it is the ugly duckling in the forum but then again it has been said that all wooden boats are inherently beautiful! As my understanding of the design grew, I realised that it is not really a simple design. The wood keel is not straight but tapered and at an angle, the sternpost also is tapered aft and the above make for a complex rebate line. Also, there are many steam bent ribs and the offsets are to the outside of skin so the planking thickness need to be subtracted. Certainly I got the complex boat I was looking for! I have not decided whether I will just built the hull or complete the whole boat. This is like a first date, you never know whether you ll end up married or drunk in a bar.
- 536 replies
-
- 11
-
-
Looking very good Elijah. BTW, if a woman suggests you have too many tools, wait for the right timing and suggest she also has too many shoes and/or bags. Proceed on the above step with extreme caution.
- 701 replies
-
- 4
-
-
- phantom
- model shipways
- (and 1 more)
-
Treenails
vaddoc replied to pugman11's topic in Building, Framing, Planking and plating a ships hull and deck
Search for the thread "tree nails in bulk", it might suit your needs -
Rope Making Basics
vaddoc replied to mikiek's topic in Rope Making/Ropewalks's Discussions about Rope Making
Mike I have sizes 5, 8 and 12. Perle 12 makes a fine 0.6-0.7 mm rope, 0.8-0,9 mm with the 8 and 1.2 mm with the 12. This thread is more supple than the cordonnet. The finest rope I have produced is 0.5 mm left hand twist with 100 weight, it is quite rigid though. -
Rope Making Basics
vaddoc replied to mikiek's topic in Rope Making/Ropewalks's Discussions about Rope Making
The DMC Cordonnet is right hand twist and the Perle left hand. There is a light twist in silk but negligible. It is very strong but very slippery too, really difficult to work with. Also the rope it produces is very stiff. Synthetics and linen might be the better option. Cotton rope really stretches a lot. -
Rope Making Basics
vaddoc replied to mikiek's topic in Rope Making/Ropewalks's Discussions about Rope Making
Mike I use DMC threads for my ropes. Most are right hand twist so either you will end up with somewhat stiff left hand twist or with right hand one made of several yarns and strands but it will be thick (and beautiful) However, look for DMC perle, this is LEFT hand twist and come in various sizes and colours so with one pass through a ropewalk you can make RIGHT hand twist rope which can be very fine. DMC is expensive though! I experimented with silk thread which does not really have a twist and is very strong and fine but it is too difficult and too expensive to work with. One other thing to consider is that cotton rope if set with some tension on the model it tends to loosen over time. I will try linen thread at some point. Regards Vaddoc -
Thank you all, much appreciated! Michael, I would really like to go for a fully framed 2 mast schooner but I think this is too big of a bite for now. So I have decided on a much smaller project that will give me the chance of practicing planking, framing, rabbet cutting etc. Of course there will be a log!
- 253 replies
-
- 2
-
-
- ketkch
- gaff-rigged
- (and 1 more)
-
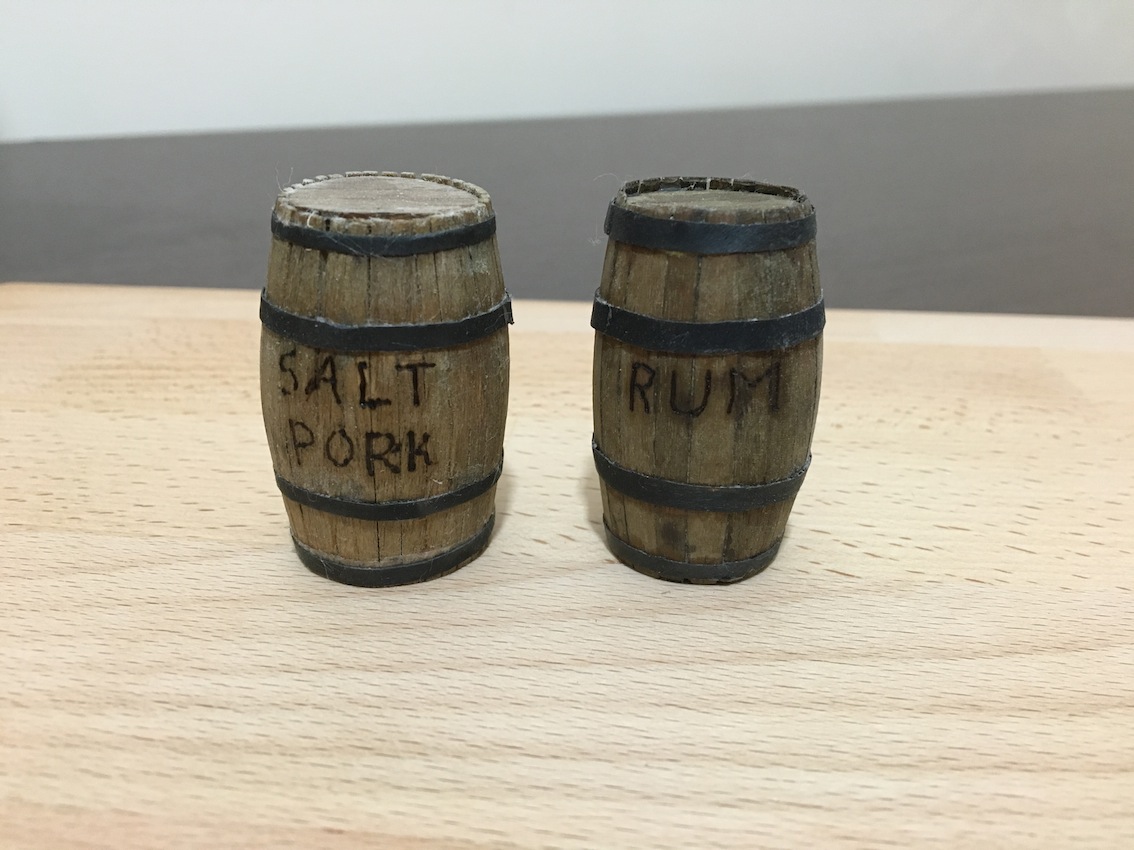
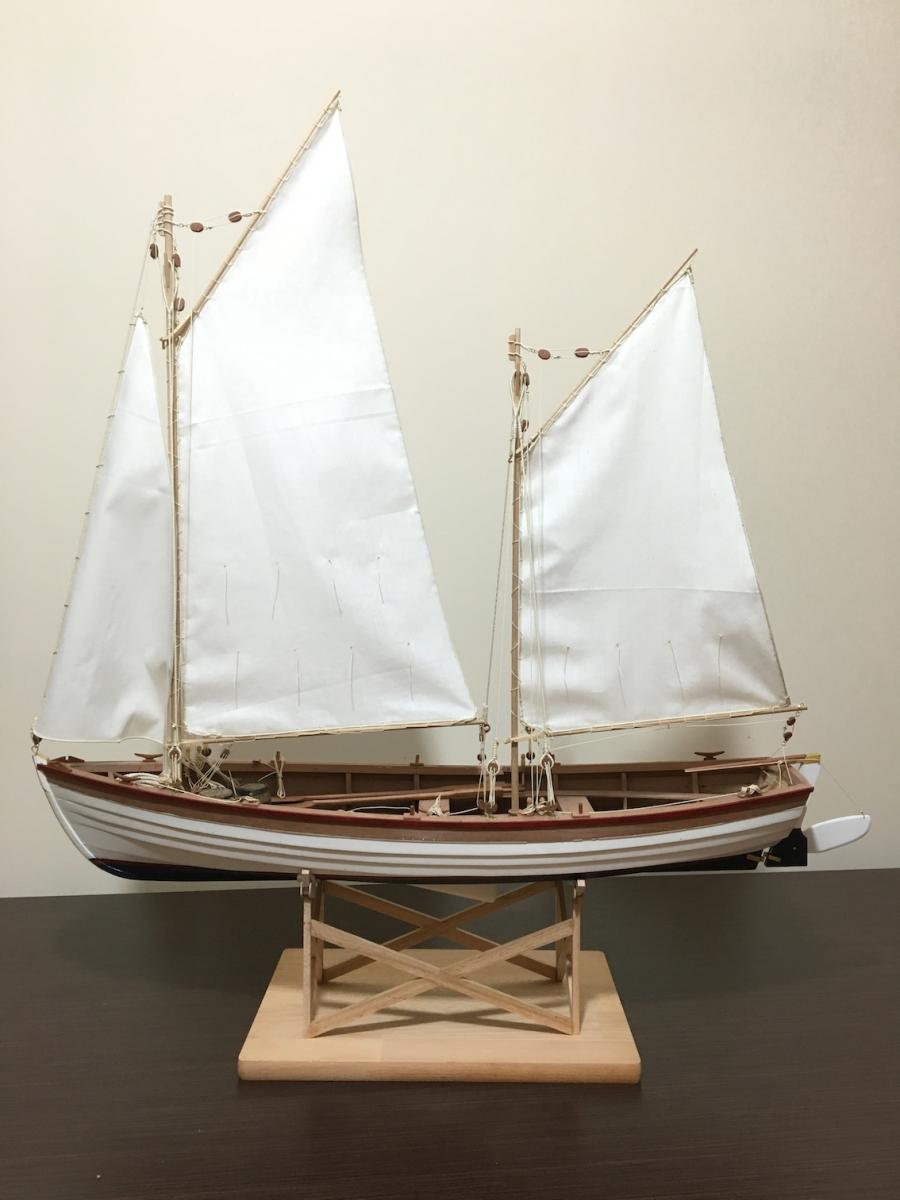
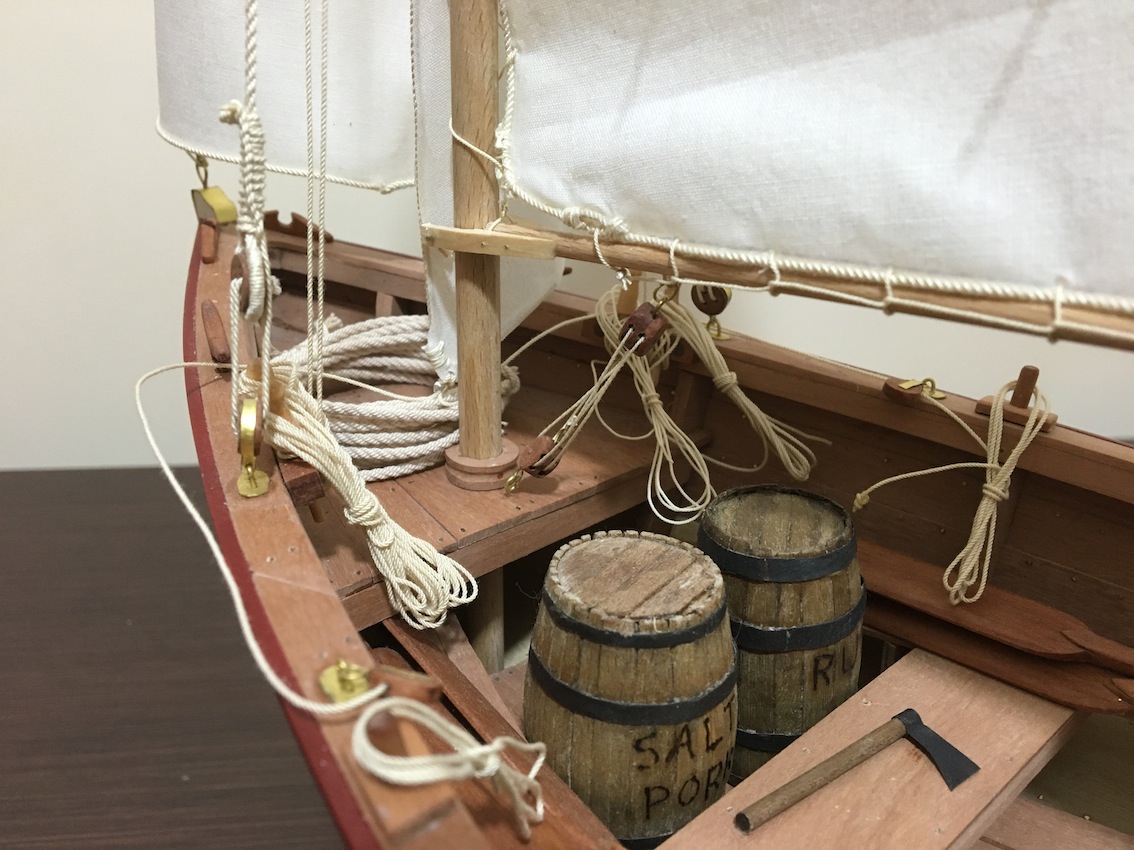
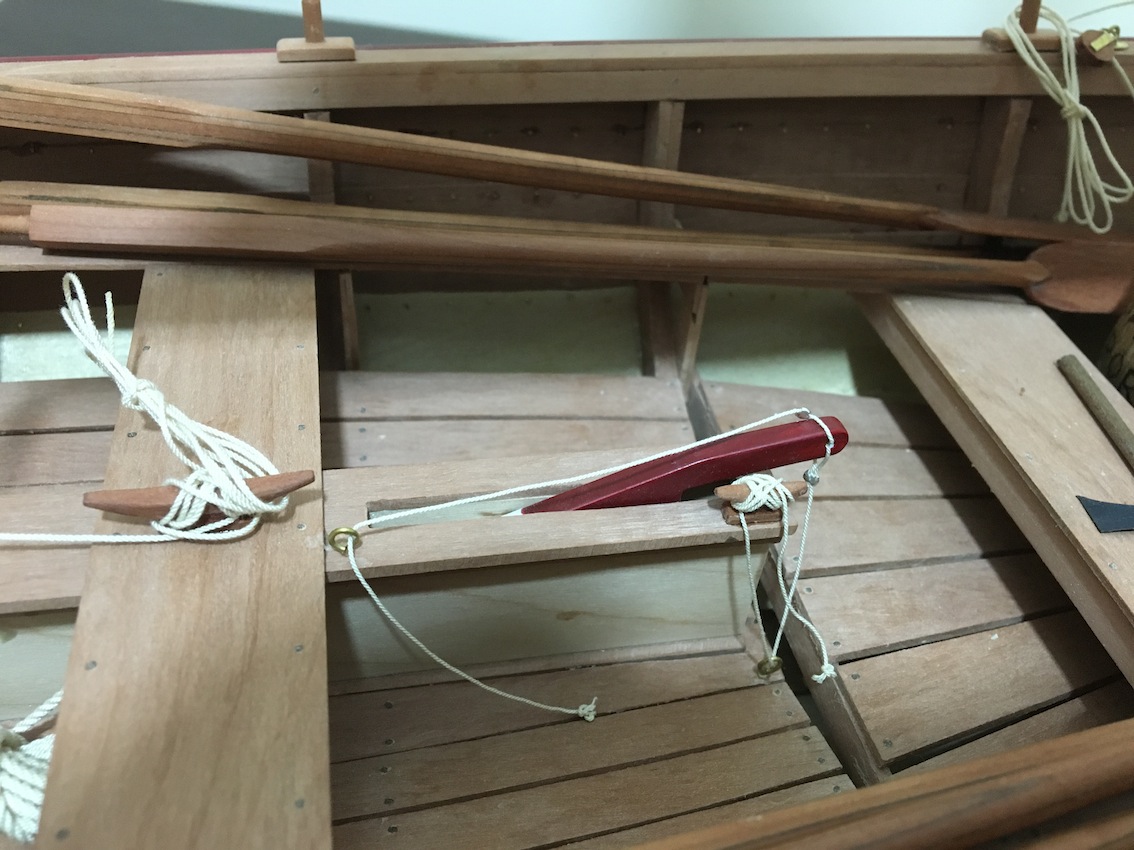
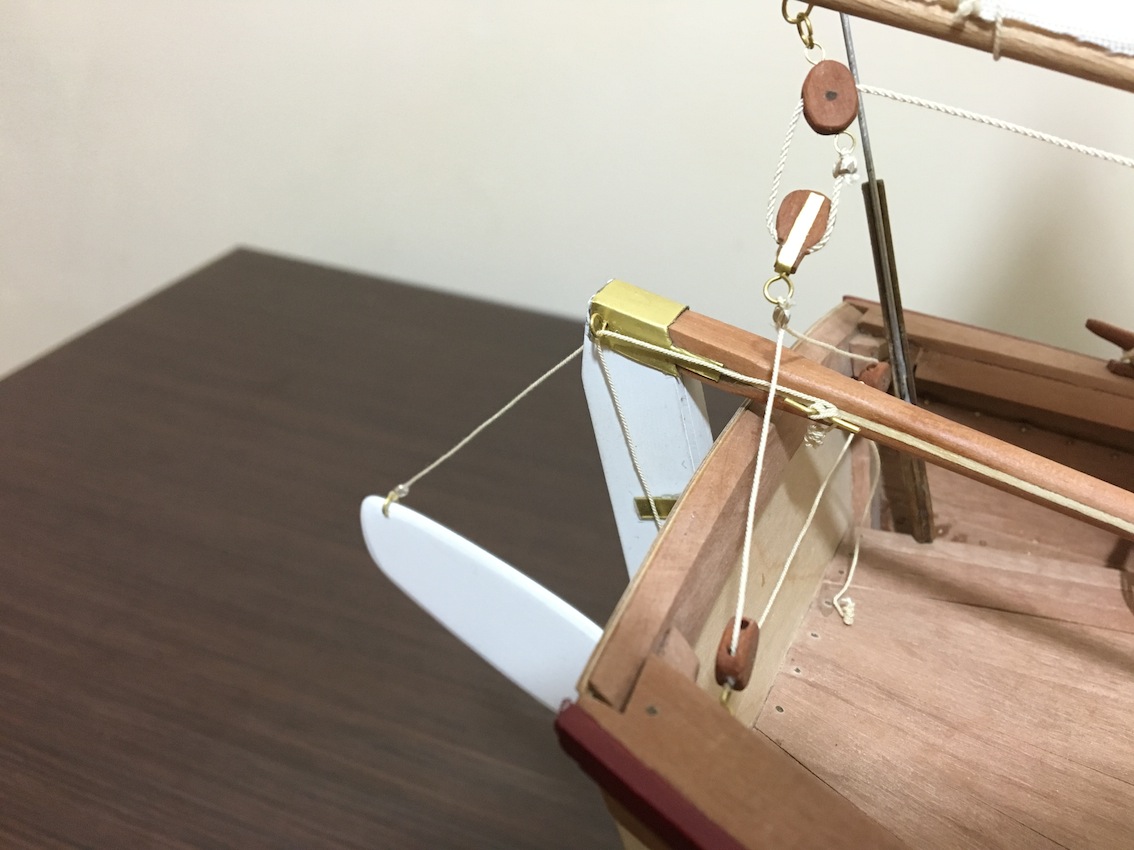
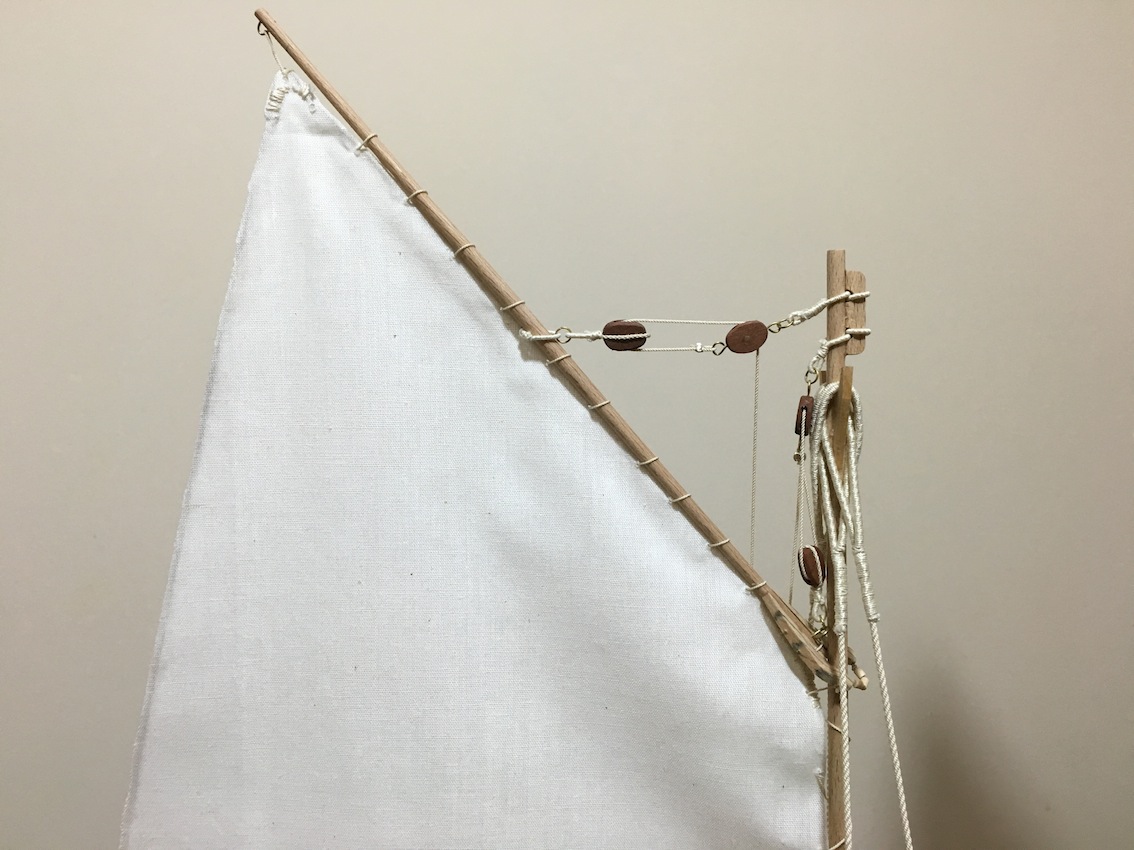
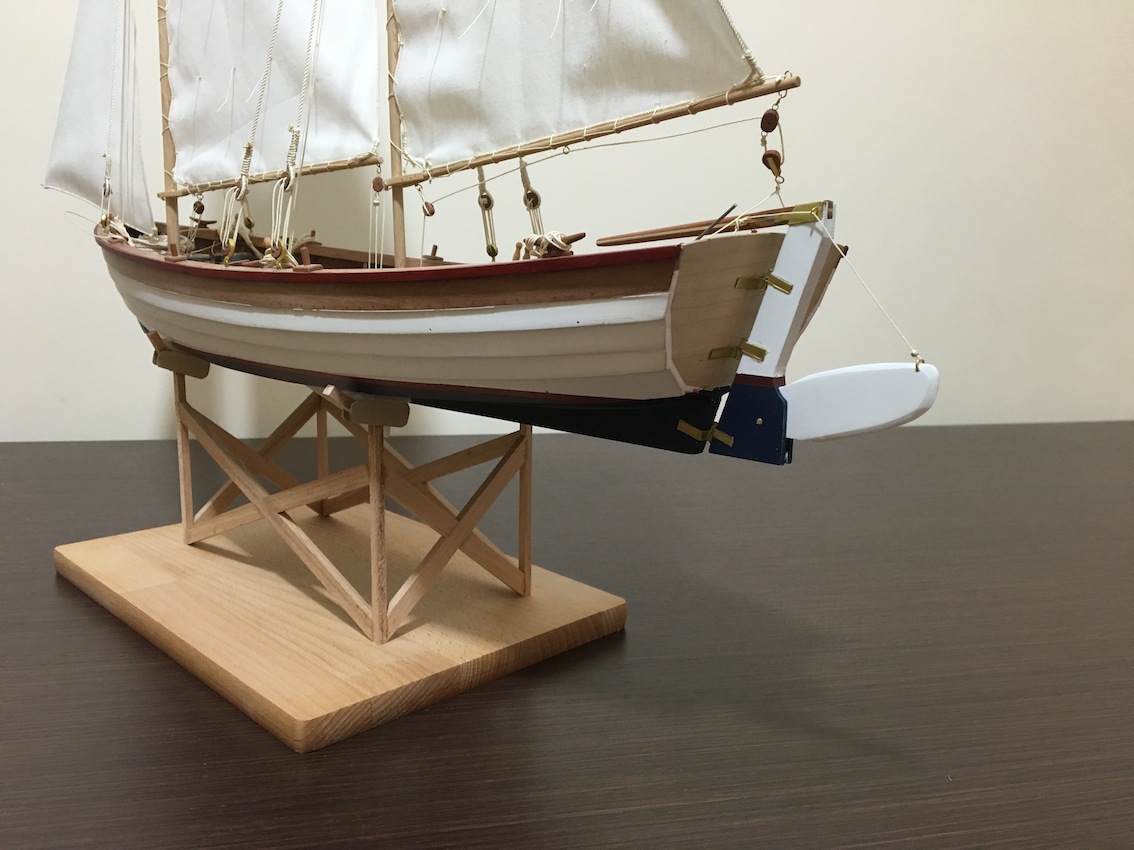
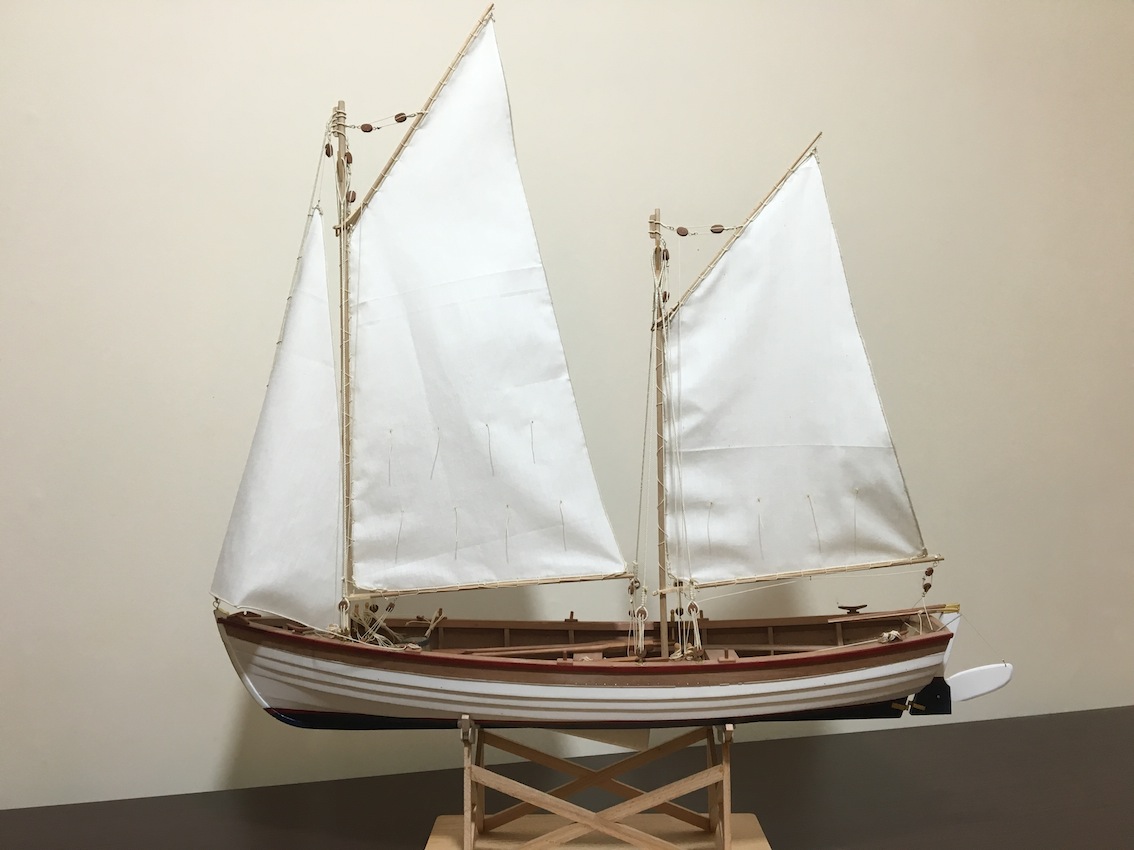
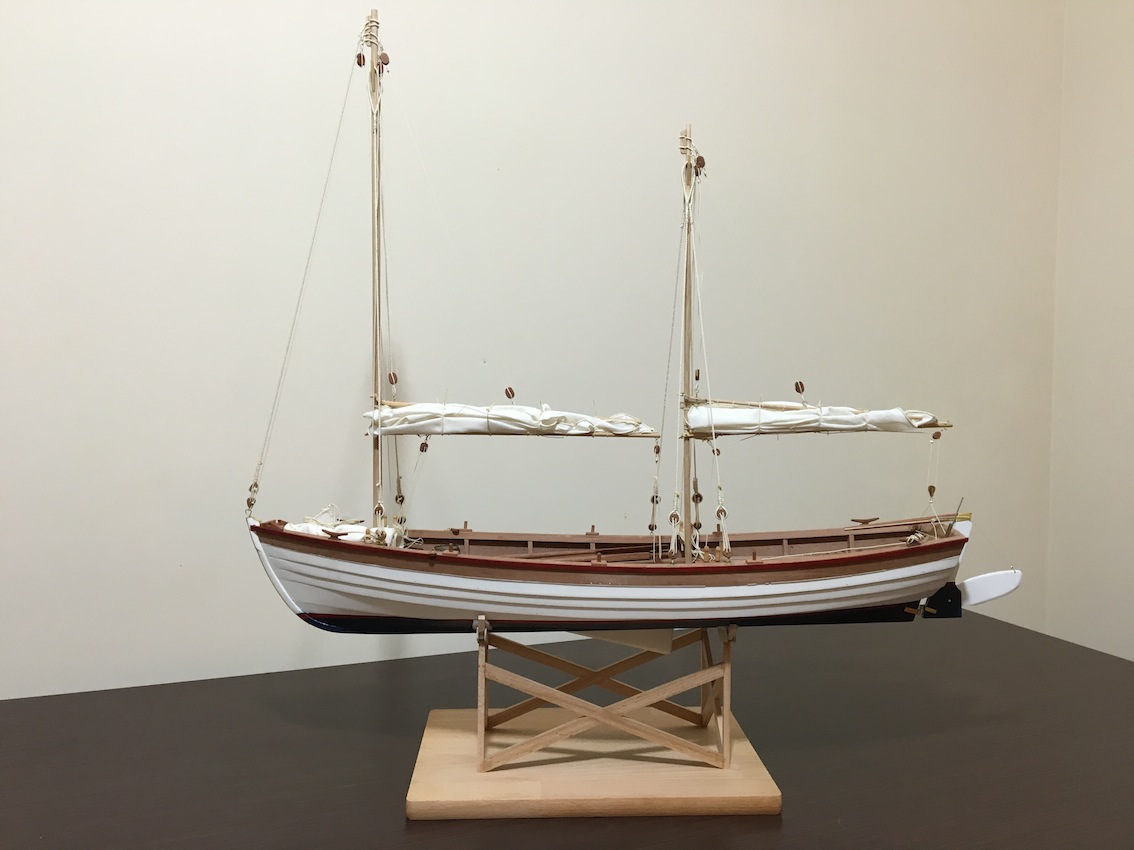
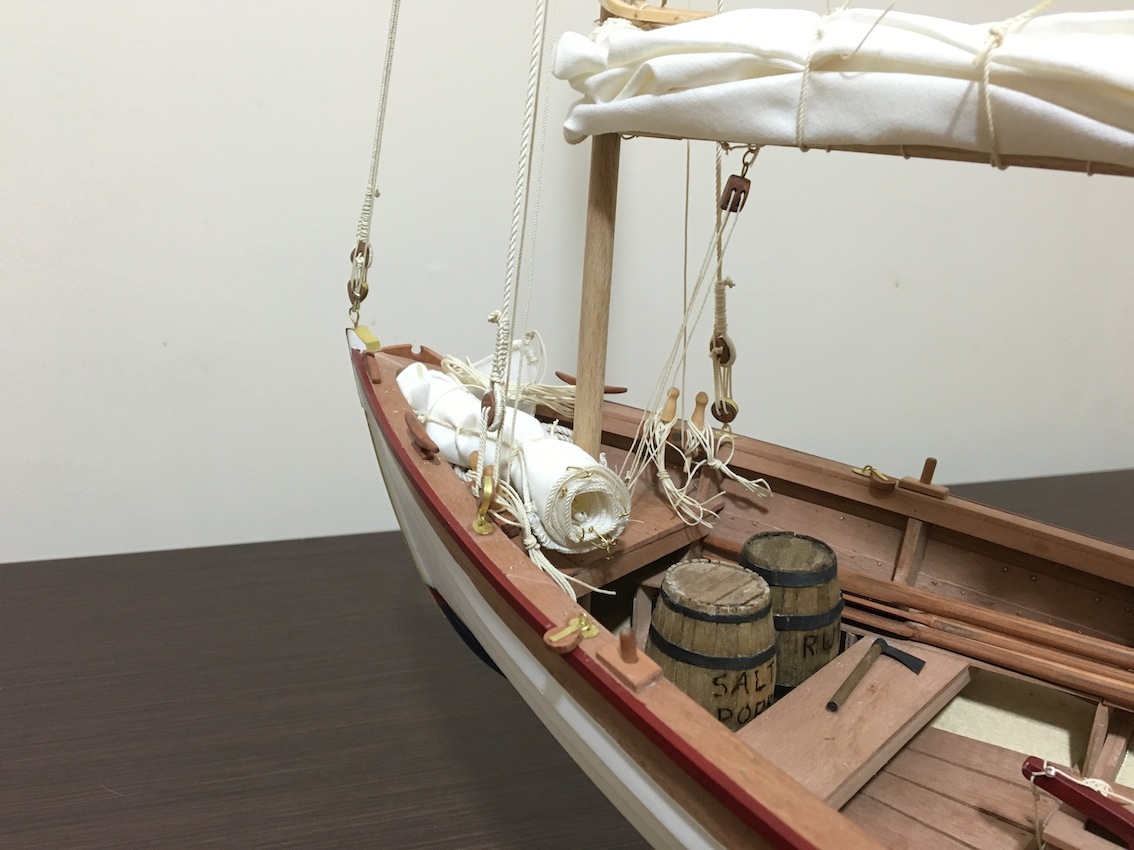
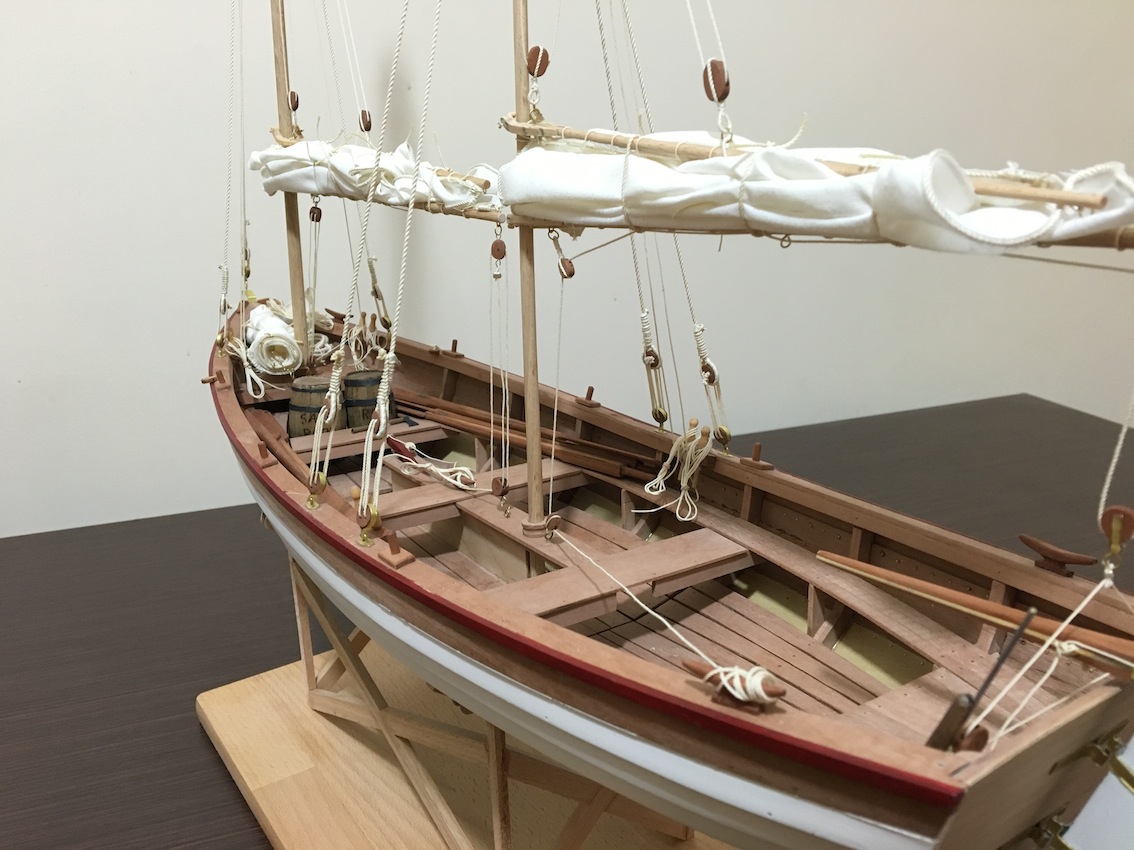
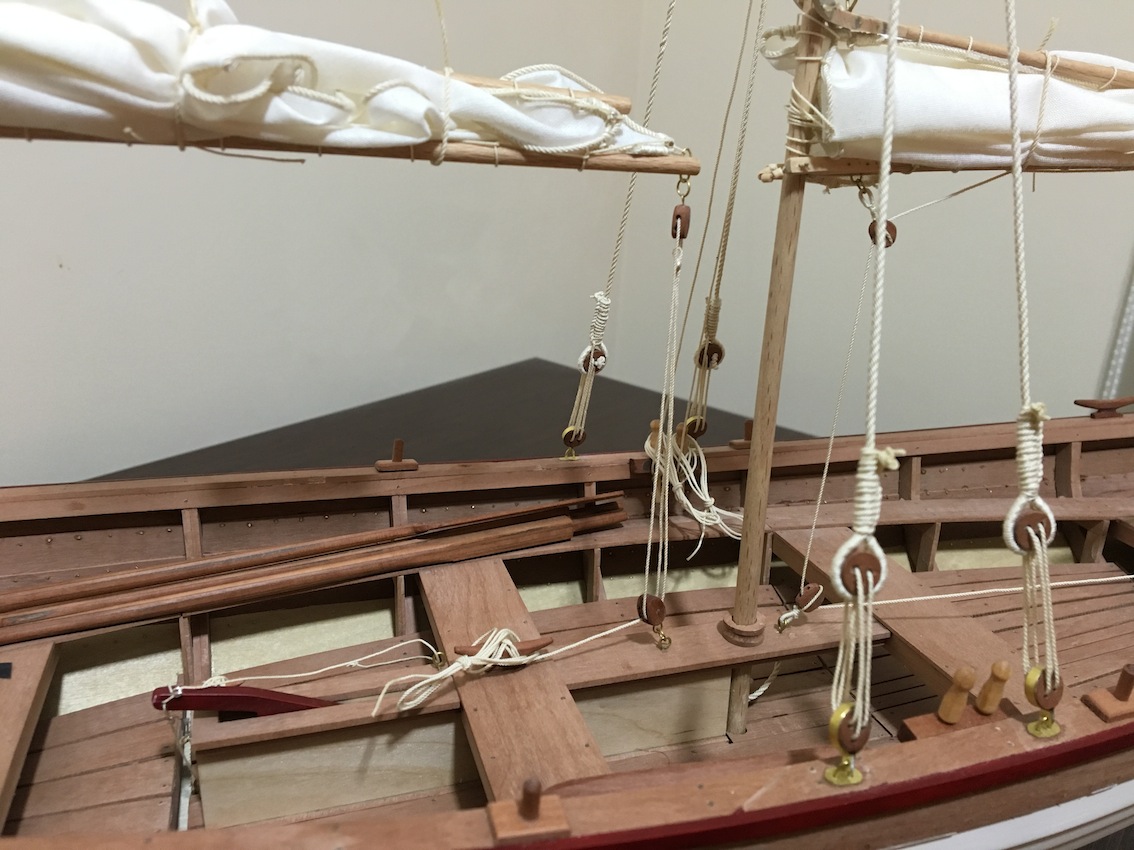
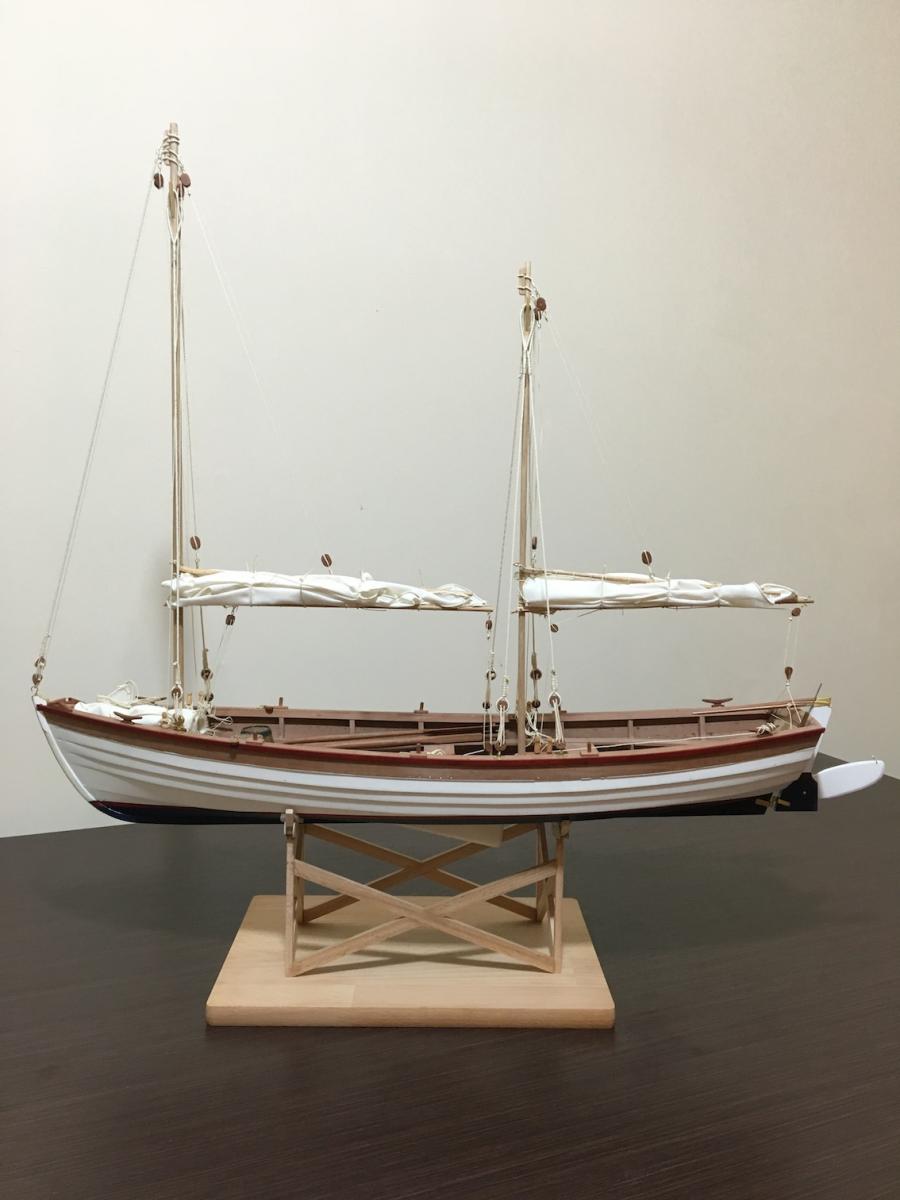
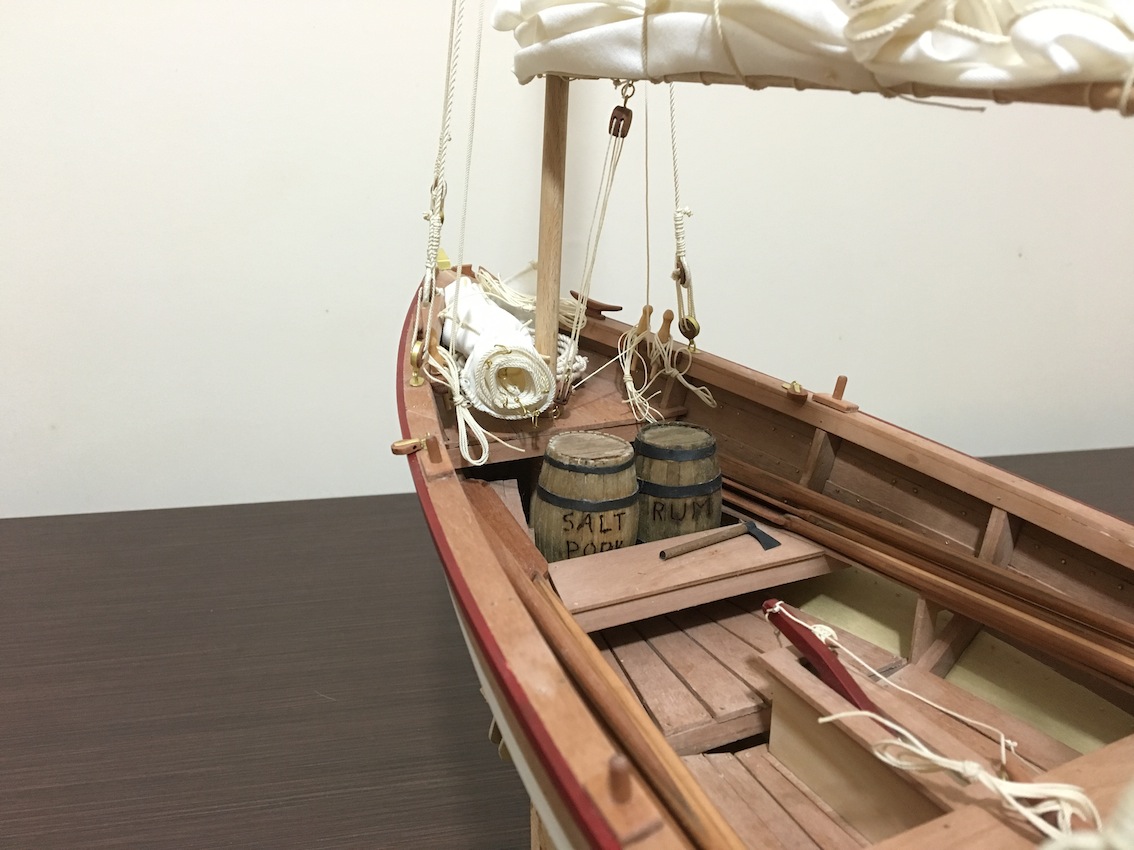
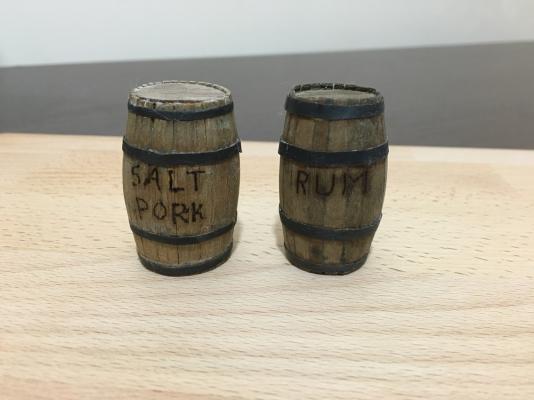
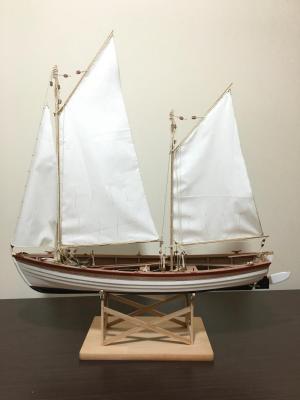
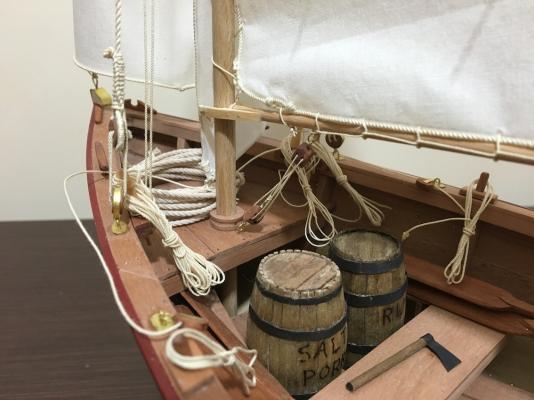
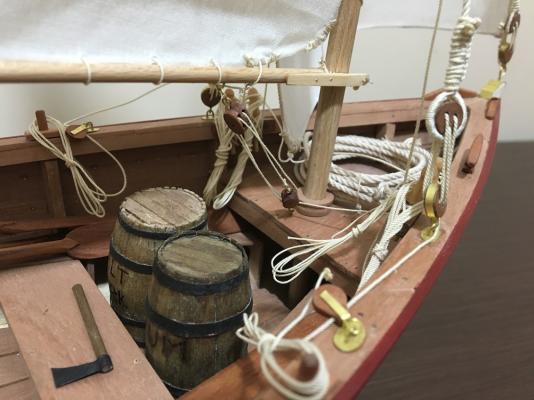
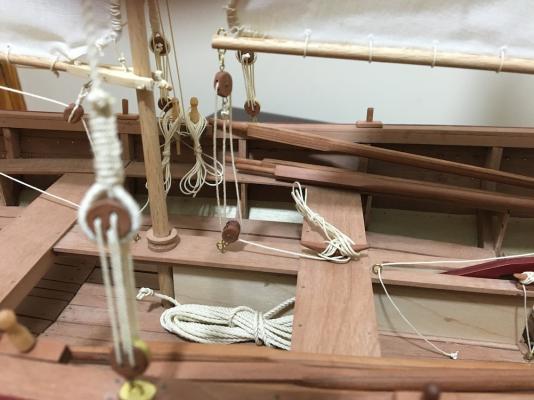
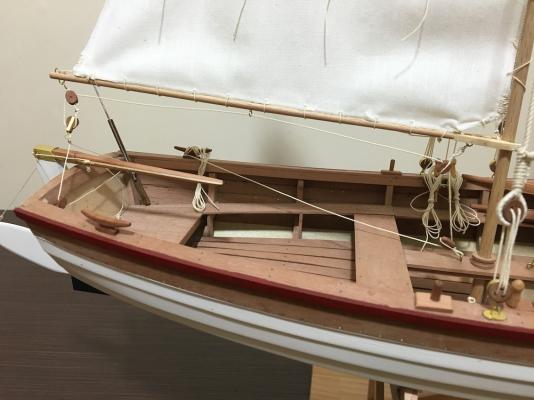
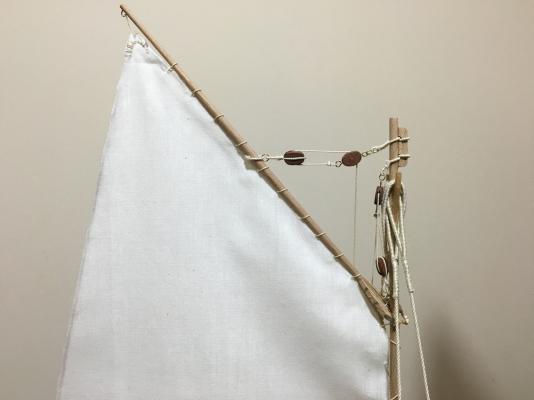
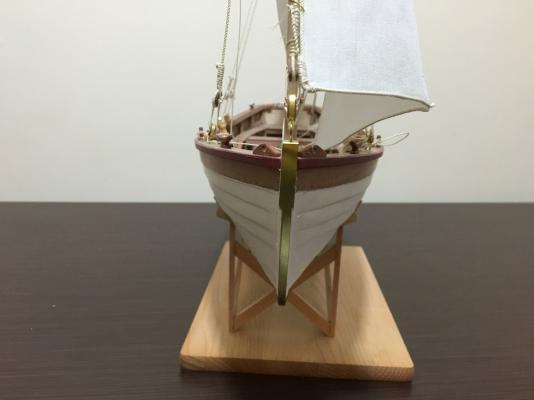
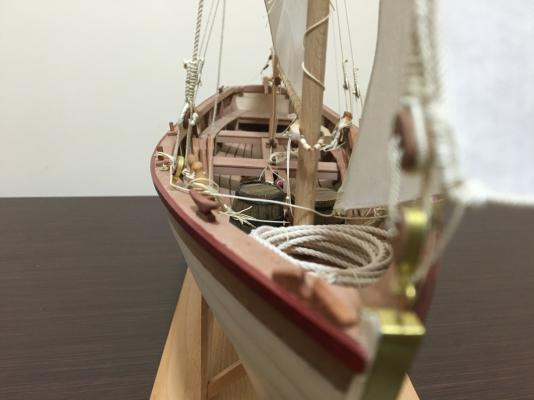
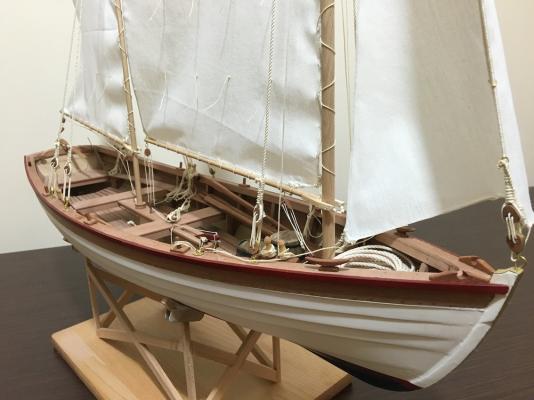
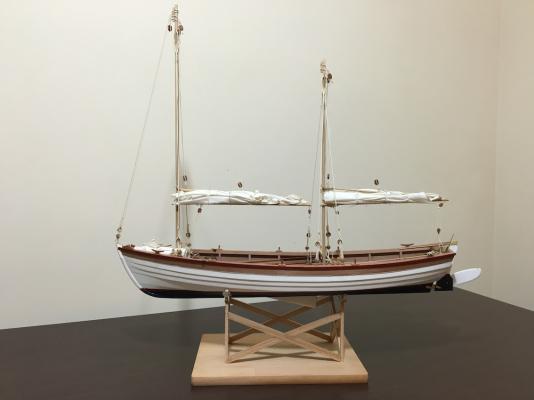
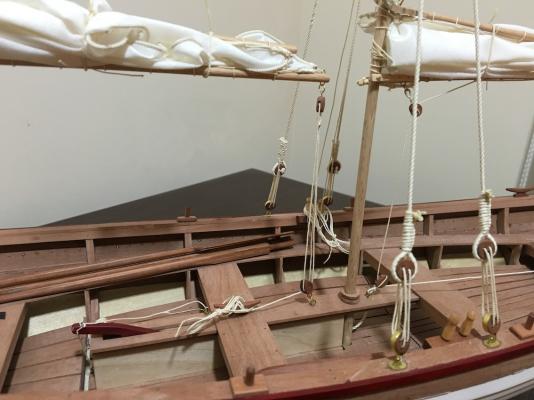
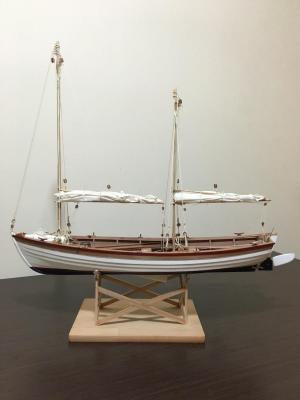
Dear all This is the last photos to be posted as the project is finally competed. The photo quality should be much better as I used the Admiral's new phone. I managed to fully blacken the barrels containing the essential supplies for any yachting expedition. Although the metal is copper so supposedly easy to blacken, there were persistent areas that did not. In the end I took the Dremel to the entire metal surface to get it to blacken. For the future though I will be using thinned black gesso and then dip the parts in Pledge as I found this produces very good results with minimal hassle. I also fitted the reefing lines and made a cradle. Nothing too fancy though, I used leftover wood and a cheap cutting board from Tesco. The joinery was a bid tricky but came out fine, I still need to finish the cradle and add the name to it. Butterfly Explorer! I thought though that it would look better with the sails furled. This was a 21 month journey but it was great fun and I learned a lot. A big thank you for your support and suggestions throughout the built and of course to Tad for releasing such a nice design. Regards Vaddoc


- 253 replies
-
- 17
-
-
- ketkch
- gaff-rigged
- (and 1 more)