

puckotred
-
Posts
430 -
Joined
-
Last visited
Content Type
Profiles
Forums
Gallery
Events
Posts posted by puckotred
-
-
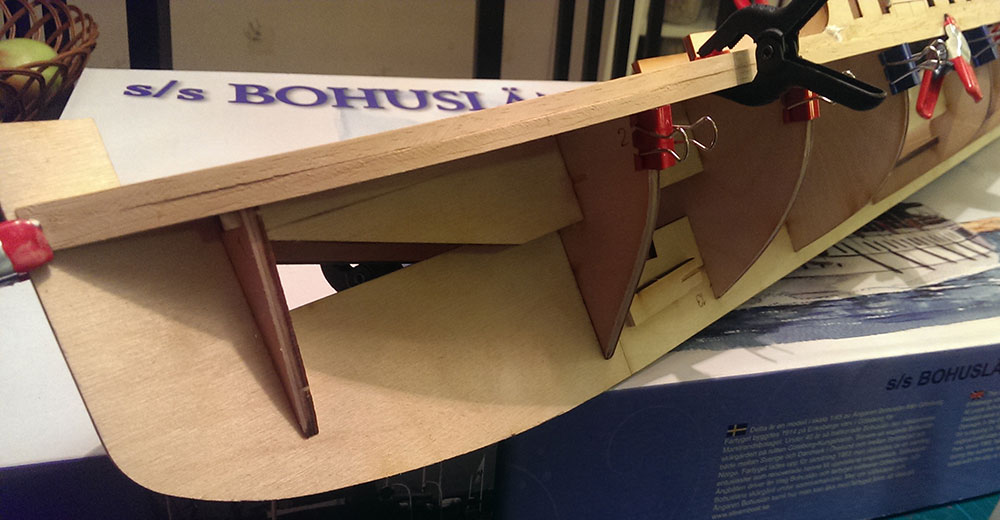
Single planking. But as the planks are not to be seen I can use as much filler I
wantneed to.A kilo or two will do I suppose...

-
The bow is pretty sharp, and at the stern the heaviest curve are the 4 first planks. And the four aft most frames have no gluing points on the section above deck... so no balsa fillers there...
Having shorter planks and more "meeting points" is a good idea. (Though more joints to fill and sand)
There's 8 to 13 cm between each frame. Half of that would be nice.

-
hello Uwe,
Wish I had a building cradle like that when I assembled the frames. It would have made life easier....
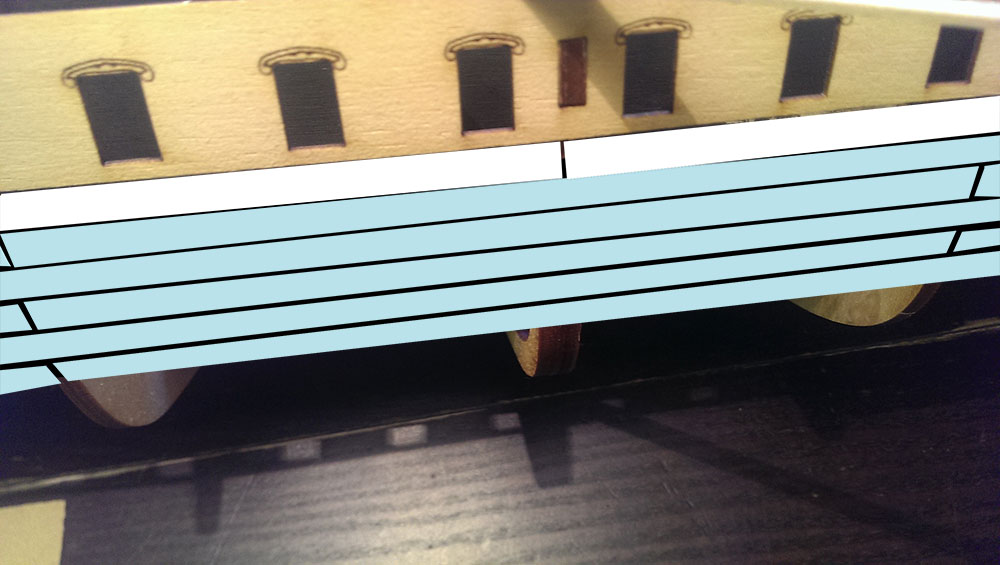
I don't know how hard it would be to handle 1 metre long planks, but what I would have done is this:
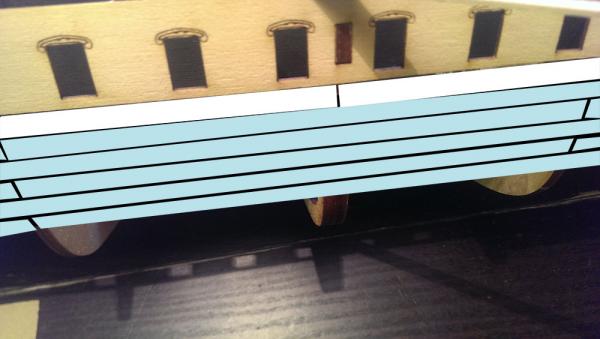
The white is how the planks meet now. The bluish is the preferred way of doing it. Letting the planks meet overlapped.
I imagine the planks would be more manageable.
-
Thanks john,
it's just so BIG. keep bumping it into stuff when I turn it around etc. have to clear the dining room table everytime I turn the hull 90 degrees.
And the ol' Moo I share blanket with is starting to have doubts on where it should go when (if) it's finished.

- Mirabell61 and ronkh
-
 2
2
-
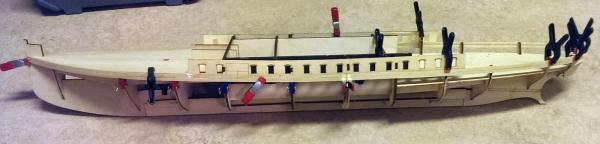
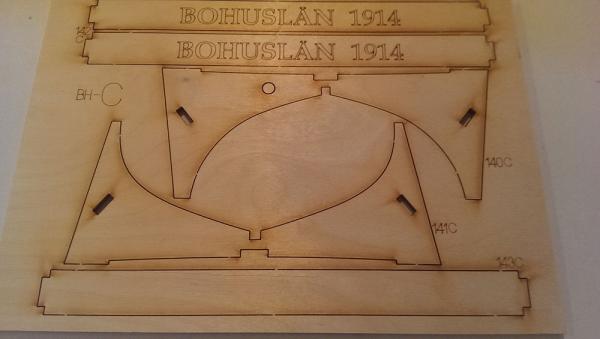
Hello and a happy new year.
A small update,
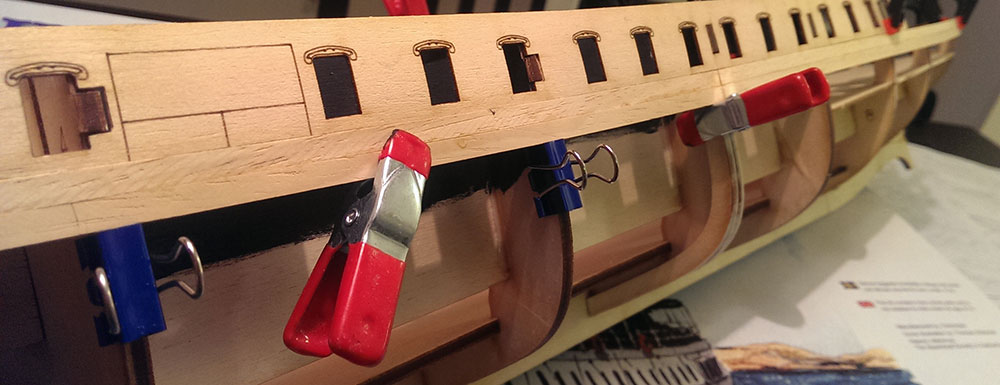
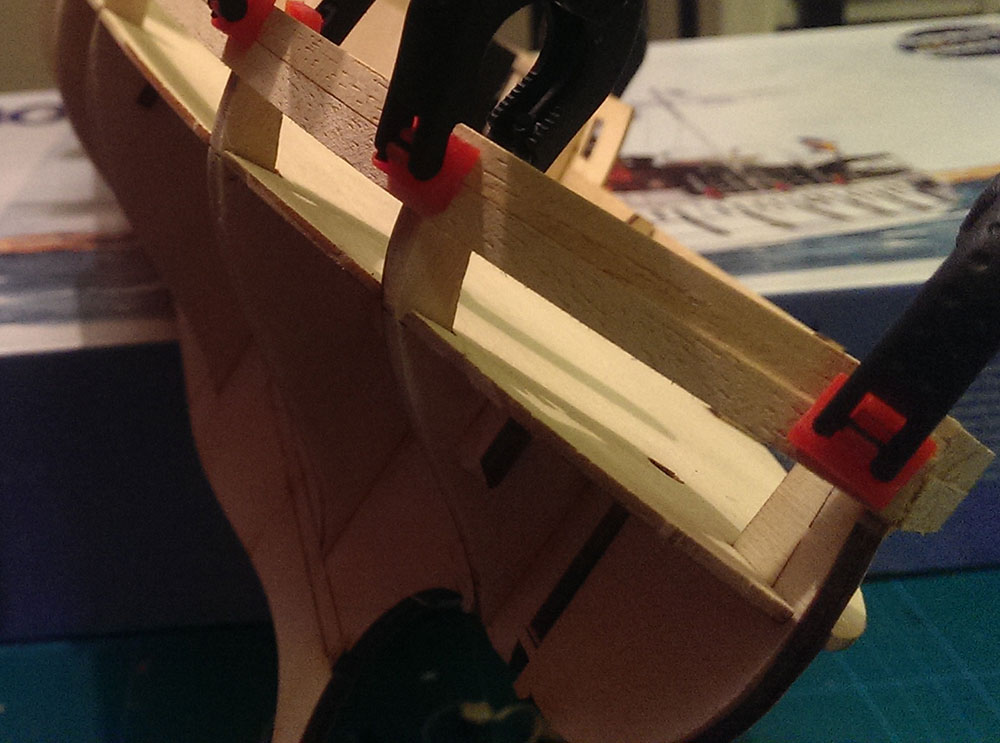
Here is the double frames where the planks will meet in the middle:
I would have prefered to do a overlapping of the planks at the two middle frames but the planks are too short for that.
They are supplied in two lengths with the shorter that fits the rear.
I also missed this problem with the deck and had to break it up again.

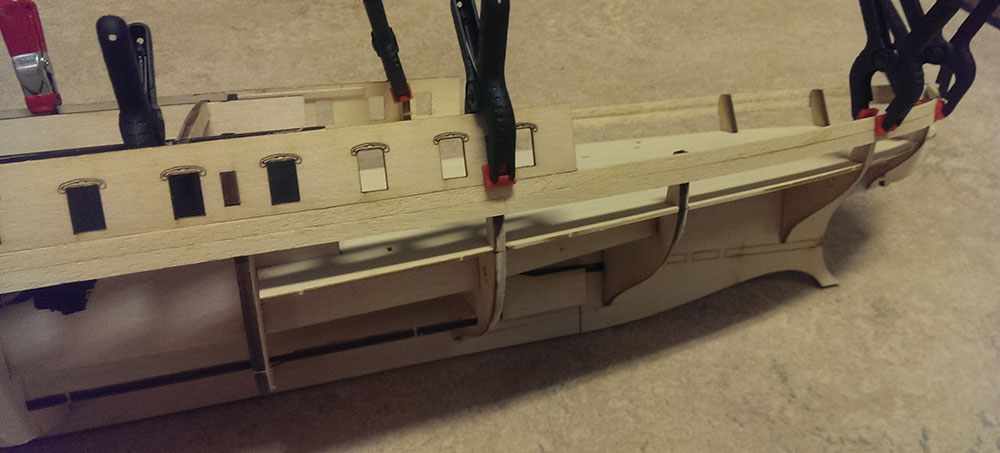
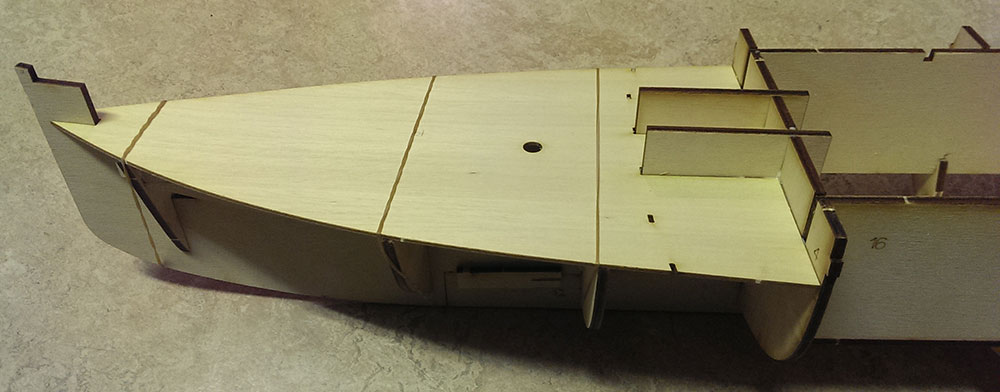
First two planks:


The deck shape does not follow the shape that the planks make at the frames... A lot of heavy sanding and use of woodfiller to come.
I found out that the thin veneer supplied is VERY bristle an breaks very easy. It breaks even when I try to sand it so one has to sand with a light touch and so takes a lot of time...
This is as far as I got yesterday...
- IgorSky, msberkman, Captain Slog and 1 other
-
4
-
Thanks per & per ;-)
and thanks for the pics Uwe. They will be most usefull.
-
Hello uheynitz,
Have you started building the kit? I would love to see some pics of it.
I just finished one of my other kits and will start fairing the bulkheads soon.
I have to do this outside because of the dust, and have to wait for good weather...
-
-
-
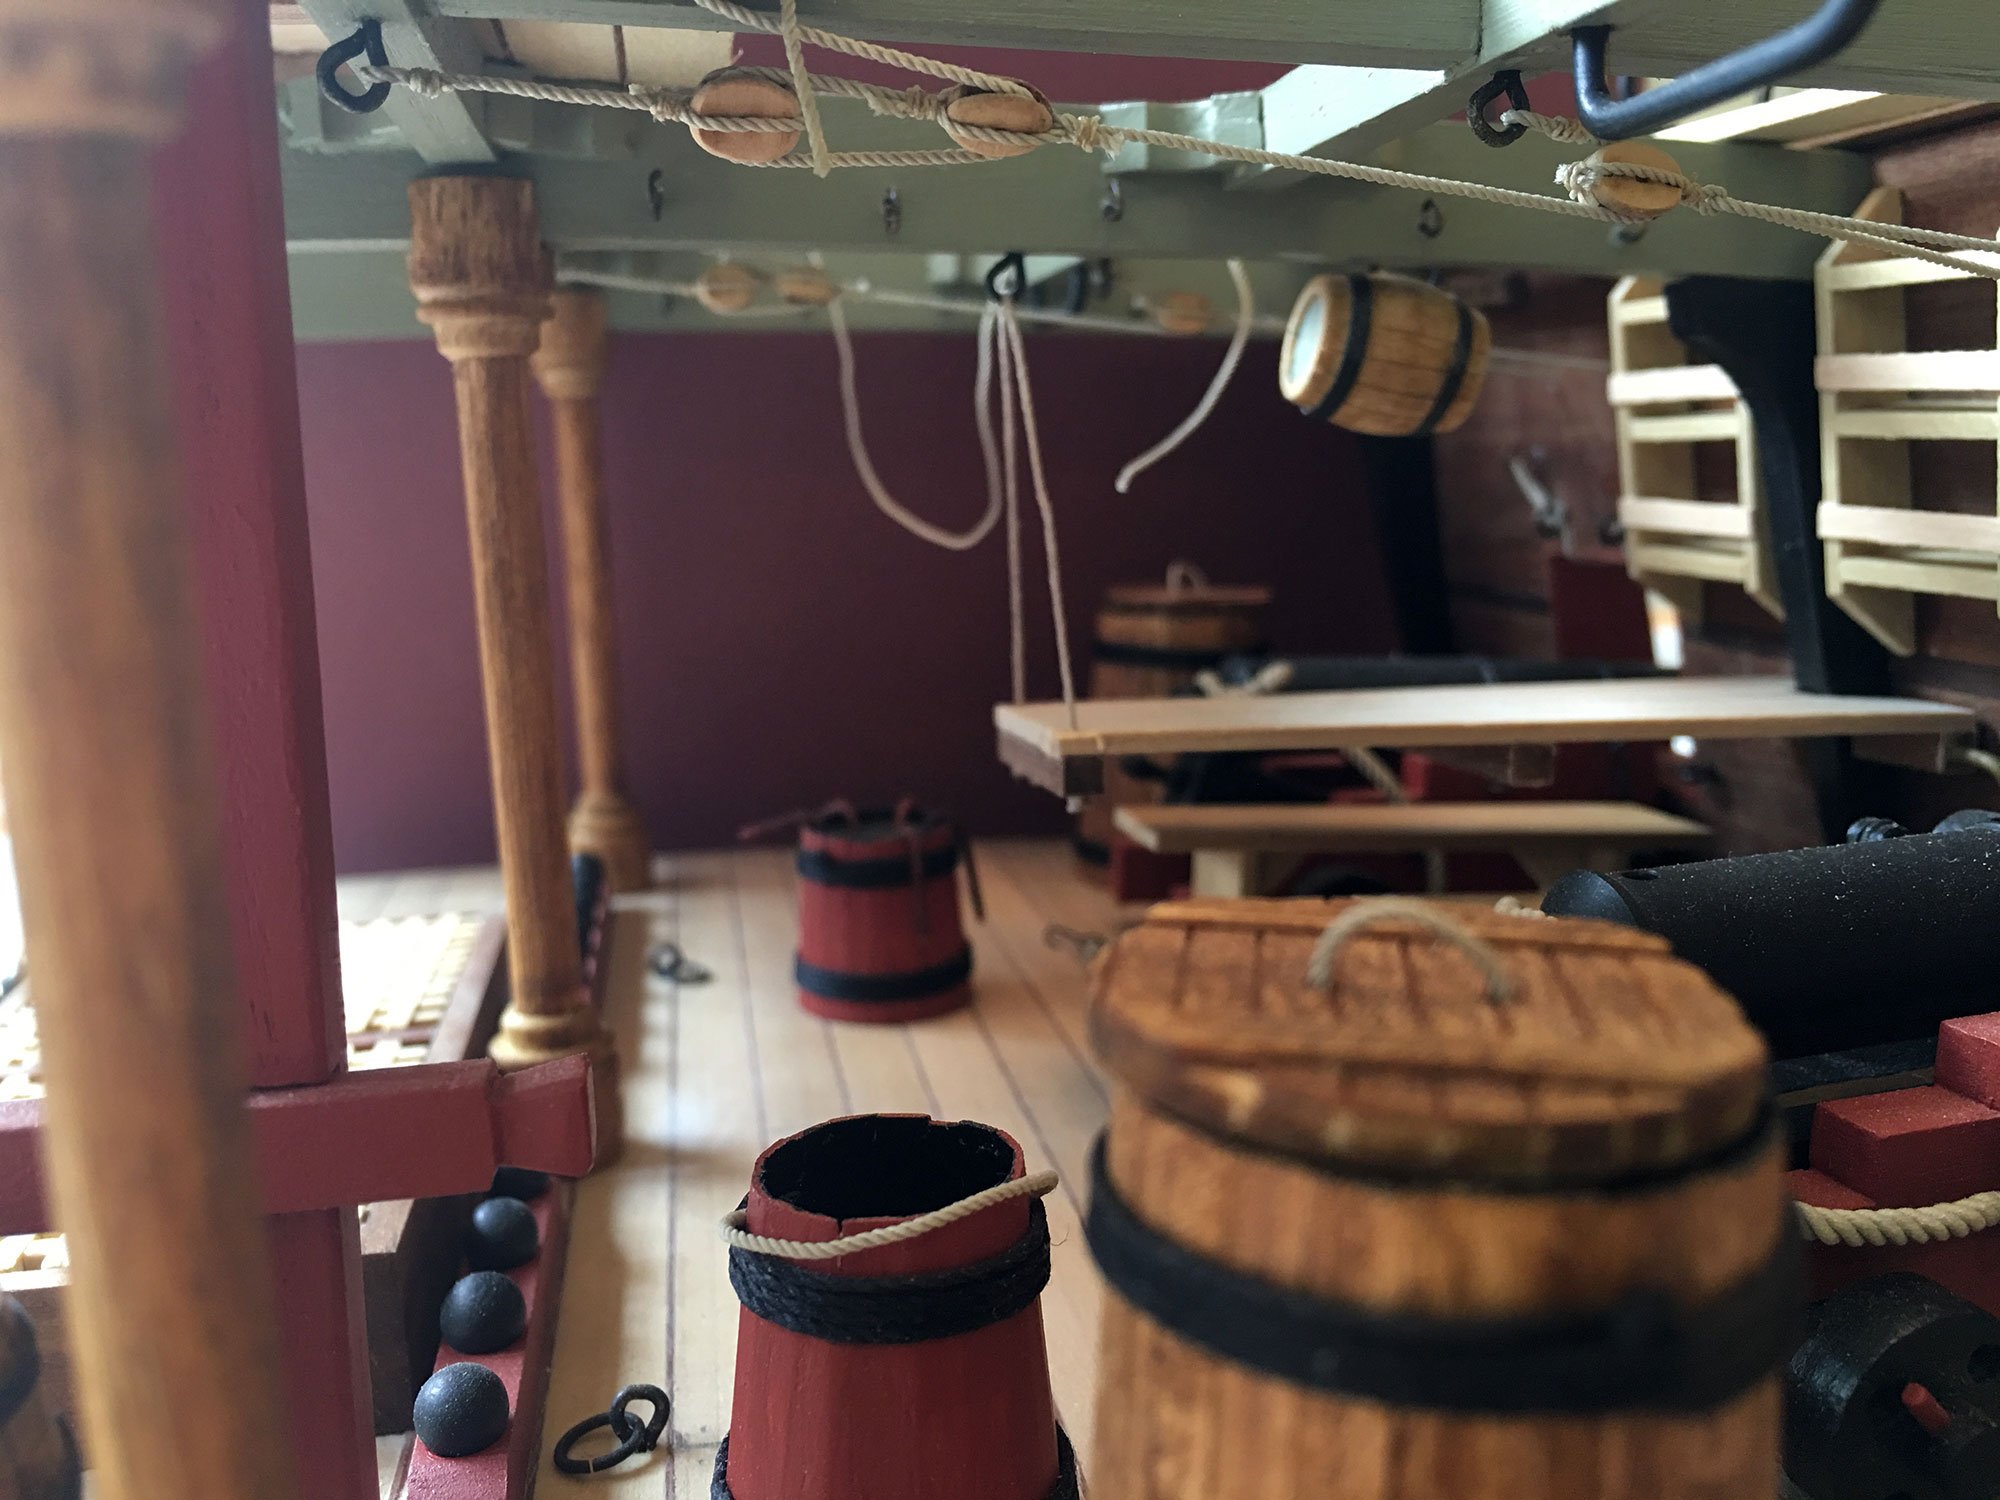
Hello Slog,
Thanks for visiting. The six poles on each side are actually fenders.
I have no idea what they are made of on the real thing but in the kit they're made up of wooden dowels.
-
Thanks Alfons. But Stenpiren is a great big hole right now.... They're building something or another there...

-
Tjenare Alfons, I got the kit from here: MJ-Specialisten it cost me SEK 2530,- and then the light-kit and shipment was included.
In my opinion it's worth the money. (My username should be "PuckoTed" but my fingers slipped.)
I've had a hard time finding pictures and documentation actually. Most of the pics I came across where people drinking beer on board... and travelling through Göteborg city yesterday only made it clear to me that I have no idea where she is...
 I'll try next Saturday to locate her again. After work it's already too dark.
Thank you John...
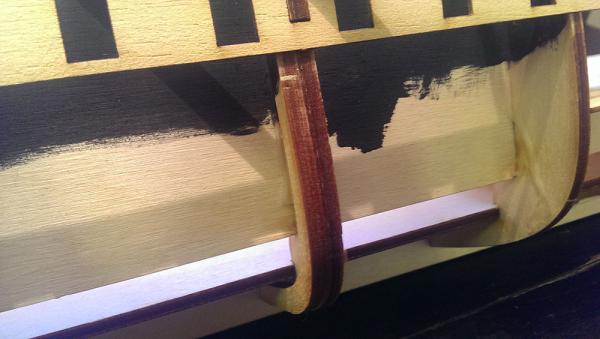
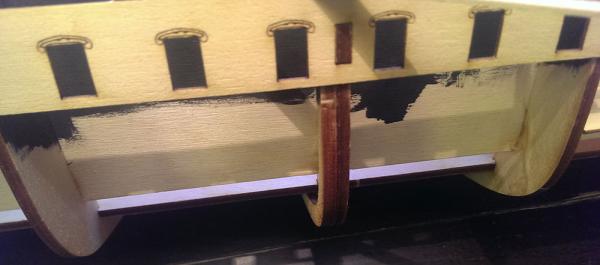
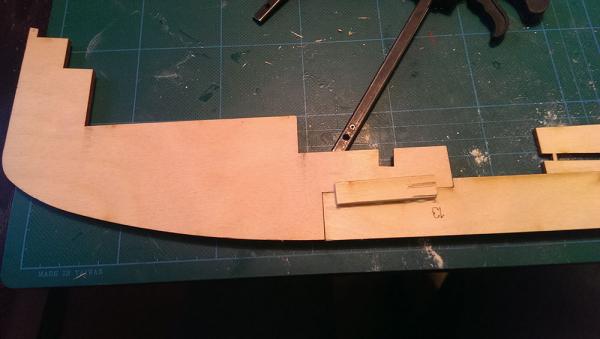
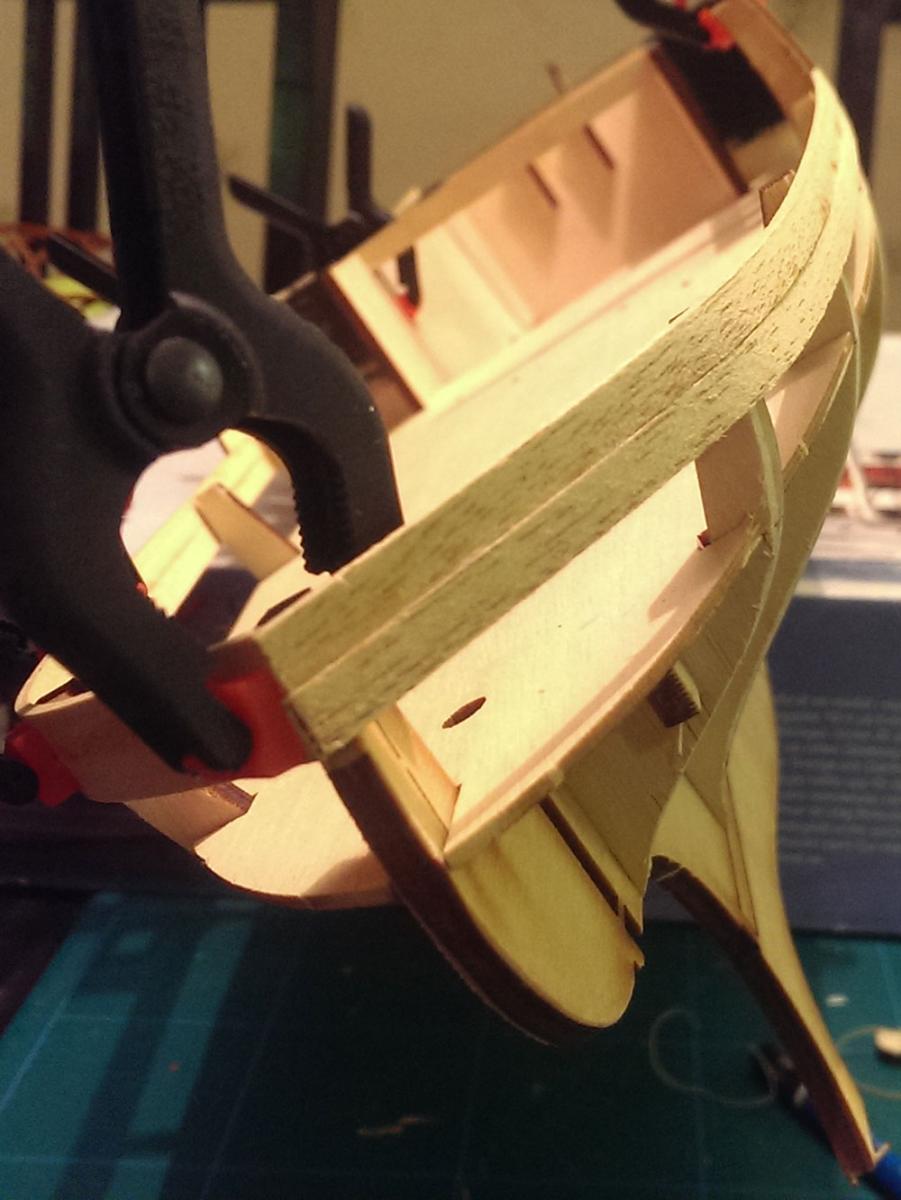
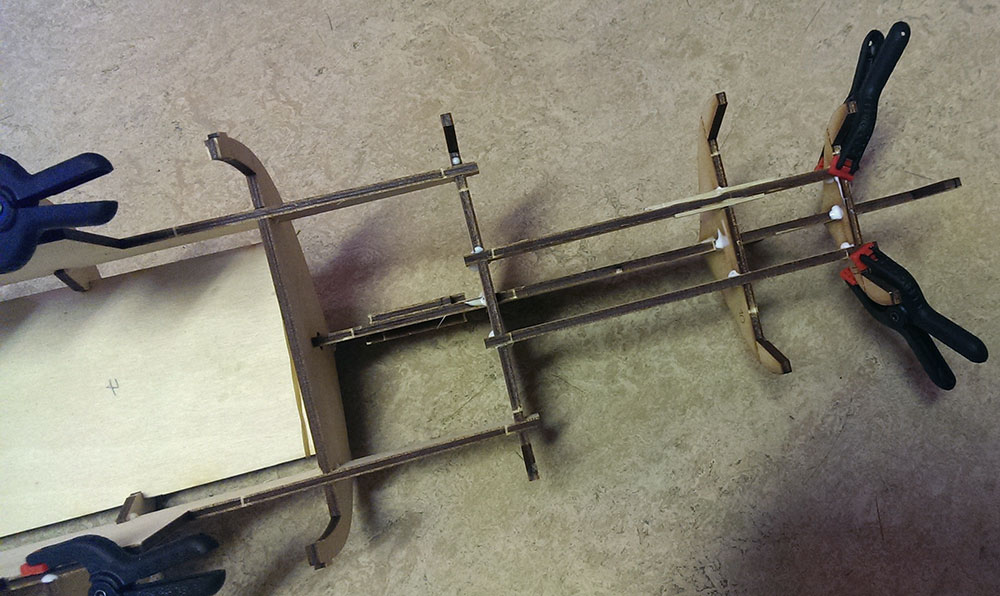
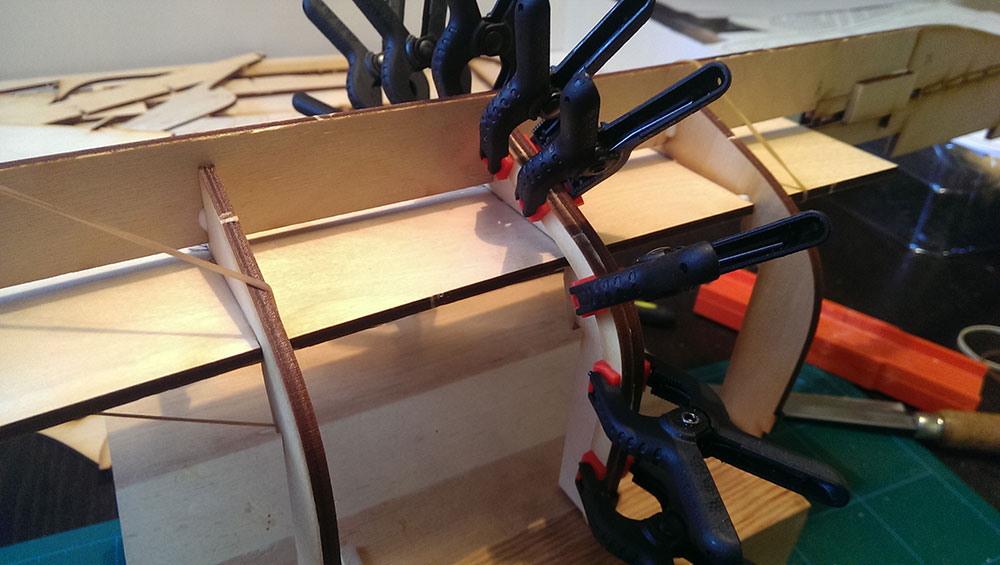
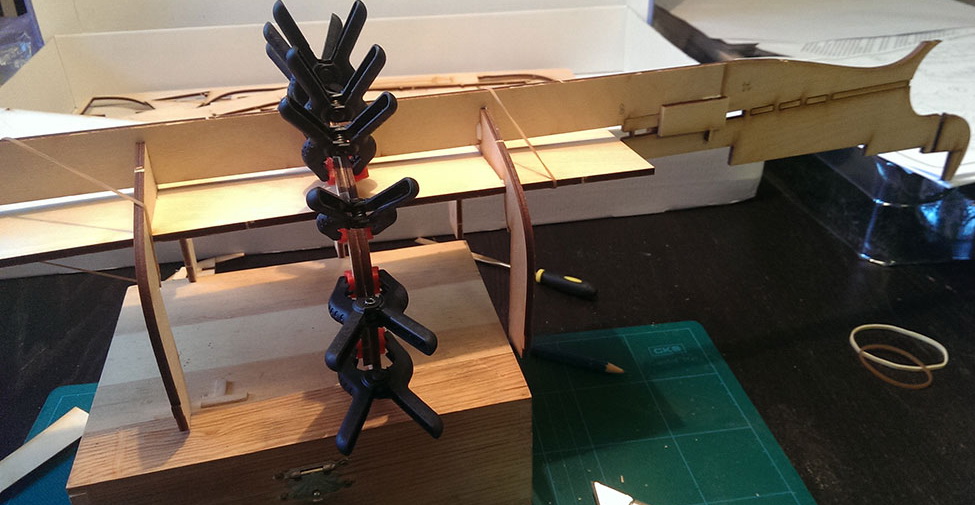
I had to have another go at the hull again.

And I learnt that no matter how much the plywood criss-crosses it doesn't guarantee a straight bulkhead.
It doesn't show but the slots did not line up so I had to break up the bulkheads again and re-glue them.
Glue never bonds as good as when it's in the wrong place...
But everything is lined up again.
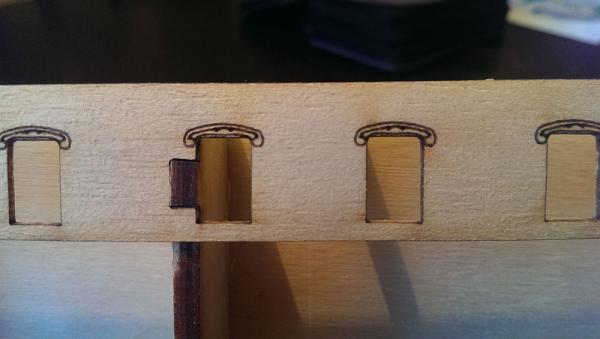
It will be fun making this notch invisible when I paint the hull....
- Mirabell61 and yvesvidal
-
2
-
Kester, Well, just checking if the parts fit and all of a sudden you sit there with a bottle of glue....
Sanding away the burnt parts at the attaching points seems to make them fit like a glove. Some Turk has either done some good thinking or has tremendous luck...
Thanks Nils, it will be a static model.
-
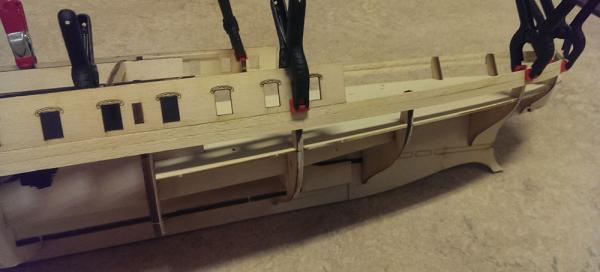
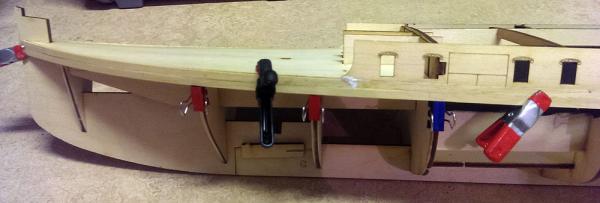
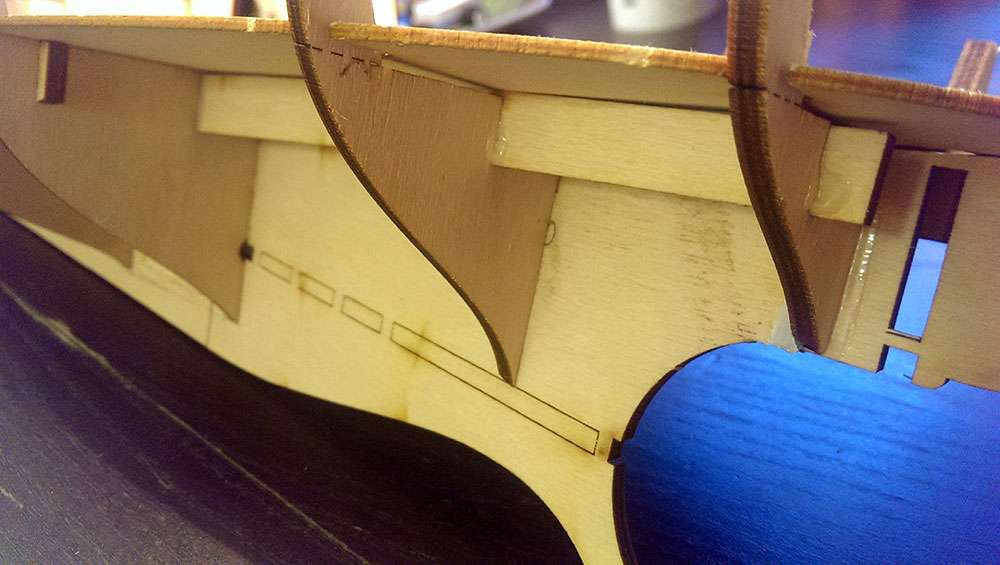
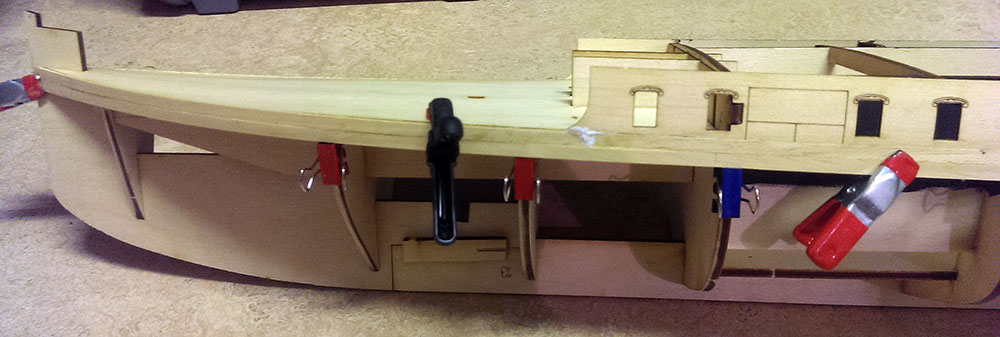
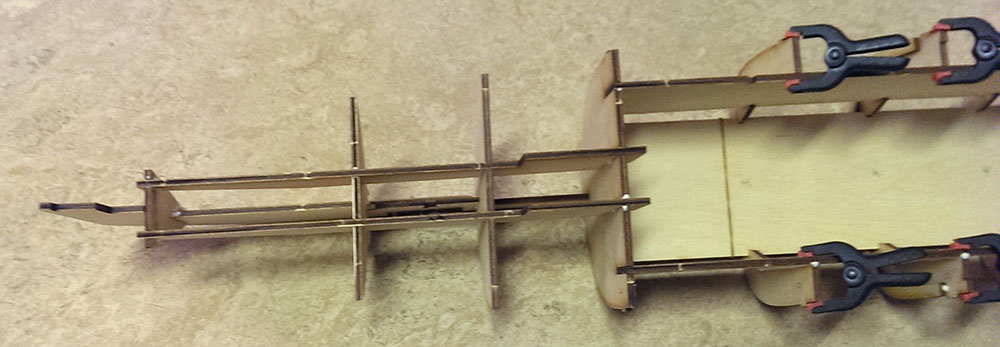
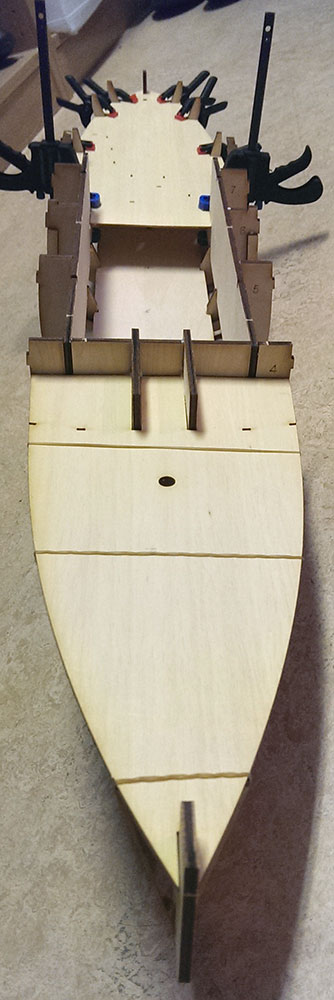
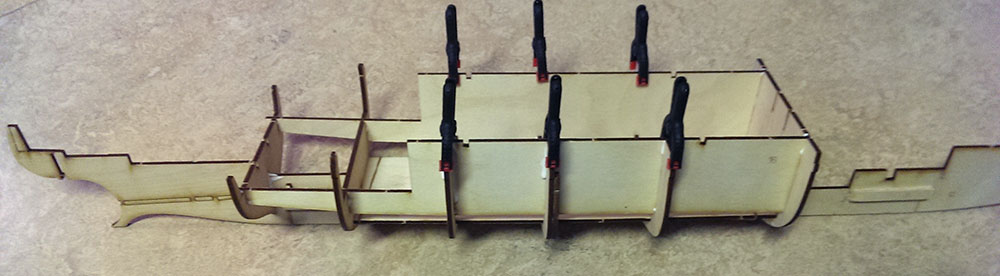
I couldn't leave the hull in its easy-to-break state so I glued on some of the reinforcements at the aft:
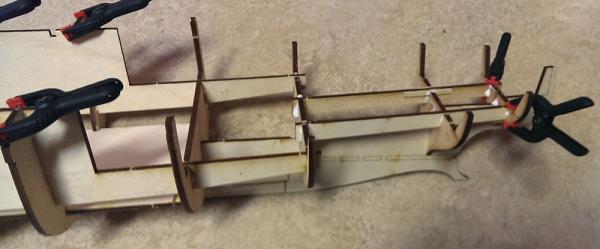
And at the bow:
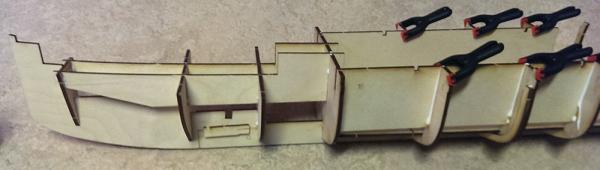

Some more glue just in case...

Had to fit the lower deck in front:

The lower deck in the rear had a little curve so I glued a little to see how it fit:

I actually glued the front deck in place after all:
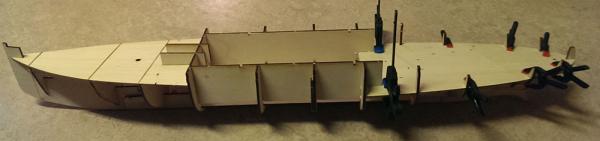

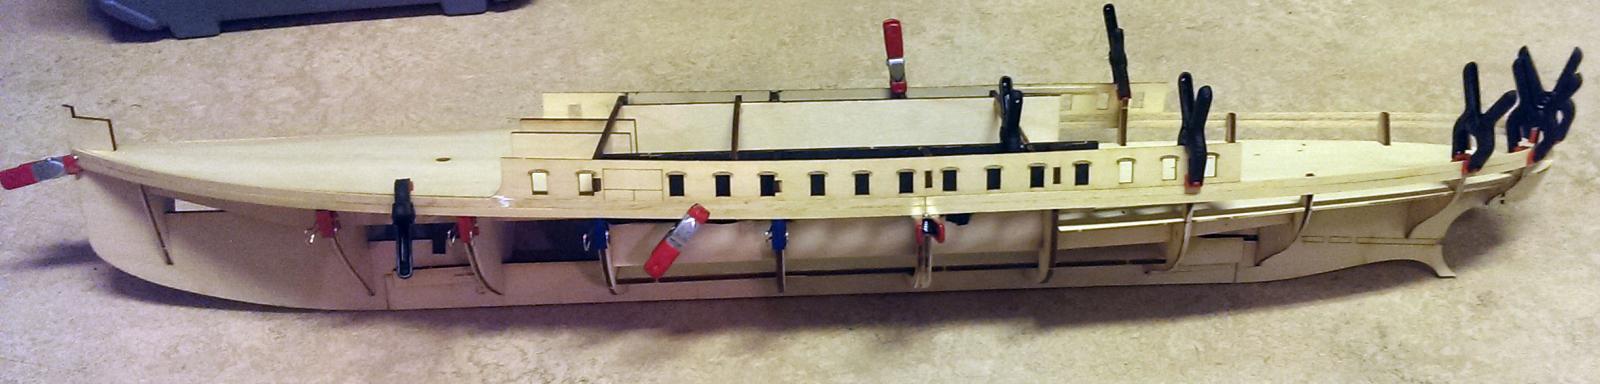
 This is Where I am so far:
-
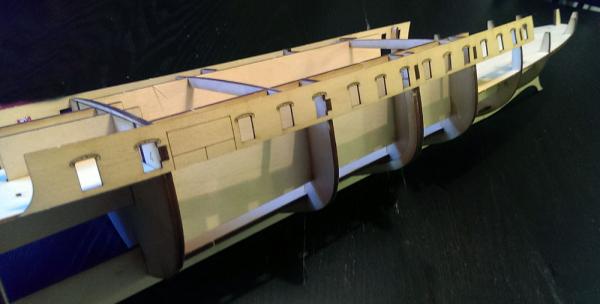
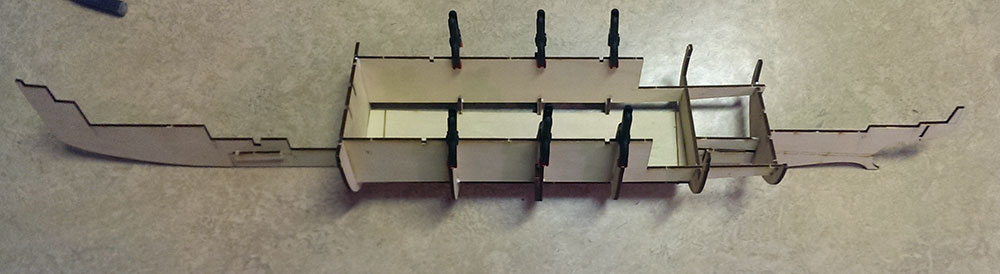
Well, I wanted to finish the rigging of my other model but I just wanted to dry fit some parts of the hull.
All of a sudden the parts just seemed to glue themselves together....
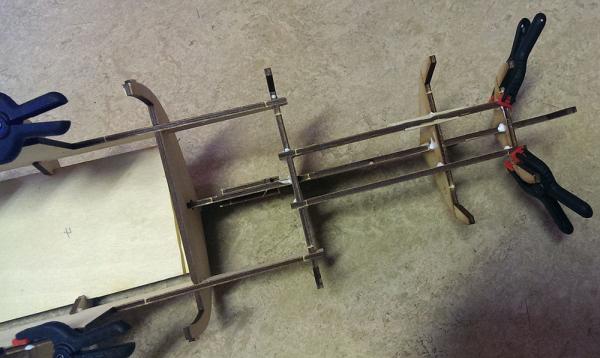
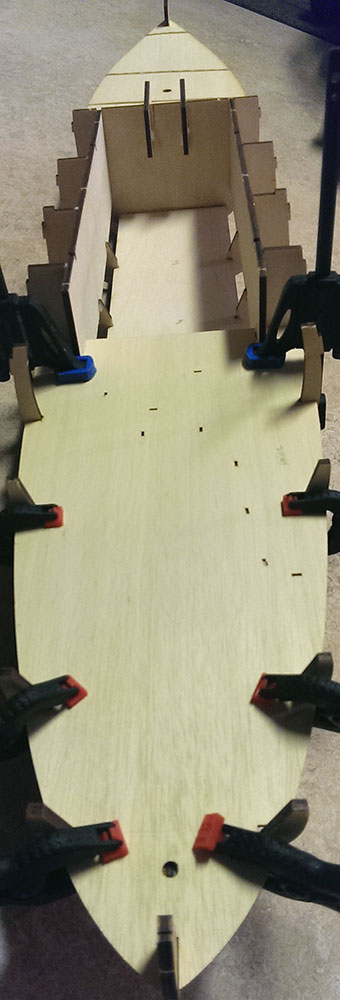
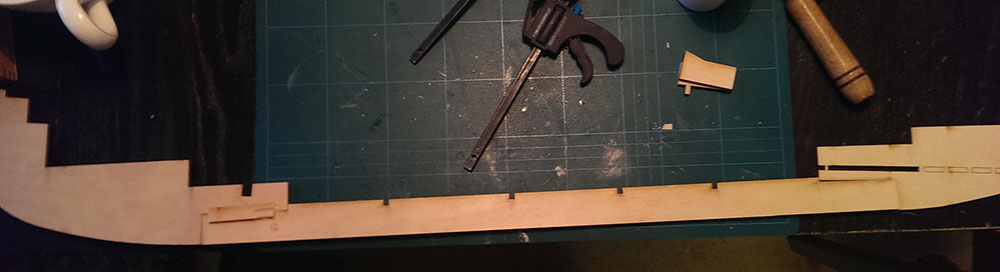
The keel was made up of three parts and it was impossible to fit the other parts without gluing these together with some reinforcements of scrap plywood:

On the middle bulkhead an extra part was to be glued on.
The end of the planks shall meet here. Long planks forward,
And shorter planks aft wards...


Midship reinforcements:

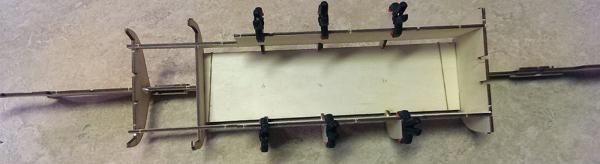

The laser cutting has quite good accuracy so far. After filing away the burnt wood everything fit nicely.
The three-part keel is quite flimsy so I think I have to glue on some more hull reinforcements tomorrow...

- hexnut, yvesvidal, Stockholm tar and 3 others
-
6
-
Kester, too bad I'm a lousy scratcher... (though I'm damn good at scratching my wife's back)
Here are the Swedish kits:
http://turk-model.com/eng/ (they have not yet put up Bohuslän on their webpage. But they made the kit, says so on the box
)Jim: Hope I won't disappoint you all now...
-
Hello Nils,
You did a great model of the old Billings kit. A lot of added detail.
The Billings was of Bohuslän as she was delivered from the shipyard in 1914 and this kit is as she is today. (more or less.)
There are a lot of details lacking in this one. For example the lower wale is missing and the bottlescrews are badly done.
I'll try and do my best but it will not come near your quality I'm sure...
-
I didn't know Sweden made model ships.
Hello Brian,
Well neither did I, and as it turned out, they don't. A Turkish manufacturer called Türkmodel made the model. For the Swedish company NCB – Nordic Class Boats.
-
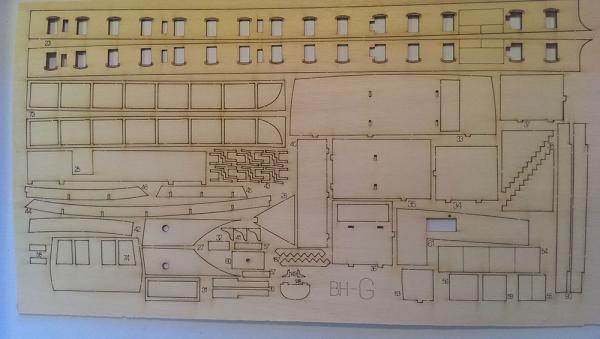
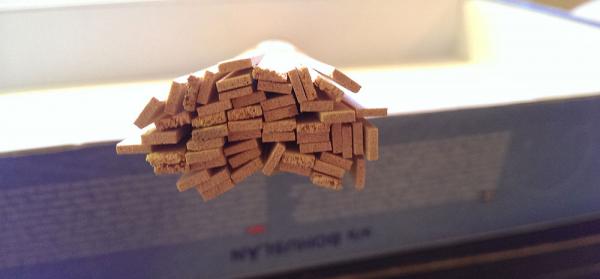
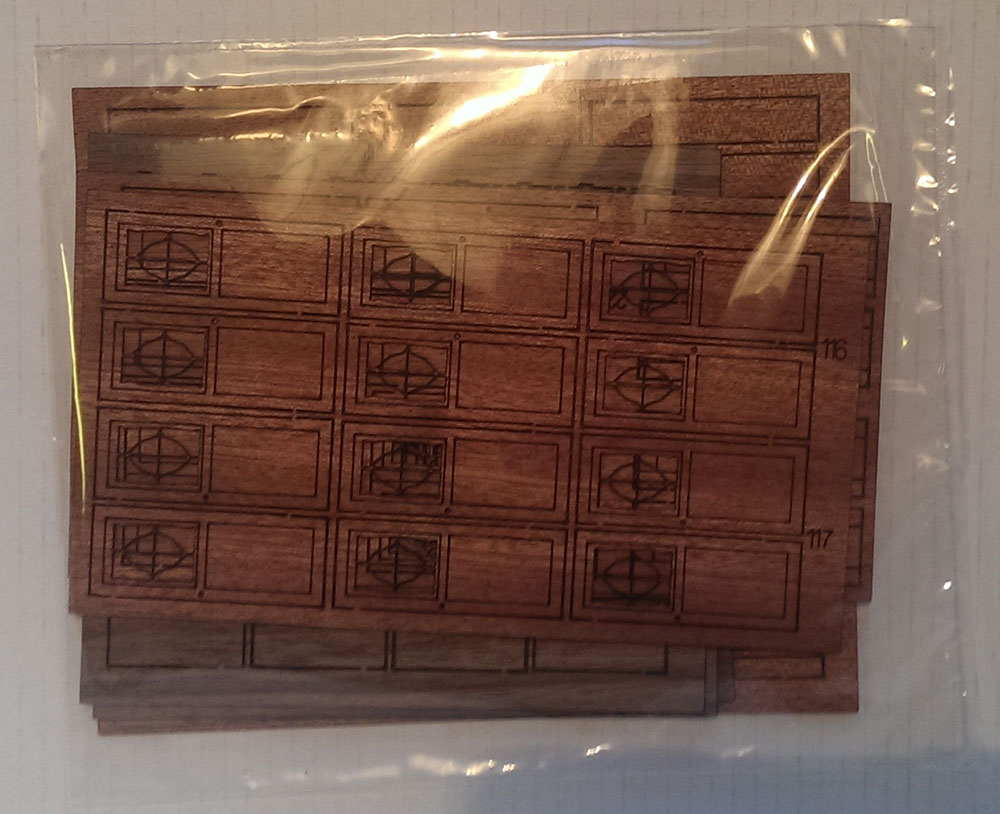
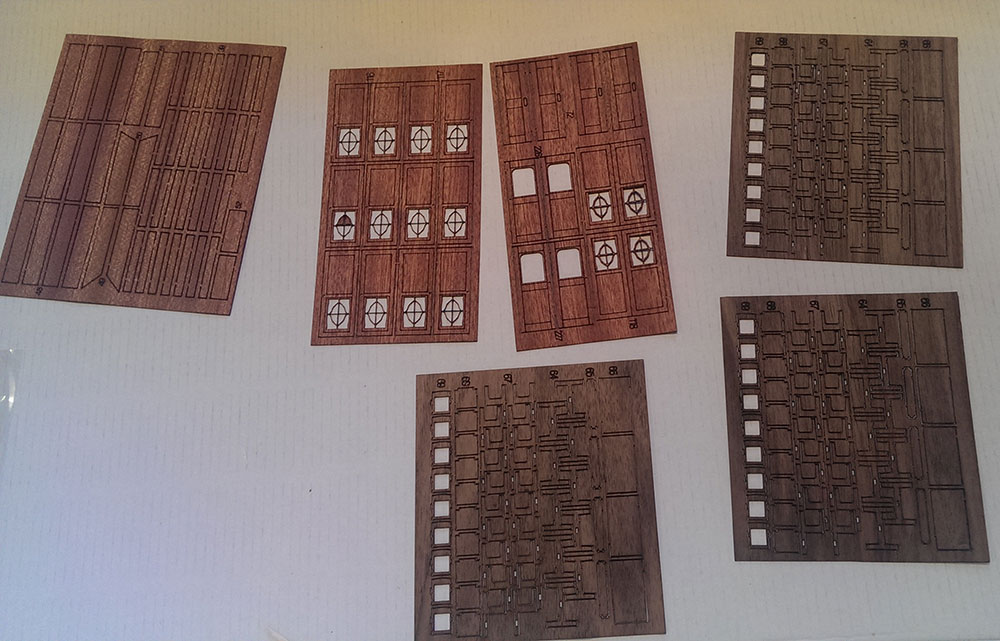
The last batch:
A bag of mahogany:
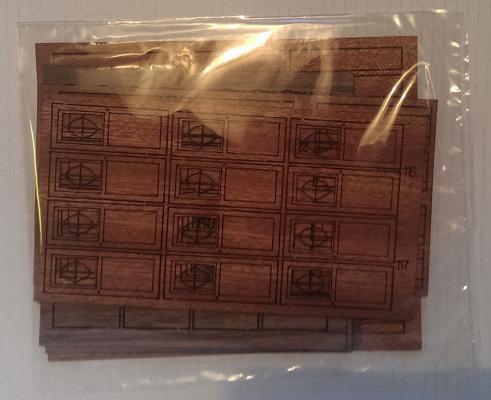
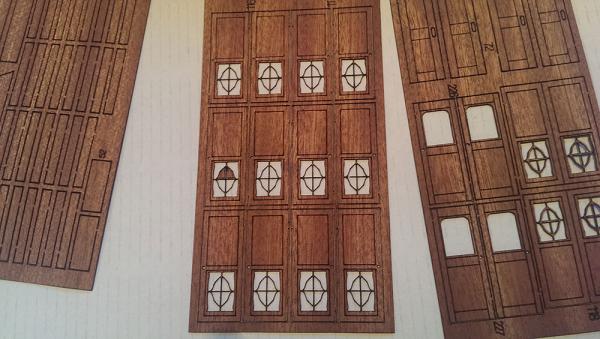
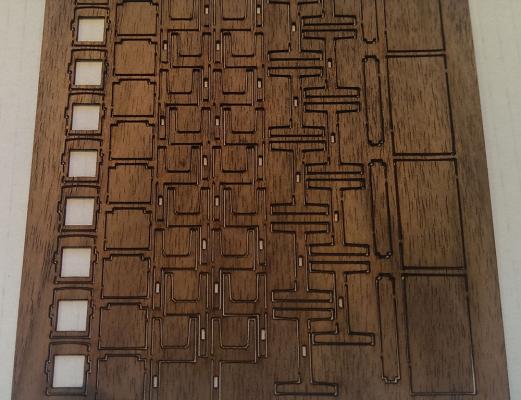
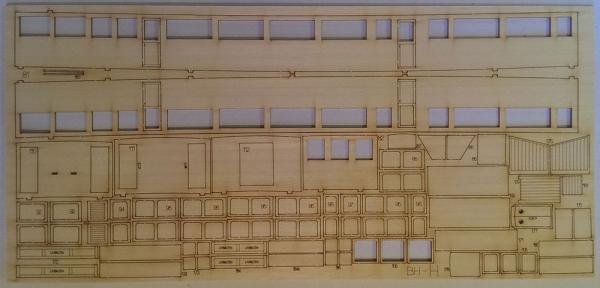
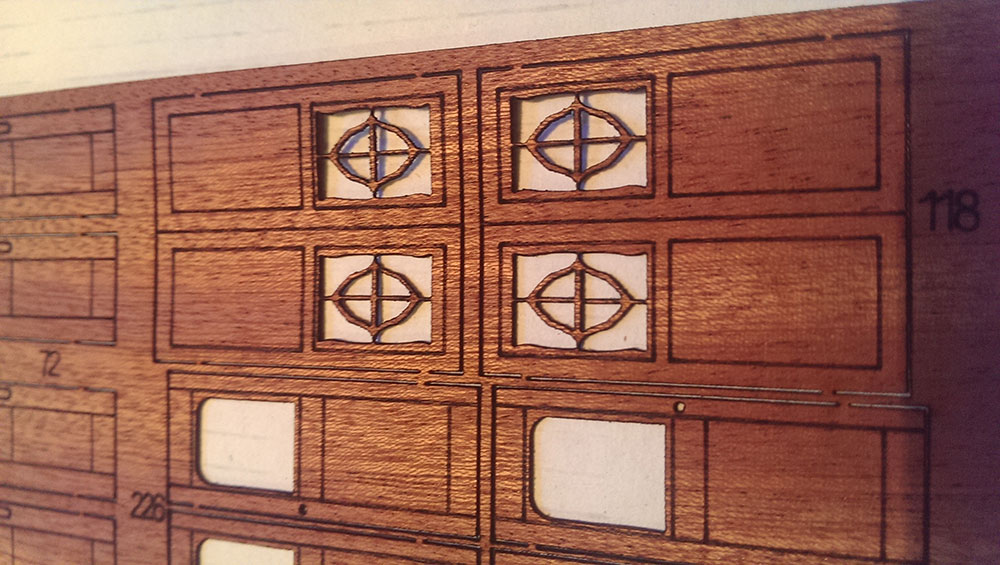
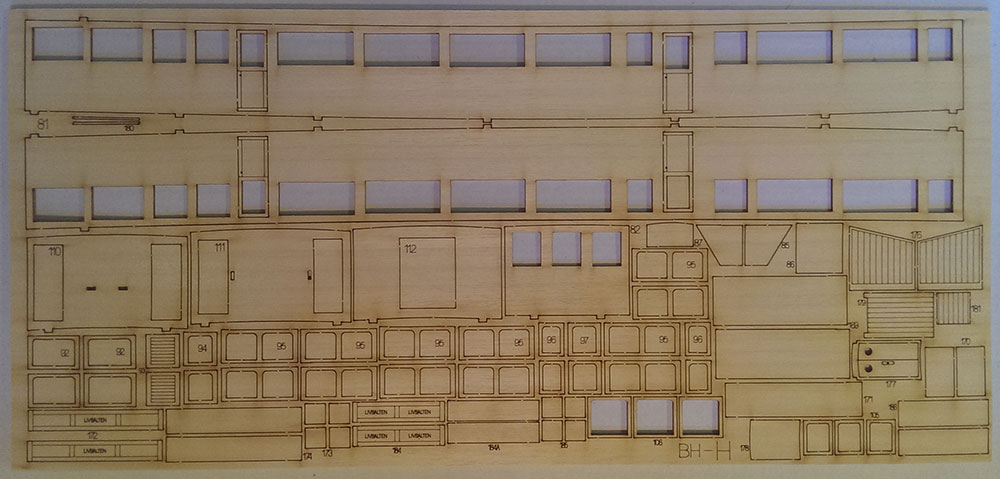
Doors, panels and steps:
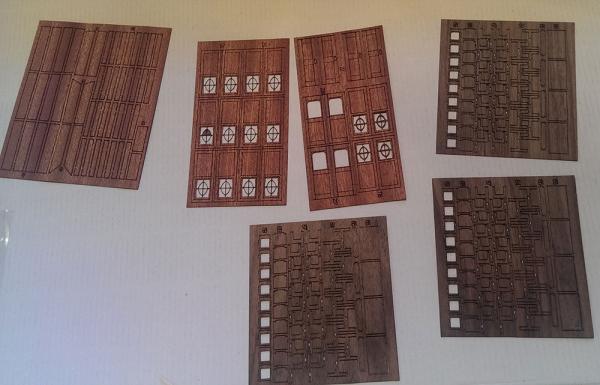
Tables and chairs:
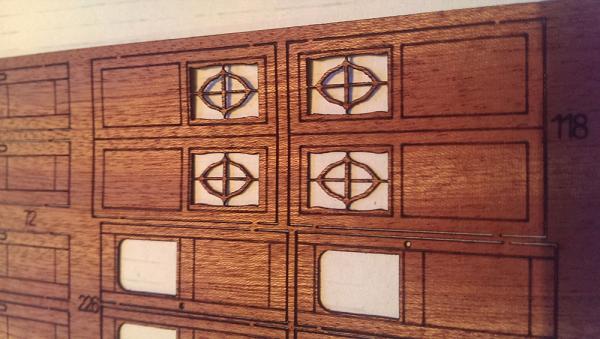
Closeup of the doorpanels:
Colour scheme?:
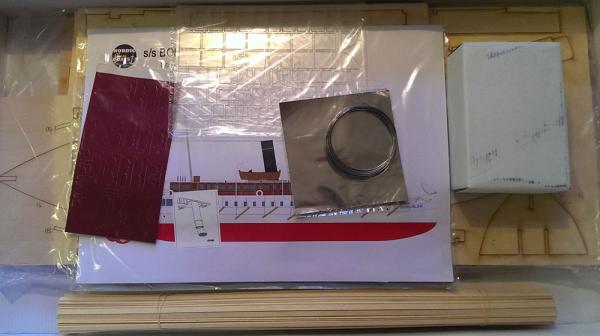
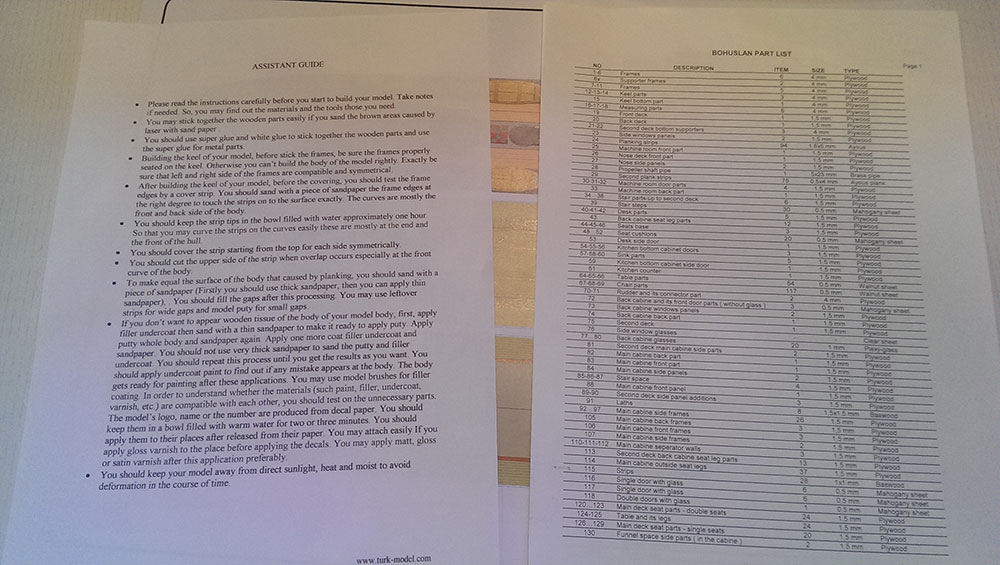
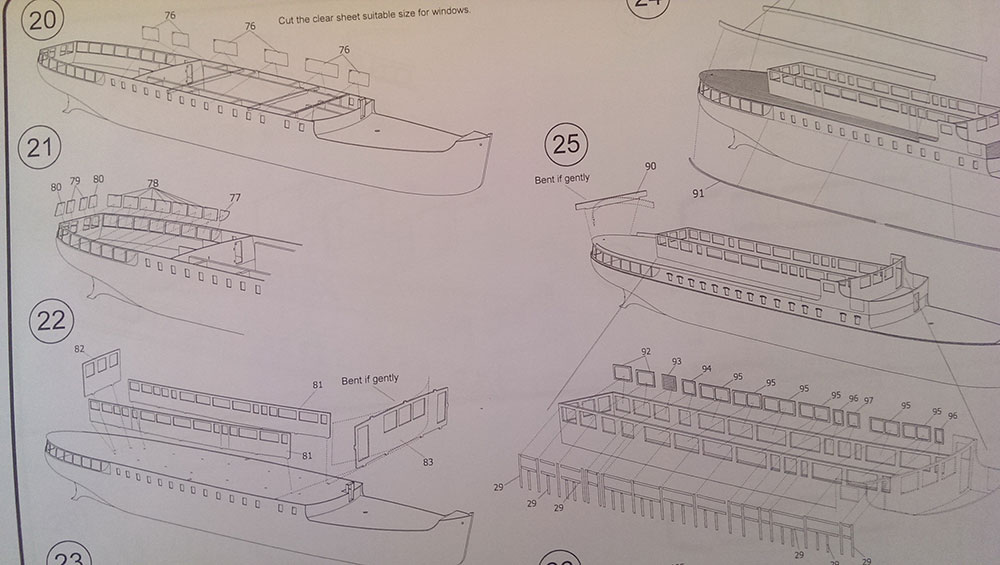
This is the full written instructions on the left: On the right parts list.
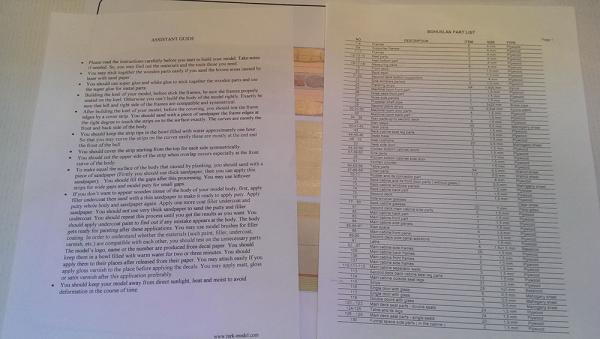
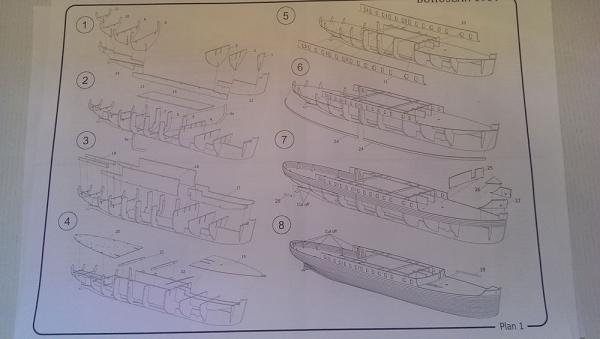
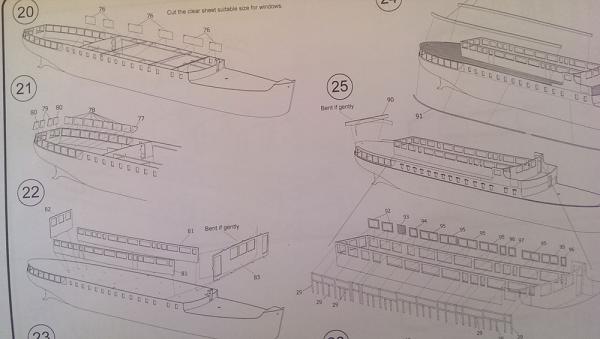
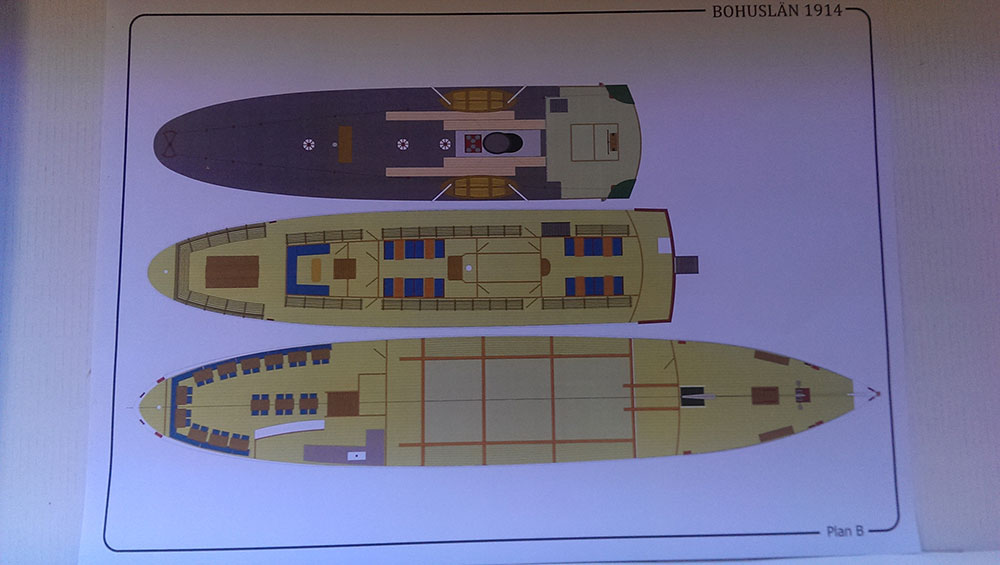
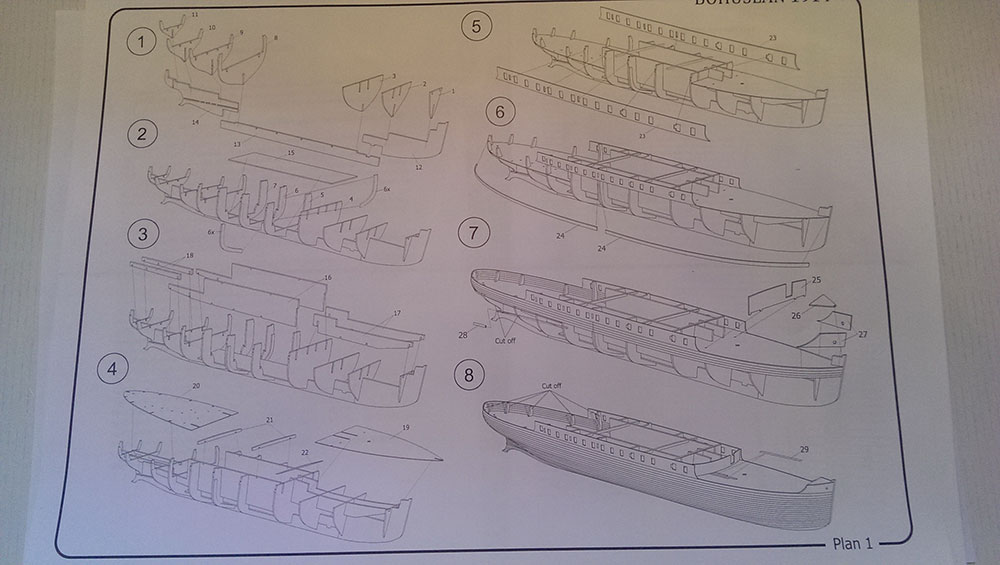
Building plans: Quite good actually. But it feels like building a plastic kit...
Example of the wiring plan:
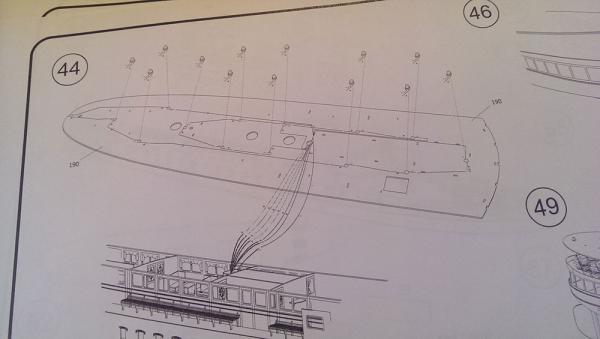
And that's it from the box!
I'm quite satisfied with the quality of the kit. I don't like the plastic parts though.. The winch is made of partly white metal and partly plastic. Strange...
I don't understand why they have instructions in bad English since the kit is manufactured for Sweden. How hard can it be to translate one page of instructions (that mostly explains how to soak planks) and a few sentences scattered around in the plans...
Not that it is a problem for me personally but I know some old farts that don't understand a word English and shy away just because of that...
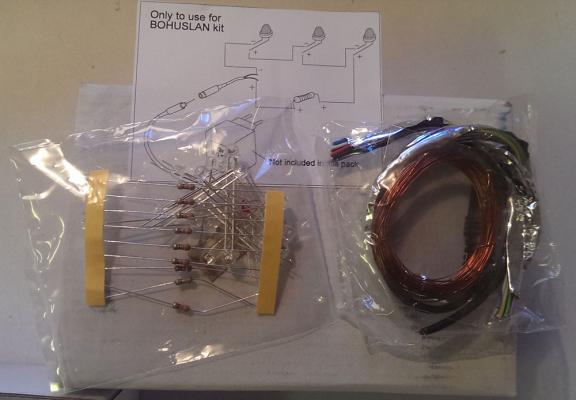
The LED kit is a fun extra. It usually cost SEK 180 but I got it for free. The kit cost me about €280 and that makes it a lot of ship for the money.
I have some rigging to do on another model before I start building Bohuslän. A couple of days...
- maggsl_01, Captain Slog, yvesvidal and 7 others
-
10
-
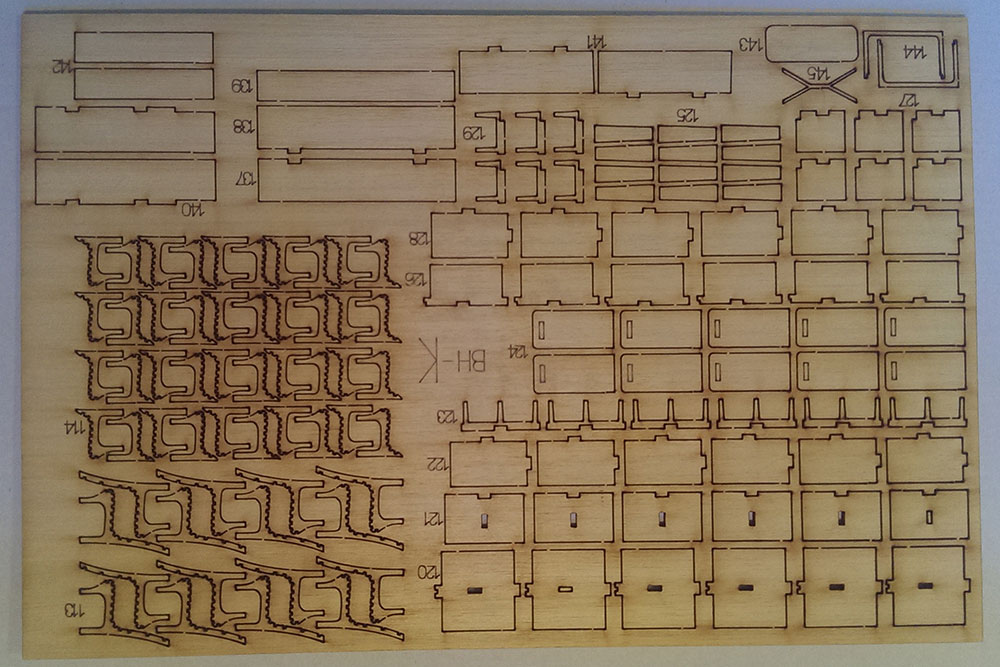
More:
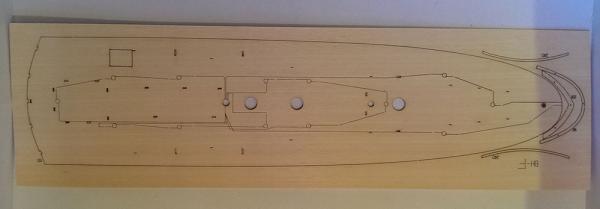
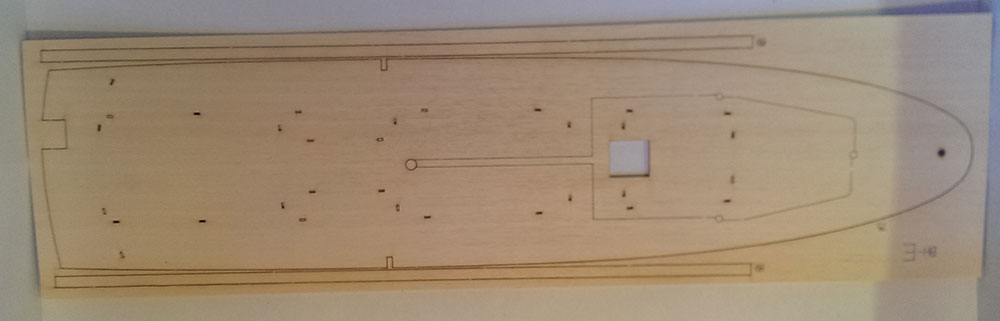
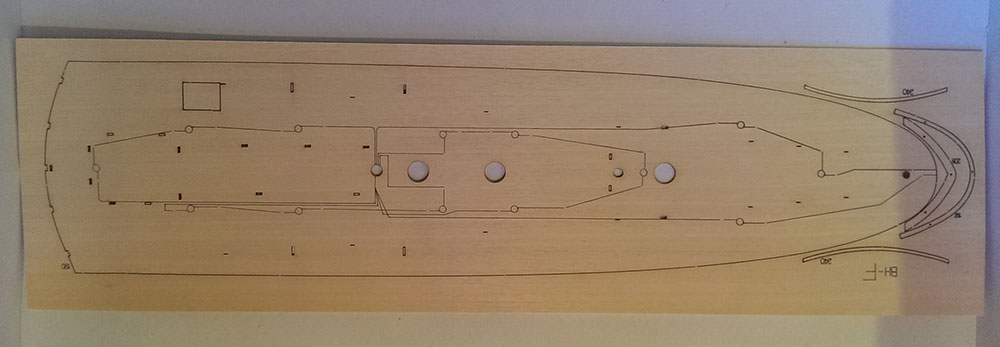
Various decks: with grooves for wiring.

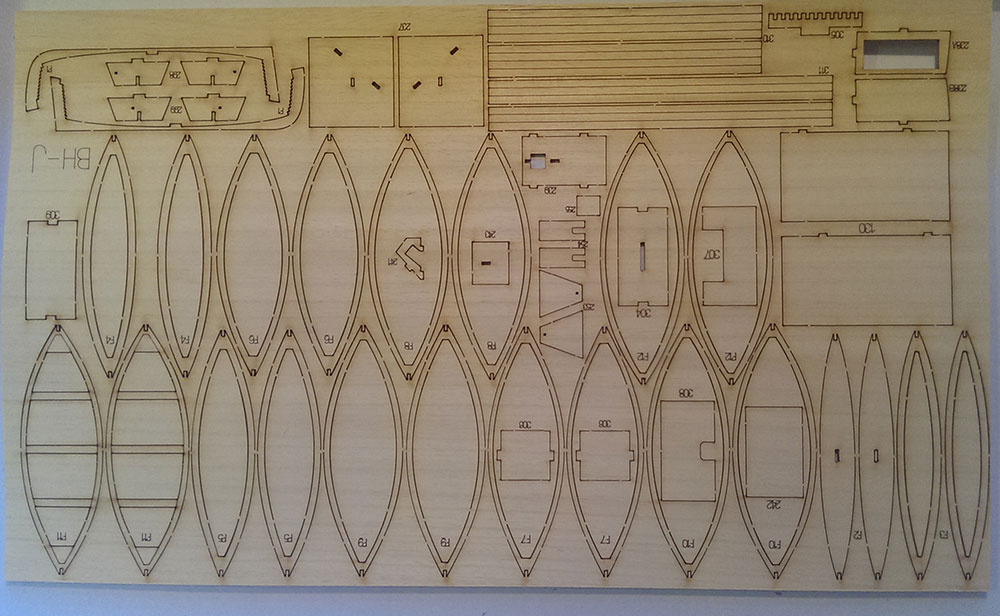
Lifeboats:
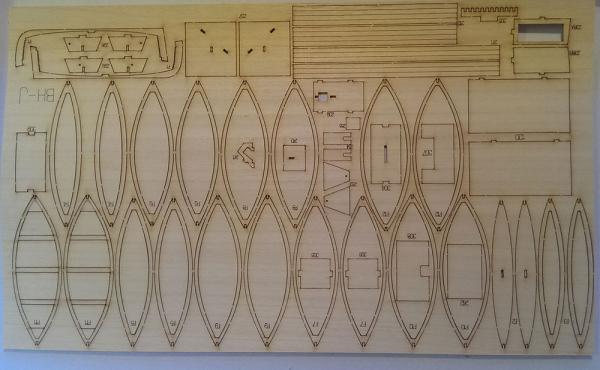
various:

Benches:
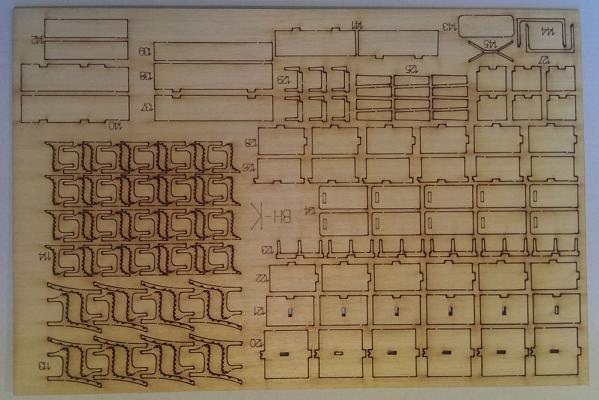
various:
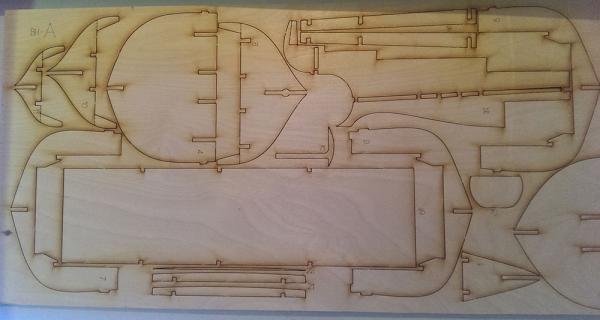
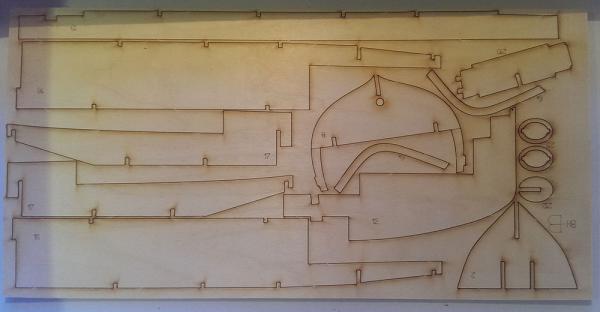
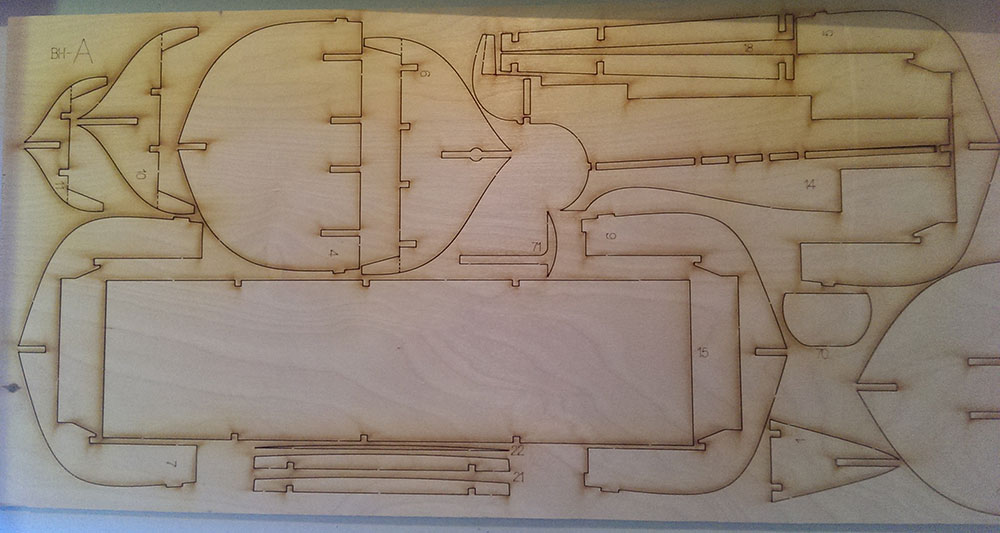
Hull parts:
To be continued...
- yvesvidal, avsjerome2003, IgorSky and 3 others
-
6
-
More of the stuff in the box:
Bag with plans:

Planks:
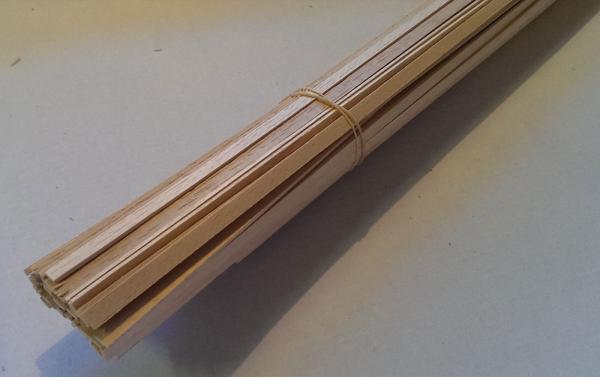
Quality kind of OK: Called Ayous, like harder balsa and easy to bend. will be difficult to get a smooth finish.
A small box...
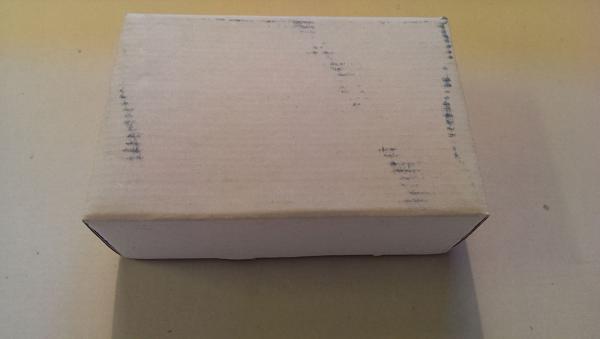
...with lighting LED's!!!

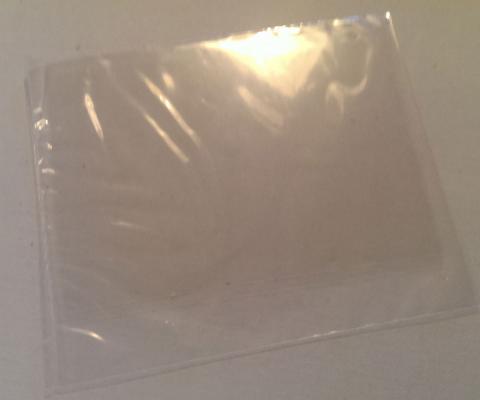
Plastic sheet for windows:
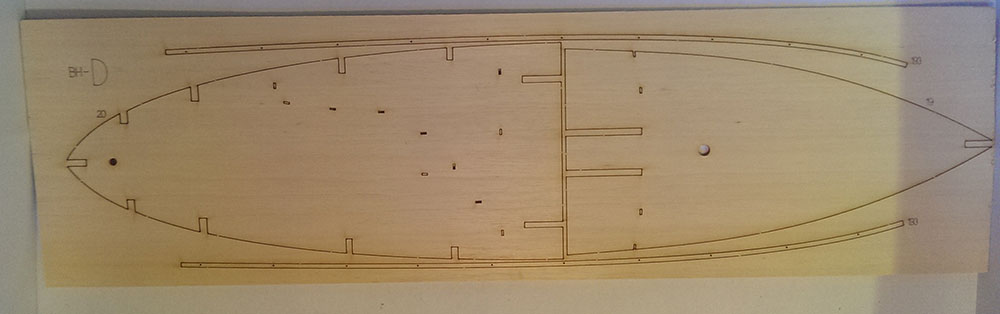
Bag of plywood:
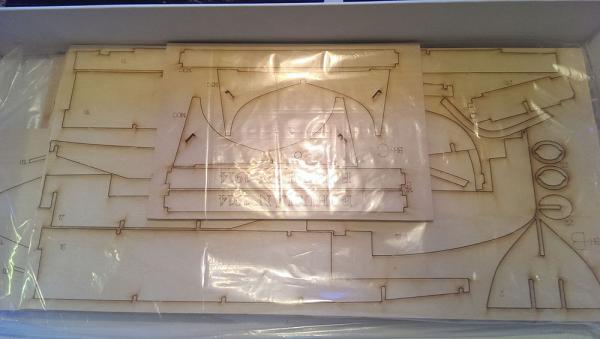
Stand:
Hull parts:
Lower decks:

To be continued...
-
Hello Ship model builders...
I am Puckotred from Göteborg and this is my third model and the first without sails.
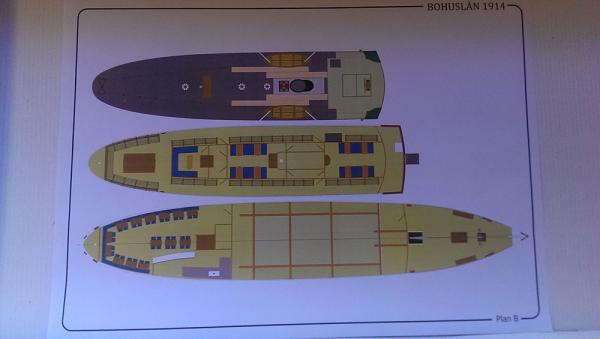
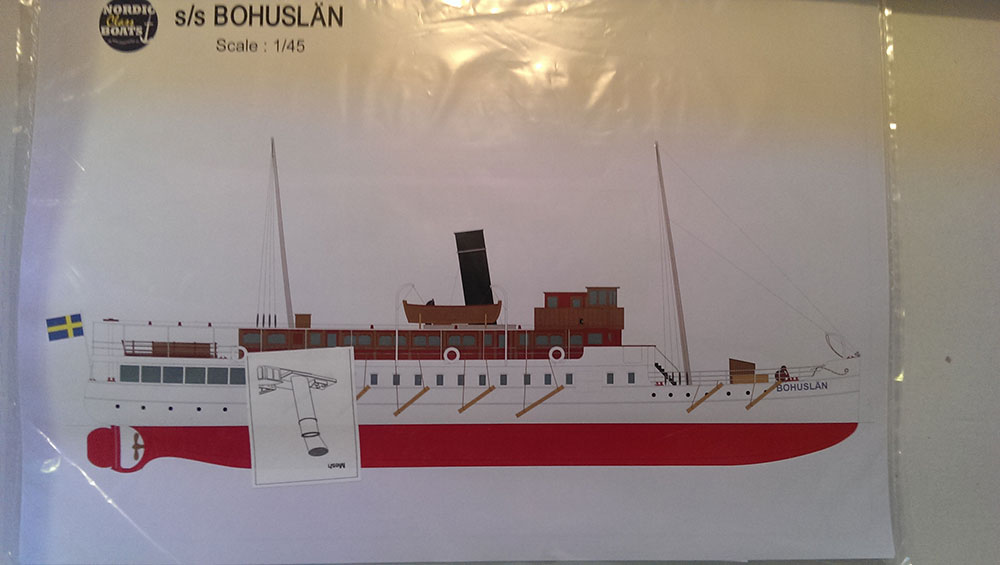
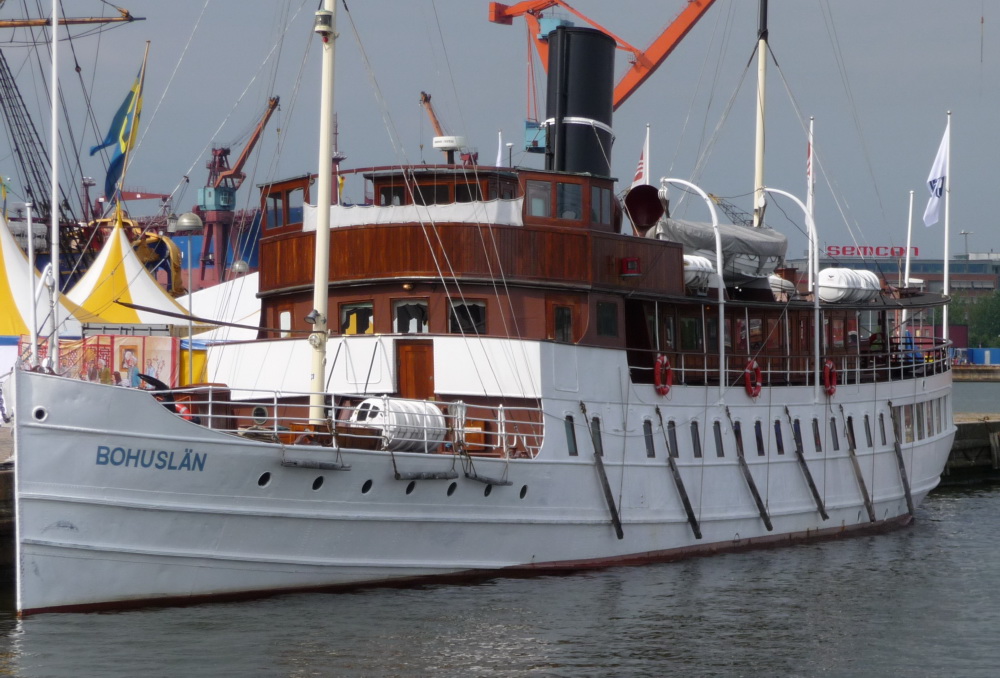
A picture of the real thing:
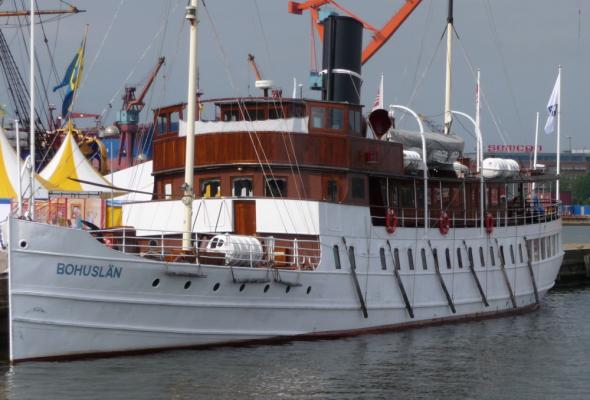
From Atlastmodels: (With some minor corrections from me)
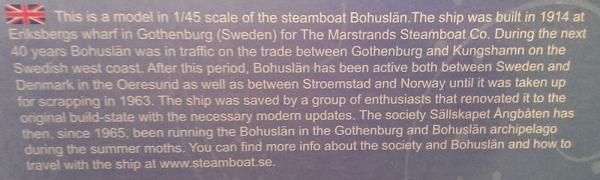
"The steamship S/S Bohuslän was built at Eriksbergs shipyard in Gothenburg 1913. For more than 40 years the traffic route of Bohuslän was between Göteborg- Lysekil-Smögen-Gravarne (Kungshamn) on the Swedish west coast. Later it was used as a ferry between Sweden and Denmark and between Sweden and Norway until it was taken off to be scrapped in 1963. A number of enthusiasts decided to rescue it and restored Bohuslän to its original condition and is still running it in the west coast archipelago in the summertime. "
Build size: 95 x 16 x 40 cm.
Made by Türkmodel on behalf of NCB – Nordic Class Boats
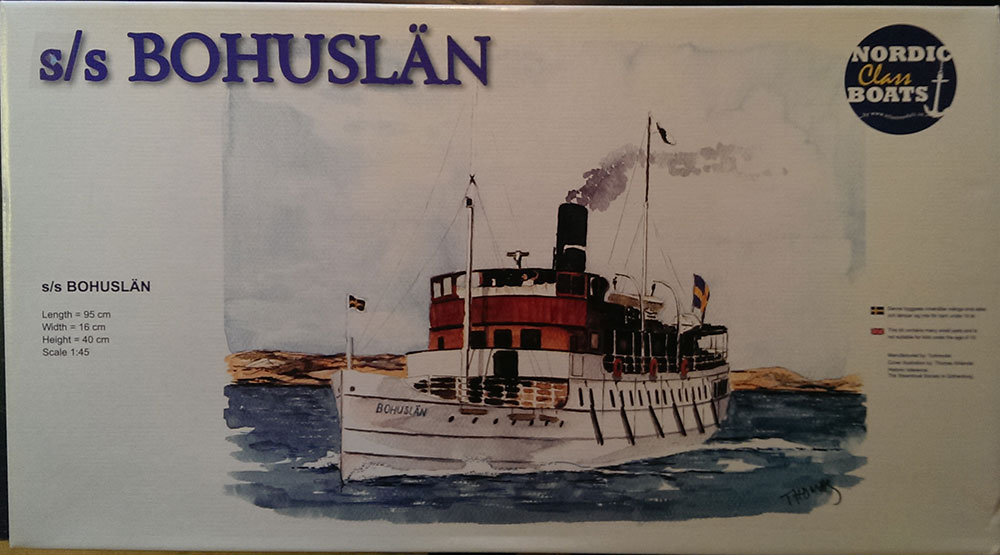
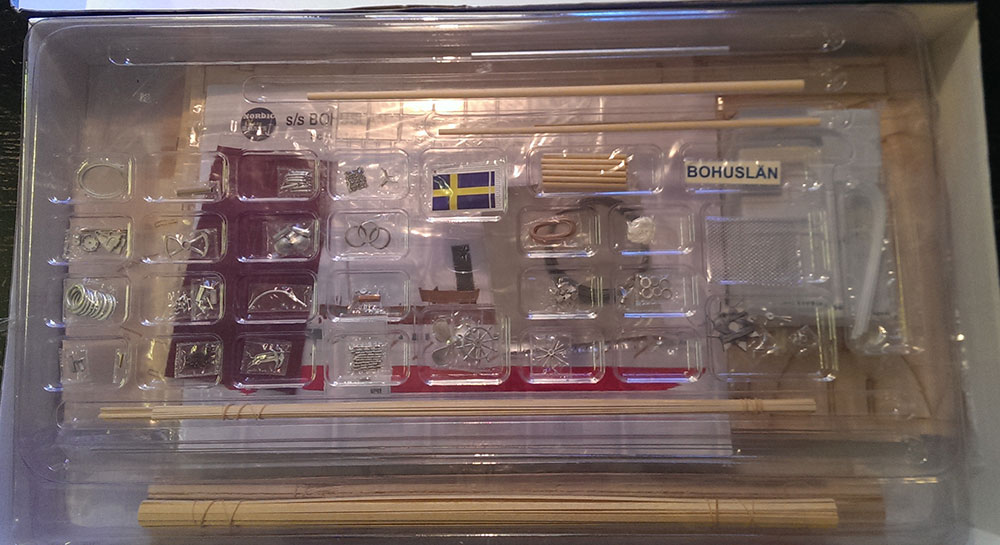
So let's start with the unboxing:
Presentation:
Box:

Lid off:

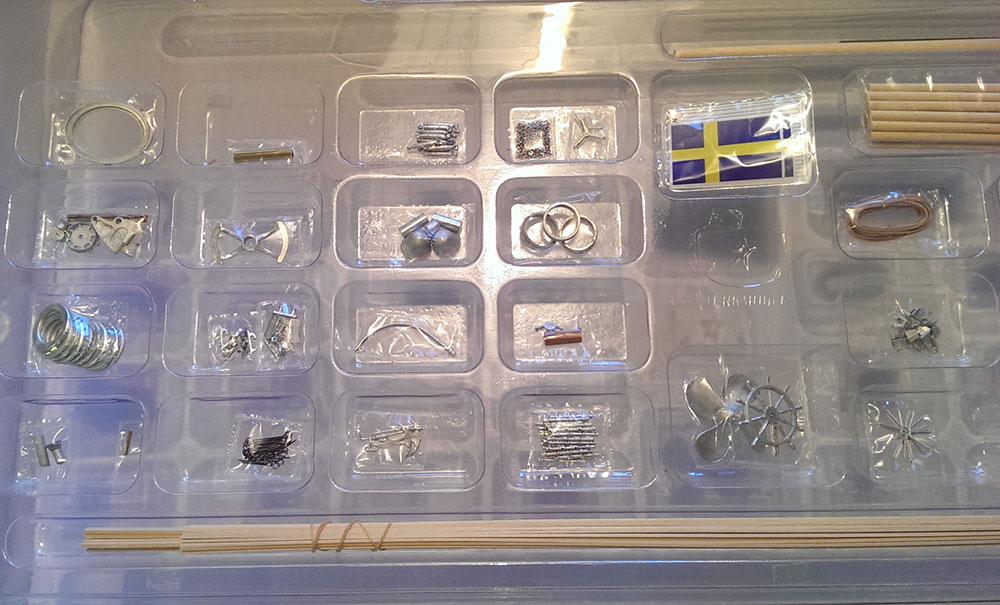
Closeup of metal cast fittings etc:
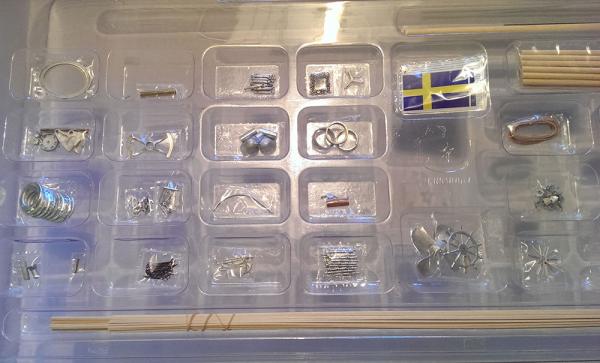
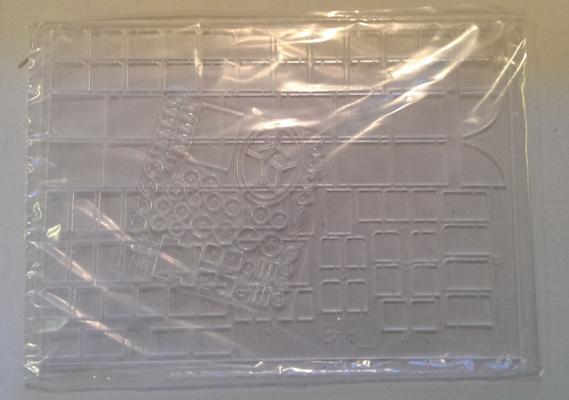
The other half. on the right are the davits (or "lifeboat hangers" as the instructions state them)
made of "plexiglass".
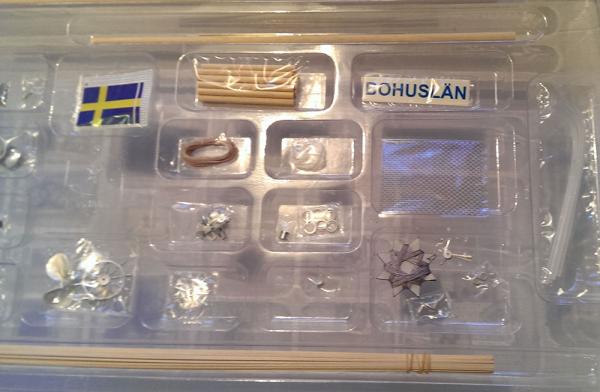
The stuff underneath:
Curtains!!!!:
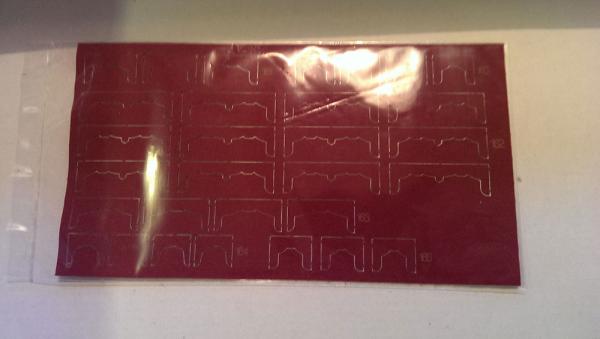
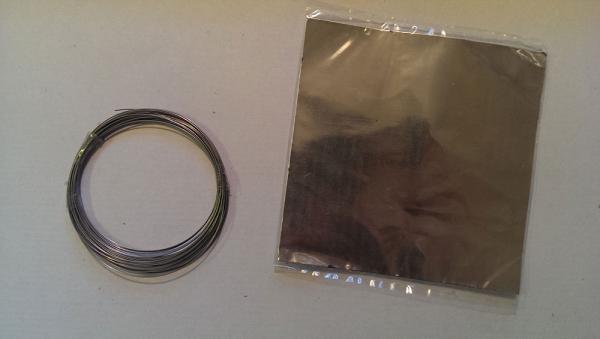
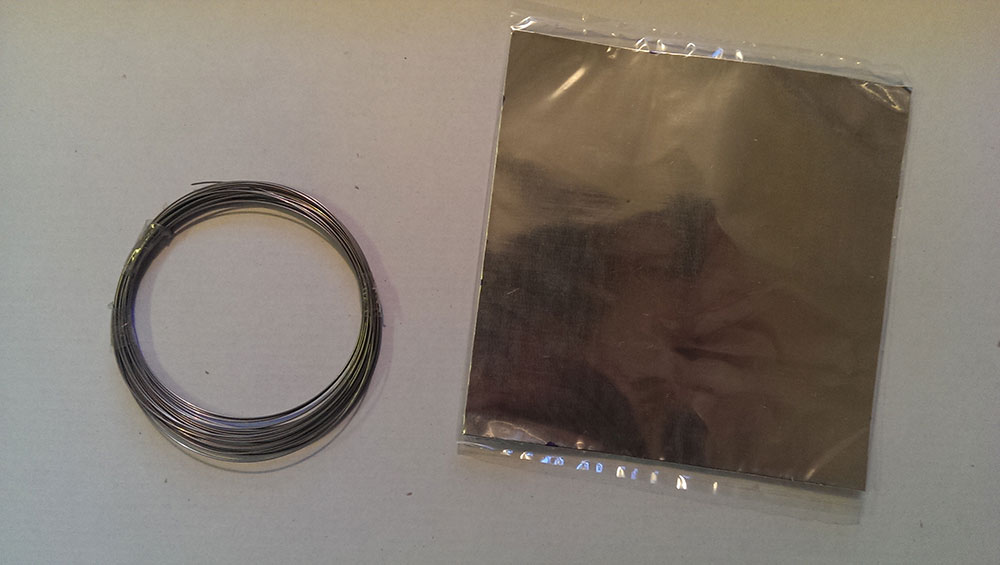
Wire and aluminium foil(?!) for the funnel:
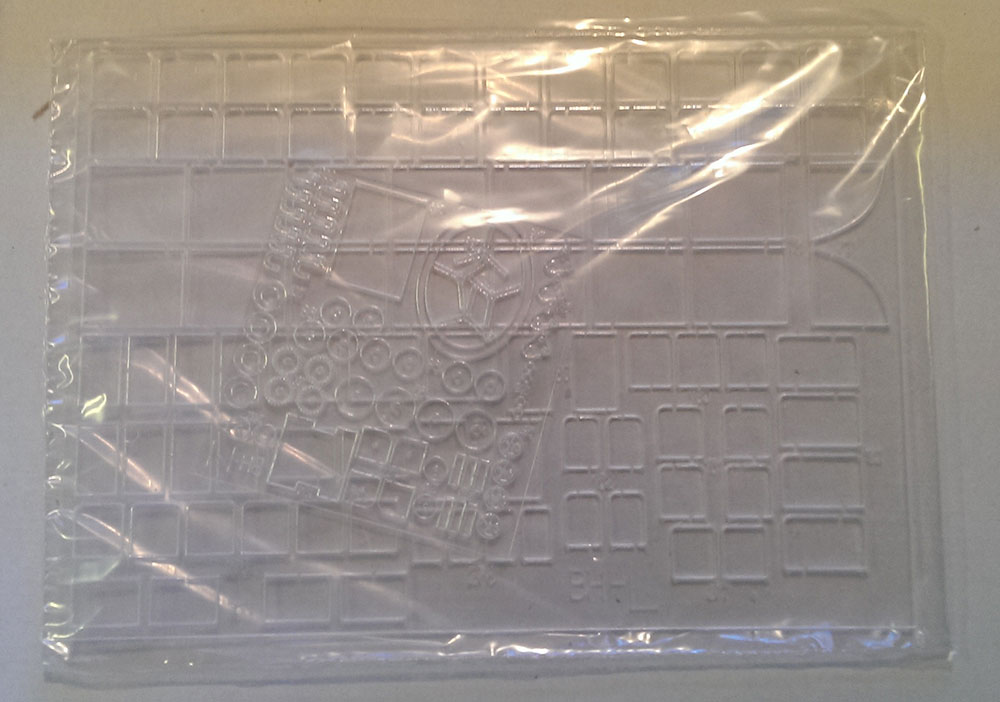
"plexiglass" OK for the windows but the small sheet on top is for the winch and sunroofs.
To be continued...


S/S Bohuslän by puckotred - Nordic Class Boats/Türkmodel - Scale 1:45 - abandoned
in - Kit build logs for subjects built from 1901 - Present Day
Posted · Edited by puckotred
Hello boys and girls, time for a little update.
Dreading the planking I thought I'd try doing some small fiddly bits.
The capstan.
What the manual calls Plexi and what I called plastic turned out to be Plexi actually..
I don't know if it's laser-cut or punched out but there's no spruces or moulding traces or anything. Just a small push and the parts pop out.
NICE!
A mix of Plexi and metal.
They might as well had made this part in Plexi since all the teeth had to be filed clean. It also was too thick. The Plexi has more detail.
Looked a little better after painting. I use red ochre.
Shaft way too long.
I have painted the rest of the capstan but forgot to take a picture of it
The top shaft is also protruding in the wrong direction. Will fix this. :mellow:
Here you see the original. Some detail is lacking on the model but nothing that bothers me too much. The lack of detail is worst further on in the build.