HOLIDAY DONATION DRIVE - SUPPORT MSW - DO YOUR PART TO KEEP THIS GREAT FORUM GOING! (Only 53 donations so far out of 49,000 members - C'mon guys!)
×


casper1961
-
Posts
98 -
Joined
-
Last visited
Content Type
Profiles
Forums
Gallery
Events
Everything posted by casper1961
-
Hi Pierre I believe the kit information and drawings say she is 1/60 scale but I will have a look again this evening and try to confirm. SG
-
Hey Sherry Thanks for finding this build log. I would link it to my signature if I knew how? This weekend I will see about finishing all the cuts to open all the gun ports and to start again at framing the sides of those same openings. SG
-
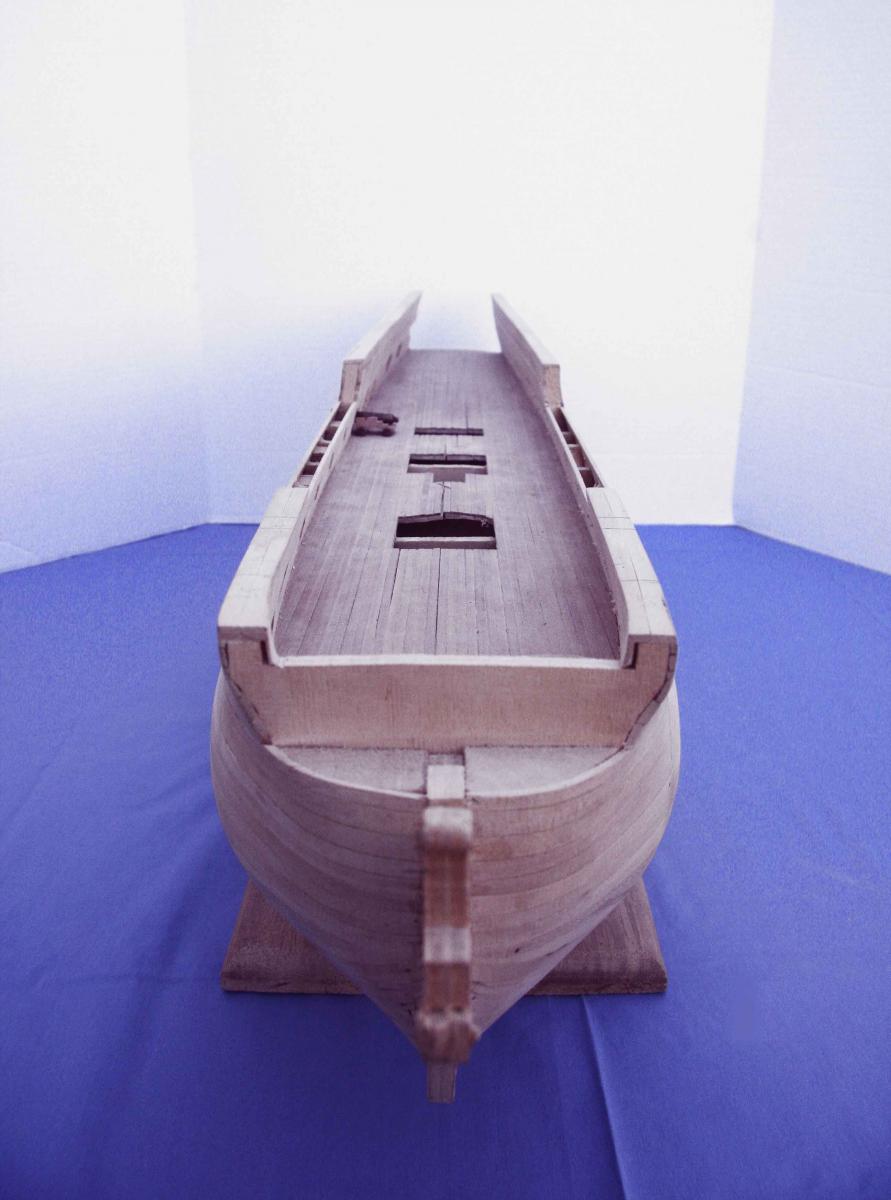
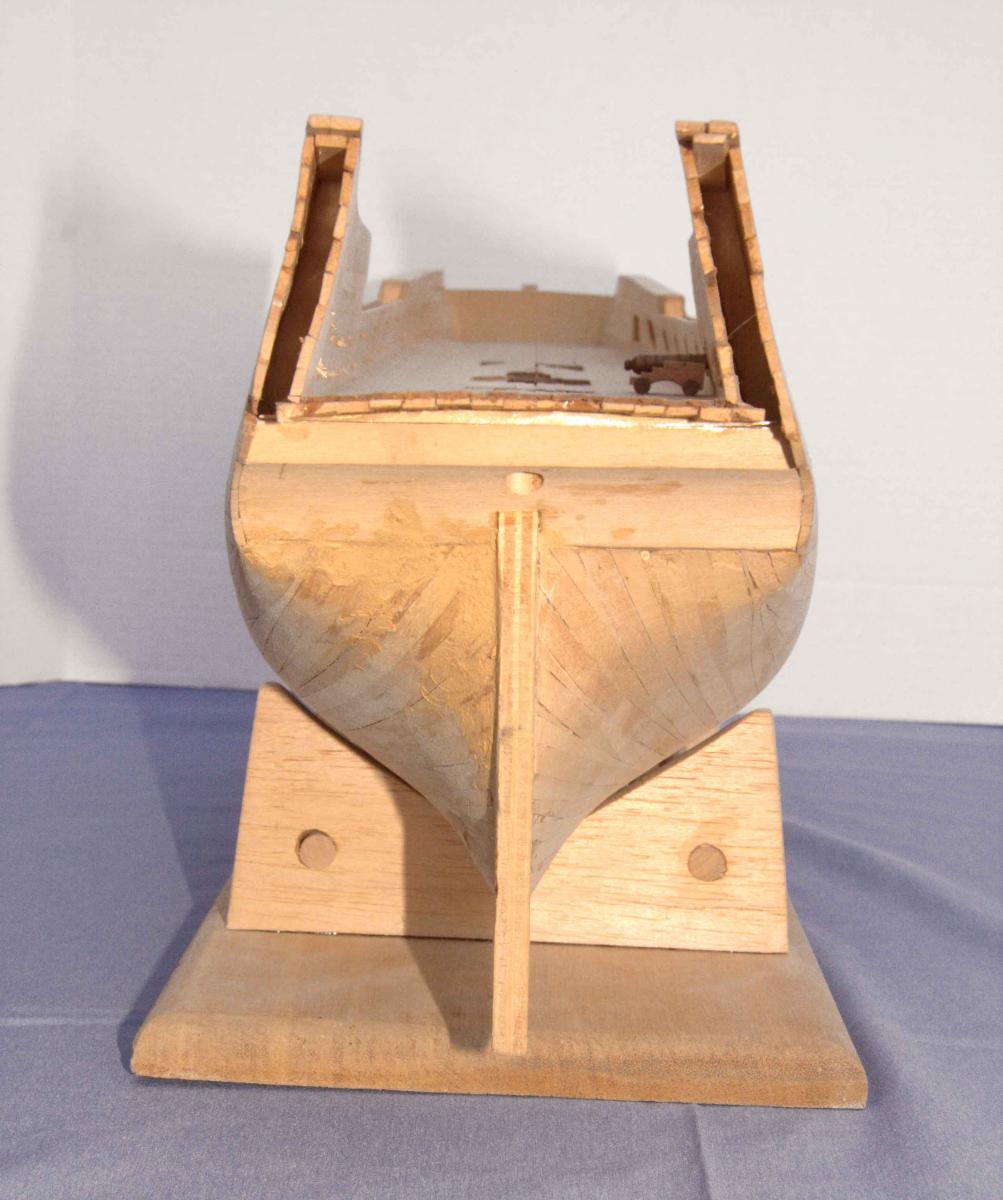
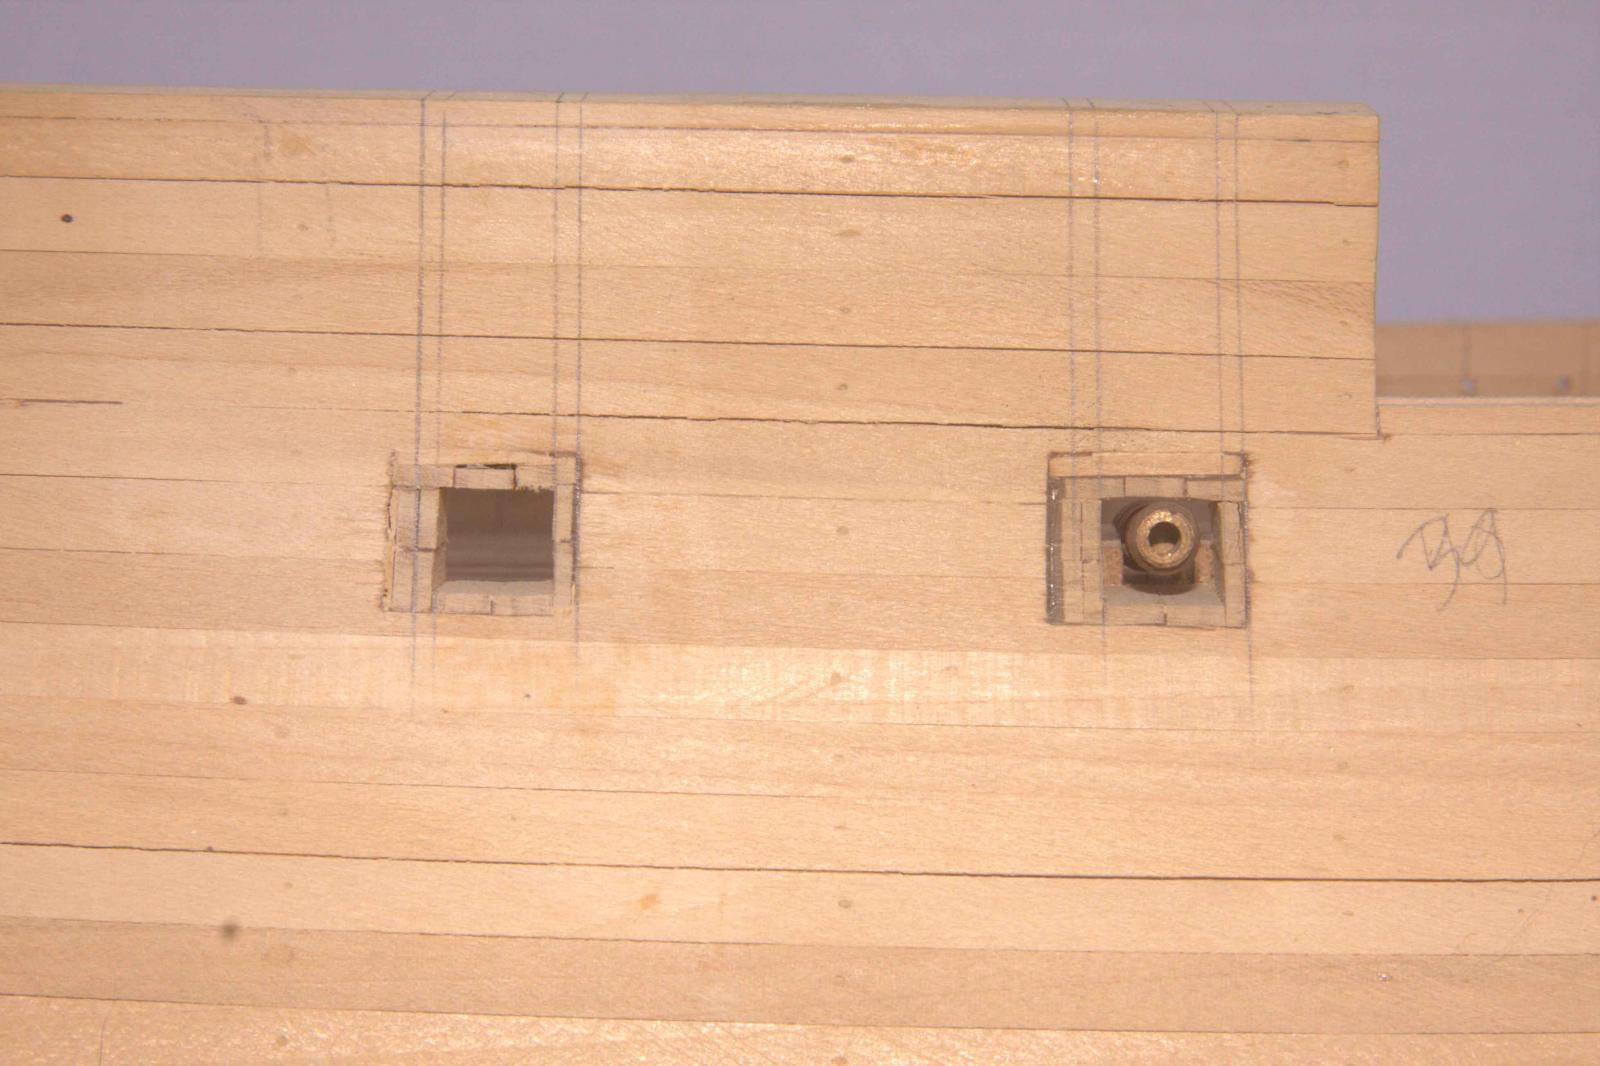
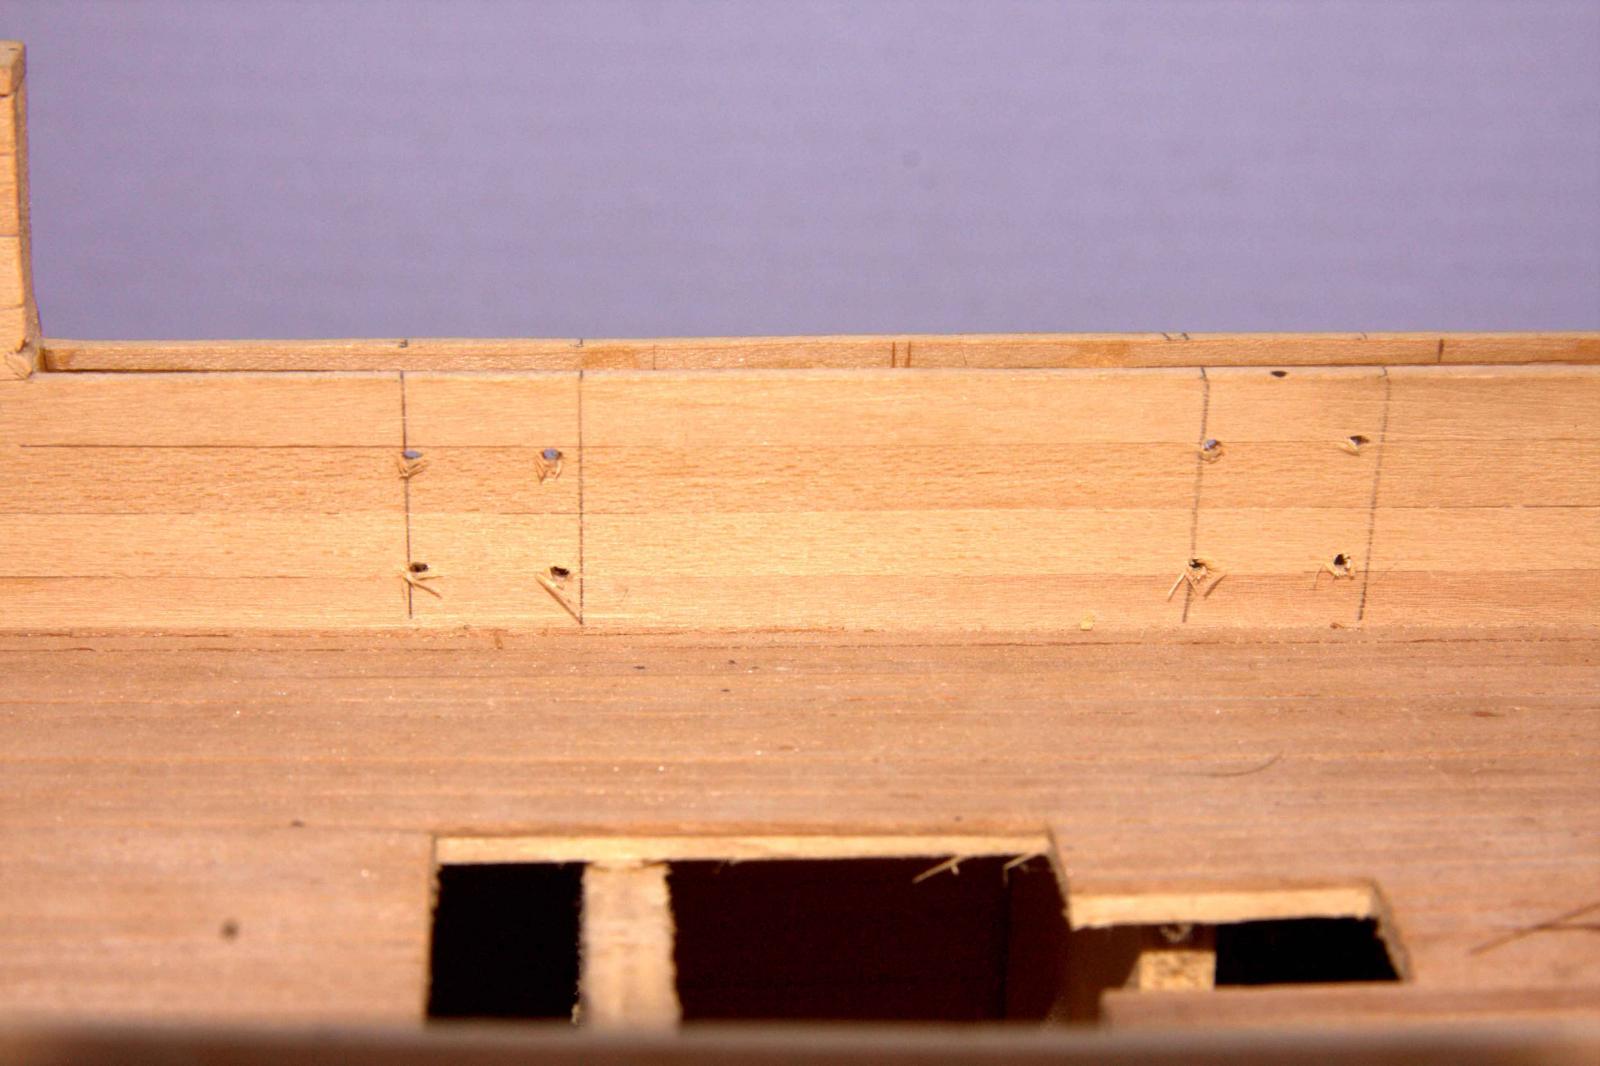
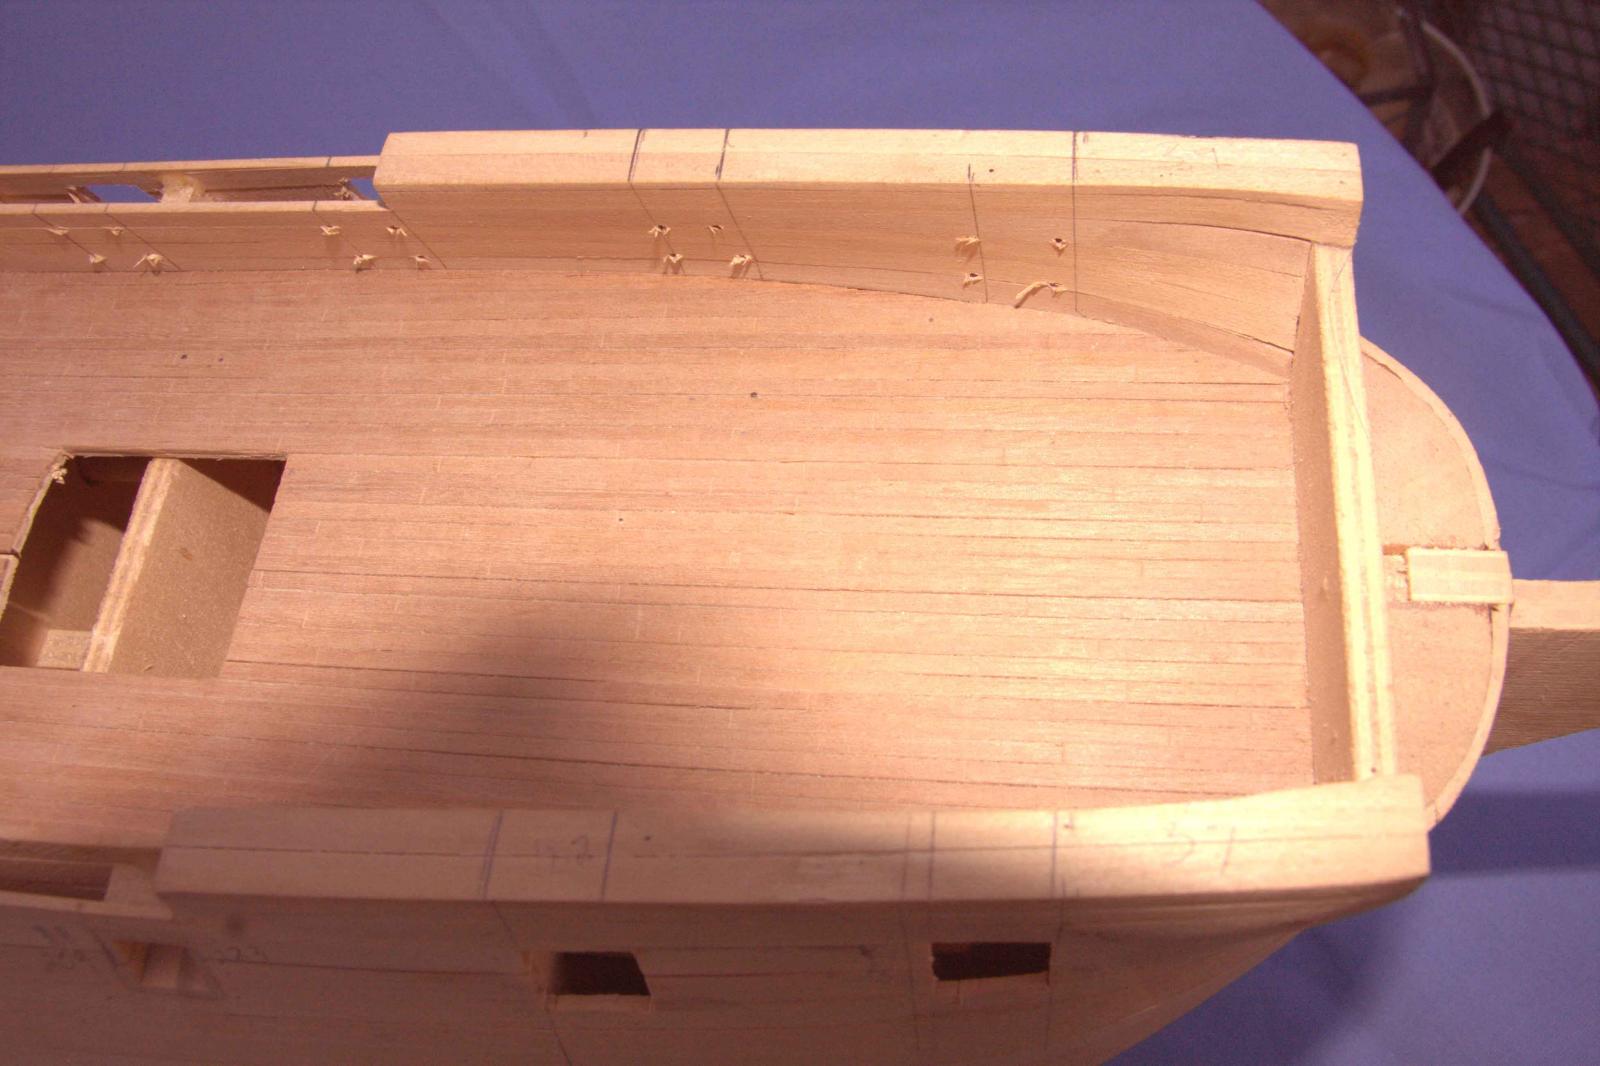
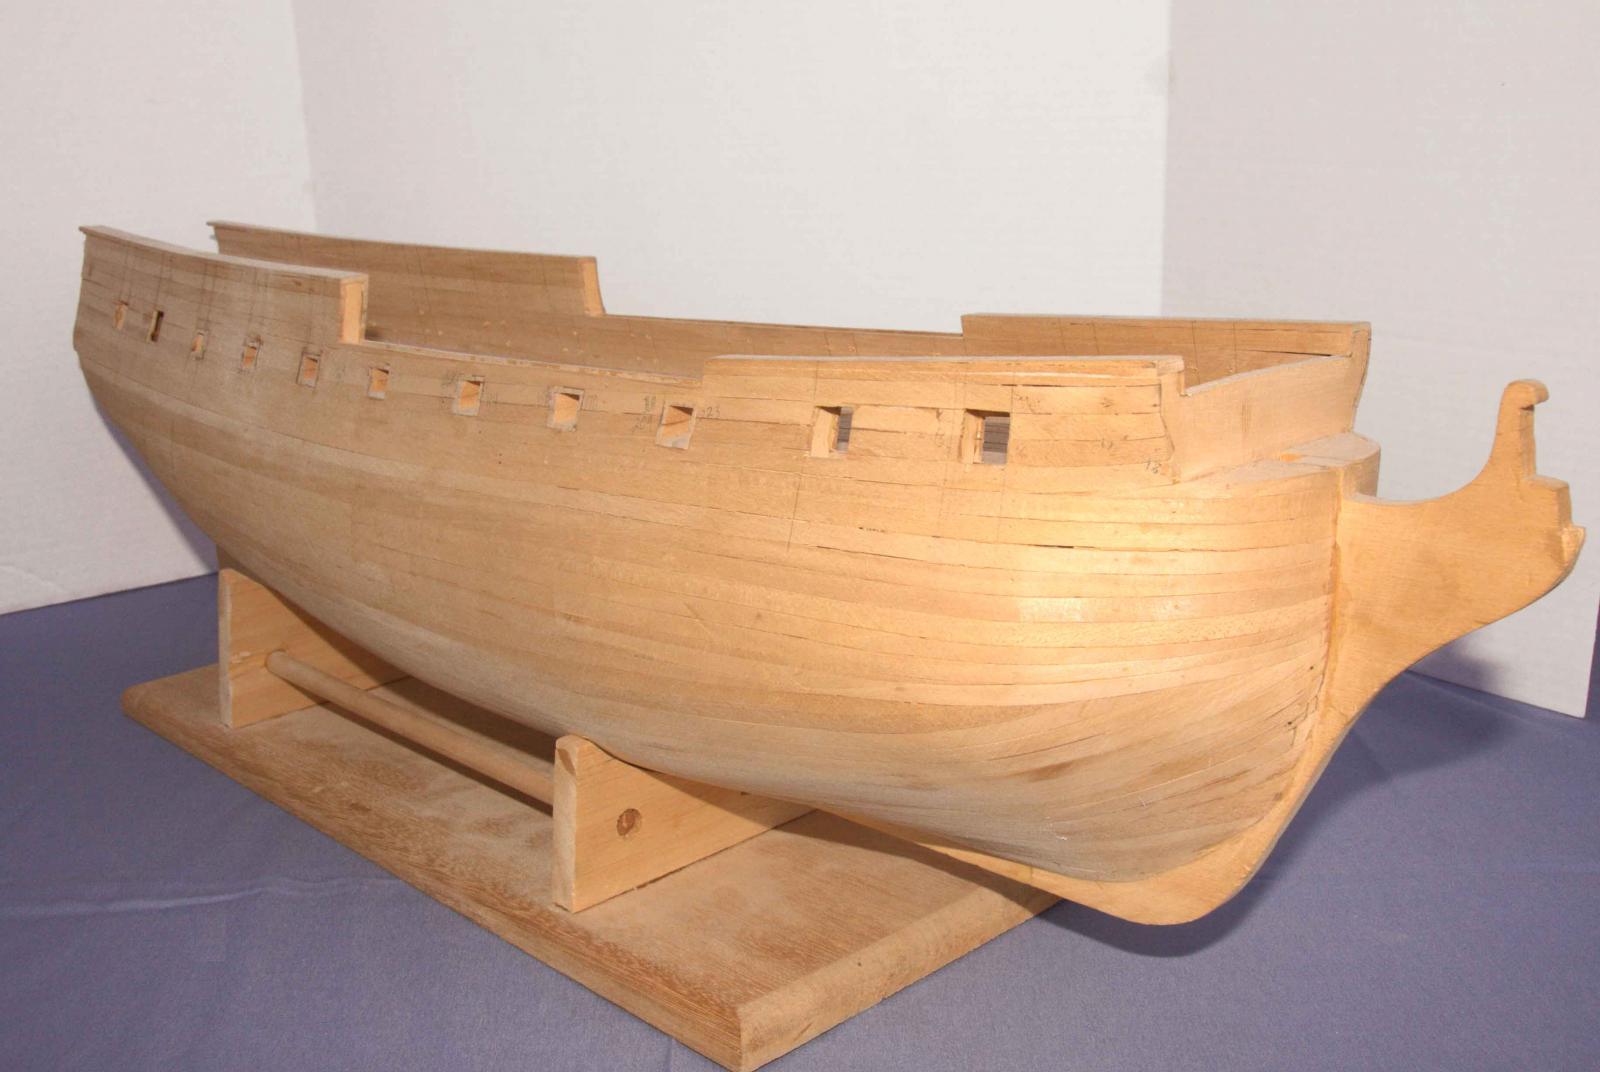
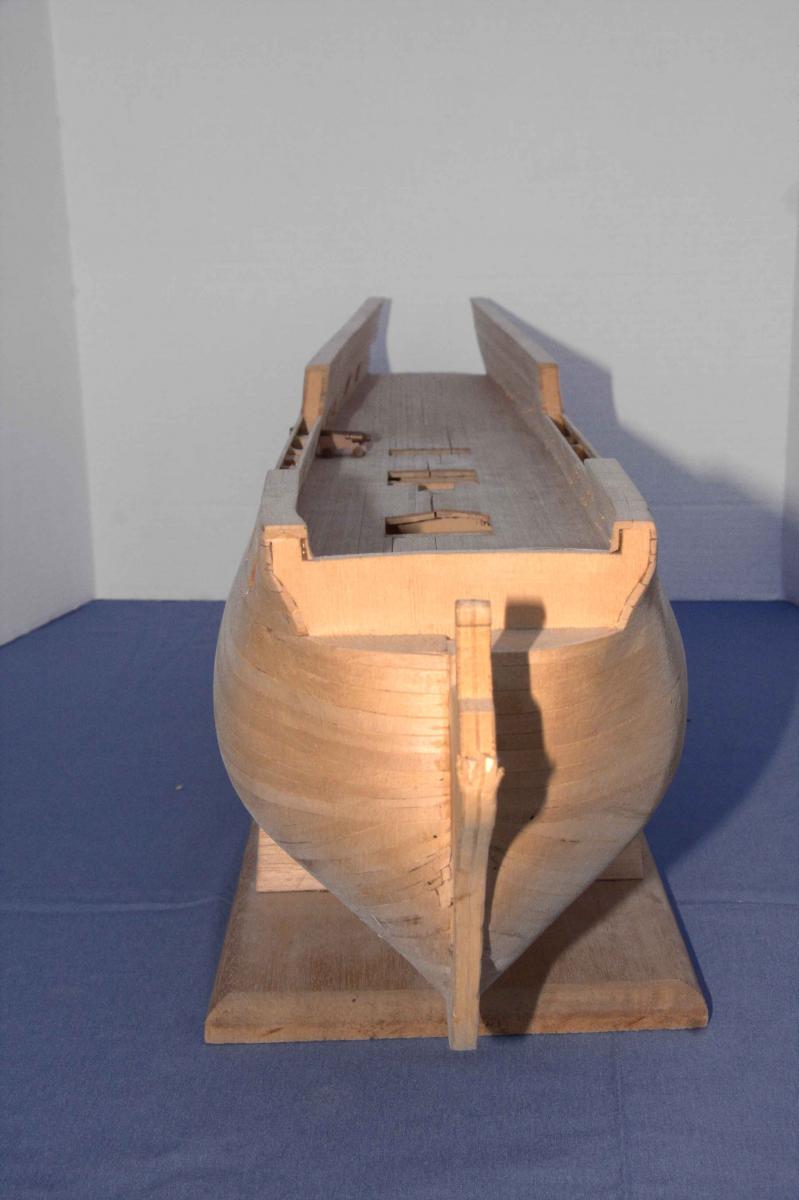
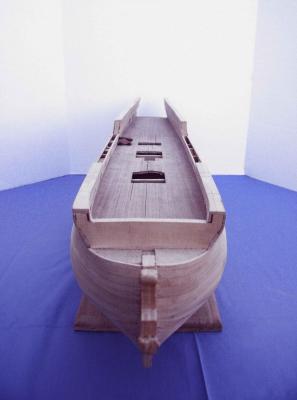
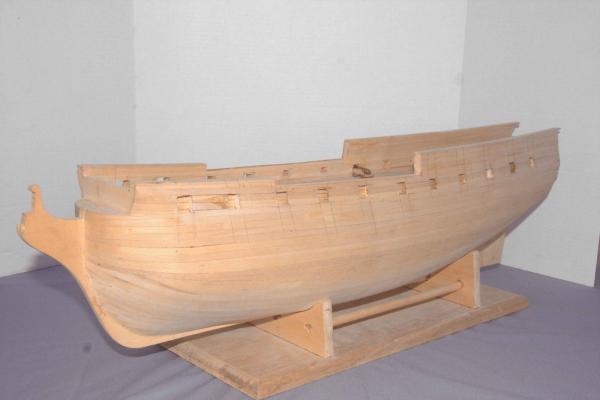
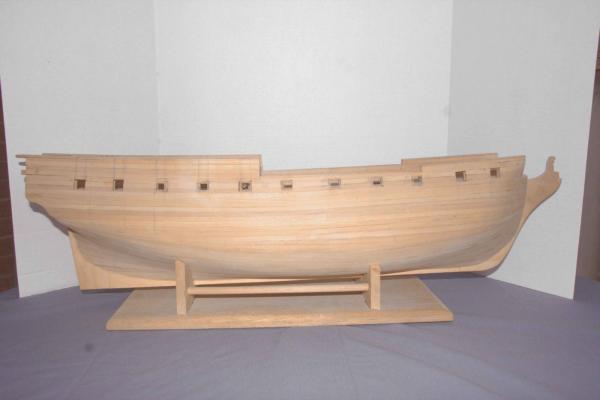
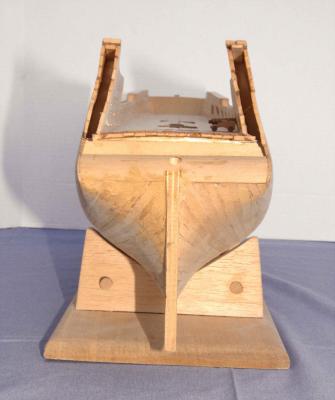
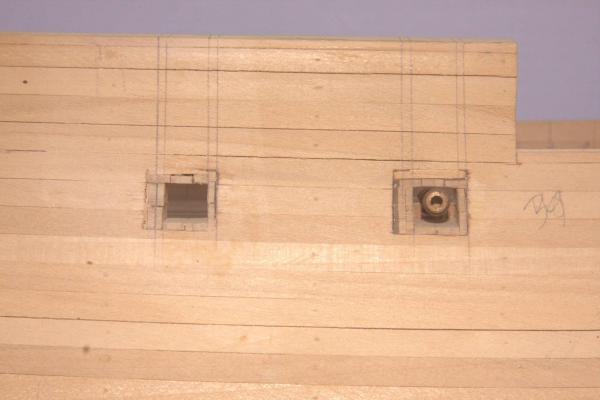
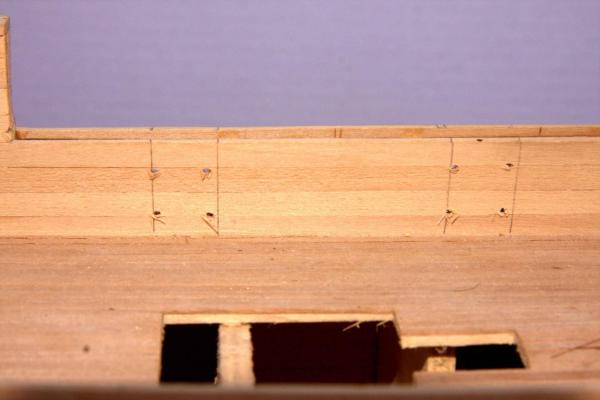
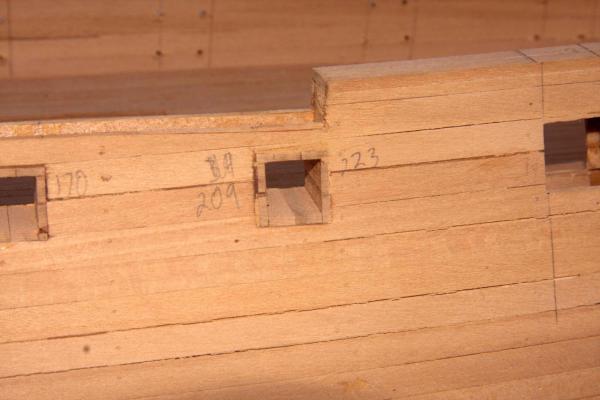
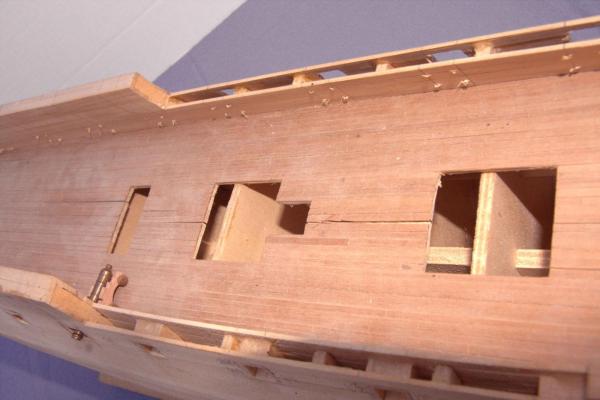
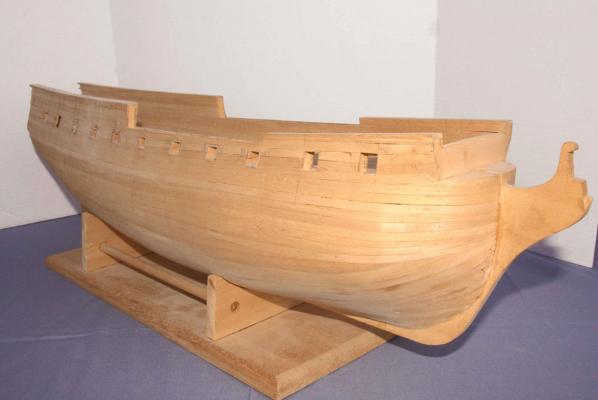
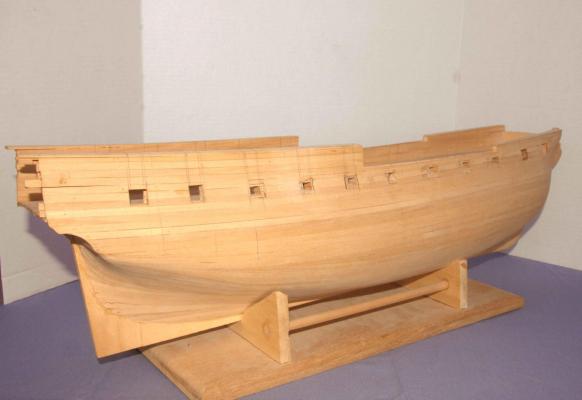
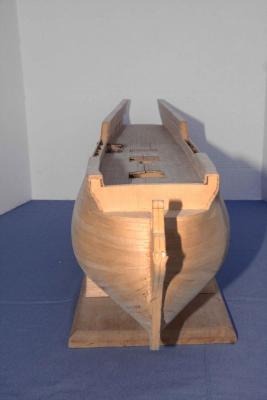
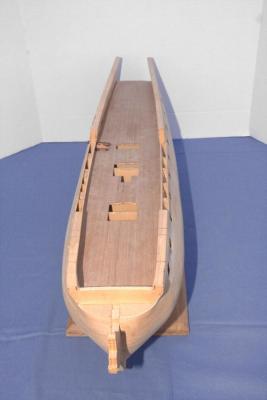
Hello! Here are the rest of the pictures of the HMS Serapis as she sits in dry dock right now. In these pictures you can see a mock-up of a canon to help ensure the gunports are at the proper height. Some of the pencil marks show my alignment of the gun ports and transfer lines from side to side. Also you can see the gun ports filler pieces. In a few case the hole that I originally cut was too large and needed a little more filling so 2 planks were added. All this will not be seen once the 2nd planking goes on. BTW, the 2nd planking should be cut back to the edge of the gun port filler pieces leaving a reveal of the filler pieces inside the gunwale. You will also note that the main deck has a bulge and crack which seems to be a result of moisture expansion. I will need to cut out the decking and fix the sub deck and reinforce it, then reapply the walnut decking. You will also note the bulkheads showing up in the openings in the deck. These should have been cut back earlier in the construction process which now will need a little dremel help. No a big issue but something that will show unless taken care of. Thanks Steve

-
Hey Pierre, thanks for stopping in, I can understand putting this kit aside way back when as the cutting of all those pieces from the plywood is SO daunting. This is the main reason mine has sat so long. Well that and life got in the way! I think she is worth enough to plug away at the scroll saw work finally get er done! Hi John, nope, no laser-cut pieces by Aeropiccolla back then but yes I think she should build up into a nice ship when done. Hey Brian, you are right Aeropiccolla is no longer in business in Italy but I understand Nature Coast Hobbies, Inc. out of Homosassa, Florida is carrying on with the newer versions of the old Aeropiccolla kits. This is going to be a slow build as I have several other projects on the go at the same time but I will try to post as I have new work to show. Thanks for stopping in! Cheers Steve
-
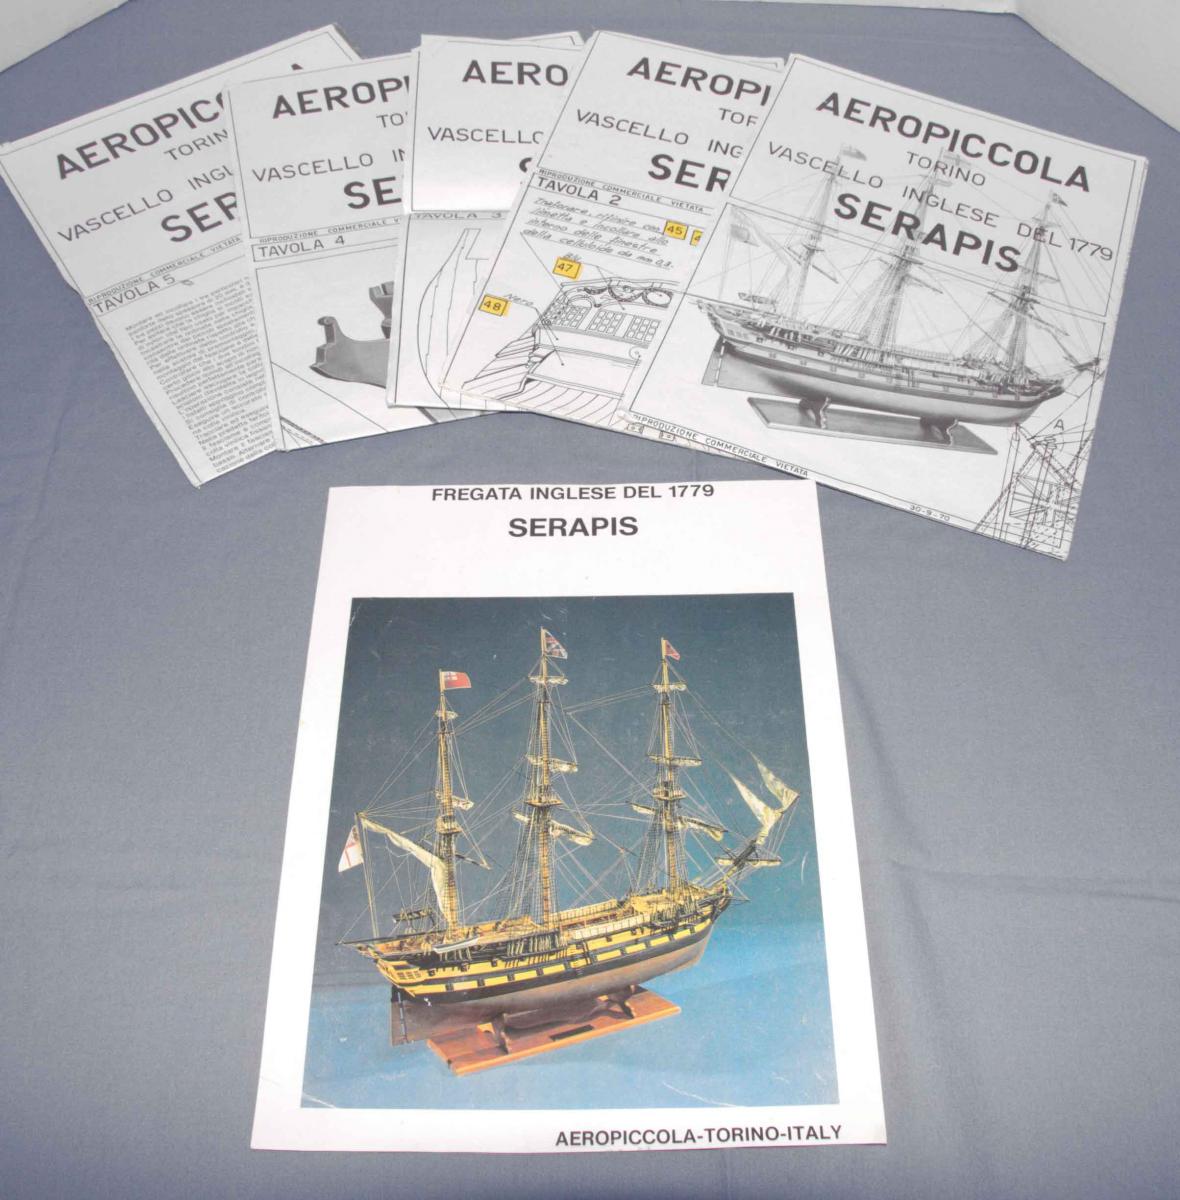
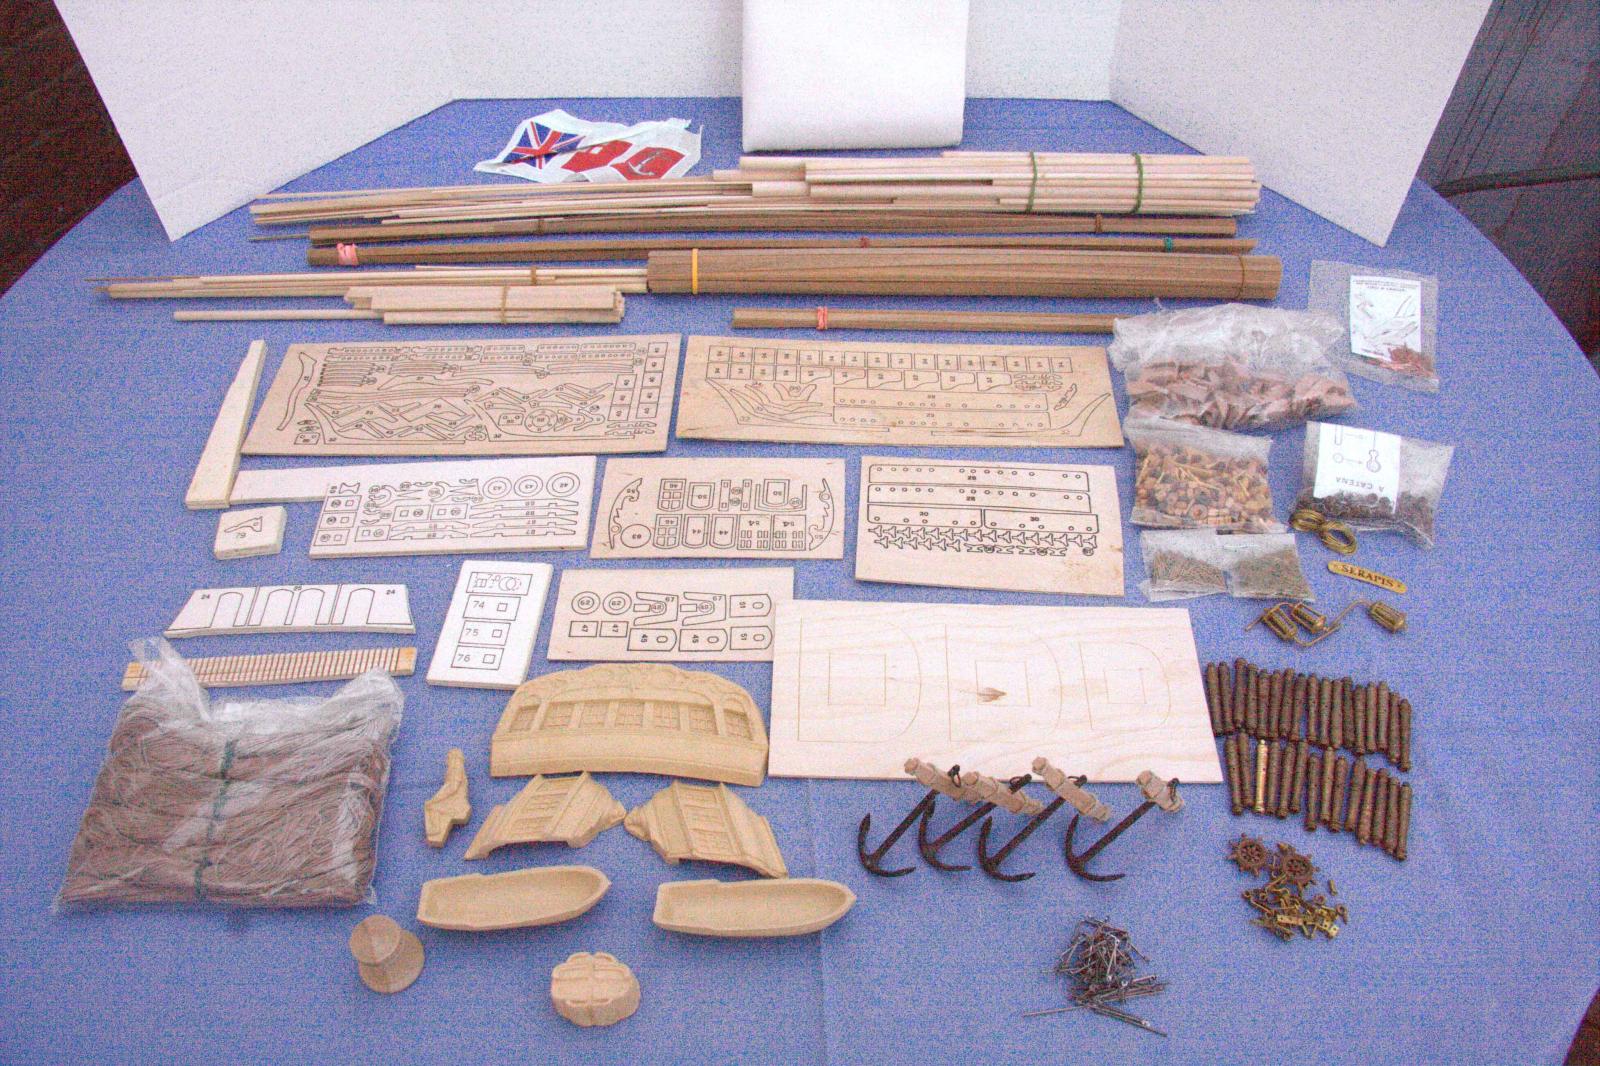
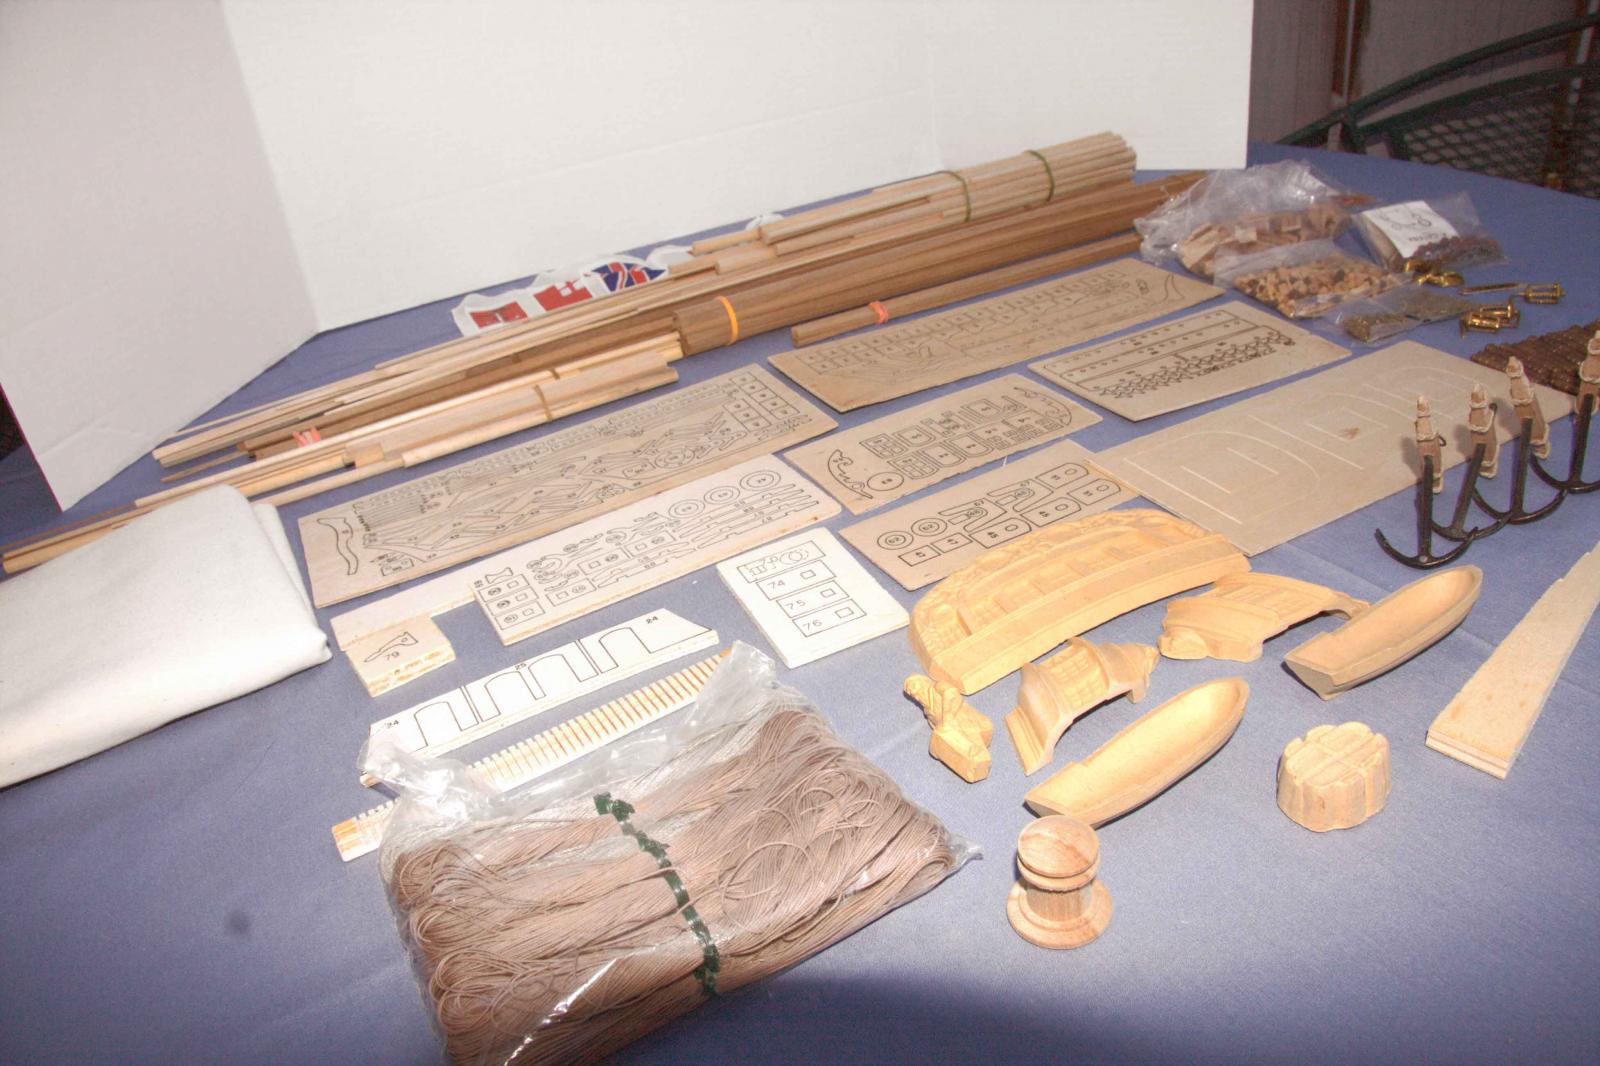
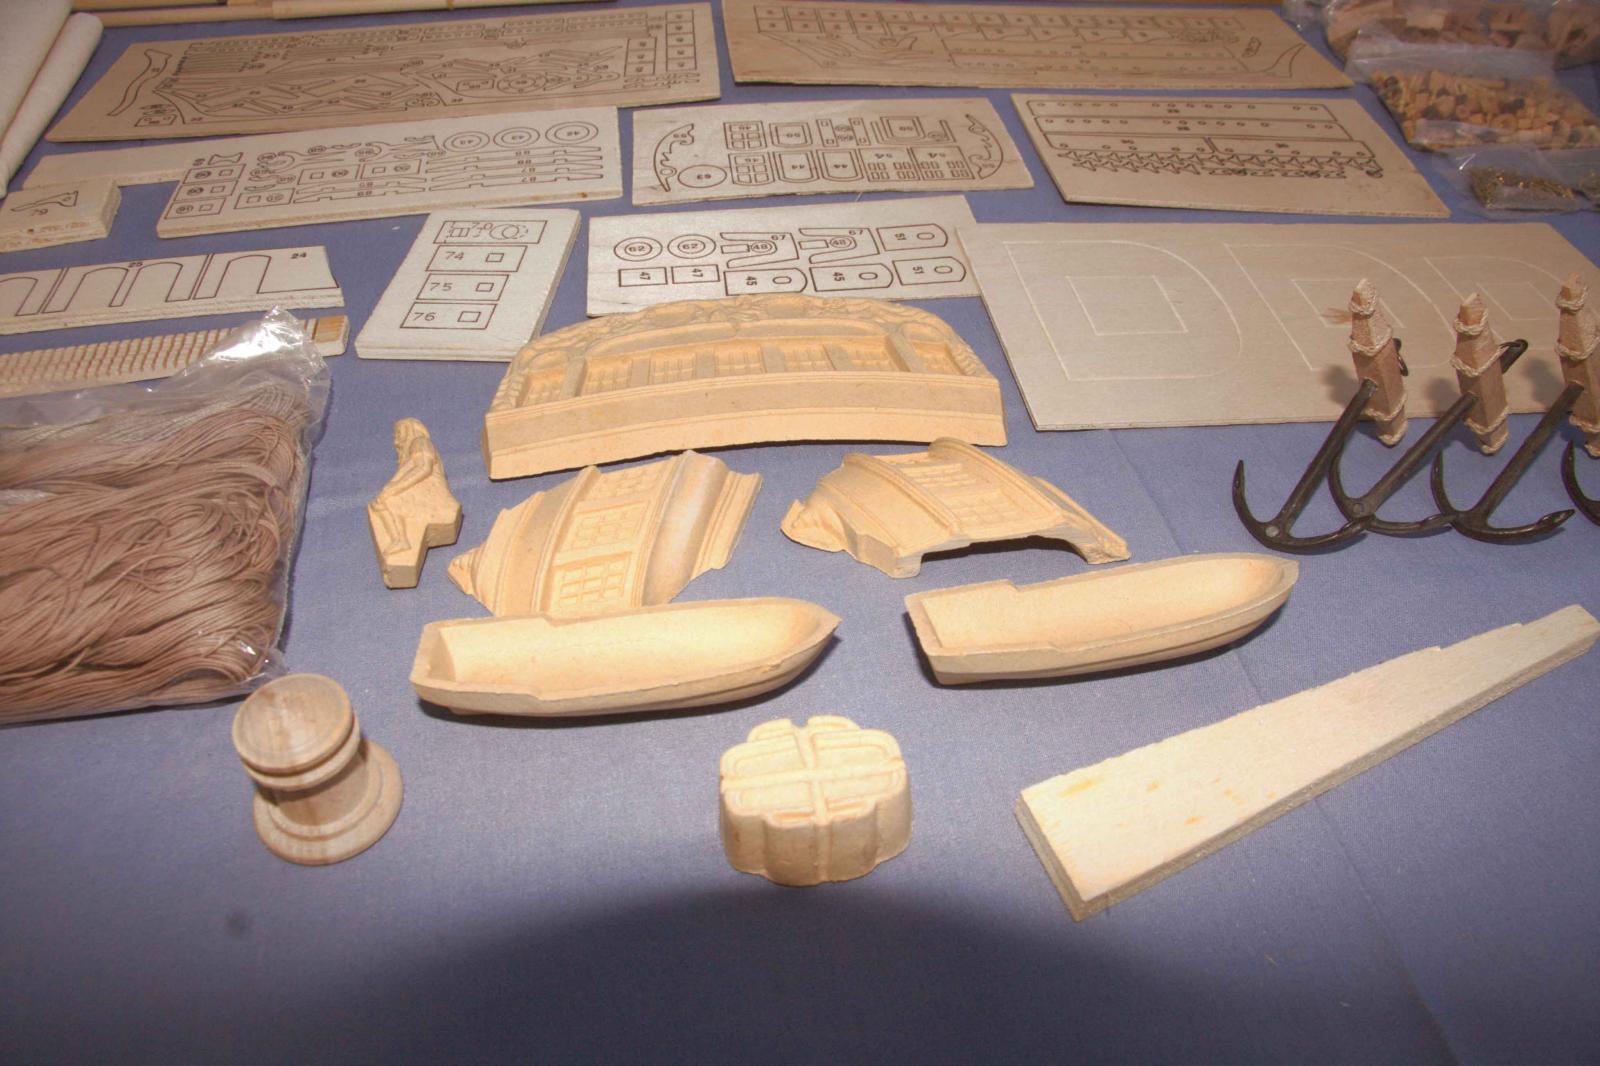
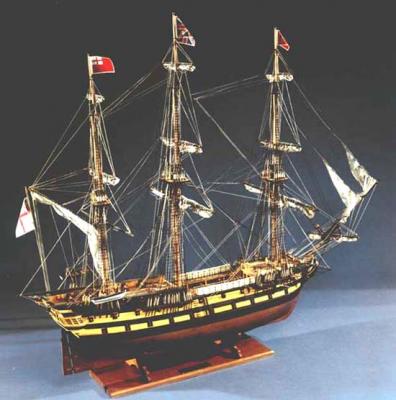
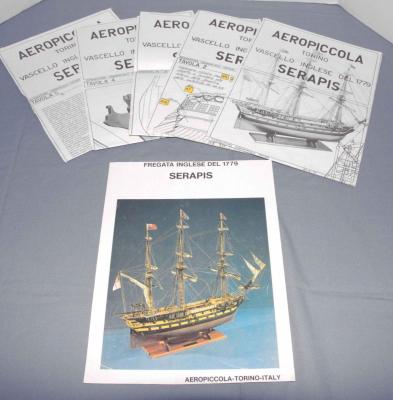
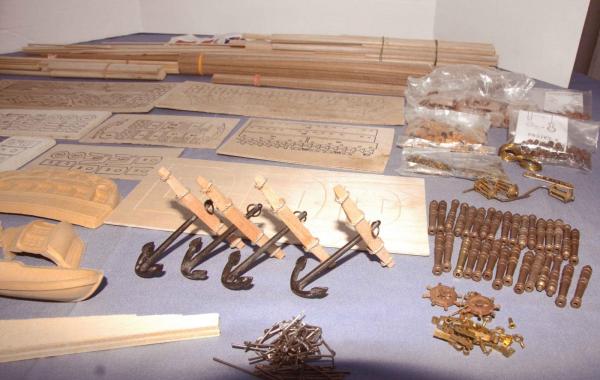
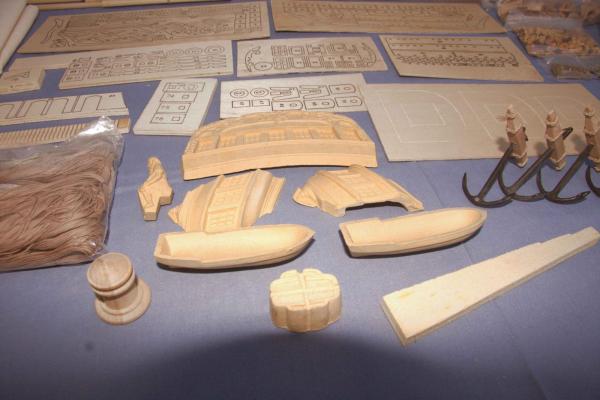
Hello All! Time I started to be more involved in this forum. I started the HMS Serapis back in the late 1980's. A few of you may not even have been born yet! I had just finished building the Charles W. Morgan whaling ship and wanted another ship model to work on at boat shows to help attract attention to my booth. I loved the story of the Serapis which is what brought me to purchase this kit. Here is that story: The Battle of Flamborough Head was fought September 23, 1779, between the American privateer Bonhomme Richard and the Royal Navy HMS Serapis and was part of the American Revolution (1775-1783). The HMS Serapis was a 44-gun 2-decked Roebuck-class fifth rate "frigate" captained by Richard Pearson. The Bonhomme Richard was lesser armed with only 32 guns and her captain was John Paul Jones. Serapis was named after the Greek & Egyptian God Serapis. These two ships clashed at Flamborough Head, England, on Septermber 23, 1779 during the American Revolutionary War. The ships traded heavy gun fire at which point the Bonhomme Richard lost most of her firepower but did manage to grapple the Serapis and bind the two ships together. Captain Pearson seeing that the Bonhomme Richard was sinking, he hailed the Bonhomme Richard and asked for her surrender, the famous quote by Captain John Paul Jones "I have not yet begun to fight" was his response. The battle raged on for another 3 hours giving time for the Alliance ( a frigate in Jone's squadron of ships) came upon the 2 ships and began firing at both. With the Bonhomme Richard sinking and being bound and tangled to her and unable to turn her own guns on the Alliance in defense Captain Pearson surrendered the Serapis. The American's captured her and transferred her to the French who commissioned her as a privateer until she was lost off Madagascar in 1781 to a fire. Although and embarrassing event for the British, Captain Pearson was decorated for his defense of the convoy that she was tasked to defend. The kit itself is as you can see over 30 years old. So no laser cut pieces. The frames were pre-cut as was the keel and that is it. Several sheets of printed plywood, pre-cut cannon bases, sanded blocks for the rigging, 5 different bundles of rigging, 5 sheets of instructions and a very small instruction page. The planking is double plank on bulkhead, with basswood for the first planking and walnut for the 2nd planking. Materials are of decent quality. A unique feature to Aeropiccolla kits of this time were pressed wood-fibre molded pieces for the stern decorations and lifeboats. I have included at the start a photo of the finished product that came with the kit. My hopes are that I will end up with something somewhere near as nice! Here is the first set of photos. Cheers Steve


-
Hey Sherry Taking those pictures for you today! Will send them later this evening... Cheers Steve
-
Nice Captain! I don't think you are going to have any problems carving the ornamentation. Re: the decking, I think it should be easy enough to do the covered areas of decking first, trenails etc sand that, apply the next deck etc...then complete the rest of the decking later. Now only 300+ sailors to go! Steve
-
Hey Sherry Did you peek at Carlosys San Felipe postings today? He is just a bit ahead of your build and he is following Mantua's steps by planking the first planking then he did a partial 2nd planking up in the gunwale area to stiffen the planking before cutting the tops of the frames off. Then did the deck planking but didn't worry about having the after decks above the main deck. I want to start my San Felipe!!!!!!!!
-
Hey Sherry STOP THE PRESS!! I have been reviewing the plans and instructions for my kit and what I thought was an interior wale planking was actually a gunwale template. You see Mantua in my kit shows 2 layers of planking done on the exterior (fig.10) before you place this gunwale template (fig.11) to trace the actual top edge of the gunwale. After tracing the line of the gunwale on the inside you are to cut this profile (fig.12) and as much as it may seem dumb then the deck planking (fig.13). After the deck planking is finished, sanded etc, then you apply walnut inwale planking. I think you could add the deck planking in the areas that will be covered by the deck plywood above before adding those decks. But take your time in planning that out the rest of the deck planking first. Should be fine... Steve
-
Hi Sherry I think doing the decking now while it is exposed is the right way to go. I would finish it at this point for the same reason. The newer kit has you add the decking then inside wale planking so I think I would do the same...do the inside wale planking to stiffen the wales, then plank the decking completely starting centreline and working to the wales...have fun What wood are you using for the decking? Steve
-
Hi Sherry I believe you are to apply another layer of basswood on the inside of the wales as shown in the 3rd photo. Yes this would be after you cut the tops off the frames. The 2nd layer should give the shell of the wale plenty of strength. I would apply the inner layer to the wale before the decking as this would be how it would/should be done in real life. Think of it this way, if you apply the decking first then apply the inner wale, you would be covering over the edges of the deck planking. This would give a nice clean look but in reality the planking would need to be left accessible in case it would need to be serviced and removed. Thus the planking should be free of the wale (inside). I hope this helps... Steve
-
Nice! Steve
-
Nice work Sjors! Nice and clean...the wood colour is great! Looking forward to seeing more. Cheers Steve
-
Hey Sherry I know it's only a few days since you posted the photos, but I was curious if you have started to glued the frames, decks and balsa filler pieces in place yet? Not rushing you just curious! Cheers Steve
-
Hi Sherry I must have missed your posting when you mentioned your brother and daughter. I went back and I am truly sorry to hear about both! I am glad your sister is doing better and I truly hope your brother turns things around and makes a speedy recovery. Just to add to your lighting thoughts, model railroading being another of my endless hobbies, they have simulated flame lantern or fire lighting accessories for between $25 to $70. Most come already wired and ready to hook up. And HO scale is very close to the same scale you are building your model at. Here is one such gizmo... http://www.hobbylinc.com/htm/mtr/mtr10010101.htm George's Trains in Markham might be a source to try out. I haven't been following the model railroad stuff for a few years to direct you any better but they have been around for ages, since I was a wee one. LOL The frames look great so far...great to see the decking go in. What are you planning to do for the deck planking? Please tell me you aren't going to mill those as well? LOL The scroll saw was a great investment. I must have several days of cutting ahead of me cutting all the printed parts for my HMS Serapis kit...honestly, I am not stoked about it at all....I guess this is why they invented the laser cut to assist lazy bones dude like me! Don't get me wrong, I love working with wood but if all my kits were like the HMS Serapis, I would never have time to finish all of them. Thank God for laser cutting!! Cheers Steve
-
Hey Sherry Looks great so far! I just bought the San Felipe kit from some place in Italy...I have been impatiently watching it's progress via the shipping tracking provided by DHL. It was funny watching the kit go from Italy to Brussels then to Cincinnati..I imagine it will be here mid week...I can hardly wait! Keep up the great work! Cheers Steve
-
Hey Denis I must say you are doing a fantastic job on this model! Historical accuracy be damned, I think this ship looks SO much better in the blue colours than the red. I am glad you decided to go this route. The details and wood colours look great. I must add the decking trenails are amazing, a detail I will copy if you don't mind! Keep up the great work! Cheers Steve
-
Wow, the details are looking great! Keep up the great work...This is very inspiring! Cheers Steve
-
Hi Bender Well thanks to you and the other Panart/Mantua San Felipe build logs, I am now the proud owner of the same! My kit is being shipped from Italy on Tuesday and I can hardly wait. Now I just need to retire to start building all these kits LOL. This was a deal I didn't want to pass up! Do you know if there much difference between the recent release and older release? I'll let you know which it is that I got/ Cheers Steve
-
Hi Bender I was curious looking at your work so far. And by the way, well done!. My question is with the decking. Is the decking pre-printed and is it meant to be planked over and the printing as a guide like the bulkhead at the stern, or is it meant to be the finish? Either way what you have done looks great. Steve
-
It's a rino-ship! LOL Looks great...keep up the good work!
-
Very nice work! Will be watching with envy...
- 555 replies
-
- 1
-

-
- sovereign of the seas
- mantua
- (and 1 more)