


rlb
-
Posts
655 -
Joined
-
Last visited
Content Type
Profiles
Forums
Gallery
Events
Posts posted by rlb
-
-
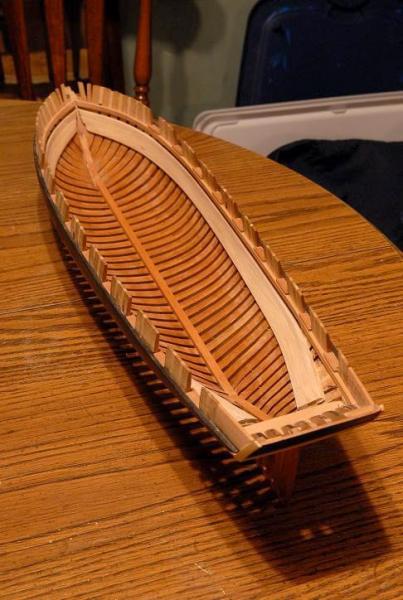
Thanks, Elia. It's been a kick going back through the log. I was really, really happy with the way the hull planking came out, and it made me raise my expectations for what I could do going forward.
Bigcreekdad,
All of the framing pieces (keel, stem, beams, knees, etc) are laser cut. Everything else is scratchbuilt from milled stock supplied in the kit. With this or Hannah, you'll find plenty of opportunity to use that Byrne's saw. The answer to my occupation just happens to come up in the next post!
Ron
-
September 5, 2010
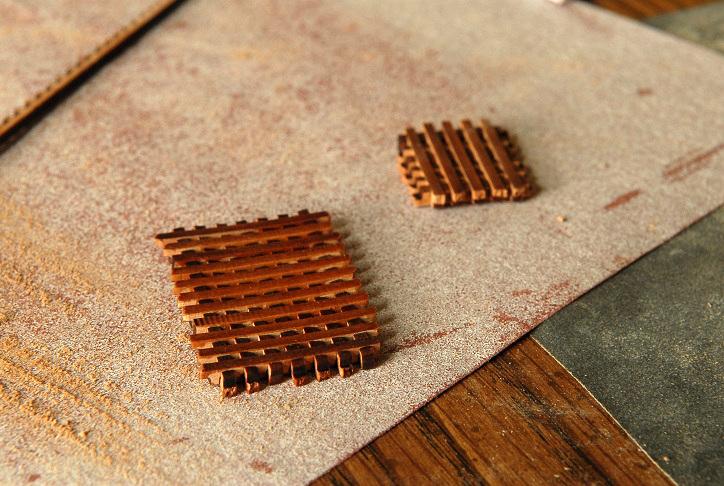
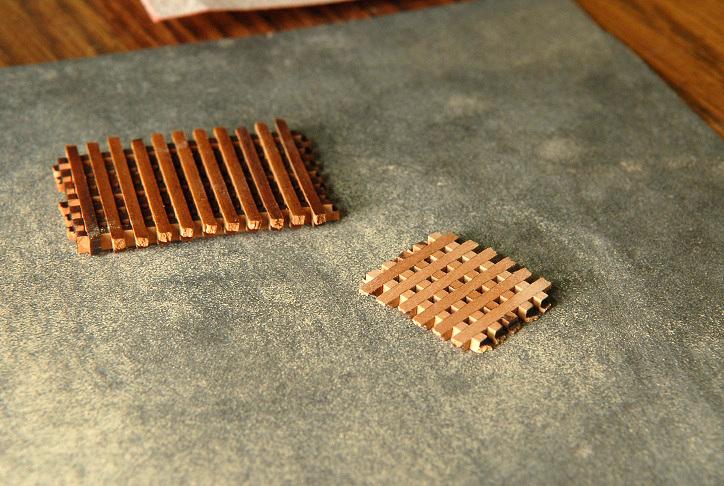
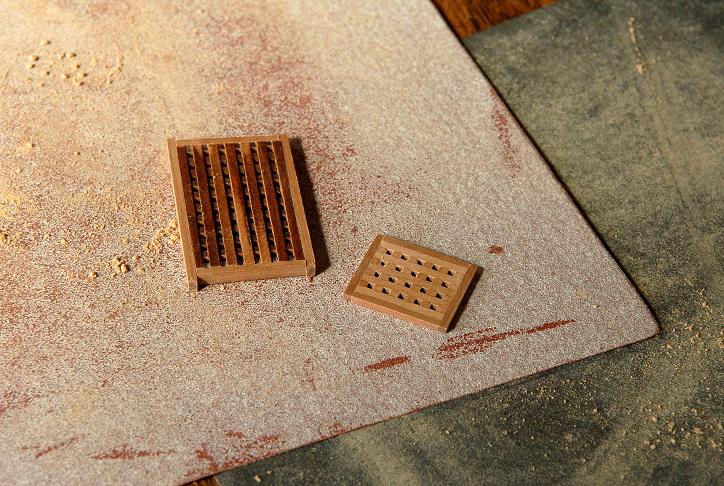
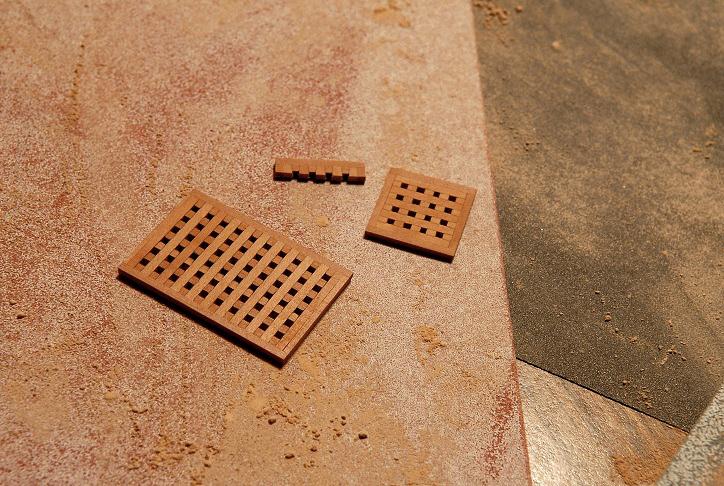
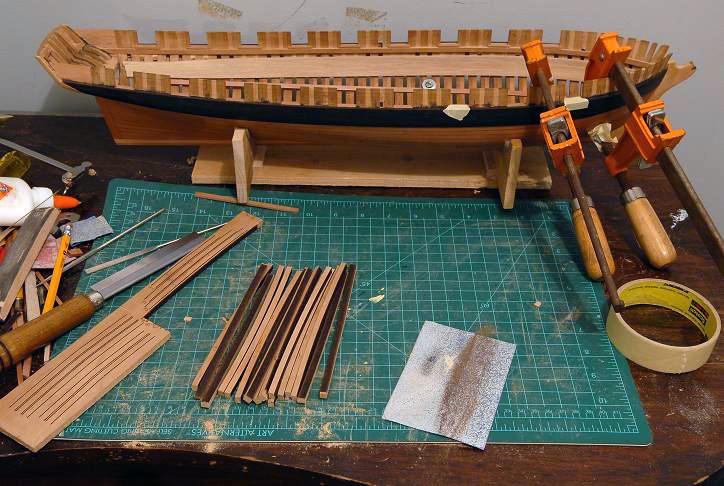
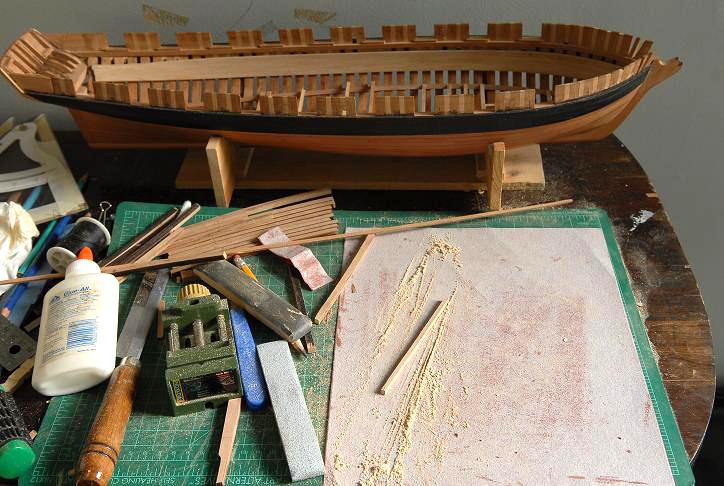
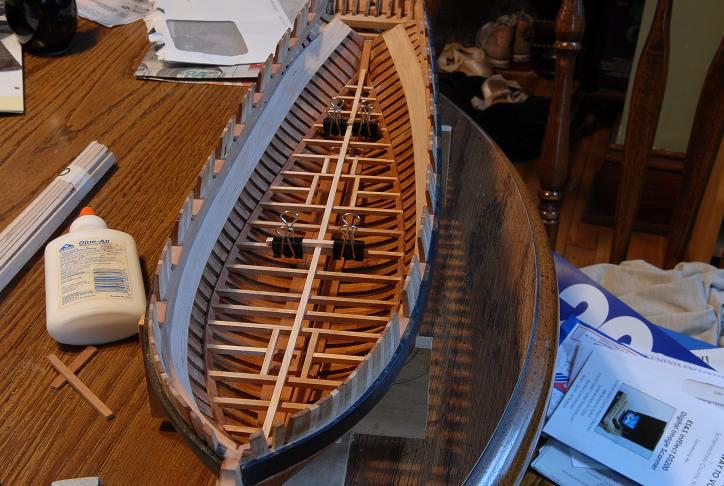
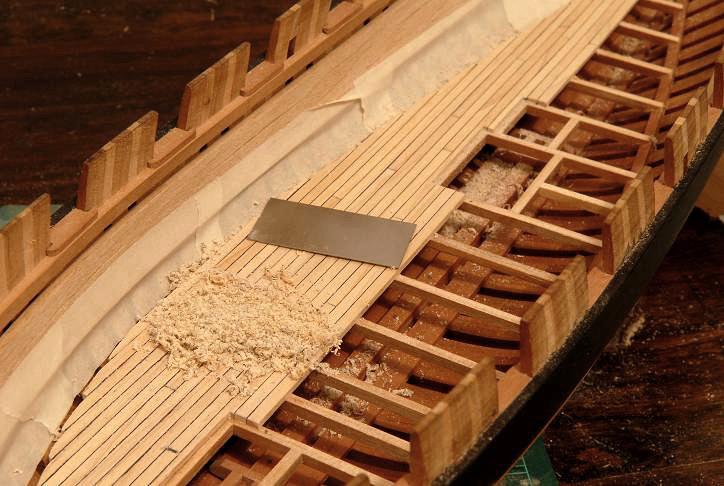
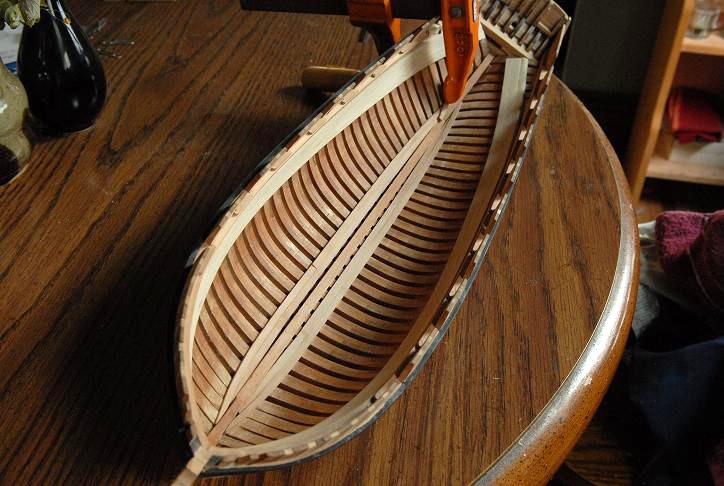
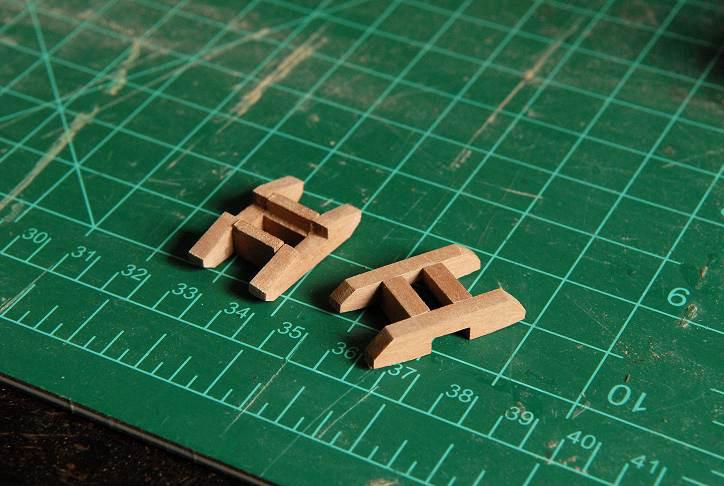
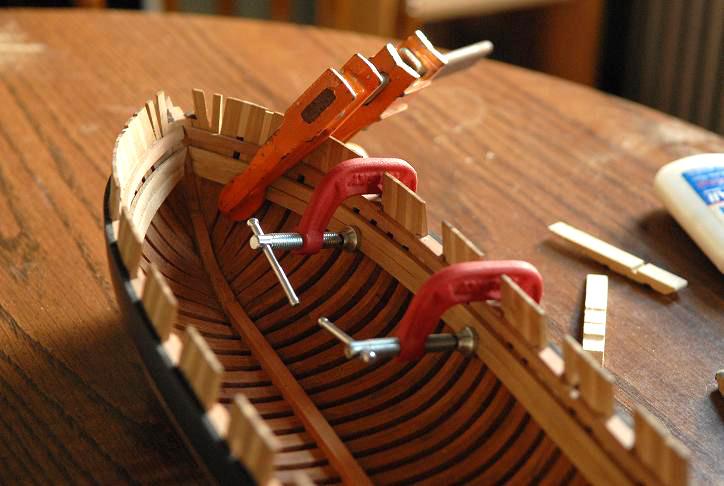
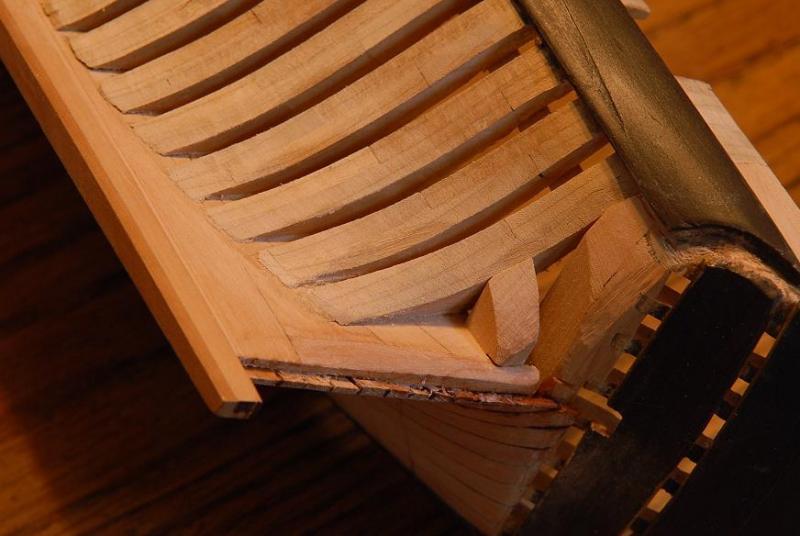
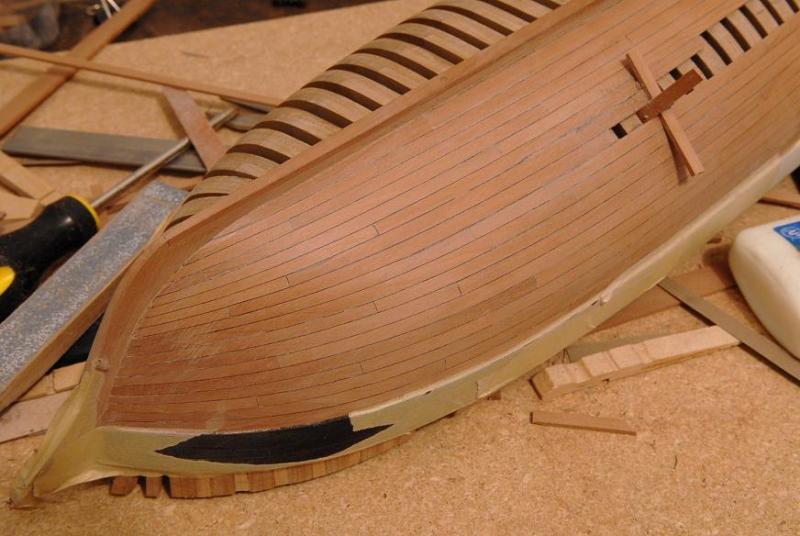
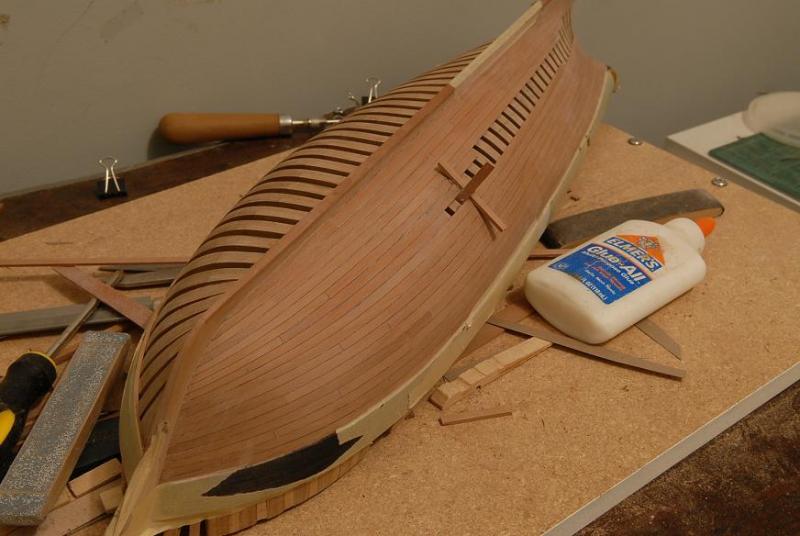
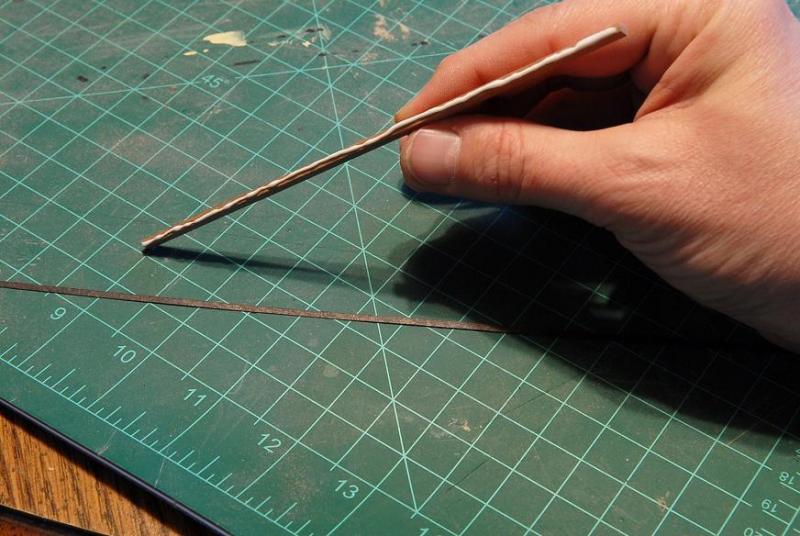
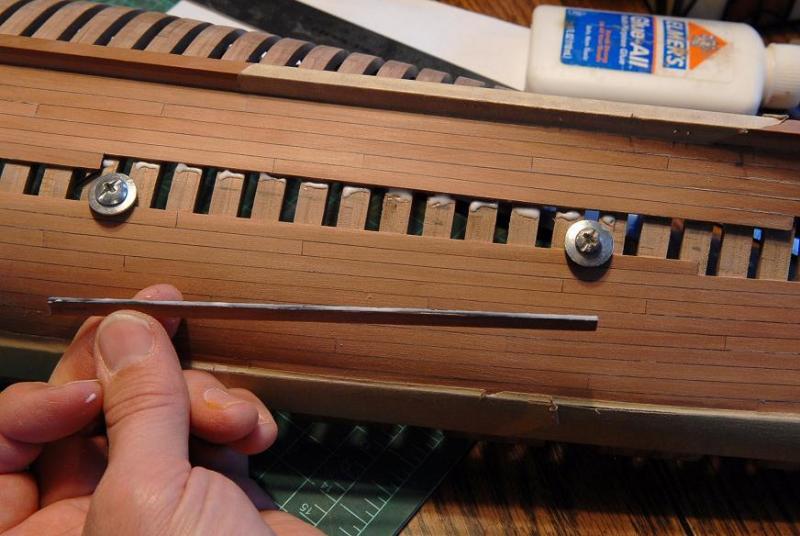
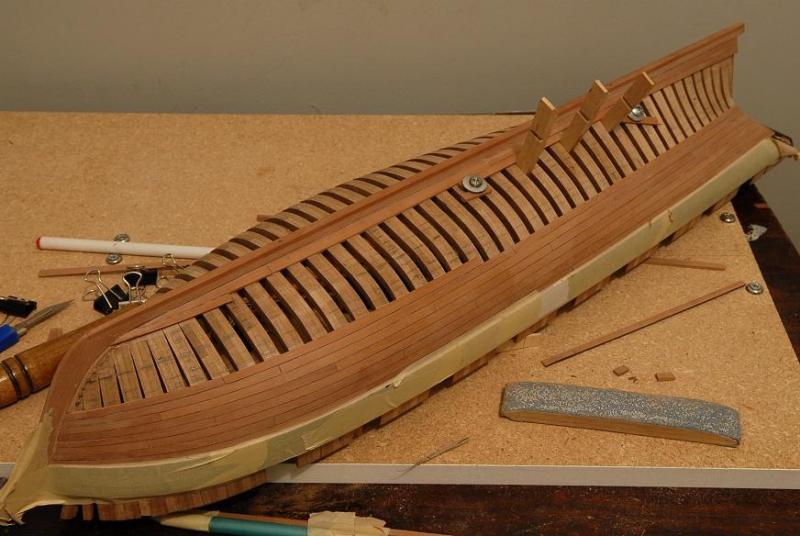
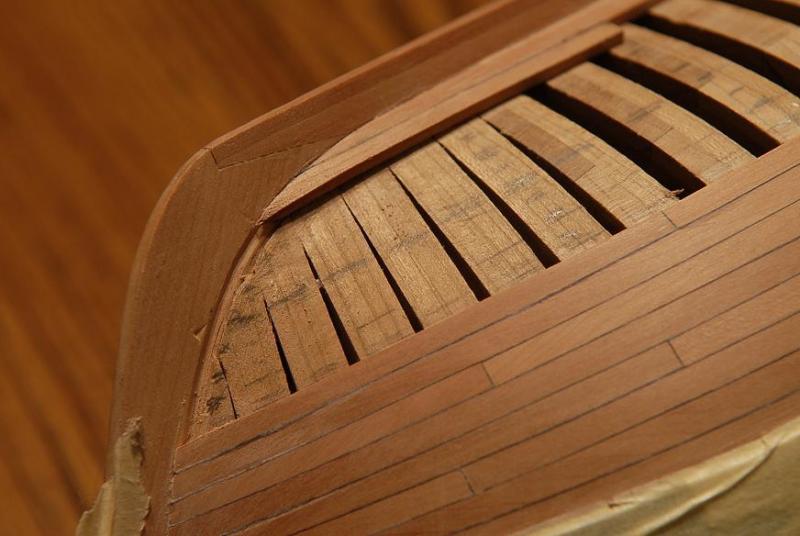
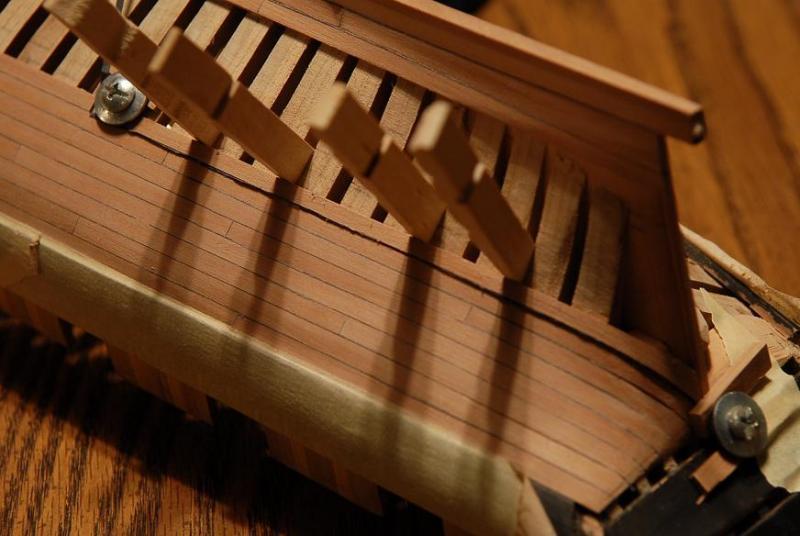
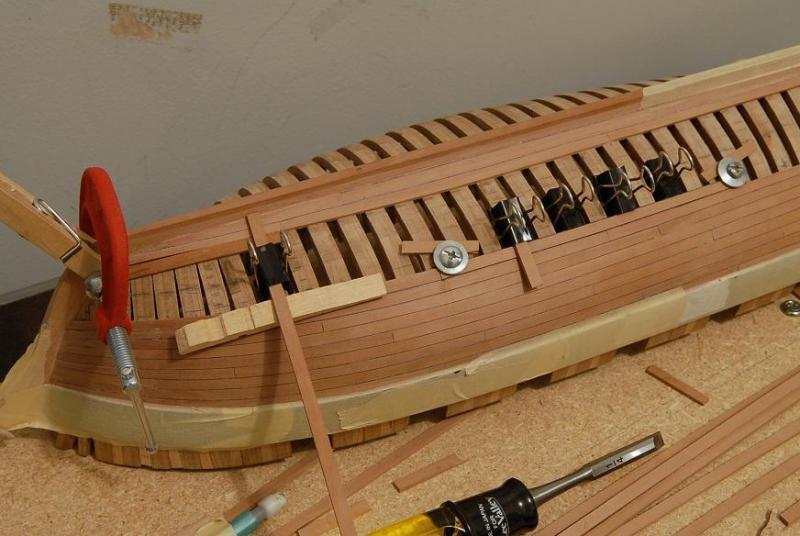
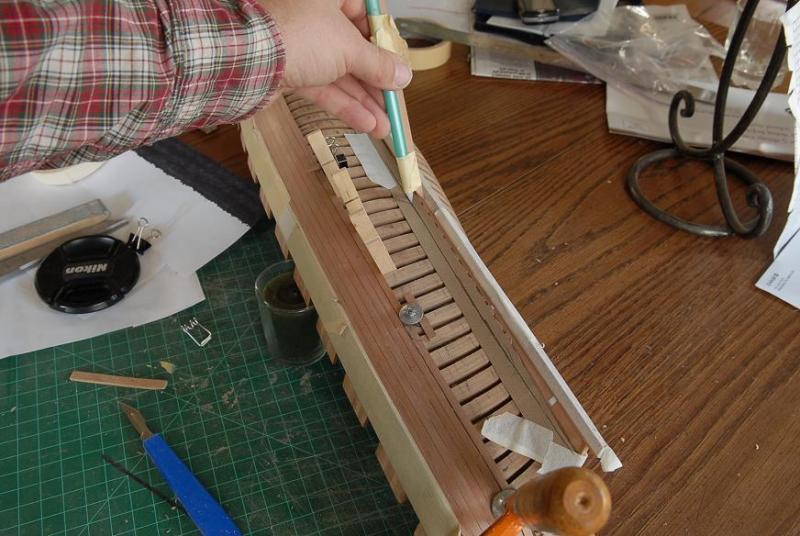
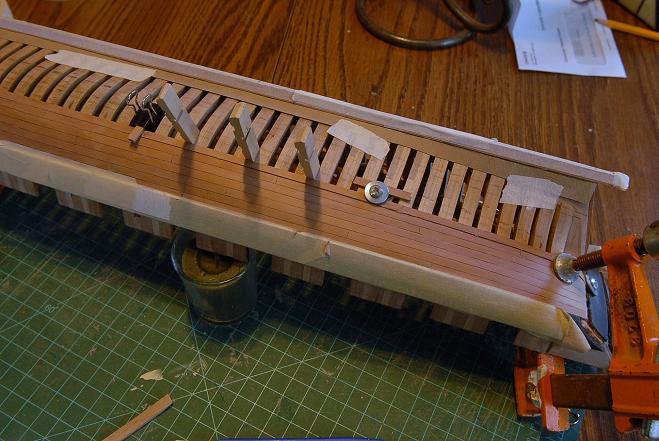
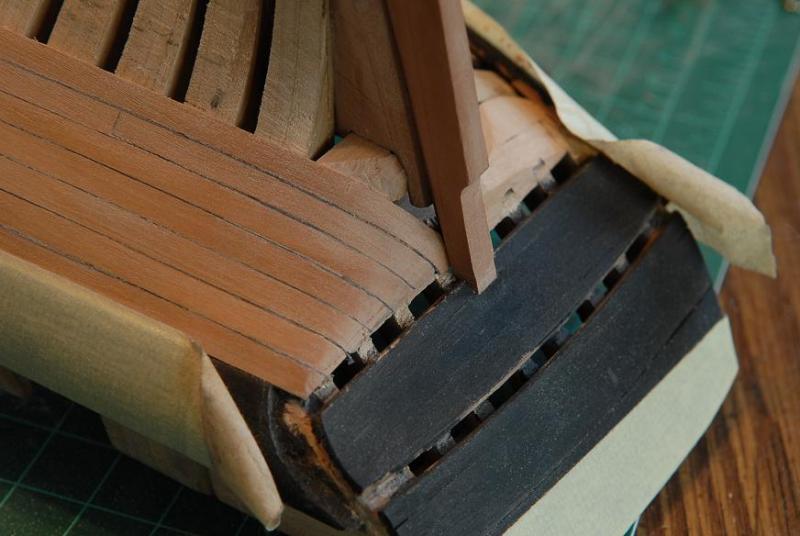
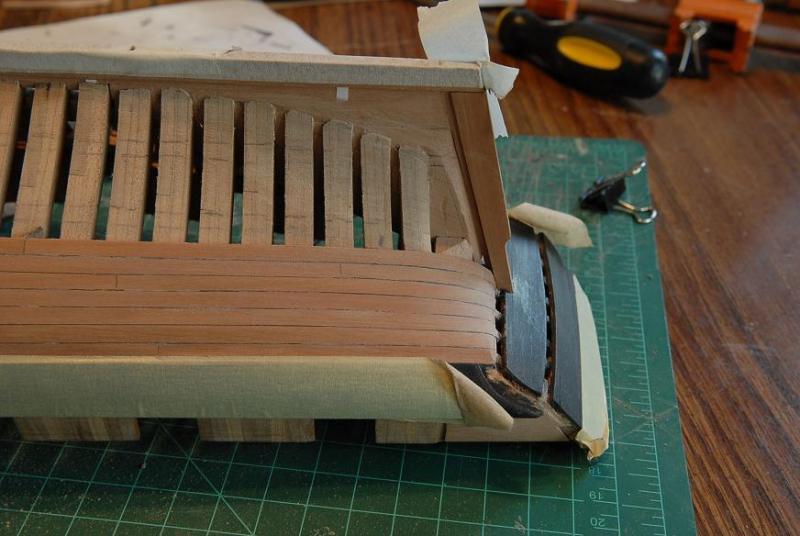
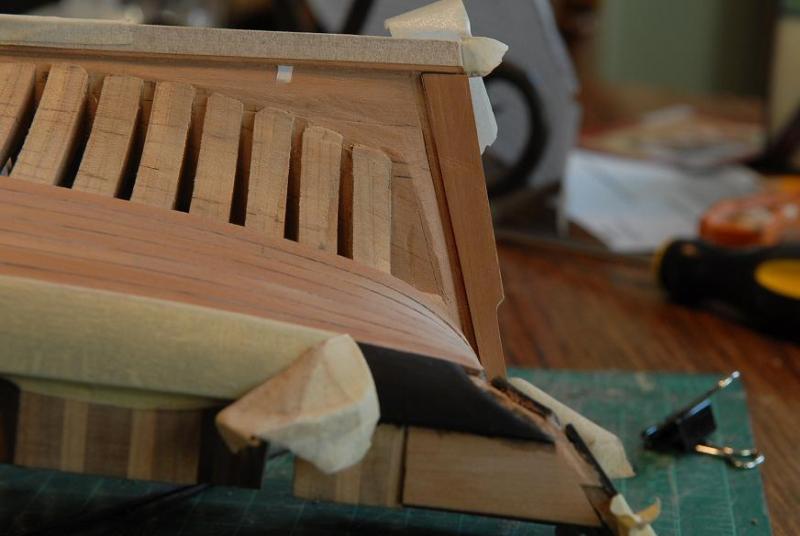
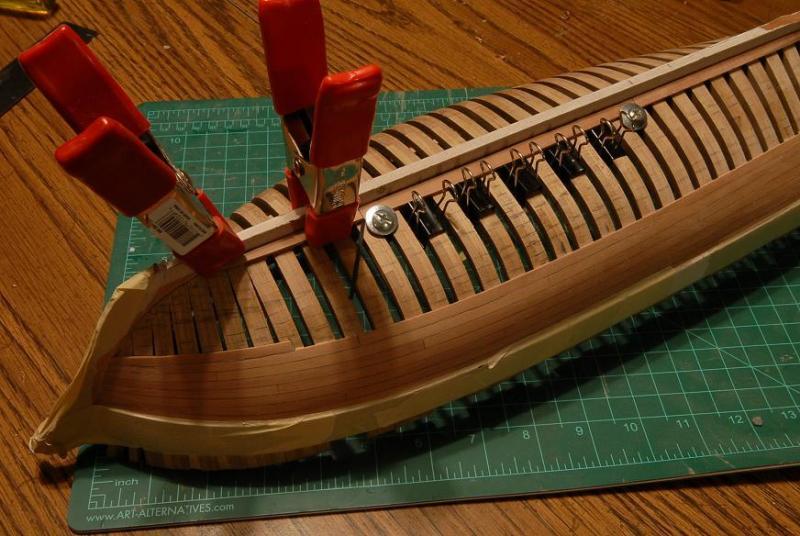
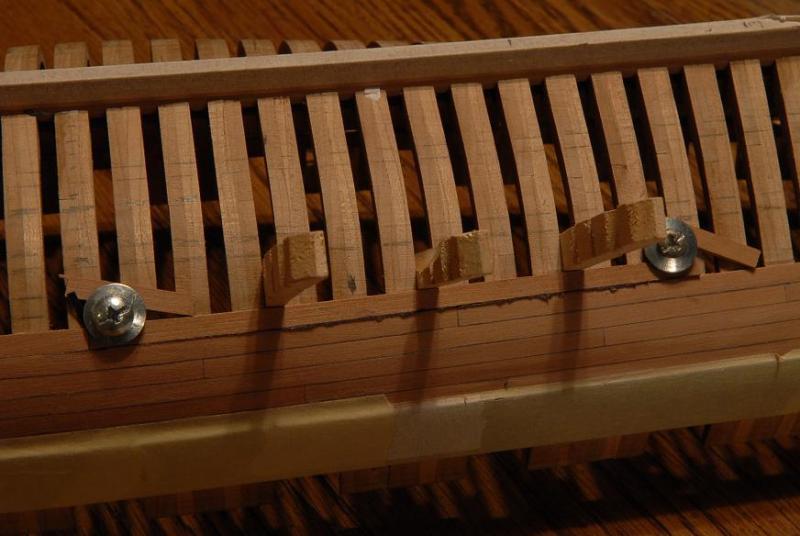
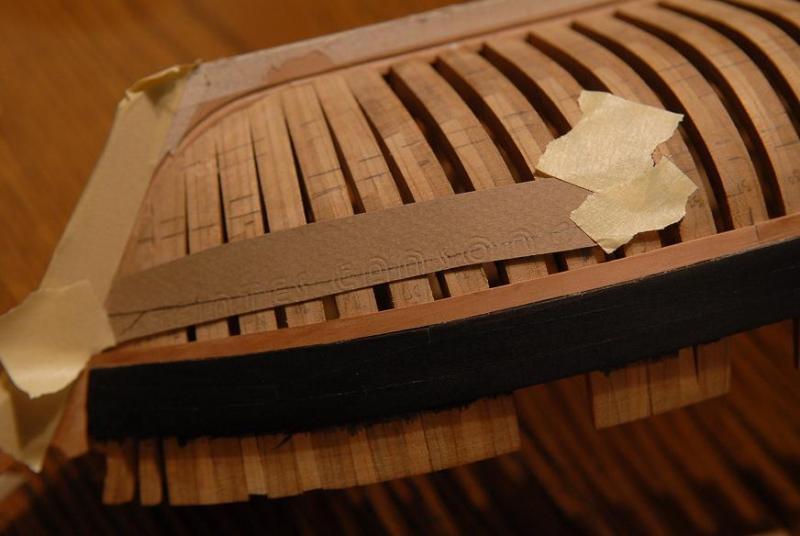
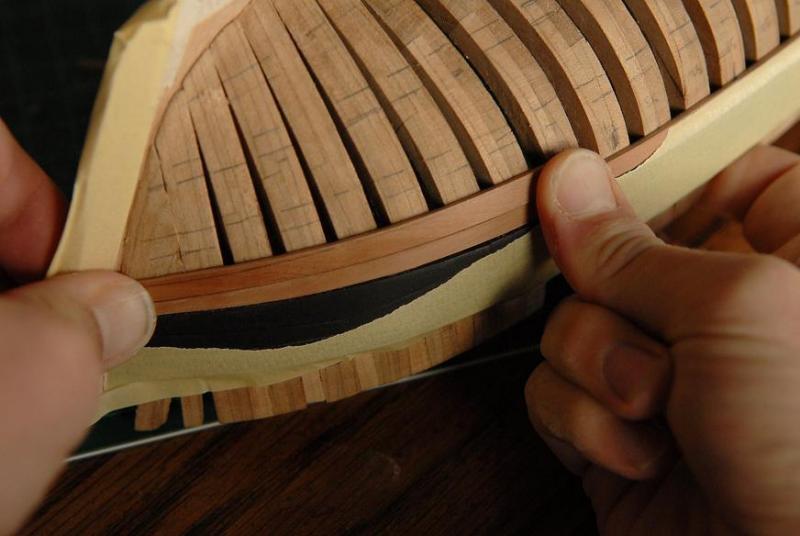
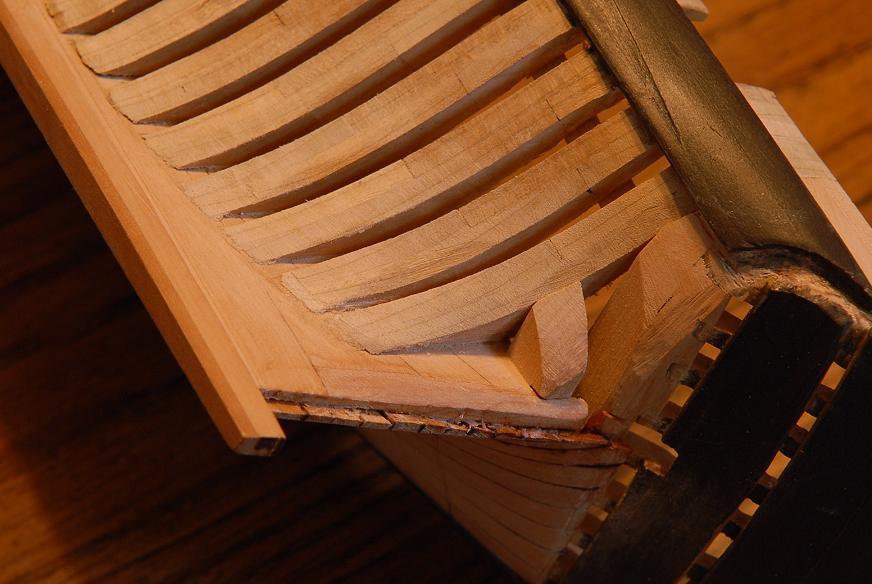
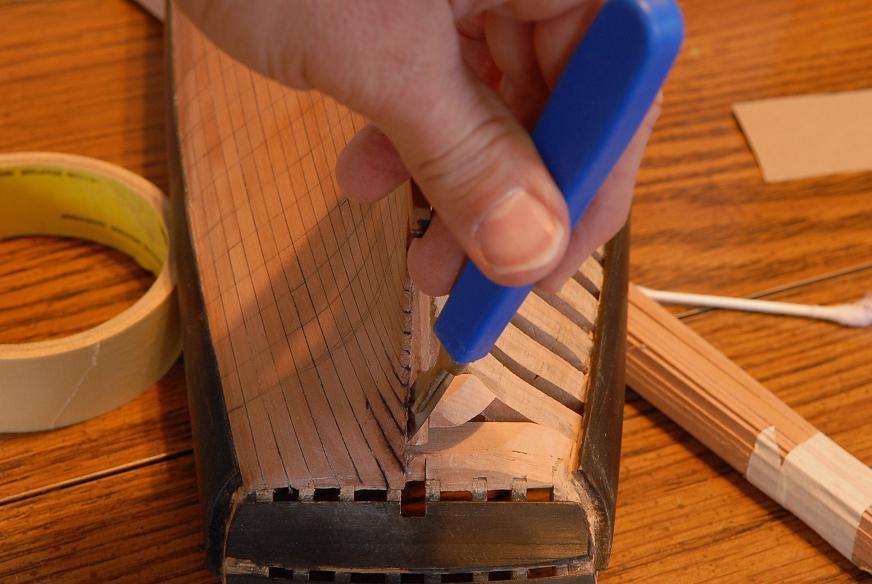
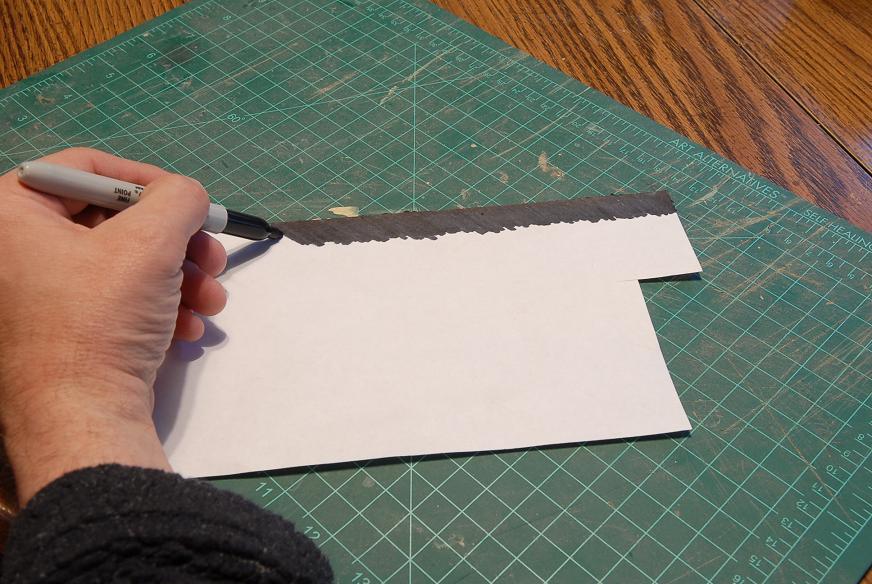
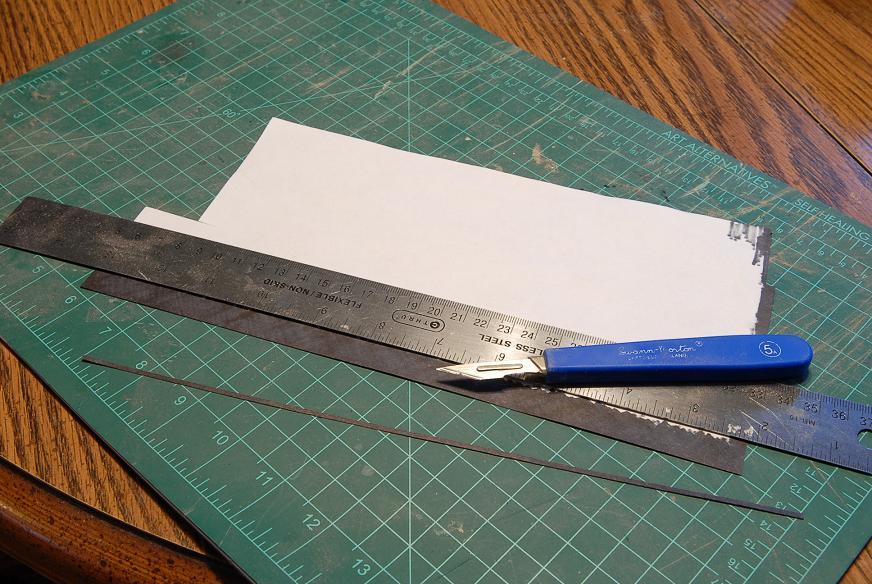
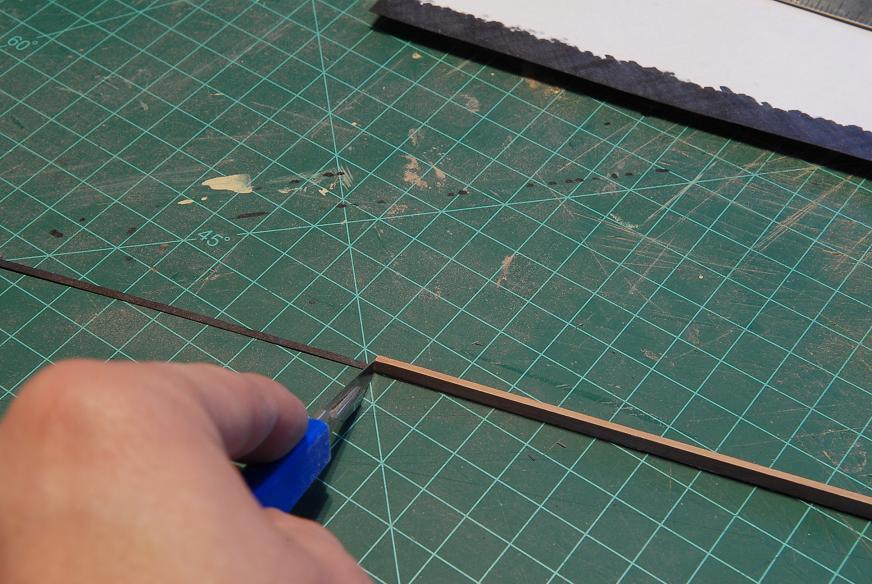
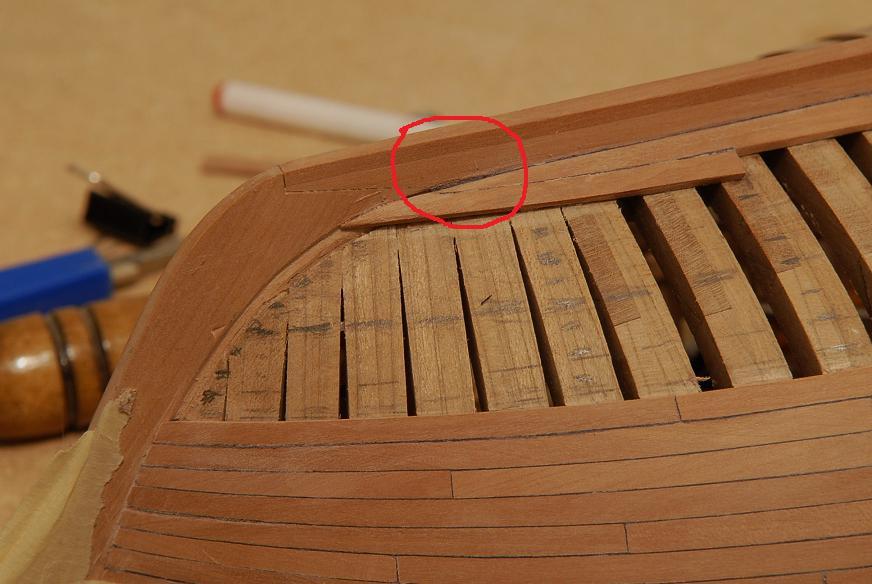
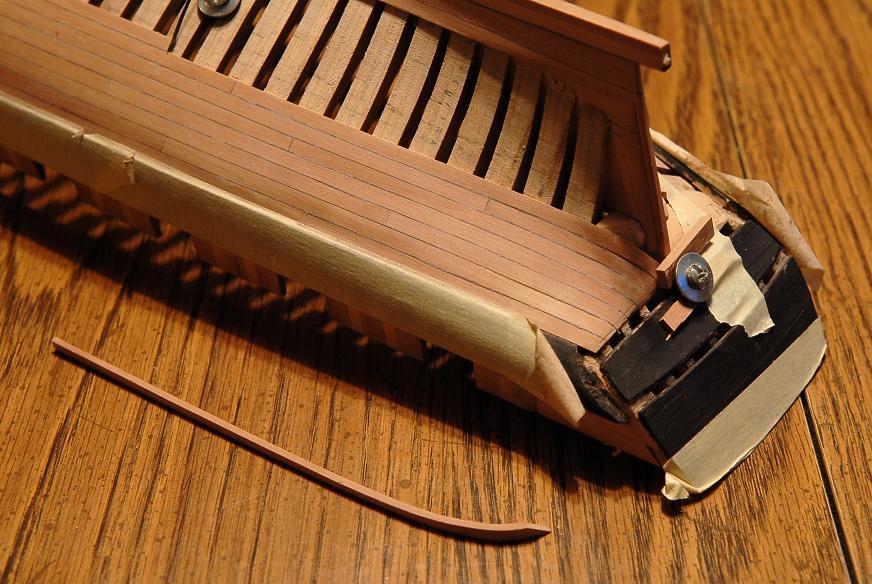
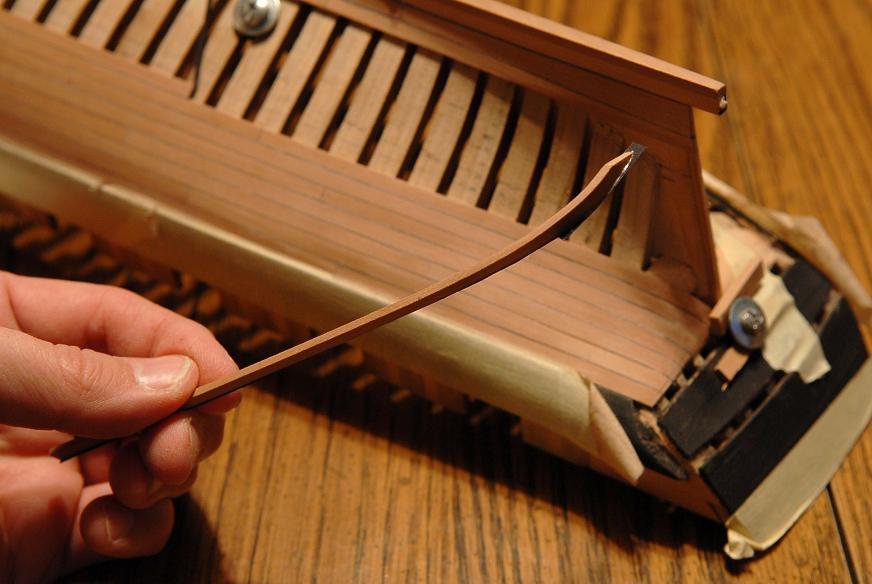
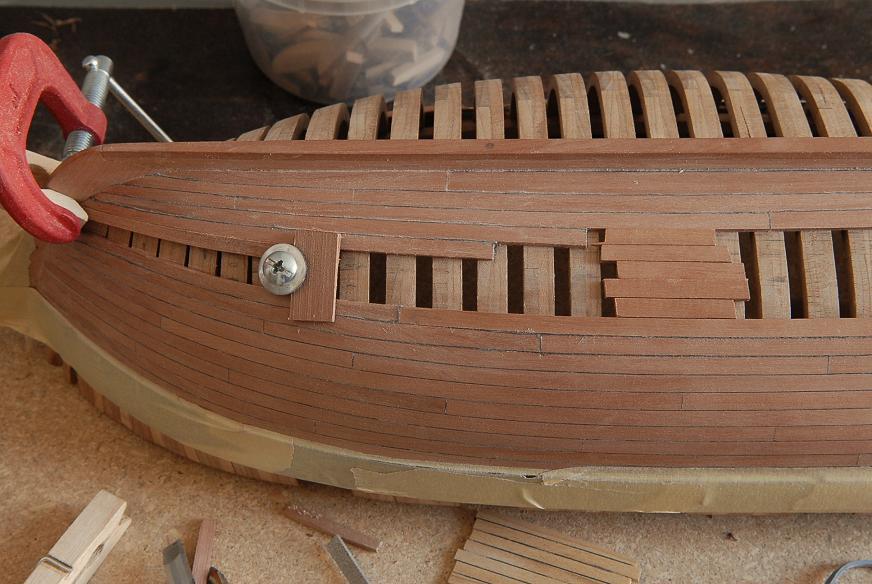
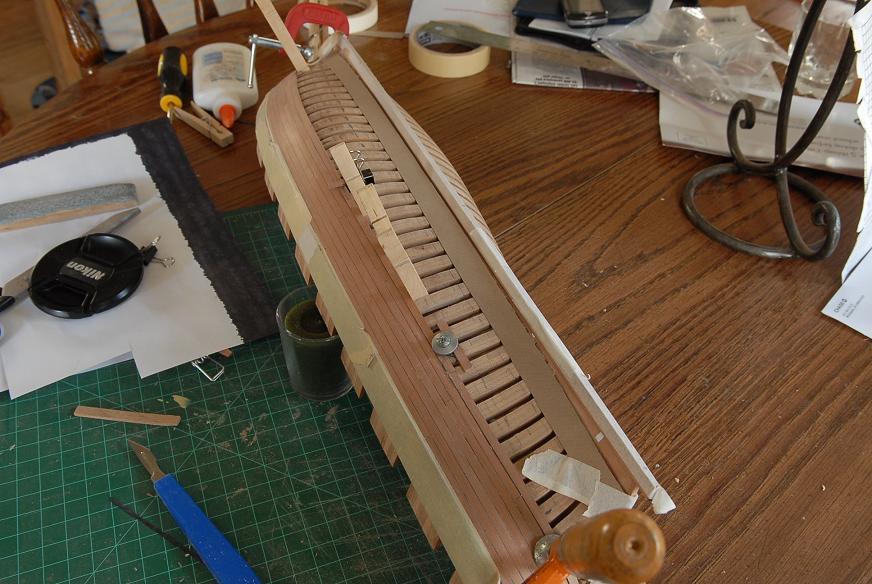
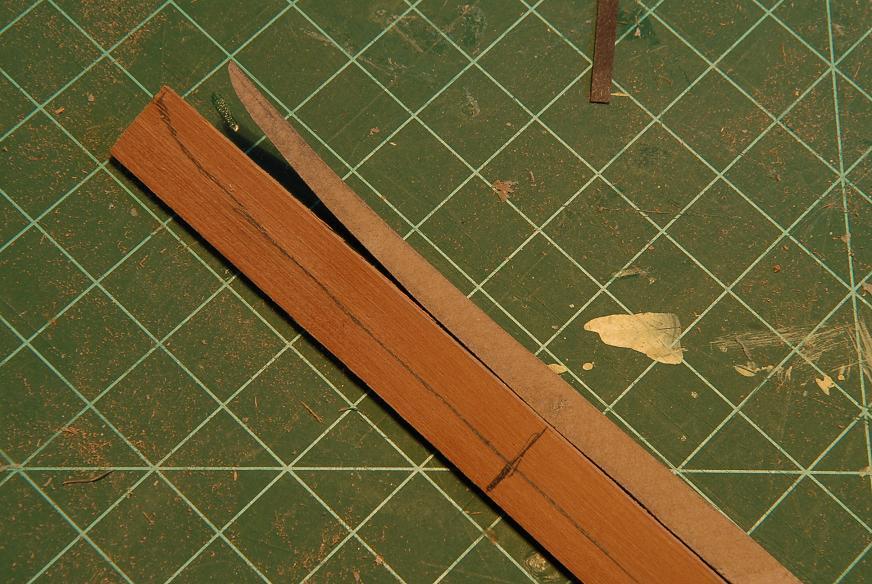
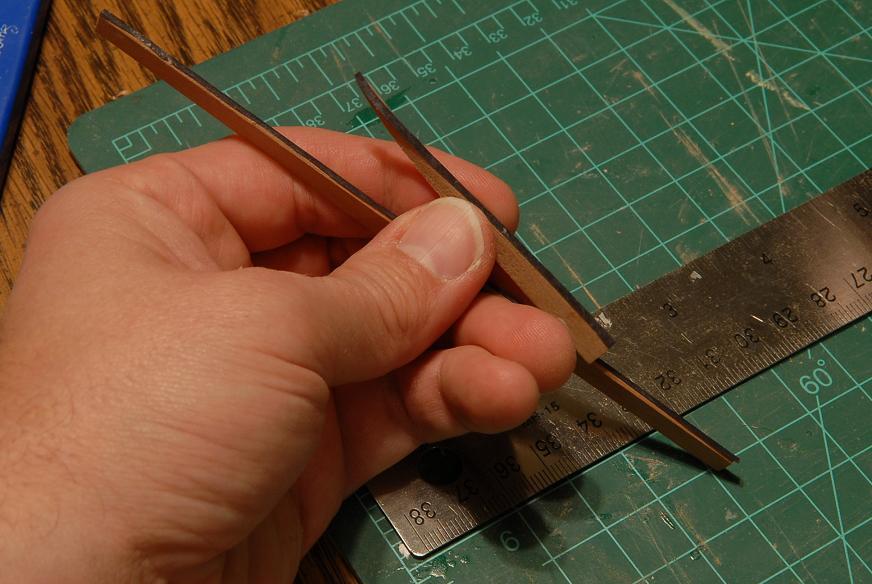
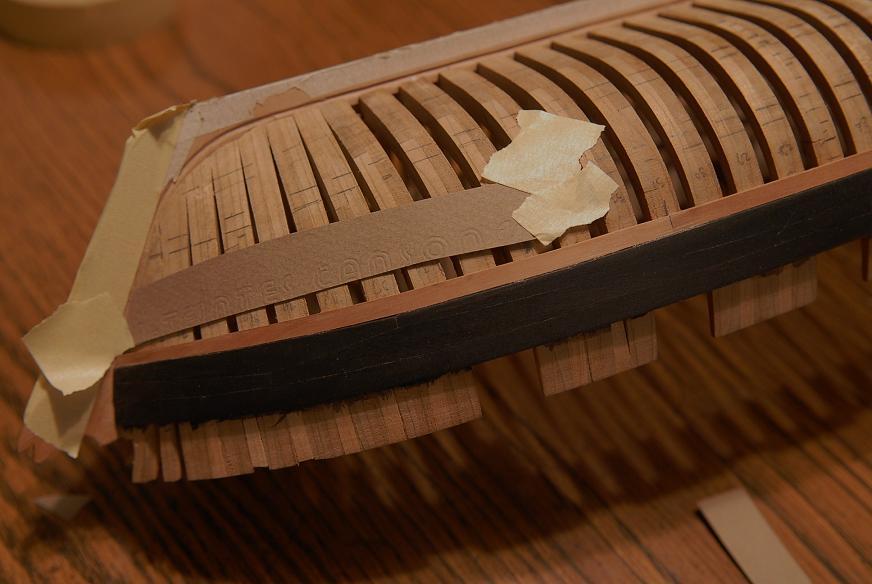
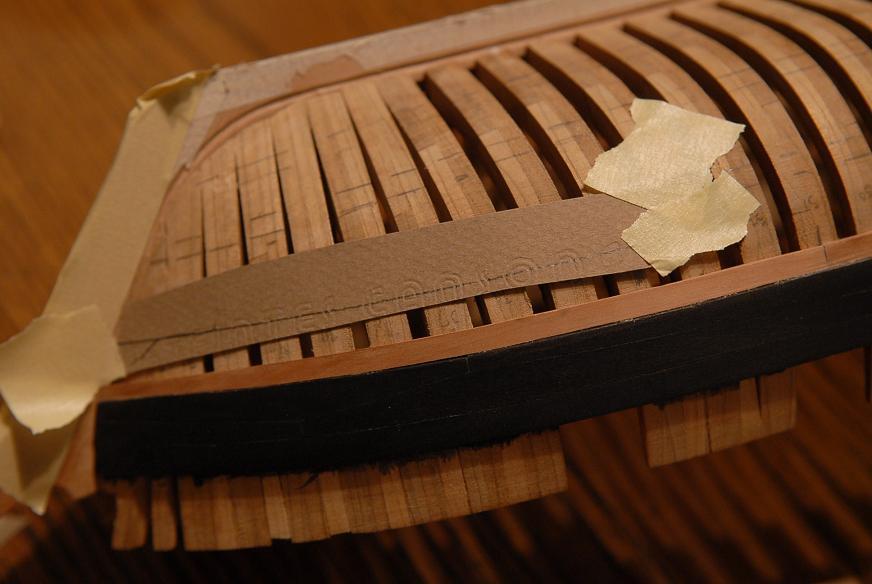
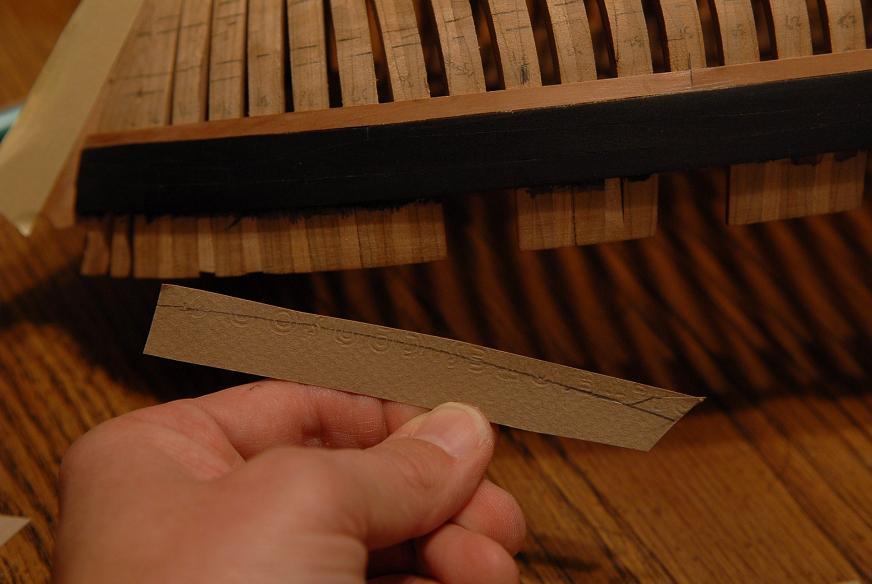
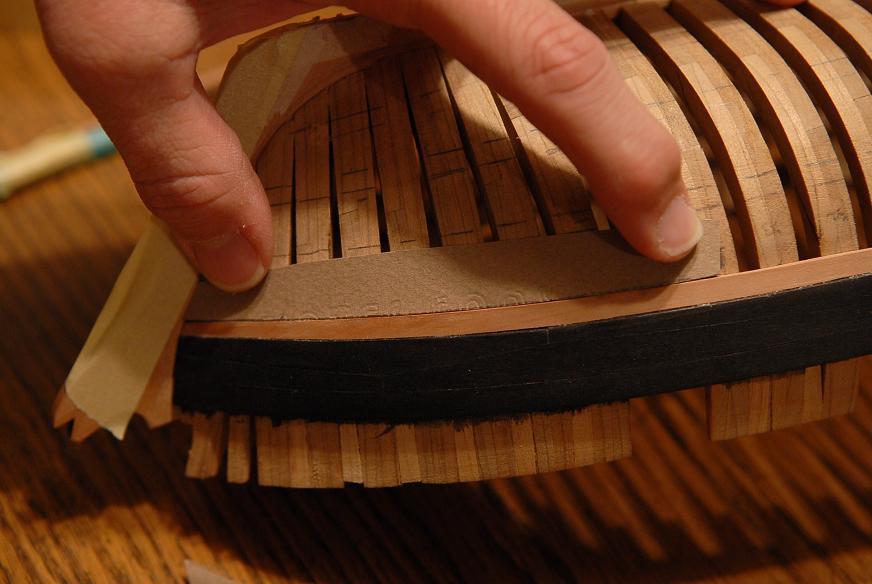
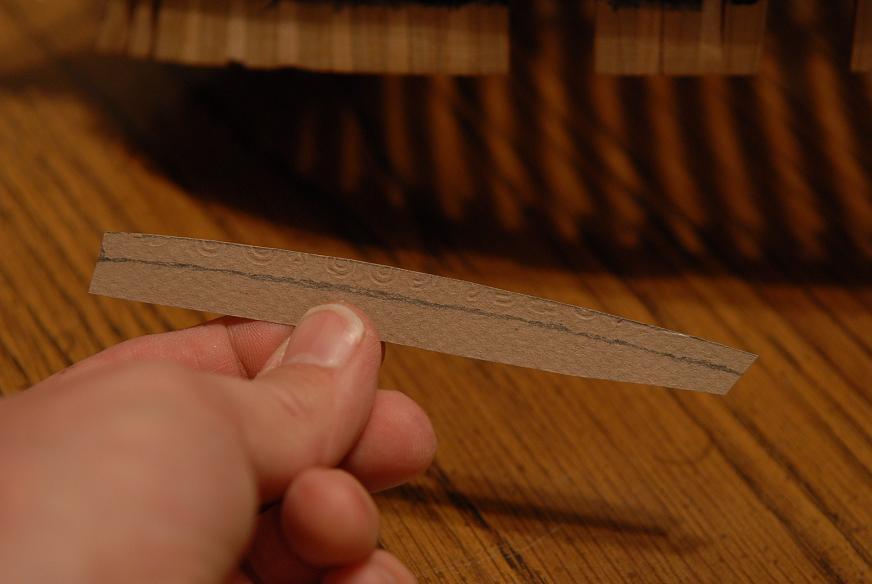
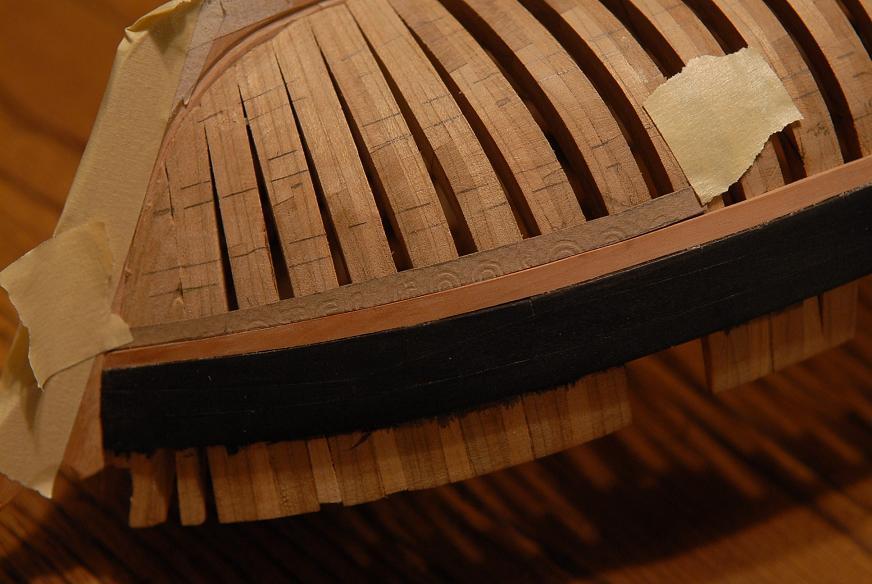
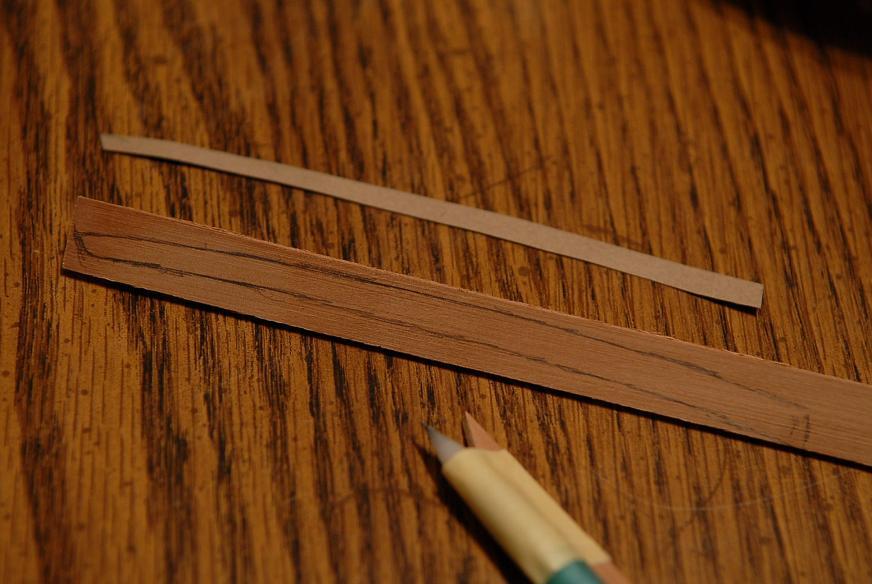
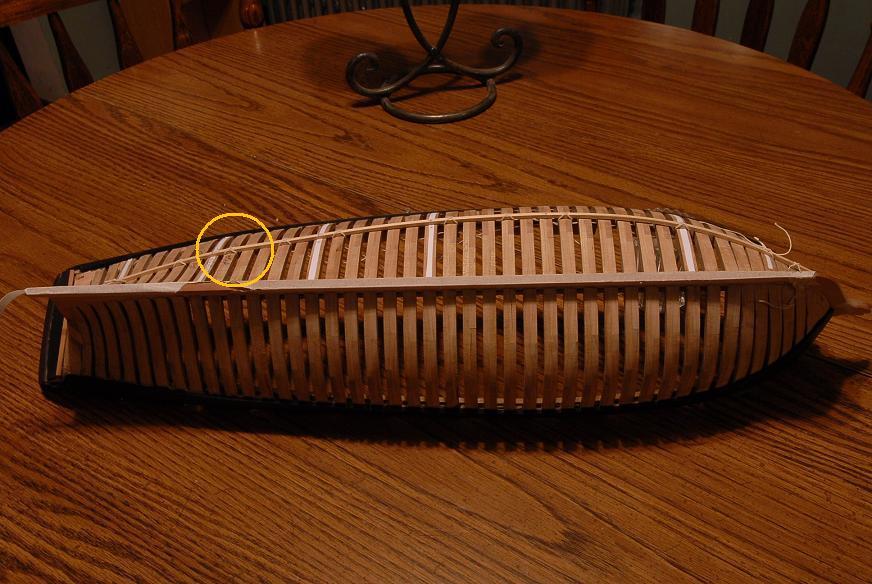
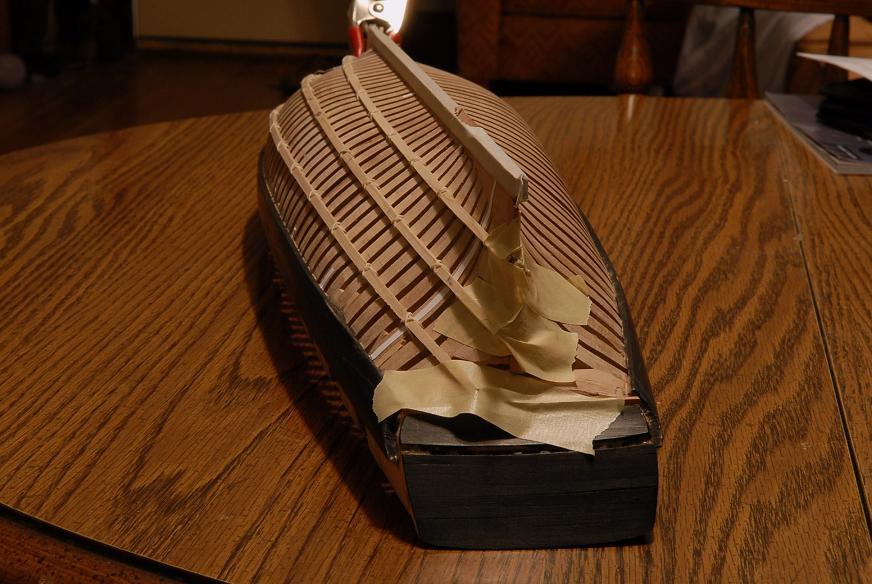
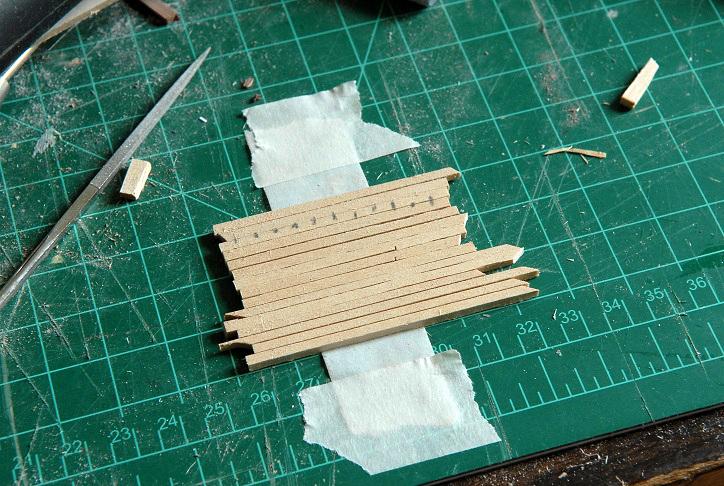
Next job was making a couple of hatch gratings. Good practice for the hatches on the main deck. One thing I realized is that for the main deck I should make the hatch gratings first, because they will set the size for the coamings, and then the planking around them.
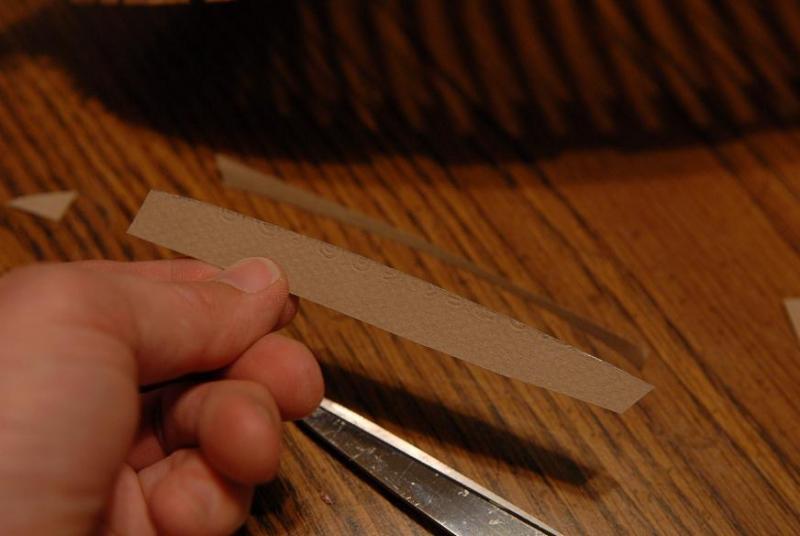
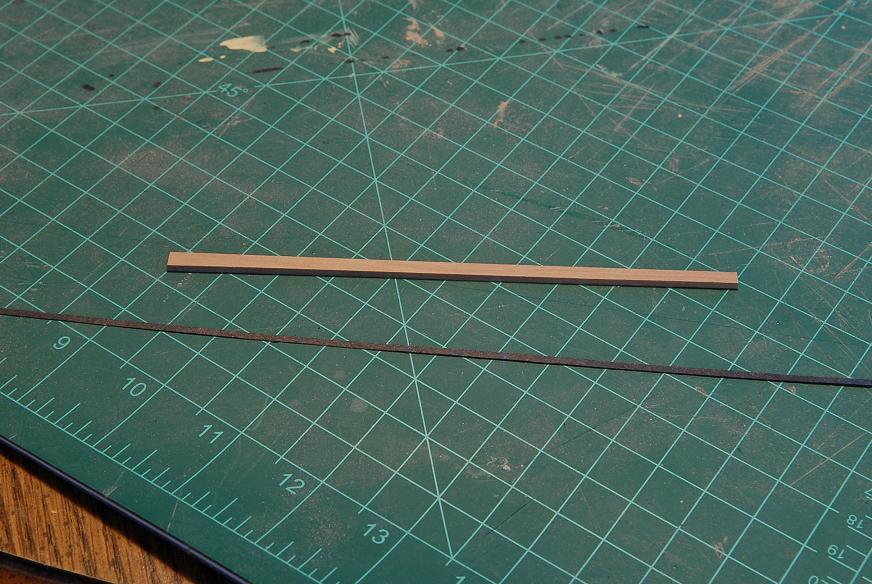
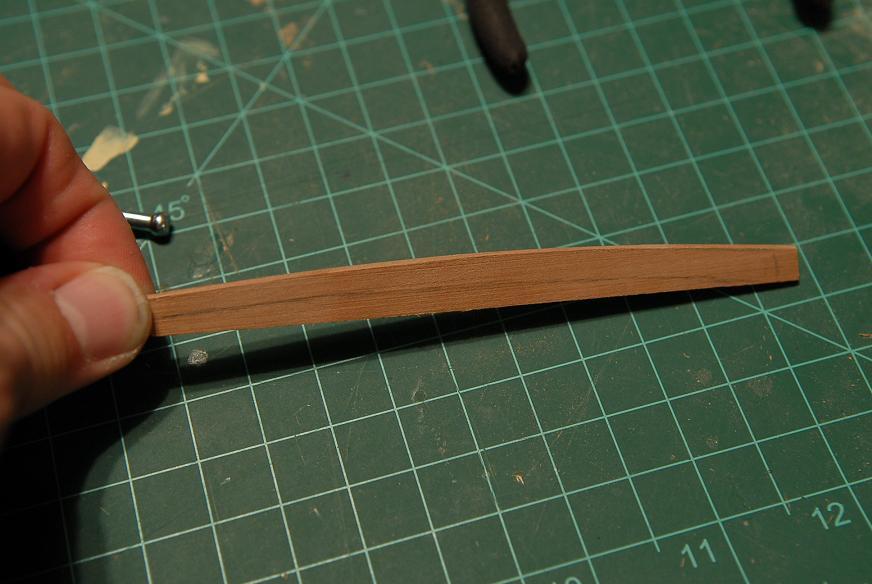
This is the way the lower deck gratings came together. First, cut a couple of the laser cut strips into pieces for the two hatches--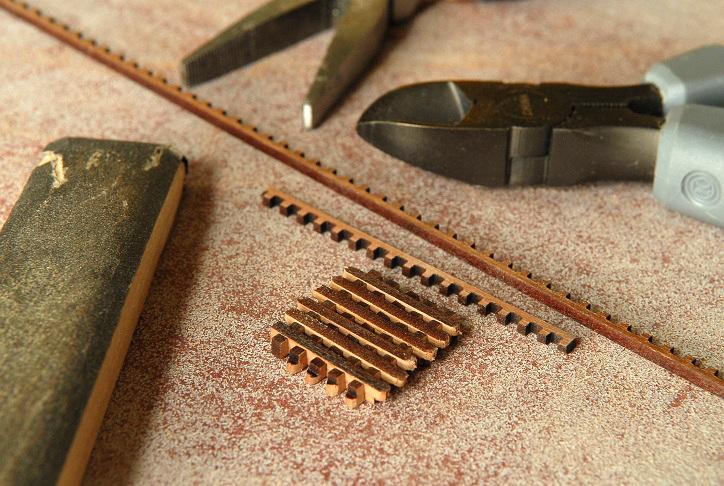
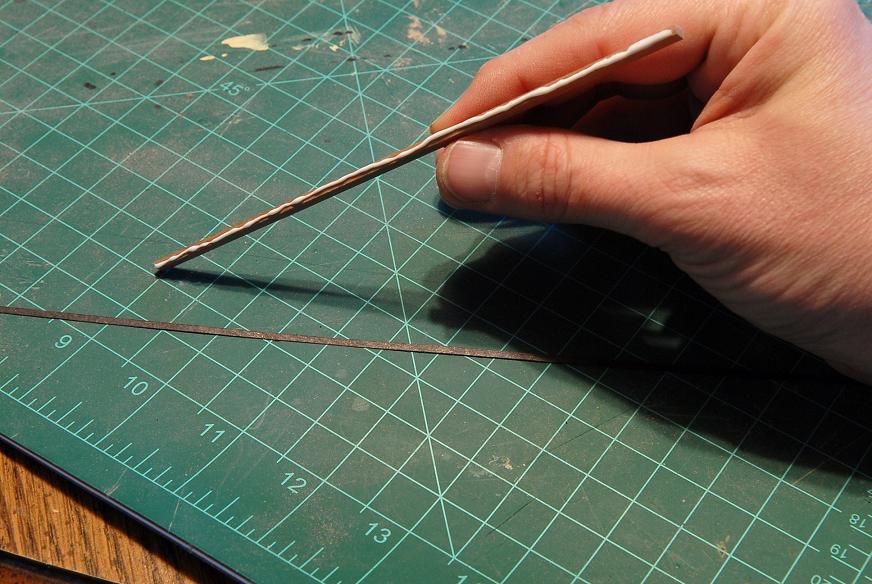
After putting them together, I wiped some watered down PVA over them, and let them dry--
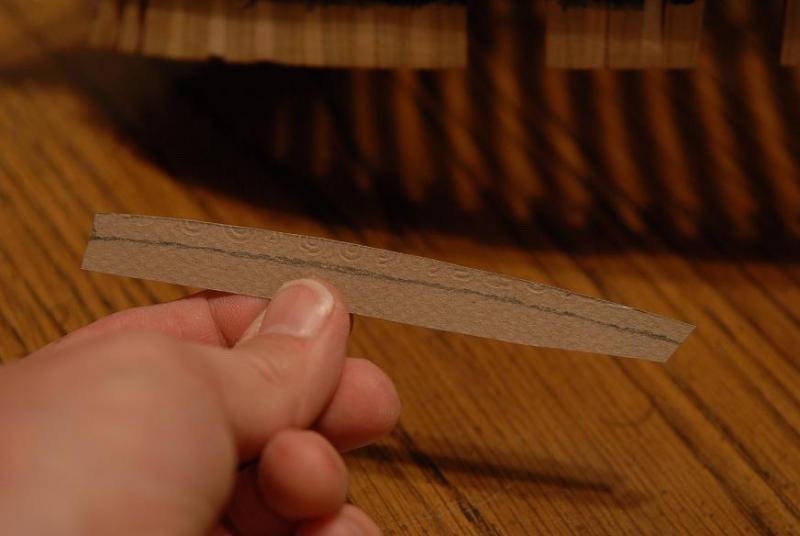
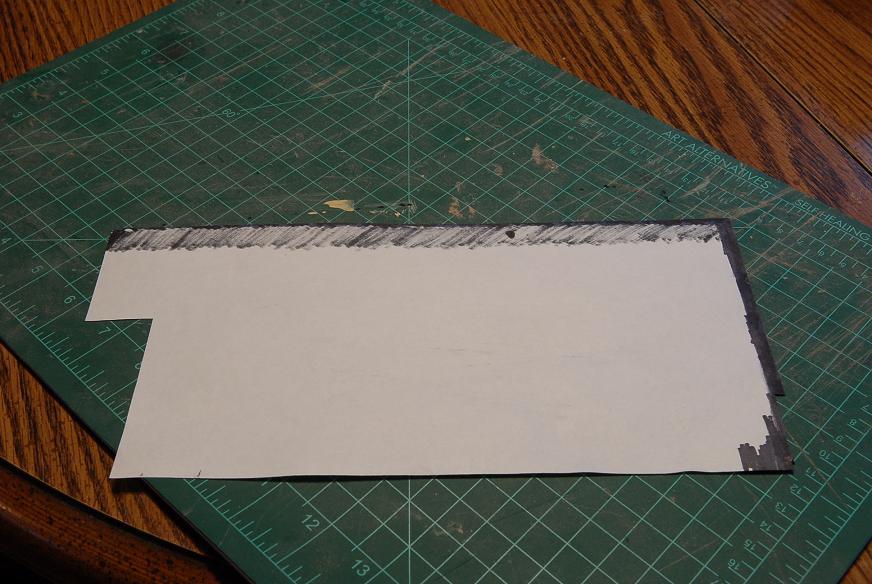
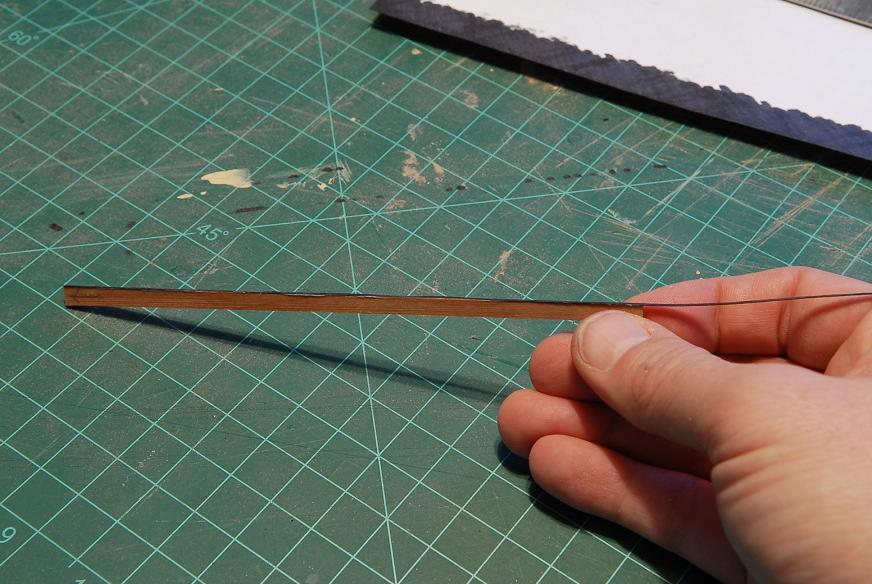
Next they are sanded flat--
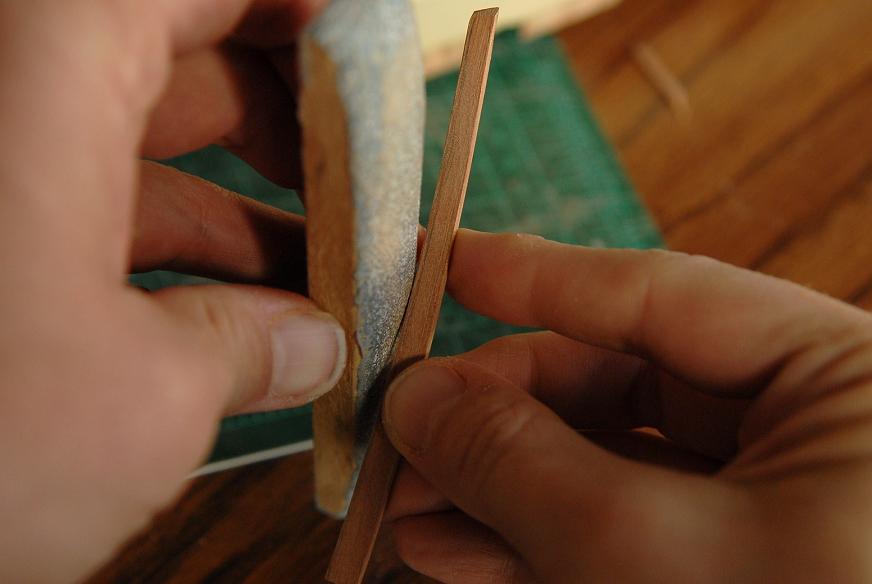
Then the edges are sanded flat--

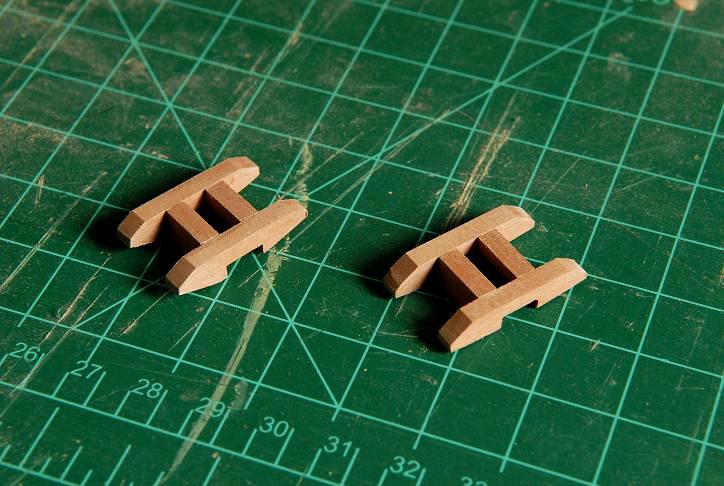
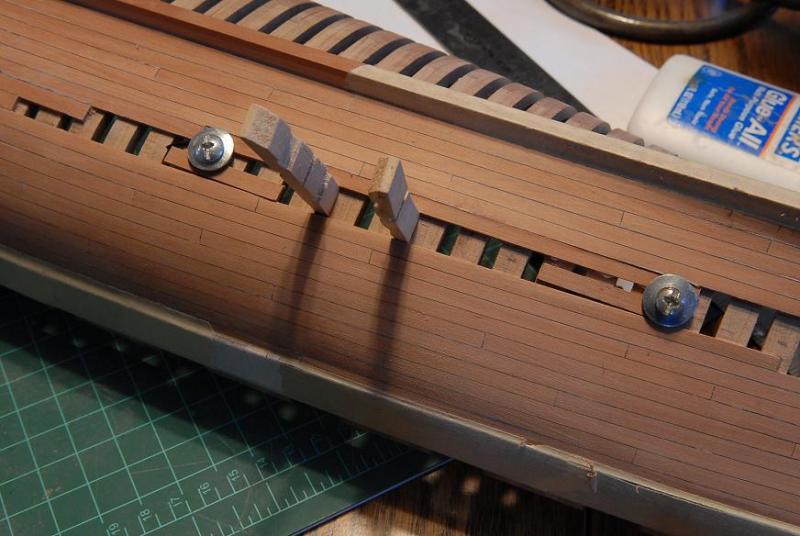
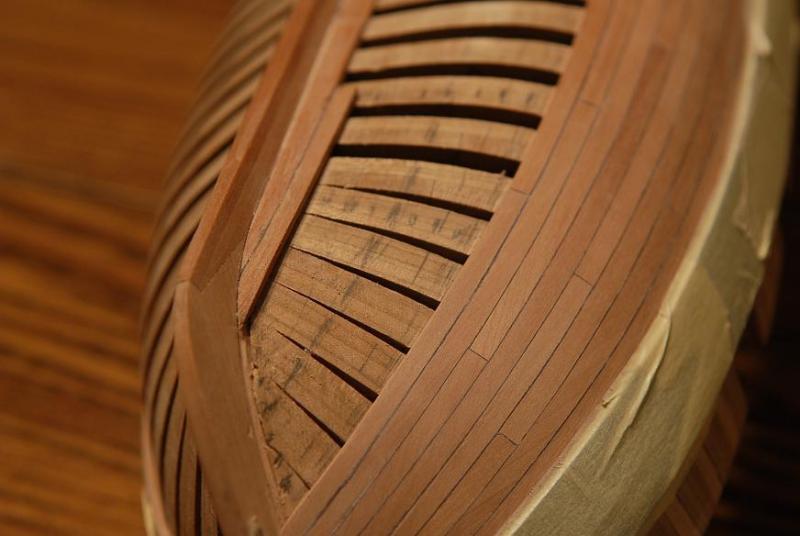
And glued another strip of wood to the outside. [This extra strip around the perimeter is how the replica Niagara gratings are constructed, but it doesn't seem to be the historical norm, and I decided not to do it on the upper deck grates.] On the larger one I decided to glue the outer strips on before sanding it flat--
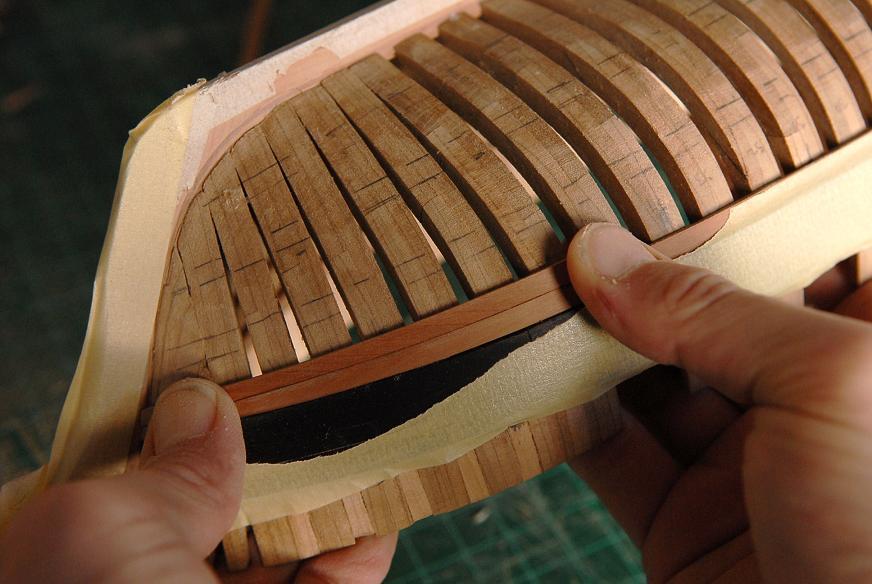
Here they are both sanded--
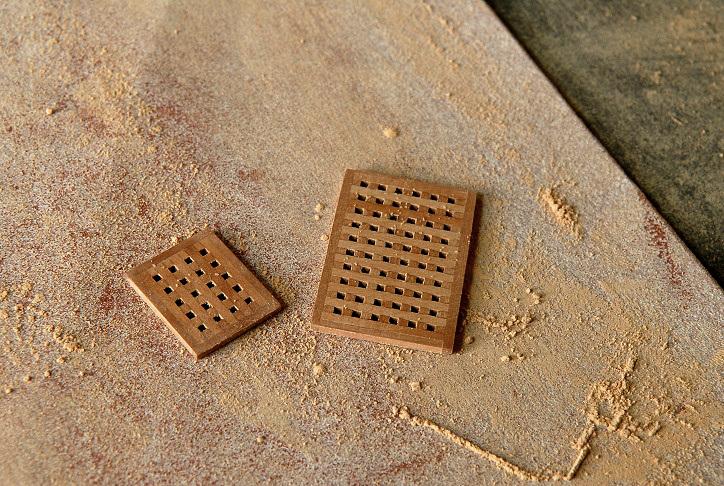
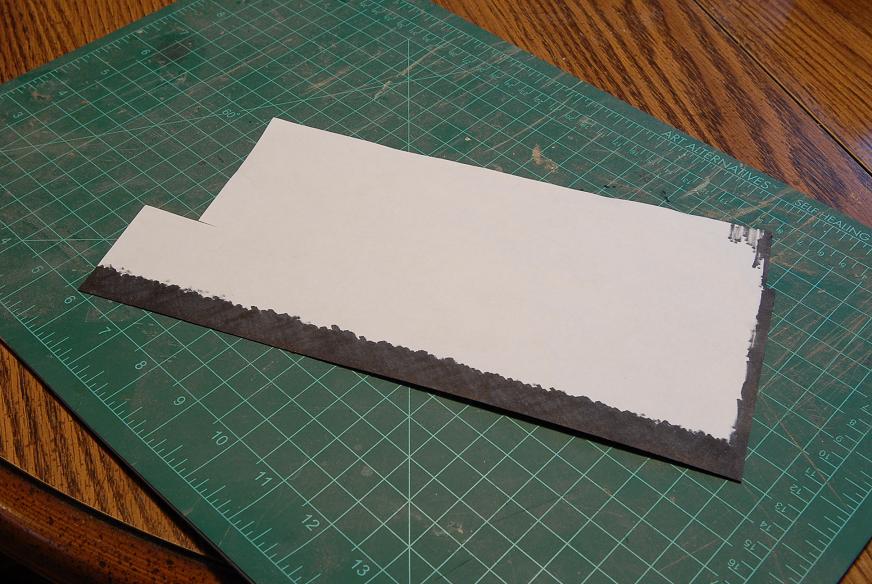
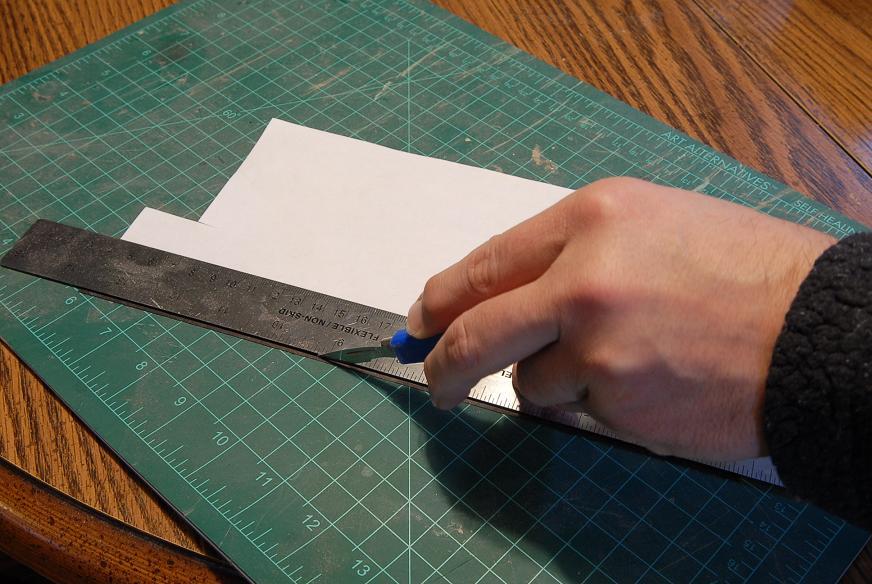
I decided that the smaller one was too big, so I had to trim a section off, and glue a new edge piece on, and sand it down again--
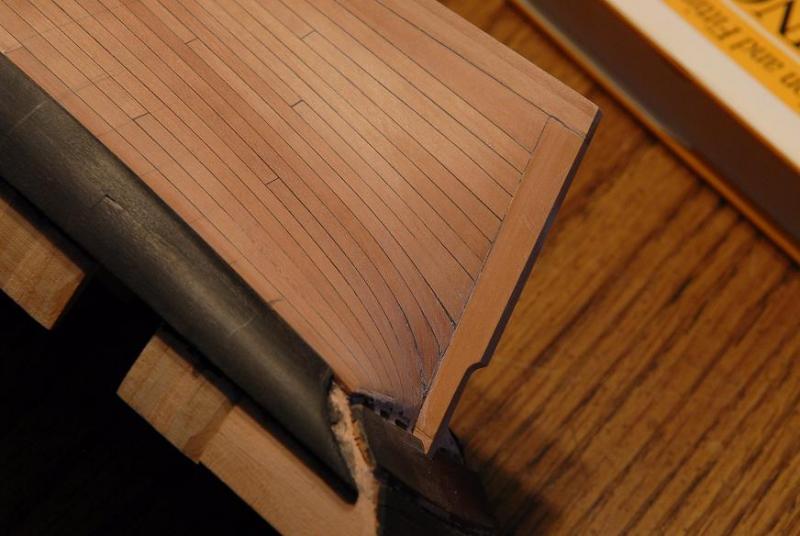
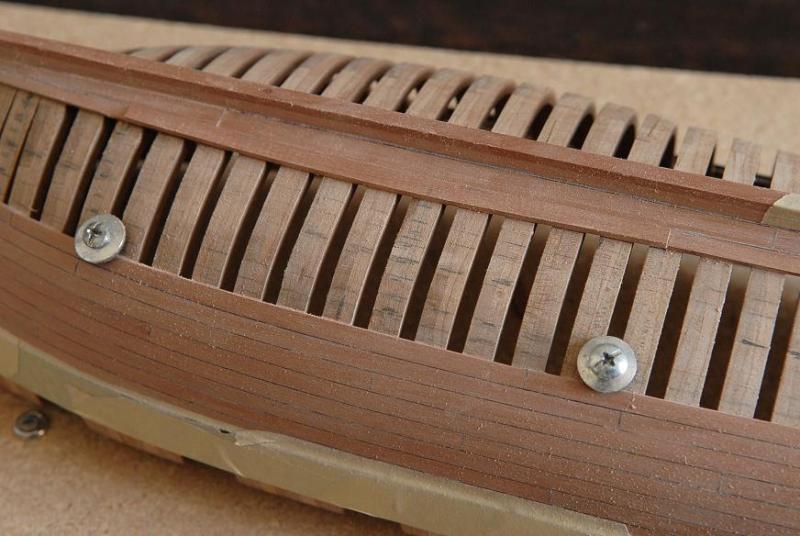
I rubbed some finish on them and here they are sitting on the lower deck. Next I'll make some coamings, and trim the planking as necessary to make it all fit together--

Ron- CiscoH, themadchemist and BETAQDAVE
-
 3
3
-
August 17, 2010
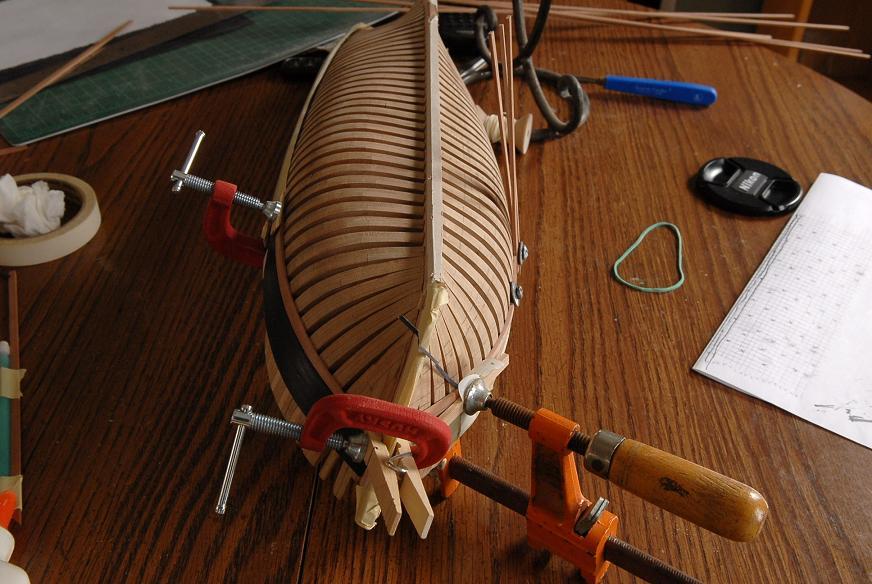
I made up an amusing little jig to mark the location for the berth deck. It rests on the gunport sills, and will give me a consistent dimension which follows the sweep of the main deck--
When I got closer to the stern, I had to break it apart and refashion it a bit
so it would fit--
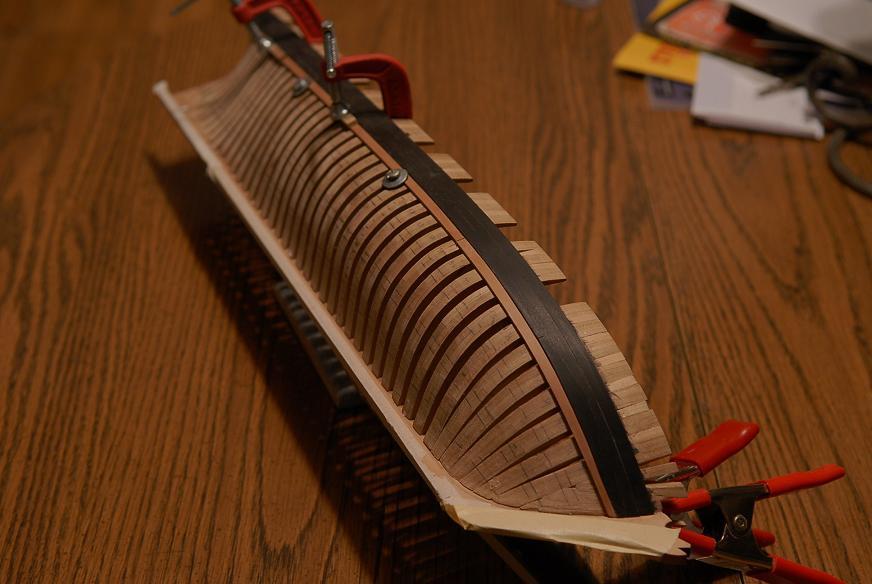
I cut two one-piece planks, boiled the fore part of each, and clamped them to dry--

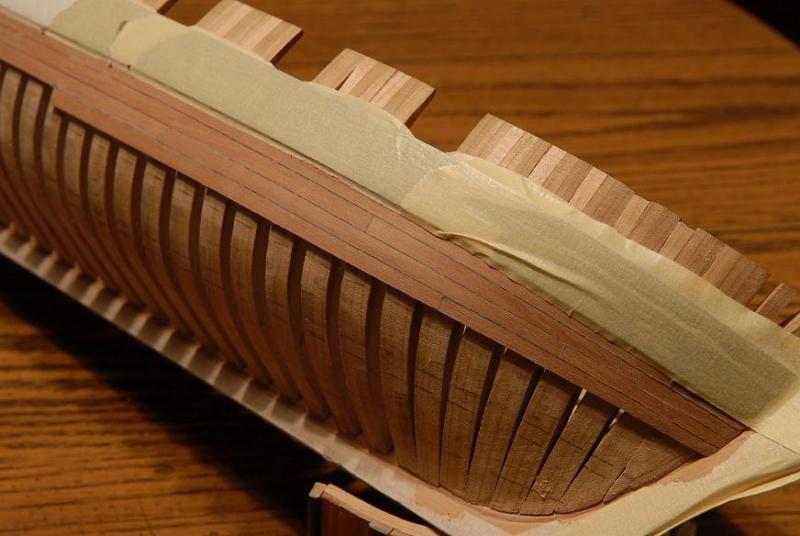
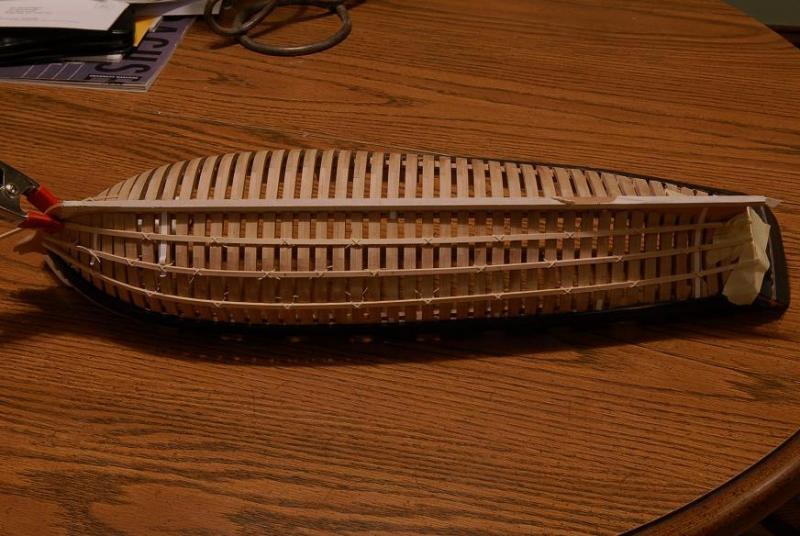
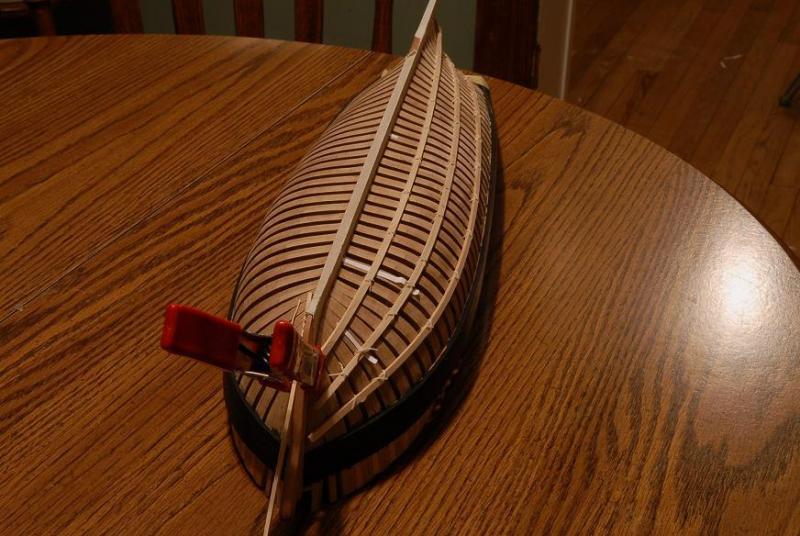
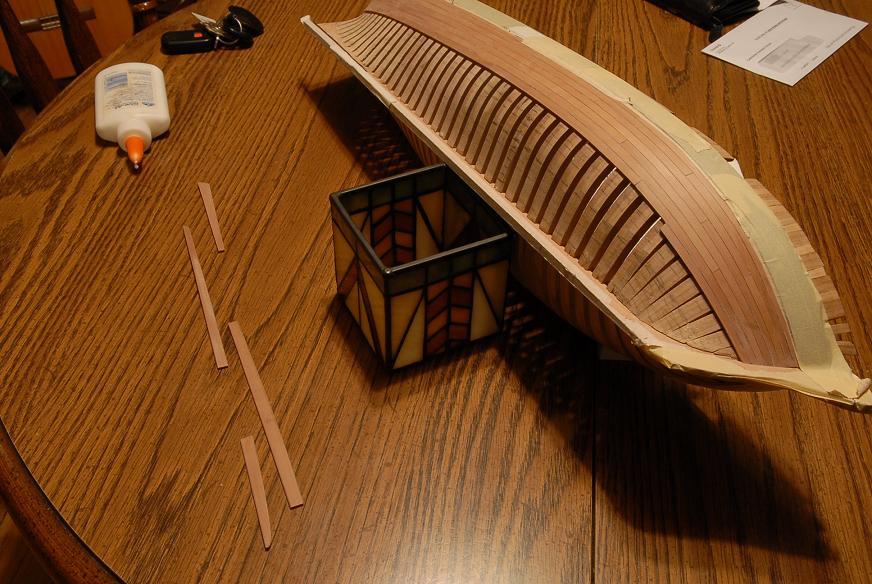
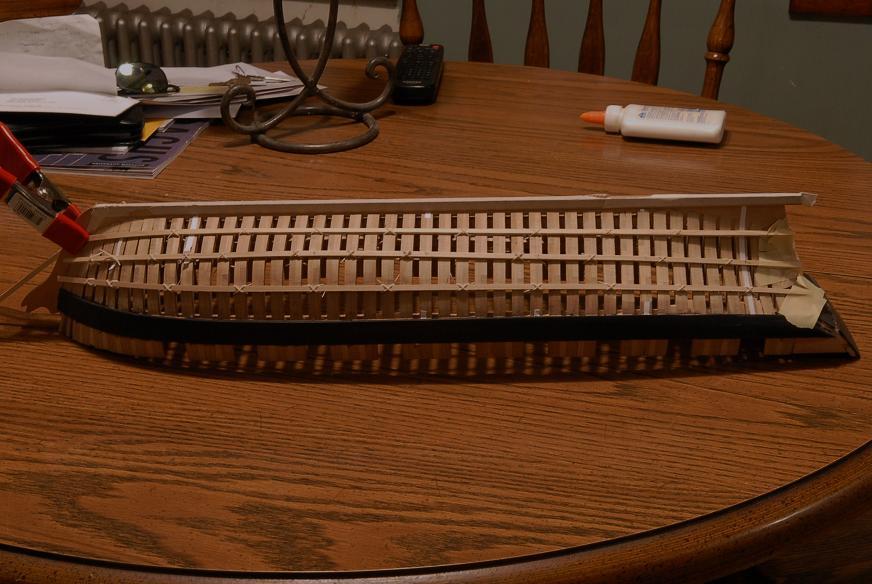
While I glue the planks bit by bit (clamping on the planked starboard side of the hull is difficult) I'm sanding the laser char off of the main deck beams--
August 19, 2010
Gluing the port side strake was much easier--
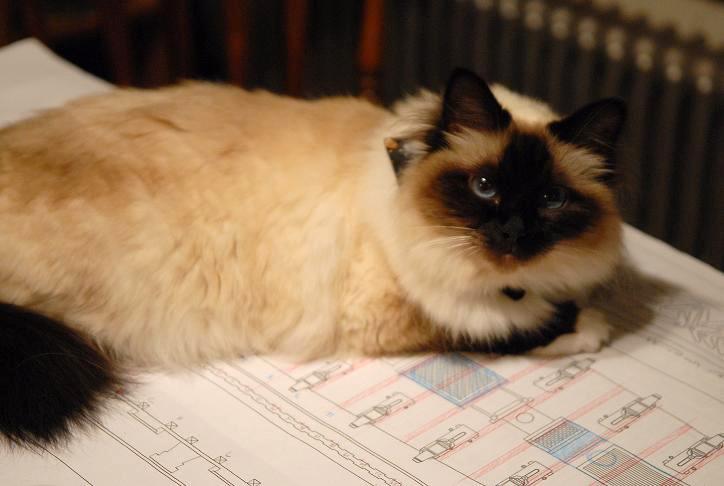
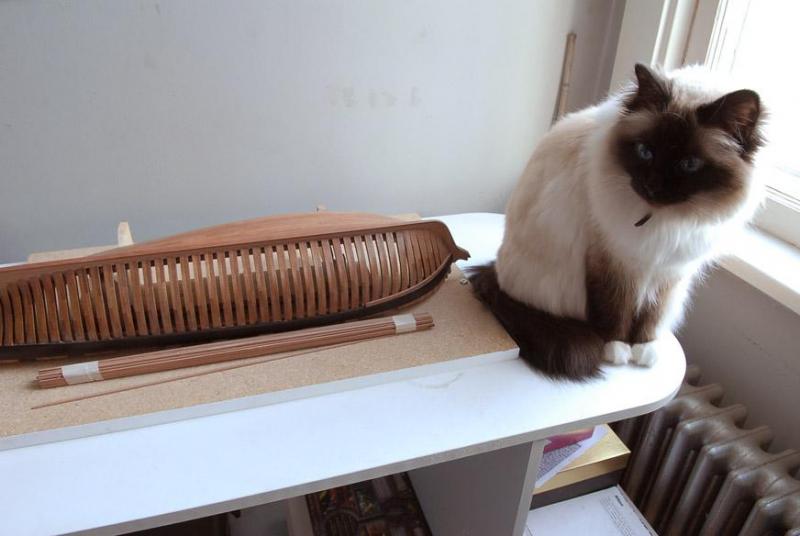
Puff has been very feisty lately. She hasn't tried to chomp on the ship yet; as long as I don't try to wave it in front of her, I think it's safe. She does keep hopping up on my table to sit on the plans, though, as I work on drawing up some deck rearrangments--
I'm thinking that I will follow Clay [cfn1803--check out his Oneida in the completed ships gallery.] ,and line the beams up with the gunports. The beams (in red) are drawn over the deck plan. these red beams are drawn centered on the gunport locations, the carronades are not shown accurately. This also shows that I would have to move both masts back about 1/4 inch--12" in scale, not to mention shifting the hatches. Still thinking on this course of action--
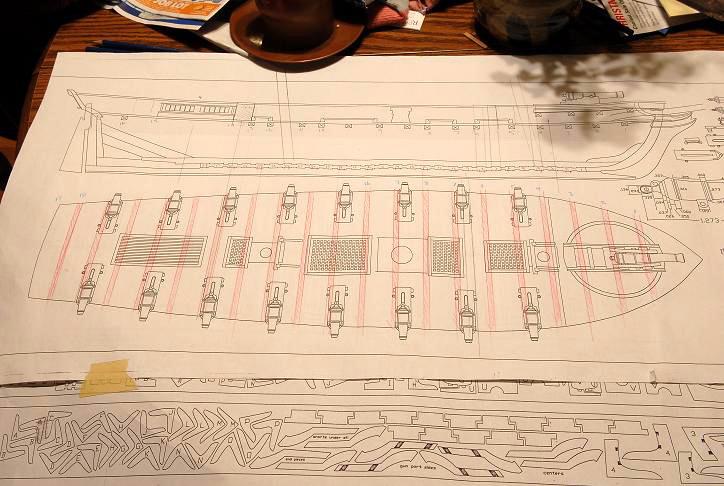
I have to make sure the berth deck beams are not be in conflict with the pillars for the main deck
beams. Moving the main deck beams to fall regularly in line with the gunports would make this easier to plan and accomplish.
Testing the position of a few of the main beams--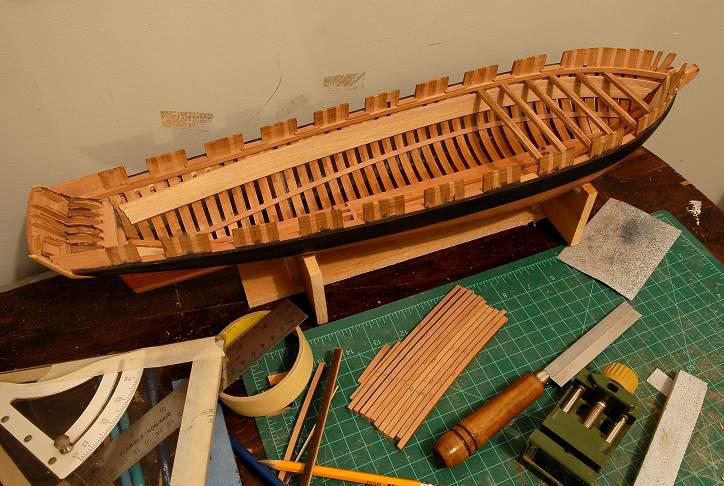
August 21, 2010
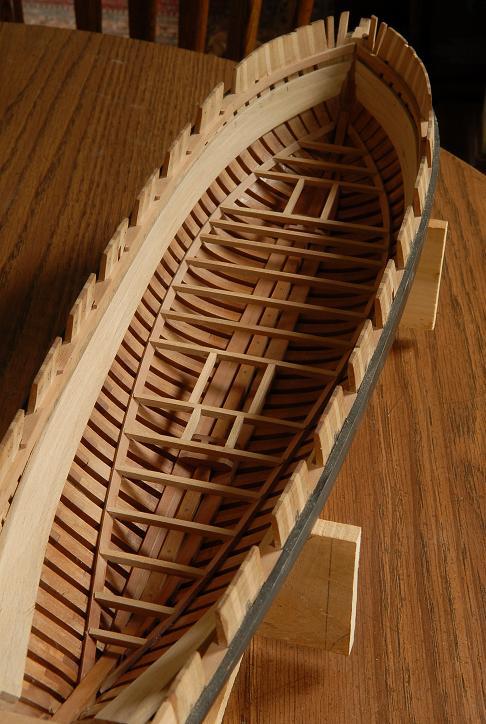
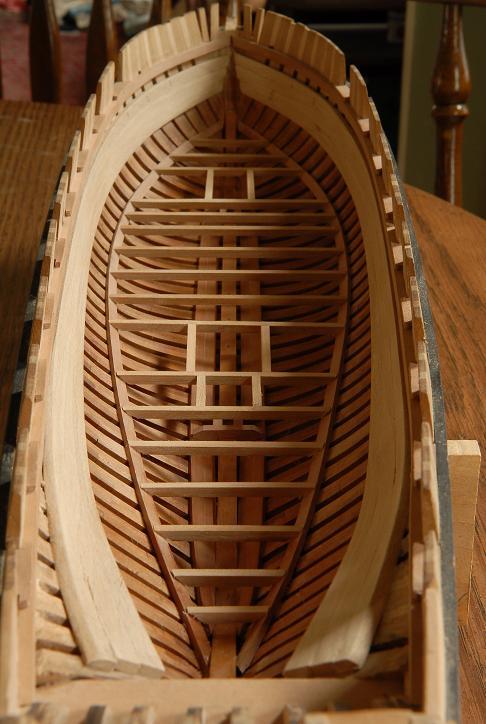
I didn't have any strip wood in the right size for the berth deck beams (just going by eye, I decided on 1/8" (6") square beams). One of the lazer cut billets was that thickness, and there was extra wood on the edge, so that became my berth deck beam stock--
After cutting a number of beams to approximate length, I played for quite a while with the spacing, keeping in mind the openings for the masts, and a main hatch, and where the posts for the main deck beams above would be located. No
doubt this isn't at all historically accurate (I'm completely ignoring the coppered magazine, for example), but it will serve my purposes--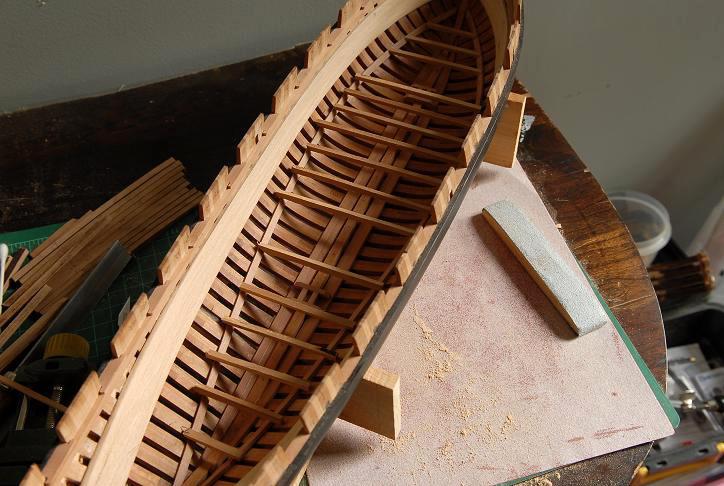
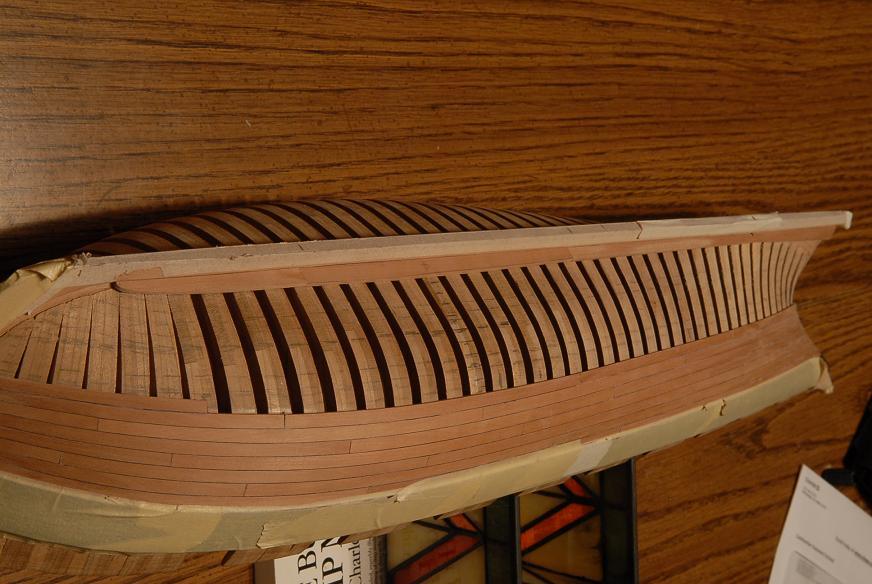
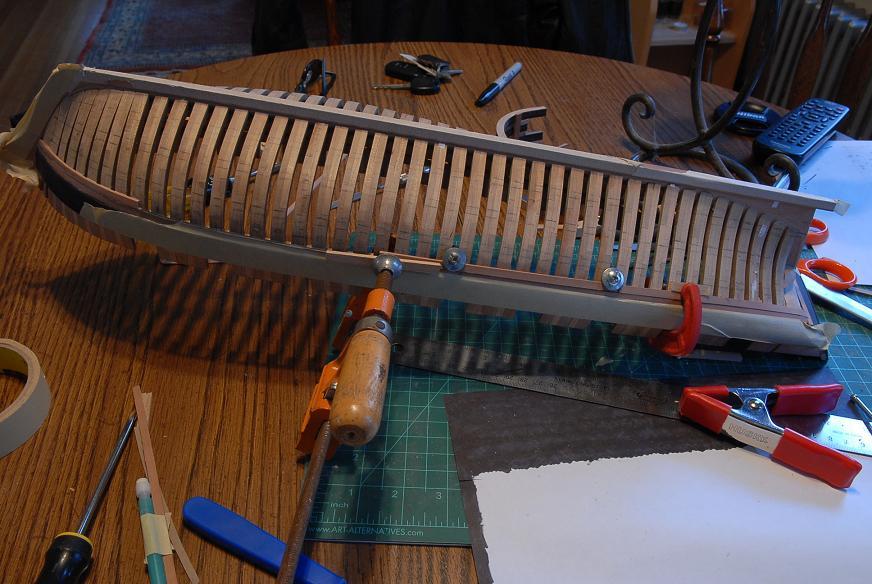
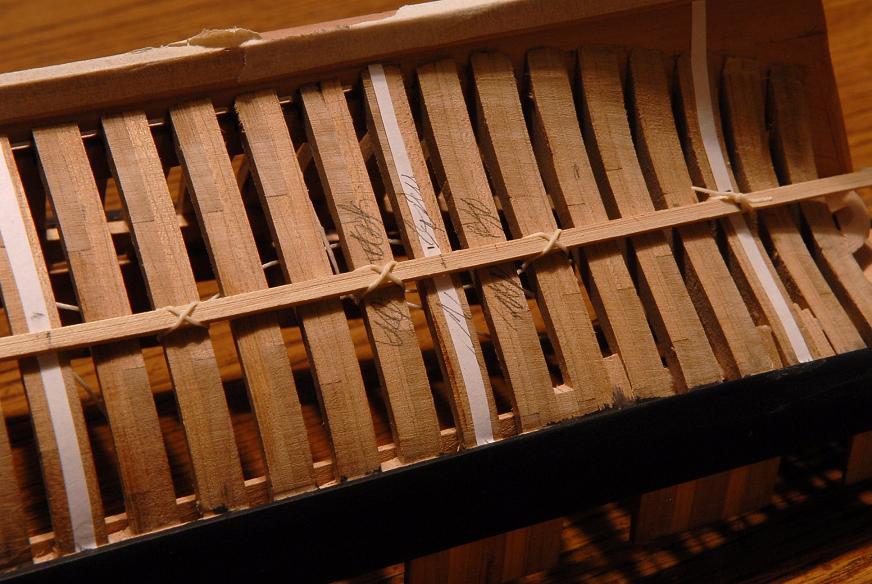
Once I was satisfied with a spacing plan, I started sanding and cutting the beams to final size, and gluing them in place--
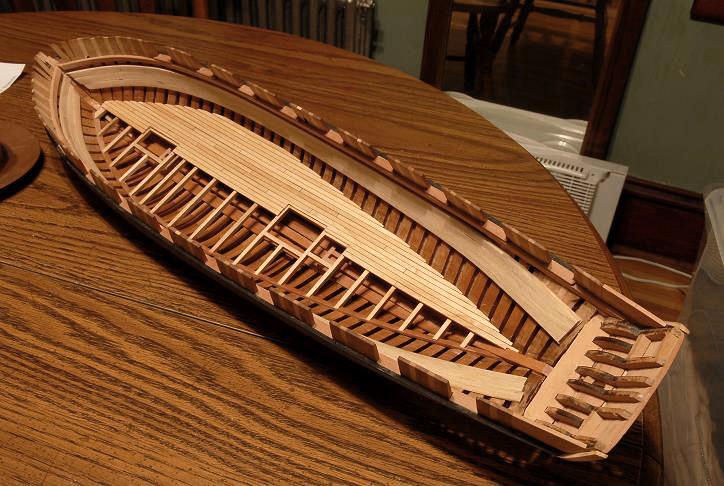
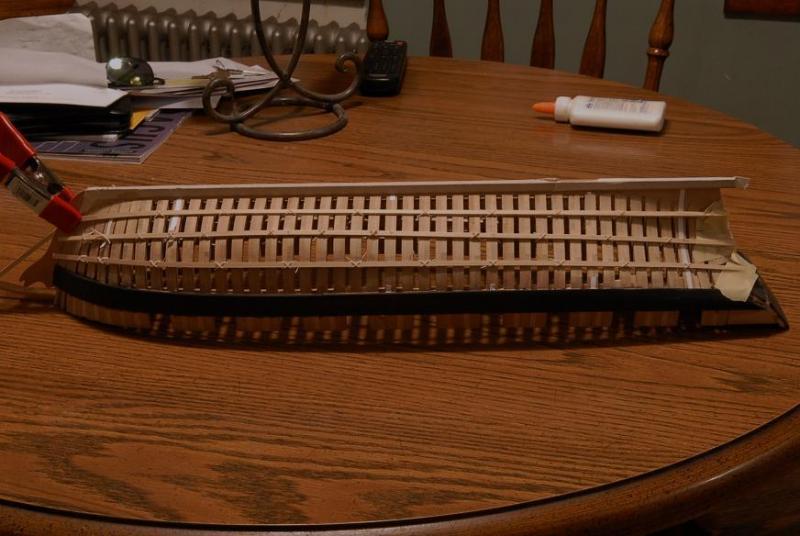
Here is the berth deck framing--


August 22, 2010
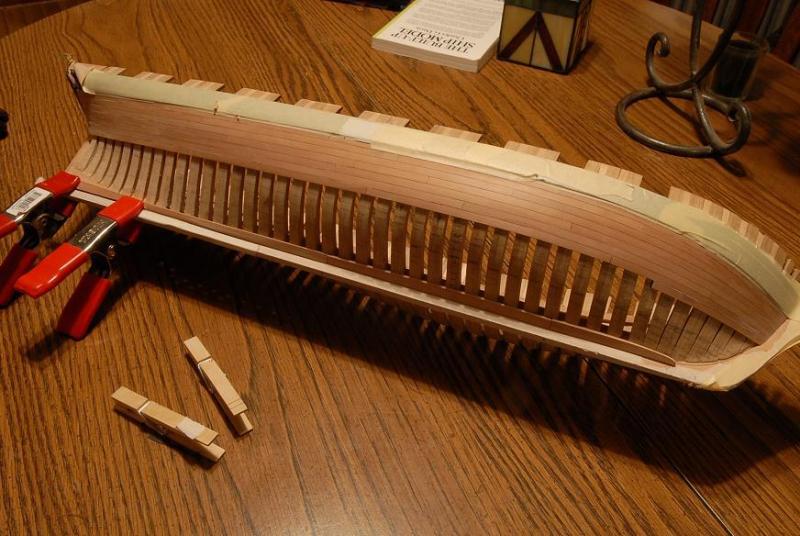
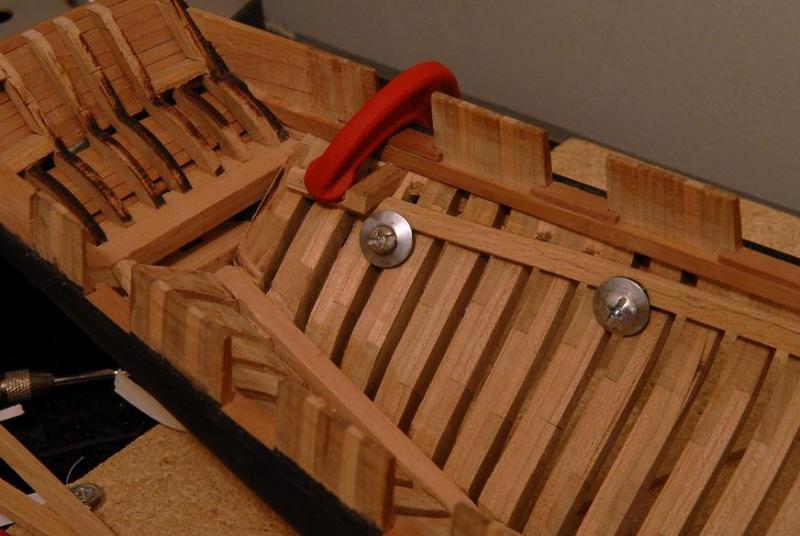
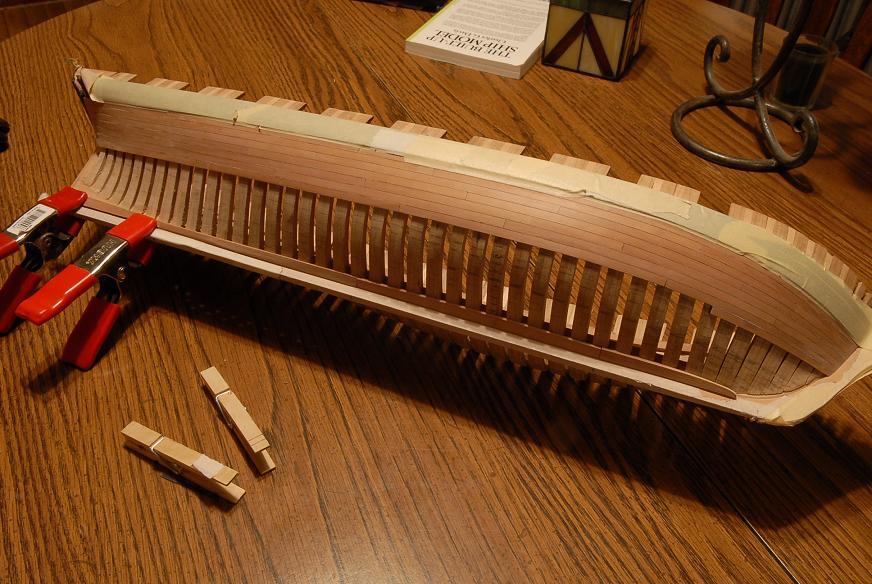
On my berth deck, I placed a temporary centerplank to act as a guide for the rest of the planking--
Then I started laying planks--
I got this far with the planking, and then realized I have a problem--
I didn't account for the bitts and bowsprit step coming down through the decks to the bottom of the hull. I have a berth deck beam in the way. I'll have to figure out how to fix that.
August 23, 2010
I quickly cobbled together a "study model" of the bitts, and put some of the main deck beams in place. I discovered that I'm in good shape. The bitts pass by the berthing deck beam. I will have to cut a hole in the deck where the pencil is pointing, but that shouldn't be too difficult. Similar situation with the bowsprit seat--
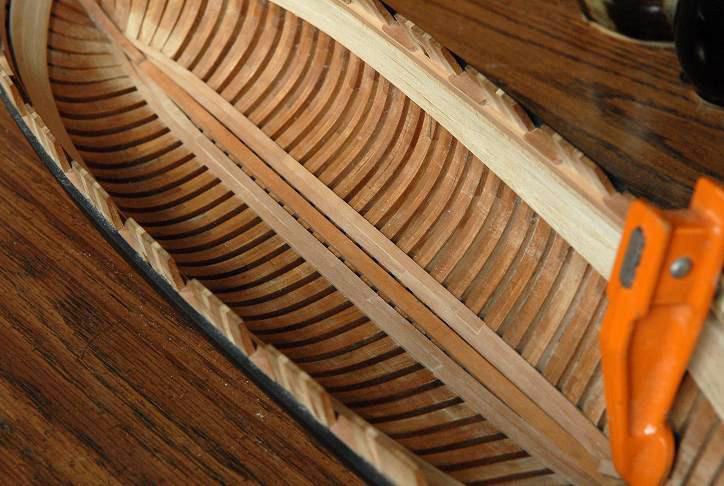
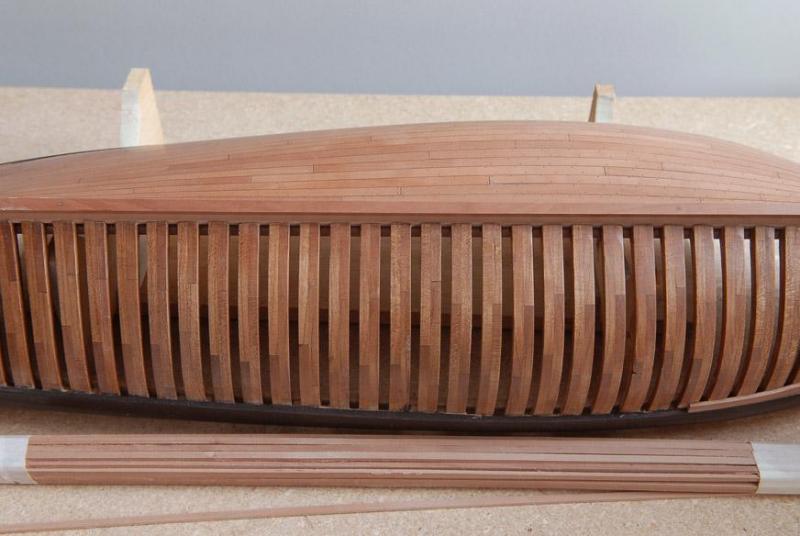
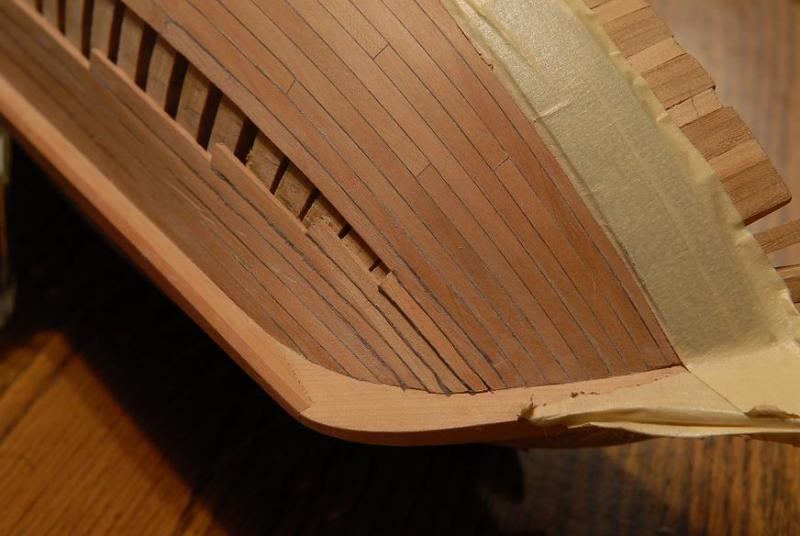
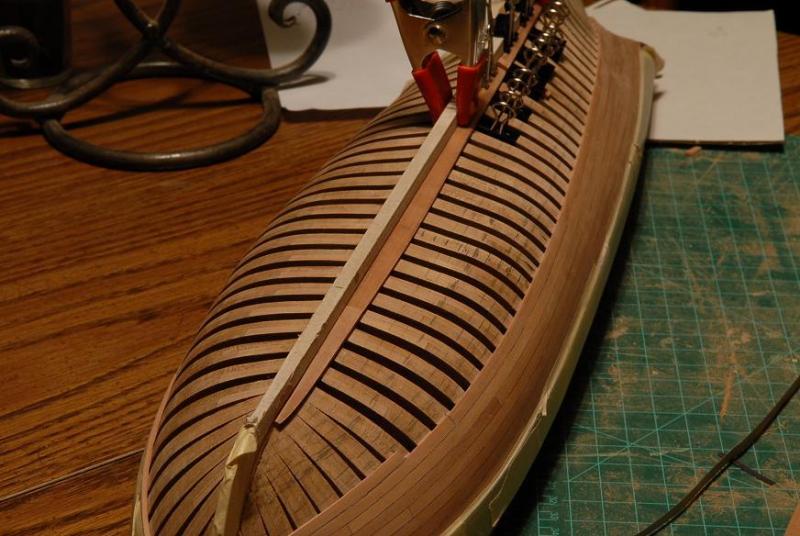
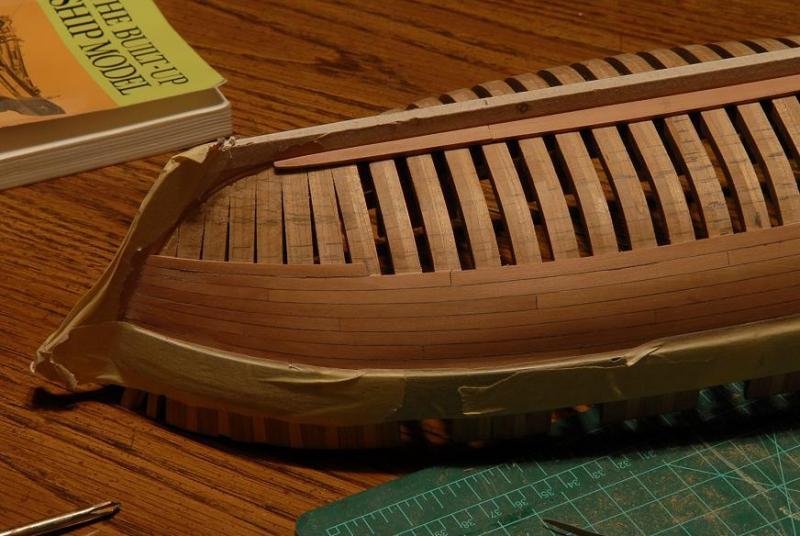
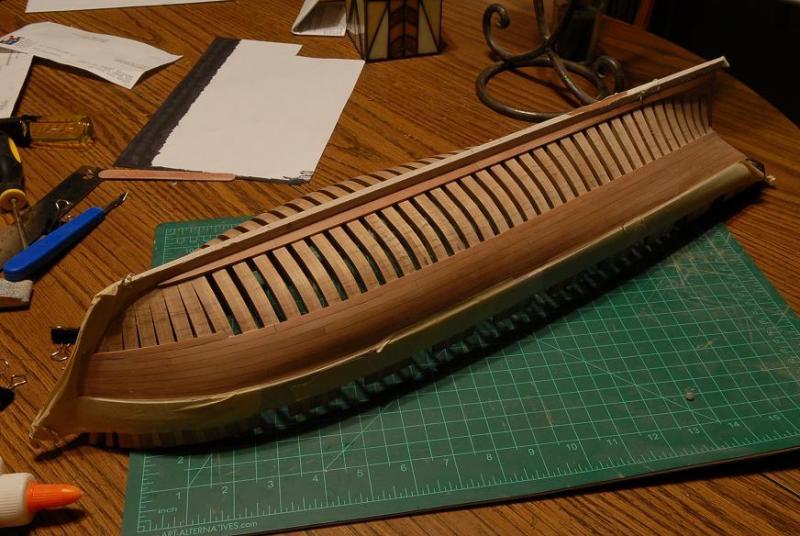
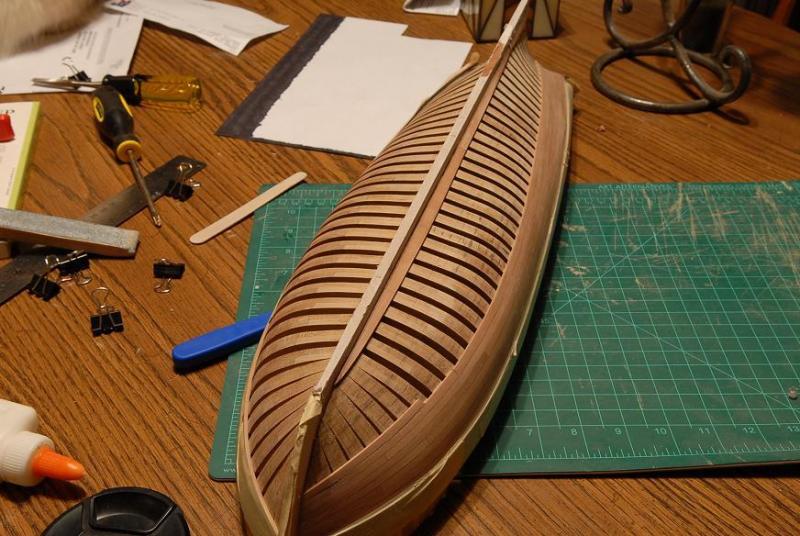
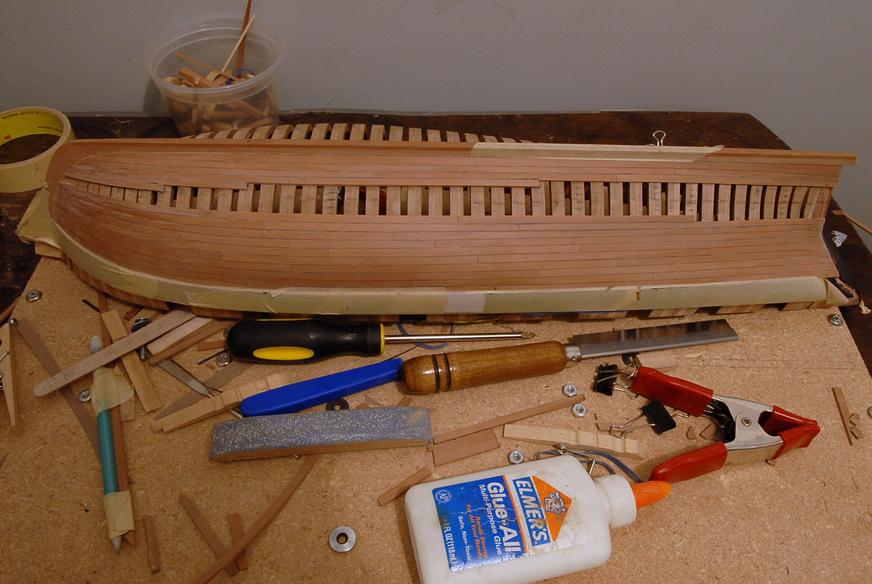
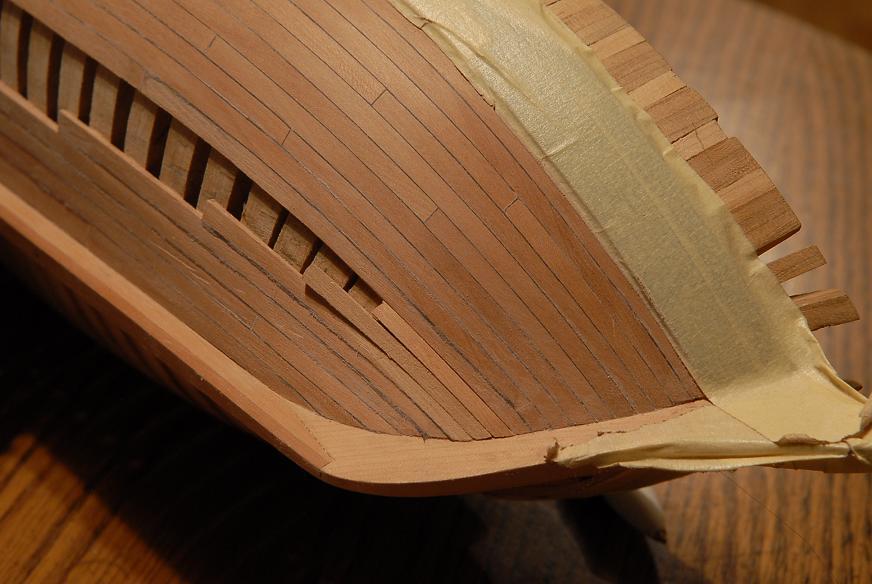
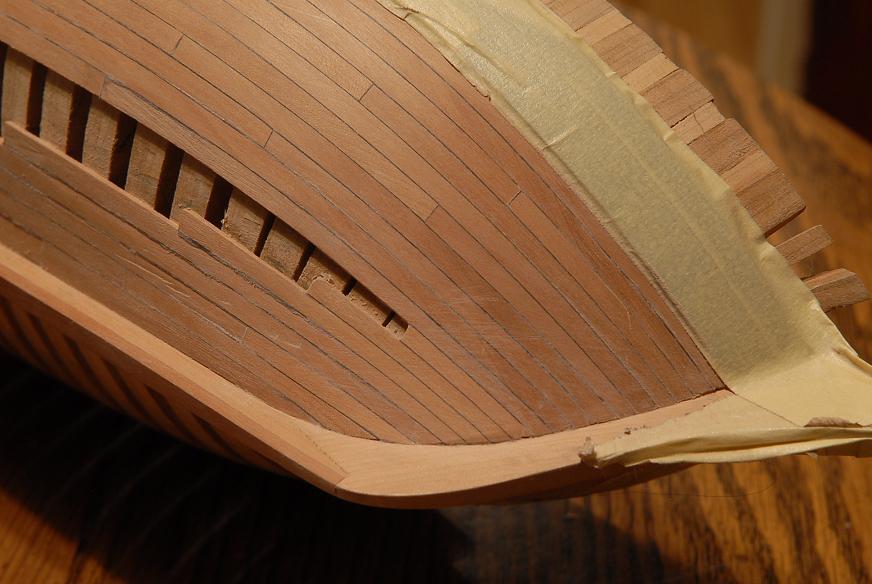
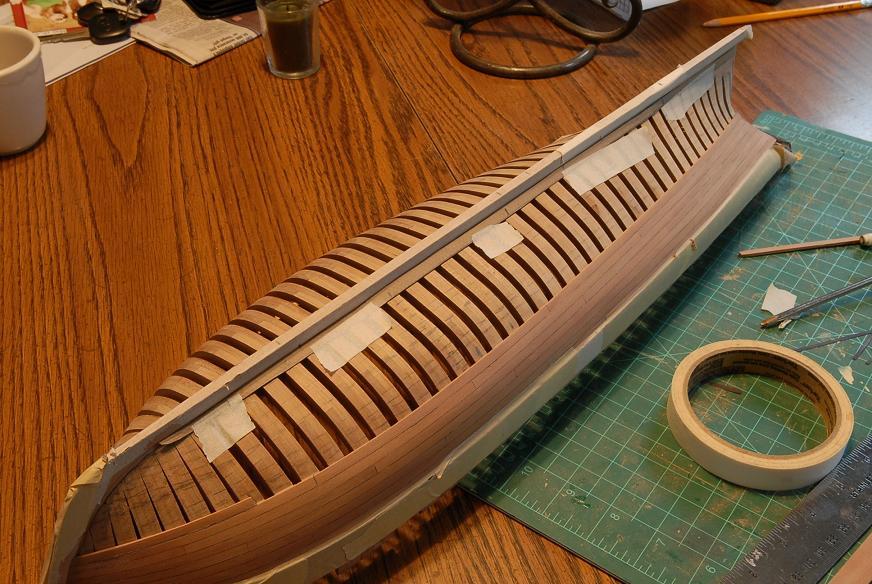
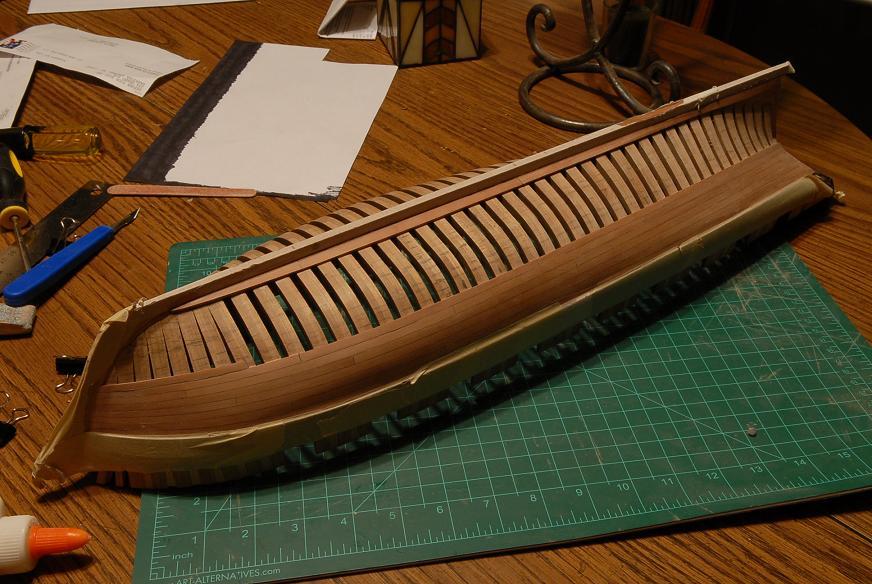
So I am nearly finished with the planking. I have a little section left to do under where the stove will sit, but I went ahead and started scraping the rest--
The berthing deck planking is pretty much finished. I am very glad I did this--it was good practice for the main deck. (Although I hope I haven't used up too much of the planking stock--there's been extra of most of the strip wood in the kit, but this might be pushing it!) I had some minor issues with the scraper that I will have to handle better on the main deck. And nibbing the planks on the main deck is going to be a real challenge to do neatly--
Ron
- themadchemist, CiscoH and BETAQDAVE
-
3
-
Hi Jay! Welcome aboard.
Haven't sharpened the chisel yet--but I will before I next use it!
Ron
-
August 11, 2010
Not much actual model work lately, but lots of thinking.
I've decided to plank about 3 strakes on each side of the keel, for the mast steps to sit on. Then I'll run a strake farther up the hull on each side for the berth deck beams to fasten to. Then I'll plank just over half of the berth deck, to accomodate the stove, ladders, capstan; whatever needs to extend up through the gun deck. So, no bulkheads, compartments, or other detail below.
At least that's the plan.
First is some additional fairing at the bow and stern to make a smoother surface for the planks near the keel. I shaved away
some very uneven framing with the scalpel, and then did some sanding--
August 14, 2010
I've finished (almost--last piece clamped and drying) two interior planking strakes. The gap between the planks and the keelson is taken from the INA Jefferson model. I have a feeling it's not exactly right as I've done it [not wide enough], but I don't think it's even going to be visible in the end--
Next will be the mast steps. That will be fun, it seems like I've been doing planking forever. Now I'll get to build a little structure.
August 15, 2010
My mast steps are generally modeled after the INA Jefferson's, shown here-

I think maybe they are made with a rectangular "mortice" which would be shimmed to fix the mast tenon in place, rather than the whole mast step being made to slide forward or back for adjustment. Just a guess.
This was my first experience using the rotary tool as a milling machine. Here are two pieces together being cut out to fit over the keelson-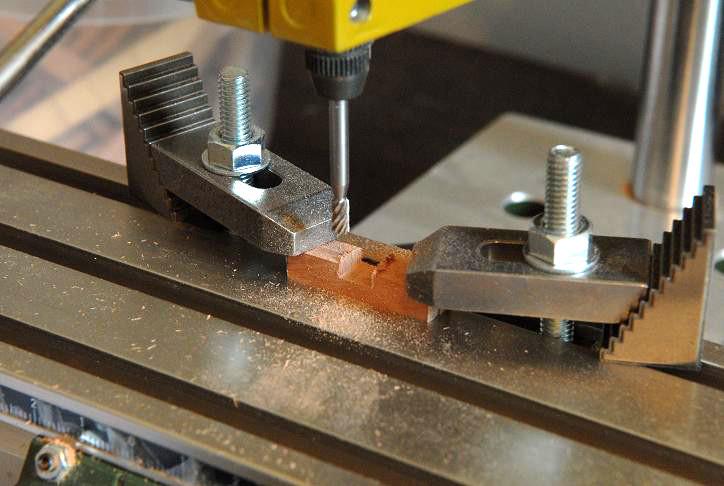
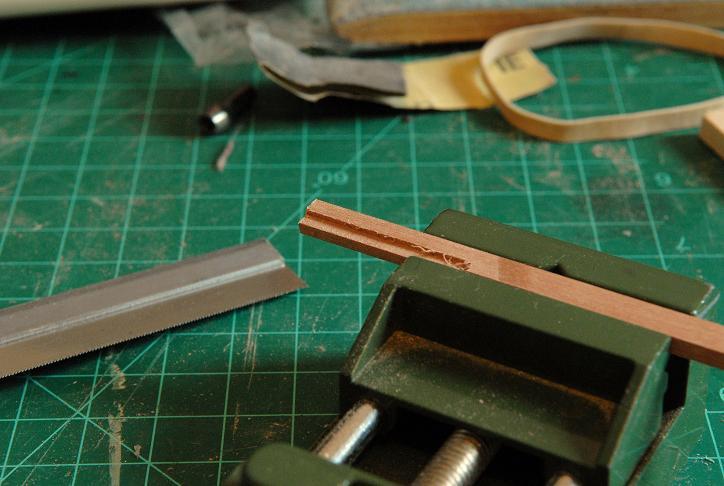
Another piece was routed along the edge. This one will be cut into short lengths to make up the sides of the mast steps--
Here are the four pieces that make up the forward mast step. The long pieces have been sanded by trial and error to fit the curve of the hull--
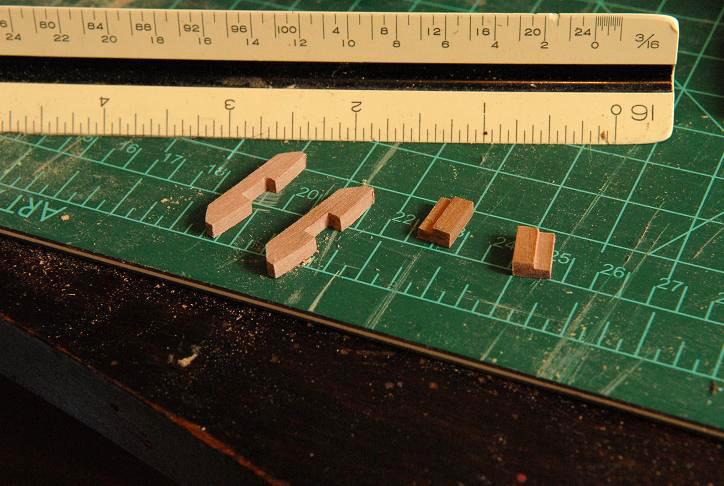
Here they are glued up. The one on the left is turned upside down--
I'm mulling over whether to put the little bolts on them--
And here they are sitting in the hull--
Ron
-
Thanks, bigcreekdad!
I'm using Formby's Tung Oil finish. I used it on my first model, and liked it, but it's not real Tung Oil. I'd like to try that someday, but I've never found any in the local stores.
Woods: Cherry for hull and deck framing, mixed in there is some Willow used for spacers, Beech for the deck clamps, Boxwood for the carronade carriages and decorative details, Maple for the deck, and Swiss Pear for everything else. I haven't decided yet what to use for the masts and spars. Dave supplied me with enough square stock of Cherry and Maple (at least I think it's Maple), but there are some drawbacks to both of those, so I may use something else.
Ron
-
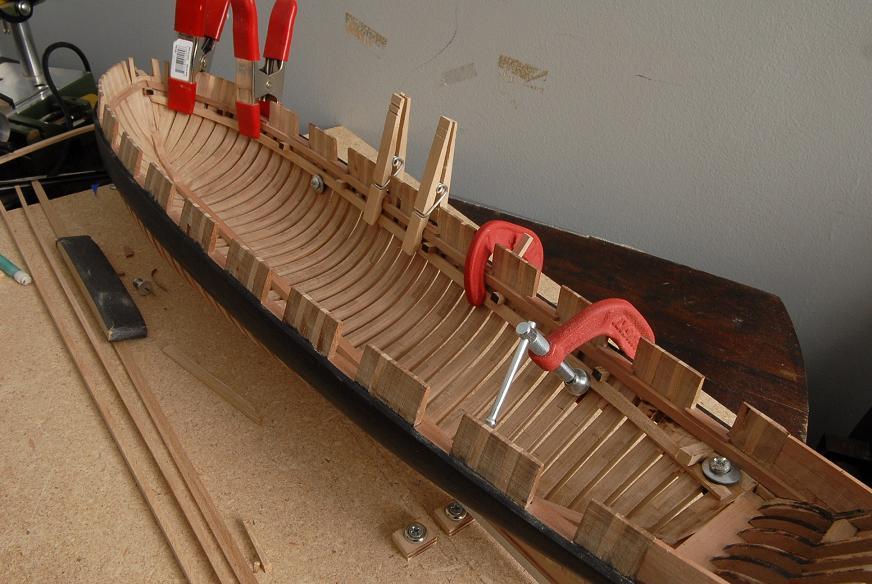
August 1, 2010
Here's the current work on the clamps--
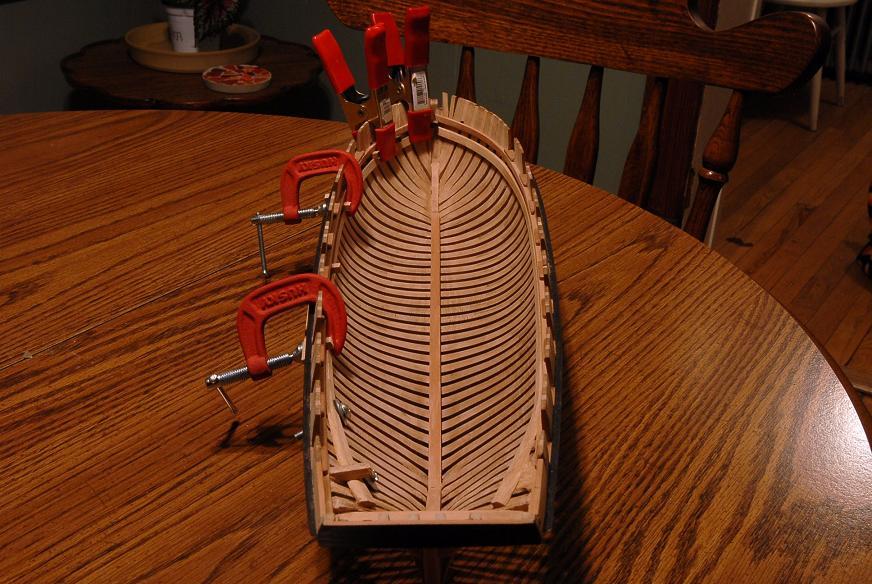
On the planked side of the hull, clamping is more challenging. I'm gluing in two phases, to lessen my chances of making a bad move during the rush to get the clamps set before the glue starts to harden.
Stage 1-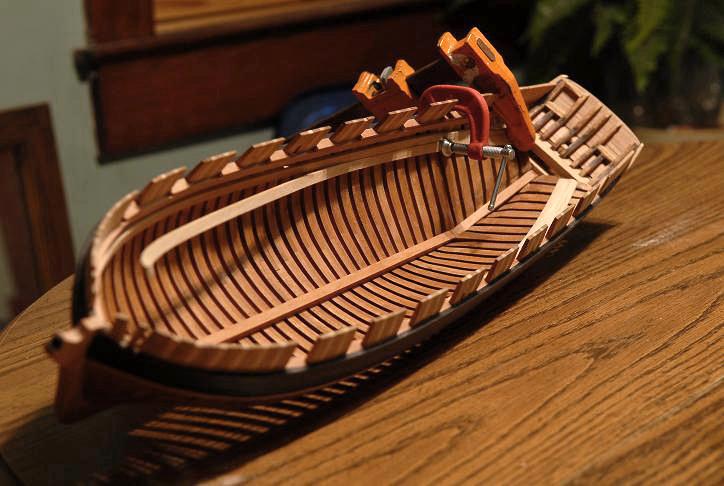
Then after Stage 1 dries, Stage 2-
One more set to go.
August 3, 2010
More pictures of the clamp clamping--
I think it's time to clean my tiny "workbench". You can see why I move the model to my dining room table to actually perform any work on it!--
The last deck clamp is now drying--


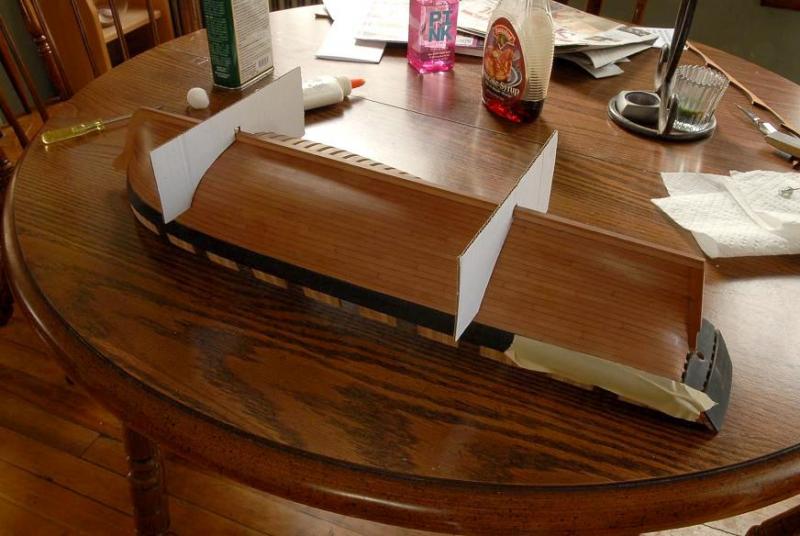
Now I have to make another decision--about whether to include any of the lower deck. I need to do the mast steps at least, and if I'm going to include any ladders going down from the upper deck, they probably need somewhere to land. And what about the stove? If I want to invite views in through the open frames, maybe I ought to put something in there, although doing so was not part of my original thinking, and it won't be very easy to see.
August 5, 2010
I have decided to add some of the lower deck. I won't try to include everything that would be there (it probably won't be very authentic), but just enough to indicate that there was a lower deck, and for the ladders, stove and capstan to fasten to.
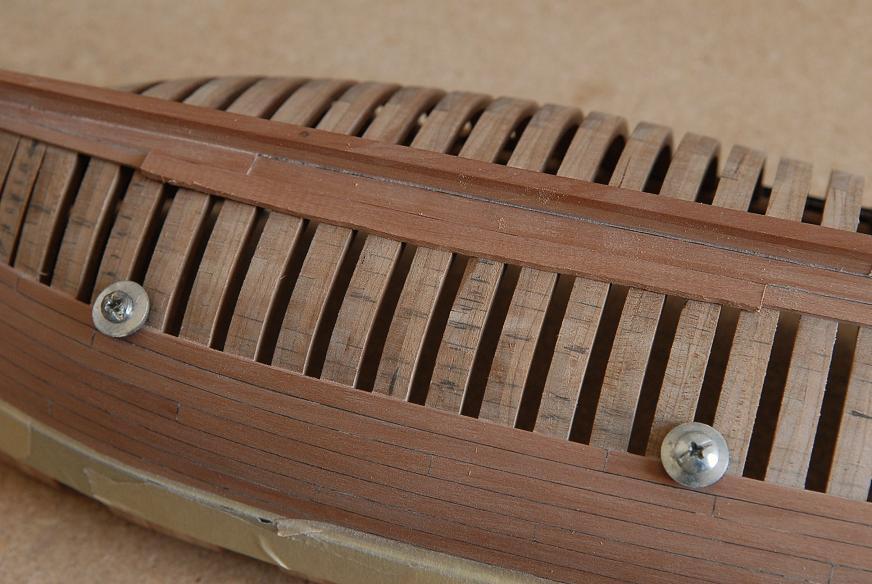
The upper deck clamps have been sanded--

And now I have to do some research and planning for the lower deck.
Ron
-
May 1, 2010
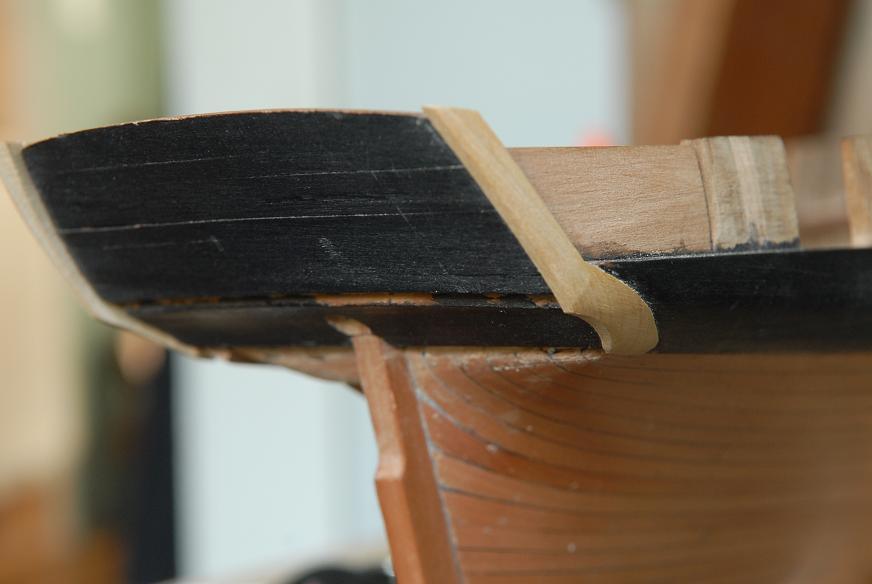
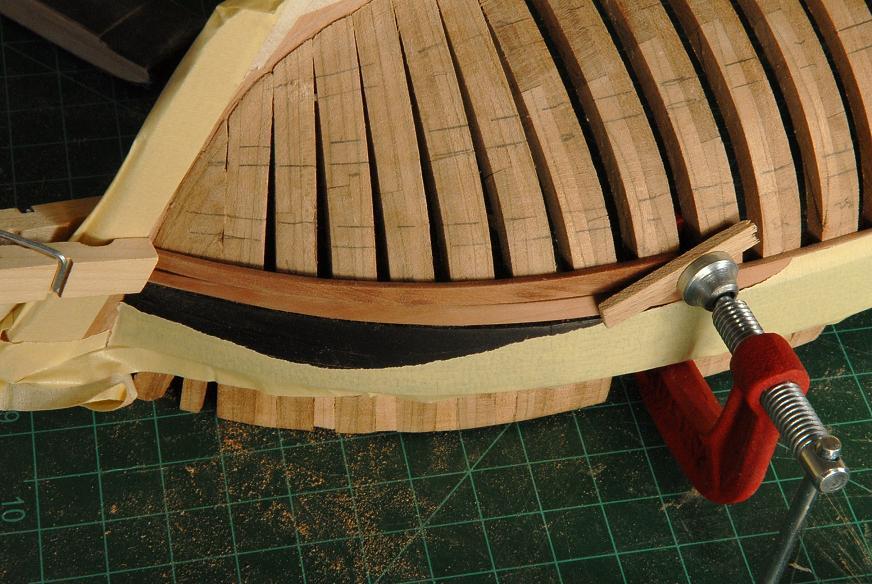
I cut a scraper to make some trim pieces for the stern--

Here is the stern with the transom trim pieces glued on. the starboard one (closest in the photo) has been sanded down to just about the final shape, the port side is still rough and just tacked on--
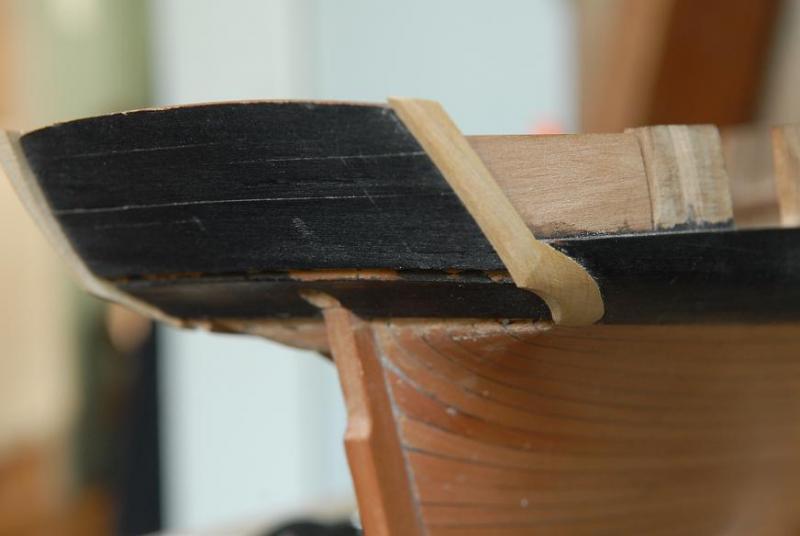
Here is a trim piece held up for fitting. It doesn't fit as well as I'd like--

In this view you can see the size of the gap between the counter planking and the hull planking. The trim piece just doesn't quite cover the ends of the hull planking well enough--
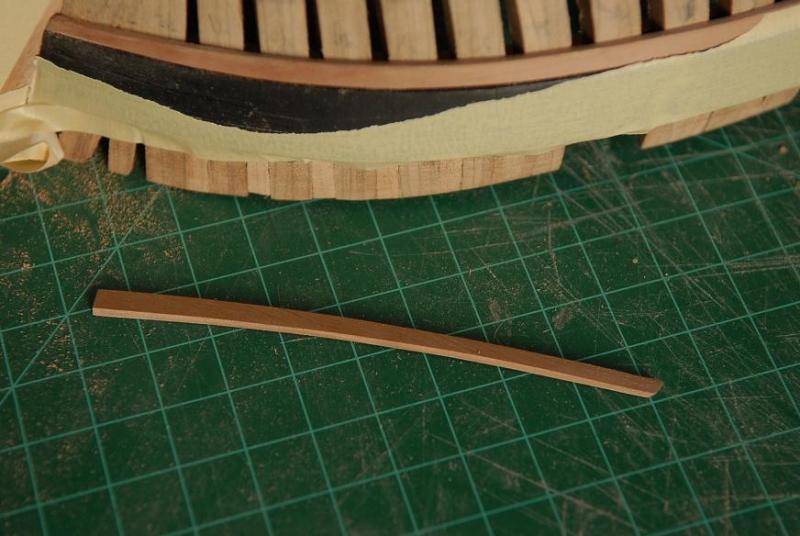
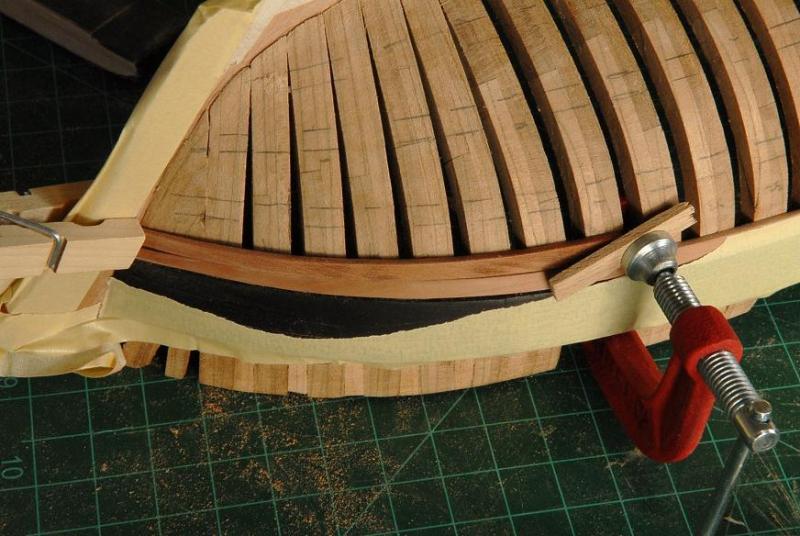
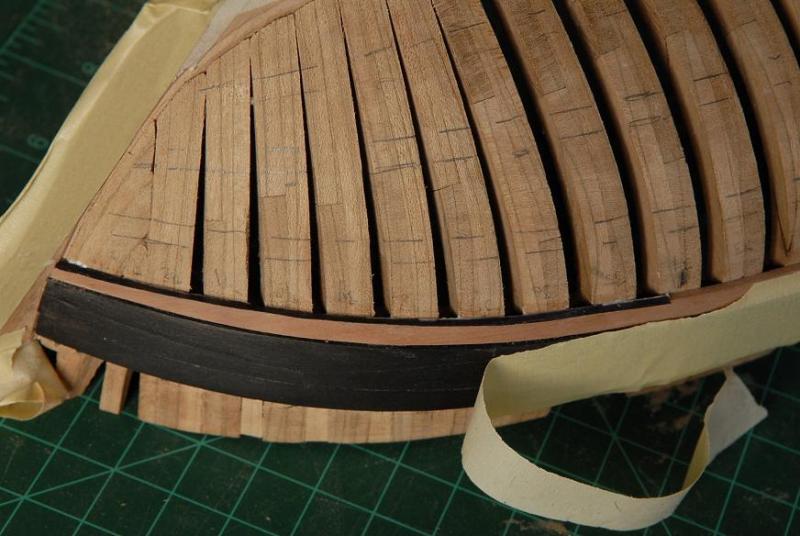
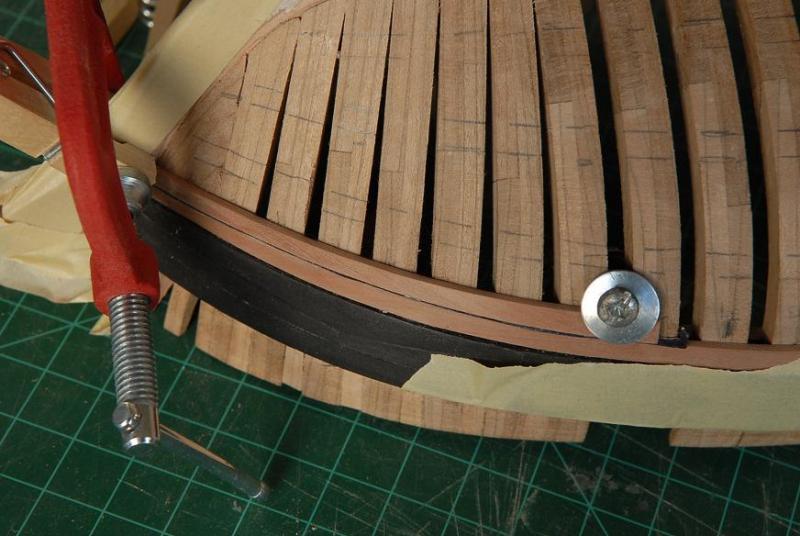
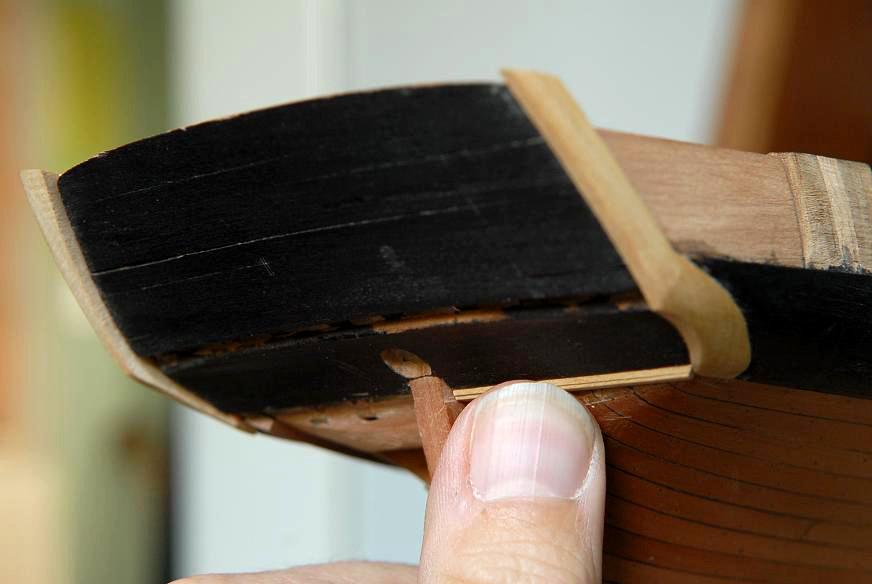
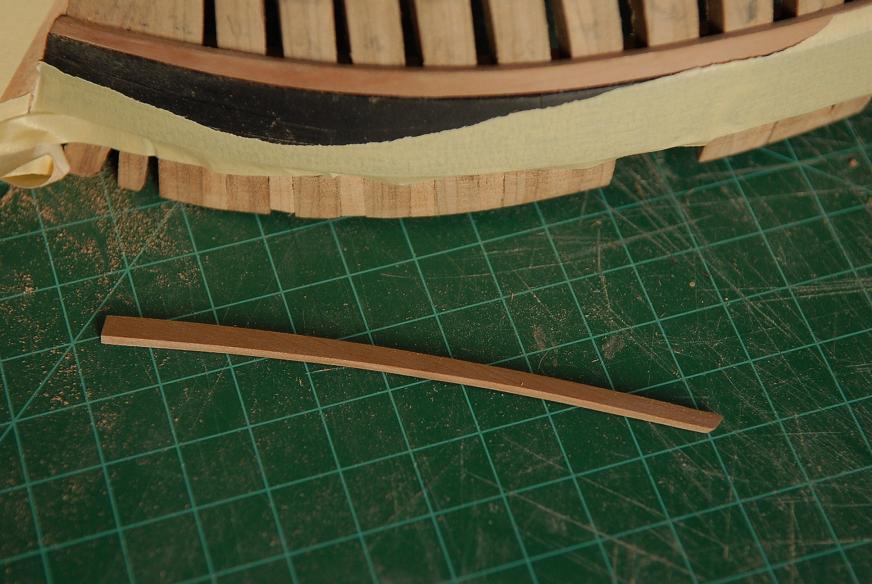
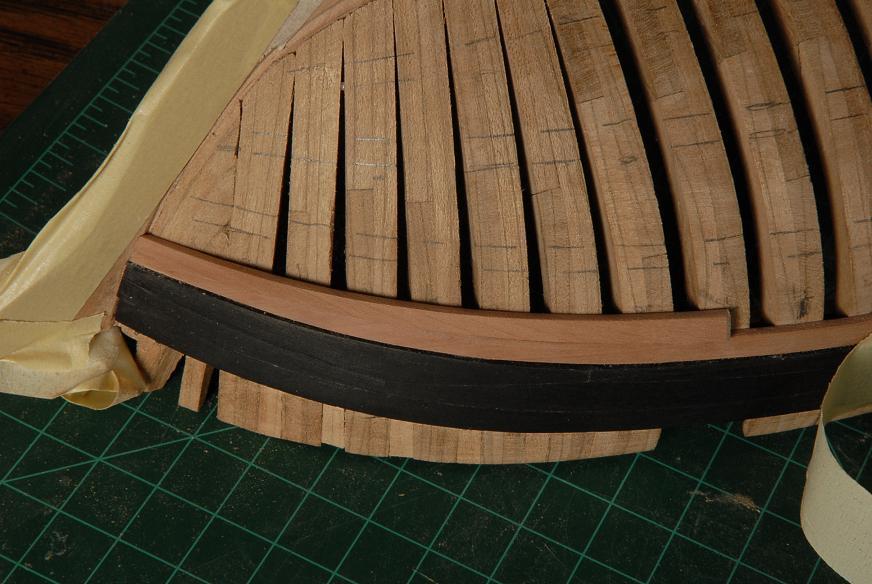
So I think I need to add a sliver more of counter planking, which will have to be blackened after I get it cut and shaped right--
Then I think the trim piece will fit better. This picture shows the two pieces, however they are not finished--when I'm done the pear filler piece will barely be visible, but it should help the boxwood trim piece cover the ends of the planks--

July 30, 2010
I cut some filler pieces for the counter planking, and glued them in--
I had saved some of my blackening solution from earlier, but I guess it has a definite shelf life, because it did not work this time. I used some black artist oil paint to color them instead.
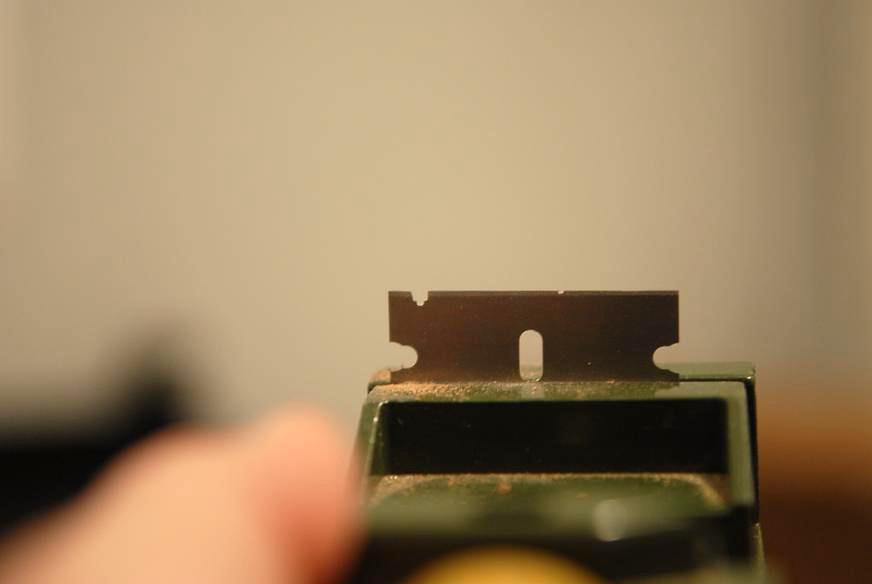
I cut a new (more traditional) profile pattern in my razor blade scraper, and made some new trim pieces, and glued them
on--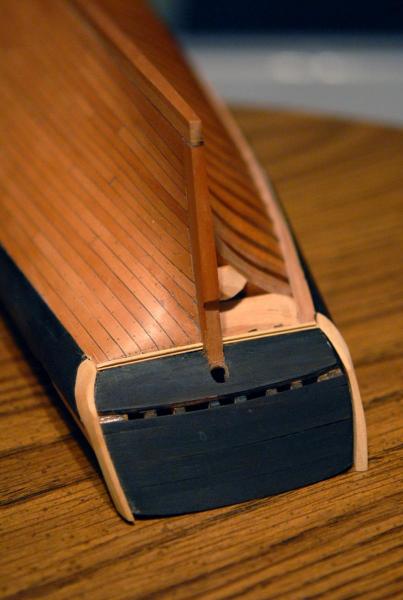
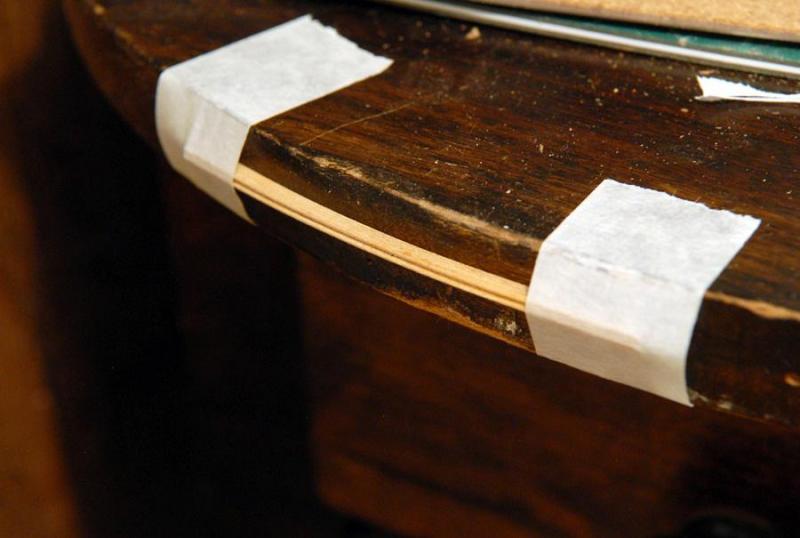
And the trim piece that goes between the transom and counter planking has been boiled, and taped along a curve similar to the transom to dry--
July 31, 2010
Gluing the trim on--
And the stern is finished for now--
I think finishing the deck clamps, and then the deck will be next.
Ron -
-
Thank you, Greg. Your work is an inspiration!
Ron
-
March 9, 2010
A few more pictures of the hull, along with the most recent activity:
The shine is dulled down a bit, but still there. (Funny, the previous pictures showed it stronger than it really is, these show it weaker than it really is.)--
A couple of closer pictures--
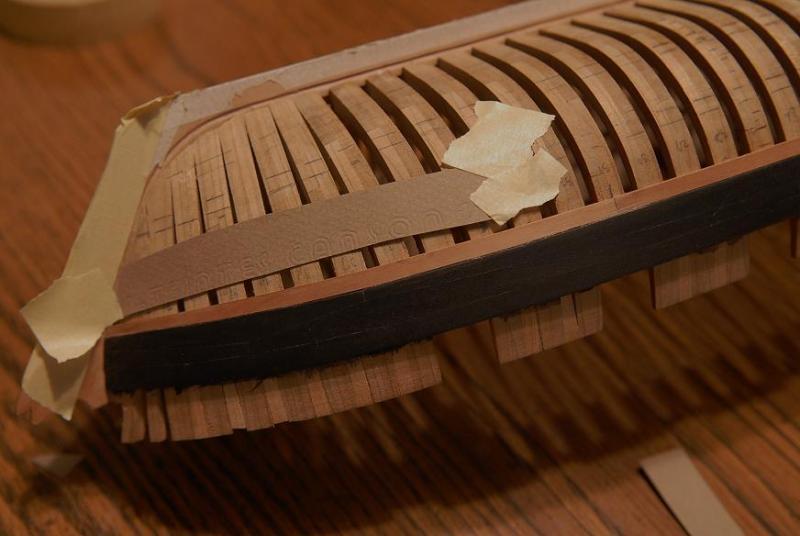
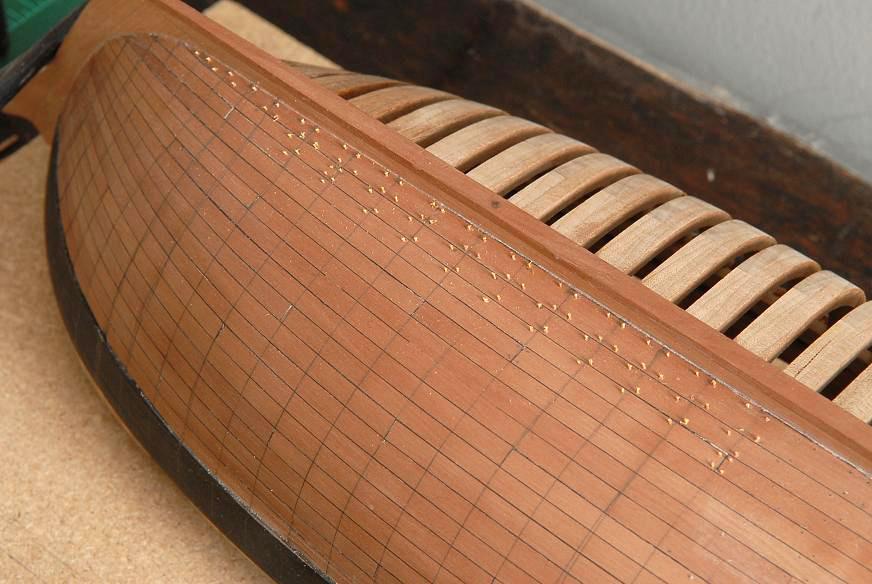
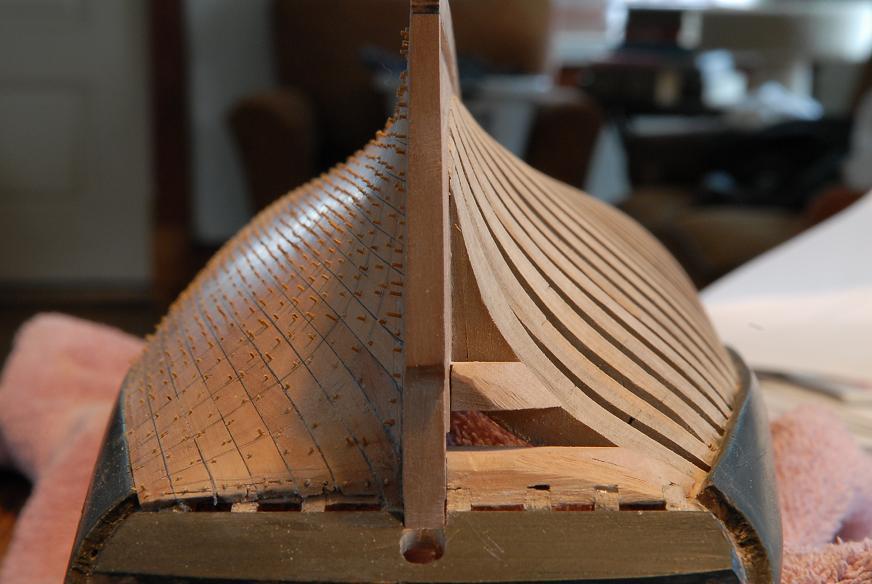
You can see where I've started to mark locations for the treenails in the wale. I'll probably wait until I plank the bulwarks, and treenail the wales and bulwarks at the same time--


Now I took one of those "hold your breath and hope" steps. I've been a little unhappy with the look of the cherry and pear side by side. As I've said, the cherry looks just great by itself, but next to the pear it takes on a yellow/green cast, which worsens with the finish I'm using. So I stained the frames darker. Gulp!
Hard to tell if it's an improvement or not--
On the inside, half are still "raw"--

I would say that the unstained cherry frames look just fine in the photos. Maybe even better than those I've stained--you would have to really wonder if I did the right thing staining them. Unfortunately, the color problem just doesn't show in the photos. Even stained, it's not exactly what I want. I would like some contrast between the cherry and pear, rather than a "not-quite" match. Maybe if/when the cherry darkens over time, it might end up to what I see in my mind.
[in hindsight, I don't think the cherry/pear combination is a good one. Pear is such a great wood for modeling, and when they're side by side, cherry just doesn't measure up. In staining the cherry darker, I was trying to make it contrast, in color, from the pear, so they wouldn't "compete".]
Looking out the window, she's waiting patiently to be finished and at sea. How can I tell her she's destined to remain "docked"!?
Ron
-
Thank you, Mark.
Amfibius, stay tuned, you'll see some.
Ron
-
Elia,
I see you took her outside for photos! Nice even light.
I know nothing about model painting techniques, so I can't give you any advice about that yellow cove difficulty. However, I think your colors are very, very good, and the grey you settled on for the deck looks perfect to me. Really sets off the deck furniture beautifully. Looks great.
Ron
-
February 20, 2010
Not only do the upper stern strakes need more sanding, but there's an even worse problem lurking there.
When I dry fit the sternpost, at the very top the planks tuck in too much. It's hard to tell from this photo, but the three or
four strakes at the top of the sternpost do not meet flush with the edge of the sternpost--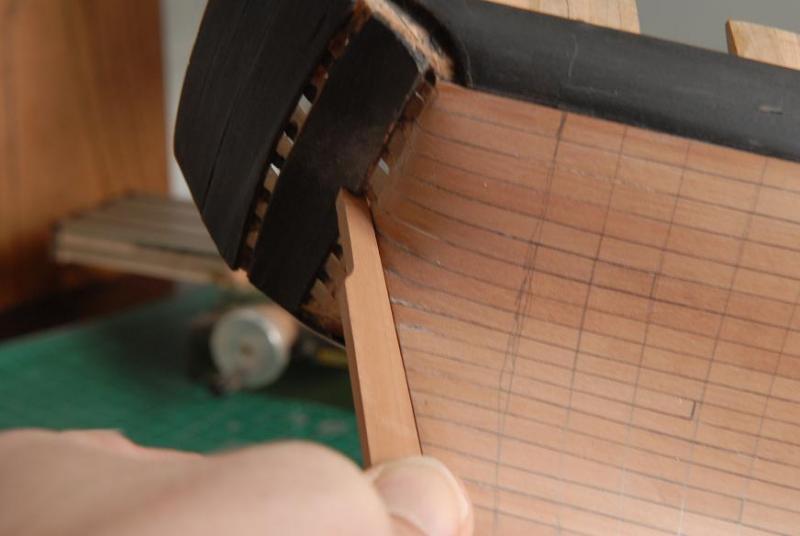
I decided to go for the fix on this one.
I applied alcohol to the problem area. Note, there was minor bleeding of the marker ink with the alcohol, so anyone who thinks to try the inked paper caulk--BEWARE. I don't think it has ended up causing a permanent problem in this case, but don't be surprised like I was!
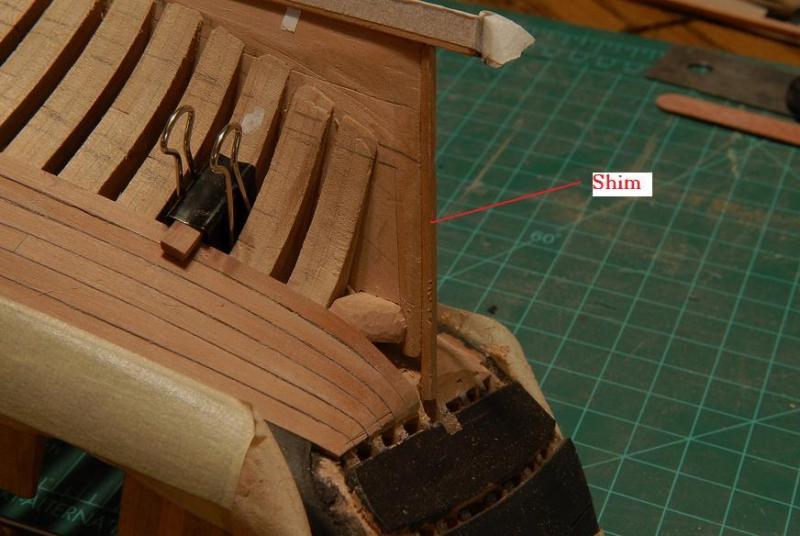
I also removed the shim I had put on to push the sternpost back about 1/16th of an inch. I needed to take the shim off because the alcohol was loosening it anyway, and it would give me deeper access to the planks--
Next I pried the loosened planks away from the deadwood--
I made a small shim to push the planks out, so they would meet the sternpost more correctly--
Then, after filing the excess part of the planking shim away, and sanding and filing the ends of the planks, I was able to glue the sternpost (and its shim) on, and then more sanding--
Those top planks still need some work, and I'm not sure I'm going to be able to get those few caulk joints to look the way they should, but the fit to the sternpost is better than it was. The photo (as they often do) is making things look worse than they really are.
December 7, 2009 [i've grouped a couple of older posts regarding treenails here, to keep all of them together.]
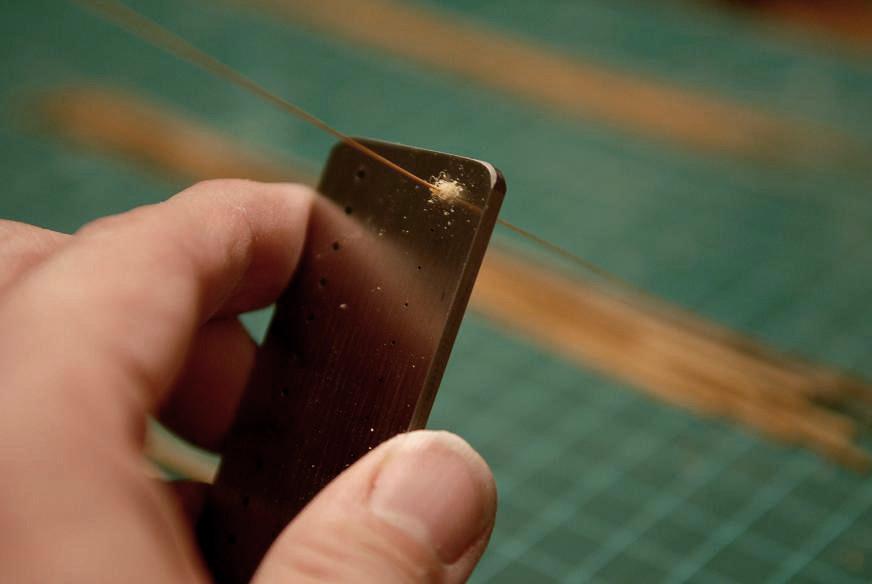
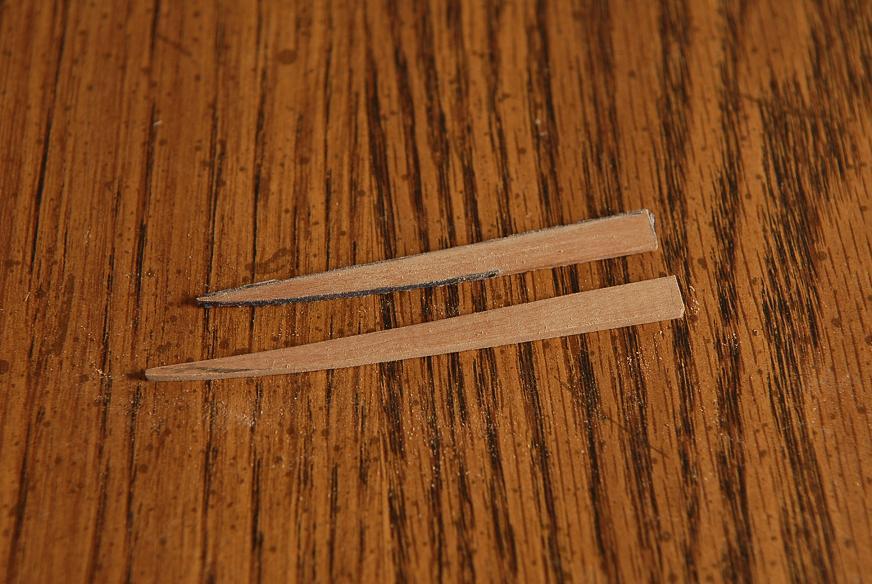
After weighing many factors, I think I may go with bamboo for the treenails, so I have started manufacturing them. I tried first with some bamboo chopsticks, and it was hopeless. They were very weak, and I couldn't make it past one or two holes in the drawplate.
Then I remembered some bamboo gardening stakes I have. They were very weathered, and I wasn't sure they would be any better than the chopsticks, but they actually are working guite well.
For the hull I need 1" treenails, which is .020". That's the third from the smallest hole on the drawplate. I was quite skeptical about my chances of working down that small (I can barely even see the hole!). But I've made about fifteen "straws". When I
took the picture I had about 7 done--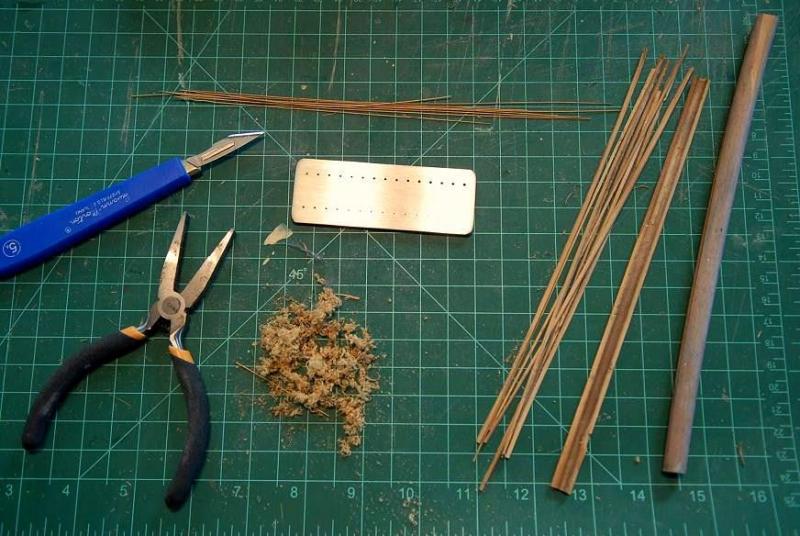
They are about 7" long, so if I need a 1/4" long treenail (being conservative here--1/8th inch might be enough) that's 28 per straw. I might need 1000 or so, so I probably need between 30 and 40 straws.
December 9, 2010
With some technique advice from other members, I was able to join the .016" club--
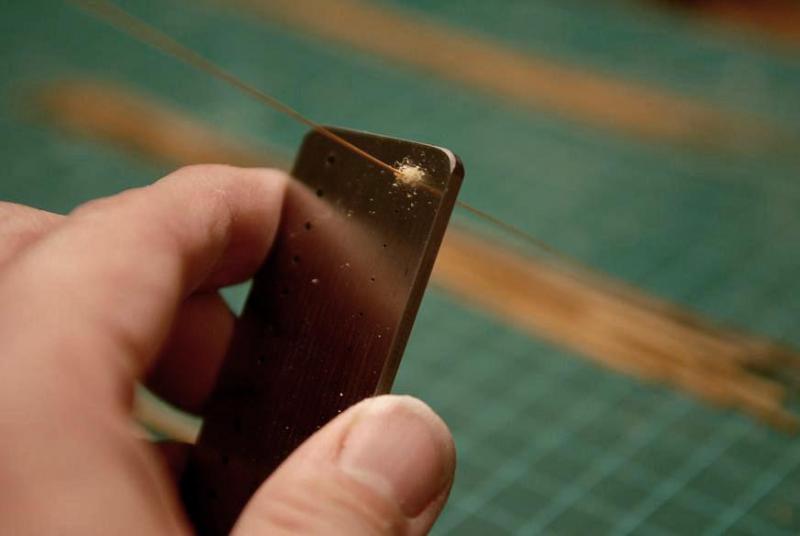
Couldn't do it without pliers, and it seemed like it took as long to do those last two holes as all the previous ones!
The small one also makes my .020" straws look like logs in comparison! .020" is right for the hull, but maybe I'll need the smaller size for the deck. Good thing that's a ways off.January 4, 2010
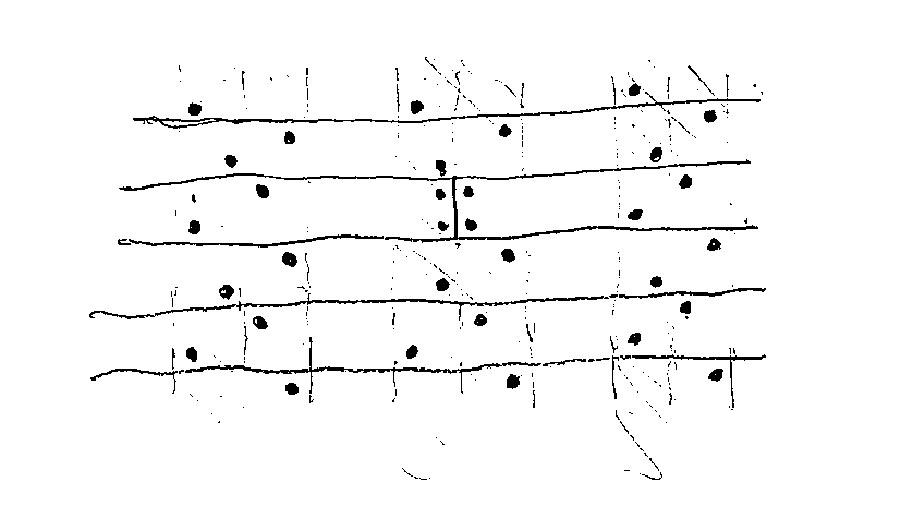
After making all those bamboo treenails, I tested them out, along with some other techniques, on my hull section mock-up.
I wanted to see how simulated caulking on the hull would look. The upper four caulk joints use black craft paper ("construction" paper is what I've always called it, but I don't know if everyone knows what I mean by that). The lower four joints use regular medium weight computer printer paper made black with a "sharpie" magic marker. I like the way the thinner joints look--they are much closer to scale [And indeed, as you have seen, that's what I used]--
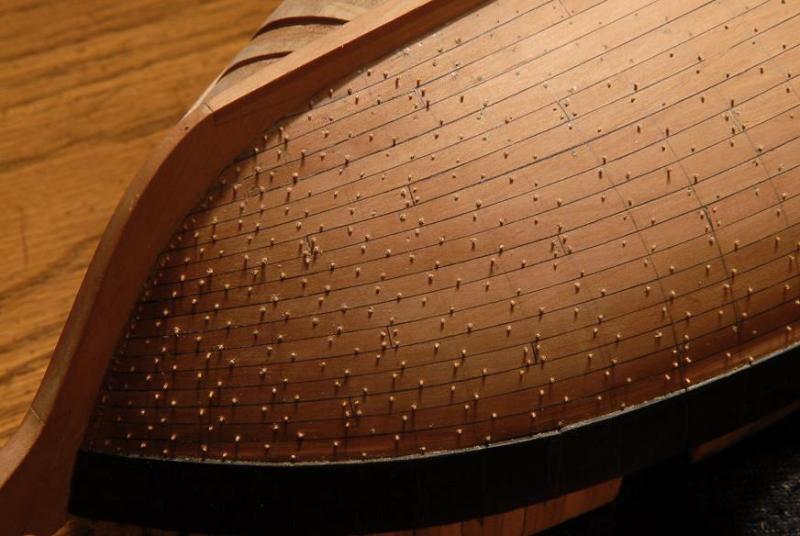
The treenails are kind of a mess. I took the old planks off and put them back on (with the new caulk joints) so some of the old silver wire spots moved around a bit. But here's the key:
The blue circle shows bamboo treenails in a hole that was drilled with a bit just a little too big. I was waiting for the right one (#76 .02") to come in the mail.
The red circle shows bamboo treenails with the right size hole. I was unhappy with all the bamboo treenails.
They look too dark to me. If they were larger, they might not have gone so dark, but this is the right size.
The green circle shows .020" holes filled with a watered down slurry of pearwood dust and glue. When I went over it with
the tung oil varnish, I think it may have disolved some of this filler because many of them look like dark empty holes now.
The yellow circle shows.020" holes filled with a slurry of full strength glue and pear wood dust. This looks the best to me (actually you can barely see the good ones, but that's about right). The only problem here is that the results weren't consistent (some still showed as a dark hole). I need to make sure the "paste" gets down into each hole.
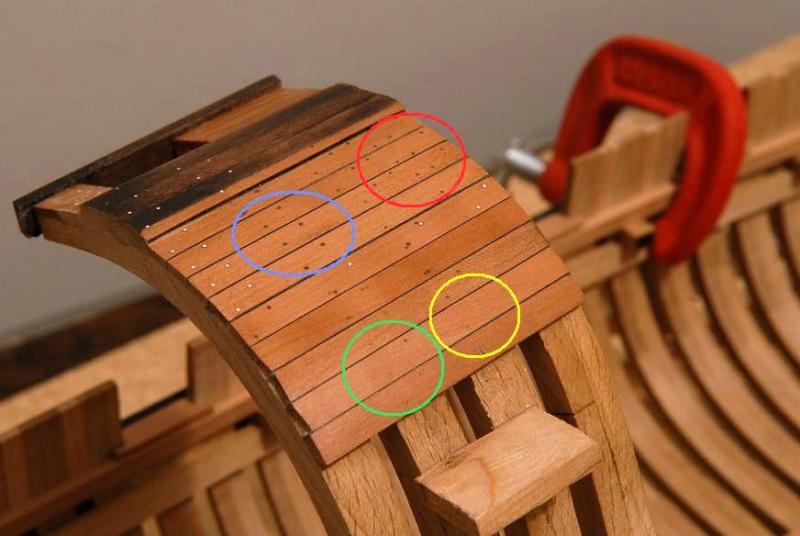
I'll chew on these experiments for a while. But it looks like I am going to abandon all those bamboo treenails I painstakingly made!! And the silver wire I bought!
February 22, 2010
Now it's on to treenailing!
I've decided to go with the bamboo, partly since I can't bear for all those slivers I painstakingly drew down to tiny size to go to waste!
I'm starting on the very bottom of the hull, which will be the least visible part--so if my beginning workmanship isn't the best, it won't be too obvious!
Near the middle is a portion that I sanded down, to see how they will look. They're so small, that even though they are still darker than I would have liked, they really fade away from a distance--
I thought my caulk joints were very thin (and most of them are), but next to the treenails some of them look positively fat! On balance though, I still like the caulking--

Only a thousand or so more to go! I'm so glad I'm only doing half the hull--and this is a small ship to boot!
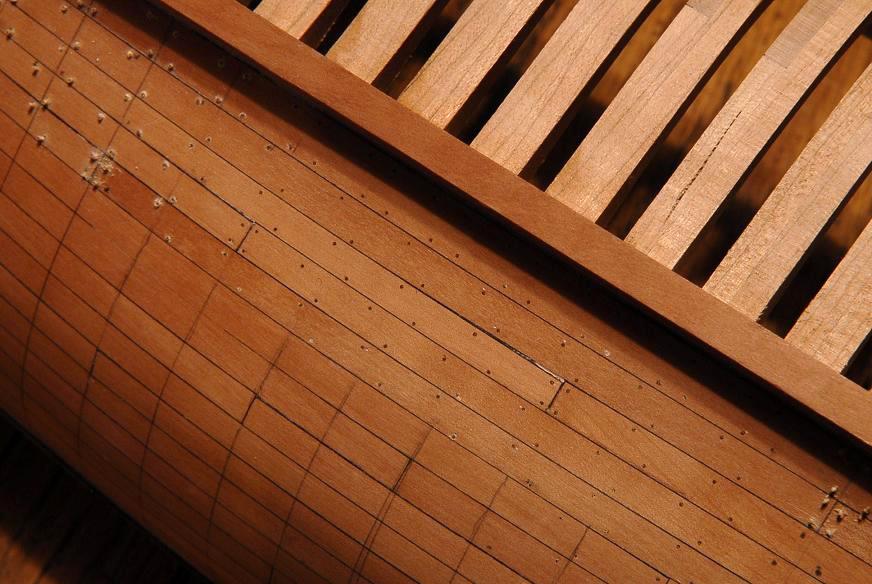
February 23, 2010
Here's a picture--as close as I can get--of the sanded down treenails. The treenail diameter (1 inch) should be four times the caulk width (1/4 inch). Just by eye it looks--close enough.

February 26, 2010
I still don't know whether treenails or iron spikes are historically accurate for this ship, but I'll settle for them just looking good!
I looked at three sources for the treenail pattern. (Goodwin, Underhill and Davis) The one that was the most helpful and seemed most accurate was the one by Charles G. Davis in "The Built-Up Ship Model". It looks a bit random at first, but there is a very sound logic to the way the treenails are placed. However, Davis didn't show what it looks like where the butt joint of the planks interrupts the pattern, so I improvised there--
[i have not seen this pattern used in any other models--maybe because it's 'busier". Every model I see uses the simpler pattern, which according to Davis, would be for single frames, whereas this was correct for doubled frames]
February 27, 2010
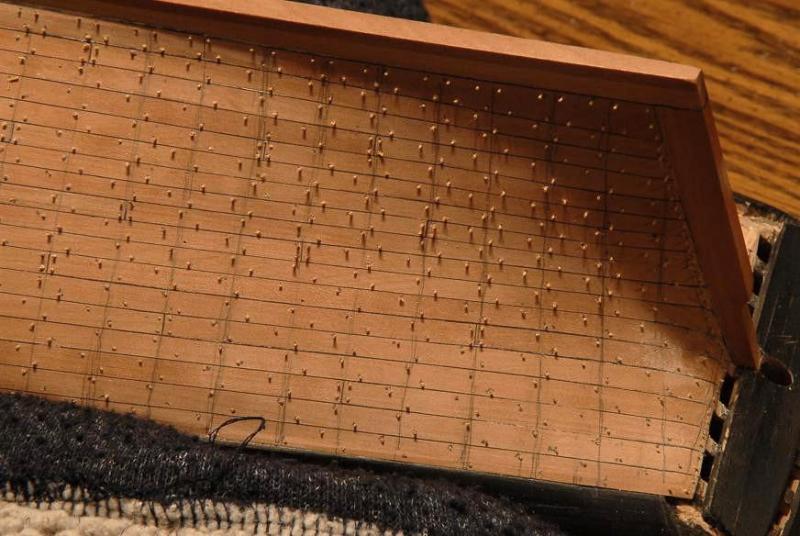
I've marked about 3/4 of the locations, and I have a growing patch of treenails.
Doing about two planks worth at a time (or about 50 treenails), I start the holes with a push pin, drill them, and glue the treenails in. Then repeat for another small section.
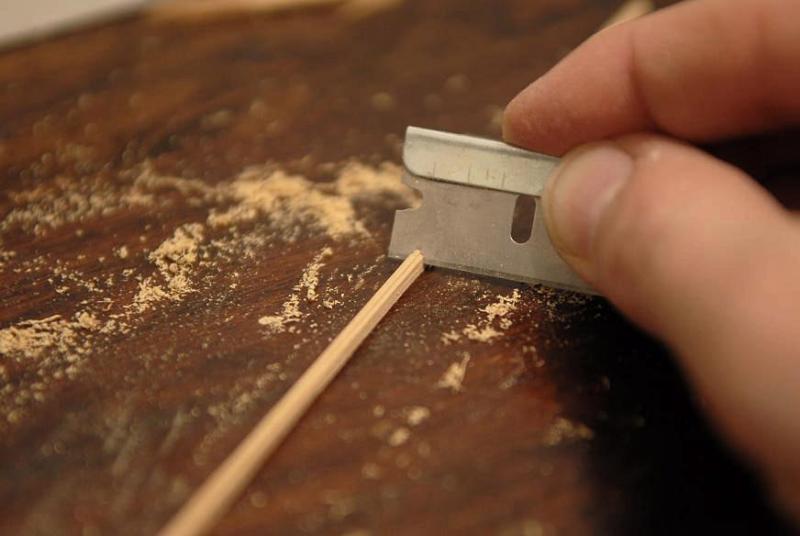
I do wish I had something that would cut these off flush. [How about the No.11 knife or a razor blade?] My supply of treenail straws is being used up faster than I thought it would, and surely there are or will be a couple of straws worth of waste in those bits that stick out.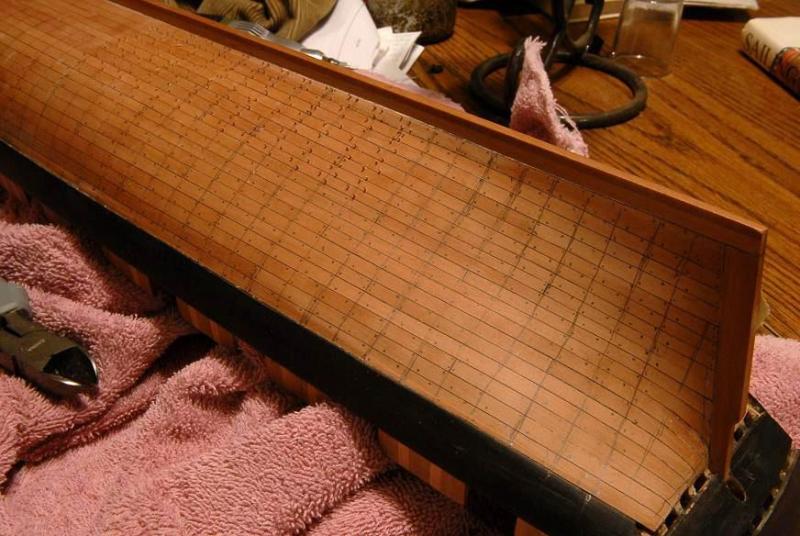
March 1, 2010
I ran out of treenail straws, so I draw down two or three, use them up, then draw down 2 or three more, etc.
I'm a little more than half done, and the bow is marked and drilled--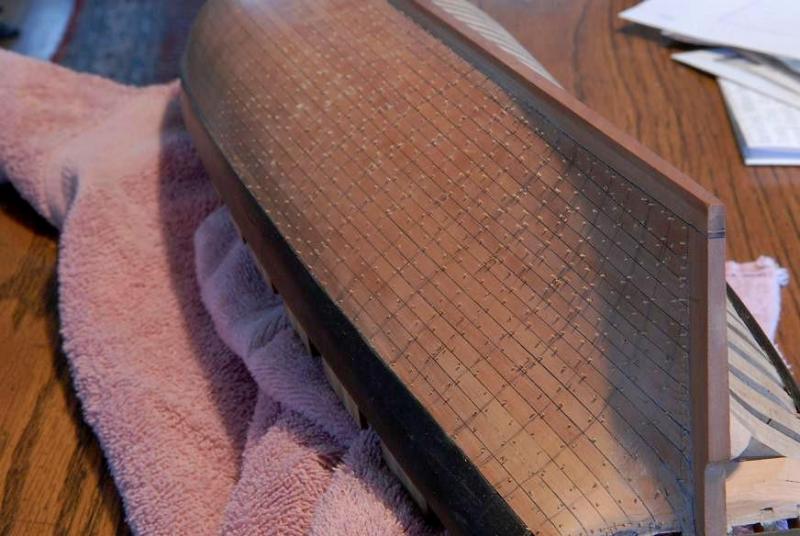

March 6, 2010
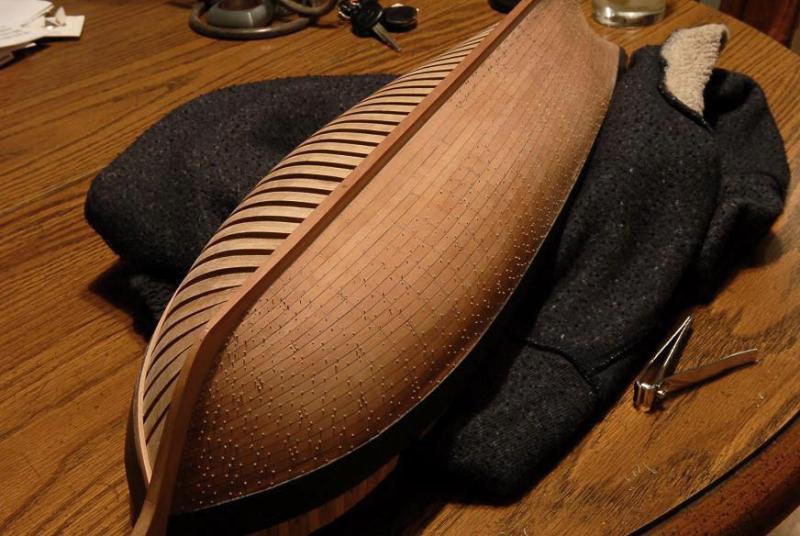
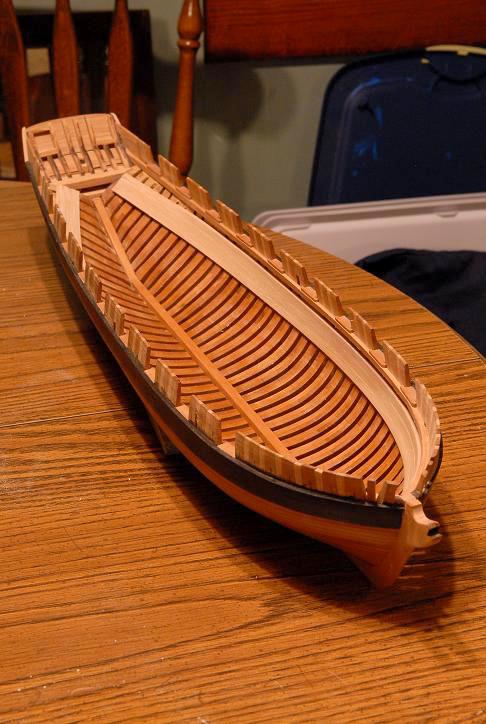
Another small milestone in the long modeling process--the lower hull treenailing is done!
After looking at the next photo I realized I wasn't completely done--
When I first looked at that photo one empty hole near the left center jumped out at me. I filled that one, looked at the photo again and noticed another!
Hopefully there are no more empty holes, but I can't guarantee it!--
Now, I will sand it down. Then some thinking about what to do next.
March 6, 2010
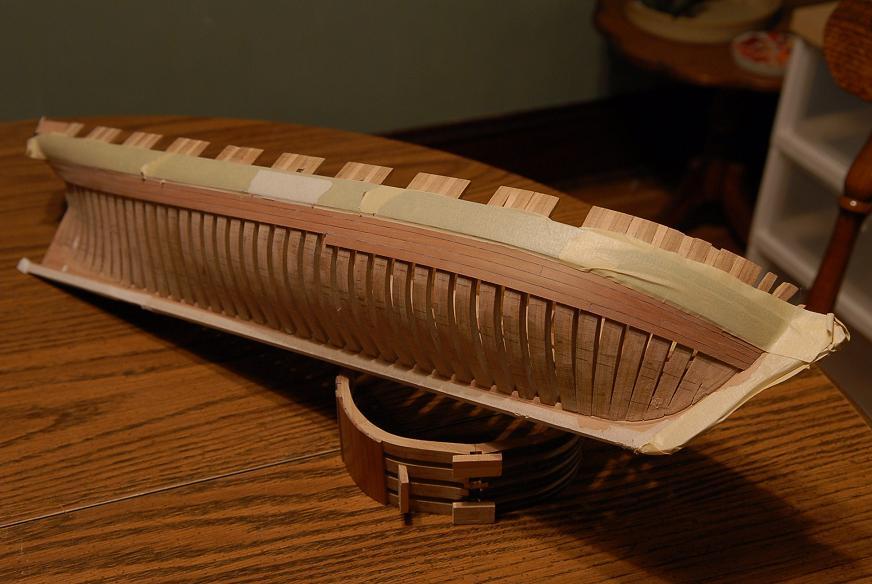
Here's the hull sanded down and with a couple coats of finish on. It looks pretty glossy, but I haven't steel wooled it yet--
Next I made a rough working stand to hold the hull upright. First cut a couple of templates for the supports out of cardboard--
Then cut them out of a piece of scrap wood with my jeweler's saw--
Then glued them on to a base. I need to do some fine tuning of the support curves, and then I'll put some foam padding on the supports, and it should be good to go--

Ron
- BETAQDAVE, fatih79, John Cheevers and 4 others
-
7
-
February 14, 2010
These are the last two spiled planks to go on. The one on the right has been shaped, steamed, clamped to the hull to dry, and then removed. The one on the left was sanded to shape, but I'm not going to steam it. The water swells the wood, and if I steam that last plank it won't fit in place to dry anyway--
Here are the two planks dry fit. The one more forward is the plank that was steamed--
The plank which I didnt' steam appears by an optical illusion to bend away from the hull more that it really does--

I glued the paper caulking to the first plank and glued it in place. The pieces of wood which stick out are just scraps which I'm using to wedge the glued plank against it's neighbor--
Then glued the next plank. The excess paper doesn't look so good--

But it sands away nicely--
I calculate 11 more planks to go. After so many months of seeing the frames, it takes a little getting used to them being covered up!
February 14, 2010
[Responding to a question about "exactly what" I was using for the caulking paper.]
I am pretty happy with the way the caulking is turning out. I have a couple small "gaps" where either the paper didn't extend to the outer plank edge, or it got dislodged when glueing. To fix those I might score a line at those few spots and fill it with something black.
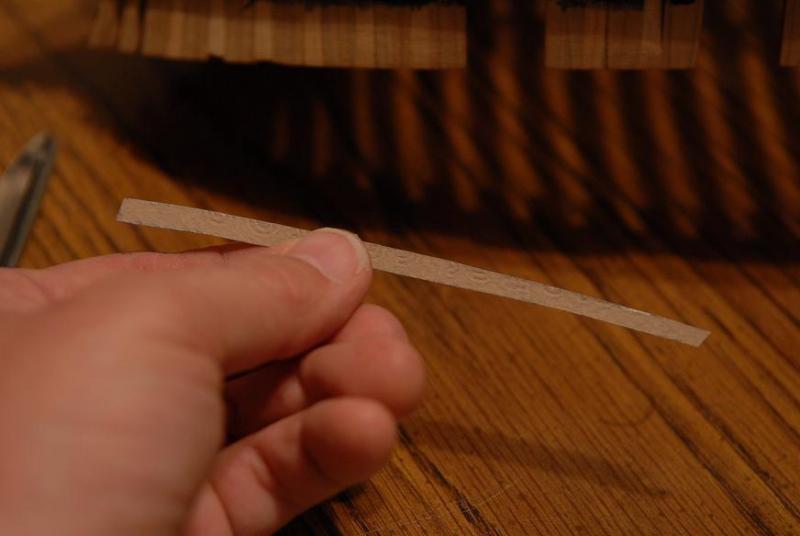
But here's how the paper works. This is a sheet of regular weight, white computer printer paper (what some of us once knew as "typing" paper!)--
Using a permanent black marker, I color one side. Somewhere, I'm sure you could just buy black paper, and not have to manually color it, but it was faster for me to do this than try to find some at a store! Also, I don't even need a full sheet to do the whole hull--

The marker bleeds through, but not completely--
So I color the back side, too--
And there's my caulking paper. [i can't stress enought that you TEST your wood, marker, paper, glue, and finish combination. The last thing you want is for the marker to bleed when you put finish on a hull that you have finished planking!!!!] I haven't measured the thickness of the paper, but I think it is not too far off, scalewise. I believe the caulk joints should be about 1/4 inch--

When I am ready to glue a plank, I cut a strip of caulk--


I run a bead of glue along the edge of the plank, and smooth it to a thin coat with my finger--
Then glue the paper to the plank. (You can see a pencil arrow at the front edge of the plank. This reminds me which side of the plank is "out" and, of course, which is the front end. It's helpful both during the sanding, so I know which edge to bevel and which direction to bevel it, and also when gluing the paper caulk, just to help avoid gluing the paper to the wrong edge of the plank--which I have done!)--

After a couple minutes, I trim the ends--

Before gluing the plank to the hull, I glue a small piece of caulk to the end of the previous plank. Usually I forget to do this until I have the new plank coated with glue, and then I'm rushing to get this small piece in before the glue on my plank starts to dry! But this time I remembered--

Then I put glue on the frames, and run glue along the long caulk edge, and short end, of the plank--
And clamp the plank in place--

There's still just enough space to wedge a couple clothspins in the frames to push against the edge of the plank--
February 19, 2010
Last plank!!--


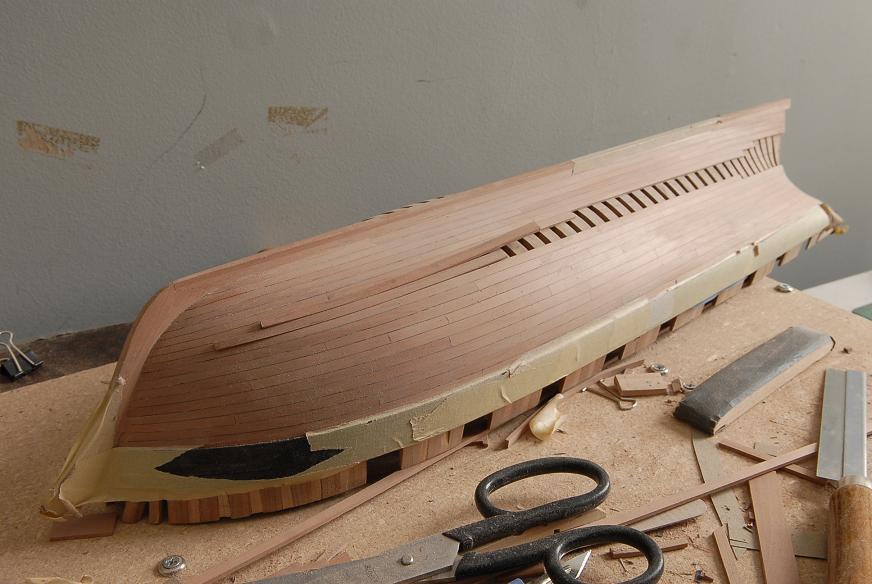
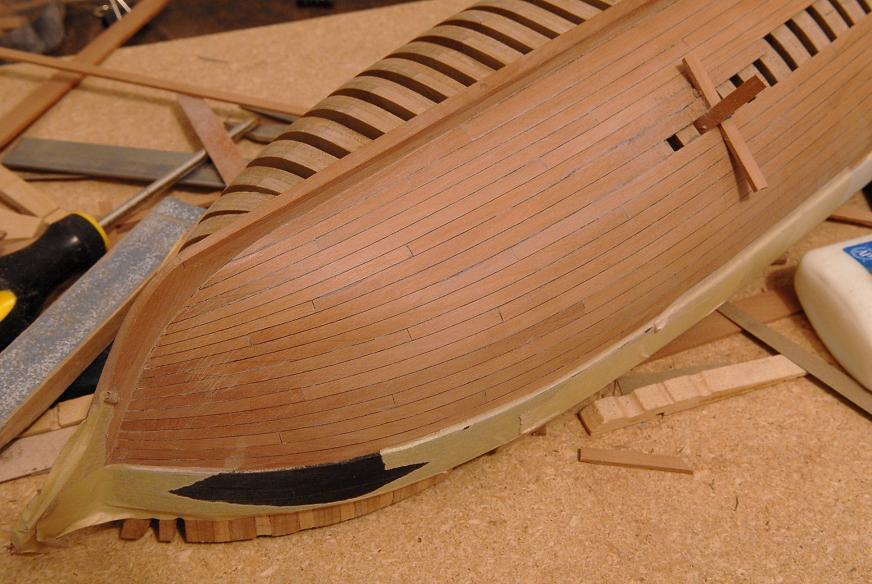
I still have to do some clean-up and overall sanding, but, by golly, she's planked!
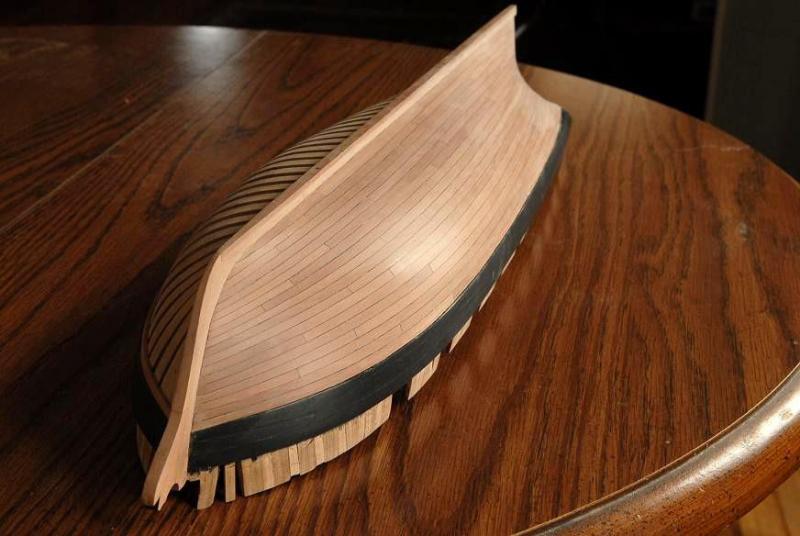
Ron
- themadchemist, BETAQDAVE, CiscoH and 1 other
-
4
-
Thank you, Crackers, Russ.
Patrick, below is something I said in a "side" post in the old log that I edited out, but it speaks to your comment:
"A large part of the enjoyment of my build is posting this log. I'm certainly no expert, but if anyone can take away the idea "so that's how you do it" or "that doesn't look so impossible" or "look at this crazy way of doing something...but it works!" then I am pleased."
Ron
-
January 28, 2010
I shaped and glued a few more planks on--
But the bow is not right.
I think the termination spot is about right, perhaps it could go forward another 1/8th inch, but what really started to give
me a headache is how it sits in the rabbet. At the very tip, it's not sitting right. I had tons of trouble trying to get the next plank to match up to it, and sit in the rabbet correctly. (This is actually the second try on that piece.)--
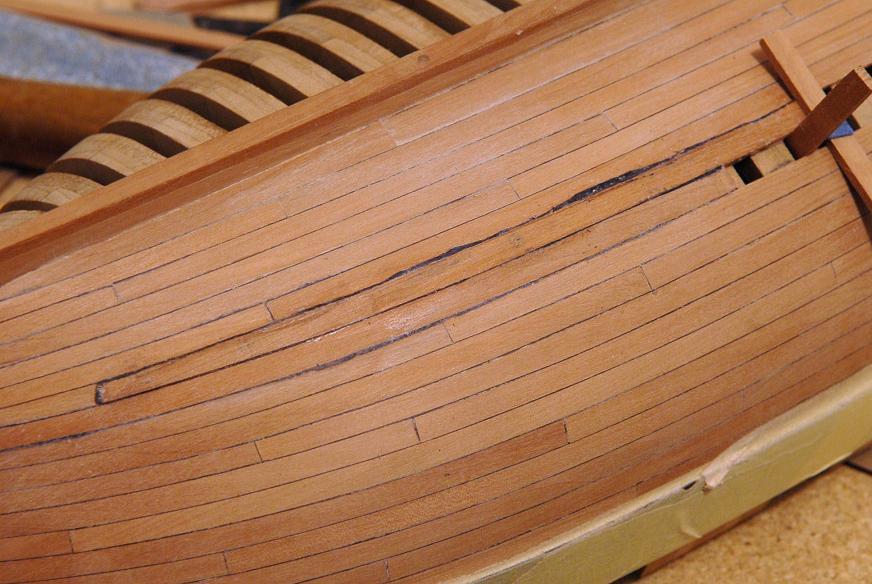
In the area of the circle, there is a "hollow" where the plank doesn't meet the keel cleanly, and the paper caulk shows too much. I could scrape the paper out, but the gap will remain--

I though briefly about trying to fill the gap with sawdust/glue paste, but decided to take the two planks off and try again.
It wasn't a major flaw, but everything else was looking so good, I just couldn't let it be--
So a little backstep--take 3 on the two bow planks, hopefully third time's the charm!
January 30, 2010
The problem with the forward plank was the twist and bend. Mostly it was that I had bent the tip just a bit too much.
But I did decide to lengthen the new one about 1/4 inch anyway, thinking that the run will be a little better looking. Here's a comparison between the previous plank and the new try--
And here it's glued on, also a new second plank. These are better than before--
Here's a bent and tapered stern plank, ready to go--

I dry fit the plank--
Then glue the paper caulk joint. Because of the extreme curve at the end, I glued an oversize paper to it. When it dries I'll trim it back to the plank edge--
And then I glue it in place. The angle of the light emphasizes the difference in thickness between the new plank and the previous one. This will require a lot of sanding to get the planks to match up. This the most extreme example of this so far--
With eight strakes to go, I'm just over halfway done with the hull planking.
February 2, 2010
Ship work is rather slow, just a small update here.
This plank I made from the wider stock, and roughly sanded it to a curved shape--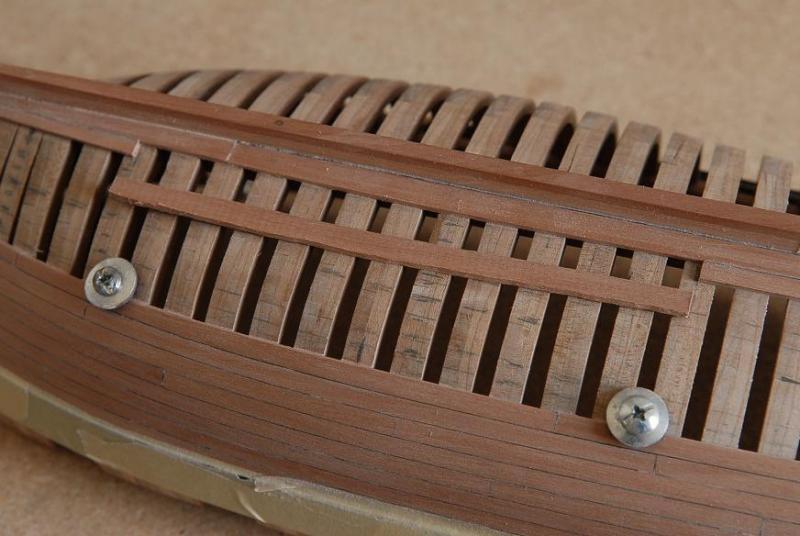

Here is a wet bow plank being clamped to dry, and a middle plank being glued--
And a shot of my work area. When I am able, I move some of this into the dining room next door, but sometimes I work right here. The rotary tool is the only power tool I've used (it's the only one I've got!), and up to this point just for sanding--
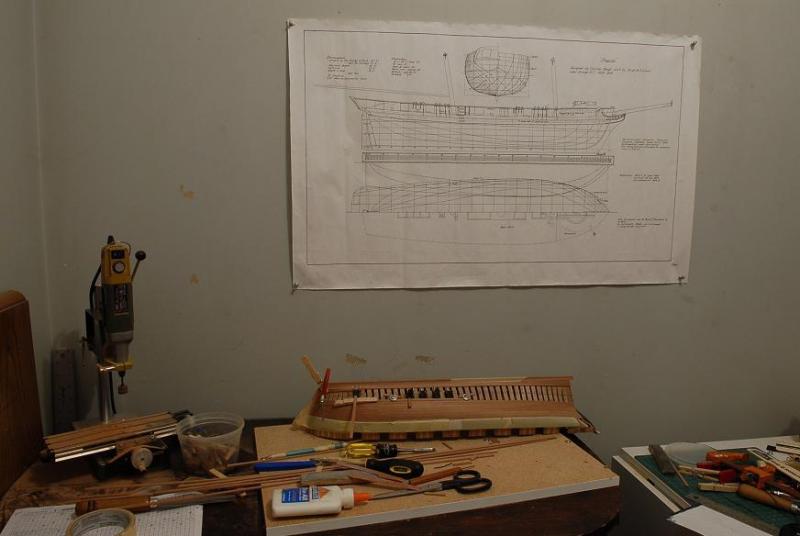
The drawing is the Chappelle plan from the Smithsonian Institution.
February 8, 2010
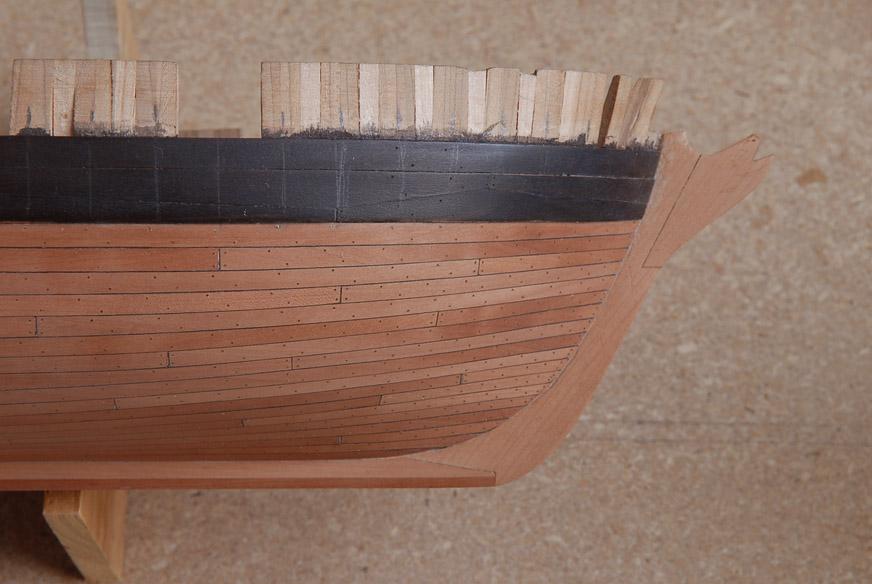
Planking continues slowly. I'm working now on closing the bow area, and then continuing aft. In this photo the gap at the stem looks narrower than it really is, but even so I think I need to shave a little off the planks there to make it just a little wider (about 1/32 wider, it's really pretty close to all right)--


February 11, 2010
Here are the last couple bow planks being installed.
First they are roughly sanded to shape, and dry fit--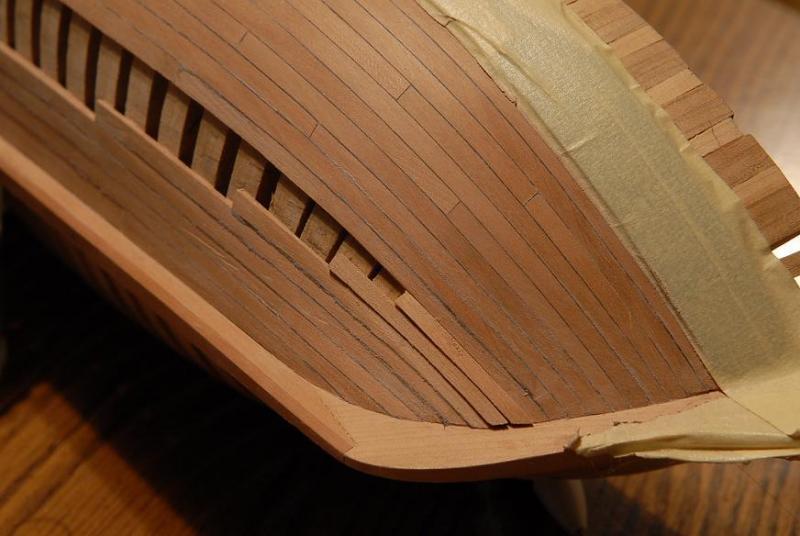
Some more sanding, and they fit pretty well now--

After sanding just a bit more, and cutting them to the correct length, the paper caulking is glued on to the plank edges, and then the planks are glued in--
Then I did some overall sanding--


I'm on the planking home stretch now!
Ron
-
-
January 23, 2010
I've reached the point where the stern planking starts to turn down along the sternpost. I figured this is a good time to switch gears and work from the garboard strake upward.
I cut a piece of paper the complete length of the garboard. Later I'll divide this into shorter lengths--
I spile a line from the keel. It's very interesting that this line isn't just a straight line, since the keel is straight. I don't quite understand that, but that's the way it is--
Here's my paper with the line drawn on it. Again, just to be clear, this is the line that goes next to the keel--
I cut along the line and checked it on the model--
Then I drew the other edge of the plank, wide at the stern, narrowing, widening again at the dead flat frame (the widest part of the ship) and then narrowing to a point at the bow. I cut this line and taped the complete garboard plank to the keel. (I forgot to take an overall picture of this, I'll get it next time.)
Next I lined up a row of plank pieces on the dead flat frame to check the number of strakes needed. There's a slight gap, so I will make the garboard strake and the one next to it just a little bit wider--
After the gluing of the last stern plank had set, and I removed the clamps, I did some trimming of the aft end, and dry fit the sternpost--
The planking tucks right under the sternpost, and now will follow down the rabbet [This shows more clearly why I needed that shim piece to move the sternpost aft a bit] --
January 26, 2010
Here's the picture of the garboard paper template in place on the model--
From the paper template I traced the 4 pieces of the garboard strake, making the pieces a little fuller than the template to account for the spacing and to allow adjustment--

Here are the four pieces--

And here they are dry fit on the hull--

I decided to glue the stern piece first and work forward--
The bow piece needed another boiling and bending session--
Here's the next piece being glued on--
The other two pieces are just laid in place, to see how they all fit--
January 27, 2010
After having a very difficult time trying to glue the paper caulk joint into the rabbet, I thought I would try gluing the paper to the plank instead. This is much easier and I will adopt this method for all remaining planks!
I also decided to taper the garboard to a point. There is a photo from a David Antscherl planking tutorial, that I hadn't remembered correctly before, that convinced me.
So now I glue the remaining pieces--
And there's the garboard--
Ron
- CiscoH, themadchemist, BETAQDAVE and 1 other
-
4
-
January 13, 2010
I'm going to do one strake on the port side, to visually transition from the strong horizontal of the black wale to the vertical
frames. But when I spiled the bow plank I discovered that the curve of my wale on the underside was not very good. This was the result of the very difficult to shape bow pieces of the top and butt wale planking. I did a better job on the starboard side, but on the port side I needed to take a chisel to the bottom edge of the wale and fine-tune the curve--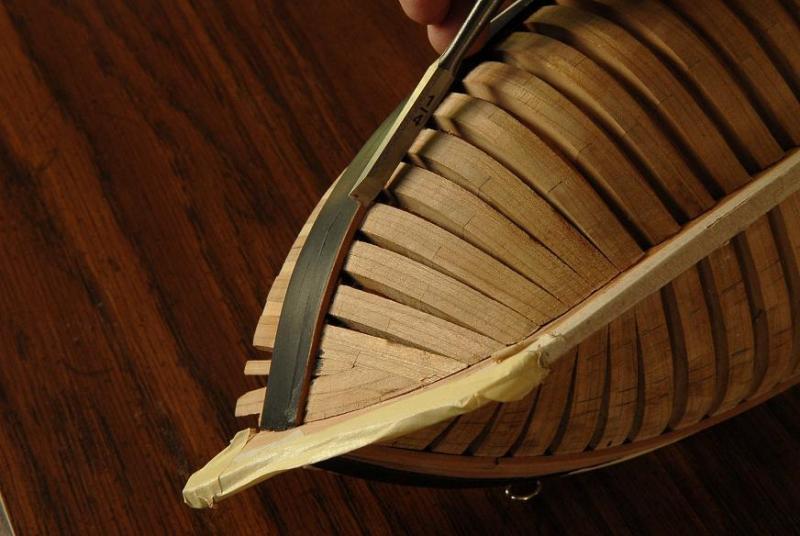
You can see a small spot where I tested a Sharpie marker to re-blacken the wale (I wasn't going to go through the whole iron staining bit for this barely visible edge). I wasn't happy with the sharpie color, and I ended up painting the edge with some artist oil paint--
I also had to do some minor surgery on the transom framing, and I'm sure there is more surgery to come in this area--
Some shots of the general clamping mayhem--

In the next photo you can see the paper I "painted" with marker for my caulk joints. Near the top of the photo is the marker I used--
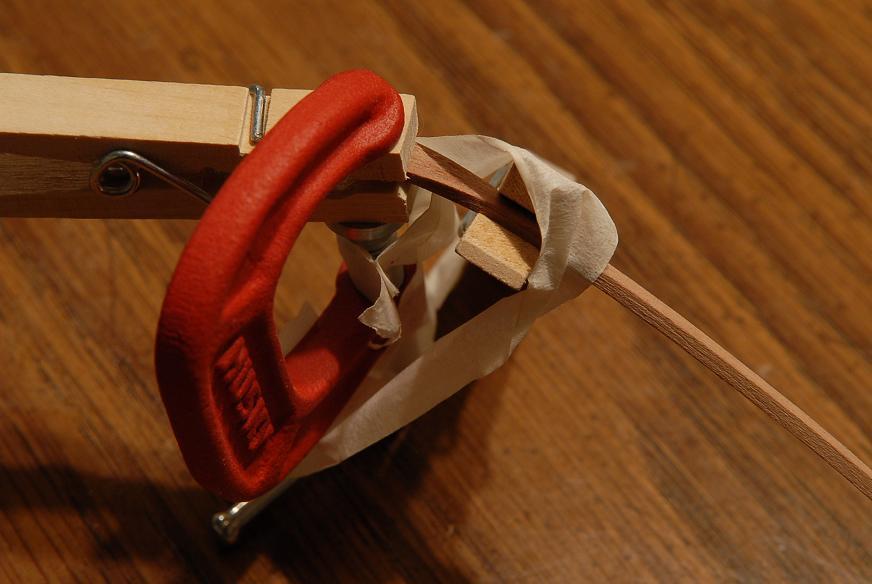
Here's my cobbled together jig of clamps and masking tape to induce an approximately correct bend and twist in a stern plank--

And some shots of where I'm presently at with the planking. I have done some sanding as I go, mostly to make sure that my paper caulk joints will look okay. I'd rather know now if they are not good. Less planking to tear out if it doesn't look good. But I think the black paper works--


I'm pretty much on target with my batten marks. At about 3/4 near the stern, I need to do some tapering in the next planks. It narrows there, then seems to widen back out again.
I'm actually enjoying the spiling part. It's kind of gratifying to have those planks happily fit right into place instead of having to force them into submission!
January 22, 2010
I haven't had much time to spend on the ship until the last couple nights, so here's a small update:
One plank gluing, and another spiling--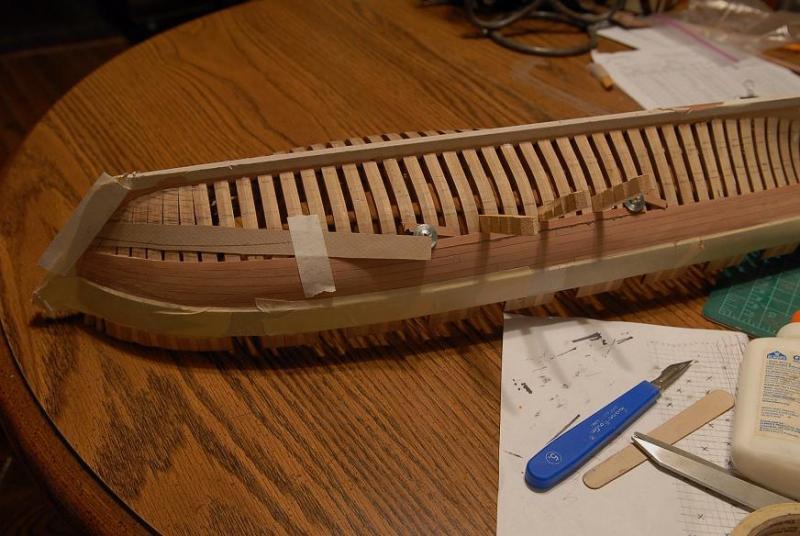
For the center hull planks, the screws and washers at the ends, and dismantled clothespins wedged in the frames in the middle, are sufficient for clamping the plank--
Here's a stern view--

My lack of experience with stern framing creates a problem--I discovered that my planking wasn't going to line up with the sternpost the way it is supposed to. The planking was ending farther aft than the front of the sternpost, which is where it should end. My first thought was to trim the planking back, and I started to cut the ends of the first planks I had done. Part way through the cutting, I realized this was going to create other problems and maybe I shouldn't do this. I decided to shim the end of the deadwood, which would move the sternpost aft just a little bit. Maybe these pictures will explain better than words--

That picture also shows some careless scratching on the sternpost. It should sand out.
There is going to be more work to fine-tune things at the stern, between the keel and sternpost, and the planking and lower edge of the counter. There's an awful lot going on here, and the kit directions are conspicuously silent about the stern framing! The instructions don't avoid the stern completely, but there are some gaps in the information, and filling them
in would benefit a first-timer! I shouldn't be harsh, it's the planking that brings the issue to light--and the kit was not designed to be fully planked. I think it will work out in the end, though now I'm wondering how well I'm going to be able to cover up that premature cut in the planks; we'll see how it goes.
I've planked six bands. That should mean I'm one third done--
Ron
- CiscoH, themadchemist and BETAQDAVE
-
3
-
Thank you, Russ and hamilton!
Ron
-
Thanks Gary, for reposting these. You look at them once, are awed, and then they slip away. Seeing them again is just great.
Thank you.
Ron
-
January 7, 2010
It's important not to "steer" the battens too much, but to try and let them run true. The stern battens seem to run pretty true, and the width doesn't change too much so hopefully it won't give me too many problems. I think where the planking bends up to the counter will be one challenge.
The bow is another story, and there I have to bend the battens where they don't really want to go. I guess that means most if not all the bow planks will need to be spiled [Yup]. I'm going to work down from the wale, and up from the garboard, trying to avoid drop planks and excessive tapering.
I marked the location of the battens with pencil, and then took them off. This way I can still do some fairing if necessary, and there is less to get in my way as I do the planking--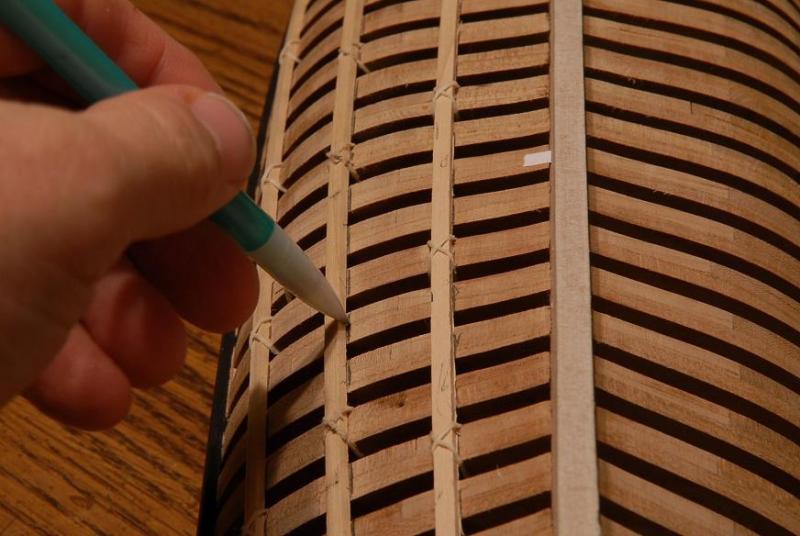
I steamed an extra wide wood strip, and spiled the bow plank. I also steamed and twisted the stern plank. Each planking strake will generally be made of four individual planks--24' scale length, typically. I glued the stern, then the bow, then filled in the inner two--
Voila! One strake done! There will be 18 strakes, plus or minus.
I apologize for not taking more photos of this process. Probably some of you would like to see the spiling part. Until you actually do it, it really is kind of a mystery (at least it was to me). I hope I have managed the first one okay.
January 8, 2010
[i received a bunch of very complimentary posts at this point, of which I was very appreciative!]
Thanks, everyone! Oh my gosh, the pressure. It's just the first strake! Well, you've been there for the ups and downs so far, we'll see how it goes. (I am pretty excited to be at this stage.)
Here's a little bit about spiling, those of you who have done it before feel free to laugh, and tell me how it should be done if I am presenting something misleading.
This is how a guy who has never done it before does it.
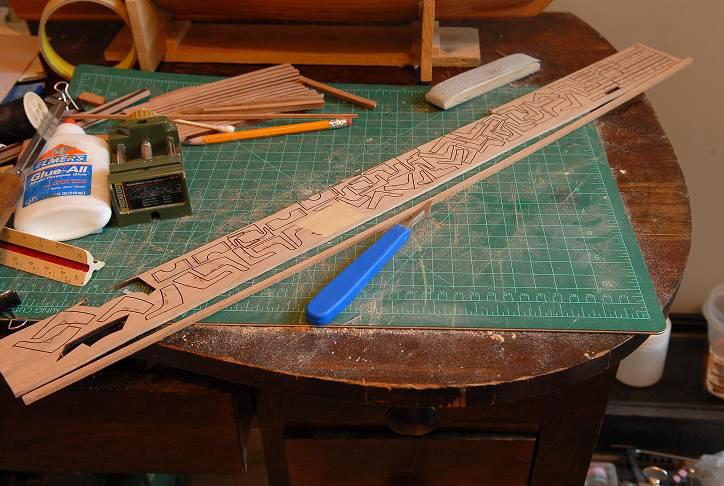
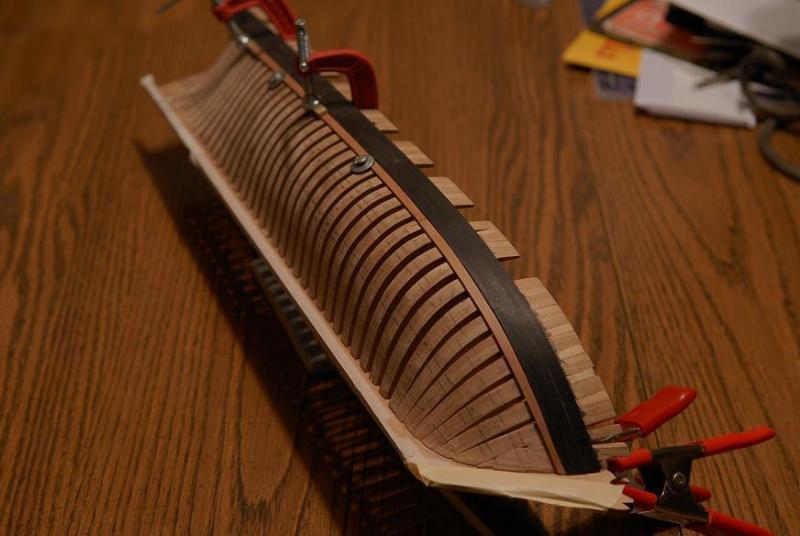
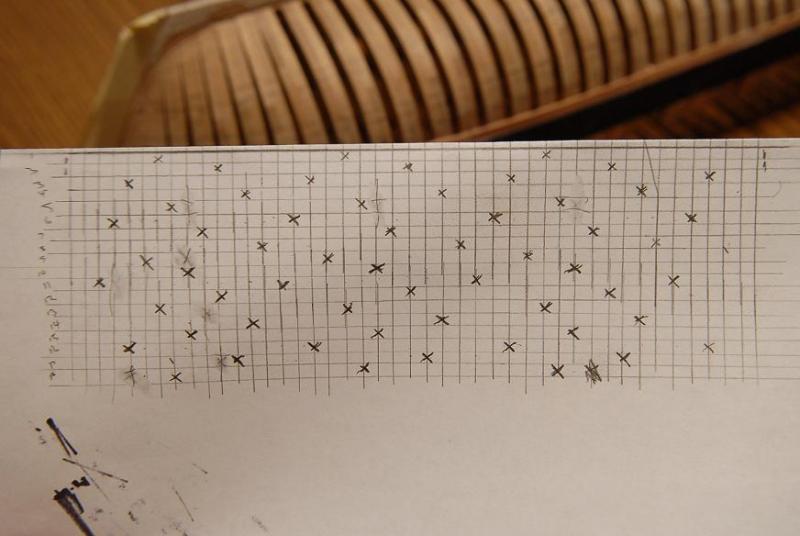
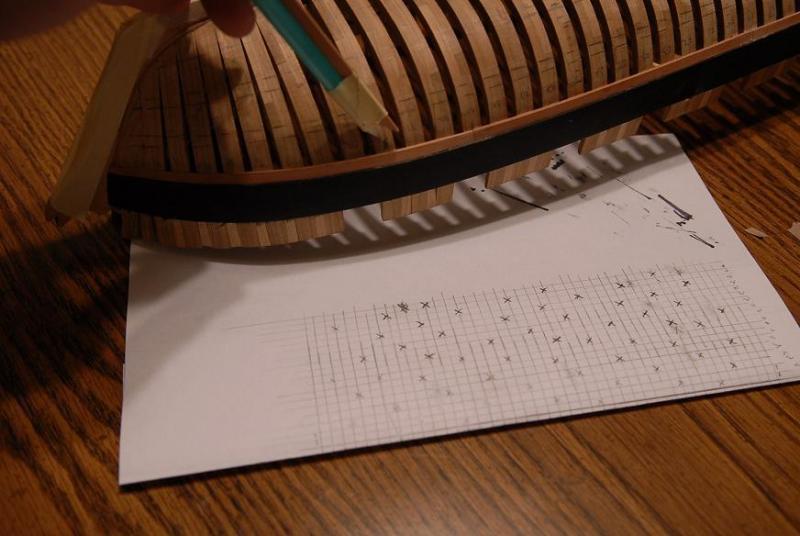
But before that, here's my chart of the planking. The vertical lines are the frames (44 I think) and the horizontal lines are the
planking bands. The "x"s are butt joints. I tried to lay it out so there were no obvious patterns that would draw the eye too much, but still follow the Lloyds rules and use 24' planks [Here I have to say--all the models I see follow an idealized pattern, with joints all lining up. This just looks artificial to me, as well as too conspicuous. Your hardwood floor has irregular lenghts of wood, and my gut tells me shipbuilding was the same. Furthermore, this irregularity would validate the Lloyds rules, which don't negate the variation, but keep it under control. I could be completely wrong, of course. Visually, as well as what I logically think was actual practice; I like some randomness in the planking!]--
So first is to mark the end of the next bow plank (after looking at these photos, I realized I have marked the wrong frame! It should be the next frame forward from the one I marked--
Then I cut a heavy paper blank, and bent it across the frames (NO edge bending, just the natural lay). The distance from the last plank depends on how wide your spiling compass or "staff" is set, you'll see in a minute--
This is my high-tech, micro-tolerance, expensive spiling staff--
And here it is in use. Just follow the edge of the plank, and it miraculously draws the same line on the paper. (Landlubber carpenters call this "scribing".)--

So now we have a paper with the exact curve of the previous plank drawn upon it--

I cut along the pencil line--
Hold it next to the previous plank, and yes, it matches pretty well--

That's half of it. Next you mark the width of the plank. In this case, it needs to taper down from the standard width. I did this by eye, but you could get very precise and plot the width at each frame and get a very accurate line. I'm not so precise at this point because I know I'm going to cut the plank a little full, and sand it to the right width--
I cut the paper plank out--
And check it again--

Then I trace it onto a piece of planking stock--
I've run out of time. Part two will be the cutting, sanding, fitting and gluing.
But I have to let you in on a little secret. On that first strake I skipped the whole paper step and just scribed (oops-spiled) that first line onto a piece of steamed wet wood I held against the bow! The softened wood cut pretty easily, too.
Skipping the paper step cuts out a lot of work, but I'm not sure it's the best thing to do, so it's good for me to try it this way, too. [i used the paper for all the rest]
January 9 2010
Now to finish up the demonstration of the bow plank:
I have sanded the upper edge that I traced from the paper template. Note: I actually traced the template upside down (mirrored). I can't seem to avoid these careless errors, but this one is of no consequence, it just might be confusing because we're looking at the back of the plank in this photo--
I roughly sand the lower edge with the drum sander on my rotary tool, and check the upper edge against the last plank--it needed some minor sanding adjustment to achieve a good fit--
Now I go to work on the lower edge, trying to sand a nice even taper--

I check it again (many times, actually) to judge the fit and taper--

Here's the plank with bow, top, and bottom edges done, I'll leave the aft end until just before gluing--
But first I need to steam (boil, actually) the plank and clamp it to dry--
Here is the plank, dry, aft end trimmed, sitting comfortably in place [This is really a nice achievement. It makes you feel good]--

I glue the black paper caulk joint in place--
And finally the plank itself--
Spiling is a fair amount of extra work, but I've found that it's absolutely no more difficult than many of the other tasks involved in making a model, and you really can't avoid it to get an authentic planking run at the bow.
On to the rest of the planking!
Ron
- garyshipwright, BETAQDAVE and CiscoH
-
3
-
January 3, 2010
Starting the new year--I feel like I'm jumping all over the place with my model, but having gotten the counter timbers 75 percent done, and the transom about 75 percent done, I don't want to finish them yet. I'm afraid the boxwood edge and
trim pieces will get nicked up if I glue them on now, with all the planking yet to be done, and lots of handling the hull still.
So now that I at least have the stern in a little better shape to withstand some of that handling, it's on to the deck clamps.
I boiled and bent the bow and twisted the stern part of the first piece. Then I did some sanding at the aft end of the clamp so
the deck beams would lay flat on top of the clamp. I glued some temporary deck beam spacers around the hull (cut from the extra deck beam I was using in my earlier hull section mock-up).
Then glued the starboard deck clamp in--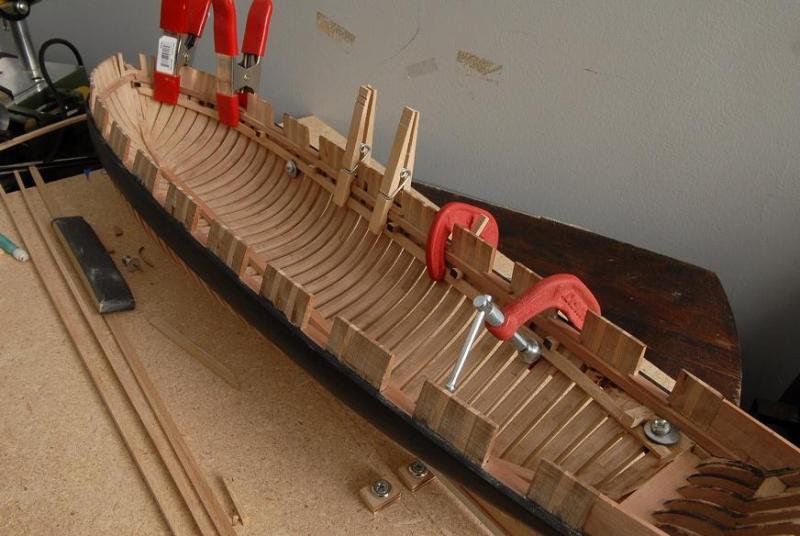
Here's a close-up of the stern area, with the heavily twisted deck clamp being clamped--
After the starboard side set, I removed the deck beam spacers, glued them to the other side, and after they set, I glued the port deck clamp in place--

There are two more to do on each side. But I am now puzzling a little bit over whether I should do the hull planking first. Finishing the clamps will take away some access from the inside of the hull--I might need it to help with clamping the hull planks.
January 4, 2010
[i did postpone finishing the deck clamps at this point in order to allow easier installation of the outer hull planking.]
In anticipation of the hull planking, I tried tying a batten strip (a piece of maple to be used for the deck planking) to the frames to try and get a feel for how the planking will run. I fiddled with it for at least an hour, trying to get it to look gracefull from all angles. Eventually I realized I have a "bulge" in the hull--


It looks like the plank is just bent at that point, but I've studied it enough that I know I have to take some wood off the frames at that point of the slight "bend" shown in the photo [not surprisingly, it was at the point where the full frames change to half/cant frames, and likely it was caused by innaccurate framing, which also led to the slightly too-narrow stern]--
I scribbled on the offending frames, and I will take the batten off and start sanding--

I had noticed this bulge way back, and thought I sanded it down enough, but the batten exercise showed I hadn't quite
taken care of it.
January 6, 1010
I've sanded the frames down in the offending area, and run some more batten strips along the hull. I think it looks okay now. I'm just guessing, but it looks to me like I may not need any stealers at the stern. The amount of tapering at the bow looks pretty substantial. I need to taper to about half the thickness of the widest part. I'll need to be careful with the garboard and lowest strakes to make sure they don't "creep" up the stem--


I'm also not sure if spiling will be necessary, especially at the lower part of the bow. This is new territory for me. [Yes, it will be necessary all over the bow!]
I do think planking the hull is next (just the starboard side)--pretty exciting! I'm boning up on whatever my books (Underhill and Charles G. Davis) have to say, and re-reading the MSW planking tutorial. One more decision first--I'm going to show the caulking on the hull planking with black paper.This is fun!
Ron
- CiscoH, BETAQDAVE and themadchemist
-
3


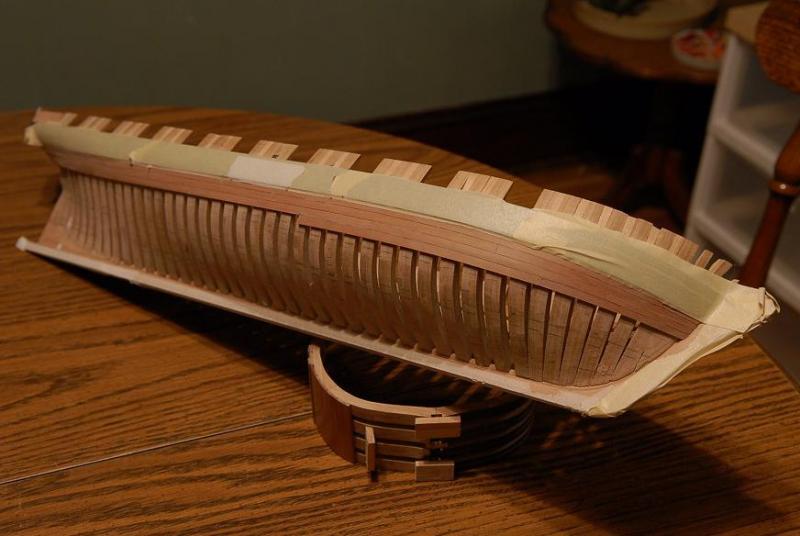
US Brig Oneida 1809 by rlb - The Lumberyard - 1:48 scale - POF - Lake Ontario Warship
in - Kit build logs for subjects built from 1801 - 1850
Posted · Edited by rlb
August 22, 2010 [some more out of sequence dates now as I group posts on this topic together]
And now--the ship's stove!
Using the tutorial on this site (Making a Ship's Stove by Allan Yedlinsky) as a guide, I'm building this up with pieces of Cherry and Pear--
The little block of Cherry on the left will become the hood that the funnel attaches to--
That's about all for the wood pieces, now I have to scrounge up some card and/or photo paper to continue--
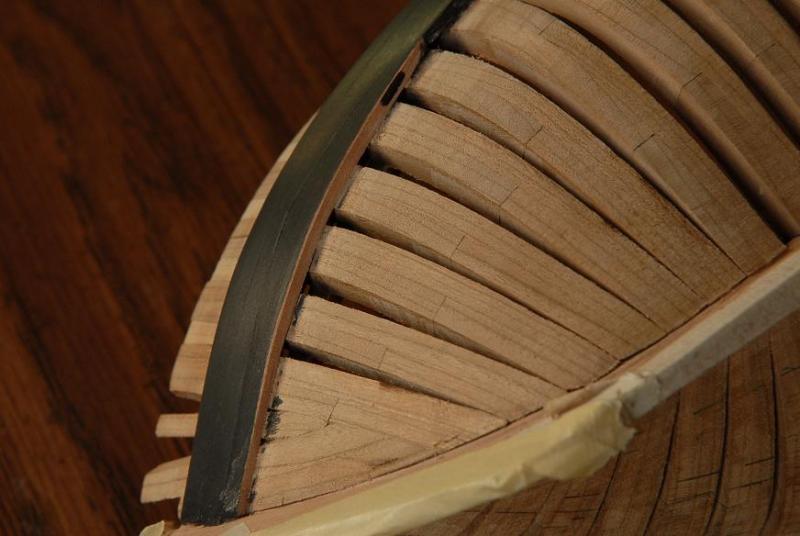
August 23, 2010
The stove is coming along. If the one in the tutorial is 1/48, I am impressed! There's no way I can get that close to scale and such detail! My paper brackets are too wide, and my lids are a little too small. Still more detail to add, but I think once this is painted black, it will look good--
September 6, 2010
I have worked on the brick hearth, first cutting some spare basswood into 4" wide (in scale) strips, and marking 8" bricks on one strip. For once I didn't have to look something up. Being an architect I know exactly how big a brick is--
I scored across the strips with a knife, and then separated the strips and filed the joints, also filing along the long edges. Here they are put back together, staggered--
I glued the strips together, and trimmed the ends--
Then I put a first coat of paint on. I will let this dry (it's artist oil paint--so it will take a while) then go back and paint some individual brick variation--
I'm also slowly adding some detail to the stove. Wire handles, starting to add some hinges to the acess doors, etc.--
Just one coat of thinned black paint so far. It actually gives a nice weathered warm look over the wood. The paint doesn't cover the photo paper I used very well--
September 9, 2010
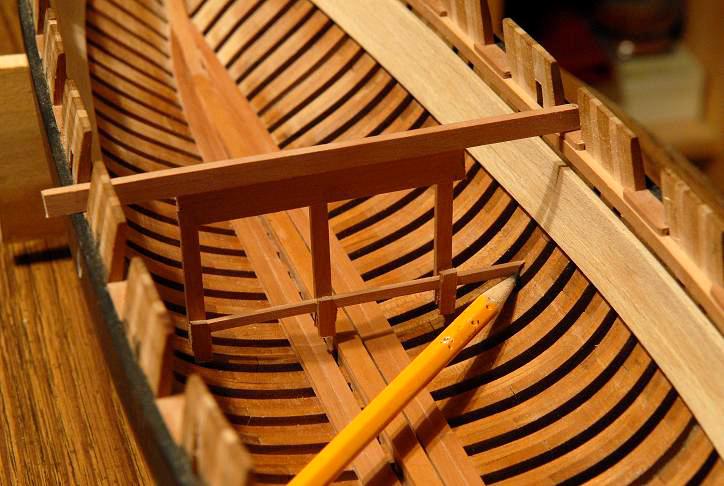
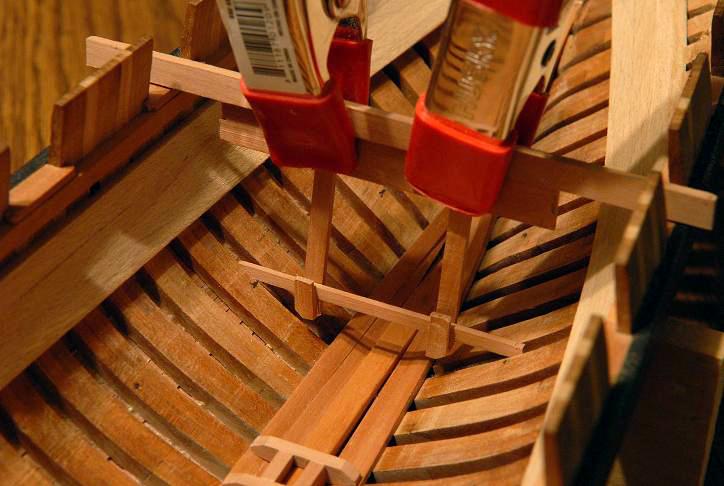
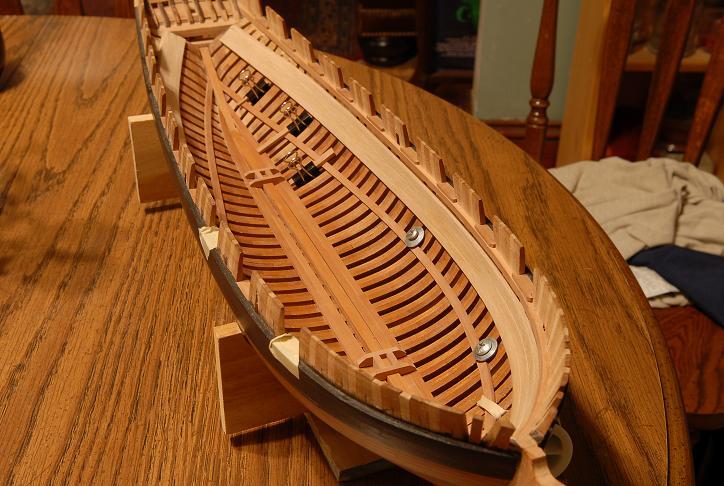
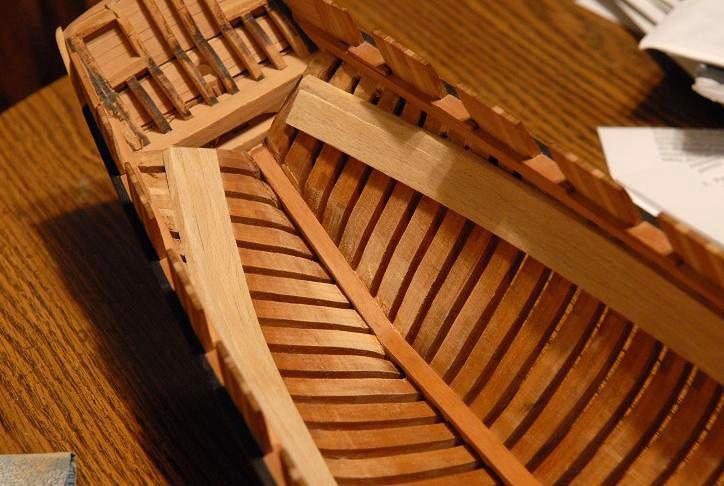
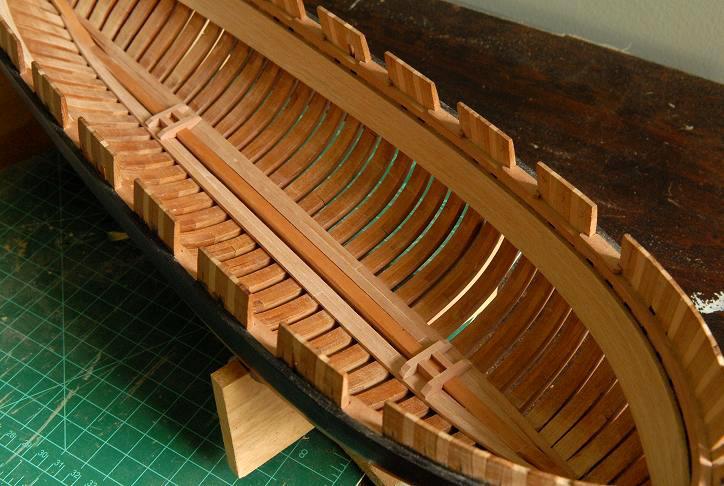
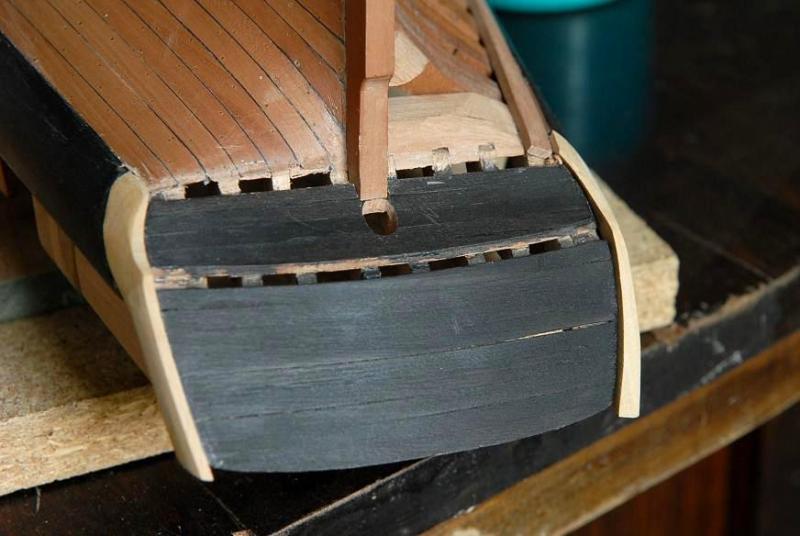
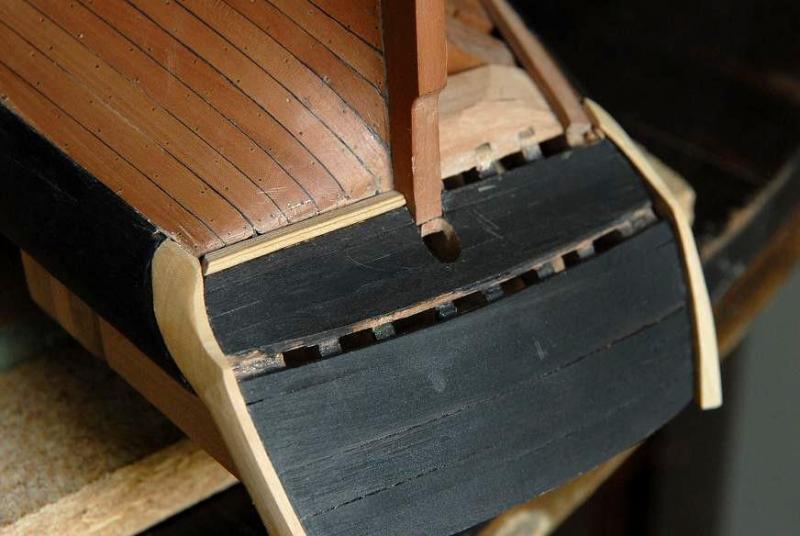
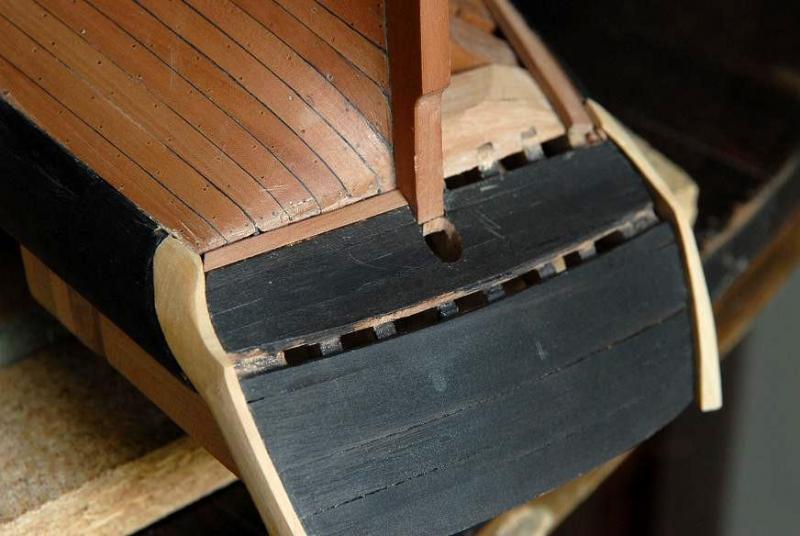
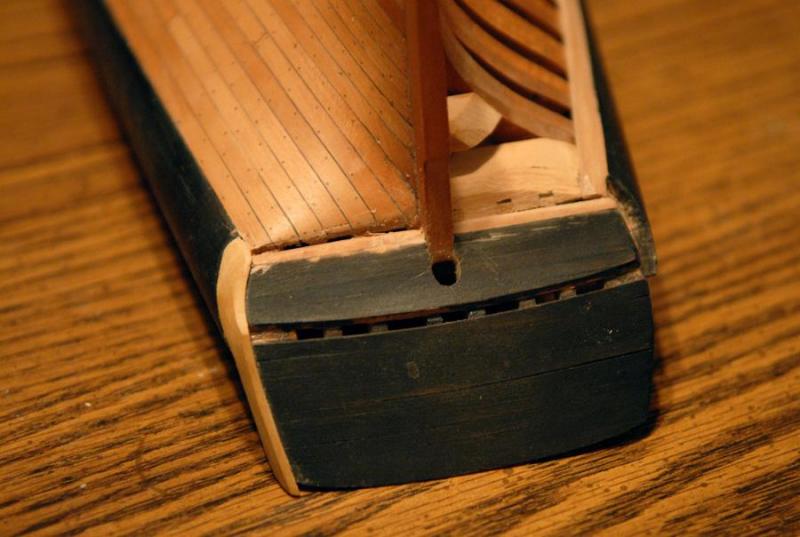
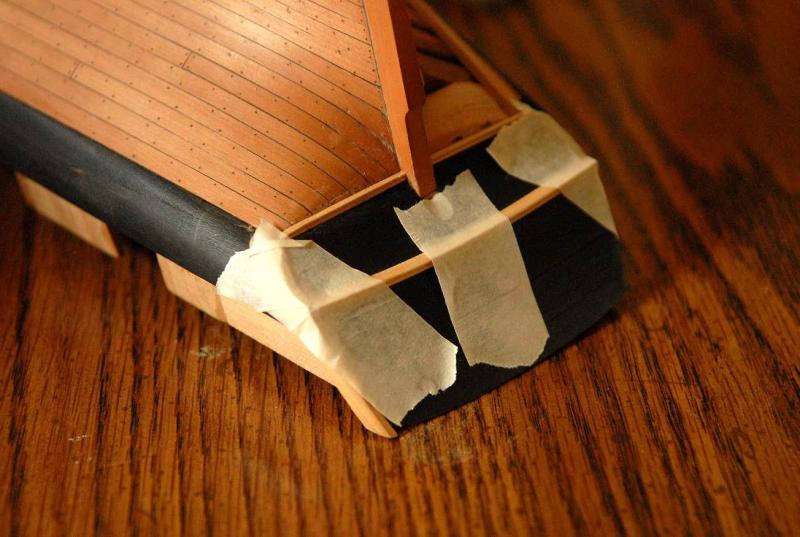
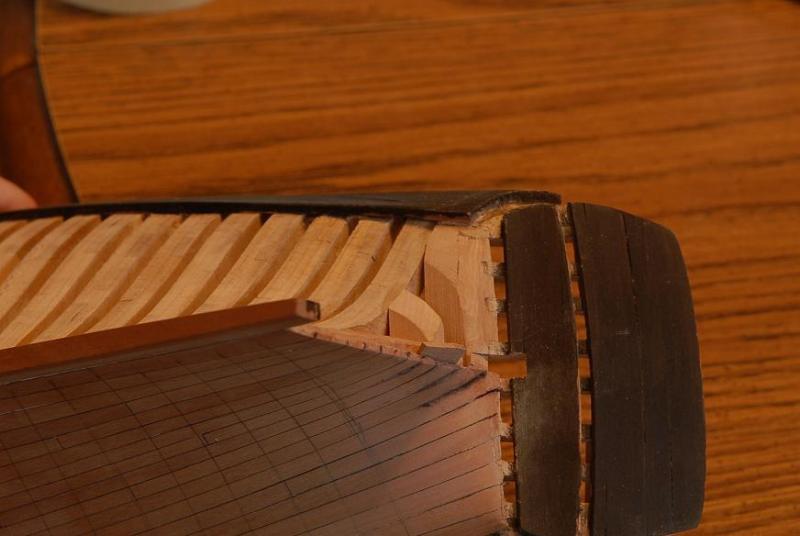
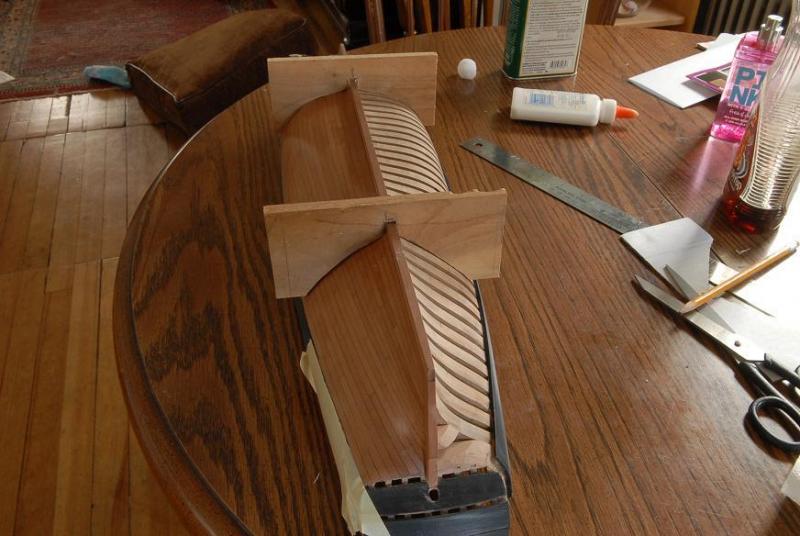
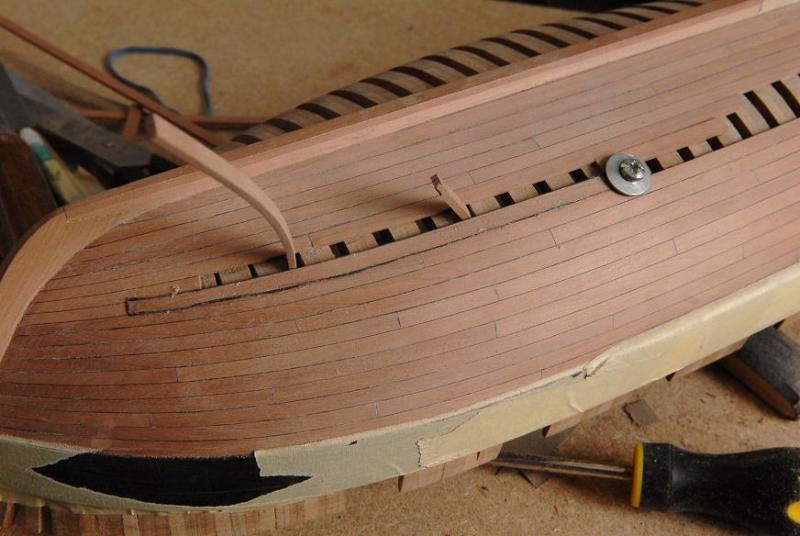
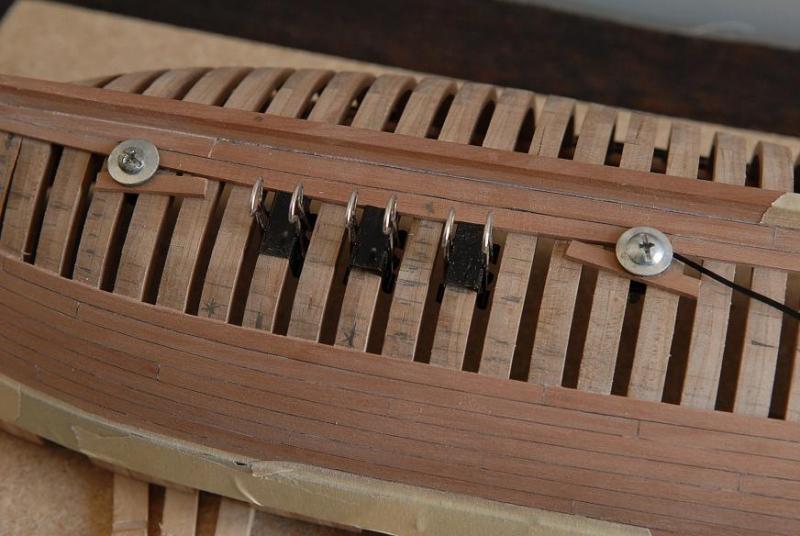
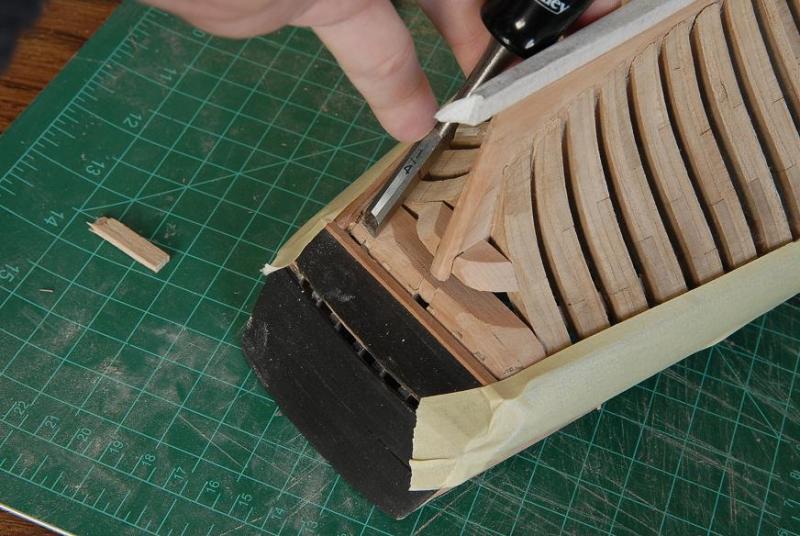
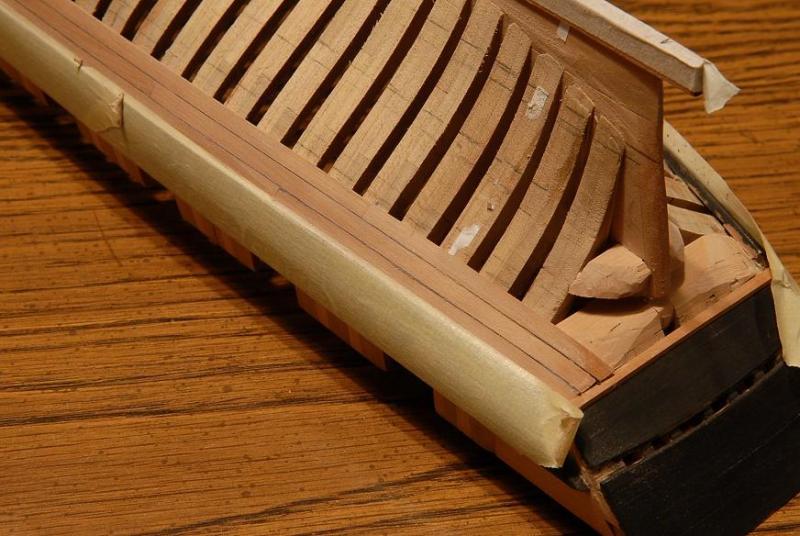
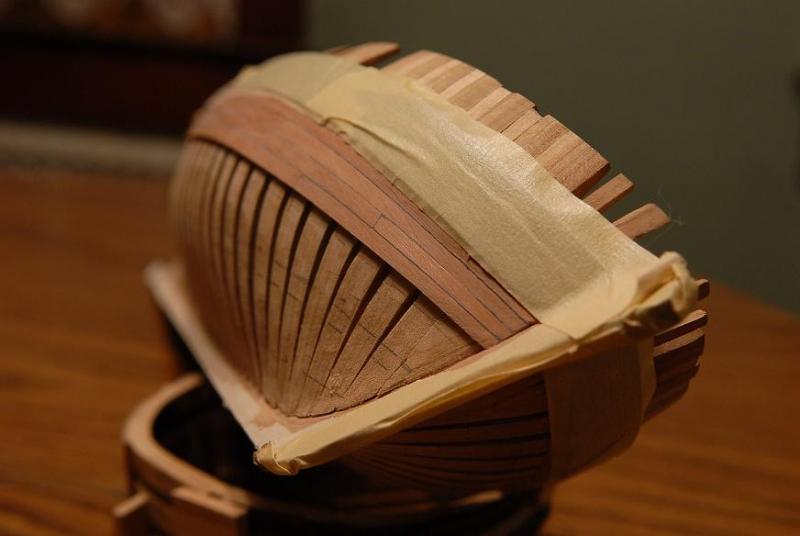
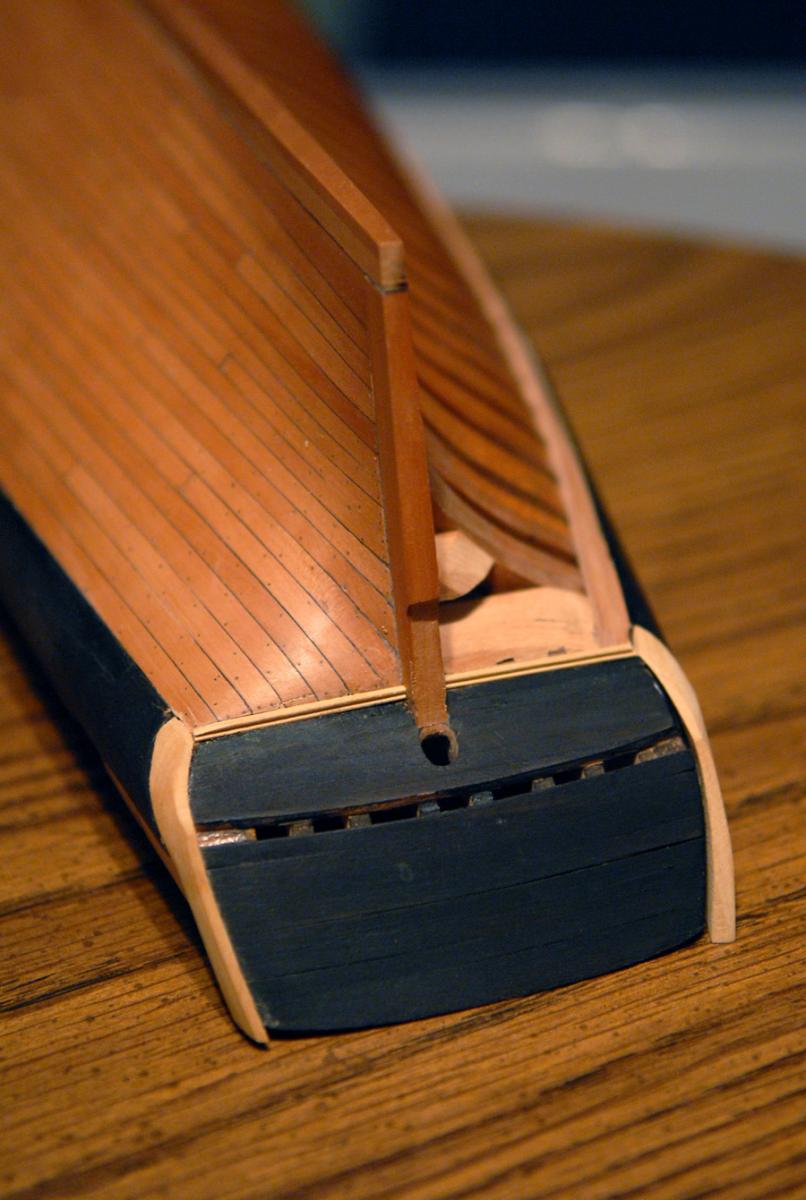
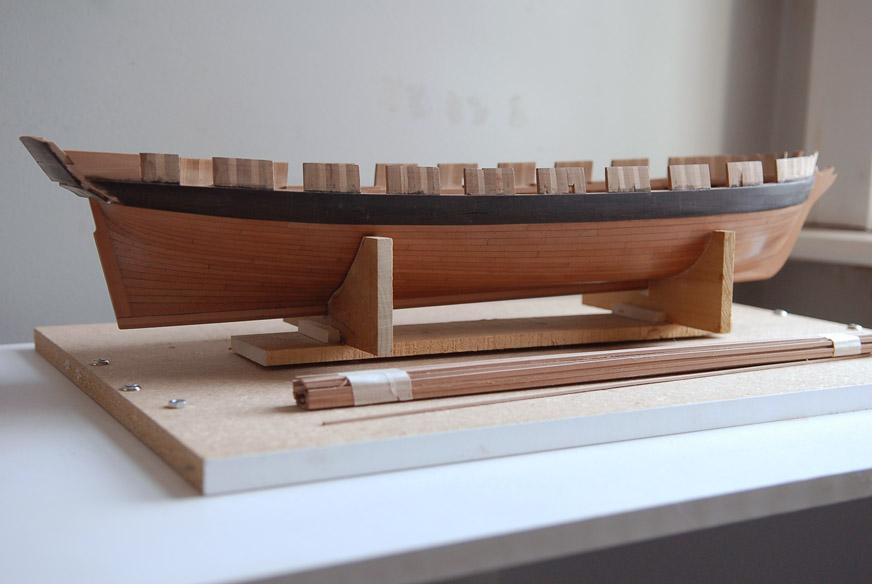
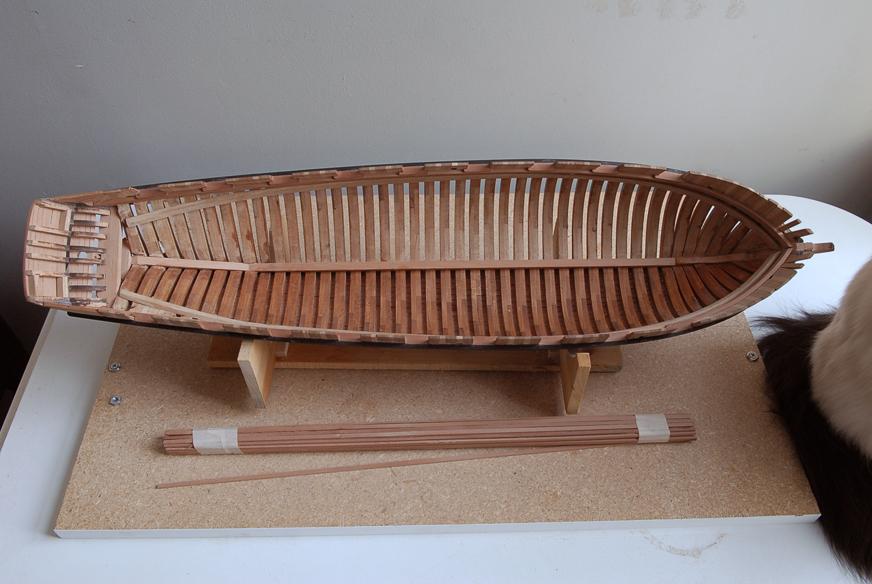
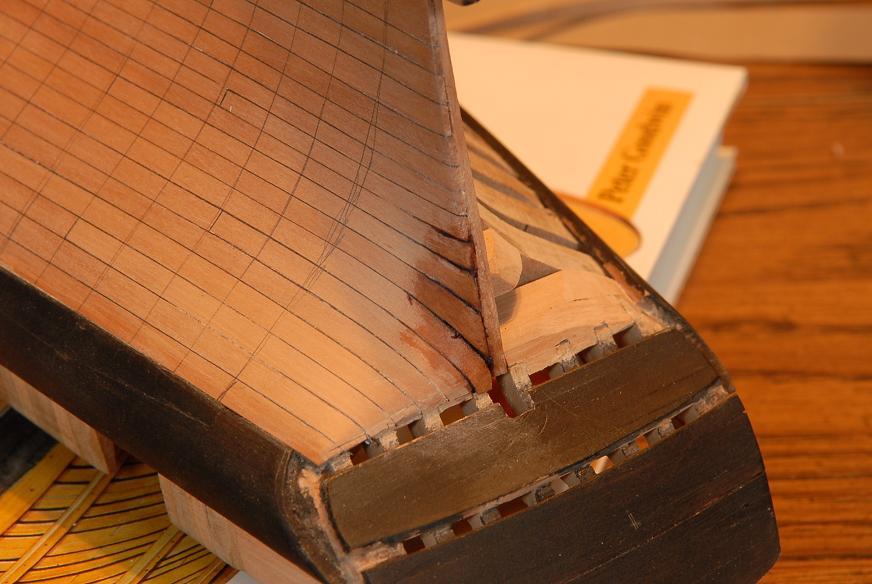
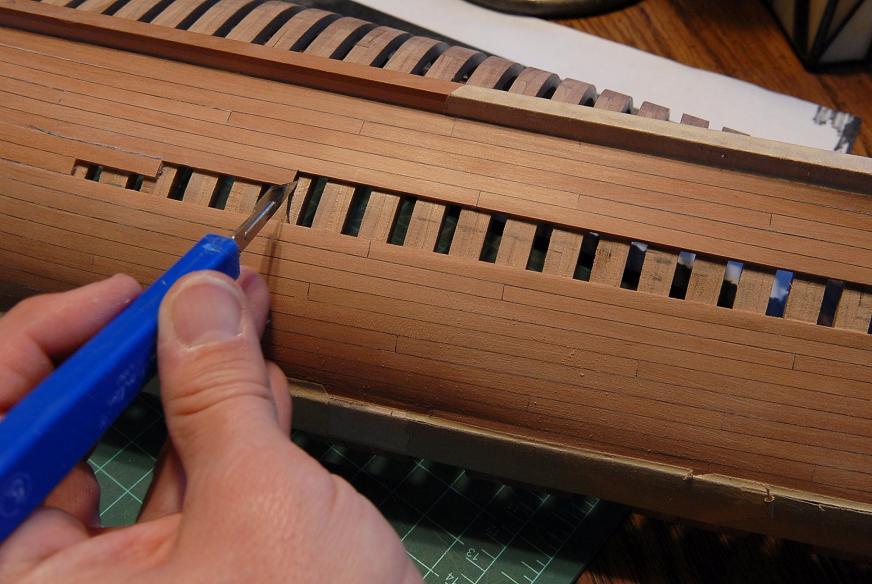
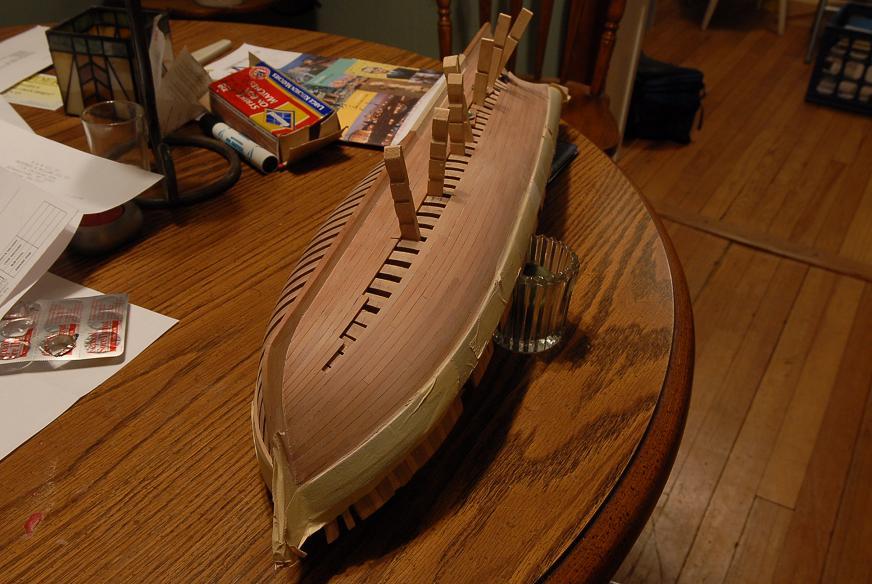
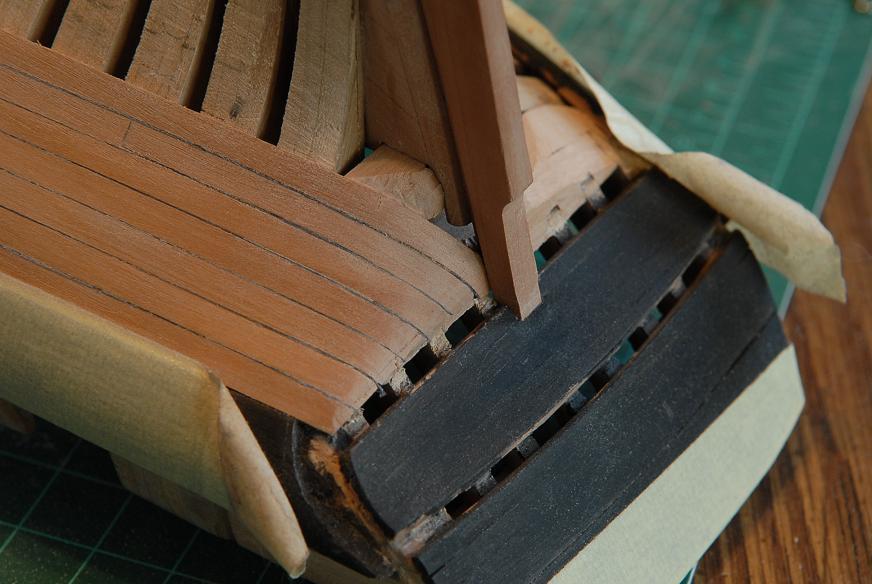
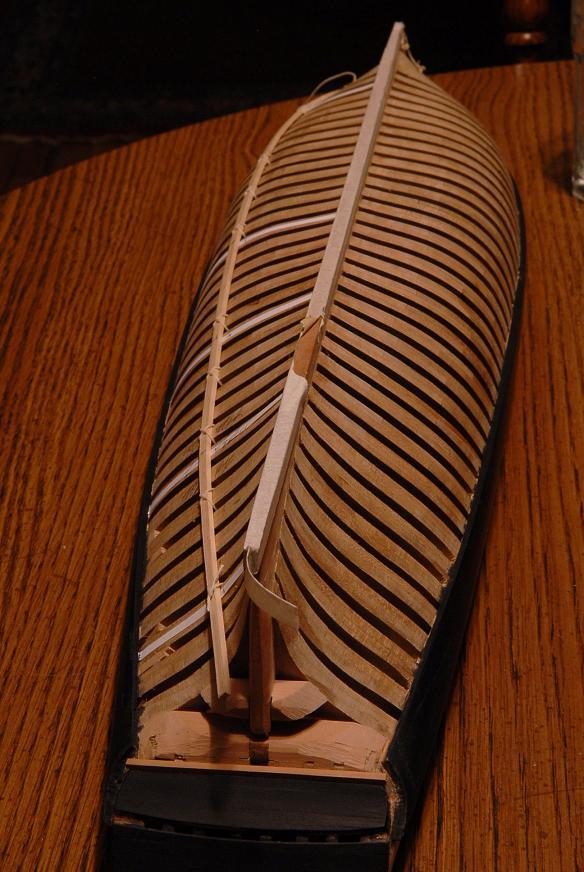
Nothing here is finished, just placed to get an idea of how everything is going to fit together. The stack for the stove will come up just forward of the beam the stove sits under--
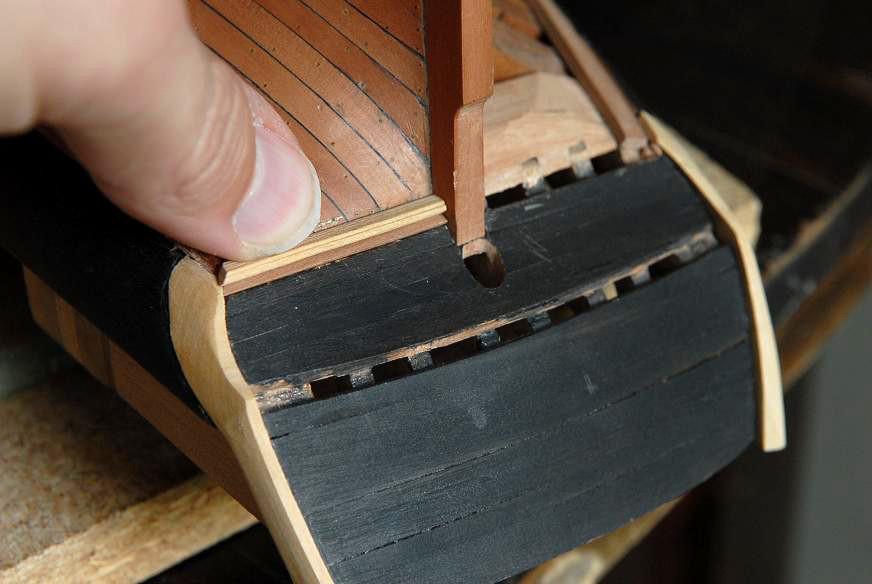
I built the bitts, and put them in their spot. Obviously, they are too high, a hole still needs to be cut in the berthing deck for them to slide down into, and then they'll be the right height--
Not much room in front of the stove!--
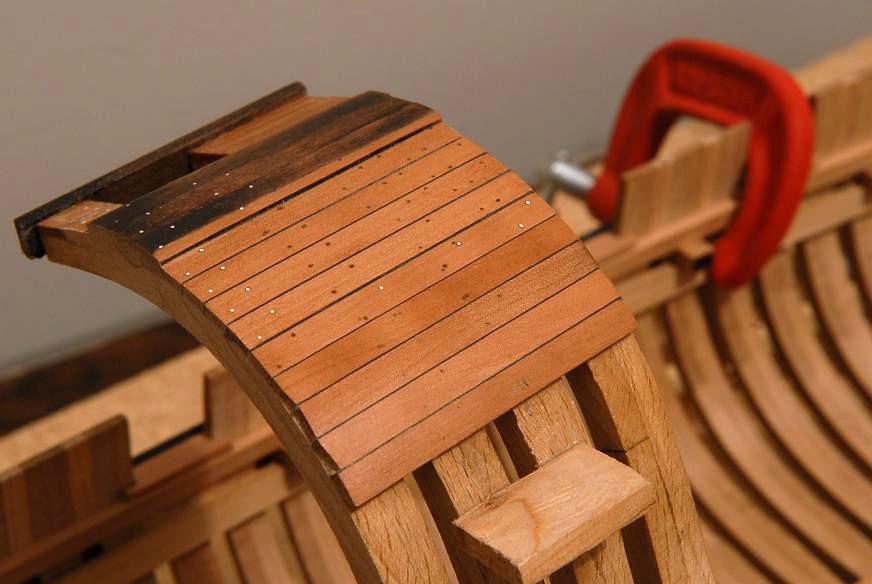
September 11, 2010
I finished the bricks, and their frame--
Here's how it sits on the deck--
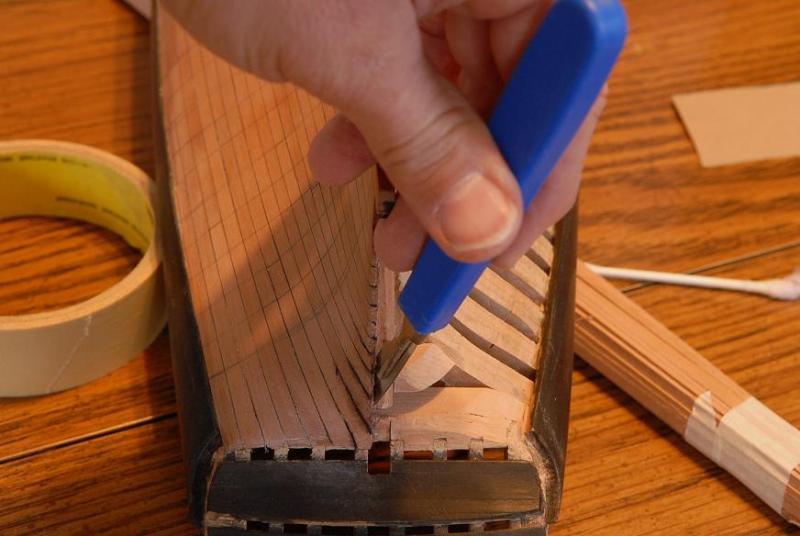
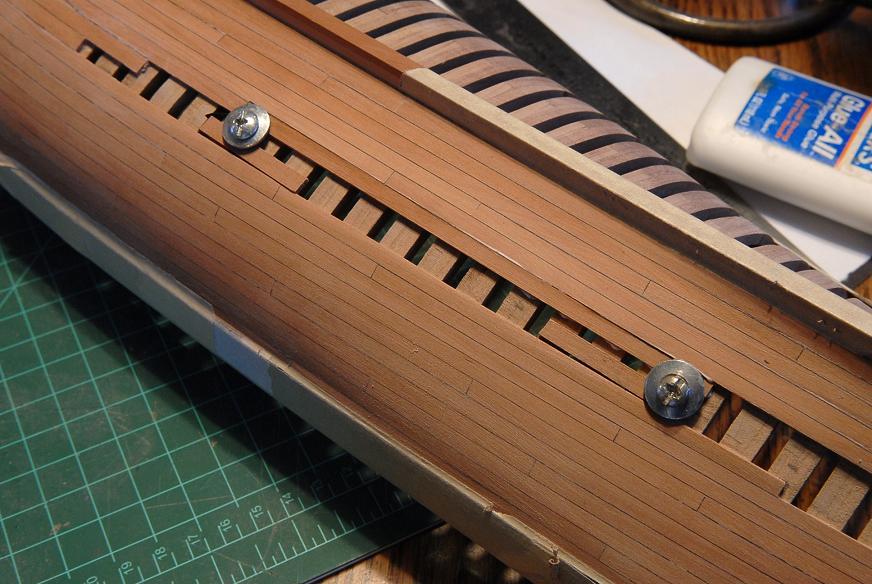
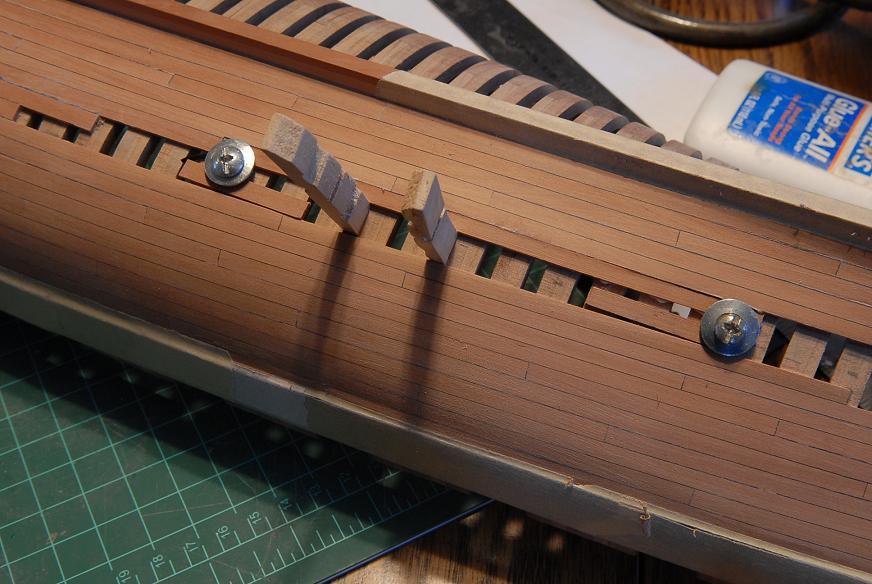
Next I marked the location, drilled some pilot holes, and carefully filed out two holes for the bitts--
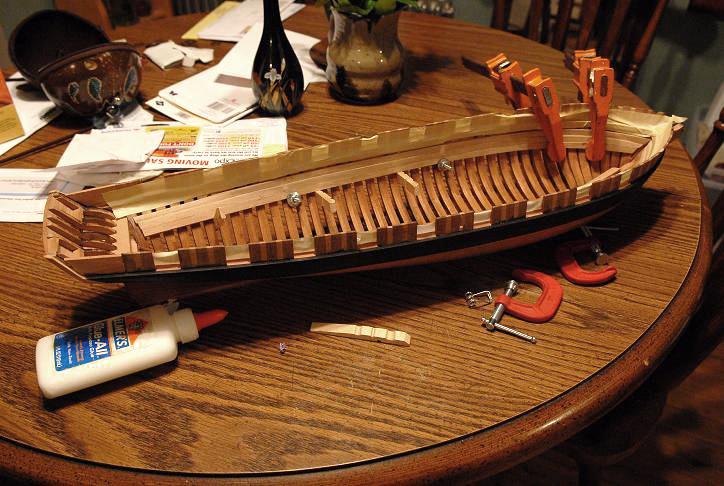
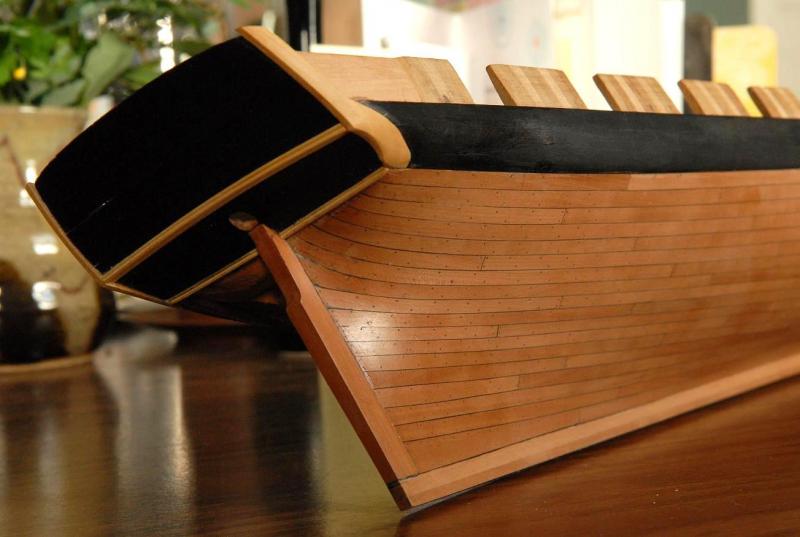
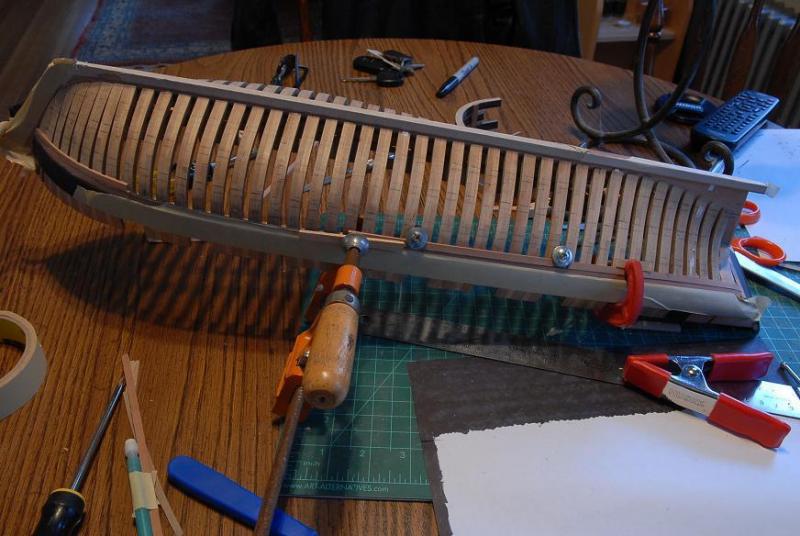
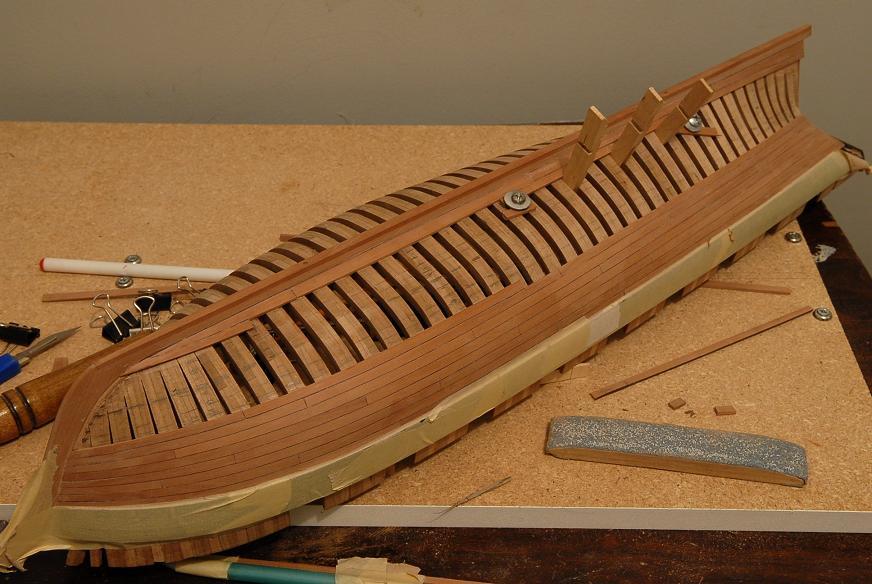
The following just shows the dry fitting of the elements I've done so far. Still need to do hatch coamings, mast partners, bowsprit step, main deck support posts (that's as far as I've thought--there might be more)--
The stove is still needs to be finished. I'll do that next.
Ron