HOLIDAY DONATION DRIVE - SUPPORT MSW - DO YOUR PART TO KEEP THIS GREAT FORUM GOING! (Only 24 donations so far out of 49,000 members - C'mon guys!)
×
SGraham
-
Posts
538 -
Joined
-
Last visited
Content Type
Profiles
Forums
Gallery
Events
Everything posted by SGraham
-
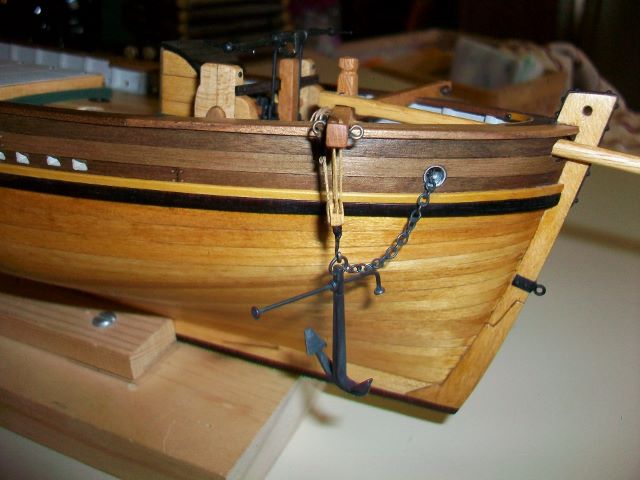
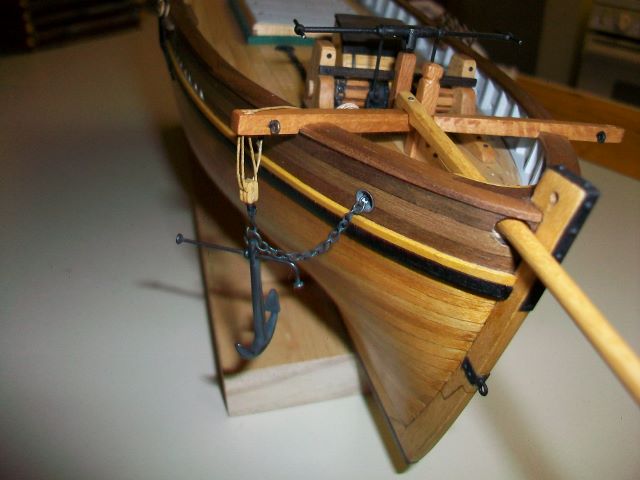
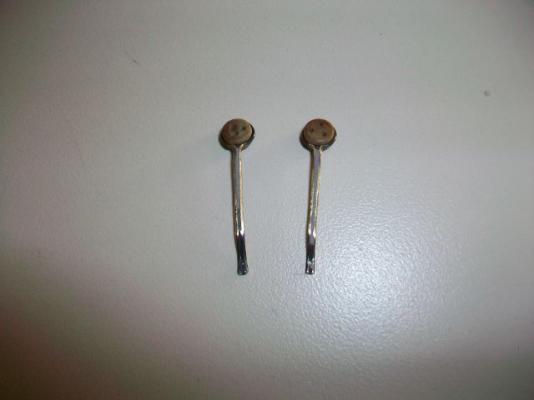
 Thanks J! Finished one of the anchors this morning. Happy New Year, Model Ship World friends!


- 569 replies
-
- 8
-

-
- shenandoah
- corel
- (and 1 more)
-
HALF MOON by jct - FINISHED - Corel
SGraham replied to jct's topic in - Kit build logs for subjects built from 1501 - 1750
The new kits sound great, J. What exactly is Chuck's Cutter? Steve -
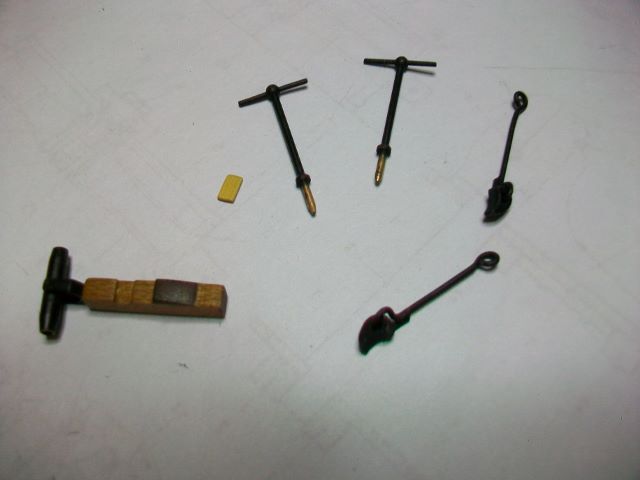
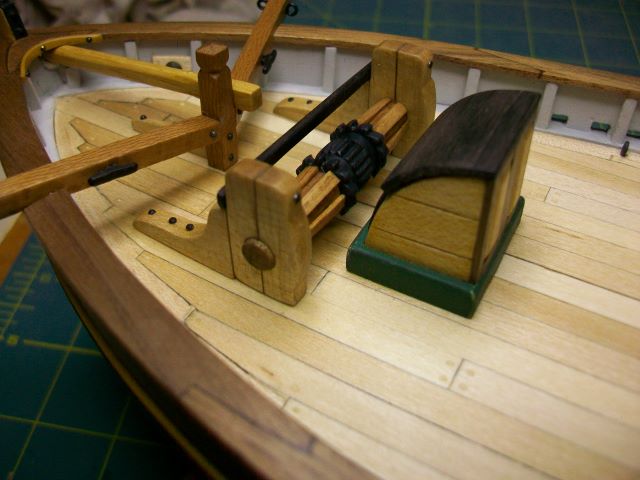
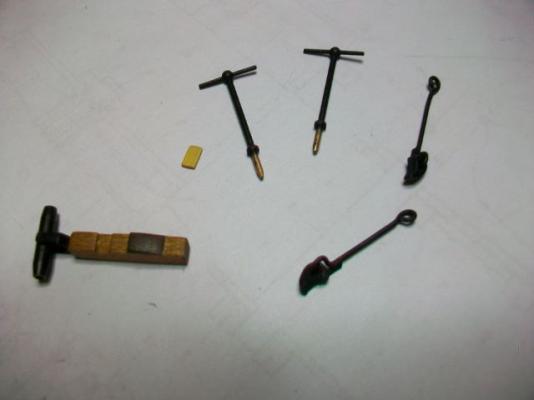
Thanks for the kind words, David and Jesse. I used the J B Weld because I don't know how to solder yet. That's waiting in my to-learn list...which is steadily growing. Here's the pump handle assembly that powers the windlass. I'm not good at metal work. I really need to stop and learn how to solder. There's a tension, though, between wanting to build and having to stop and learn/research something in order to be able to build it with at least a tip of the hat towards accuracy. Having said all that, this pump assembly is wildly inaccurate--unless they made a special anti-gravity pump handle windlass where the pawls fall upwards to engage the ratchet gears. Maybe they did for use in the Bermuda Triangle. Thanks for reading! Steve

- 569 replies
-
- 7
-
-
- shenandoah
- corel
- (and 1 more)
-
Thanks J. Not fixed yet.
-
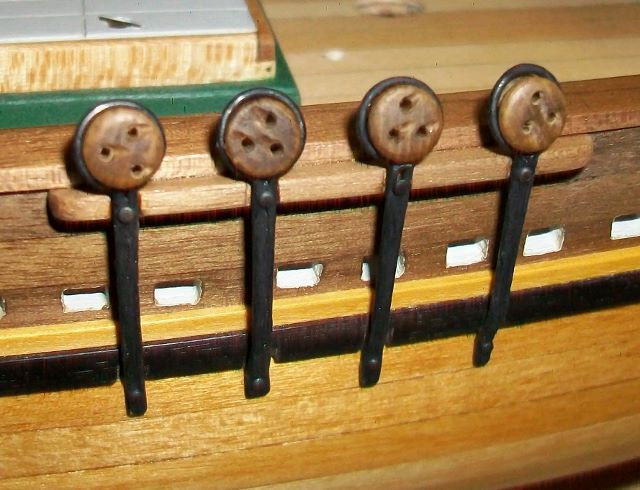
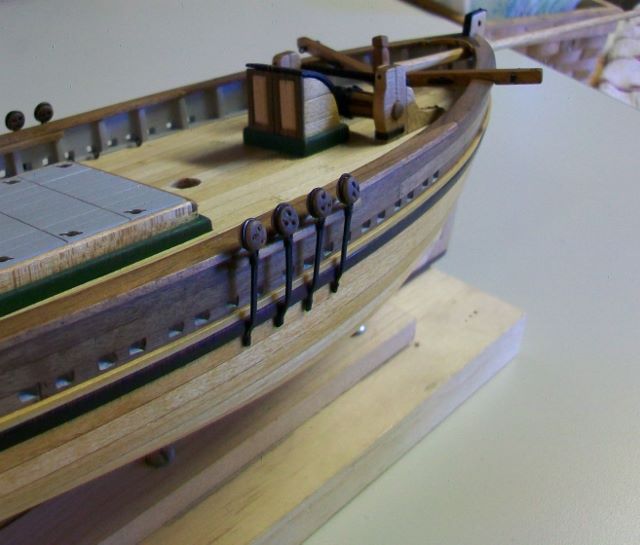
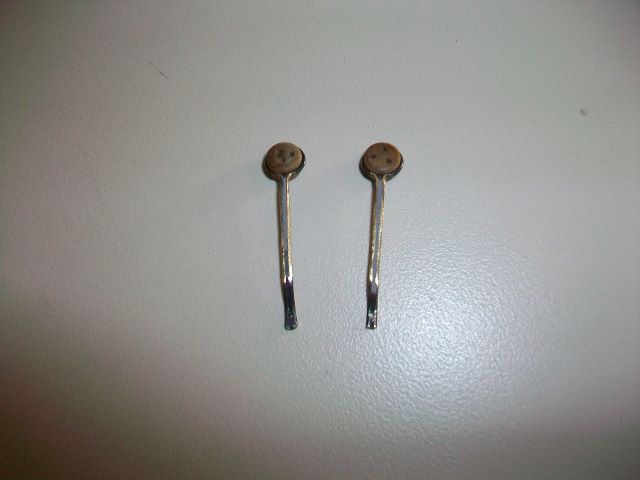
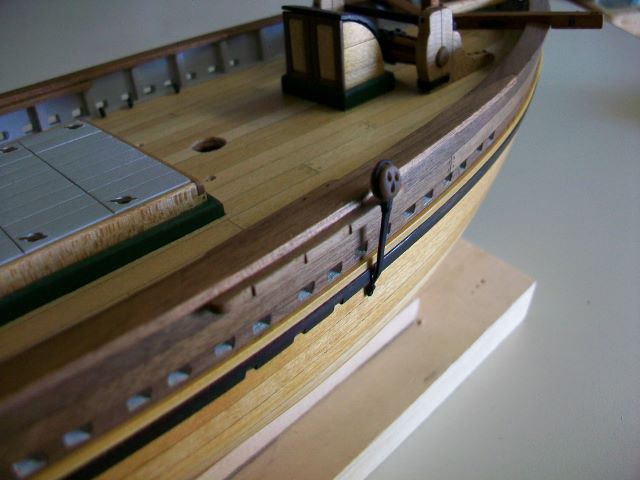
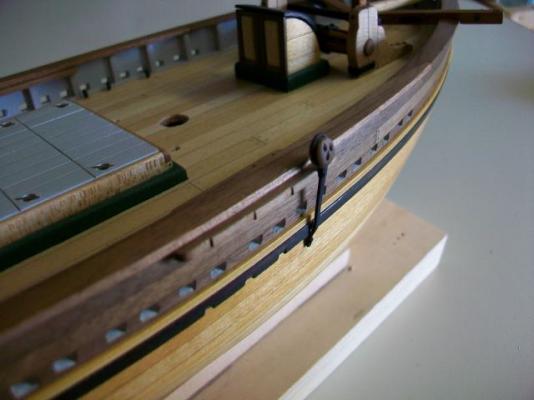
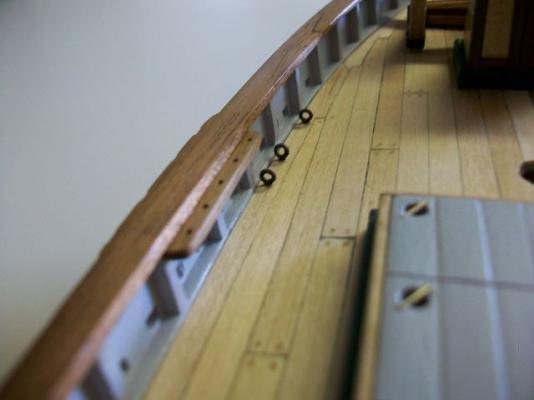
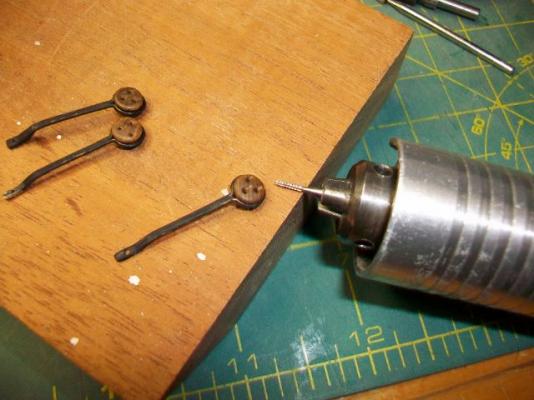
Still creeping along in the old GP Boatworks. I decided to start on the deadeyes before I made the pump handle assembly for the windlass. The chain plates that come with the kit consist of a long piece of brass wire bent double with a loop for the deadeye. The opposite end from the loop has a blob of solder to hold it all together. I filled the rest of the space between the wires with JB Weld. This seems to have worked all right. I filed it all flat and gave it a coat of paint. I'll touch up the paint after they are all installed. On the hull I had to cut beveled slots in the black waling to take the chainplates. The dogleg chisels are great for this job. I also made channels and pinrails from walnut. The last photo is of the long skinny burr that I used to bevel the holes in the deadeyes. It worked well. Thanks for reading! And a happy new year to everyone! Steve
- 569 replies
-
- 6
-
-
- shenandoah
- corel
- (and 1 more)
-
Thanks J and Jesse. Merry to Christmas to you and yours. Steve
- 569 replies
-
- 1
-
-
- shenandoah
- corel
- (and 1 more)
-
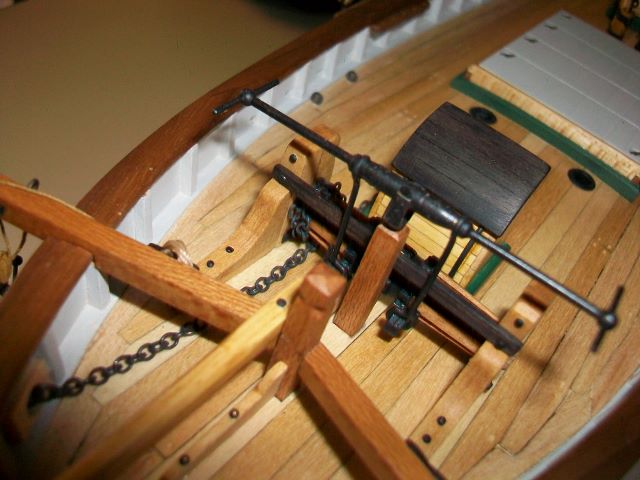
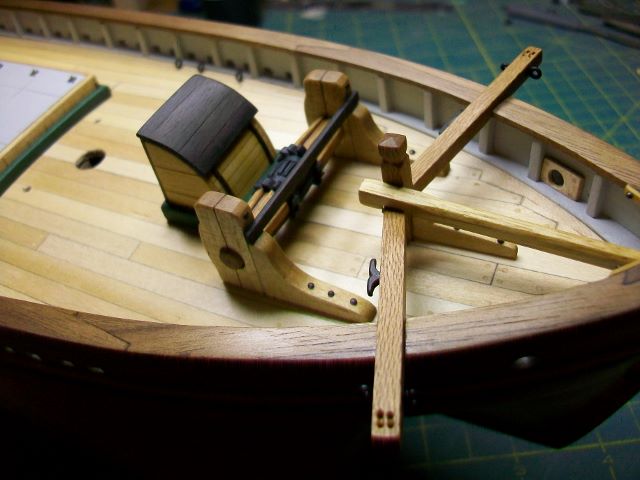
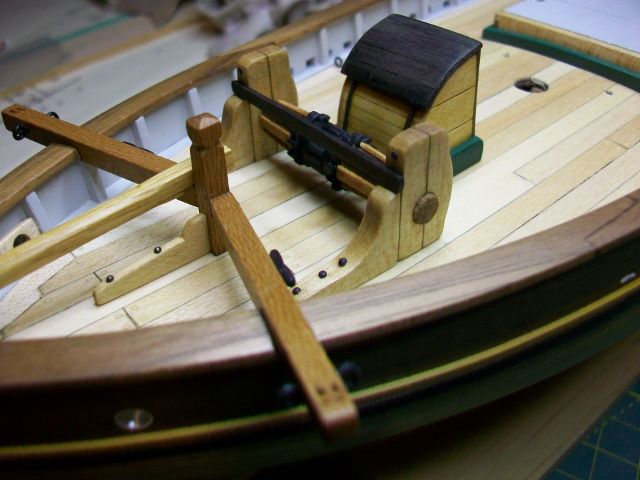
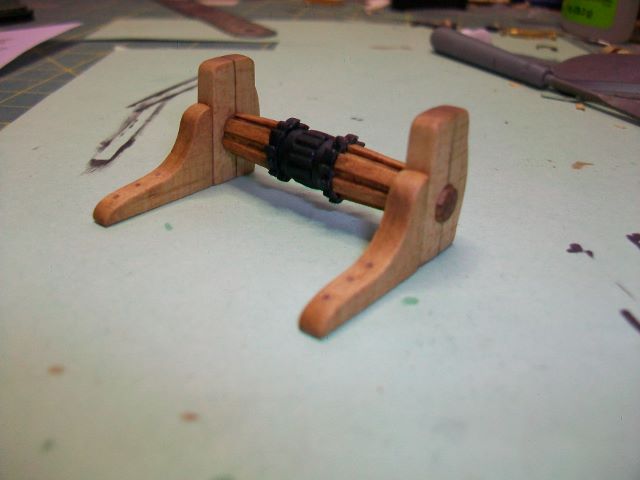
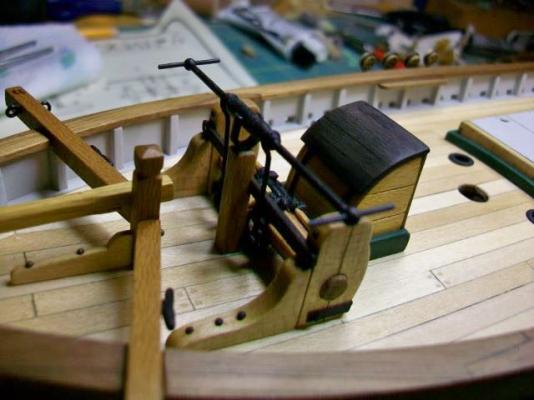
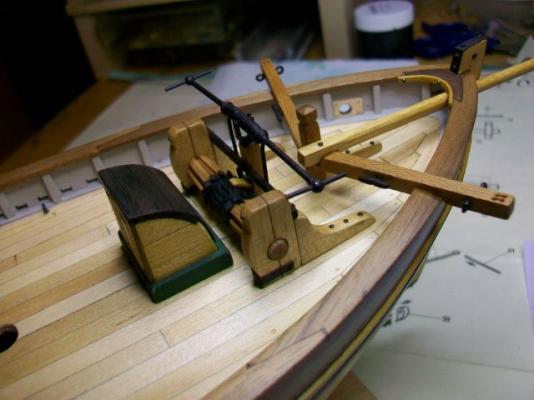
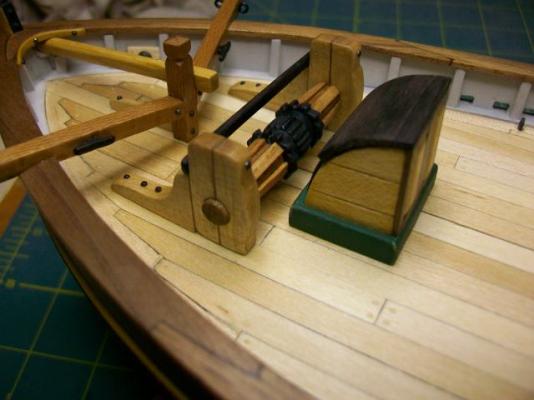
Thanks J. Here is the windlass sitting in the bow. It's still far from done but I couldn't resist posting a couple more ... Steve


- 569 replies
-
- 9
-
-
- shenandoah
- corel
- (and 1 more)
-
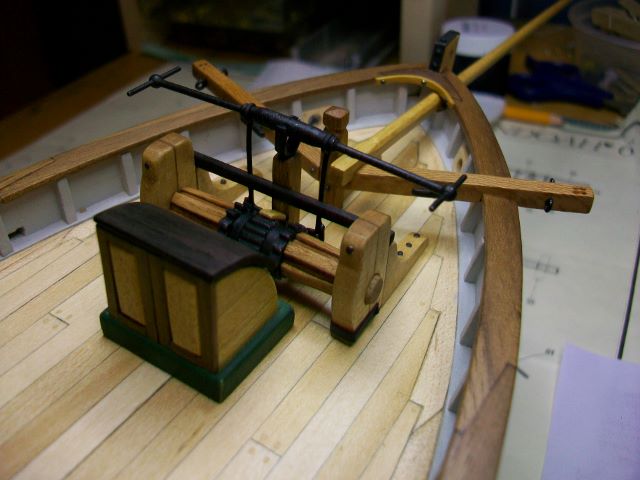
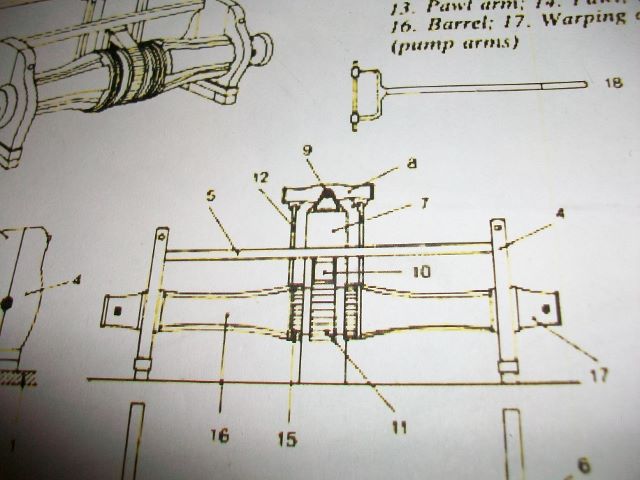
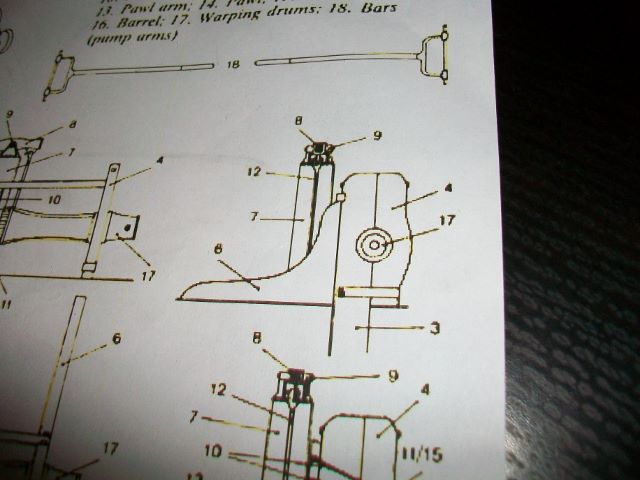
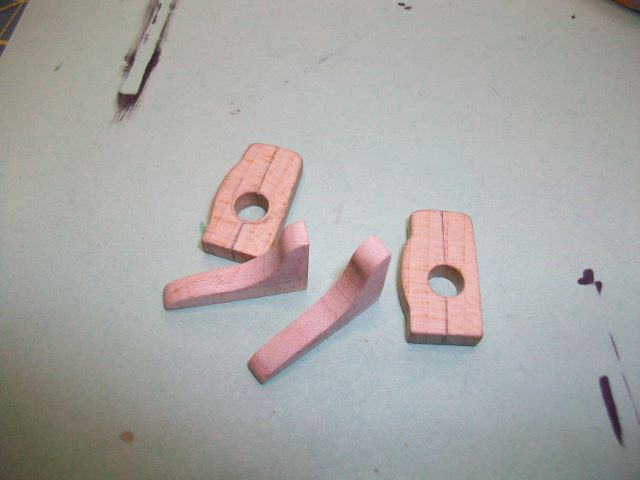
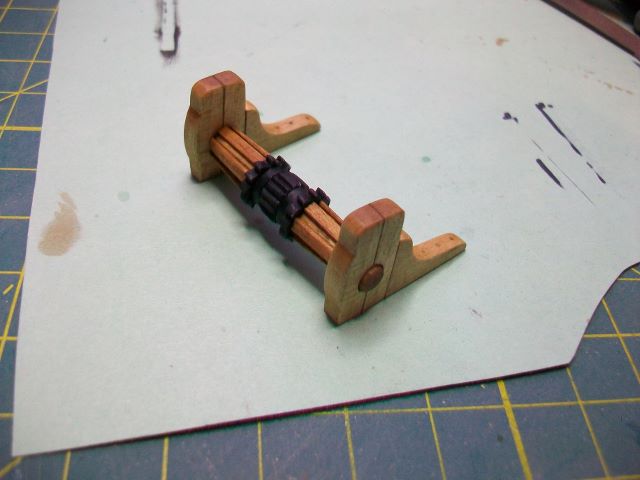
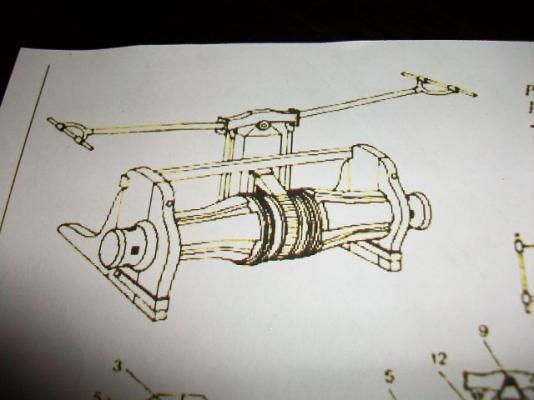
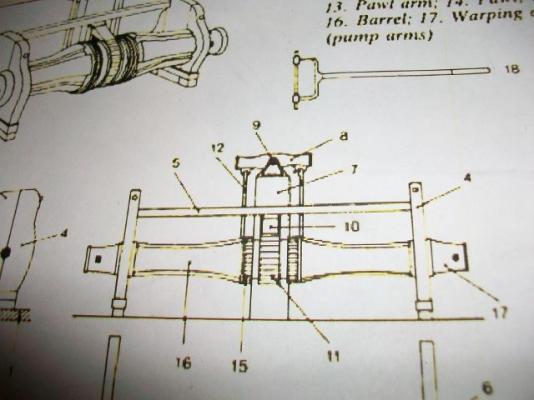
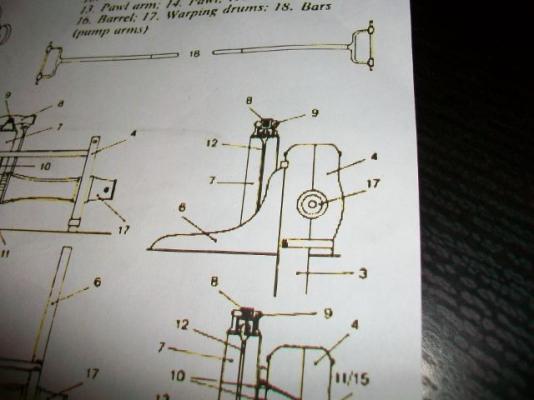
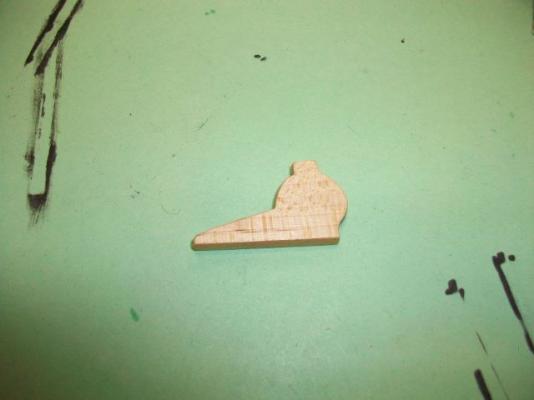
Well, I started working on the windlass. It's a pump handle type, and once again, I wasn't thrilled with the parts included in the kit. The cheeks and standards (the main pieces of the framework that hold the barrel) were all one piece. The more I thought about it, the less likely that sounded in real life. I looked around online and found a nice diagram of a mid-19th-century pump-style windlass. Sure enough, it showed the cheeks in two pieces with the hole for the barrel axle coming right at the seam between the two cheek pieces. They bolt and strap together. This would make a lot of sense when it came time for repairs. I decided to make my windlass a hybrid between the one in the diagram and the one detailed on the kit plans. After the diagrams, the first photo shows the original shape of the cheeks and standards. I had made this piece out of maple since I didn't like the wood supplied with the kit. Next are the cheeks with the simulated seam down the middle and the curved standards, all made of maple. The barrel I ended up keeping. I glued some boards across the barrel between the cheeks and the pawls for the chain to have something to grab onto. I noticed a lot of 19th century windlasses have these boards. Some are straight, some are tapered, and some are scooped out in the middle. I tapered mine. Now I'm making up some more round-headed pins. After that, there's a lot of detail to go onto this basic assembly before I begin the pump handle assembly. Thanks for reading! Steve


- 569 replies
-
- 7
-
-
- shenandoah
- corel
- (and 1 more)
-
HALF MOON by jct - FINISHED - Corel
SGraham replied to jct's topic in - Kit build logs for subjects built from 1501 - 1750
Looking great, J. I really like the closeups of the rigging. Thanks for posting. Steve -
Thanks, J and Bob.
-
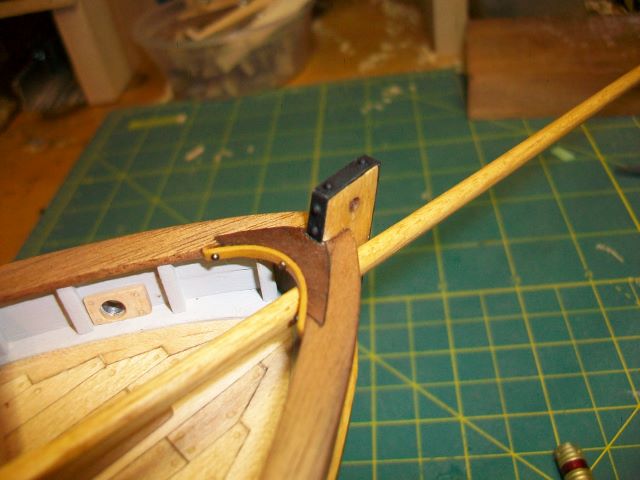
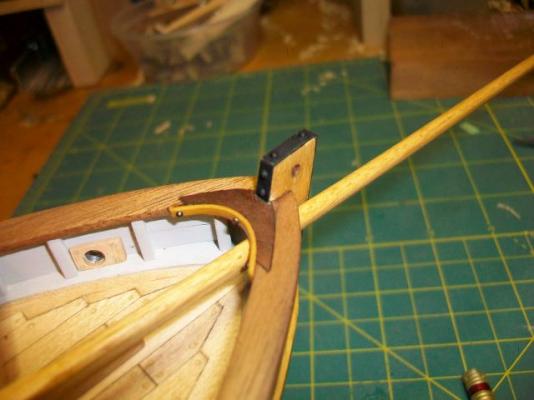
Thanks for the tip, Mark. I'll take a look at Danny's log. Meanwhile, here's a stem cap made of card stock and bolted in place. Steve

- 569 replies
-
- 9
-
-
- shenandoah
- corel
- (and 1 more)
-
Thanks Mark and Sam. I'm just wondering how it connected. I guess it could have been laced around the bowsprit and bolted onto the bulark face around the hole?... Steve
-
Wow, Sam. I bet you're getting weary! Are you making Christmas presents? Steve
- 569 replies
-
- 1
-
-
- shenandoah
- corel
- (and 1 more)
-
HALF MOON by jct - FINISHED - Corel
SGraham replied to jct's topic in - Kit build logs for subjects built from 1501 - 1750
Wow, J. The Moon is looking wonderful. I'm saving these latest pics in my need-to-know file. I really enjoy seeing how you're solving technical challenges. This little ship is really coming together. Steve -
Thanks J and Sam. I appreciate the kind comments. I've got some time off coming up, so I'm hoping to get some more done. Sam, yup, we're battening down the hatches so to speak. I hear there are two more storms stacked up behind this one. Do you think the Pineapple Express is back on the rails? S. Coleman, thanks for dropping in. I'm thinking of trying to simulate a canvas gasket of some sort on the outside of the bulwark. I'm looking for a picture of how it was done. Steve
- 569 replies
-
- 1
-
-
- shenandoah
- corel
- (and 1 more)
-
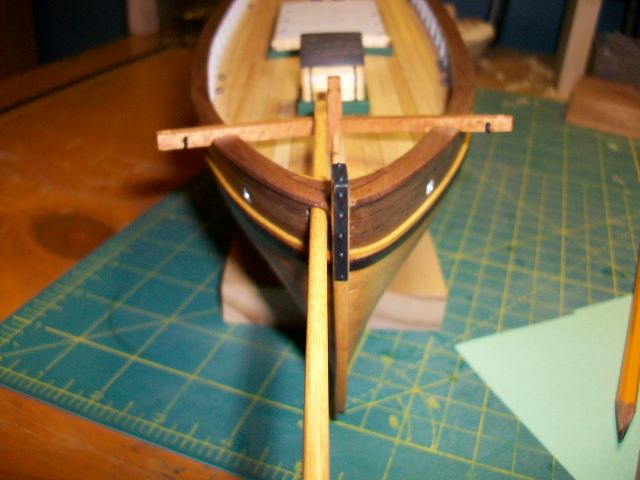
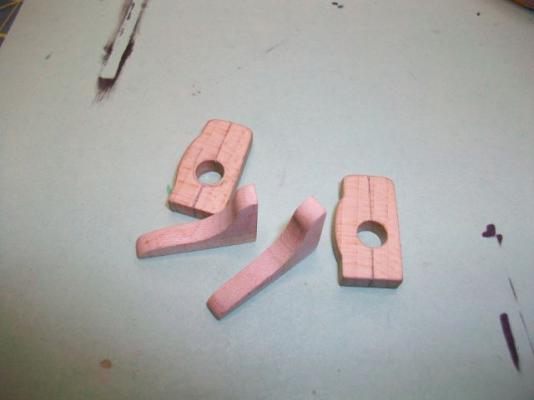
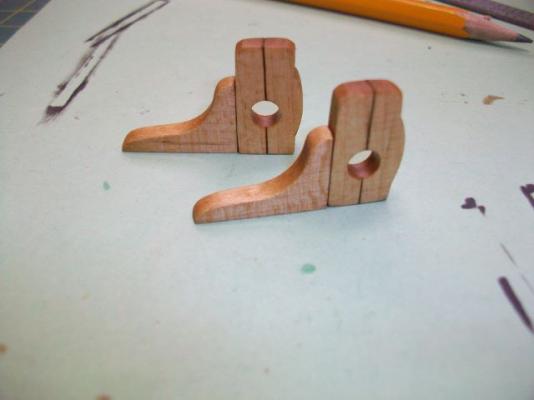
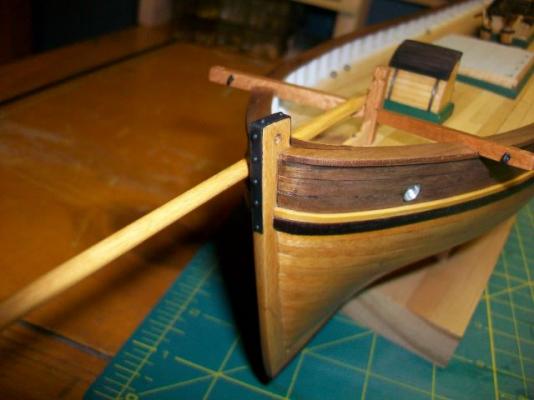
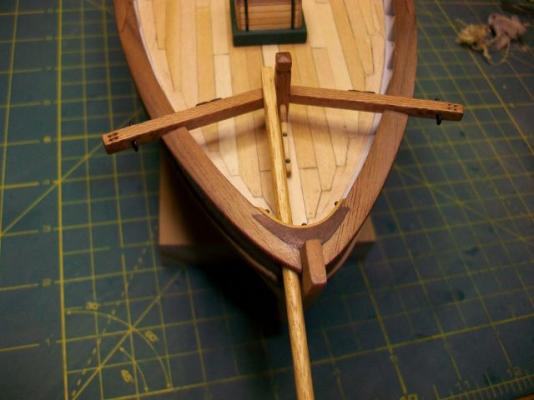
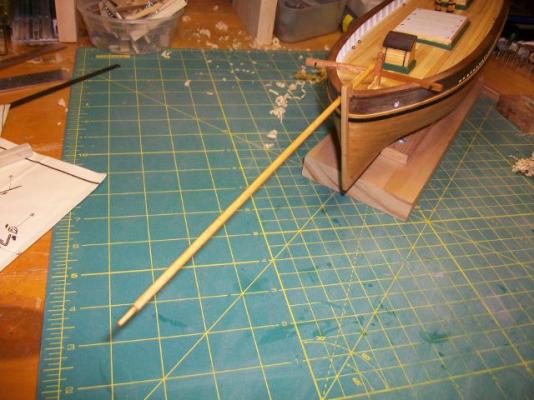
Hello everybody. Well I finally got back out to the Glacial Progress Boatworks. It felt good to get something done on the Shenandoah. I finished the catheads yesterday and then today shaped the bowsprit. The aft end of the bowsprit is square where it connects to the post. Between the post and the bow it's octagonal, and then outboard of the bow it's round. It isn't actually attached yet; it has a wad of tissue paper jammed underneath it where it emerges from the bow bulwarks to hold it up. I roughly shaped it with a small plane and files and then got it round by chucking it up in my drill press and gripping it with sandpaper while it turned. My lathe isn't ready to use yet. Still, I'm pretty happy with its shape. I carved the two cleats out of some scrap ebony. I might have gone a little overboard with the bolts... Question: I made the hole in the bow bulwarks much too large. Did the builders put some kind of gasket there to keep water from entering around the bowsprit? Steve


- 569 replies
-
- 10
-
-
- shenandoah
- corel
- (and 1 more)
-
HALF MOON by jct - FINISHED - Corel
SGraham replied to jct's topic in - Kit build logs for subjects built from 1501 - 1750
Wow, J, it's looking great. I really like the looks of those card rings at the base of the masts. Nice touch. Steve -
HALF MOON by jct - FINISHED - Corel
SGraham replied to jct's topic in - Kit build logs for subjects built from 1501 - 1750
J, those crows nests are wonderful looking mounted on the masts. It looks to me like they were well worth the effort it took to rebuild them. I'm itching to get started on my Half Moon. Steve -
Sam, the color on that ordinance is just right. Very impressive. Steve
-
I love your metal work, Bob. Very inspiring! Steve
-
Thanks Bob. When I innocently bought the kit, I had no idea I was signing up for a course in 19th-century naval technology. The thing is, you really start caring how pumps were made back then...I think this hobby just makes odd people even odder. In a good way, I hope. Thanks Sam and Jesse. It's off to Syren I go. That's a great suggestion. I do want to learn to make myv own rope, but right now the idea is a bit overwhelming. Steve
- 569 replies
-
- 2
-
-
- shenandoah
- corel
- (and 1 more)
-
Thanks Steve, Sam, and J. I've looked at the rope in the kit and it looks more like string. I don't understand rope at all--other than the stuff my dad used to tow me behind his boat with. I think I'll have to look into rope making--and silver soldering--and how mid-19th-century capstans were put together and worked--and what anchors looked like back then--and how they were stowed, etc. Steve
-
Thanks Bob. I appreciate it. Steve
-
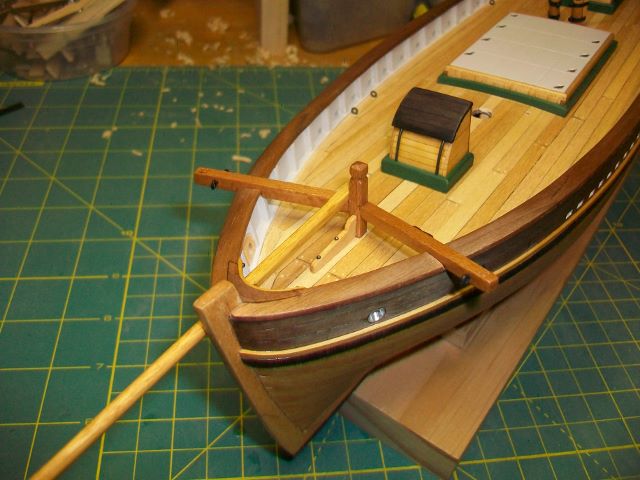
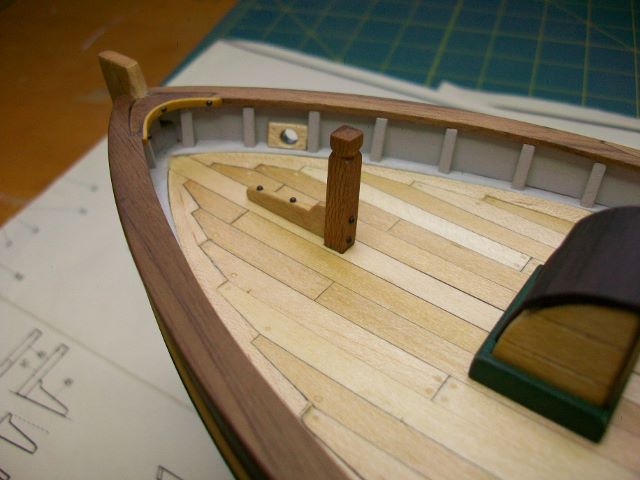
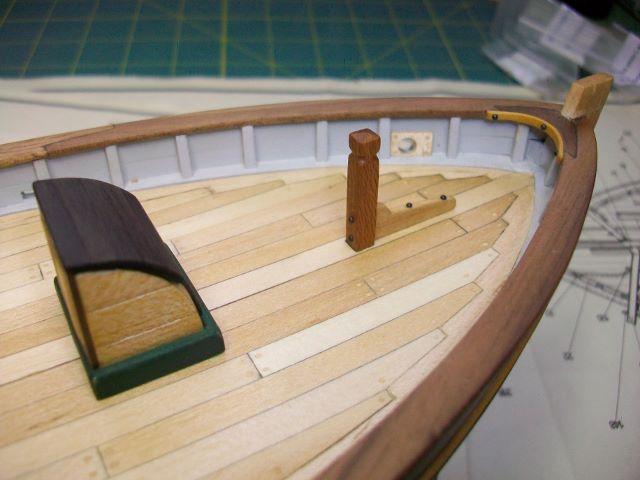
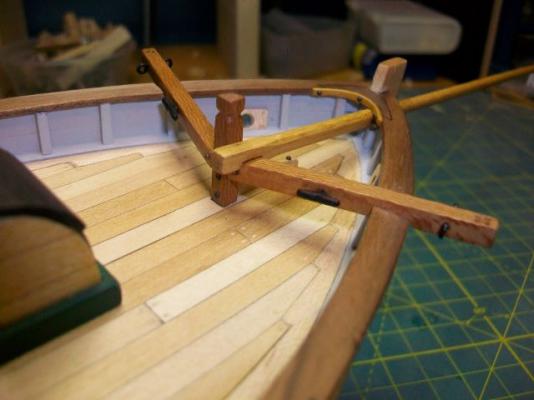
Hello friends. I've been out of the shipyard for several weeks, mostly due to the start of a new school year. Well, my classes are up and running well now, and we were blessed with a nice cool day today, so I headed out to the Glacial Progress Boatworks and started work on the post that will hold up the catheads. The catheads will angle in from the tops of the bulwarks and bevel into the post. The bowsprit will sit on top of the one of the catheads to the side of the post. Not much work, but that's never stopped me from posting photos before. Steve


- 569 replies
-
- 9
-
-
- shenandoah
- corel
- (and 1 more)