HOLIDAY DONATION DRIVE - SUPPORT MSW - DO YOUR PART TO KEEP THIS GREAT FORUM GOING! (Only 24 donations so far out of 49,000 members - C'mon guys!)
×
SGraham
-
Posts
538 -
Joined
-
Last visited
Content Type
Profiles
Forums
Gallery
Events
Everything posted by SGraham
-
 Thanks, J. The line is from Chuck. When I finish this build I think I'm going to check into learning how to make my own. Steve
 -
HALF MOON by jct - FINISHED - Corel
SGraham replied to jct's topic in - Kit build logs for subjects built from 1501 - 1750
J, keep us posted on the case, if you don't mind. I'm curious to see what you come up with. Steve -
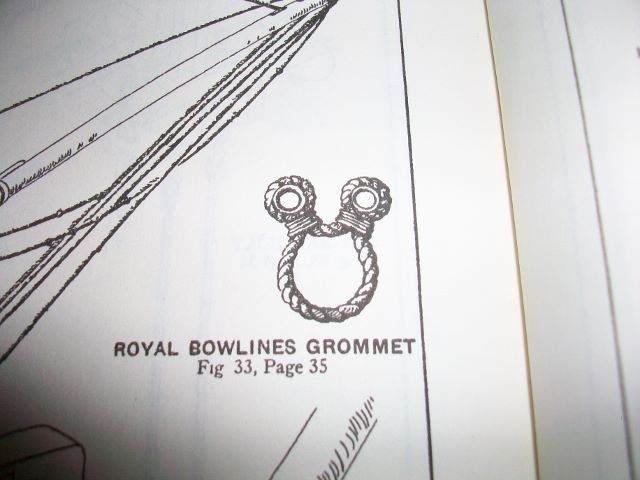
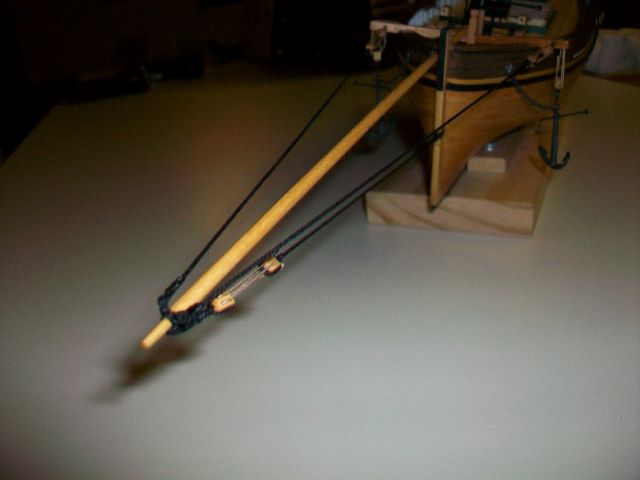
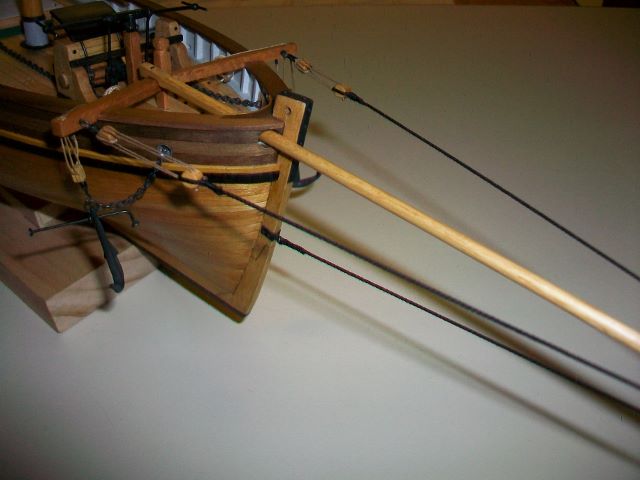
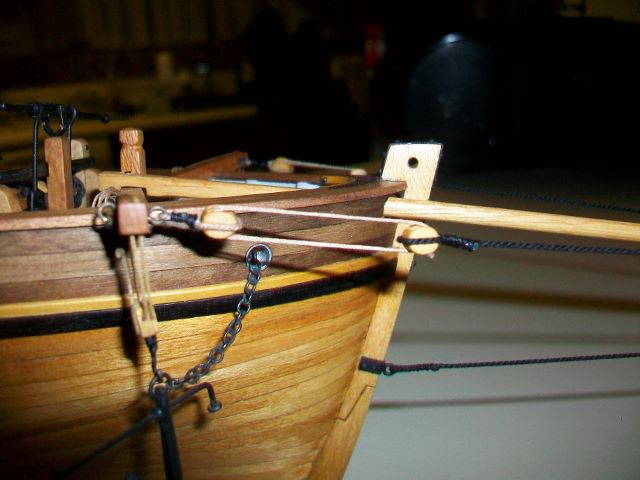
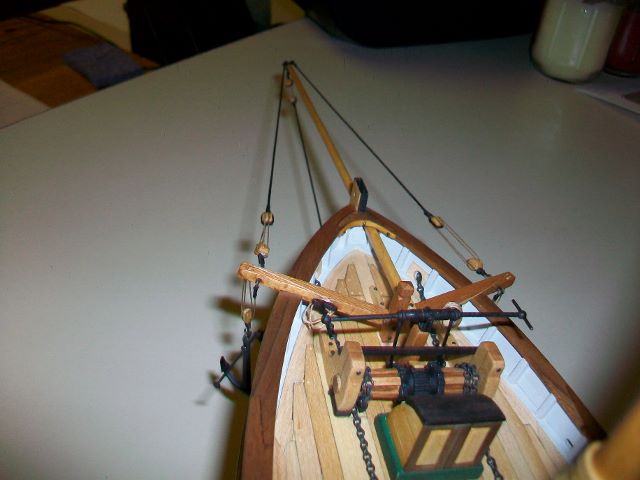
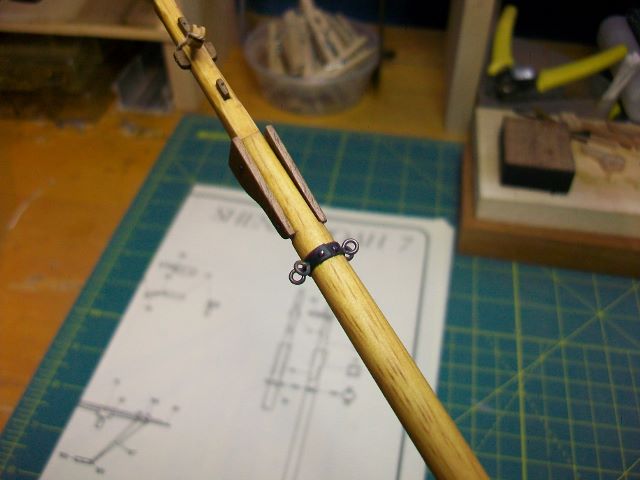
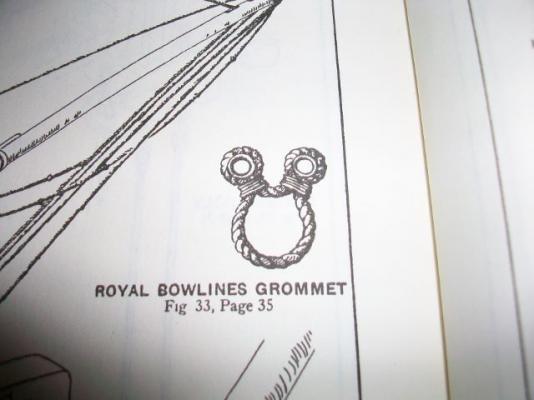
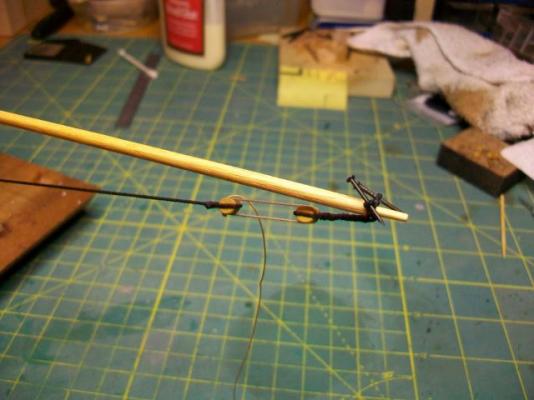
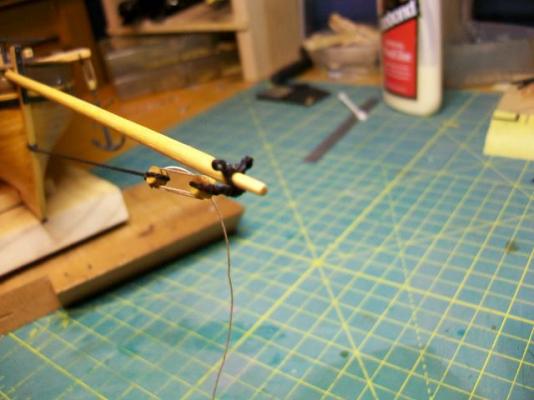
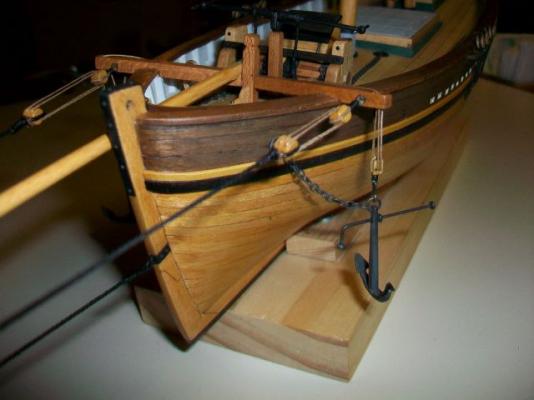
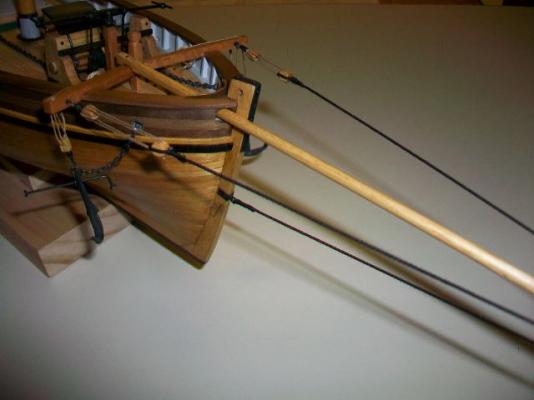
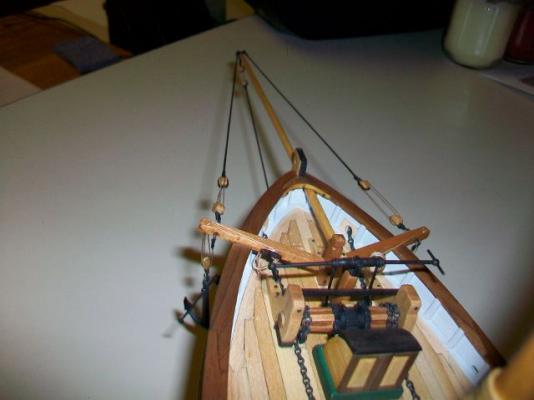
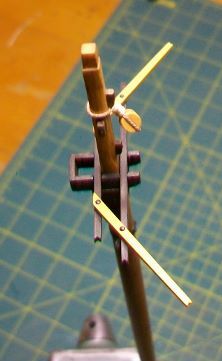
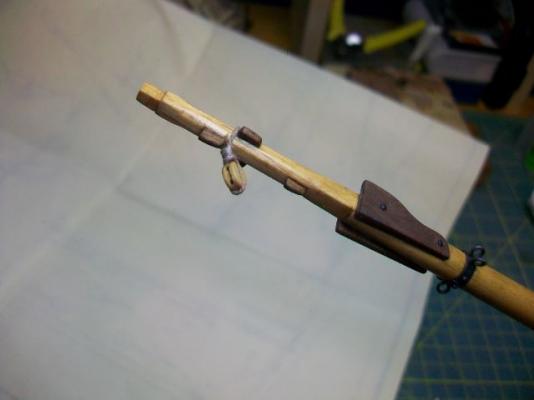
Good to hear from you, Scott. I'll enjoy checking out your building logs. I started rigging the bowsprit. I was looking in Murphy and Jeffers Spars and Rigging, from Nautical Routine, 1849 and found a plate of a royal bowlines grommet. It's the first photo--the one that looks like a pleasantly surprised frog. I don't have the foggiest notion of what a royal bowlines Grommet is, other than a guess that it lives with a royal bowlines Wallace. Anyways, I thought it might work on the end of a bowsprit, and it looked fun to try. Ha! This rigging stuff is way harder than the building. I came up with something that sort of resembles said grommet, and it provides 3 nice purchase points for the standing rigging of the sprit. It's a little bulky, but oh well... The lanyards that attach to the catheads are seriously lopsided too. One side is half again as long as the other. Still, it goes right along with the lopsided scuppers. Thanks for reading! Good night. Steve


- 569 replies
-
- 9
-

-
- shenandoah
- corel
- (and 1 more)
-
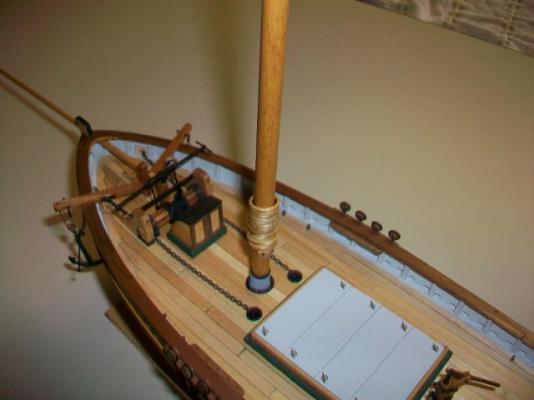
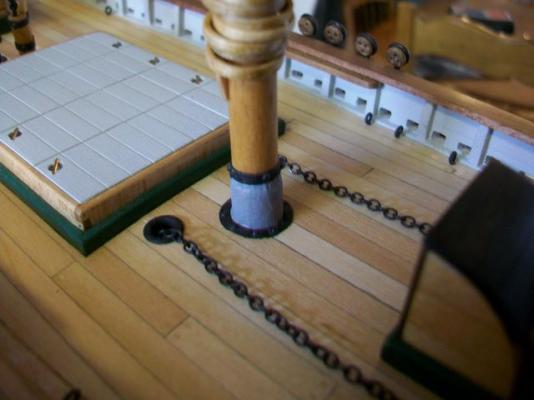
Thanks J. The ring around the base of the mast is card stock. The ports where the chains enter are the brass ones that came with the kit. Steve
- 569 replies
-
- 3
-
-
- shenandoah
- corel
- (and 1 more)
-
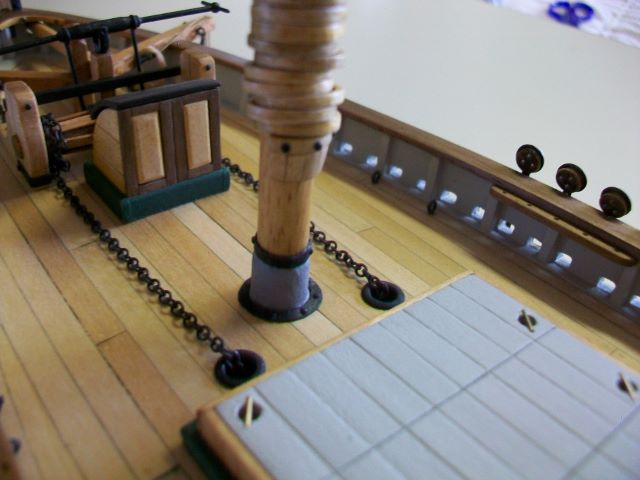
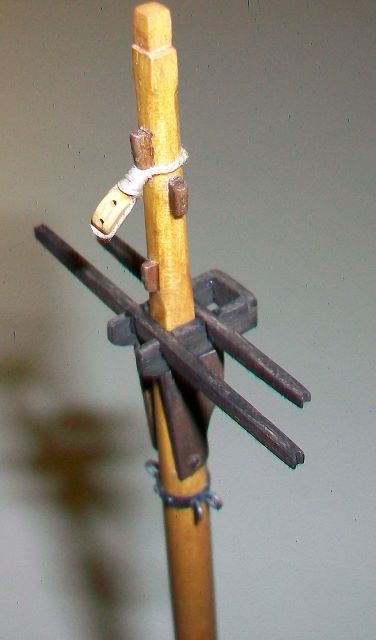
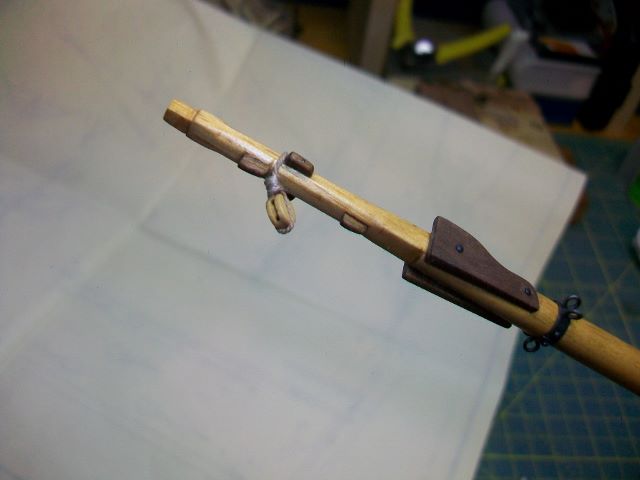
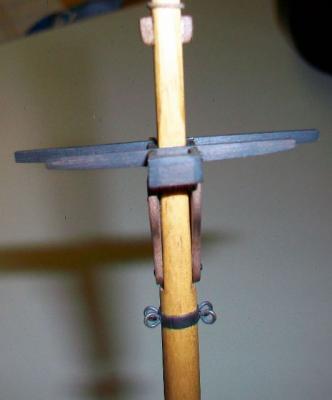
Got a little more done today. I added one more cross piece to the cross trees. I also made a support for the boom. Then I attempted a mast boot. I learned that at least some were made of canvas with metal bands above and below to fasten them to the mast and deck. For the canvas I used a piece of paper towel covered in shellac. The metal bands were made of card stock and pinned to the mast and deck with blackened steel pins. The paint on the boot is pretty garish looking, especially in the flash of the camera. I may change the color. Thanks for reading! Steve


- 569 replies
-
- 11
-
-
- shenandoah
- corel
- (and 1 more)
-
I think a sewing machine pedal would work fine on a variable speed rotary tool. The foredom's pedal looks suspiciously singer-esque. Steve
-
Looking really good, Larry. I really like the photo of the run of the planking underneath the stern. I also like the narrow deck planks. Thanks for sharing. Steve
-
Wow, Jesse, those sails look amazing on the spars. Thanks for sharing the tip about how to get nice clean holes in sailcloth. Steve
- 607 replies
-
- 1
-
-
- scottish maid
- artesania latina
- (and 1 more)
-
Thanks J. I'll be getting to ratlines soon. Be still my heart! A while ago I picked up a used foredom tool with a bunch of used burrs from a retired jeweler. I used a tiny cylindrical burr on the ends of the spreaders. It's quick and accurate. With the dremel tool I had been using, with its on/off only capabilities, tool points were scooting all over the place. The foredom with its rheostat pedal makes it a lot easier to keep the tool point where I want it. Steve
- 569 replies
-
- 3
-
-
- shenandoah
- corel
- (and 1 more)
-
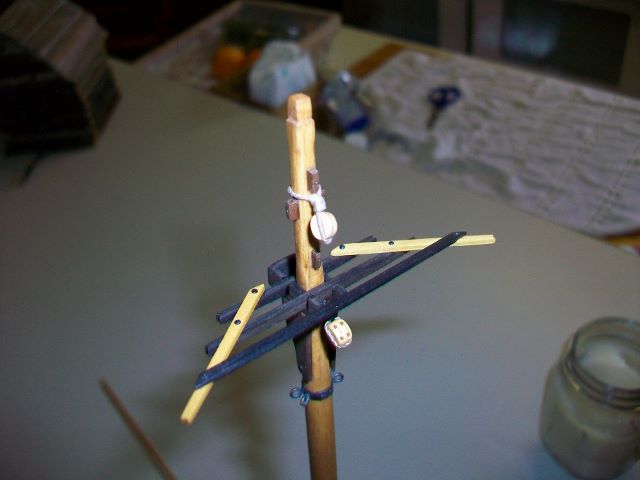
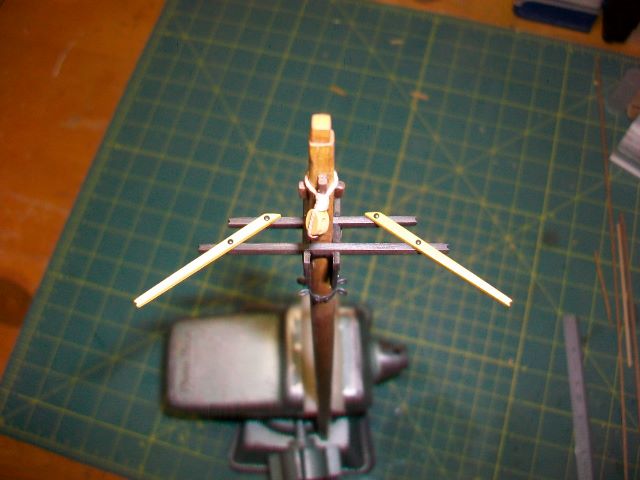
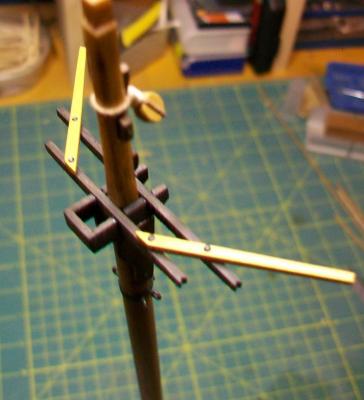
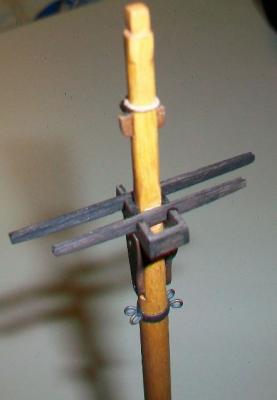
Here's a tiny bit more progress. I made and attached the spreaders for the backstays. I think they are yellow boxwood. The yellow doesn't look so garish in real life. The ebony is going to be left unfinished. The boxwood has a little tung oil rubbed into it. It's funny that such a seemingly simple part could take so long to make and attach. Like the crosstrees, these are notched on the ends to take the stays. Thanks for reading! Steve

- 569 replies
-
- 9
-
-
- shenandoah
- corel
- (and 1 more)
-
Thanks Jesse, Sam, Nils, and J. I appreciate the kind words. I'm finding the mast to be more challenging to build than the hull. I'm glad this little ship only has one mast. Welcome aboard, Scott. Thanks for the nice comments. This is my first build log, and I've found folks to be very encouraging and helpful. What are you building right now? Steve
-
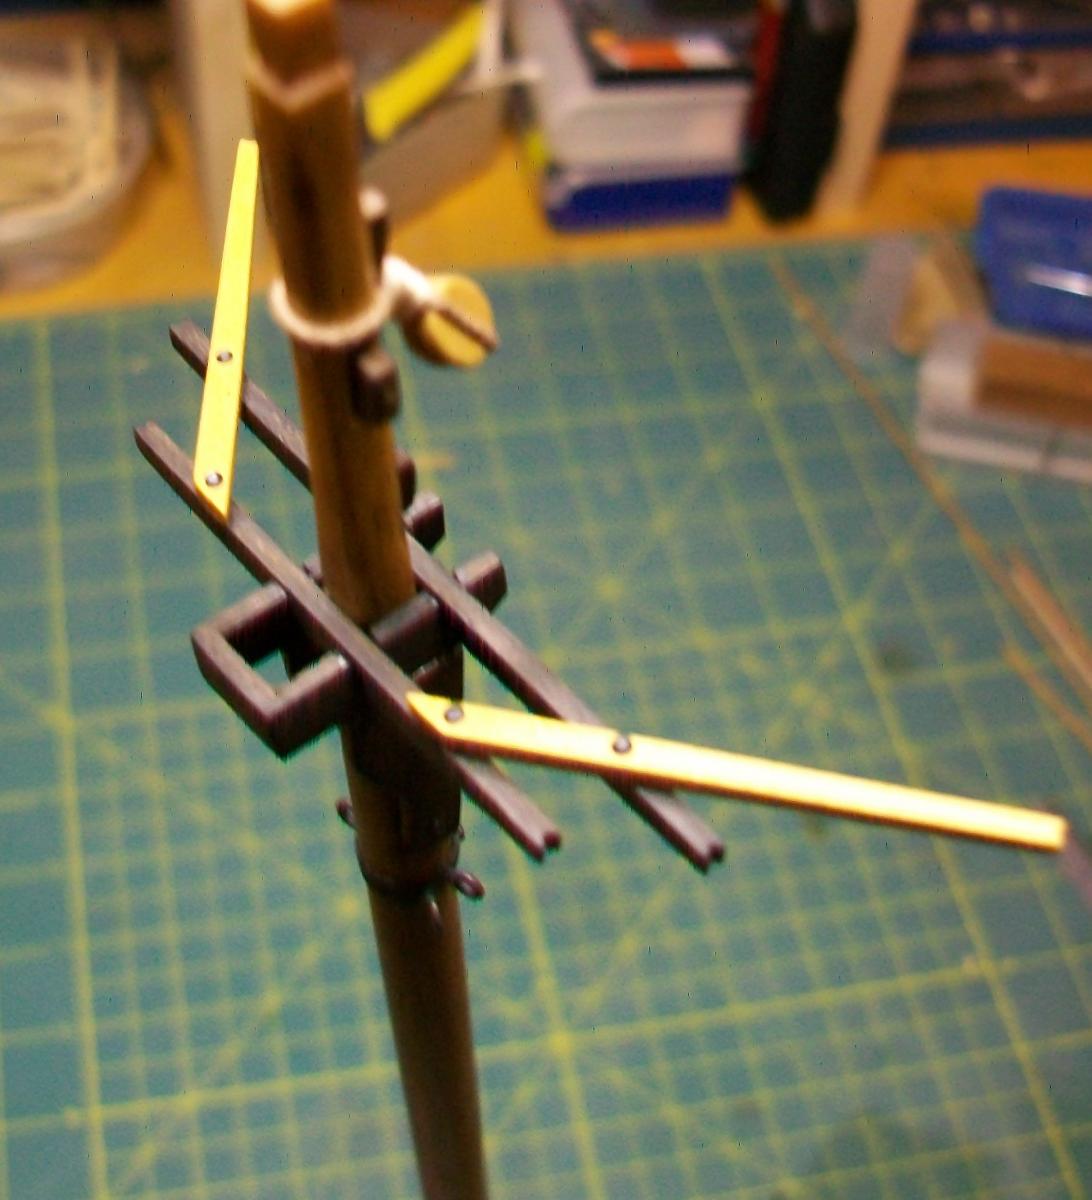
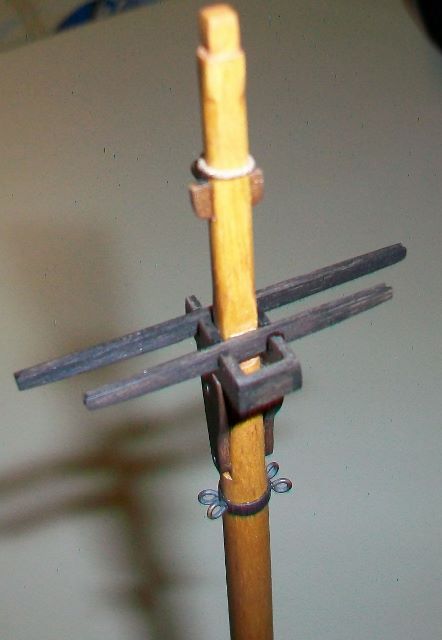
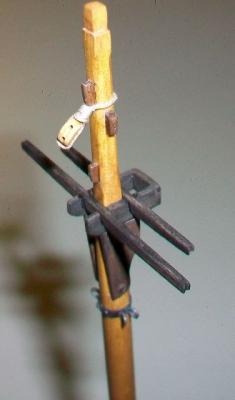
I think you call these the cross trees. They are about halfway done. I used some ebony scrap from a piece of leftover guitar binding to make them. The ends of the spreaders are grooved to take the deadeyes and futtocks for the topmast. This was the fiddliest work yet for my stubby fingers. Thanks for reading. Steve

- 569 replies
-
- 10
-
-
- shenandoah
- corel
- (and 1 more)
-
The ratlines look perfect. I really like the detail you put into those yards. That's very impressive. And the sail looks very realistic on the yard. Excellent work! Steve
- 607 replies
-
- 1
-
-
- scottish maid
- artesania latina
- (and 1 more)
-
Thanks for the replies, Jesse, David, and Steve. I've heard others, like David, report great success with Brass Black. I'm still having a hard time getting it to work well. It takes a lot of prep and then needs a couple of treatments. And then the coating is very fragile. For simulating round-headed bolts, it's really fast to use a steel pin, turn it against a file and hit it with gun blueing. Like Steve, I find the metal turns immediately dark black with a durable finish. I don't even degrease the pins first. I guess I need to practice more with the Brass Black. But when I need round-headed bolts now, the steel is an easy solution. Steve
- 569 replies
-
- 2
-
-
- shenandoah
- corel
- (and 1 more)
-
Thanks J and Jesse. What does gun blueing do to brass?
-
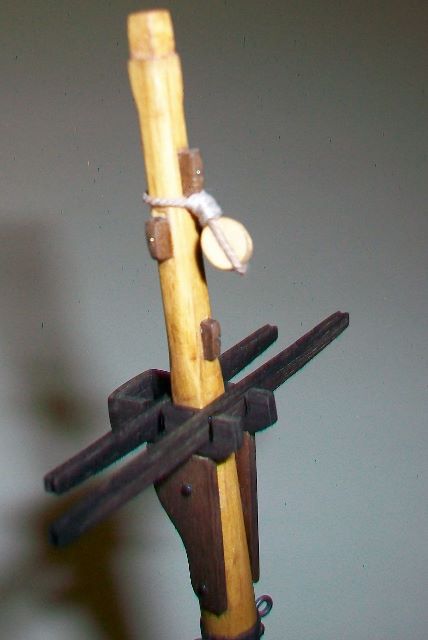
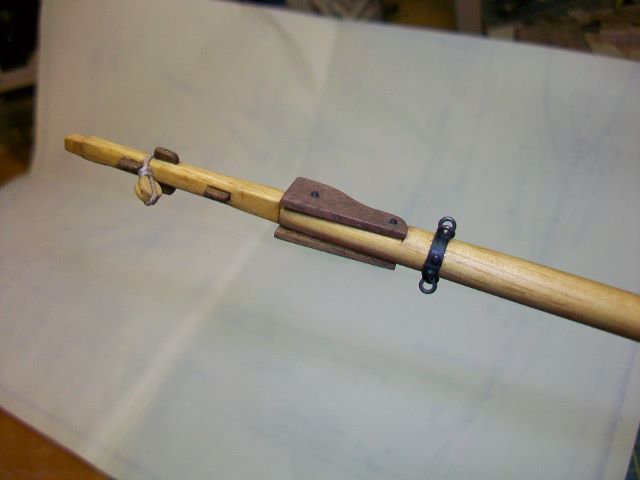
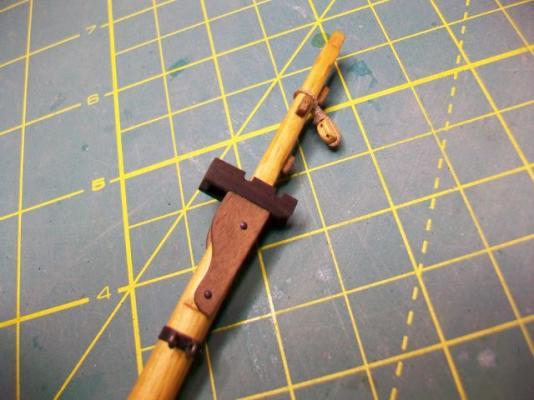
I started work on the spars today. It's raining (hooray) and working in the boatyard while listening to the rain come down is a very pleasant way to spend an afternoon. Here is the top of the lower mast. I made the ring below the mast cheeks with card stock. I love paper! It's great for folks who don't know how to solder yet. The cheeks and little cleats are walnut. I had to inlet the cleats into the mast because they were having a hard time staying attached. Inletted and pinned, they seem to be staying put. We'll see when I add more rigging. The block is from Chuck's store, Syren. He sells some really nice fittings. The round-headed pins are steel pins that I turned in my dremel tool while holding them against a file. I chose to use steel pins instead of brass because you can blacken them with gun blueing. It goes right on without fastidious degreasing and it stays on real well. Thanks for reading! And check out J's Half Moon. He's all done! Steve


- 569 replies
-
- 8
-
-
- shenandoah
- corel
- (and 1 more)
-
HALF MOON by jct - FINISHED - Corel
SGraham replied to jct's topic in - Kit build logs for subjects built from 1501 - 1750
That's a breathtaking little ship! Congratulations, J! It's been fun watching her come together. Are you going to add the Moon to the gallery? Steve -
Shenandoah by Leo-zd - 1:200
SGraham replied to Leo-zd's topic in - Build logs for subjects built 1851 - 1900
My potatoes keep getting in the way too! And I'm working at 1:75 scale. Ha! Steve -
Shenandoah by Leo-zd - 1:200
SGraham replied to Leo-zd's topic in - Build logs for subjects built 1851 - 1900
Thanks for posting, Leo! Very impressive. I don't know how you can control the details at such a small scale. I looked at your photos in the gallery. I'm really glad you are also posting a build log for the cutter. Steve -
Looking great, Bob! The friendships are one of my favorite boats. Mind if I pull up a beach chair and follow along? Steve
-
HALF MOON by jct - FINISHED - Corel
SGraham replied to jct's topic in - Kit build logs for subjects built from 1501 - 1750
J, the gauge for the ratlines is a great idea. That's going into my need-to-know file. The ratlines and rigging are really making the Moon come alive. I'm looking forward to seeing the flags hoisted. Steve -
Wow, Jesse, beautiful sails. What an accomplishment! Steve
- 607 replies
-
- 1
-
-
- scottish maid
- artesania latina
- (and 1 more)
-
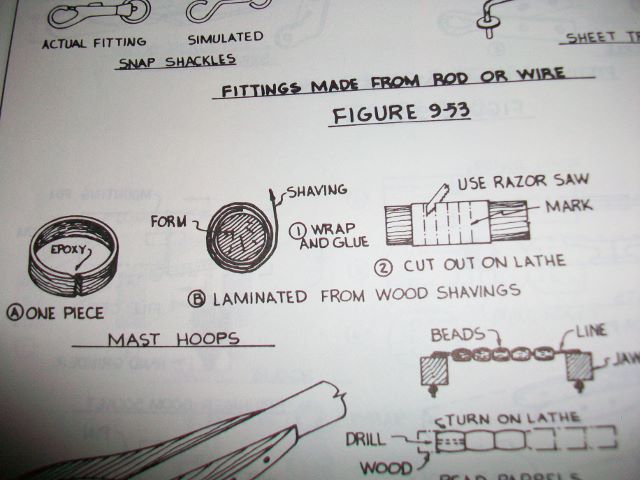
Thanks Sam, Jesse and Larry. I got the idea from "Watercraft Modeler's Handbook" by Benjamin Lankford, Jr. (Nautical Research Guild, Inc., 1988). He has a lot of helpful tips that are diagramed clearly enough for folks like me to follow. Steve
- 569 replies
-
- 3
-
-
- shenandoah
- corel
- (and 1 more)
-
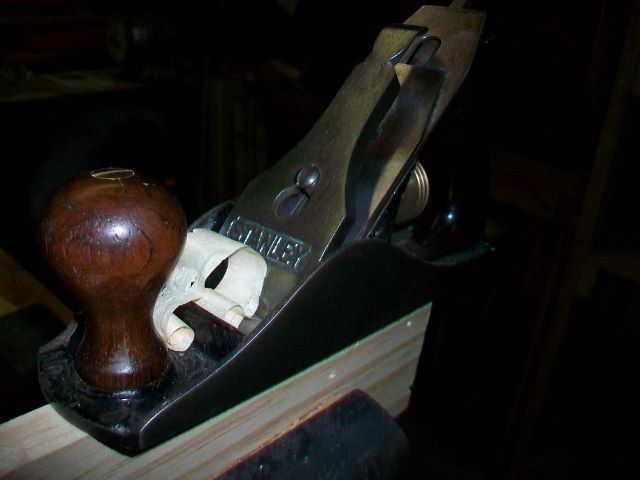
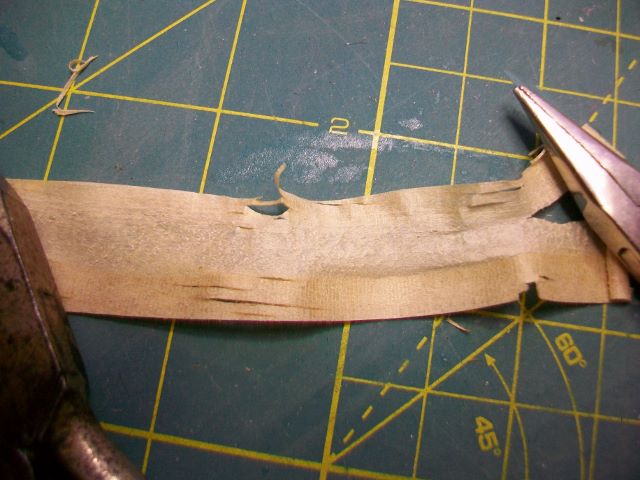
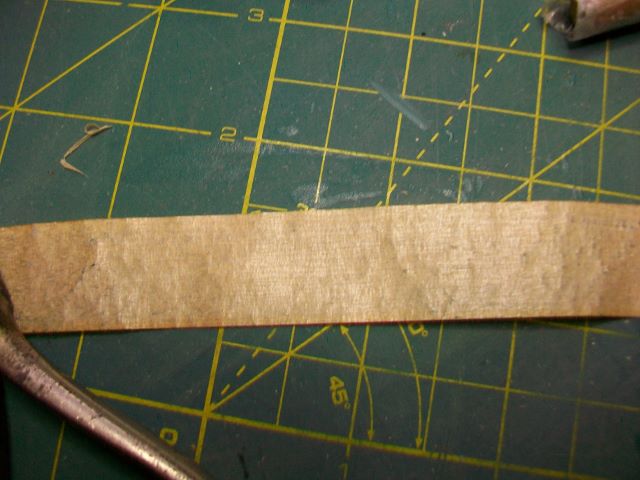
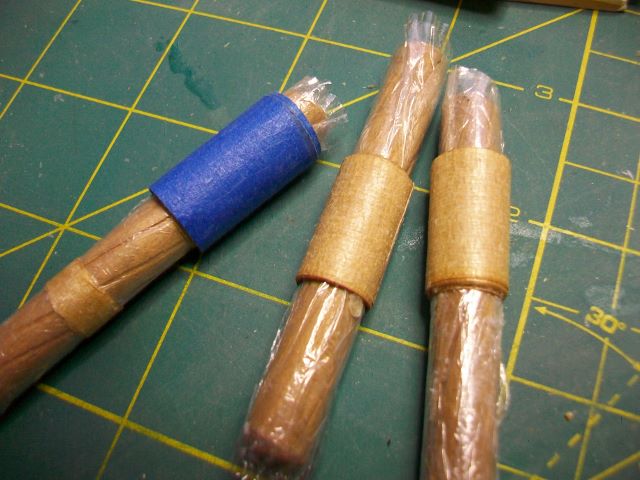
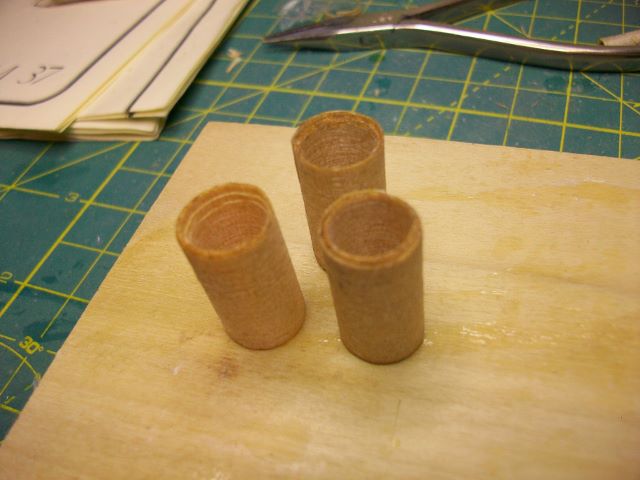
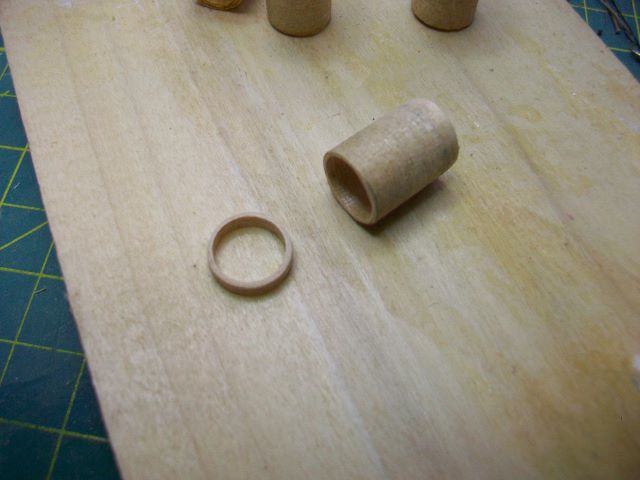
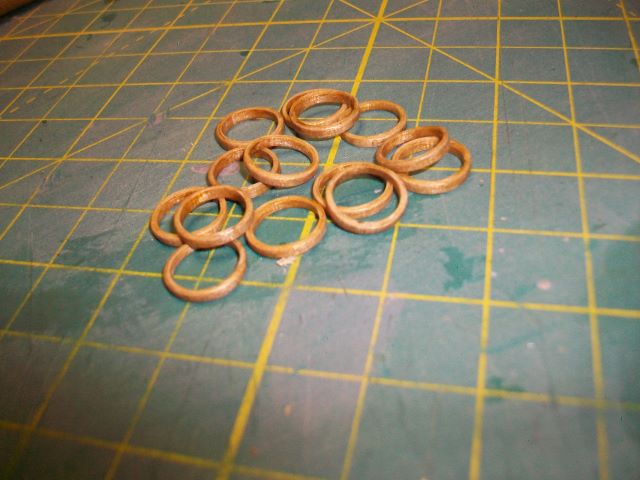
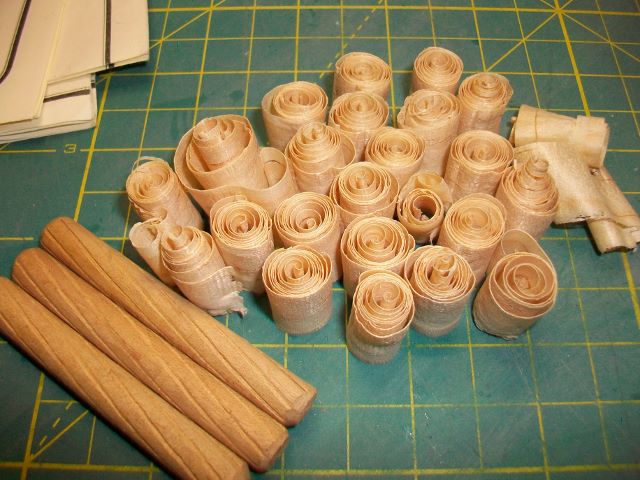
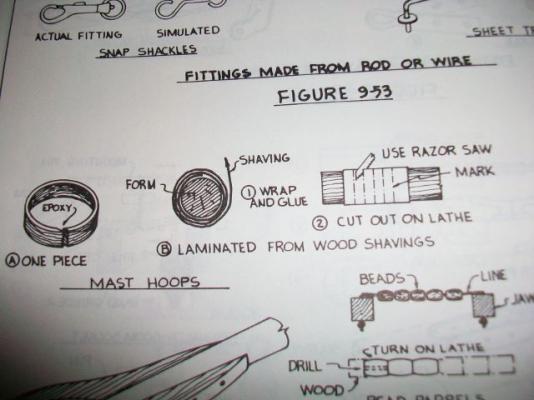
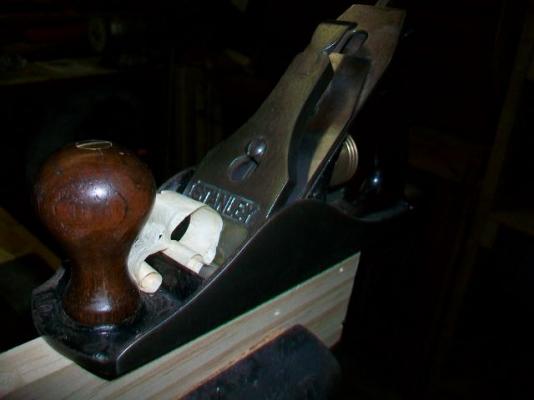
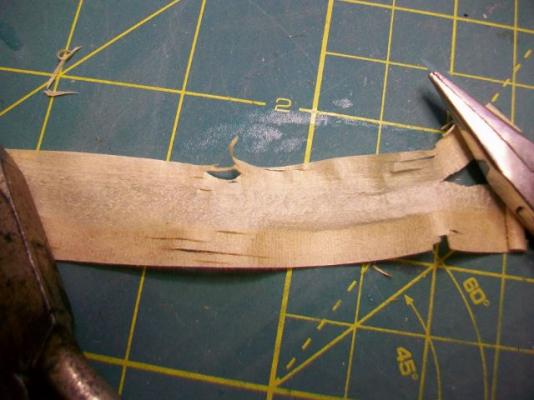
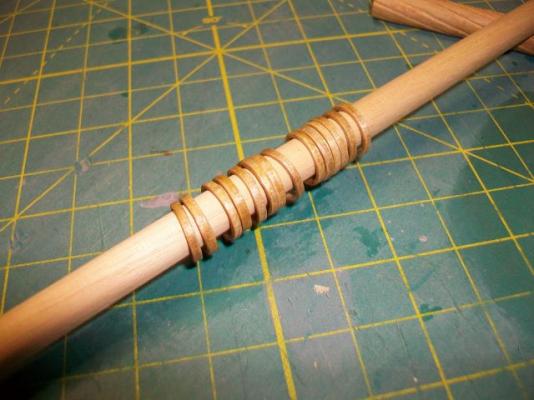
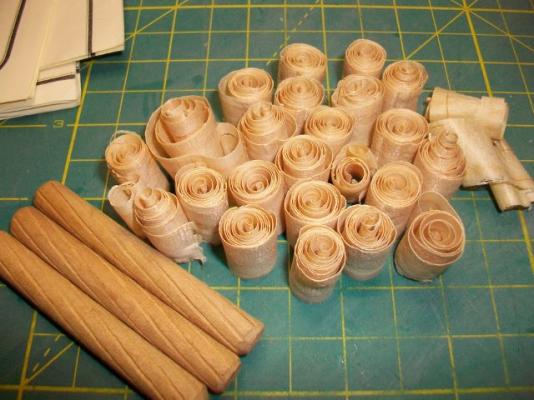
Before starting the mast, I decided to try my hand at making some mast hoops out of wood shavings. I hope I'm not stating the obvious, but here is the process I followed in case any other newbies like me care to give it a try. 1) I cut the shavings with a plane. 2) The wood I started with was some generic "white wood" they sell at the big box stores. It had weak spots in the grain streaks that tore open as soon as they were touched. 3) I switched to a piece of clear maple and got much better results. The piece I used was about 8" long and 3/4" wide. 4) I used short wooden dowels as plugs and covered them with cellophane. 5) I rolled the shavings out and sprayed one side with contact adhesive. Next, I rolled them tightly onto the plugs. The roll with the blue tape was glued with wood glue. I got the same results with the wood glue as the spray adhesive but had to wait longer for it to dry. The spray adhesive was easier and faster to use. 6) After a few minutes of drying time, I sanded flat the ends of the rough rolls. 7) I cut the hoops with an X-acto knife. By the way, sanding and cutting was done with the hoops back on the dowels. 8) I finished the hoops with amber shellac and buffed them out with #0000 steel wool. 9) I made way too many rolls of shavings. The Shenandoah calls for 14 mast hoops. It only took one and a half shavings to get that many. So, I have enough glued up rolls for all the models on my shelf. One last thing: I had to flow a little thin super glue onto the cut edges of the hoops to stiffen them up before sanding them. Thanks for reading! Steve


- 569 replies
-
- 10
-
-
- shenandoah
- corel
- (and 1 more)
-
Thanks so much, Sam and Bob. I'm going to try to start on the mast today.