HOLIDAY DONATION DRIVE - SUPPORT MSW - DO YOUR PART TO KEEP THIS GREAT FORUM GOING! (Only 24 donations so far out of 49,000 members - C'mon guys!)
×
SGraham
-
Posts
538 -
Joined
-
Last visited
Content Type
Profiles
Forums
Gallery
Events
Everything posted by SGraham
-
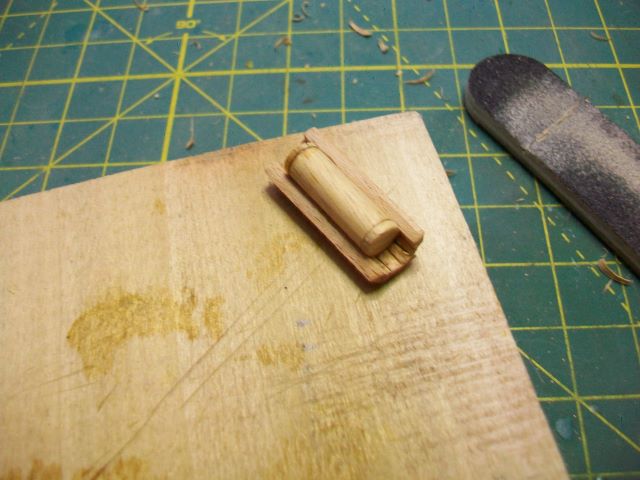
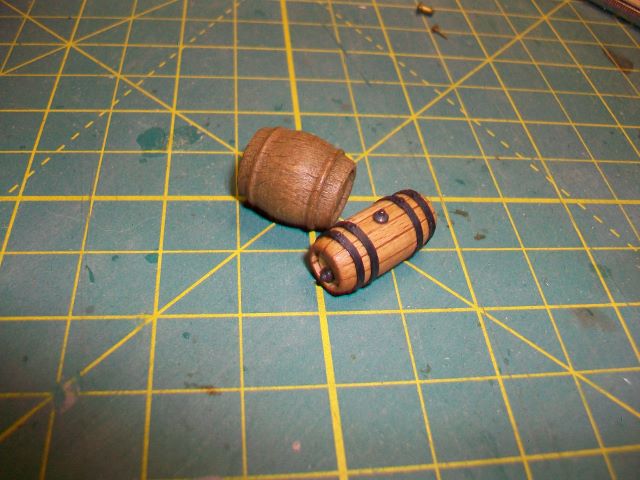
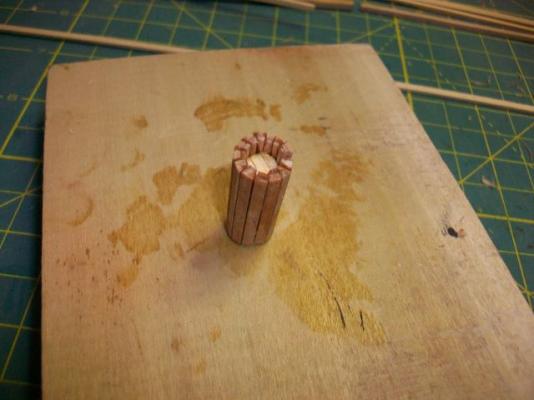
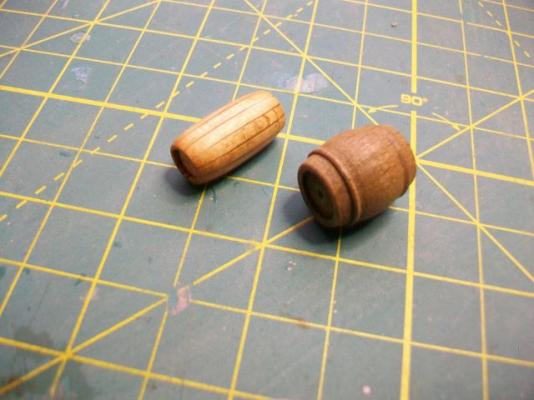
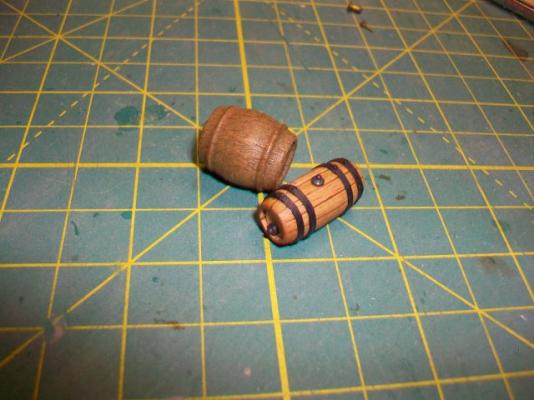
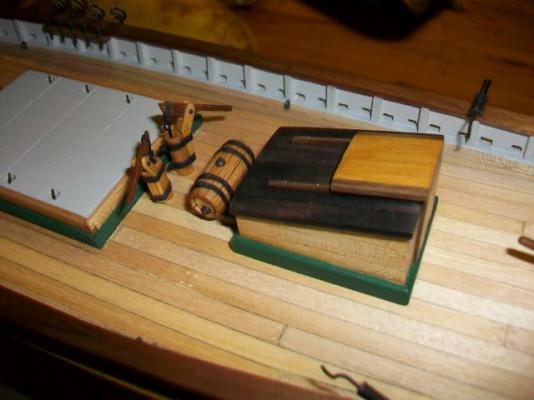
 Thanks, J, Sam, and John. I appreciate it. J, the hardware is from some brass stanchions off that disastrous Dikar kit I built back in the '80s. I think I'm going to reduce them a little in size; they look like oversized doorbells. The bands are card stock pinned down with rounded steel pins. I left off one set of bands, laziness wins out over accuracy again! As far as angles go, it's all just eyeballed. I was going for a uniform thickness of the staves at the ends of the barrels. Sam, I thought if I put thick enough staves around the dowel, I'd be able to file them down around the ends and get somewhat of a barrel look to it. I'm attaching some pics of the non-fat water casks I found.
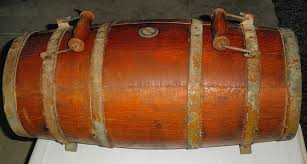
- 569 replies
-
- 4
-

-
- shenandoah
- corel
- (and 1 more)
-
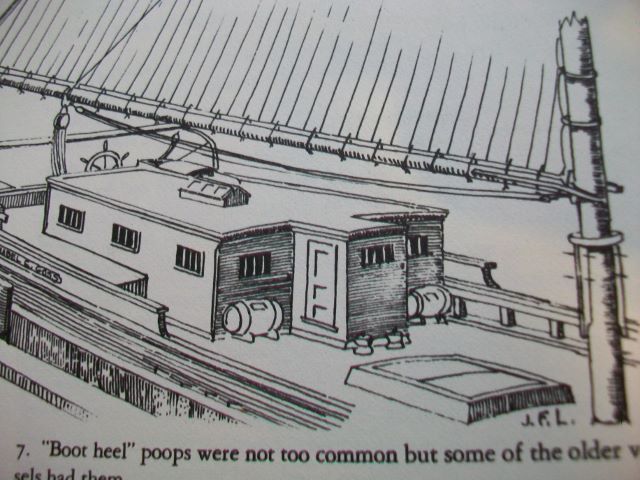
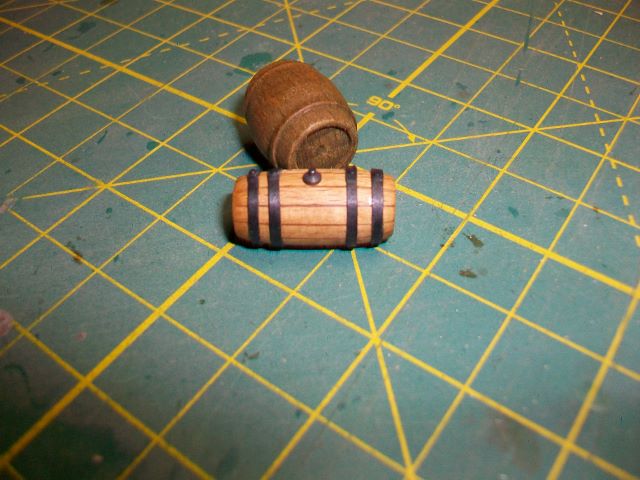
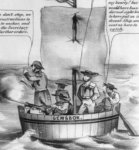
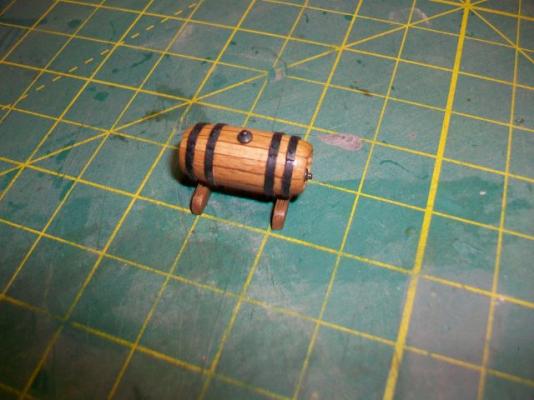
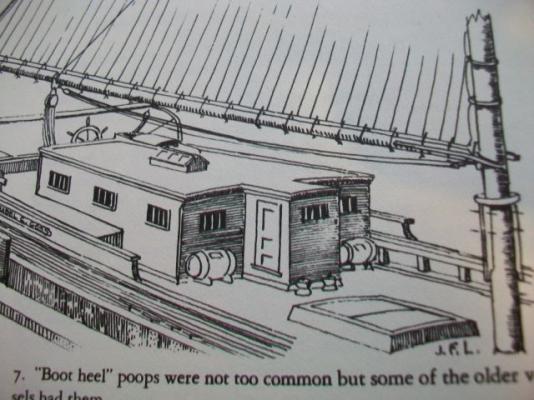
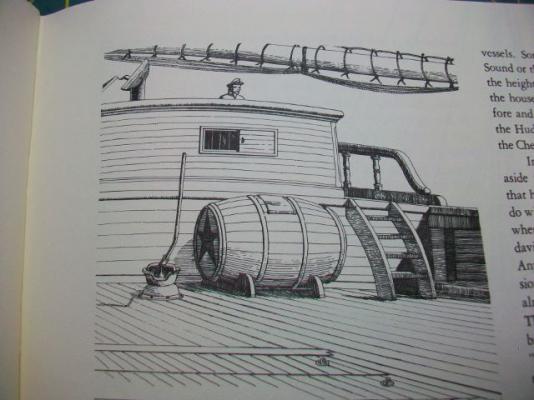
Here's a shot of the cask with its feet on. I'm going to cut them down. I'm also including the sketches I found. It's from Leavitt's "In the Wake of the Coasters." The cask in the sketch with the man looking over the deck house is quite large. This was on a large schooner that would be out at sea for quite a long time. My cutter was much smaller than this and would be making much shorter runs. Steve
- 569 replies
-
- 9
-
-
- shenandoah
- corel
- (and 1 more)
-
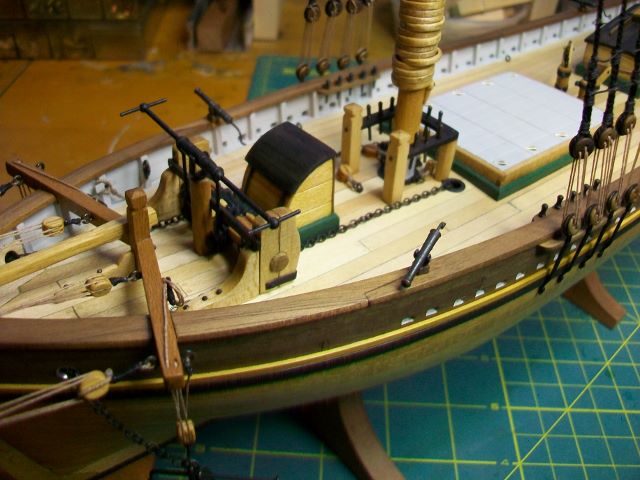
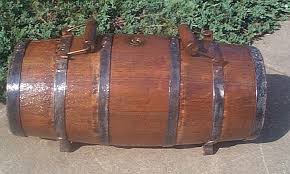
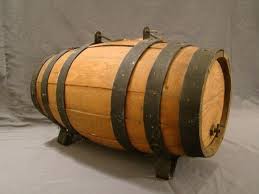
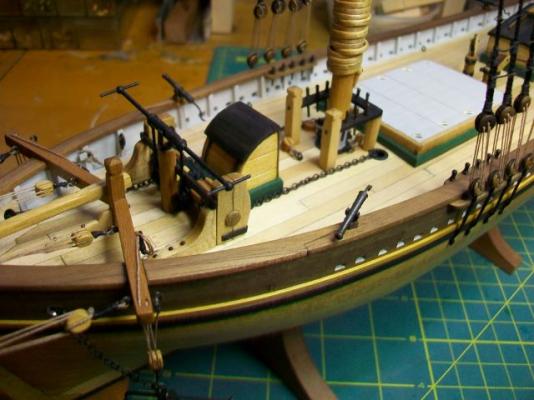
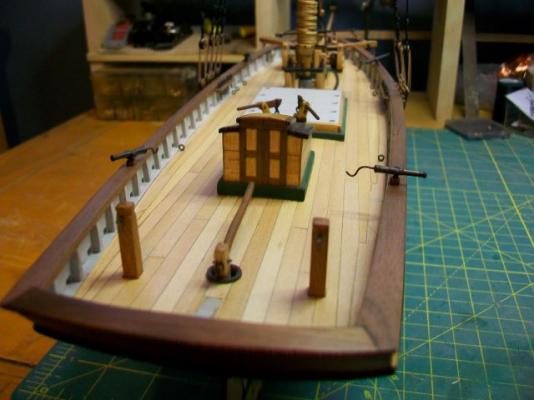
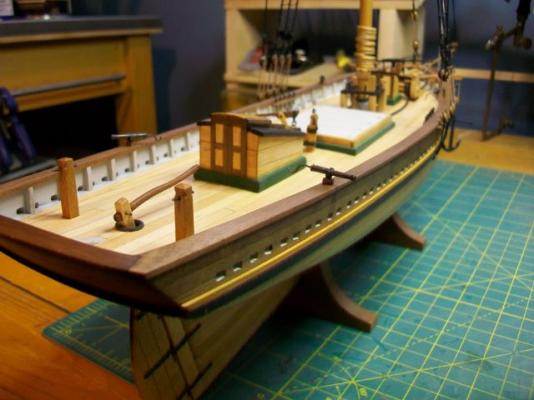
Thanks for the leads, Sam. Here's a water cask that I made today. The one that came with the kit was huge and odd looking. I did a search on mid 19th-century water casks and found some casks that ambulances carried during the Civil War, the right time period. I also found some supposed naval water casks that looked identical to the ambulance casks. The thing I immediately noticed was how slim the casks were compared with the big rotund barrels that came with the kit. So, I tried my hand at making a slim cask. Also, the plans call for three huge barrels to be lashed to the bulwark right where I assume sailors would need to be working. I also found some sketches of fishing schooners with their water casks stowed just forward of the deck house. That made sense, since they would be out of everybody's way. I think I'm going to mount mine in front of the deck house as well. The feet on the cask are too big right now I'll cut them down. Neither the cask nor the pumps are glued on the boat yet. Thanks for reading! Steve


- 569 replies
-
- 7
-
-
- shenandoah
- corel
- (and 1 more)
-
Wow, J, those spars and sails look great. That electric fan sail-billowing technique is inspired. I love seeing the ways people come up with to achieve effects. Amazing. Steve
-
Thanks Jesse! Good to hear from you. I hope you're doing all right. Hey Sam! Great to hear from you too. Thanks for the tips about glass cutting. Yes, those classes do interest me. Hopefully I'll find time soon to check it out. My work is ramping up now too, but not to 18 hour days! Steve
- 569 replies
-
- 2
-
-
- shenandoah
- corel
- (and 1 more)
-
Hi Sam, Great to see you got some time in on the Enterprise. Those windows look beautiful! I'm not sure that I see what the problem is at all. Is there something that doesn't look right? If so, I'm not seeing it. Steve
-
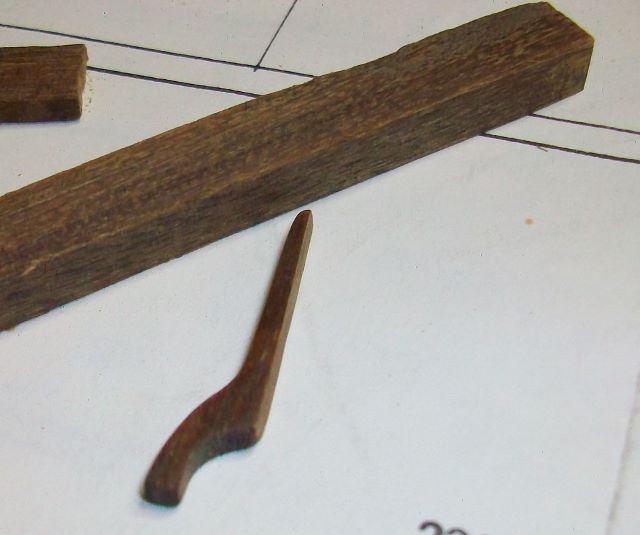
Thanks J. David, I'd love to get ahold of some boxwood one of these days. The only boxwood I've ever worked with was in the form of a couple of strips I cannibalized from another kit that's waiting to be built. I agree, the maple would have been nice, but I wanted a color contrast. I made the tiller from the ironwood and really liked how it looked. Steve
- 569 replies
-
- 2
-
-
- shenandoah
- corel
- (and 1 more)
-
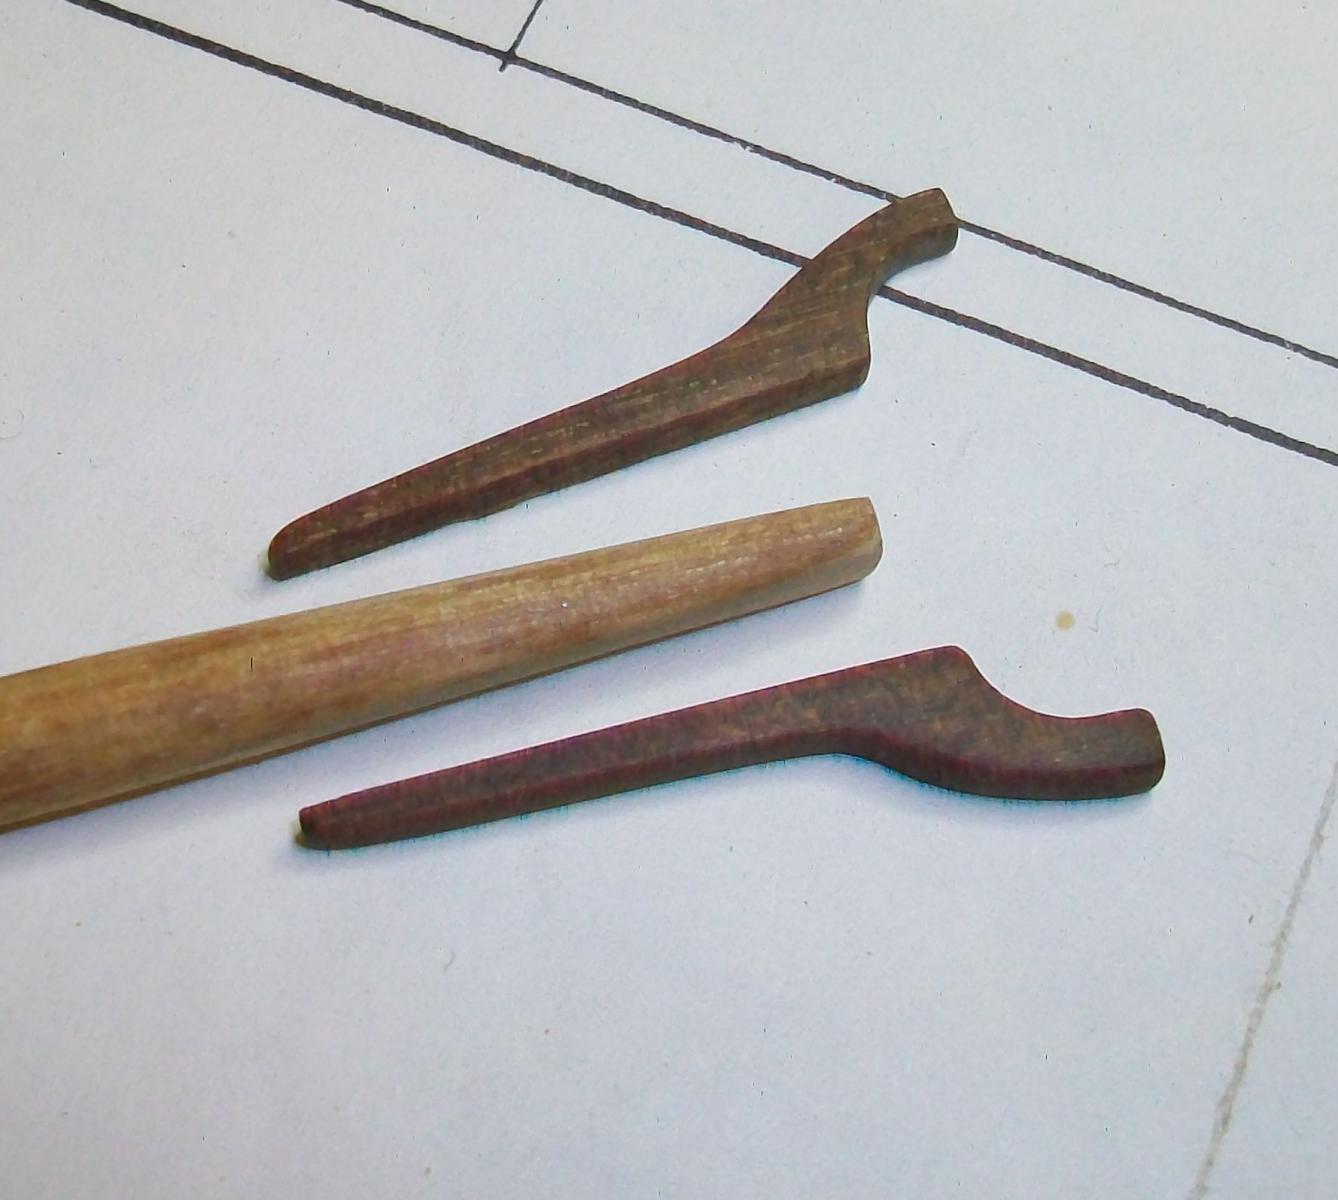
Thanks, J and John. I'm just using whatever is in my scrap box because I'm cheap. Like I said, I'm a compulsive wood hoarder. But just for fun...let's see, there's lots of maple, some walnut, a little ebony, a little boxwood, some mahogany, the desert ironwood, and the mysterywood planking that came with the kit. Actually, the ironwood cuts nicely with a spiral coping saw blade. Planes work on it too, if you like to sharpen blades. The stuff files like metal and can be sanded to a high polish, like ebony. It's pretty cool stuff, but I think I'm allergic to the oil in it. I learned that when I made some fretboards out of it. Nice fretboards, but big fat welts on the palms of my hands. Anyways, no welts yet after one set of jaws. And, speaking of different woods, I'm thinking of trying a scratch build after this kit is done. There's a cool little skiff with a leg-o'-mutton rig from the "Perfect Skiff" competition that Wooden Boat magazine held many years ago. They included the lines of the skiff in that issue, and I'm thinking that might be a good way to get a taste of scratchbuilding. I've got a plank of sycamore out in the garage that has a beautiful silking pattern in the grain. I'm thinking it would make beautiful hull planking... Steve
- 569 replies
-
- 1
-
-
- shenandoah
- corel
- (and 1 more)
-
Thanks again, J, for the advice on glass cutting. I'll let you know how it goes--and how many stitches it took! Here's a tiny bit more progress. I've started to work on the boom and gaff. I used a scrap of desert ironwood to make a pair of jaws for the boom. It's strange wood--sinks in water, miserable to work with an edge tool, but it files like a dream. Because of its density and tight grain, I thought it wood be a good material to make a small, thin, curved piece out of. Oh yes, and the sawdust and oil is toxic. I'll have to wait a week or so before I make the gaff jaws, or I'll break out in welts on my hands. Other than that, it's lovely stuff. Steve


- 569 replies
-
- 4
-
-
- shenandoah
- corel
- (and 1 more)
-
That's impressive work, skyboat! Thanks for sharing. Steve
-
Thanks David, J and John. I appreciate it. J, I recall reading on your Half Moon log that you cut your own glass. I wish I knew how; I bet it would save me some money. I have a little glass cutter tool--you know, the pencil-sized thing, but I don't know how to use it. Where did you learn to cut glass?
-
The tape is a good idea, J. I have to remember that one. I like the unevenness of the coffee staining. It looks like the salt staining I get on the canvas duffel bag I keep my diving gear in. I can imagine the same kinds of marks on canvas sails. When you penciled in your seams, did you have a hard time keeping the cloth from bunching up as you drew the lines? Steve
- 52 replies
-
- 1
-
-
- model shipways
- 18th century longboat
- (and 1 more)
-
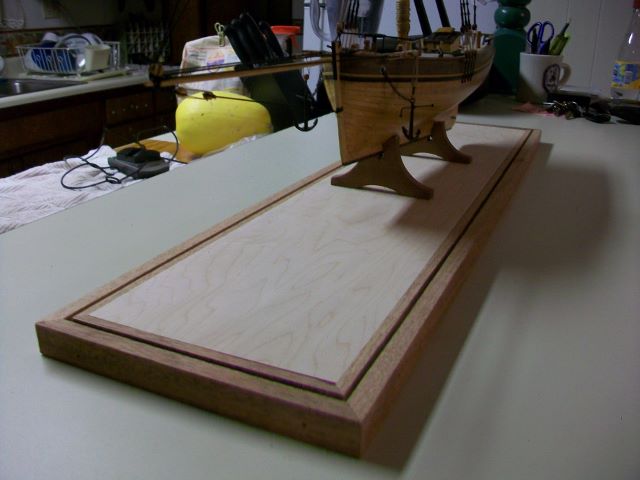
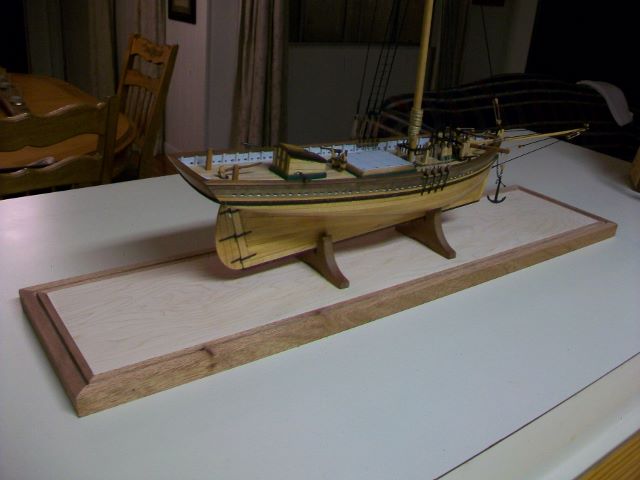
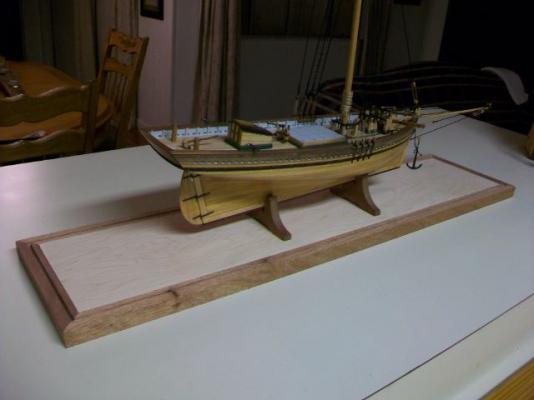
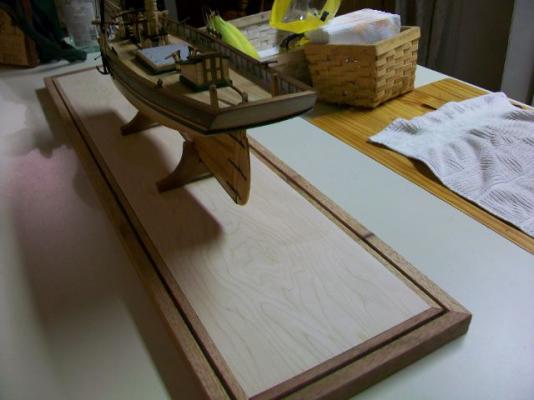
Thanks Bob! You've got the metalworking thing down to a science. Well, I got a very little bit more done. I went ahead and started thinking about how to make a display case. I decided to go with a maple base. It's plain old vanilla, slab sawn, but it will look nice underneath the boat. I built a mitered framework around it out of mahogany. I wrapped the maple base in cellophane so the miter joints wouldn't stick to it when they were glued up. I slotted the mahogany pieces to take the glass panes. It will basically be a mahogany and glass box, with glass on five sides, that will slip down over the maple base. I'll hold the box and base together with removable pins. It's all bare wood right now. I also took a semi-circular cut out of the bottoms of the feet the boat sits on. They were looking too bulky. Next comes a water scuttle, a gaff and boom, and the running rigging. Thanks for looking.

- 569 replies
-
- 9
-
-
- shenandoah
- corel
- (and 1 more)
-
I'm also building a kit by Corel, the Shenandoah. The keel in my kit was also warped. I heated up a pipe I use for bending guitar sides. A few seconds of holding the warped keel against the hot pipe is all it took to straighten it. I was worried beforehand that it would be a difficult problem to fix, but it turned out to be very easy. I think a curling iron or clothes iron would work as well. Hope this helps! Steve
-
Let us know what you decide on, Dee Dee. I'm sure I'm not the only one interested. I decided to leave the sails off my current build since the learning curve is just too steep for me right now. I'm looking forward to finding out how you solve the scale problem. Steve
-
Mary Rose 1545 by tarbrush - Scale 1:72
SGraham replied to tarbrush's topic in - Build logs for subjects built 1501 - 1750
Thanks John. I was just looking back at the photo of the three hull sections in your post #65, viewed from the top. It's very interesting how sharp the bow of the Mary Rose was. I wouldn't have expected that, but then, I don't have much experience on which to base expectations. I wonder if that was common in that day. Steve -
I think Igor has a good point. Scraping the deck instead of sanding might give the paper caulking a cleaner edge. Steve
-
Absolutely beautiful, clean work as usual, Dee Dee. Thanks for sharing. I'm curious to see how you go about making your sails. The sails on the Corel kit I'm building right now would be equivalent to heavy velvet theater curtains doubled if they were scaled up to full size. I've also thought about using tissue paper or vellum. Steve
-
Mary Rose 1545 by tarbrush - Scale 1:72
SGraham replied to tarbrush's topic in - Build logs for subjects built 1501 - 1750
Looks beautiful, John. Are those 3 sections pretty rigid and strong? I'm curious as to how you faired the frames--did you bevel them before you installed them? Newbie questions, I know. Steve -
That deck is just spectacular, Bob. Very classy. It fits with a pleasure craft nicely. Steve
-
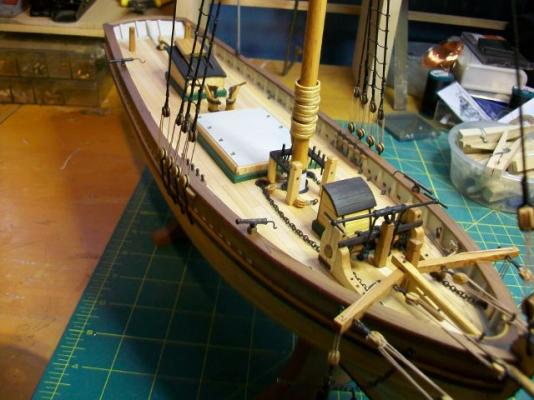
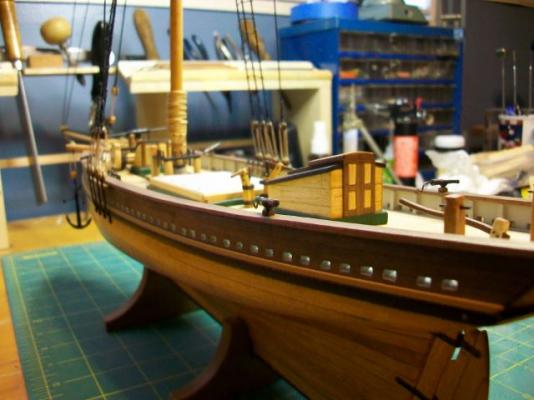
News flash: Shenandoah is armed...with four popguns. I think they look a little silly. Maybe they used them for duck hunting. Working with metal is much harder than working with wood, and I'm glad they're done. Thanks for reading! Steve
- 569 replies
-
- 15
-
-
- shenandoah
- corel
- (and 1 more)
-
Hi J. You know, it's typical for me with my addiction to vintage machines, but after I finished restoring that old White sewing machine, I'm starting to think about using vellum for the sails. Maybe I'm just reluctant to bring the build to a close. Please don't wait on me! You go first. Steve
- 52 replies
-
- 1
-
-
- model shipways
- 18th century longboat
- (and 1 more)
-
Thanks John. I just read through your Mary Rose log. Wow, just wow! You scratch builders amaze me. Steve
- 569 replies
-
- 1
-
-
- shenandoah
- corel
- (and 1 more)
-
Mary Rose 1545 by tarbrush - Scale 1:72
SGraham replied to tarbrush's topic in - Build logs for subjects built 1501 - 1750
John, I just read through your build log. What impressive work! That photo of the bow section pointing skyward is very cool. That must give quite a sense of satisfaction to build something like that from scratch. I'll be following your build with interest. Steve -
Wow, J, that last photo looks like you're looking down into the real deal. Beautiful work. Steve