HOLIDAY DONATION DRIVE - SUPPORT MSW - DO YOUR PART TO KEEP THIS GREAT FORUM GOING! (Only 24 donations so far out of 49,000 members - C'mon guys!)
×
SGraham
-
Posts
538 -
Joined
-
Last visited
Content Type
Profiles
Forums
Gallery
Events
Everything posted by SGraham
-
 Thanks for the reply, Bob. I was checking again in Biddlecomb. He says that the forestays in cutters run through blocks at the end of the bowsprit. So, they are definitely stays. I think I'm going to switch them to black line.
- 569 replies
-
- 1
-

-
- shenandoah
- corel
- (and 1 more)
-
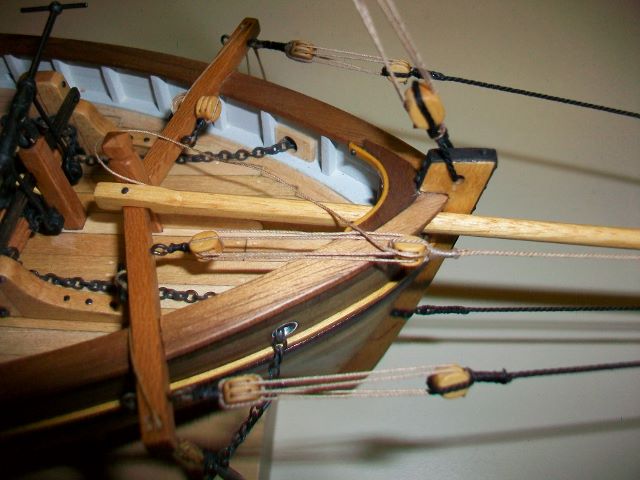
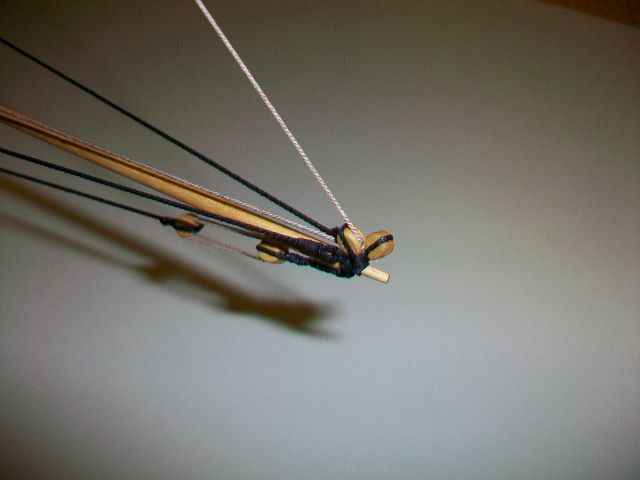
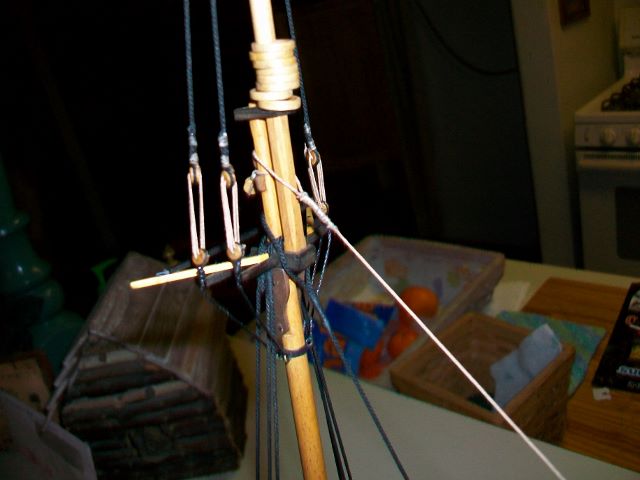
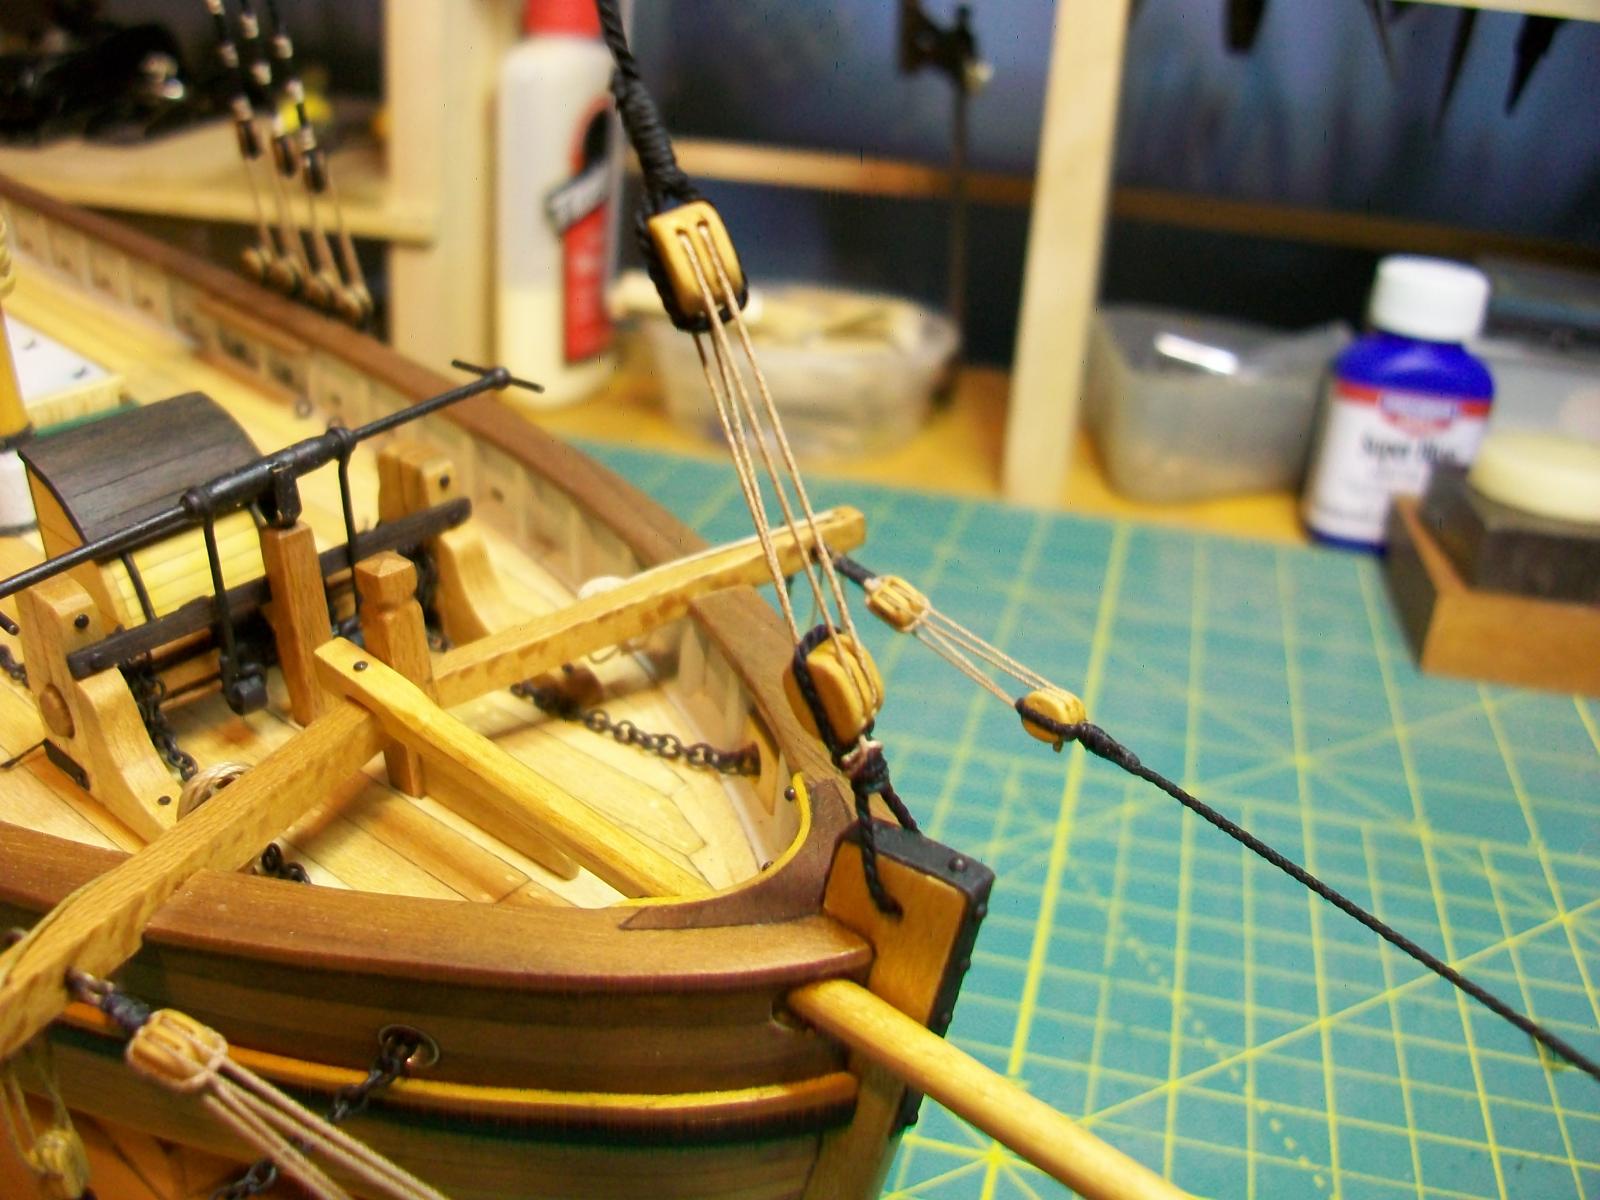
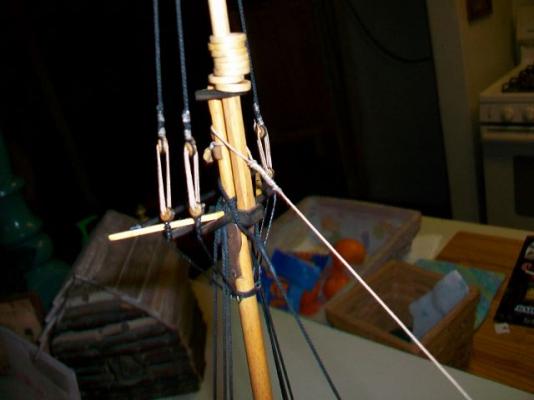
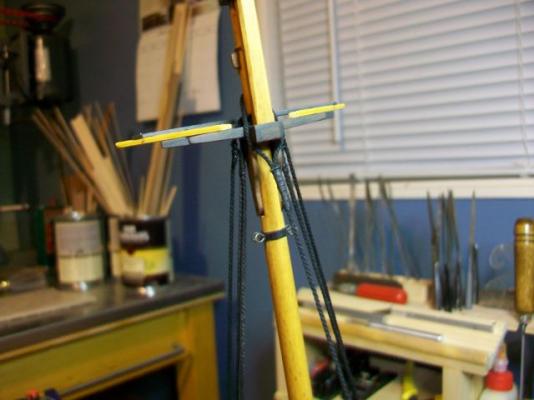
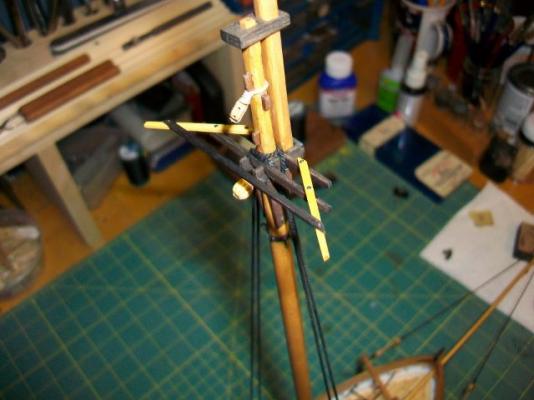
I have a question about the forward rigging. If you look in the first photo, you'll see an untarred rope that runs parallel to the bowsprit right next to it. It attaches to the knights head with a laniard. In the next photo you see where it passes through a single block at the tip of the bowsprit and heads back up toward the masthead. In the next photo you see where it attaches to the top of the lower mast. This line/stay is what I'm supposed to hang one of the head sails on. Should it be tarred? It's on the diagram showing the standing rigging, but Corel doesn't differentiate between rigging colors on the plans or in the instructions. It seems like it should be tarred along with a similar line that runs to the top of the topmast. The thing is that they both pass through blocks. Does tarred rigging ever pass through a block? It seems unlikely to me. Thanks! Steve


- 569 replies
-
- 5
-
-
- shenandoah
- corel
- (and 1 more)
-
Nothing personal, Mark, but nice knees! Also, great job on that rudder. Having the visible seams works well. Thanks for sharing. Steve
- 128 replies
-
- 1
-
-
- artesania latina
- Finished
- (and 2 more)
-
HALF MOON by jct - FINISHED - Corel
SGraham replied to jct's topic in - Kit build logs for subjects built from 1501 - 1750
J, the case looks great. Thanks for detailing the building process. Nice miters on the corners, by the way! Steve -
Thanks David, I appreciate it! Here are the topmast deadeyes and futtocks, I think they're called. Steve

- 569 replies
-
- 6
-
-
- shenandoah
- corel
- (and 1 more)
-
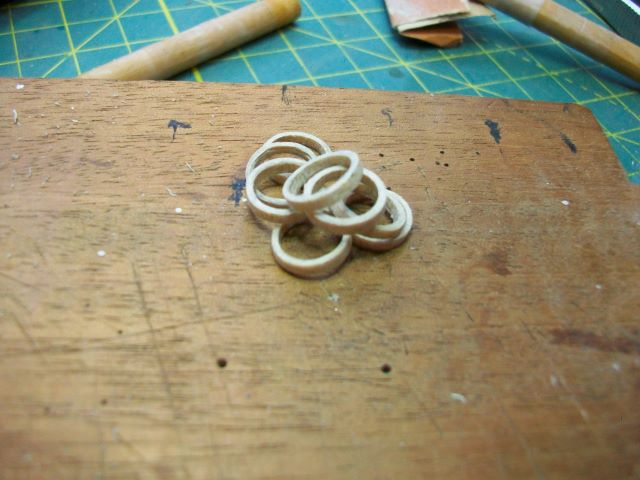
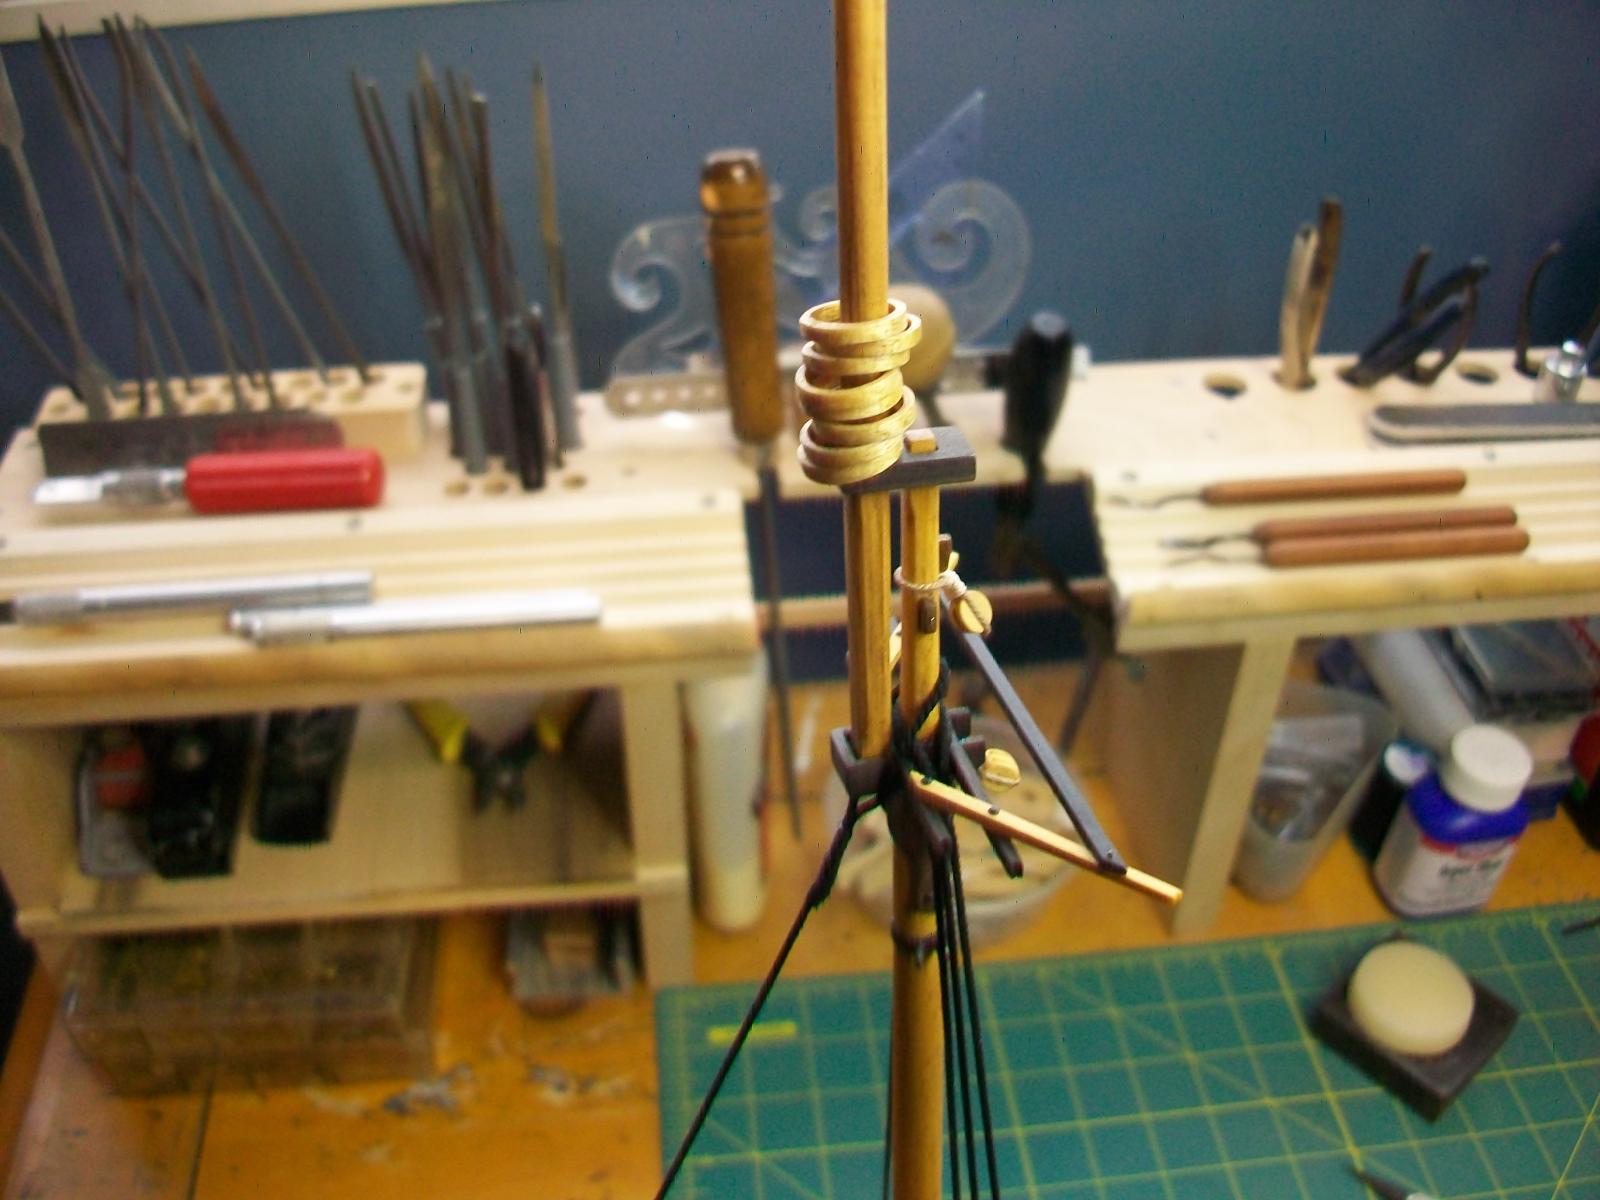
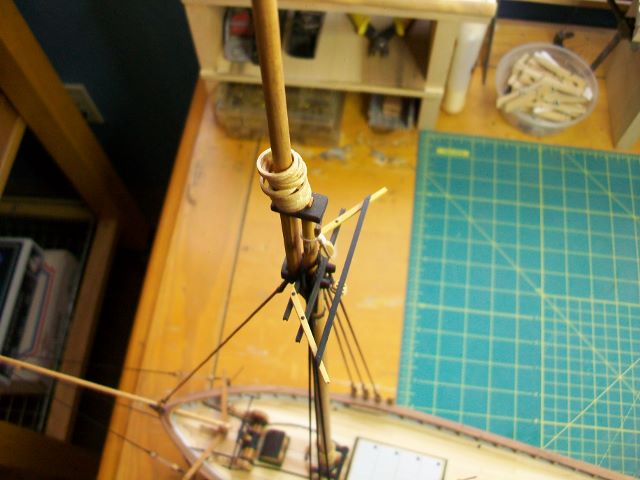
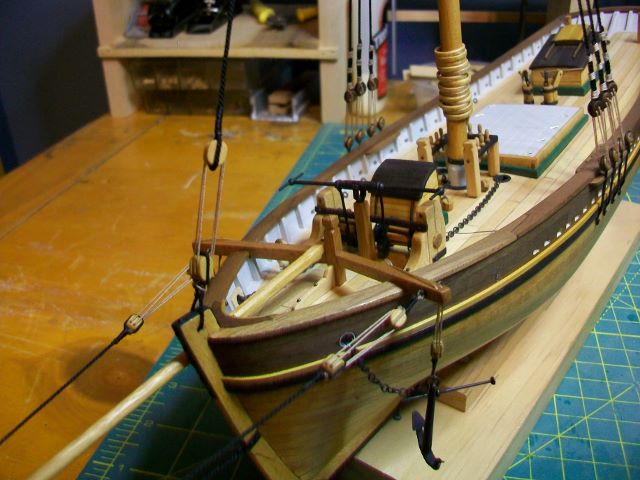
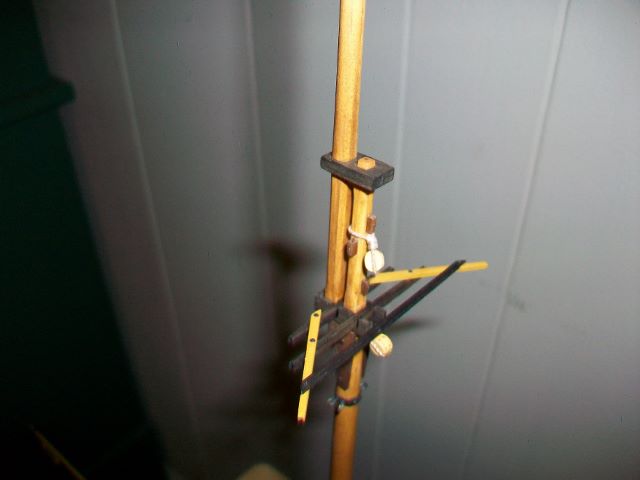
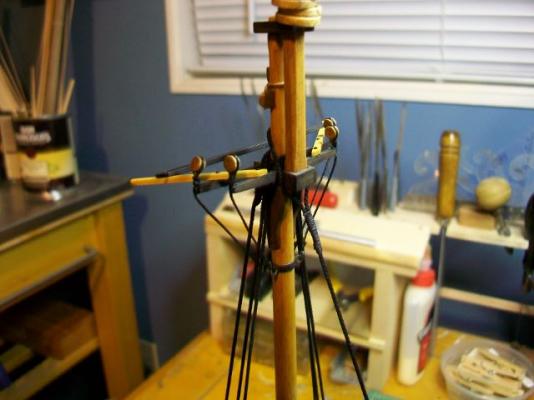
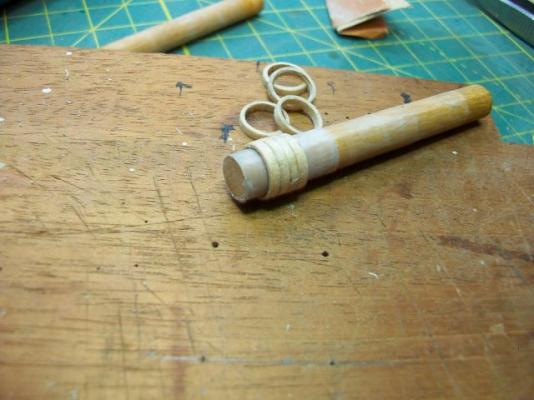
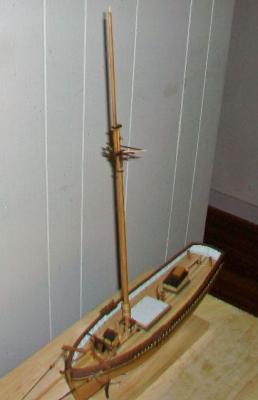
Thanks J! I'm not sure how applicable Biddlecombe's comments are to mid-19th century cutters, or to your longboat for that matter. But I think those shrouds and stays completely served would be a good looking touch. I made a little bit more progress. I swapped out the wooden belaying pins for some brass ones. I darkened them to a dark bronze color. I think I like how they look better than the wooden ones (too beefy). I also made up some mast hoops for the topmast. They're a good deal smaller than the hoops down on the lower mast. I needed to put them on before I could add the upper shrouds and stays. I almost forgot to do them. Lucky save! I added a shot of them on the dowel to show how I sand them and buff them out after shellac. If I try to sand them off the dowel, they start to delaminate. Thanks for reading, and for the "likes." Steve


- 569 replies
-
- 8
-
-
- shenandoah
- corel
- (and 1 more)
-
Love the miter joints, Larry! Steve
-
Thanks Andy, I really appreciate it! I'm looking forward to seeing your Shenandoah take off again. Steve
-
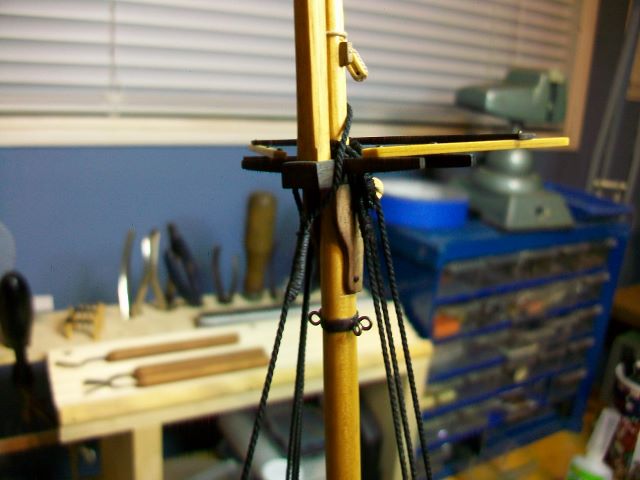
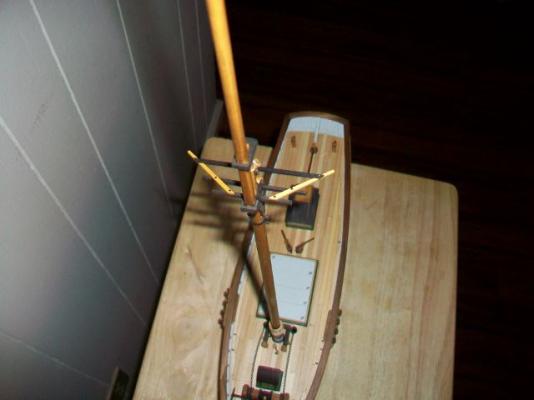
I added the last pair of shrouds this afternoon. The last empty pair of deadeyes is for the backstay. I also installed the bobstay, I think it's called. It goes from the top of the stem to the masthead. I sure like the rope and boxwood blocks I got from Chuck. Thanks for reading! Steve


- 569 replies
-
- 11
-
-
- shenandoah
- corel
- (and 1 more)
-
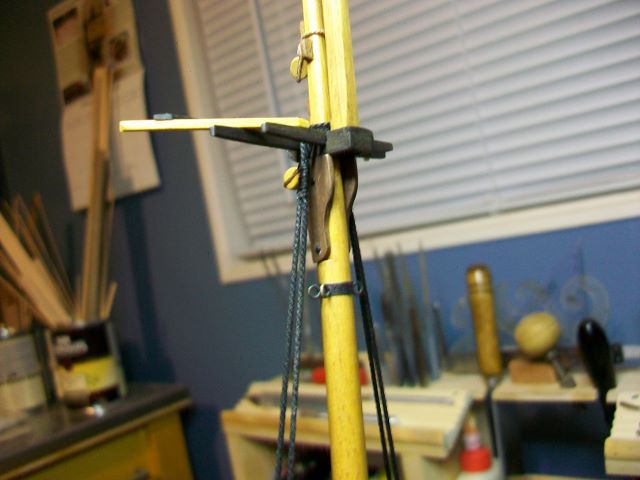
Thanks Mark. That's exactly what I need. Trying to do it by hand was simply an exercise in futility. I may give that a try. Hi J. Here's what I found in George Biddlecombe's The Art of Rigging. He says on cutters, the shrouds "are fitted and put over the mast-head, similar to those in ships. They are wormed throughout" (p. 111). He also says for cutters or vessels with one mast, "The stay is fitted over the mast-head, similar to that in ships; only wormed its whole length" (111). For ships, Biddlecombe says, "The eyes of all the shrouds are parceled with worn canvas, well-tarred, about one fathom and a half [9 feet] on each side of the middle, for large ships, and proportionably for smaller; and the served with spunyarn one-fourth of the length; each turn of their serving is laid close, and strained tight round, to prevent the water from penetrating. The foremost shroud is served the whole length" (52). So I guess I should have served all the shrouds and the forestay, being that I'm building a one-masted vessel. If I had that serving tool Mark spoke of, I'd do it, and I suspect it would look very nice. I'll aim to do it on the next build. Steve
- 569 replies
-
- 2
-
-
- shenandoah
- corel
- (and 1 more)
-
This evening I had a chance to get my head back on straight out in the Glacial Progress Boatworks after a long week of trying to civilize sophomores. I hung two pairs of shrouds with their deadeyes. I had delusions of grandeur running through my head all week. Early in the week I read that the foremost shrouds are served for their entire length. Of course, I was going to do that! How hard could a little bit of serving be? Well, suffice it to say that only the tiniest portion got served, up near the eye that passes over the mast head. I did find a diagram of jig to serve lines with. I'm not patient enough right now to build a jig, though, and the fancy served shrouds will have to wait for my next boat--maybe. Thanks for reading! Steve


- 569 replies
-
- 12
-
-
- shenandoah
- corel
- (and 1 more)
-
Mark, I just read through your build log. Wow, what great detail. I especially like the windlass you made. Was that scratch built or per the kit plans? Thanks for posting. Very inspiring! Steve
-
That myrtle planking looks good enough to eat! Is it stained or natural? Steve
- 33 replies
-
- 1
-
-
- sanson
- artesania latina
- (and 1 more)
-
Dee Dee, I also just read through your build log. Such impressive work. I so enjoyed watching the planking take shape. The painting is very evocative of the real craft. In a couple of photos I had to double check if I was looking at the model or the real deal! Steve
-
Wow, Jesse! Those are the coolest sails I've ever seen. Incredibly beautiful! Steve
- 607 replies
-
- 1
-
-
- scottish maid
- artesania latina
- (and 1 more)
-
Thanks J! For some reason your description conjures up pictures of Barney Fife in his deputy's uniform, his one-and-only bullet in his shirt pocket, glaring at the sailors while they work, shouting, "We've got to nip it in the bud, men, nip it in the bud!"
- 569 replies
-
- 3
-
-
- shenandoah
- corel
- (and 1 more)
-
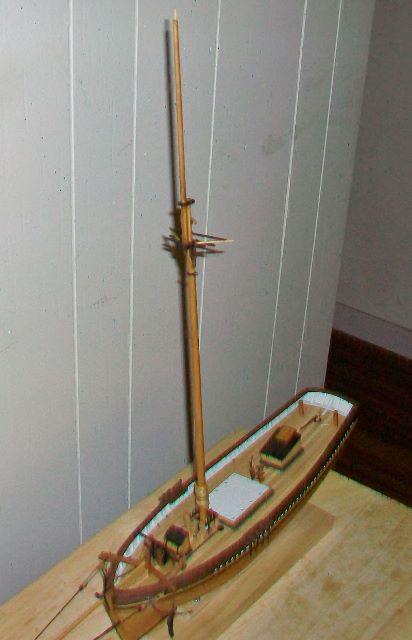
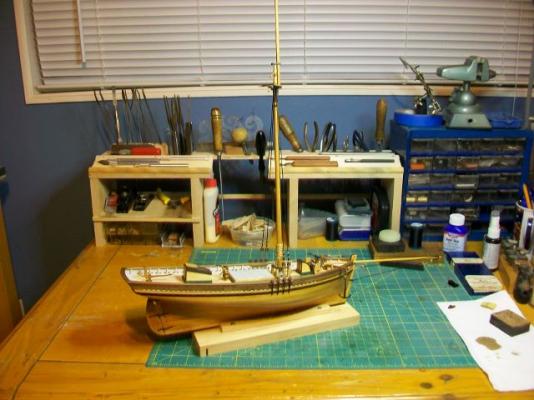
Thanks Jesse. I remembered you doing that on your Scottish Maid build. I added a topmast. The mast cap was a real challenge. It's a lot of mast for a little ship. Thanks for reading! Steve


- 569 replies
-
- 5
-
-
- shenandoah
- corel
- (and 1 more)
-
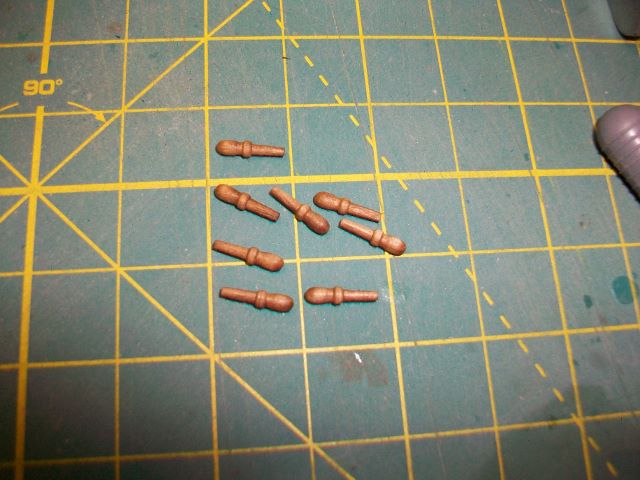
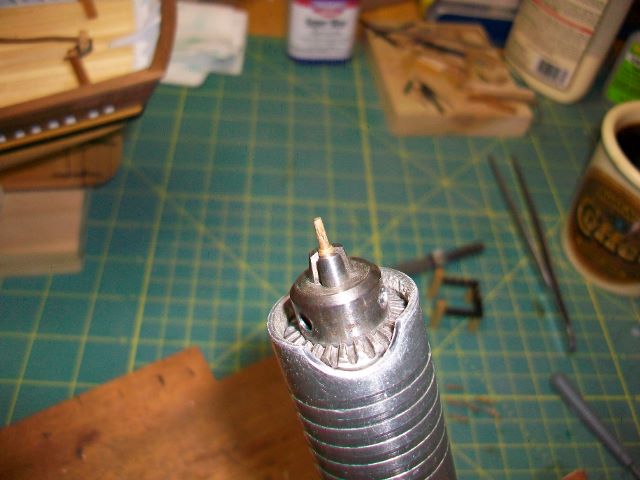
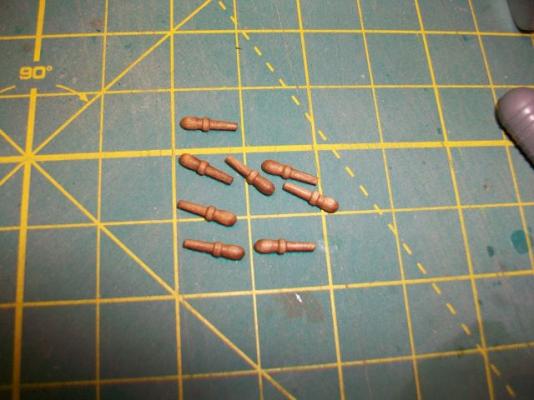
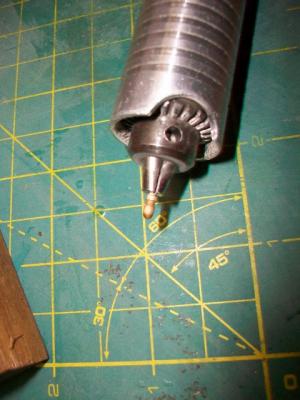
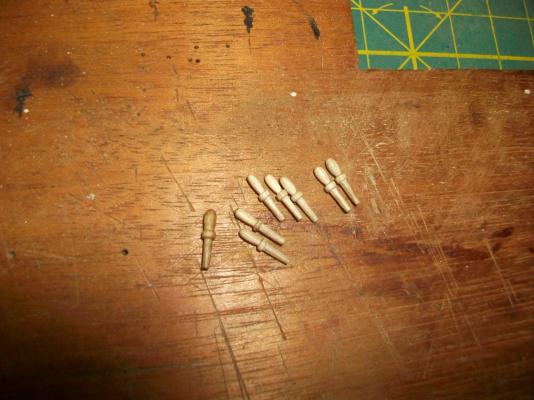
Thanks, Bob and Sam! David, where do I get one of those? Does Byrnes sell them? I got around to putting the belaying pins in the rails and noticed that they looked downright chubby. I decided to put them on a diet. I chucked them handle-first into the foredom tool and then the other way around. A few seconds turning against a file and then a couple of grades of sandpaper took off a good amount of material. Now they are thinner, but no two are quite alike. Sort of like the scuppers. This ship is really starting to follow a pattern... Thanks for reading! Steve


- 569 replies
-
- 5
-
-
- shenandoah
- corel
- (and 1 more)
-
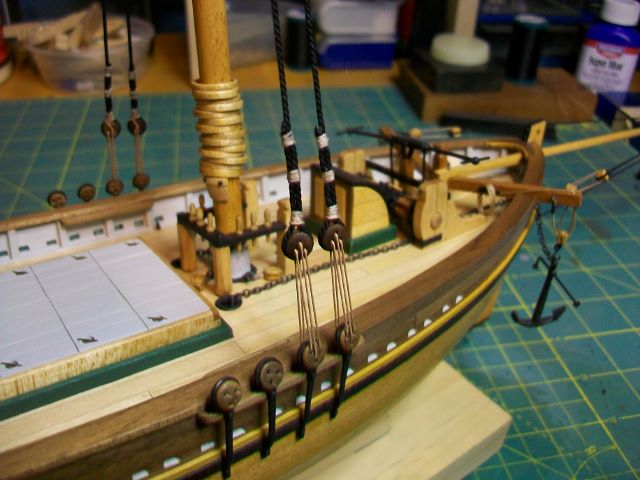
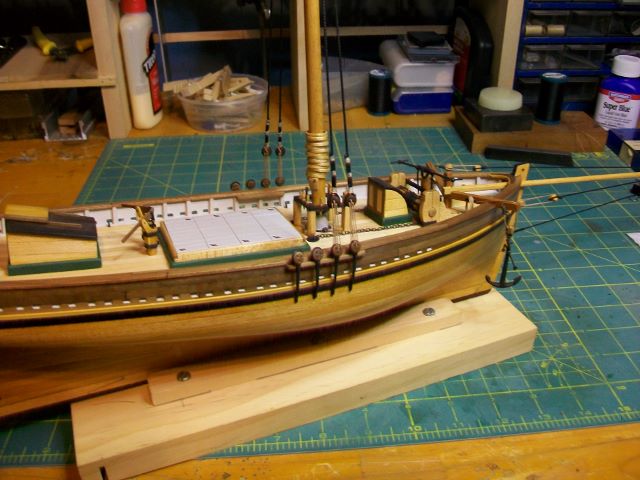
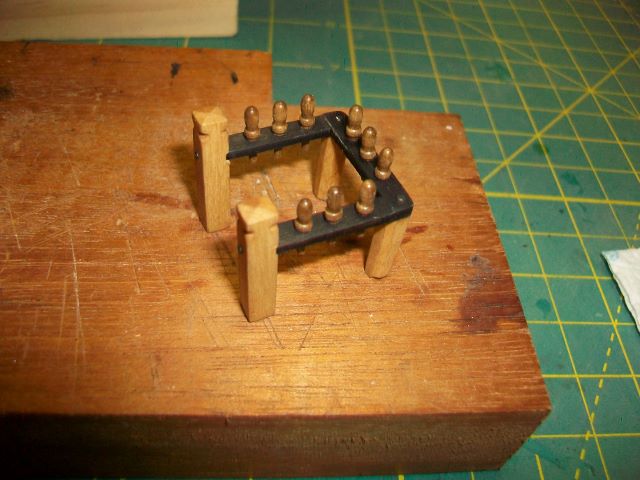
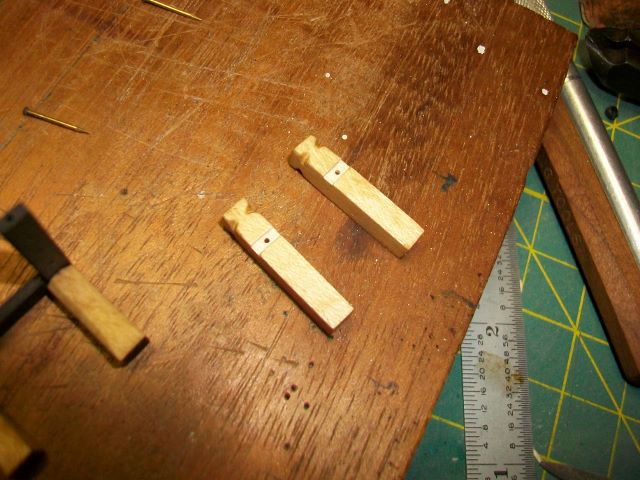
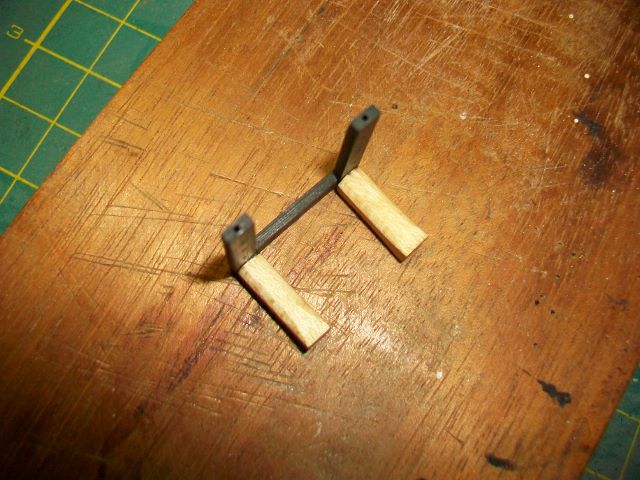
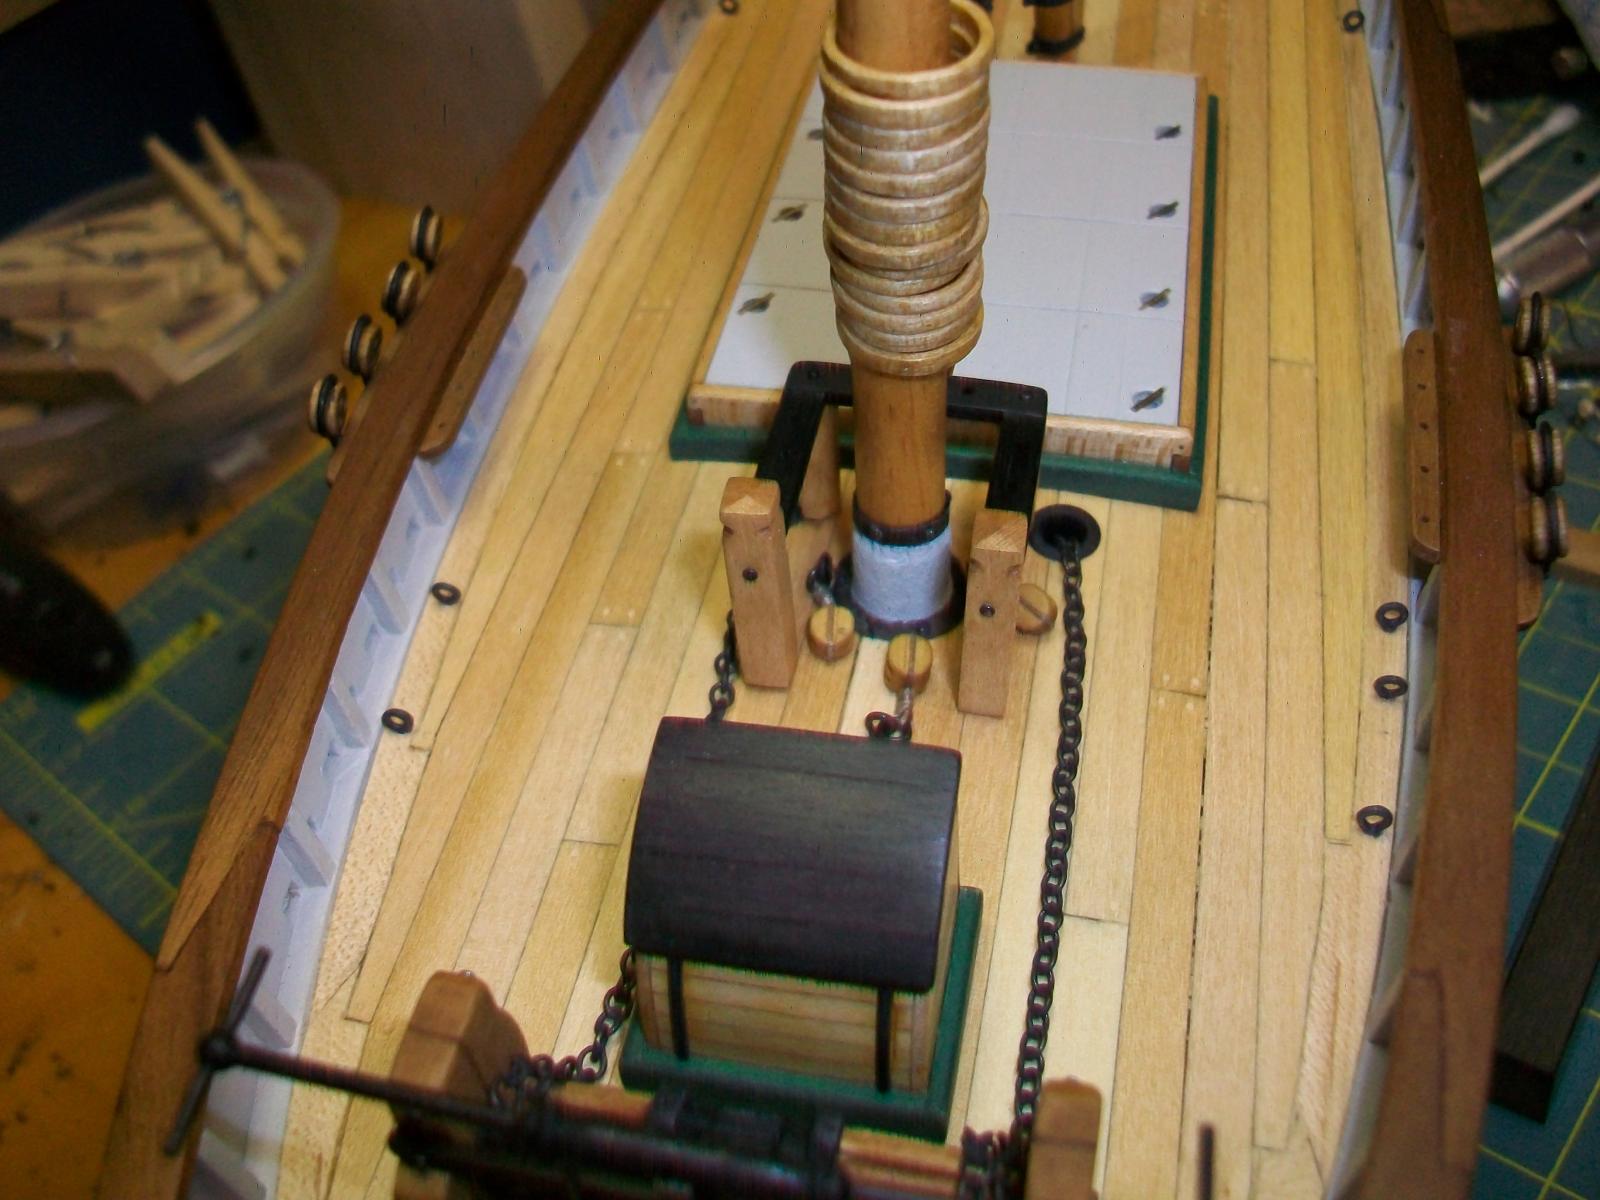
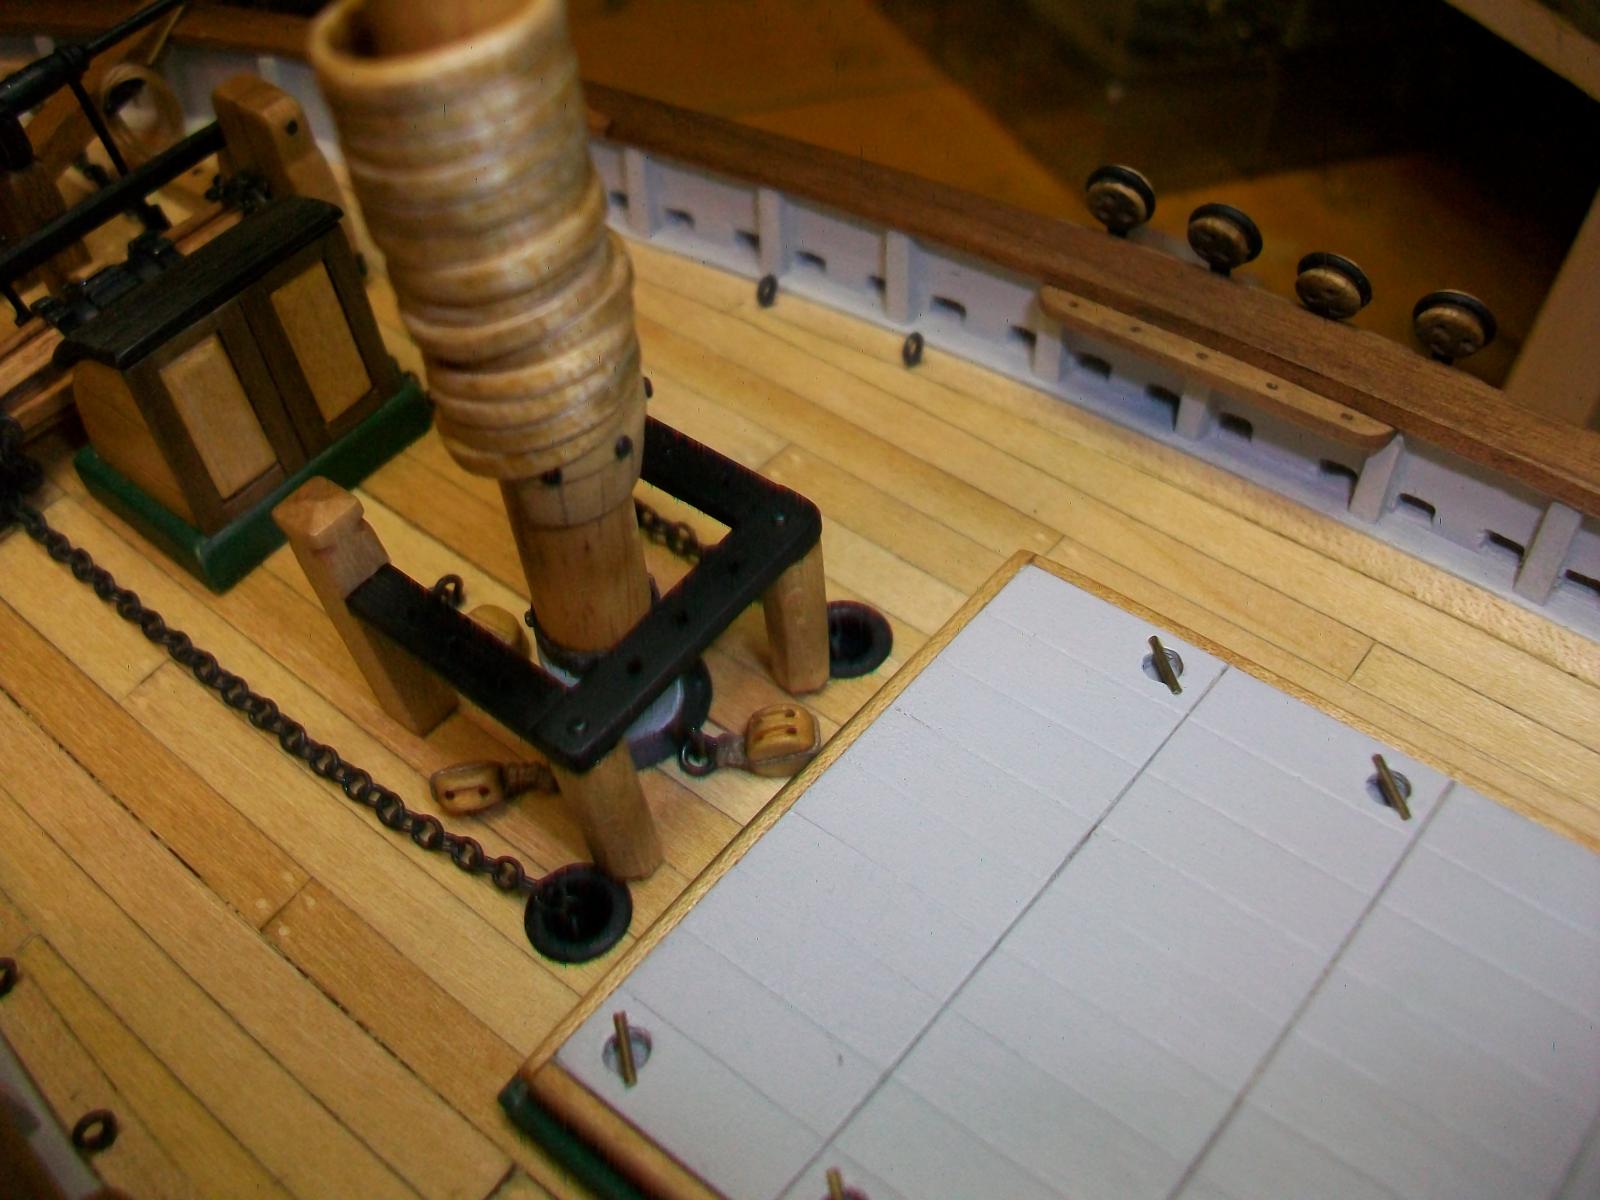
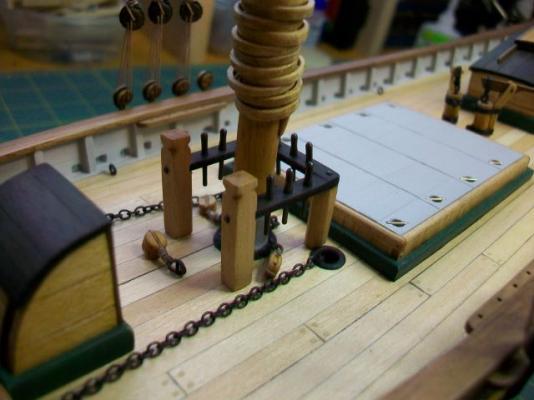
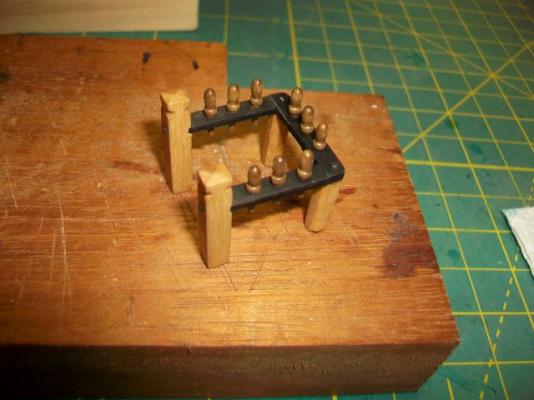
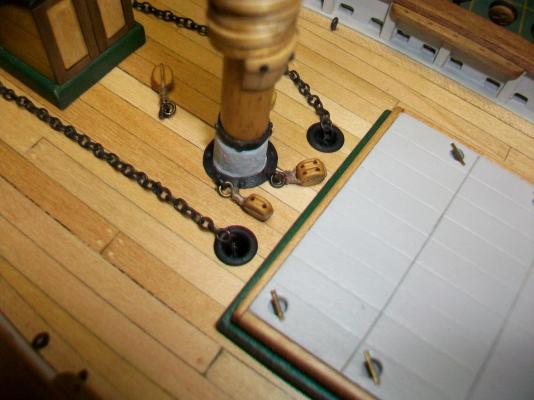
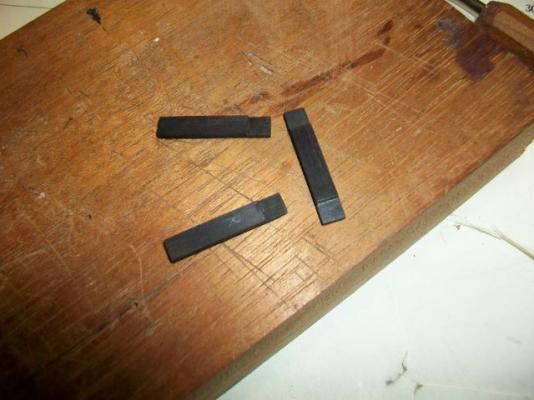
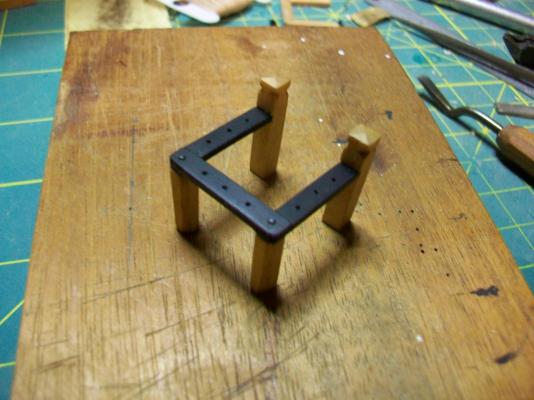
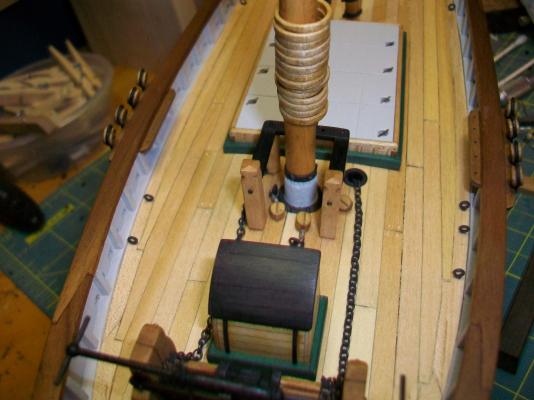
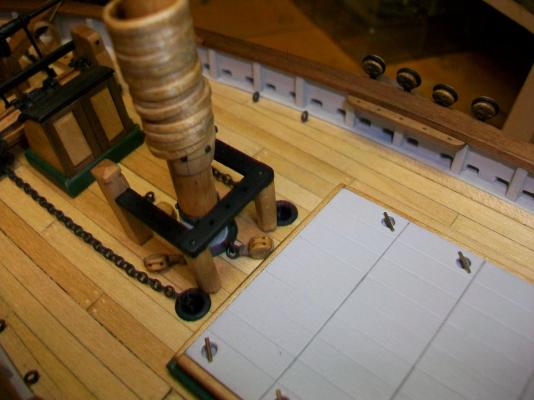
I spent some time today in the shipyard and made a little progress. I repainted the mast boot a lighter color to match the bulwarks. Also, I stropped up some blocks and attached them to rings and ringbolts around the mast. Then I made up a fife rail, I think you call it. I built it per the plans, sort of, and liked how it looked until I set it on the ship. It was too wide. The rear posts sat partly on the chain pipes. I think I placed the holes for the chains a tiny bit too close to the center line of the deck. I really didn't want to build another rail, so I just notched the undersides of the rear posts to slide over the edge of the chain pipes. Also, the fife rail looks really chunky to me. I don't have it glued down yet, so I'll live with it a few days to see if I want to try another one. I suppose it's not going to matter too much since it's going to be festooned with rope coils. Anyways, I detailed the steps I took to make the rail for posterity's sake. Thanks for reading! Steve


- 569 replies
-
- 12
-
-
- shenandoah
- corel
- (and 1 more)
-
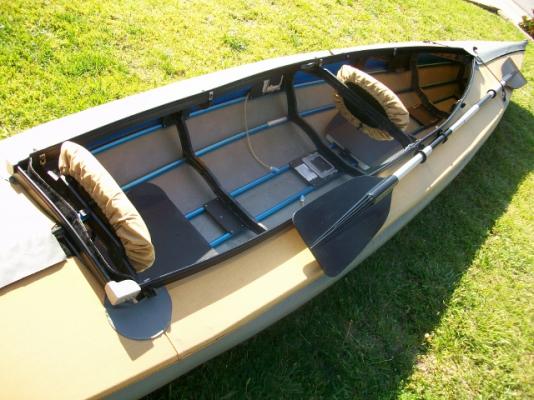
Those Pygmy kayaks are beautiful, and yours is no exception. I've never built anything using stitch-and-glue or tape-and-glue. How hard was it? And that's one beautiful paddleboard. I've seen plans for wooden surfboards that get me all hot under the collar too. One of these days... Steve
-
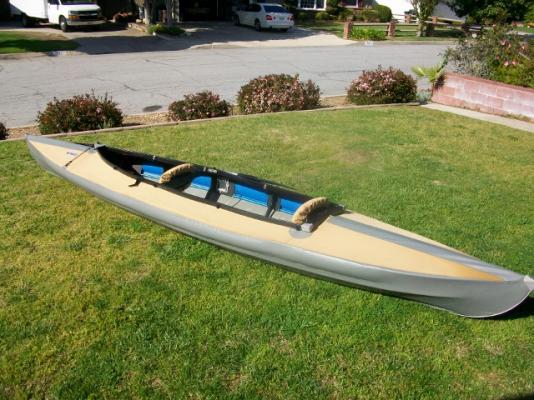
I've got plans for a 21' Chesapeake Light Craft double kayak. My wife and I were going to build it and use it, but we ended up getting a really cool old 17' Folbot Super folding kayak instead. We certainly paddled some miles in that. I got rid of it after I placed her in a nursing home. I don't think I'll ever build that huge double now--I don't know where I'd keep it. Here's a pic of my Folbot Greenland 2 that I still paddle sometimes. I take out one seat and put the remaining one amidships. What model/make is your 14 footer? Someday I might like to try to build one. Did you post build logs on any of the small craft? Lots of questions, I know. Steve
- 569 replies
-
- 4
-
-
- shenandoah
- corel
- (and 1 more)
-
Good to hear from you, Andy! Did you finish the paddleboard?
-
Hi again Scott, I just looked at your Hellen build log. You obviously have wood bending down to a science! Beautiful boat! Steve
- 33 replies
-
- 1
-
-
- sanson
- artesania latina
- (and 1 more)
-
Hi Scott, I've really enjoyed reading through your build log. I like how you're thinking through the steps and making modifications where needed. I think making planks out of Huon pine is a fine idea. I've seen photos of some very old yachts down in your part of the world that were made of Huon and they have held up amazingly well. You are going to have one tough tug boat there--a Sampson indeed. Hooray for your wood-stashing uncle! I'm an incurable wood picker myself. It's amazing what people will throw away. I'd suggest following Chuck's planking tutorial. I found it very helpful. I think if you take your time you can succeed in planking the hull with one layer. Do you have a hot pipe or curling iron to bend wood on? That will make a lot of difference. If you bend your wood, and I'll bet that Huon will bend admirably, you can do a neat job. Search the site on bending wood. There are many ways to do it. Your build looks great. I can't wait to see how you construct a steam engine. I'll be following with interest. Steve
- 33 replies
-
- 1
-
-
- sanson
- artesania latina
- (and 1 more)
-
Larry, I really like that close-up shot of the inside of the bow with the waterways, the supports for the hawsepipes, the decking, the clean paint lines, etc. Very nice work. The Niagara looks like a fun build. Steve