SGraham
-
Posts
538 -
Joined
-
Last visited
Content Type
Profiles
Forums
Gallery
Events
Everything posted by SGraham
-
 Thanks Mark and J. The torch is 5 1/2" tall. I went ahead and made a bracket for one of the swivels out of a half piece of copper refrigerator water line. I soldered a brass post to the bottom of it. I can't take adequate close-ups with my pathetic little camera. Steve
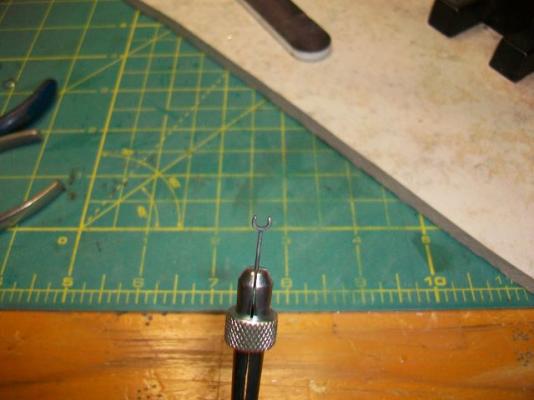


- 569 replies
-
- 9
-

-
- shenandoah
- corel
- (and 1 more)
-
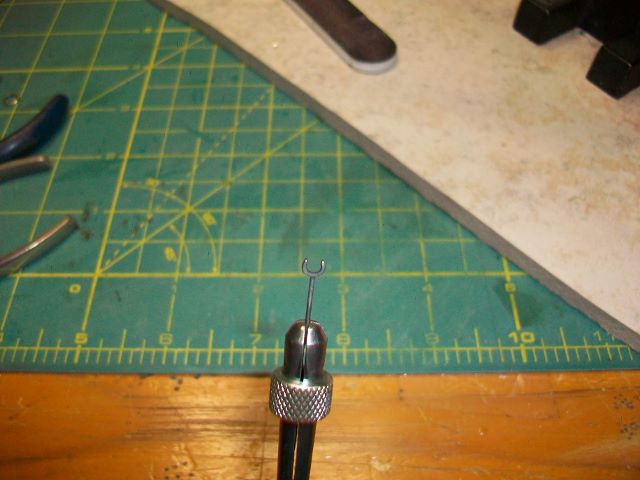
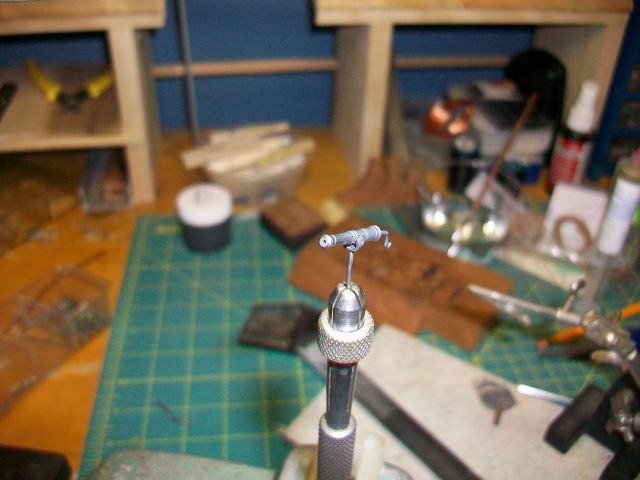
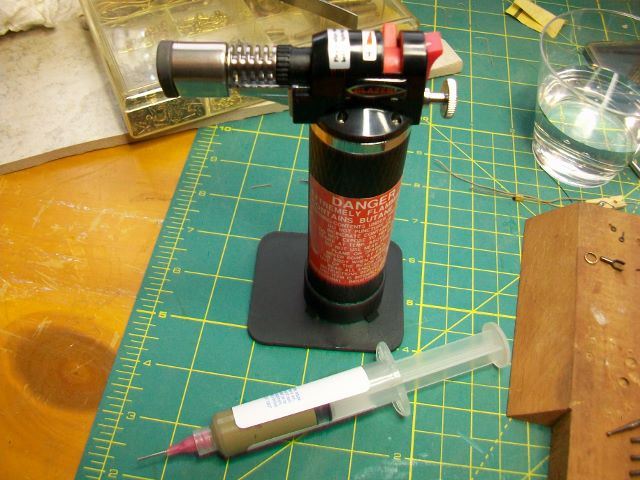
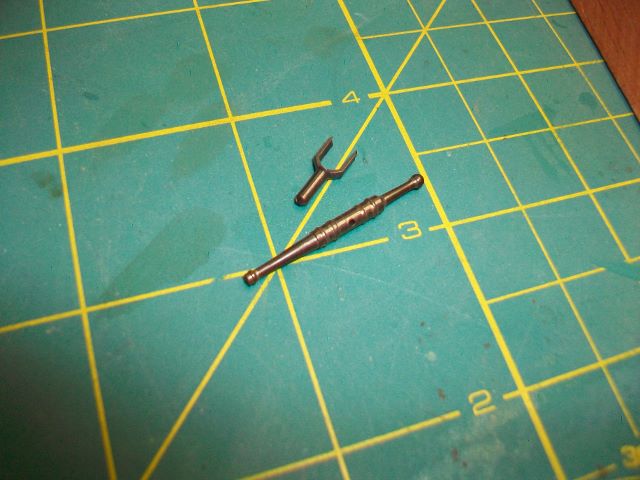
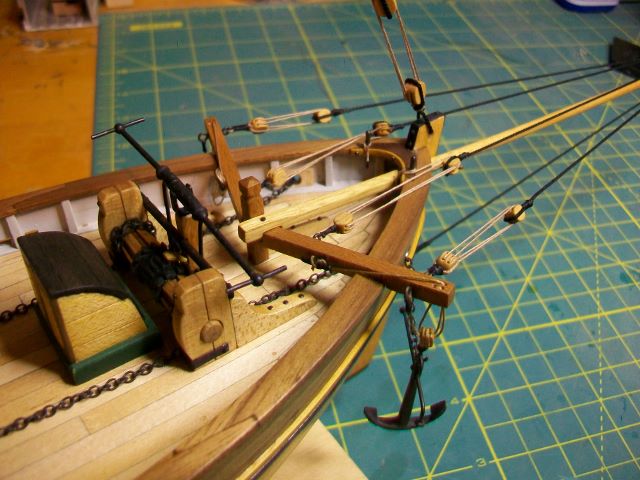
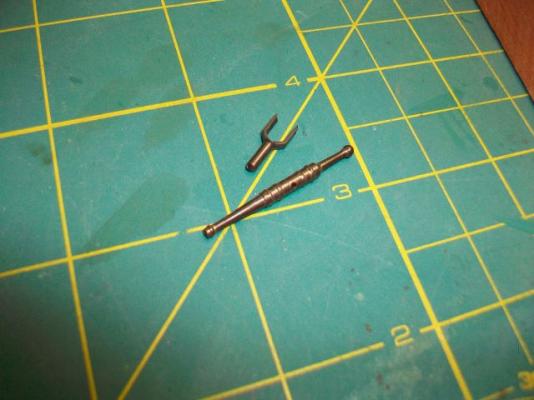
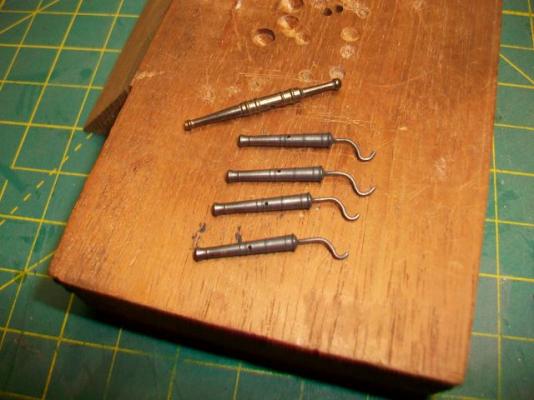
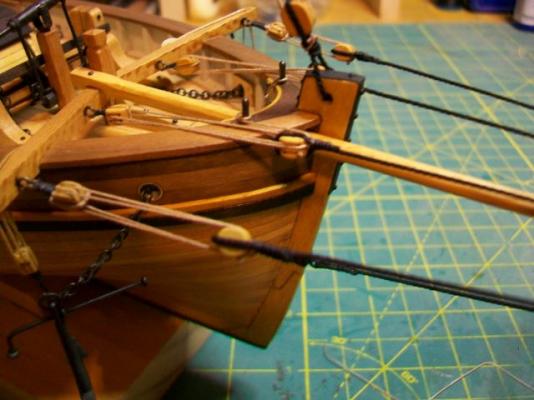
The torch arrived. I also bought a syringe loaded with a paste made of flux and silver solder. I tried it out on a brass ring and it worked well. I removed the knob on the back of the swivel guns I bought from Chuck. I drilled hole there and soldered in brass wire. It was easier than I thought it would be. Probably beginner's luck. Here are the guns blackened. I included one of the guns from the kit for comparison. Steve P.S. David--I'll watch the $2 rack for you!

- 569 replies
-
- 8
-
-
- shenandoah
- corel
- (and 1 more)
-
Arrr...those be some salty rats! Looking great, David! Steve
-
Thanks David and J. There's a used book store near me that puts racks of books out on the sidewalk for $2 apiece. I found Chapelle on the $2 rack. How the mighty have fallen! Steve
-
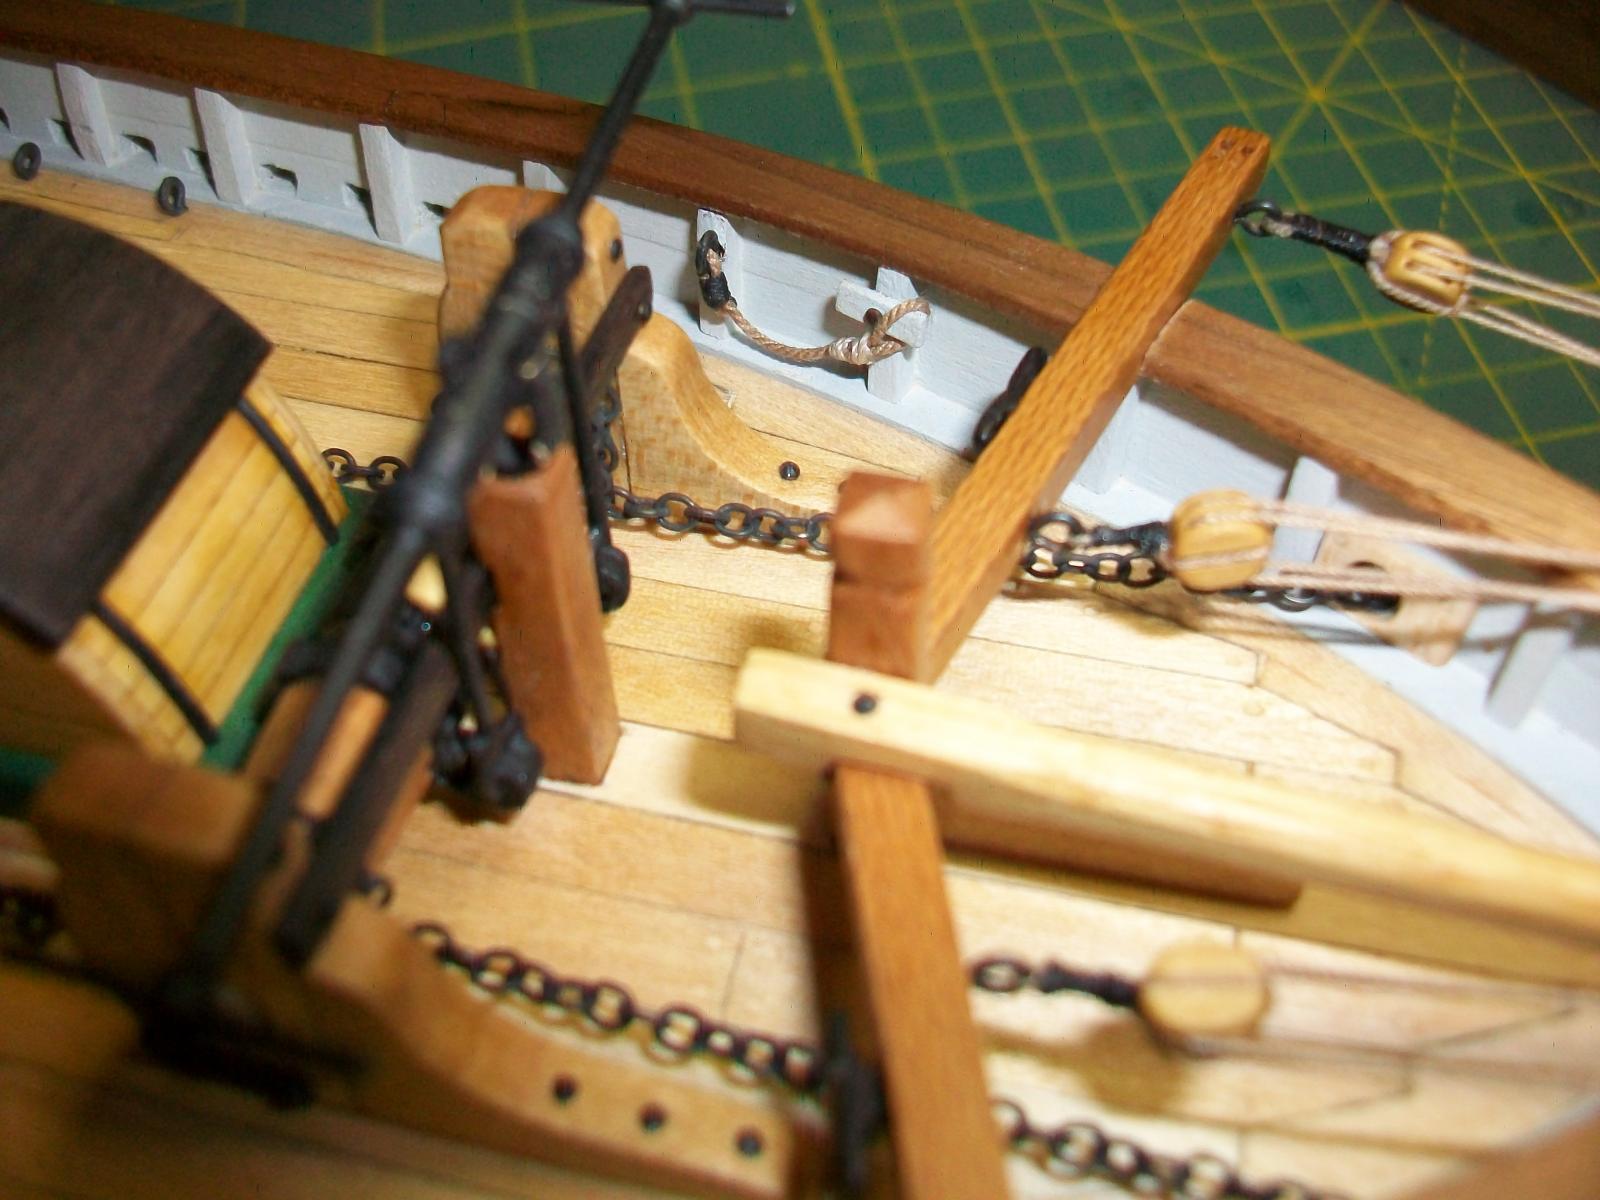
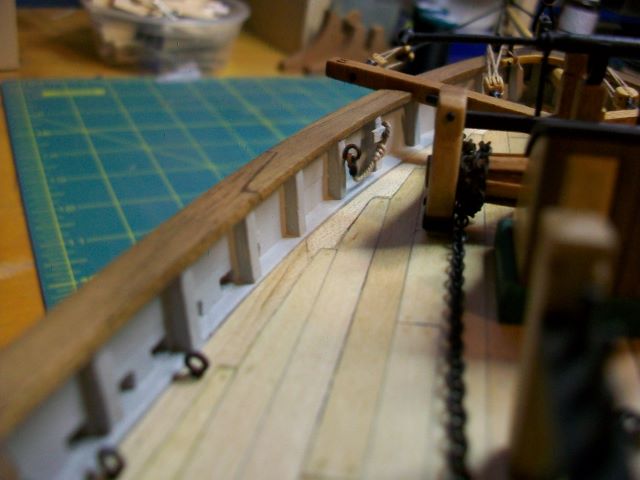
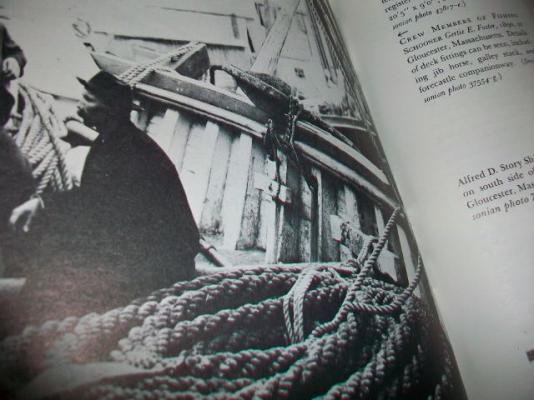
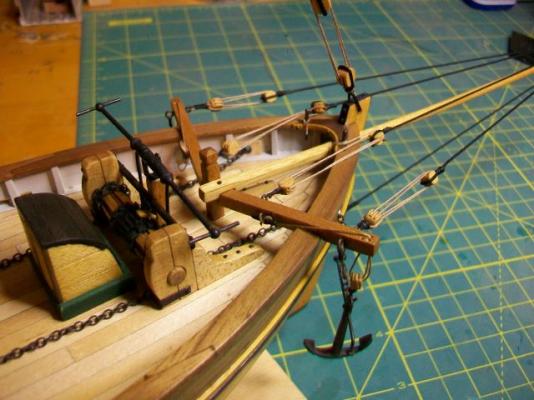
Thanks J. I made a tiny bit of progress yesterday. I found a photo in Chapelle's "The National Watercraft Collection" that shows how they secured the anchor on the starboard bow rail of a schooner. They used a ringbolt and a plain cleat. A line is attached to the ringbolt and has an eye spliced in its other end. The line is looped around the anchor and the eye at the end of the line simply hooks around the end of the cleat. I'm not sure I want to stow an anchor up on the rail of the Shenandoah, but I thought I'd add this small detail. It's ready for the anchor if anyone wants to stick it up there. Thanks for looking. Steve


- 569 replies
-
- 10
-
-
- shenandoah
- corel
- (and 1 more)
-
J, I'm joining the party a little bit late. Wow, it's amazing how quickly this boat is going together. The combination of paint and stain is very eye-pleasing. These longboats are so complicated inside--so many different strata. I find them fascinating to look at. Thanks for sharing. Steve
-
Thanks J and Sam. So, J, what's the next build? And Sam, don't overdo it with the work. Steve
- 569 replies
-
- 1
-
-
- shenandoah
- corel
- (and 1 more)
-
Thanks for sharing the details about silver soldering. I just ordered a torch and will be referencing your comments when it arrives. Steve
-
I agree with the jack-screw votes. That's a very impressive job you've done replicating it, Larry. Also, I like the color you achieved on the carronade barrel. Is that blackening or paint? I have a couple of questions about details in the photos. In the second photo on the preceding page--the photo showing the jack-screw, I like the look of the rope wrapped around the barrel. Was that commonly done? Also, what is the small ring right in back of the bottom of the jack-screw for? I notice in the photo that there is a small line tied to it, but I can't imagine what its use is. Steve
-
Scroll saw operation
SGraham replied to bigcreekdad's topic in Modeling tools and Workshop Equipment
I like Jay's homemade blade guide/thrust bearings. Those are a great idea. Here's how they did that on my old Walker Turner. Steve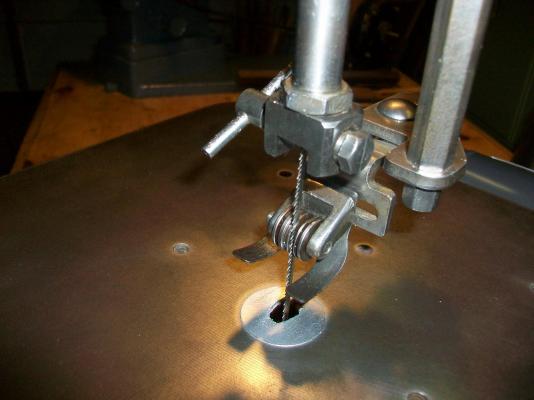
-
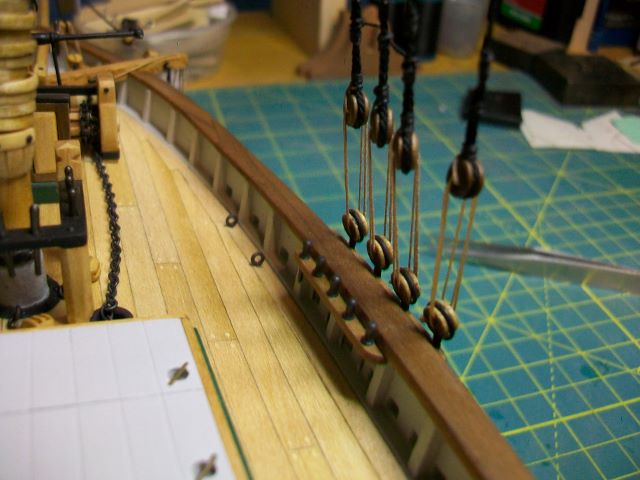
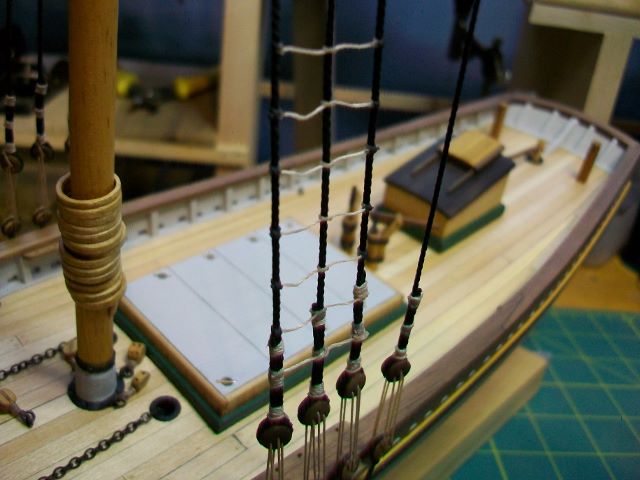
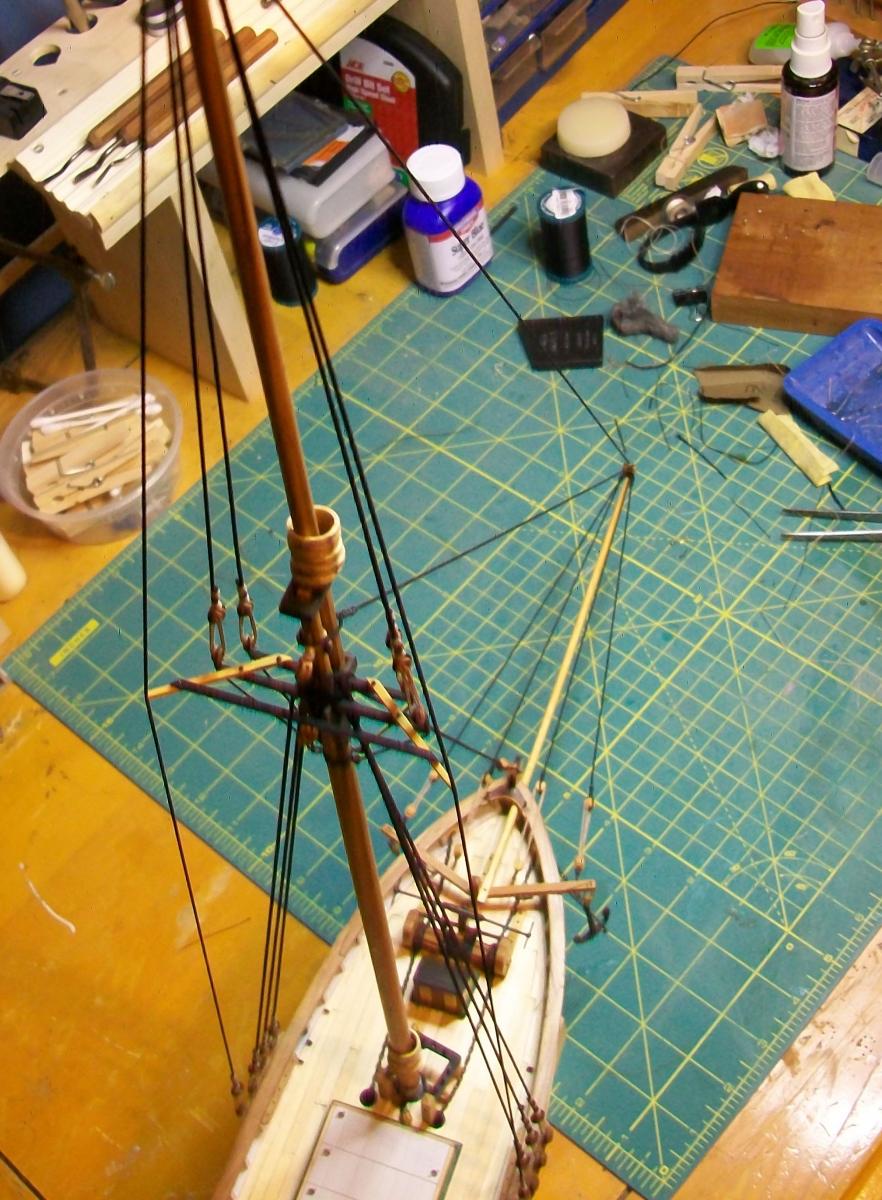
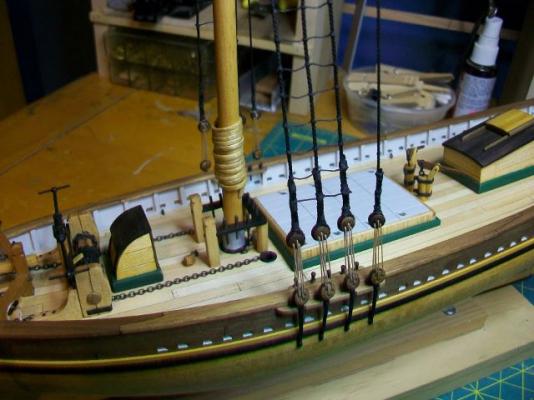
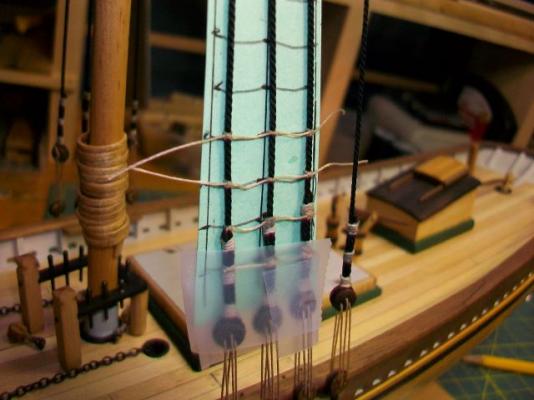
Ratlines are tarred, and I switched out the wooden belaying pins for blackened brass. I like how they look. The swivel guns for the Shenandoah look like 16th-century falconets. I could just picture the Confederate crew shouting, "Thou ill-favoured Yankee miscreant, I'll crack thy knave's pate with yon murthering piece!" Seriously, they couldn't look more out of place. I ordered a set of Chuck's brass swivel guns to replace them. They'll need some modifying, so...I went ahead and ordered a butane micro torch, silver solder, and flux from Otto Frei. When they arrive, I'll be entering the esoteric wilds of silver soldering. Photos are of the tarred rats and blackened pins. Thanks for reading! Steve

- 569 replies
-
- 13
-
-
- shenandoah
- corel
- (and 1 more)
-
Those shrouds look great, David.
-
I'm nearing completion in my build of Corel's Shenandoah kit, a 19th-century cutter. I chose it because the hull was very sharp at the ends and didn't look too hard to plank. That turned out to be true. The thing I noticed, though, was that Corel has beautiful, detailed, clearly drawn plans with minimal, almost non-existent written instructions. If you are a visual learner, you'll do well with them. If you are a verbal learner, you'd be better off with something else. For clarity of instructions, I'd give Model Shipway's Glad Tidings high marks. I haven't built the kit yet, but I've read through the instructions and they are a joy to follow. Good luck in your search, Luke. Steve
-
Hi David, I just found your build. What wonderful clean work! That dragon head is a wonderful touch. When you install the shrouds, you work with alternating pairs of shrouds, starting at the forward starboard side and moving aft. The first pair you put on should be the forward ones on the starboard side. The loop formed by that pair will sit at the bottom of the pile of shrouds at the lower masthead. On top of those goes the loop formed by the first pair on the port side. On top of those goes the next pair on the starboard side, then the next on the port, etc. The loops are seized together and wormed and served to a few feet below the masthead. I hope this makes sense. Great, imaginative build! Steve
-
Bob, I really like the detail of the one dark slat toward the front edge of all three benches. That's a very nice touch. And I can't get over that vinyl! It looks like your legs would stick to it on a hot muggy day. Steve
-
Mark, that rudder is beautiful. Those seams are eye-catching. Is it going to be oiled? Steve
-
Thanks David and J for the comments. I learned that the ratlines were coated in pine tar, not the stuff we call tar today, and that it would turn black with repeated applications over time. I may paint them black; I agree that they pop, but I'm not sure I want that much pop. The newer vessels that I saw photos of all have black shrouds and white ratlines. The older ones, it was hard to tell. I also heard that the rats were left untarred to keep sailors from getting tar on their feet. That sounds like a story to me. I don't think pine-tar-coated rope would stay sticky for very long, though, and I'd hate to climb up a big tall mast on deteriorating little pieces of rope. Food for thought... Mark, thanks for the kind words. And, of course, relocate away! I'm following the Lady A. with interest. Steve
-
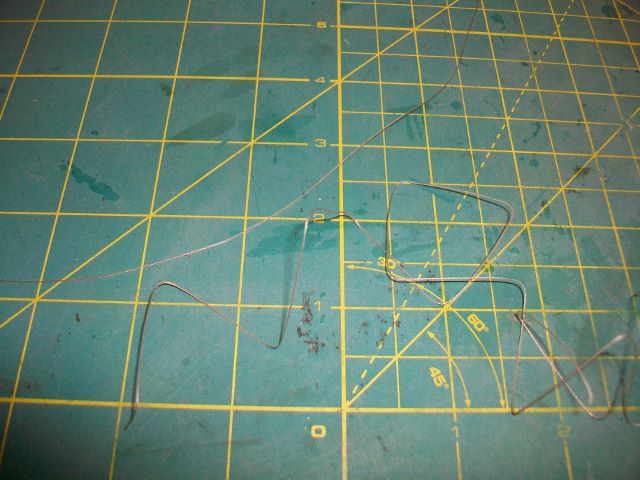
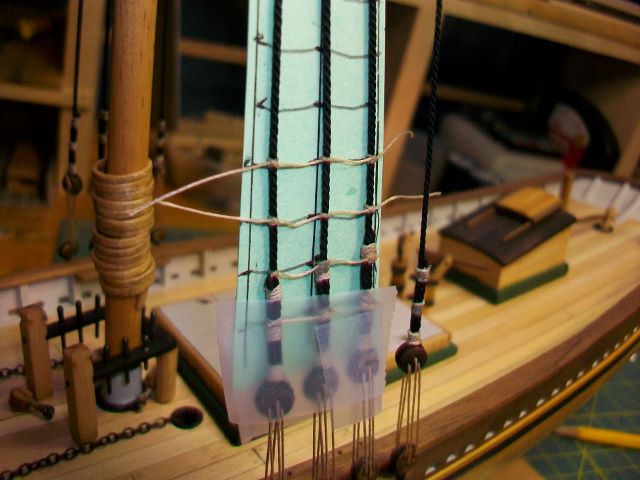
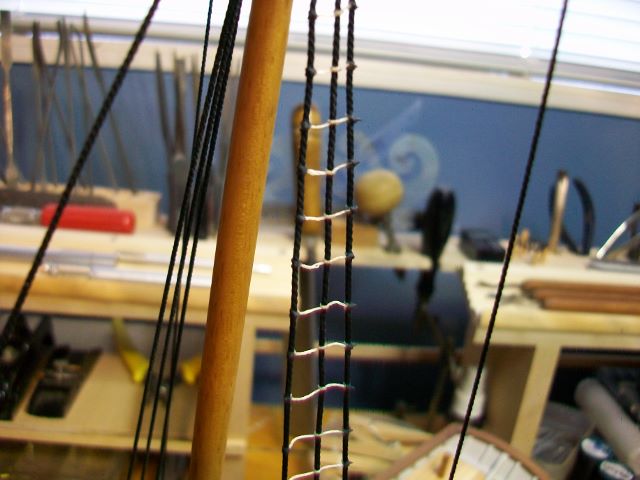
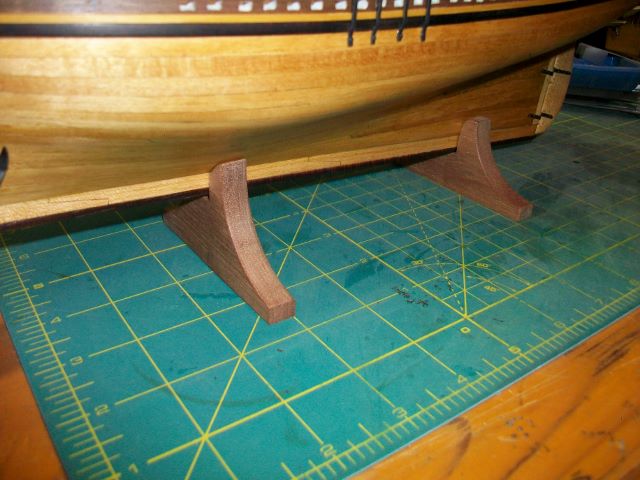
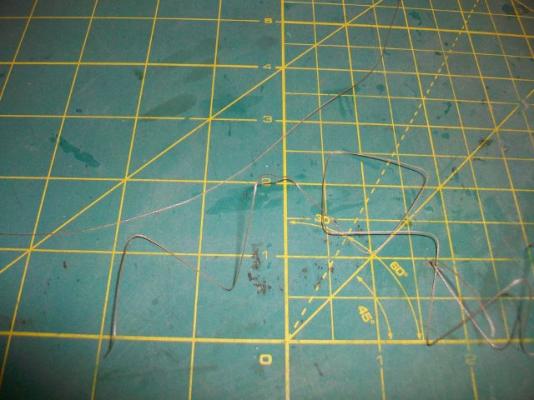
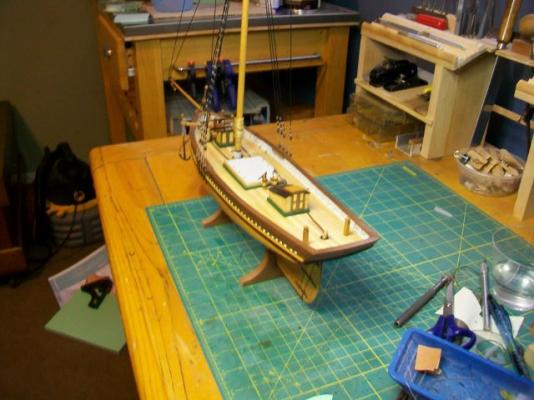
I've got the port side ratlines done. I put in some photos to detail the process. They show ideas I've "relocated" from other builders on this fine site. "Relocated," by the way, is a term we use in education to mean purloined. The first shot shows the thin line I used for the ratlines. The kinked strand in the bottom of the photo is how the line came off the spool. The straight line above it is after heating it by running it around my bending iron for a few seconds. It straightened it right out. Be careful of using too much heat, though, if your line is nylon--it can partially melt and stiffen up. This makes it hard to tie knots. The second shot is of the jig I made to make sure I spaced the ratlines out evenly. I succeeded for about a third of the way up the shrouds and then got curious to see how it looked without the jig, pulled it off, and neglected to put it back on to finish the job. So I've got rather free-form ratlines on the port side. I read up on a thread about whether or not the ratlines were tarred. It was a very interesting read, but I learned that the answer isn't a clear-cut yes or no. Some said tarred, some said not, some said partially, etc. So, I "tarred" the outer knots with black paint where the ratlines tie into the outer shrouds. I pity all of you who build big, many-masted ships. Those rats are hard to get even! Finally, I've been thinking about a stand for the Shenandoah. I wanted something very simple. The last photos are of what I came up with. They are still bare wood. I'm going to peg them to a larger flat display base later. They might be a little bulky and might look better a bit thinner. I'll live with them a few days and make that call later. Thanks for reading! Steve


- 569 replies
-
- 11
-
-
- shenandoah
- corel
- (and 1 more)
-
Wow, very sorry to hear this, Scott. Good luck with your Hellen. Steve
-
Flying Fish by Reuben - Corel
SGraham replied to Reuben's topic in - Kit build logs for subjects built from 1851 - 1900
Hi Reuben, I like to put low-gloss tung oil on the pieces and rub them out with #0000 steel wool before I glue them down to the deck. I can't do a clean job of this if I glue stuff down first. I think the deck fittings should stick just fine even if they are both pre-varnished, oiled, shellacked or whatever finish you choose to use. They are not under much of a load. I don't think fire is much of a danger. I'd make sure a joint like a stem-to-keel or sternpost-to-keel was bare wood to bare wood, though, since this area will likely take more stress than your deck furniture. Does this make any sense? On my current build, I carefully traced a line around the deck fittings and cut away the decking there. Then I glued them to the subdecking. See my Shenandoah build log, post #221 if you like. I just thought it looked more realistic that way, and it nicely dealt with the problem of getting the bottom of the deck fittings to fit the camber (curve) of the deck just right. If your airplane building friend makes flying models, he is dealing with loads and stresses in his builds that ship modelers don't have to deal with. But, yes, I'd get all the advice from him that I could. Steve -
Such a nice build, Jesse. It's been fun following your progress. The Maid is a beauty for sure! Steve
- 607 replies
-
- 2
-
-
- scottish maid
- artesania latina
- (and 1 more)
-
Flying Fish by Reuben - Corel
SGraham replied to Reuben's topic in - Kit build logs for subjects built from 1851 - 1900
Reuben, your Flying Fish is looking very nice. I think you're going to have a schooner to be proud of. As far as the brass goes, some people like to paint it, and others darken it with Brass Black, a chemical from Birchwood Casey. Do a search on this site on blackening brass. Some members have posted some useful insights into the process. Keep posting photos. I'm interested in this kit and look forward to following your build. Steve -
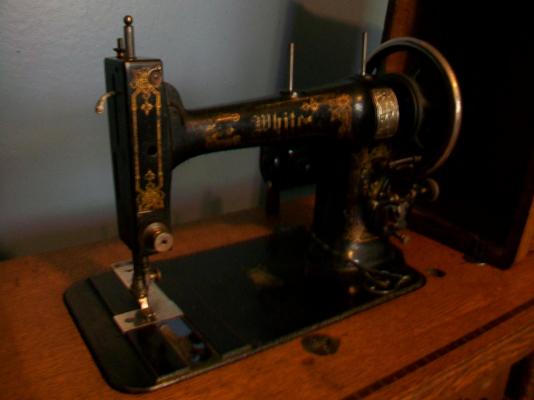
Thanks for the input, guys. I finally figured that even though the jib and topmast stays run through blocks out at the end of the bowsprit, they cant move much. Maybe the blocks serve like the bees on the bowsprits on larger vessels. I don't know, but the white stays just looked wrong. As far as my new sailmaking tool, goes...my daughter is going to show me how to use it. She doesn't know that yet. It's an 1881 treadle that was retrofitted with a motor sometime back. I have a new motor and pedal for it that I was going to use on a small lathe and never got around to it. Anyways, see where ship modeling has taken me? Now I have to learn to sew. Sheesh! Actually, it's all Jesse's fault. Those sails on the Scottish Maid were truly an inspiration. Steve
- 569 replies
-
- 4
-
-
- shenandoah
- corel
- (and 1 more)
-
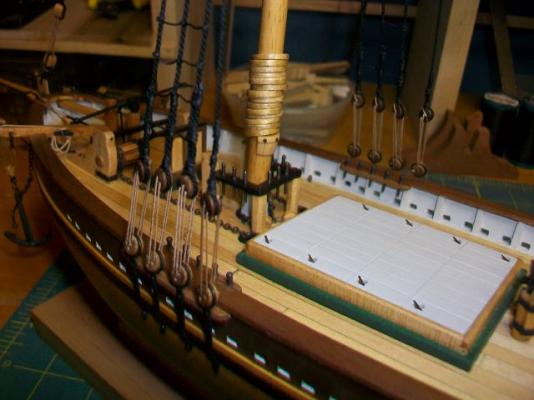
Standing rigging is done. I added the backstays and two forestays. I also stuck a couple of belaying pins up in the bows--no rope coils on them yet. Time to start thinking about sails. The first 2 photos show something that might help in the sailmaking process. My daughter and I found it yesterday. Thanks for reading! Steve


- 569 replies
-
- 9
-
-
- shenandoah
- corel
- (and 1 more)
-
Thanks J. I've still got a gaff and boom to make, a couple of stays yet to fit, and then comes sail making and running rigging. At my rate of work, I'm looking at next Christmas... Steve
- 569 replies
-
- 2
-
-
- shenandoah
- corel
- (and 1 more)