SGraham
-
Posts
538 -
Joined
-
Last visited
Content Type
Profiles
Forums
Gallery
Events
Everything posted by SGraham
-
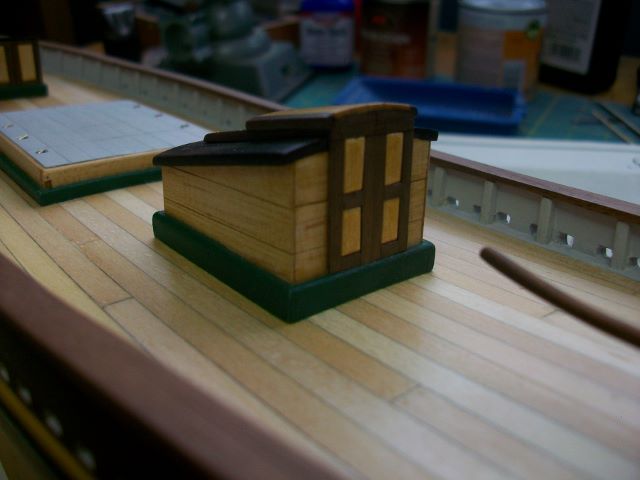
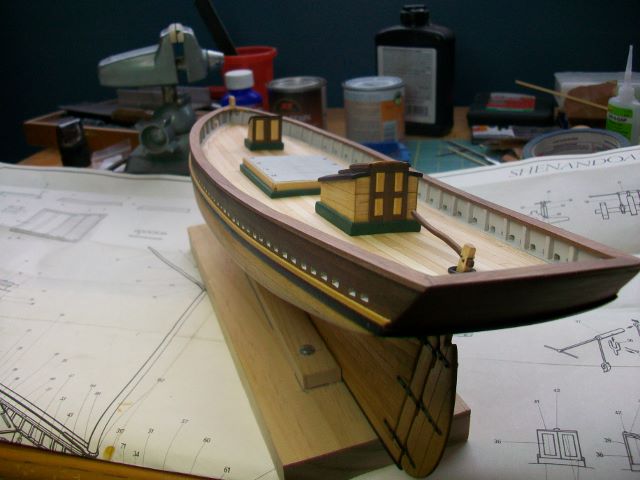
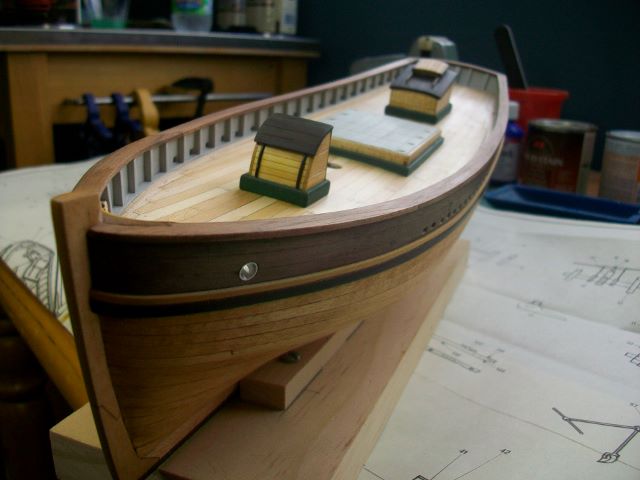
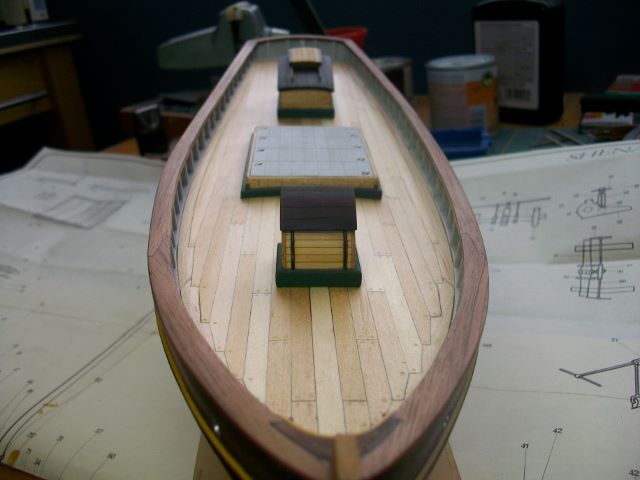
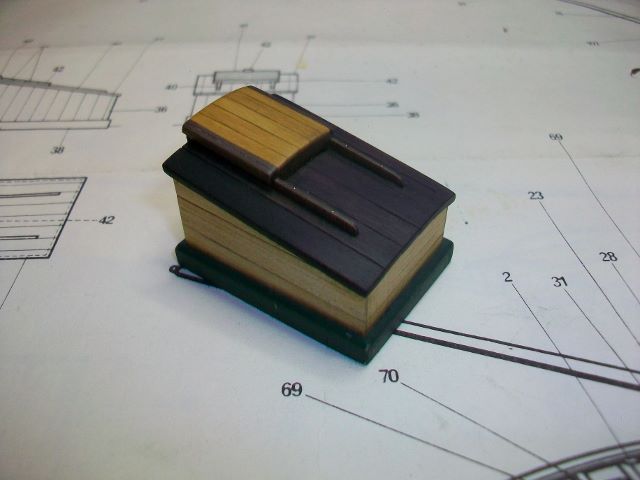
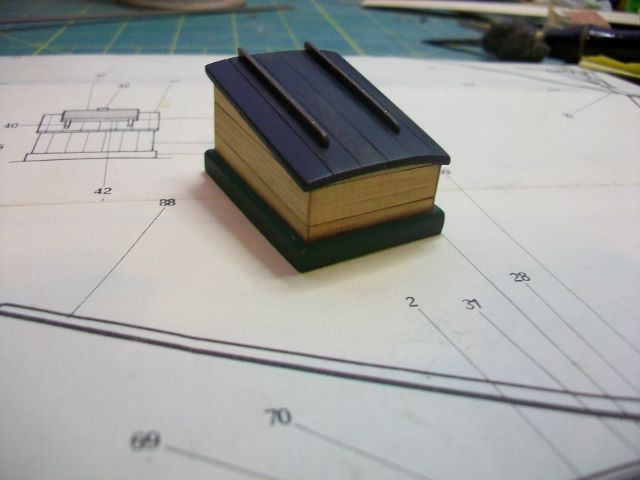
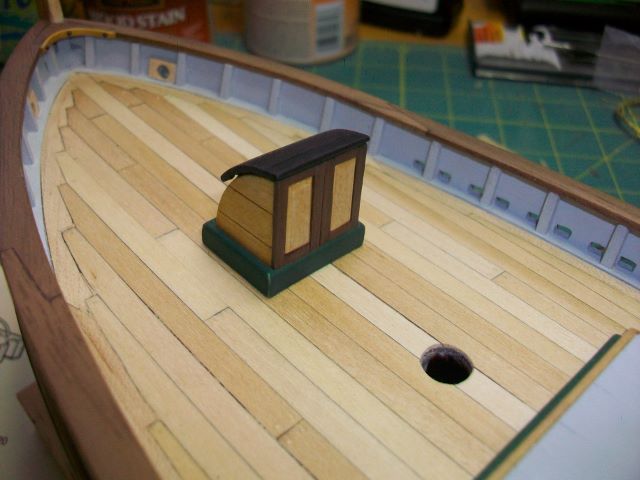
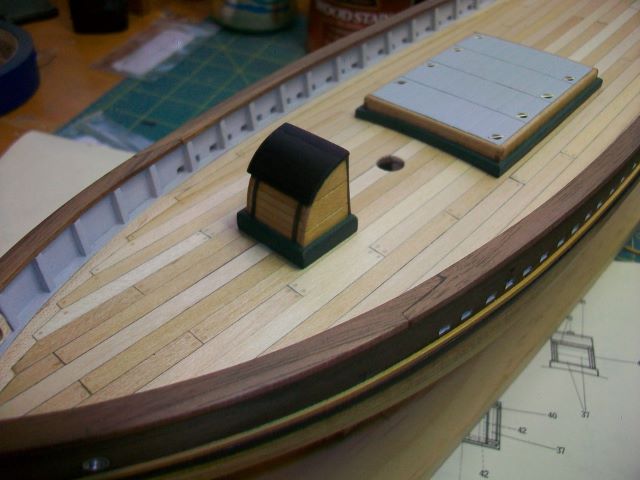
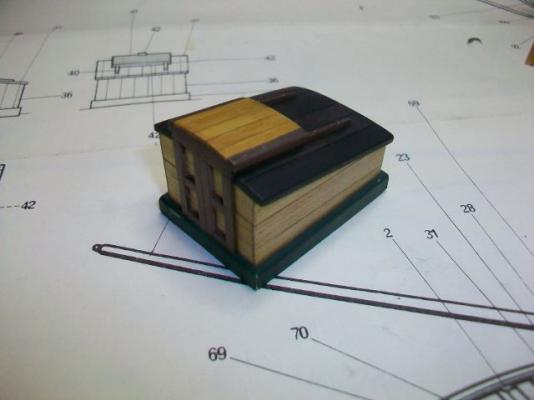
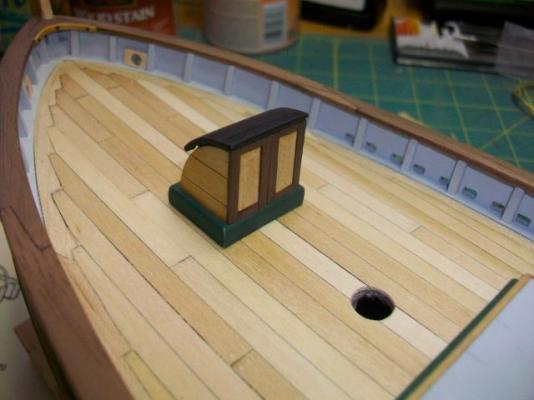
 Probably fewer gouges in parts as well from drill bits skipping along on their merry way. Well, the deck houses are done. I know I've been posting a lot of pics, but please bear with me for just a couple more with the houses on the deck. I de-shined the cabin tops a little with 400 grit sand paper. From here I move on to bitts. (Sounds like I'm going to fall apart.) Thanks for looking patiently! Steve


- 569 replies
-
- 12
-

-
- shenandoah
- corel
- (and 1 more)
-
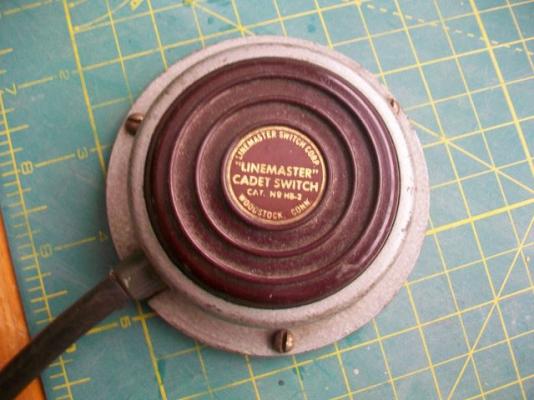
That sounds like a great deal, David. Does the foot control allow the foredom tool to start up very slowly? I've got a cool old foot switch, but its positions are on/off. When you step on it, the tool it's attached to leaps into life. This is not conducive to accuracy. Steve
-
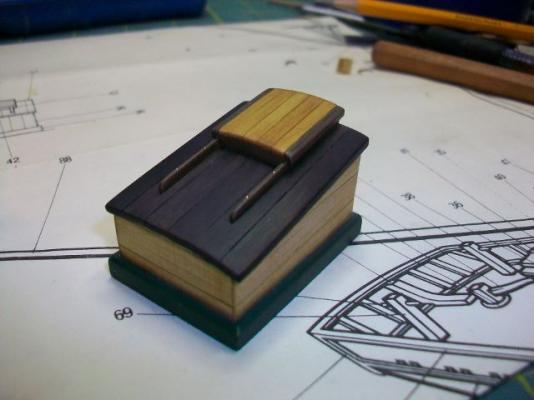
Thanks J. David, I used a foredom way back in the day at the jewelry bench. I remember the foot pedal being very easy to control. Here's a hatch cover on the deck house. Still to go are raised panels for the doors. Thanks for looking. Steve

- 569 replies
-
- 13
-
-
- shenandoah
- corel
- (and 1 more)
-
Where's the repair? I can't see it... Steve
- 607 replies
-
- 1
-
-
- scottish maid
- artesania latina
- (and 1 more)
-
HALF MOON by jct - FINISHED - Corel
SGraham replied to jct's topic in - Kit build logs for subjects built from 1501 - 1750
Now there's some intricate work for you. Nice job, J. Did you have to heat the beech wood? Steve -
Clean work, Sam. I admire your persistence. That oven trick is another one to remember. Steve
-
Thanks Jesse. I just might have to pick me up a bottle of that stuff. Steve
-
Thanks David. I was using a #79. The rails are a hair under 1mm thick. I'm just not used to working with such small parts. Even with magnification, it's hard to see it correctly. I have a Dremel with a flex shaft. The chuck is fairly crude and the bit shows considerable runout. By hand I was able to get better control. With the electric drill, the hard part is that fateful moment when I first hit the gas (I have a foot control). It sort of leaps into action and accuracy suffers--so do fingers sometimes. Steve
-
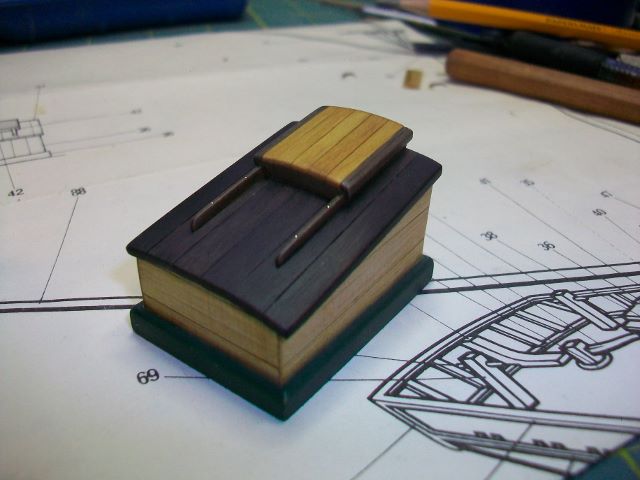
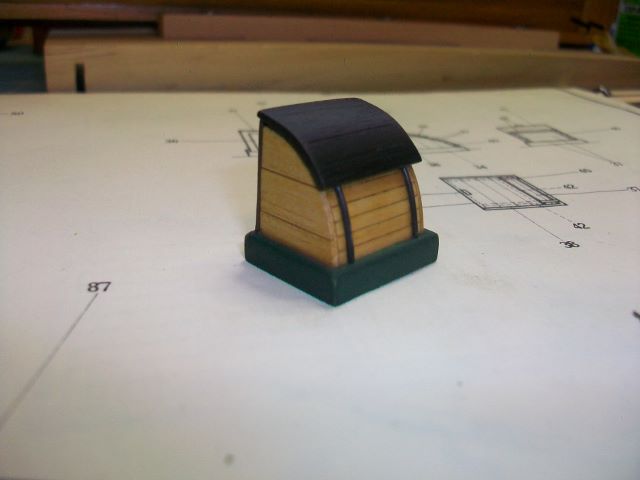
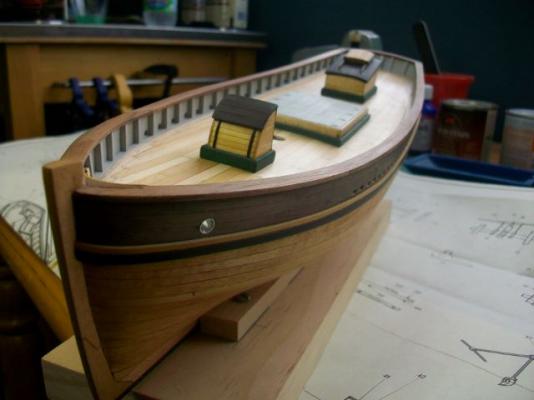
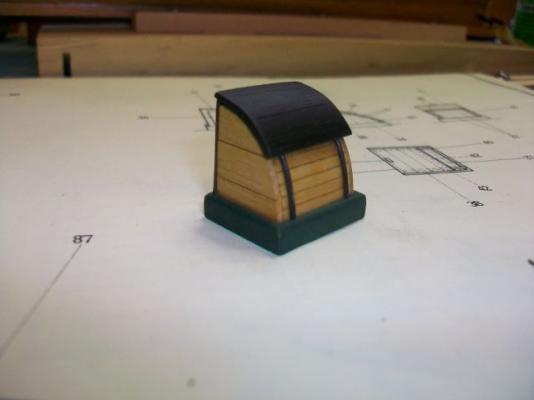
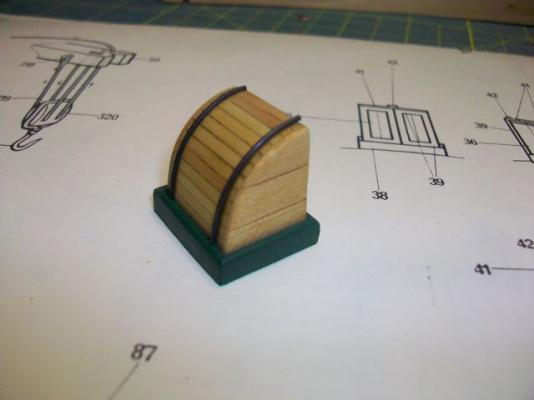
Thanks Steve. I appreciate the encouragement. Here's the deck house, planked in maple with an ebony top. This ebony top is bare wood just rubbed out with 400 grit paper and steel wool. I like this look a little better than the shinier finish on the forward companionway hatch cover. The rails are walnut and pinned on--otherwise I couldn't get them to sit up straight. I found that drilling the holes for the pins through those skinny little rails is best done SLOWLY by hand with a bit in a pin vise rather than with an electric drill. Next step is a set of doors and the companionway hatch cover. Thanks for looking. Steve


- 569 replies
-
- 4
-
-
- shenandoah
- corel
- (and 1 more)
-
Wow, Jesse, those yards look amazing. Beautiful work. This is the first I've seen Fray Check. Steve
- 607 replies
-
- 1
-
-
- scottish maid
- artesania latina
- (and 1 more)
-
I'm a confirmed trash picker myself when it comes to wood scraps. I've built some fun musical instruments from discarded furniture, pianos, etc. I'm looking forward to seeing your boat in the gallery. Steve
-
Holy cow, Steve, that's beautiful! The boards making up the door in the companionway drop in a slot, right? Those barrels are incredible. So you're a carpenter in a boatyard? I guess that would be a great place to pick up scraps. Do you have a build log for this vessel? If not, I'd really encourage you to do so. That would give a lot of people a chance to watch your work take shape. Thanks for sharing the pics. Steve
-
Thanks Chuck.
-
Thanks Dee Dee. The deck certainly has a camber. And by everything, do you mean the ship's cat too? Steve
- 569 replies
-
- 1
-
-
- shenandoah
- corel
- (and 1 more)
-
Thanks Chuck. What about the roof of the cabin, if the Star has a cabin that rises above deck level? Steve
-
Thanks Jesse and Pete. I appreciate it. I'm trying to decide right now whether or not to put some camber in the cabin top. I started another thread on that and have gotten some very helpful replies already. This is a great place! Steve
- 569 replies
-
- 2
-
-
- shenandoah
- corel
- (and 1 more)
-
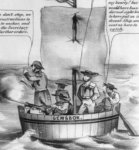
Thanks Shoule. I'm curious. Did you build the Shenandoah? If not, what ship did you alter the cabin top on? I'd love to see a photo. Clare, thanks for the reply. Beautiful, beautiful work, by the way, and thanks for the photos. Yes, that's what I'm more used to seeing. I don't think the Corel plans are for a specific craft. They are more for a type of trading cutter that was used in the southern states in the mid 19th-century. They are selling it as a Confederate craft that supplied blockade runners. I'm sure the Confederates used whatever was handy. I'm not sure that the trading craft that supplied blockade runners would bother to arm themselves with four swivel guns either. I think Corel added them for the "coolness" factor. I'm not sure of the lifespan of working craft in the South at that time, but it's not inconceivable there could have been cutters of an 1850 vintage running around. All of that is to say that the plans aren't "accurate" as far as faithfully replicating any specific craft goes. I think they're based off of a photograph taken in a shipyard at the time. I've yet to find that photo. I could put camber in the cabin roof and not offend any purists, I think. Steve
-
Thanks Mark. I guess the camber would be overkill.
-
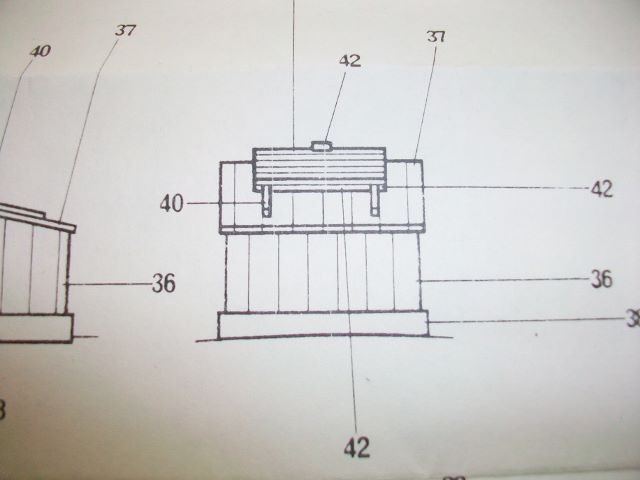
I'm ready to build the cabin on my Corel Shenandoah kit. The plans show the cabin with a completely flat roof. What I mean is there is no camber whatsoever going crosswise on the cabin top. It seems odd, like there ought to be some camber to shed water, but maybe the fore and aft tilt of the roof would take care of that. Have any of you built a flat cabin roof? Just curious. If it's wrong, I don't want it sticking out like a sore thumb, or flat rooftop. Thanks! Steve
-
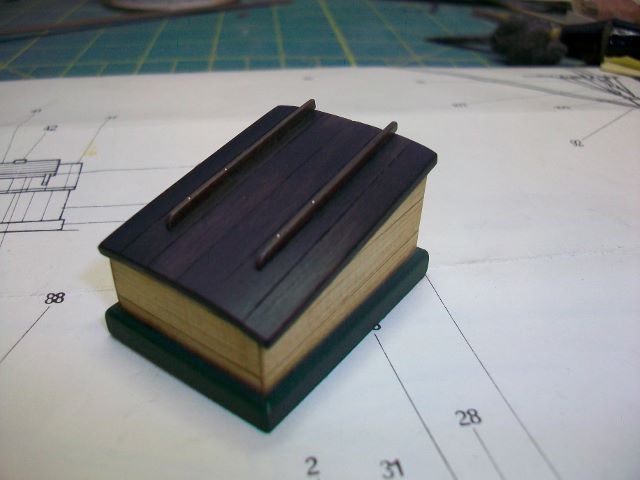
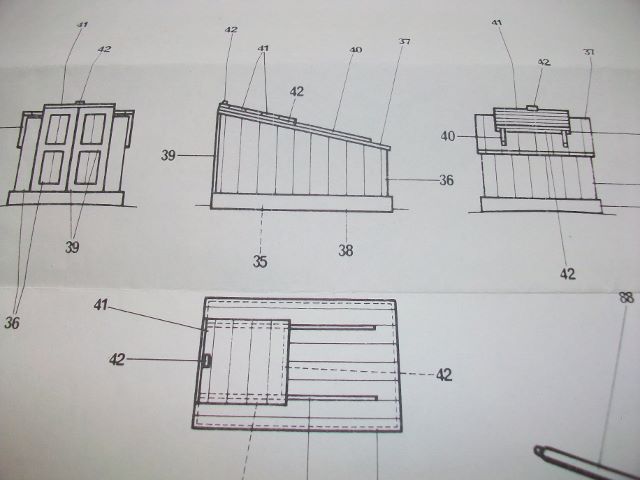
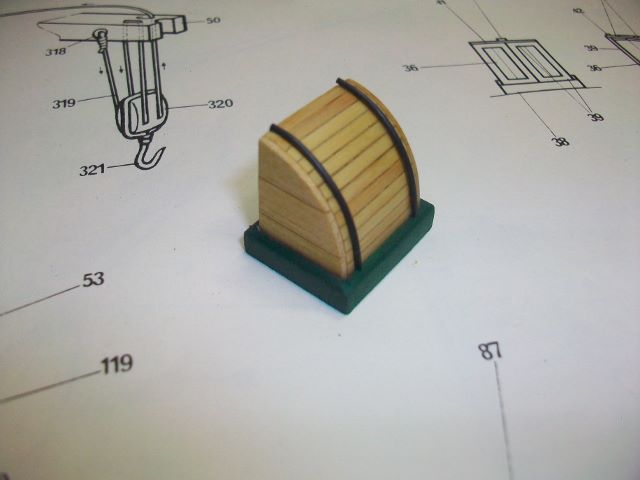
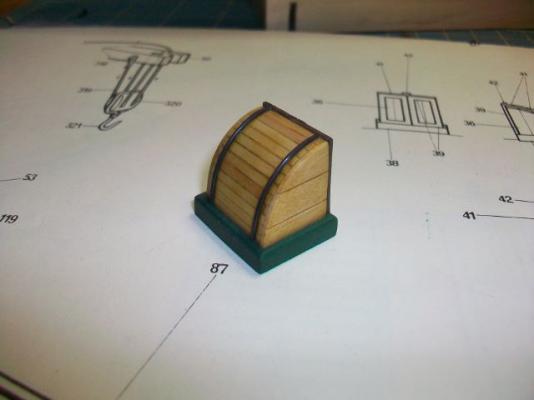
Thanks Pete and J. Here's the last of the companionway shots, I promise. I made the sliding hatch cover out of ebony. It looks black in the pics, but it's really dark brown. It has shellac on it that's rubbed out with steel wool, but I might sand it again and leave it bare wood. All I have left to do on this piece is a handle for the hatch. Steve

- 569 replies
-
- 10
-
-
- shenandoah
- corel
- (and 1 more)
-
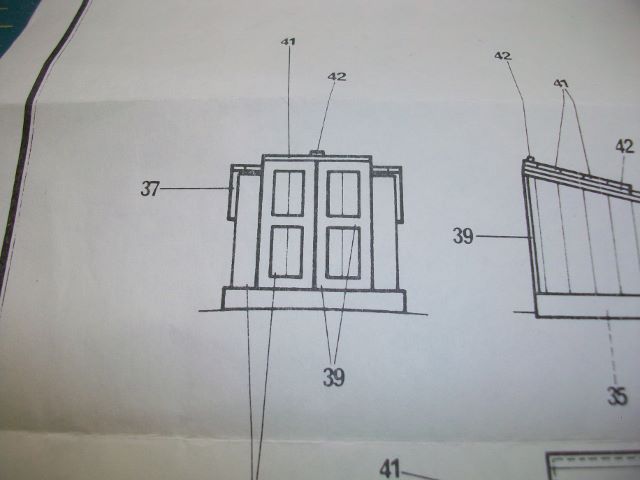
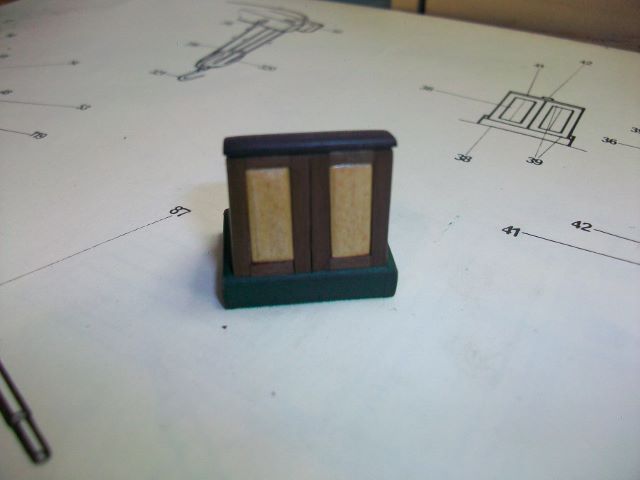
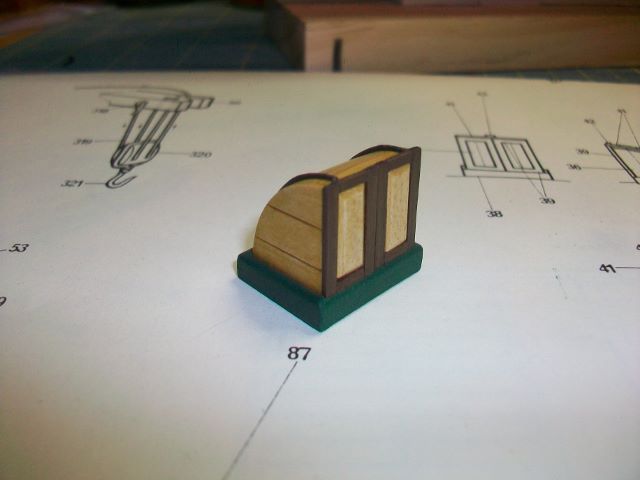
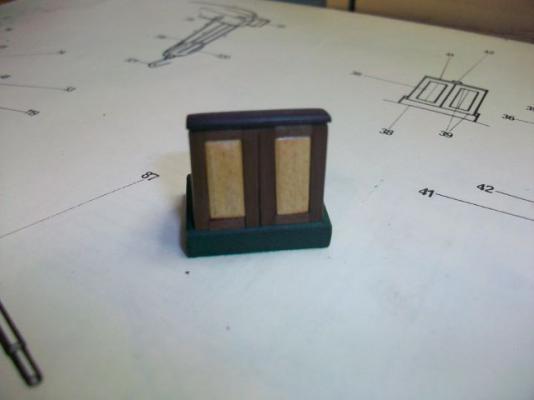
Here is a pair of doors on the companionway. They're supposed to stick up slightly over the top of the companionway in order to seal with the sliding hatch cover. I tried to file in a raised panel in the center of each door. Next comes the hatch cover that rides on the rails. Thanks for looking. Steve


- 569 replies
-
- 8
-
-
- shenandoah
- corel
- (and 1 more)
-
I'm really glad you're posting this, David. This is the first card model I've watched come together. How rigid is the structure at this point? Steve
-
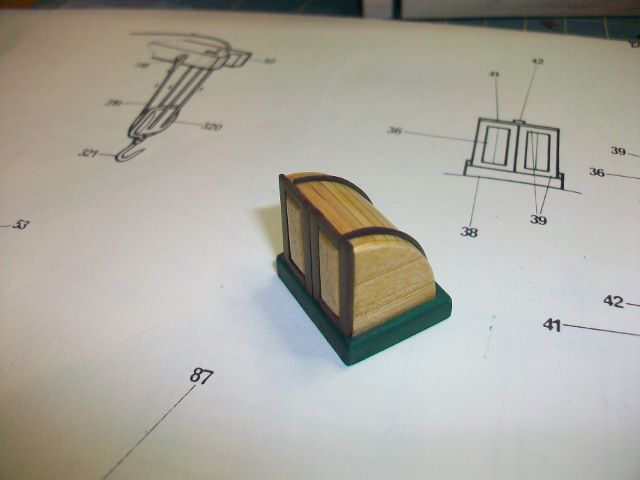
Thanks Bob and Sam. I appreciate the encouragement. My apologies for posting in tiny increments, but here's the forward companionway with a coaming. Next comes a pair of doors on the other side. Thanks for looking. Steve

- 569 replies
-
- 4
-
-
- shenandoah
- corel
- (and 1 more)
-
Bob, that mockup is a great idea. I'm not sure I've got the patience to take a step like that, which is probably why I do so much tearing apart what I've put together wrong. You've got me seriously thinking about coming over to the "dark side." Steve