HOLIDAY DONATION DRIVE - SUPPORT MSW - DO YOUR PART TO KEEP THIS GREAT FORUM GOING! (Only 24 donations so far out of 49,000 members - C'mon guys!)
×
SGraham
-
Posts
538 -
Joined
-
Last visited
Content Type
Profiles
Forums
Gallery
Events
Everything posted by SGraham
-
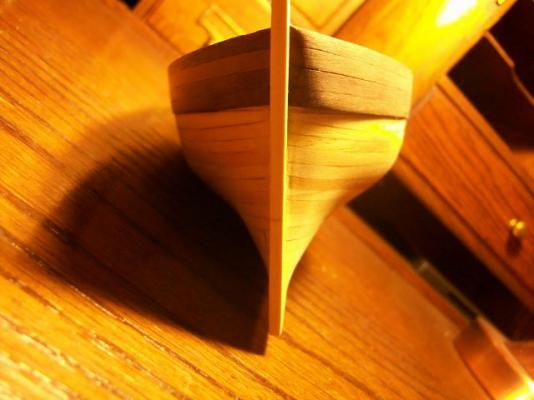
 Thanks, David. My brother is very good with an airbrush. I may enlist his help. I'm also thinking of accentuating the lines between some of the planks a bit with a fine triangular file. Some of the planks have no discernable line between them while others do. It would be nice to be able to see them all uniformly. I think I am going to paint. I was thinking of leaving the hull bright between the waterline and the wales, but the grain on those planks is really big and rough looking. At full scale, it would look like some ridiculous undiscovered species of wood with 12-foot-long grain lines. On my next build I want to have the paint/bright wood combination, so I'll make better decisions about what types of wood I'll use for my hull planking. Steve
- 569 replies
-
- 1
-

-
- shenandoah
- corel
- (and 1 more)
-
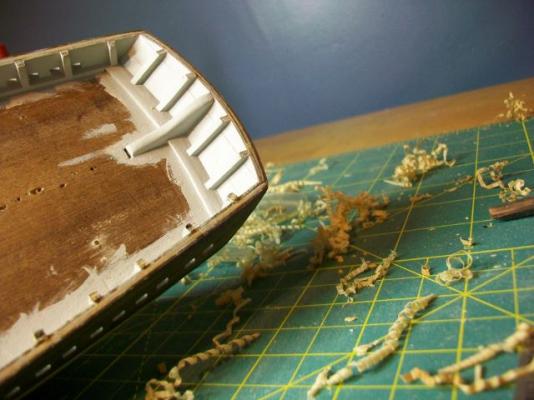
Thanks so much, Bindy. I'm putting on the keel sole and deck planking while I think about whether or not to paint. Steve
- 569 replies
-
- 1
-
-
- shenandoah
- corel
- (and 1 more)
-
Got it. That seemed like an awful long way to go, although it is nice out here this time of year. Steve
-
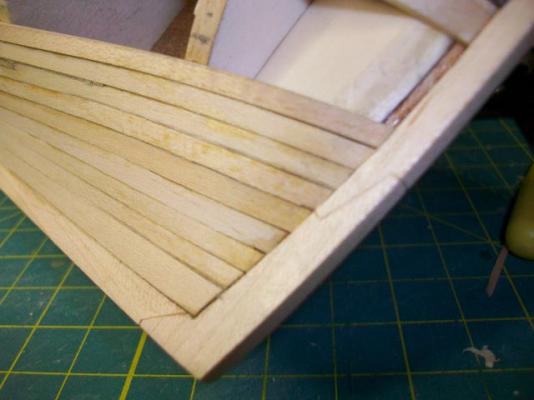
Thanks Andy. I've got quite a bit to do on the hull before I get to the spars, so I'll be looking to you for inspiration. Thanks J, The top of my bending iron is flat. I found that if I get it nice and hot, lay the plank on it and twist the ends in opposite directions, I get the transition from vertical to horizontal pretty quickly. Read wrong, that last sentence makes it sound like the bending iron causes me fall down and faint. The hard part for me was when I got down to my last few planks on each side, I ended up with a rather irregular space to fill. I ended up with one too-wide plank right at the turn of the bilge and an oddly shaped plank just below it. Thanks Sam and David, I set some of the stealers in too deep below the run of the surrounding planking. That was where the end of the stealer didn't rest on a frame. I've got a couple of ugly patches of filler plugging those gaps. You can see them in the photos. That's partly why I want to paint. Also, there are a pair of oversized and a pair of oddly-shaped planks right at the turn of the bilge on either side of the hull. Paint would hide these nicely. I'd like to airbrush but don't own one. Also, I had to do some pretty aggressive sanding to get the planks to lie fair with each other. I've done sanded away all the lines between the planks. I guess I could score them back in... The instructions suggest dark gray for the sides above the WL. Is there any more pleasing color than that? I'm not going for the blockade runner look--just a trading schooner. David, where is UOI? Is that Irvine? When are you coming out for treatment? Steve
-
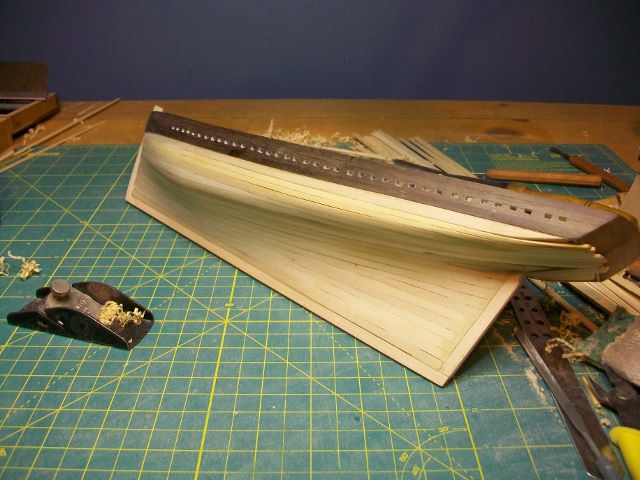
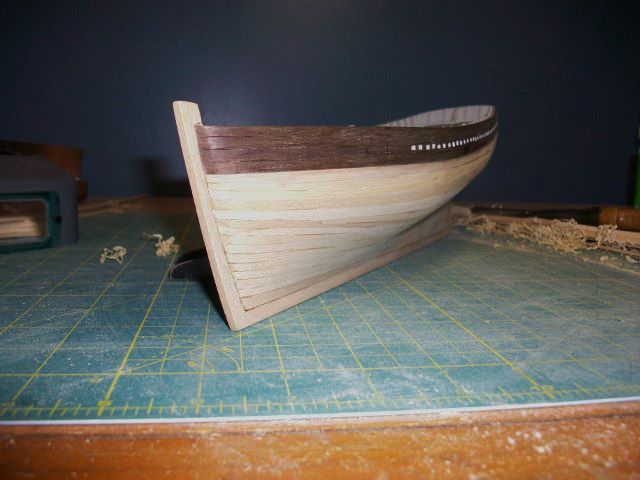
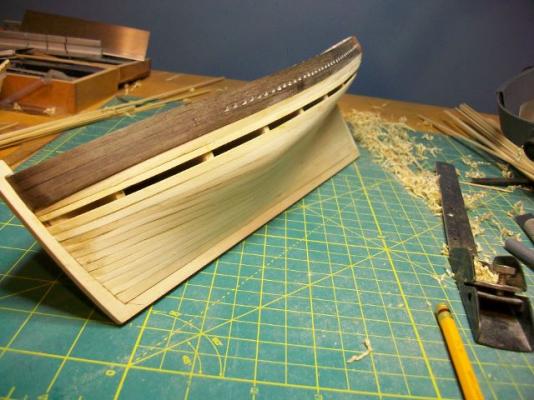
Well, I finished the first layer of planking tonight. I also filled the gaps and gave it a coat of sanding sealer. I think this will be the only layer of planks I'm going to hang. I've sort of sanded away some of the scarf joints, so I'm going to cut those back in before giving the hull a coat of primer. Also, I need to add the keel sole before priming. This planking job came out way better than my Roger B Taney travesty back in the '80s. On that ship, the planks around the curve of the bow looked like shark gills. You could see right through them. I appreciate the help and encouragement from the MSW crew. Steve


- 569 replies
-
- 9
-
-
- shenandoah
- corel
- (and 1 more)
-
HALF MOON by jct - FINISHED - Corel
SGraham replied to jct's topic in - Kit build logs for subjects built from 1501 - 1750
J, that little detail change made a real difference. I like the process you detailed in going about it. Do you plan these steps out or just dive in and make it up as you go along? Steve -
And there's the last one. I'll add the stealers tomorrow. Good night. Steve


- 569 replies
-
- 5
-
-
- shenandoah
- corel
- (and 1 more)
-
One more strake to go on the port side (not counting a couple of stealers at the stern.
- 569 replies
-
- 5
-
-
- shenandoah
- corel
- (and 1 more)
-
You're a fast builder, Andy! Wow, your ship is looking fine! I like how you trimmed the planking at the stem and sternpost. Real clean. I agree, the trim looks really nice. The natural wood is good looking. Very inspiring. Steve
- 55 replies
-
- 1
-
-
- corel
- shenandoah
- (and 1 more)
-
Thanks for the kind words, everyone. I'm learning a lot on this hull. Steve
-
Jesse, beautiful work. Thanks for documenting the windlass step by step. I like how you notched and beveled that stanchion. Thanks also for sharing about your health struggles. It's encouraging to see someone facing them with humor and heart. Steve
-
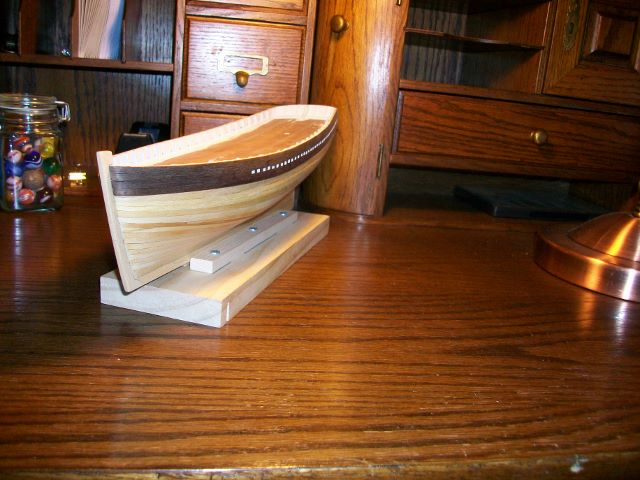
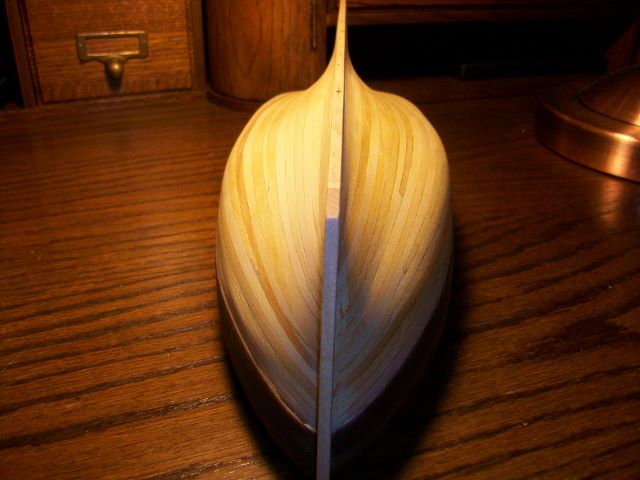
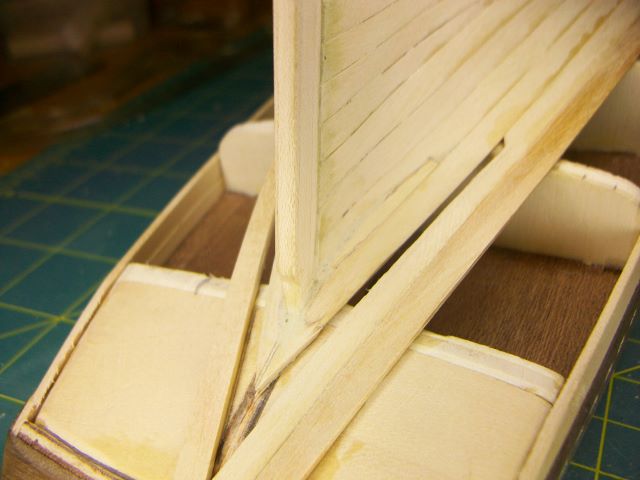
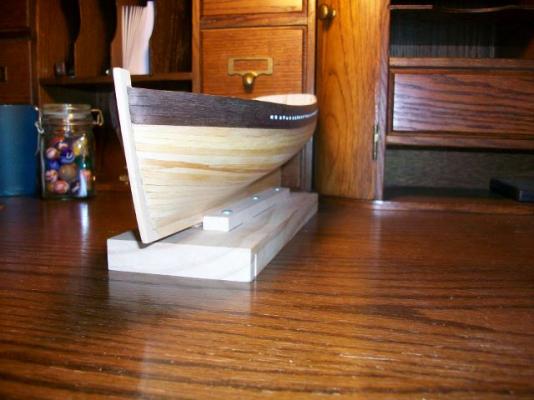
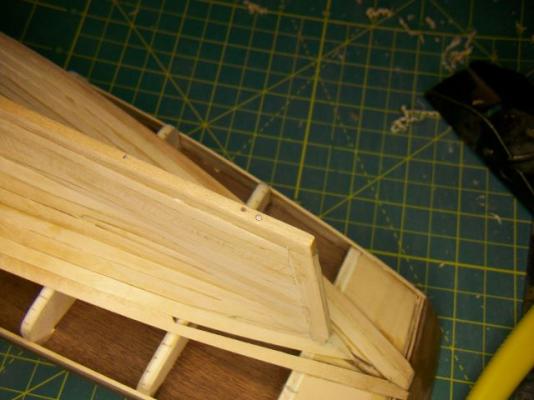
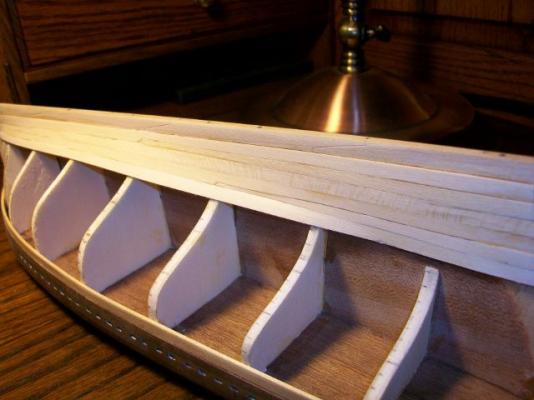
Well, it's been a week since I posted last, so here's an update. I'm a little more than half way through with the first layer of planking. I hope it will be the only layer. I'm planning on painting the hull, so a little filler here and there should be fine. I haven't sanded anything down yet, so it looks pretty rough. I'm really enjoying tapering down the planks with a small plane. I've found that I can hang a pair of planks in the evening after work. That's about it. It's slow going but it's relaxing--and I guess that's the whole point. I like how the planking came together around the sternpost. There's some filler on it, but I notched the planks on either side to fit around the post. The port side notch cracked while I was handling it, but it went back in nicely with glue and filler. The gap in the planking underneath the counter is for a pair of stealers. I'll need one more pair of them back there before I'm finished. Also, the wide basswood plank below the lowest walnut plank is coming out. It bends down at the bow, so I'll replace it with a plank like the others below it. Thanks for reading! Steve


- 569 replies
-
- 7
-
-
- shenandoah
- corel
- (and 1 more)
-
So THAT'S what tung oil looks like!
-
Andy, I really like the color of the walnut planking. Did you oil it? The lines of your planking look really nice. Yours is the first I've seen planked up--except for the picture on the box. Keep up the good work. Thanks for sharing the photo. I'm about three quarters done with the first layer. Steve
-
HALF MOON by jct - FINISHED - Corel
SGraham replied to jct's topic in - Kit build logs for subjects built from 1501 - 1750
In the field of education we use the term "relocate" when we steal someone else's good idea. Steve -
HALF MOON by jct - FINISHED - Corel
SGraham replied to jct's topic in - Kit build logs for subjects built from 1501 - 1750
J, Those built-up crows nests look oh so much better than the big solid monstrosities from the kit. I'm saving this idea for when I begin my Half Moon. The hull looks great. The gun port fix really paid off. I like the planked ports too. Thanks for sharing the pics. Steve -
Impressive critical thinking! Steve
-
Planking is great fun, but I think I'd rather be on the beach! Have a wonderful time! Steve
- 569 replies
-
- 1
-
-
- shenandoah
- corel
- (and 1 more)
-
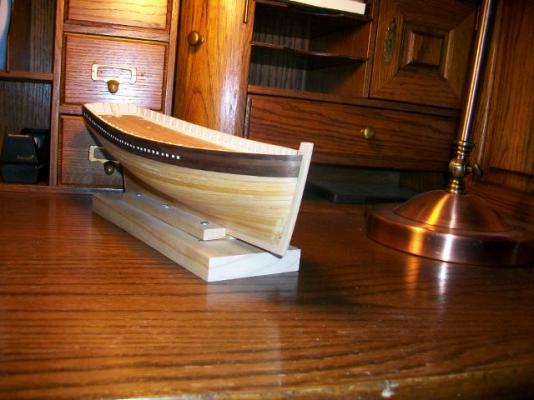
Hi DRW, That really looks like a fun kit. The hull is looking good. And I love the idea of sanding in bed--although I'm not sure if I like the idea of sleeping in sawdust... My snipe is glassed-over plywood. I believe it dates from the 60's. It's painted red outside above the waterline and white below. It's gray inside. The splash guard just forward of the cockpit is bright teak. It was free boat that needs some fixing up. Like they say, there's nothing as expensive as a free boat. Still, the spars and sail are fine. I think planking your snipe would look great. I was looking at Edwin Monk's plans for "Truant," which although it's only 12 1/2 feet long, looks a lot like a snipe. He shows three planks on the each side above the chine. It looks to me like the bottom has three planks per side too, between the chine and the keel. So, the planking is all rather wide as opposed to narrow strips. Hope this helps. Steve
-
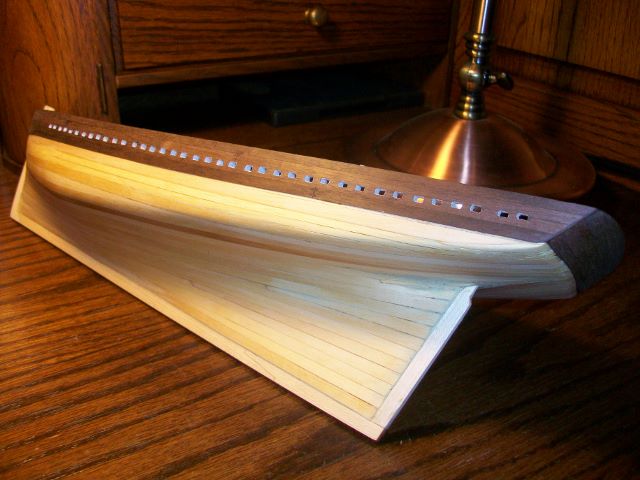
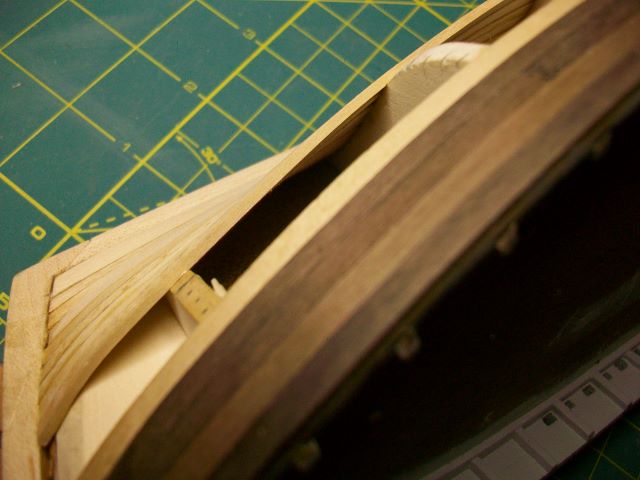
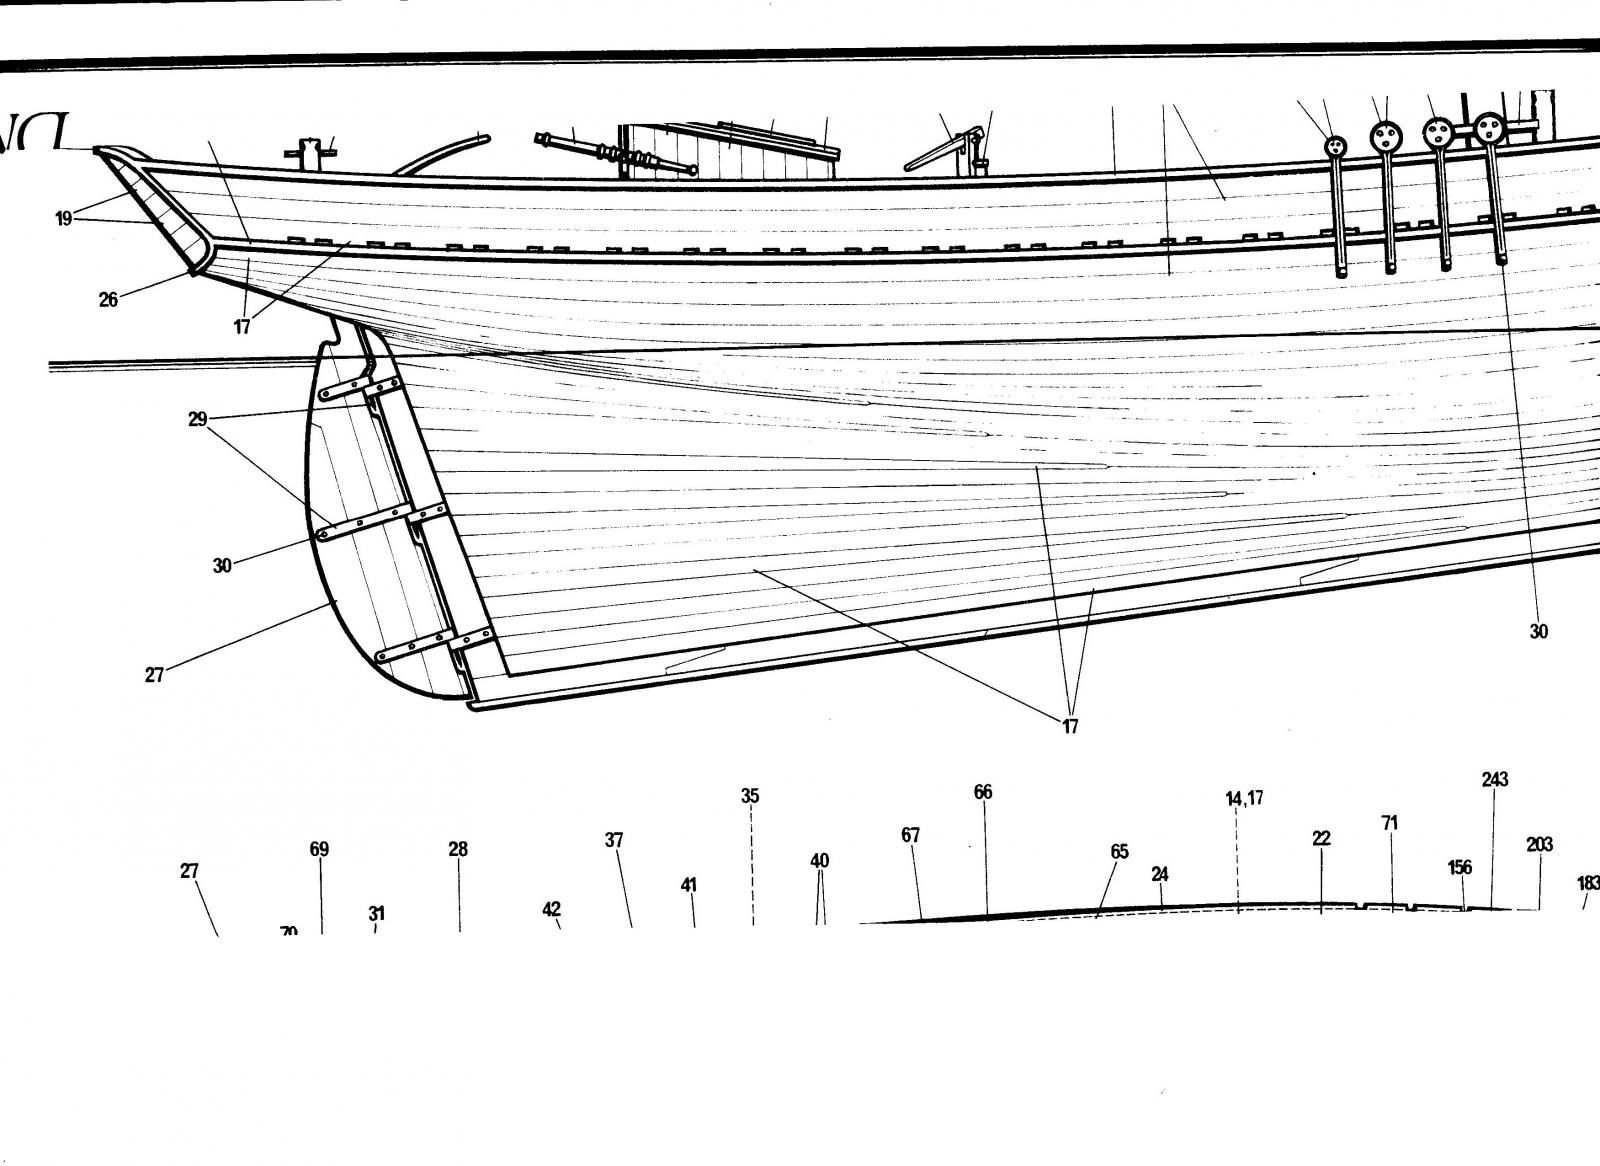
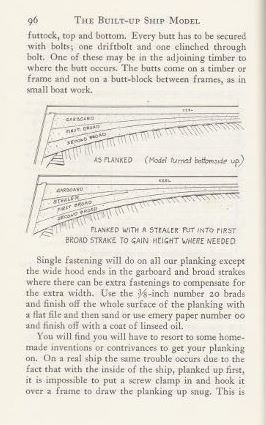
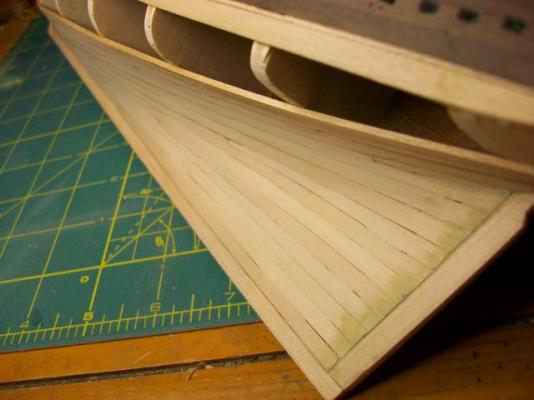
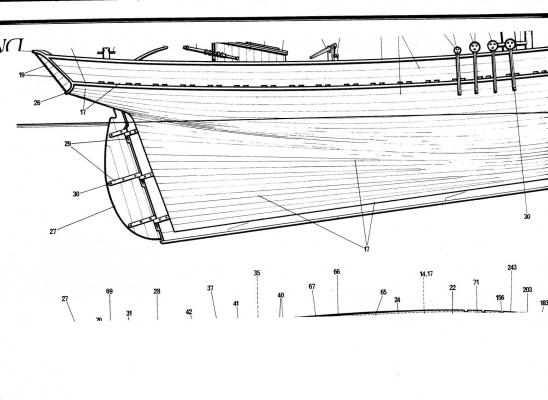
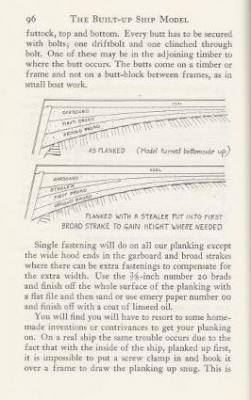
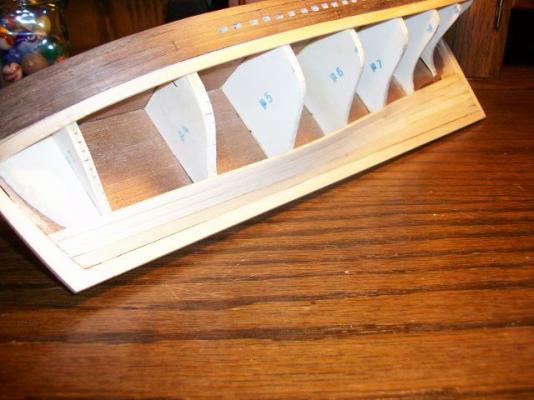
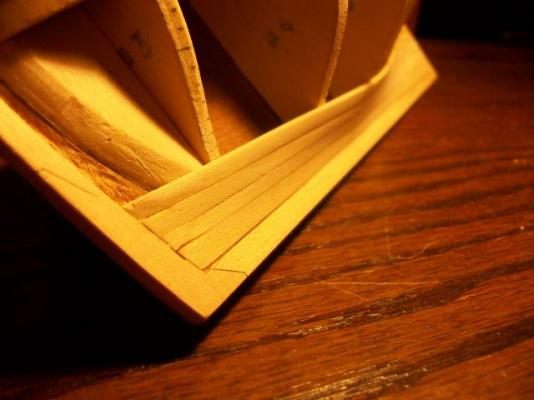
Thanks J and Bob and David and Bindy and Andy. I really appreciate the encouraging words. I felt a little funny posting pics again after I'd only added a couple of strakes, but I thought the stealers might be of interest. Andy, I just learned that stealers are wedge-shaped pieces of planking that are let into other planks near the stern. I think builders might use them at the bow as well, but someone who knows can tell us if that's true or not. Donald Dressel has a good discussion of stealers in "Planking Techniques for Model Ship Builders" (p. 64). Charles Davis does the same on p. 88 of "The Built-Up Ship Model." Davis says they "are a good way to raise the planking aft." Dressel says they are used in places where "the area to be planked is too large for the number of planks which are to fit into that area." I included a diagram from Davis' book showing the addition of a stealer plank. I used this diagram to determine the shape of the stealers I used. I used whole planks too. The only partial planks I used were the stealers. I'm going to mark in butt joints on planks later with a scratch awl or something. The planking shown on the hull plan for the Shenandoah has stealers on it. You have to look carefully. Starting at the garboard and working up, the pattern goes: Garboard (notched on its top edge to receive a stealer), first stealer plank, one plain strake with no notches, one strake notched to take a stealer, second stealer plank, one plain strake with no notches, one strake notched to take a stealer, third stealer, etc. I added a scan of the plan below. The first stealer starts at the middle frame and stretches to the stern post. The second stealer starts on frame back from the middle frame. The third starts one frame back from the second, etc. If you look at the run of the planking, you can see that it more or less follows the line of the sheer (the line of the top of the bulwarks). Without the stealers on this hull, the planks would probably curve downward at their ends near the stern, and that would look strange. I really hope to get away with single-planking this hull, so I want the first layer of planking to look right. If I mess up I'll go with a second layer. Anyways, That's my story and I'm sticking to it. Steve
- 569 replies
-
- 3
-
-
- shenandoah
- corel
- (and 1 more)
-
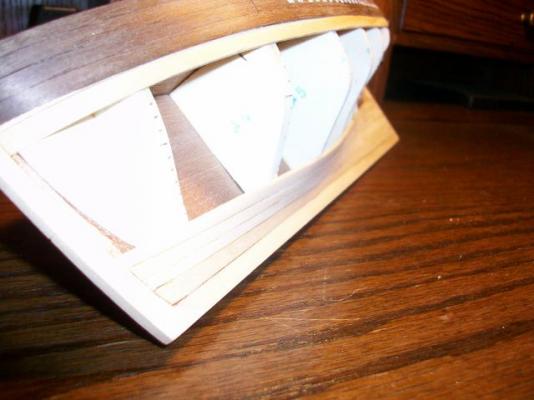
Couple more strakes. Four at the bow, six at the stern. Note how the stealers shift aft as they go up from the keel. The next pair will start at the next frame back. Sorry about the picture quality. Steve
- 569 replies
-
- 1
-
-
- shenandoah
- corel
- (and 1 more)
-
DRW: beautiful work on the small craft! I love the combination of paint and brightwork. And I thought I was looking at a full-size canoe. I'm looking forward to following your progress on the Snipe. I have one of those sitting on a trailer next to my garage. Don't forget the toe straps on the centerboard trunk. Steve
-
Thanks J and Sam. So Sam's Tectonic Boatworks was shaking? I was up at 6:25 but I didn't feel the quake. 4.7 ought to be big enough to feel from Westwood to Glendora, but I hadn't had any coffee yet. Steve
- 569 replies
-
- 1
-
-
- shenandoah
- corel
- (and 1 more)
-
Thanks Sam. I think Sam's Tectonic Boat Works has an impressive ring to it. I'll keep looking, but I ain't seeing no Crystal Cathedral yet in that pile. Steve
-
Andy, that walnut looks great on there! I've been planning on painting my hull, but now you've got me thinking of leaving it bright. You're really covering ground fast. Thanks for sharing the pics. Steve
- 55 replies
-
- 1
-
-
- corel
- shenandoah
- (and 1 more)