HOLIDAY DONATION DRIVE - SUPPORT MSW - DO YOUR PART TO KEEP THIS GREAT FORUM GOING! (Only 27 donations so far out of 49,000 members - C'mon guys!)
×


pete48
-
Posts
2,132 -
Joined
-
Last visited
Content Type
Profiles
Forums
Gallery
Events
Everything posted by pete48
-
 Thank you Shawn and Russ
 -
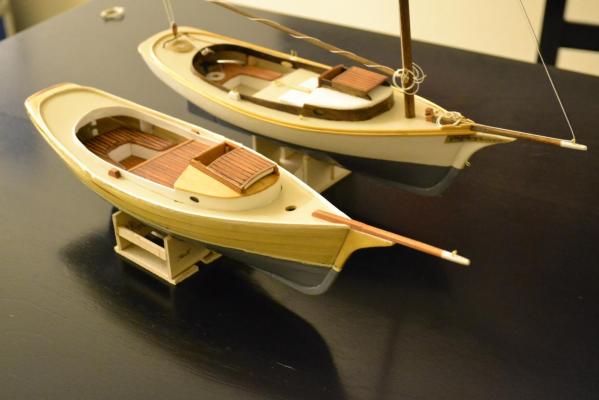
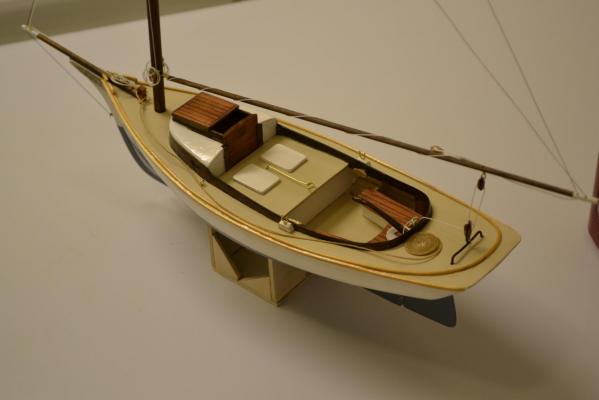
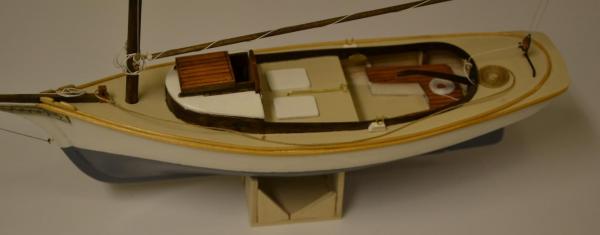
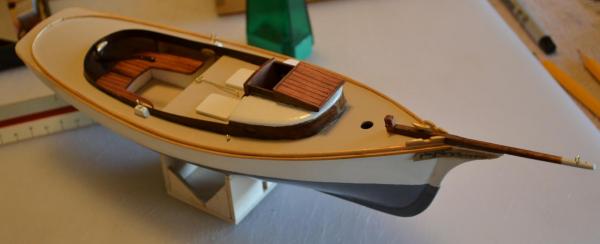
I got to work first thing this morning, finishing up the masting, I then Installed the Bowsprit and Oar lock Blocks, Then the Toe Rail, On this Toe Rail I decided to go against the Instruction Manual, and Install the curve first, working my way to the Bow then making the cut against the Bowsprit. It was alot easier to do it that way. I was very pleased with the results I also added a comparison photo between the Kit and Keel # 1. Here are the Results

- 209 replies
-
- 4
-

-
- muscongus bay lobster smack
- midwest products
- (and 1 more)
-
Today On keel #3, I Stained and got one coat of varnish on the birch ply on frame #1 then did a few other areas out as well (Transom). Here are the results


- 153 replies
-
- 3
-
-
- musongus bay
- sloop
- (and 1 more)
-
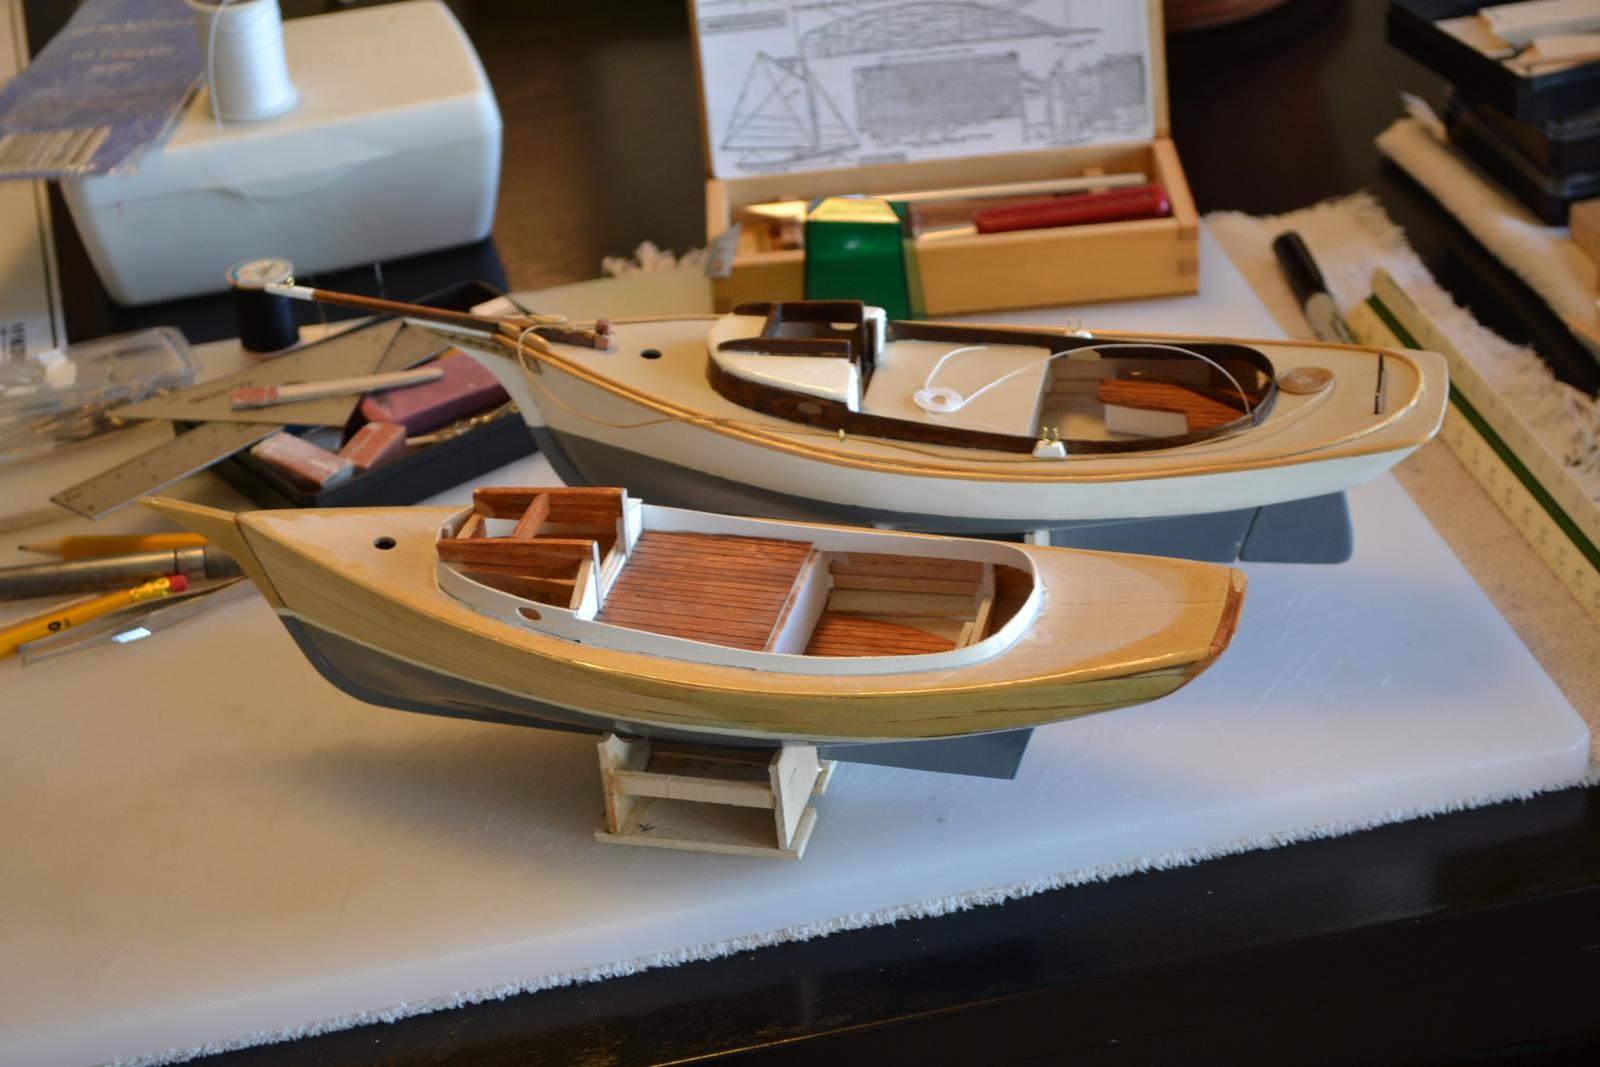
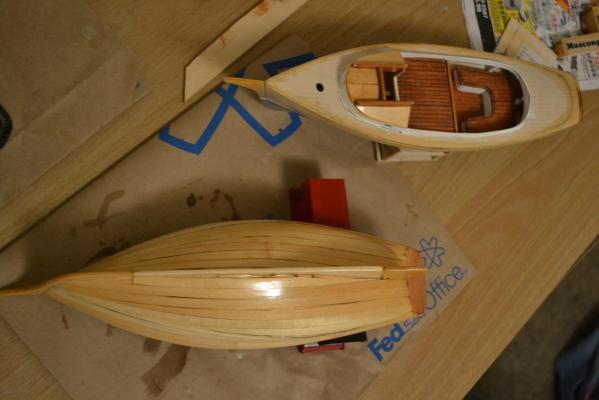
Hi Stan, as for the molds and fixing planks, in my Build log for the Moscongus Bay Lobster Smack, I actually scratch built 2 hulls. The first or Keel 1 was built because the Transom on the Kit was not correct and was able to get the transom close. (I did strip plank that boat from the water line up). Then Keel 2 was built just to get the planking correct. I did recently Varnish the hull and have been toying with floating it ( because of your previous post) Best Regards, Pete
-
Awesome Casey, I cant wait to see it , with the Sails up
-
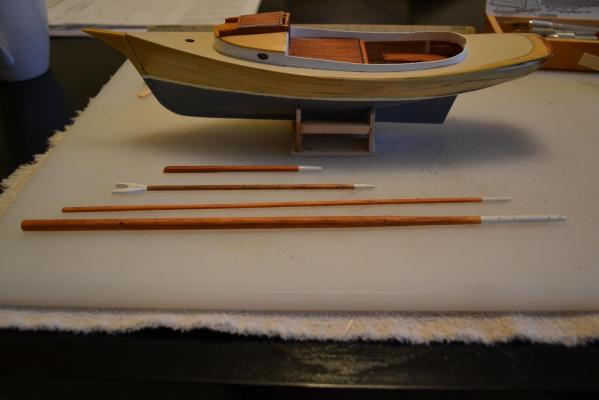
On Keel 1, I got the deck painted, Made the Bowsprit and started masting, I will be making the blocks and cleats again for this one (I am starting to get the hang of it) Here are the results from today

- 209 replies
-
- 4
-
-
- muscongus bay lobster smack
- midwest products
- (and 1 more)
-
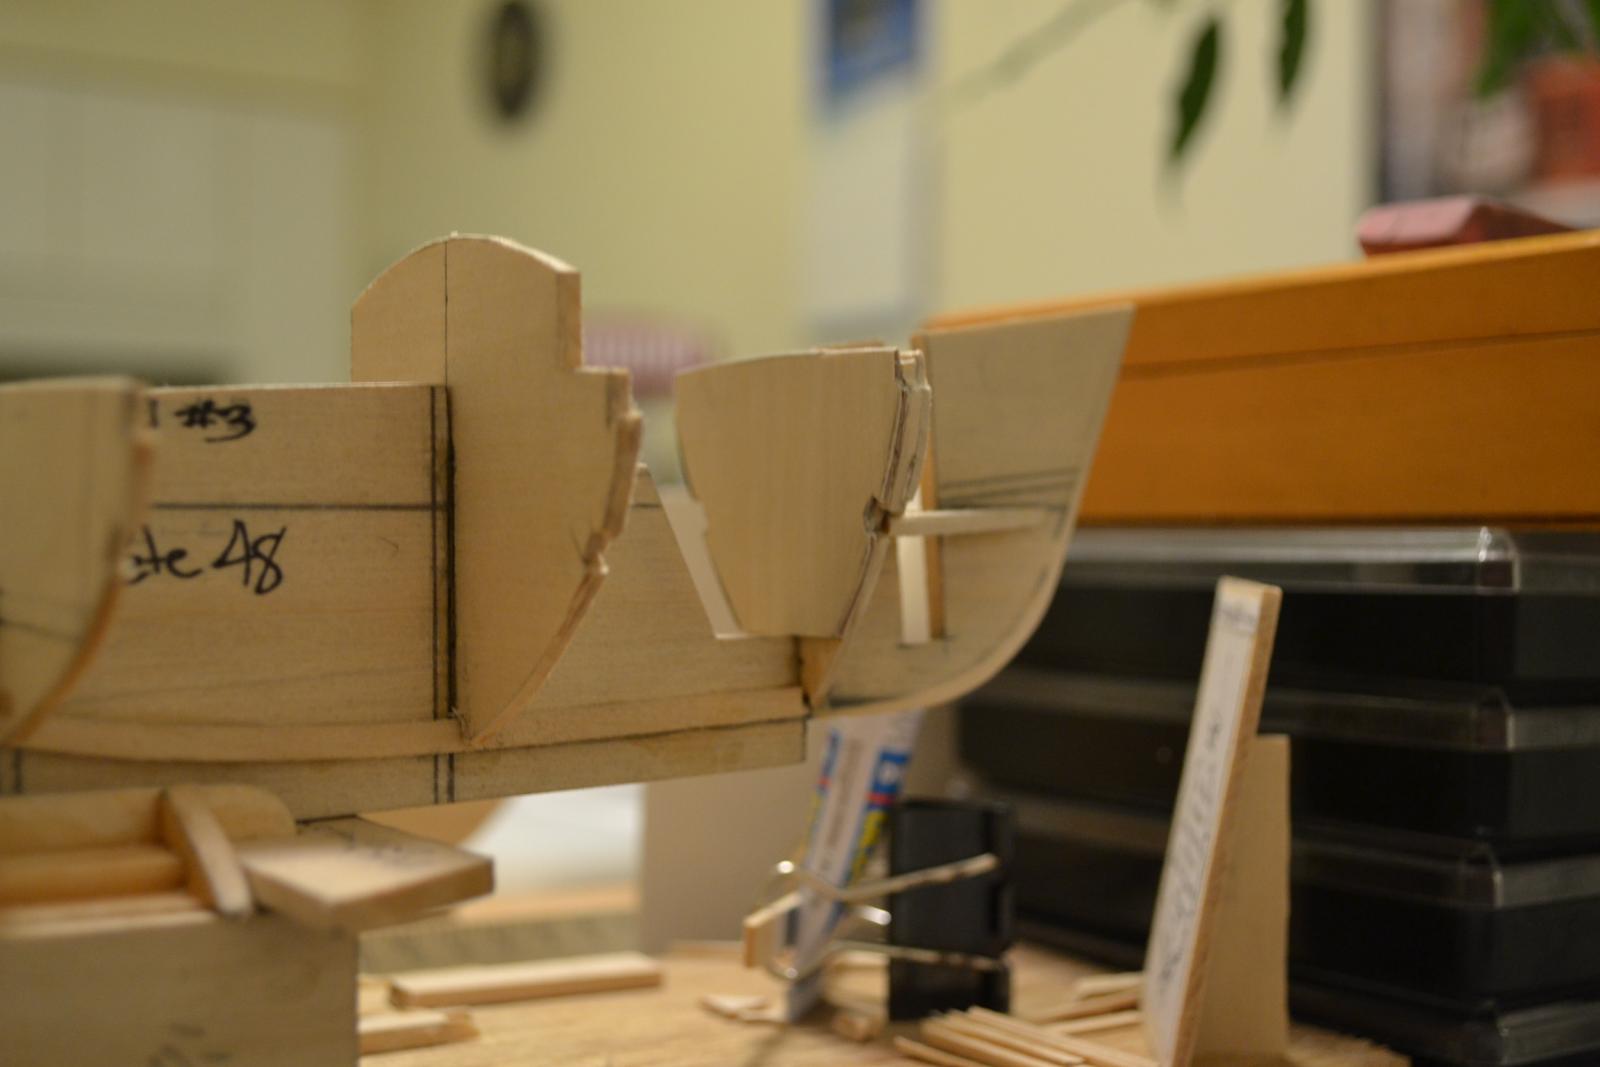
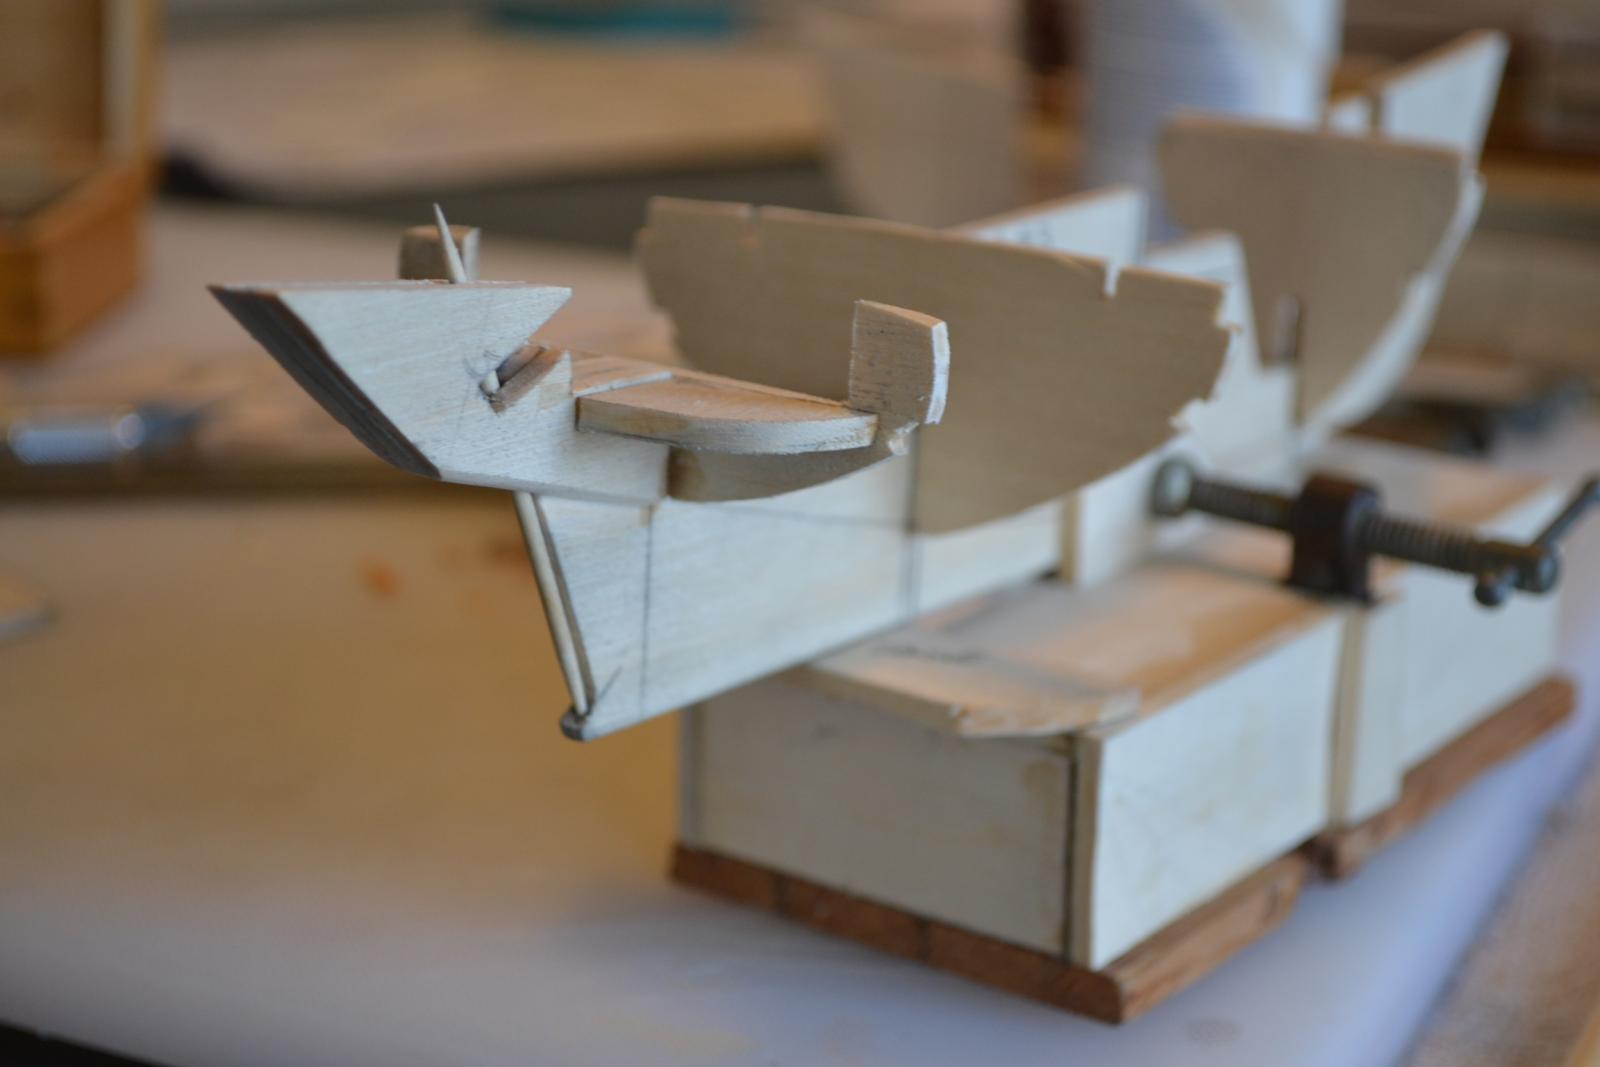
Today I finished Installing the frames. I then decided to add a piece of 3/32" birch plywood to frame #1 it will be easier to do it now than later. I will then stain it with a Minwax Provincial and then varnish. Here are the results


- 153 replies
-
- 3
-
-
- musongus bay
- sloop
- (and 1 more)
-
Shawn thats Brutal
-
Thank you Shawn, How is yours comming along ?
-
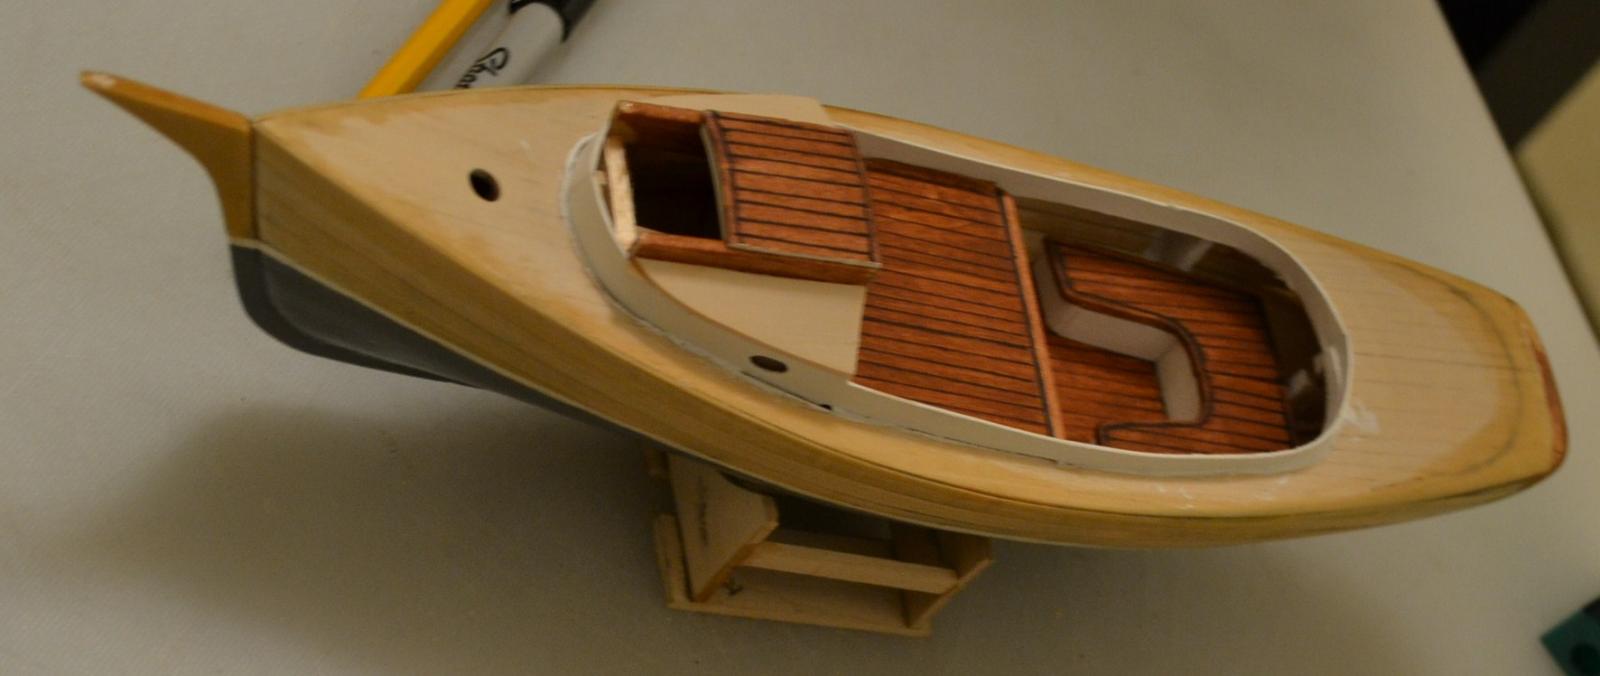
Thank you Richard and Russ, I was happy with the companionway Hatch . I wish I would have made the cut out for the centerboard box ( it would have given more room below decks) like what I did on the kit build (hindsight is always 20/20) Best Regards, Pete
-
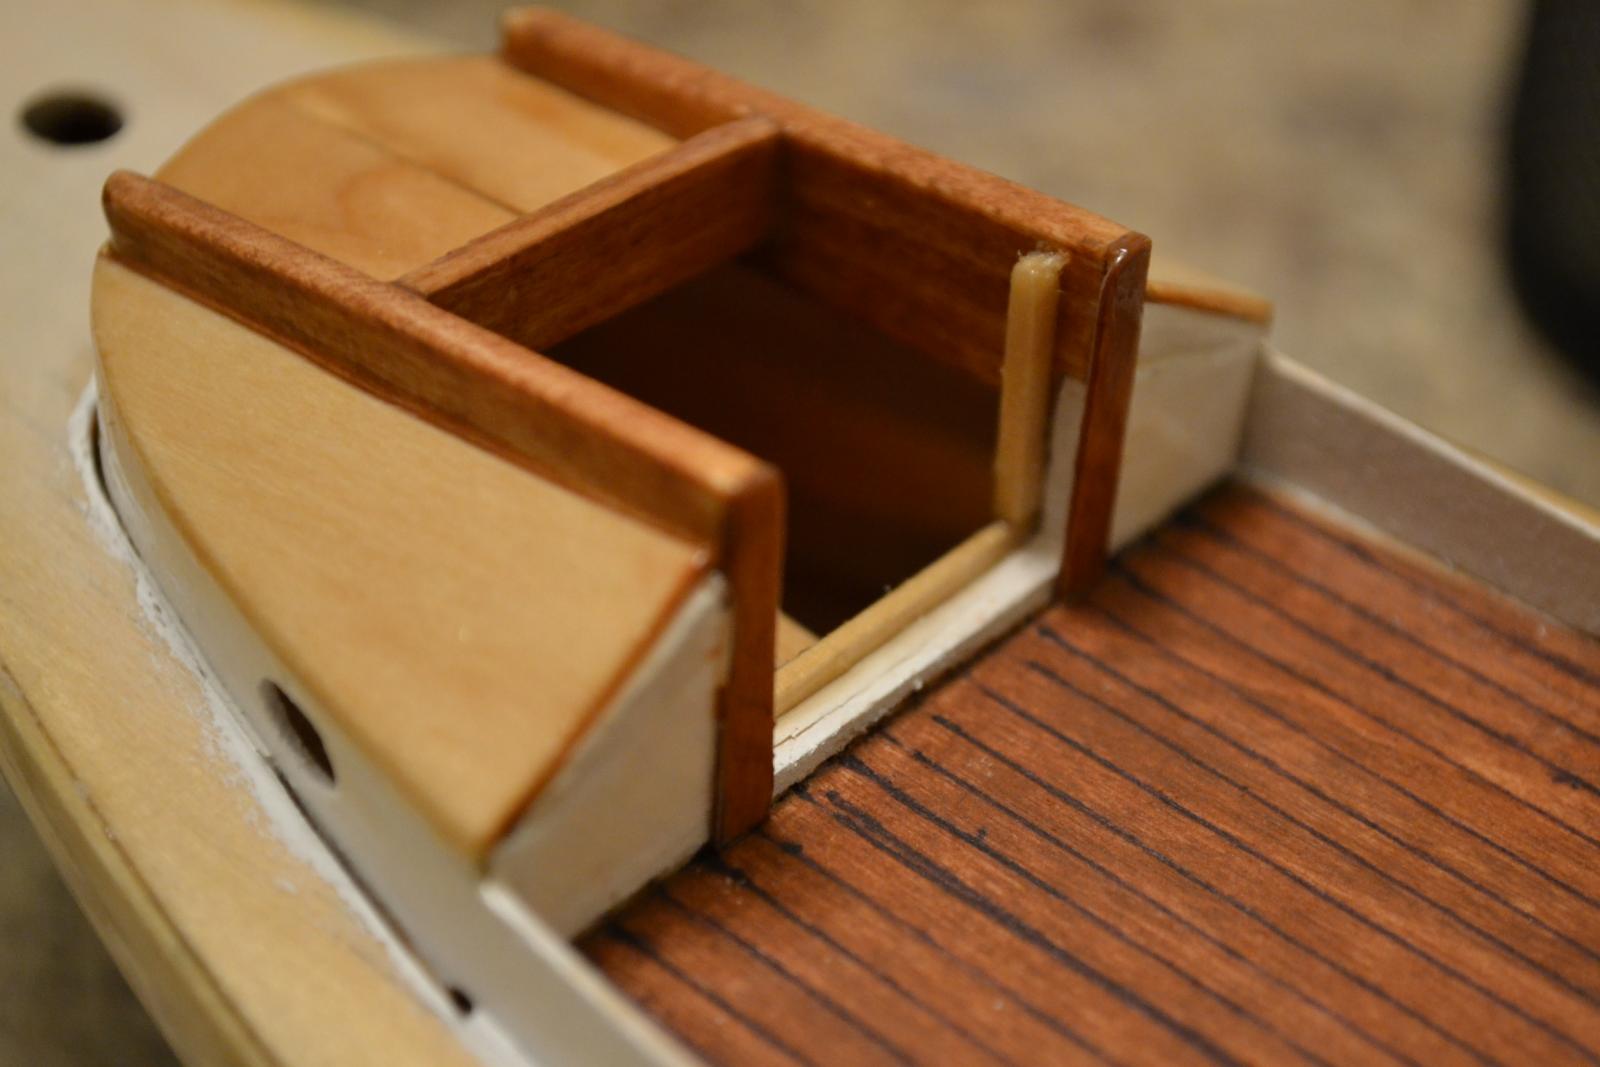
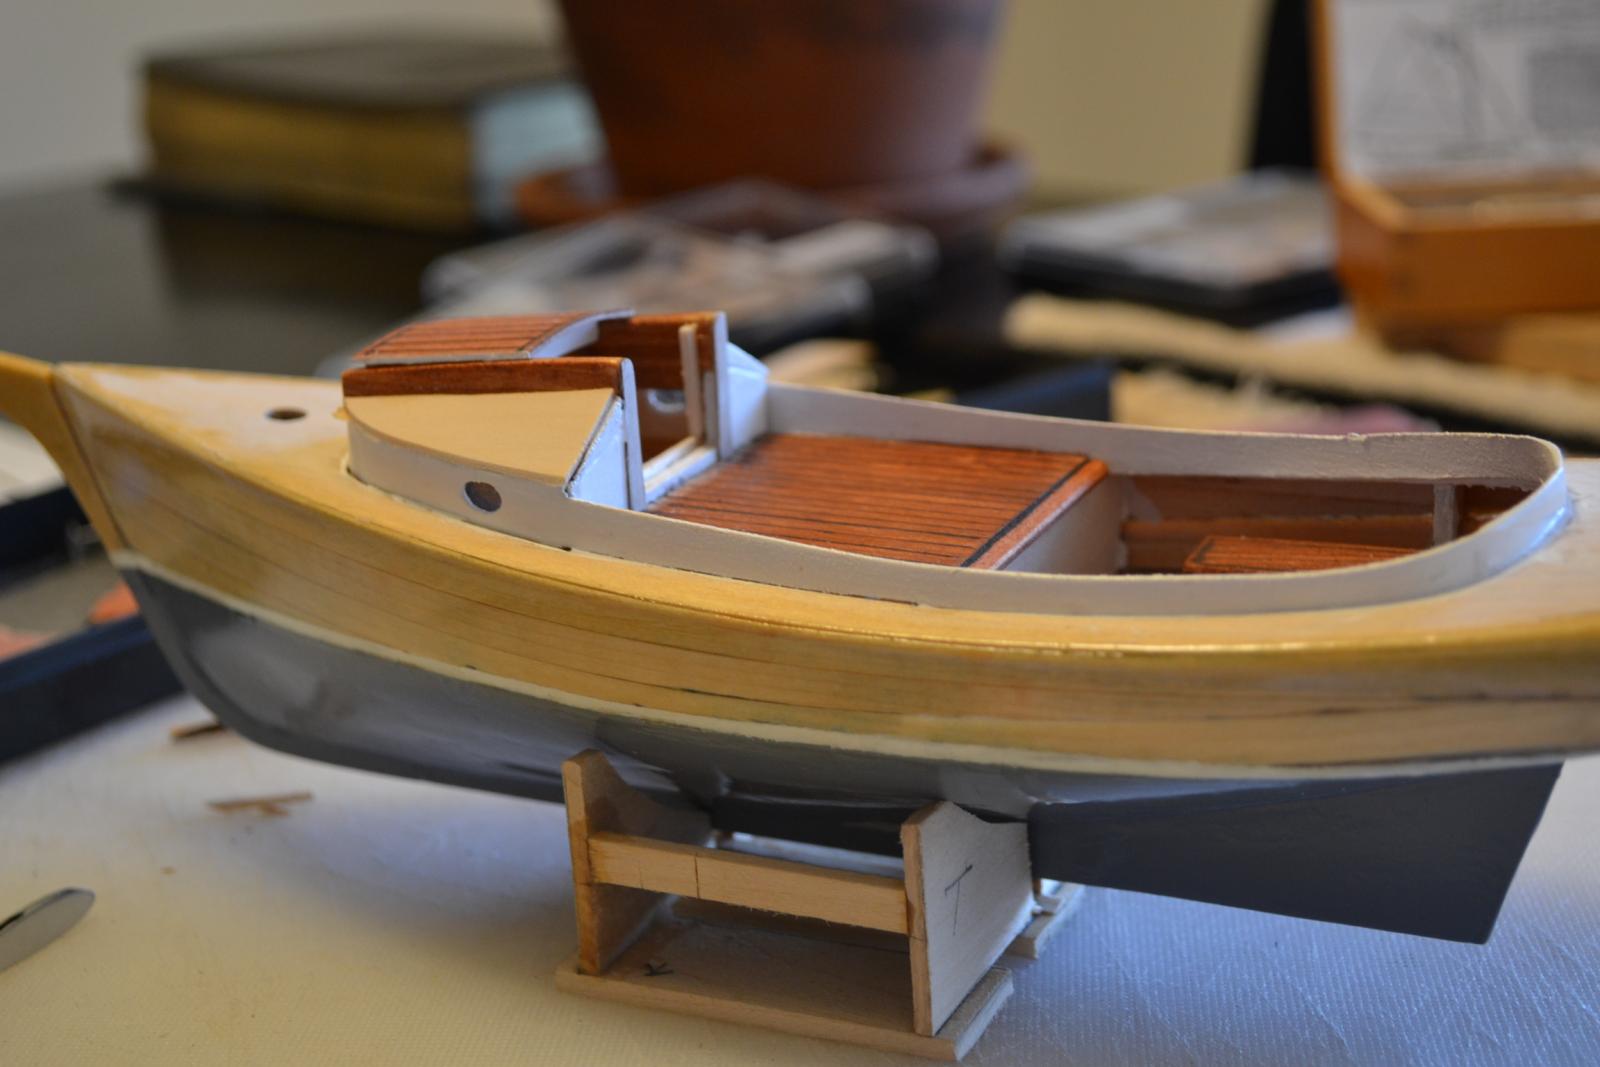
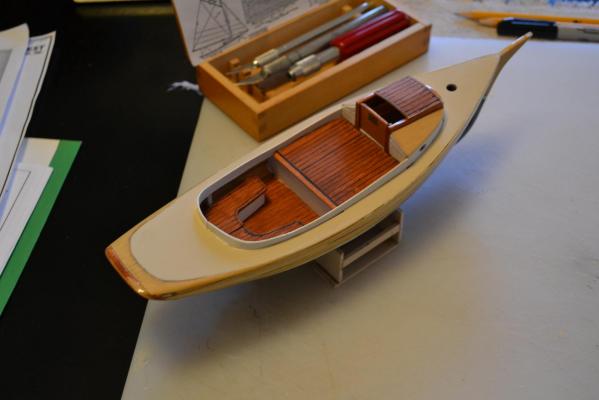
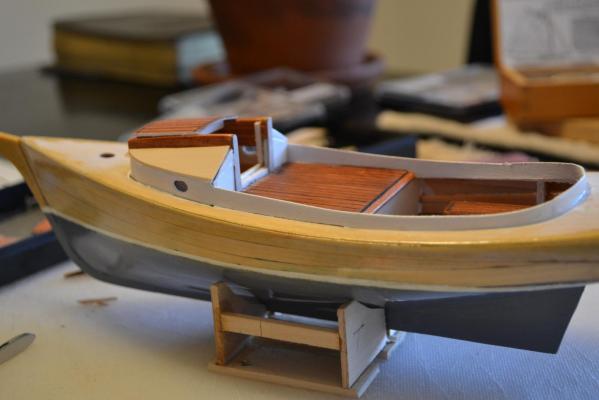
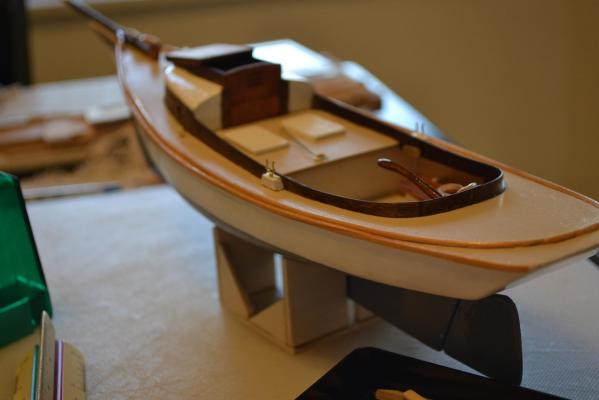
I did get work done on Keel # and #2 today. I first finished the cabin, and got it ready to varnish, Then I decided that I just need a cutwater and a rudder and I could varnish Keel #2 so I did that as well . Here are the results

- 209 replies
-
- 4
-
-
- muscongus bay lobster smack
- midwest products
- (and 1 more)
-
Hi Stan,The Plan Down the line is to make an R.C version . The rudder configuration will work for R.C. the Scale is 1/24 or 1/2" = 1"-0" Best Regards, Pete
-
Looks Good, Nice Job Best Regards, Pete
-
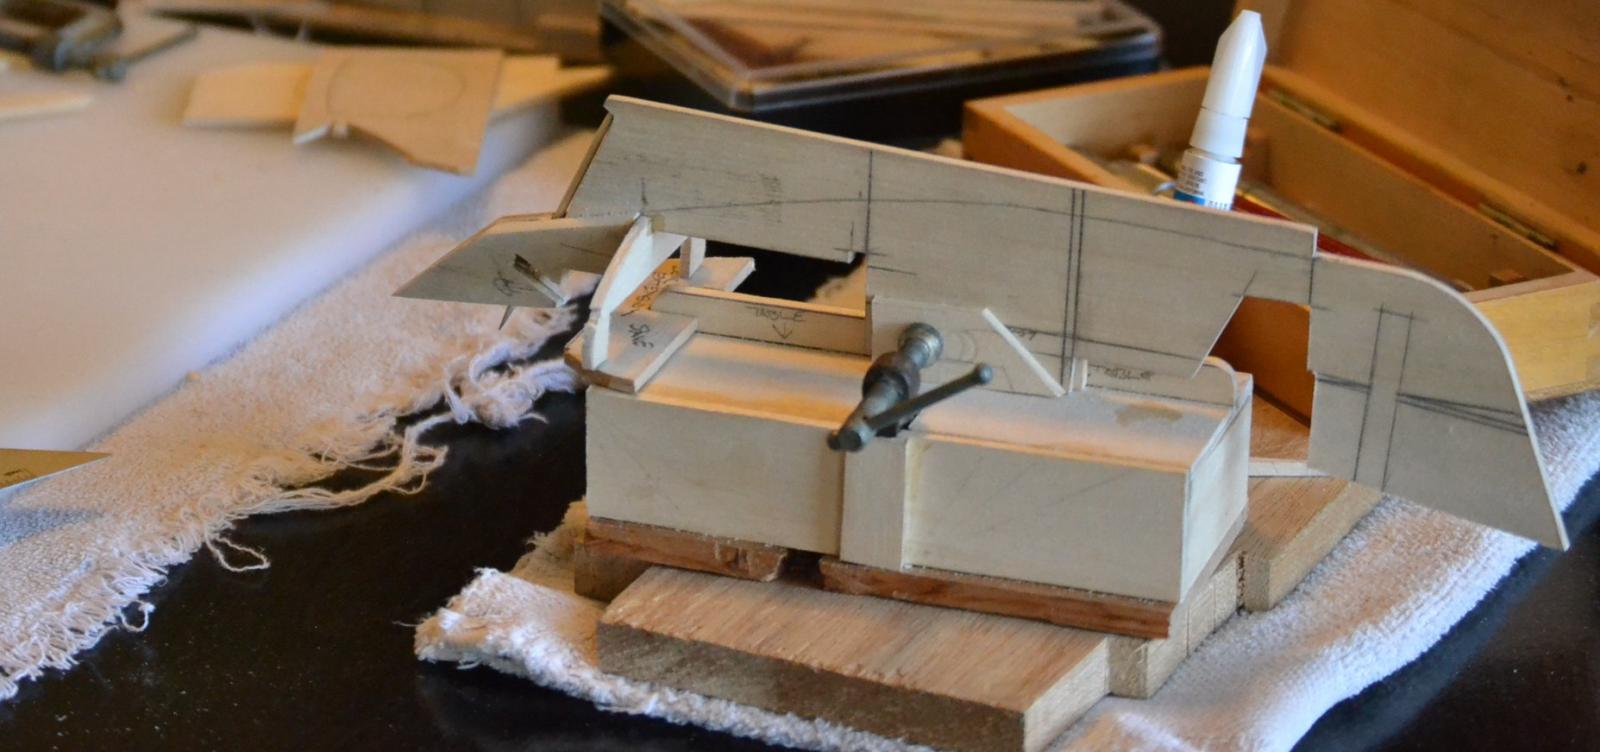
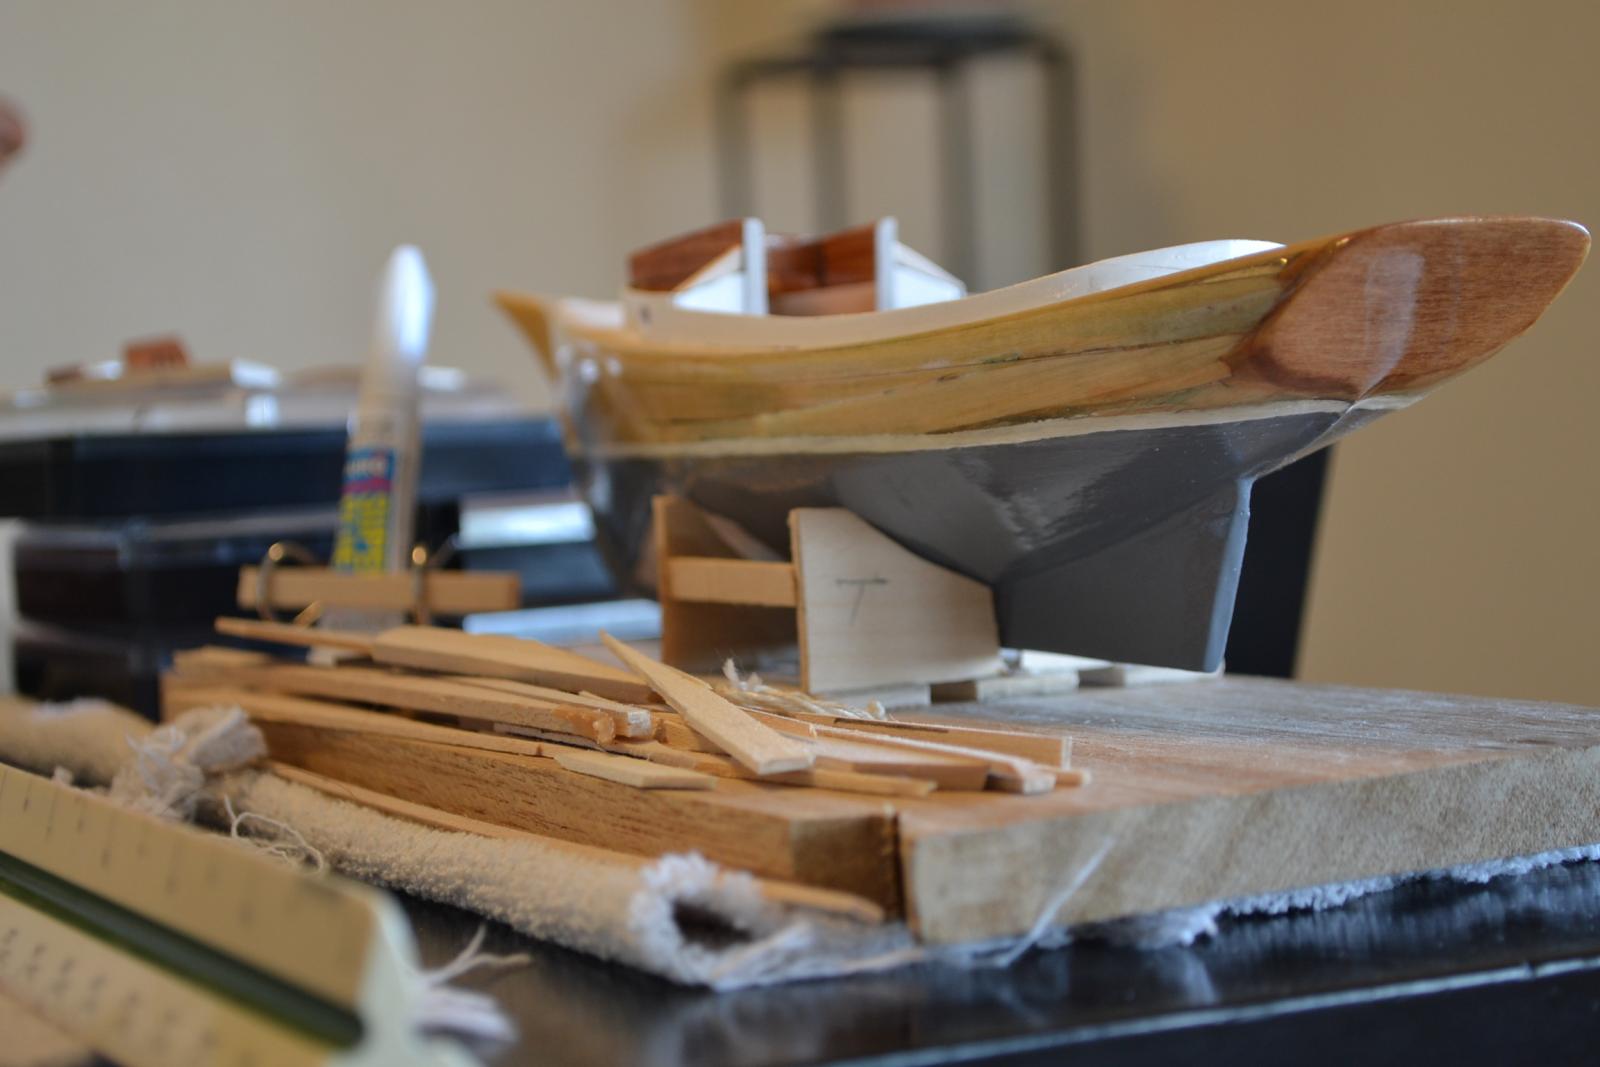
Last Night I did Manage to squeeze in a few hours, so I installed the transom, beefed up the seat section behind frame 4 (this helps keep everything square) added the keel strips and stared fairing the rabbet line. Here are the results

- 153 replies
-
- 3
-
-
- musongus bay
- sloop
- (and 1 more)
-
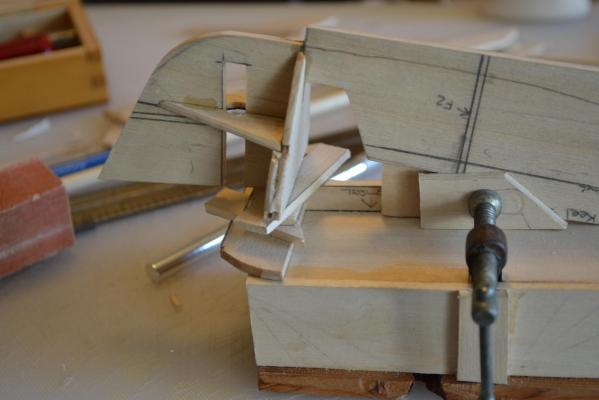
Today I did manage to get a few hours in and finished up the Rudder area, (A standard wood tooth pick works well) I then Started to install the frames and breasthook. Here are the results


- 153 replies
-
- 3
-
-
- musongus bay
- sloop
- (and 1 more)
-
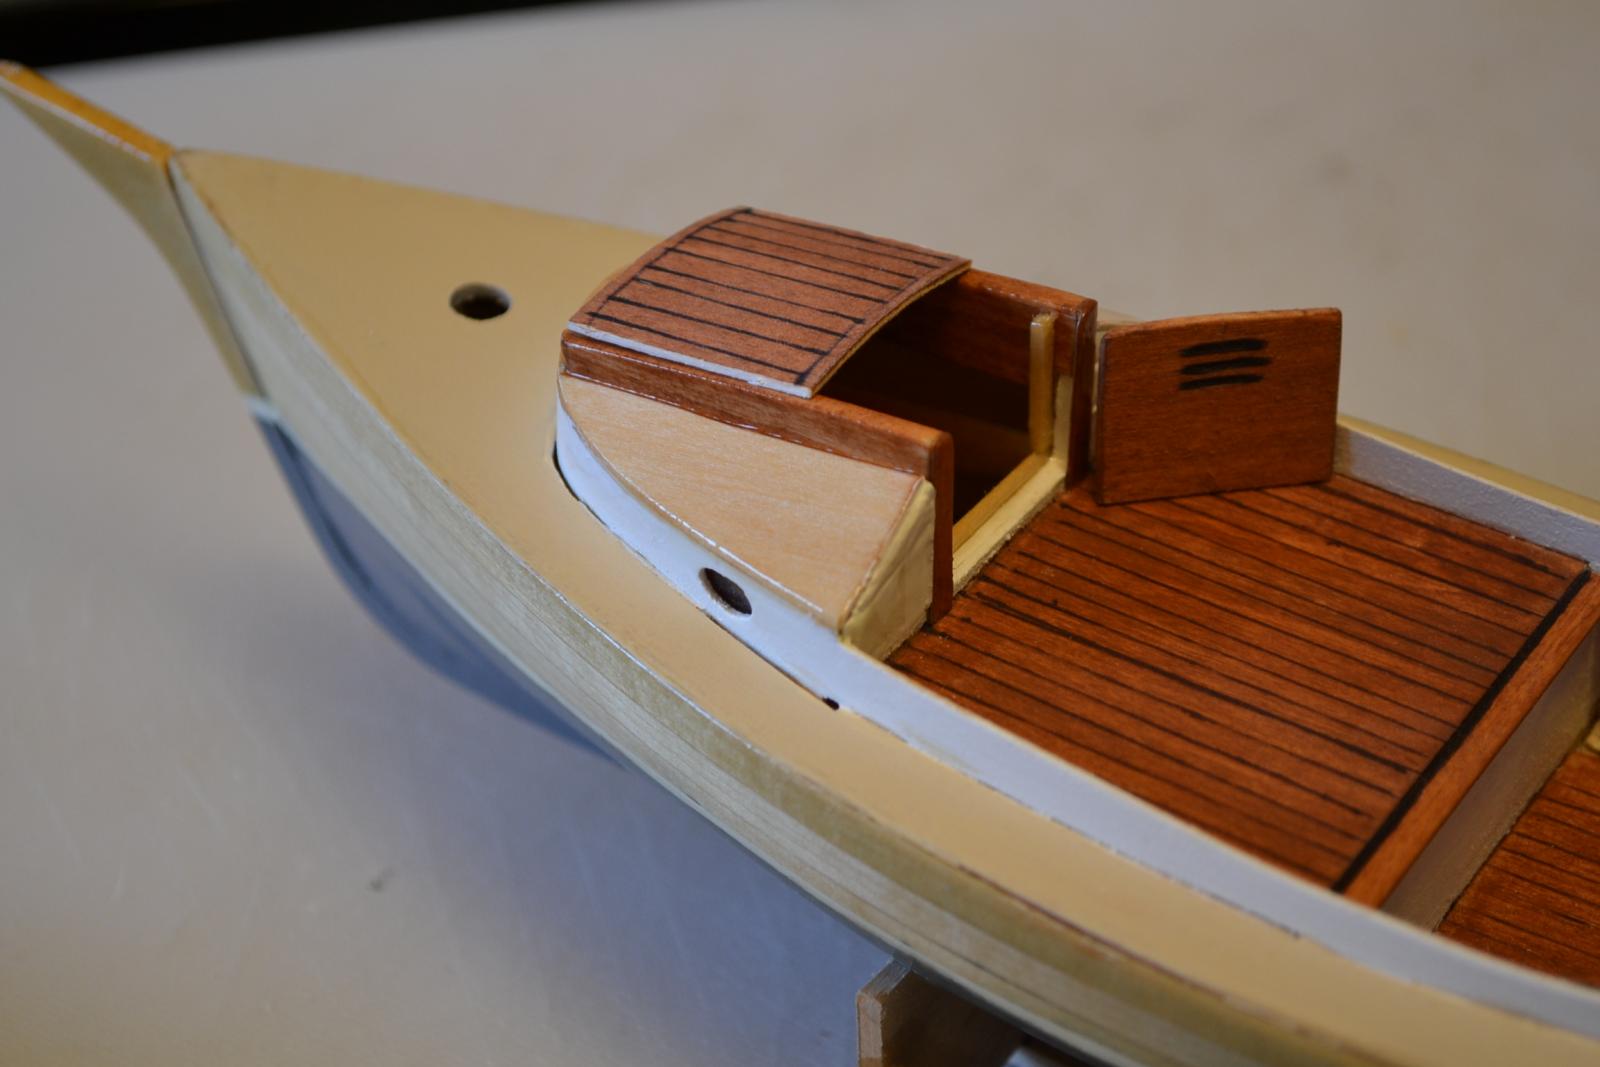
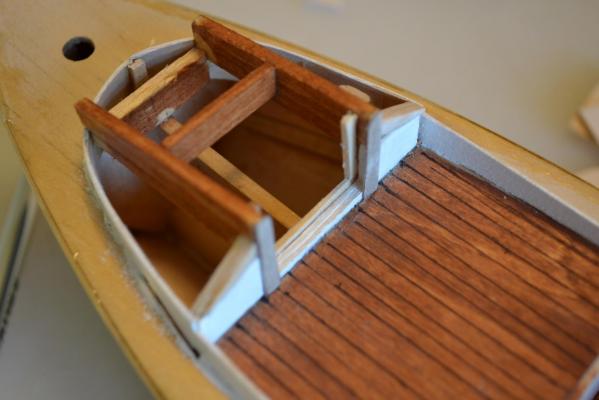
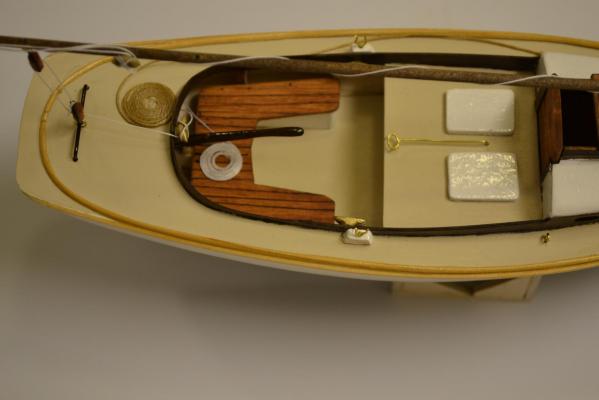
I got back to work today on Keel #1 starting with finishing up the campanion way Hatch ( I did put 3 coats of varnish on the brightwork), I then finished up the cockpit by enclosing the bench supports ( I painted them flat white) Then installed them as well as the seats. I also got one side of the cabin top installed. Here are the results

- 209 replies
-
- 2
-
-
- muscongus bay lobster smack
- midwest products
- (and 1 more)
-
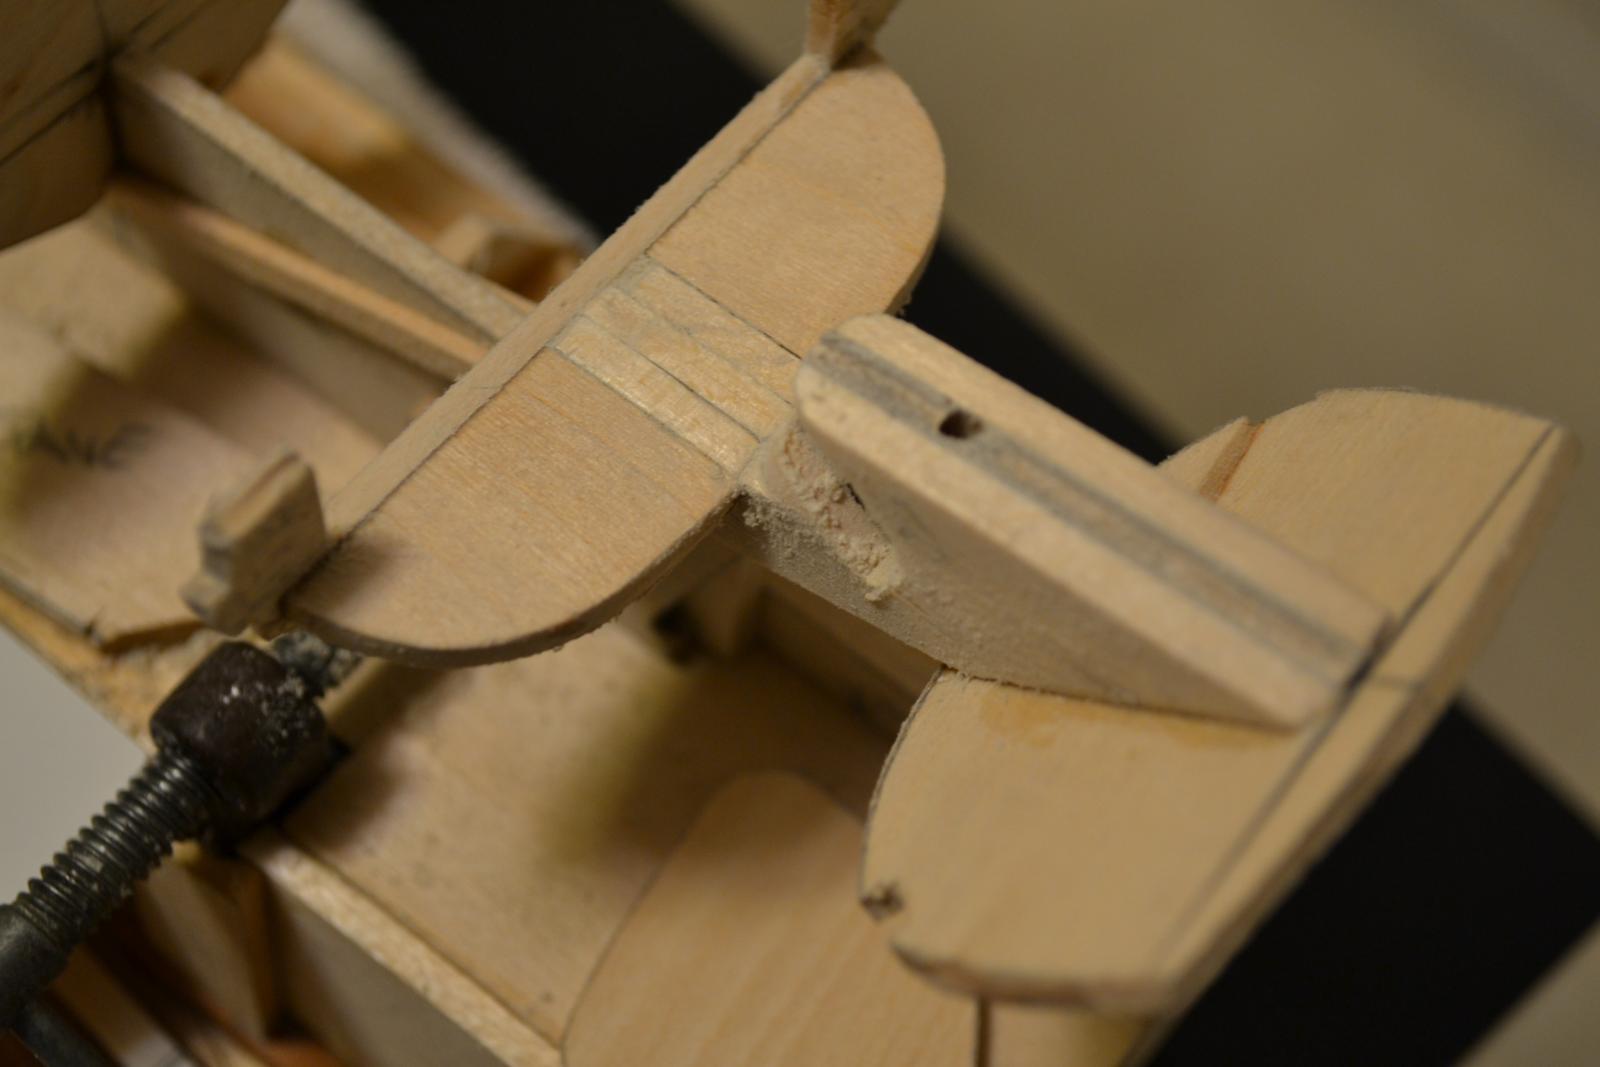
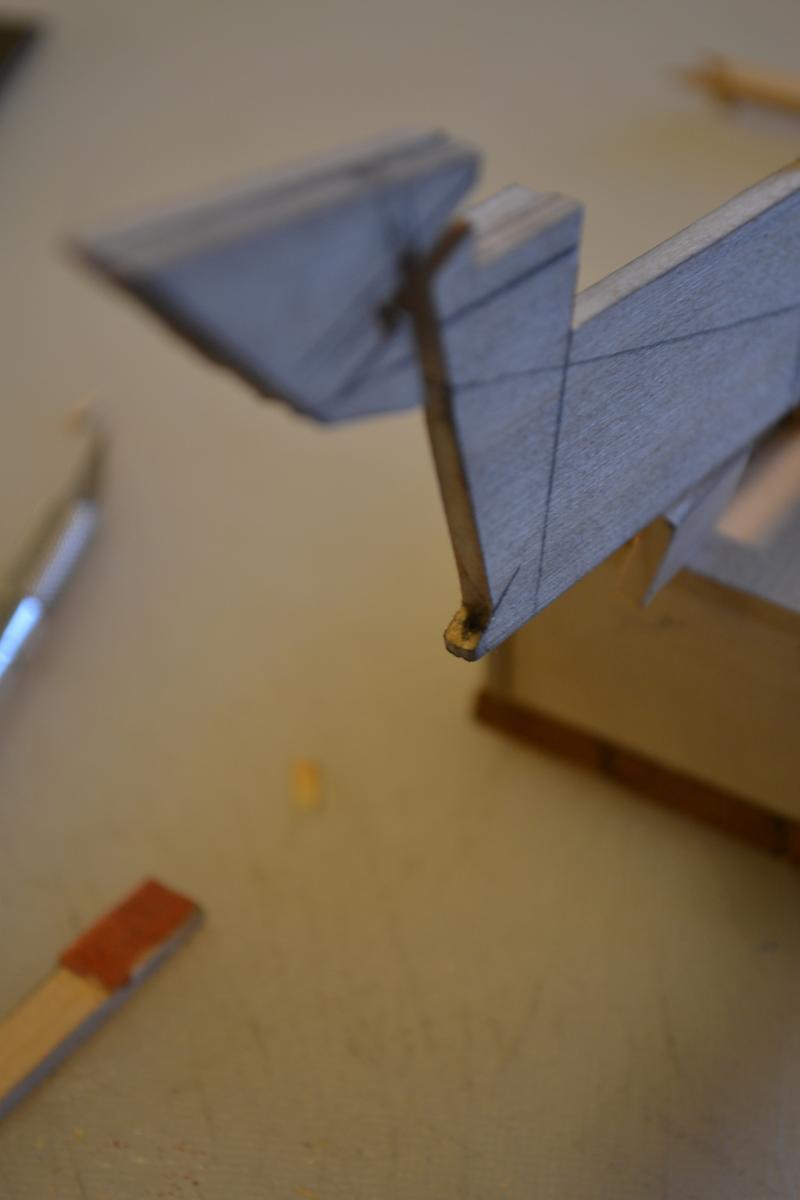
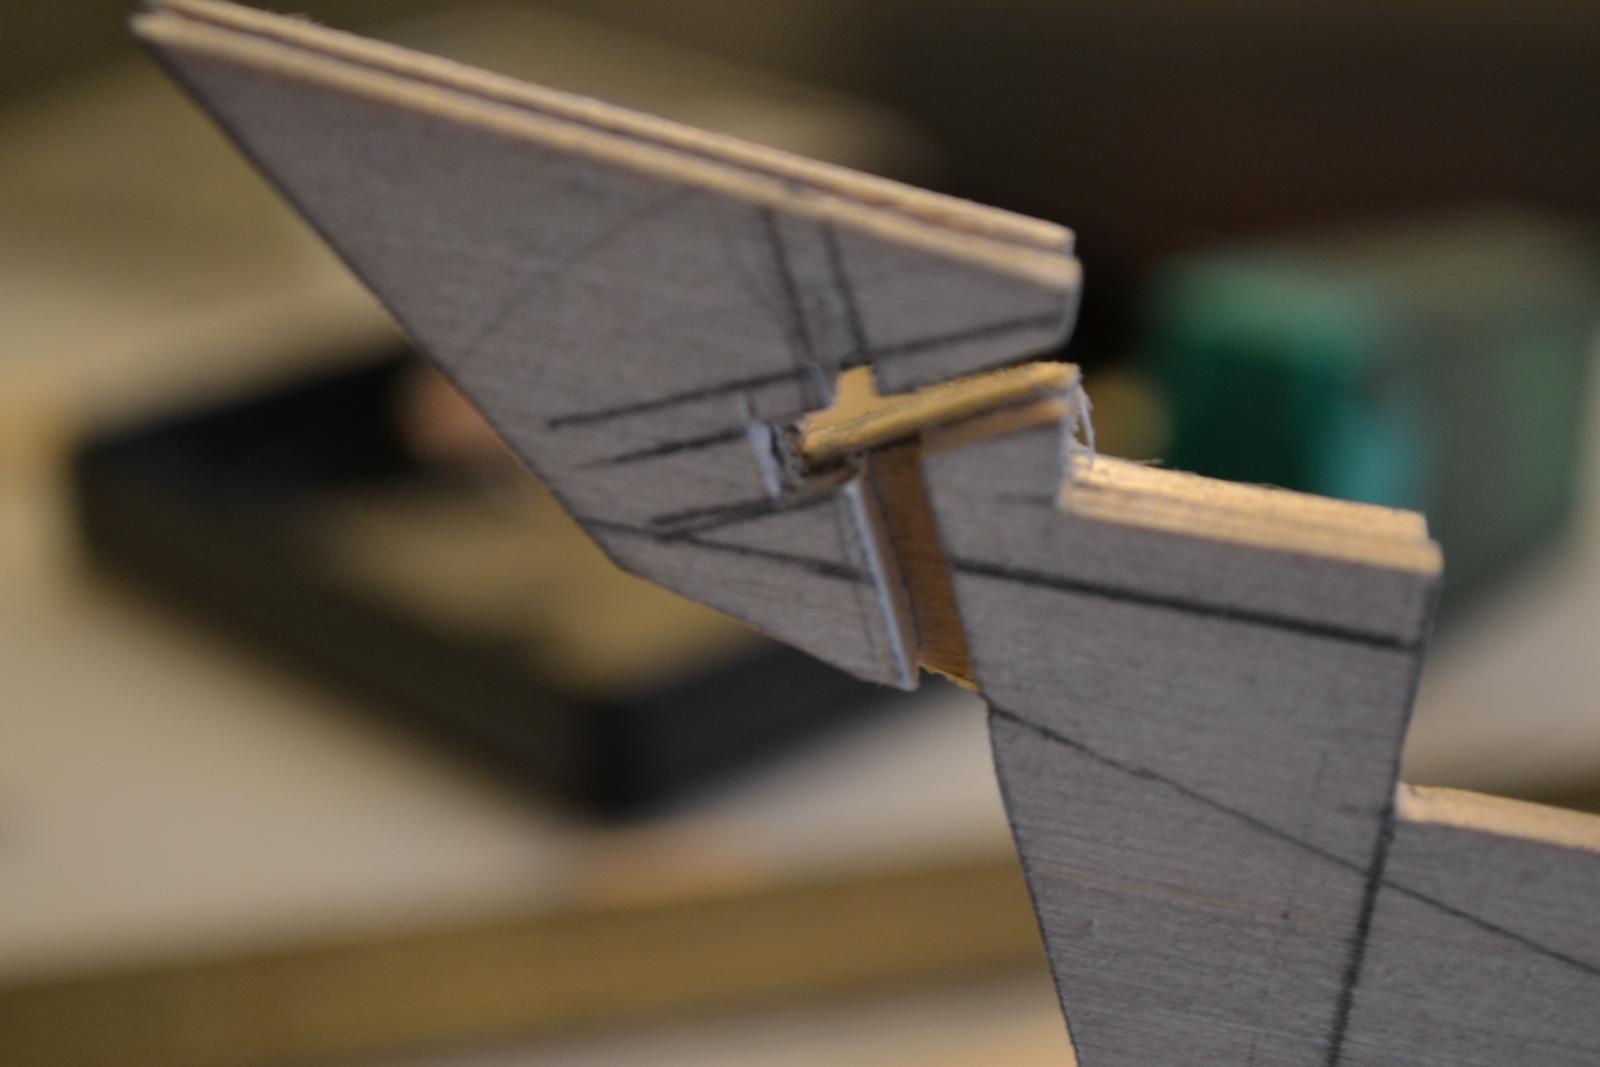
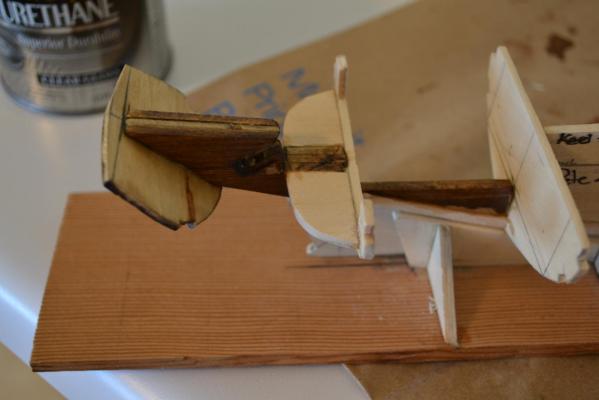
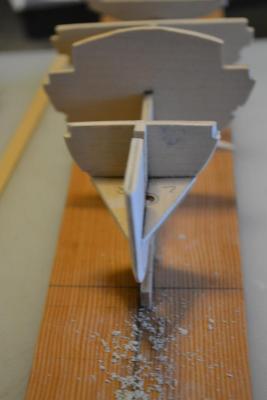
The first thing I would like to do , is to have a working rudder. I went back to the Chapelle drawing and added the divit ( for lack of a better term)at the end of the keel. I then Figured out the center line for the Rudder, and removed a 1/8" slot in the keel. I then made up 2 pieces of 1/8" to fit against frame #4, this will make the transom stronger and at the rabbit line I can then blend in the Keel strip. Here are the results


- 153 replies
-
- 3
-
-
- musongus bay
- sloop
- (and 1 more)
-
Thank you Bob, So would I , I try to build the Boats that I would love to Sail Best Regards, Pete
-
Thank you Russ and Shawn,, It was fun to build , I was happy with the way it turned out
-
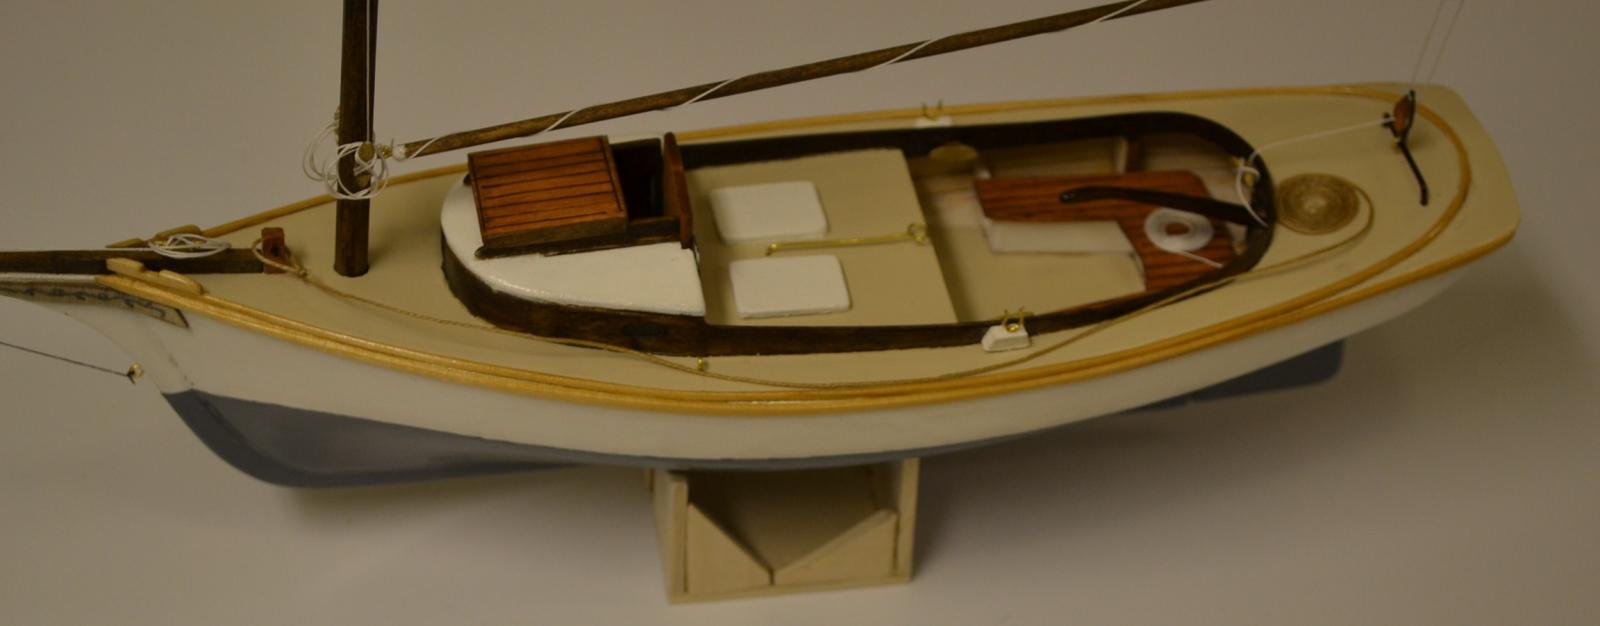
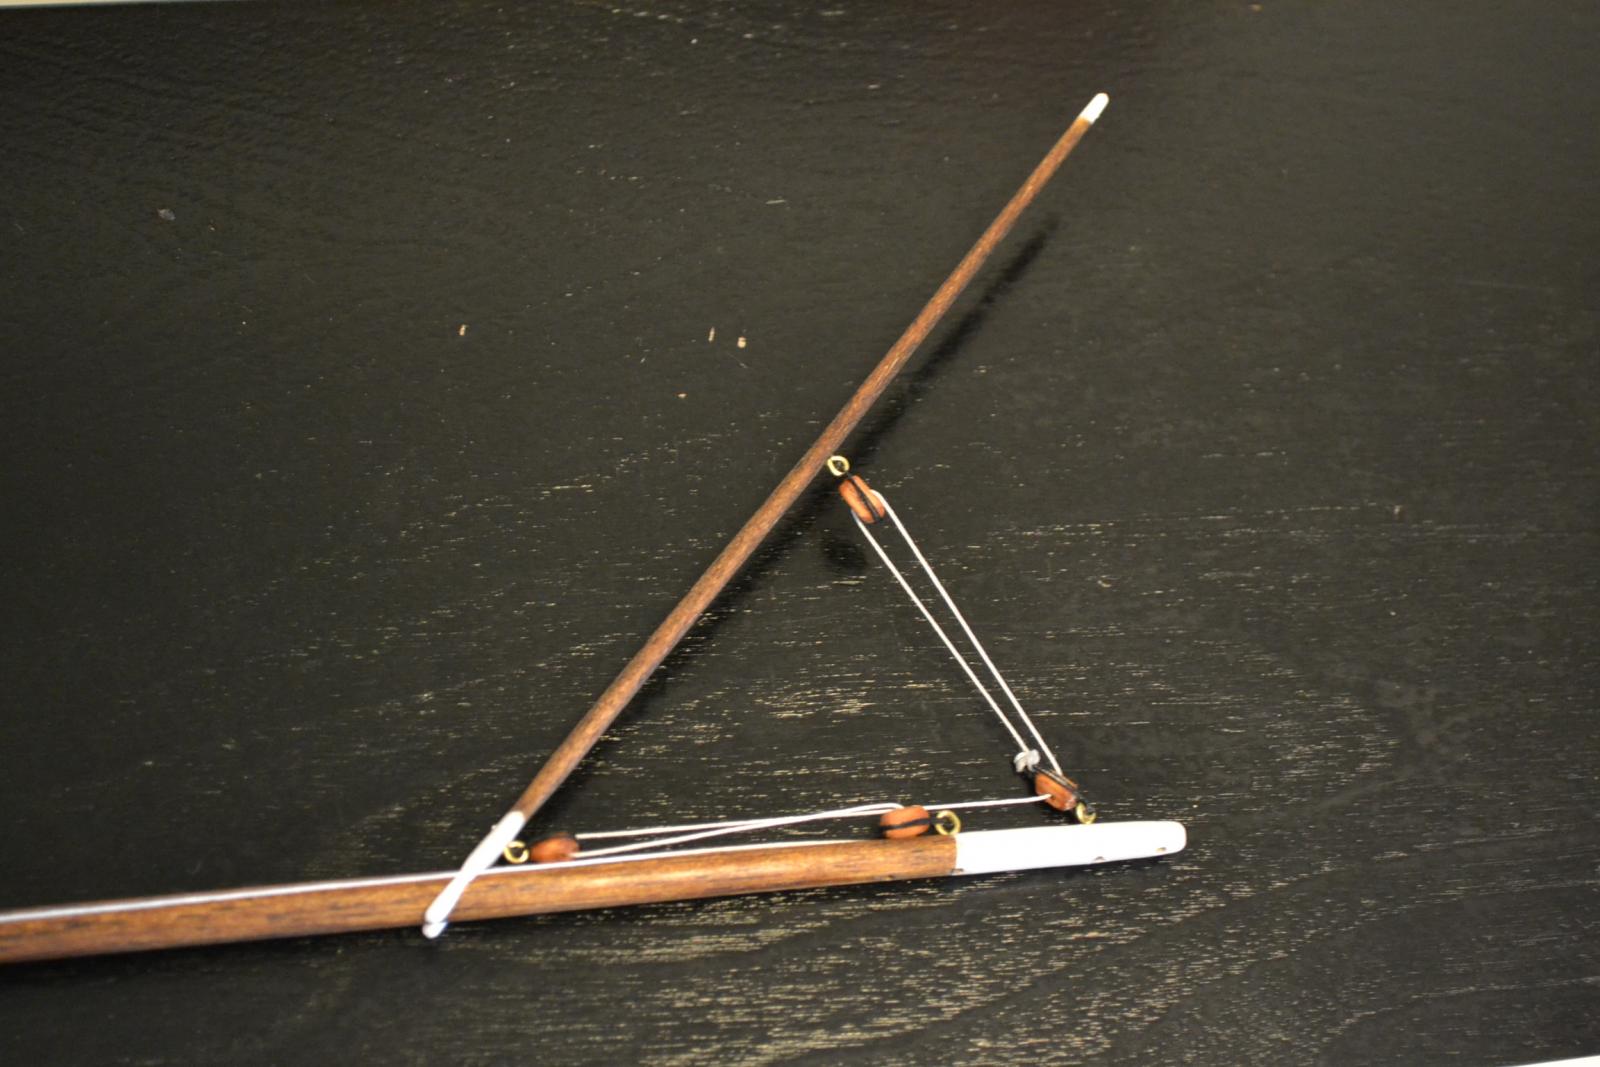
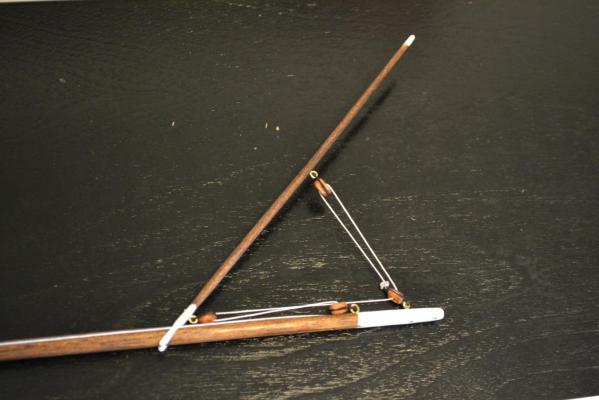
I realized this morning that Thanksgiving was this week , So I jumped on it and got the Kit build finished, I did change a few things, like the block location on the boom, The Main sheet should come from aft not over the top . I also used a fat paperclip for the traveler and used a sharpie on it . I added a moring line with a pancake on the end ( I learned how to do that here on M.S.W. ) here are the results
- 209 replies
-
- 5
-
-
- muscongus bay lobster smack
- midwest products
- (and 1 more)
-
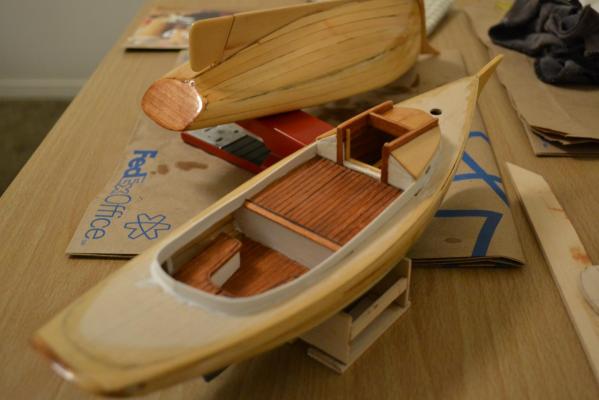
Well I did ti, The Kit Build Is Complete, After my post this morning I went straight to work in the Masting Shop. Then I retrieved Keel #1 from the Fishing room (the spare bedroom) Over the course of 3 days (in between the kit Build) I managed to get 7 coats of varnish (sanding in between coats with 400 grit)here are the results


-
As the excitement builds toward completion of the kit build, I stayed up till about 3am to get 4 coats of varnish on the toerail, fairleads and trailboards. (my Wife let me use the spare bedroom for the varnishing) So today I will start putting the finishing touches on her. Here are the results
- 209 replies
-
- 1
-
-
- muscongus bay lobster smack
- midwest products
- (and 1 more)
-
Hi Casey, Yes I plan to do some cool stuff to this one , Like a Teak Grating for the Cockpit floor, I did look into a 3 volt electrical system when I started the Kit build (just basic runnig lights, Mast head light and a cabin light ) and figured on putting the battery and Light switch in the Fish well's ( I may do that )The main thing I would like do on this project is a retractable centerboard. I figure it will take 2 maybe 3 boats to get me there. This first one (Keel #3)is to have a working rudder. Best Regards, Pete
- 153 replies
-
- 1
-
-
- musongus bay
- sloop
- (and 1 more)
-
Thank you Bob, I look forward to this build, it will give me a chance to do some of the things I thought about after the fact( Kit build & Keel #1) Best Regards, Pete