Geoff Matson
-
Posts
720 -
Joined
-
Last visited
Content Type
Profiles
Forums
Gallery
Events
Everything posted by Geoff Matson
-
 It always amazes me how many ways there are in modeling to do the same thing! Great work on the scroll work Jay.
 -
Looking good Jay
-
Jay I am sure you could use some thin wood and do it the same way. Maybe 1/32 or 1/64 might work. I have used pretty thin basswood run through the thickness sander. The thinner you go with basswood the more fuzz you get. I think boxwood might work better. You could always check one of the styrene companies on the internet. You can almost always get it in a few days.
-
Jay I am sure it will help out to a little break from the rigging. You can only do so much. Try the boats they a fun build and a nice break from the rigging. Thats what I am doing right now. Working on the fore and aft bumpkins and the studding boom storage. Then I will tackle the yards. So many shapes to put on one wooden dowel
-
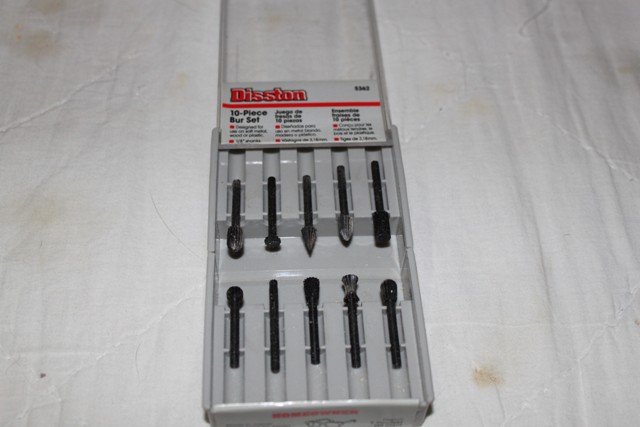
Jeff For doing the interrior I found these worked great. Just put them on the dremel tool and you move right along. I got mine at Menards, but any similar ones will work. Much easier then carving.

-
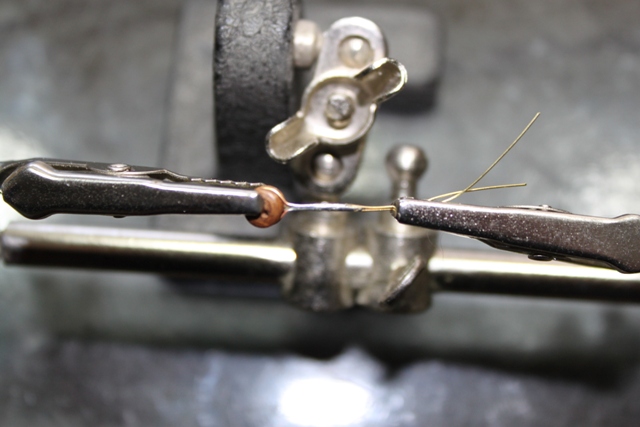
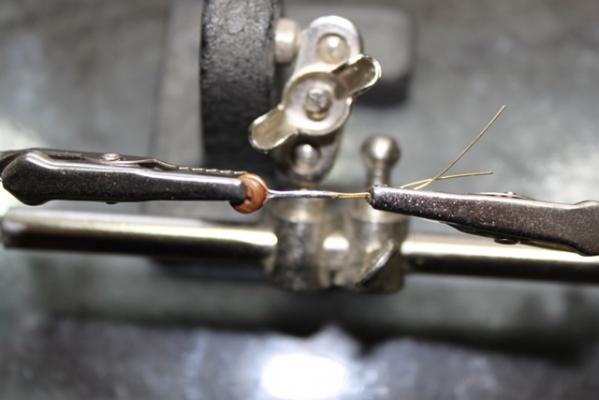
Jeff Good call on the deadeyes. If I were to do it over I would have left them natural. Much easier to align them when you fo on the rigging part. On your anchor storage area, make sure to test fit the anchor. I had to adjust the opening and it was not easy after I had already installed it. Your boats are great. I really like building them, each one is a model in itself. The styrene worked great for me. I have finished the masts and bowsprit and am working on the aft and fore bumpkins and the studding boom storage area. On the soldering. If you do it like the picture you will not scortch the deadeyes. Once soldered just twist them a little to tighten the deadeye. But make sure the deadeye has a little room to move to help alignment. Just practice on a few. Happy modeling
-
Glad to hear you got the keels on. I really like building the boats. Each one was a model in itself. The one decision you have to make when you decide to detail the interrior is how much do you want to put in the boats. As you can see by my pictures, the boats are pretty cluttered . If I were to do it over I think I would have put in a few oars, and maybe left the sails off the masts. You end up hiding a lot of details, but it also hides my mistakes Have fun with the boats and look forward to you posts.
-
Good move. Never throw anything out. You can always find a use for it somewhere. Boats are looking good.
-
Lookis like you are making good progress. Lots of line and knots. Keep us posted
-
The grating is a brass square about 2 inches or so. I made the surrounds per the plans and then put the brass grating in. I left it brass because I liked the look. You could always paint it if you want.
-
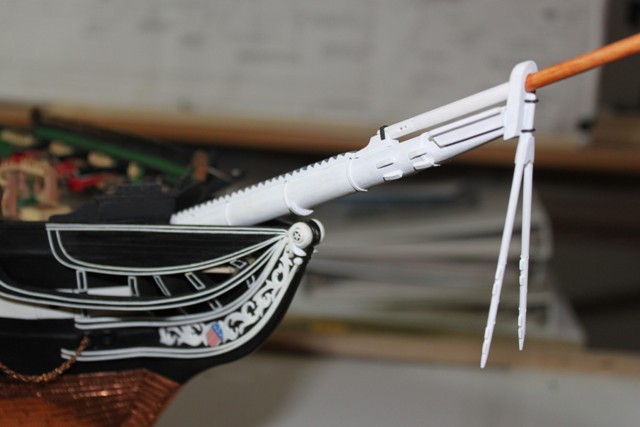
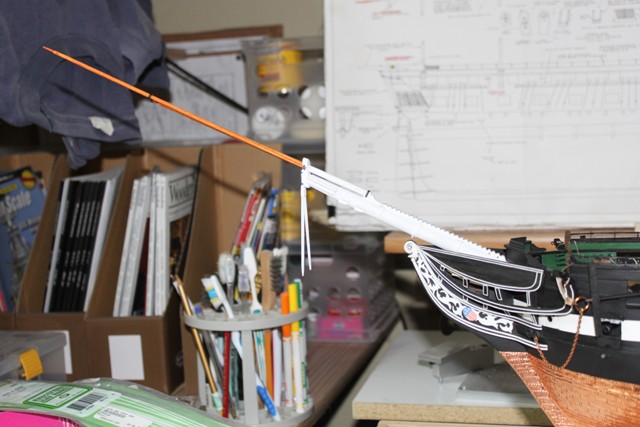
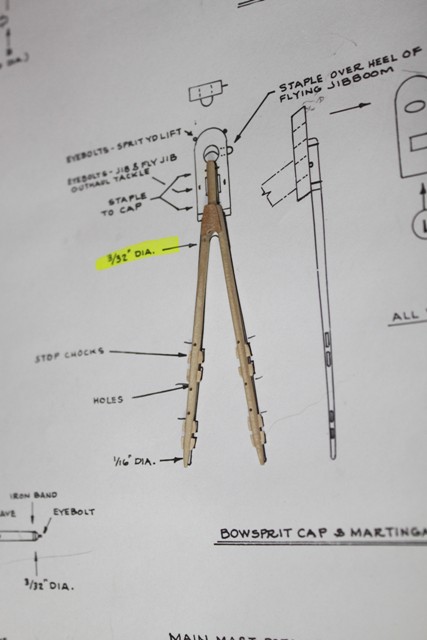
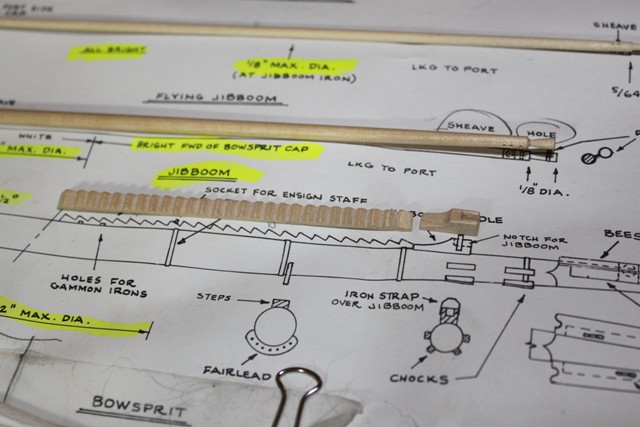
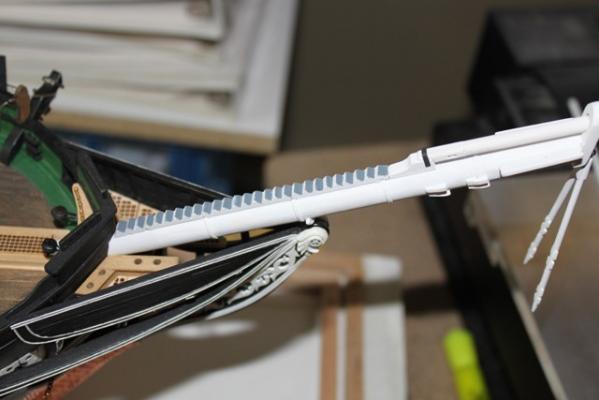
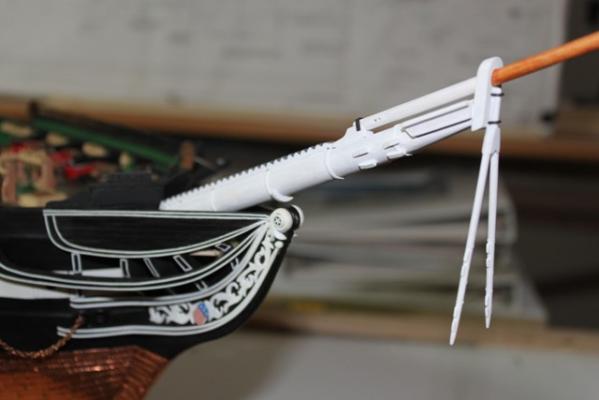
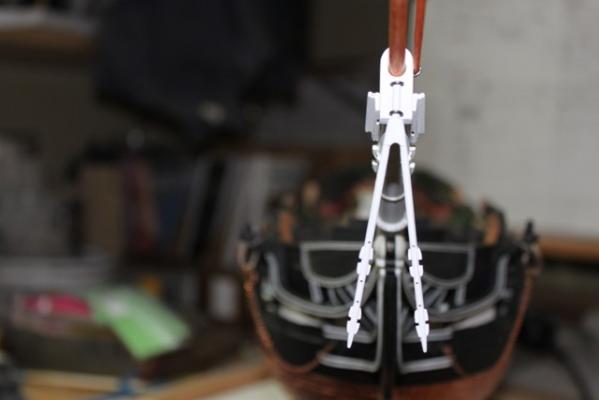
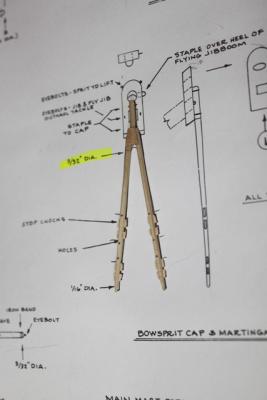
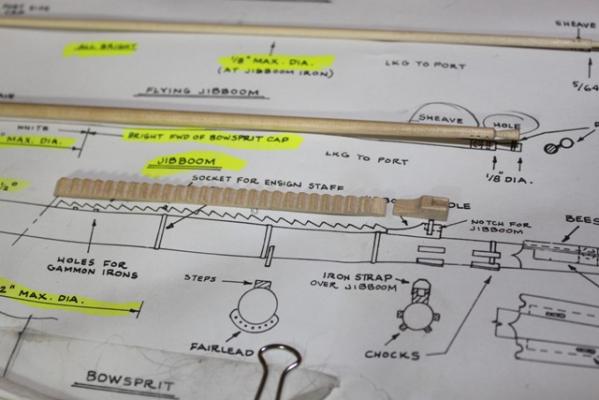
Here is the bowsprit all assembled and painted Again everything was per the plans. Glad this part is over. A lot of work and planning went into it. The steps on the bowsprit were a challenge for me.

-
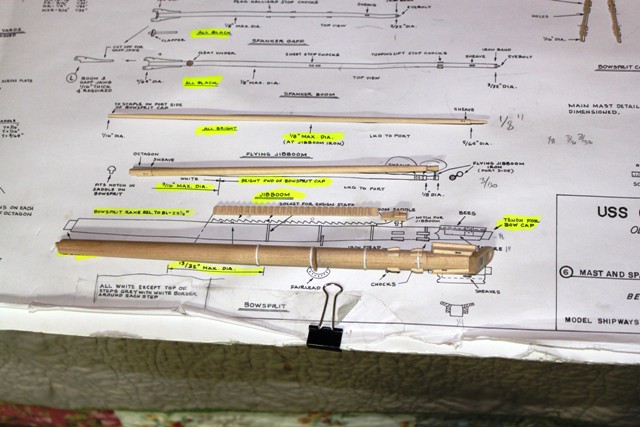
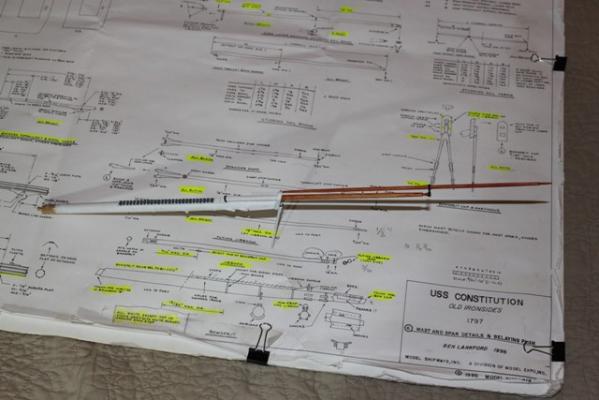
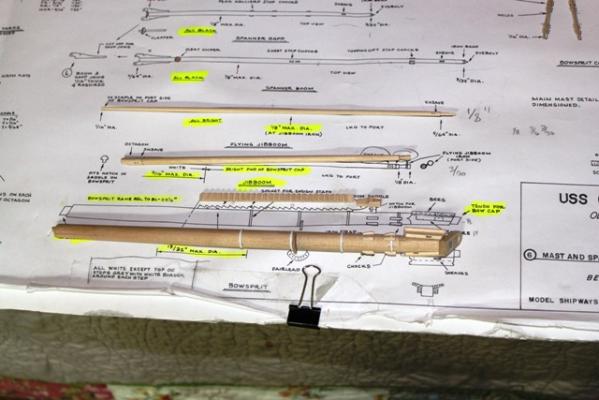
I finished my bowsprit Here are parts under construction. Everything was done per the plans Once I figured out the shape of the bowsprit the rest was preety easy.
-
Where do flag halliards go? Deck or top?
Geoff Matson replied to Modeler12's topic in Masting, rigging and sails
Jay I like all the details are including with your Conny. Great job! -
Looking good Steve. The plastic is actually easy to work with. Just take your time. I painted the interrior before I added the floor boards. Then I just scraped off the area I wanted to glue to. The one thing I did that was a little different is that I used different woods on the interriors. The big boat was done with boxwood the two side boats were done with cherry and the stern boat was donw with mahagony. I like to experiment as I go along for future builds. But like I said before, once you put all the stuff in the boats you don't see much of the interrior. Have fun
-
Jay The choice of material seems to unlimited. The Byrnes ropewalk does not say which material is best. There has been a lot of discussion on the list about what material to use. Some guys like cotton, some silk, some guys like to die their own color etc. I guess it comes down to personal taste. I am still not sure which was fo go.
-
Thanks for recreating what you could of the build log. The carving part is a tutorial in itself. Great job.
-
Jay Way to go on the rope walk. That is the one thing that really amazes me about this list. All the different ways to get the same job done. We have some inventive people here. I plan on making all my own own rope for the rigging. I will be using the Byrnes ropewalk. Right now I am trying to figure out the line sizes etc. I am alomost done with the bowsprit and will post my progress soon.
-
Harvey Glad to see you back to work on the Conny. Everything is looking great. Lots of details to put on the deck.
-
Dan Looking good. Isn't it nice when you can sit back and look at your progress. Then you remember you "Have to the other side"
-
Jay Good to hear things are working out. Happy modeling
-
Jeff Just checked out sight and tips page. What great information to have. Thanks for doing that.
-
I know the problem. Us old guys with big hands and small deadeyes and even smaller threads really make things hard. When I rigged my AVS I used the tweezers like extensions of my fingers. Kind of like Edward scissorshand I try to make sure my deadeyes are lined up right the bottom one is like a smiley face and the top one is likea up side down one. Using a gauge as do also helps keep the spacing the same. Seizing and serving the lines is very hard to get looking right. It takes practice. Thats why I try to do as much rigging off the model as I ca. I seize and serve all my lines. No knots. The one thing I learned is that if something bothers you "do it over" otherwise everytime you look at it and wish you hard. If the rigging is starting to get to you go ahead and make the boats or work on the bowsprit or carvings for a diversion. The most important point is hang in there.
- 732 replies
-
- 1
-

-
- constitution
- model shipways
- (and 1 more)
-
There has been a lot of disscussion about the line colors. I have seen them done both ways. I think I will rig my deadeyes with the lighter colors.
-
Jeff A few words about the deadeyes Make sure you us a third hand. It makes soldering that much easier. I twisted the wire around the deadeye, fluxed the wire and then soldered it. That is what you see in the picture. Then I cut the wire to length put it in one clip and put the strap in the other clip, fluxed everything and soldered it together. Check the plans for the proper length of everything. Also make sure your deadeyes have a little play in wire. That way when you go to rig them you can adjust them a little. If you paint everything black make sure the deadeyes are lined up the way you want them. The paint will act as glue and freeze them in place.
-
Jay When I first looked at the mizzen mast deadeyes I thought they were kidding me But that is what the palns called for. Eveything is looking great.