Geoff Matson
-
Posts
720 -
Joined
-
Last visited
Content Type
Profiles
Forums
Gallery
Events
Everything posted by Geoff Matson
-
 I also have the kit, it will be awhile before i get to it though. It will be great to follow yours and Jeffs progress. So make some sawdust guys so it will be easier for me.
 -
I am aware of that spar. Thanks for the update though. I am actually getting pretty good shaping these things by hand. The first ones are the hardest, then the second seems easier and so on. Right now I am spending more time planning than building.
-
Jay The boats are a fun build. You can put as much or little details that you want into them. I have even seen som covered with tarps. Each on is a model in itself.I am still futzing with yards. Almost have one done.
-
Great tip Jay. All the way from kids toys (ropewalk) to old photo paper (metal bands). Modeling is always making us think and plan ahead
-
Bowsprit and martingale are looking good. Nice dervision from the rigging.
-
New Tool Syndrome
Geoff Matson replied to capnharv2's topic in Modeling tools and Workshop Equipment
Harvey I know just how you feel. Sometimes the old proven ways seem the best. Right now I am working on the yards. I have no lathe so...... All the shaping is done by hand. I used all kinds of sanding stick, files, my dial caliper,etc. Nice slow pace and a few hours later I have my yard. All I had to do is remove everything from the dowl that didn't look like a yard I think some day I might get a lathe, but I will have to win the lottery first. -
Glad to see you have busy. The boats are fun becasue each one is a model in itself
-
X-Y Attachment for Dremel
Geoff Matson replied to Martin W's topic in Modeling tools and Workshop Equipment
She is a great help Martin. I must admit I do borrow the optivisor from her from time to time time to time. -
Jay the dogs name is Hiedi. She was a rescue St Benard and we have had her two years now. I must confess I do borrow the optivisor from her once in a while. I could not do the close up work without it. As we get older I wish I had smaller hands and bigger eyes . Your rigging is coming along nicely. The one thing I noticed about gluing and rigging. You have to be careful of the glue. Once applied it tends to tighten up the lines a little. Even the diluted white glue. This can be a plus to tighen up slack lines a little, but not good if it makes the lines too taught. It has the same effect on port to starboard lines.
-
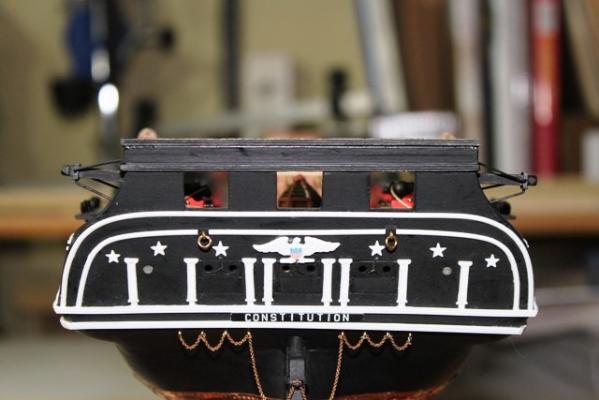
Thanks for your interest The lettering on the name plate is just dry tranfer lettering from woodland senics. Very east to use. As for the chains on the rudder. I think you are right about it being a fail safe to keep the ruddr from breaking away. Not sure as why there are three loops. That is what is on the plans. If I were to do it over I would blacken the chain and not have it brass.
-
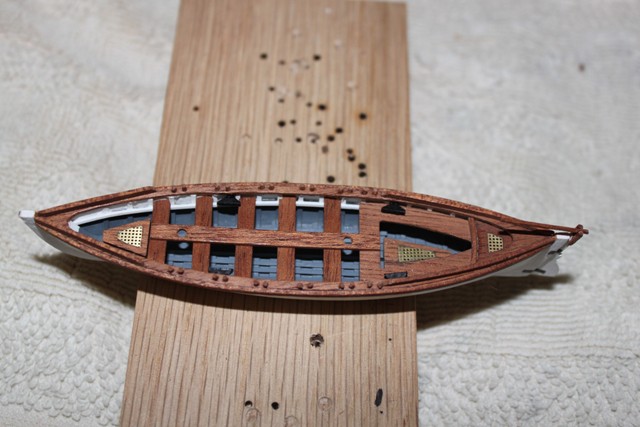
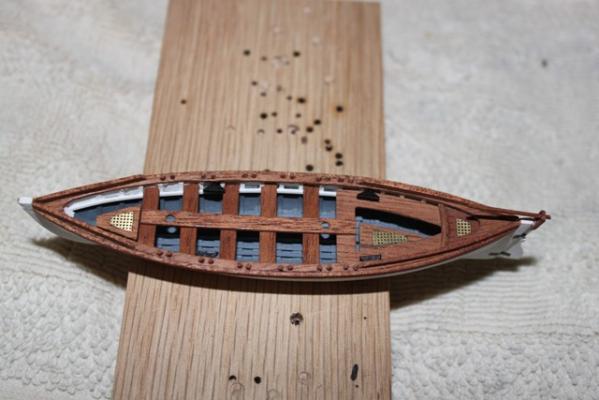
Steve To simulate wood grain on plastic I have seen modelers use sandpaper to roughen up the wood, paint it brown or the color you and and then use a light black wash to simulate the wood grain. That is why I used maghony on the stern whale boat. I really liked the grain of the wood. You can see how much interrior you hide by filling the boats will the extra stuff.
-
I also thought of painting the boats green as they are now. But....I really like the white so that is the way I went. I just think a green boat would be hard to spot on the water. As for the plastic on a wooden model. I thought long and hard about about that one. I like to experiment and try things for future builds. The plastic worked well at the scale of the Conny. Thats why used boxwood for the interrior on the large boat, cherry on the two side boats, and mahogany on the stern boat. I have also used plastic for some iron bands and bands in general and painted them black. All worked well. I have also soldered a lot of fittings and once you paint them black you cannot really tell the diference. Some modelers use card stcok in the same manner. On the bowsprit I did use metal for the all the fittings. Except for the the bands for the jibboom . I made those band from plastic and apinted them black. I guess it is personal preference. I really like working with 1/48 scale and would probably used all wood and, brass, and wire at those scales. Thanks for the comments as they are always welcome and taken seriously. It still amazes me how many ways there are sre to do the same thing in modleing
-
Looks like we are at the two ends of the state. I am right on the Ill. Wis. Border. Thanks for the comments. I wish the Conny was of a larger scale so you could show more details. But if it was You have have to keep it in a garage! I am now working on the yards, A lot shaping and sanding to get them right.
-
Thanks guys. It sure is nice to have a group and future group of guys working on the Conny. That way you know help is just an email away
-
Gee Jay I go away for a couple of days and come back to find my St Benard rigging you boat. Just kidding, looks light you are making major progress. Still have some experimenting to do on the rigging lines but I still have time. I have just started working on the yards. Lots of shaping to do on those ole dowels.
-
Steve the boats are loooking good. Look forward to more updates.
-
X-Y Attachment for Dremel
Geoff Matson replied to Martin W's topic in Modeling tools and Workshop Equipment
Check out www.vanda-layindustries.com I have there tree nailer and hold it and like them very much. But i agree you need a firm base to get anything accurate -
Thanks for posting your build log. This one is one to do list. Your presentations are always a joy and never too long. I hope to be at the meeting Sat if I don't have horses to haul and listen to your next talk.
-
Thanks for the pictures Jay. That is kind of what I had in mind. There always seems to be some alligators getting out of the pond on this build.
-
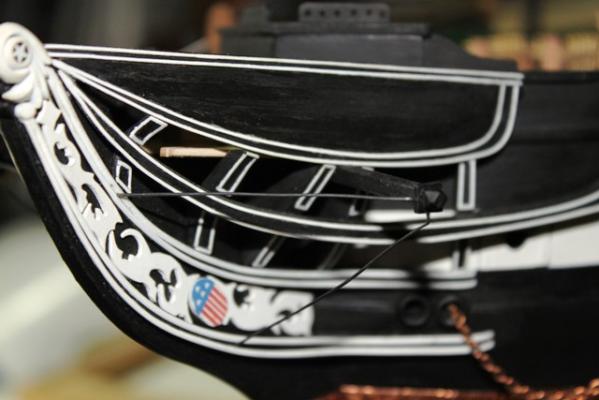
One thing I noticed is it is going to be a project to thread the chains thru the stem up and around the bowsprit. Not too much room. I was thinking of trying to run a thread thru and then attach the chain. Oh well I have awhile before I need to that. I will just wait and see what you do
-
Looks like it won't be long for the bowsprit to find a home. Nice job on the scroll work.
-
Dan I enjoy following your build and always learn something. The tip on the eyebolts for the cannons was a great one.
-
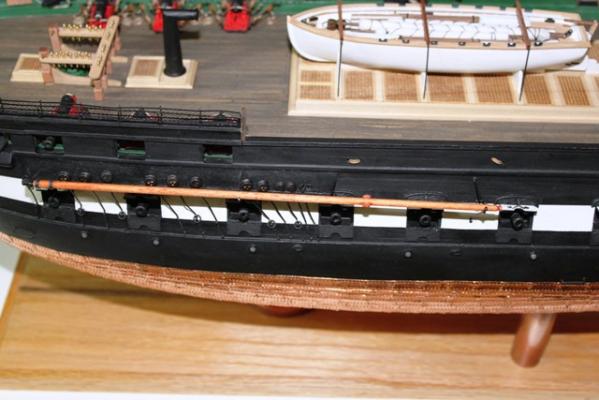
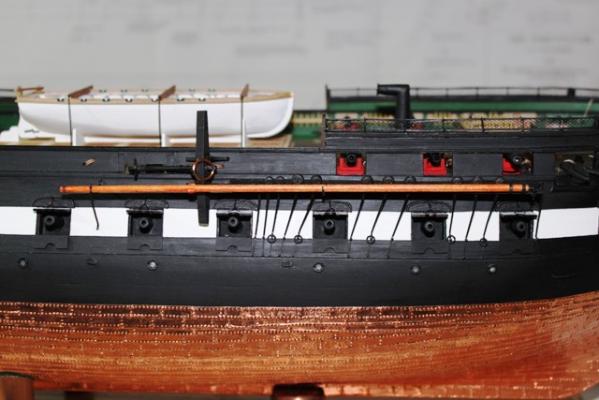
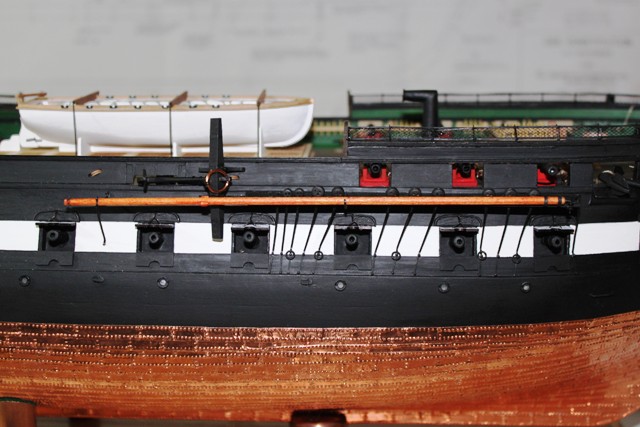
Well, I finished the fore and aft bumpkins. I used basswood for the bumpkins Square plastic for the iron band and wire for the rods. Just took everything off the plans. The one Thing I noticed is that once the bowsprit is installed it is going to be a tight fit to install the chains around the bowsprit

-
Steve The boats look great. Nice job on the keels. It is nice to see you having fun with the boats. The templates are the way to go with interrior.
-
I finished the studdung boom storage area They are just dry fitted in place. I will not install them until the rigging is completed.