Supplies of the Ship Modeler's Handbook are running out. Get your copy NOW before they are gone! Click on photo to order.
×


Glenn-UK
-
Posts
3,021 -
Joined
-
Last visited
Content Type
Profiles
Forums
Gallery
Events
Everything posted by Glenn-UK
-
 It looks very complicated, but you seem to be working steadily through this phase. Keep up the very good work
 -
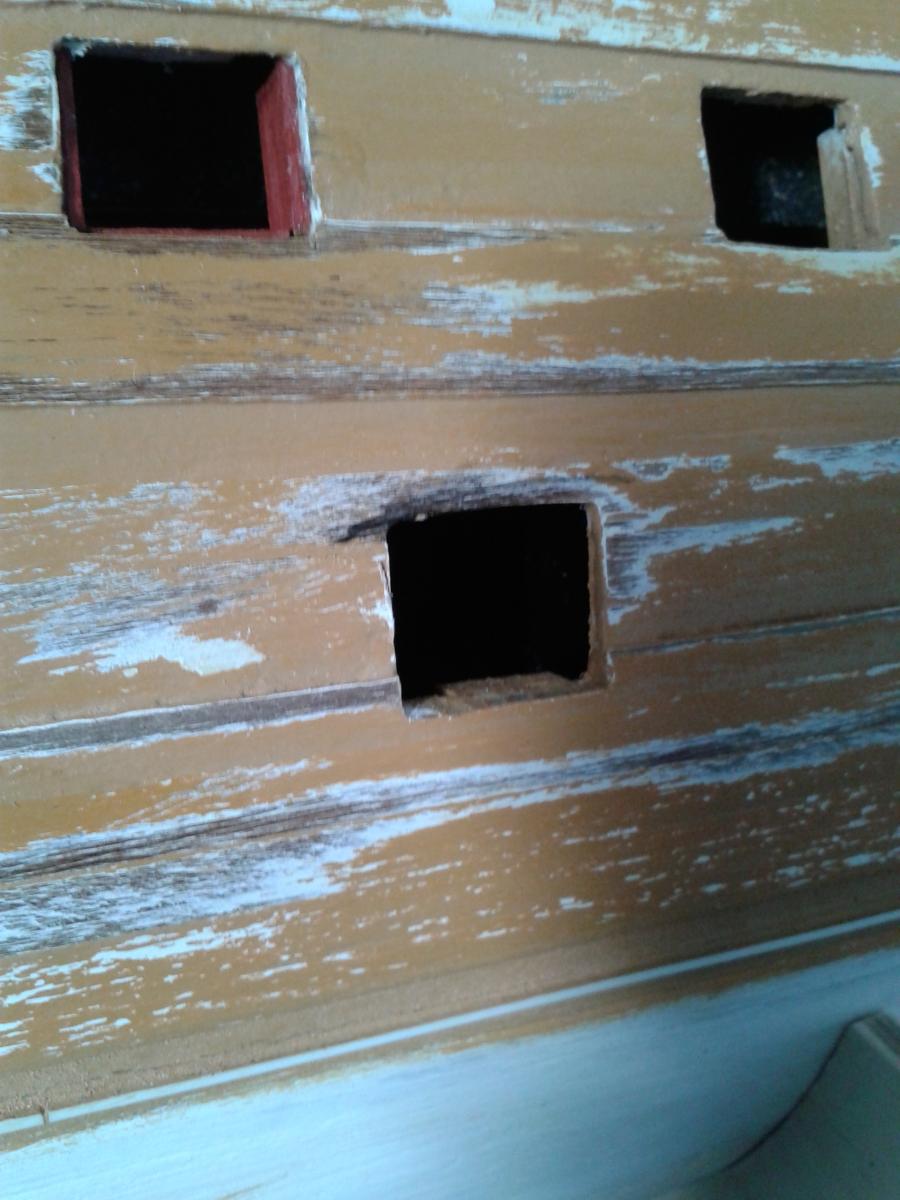
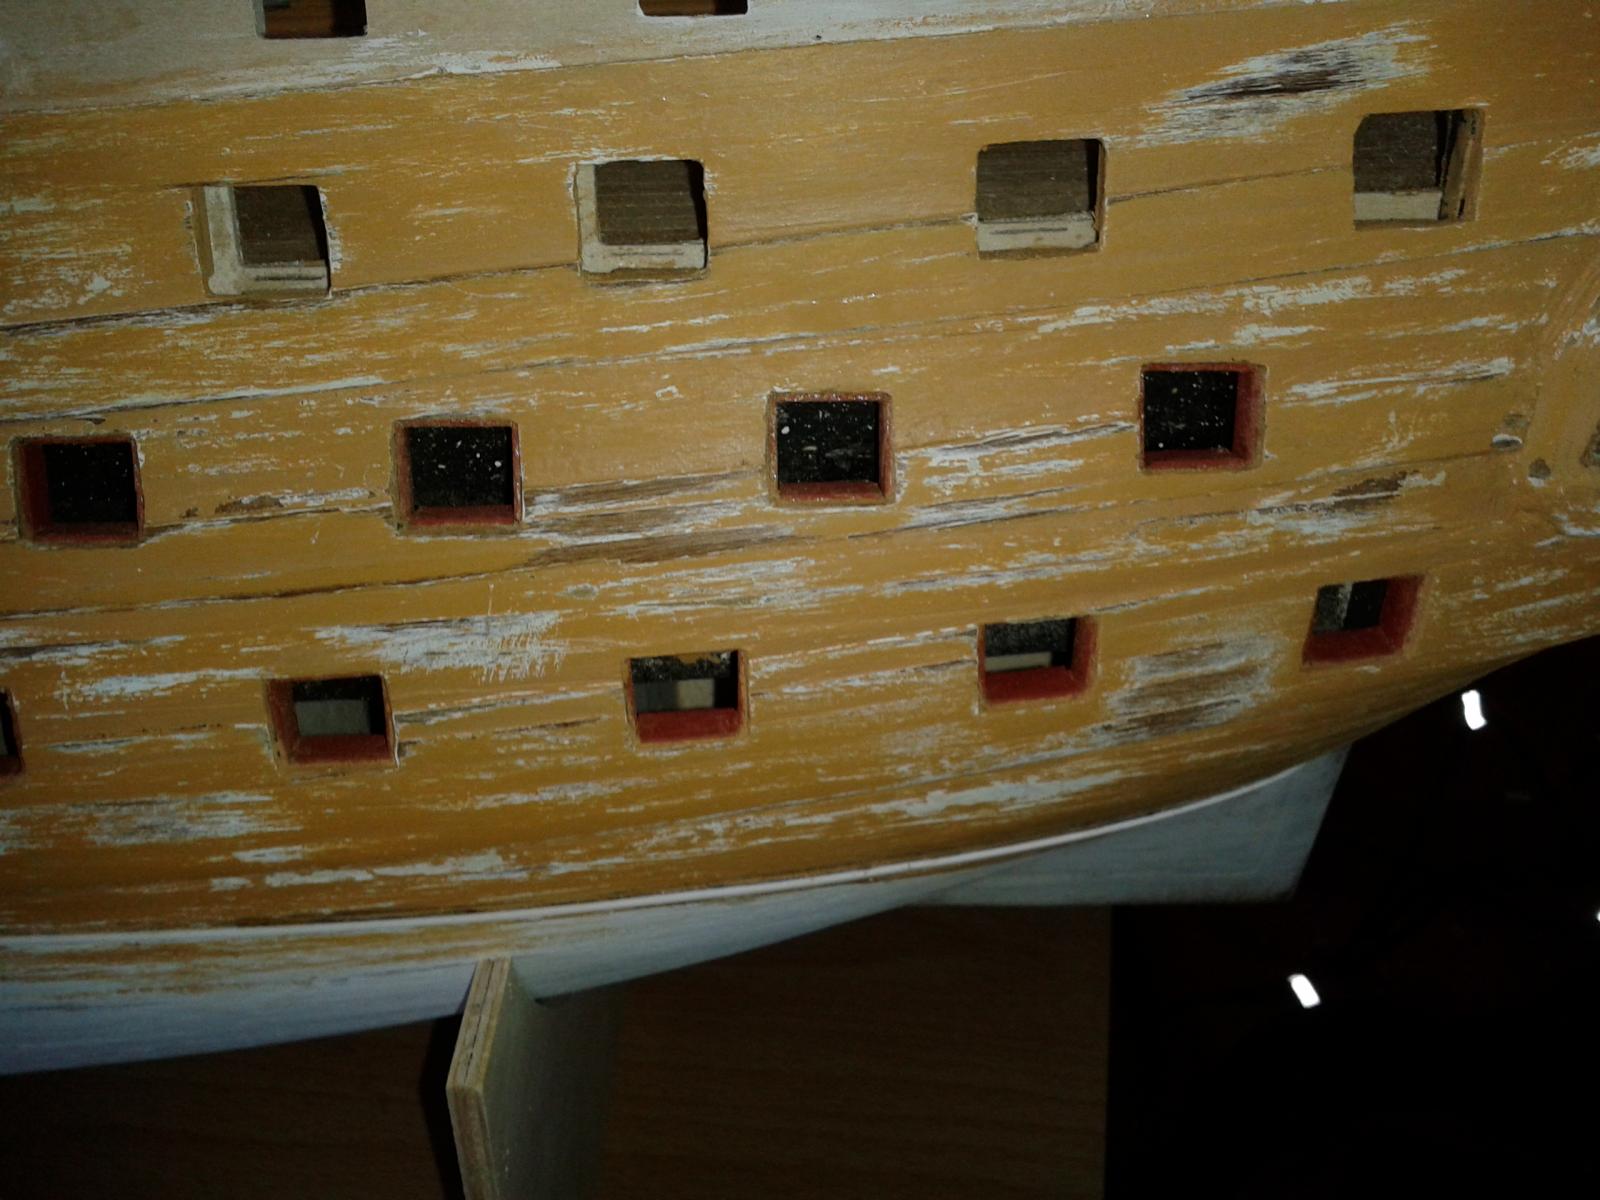
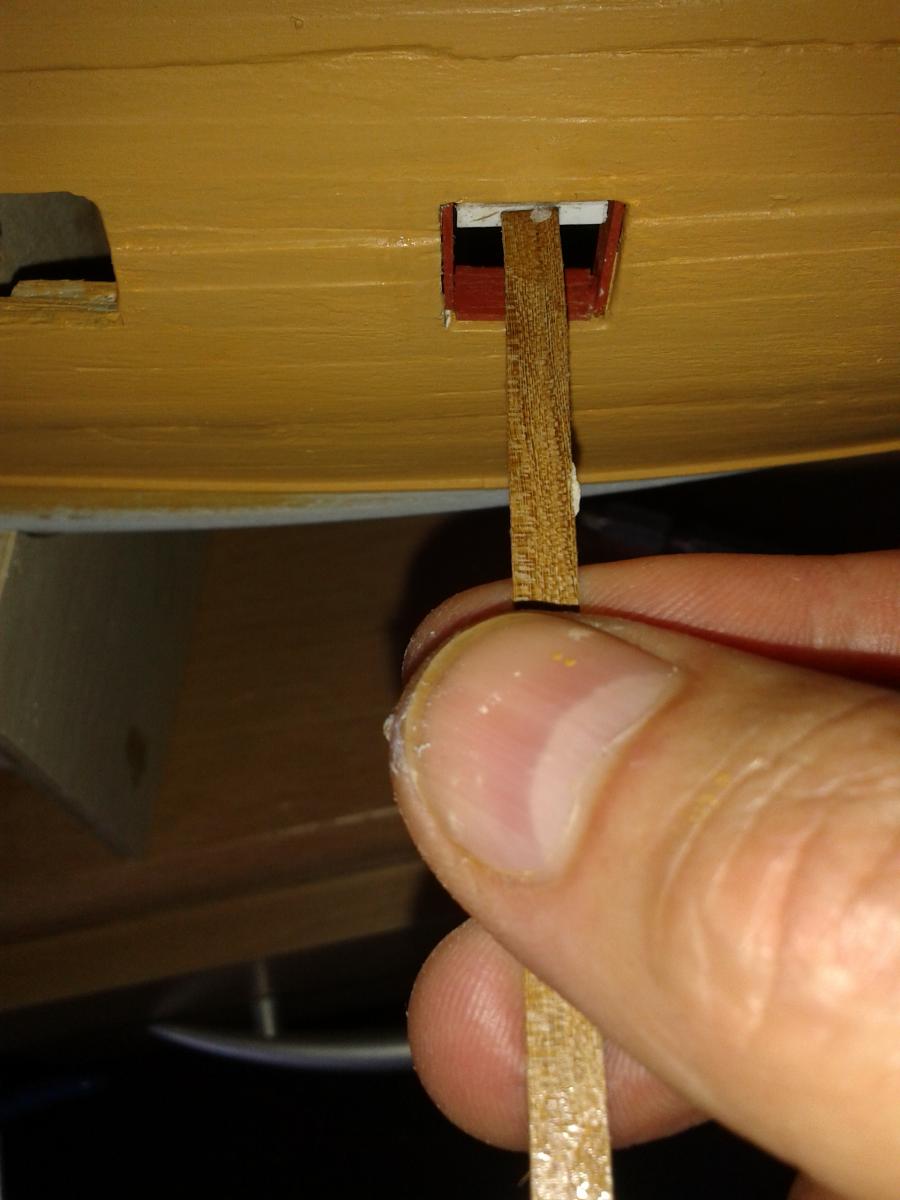
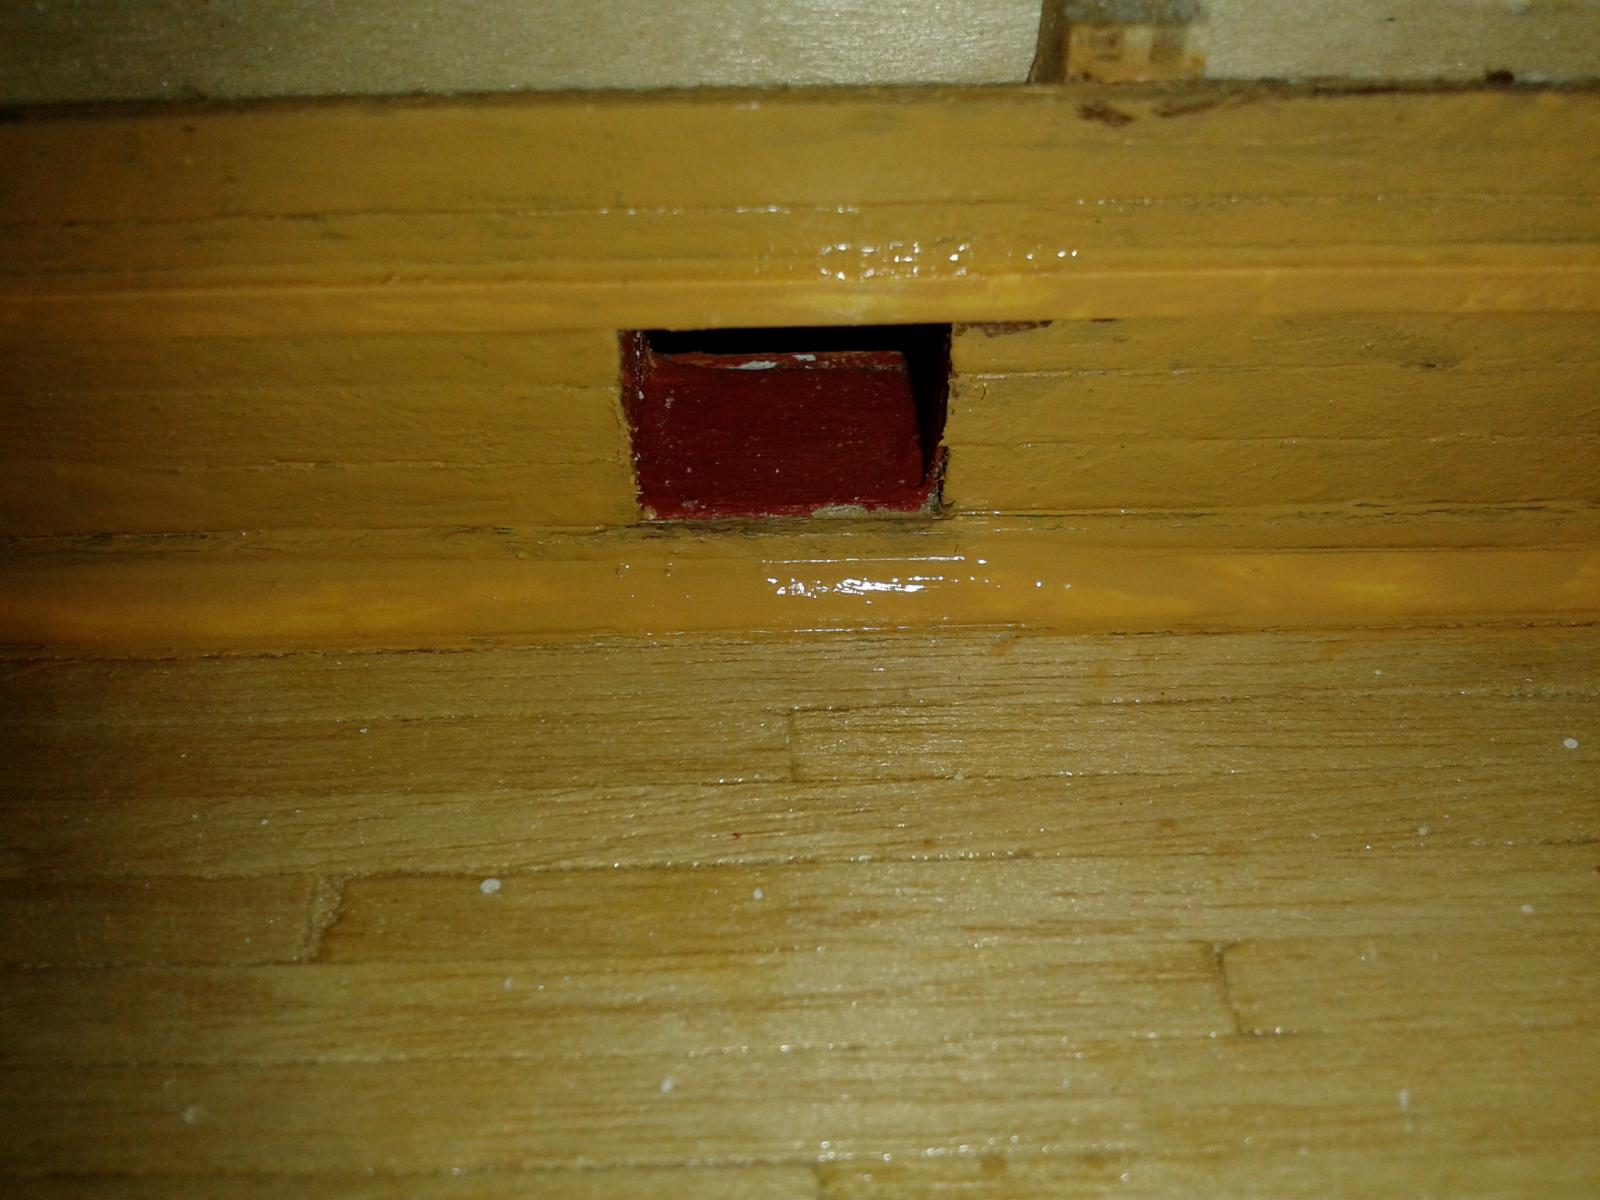
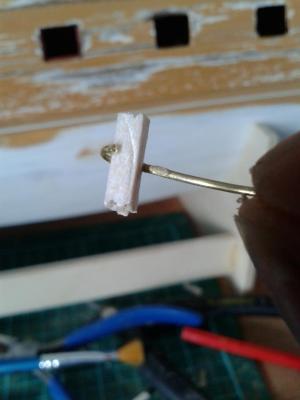
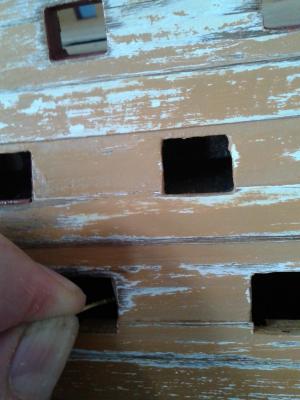
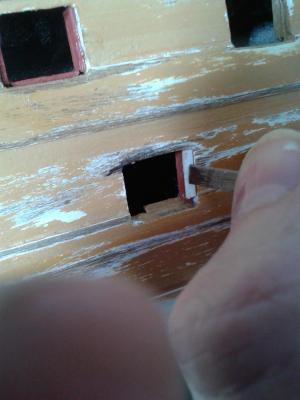
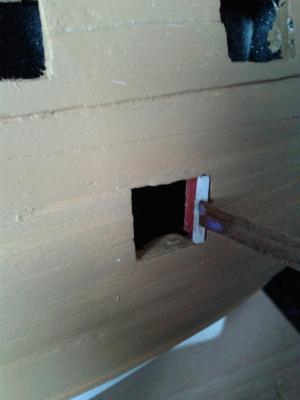
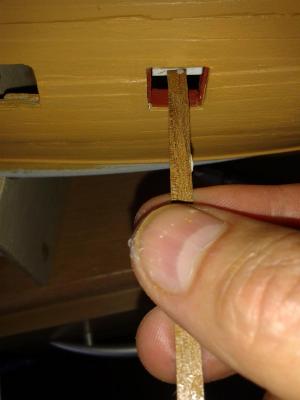
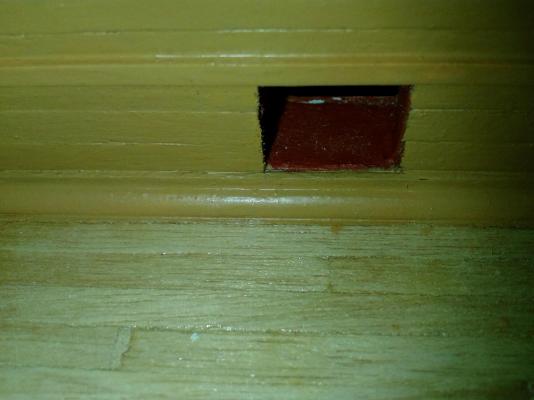
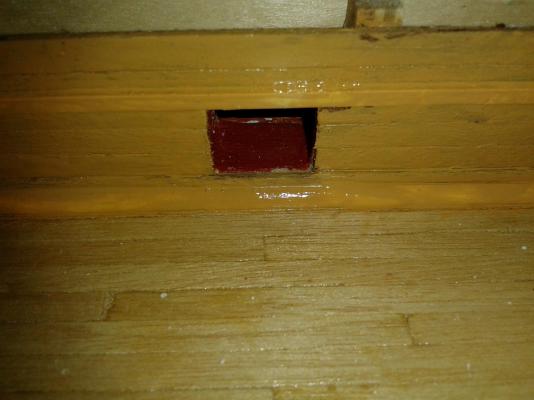
Good morning Today I thought I would share my gun port lining procedure, it may not work for others but it does work well for me and is based on a gun port without a balsa seat fitted. I took the decision early on in the build to fit balsa seat to the gun port strips prior to their installation. This has saved some time and also did create a few minor problems with the installation on the gun deck. In some instances I did not pre-fit a balsa seat due to the limited space, and in some cases the balsa seats become detached during the installation of other items. Gun port lining ready to be lined but has no balsa seat to aid the installation. Using a special tool to hold the balsa seat; a small amount of ca glue is be applied to the balsa seat. The seat can then be positioned using the tool which is removed after a few seconds. Balsa seat after installation, this one will need to be trimmed. Seat after installation and trimming. The painted 6mm lining strip is then measured and cut to size. After the cut a dry fit is carried out. The lining strip is then coated with super phatic glue and positioned in the gun port, using a special tool to ensure it is set back 1mm. That concludes my procedure, it may not be the best and I think it is very important to find a method that works well for you.


-
Hello Jerry According to fault report in the forum it is up to each member to update their logs as necessary to replace the missing pictures Glenn
-
Hi Jerry This was a problem with the server and some pictures were lost, every one will need to upload the missing pictures to their log
-
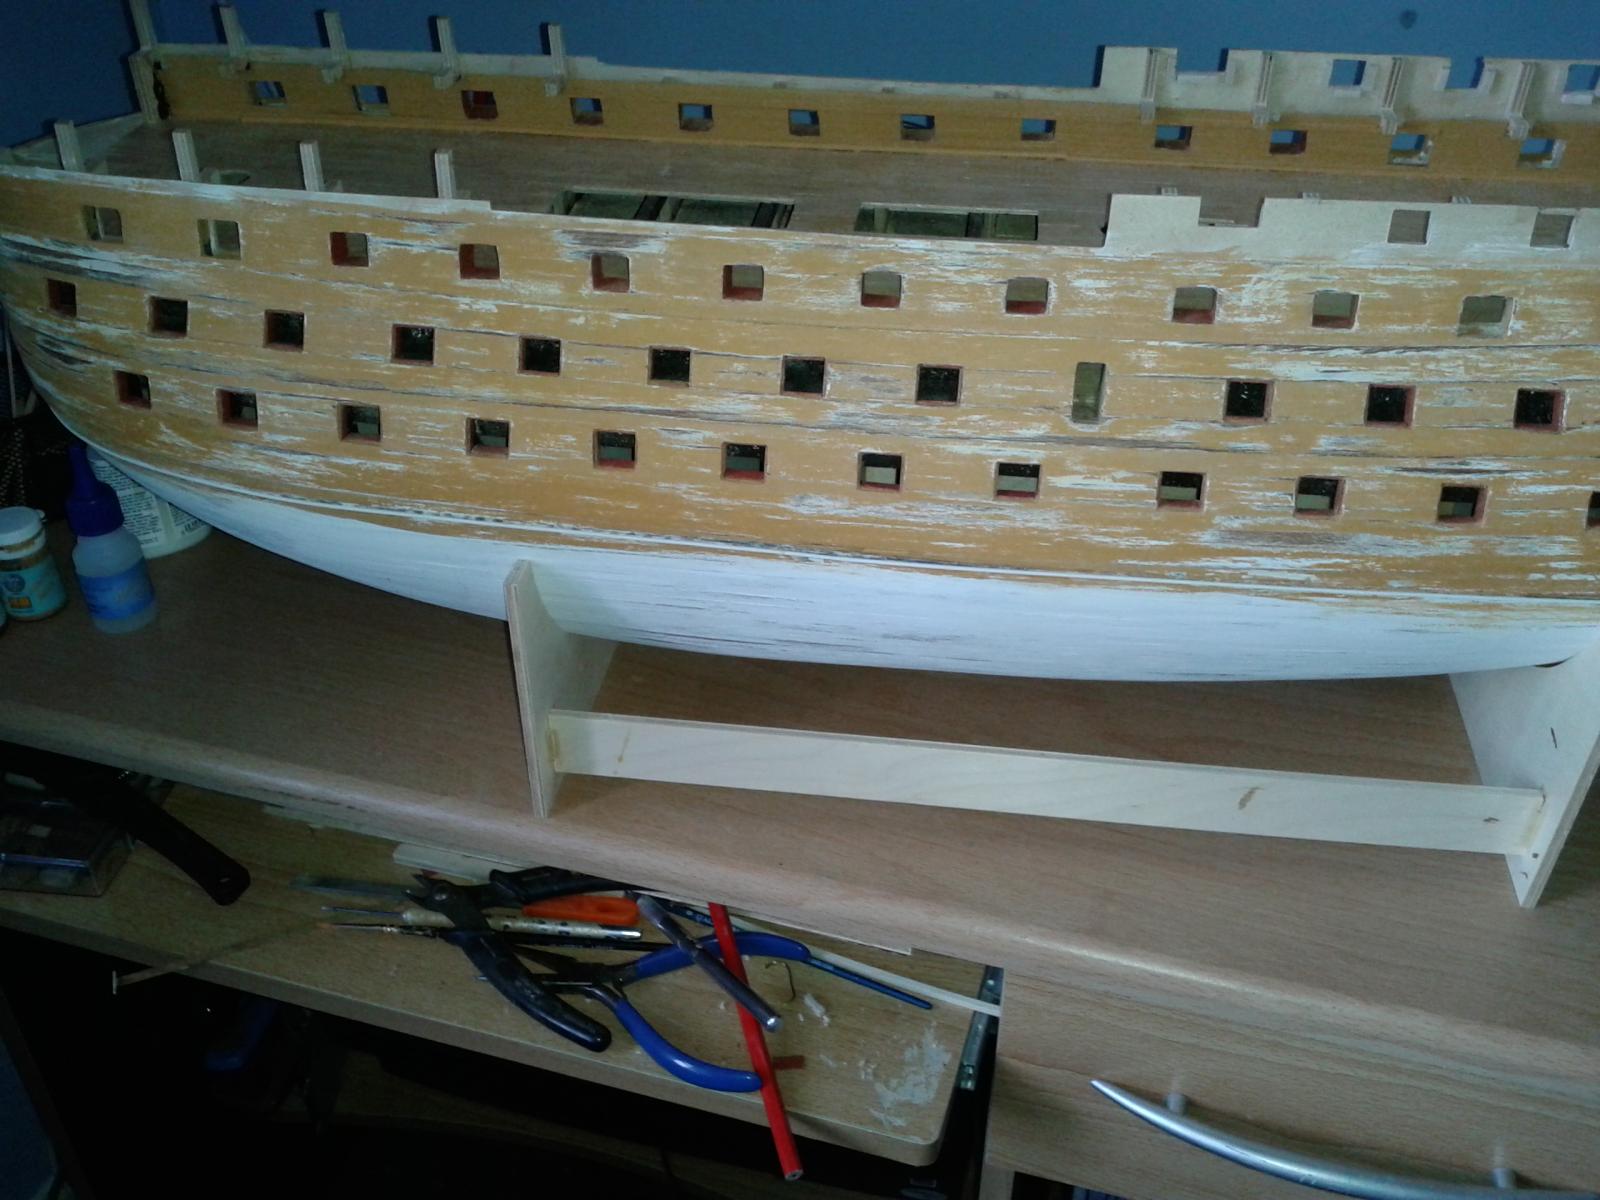
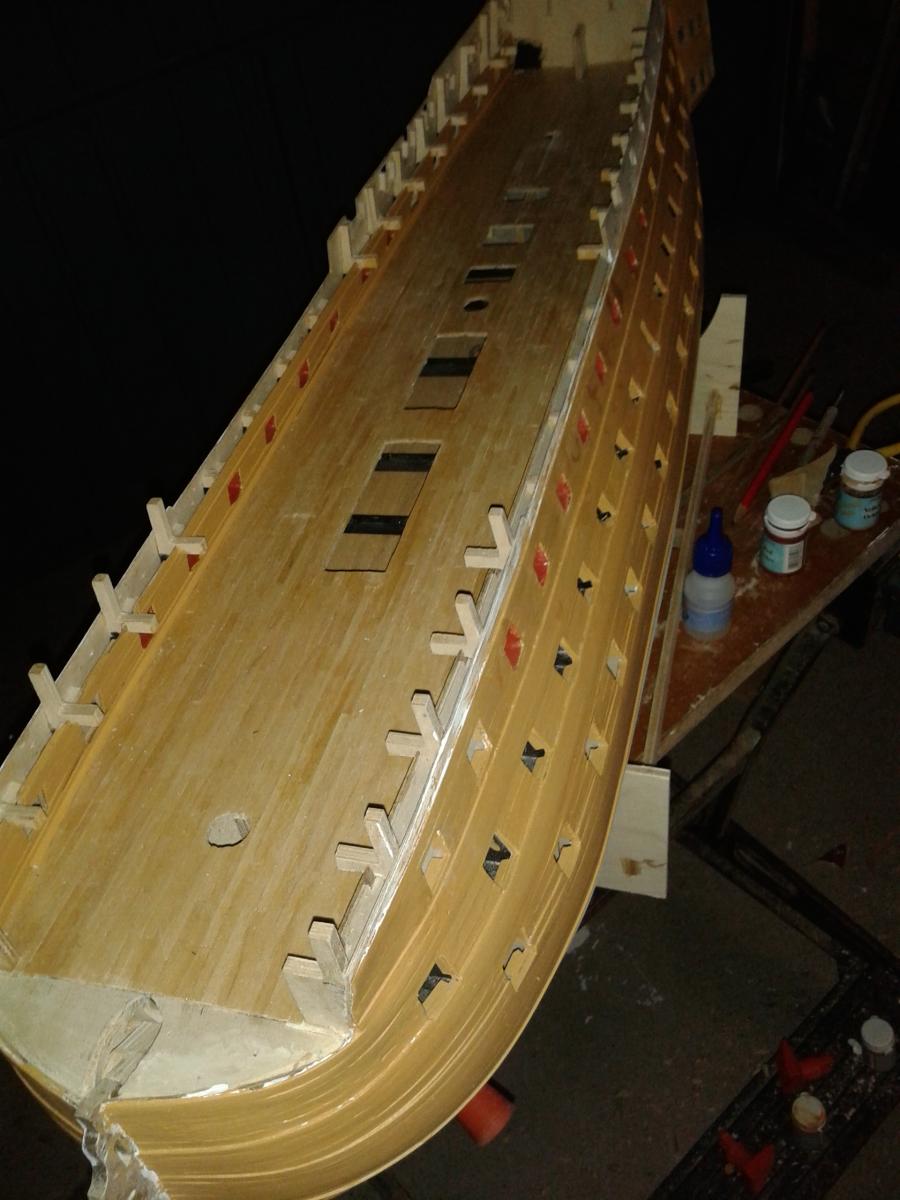
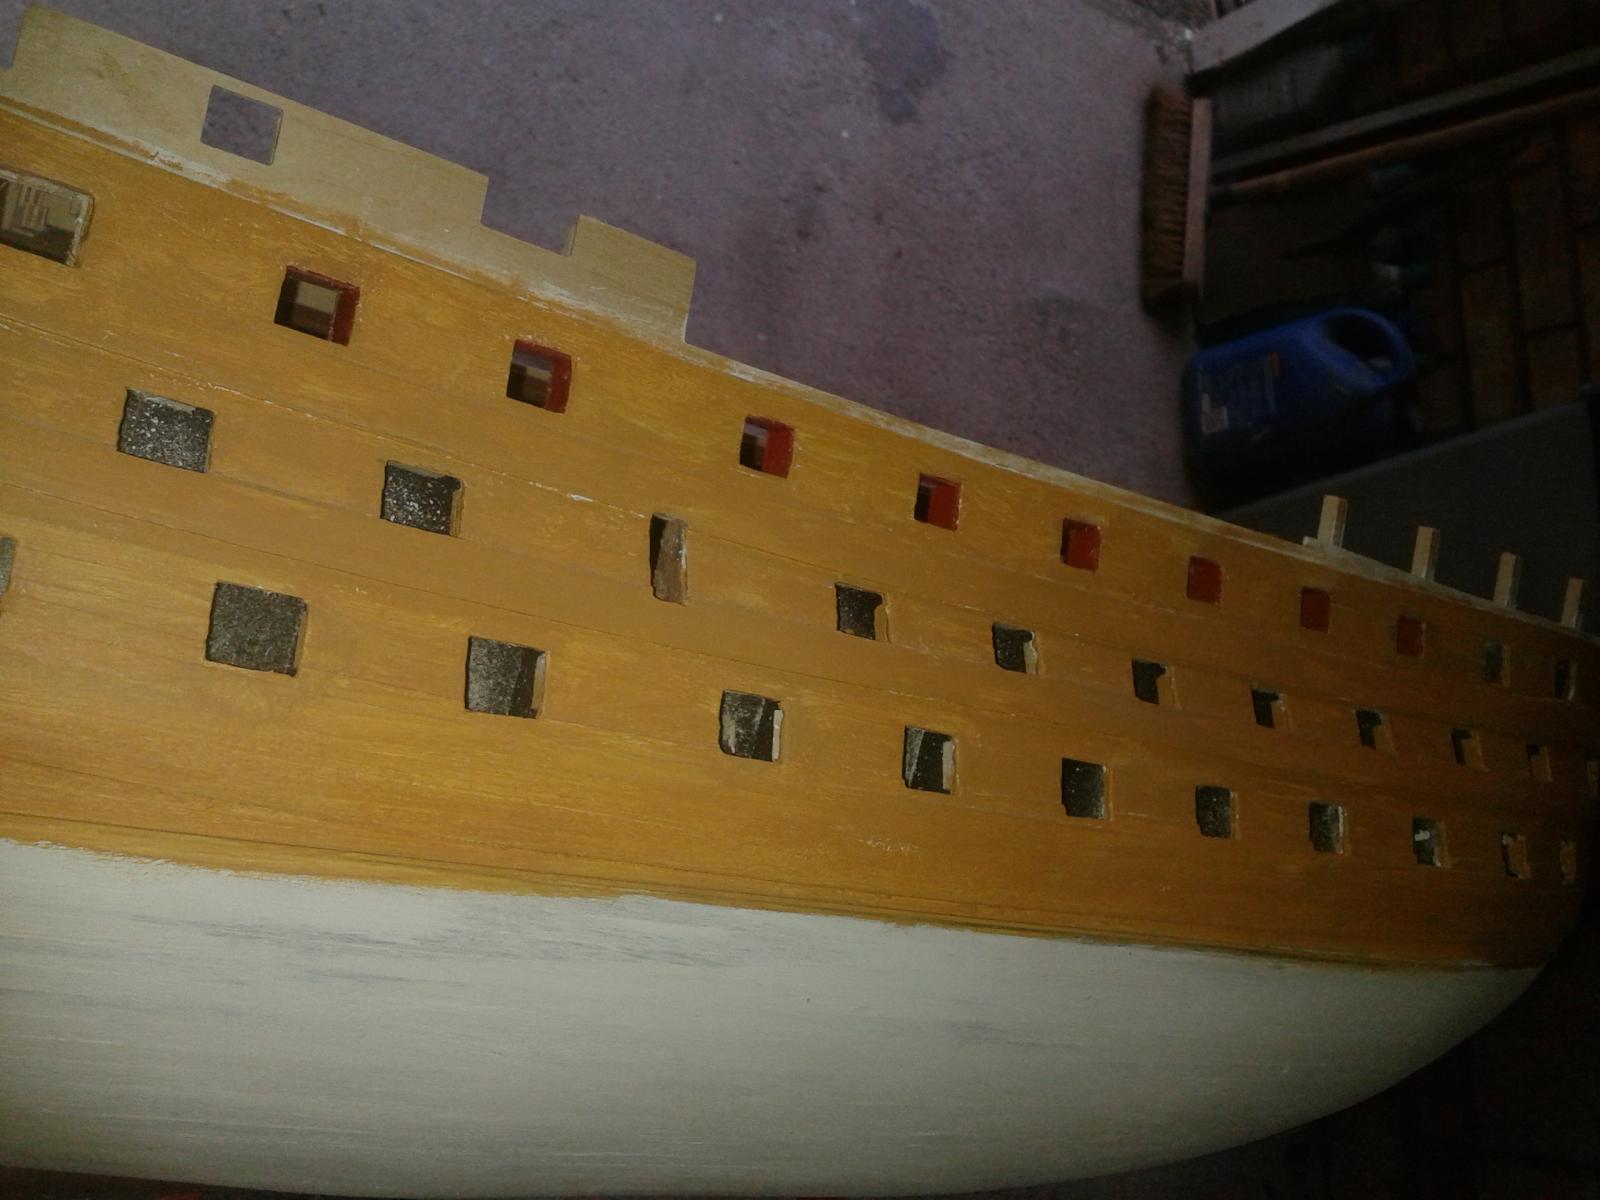
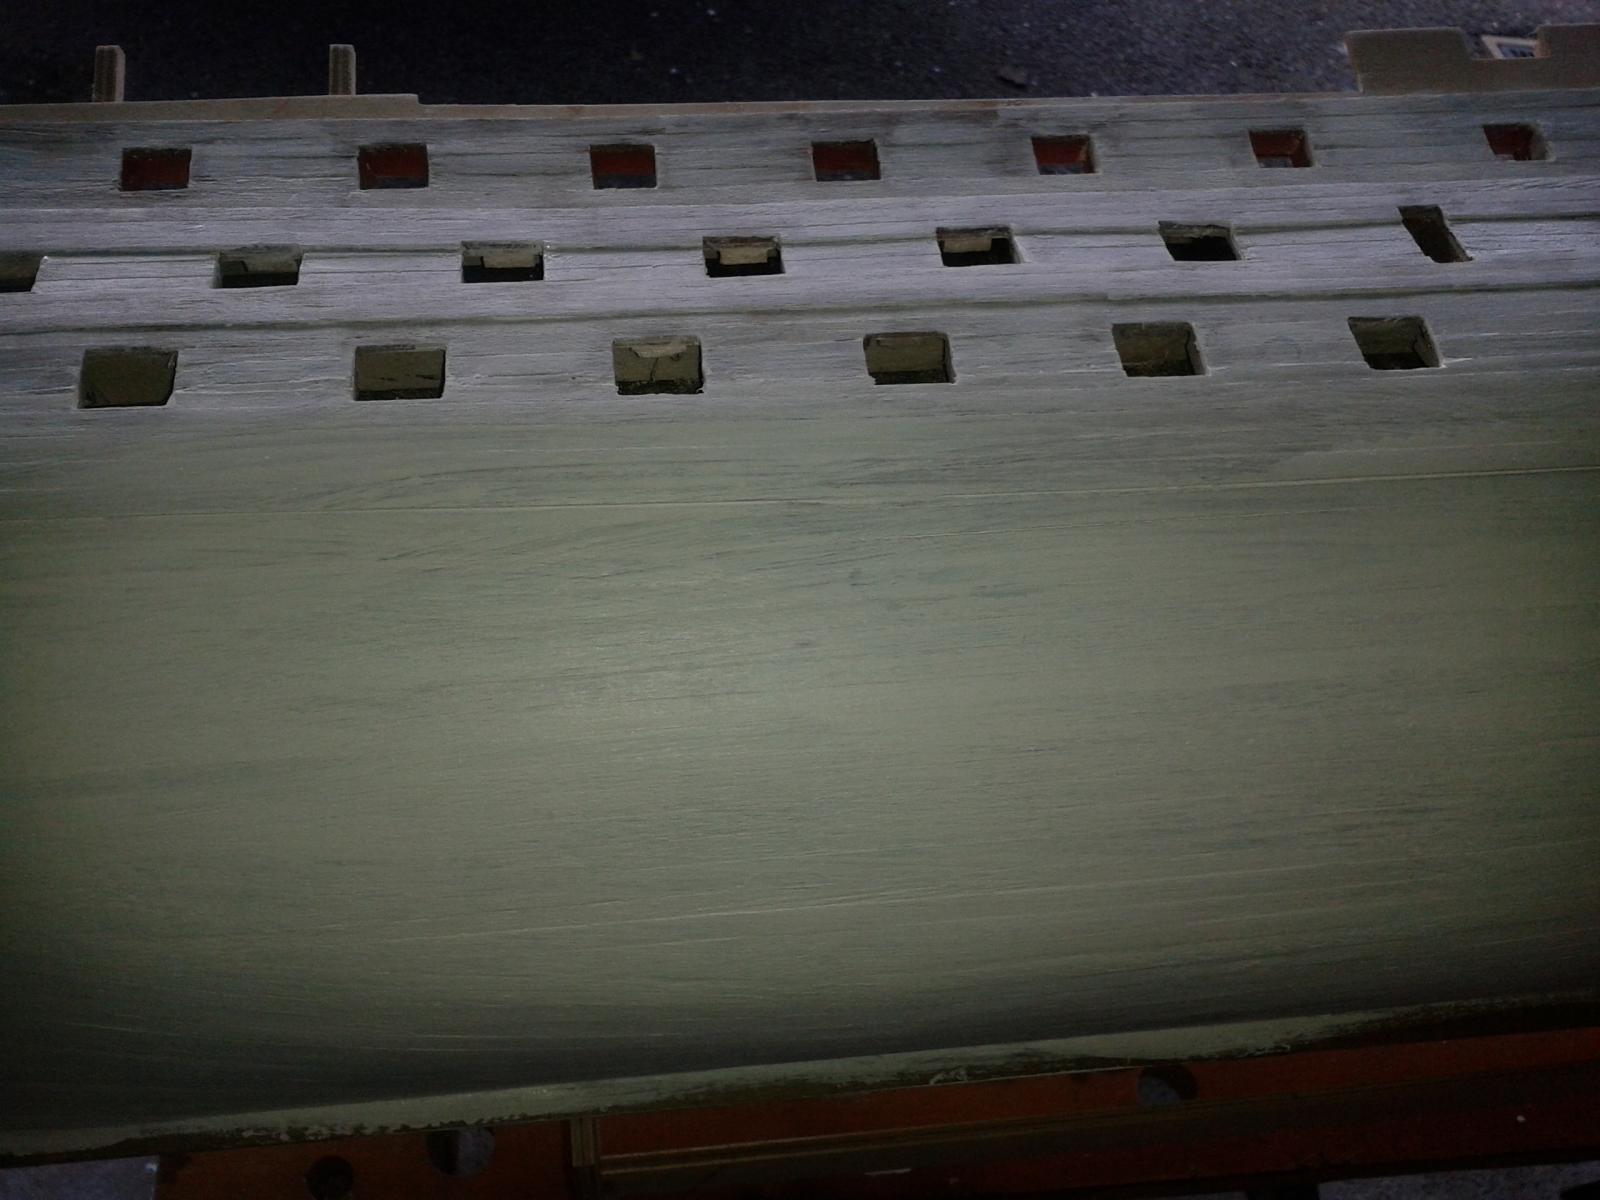
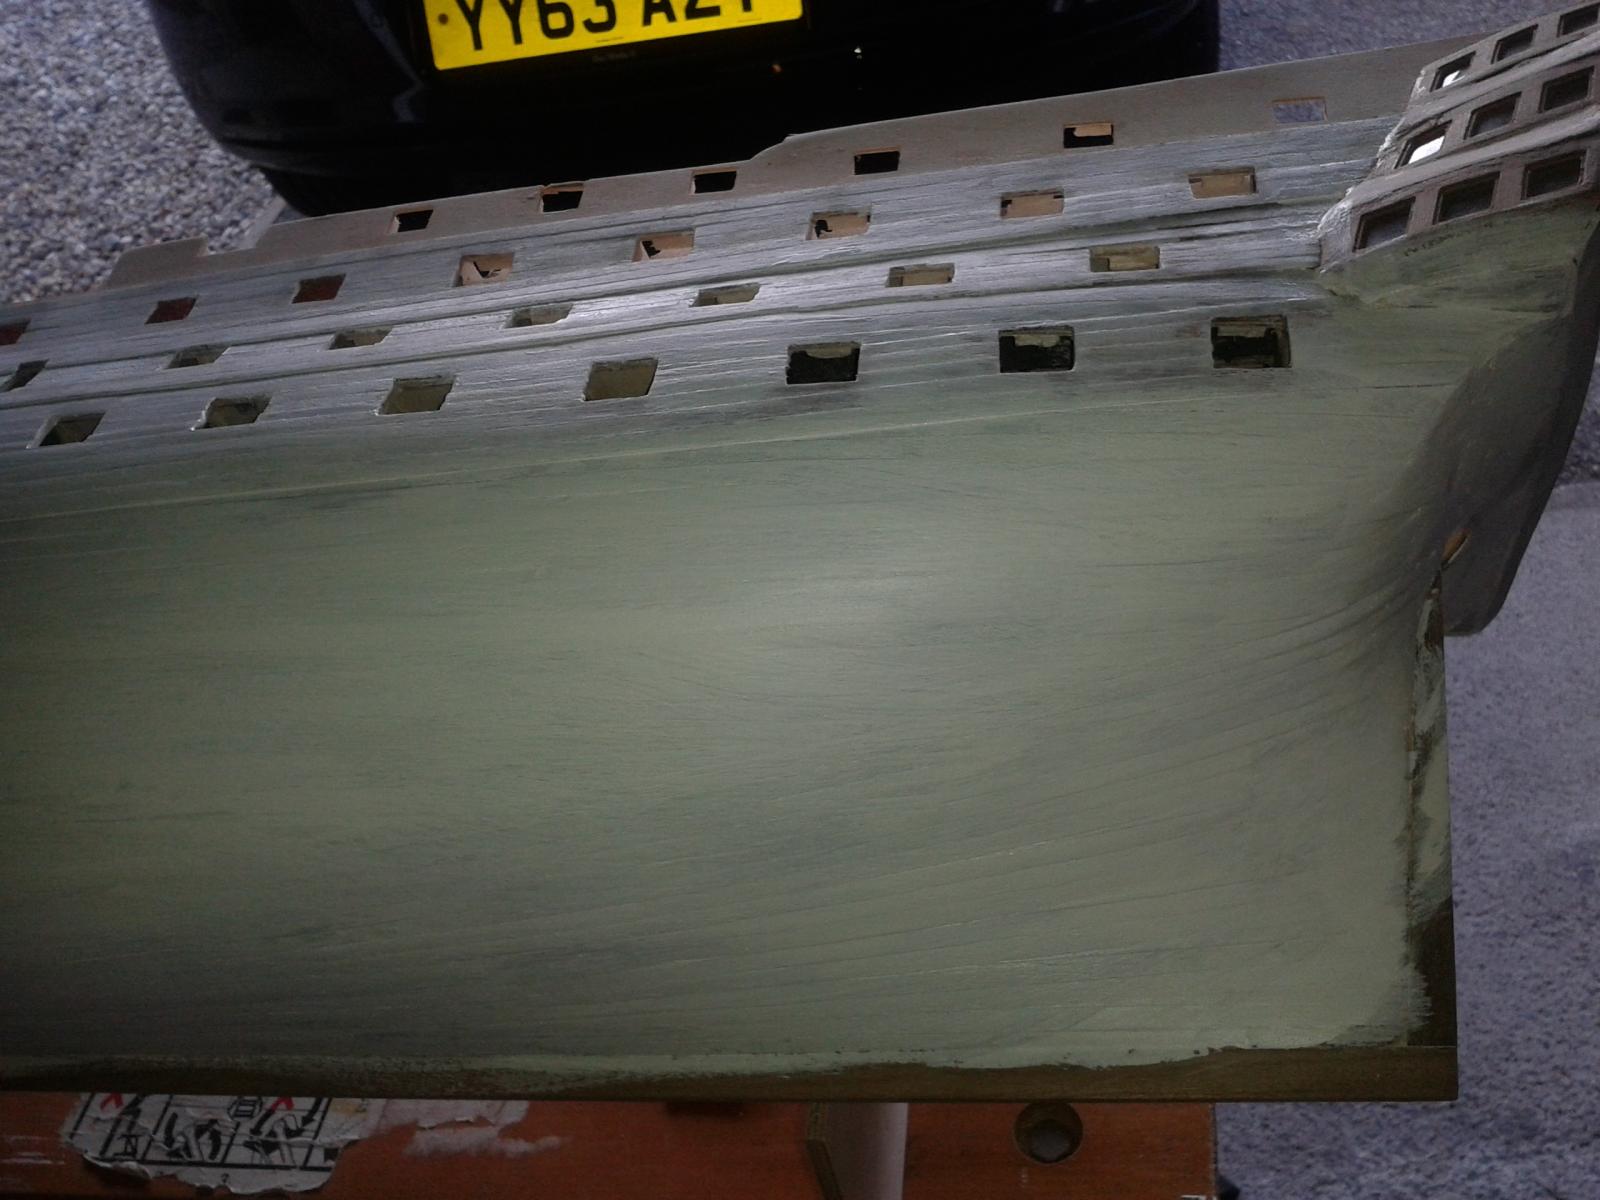
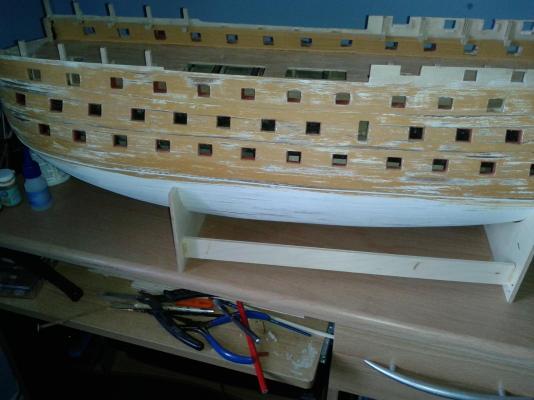
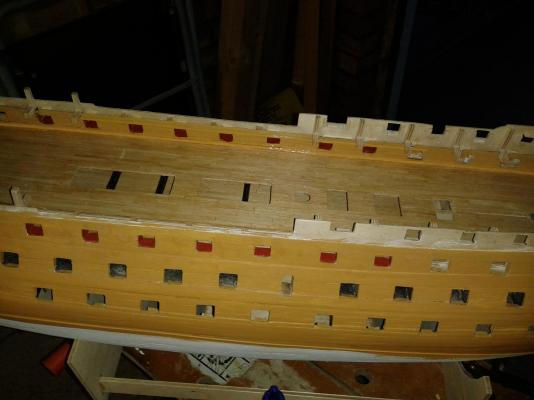
Just a quick update, still working on lining the gun ports. All 6mm linings on port side are complete and 50% of 6mm linings on starboard side are complete which I expect to complete in the next 2 or 3 sessions. I will then add the 16mm linings to the upper gun deck gun ports. I will then give the hull a very good clean and repaint as necessary, including adding the black lines before I start fitting the dreaded copper tiles.
-
Hello Jerry Fine work on your first yard.
-
Hello Jerry Many thanks for your kind words. I would not be adding the fine touches or be so self critical of my build if wasn't for the excellent builds and sound advice by all the other HMS Victory modellers, such as your good self. The more I get into the build the more I check the other build logs for idea's on how I can improve my build and modelling skills. Thank you.
-
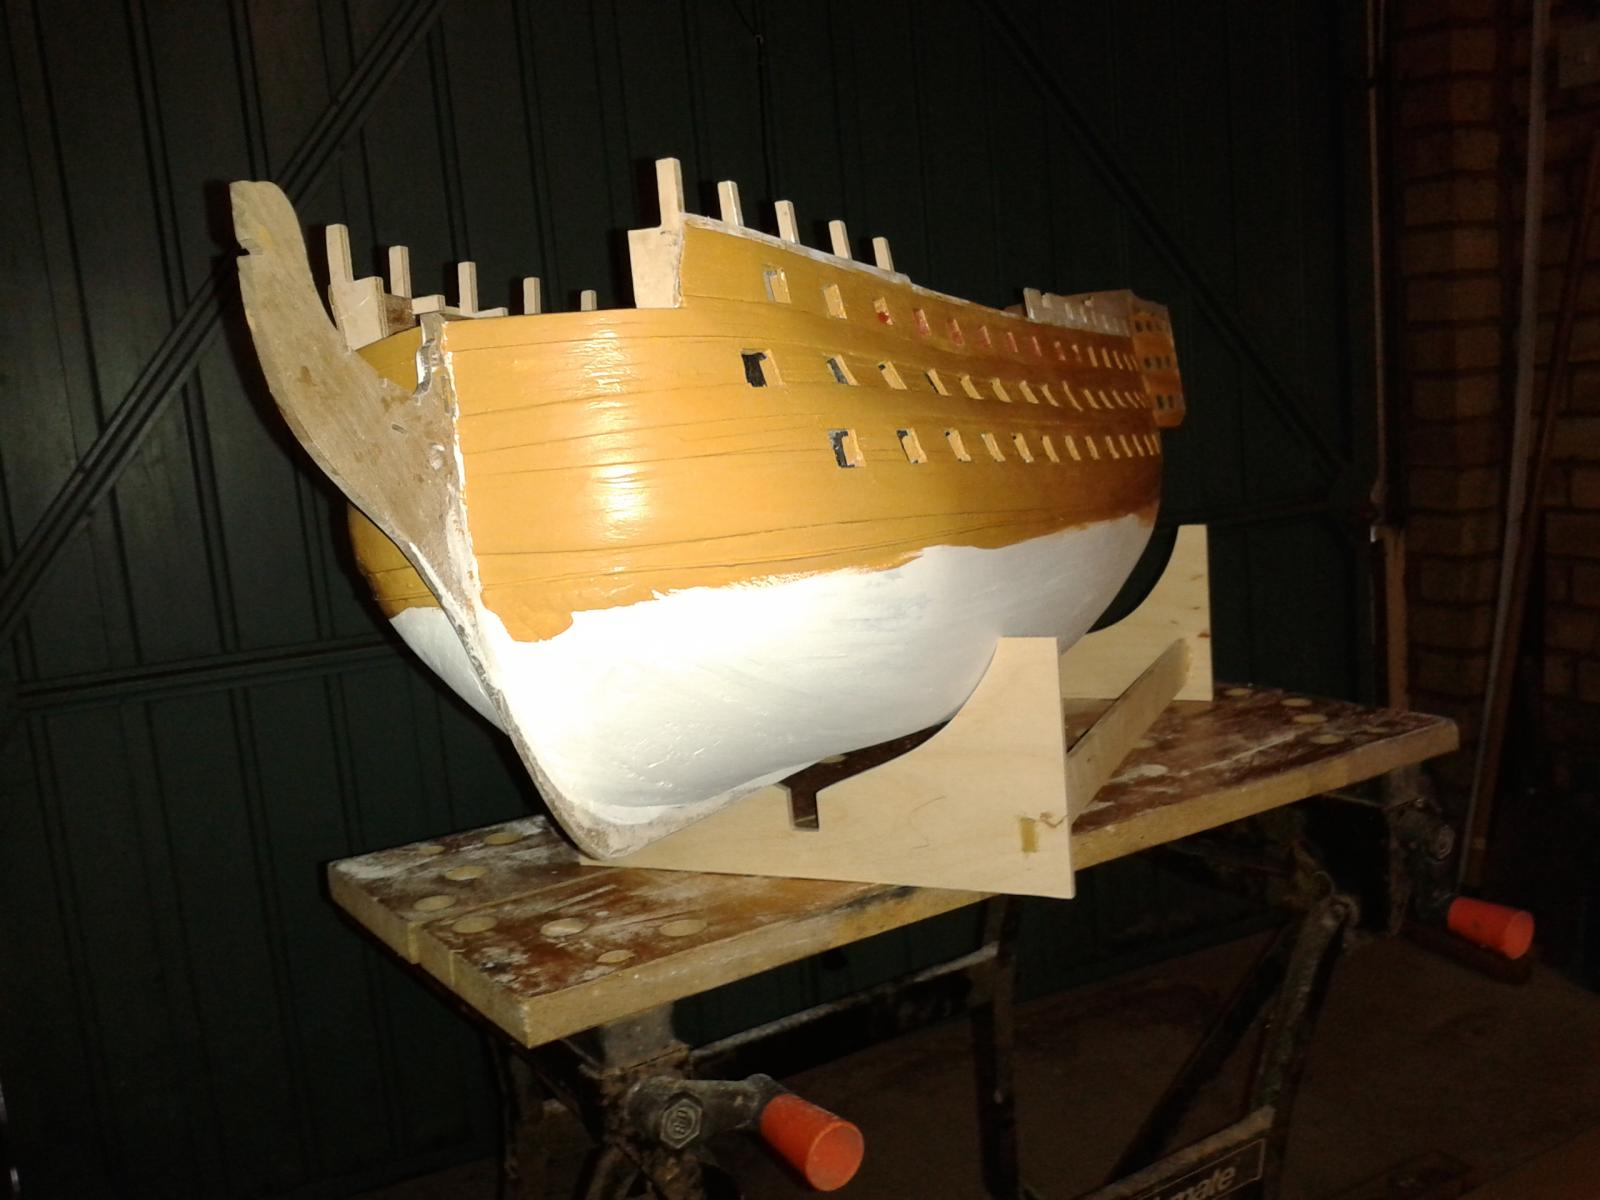
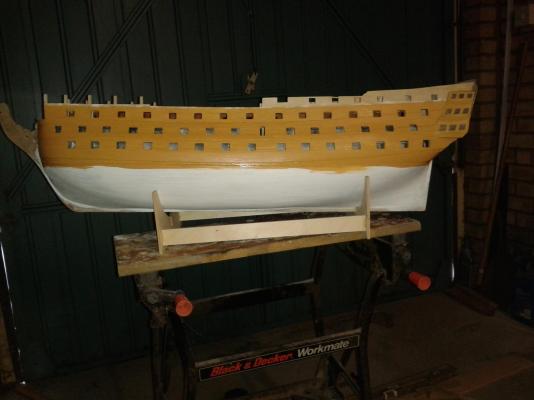
Not spent much time on the build over the last couple of days; being a bank holiday weekend in the UK. I did complete the port side 6mm lining of the lower and middle gun ports on Saturday morning. I was not very happy with the finish of the yellow paint, even a light sand and second coat of paint did not appease me. The paint was showing too many imperfections so I took the decision to sand out as necessary. I'm sure it will be look much better when I start to apply the paint again. I also was not happy with the way the starboard waterline looked so I removed the styrene strip and redraw the line and fitted a new strip. It now looks much better.

-
Take a look at the following web link, which shows a very neat solution. http://www.ianlawrencemodels.com/wipmaid2.html
-
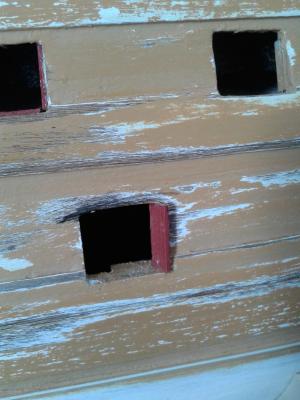
Hello David and Lawrence Many thanks for taking the time to visit my log. I have done a bit of dust removal using a brush as I don't have the luxury of an air line. The 6mm strip is painted red prior to trimming and I have found the cutting tool supplied with the plank bender makes short work on cutting the linings It will soon be time for another session on the ship build.
-
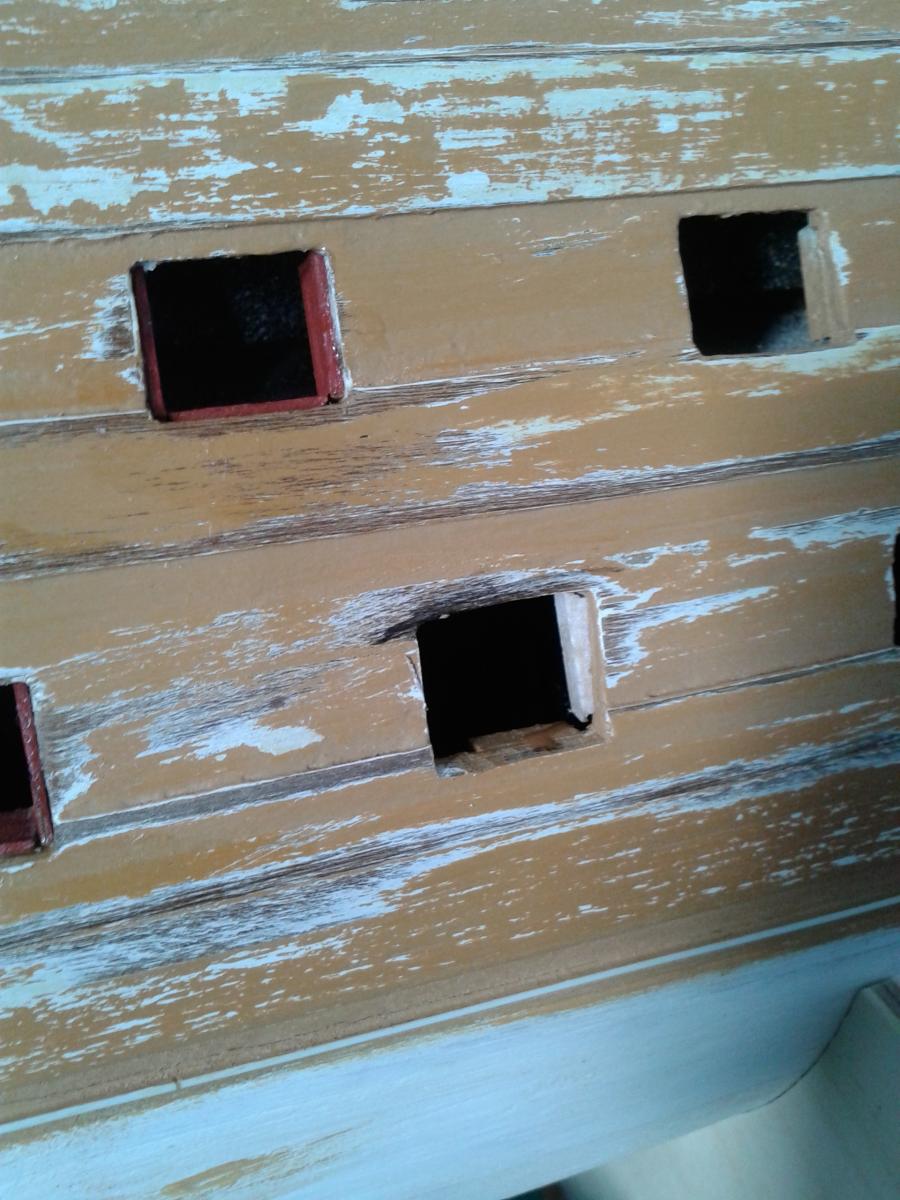
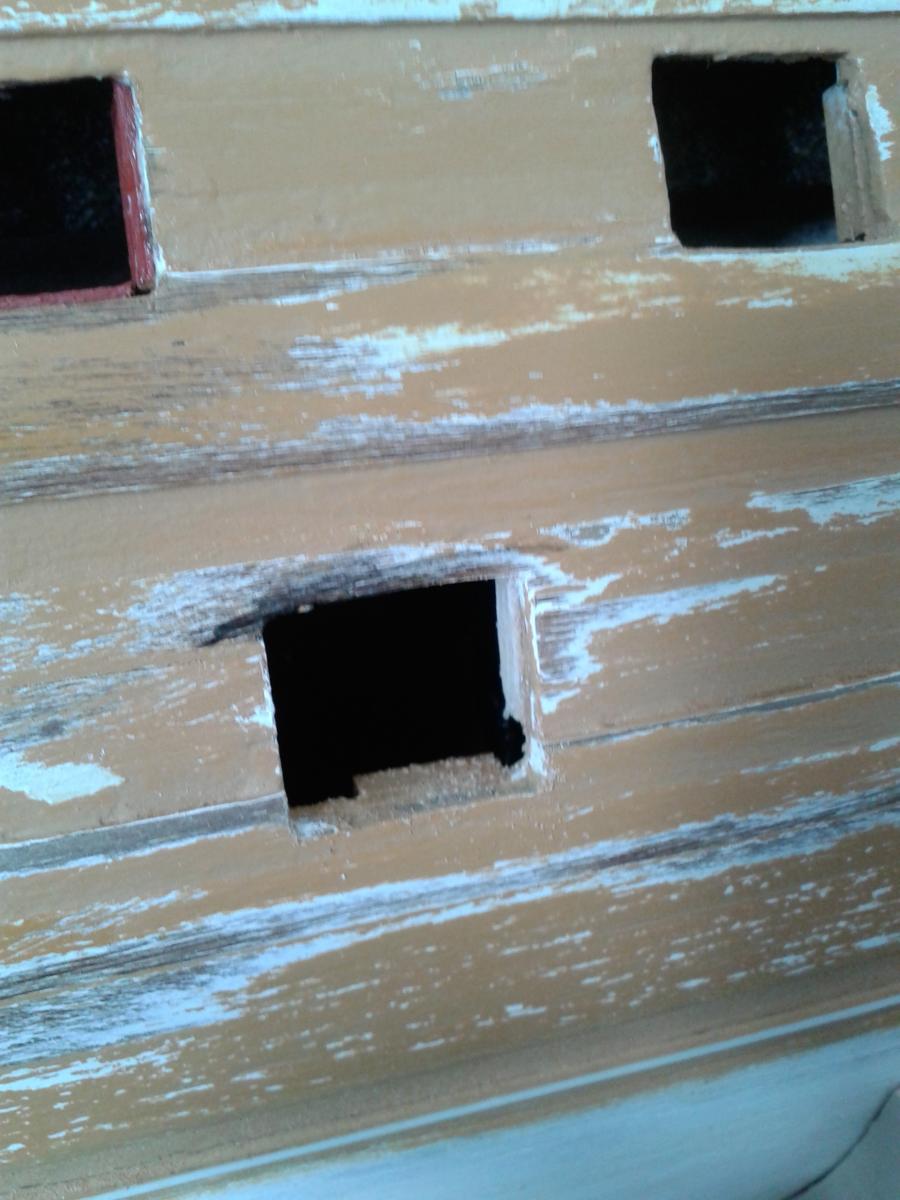
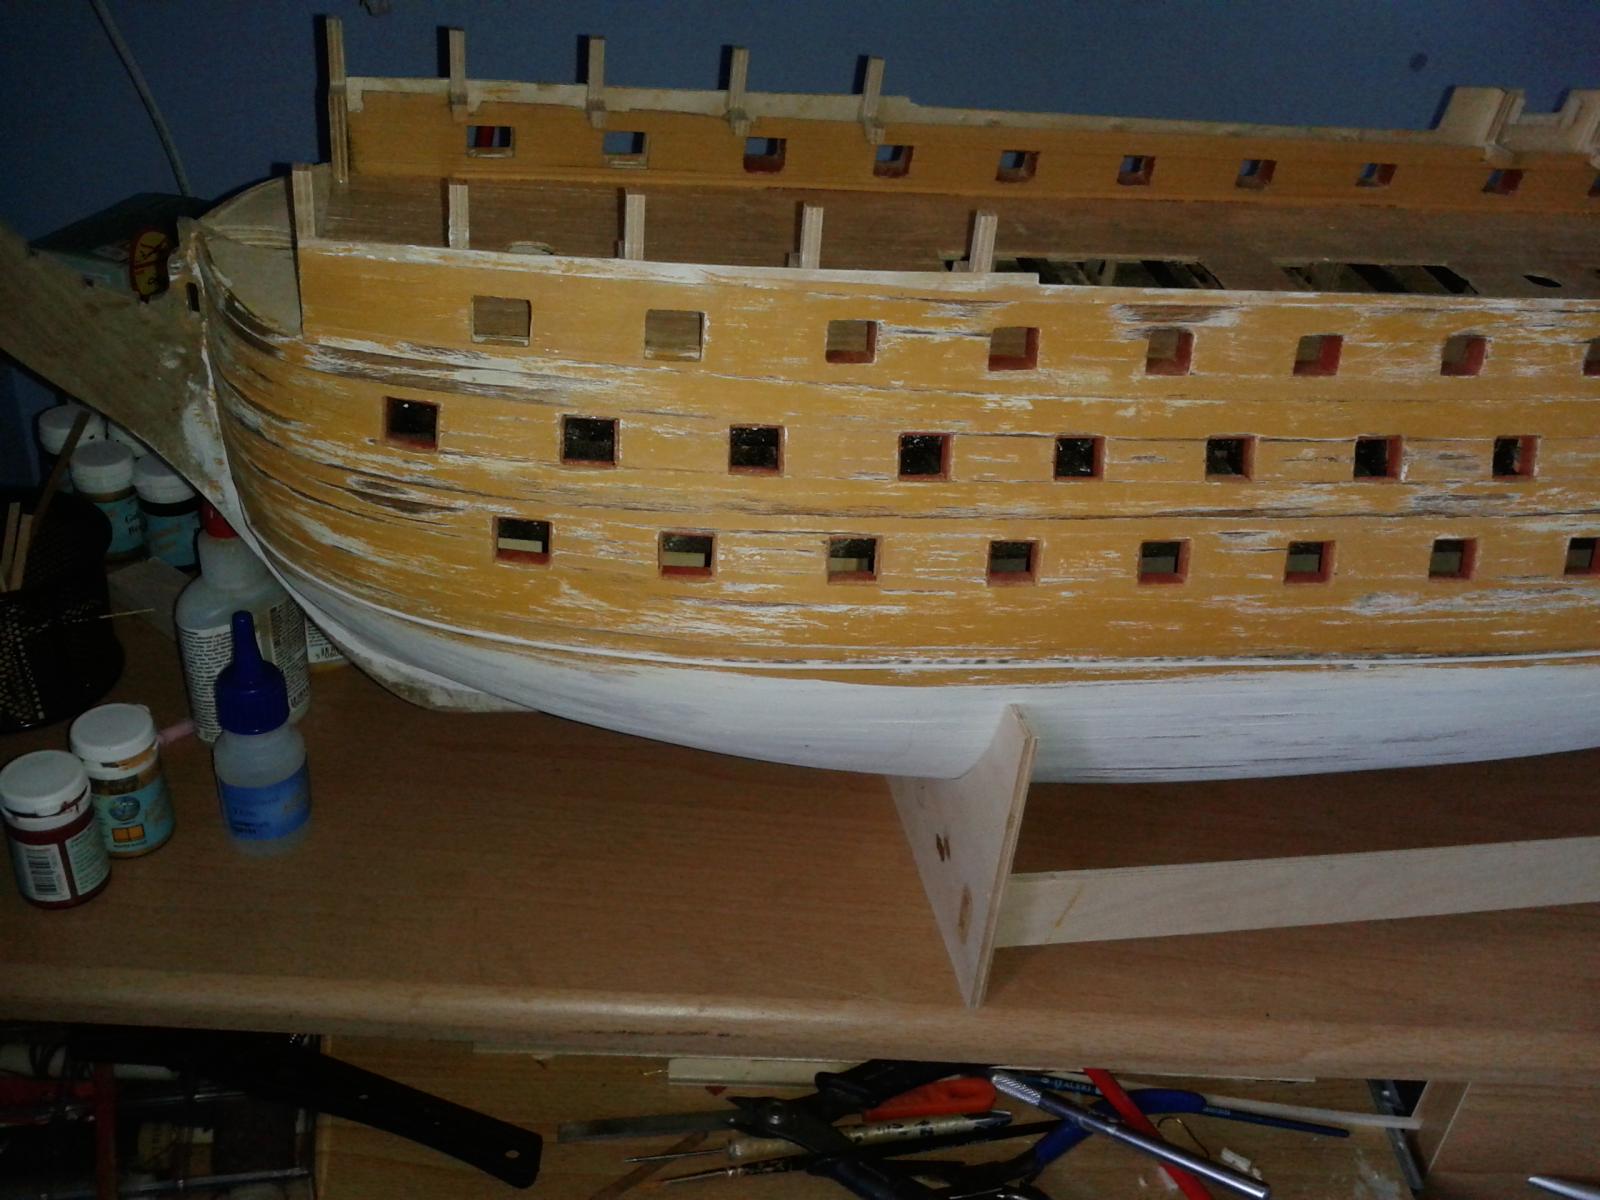
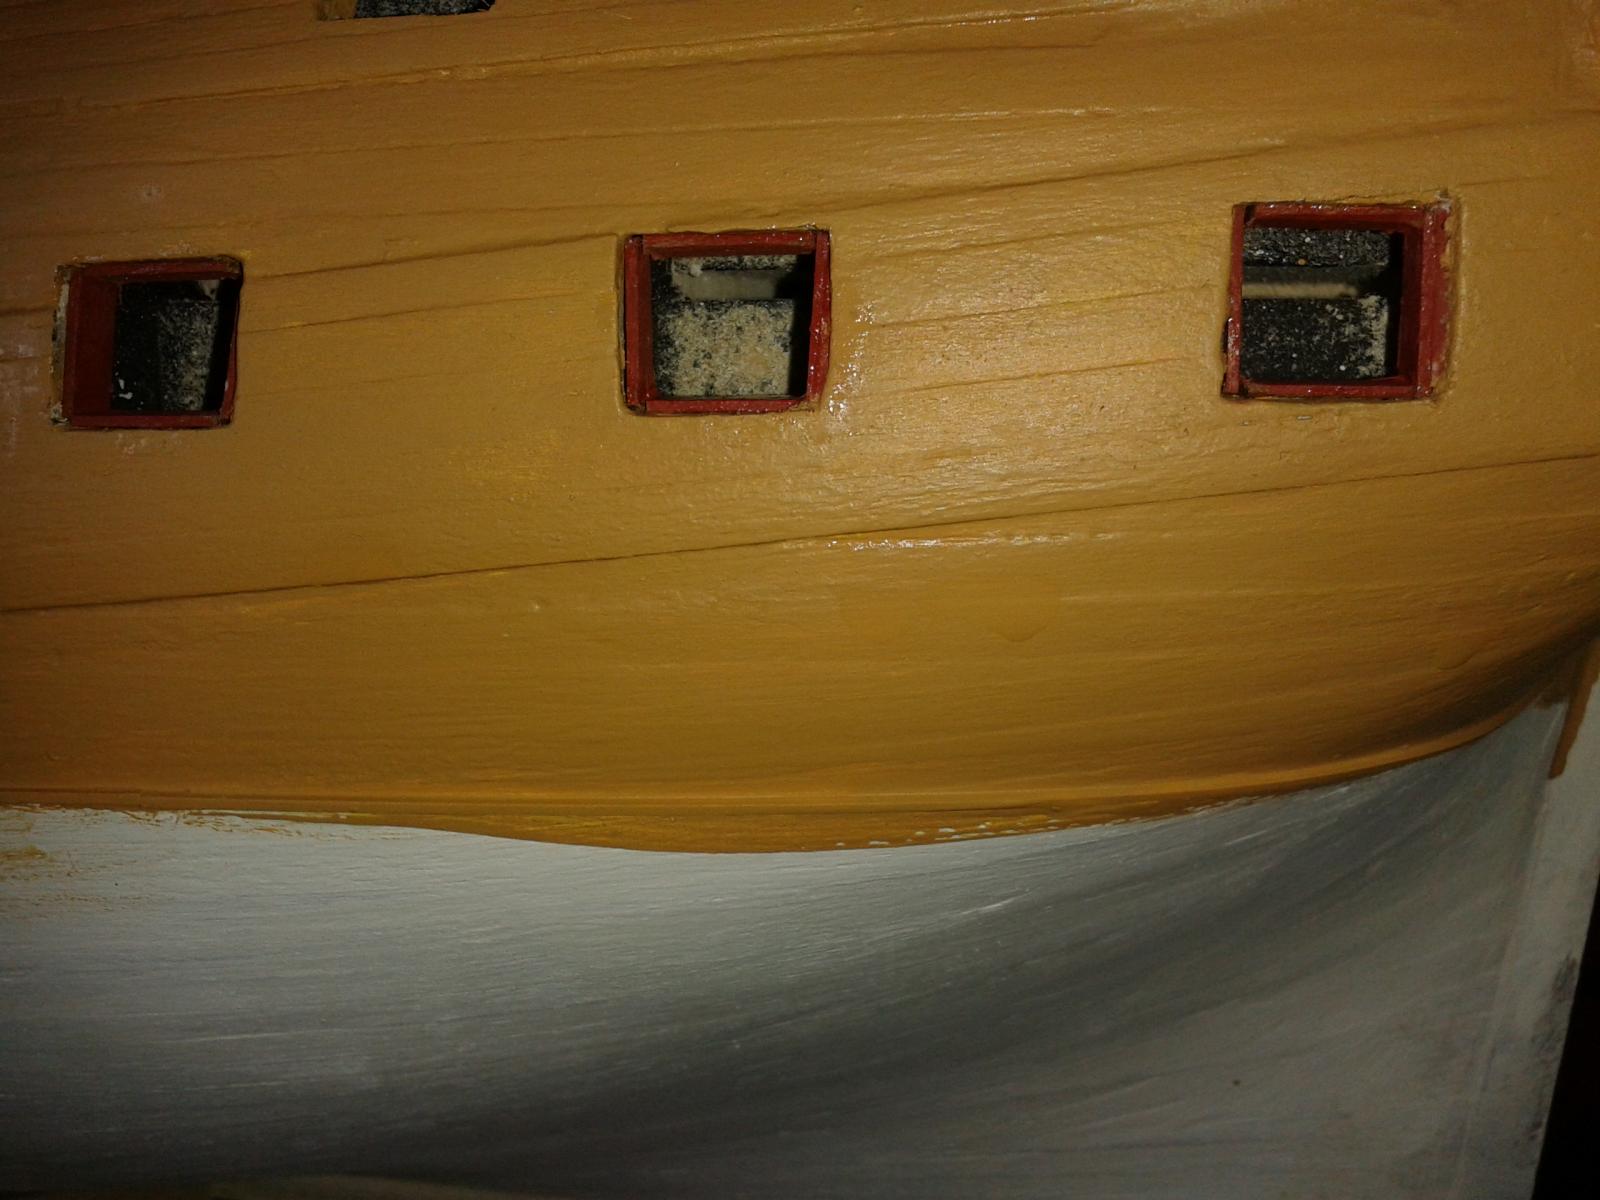
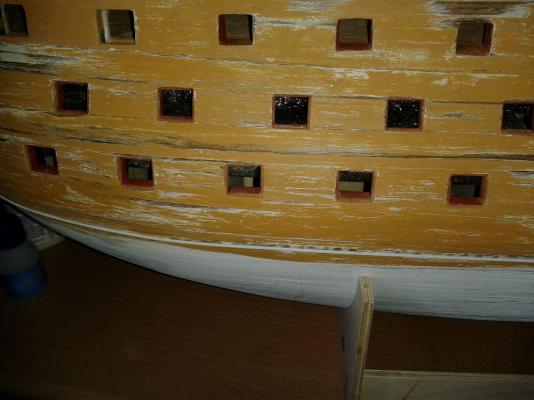
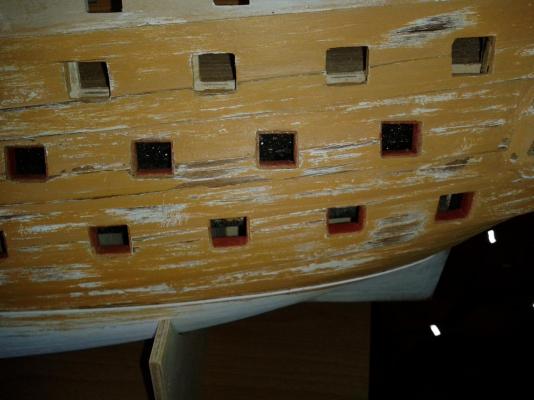
Installed all missing seats on starboard side lowest gun ports. This means I'm now moving forward on fitting the gun port linings at a reasonable pace, takes about 15 minutes per gun port to cut and glue the linings. I have now completed lining 9 gun ports on the starboard side. I have been checking gun port openings are wide enough for the gun port lids as I progress, that's for the advice David. I was really not looking forward to this task but now I'm quite enjoying it as the two hand made tools have really helped.
-
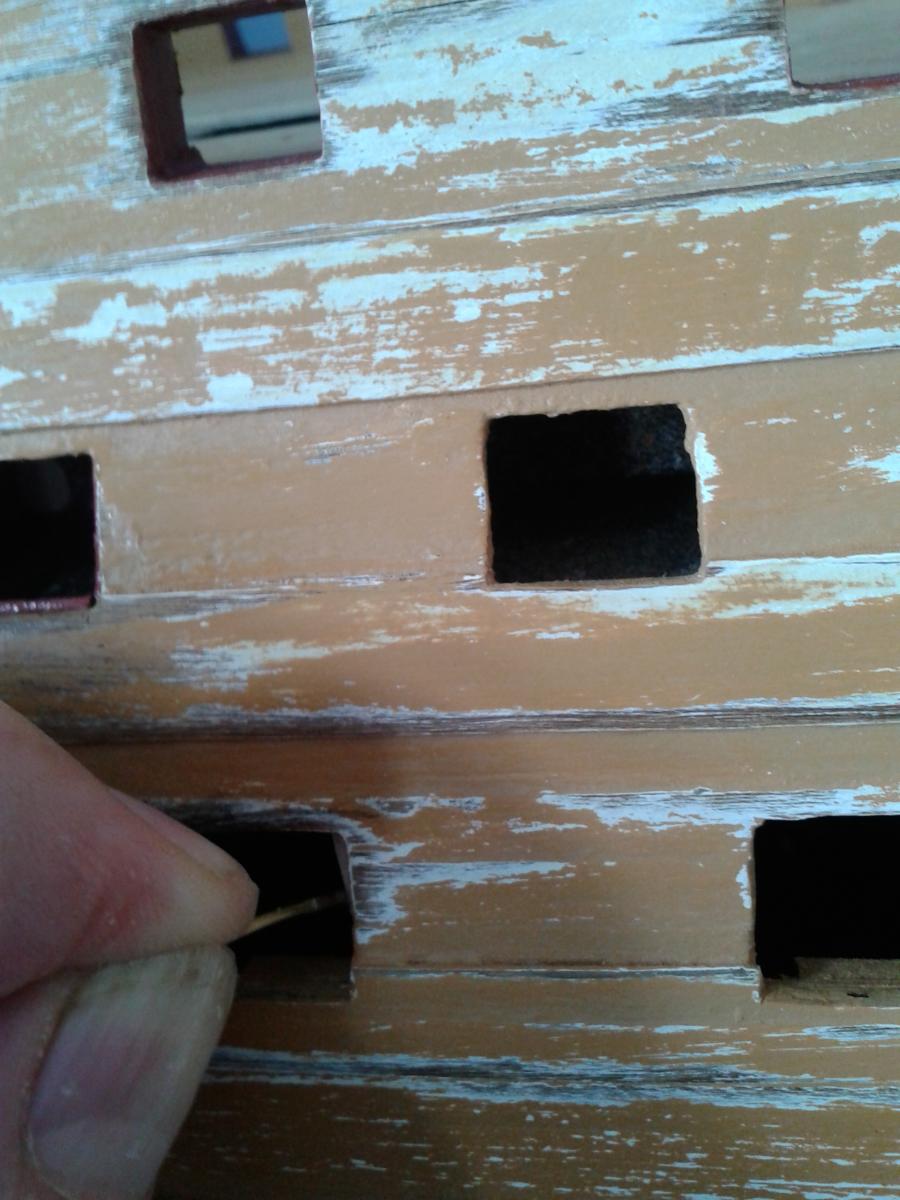
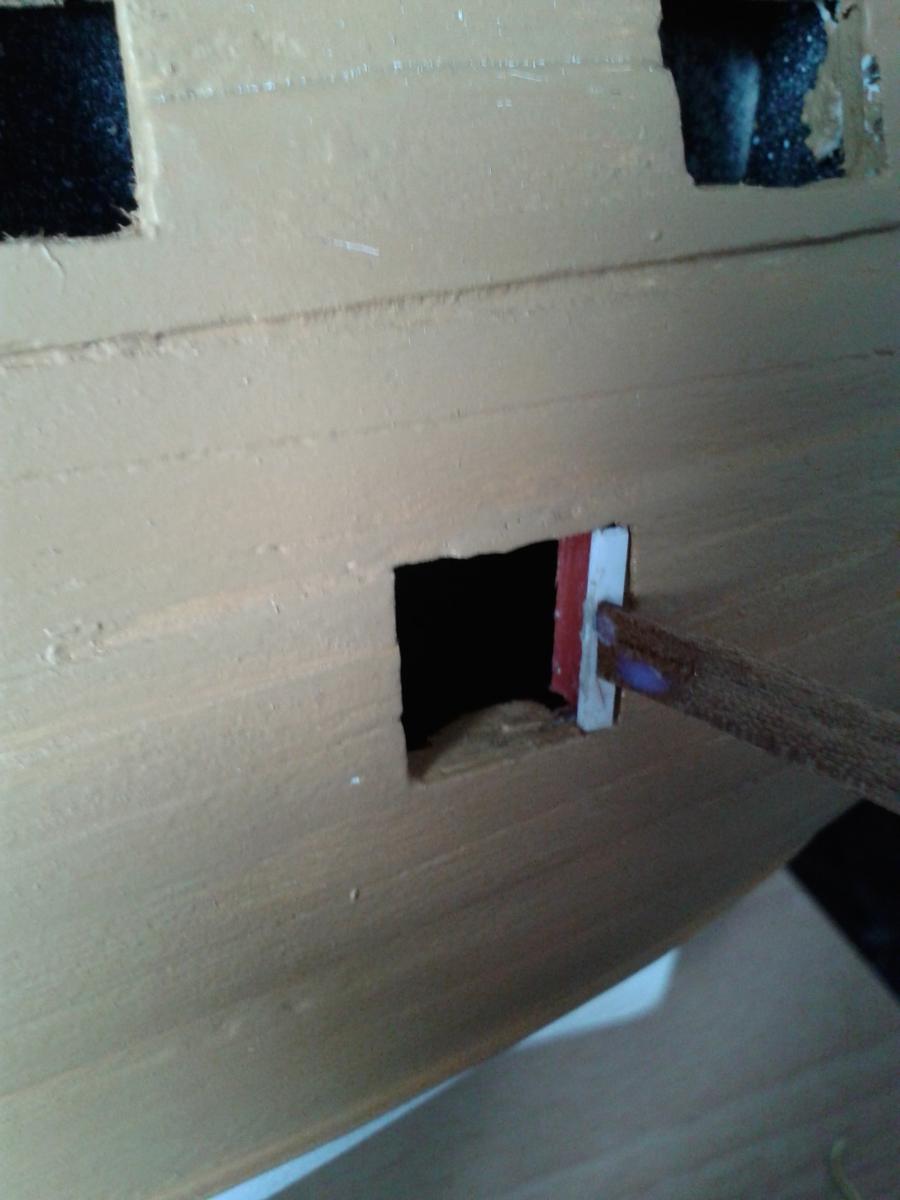
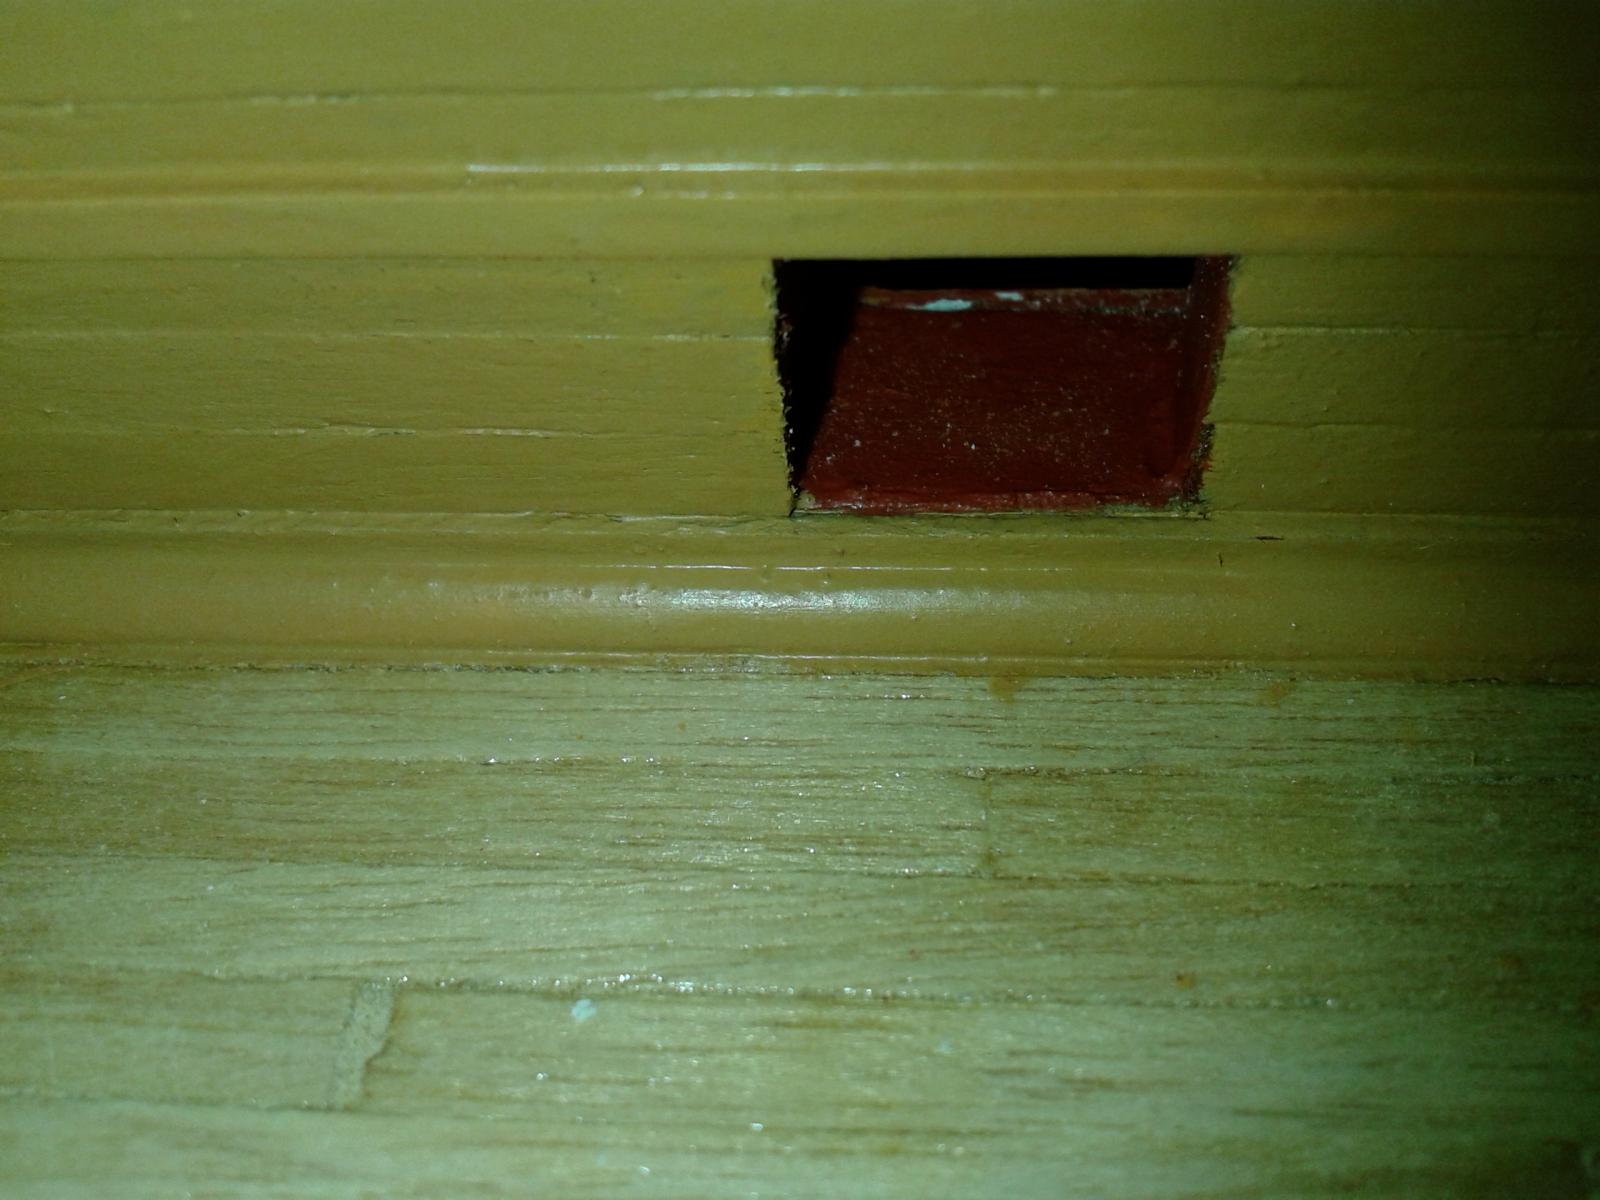
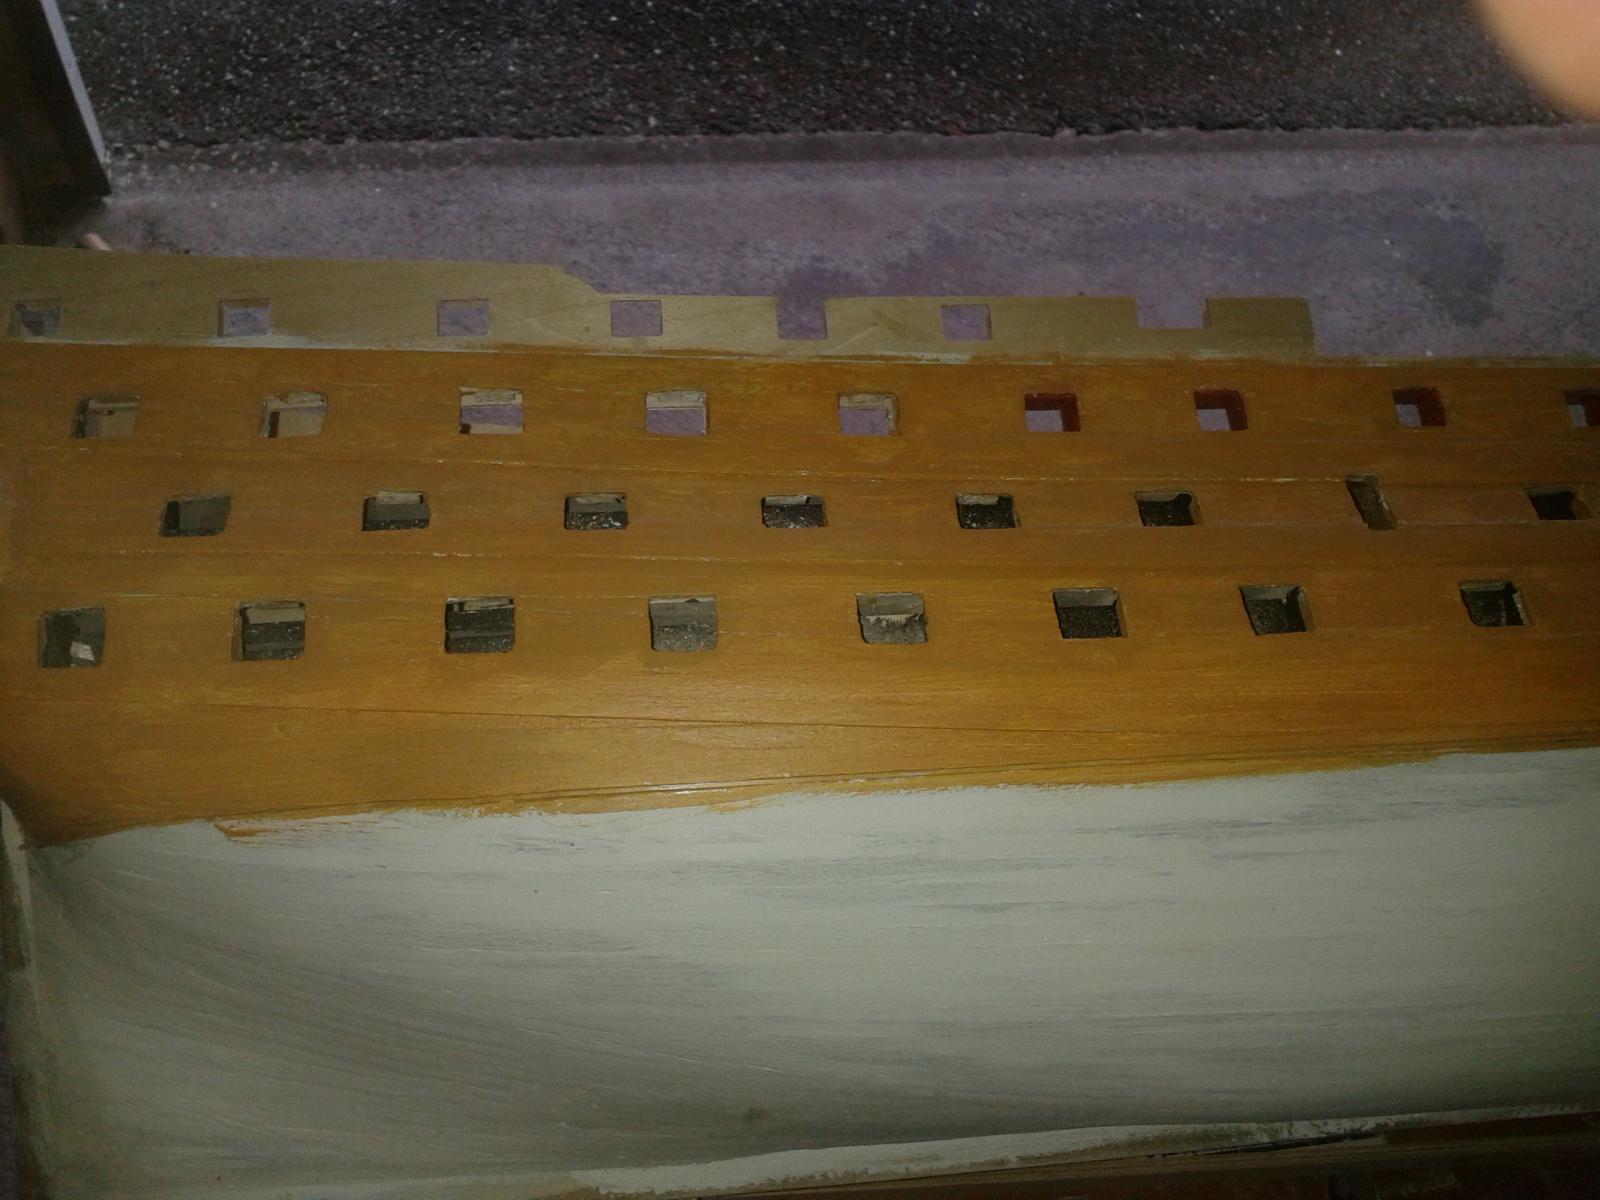
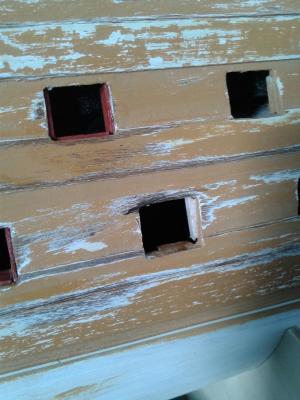
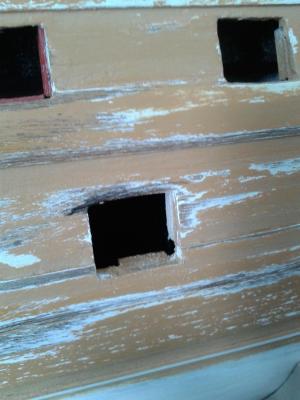
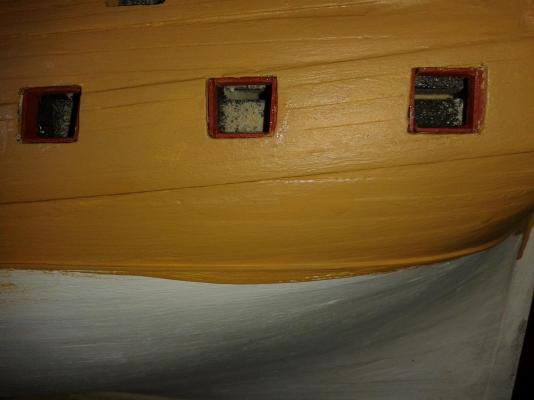
Not been able to spend much time on the ship today, made a simple tool to check gun port linings are set back 1mm. Seems to be taking about 30 minutes per gun port to fit the linings and additional balsa seats, which I'm fitting with another homemade tool, a bent bit of copper wire which is inserted in the basla seat which can be removed once the super glue has dried leaving the seat in position. I painted the 6mm strip before the installation. I attached a 1mm styrene strip to a wooden handle to check position of lining. The yellow paint is not shown very well as no flash used. Using the super phatic glue allows time to adjust the position of the lining until I'm happy. First three lining complete; the close up picture makes it look worse than it really looks, will need to remove dust from within the gun port.
-
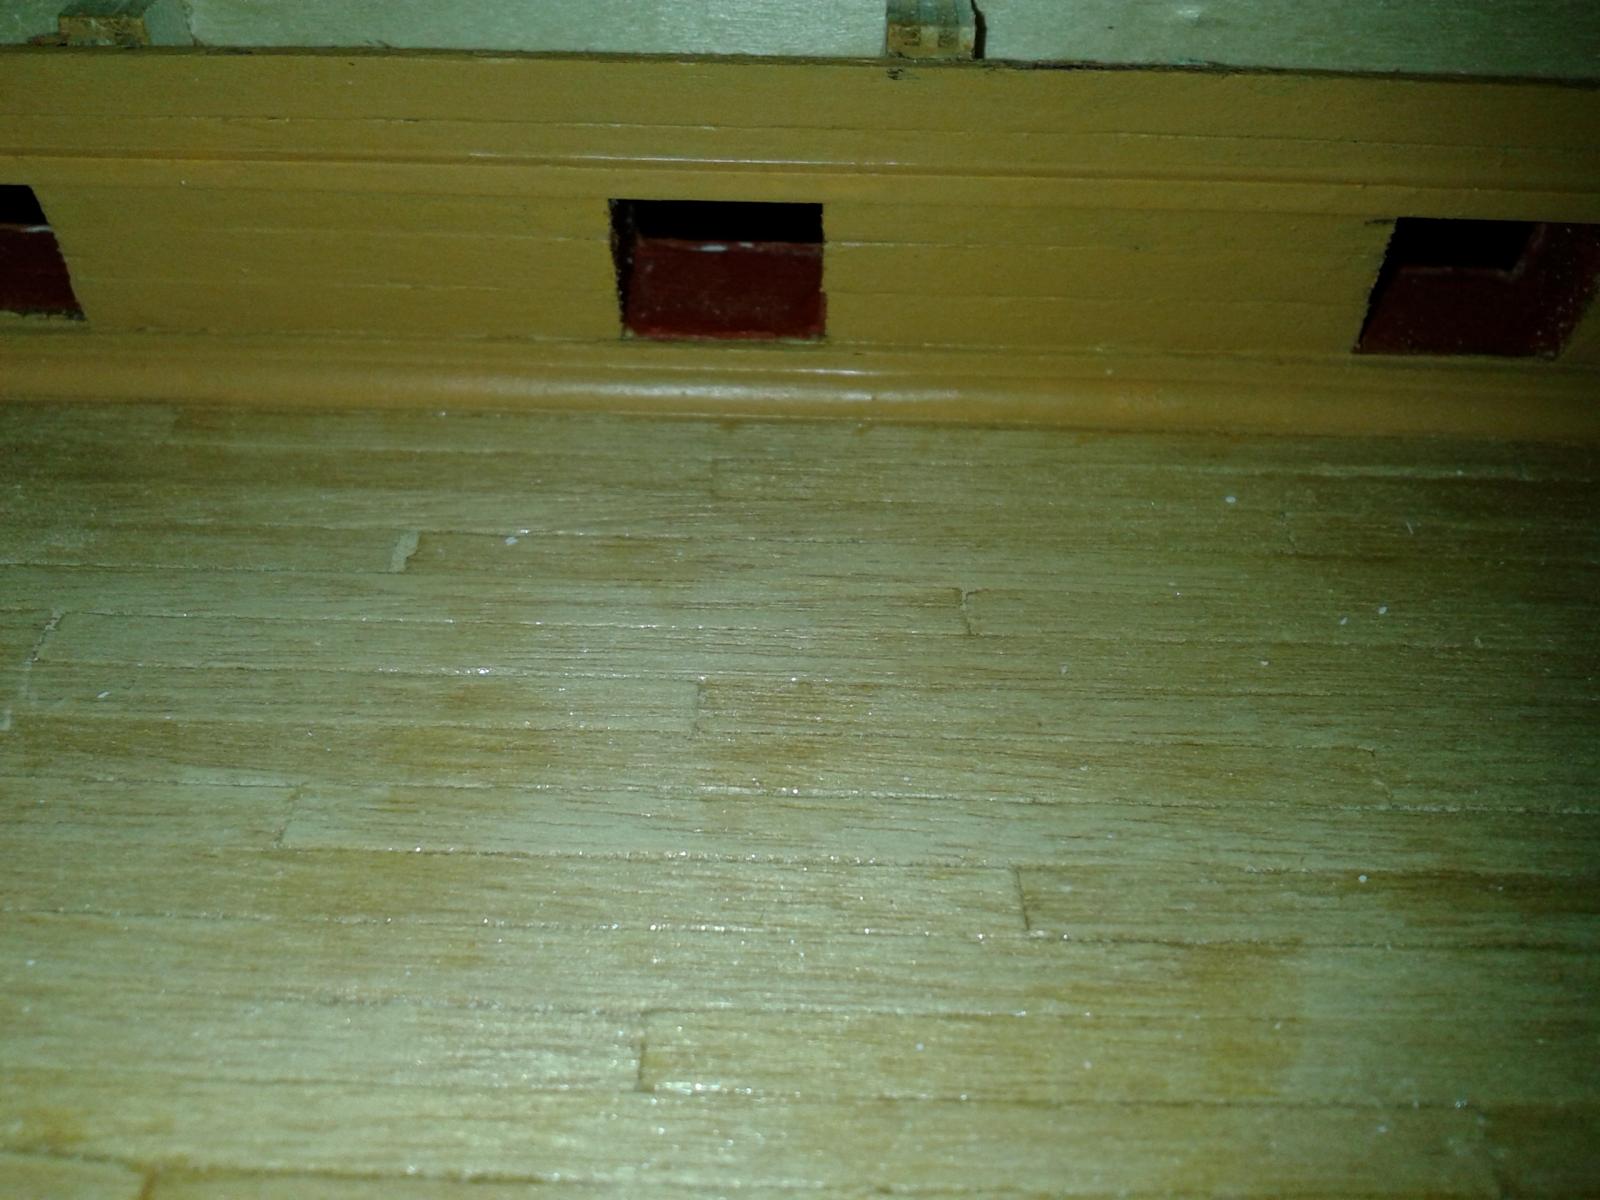
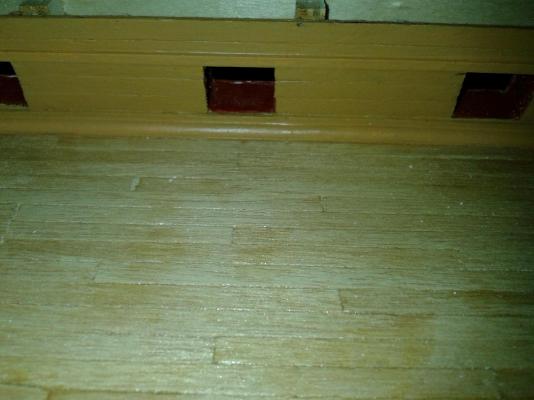
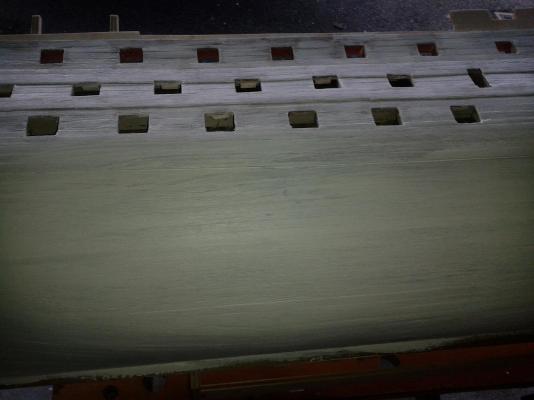
Bulwarks look better following light sand and second coat of paint. Ready to start moving forward with adding more gun port linings and I will paint the black lines as this task progresses. Will use a suitable low adhesive masking tape (Tamiya or similar). This picture shows the beam shelf (above gun port), stringer and waterway (below gun port)

-
Congratulations take a well earned rest before the next phase begins
-
Fitted beam shelf, stringer and waterway to inner bulwarks and then added first coat of paint. I have now realised the waterway is a tad to big; I'll decide tomorrow if I will remove so I can fit a smaller quarter round strip. I more inclined to leave as is as most of it will be covered up when the quarter deck is installed. With the following picture the paint is still very wet and uneven looking and shows all the imperfections. It will look much better once the paint has dried and the bulwarks have had a light sand and a second coat of paint.
-
Hi Patrick Many thanks for your kind comments. I had already decided to wait until fitting the brass frames stage before applying the micro glaze. It worked very well on my test piece which was bigger than the gallery window frames. I'll have a few weeks before the copper tile phase (I can hardly wait!) whilst I install the gun port linings.
-
A minor set back but it seems you were able to fix, the rigging looks exceptional, well done.
-
Hello Jerry Many thanks for taking the time to visit my log. You have made swift and fabulous progress with your standing rigging. You have made it look easy which I know is not the case. I plan to start the linings tomorrow night, and expect this will take up to 4 weeks to complete. I need to add some additional seats as some of the ones I fitted prior to installation on the gun port strips are now AWOL. Then it time for the copper tiling phase, 6 to 8 weeks work at least I would expect.
-
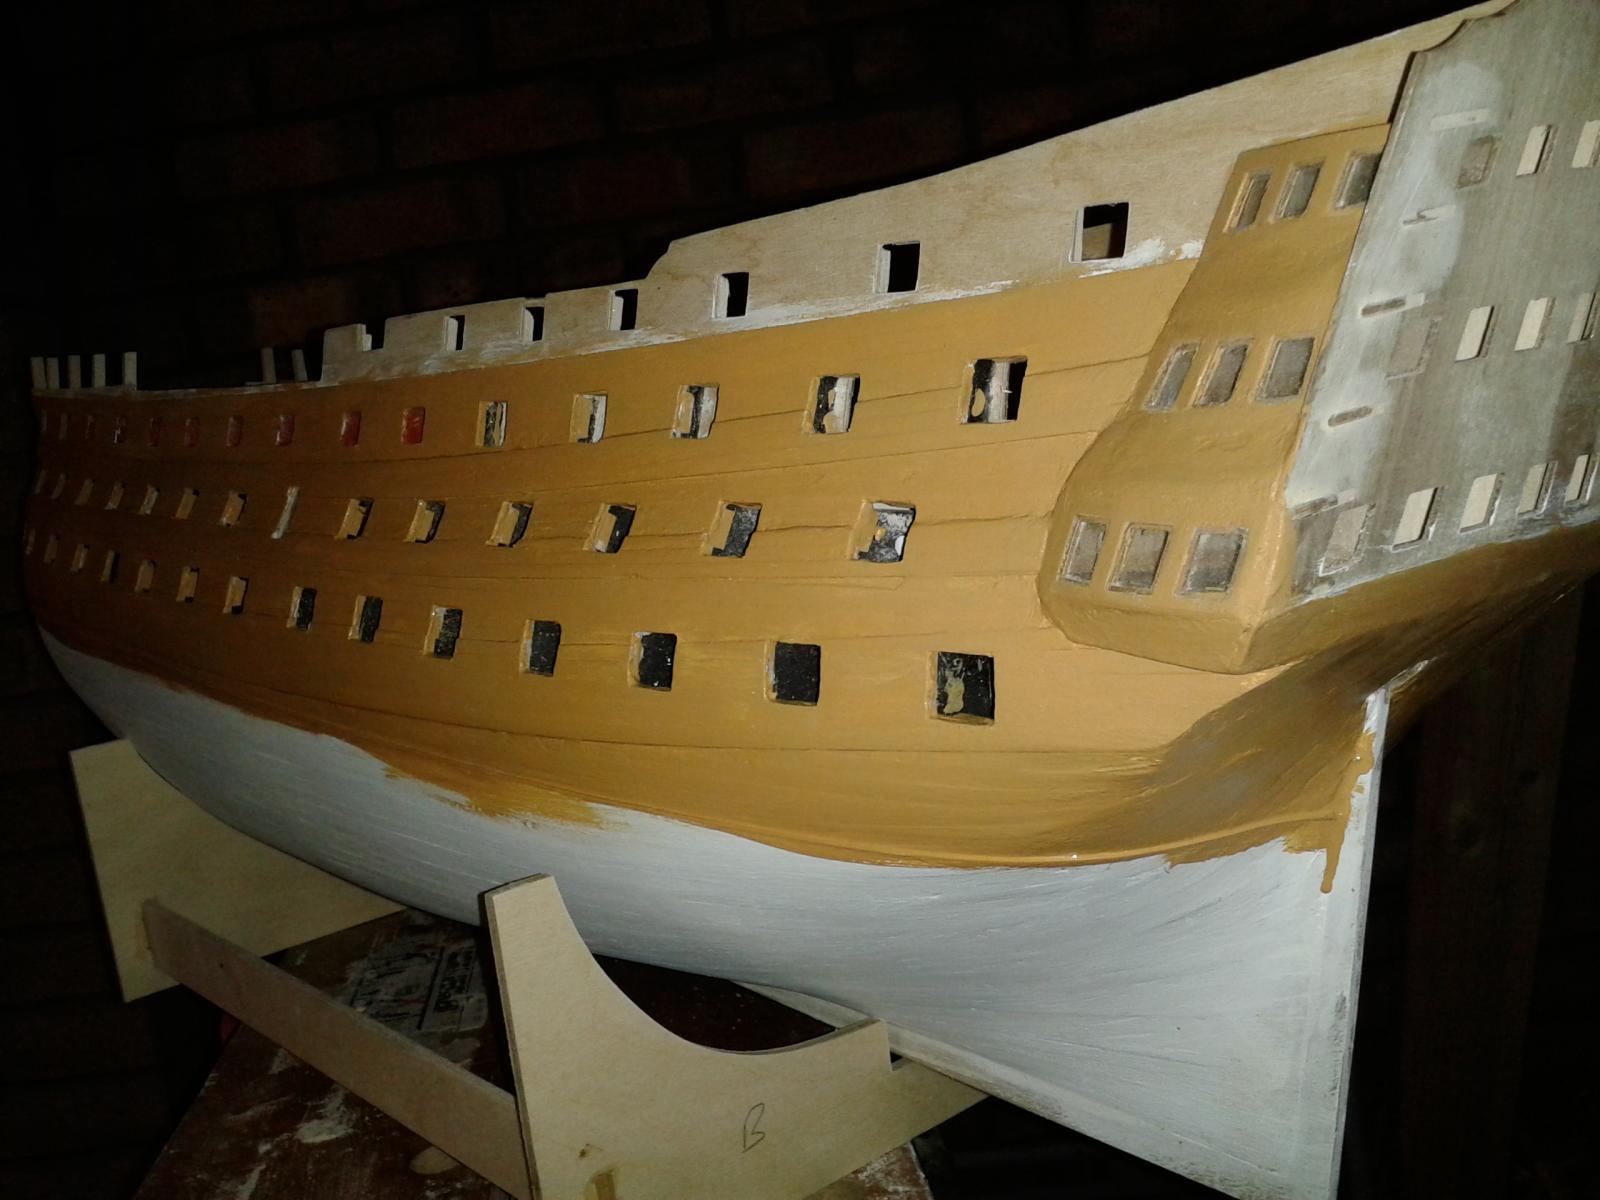
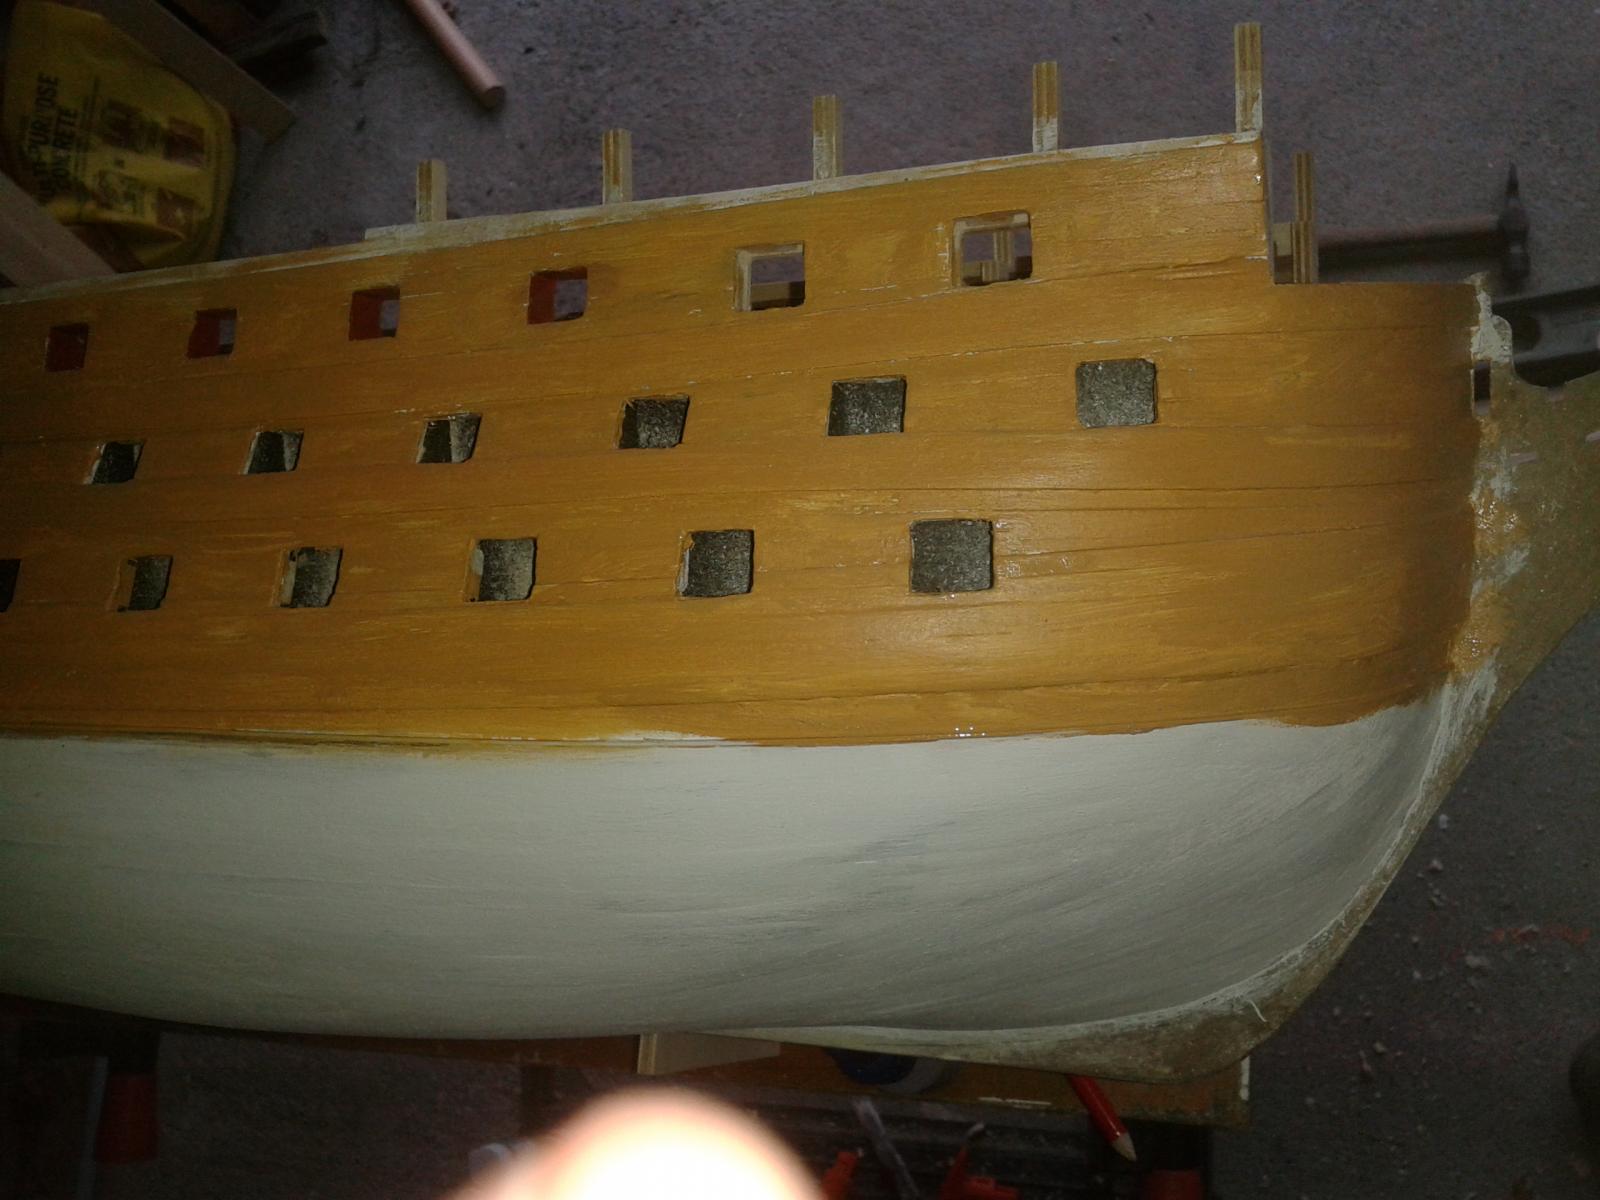
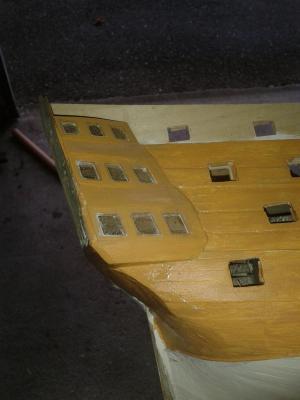
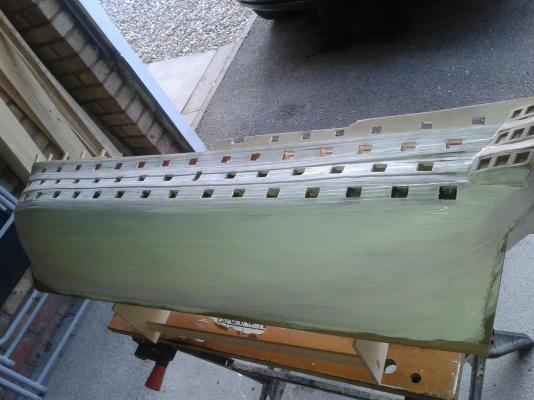
More pictures of the yellow painting which is now complete. Once it has fully dried I can start to add more gun port linings. Planning to paint the linings red red prior to installation, and will coat rear side with some ca glue to prevent splitting when trimming. I like this picture, I'm going to try the micro-glaze on the gallery windows once the paint is fully dry More pictures


-
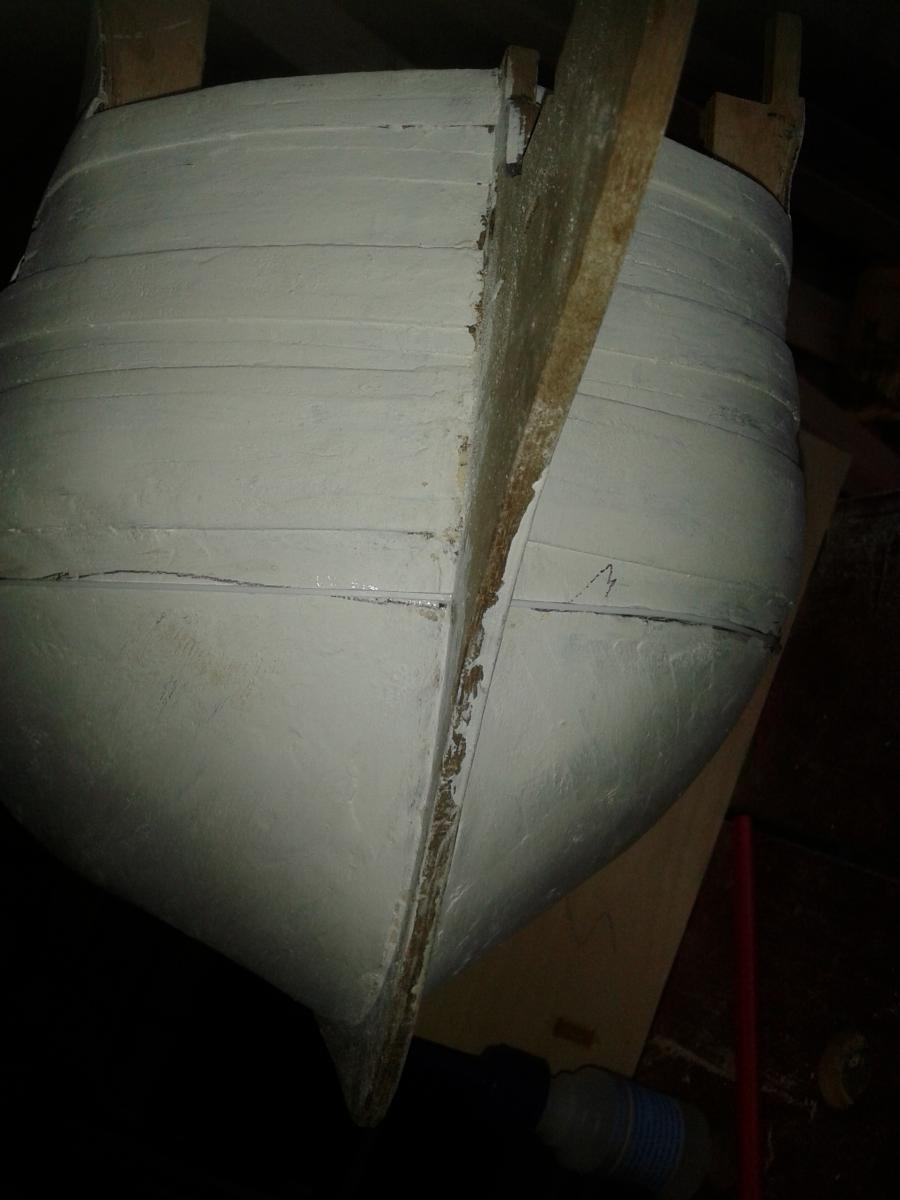
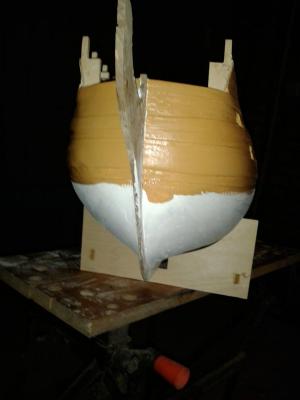
Day off work today, so I have spent a bit of time working on the ship. First task was to mark the water line and I added a 1mm2 styrene strip. I then added the first coat of yellow ocra prior. Will let dry and then I will give it a light sand before applying a second coat. Took a couple of goes to get the position of water line under the stern, as can be seen by the following photo. Painting


-
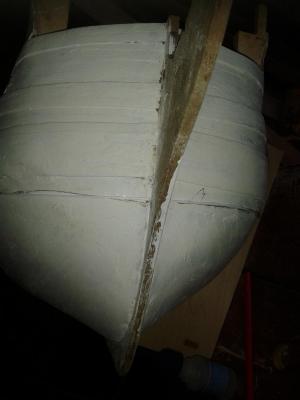
Hello Lawerence Many thanks for you visit to my log and kind words. Certainly adding the primer has highlighted the areas to be filled and filled. Spent another 3 hours this morning sitting in the sun sanding and filling and just added a second coat of primer to the starboard side, will do the same to port side once the primer has dried and I can turn the boat around.
-
Hi I used the cheapest I could find which was Diall £5 from B&Q
-
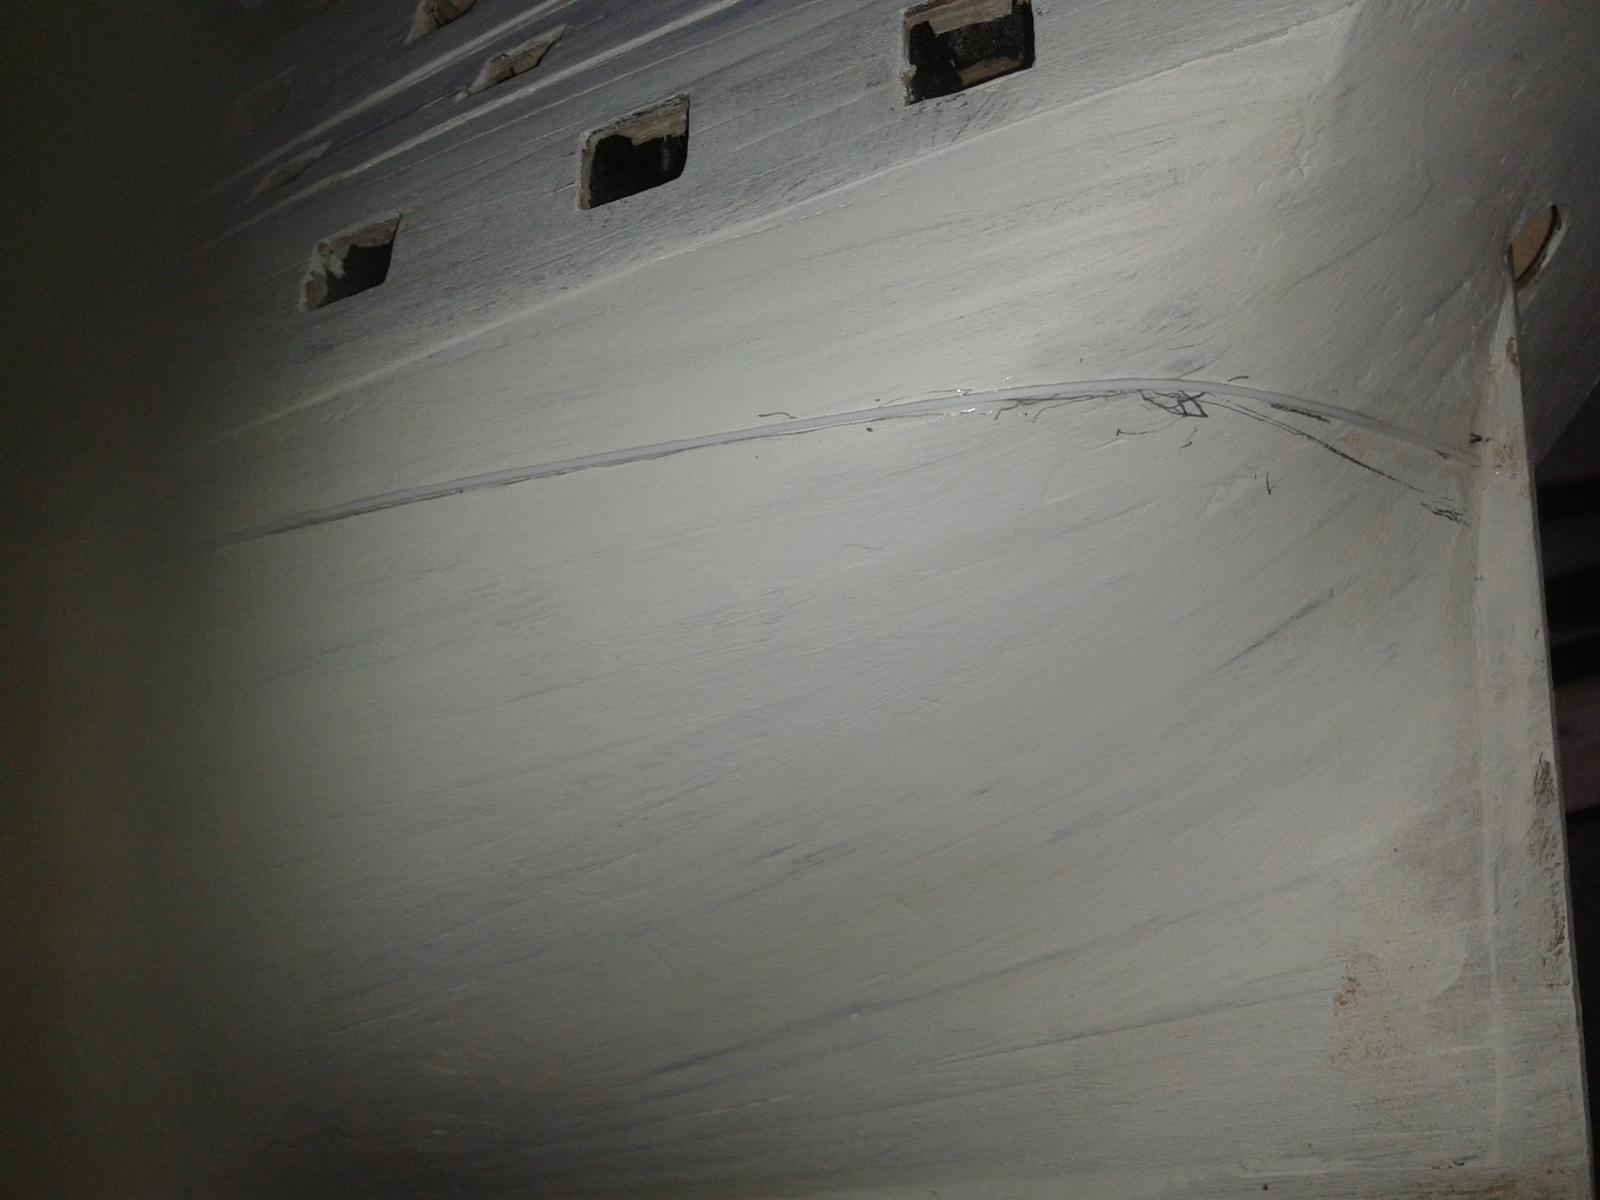
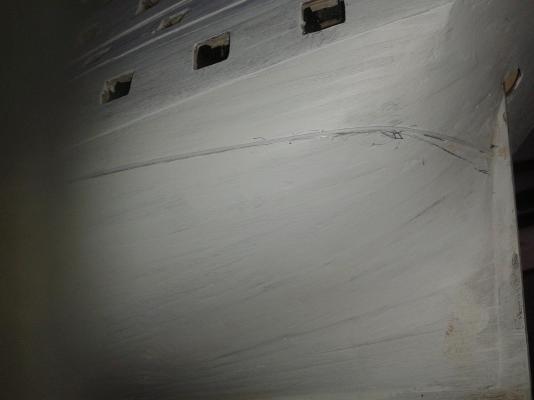
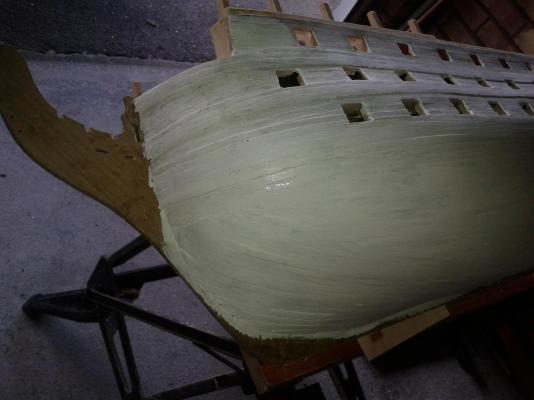
Pictures of the sanding and hull coating with 1st coat of primer; this has shown a few areas which will need a bit more sanding.


-
Hello Mort Many thanks for taking the time to visit my log. I will work on 1mm back from 2nd plank level as the wales are an additional external feature to the hull
-
All the Wales are now fitted. Have checked all gun ports have been cleared of excess planking and wale material. Spent 2 hours this afternoon sitting in the sun sanding the hull and filling all the obvious gaps; I was pleasantly surprised as there are not that many. Have now applied a primer coat to the port side and it will require a second coat when dry. It has shown a couple of small bits which need some filler. Will continue on adding the primer on Monday as tomorrow we have the grandkids. Will post some pictures with next post.