Glenn-UK
-
Posts
3,170 -
Joined
-
Last visited
Content Type
Profiles
Forums
Gallery
Events
Everything posted by Glenn-UK
-
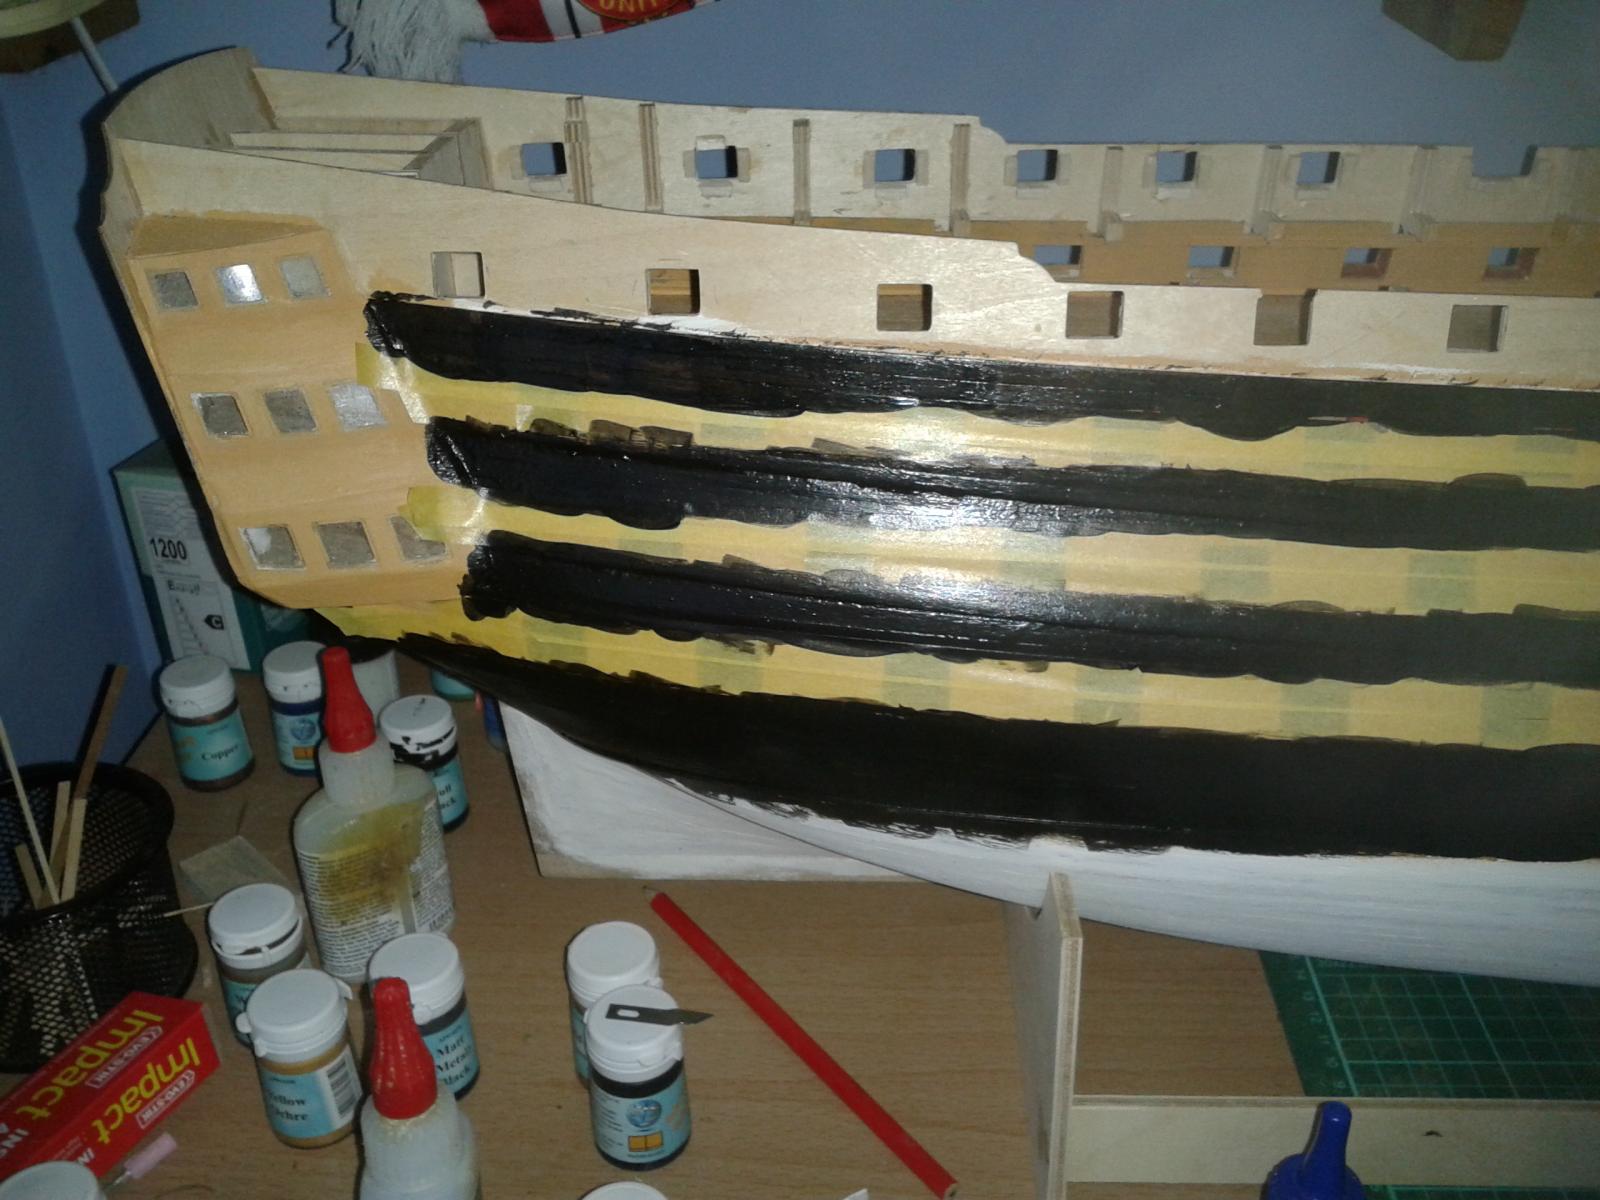
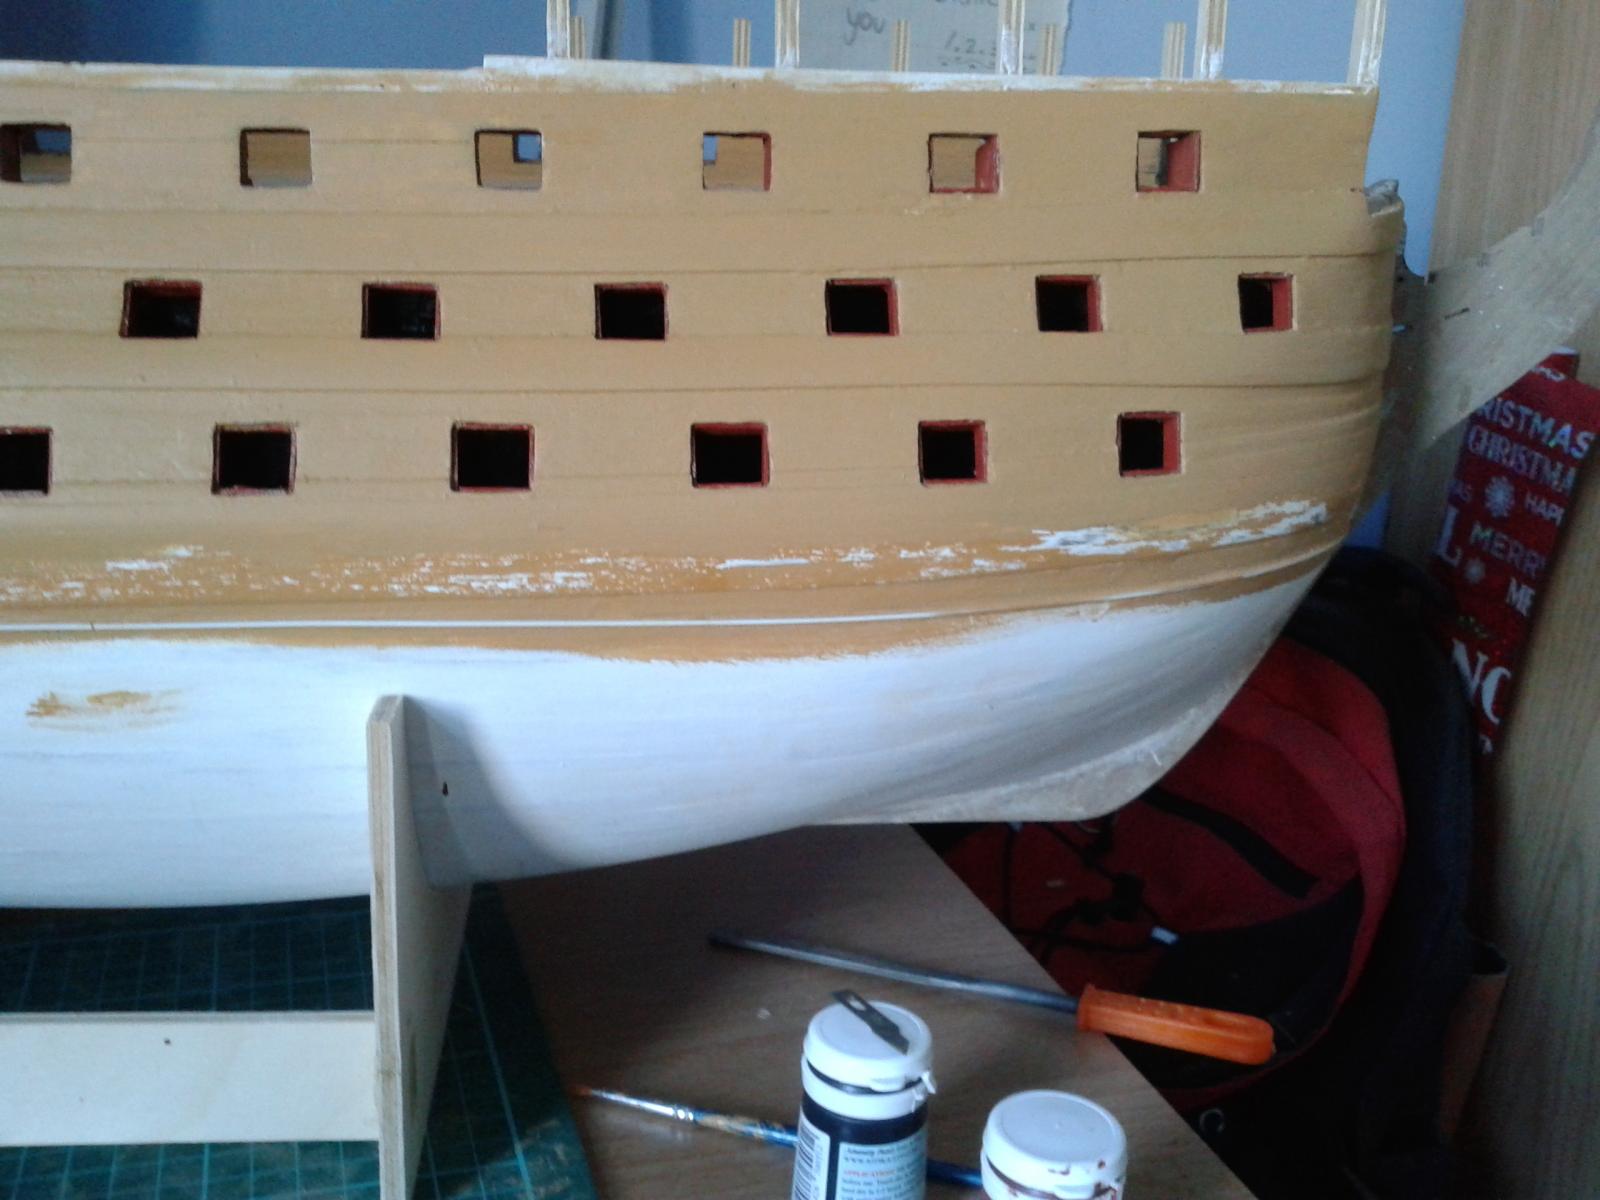
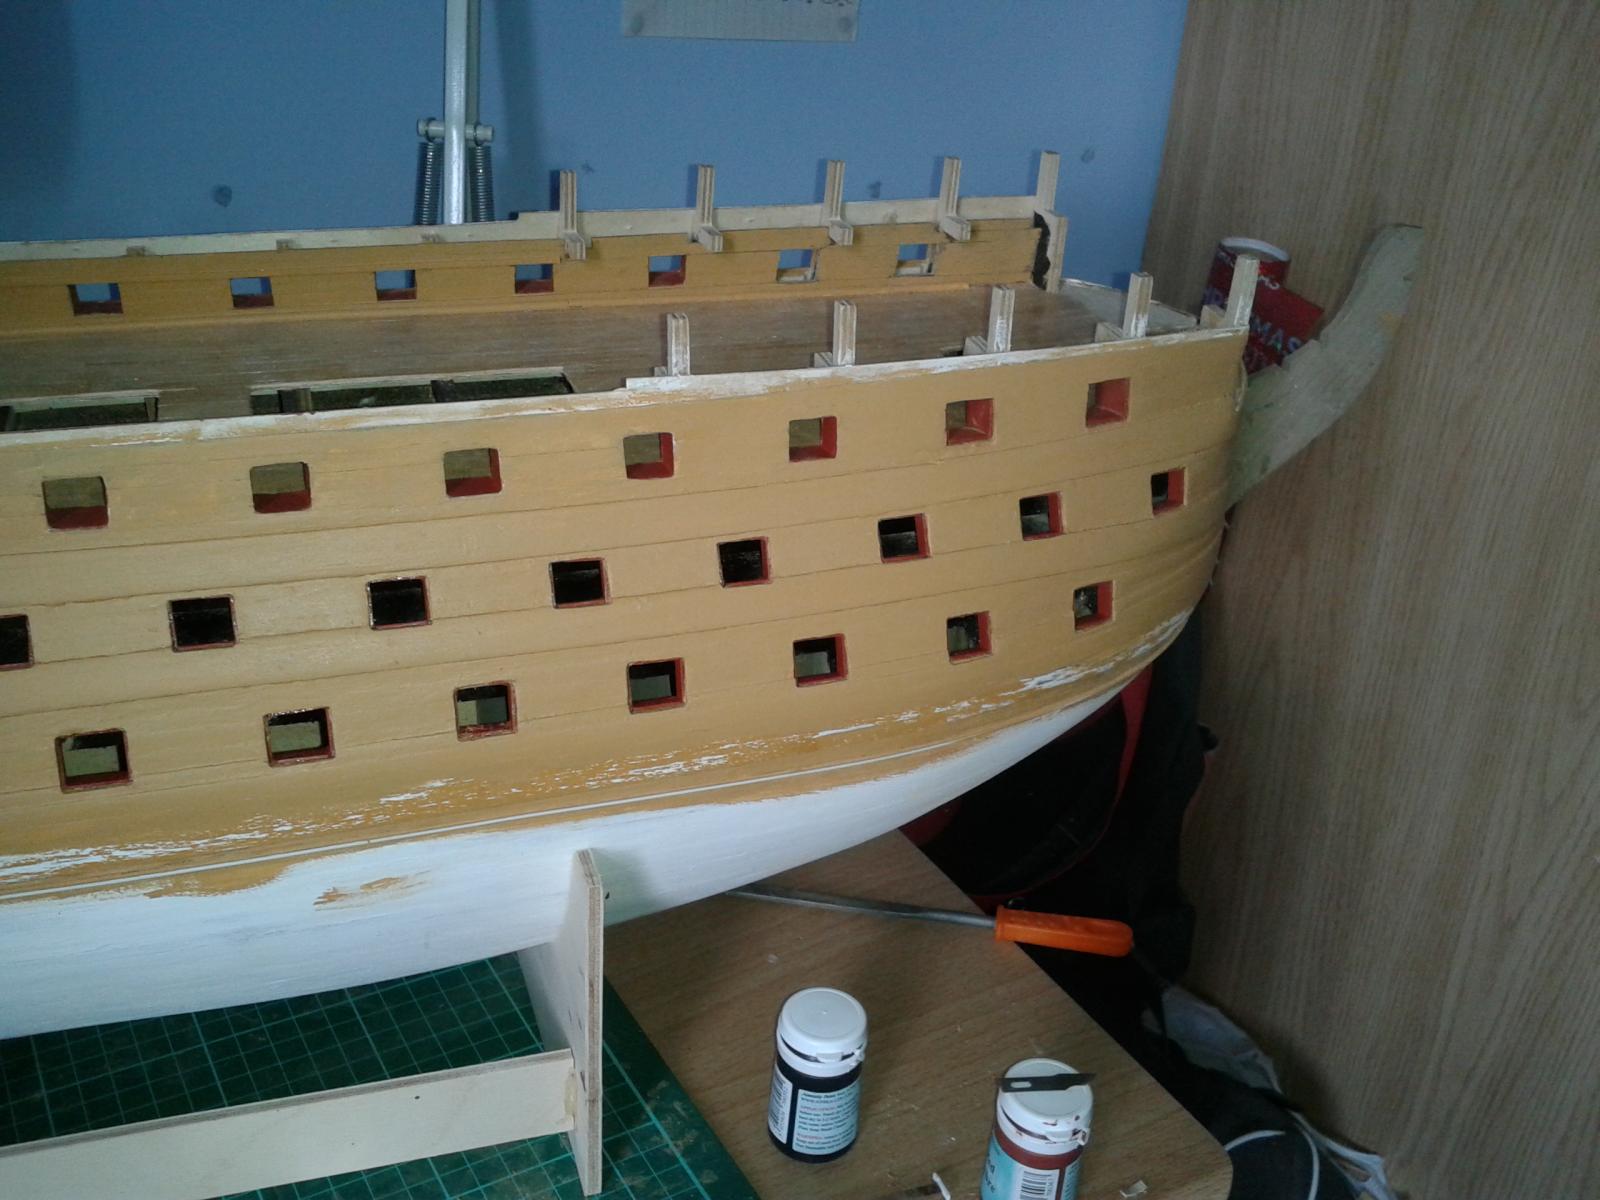
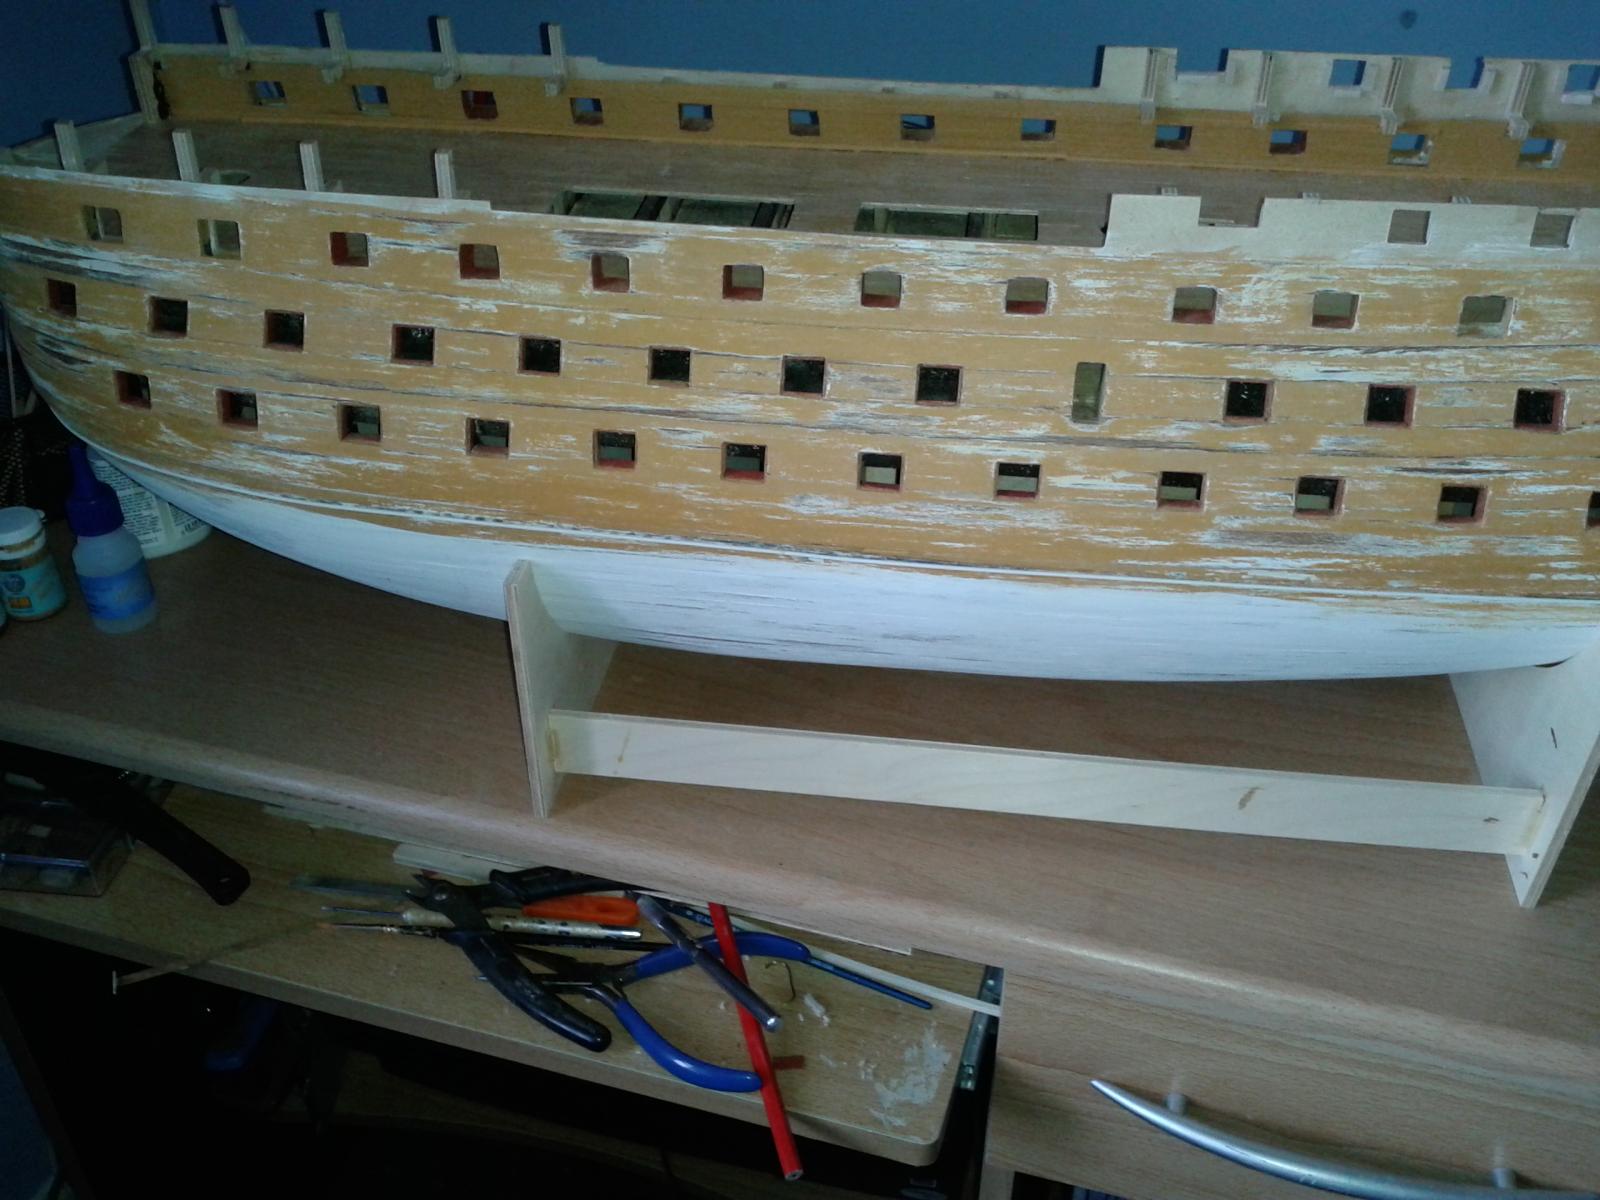
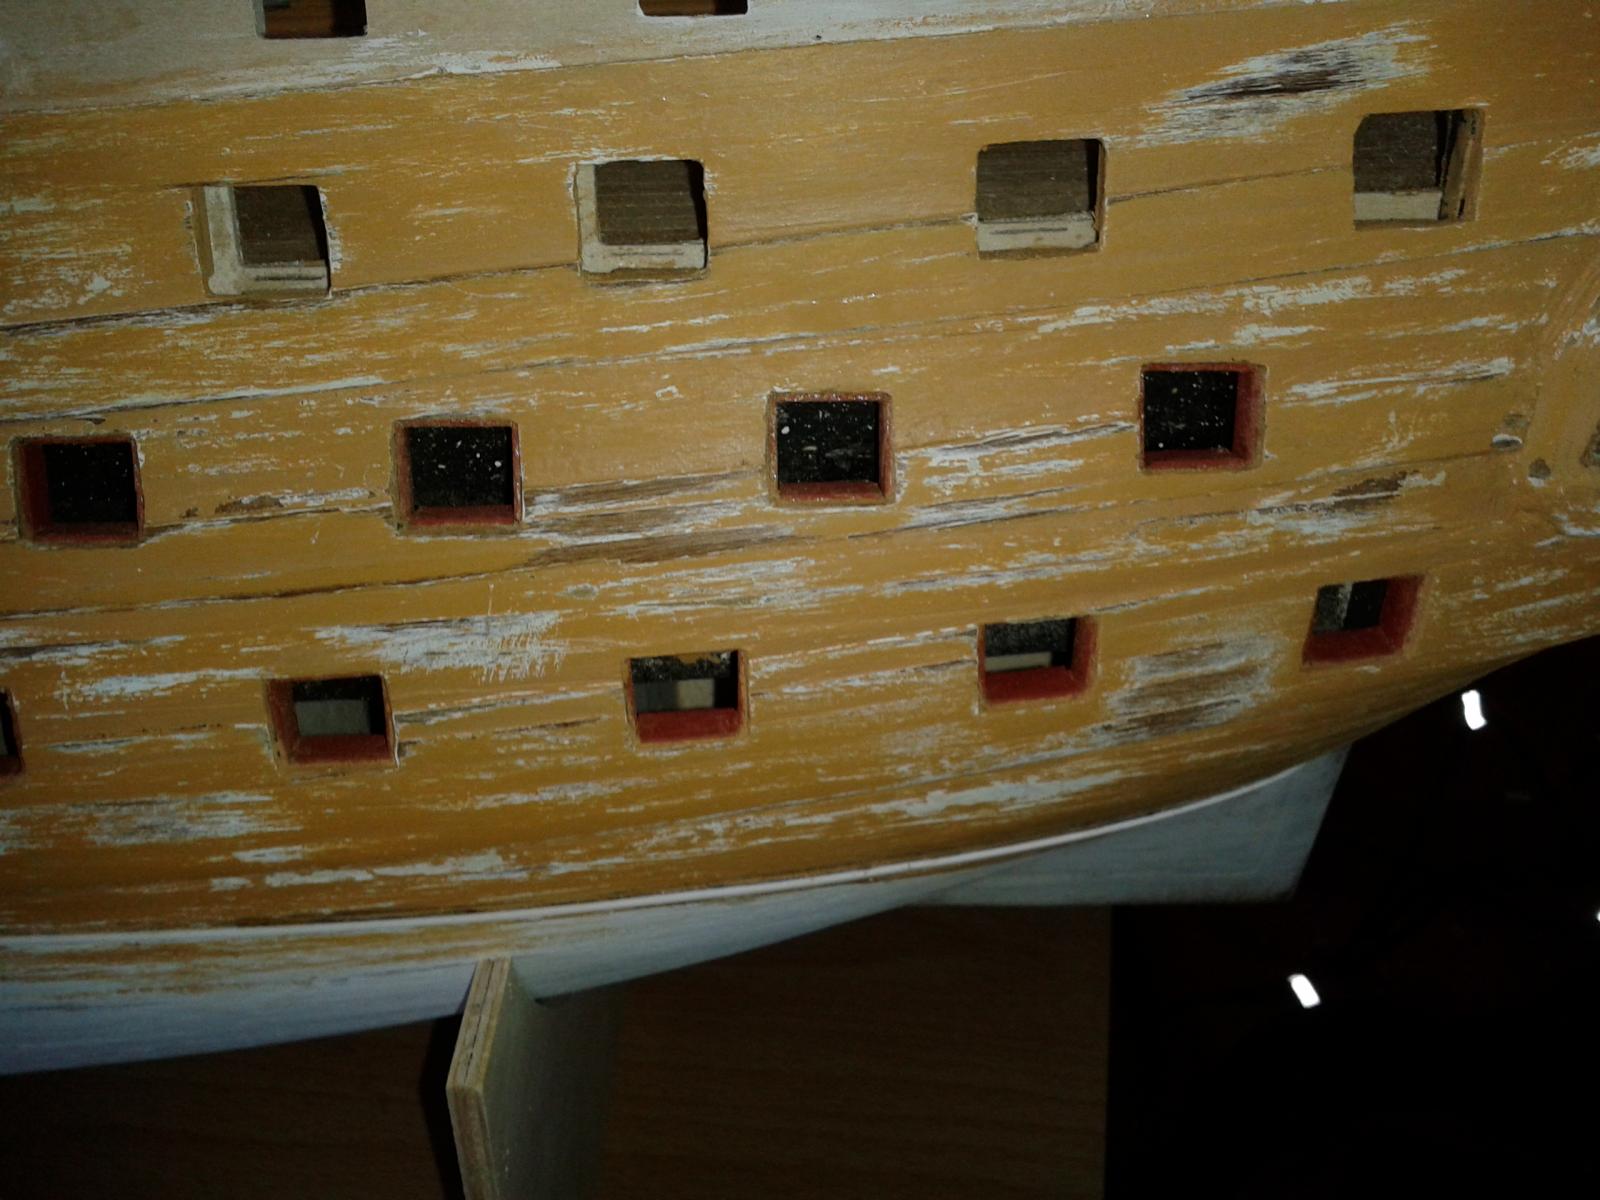
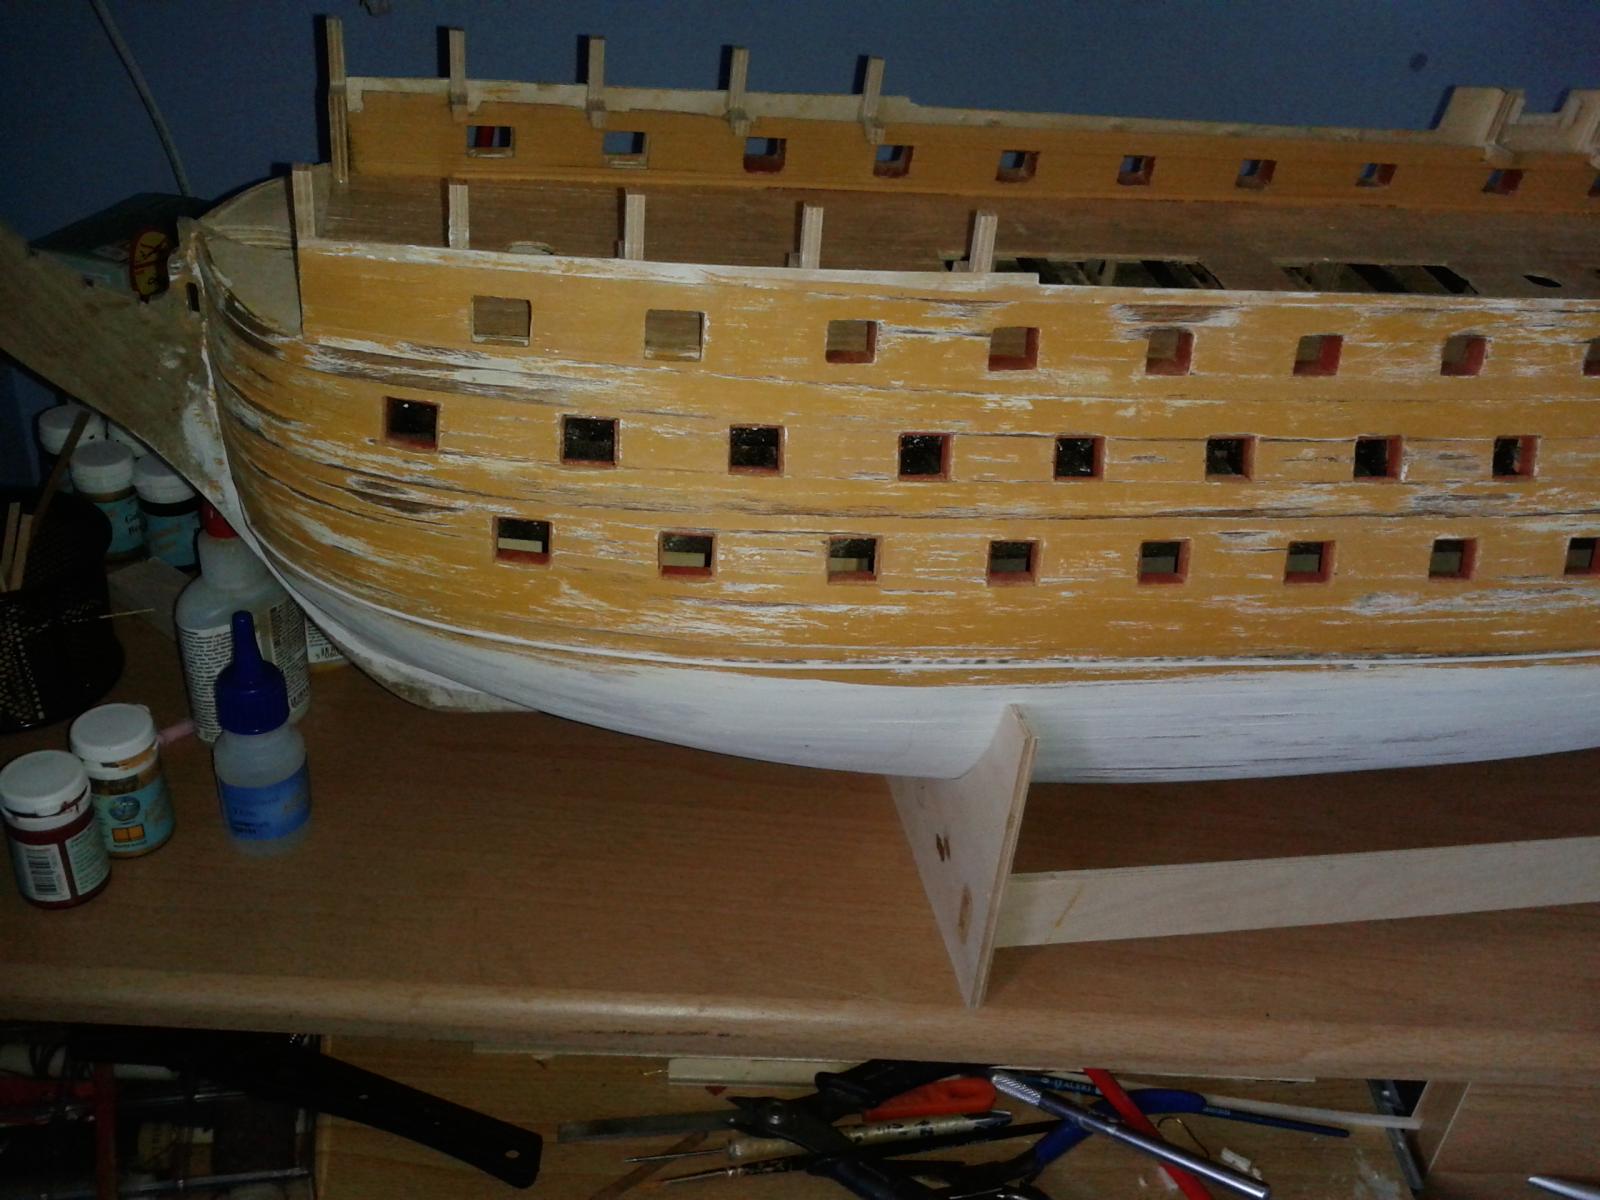
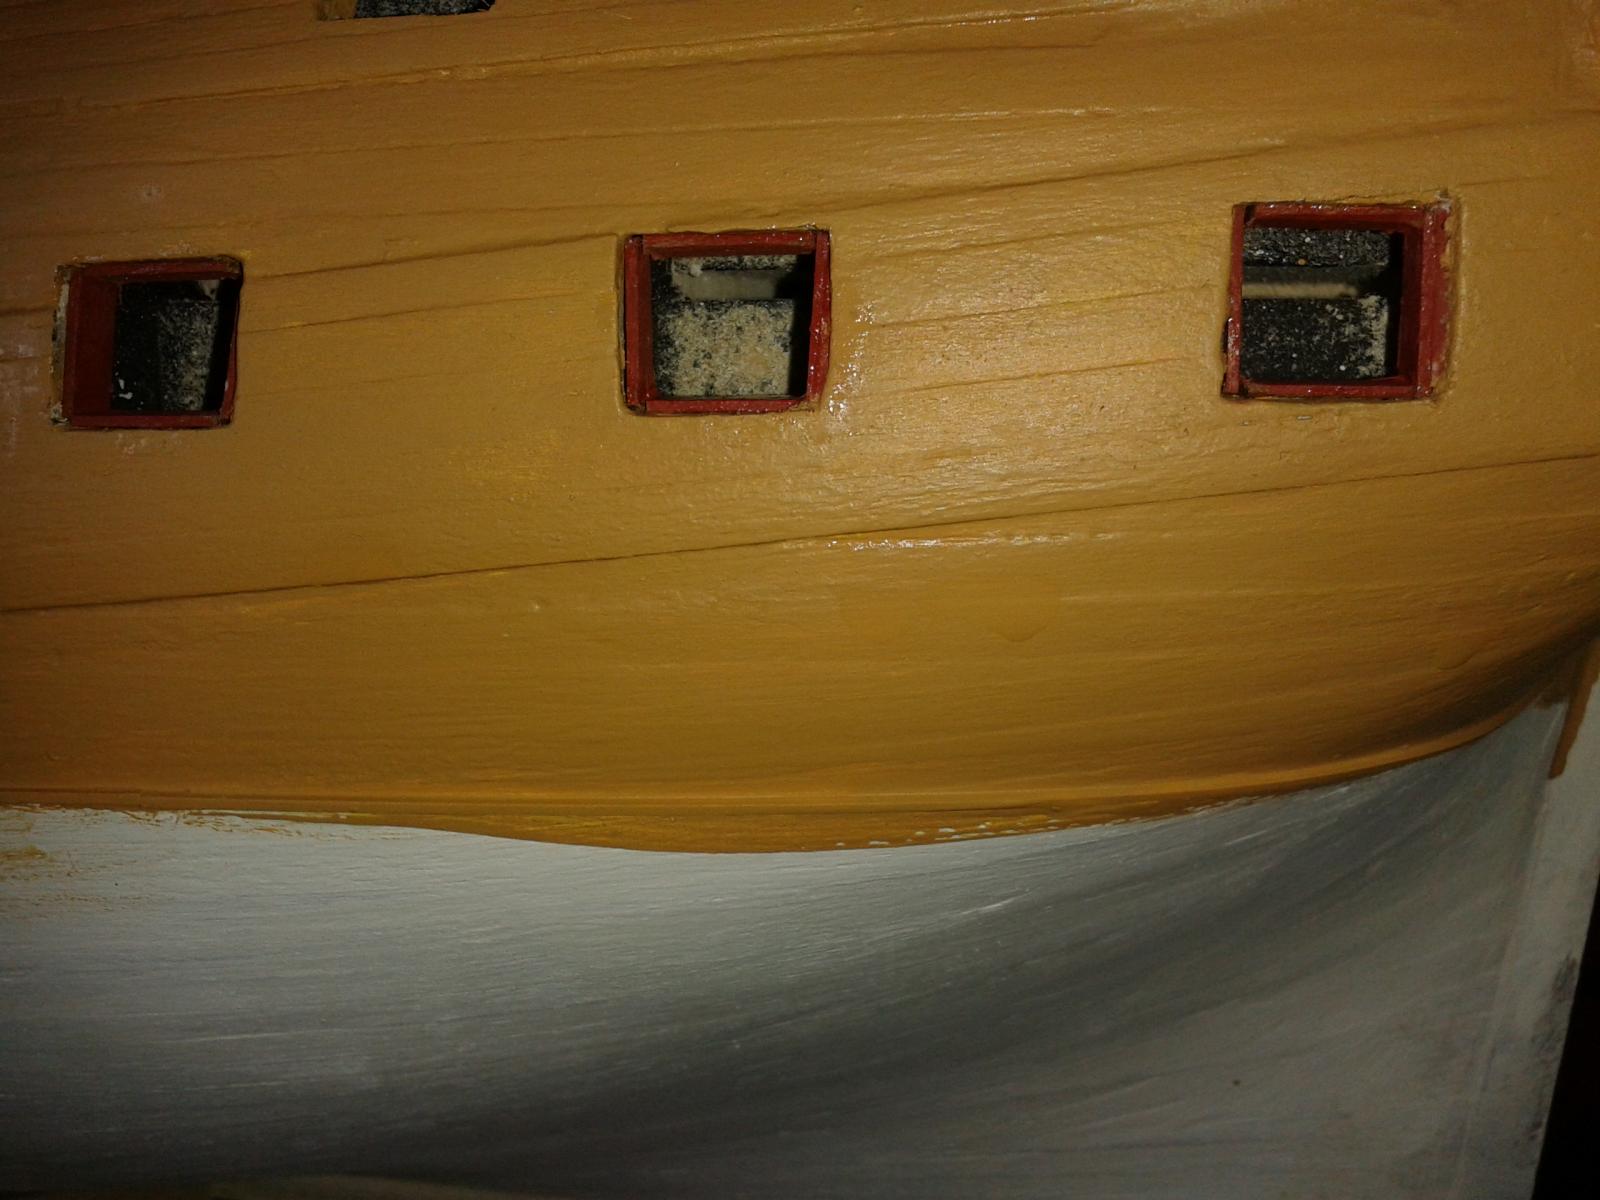
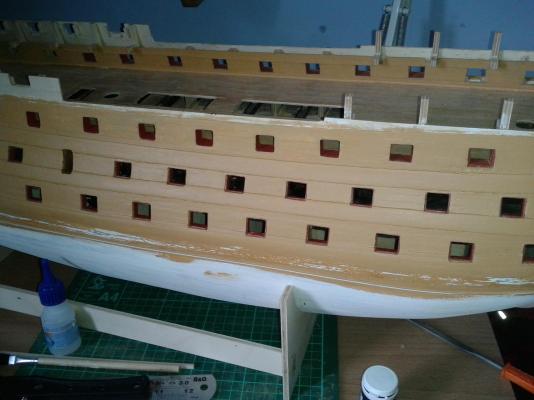
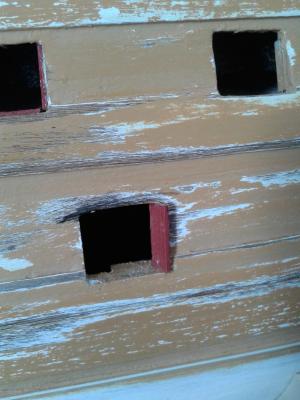
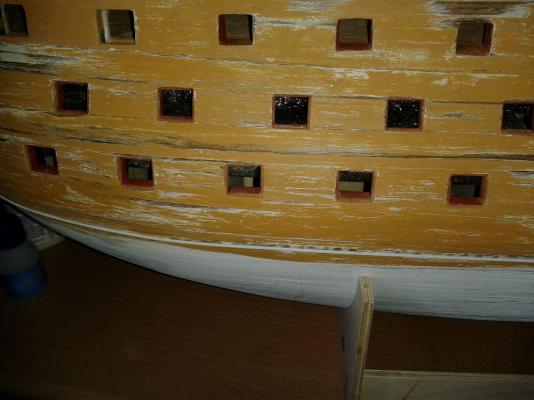
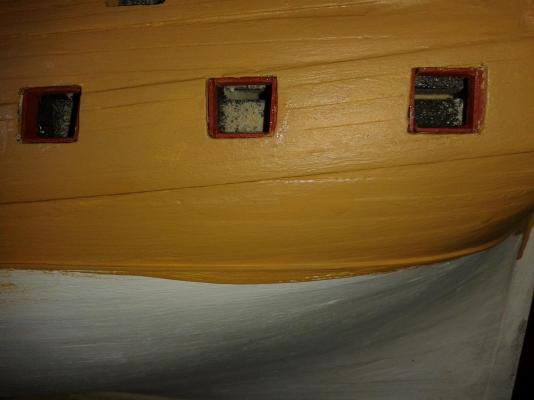
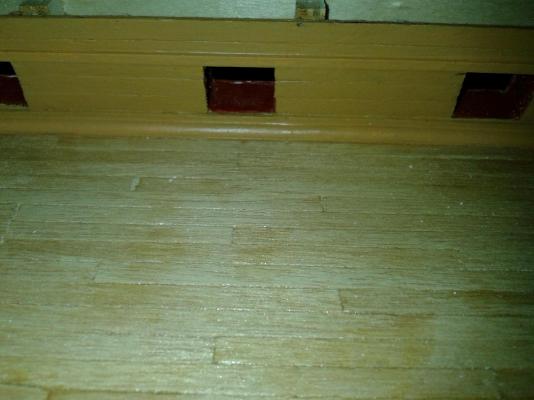
 Completed port side gun port linings and painted the black strips. I used Tamiya model masking tape in order to get good clear lines between the yellow and black paint, or so I thought! As you will see I suffered bleed through which is a tad frustrating. I will have to sort this out at another time, as I want to complete the starboard side over the next few days. Taped and painted Tape off, but not good clean lines between the yellow and black paint!
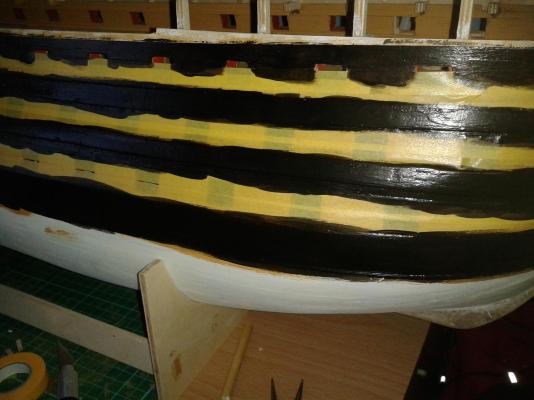


-
Hi Jerry I had the back breaking task of breaking up 14 fence panels so I could fit in my car and take to the tip, in multiple trips. I then had to remove some of the lawn as I wanted to reshape some of the flower beds. Then took some time to trim and the feed the lawn. Finally I was able to get the sun chairs out and doze as I soaked up the rays. Thankfully it's not so sunny today as I'm back at work!!!
-
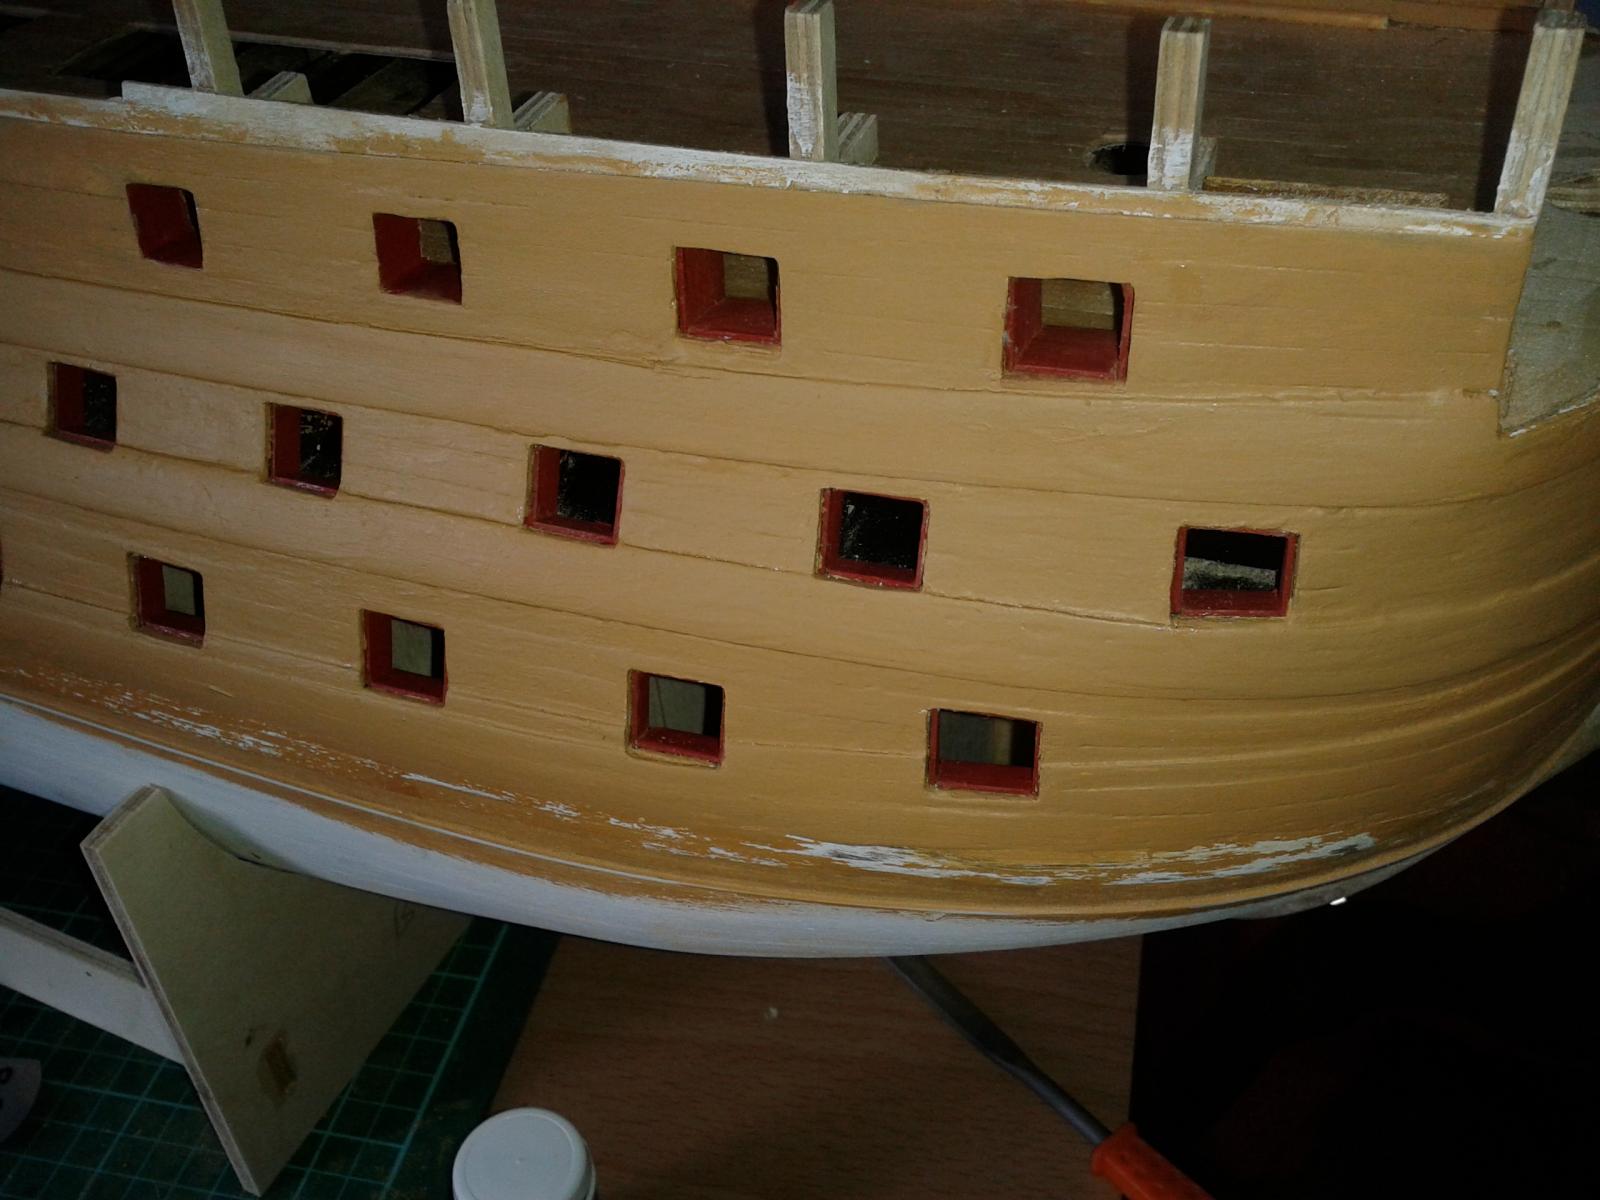
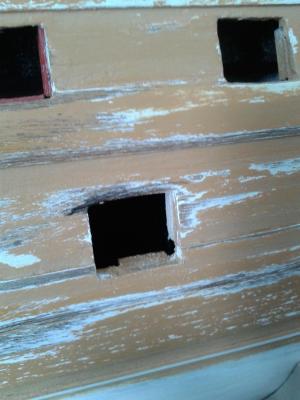
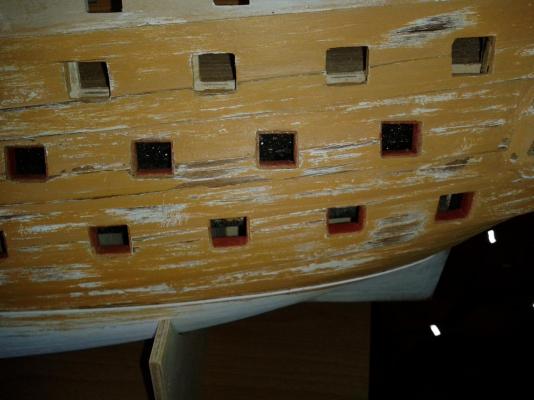
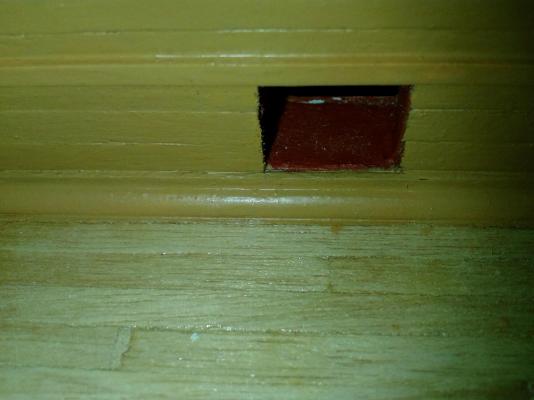
With the very warm sunny weather over the weekend; so time on the boat has been restricted whilst I spend time in the garden enjoying the sun. I have spent some time cleaning and painting the hull and I also starting installing the 16mm gun port linings. I expect to have this work completed within the next couple of weeks, which then means it time to start the copper tiling. Can you spot the damage to the gun port lining strip on this photo, look top left middle gun port. I can effect a simple repair. Poor colour without flash It will not be long before I add the black lines, I have some Tamiya masking tape ready!


-
Nice work Jerry
-
Hi Jerry It's been hard not going to the build every evening after work but we've been looking after the grandkids in the evenings which is equally hard work and just as enjoyable. But normal ship build service returns next week, keep up the good work with your rigging. I hope I will find the coppering enjoyable as well, as I know it will be very Labour intensive.
-
It look goods, well done; that one major job completed.
-
A great set of photos once again. Just when you think you can see the light at the end of the tunnel something switches it off!, hope the damage to the pointy thing is not too bad and can be repaired (again) without too much disruption. My time in the build area has been limited just recently and it will be Thursday probably before I can get back to work on it when I should complete the 6mm linings, as I only have 4 gun ports left to complete.
- 439 replies
-
- 1
-

-
- victory
- caldercraft
- (and 1 more)
-
It looks very complicated, but you seem to be working steadily through this phase. Keep up the very good work
-
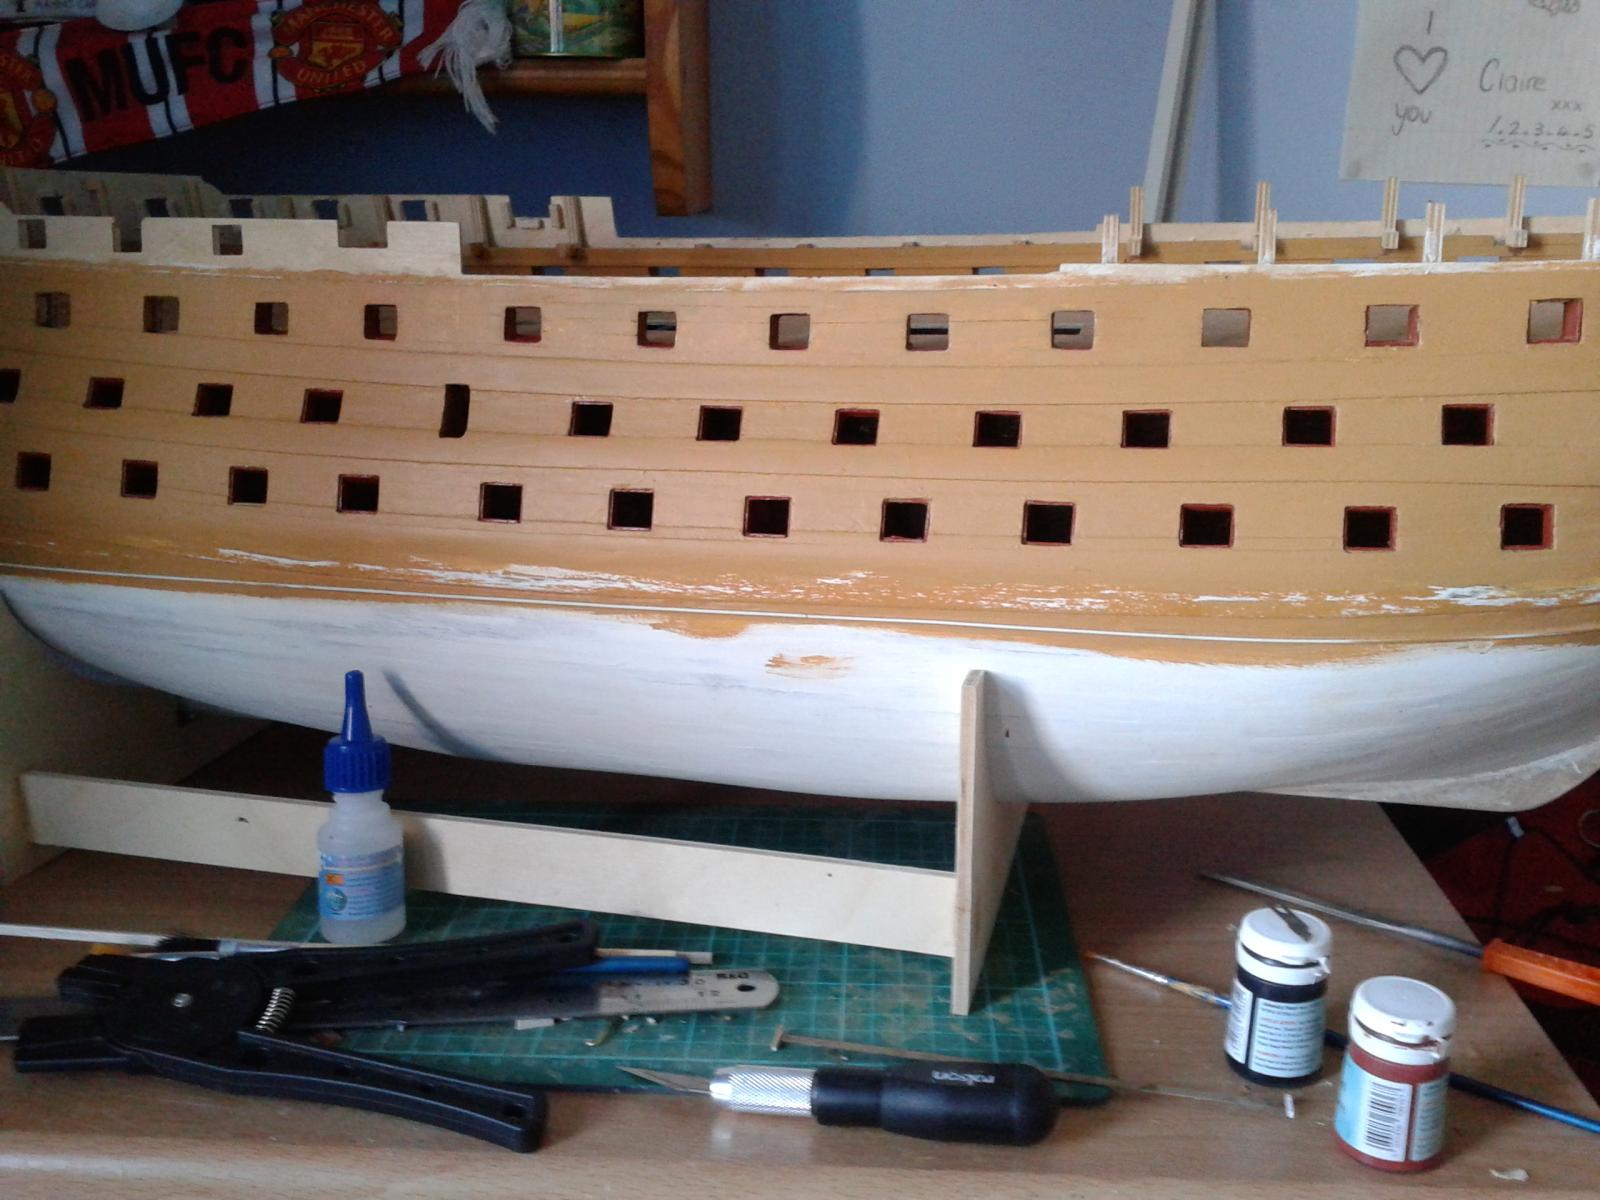
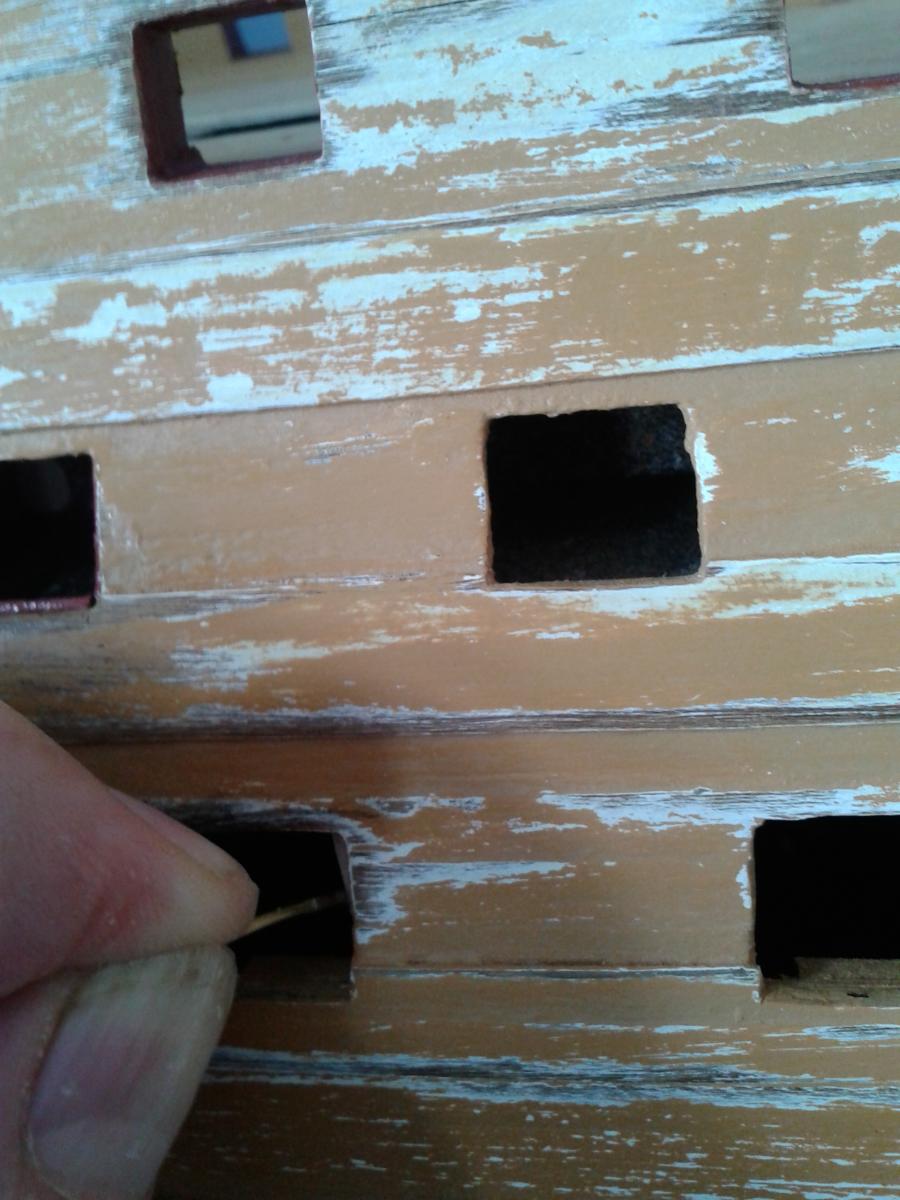
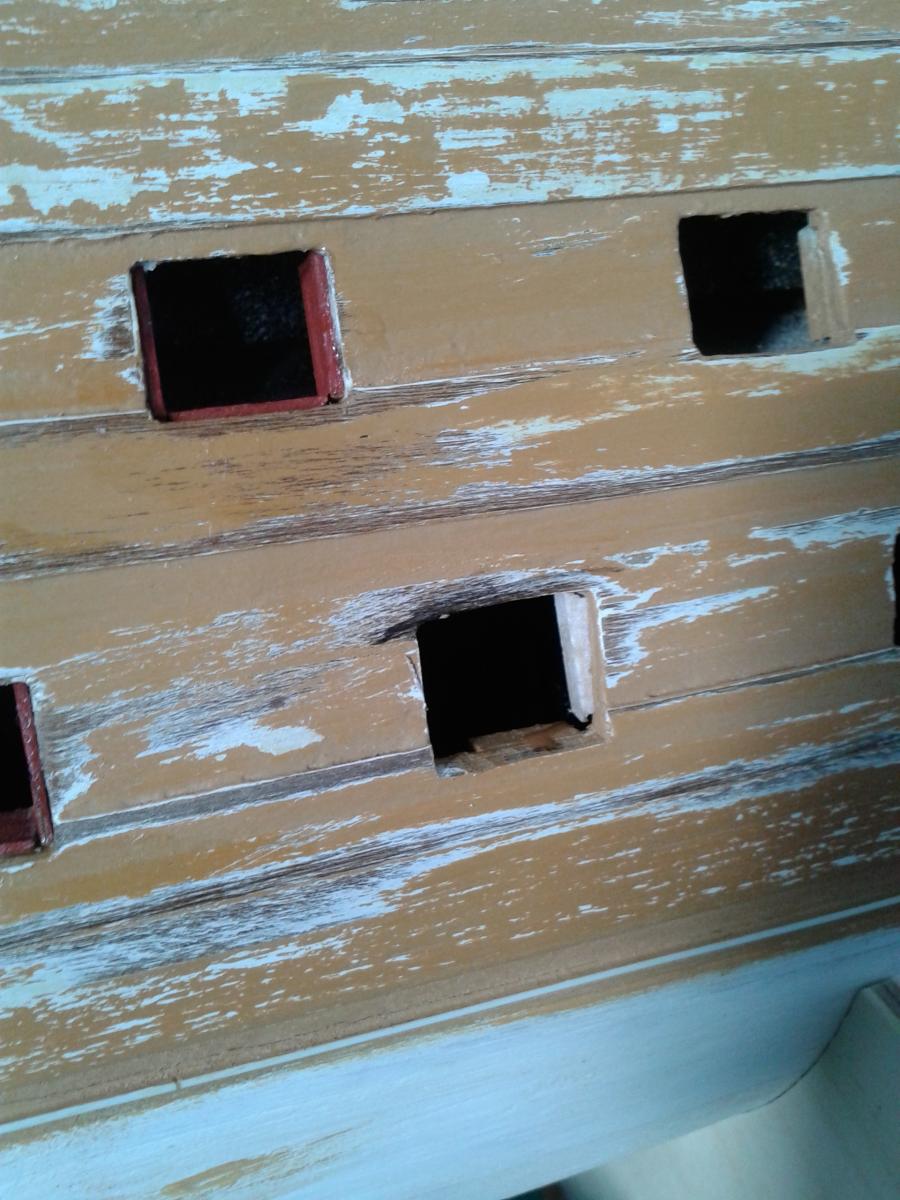
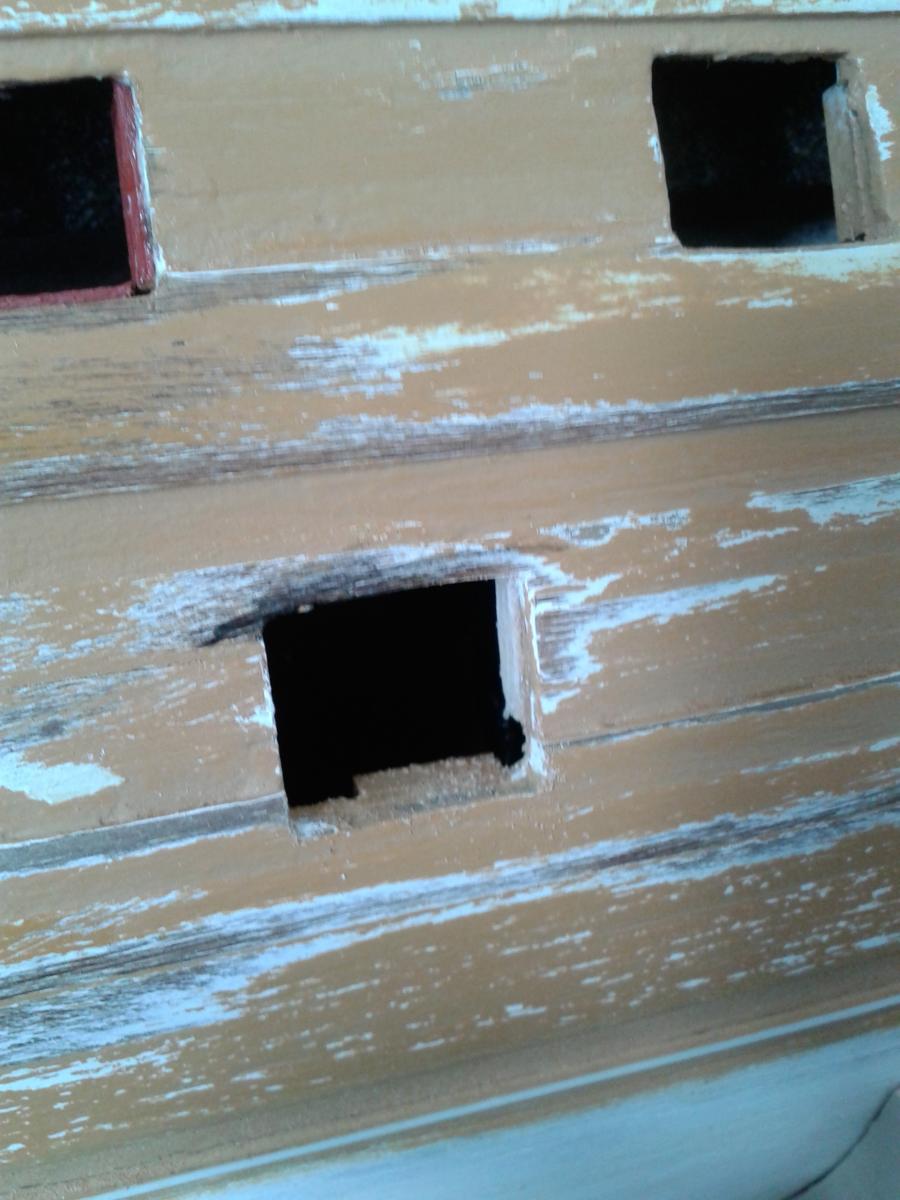
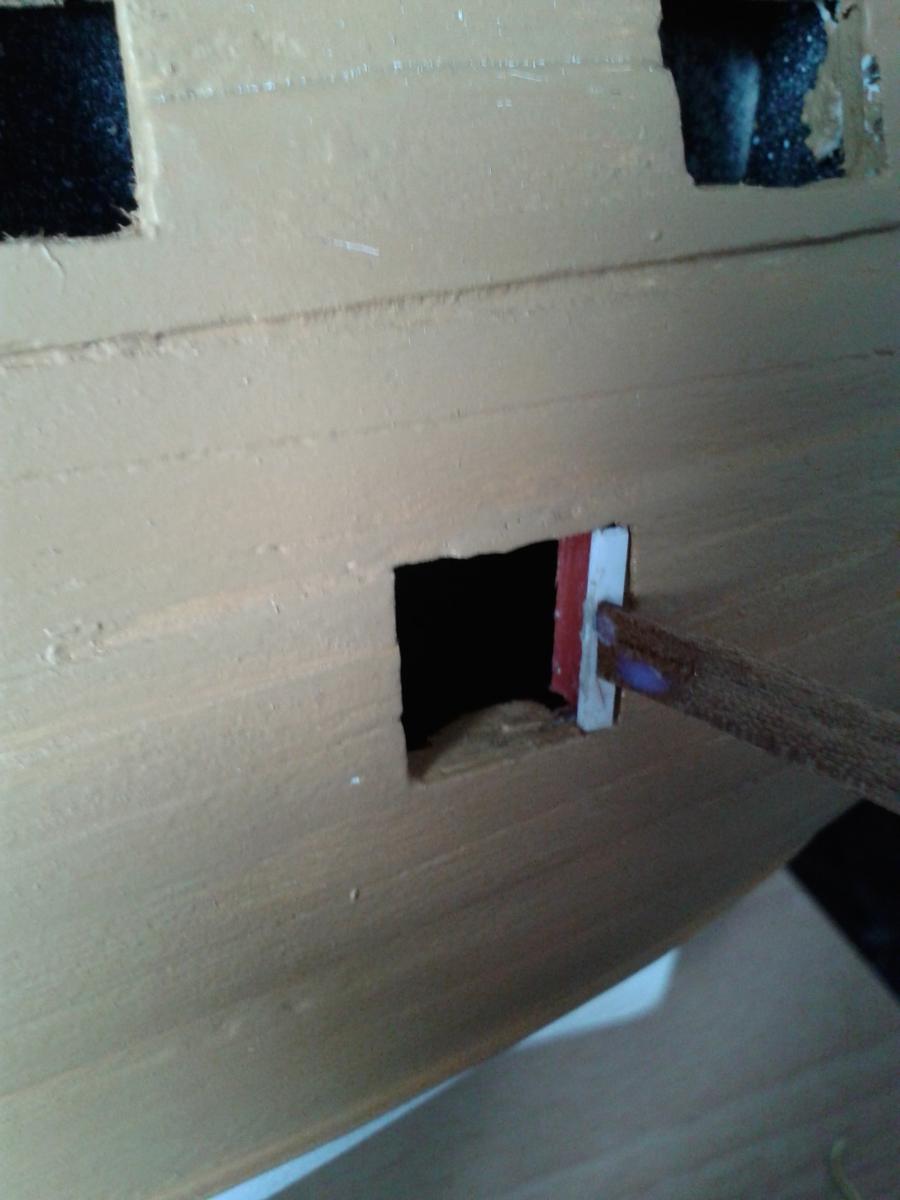
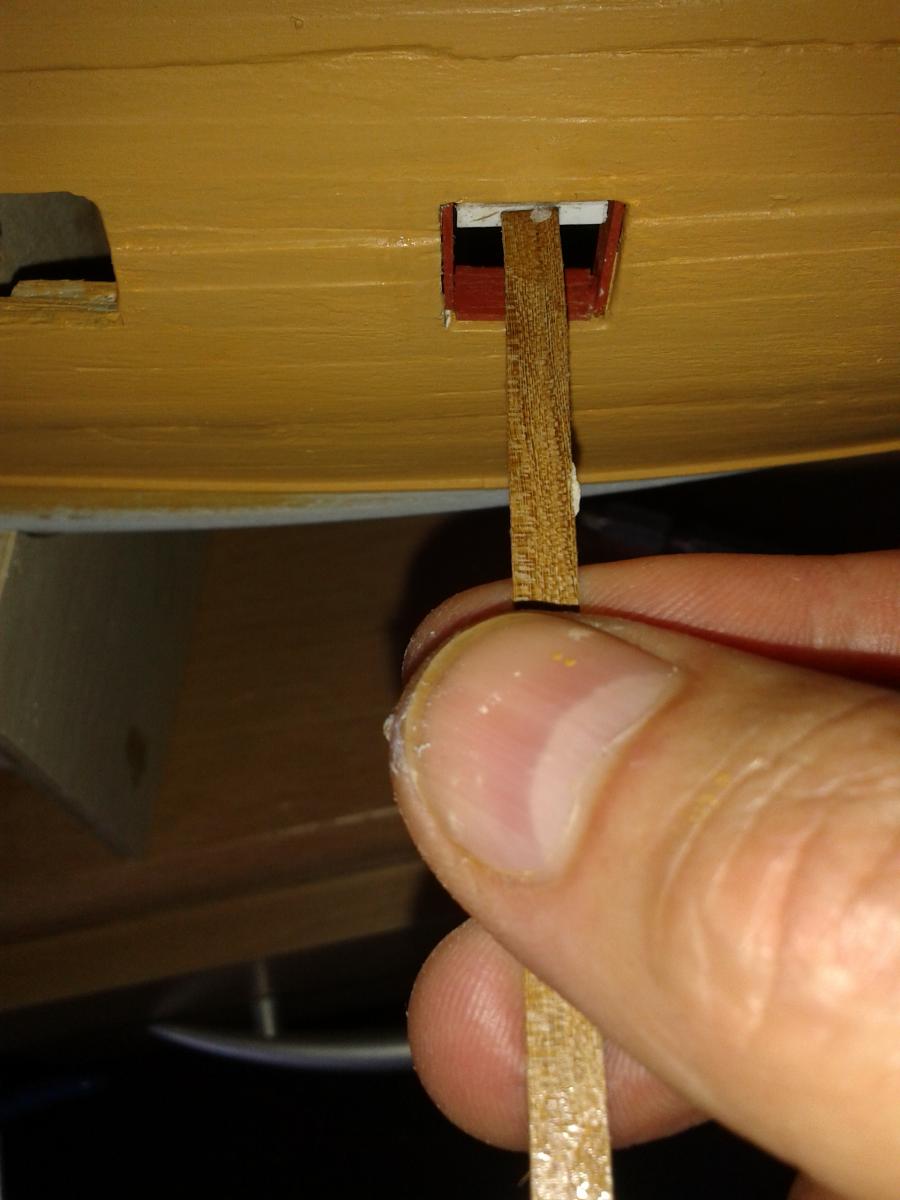
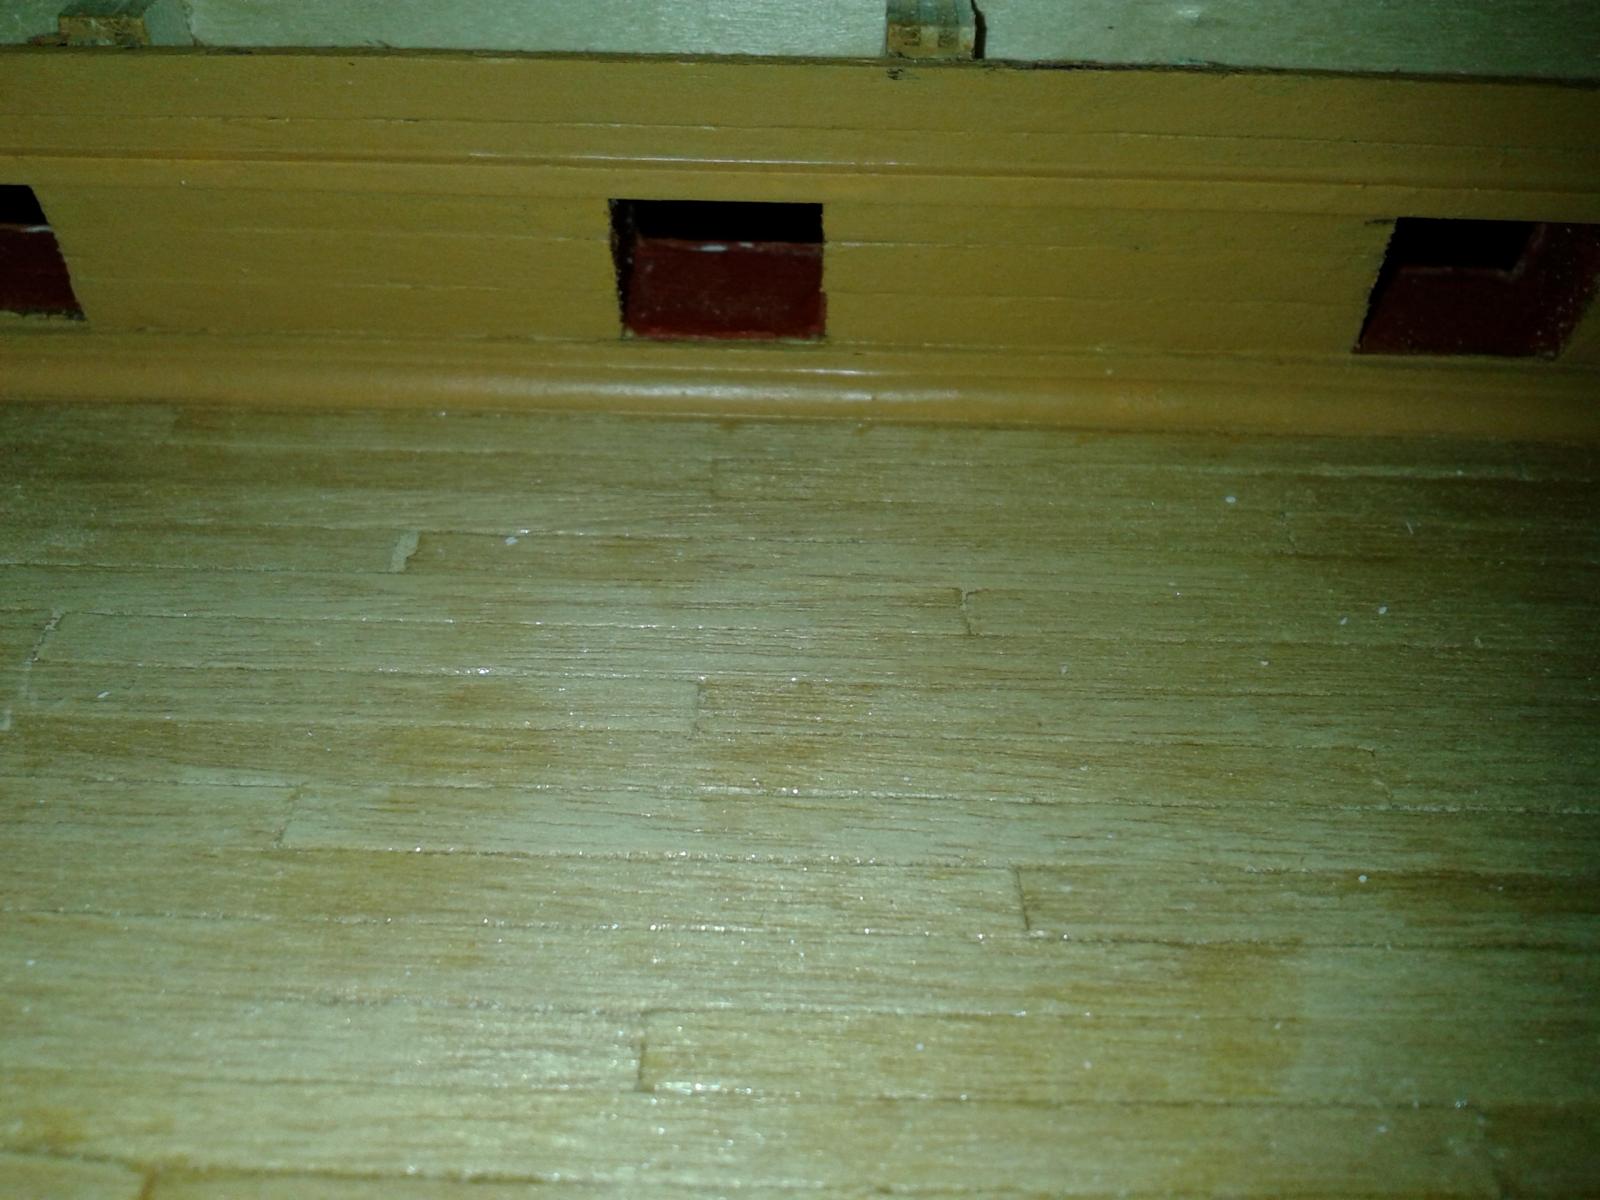
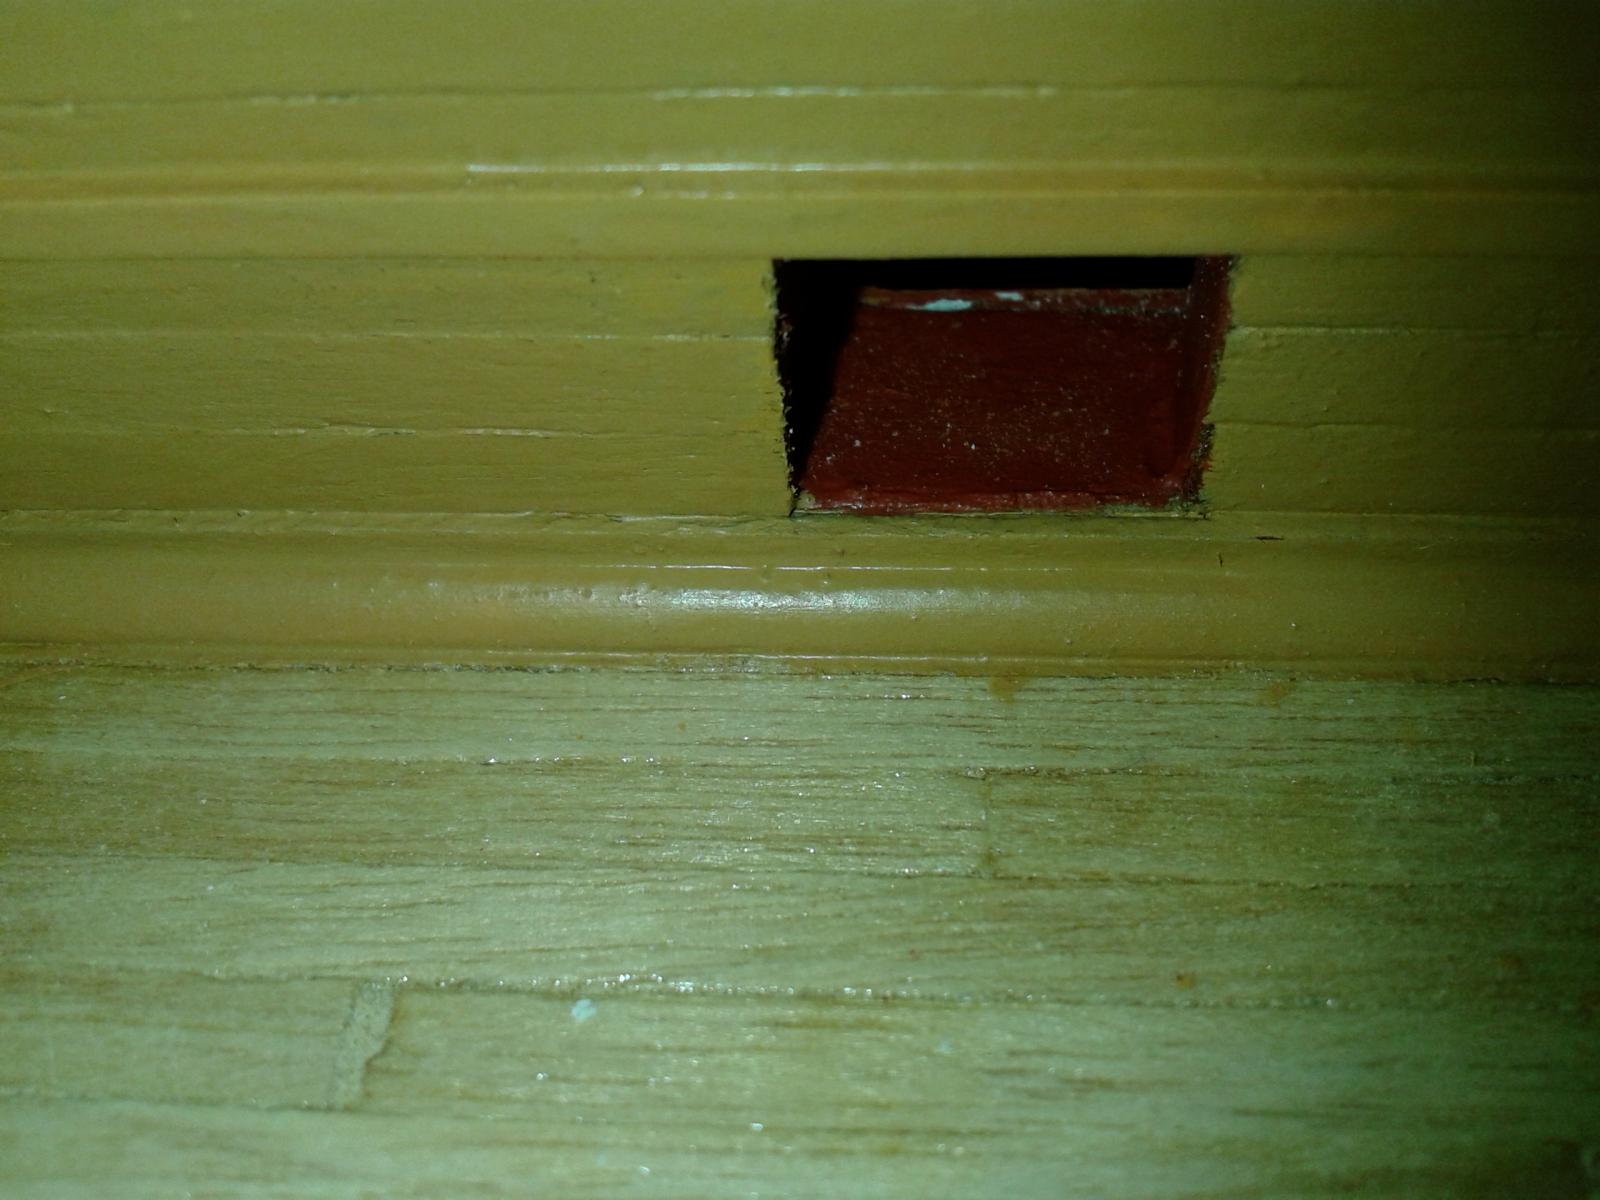
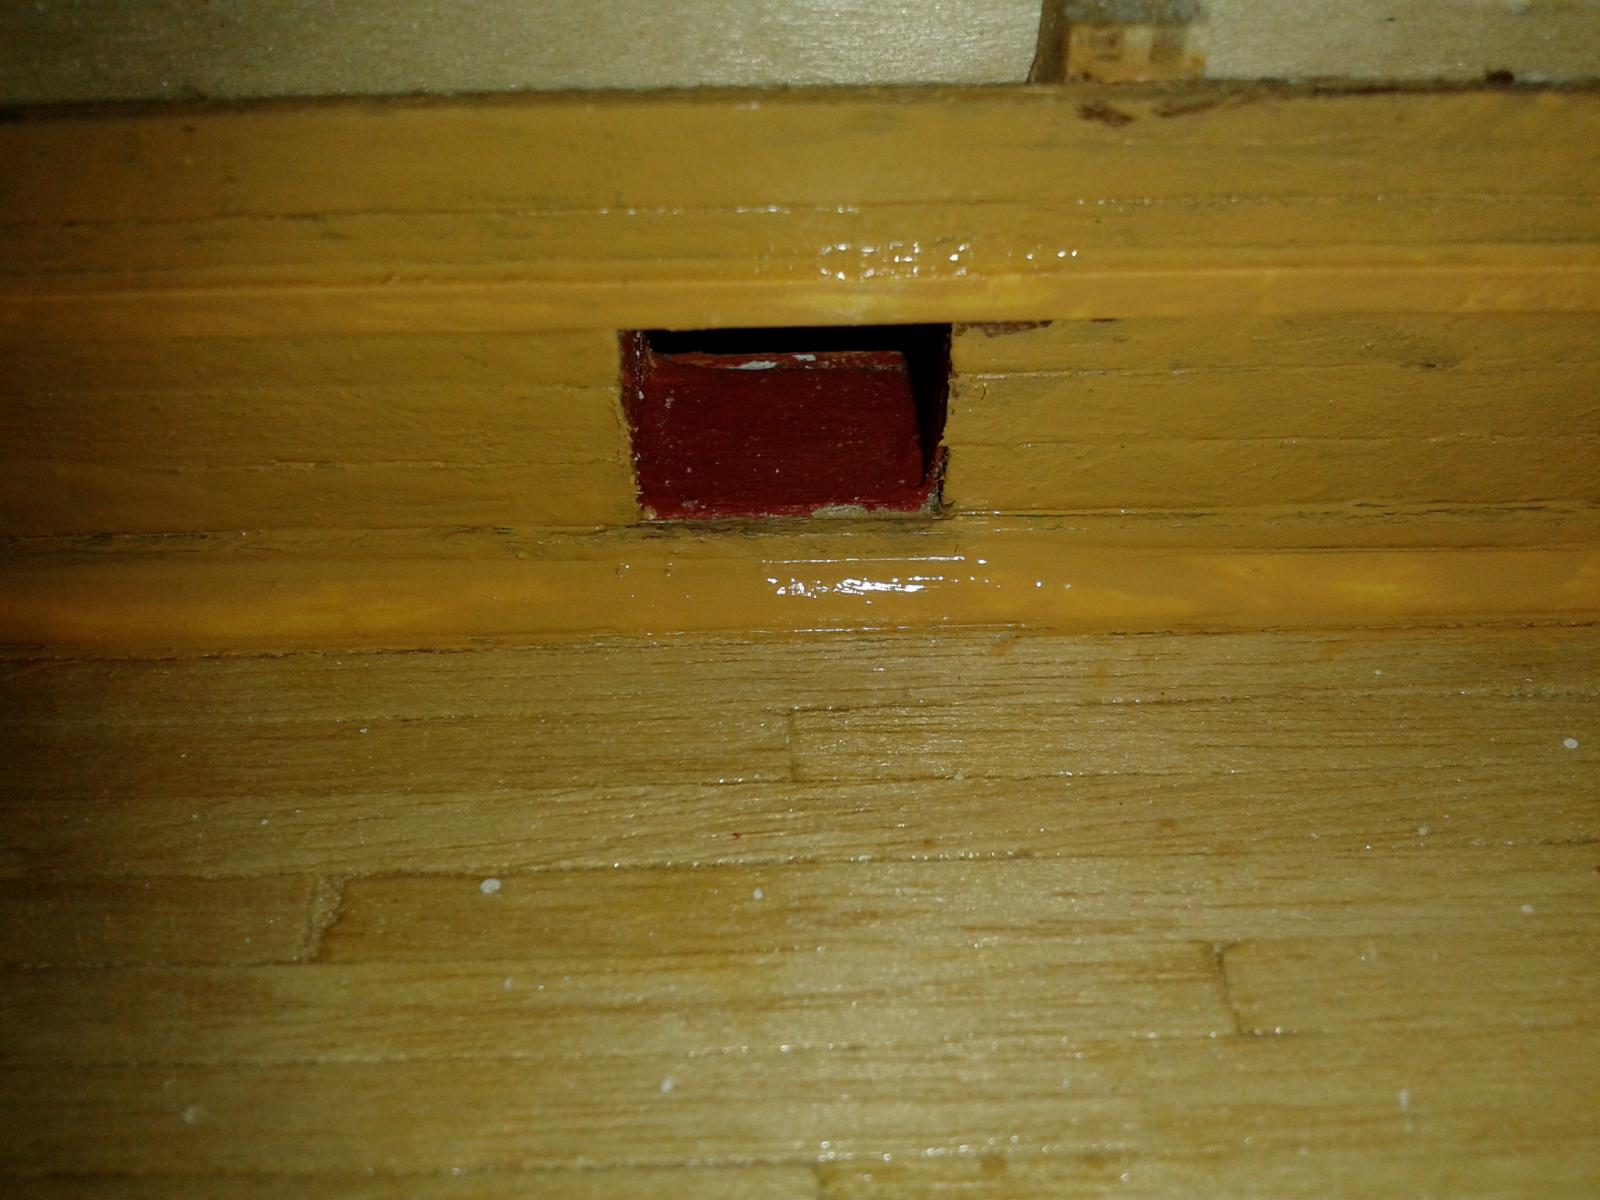
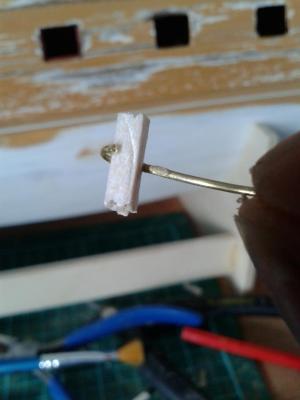
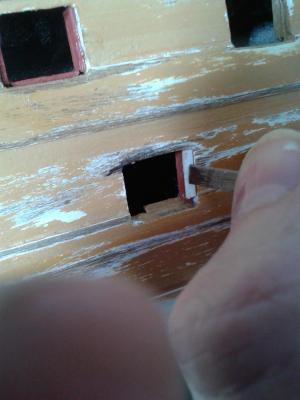
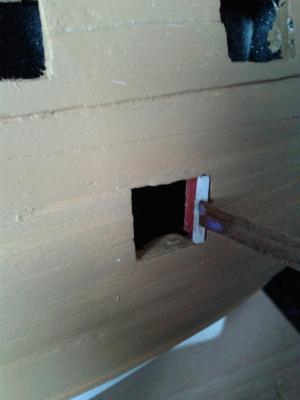
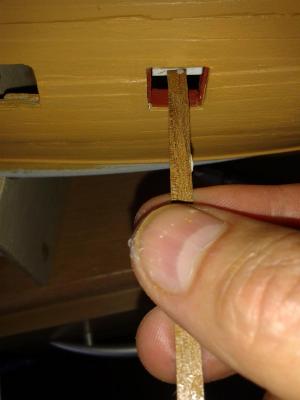
Good morning Today I thought I would share my gun port lining procedure, it may not work for others but it does work well for me and is based on a gun port without a balsa seat fitted. I took the decision early on in the build to fit balsa seat to the gun port strips prior to their installation. This has saved some time and also did create a few minor problems with the installation on the gun deck. In some instances I did not pre-fit a balsa seat due to the limited space, and in some cases the balsa seats become detached during the installation of other items. Gun port lining ready to be lined but has no balsa seat to aid the installation. Using a special tool to hold the balsa seat; a small amount of ca glue is be applied to the balsa seat. The seat can then be positioned using the tool which is removed after a few seconds. Balsa seat after installation, this one will need to be trimmed. Seat after installation and trimming. The painted 6mm lining strip is then measured and cut to size. After the cut a dry fit is carried out. The lining strip is then coated with super phatic glue and positioned in the gun port, using a special tool to ensure it is set back 1mm. That concludes my procedure, it may not be the best and I think it is very important to find a method that works well for you.


-
Hello Jerry According to fault report in the forum it is up to each member to update their logs as necessary to replace the missing pictures Glenn
-
Hi Jerry This was a problem with the server and some pictures were lost, every one will need to upload the missing pictures to their log
-
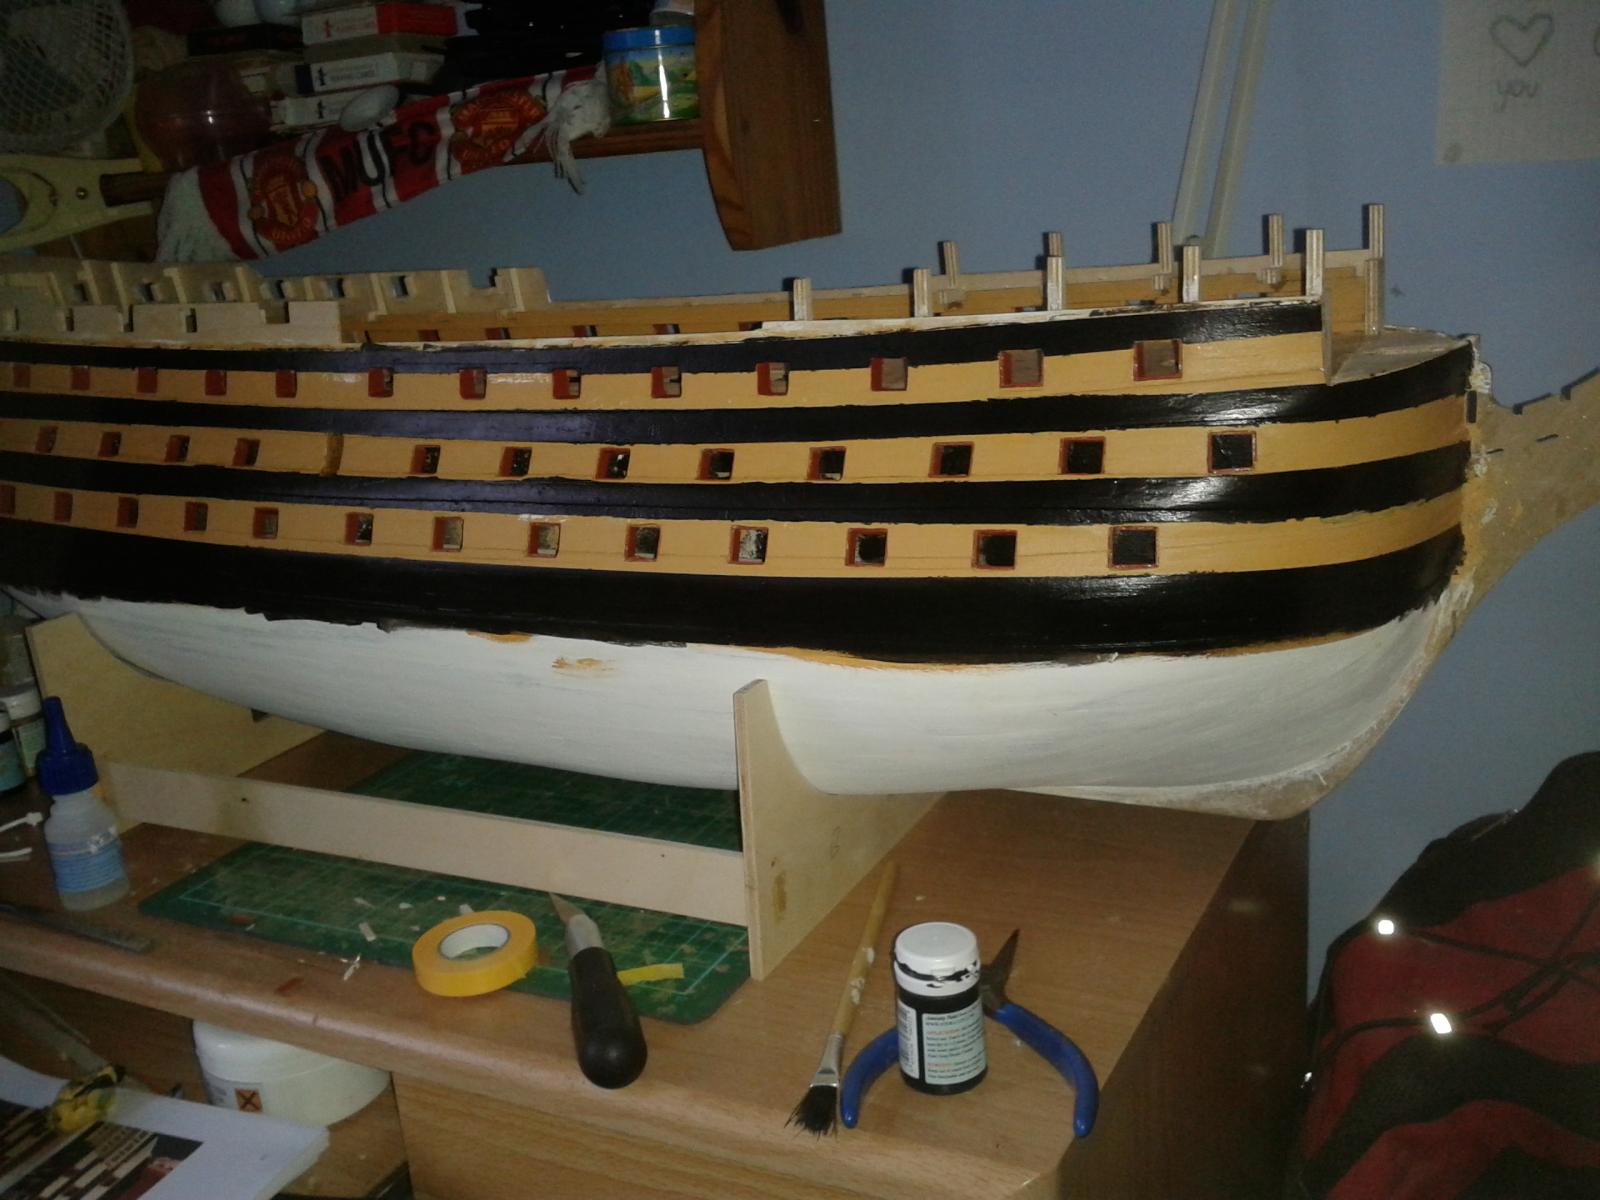
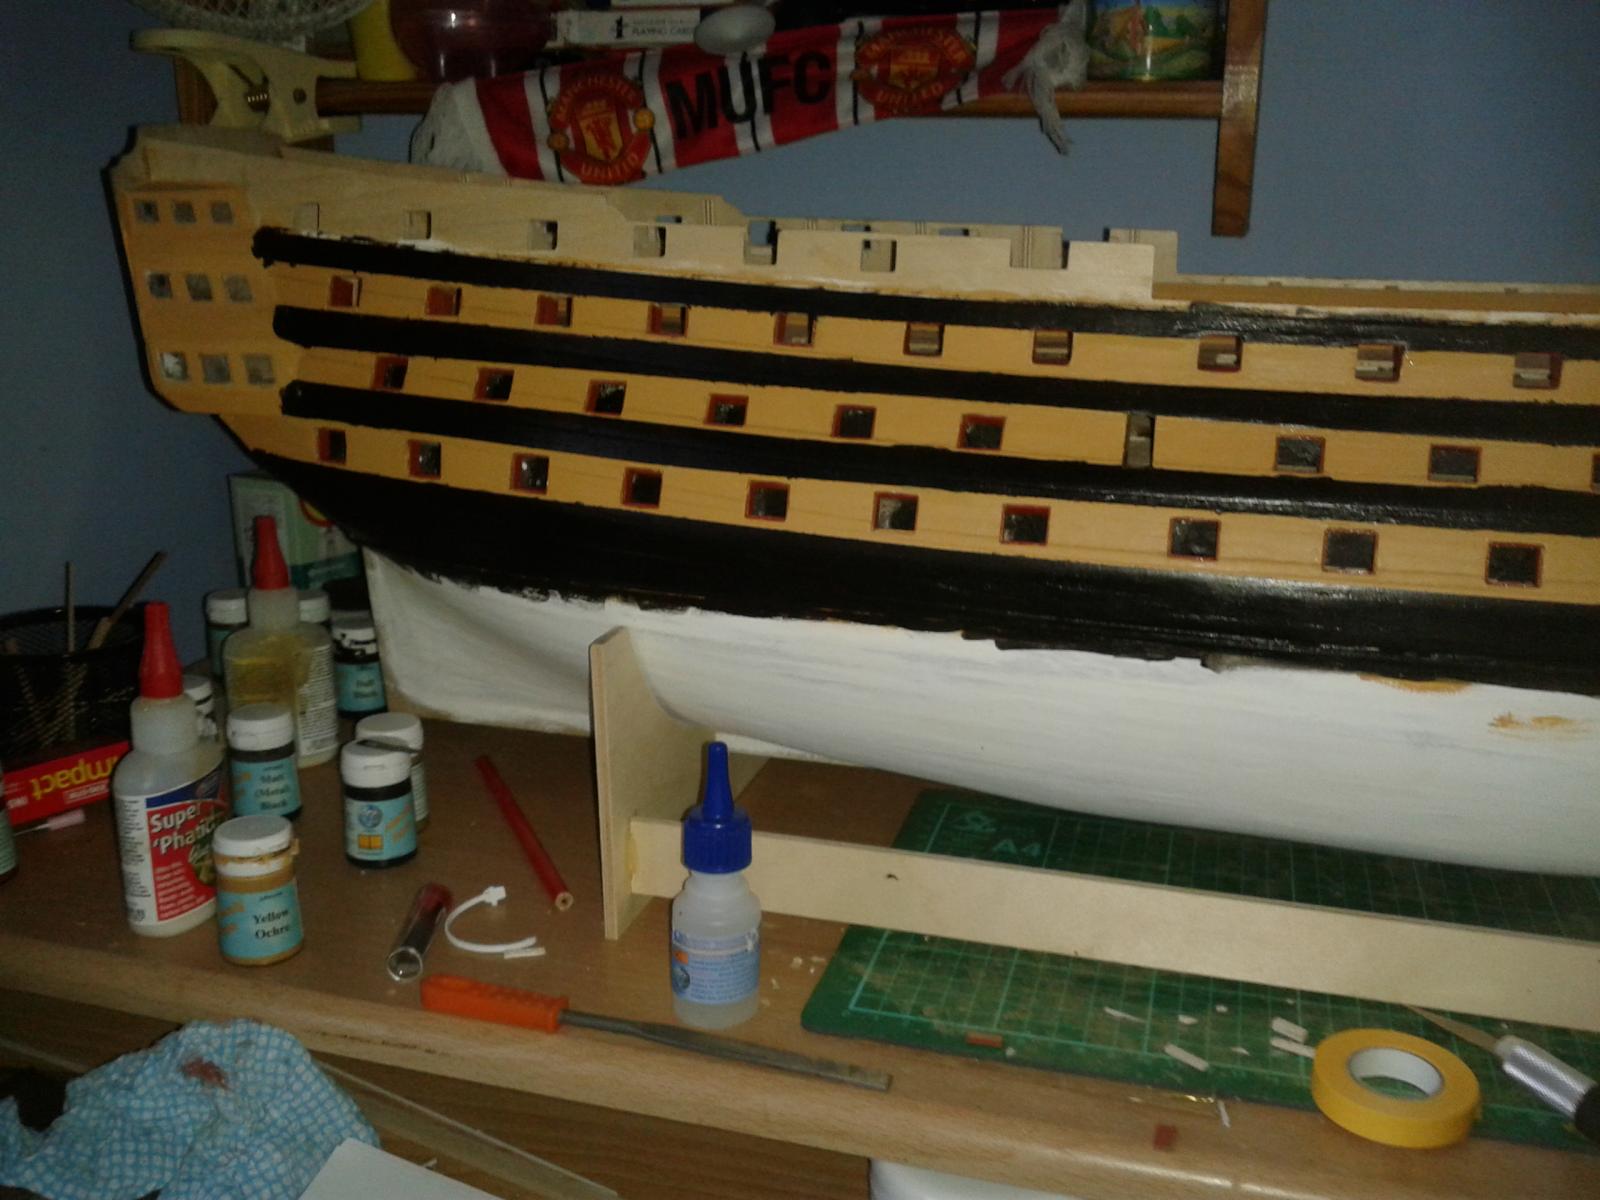
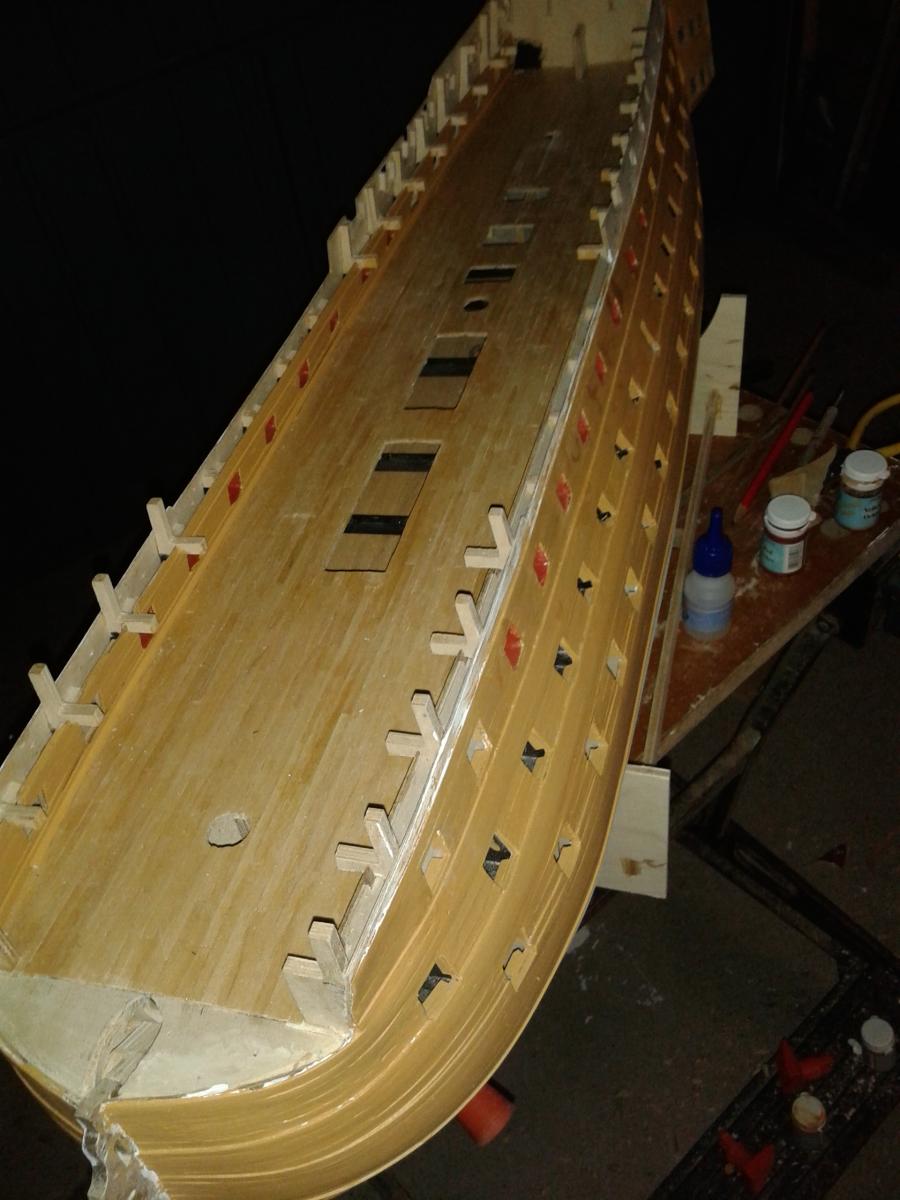
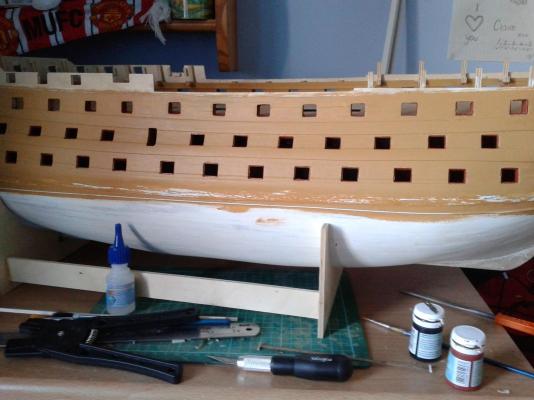
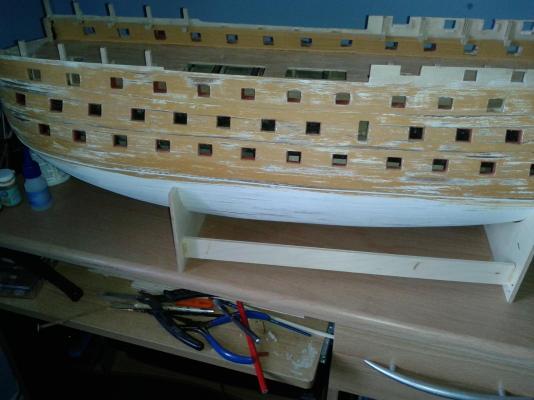
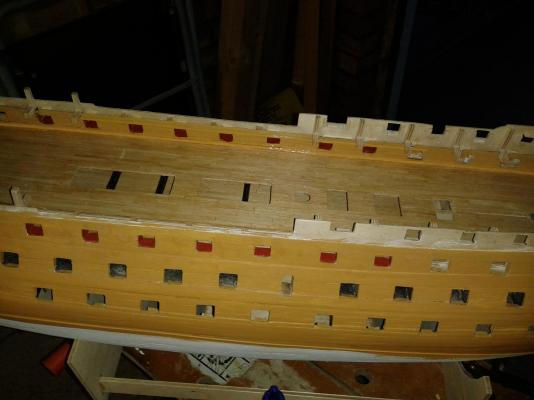
Just a quick update, still working on lining the gun ports. All 6mm linings on port side are complete and 50% of 6mm linings on starboard side are complete which I expect to complete in the next 2 or 3 sessions. I will then add the 16mm linings to the upper gun deck gun ports. I will then give the hull a very good clean and repaint as necessary, including adding the black lines before I start fitting the dreaded copper tiles.
-
Hello Jerry Fine work on your first yard.
-
Hello Jerry Many thanks for your kind words. I would not be adding the fine touches or be so self critical of my build if wasn't for the excellent builds and sound advice by all the other HMS Victory modellers, such as your good self. The more I get into the build the more I check the other build logs for idea's on how I can improve my build and modelling skills. Thank you.
-
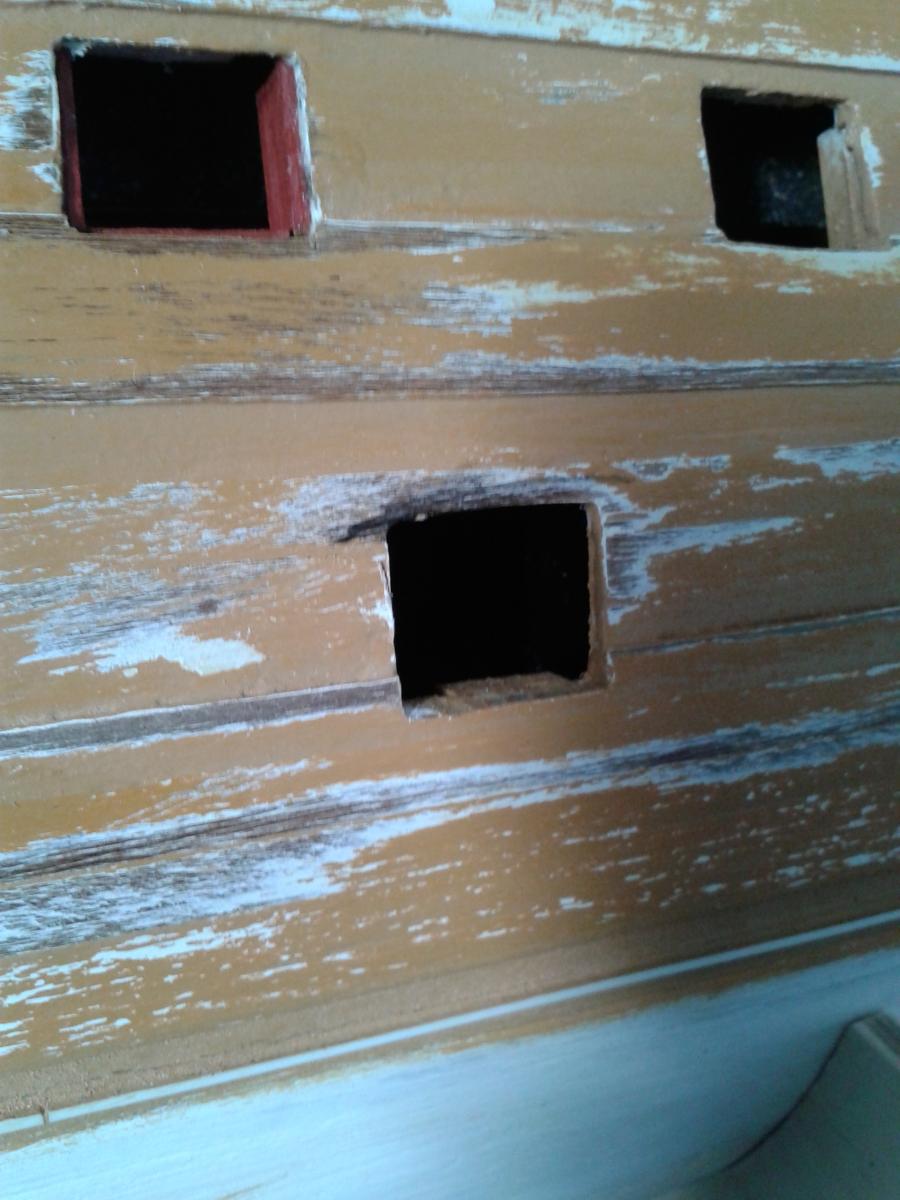
Not spent much time on the build over the last couple of days; being a bank holiday weekend in the UK. I did complete the port side 6mm lining of the lower and middle gun ports on Saturday morning. I was not very happy with the finish of the yellow paint, even a light sand and second coat of paint did not appease me. The paint was showing too many imperfections so I took the decision to sand out as necessary. I'm sure it will be look much better when I start to apply the paint again. I also was not happy with the way the starboard waterline looked so I removed the styrene strip and redraw the line and fitted a new strip. It now looks much better.

-
Take a look at the following web link, which shows a very neat solution. http://www.ianlawrencemodels.com/wipmaid2.html
-
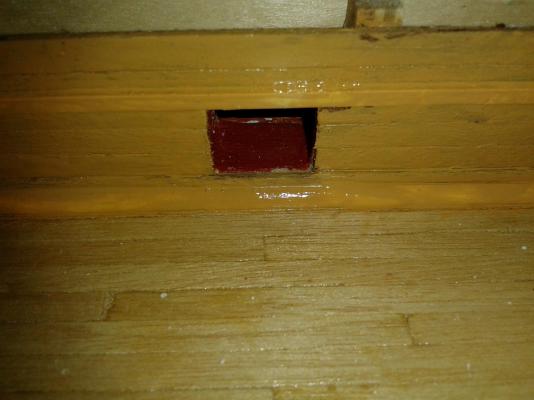
Hello David and Lawrence Many thanks for taking the time to visit my log. I have done a bit of dust removal using a brush as I don't have the luxury of an air line. The 6mm strip is painted red prior to trimming and I have found the cutting tool supplied with the plank bender makes short work on cutting the linings It will soon be time for another session on the ship build.
-
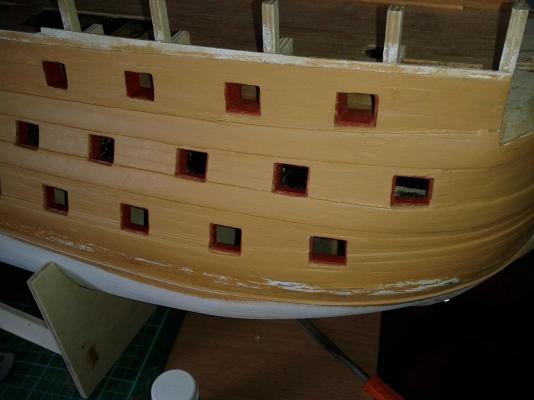
Installed all missing seats on starboard side lowest gun ports. This means I'm now moving forward on fitting the gun port linings at a reasonable pace, takes about 15 minutes per gun port to cut and glue the linings. I have now completed lining 9 gun ports on the starboard side. I have been checking gun port openings are wide enough for the gun port lids as I progress, that's for the advice David. I was really not looking forward to this task but now I'm quite enjoying it as the two hand made tools have really helped.
-
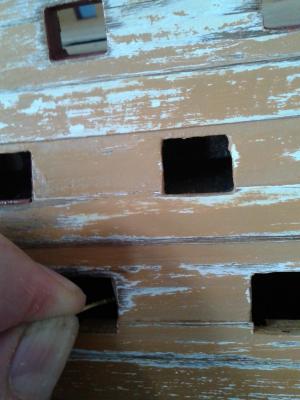
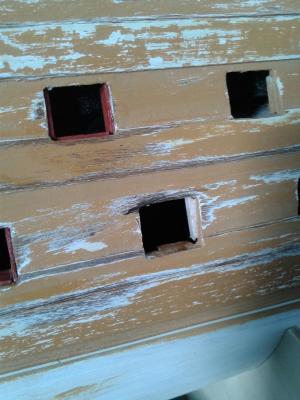
Not been able to spend much time on the ship today, made a simple tool to check gun port linings are set back 1mm. Seems to be taking about 30 minutes per gun port to fit the linings and additional balsa seats, which I'm fitting with another homemade tool, a bent bit of copper wire which is inserted in the basla seat which can be removed once the super glue has dried leaving the seat in position. I painted the 6mm strip before the installation. I attached a 1mm styrene strip to a wooden handle to check position of lining. The yellow paint is not shown very well as no flash used. Using the super phatic glue allows time to adjust the position of the lining until I'm happy. First three lining complete; the close up picture makes it look worse than it really looks, will need to remove dust from within the gun port.
-
Bulwarks look better following light sand and second coat of paint. Ready to start moving forward with adding more gun port linings and I will paint the black lines as this task progresses. Will use a suitable low adhesive masking tape (Tamiya or similar). This picture shows the beam shelf (above gun port), stringer and waterway (below gun port)

-
Congratulations take a well earned rest before the next phase begins
-
Fitted beam shelf, stringer and waterway to inner bulwarks and then added first coat of paint. I have now realised the waterway is a tad to big; I'll decide tomorrow if I will remove so I can fit a smaller quarter round strip. I more inclined to leave as is as most of it will be covered up when the quarter deck is installed. With the following picture the paint is still very wet and uneven looking and shows all the imperfections. It will look much better once the paint has dried and the bulwarks have had a light sand and a second coat of paint.
-
Hi Patrick Many thanks for your kind comments. I had already decided to wait until fitting the brass frames stage before applying the micro glaze. It worked very well on my test piece which was bigger than the gallery window frames. I'll have a few weeks before the copper tile phase (I can hardly wait!) whilst I install the gun port linings.
-
A minor set back but it seems you were able to fix, the rigging looks exceptional, well done.
-
Hello Jerry Many thanks for taking the time to visit my log. You have made swift and fabulous progress with your standing rigging. You have made it look easy which I know is not the case. I plan to start the linings tomorrow night, and expect this will take up to 4 weeks to complete. I need to add some additional seats as some of the ones I fitted prior to installation on the gun port strips are now AWOL. Then it time for the copper tiling phase, 6 to 8 weeks work at least I would expect.