Glenn-UK
-
Posts
3,175 -
Joined
-
Last visited
Content Type
Profiles
Forums
Gallery
Events
Everything posted by Glenn-UK
-
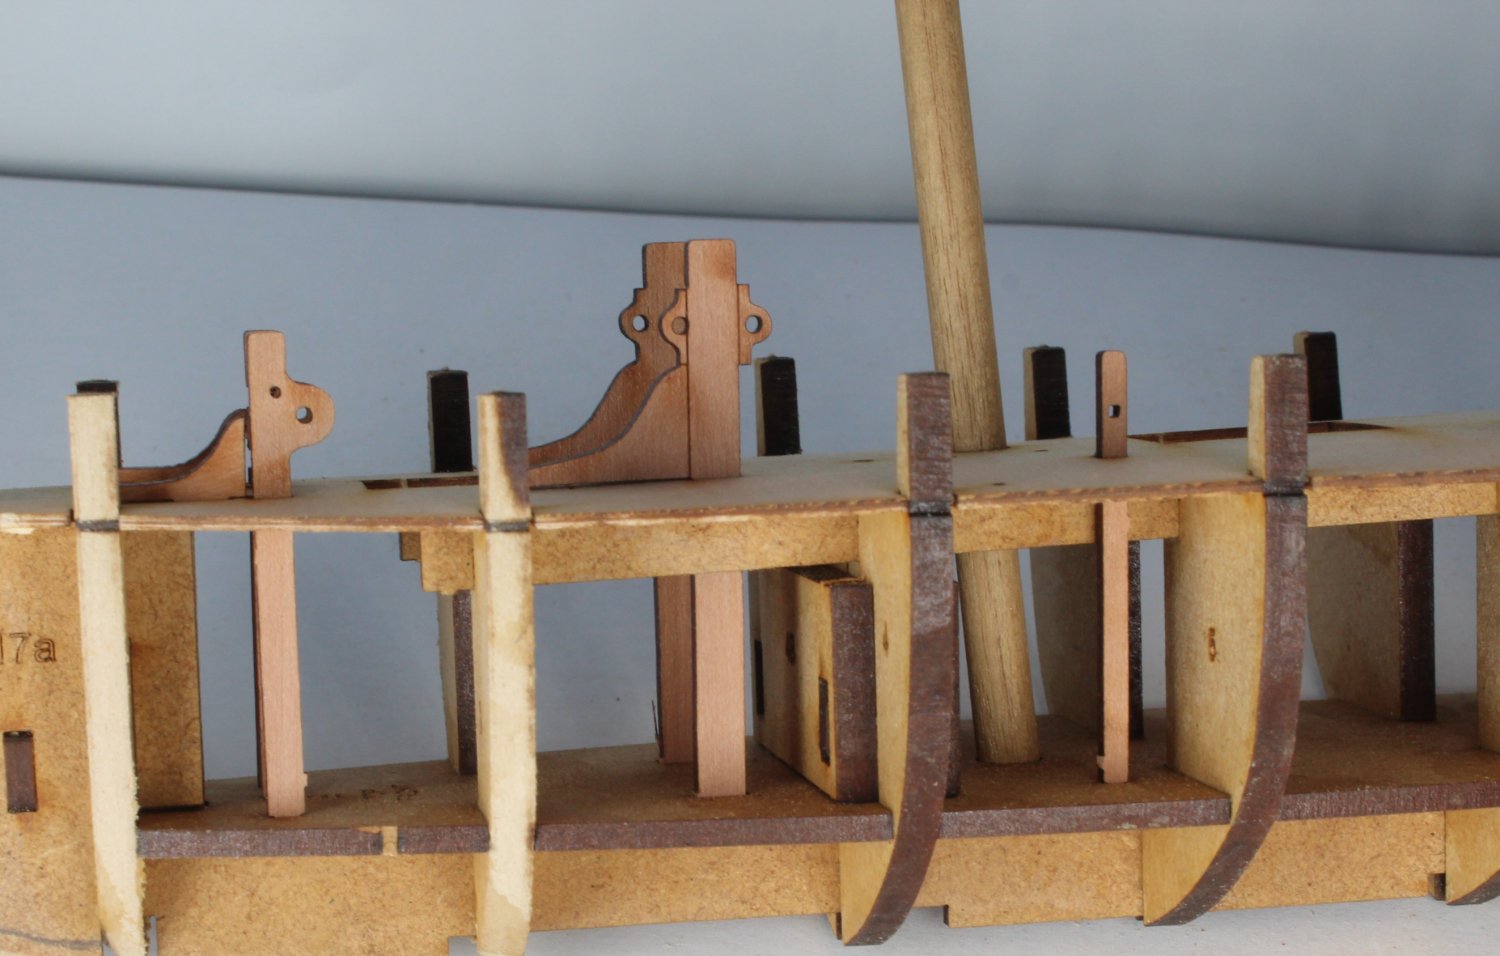
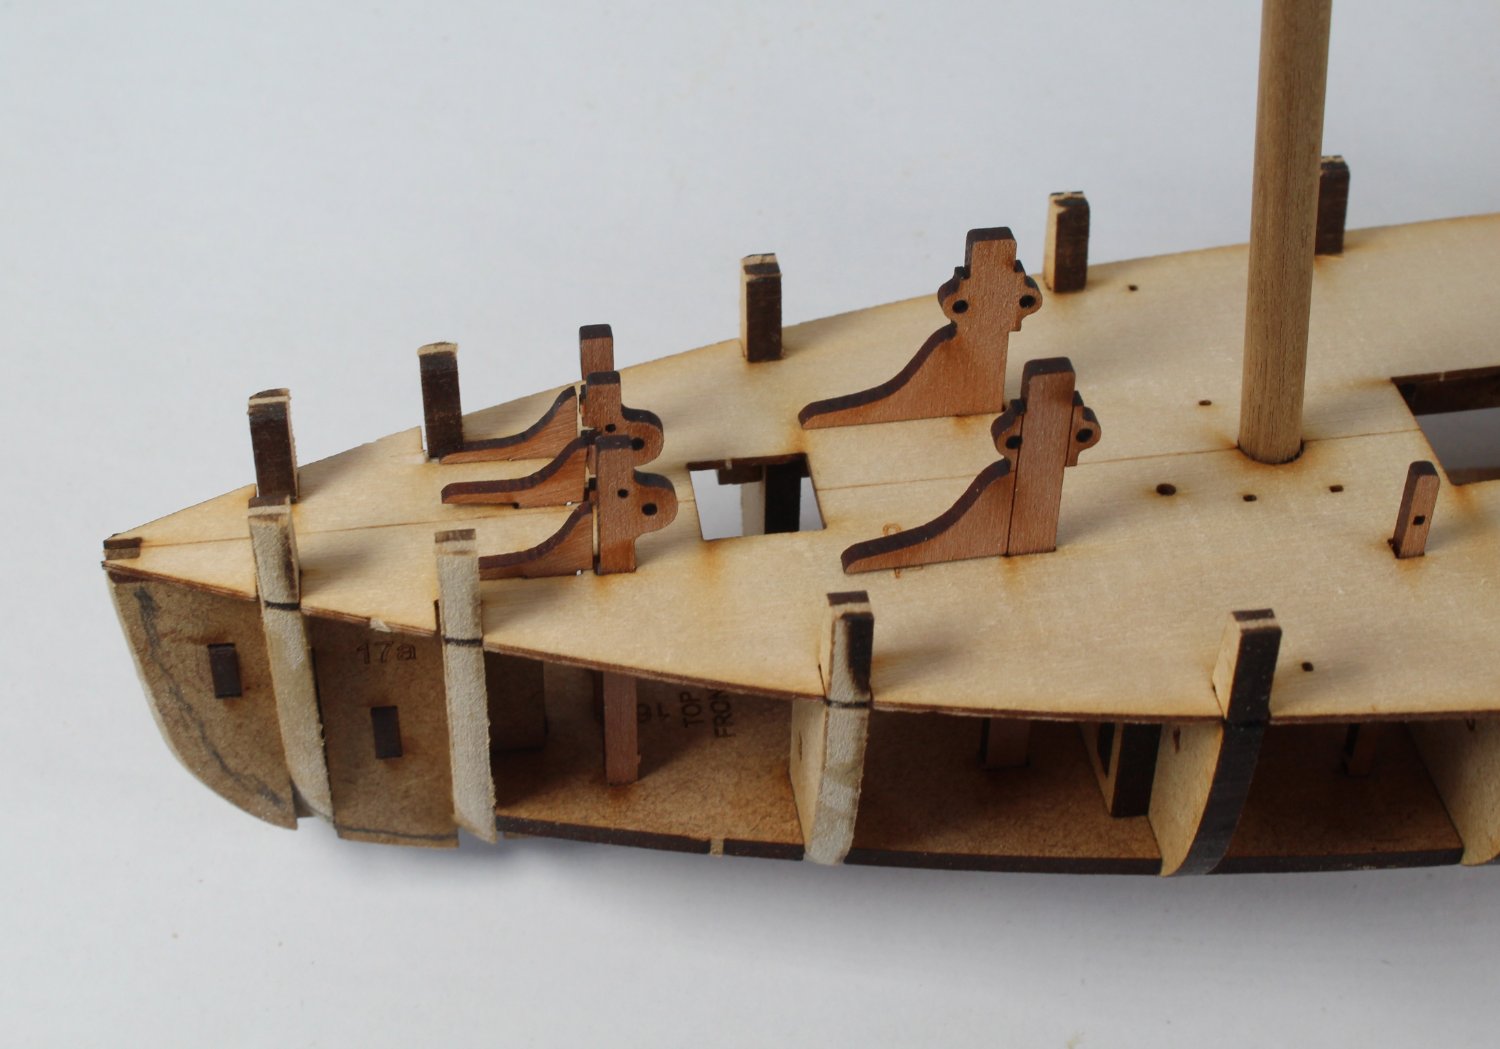
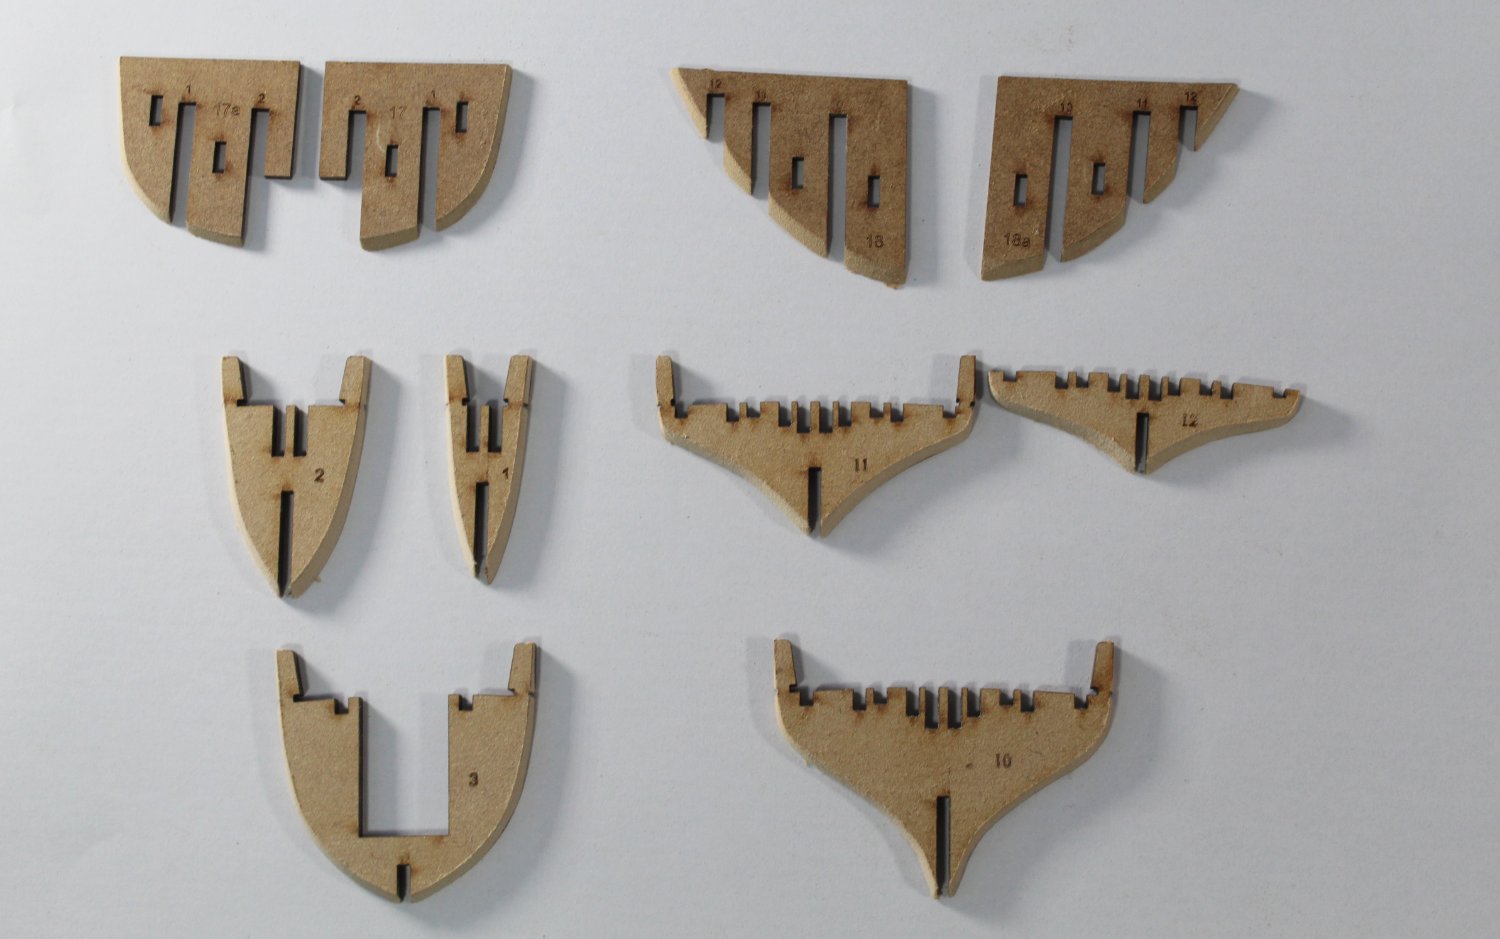
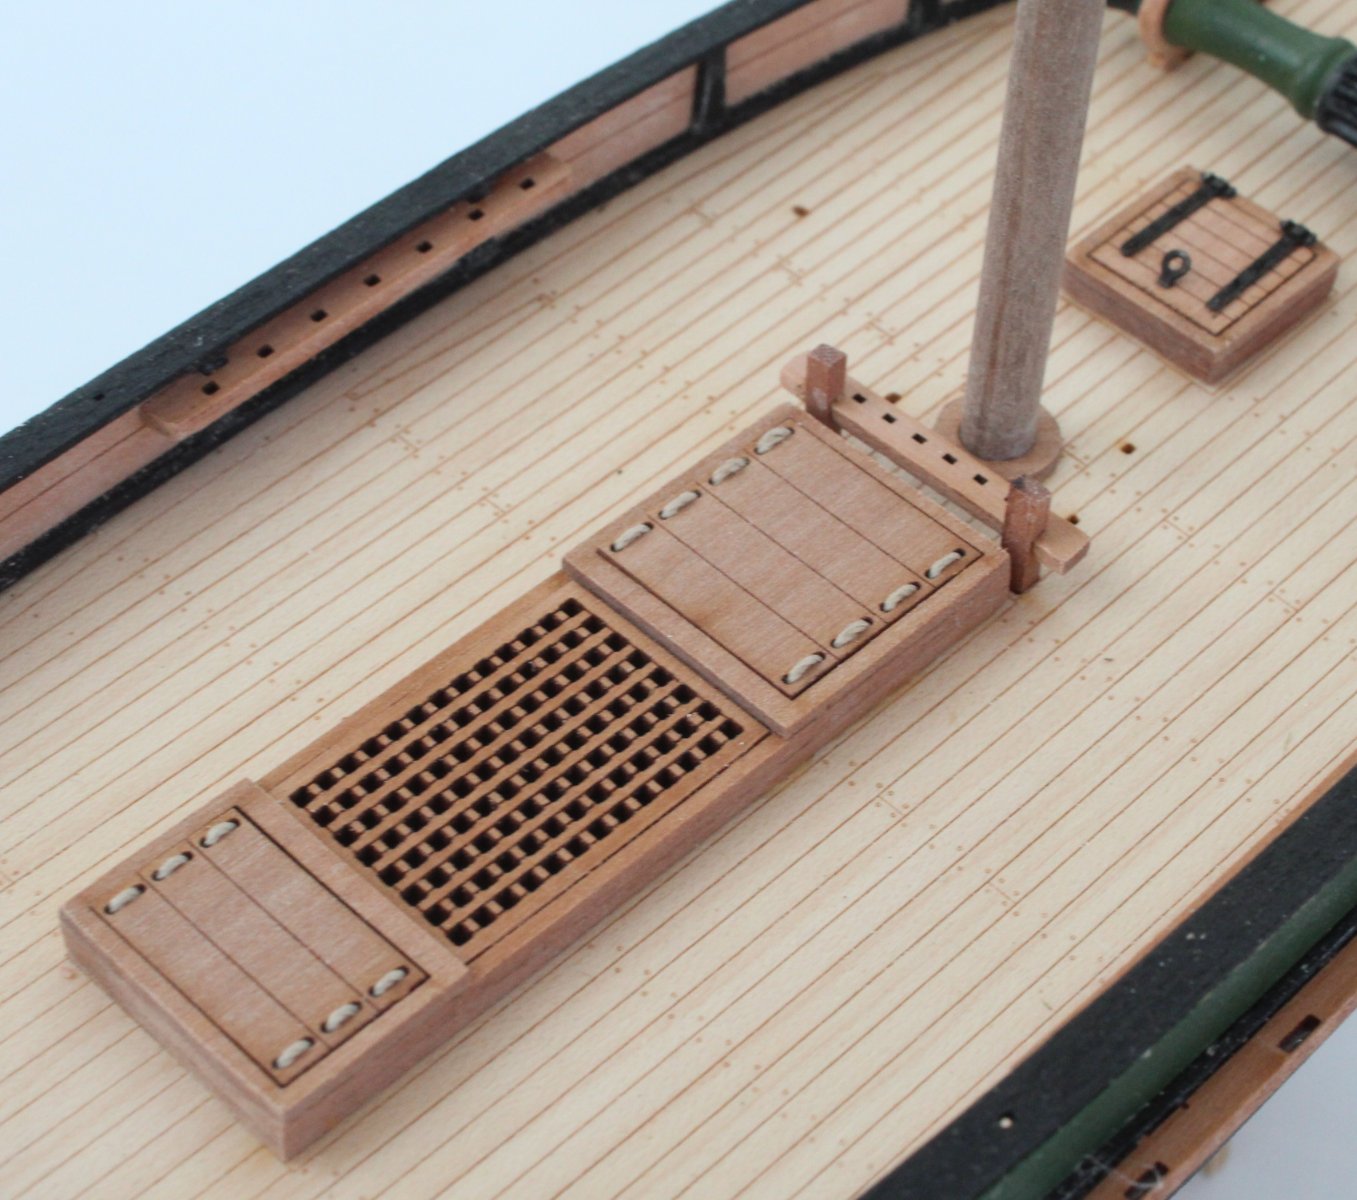
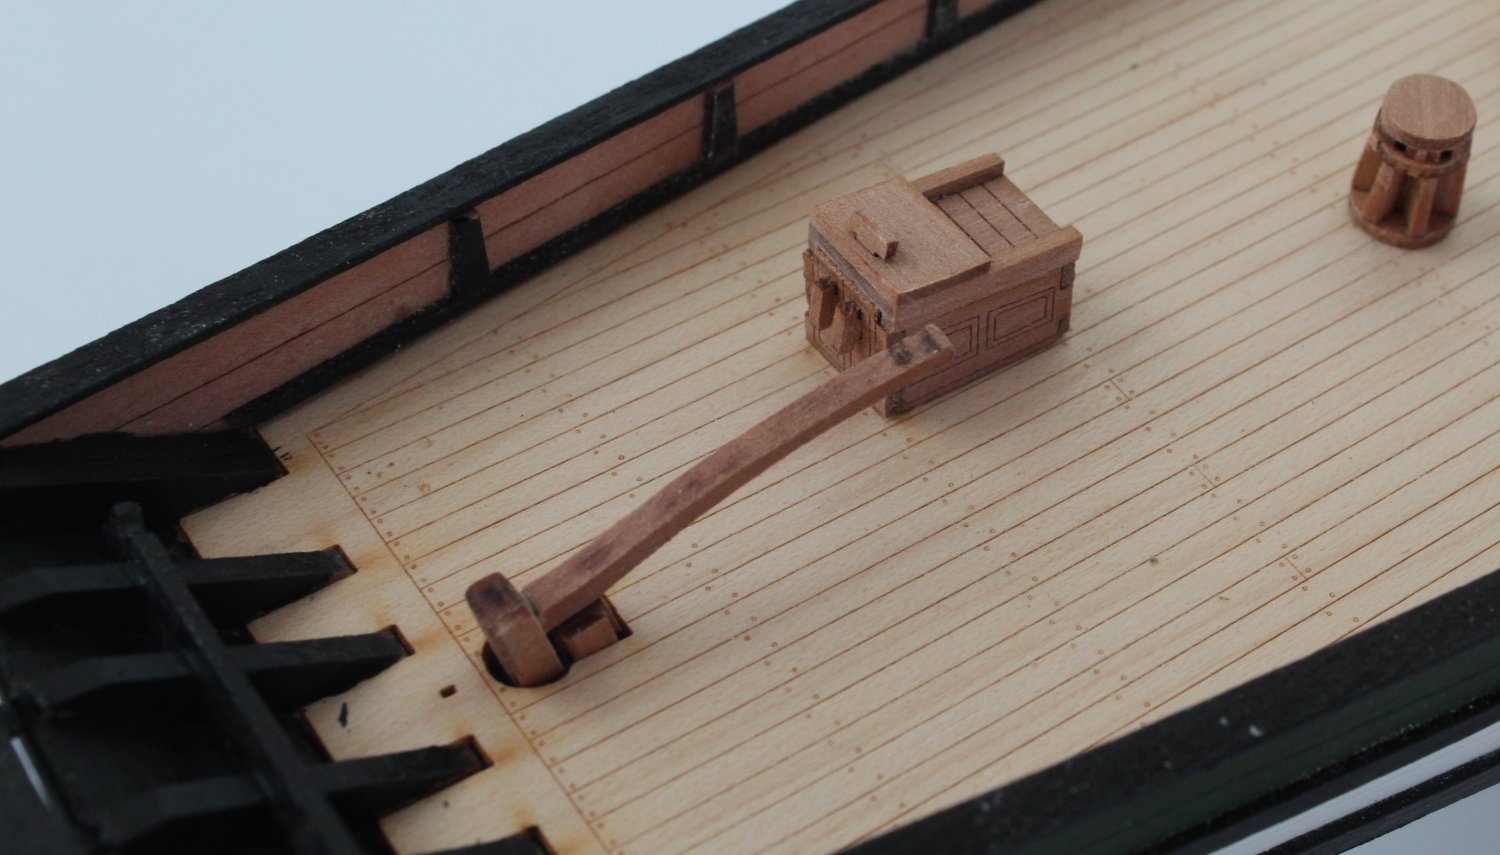
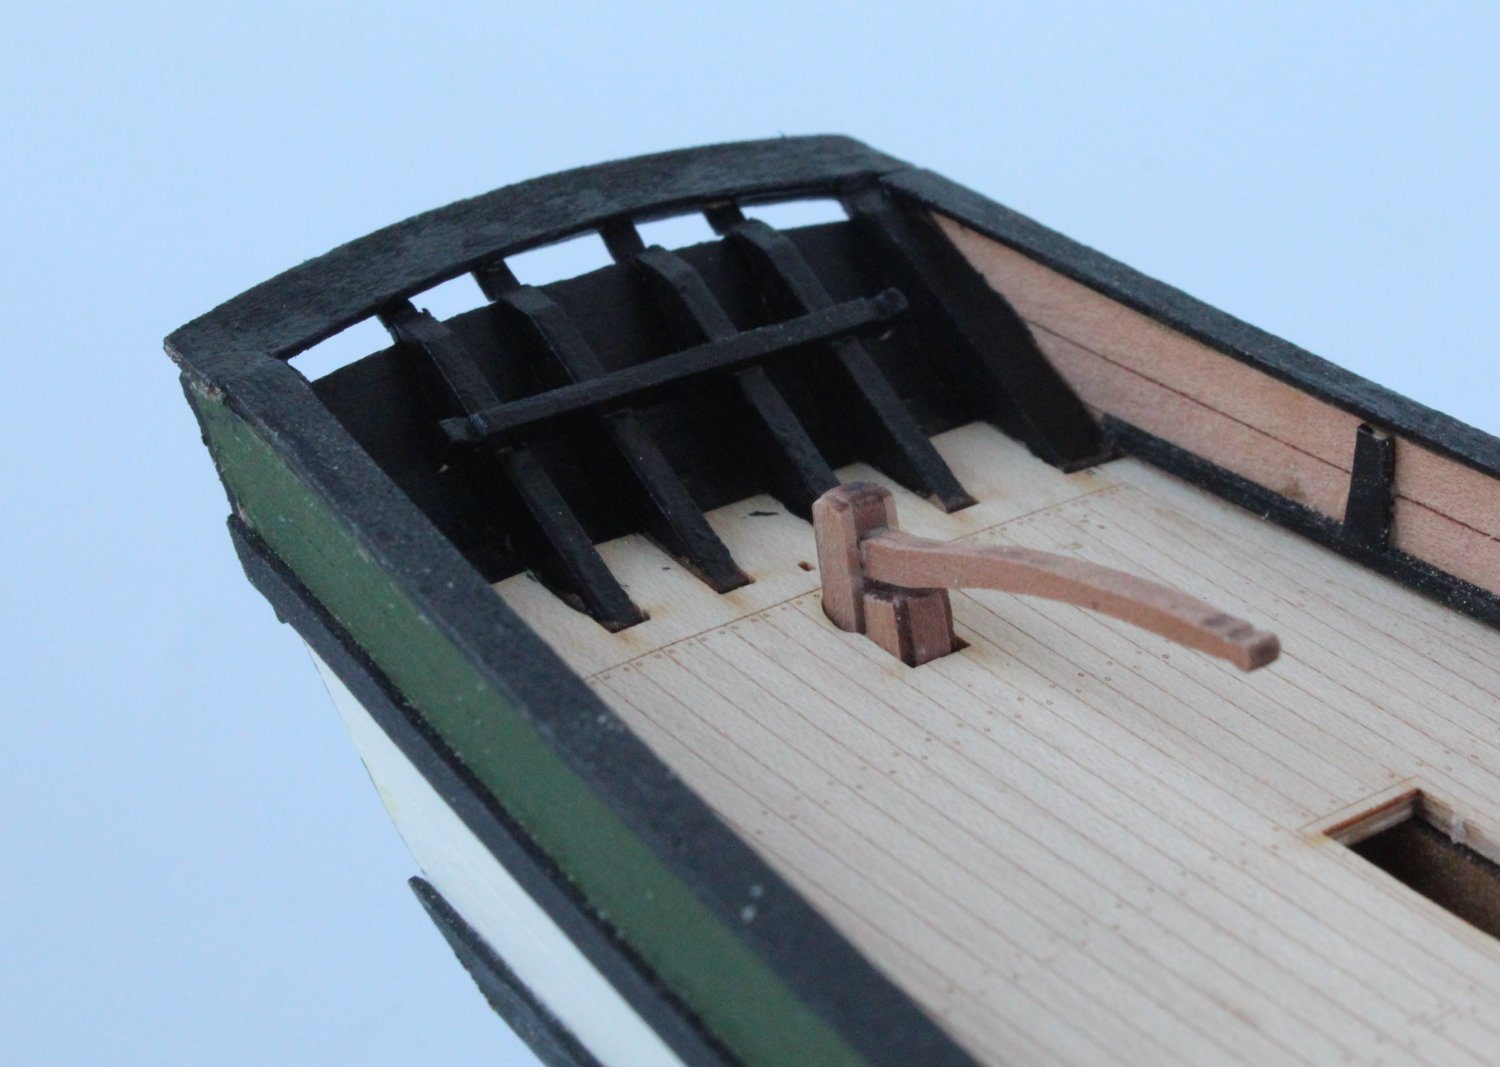
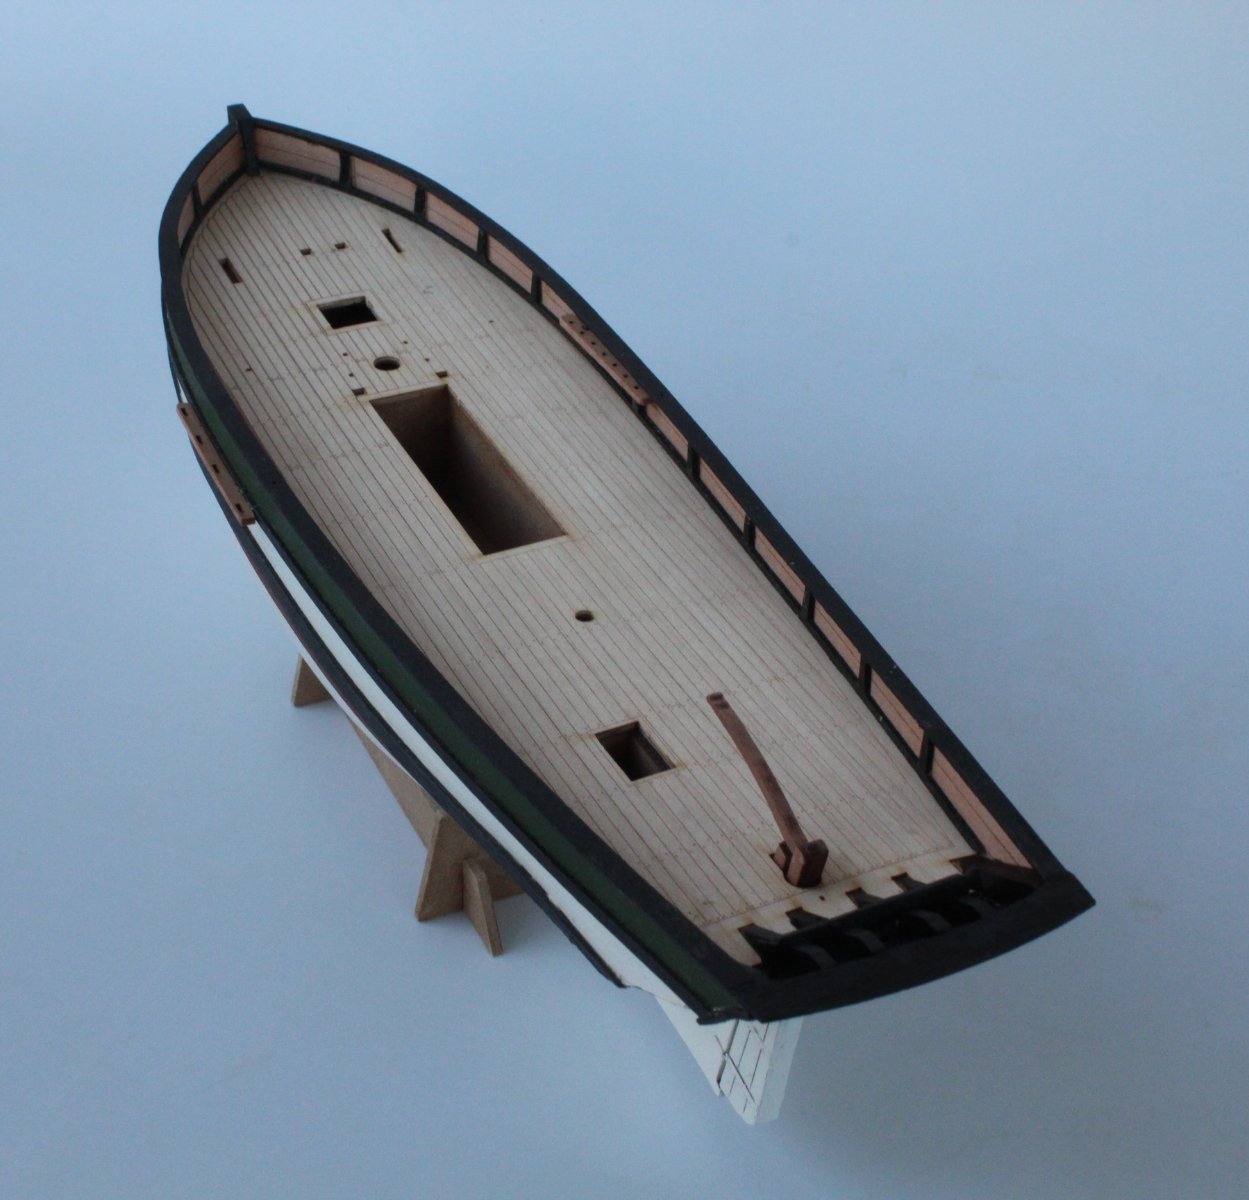
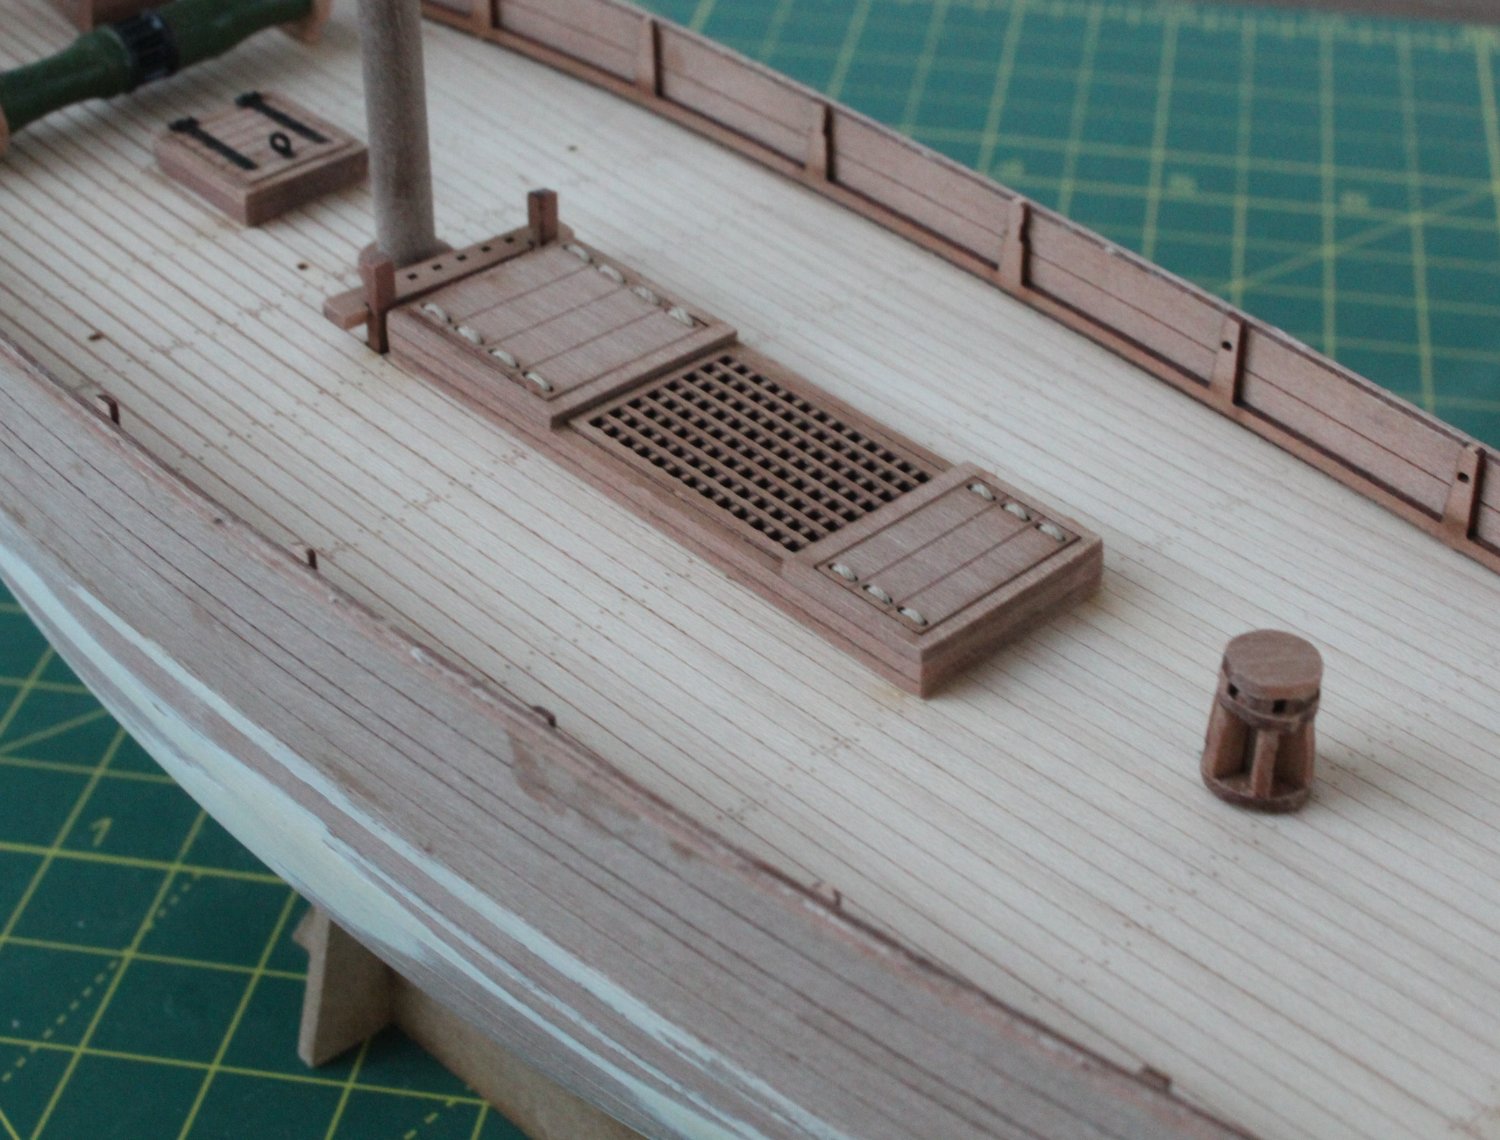
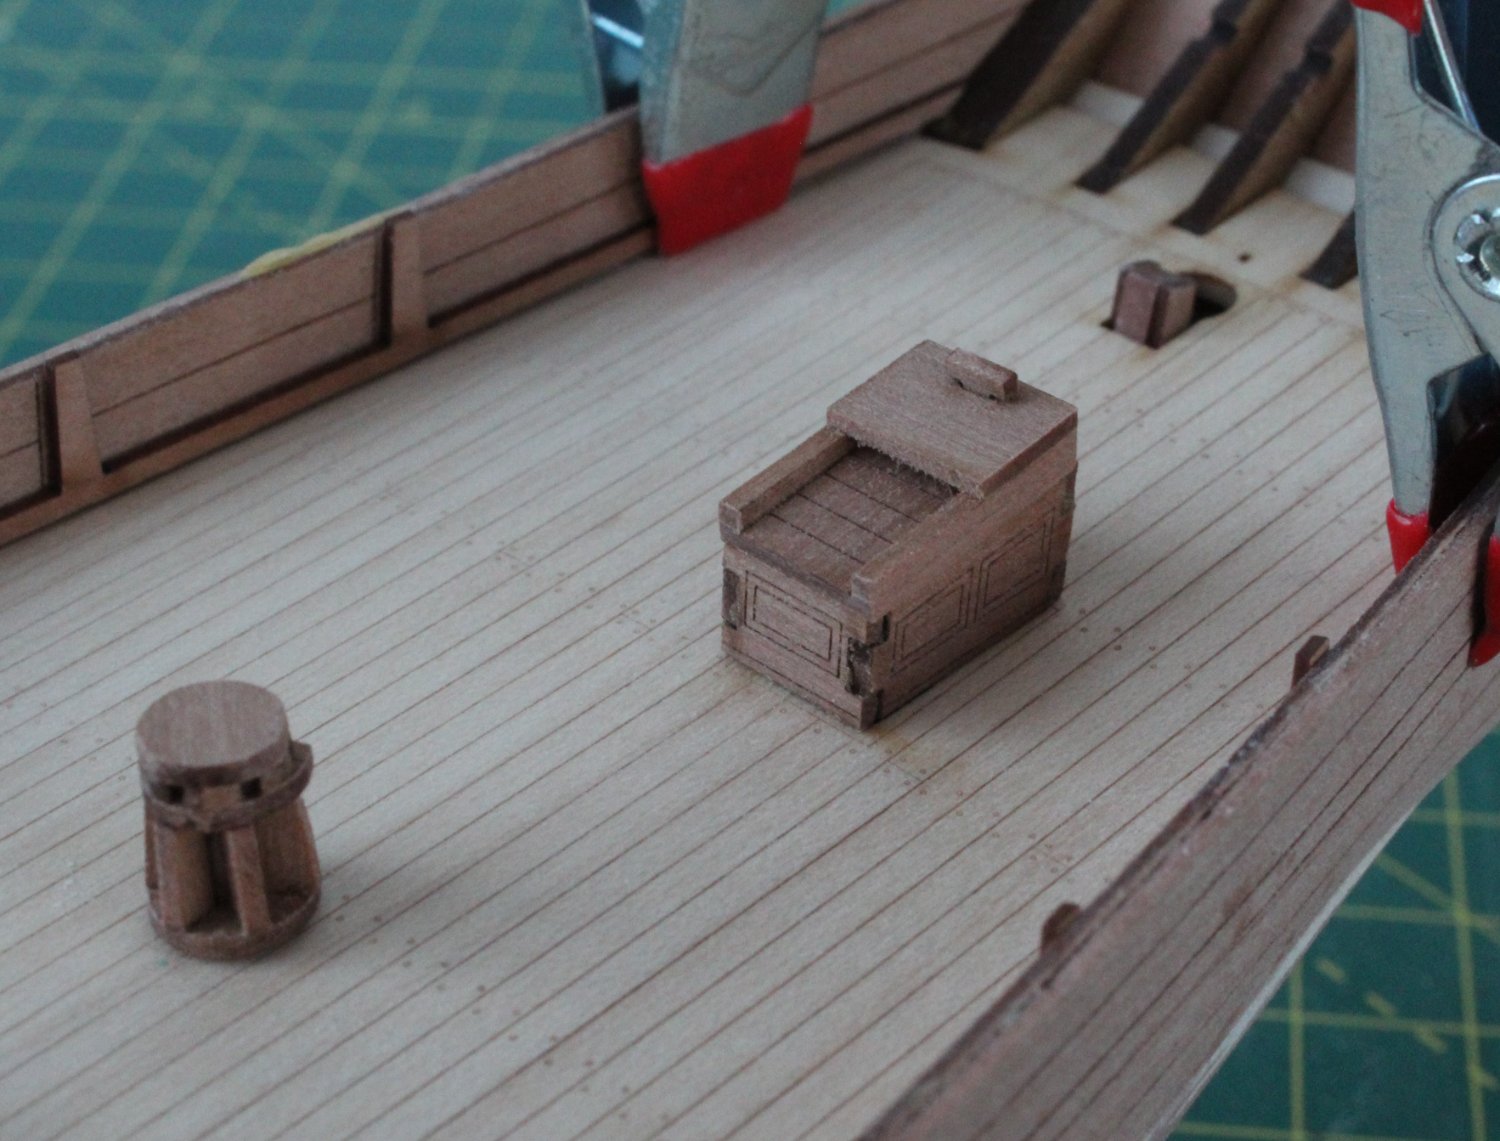
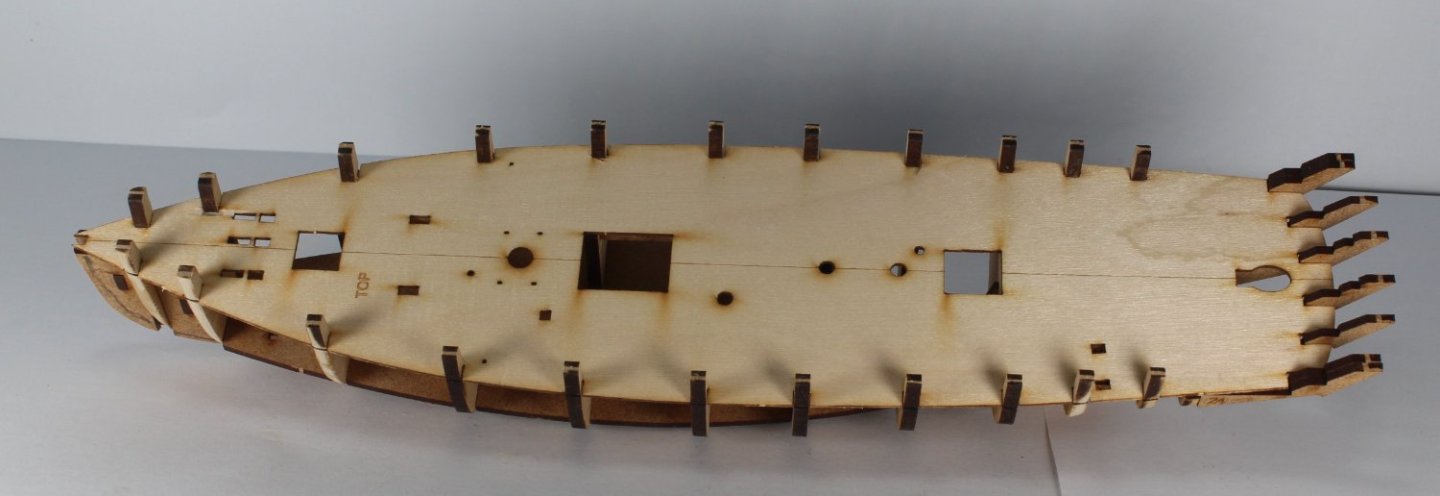
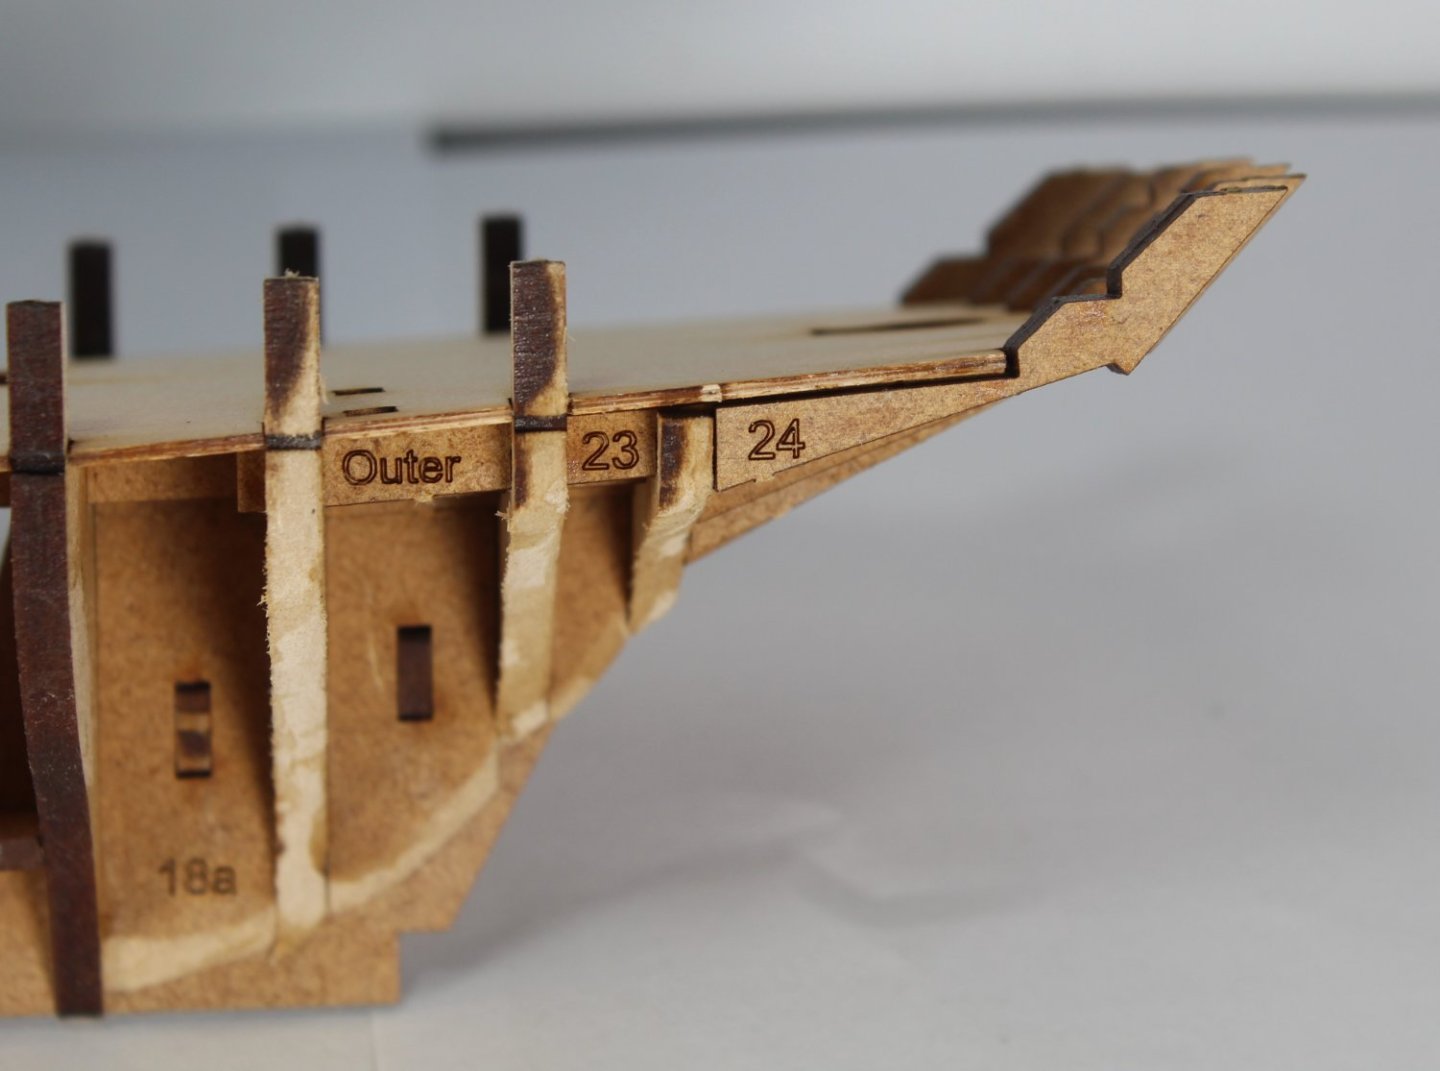
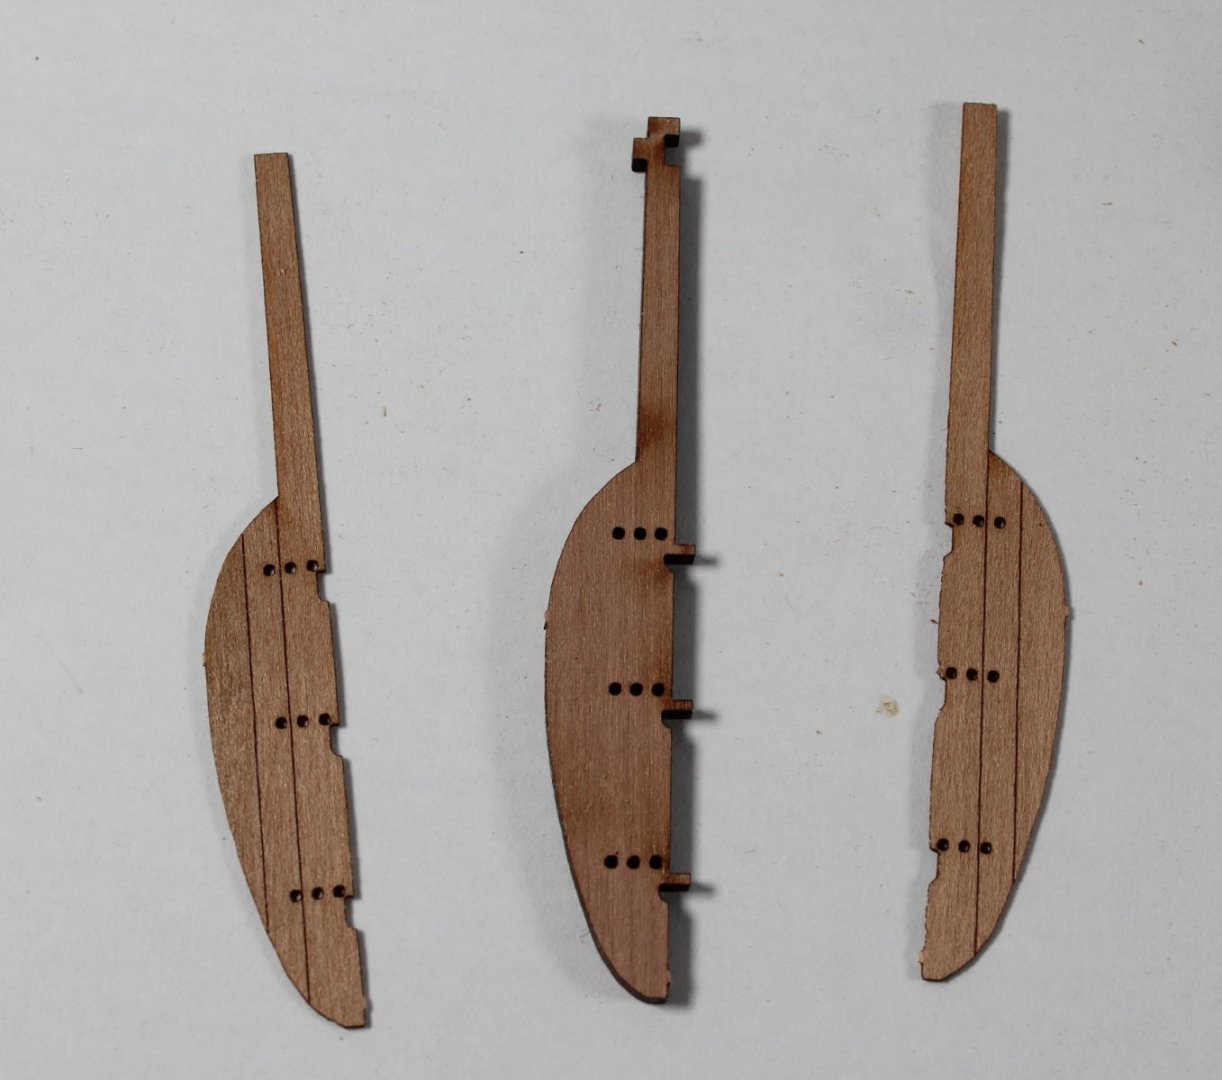
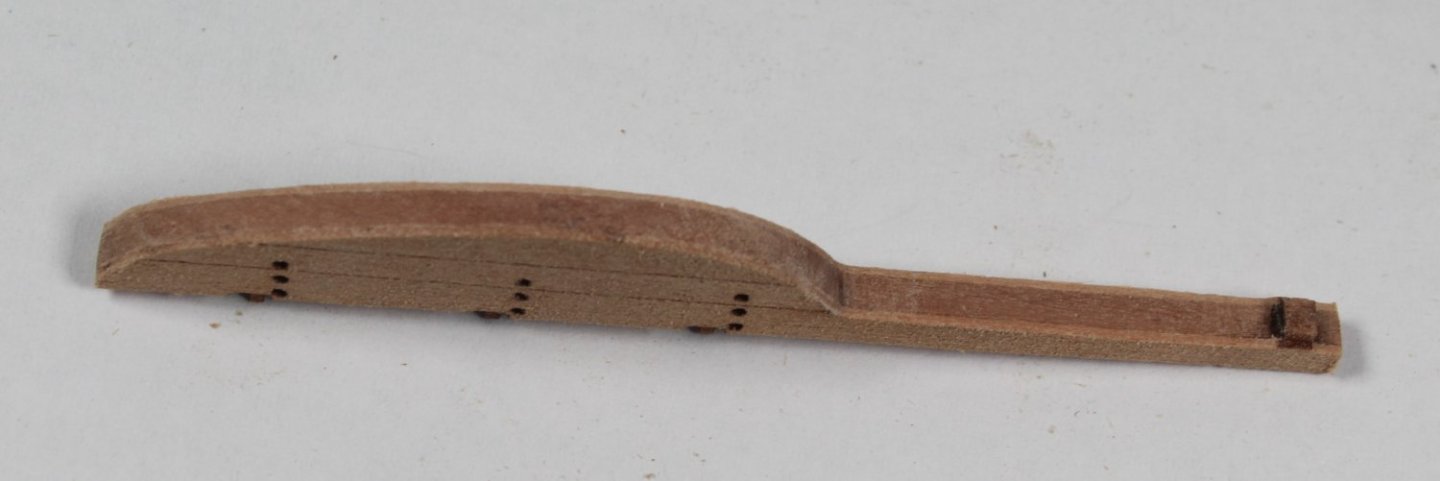
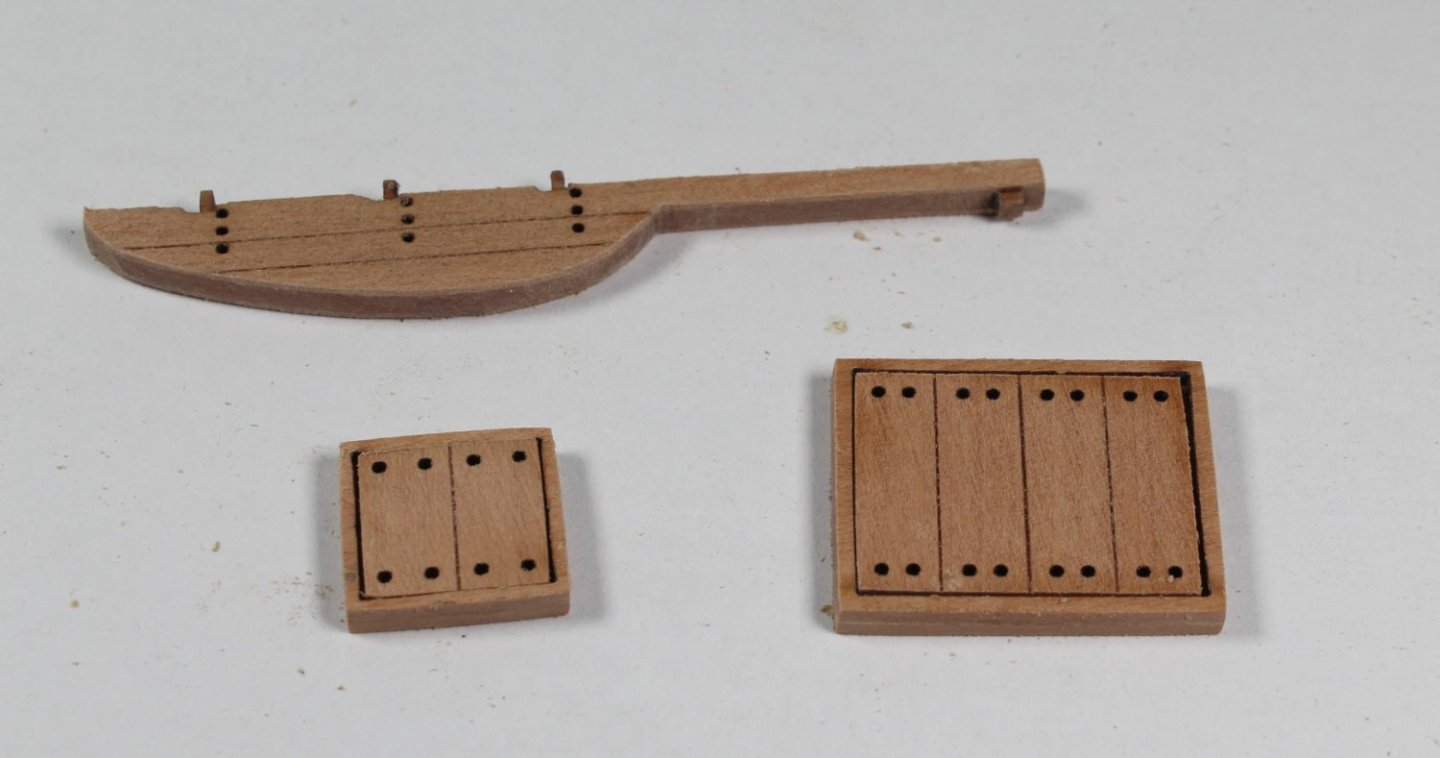
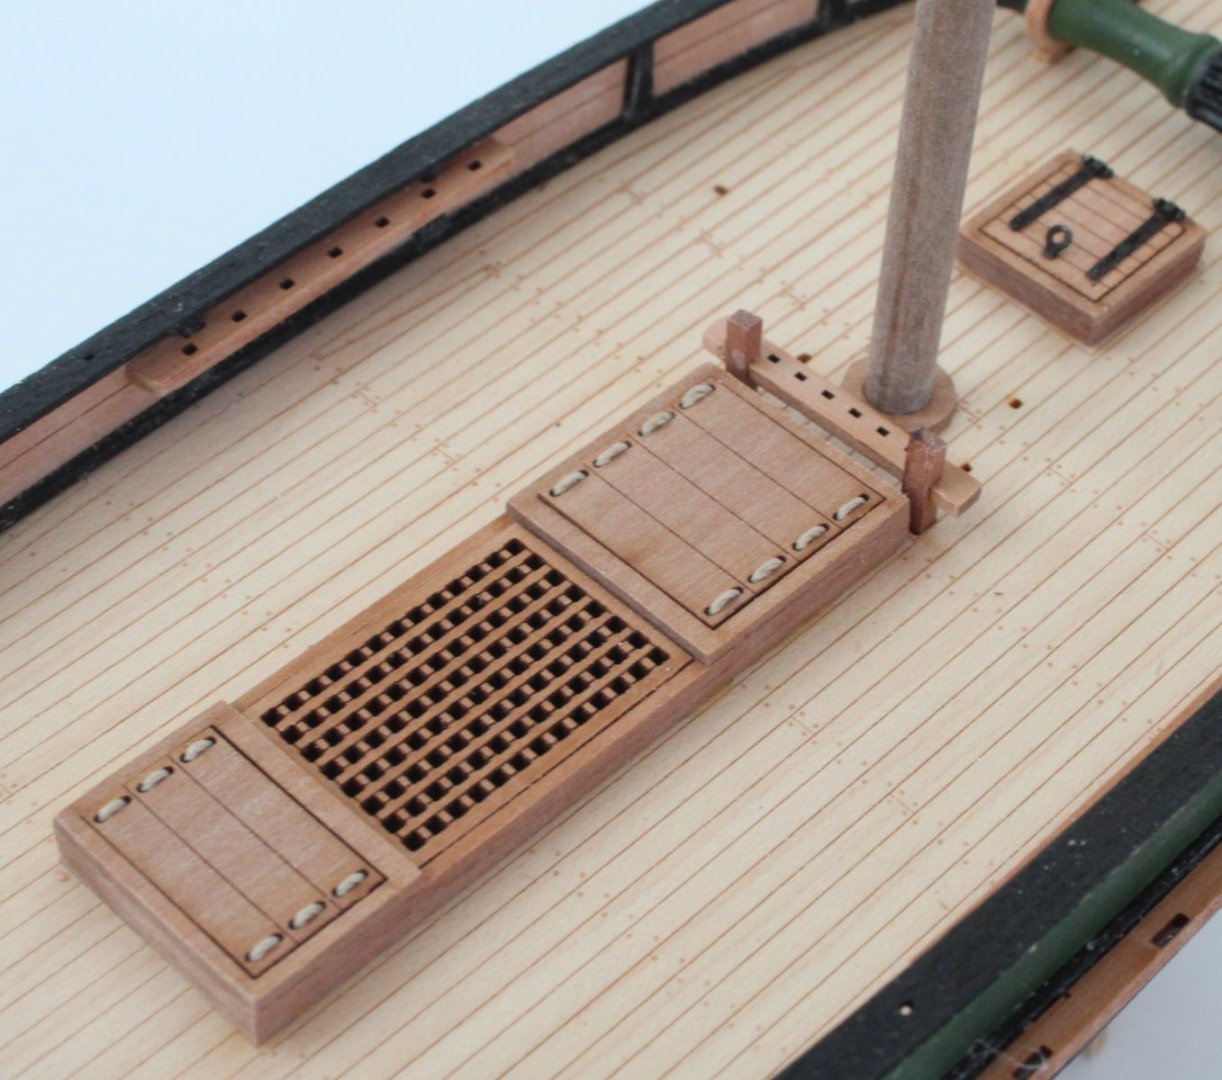
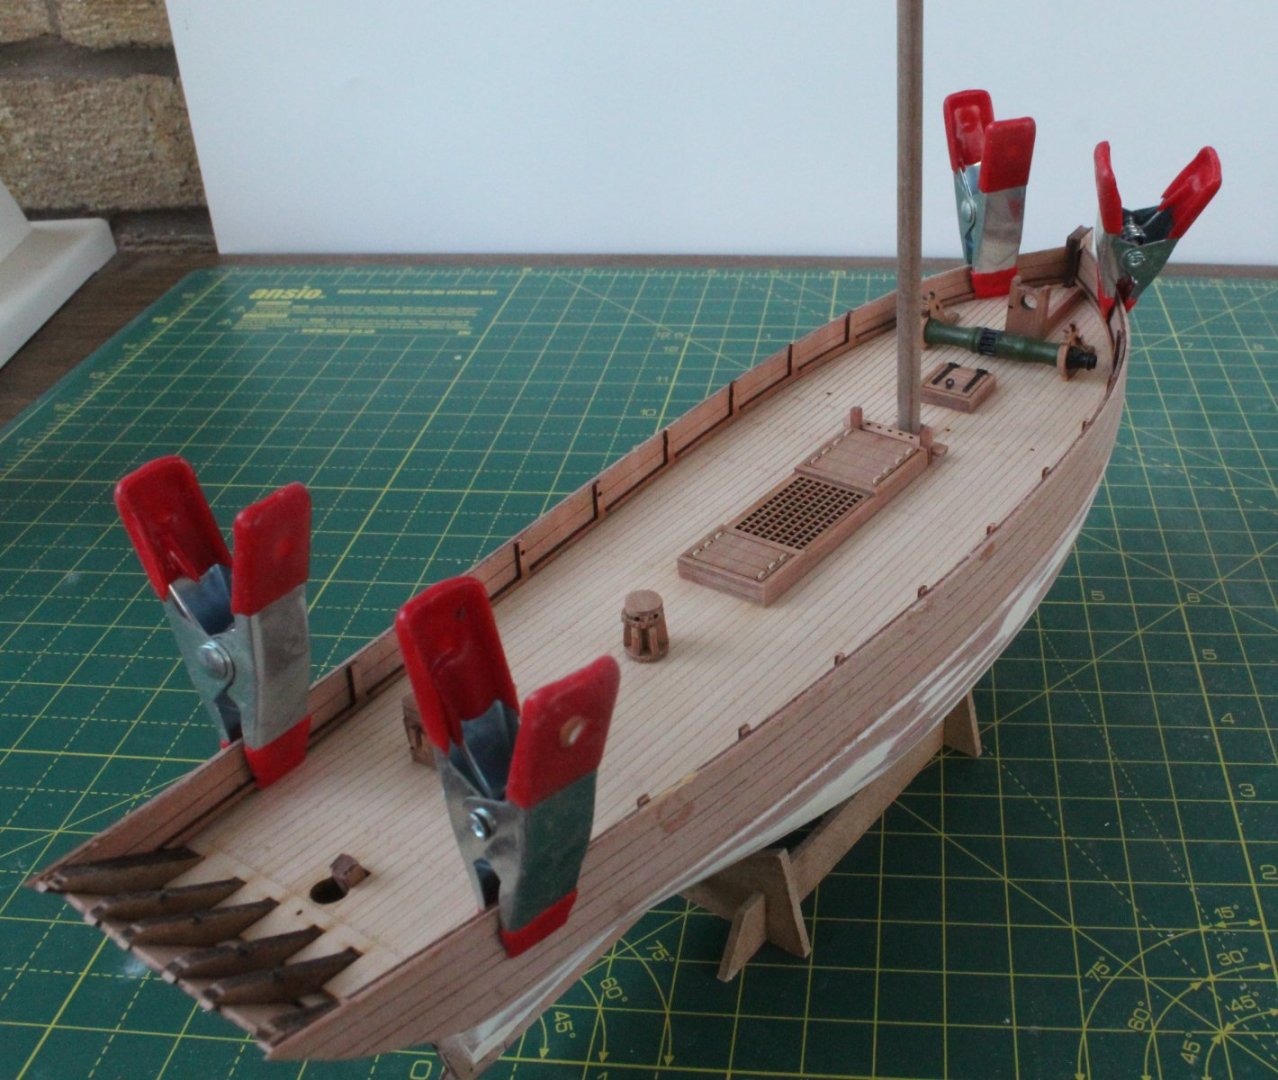
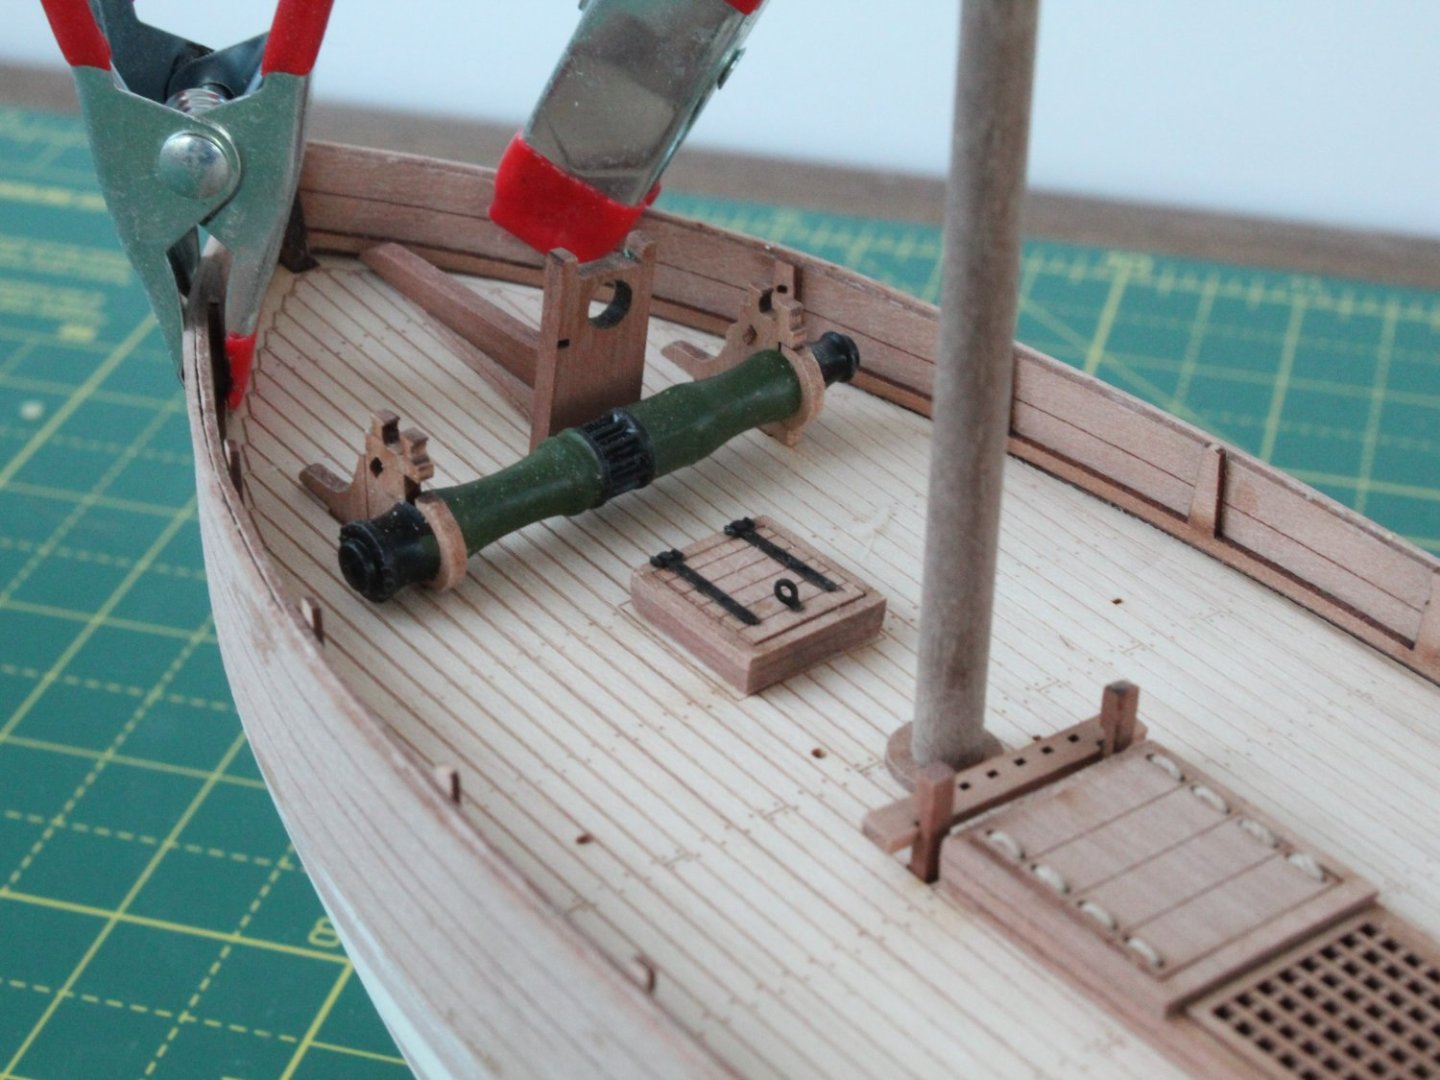
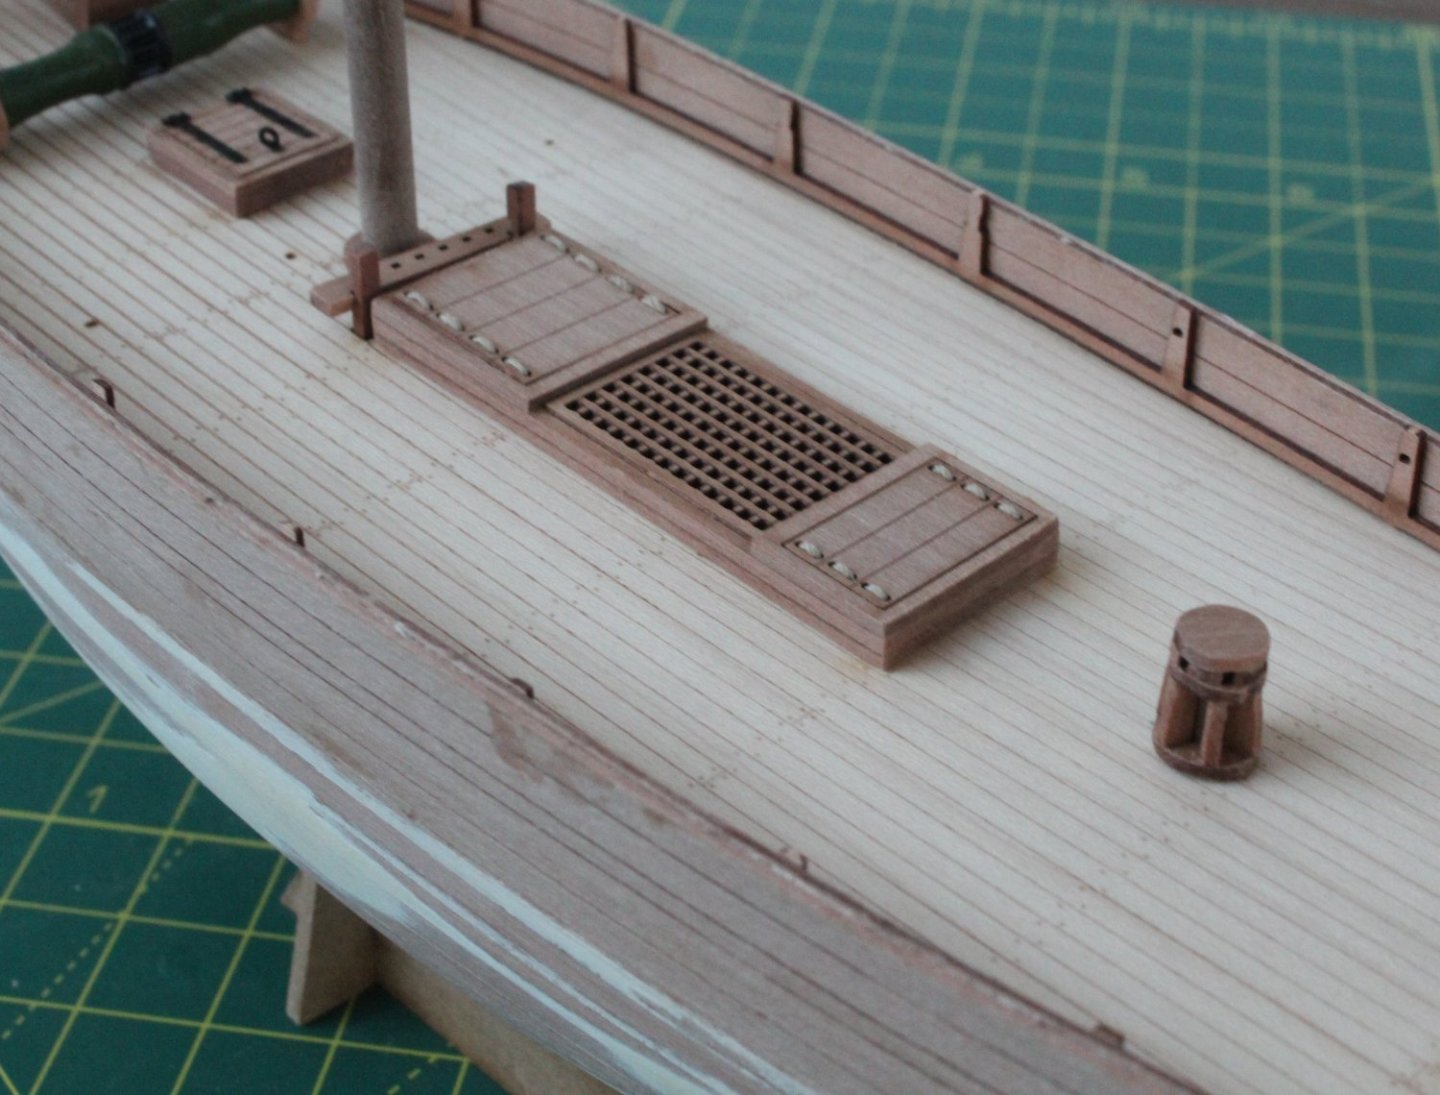
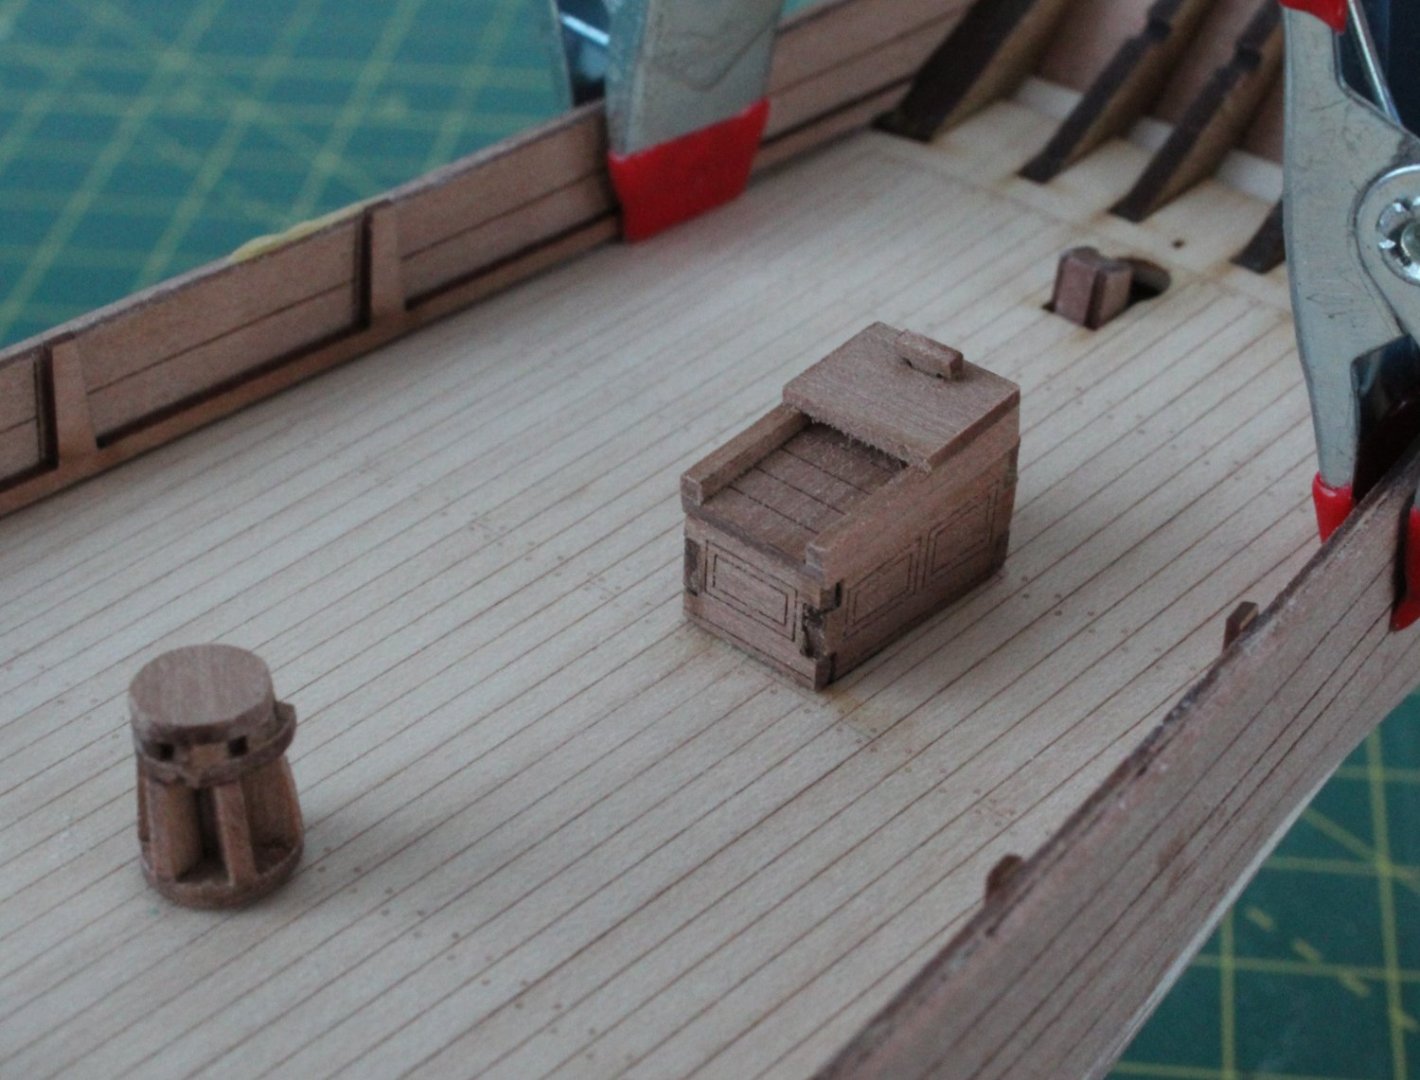
 004 - Hull Construction Work Continues The next task is to fit the main deck plywood base. This part should slip over the bulkheads and locate into slots. Before fitting the deck I did sand the area where the deck would sit to ensure it was a nice flat surface. It is essential to check the deck fully engages with the locating slots on each bulkhead w hen it is installed, noting there is a nice click when this happens. There was no issues with aligning the deck and after clicking it into place I was pleased that it was sitting nice and flush on top of the bulkhead assembly. After double checking the deck was fully engaged I brushed a diluted titebond solution into the joints. I also fitted the outer stern filler patterns. Before moving on to the next task, which is fairing the hull, I decided it would be prudent to check some of the deck items which pass through the main deck and locate in slots on the lower deck. This is always a worthwhile task prior to the planking in my opinion. The various parts were test fitted and located in the lower deck slots without any issues. I can now turn my attention to fairing the hull.

- 48 replies
-
- 4
-

-
- Nisha
- Vanguard Models
- (and 3 more)
-
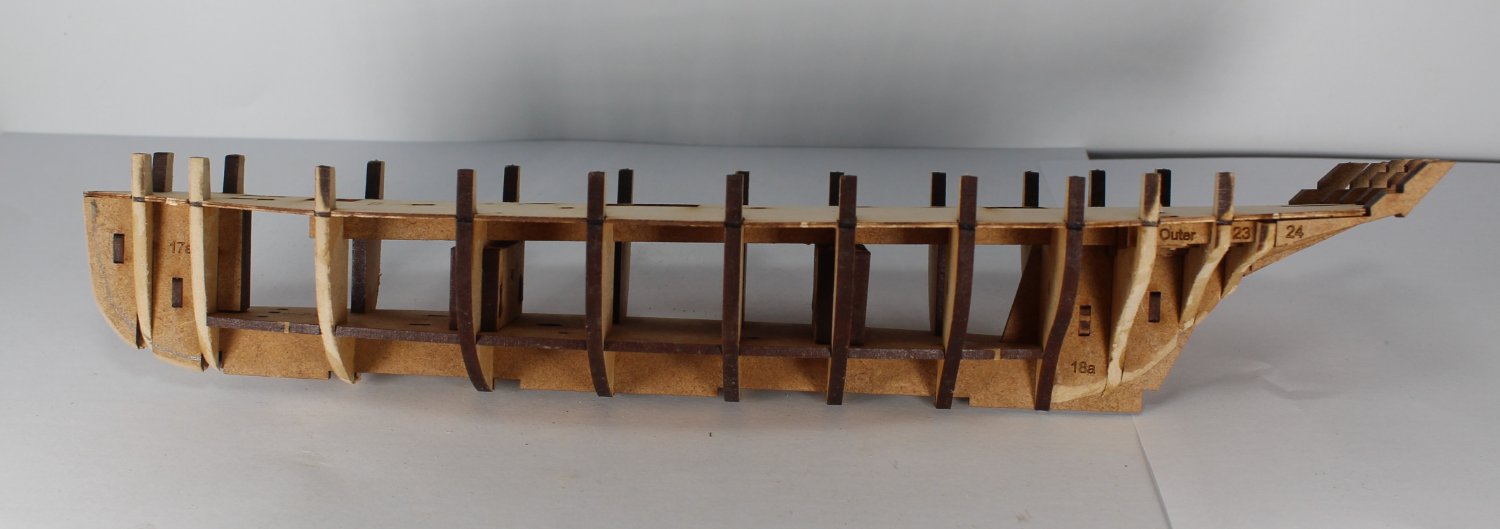
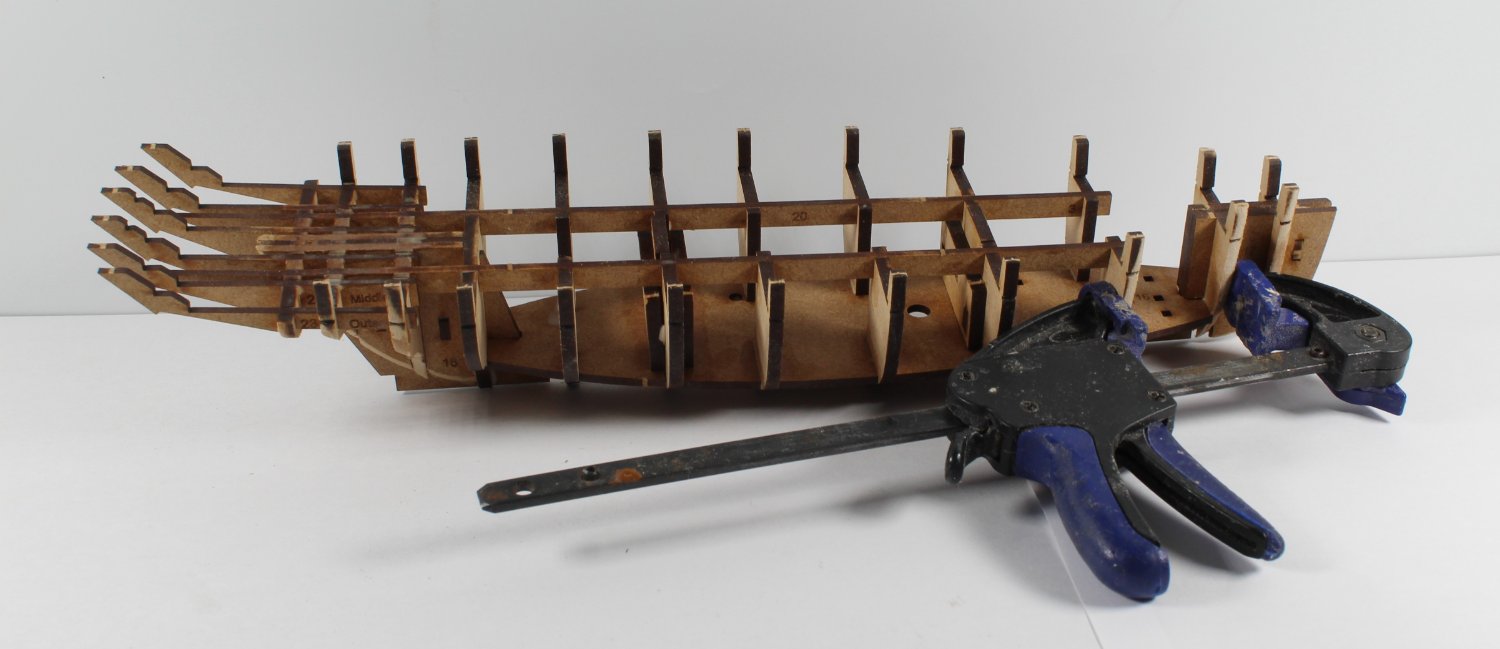
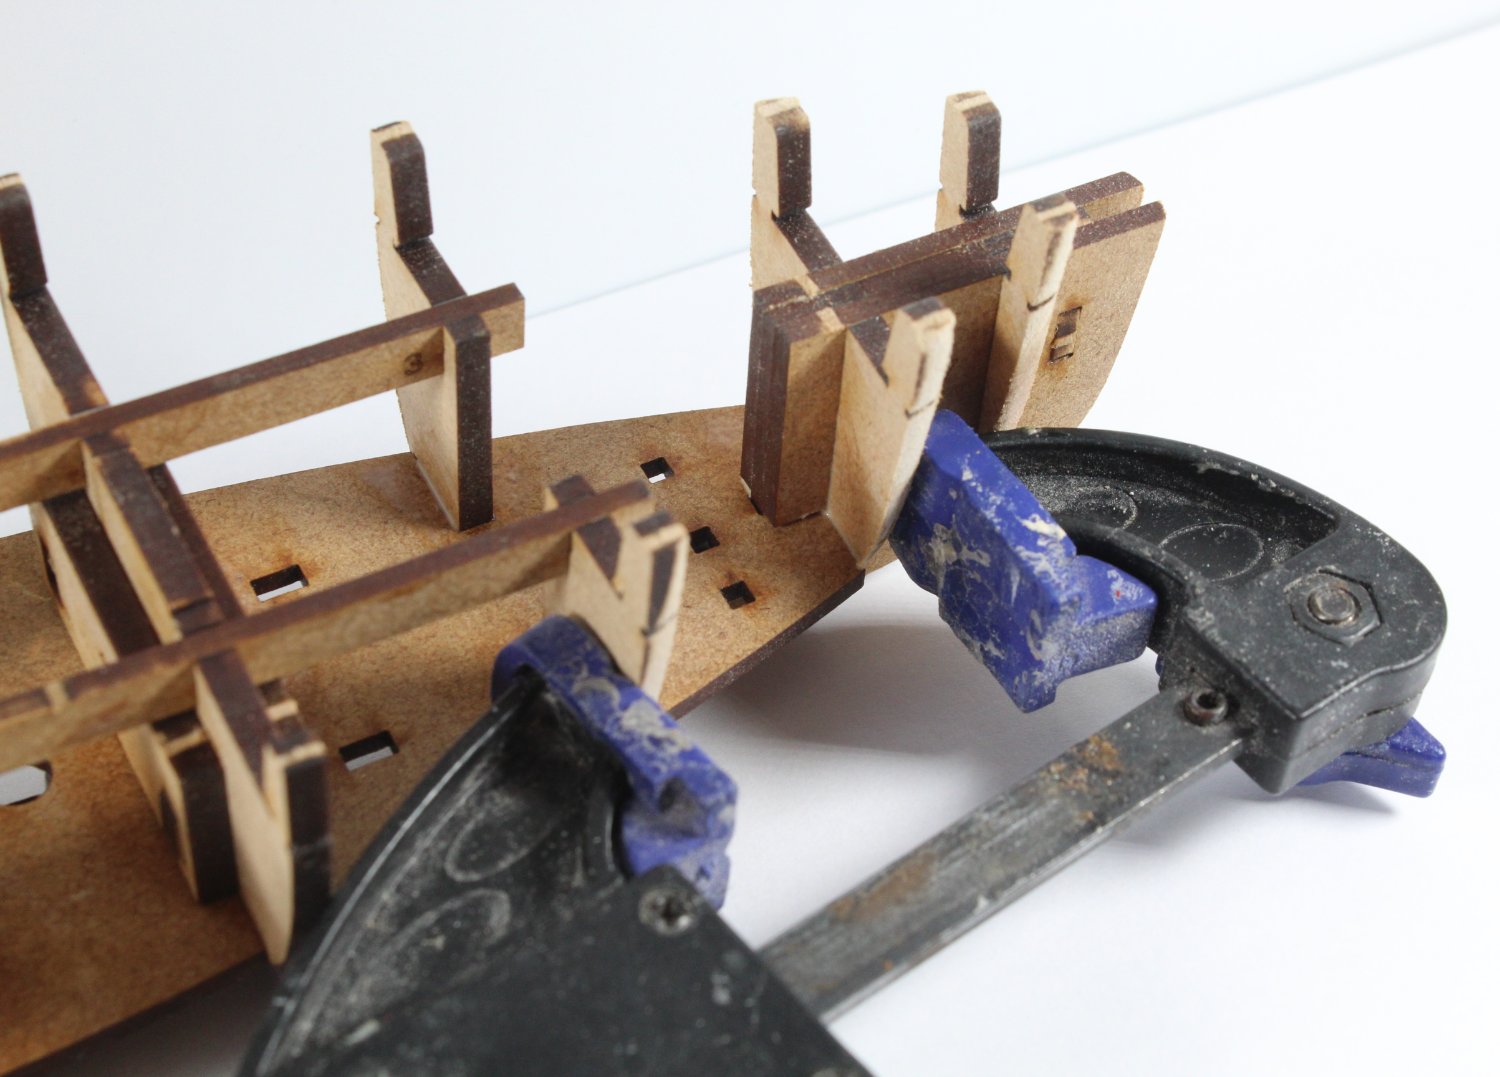
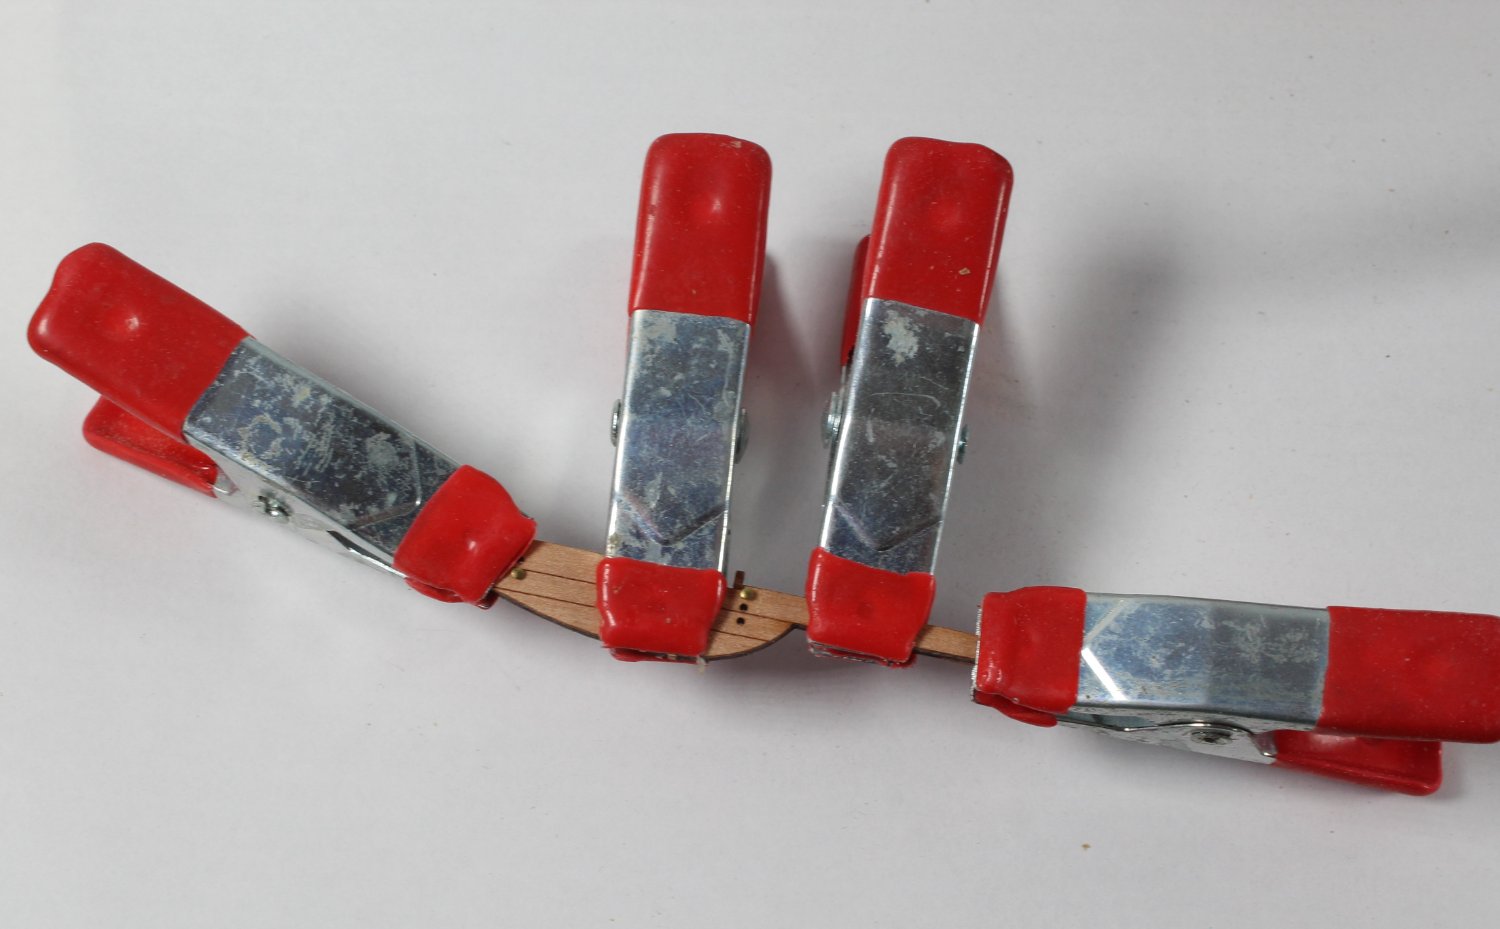
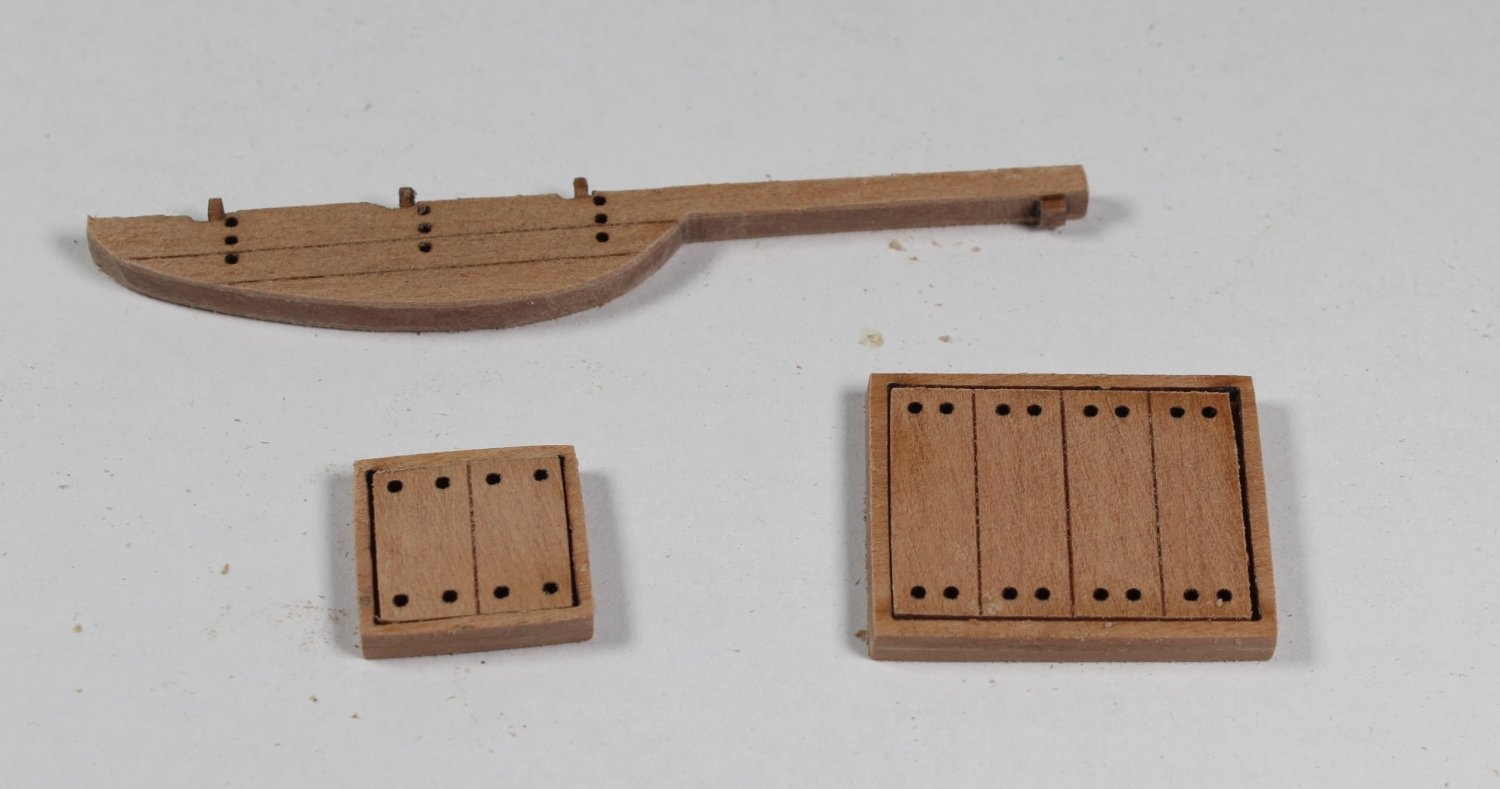
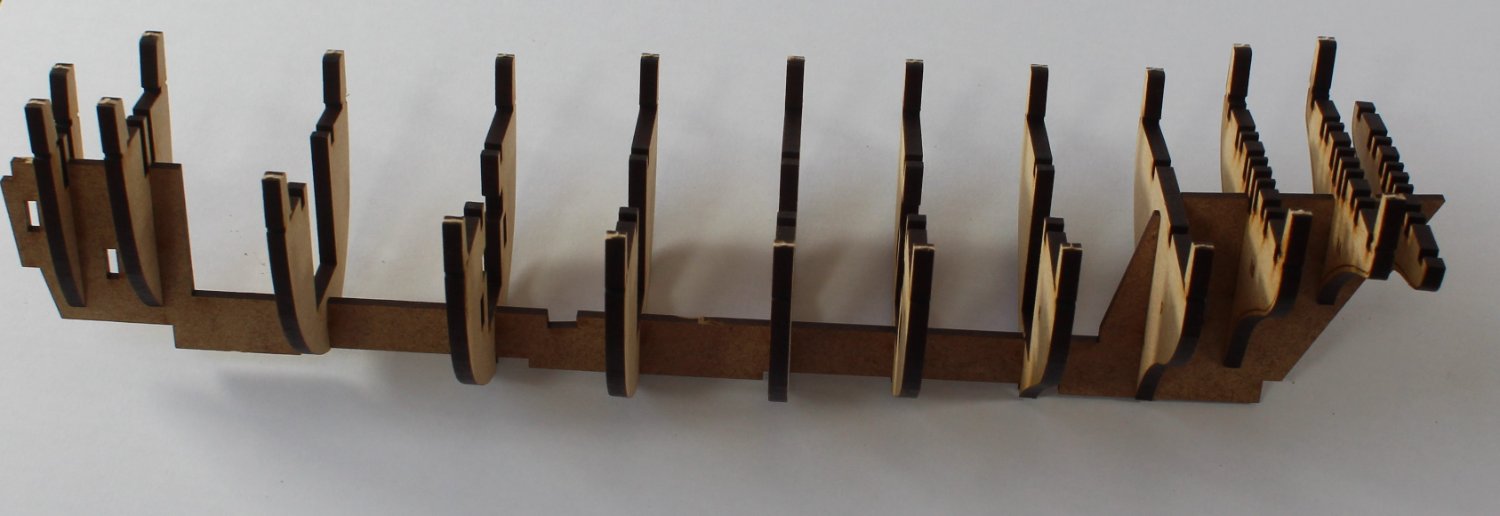
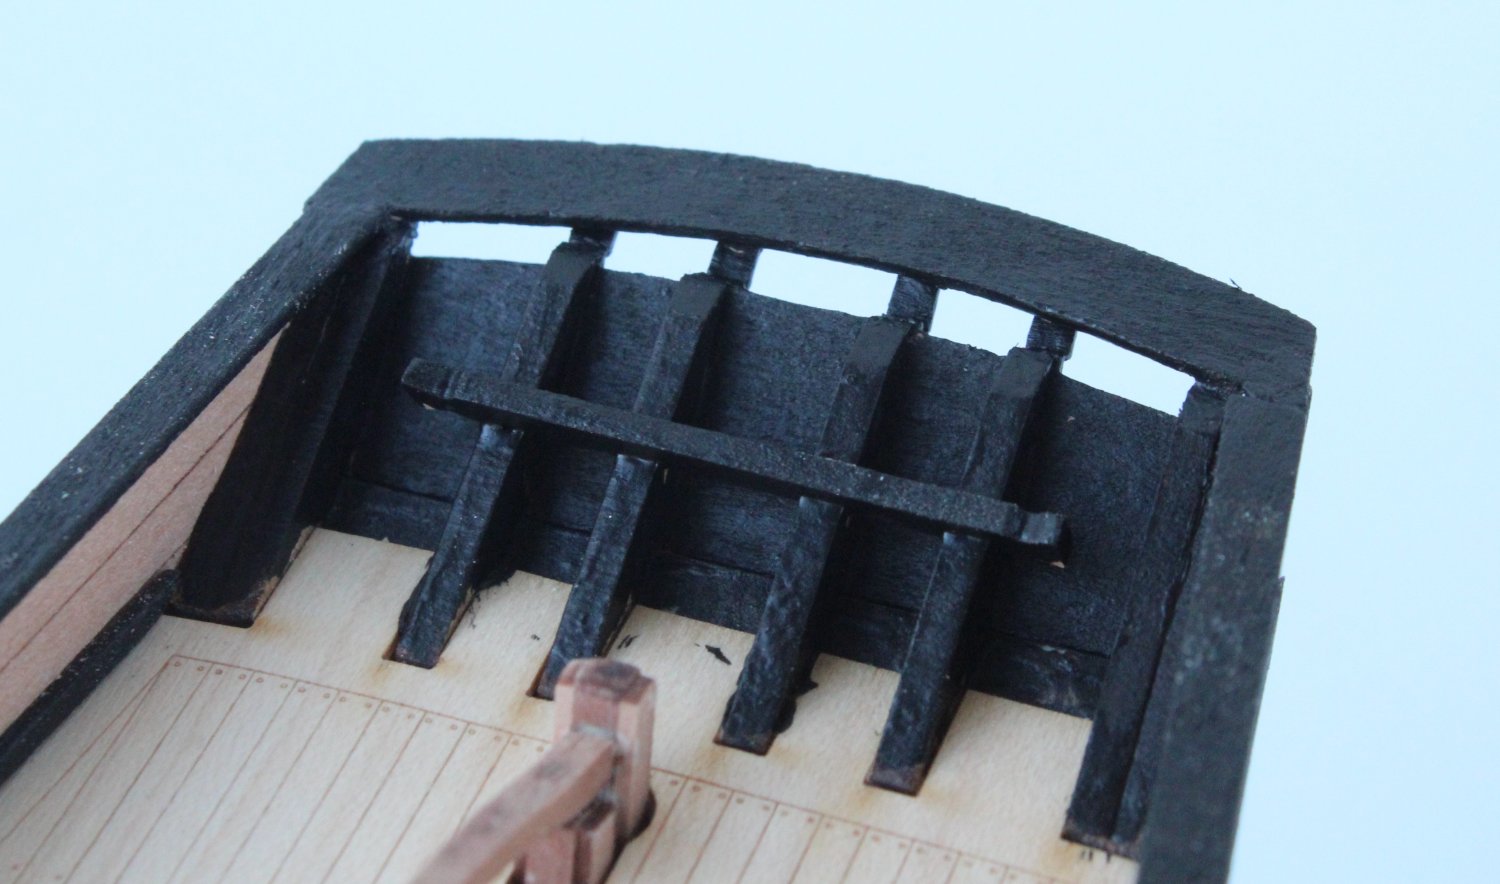
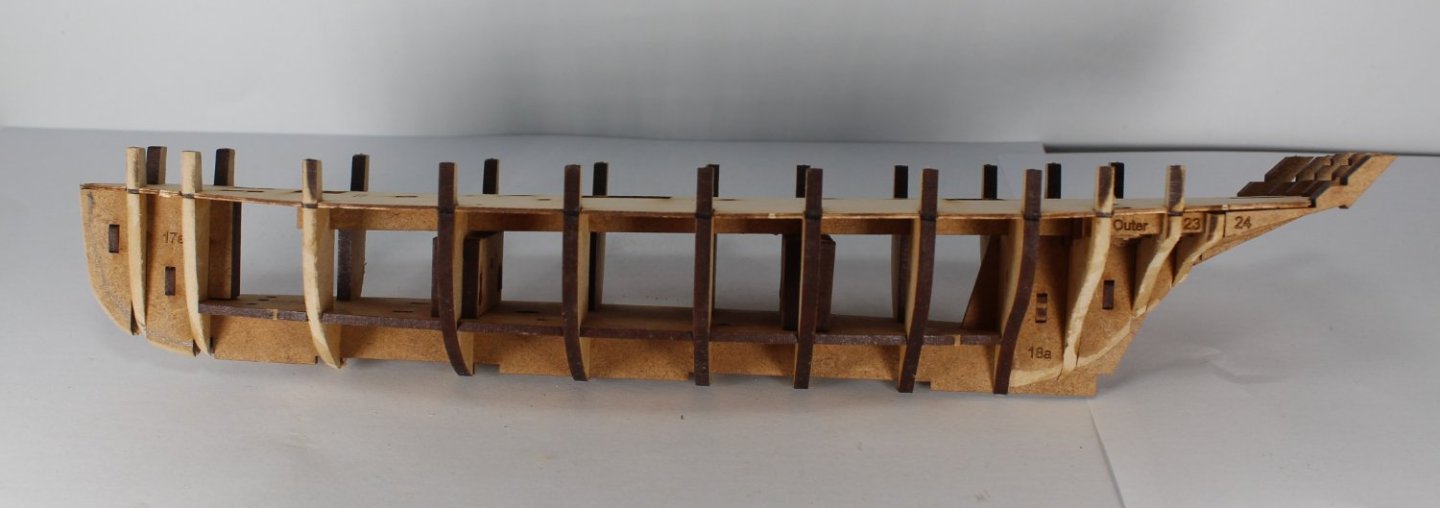
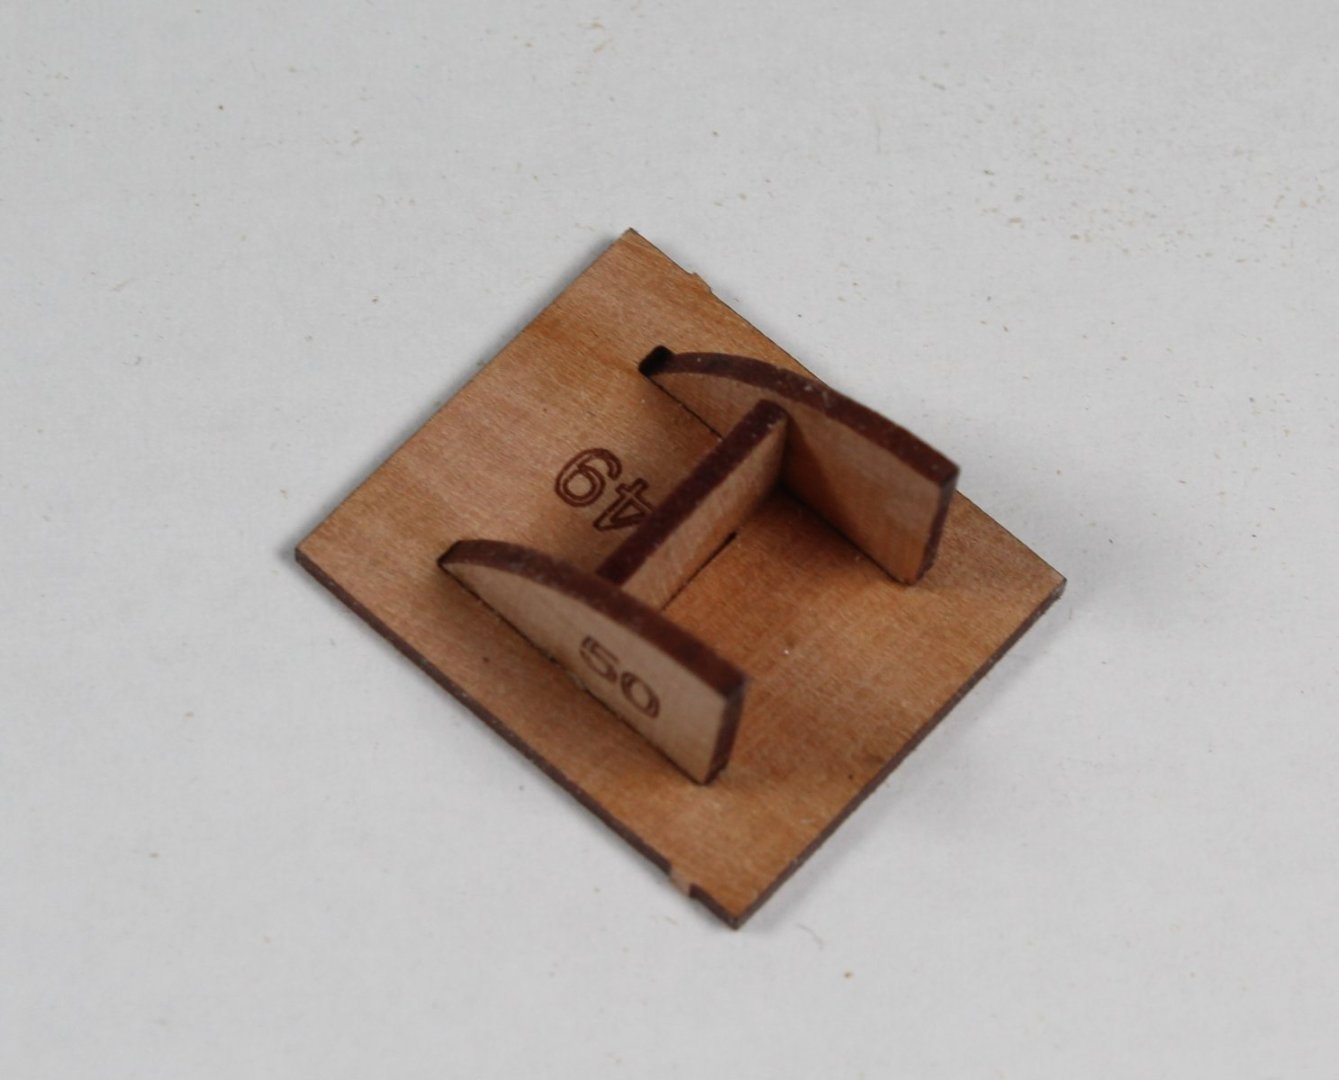
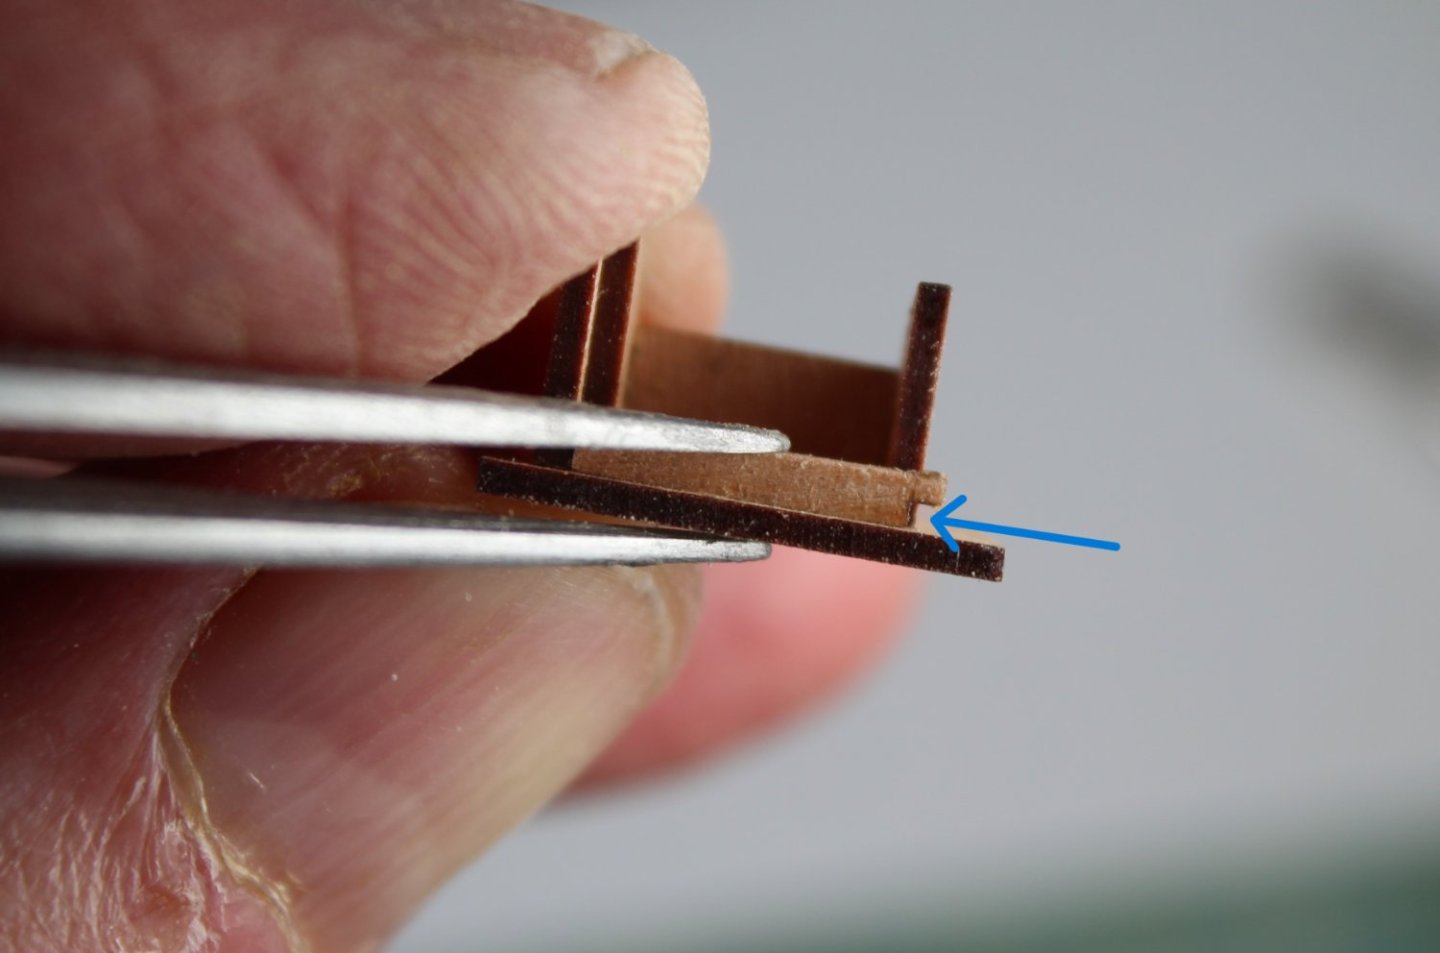
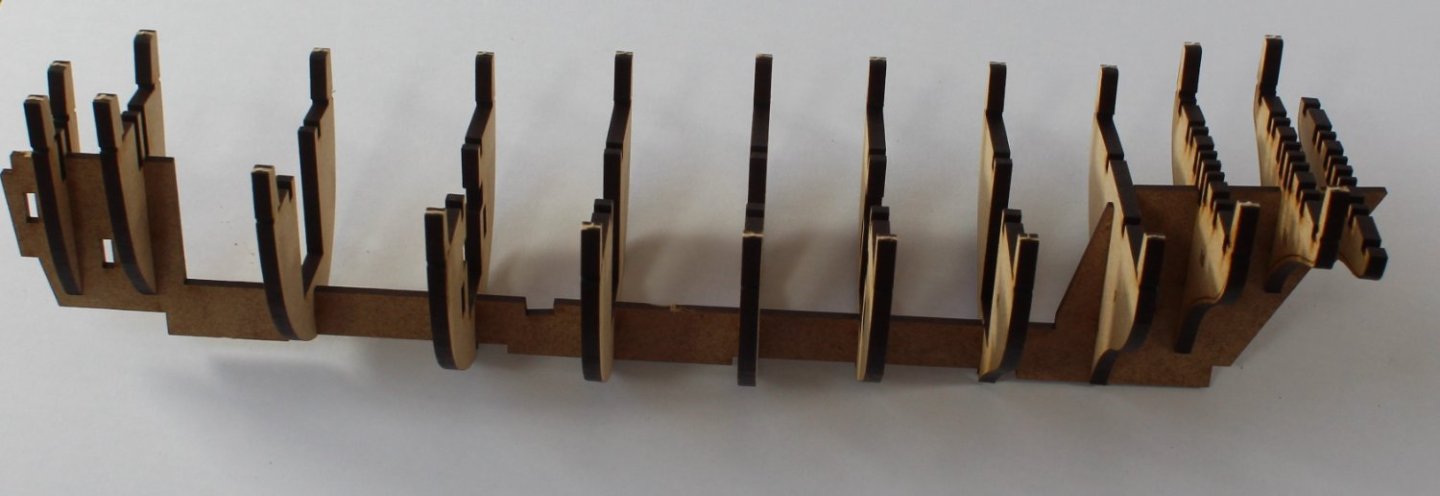
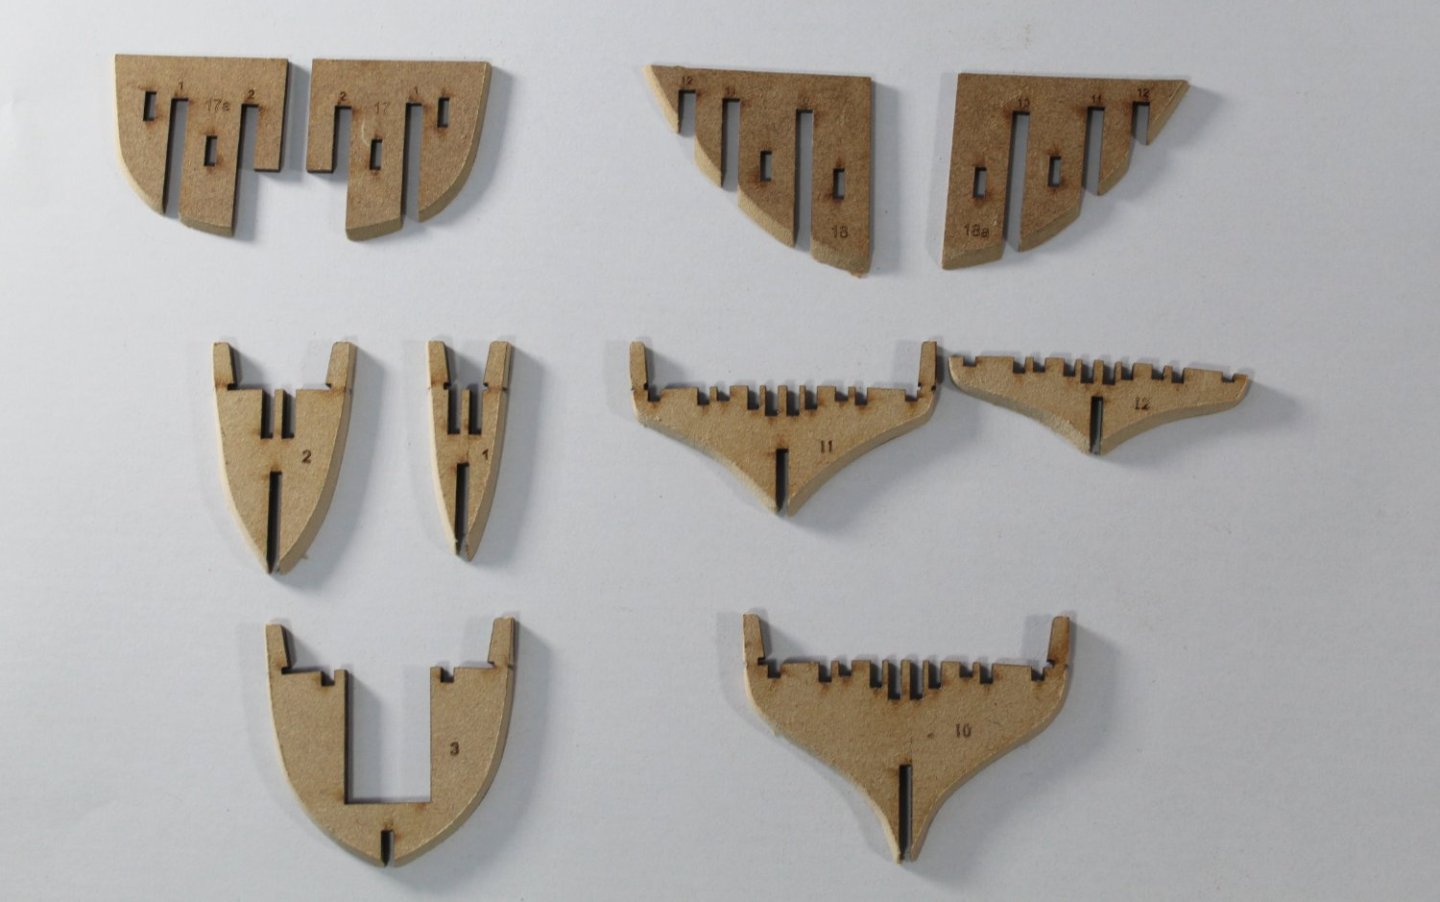
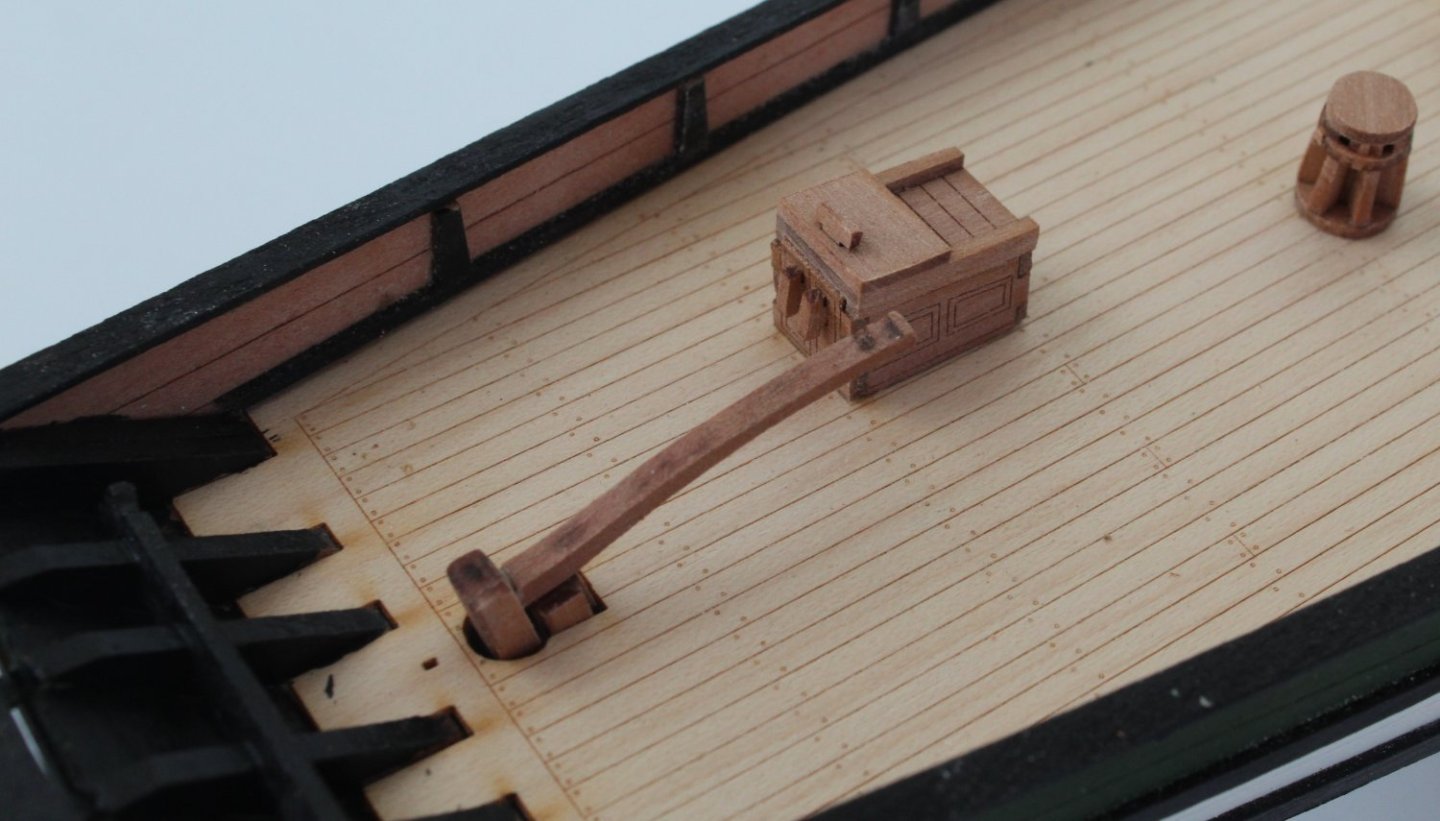
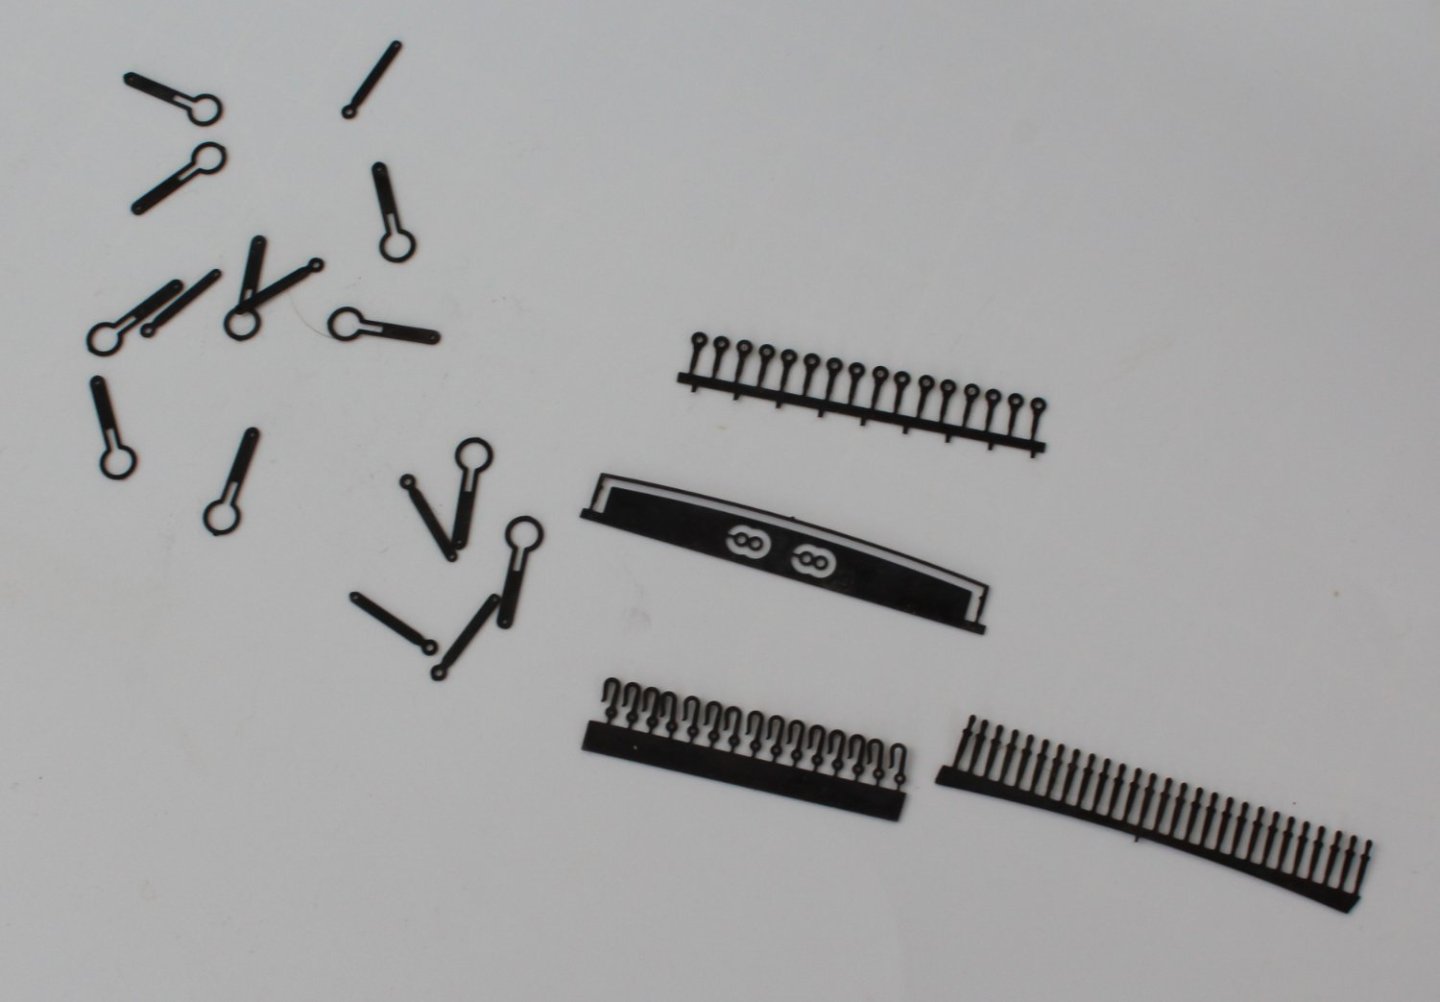
003 - Hull Construction and Deck Items (highlighting a slight snag with the companionway jig) The bulkheads were positioned along the keel along with the lower deck pattern. The bow and stern planking edge patterns were next to be added, using the 4 off locating pegs to ensure they were correctly positioned. The clamps parts for bulkheads 4 and 7 were then added using the locating pegs to ensure the correct alignment. Next the two longitudinal brace patterns were slotted in place. These patterns help to align and lock the bulkheads in position from position 3 to 12. Finally the 6 stern frame patterns, 2 inner, 2 middle and 2 outer were slotted in to place. Once I was happy everything was in place and fully engaged I brushed a diluted titebond glue solution into all the joints. The hull assembly will now be left for 24 hours to ensure the glue has fully cured. I did add a clamp between bulkhead 2 and 3 on the right hand side to keep bulkhead 2 in the correct position. With a bit of time to kill before I can continue with the tasks on the hull construction I decided to make a start with some of the small sub-assemblies. Rudder Sub-Assembly There are two decorative patterns to be added to the rudder. The two patterns were glued and clamped in place. I used a couple of brass pins to ensure the patterns were correctly aligned. The 6 off PE hinges will be added later on. Fore and Aft Fish Hatch Sub-Assembly Each fish hatch has an upper and lower frame which were glued together and then clamped. Once the glue had been given time to cure the laser char was removed from the visible edges using a 180 grit sanding stick then a 1000 grit standing stick. The fish hatch covers were then test fitted. I will add the 0.5mm thread to the fish hatch covers later on in the build process. Companionway Sub-Assembly The first task was to build the jig. The side pieces were slotted in place on the base plate followed by the jig's cross beam. I then took the two side pieces of the companionway and glued them to the companionway cross beam. Once the glue had time to cure I tried to place the companionway assembly over the jig so the curved canopy could be added. This is when I hit a snag as the companionway assembly would not fit over the jig. With a little bit of investigation I noted the jig was fractional oversized, as can be seen in the next photo. In order to resolve this I will need to sand the outside edges of the companionway jig to reduce the overall dimension which I believe should be 11mm, but currently measures 11.4mm.


- 48 replies
-
- 4
-
-
- Nisha
- Vanguard Models
- (and 3 more)
-
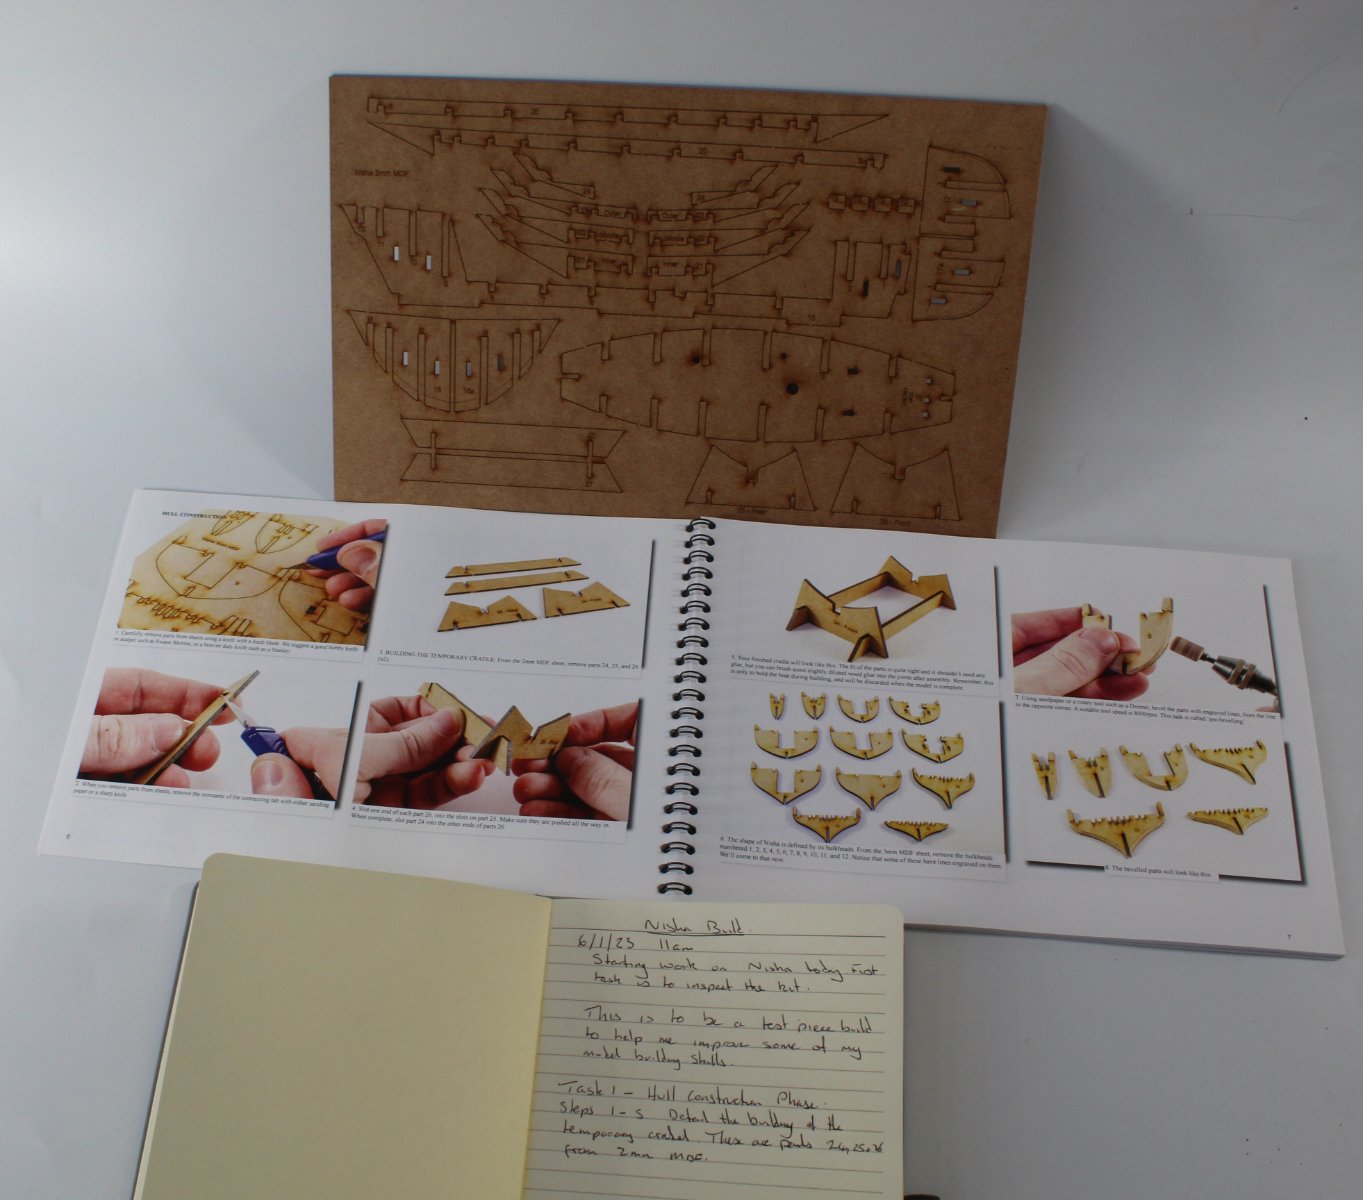
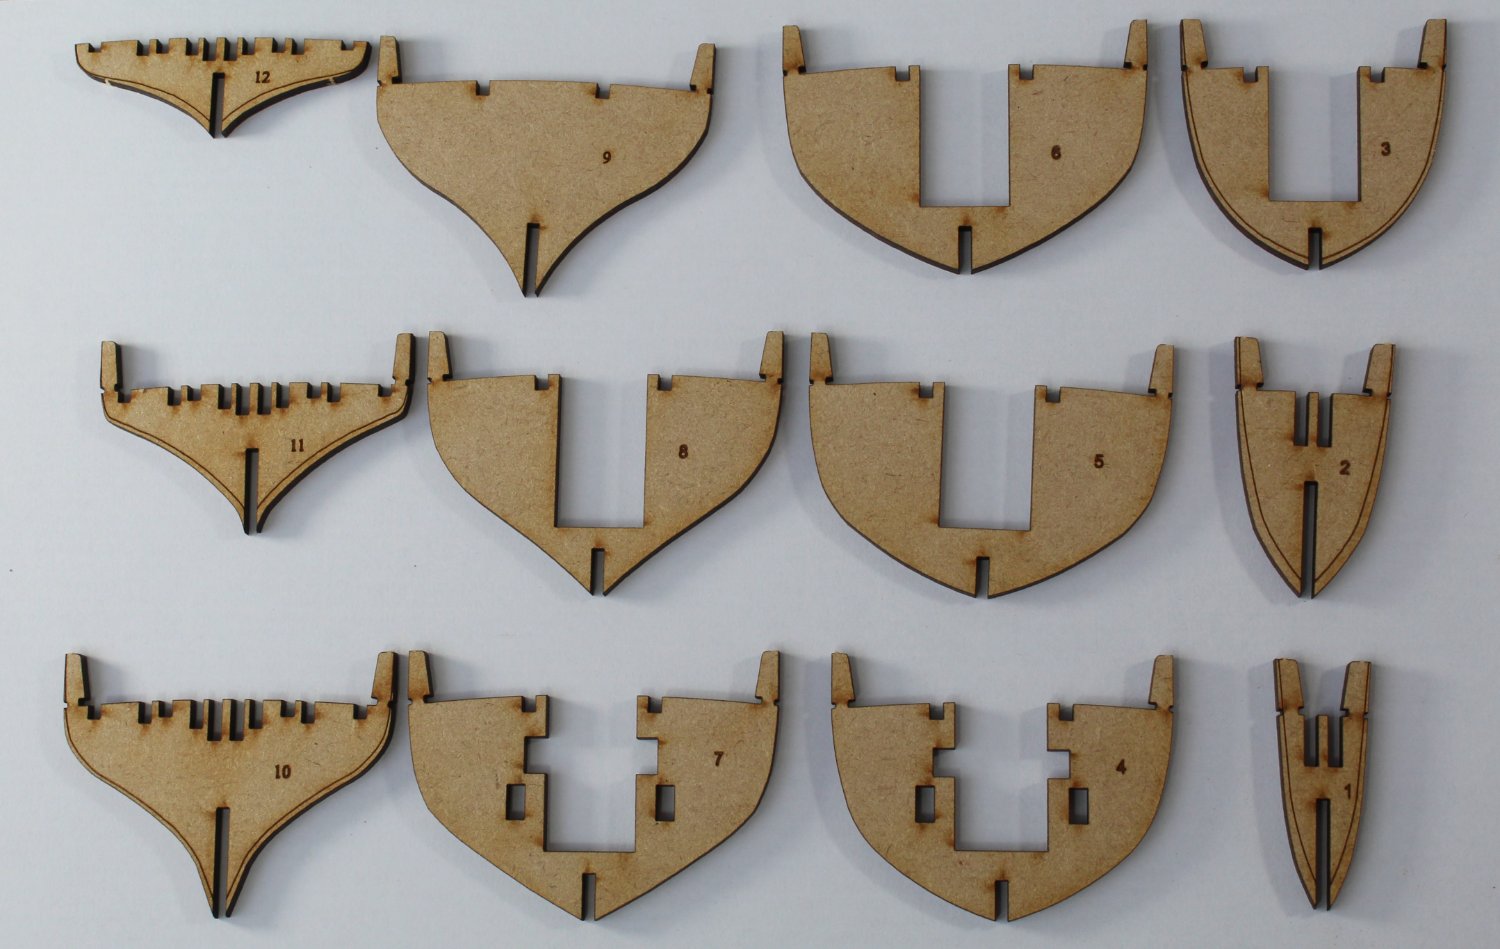
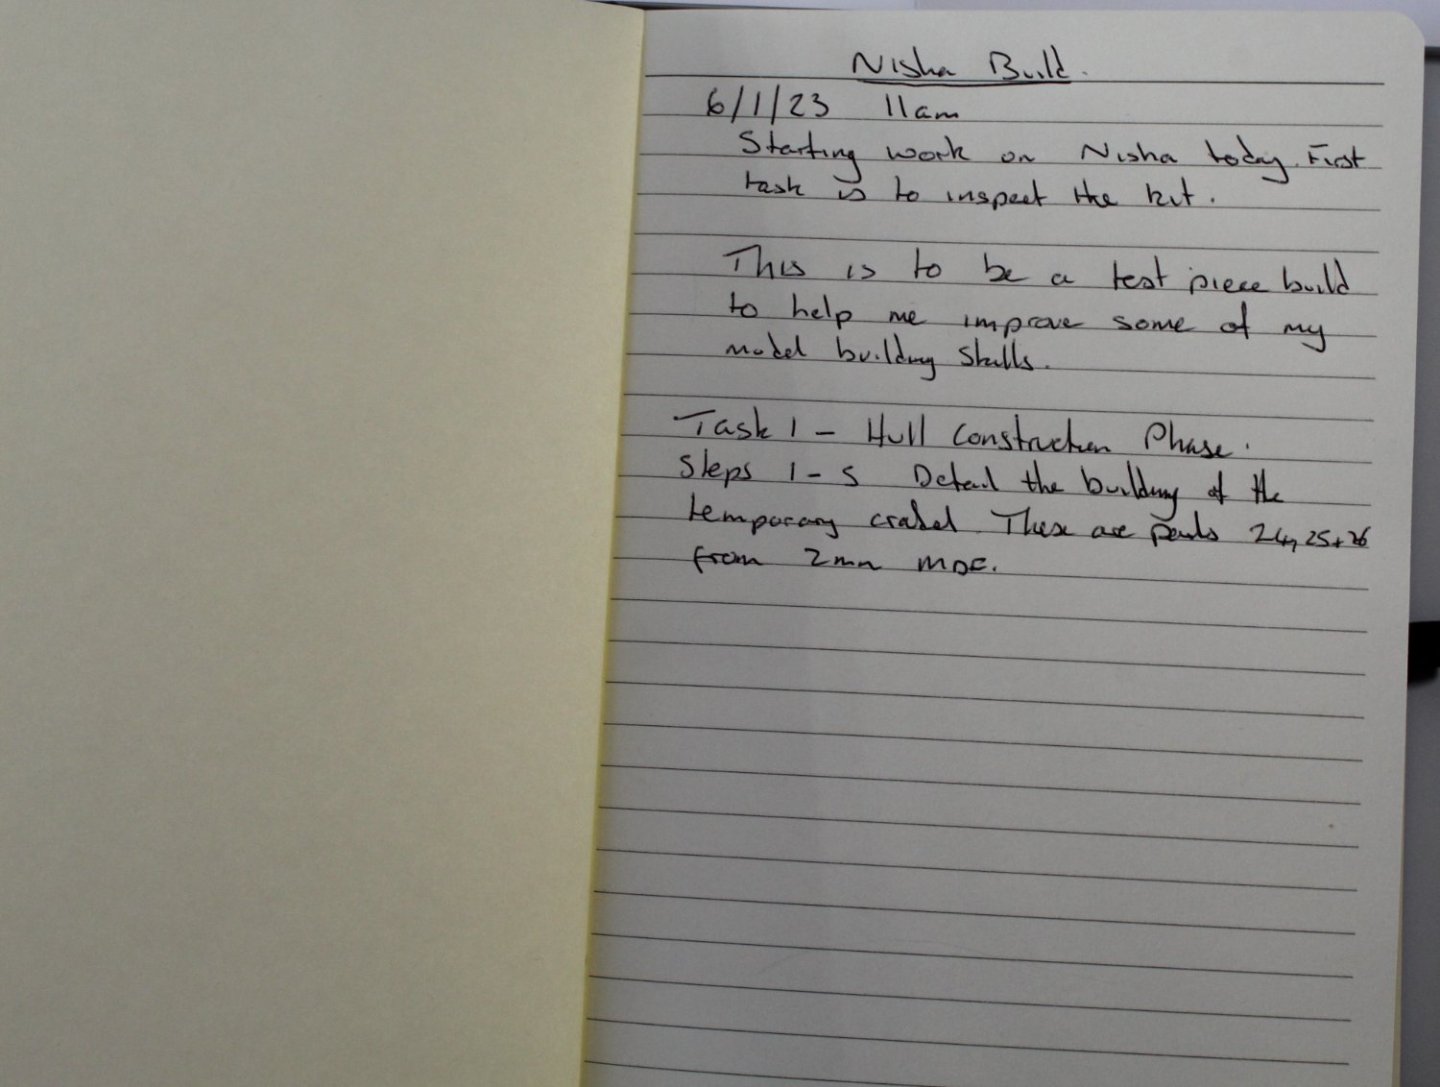
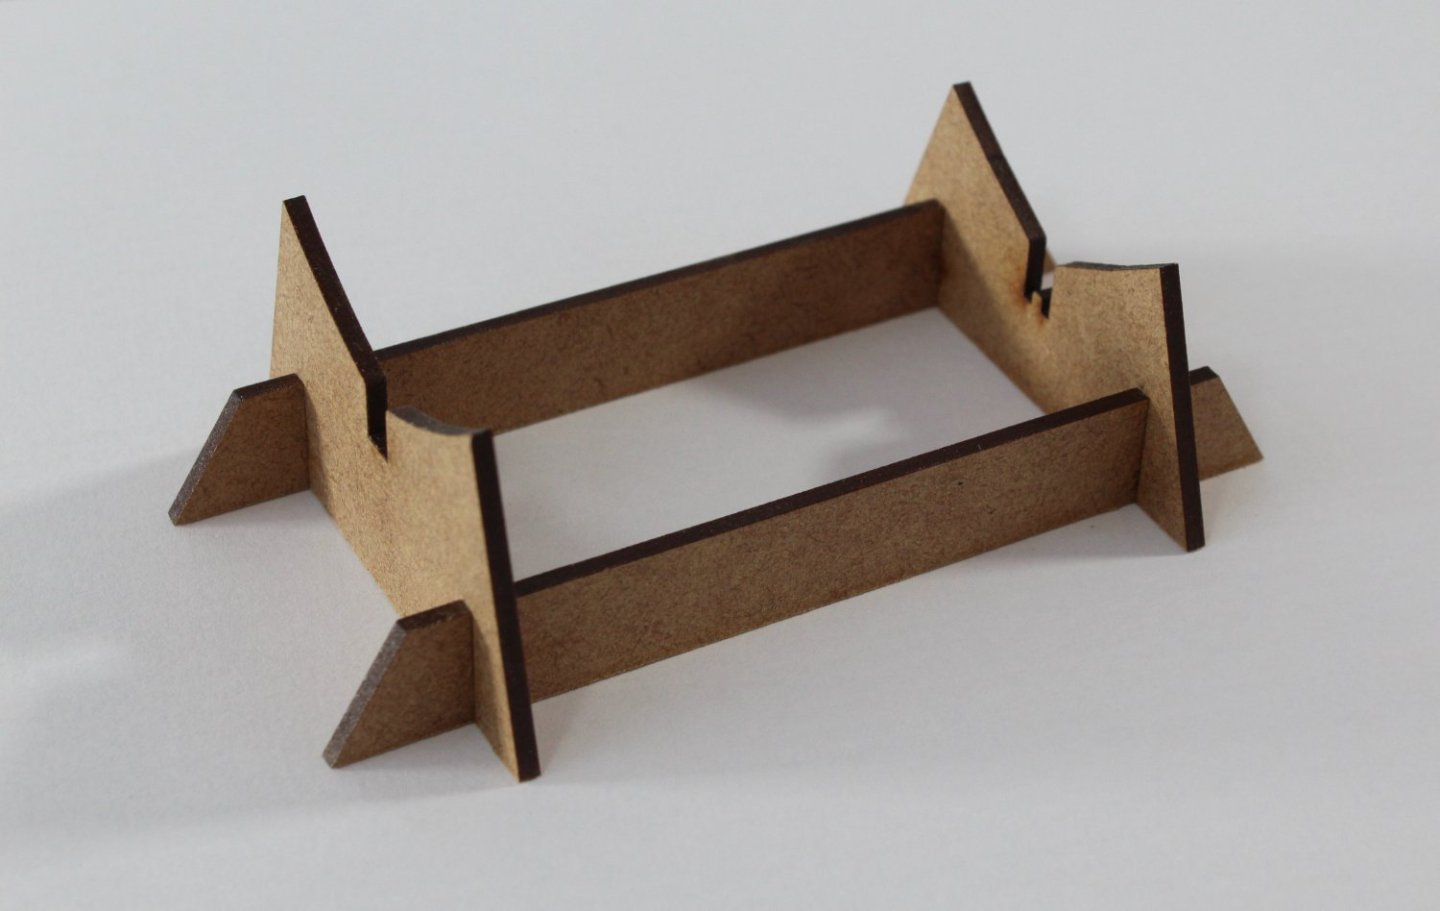
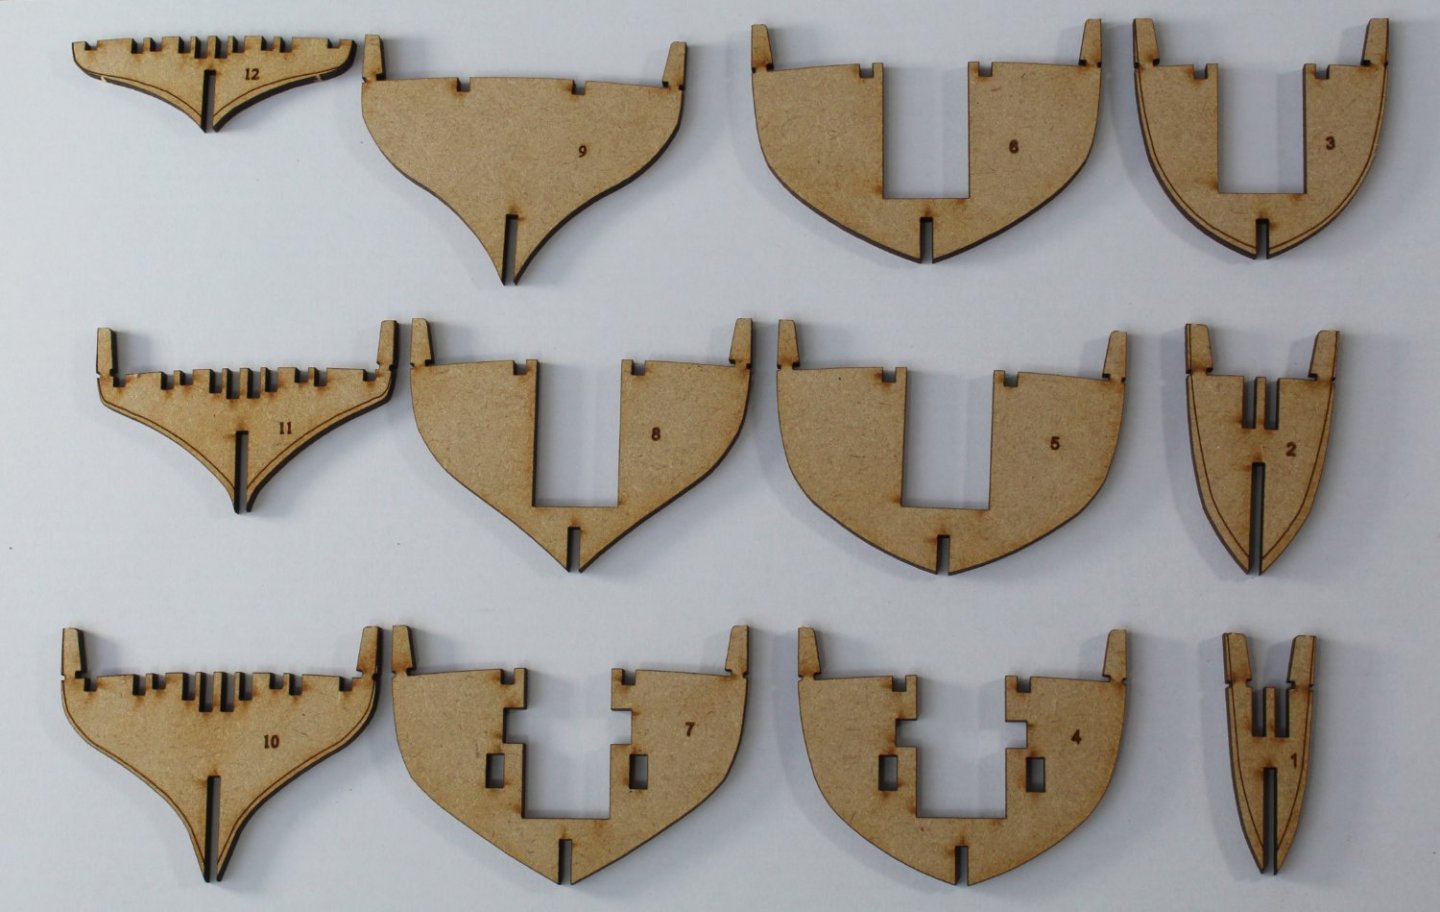
002 - Start of Hull Construction I am taking a slightly different approach to this build. This time, after review of the build manual instructions, I am making my own build notes. I think this will help me visual the build process better and it hopefully it will help me reduce my normal array of build errors. My first set of build notes is a bit sparse as they relate to building the temporary cradle. I am now ready to start work on building the cradle. The 4 cradle parts were removed removed from the MDF sheet. I then clean up the tab ends from the bottom edges. I did this by simply rubbing the edges over a piece of 120-grit sandpaper. The four cradle parts slotted together without any problems, the slots were a good tight fit. I now have a completed cradle. I think I need to go for a rest now.😂 The next task was to remove the 12 off bulkheads from the 3mm MDF sheet. I noted that bulkheads 1, 2, 3, 10, 11 and 12 have laser etched lines for the pre-beveling of the edges. Before starting the pre-bevelling I decided to check that the bulkheads would fit on the keel. I also checked the fitting of the stern counter patterns (inner, middle and outer) and planking edge patterns (bow and stern). Everything seems to fit together very well so I now have confidence to move on to the pre-bevelling phase. I used my Gilmour rotary tool for the initial pre-bevelling. I then used a sanding stick on the bevelled edges and finally completed the process with some 120-grit sandpaper. I also pre-bevelled the planking edge patterns. I have made a good start today, with limited time in the shipyard due to grandparent duties. I am now ready to start the initial hull assembly steps. I don't think it will take too long before the basic hull frame is built.

- 48 replies
-
- 6
-
-
- Nisha
- Vanguard Models
- (and 3 more)
-
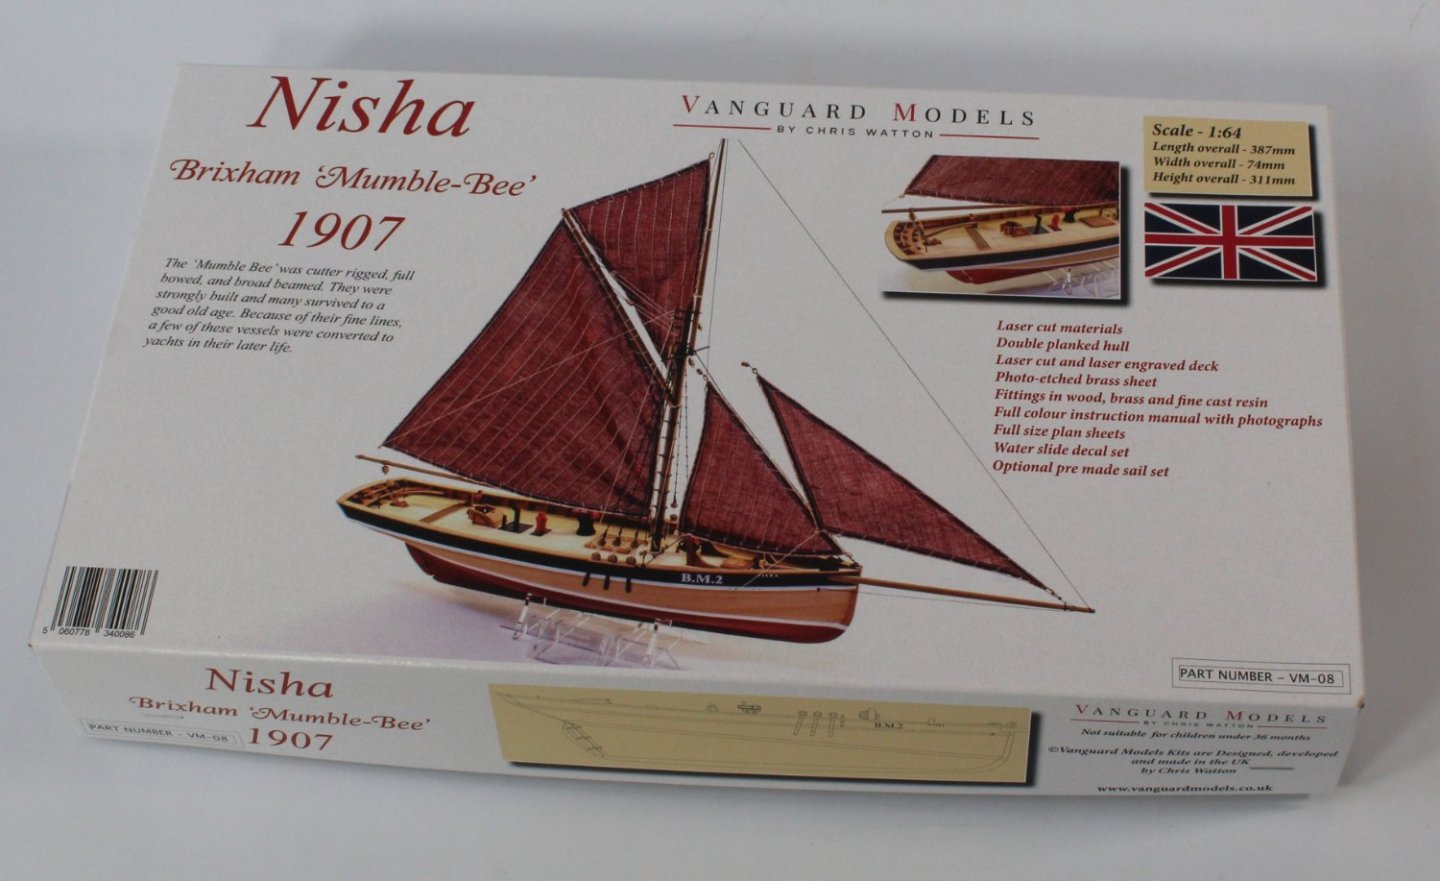
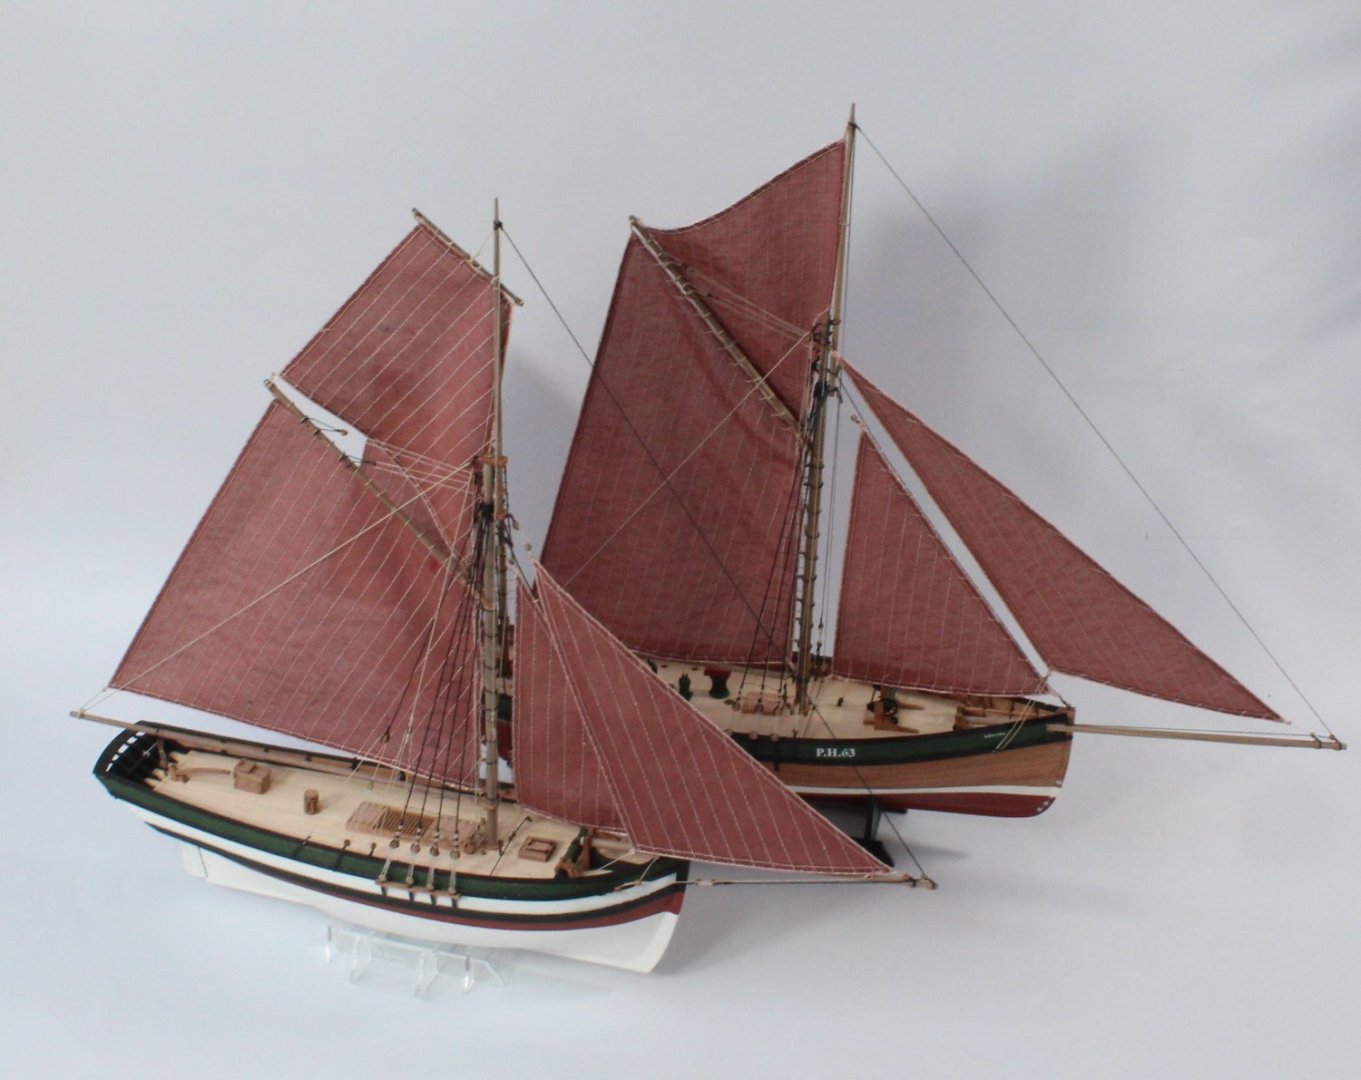
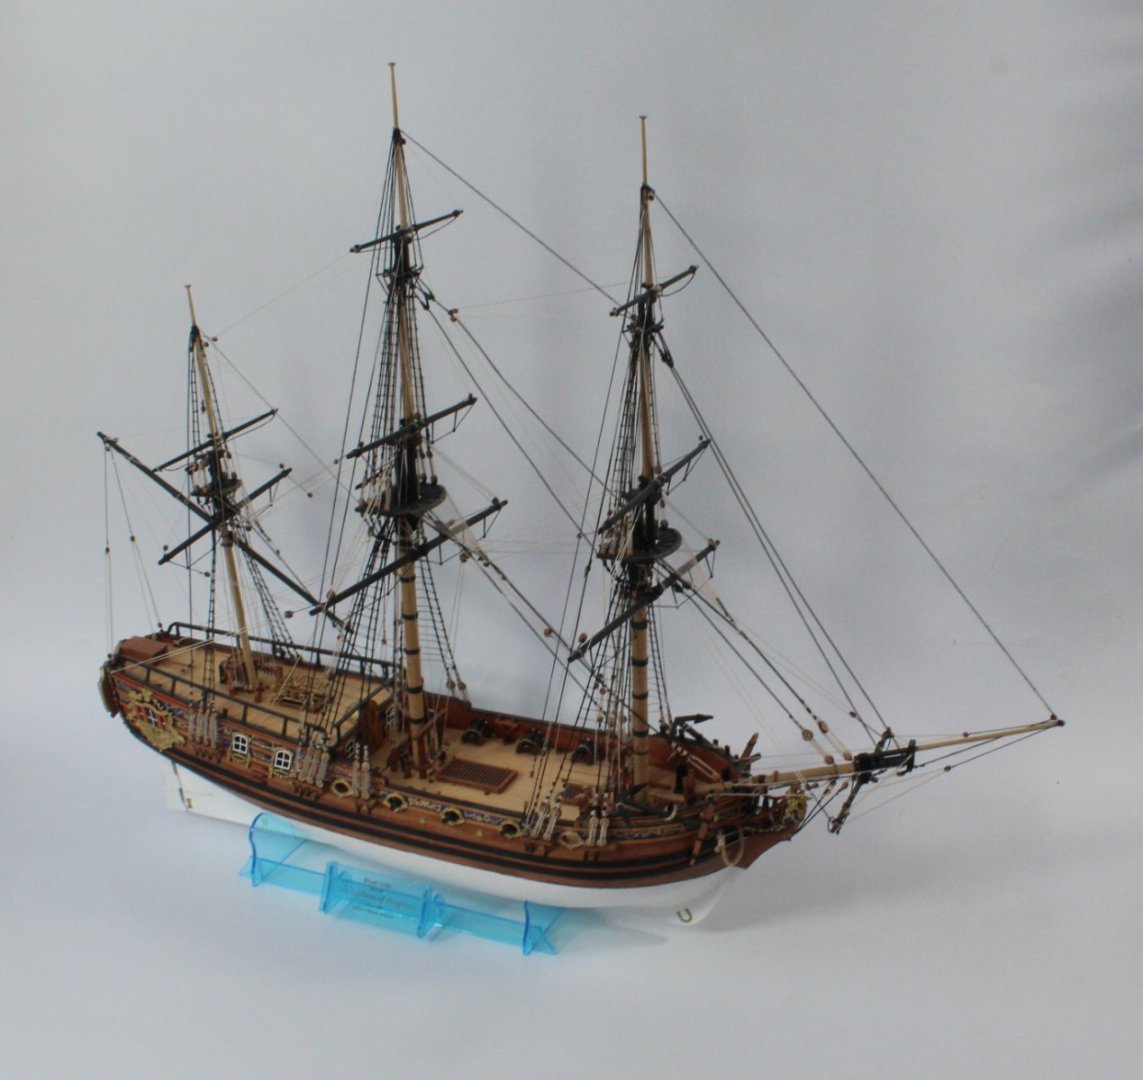
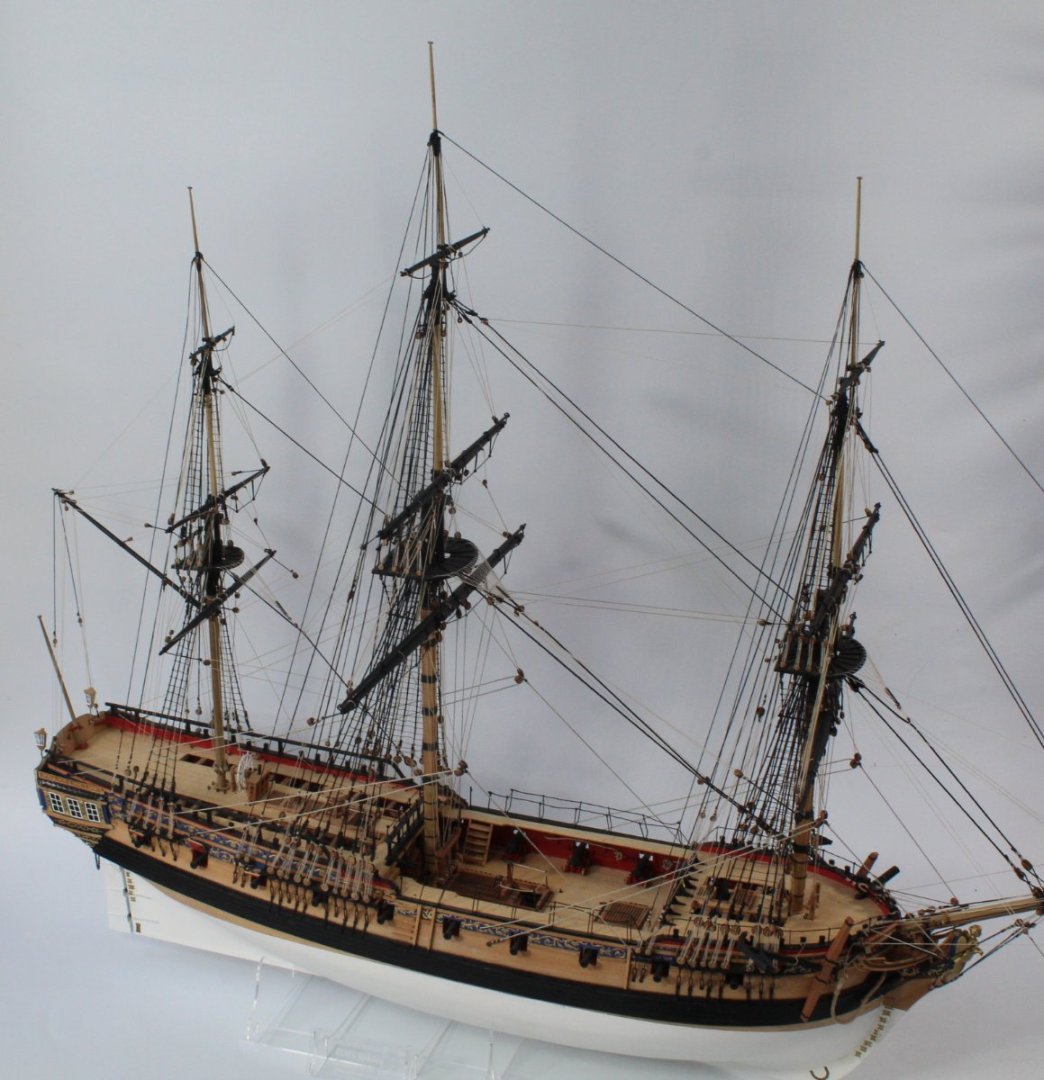
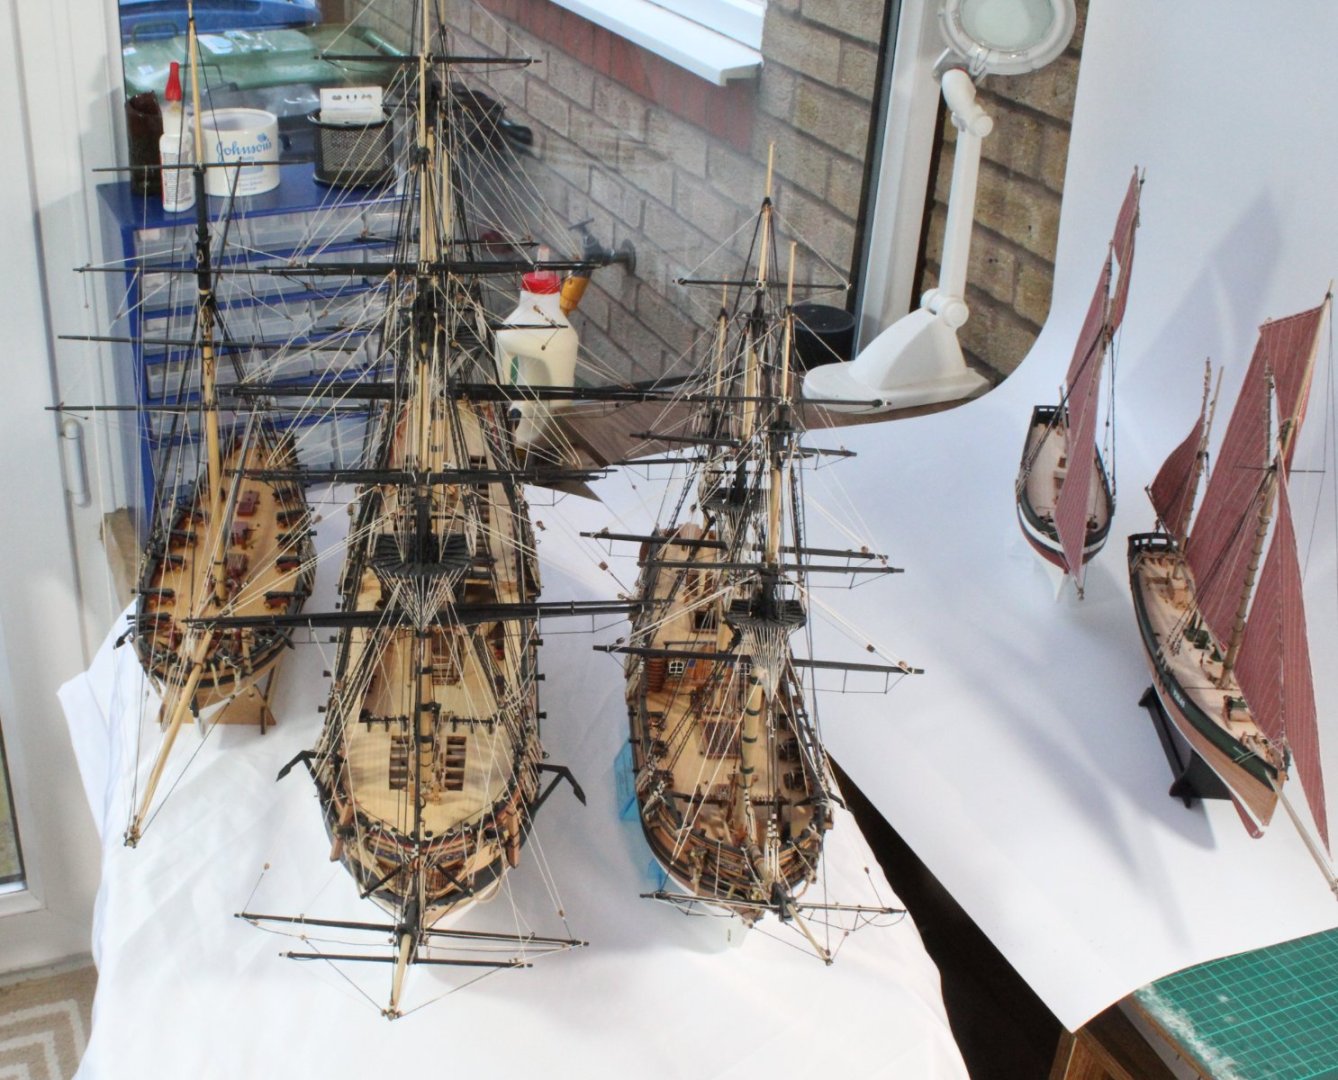
001 - The Fleet My next venture with Vanguard Models starts today with the arrival of the Nisha Brixham 'Mumble-Bee' kit. The plan for this build is for a test piece so I can work on improving some of my techniques in readiness for the Indy build, especially the planking and painting aspects. I think this build will fill the time nicely before the eagerly waited release of the Indy, hopefully late Feb early March. The existing fishing fleet (Eyrcina and Saucy jack) are both excited about a new arrival to the shipyard. The bigger ships in the fleet also showed a passing interest, Speedy not included as she was only a part build. The Alert The Duchess Sphinx The fleet in unison

- 48 replies
-
- 8
-
-
- Nisha
- Vanguard Models
- (and 3 more)
-
Thanks for all the comments and likes. The shipyard has now been cleaned and tidied up ready for the Nisha build. The kit should arrive in the next day or two.
- 62 replies
-
- 1
-
-
- Saucy Jack
- vanguard models
- (and 3 more)
-
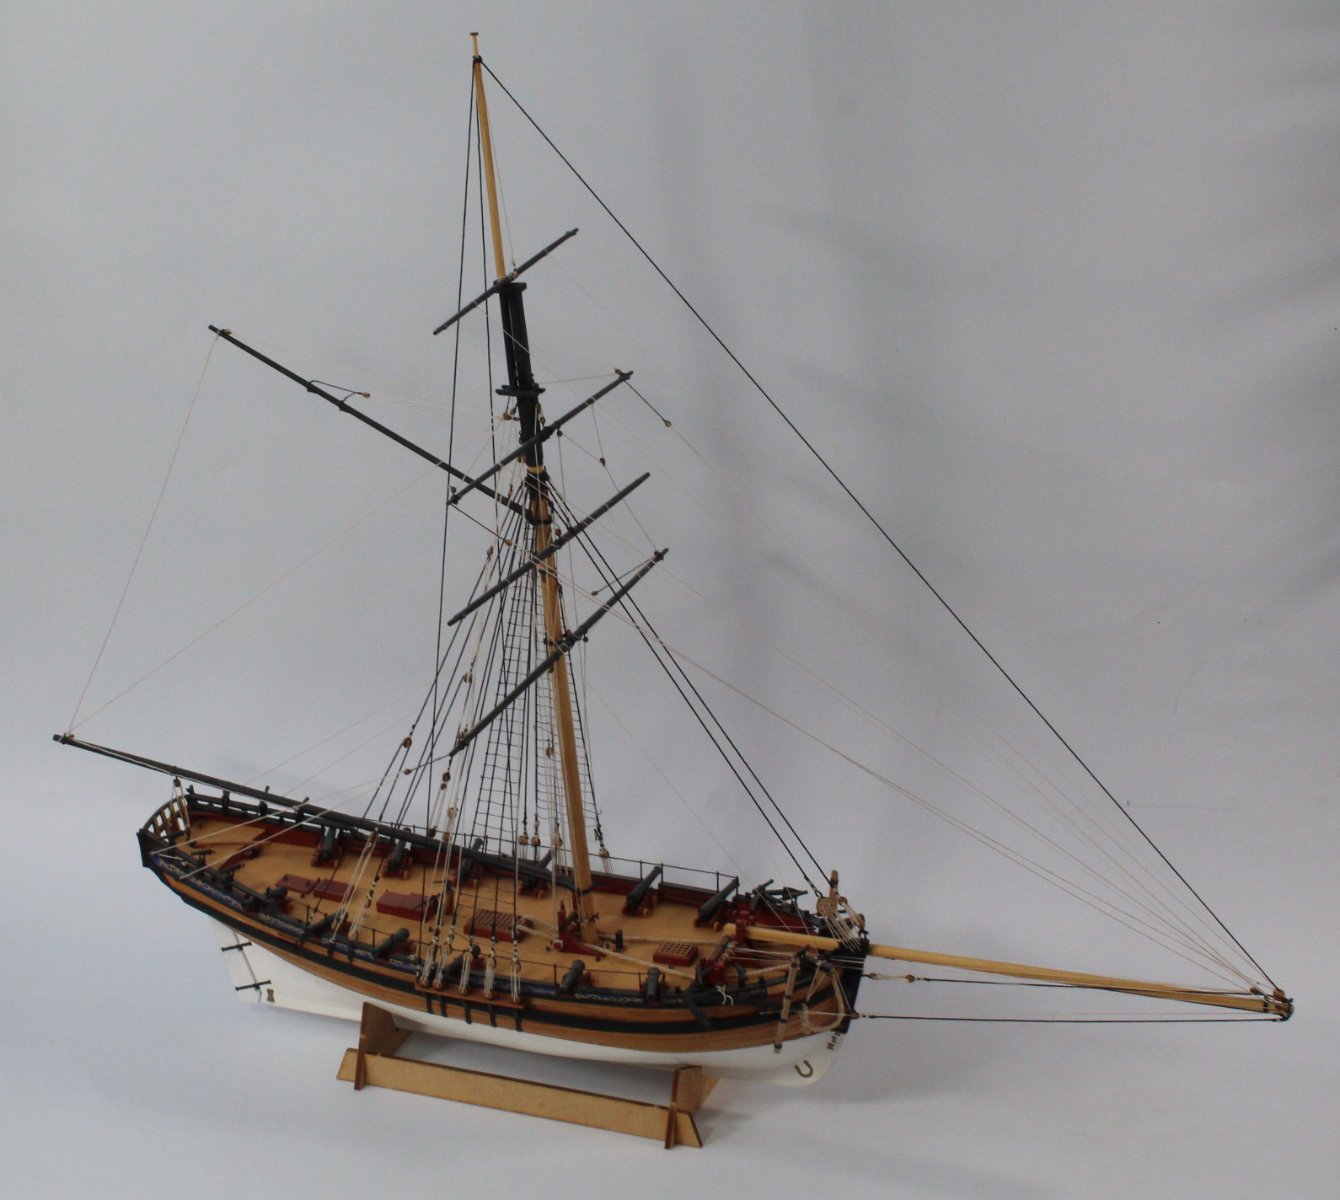
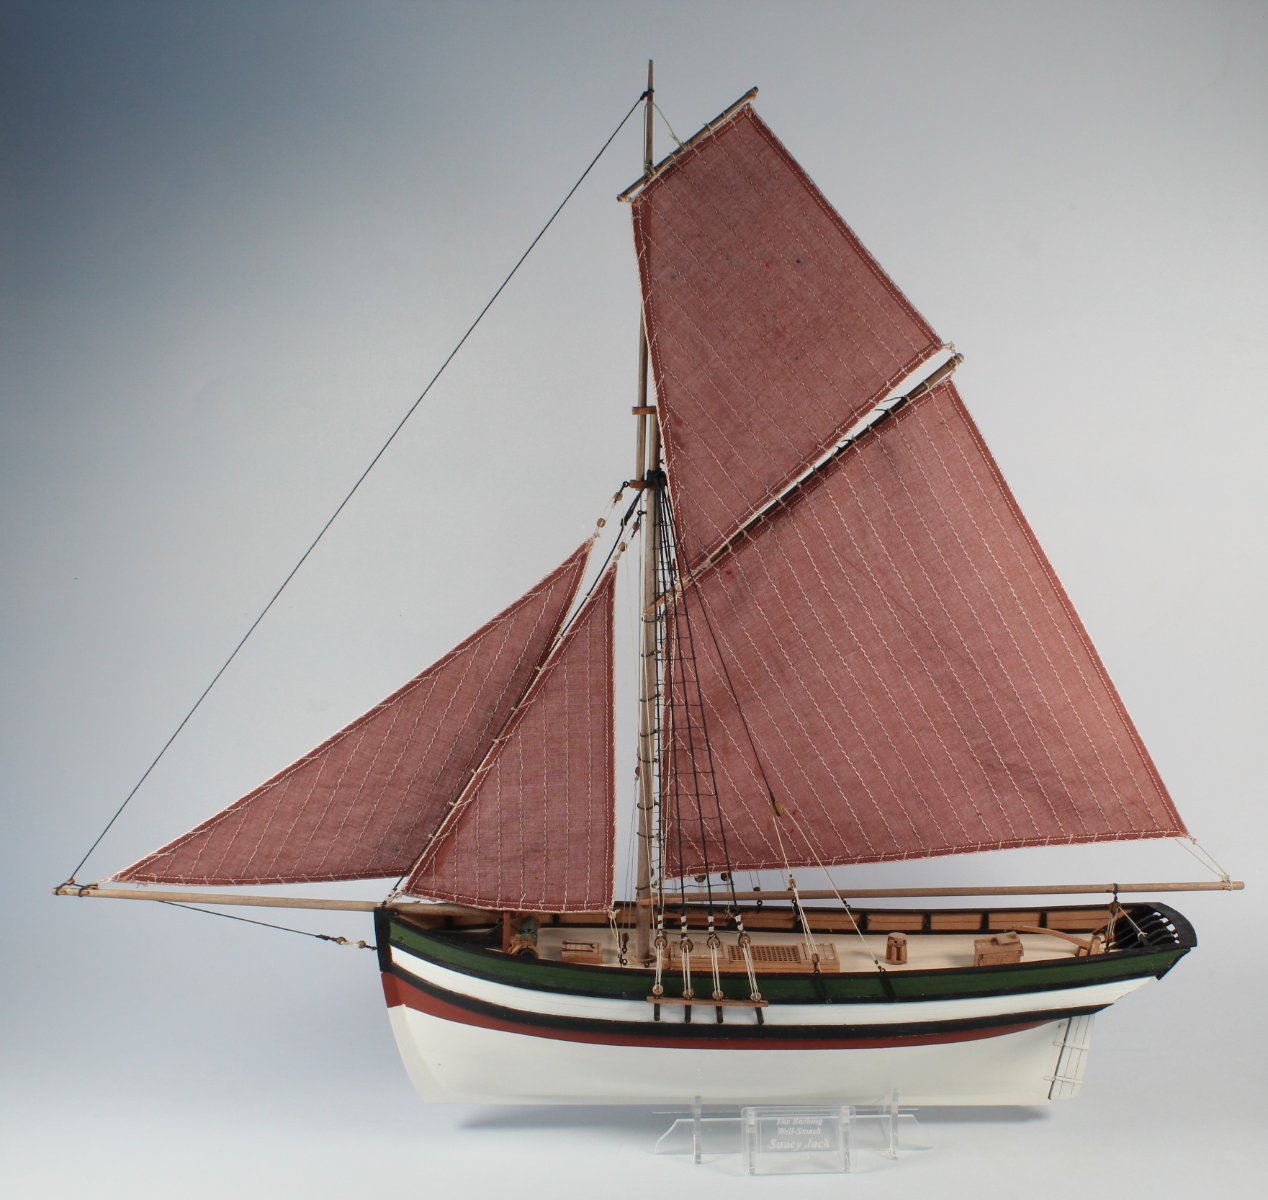
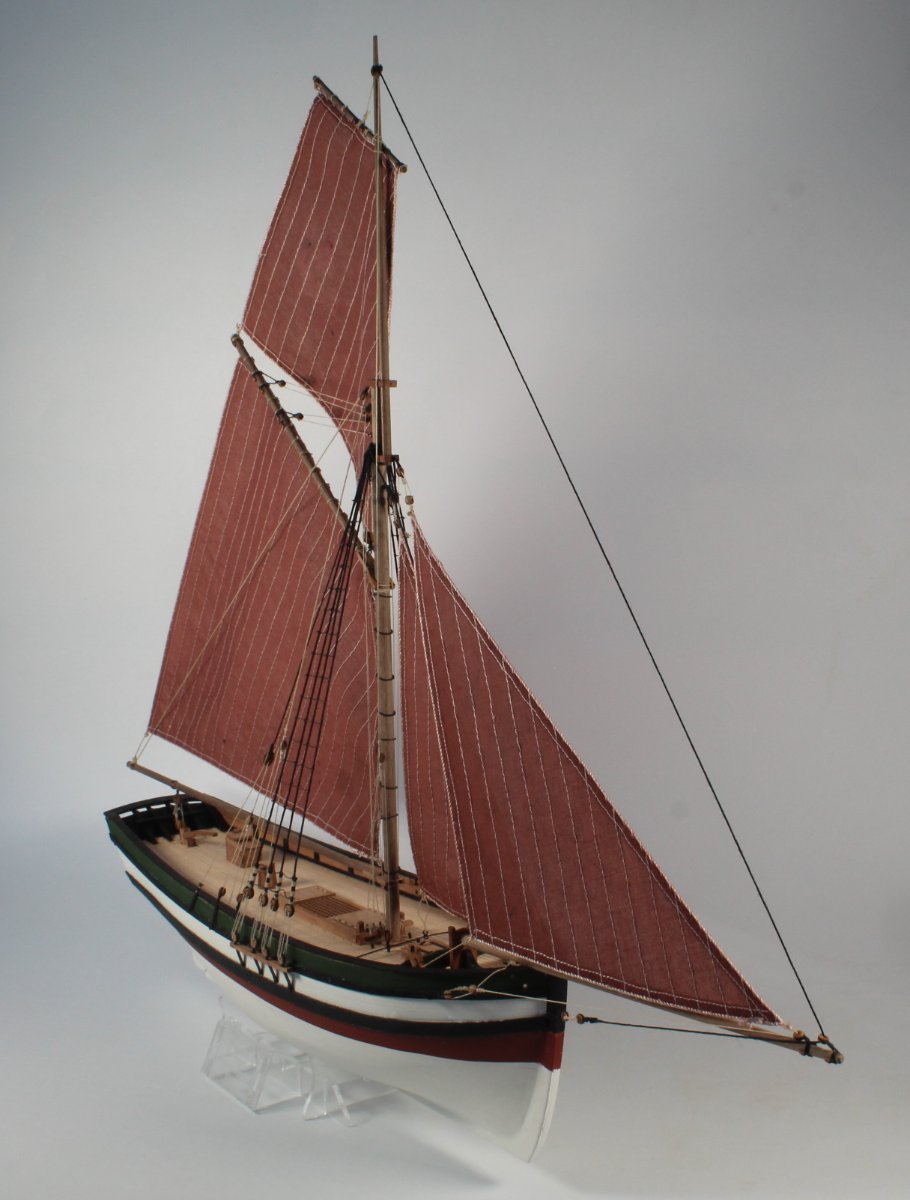
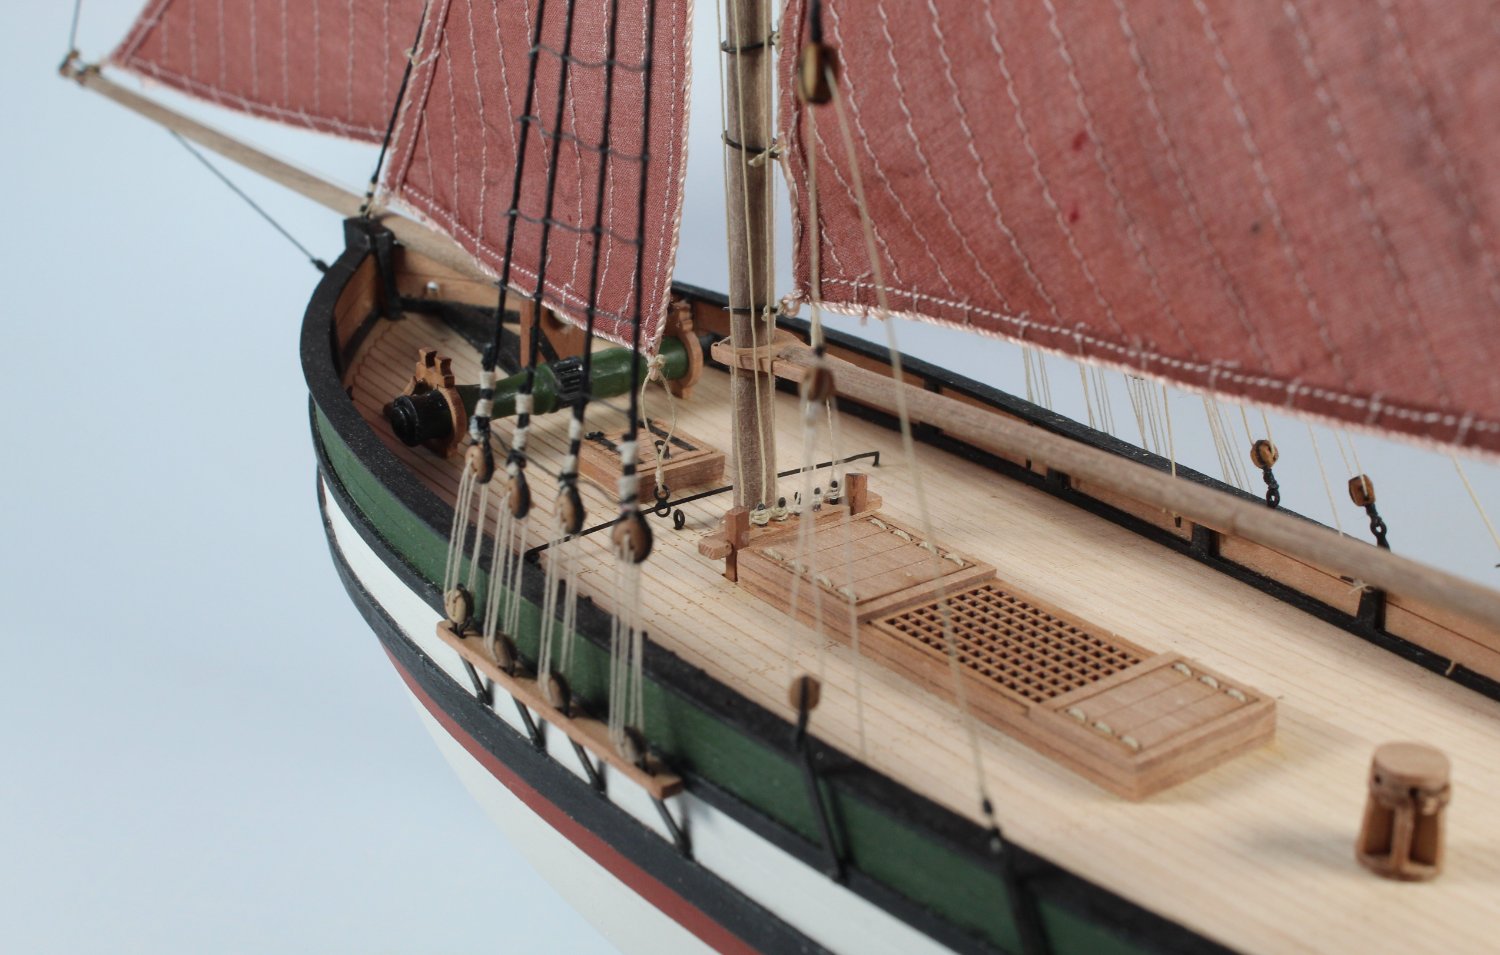
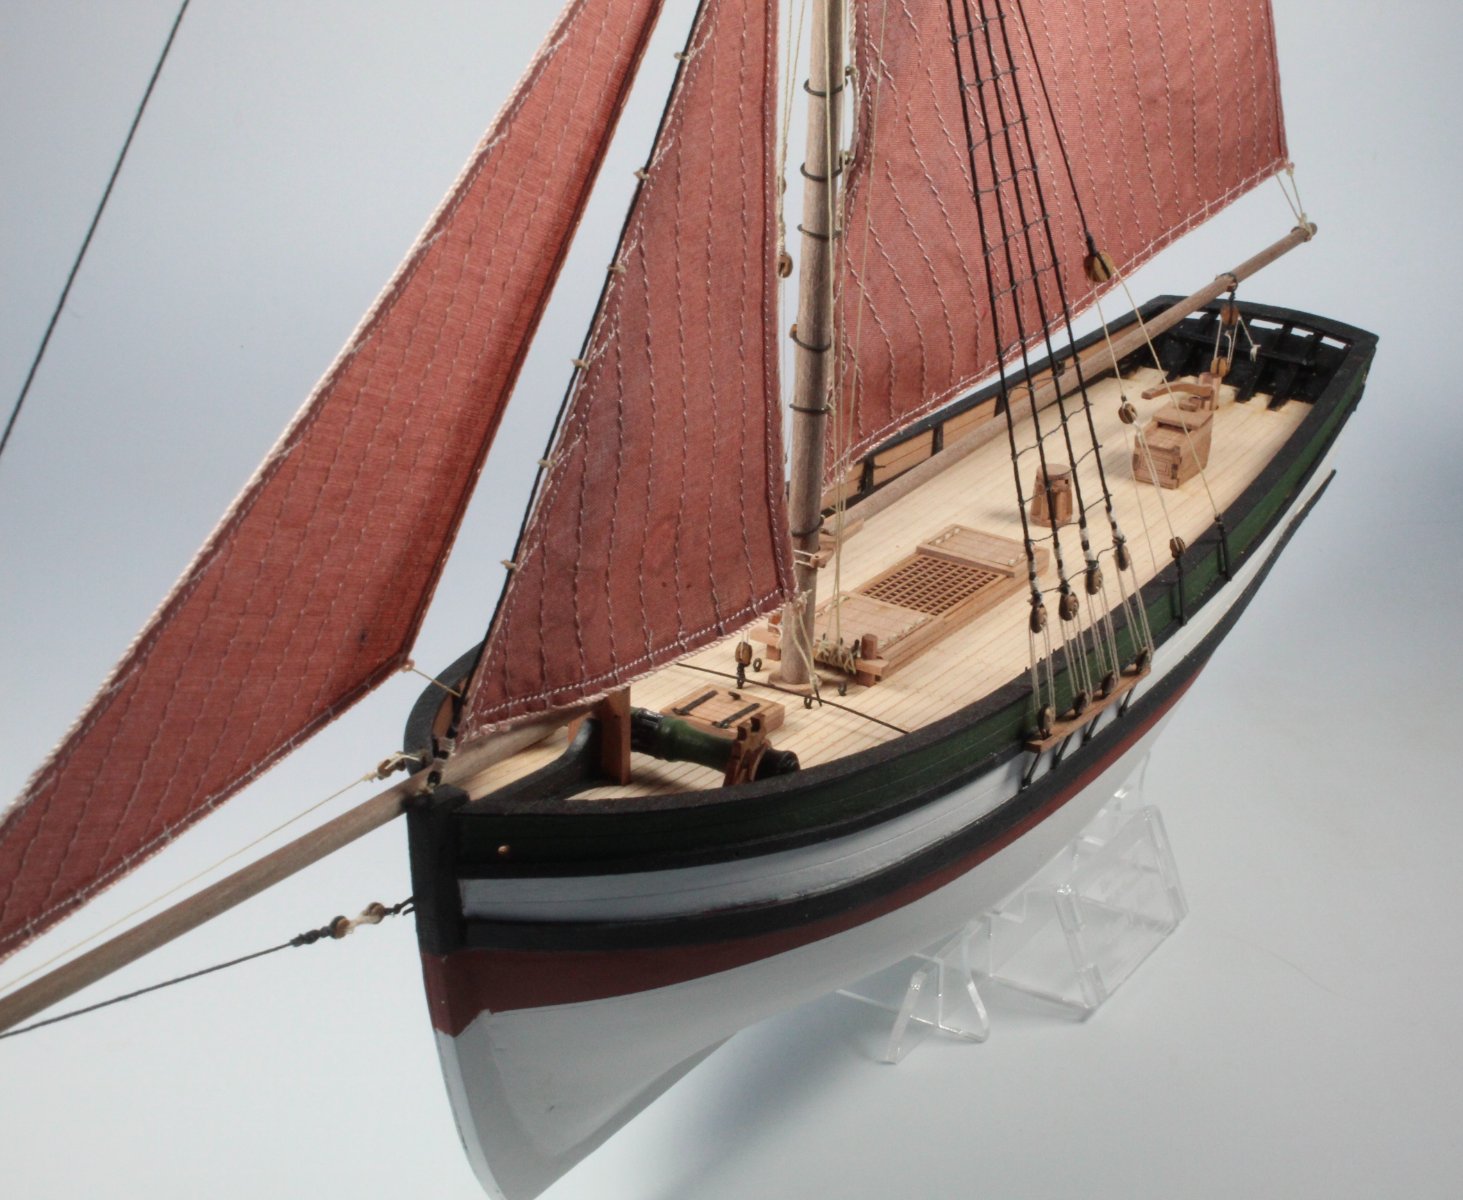
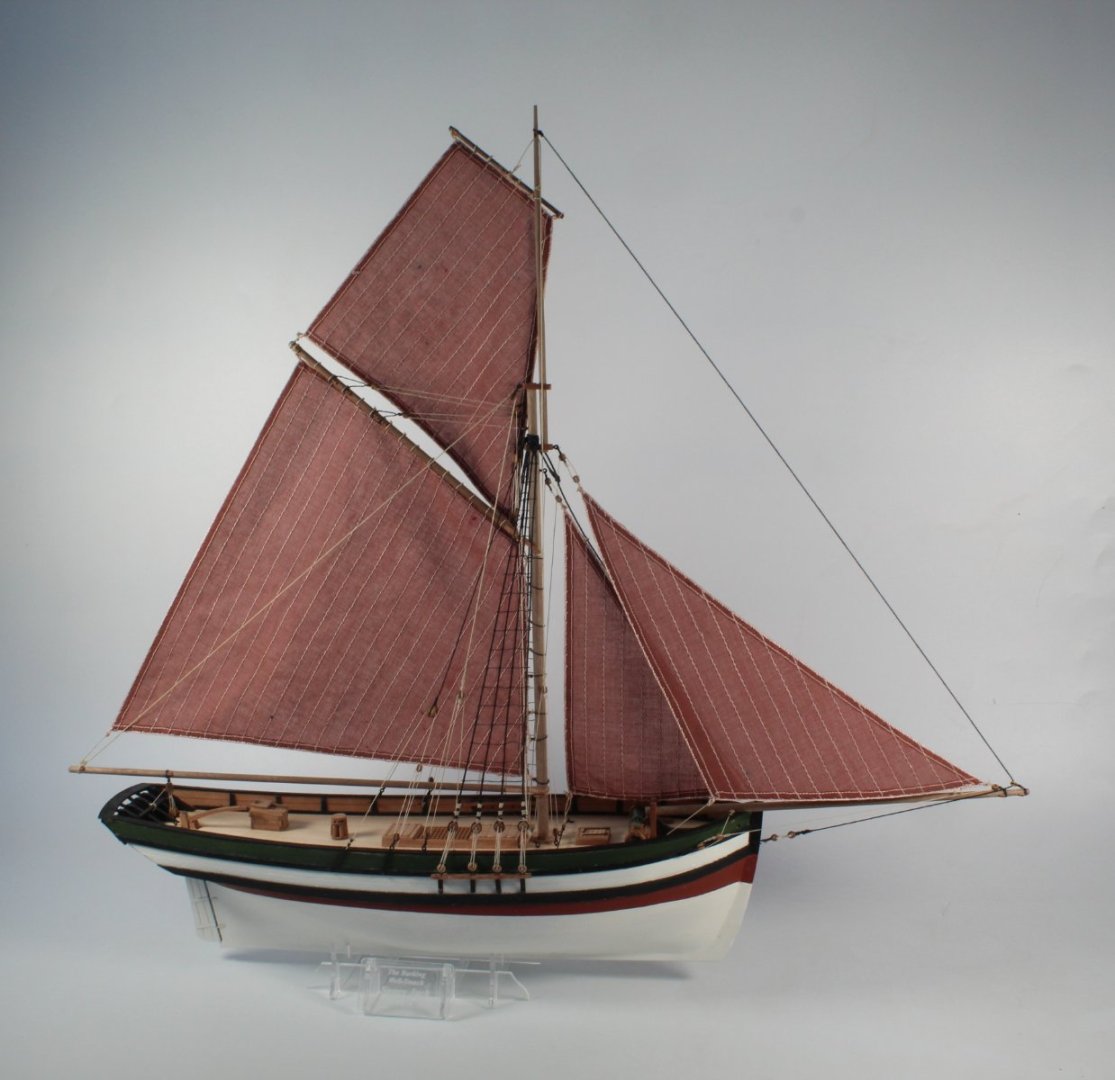
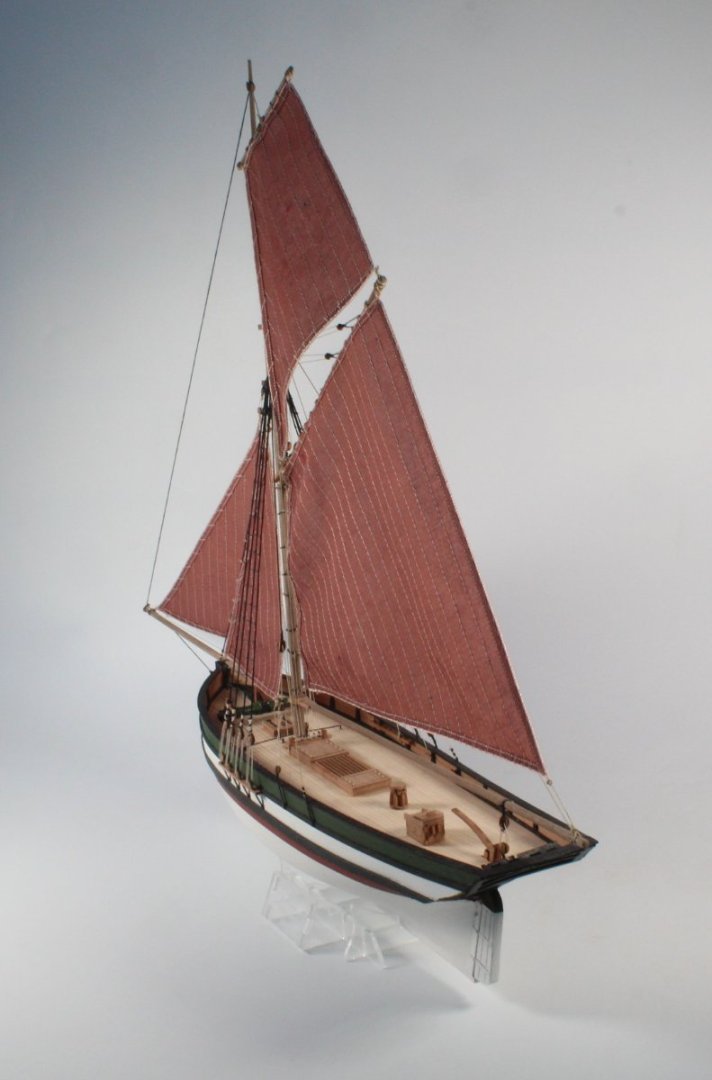
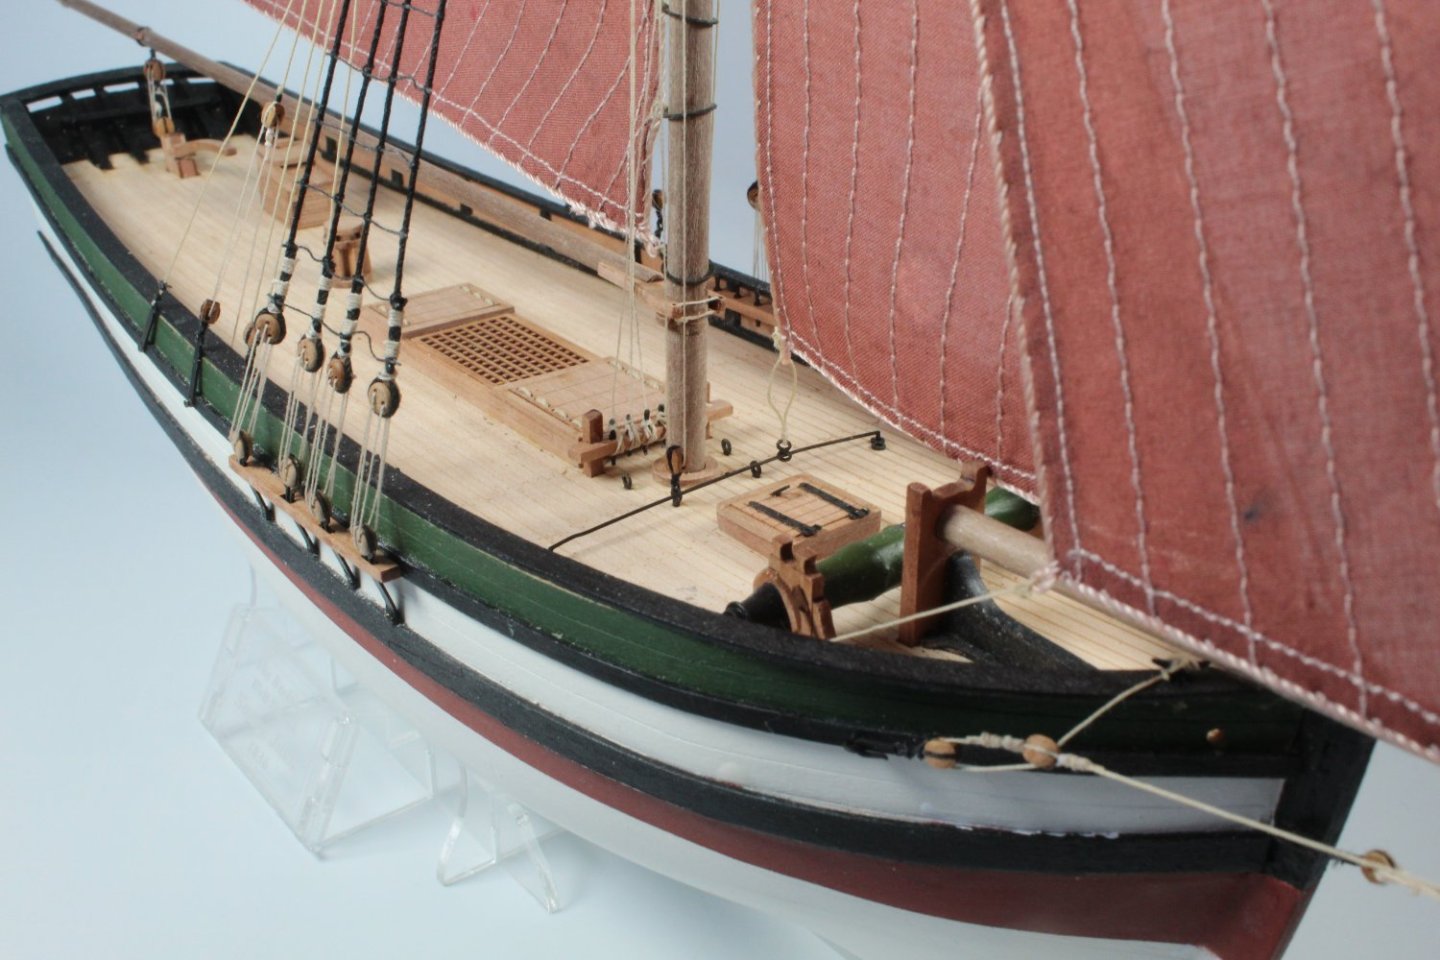
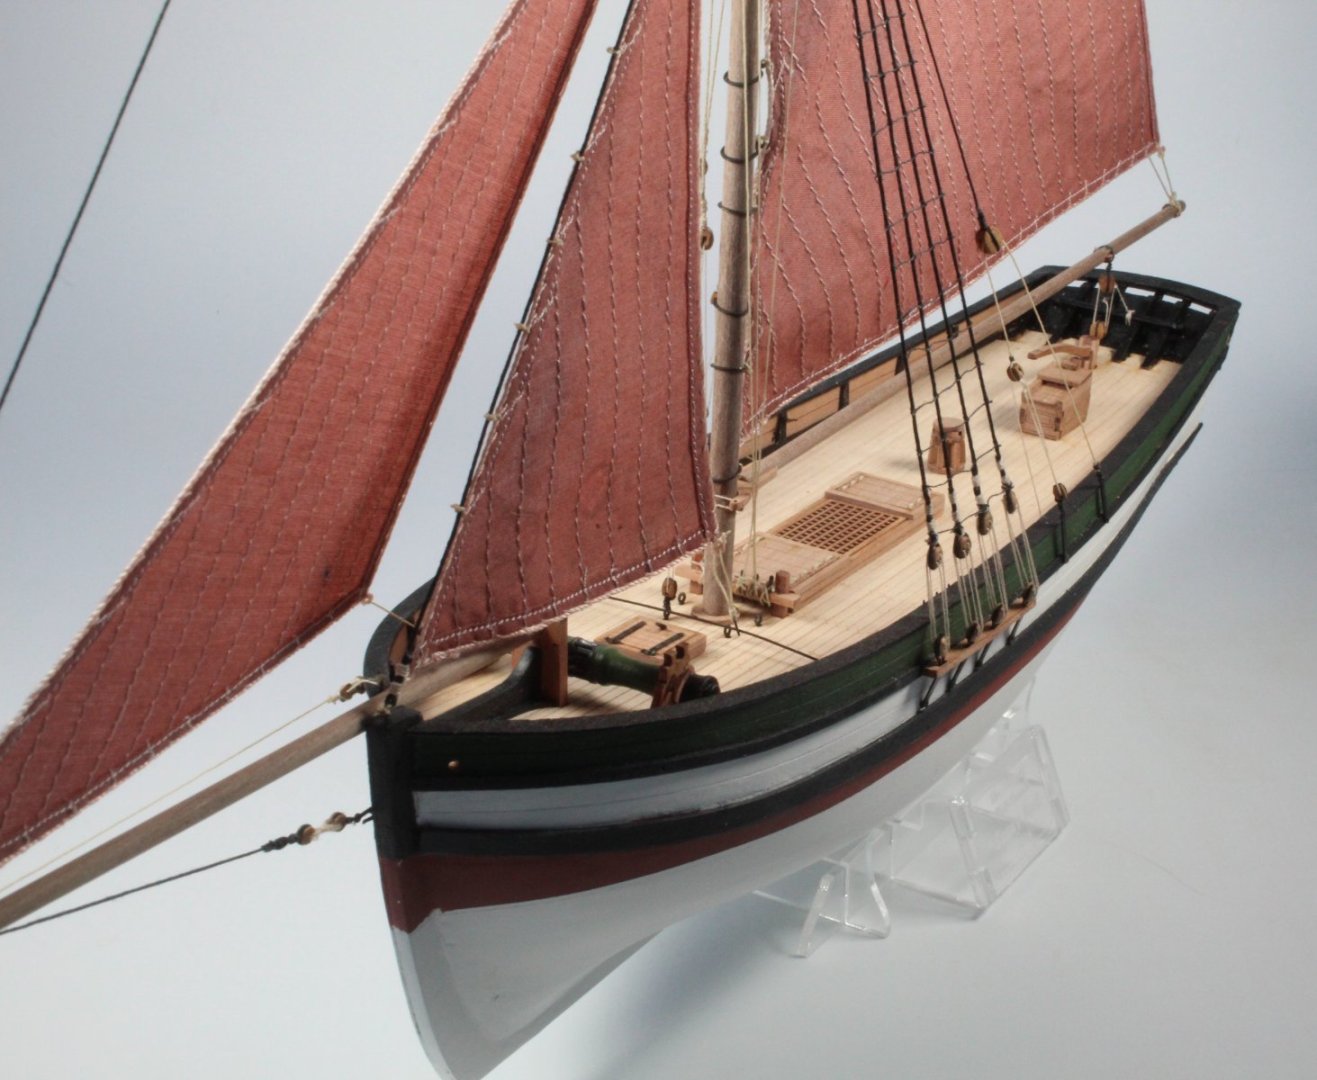
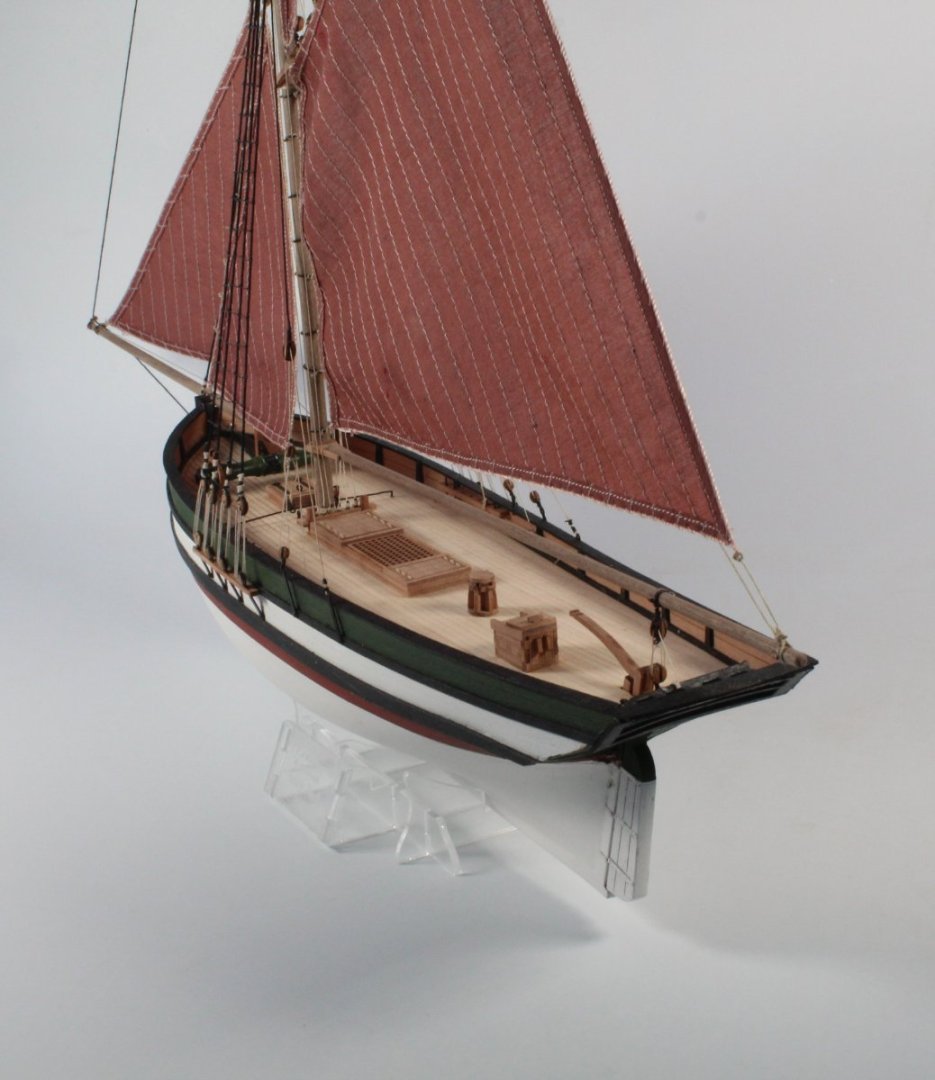
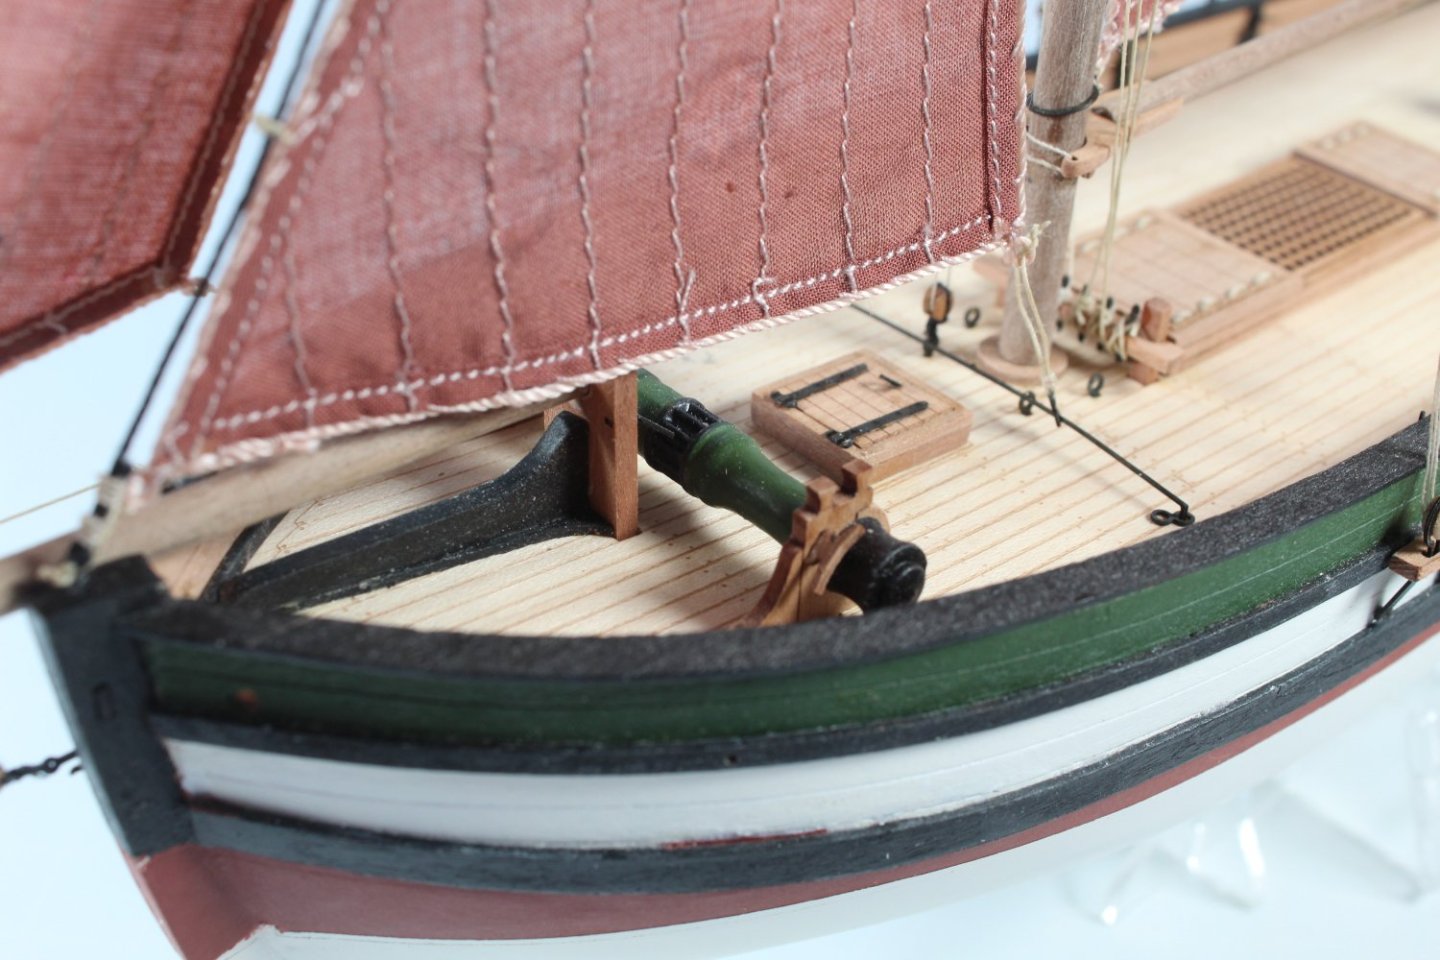
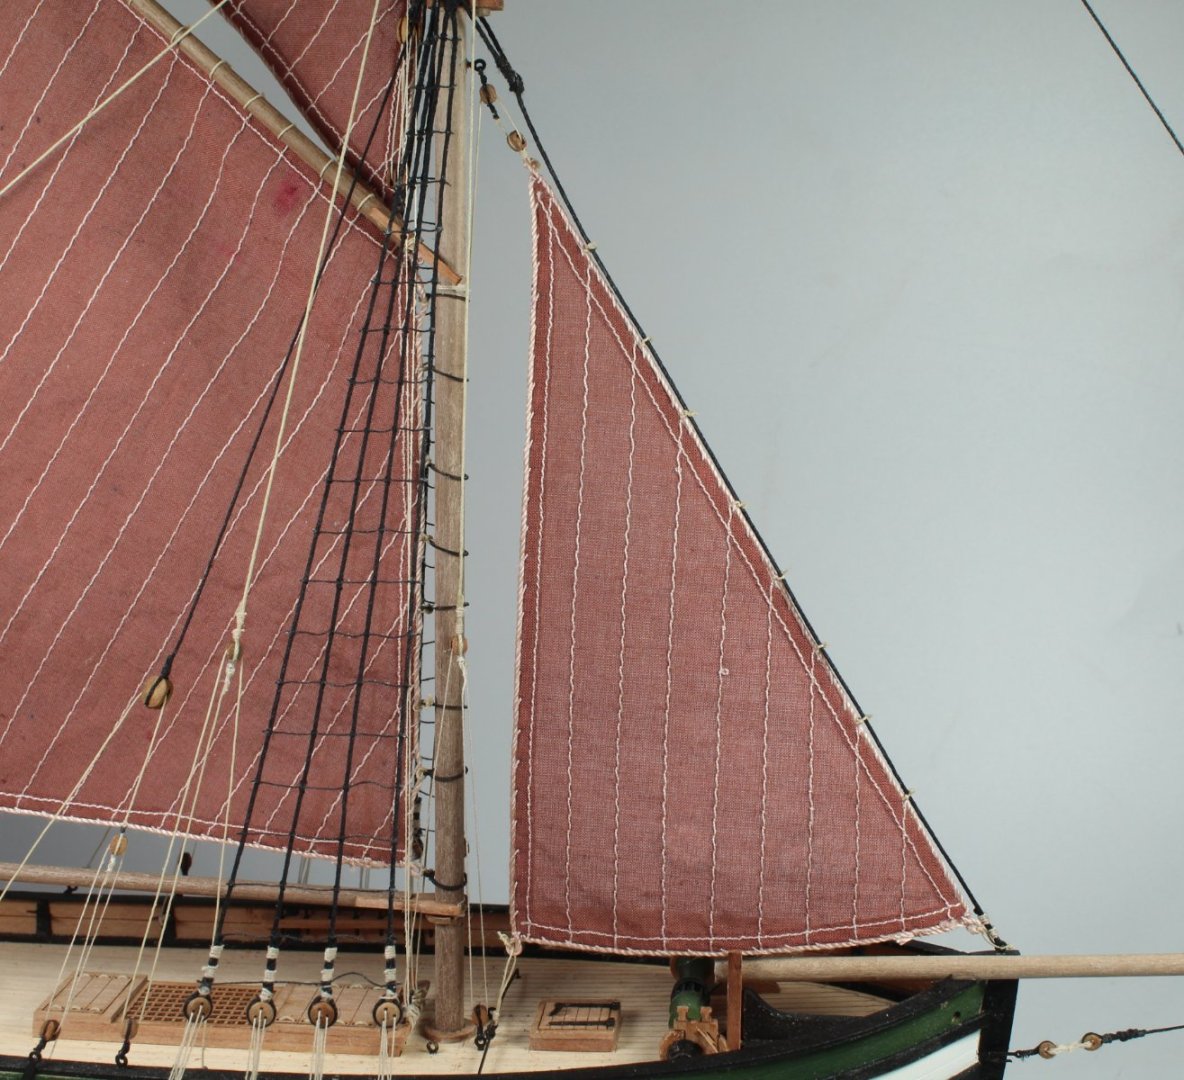
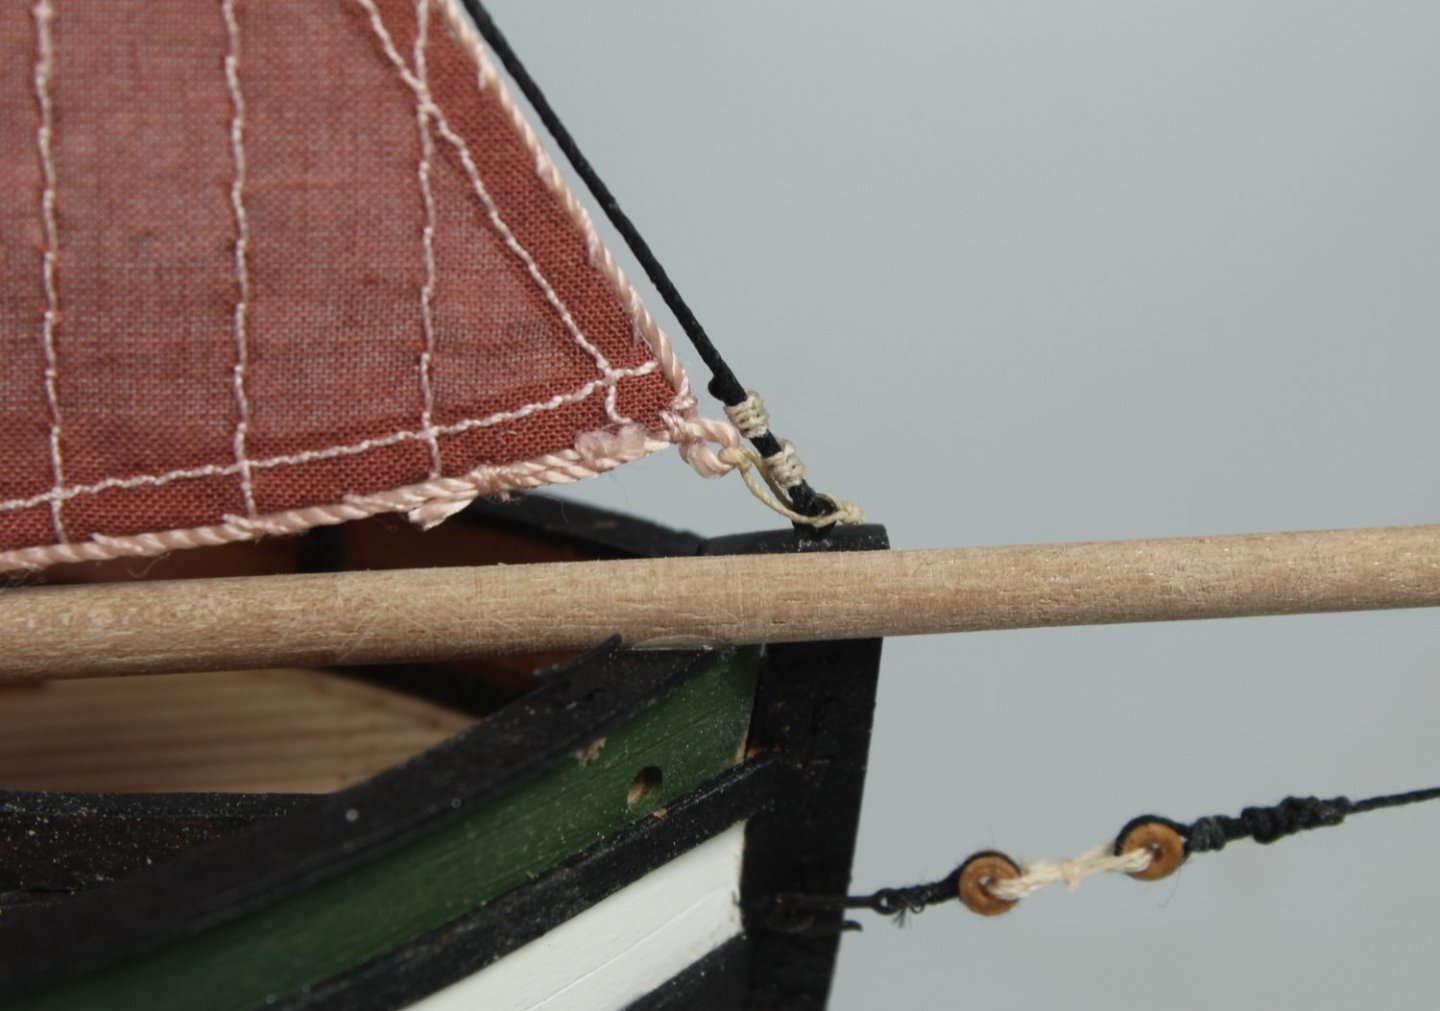
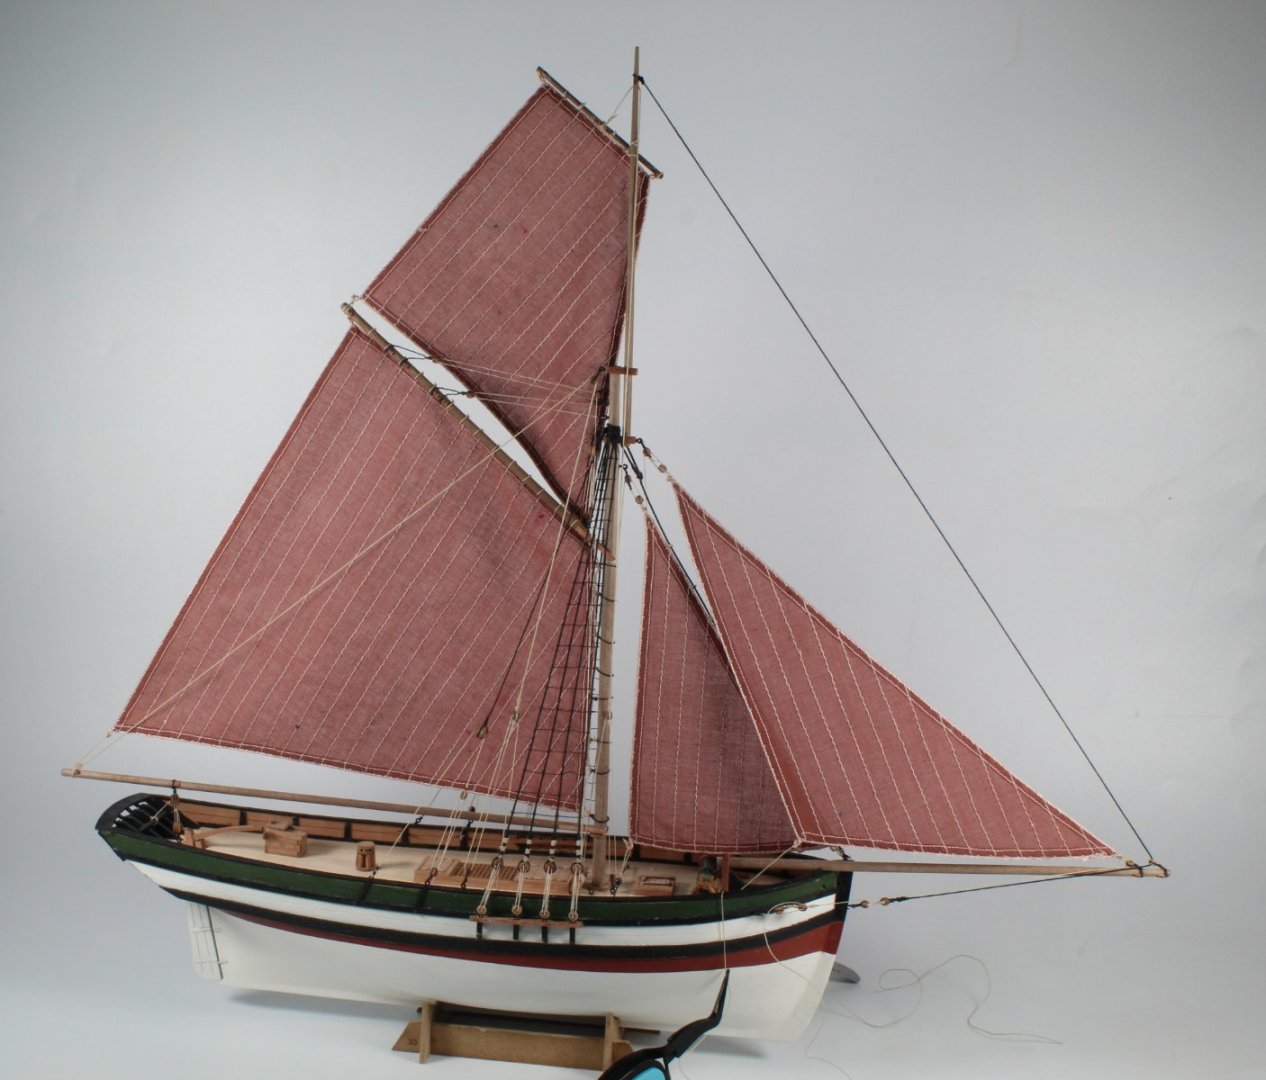
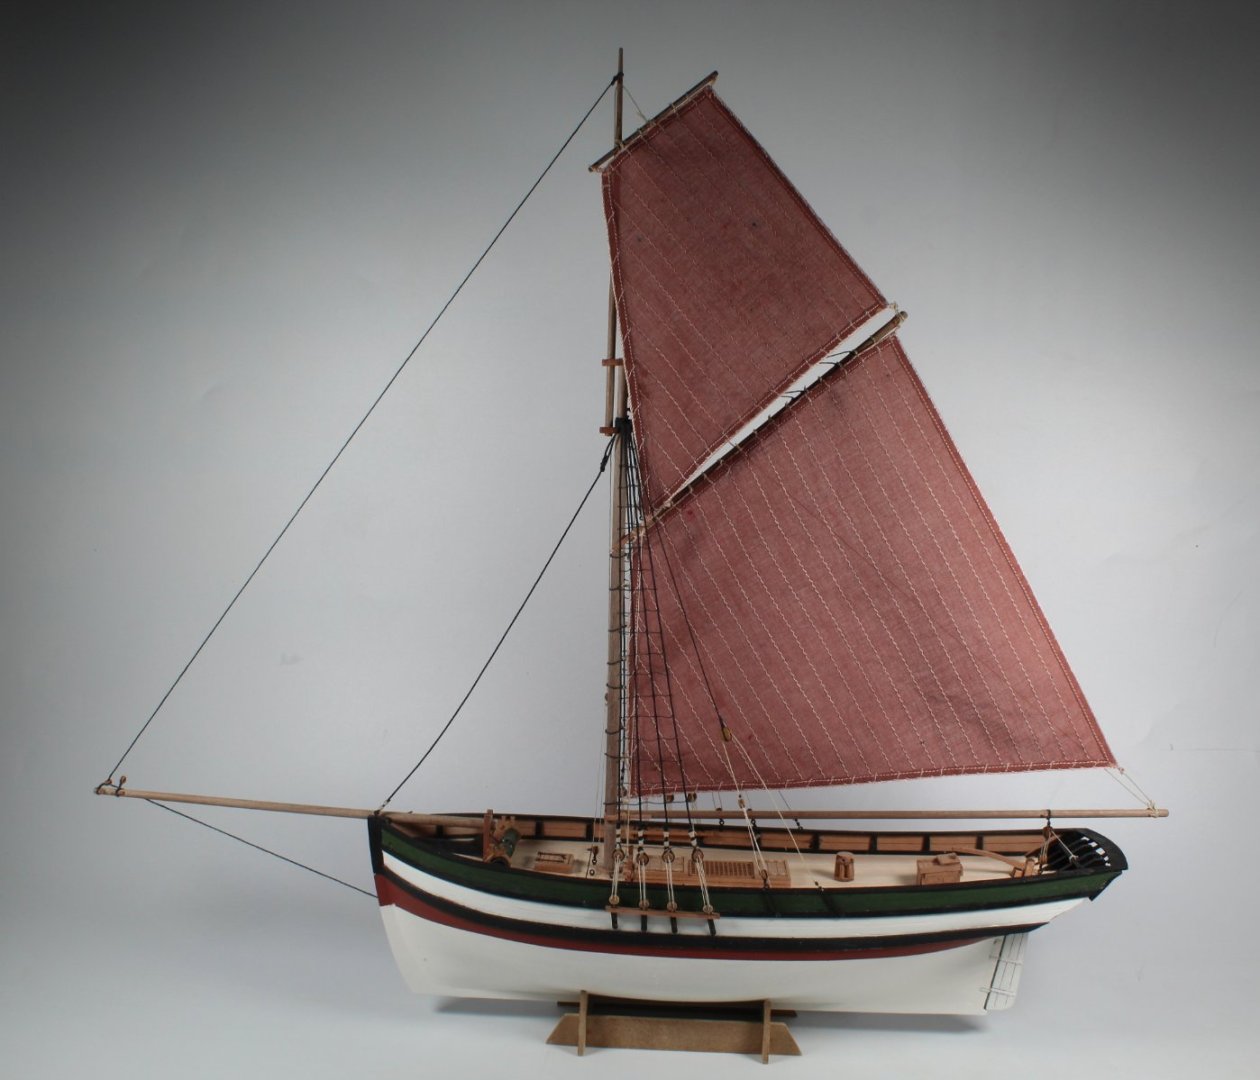
024 - The Completed Saucy Jack All good things must come to an end and this morning I completed the final task so the Saucy Jack is now complete and will be added to my ever expanding Vanguard fleet. To date I have built Speedy, Alert, DOK, Sphinx, Erycina and Saucy Jack. The Indy, when released will be a major undertaking and I expect it will take 2 to 3 years to complete. Thanks to everyone who has been following this build and for all the kind comments and likes. It is greatly appreciated. Thanks also to Chris and James for all the the work they have put in to developing and producing a brilliant range of models. Until the Indy kit is released, which I have pre-ordered, I need another small project so I have now ordered the Nisha – Brixham ‘Mumble Bee’. My plan for the Nisha is to use it as a practise piece to try to hone some of my weaker skills, especially the planking aspect which needs great improvement. I have attached a few pictures of the completed Saucy Jack.


- 62 replies
-
- 18
-
-

-
- Saucy Jack
- vanguard models
- (and 3 more)
-
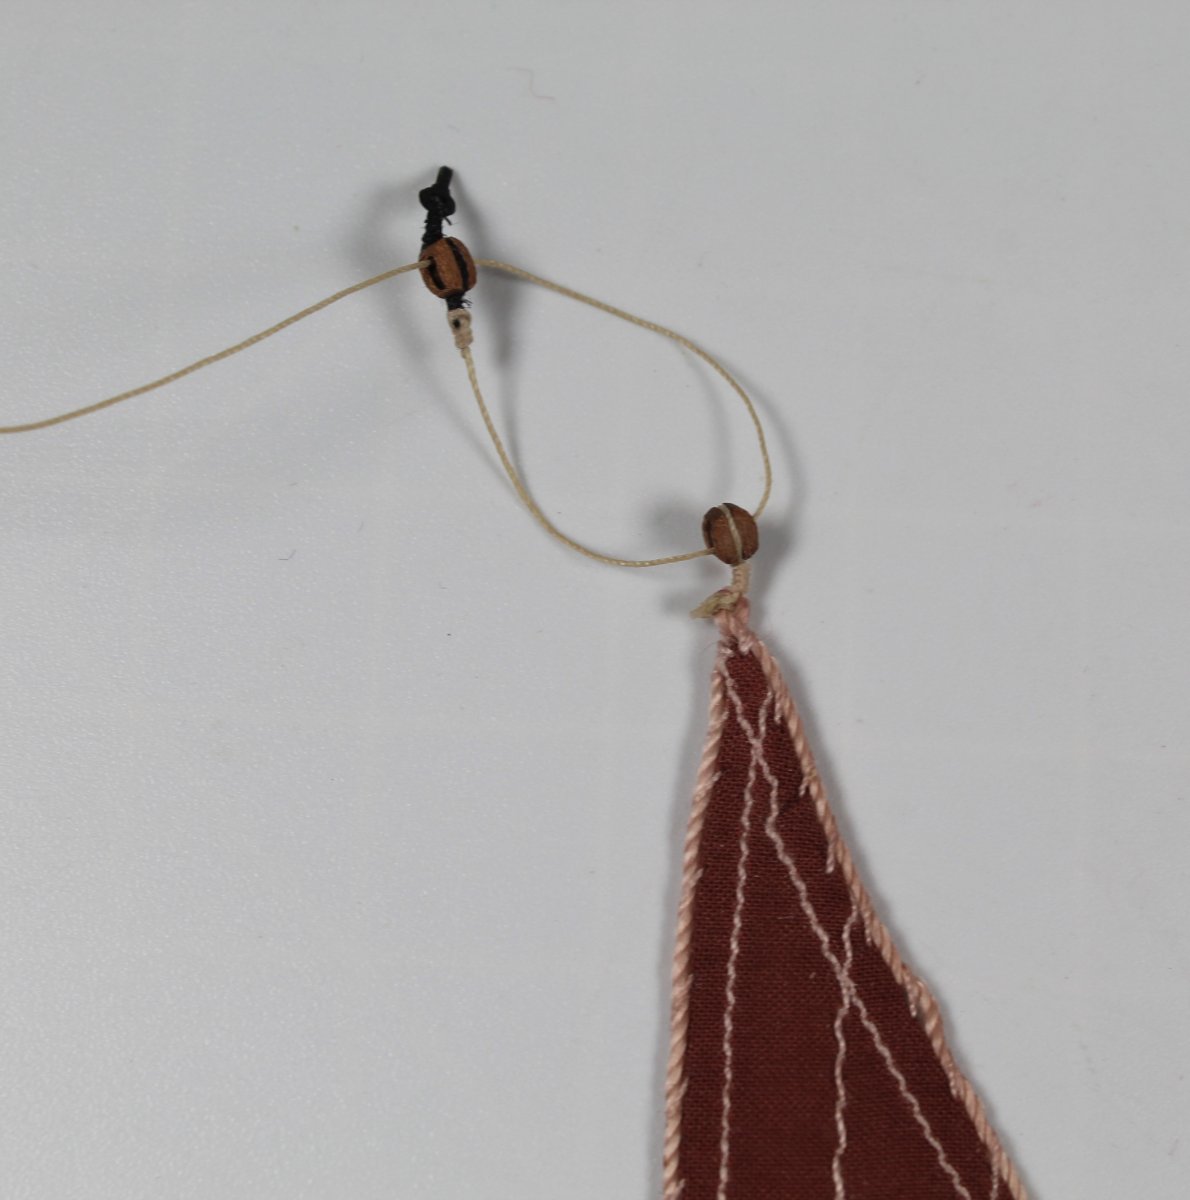
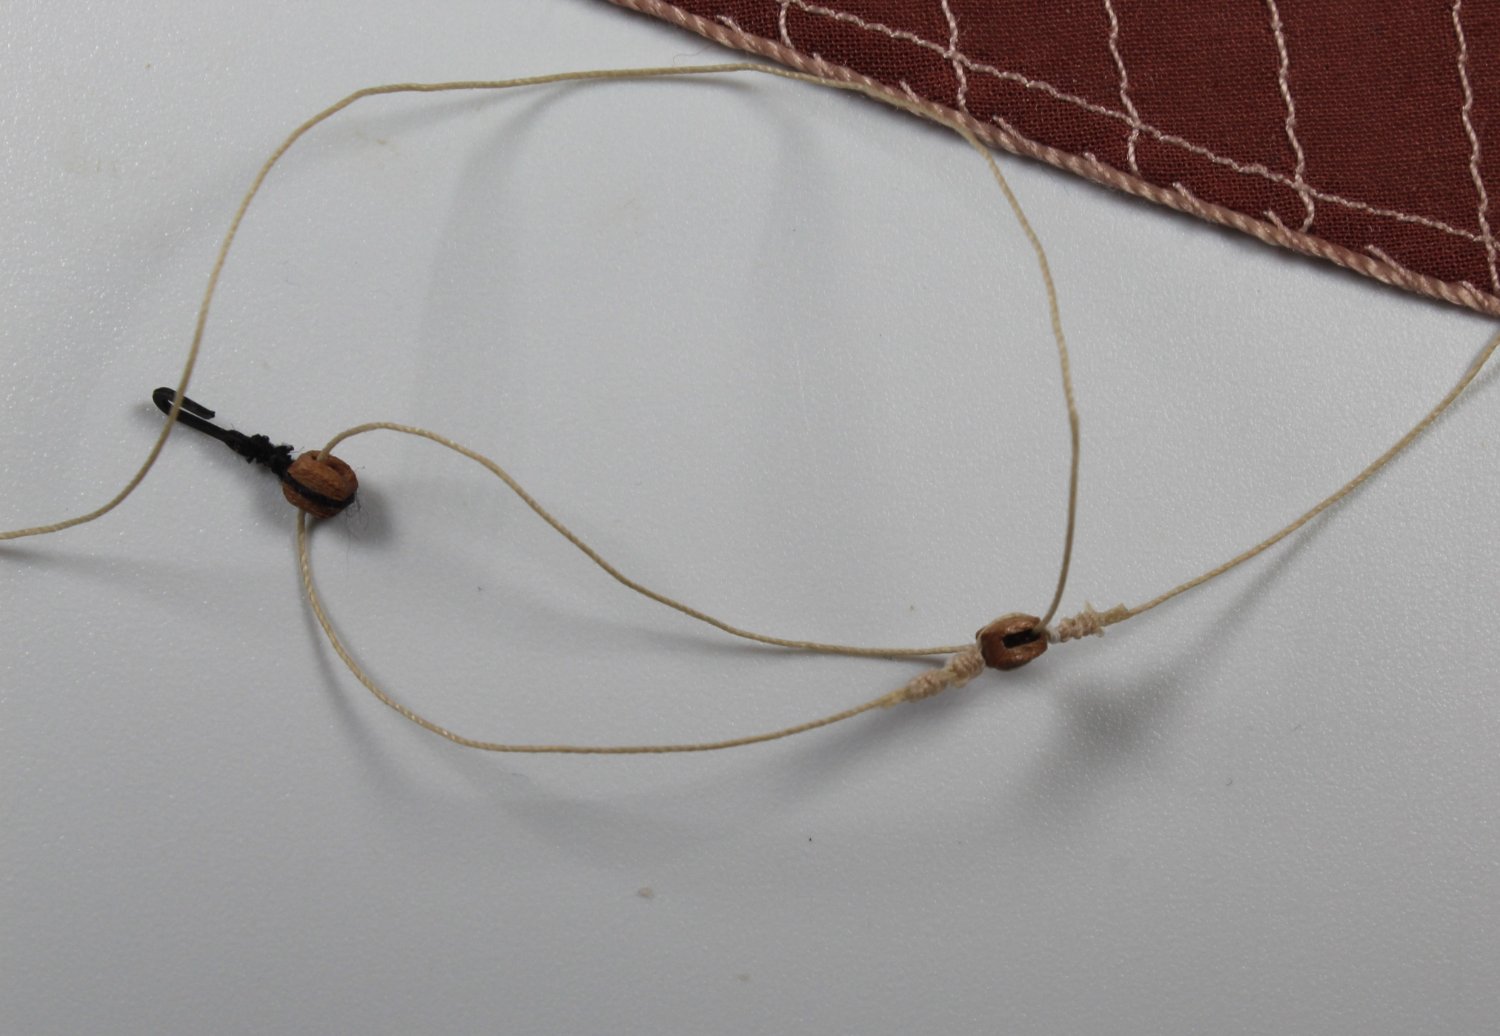
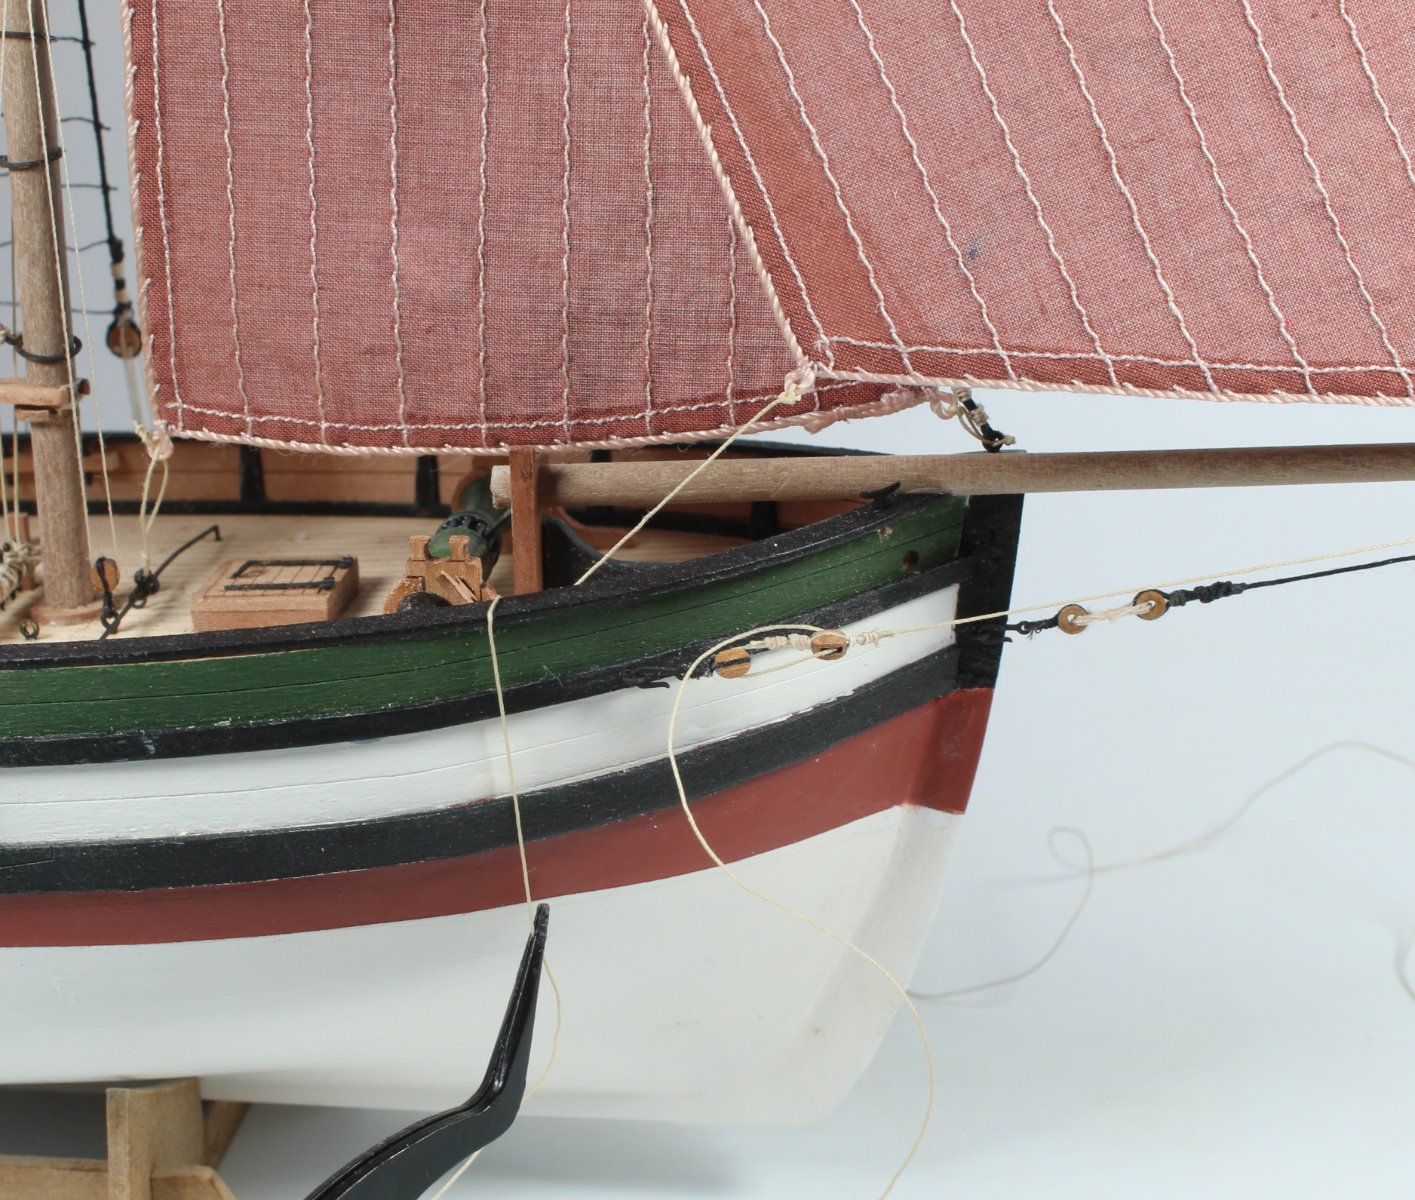
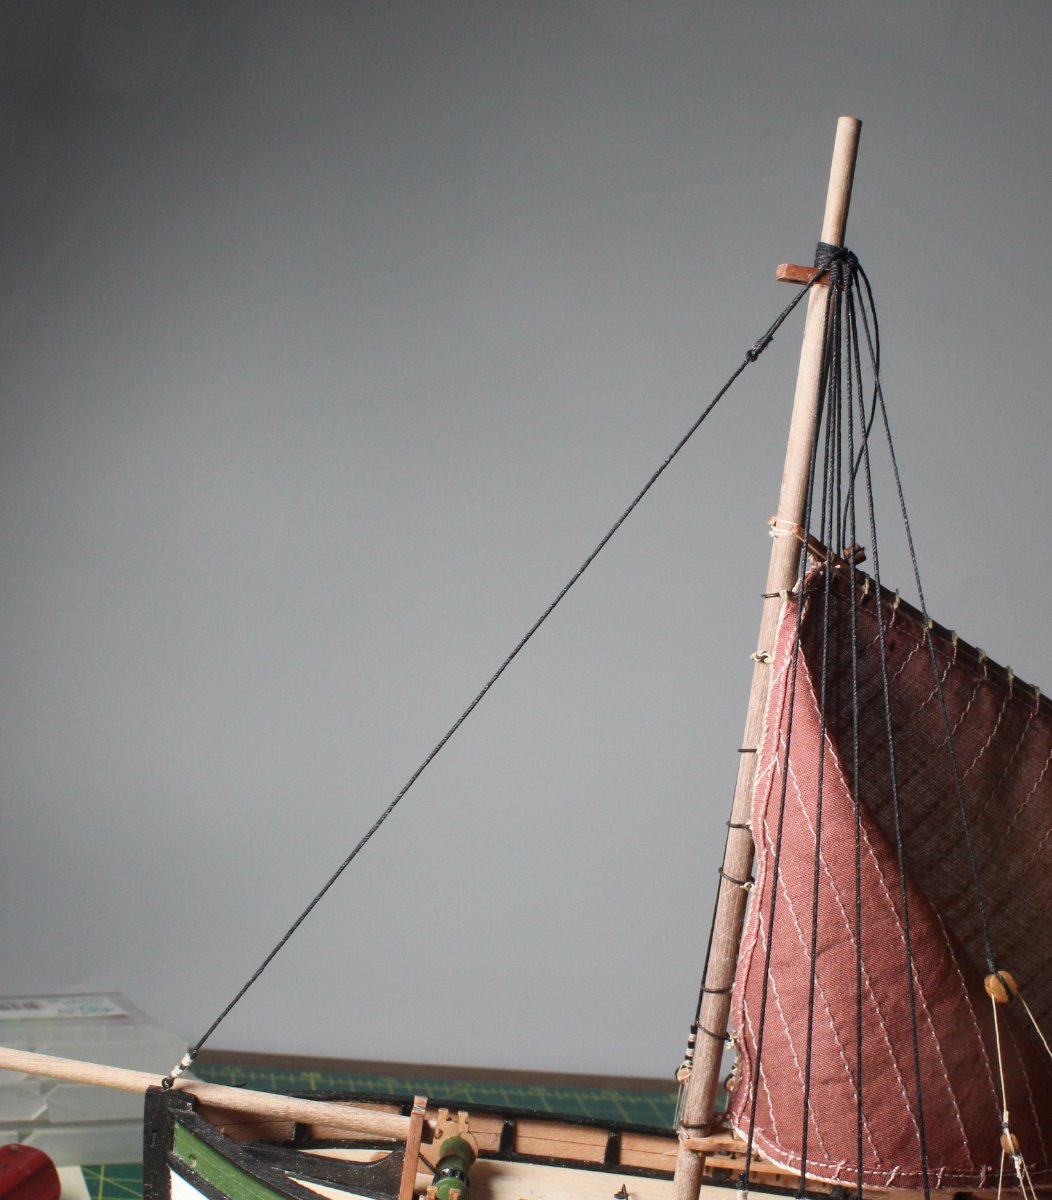
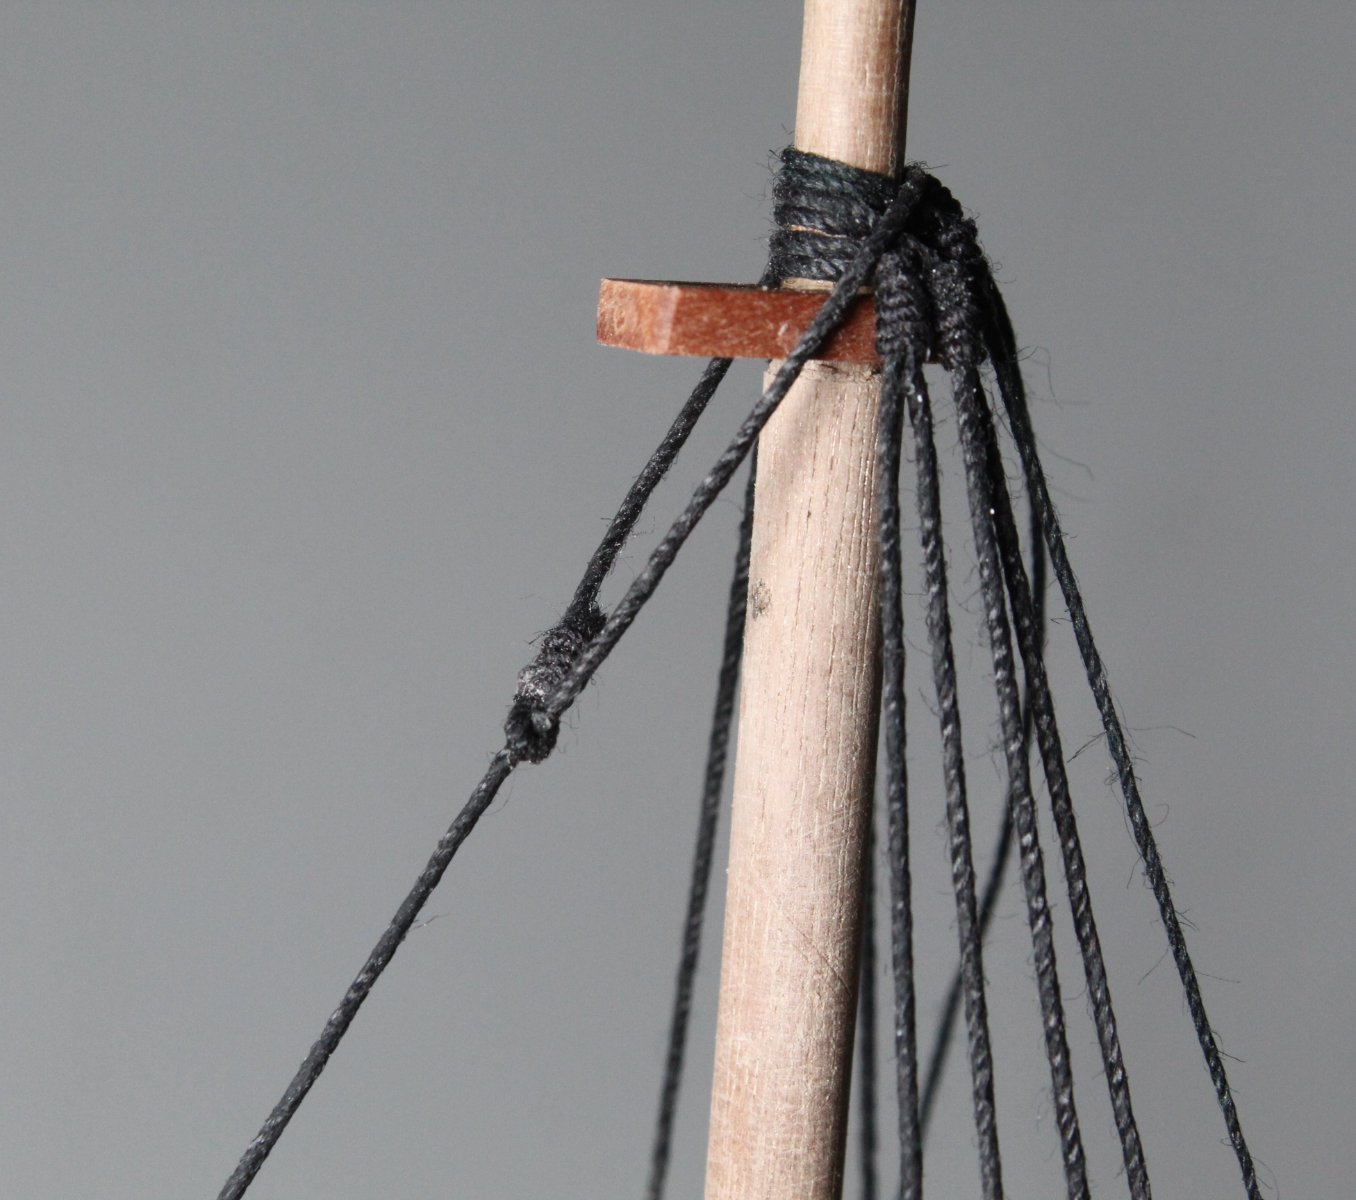
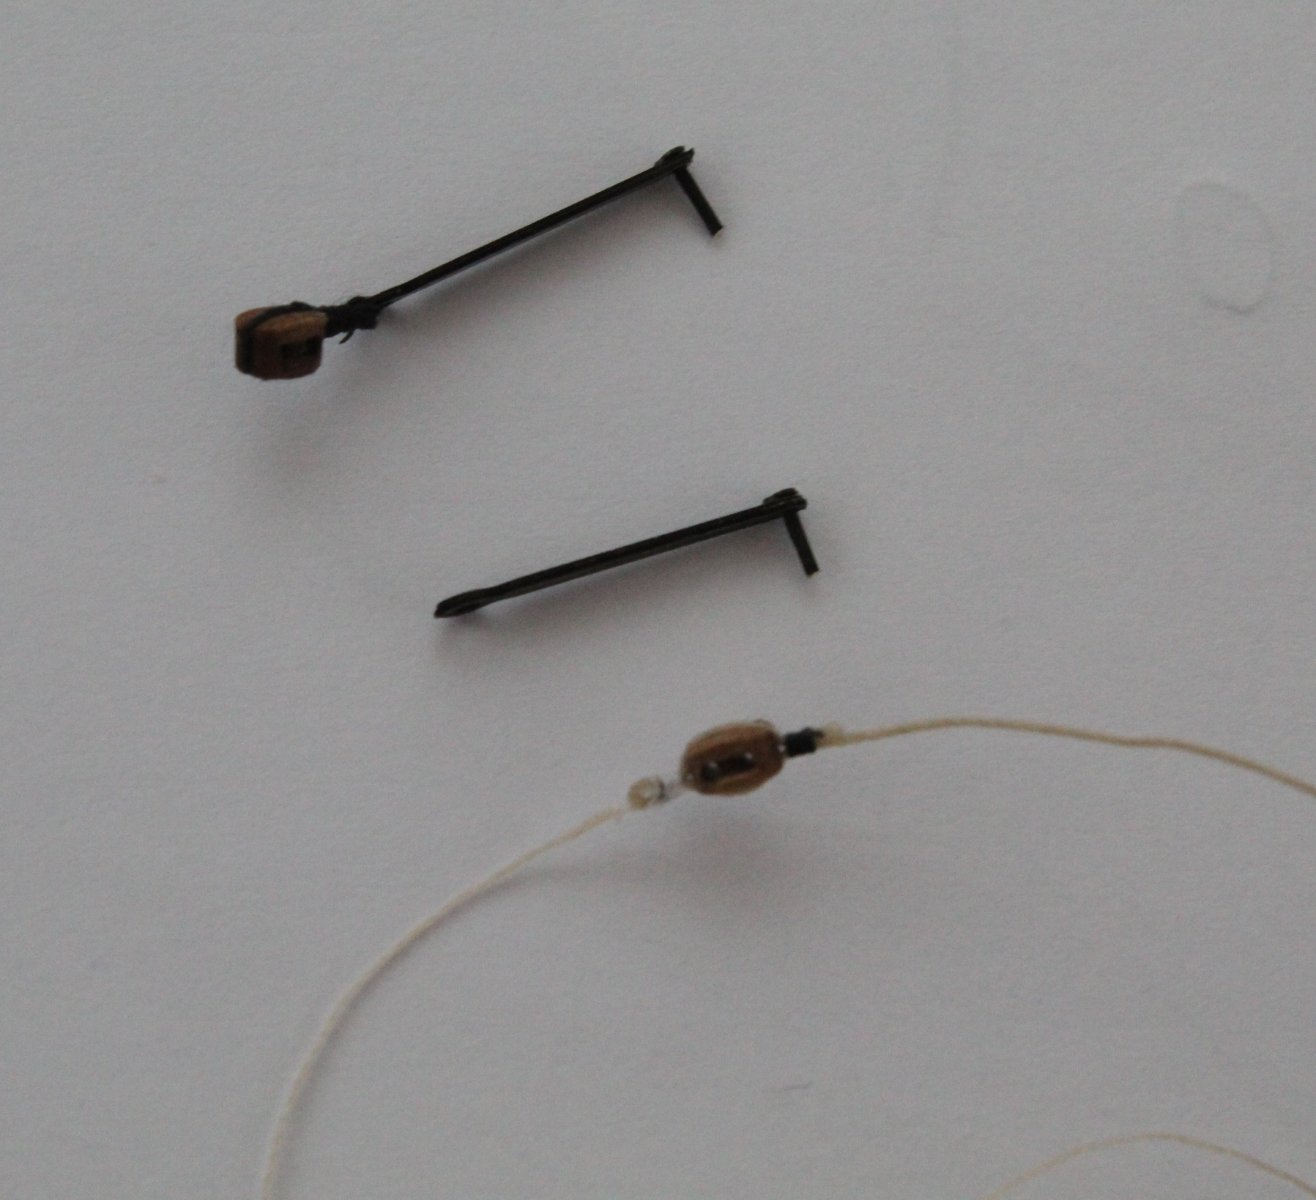
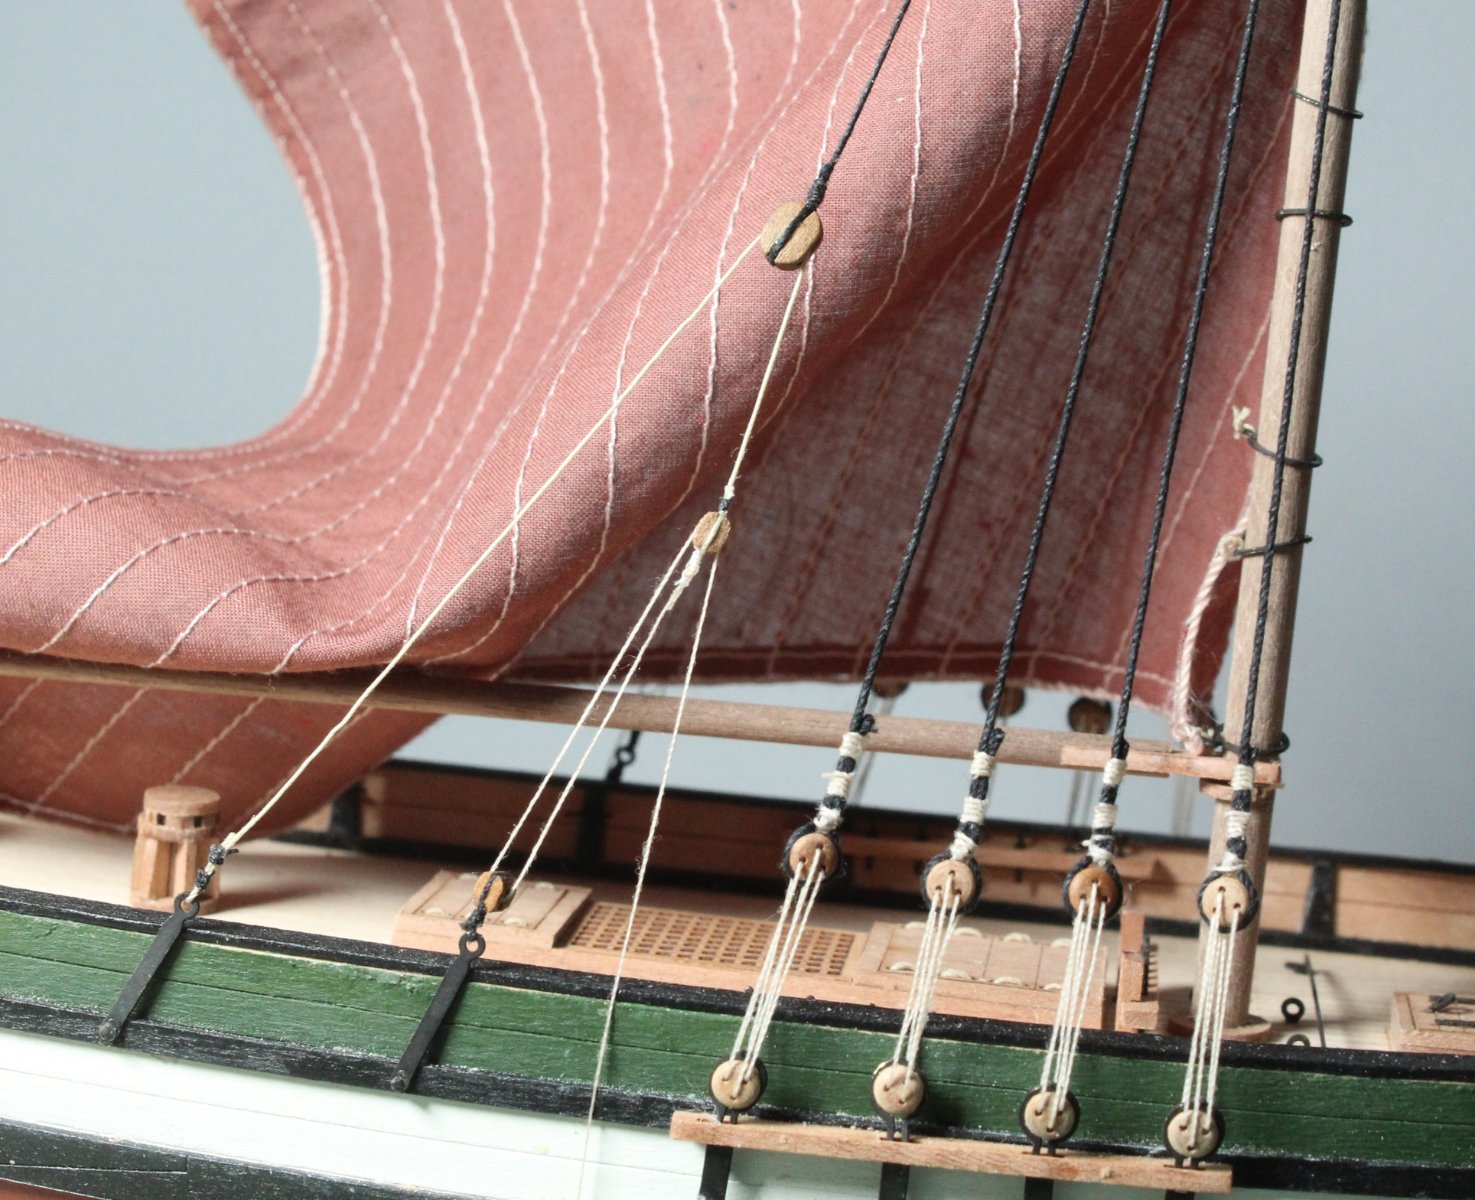
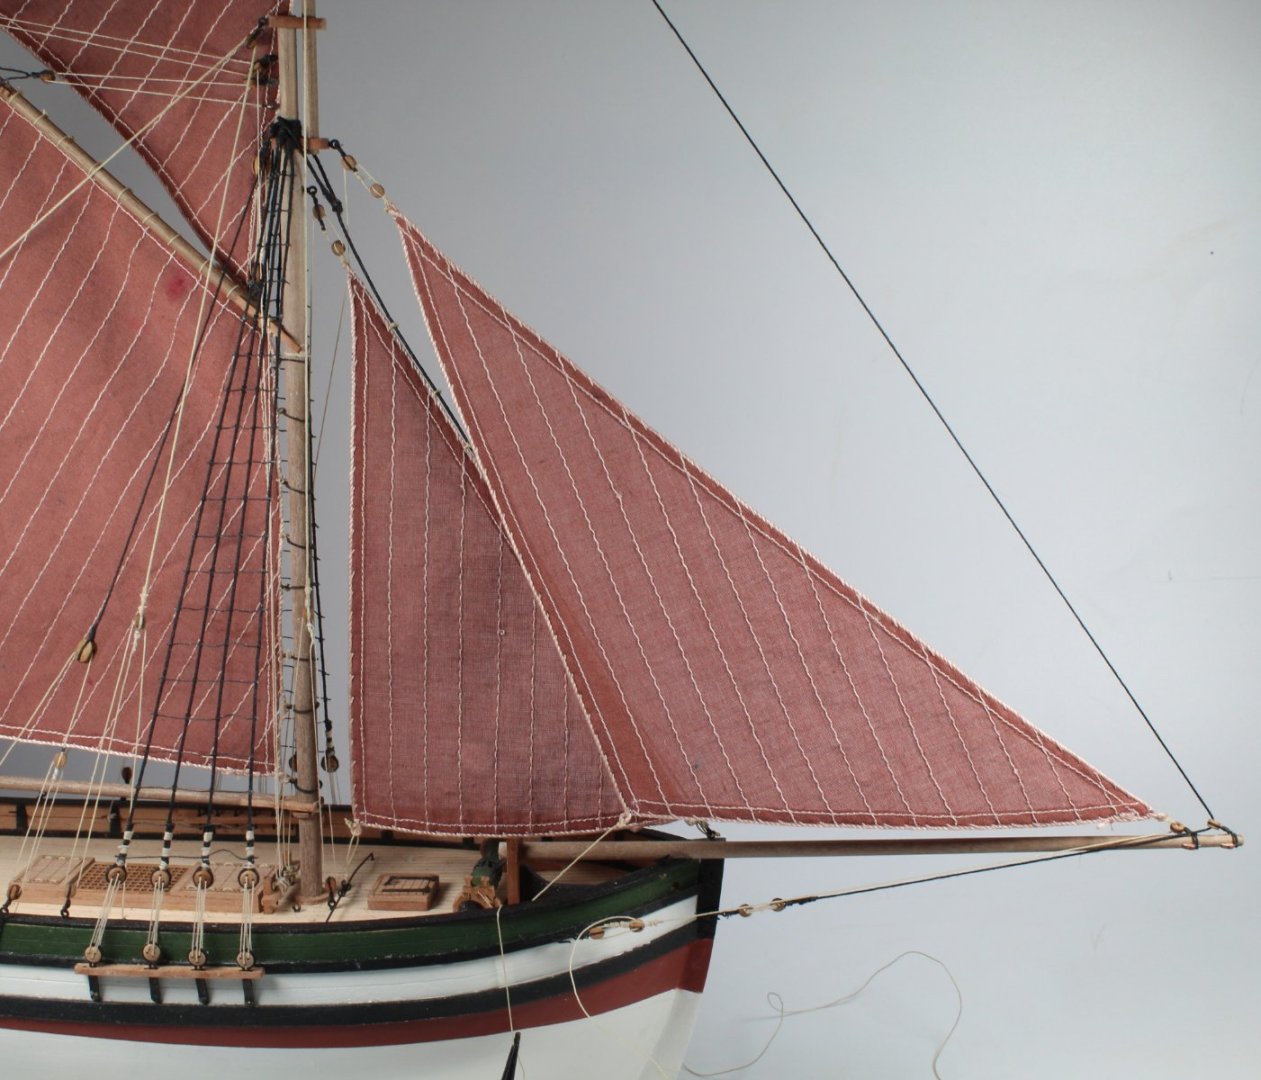
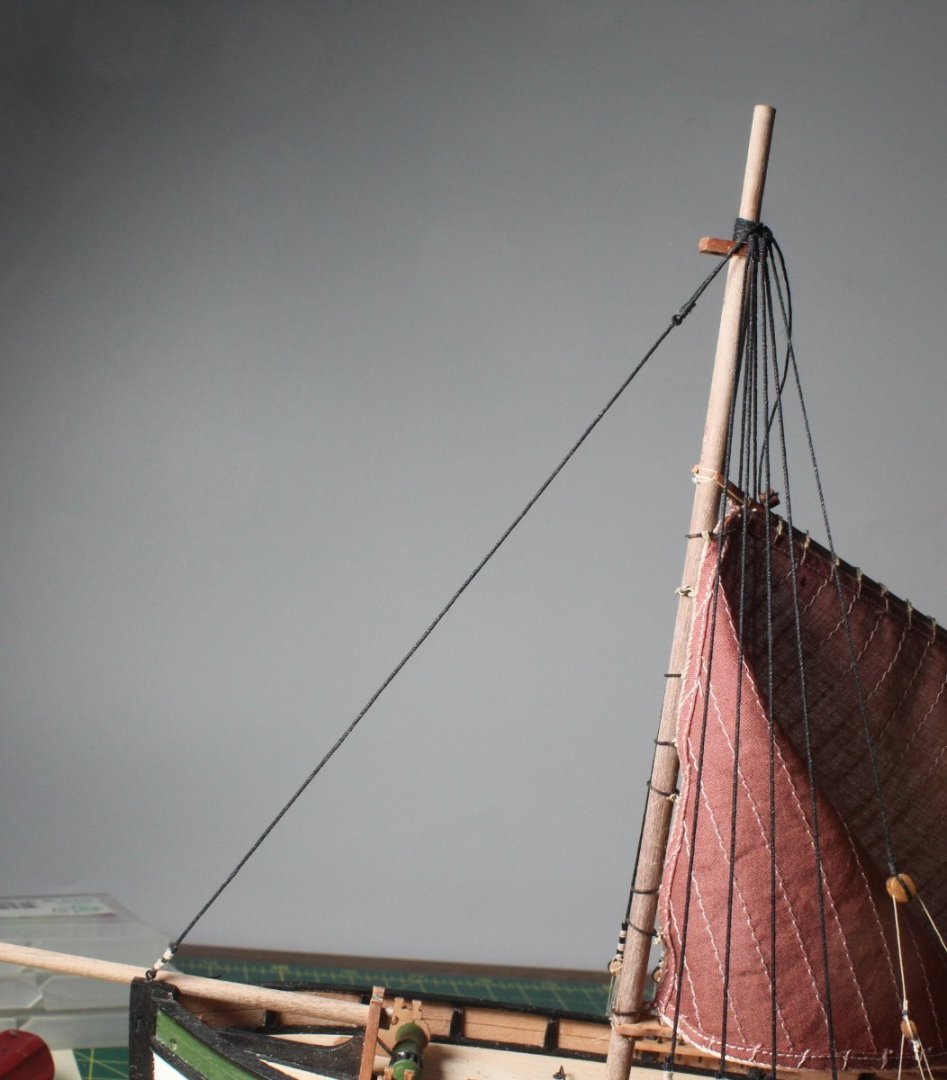
023 - Adding the Inner and Outer Jibsails I started with the inner jibsail which was installed without too much fuss. I used the same method for the installation of the inner jibsail as detailed for the outer jibsail, later on in this post. As with the inner jibsail I started the installation process for the outer jibsail by making the various blocks, as can be seen in the three photos below. The outer jibsail was then attached to the lower main mast end cap, via the eyebolt and double block arrangement, as can be seen in the next photo. The lower fastenings were then added, but not belayed, so the position of the outer jibsail could be adjusted as necessary The outer jibsail has now been positioned and is ready to be belayed. I am using a couple of reverse action tweezers to hold the two of the three unbelayed lines in place in the photo below which shows the current the current state of the Saucy Jack build. Once the three outer jibsail lines have been belayed I will make the stand and the build process will then be complete.


- 62 replies
-
- 10
-
-
- Saucy Jack
- vanguard models
- (and 3 more)
-
Thanks, I use reverse action tweezers, straight and right angled. I did buy a set of rigging tools many years ago from CMB's when build HMS Victory but I never used them. Perhaps they can help, I will give them a try.
-
Compared to my other boats this seemed much more difficult, especially accessing the belaying pins under the shrouds. I have plenty of tools. I find reverse action tweezers are usually the most useful, both straight and right-angled versions.
-
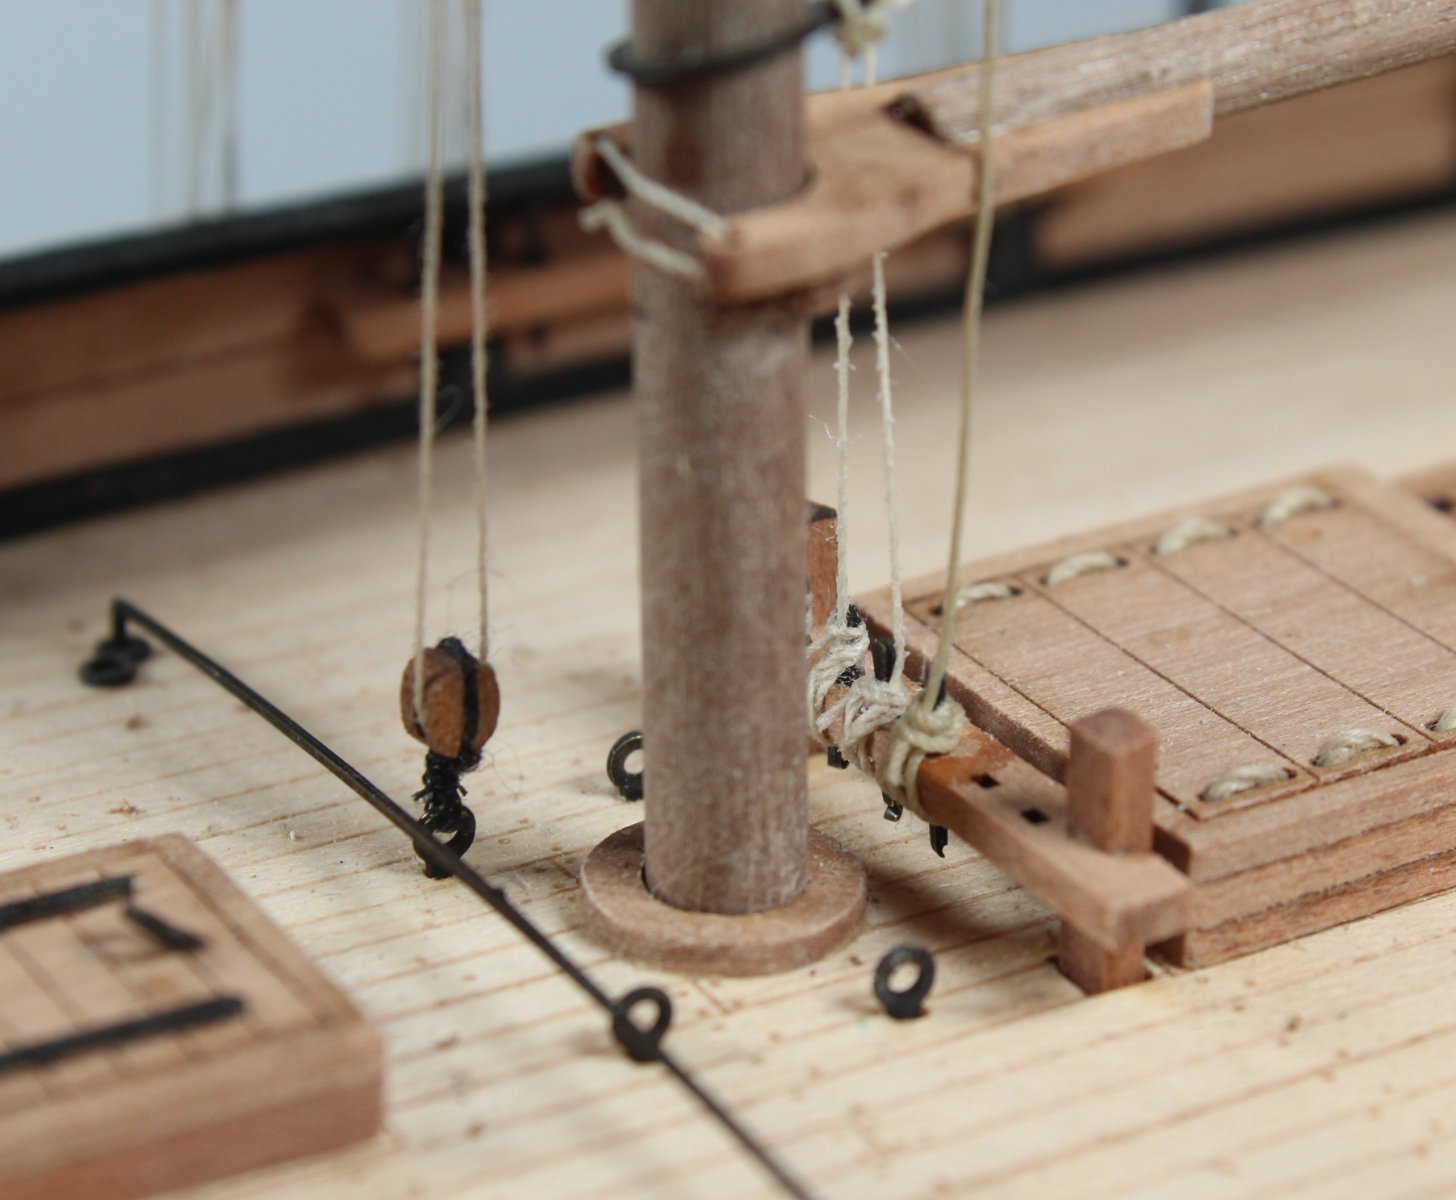
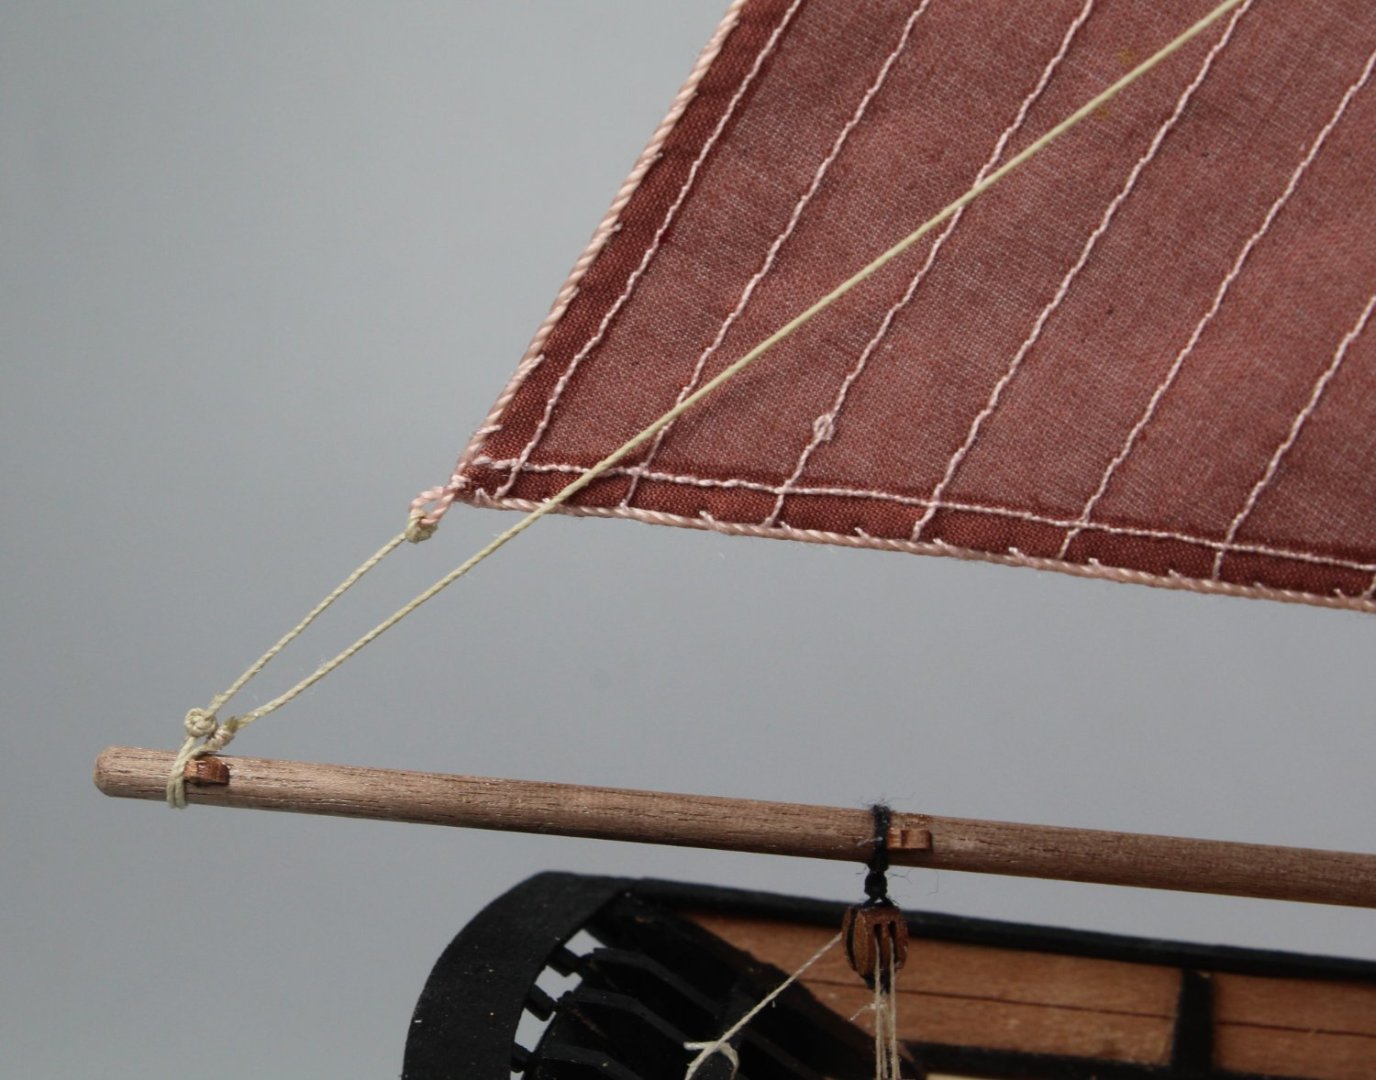
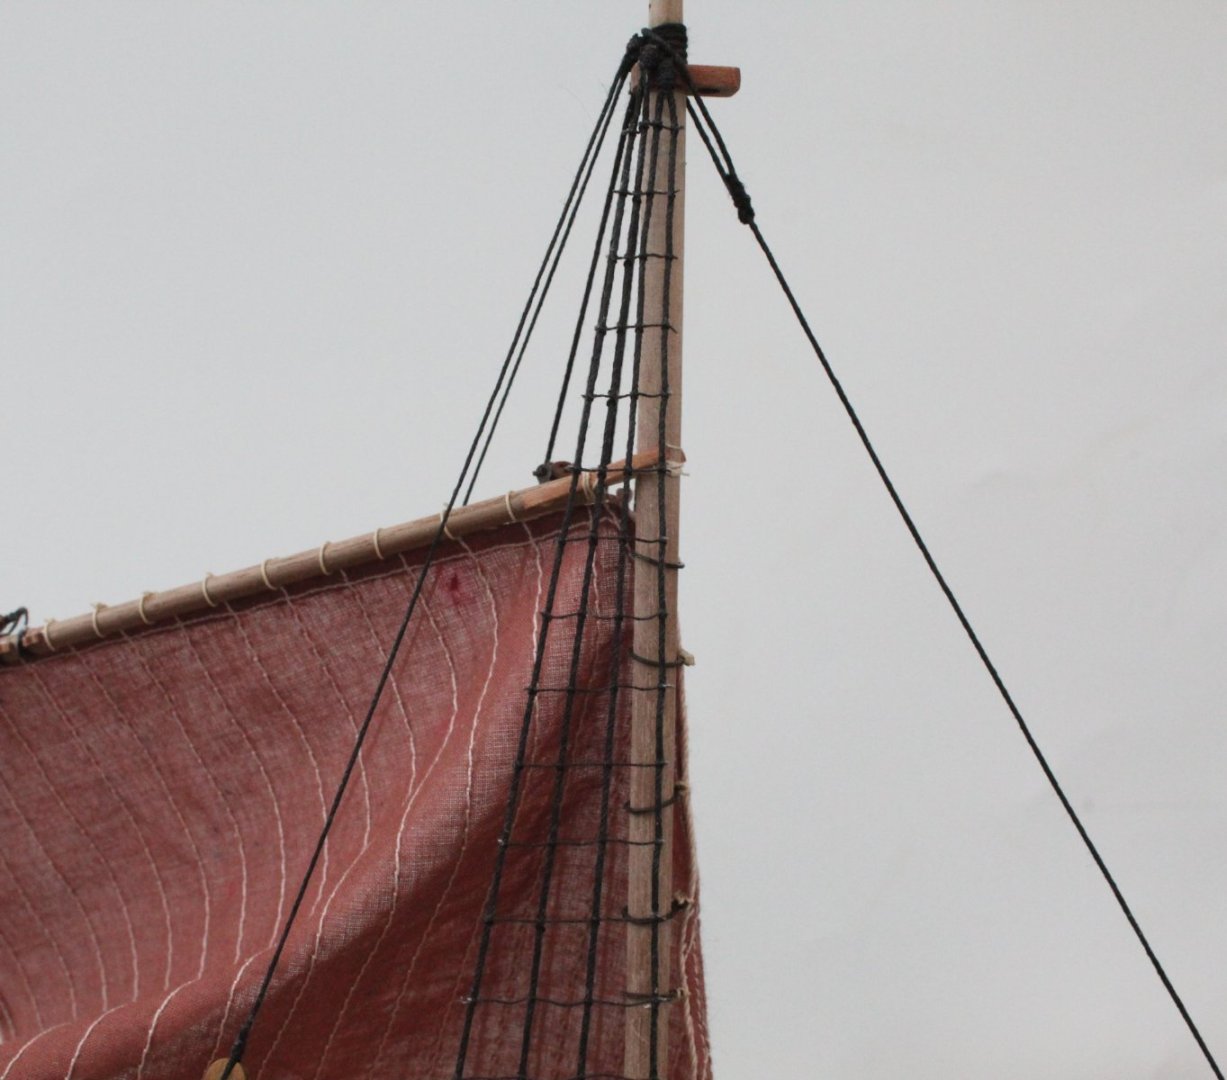
022 - Main Sail and Top Sail Rigging I have been able to spend a little bit more time in the shipyard and I have now completed the work related to adding the main and top sails. The photo below shows the current state of play. The top mast stay has been added but I have not belayed the free end which is why it looks wrong after passing through the bowsprit thimble. The next few photos are a collection of various aspects of the main and top sail work, in no particular order. I have rigged a few model boats but I have found some of the belaying to the bitts very tricky due to the limited space. It took me the best part of an hour to belay the line shown in the next photo as I found it almost impossible to hook the rigging line around the bottom of the belay pin. Some of the belaying block arrangements are shown in the next photo. The boom looks a bit long. I did double check the measurement and it is as per the plan sheet.

- 62 replies
-
- 6
-
-
- Saucy Jack
- vanguard models
- (and 3 more)
-
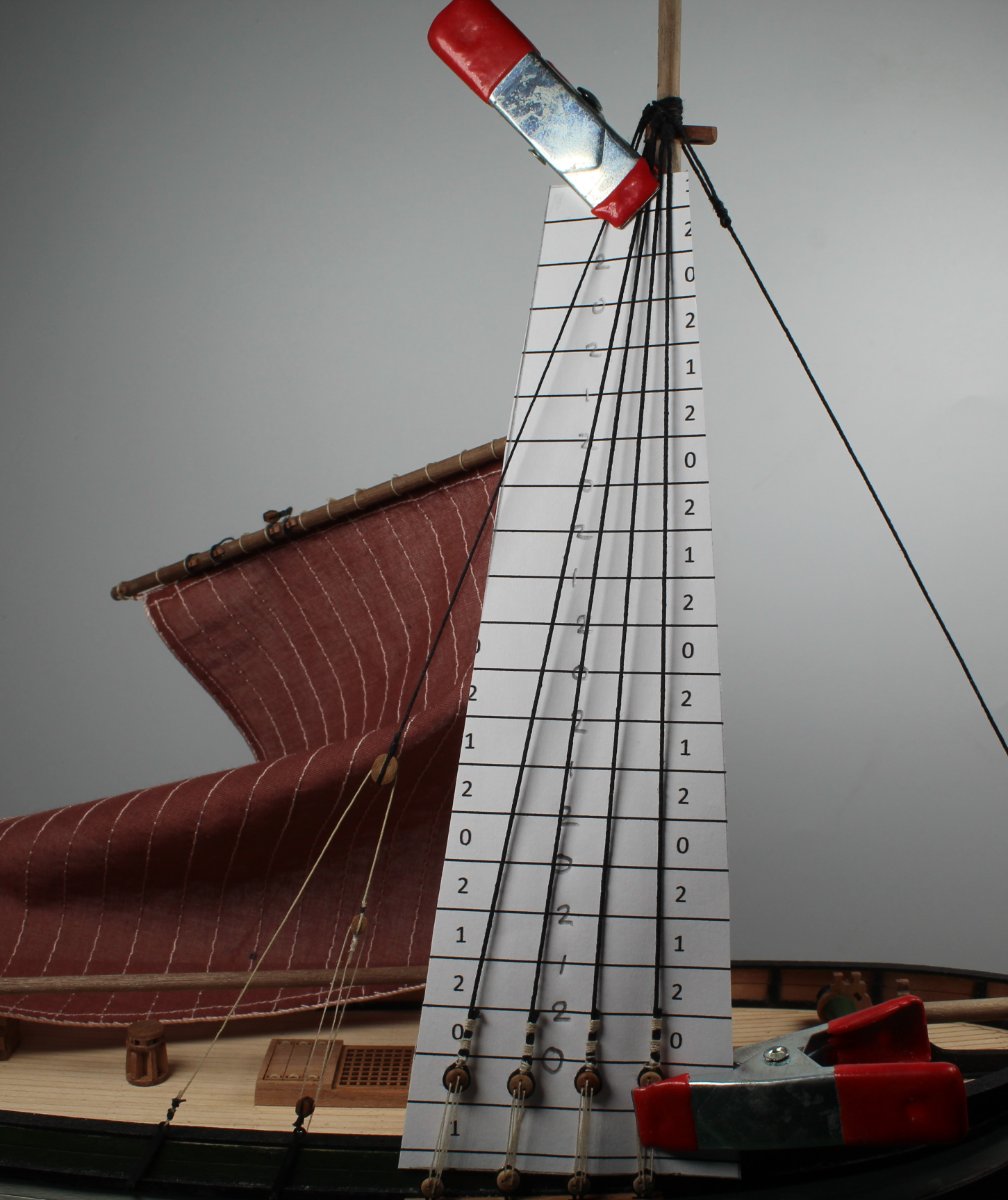
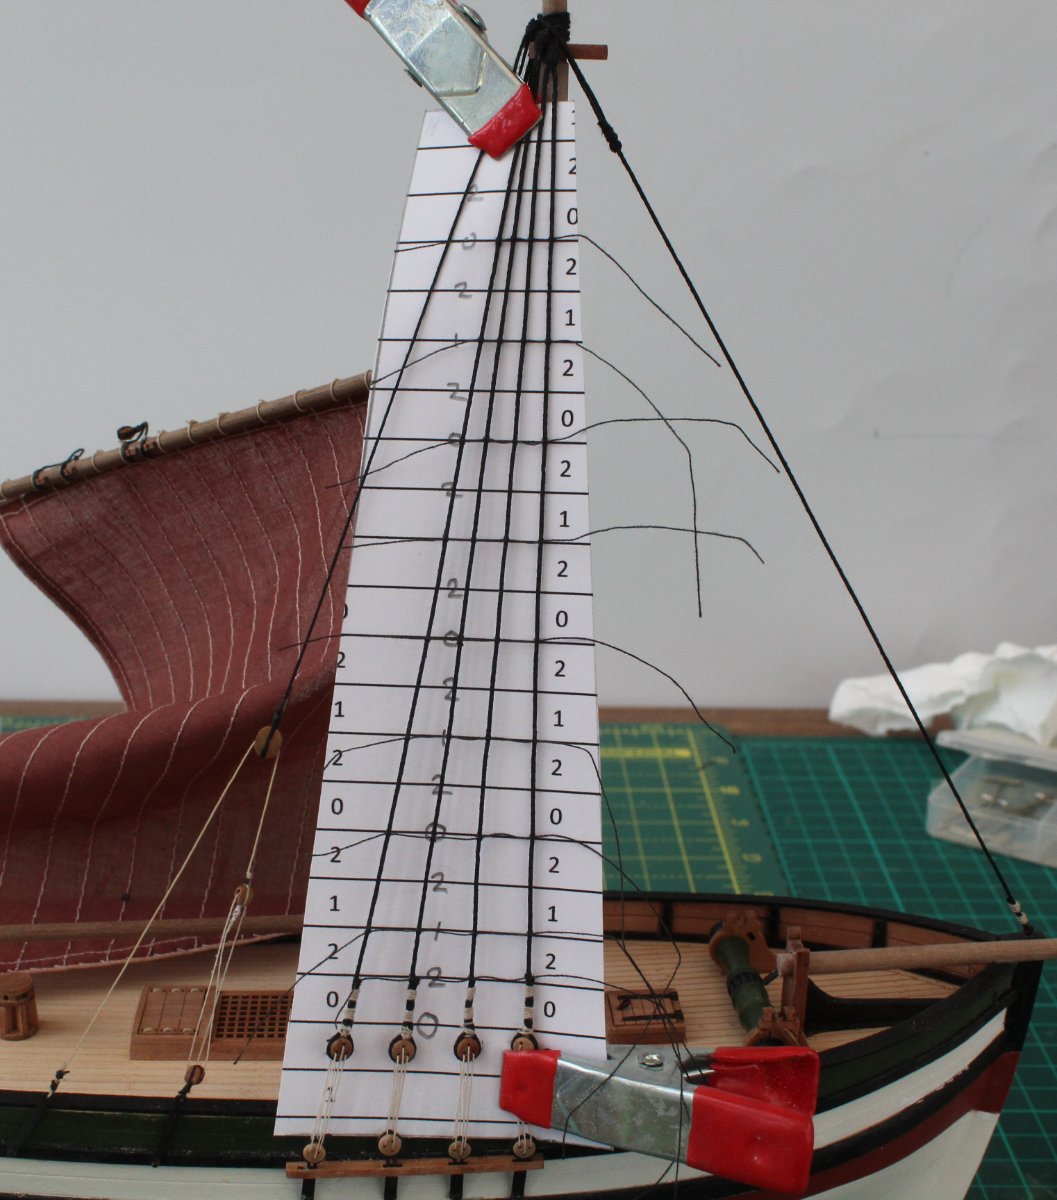
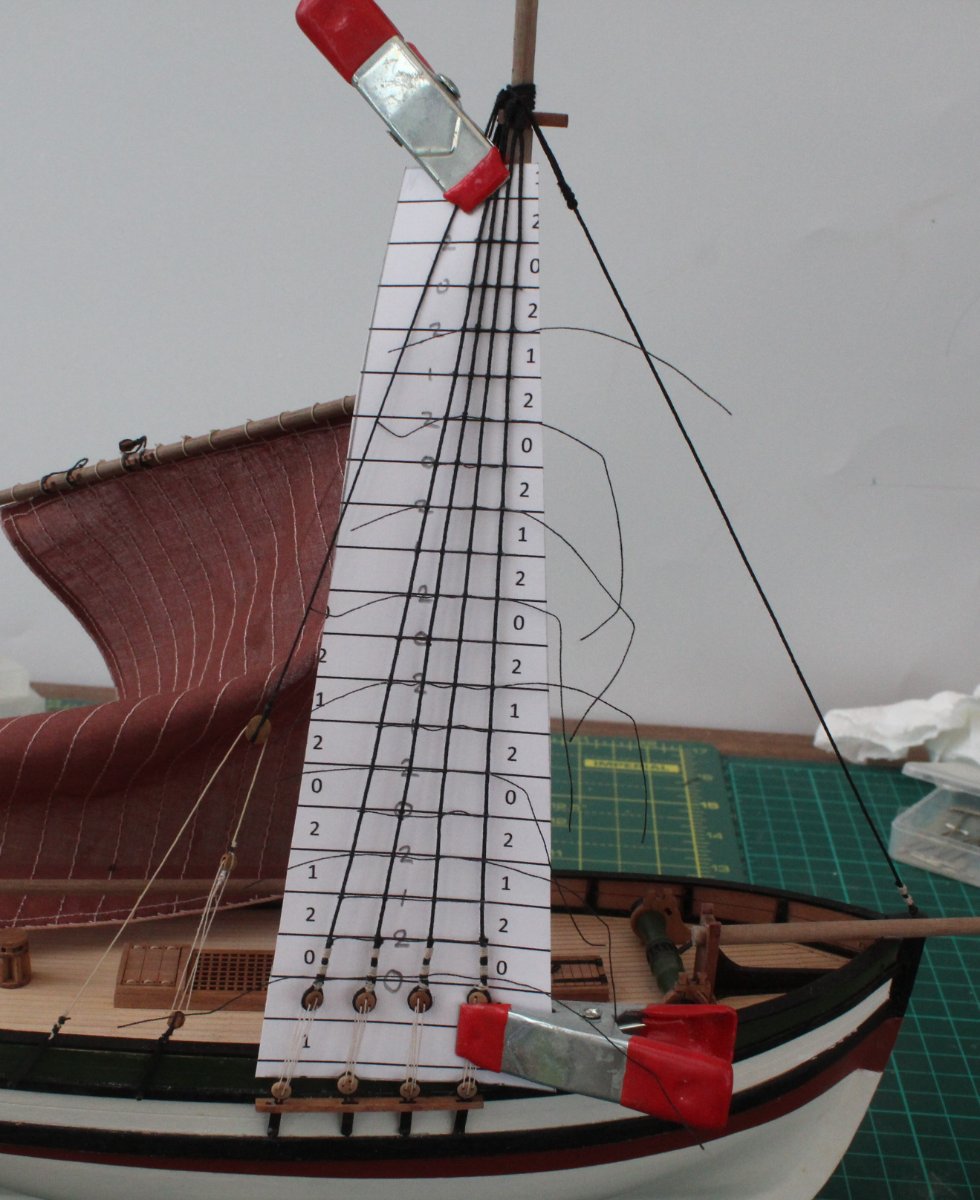
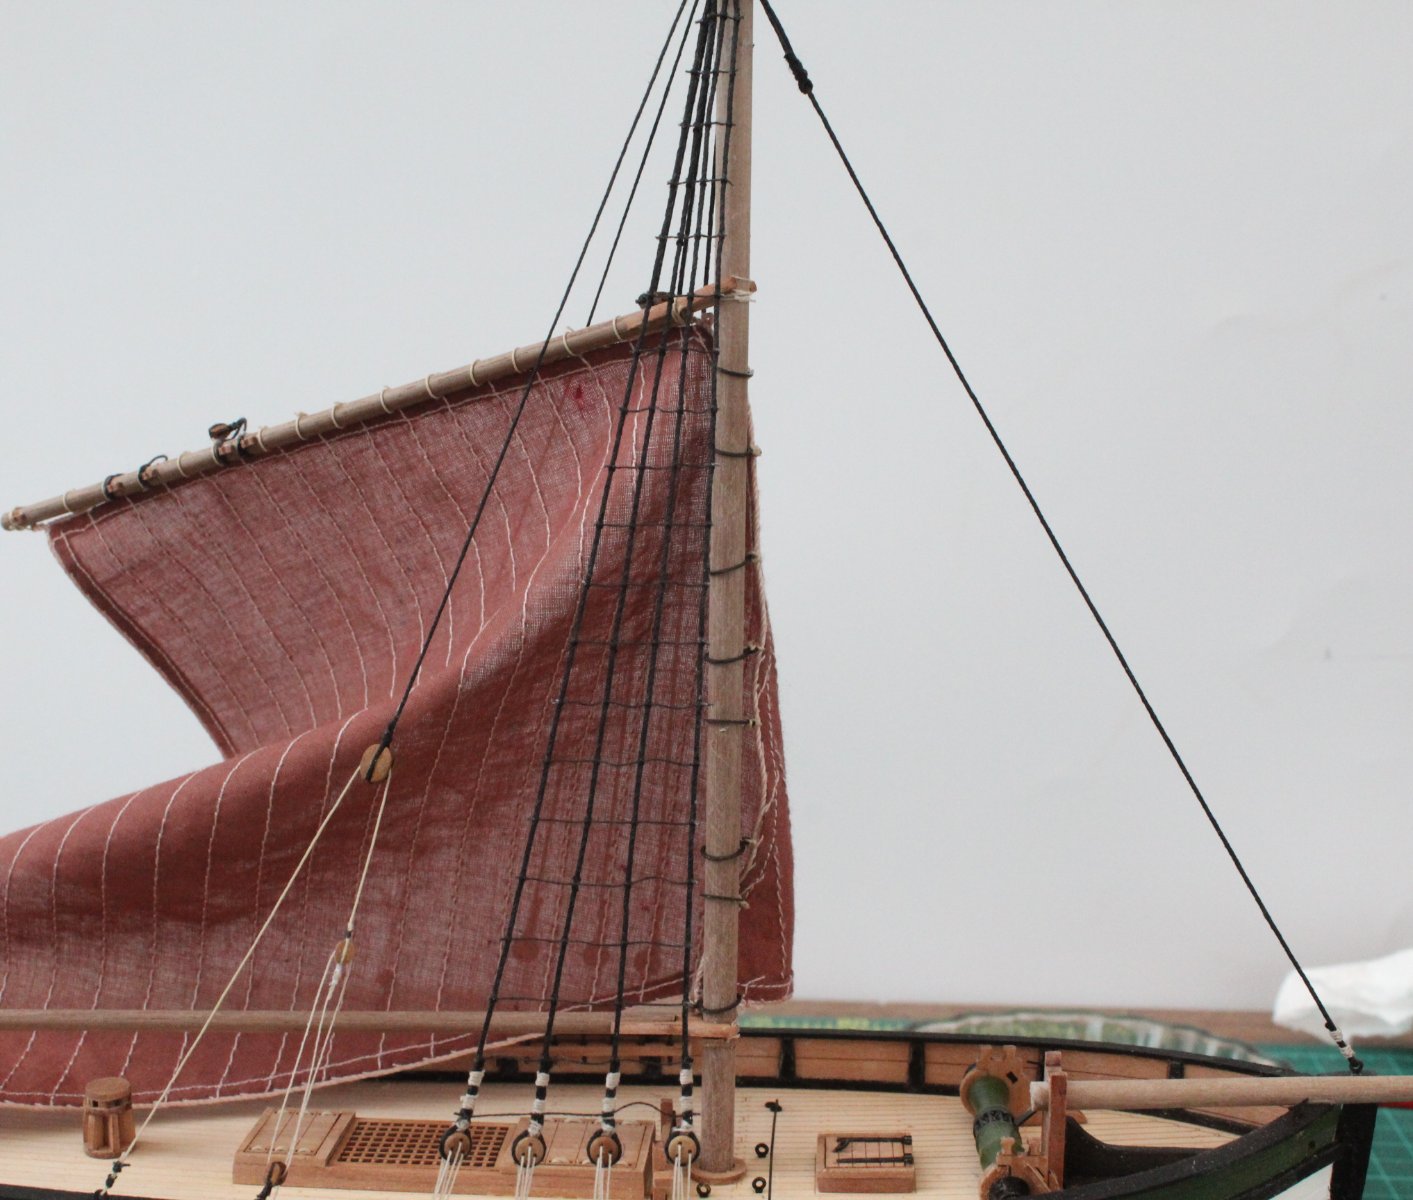
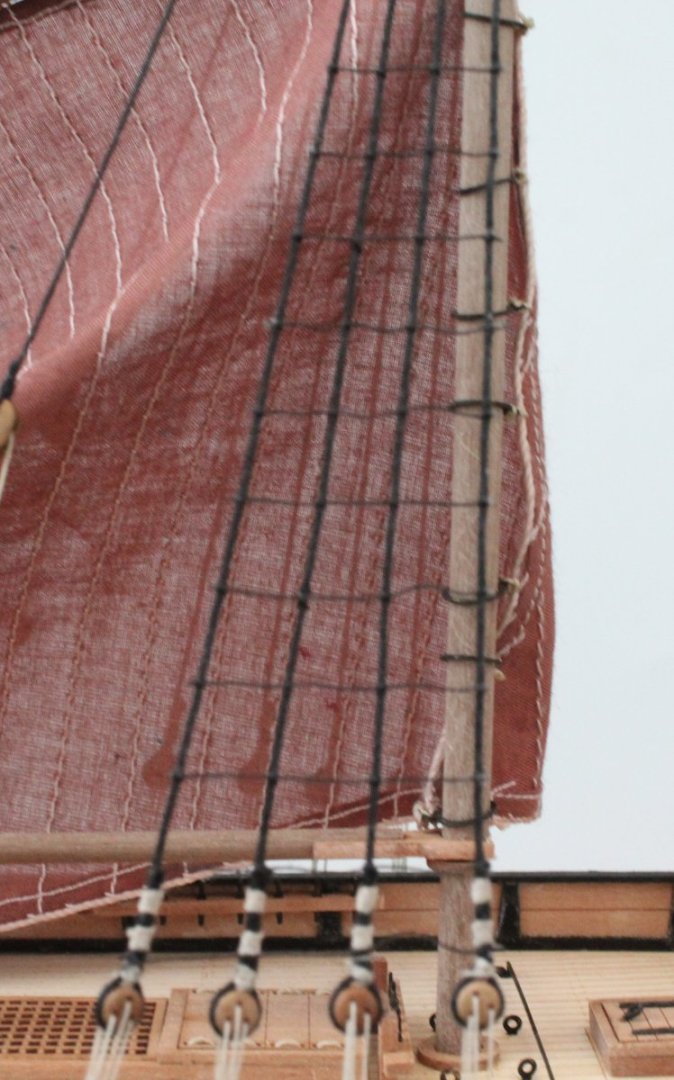
021 - Ratlines I printed out a template and added my usual 0, 1 and 2 markers. The ratline sequence I follow is to add all the 0's first. Then I add all the 1's. The job is completed by filling in the gaps by adding all the 2's. As can be seen in the photo below I have positioned the template behind the shrouds and I ready to start adding the ratlines. As can be seen in the next photo I have added all the 0's. The more observant will note I actually added the bottom 2 rather than the bottom 0 ratline. I will add the bottom 0 ratline once all the other ratlines have been added so I can then repositioned the bottom clamp. In the next photo I have added the 1's ratlines, except the one at the top which can be added when the top clamp is repositioned. In the next photo I have added the all the 2 ratlines. In the final few photo's all the ratlines have now been added and all the ends trimmed. I now have to repeat this process for the other side. It does not take me to long to complete this process.


- 62 replies
-
- 6
-
-
- Saucy Jack
- vanguard models
- (and 3 more)
-
I am going quite slow at the moment for me. I might have to build another fishing boat in the new year before I get the Indy kit.🤣
- 62 replies
-
- 1
-

-
- Saucy Jack
- vanguard models
- (and 3 more)
-
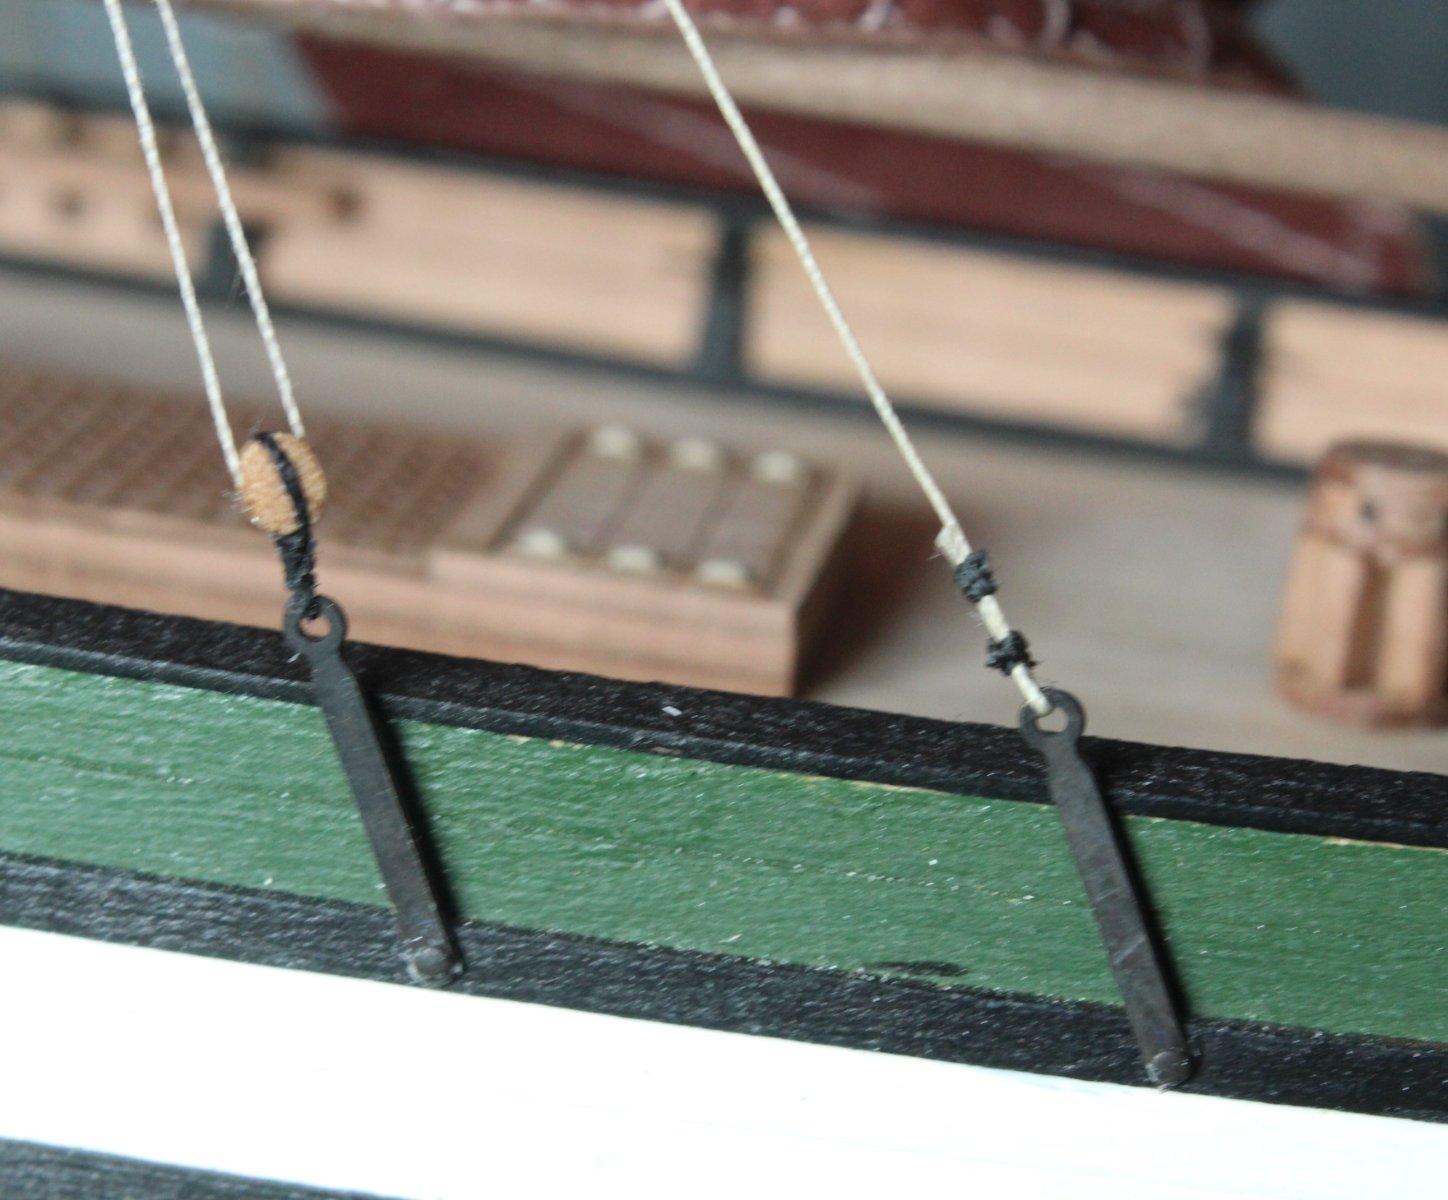
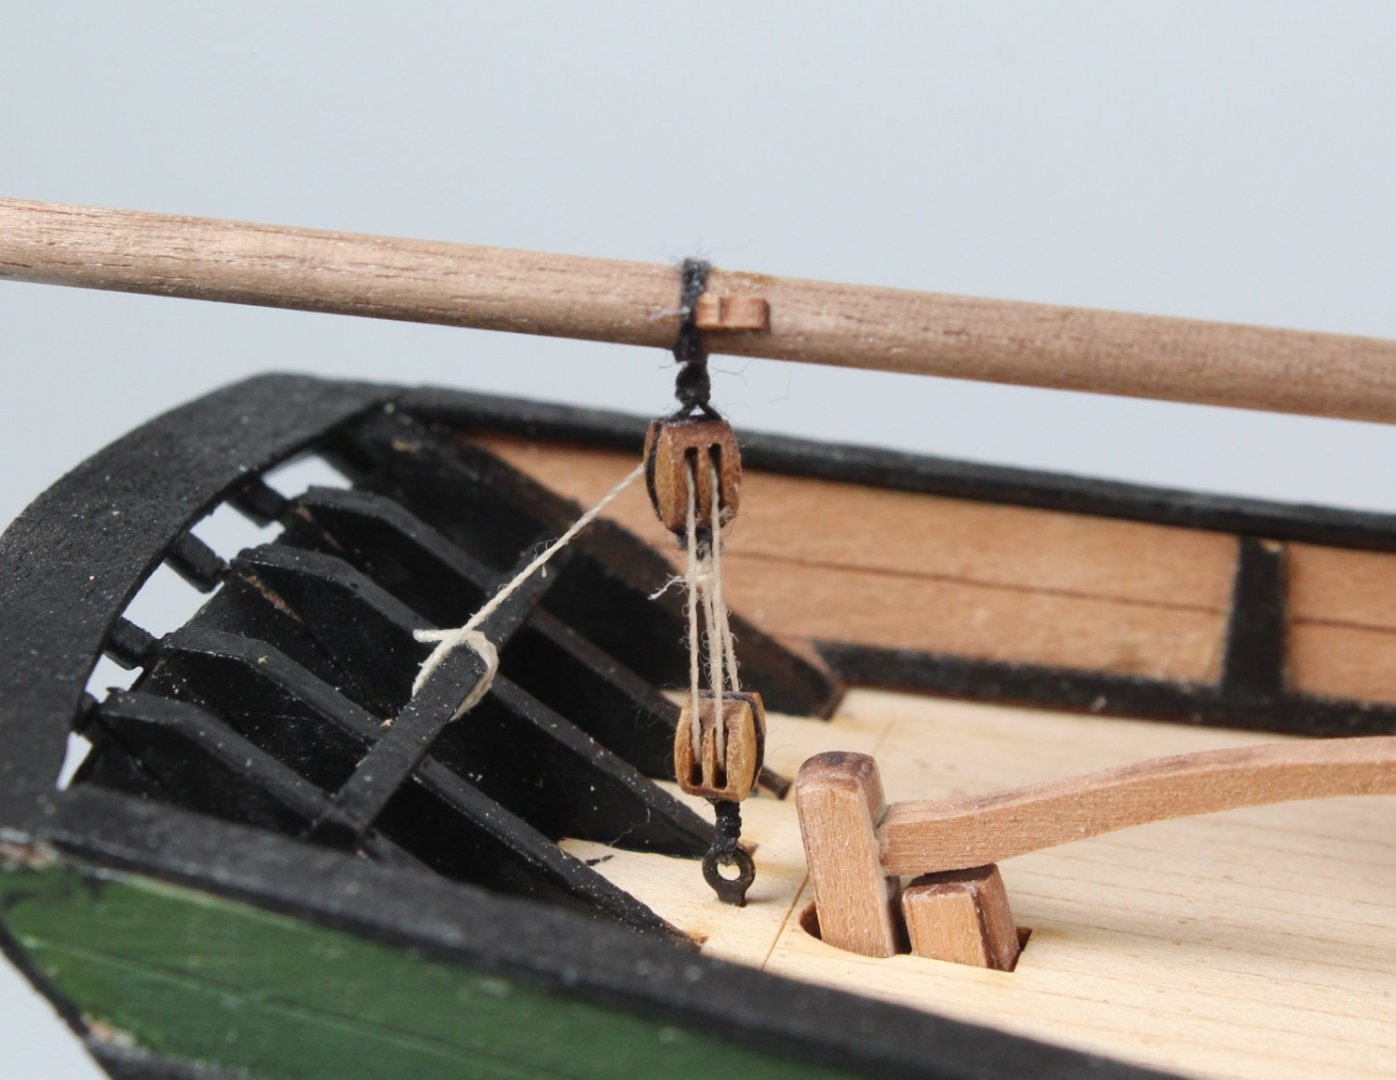
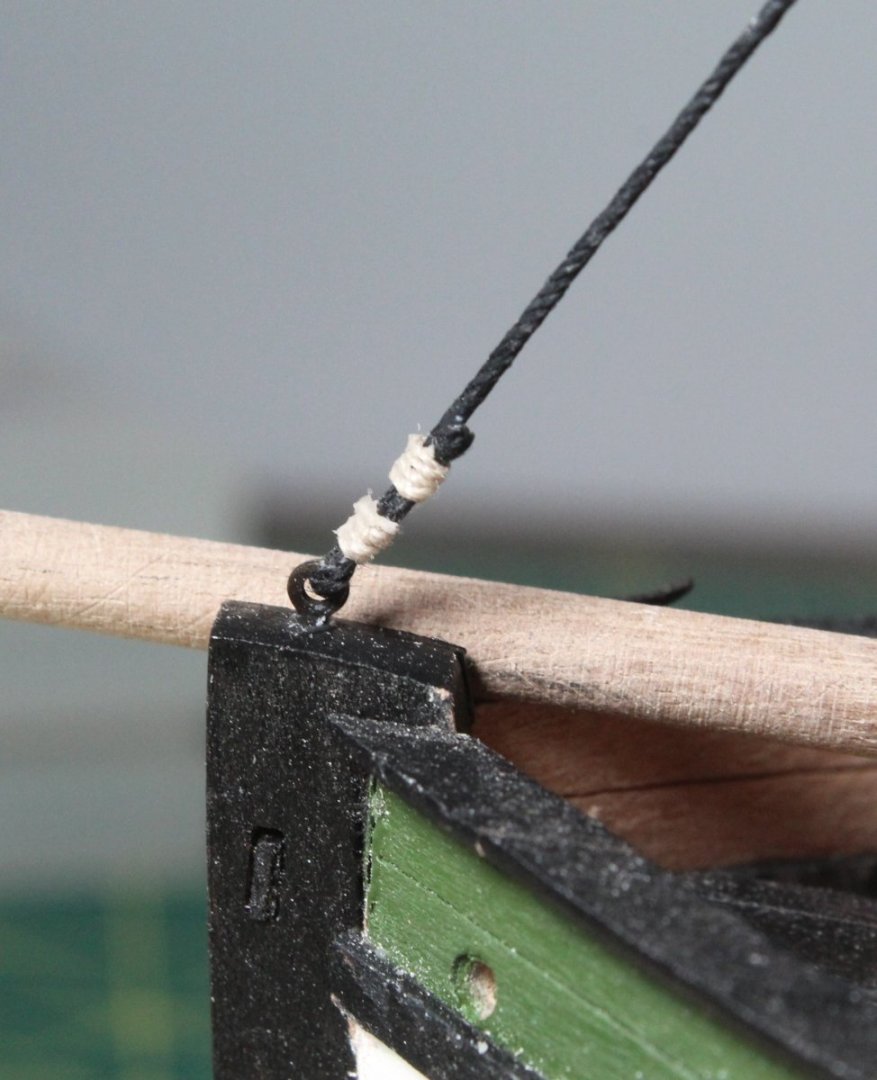
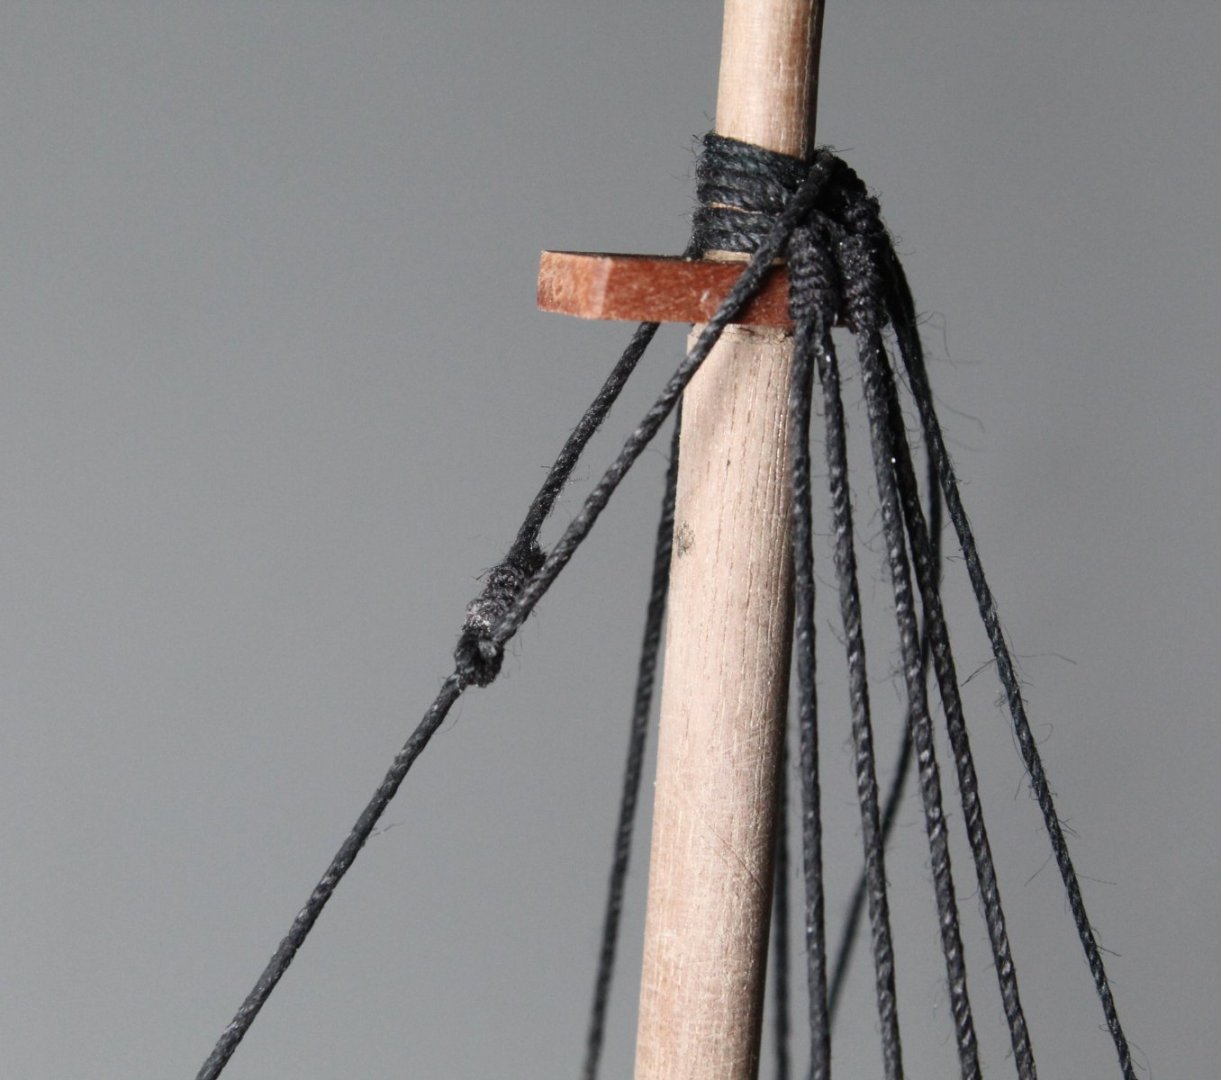
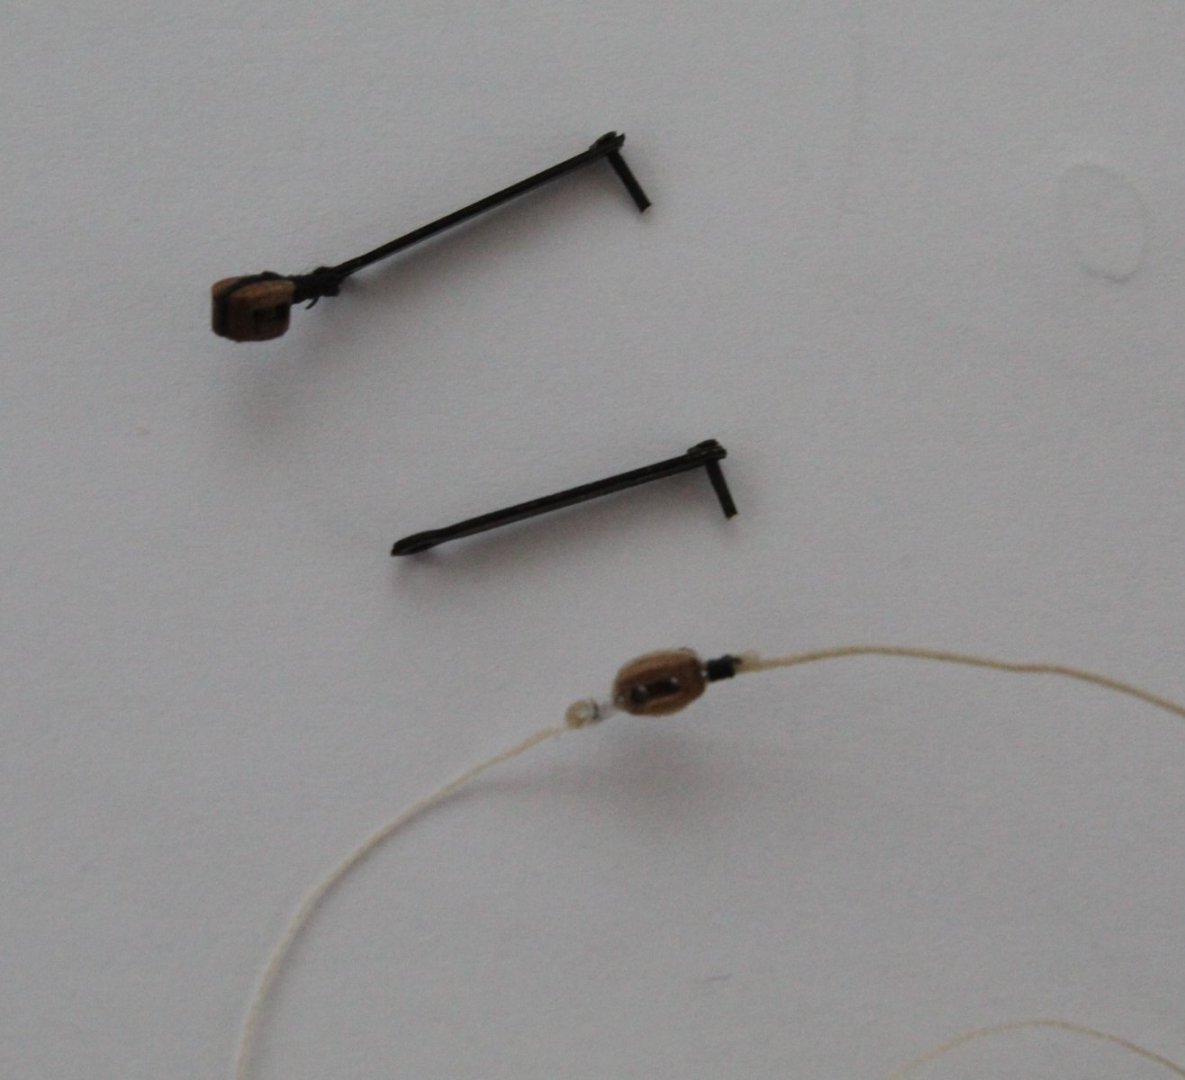
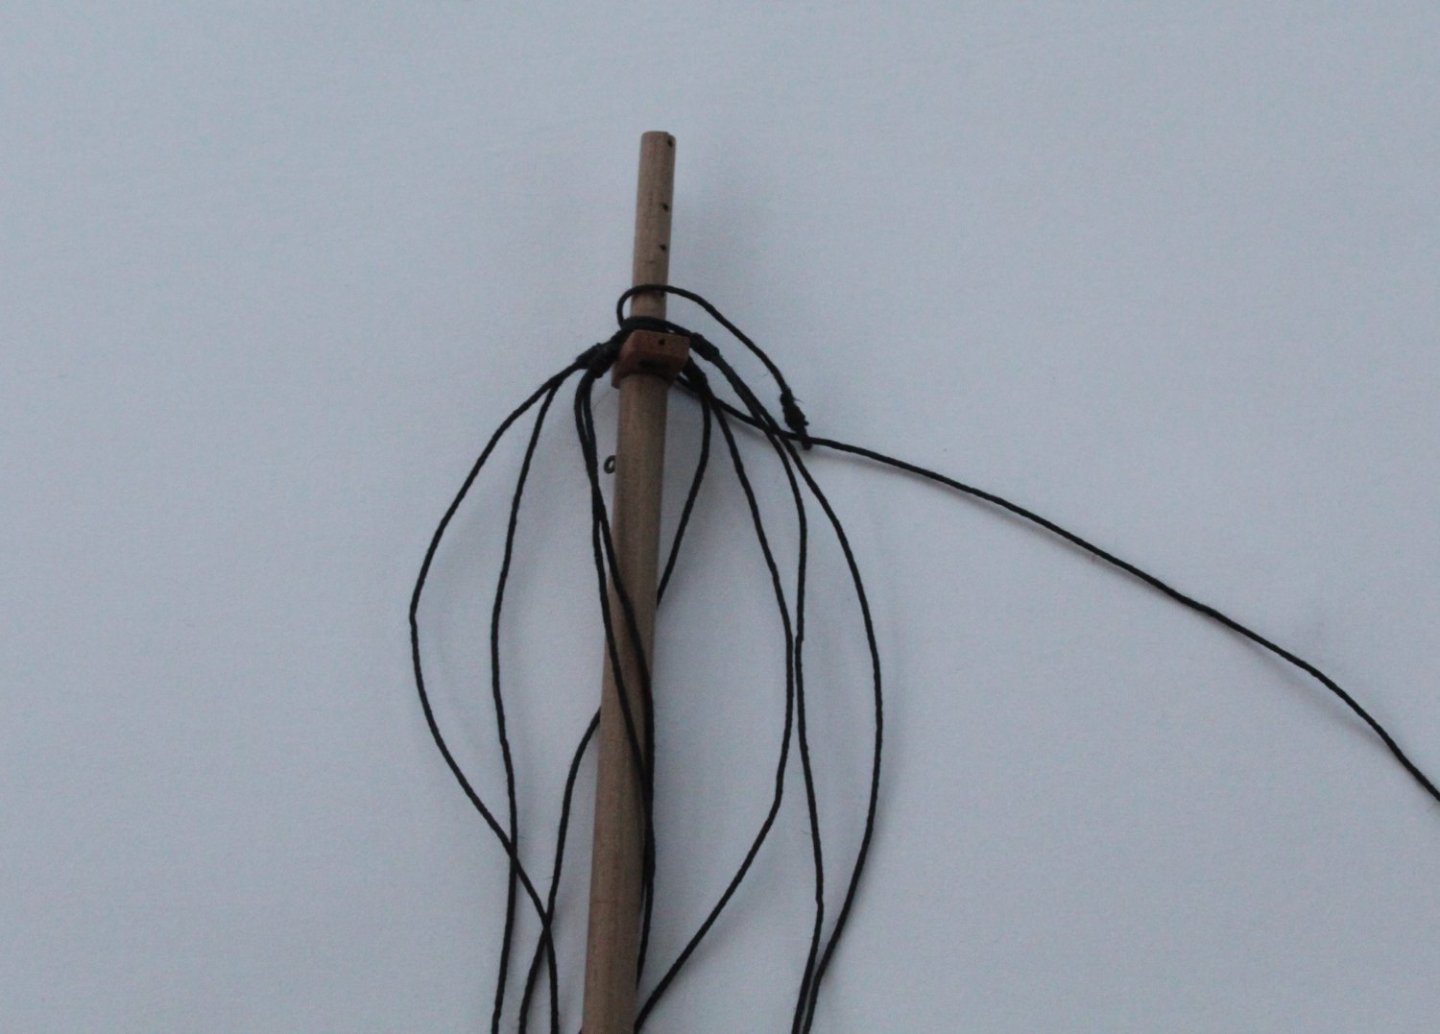
020 - Main Mast and Back Stays The shrouds have been fitted and tied off and are now ready to have the ratlines added. Before adding the ratlines I decided to add the main mast stay and back stays. The main mast stay was a very easy line to rig. The main stay is belayed to an eyebolt located on top of the bow, as can be seen below. The other end of the main mast stay is looped around the main mast. I added a small mouse to main stay line which stops the line running through the loop end. Moving on to the backs stays. These are a little be more involved, with each back stay comprising a three block arrangement. A single 5mm block was added to the end of each back stay. I then prepared the other blocks and mast rigging straps. One block is seized to one of the rigging straps. the other block requires two threads adding, 0.25mm and 0.1mm natural. The rigging straps were added to the hull and the threads rigged through the three blocks. The final free end is ready to be belayed to a cleat. The next photo shows the rigging straps. The final photo shows the other two blocks.


- 62 replies
-
- 7
-
-
- Saucy Jack
- vanguard models
- (and 3 more)
-
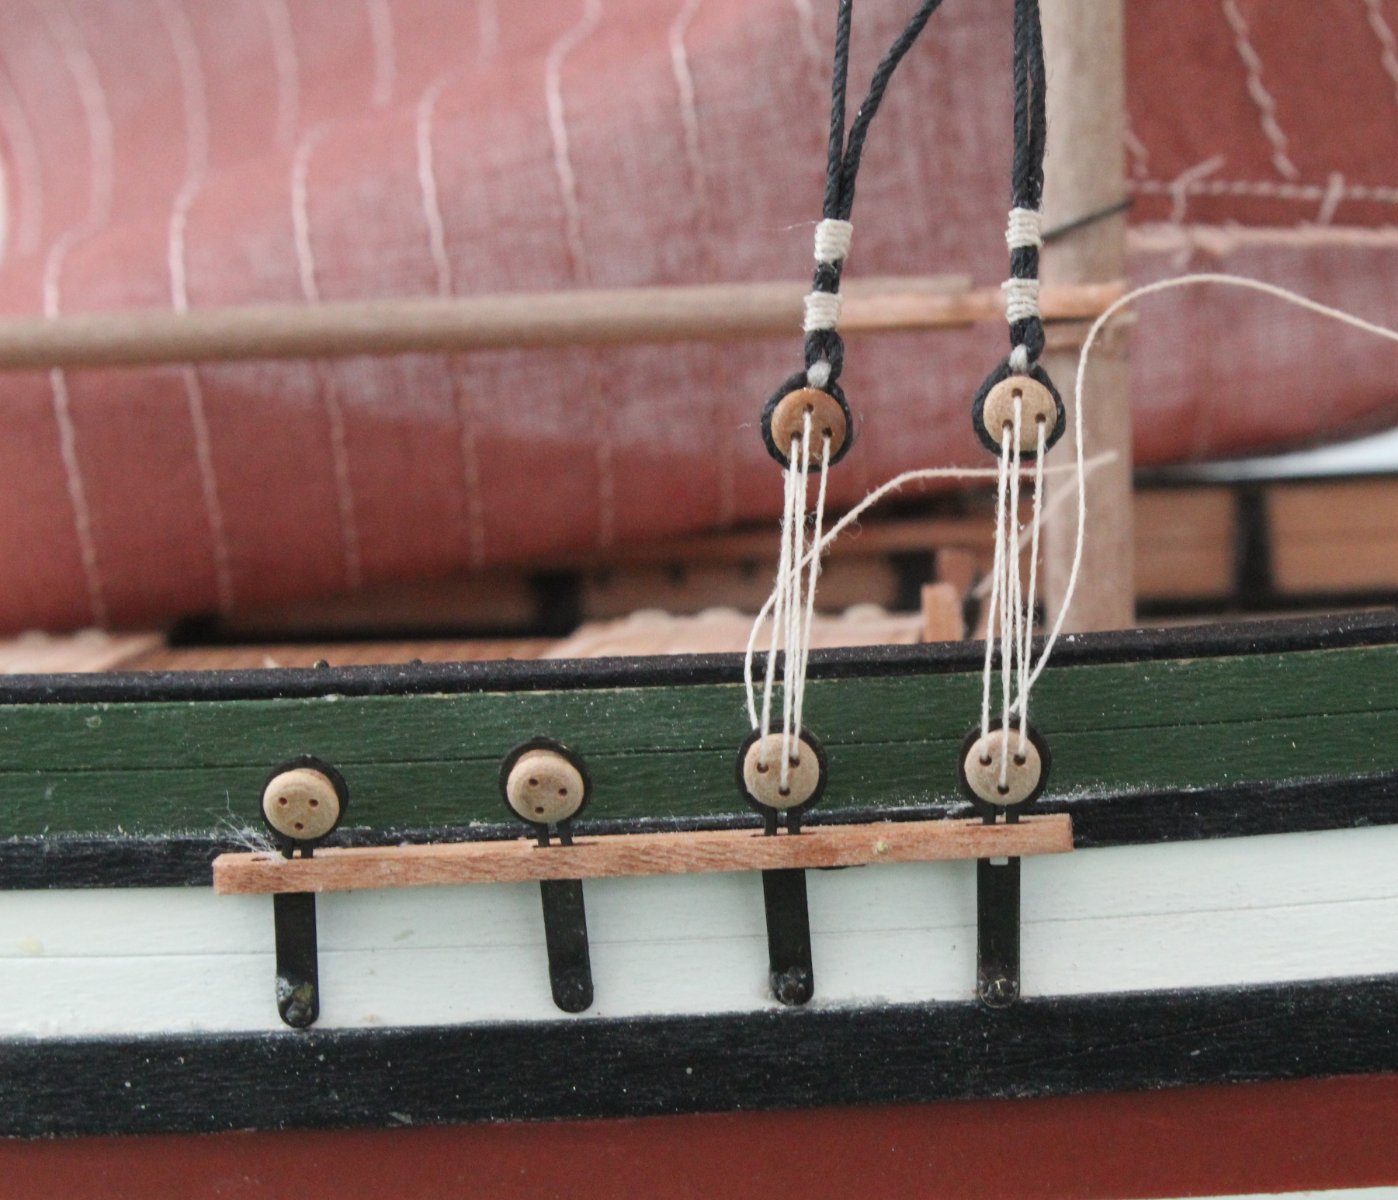
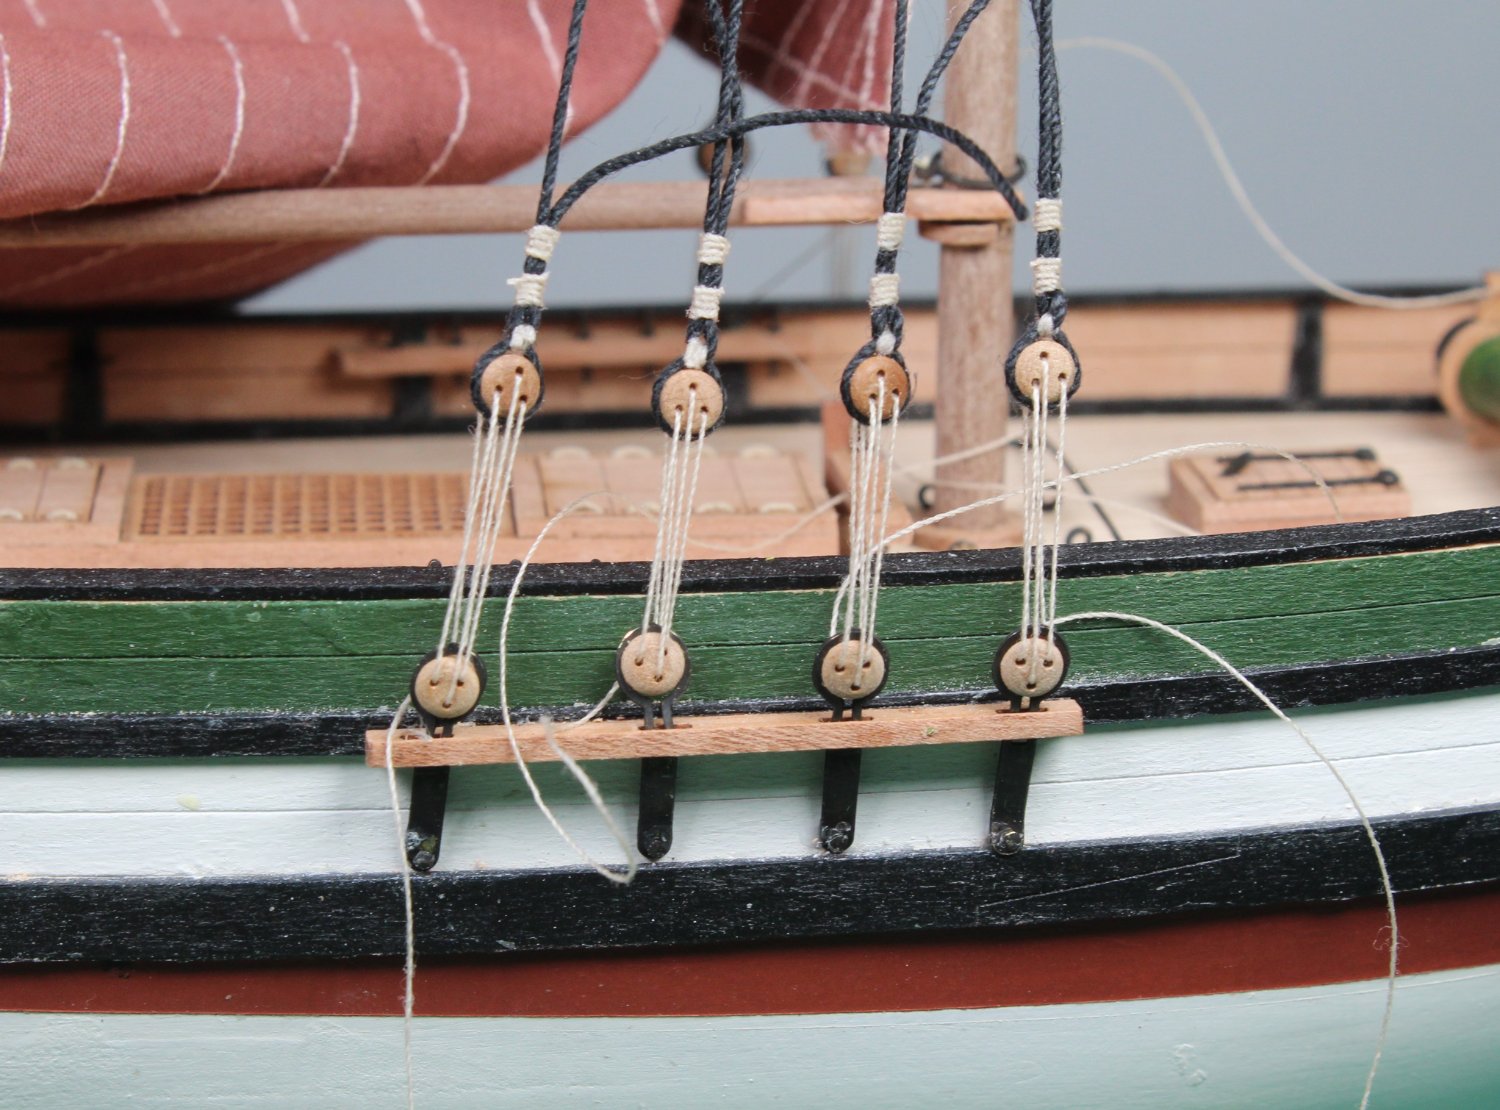
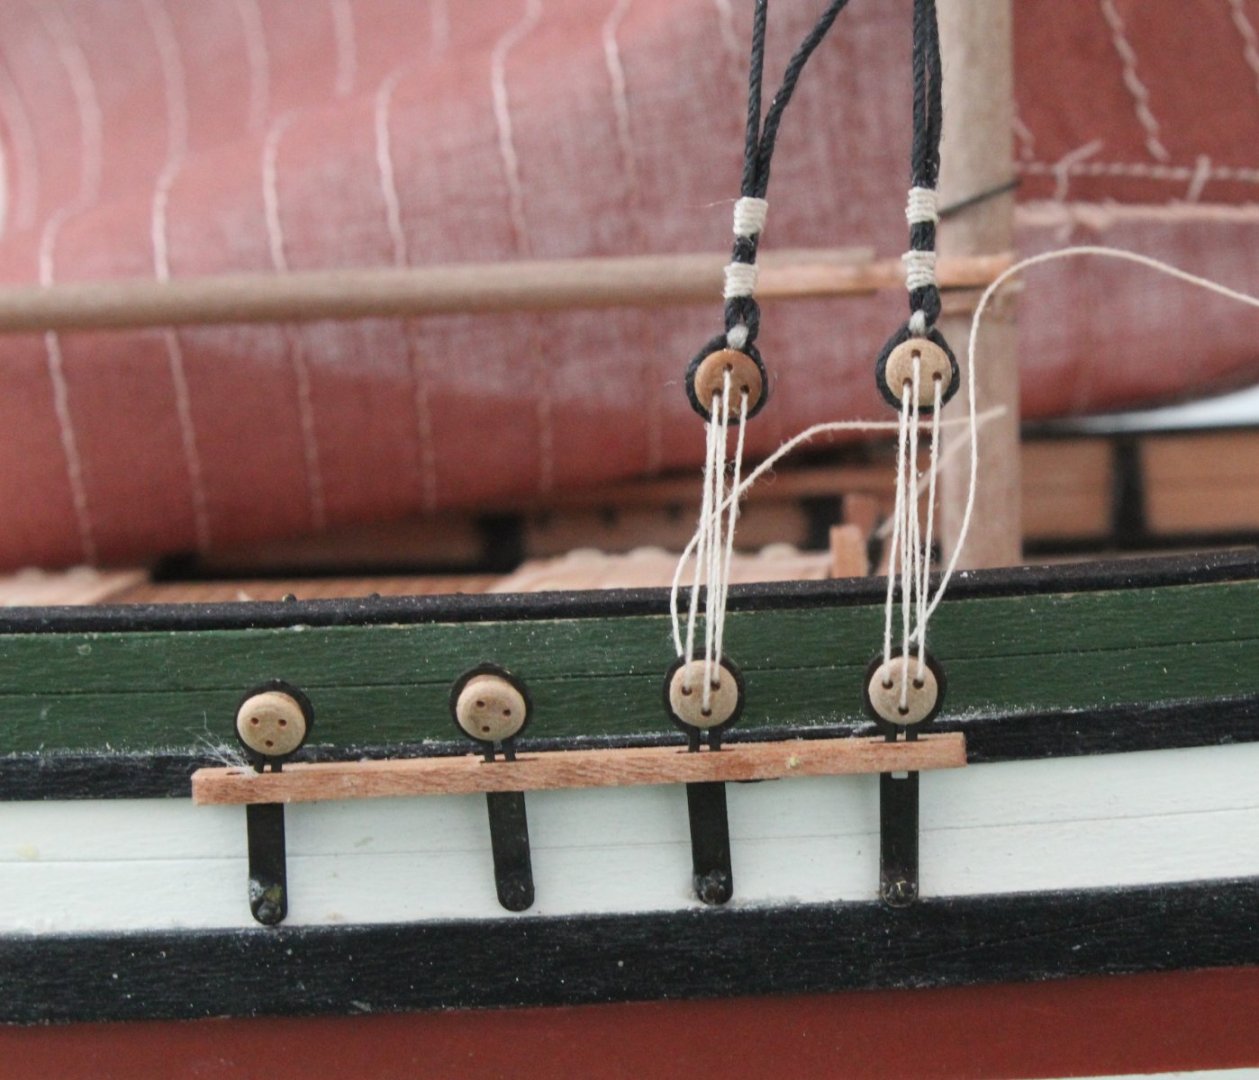
019 - Shrouds WIP Time for another quick update as I have now started rigging the shrouds. In the first photo I have added the deadeyes and lanyards to first shroud pair. I have not tied off the lanyard or trimmed the end shrouds in case I need to remove the lanyards and release the shroud seizing to readjust the position of the deadeye. I have also added the first shroud pair to the other side of the main mast. In the next photo I have added the deadeyes and lanyards to the second shroud pair. I did have to release and redo the final (left end) deadeye as it was sat to low compared with the other deadeyes when the lanyard was tensioned. They look much better now. Once I have made the final adjustments to the lanyards and I am happy with the deadeye alignment I will trim the excess shroud thread and tie off the lanyard free ends.

- 62 replies
-
- 6
-
-
- Saucy Jack
- vanguard models
- (and 3 more)
-
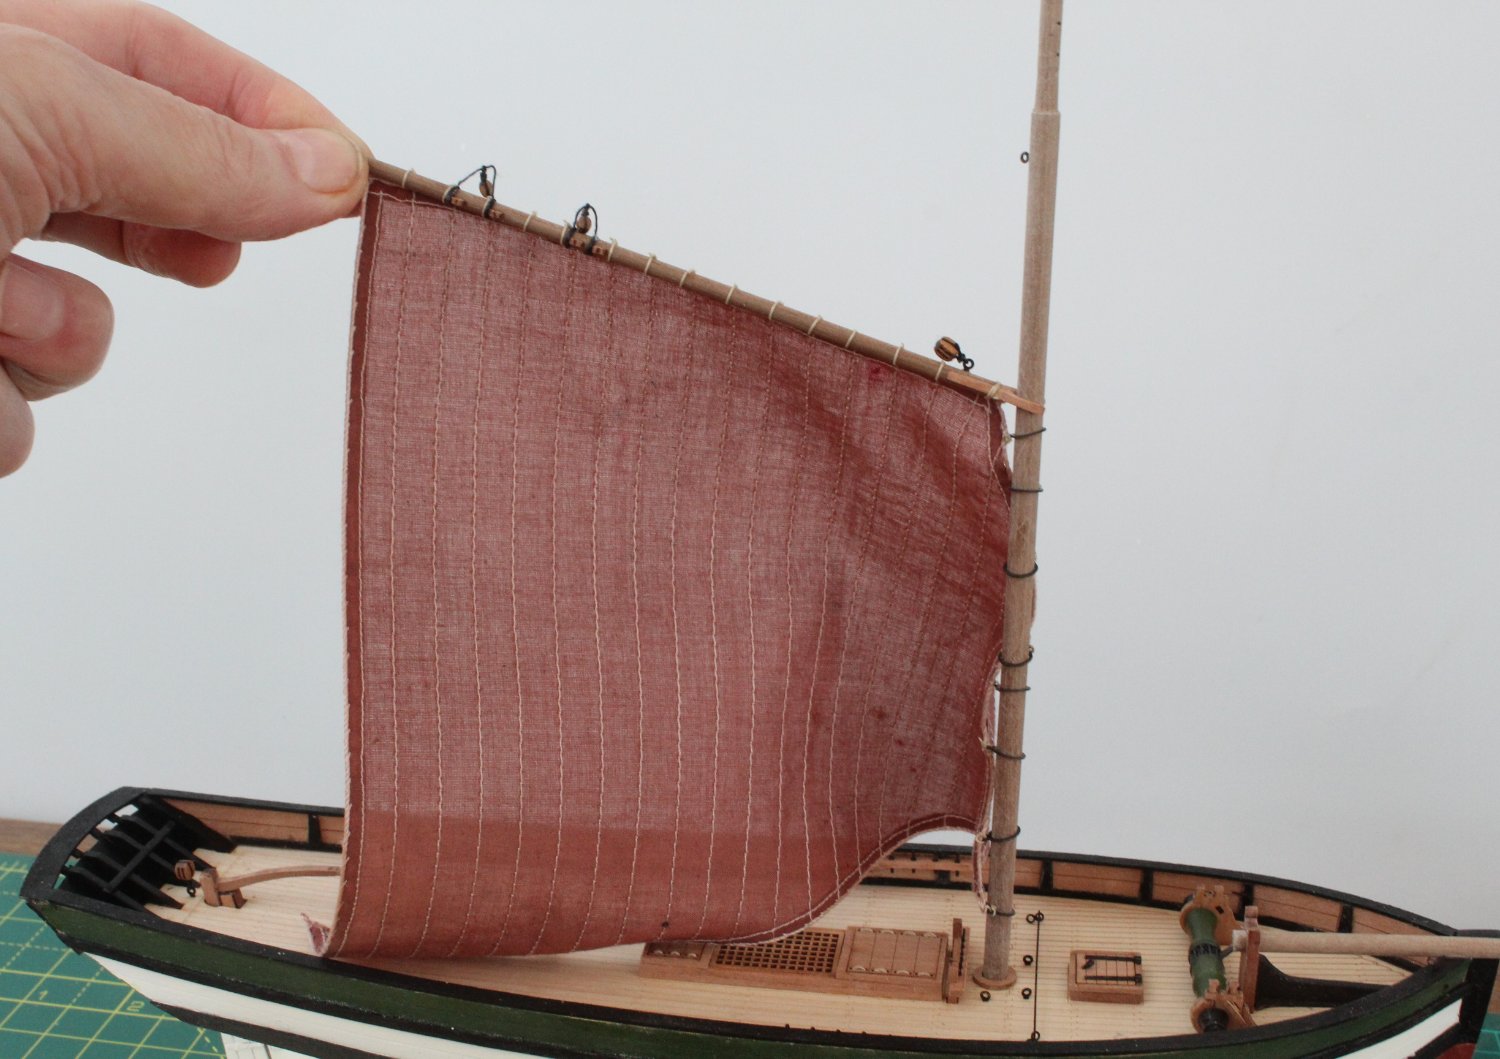
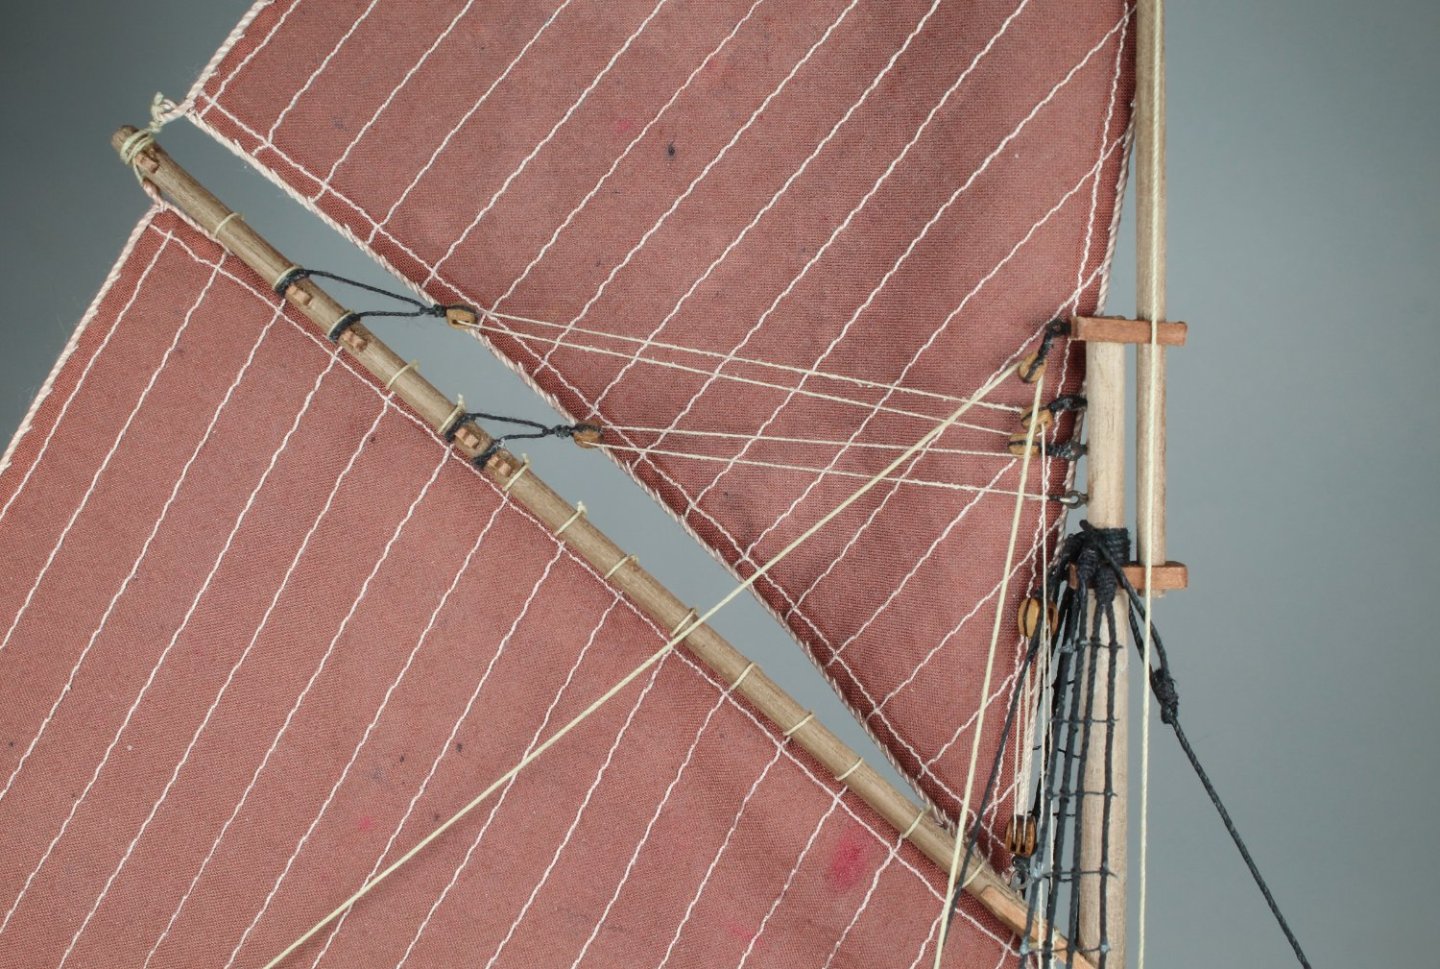
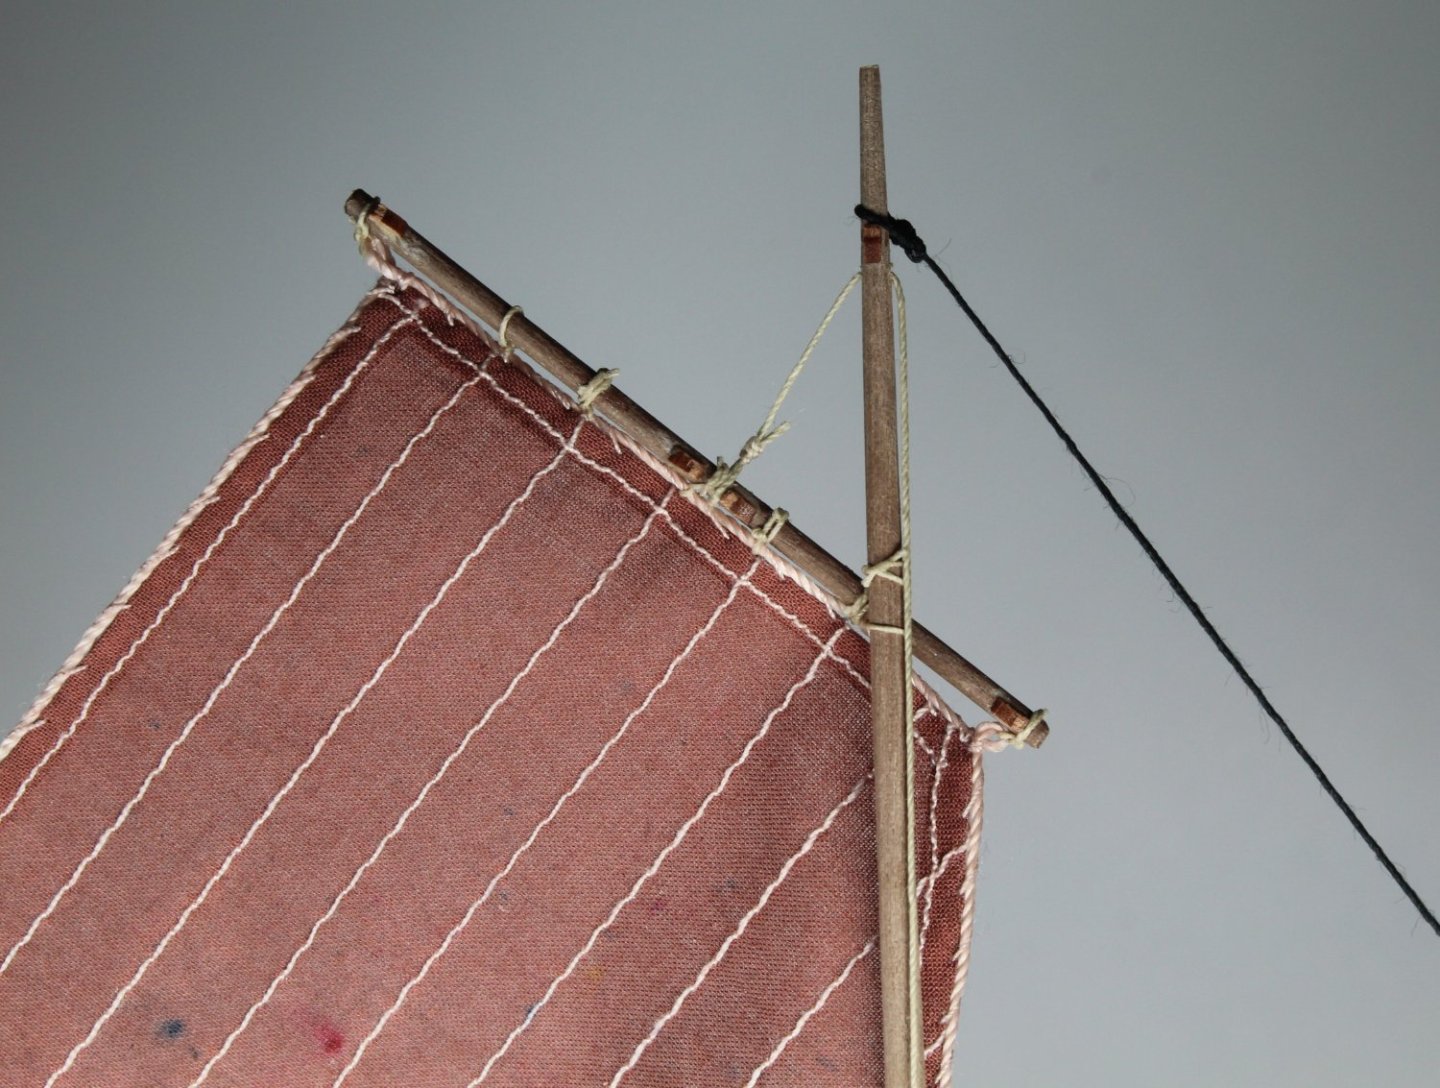
018 - Main Sail With regards to work on the main sail I started by adding 8 off mast rings. Once they were in place I started to secure the sail to the main gaff. With the main gaff held in the quad hands I positioned the sail and secured it to the gaff at each end as can be seen in the photo below. I then continued the process gradually working toward the centre from both ends as can be seen in the next photo. With the sail had been secured to the main gaff I threaded the mast rings over the main mast and then did a test fit to get an idea of how the sail would look as can be seen in the photo below. You will also note I have added a 4mm double block to the eyebolt located behind the tiller. I also checked and marked the position of the main boom on the main mast. Once I have glued the main mast in place I can start rigging process starting with the shrouds.


- 62 replies
-
- 5
-
-
- Saucy Jack
- vanguard models
- (and 3 more)
-
I have placed my order and looking forward to the challenge of lifting the big heavy box from the courier to my shipyard. Seriously I am excited about the challenge of building the indy.
-
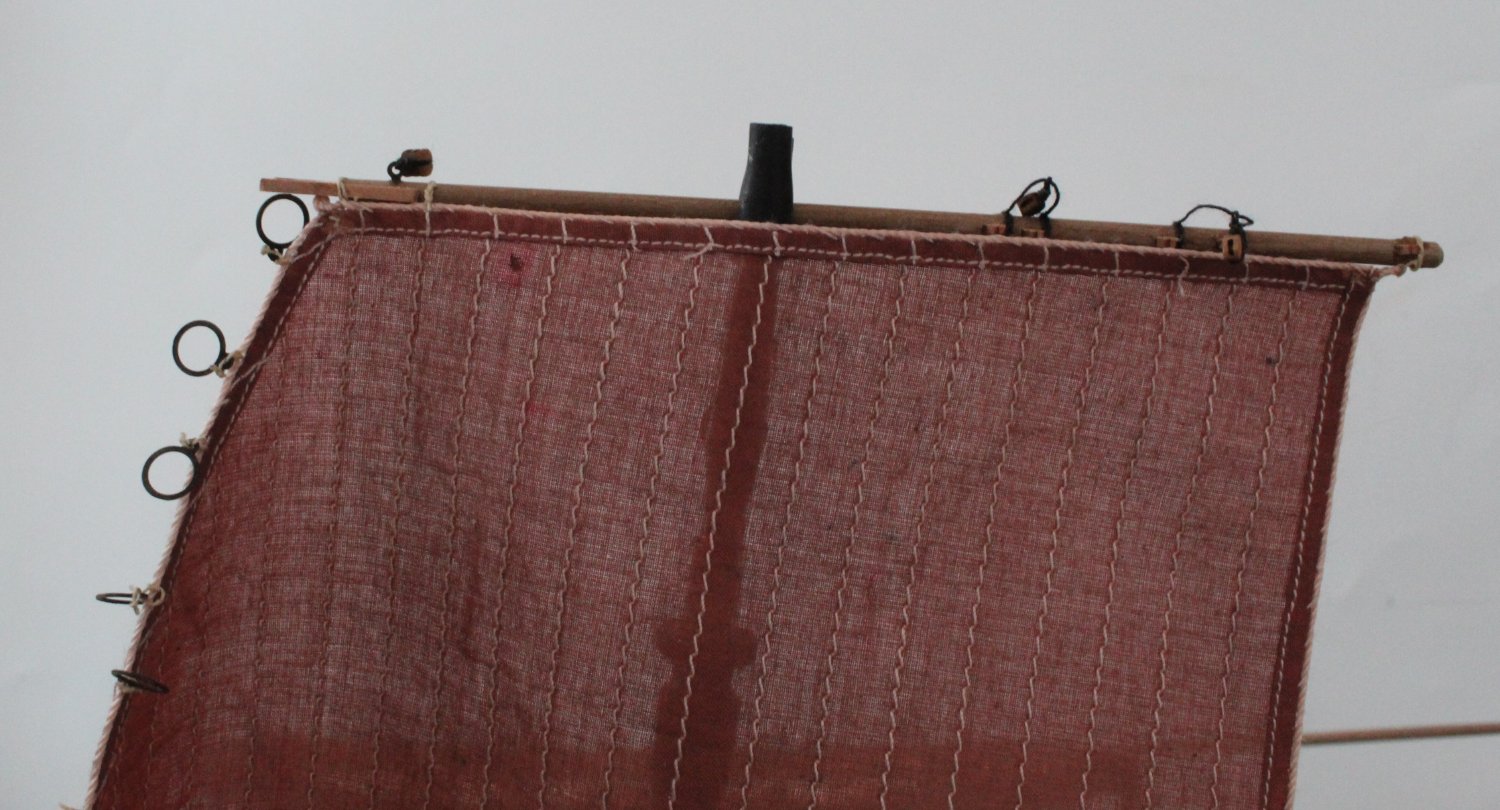
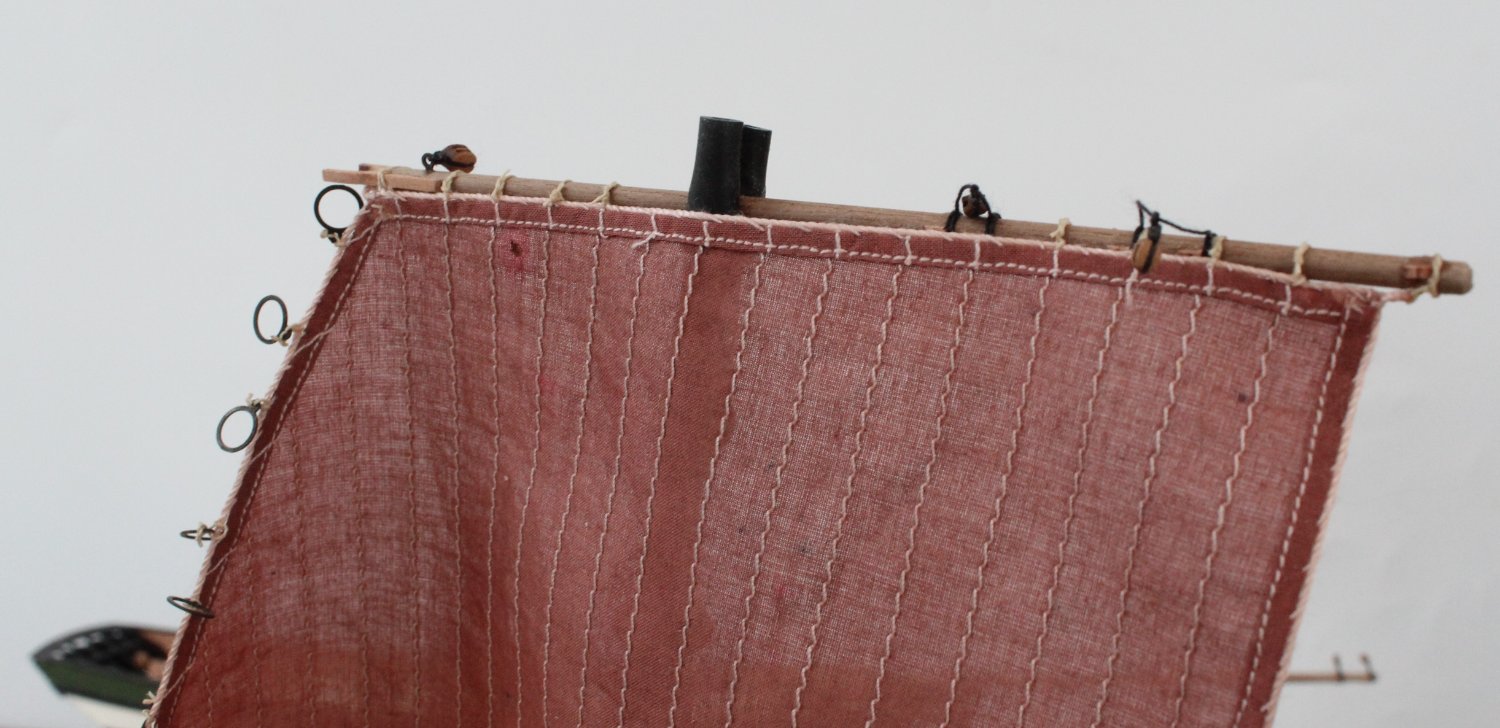
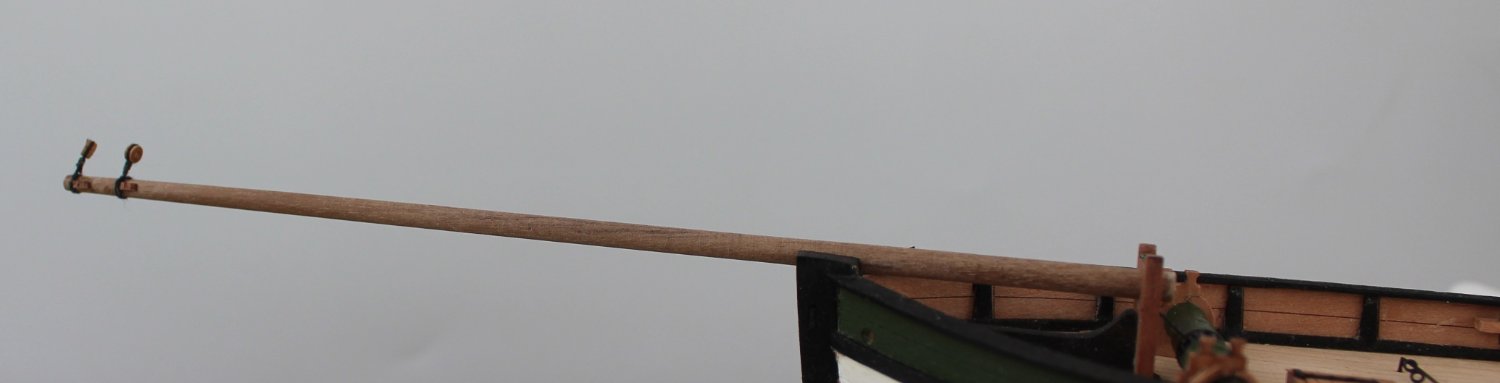
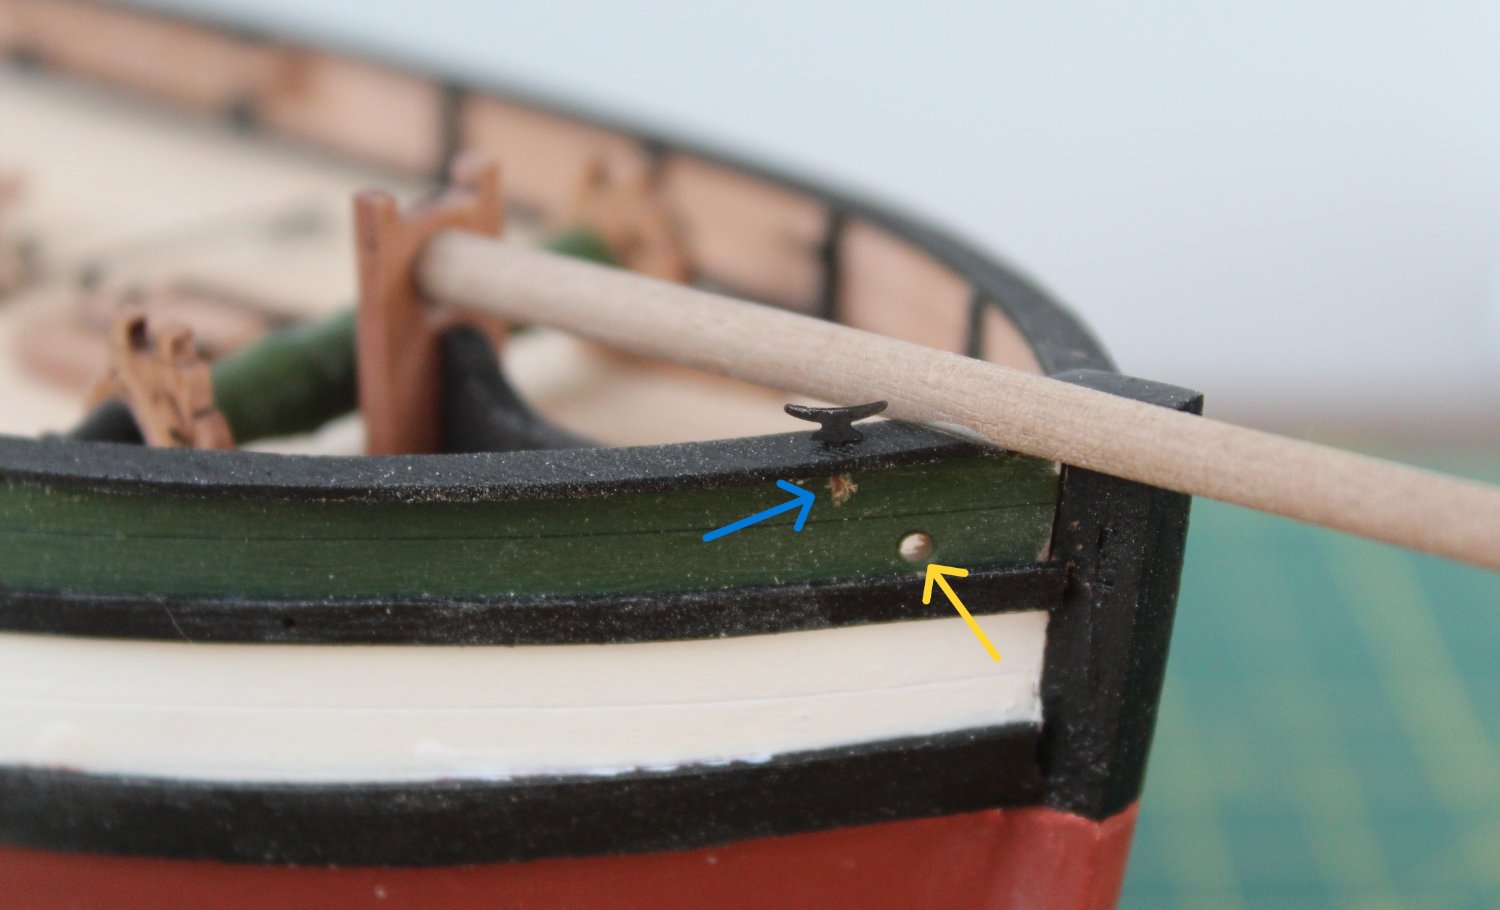
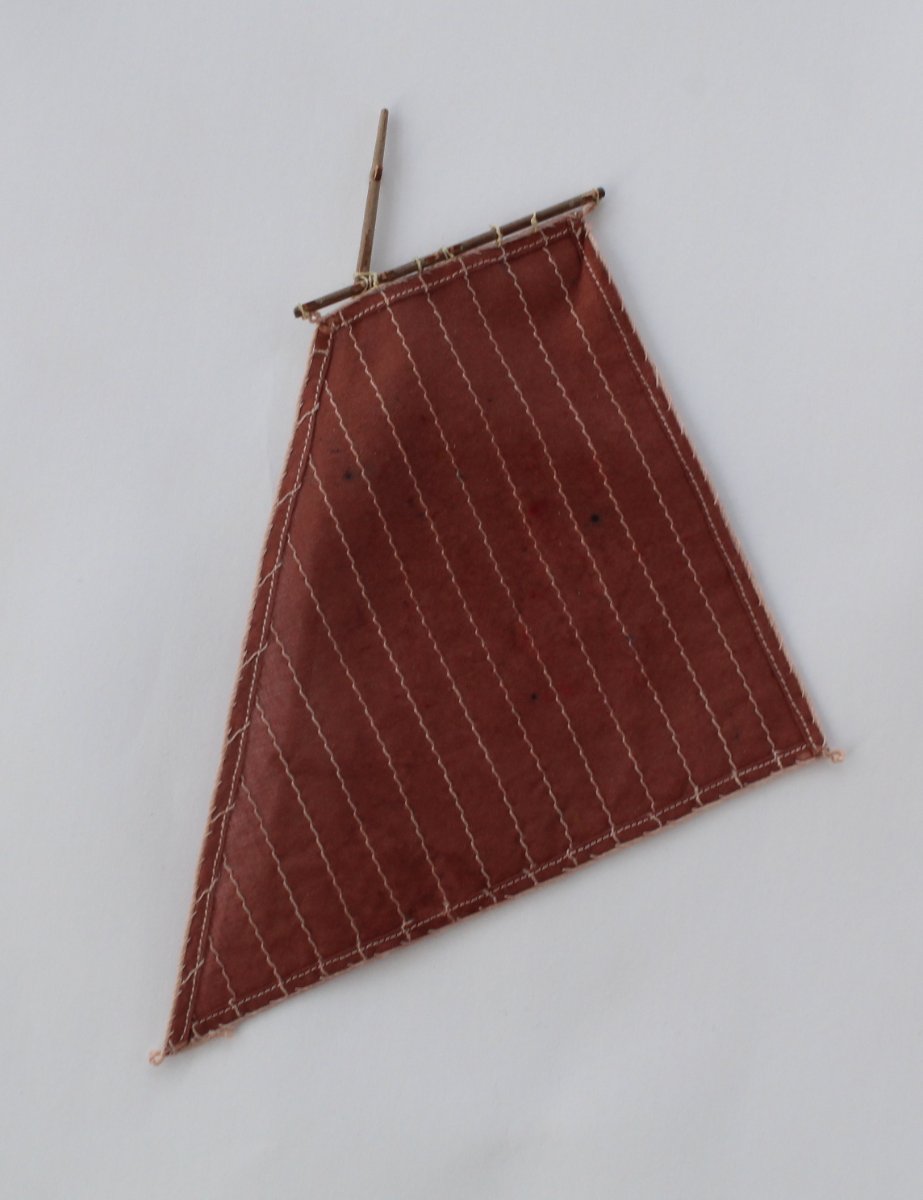
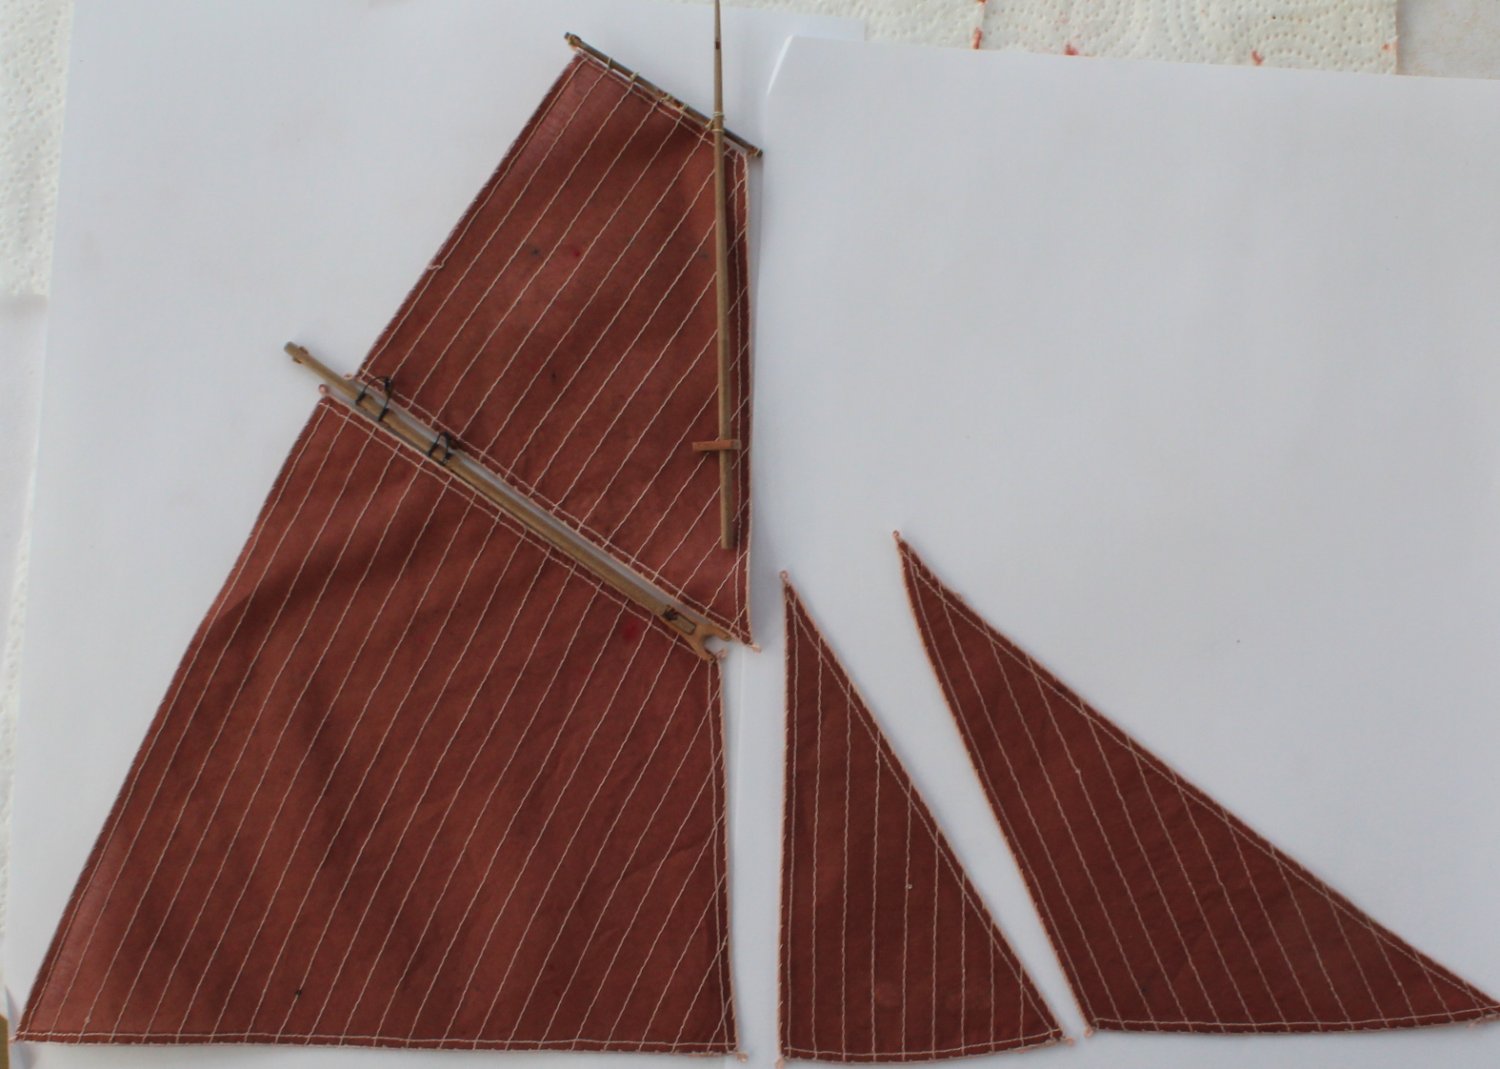
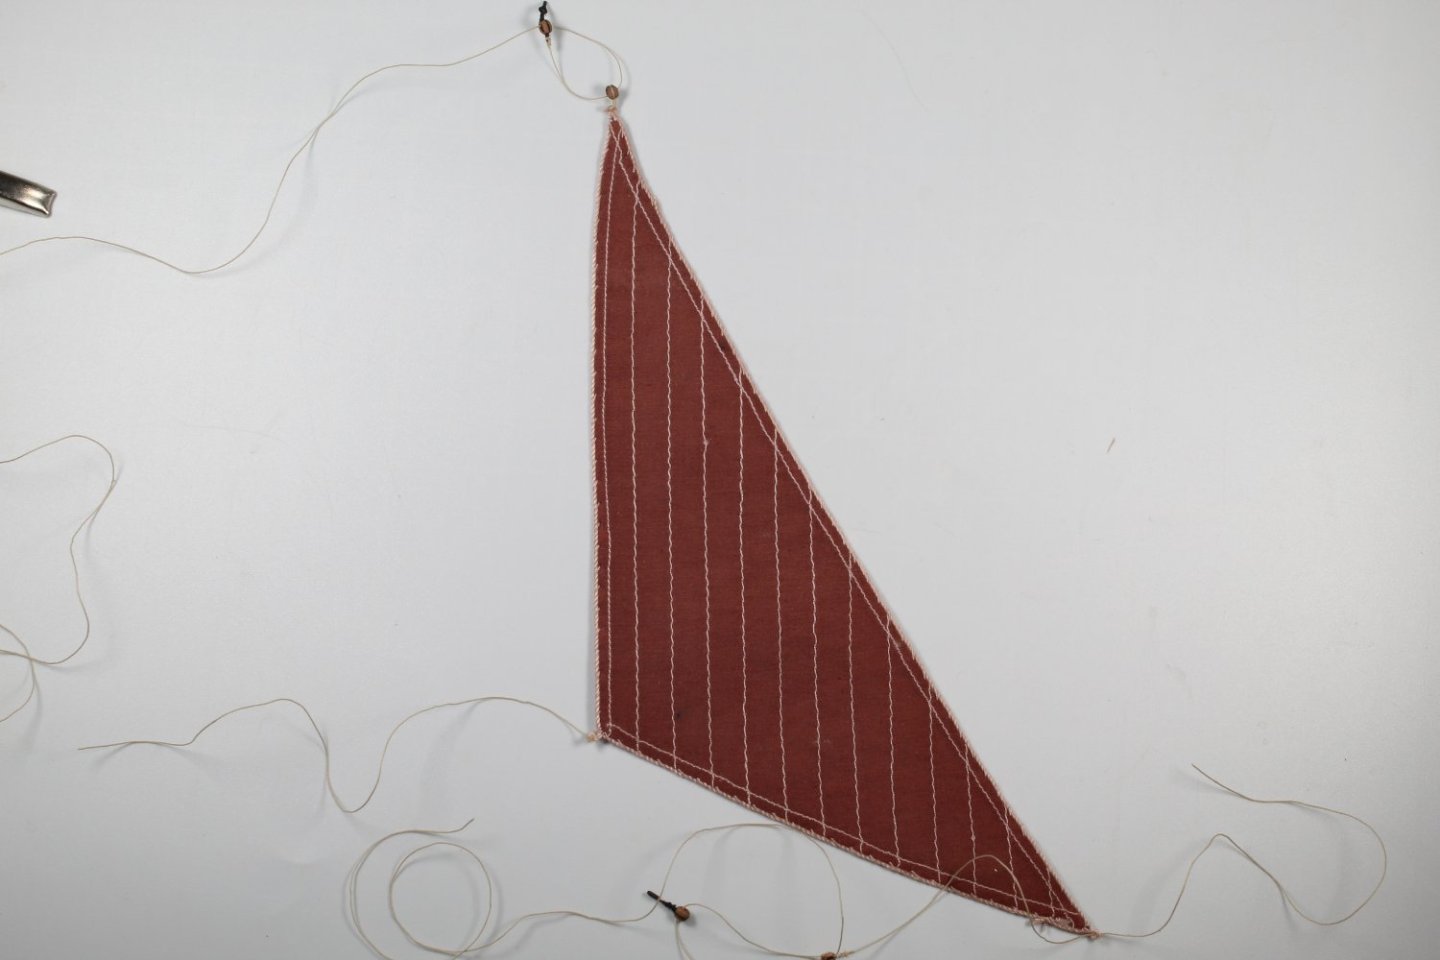
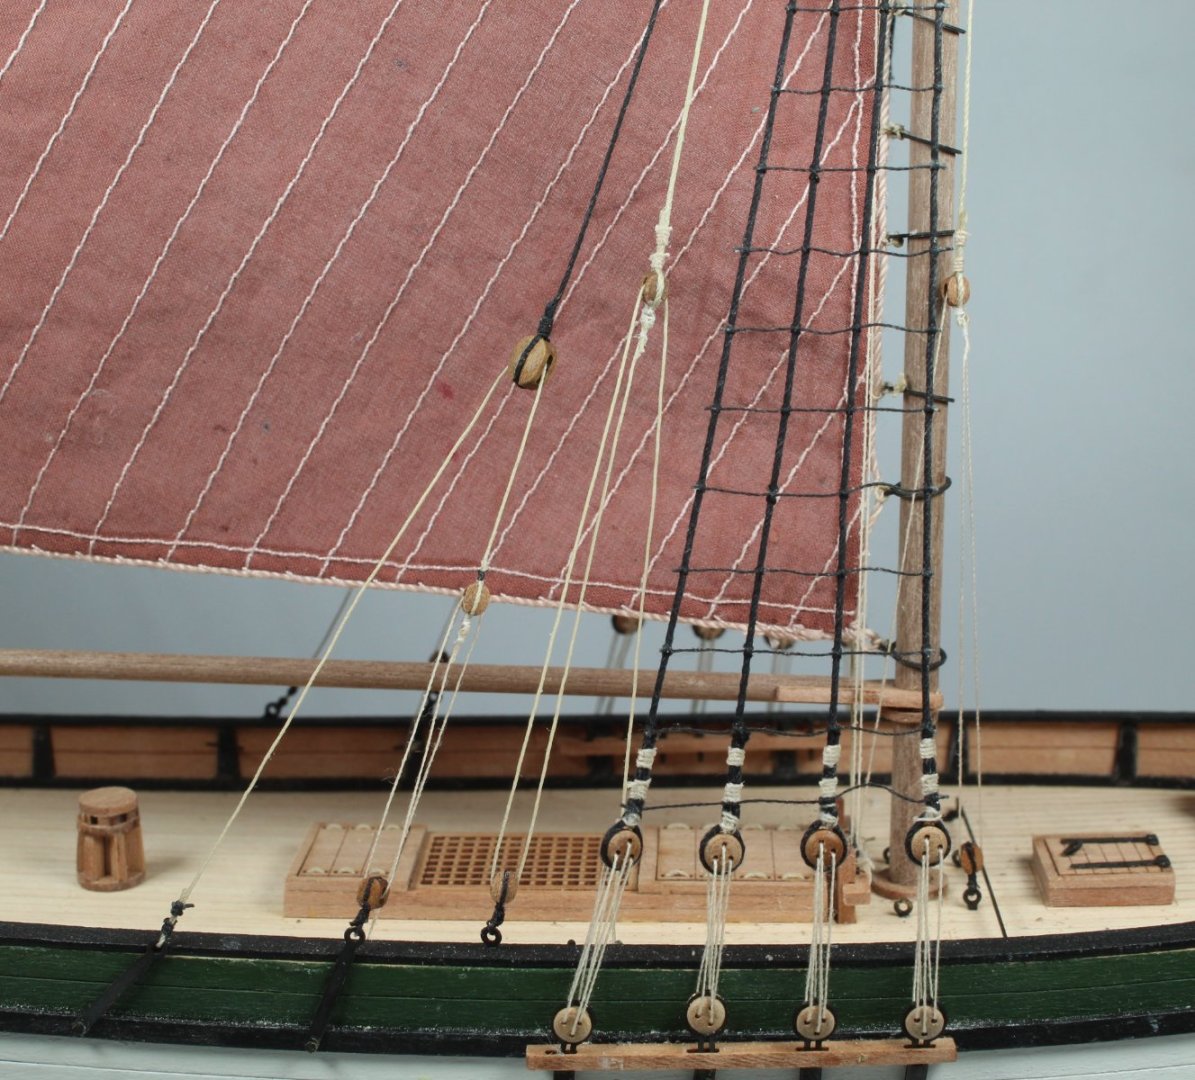
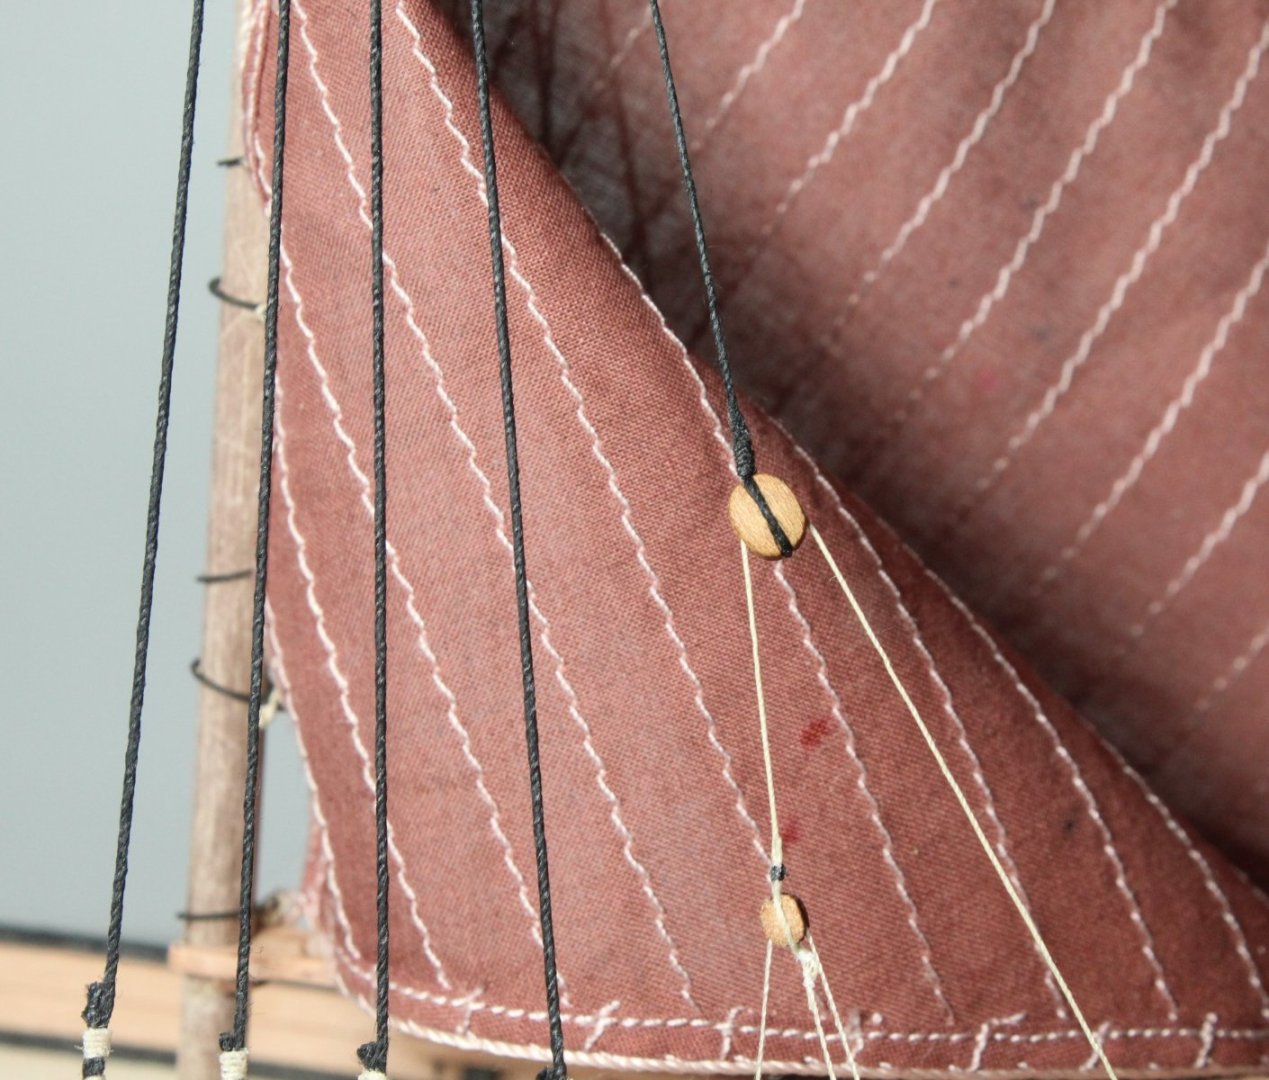
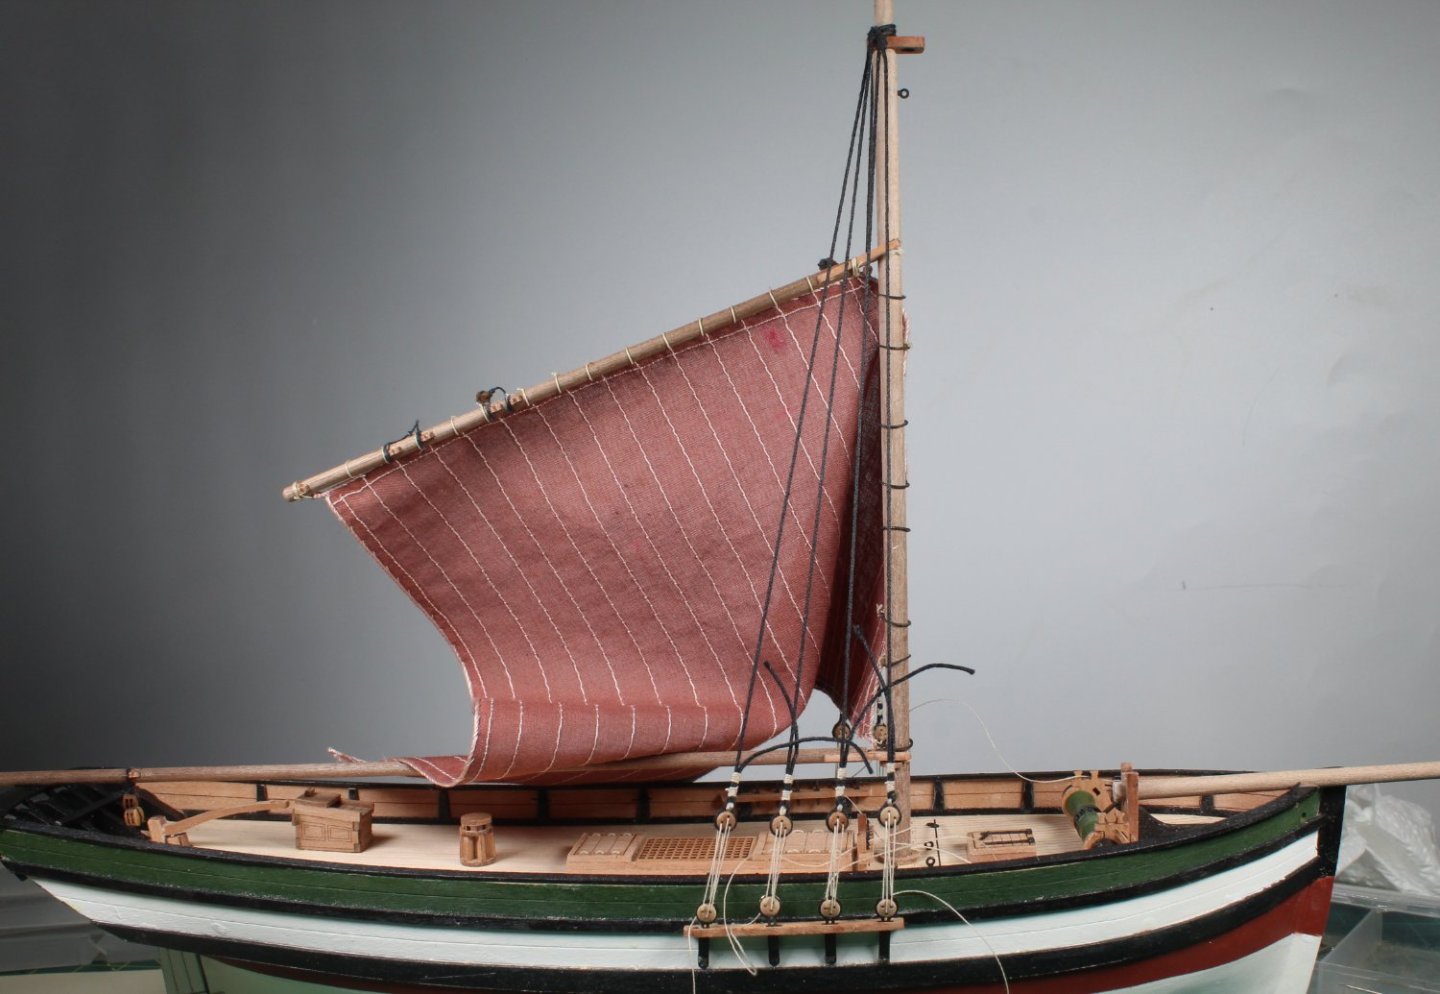
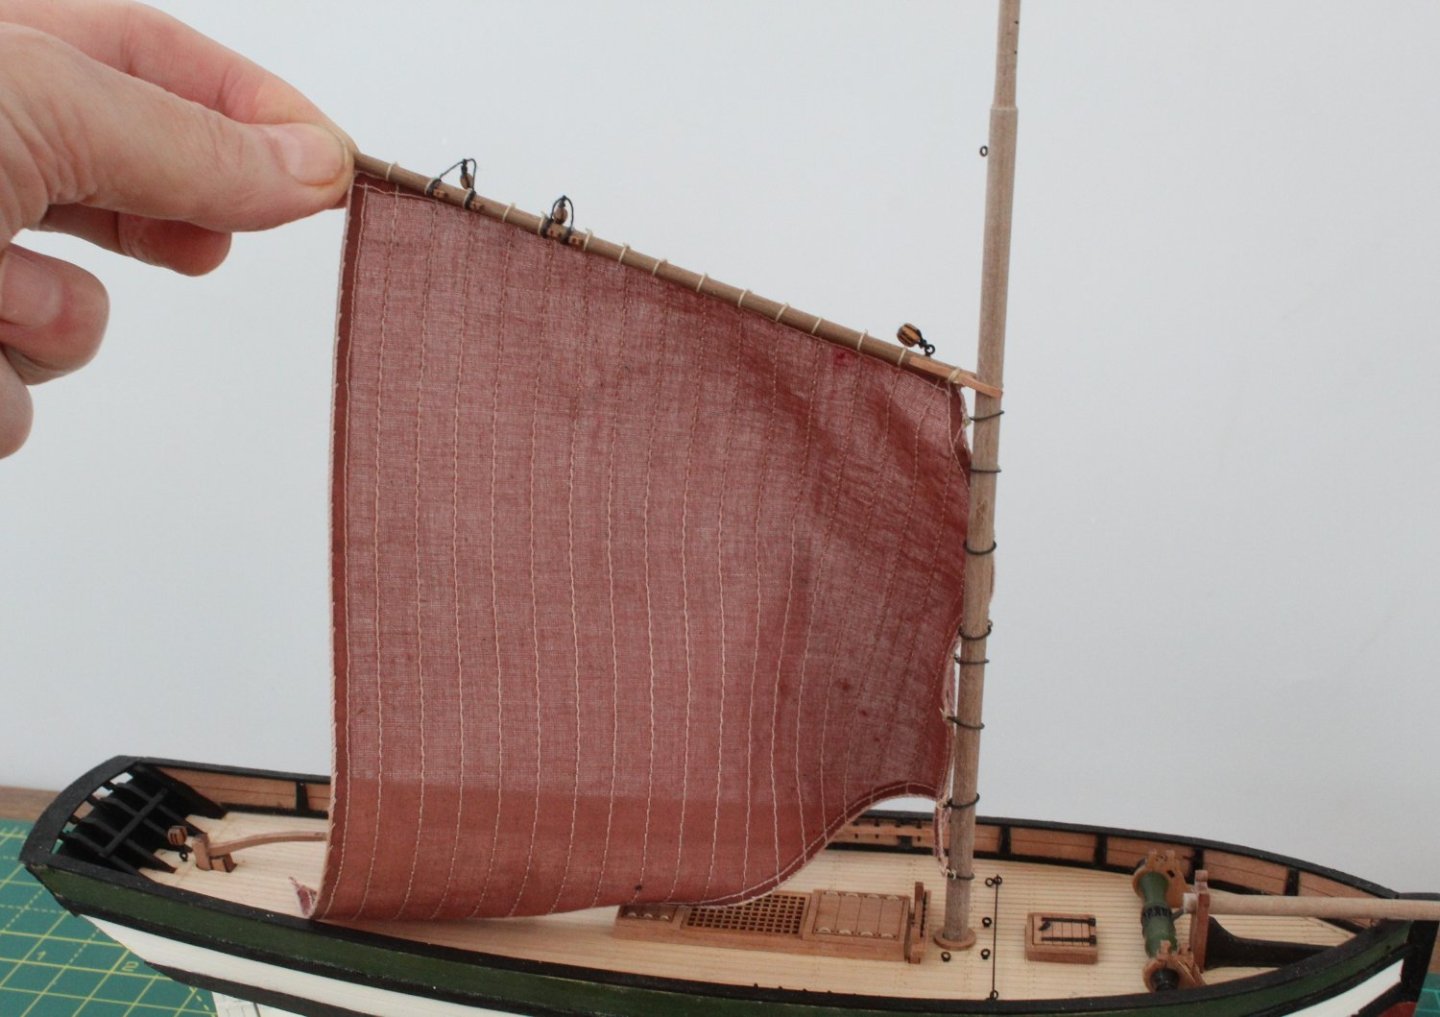
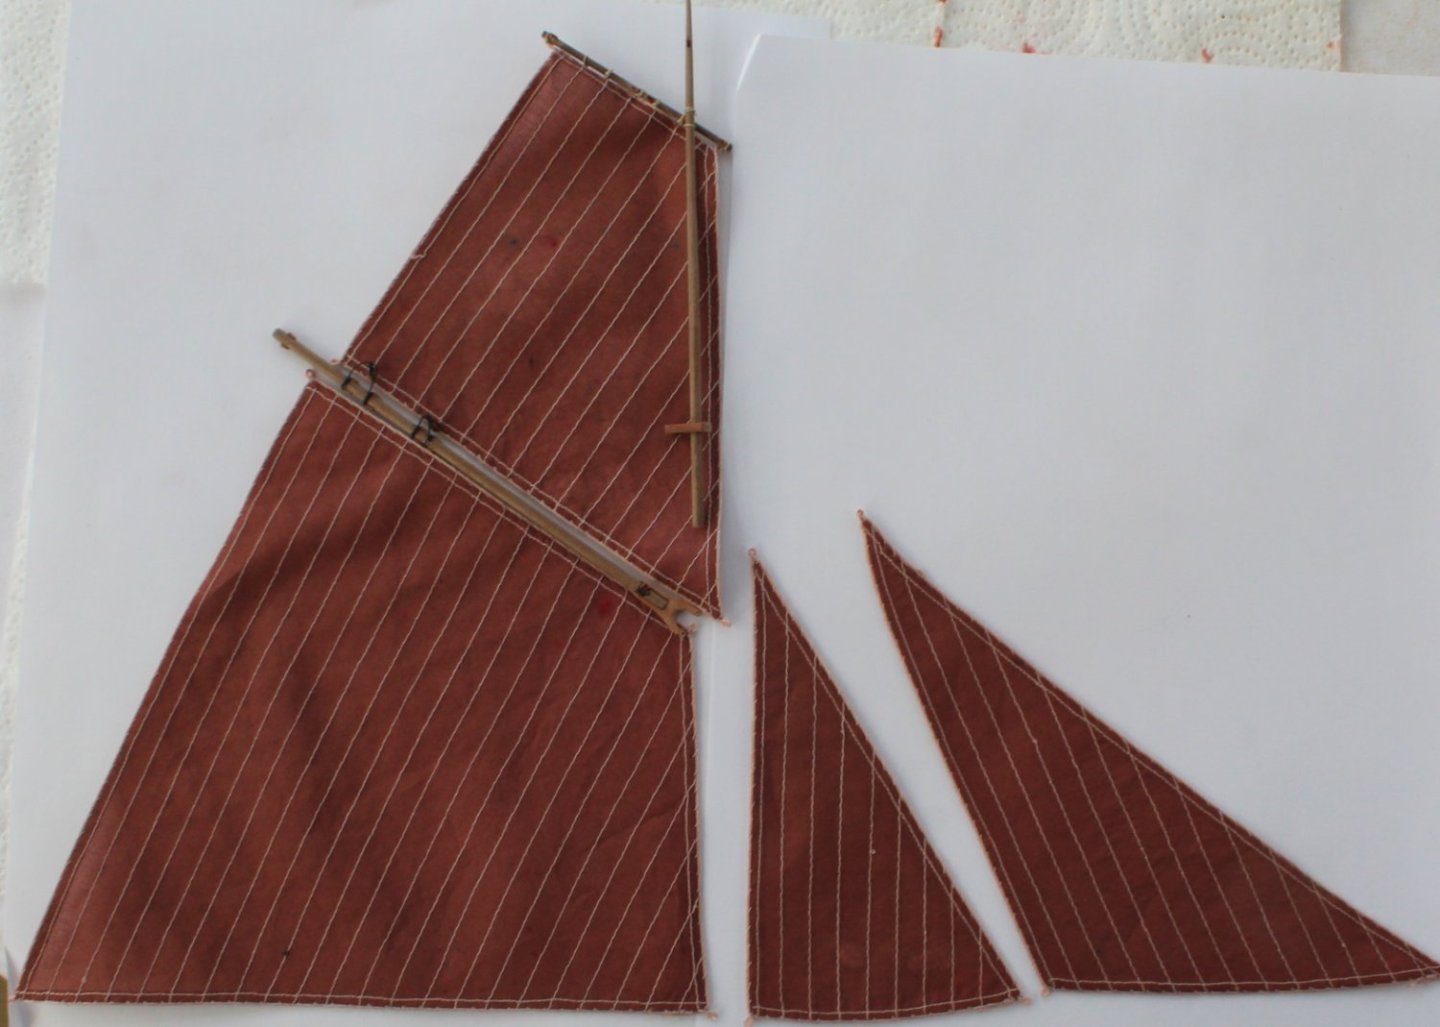
017 - Getting Ready for the Rigging Phase and Sails After carefully adding a slot on the starboard side for the bowsprit it is was glued in place. With regards to the next photo, the blue arrow shows where I went a bit off line with the drill when adding the cleat. This will be touched up. The yellow arrow shows the opened up anchor hole. Some of my surplus pear wood deadeyes were added to the strops and placed in the channels. I will add the pins when I ready to rig the shroud lines. With regards to the shroud lines and forestay I have made a start and these lines area ready to be rigged, which will be later as I need to add the main sail to the main mast. I dyed the sails using a cocoa brown dye which was the same process I used for the Erycina. I then added the topsail to the top yard / top mast. It is possible to move the top yard/sail up and down the top mast so it's final position can be set later on. Here is a picture of all the sails in roughly the right position. I am very happy with the sail colour.


- 62 replies
-
- 9
-
-
- Saucy Jack
- vanguard models
- (and 3 more)
-
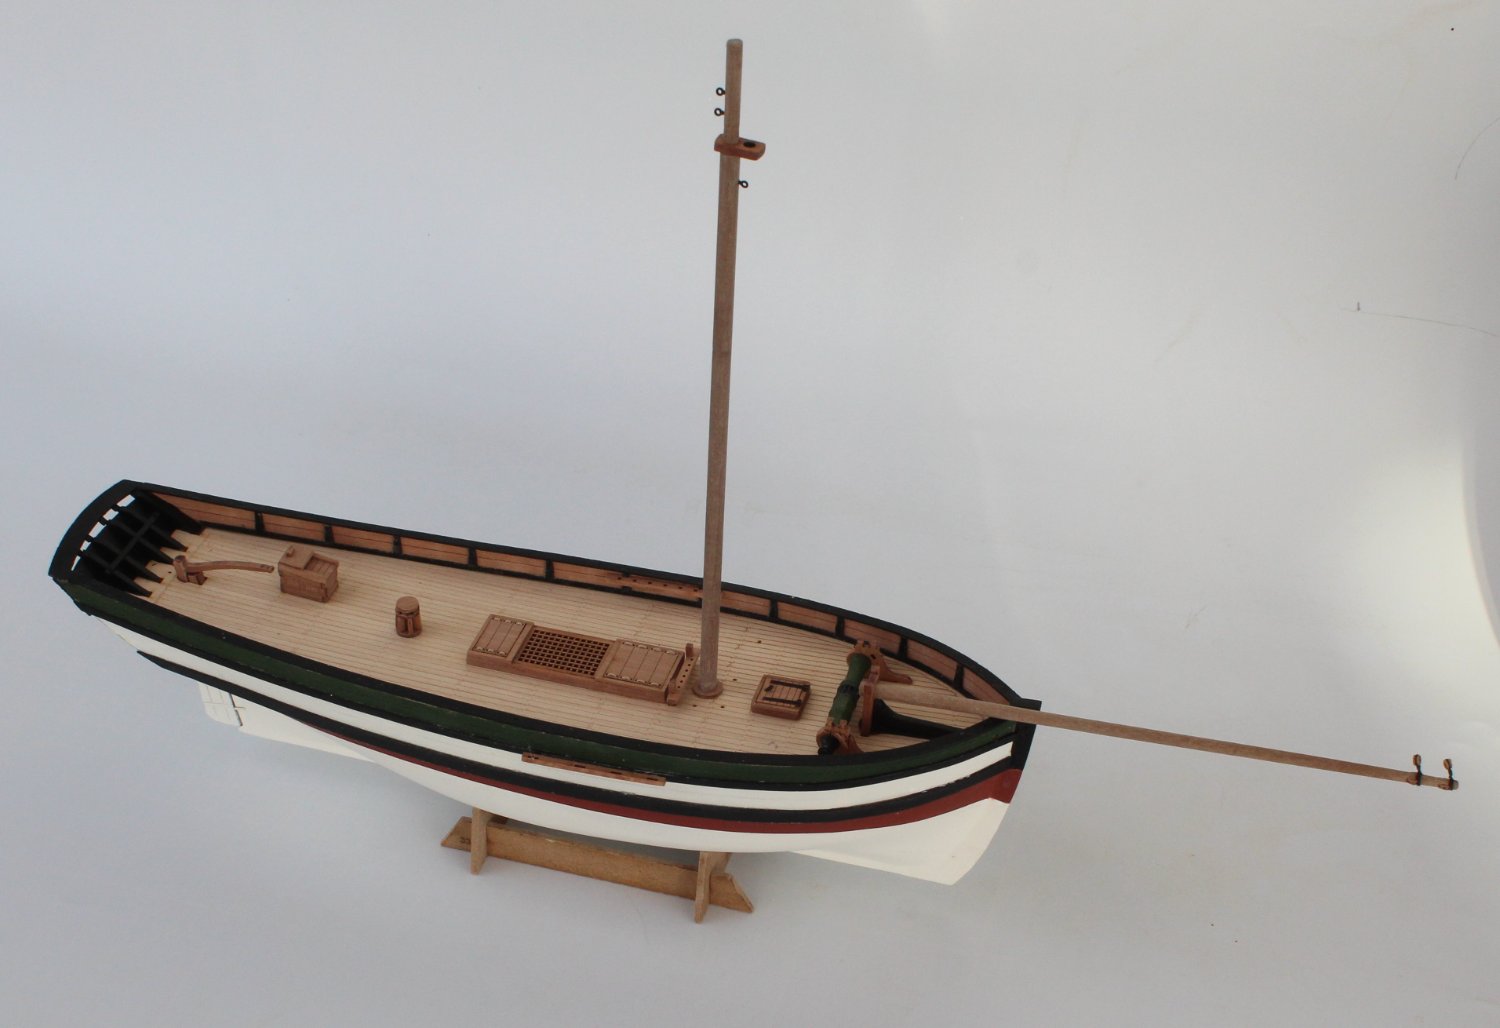
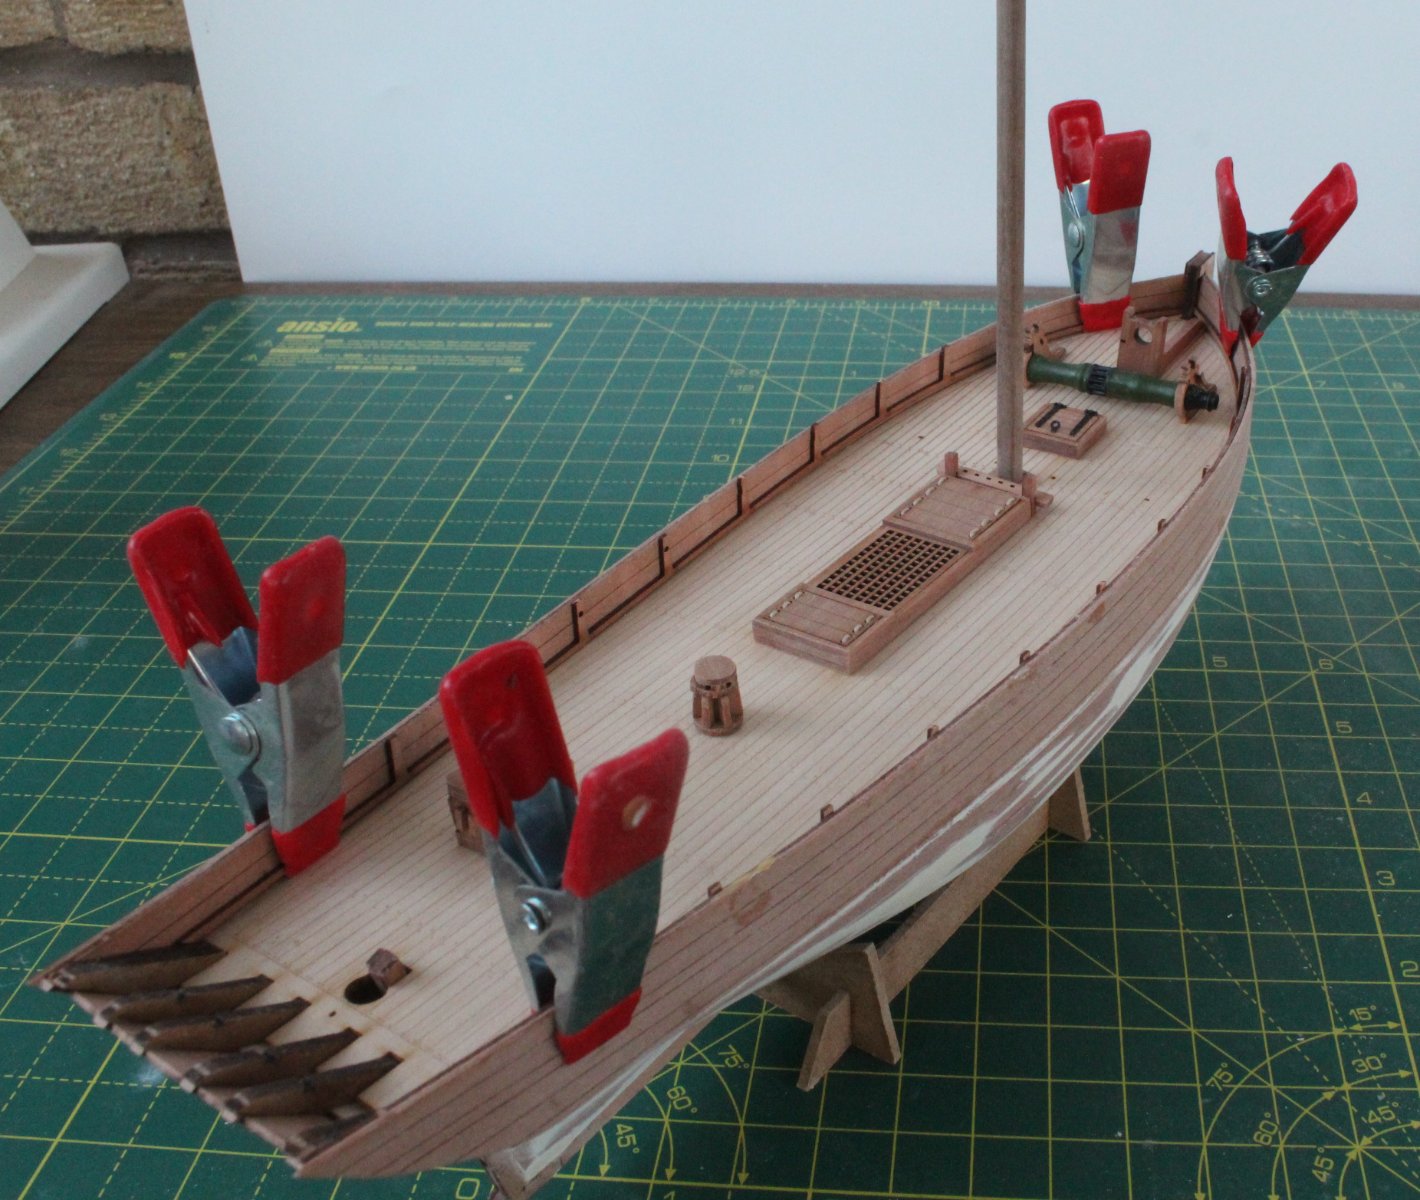
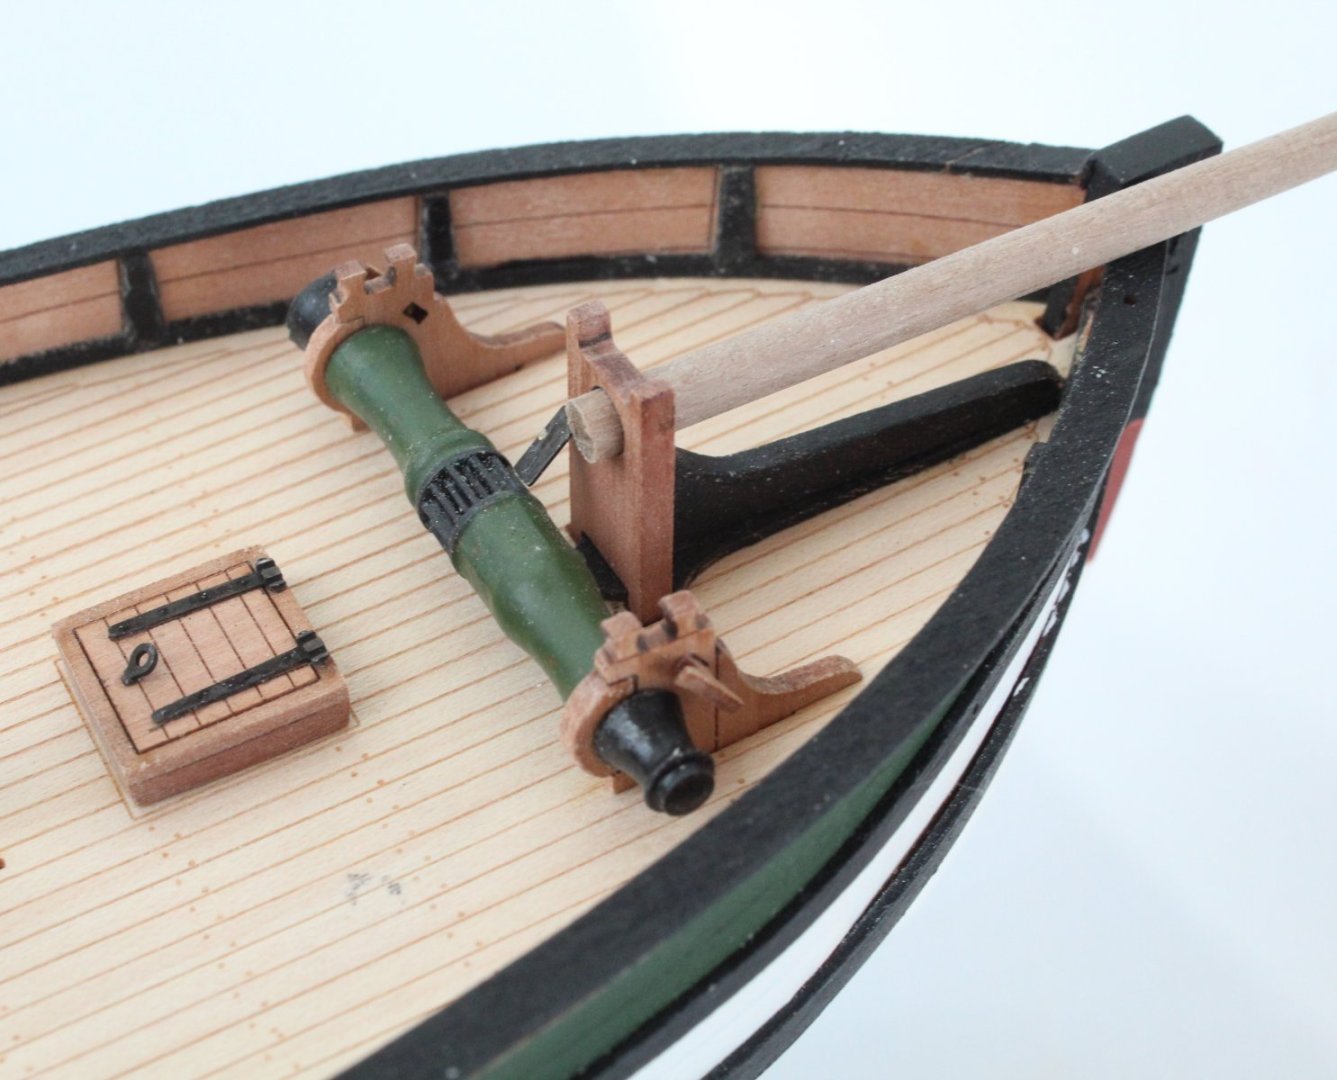
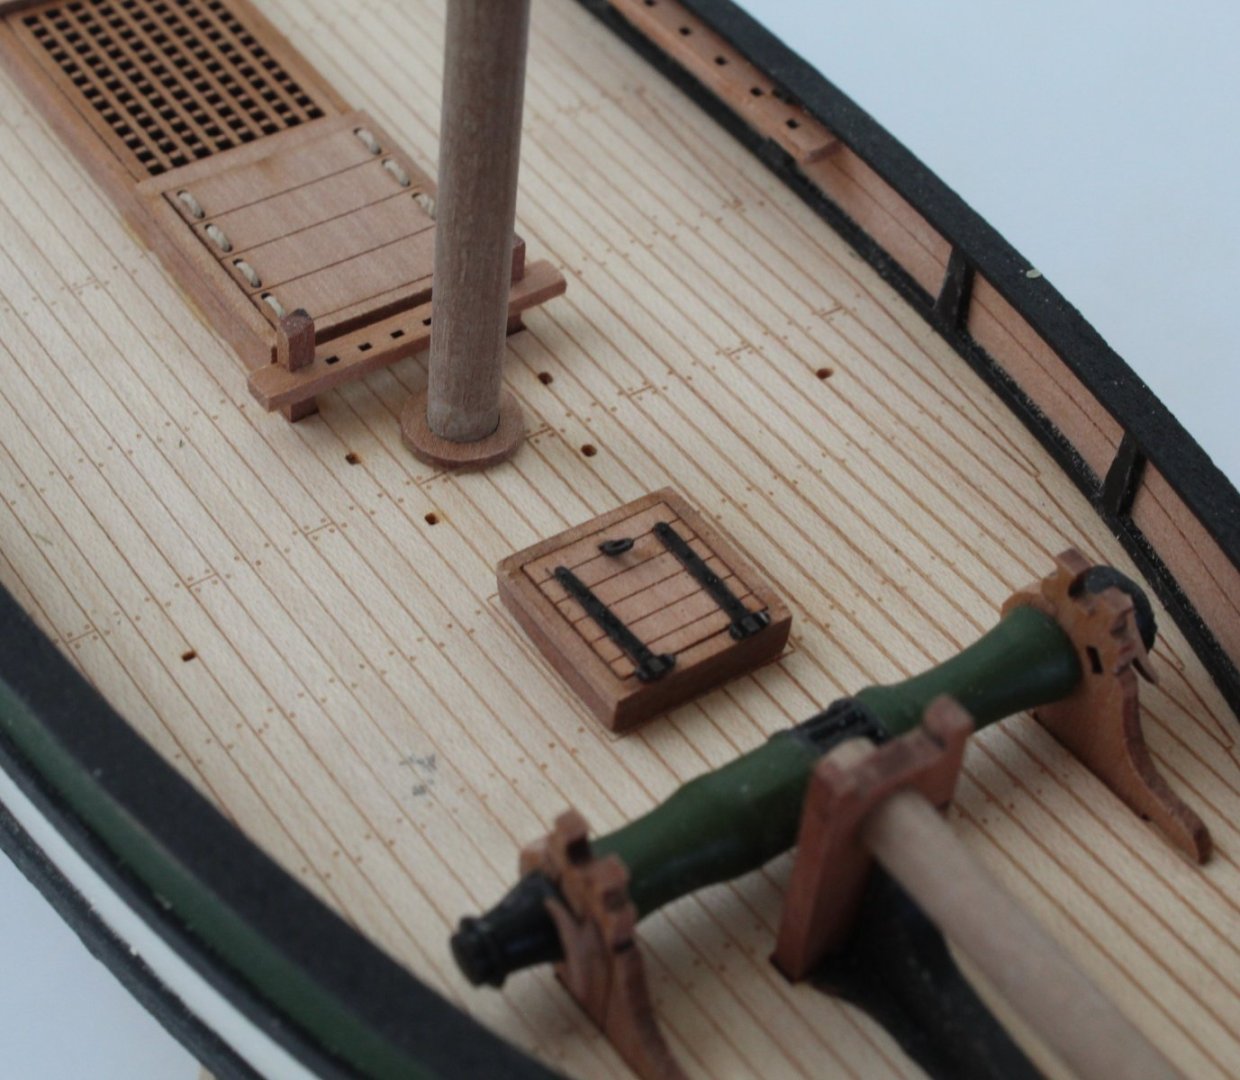
016 - Deck Items Following in my my earlier post I have not glued all the deck items in place, with the exception of the PE parts. I also drilled out the two holes for the anchor cables, using a 1.6mmD drill. Next on the build process will be fitting the belay pins, adding the deadeyes to the strops and then placing them in the channels, I also have to file a slot in the right side gunwale for the bowsprit. Here is a selection of photos of the Saucy Jack with the all deck items glued in place. The mast and bowsprit are included in these photo's but they have not been glued. After a good clean in soapy water and acetone baths the various PE parts were chemically blackened. I have shown a selection of these in the final photo of this post. I also have the sail set to dye which I will probably do in the next day or two. I am hoping to have completed this build by the end of the year or maybe early in the new year given my shipyard time might be reduced due to the forthcoming (bah humbug!) Christmas festivities. MY next planned build will be the HMS Indefatigable. The Indy kit is due to be released by the end of February with pre-orders available next week. I might have to build another small fishing boat to fill the void such as the Nisa or maybe I should decorate the house as it does need doing.


- 62 replies
-
- 4
-
-
- Saucy Jack
- vanguard models
- (and 3 more)
-
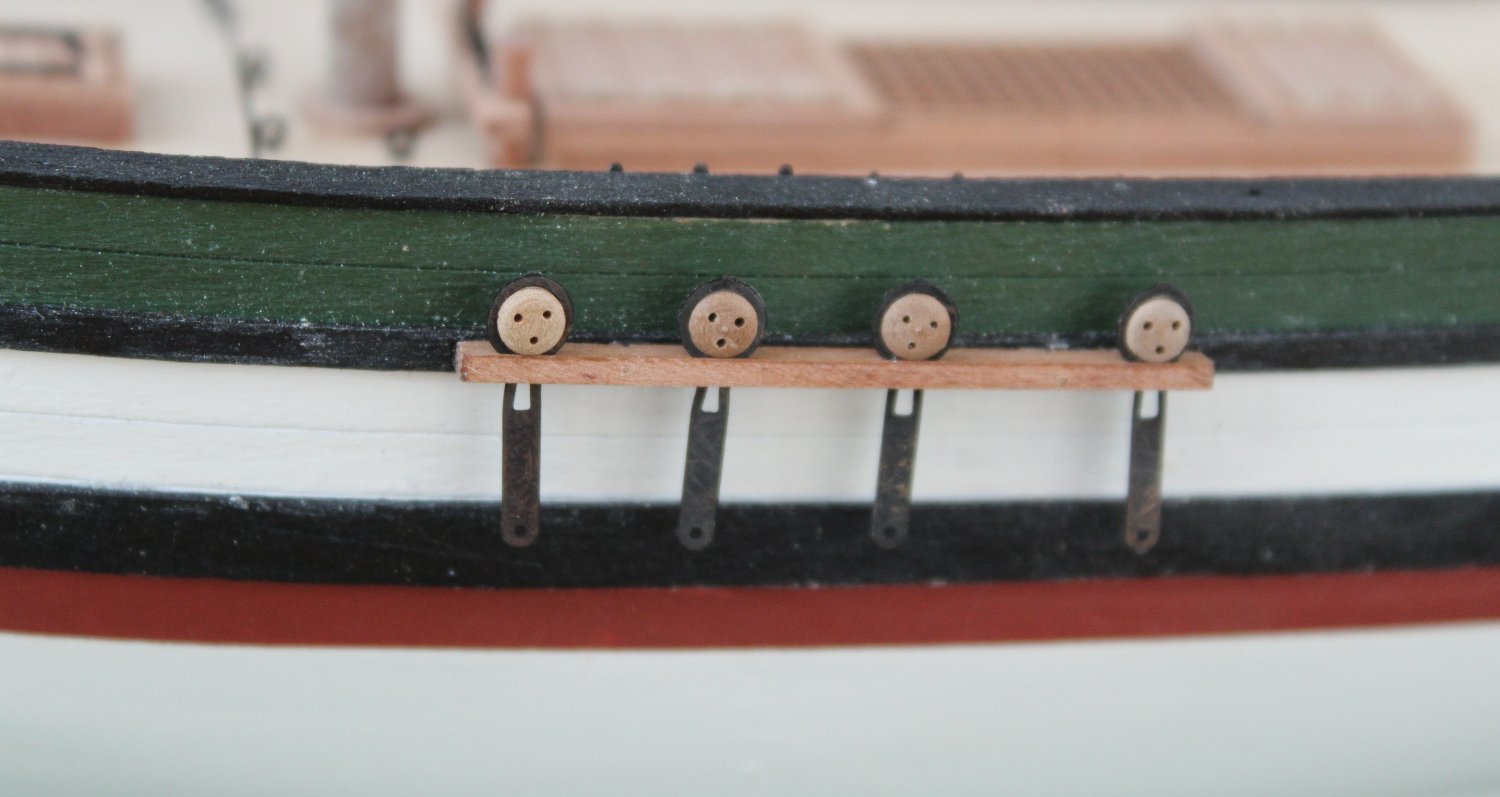
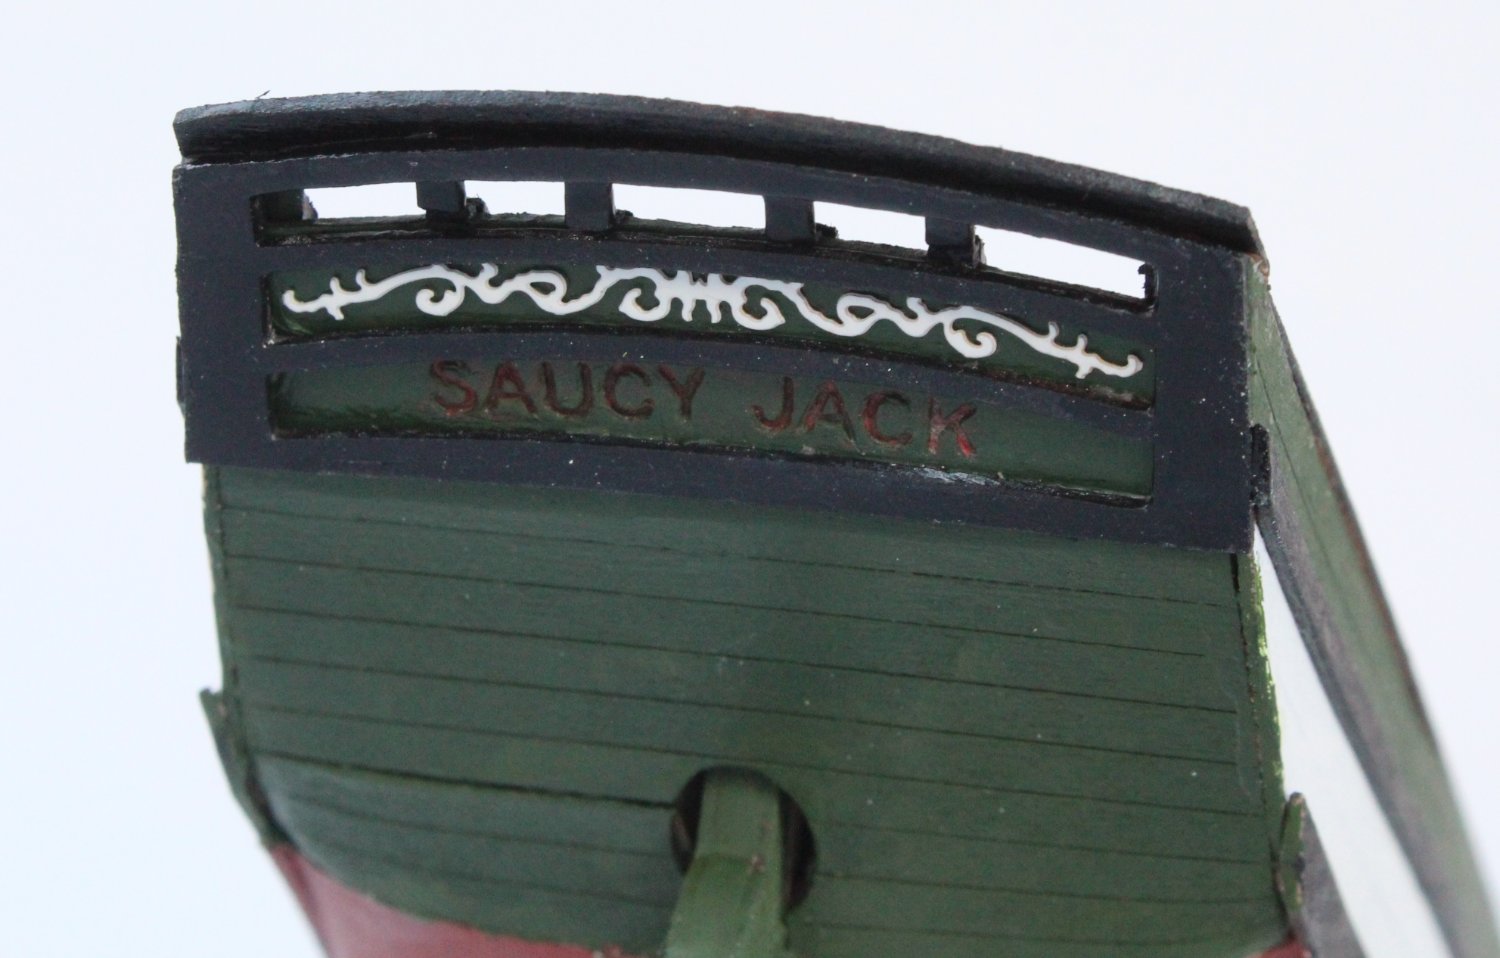
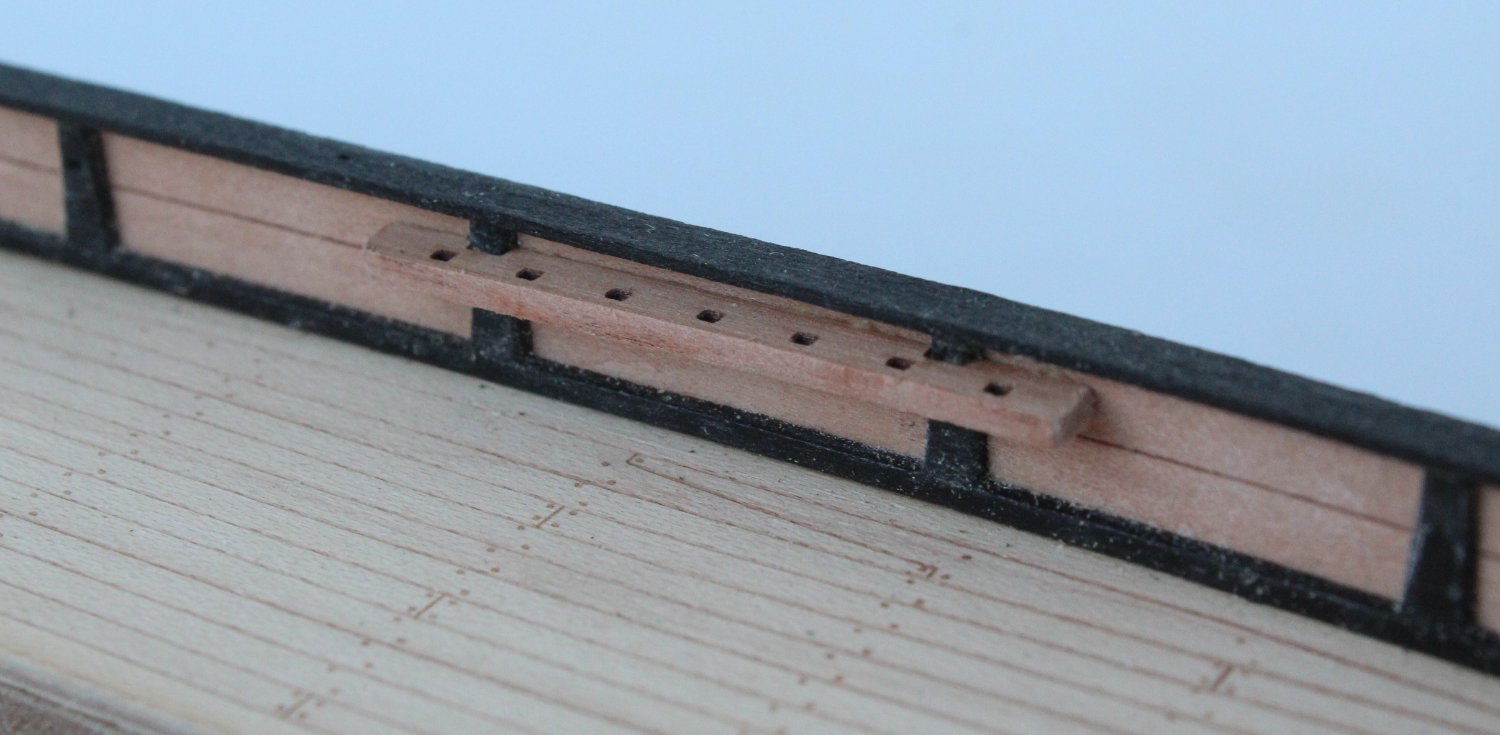
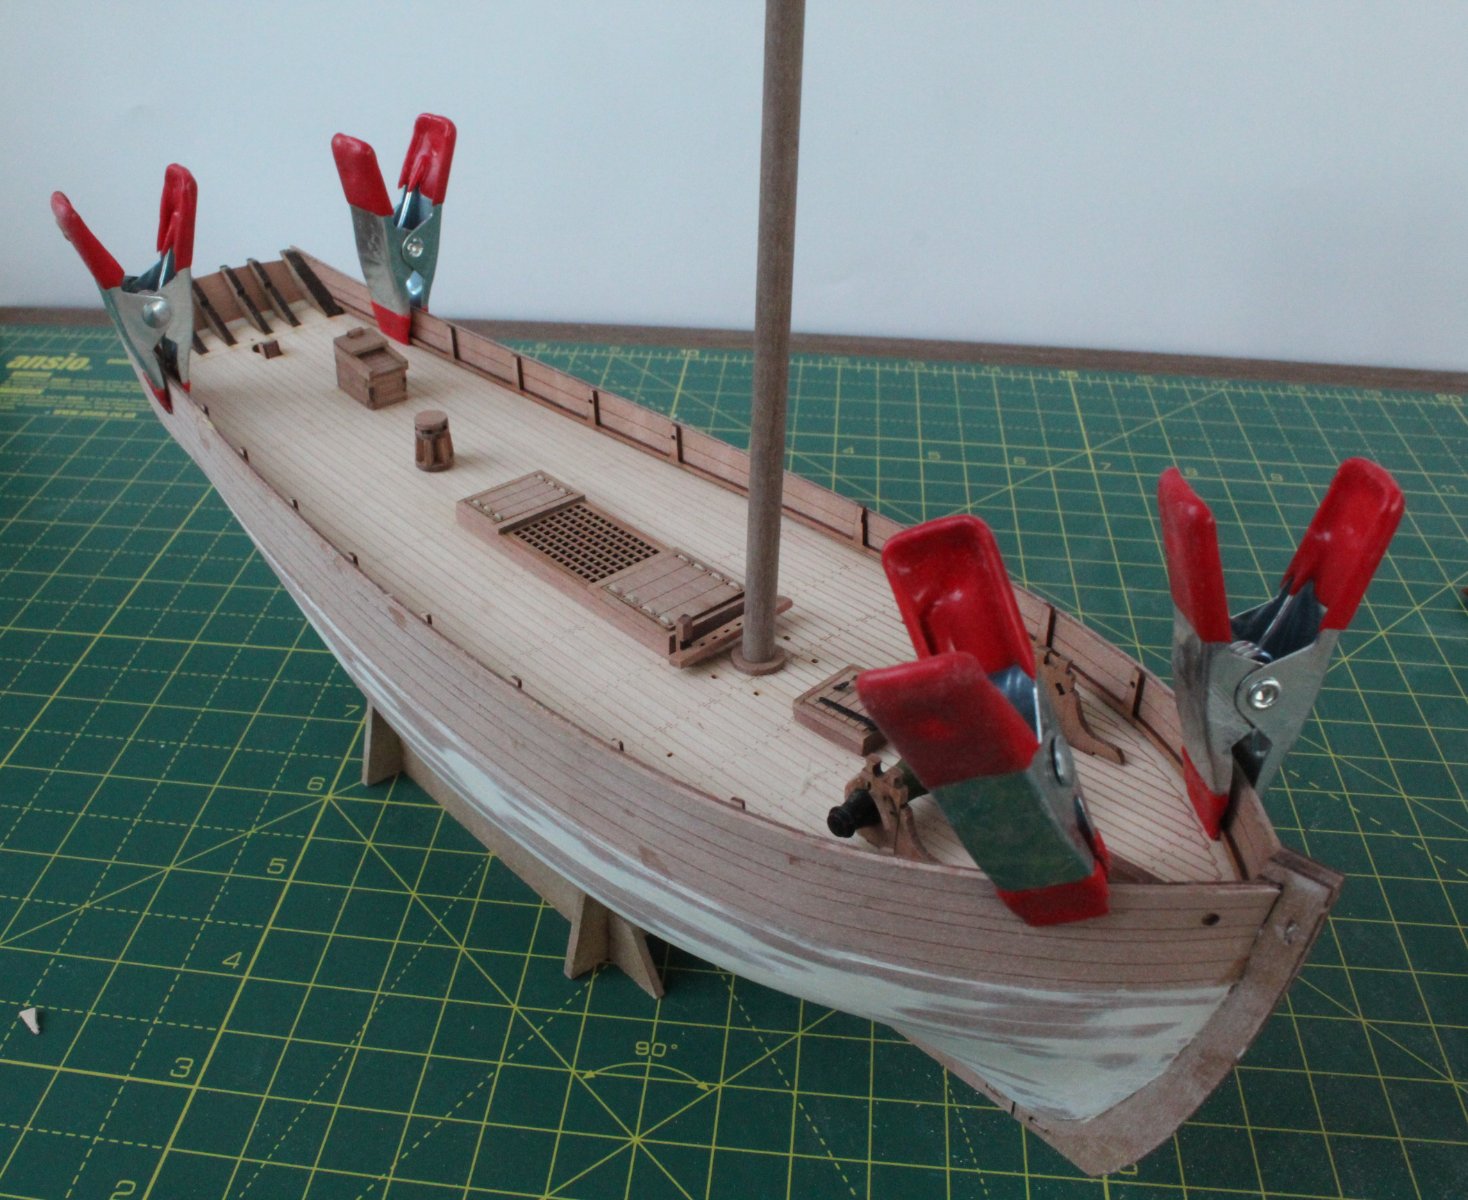
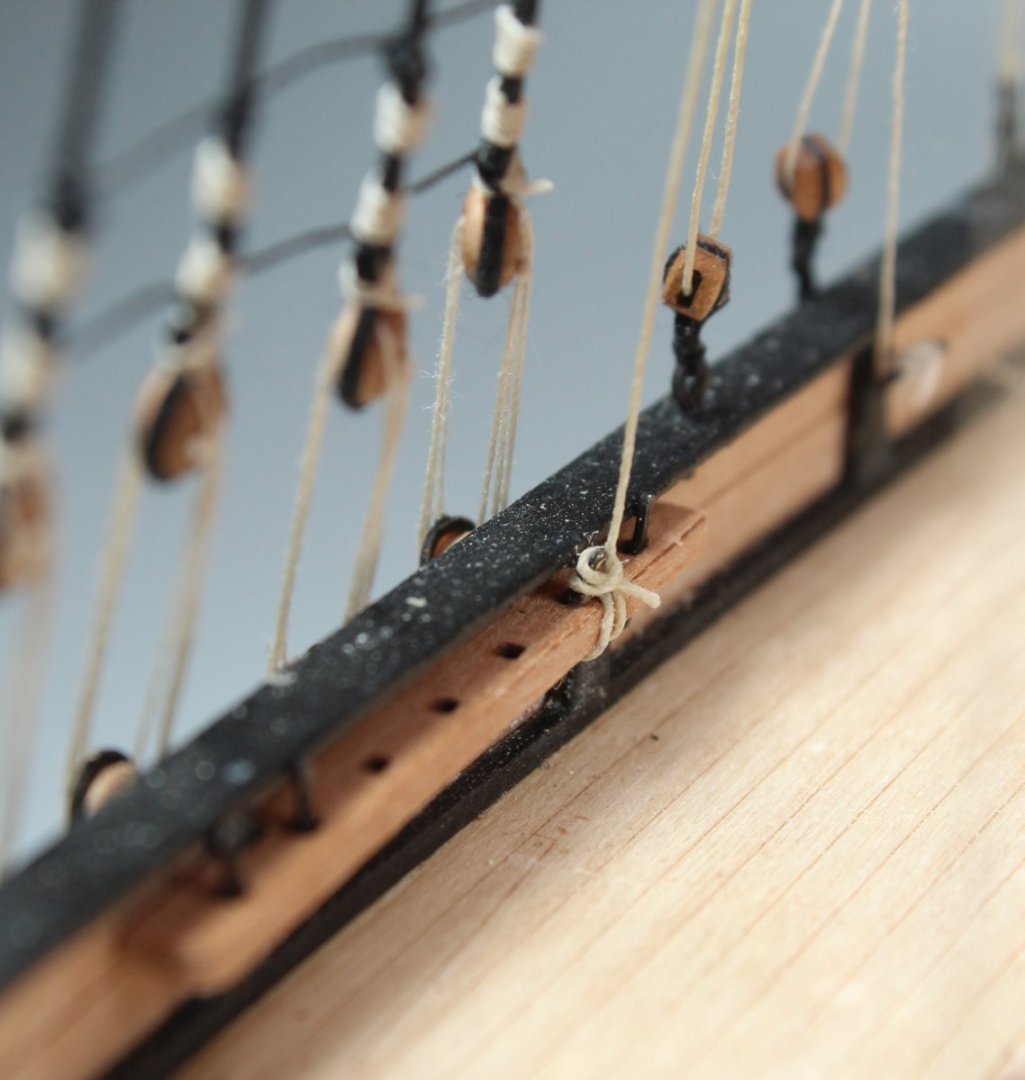
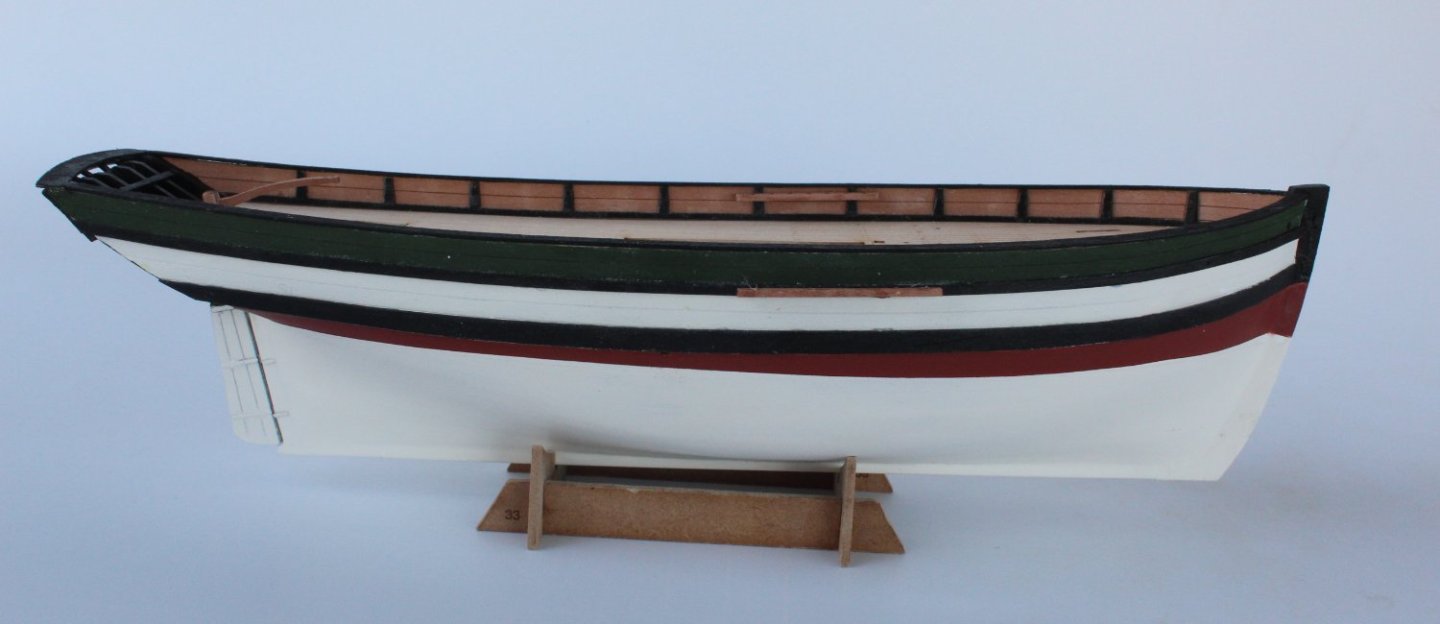
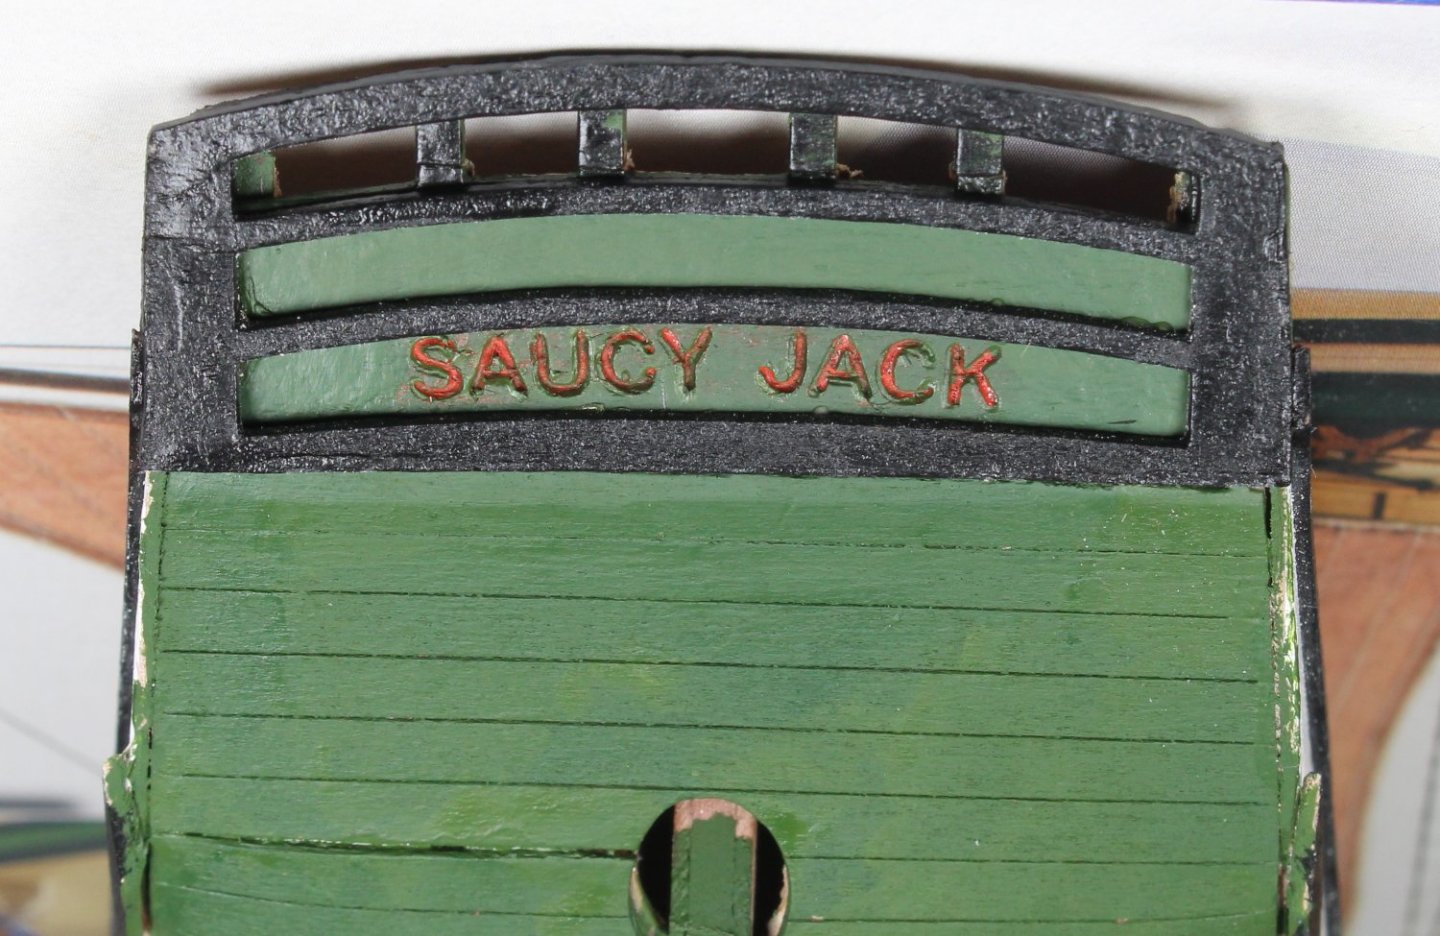
015 - Gunwales and Rudder Time for another Saucy jack update. I have now fitted the belay pin racks, deadeye channels, gunwales and rudder assembly to the hull. The first couple of photos shows the current build state of the Saucy Jack. She is now ready to have all the deck items added. The various pieces of PE parts (eyebolts, belaying pins, hooks, strops, etc.) are currently being cleaned in hot soapy water and acetone baths so they can be blackened. The next photo is shows the gunwales in place. The next photo is a close up of the tiller and stern area. The one area I am not totally happy with is the stern counter pattern area, as can be seen in the next photo. I tried to be clever with the engraved Saucy Jack by adding a red infill. It almost worked. I did paint the inner stern area black, which I think made a big difference, noting the odd splash of unwanted black paint on the deck, which I might be able to clean off. The next photo shows the the left side belay pin rack in place. As mentioned in an earlier post I think painting the inner bulwark support patterns black was a good choice. The final photo in this post shows left side channel, which has been pinned and glued in place.


- 62 replies
-
- 5
-
-
- Saucy Jack
- vanguard models
- (and 3 more)
-
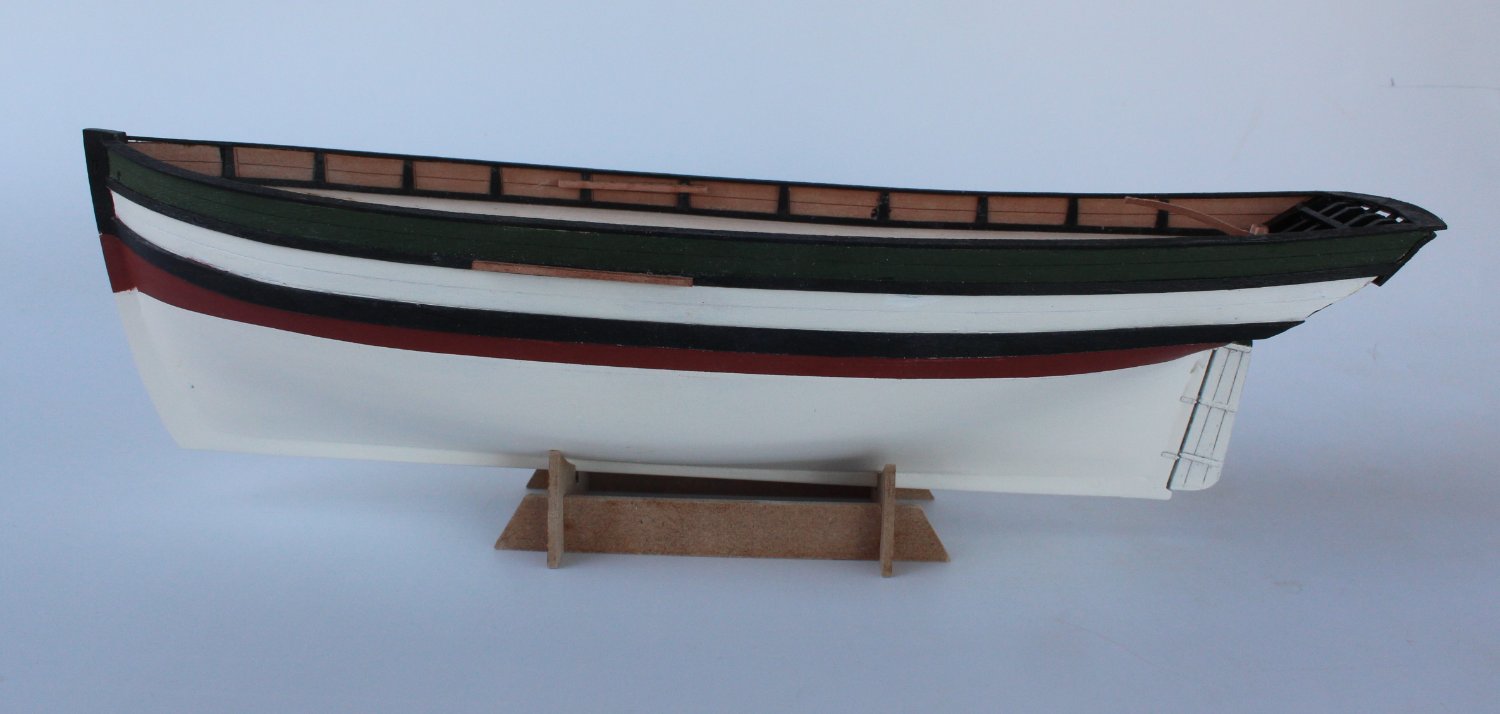
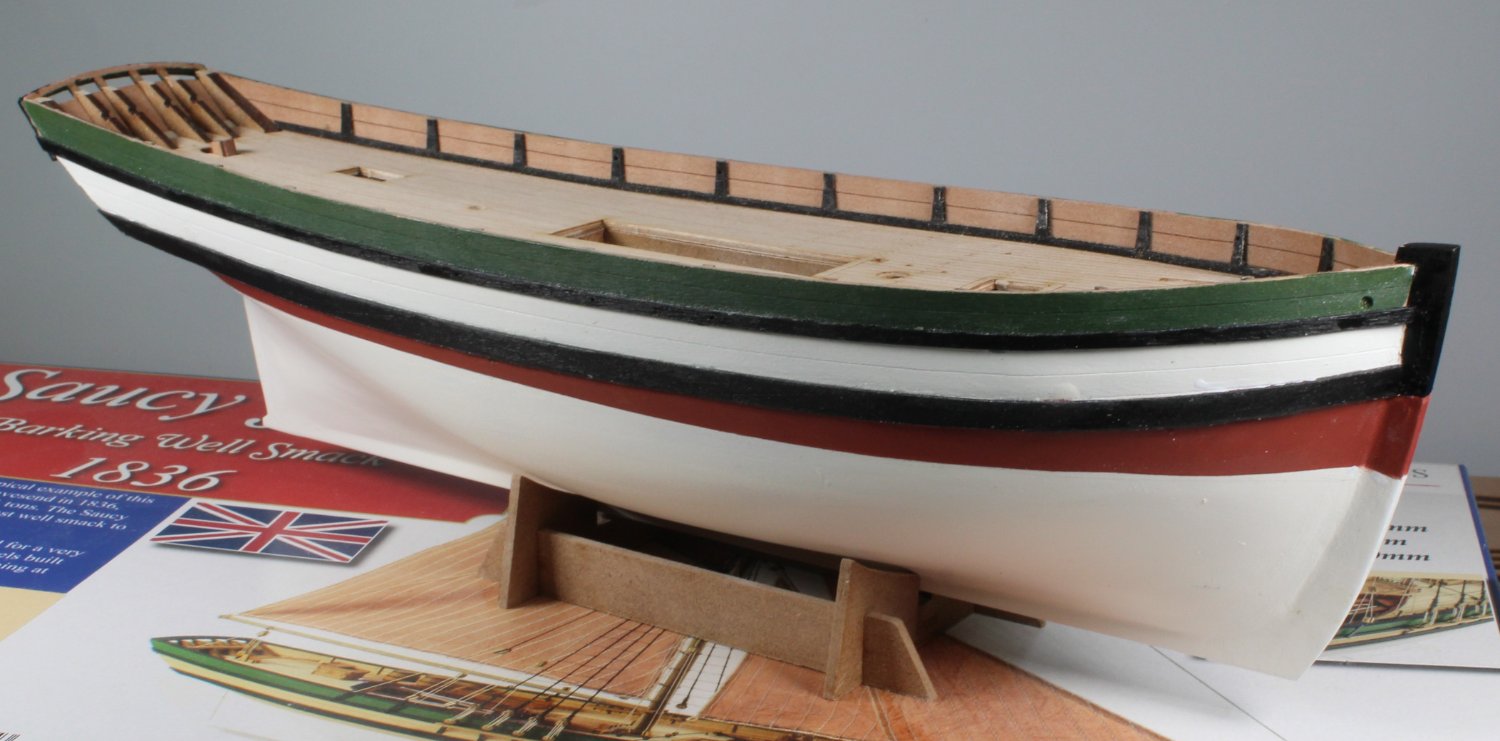
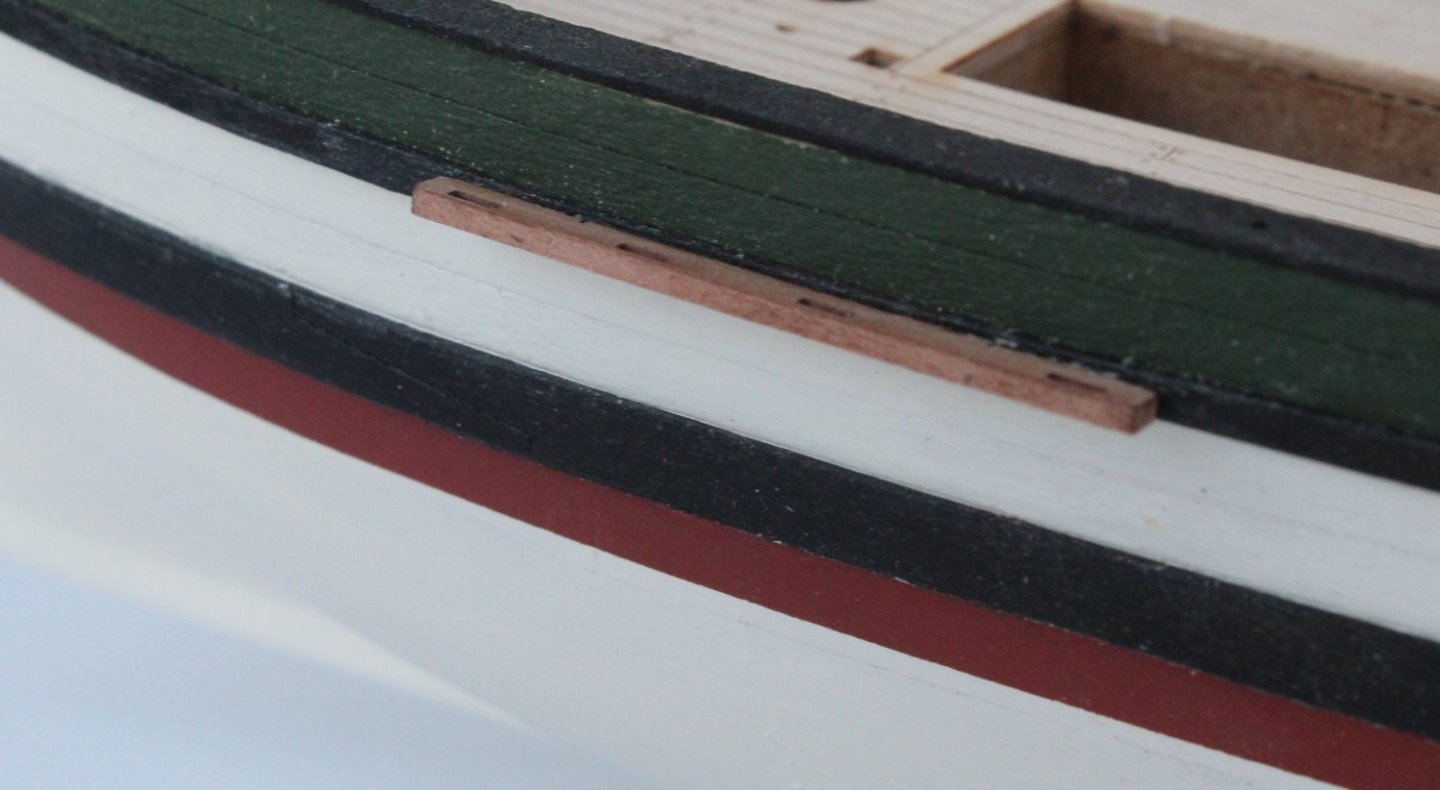
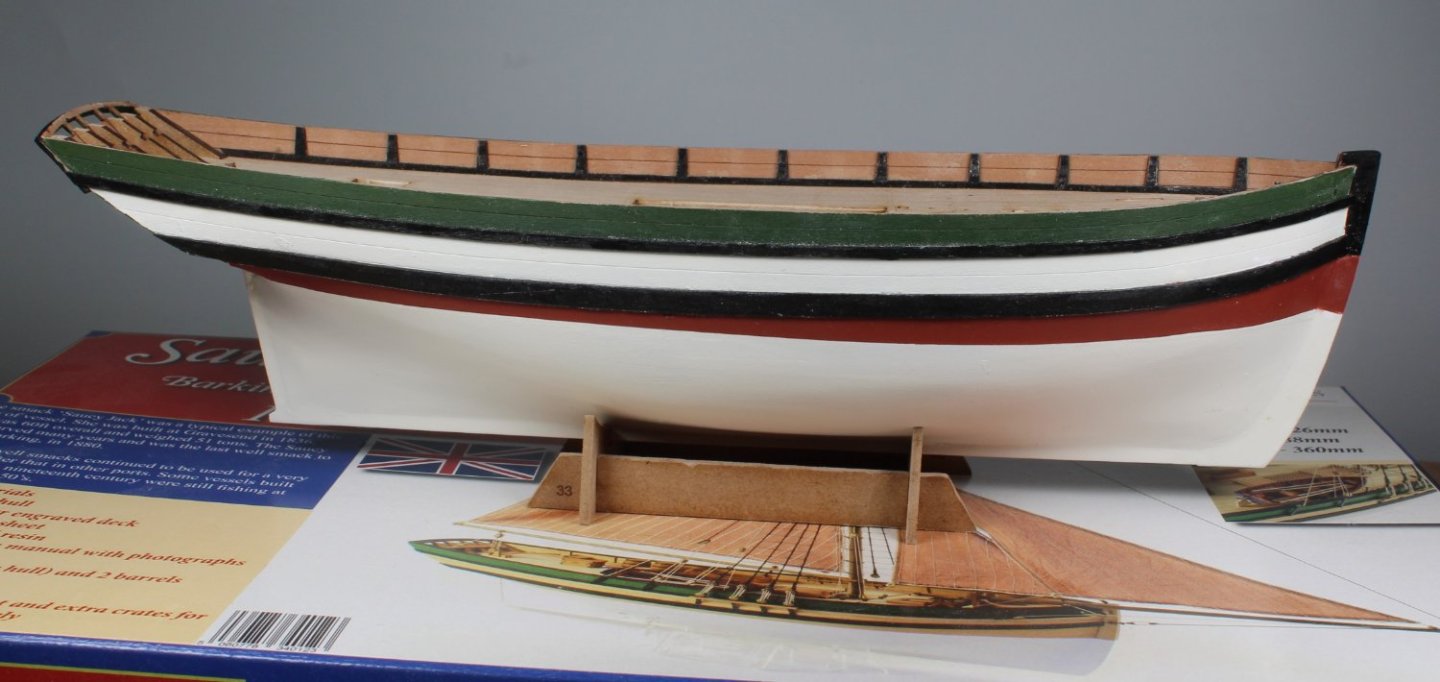
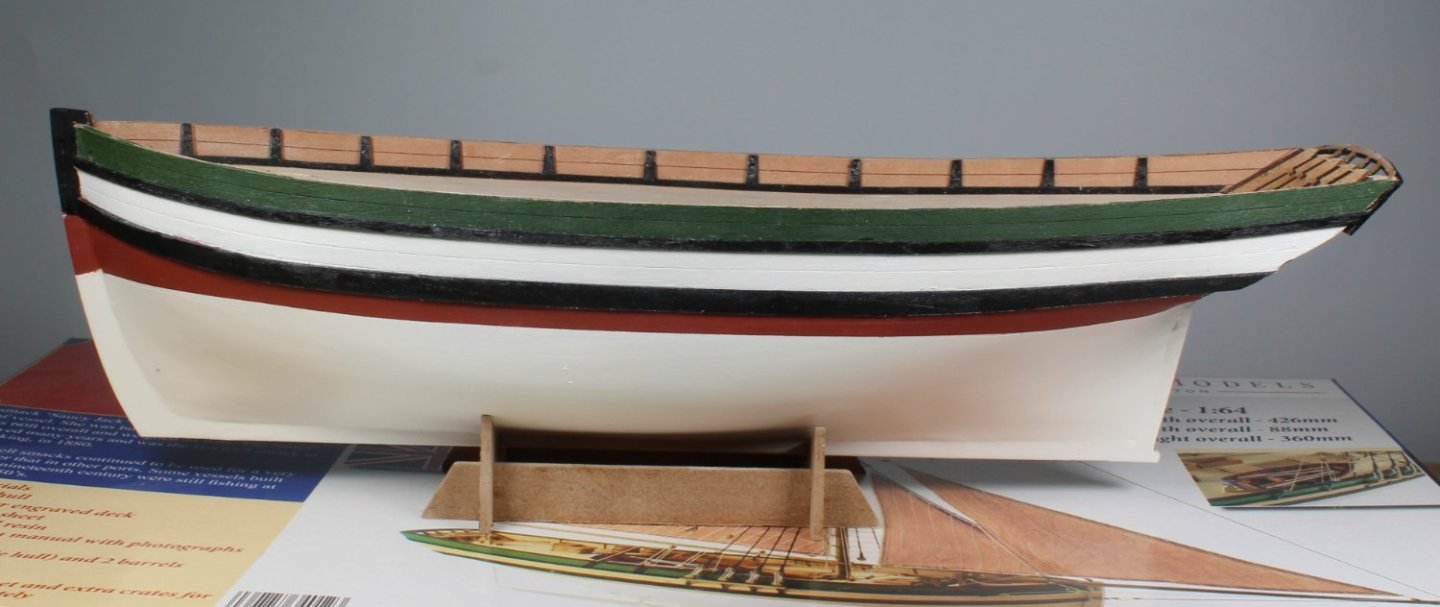
014 - The Painted Hull I have almost completed the hull painting phase. There is just a little bit of touching up along some of the edges. It is not my finest work but I do like the colour scheme. I was undecided about is the bottom of the hull should be red oxide and the bit above the water should be white, but opted for a white hull finish below the water line. I do like the black finish applied to the inner bulwark support patterns. I decided the stern counter would be painted flat green with the upper outer stern counter painted black. Before the outer upper counter was fitted I applied a scarlet paint wash over the engraved name. On reflection I think I should have gone for a white wash infill. I might experiment with a fine point to see if I can apply a white infill. I still need to tidy up the outer edges and fit the decorative pattern in the gap above the engraved name. The lower stern counter pattern did split on the left hand side when it was fitted, as can seen.


- 62 replies
-
- 7
-
-
- Saucy Jack
- vanguard models
- (and 3 more)
-
I also have a large collection of guitars, from my days as a semi pro musician. My favorite is a Gordon Smith Galaxy, hand built uk guitar, one of 3 Gordon Smith guitars in my collection. I tended to use my two Line 6 variax's when gigging for the versatility of sounds. I also have a "blackie" fender strat.
- 488 replies
-
- 8
-
-
- Indefatigable
- Vanguard Models
- (and 1 more)
-
013 - Deck Fitted Just a quick update. I have now fitted the deck which was a good fit once the laser char had been removed from the edges. I have also test fitted the inner bulwarks support patterns and deck items. I did have to trim the ends of the support patterns for a good fit. I have opted to paint the inner bulwarks support patterns black as I think it will be a nice contrast to the bare wood inner bulwark patterns. They have been spray painted and once the paint has dried they can be glued in place. I am also working on painting the upper stern counter area. The top of the inner upper counter pattern has broken away but it can be glued back in place, when the outer upper stern counter pattern is fitted. The hull smoothing process is still ongoing but is looking a lot better. Once I have fitted the inner bulwark support patterns and outer stern counter pattern I will commence the final phase(s) of the hull smoothing and painting.

- 62 replies
-
- 4
-
-
- Saucy Jack
- vanguard models
- (and 3 more)
-
With a bit of sanding the bare wood finish might have been ok. I really liked the red oxide used on the Eyrcina below the water line with a white strip above, so I'm just extending this a bit for the Saucy Jack. I've not thought about the stern painting as yet. I have a good set of paint brushes, so hopefully with a bit care I will be OK. Time will tell.
- 62 replies
-
- 1
-
-
- Saucy Jack
- vanguard models
- (and 3 more)