Glenn-UK
-
Posts
3,175 -
Joined
-
Last visited
Content Type
Profiles
Forums
Gallery
Events
Everything posted by Glenn-UK
-
 Many thanks. I have painted and blackened before. Generally I prefer to blacken. Tomorrow I will start seizing the various blocks which is a tedious task.
- 48 replies
-
- 1
-

-
- Nisha
- Vanguard Models
- (and 3 more)
-
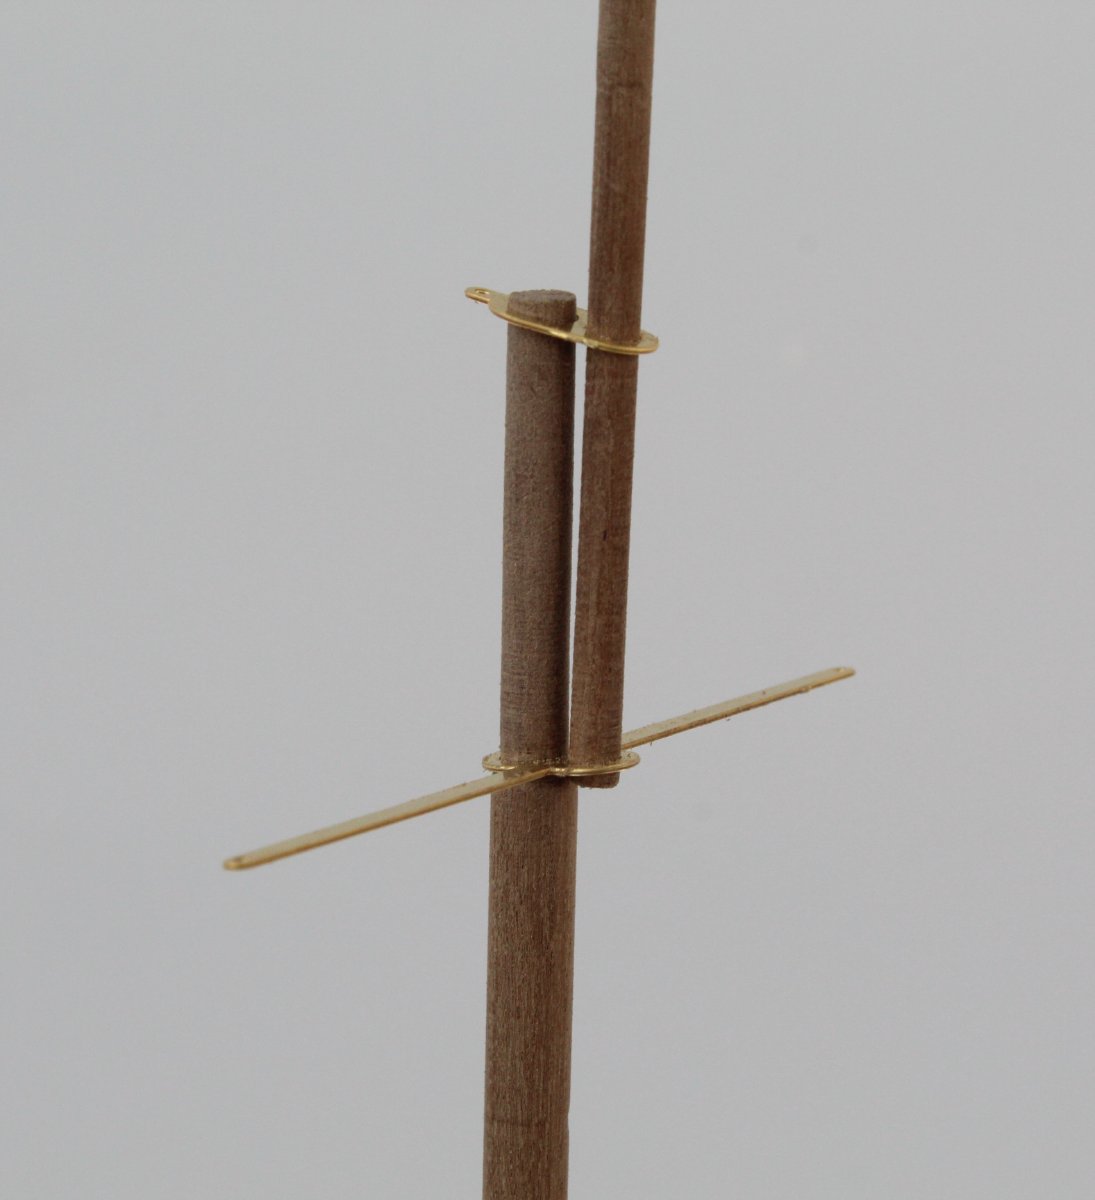
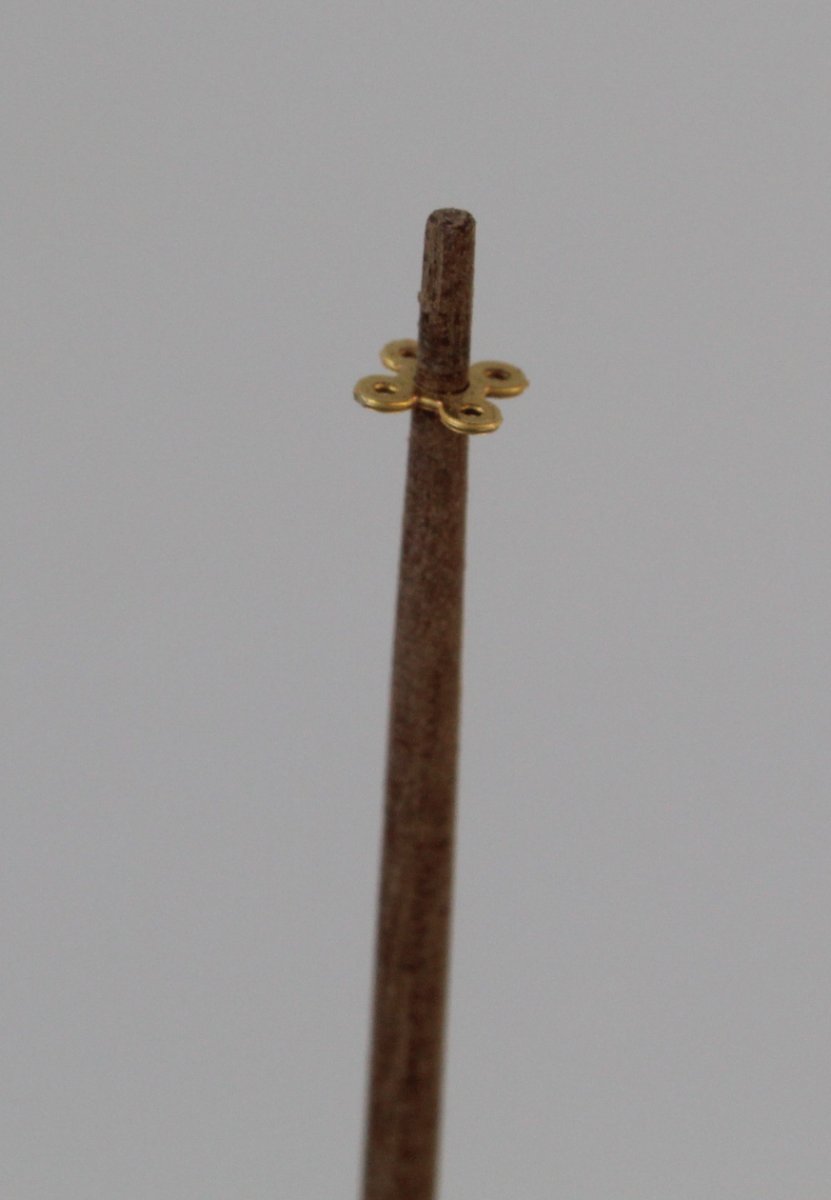
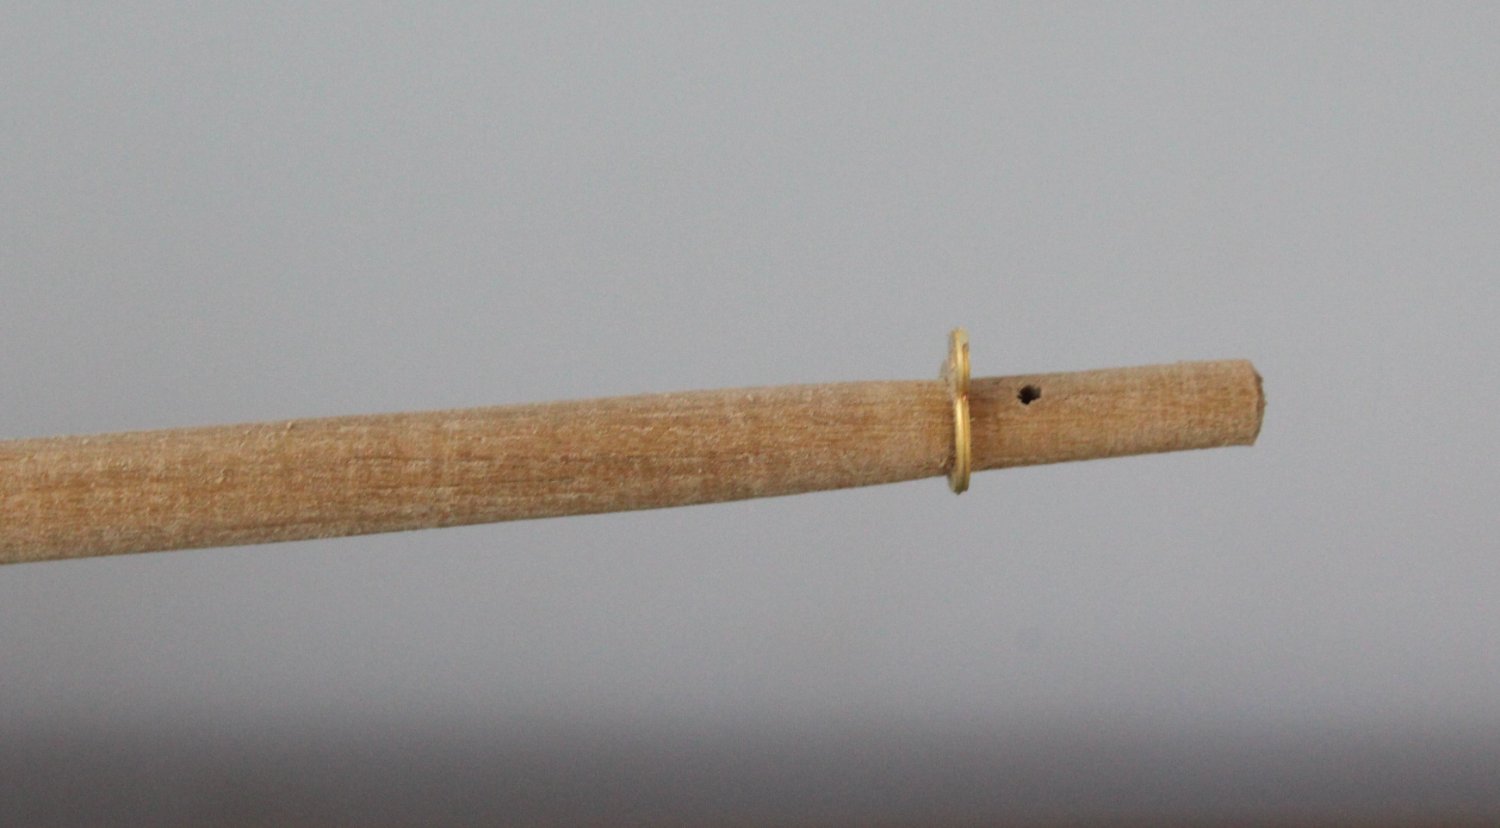
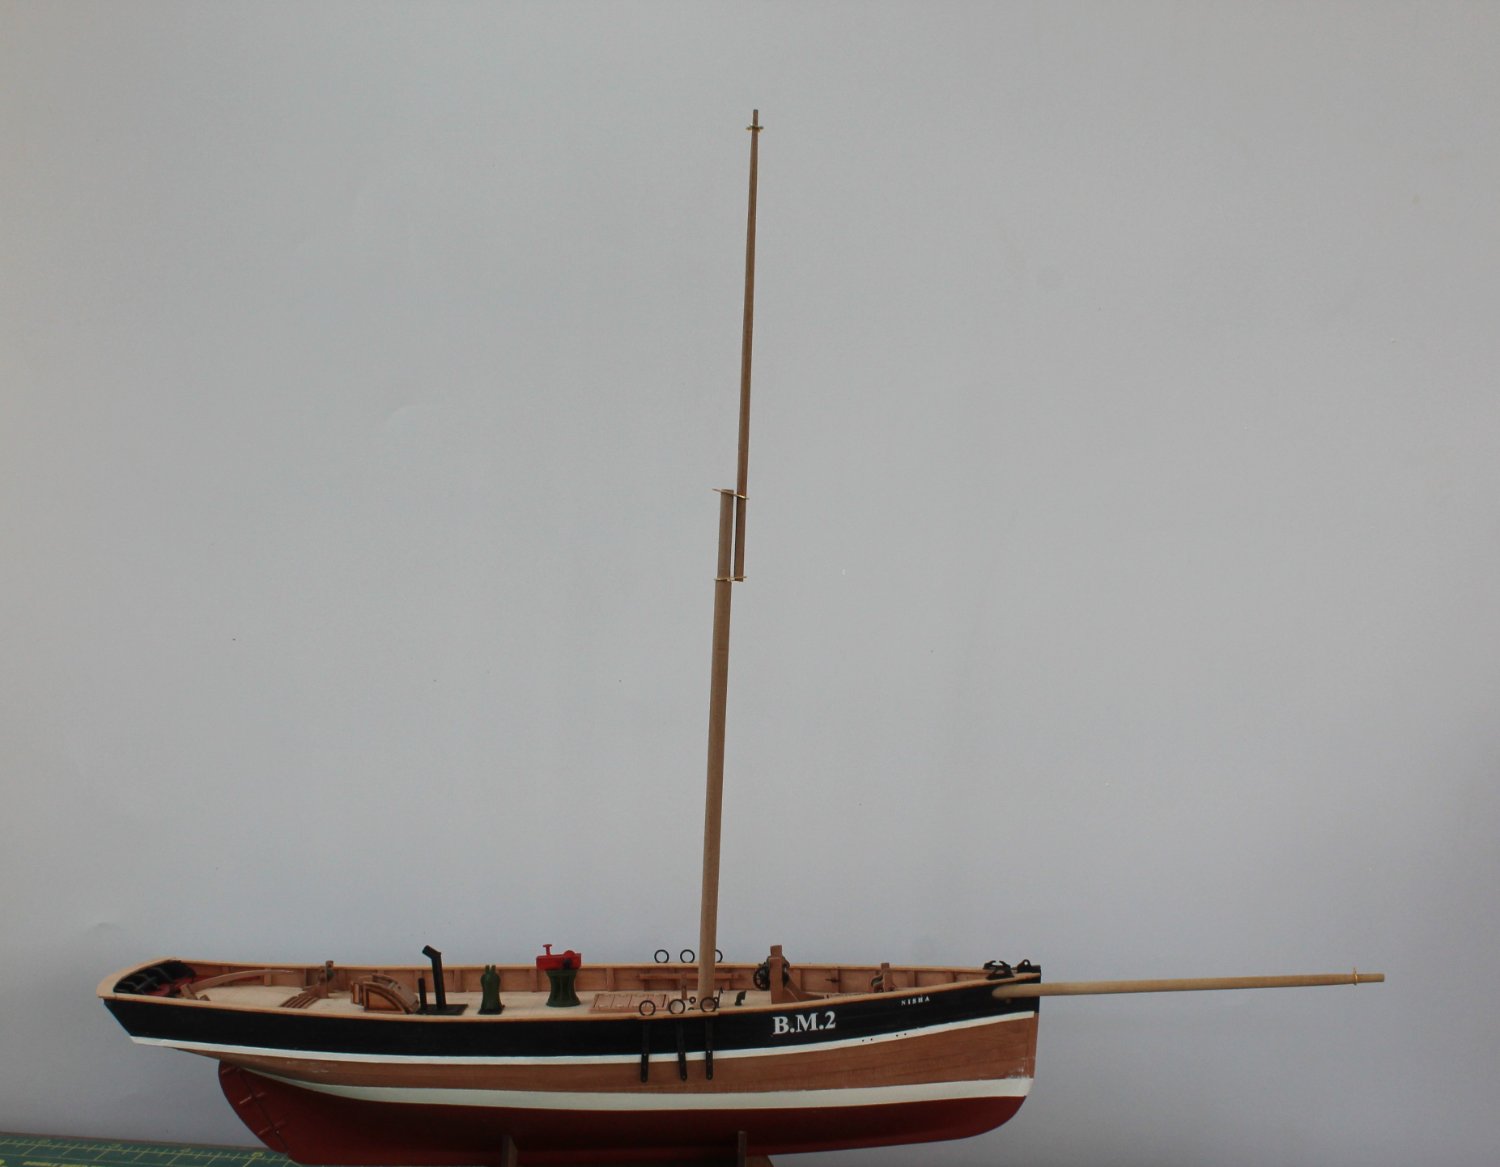
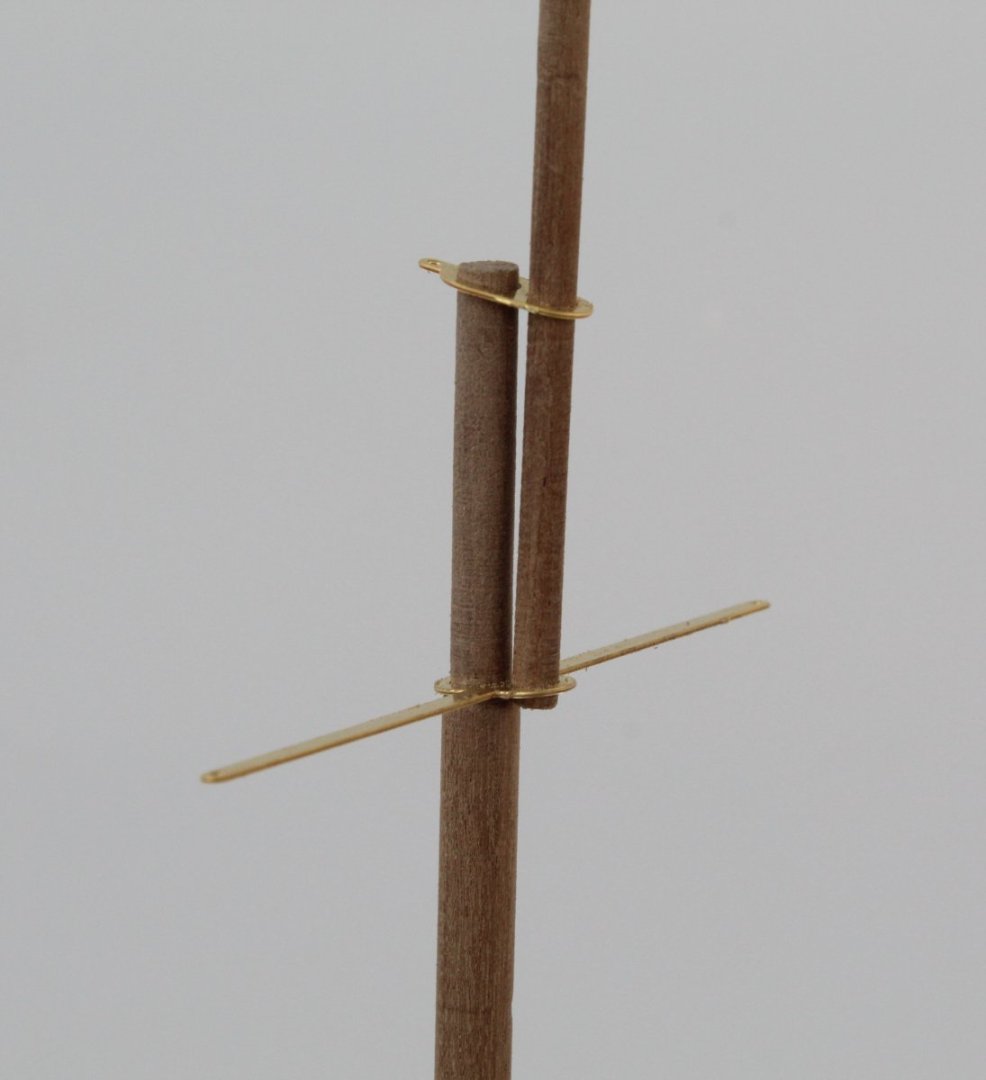
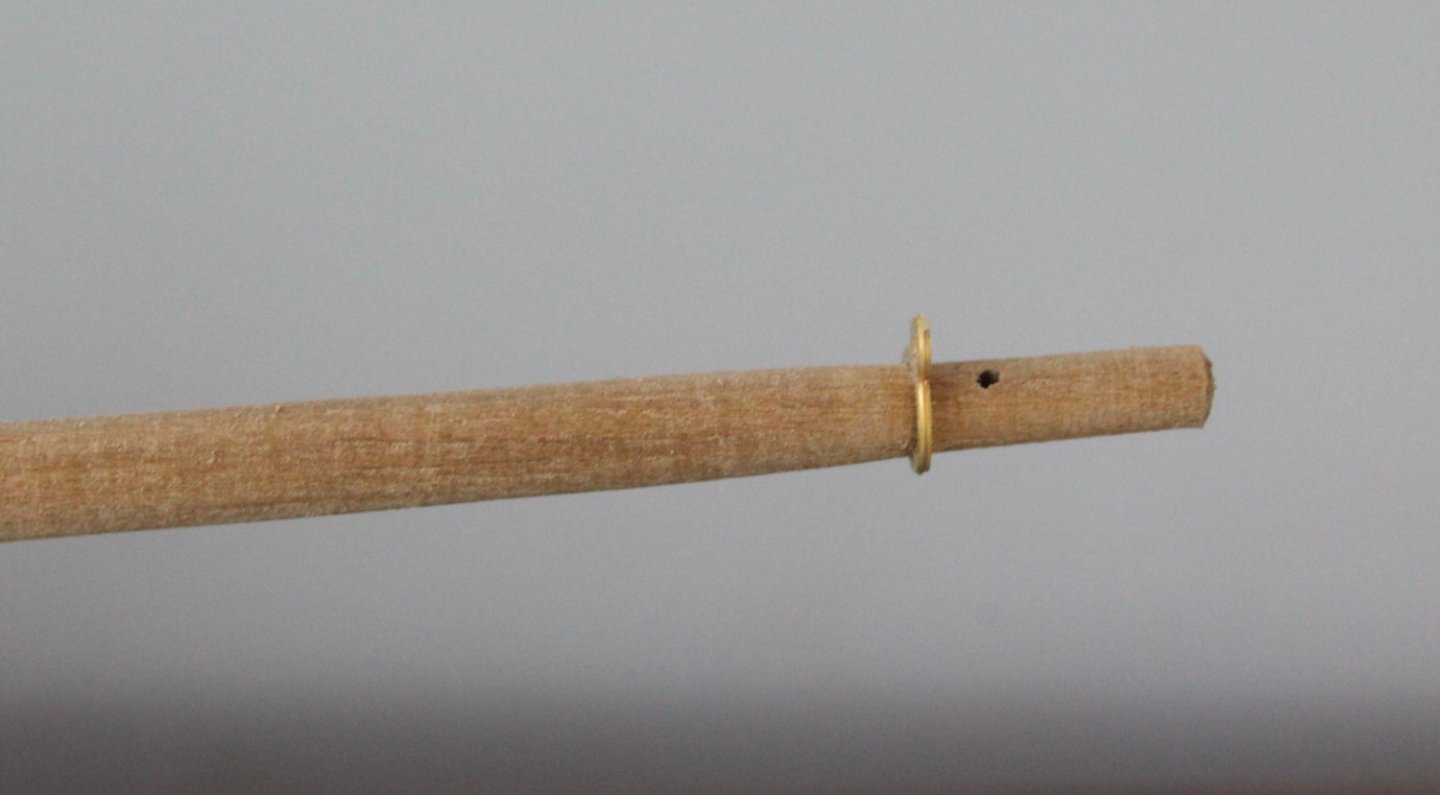
018 - Masts and Bowsprit Manufacture - Part 1 Today I have shaped the main mast, top mainmast and bowsprit. To do this I used my Proxxon mini lathe. The main mast manufacture was fairly straight forward, comprising a length of 5mm dowel with the top end slimmed down to 4mm. The main topmast was a length of 3mm dowel which is tapered to 1.5mm at the top end. The main mast and main topmast PE parts were regularly test fitted as the excess dowel material was removed. The main and main topmast were dry fitted for some photo's. The PE parts will need to be cleaned and blackened before they are fitted. The bowsprit was manufactured from a length of 4mm dowel which required a taper and 0.8mm hole. The un-blackened PE part was dry fitted in the attached photo's


- 48 replies
-
- 5
-
-
- Nisha
- Vanguard Models
- (and 3 more)
-
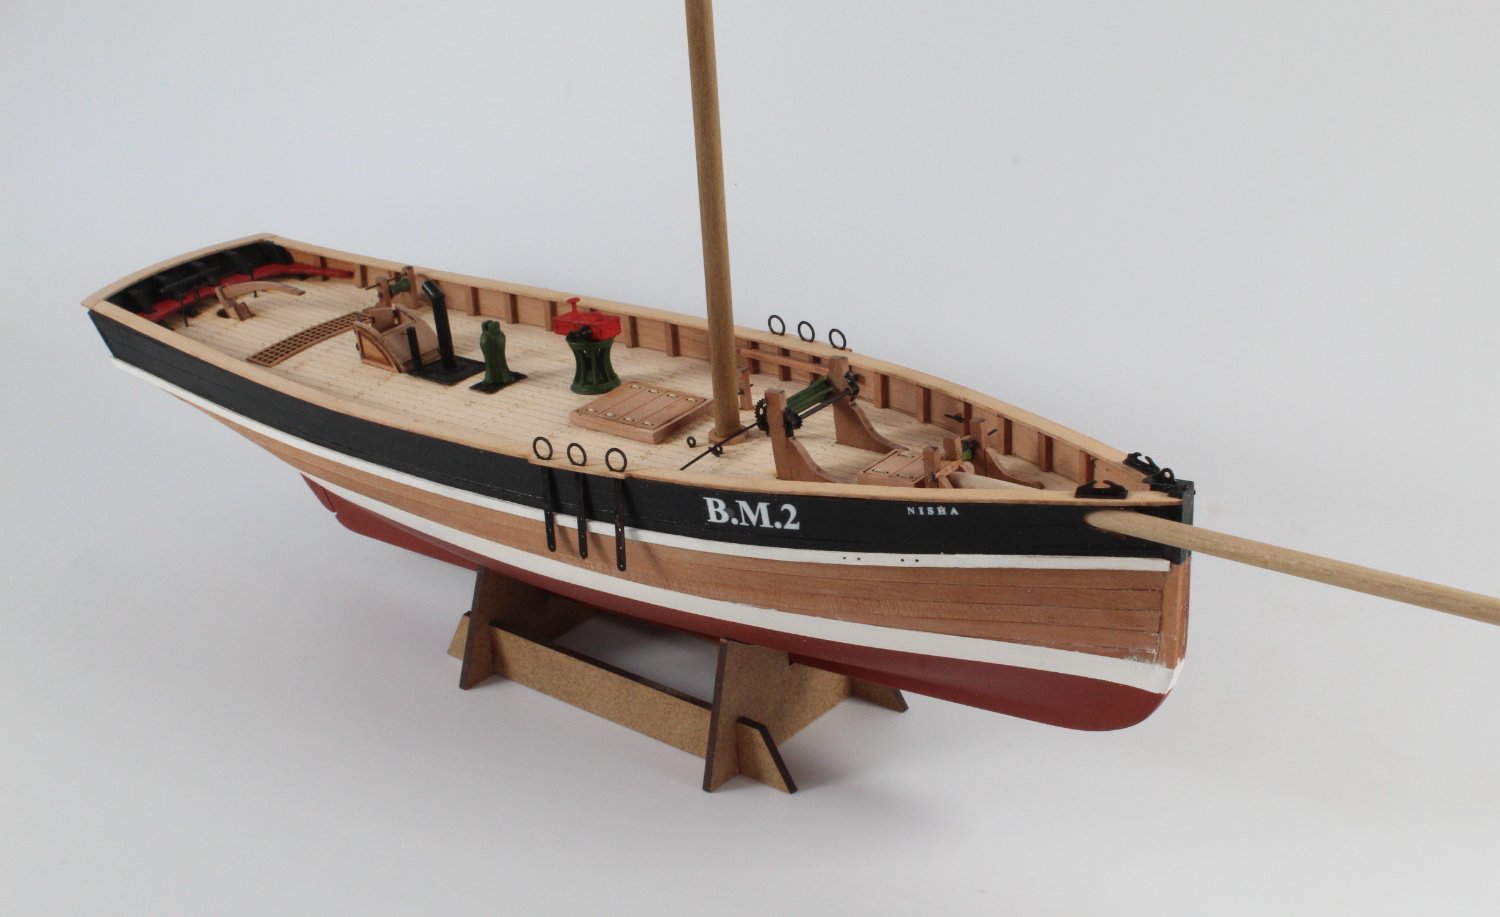
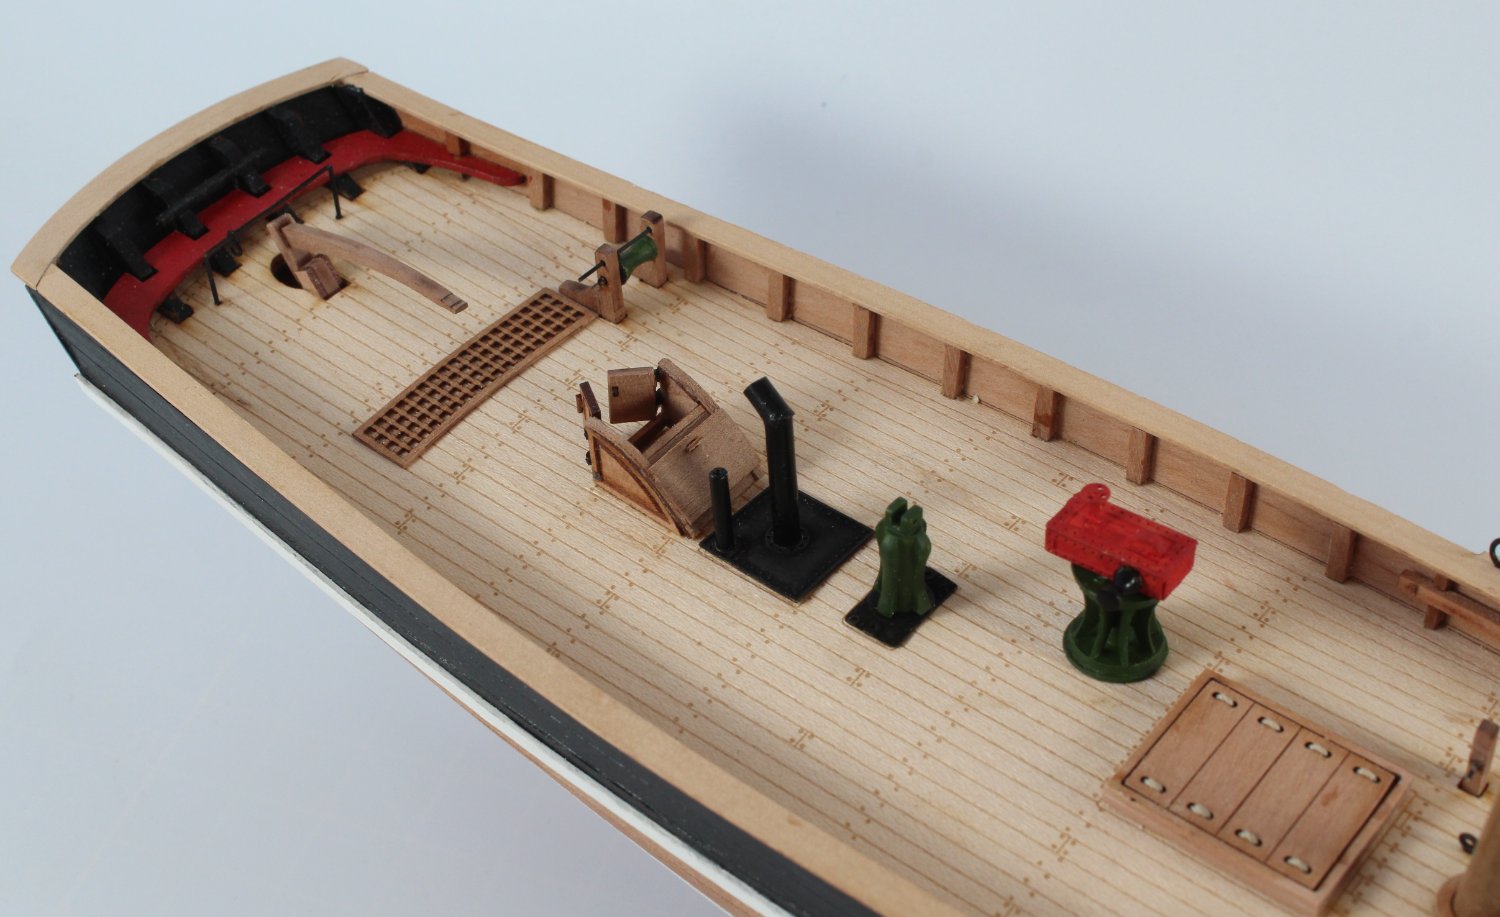
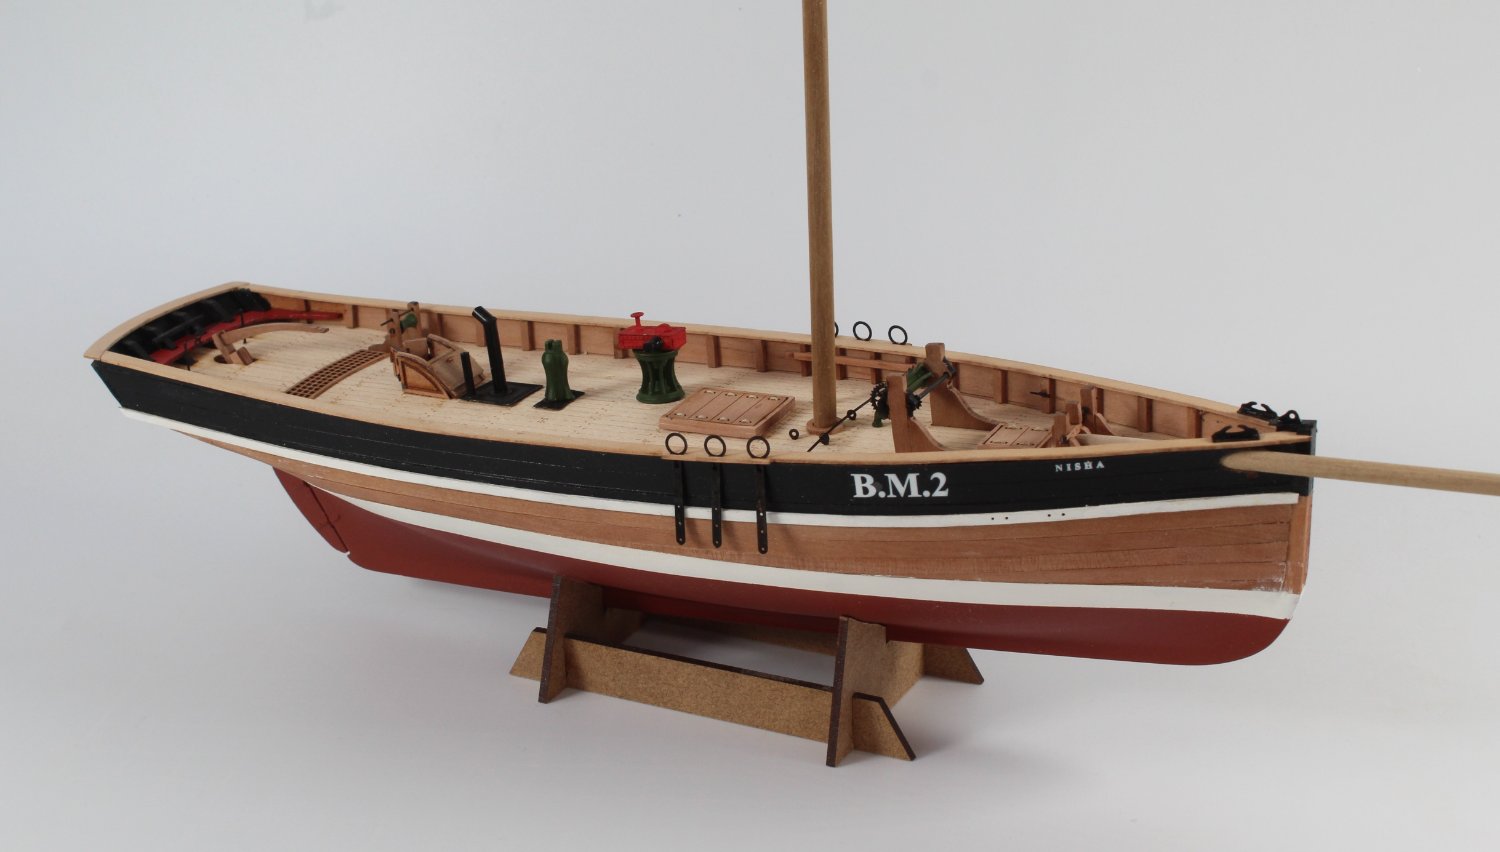
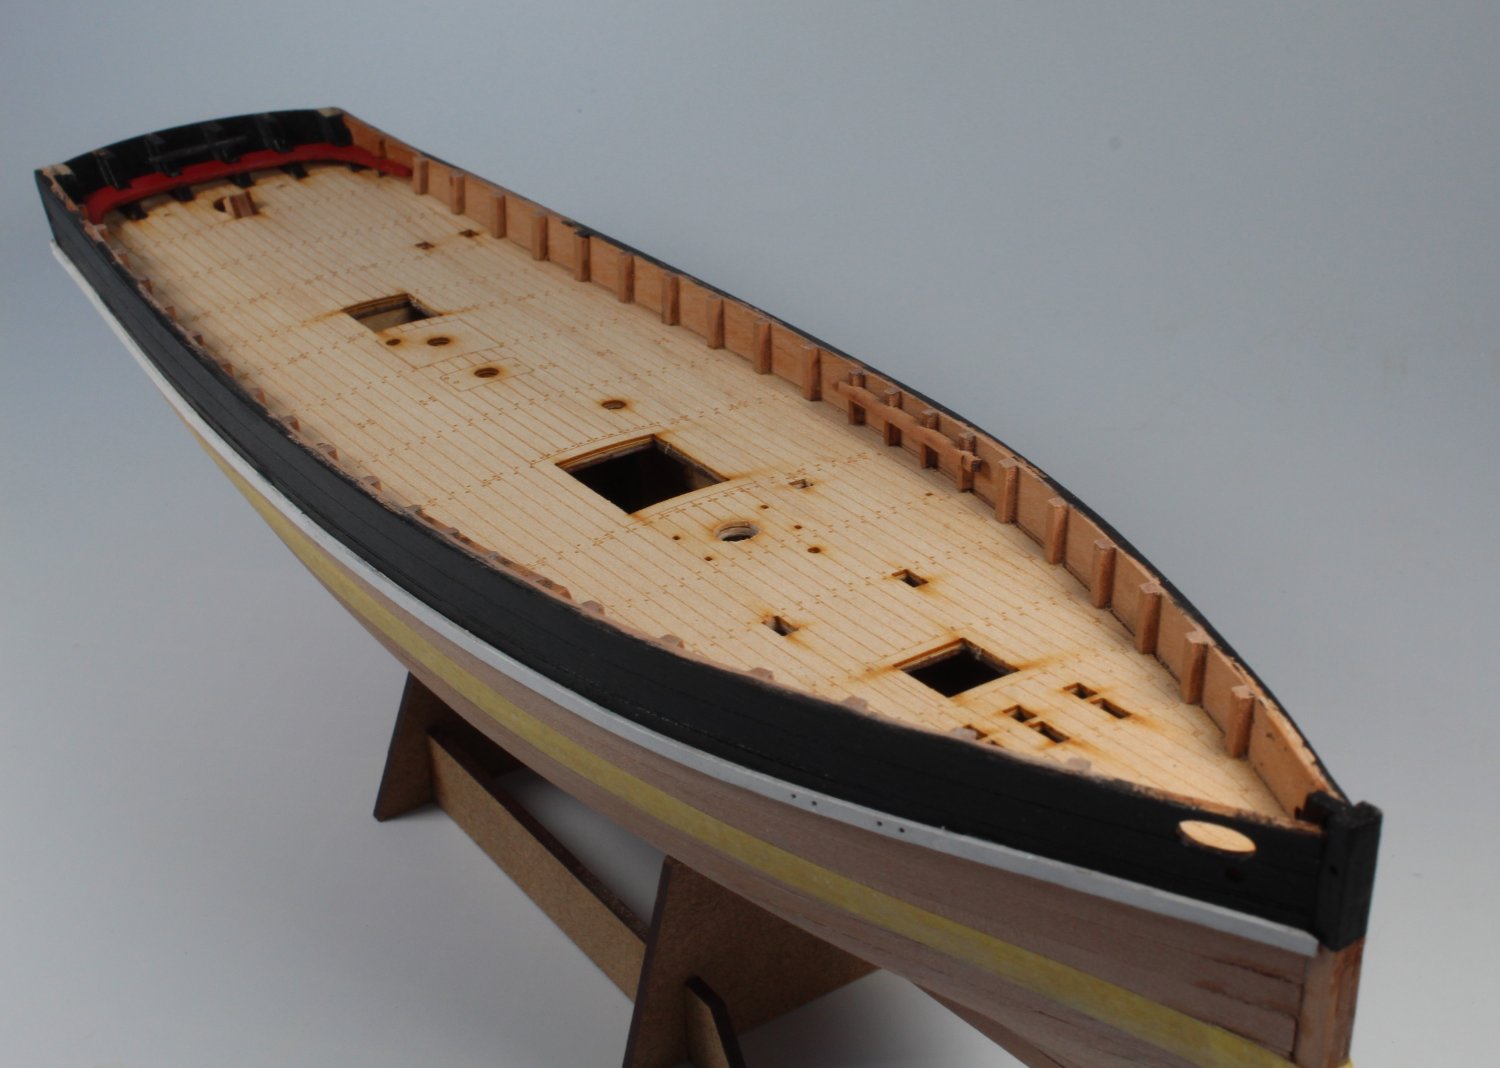
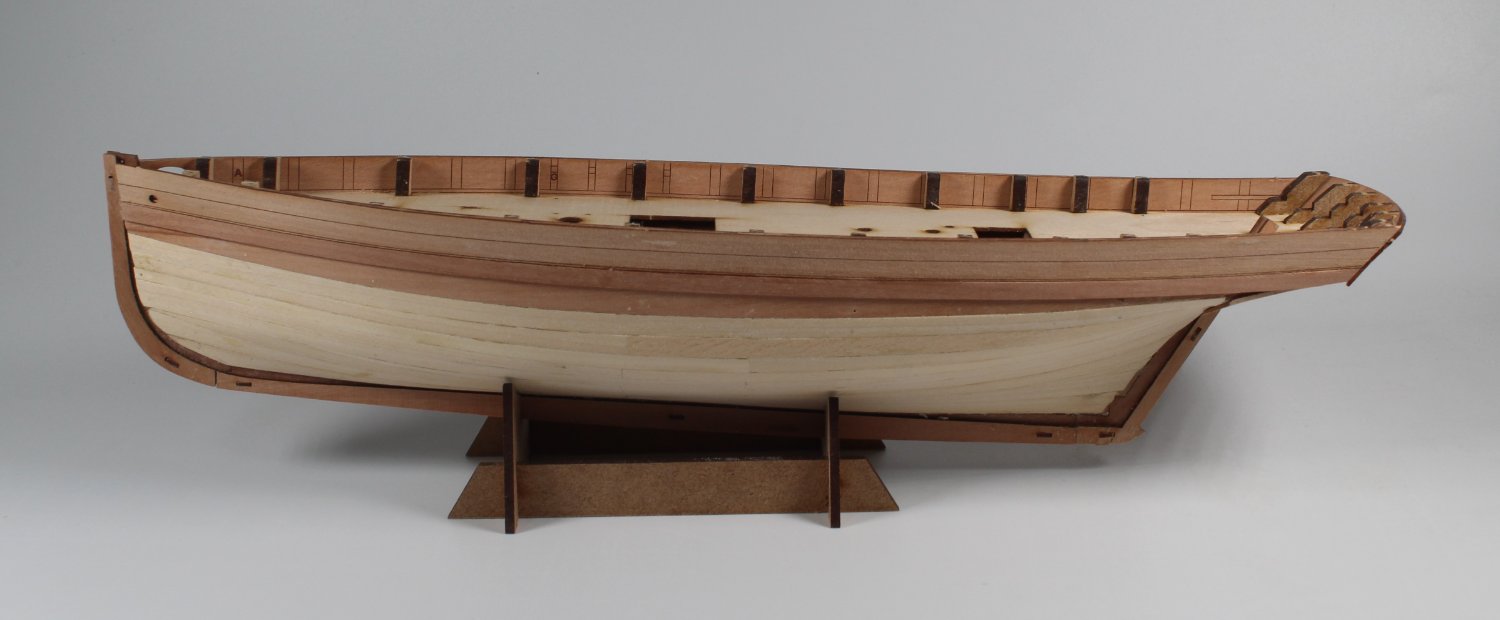
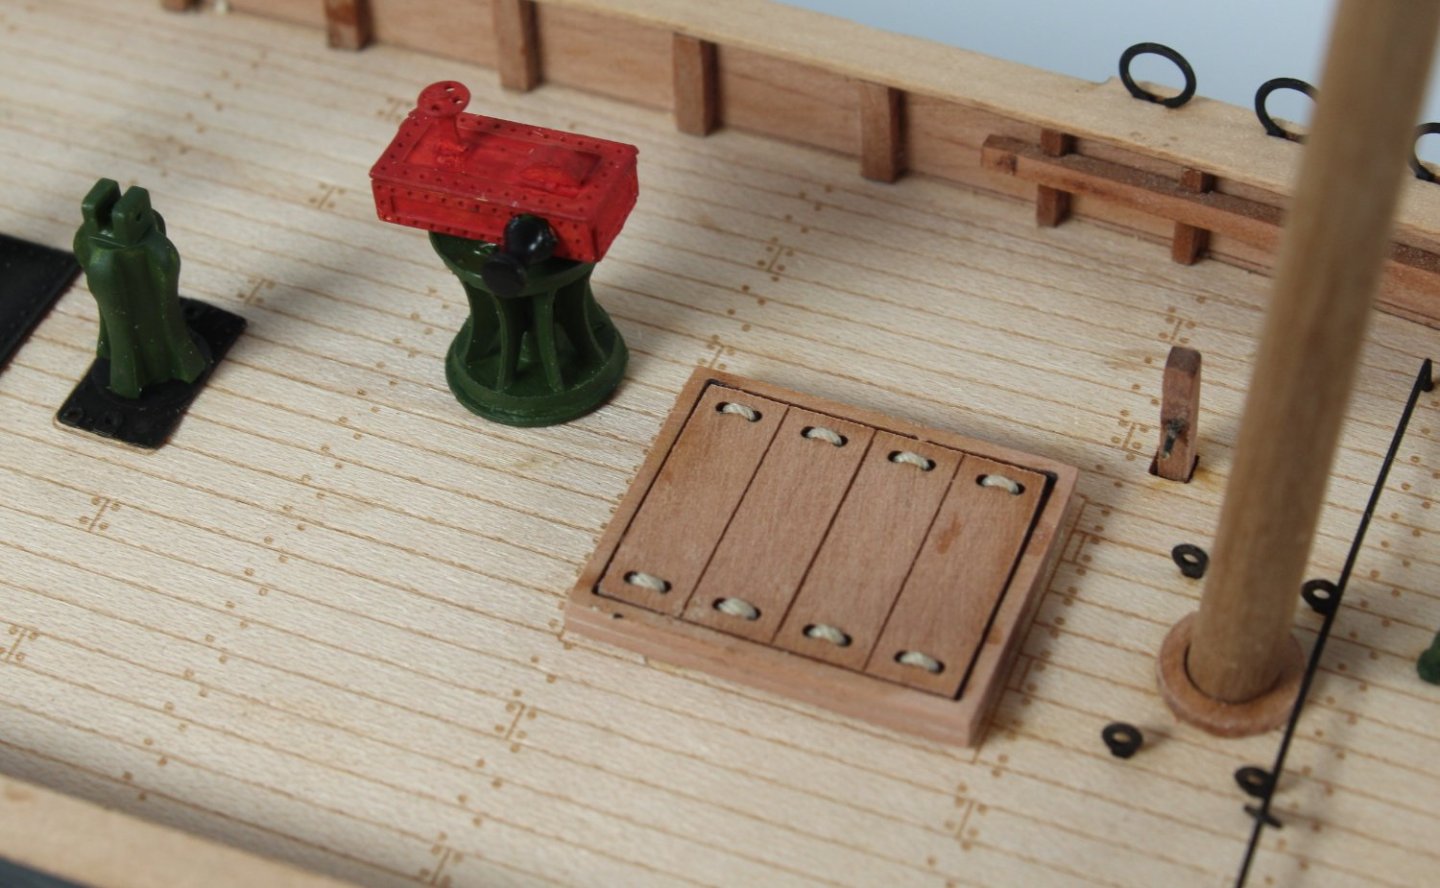
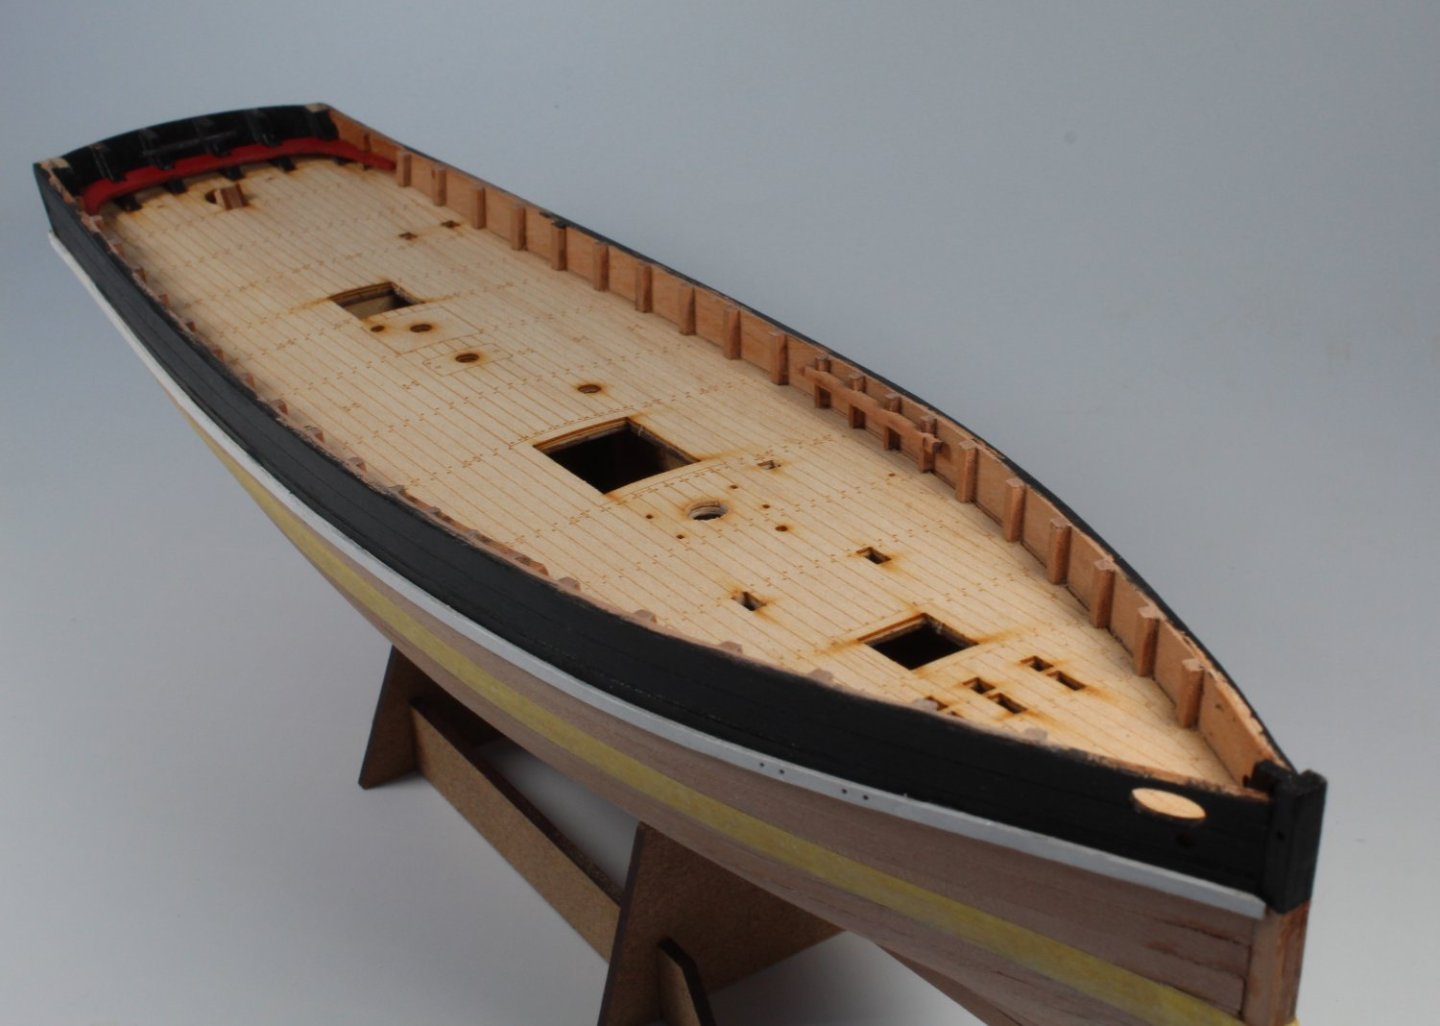
017 - Deck Items Fitting Completed I have been back in the shipyard today after two days away from home looking after one our grandkids. All the deck items have now been fitted and I am now ready to start manufacturing the masts, boom, gaff and bowsprit. I really like the build when I reach this stage as it is the completion of a major milestone. Unlike the Saucy Jack and Erycina builds I have decided not to add the sails to Nisha. I have attached a selection of photo's showing the current build status.


- 48 replies
-
- 6
-
-
- Nisha
- Vanguard Models
- (and 3 more)
-
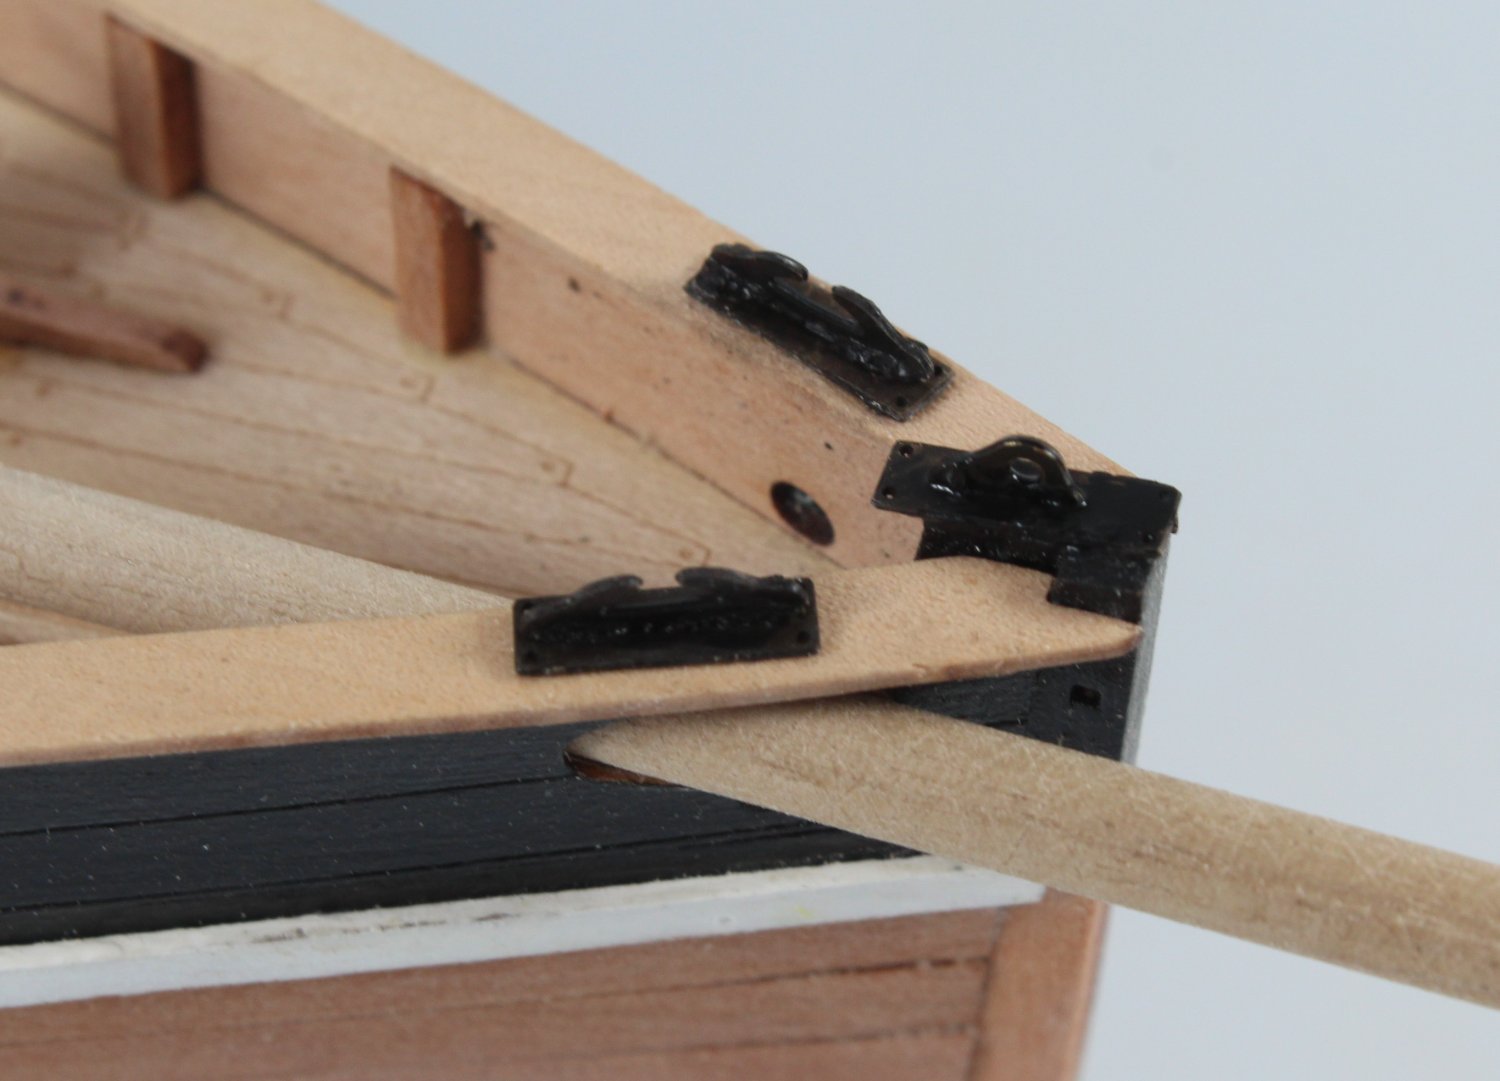
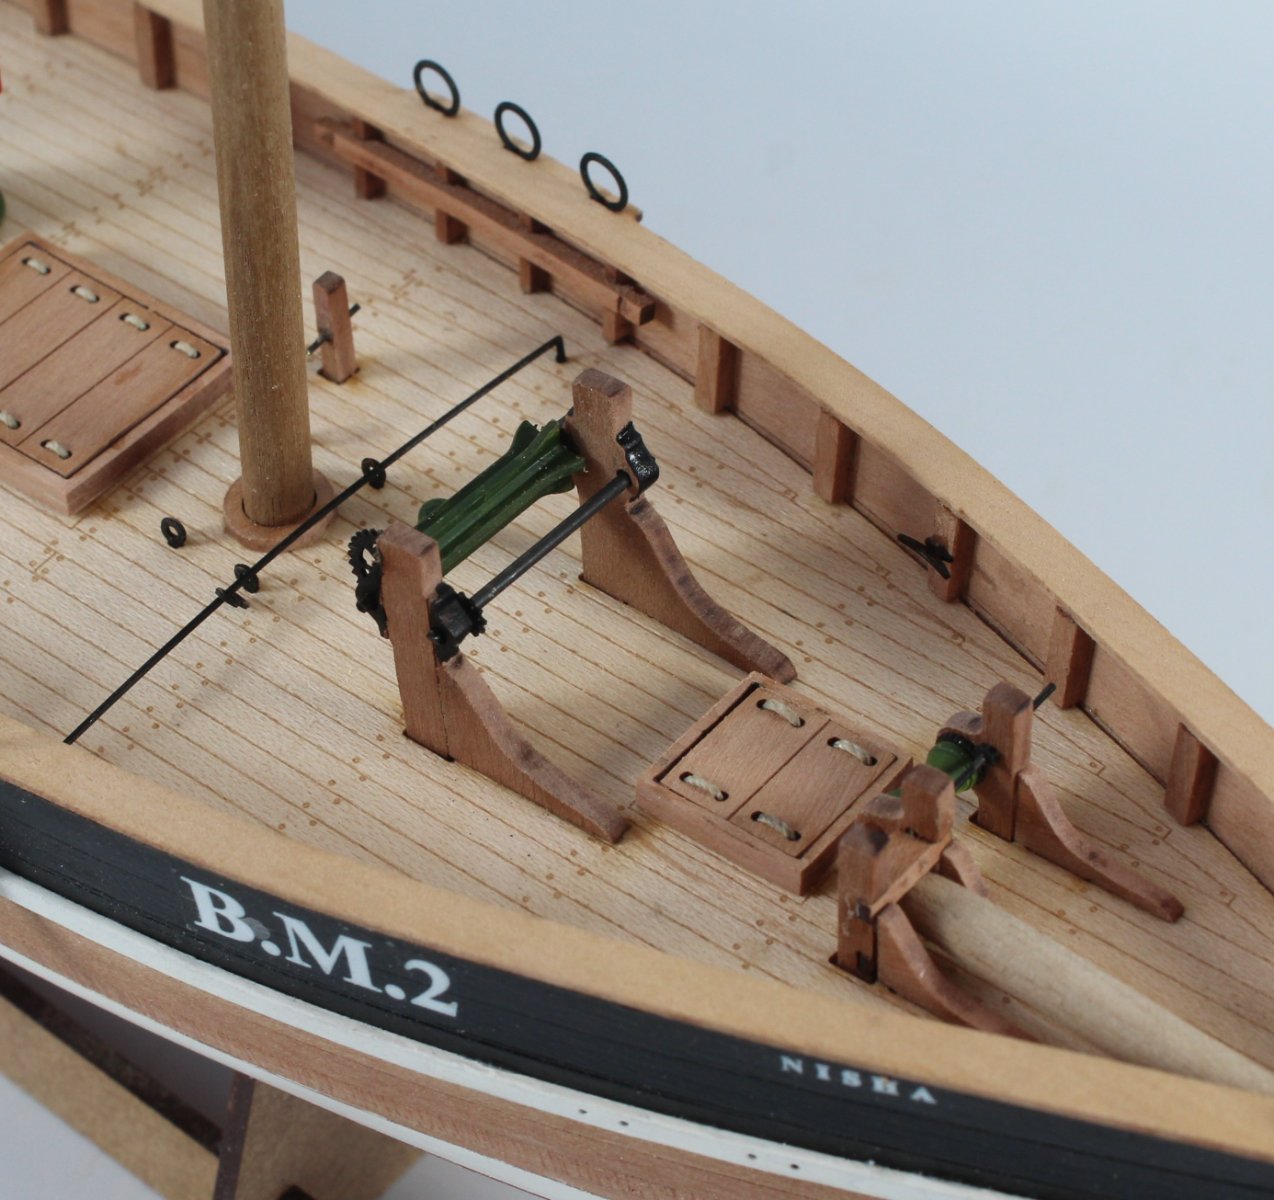
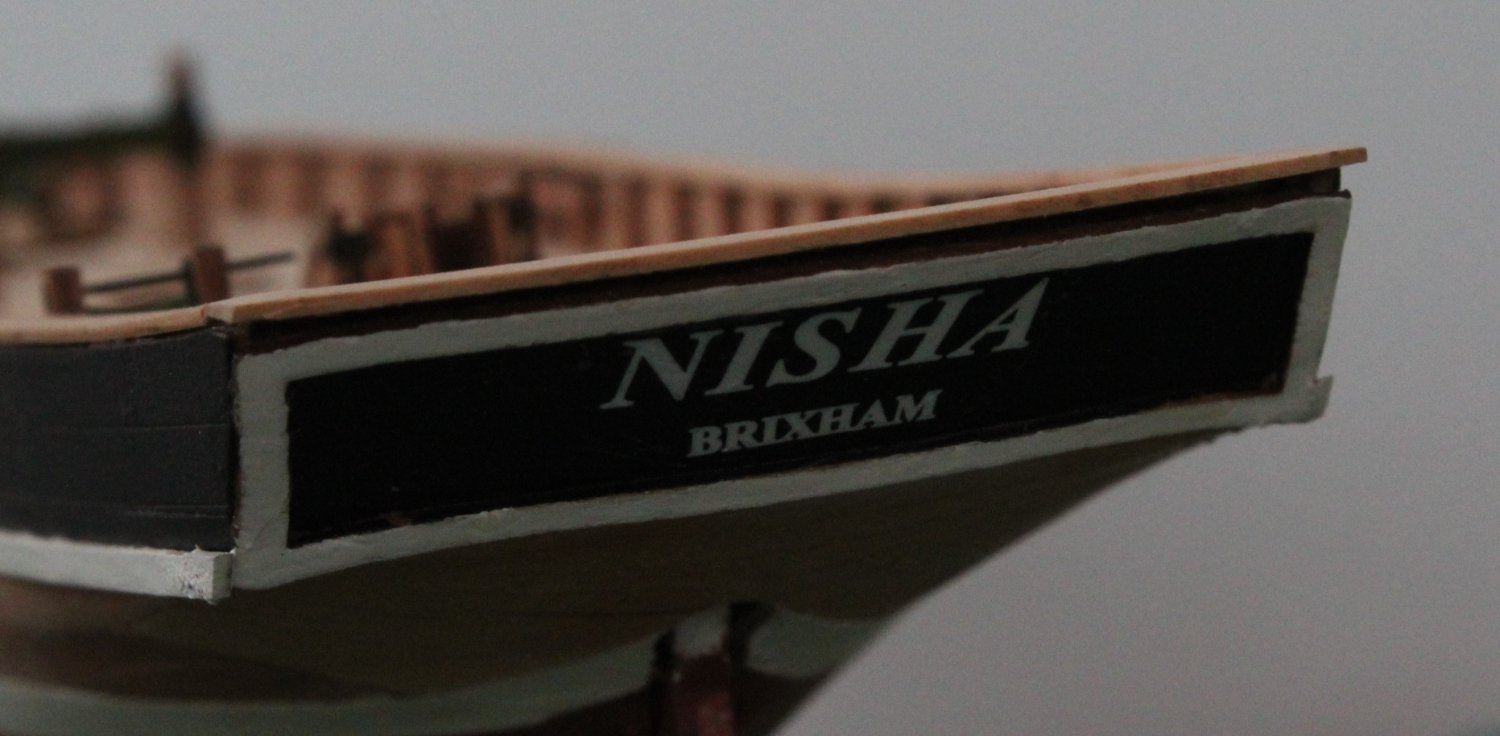
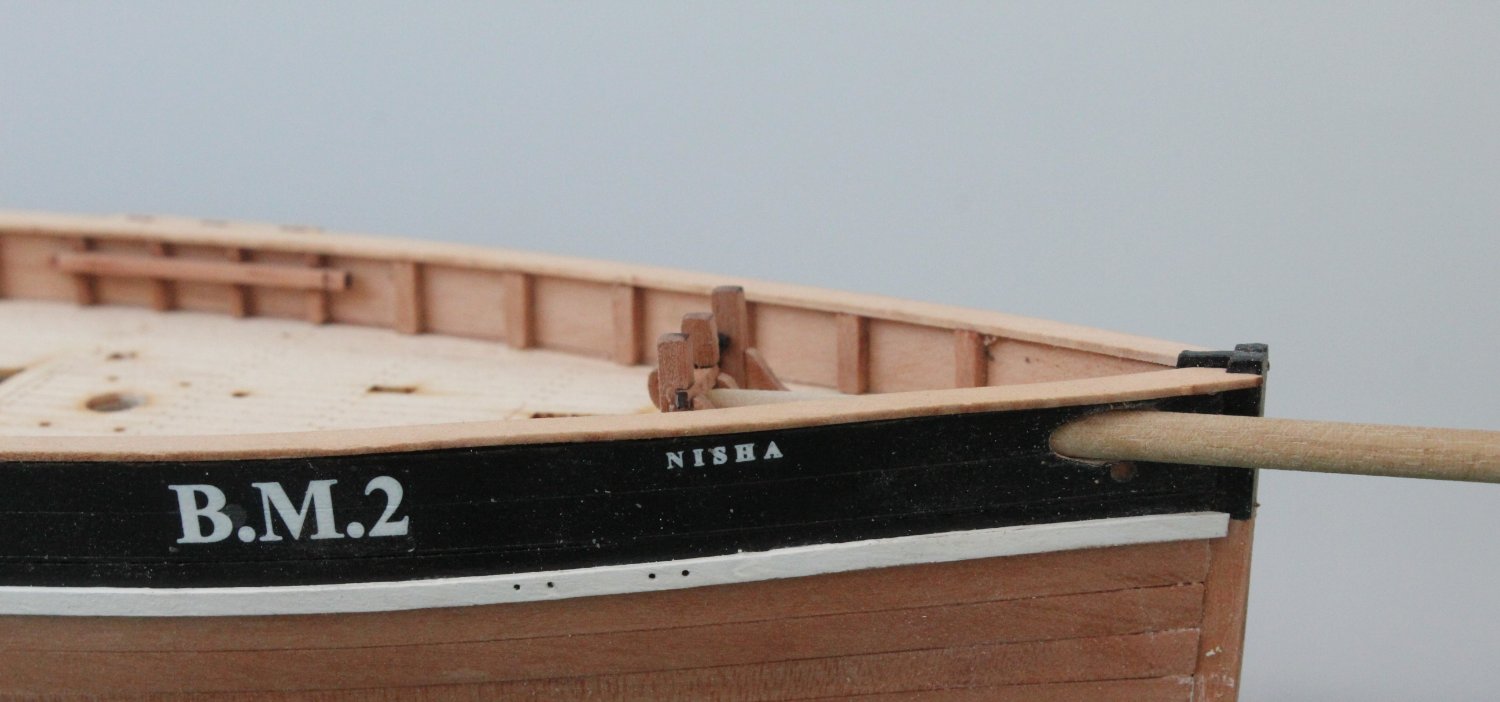
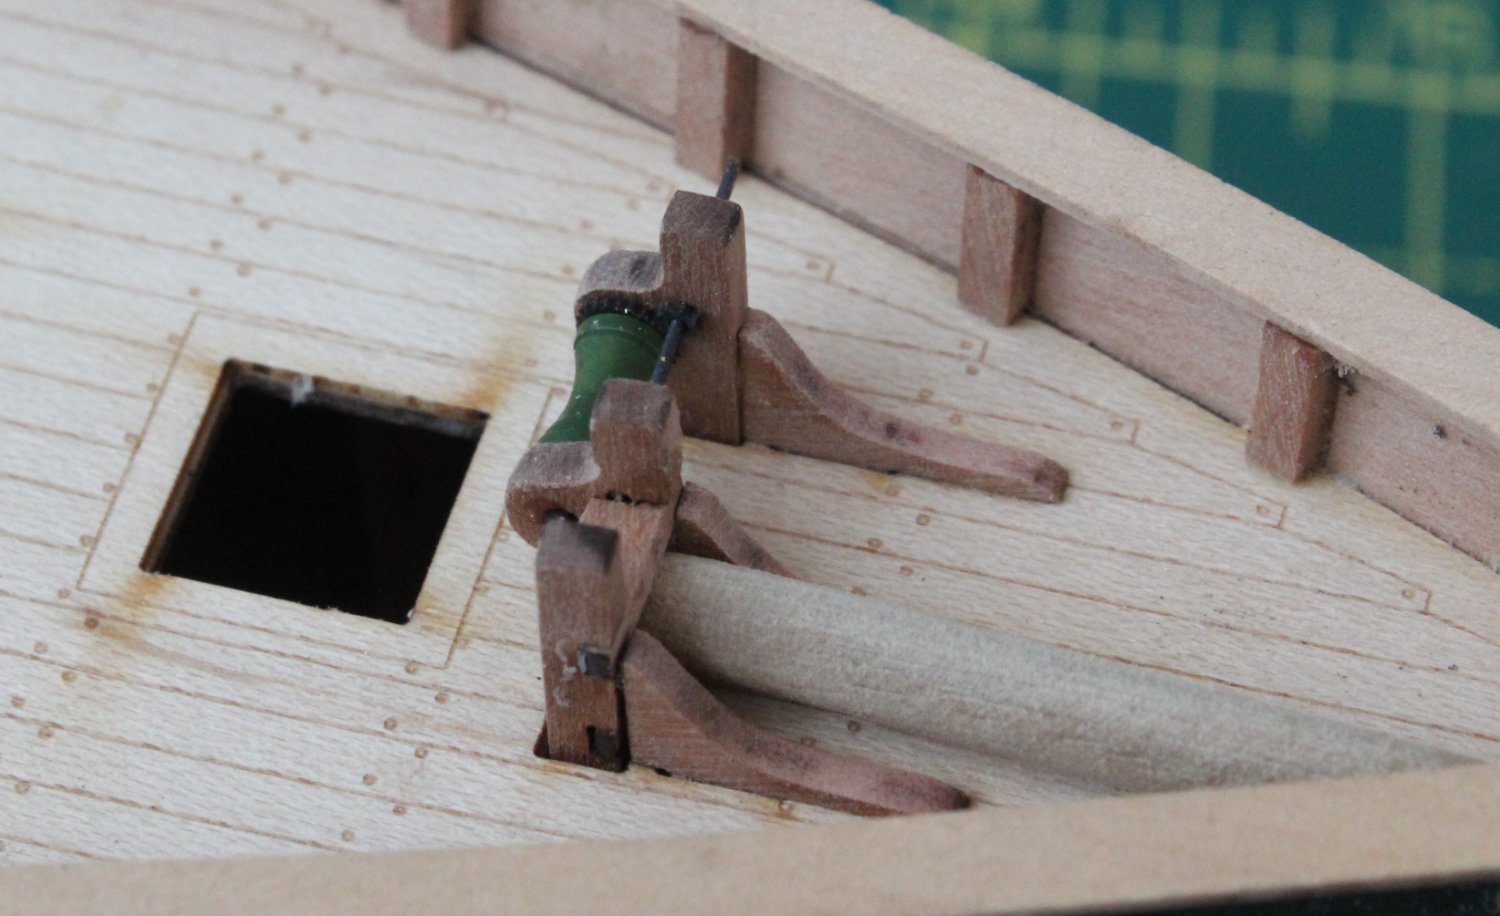
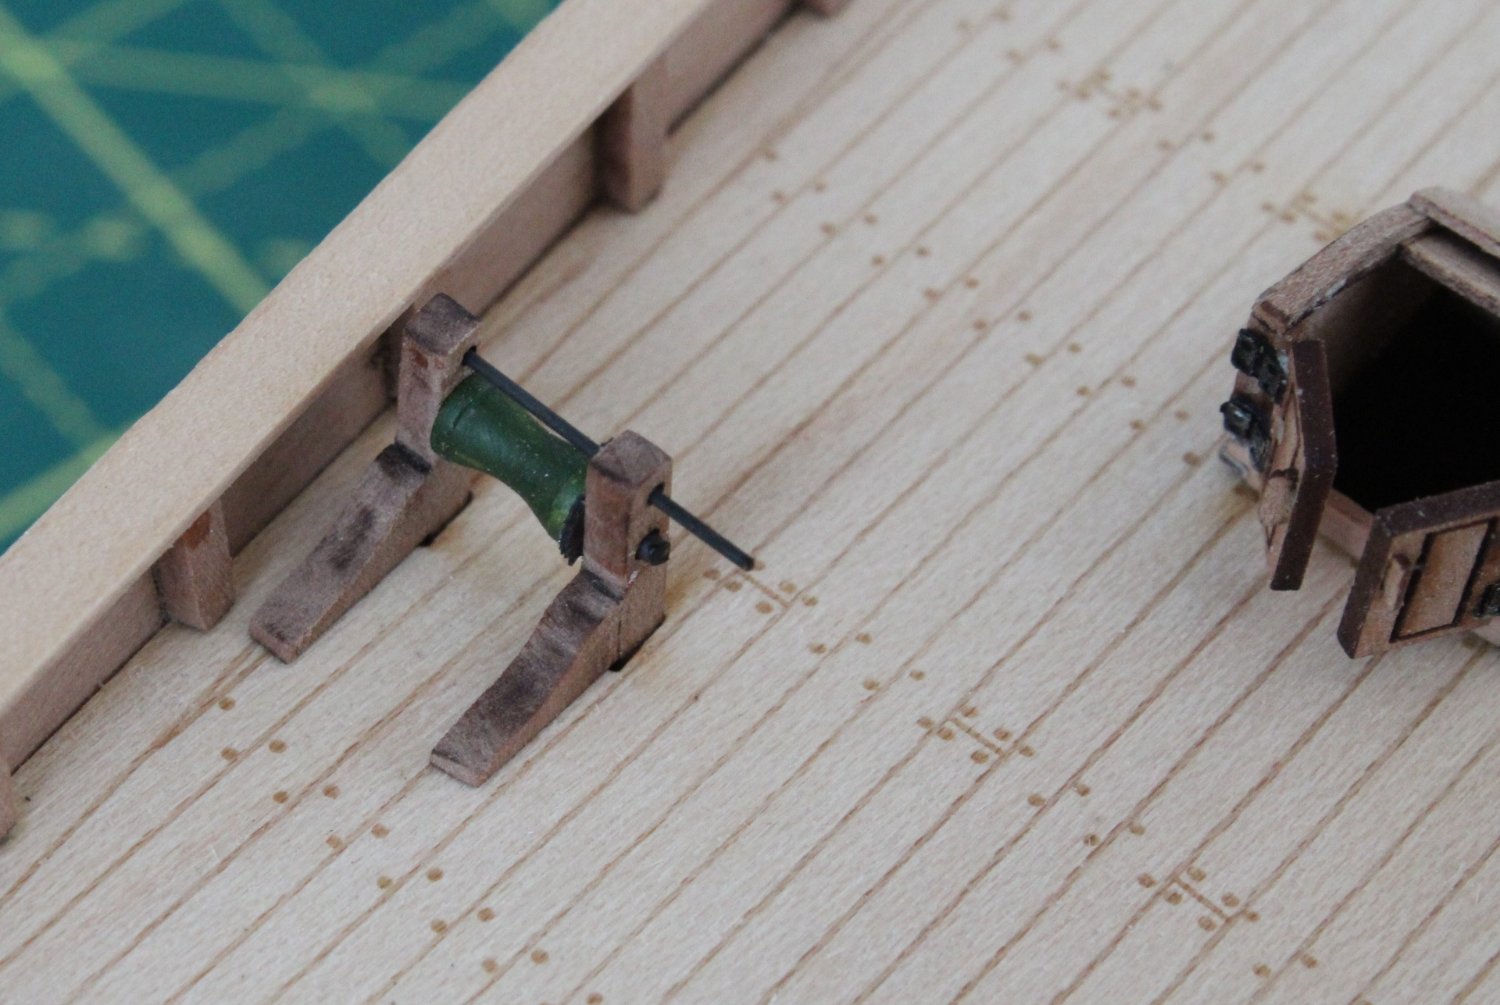
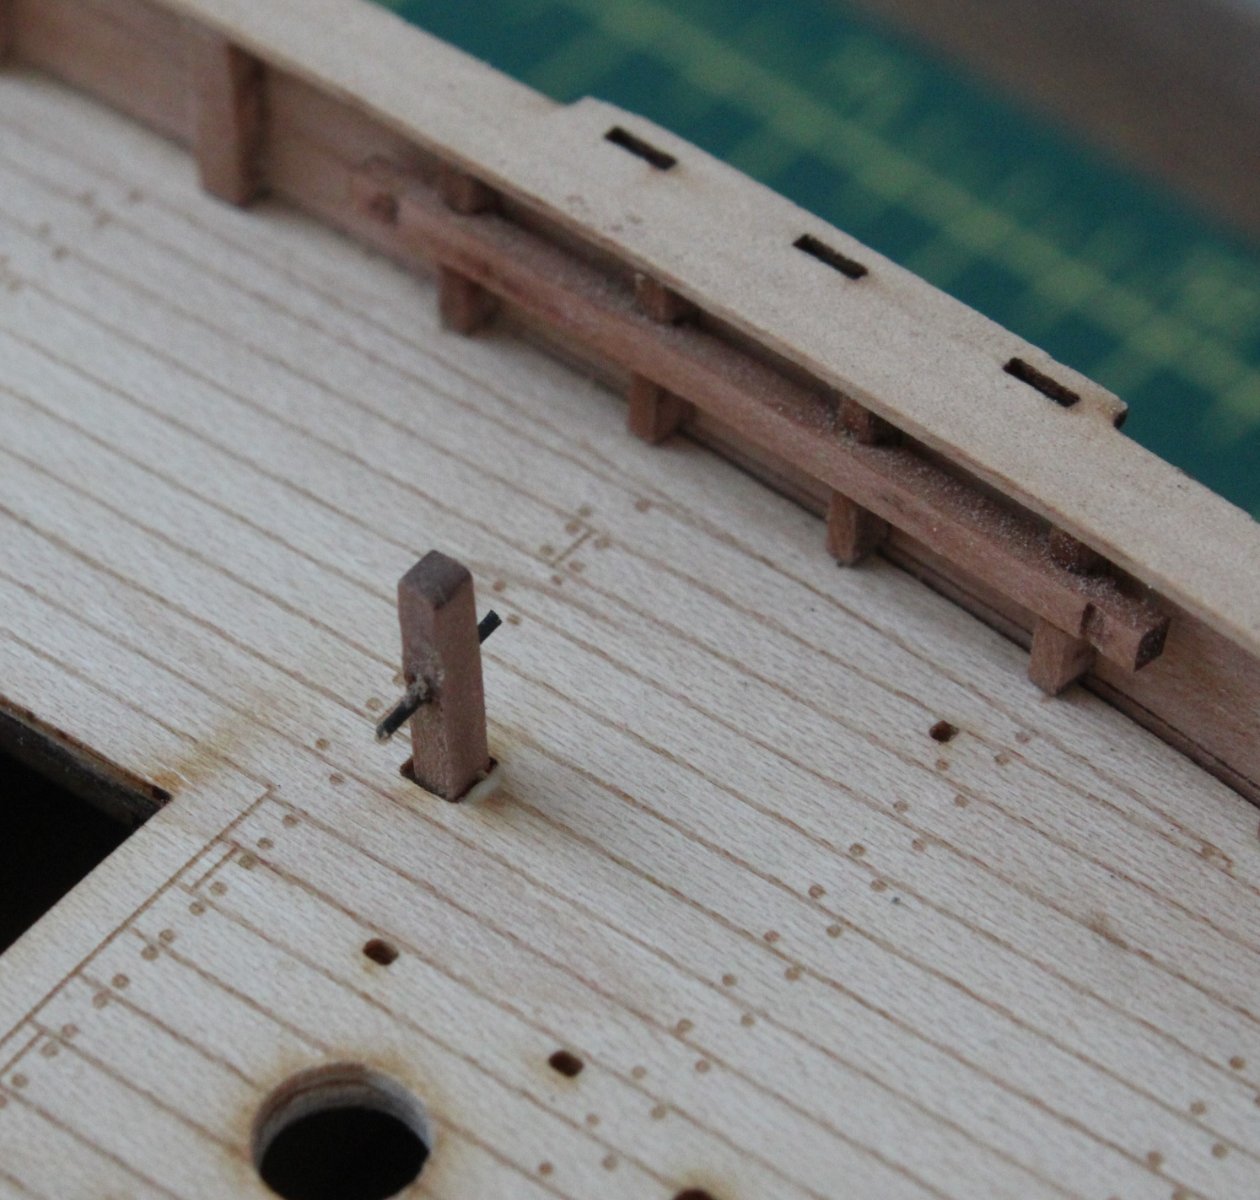
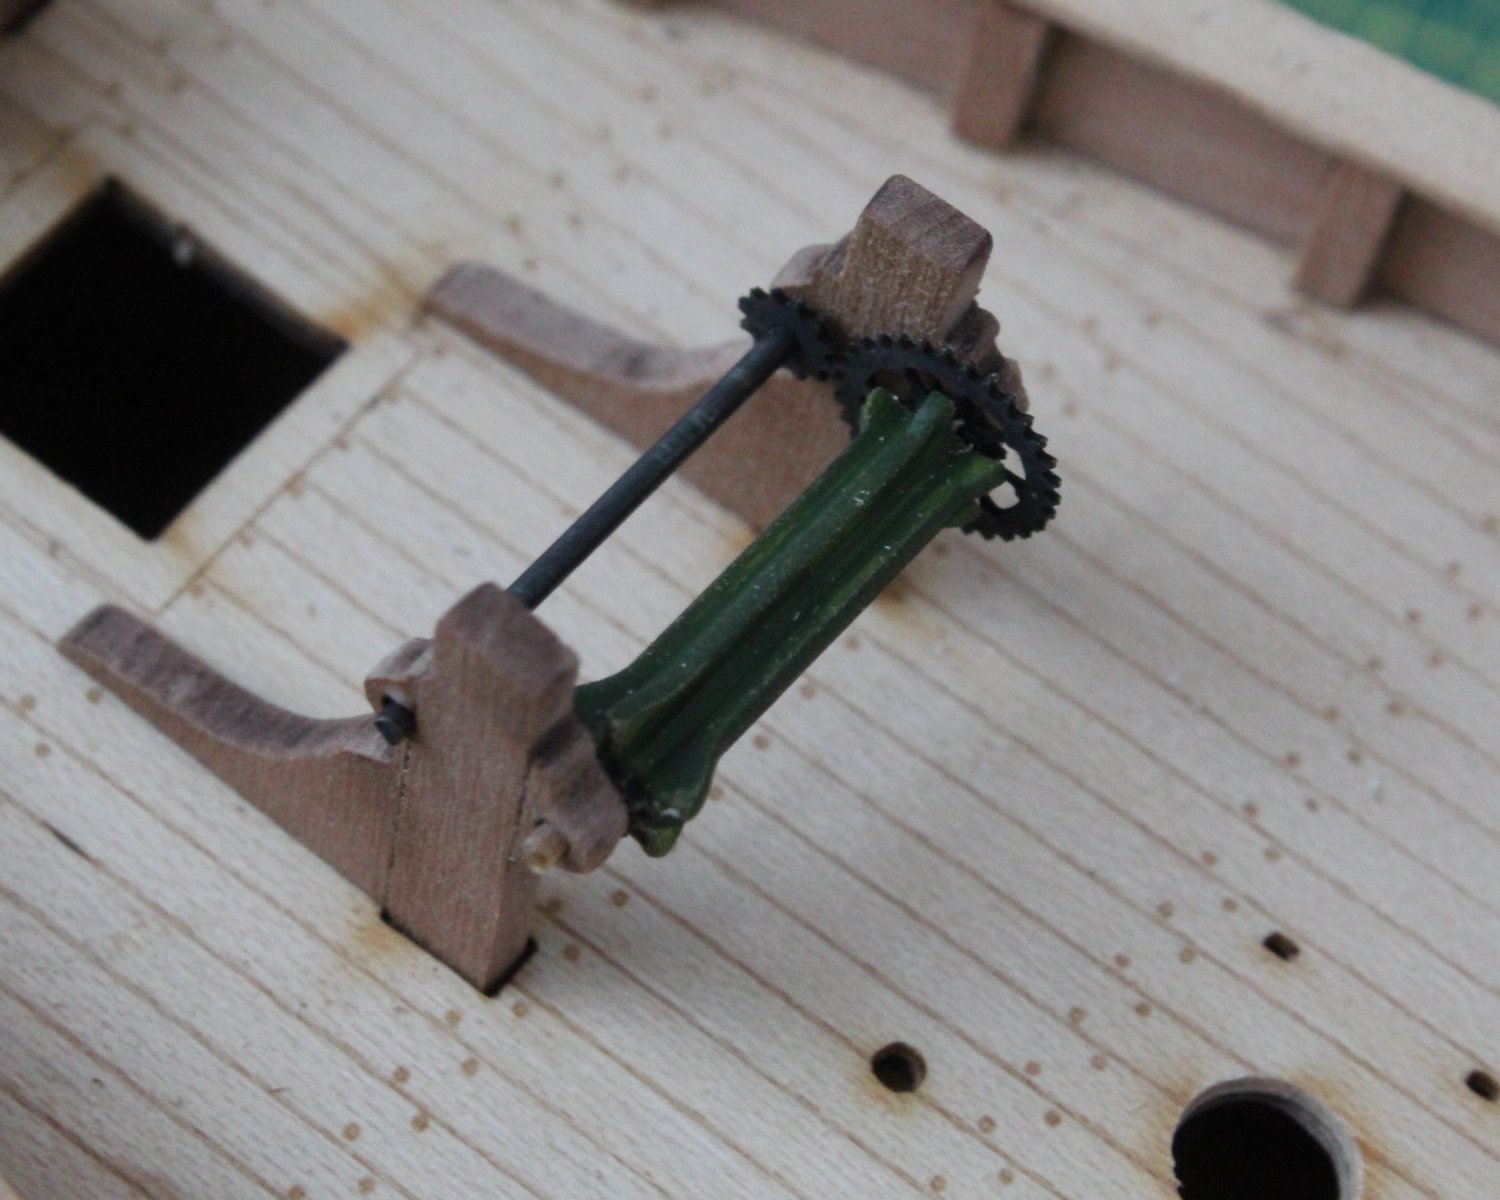
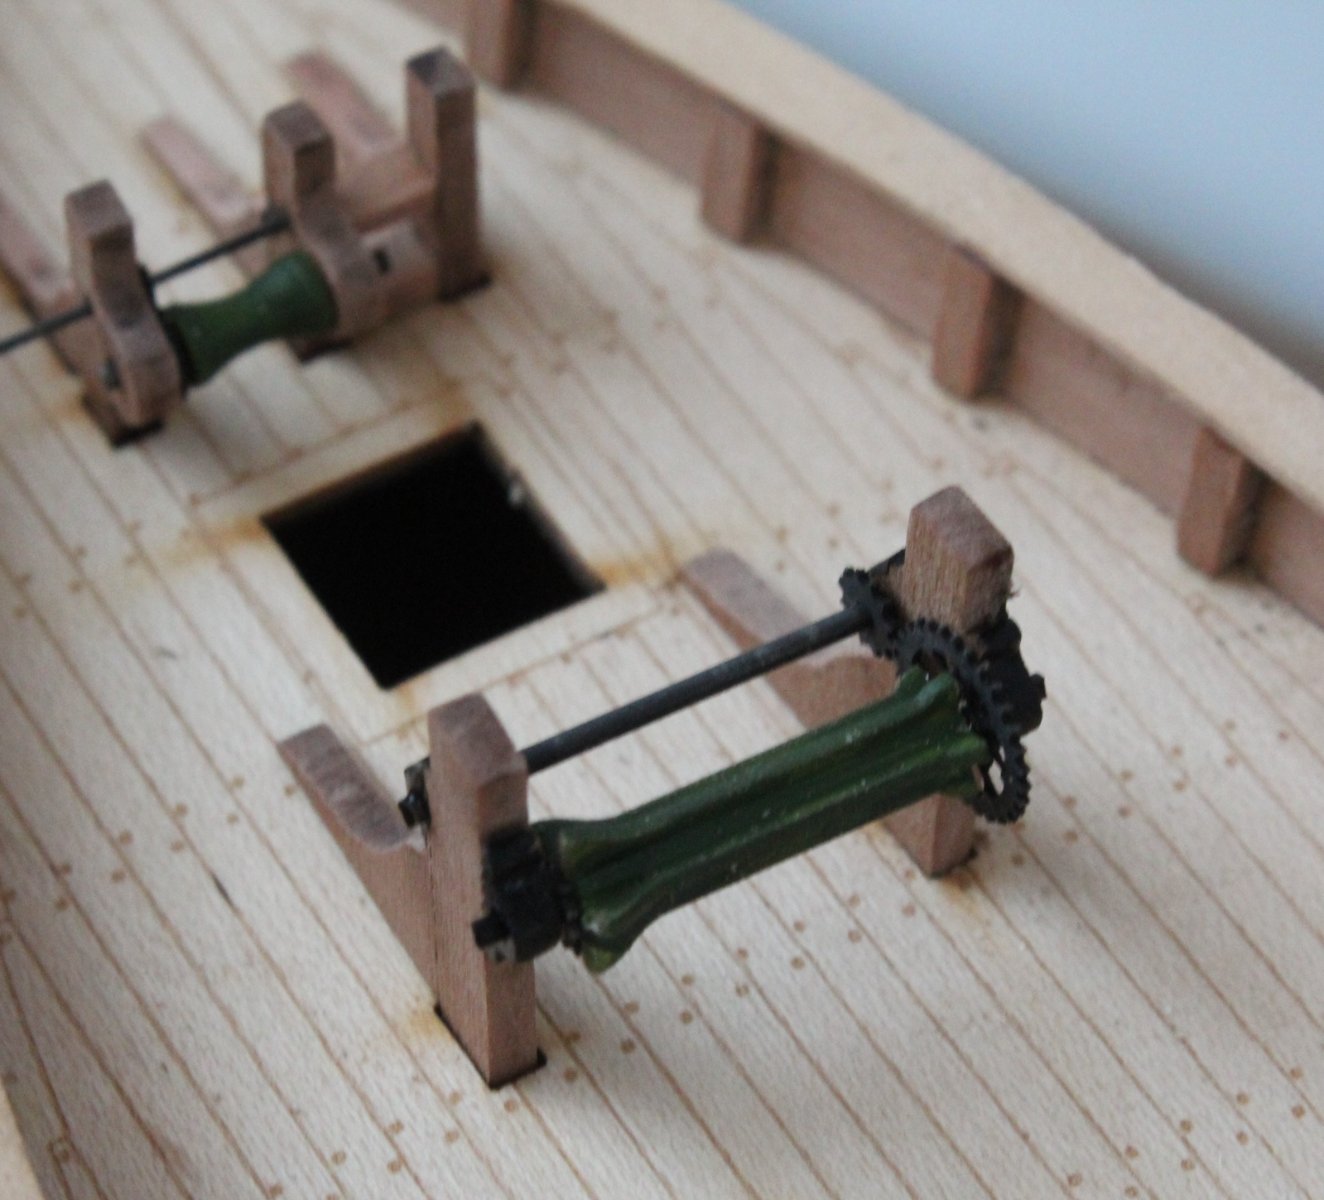
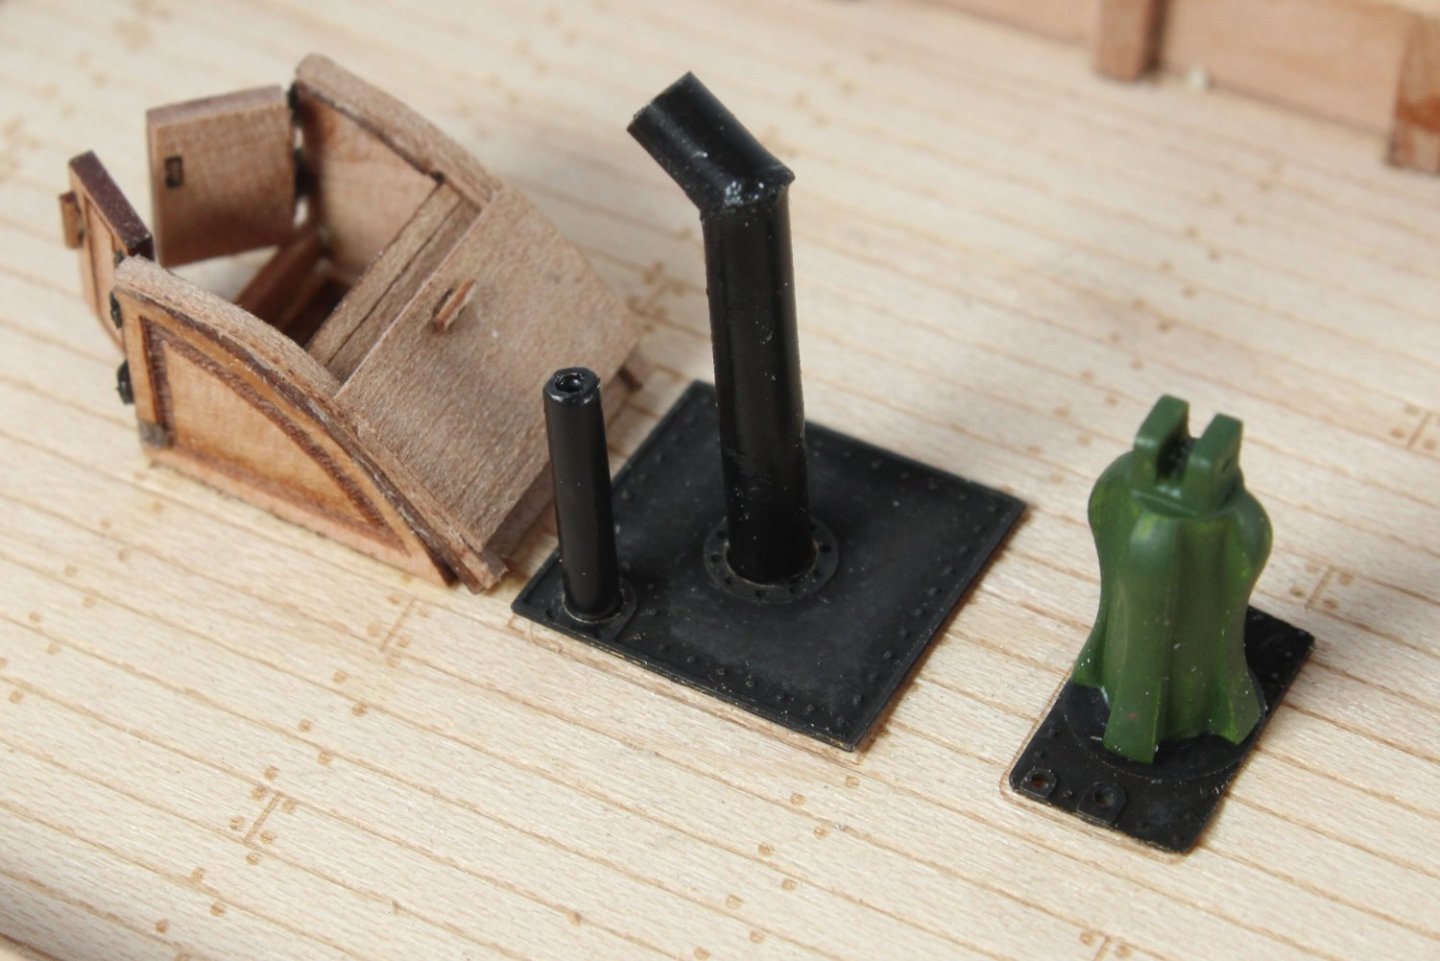
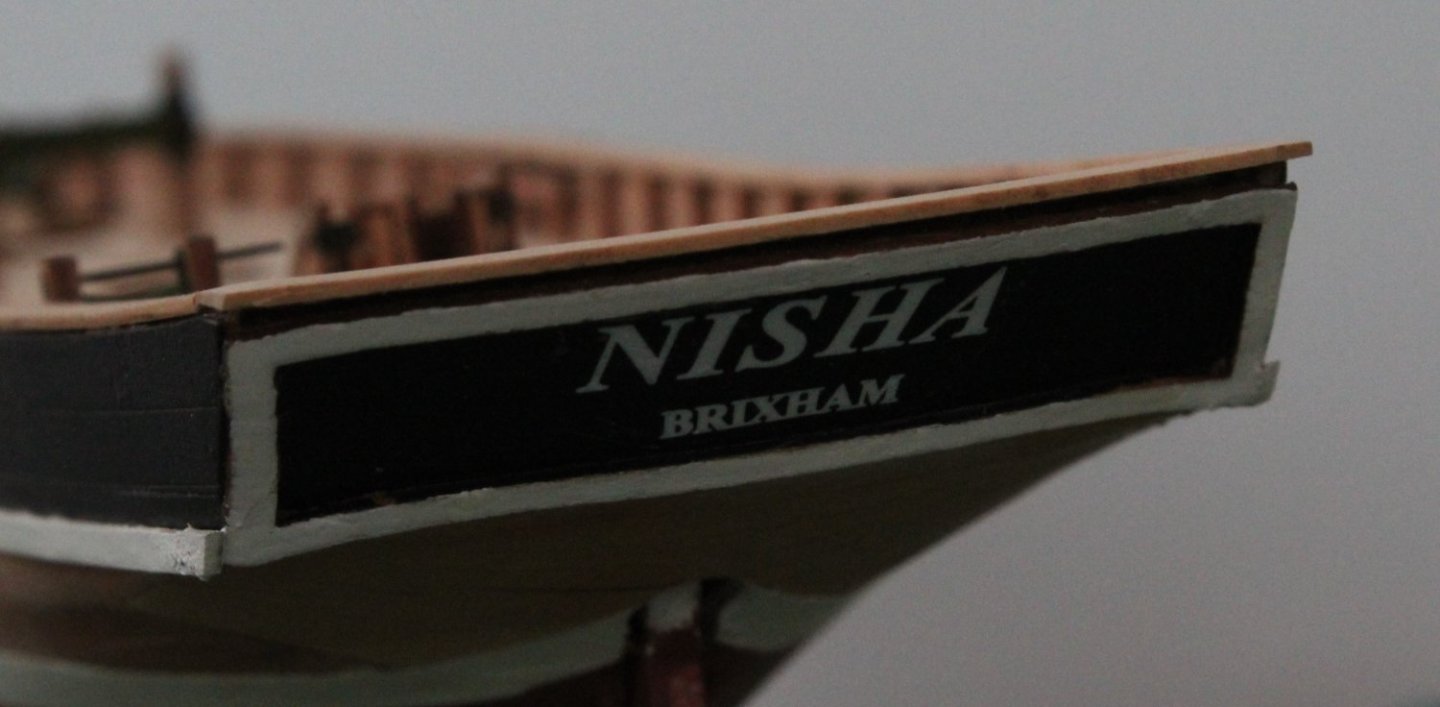
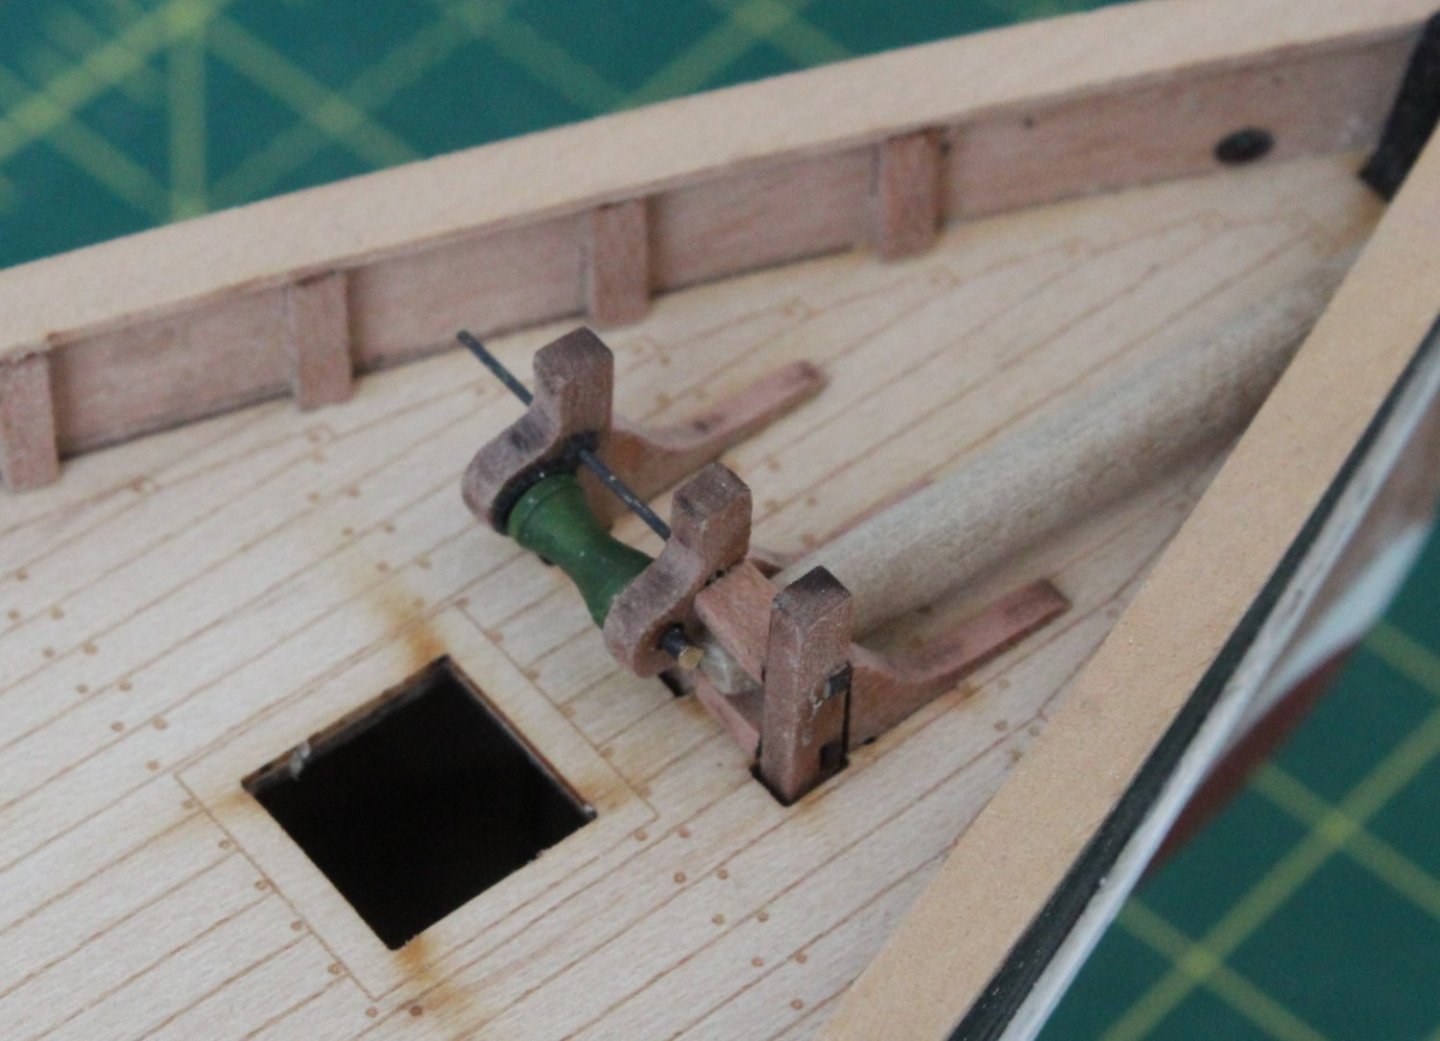
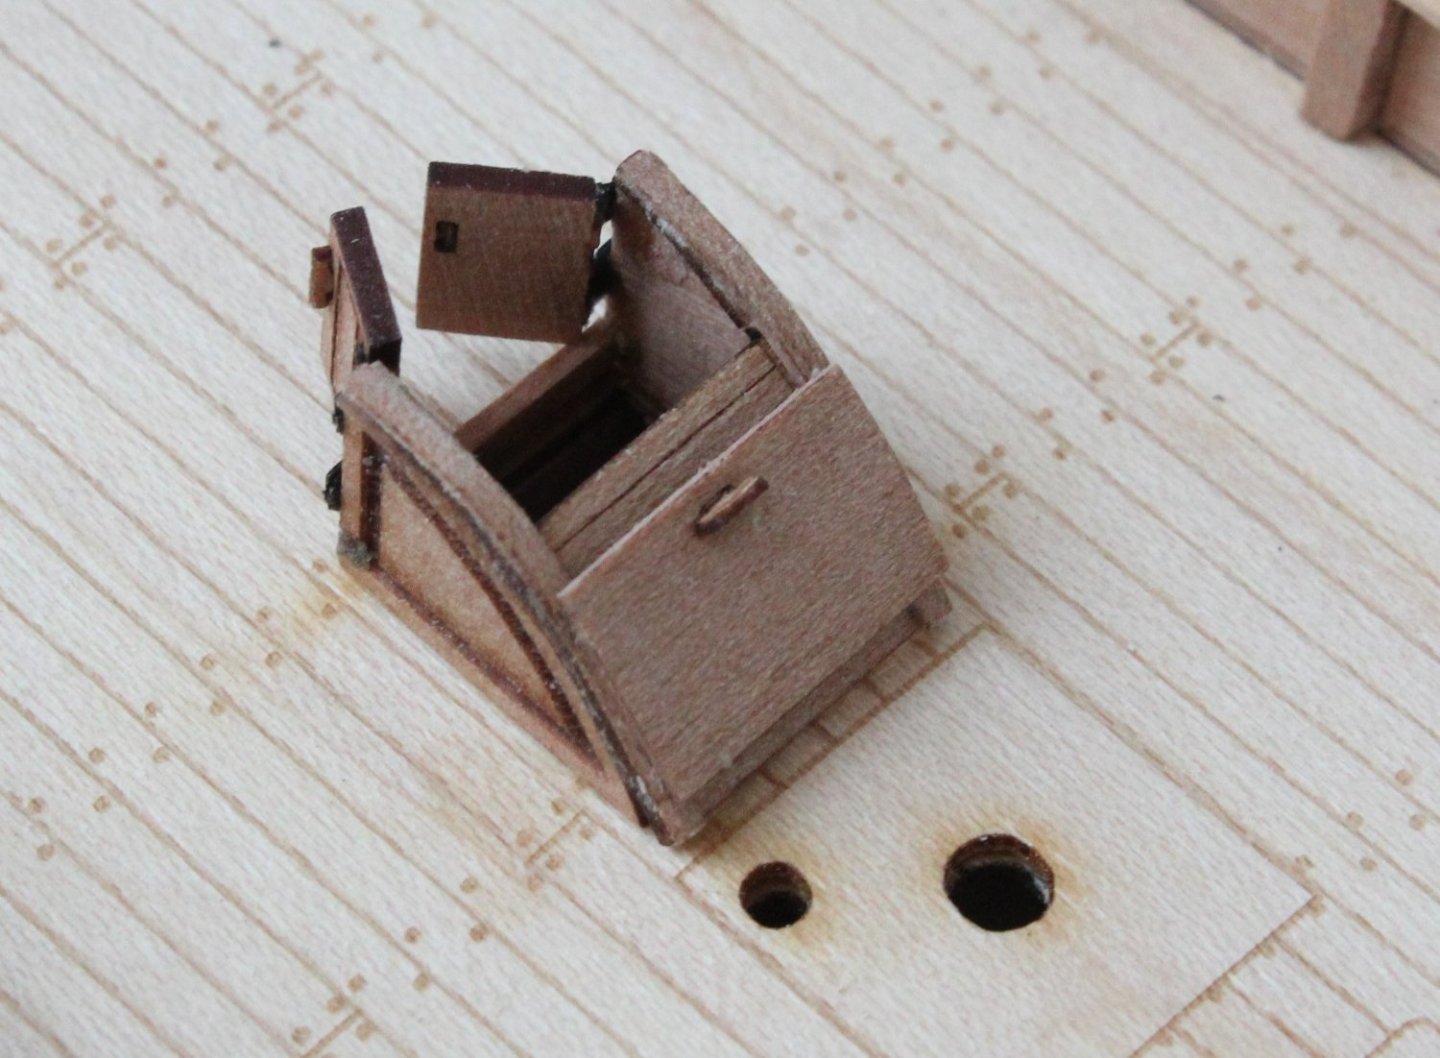
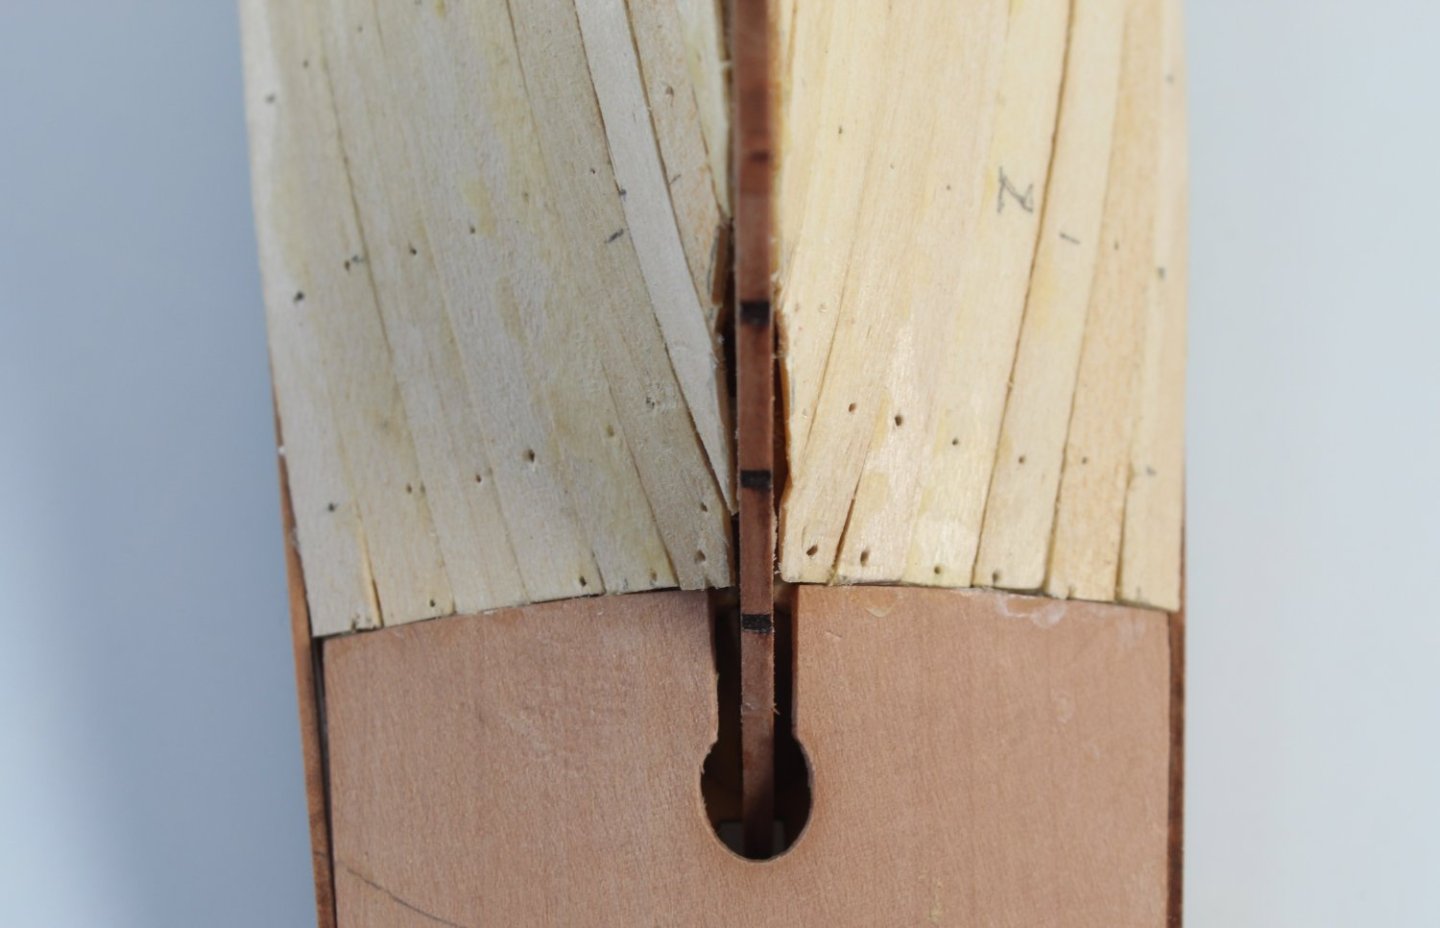
016 - Deck Items - Part 1 Time for a quick update. First task was to add the transfers to the hull. I also opened up the slot for the bowsprit. I then started to add some of the deck items, as can be seen in the next few photos. It should not take me too long to add the remaining deck items, all of which have been built. The next item was a very fiddly item to assembly. I did forget to remove the laser char from the doors. I forgot to paint the bracket sections black before the installation of the following item, as can be seen in the photo below. I did manage to paint the brackets black in situ as can be seen in the final photo.


- 48 replies
-
- 7
-
-
- Nisha
- Vanguard Models
- (and 3 more)
-
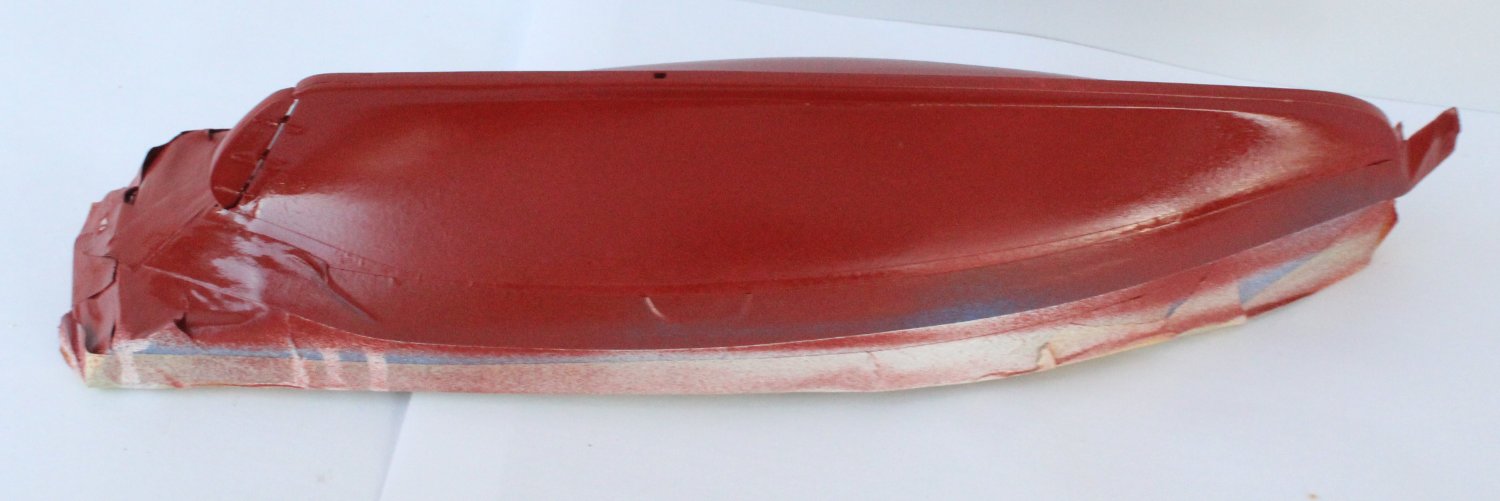
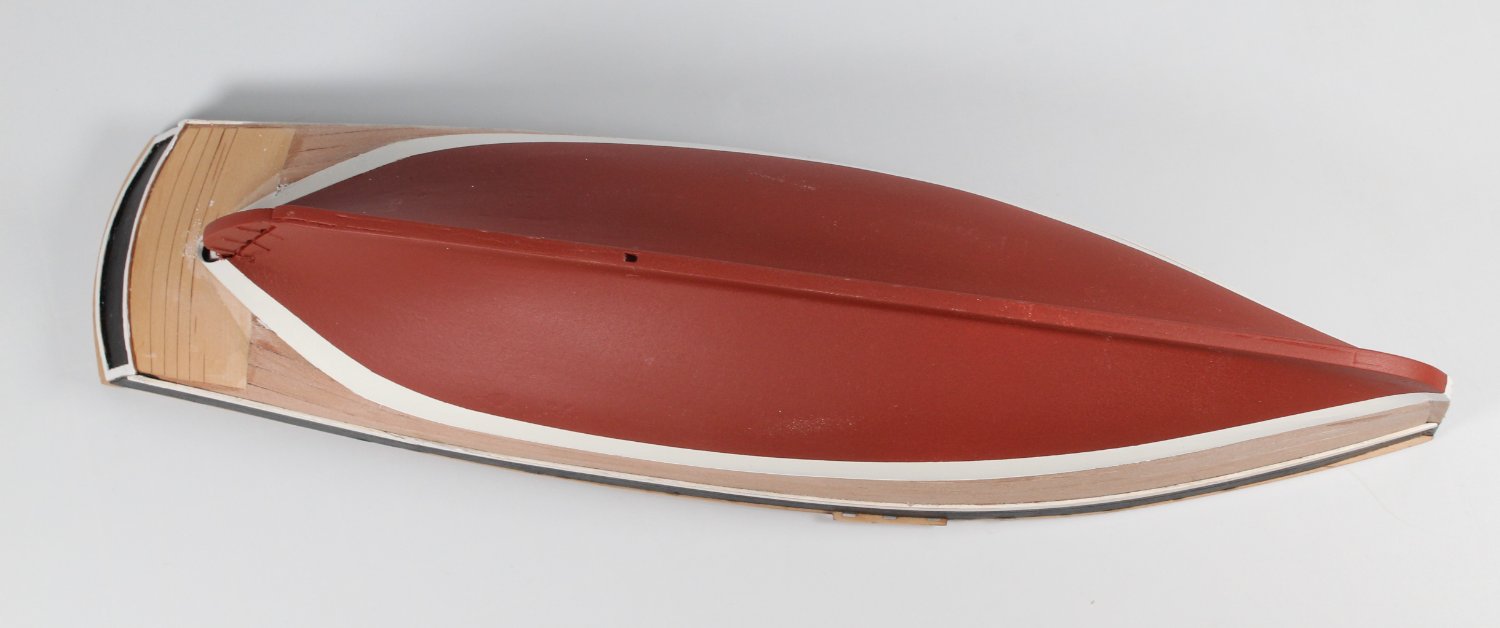
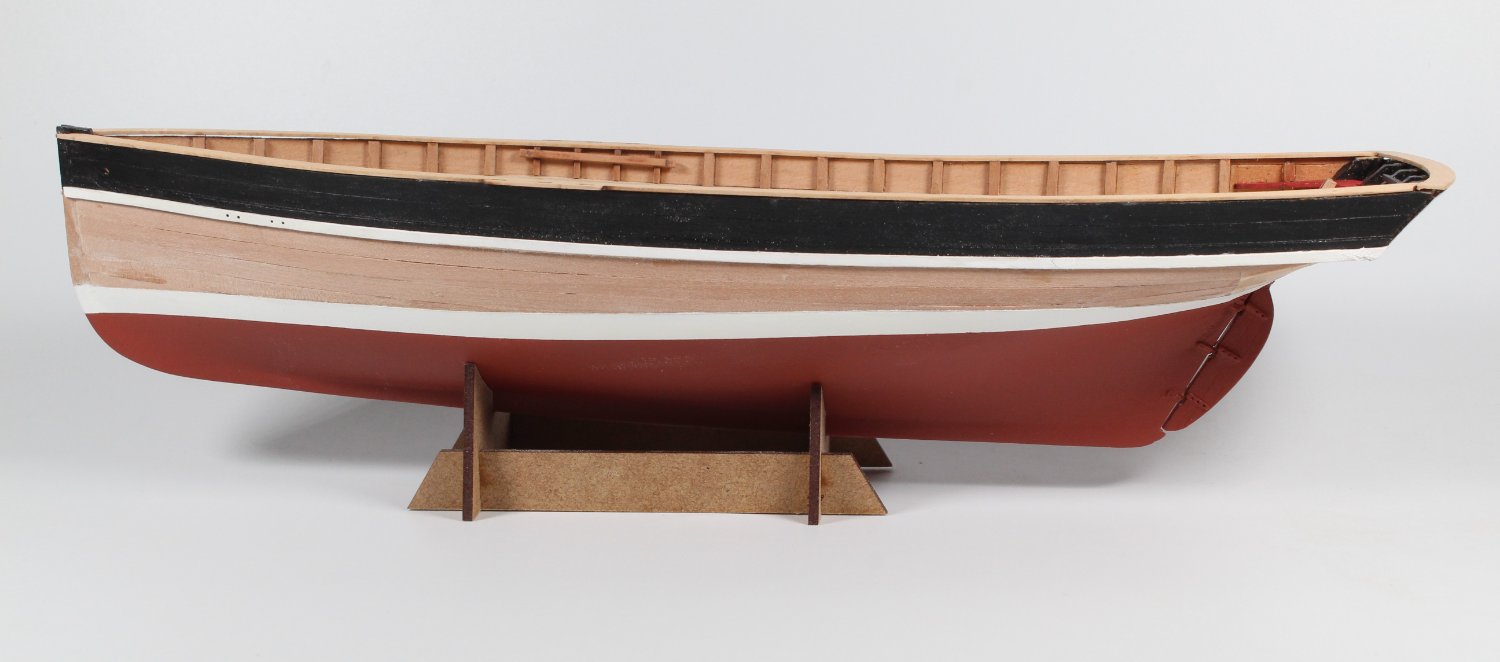
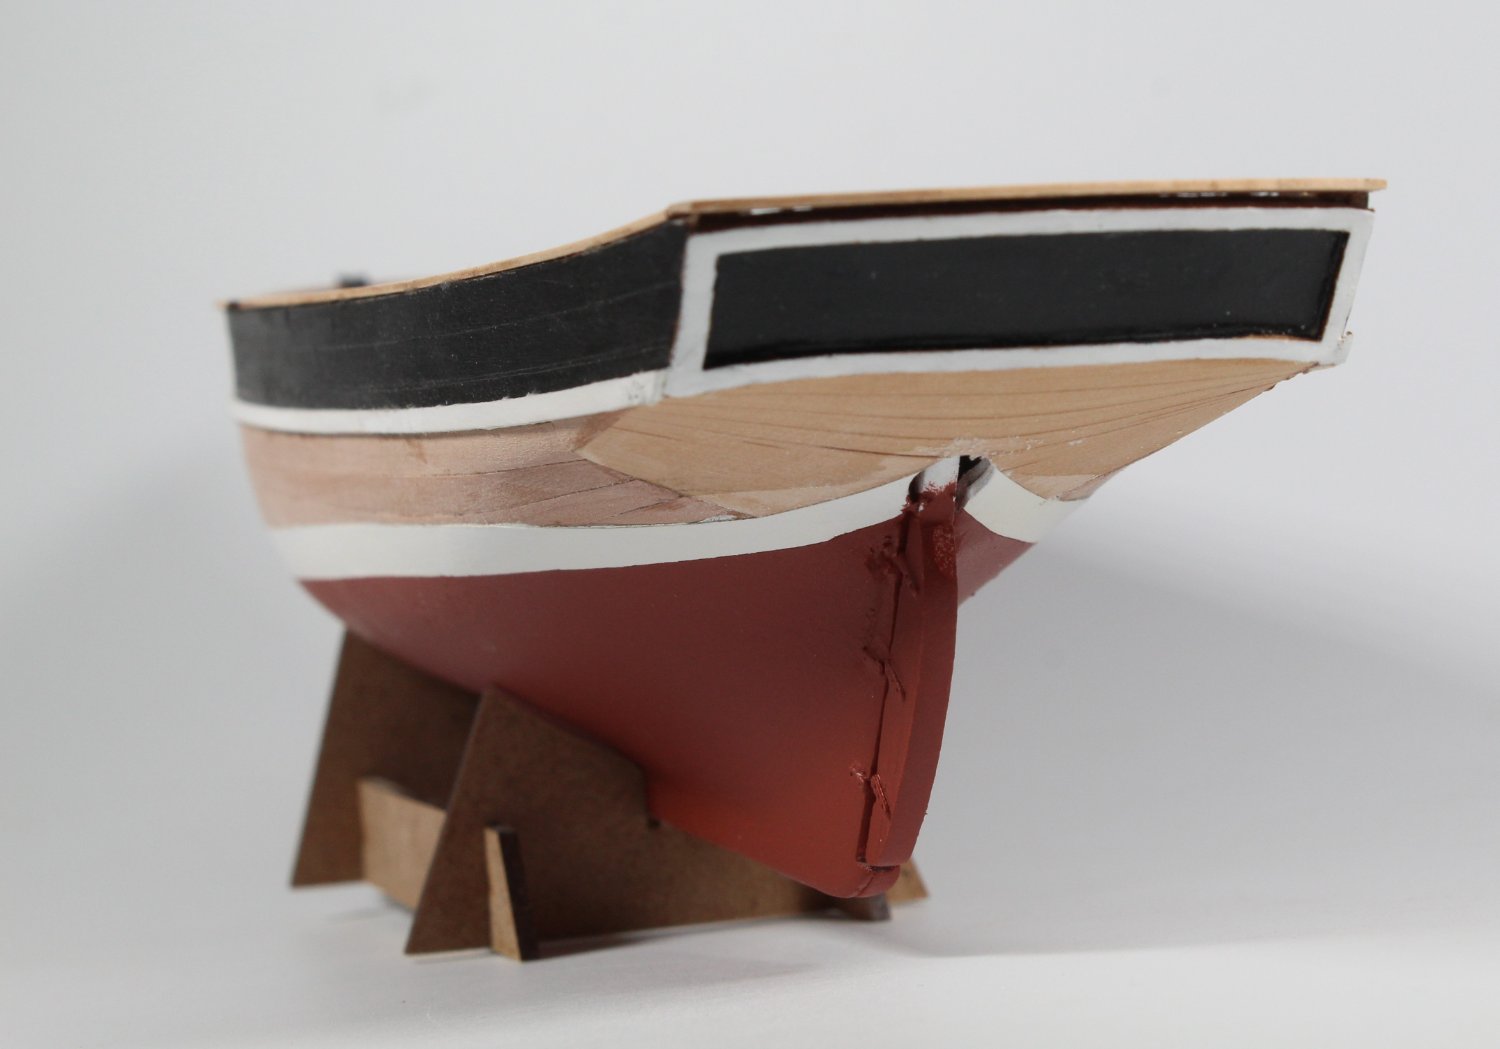
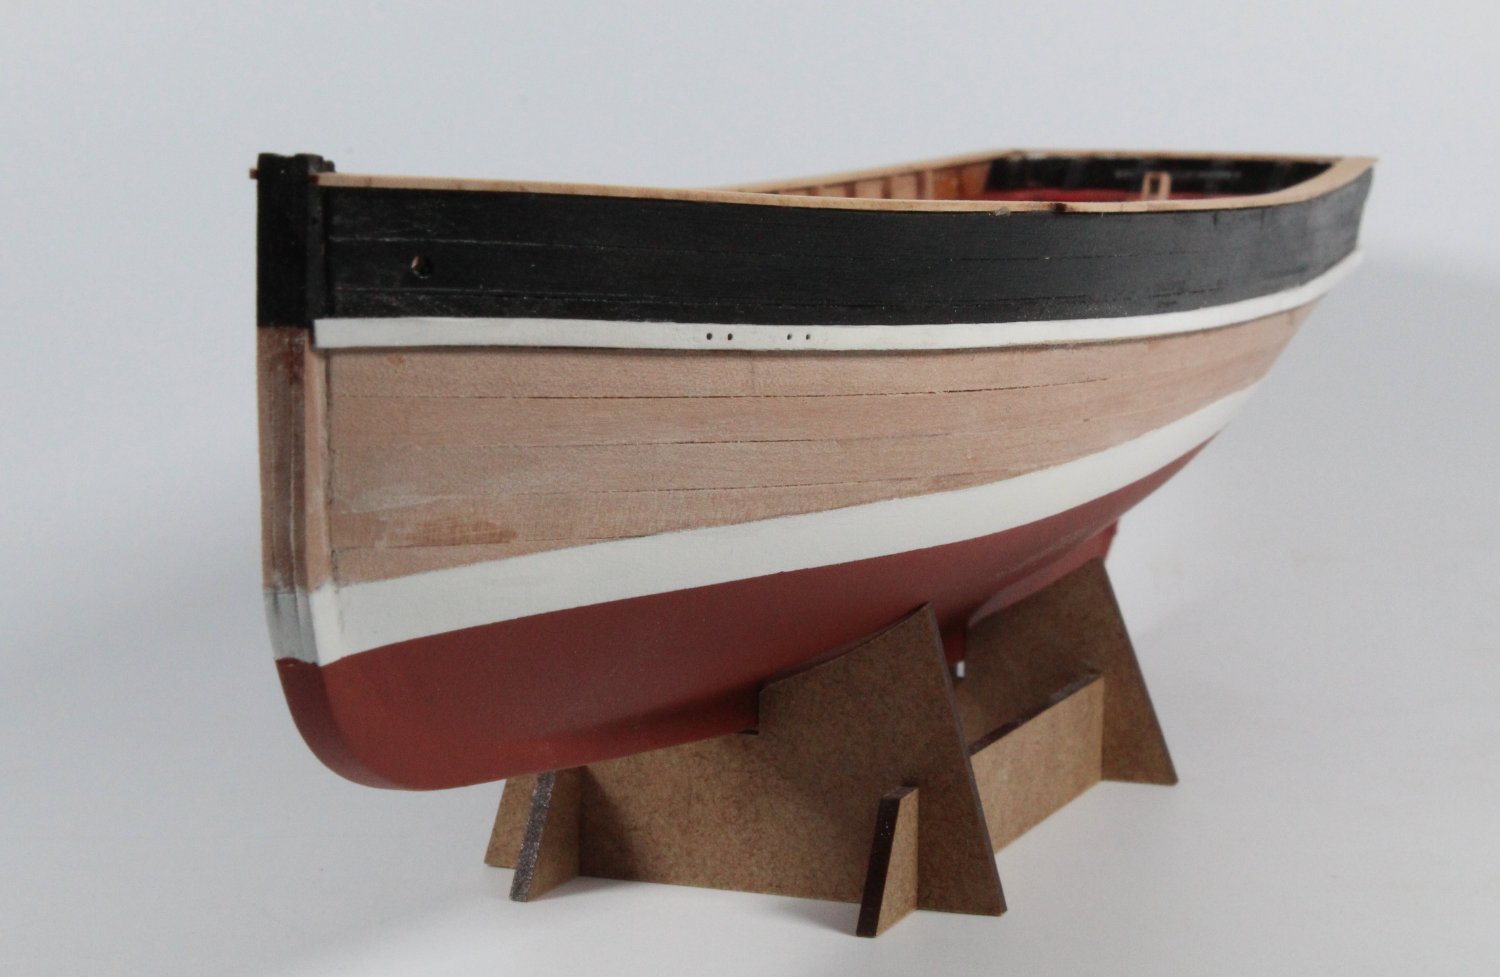
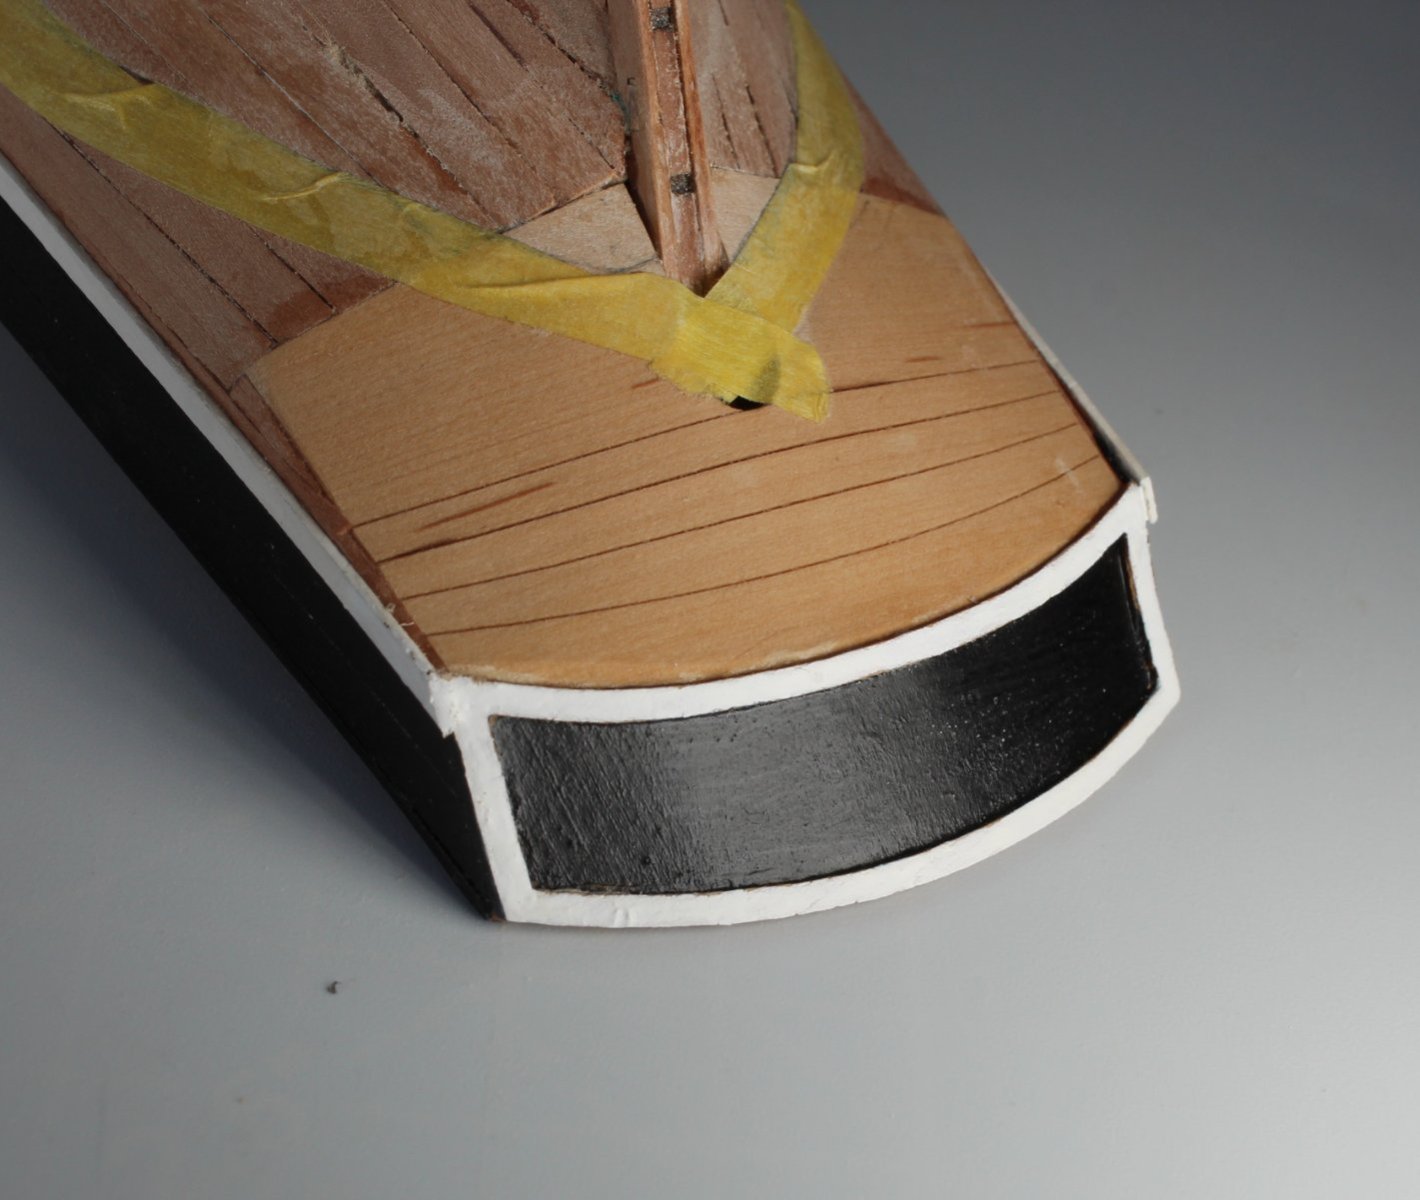
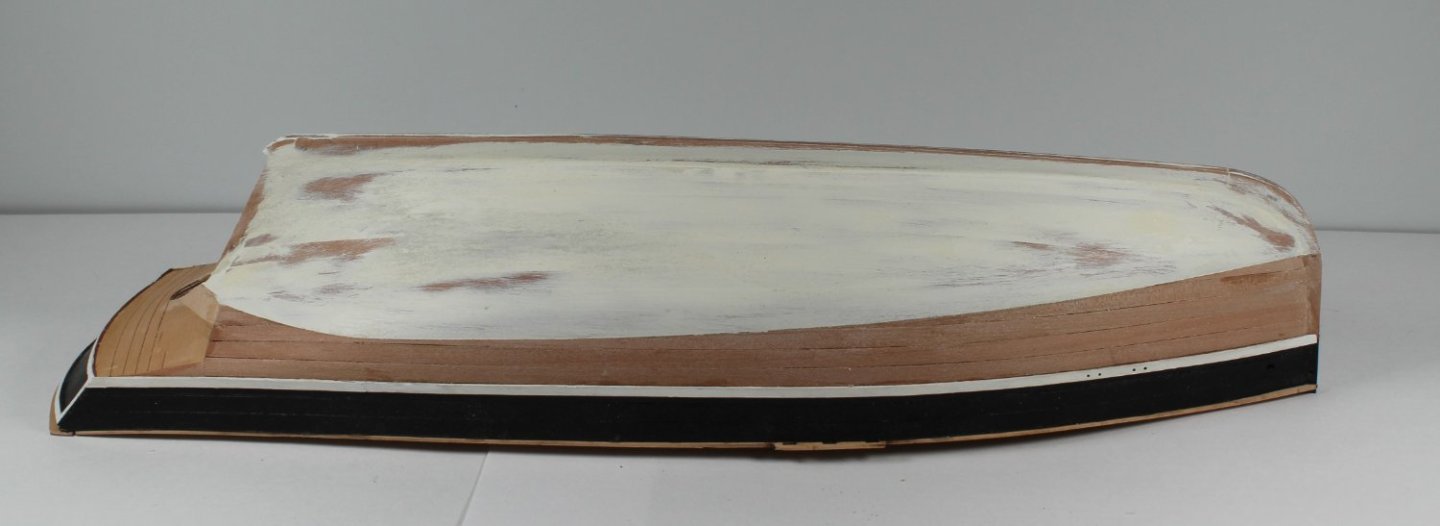
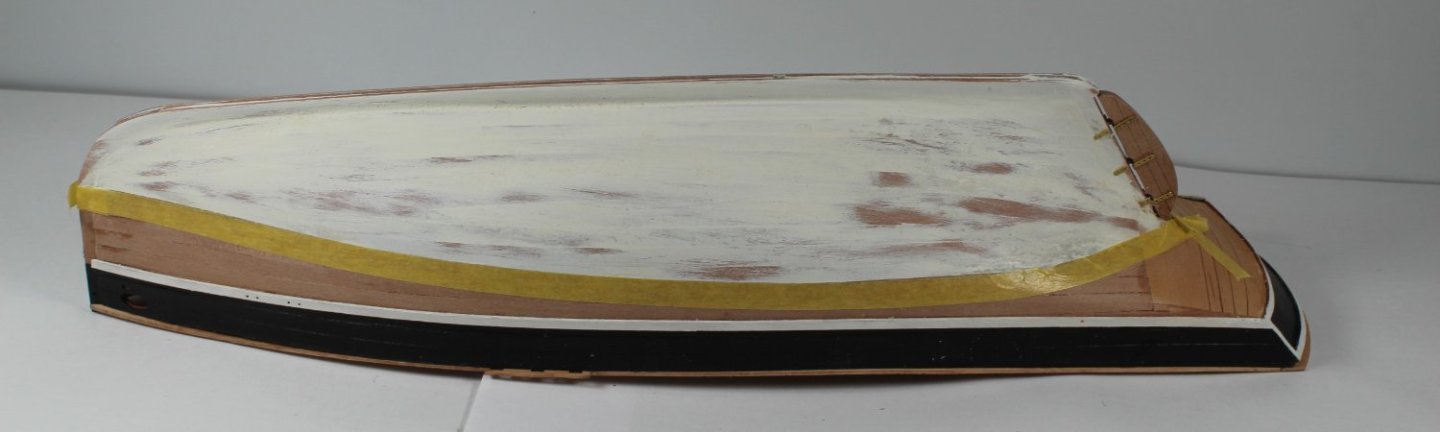
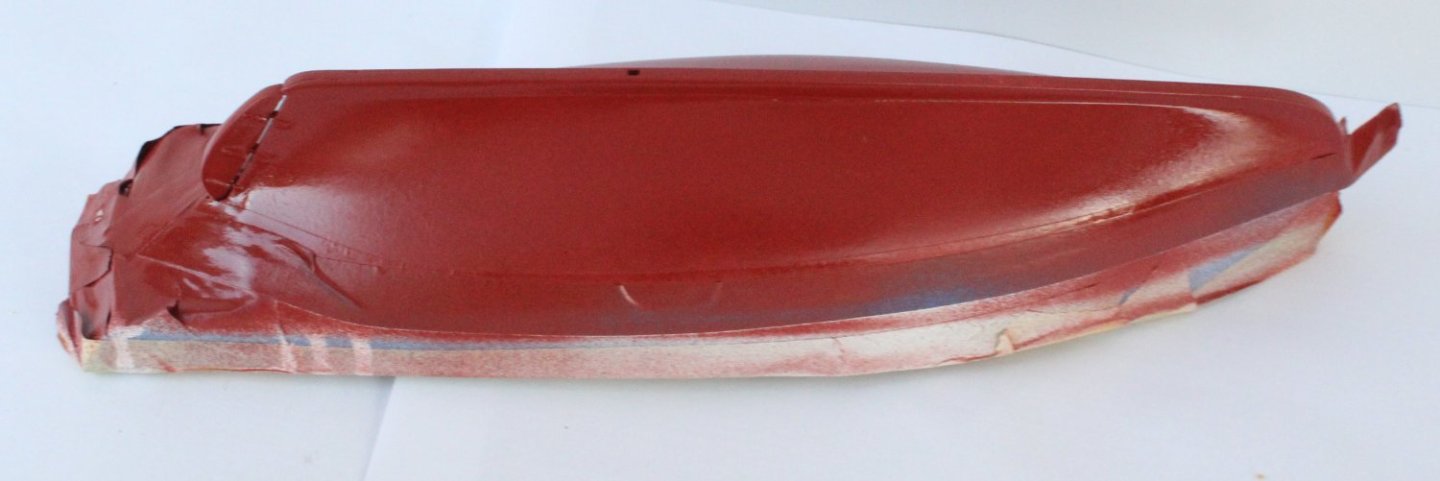
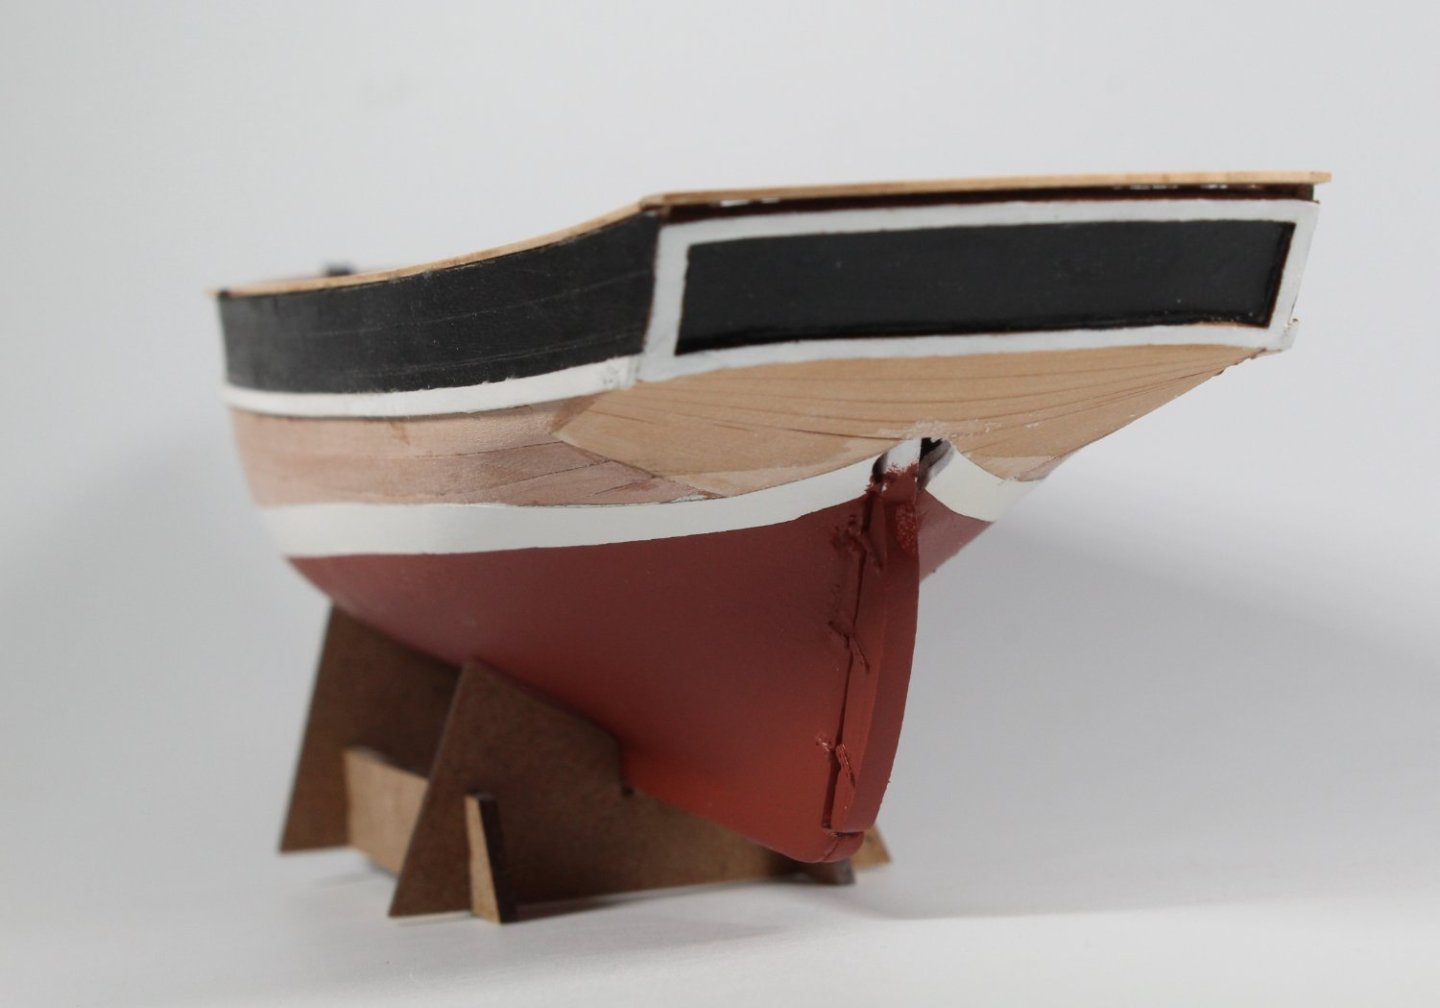
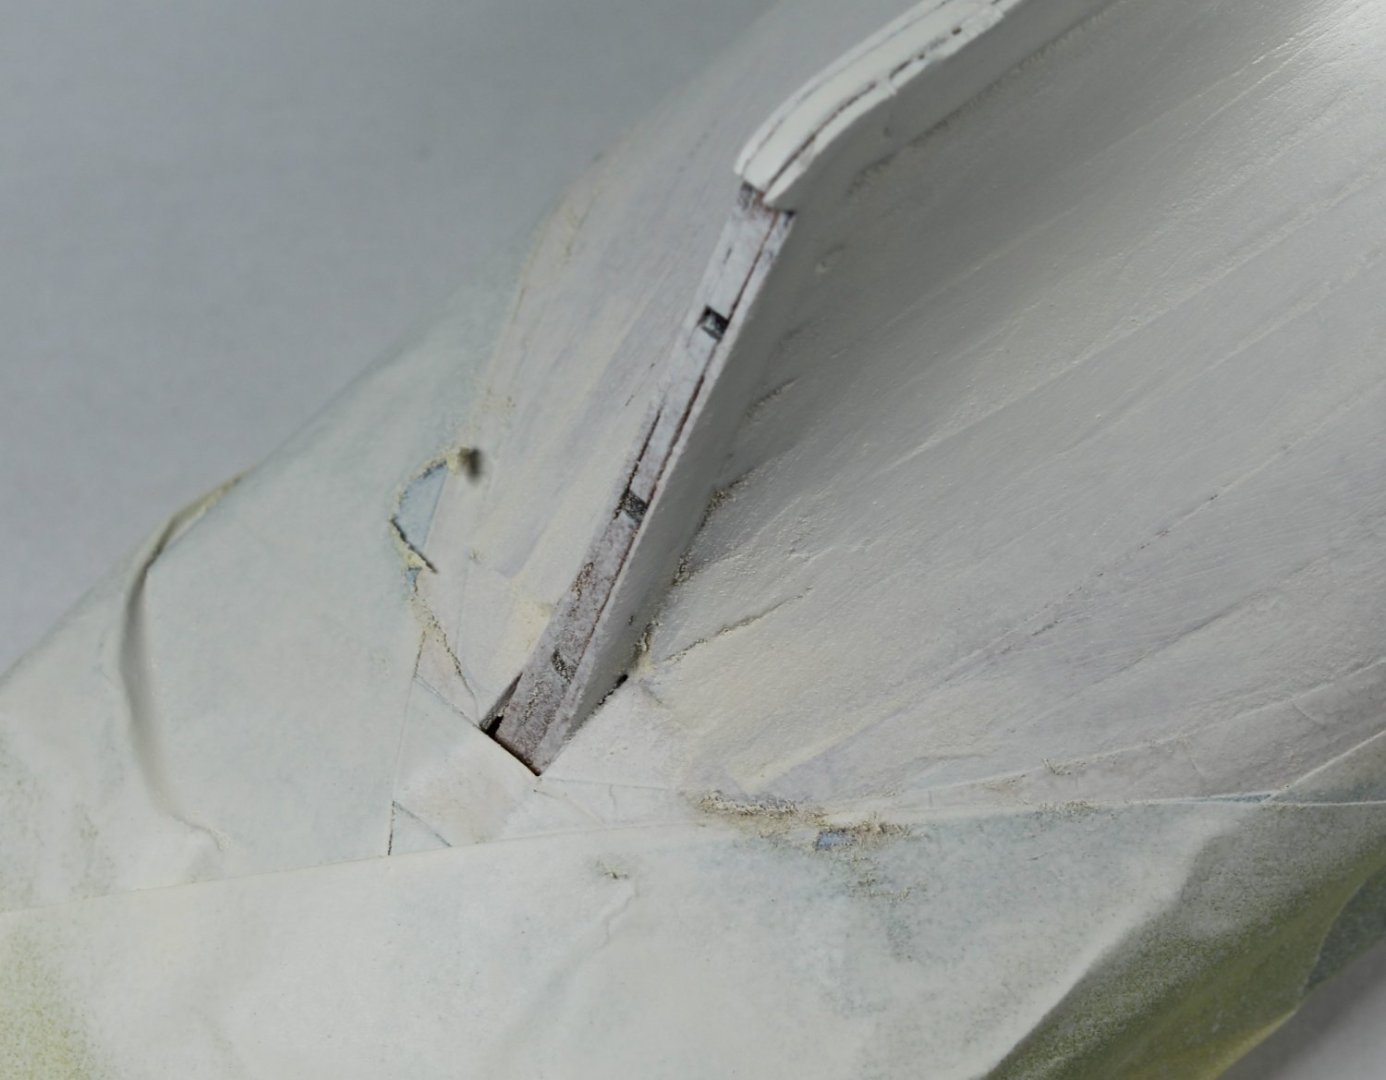
015 - Smoothing and Painting The Hull - Part 2 I continued to fill, sand and paint the hull. With the hull looking and feeling smooth it was time to move on to the next stage. It was necessary to remove the tape so the rudder assembly could be fitted. I was also able to check if there was any paint bleed. As can be seen there is a fairly clean separation. The rudder was fitted without any problems. I also gave the hull a light sand along the water line to remove any raised paint edges before the tape was reapplied. I used 6mm tape for the critical taping, as seen below. With the hull fully taped the white paint was applied, with two light coats. I gave the hull a very light sand with 600-grit sandpaper between each paint coat. The hull does look really smooth and the spotlights can be seen reflecting off the wet white paint. Once the white paint had dried I added a 6mm tape line below the waterline and then sprayed the hull red (Plastikote Red Oxide). Once the red oxide paint had dried all the tape was removed. I was reasonably happy with the end result. I still need to apply WOP coat to the unpainted wood area but I will clean up any paint overspills before I do this.


- 48 replies
-
- 7
-
-
- Nisha
- Vanguard Models
- (and 3 more)
-
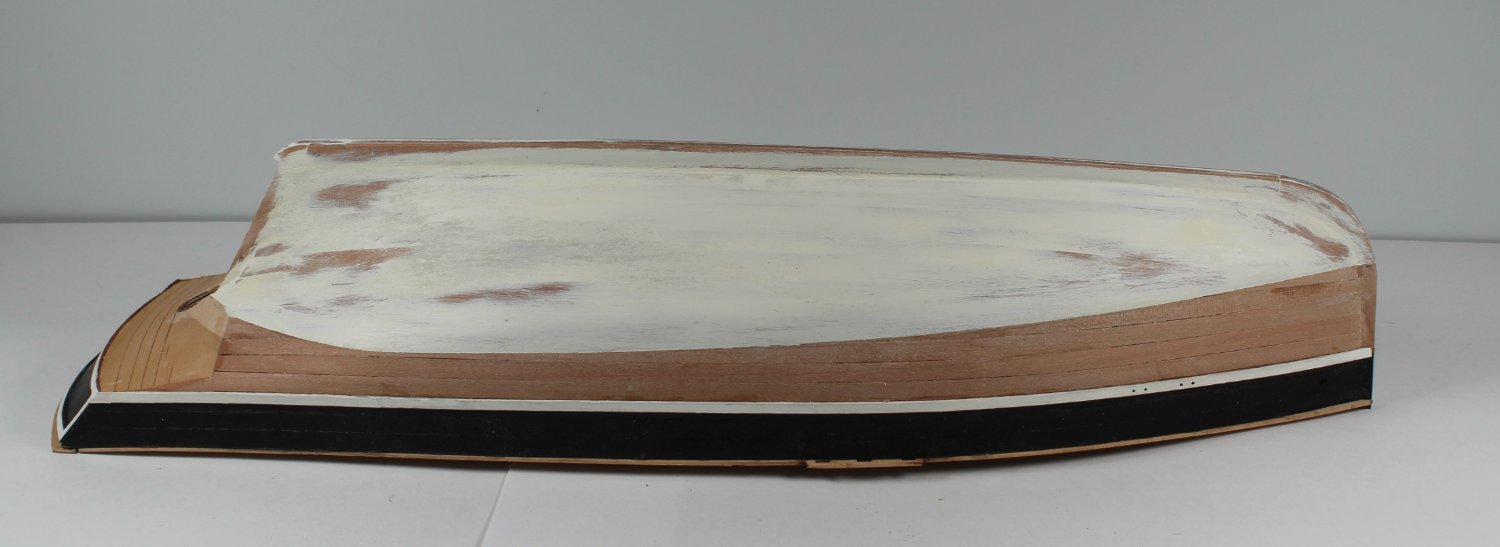
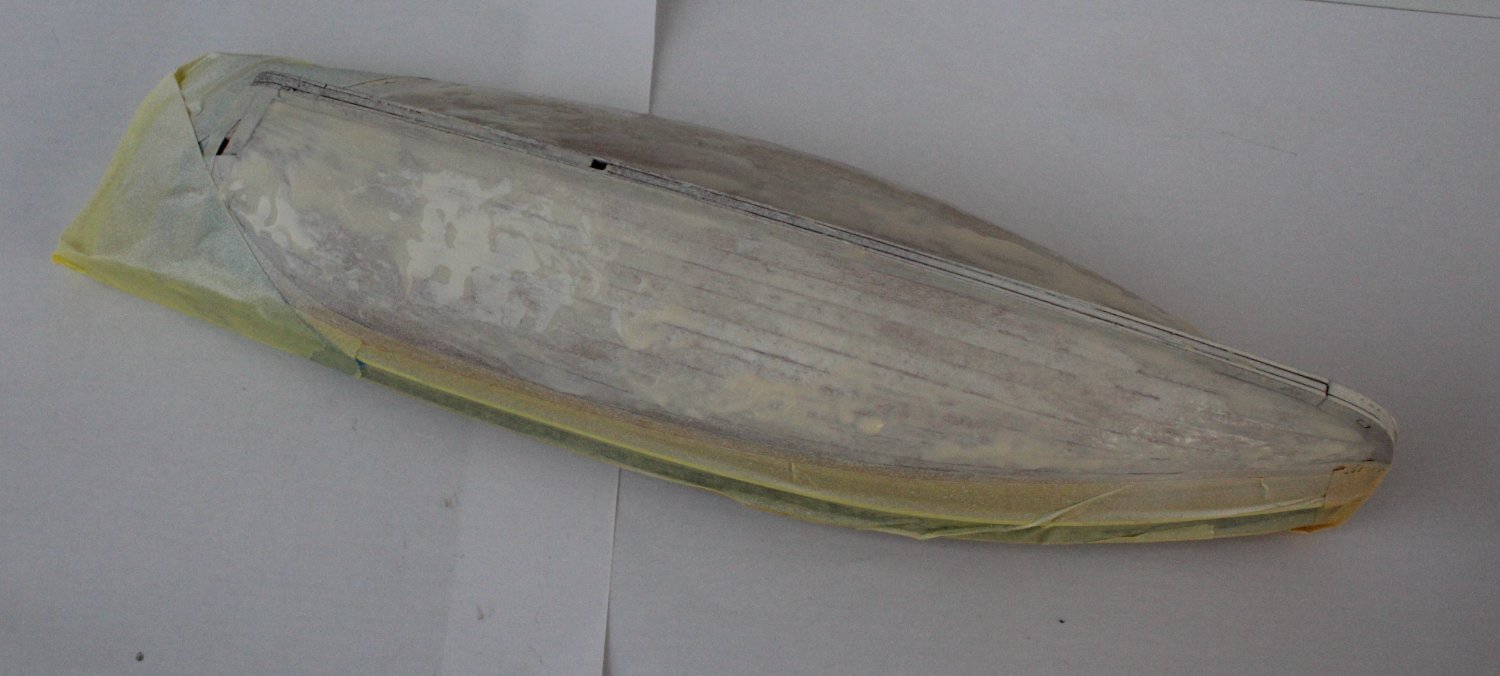
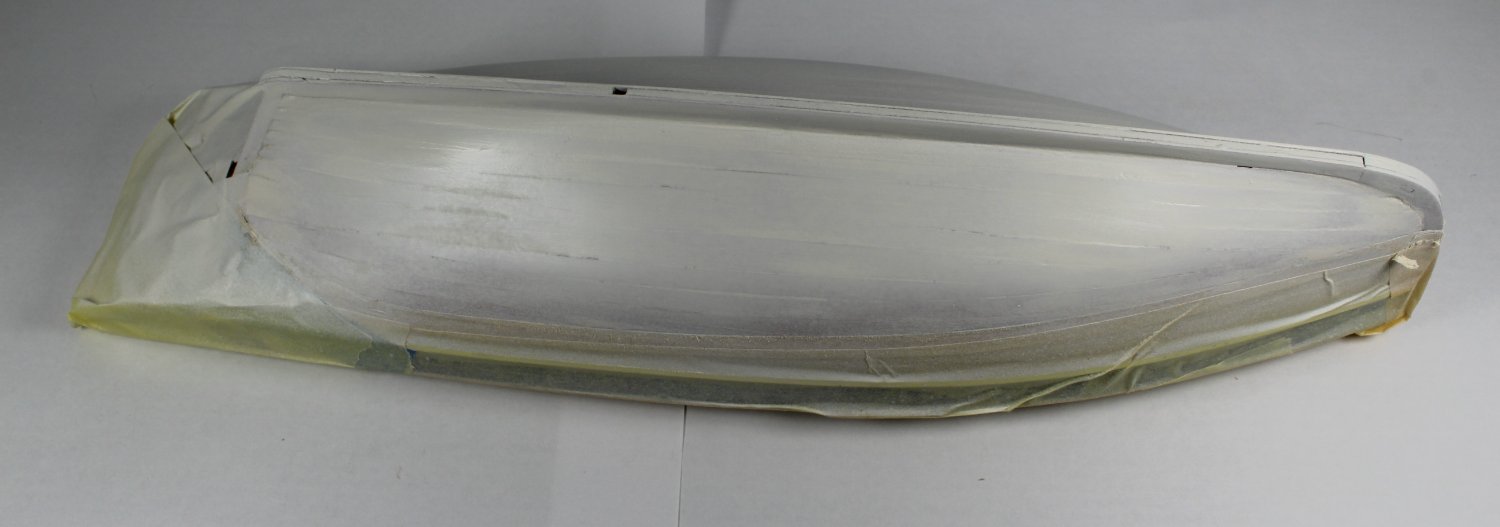
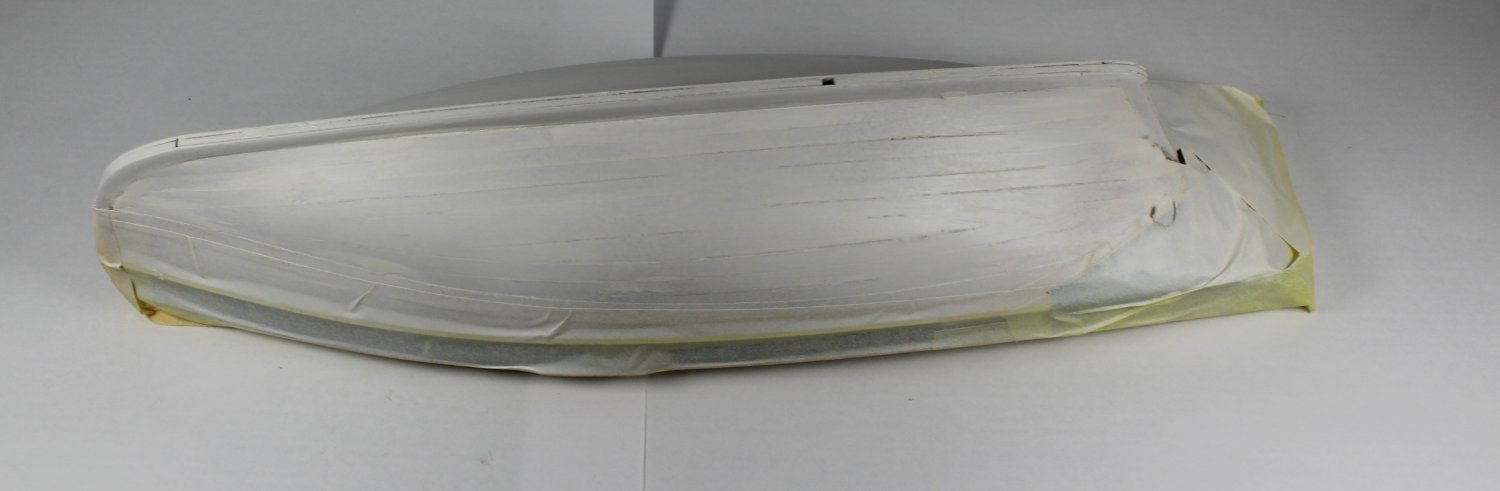
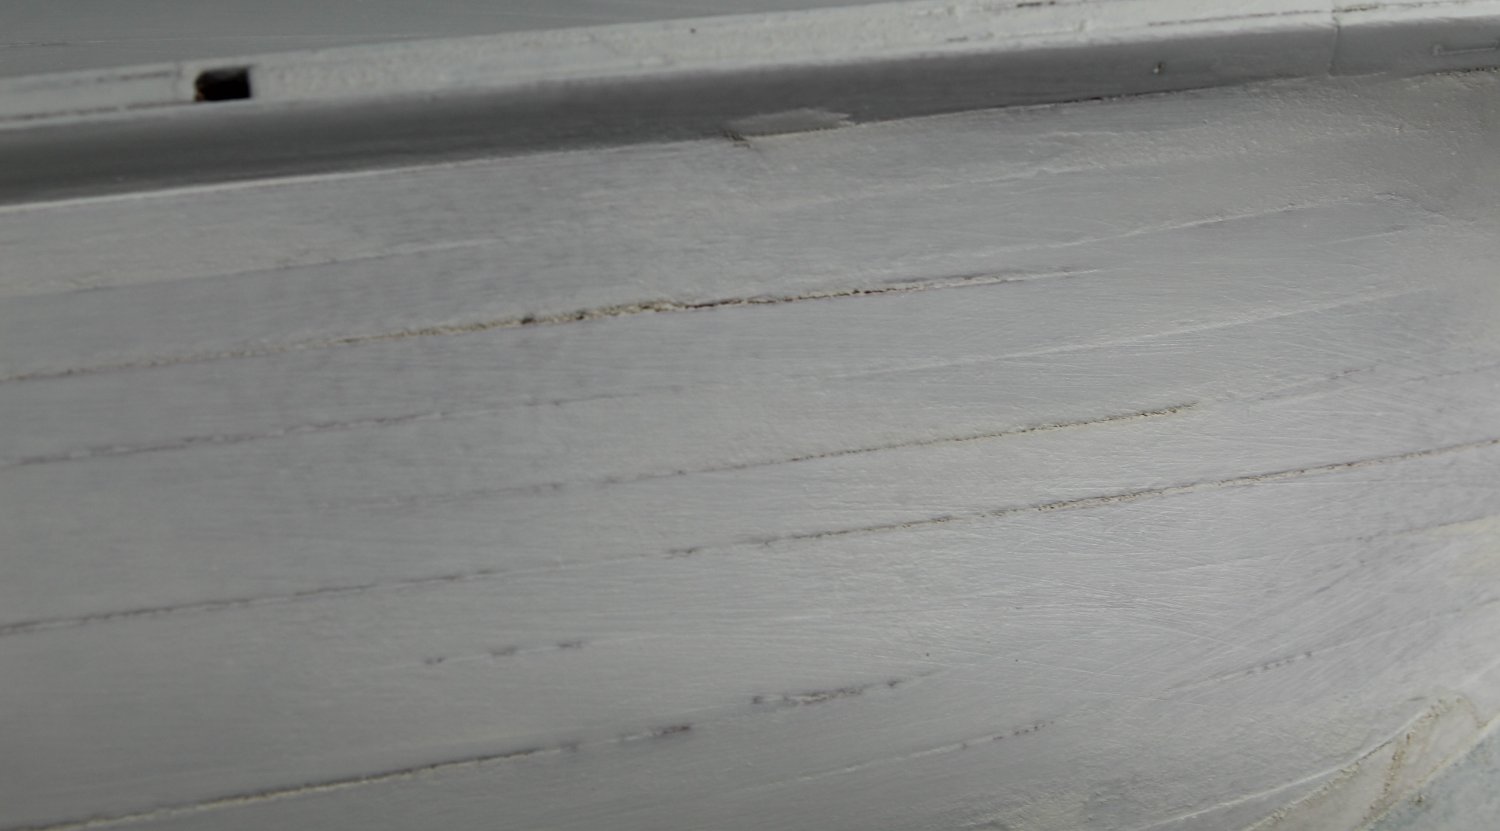
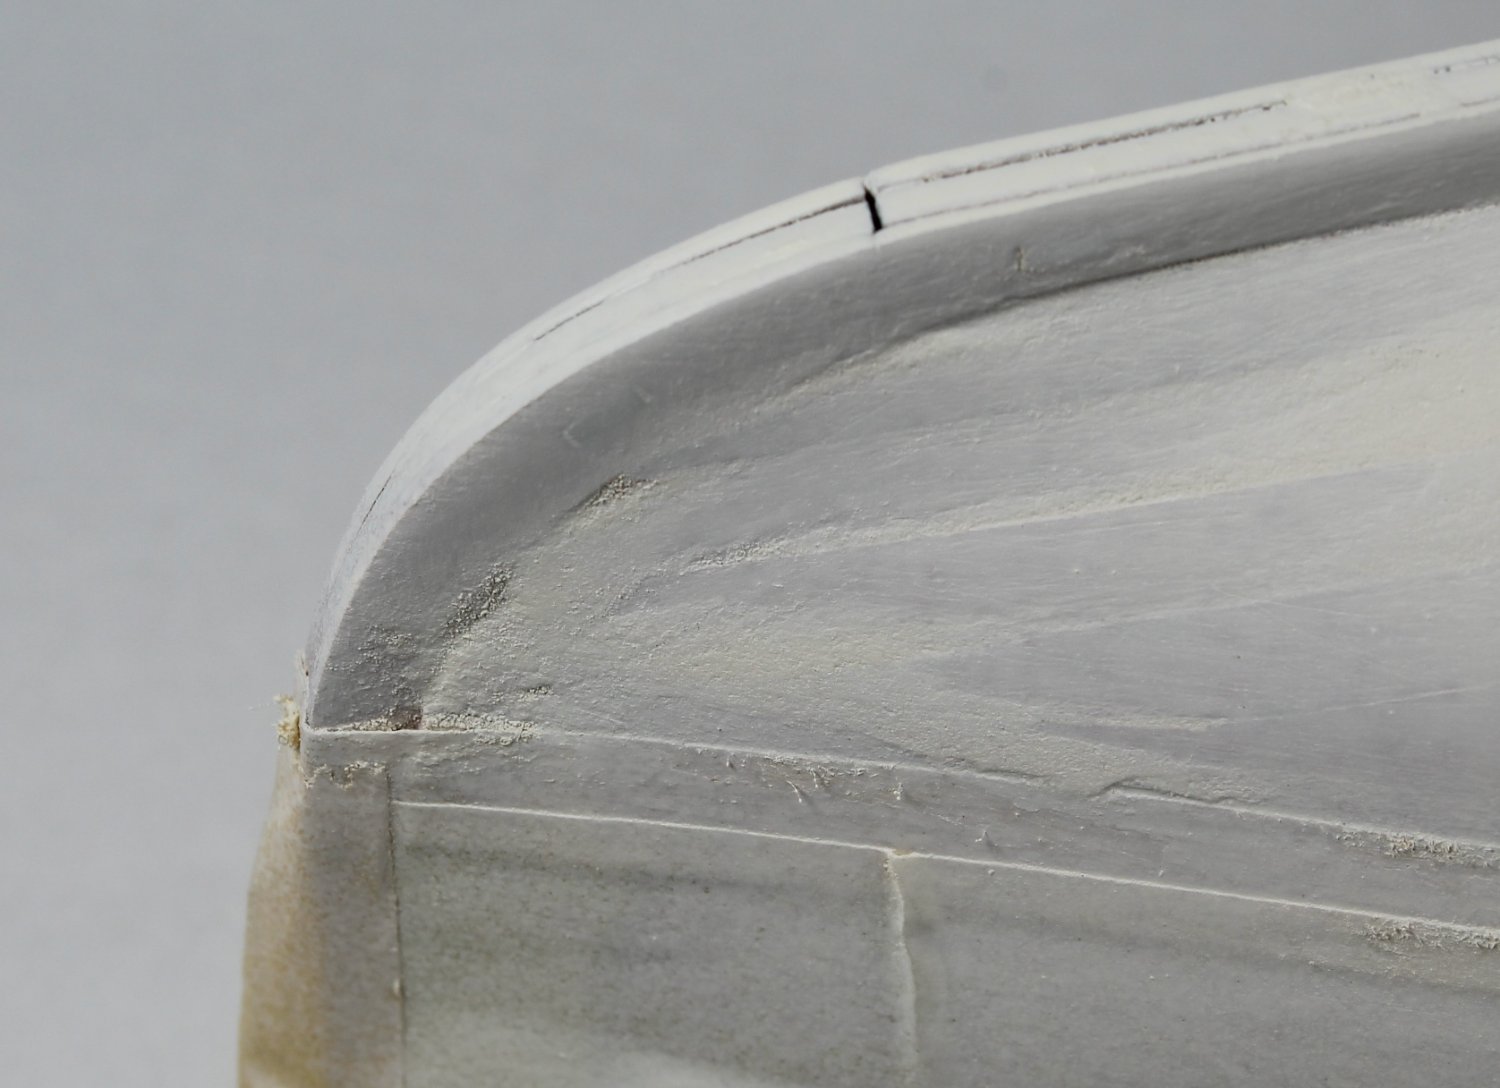
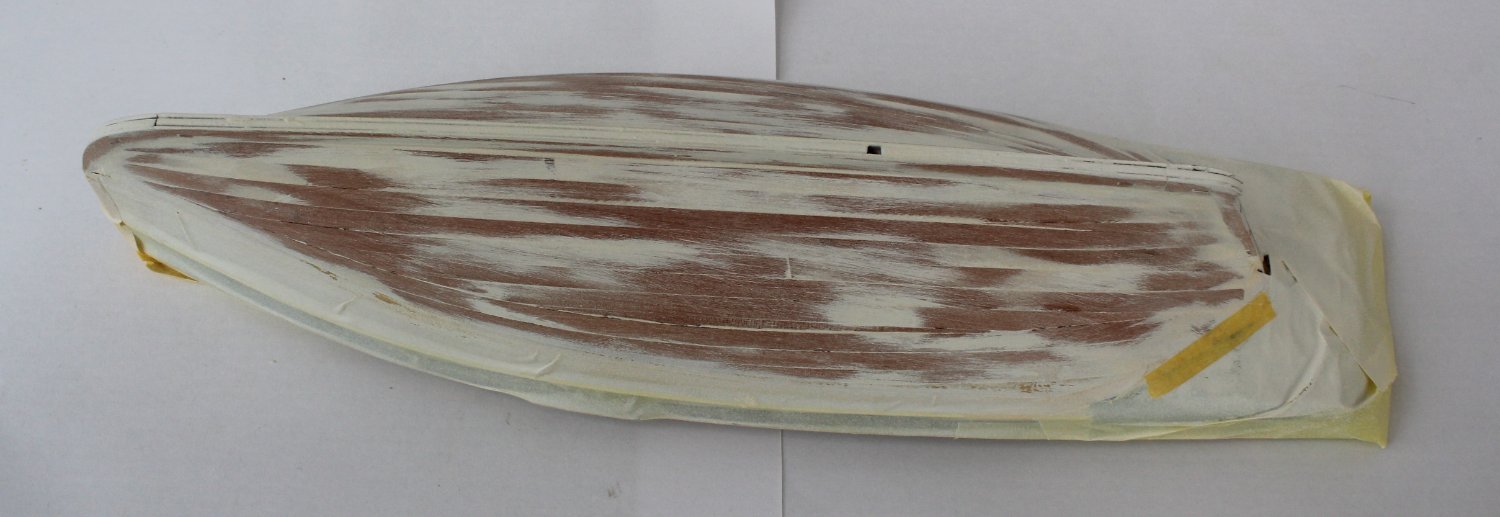
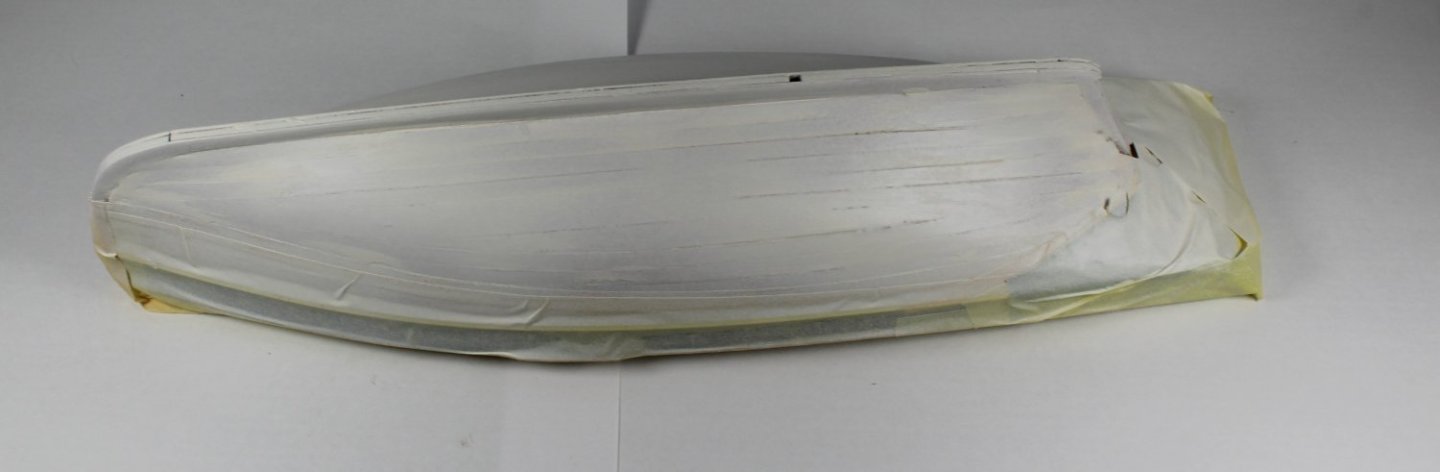
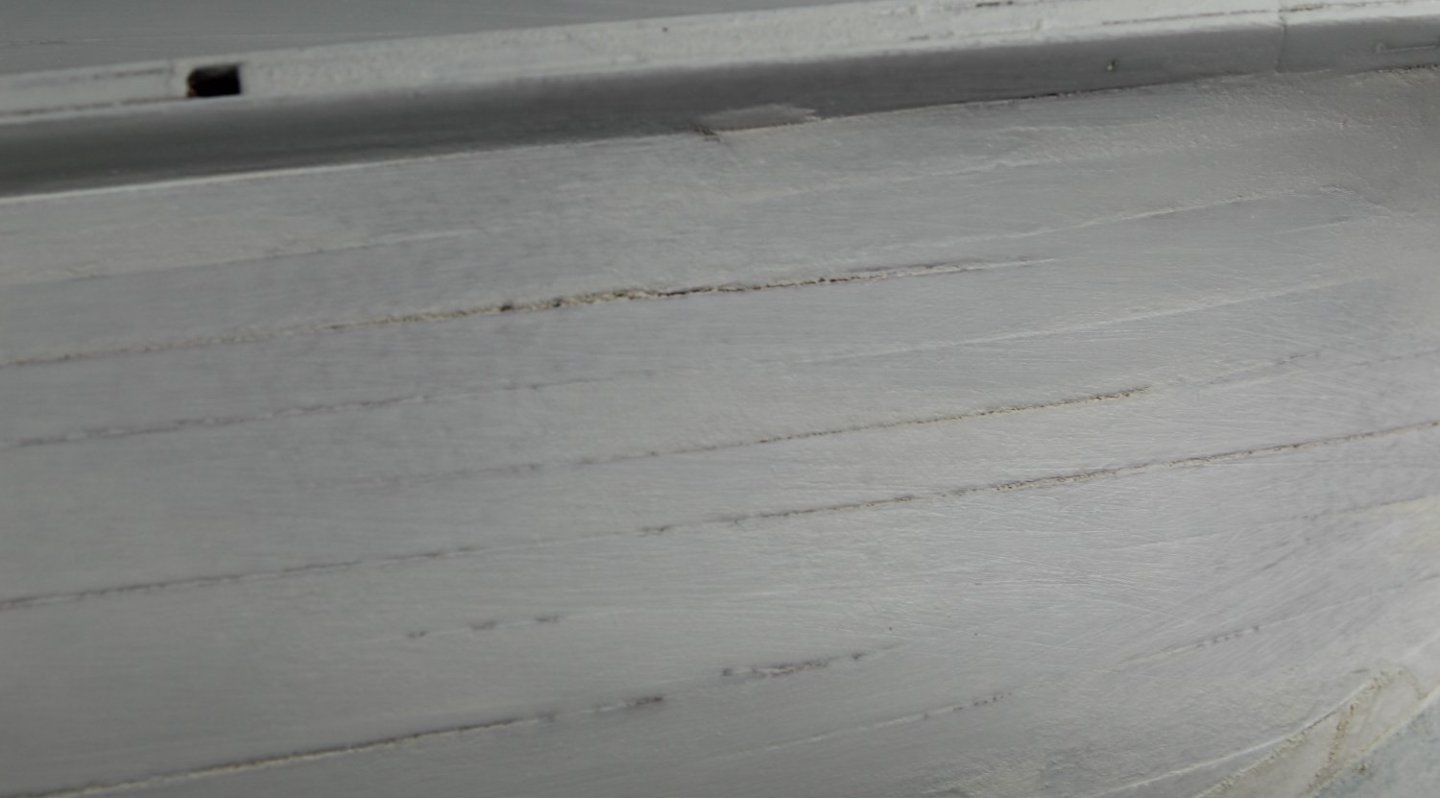
014 - Smoothing and Painting The Hull - Part 1 Sanding and filling the hull so the final painting hull looks smooth takes time. I am going to document the full process I use and given it normally requires a few interations of the paint, sand and fill process I will spilt this over two posts. After the initial sanding of the hull was completed I sprayed a very light coat of white paint. This shows up the defects really well as can be seen in the first two photos. the next stage is to apply plenty of filler. I mix up a 50/50 solution of wood filler (Ronseal Natural) with Titebond original and then add water to get the right consistency. The solution is then applied to the hull using an paint brush. Once the wood filler solution has had time to dry the hull sanded smooth. My aim is to reveal as much as the wood planking as possible so the filler only be located in the dips. I then apply another coat of white paint, but this time I aim for a slightly better coverage. When examining the hull some imperfections are still visible, as can be seen in the next few photos. Another wood solution is prepared and this time it is applied to the areas where the defects are visible. It is time, once again to sand the hull. The hull is looking much smoother already. Another coat of white paint is then sprayed on the hull one side is looking really good. As can be seen in the next photo there is still a couple of areas which still require a bit more filling work but overall this side of the hull is also pretty smooth. Once the paint has had time to dry I will add some more filler to the target areas.


- 48 replies
-
- 8
-
-
- Nisha
- Vanguard Models
- (and 3 more)
-
Congratulations on completing another Vanguard build, your fleet looks impressive. I think you're ready to build The Alert.
- 46 replies
-
- 3
-
-
- vanguard models
- Erycina
- (and 3 more)
-
I have started a weight training program so I will be able to carry the Indy box to the shipyard when it arrives.😂
- 488 replies
-
- 12
-
-

-
- Indefatigable
- Vanguard Models
- (and 1 more)
-
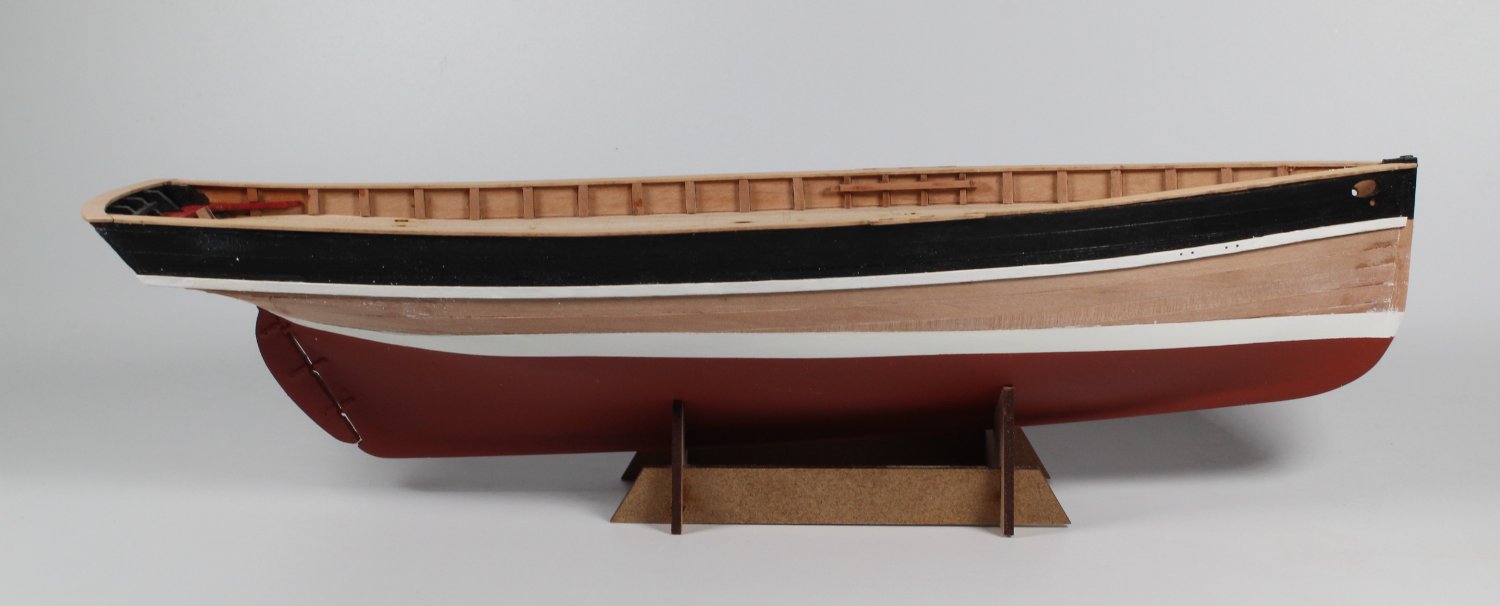
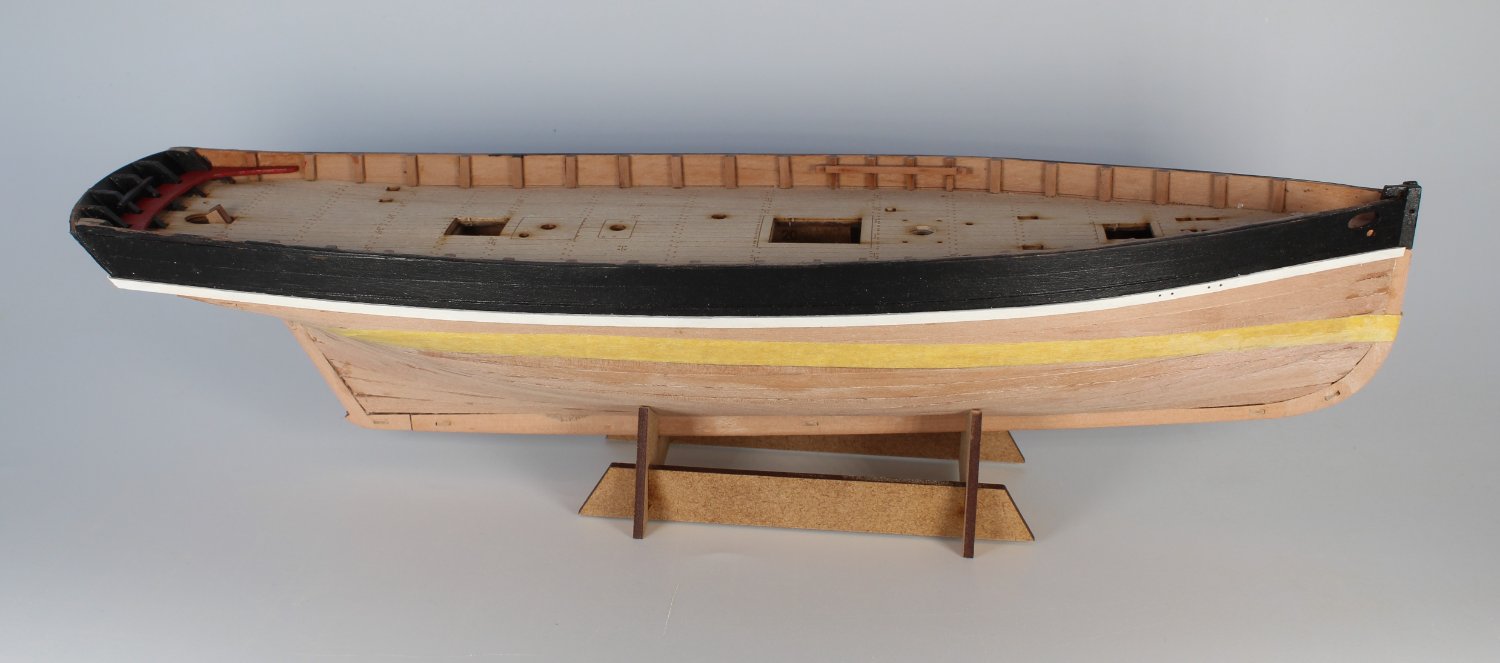
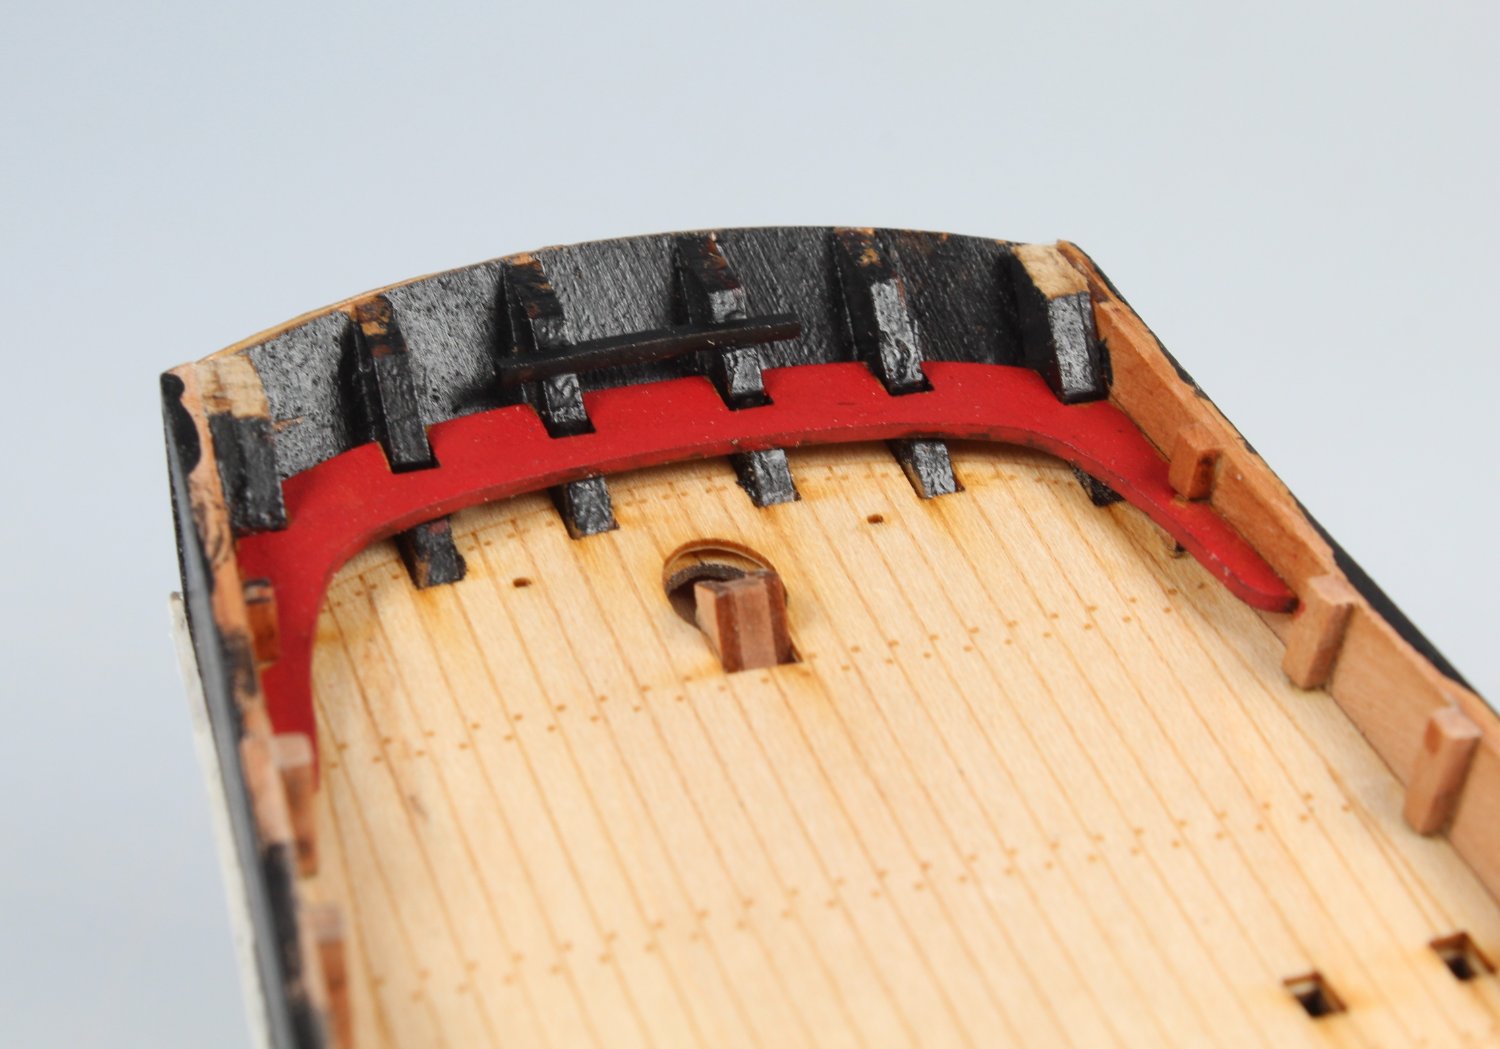
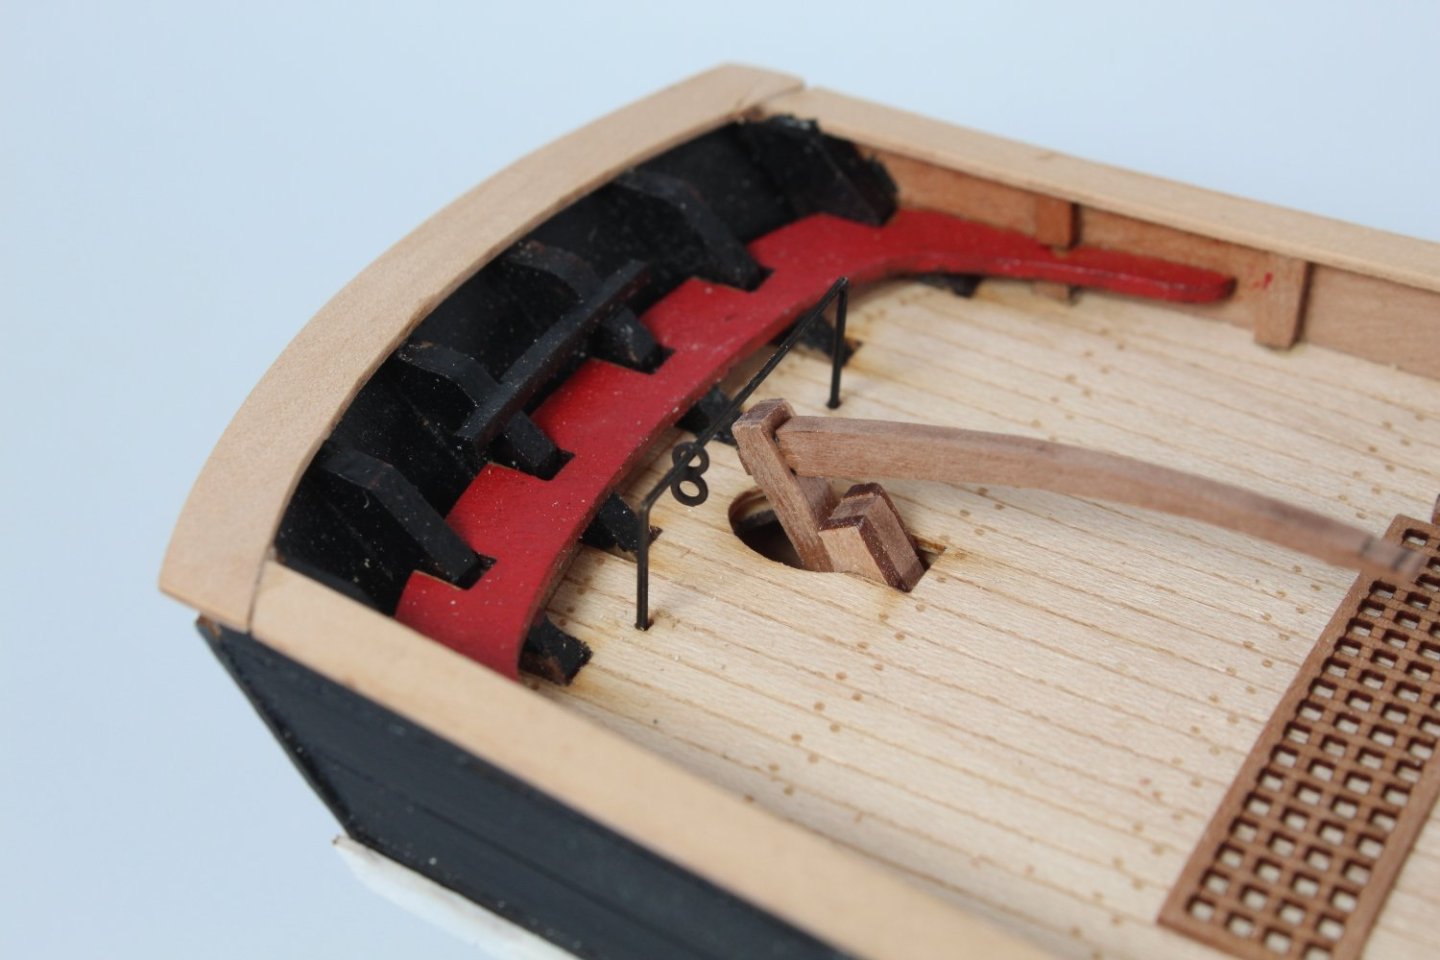
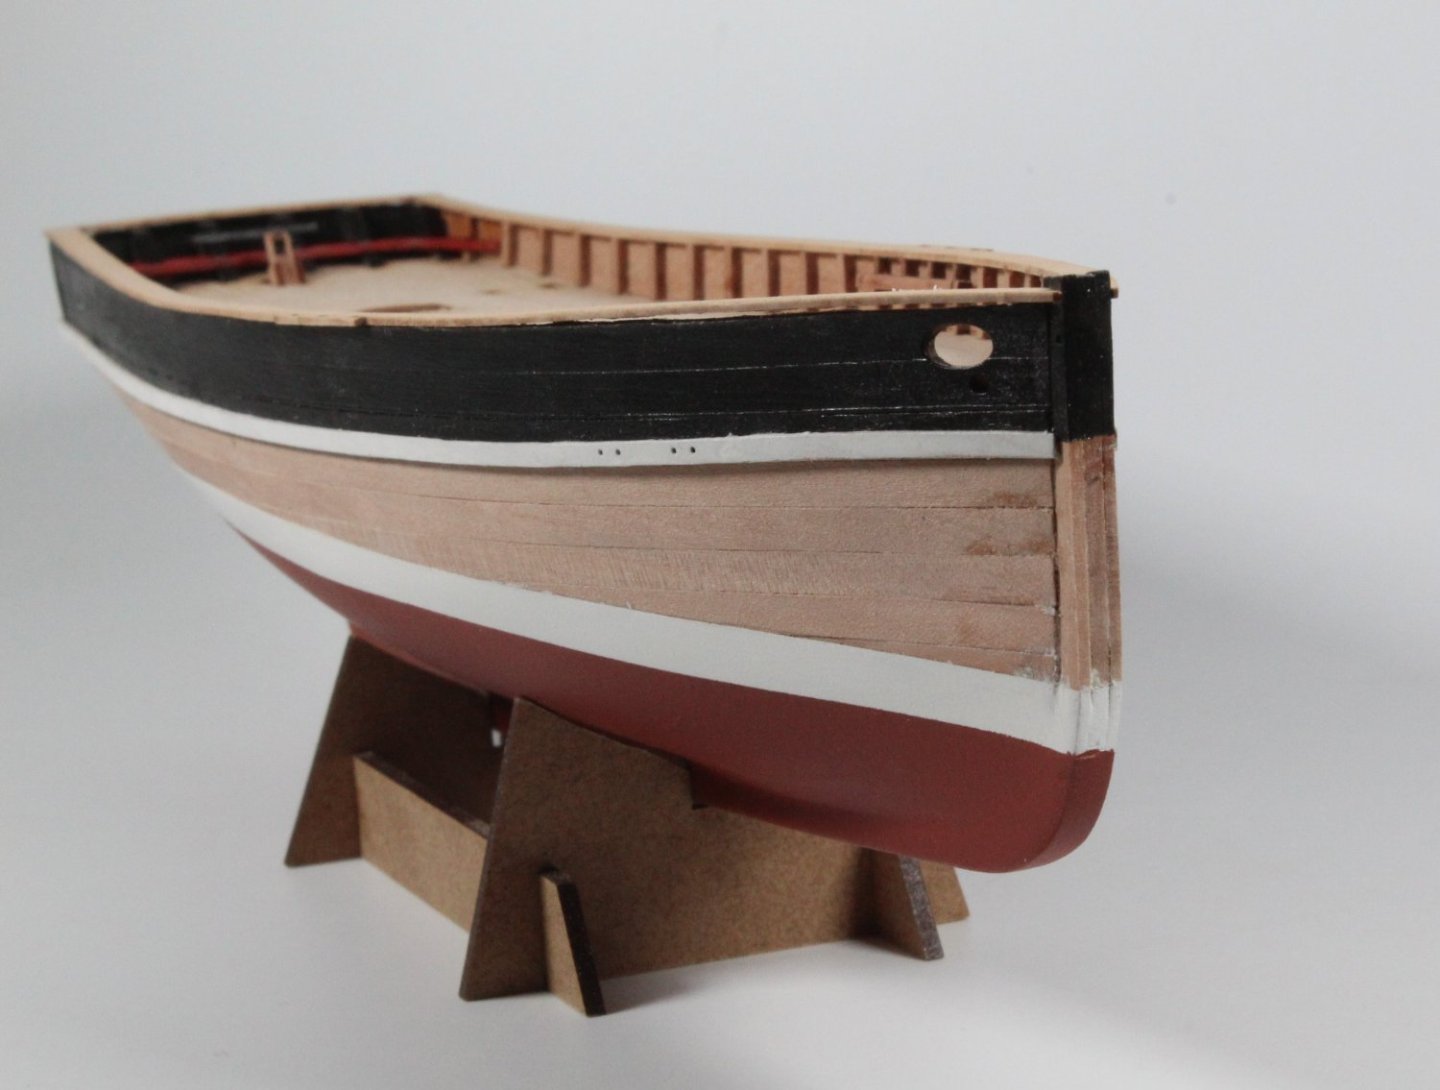
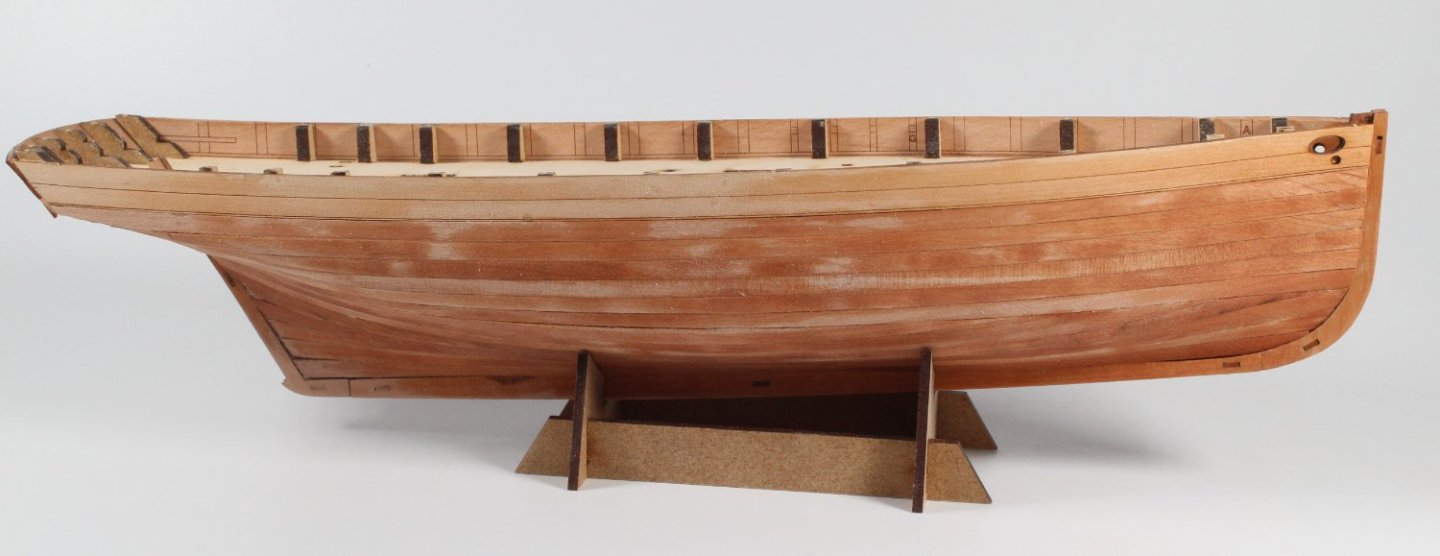
013 - Painting, Wales and Timberheads Time has been a bit limited in the shipyard due to grandparent baby sitting duties. However I have made a little bit of progress. All the timberheads have been fitted. The tops of the bulwarks have been sanded in readiness for fitting the gunwale and stern gunwale. I did add a small filler piece to the top of the right-hand bulwark. I then fitted the transit rail and stern cavil to the stern area. I opted to paint the transit rail red using Vallejo "Flat Red". The rest of the stern inner area was painted black, using Admiralty "Dull Black". Before applying the paint the surfaces were treated with a WOP base. With the area taped where the wale is to be fitted a base WOP coat was applied to the outside of the bulwark patterns. Once the WOP had dried I brushed on two coats of black paint, using the Admiralty "Dull Black". I then gave the painted bulwarks a very light sanding with a 1000-grit sanding stick before adding a final coat of black paint. After applying a WOP base to the two wale patterns they were painted white, using Admiralty "Matt White". These were very lightly sanded with a 1000-grit sanding stick after the second coat of paint before the final coat was brushed on. Once the paint had dried they were glued in place, using small dabs of ca gel along the length. The outer edge of the stern board was painted black and the stern frame surround was painted white. This was after they were coated with a WOP base. I have attached a few picture of the current build state. The next task will be to fit the gunwale patterns, but you will see that I have already drawn the waterline and applied strip of tape above the water line in readiness for painting, filling, smoothing, noting I will cover all the upper area of the boat with tape before I start this process.


- 48 replies
-
- 8
-
-
- Nisha
- Vanguard Models
- (and 3 more)
-
Thanks, I have painted the inner stern board and stern frames black. I will probably stick with the Vanguard colour scheme.
-
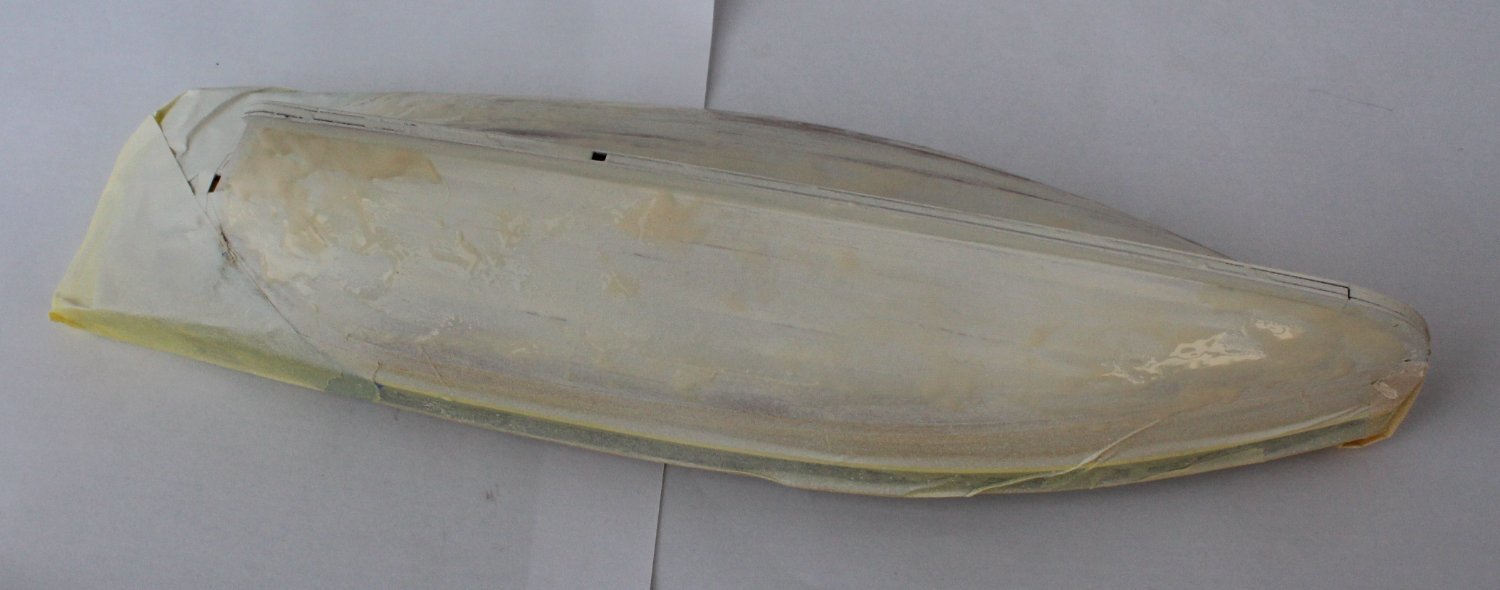
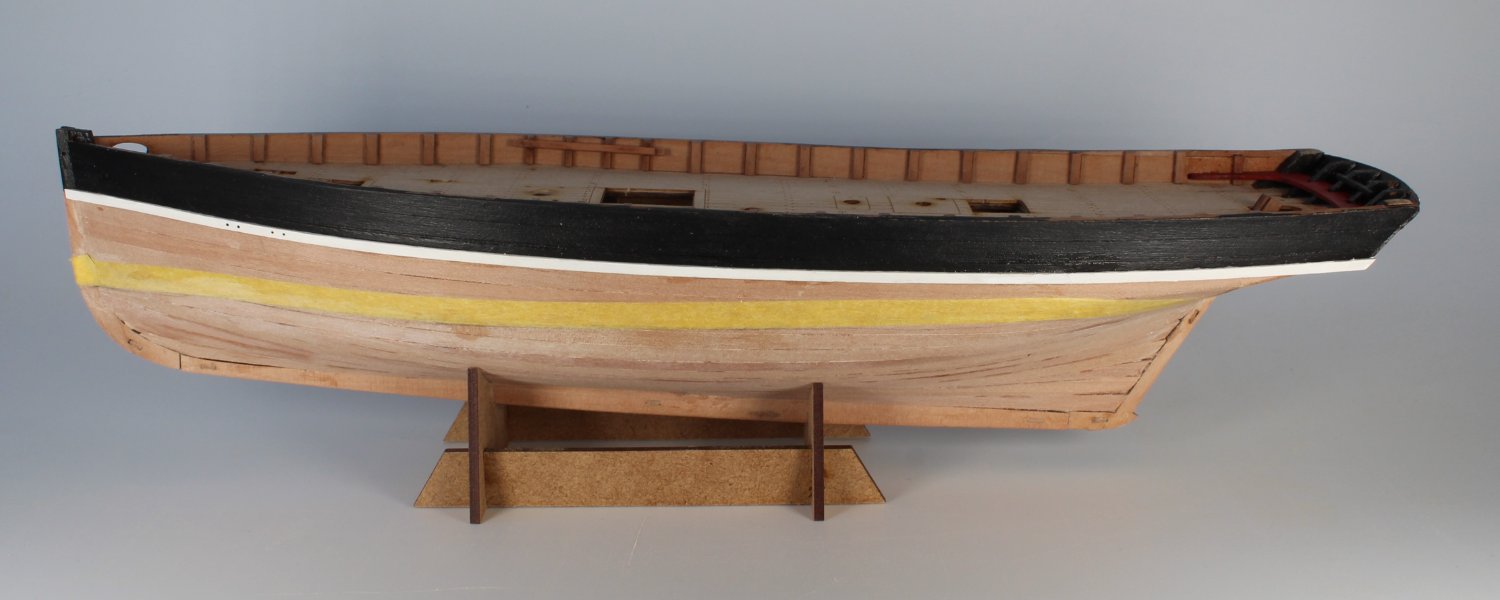
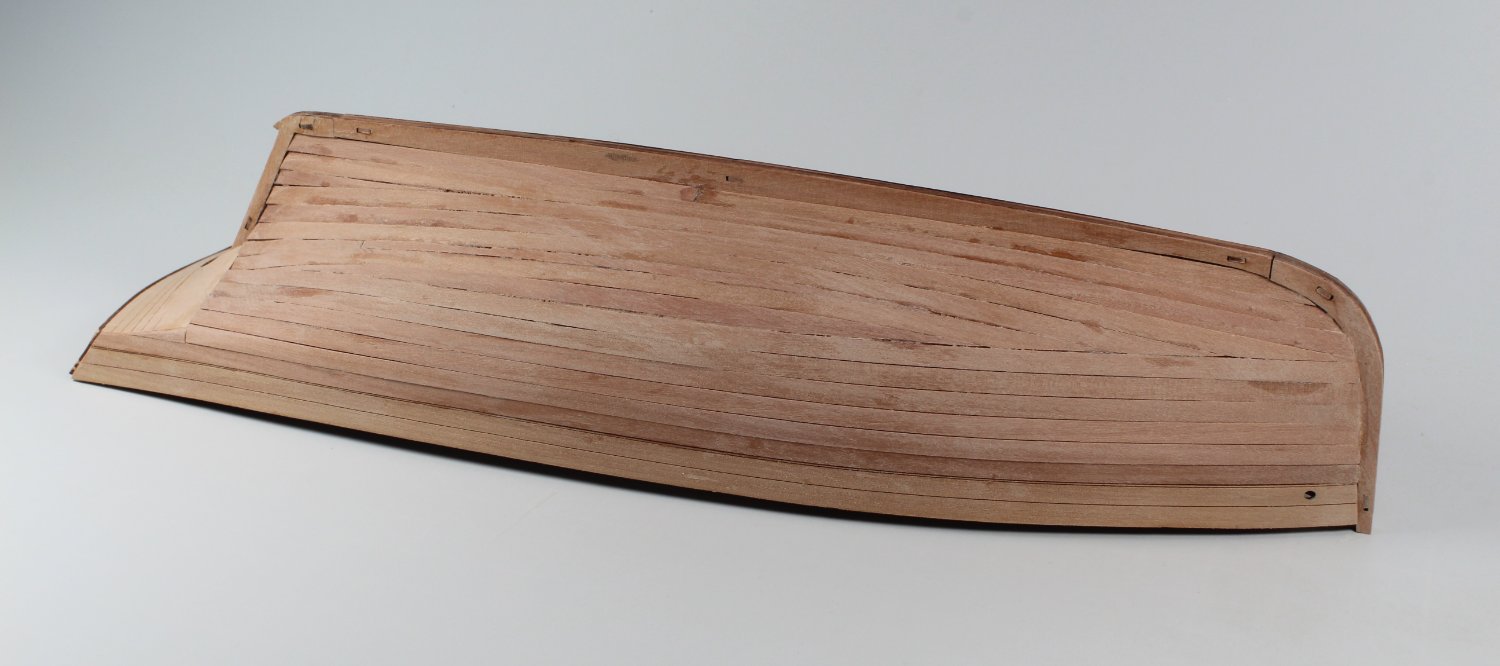
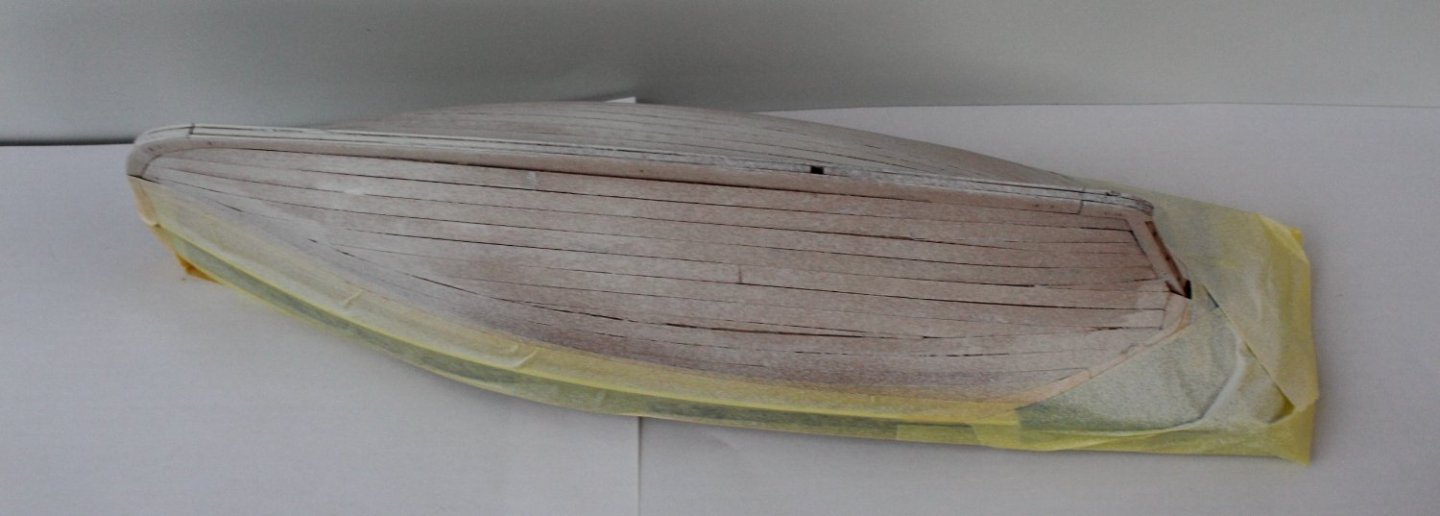
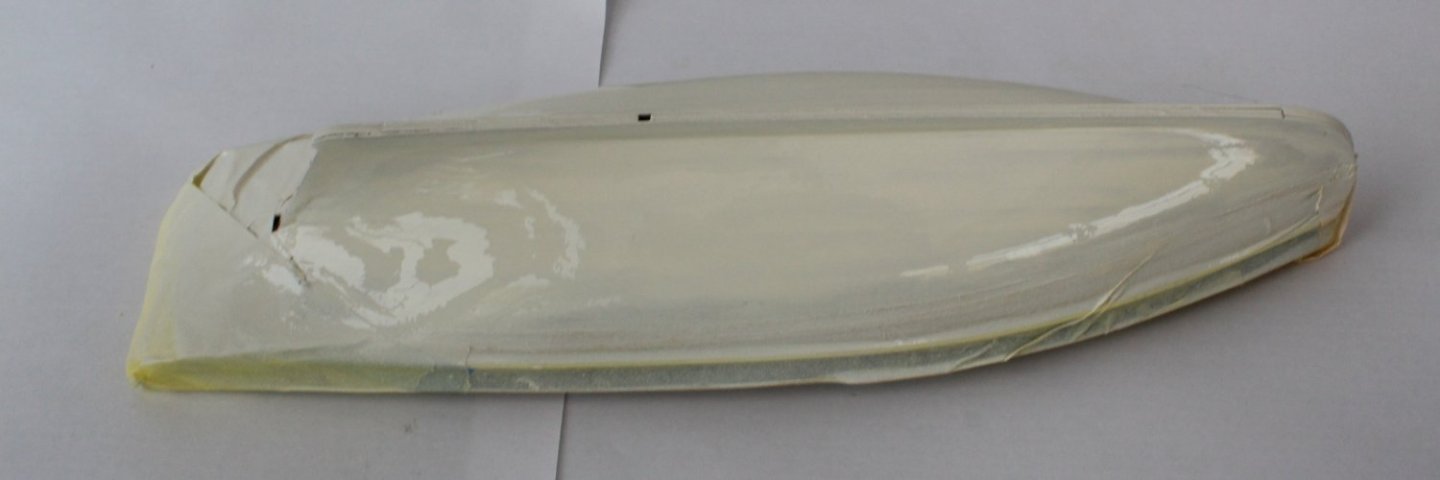
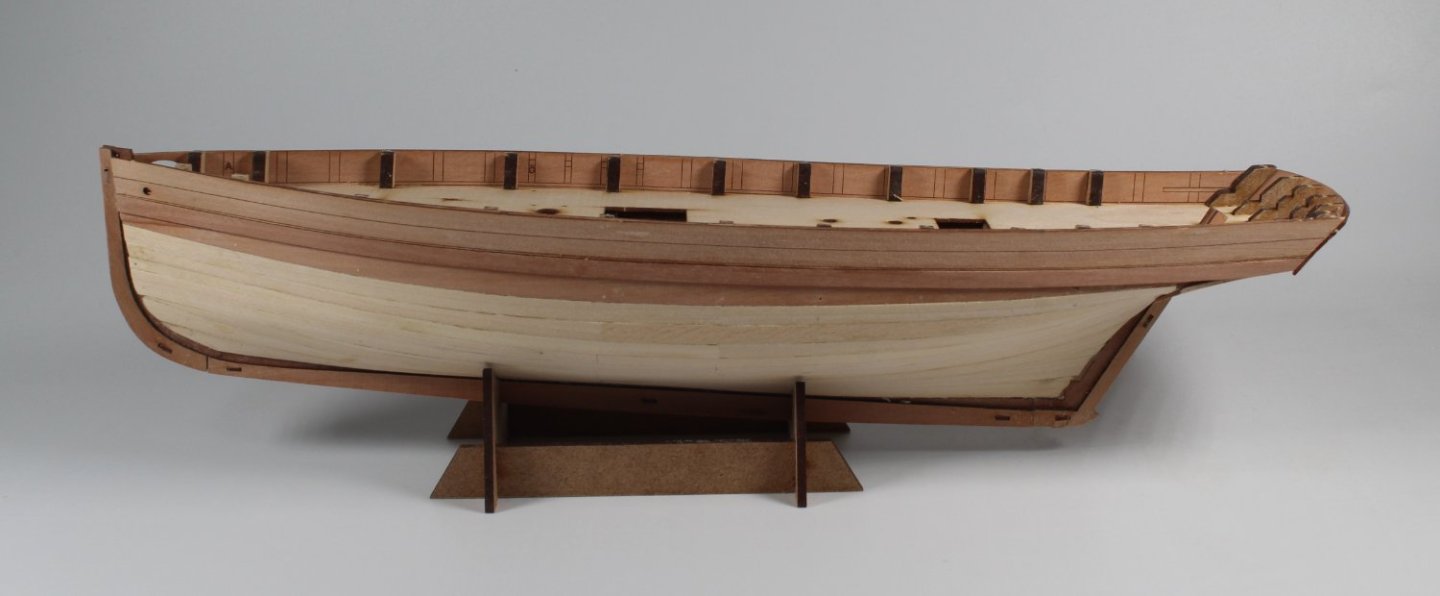
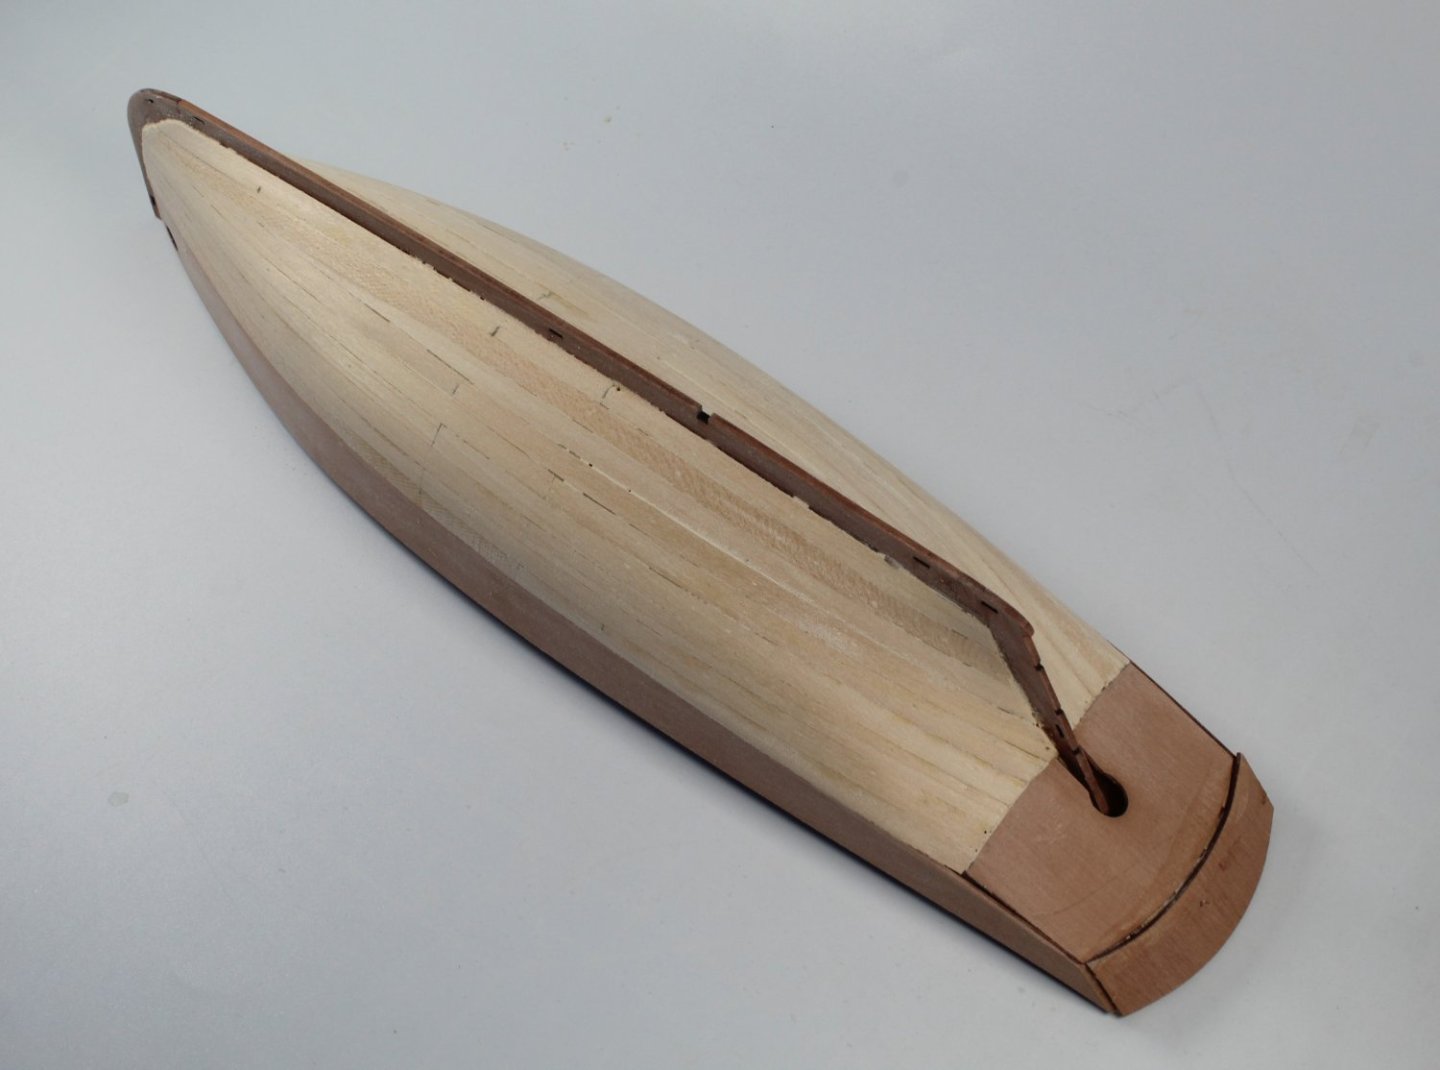
012 - Second Planking Completed I have now completed the second planking layer. Having trialed the lateral edge bending method I found it much easier to get some better fitting planks without the dreaded clinker effect. For the most part I am very happy with the end result noting there are one or two areas which I could have done better. I have also sanded the hull smooth to the touch. I started with 120-grit sandpaper, then 220-grit and finally 400-grit. I noted some of the plank areas became level when I bit of pressure was applied. I applied a bit a ca get to the slightly raised edge and then sanded the excess ca gel away whilst apply downward pressure. This seemed to work very well. After brushing the sawdust from the hull with a dry brush I then used a damp brush to complete the process. The planks are still slightly damp in the attached photos. The next task will be to remove the bulkhead ears and to then sand away any remnants smooth before fitting the laser etched deck. As can be seen in the final photo I will need to use a bit of filler around stern post area, below the waterline. Thankfully my bad workmanship will be hidden by the paint.


- 48 replies
-
- 7
-
-
- Nisha
- Vanguard Models
- (and 3 more)
-
Congratulations on a very well built model. Something to be very proud of.
- 38 replies
-
- 5
-
-
- Lady Eleanor
- Vanguard Models
- (and 1 more)
-
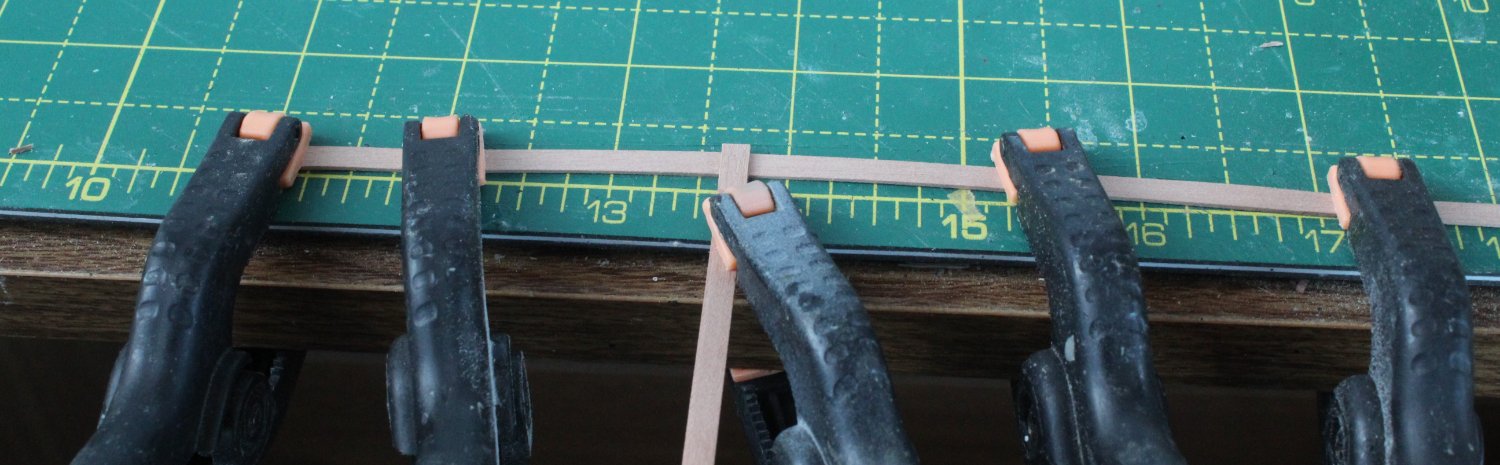
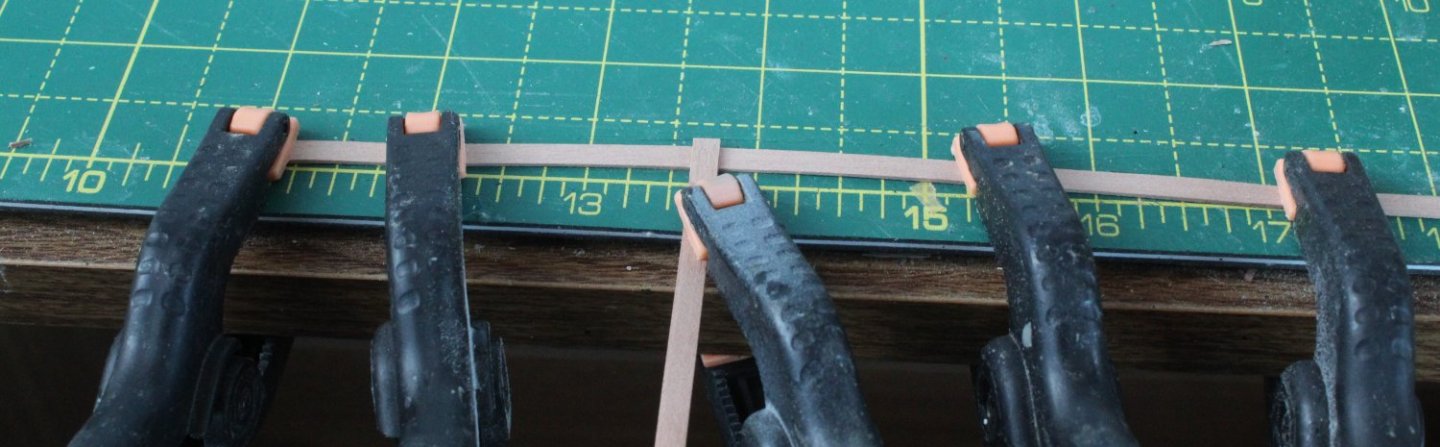
011 - Second Planking LHS I have now completed the second planking layer on the left-hand side. I was really happy with how the first few planks were fitted. I then seemed to find one plank really difficult to fit. So I decided to experiment with the lateral edge bending method to see if that would help. A plank was held either end of the required bend with clamps. I then glued two small lengths of some planking material off-cuts to make a simple jig, the top off-cut overhung the bottom so when in place it would keep the plank to be bent flat. The jig also allowed me to apply a required bend to the plank. With the plank held in place I brushed on some water and then left it dry overnight. I could have applied some heat to sped up the process (with hair dryer or iron). However when the plank was released from the clamps it had retained the bend. I was then very pleased that the laterally bent plank was a perfect fit. I have attached some pictures of the completed left-hand side. There will be a little it of work required to sand, fill and smooth the hull below the water line .before the painting process. I still struggle to use super glue (gel) when adding these planks. I start by adding a few drops along the first 50mm (approx) of the plank and then I place it on the hull. Once I am happy the glue is holding the plank in place I add more drops, this time to the hull, under the plank, working in sections. I use a broken micro drill end to add the glue to the hull. Any excess glue is wiped away.


- 48 replies
-
- 7
-
-
- Nisha
- Vanguard Models
- (and 3 more)
-
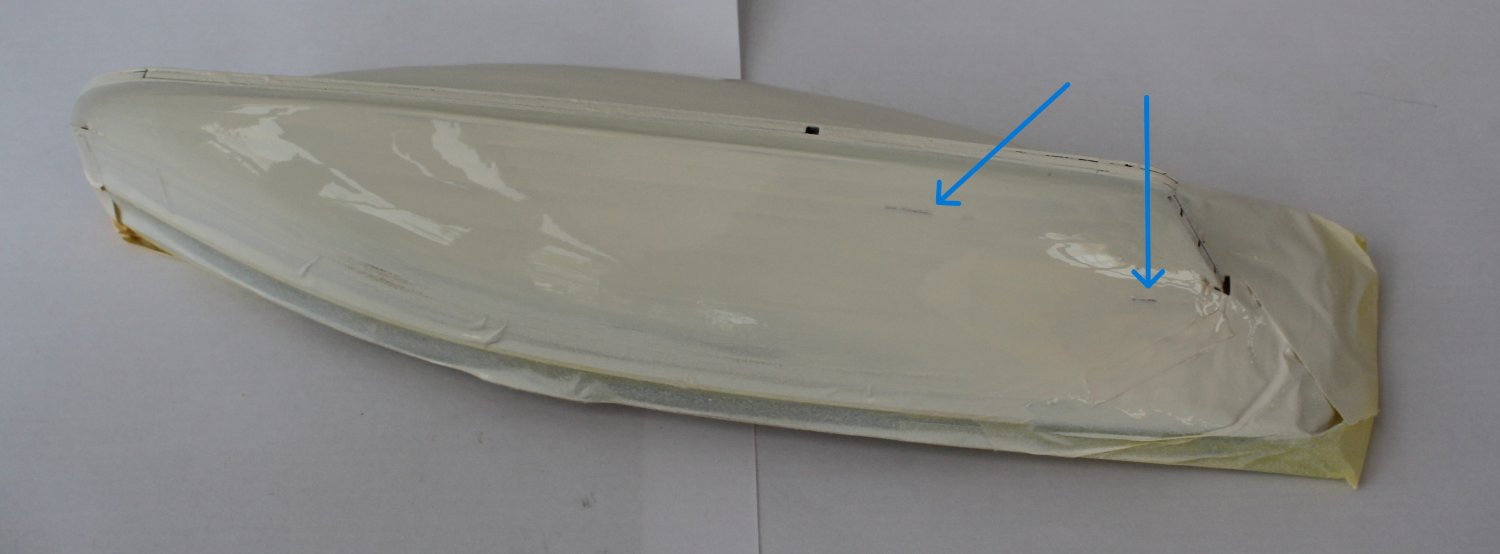
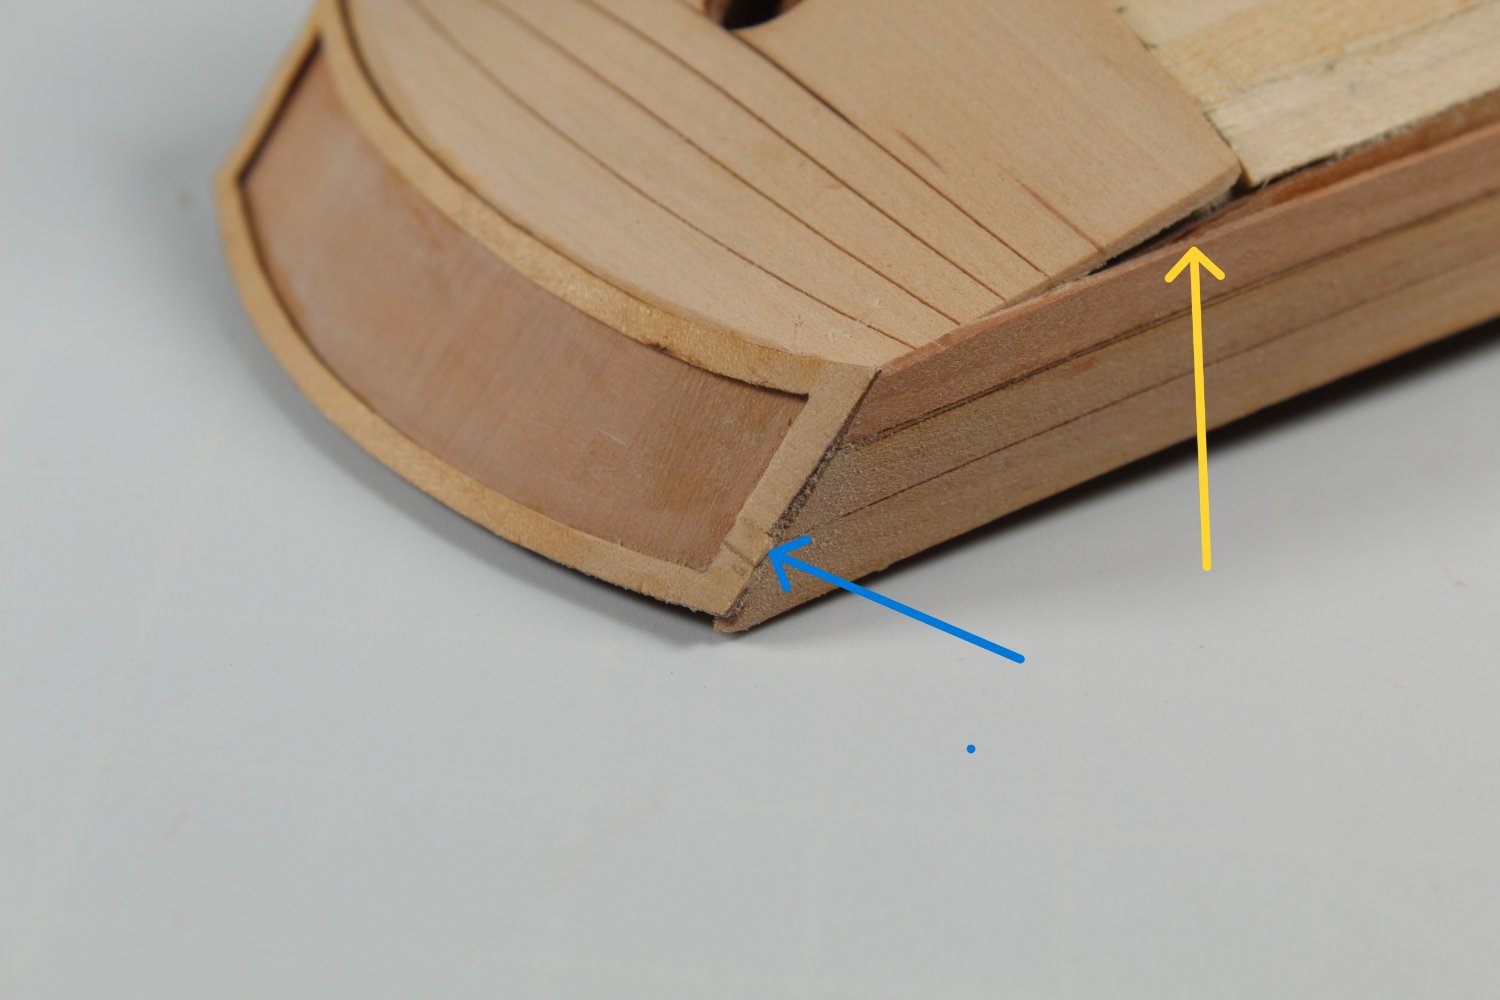
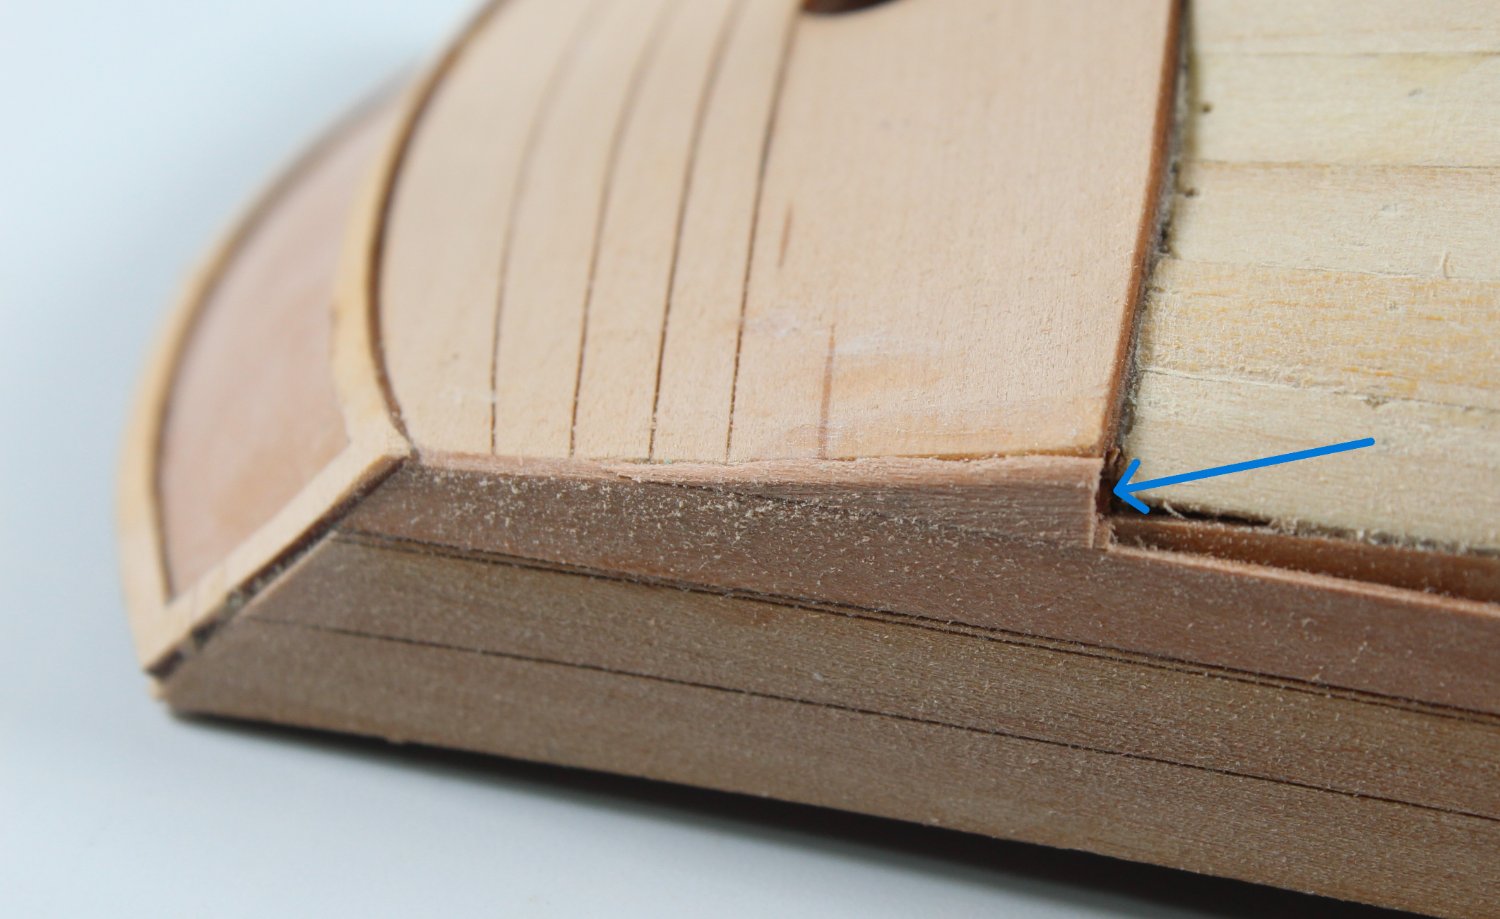
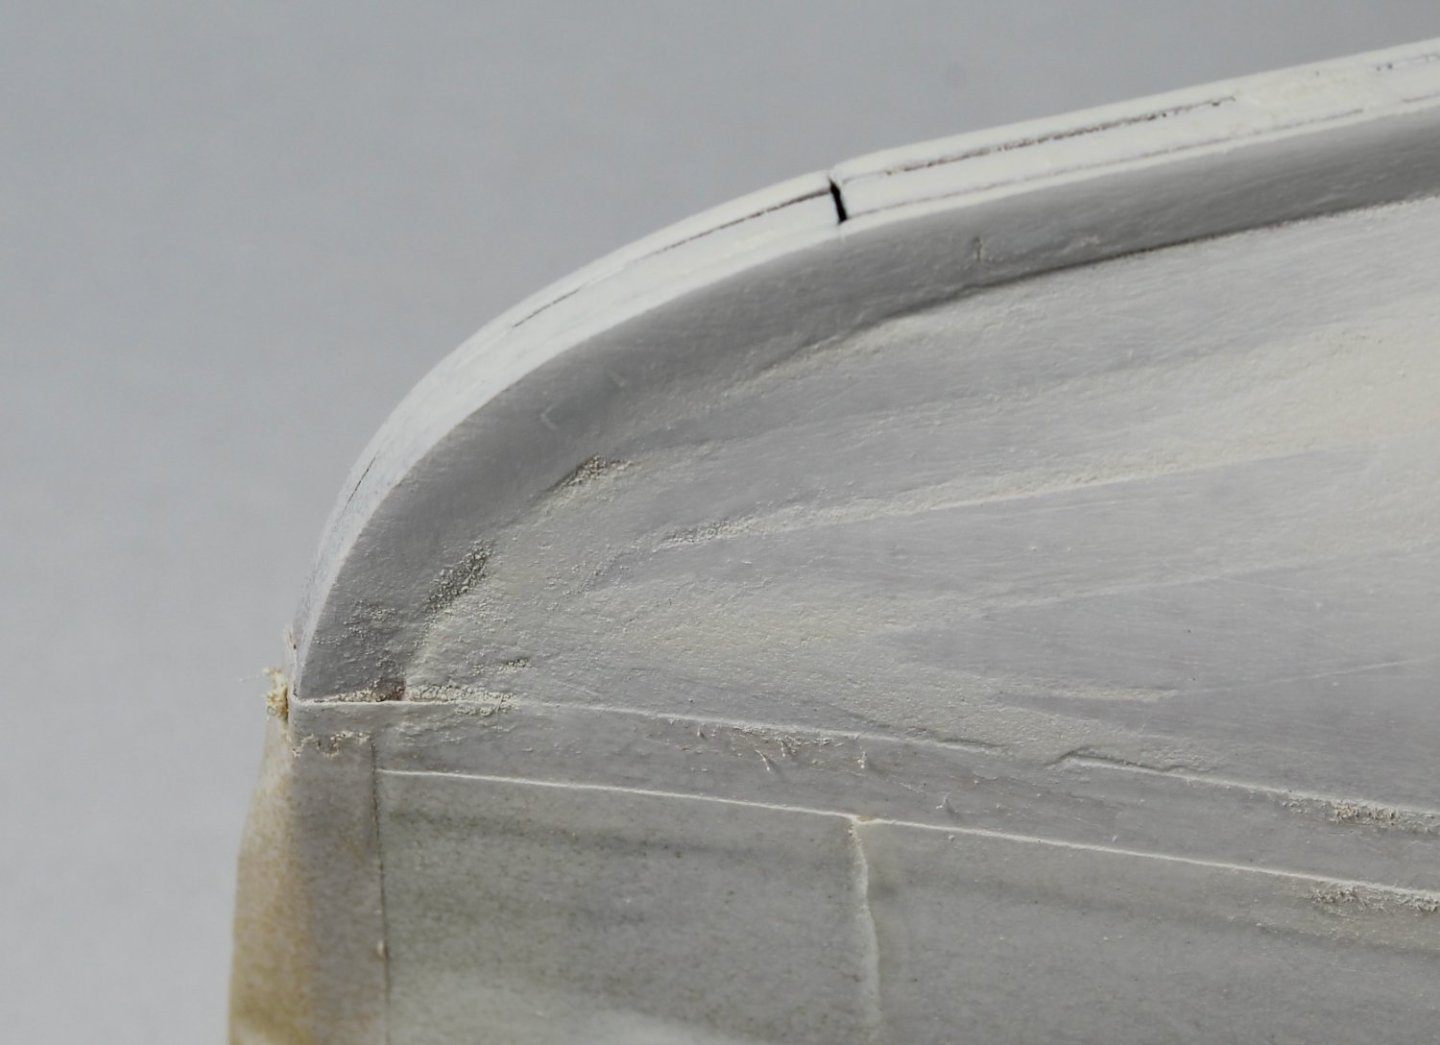
010 - Adding the outer patterns and start of second planking I have now added the outer patterns for the stem, keel and stern post. I have also added the outer bulwark patterns and the first plank underneath the bulwarks. I then added the upper and lower outer stern counter patterns. With reference to the next photo you will note that I did manage to break the upper outer stern board pattern, indicated by the blue arrow. I will need to tidy up the broken joint area before I apply a coat or two of white paint. There is also a little plank filler required as indicated by yellow arrow. With a little bit of work the filler piece was added, as indicated by the yellow arrow in the following photo. I have also tidied up the joint where I had broken upper stern board pattern.


- 48 replies
-
- 7
-
-
- Nisha
- Vanguard Models
- (and 3 more)
-
I would simply replace the damaged shroud pair with a new shroud pair and strip away the ratlines. In the past I have undone completed ratlines without any problems. Good luck with your repairs whichever way you chose to go.
-
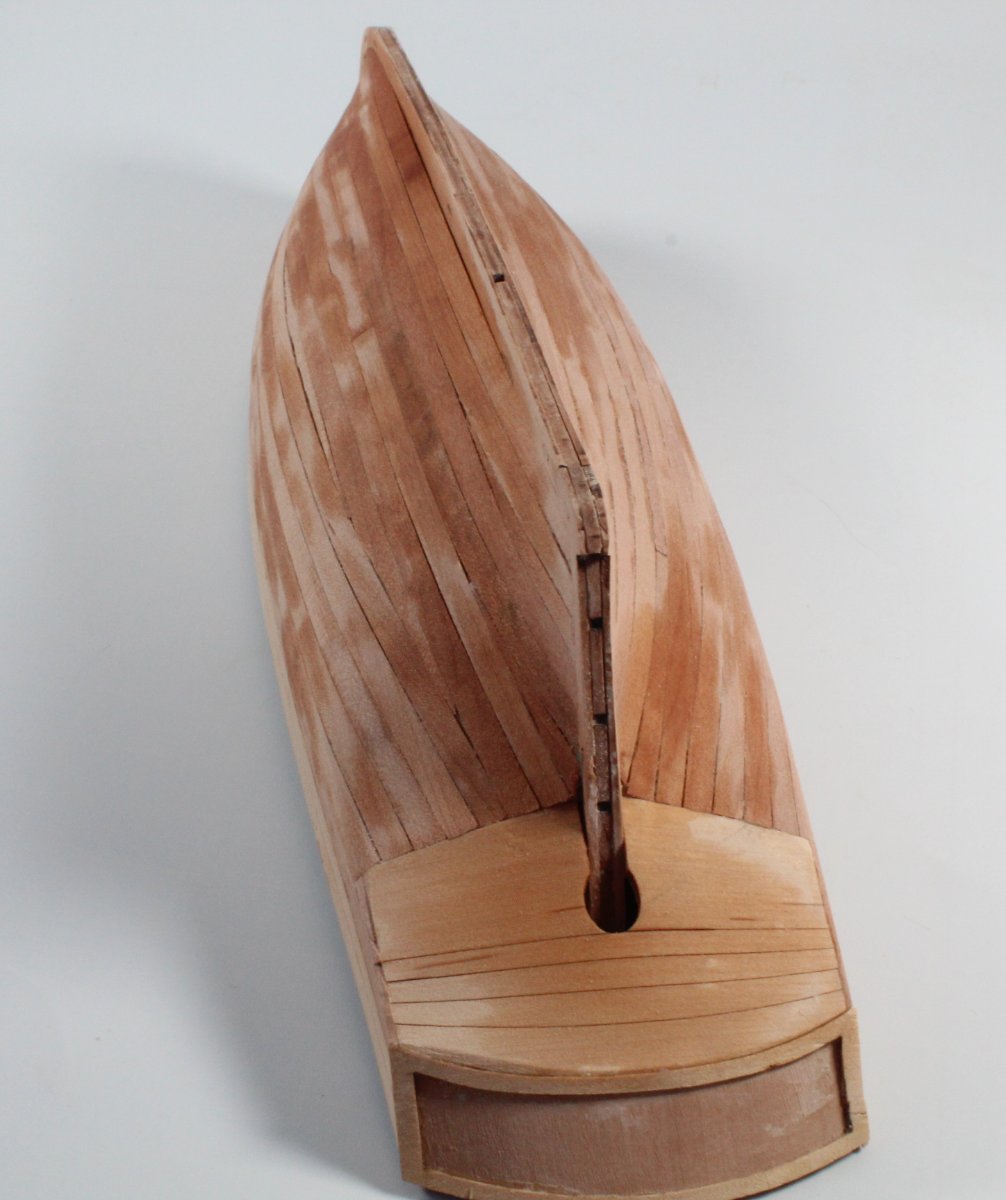
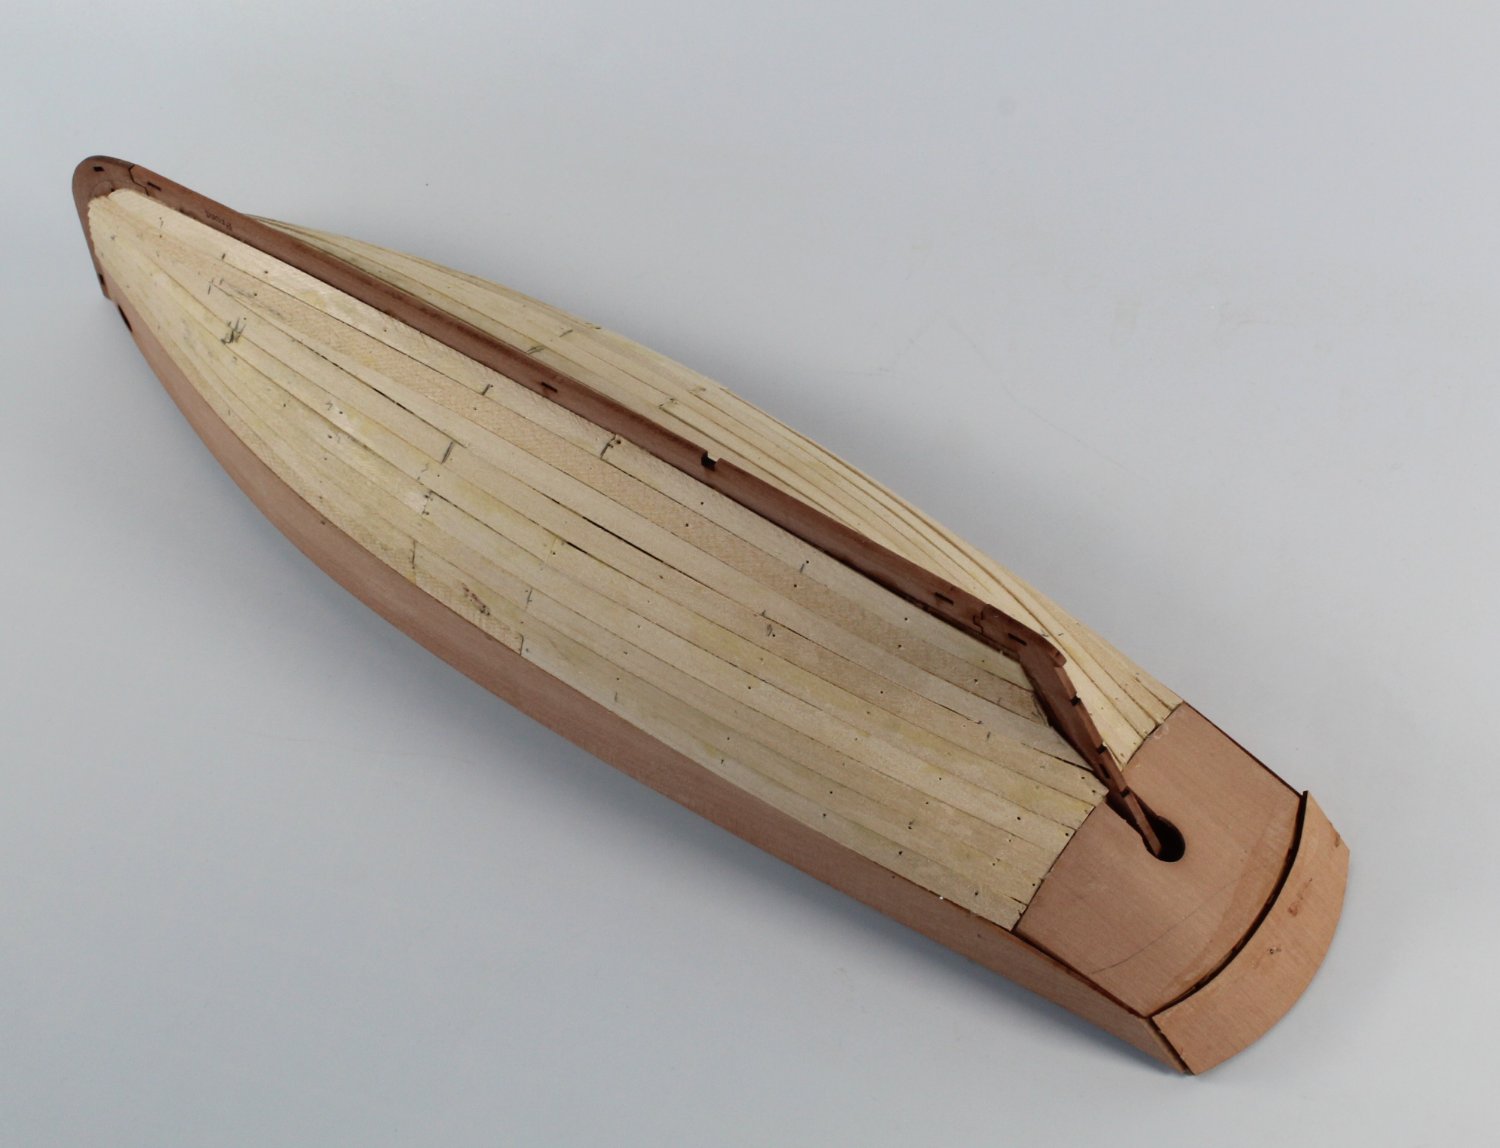
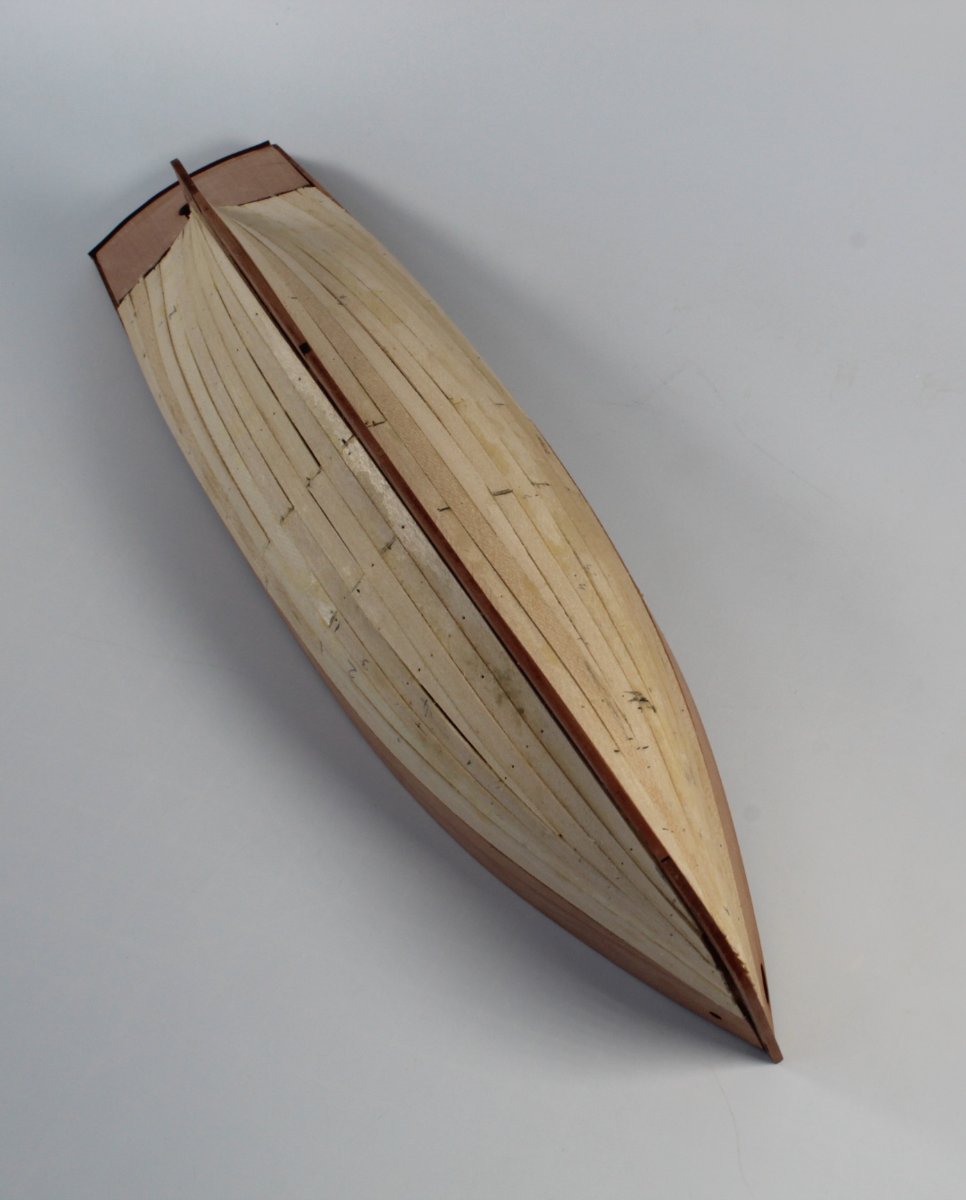
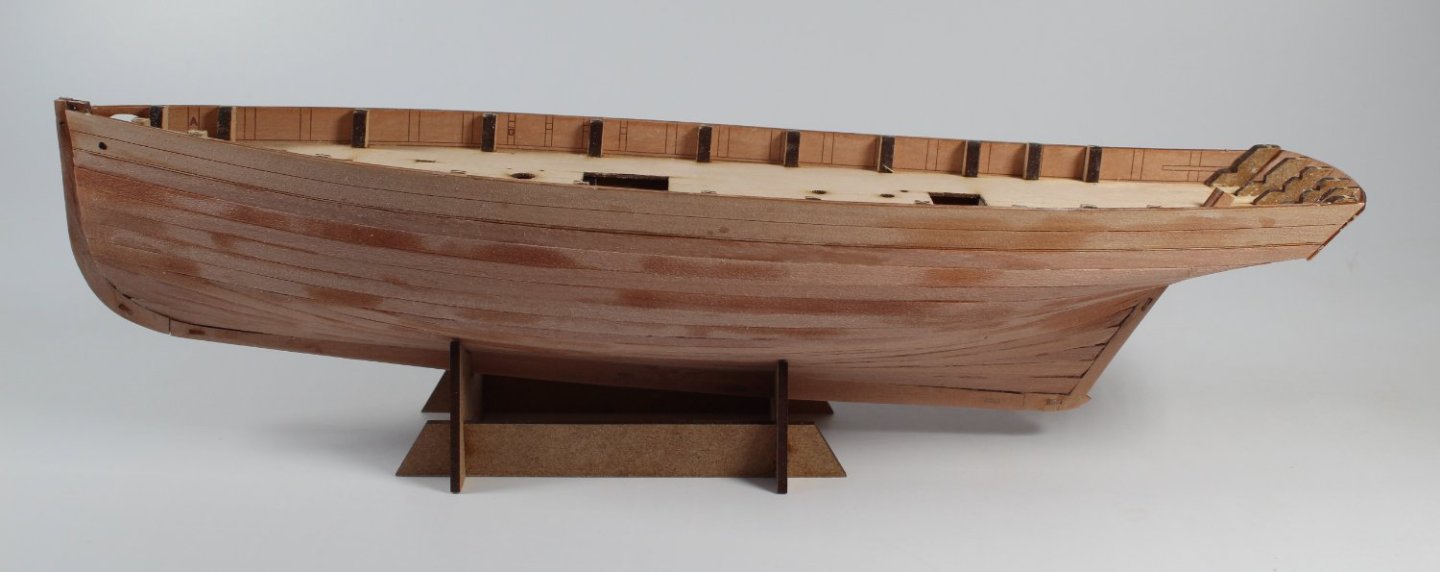
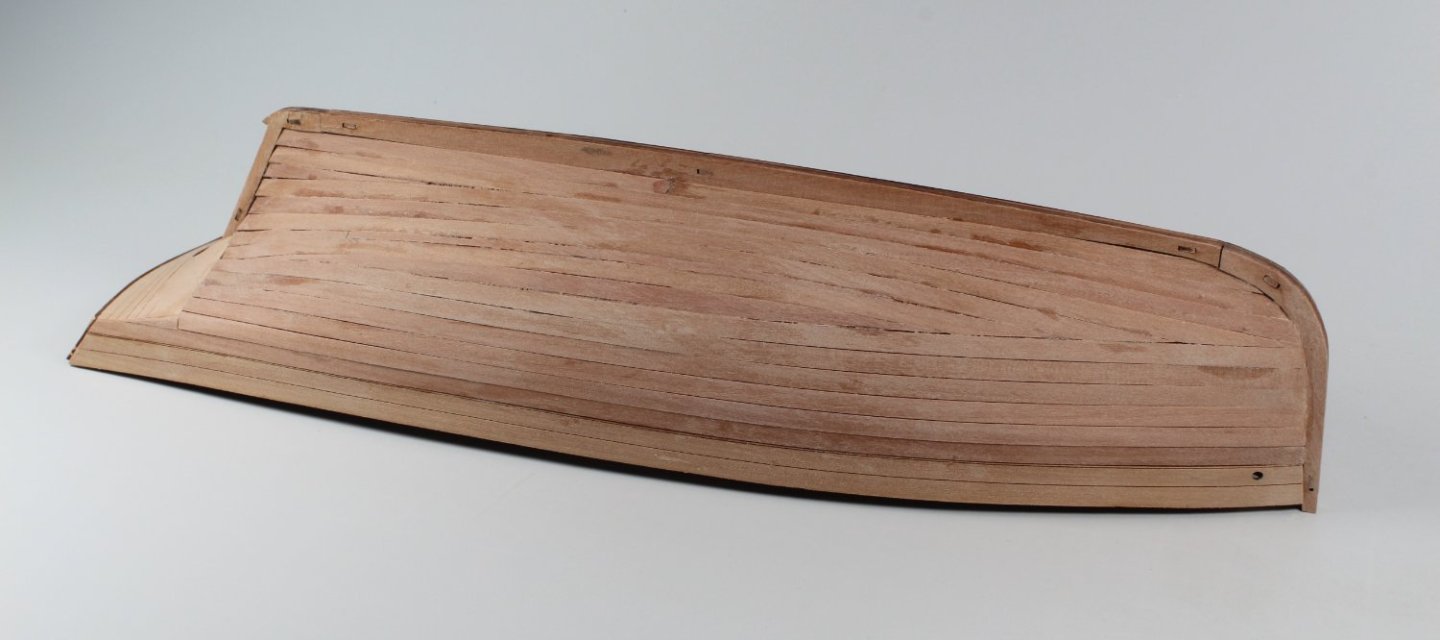
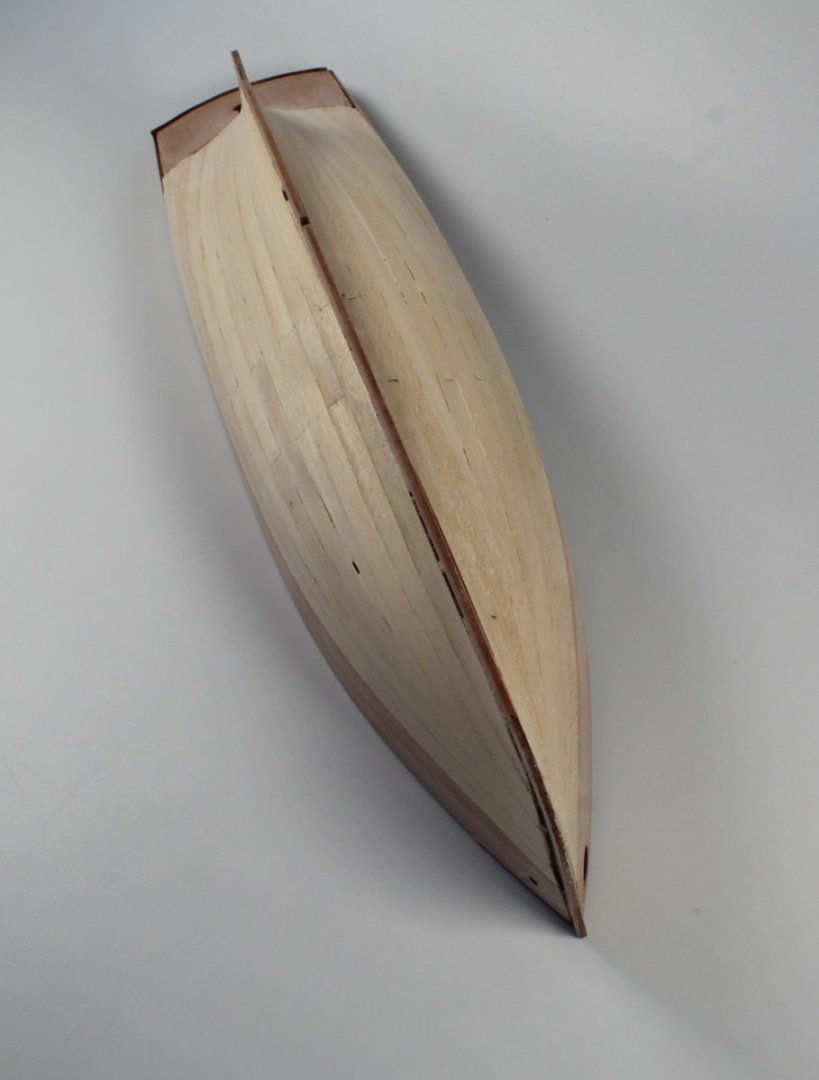
009 - 1st Planking Completed Over the last two days, with limited time in the shipyard, I have managed to complete the first planking layer. I did not make such a good job on the LHS planking compared with the RHS but I did make a reasonable job of it. I did experiment with fitting a laterally bent plank. The photo below shows the plank held in the place as the lateral bend is applied. The next few photos are a selection of the completed first planking, noting I have also fitted the stern board. I have made a start sanding the hull smooth. I started with 120-grit sandpaper and then used 220- grit and finished off with 400-grit sandpaper. The hull does feel smooth to the touch and is ready for the second planking. I have attached a few more photos of the sanded first planked hull.


- 48 replies
-
- 7
-
-
- Nisha
- Vanguard Models
- (and 3 more)
-
Many thanks Kevin. You're doing a great job on the Lady Eleanor. Nisha is a nice easy build (so far). I am really looking forward to the release of the Indy which will be a mammoth undertaking. It took me 11 months to build the Sphinx but I would expect Indy will be 2 to 3 year build project.
- 48 replies
-
- 1
-
-
- Nisha
- Vanguard Models
- (and 3 more)
-
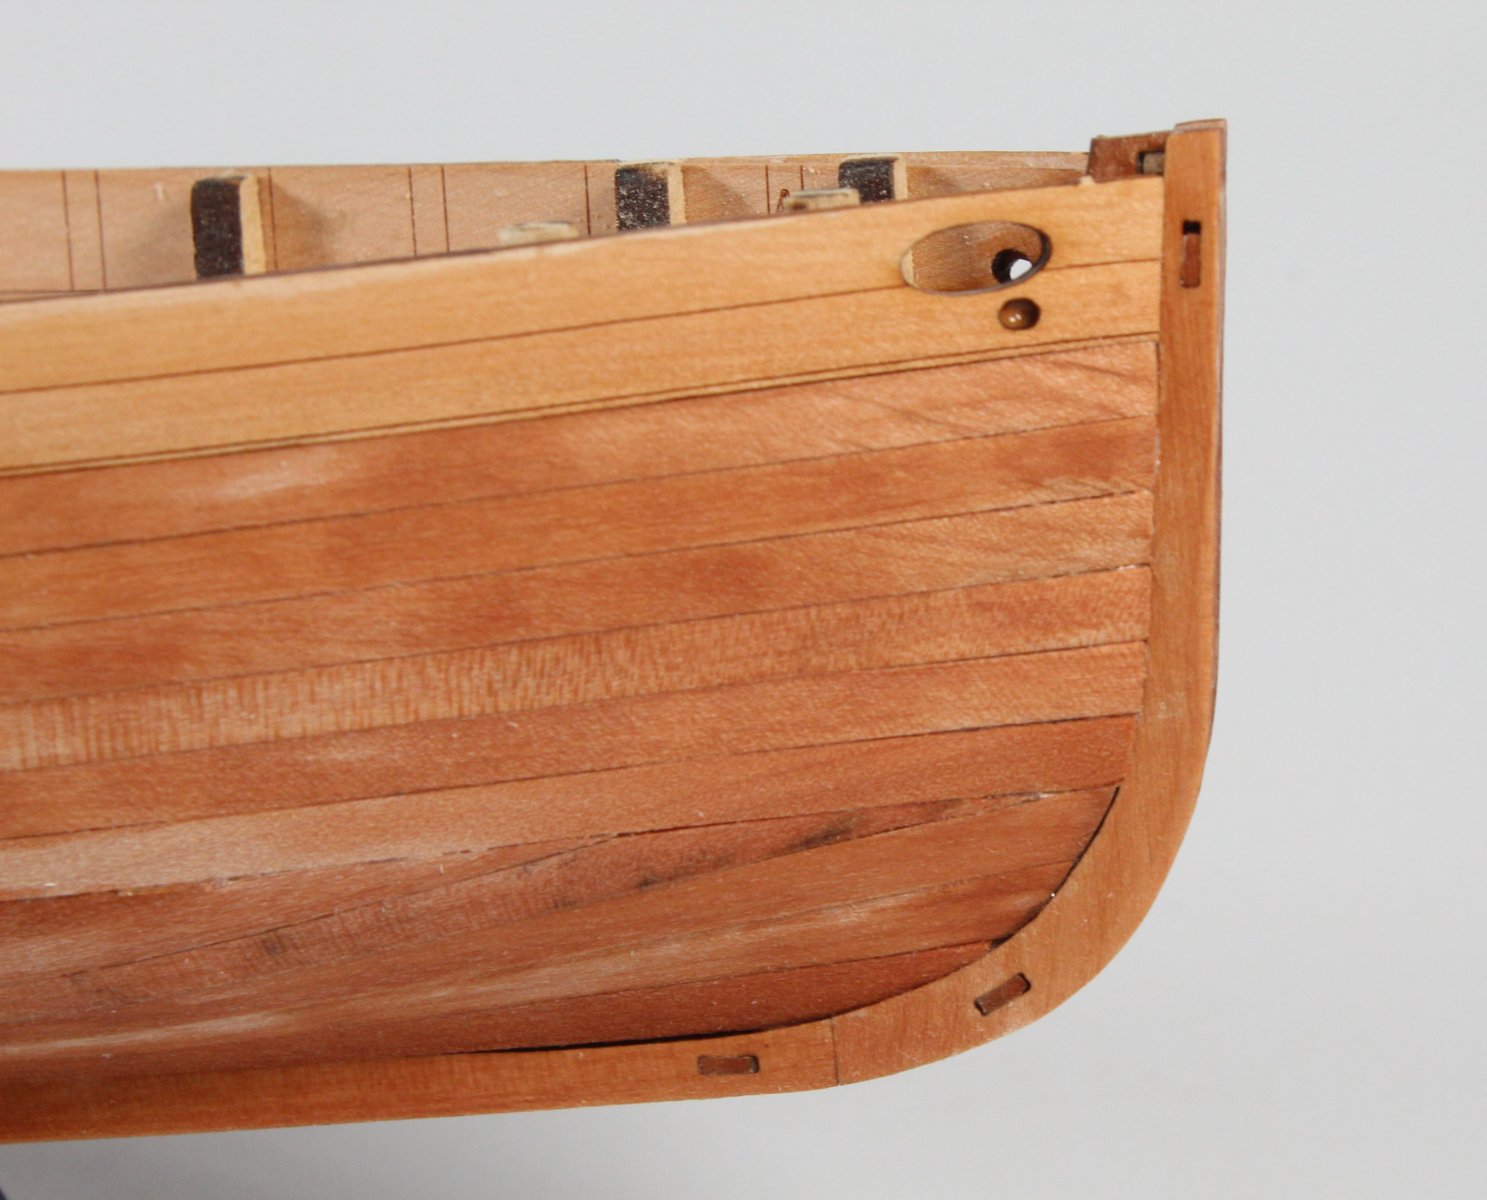
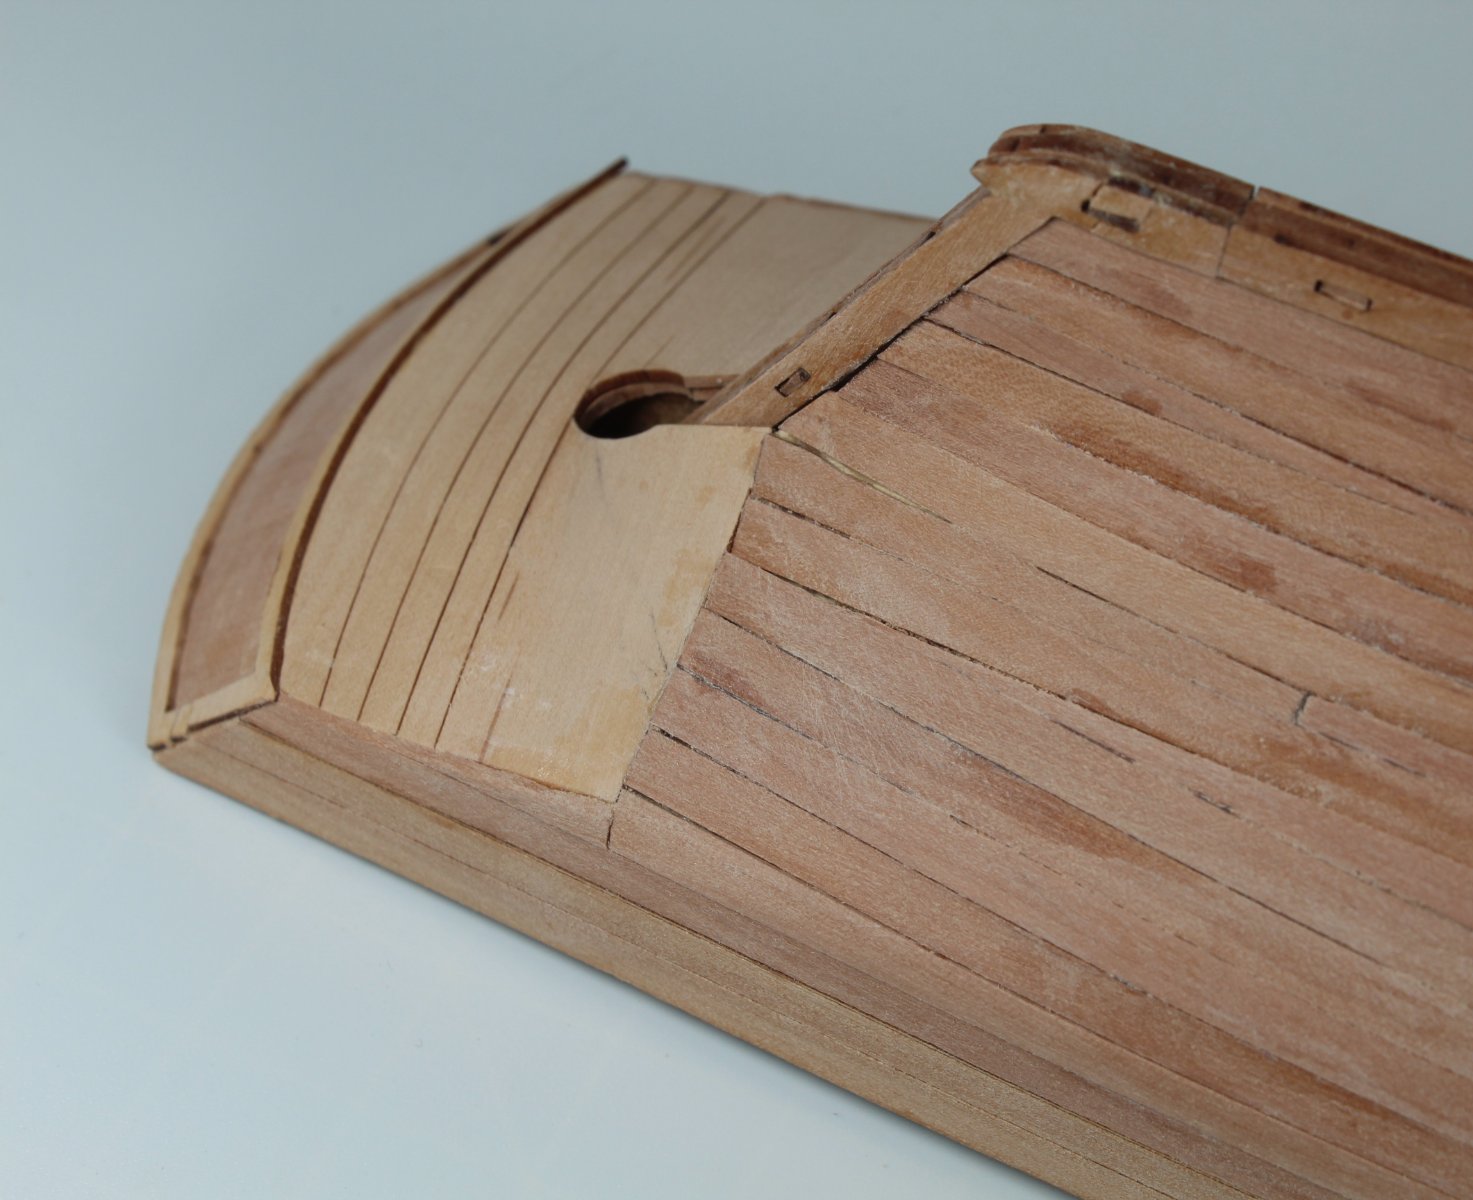
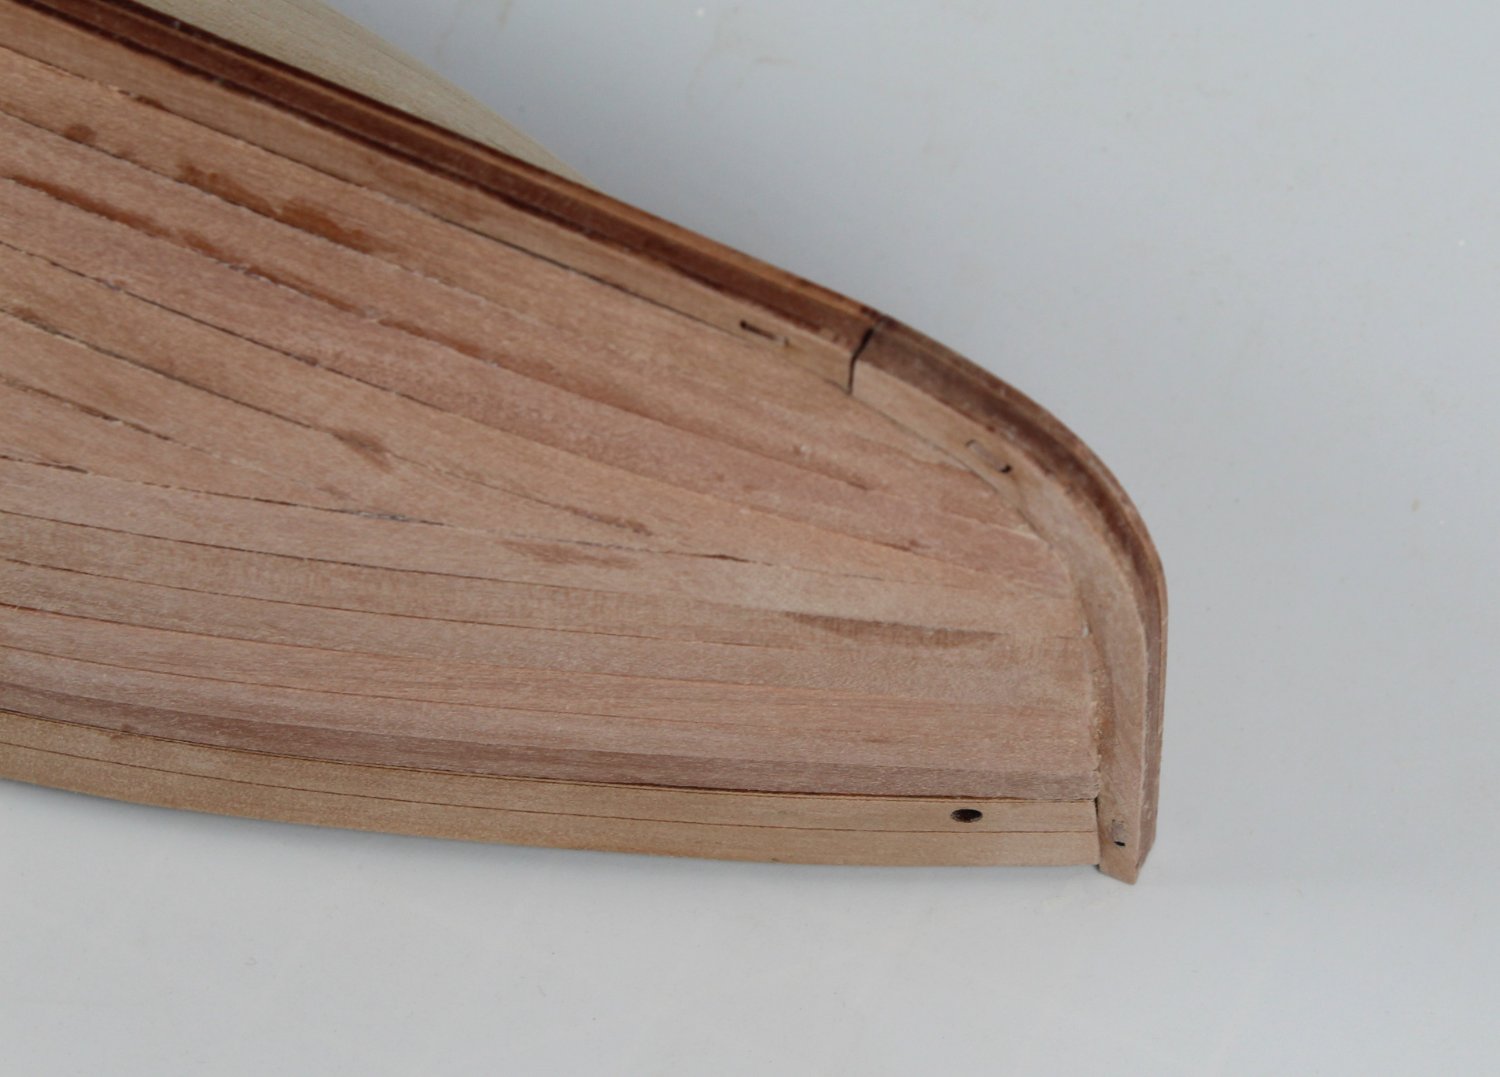
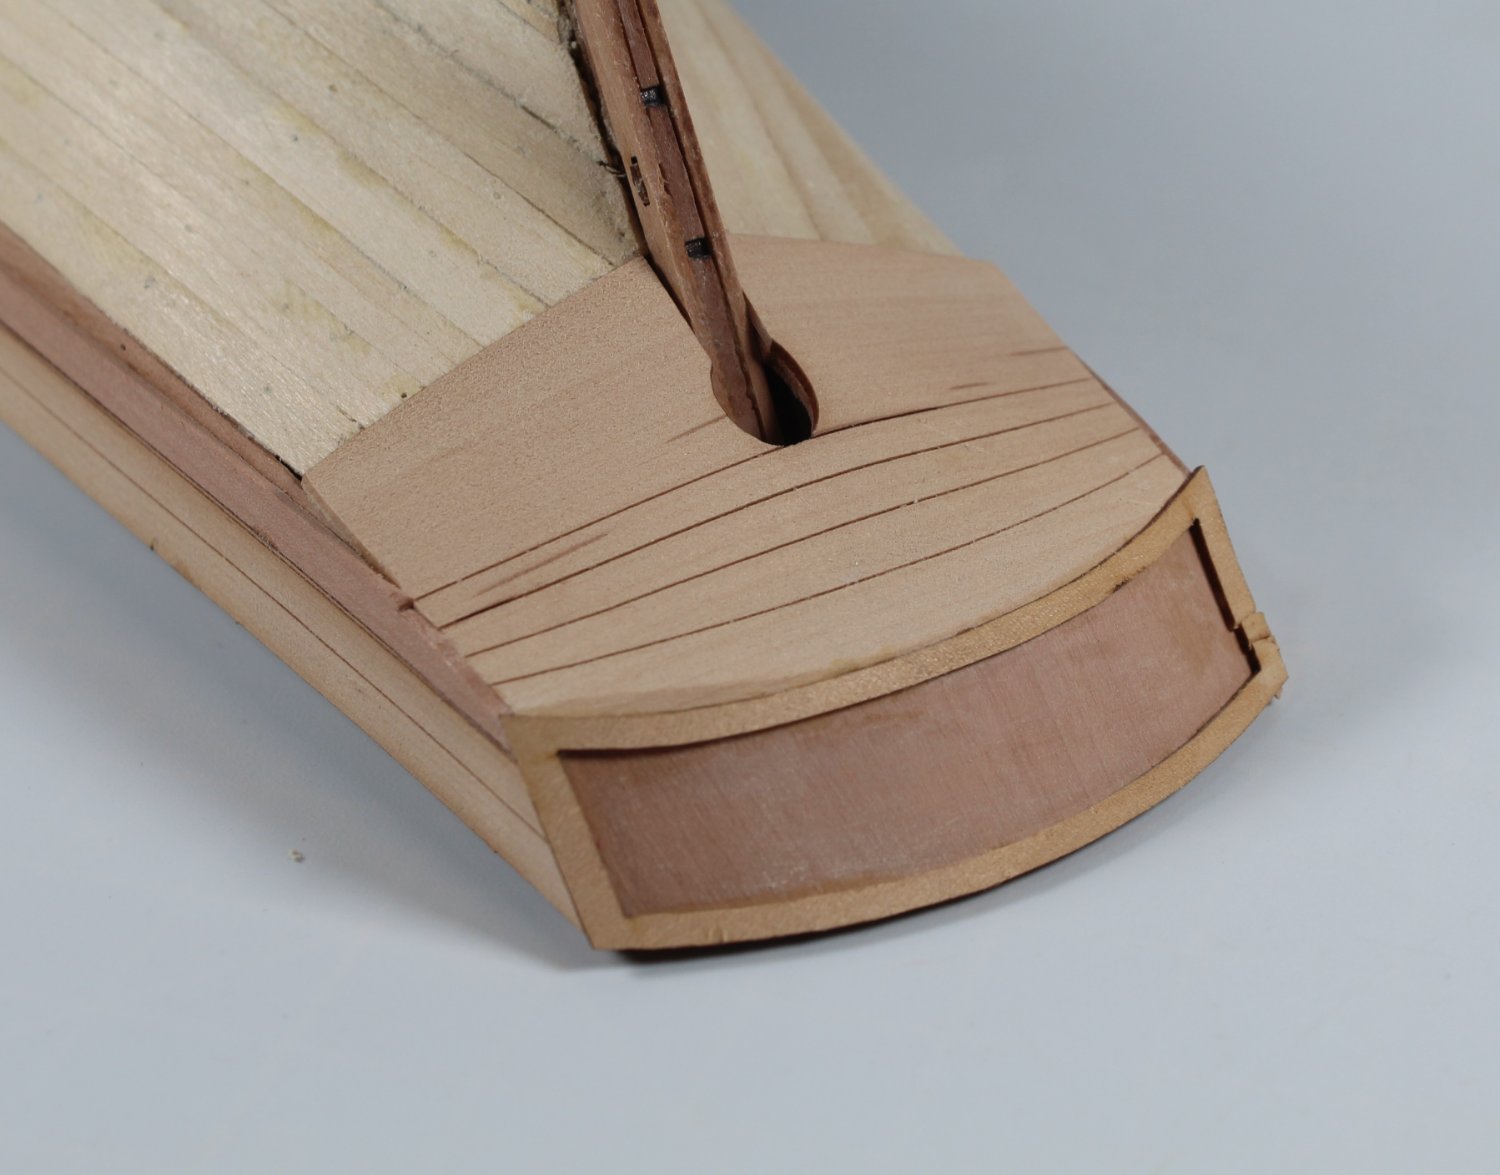
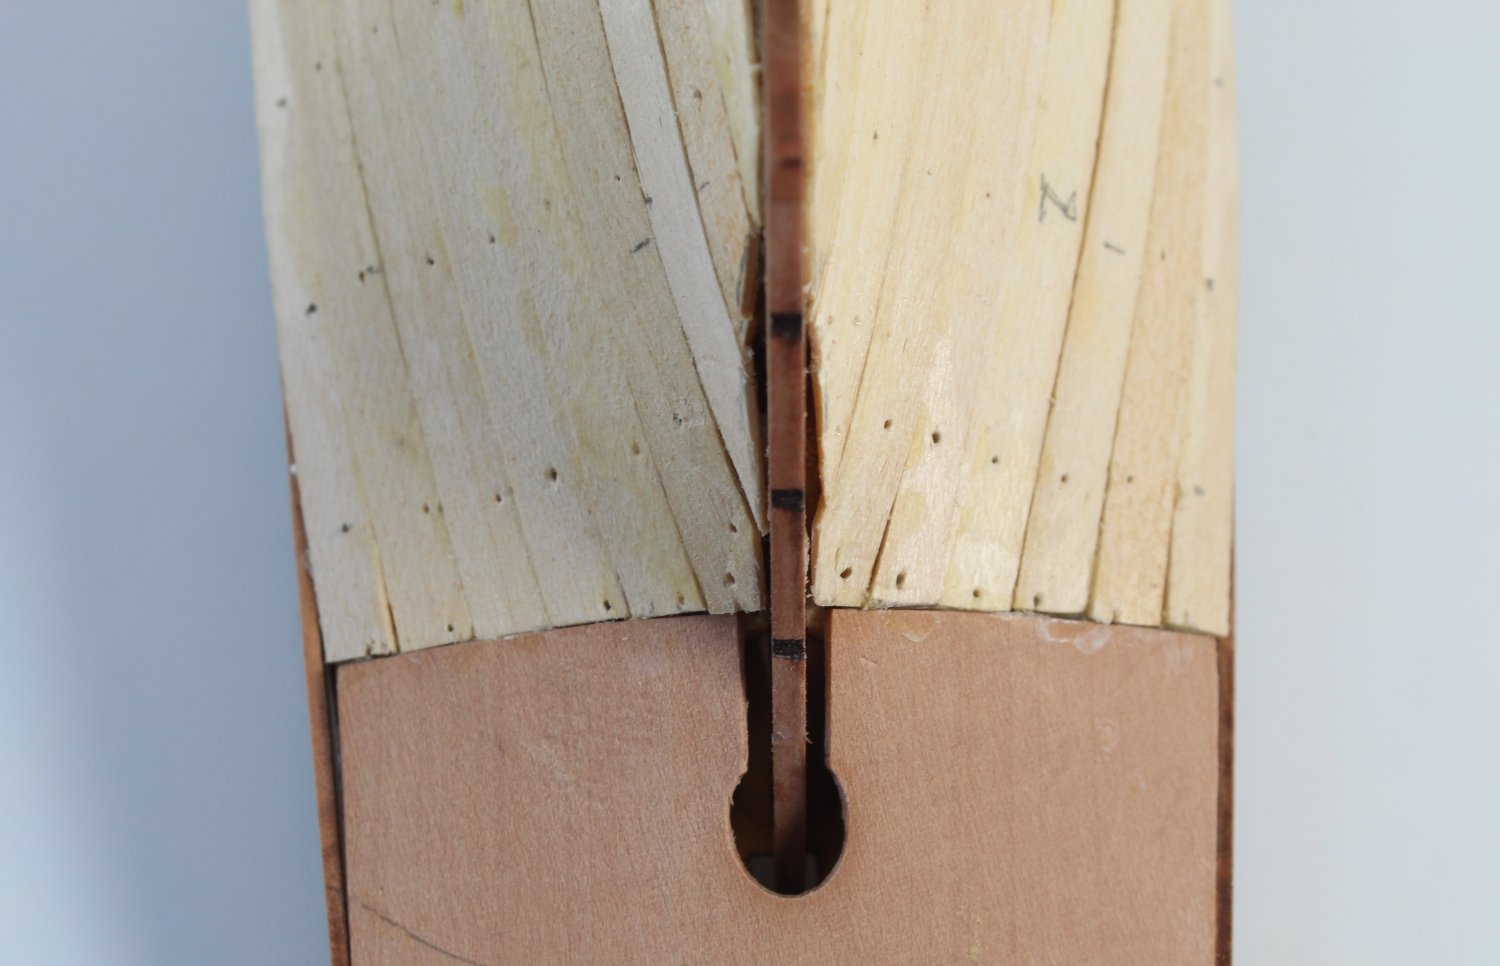
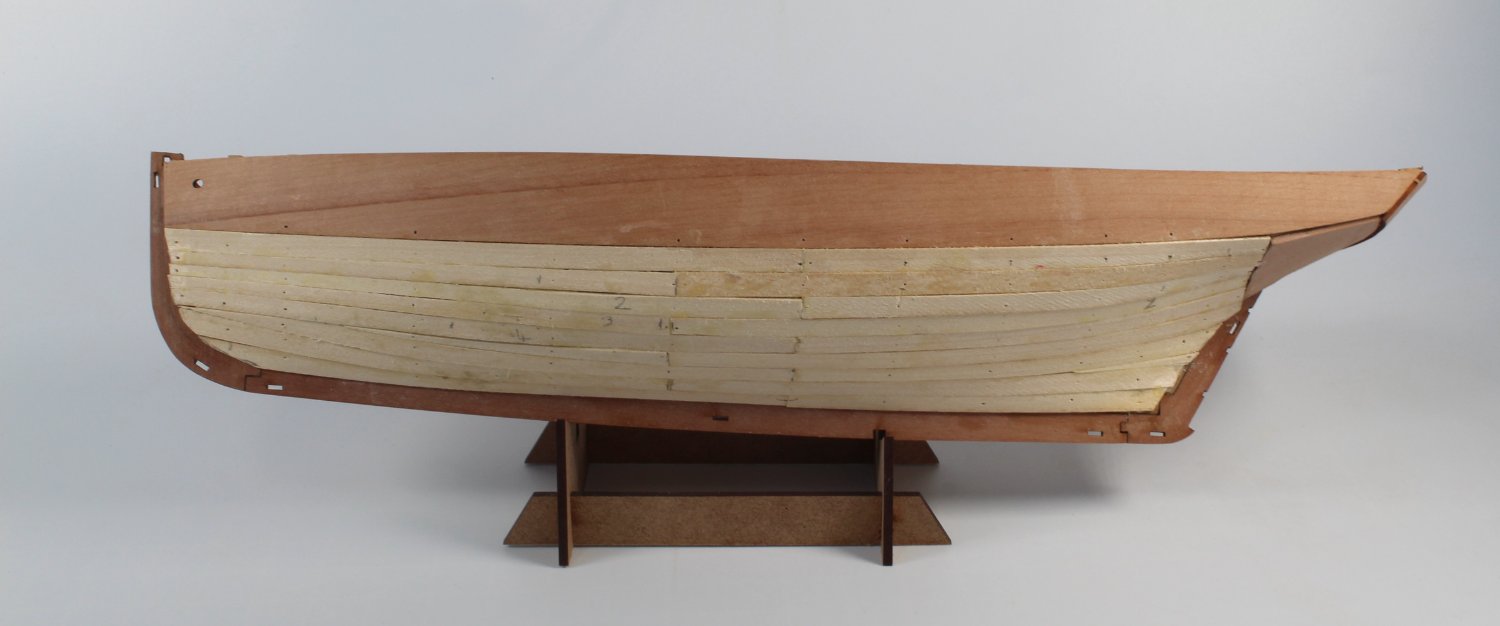
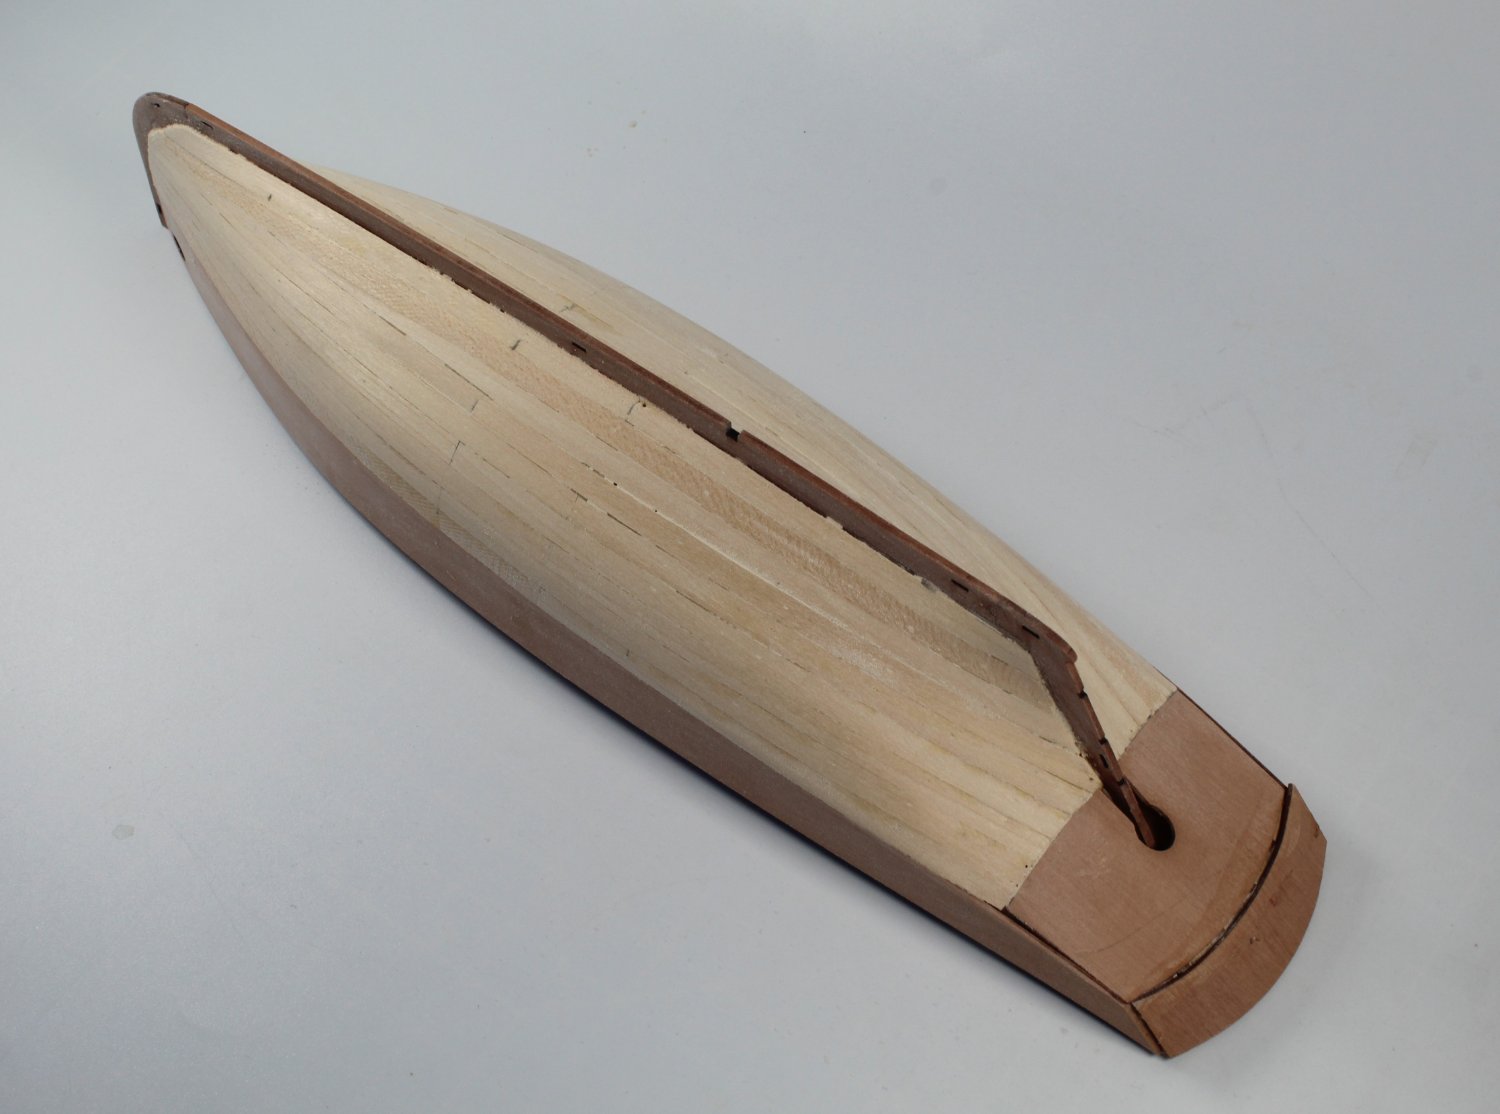
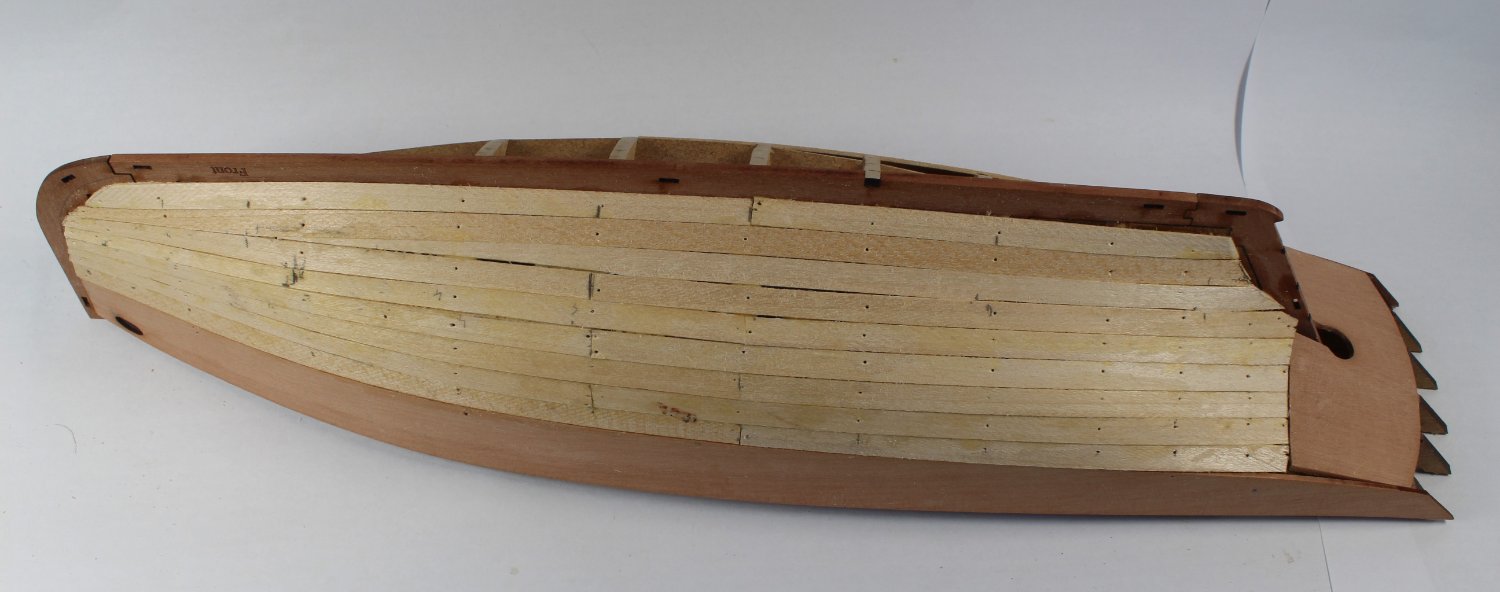
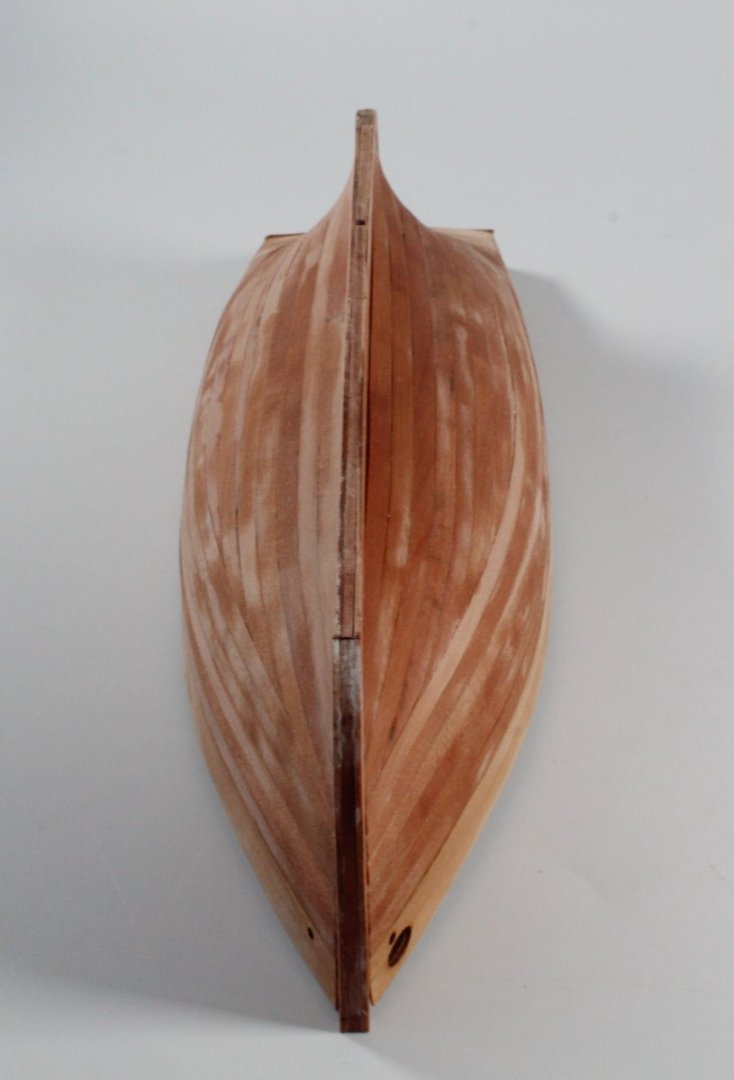
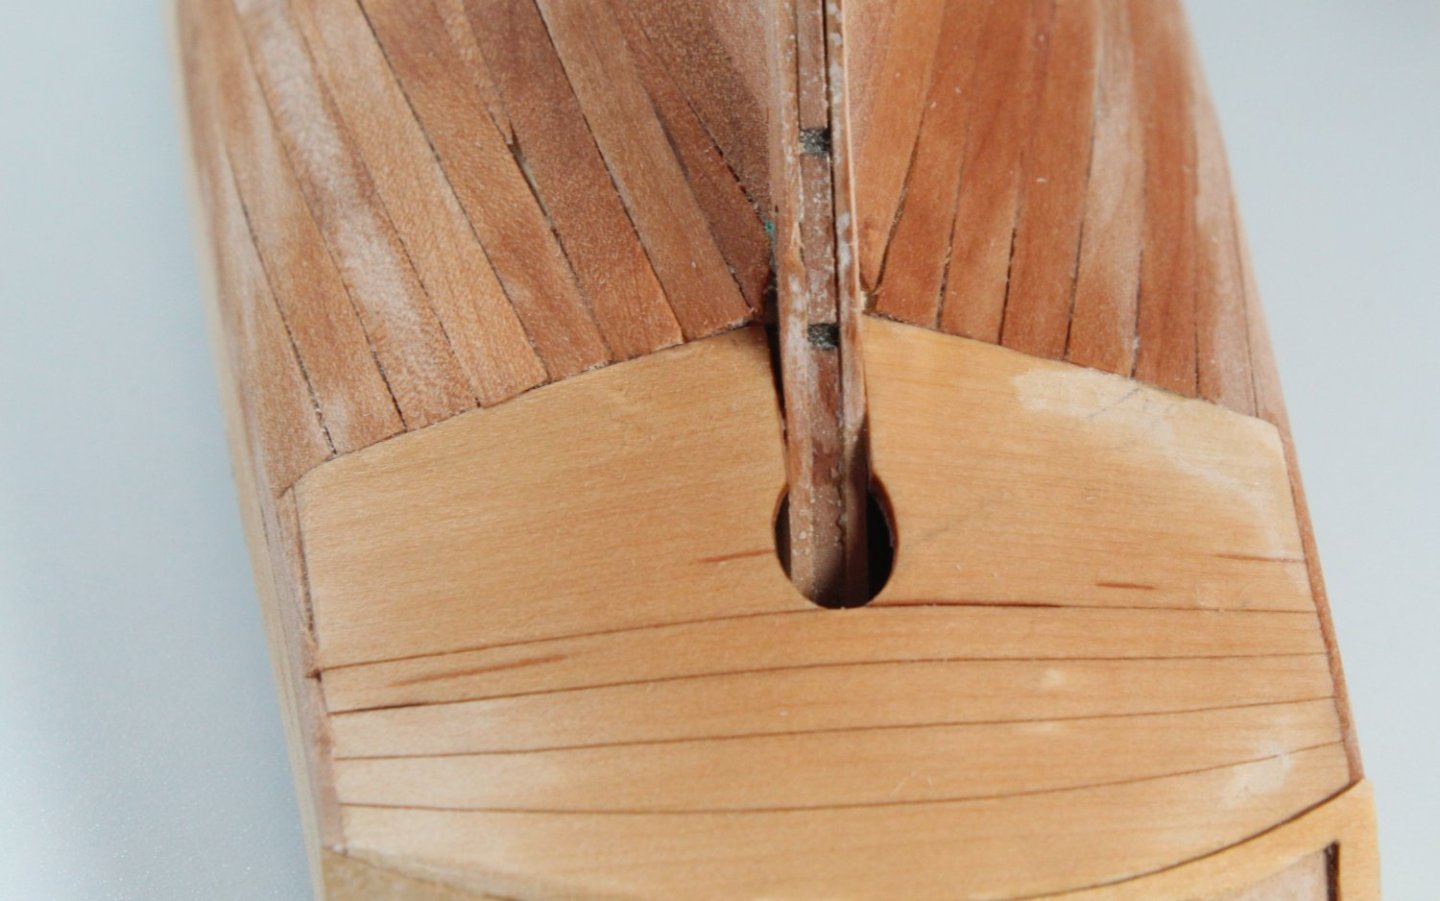
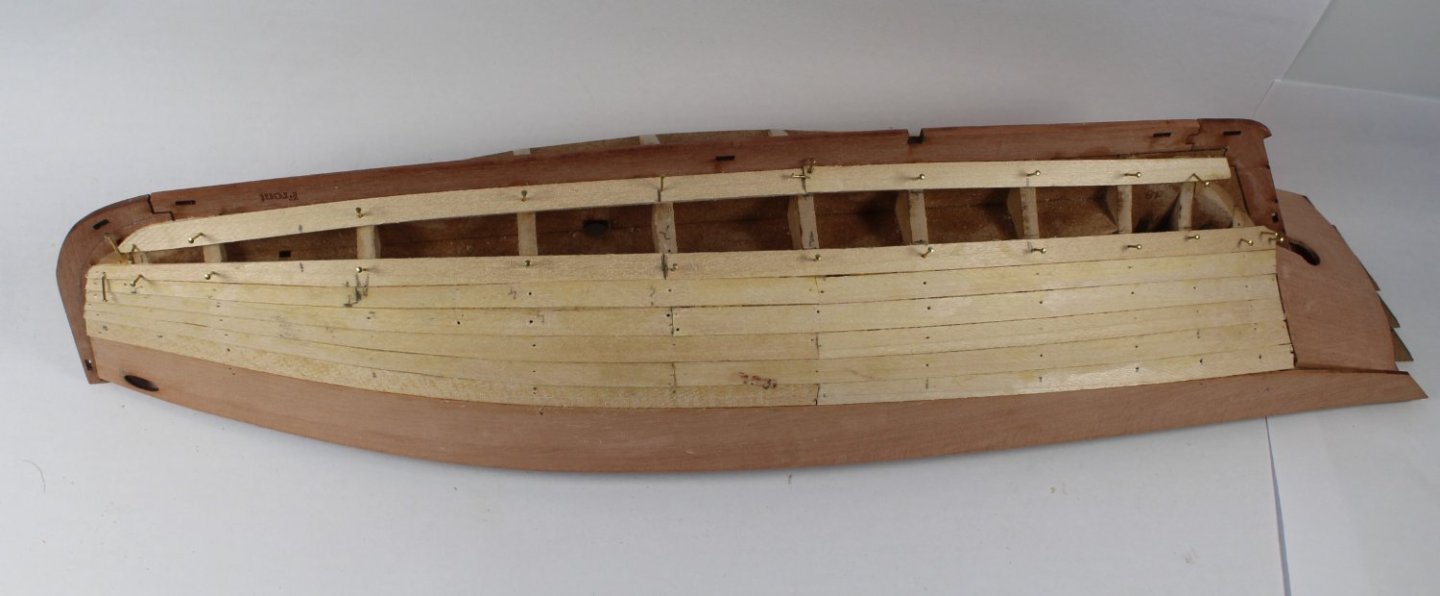
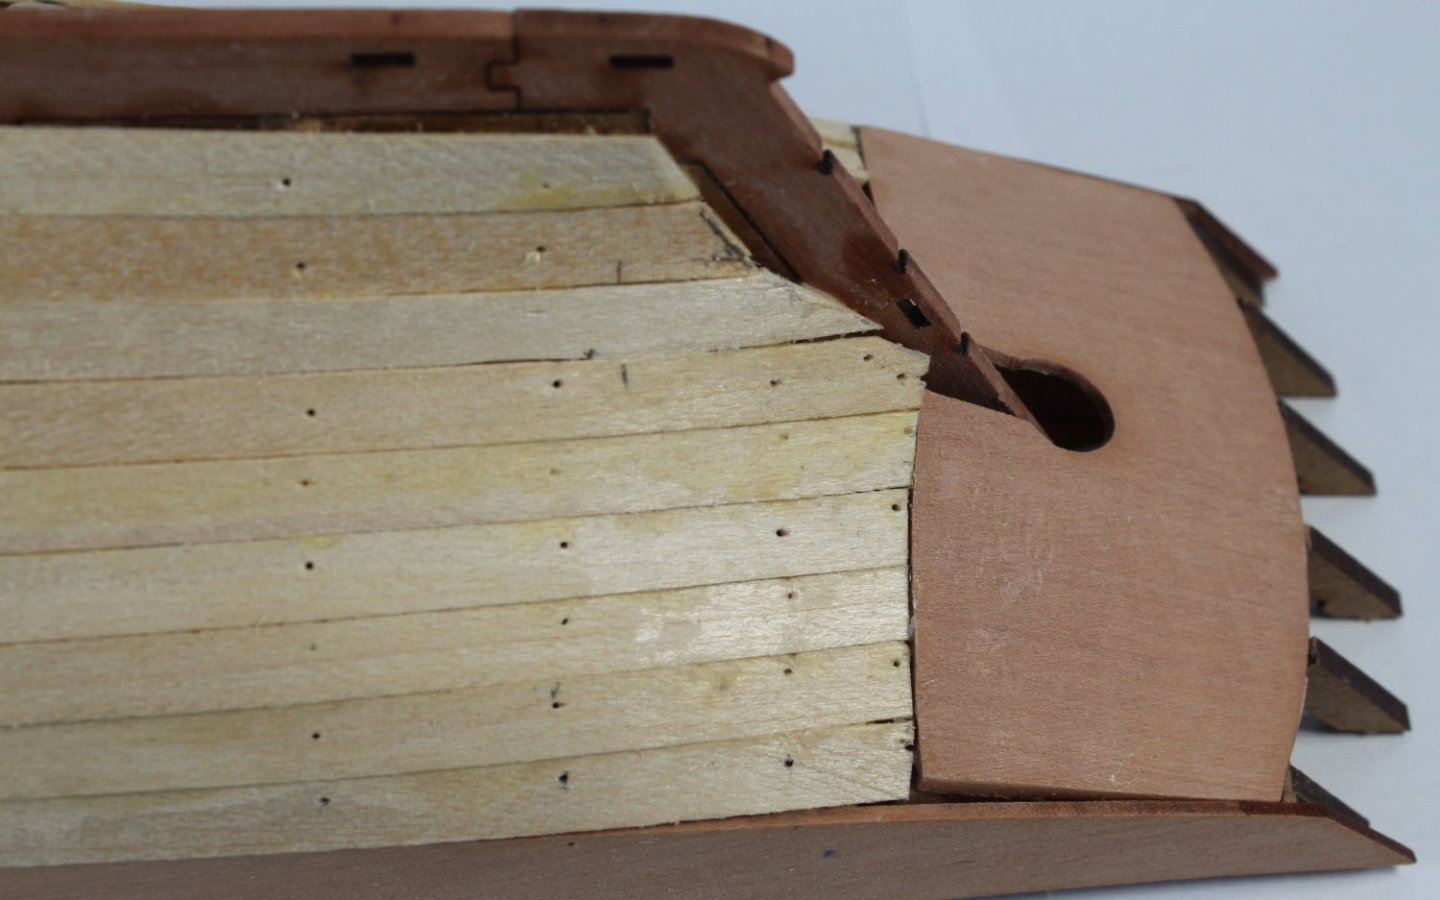
008 - 1st Planking RSH Completed I have now completed the first planking on the right-hand side. After completing the first banding I fitting the garboard plank. Although it was not strictly necessary I did fit this in two halves. It was then a simple job to fit the remaining two planks to complete the right hand planking. I am very happy with the first planking and it should not take too much sanding to create a nice smooth surface ready for the second planking. I did stop the planks short of the stern post which will enable to planks to be tapered (thinned) so the second planking will fit flush with the outer stern post pattern. I will test fit the outer stem post pattern and will trim the planking around the stem post as necessary to ensure there is a nice rabbet for the second planking.


- 48 replies
-
- 6
-
-
- Nisha
- Vanguard Models
- (and 3 more)
-
I don't think there issue with the 2nd planking as I have test fitted the stem outer patterns after fitting the first two planks. When I built the Erycina and Saucy Jack I did end up trimming some of the 1st planking back a bit so the 2nd planking would fit in the rabbet.
- 48 replies
-
- 2
-
-
- Nisha
- Vanguard Models
- (and 3 more)
-
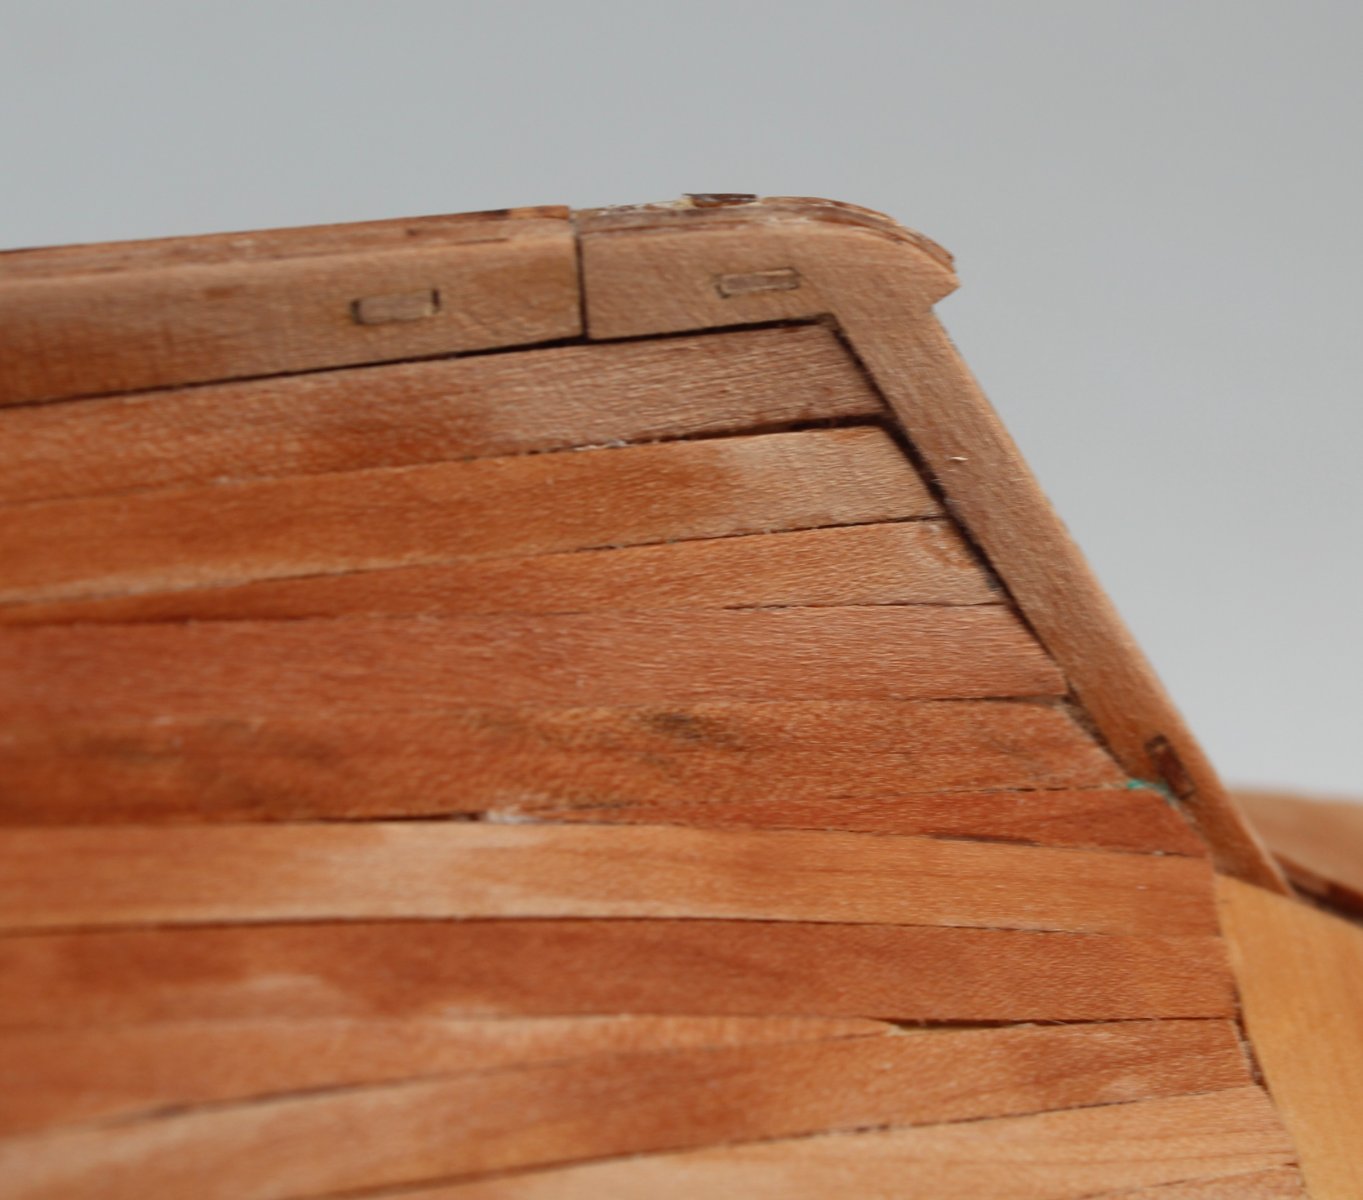
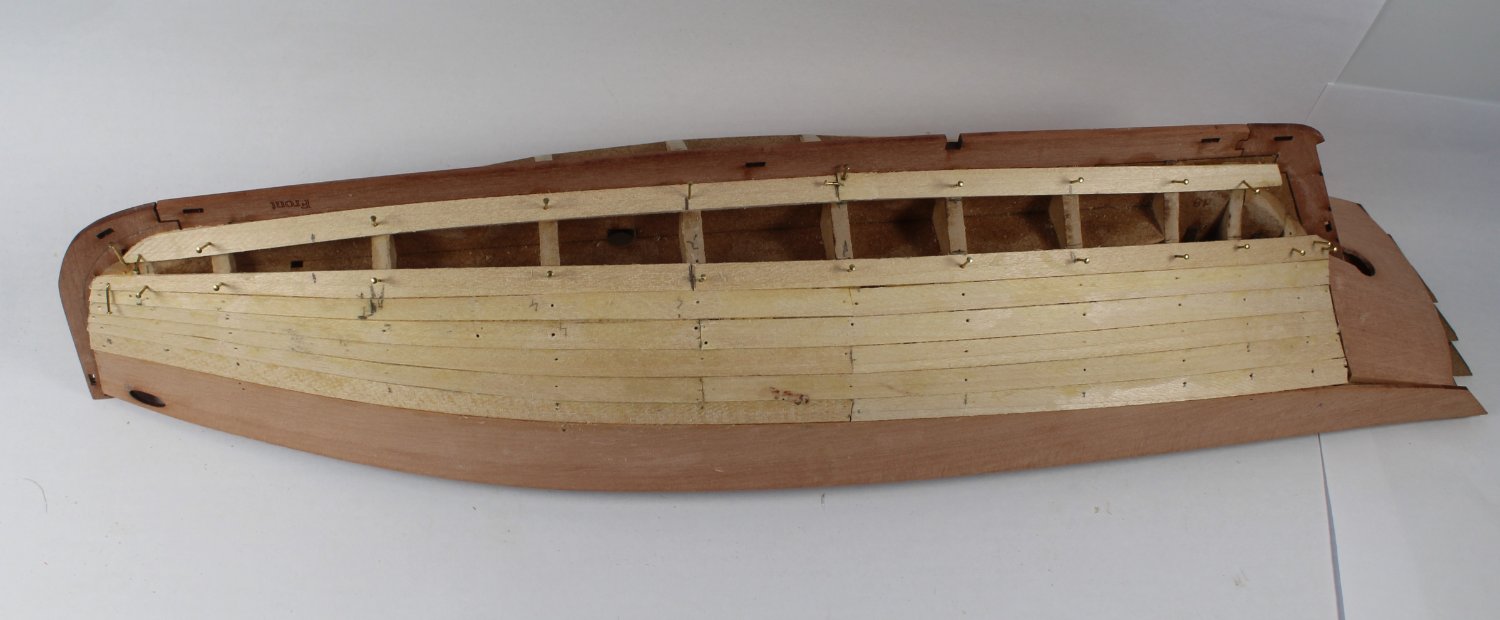
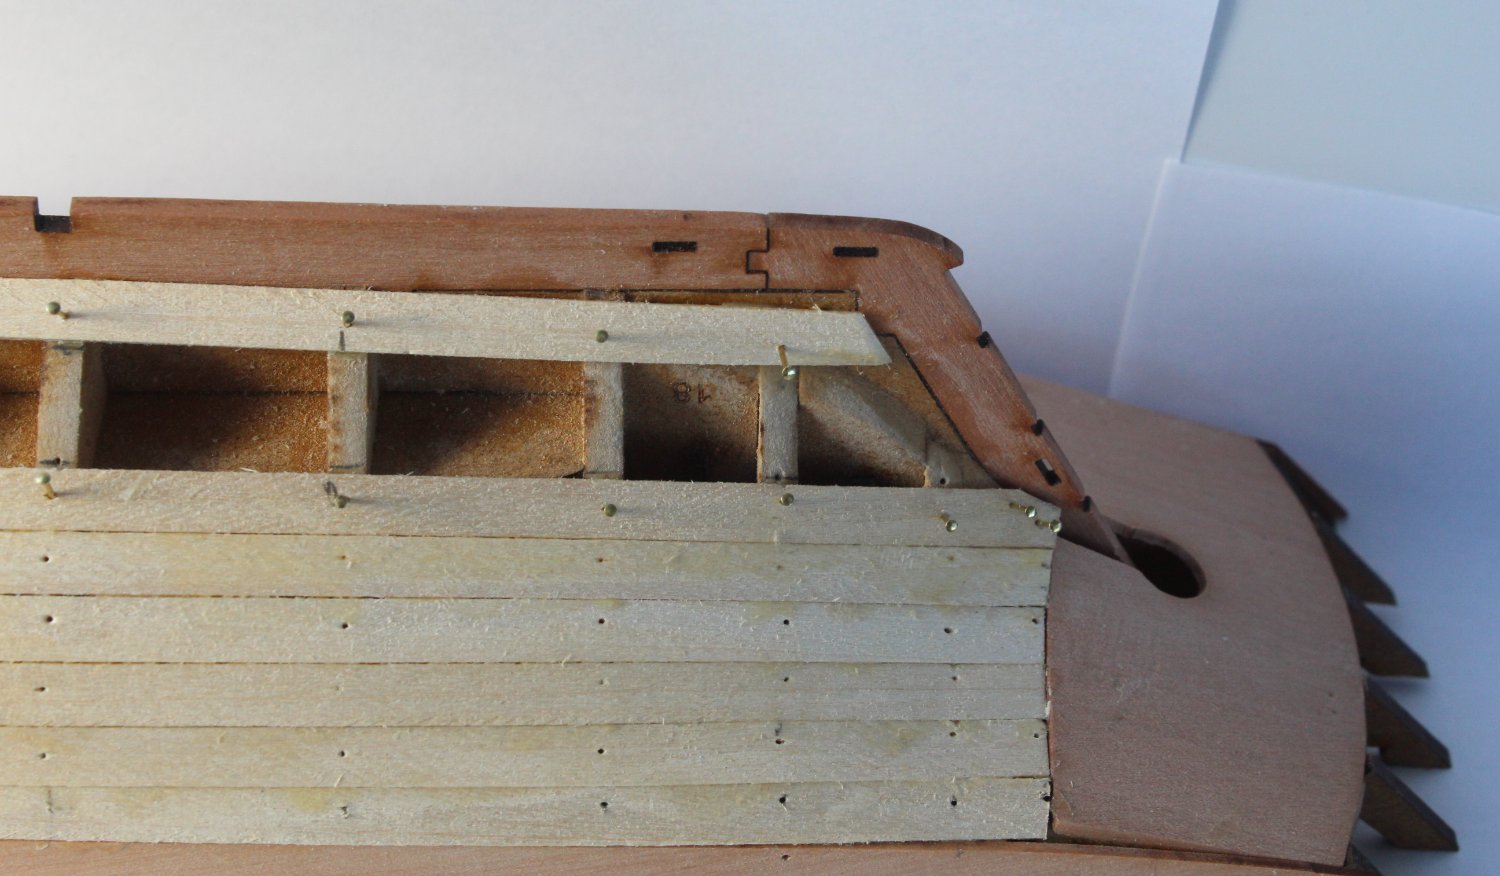
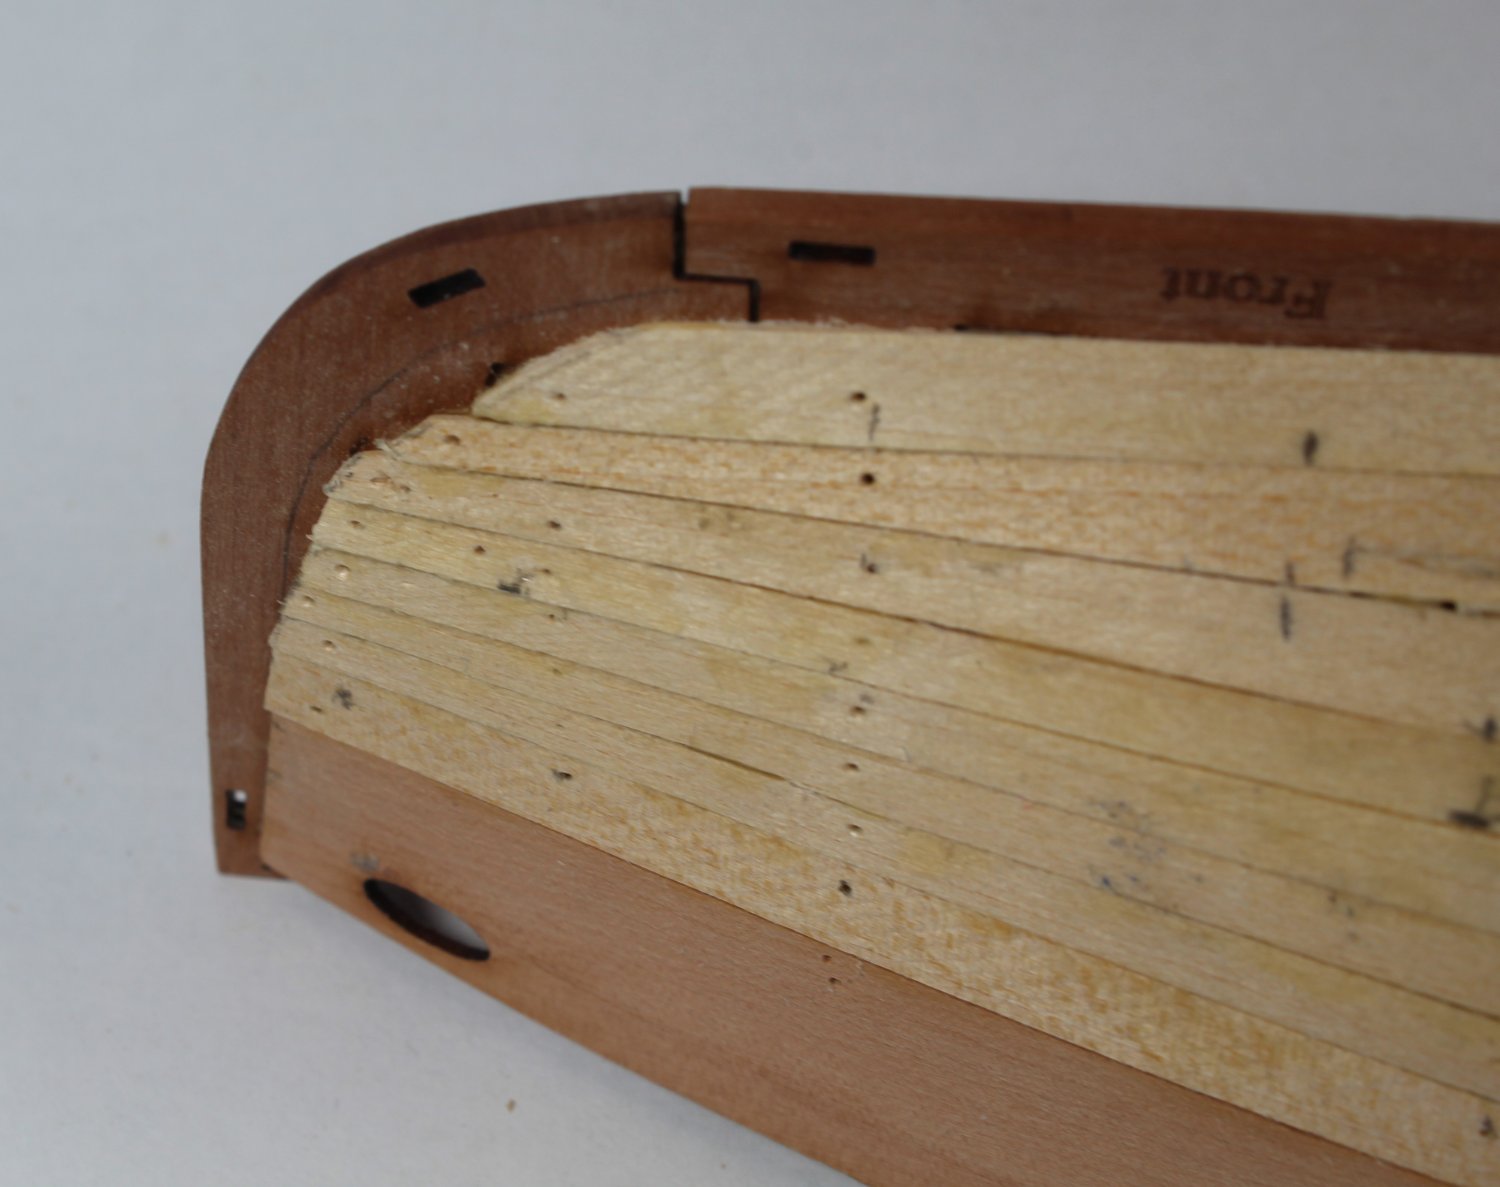
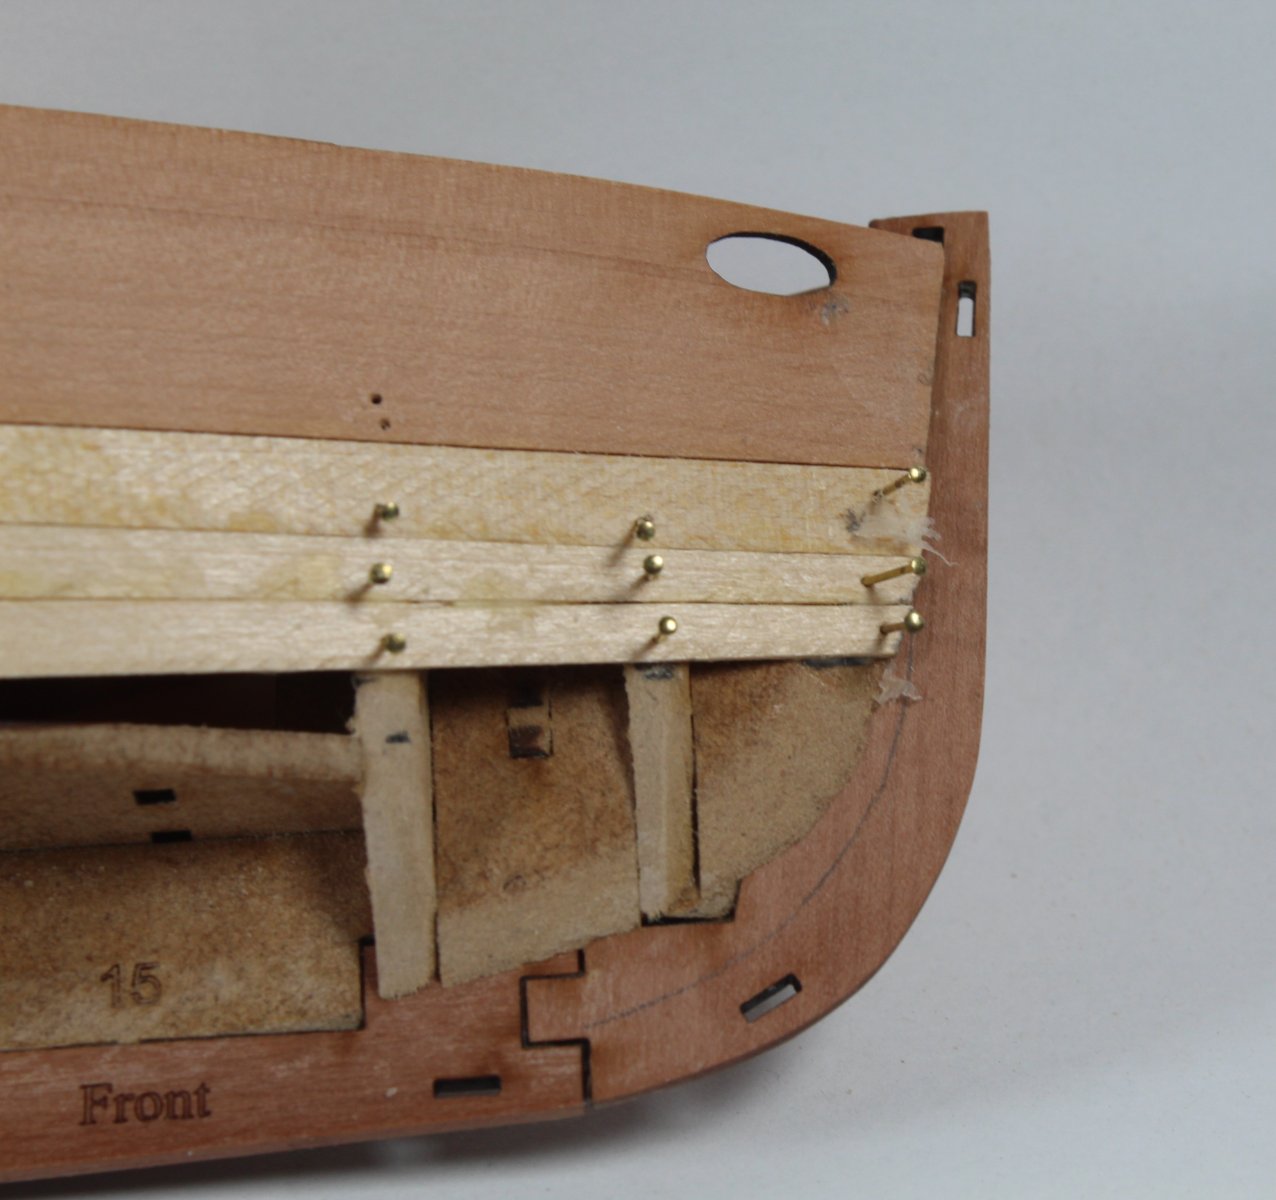
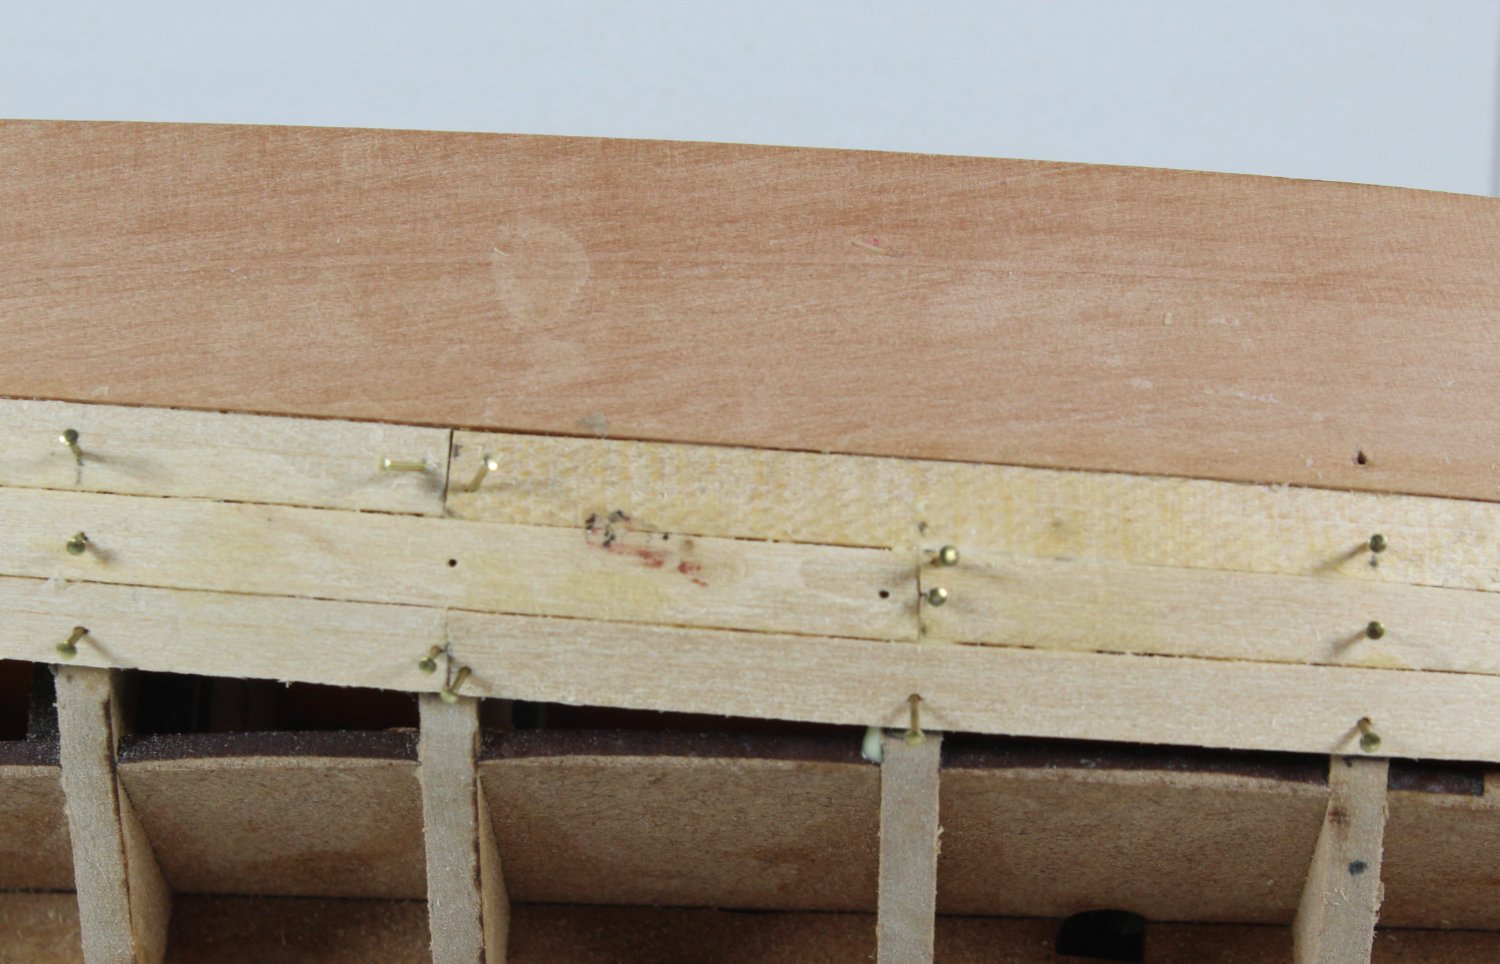
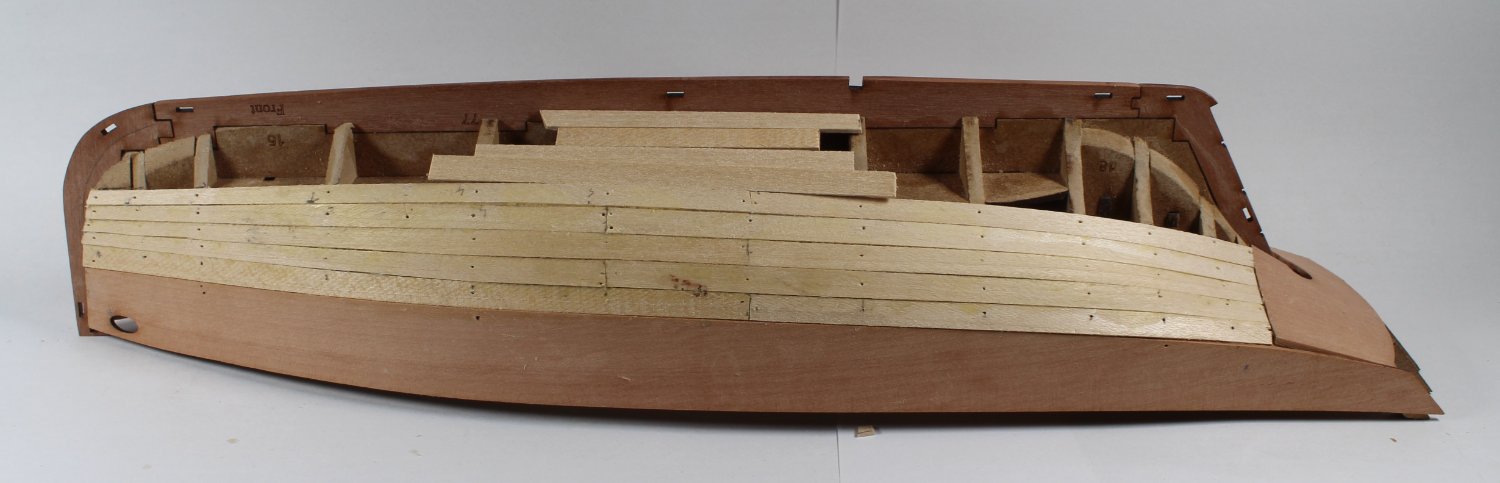
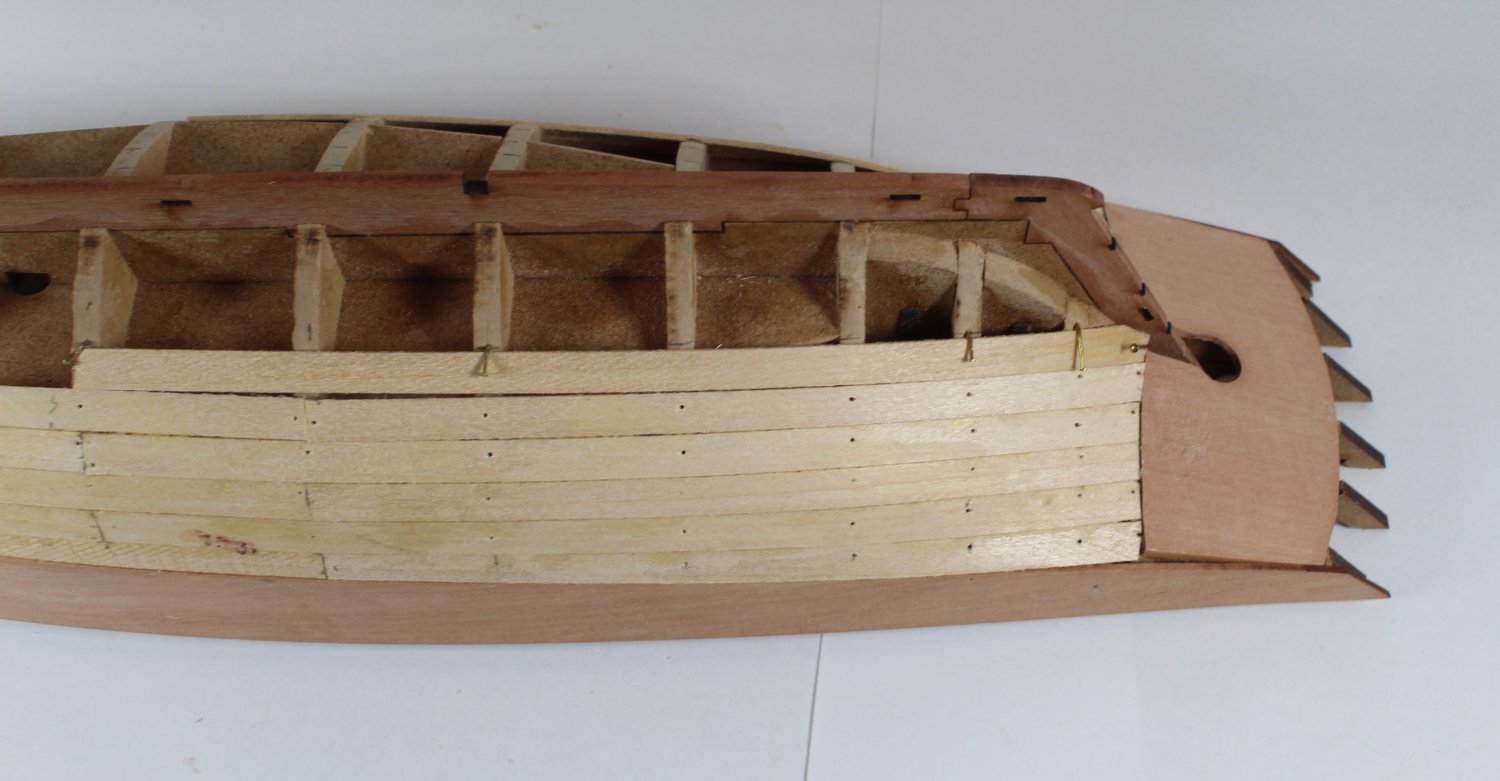
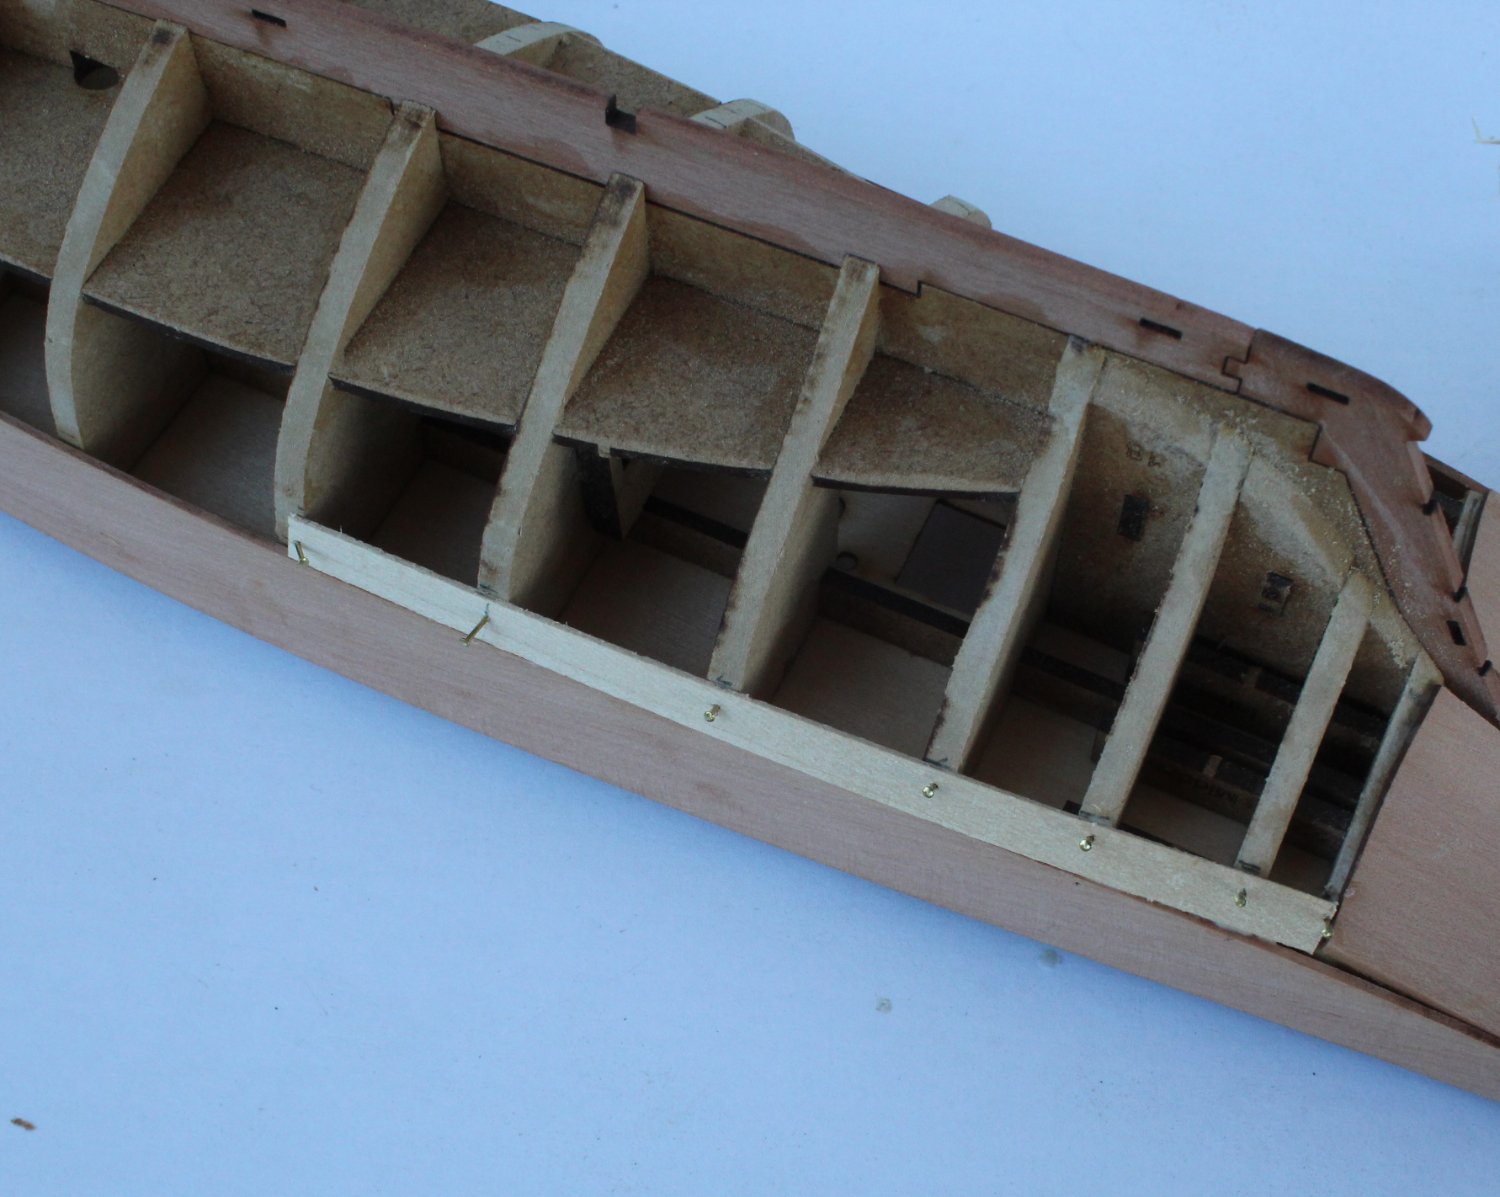
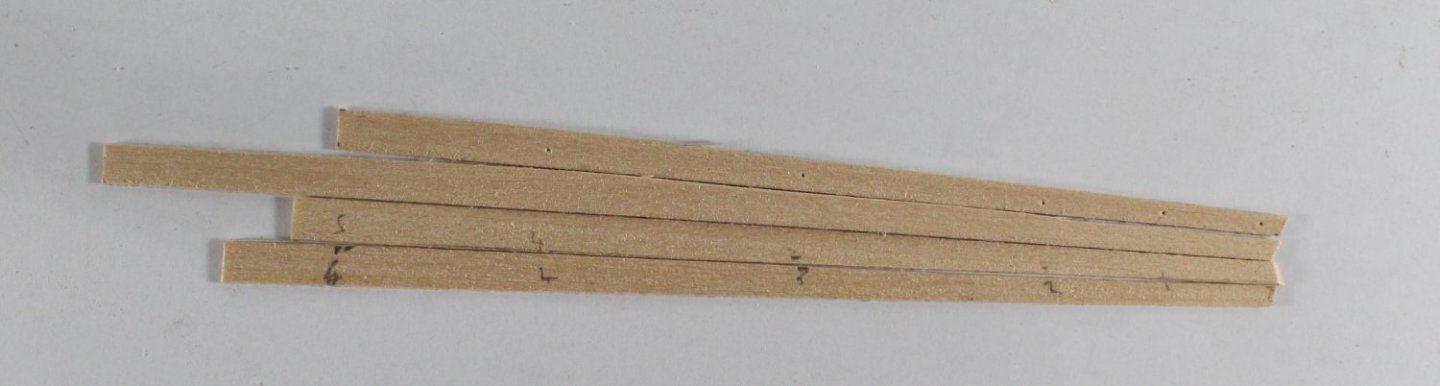
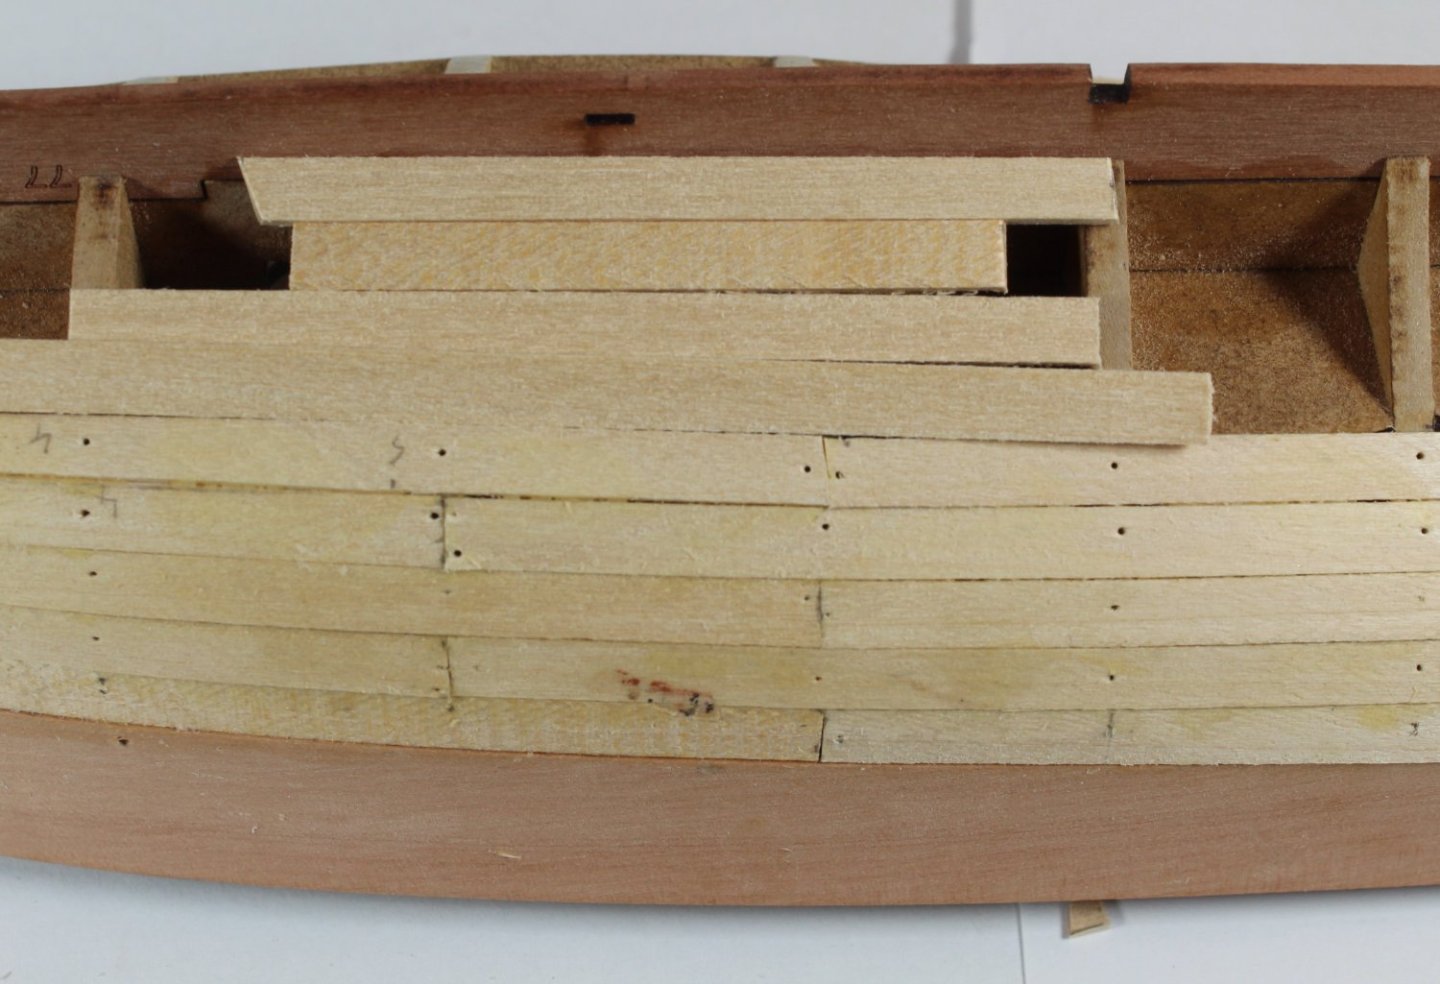
007 - 1st Planking Band 1 Having decided to try using a banding technique for the first 4 planks I tapered some planks, based on my bulkhead measurements. The taper would start from bulkhead 5 tapering to 4mm at bulkhead 3 and 3mm. I tapered four planks and did a test fit. In the photo below you can see where I marked the positions of the bulkheads. The next set of photo's show the progress made after the first two plank were fitted. Each plank was test fitted and I did slightly sand some of the bulkheads before gluing the planking in place so the plank height looked level with the adjacent plank. In the next photo you will note the method I used to hold the plank in place on bulkhead 11 to ensure it was in full contact with the bulkhead. The next set of photos is after the completion of planking in the first band. I did also dry fit some planks in the gap to verify the infill at the widest point was 9 planks in total. The next plank to be fitted to the stern counter required a bit of shaping. The next photo shows me checking the shaping As the plank required a bend I did slightly wet the plank and then pinned it in place hopefully retaining the bend once the plank has had time to dry out.


- 48 replies
-
- 6
-
-
- Nisha
- Vanguard Models
- (and 3 more)
-
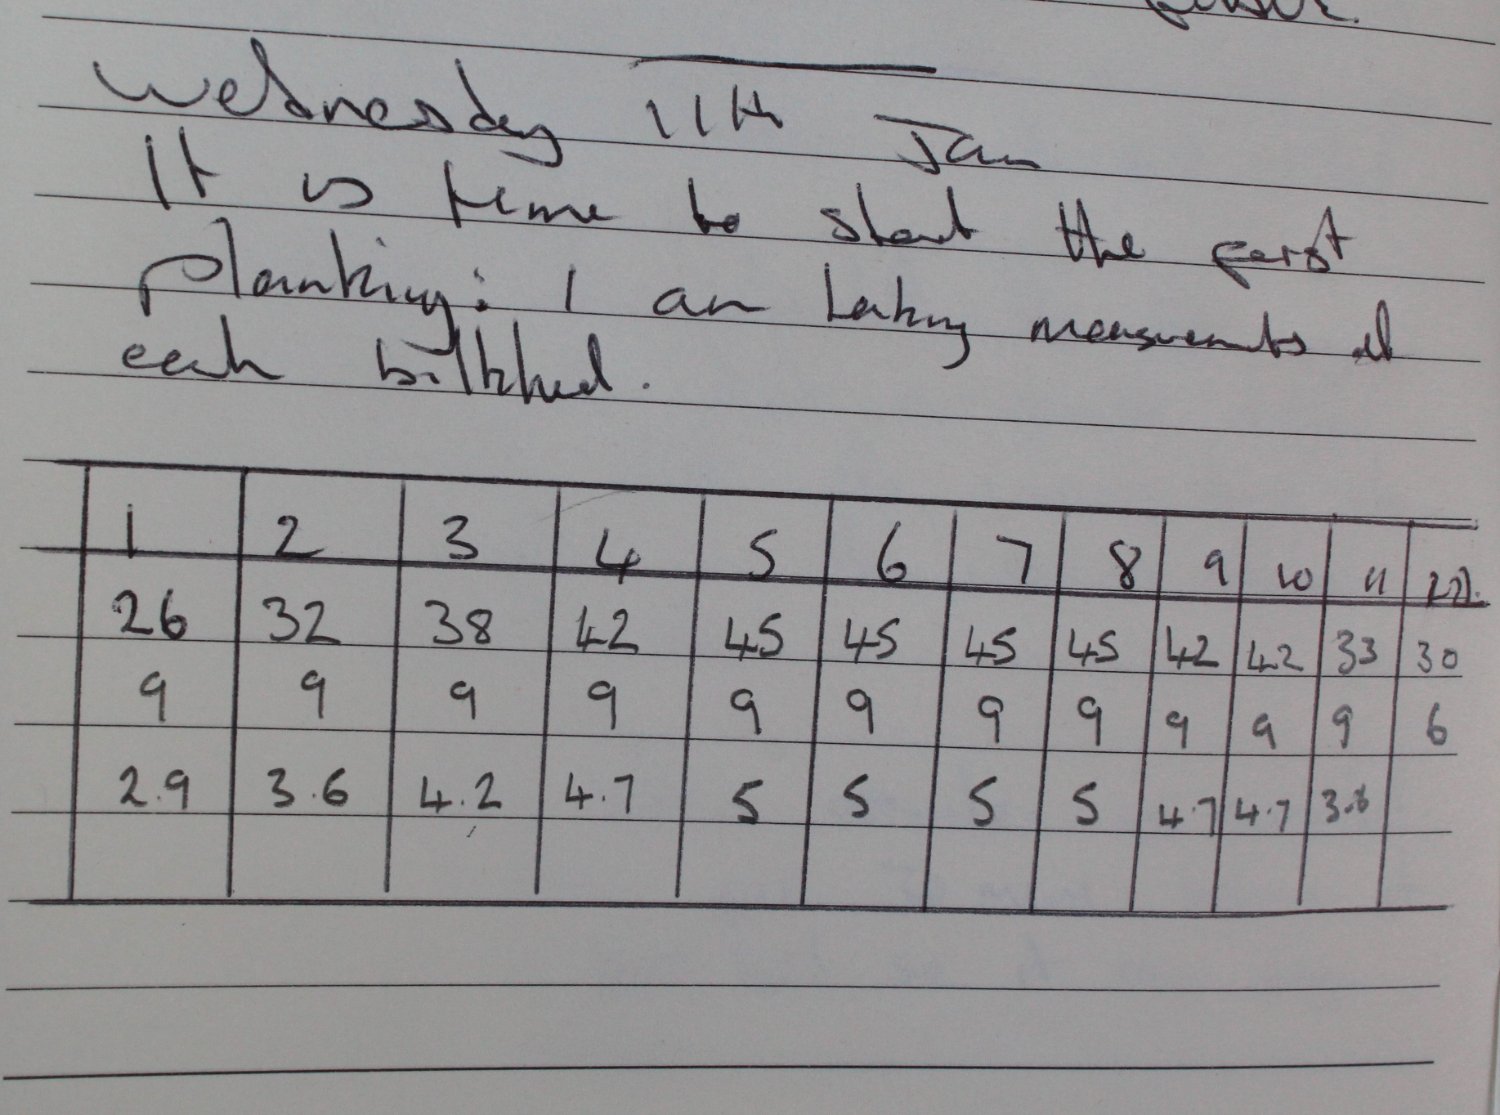
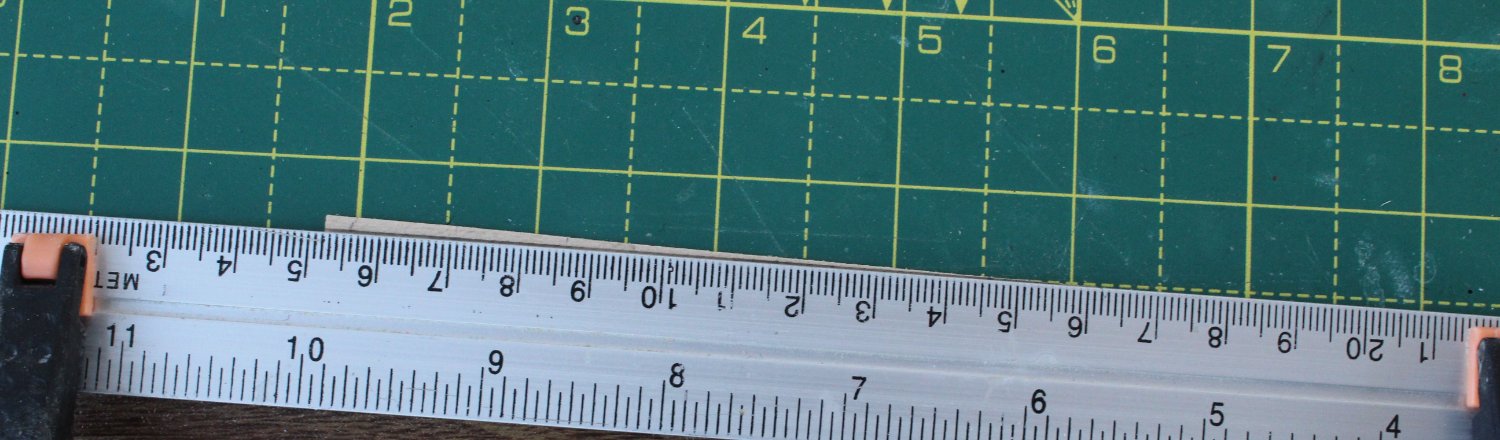
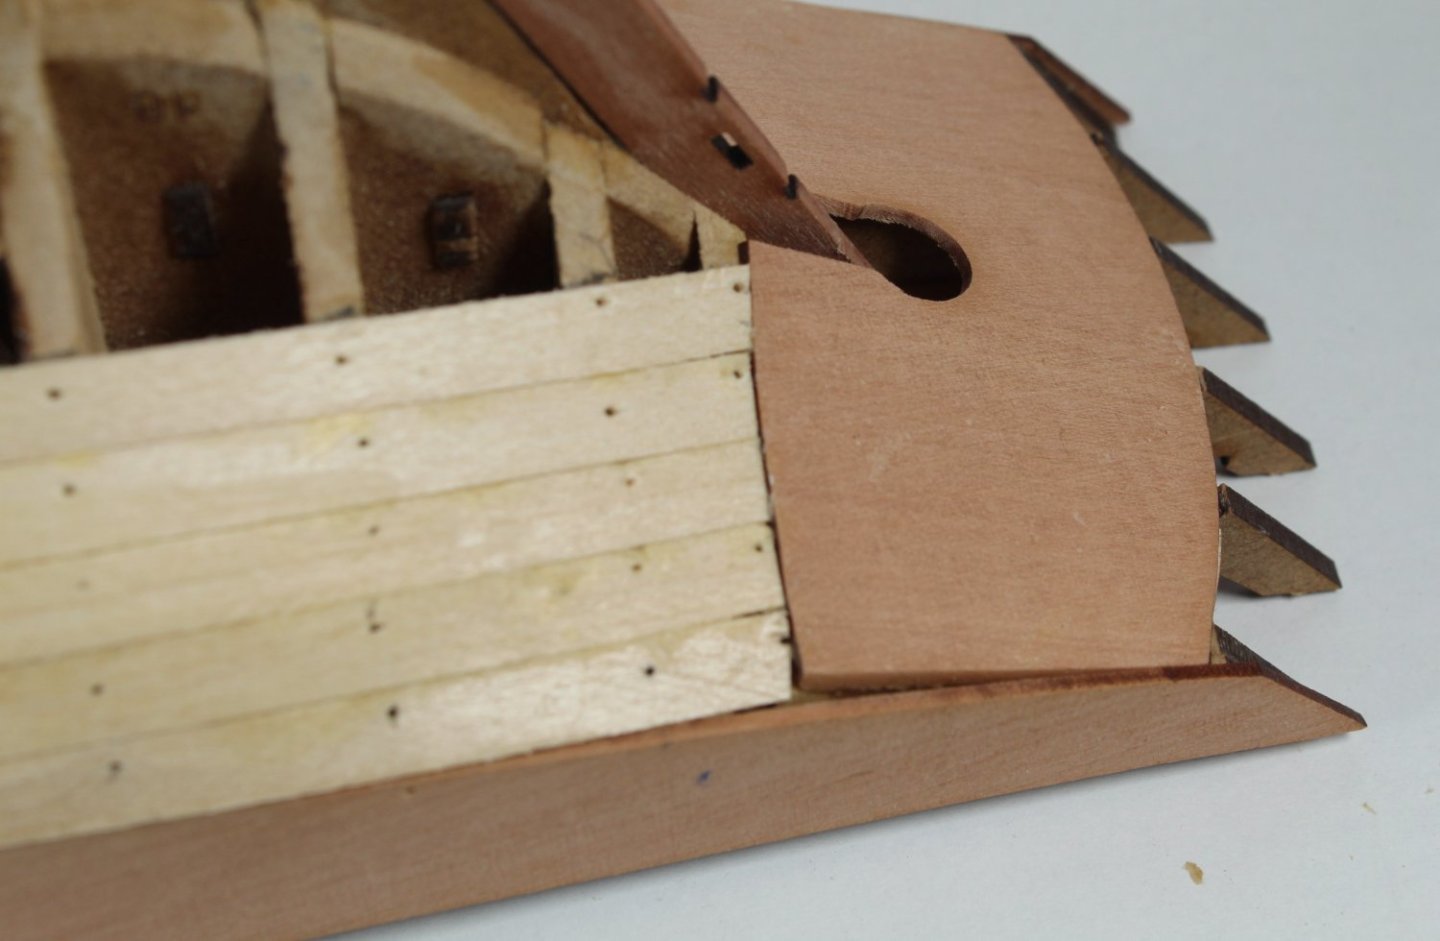
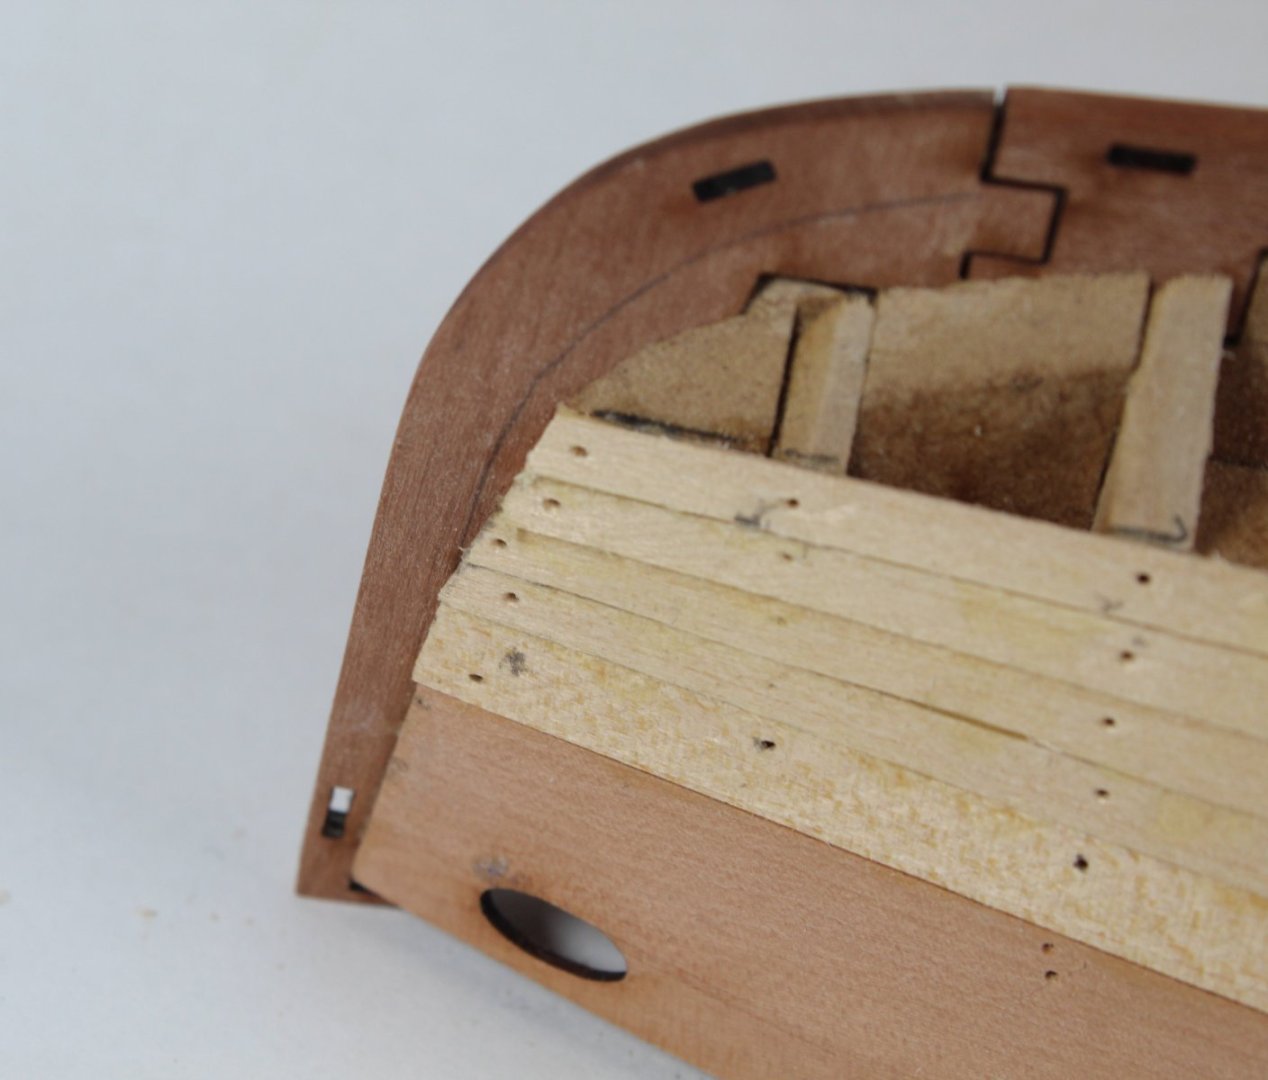
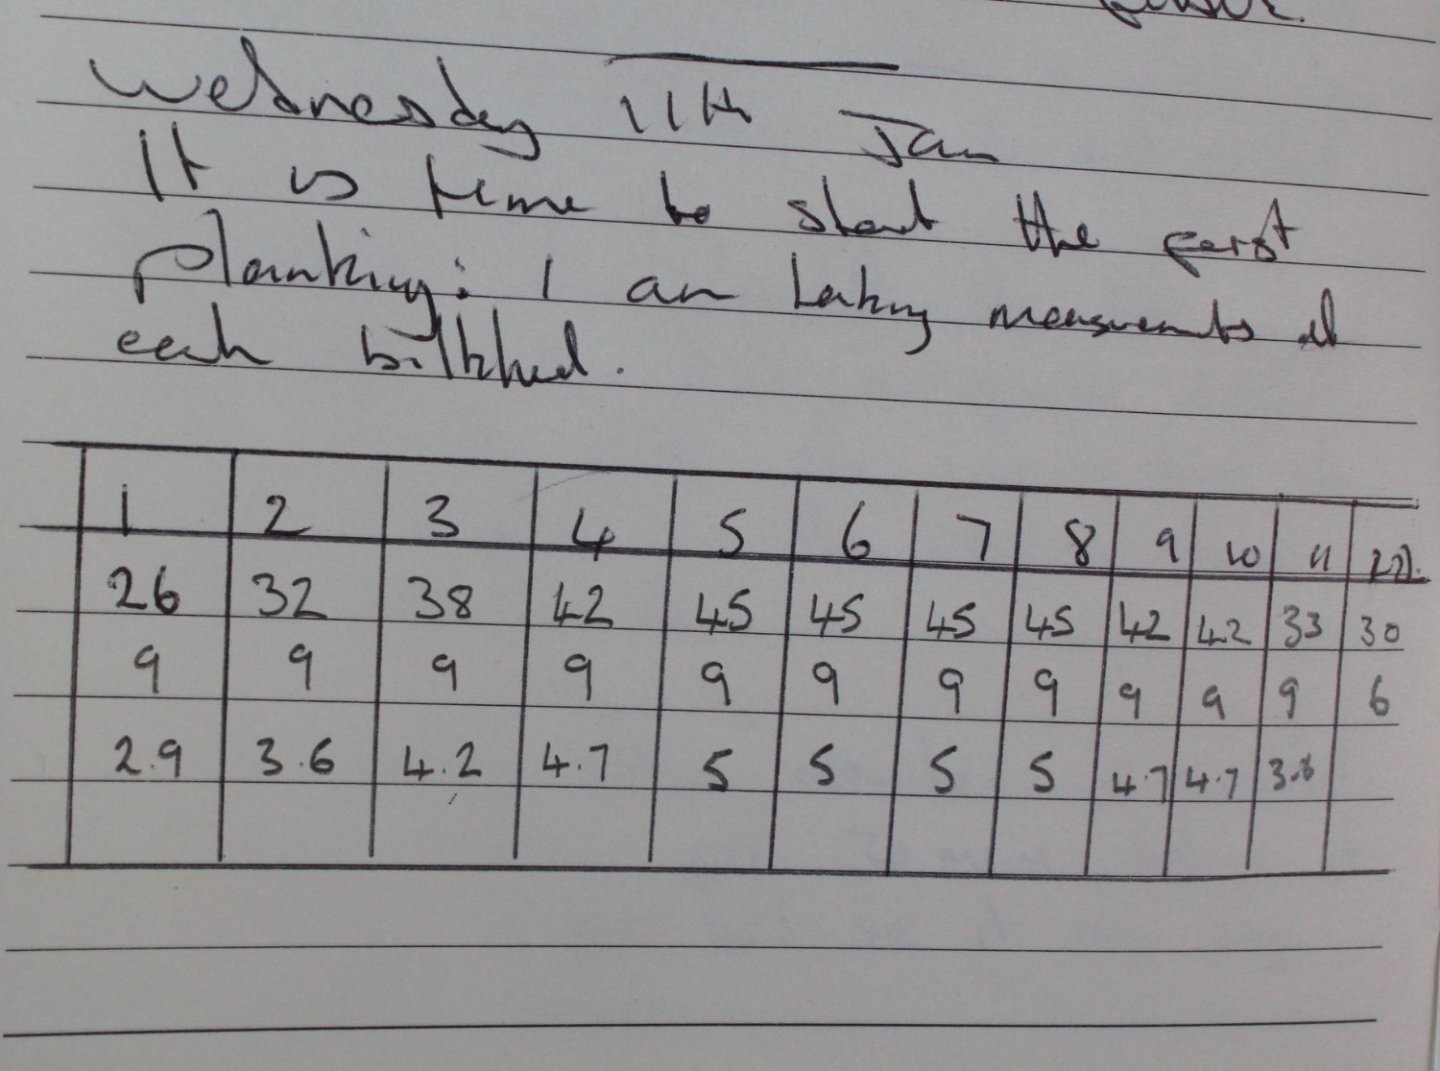
006 - Start of 1st Planking One of the reasons for buying this model was so I could use it as a practice piece for some aspects of model building which I need to get better at. Planking is one such area which I would like to improve on. With that in mind, and after reading several different methods, my head is now full of different ideas, such as: a) simply follow the build manual instructions with regards to tapering b) Create different banding areas for planking and taper the planks as per the banding requirements c) use Chuck's lateral edge bending method Starting with the basics. I have measured the distance from the bottom of the bulwarks to the keel and recorded them in a table. At the widest point 9 planks will be required. The planks are 5mm wide so with a very simple bit of maths the required plank width at each bulkhead has been calculated. After a little bit of careful consideration I have opted to followed the build manual for the first plank which has been split in two with a joint at bulkhead 6. This also means the rest of the planking can be split into 2 x 4 planking bands should I decide to the taper the planks to fit into these bands. I have plenty of spare planking material so I think I will test fit the next 4 planks with the required taper from bulkhead 5 to bulkhead 1 which is 5mm down to 2.9mm. Depending on how the planks look when test fitted I may also look at experimenting with Chuck's lateral plank bend. The taper for the first plank has been marked and is now ready to be trimmed. I will will provide further updates once I have made more progress with the planking.


- 48 replies
-
- 6
-
-
- Nisha
- Vanguard Models
- (and 3 more)
-
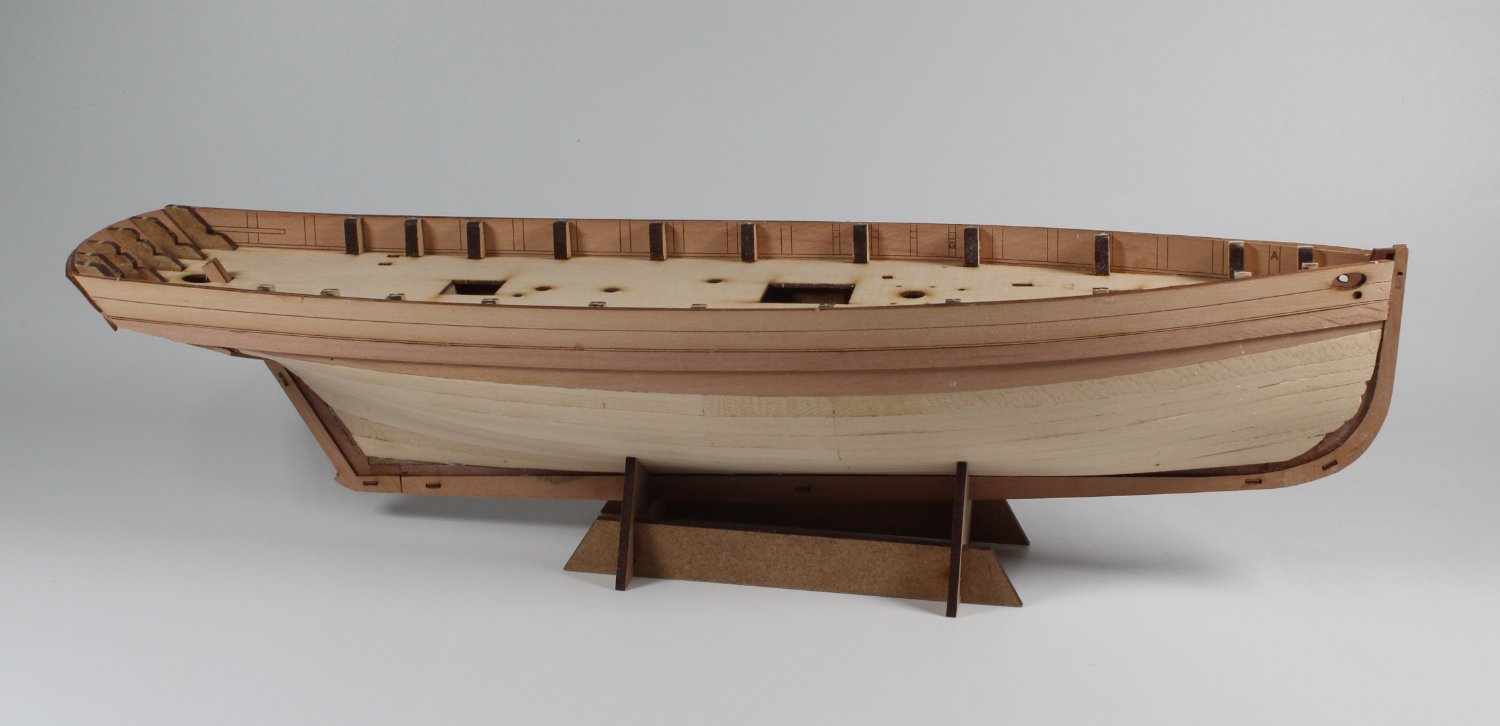
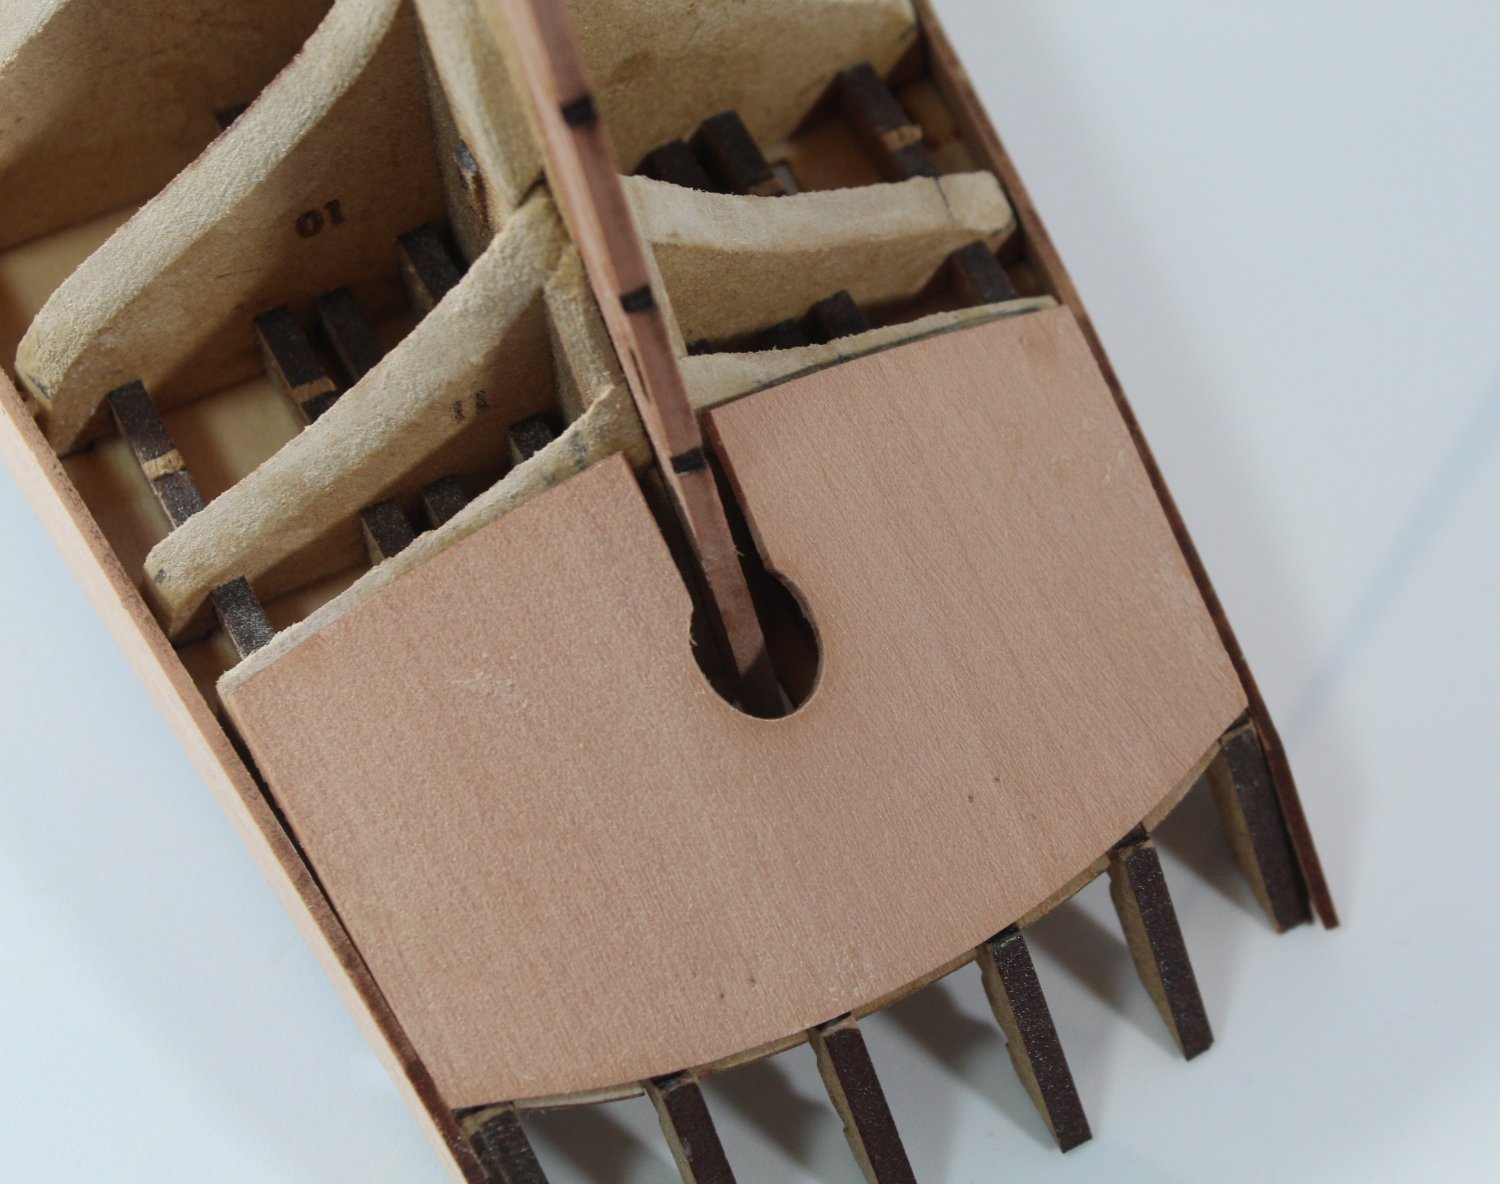
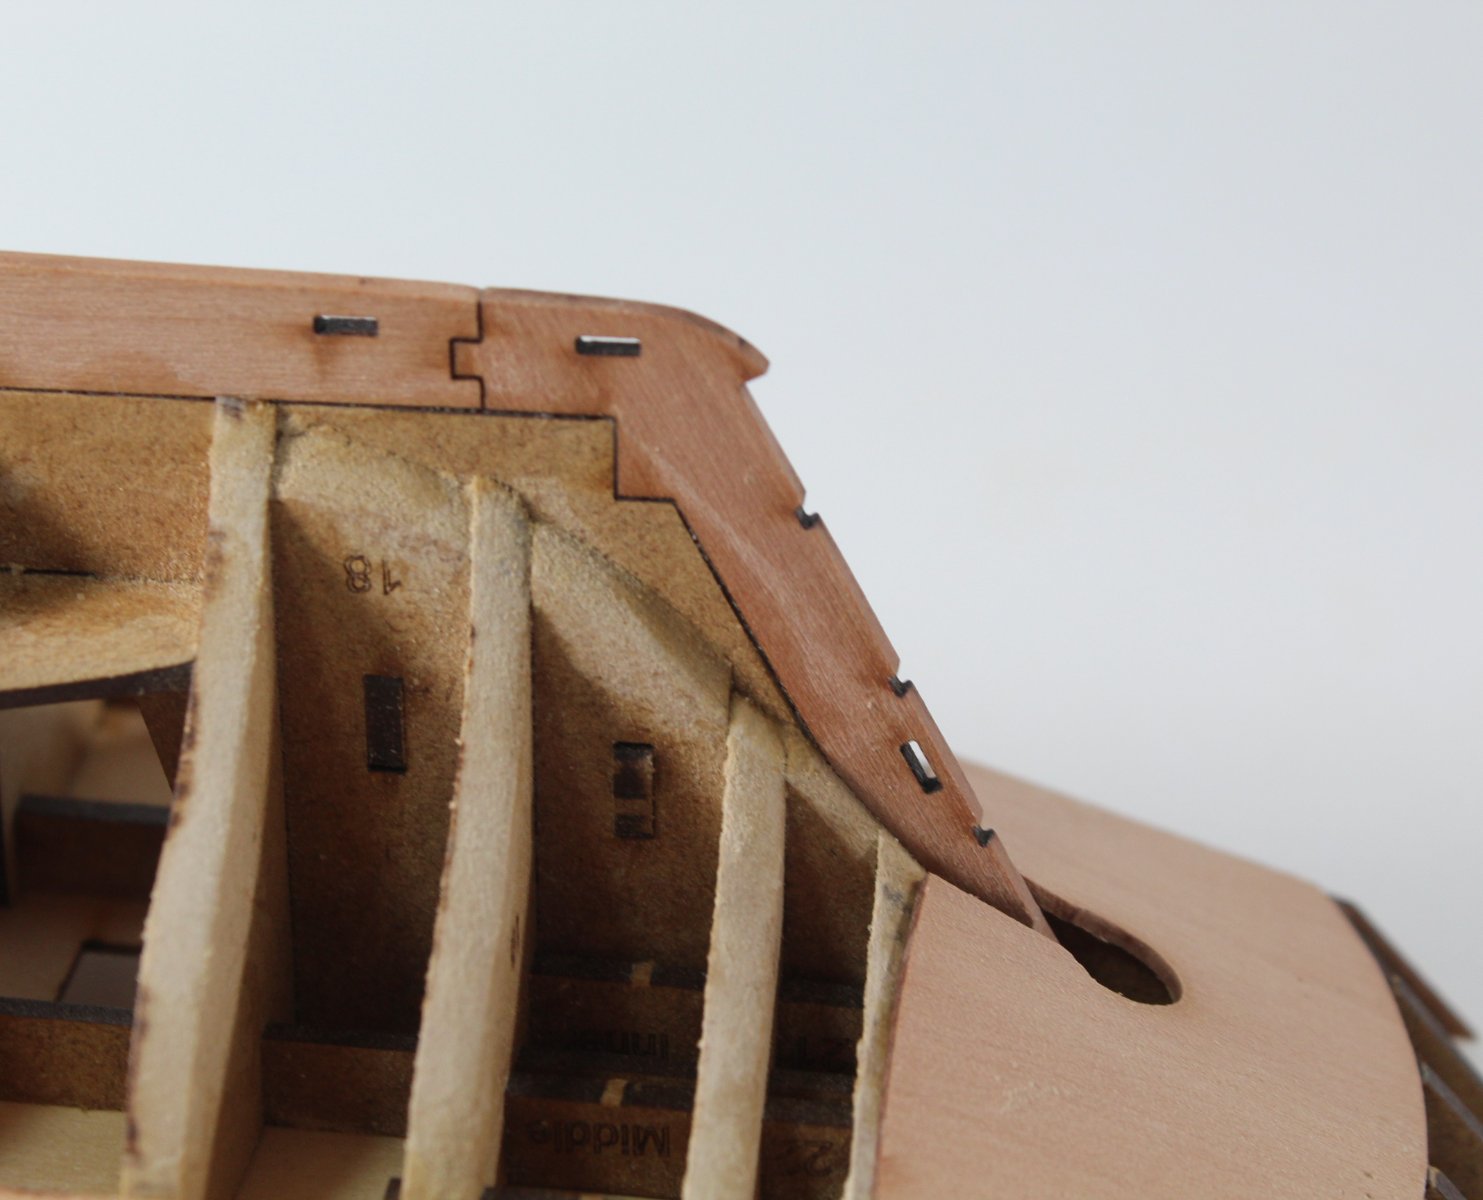
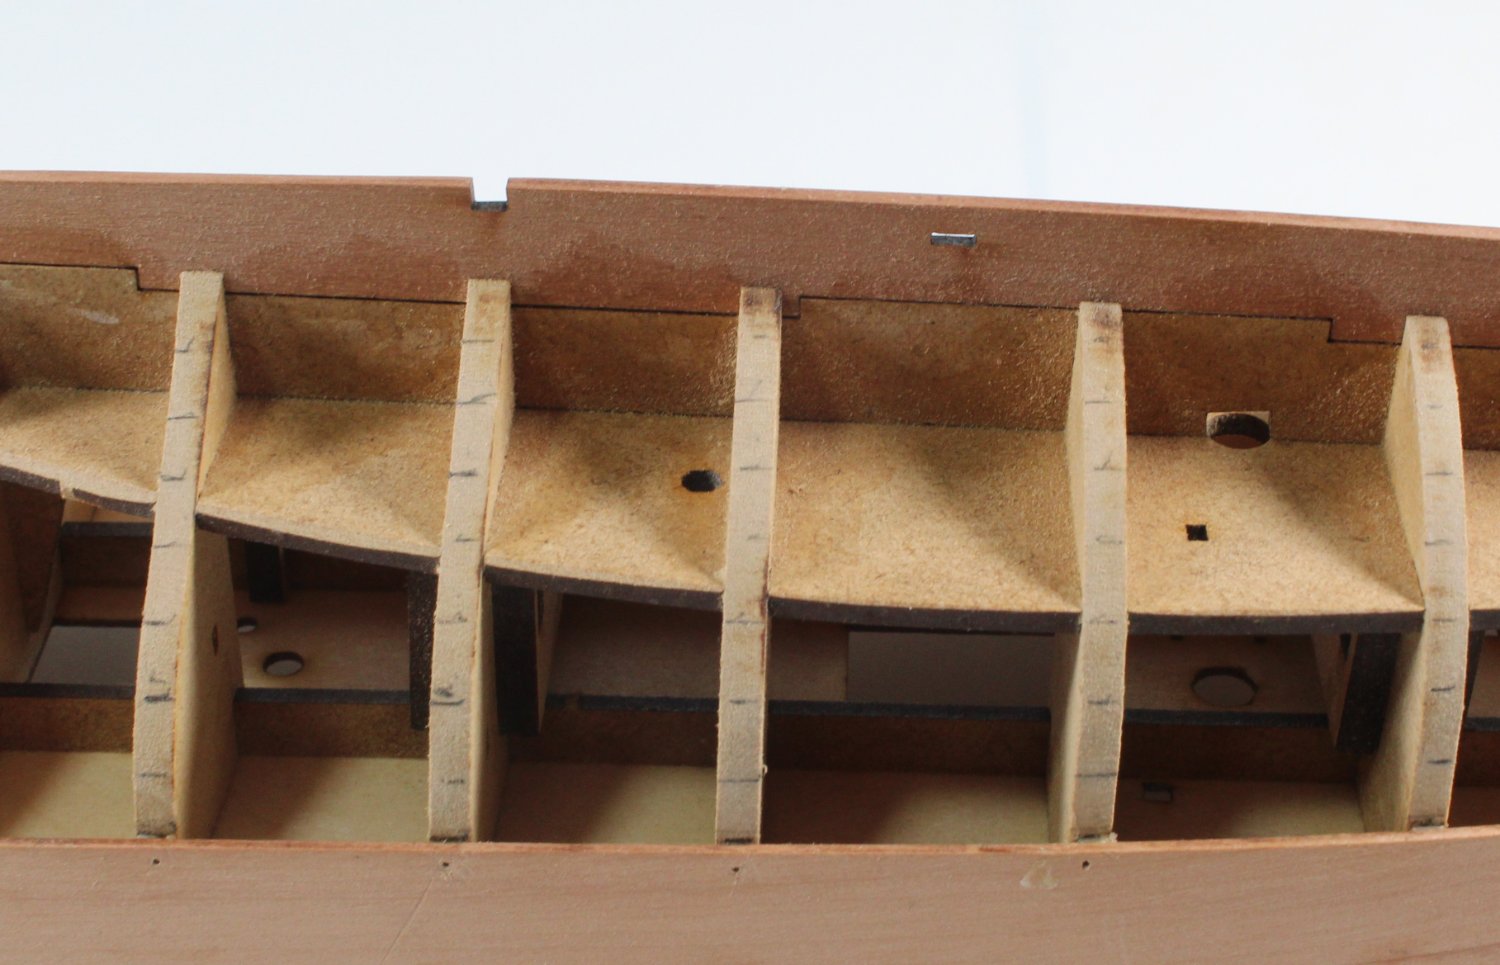
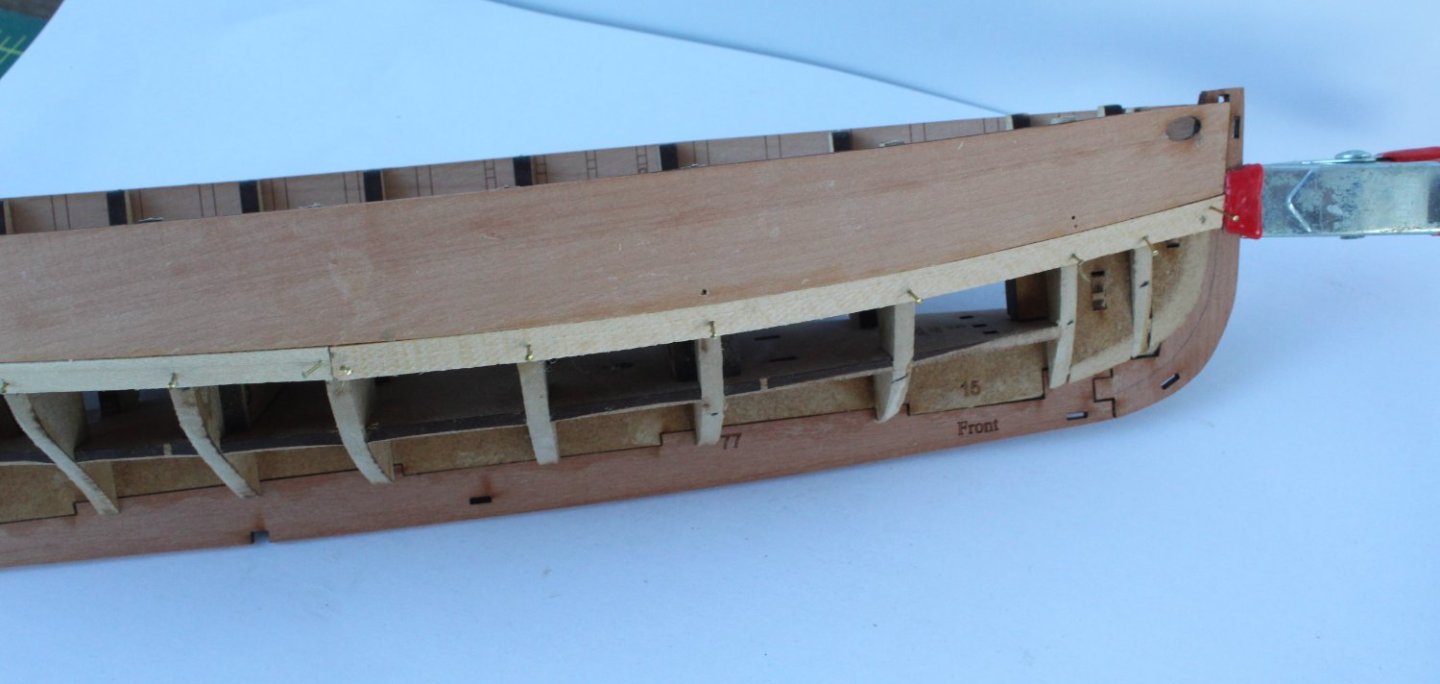
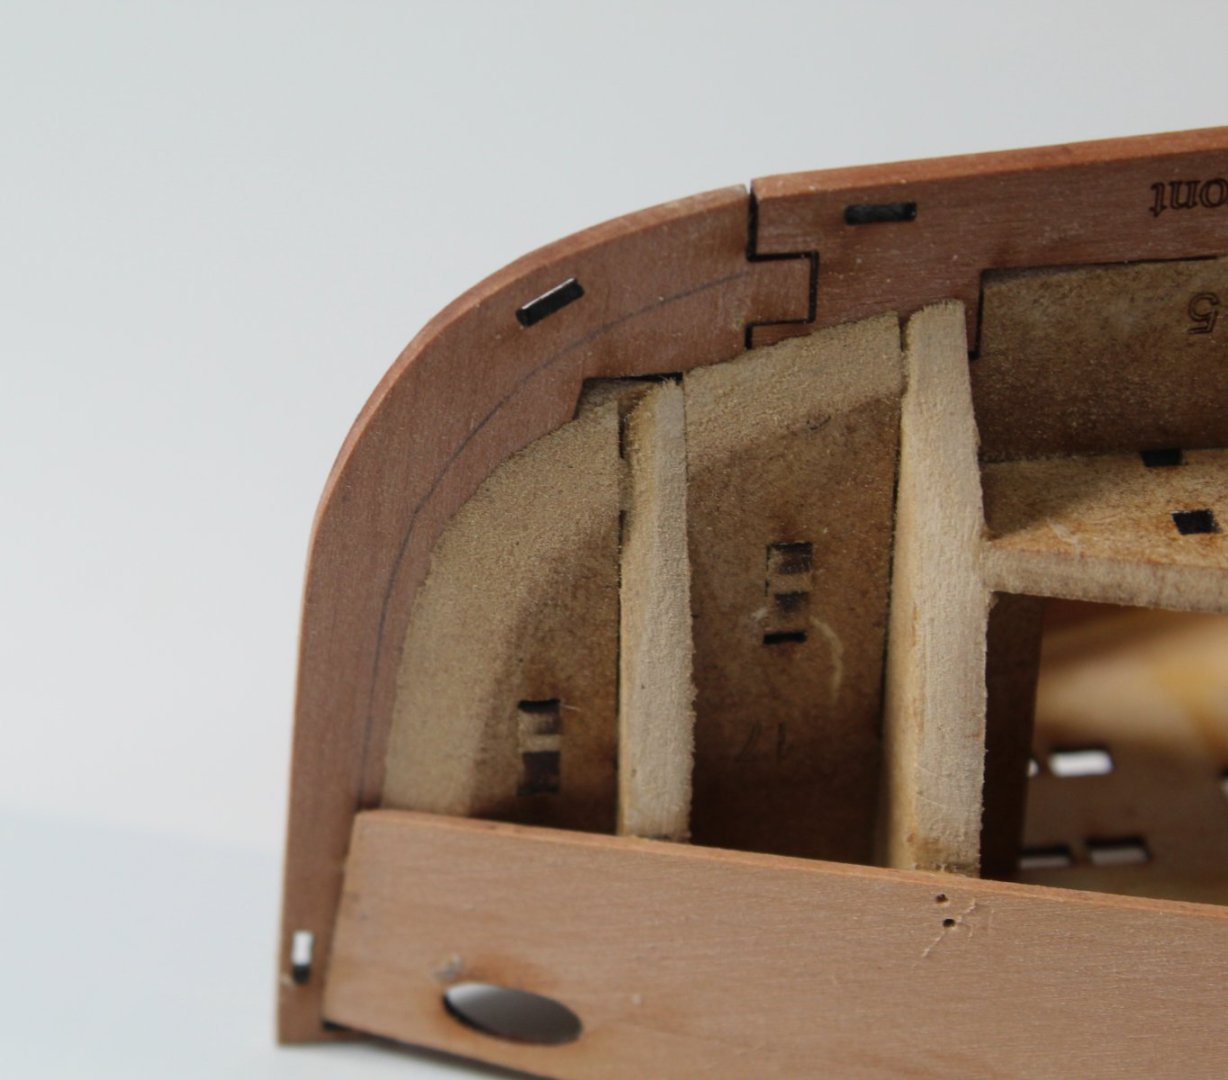
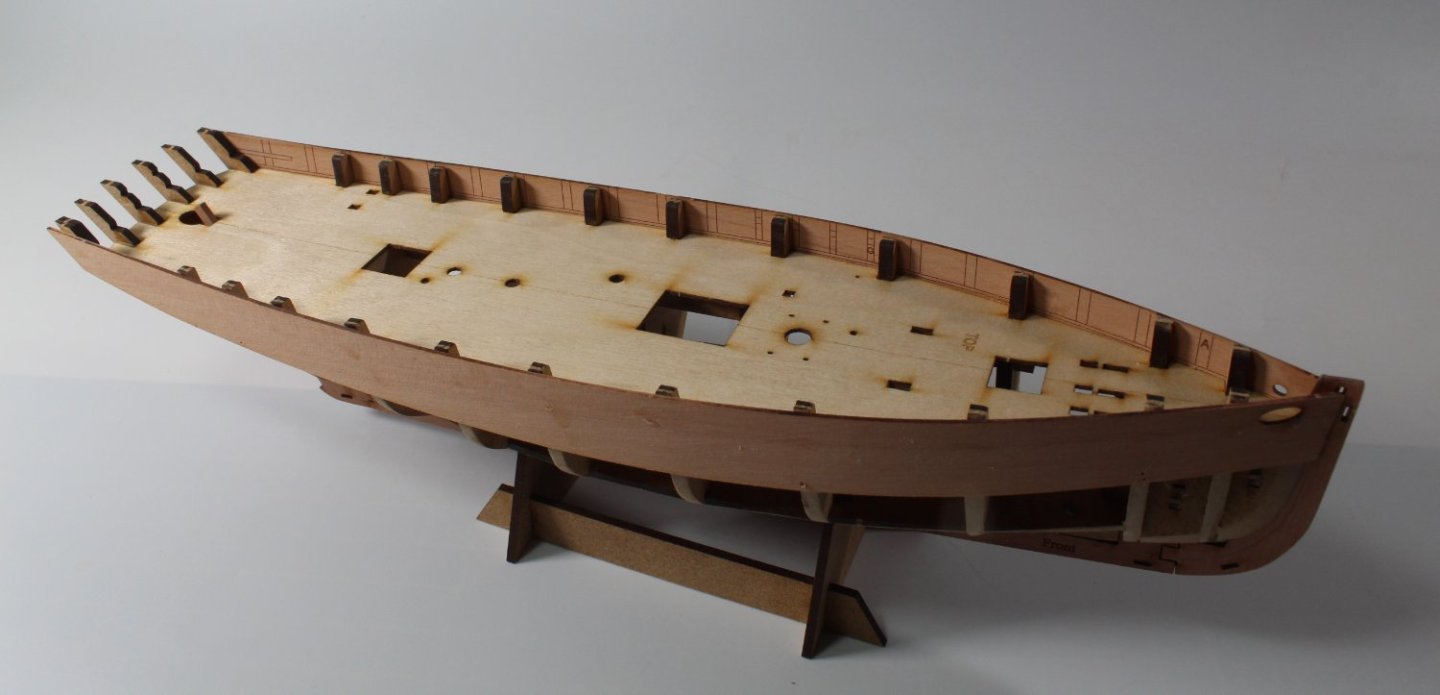
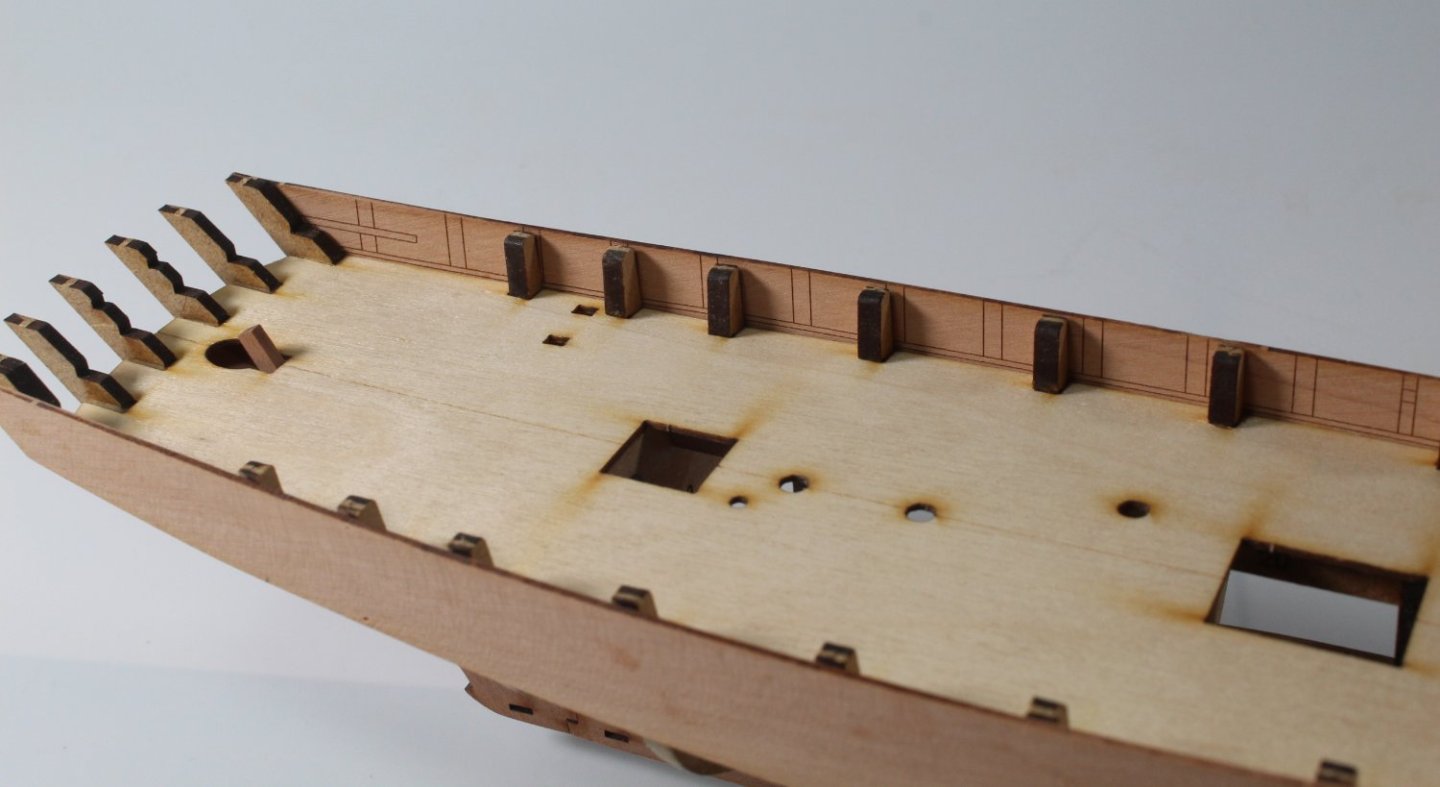
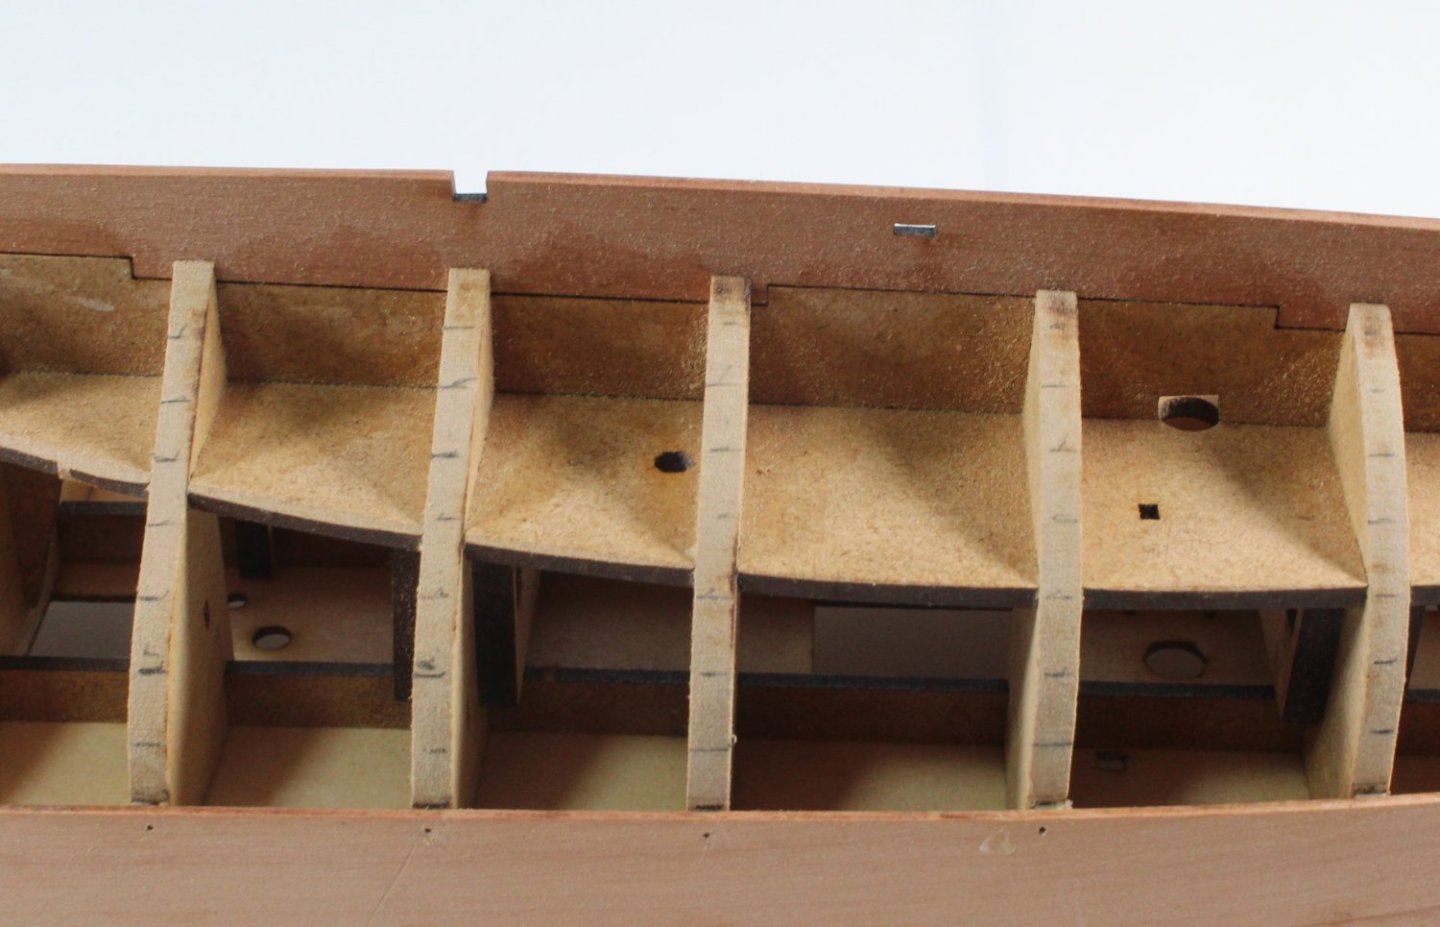
005 - Stern Counter and Bulwarks I spent a bit of time fairing the hull. I started off with 180-grit sanding sticks and 120-grit sandpaper. I then used 400-grit sanding sticks. I have checked the hull with a test plank and as far as I can tell there is good contact for the planks. I did try a few different planking runs The stem, keel and stern posts were then added. To help ensure I had a good adhesion I did brush a diluted titebond solution into the joints I did test fit the outer stem post patterns and drew a line on the stem post so I know where thew second planking needs to terminate. The stern counter pattern was soaked in hot water for 30 min and then clamped to the stern frames and left to dry overnight. The dried stern counter pattern was a nice fit as it was glued into place. Next was to add the two bulwark patterns. I did bevel the bow end leading edges and aligned the lower marked line with the deck level. I am at a loss to explain why the right-hand bulwark does not line up properly with the stern frame. The deck is firmly resting on the framework. The stern frame parts were fully pushed into the locating slots. The bulwark bottom line is aligned with with the deck. I am not going to worry about it at the moment. I will decided on what needs to be done when the bulwarks are ready to be painted and the stern gunwale is ready to be fitted. I am now ready to start adding the first planking layer. As can be seen in the photo below and have marked some 5mm steps which indicates I should be fitting 8 planks at the widest point. I have checked and believe 5 planks (per side) will be required to cover the distance between the bulwark and the stern post.


- 48 replies
-
- 6
-
-
- Nisha
- Vanguard Models
- (and 3 more)