Glenn-UK
-
Posts
3,169 -
Joined
-
Last visited
Content Type
Profiles
Forums
Gallery
Events
Everything posted by Glenn-UK
-
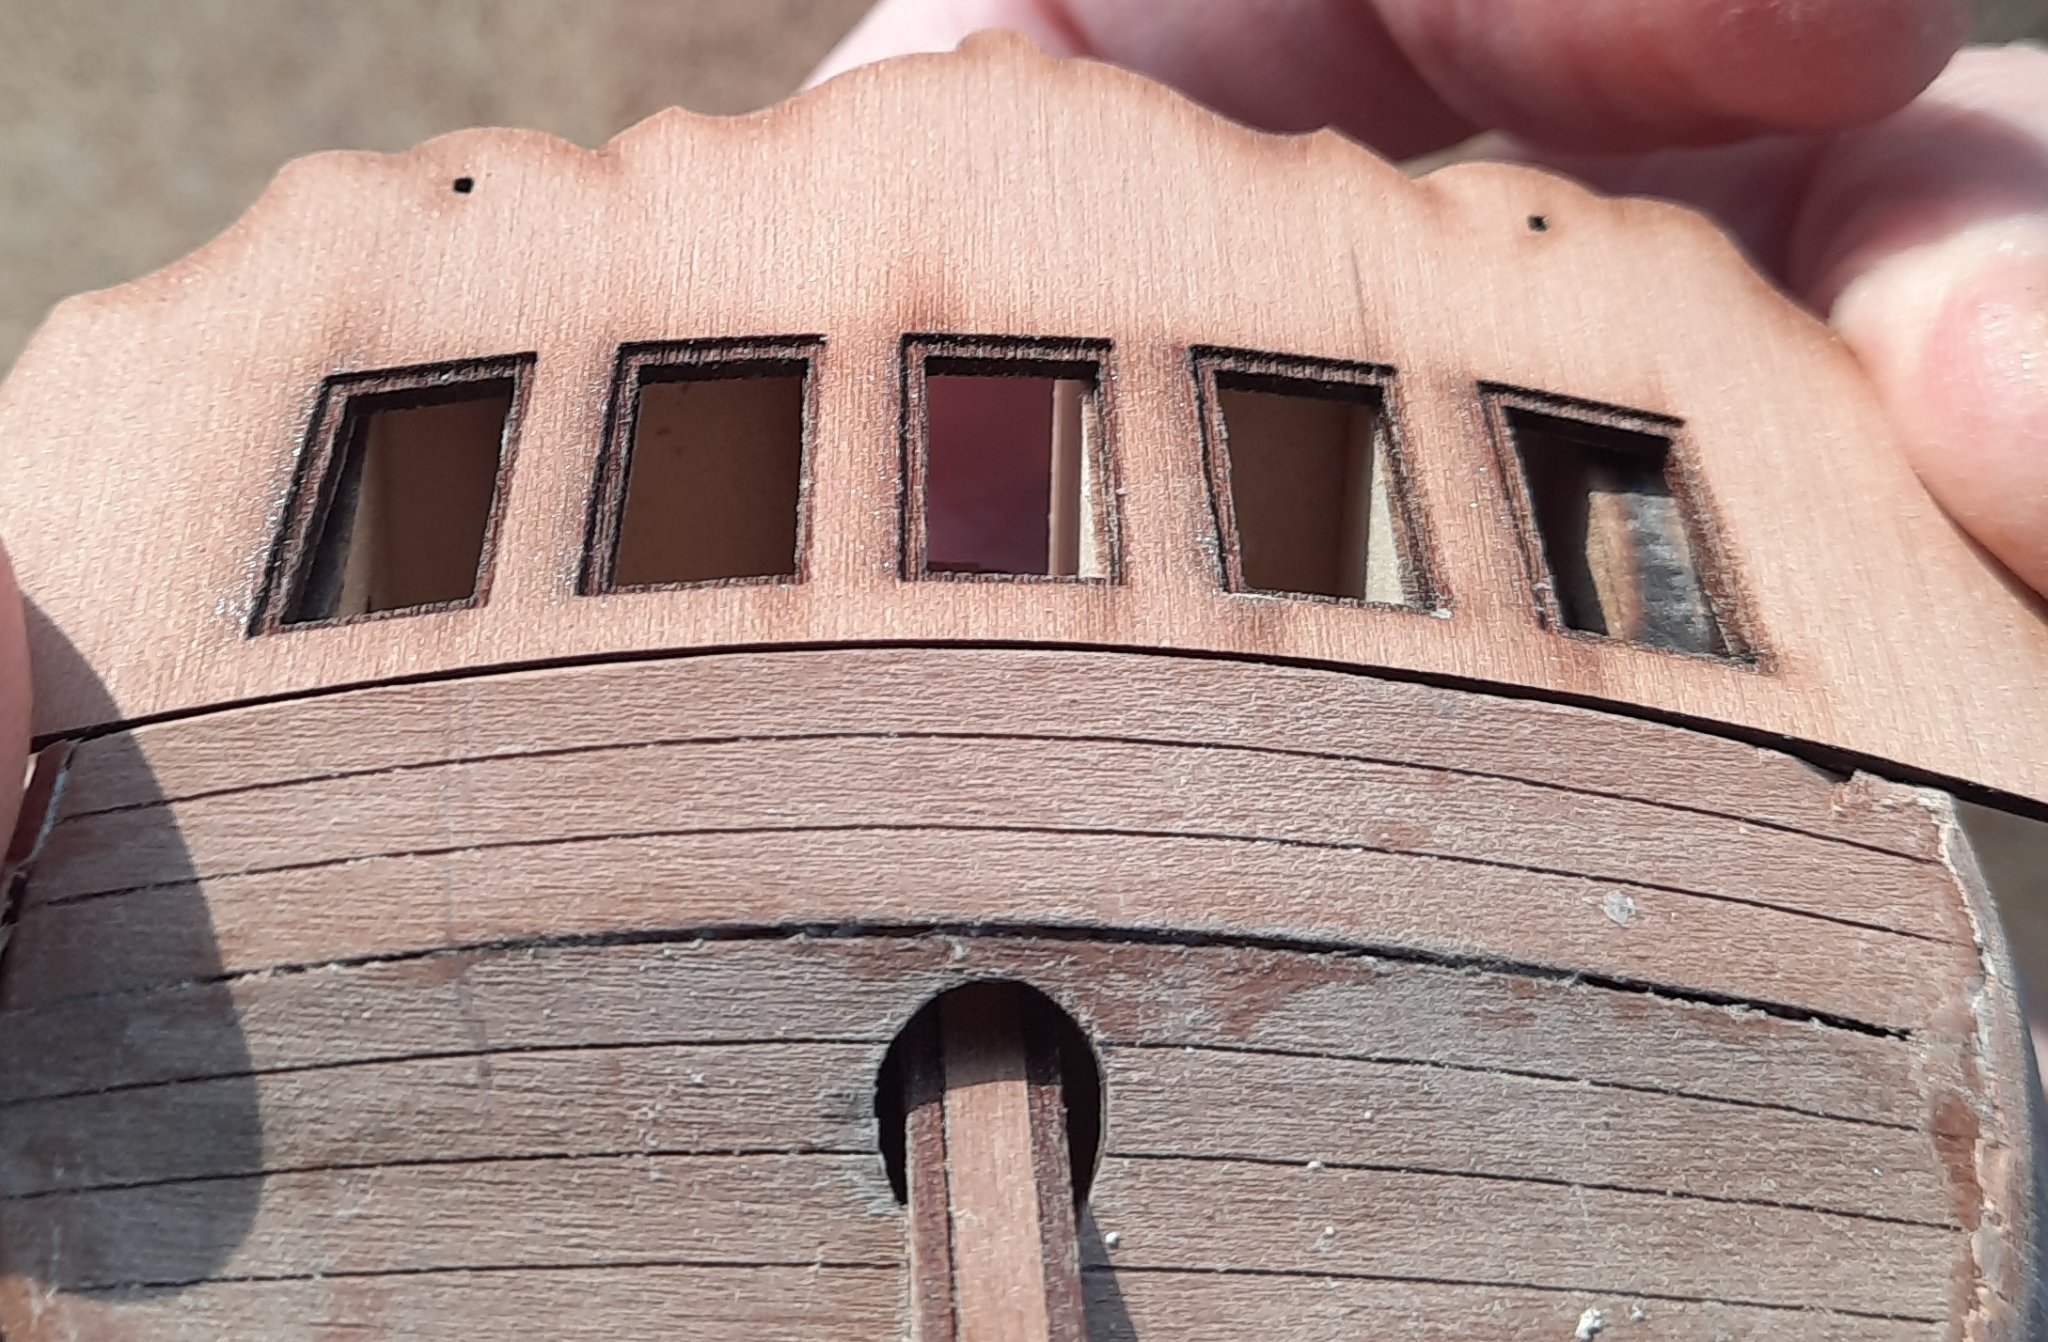
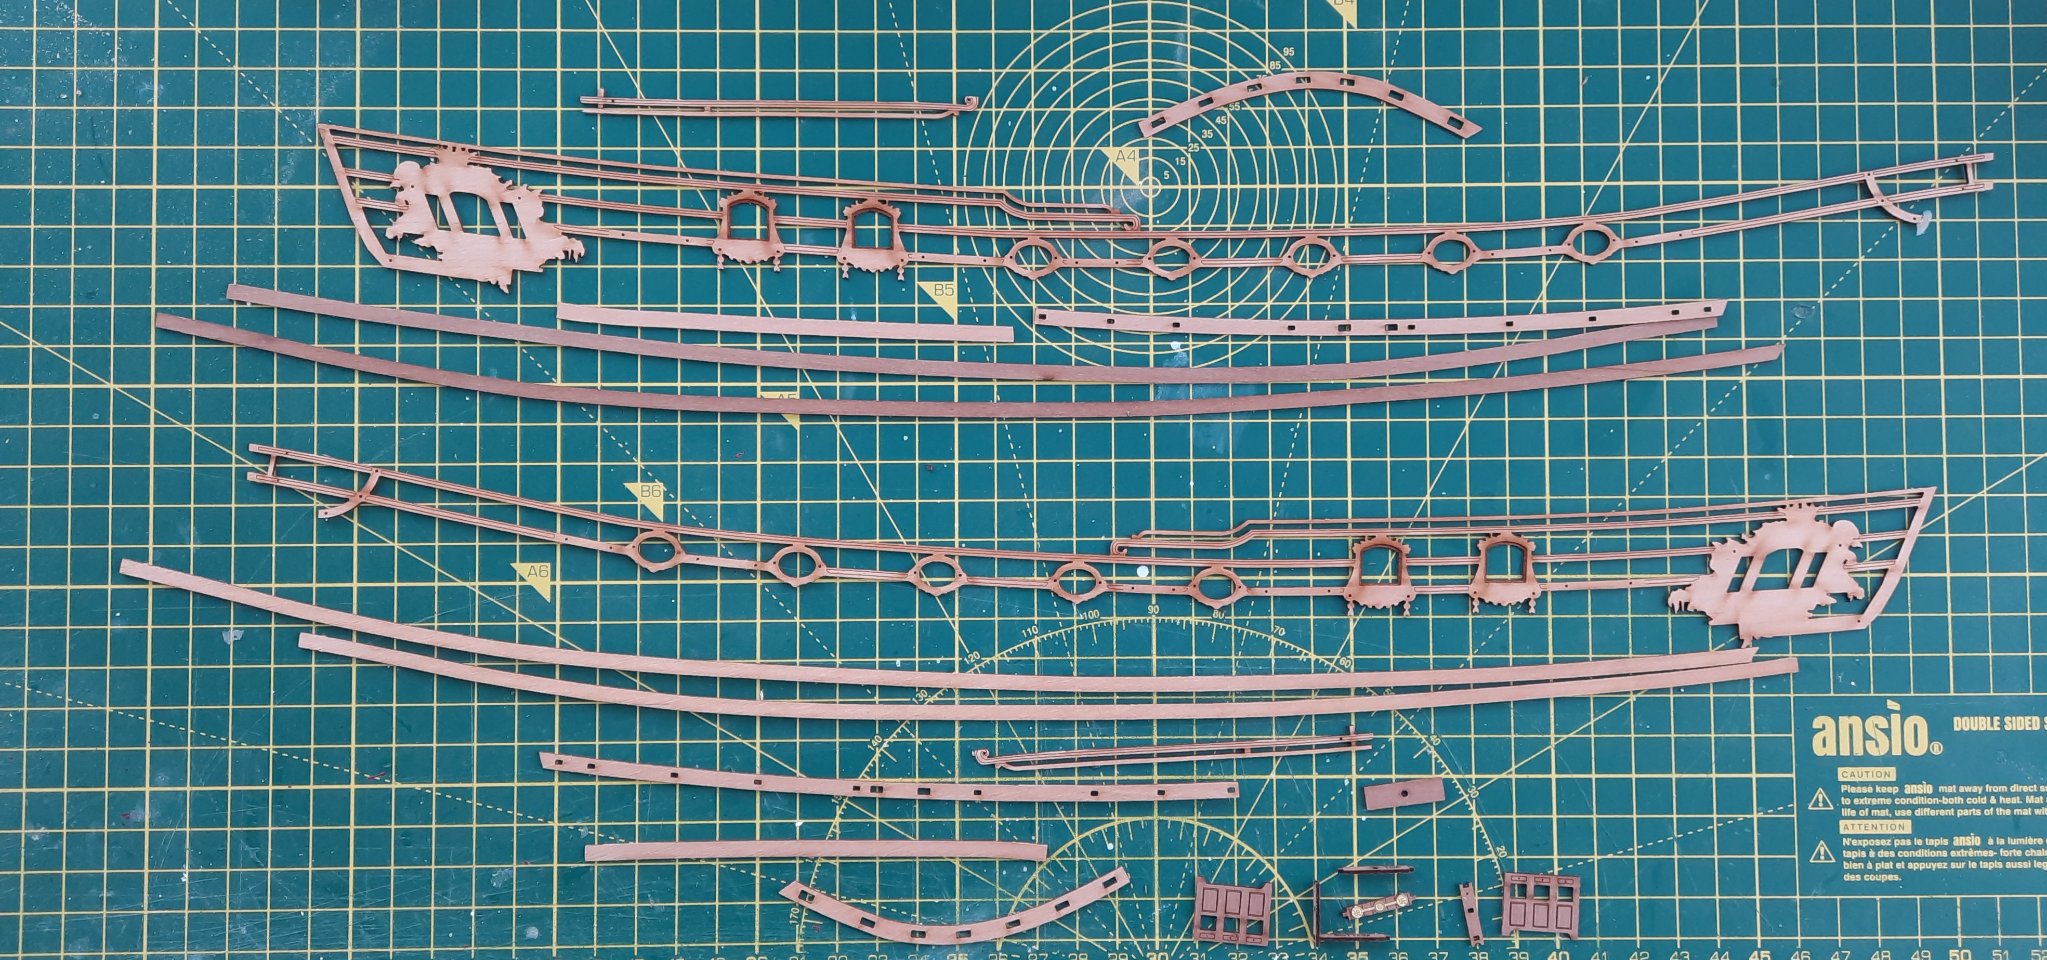
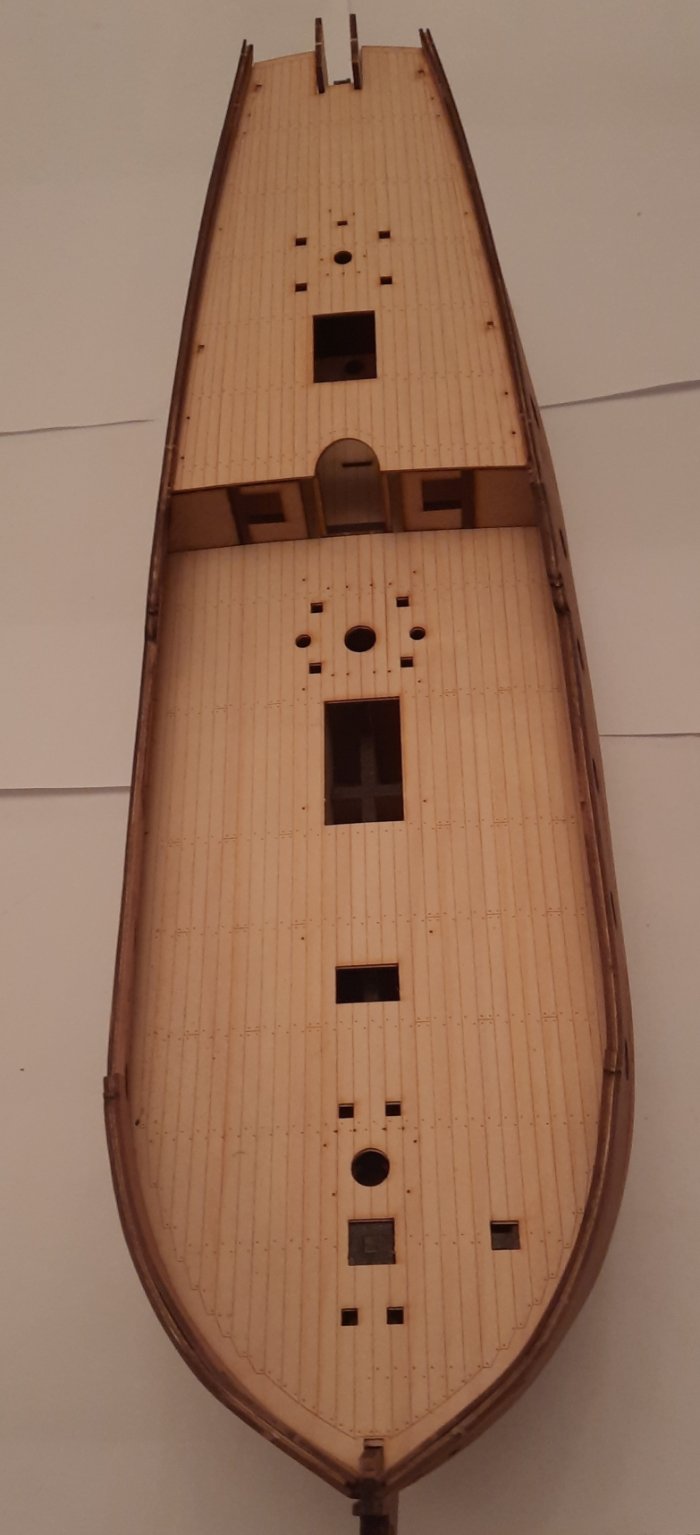
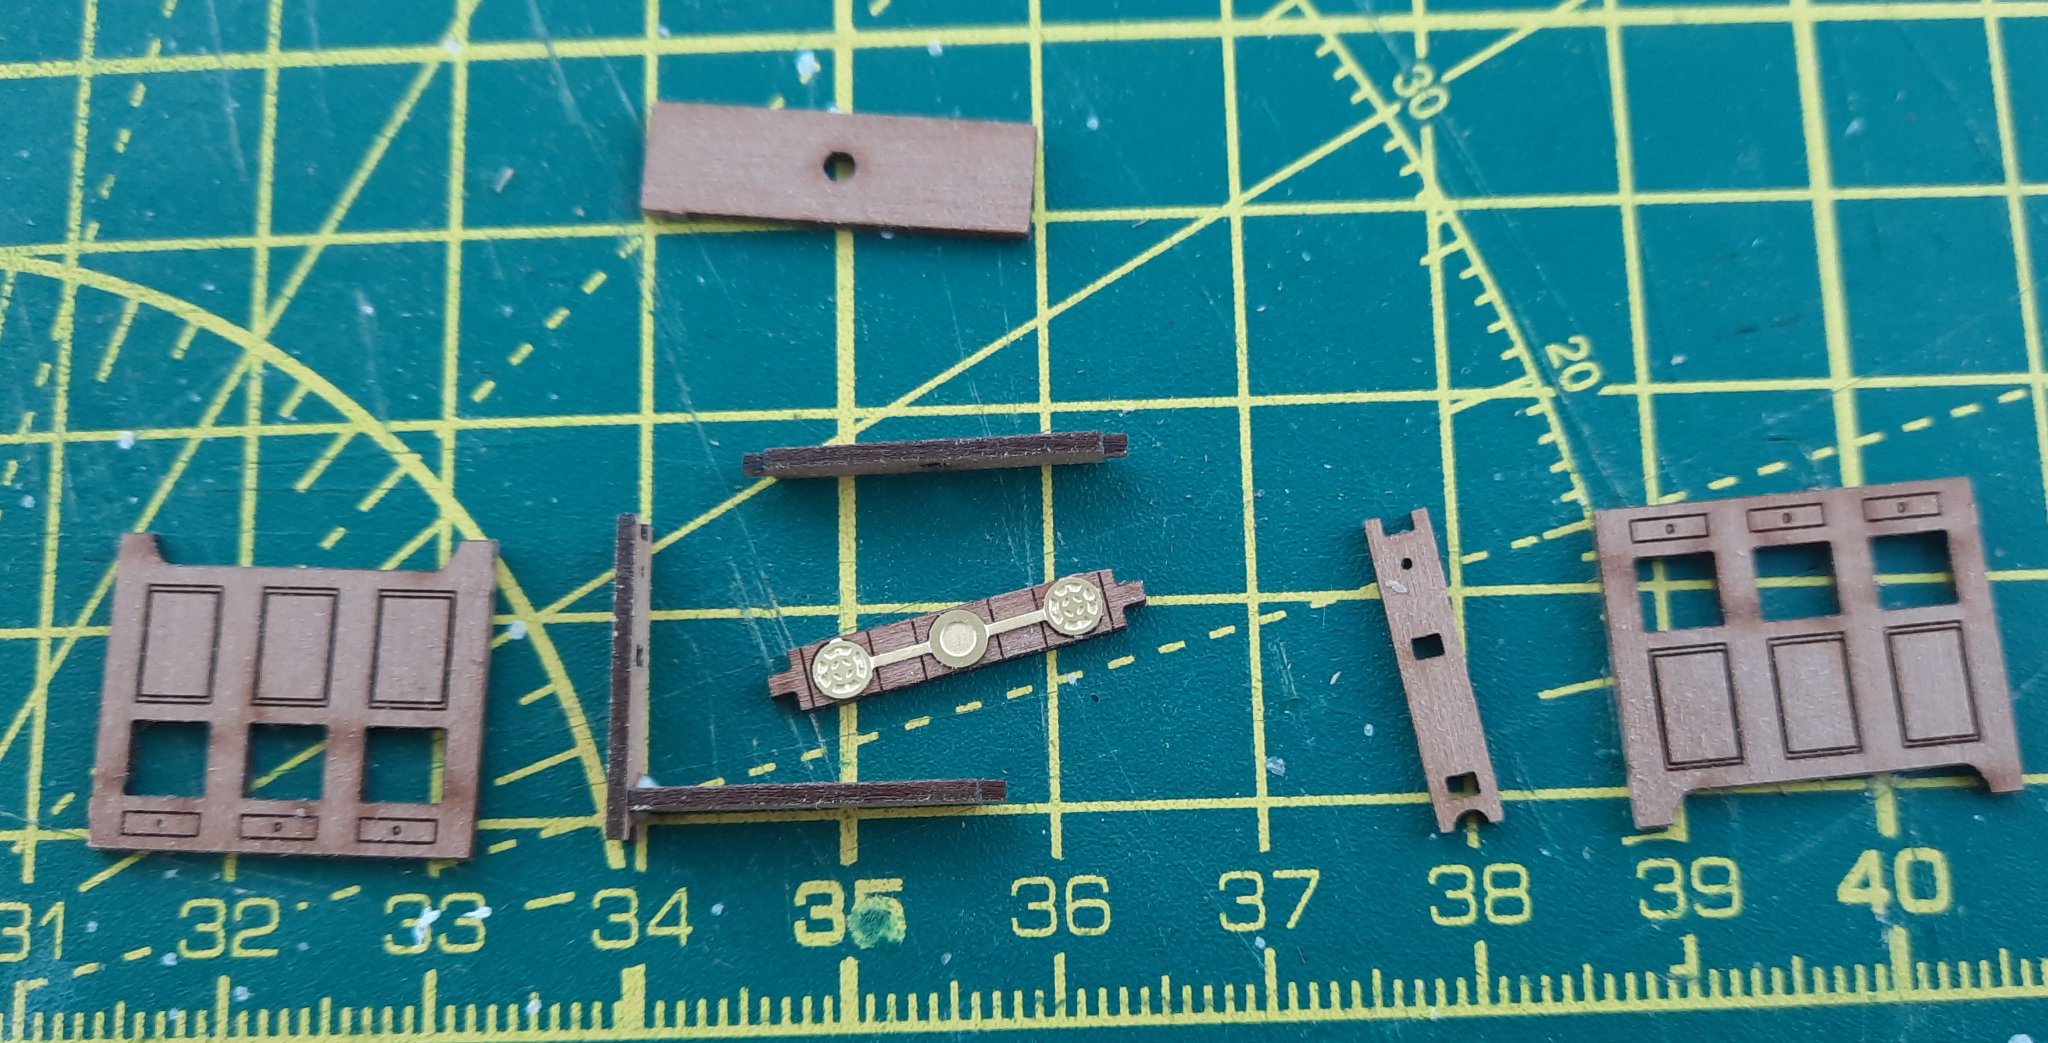
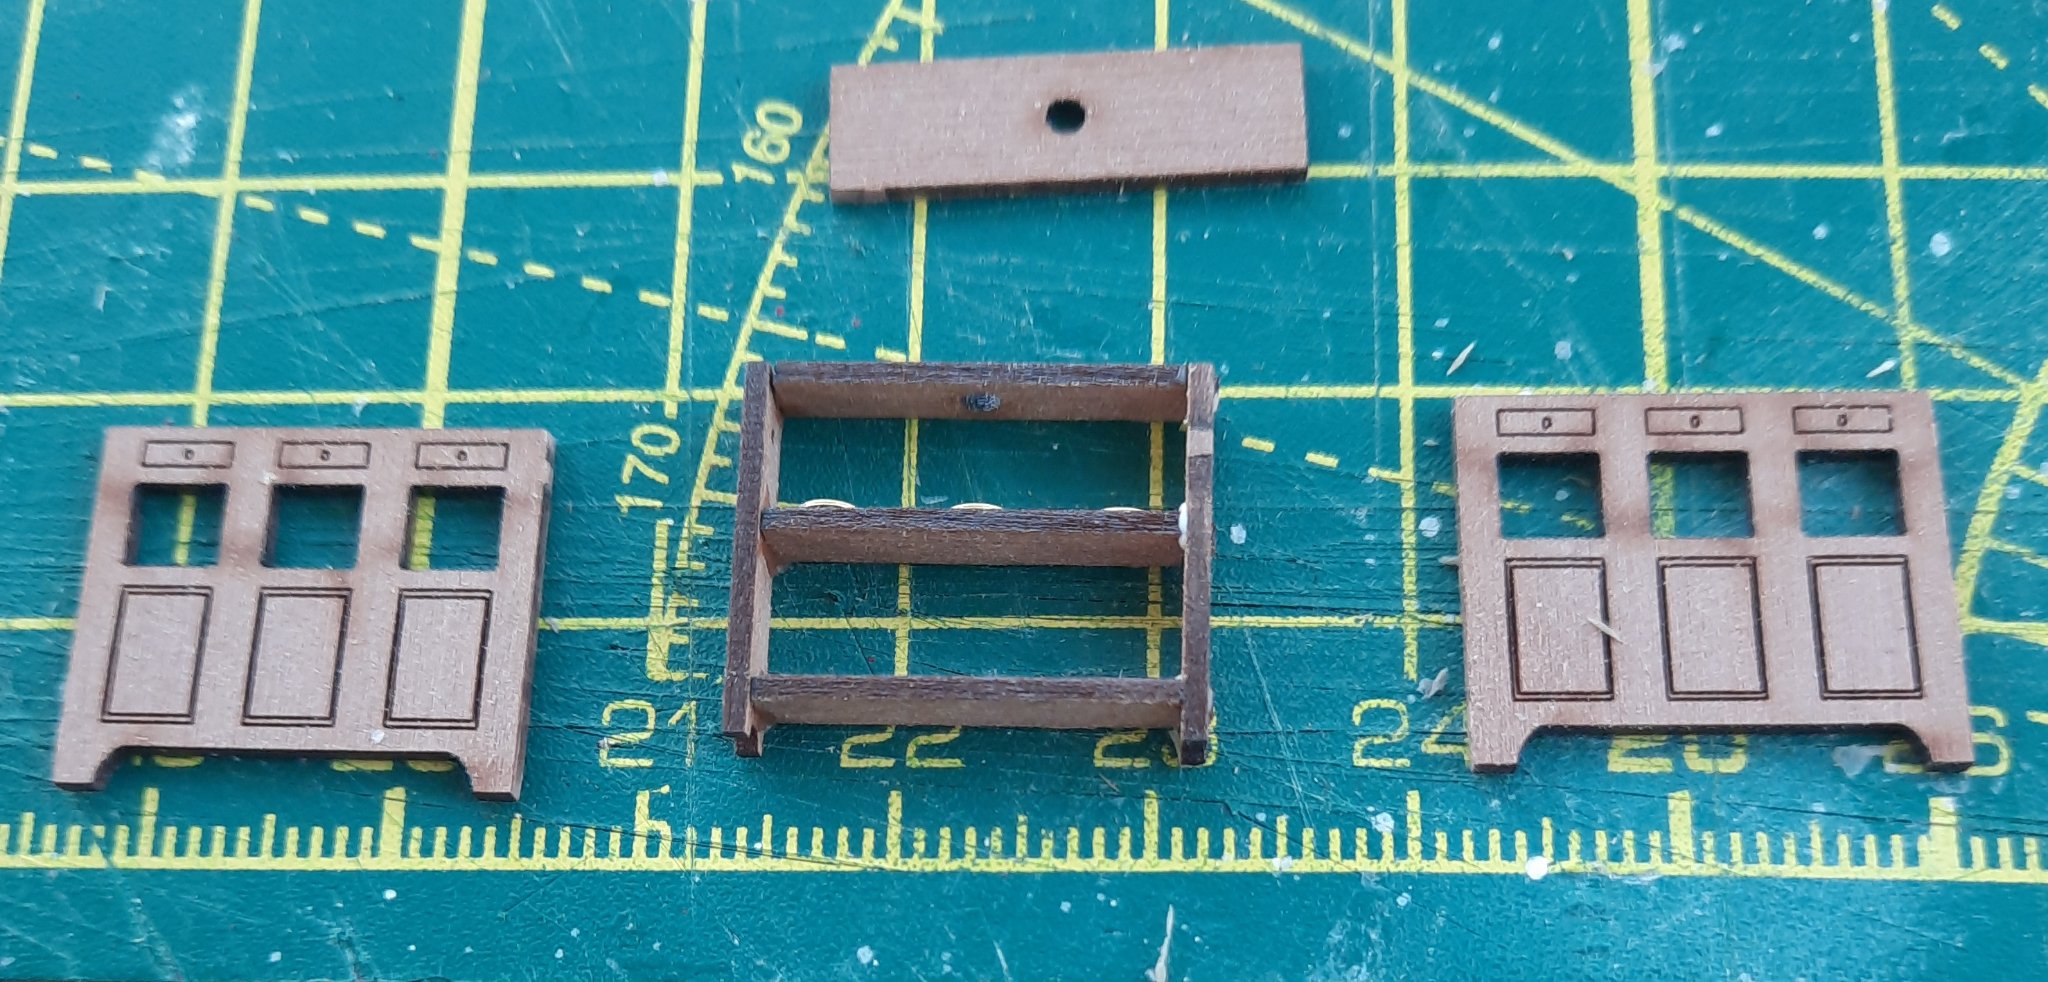
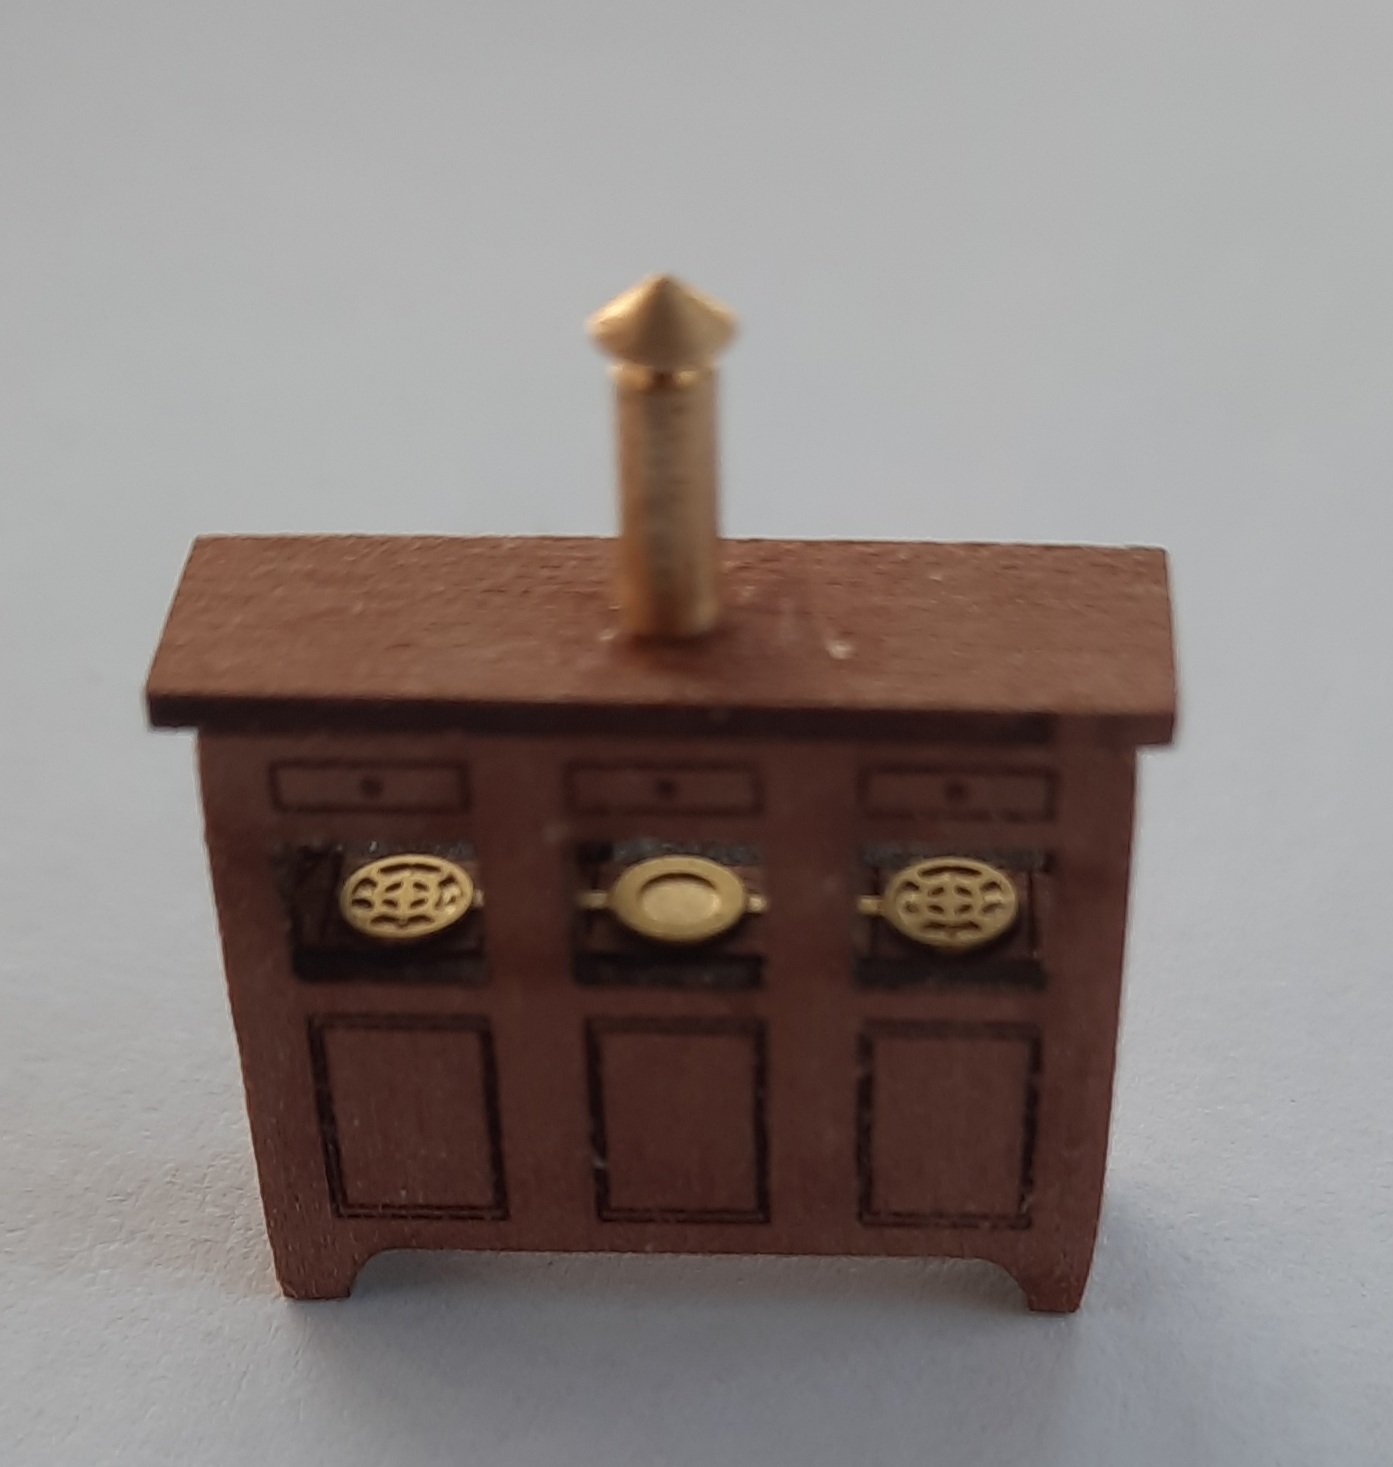
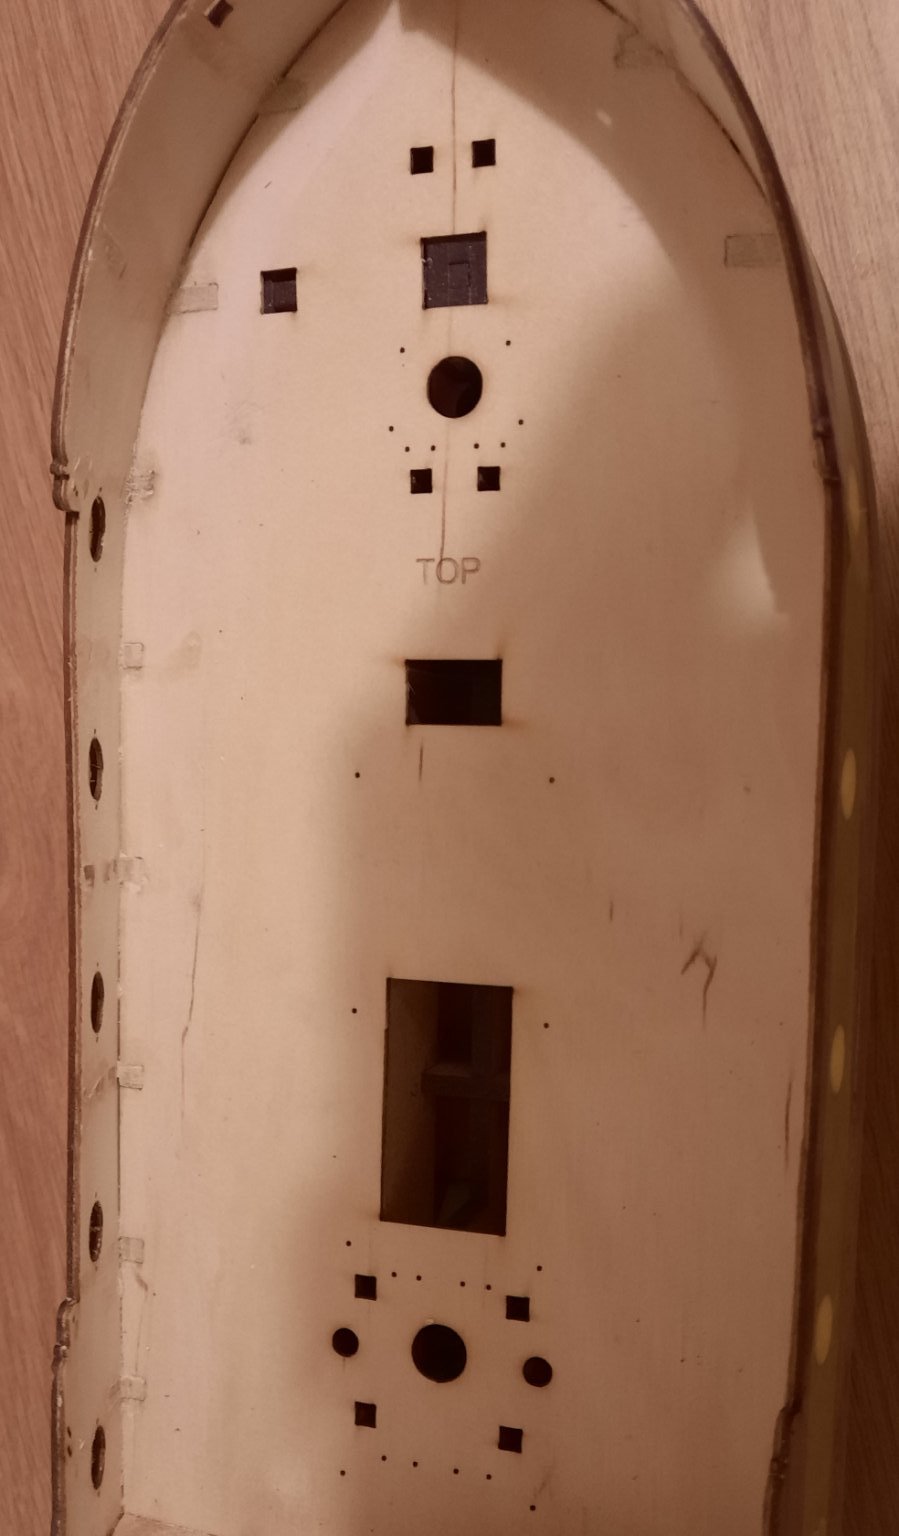
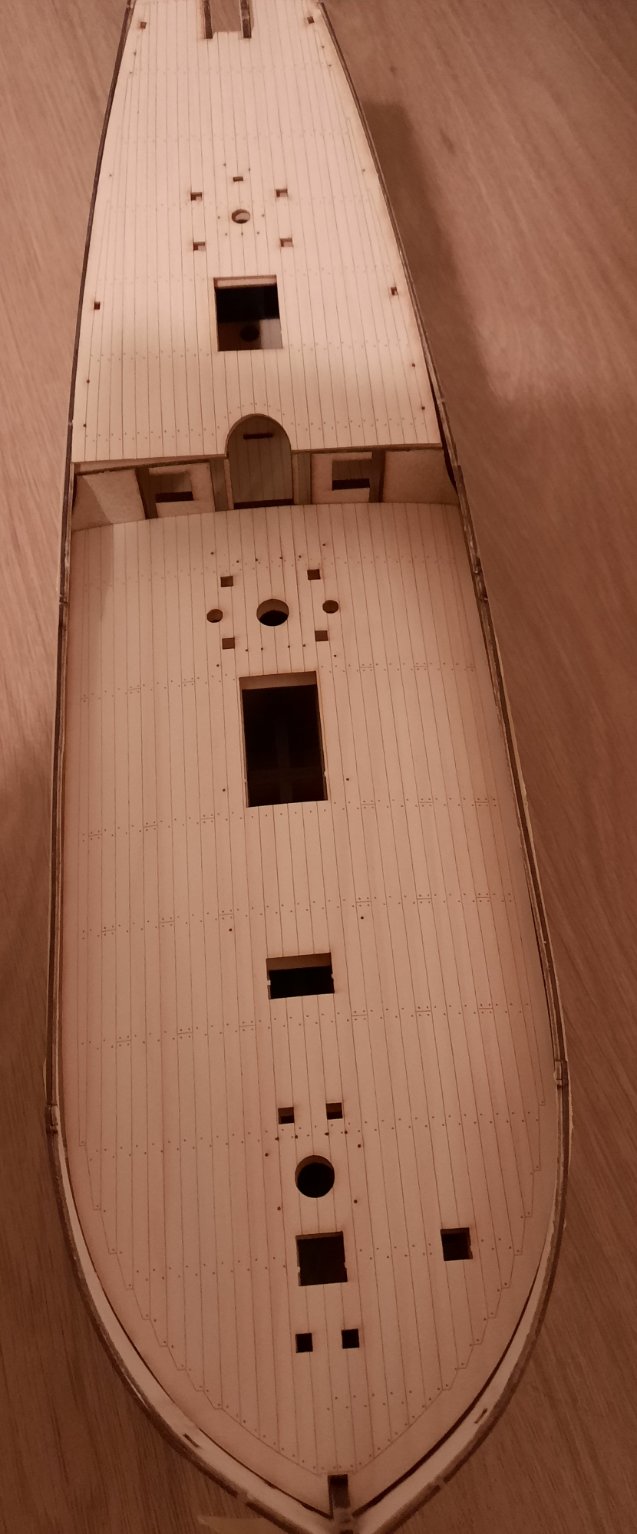
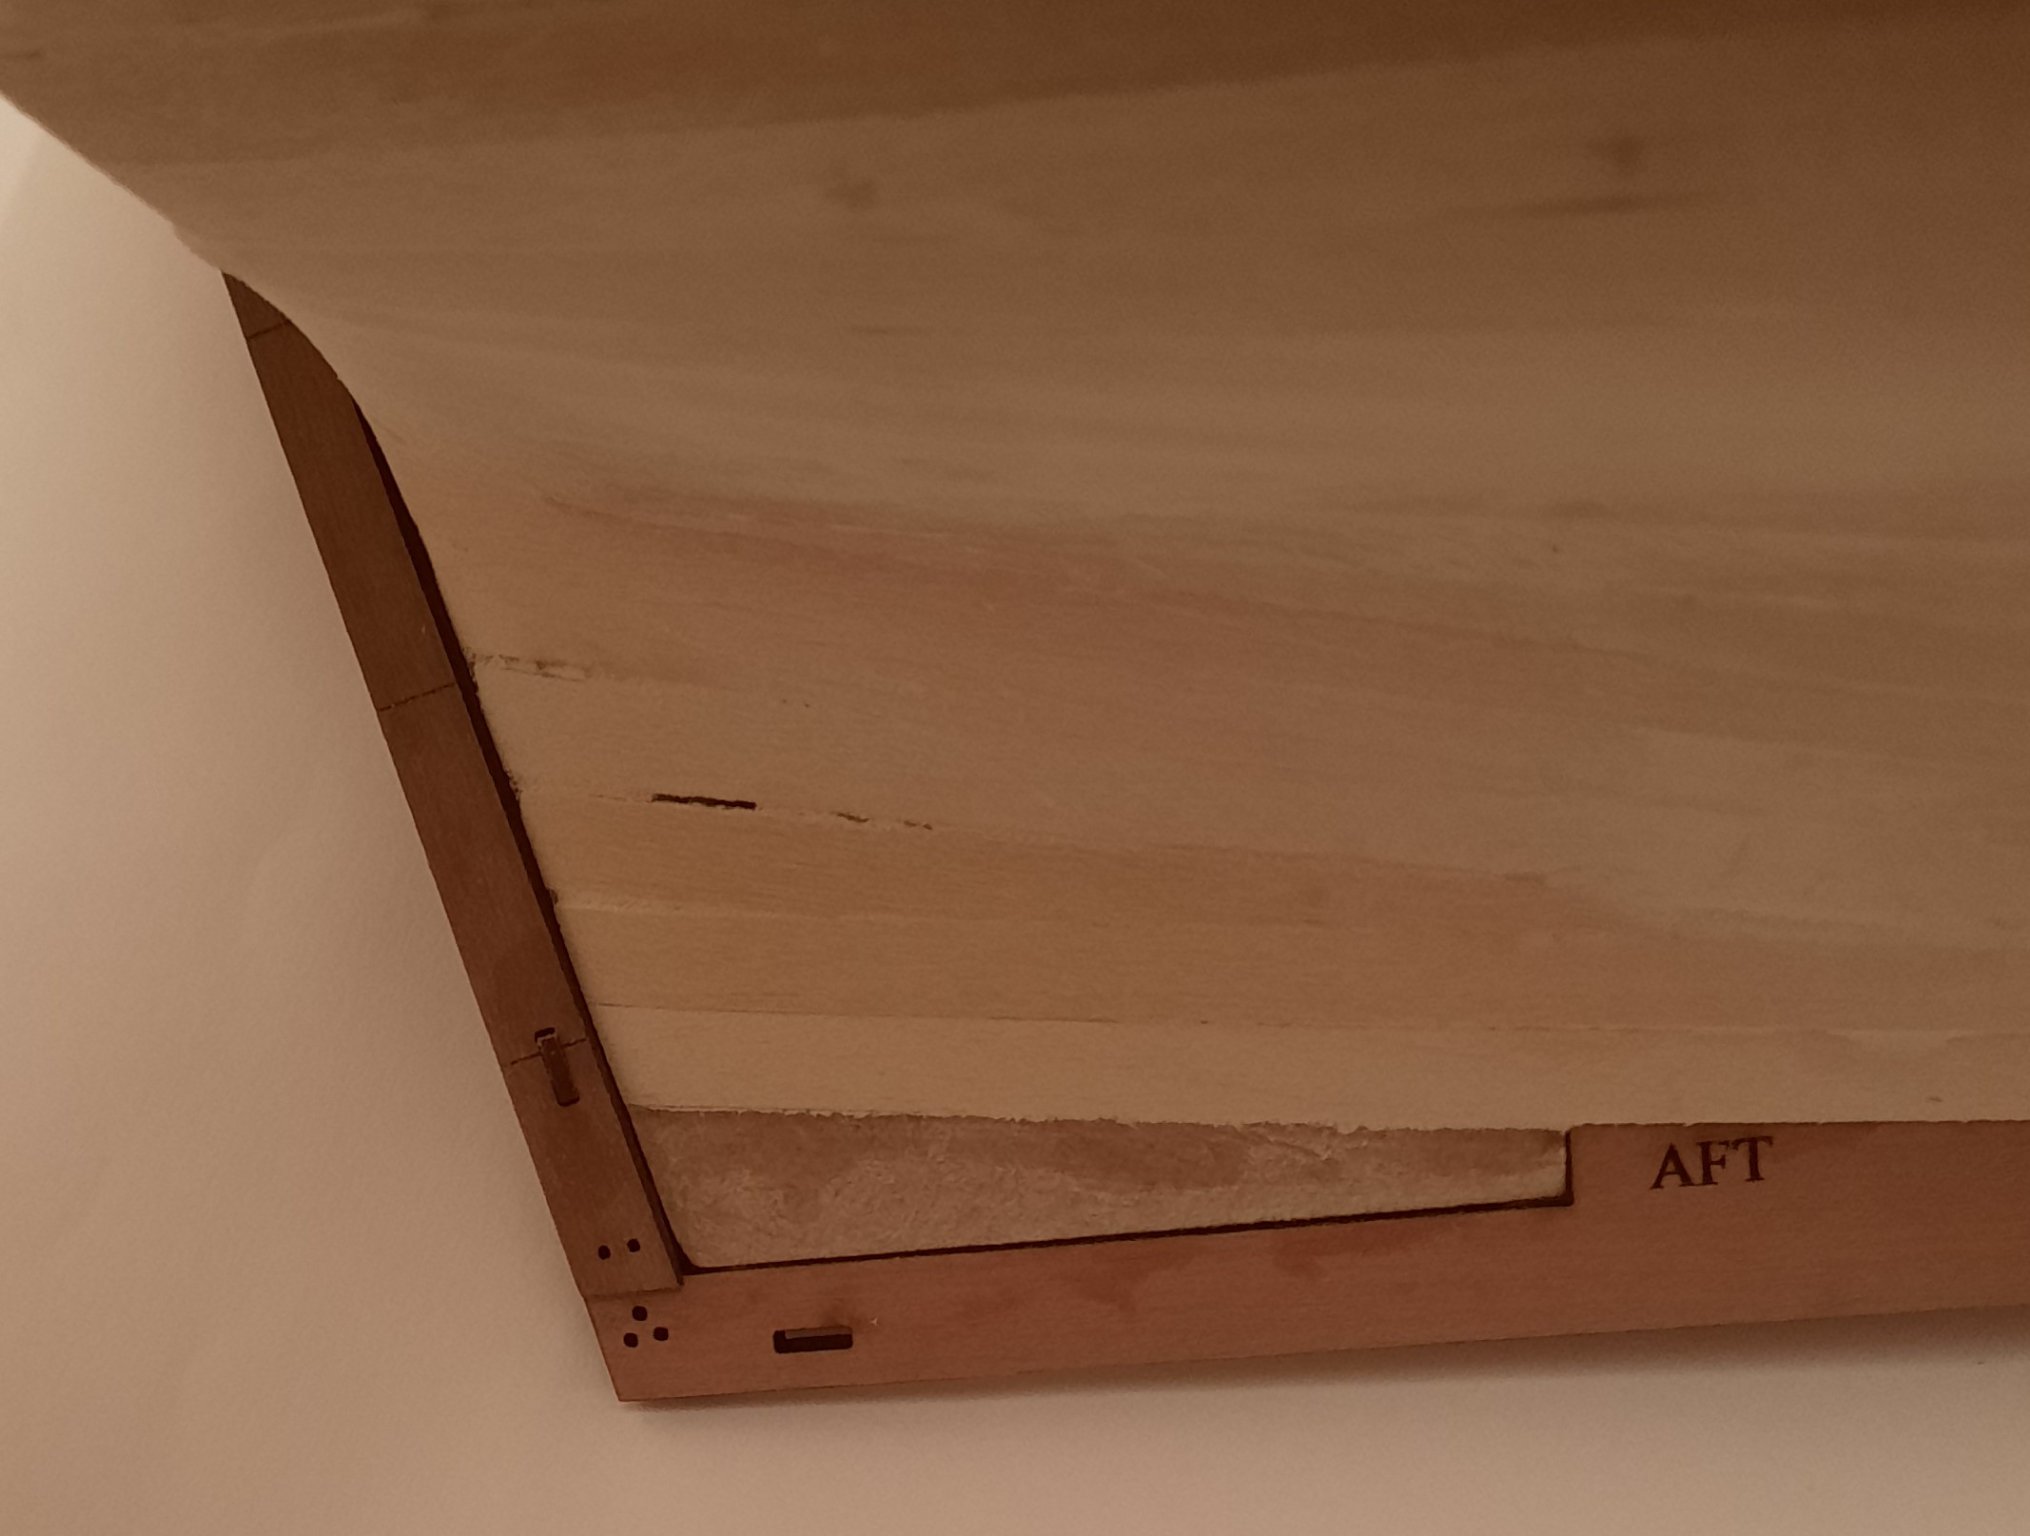
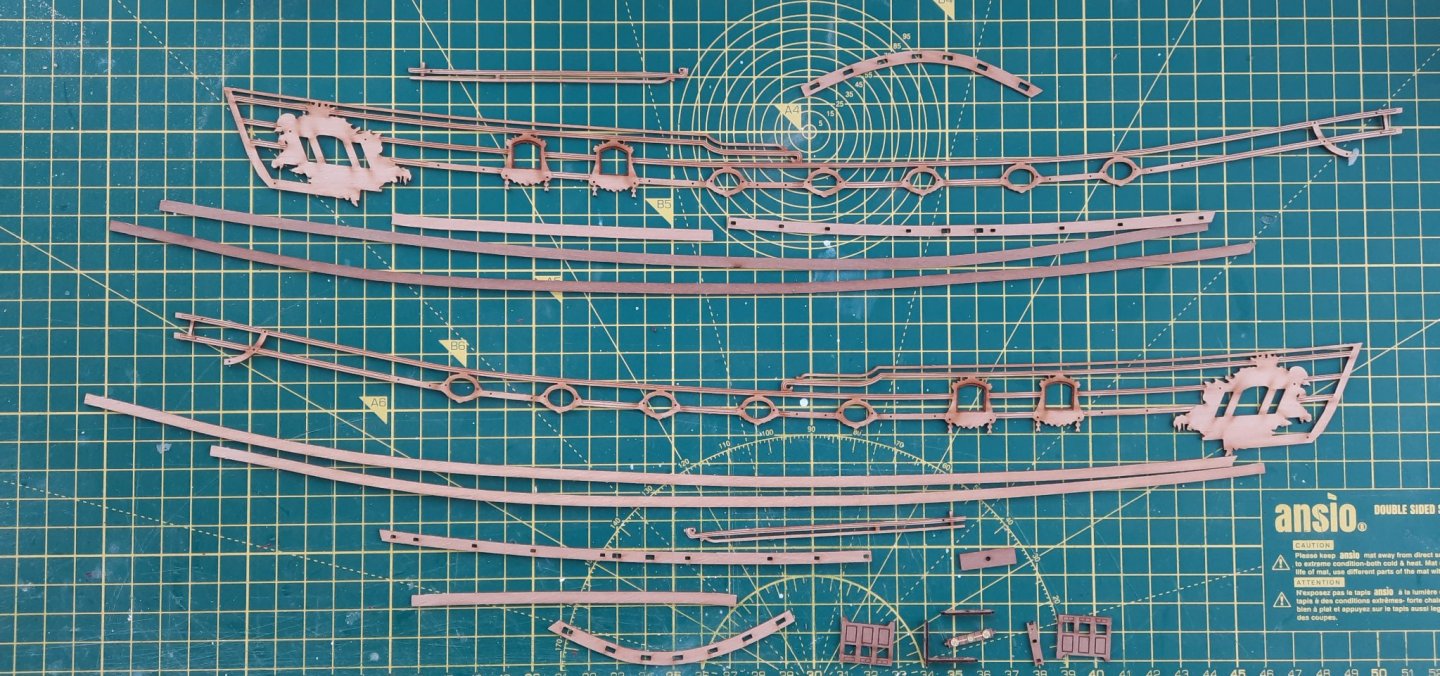
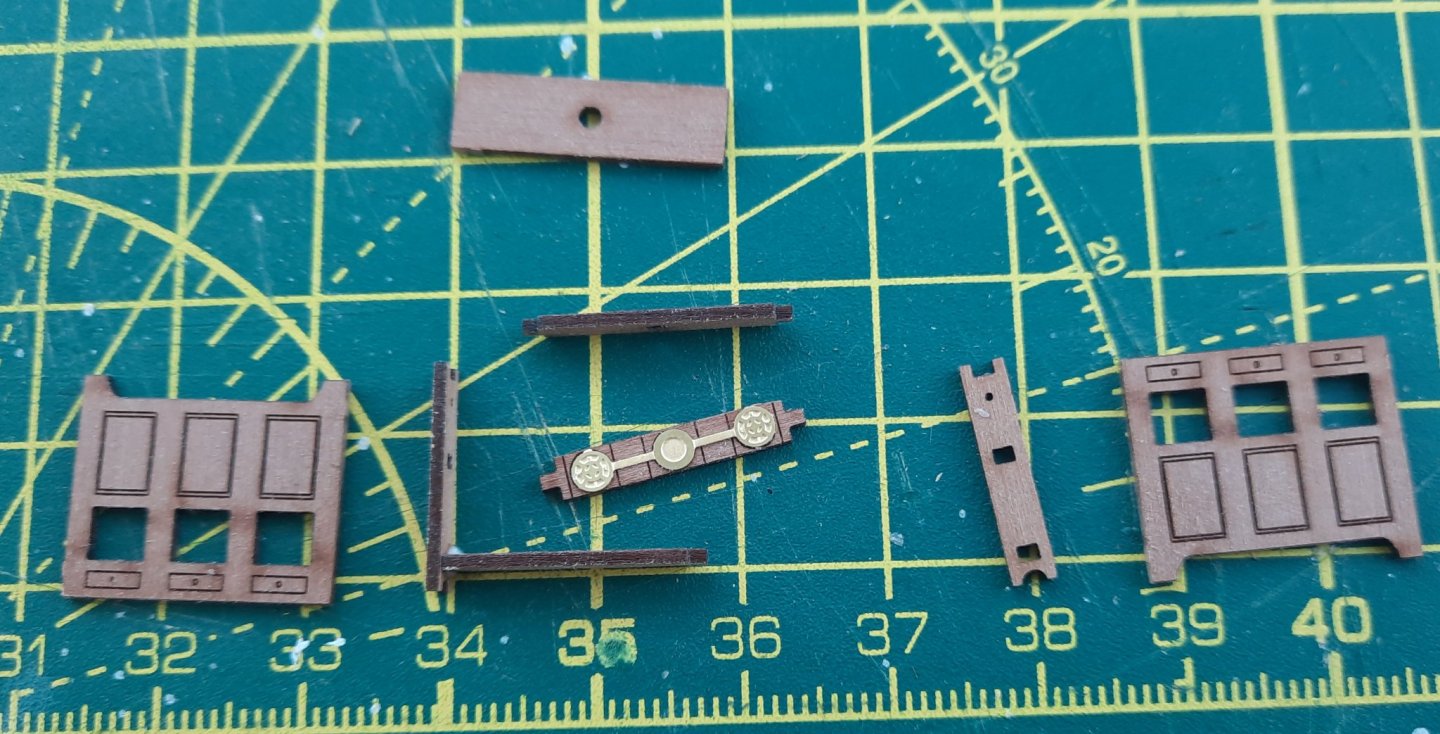
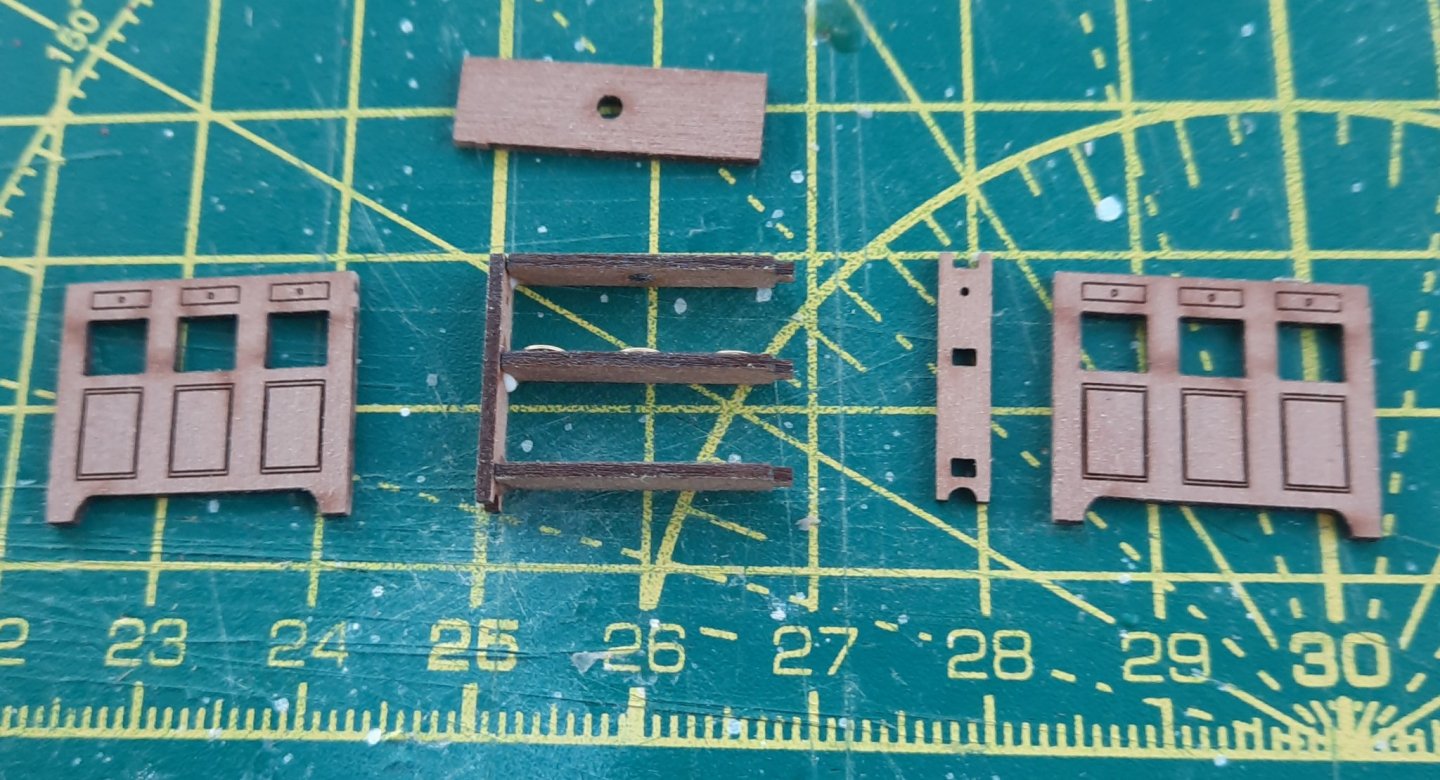
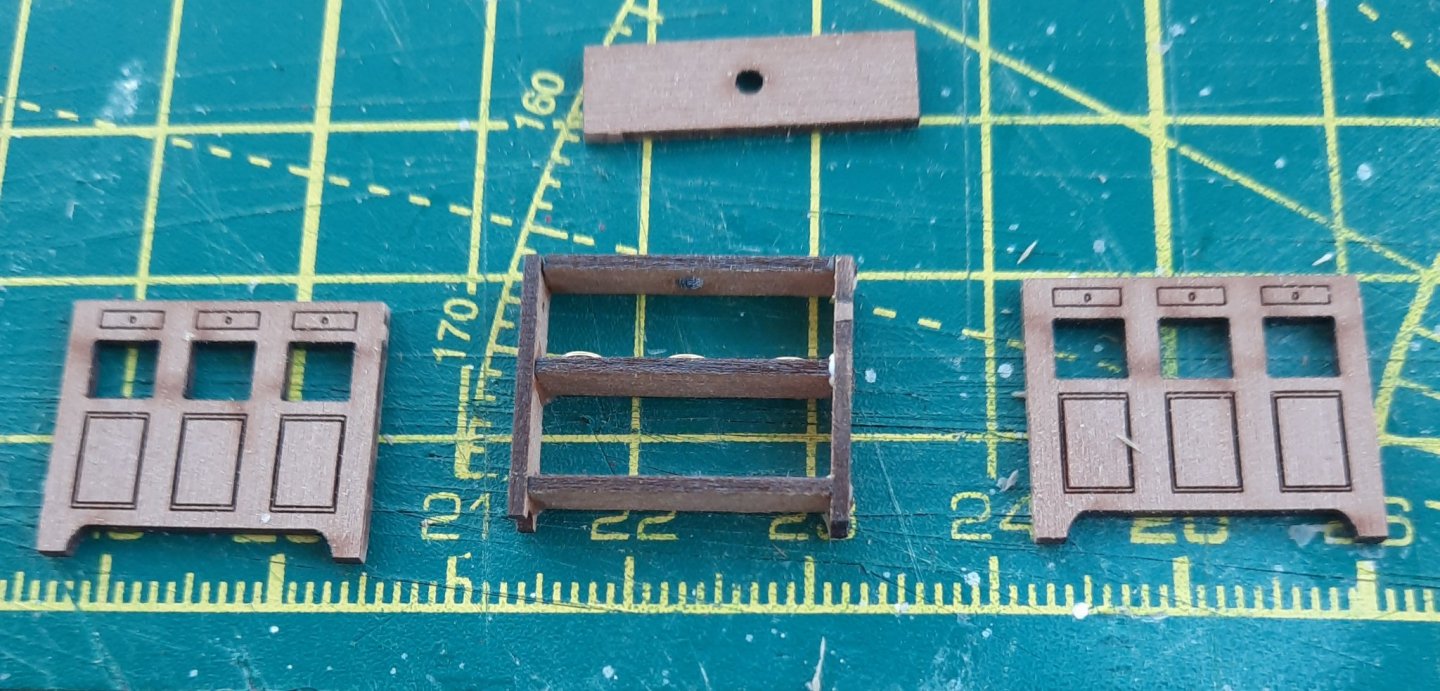
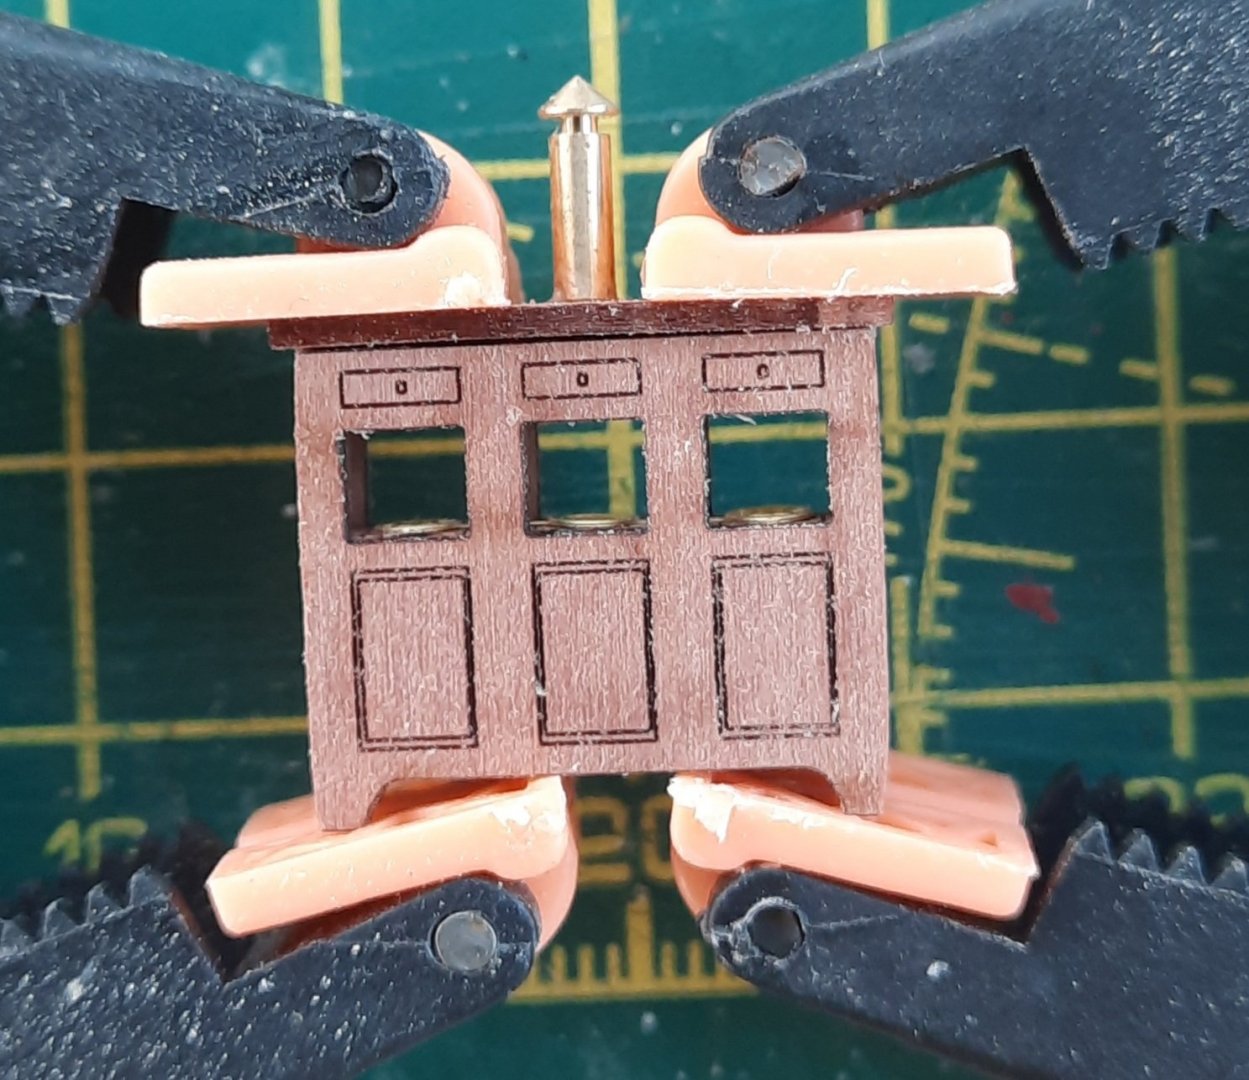
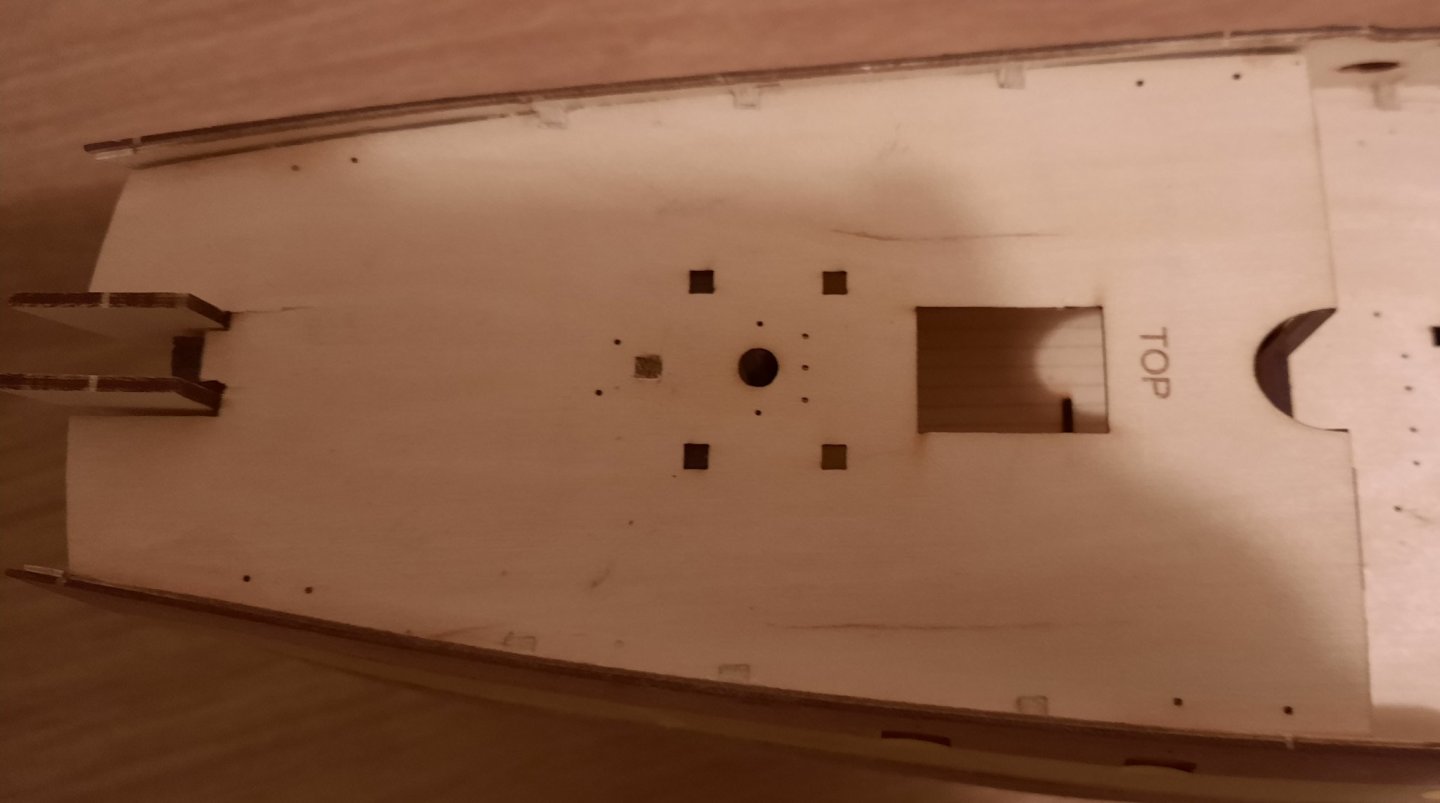
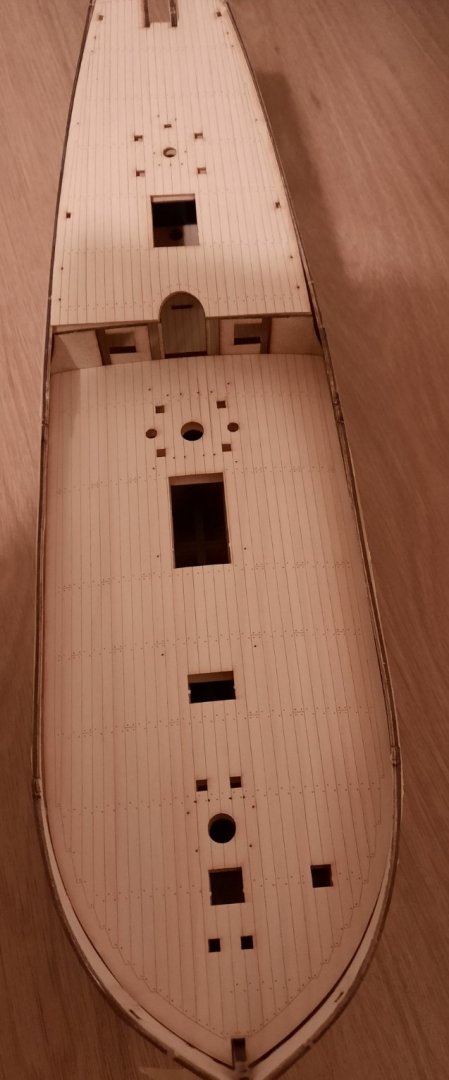
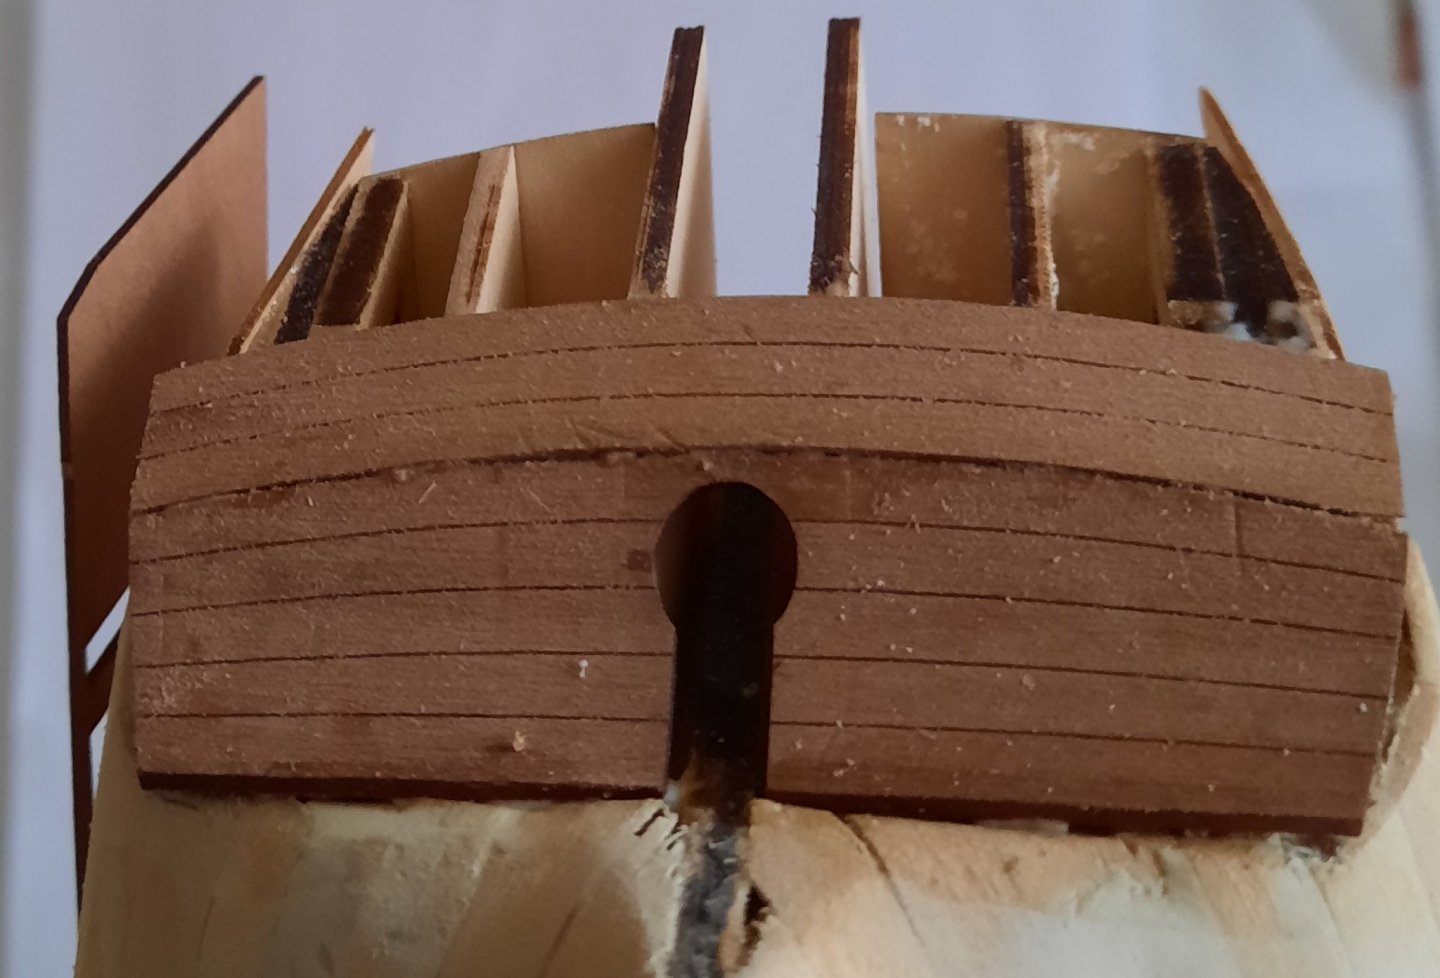
 I am currently waiting for delivery of some products, such as the polyethene matt varnish which is due for delivery this week I pondered what to do. I thought I would start this post with a picture of the fore and aft decks. Firstly I removed the various patterns from the pear wood sheets and I did dry fit these parts. I plan to soak the rail patterns in hot water later today so they can be clamped to the hull to dry overnight. When removing the wales I noted that the only the binnacle parts remained on the pear wood sheet. Therefore I decided to remove these parts so I could assemble these deck item. This turned out to out to be a fun task. It does not really require a detailed explanation of my build method but I have attached a set of photo's of the various stages. I thought I would replicate the photo in the build manual in the next photo I then decided to see how the stern fascia panel would fit. It seemed to be a reasonably good fit but it would not sit flush with the upper stern counter pattern. The problem was quickly solved by adding a chamfer to the lower edge. There is a bit of damage to the upper stern counter (top right corner) which I did when removing some of the excess planking material. This is is not a big issue as it can be filled before the blue paint is applied.
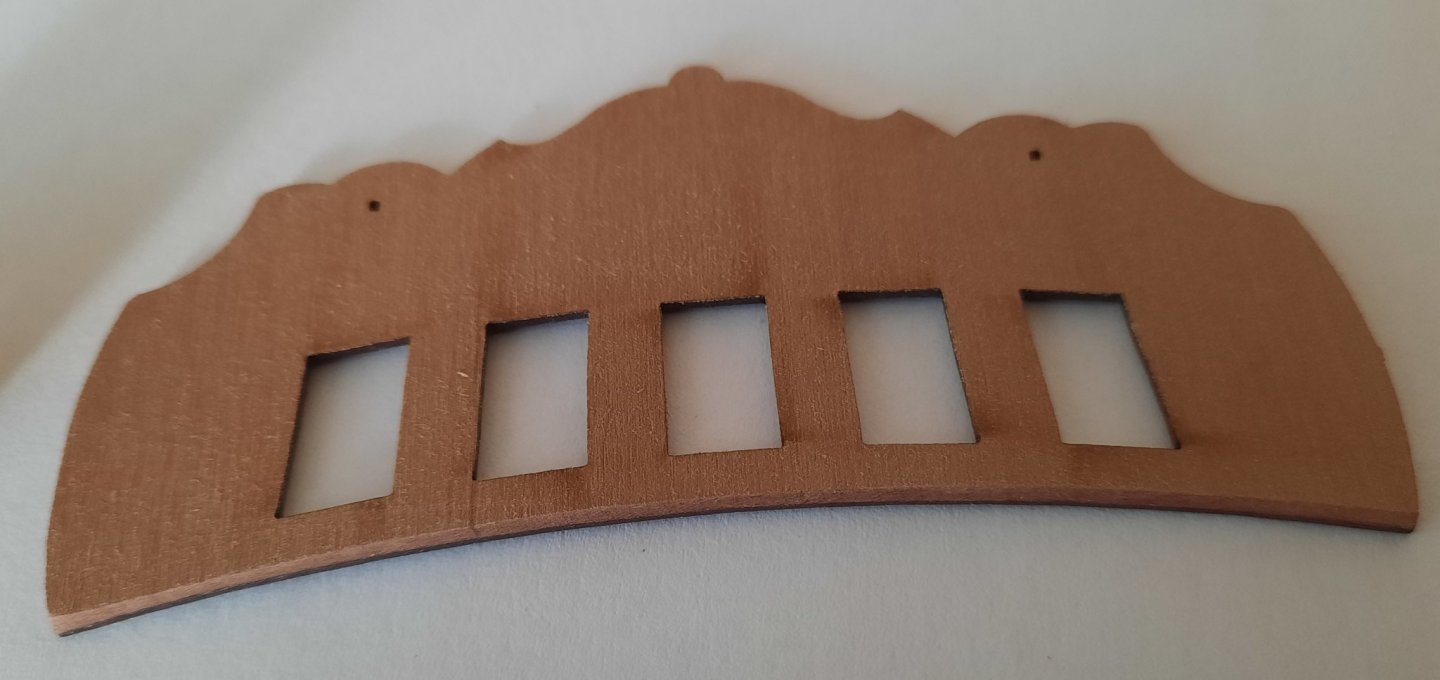


- 382 replies
-
- 9
-

-
- Vanguard Models
- Duchess of Kingston
- (and 1 more)
-
I have a question regarding blackening PE parts. I am planning to use AK Interactive Brass Photoetch Burnishing to blacken some parts, such as the eyebolts, hooks, etc. I am interested to know what method should be used to clean the PE parts before the application of the AK product. For example should I clean as follows: a) Using a toothbrush clean the parts with soapy warm water to remove any grease b) Once cleaned with soapy water brush the parts with white vinegar. c) Finally clean the parts with clean water to remove all traces of the white vinegar d) Apply the AK product to blacken, probably two applications will probably be required to get the best result.
- 382 replies
-
- 1
-
-
- Vanguard Models
- Duchess of Kingston
- (and 1 more)
-
Hi Chris I have ordered Ronseal Ultra Tough polyethene matt finish varnish.
- 382 replies
-
- 2
-
-
- Vanguard Models
- Duchess of Kingston
- (and 1 more)
-
Thanks for your support, it is greatly appreciated. It is starting to look nice. I'm looking forward to adding the deck features in the next week or two which is when the model comes to life for me.
- 382 replies
-
- 2
-
-
- Vanguard Models
- Duchess of Kingston
- (and 1 more)
-
Thanks for the info. I live in a small town, with a 50 min drive to the better equipped / stocked stores in Hull, York or Middlesbrough.
- 382 replies
-
- 1
-
-
- Vanguard Models
- Duchess of Kingston
- (and 1 more)
-
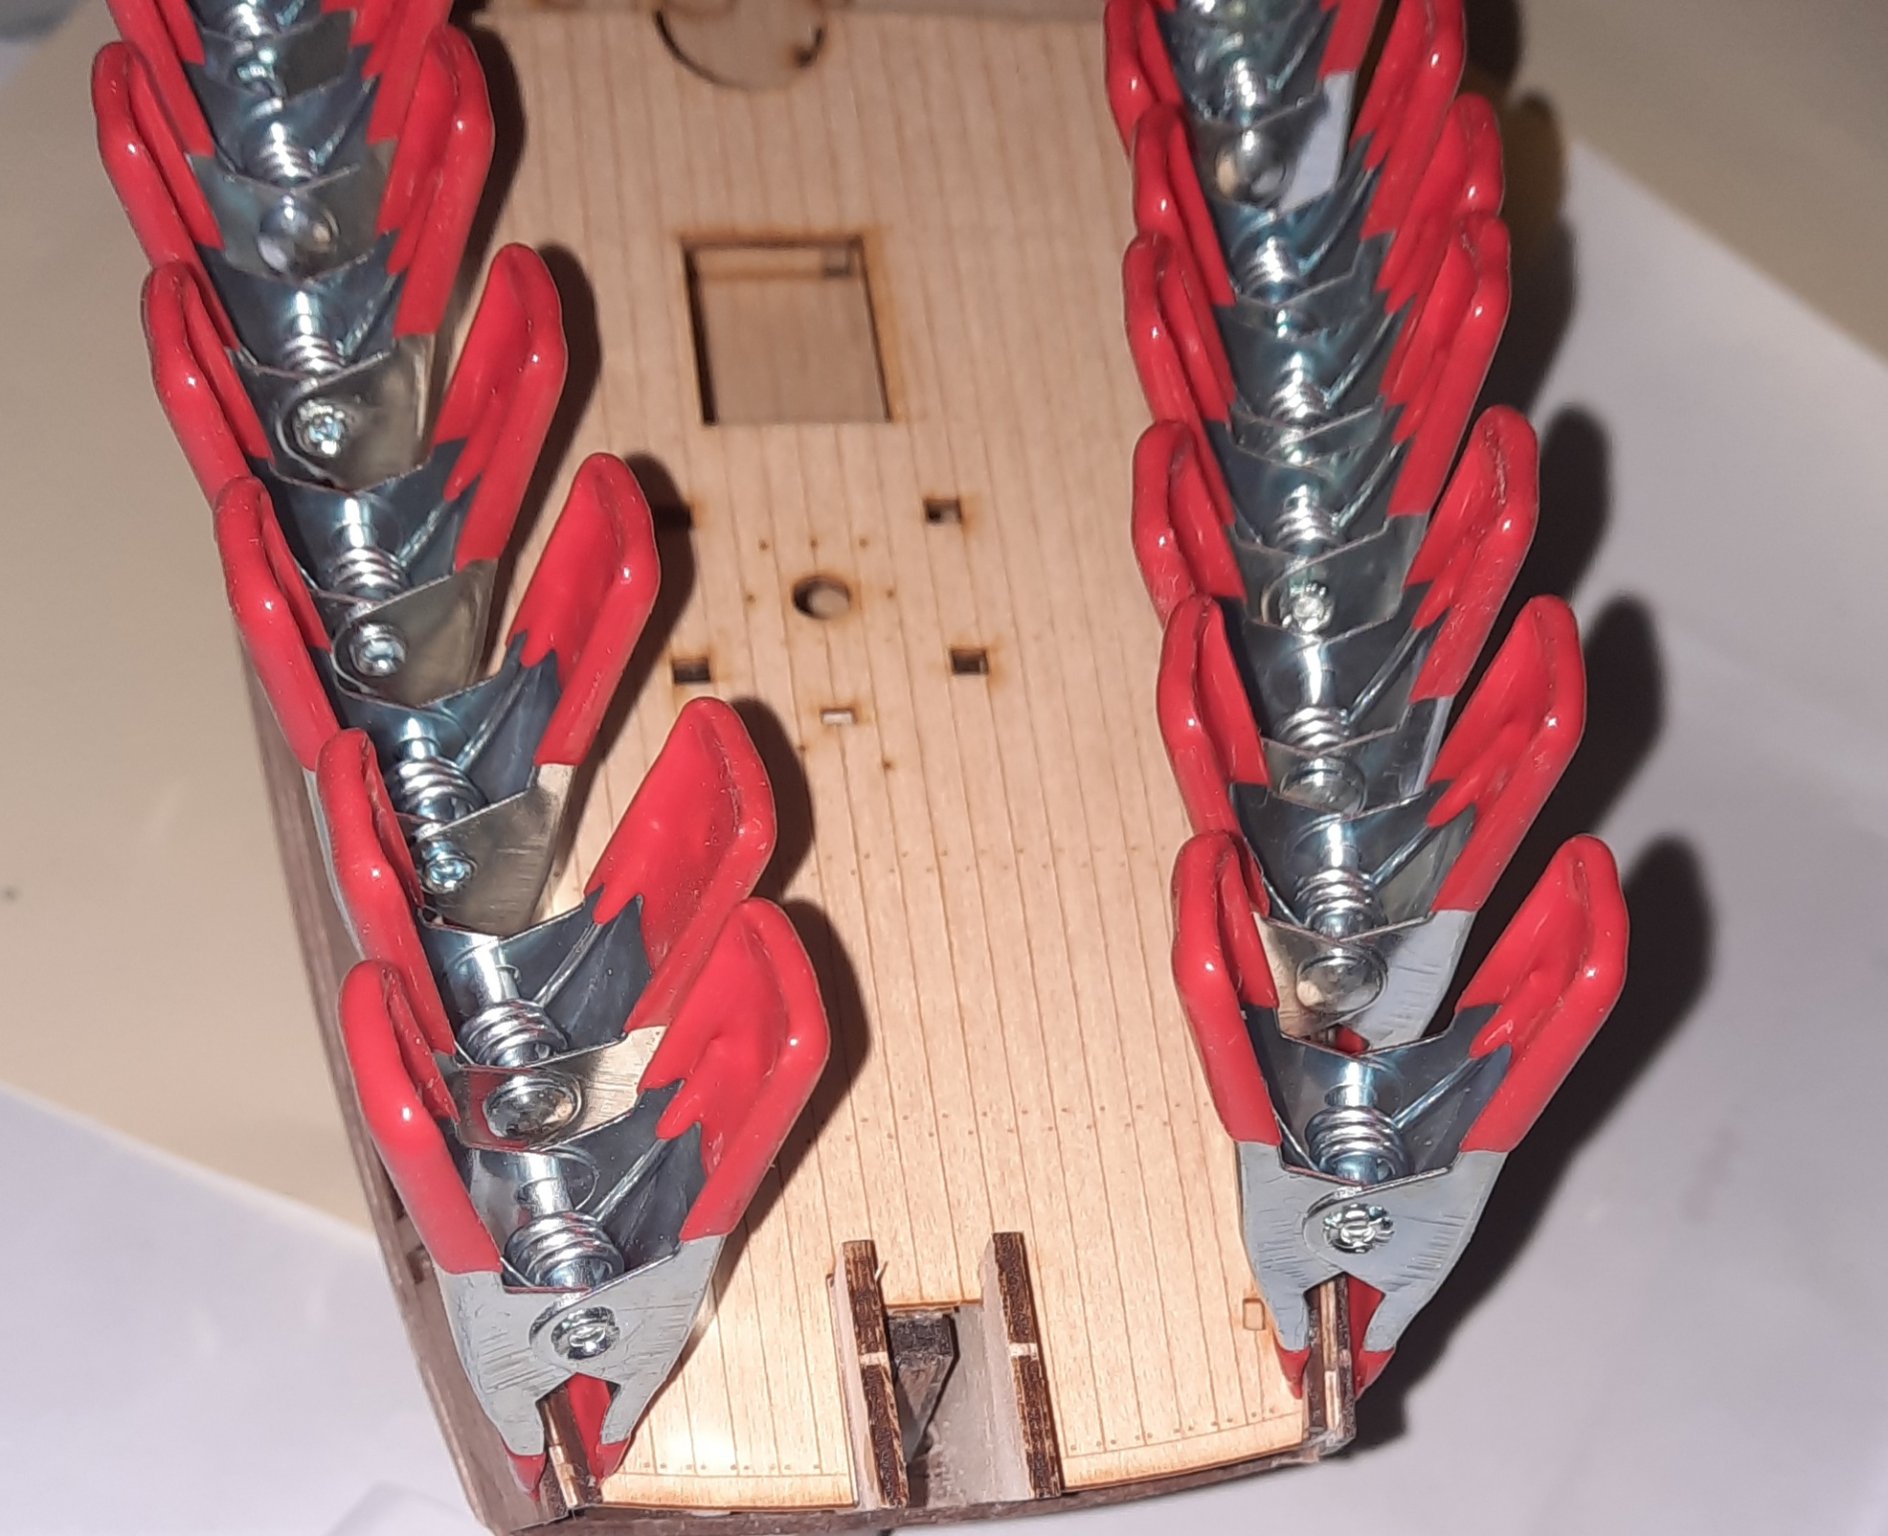
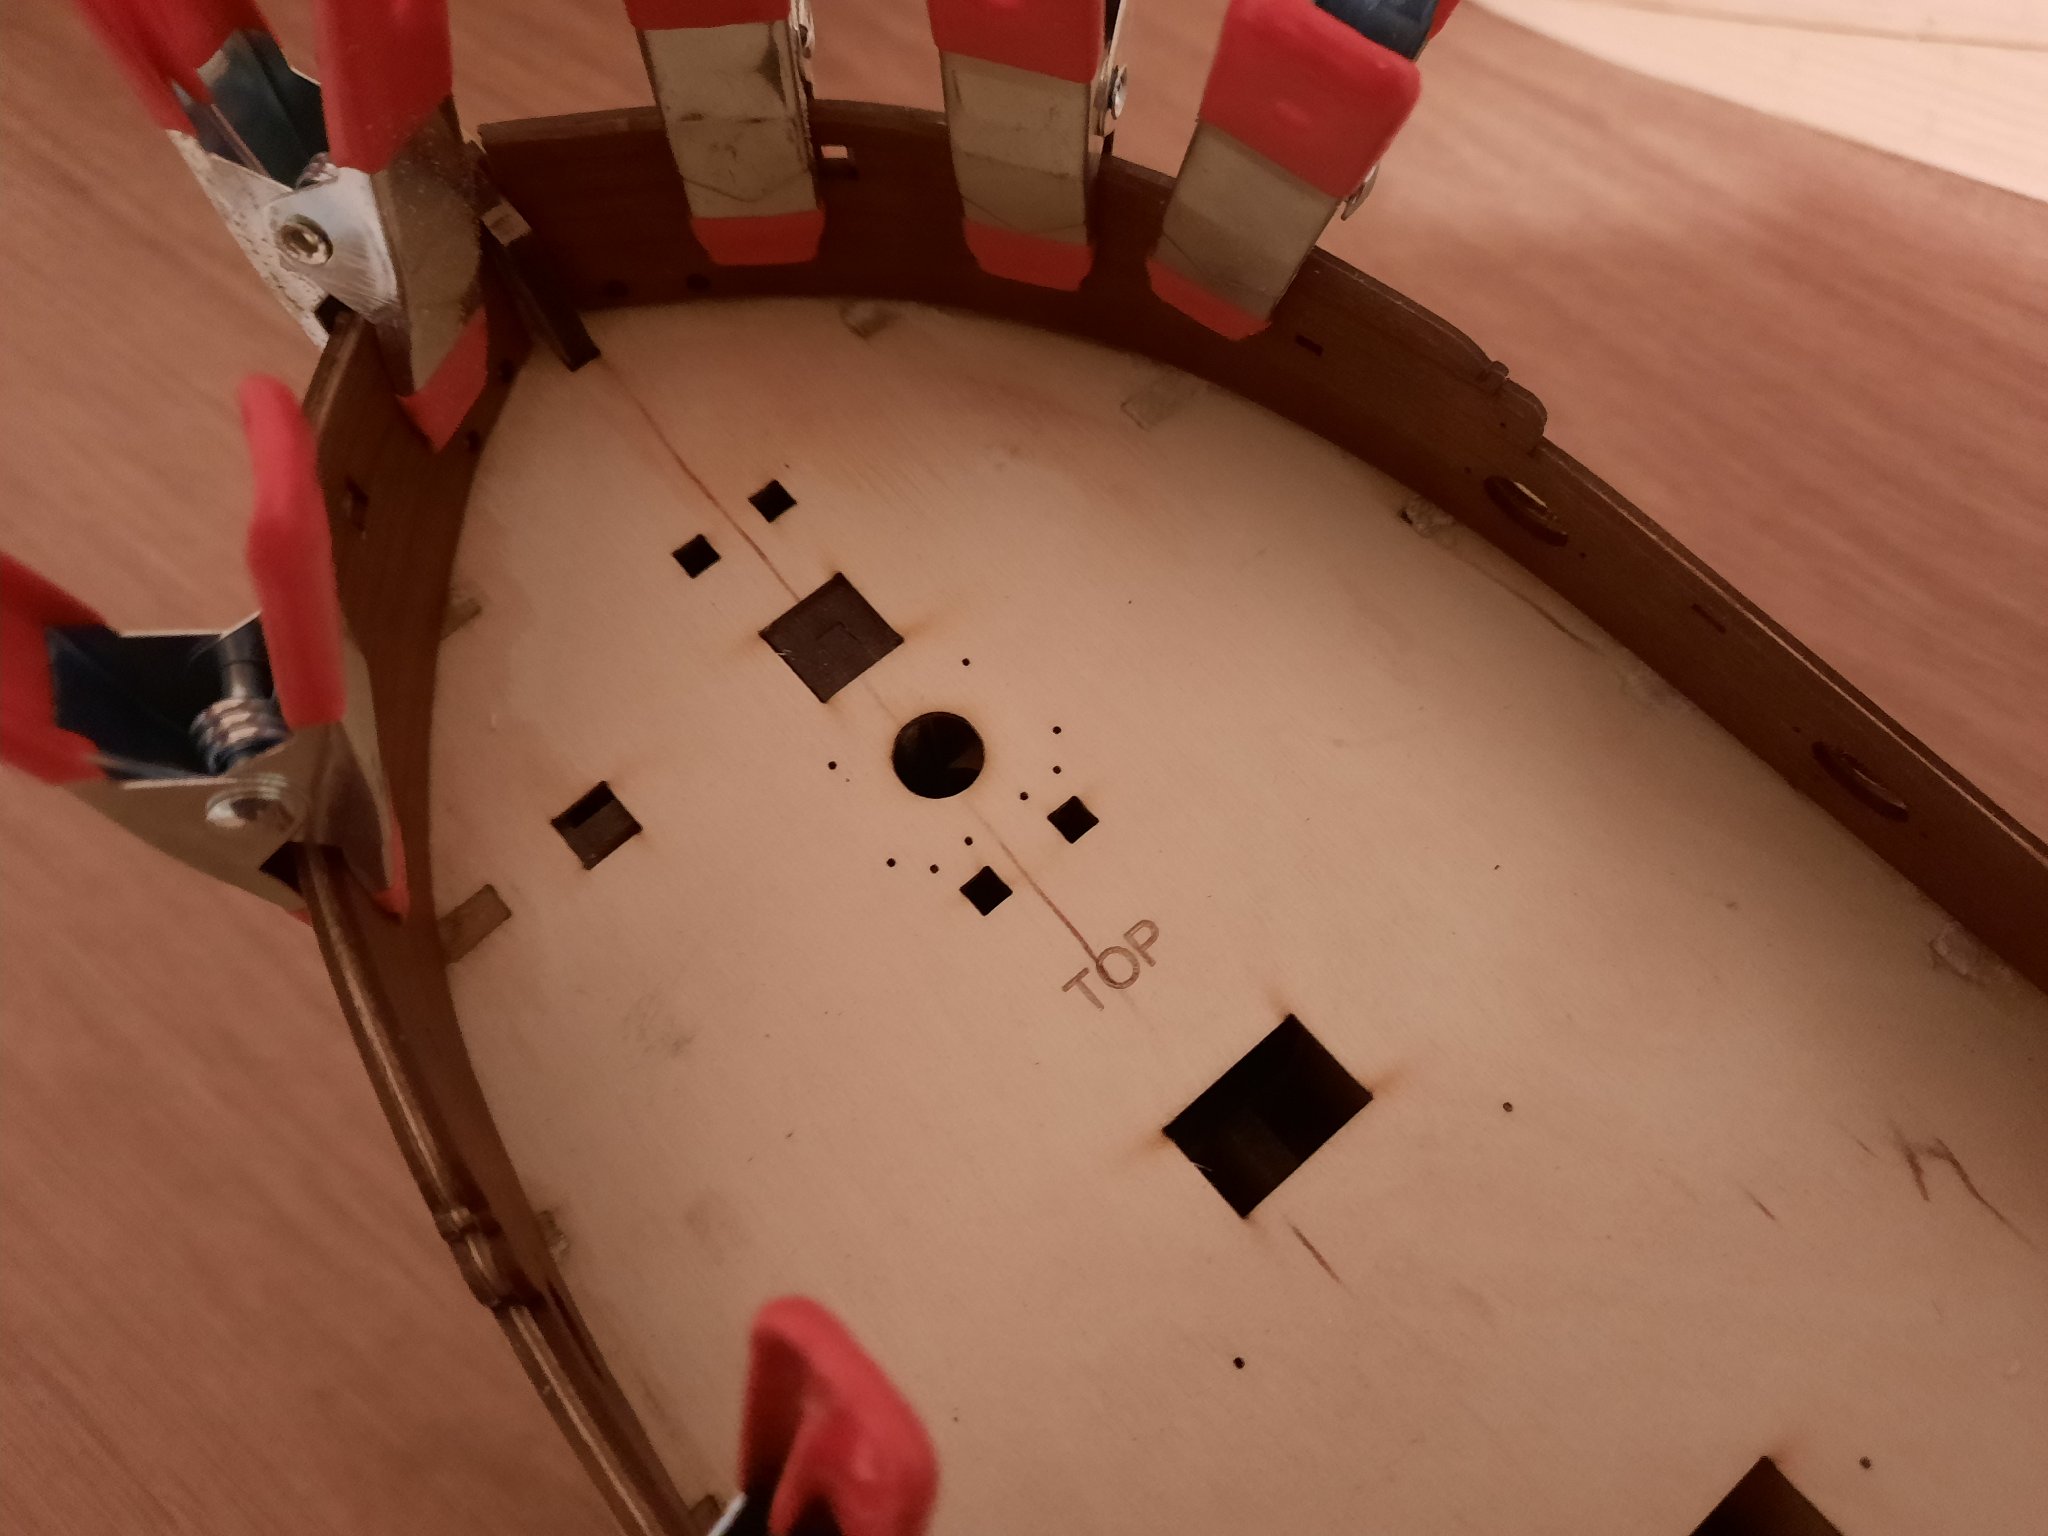
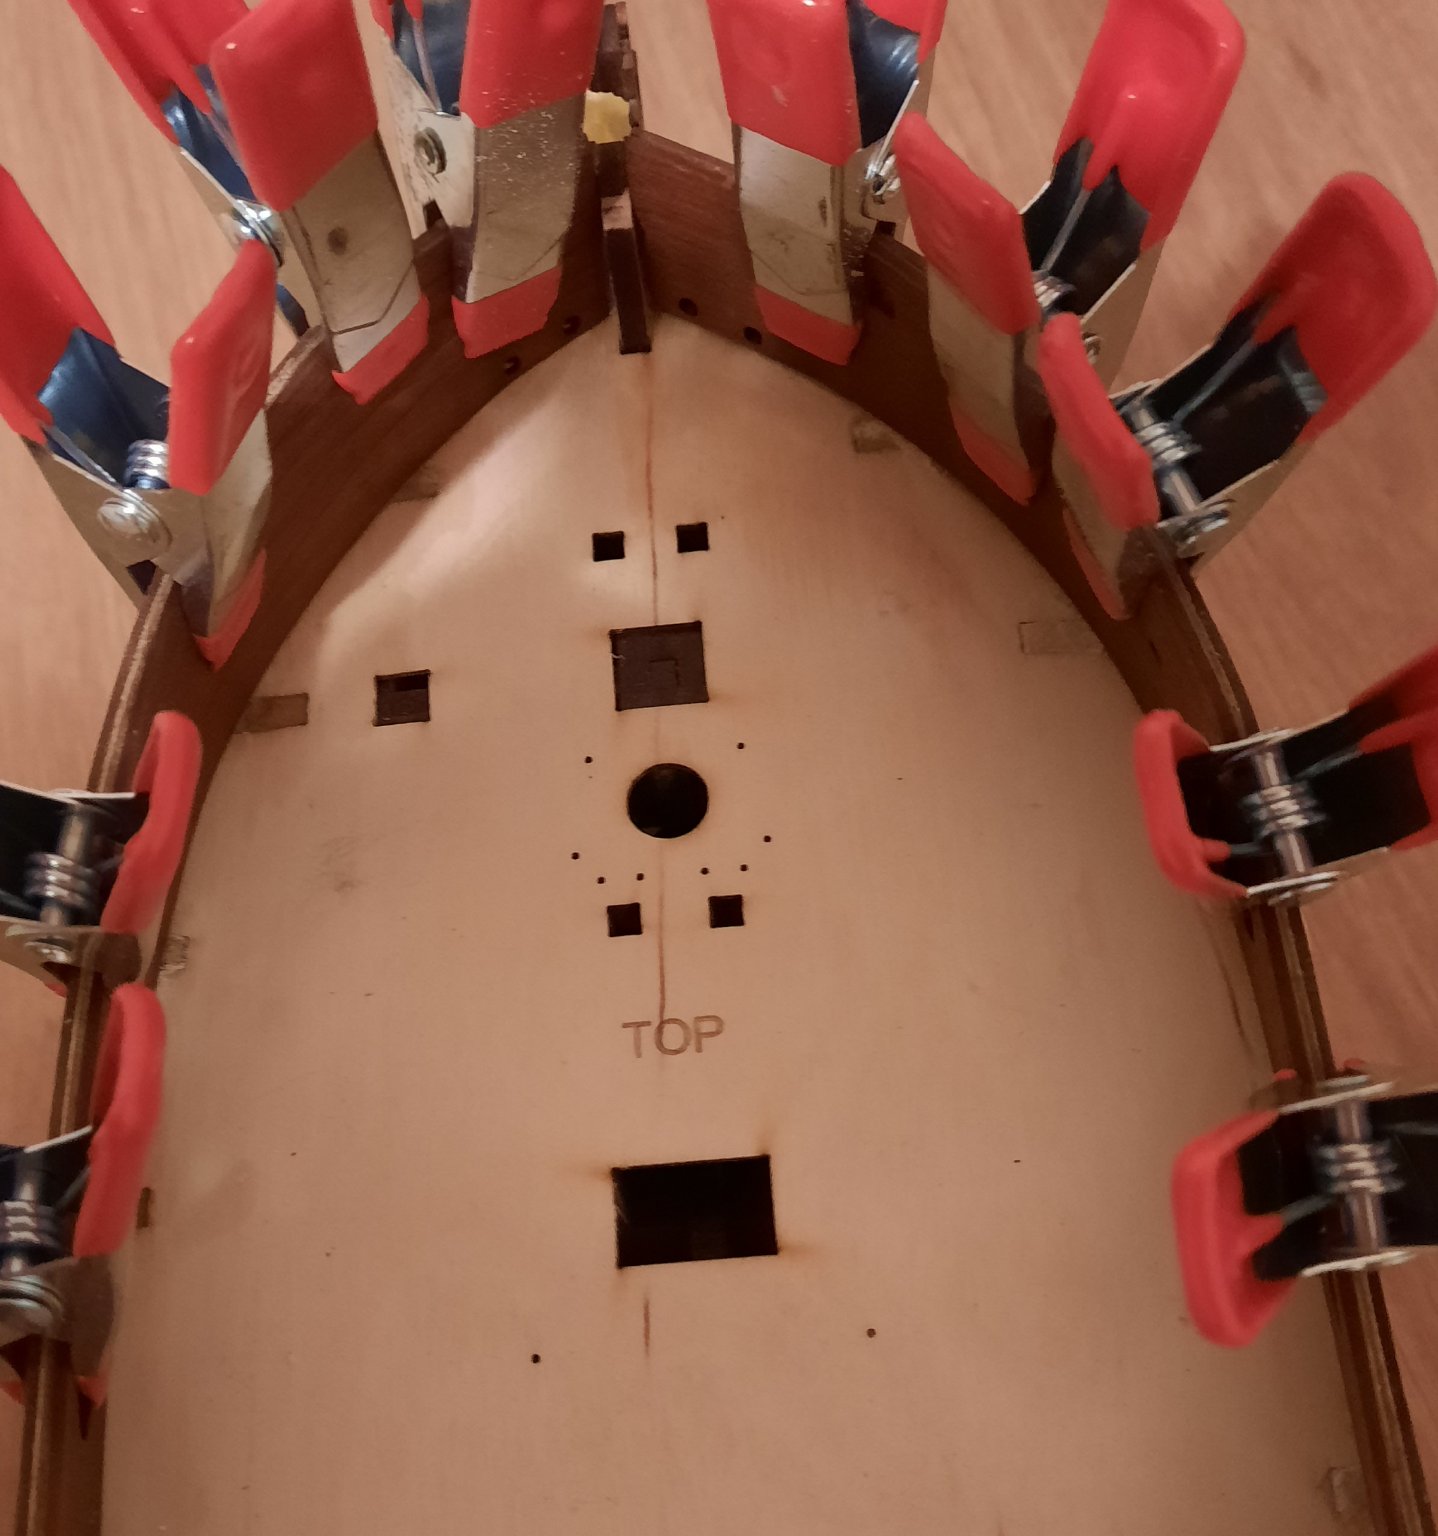
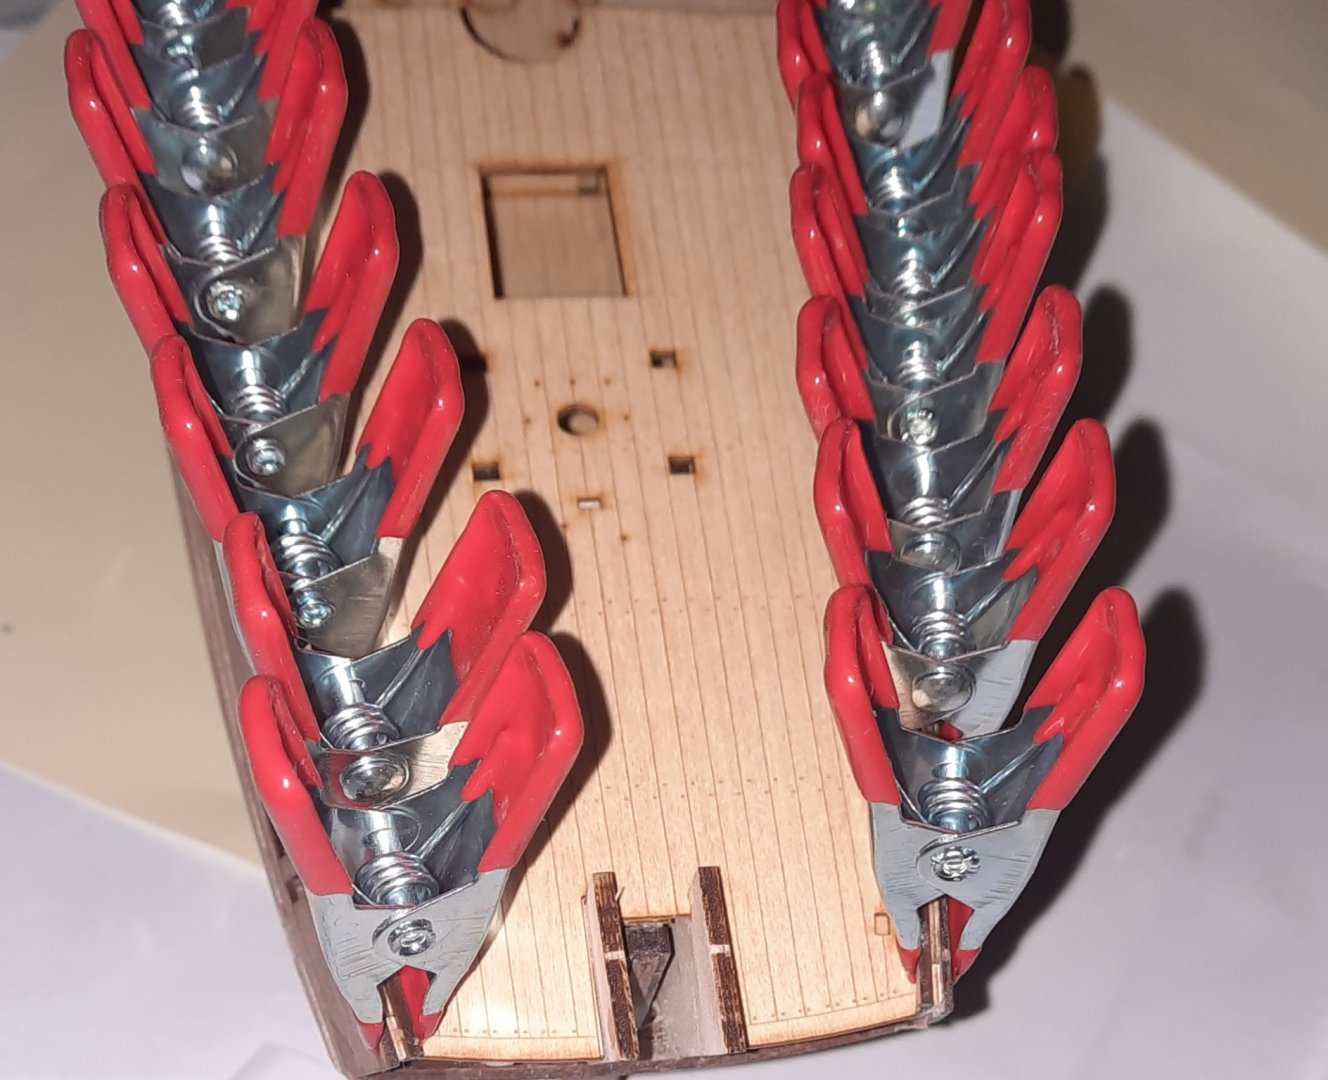
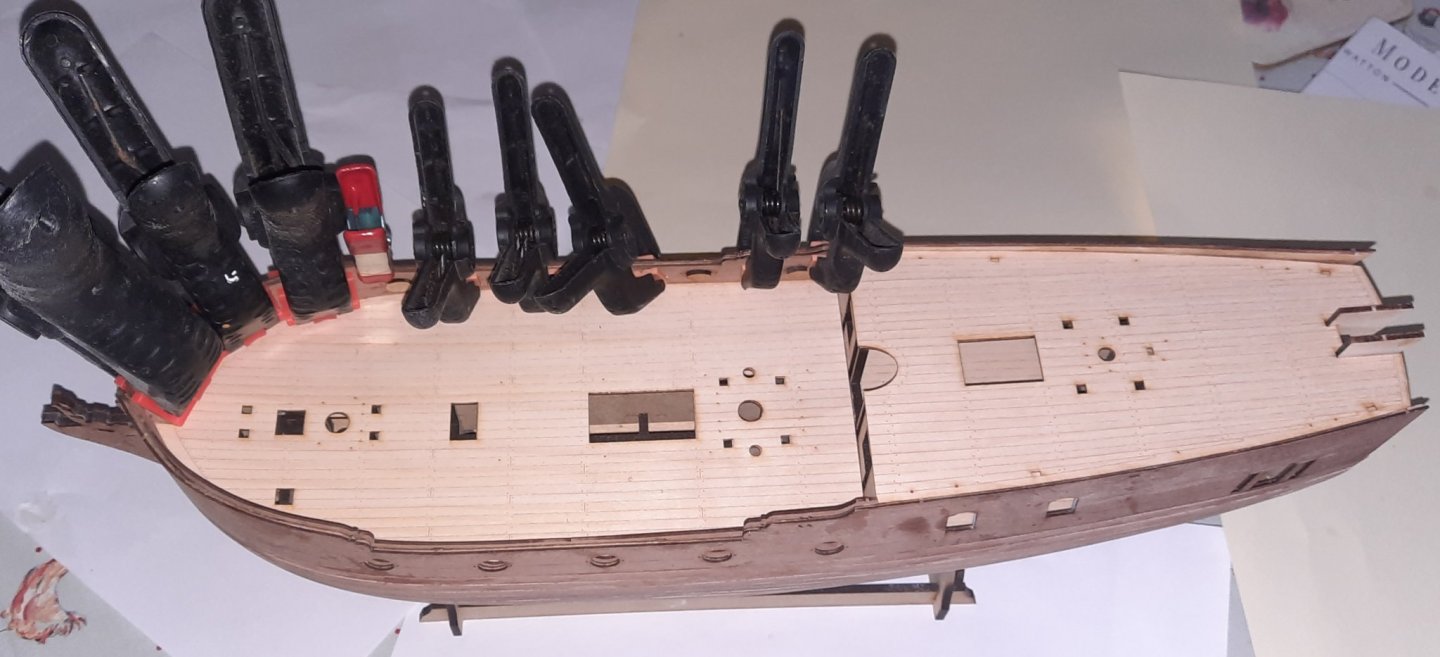
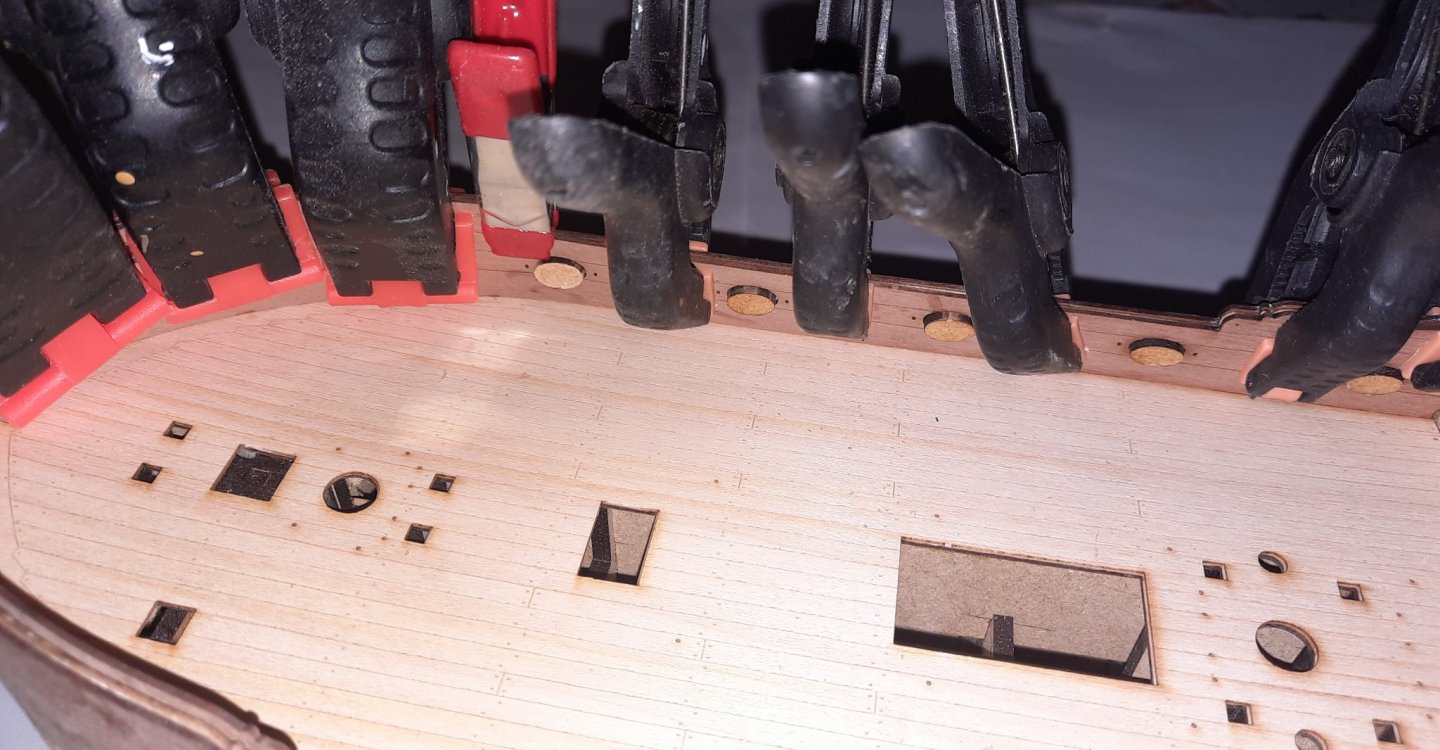
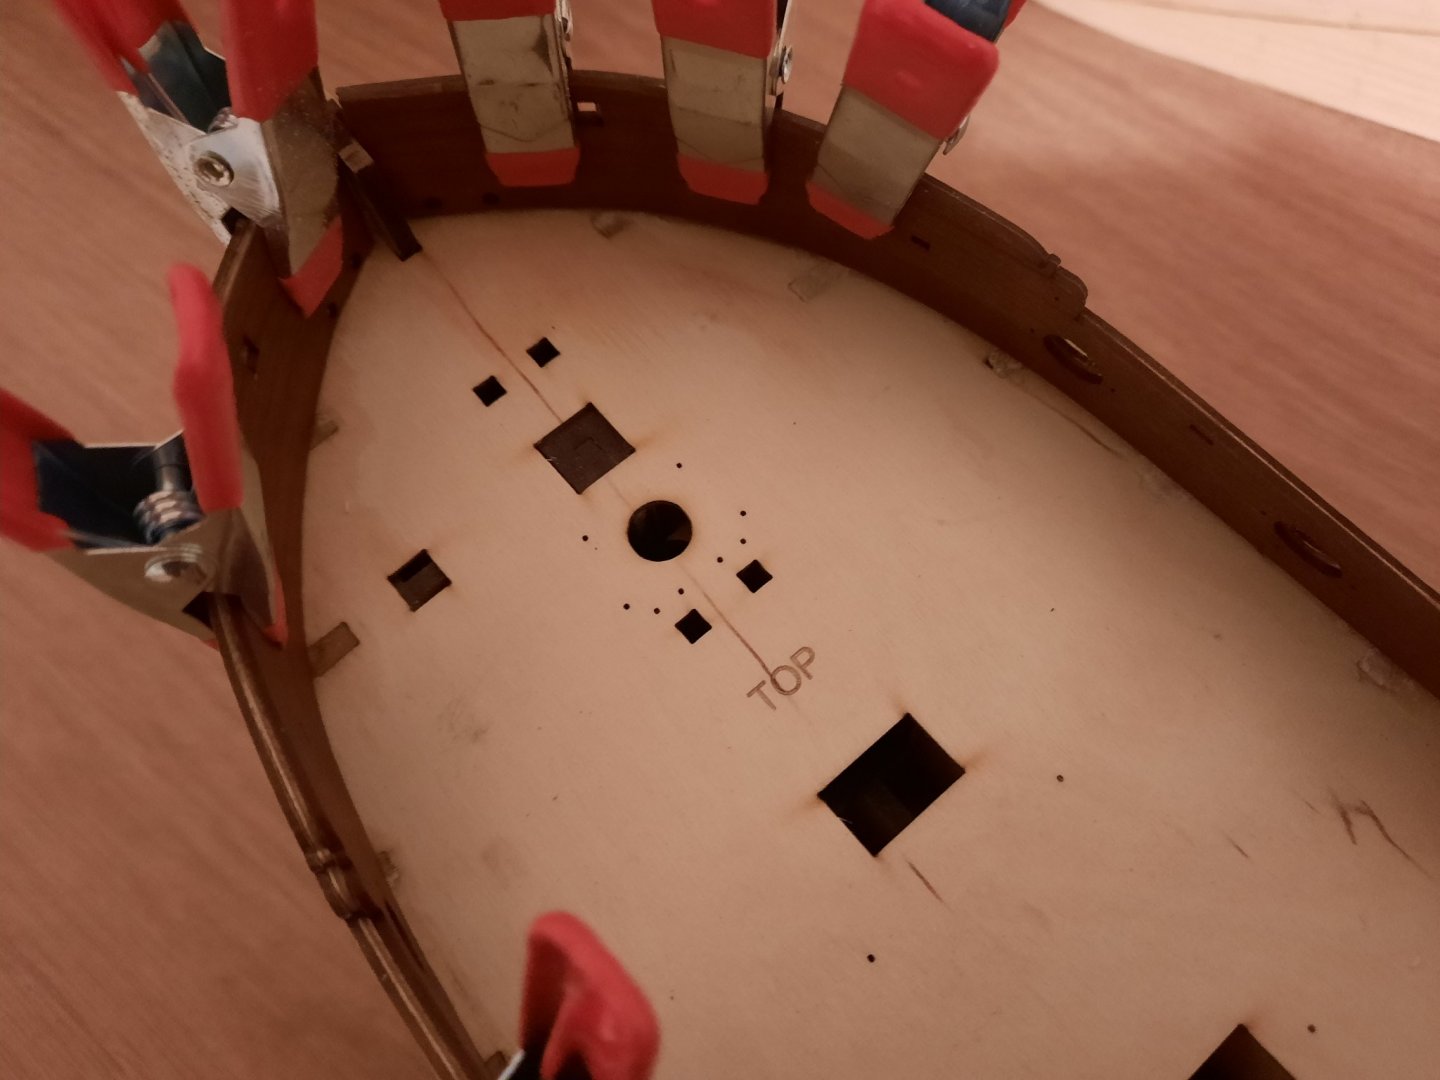
The fore and aft decks have now been glued in place. I dry fitted the inner bulwarks in place to ensure the deck stayed in place as the glue gripped and cured. I also used the Oval Side Port Locator plugs to test the alignment, as can be seen in the photo below. I checked the fit of the inner bulwark patterns which need a minimal amount of sanding at both ends. My build seems to have a slight misalignment issue on the port side around the midships and towards the stern as I found it necessary to sand the bottom edge of the fore inner bulwark in order for it to align up with the final 2 (stern) gun port openings. I also noted a similar issue with the aft post side inner bulwark. I also checked and ensured I could push a brass pin through the small holes around the gun ports and window frames. The bulwarks were then glued into place. The Oval Side Port Locator plugs were used to ensure the fore inner bulwarks were correctly positioned. I used plenty of clamps to hold the patterns in place. Once the glue has fully cured there will be a tiny bit of sanding required to ensure the top edges of the inner, middle and outer bulwarks are all flush with each other. In discussion with Jim Hatch I have opted to apply a polyethene varnish to the decks and inner & outer bulwarks. It may take a couple of days before I receive the delivery of this varnish, which was not available in my local DIY stores (Screwfix and B&Q).
- 382 replies
-
- 9
-
-
- Vanguard Models
- Duchess of Kingston
- (and 1 more)
-
Nice work, the precision of the design is impressive
-
It is a nice wood to work with also
-
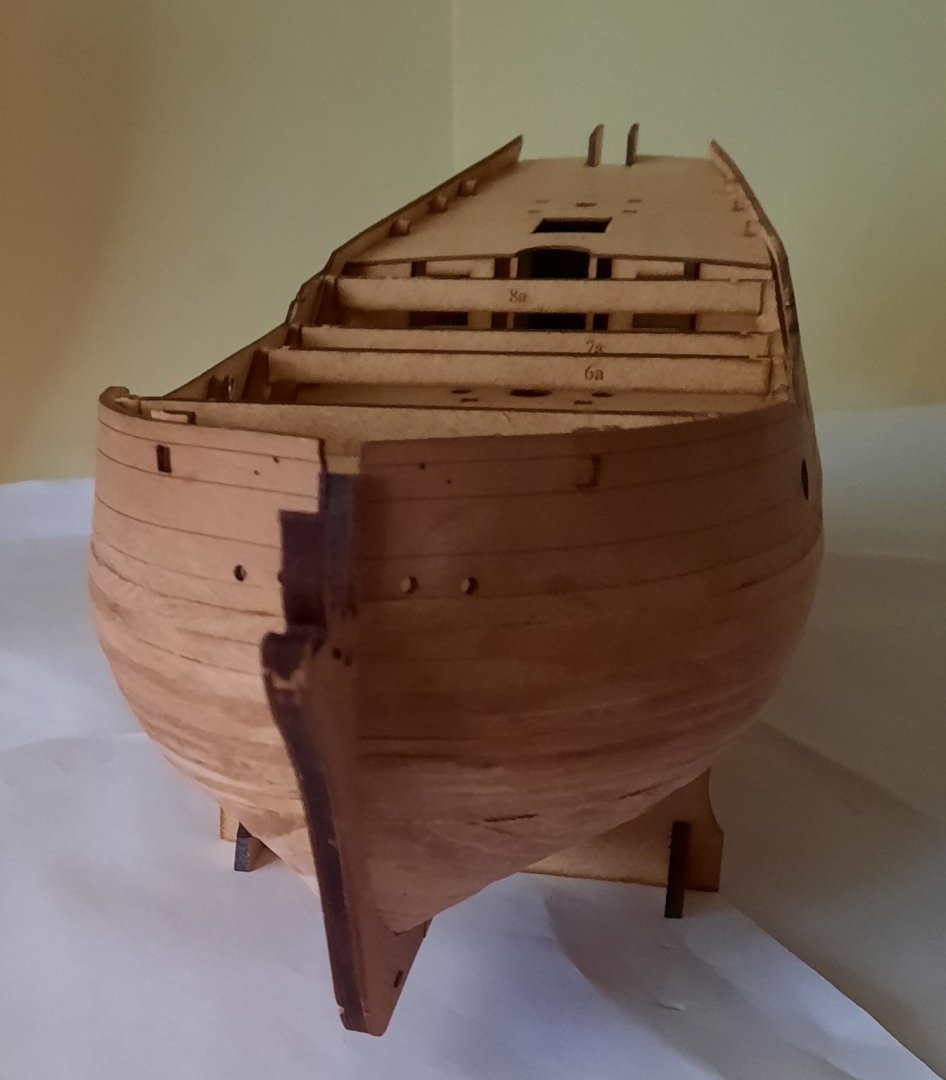
Stage: Hull Construction Build instructions: 87 - 91 Task: Stern 2nd Planking Parts: N/A Time Spent: 3 hours Status: Complete Build Notes: I applied filler below the water line and then proceeded to sand it back, just leaving filler in the depressions. It looks nice and smooth for the most part, but it will need a little bit more work once I have applied the primer coats to the entire hull below the waterline. I then removed the temporary beams and I also twisted off the MDF bulkhead tabs above the decks. Using my craft knife, sanding stick and sandpaper I was able to remove the wood remnants. The inner bulwarks needed a little bit of sanding to remove some glue remnants from the bulkhead tab areas. I then decided to test fit both the fore and aft decks. They both fitted perfectly but I did note that one hole location in the Upper/Poop ply deck did need to be opened up a little, as mentioned in the instructions. The two Inner Bulwark Patterns (193, 194) were soaked in hot water for about 25 mins and then were clamped in place and will be left to dry overnight. I will, if they need, trim them once they have fully dried out. I also checked the fitting of the rear Inner Bulwark Patterns (195) with the aft deck in place and they seemed to be a good fit. Once the decks and Inner Bulwark Patterns have been glued in place I will move on to painting the outer bulwark patterns blue and red.


- 382 replies
-
- 9
-
-
- Vanguard Models
- Duchess of Kingston
- (and 1 more)
-
Great information and advice
-
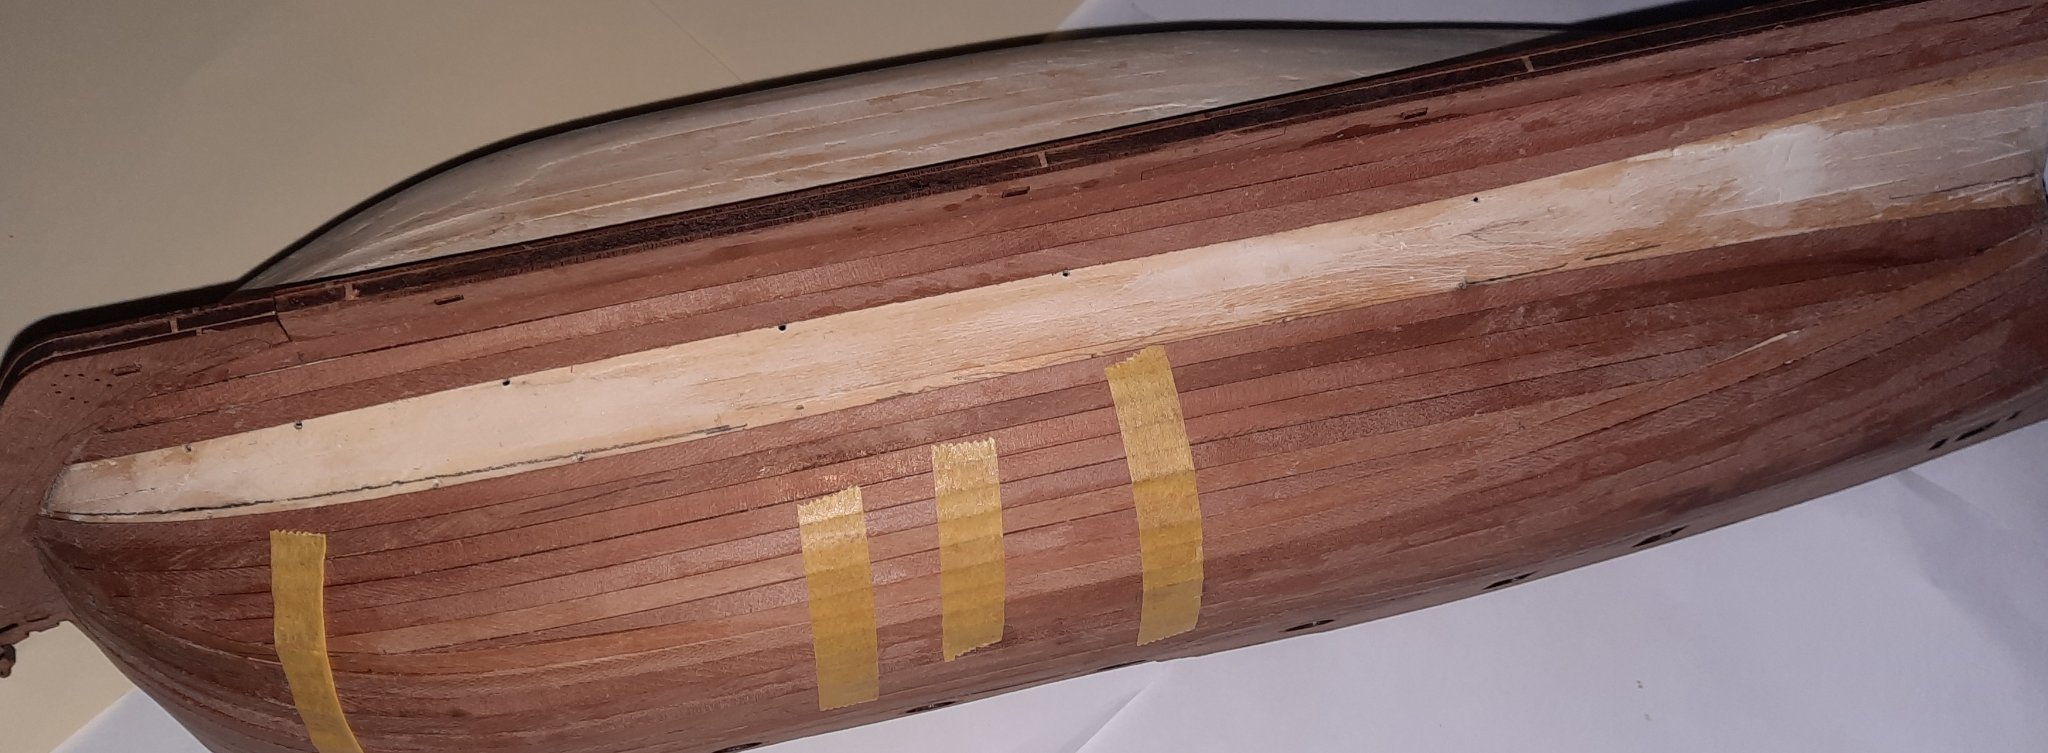
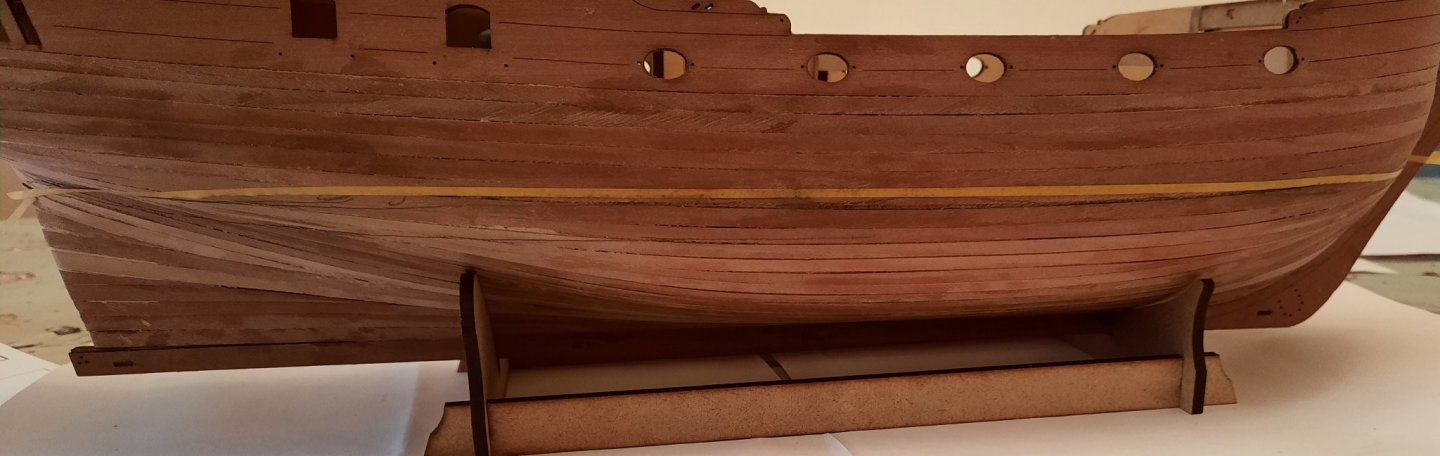
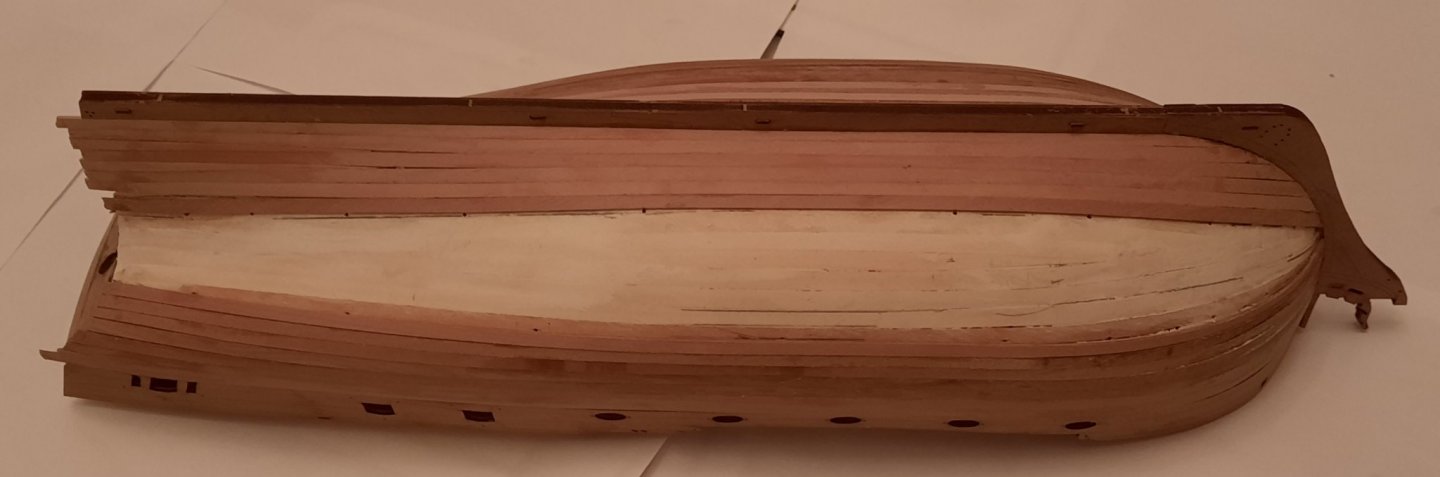
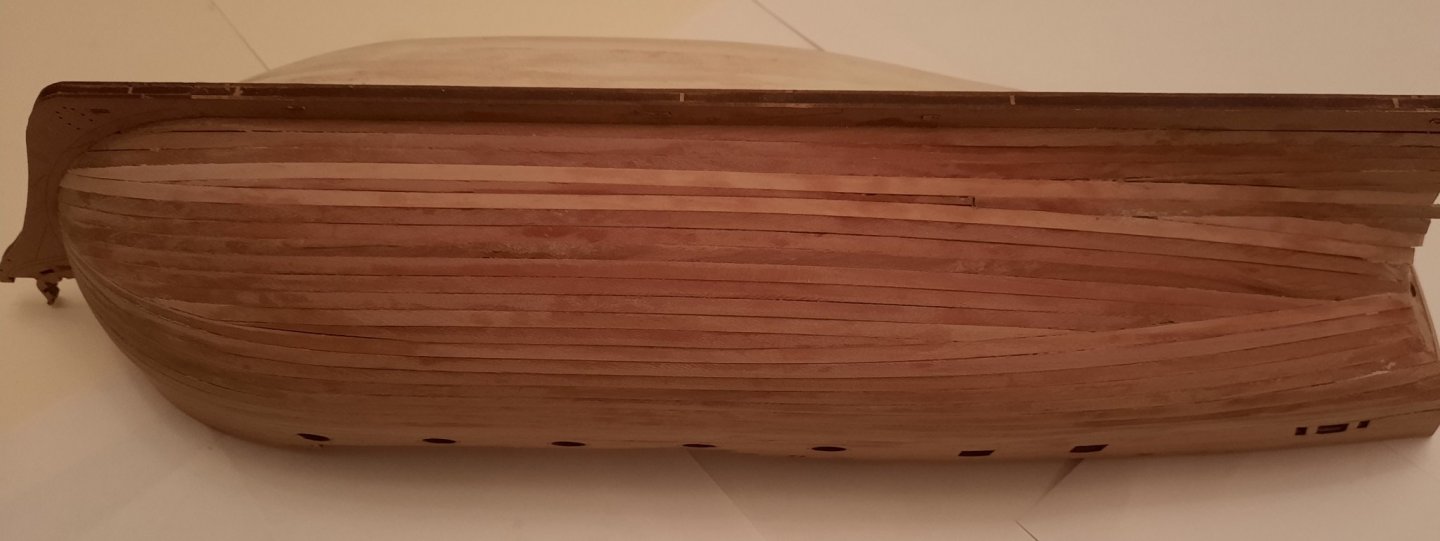
Stage: Hull Construction Build instructions: 85 & 86 Task: Stern 2nd Planking Parts: N/A Time Spent: 24 hours Status: Complete Build Notes: I have finally completed the 2nd planking. It did not turn out to be neat and tidy as Jim’s pre-production model, but it is not too bad. The rabbet was a great help with the planking. I marked the position of the waterline using my Amati tool and then, using some 1mm tape followed the marked line and then double checked the waterline position using Amati tool and plan drawing. I plan to apply filler (Ronseal RSLMPWFN100G 100g Multi-Purpose Natural Wood Filler) below the water line and sand to get a flat even surface. Once I am happy that the lower hull is smooth I can proceed with the next phase of the build which is to remove the temporary beams, pre bend the Inner Bulwark Patterns (193, 194), fit the Fore and Aft Deck Patterns and fit all of the Inner Bulwark Patterns (193, 194 & 195).


- 382 replies
-
- 17
-
-
- Vanguard Models
- Duchess of Kingston
- (and 1 more)
-
Just a quick update. I took a couple off days of the build over the weekend to sort some other stuff out so I actually stated the 2nd planking on the port side on Monday (I have already completed the starboard side). I decided to use a two prong attack planking both down toward the keel and also up toward the bulwarks. This seems to be working very nicely and it has speeded up the progress (given I am using wood glue). I am matching the bow planking terminations with the starboard side (almost). Given the progress I have made over the last two days I expect to complete the 2nd planking in the next couple of days.
- 382 replies
-
- 12
-
-
- Vanguard Models
- Duchess of Kingston
- (and 1 more)
-
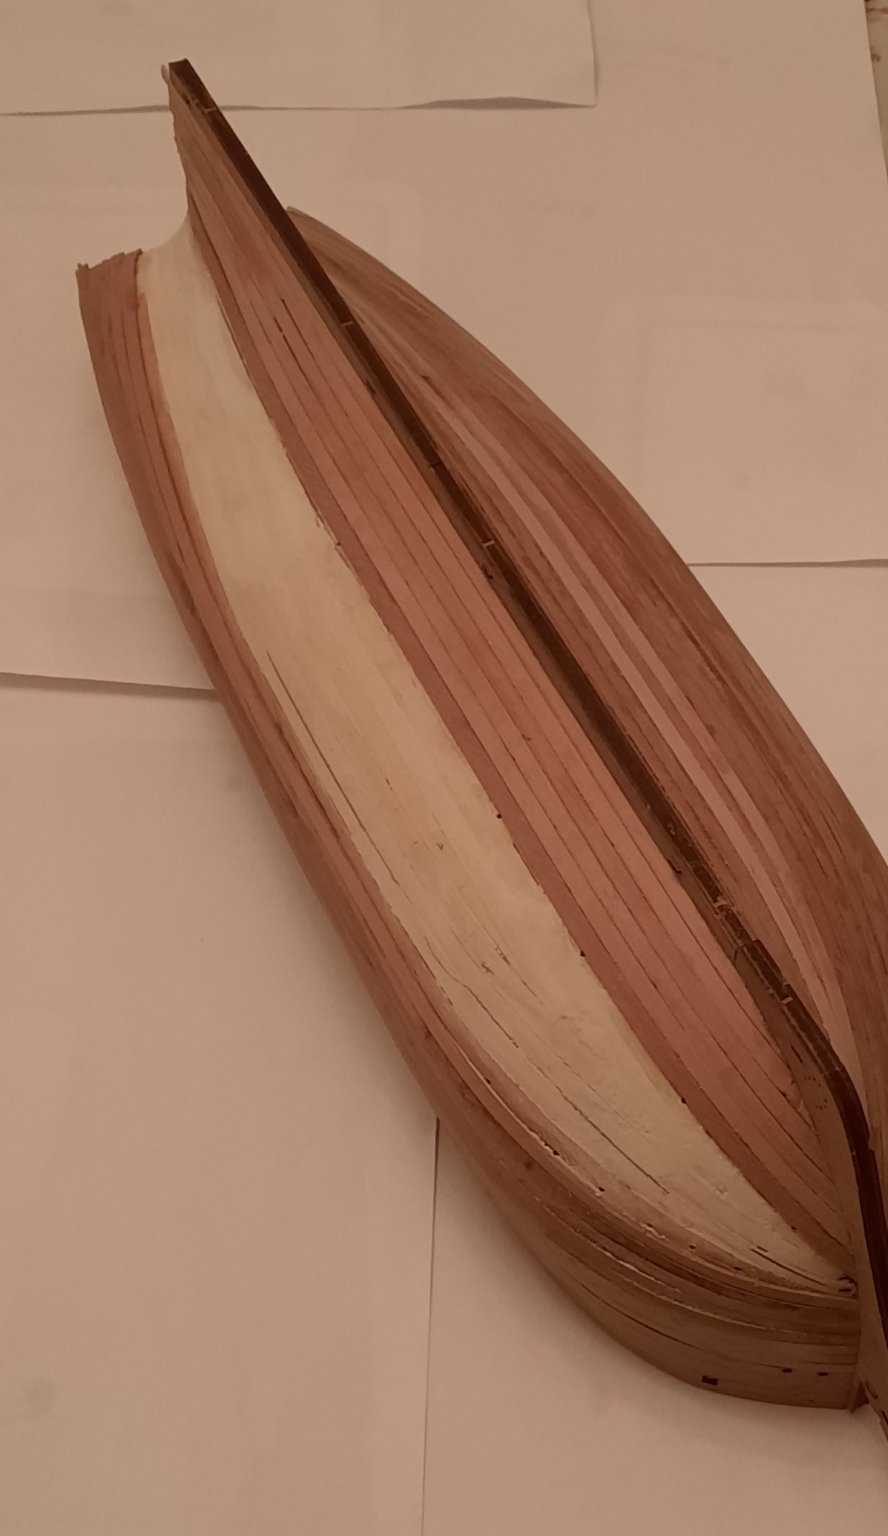
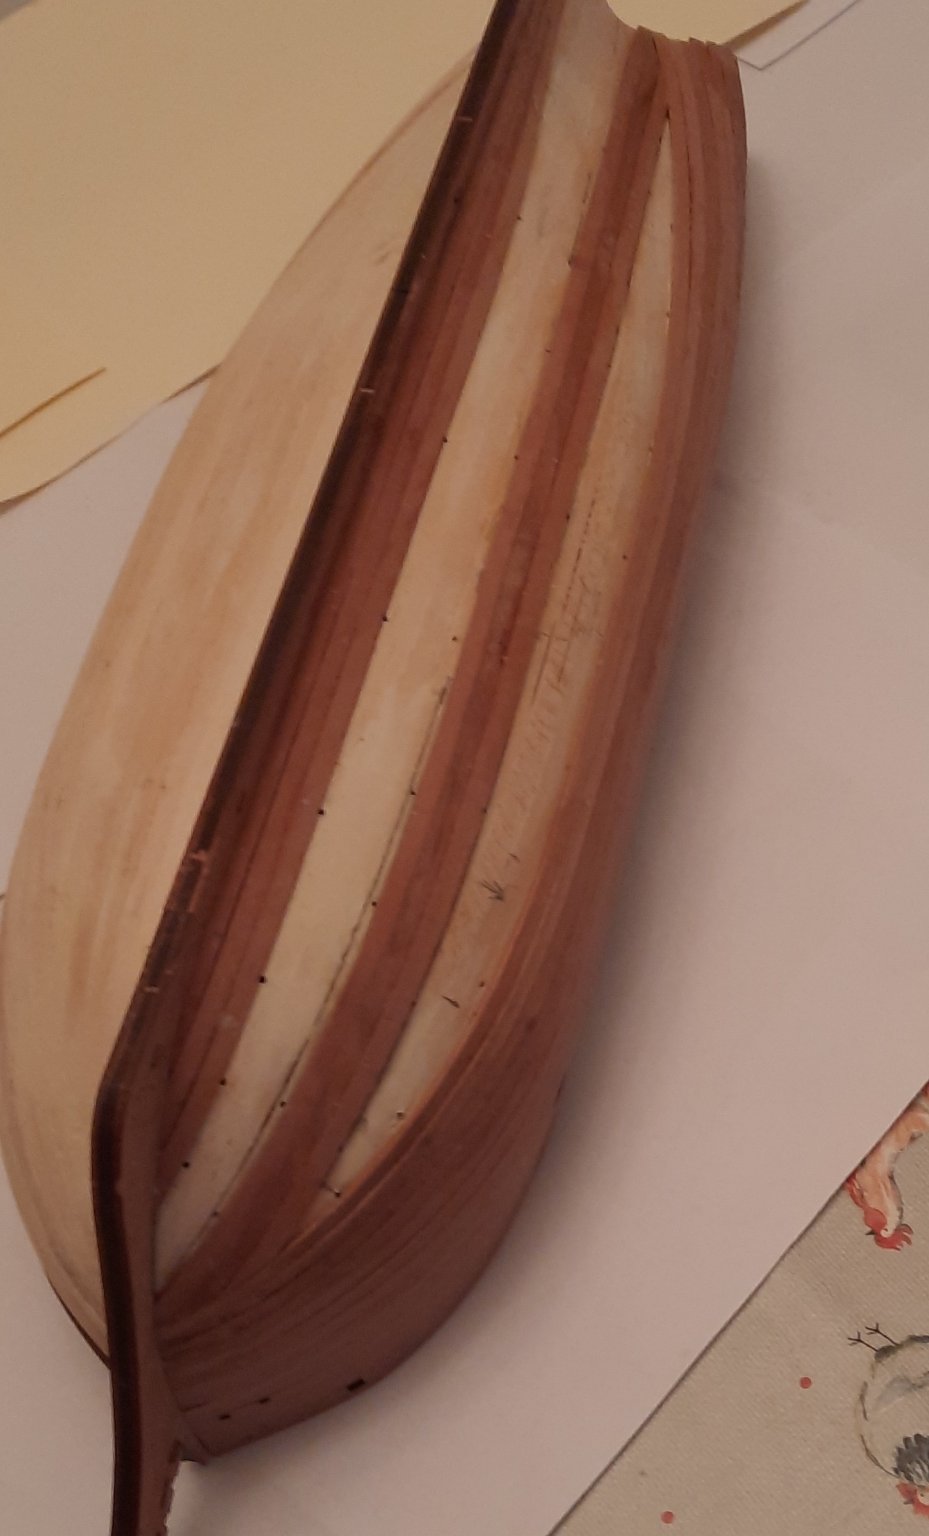
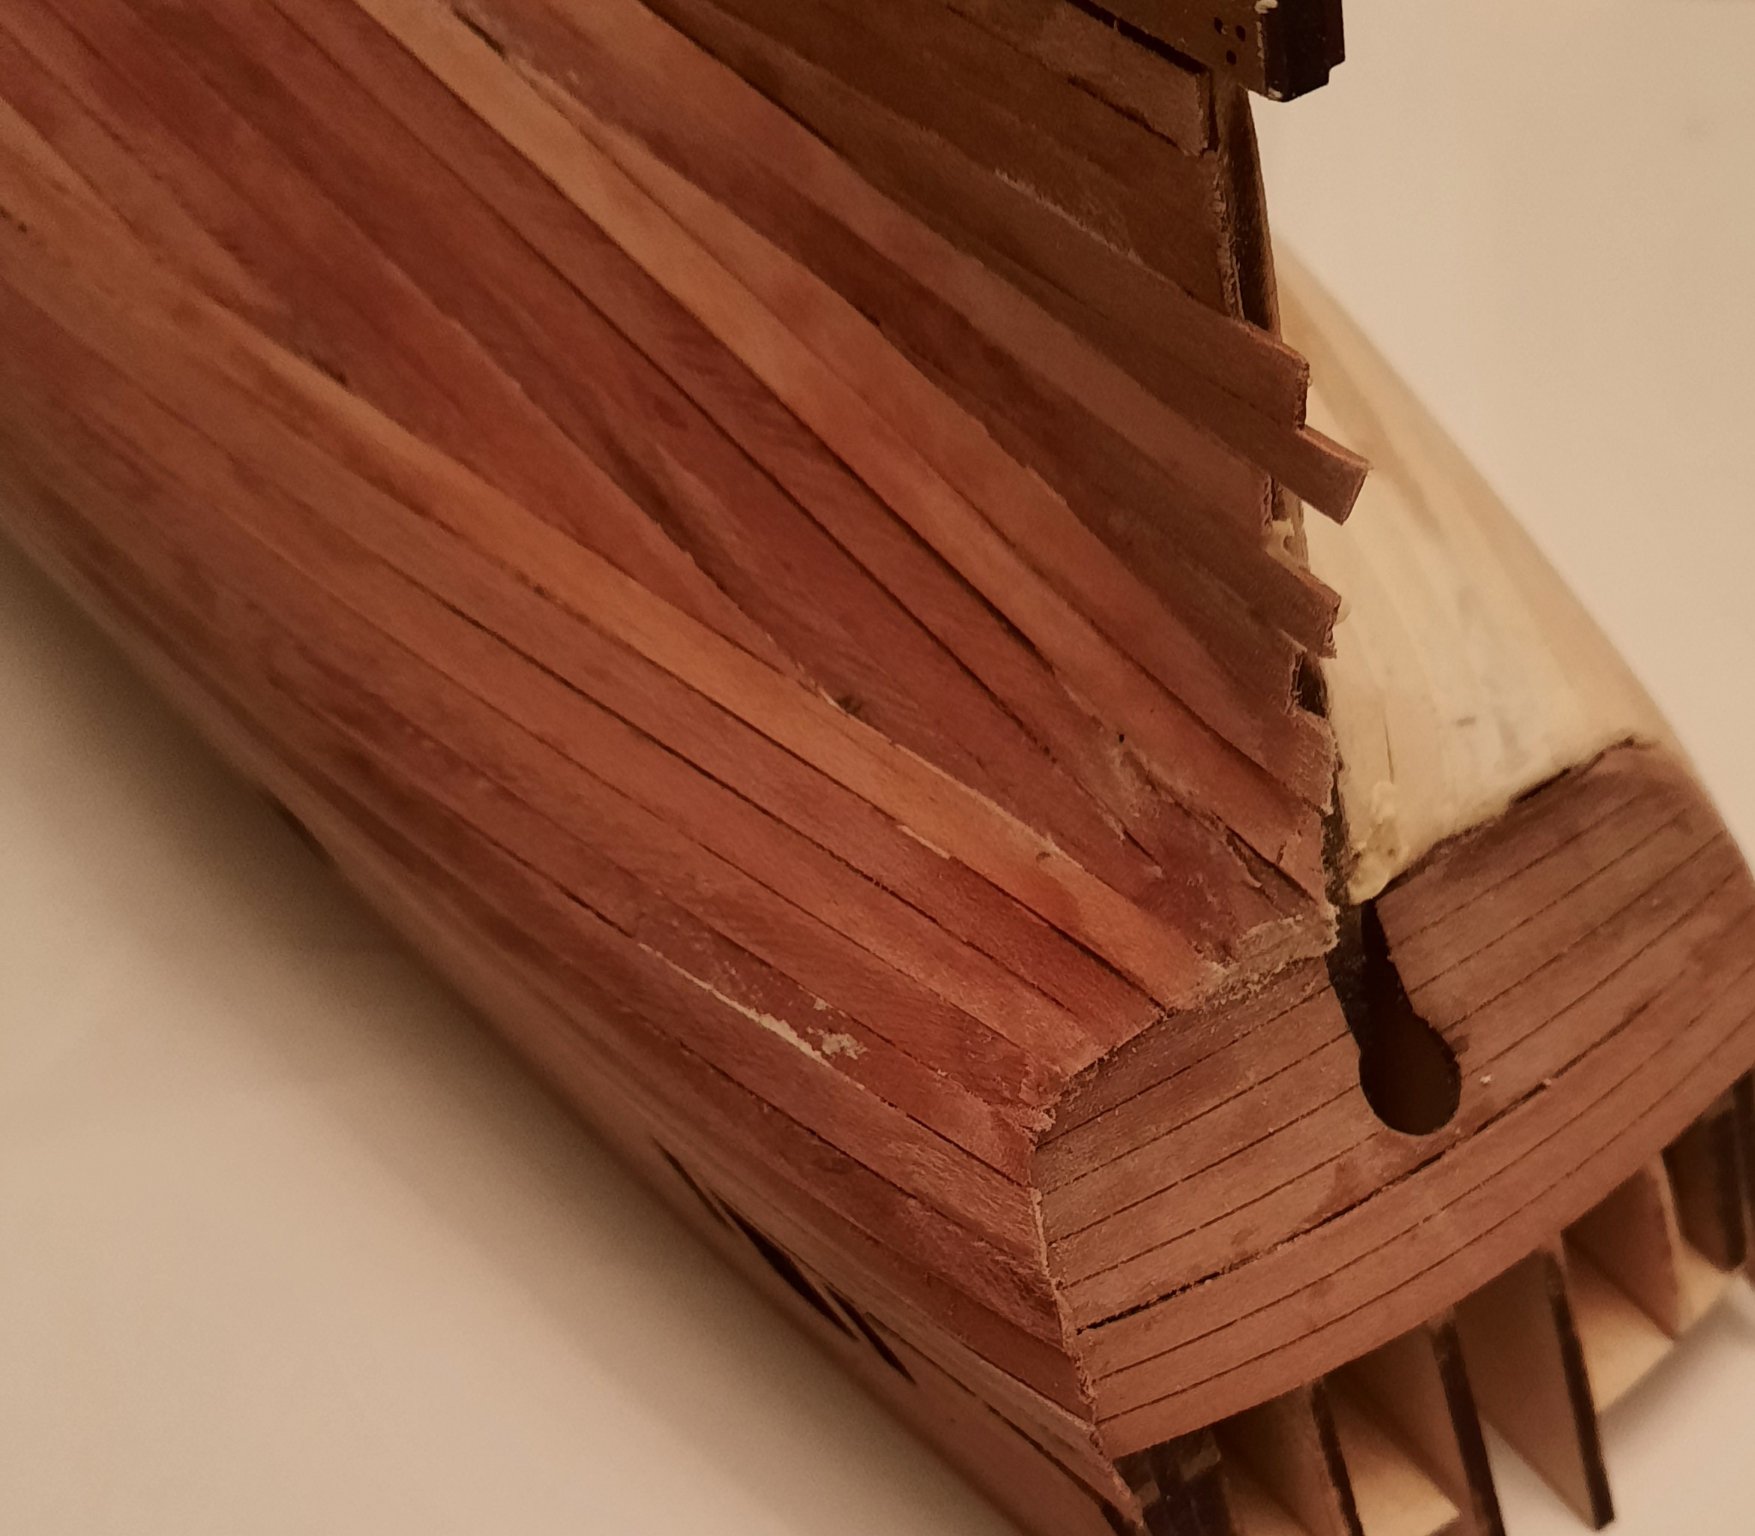
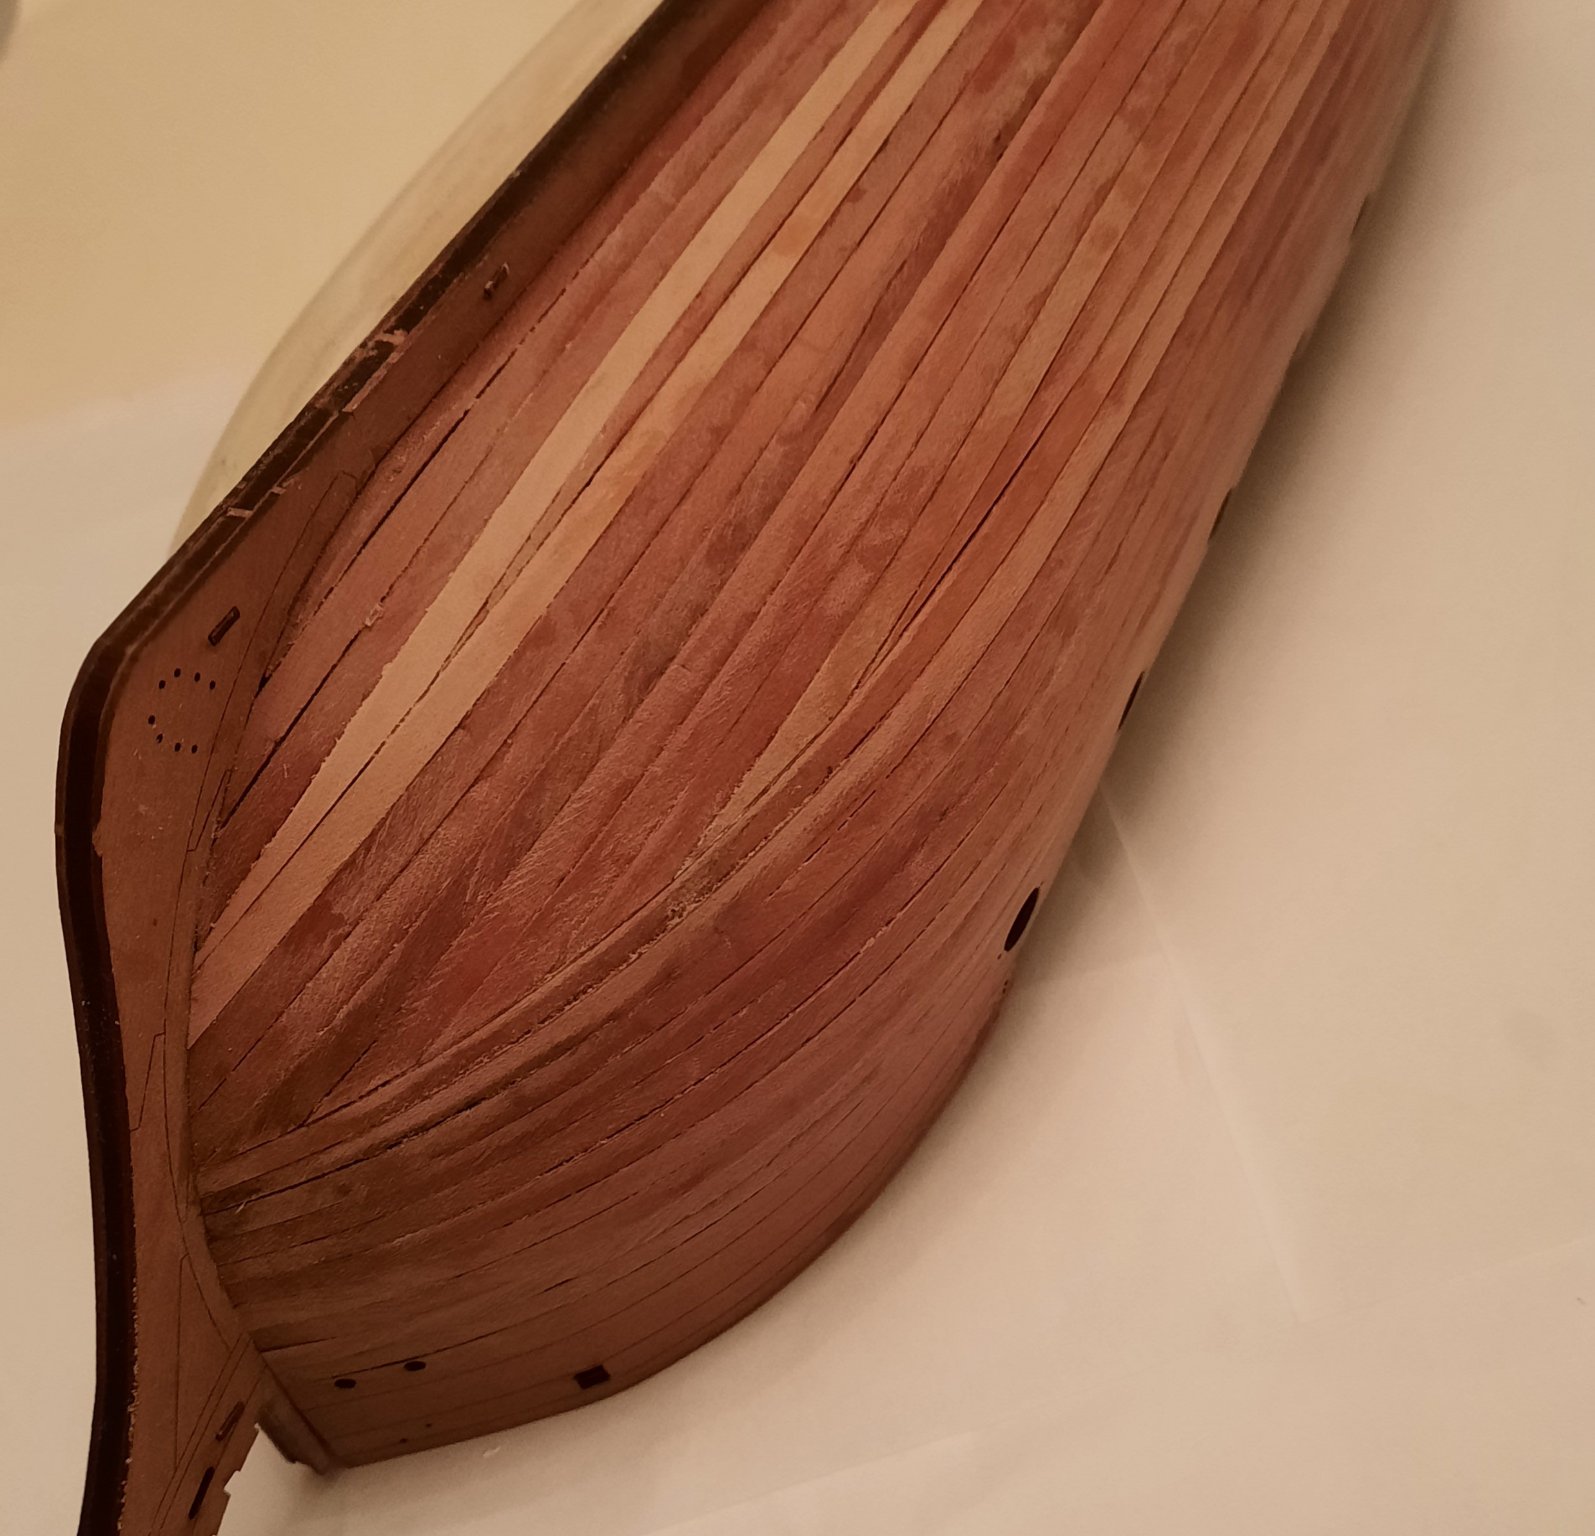
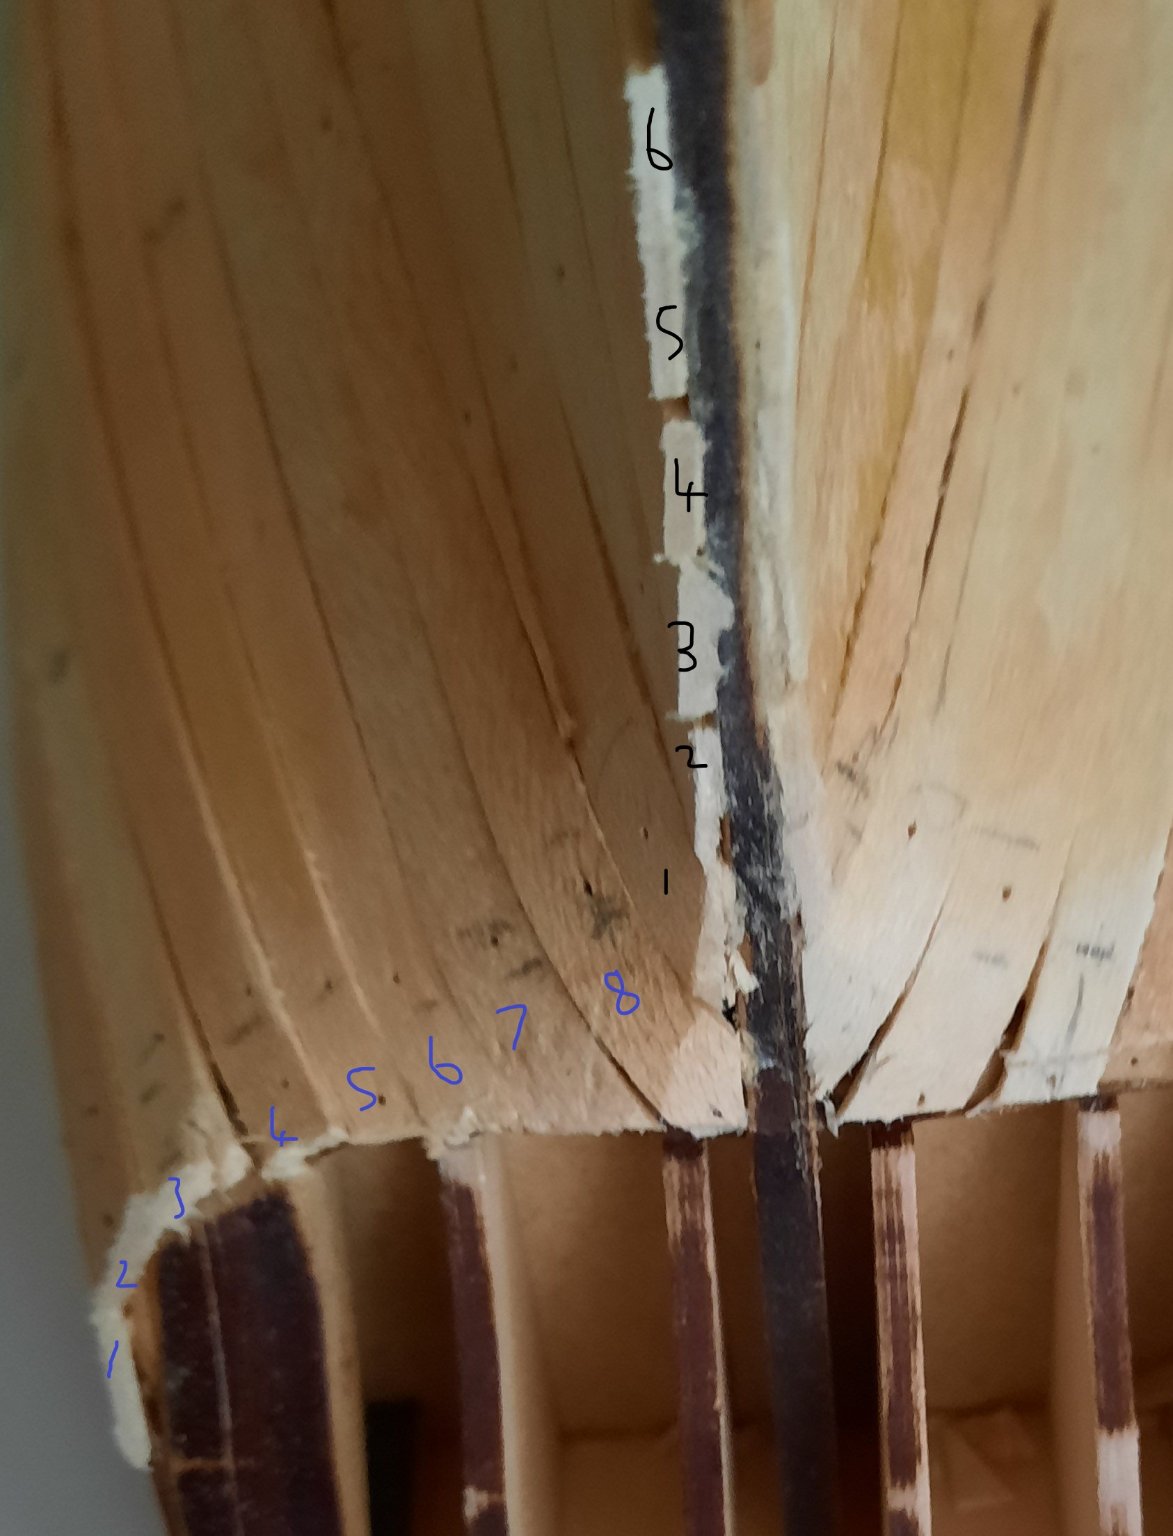
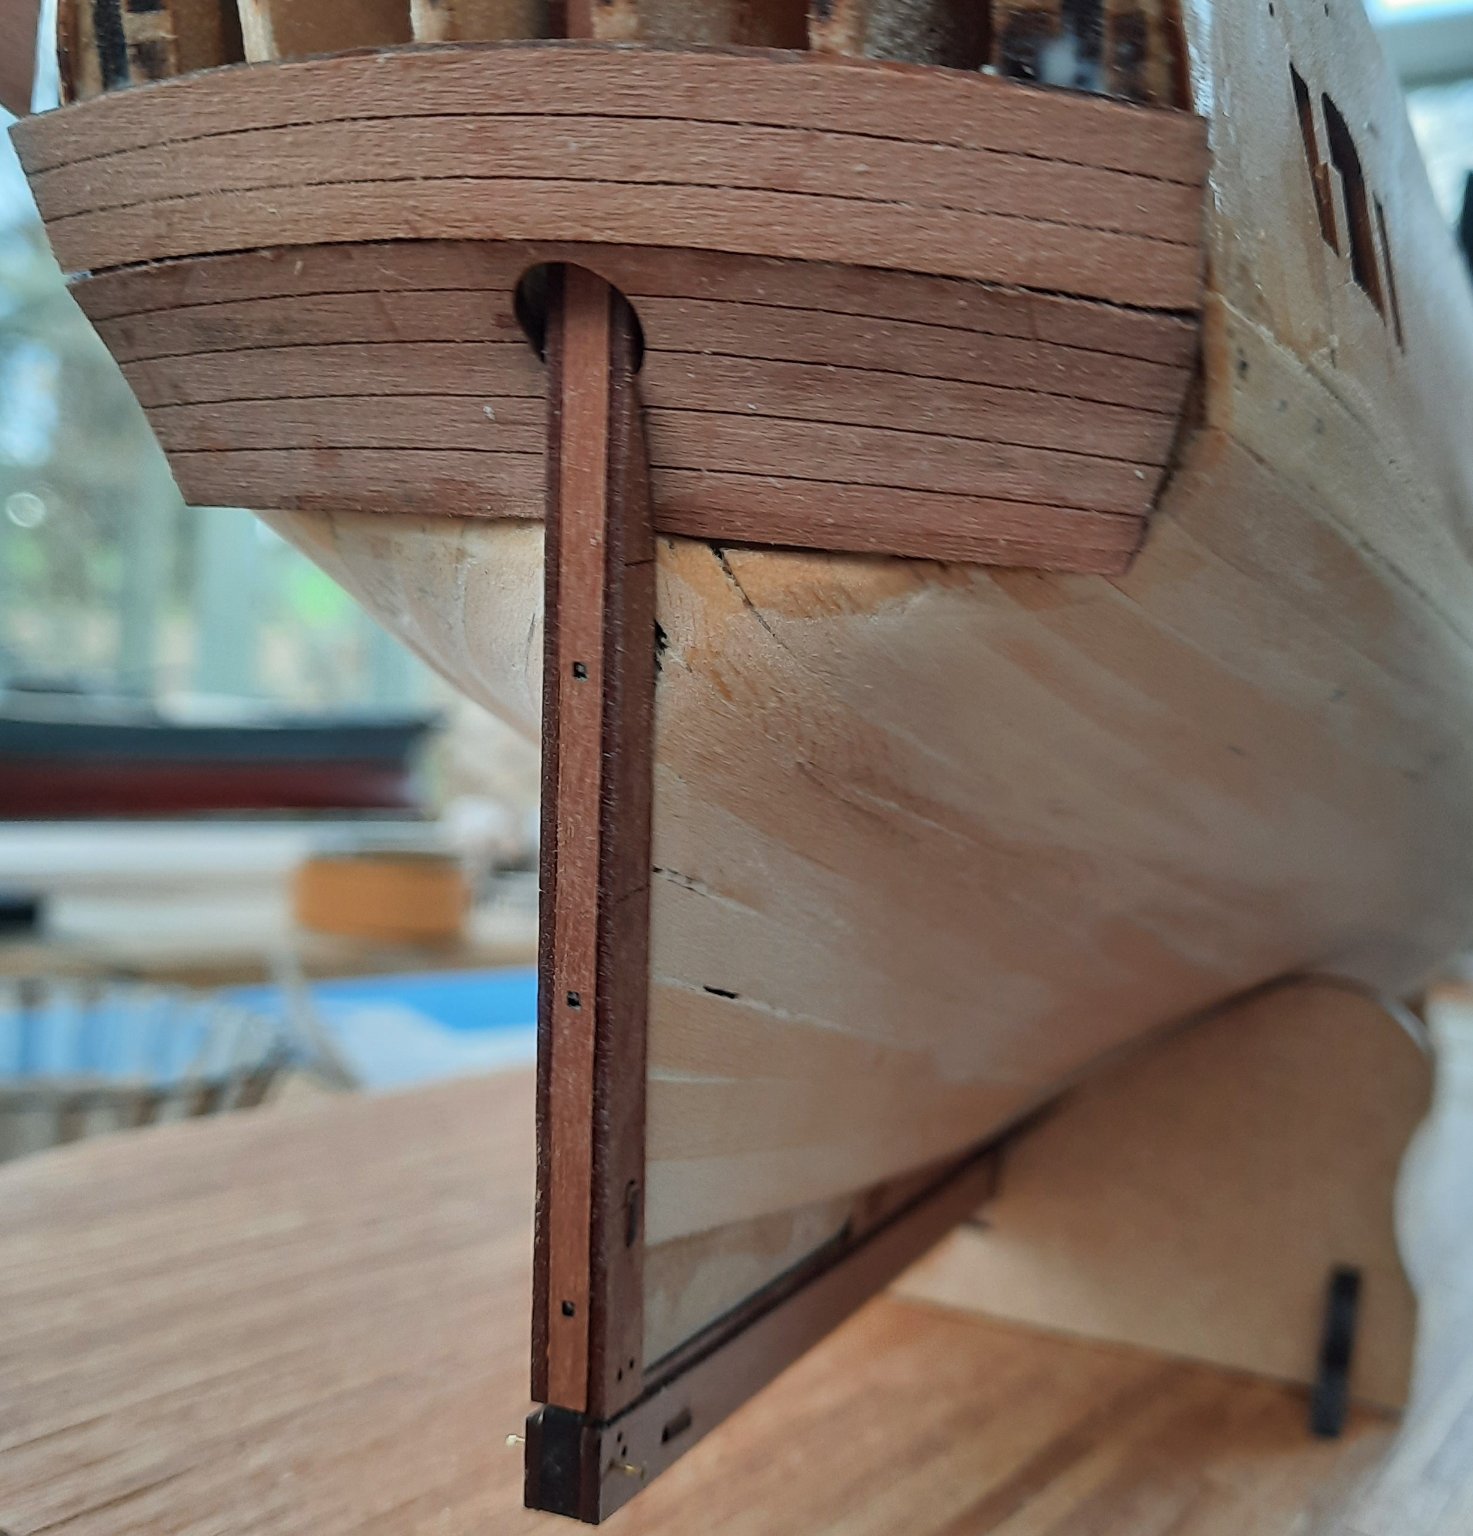
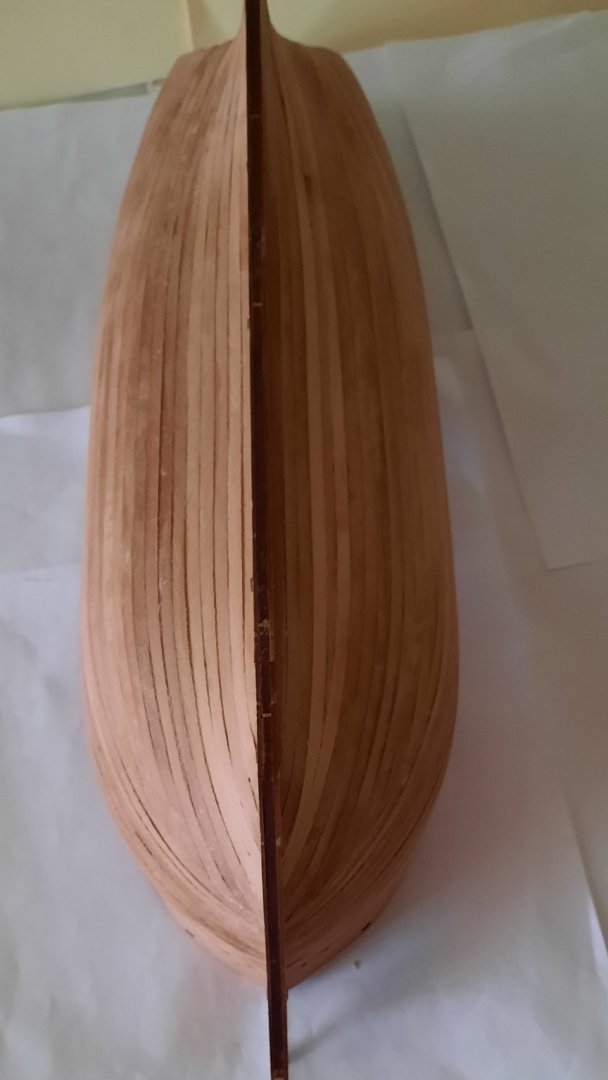
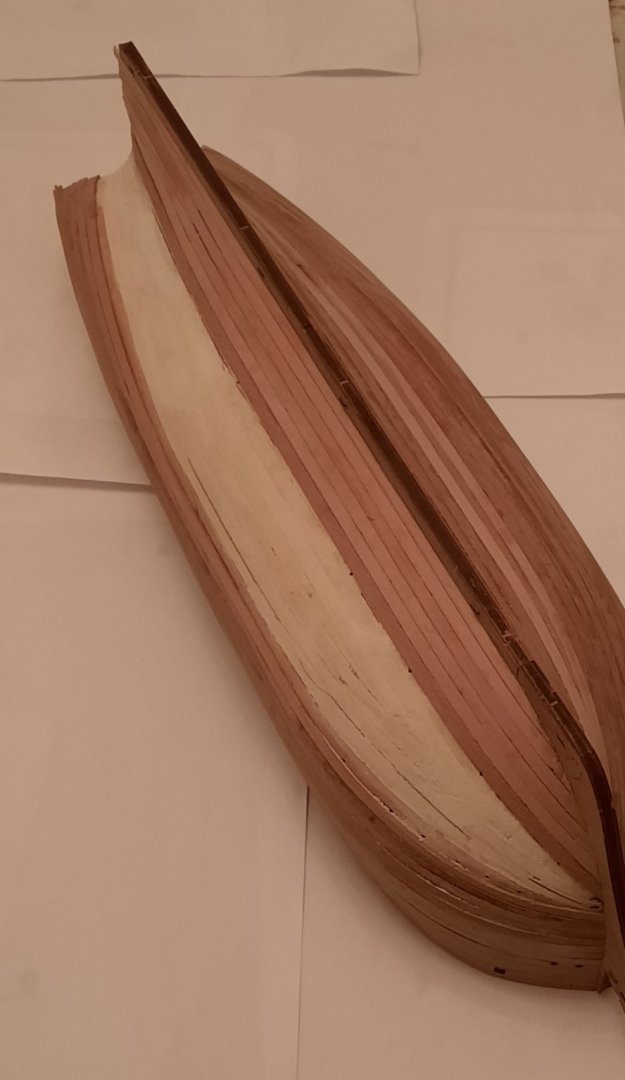
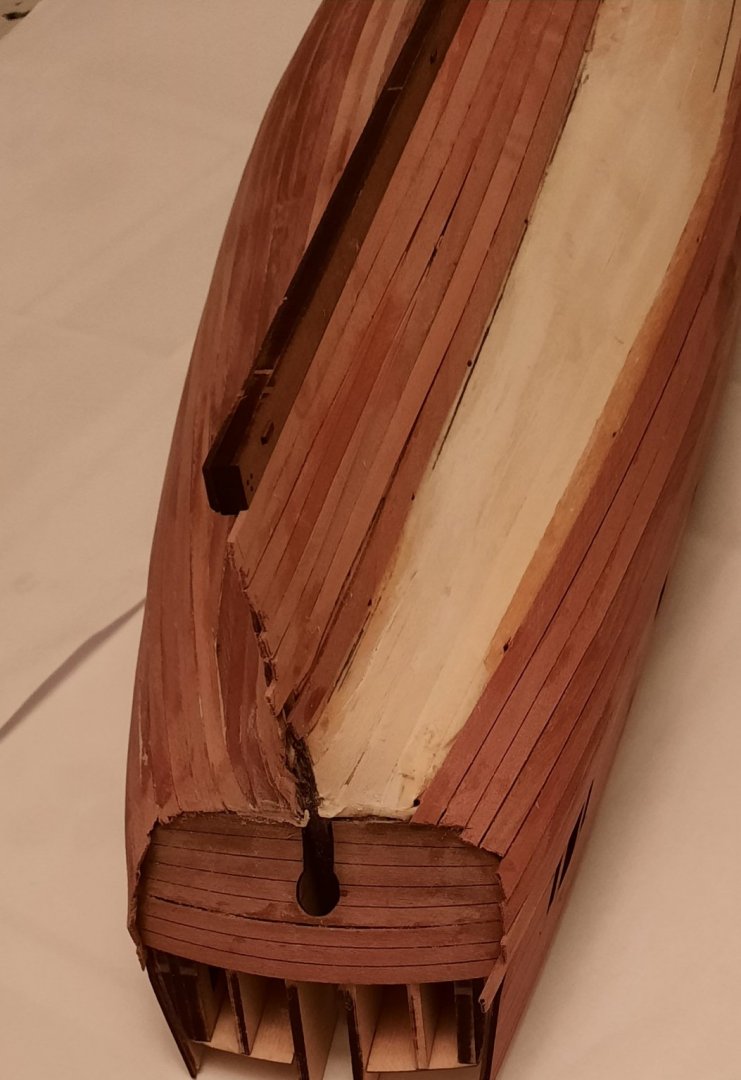
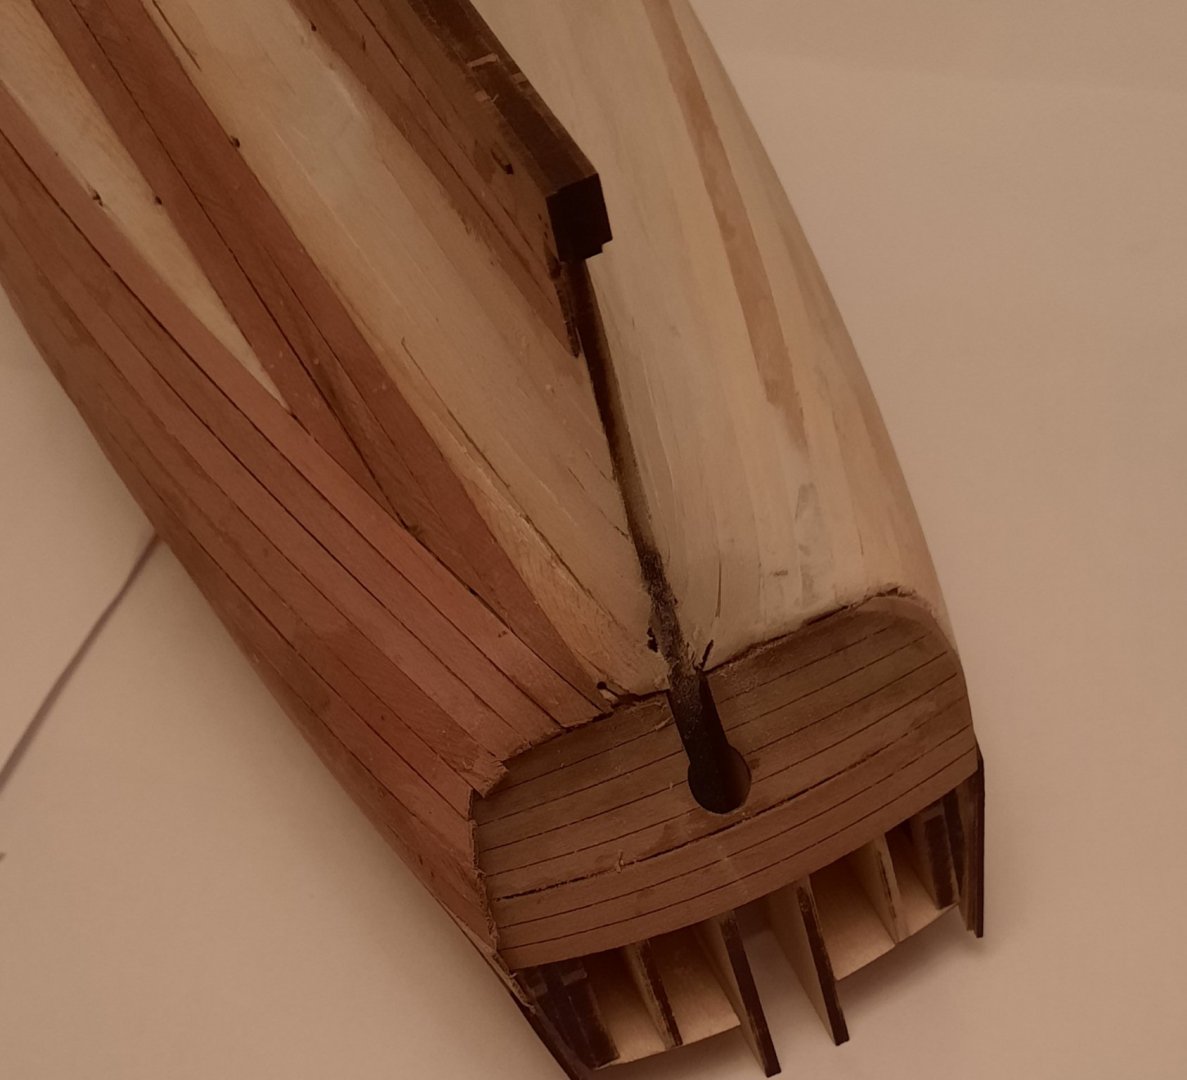
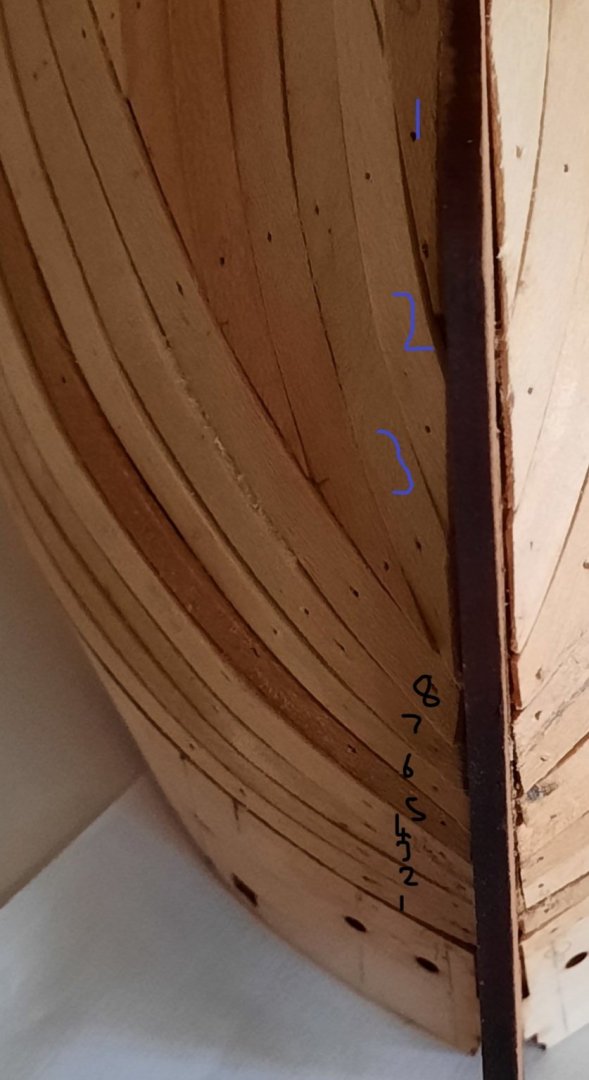
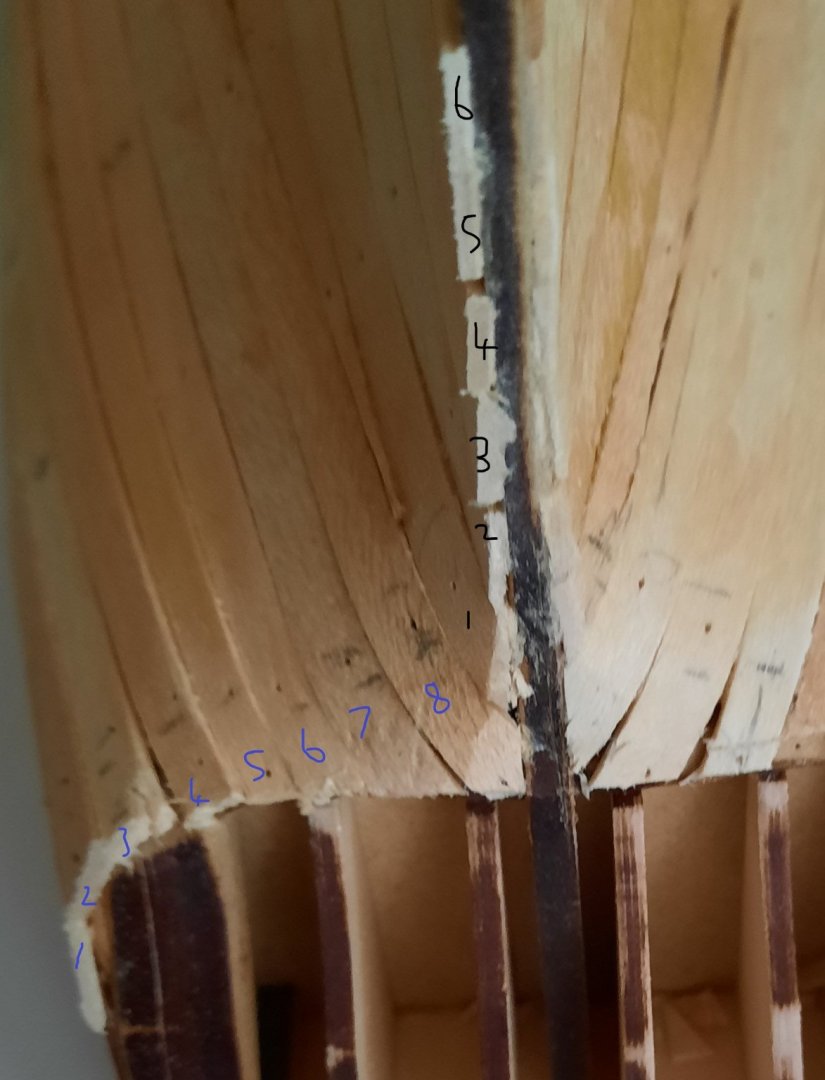
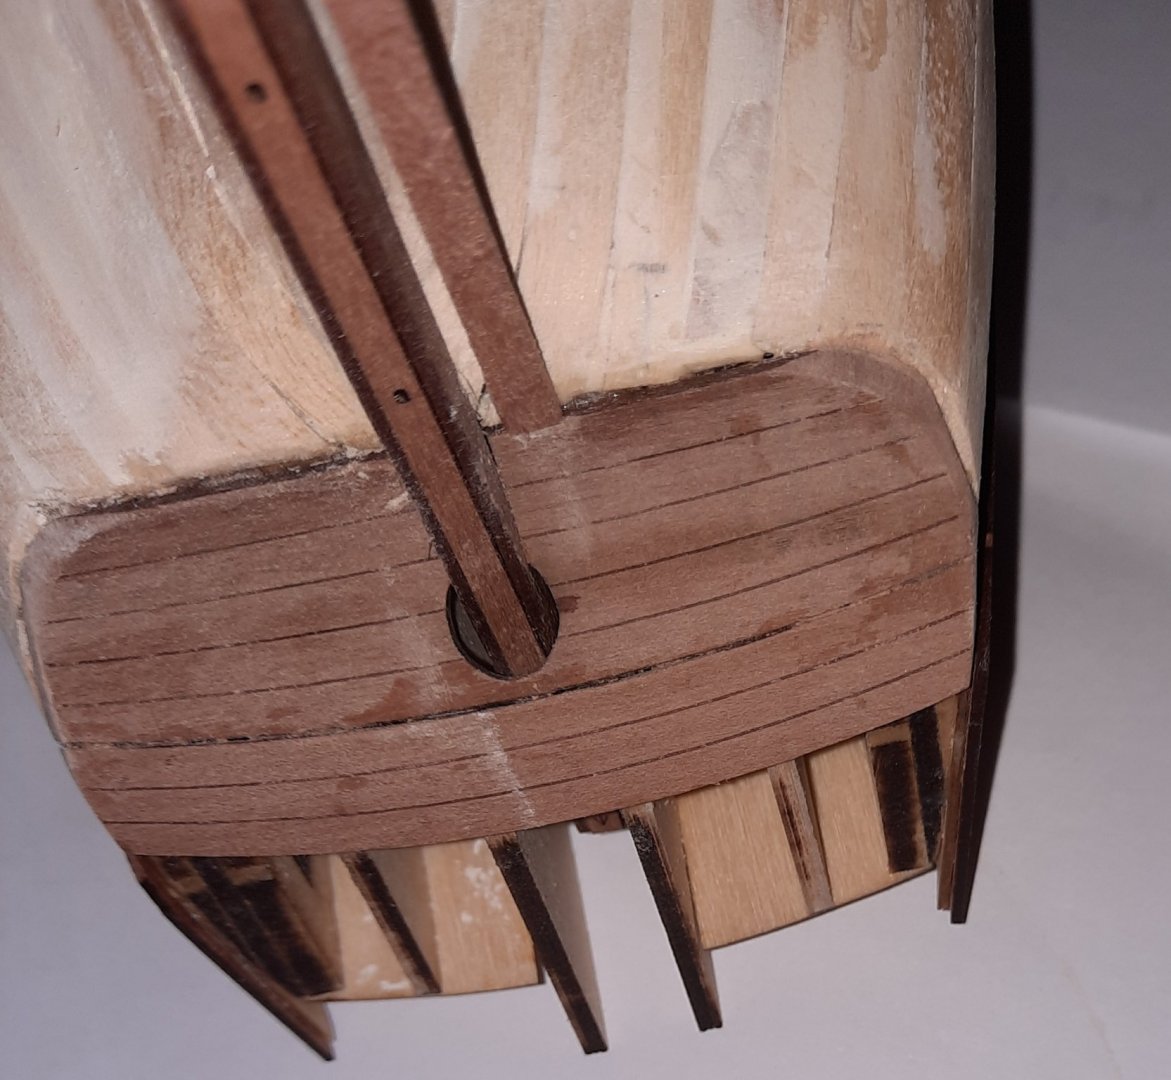
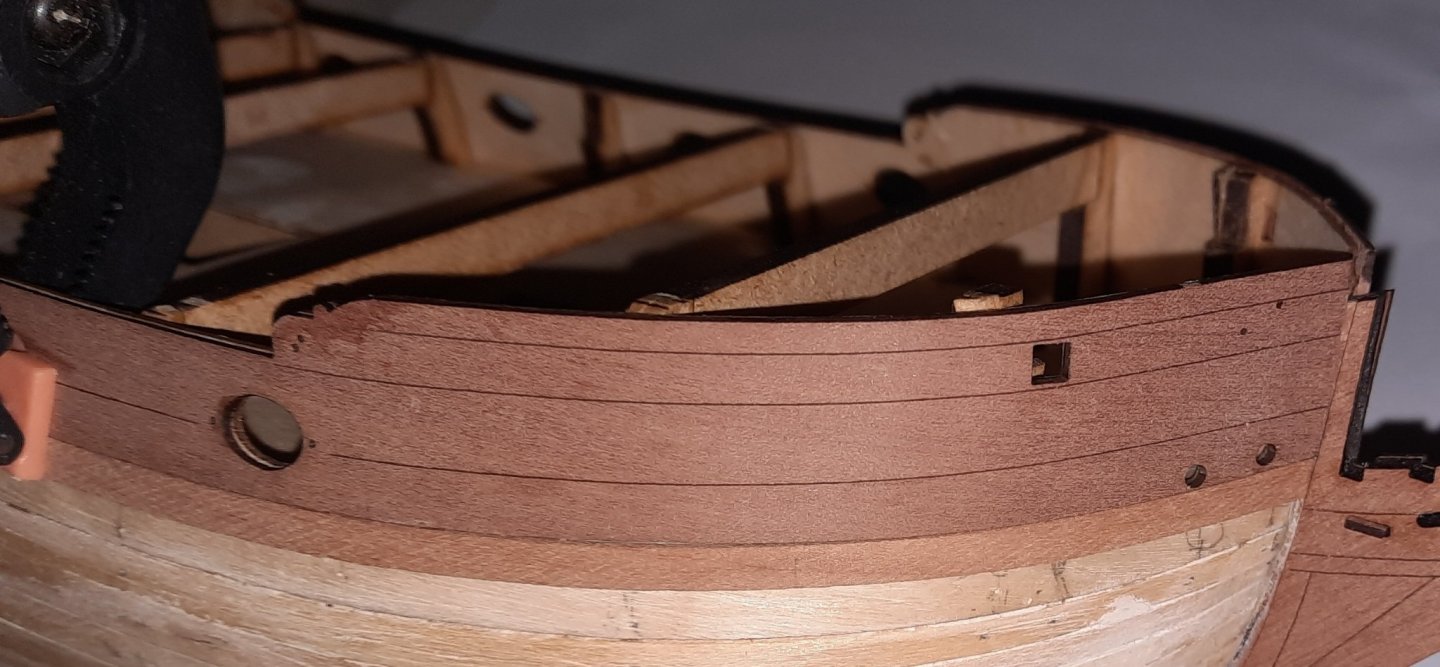
Stage: Hull Construction Build instructions: 85 Task: Stern 2nd Planking Parts: N.A Time Spent: 14 hours Status: in progress, port side complete Build Notes: I have continued with the 2nd planking of the starboard side which is now complete and ready for sanding and filling. As per the instructions I have been working from the bulwarks down toward the keel tapering the planks at the bow as necessary. I was also doing my best to tuck the stern planks under the lower stern counter pattern as I went along and I think out has turned out OK, noting this area will be covered up when the lower stern rail (207) is fitted later on in the build. Eventually I reached a point when next plank could not be tapered to terminate at the bow rabbet. As with the 1st planking, I decided to fit a full plank from the bow and allowed it to follow it natural path. At the widest point I set the infill gap to exactly 6 plank widths. With this middle central plank in place I then added two further planks above it. I then turned my attention to the keel rabbet and decided to fit the first three planks. I must admit it was a bit fiddly trying to get the first plank in position but once it had been cut, shaped and bent it ended up being a really good fit. I found it unnecessarily difficult to trim the plank to the right length to sit flush with the stern post therefore after the 2nd keel plank was fitted I decided it would be easier to remove the stern post and to refit once the all the planks had been fitted and been trimmed It also means that it will be easier to sand the planks, if required, so that they sit flush with the stern post . See the pictures below. I then filled in the gap in the middle of the hull. This turned out to be a straightforward enjoyable task Finally, working from the keel upwards I filled in the low gap. As planks were terminating at the stern post. I was ensuring any gaps left for infill steelers were an exact plank width. I decided it was not that important how neat the planking looked below the water line as it was going to be sanded, filled and primed so that it became a smooth even surface for the final coat(s) of white paint.


- 382 replies
-
- 11
-
-
- Vanguard Models
- Duchess of Kingston
- (and 1 more)
-
Thanks for the tip. Planking progress is slow as I've opted to use wood glue rather than ca.
-
I must thank my wife for letting me use our conservatory
- 382 replies
-
- 2
-
-
- Vanguard Models
- Duchess of Kingston
- (and 1 more)
-
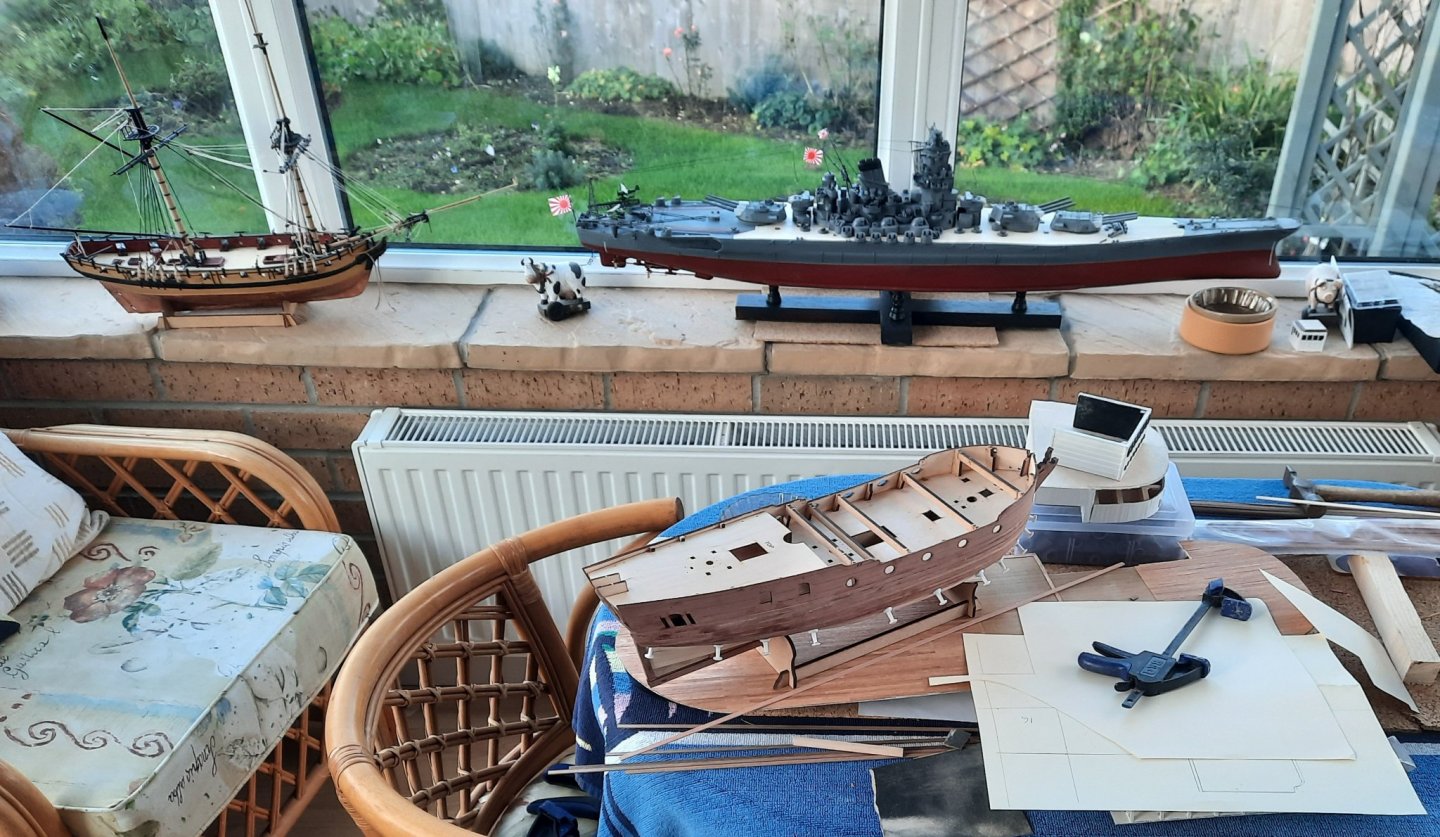
I thought I would start start todays update with a photo of my shipyard. The Duchess is sitting on the deck of the Robert E Lee with Speedy and IJN Yamato in the background. Progress on the 2nd planking is slow and steady, it is not perfect but I am pretty happy with how it is going and I think it will look good once it has been sanded smooth. I have started to tuck the stern planks under the lower stern counter as per the instructions.


- 382 replies
-
- 13
-
-
- Vanguard Models
- Duchess of Kingston
- (and 1 more)
-
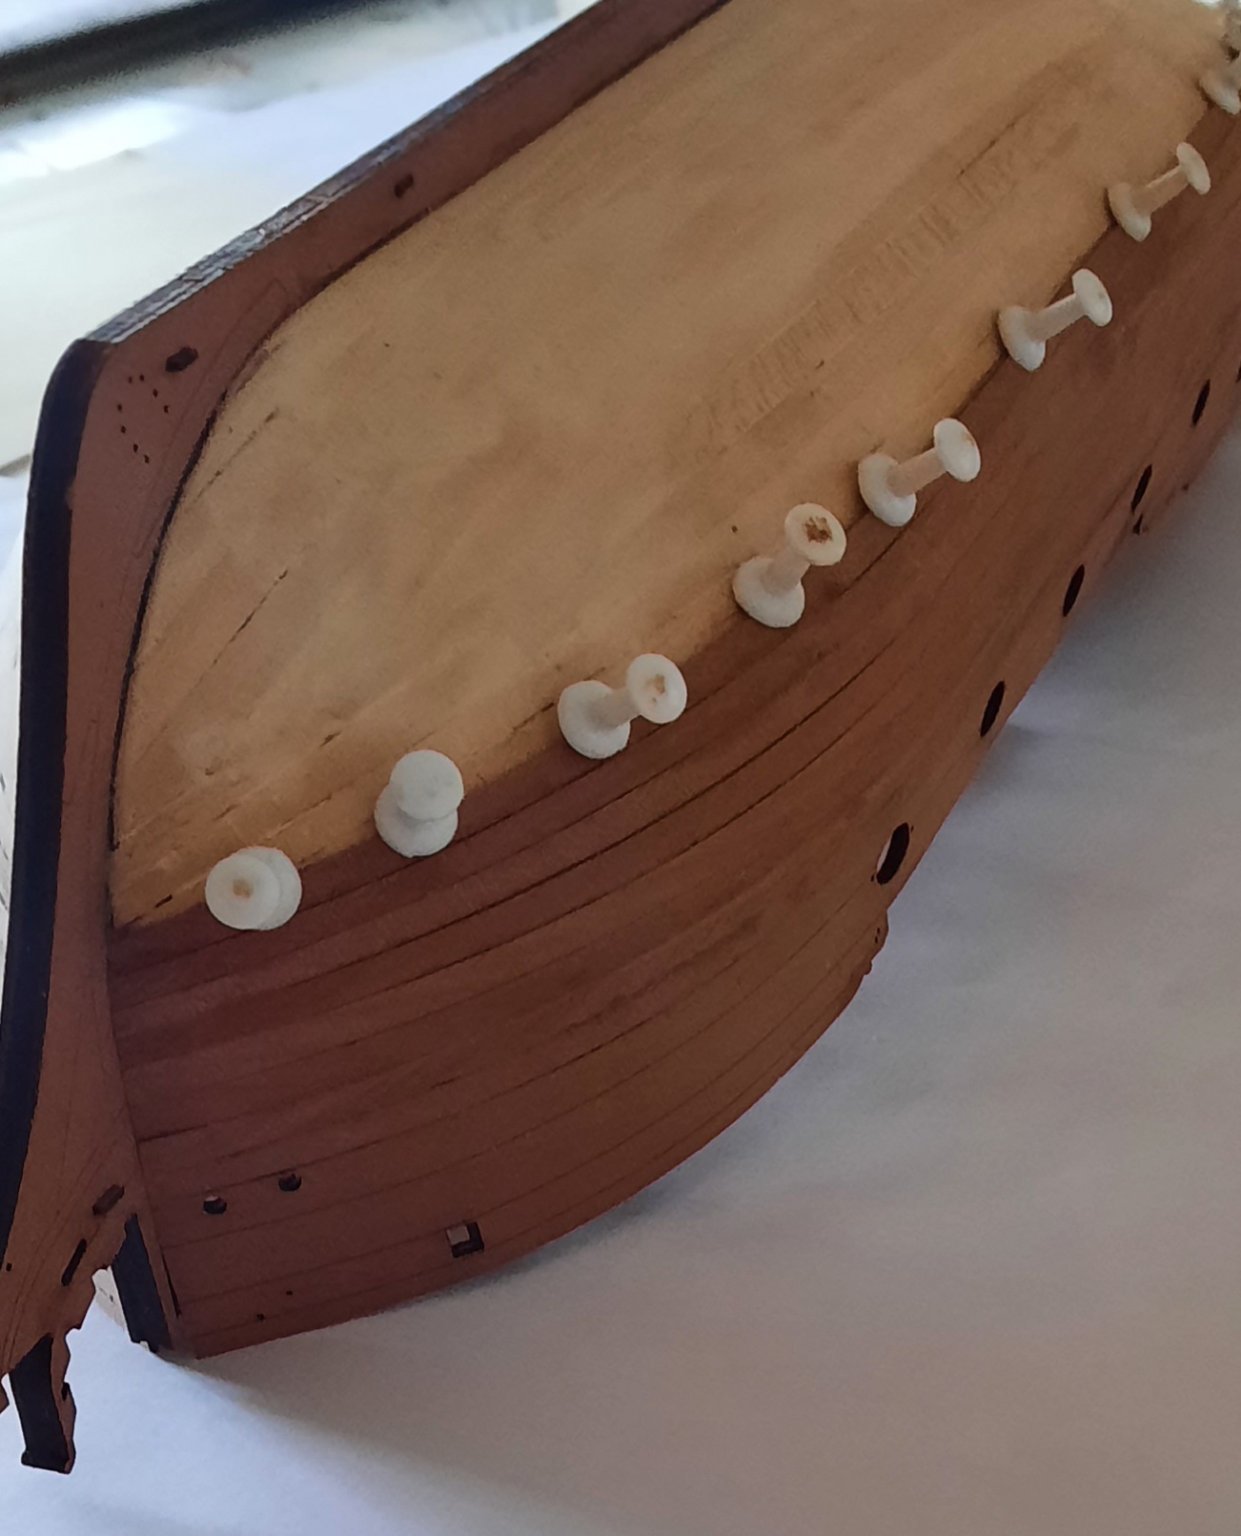
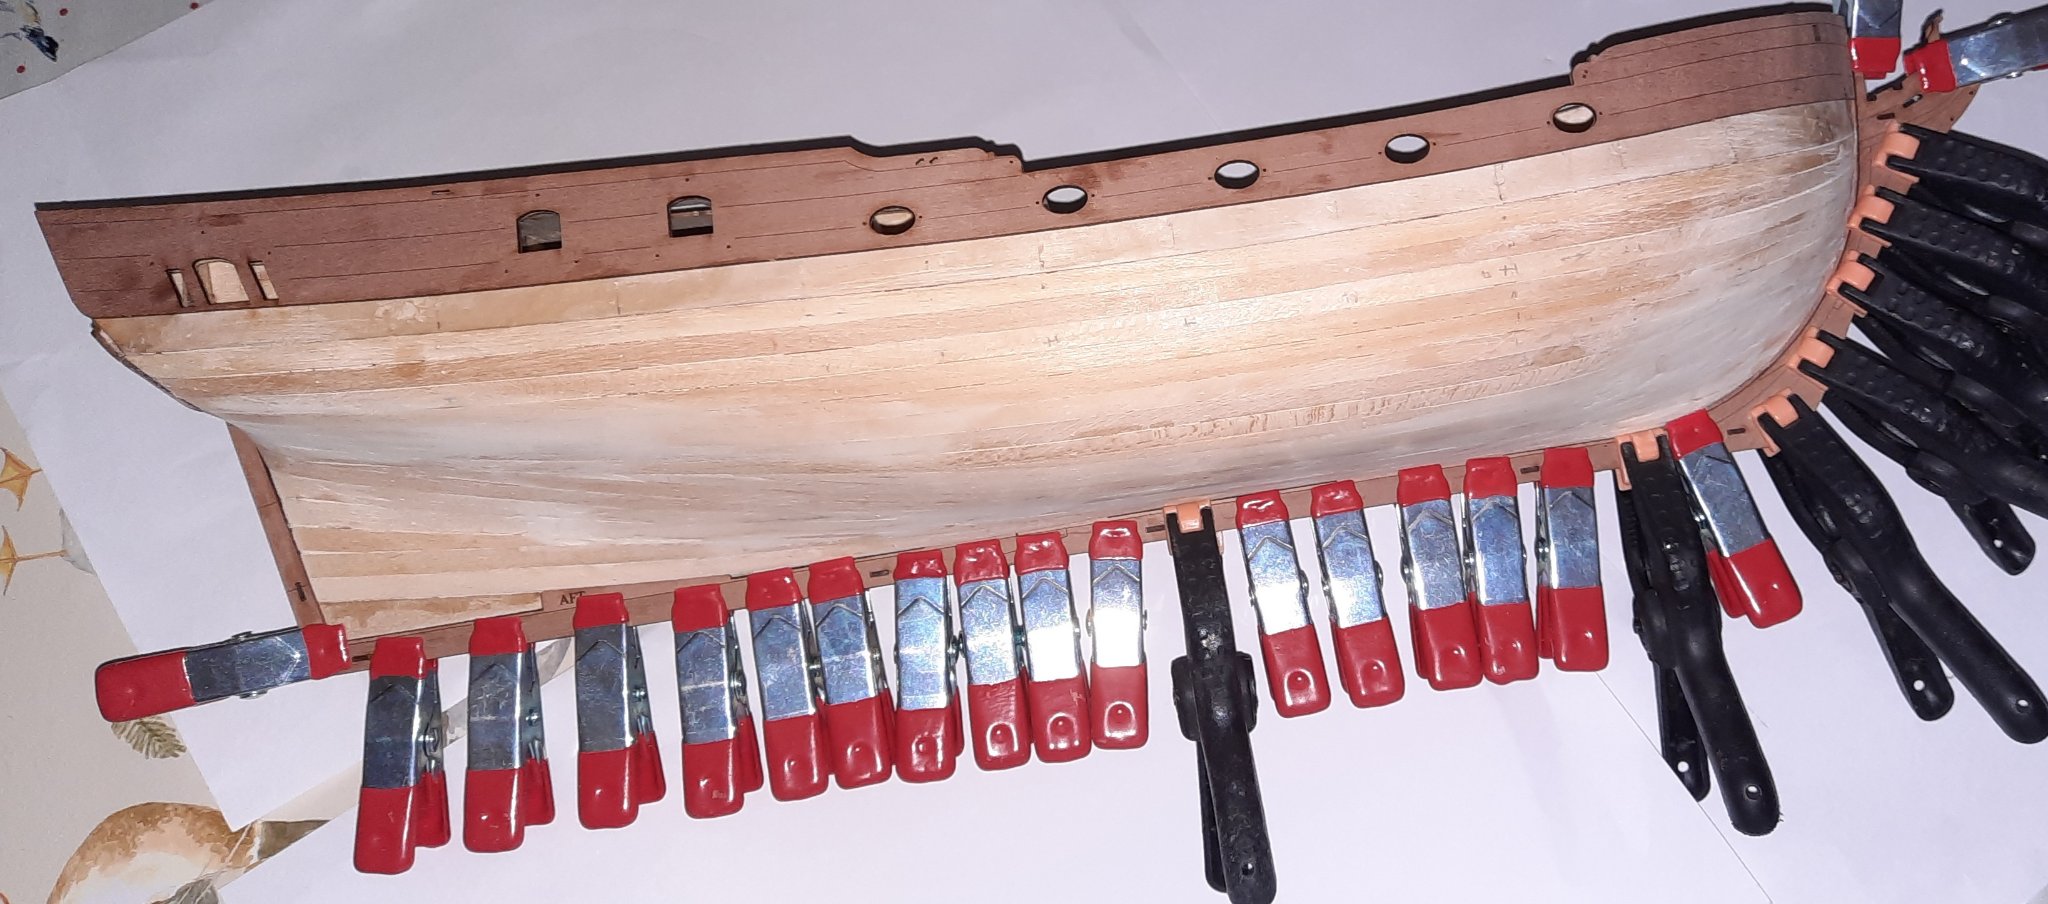
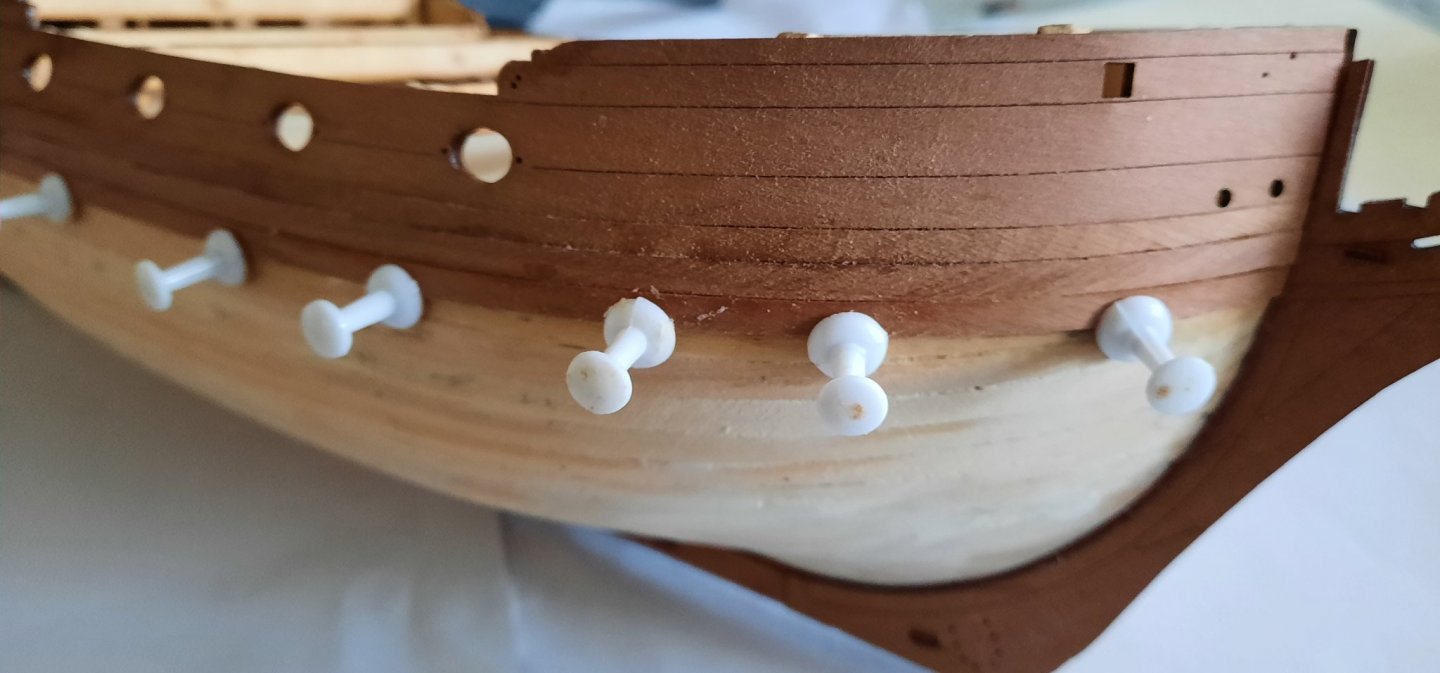
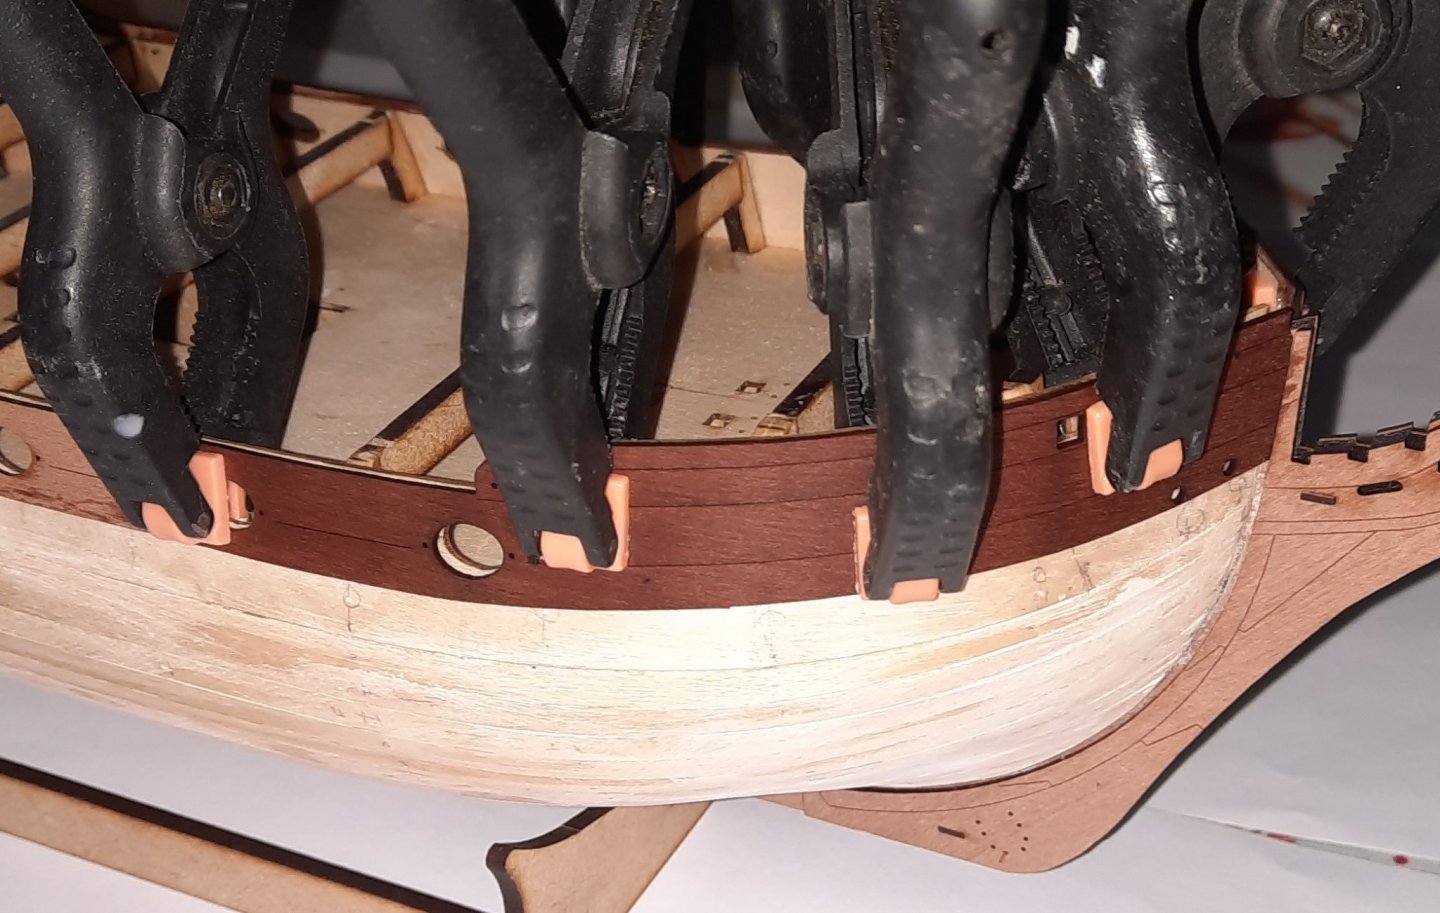
Hello Darrel Great news on you starting a build log. I will follow with interest. With regards to glue I tend to use wood glue whenever possible. I use a small paint brush to apply the wood glue and have a small tub of water so I can dilute / clean as necessary. I will use ca glue usually when I need a quick bind and I'm unable to find a suitable clamping method. I will use a small drop of CA when rigging to secure knots. If I need strength I will sometimes use epoxy resin, such as when fitting the channels. I have started the 2nd planking and I'm using wood glue. It does take more time but I prefer this method rather than ca glue which is much quicker. No matter how careful I seem to be I still end up with CA glue on my fingers which causes more problems (sticky fingers). As can be seen in the picture below I use pins to hold the glued plank in place as I move further down the hull.
- 382 replies
-
- 8
-
-
- Vanguard Models
- Duchess of Kingston
- (and 1 more)
-
Hello Darrel Many thanks for your kind comments. With regards to the aft section I did not fit any stealers. I think the method I used on the port side worked best for me. I planked down toward the keel for 8 planks. I just trimmed the planks as necessary without any stealers bow or aft. I then started to plank from the keel toward. I then took three full planks for the bow to be complete. I continued upward until the planking was complete. It required 14 planks at the stern
- 382 replies
-
- 6
-
-
- Vanguard Models
- Duchess of Kingston
- (and 1 more)
-
Looking good, I have just started my 2nd planking.
-
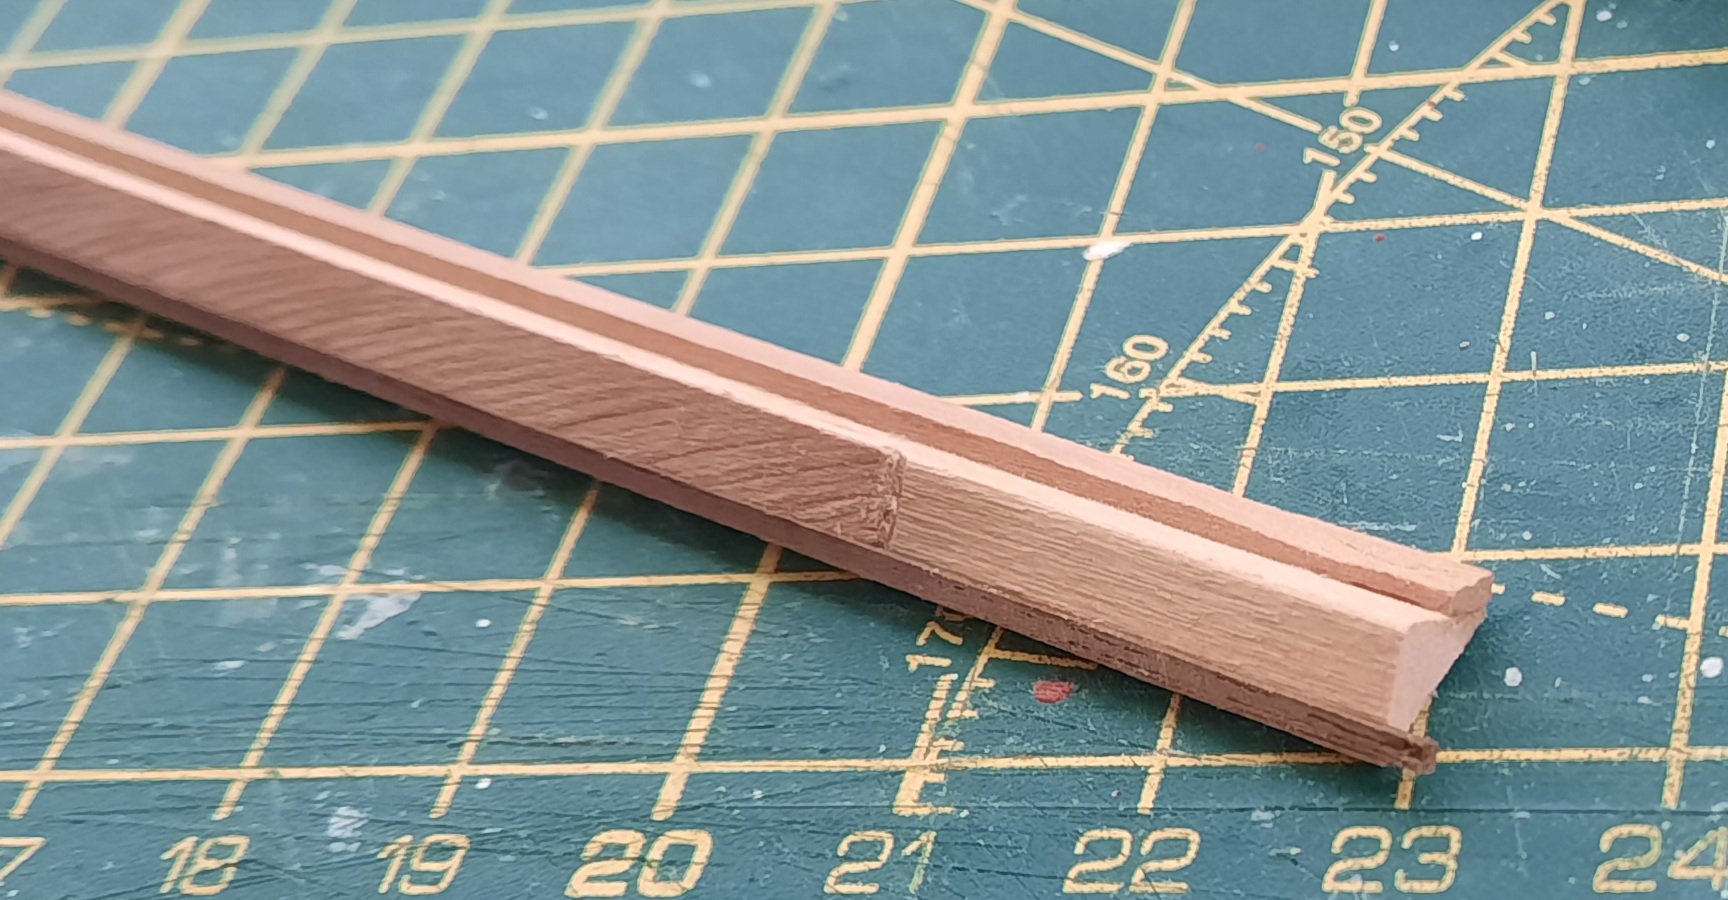
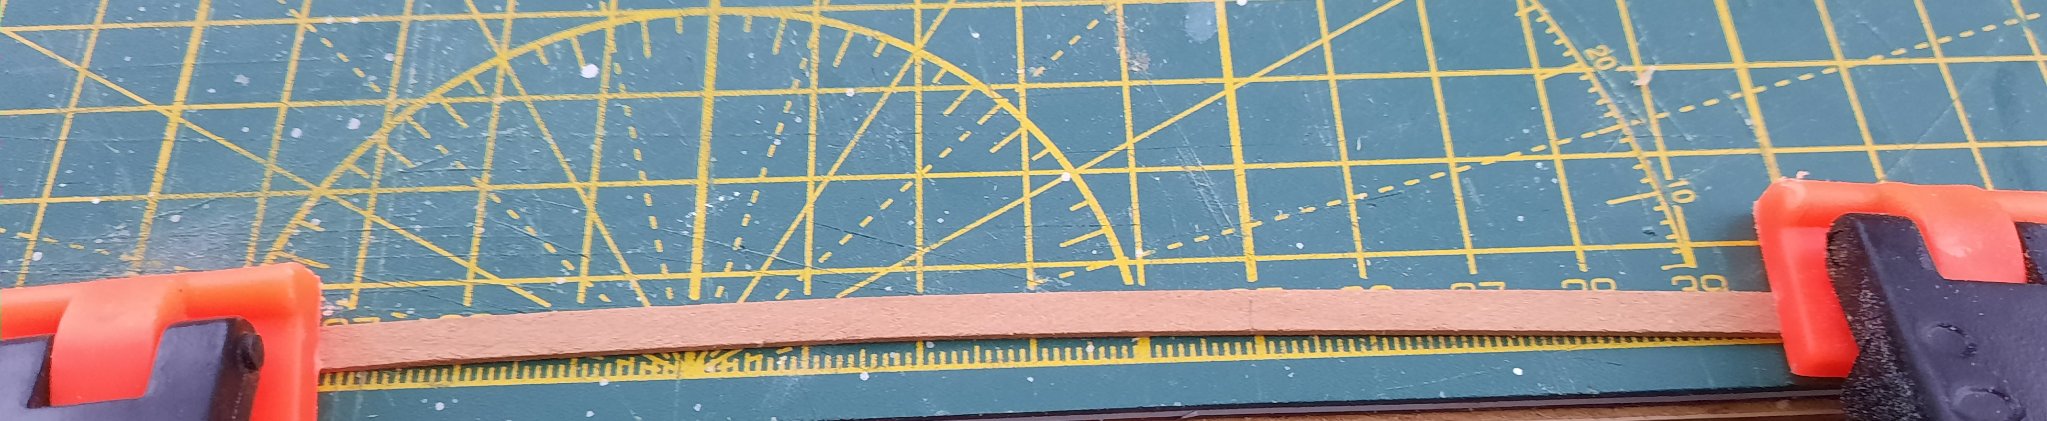
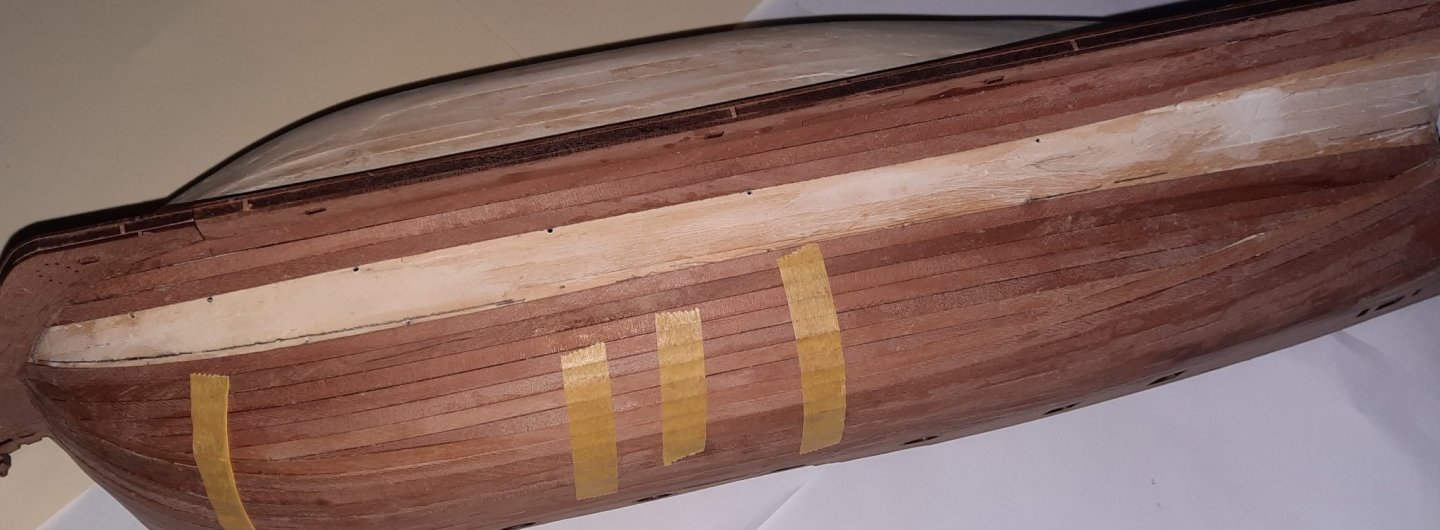
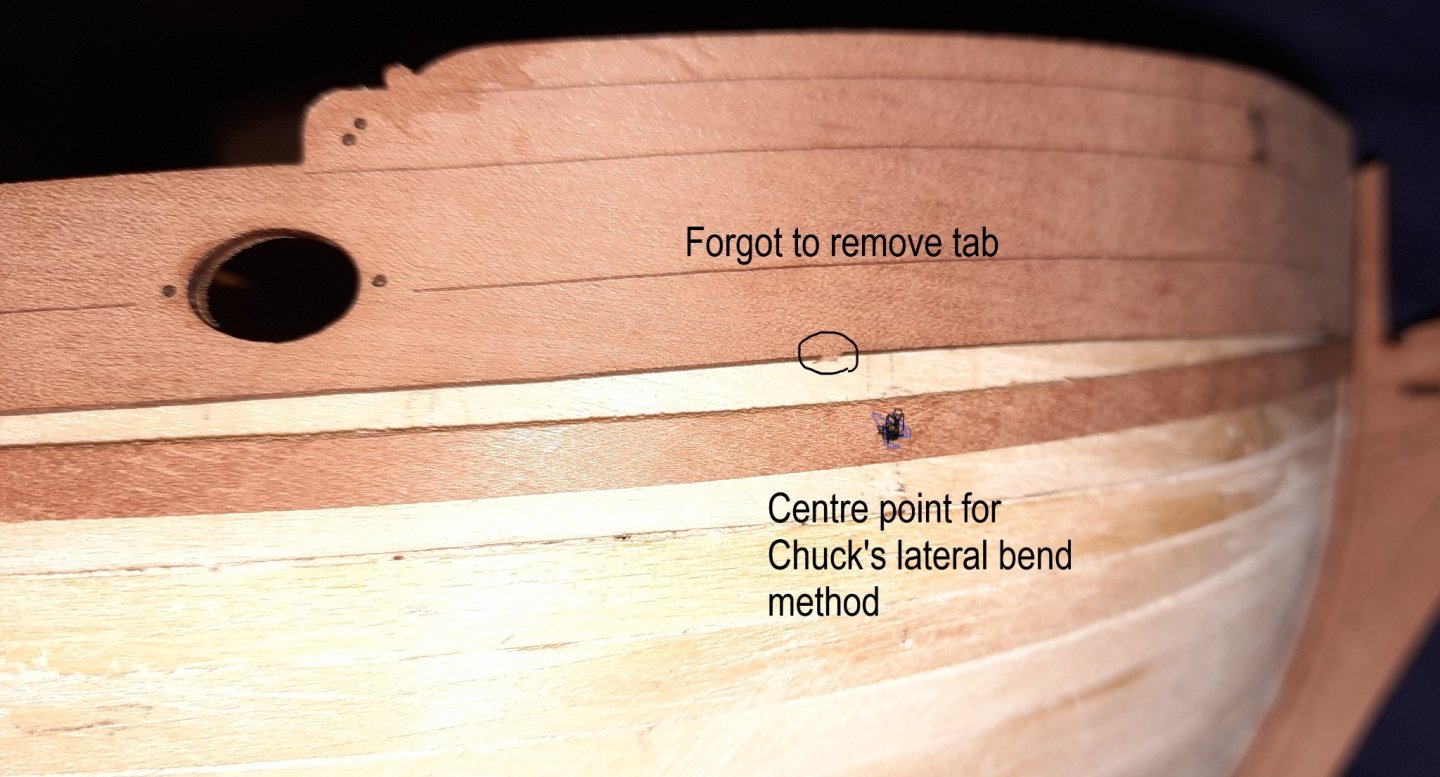
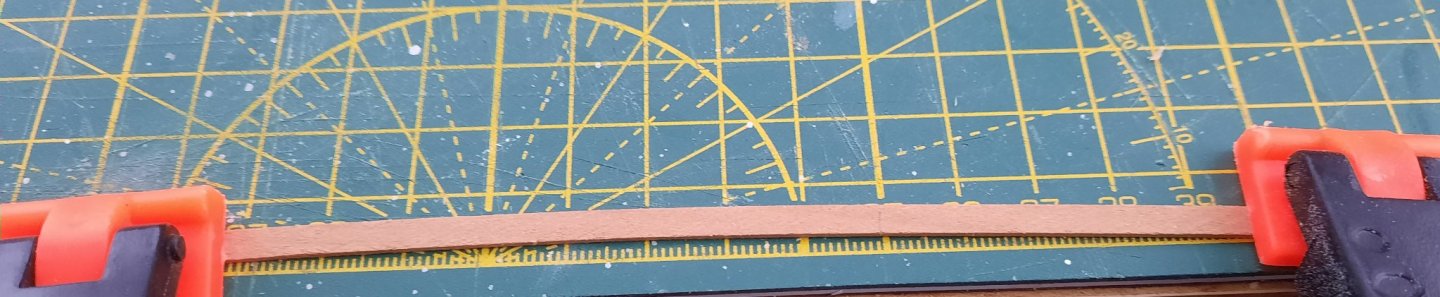
I believe that it is important to make sure everything is ship shape before undertaking the 2nd planking. Therefore I thought I would share my final preparations before I start the 2nd planking, as I did find this very beneficial and I did discover a couple of minor adjustments were necessary. Below I have detailed the following checks I undertook: a) Now that the bow and keel outer facings had been glued in place I double checked the rabbet using a plank. I was happy that I had a good gap around the bow and along the keel. b) Check how the planks would look along the stern post and under the lower stern counter. I discovered that the hull required a little bit more sanding (with a thin sanding stick) around the stern post / lower stern counter area before I was happy with how the planks would fit. c) Check how the first plank will fit around the bow area and to see if there is any tapering required. I do not think the first plank will require any tapering. The true line of the plank does not follow the bottom edge of the outer pattern as shown in the photo below. I found I could " force" the plank to follow the bottom edge. However as I intend to use Chuck Passaro's plank bending method I think the "U" shaped bent plank will fit Ok. d) using a triangular length of material I made a simple jig to enable me to chamfer the plank edge. e) Using a spare piece of planking material (from Speedy) I tested the plank bending method. Using some clamps the plank is held in a bent position. I then brushed on some water and used a hair dryer. f) Once the plank had cooled down (only takes a minute) the bent plank was test fitted and I was pleased with how easily the plank fitted. Once secure in the rabbet the plank followed the required line, without any forcing) and staying flush with the hull. A clamp was added to hold the plank to demonstrate this in the photo below.


- 382 replies
-
- 15
-
-
- Vanguard Models
- Duchess of Kingston
- (and 1 more)
-
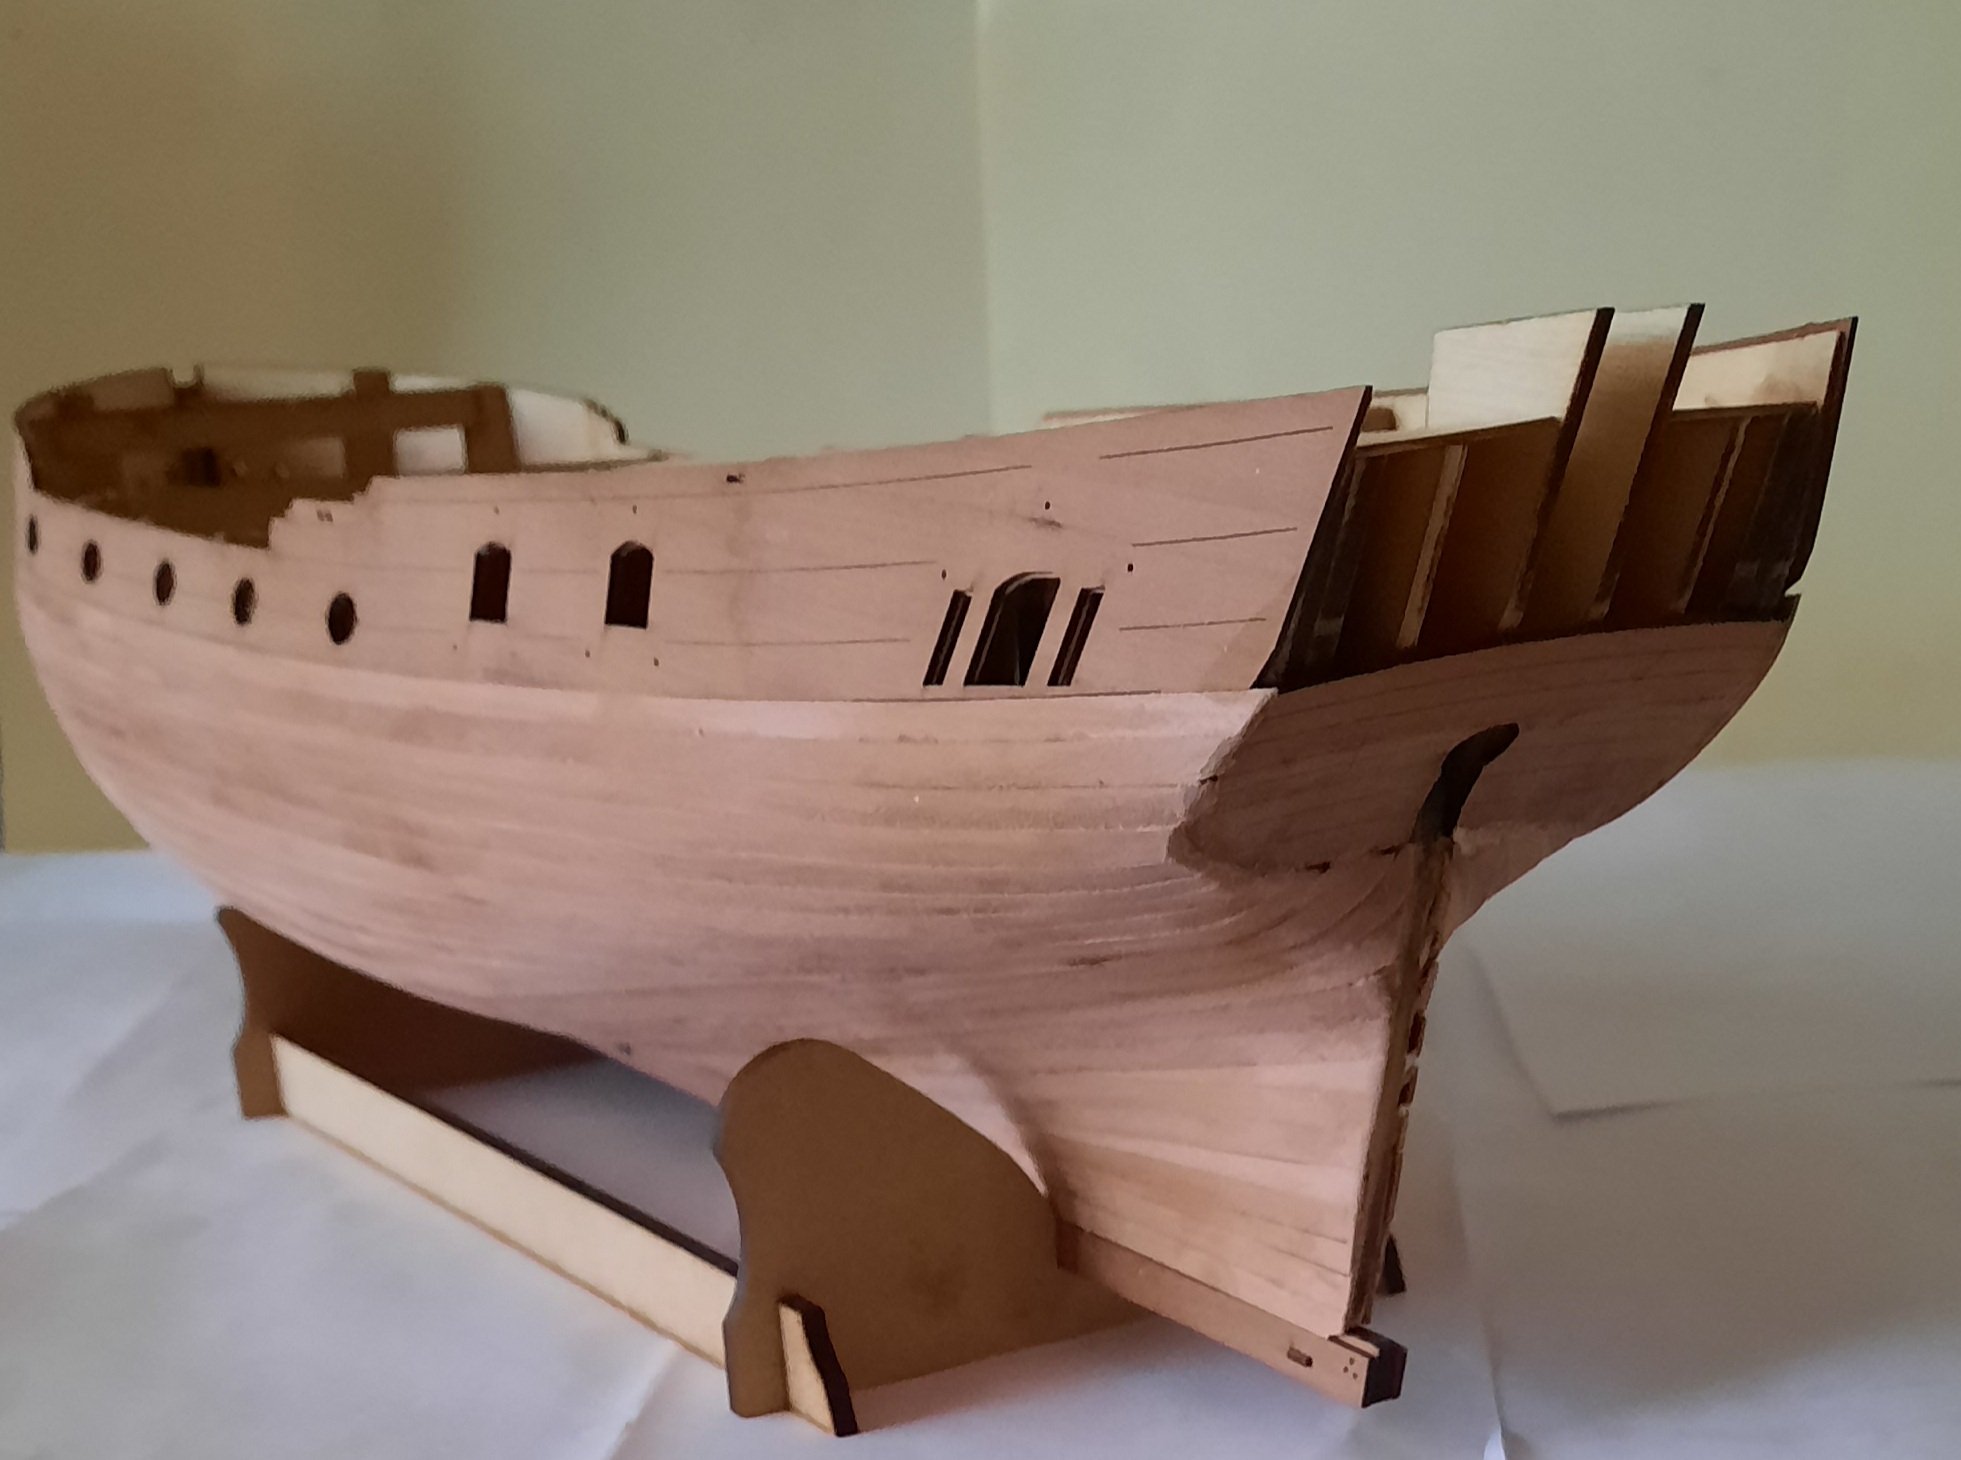
Stage: Hull Construction Build instructions: 82 - 84 Task: Stern Outer Side Patterns & Bow and Keel Outer Facings Parts: 134, 135, 135 & 136 Time Spent: 40 mins Status: Complete Build Notes: The bow end of the two outer side patterns 134 and 135 required a very minor trim. I removed approx. around 0.2mm from each bow end to ensure a good fit as the design had left some extra material to allow for build variations. The two outer patterns lined up very well and I used the various pin holes to ensure they were correctly lined up. I used a couple of spreader clamps for the stern area, and standard clamps, elsewhere as the wood glue cured. I then proceeded to glue to the bow and keel outer facings. I think I used enough clamps to ensure these parts were properly secured during the curing process😂. The hull is now ready for the 2nd planking.

- 382 replies
-
- 13
-
-
- Vanguard Models
- Duchess of Kingston
- (and 1 more)
-
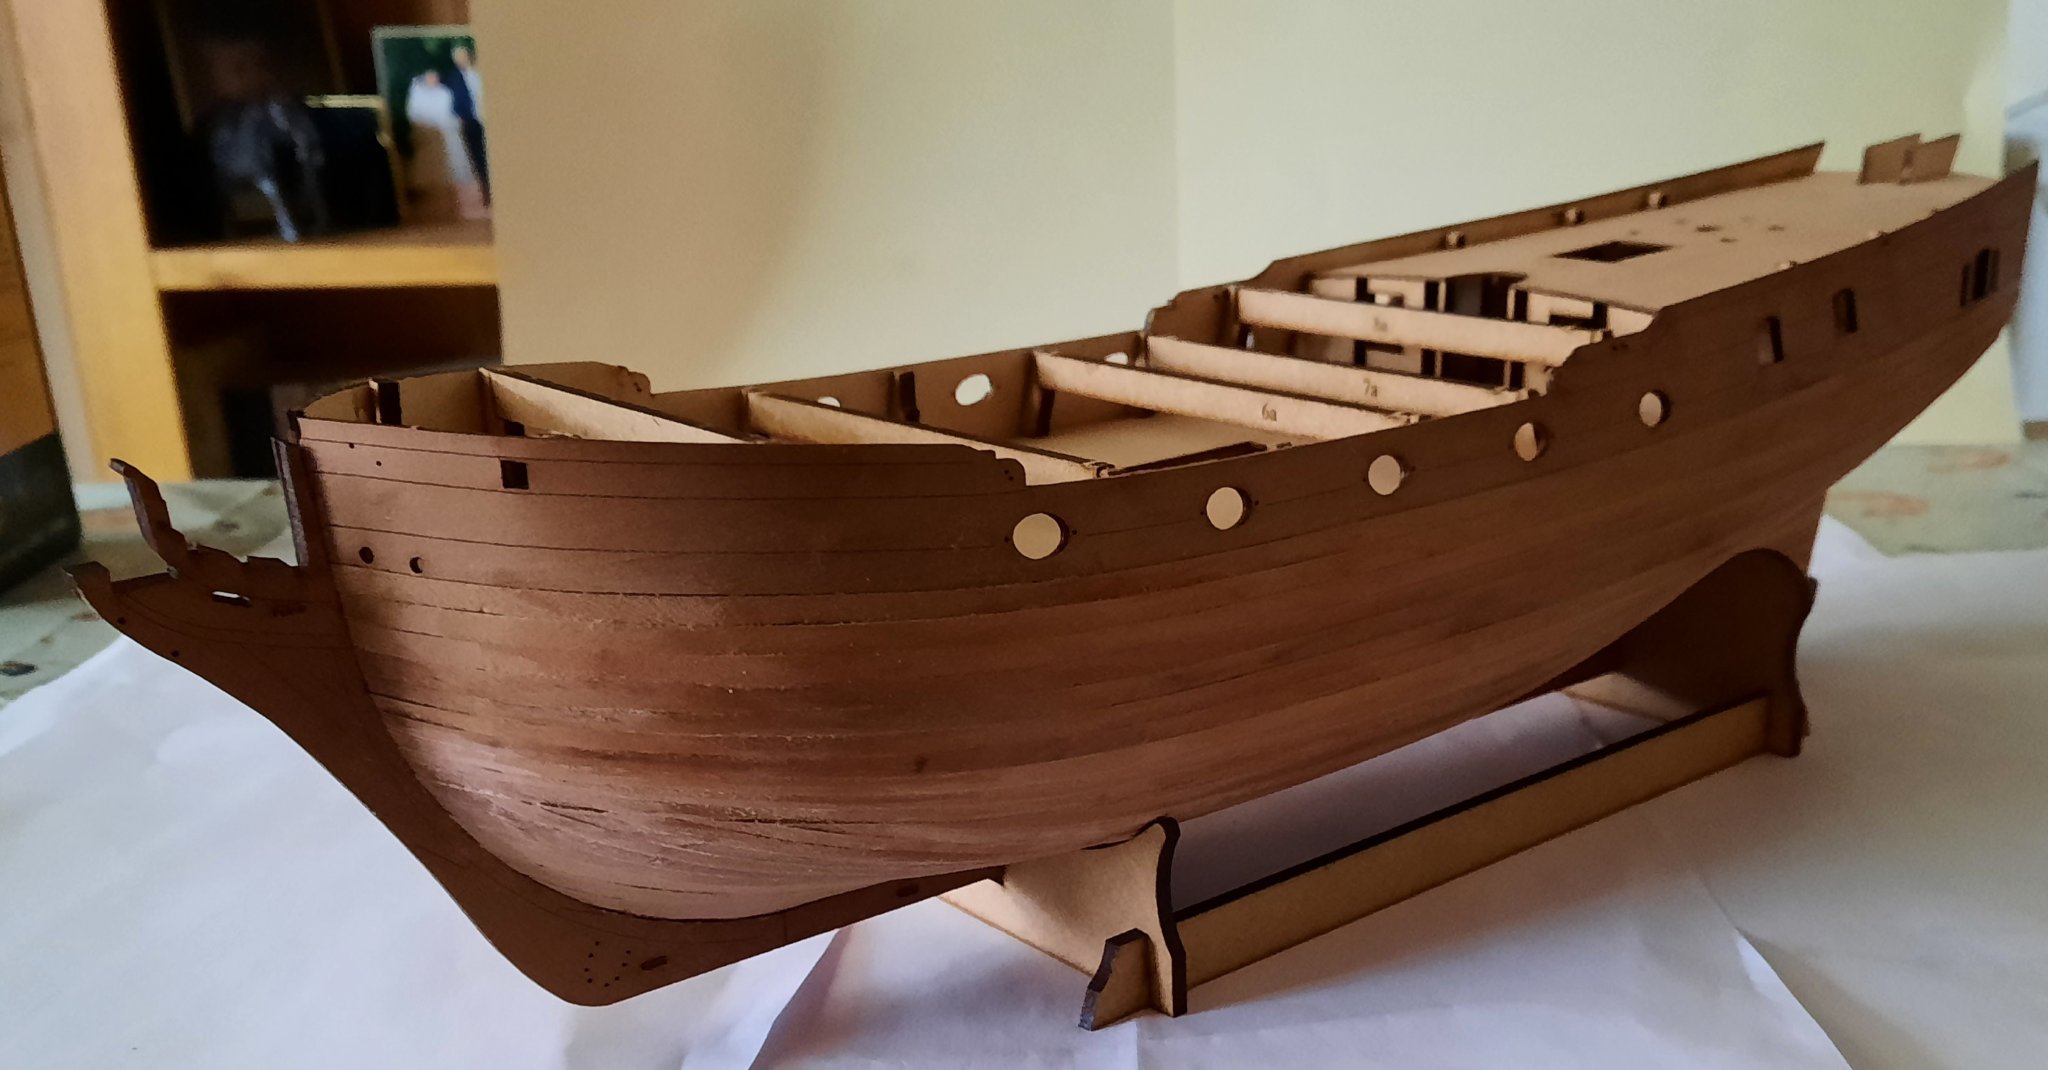
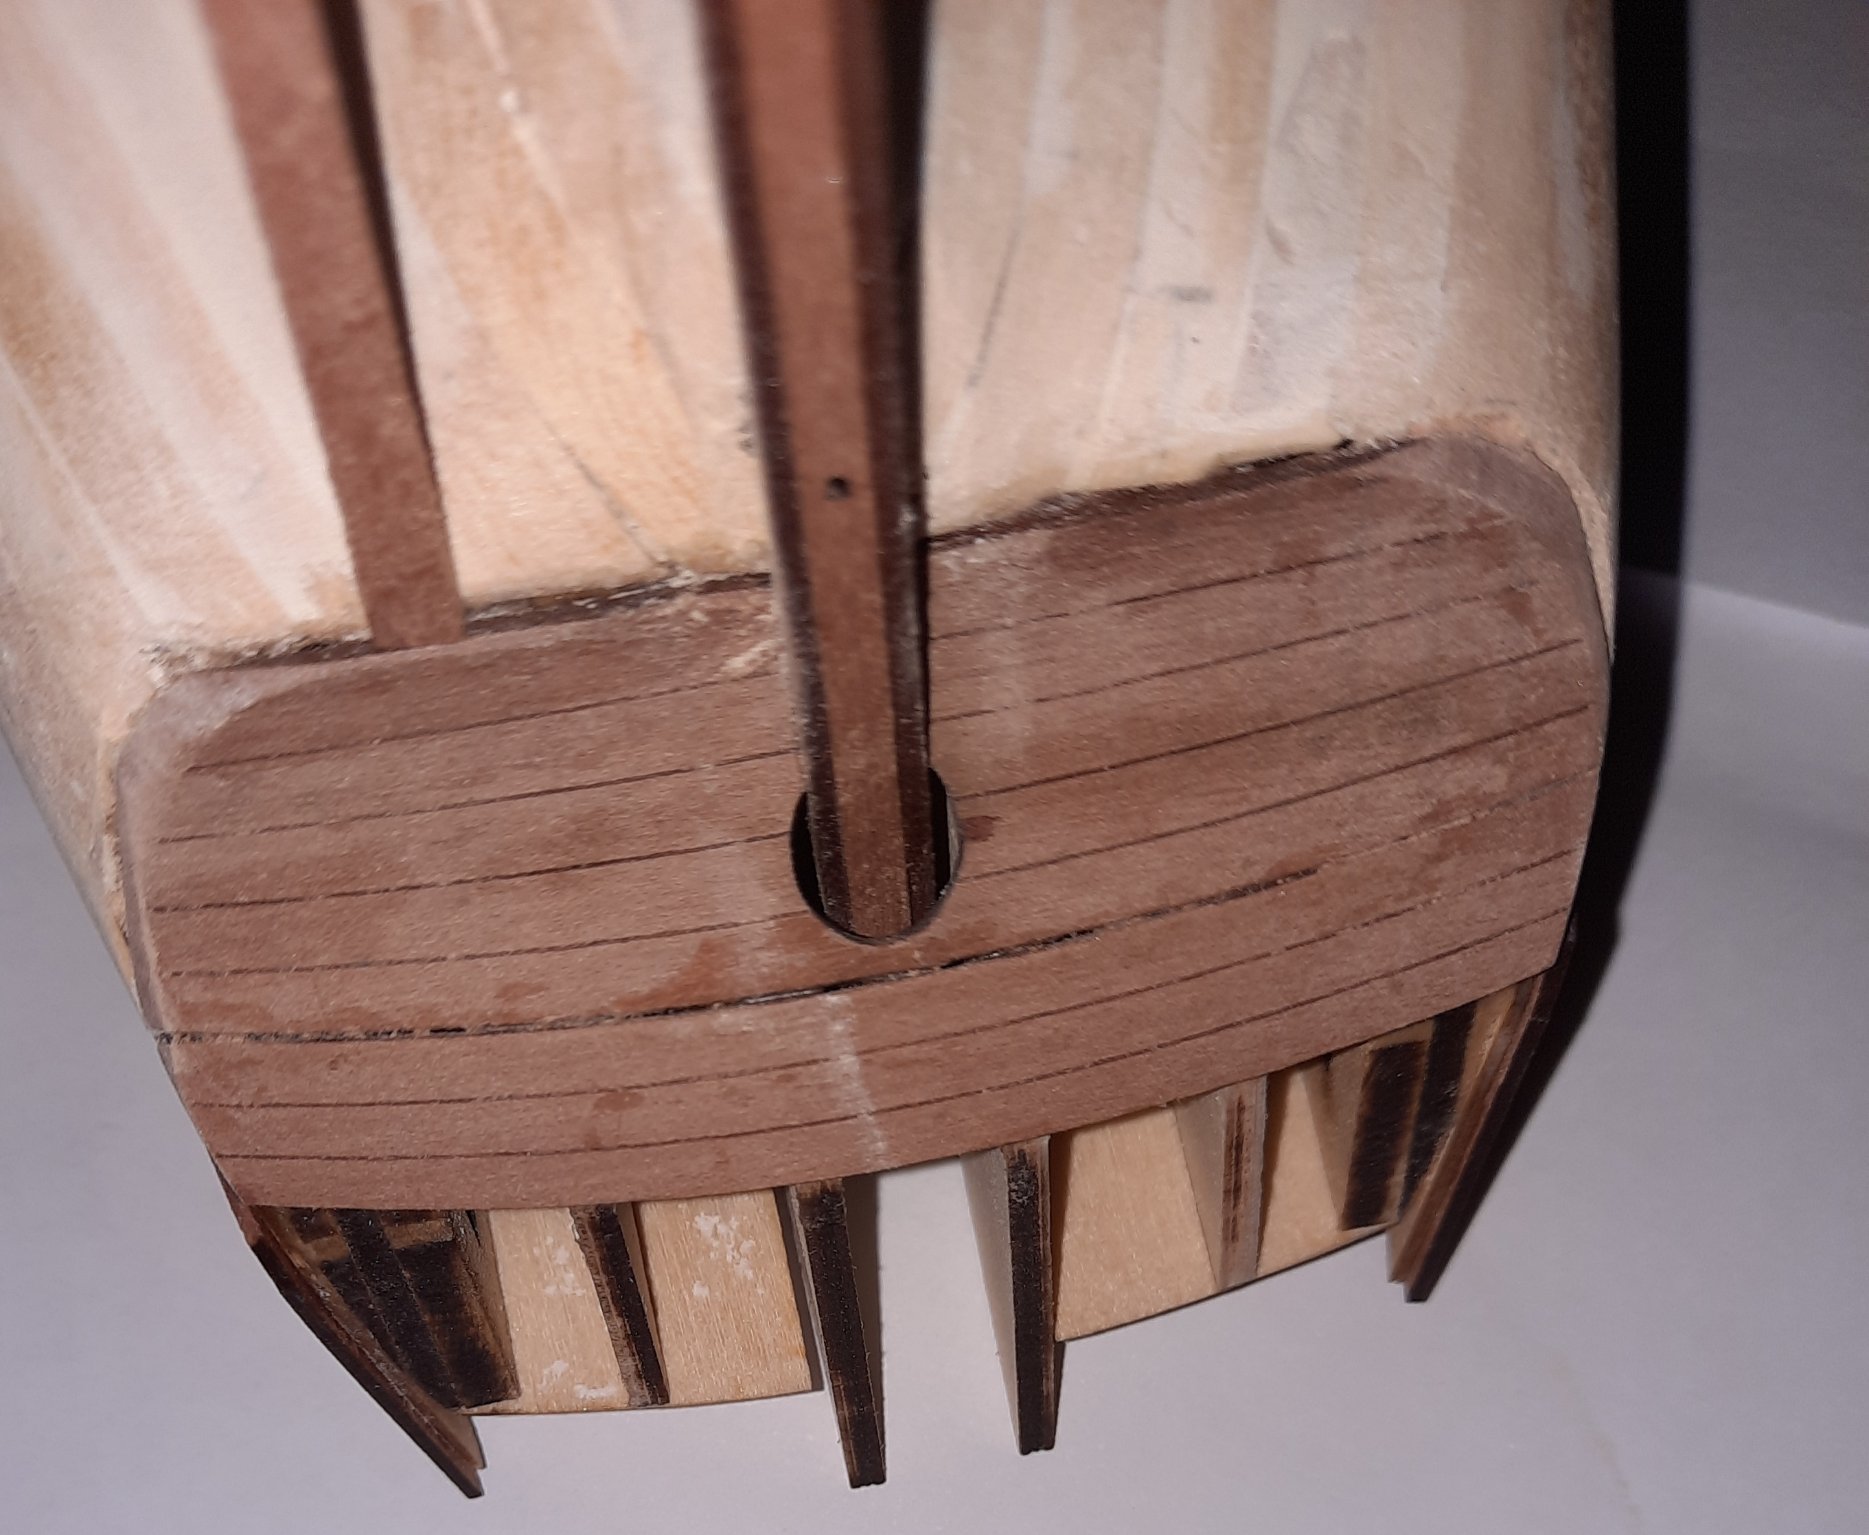
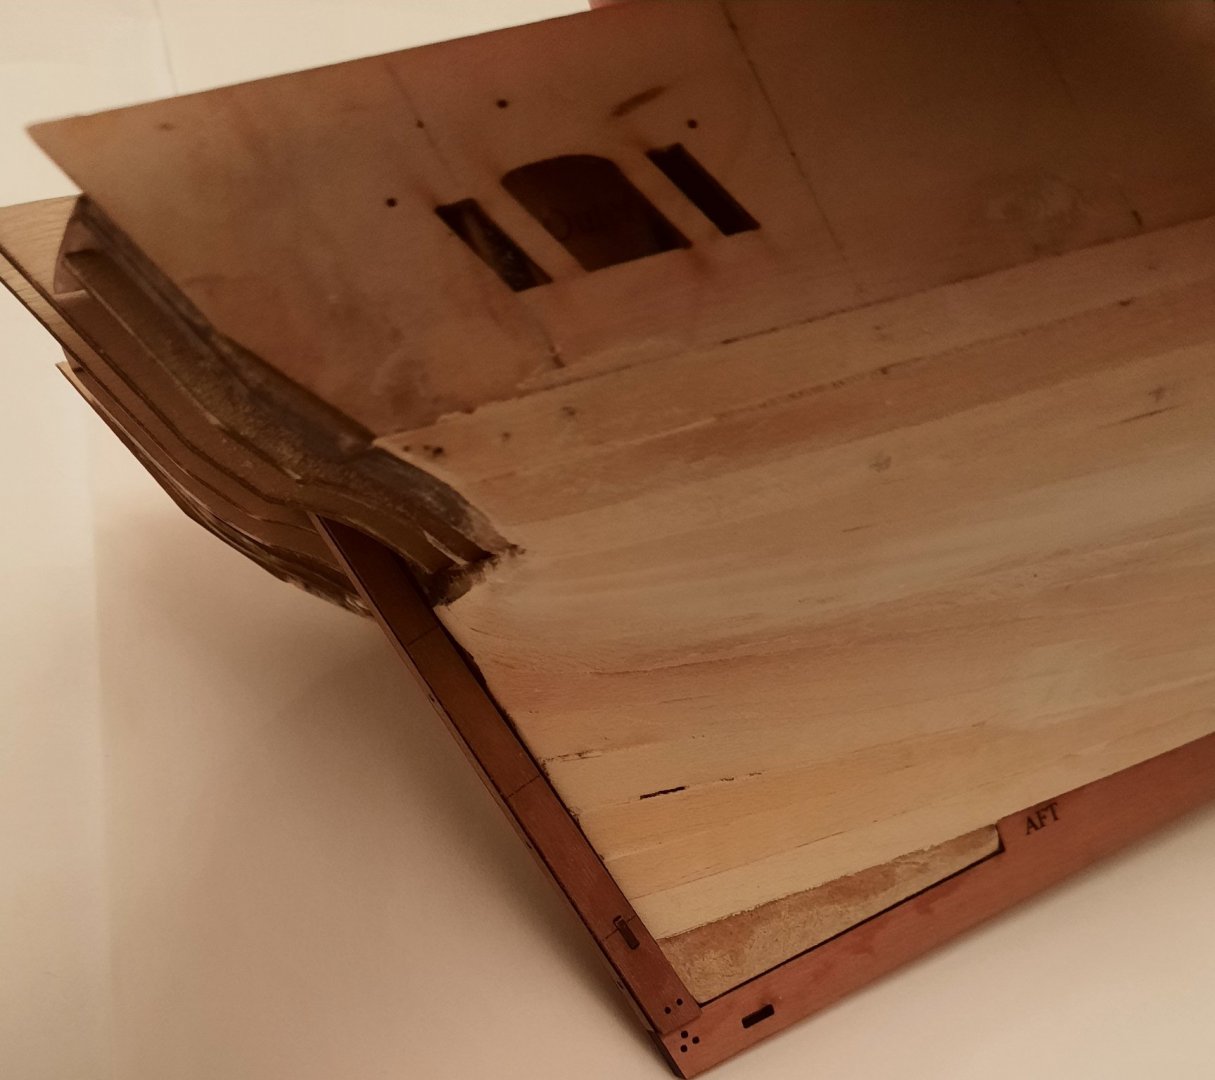
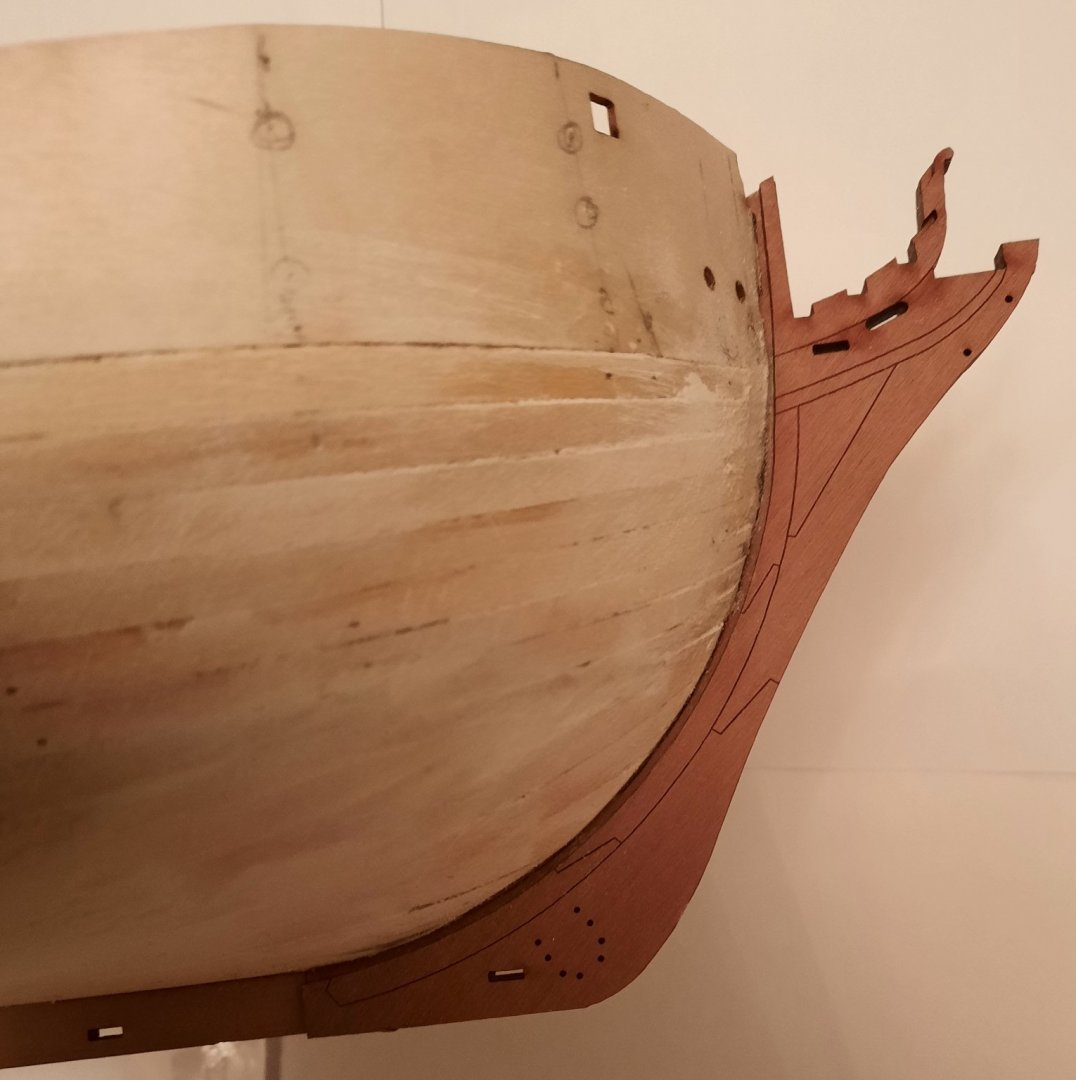
Stage: Hull Construction Build instructions: 78-81 Task: Stern Counter Patterns and Outer Side Patterns Parts: 77 & 78 & 119 &120 Time Spent: 30 mins Status: Complete Build Notes: The bent lower stern counter pattern fitted like a dream and was glued in to place as was the upper stern counter pattern. The stern post assembly was also glued in to place at this stage. I did bevel the edge of the upper stern counter pattern so that I got nice join with the lower stern counter pattern. I will leave this area alone for the next couple of hours to allow time for the glue to cure. I did remove and reposition the patterns shown in the following pattern as they were not correctly positioned. I might need to add a touch of filler near the two outer edges, as can be seen in the photo below Using the location strips supplied (another great idea by Chris) I dry fitted the bow and keel outer facings and this does provide a perfect rabbet for the 2nd planking. The two outer side patterns were soaked in hot water for 30 mins and then clamped to the hull. I found having the bow outer facings to be a benefit but not essential. These patterns will be glued and clamped along with the bow and keel outer facings once the patterns have had time to fully dry out. I am impressed with the provision of pin holes to aid the correct alignment of the outer side patterns during the glue and clamp phase. This attention to detail by Chris is one for the many factors which sets his kits apart for other designers. I plan to start the 2nd planking tomorrow morning. I will take my time to ensure I am happy with the fit of each plank before it is glued into place. I plan to edge bevel the planks to minimise the joint gaps and will probably use Chuck’s lateral planking bending method once again, especially for the planks above the water line. I do not think it is a critical for the planks fitted below the water line as they will be sanded, filled, primed and painted for a smooth seamless finish (fingers crossed).

- 382 replies
-
- 12
-
-
- Vanguard Models
- Duchess of Kingston
- (and 1 more)
-
Many thanks James, your comments are greatly appreciated, as is your build log and advice. Credit must also go to Chris for an awesome design. Glenn
- 382 replies
-
- 1
-
-
- Vanguard Models
- Duchess of Kingston
- (and 1 more)
-
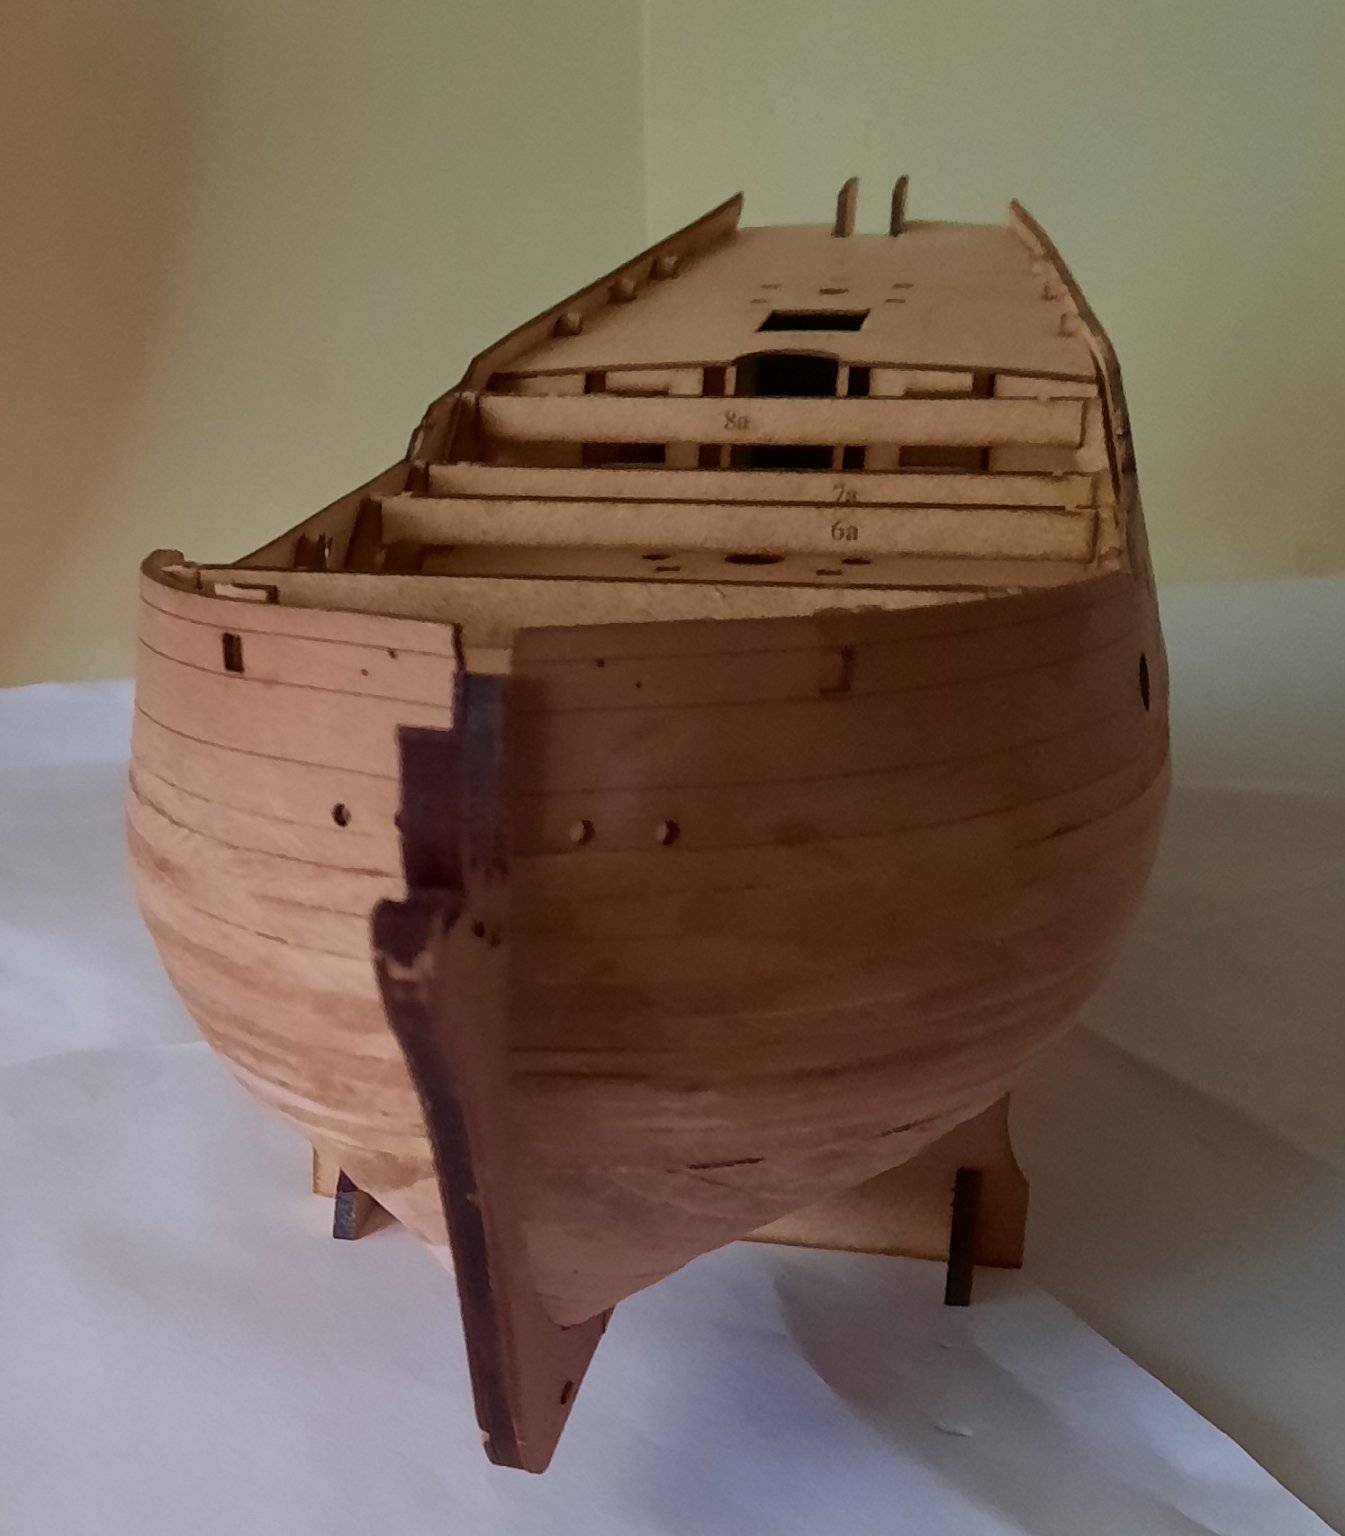
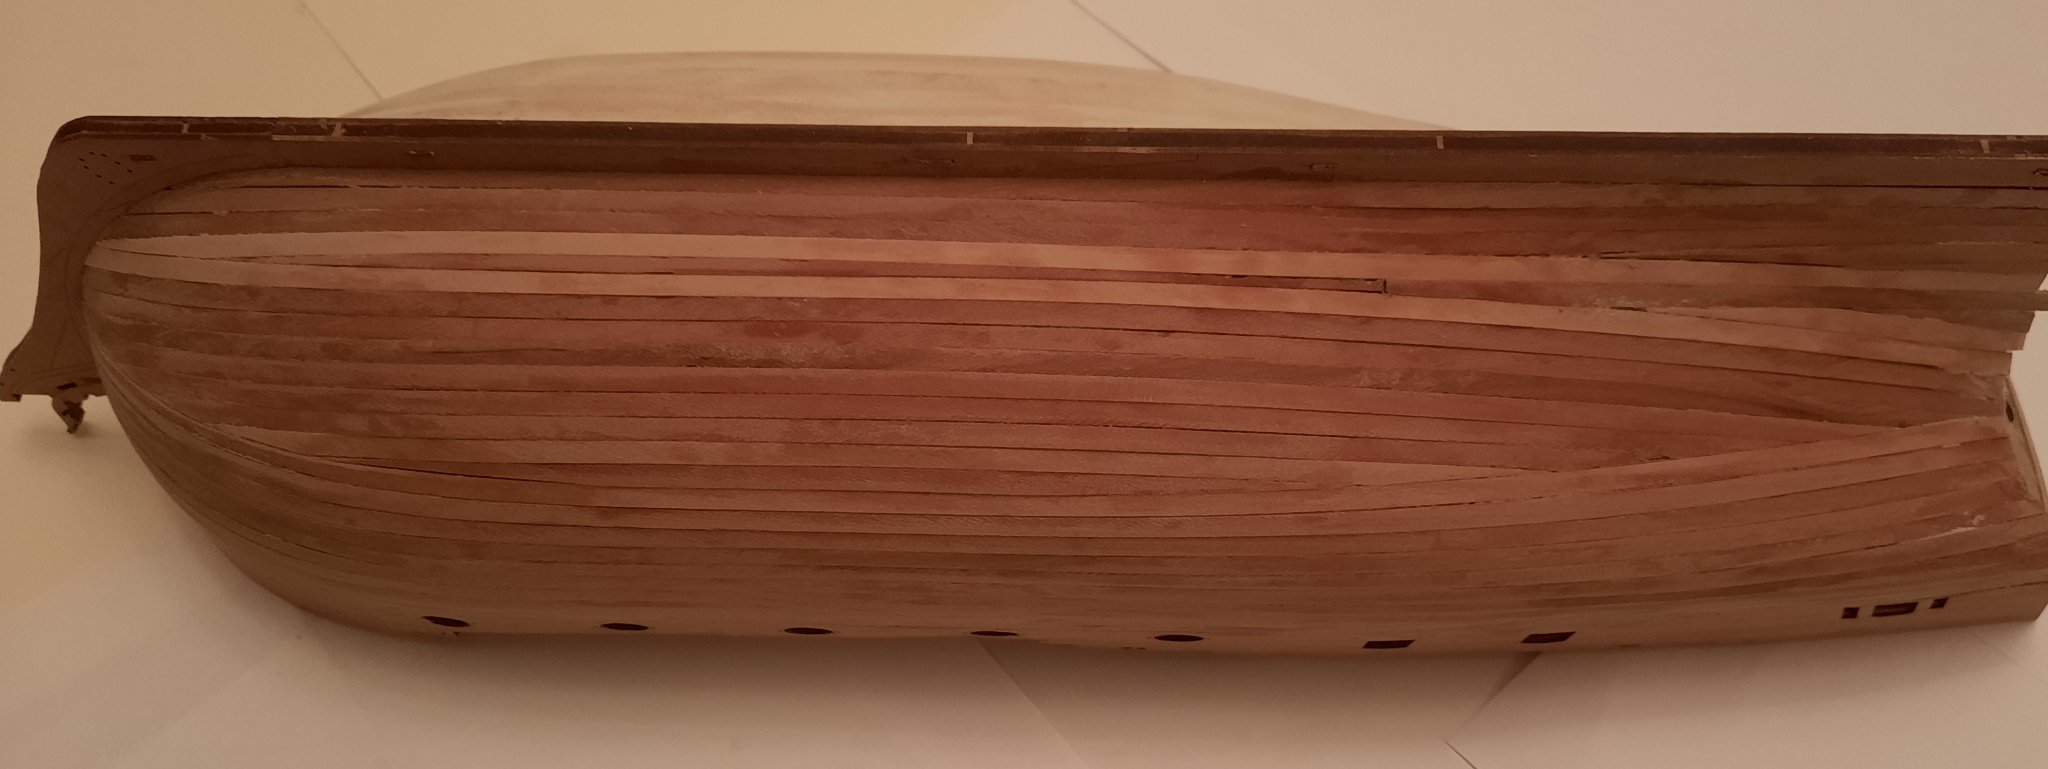
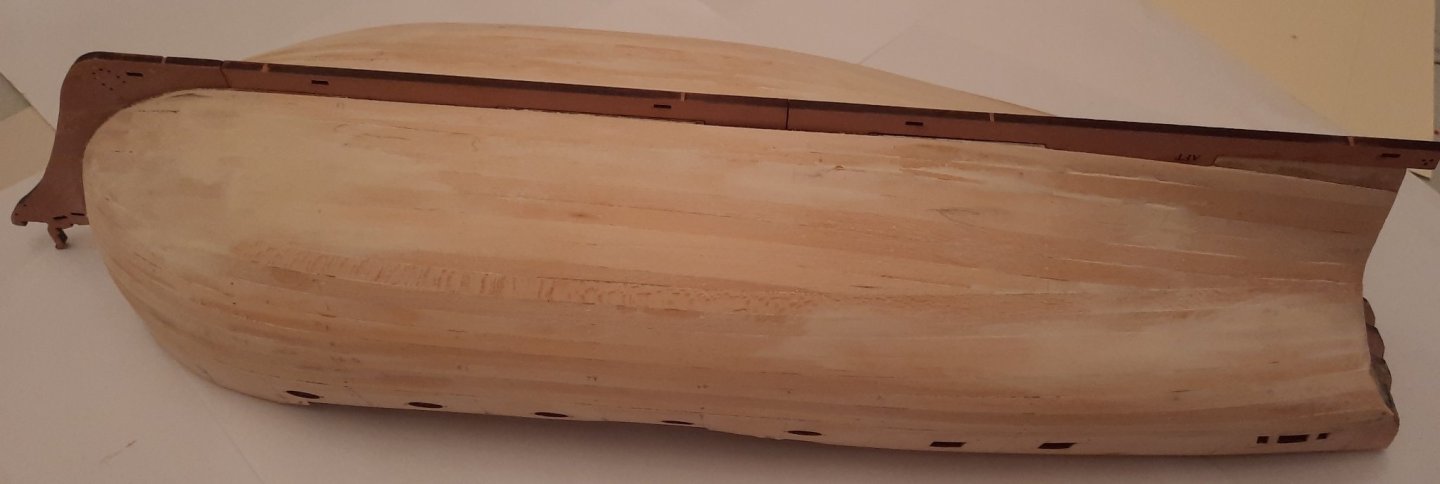
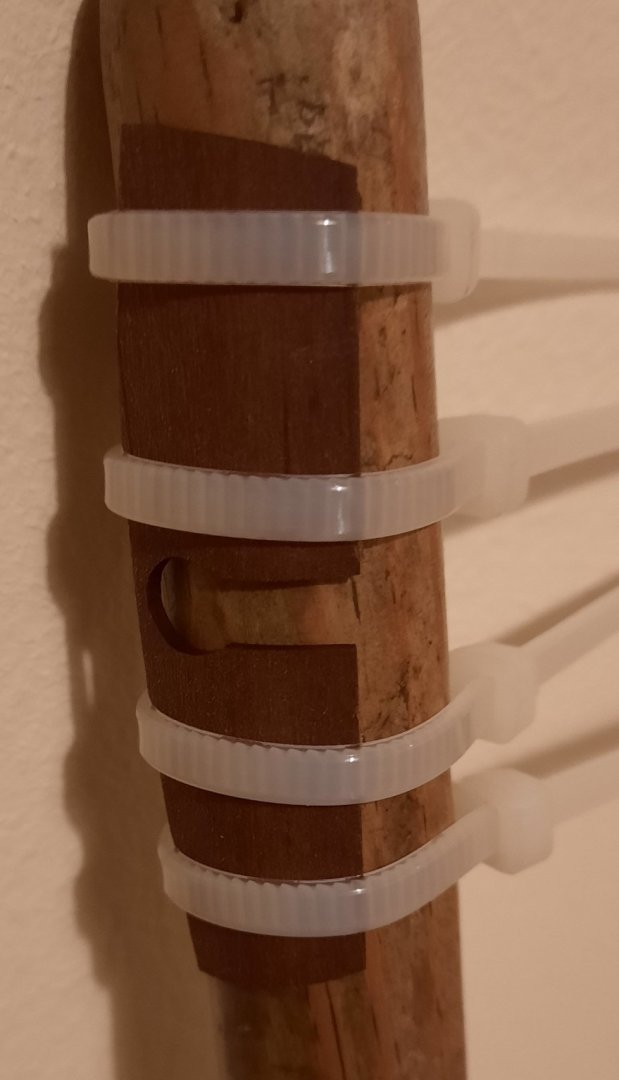
I have finished the sanding on the hull after the 1st planking. I believe I have a really smooth and good shaped hull ready for the 2nd planking. I have fitted the Fore and Aft keel parts. I also assembled the stern post assembly and will glue that in place once the stern counter pattern has been shaped and is ready to be fitted, just in case I have to trim / sand the stern area a little bit more. There following three points are worth noting: a) Position the stern counter patter (dry fit). Make pencil markings on the 1st planking to indicate areas which needed additional trimming b) The first planking needs to be sanding almost to nothing along the stern post edge to ensure, when fitted, the 2nd planking aligns correctly with the stern post assembly. I did check this by holding the stern post assembly in place and then seeing how the plank would look. c) Check the rabbet by holding the bow outer and keel facings in place (dry fit). I think this method of providing a rabbet is a brilliant and innovative design idea by Chris Watton. The stern counter pattern needs to be shaped. I soaked the pattern in hot water for 90 mins (as per the instructions). I initially clamped the pattern to a tin can but I was not totally happy with how this was looking. In the end I decided to use a broom handle and 4 tie wraps to form the required bend. This will now be left to dry out overnight.

- 382 replies
-
- 12
-
-
- Vanguard Models
- Duchess of Kingston
- (and 1 more)