Glenn-UK
-
Posts
3,169 -
Joined
-
Last visited
Content Type
Profiles
Forums
Gallery
Events
Everything posted by Glenn-UK
-
 I have received notification that UPS have now collected my DOK kit from Vanguard Models today. I'm now eagerly awaiting an updated notification from UPS regarding the delivery. I have bought some new tools in help me with this build. I plan to keep a build diary to keep track of my time spent with this build and to record any observations / notes / problems.
 -
UPS are scheduled to pick up the kits on Monday.
-
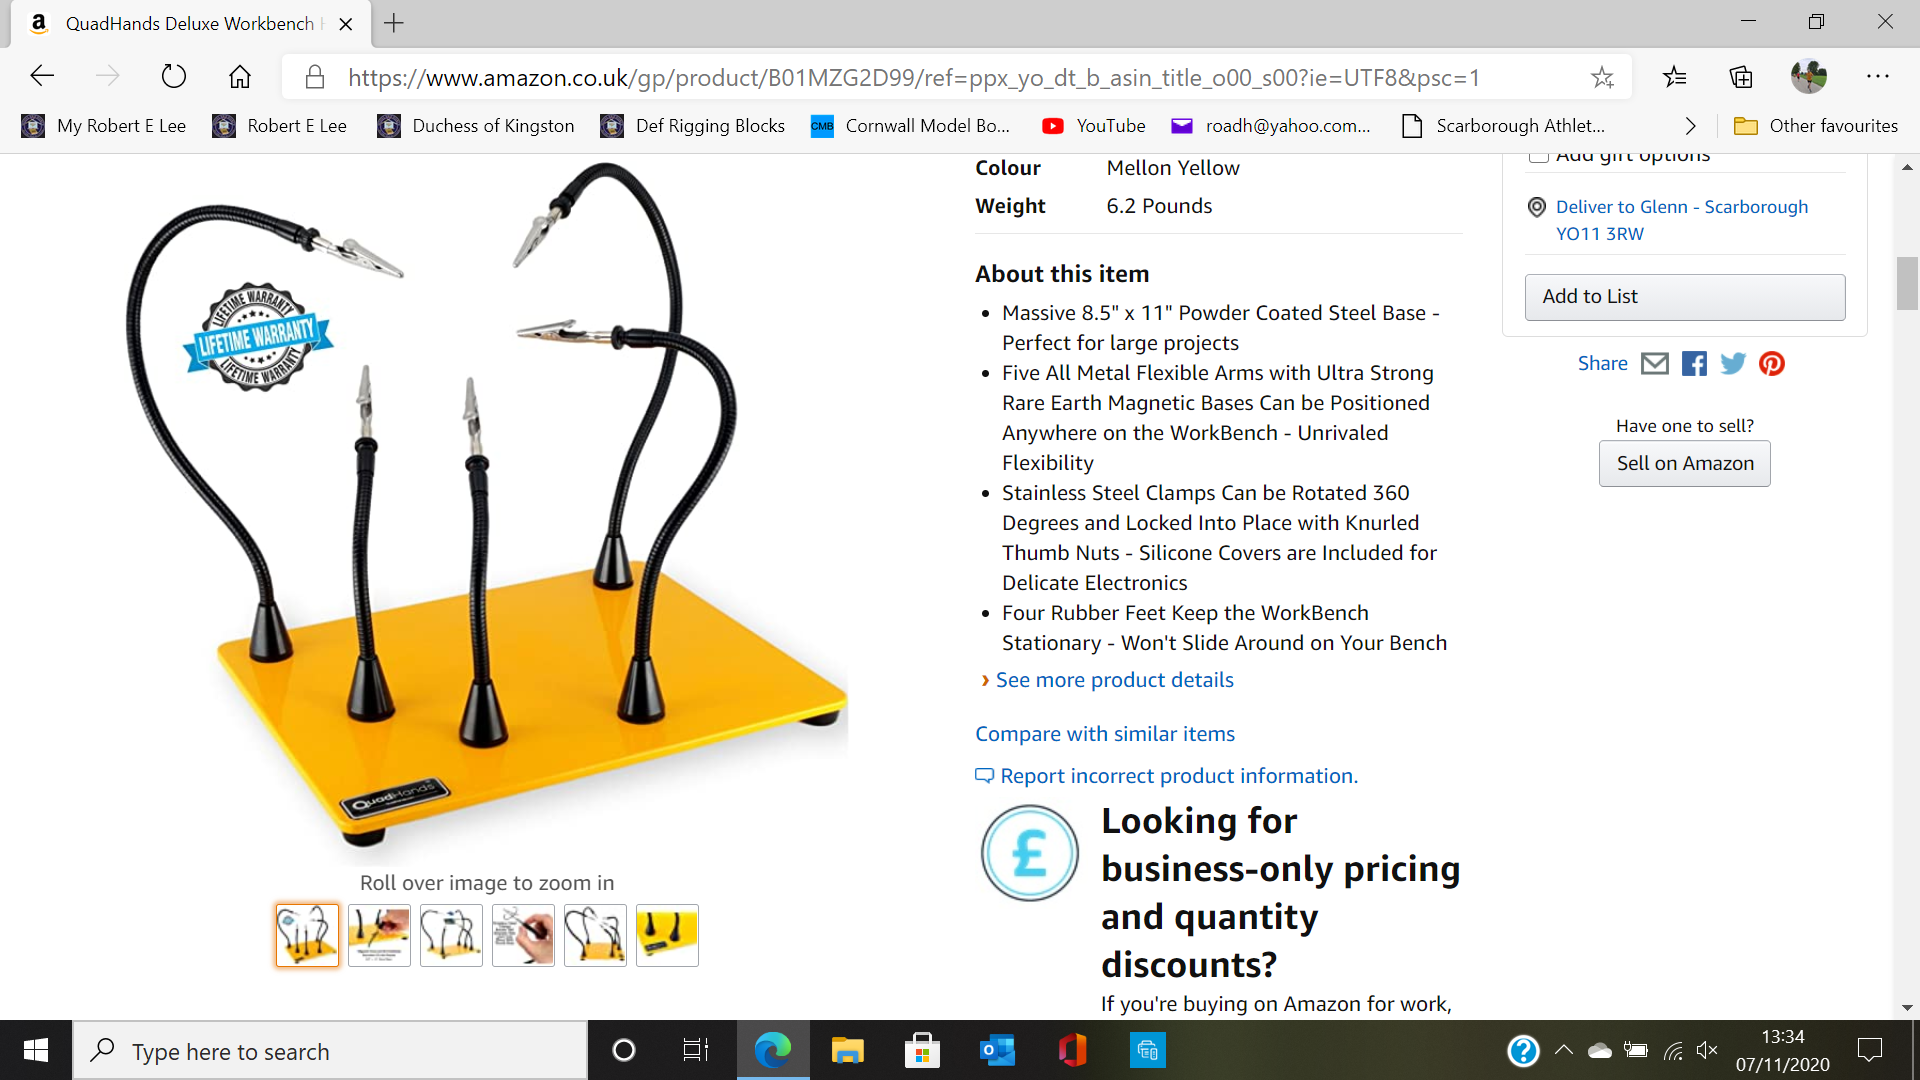
Planning ahead for this build, especially the rigging phase I have ordered a set of Quad Hands. Thanks to Derek (Delf) for the tip on this great looking tool. The DOK kit is due to arrive on Tuesday, fingers crossed. I am planning to spend the mornings working on DOK and the afternoons working on my current Robert E Lee build.

- 382 replies
-
- 4
-

-
- Vanguard Models
- Duchess of Kingston
- (and 1 more)
-
Thanks for picture, I've had notification from UPS. Delivery expected Monday for DOK
-
And I'm now eagerly waiting for my delivery
-
Thanks for the info. I consider my Speedy a learning build and I do not have plans to do any more work on that build.
-
Thanks Derek.
-
Do you add any mast rigging such as the shrouds, less the deadeyes prior to installation, as it might be easier to size them under the crosstrees prior to installation. I am also interested to know how tight the shroud is sized to the mast as it is not clear from your build photos.
-
I have already pre ordered this new model kit from Vanguard Models which is due to be released tomorrow. I plan to take my time with this build and it will start as a low priority side project whilst I complete by current project (Robert E Lee Paddlewheel Steamboat). I will start the build log in earnest after receipt of the kit. The build log of the prototype build by James Hatch was very informative and made the decision the buy this kit very easy. Also I was very impressed with Chris Watton's design, quality of materials and the standard of the build manual and plans with Speedy and I believe he has gone to another level with this kit.
- 382 replies
-
- 7
-
-
- Vanguard Models
- Duchess of Kingston
- (and 1 more)
-
I really enjoyed reading your methods for adding the strops to the blocks and deadeyes, especially adding the multiple blocks to the bow sprit and rigging the cannons. I hope you will provide a similar guide when you rigging the shroud deadeyes (and setting the correct tension) as it has been a task I have always struggled with with previous builds. I am Ok at the woodworking skills but have great difficulty with the rigging aspects. You methods has given me the confidence to attempt another rigged build (Duchess of Kingston). The other problem I have is threading the rigging through the blocks. I do add a touch of ca to the end and I have also tried making a diagonal cut across the end. In the end the method I have used (which I think is wrong) is to use a micro drill to enlarge the holes as much as possible which seems to work along with using a touch a ca of the thread and a diagonal cut end. Do you use beeswax (or similar) of the rigging lines (standing and running)? Thanks
-
I have pre ordered this kit and you have done an awesome build. Do you find it better to build and install the entire mast assembly before you start the shroud rigging?
- 117 replies
-
- 1
-
-
- vanguard models
- yacht
- (and 2 more)
-
This is so very true for me.

-
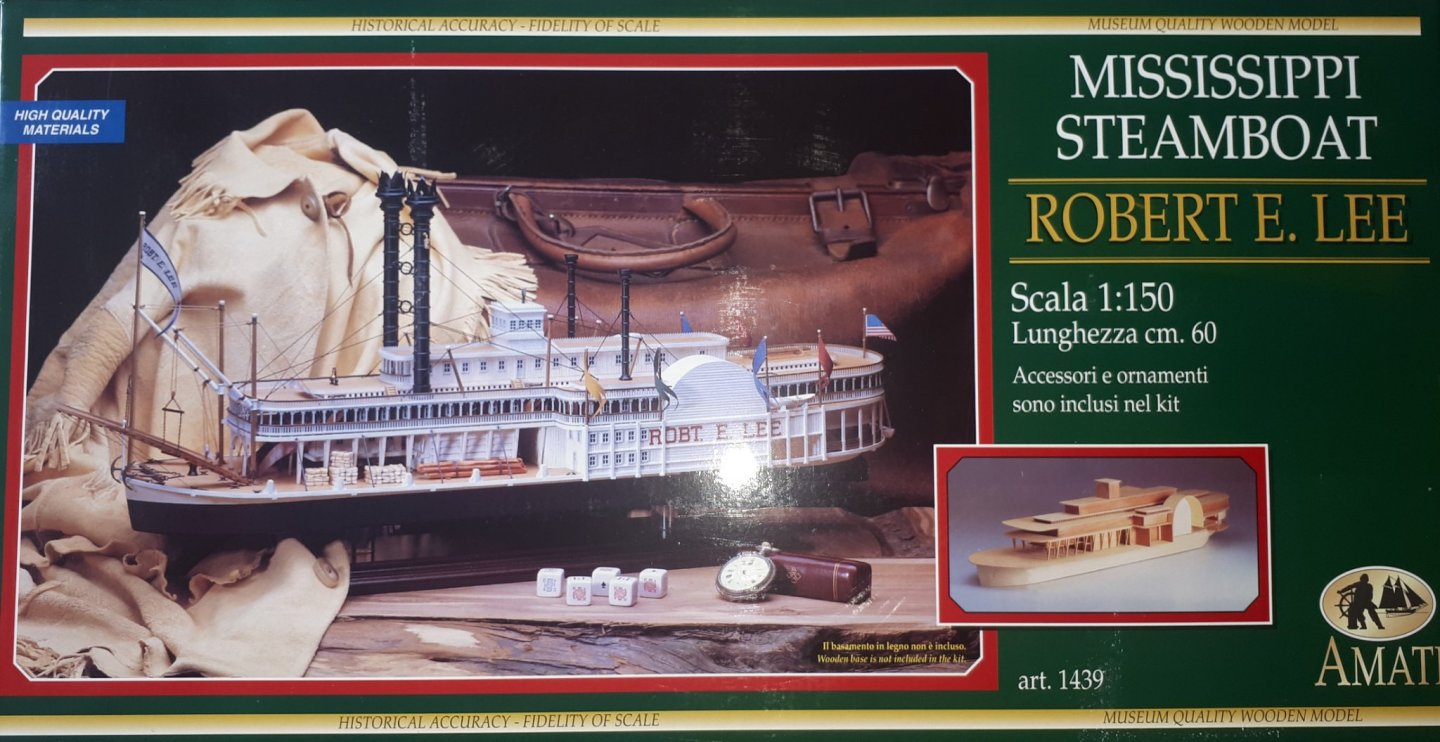
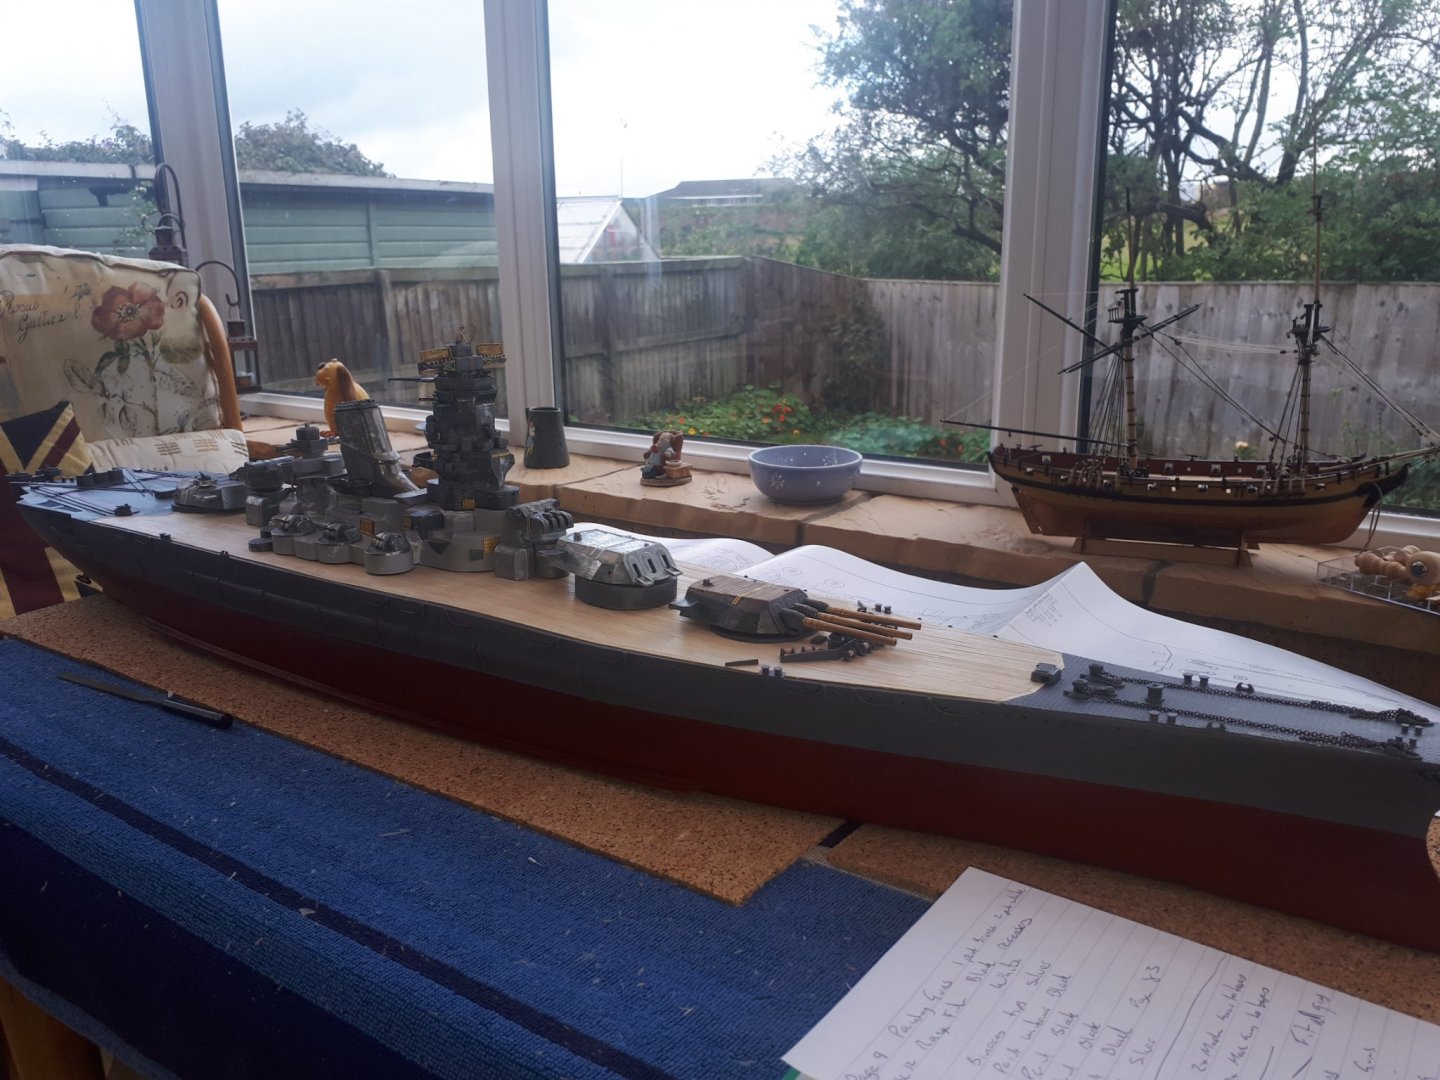
I have finally completed my current project which is a 1 / 250 scale model of the IJN Yamato. This is a mix of wooden construction for the hull and die cast metal for the the superstructures, armaments, etc. This is the De Agostini kit. The die cast parts were not the best quality and I did spend quite a bit of time rectifying manufacturing defects which was quite a chore at times. The build instructions were very basic and the supporting build photos did not really help. That said I am happy with the end result. My next project will be a Mississippi Steamboat, the Robert E Lee. I will start a build log once in the next day or two.
- 64 replies
-
- 10
-
-
- yamato
- deagostini
- (and 2 more)
-
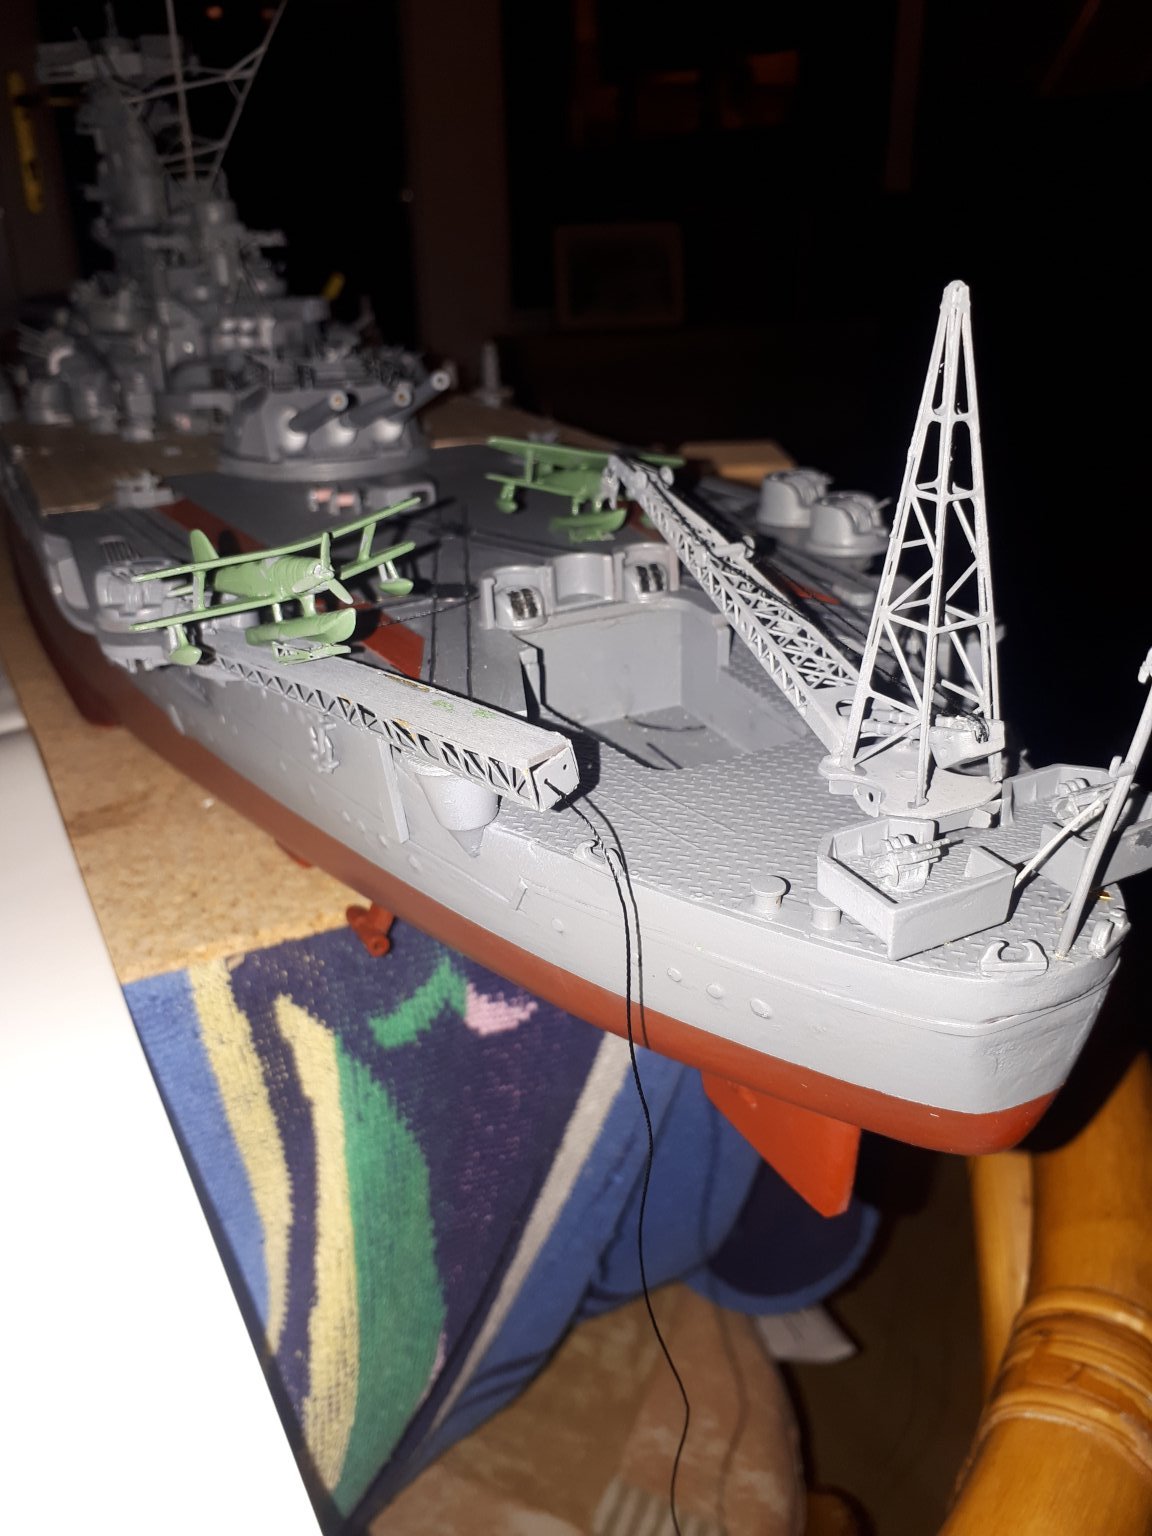
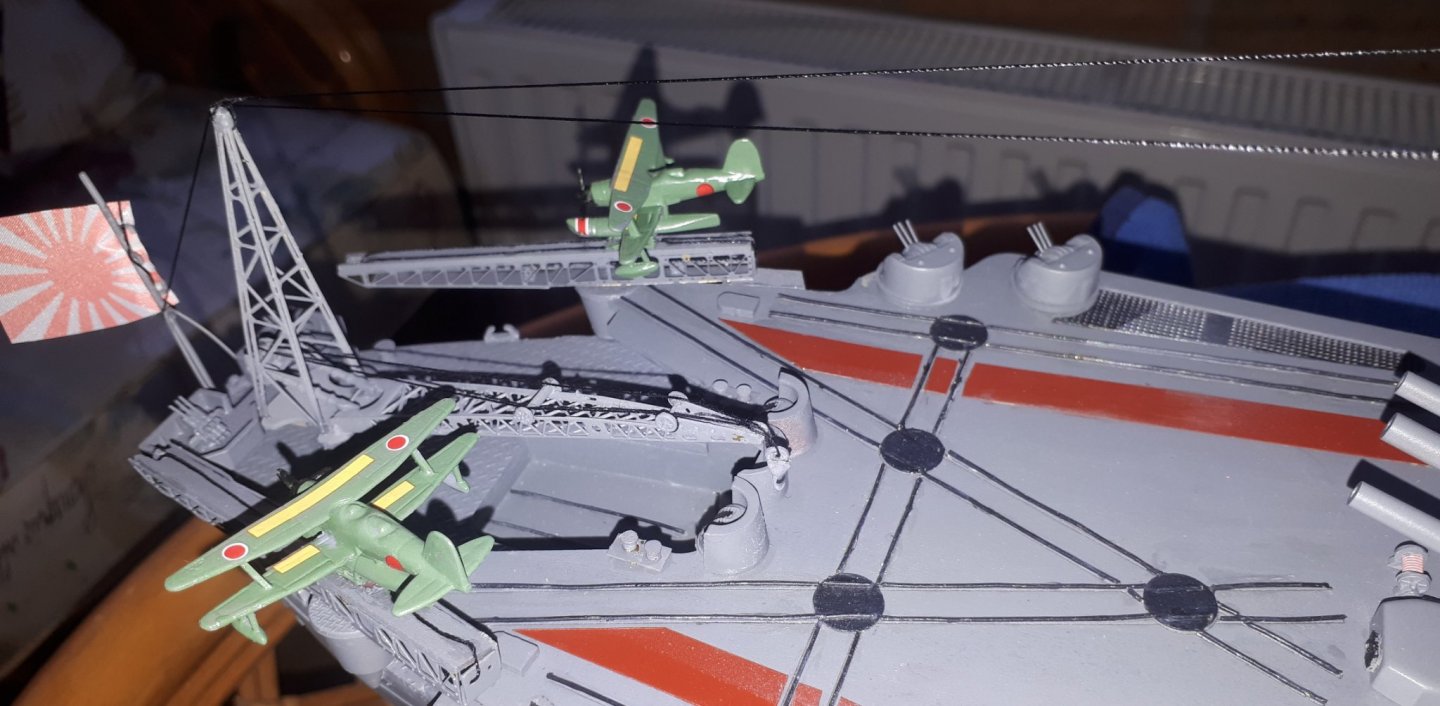
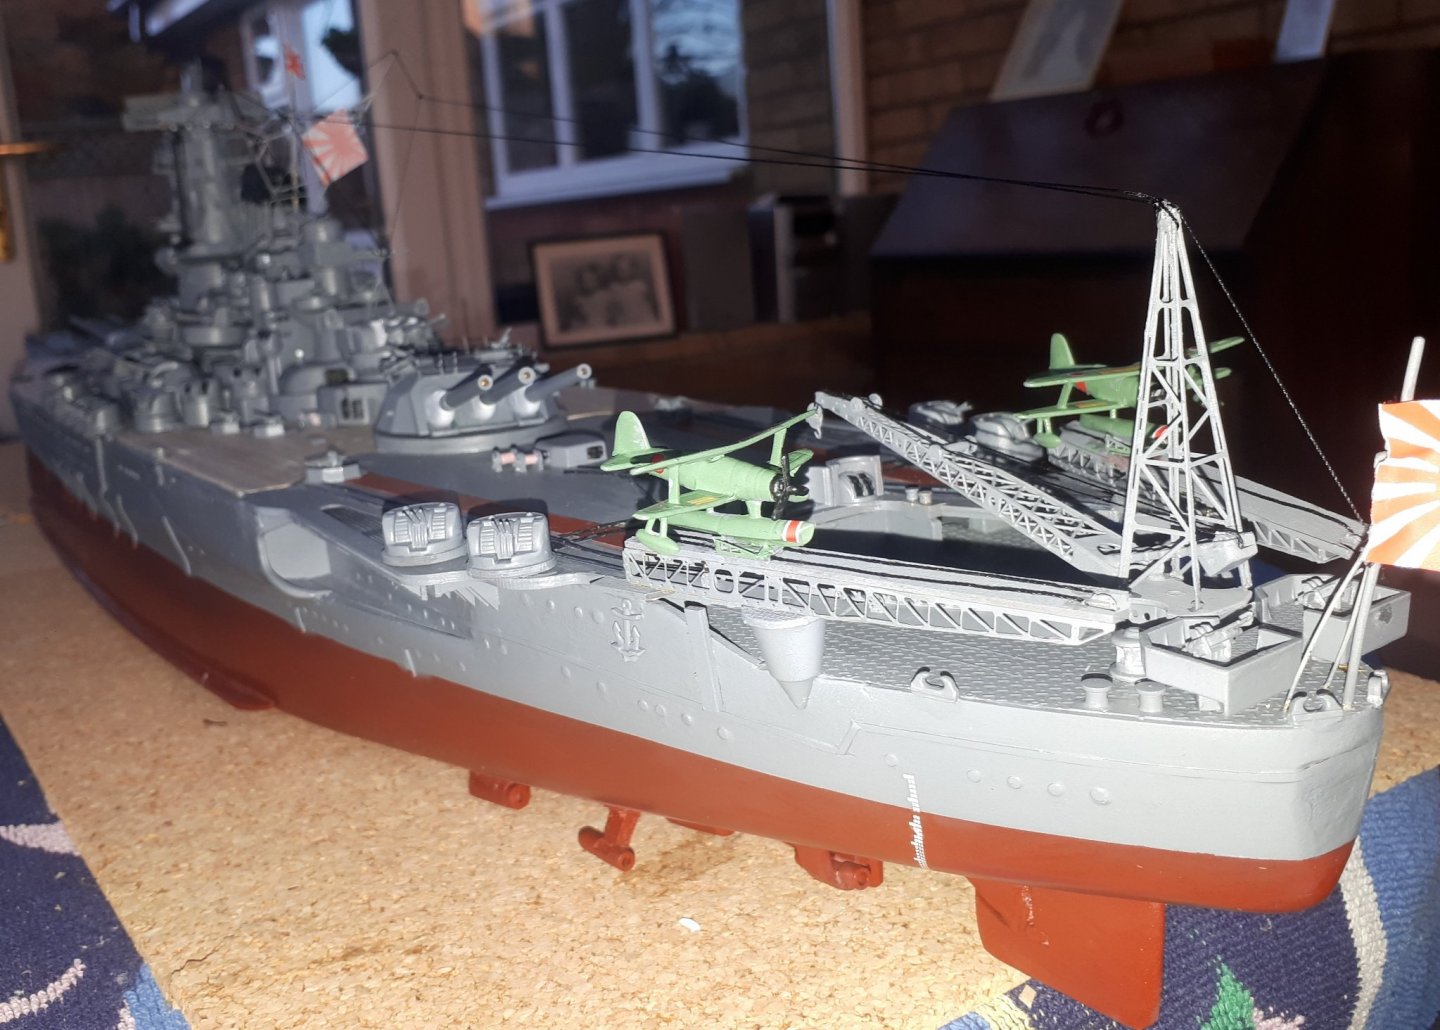
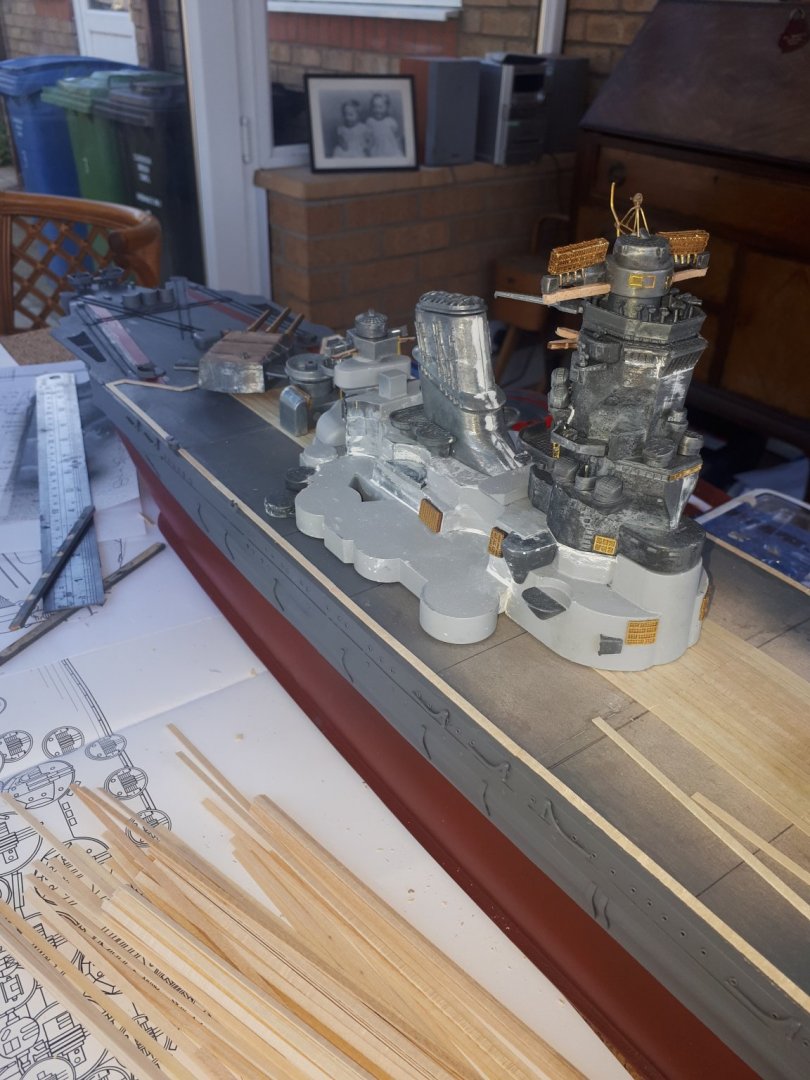
I have added the crane and stern radio mast. I have built the two planes and catapult, and I have dry fitted one in the attached pictures. Just a bit of rigging and deck rails to add and then job done.

- 64 replies
-
- 8
-
-
- yamato
- deagostini
- (and 2 more)
-
A very nice build log. I have just about completed my current build of IJN Yamato and my Robert E Lee Amati kit will arrive on Monday so I should start my build (and build log) in the next few days. Your build log will be one of my main points of reference as I progress with the build of the Robert E Lee.
-
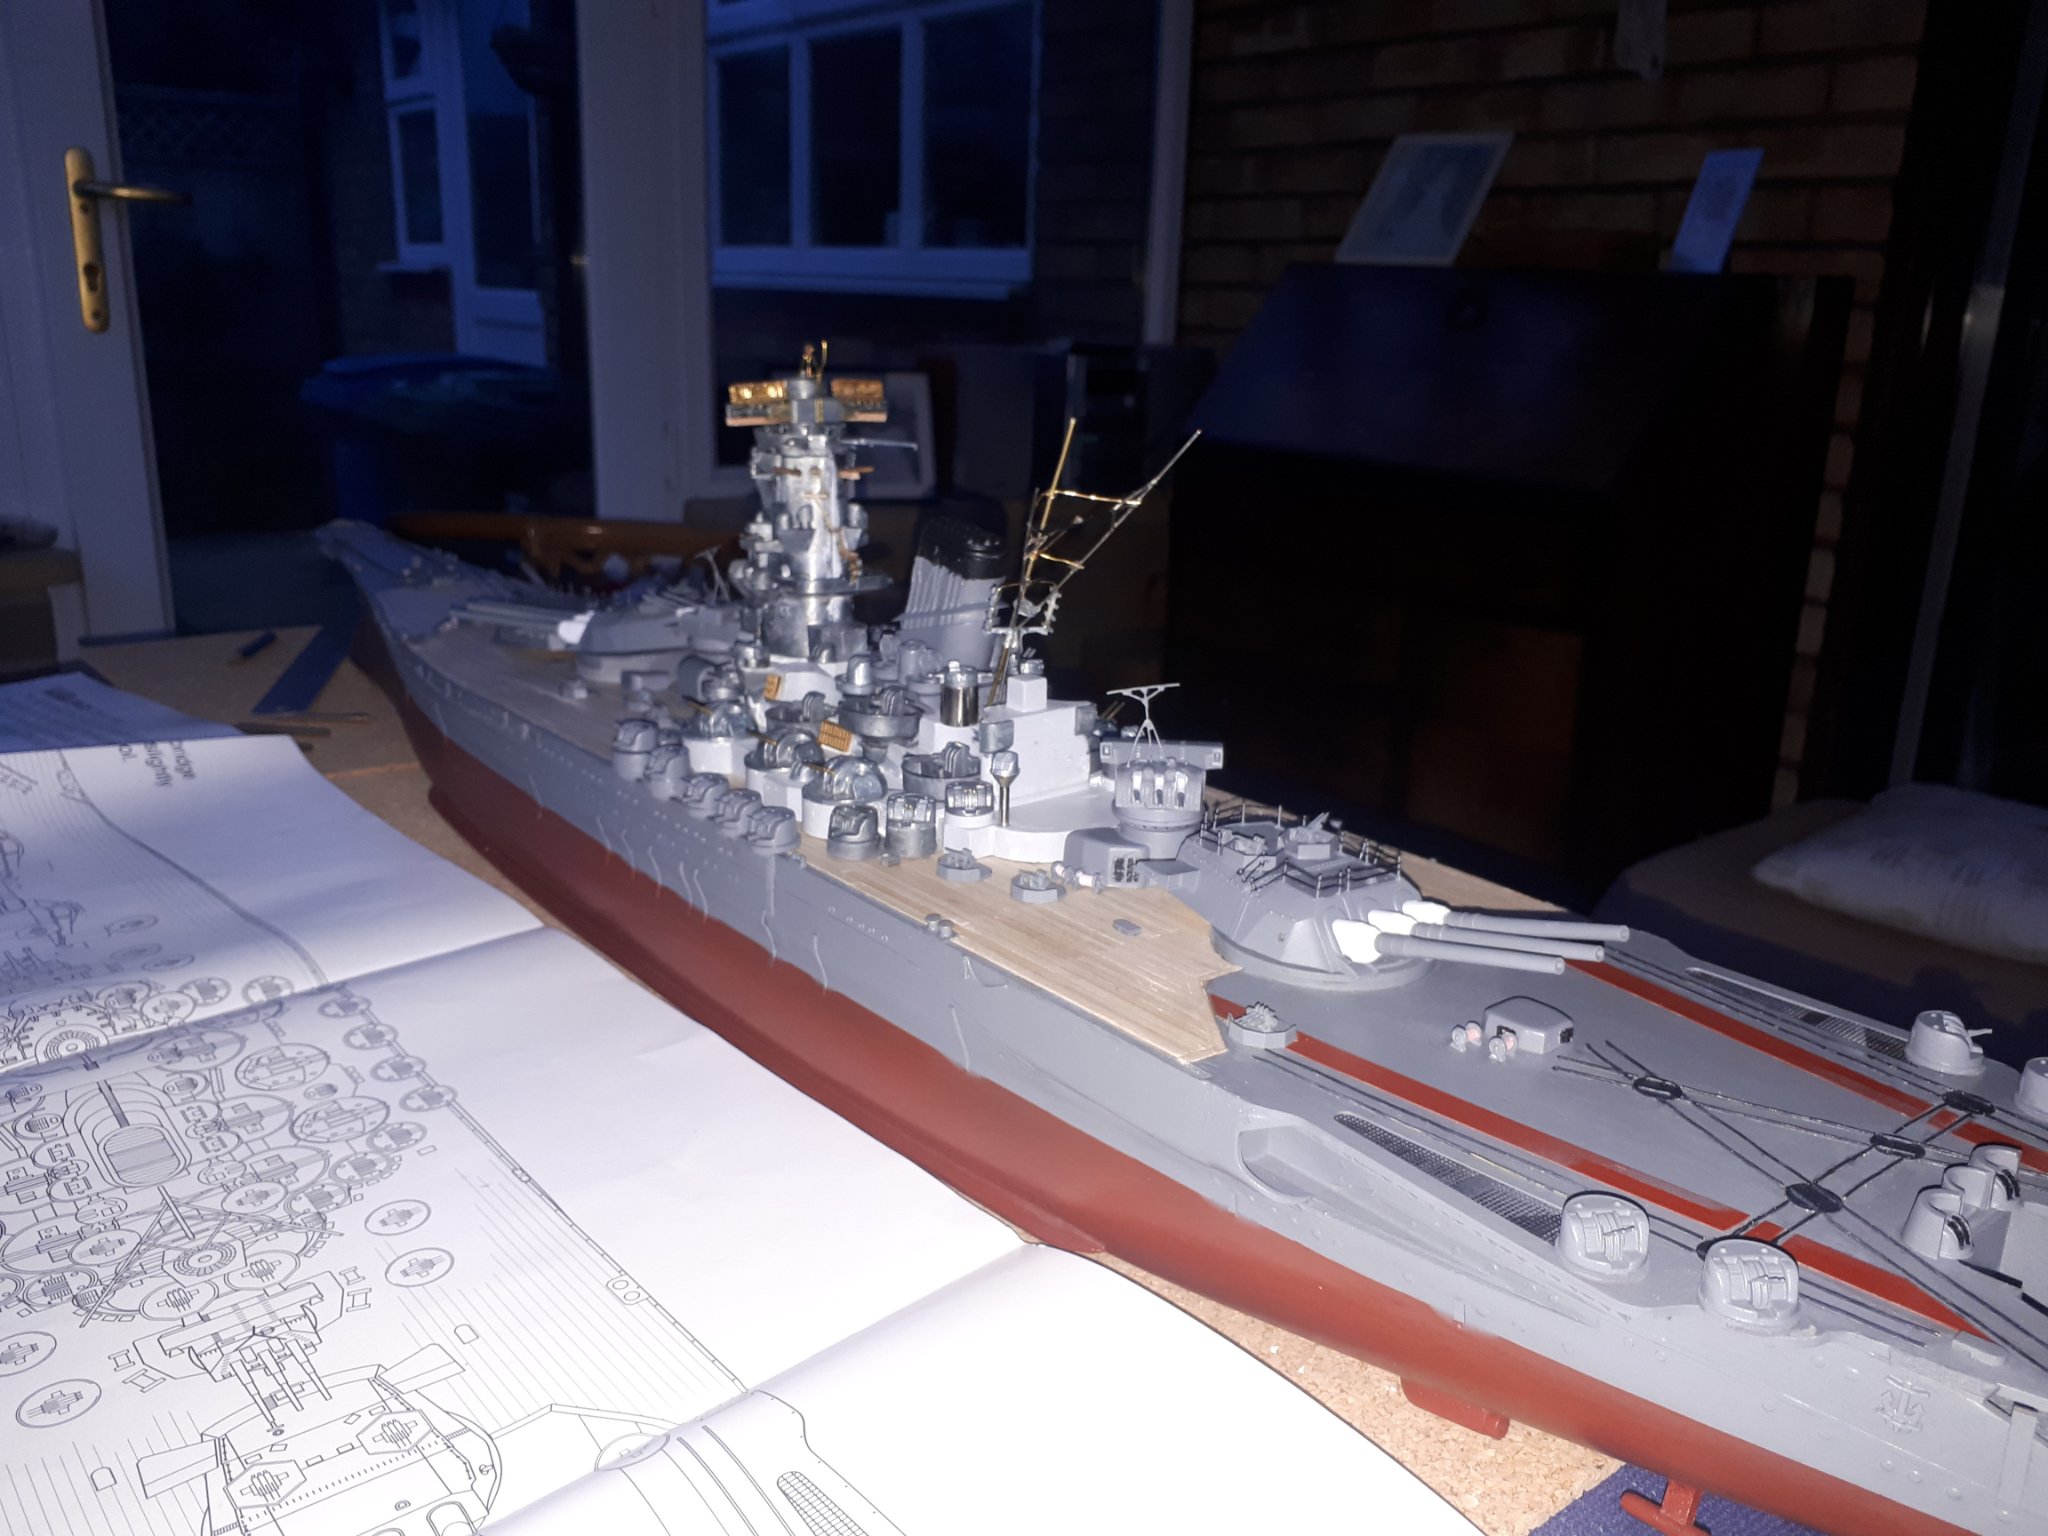
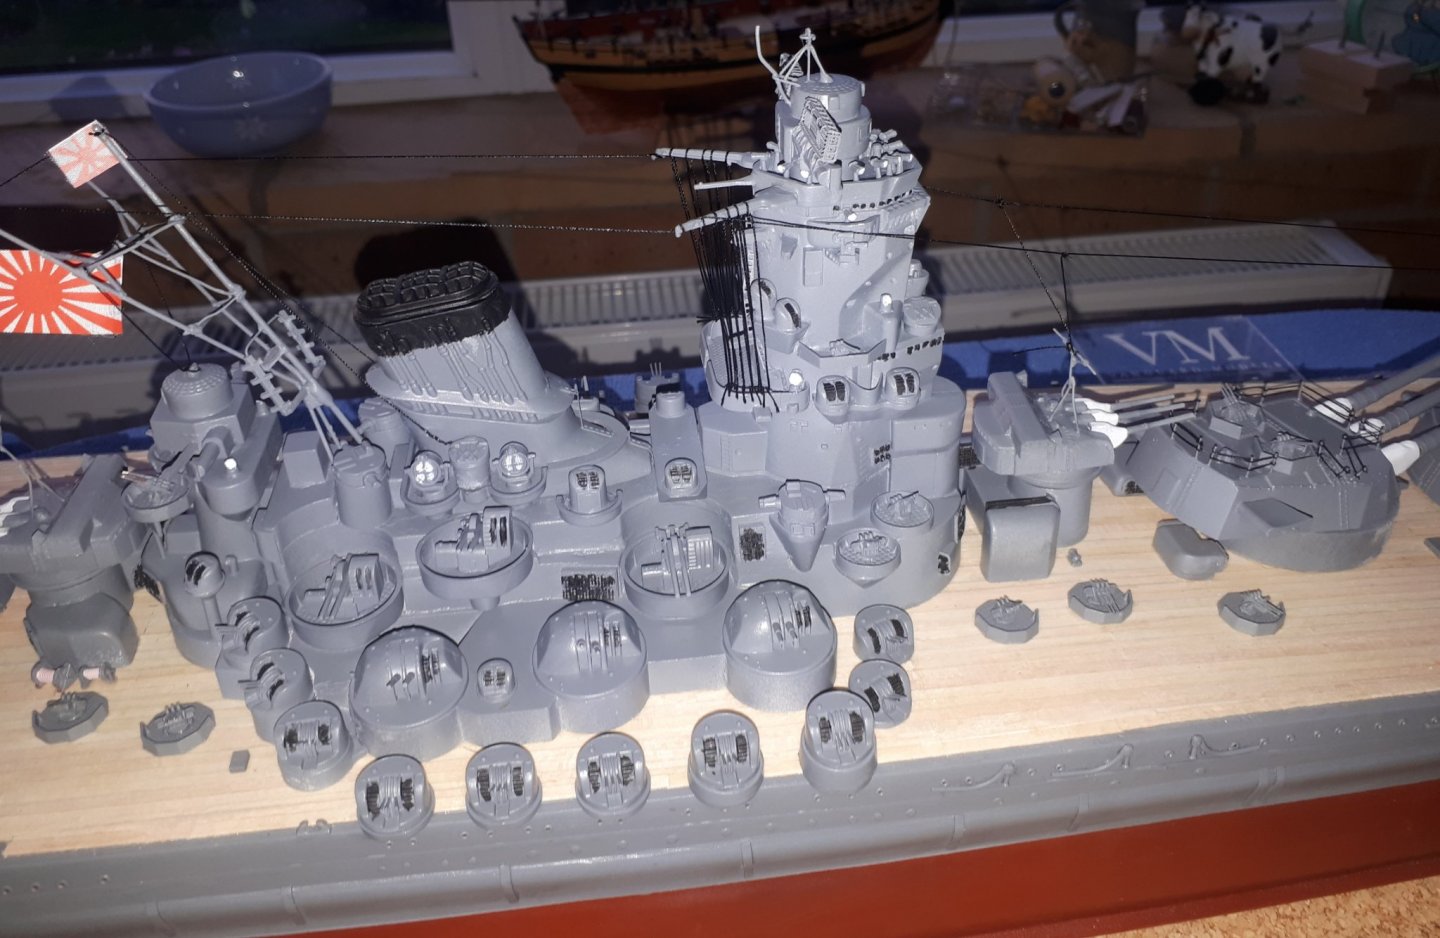
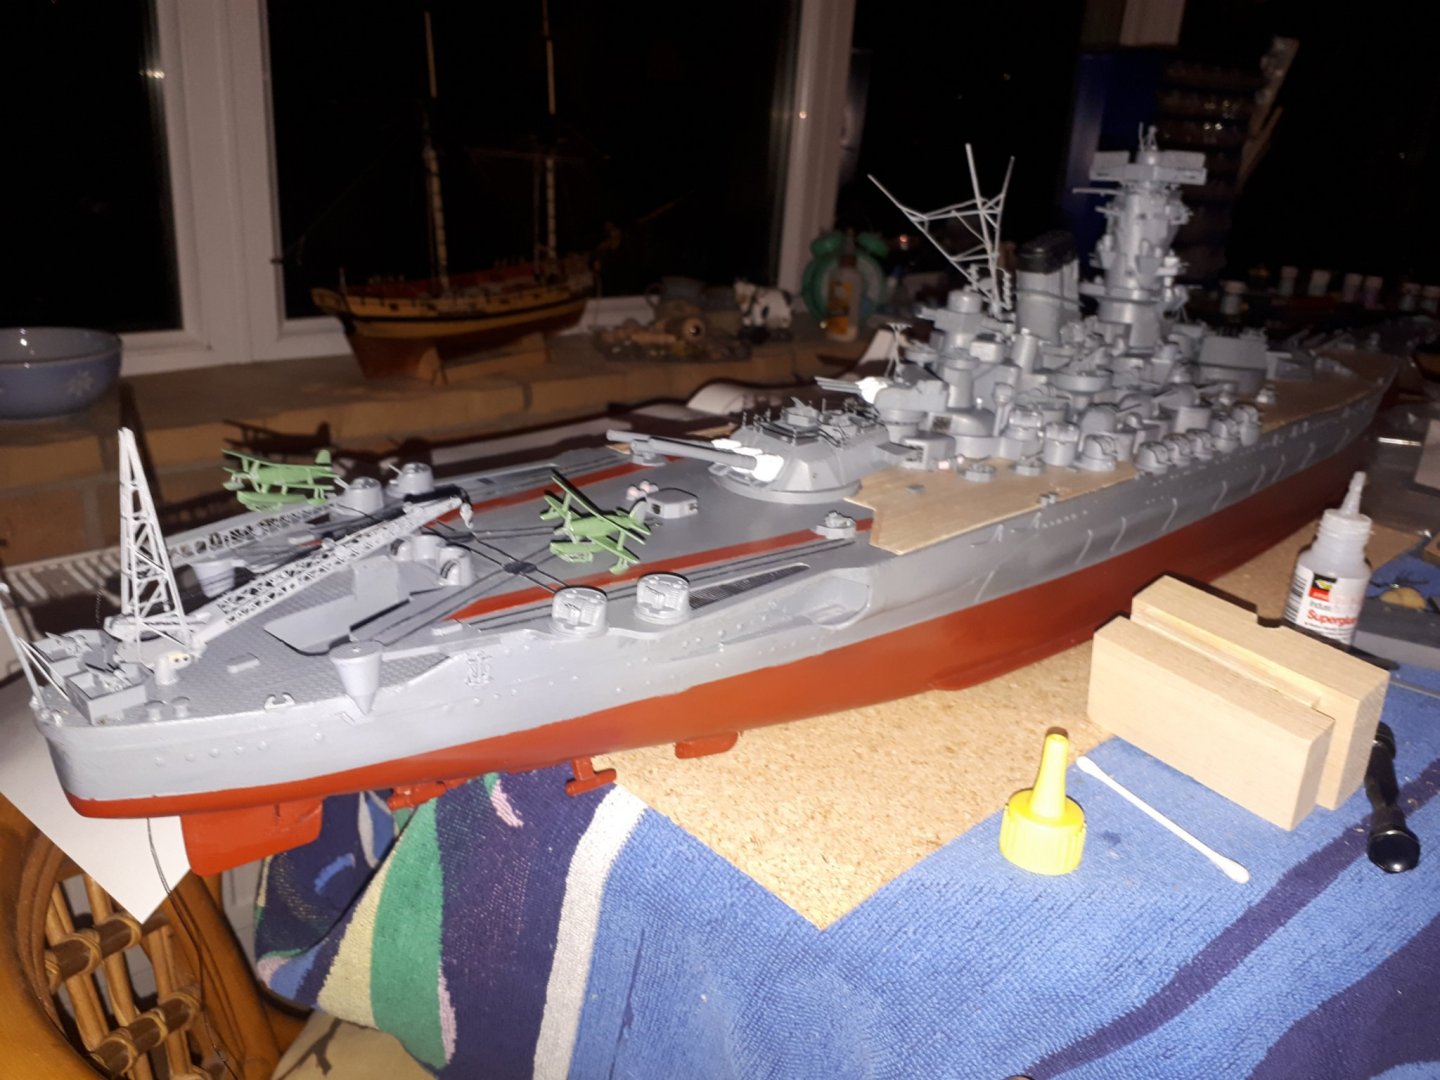
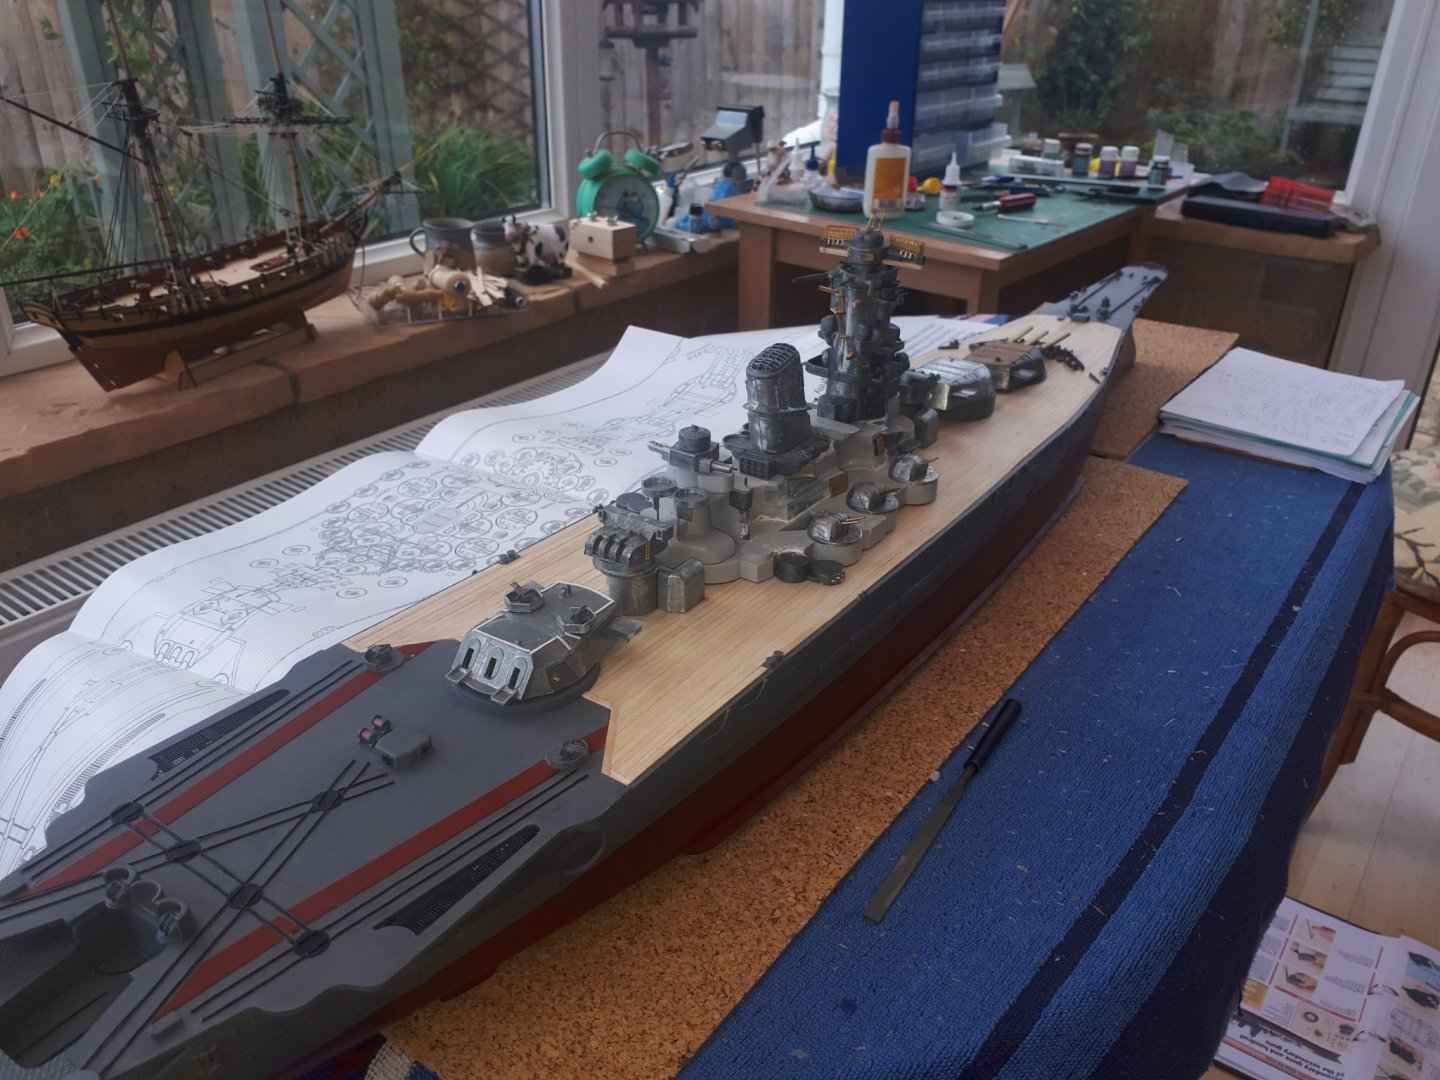
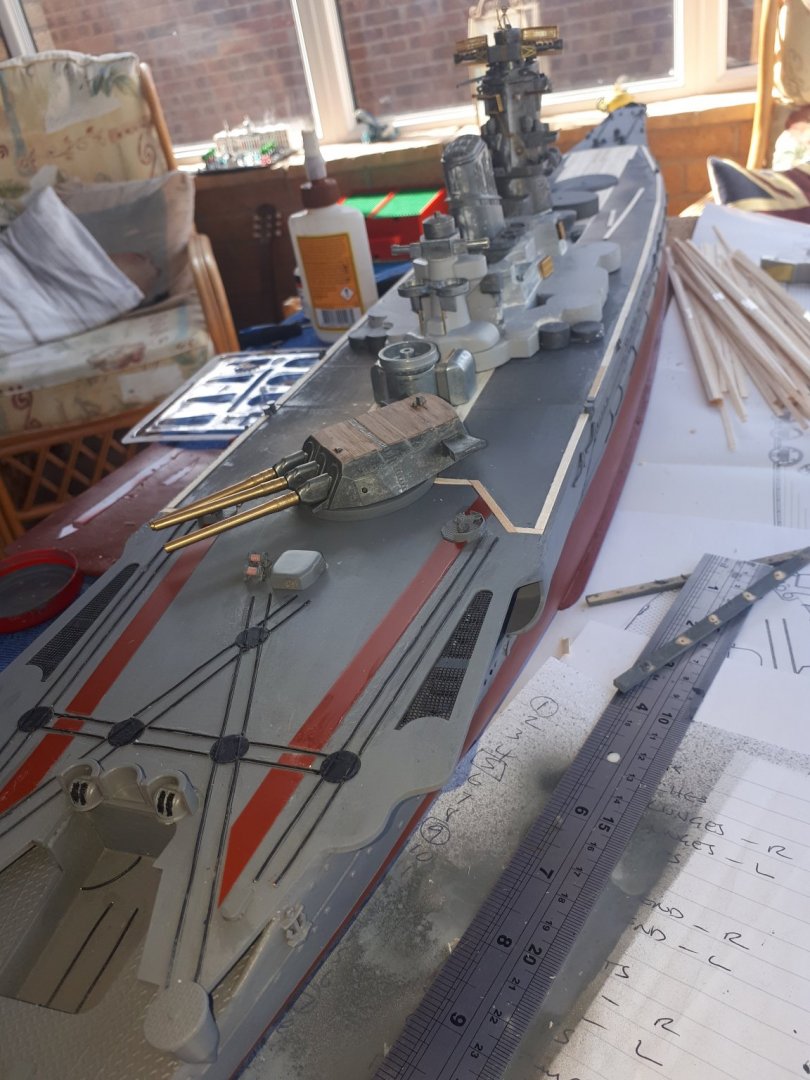
I have had a very productive day, adding all the outstanding deck fittings and also adding the final parts to the superstructure, which just needs painting. The remaining tasks left are Build the two aircraft Build the two aircraft launch catapults Build the main radio mast Fit all the deck railings. I have just ordered the Amati Robert E Lee paddle steamer which will be my next build project. After that it will be either Chris Watton' s next model (due later this year) or Amati's Bismark kit, which is due for release in the new year

- 64 replies
-
- 6
-
-
- yamato
- deagostini
- (and 2 more)
-
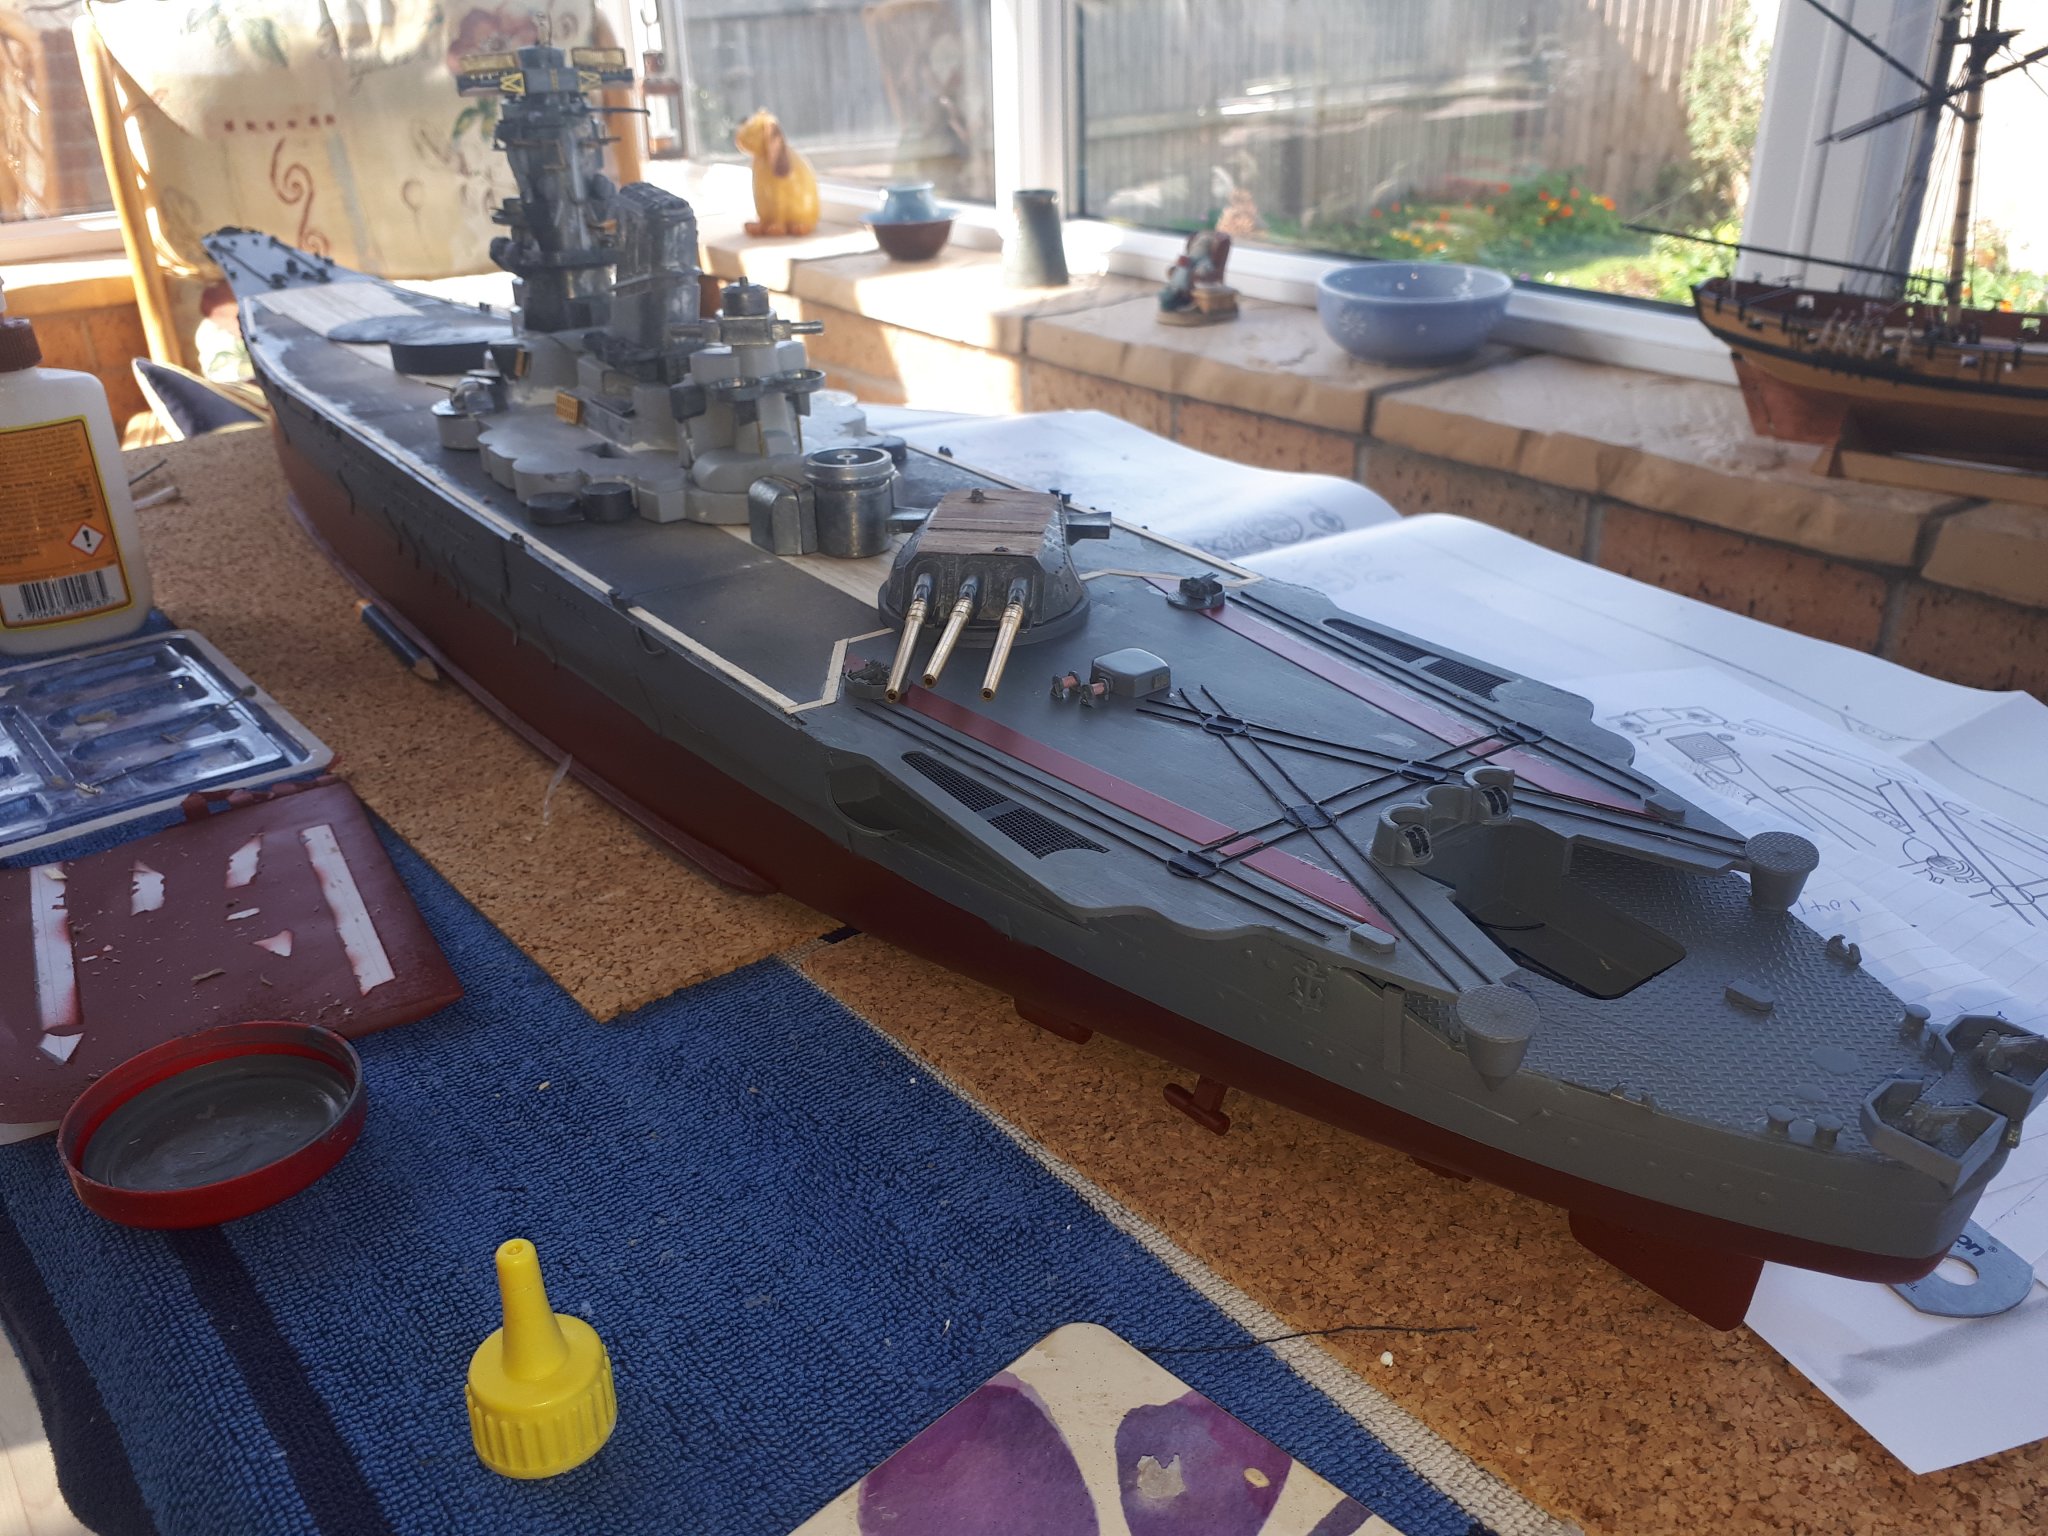
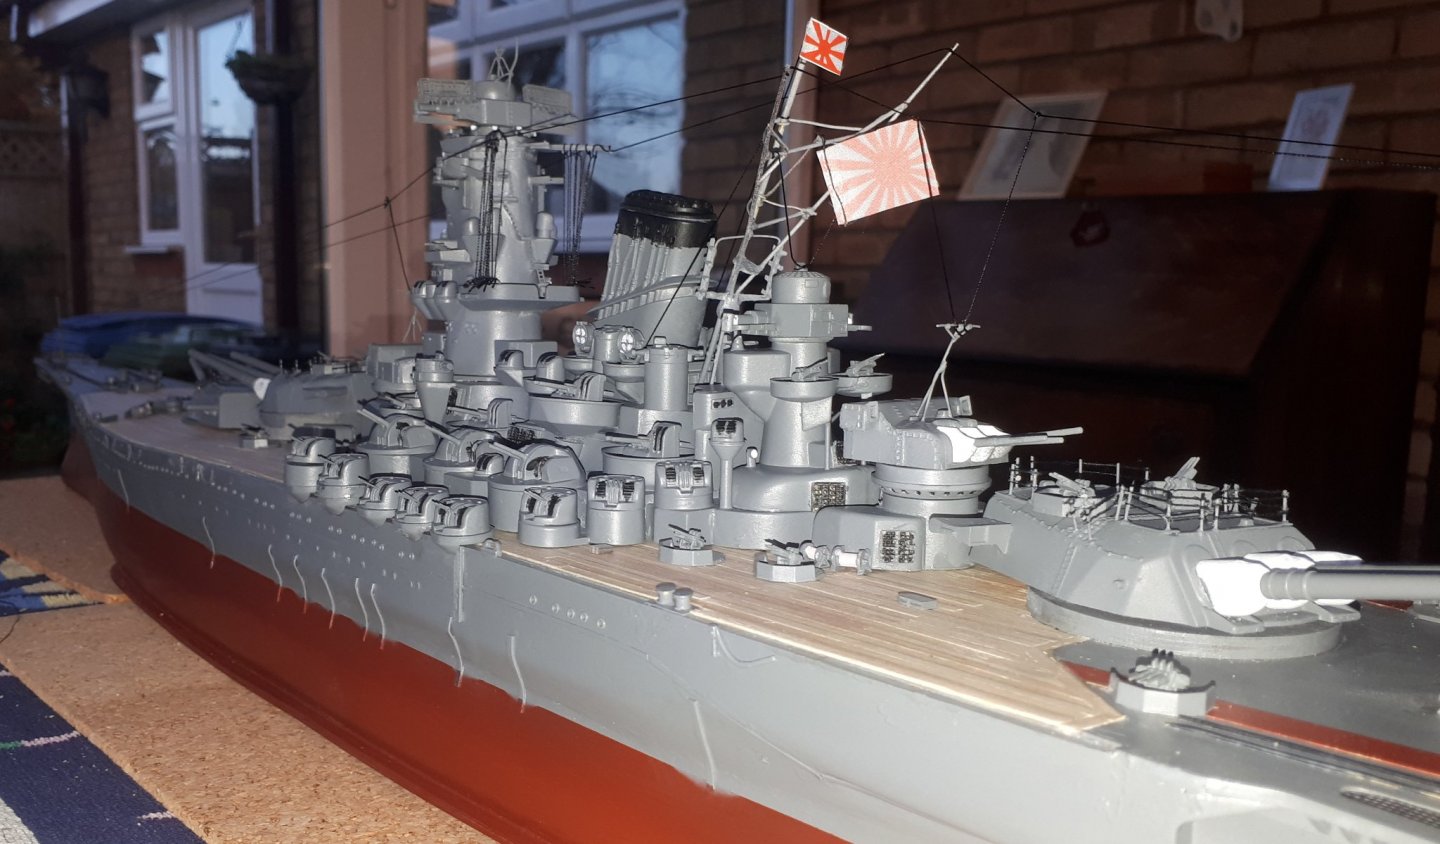
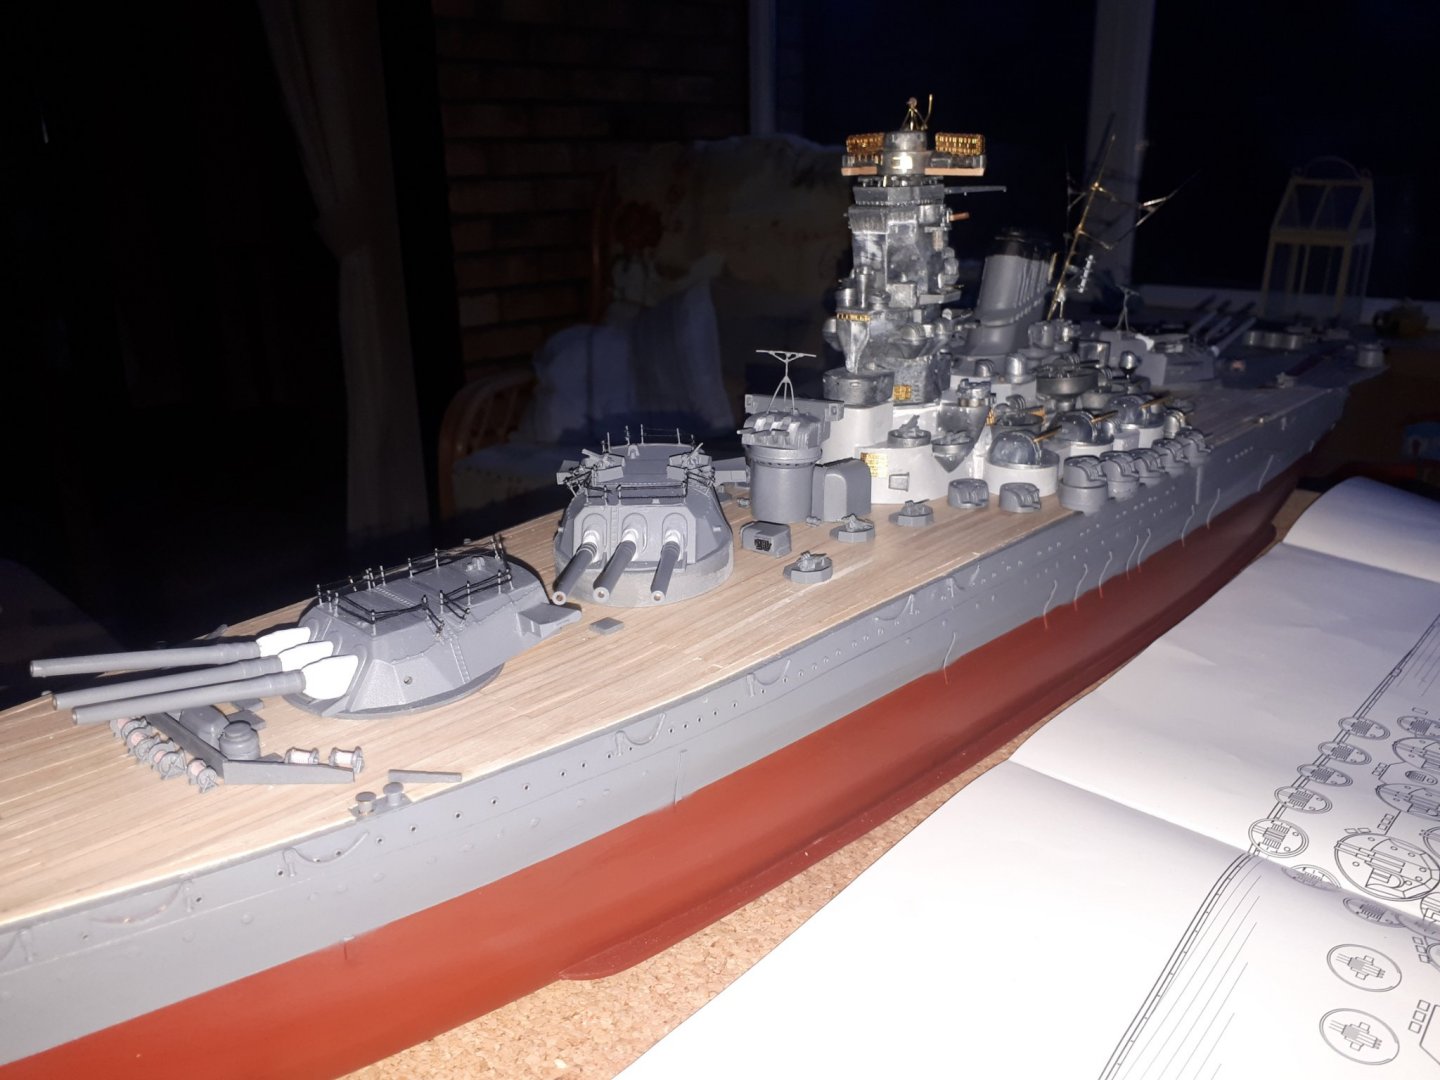
I have completed all the work on the three main guns and 2 secondary guns. I have completed the manufacture of all the additional ant aircraft guns, some will require painting and then can be fitted to the deck. I have a few minor items which can now be glued to the superstructure. After that I have the a couple of antenna's to build and the two aircrafts launch catapults. Finally I will have the deck railings to add and fingers crossed the model will be complete, hopefully by the end of the October. I have added a couple of pictures of the progress to date, noting than that superstructures and deck items and not secured in place at the moment.
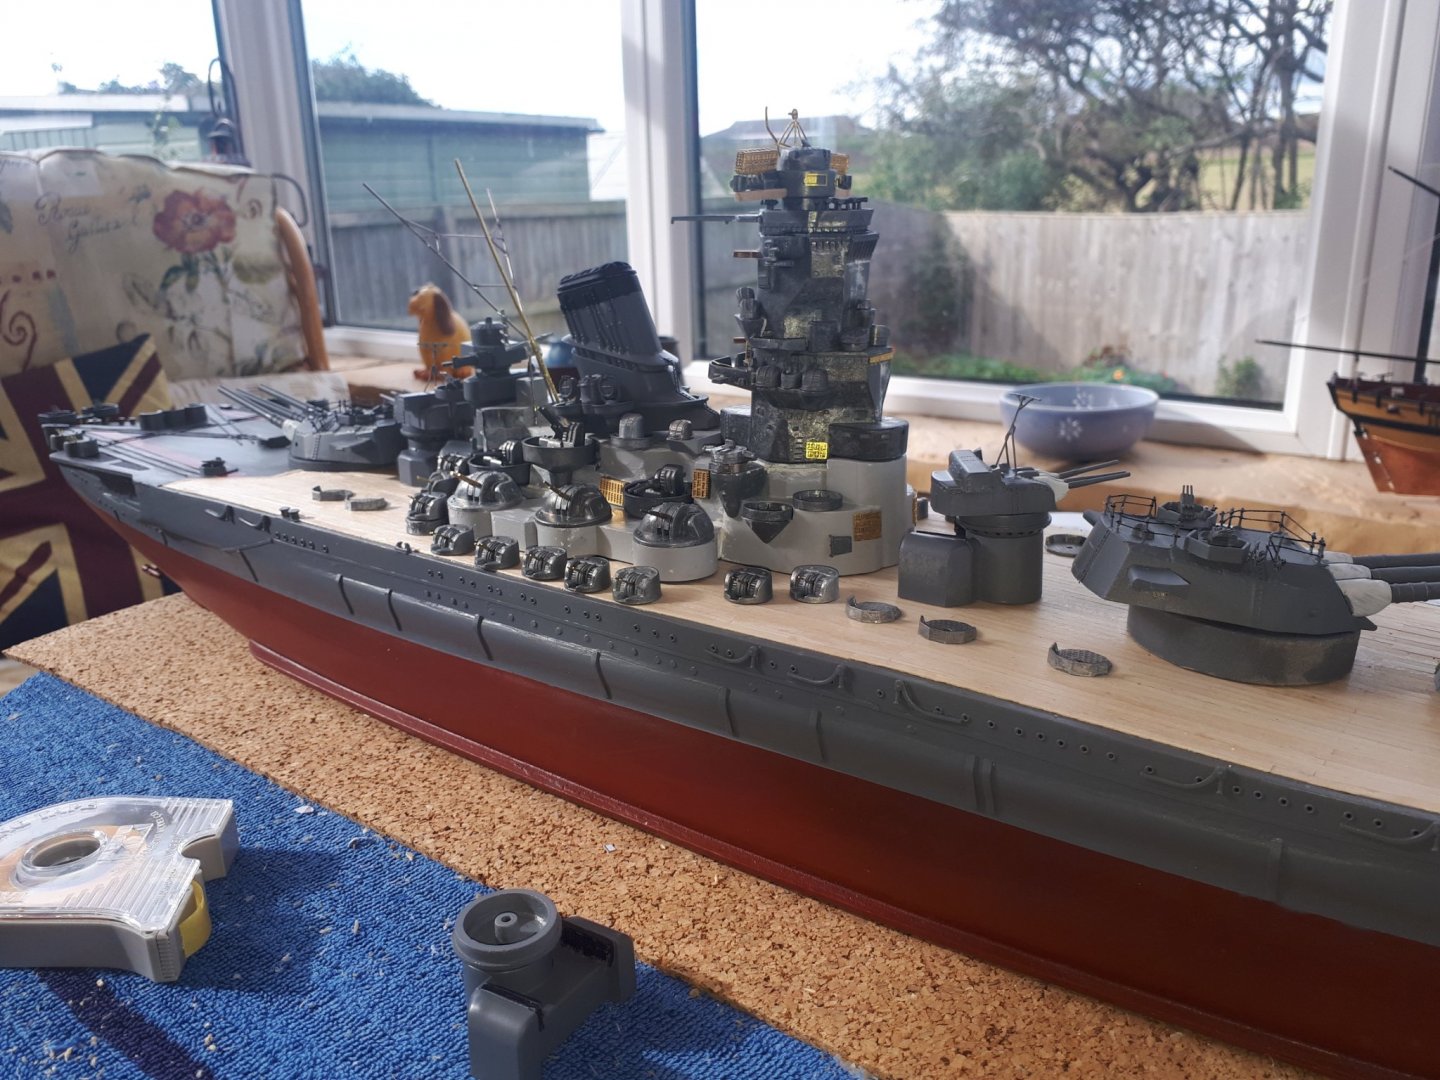
- 64 replies
-
- 7
-
-
- yamato
- deagostini
- (and 2 more)
-
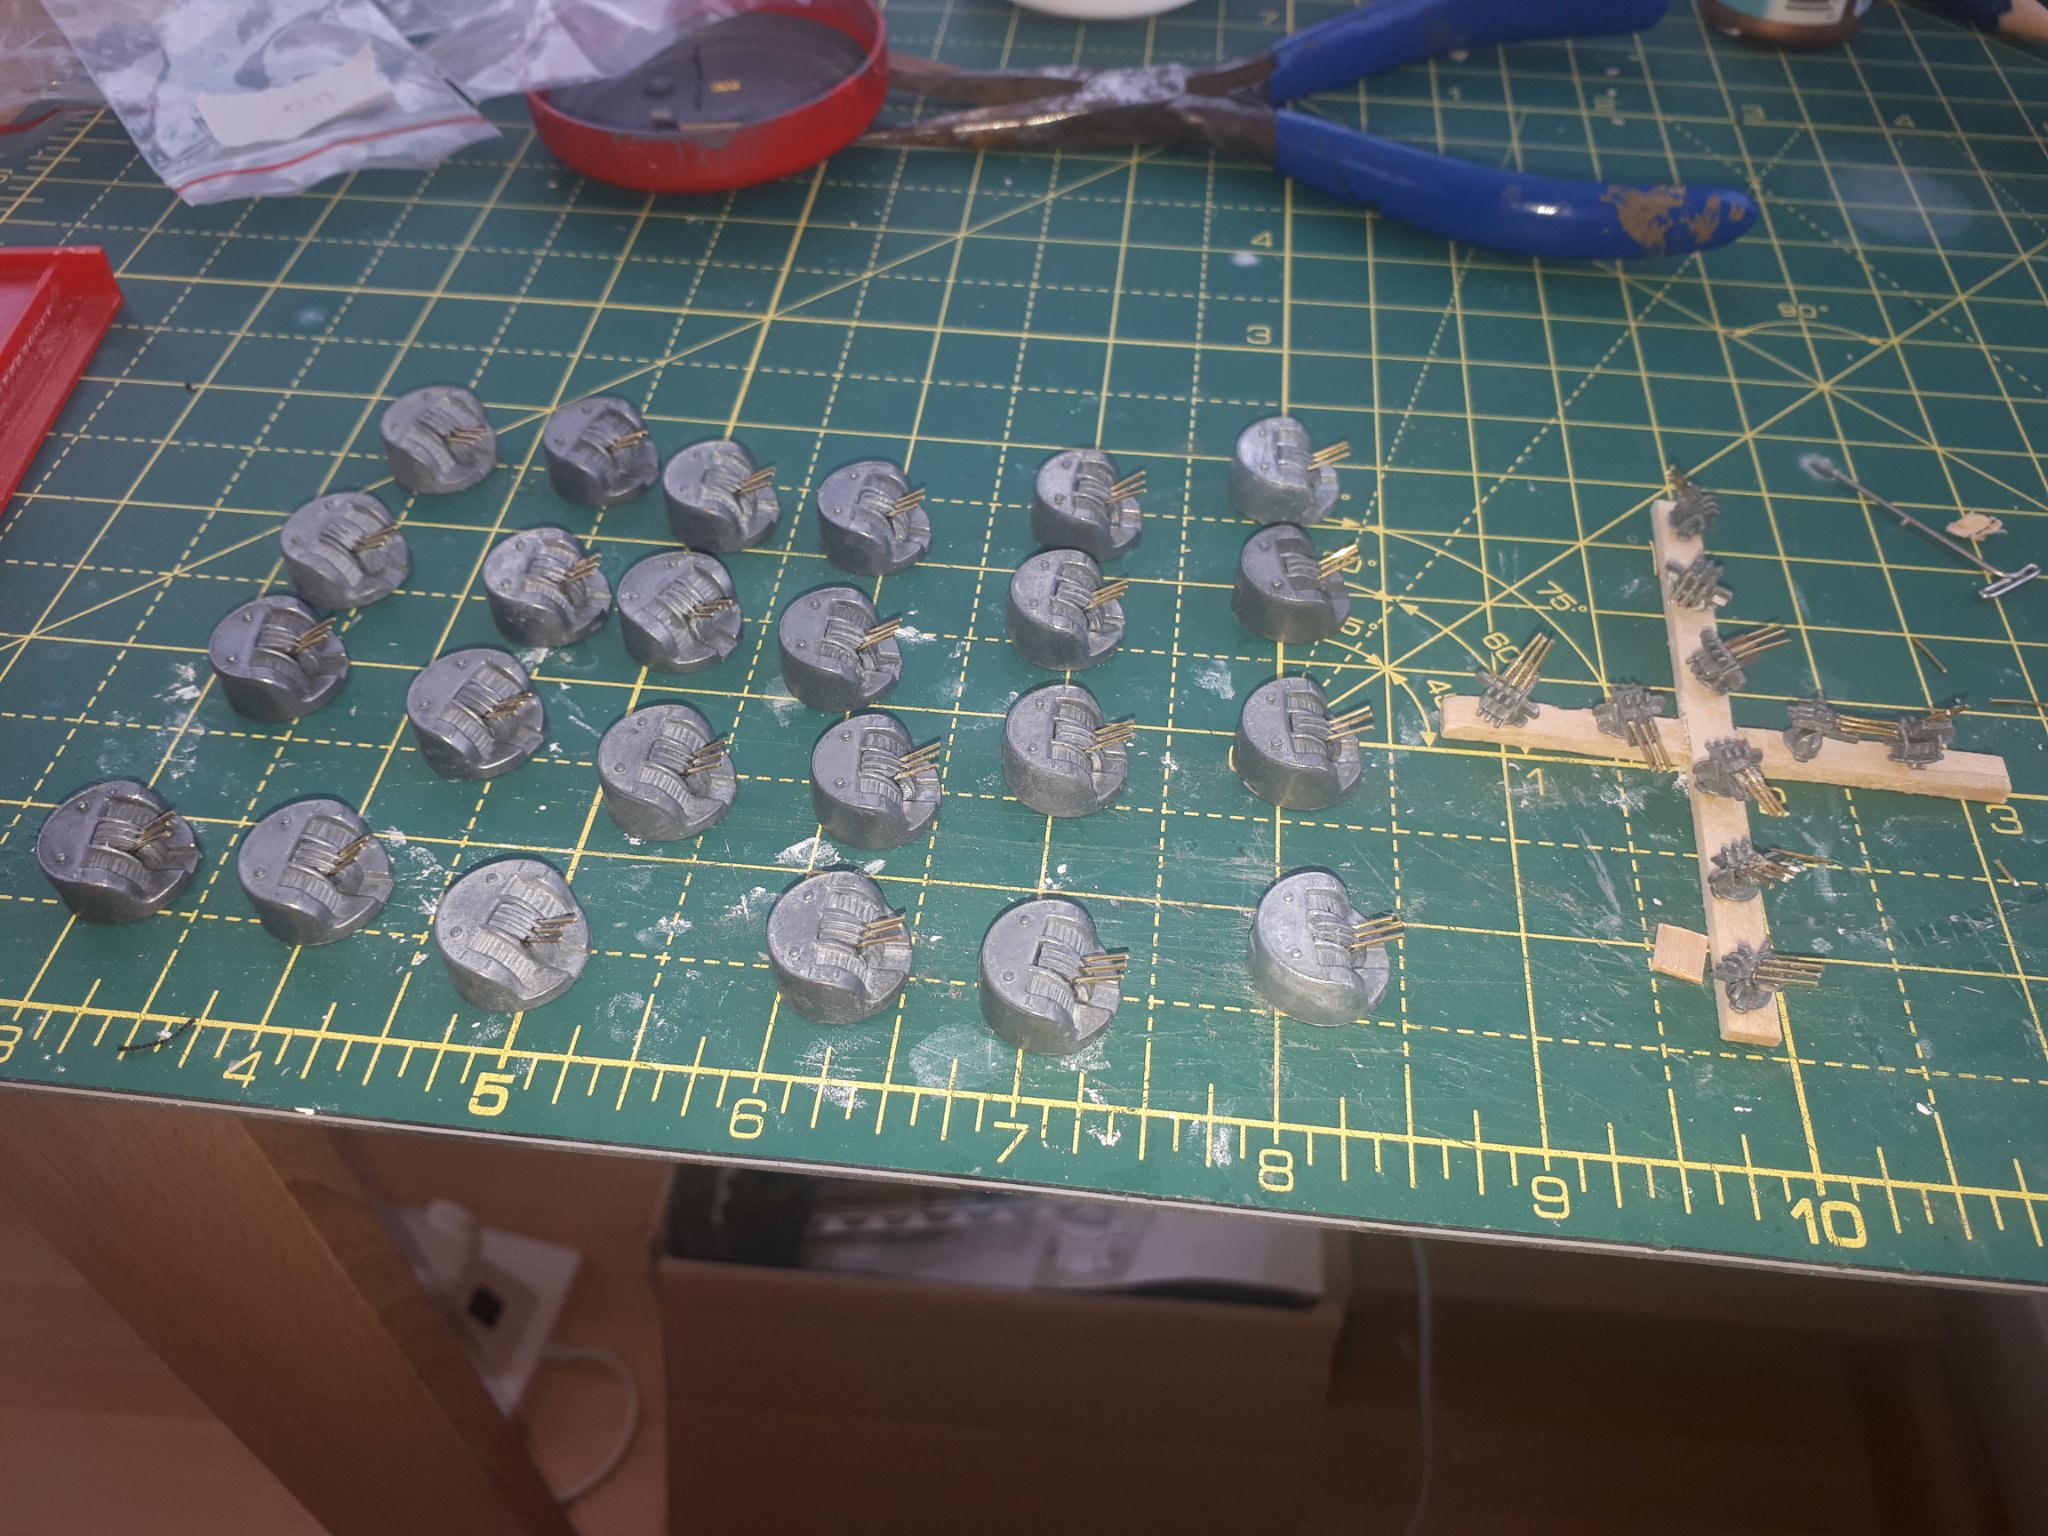
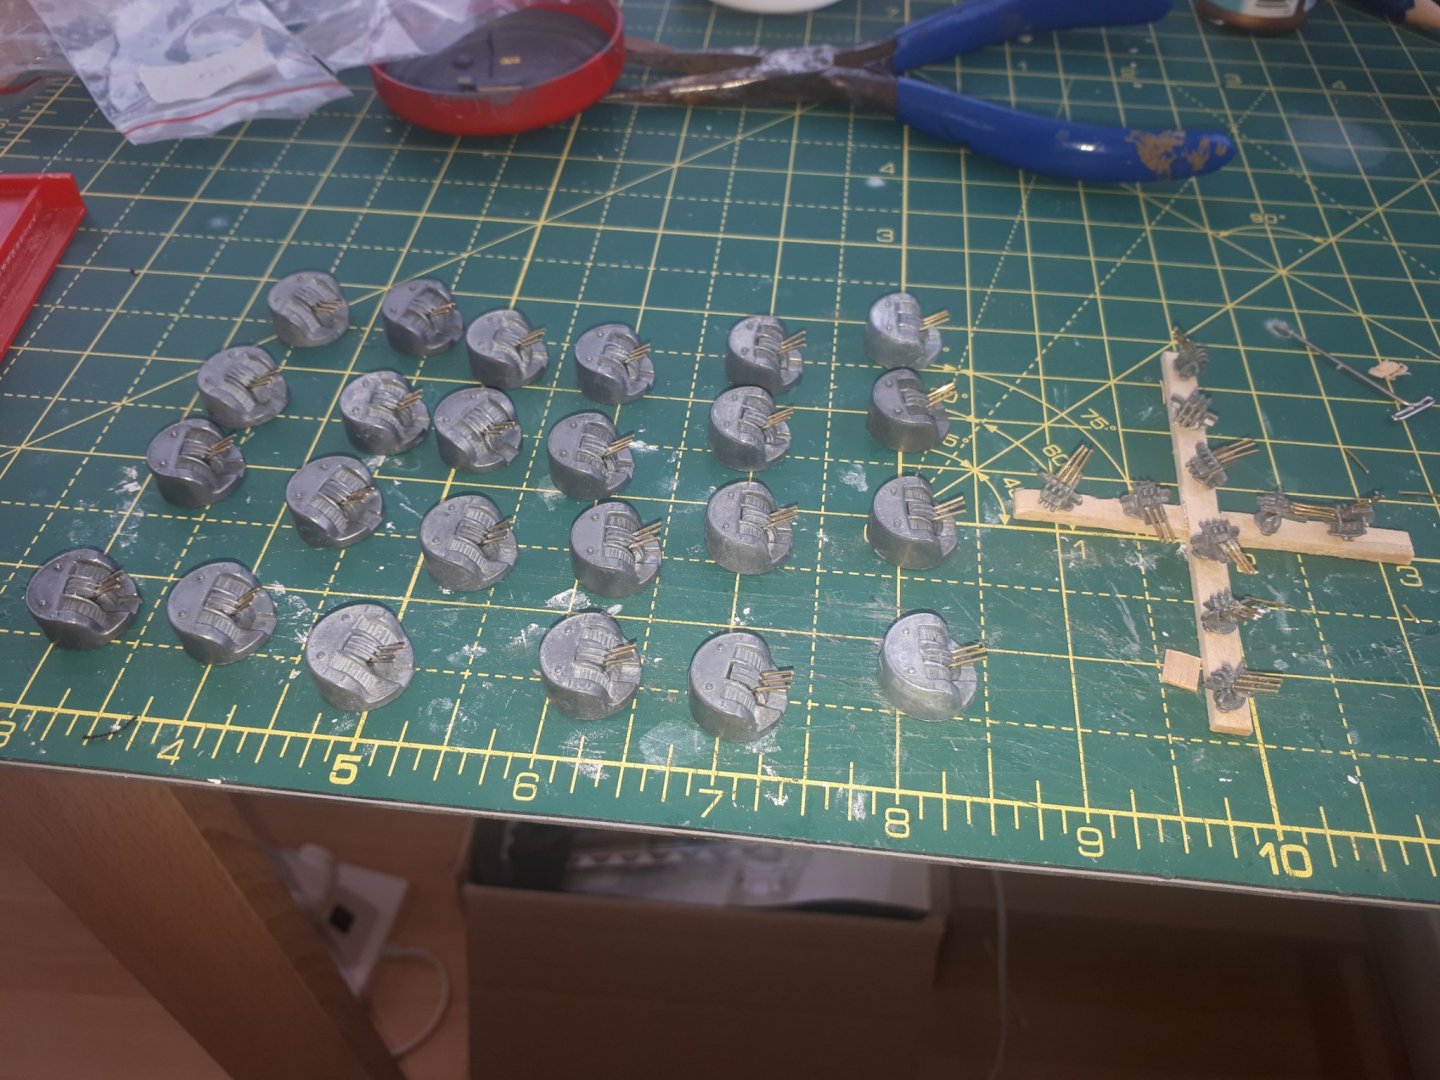
Today I was mostly building anti aircraft guns, 34 in total. It was a bit of a tedious task, and I found it very fiddley cutting and fitting the 102 gun barrels, each 5mm long.
- 64 replies
-
- 6
-
-
- yamato
- deagostini
- (and 2 more)
-
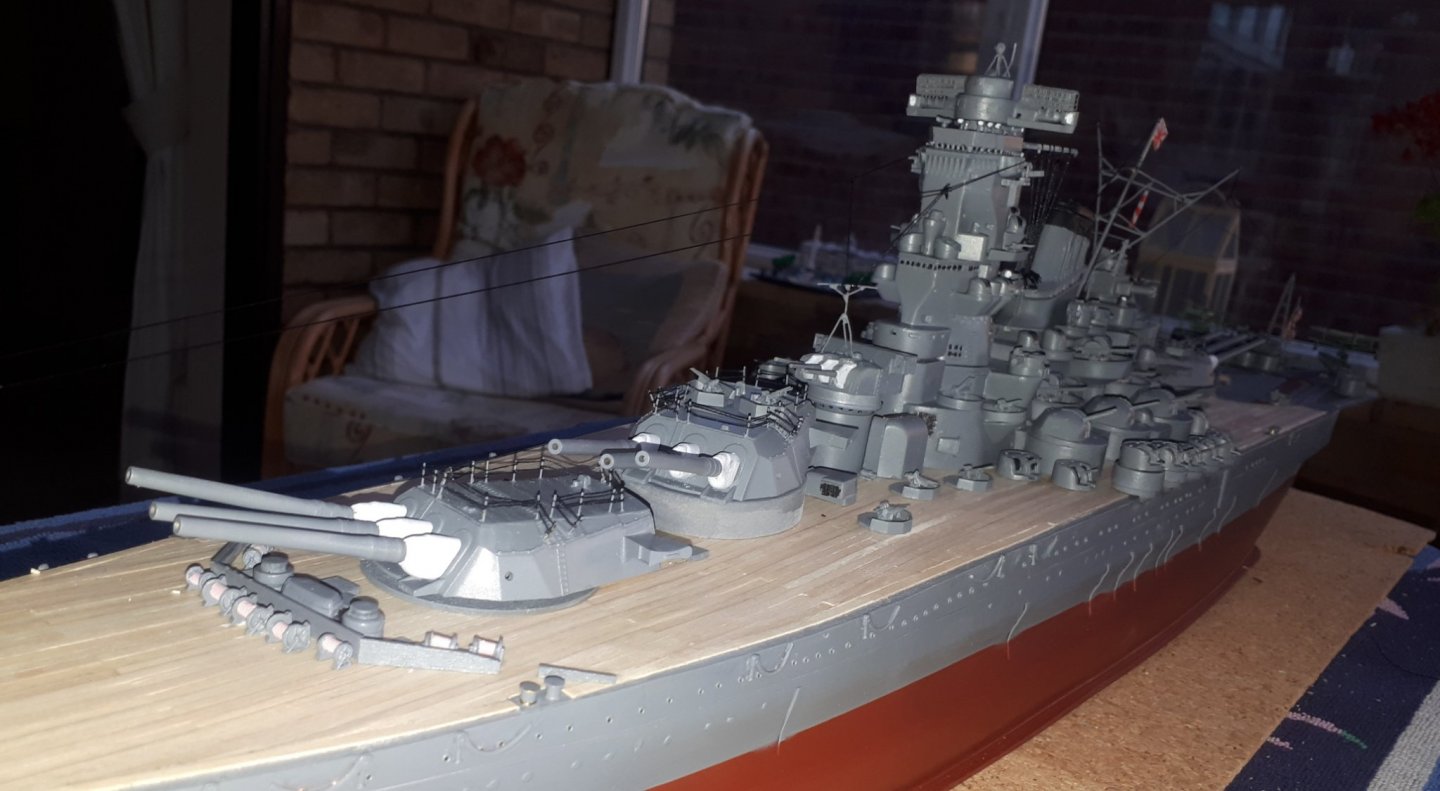
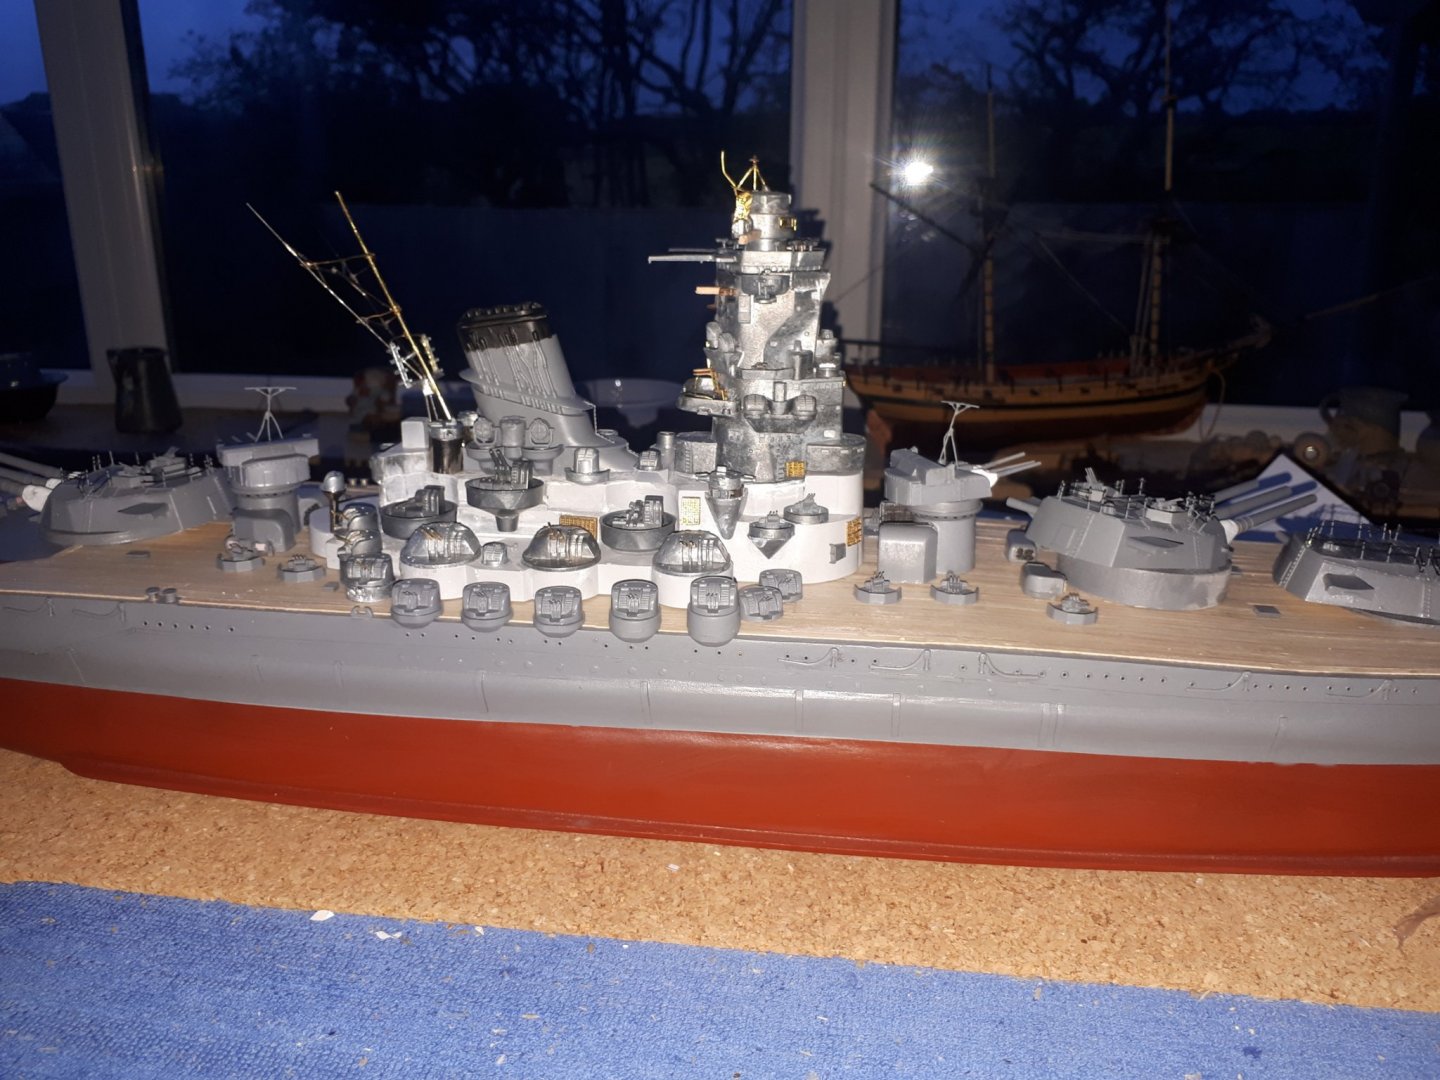
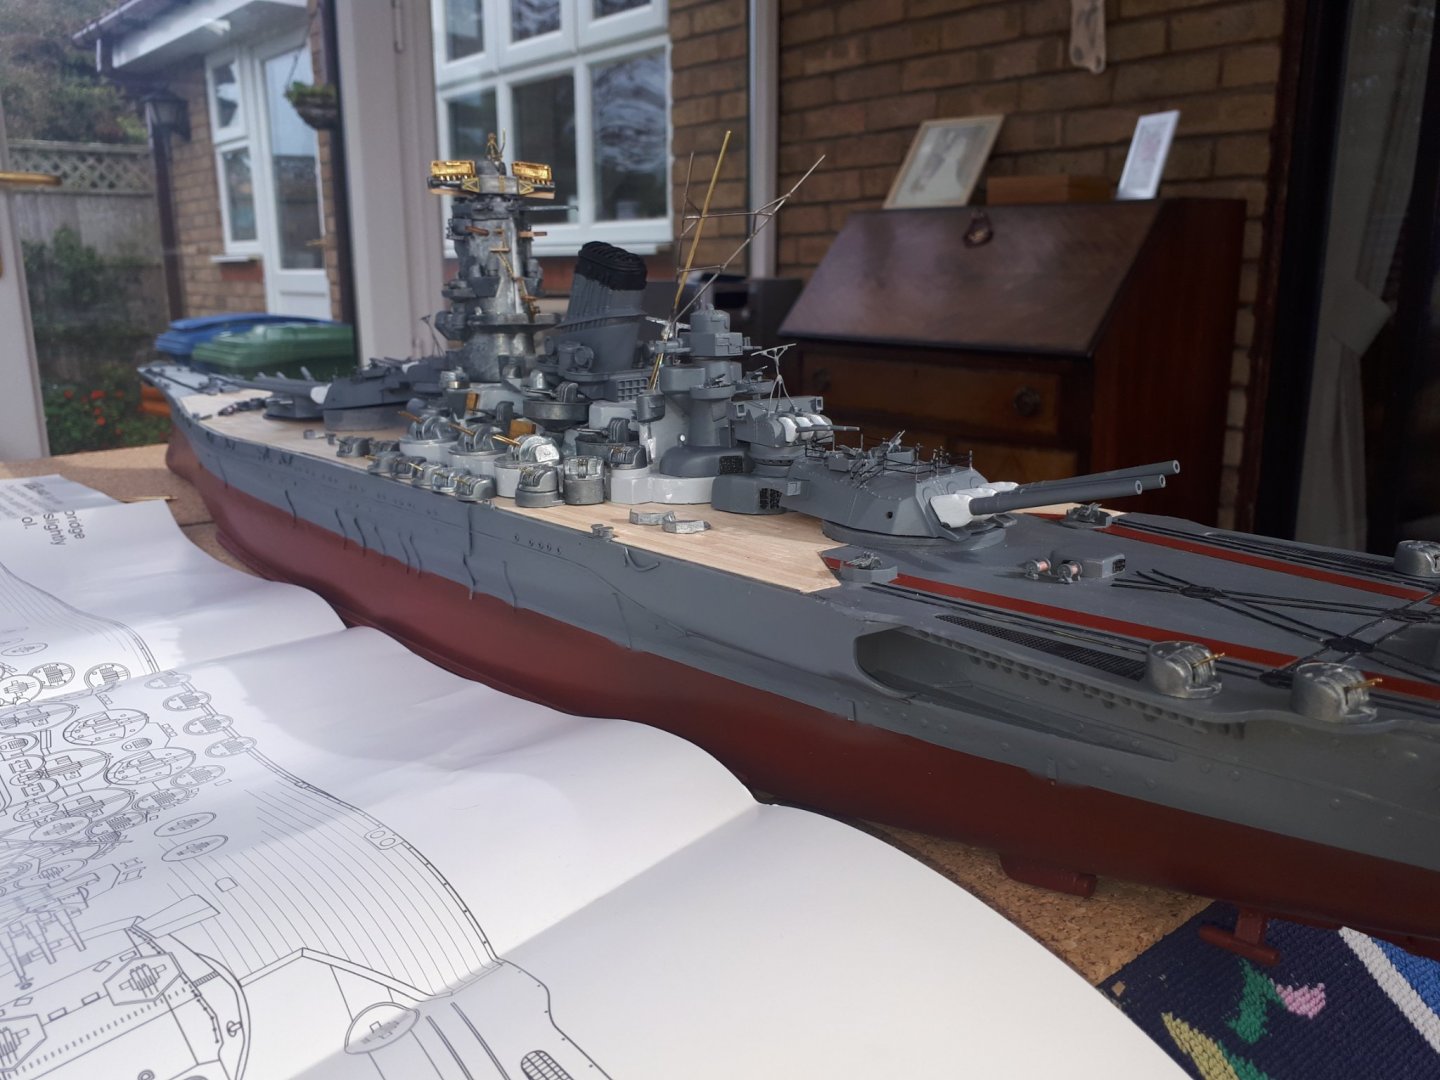
I have now built the 3 main and 2 secondary guns. This completes all the main super structures for the deck. So I thought I would dry fit the items on the deck to get a sense of what the final build will look like. Tomorrow it will be a case of painting the main and secondary gun assemblies and adding the gun deck railings.
- 64 replies
-
- 8
-
-
- yamato
- deagostini
- (and 2 more)
-
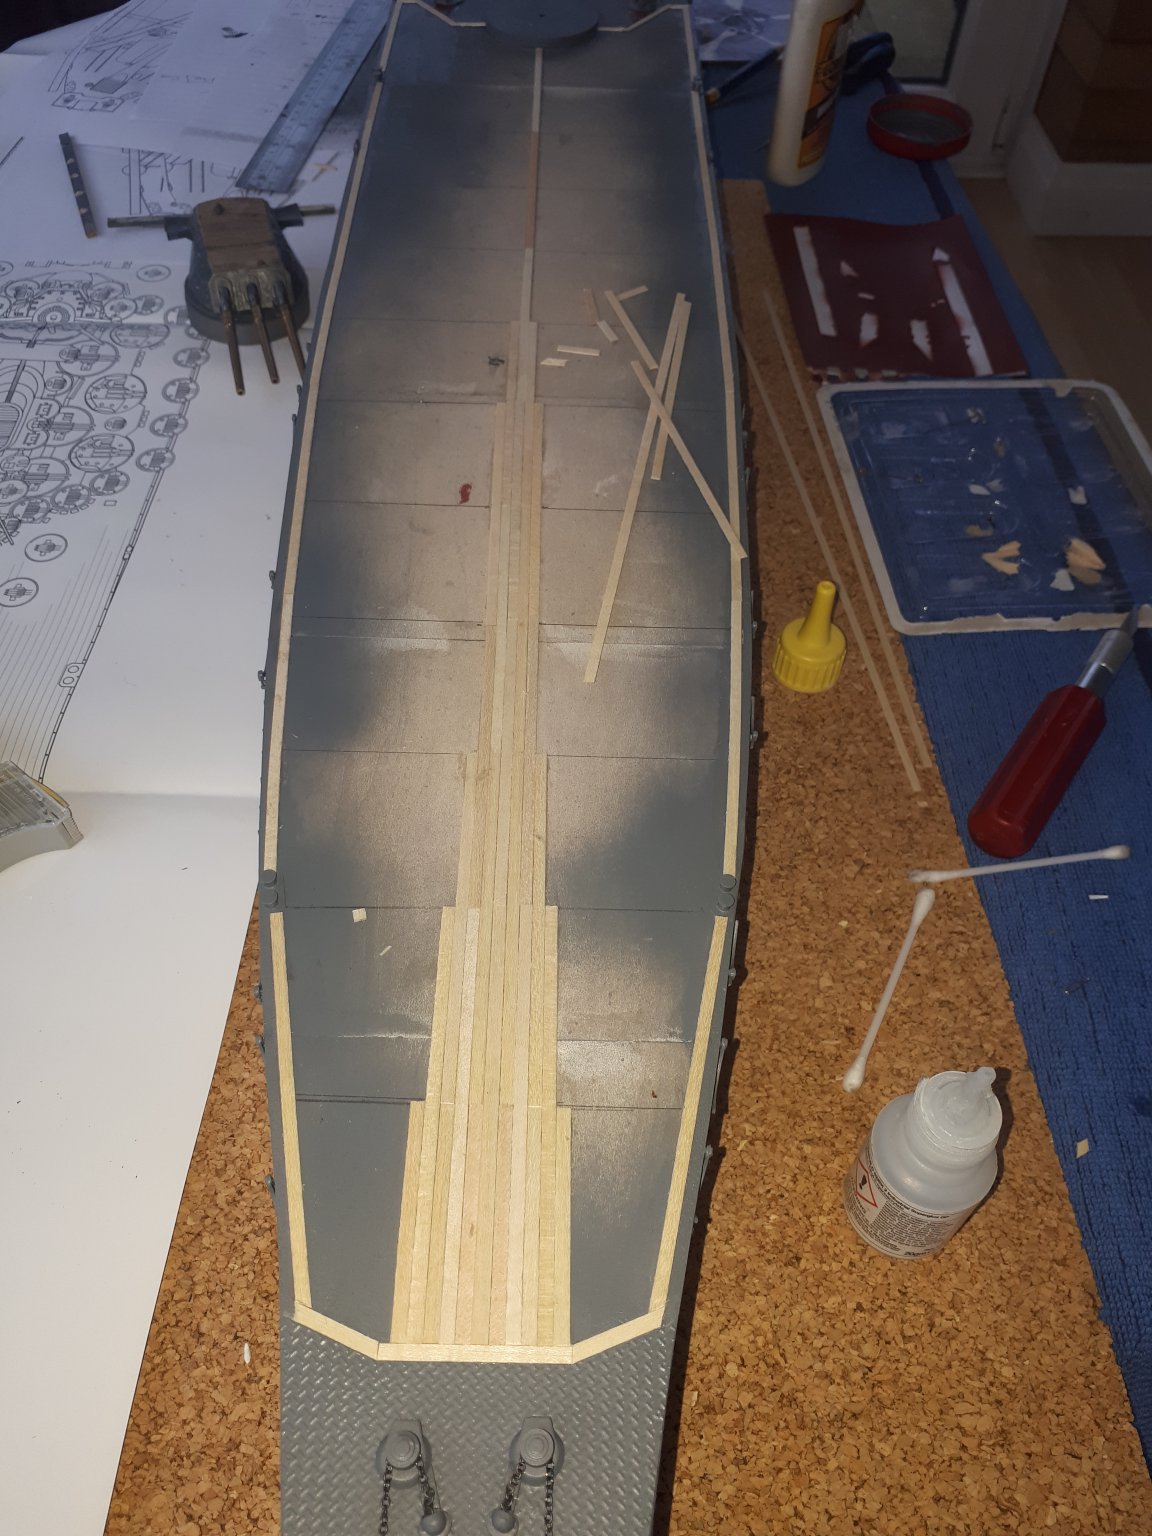
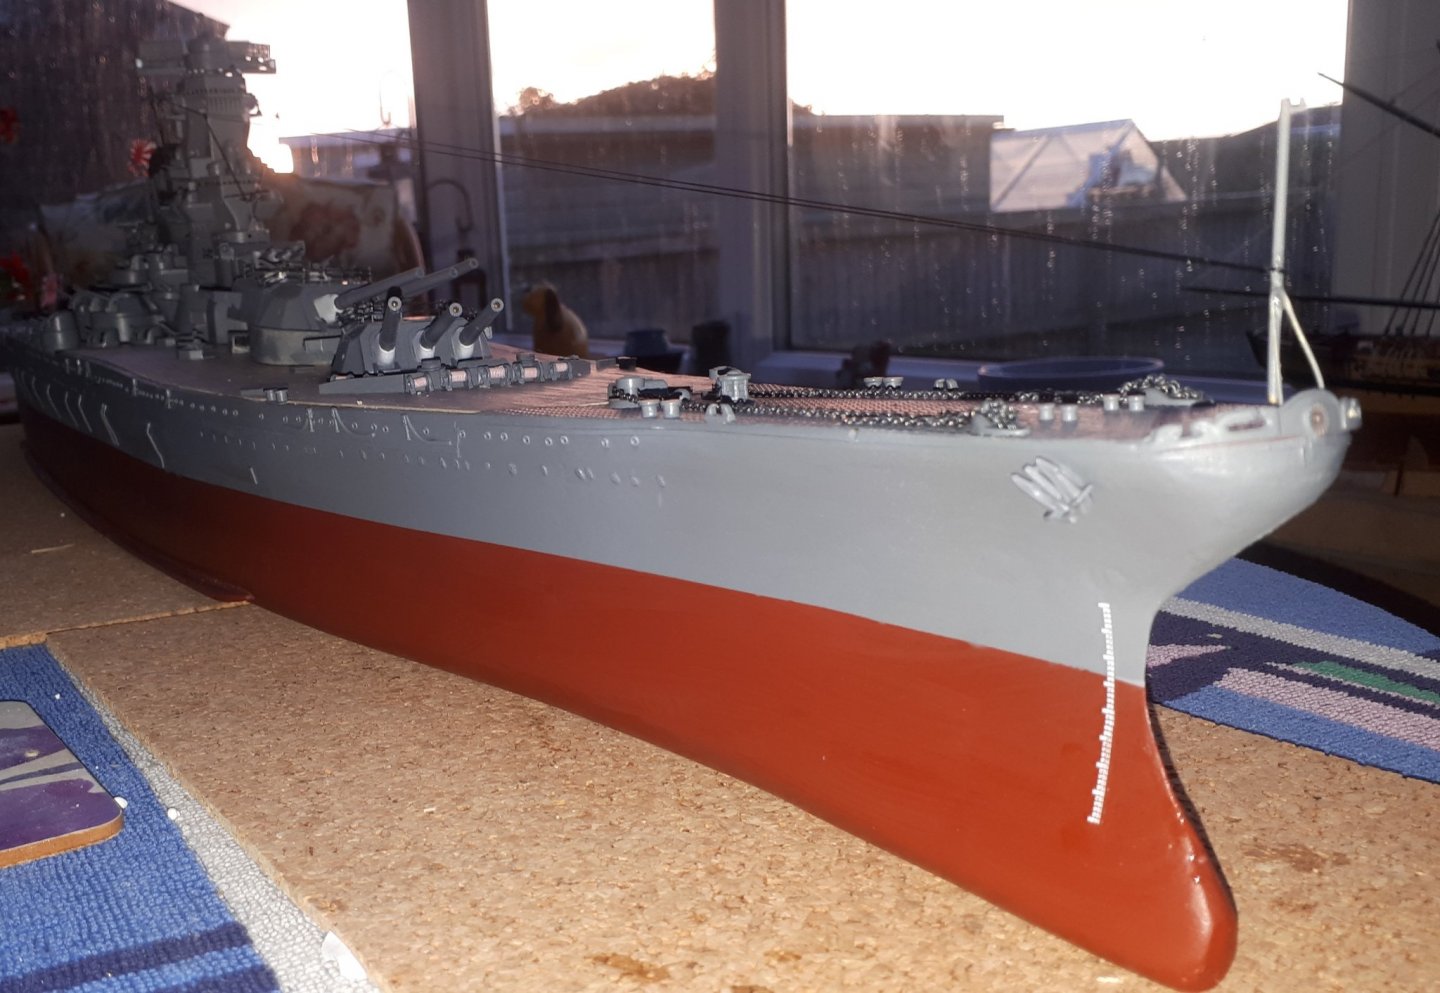
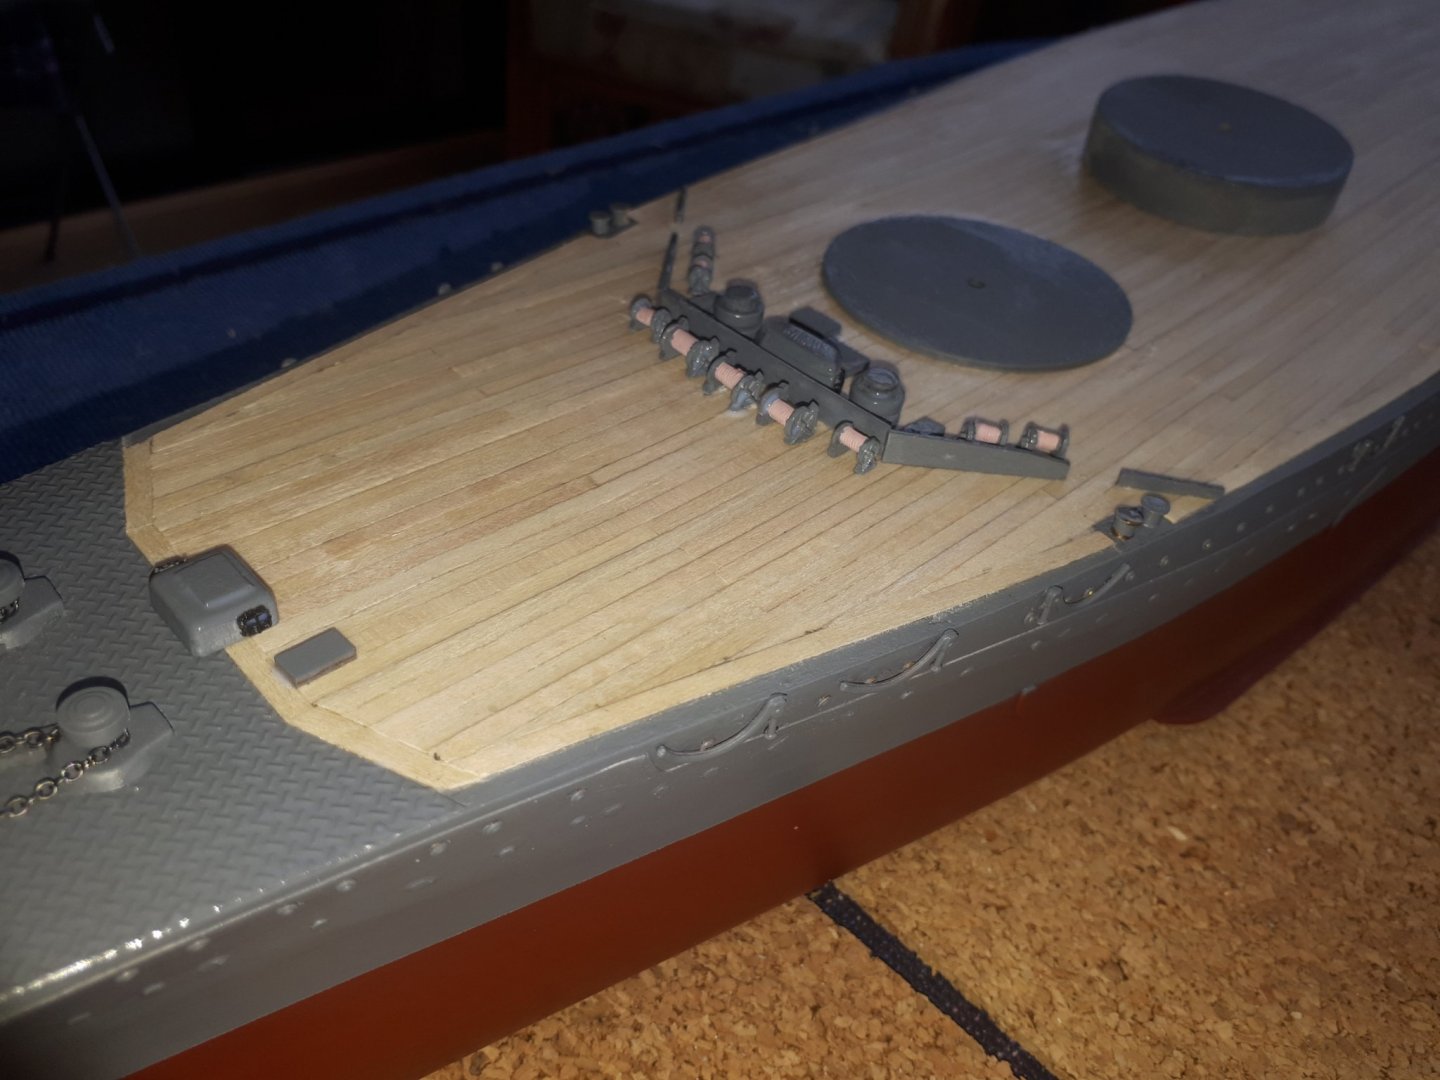
I have completed the planking of the deck and have coated it with some a flat clear varnish. I might add some weathering details at a later stage. I have now started to add some of the deck details. I plan to work from bow to stern when adding the detail.

- 64 replies
-
- 7
-
-
- yamato
- deagostini
- (and 2 more)
-
Work progressing on the deck planking. I thought it would fun to dry fit some of the deck superstructure.

- 64 replies
-
- 7
-
-
- yamato
- deagostini
- (and 2 more)
-
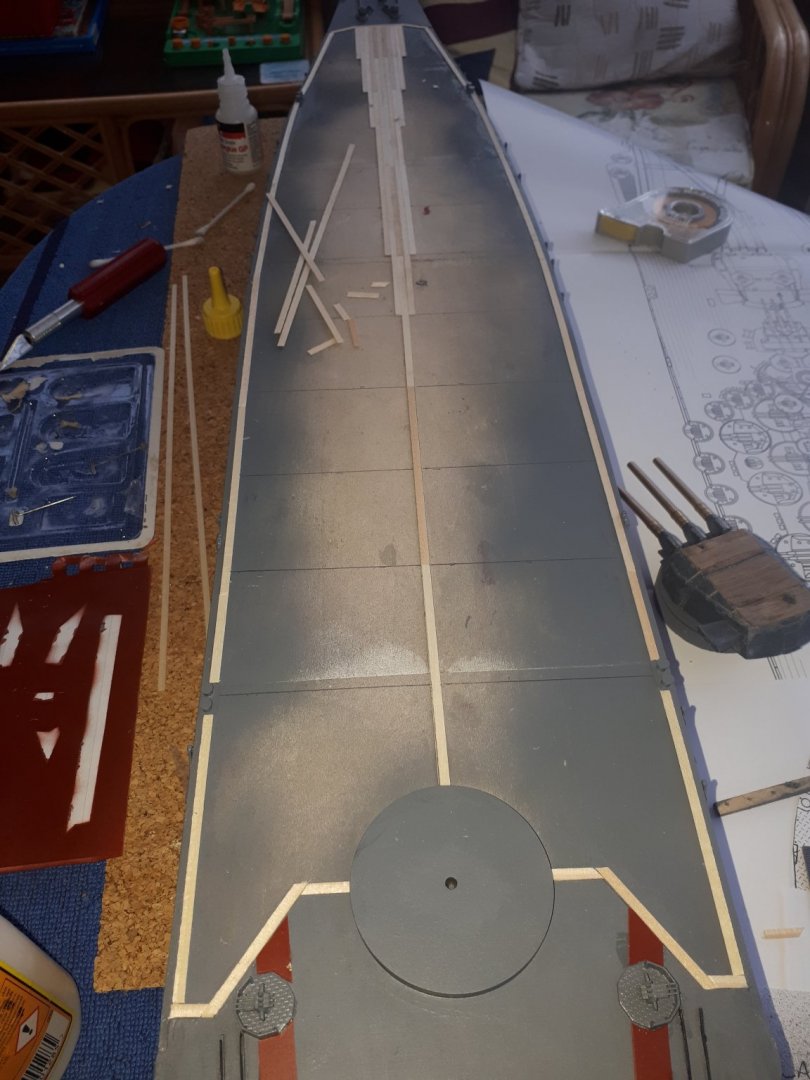
I have made a start to the deck planking, this is much more in my comfort zone and this is going to be a quick and easy task. I started with doing the outline and then I added the central line. I am now filling on the gaps using 100mm and 50mm length planks.

- 64 replies
-
- 7
-
-
- yamato
- deagostini
- (and 2 more)