Glenn-UK
-
Posts
3,170 -
Joined
-
Last visited
Content Type
Profiles
Forums
Gallery
Events
Everything posted by Glenn-UK
-
 Thanks Chris. It is a slow process with plenty of checks as I progress to make sure I have faired enough at each key point. James did provide me some useful advice as well.
- 382 replies
-
- 1
-

-
- Vanguard Models
- Duchess of Kingston
- (and 1 more)
-
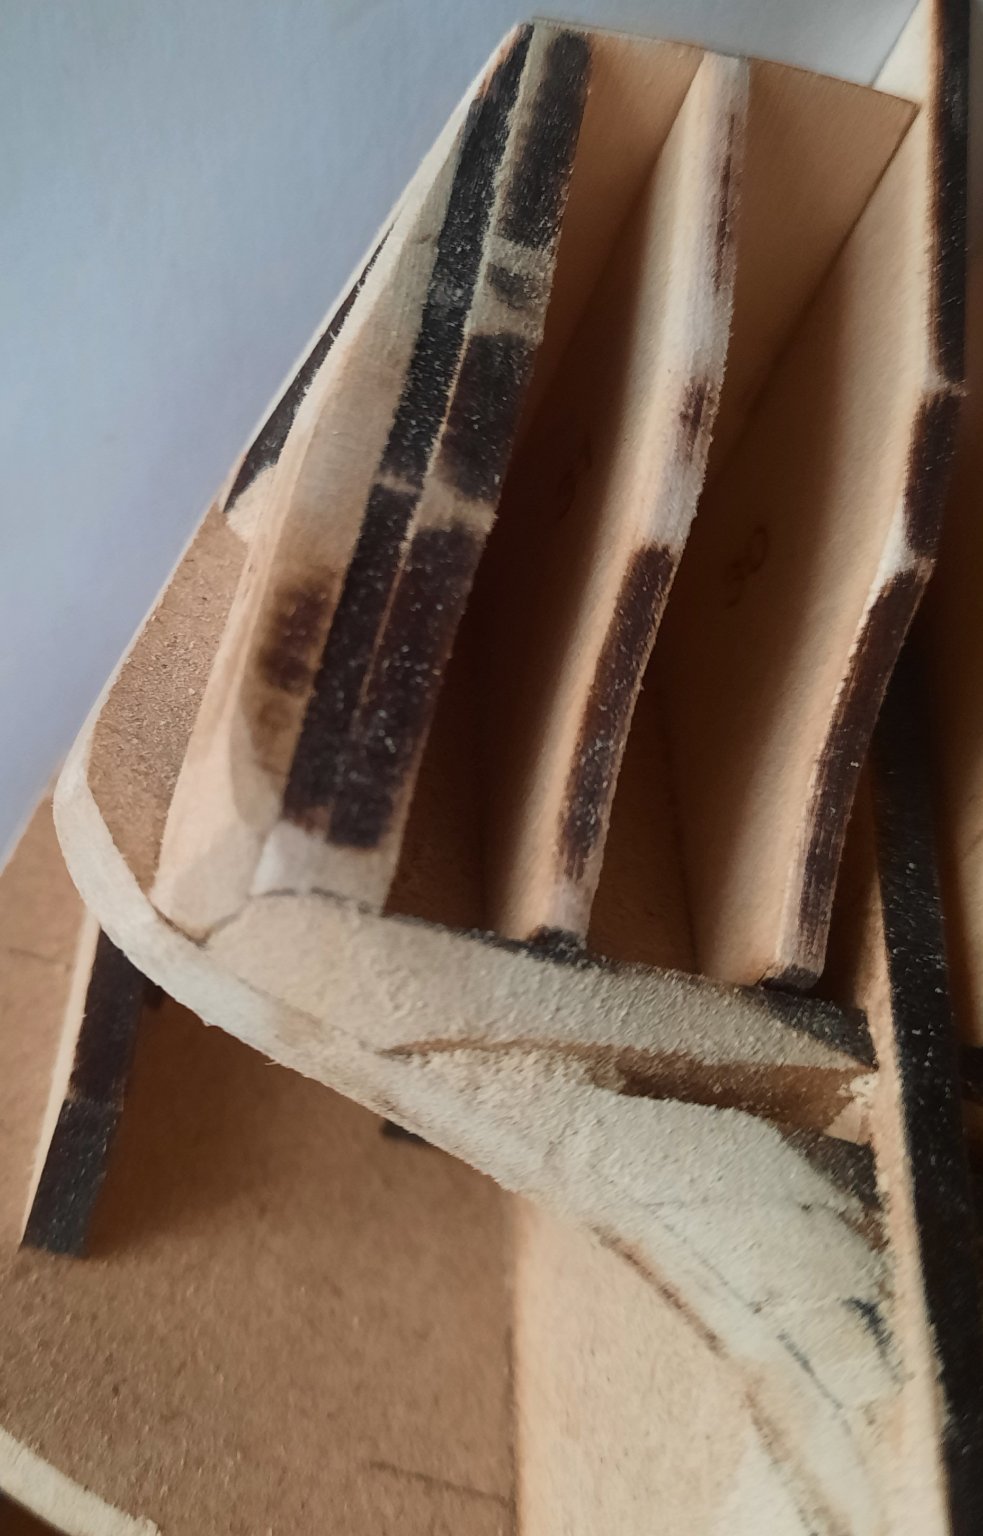
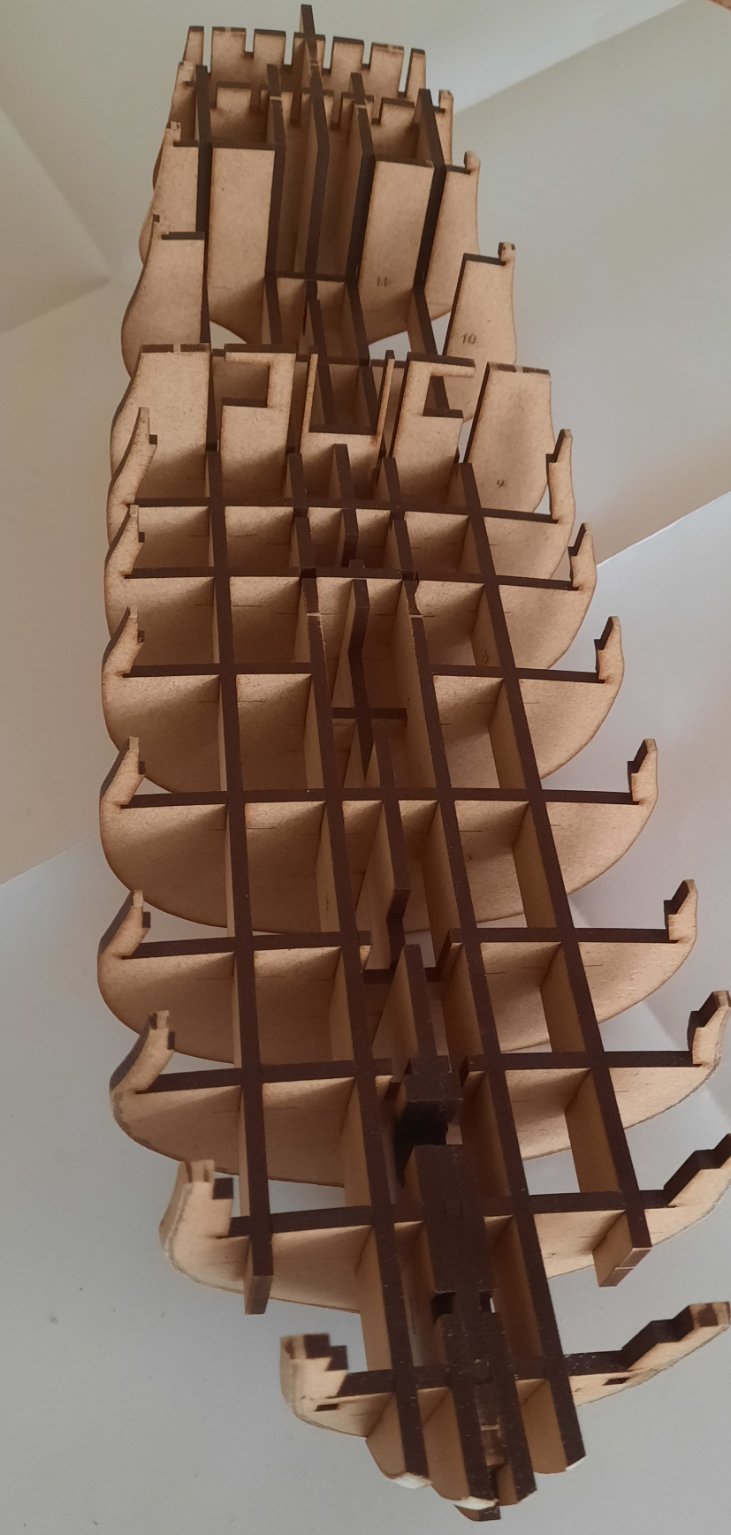
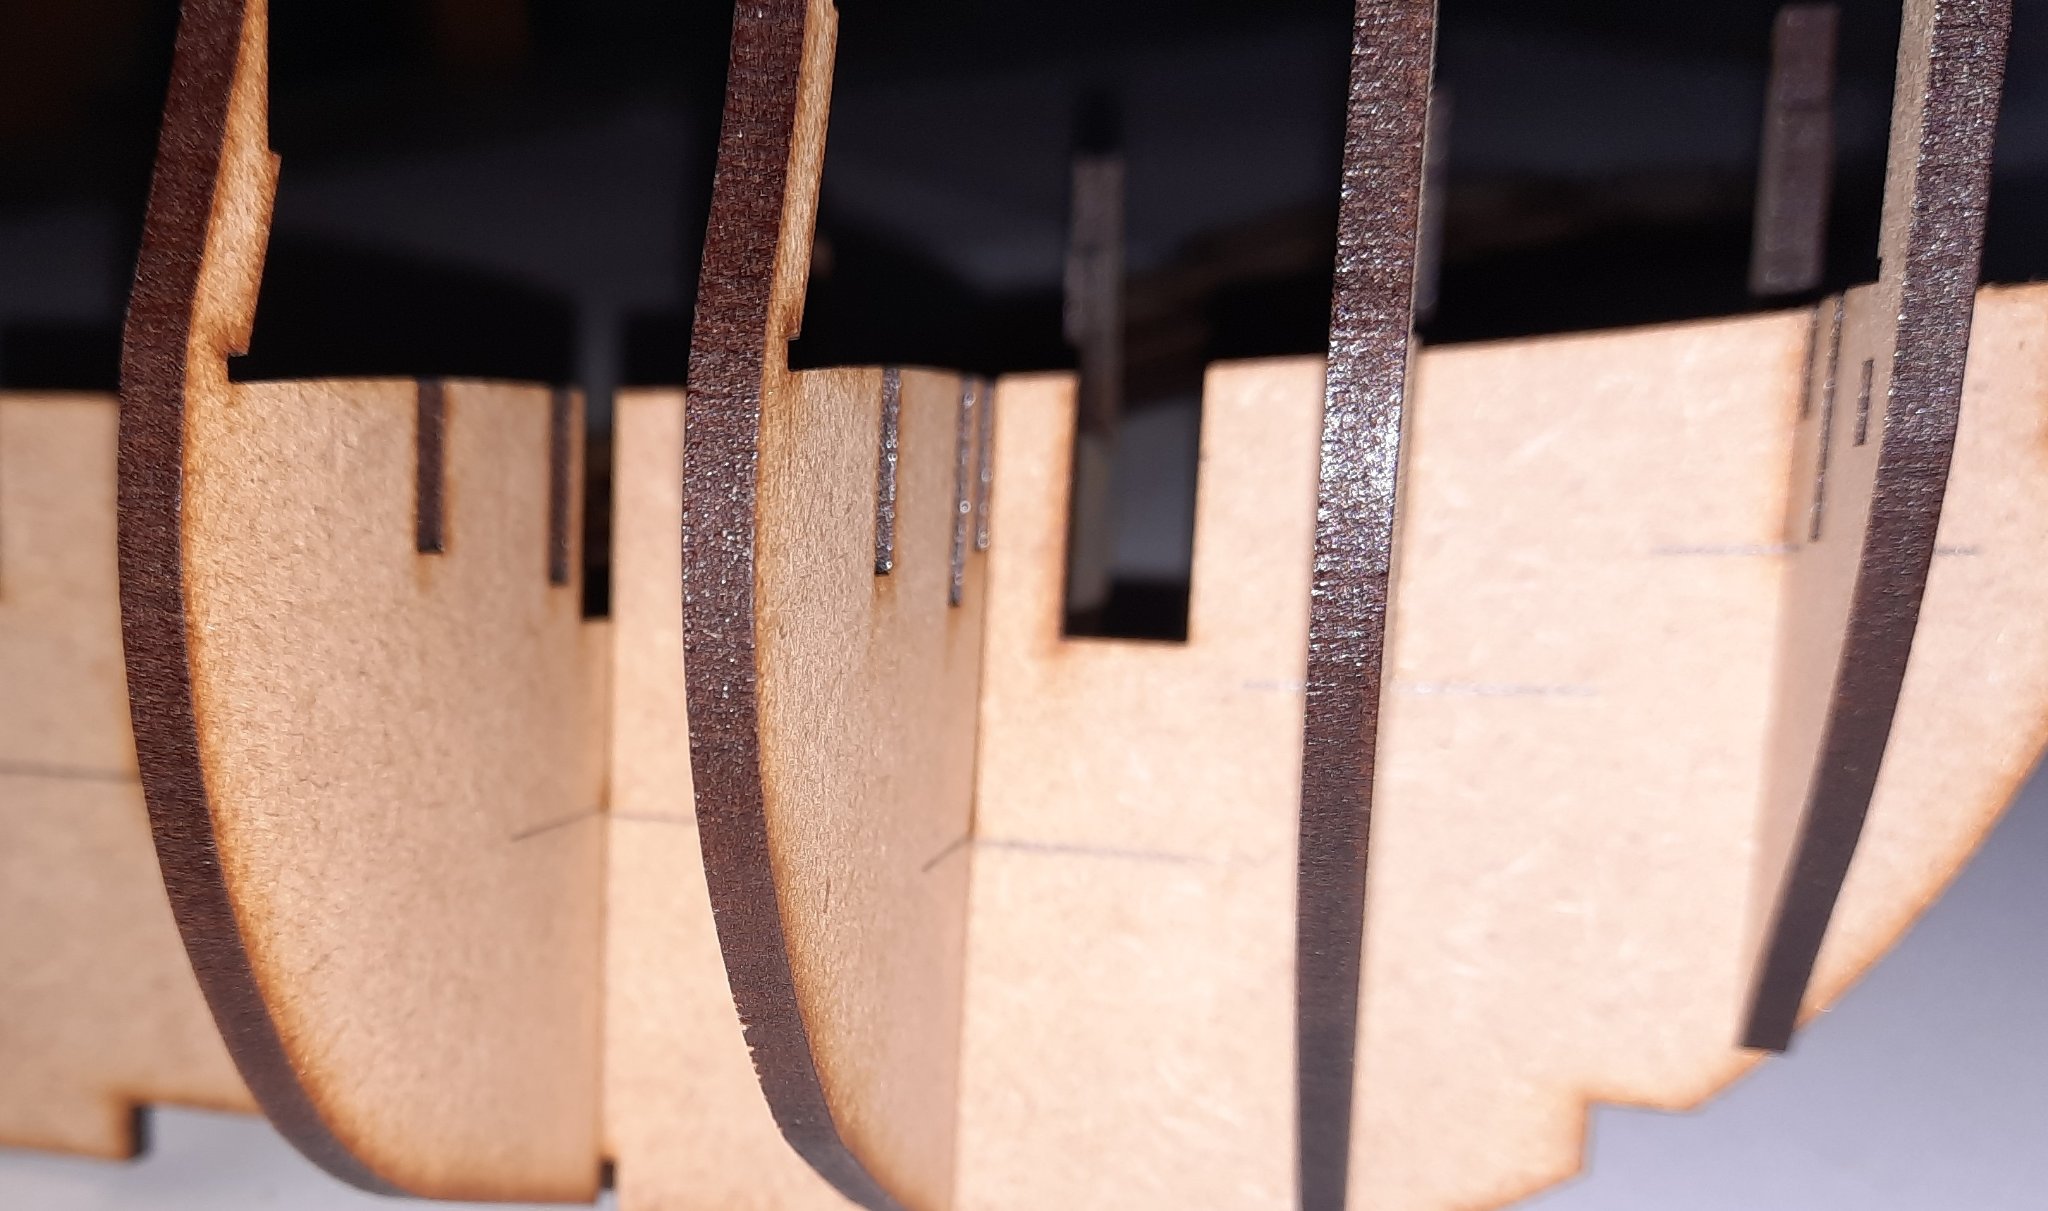
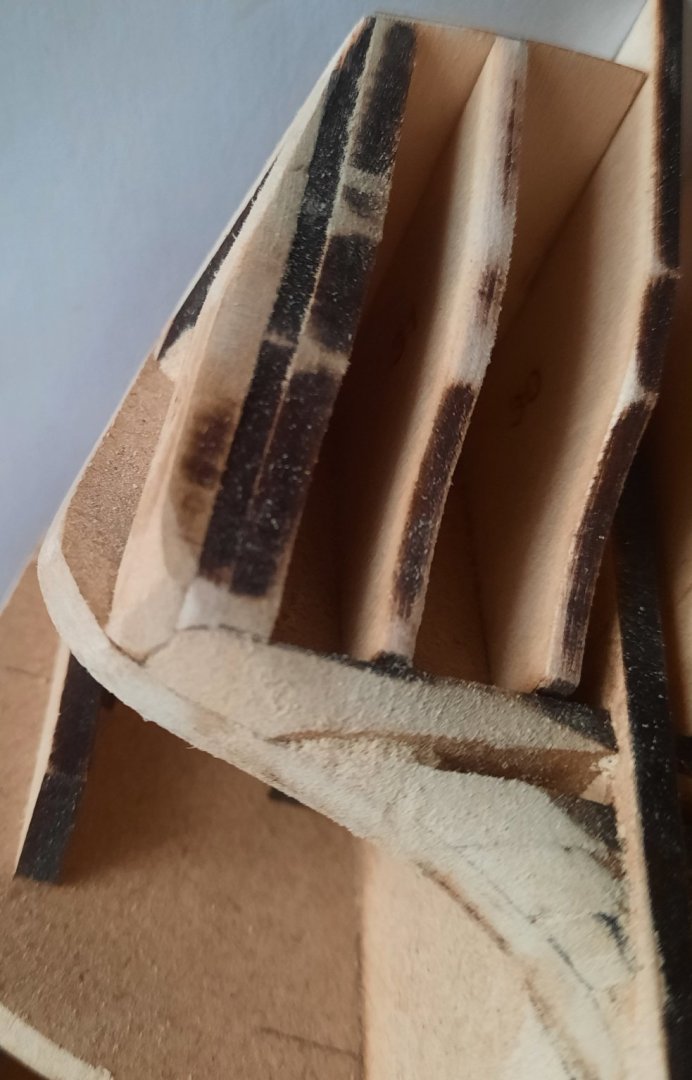
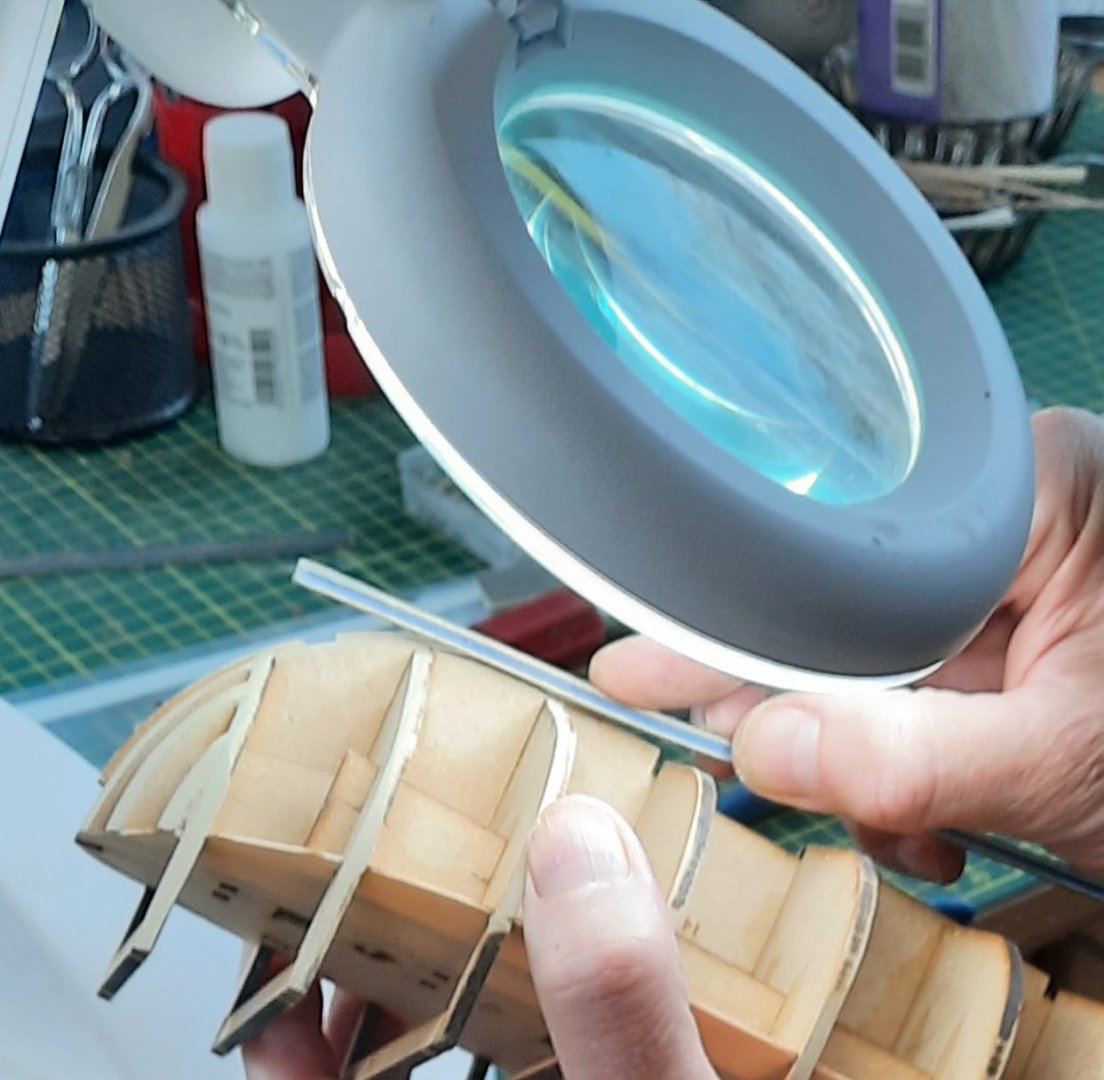
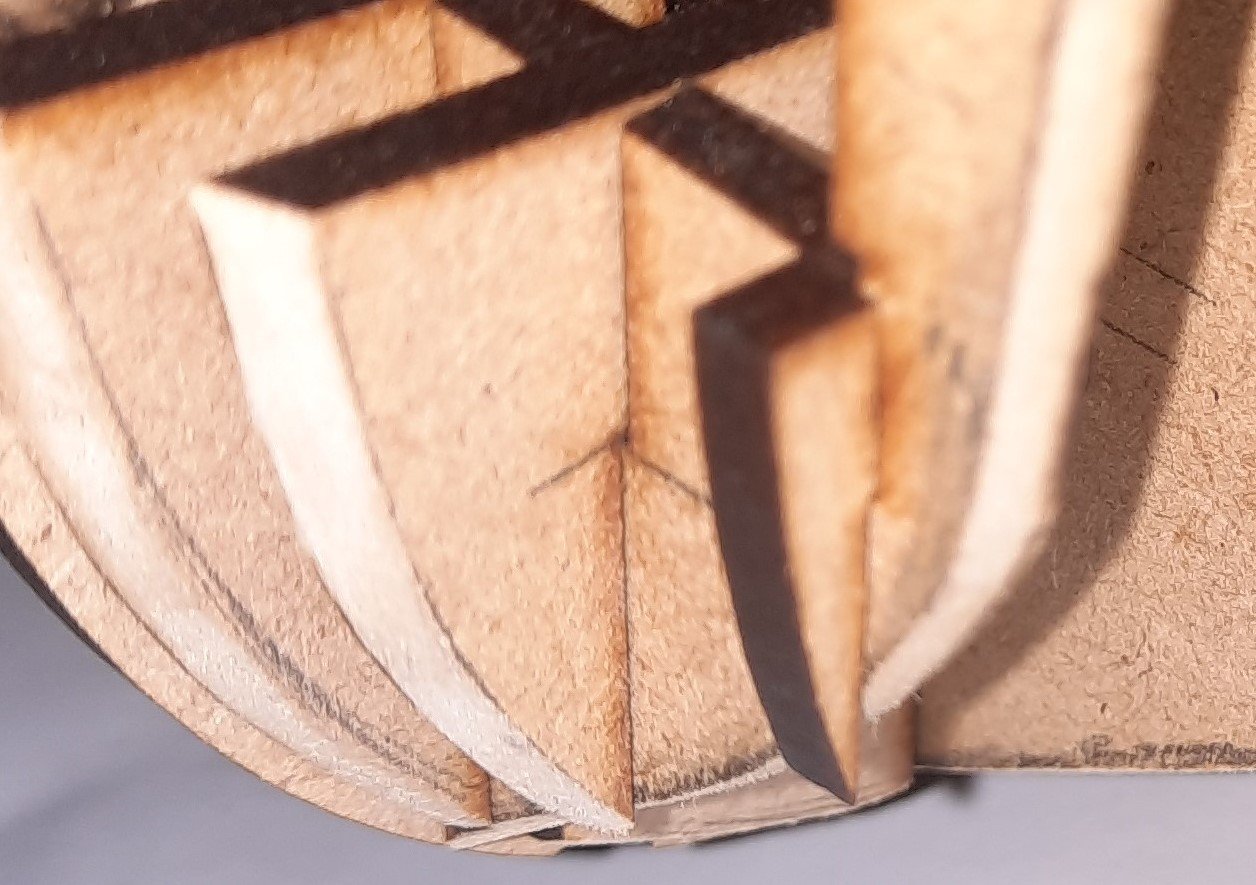
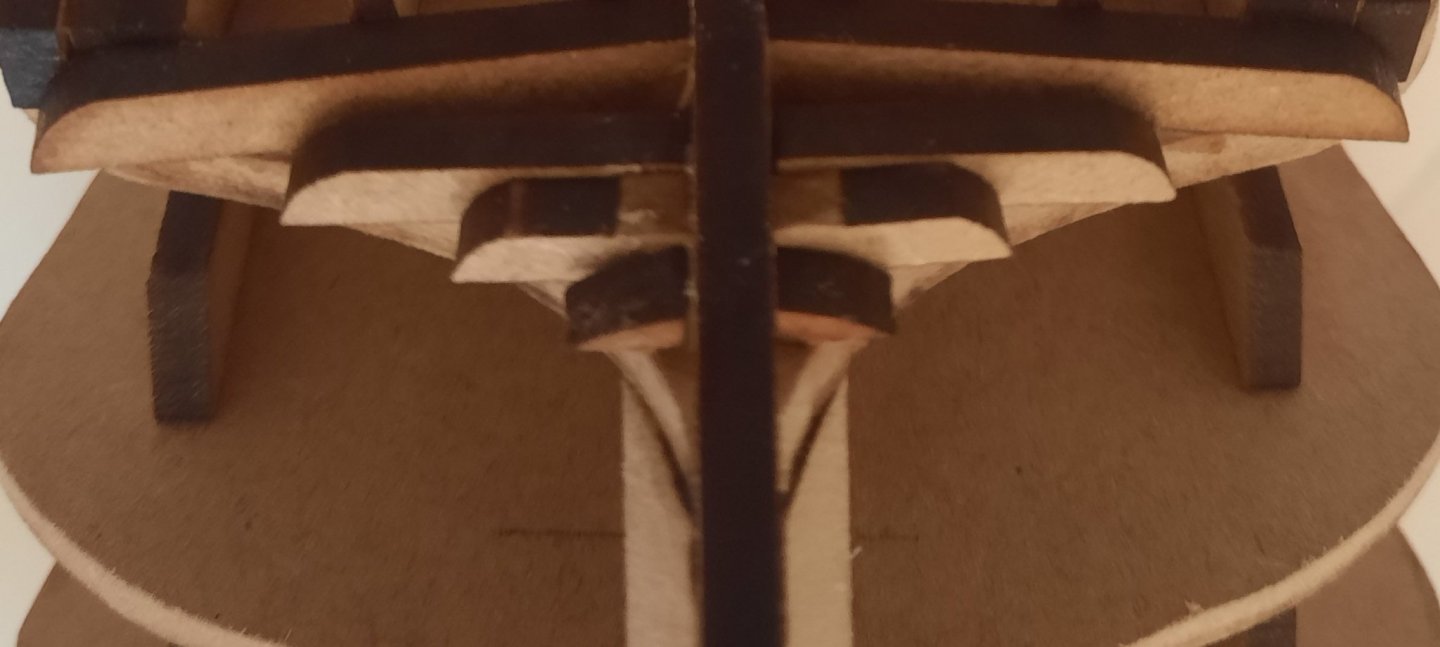
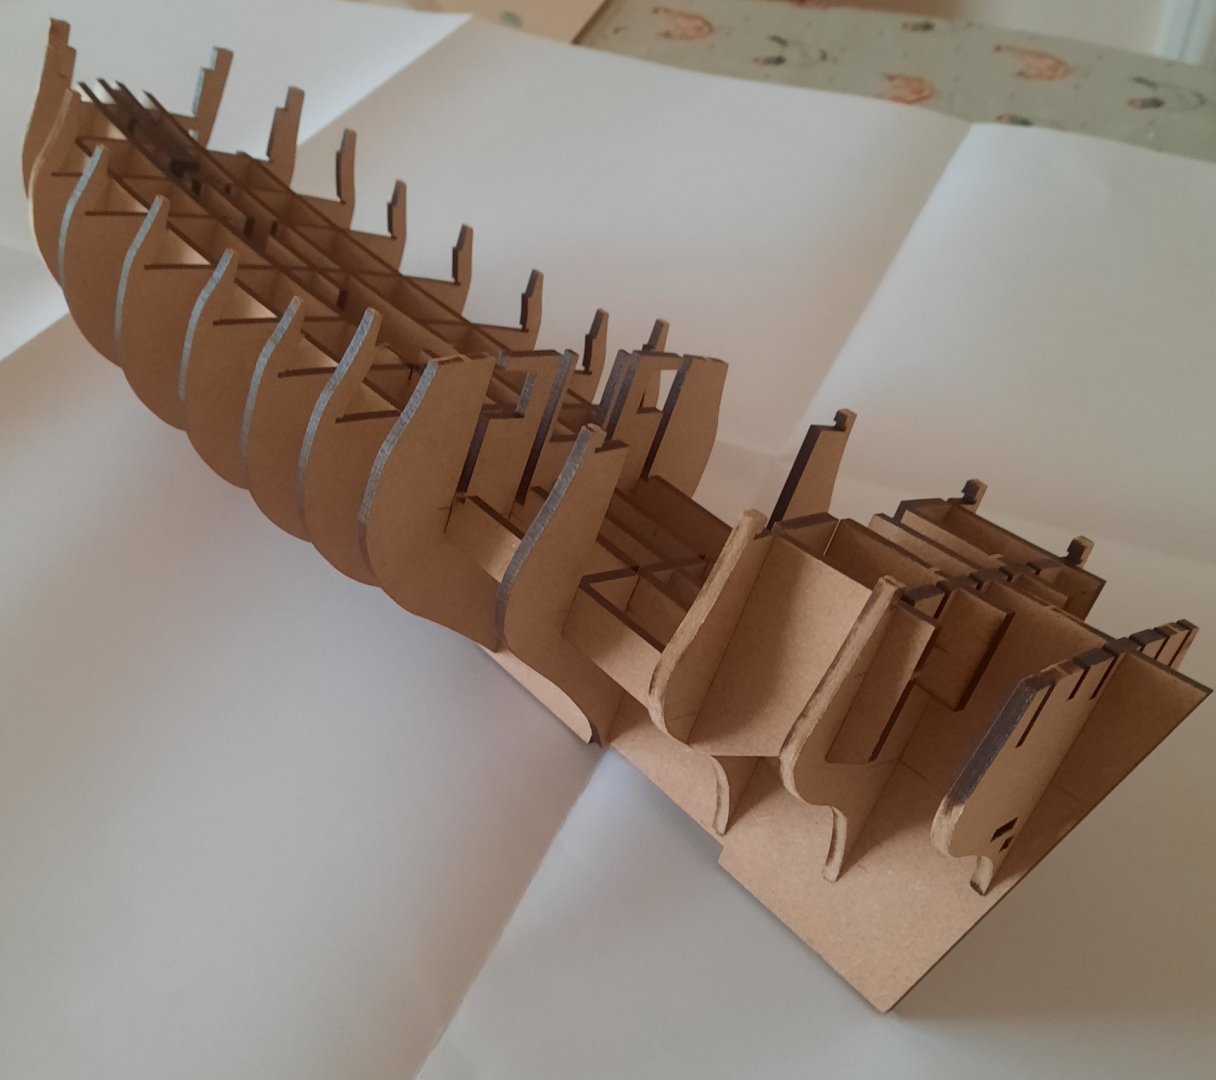
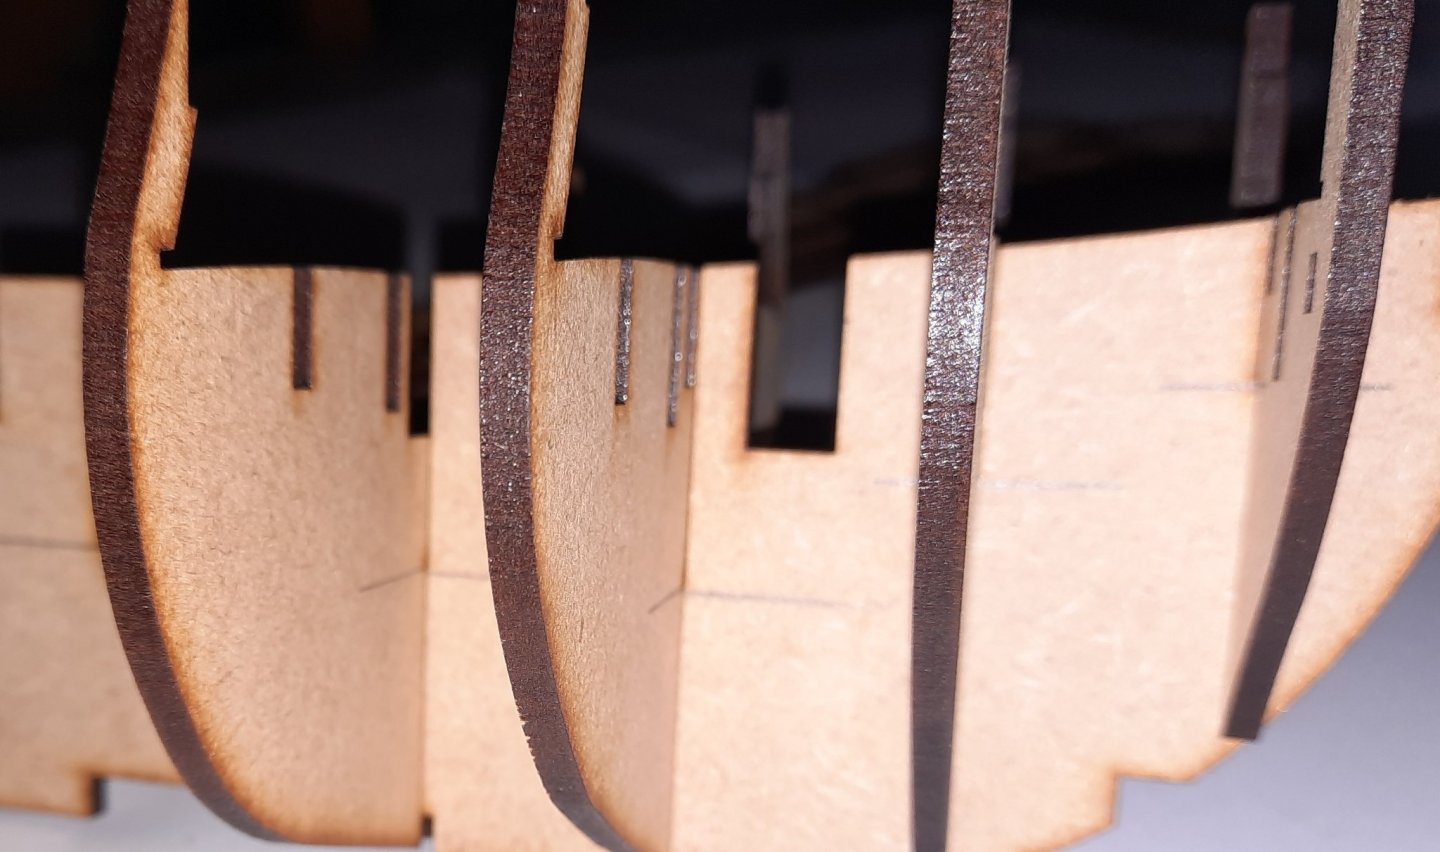
I am currently working on fairing the hull. This is going to take a few hours before I'm happy with the end result. I am using a mixture of thick and thin sanding sticks and some 220 grit sand paper. I'm also using a thin planking strip and my illuminated magnifier to check the fit, especially where the decks sit with bulkheads. I was planning on using my dremel for some areas but it suffered a catastrophic failure when I had to create a space to retro fit the fore mast supports. After 3 hours effort I have completed fairing the starboard side and I'm about halfway through fairing the port side. I have found where stern pattern 19, 19a, 19b and 19c are located is the most time consuming and awkward area to fair. The other time consuming part is fairing the bottom edge of bow pattern part 15. Time and patience is my friend at the moment

- 382 replies
-
- 10
-
-
- Vanguard Models
- Duchess of Kingston
- (and 1 more)
-
Thanks, I normally use use two wire strips to set the distance, but I can understand your jig which I might replicate. Thanks for info on the seizing, so that now makes sense to me. I will have a morning practising at some point.
-
I'm still a bit unsure of the move from step from 4 to 5 on the diagram. Also I'm not sure how you can ensure you locate the deadeye at the right length on the shroud lines. I now have some quad hands and plenty of spare blocks and deadeyes so I can experiment.
-
The instructions are clear as day and follow a nice logical sequence. Mine was a simple error. After pre fairing the parts as instructed I simply forgot to fit the mast supports as I had put them away for safe keeping. Old age I'm afraid.
- 382 replies
-
- 2
-
-
- Vanguard Models
- Duchess of Kingston
- (and 1 more)
-
Enjoy the build, it is a nice build and I'm enjoying it so far. If you have not seen James Hatch has a build log of the prototype for this model.
-
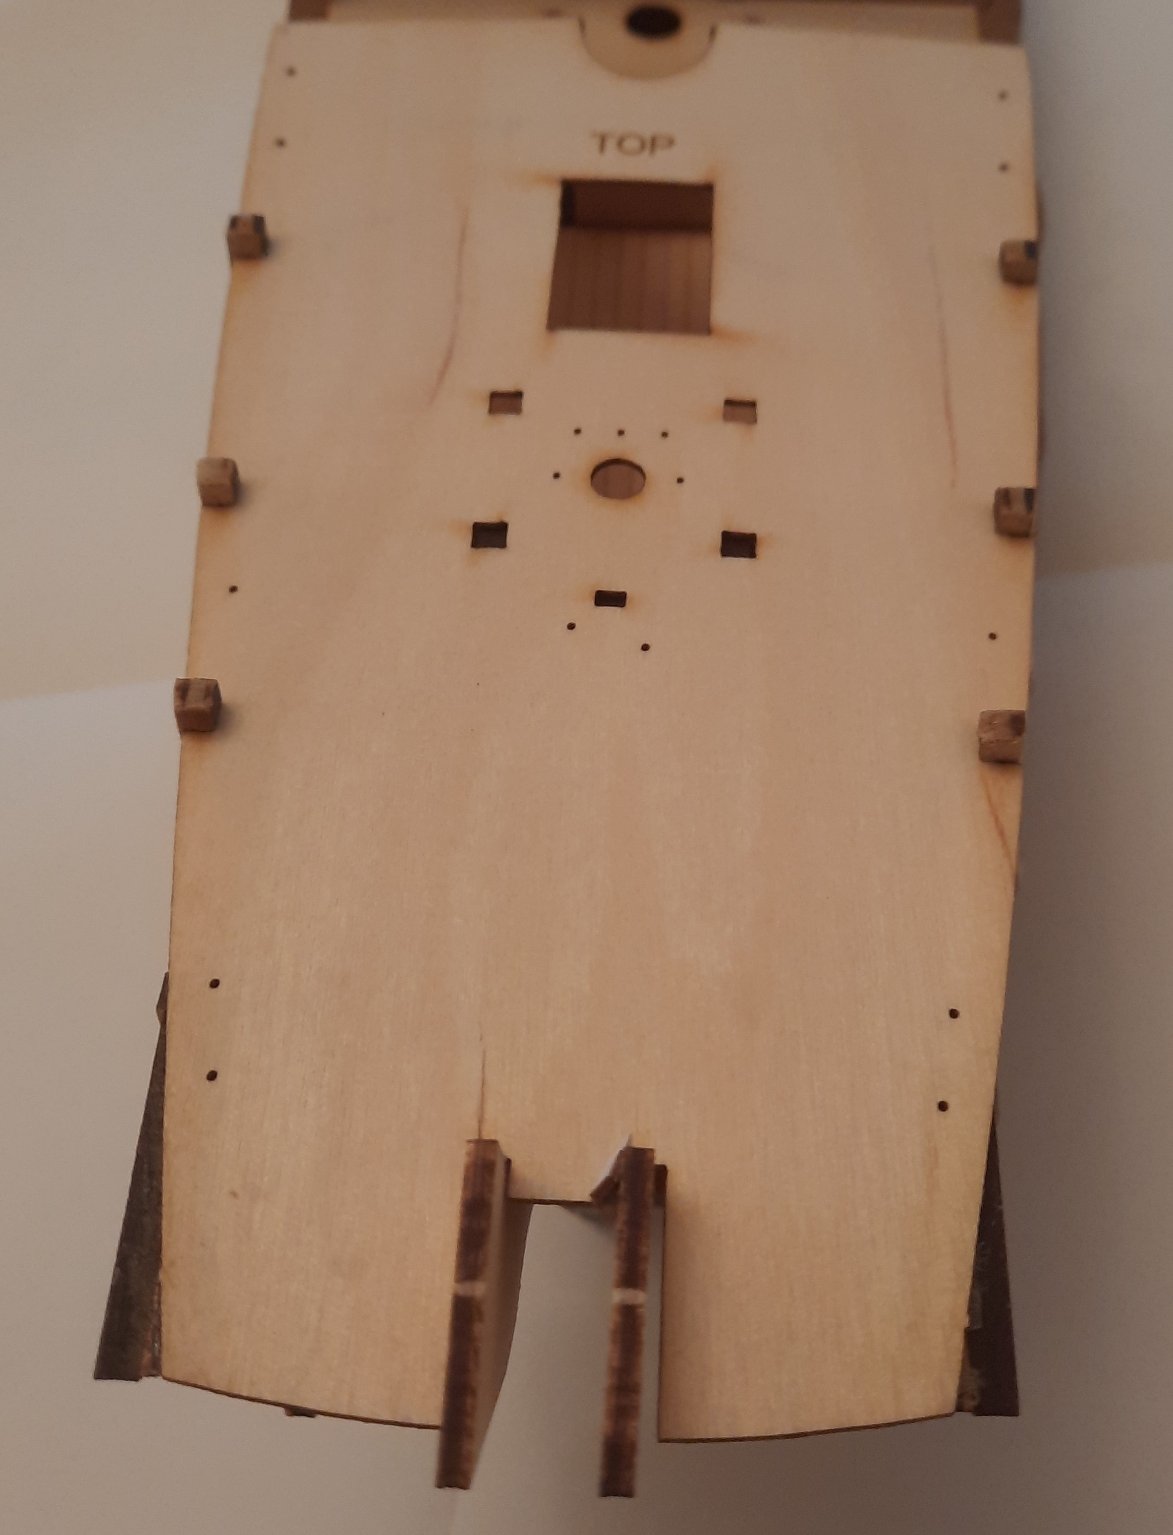
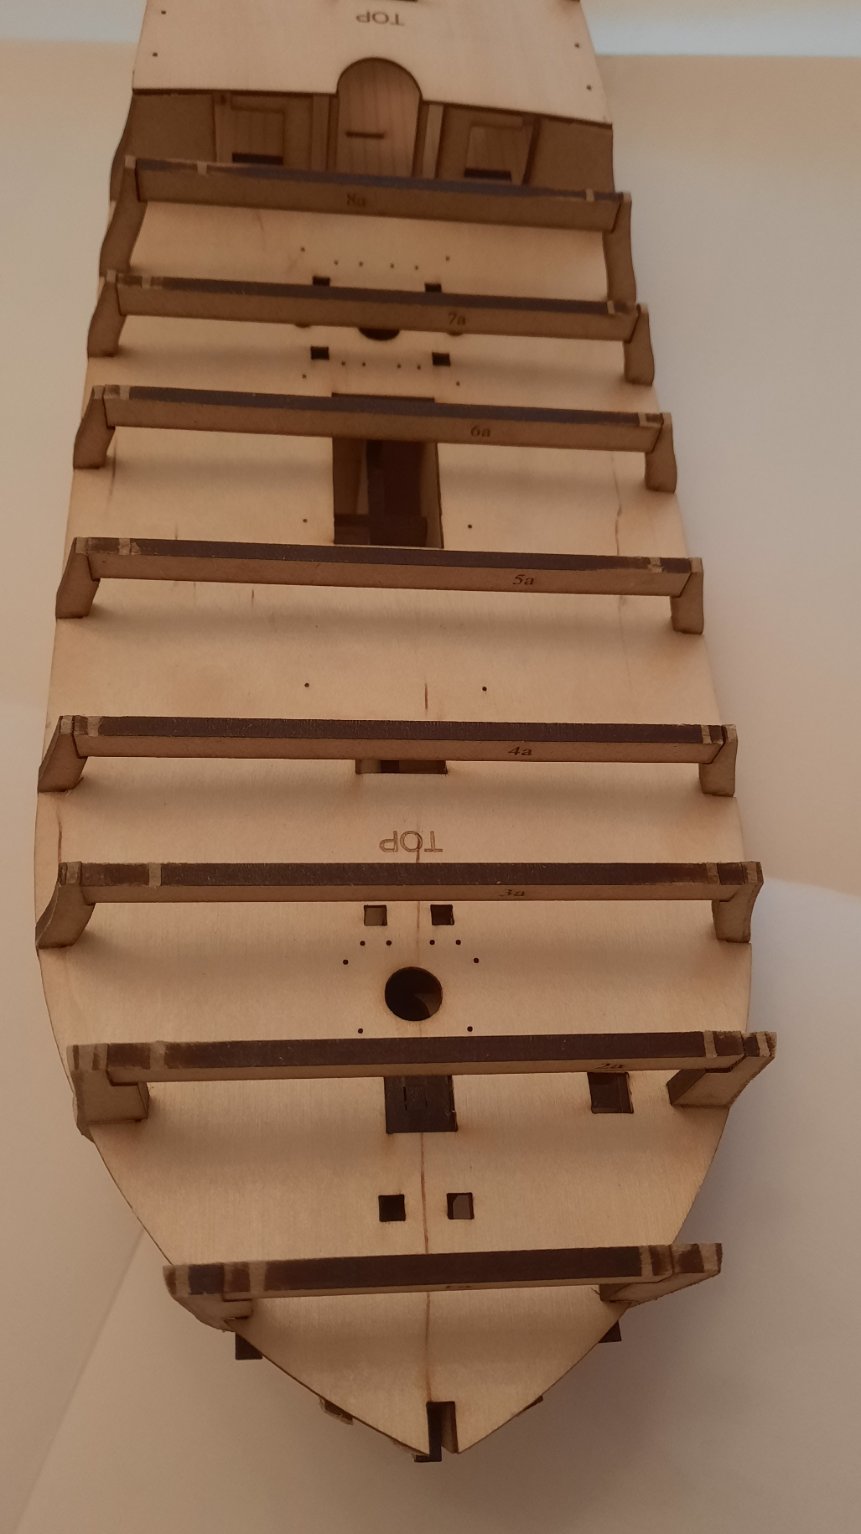
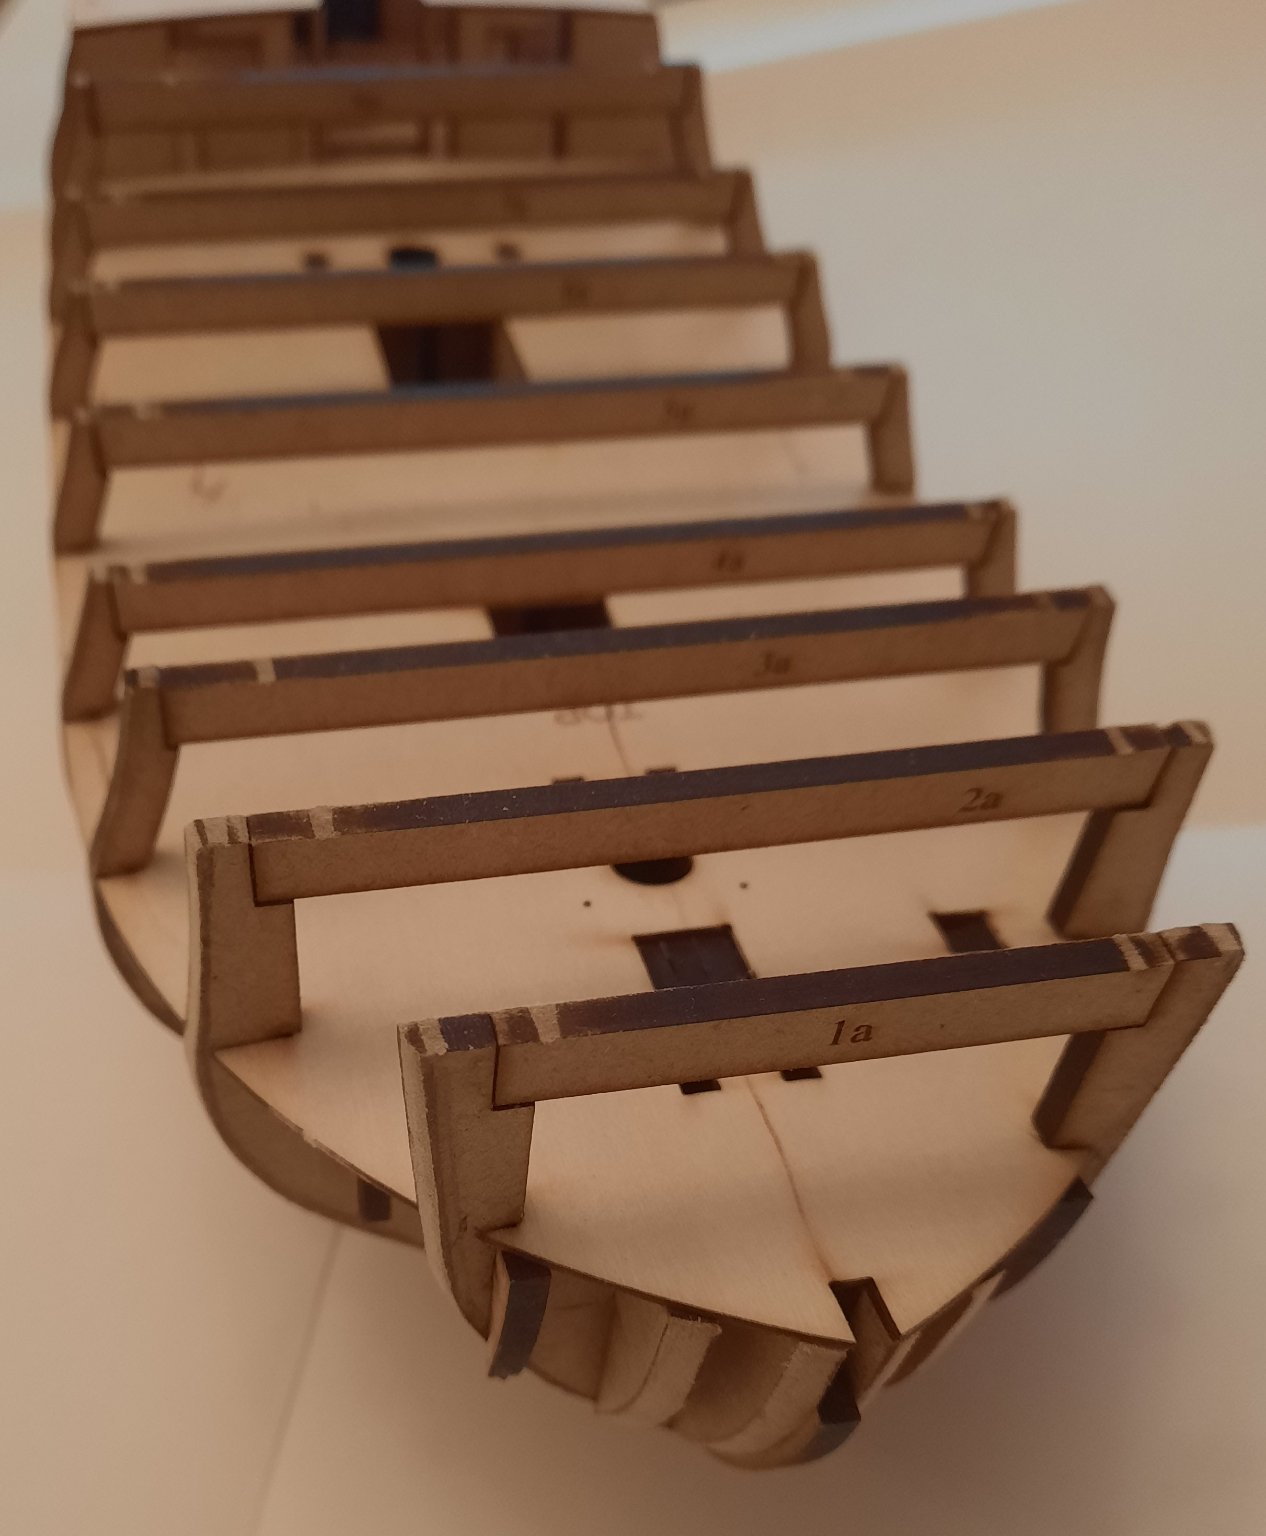
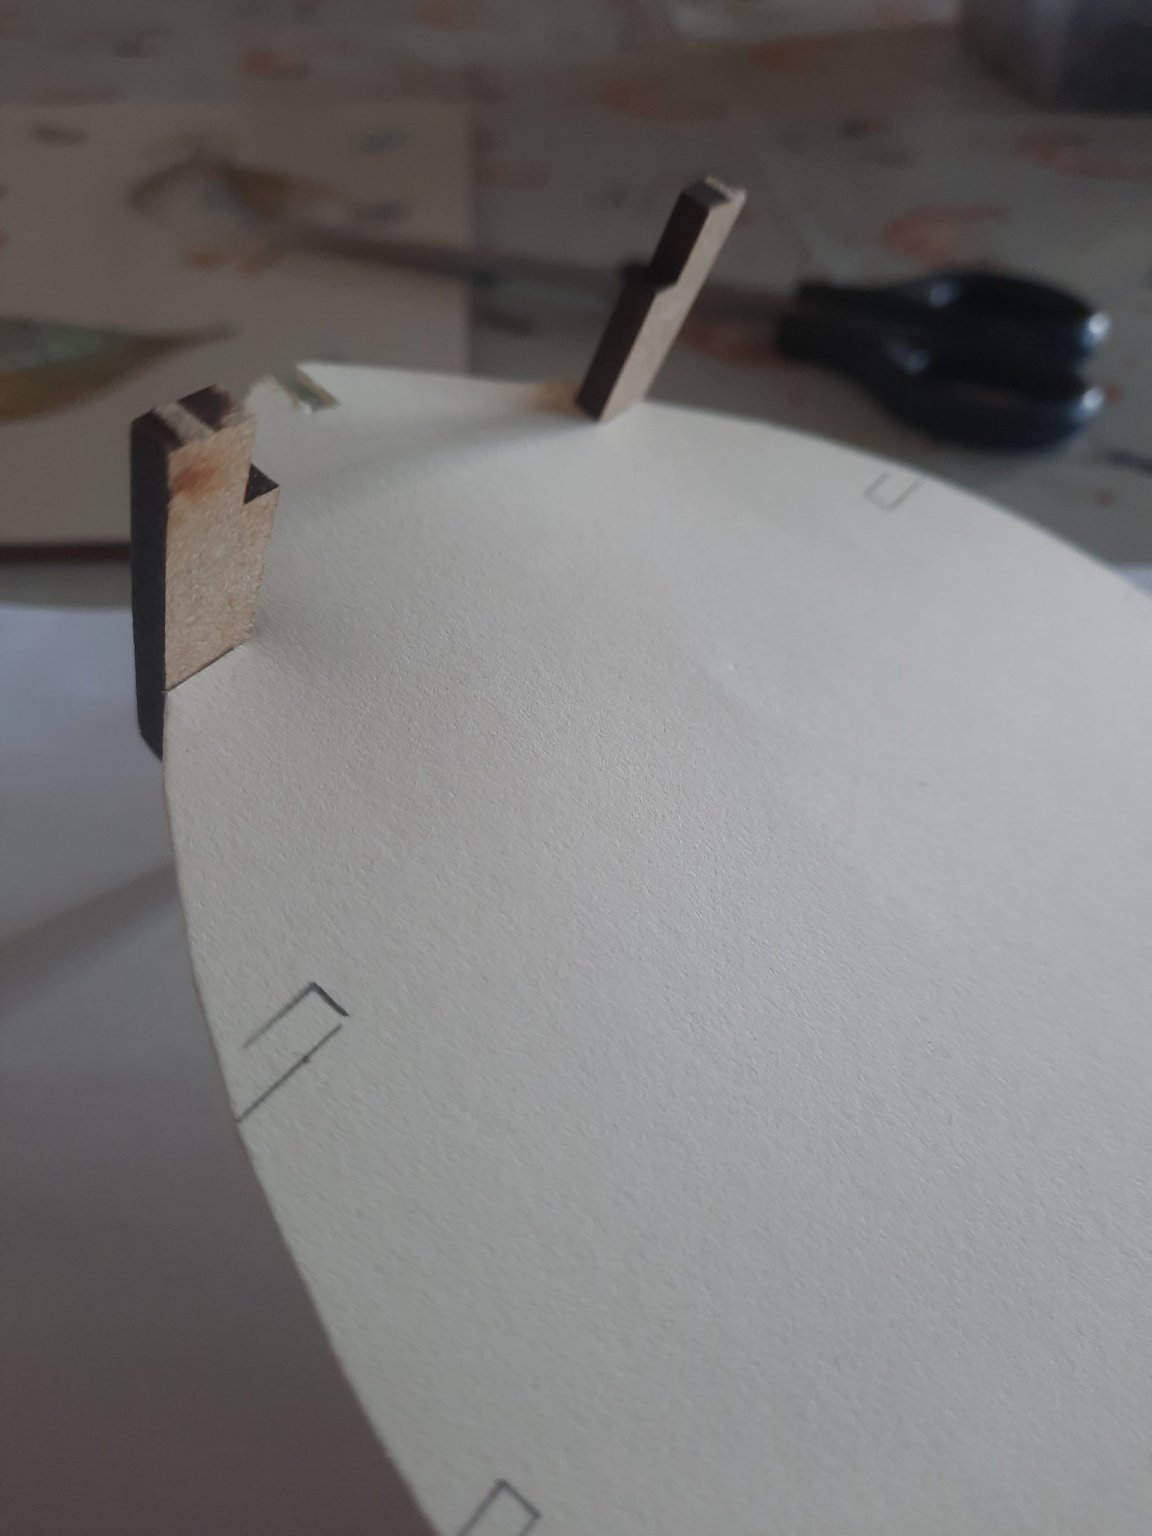
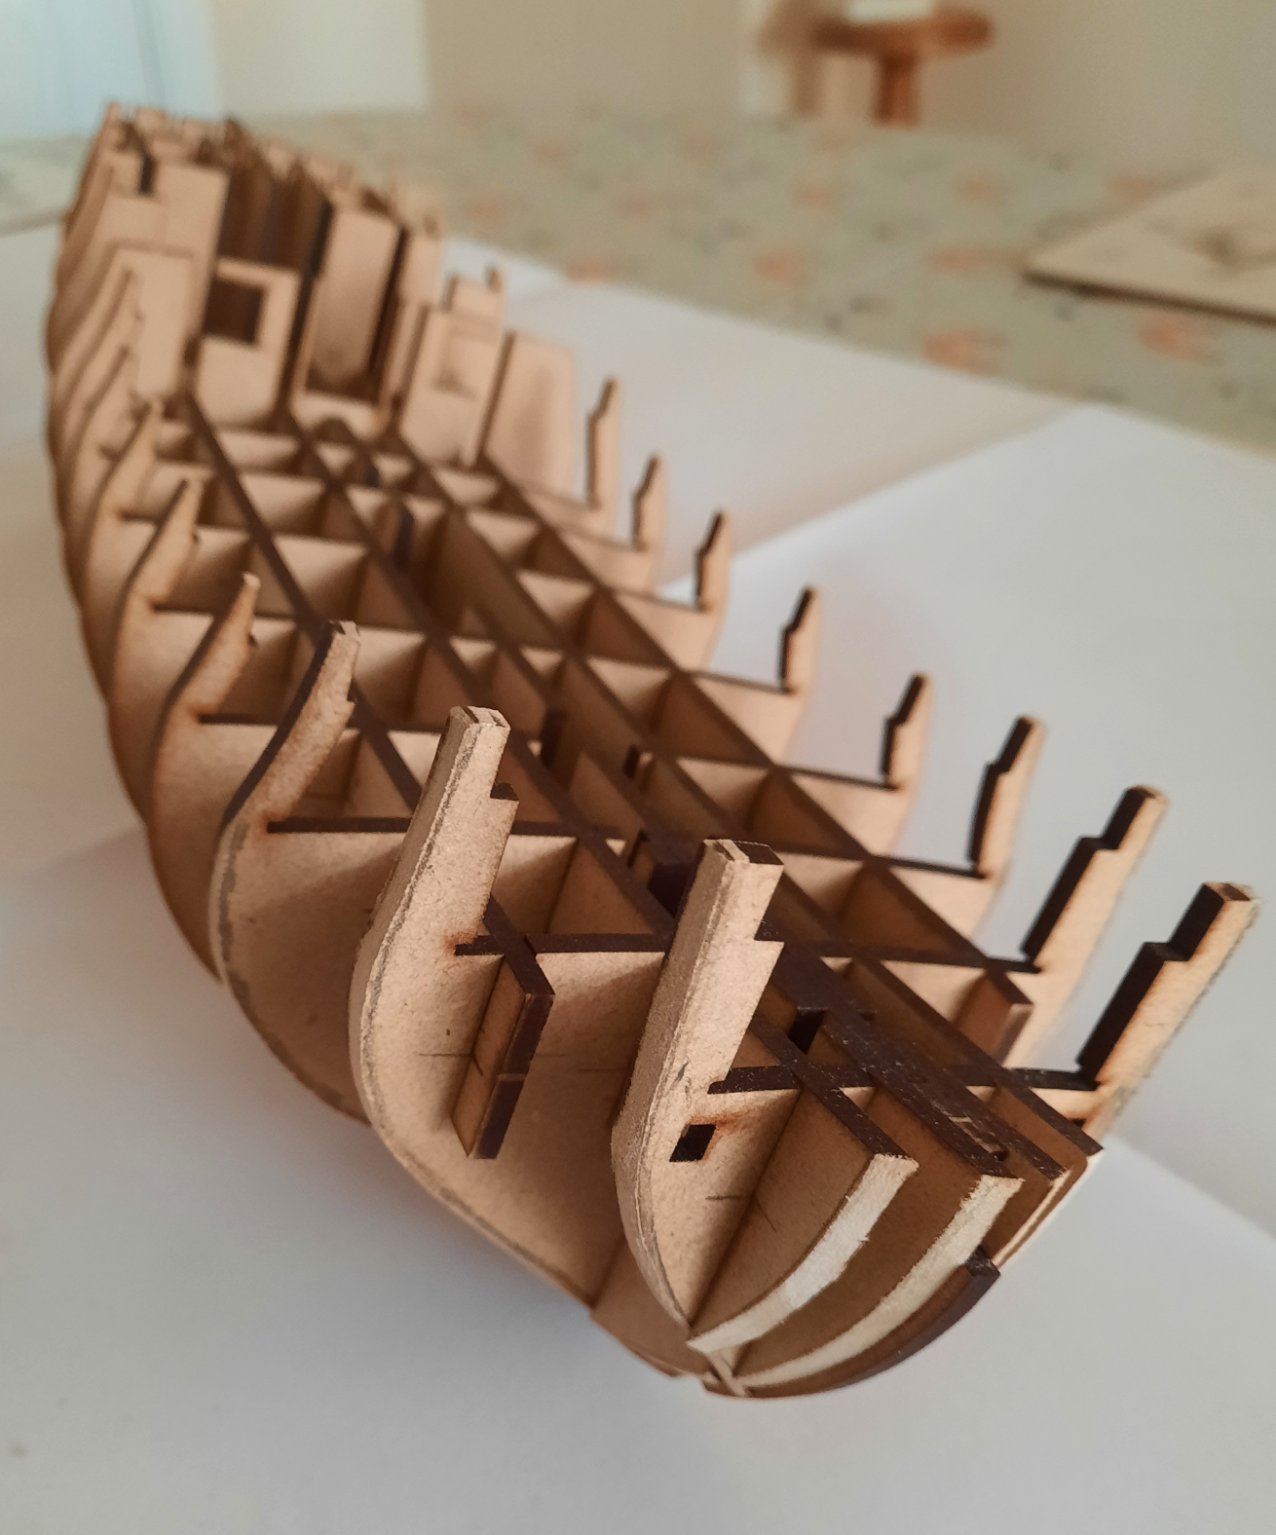
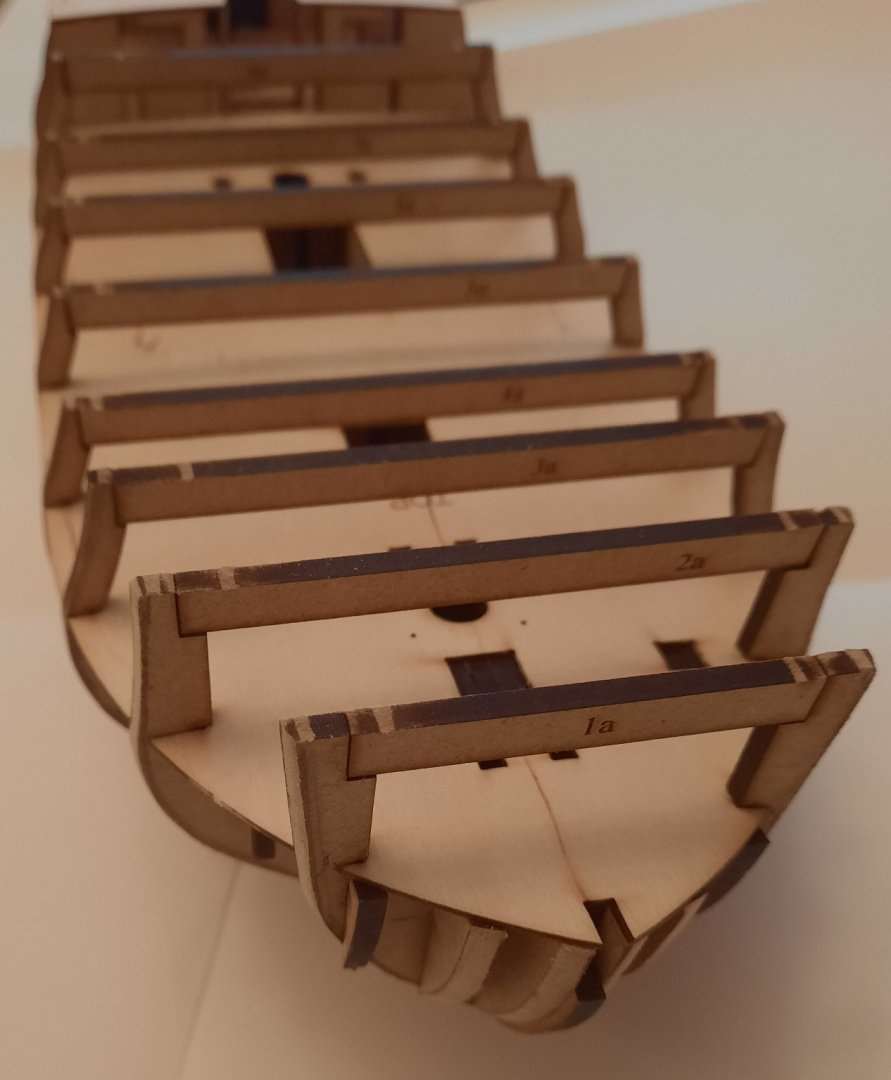
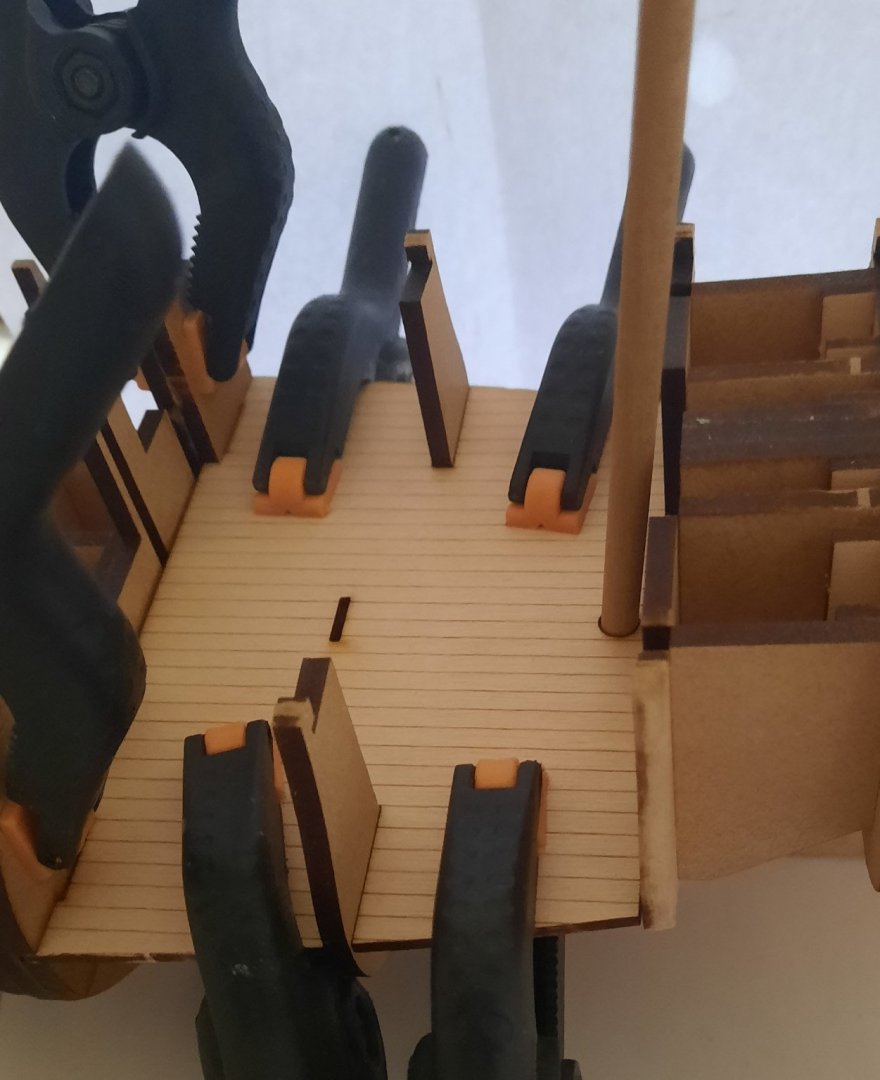
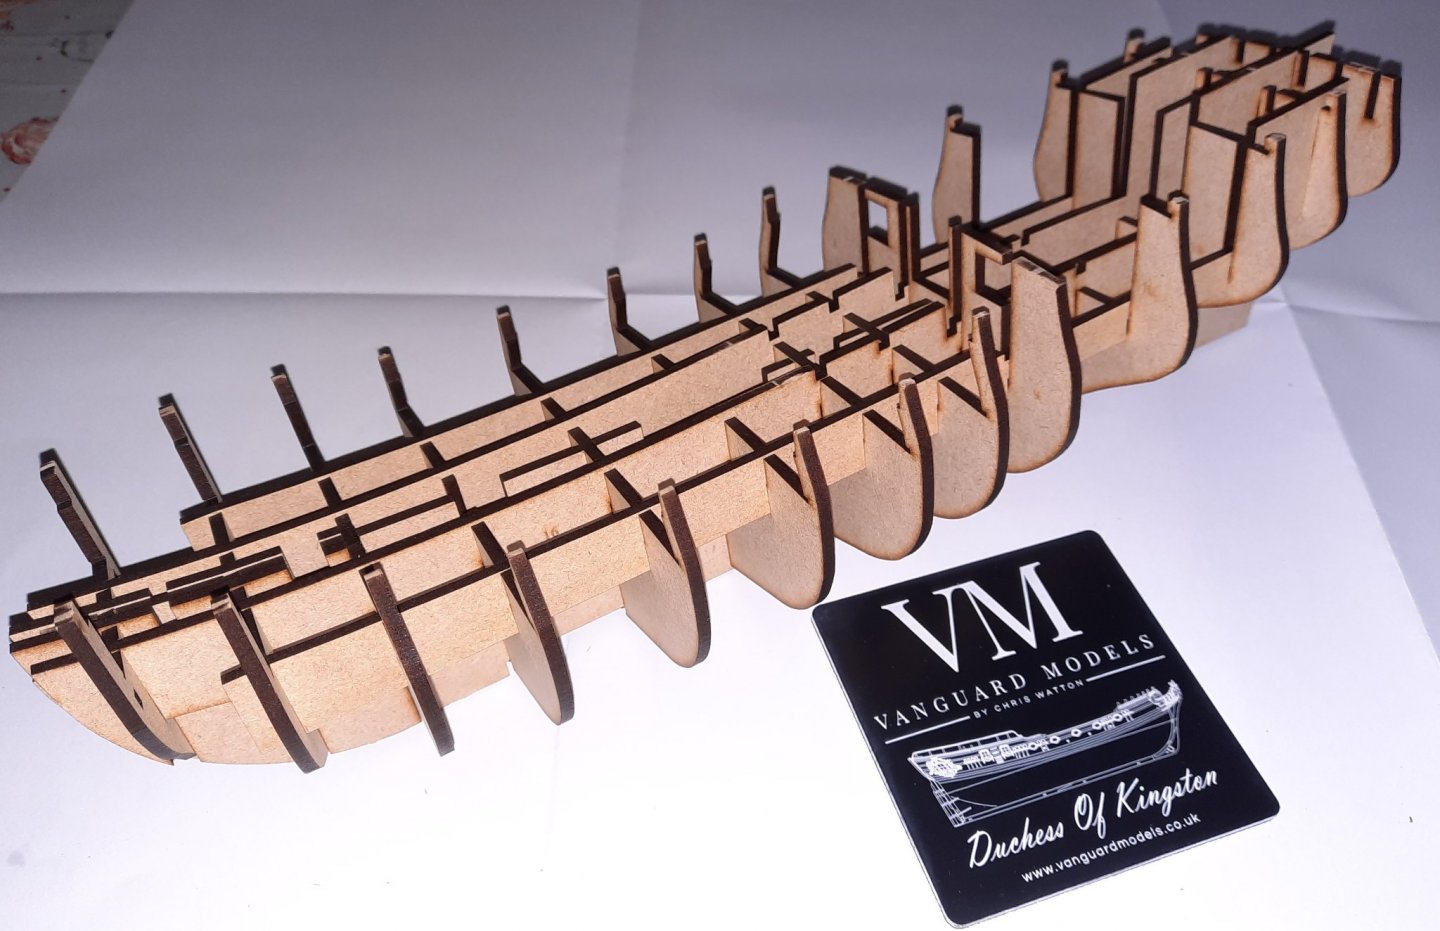
Stage: Hull Construction Build instructions: 45-46 & 50-59 Task: Adding fore and aft decks, temporary cross beams and final stern and bow patterns Parts: 1a – 8a, 18 – 20, 19a, 19b, 19c, 42 & 43 Time Spent: 20 mins Status: Complete Build Notes: This was a straightforward assembly process, with no problems encountered. I started by gluing the two stern quarter filling patterns (20) in place on the outside of the two outer stern patterns (32). I then added the 2 bow patterns (18) and the 2 sets of stern patterns 19, 19a, 19b and 19c I applied plenty of wood glue to the bulkheads and false keel and with relative ease the fore deck (42) was added. Initially the was a slight bit of bowing but after a quick check I noticed that the deck had not fully engaged with one of the locating slots. Once that was fully clicked in to place the deck locked into place. I then repeated the process for the aft deck. I added a couple of pins to the outside edge of the deck where it sits on bulkhead 9 for good measure. The temporary cross beams (1a – 8a) were a nice tight fit, I only had to use a clamp to hold 8a in place. Using a 8mm dowel (not the 8mm dowel supplied with the kit) I decided to check if the dowel would pass through the mast support patterns (14a and 15a). This is easier to check before the hull planking is added. Indication marks were added to the temporary dowel for future reference when the actual masts are ready to be fitted. I now believe the basic hull structure is complete and ready for the fairing process. I must congratulate Chris Watton for his work; the design has been well thought out and quality of the material supplied is very good. The build instructions are easy to follow with plenty of good quality photos.


- 382 replies
-
- 10
-
-
- Vanguard Models
- Duchess of Kingston
- (and 1 more)
-
Totally agree James. When I discovered the two left over pieces my initial reaction was I wonder when they need to be fitted and scanned ahead in the manual. I was gutted when I eventually discovered I had missed fitting them prior to adding part 15
- 382 replies
-
- 2
-
-
- Vanguard Models
- Duchess of Kingston
- (and 1 more)
-
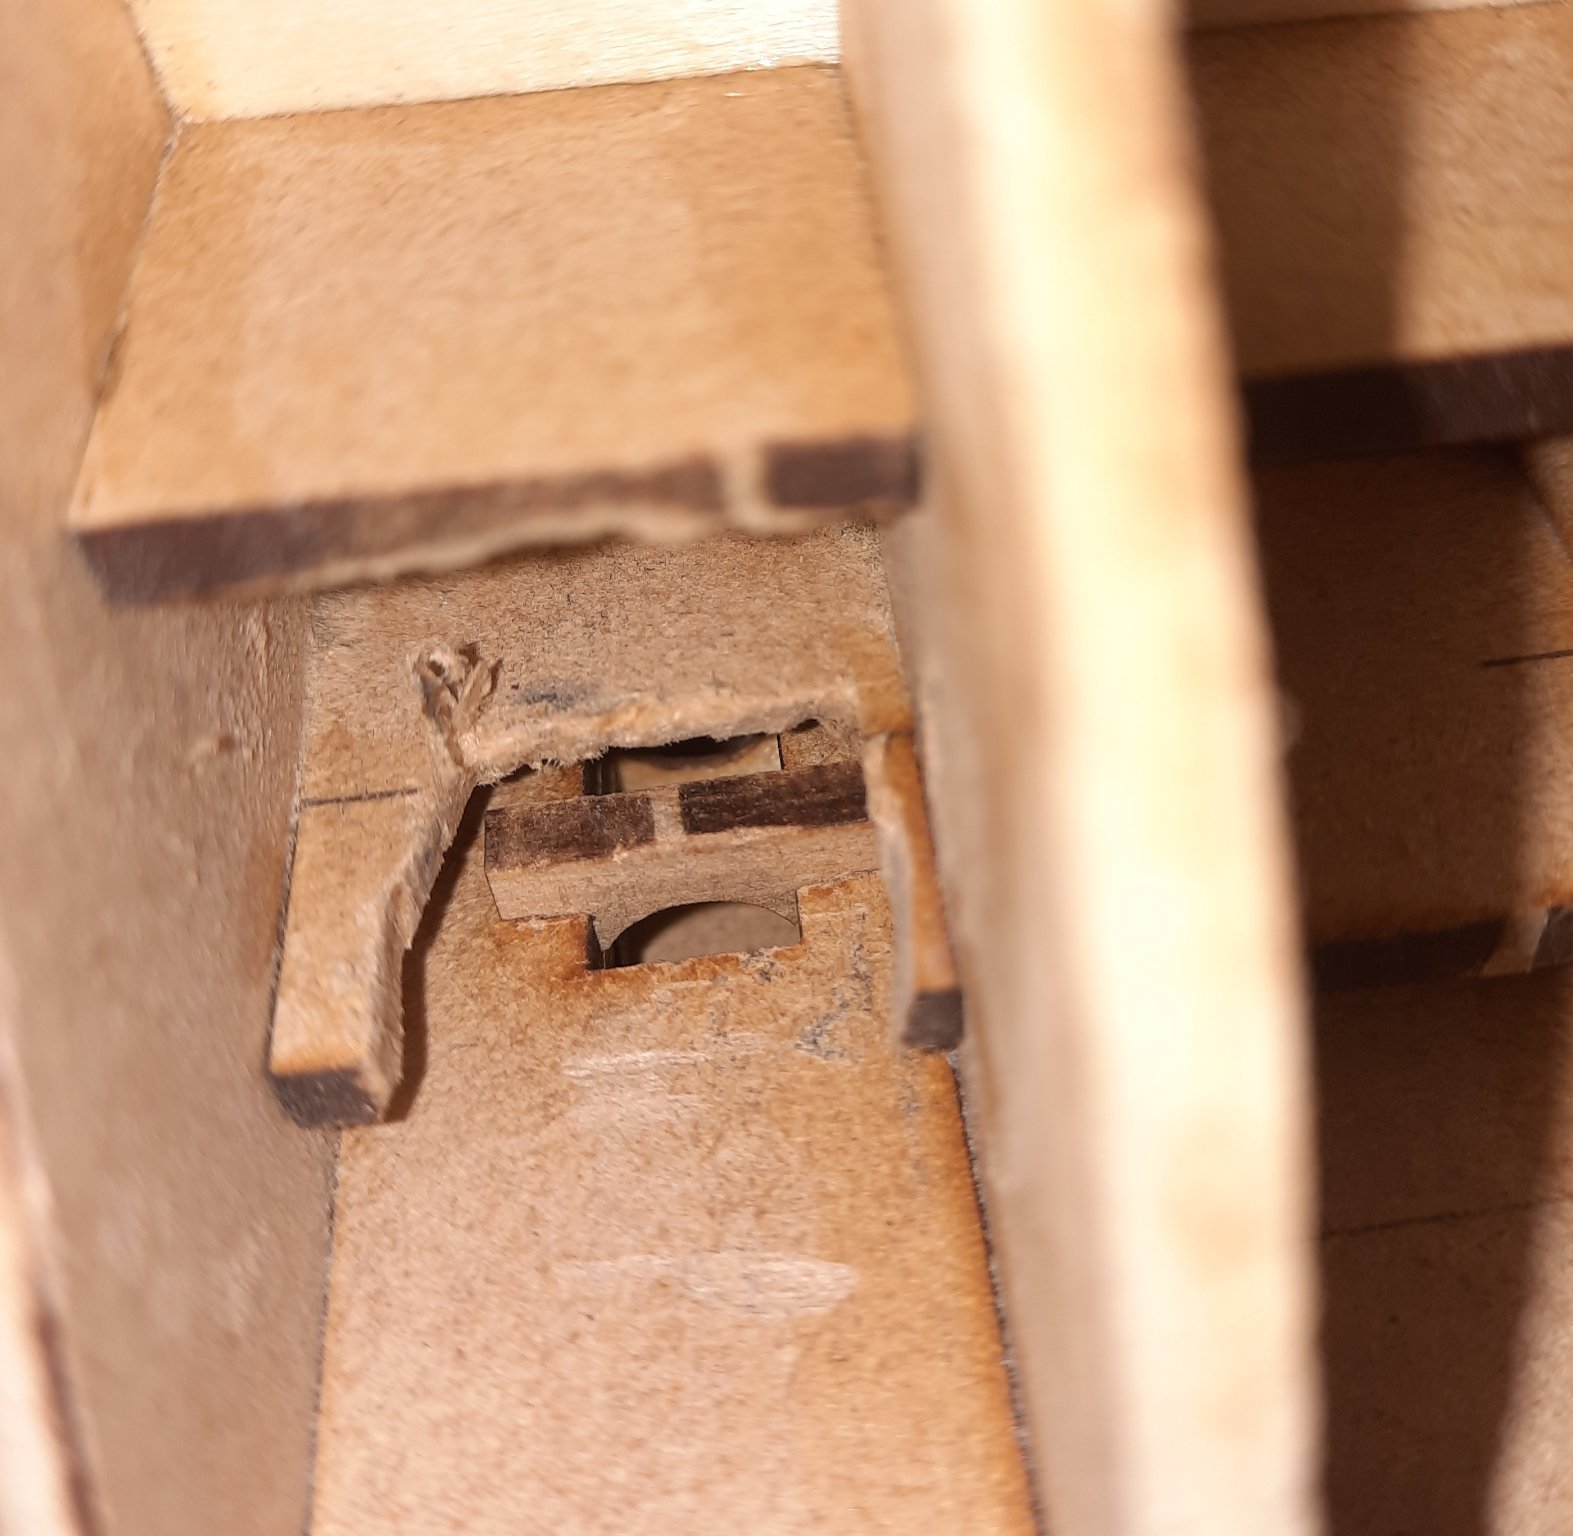
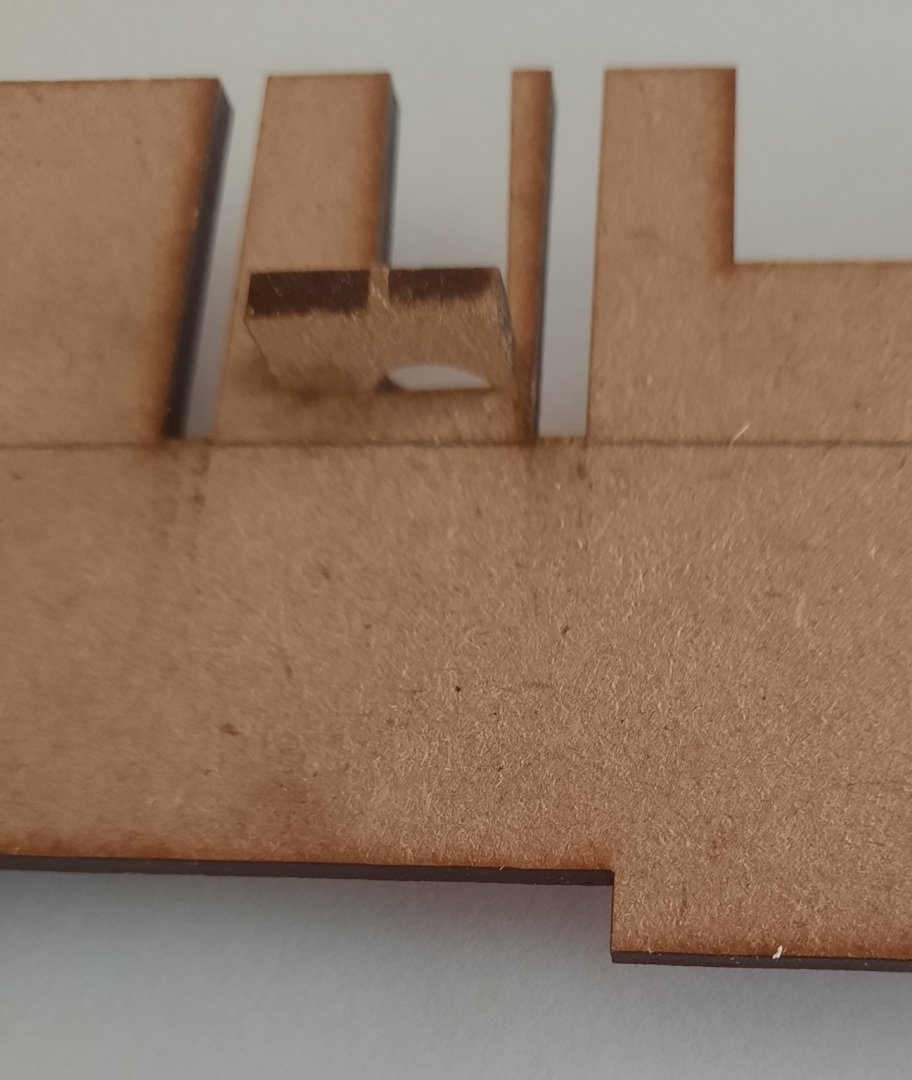
Hit my first snag this afternoon, when I realised I had failed to fit the fore mast supports (2 x 15a) to the bow patterns 15 prior to their installation to the false keel. The inner longitudinal strip (16) needed a bit of modification work in order to retro fit missing mast supports. Thankfully this mofification has not affected the hull integrity and will be hidden from view after the 1st planking has been completed.

- 382 replies
-
- 5
-
-
- Vanguard Models
- Duchess of Kingston
- (and 1 more)
-
It is a very well designed kit, everything fits together so well so far.
-
It is a very well designed kit, everything fits together so well so far.
-
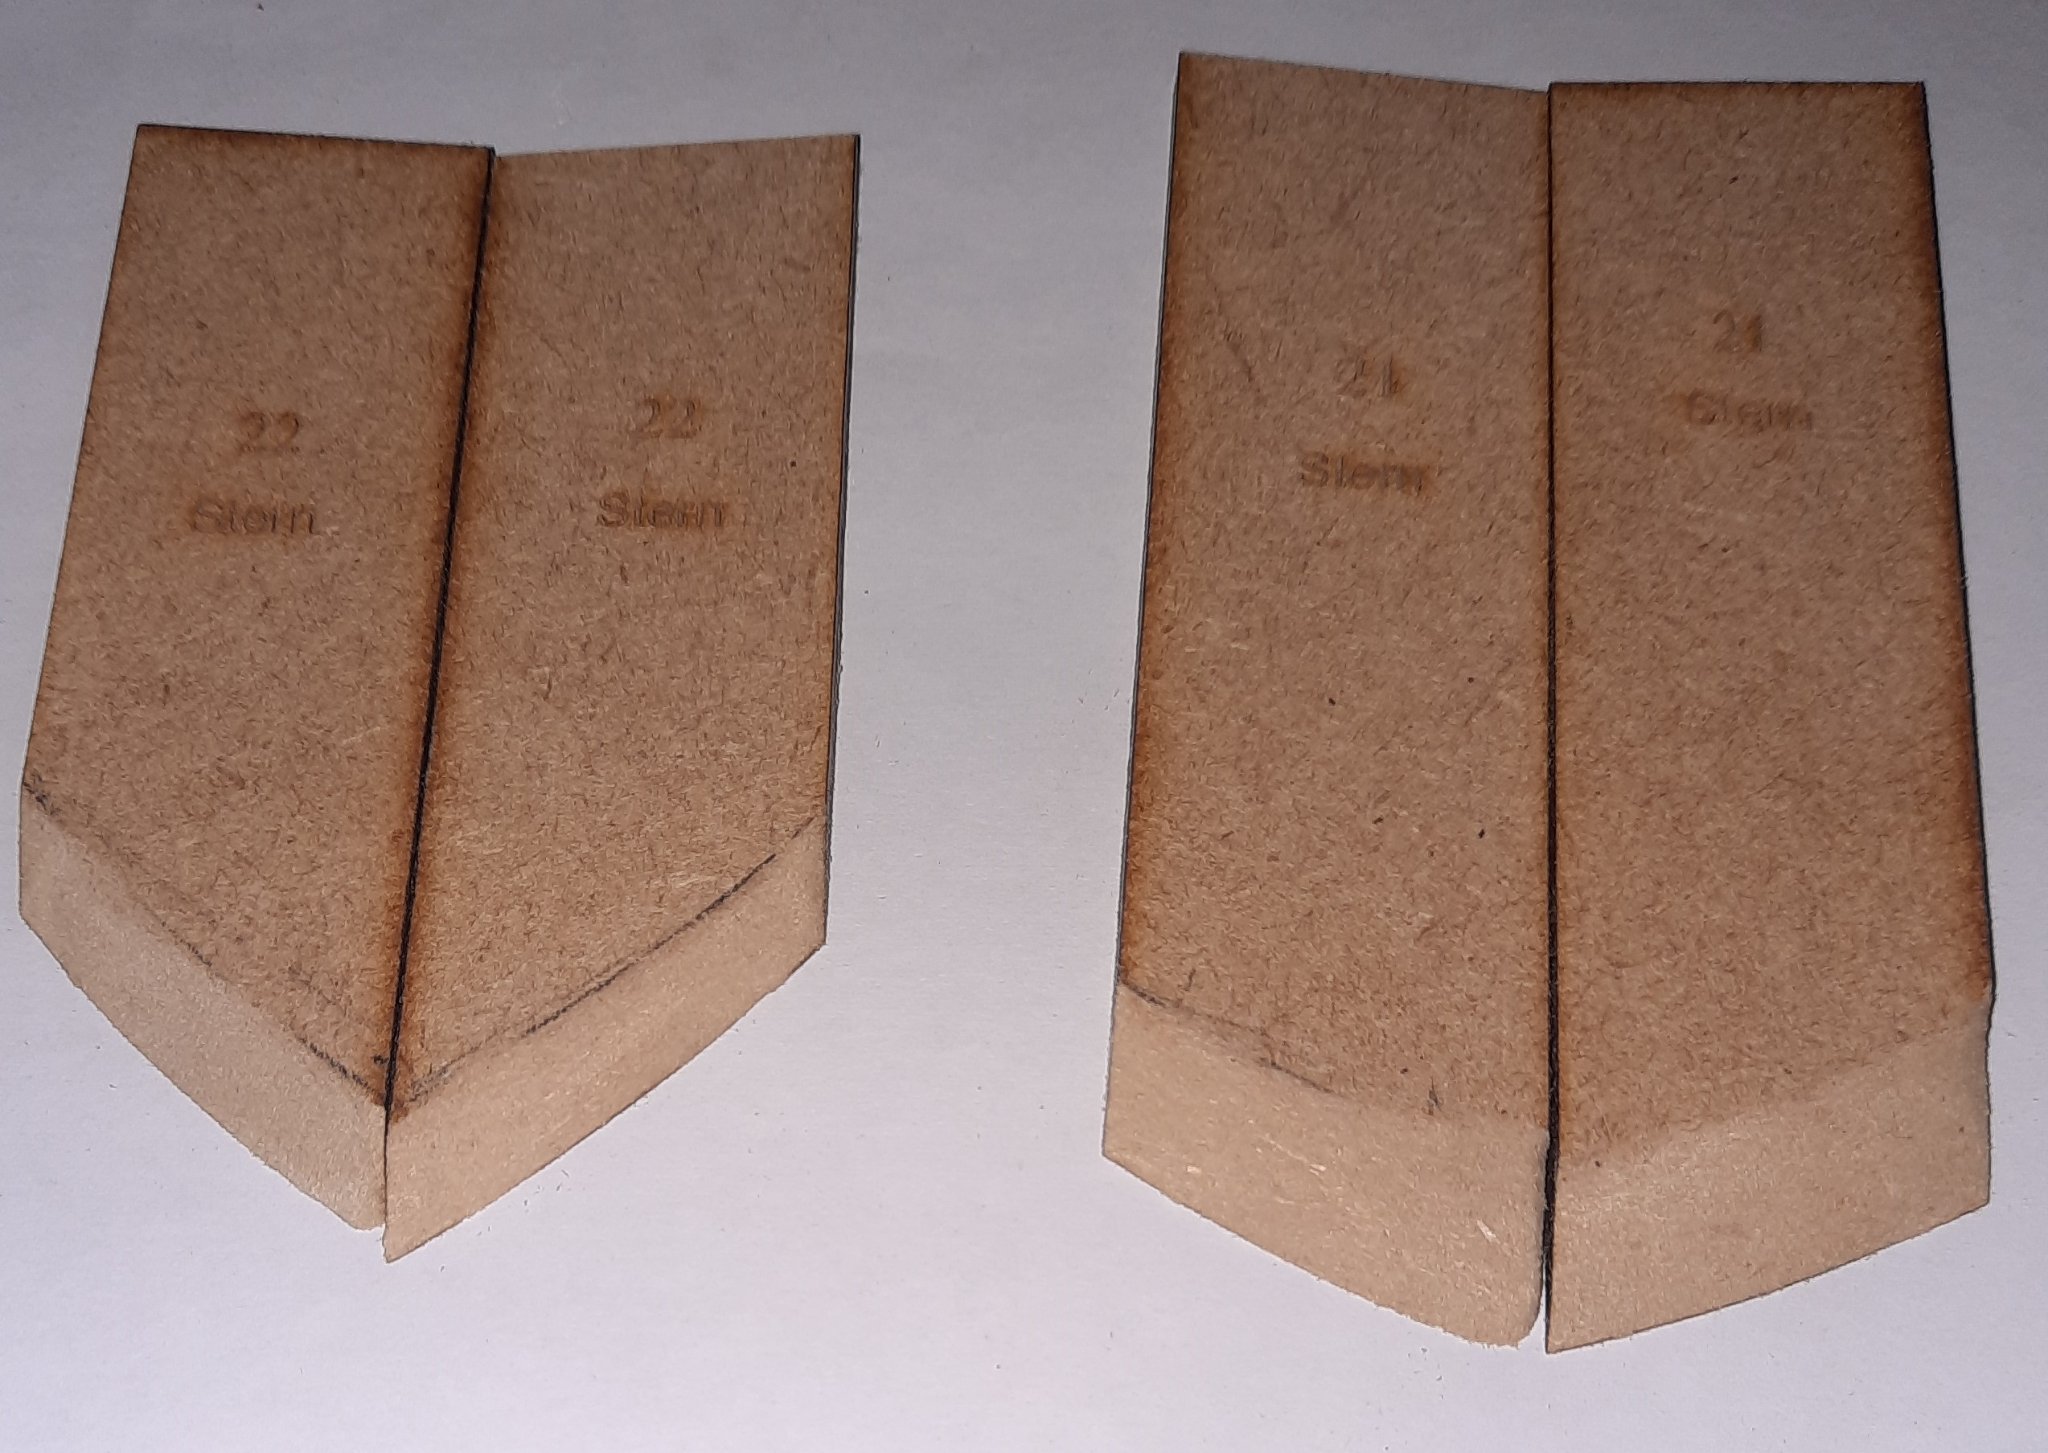
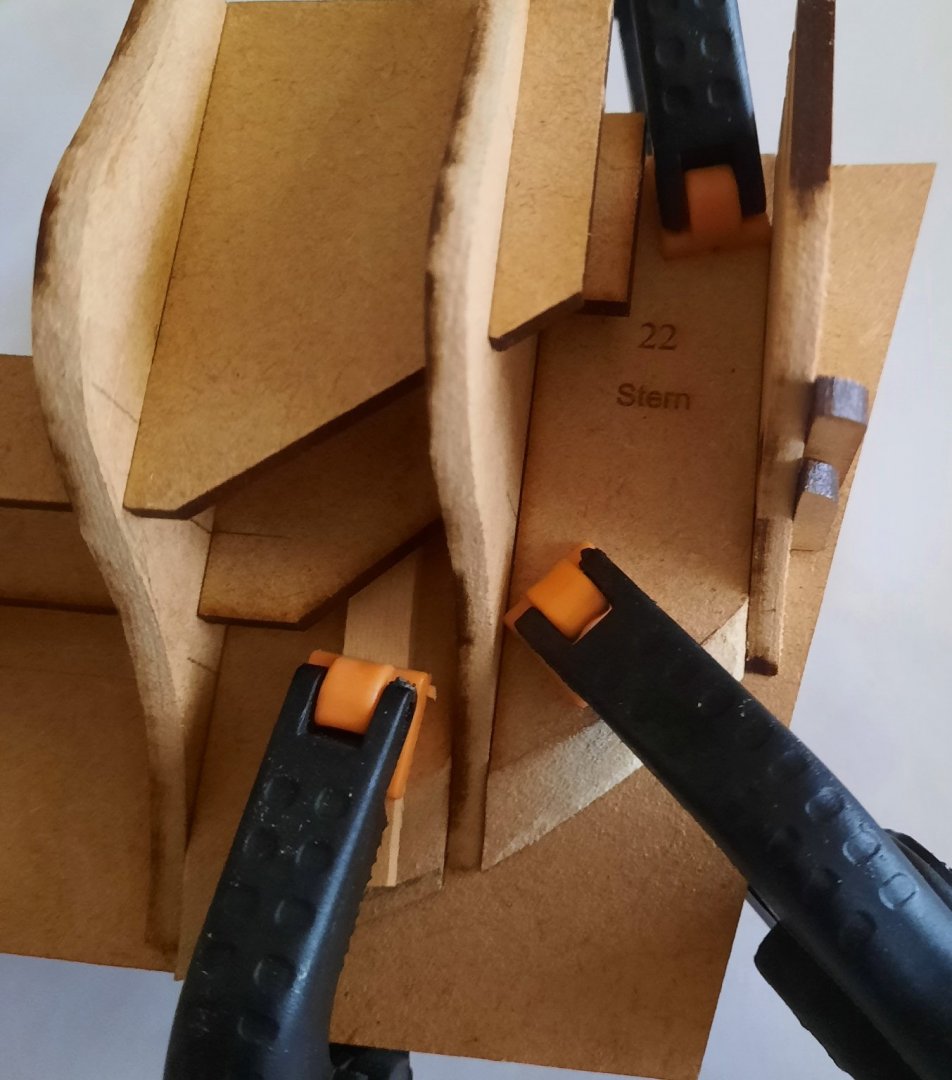
Stage: Hull Construction Build instructions: 29 – 44 & 47-49 Task: Adding stern patterns, cabin supports, deck supports & thickening patterns Parts: 212-25, 29-32 Time Spent: 30 mins Status: Complete Build Notes: This was a straightforward assembly process, with no problems encountered. I started by dry fitted the 2 main deck rear supports (23) and the 2 mid cabin front deck supports (24). I did not encounter any problems fitting these parts. I then decided to jump ahead to build instructions 47 to 49 which is where the stern patterns (2 x 21 and 2 x 22) are fitted. With the patterns dry fitted I was able to make a pre fairing line. Using my Dremel 3000 on a slow speed setting and a needle file it did not take too long to complete the process. I did air on the side of safety once again knowing any excess will be removed during the final fairing once the hull has been fully assembled. The parts were glued and clamped in place. I used a couple of wooden strips aid the clamping of the 2 stern patterns 21. Once I was totally happy the bulkheads, longitudinal strips and deck supports were fully seated I applied a diluted wood glue solution, using a small paint brush, to the all the joints. Next I added the 6 off stern patterns (2 x 30, 2 x 31 and 2 x 32). These pieces were a good tight fit and made a nice click noise when fully seated. I also dry fitted parts 19 and 19a at this stage to make sure there were no issues. I was very pleased to note that the stern patterns, when fully seated, rested nicely on the upper stern patterns (2 x 19) The final task for this build session was to fit the Main Cabin Deck (29) and the two thickening patterns (25). With the deck in place I also checked the mizzen mast fitting.


- 382 replies
-
- 8
-
-
- Vanguard Models
- Duchess of Kingston
- (and 1 more)
-
Thanks, I'm going to take my time and dry fit the next few parts before glueing the bulkheads to make sure there are no unforeseen problems.
- 382 replies
-
- 2
-
-
- Vanguard Models
- Duchess of Kingston
- (and 1 more)
-
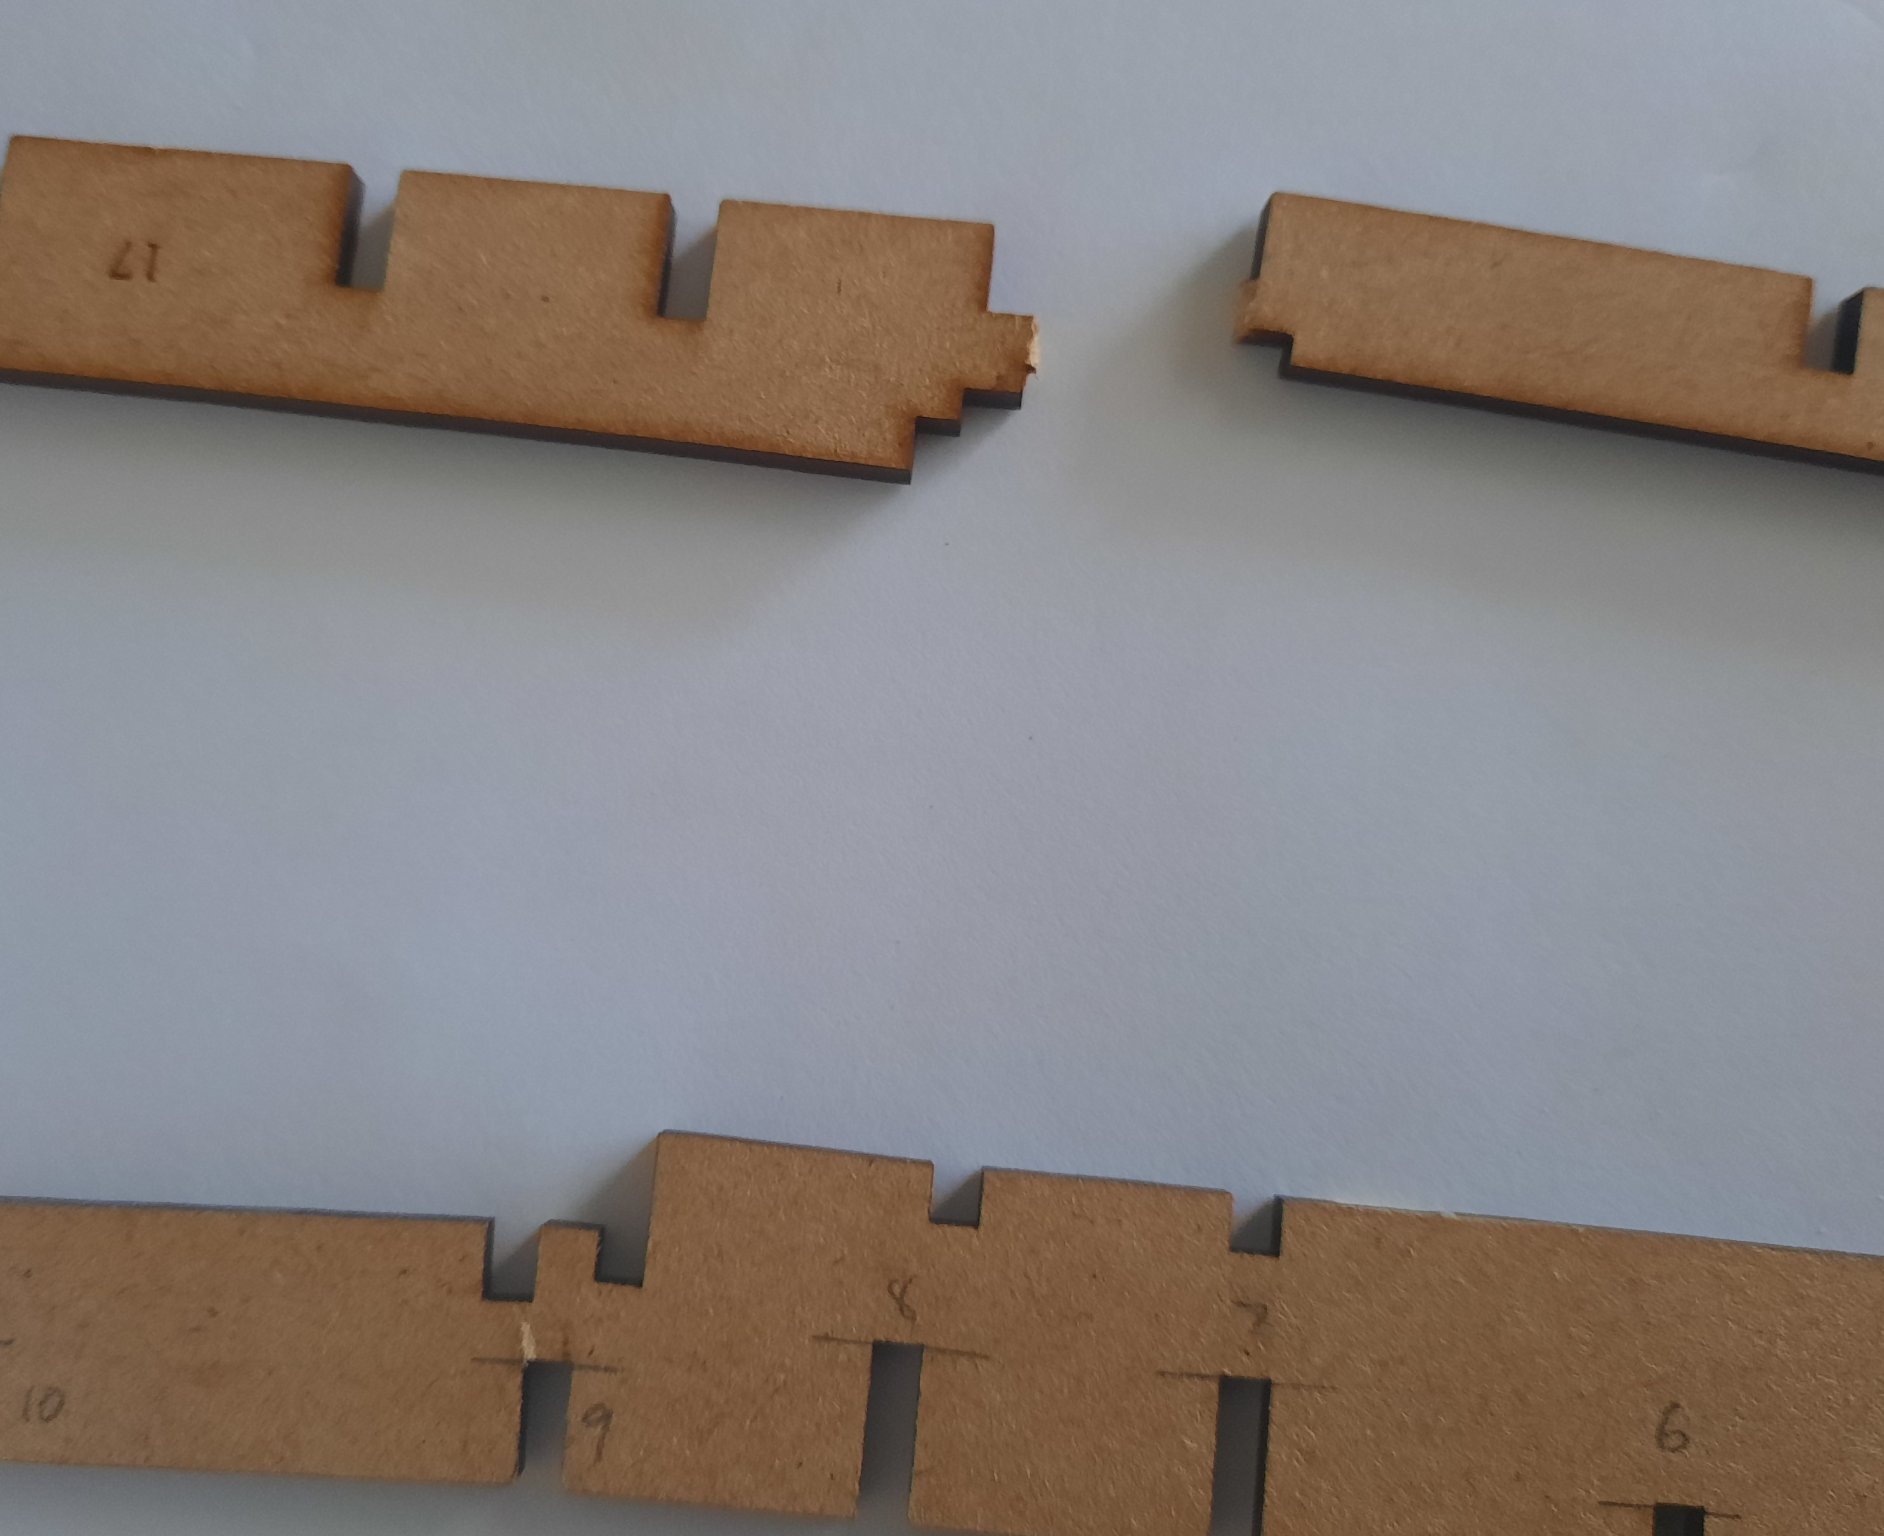
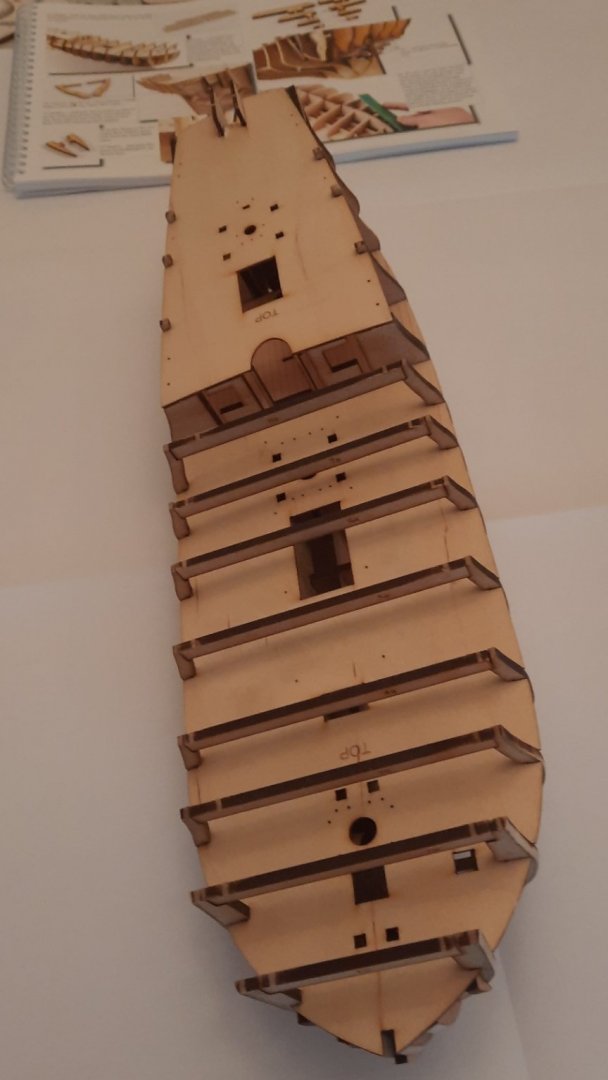
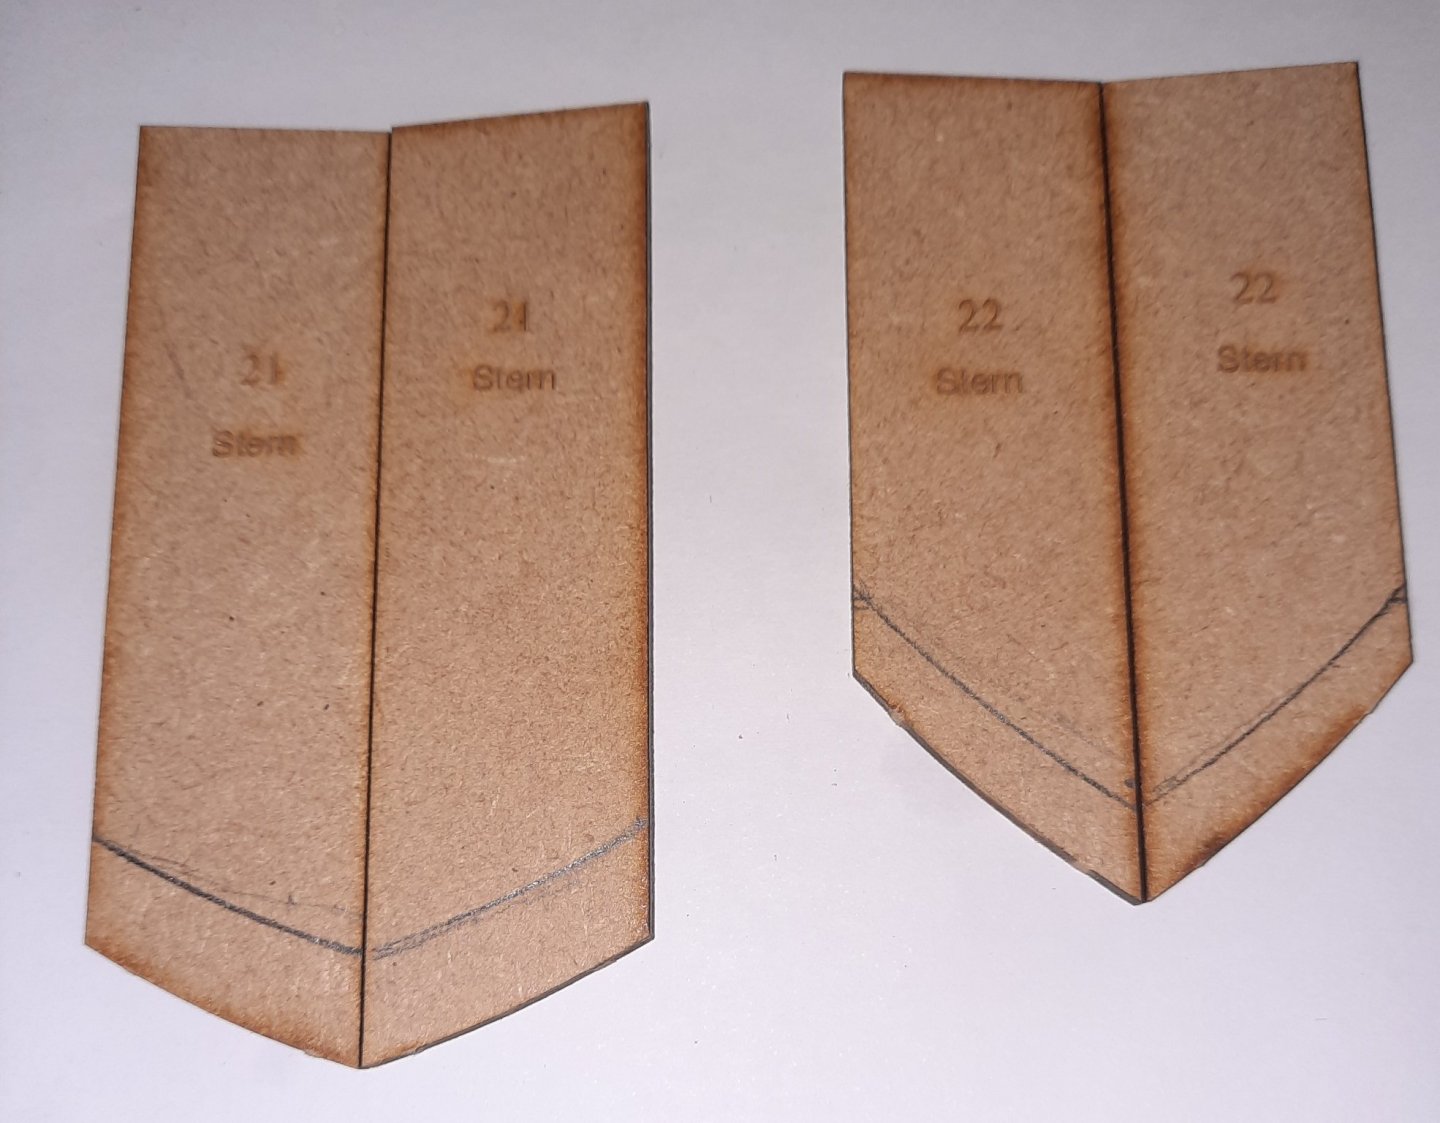
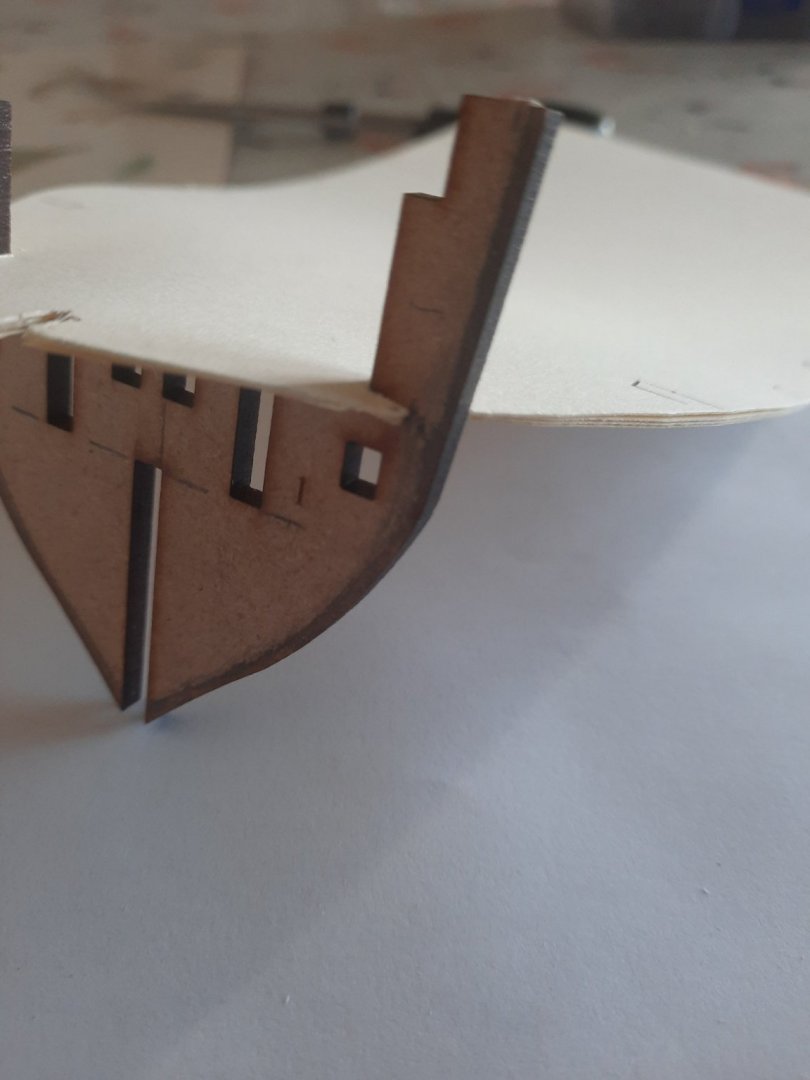
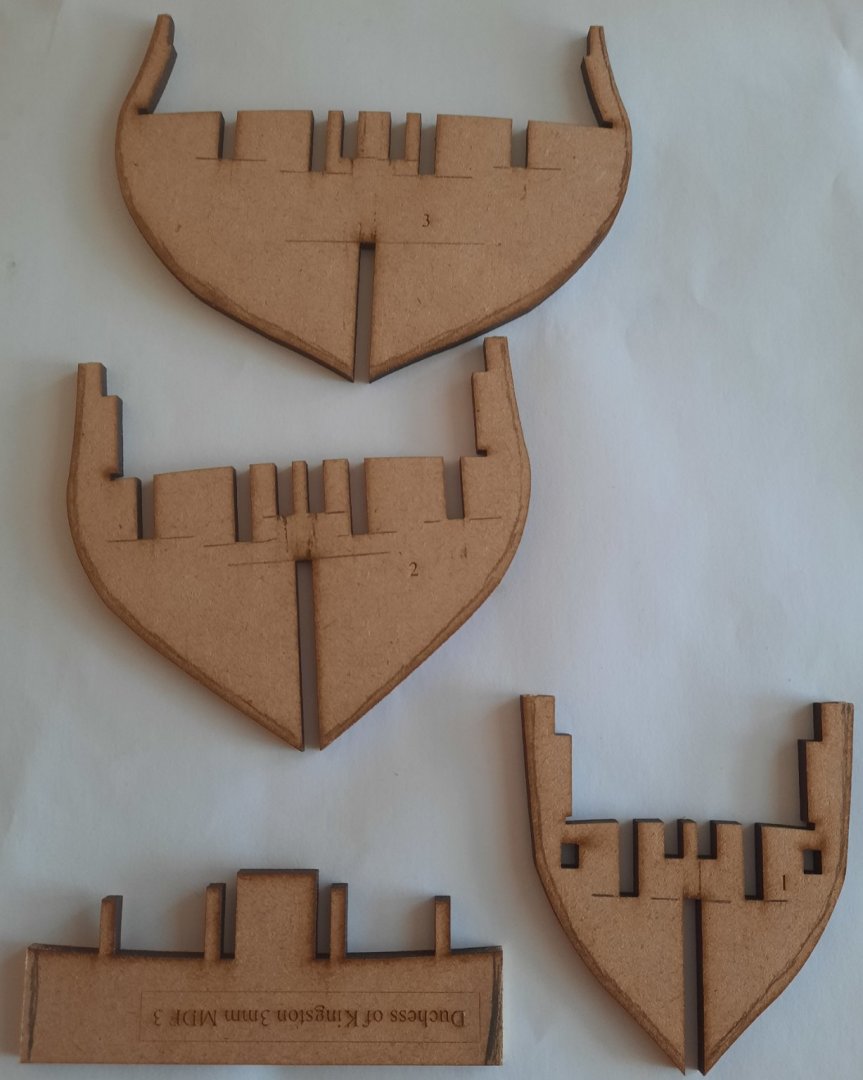
Stage: Hull Construction Build instructions: 10-28 inclusive Task: Fairing and fitting bulkheads to false keel Parts: 1 to 17 Time Spent: 60 mins + 60 mins preparation work Status: Complete Build Notes: Bulkheads 1-3 & 11-13 need to be partly faired before they are fitted to the false keel (14). The same is true with the 2 x bow support patterns (15) and the 2 x inner longitudinal strips (16). To help get a better idea of the amount of fairing required I made a template of the fore deck using some stiff card. I found this to be of great benefit. I have added a couple of photos to show this. I added a pencil line to the bulkheads to indicate the amount of pre fairing required, airing on the side of safety noting the final fairing would be completed once the decks have been fitted. I used my Dremel 3000, on its slowest speed with a 400+ grit sanding wheel, to apply the required fairing. I made sure I did not extend past by pencil lines. I also used one of my thin sanding sticks to finish off the pre-fairing. I have attached a picture of the completed pieces. I did find it necessary to slightly enlarge the slots in bulkhead 10 that are used to locate with the longitudinal strips 16 and 17 using one of my needle files as I found this bulkhead was very tight fitting compared with all the other bulkheads. Bulkheads (1-13) were added to the false keel without any problems. Next I added the two bow support patterns (15) and finally the 4 longitudinal strips (2 x 16 and 2 x 17) were added. I took my time fitting the inner longitudinal strips (16) ensuring all the bulkheads were lining up with the slots. Once all the longitudinal strips were fully inserted the hull became very secure. I was incredibly pleased with how the hull is now looking, which is a great testament to the attention to detail with Chris Watton’s design work. Pictures of completed stage have been added. Build Photo(s): Pre marking the bulkheads with template Pre faired bulkhead, support patterns and longitudinal strips Hull assembly with parts 1 -17 fitted


- 382 replies
-
- 10
-
-
- Vanguard Models
- Duchess of Kingston
- (and 1 more)
-
Stage: Hull Construction Build instructions: 6-9 Task: Fitting Main Support Pattern to False Keel Parts: 14 & 14a Time Spent: 5 mins Status: Complete Build Notes: This was a straightforward task. It is important to make sure that part 14a is fully locked into place. Once in place I brushed some diluted wood glue around the joins. Build Photo(s):
- 382 replies
-
- 8
-
-
- Vanguard Models
- Duchess of Kingston
- (and 1 more)
-
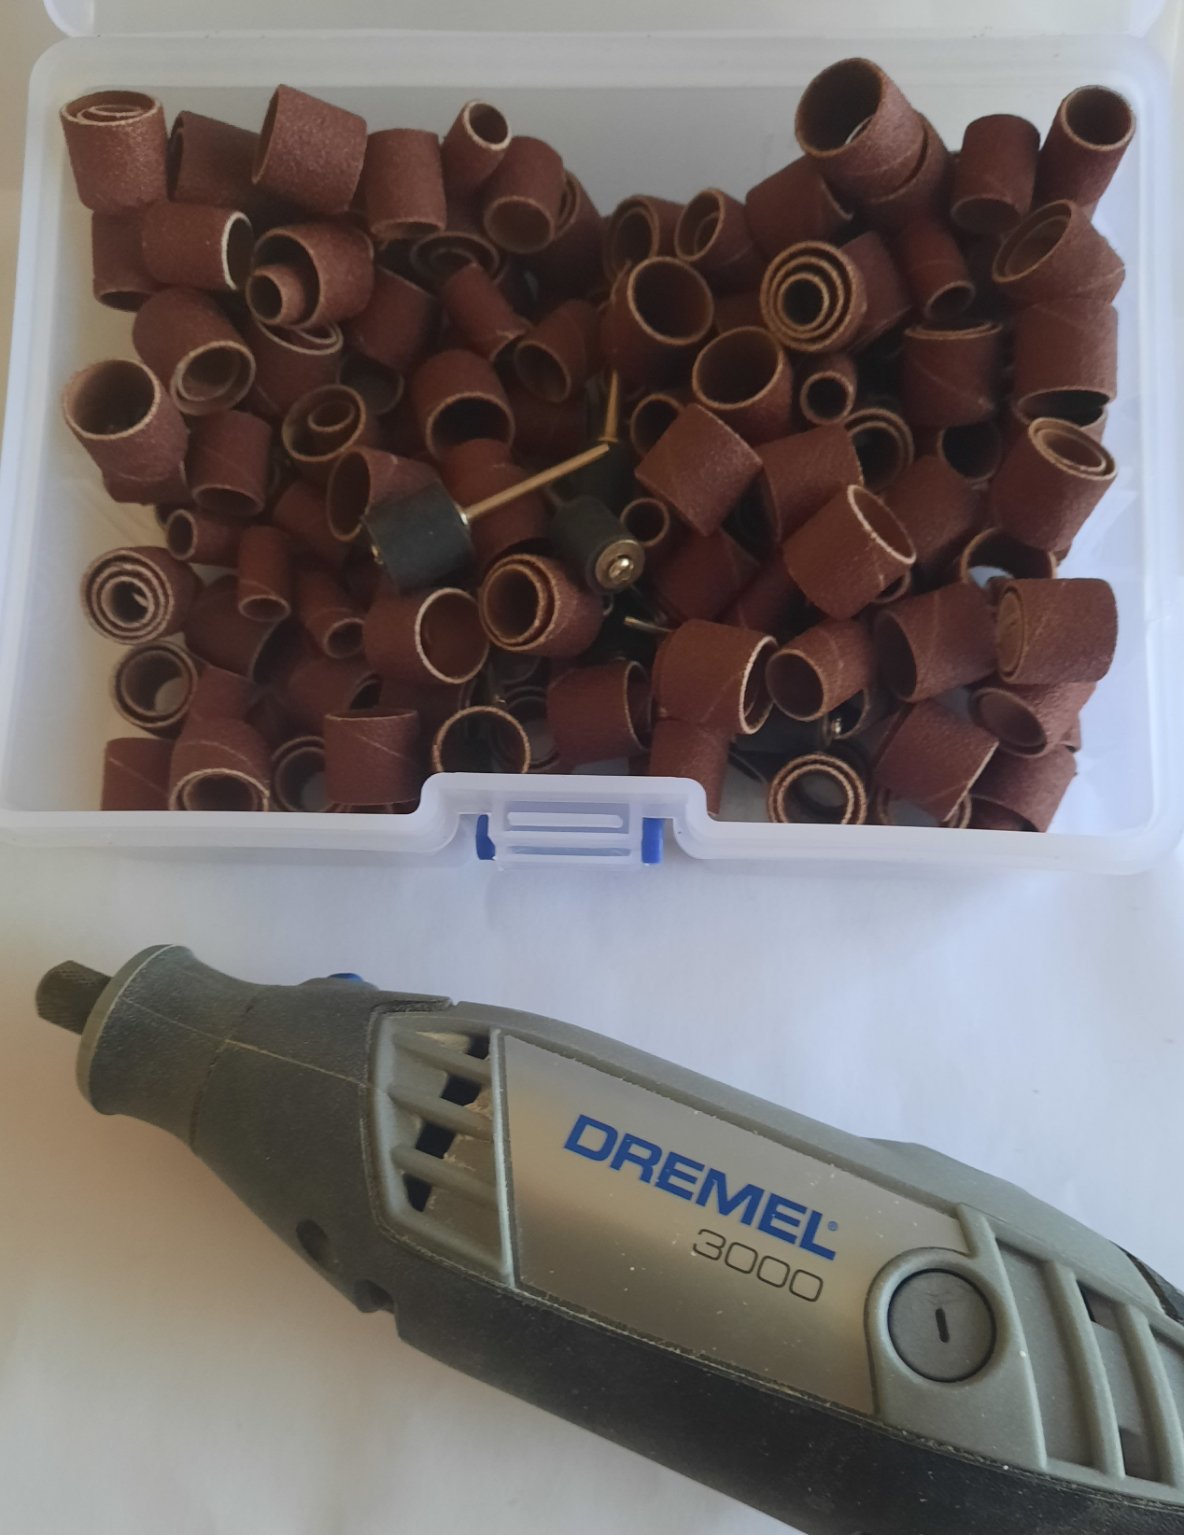
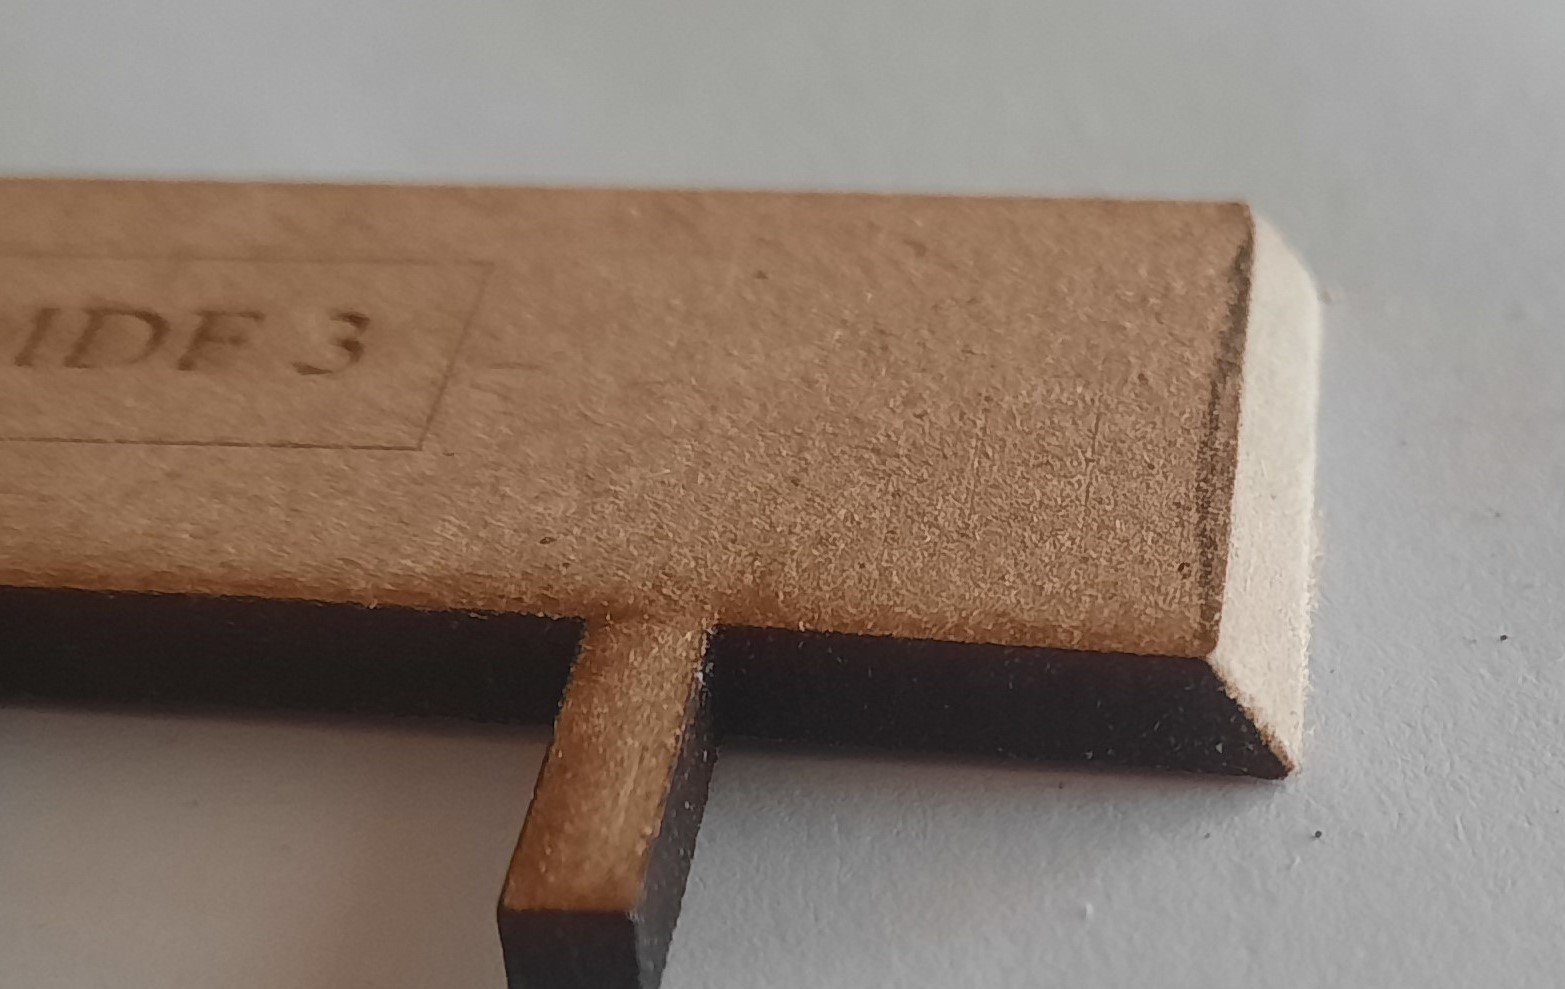
I have not made any progress today, but I have done some preparation work as detailed below, approx. 2 hours in total today Unfortunately, as can be seen in the photo below I have managed to damage (my own stupid fault) 2 of 4 the longitudinal strips (1 x 16 and 1 x 17). The damage to 16 happened when holding the longitudinal strip in one hand with one bulkhead being test fitted, the weight of the unsupported bulkhead caused the damage. The damage to 17 happened when I was trying to "gently" release the parts from my initial dry fit assembly. These parts can still be fitted without affecting the integrity of the model (as two parts rather than 1). It should be noted that both strips were damaged at the same point which is where bulkhead 9 slots in so please take care if you are building this model. I believe I have sorted out the slight issue I had yesterday with fitting the longitudinal strips. When checking each bulkhead in isolation I discovered that bulkhead 10 had a little bit of burring around the slot which was preventing the two parts engaging. I gave bulkhead 10 a very light sand with a 1000 grit which removed the burring and on a retest bulkhead 10 did seat fully in the slot on strip 16, albeit it was still a tad tight compared with the other bulkheads. As part of the preparation I have now marked bulkheads 1-3 ready for the initial fairing as shown in the picture below. I also made a cardboard replicate of the fore deck part and used that to get an rough idea of how much fairing would be required. Hopefully I aired on the side of caution when marking the bulkheads. I also marked an offcut piece of the 3mm MDF which will be my test piece. I have a large selection of dremel sanding discs, as can be seen in the attached picture and I rummaged through them looking for a 400+ grit attachment. With my dremel set to the slowest speed setting I was able to fair the test piece without any problems. The process did not take too long yielded a very nice even result. As can be seen in the following picture it produced a very good result and appears to be a very good match for the picture(s) provided in the build manual. Rather than rush this task I plan have another couple goes at fairing test pieces before I actually start on the actual bulkheads.


- 382 replies
-
- 12
-
-
- Vanguard Models
- Duchess of Kingston
- (and 1 more)
-
Thanks Chris. Based on my experience with your other designs I'm 100% certain there is not an issue. I just to take a bit of time to make sure everything is fully aligned which will be tomorrow's first order of business. Bulkheads 1-13 & 15 fitted very nicely and I did like the click when fully seated.
-
Thanks James. I was teasing part 16 (port and starboard) and they seemed to be aligned across all the bulkheads but they did not seem to locate fully when I started to apply some pressure on bulkheads 11 and 12. I had to take a break for some household chores. I sure when I have a bit more time they will locate fully.
- 382 replies
-
- 1
-
-
- Vanguard Models
- Duchess of Kingston
- (and 1 more)
-
Stage: Hull Construction Build instructions: 18-28 Task: Dry Fitting Parts: 1-17 Time Spent: 20 mins Status: Complete, but I will revisit this task again once I have checked fitting of part 16 with bulkheads 11 and 12 in isolation. Build Notes: I have dry fitted the bulkheads (1-13 & 15-17) to the false keel (14). I noted some bulkheads were a tight fit therefore I decided to add some marks to double check the bulkheads were correctly seated. I made a pencil mark on the bottom of the slots, both on the bulkheads and on the keel. When correctly fitted the two pencil marks should be aligned, the bulkheads 1-13 all seemed to make a satisfying click noise when fully seated. I was not able to fully insert the two Longitudinal Patterns (16) as they seemed to be a slight issue with fitting them to the slots on bulkheads (11 and 12). I did not want to apply any undue pressure at this stage therefore when I disassemble the dry fitted bulkheads from the false keel. I will need do some further checks of the slot fitting of the Longitudinal Patterns (16) with the bulkheads 11 and 12 in isolation. The dry fitted hull assembly seems to be very sturdy. The next task will be to mark the bulkheads with a preliminary fairing line as per build instruction 11. Build Photo(s): Marking the bulkheads Bulkhead 1 correctly positioned Bulkhead 1 - 4 correctly positioned Dry fit of parts 1 to 17 inclusive

- 382 replies
-
- 12
-
-
- Vanguard Models
- Duchess of Kingston
- (and 1 more)
-
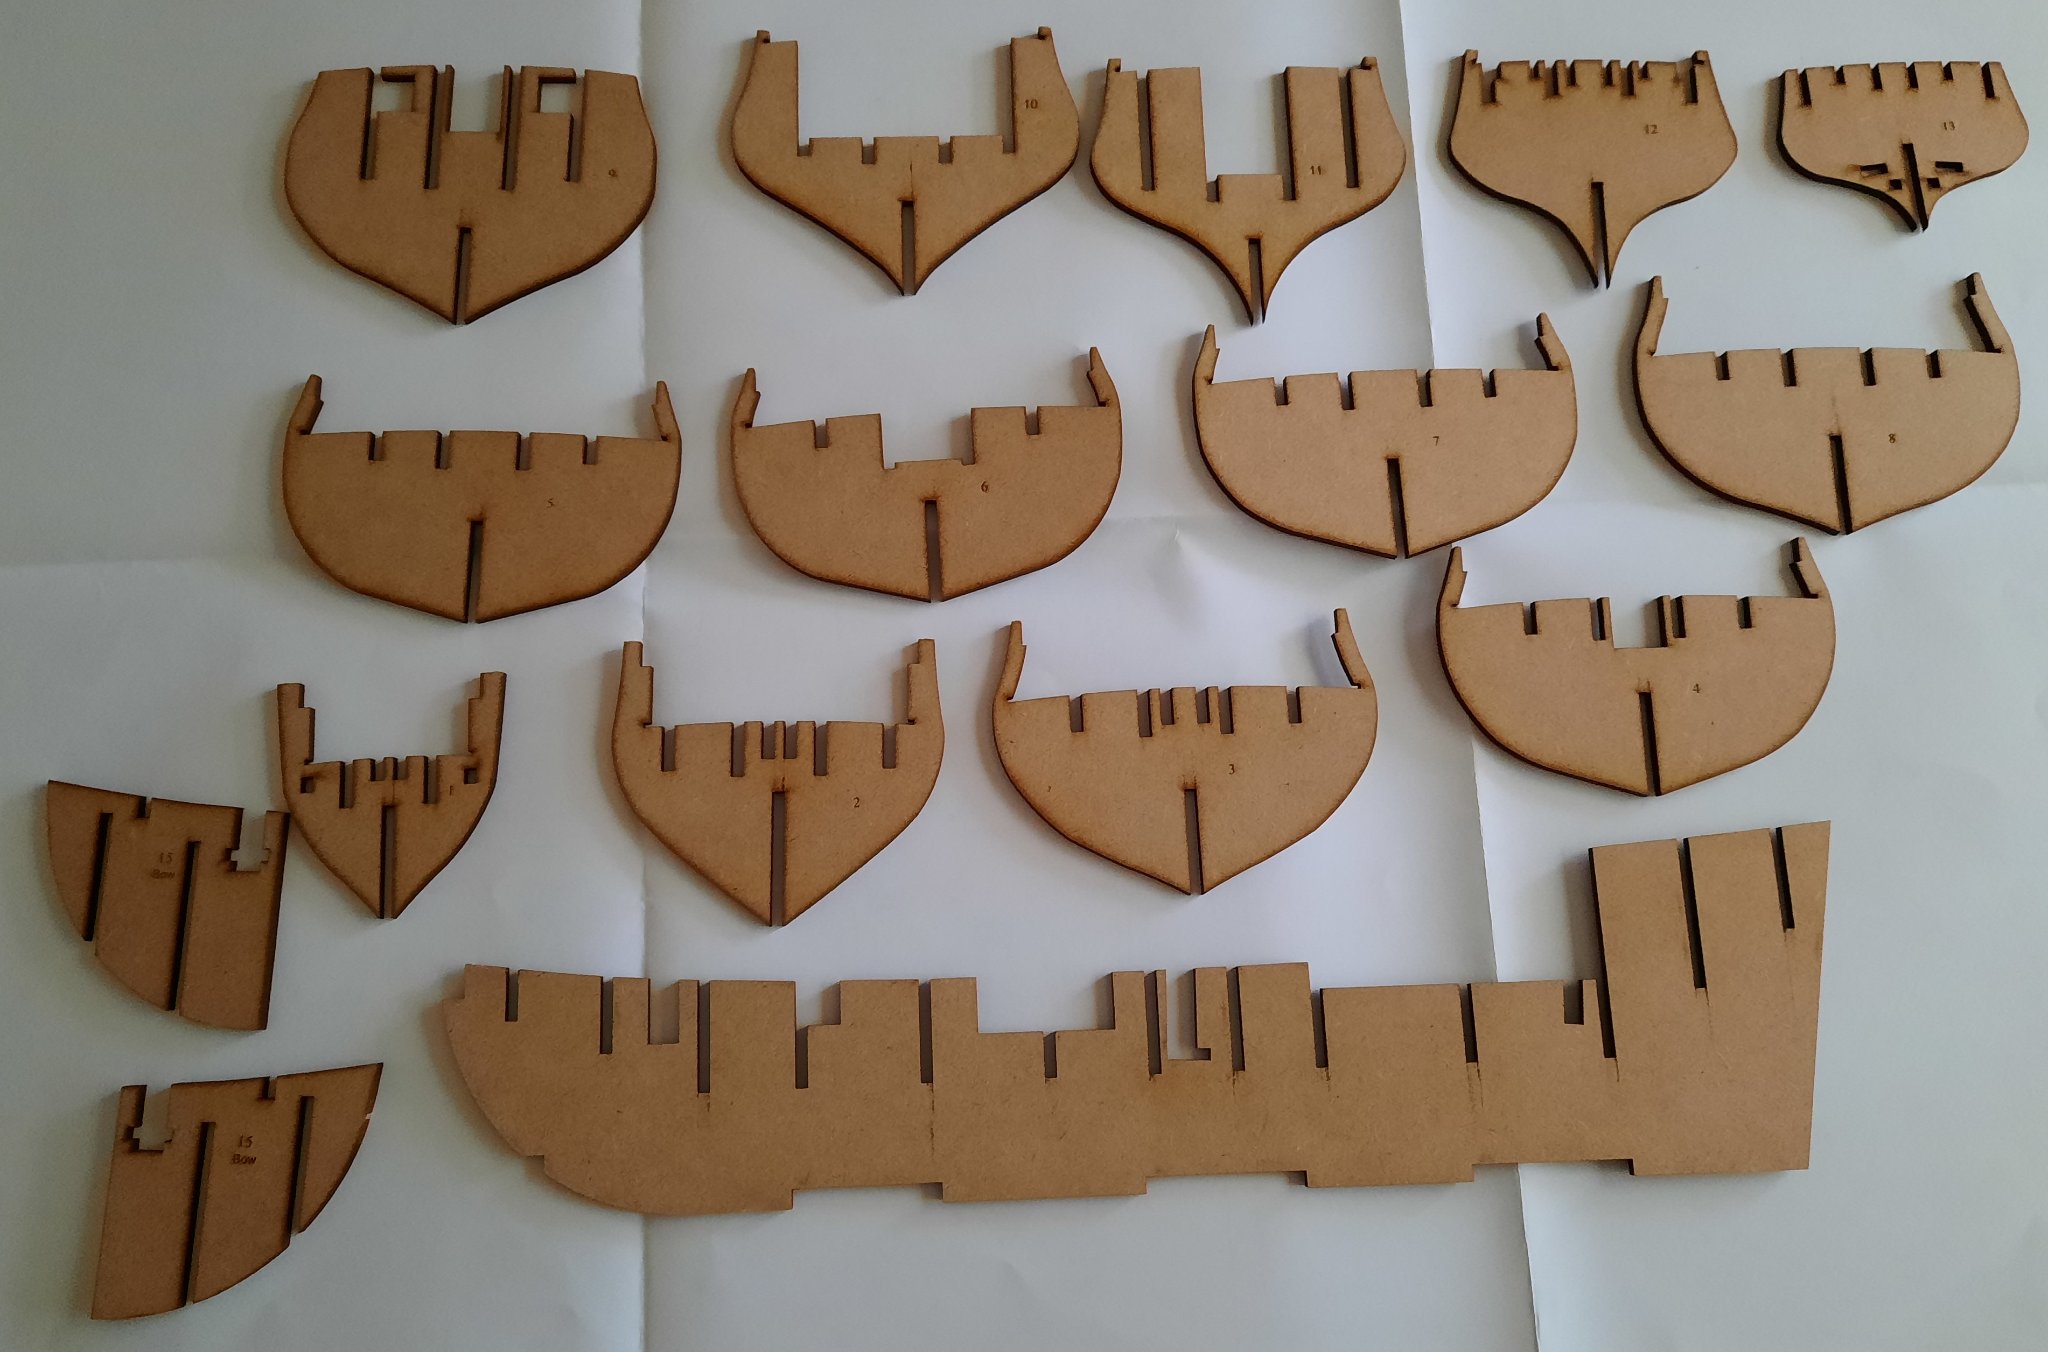
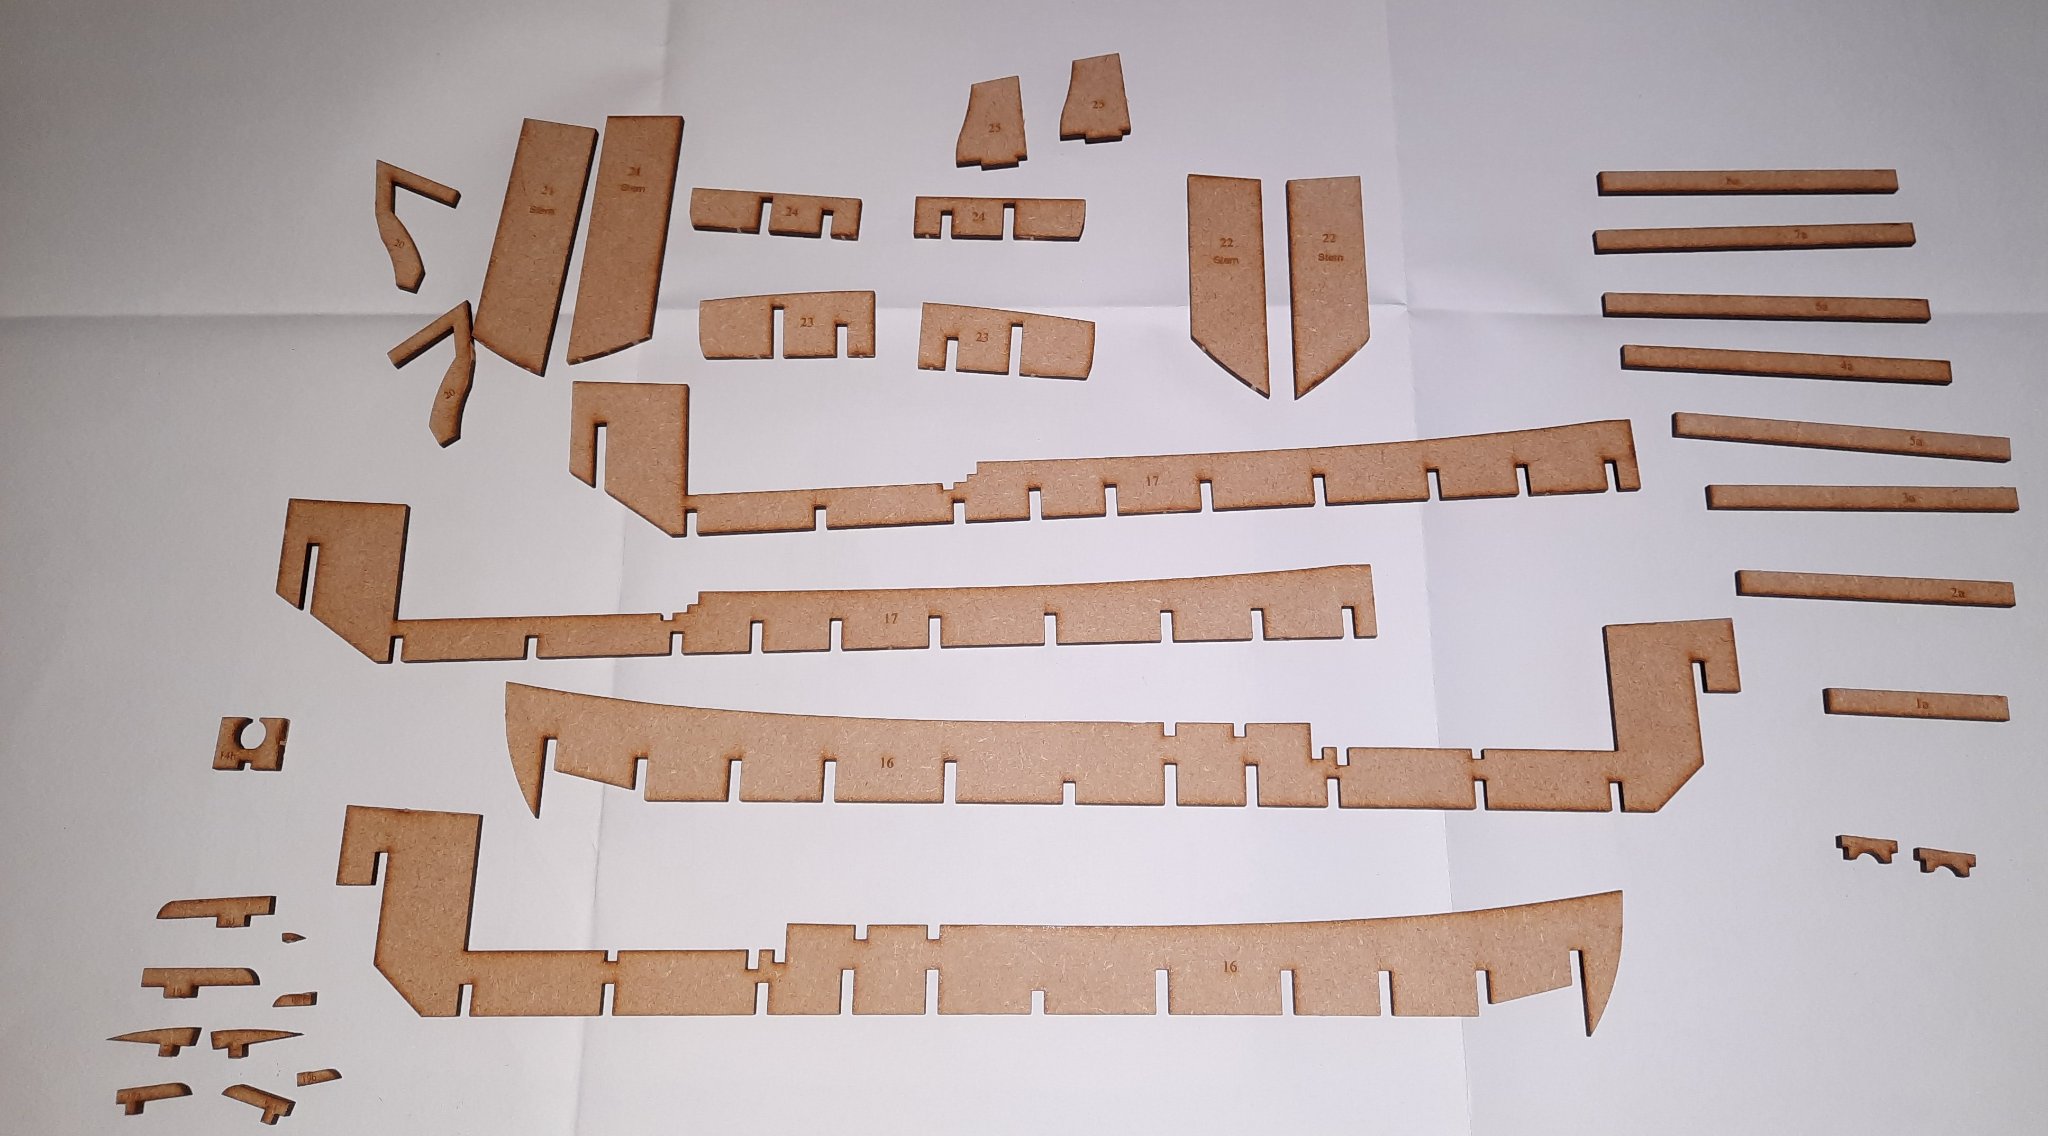
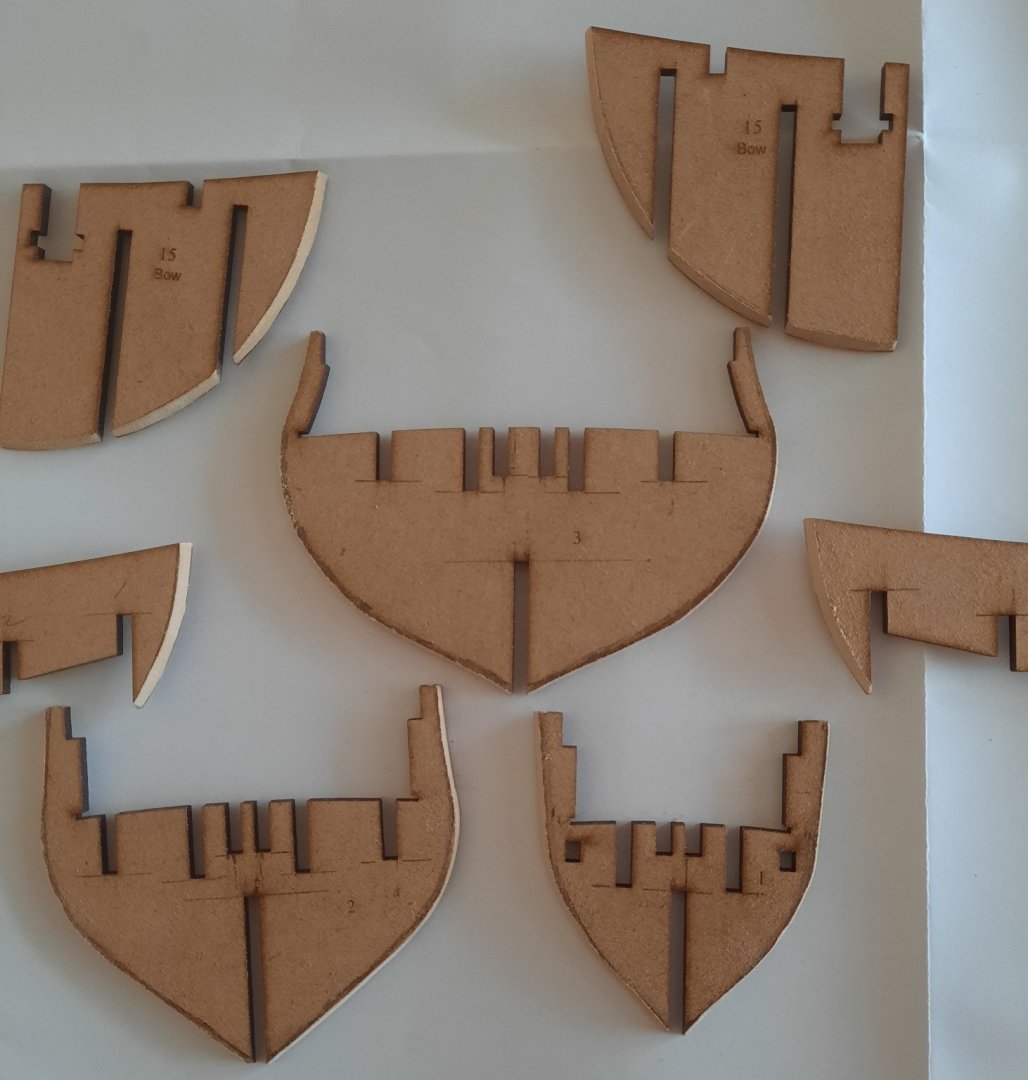
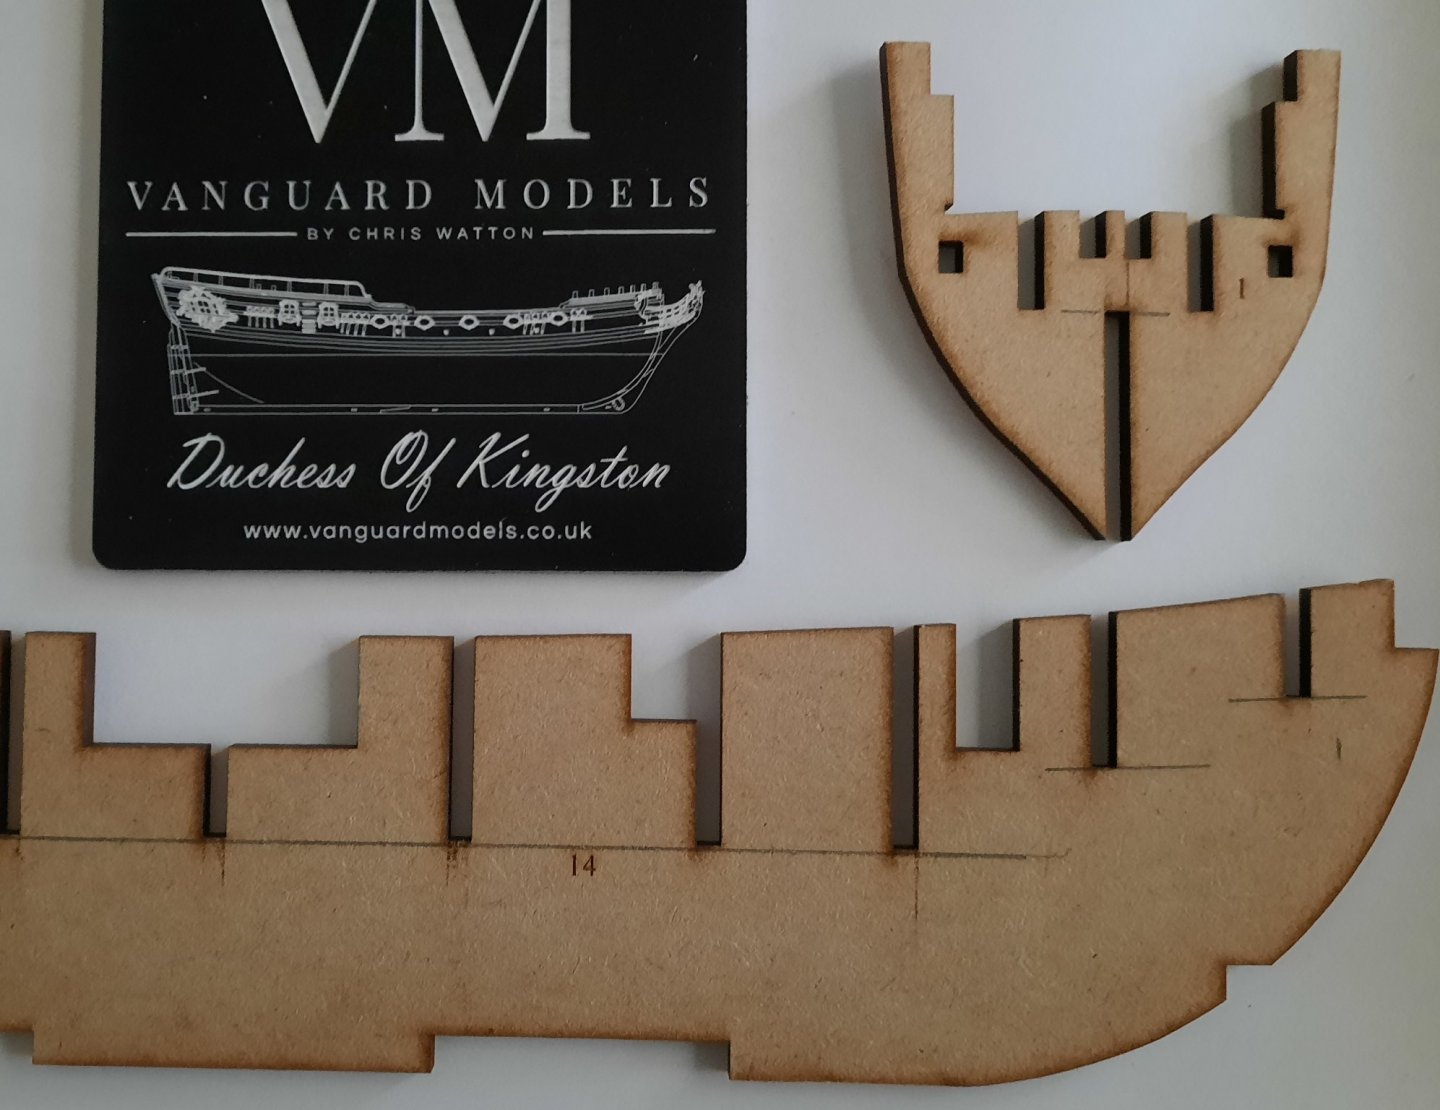
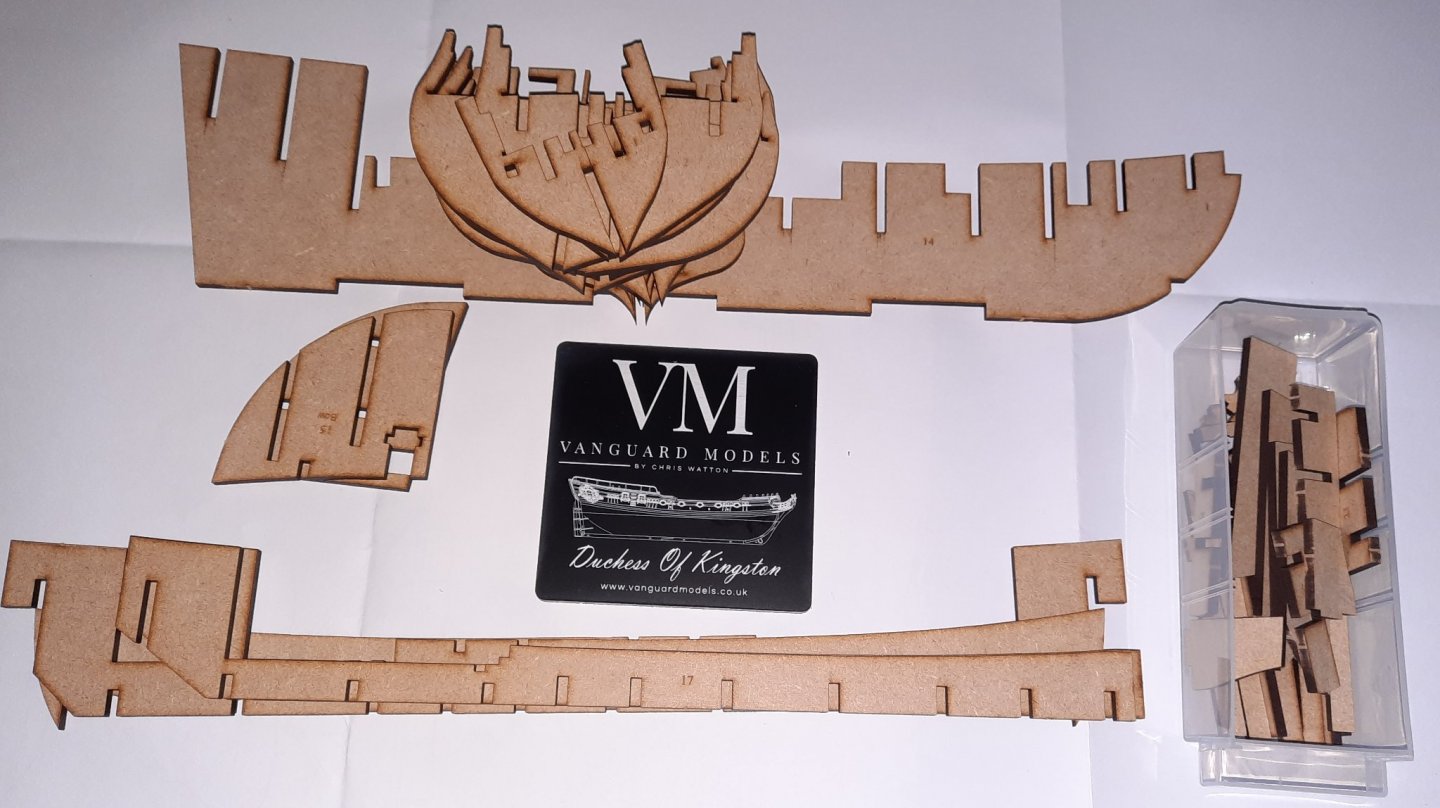
Stage: Hull Construction Build instructions: 1-2 Task: Removal of Keel parts from MDF sheets and cleaning tabs Parts: 1-25, 1a-15a, 19a-c Time Spent: 80 mins Status: Complete Build Notes: This is not very exciting post but I have included this task in my build log to reflect an accurate record of the work undertaken Using my trusty craft knife (fitted with a new blade) each piece was released from the MDF sheet(s) in turn. I then used my thin medium grit sanding stick to clean the tabs. There were quite a few different parts and it took longer than I expected to complete this process. I think it was better to take my time, especially with the cleaning of the tabs. All the pieces have been engraved with the part number which I think is a major plus point. A couple of the smaller pieces did delaminate (1 x 19b and 1 x 19c) as there were removed from the MDF sheet. I simply applied some wood glue to the delaminated areas and clamped. I plan to dry fit the hull construction parts before starting to fair / glue any of the hull construction pieces together so that I can get an appreciation of the bulkhead fairing angles and mark the required bulkheads accordingly. Also the build instructions 10,11,12…. etc. recommends the bulkheads are marked and faired prior to being assembled. Build Photo(s): Hull parts 1 – 15 Hull parts 16 – 25 plus the subset parts (a, b and c) Hull parts ready to be dry fitted, some parts to be kept safe in storage draw


- 382 replies
-
- 10
-
-
- Vanguard Models
- Duchess of Kingston
- (and 1 more)
-
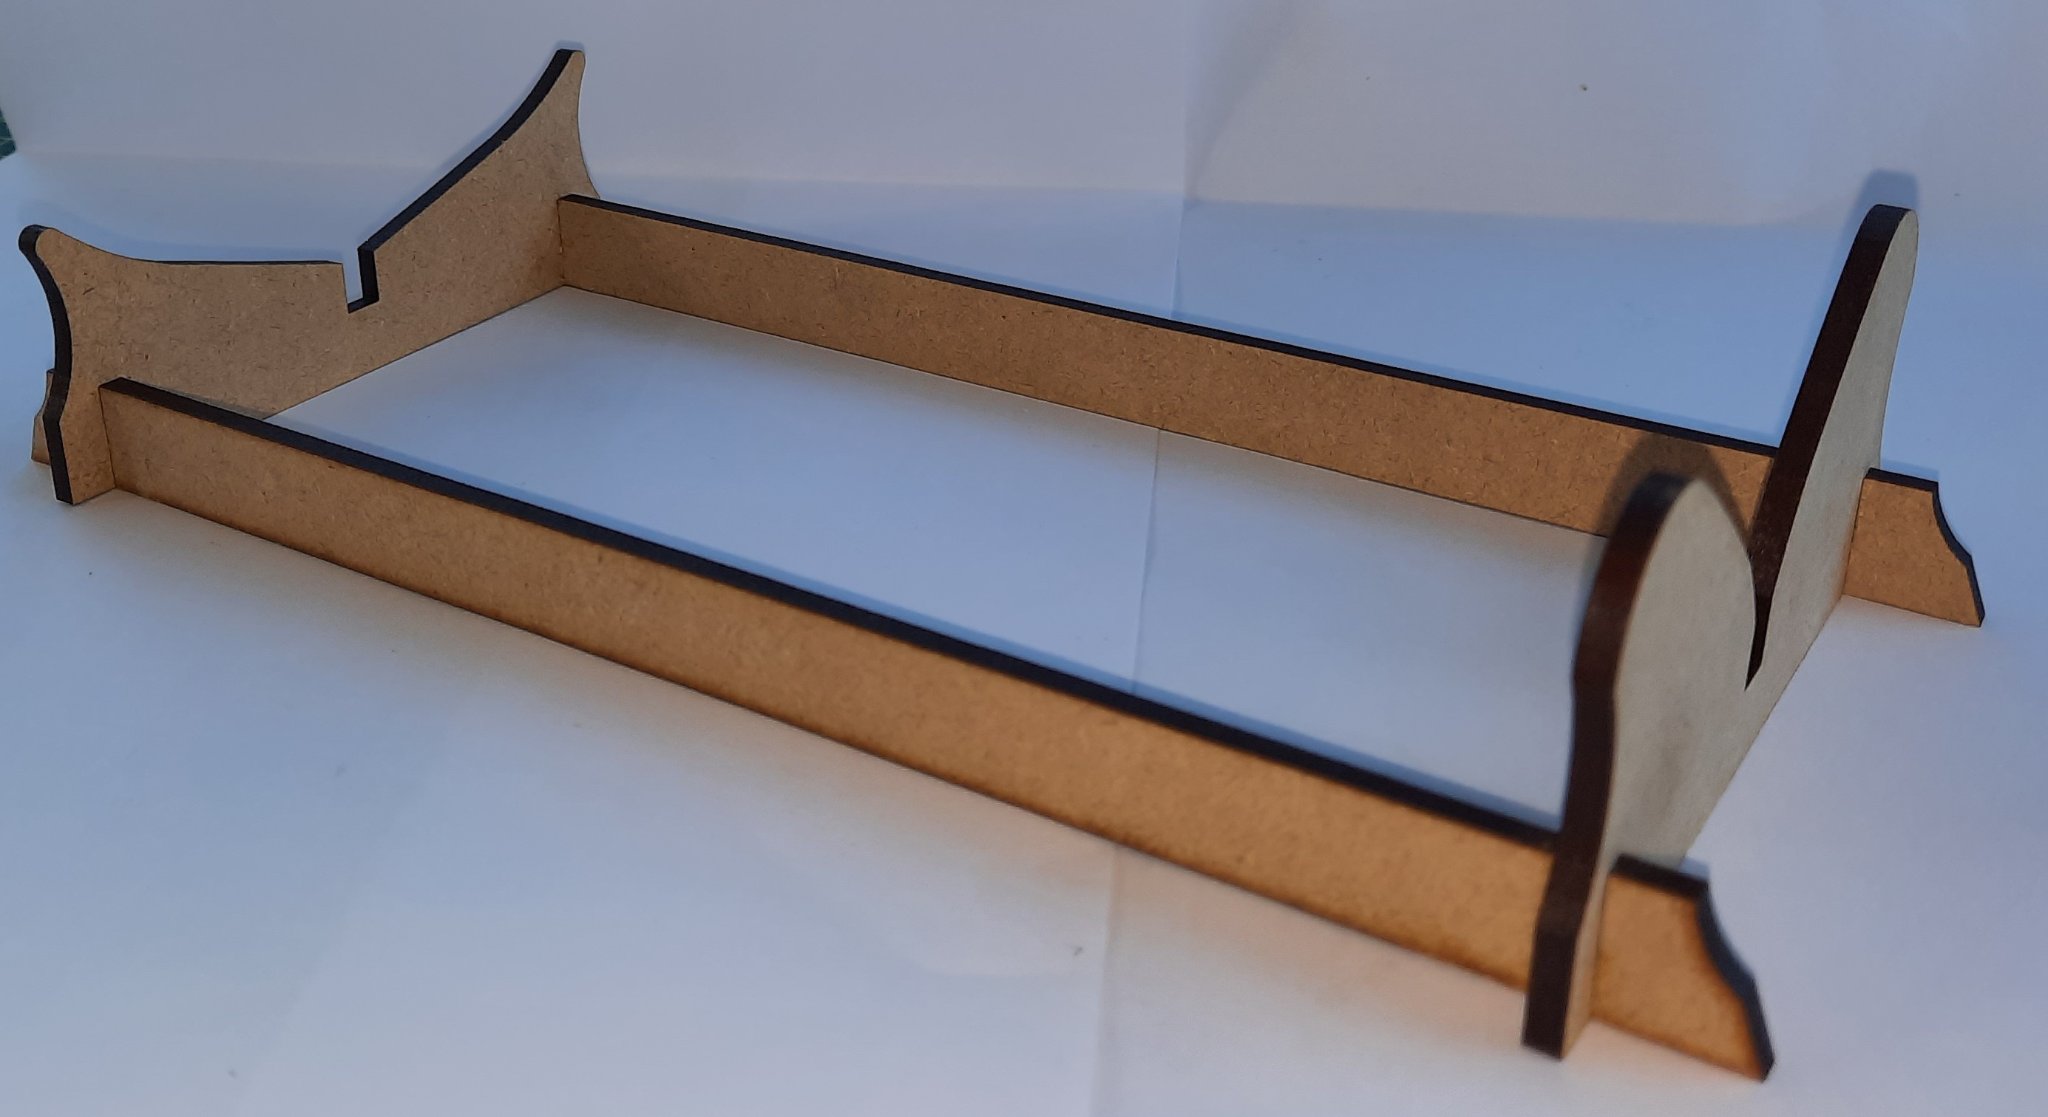
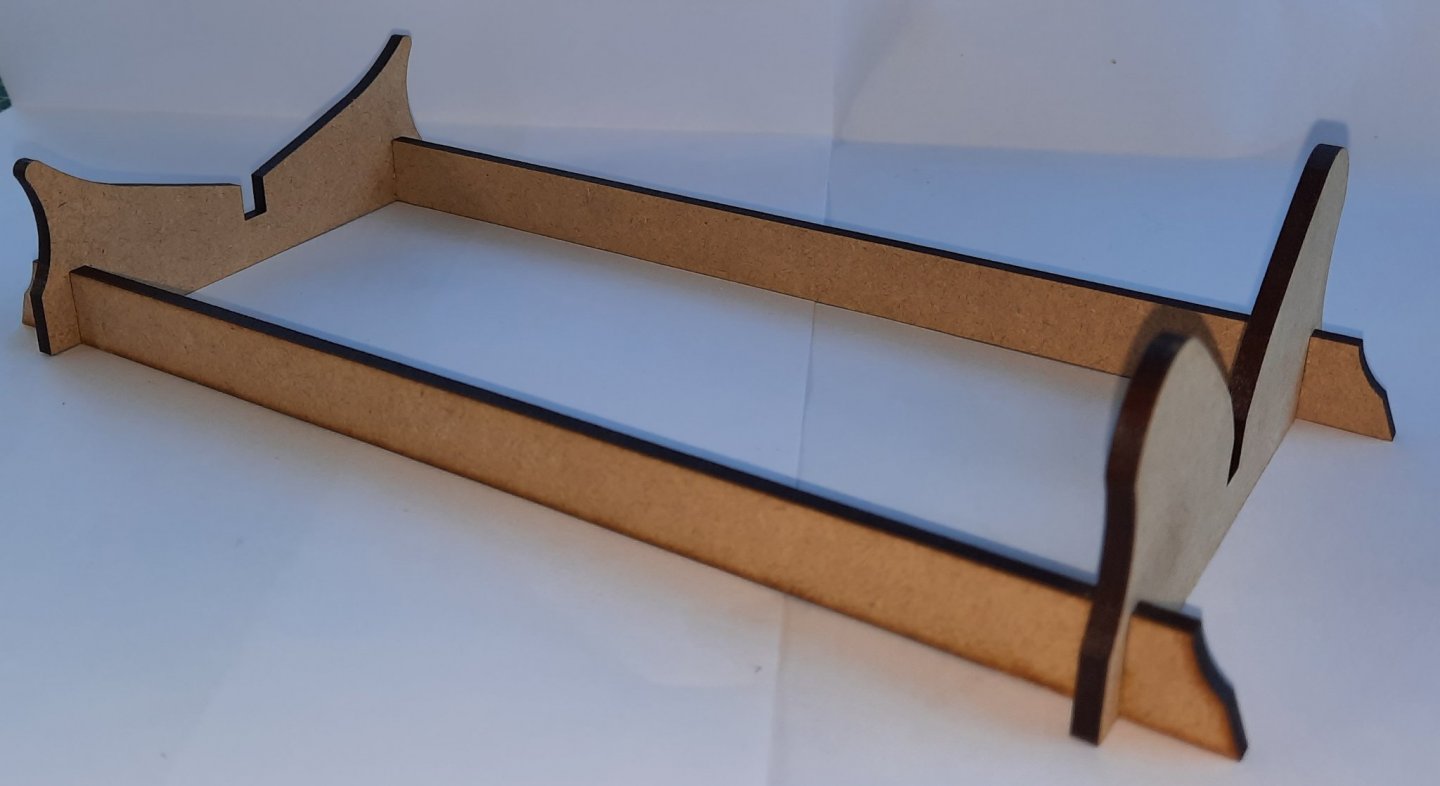
With regards to how I plan to structure this build log I have taken note of a comment made in the build manual which states " Treat each stage as a separate project" With that in mind I will attempt to record each stage separately. In some cases a build stage will be a simple single post, but in some cases it may be necessary to record a completed stage as a series of posts. Therefore each post will start with a Stage Header and Status. I will also try to keep a record of the time spend on building the model. in this respect I will not record any time I have spent reading / studying plan drawings. Stage: Hull Construction Build instructions: 1-5 inclusive Task: Build of temporary cradle Parts: 26, 27 & 28 (x2) Time Spent: 8 mins Status: Complete Build Notes: It did not take too long to remove the 4 parts required for the temporary cradle. I used one of my thin medium sanding sticks to clean up the tab marks. The parts fitted together very well noting the slotted parts were a very tight fit which meant the frame was very solid and did not require any wood glue. I might brush in some diluted wood glue at some point for belt and braces. Build Photo(s):
- 382 replies
-
- 8
-
-
- Vanguard Models
- Duchess of Kingston
- (and 1 more)
-
I will follow this very sound advice. Many thanks for the heads up. I think it will a week or two at least before I've reached that stage.
- 382 replies
-
- 1
-
-
- Vanguard Models
- Duchess of Kingston
- (and 1 more)
-
The DOK has safely arrive at my dry dock. My time will now be split between my current Robert E Lee build and the new Duchess of Kingston build. Great delivery service by UPS and special thank-you to Mrs Watton for taking time off work to put the kits together, her dedication to the cause is greatly appreciated.