Glenn-UK
-
Posts
3,170 -
Joined
-
Last visited
Content Type
Profiles
Forums
Gallery
Events
Everything posted by Glenn-UK
-
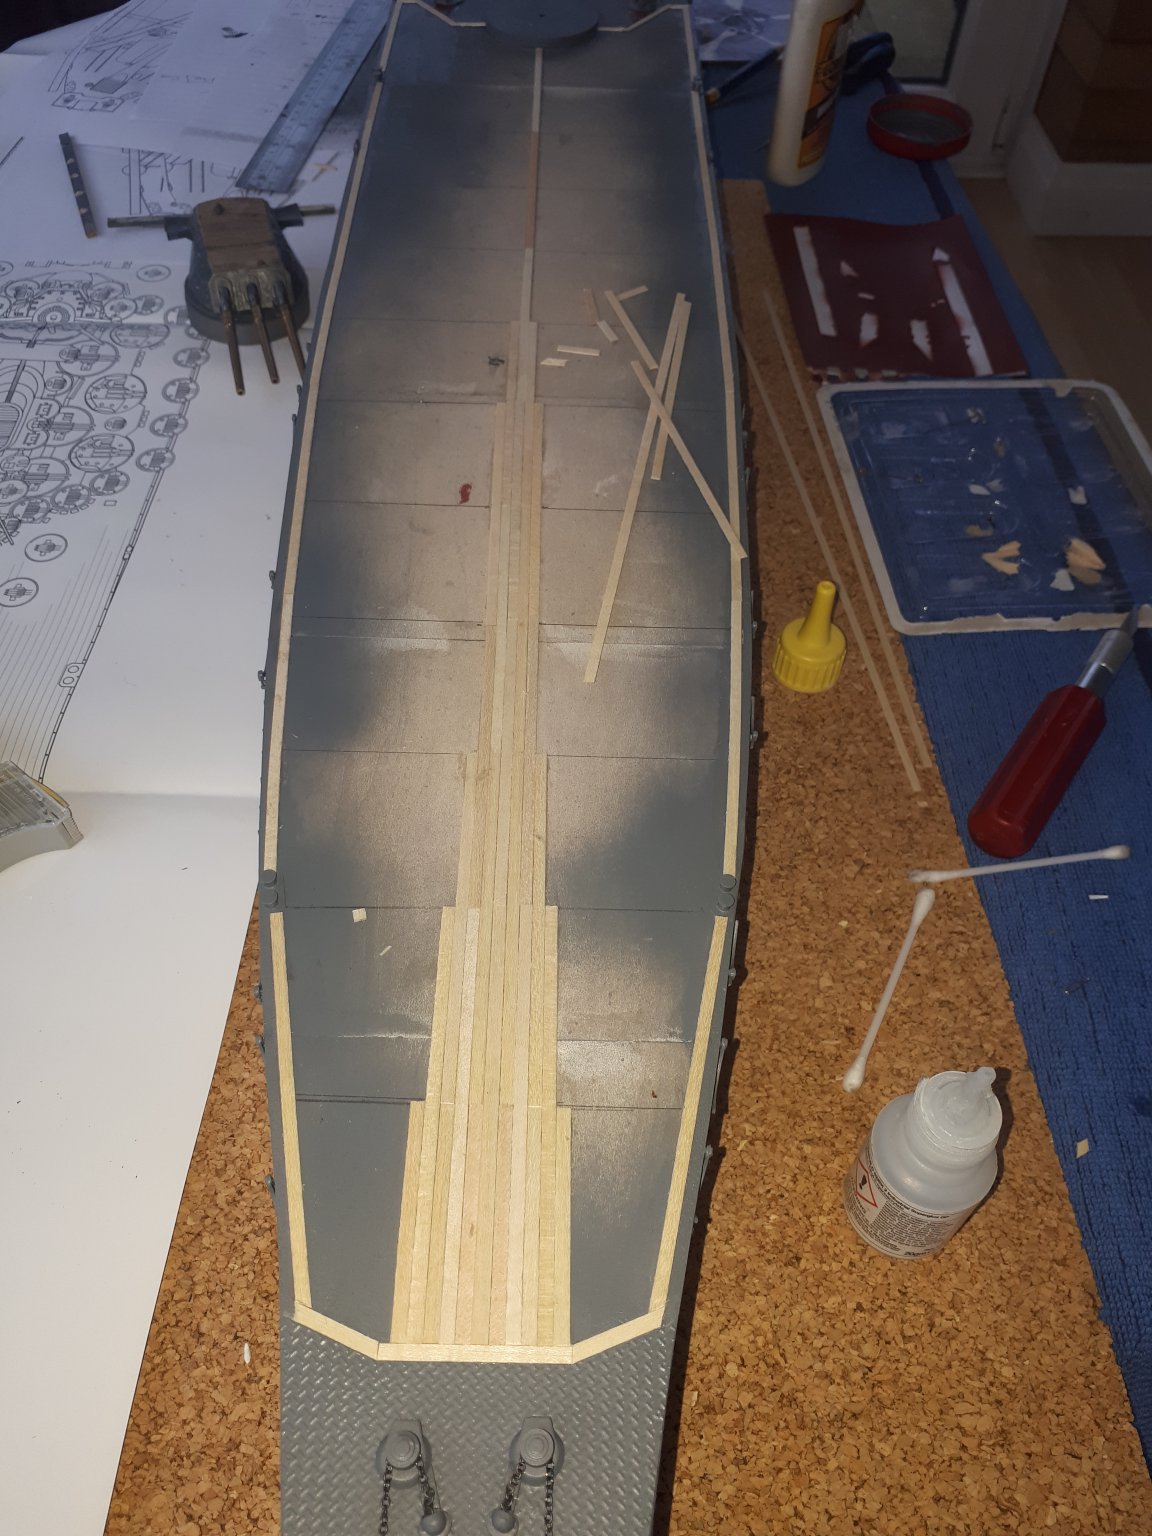
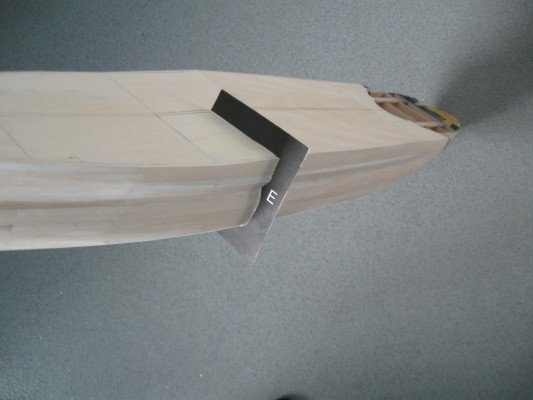
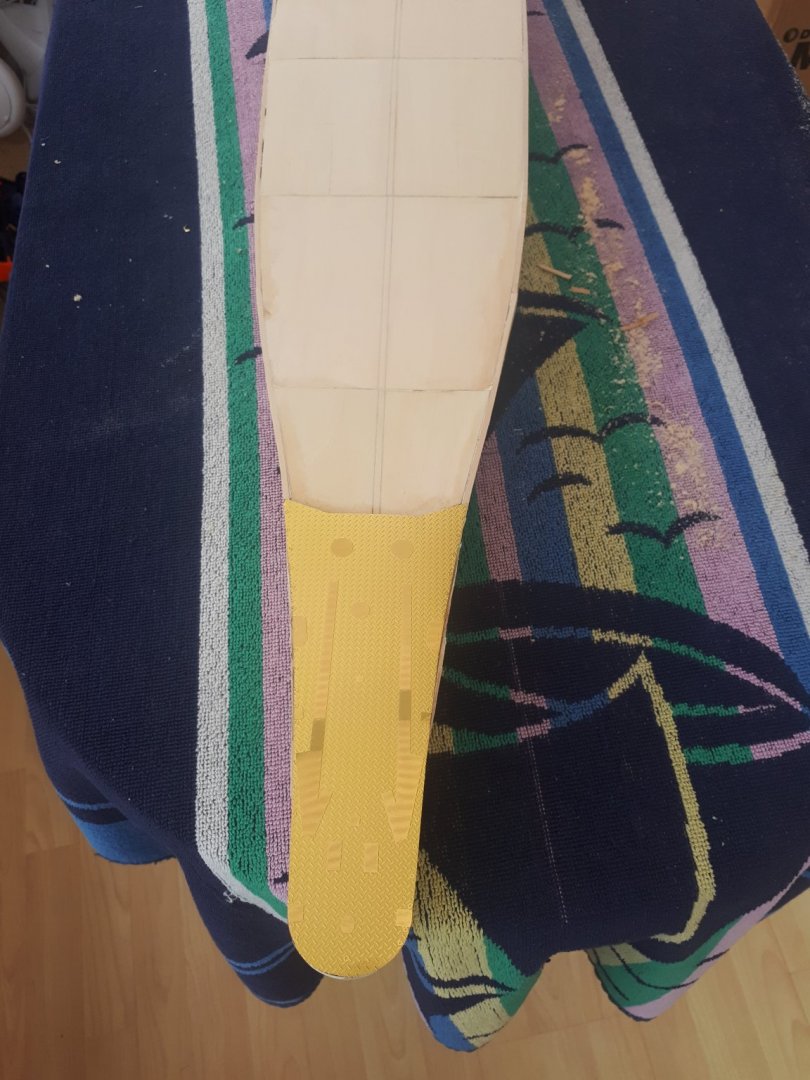
 I have made a start to the deck planking, this is much more in my comfort zone and this is going to be a quick and easy task. I started with doing the outline and then I added the central line. I am now filling on the gaps using 100mm and 50mm length planks.
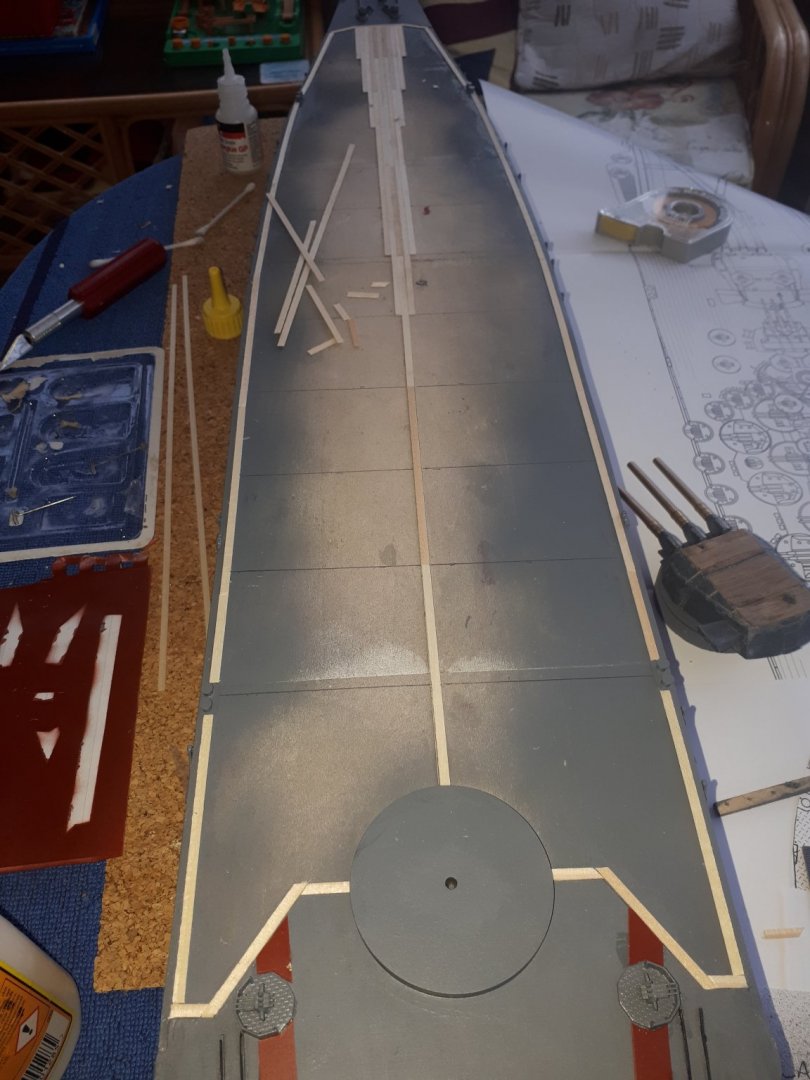

- 64 replies
-
- 7
-

-
- yamato
- deagostini
- (and 2 more)
-
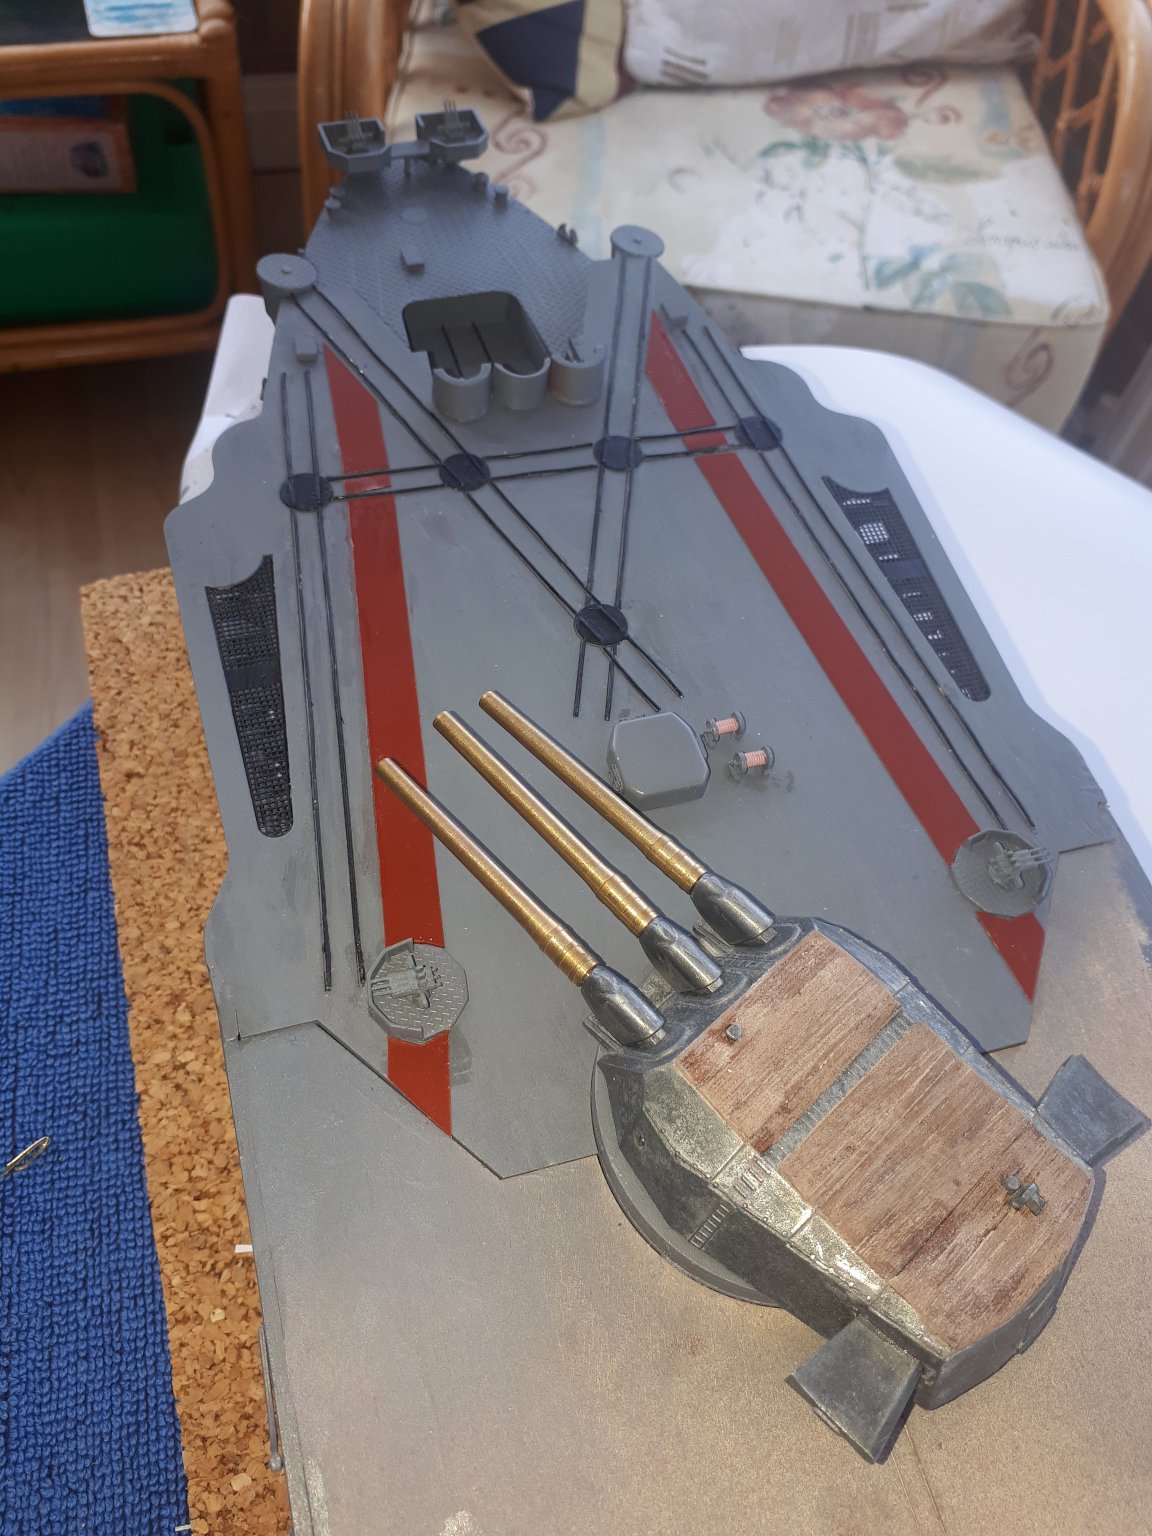
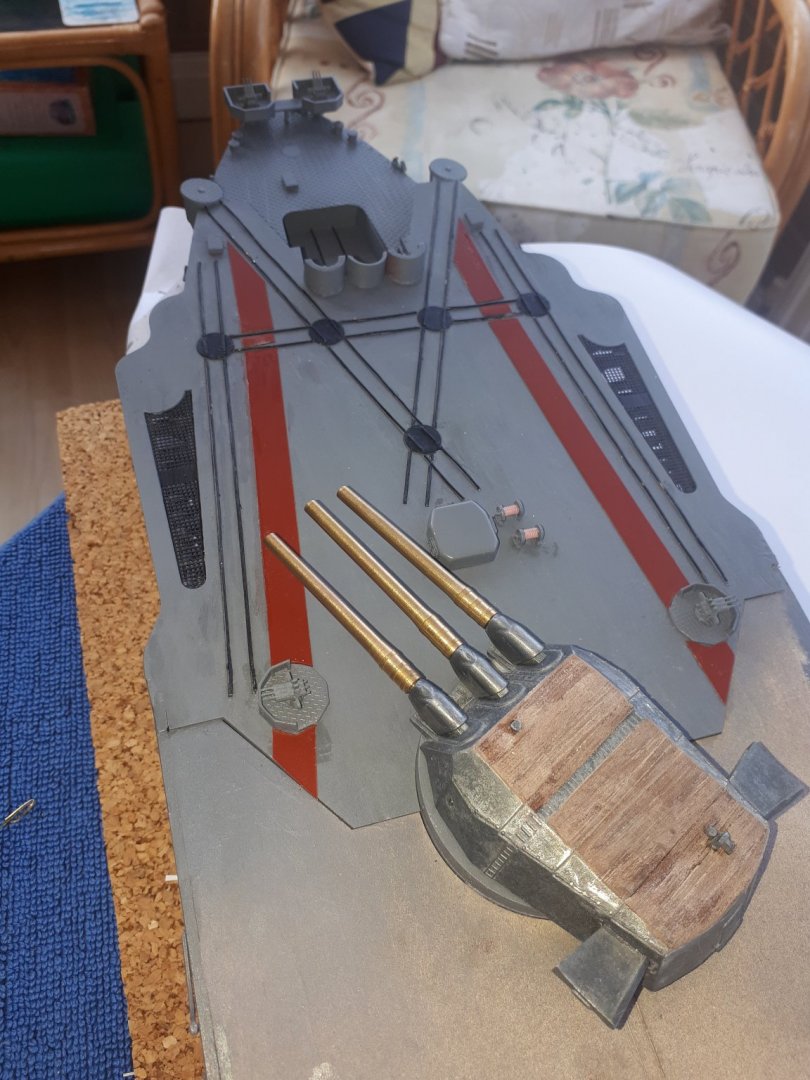
I have continued to work on the stern section and things are progressing nicely. The main gun shown is only dry fitted as it will need the rails adding and the whole gun painting before it is fixed in place. I will start to add the deck planking next.

- 64 replies
-
- 7
-
-
- yamato
- deagostini
- (and 2 more)
-
Today I fitted the turntables and tracks to the stern section. It was a tricky task to straighten the copper wire provided for the tracks (it was supplied coiled). I painted the track and turntables metalwork black. I think it looks very nice. I will continue to add the remaining parts to the stern section before I start the deck planking. I thought this picture would show the actual size of the model.

- 64 replies
-
- 5
-
-
- yamato
- deagostini
- (and 2 more)
-
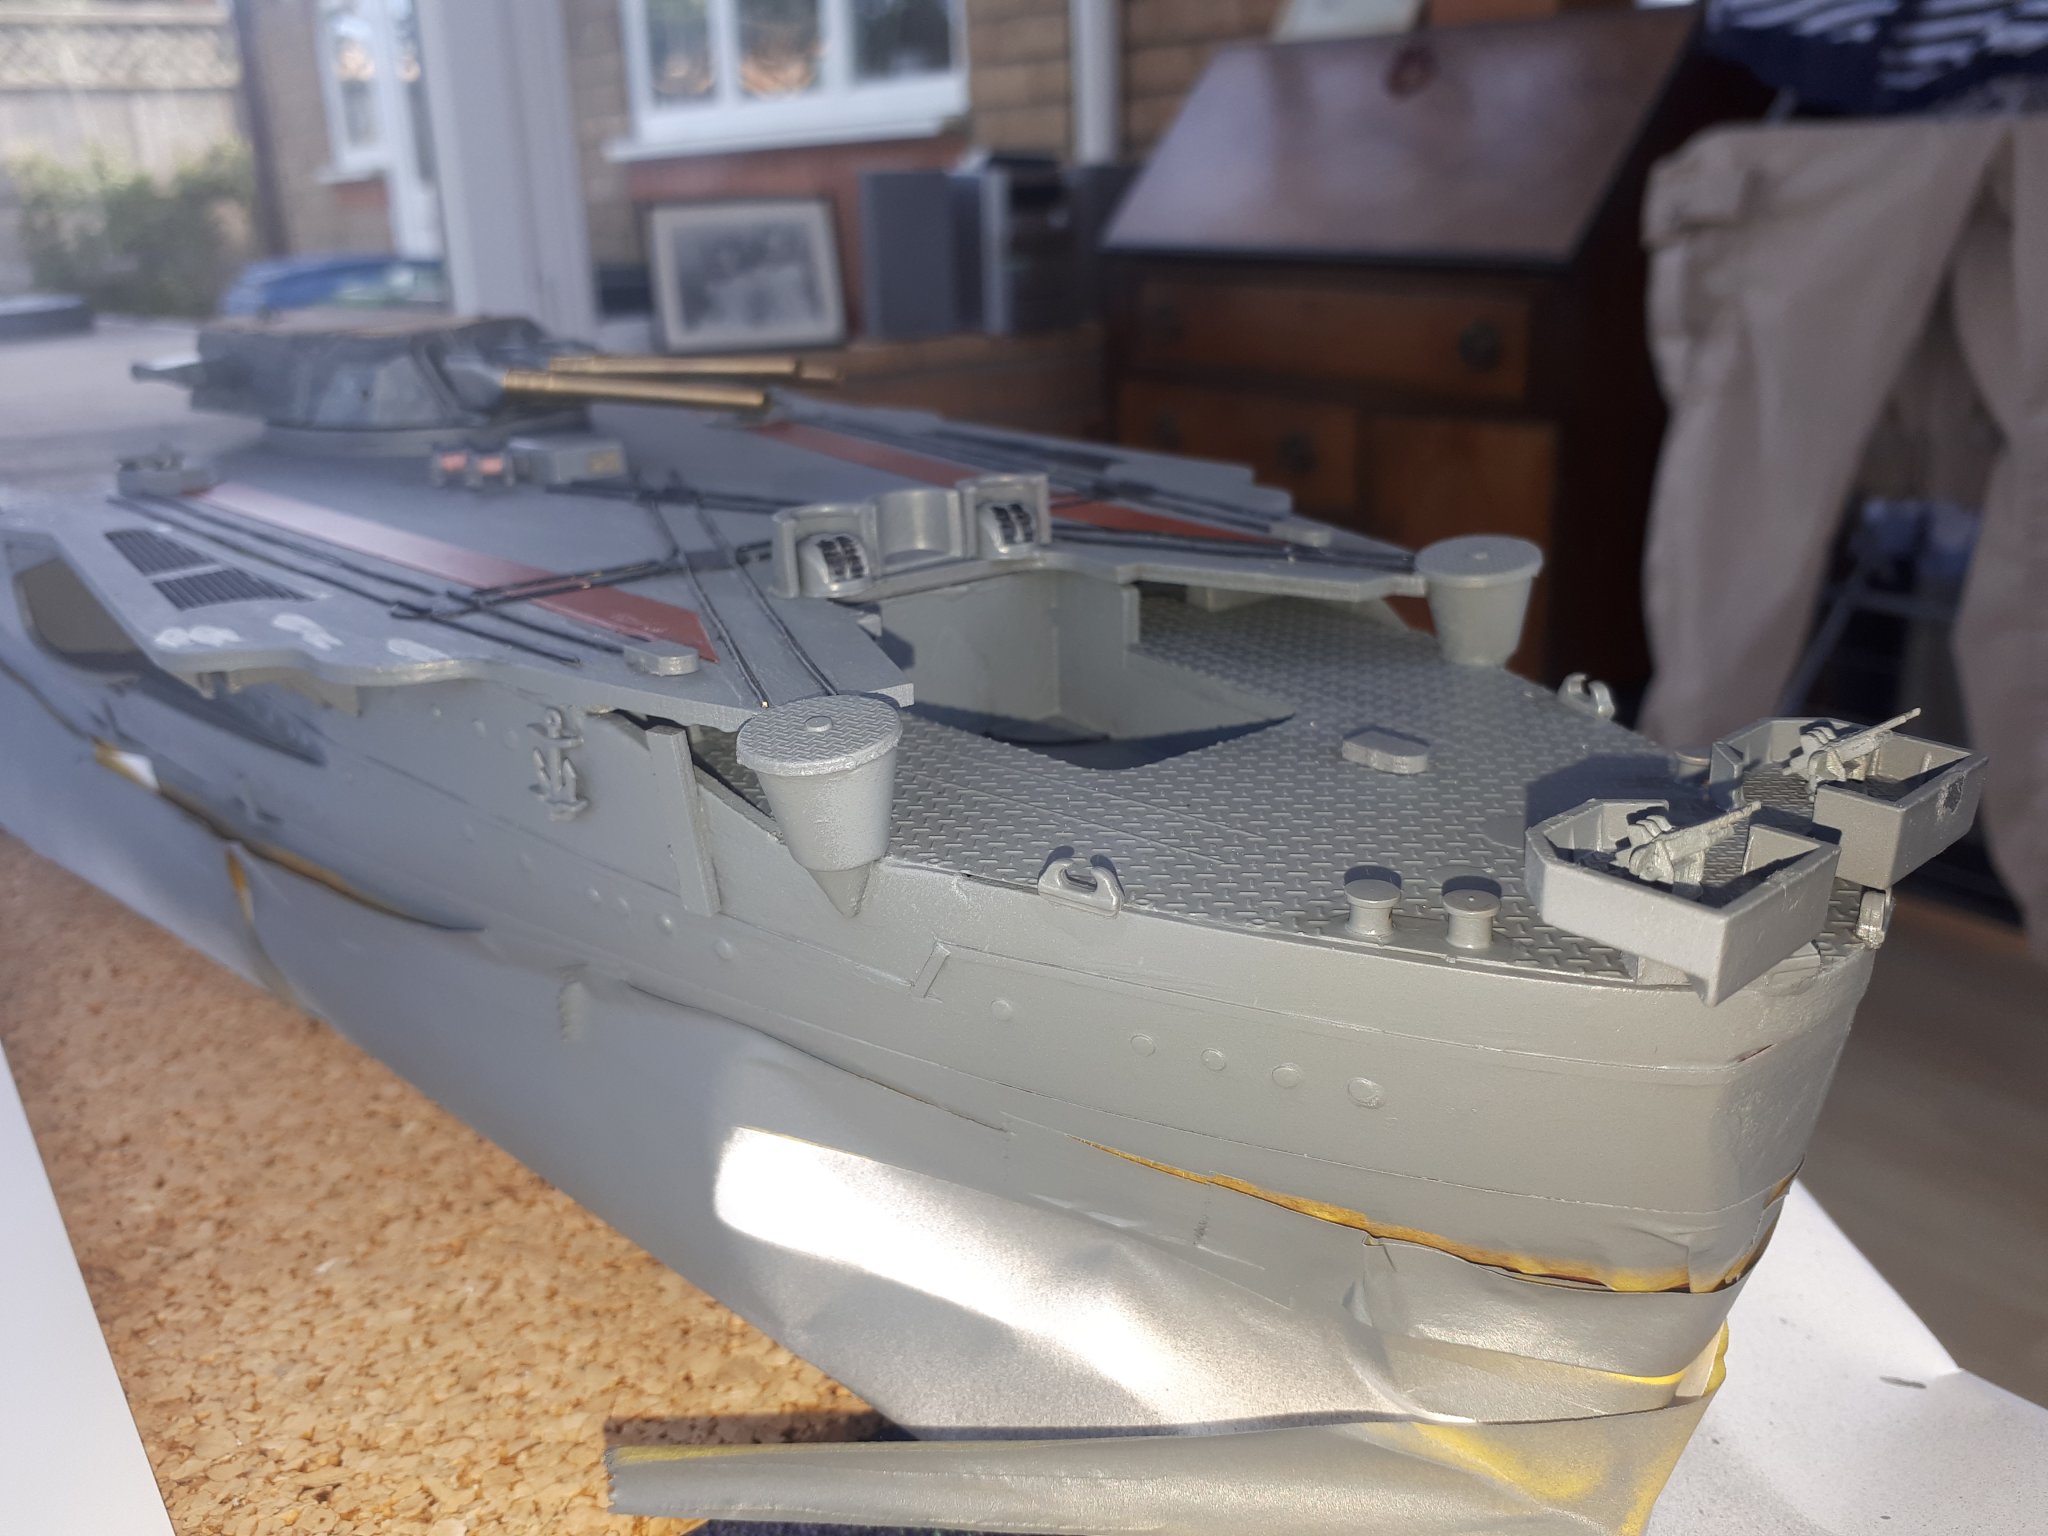
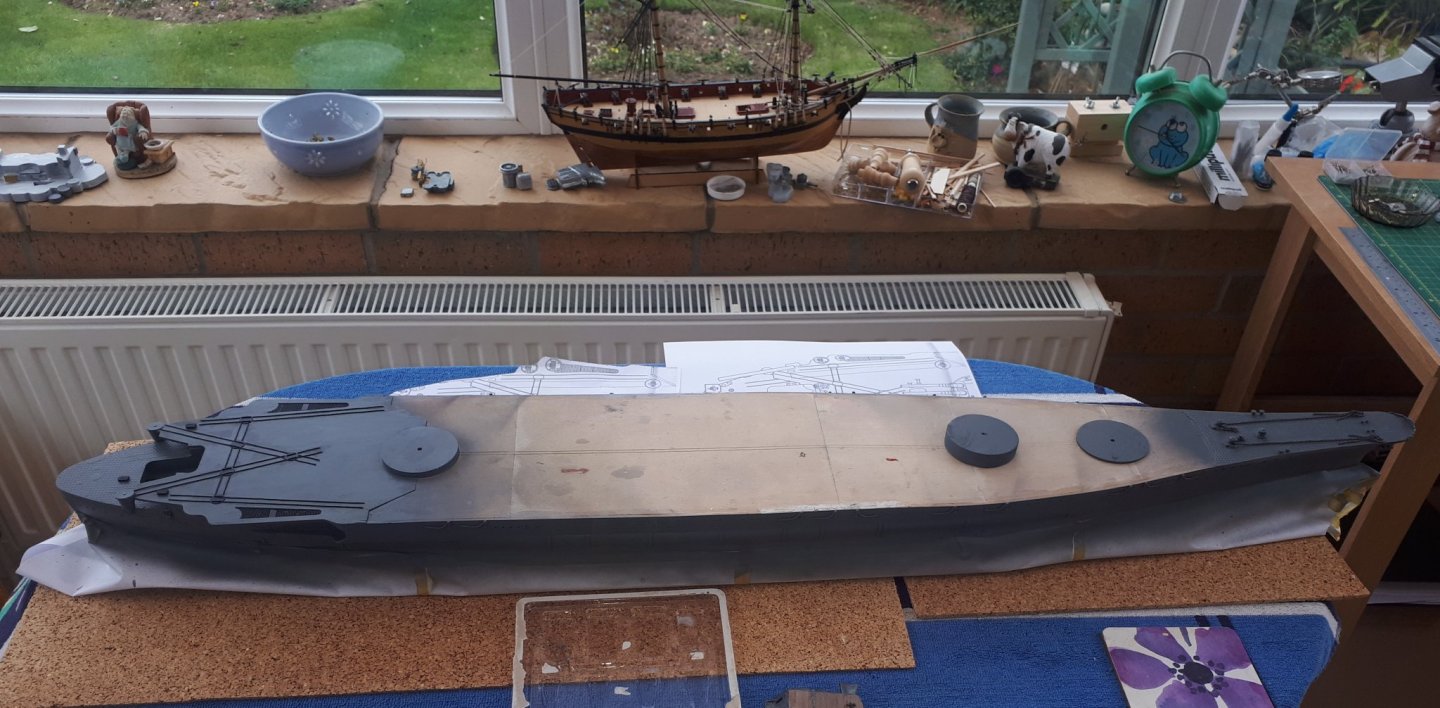
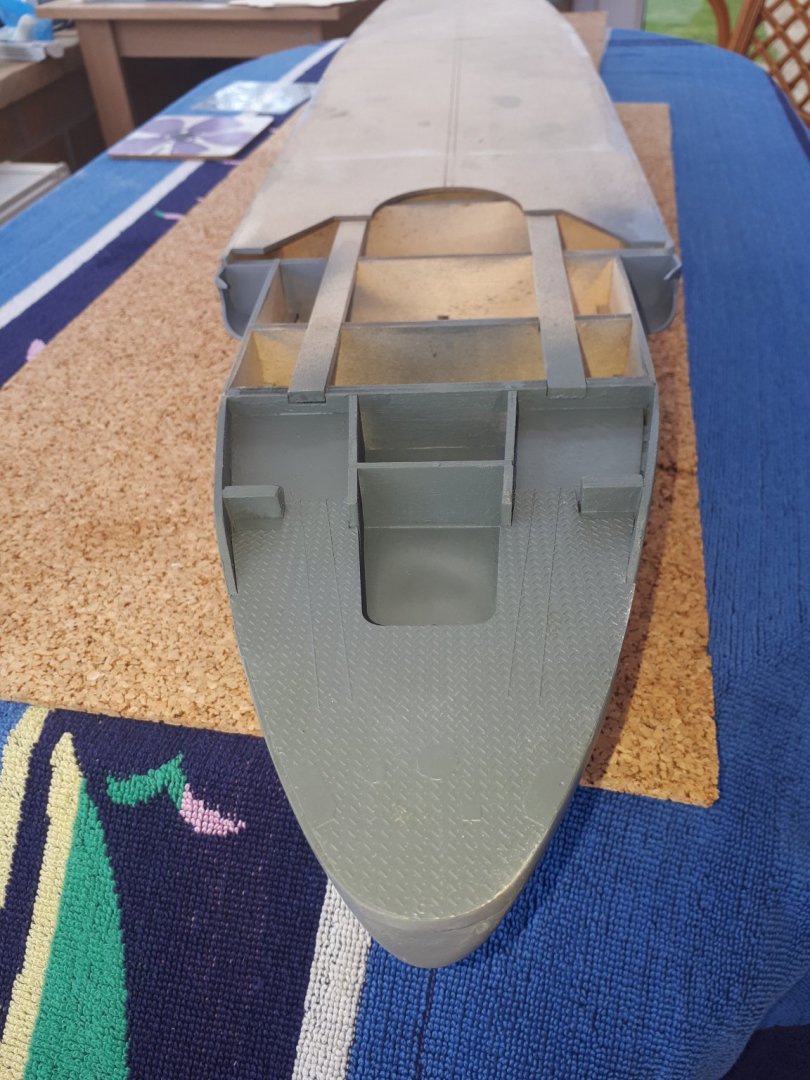
I have made more progress, the hull has been painted but I'm leaving the covers on hull for the time being while I add some deck detail. I have added all the parts to the bow section and I'm currently adding some parts to the stern section. Pictures of the bow section added.
- 64 replies
-
- 6
-
-
- yamato
- deagostini
- (and 2 more)
-
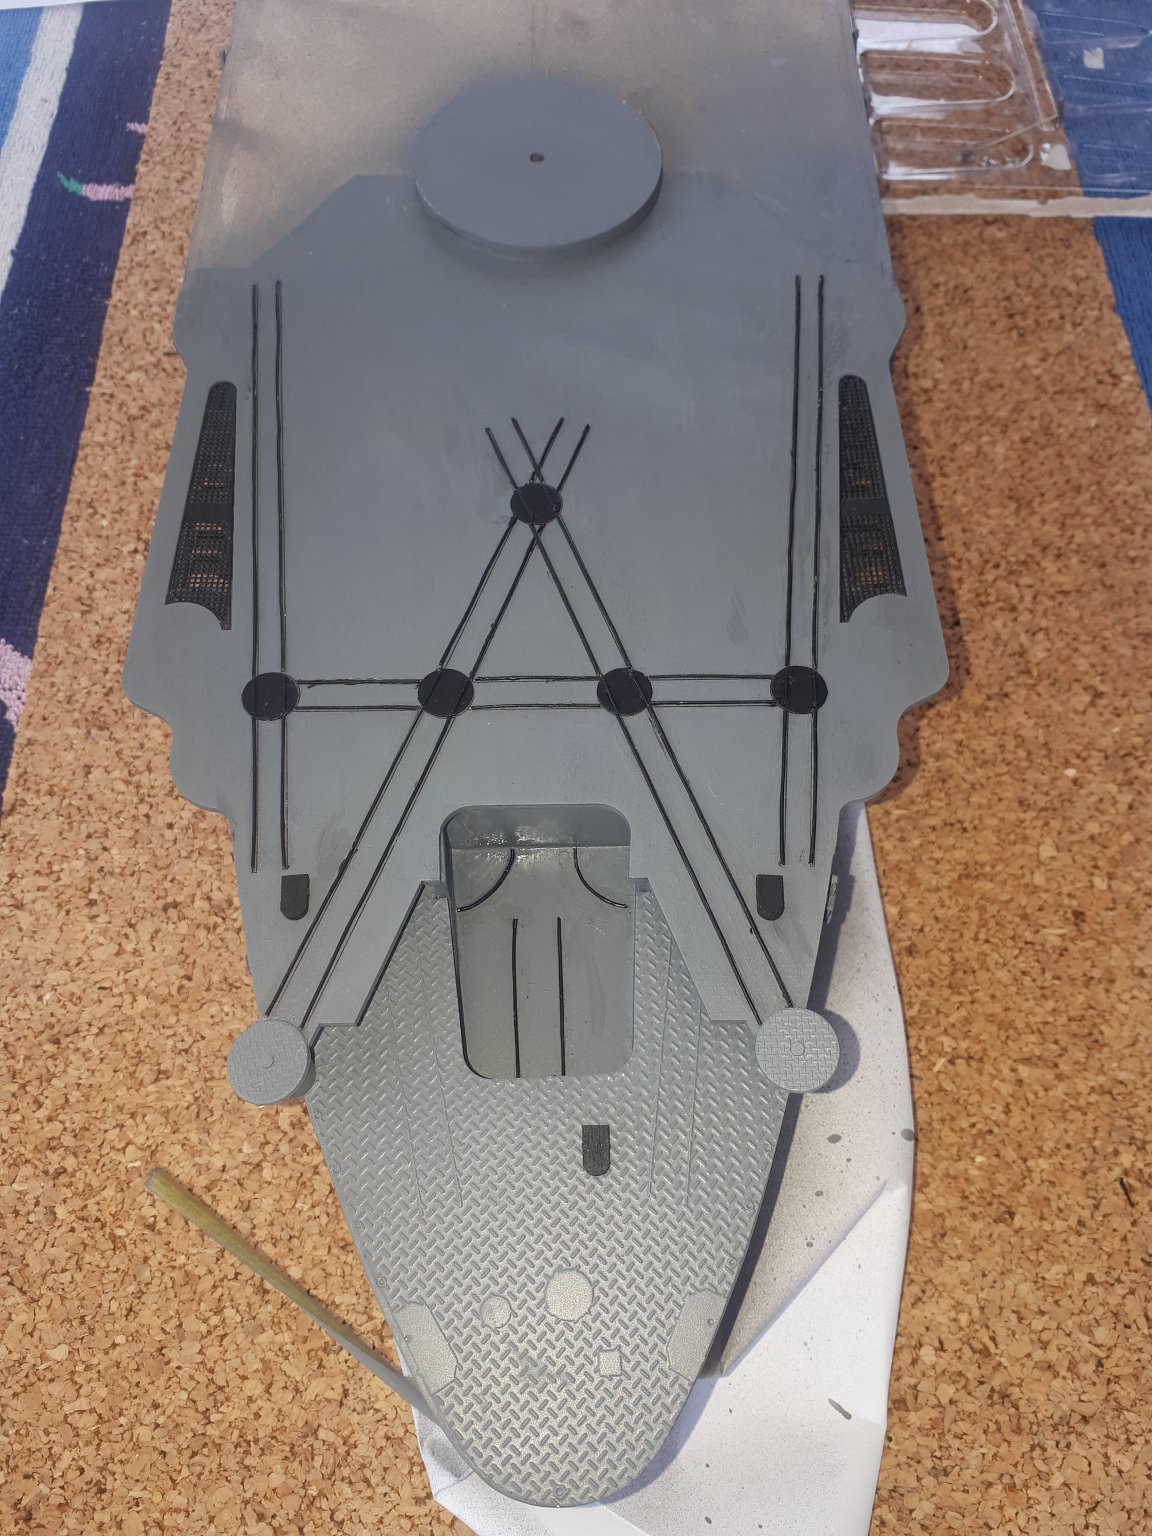
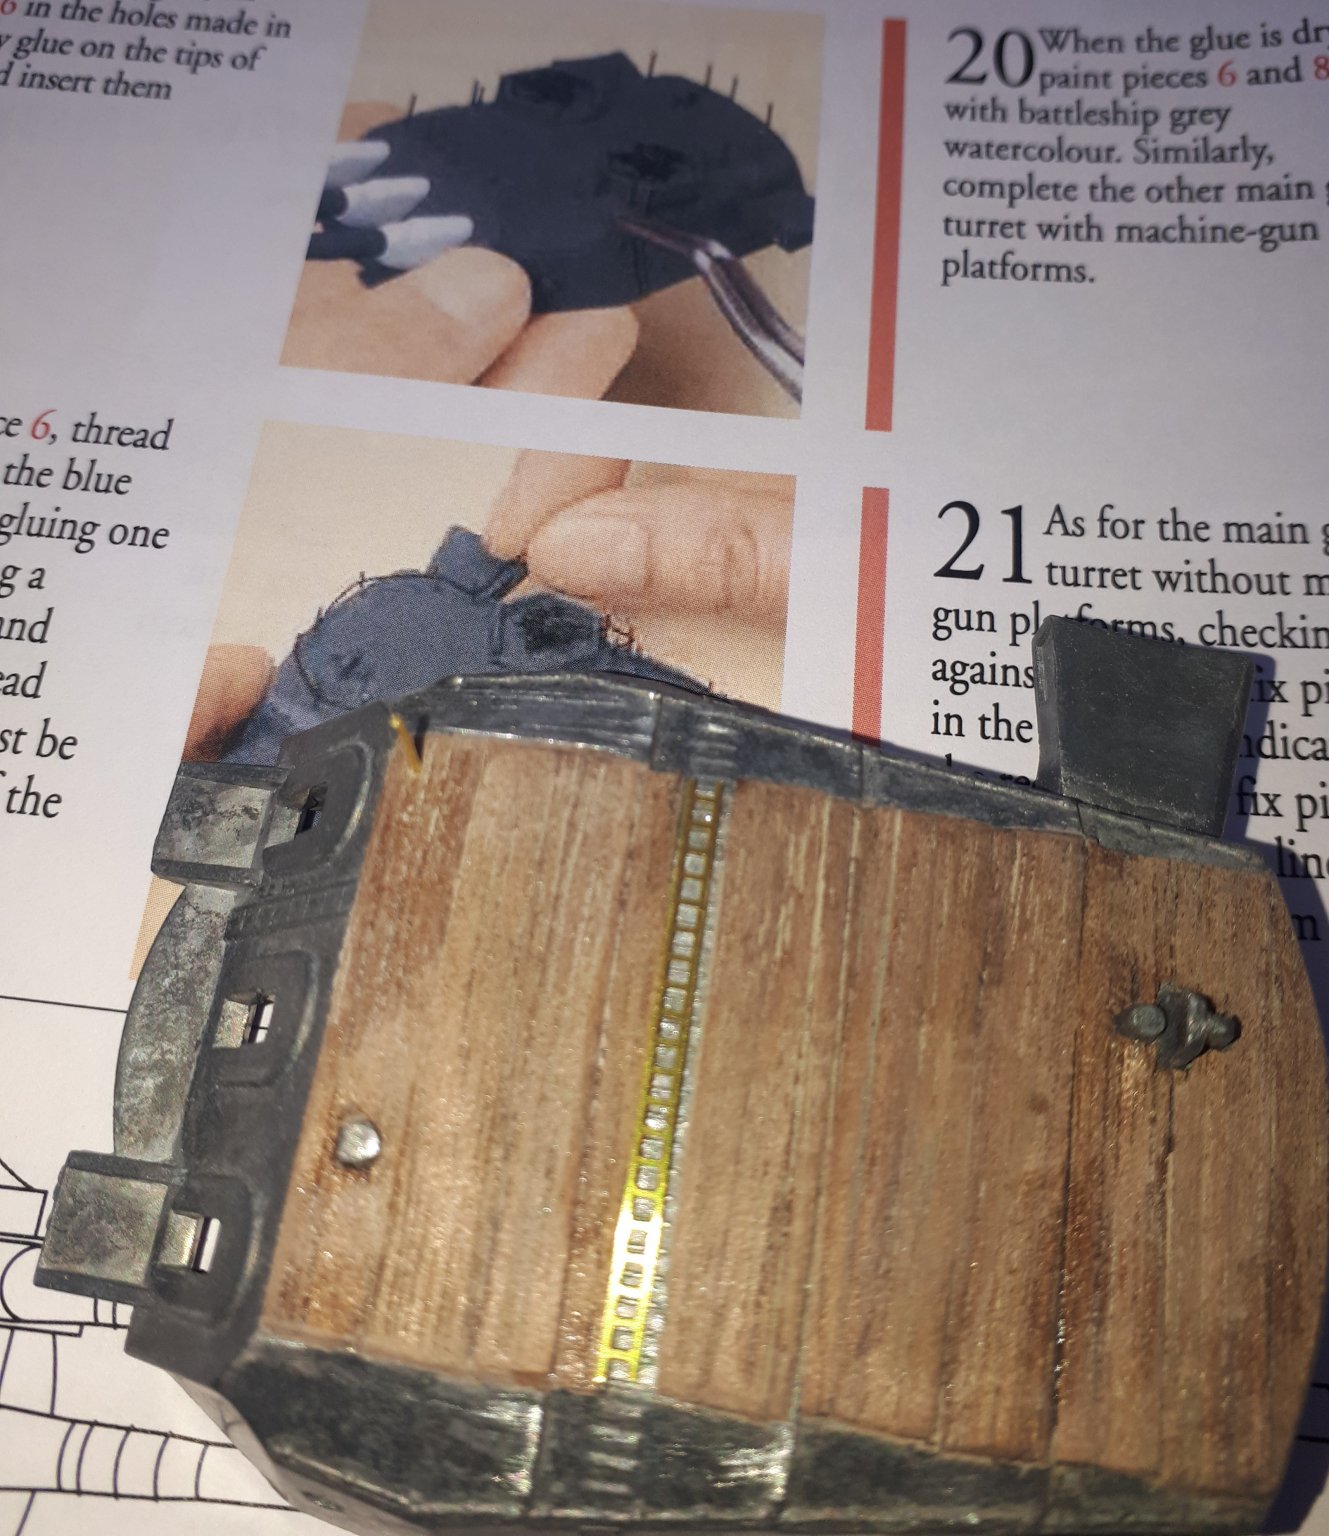
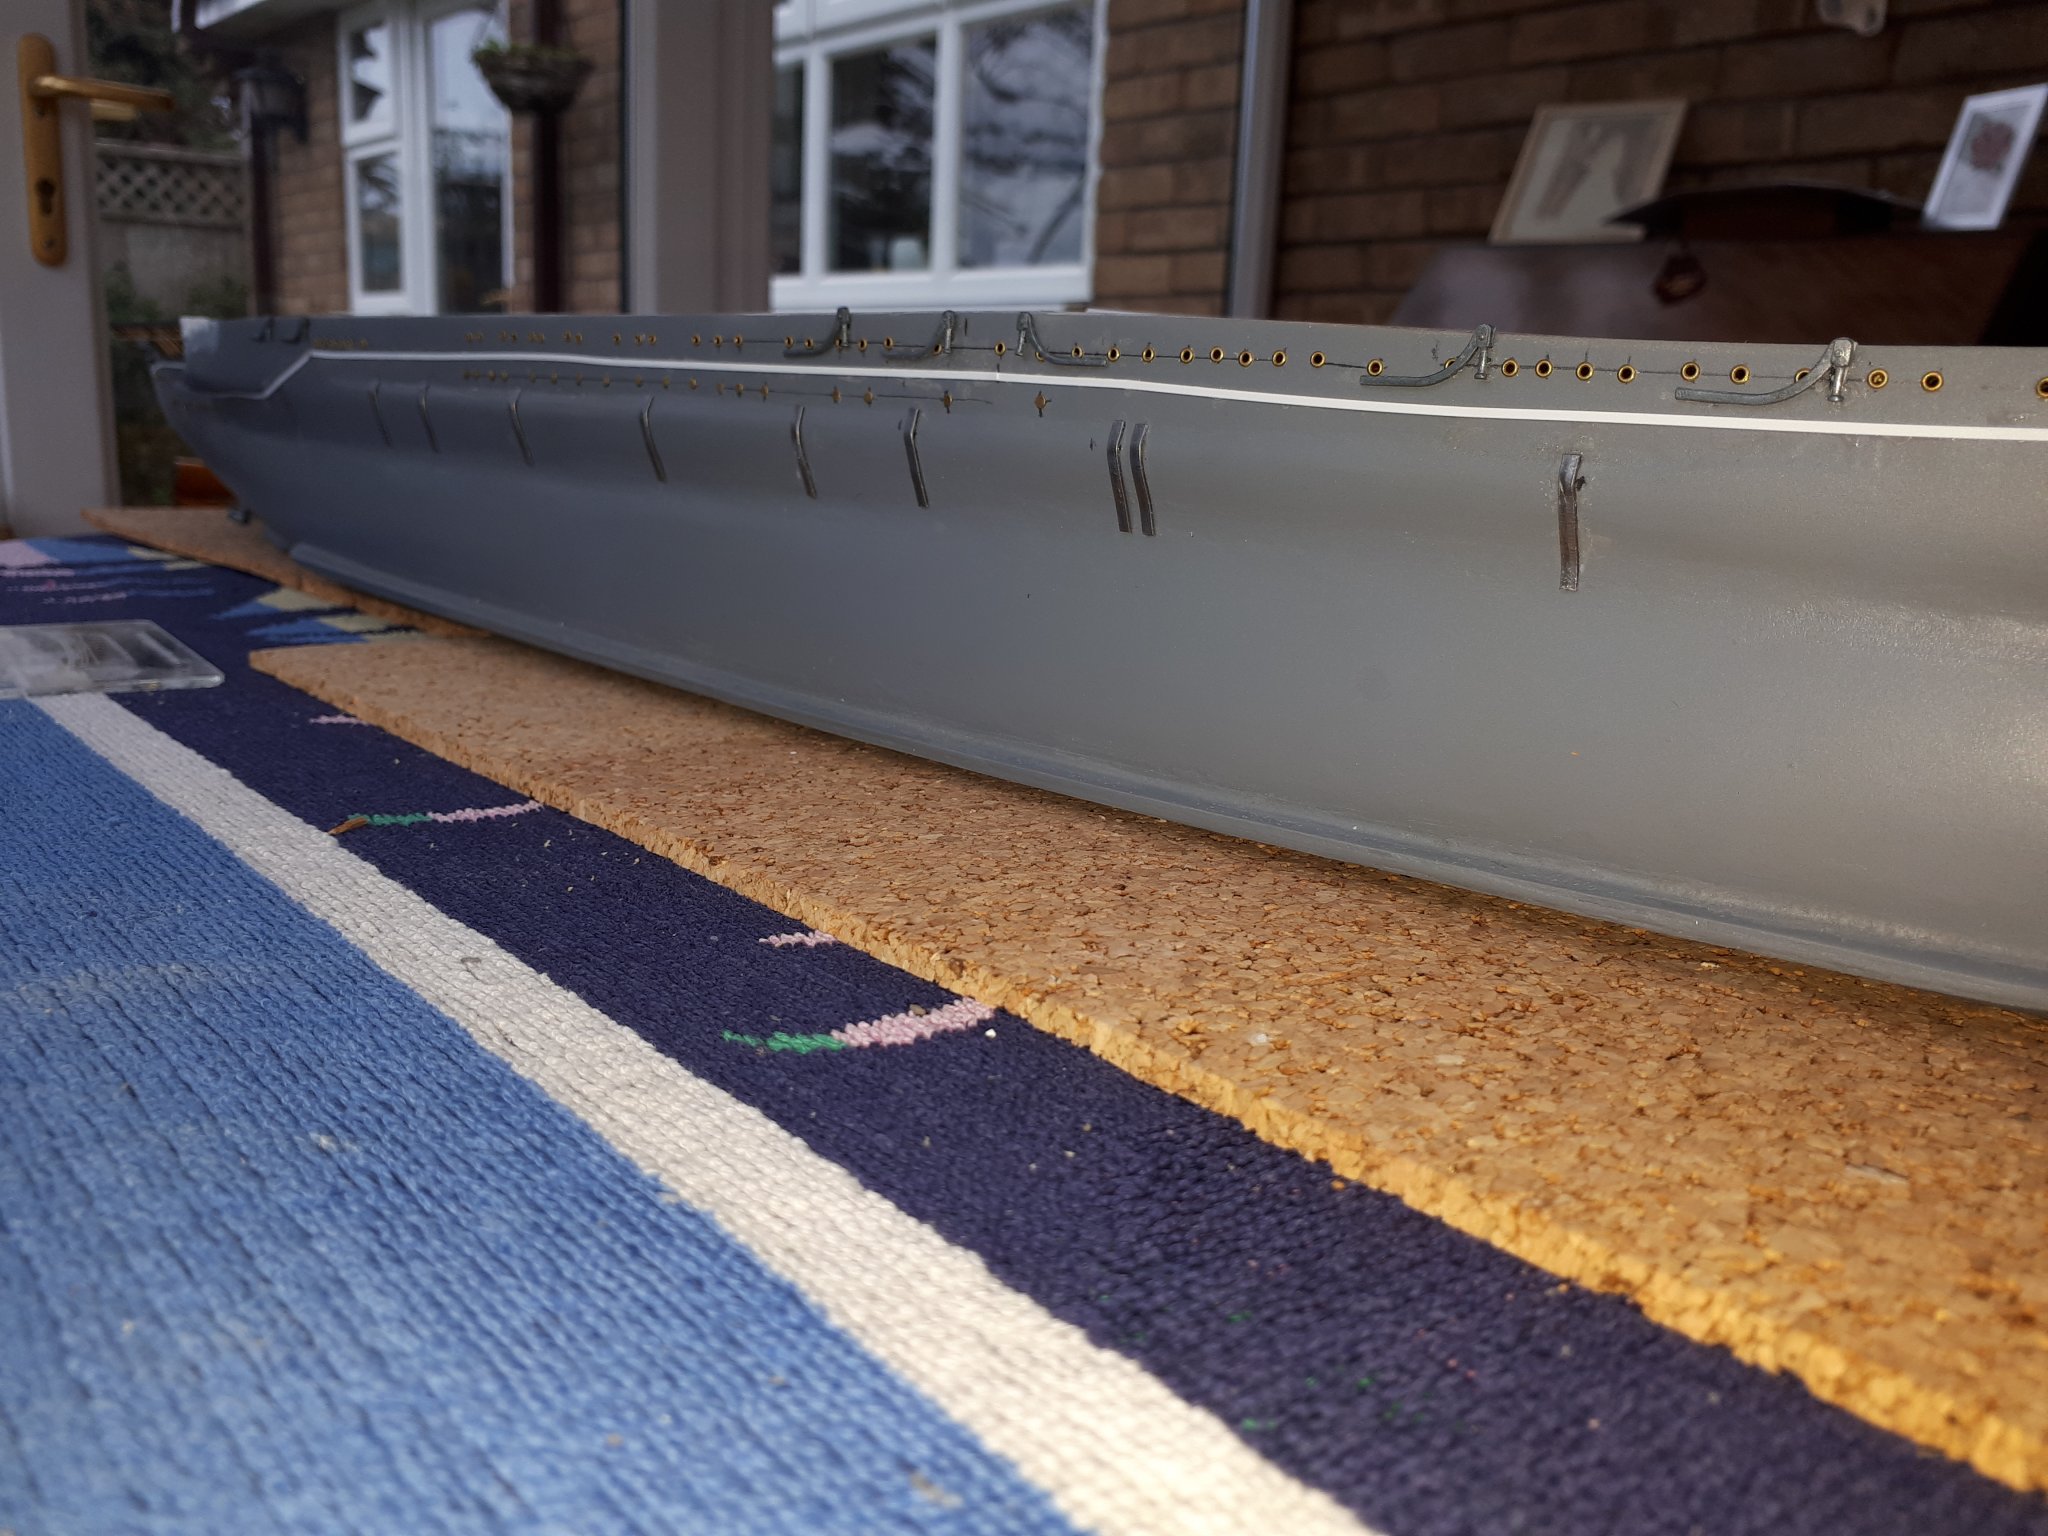
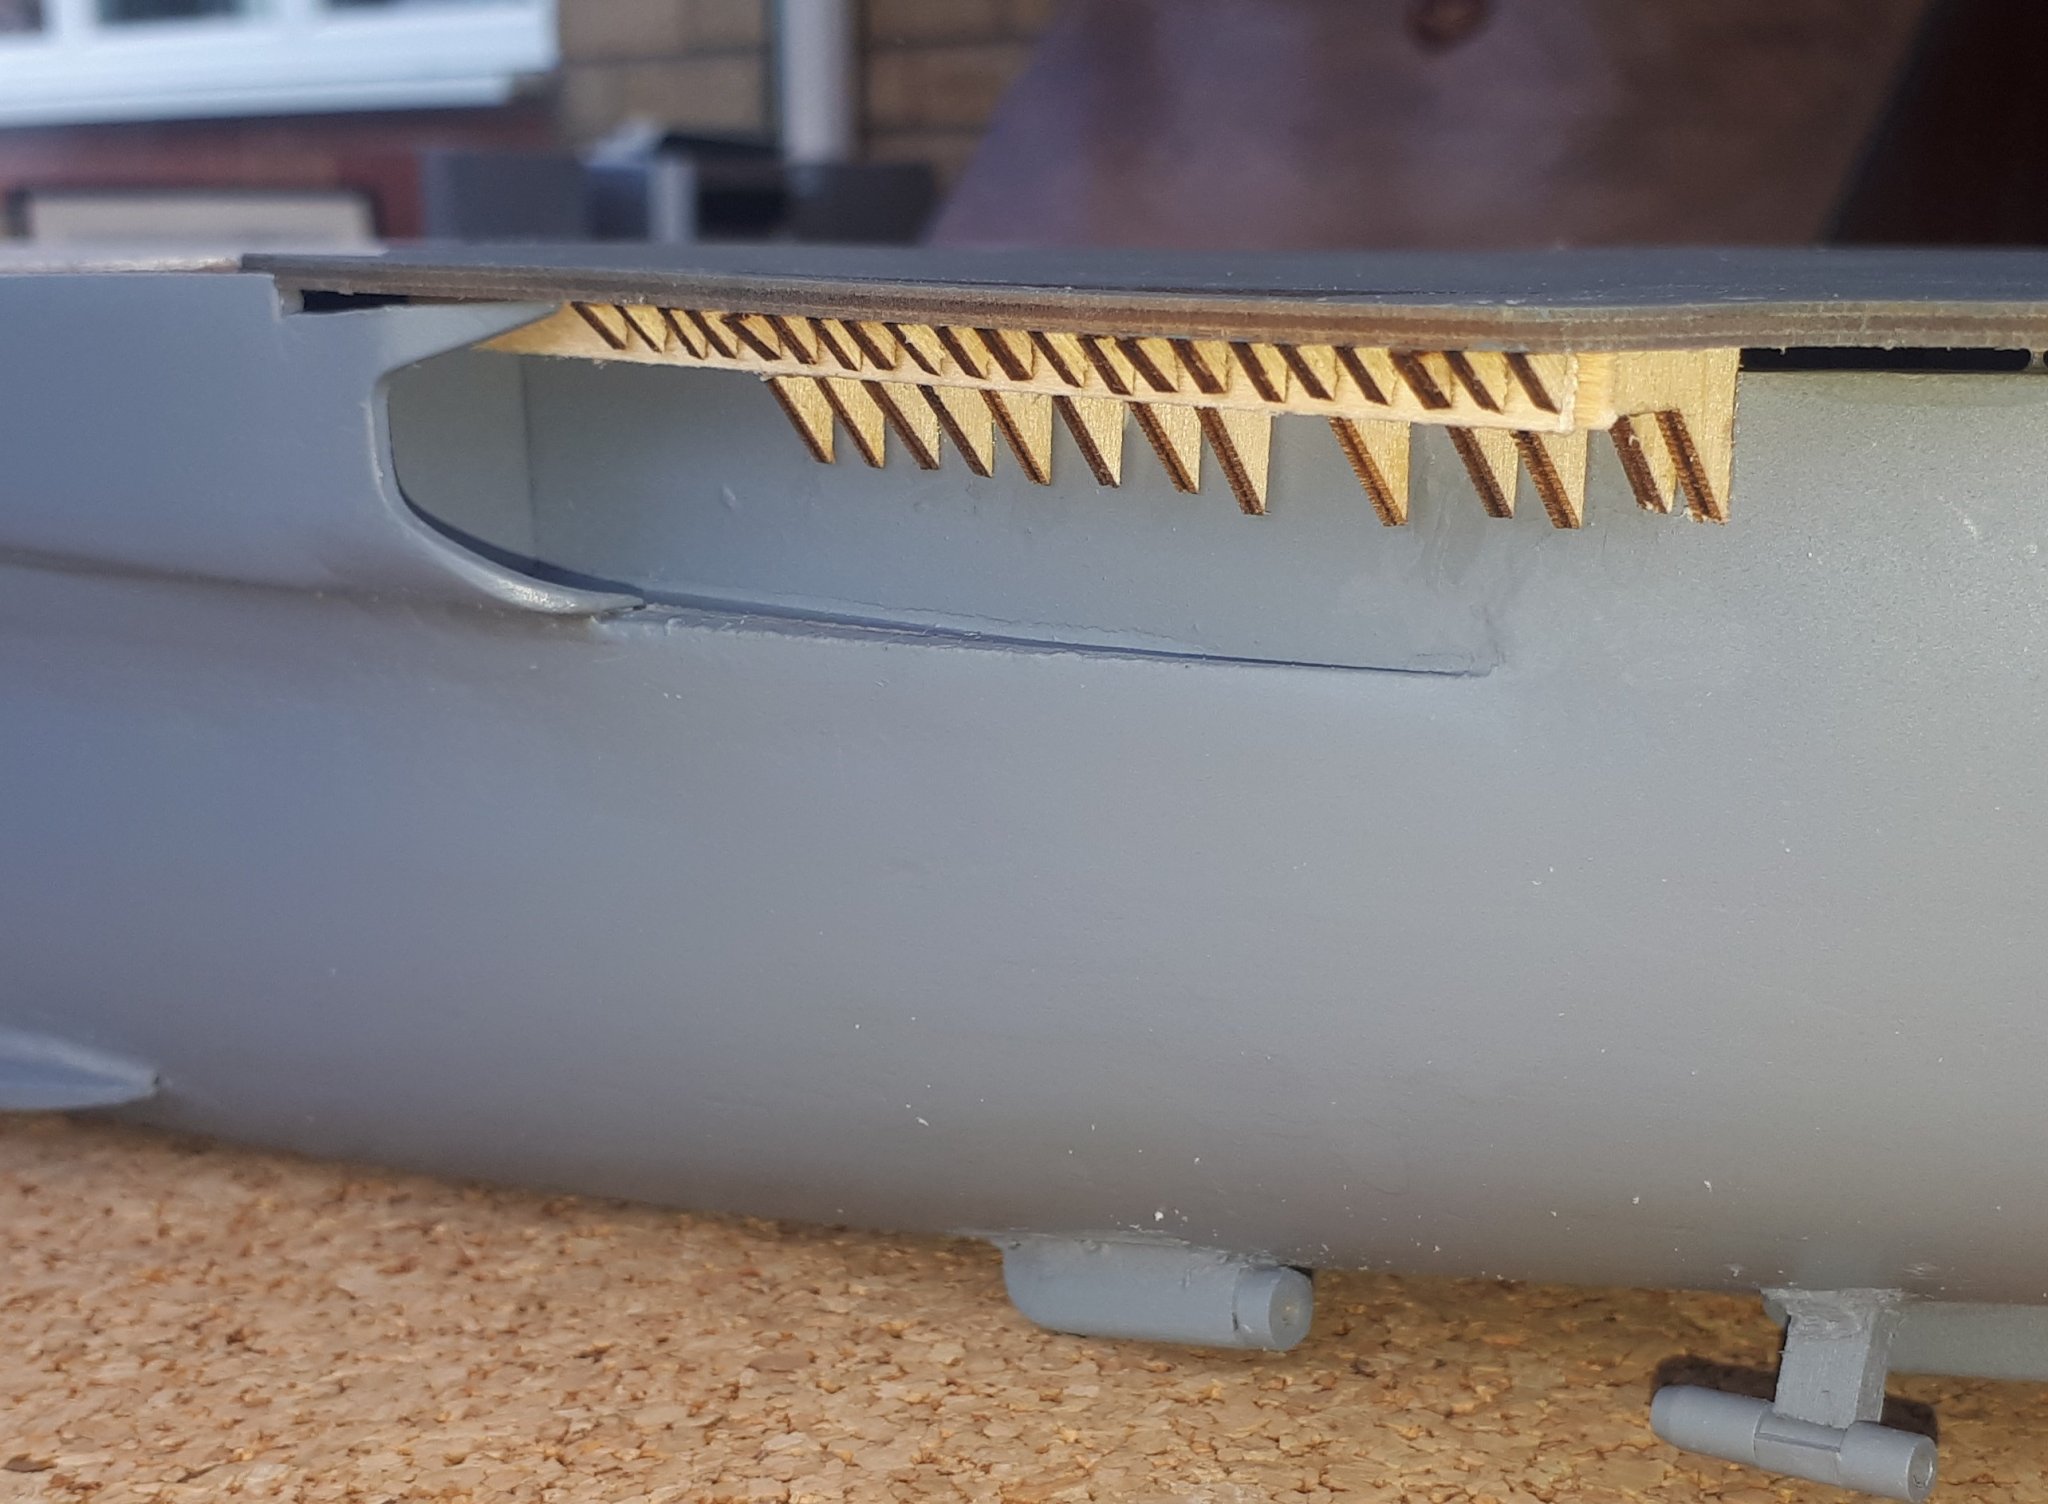
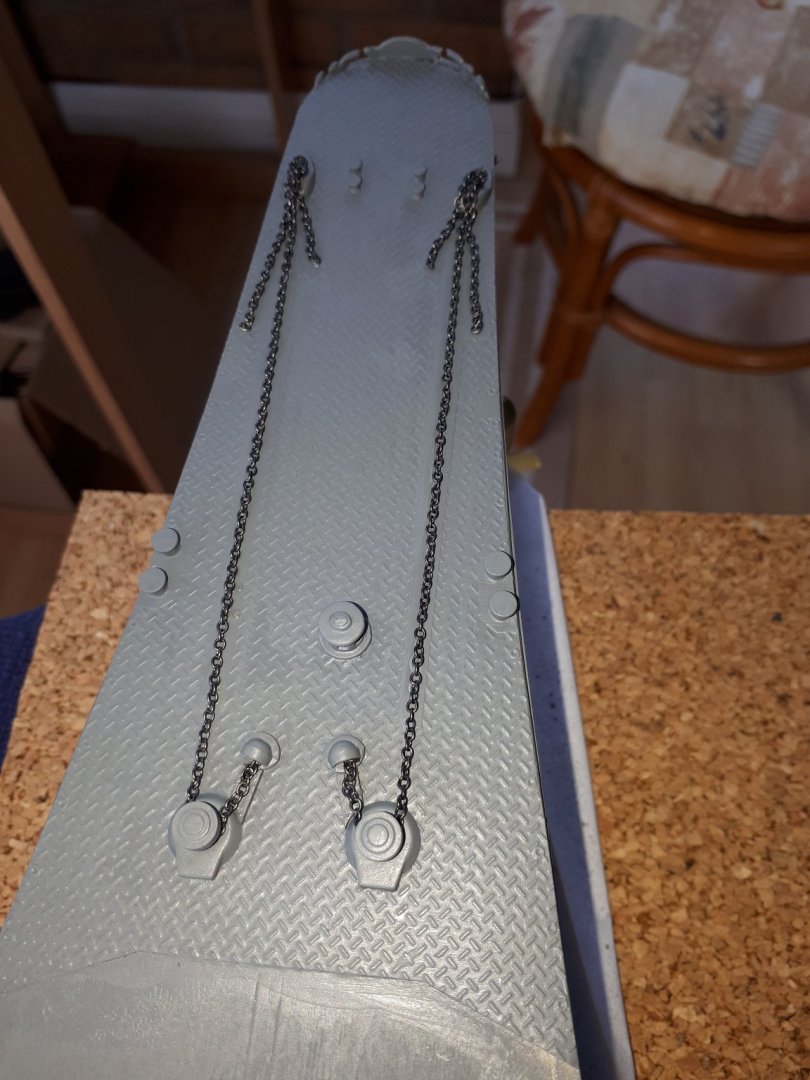
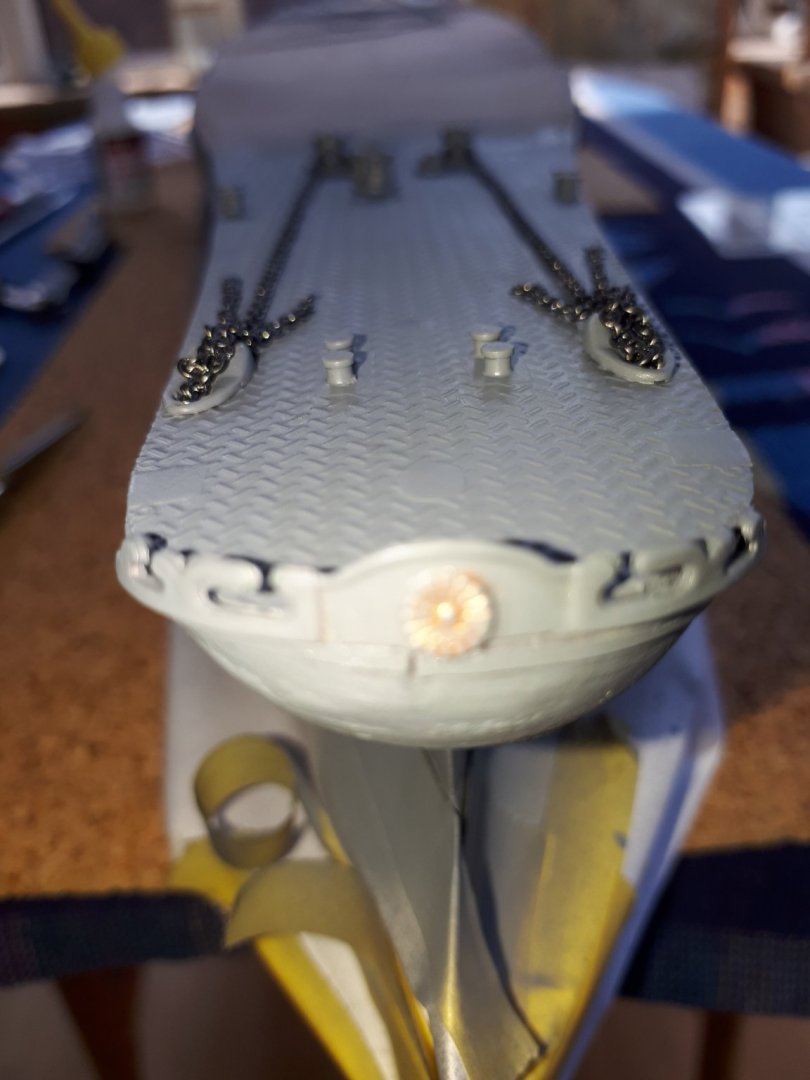
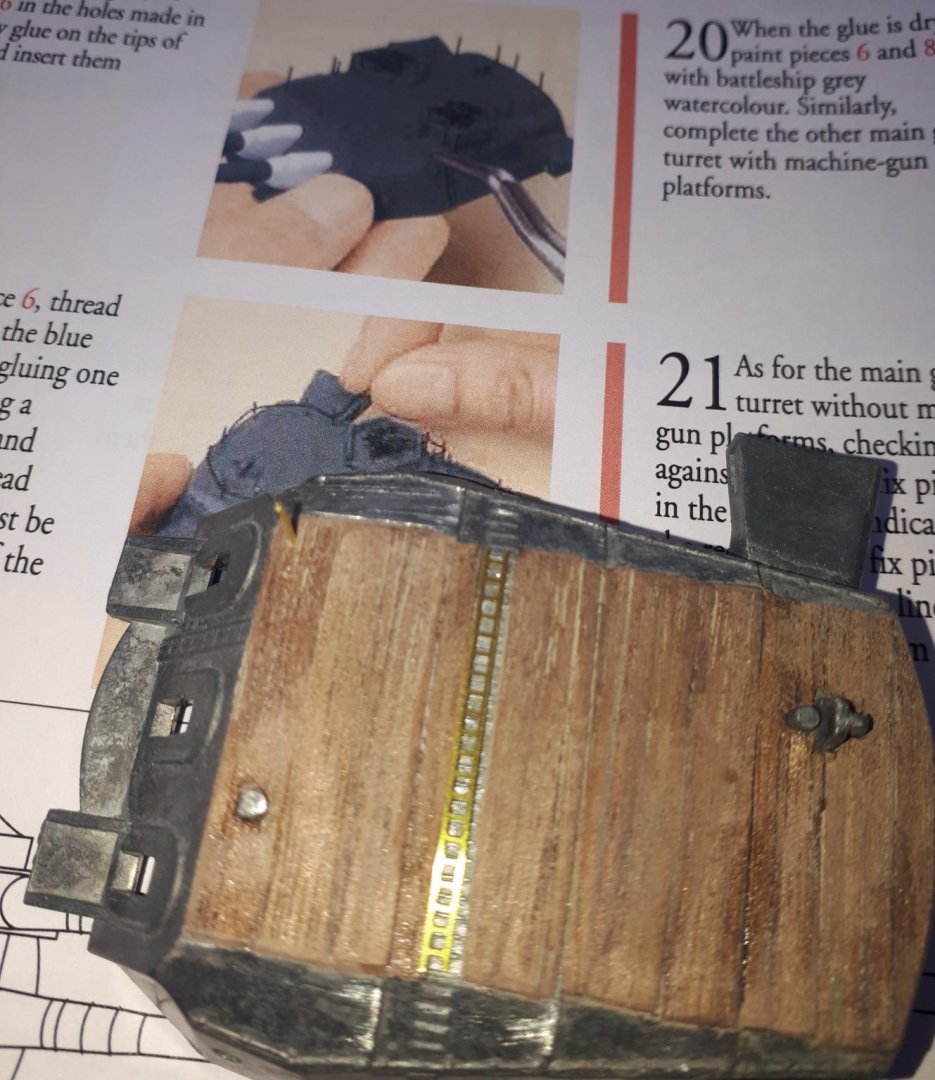
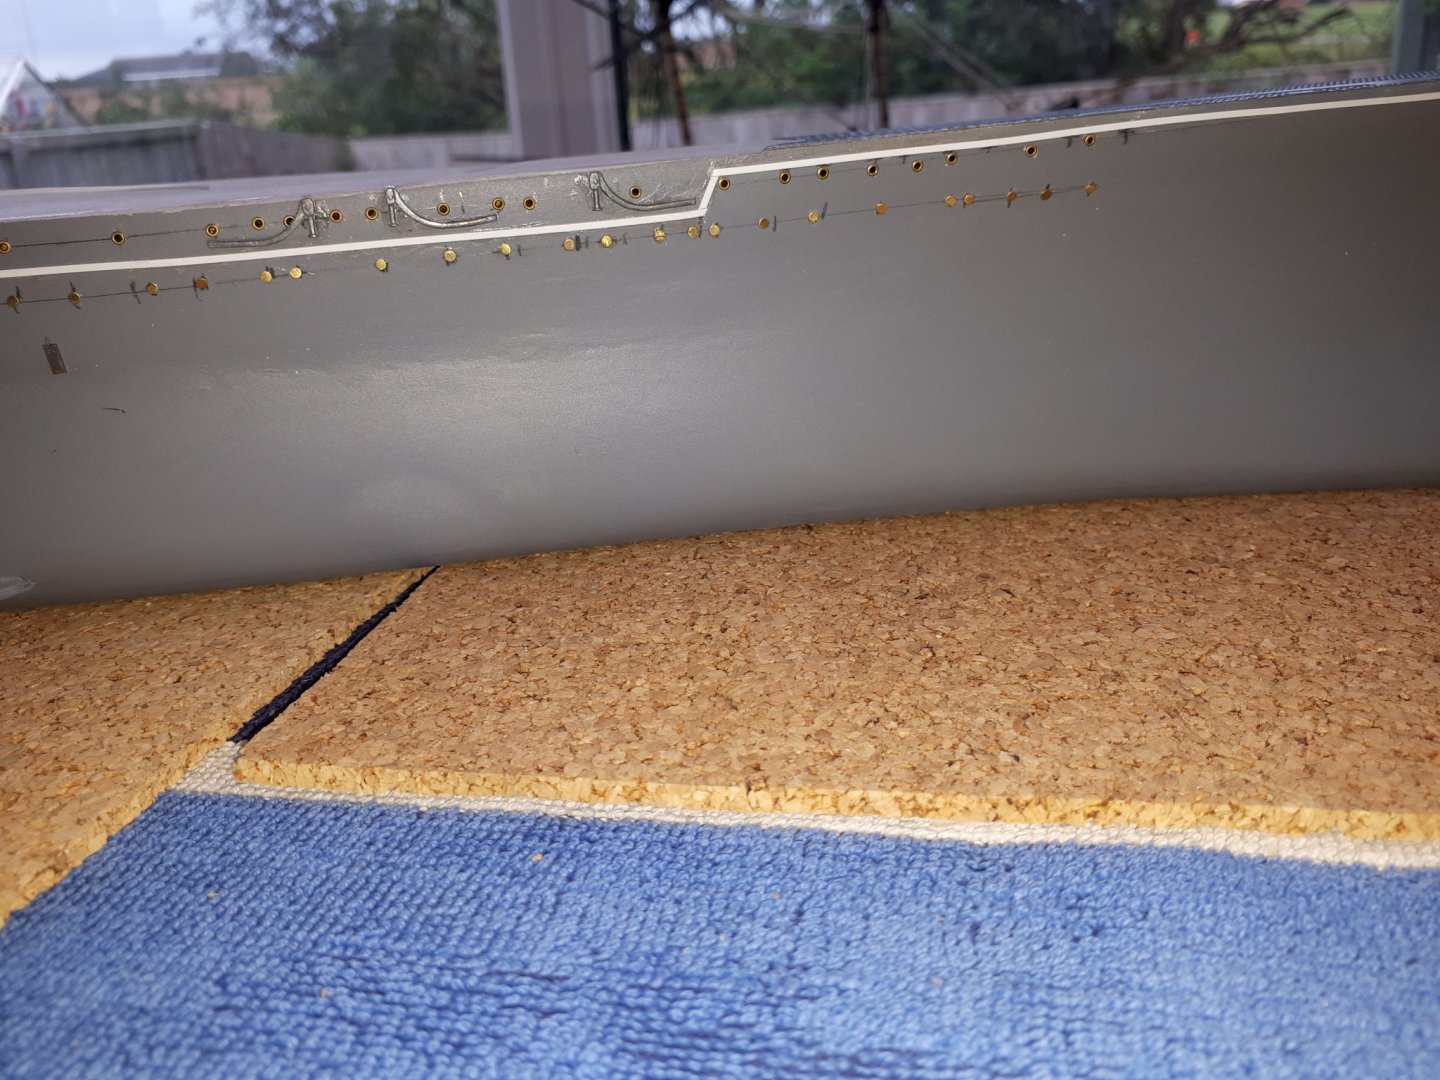
The three main guns require a handrail, but you need to drill a 0.5mm diameter hole approx. 0.5 mm deep to secure the handrail posts. I soon found out that I was unable to drill these holes in the die case metal case. I solved this by adding a 0.5mm thick wooden top. This will not be noticed once the gun as been primed and painted. I have now completed adding the features to the port side of the hull, namely the load lines, portholes, hanger cranes and exhaust pipes. I opted to use some Amati potholes for the open hatches. I also used 1mm plastic strip for the load lines.

- 64 replies
-
- 7
-
-
- yamato
- deagostini
- (and 2 more)
-
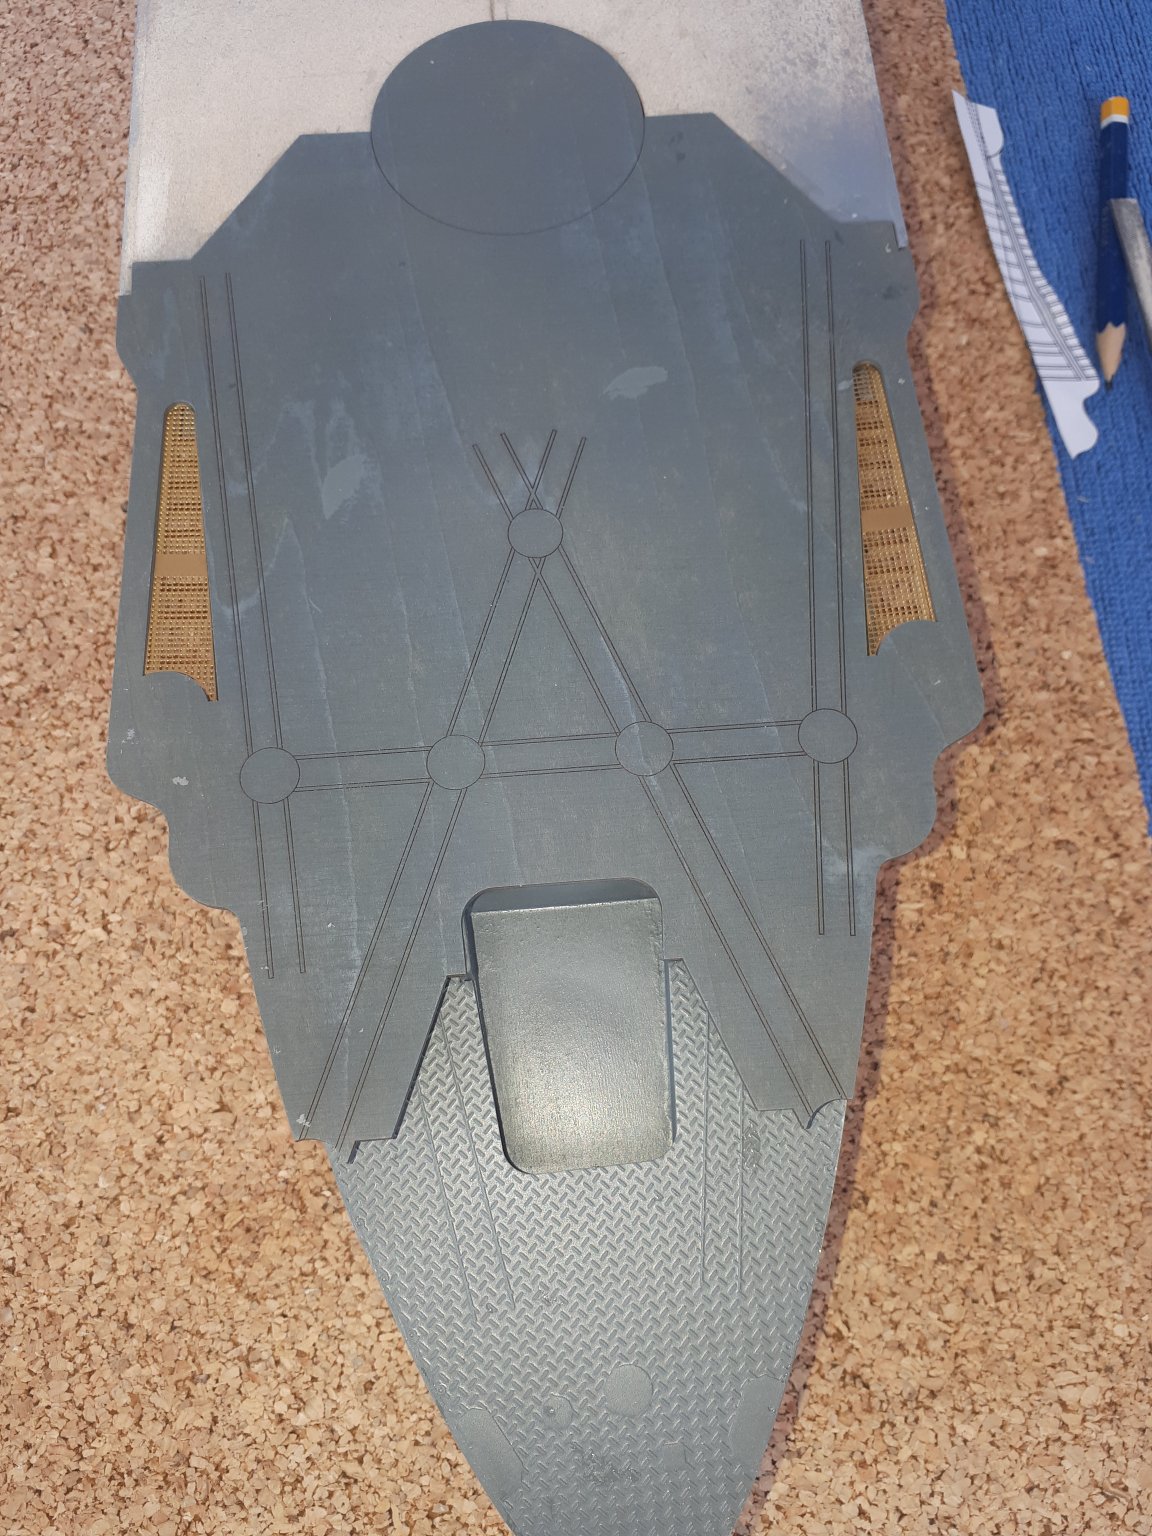
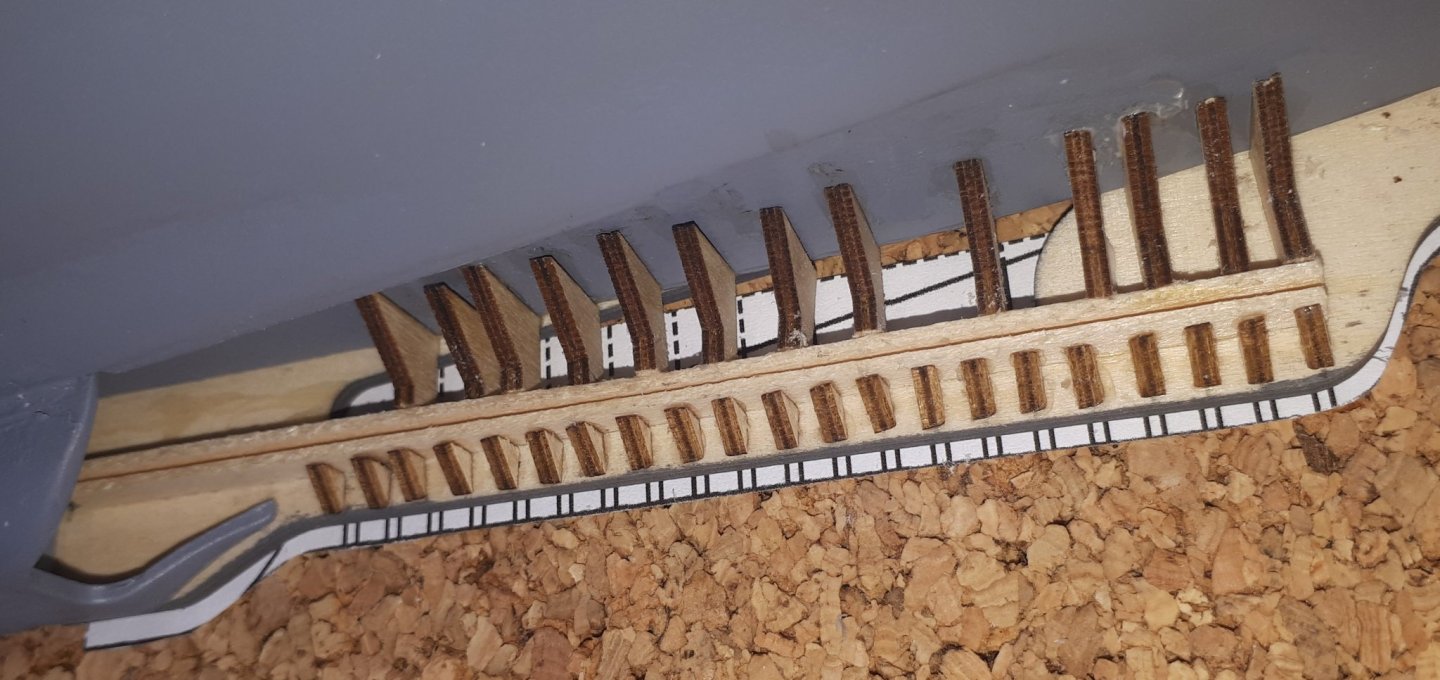
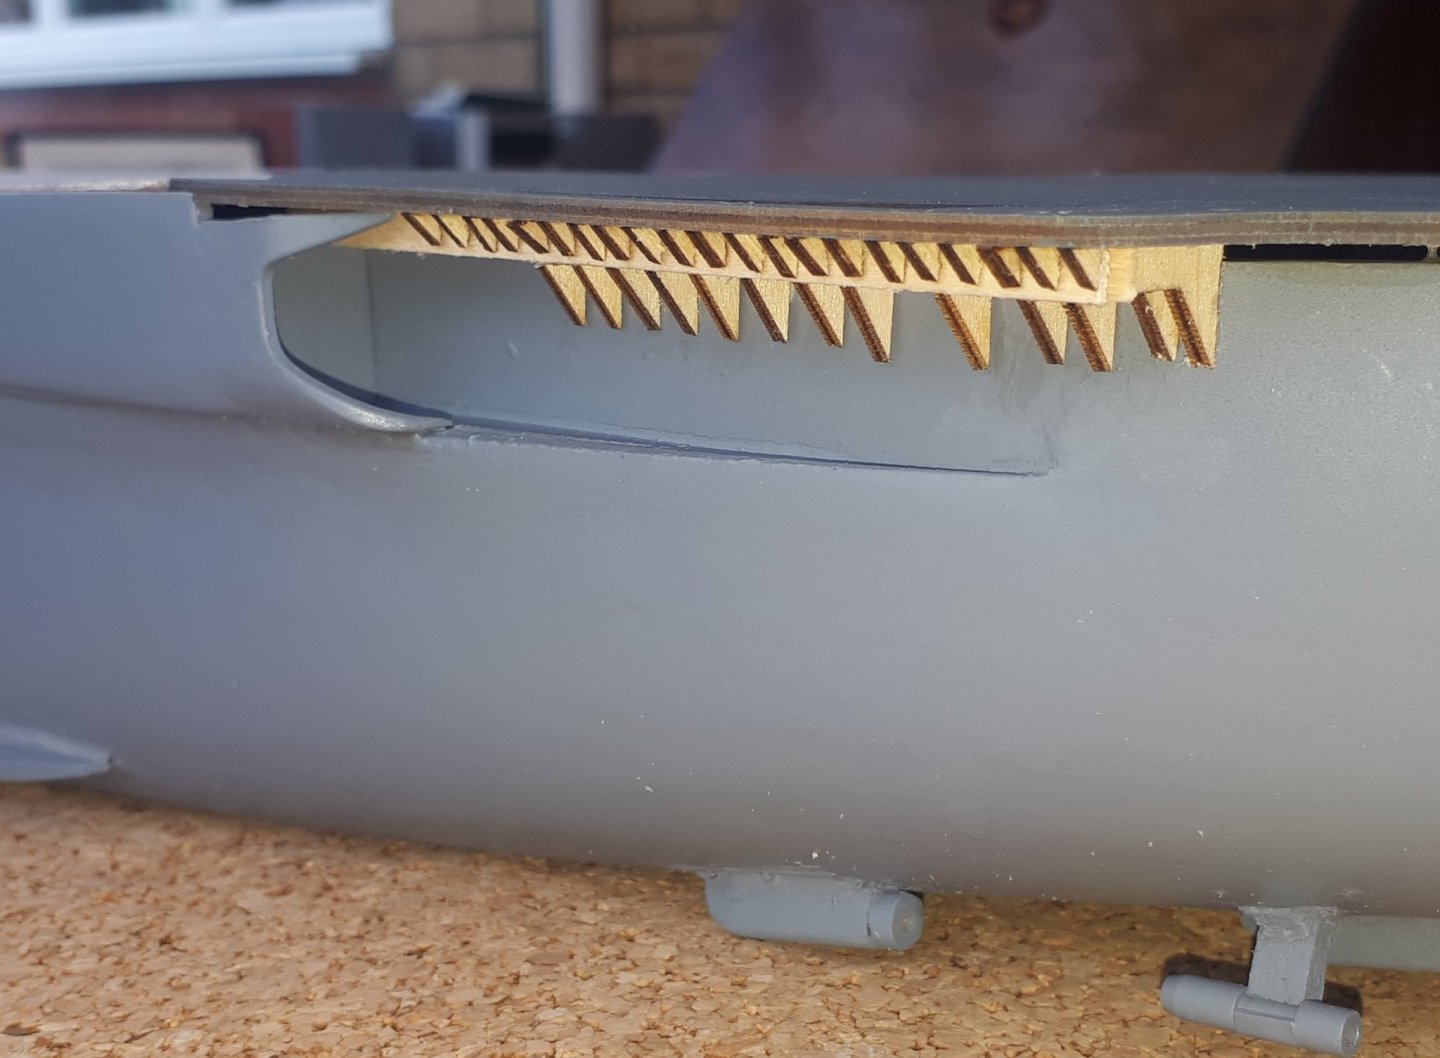
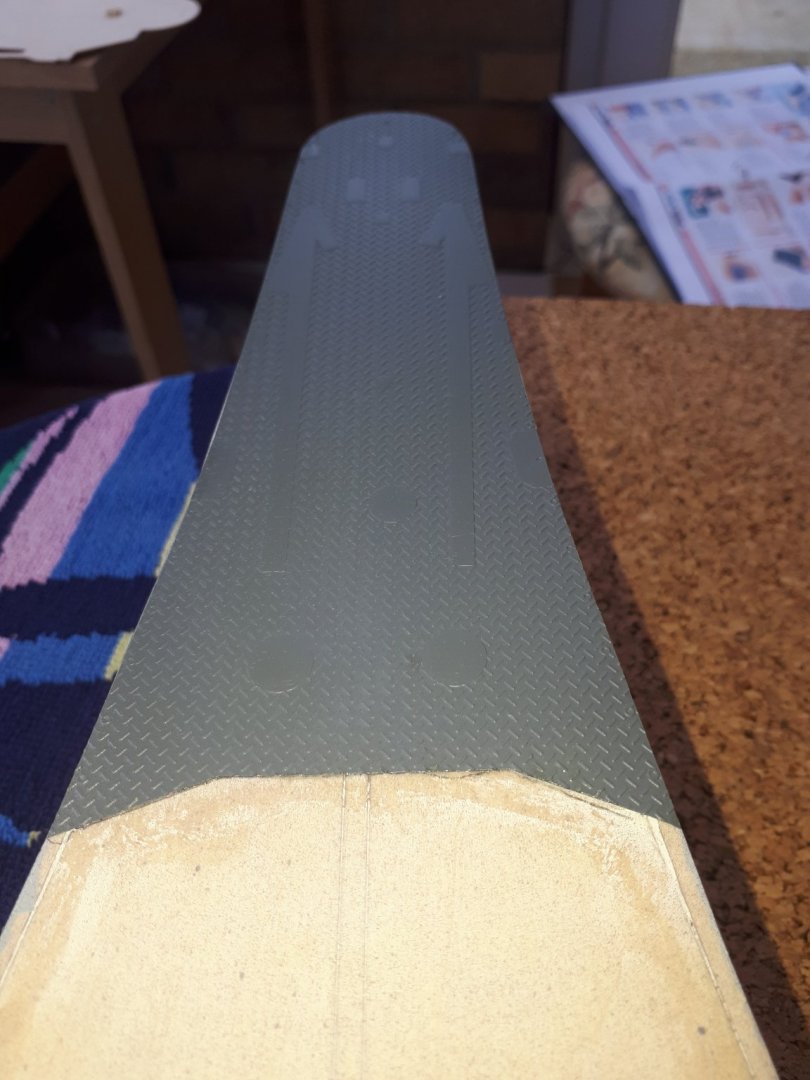
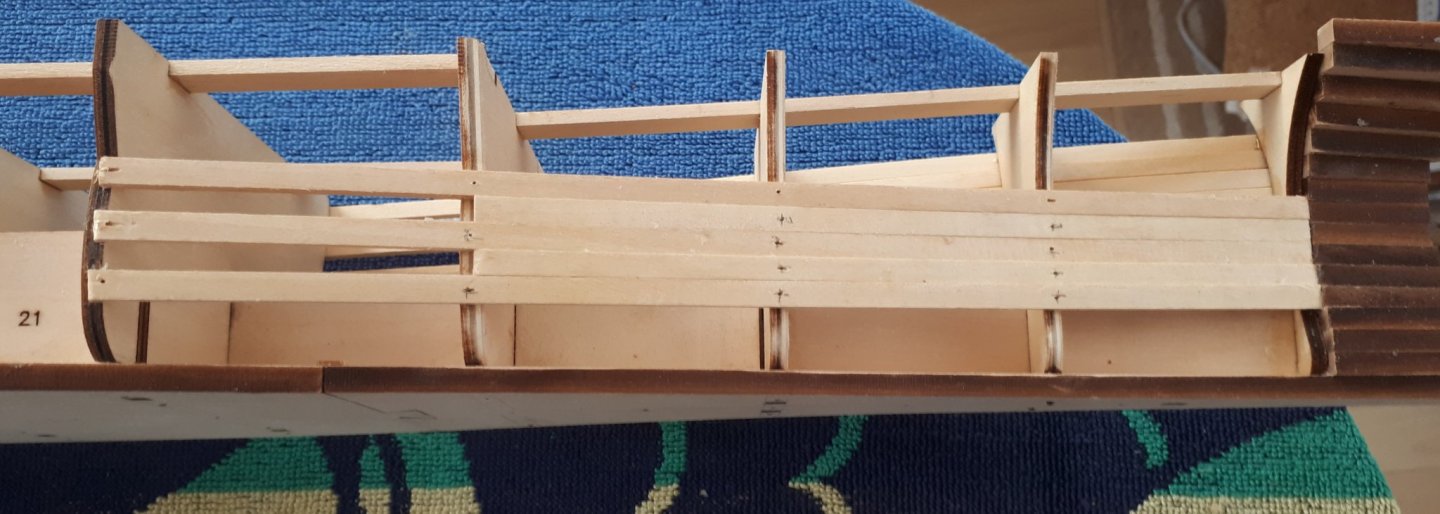
Today I worked on installing the hanger deck and associated supports. The task turned out to be much simpler than I was expecting. I printed out a picture of the hanger support arrangement and positioned it under the deck and used that as a guide to add the various hanger deck support pieces. The hanger deck will require some additional filler / glue as can be seen below. The hanger deck grills have been dry fitted at this stage as then need to be removed and painted Iron Grey before they are glued in place.

- 64 replies
-
- 10
-
-
- yamato
- deagostini
- (and 2 more)
-
Thanks Mike It is an interesting build, difficult at times due to the poor quality of the materials and or the build instructions.
- 64 replies
-
- 3
-
-
- yamato
- deagostini
- (and 2 more)
-
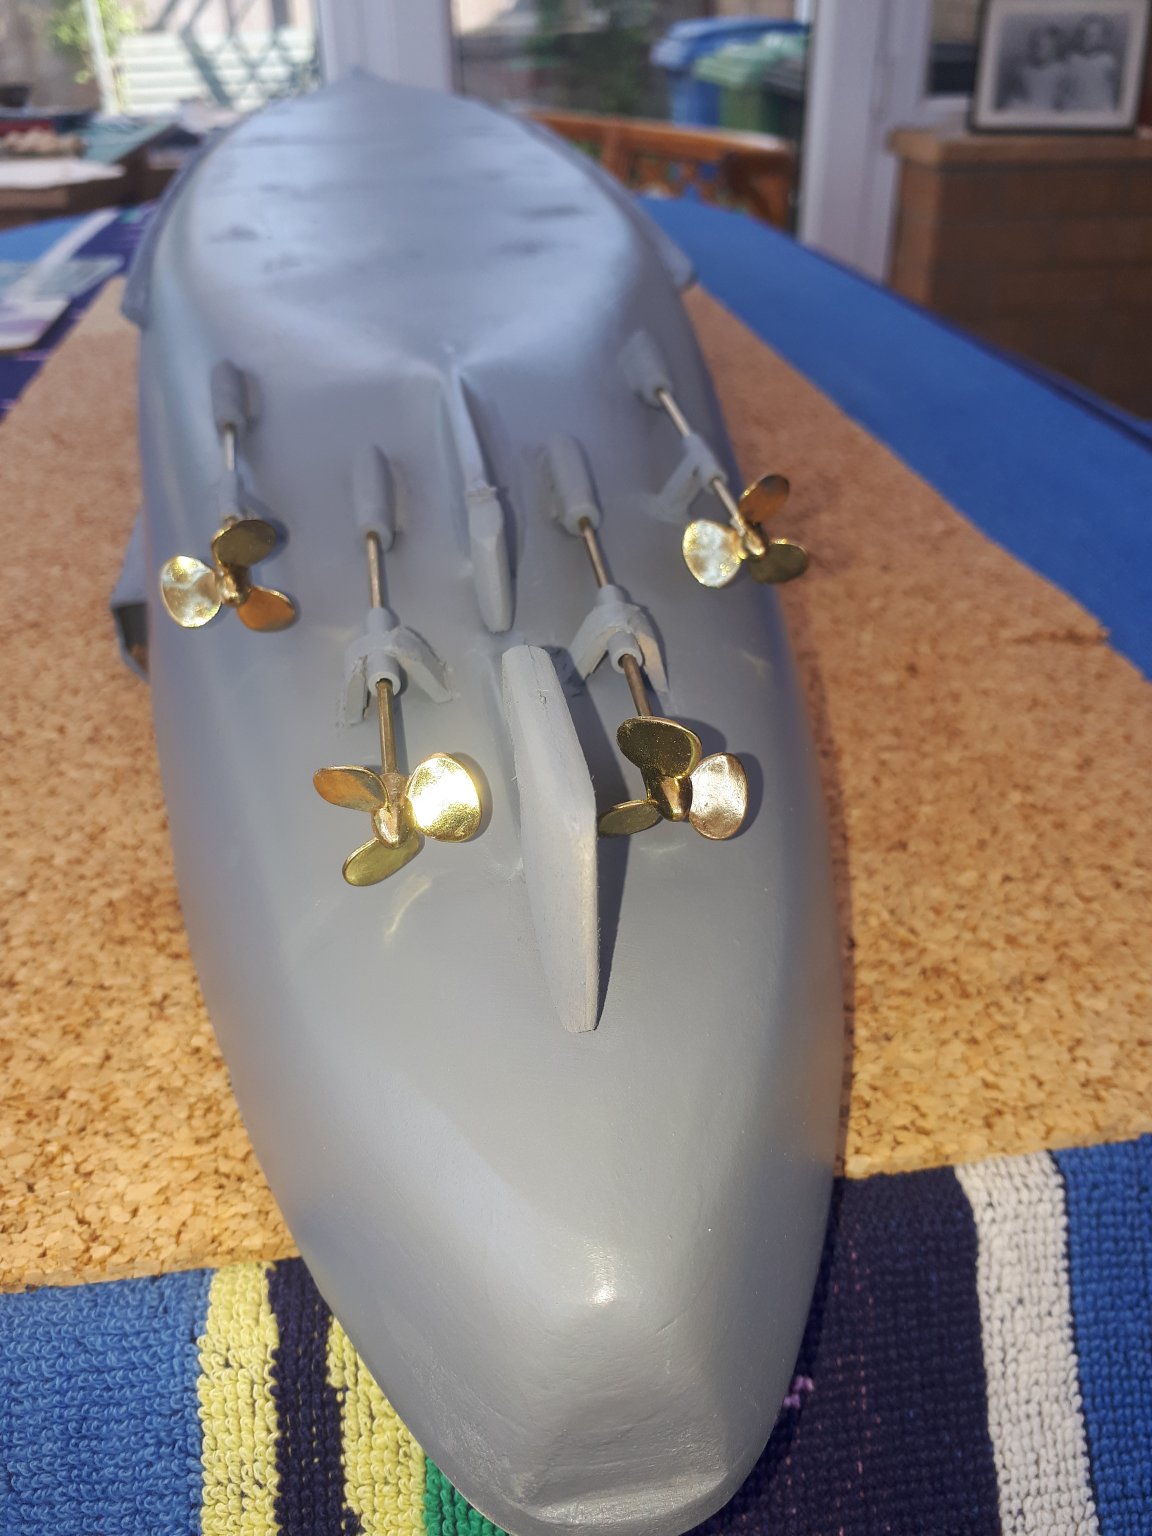
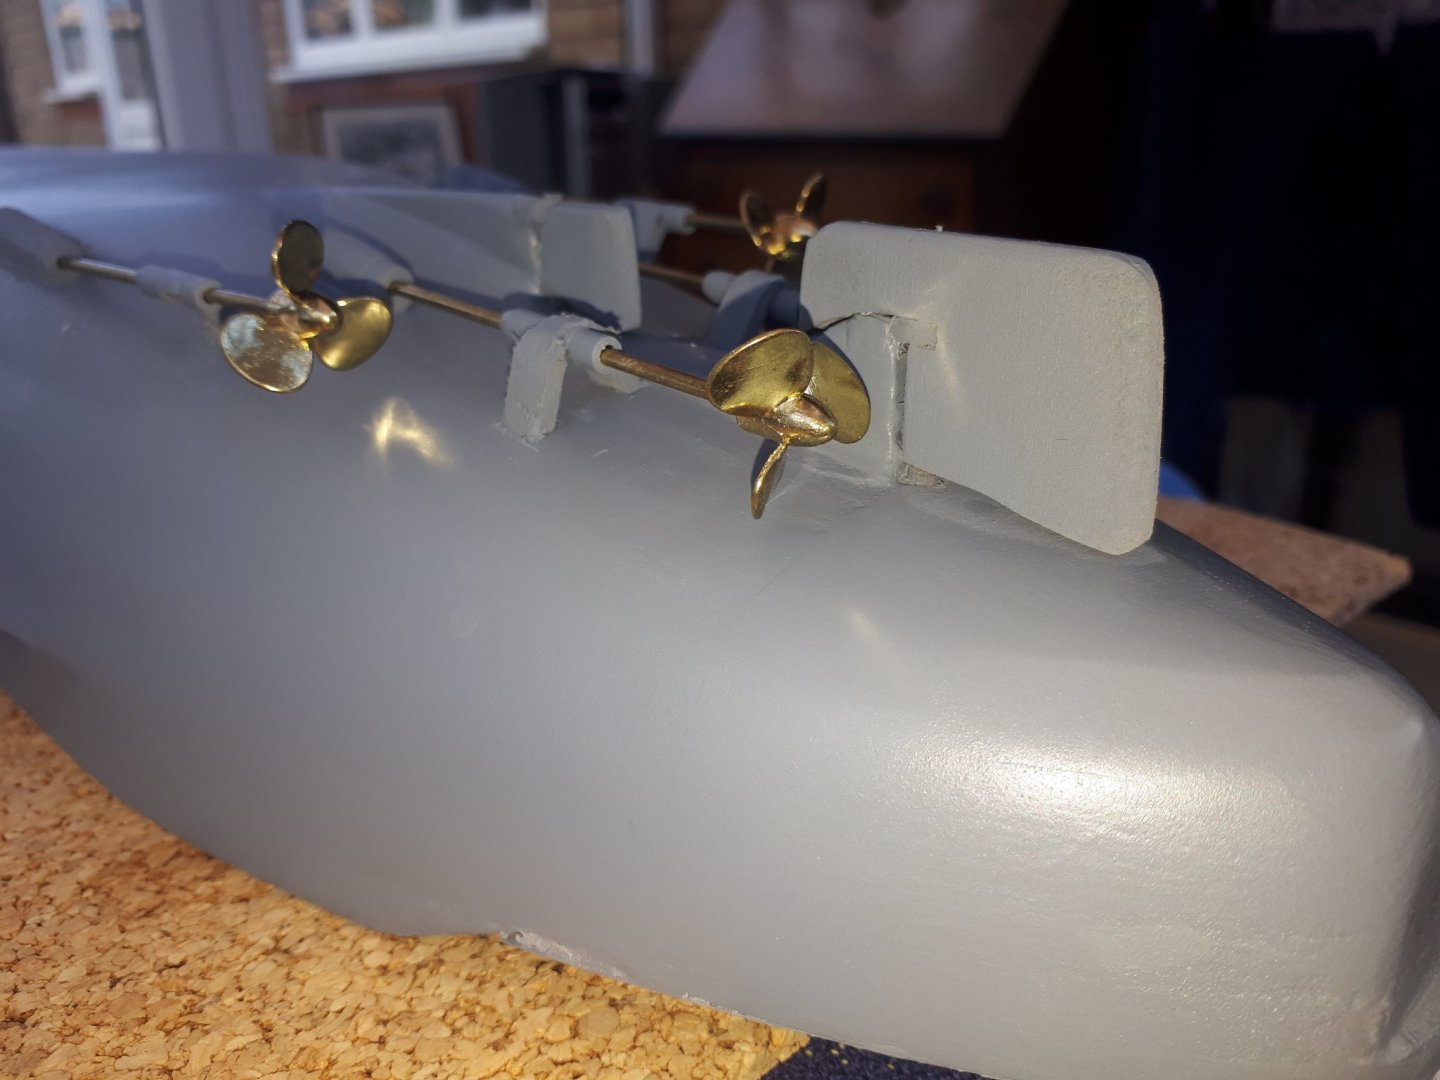
I have continued on with steady progress. I have assembled 12 small machine guns, which was quite time consuming given how small the parts were and that I also had to manufacture 24 gun barrels, each 5mm long. I also fitted the bow and stern photo etched plates. Following on from that I added the rolling chocks, propellers and rudders to the hull assembly. Again there was quoite a bit of work involved with these tasks.

- 64 replies
-
- 9
-
-
- yamato
- deagostini
- (and 2 more)
-
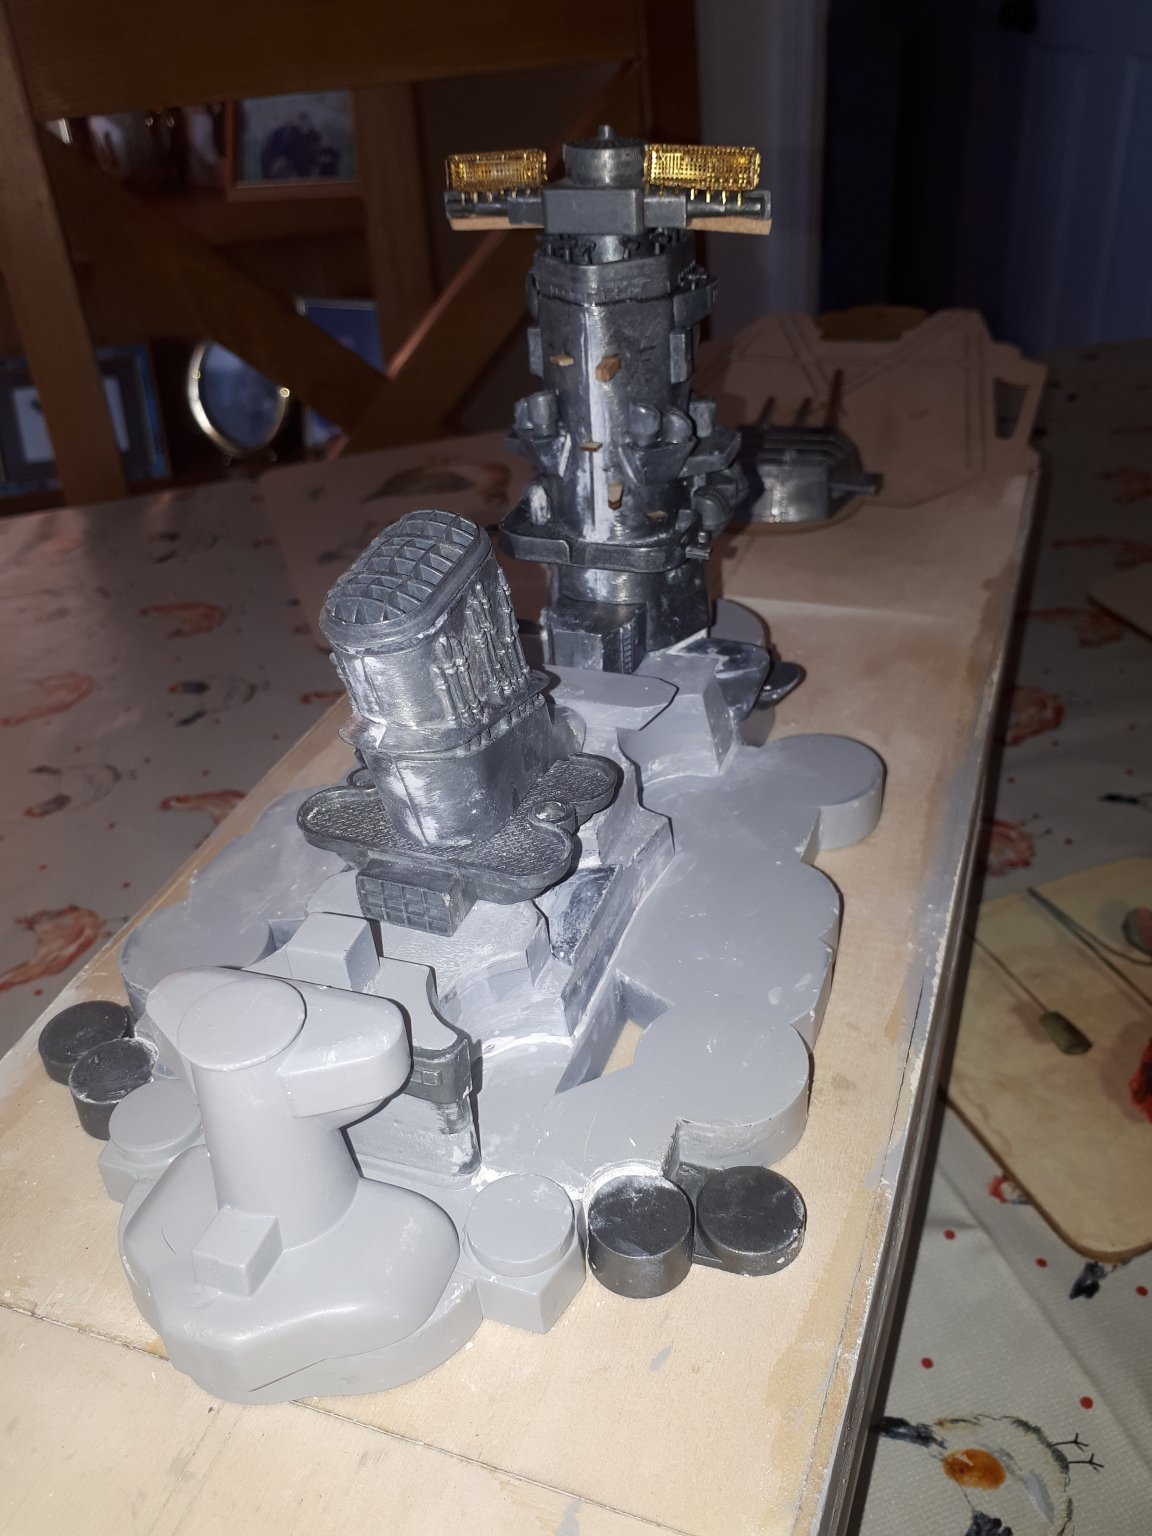
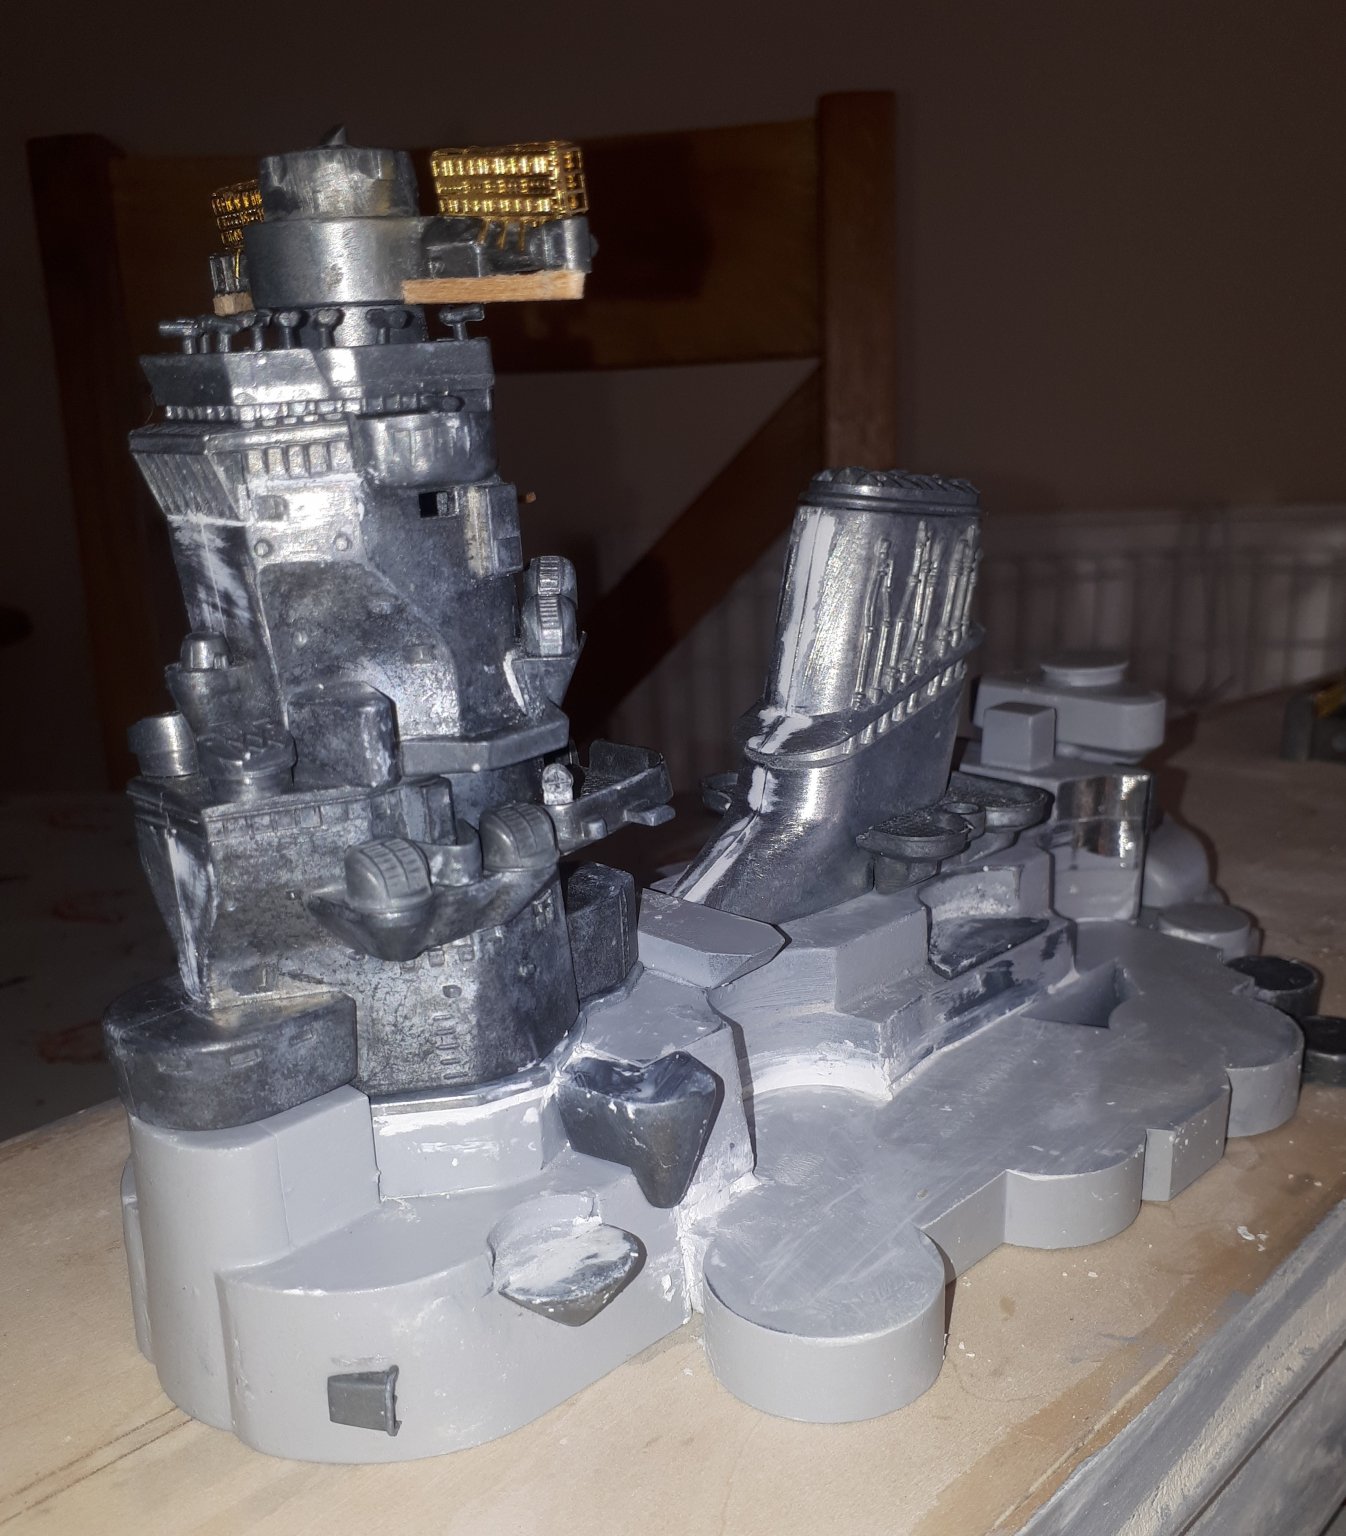
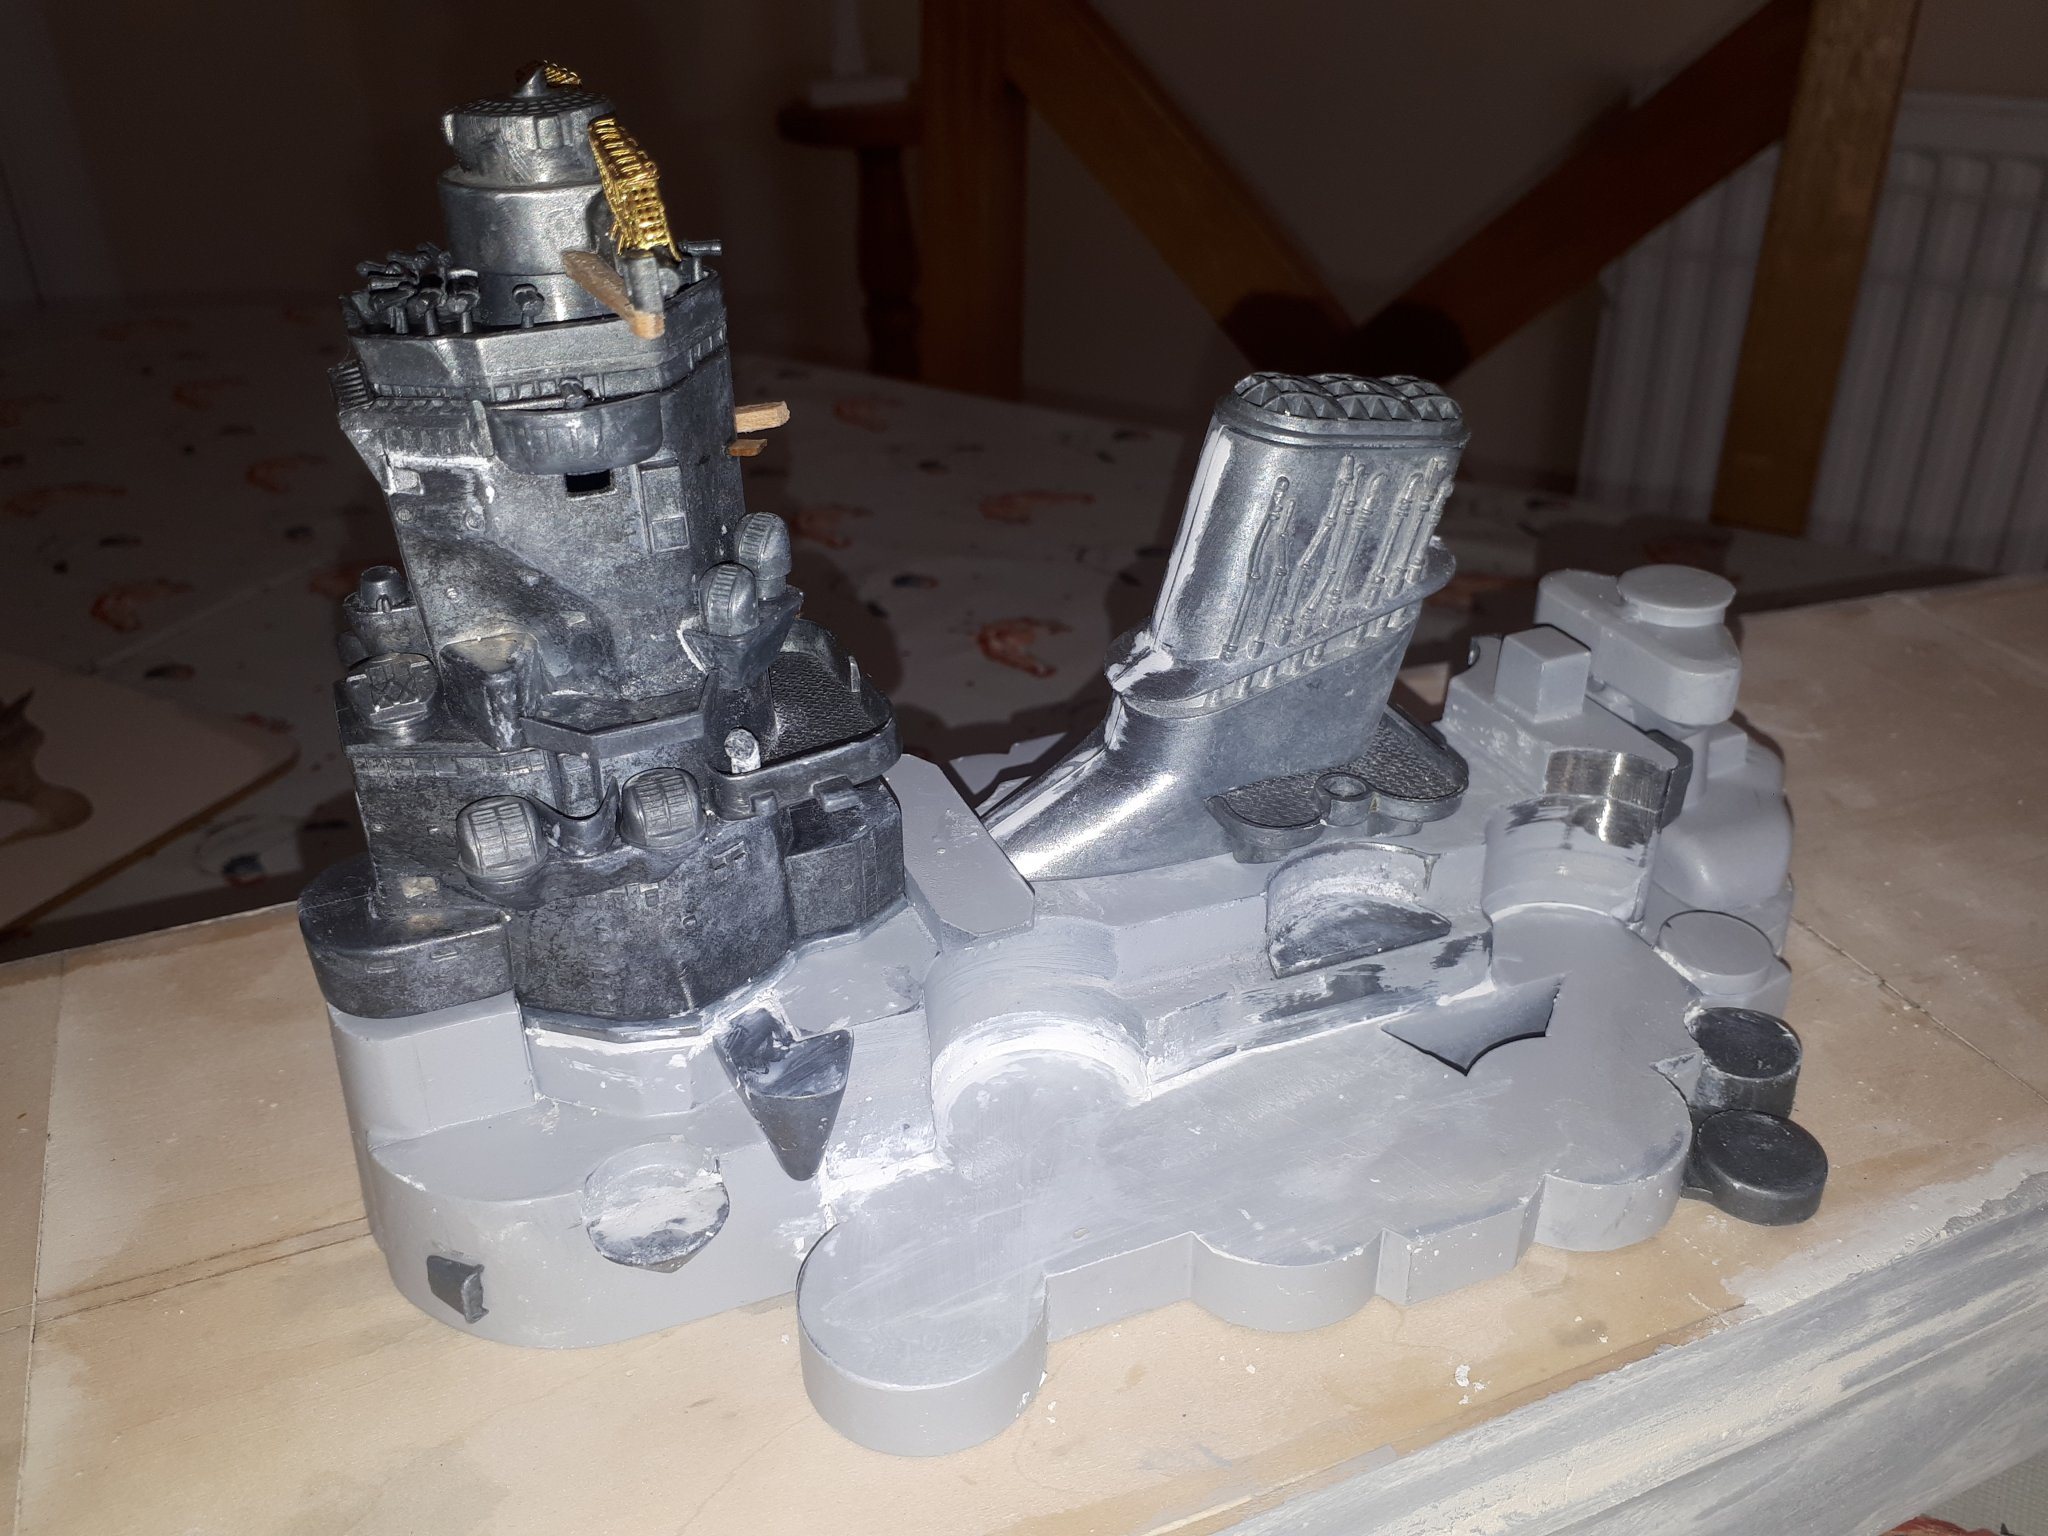
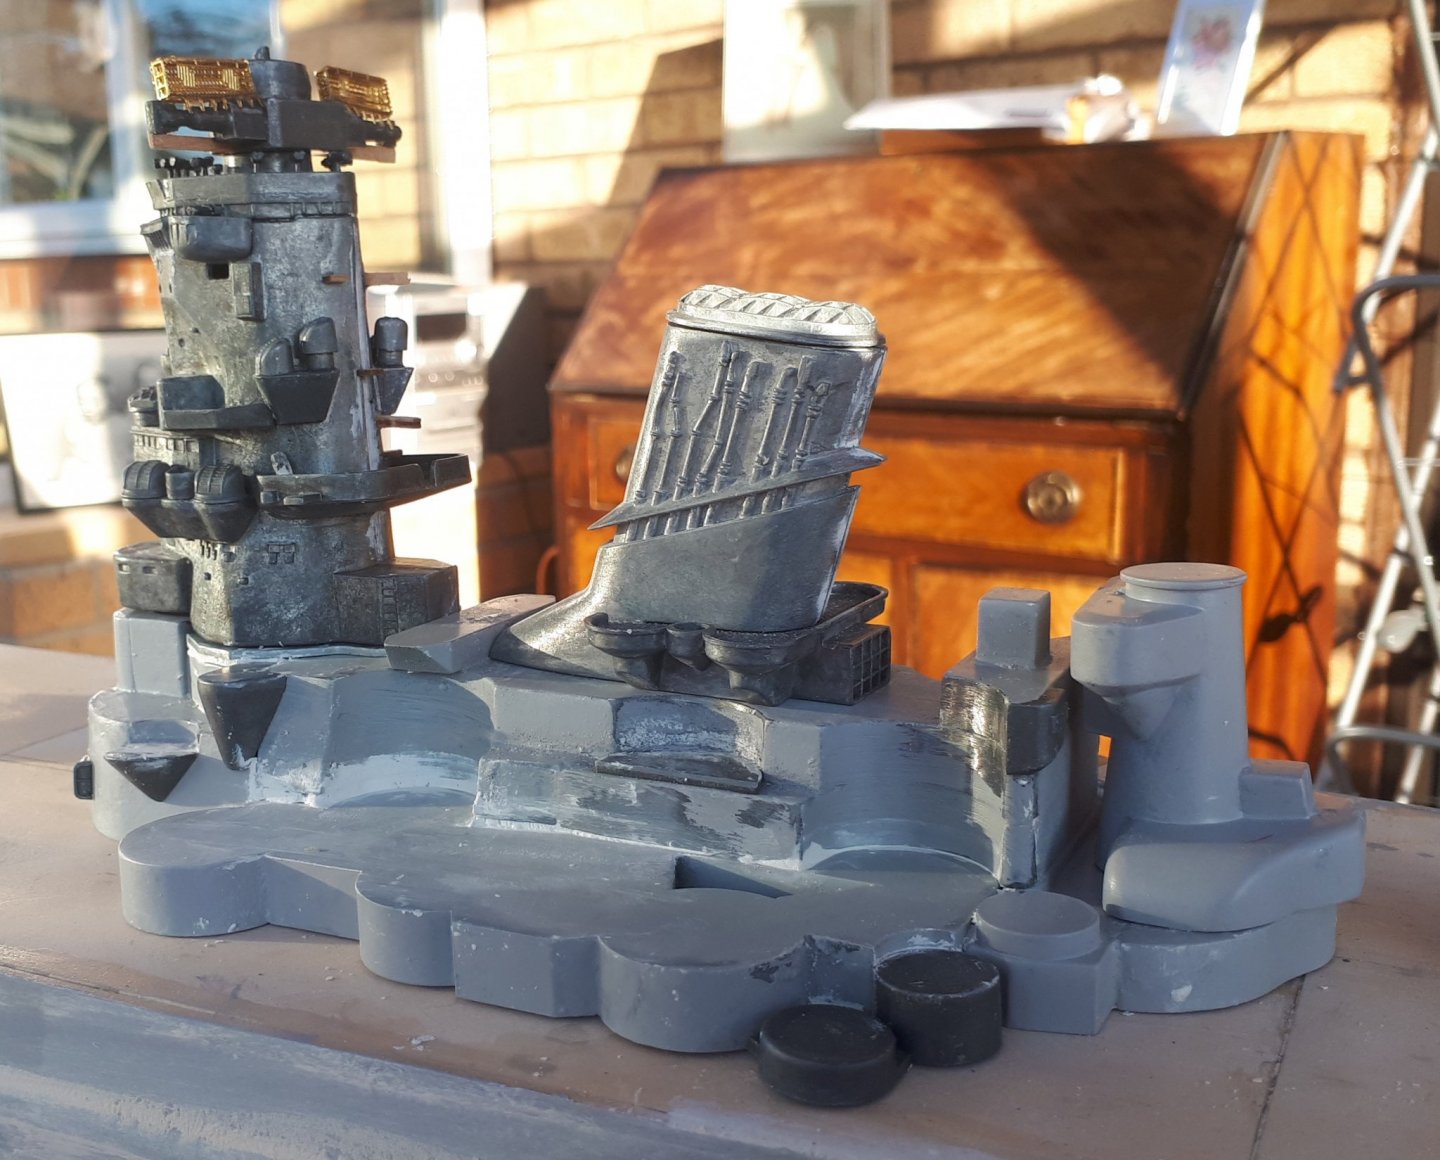
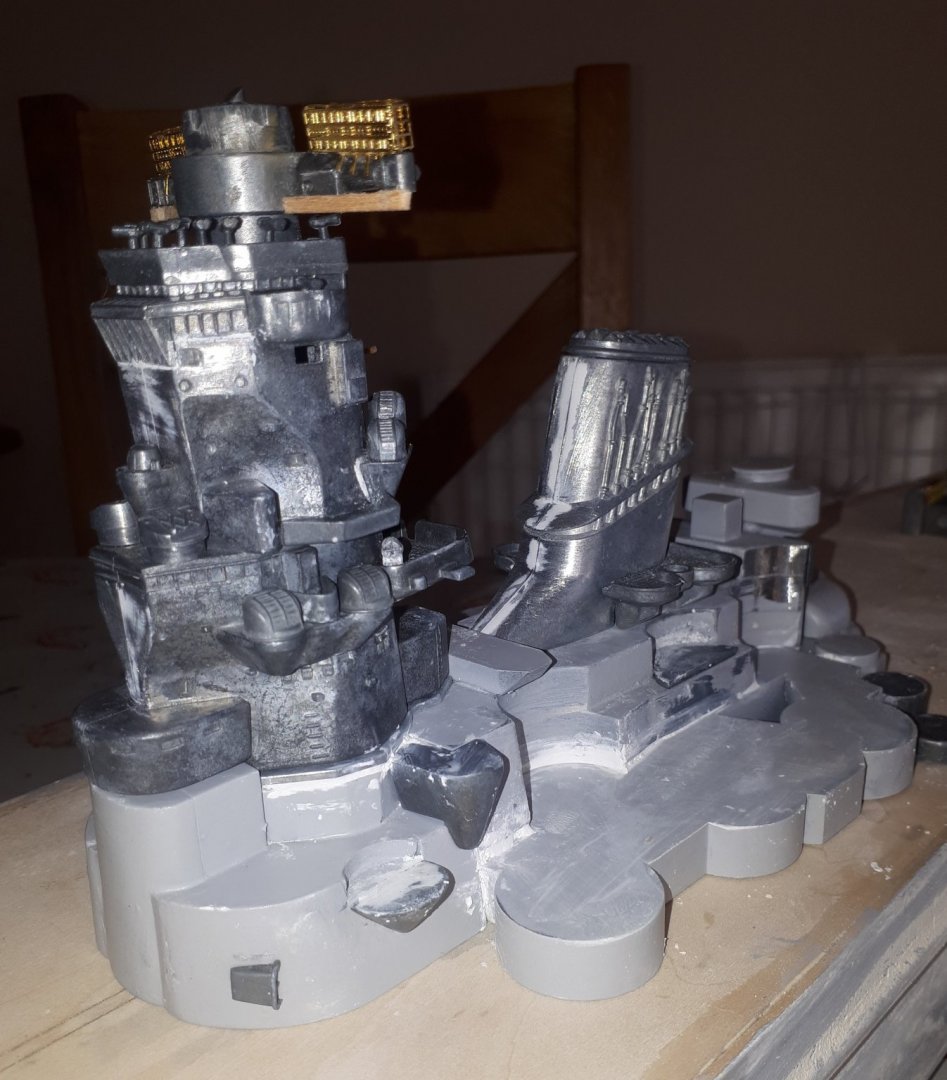
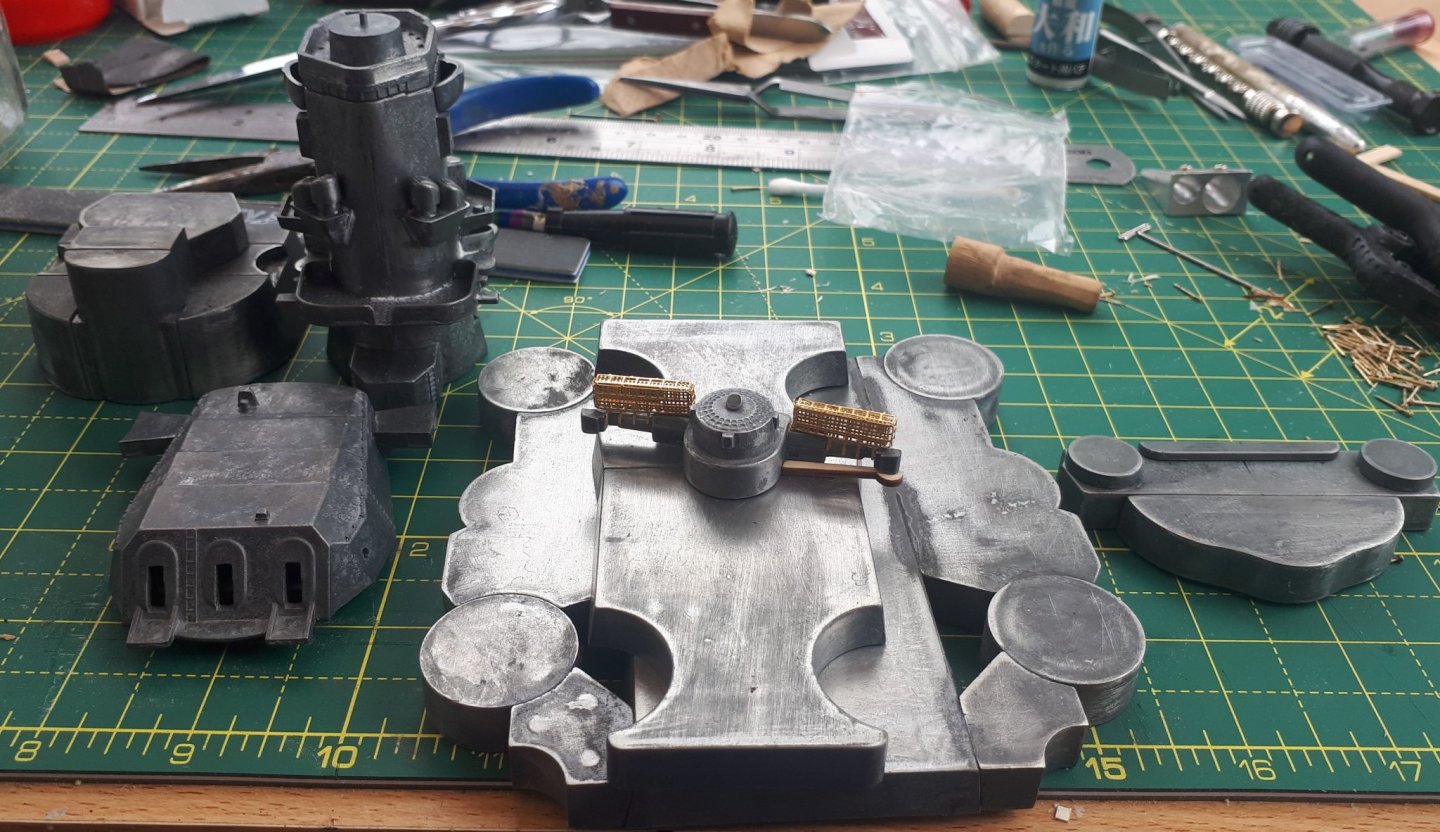
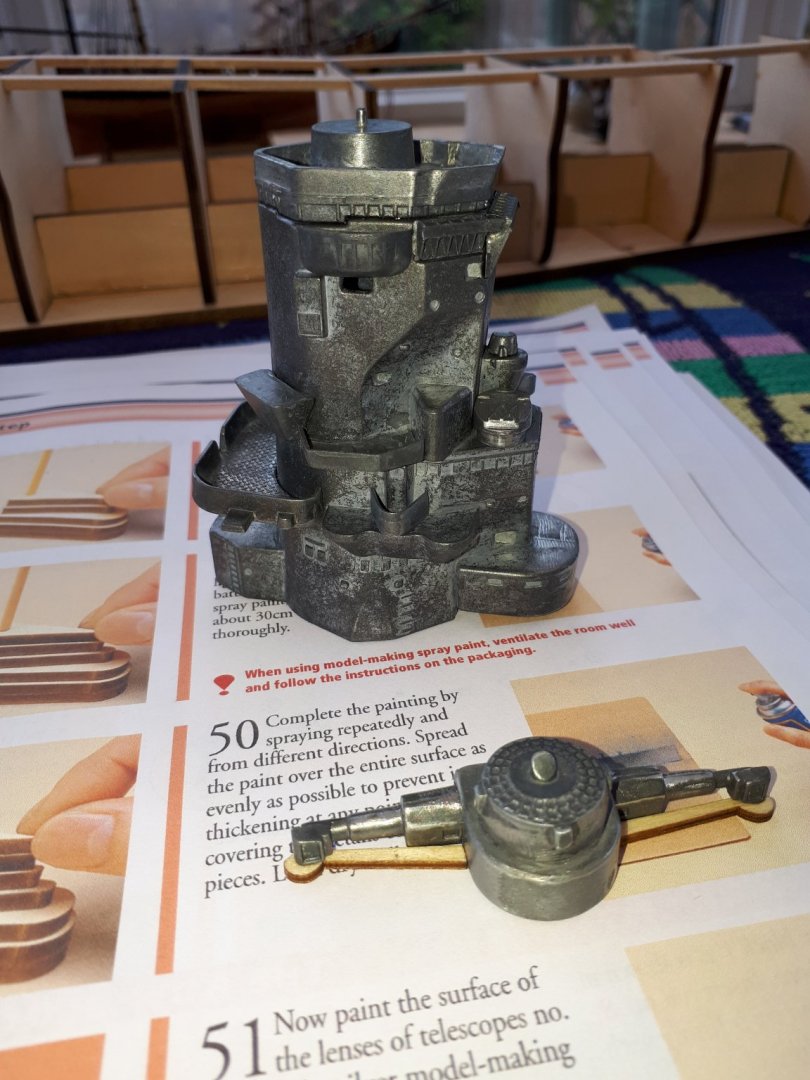
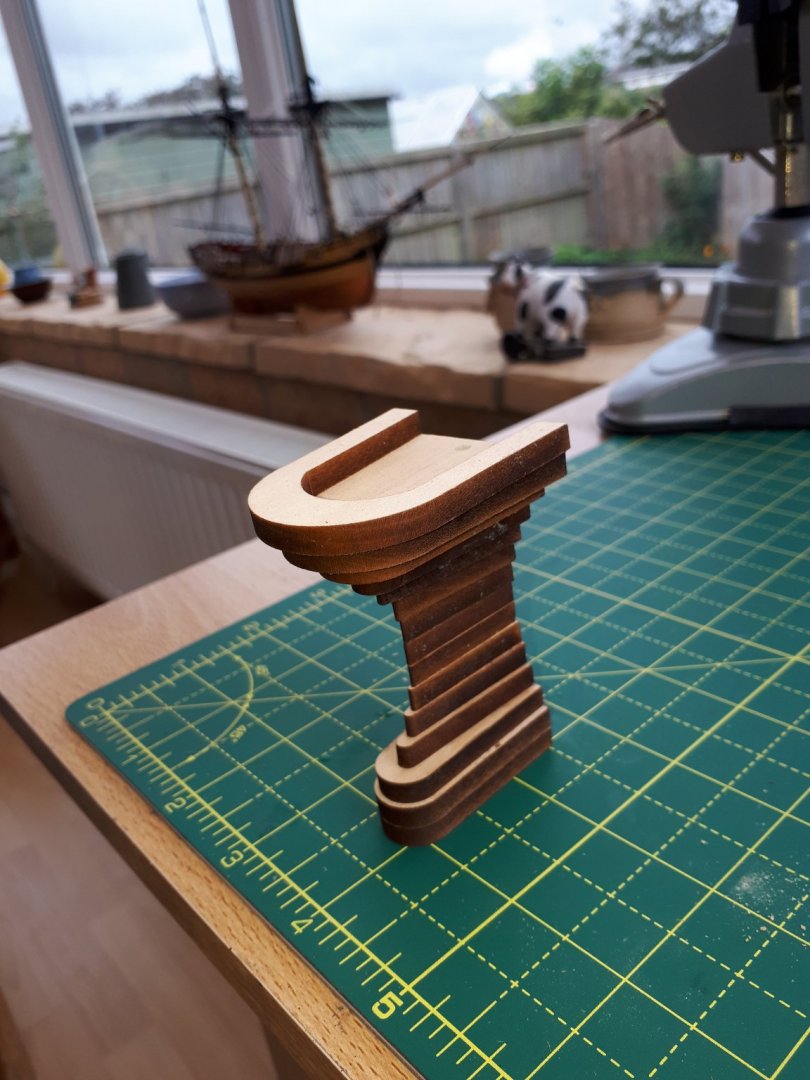
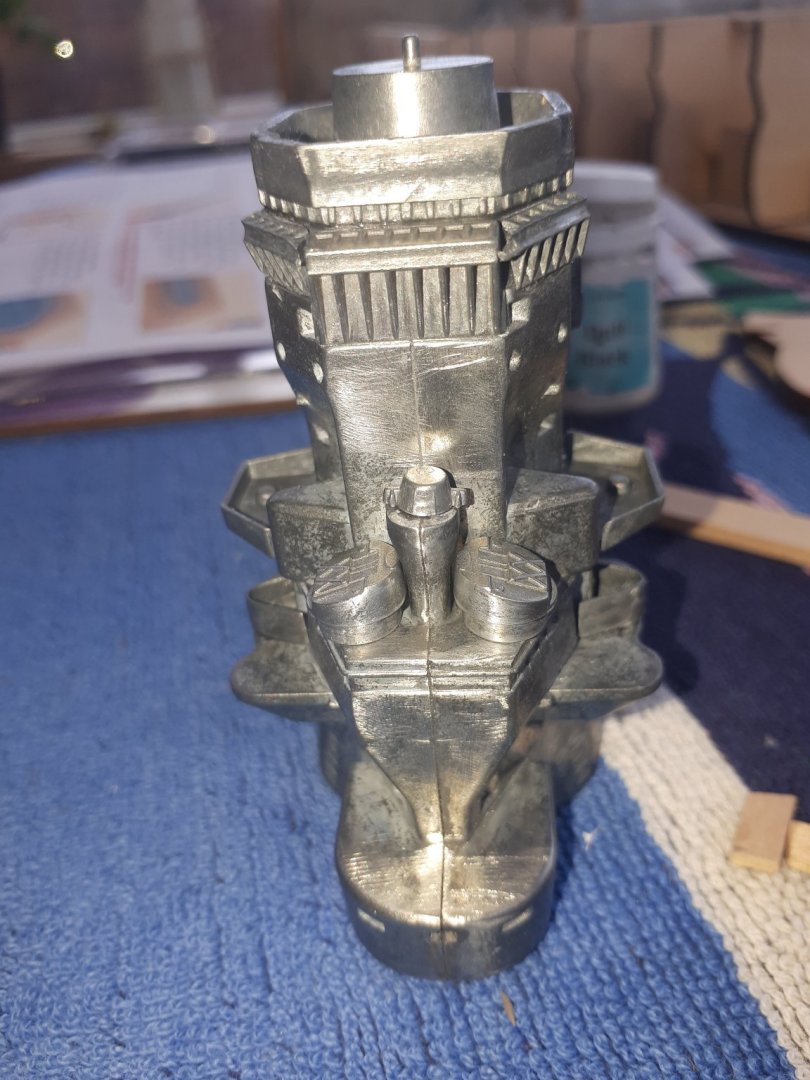
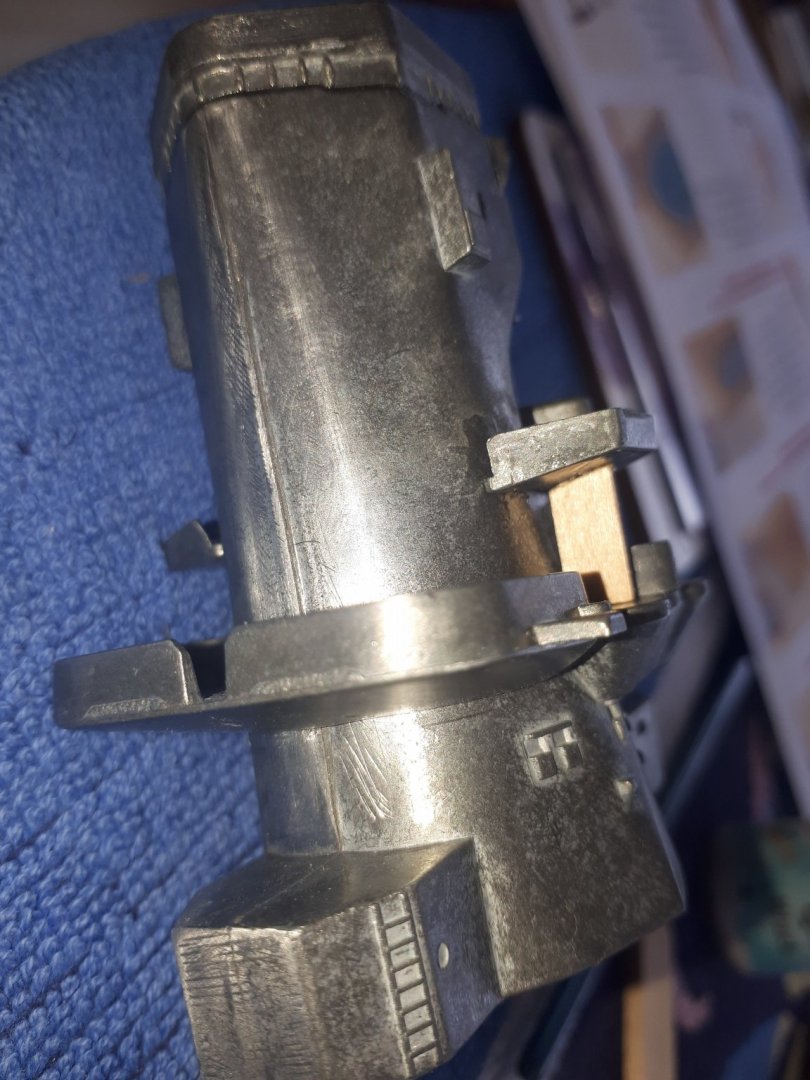
I have continued to work on the main superstructure assembly. It takes quite a bit of work due to the poor quality of some of the die cast parts, requires plenty of filing and putty to correct. I have added primer to some parts to help highlight some of the defects The main bridge and funnel assemblies have not been glued as yet, as there is still some more bits to add.


- 64 replies
-
- 7
-
-
- yamato
- deagostini
- (and 2 more)
-
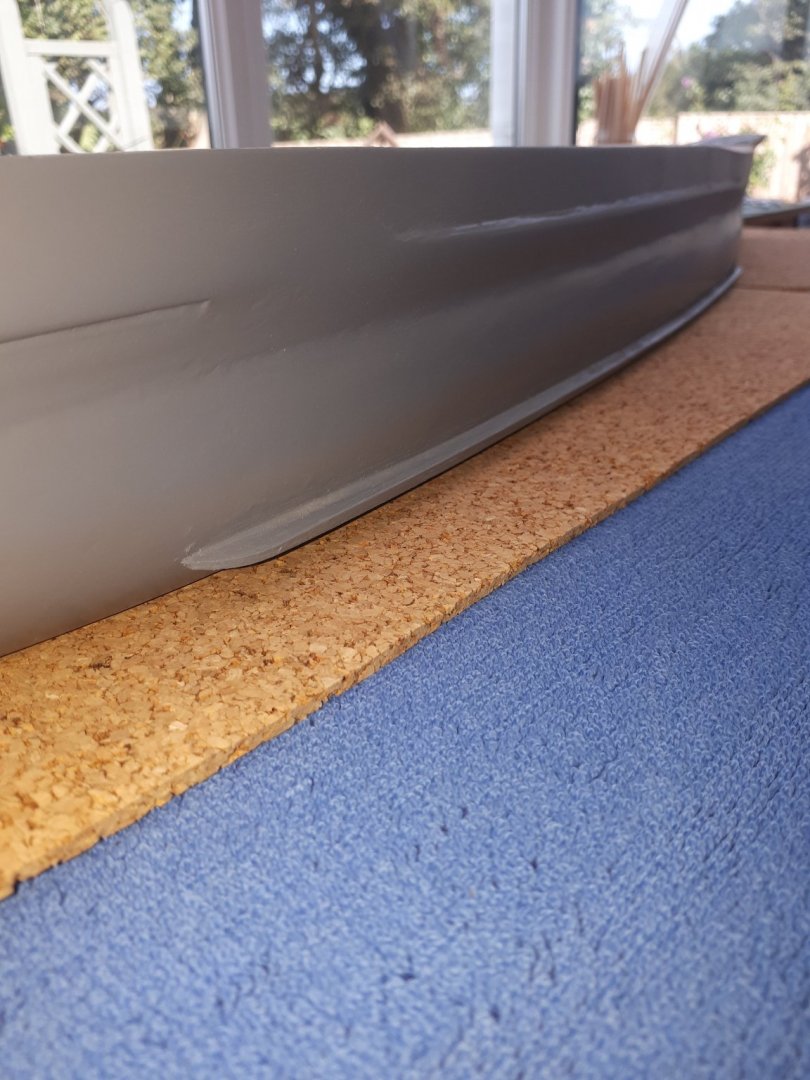
Thanks, still another day or two work required on hull before it's really smooth
- 64 replies
-
- 1
-
-
- yamato
- deagostini
- (and 2 more)
-
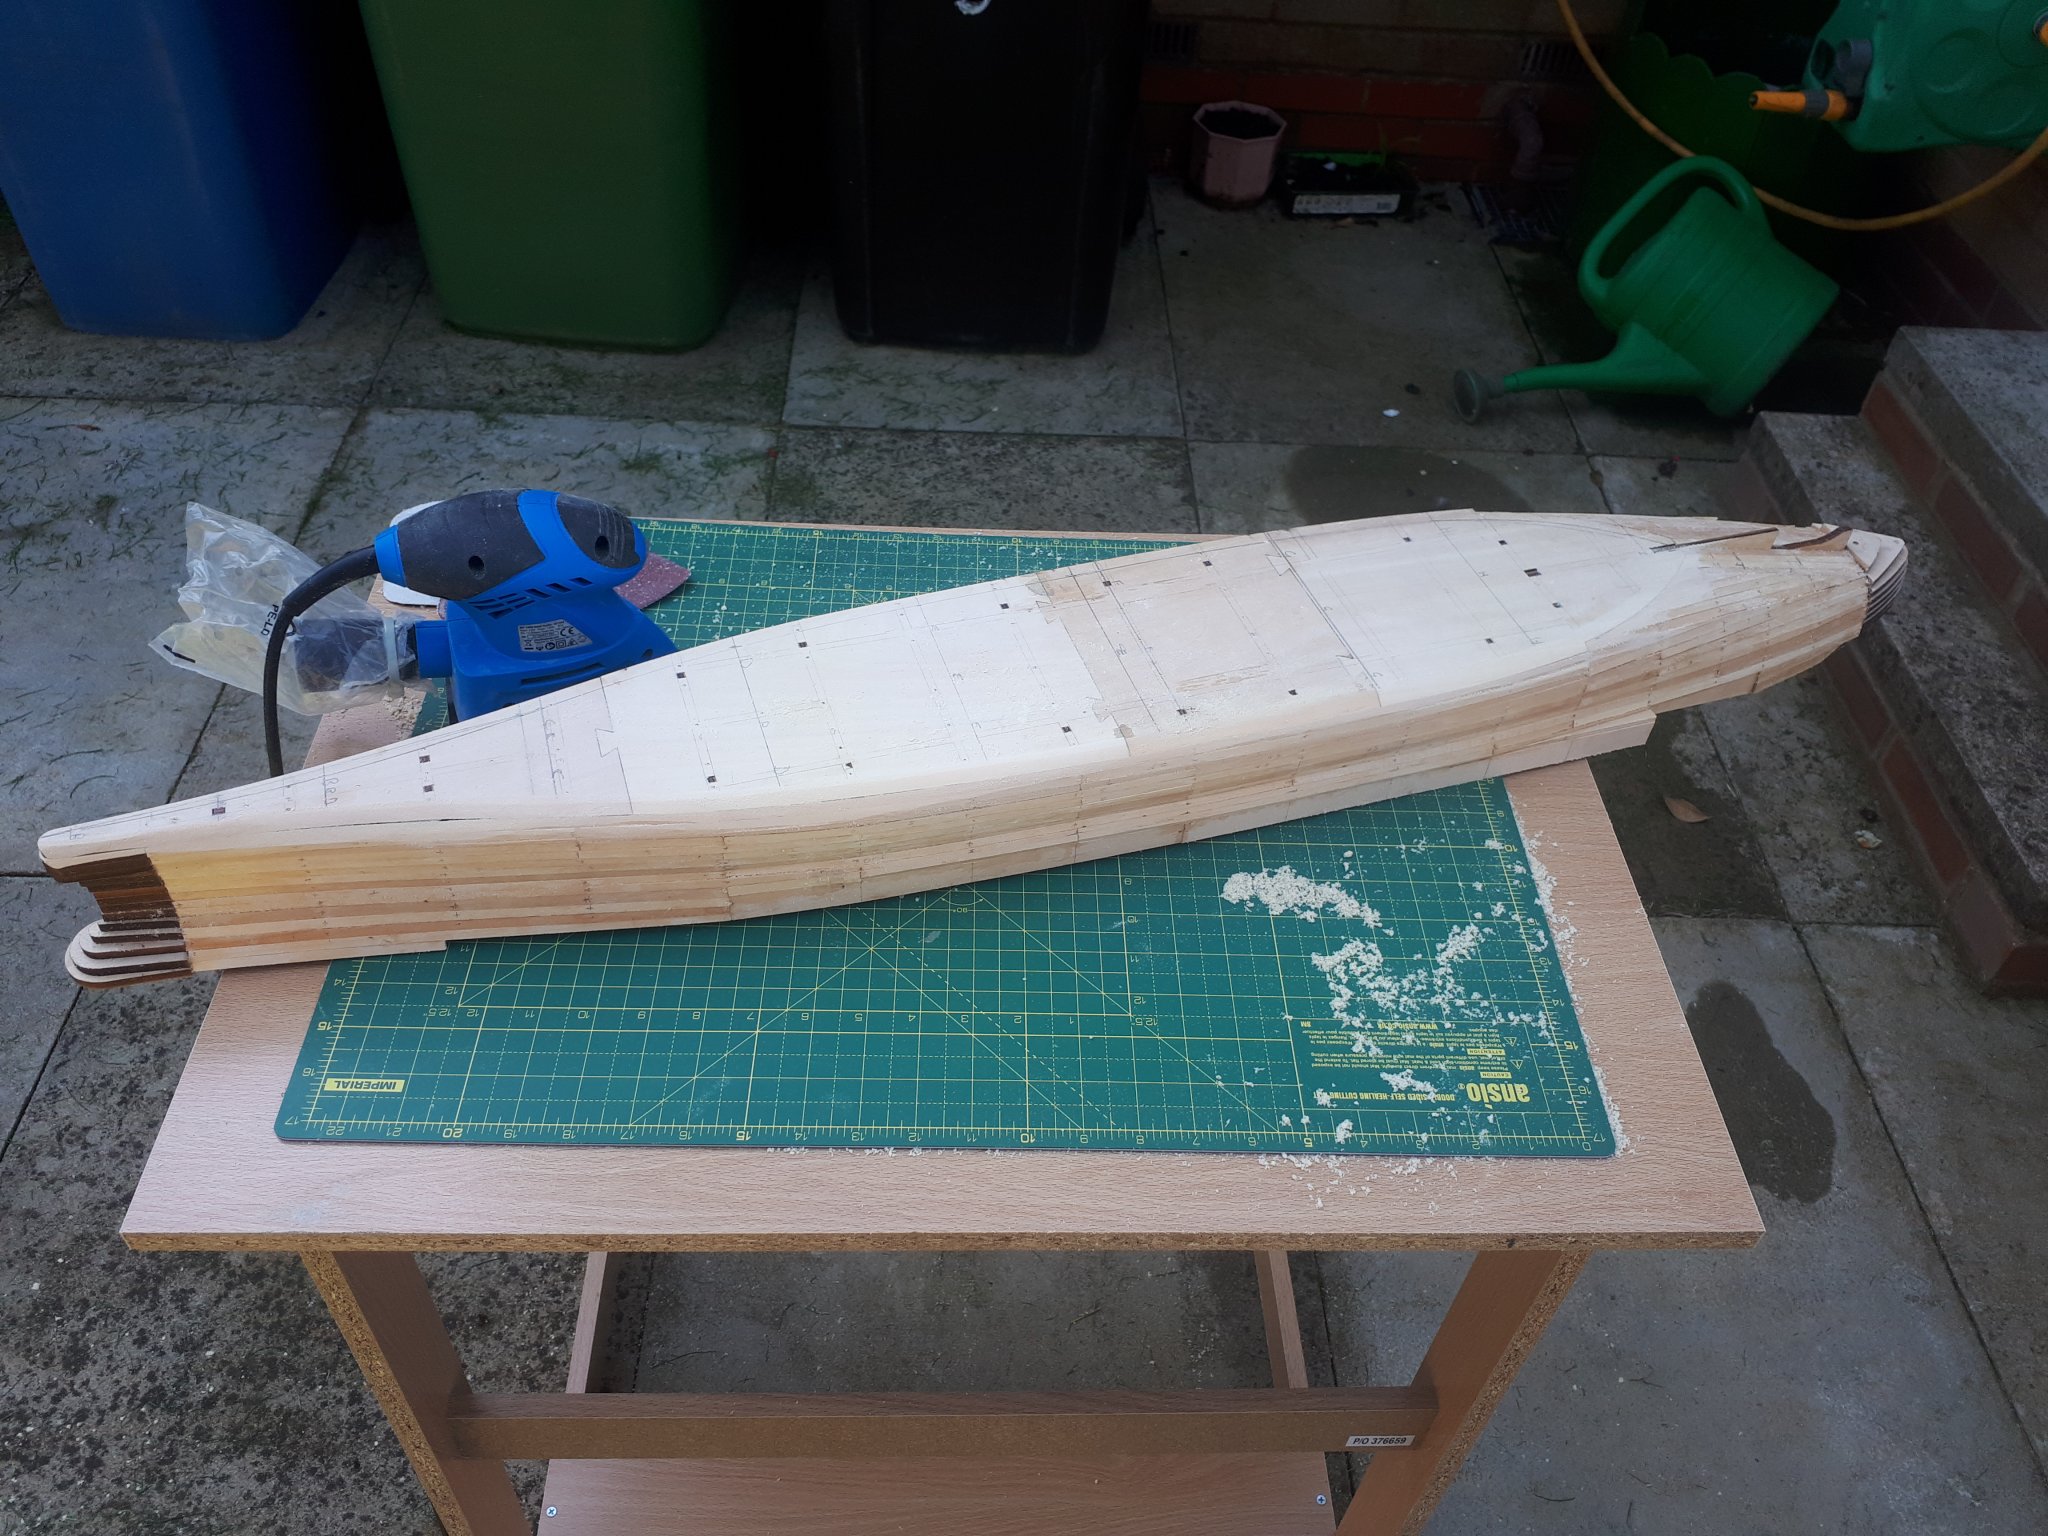
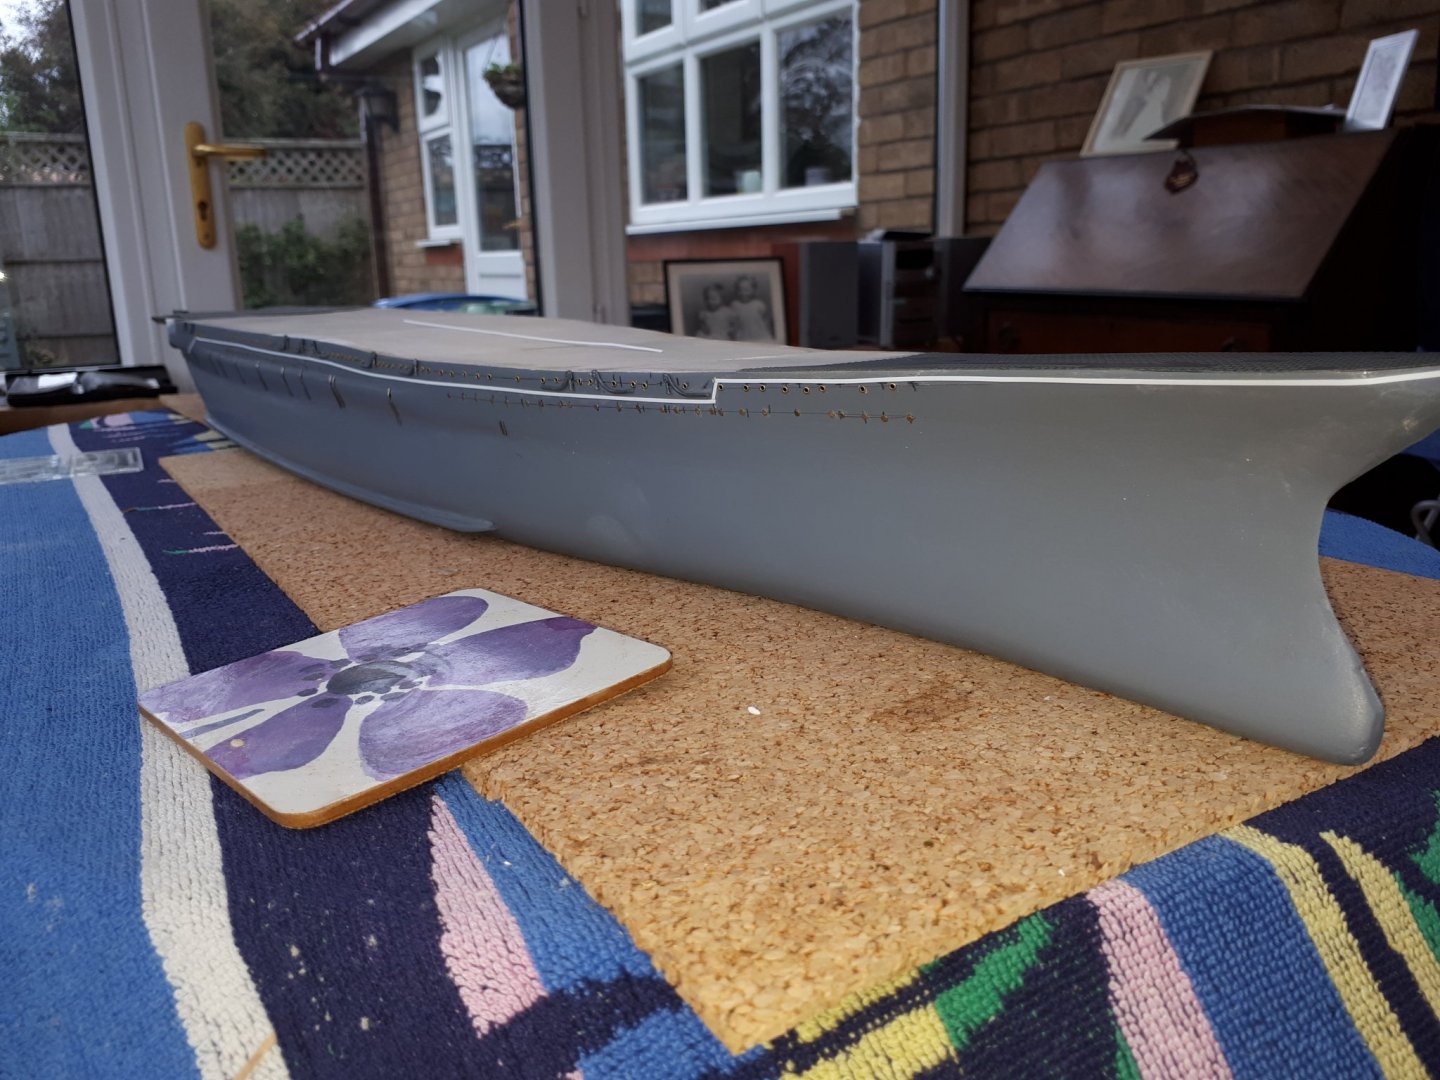
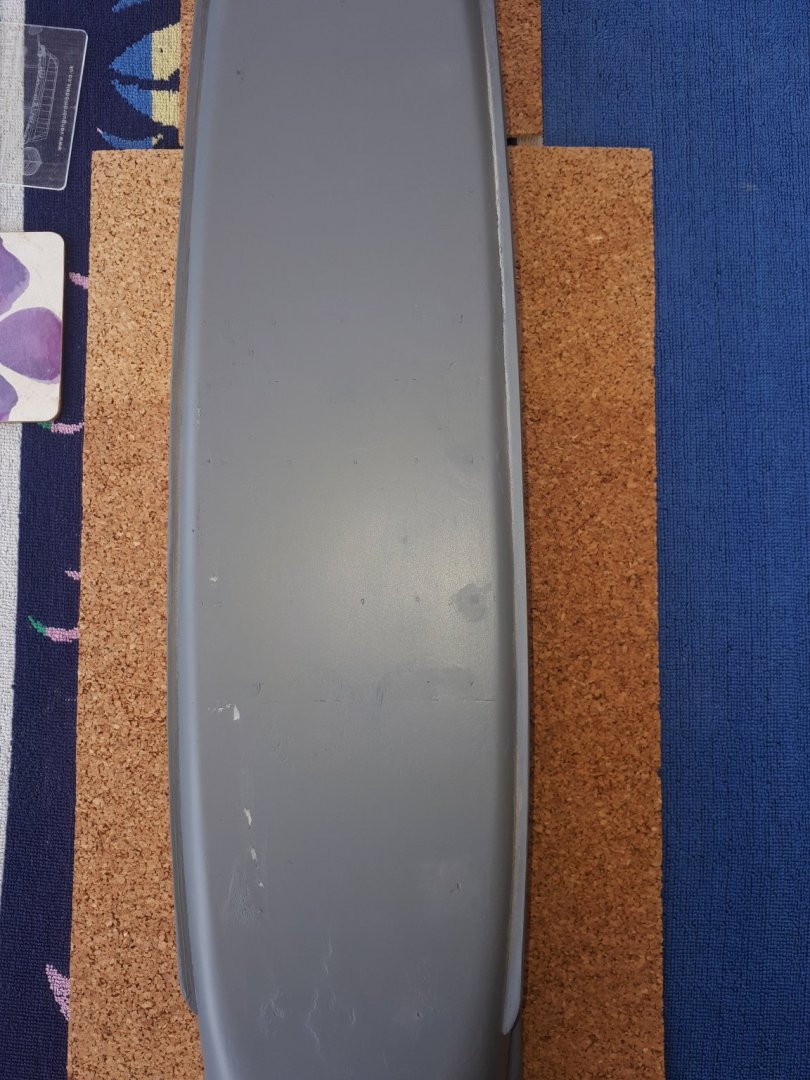
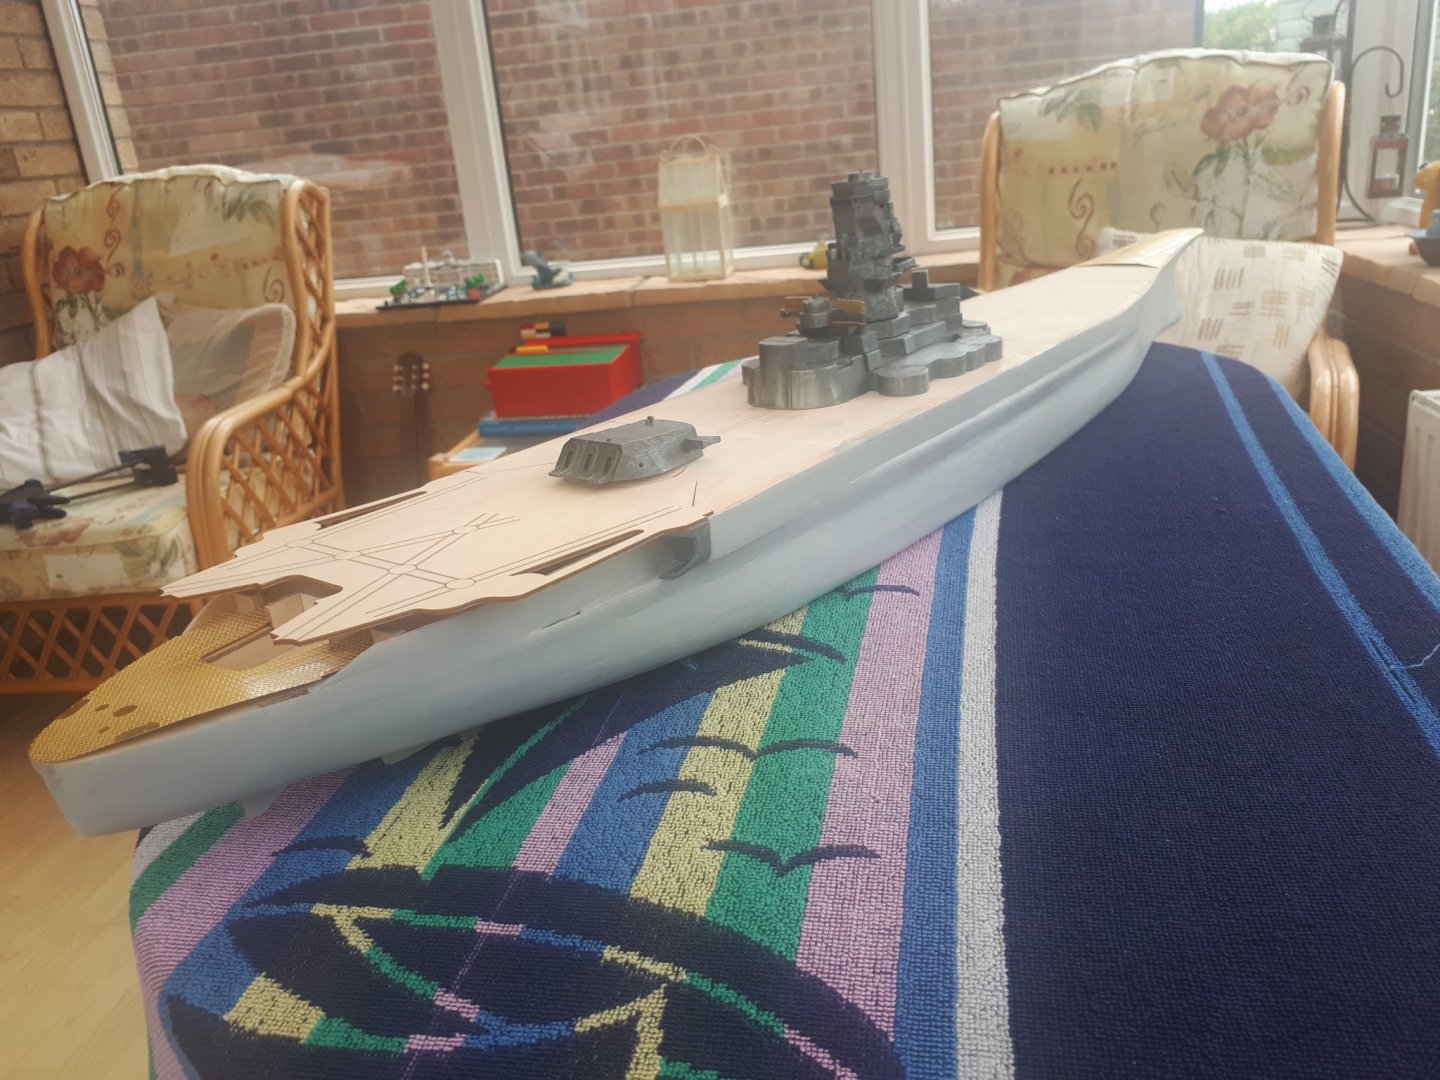
I have spent quite a bit of time on sanding (and filling) the hull to get a nice smooth finish. It is still very much work in progress as I continue to apply more coats of primer and to then sand smooth. It is a task I prefer to do outdoors and the weather is not playing ball today (windy with a few drops of rain). To make the attached photo a bit more interesting I decided to add some of the superstructure parts, noting these have not been assembled or positioned correctly on the deck. They have just been added for a bit of fun, but I think they do add menace to the model. The two photo etched deck parts are also only positioned for effect. There will need to be painted prior to actual fitting.
- 64 replies
-
- 8
-
-
- yamato
- deagostini
- (and 2 more)
-
Hi, I have partial rigged Speedy. I have really enjoyed the build of a very well design product but I have no plans to carry on further as I have a commission build project to undertake for a close friend.
-
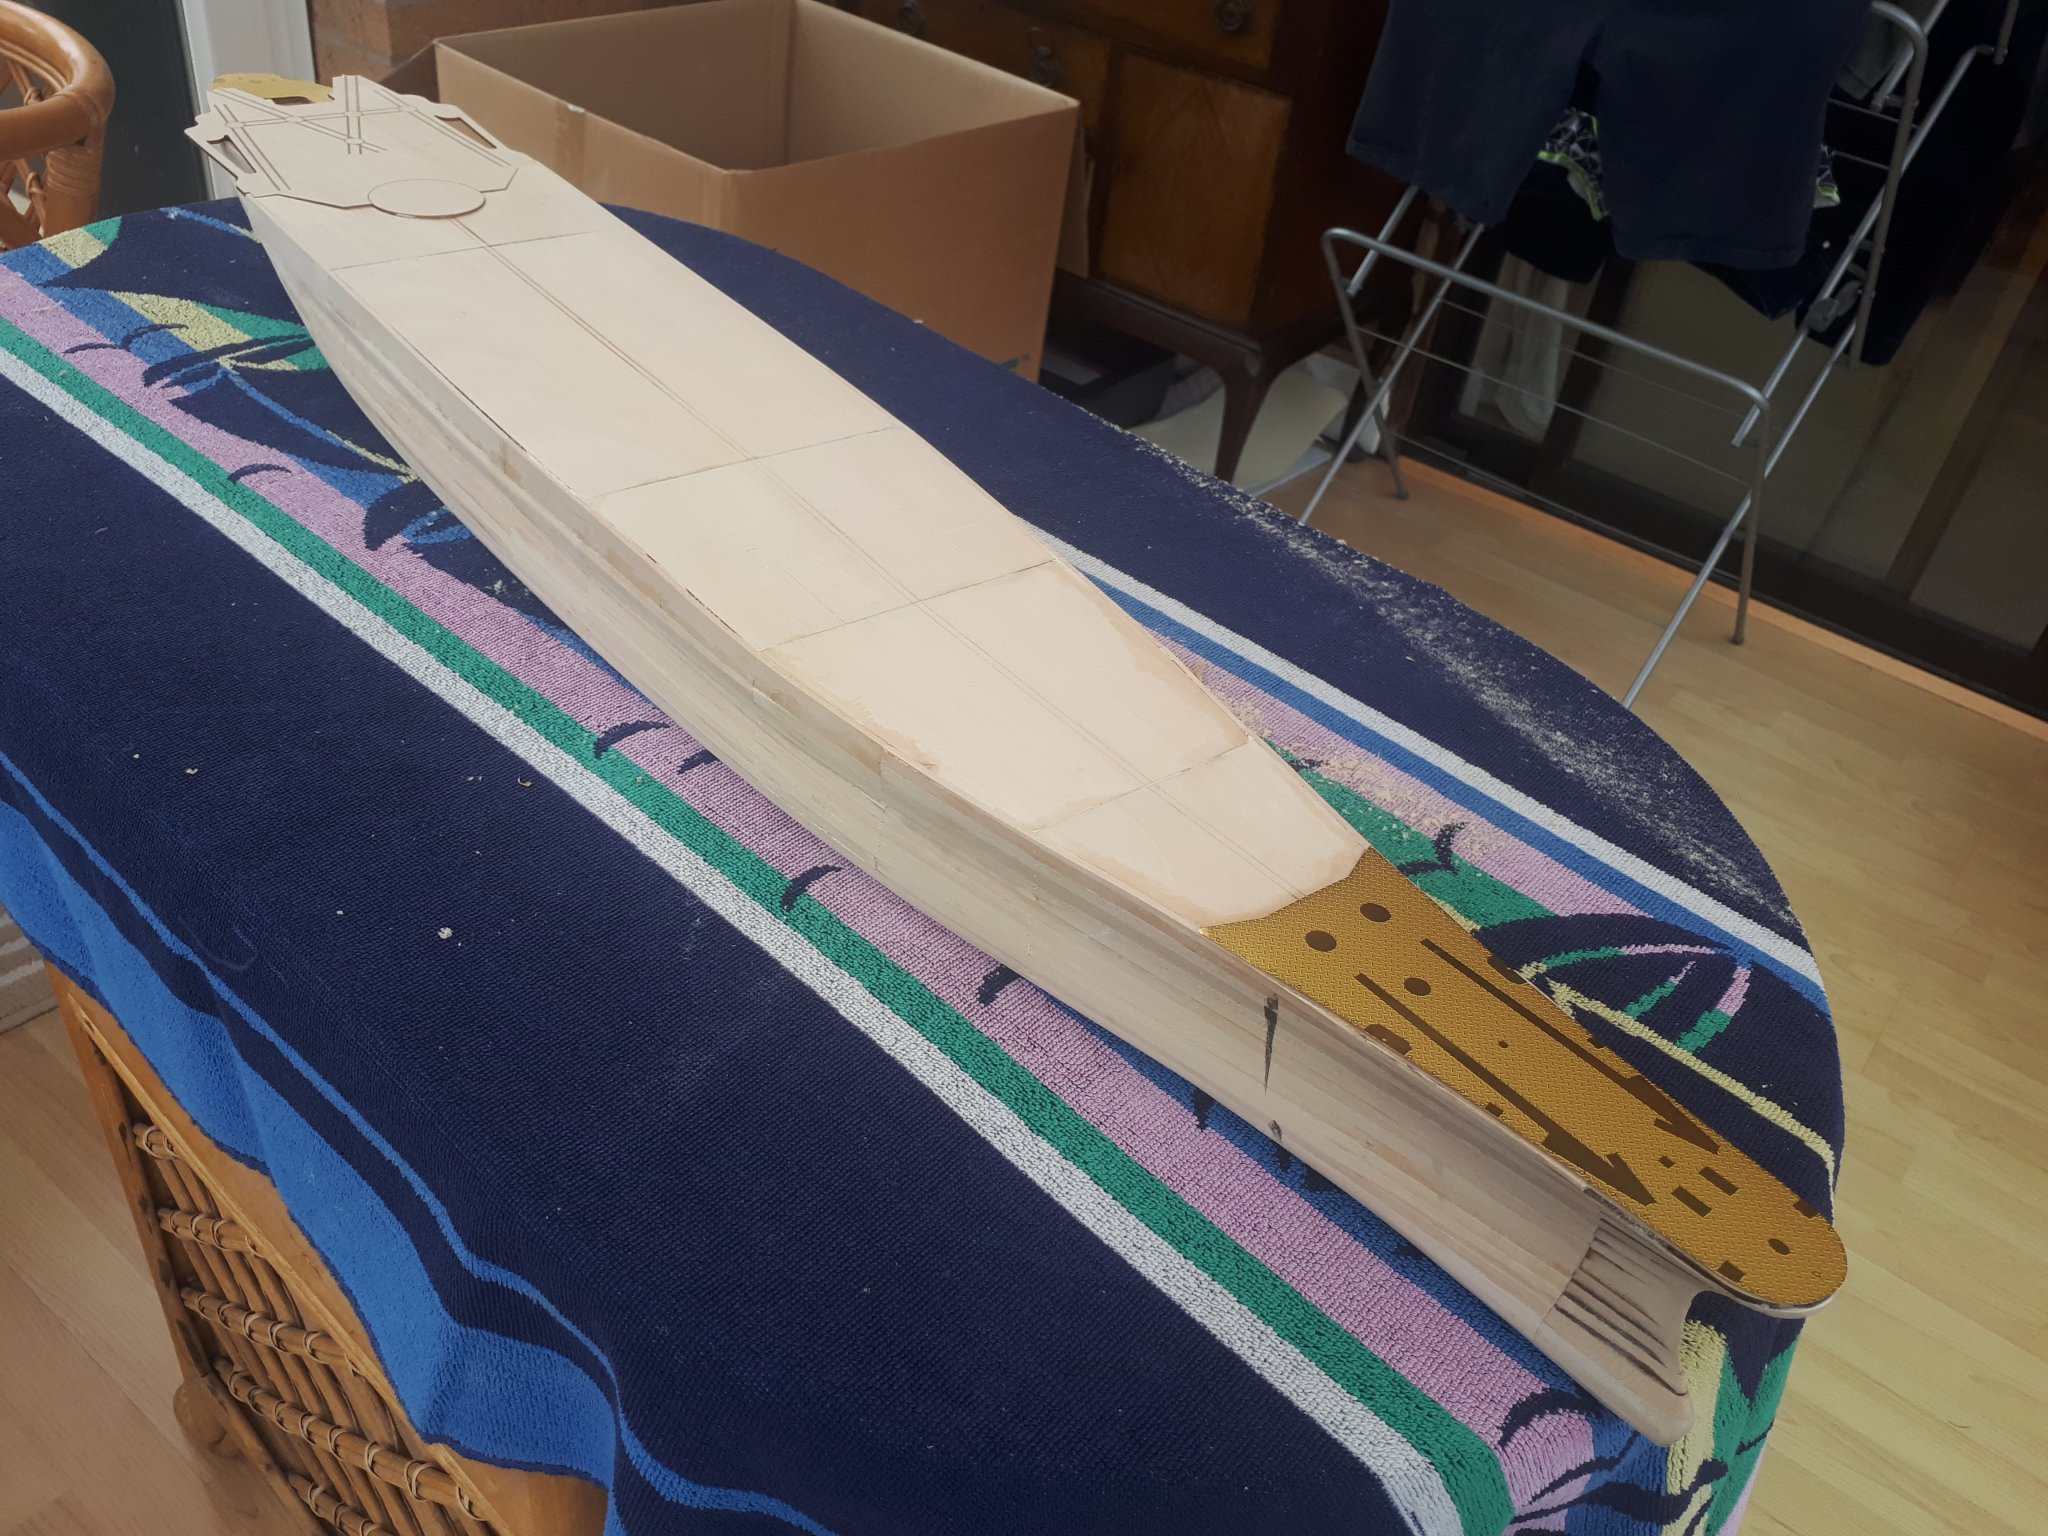
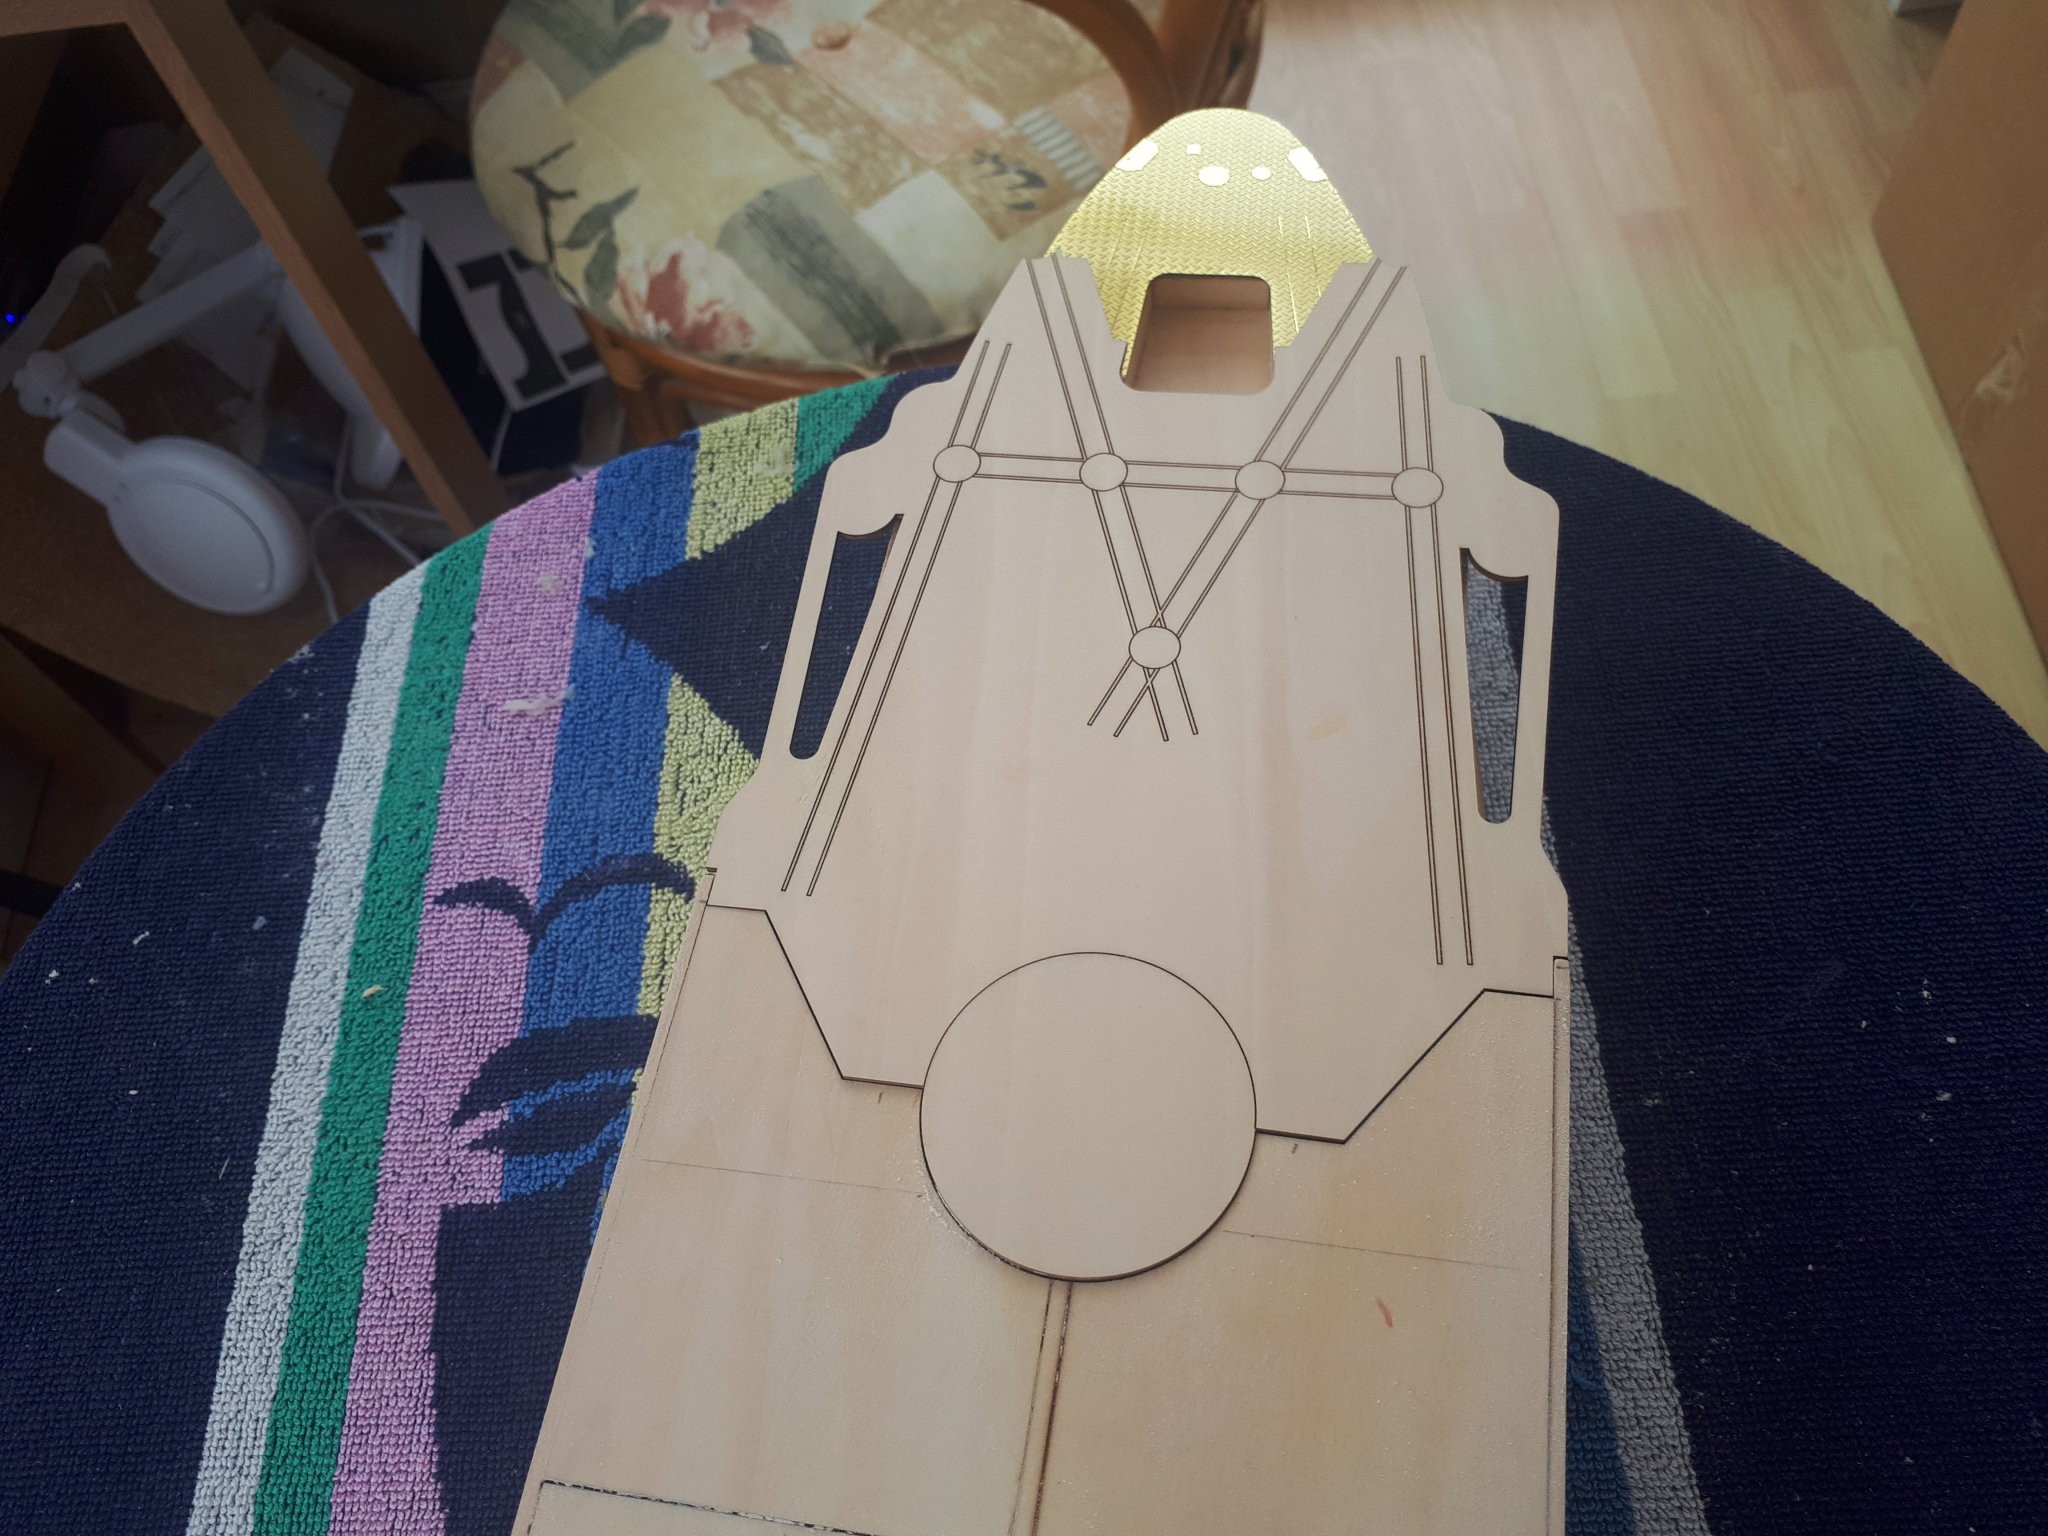
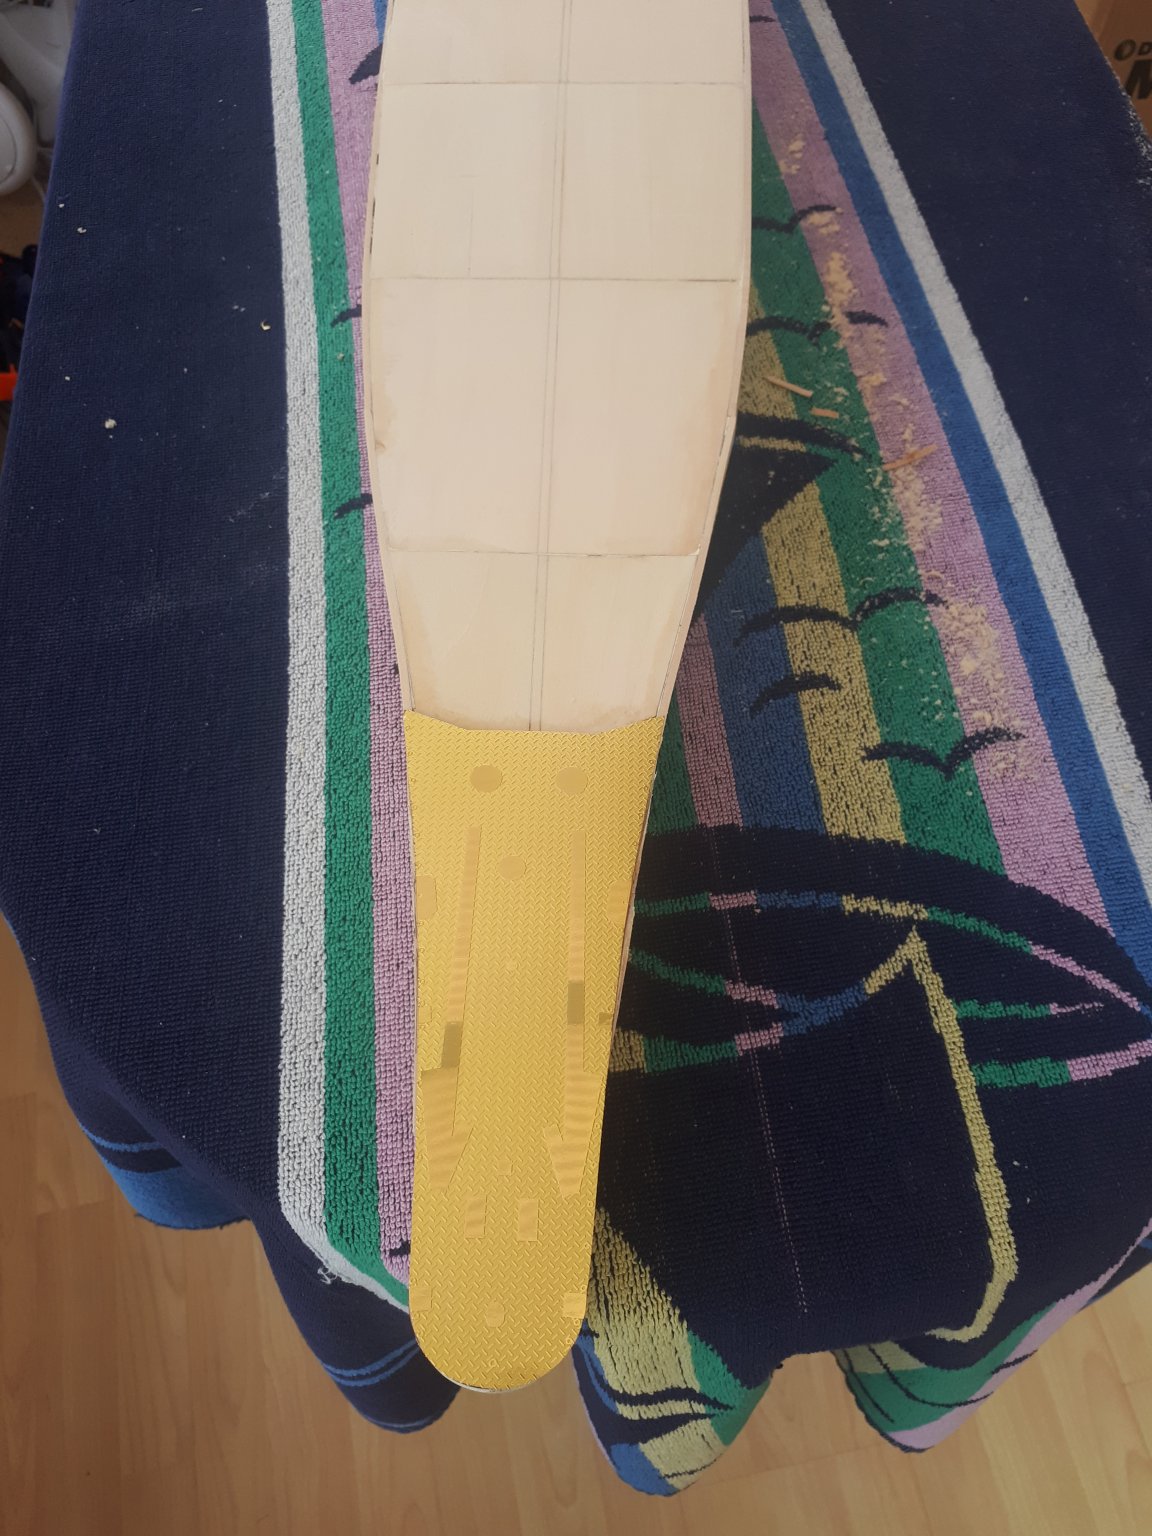
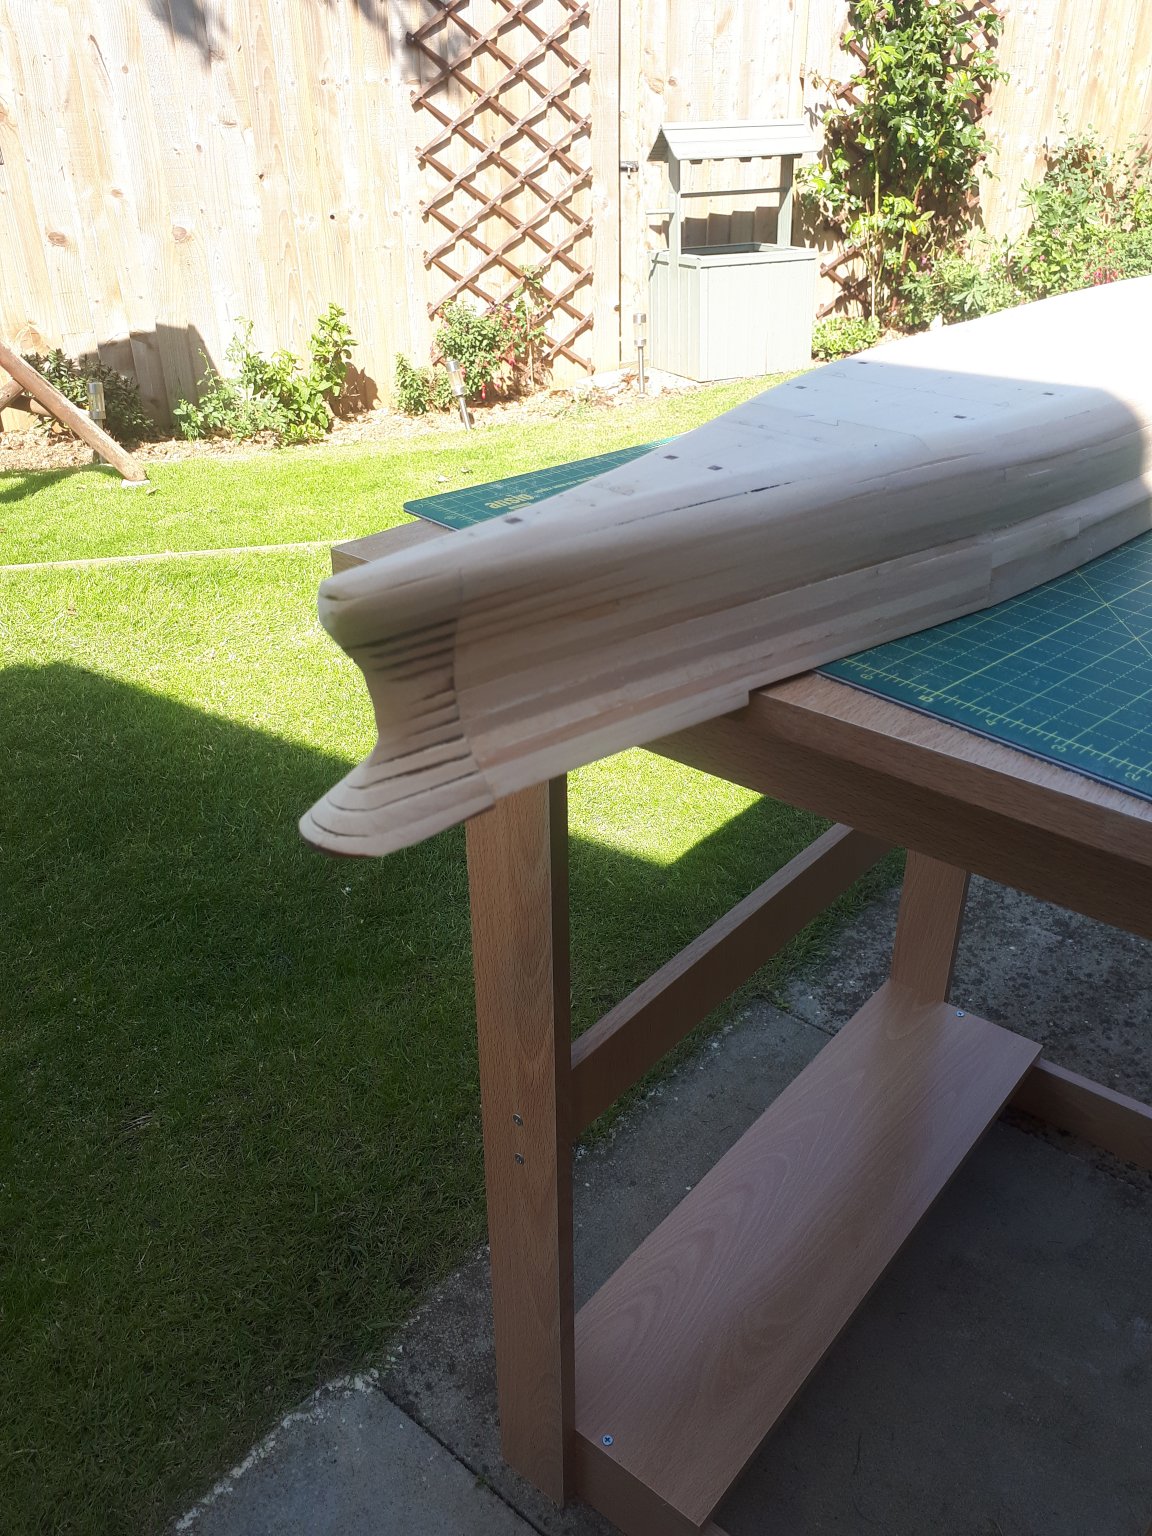
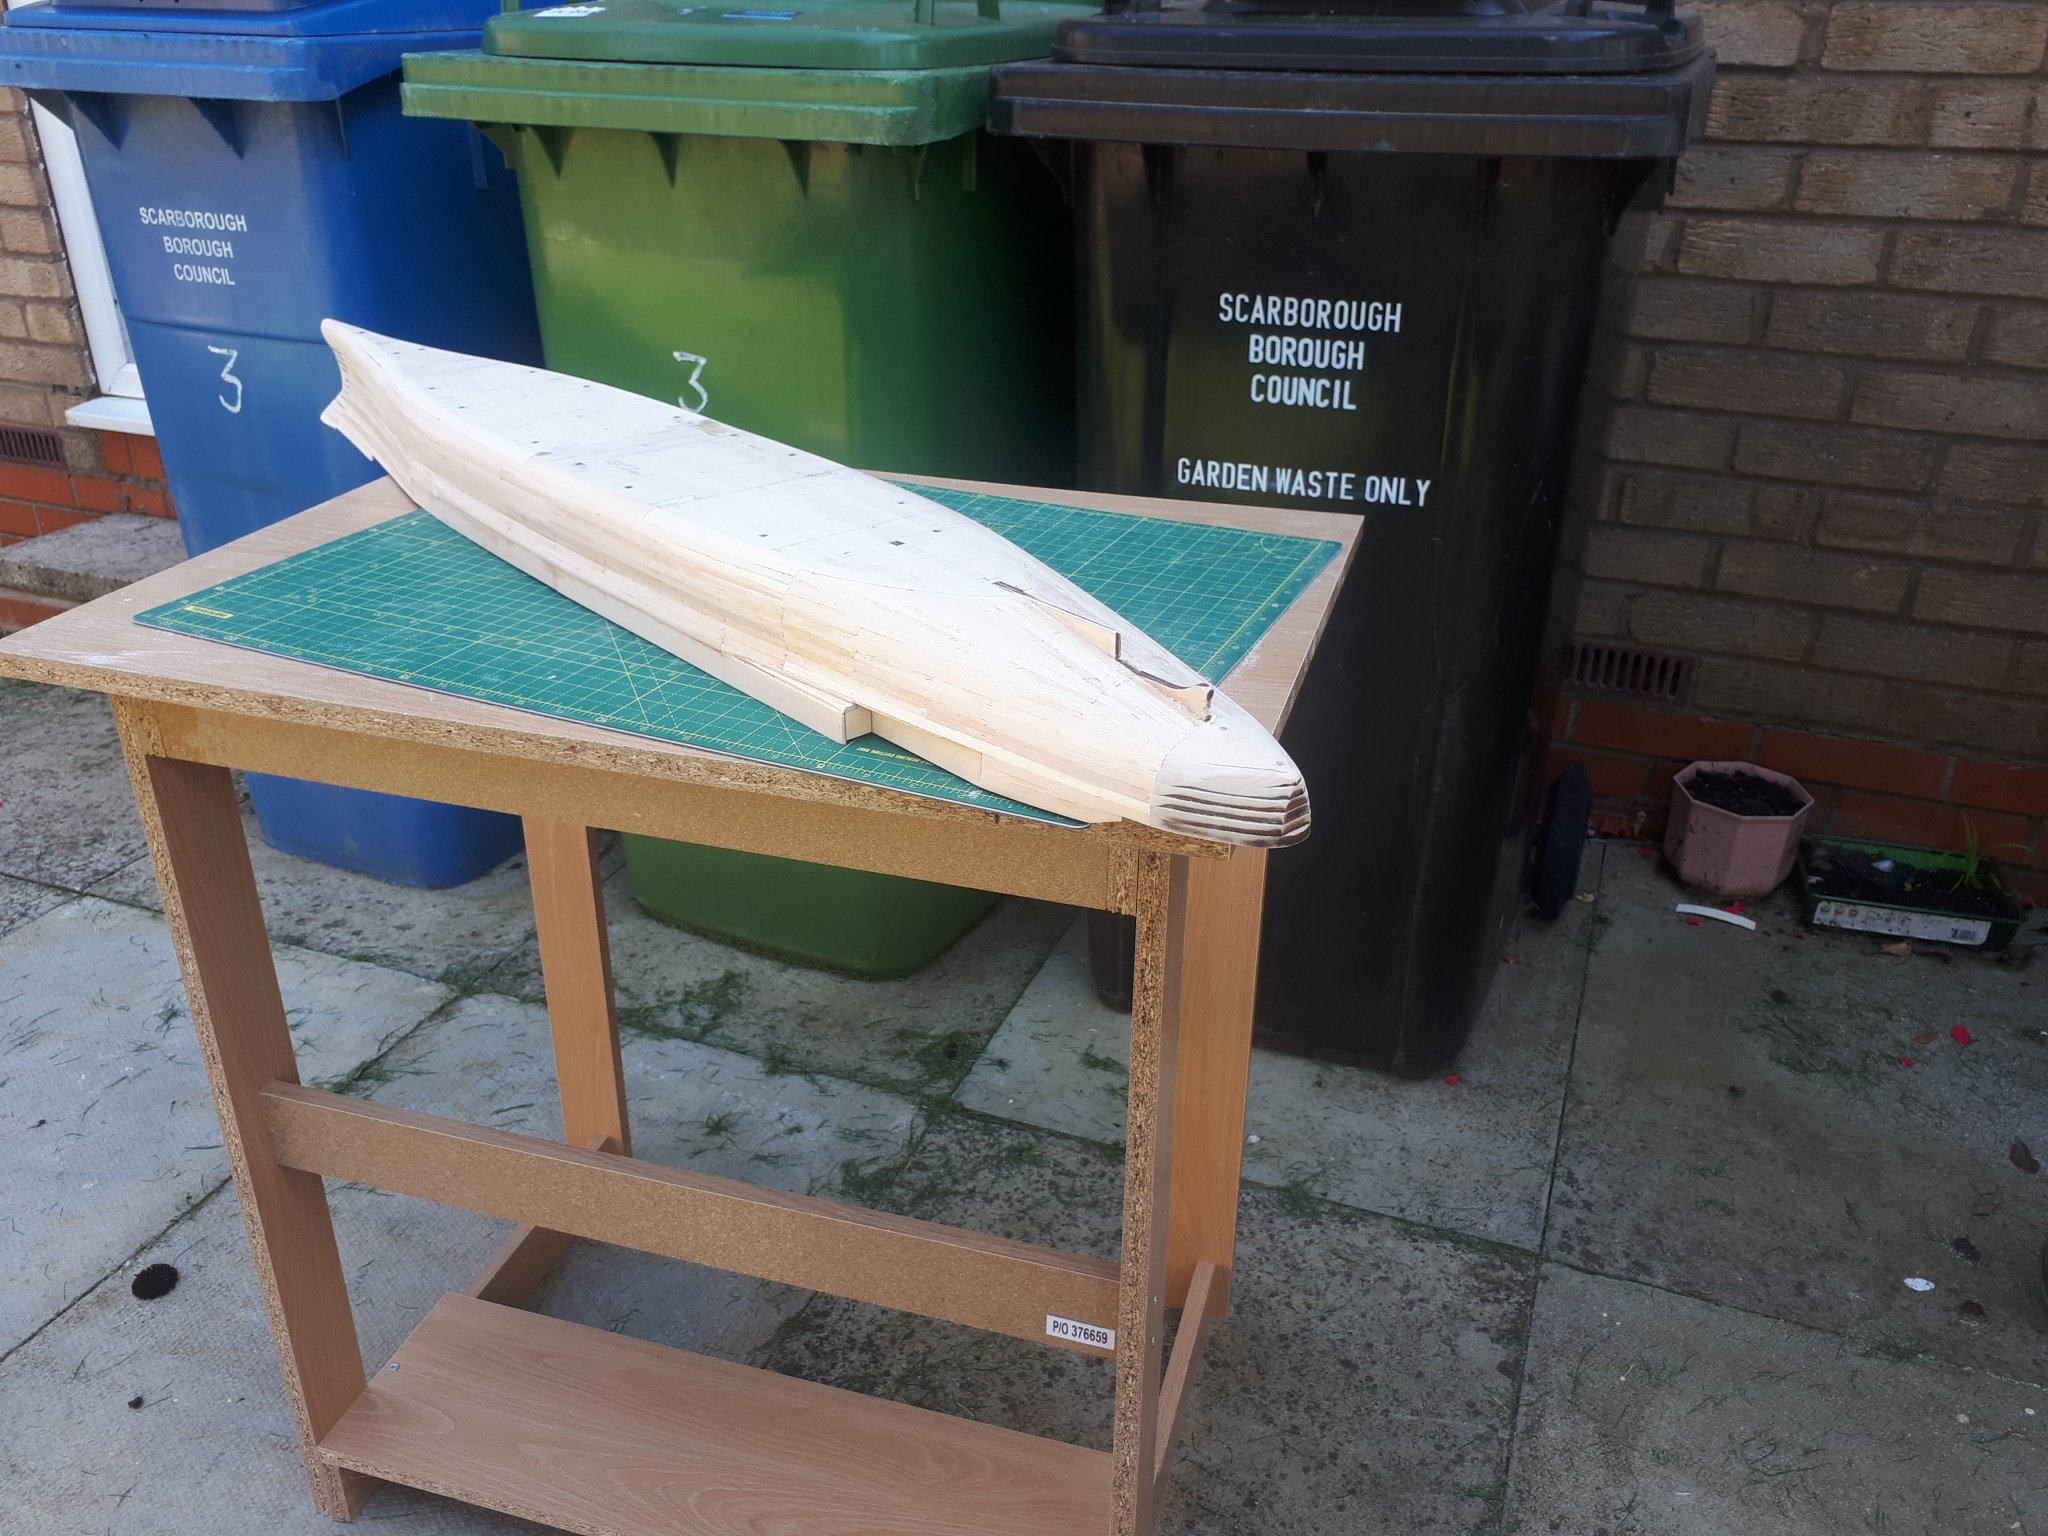
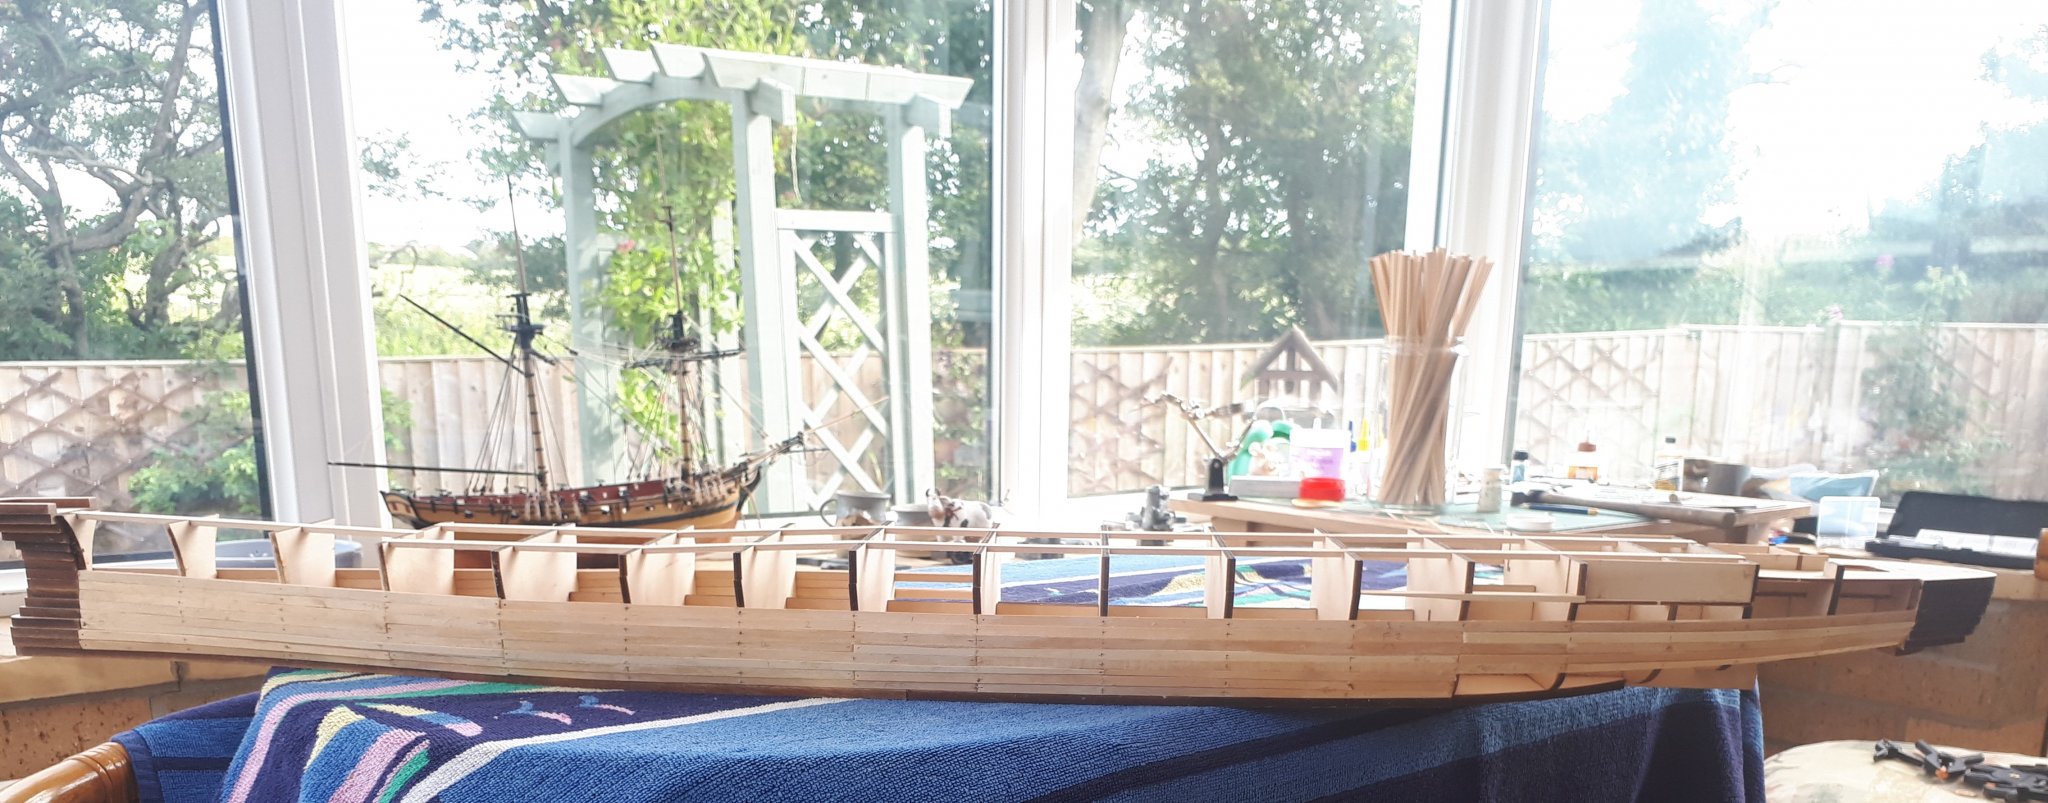
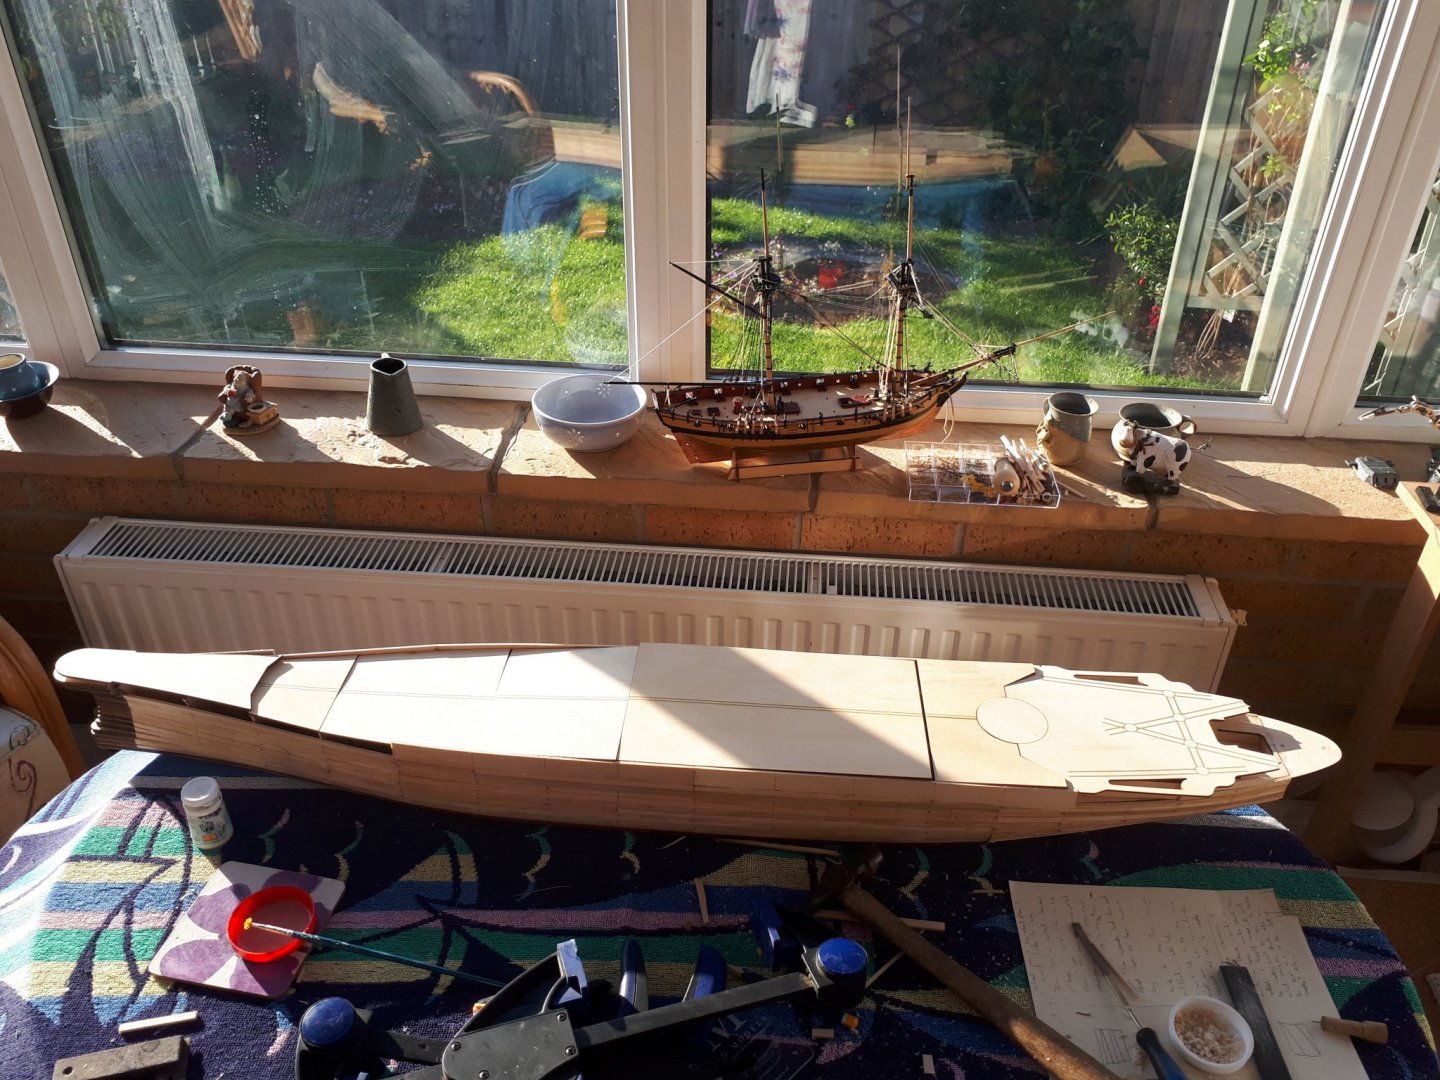
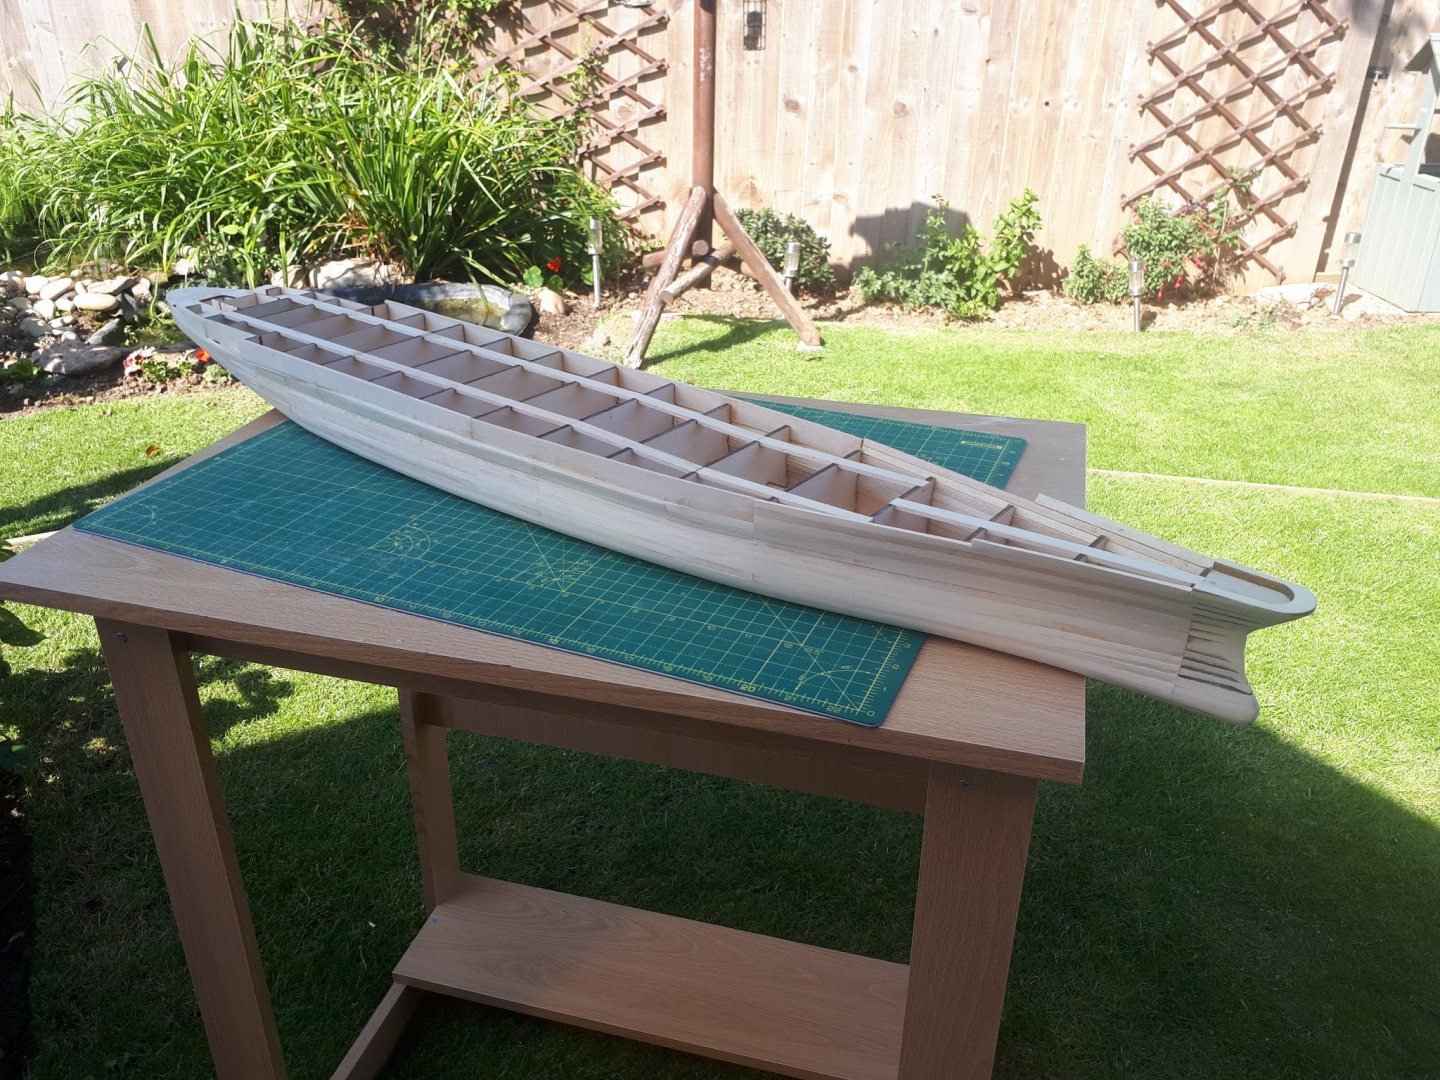
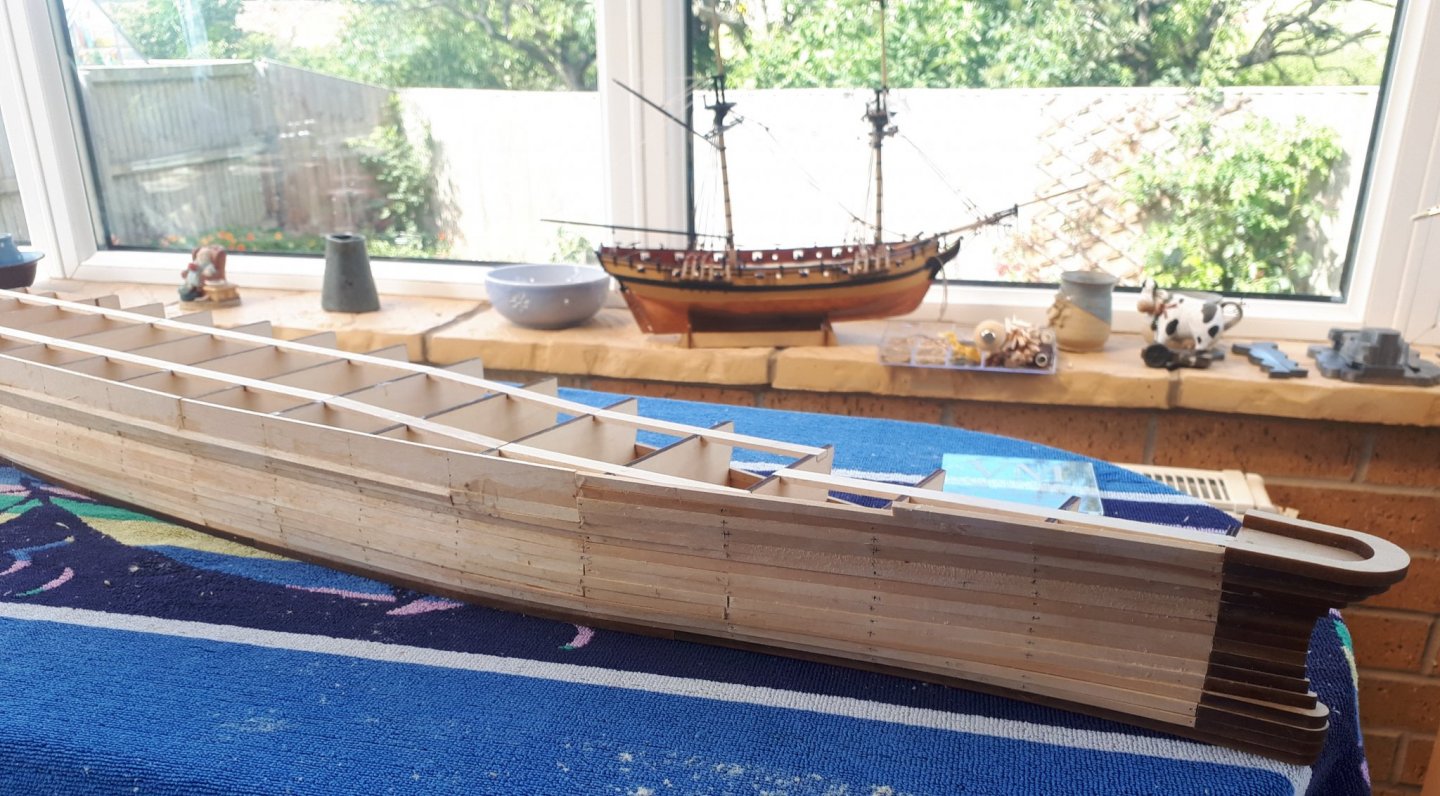
I decided to deviate from the instructions, which requires each deck part to be planked separately and installed at a much later stage. I think it is better to fit all the deck panels first and to then fit the deck planks later on. The photo etched parts are only dry fitted at the moment as is the final deck part, as the hanger deck will require painting prior to the fitting. I found this method was much better for getting the hull profile to fit the sanding templates. Decks fitted.


- 64 replies
-
- 6
-
-
- yamato
- deagostini
- (and 2 more)
-
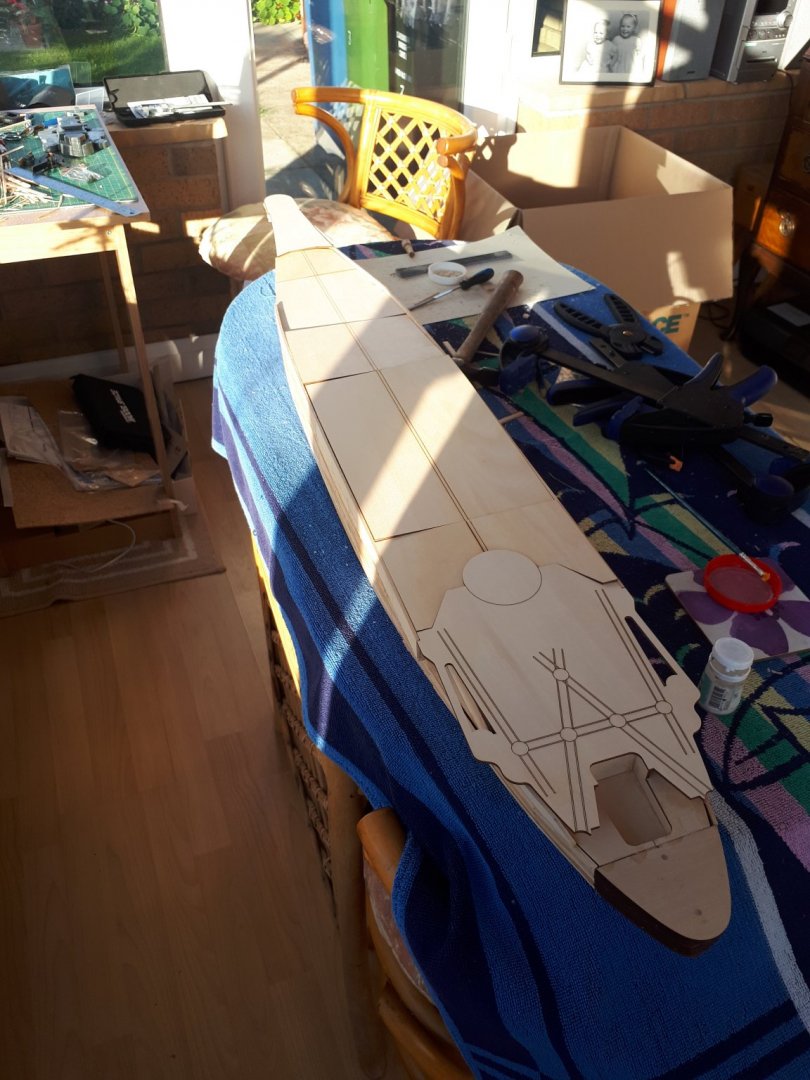
Having completed the hull planking I decided to dry fit the hull deck parts. The seemed to fit OK and will not require too much tweaking. I took the hull sanding profiles provided (a great kit idea) and spent a nice couple of hours in the sun this afternoon sanding and smoothing. The hull profile is now more or less in line with the all the different profiles templates. The hull requires a couple of minor tweaks. I think I will spray the hull with a primer to highlight any defects. This can then be filled as necessary and sanded smooth.

- 64 replies
-
- 11
-
-
- yamato
- deagostini
- (and 2 more)
-
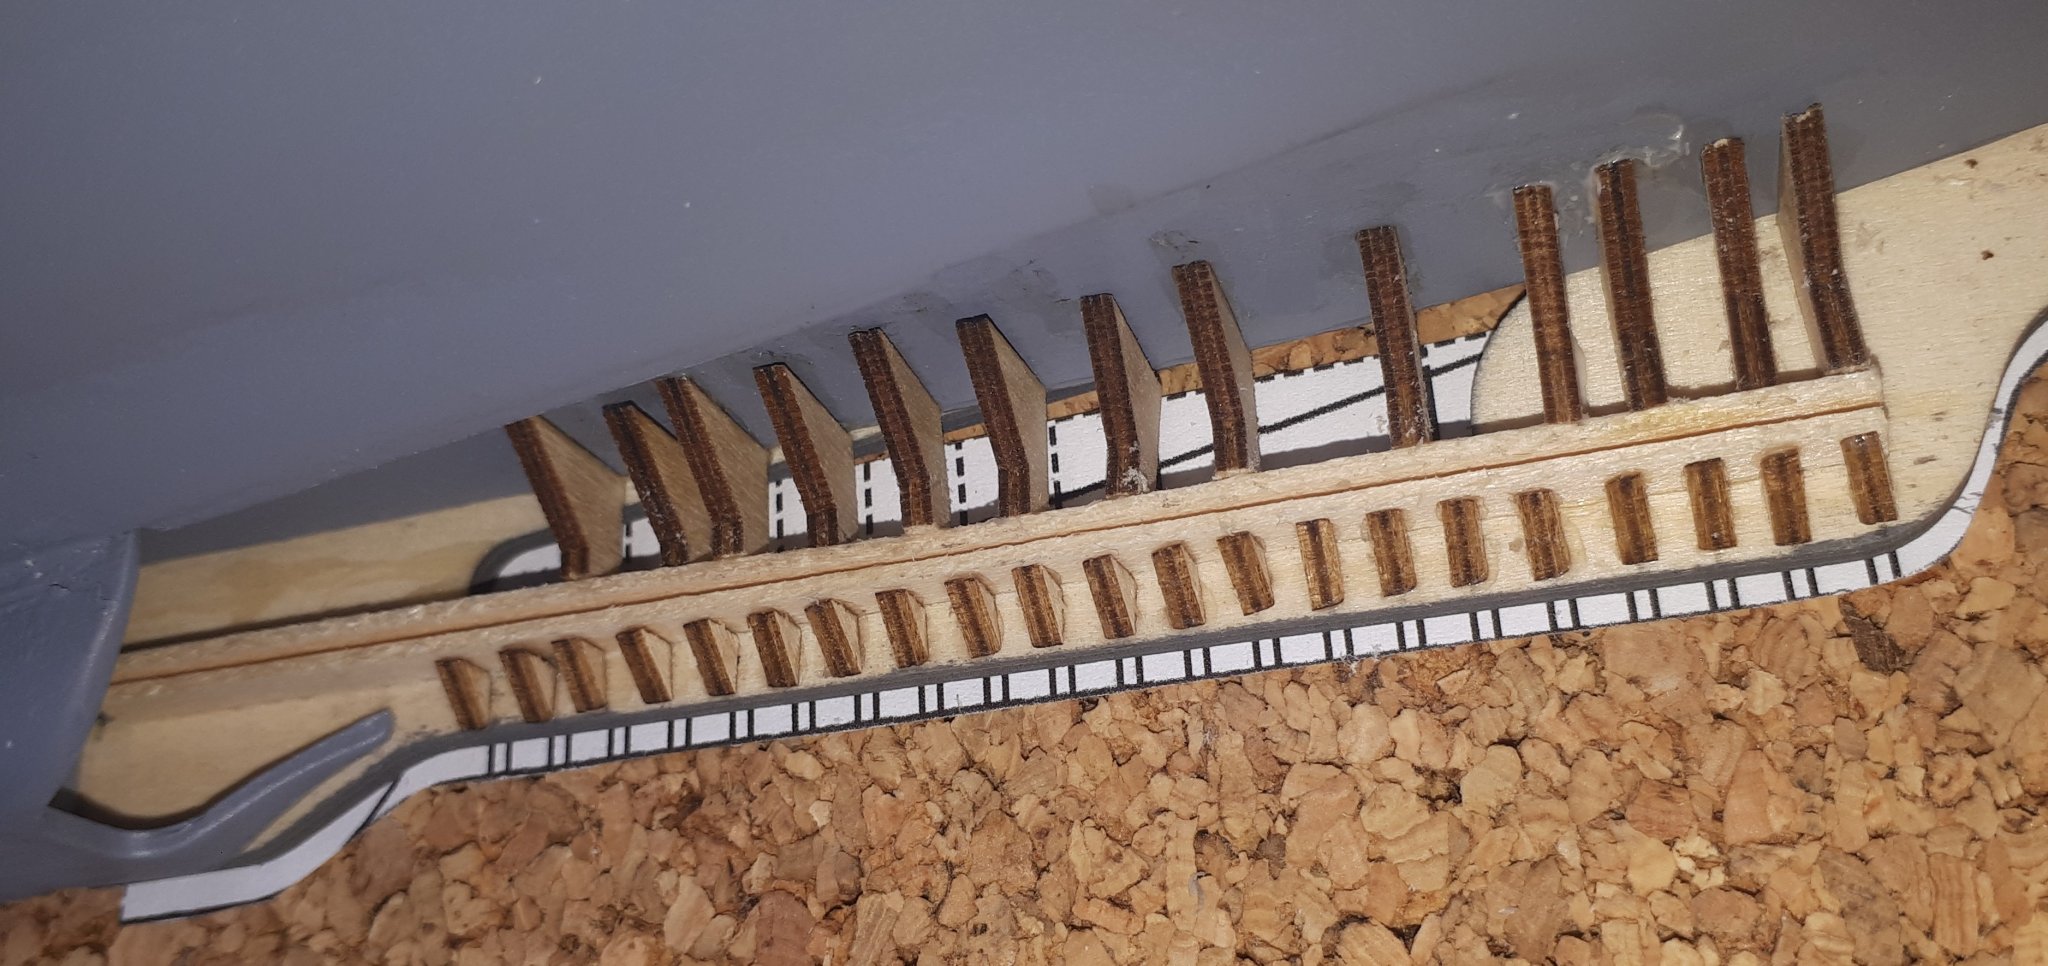
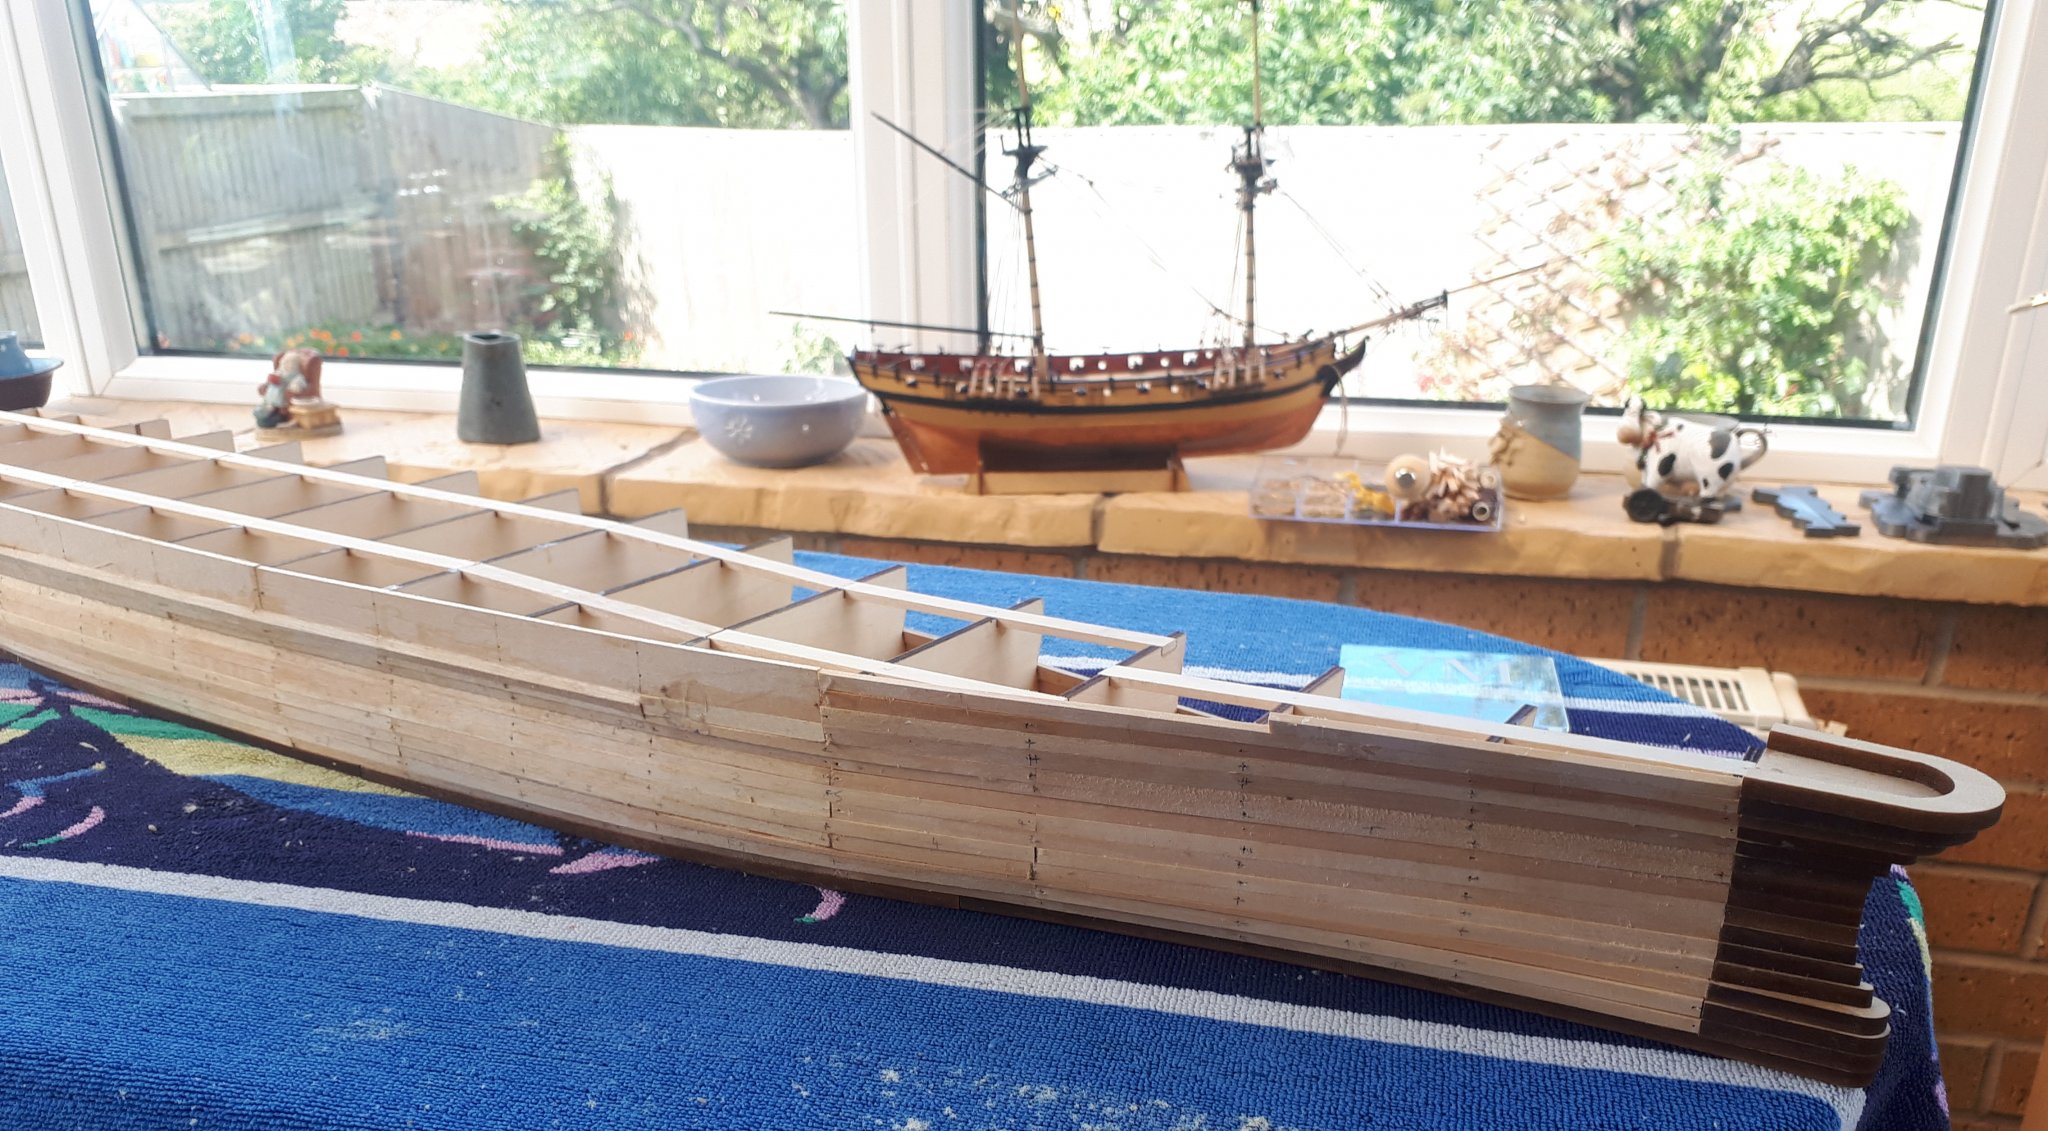
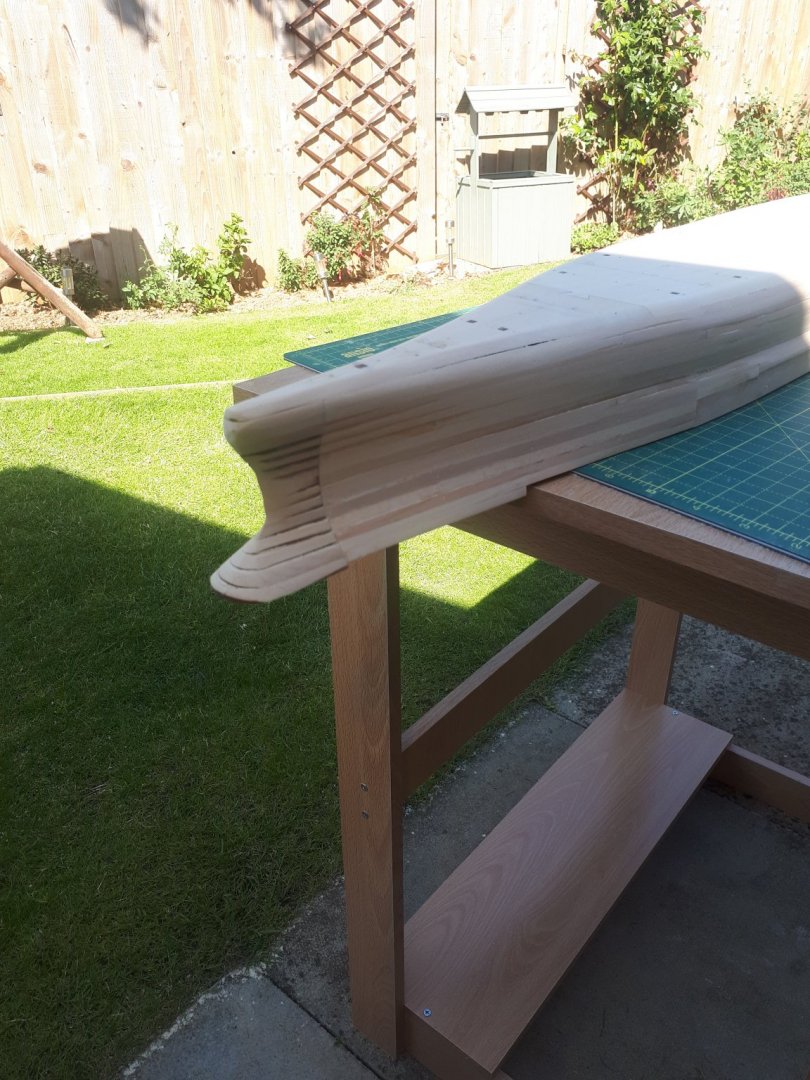
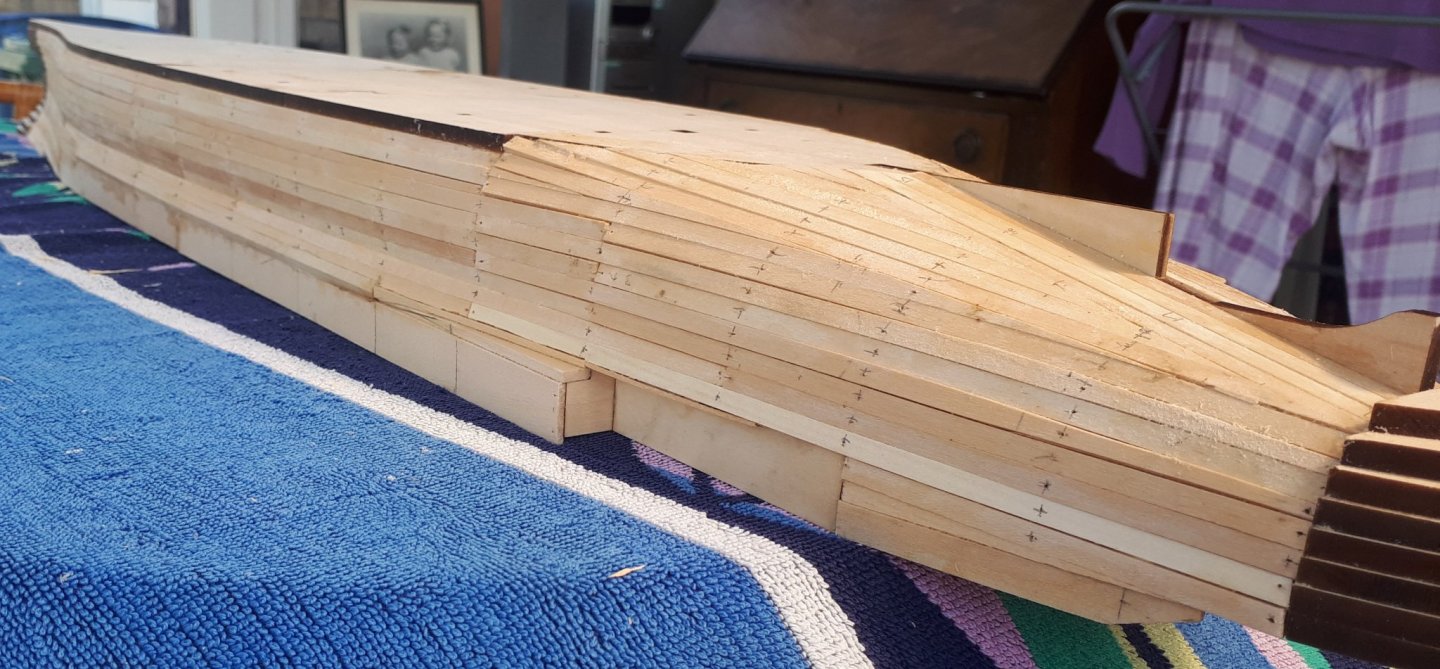
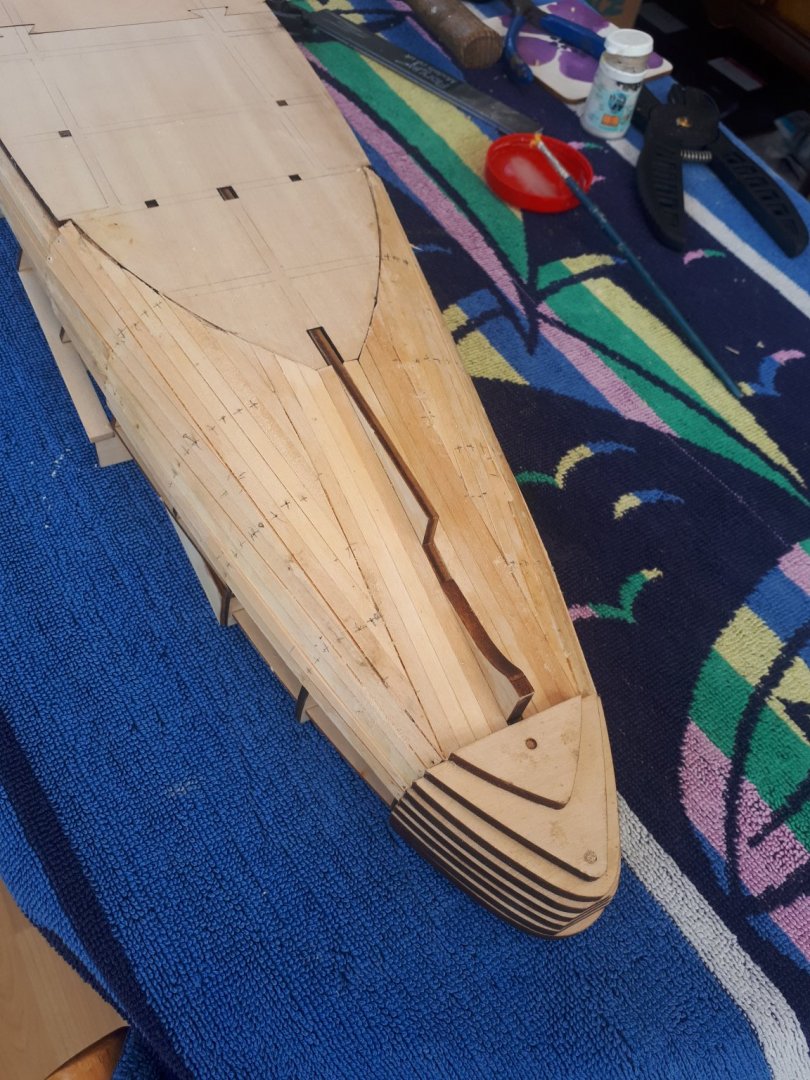
I have now completed adding the strakes to the starboard side of Yamato's hull framework. It looks rough and uneven at the moment which is to be expected. I should be able to complete adding the remaining strakes to the port side in the next couple of days (or so). Once I have added all the strakes the hull can then be marked out and sanded (and filled) smooth, using the various templates provided to ensure the correct profile along the length is achieved. I think the sanding and filling process will take some time to get right. I have noted the problem strake toward the keel on the following picture, which I have now sorted out due to a bad glue joint.
- 64 replies
-
- 6
-
-
- yamato
- deagostini
- (and 2 more)
-
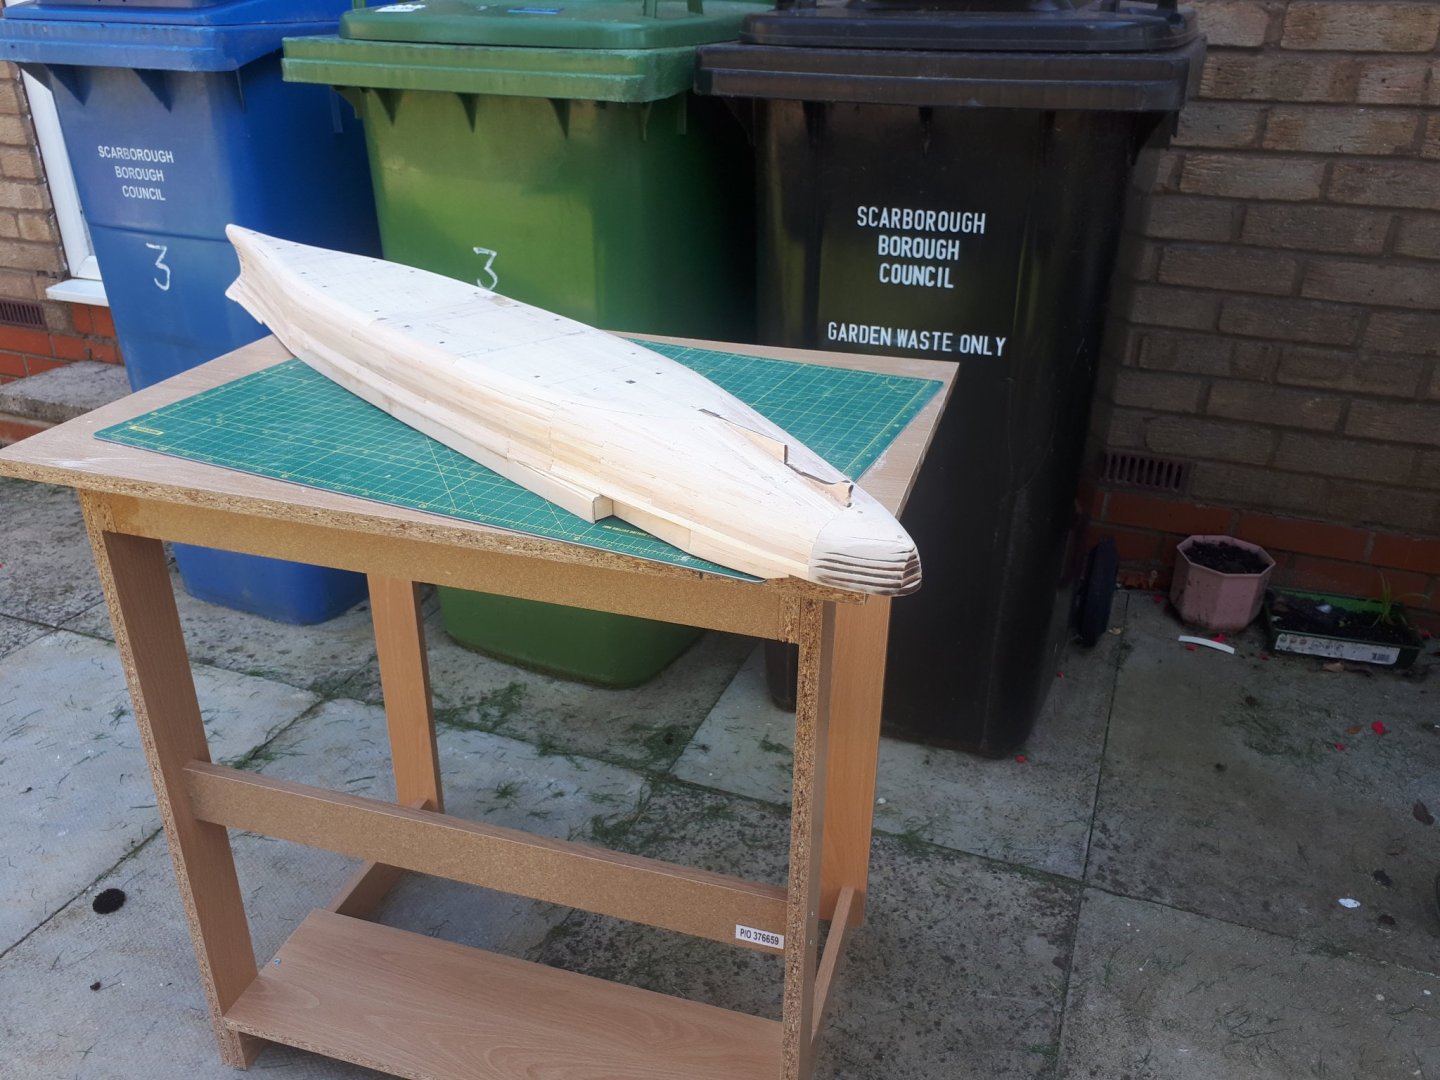
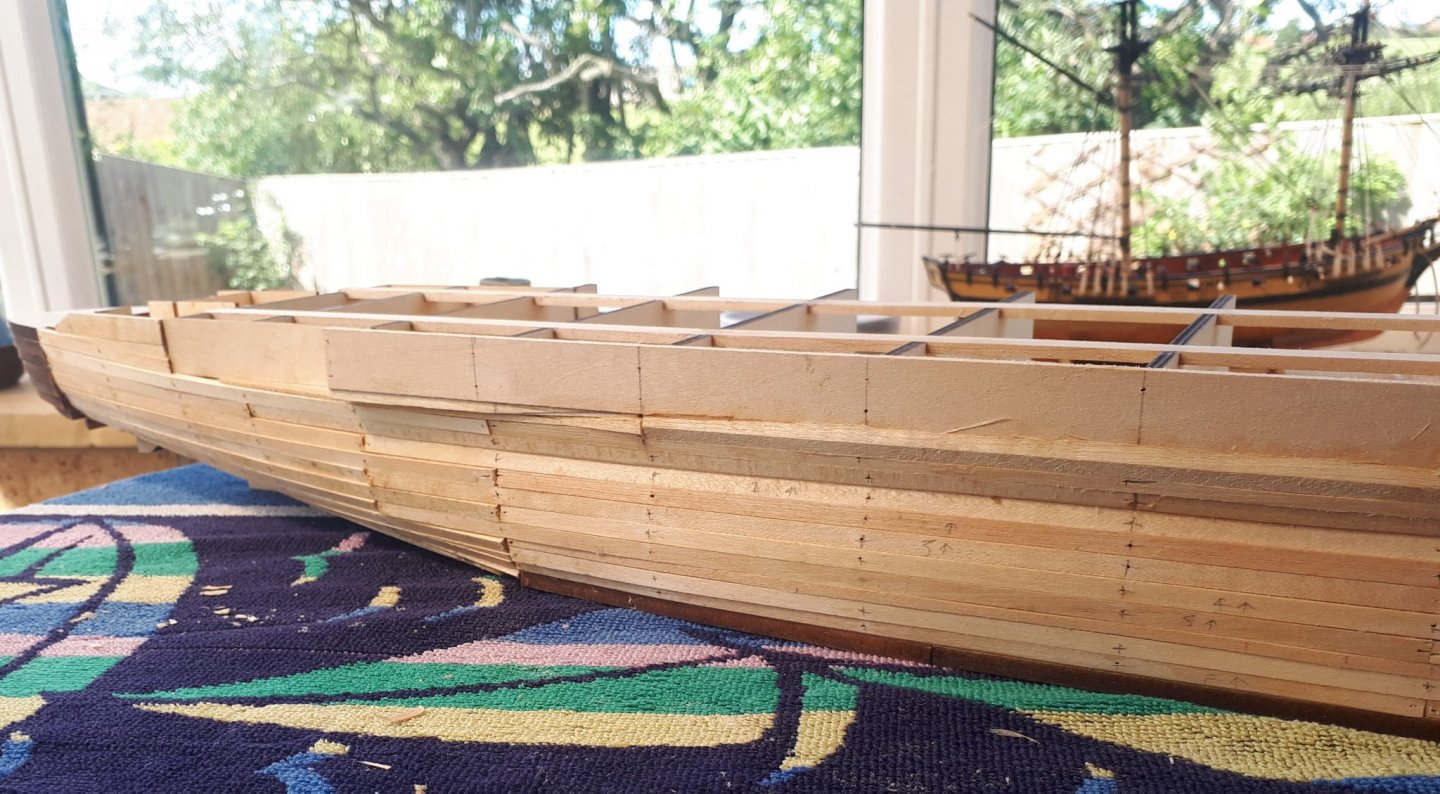
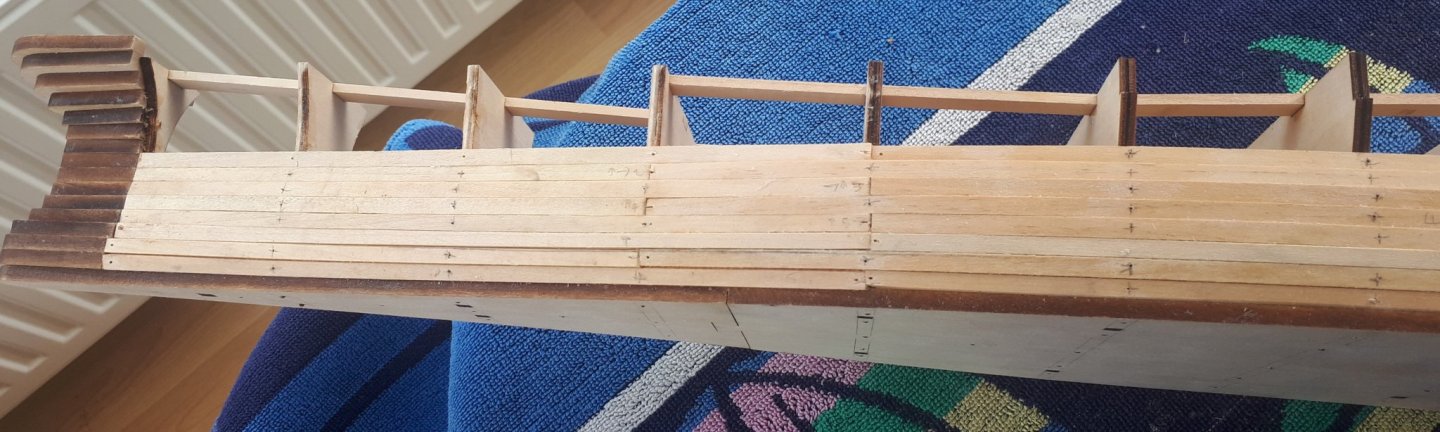
I have made more progress on the hull planking. I have now completed the stern area. I only have the final few top strakes to add. The fun and games then starts with the hull sanding. Templates have been provided to help check the shape of the hull during the sanding process.
- 64 replies
-
- 7
-
-
- yamato
- deagostini
- (and 2 more)
-
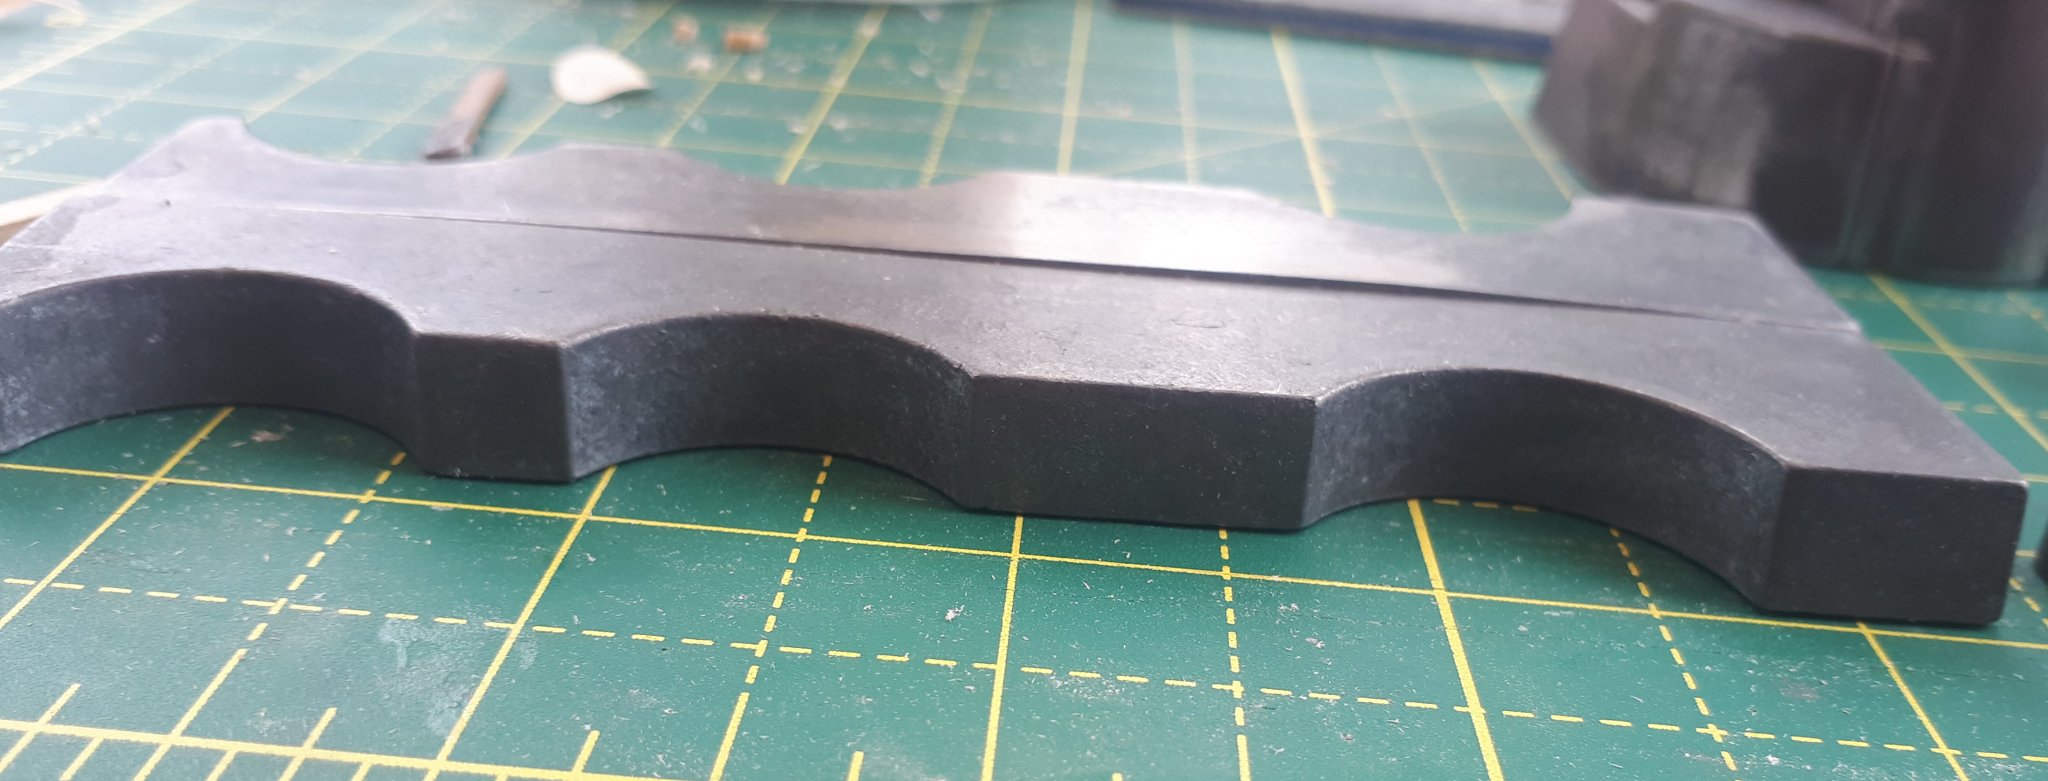
I have continued to make good progress on both the superstructure and hull planking. The quality of some of the die cast parts is a concern, one part arrived badly warped, it has an approx. 3mm displacement. I could use the part but it would require a lot of filing and filling with epoxy resin. I have been in contact with the supplier and they have ordered a new part. Photo of warp part WIP Superstructures I am finding the detailed planking instructions very odd and goes against what I would normally do. I should be able to completed the hull planking in the next few days all being well. Planking progress photos

- 64 replies
-
- 7
-
-
- yamato
- deagostini
- (and 2 more)
-
Better quality every time, my experience with poor quality materials from Model Space confirms that in my opinion
-
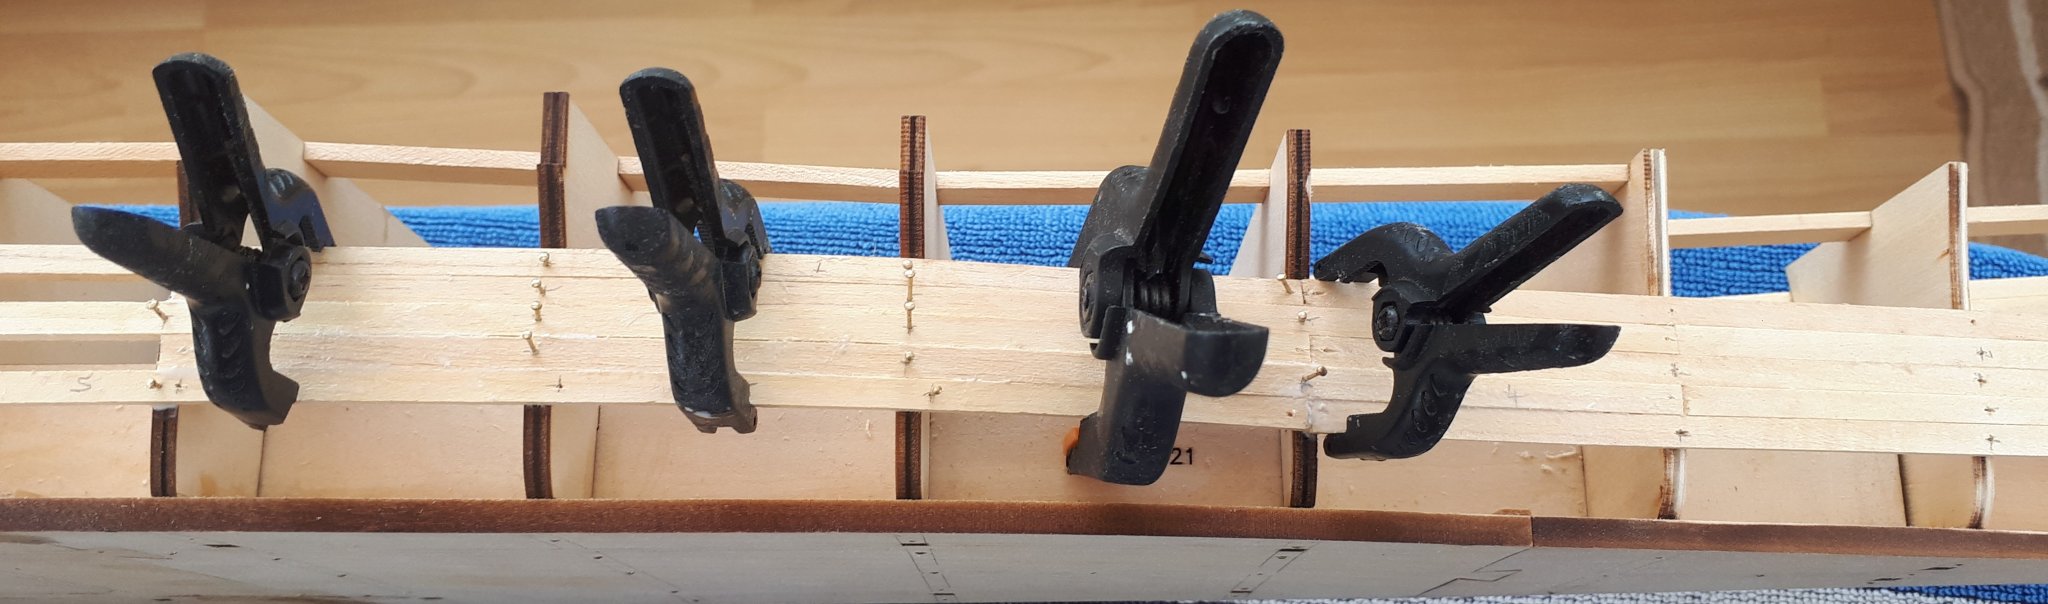
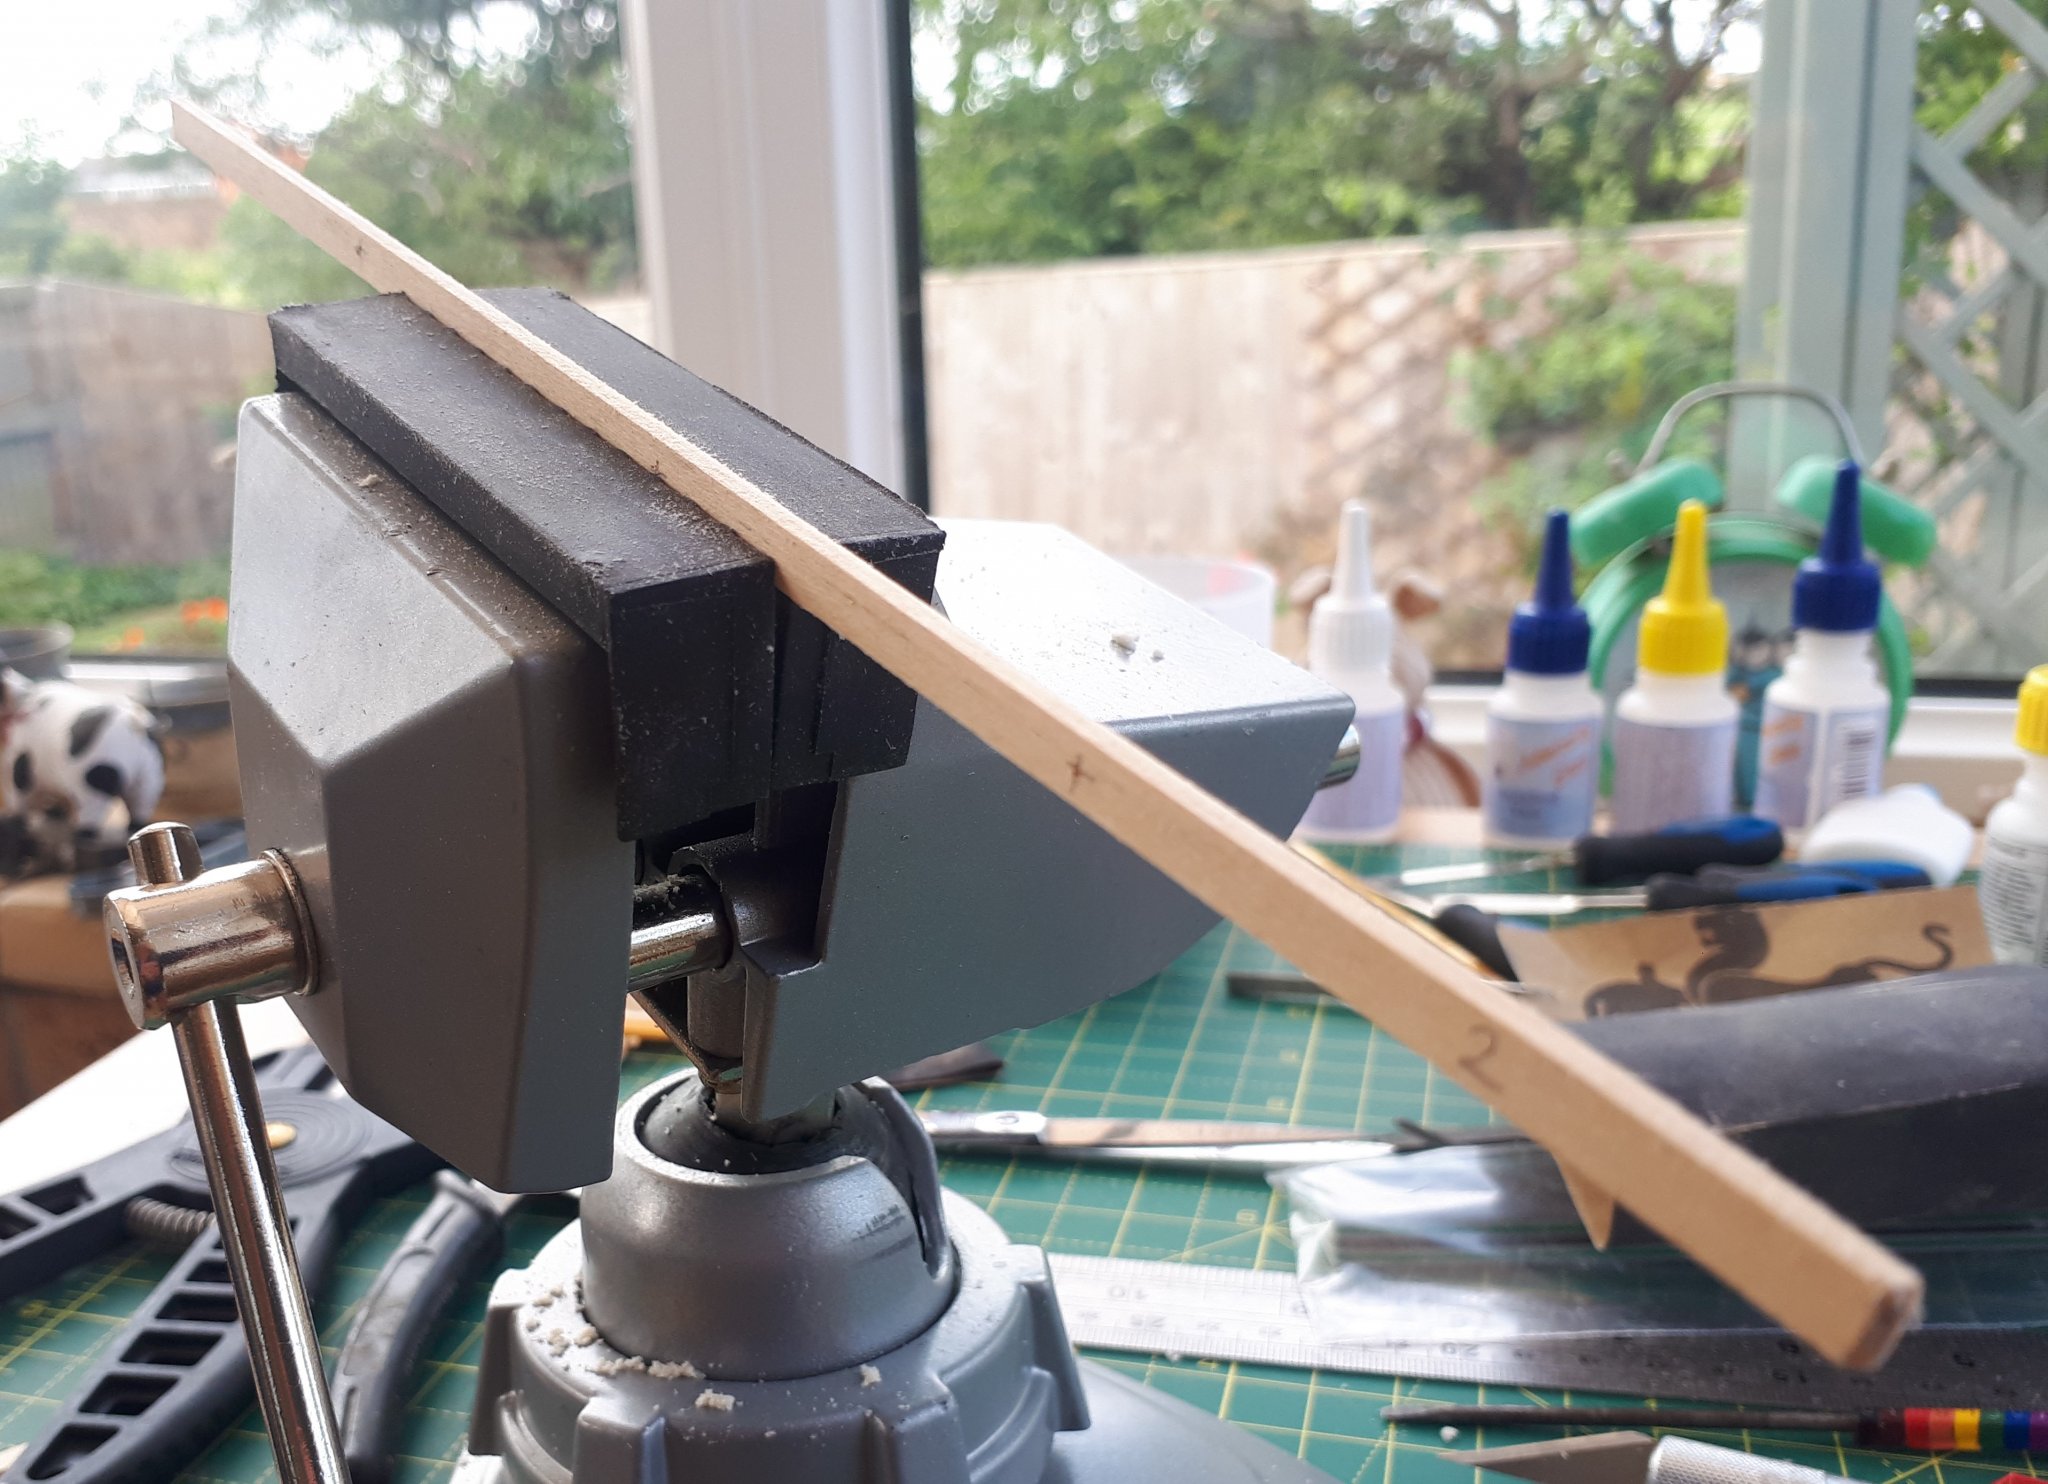
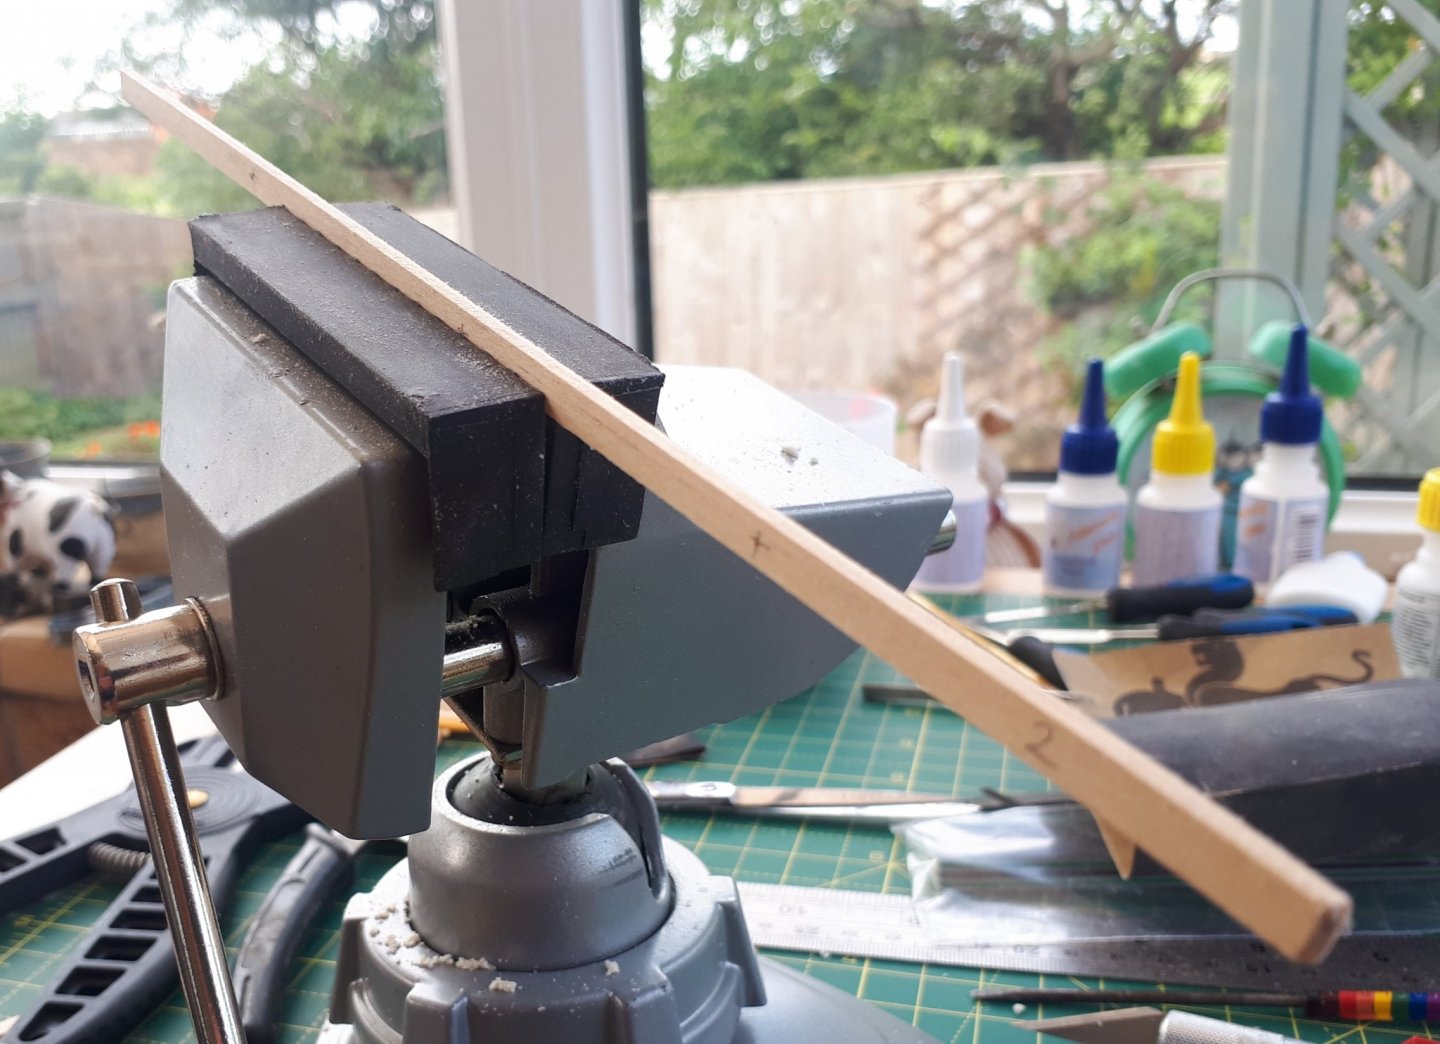
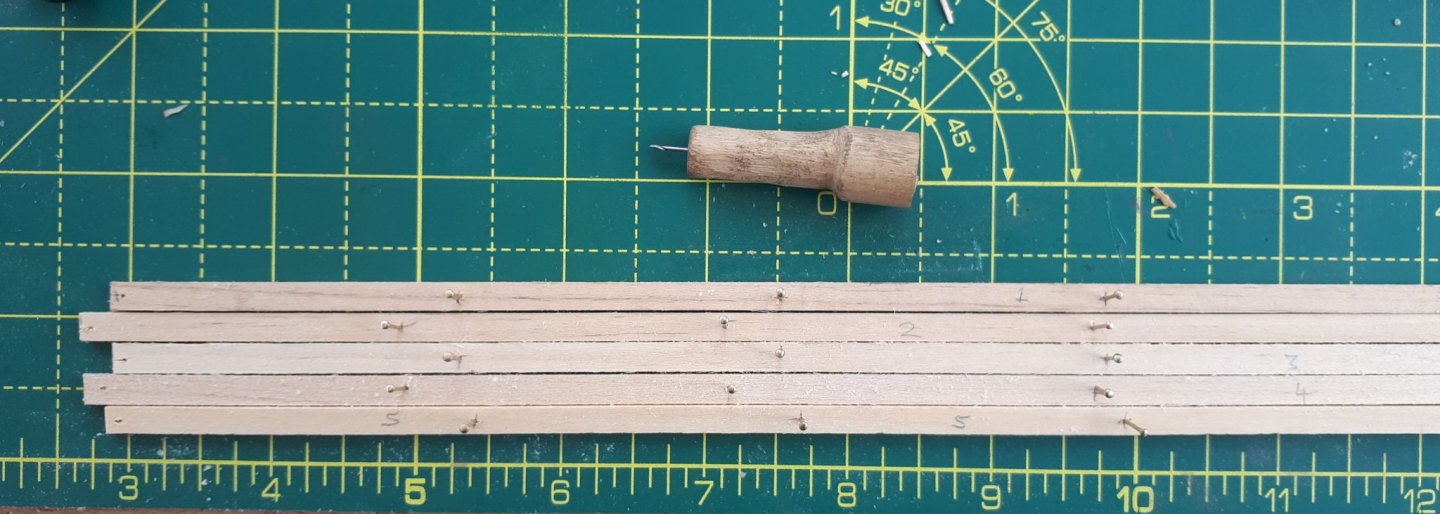
I have added a few more hull planks today. I thought I would share my method for doing this. The instruction manual requires 5 planks are fitted at a time. I started by measuring and cutting the 5 planks to the correct length. I then added a chamber to the top edge of the planks to ensure the edges line up when fitted to the hull. The next task was to make the pin holes and then to add the pins. I made a small hand made tool to make the holes. The first plank was then glued and pinned in place, ensuring it was correctly positioned on the hull frame. I then repeated this process for the 4 remaining planks, using clamps to close the gaps between the planks and where necessary using the pins to help secure the planks.


- 64 replies
-
- 7
-
-
- yamato
- deagostini
- (and 2 more)
-
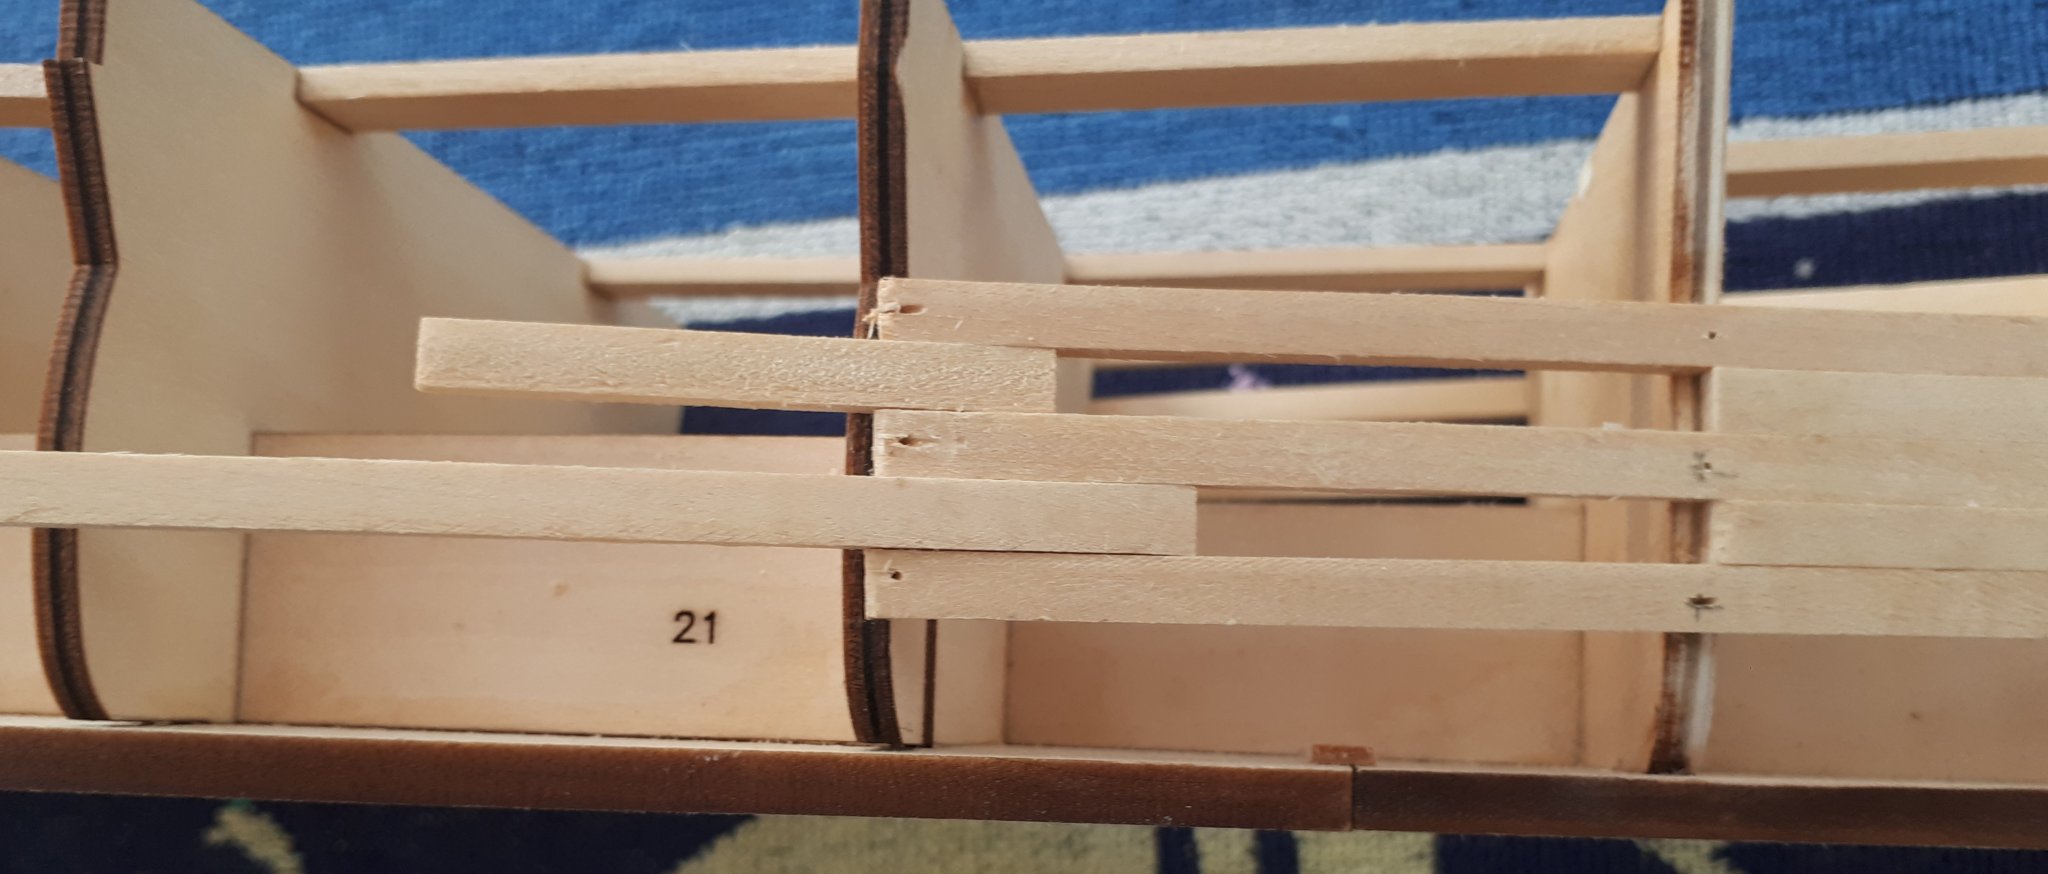
I have started the hull planking, added 5 strakes each side. I have been following the instructions in the manual. To ensure the gaps are maintained at the bulkheads, scrap pieces were used as spacers.

- 64 replies
-
- 7
-
-
- yamato
- deagostini
- (and 2 more)
-
I do have a commission build for a local bistro so I'm looking for a nice model for them. Flirt is on my radar as is Alert.
-
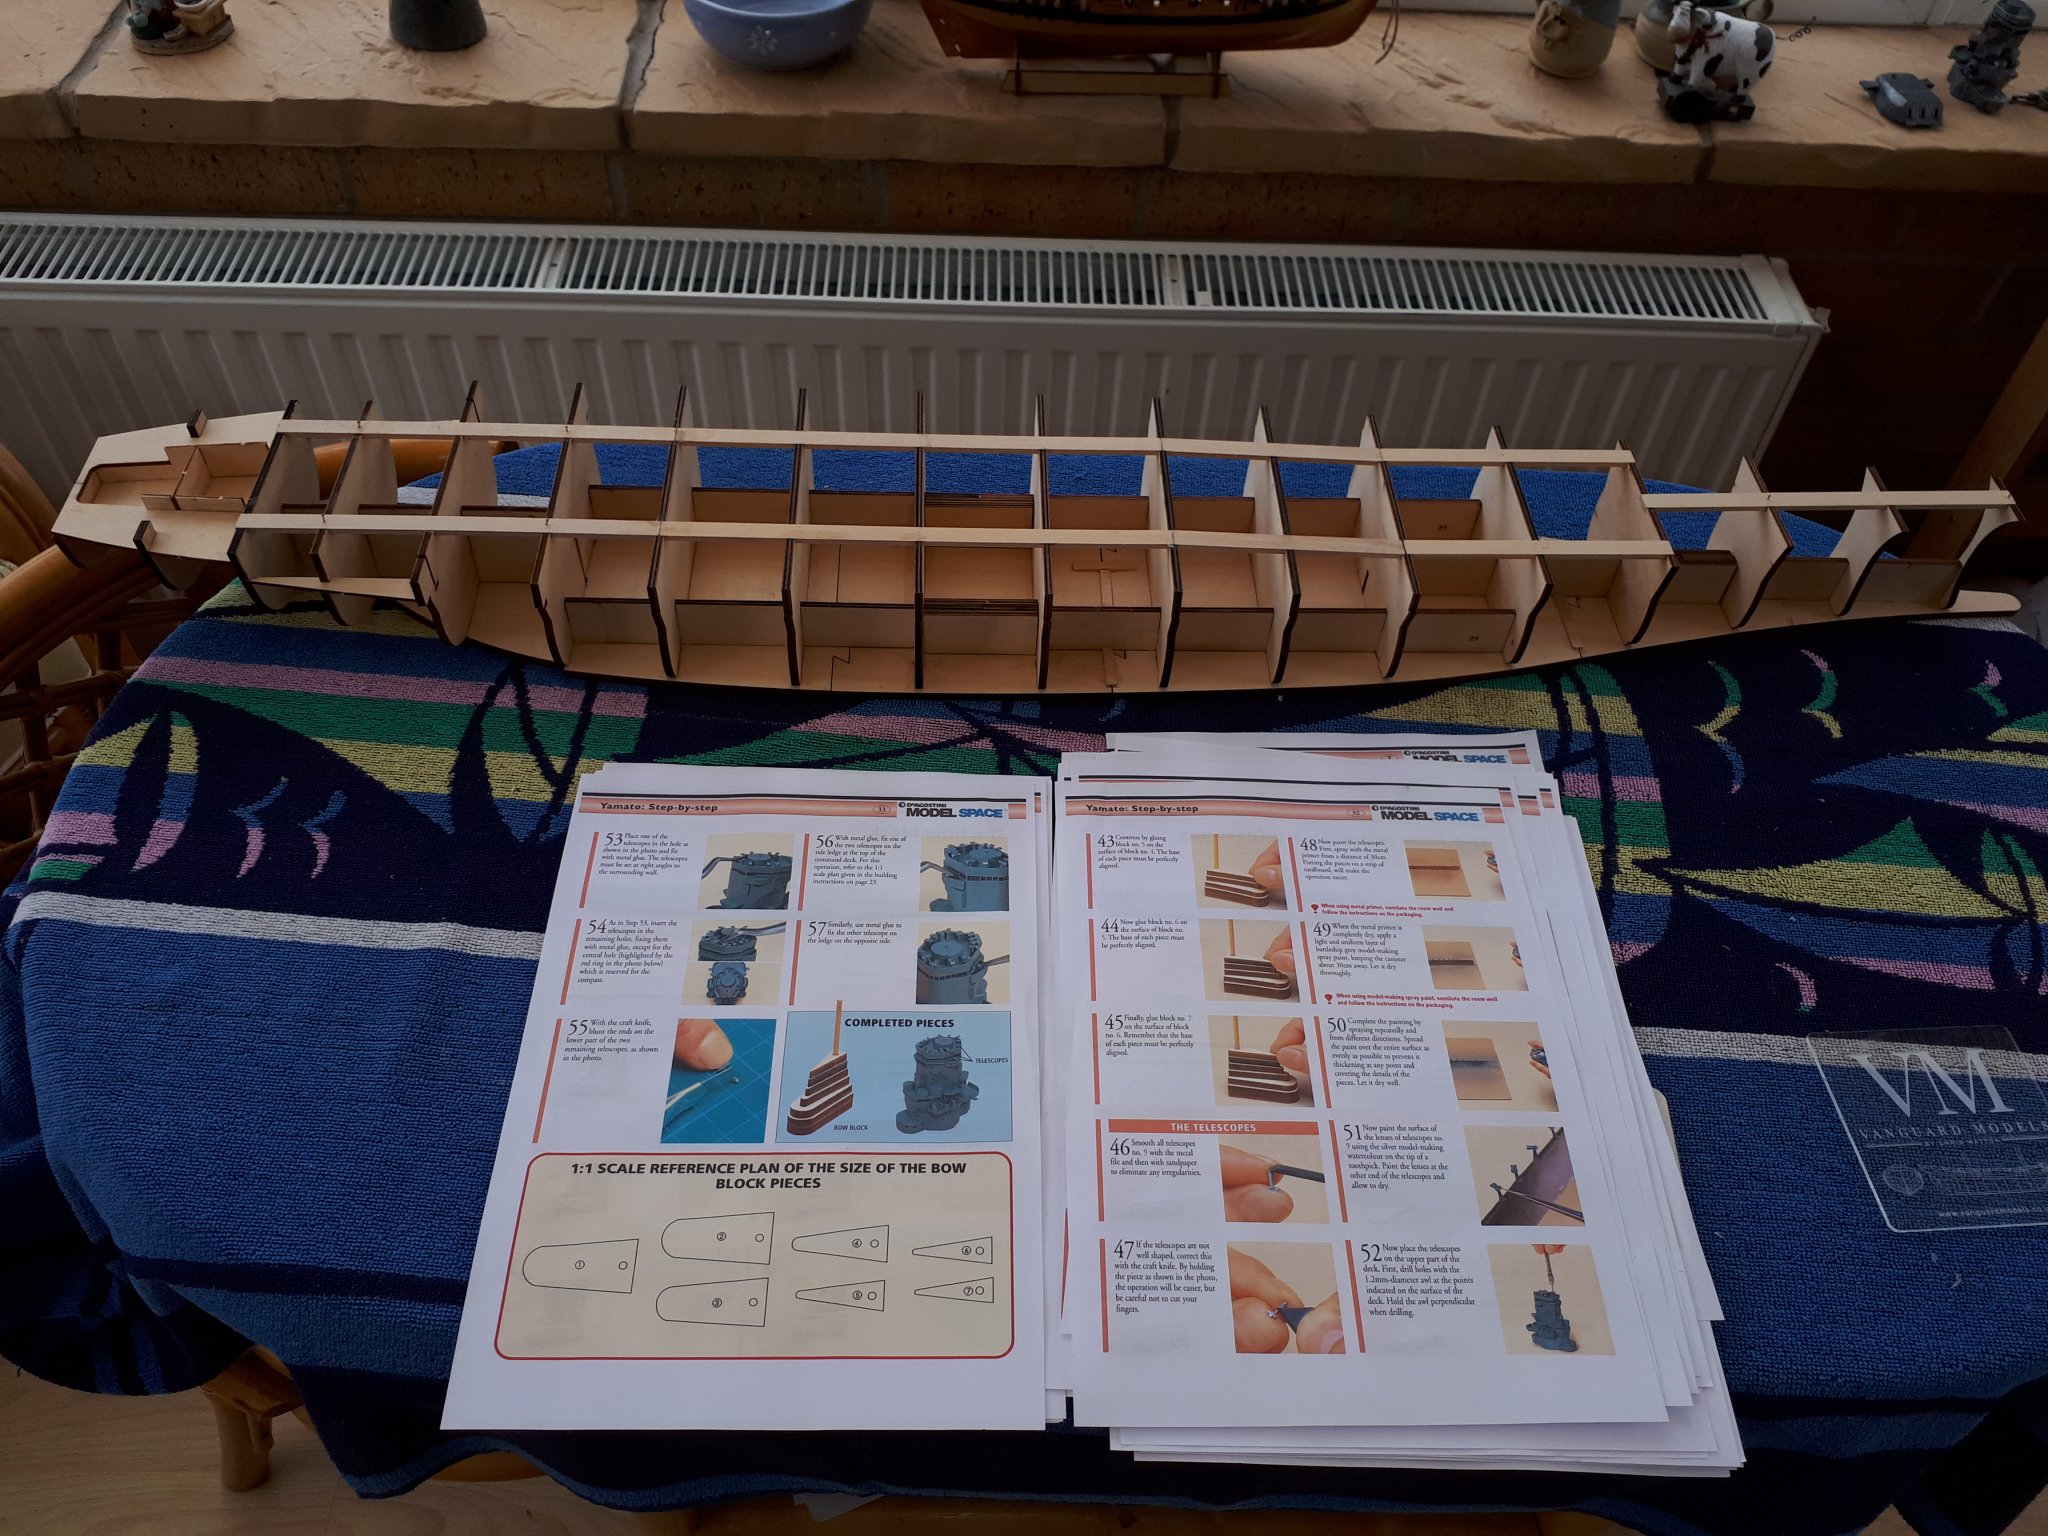
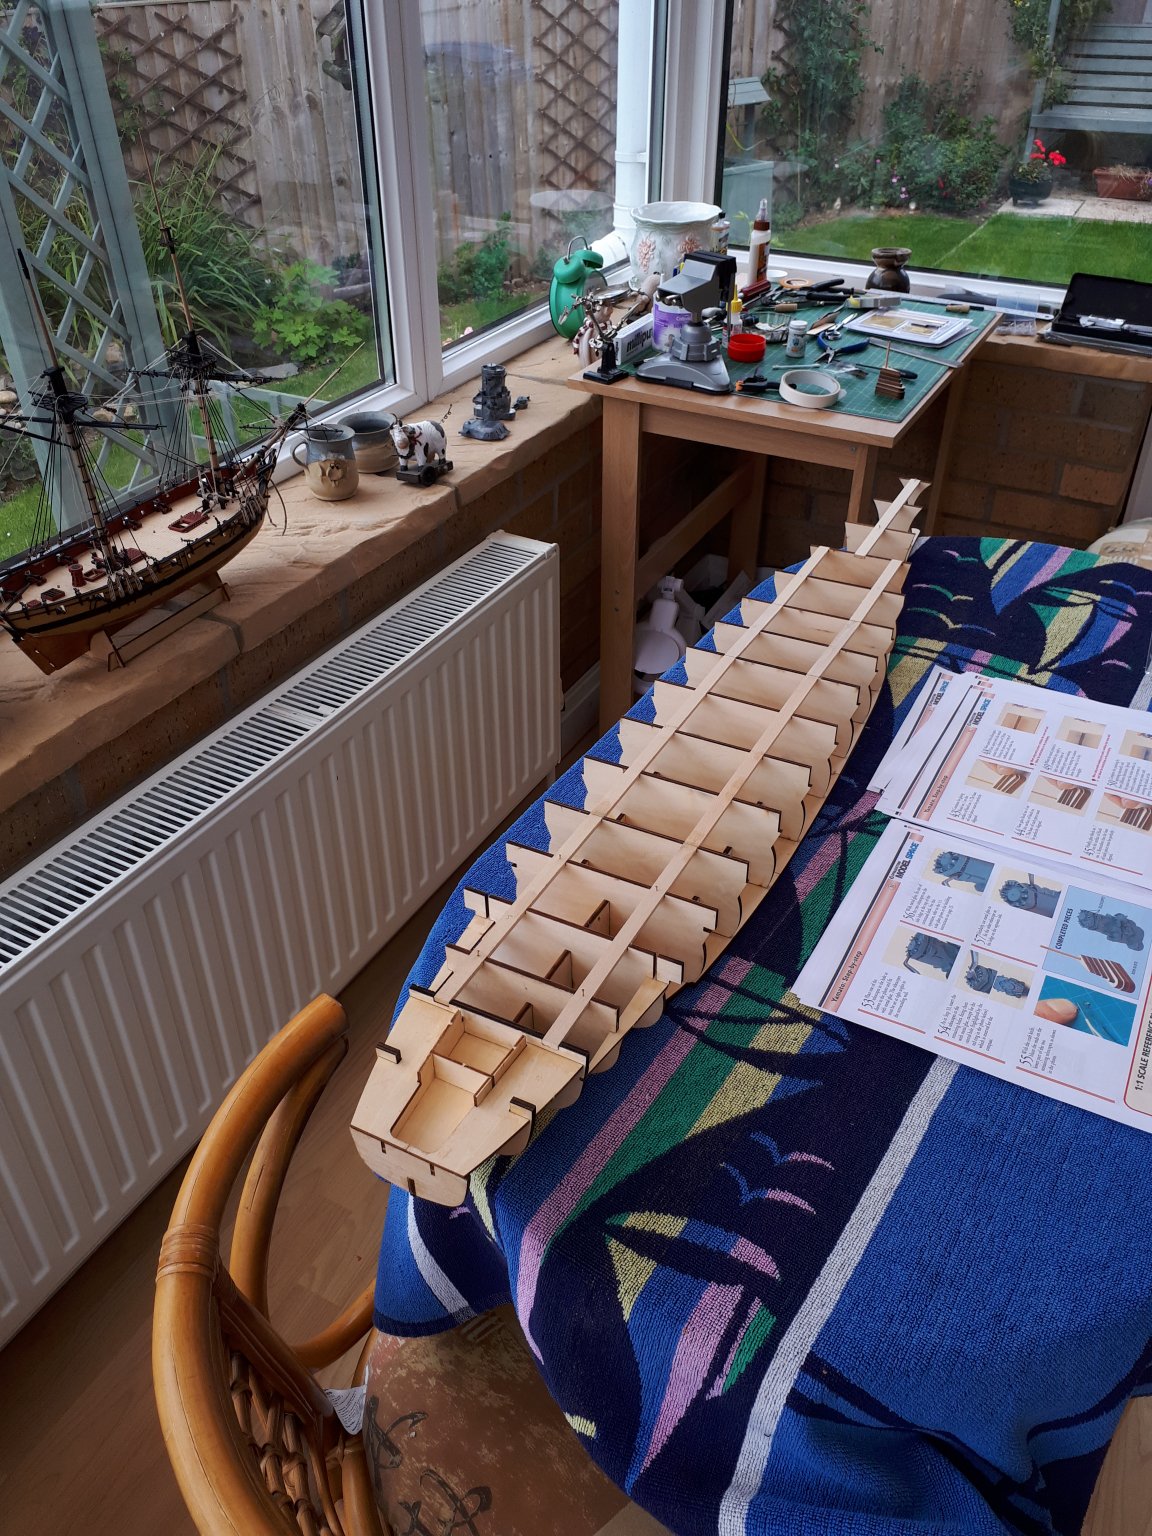
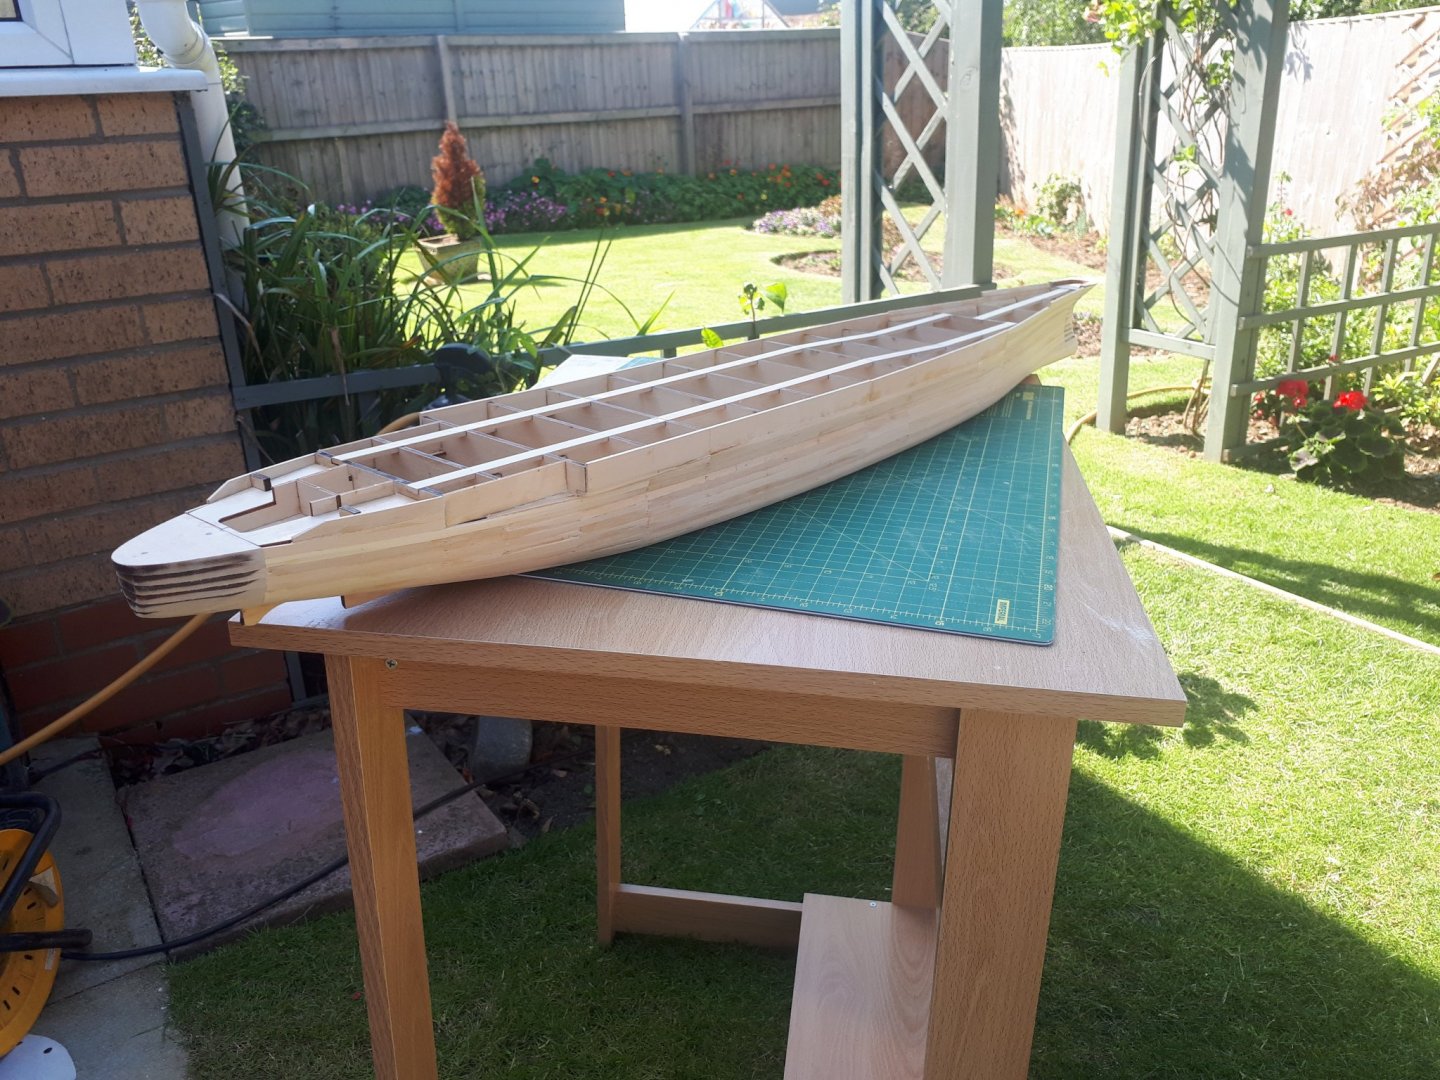
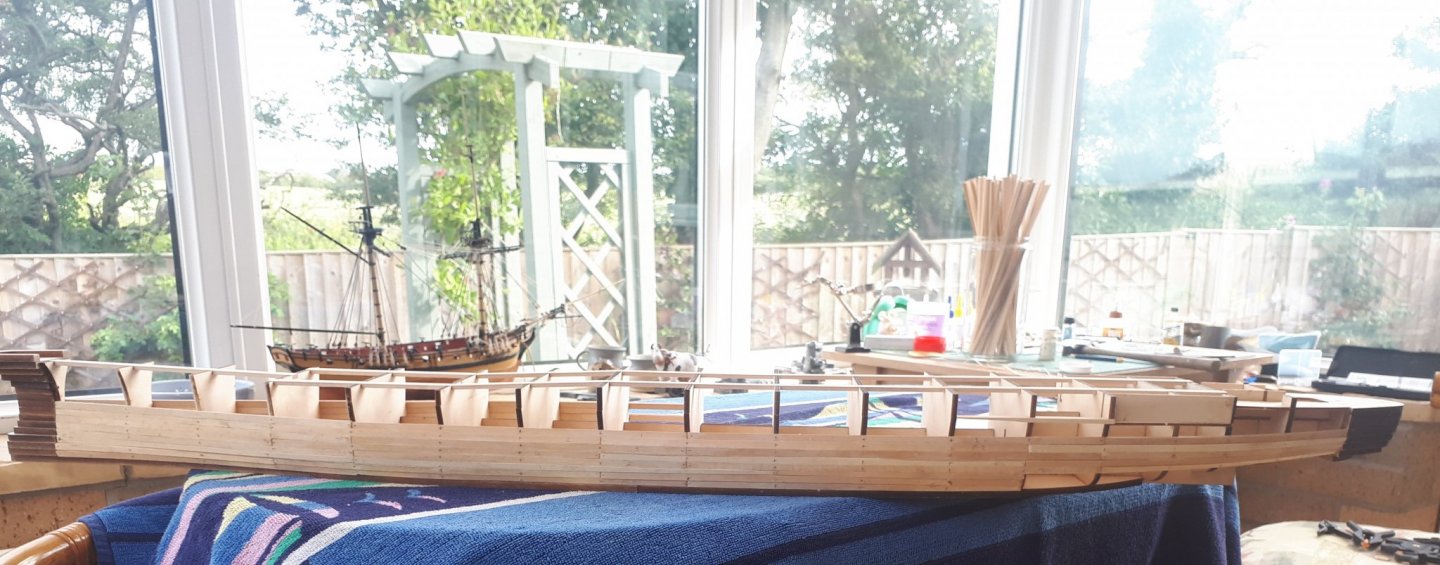
My IJN Yamato 1/250 scale model kit arrived 5 days ago. I have now completed the basic hull frame assembly. Once I have attached the bow assembly (also completed) to the hull frame assembly I can then start work on the hull planking. I am also making good progress on the bridge assembly.


- 64 replies
-
- 9
-
-
- yamato
- deagostini
- (and 2 more)
-
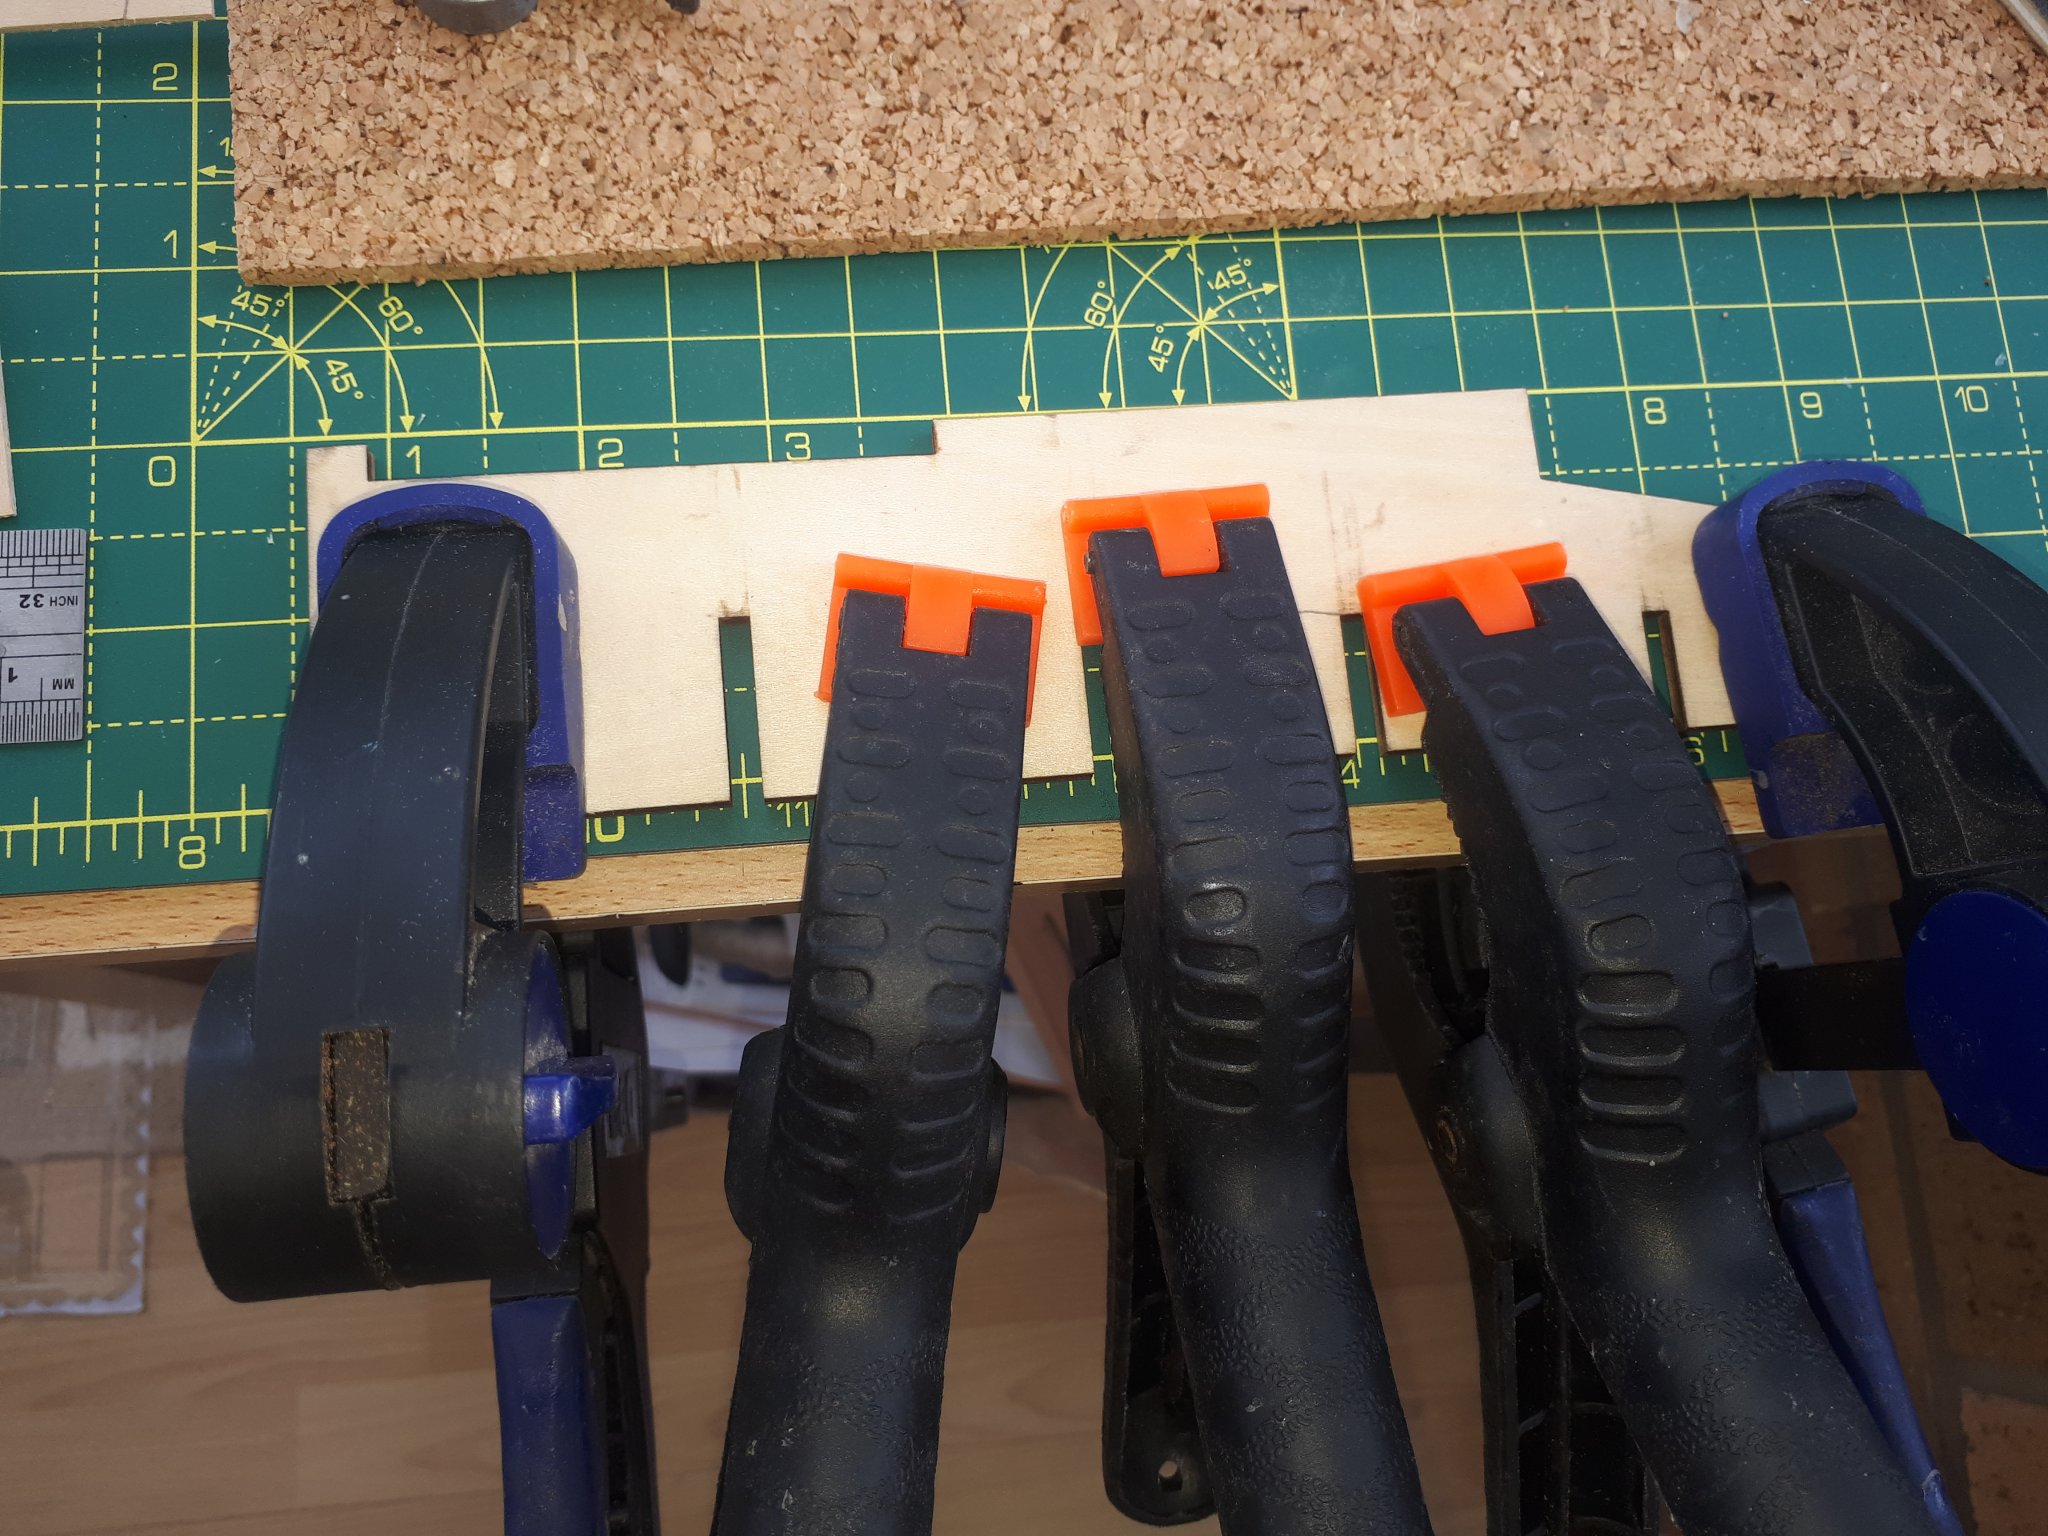
More work undertaken today on the bridge and hull Bridge Work I have added some more bridge parts. I made another small wooden jig (10mm one edge and 11mm the other edge) to support one piece as the epoxy resin sets. Hull Assembly I have now glued the majority of the hull bulkheads in place. I still have a slight issue with the warped keel support piece but it is almost straight. I'm just giving it one more clamping (after soaking in water).


- 64 replies
-
- 7
-
-
- yamato
- deagostini
- (and 2 more)