Glenn-UK
-
Posts
3,172 -
Joined
-
Last visited
Content Type
Profiles
Forums
Gallery
Events
Everything posted by Glenn-UK
-
 Hello Chris I have a clarification with regards to the Speedy build related to parts PE 7 (cannon eyebolt) and PE7a (cannon eyebolt ring). I believe correct fitting of the cannon eyebolt ring is as shown in photo (page 34 of the instruction manual), i.e. they are simply fitted over the cannon eyebolts so the eyebolt ring can then be used if the cannons are rigged. Is this correct? The diagrams shown on page 35 of the manual initially made me think that the eyebolt rings were actually fitted to the hull (as decoration), which I do not believe is the case, the diagram is just simply showing the eyebolt rings in place fitted over the eyebolts, as per the photo on the previous page. I thought it better to clarify as these parts are currently being painted so I can fit to the hull in the next day or two. I have made a few mistakes along the way and I would like to make sure I get this part of the build right first time. Many thanks for a great kit, I am really enjoying building it at the moment.
 -
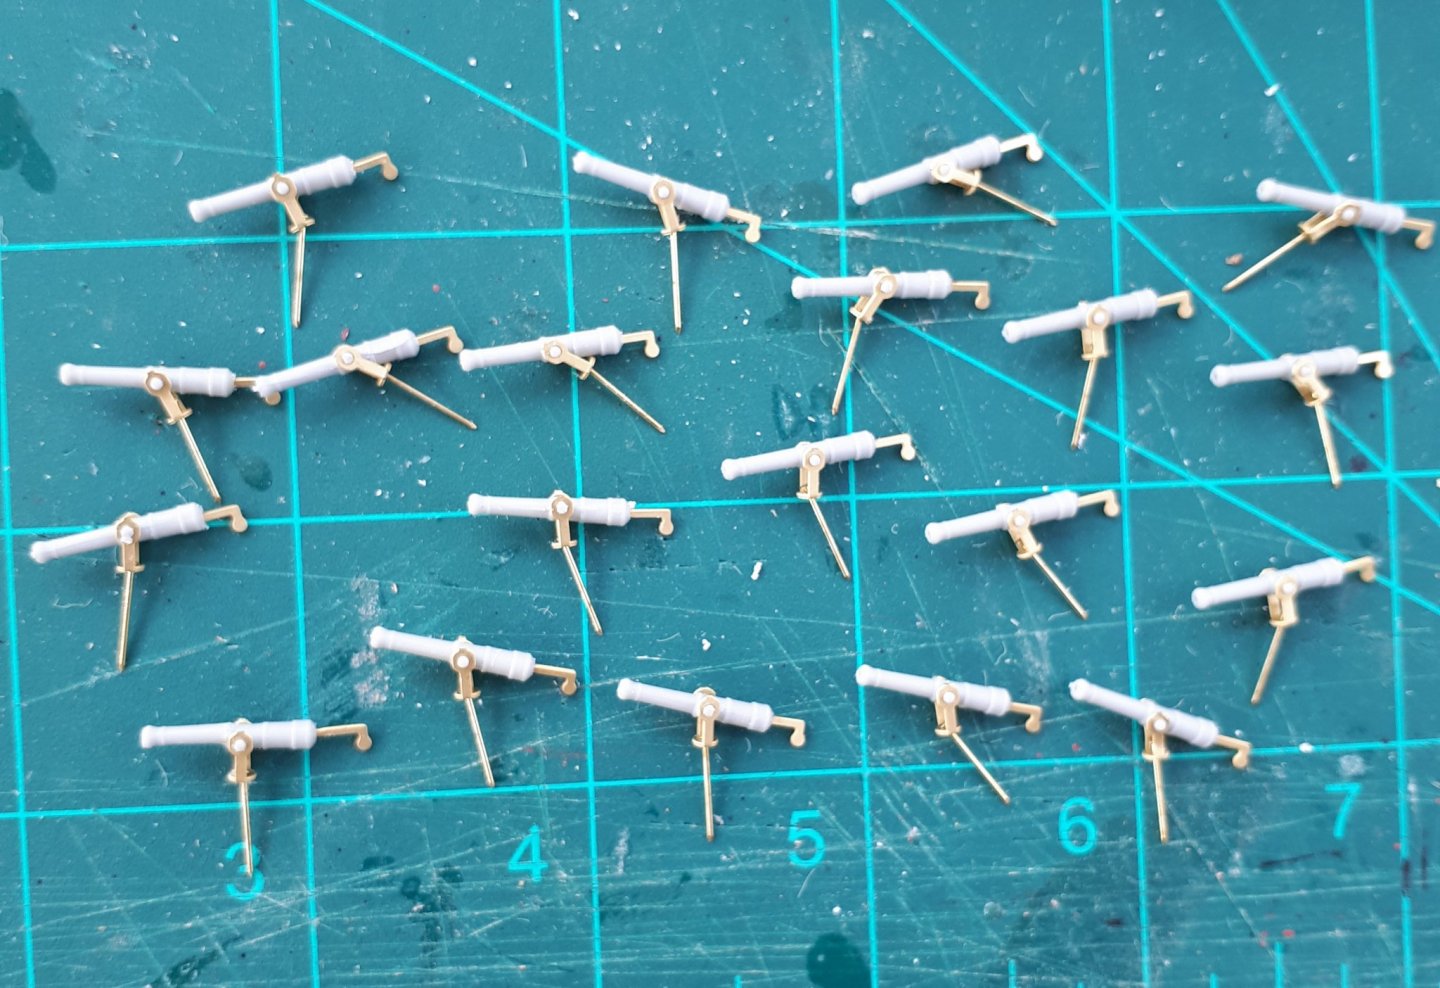
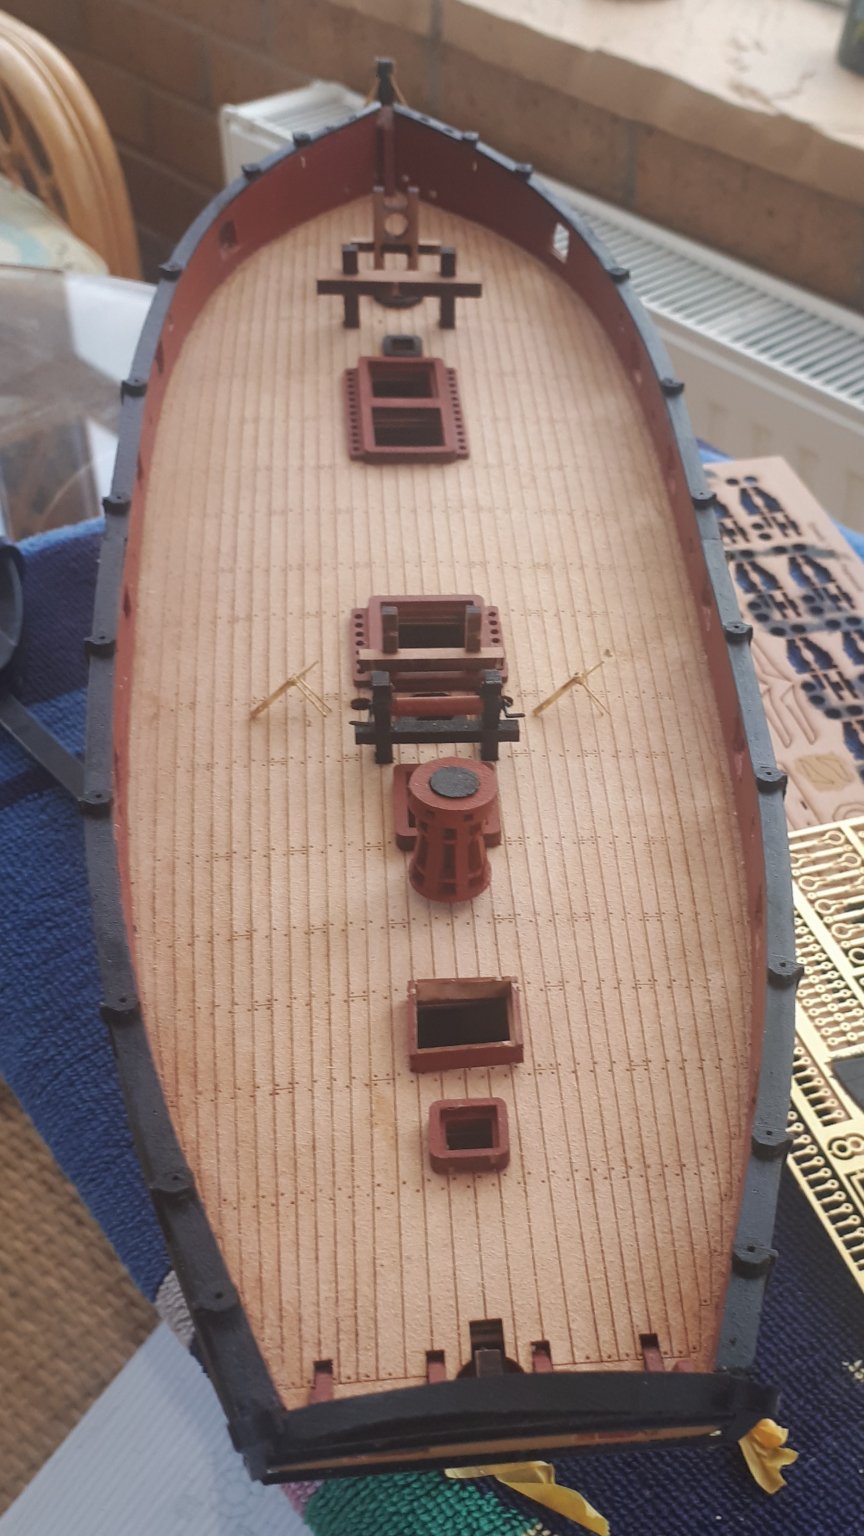
A little pit more progress today. I have used a 0.8mm drill on the 20 off swivel guns and clued the swivel gun handles into position. I will delay fixing these gun assemblies to the build until I'm ready to finalise the fitting of all the deck items. I have also fitted the belaying pin racks to the hull assembly. I did follow the advise the manual and used a pin to provide additional support. I'm planning to build and fit the channel assemblies next together with the gun tackle eyebolts and cleats.

-
Hello Derek I prefer to apply a clear matt varnish finish to my copper plating.
-
Hi David Great to hear from you again. I have been away from model boat building for a couple of years (or more). I was really excited by the Chris Watton design and as I was move my work area in to my conservatory (from the garage) I took the plunge. It is a great kit and I really happy to be back building. I look forward to watching you progress with Diana.
-
I plan to fit all the swivel guns. I also read that they may not have all been fitted but I think it will look more impressive with all guns and cannons fitted. I also thinking about rigging all (or some of) the 4lb cannons. If I do so I will build a rigging jig to make the task easier.
-
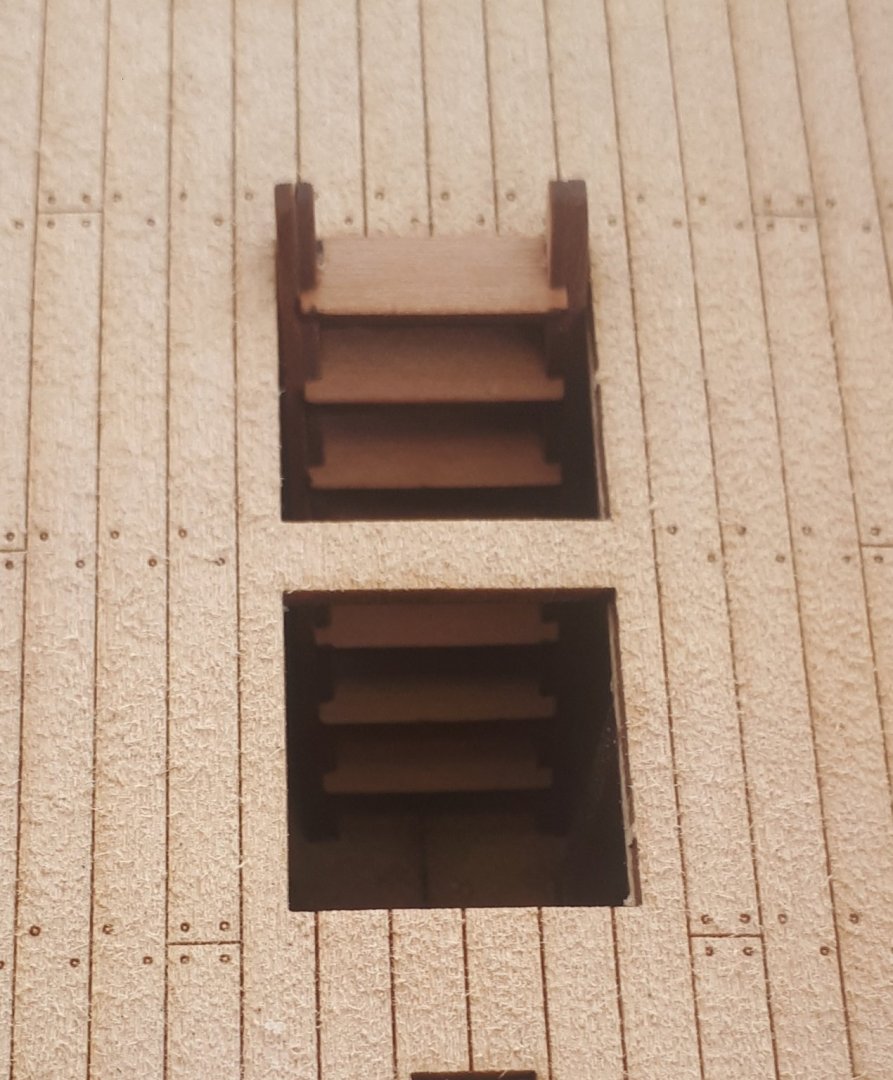
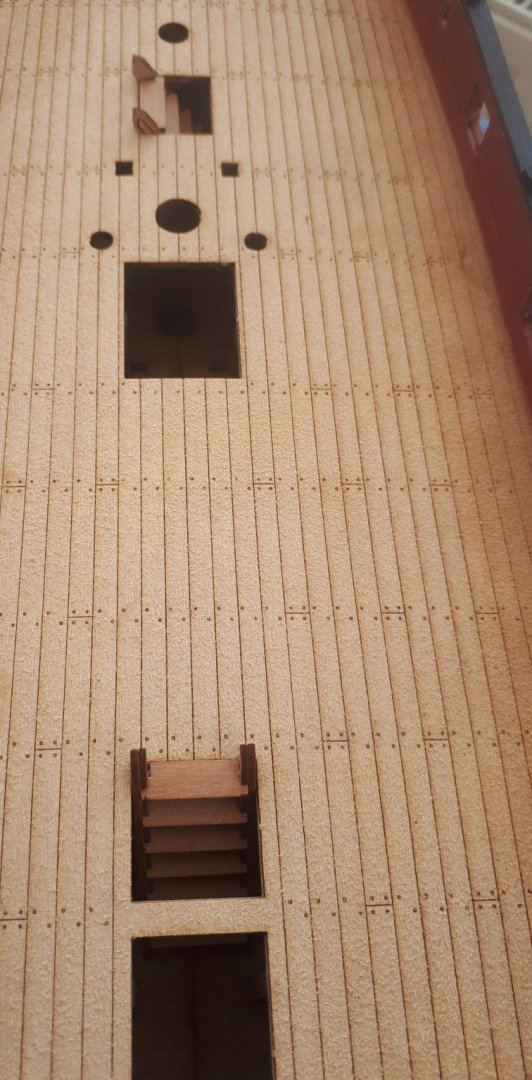
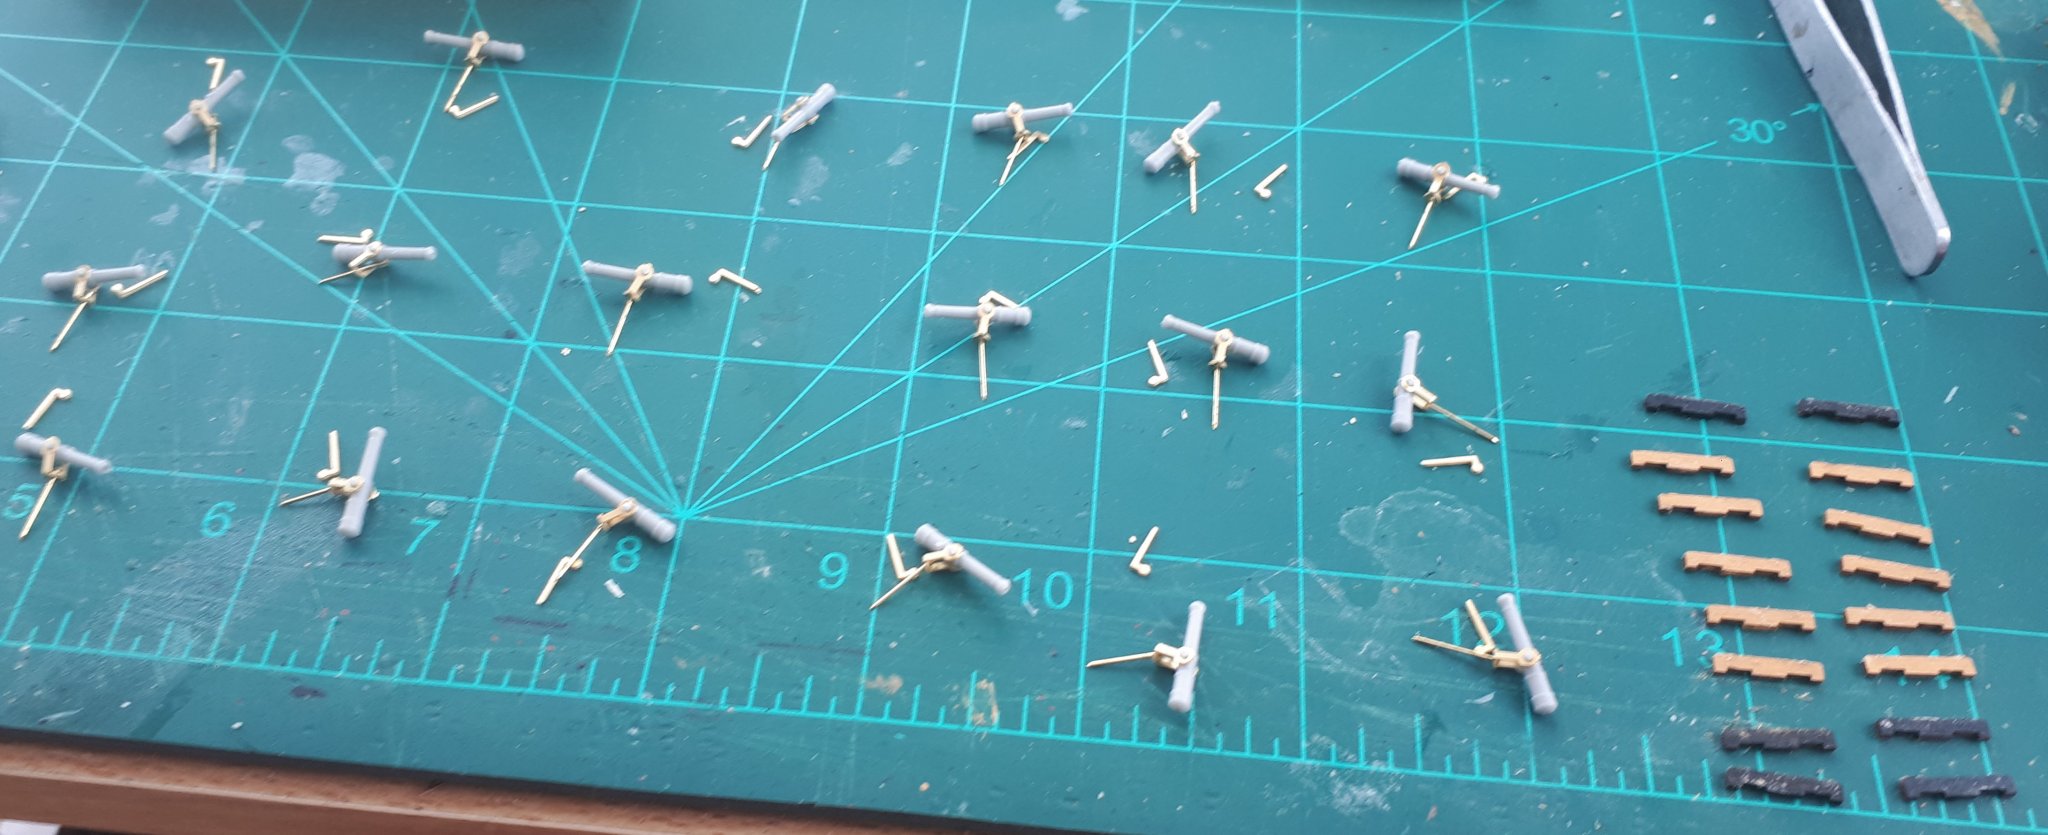
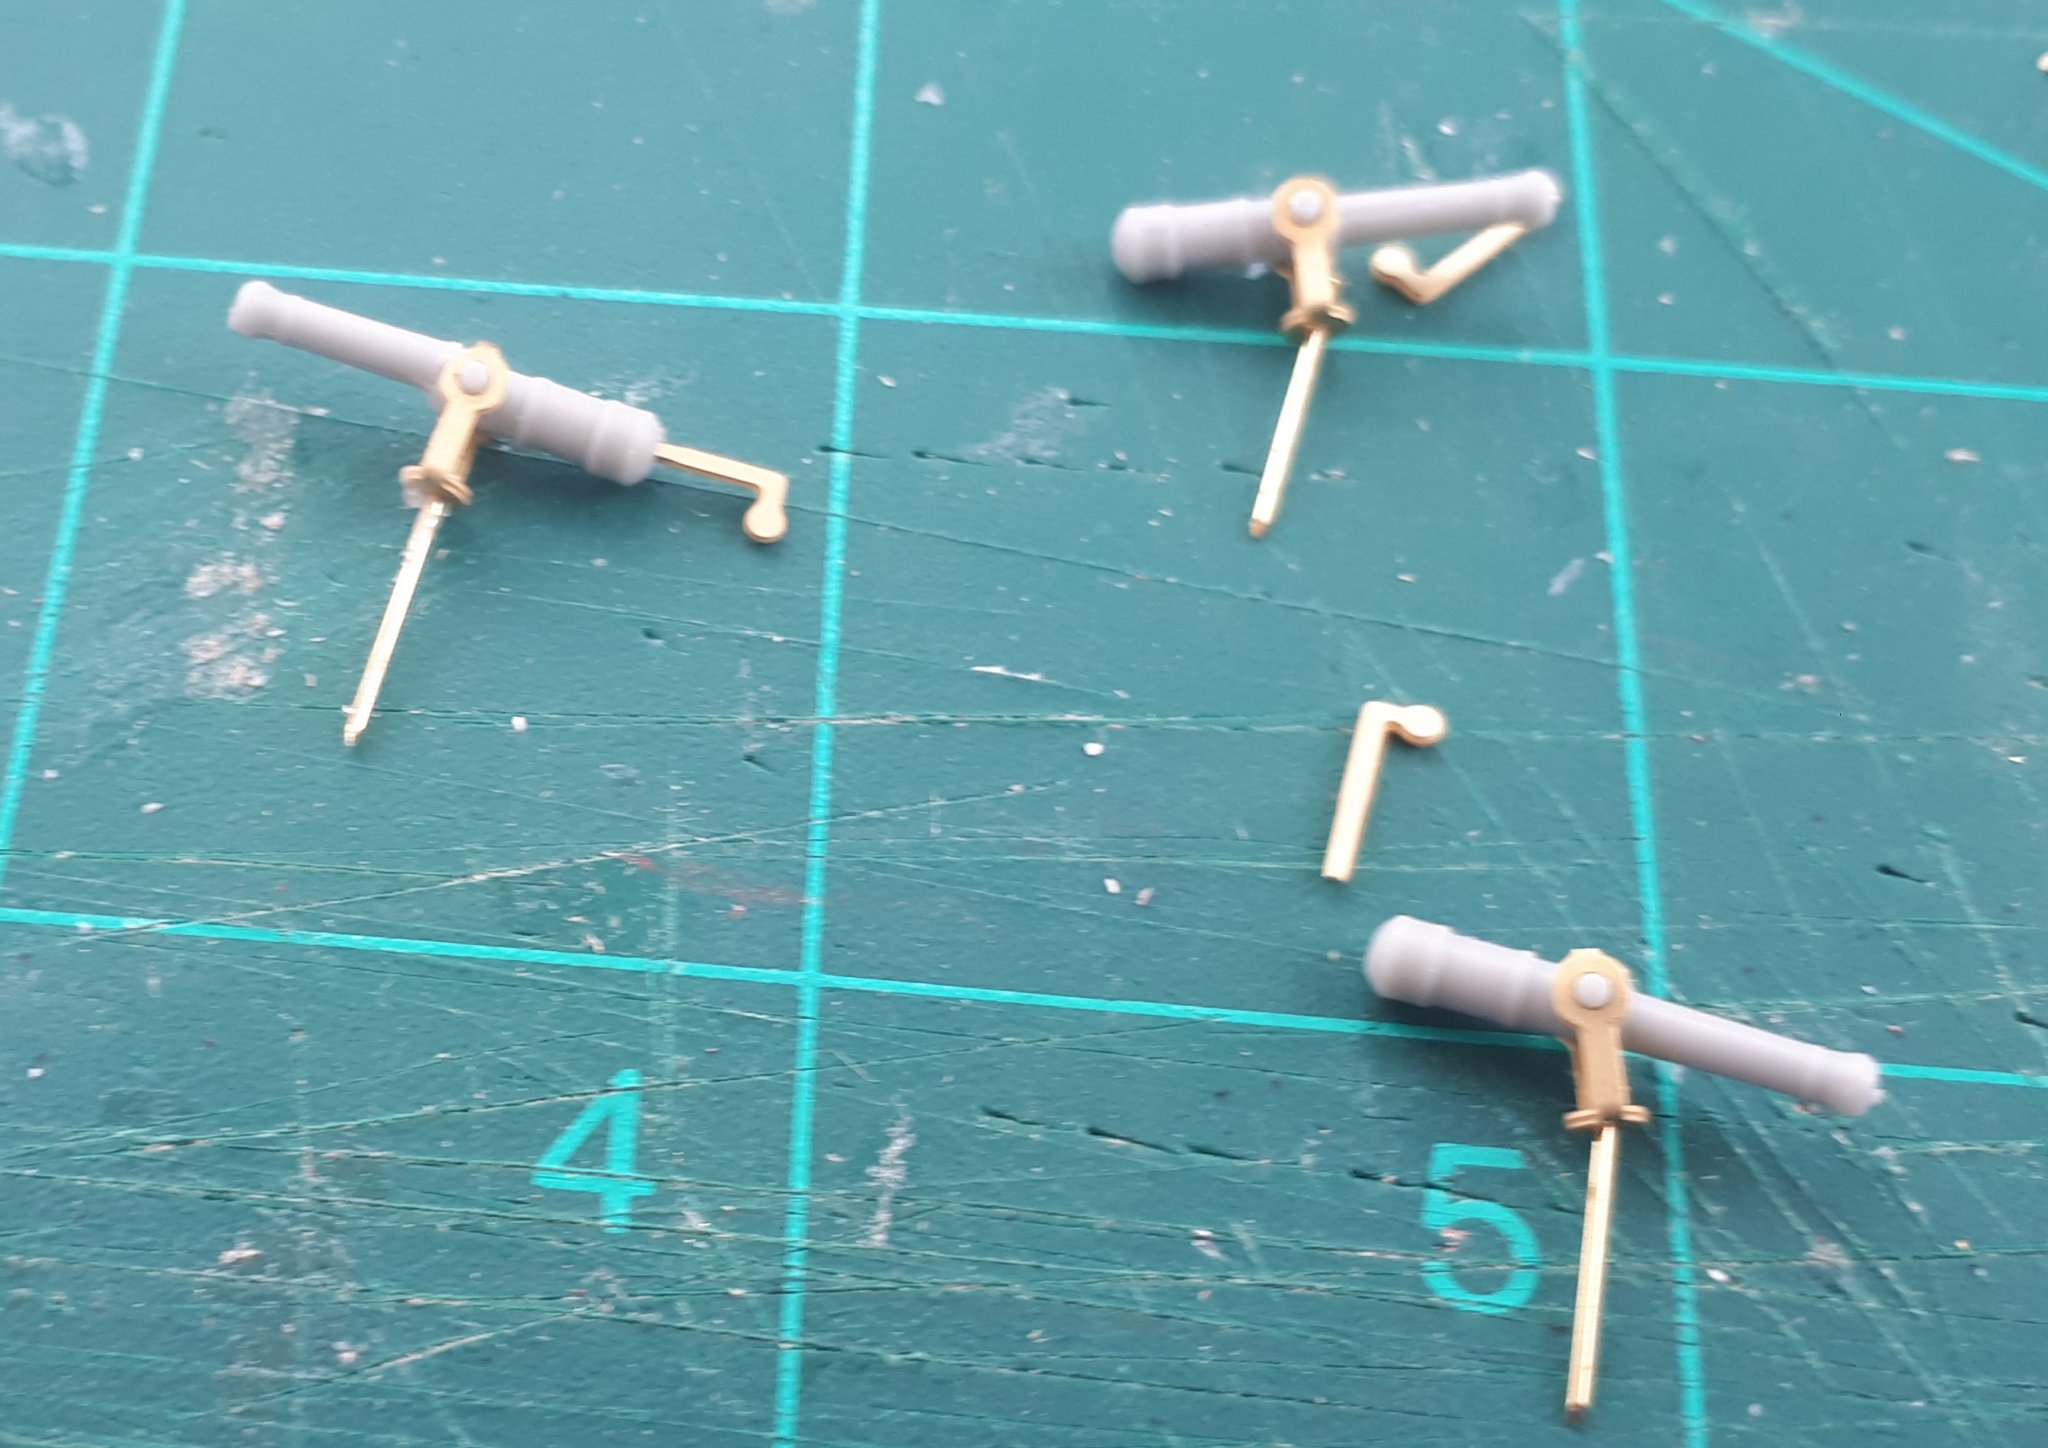
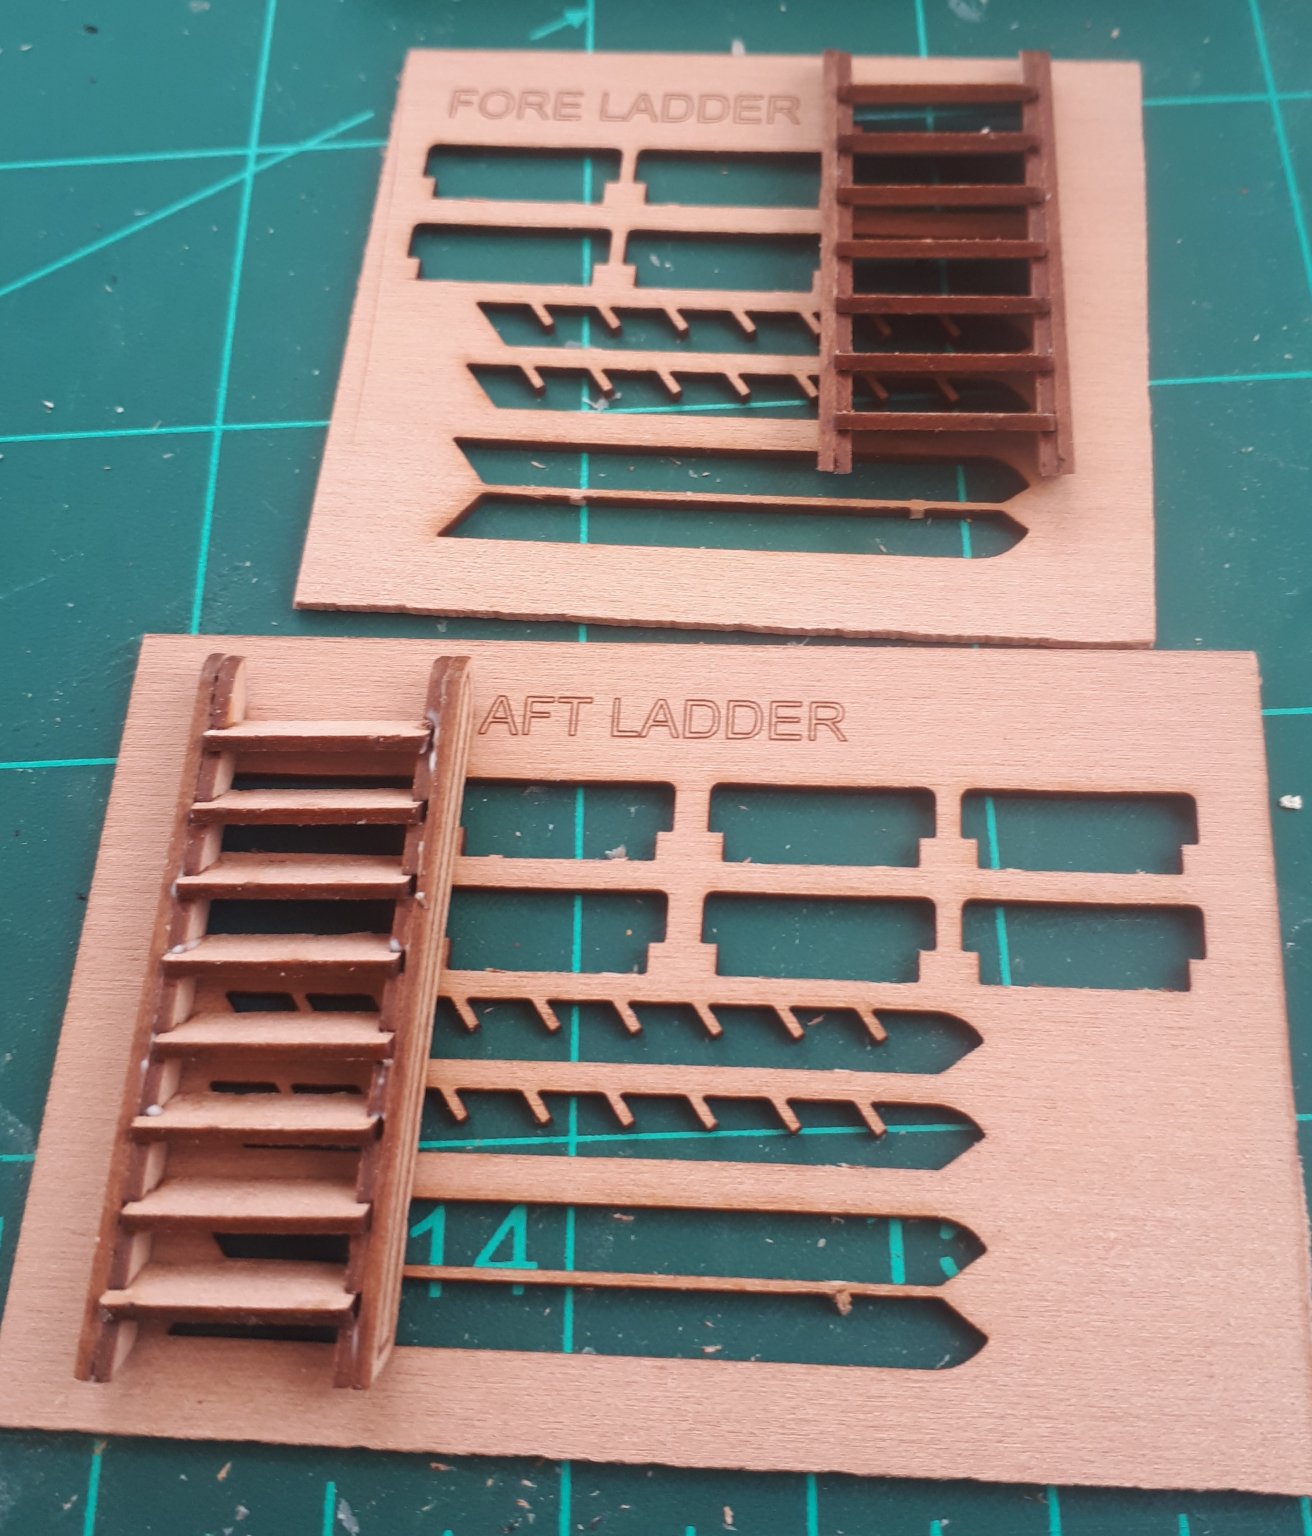
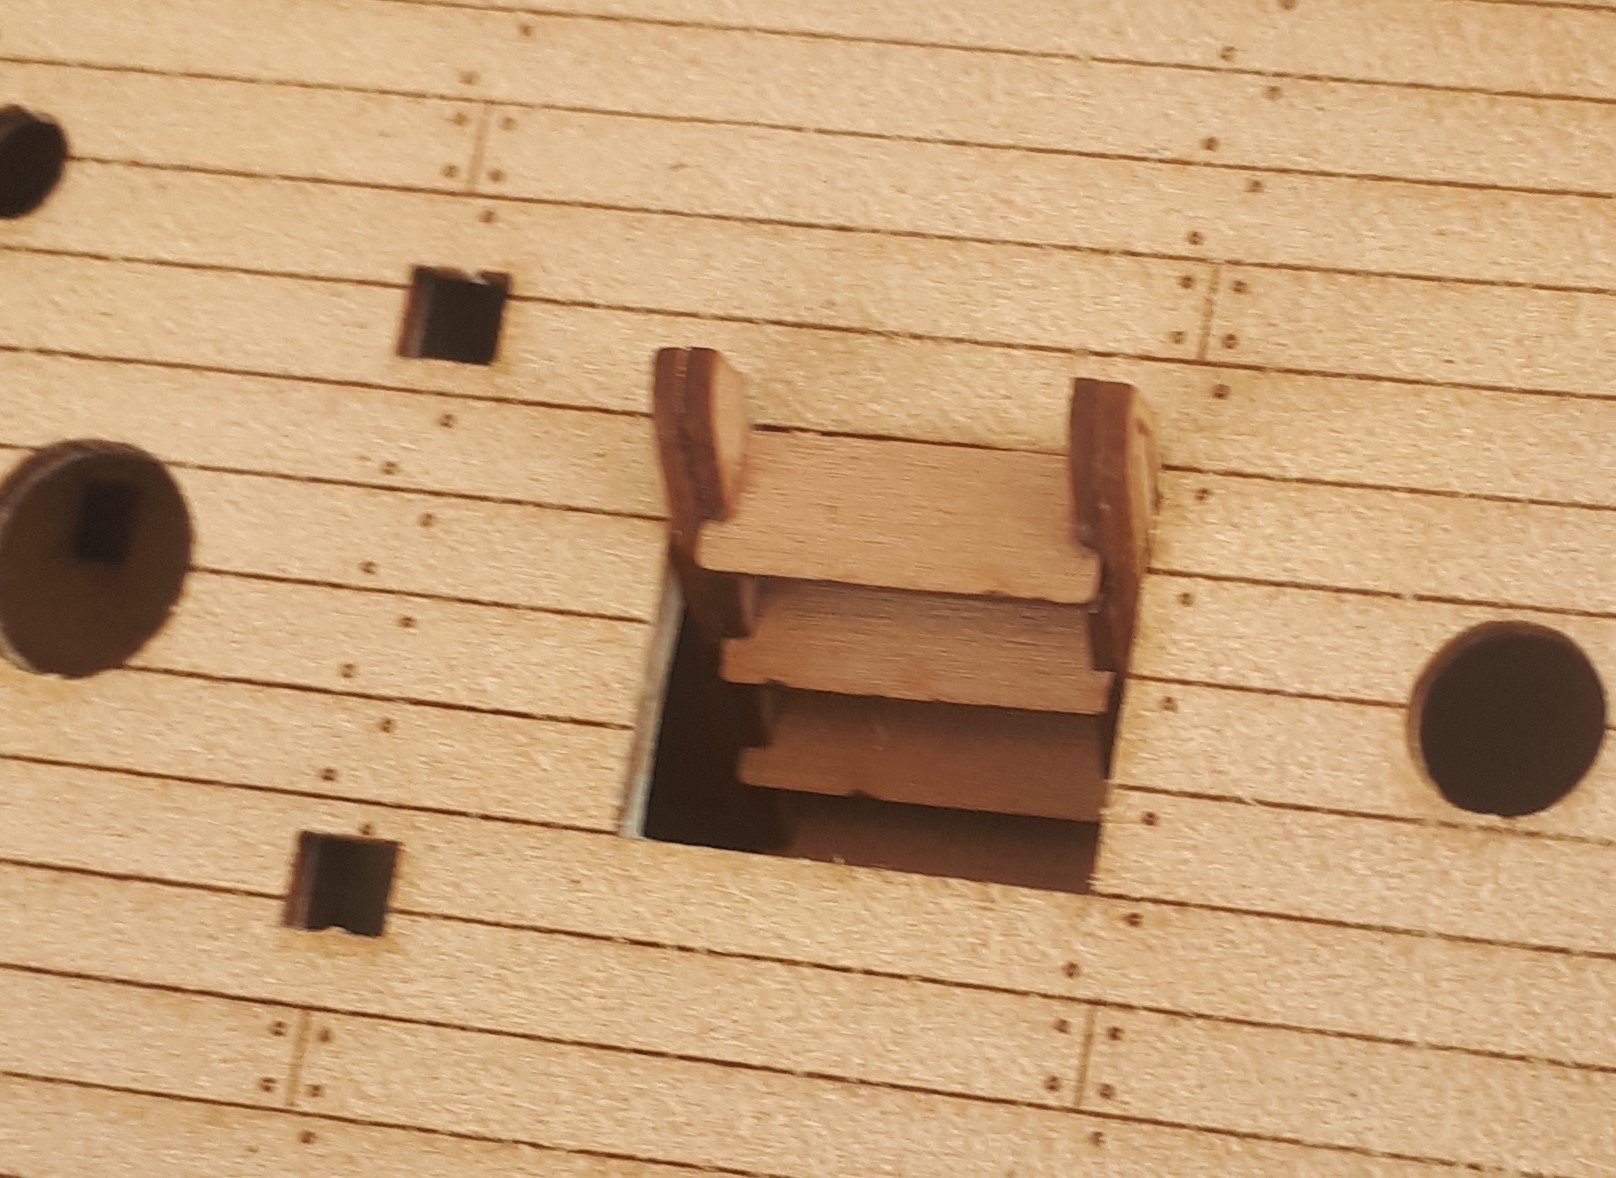
I have started the assembly of the 20 off swivel guns. I am just waiting for a delivery of a new set of micro drills (due later today) as I have snapped all my 0.8mm and 0.6mm drill bits before I can complete this task. In the first picture you can also see the steps painted side steps, in readiness for installation. In the second picture you see one completed swivel gun assembly, prior to snapping my final 0.8mm drill bit. I used some 2mm tape, marked with the position of the steps to help position the side steps. Finally I have also assembled the two ladders and test fitted them.


-
Yes, I did that before I started the copper plating on my build.
-
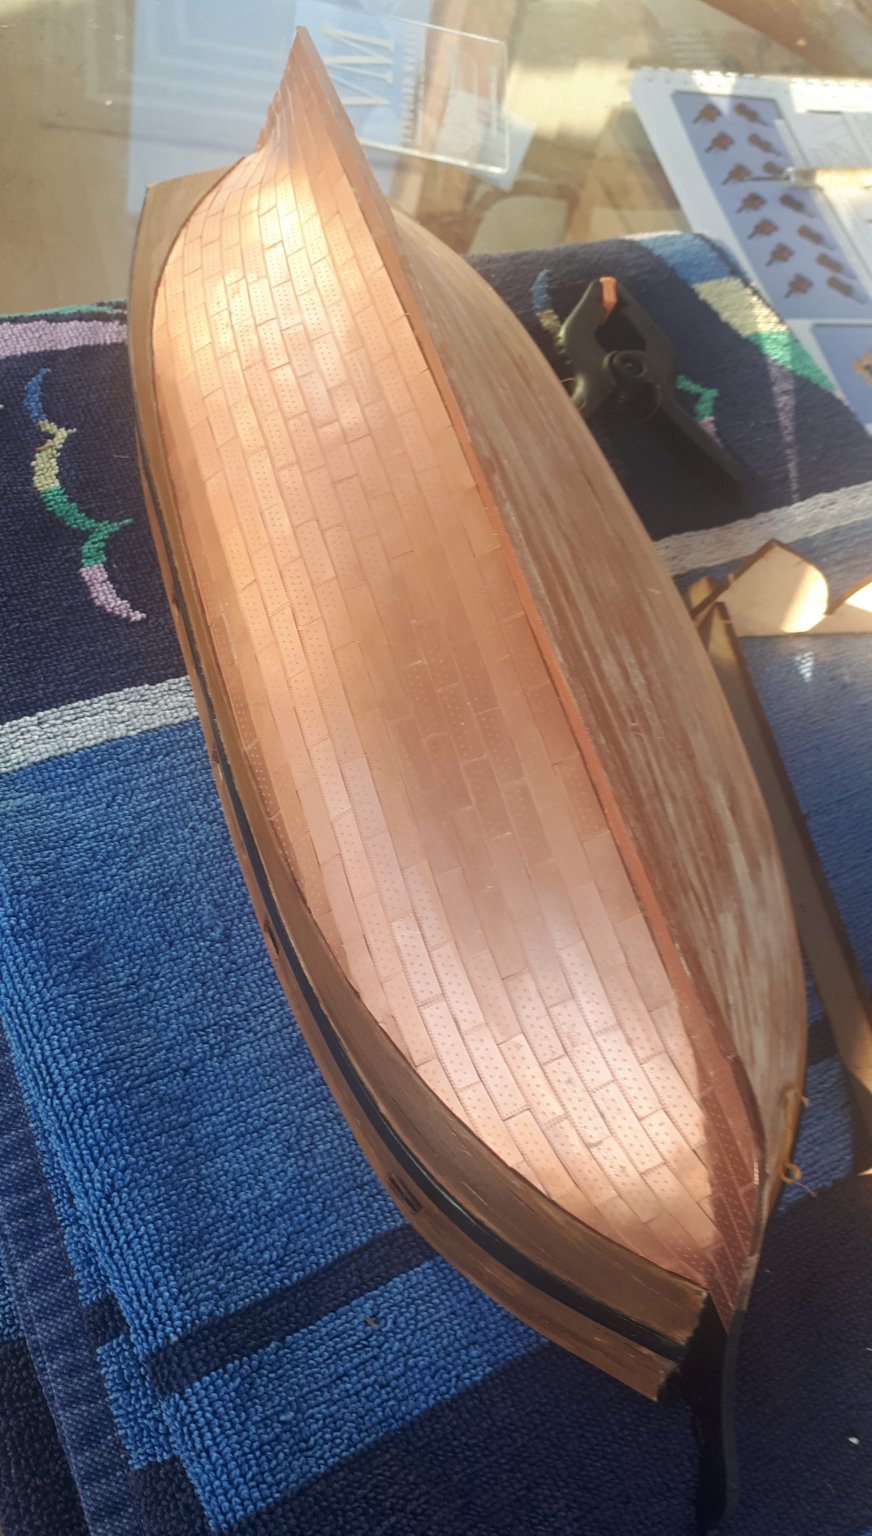
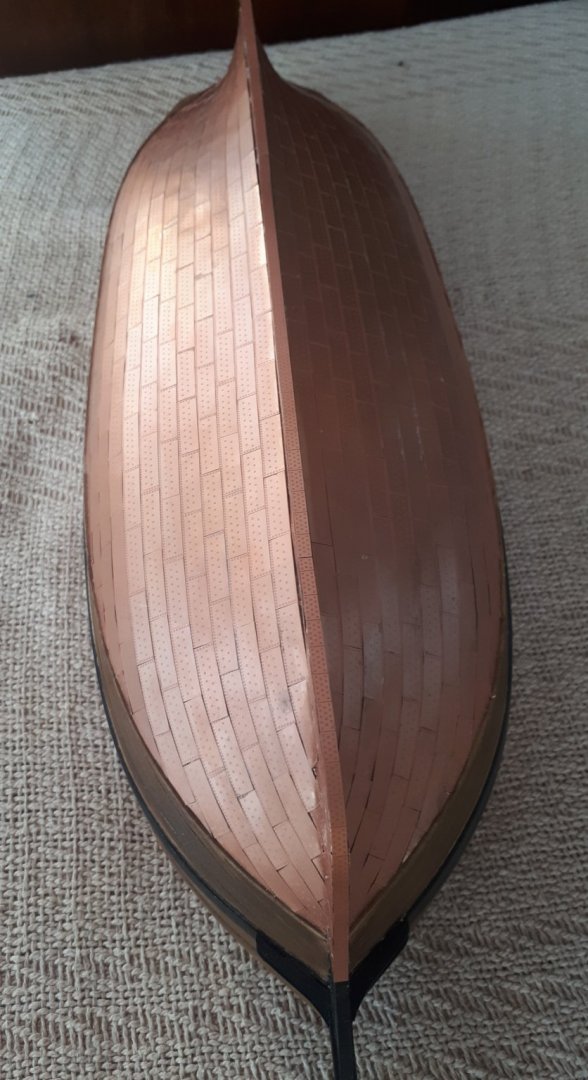
I found Speedy copper plating quite relaxing. My HMS Victory build had approx 3000 copper plates to fit and that did become a tad tedious at times but the end result was worth it on both builds.
-
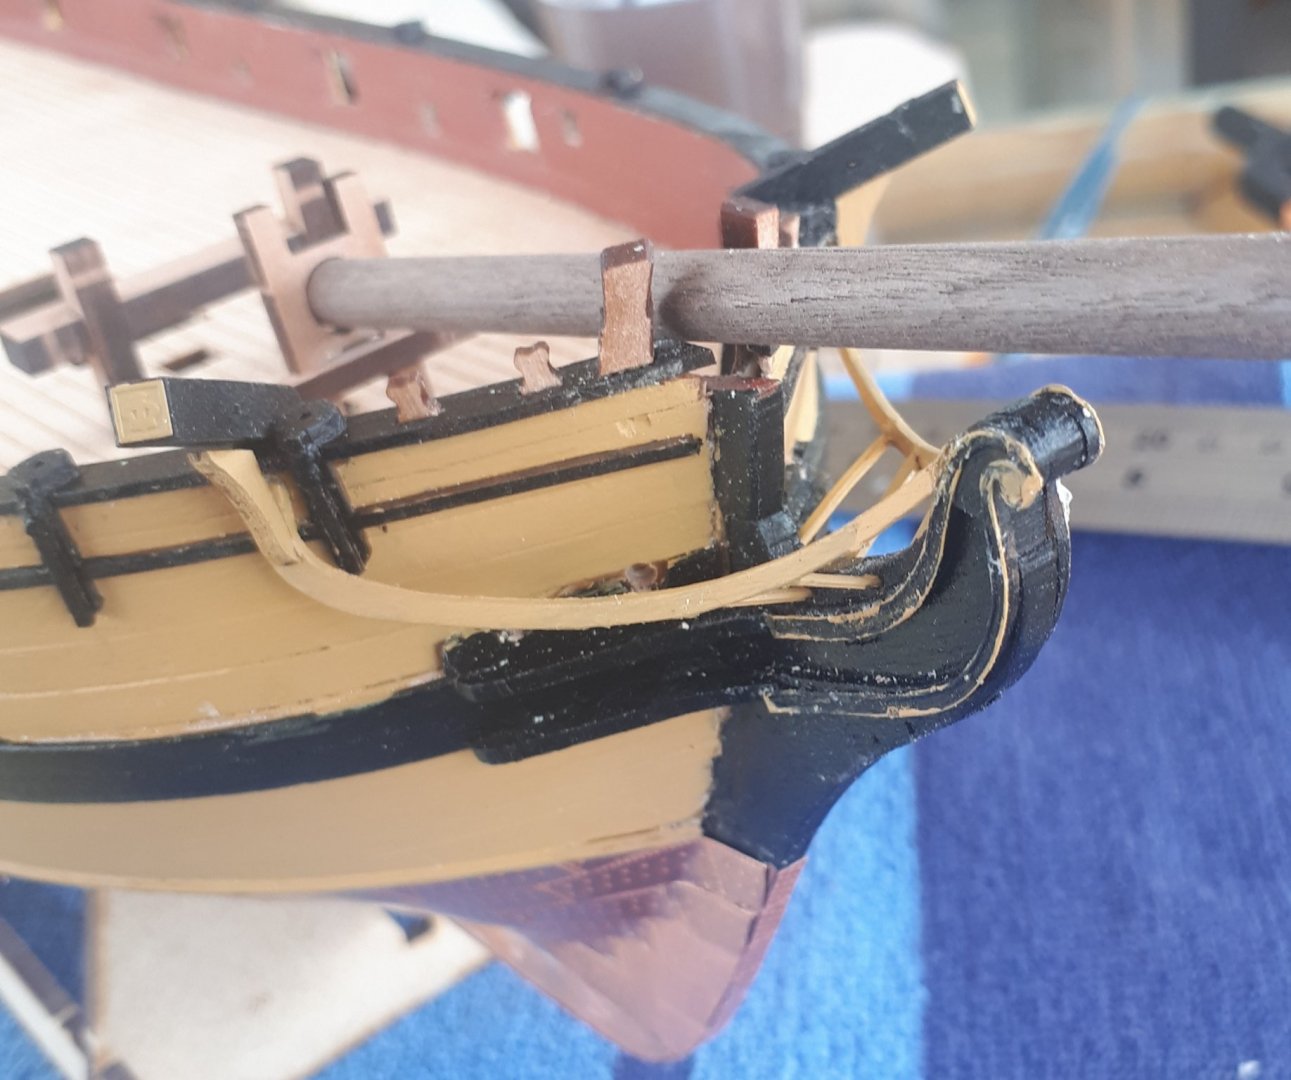
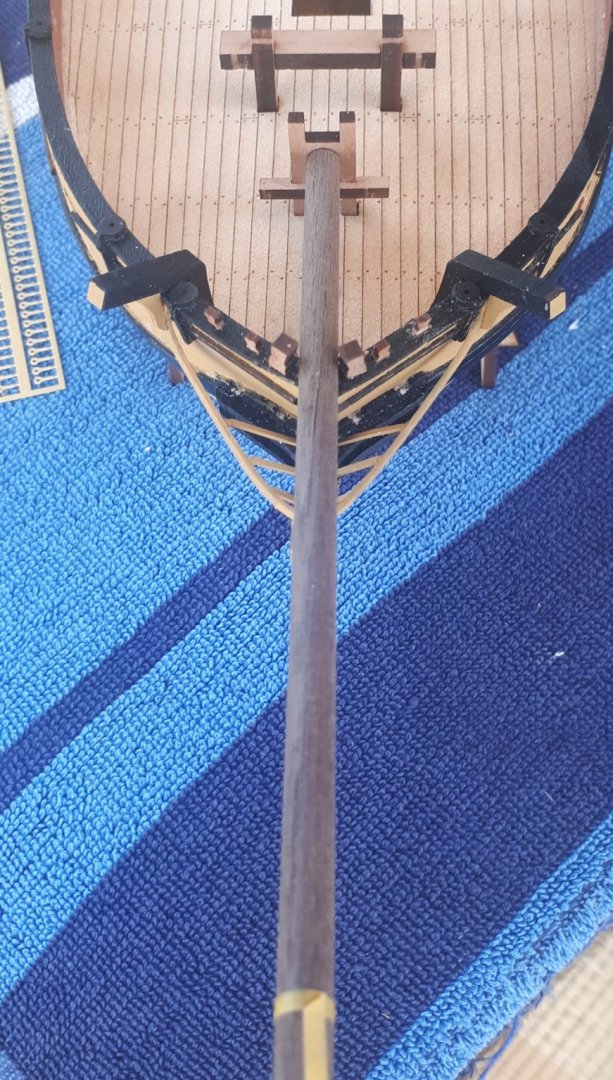
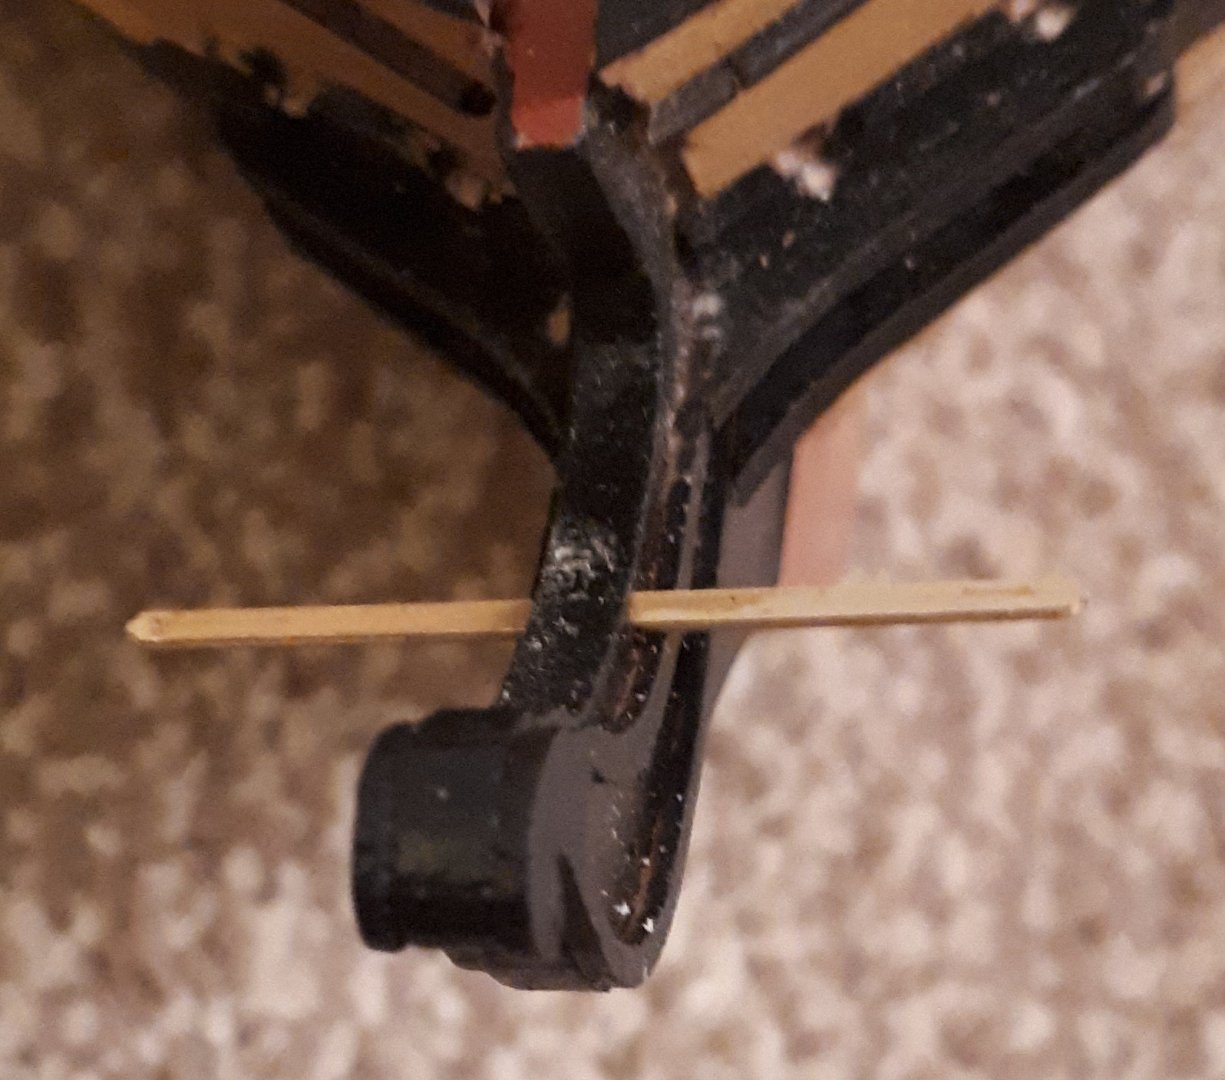
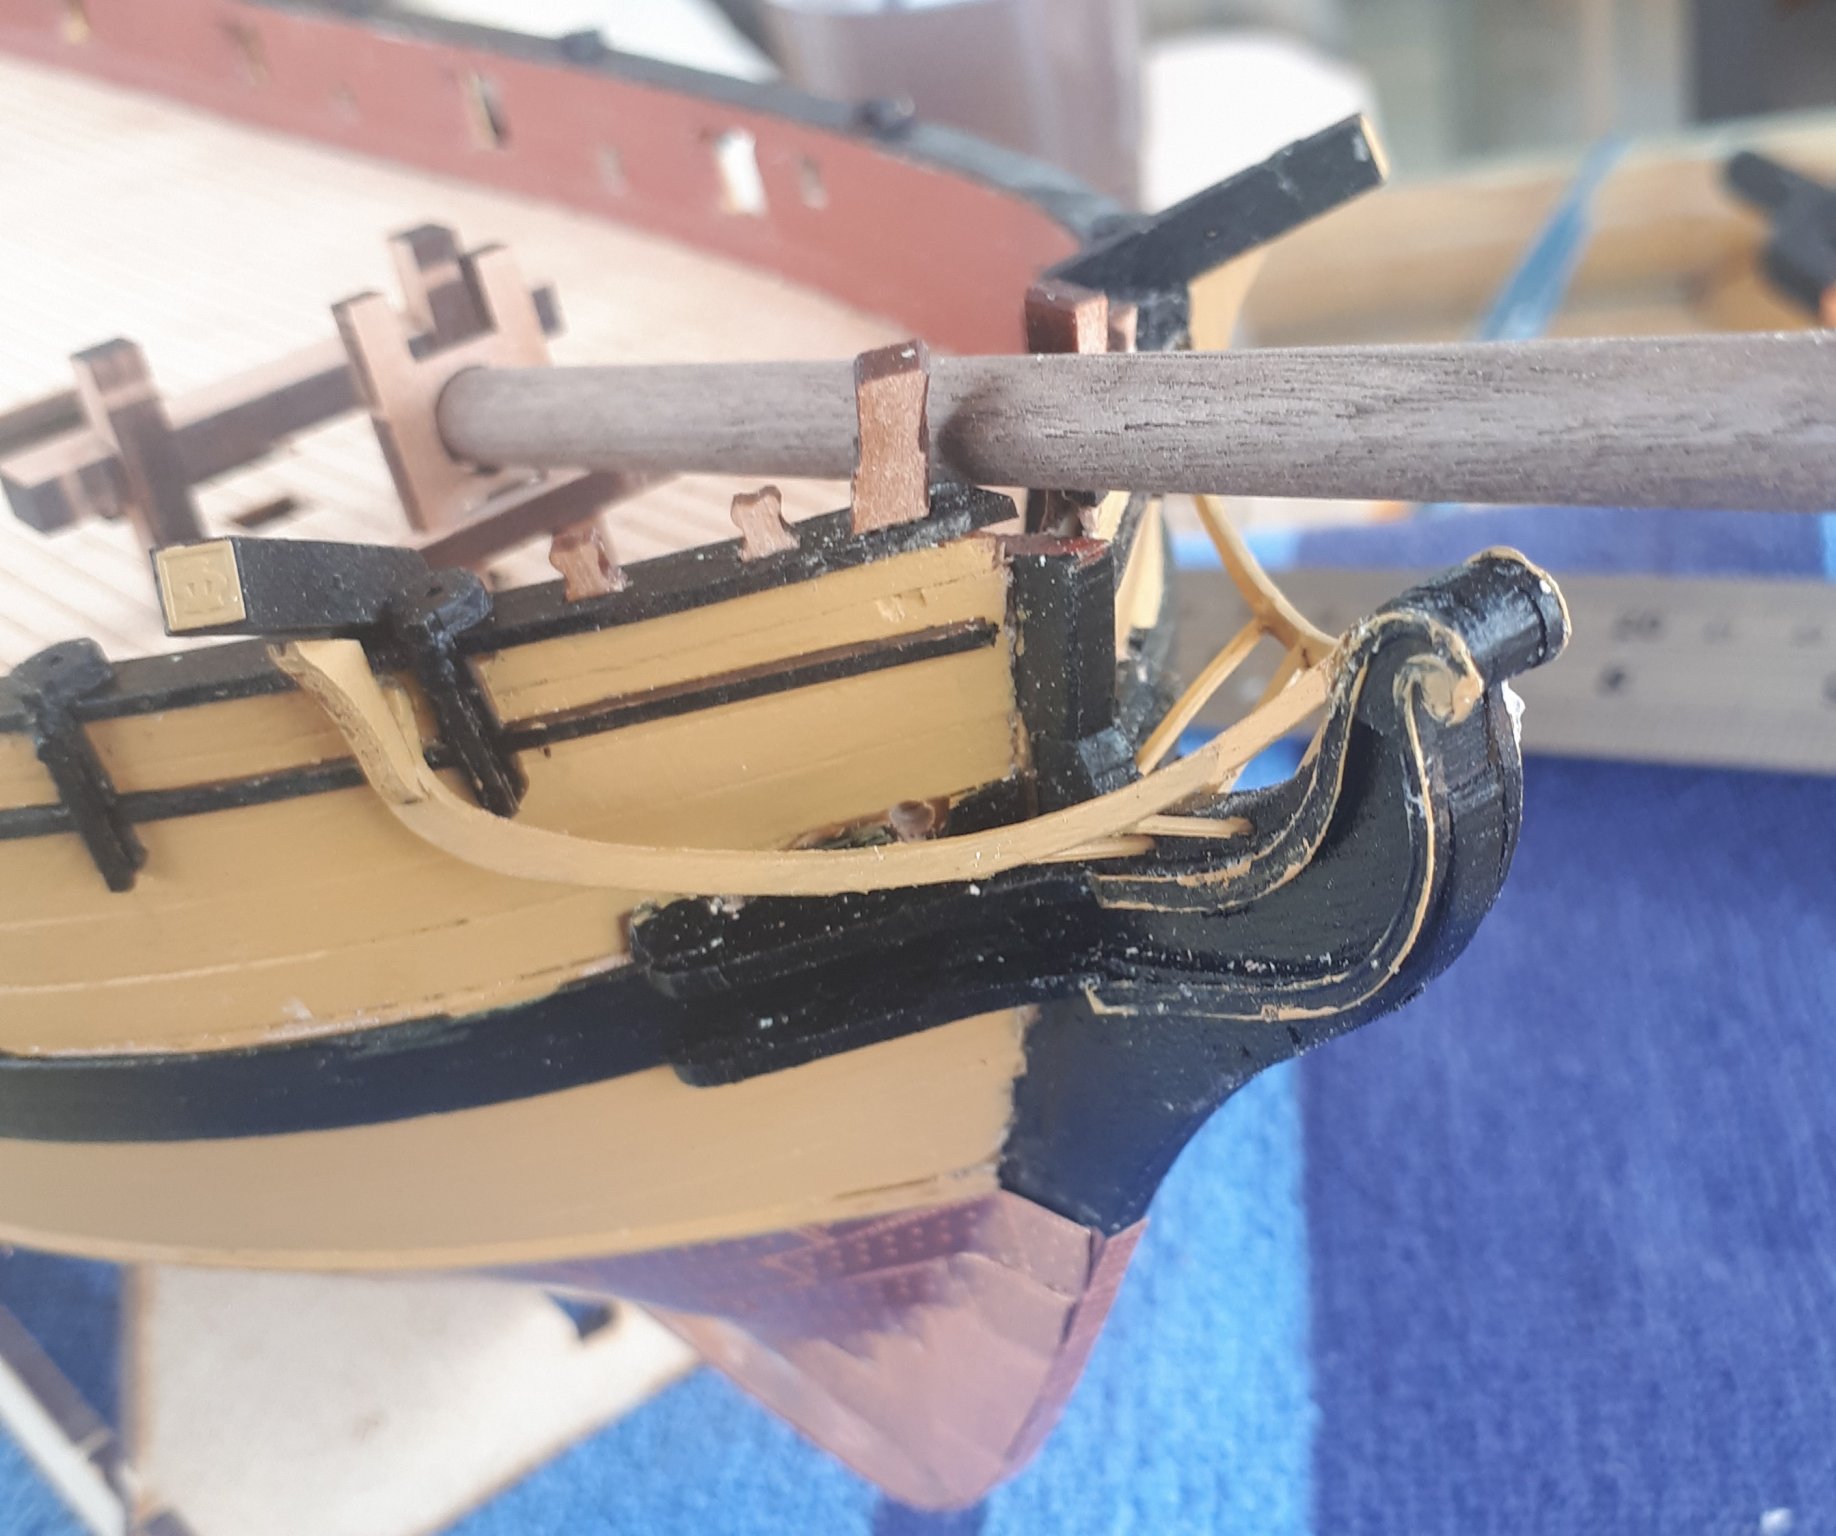
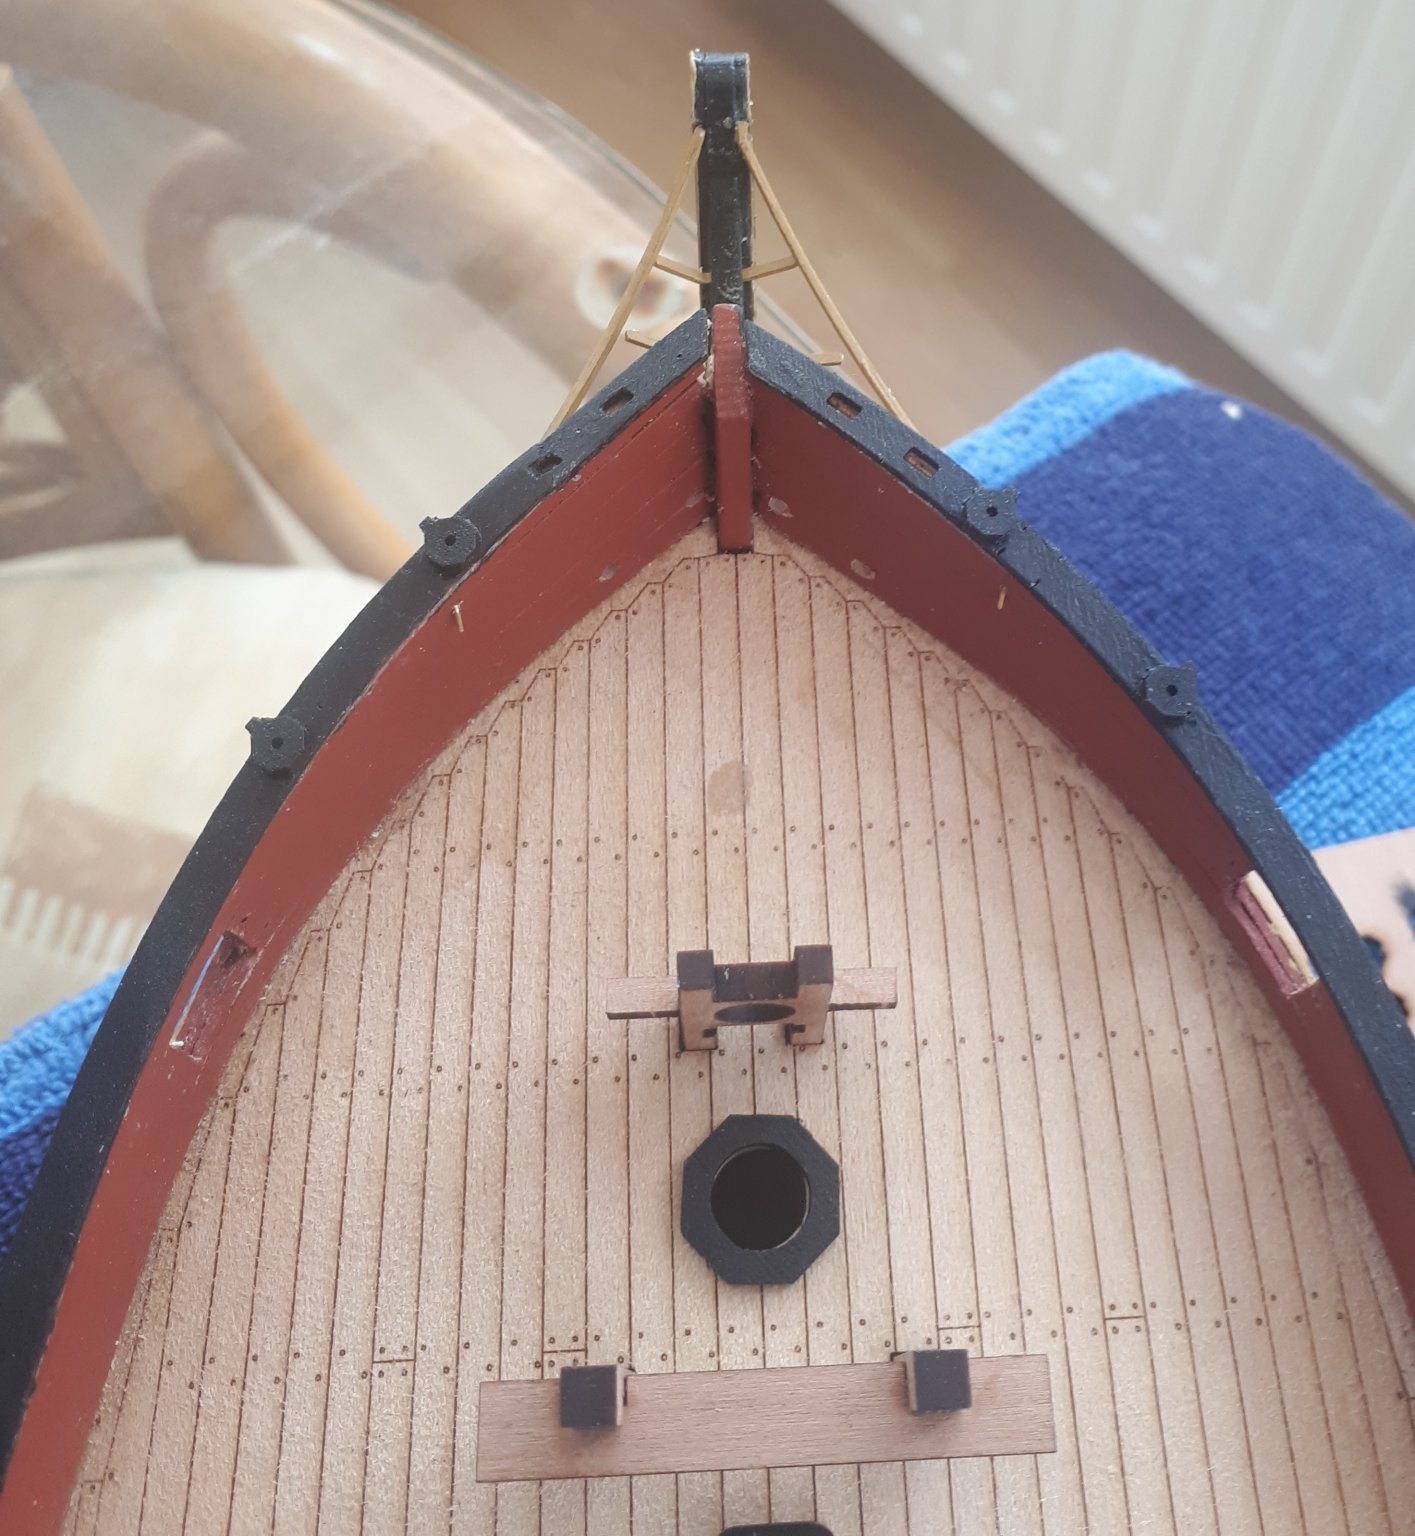
Catheads and timber heads have now been fitted. I did pin the timber head (part 122) to provide additional support. I also used a 6mm dowel to ensure the is room for the bowsprit to be fitted between the timber heads.
-
Looks really good, slow and steady is the best way.
-
It is a great design which I'm sure you will enjoy building. I always think adding the deck fittings really starts brings the build to life.
-
Thanks Derek. It has been a very productive day. I will start the mass production the swivel gun assemblies later this week. I have tended to paint the parts before removing from the sheets, and then touching up where necessary.
-
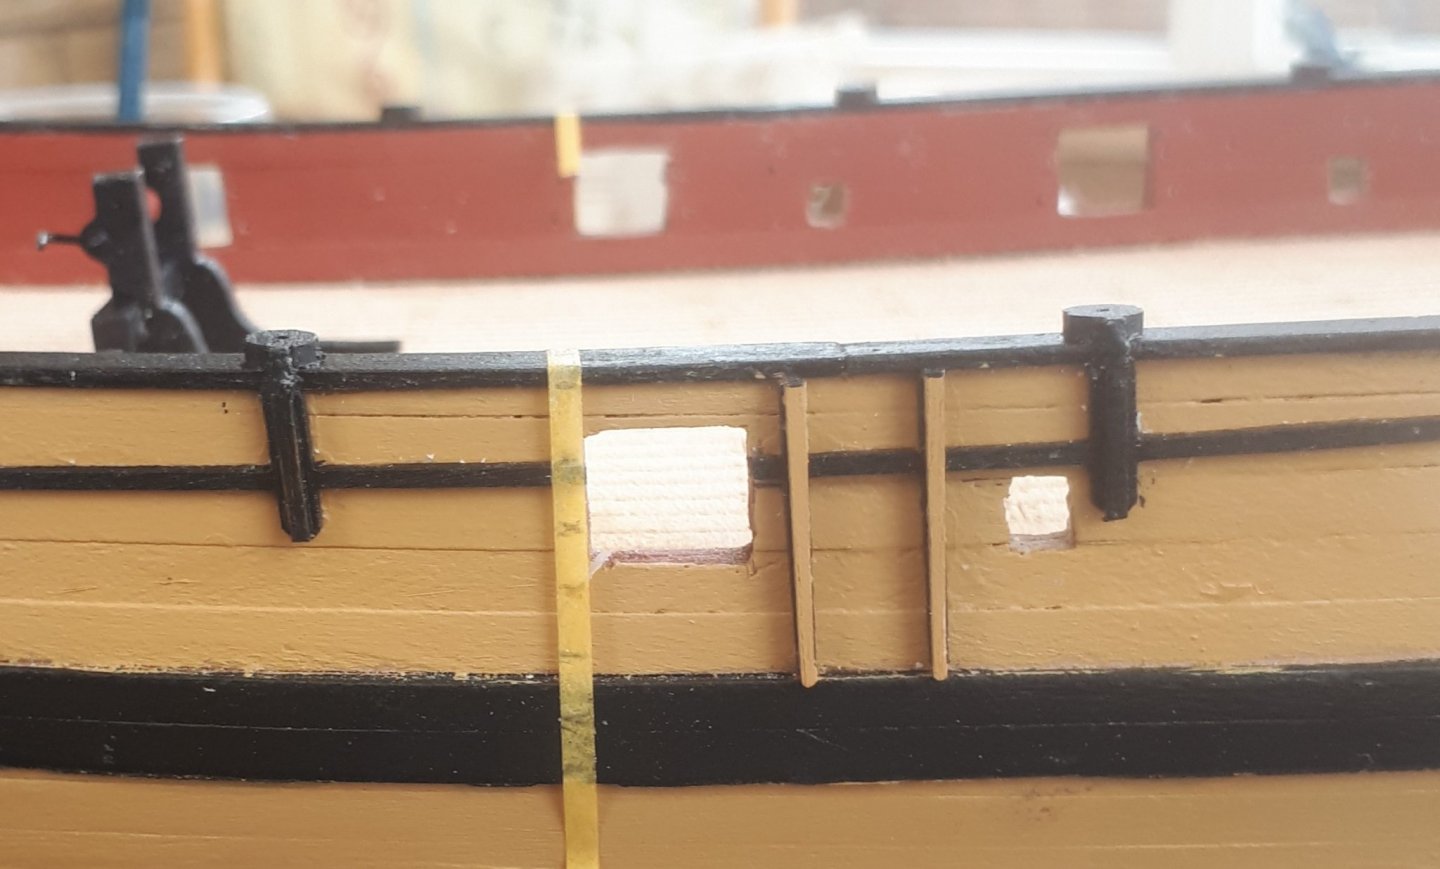
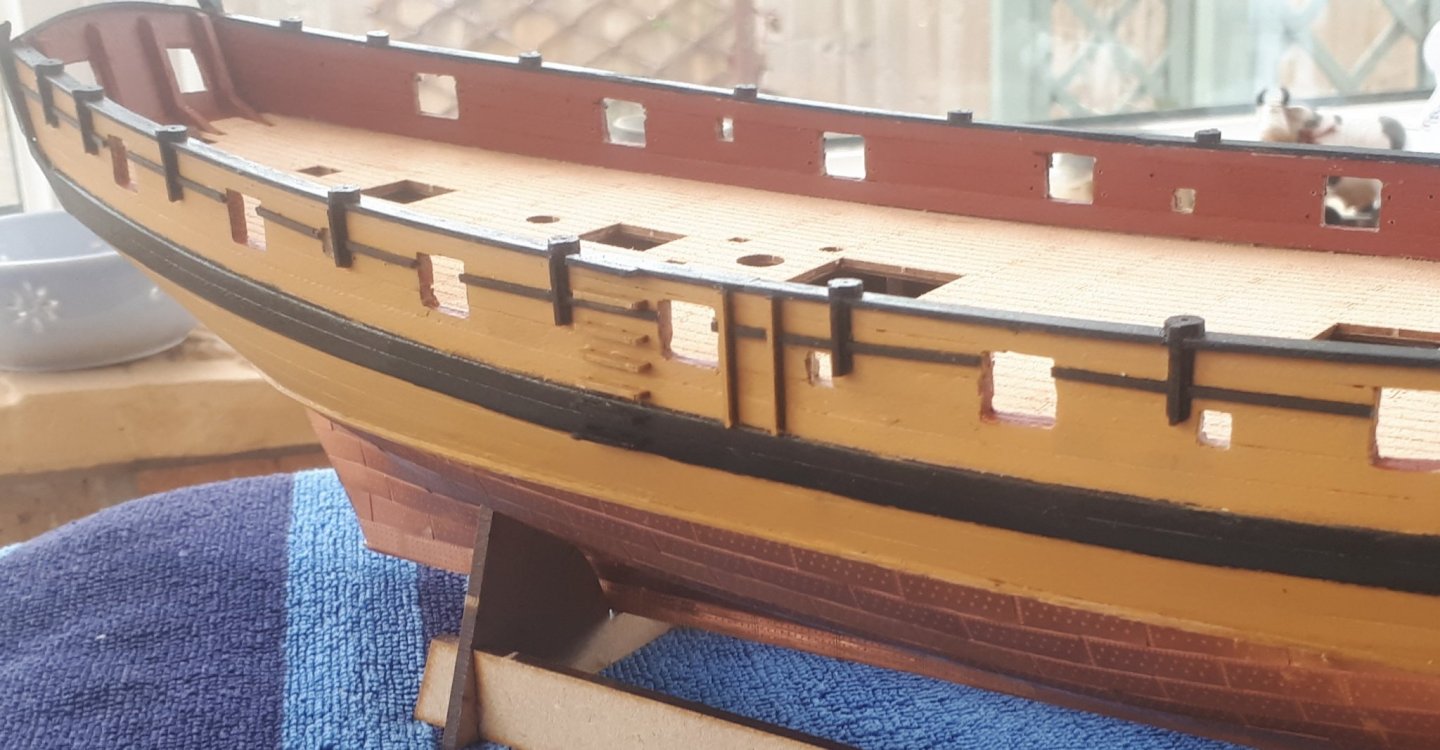
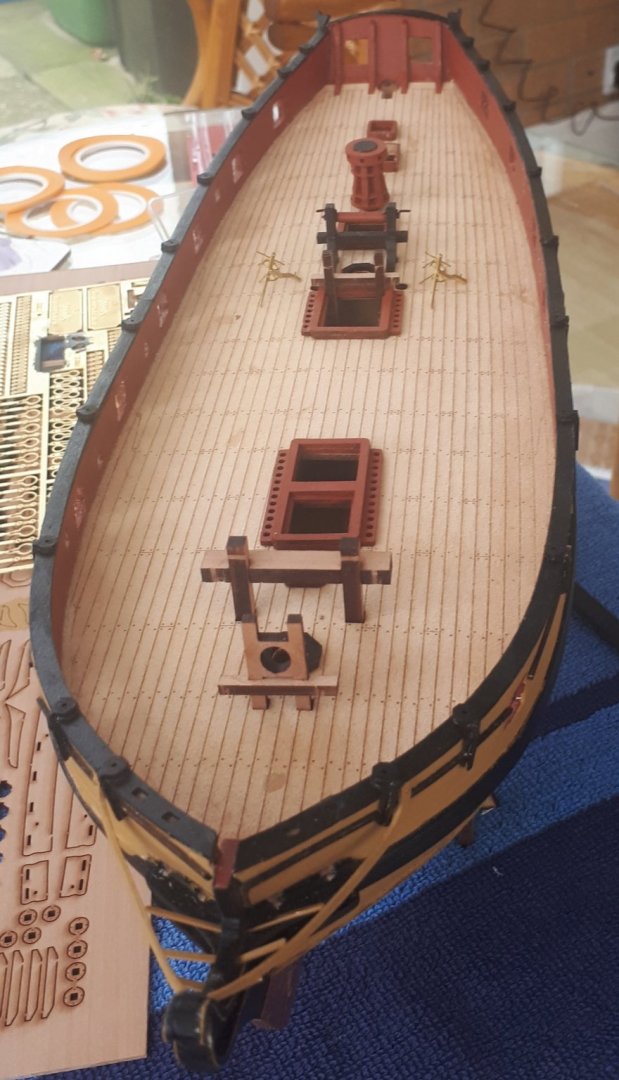
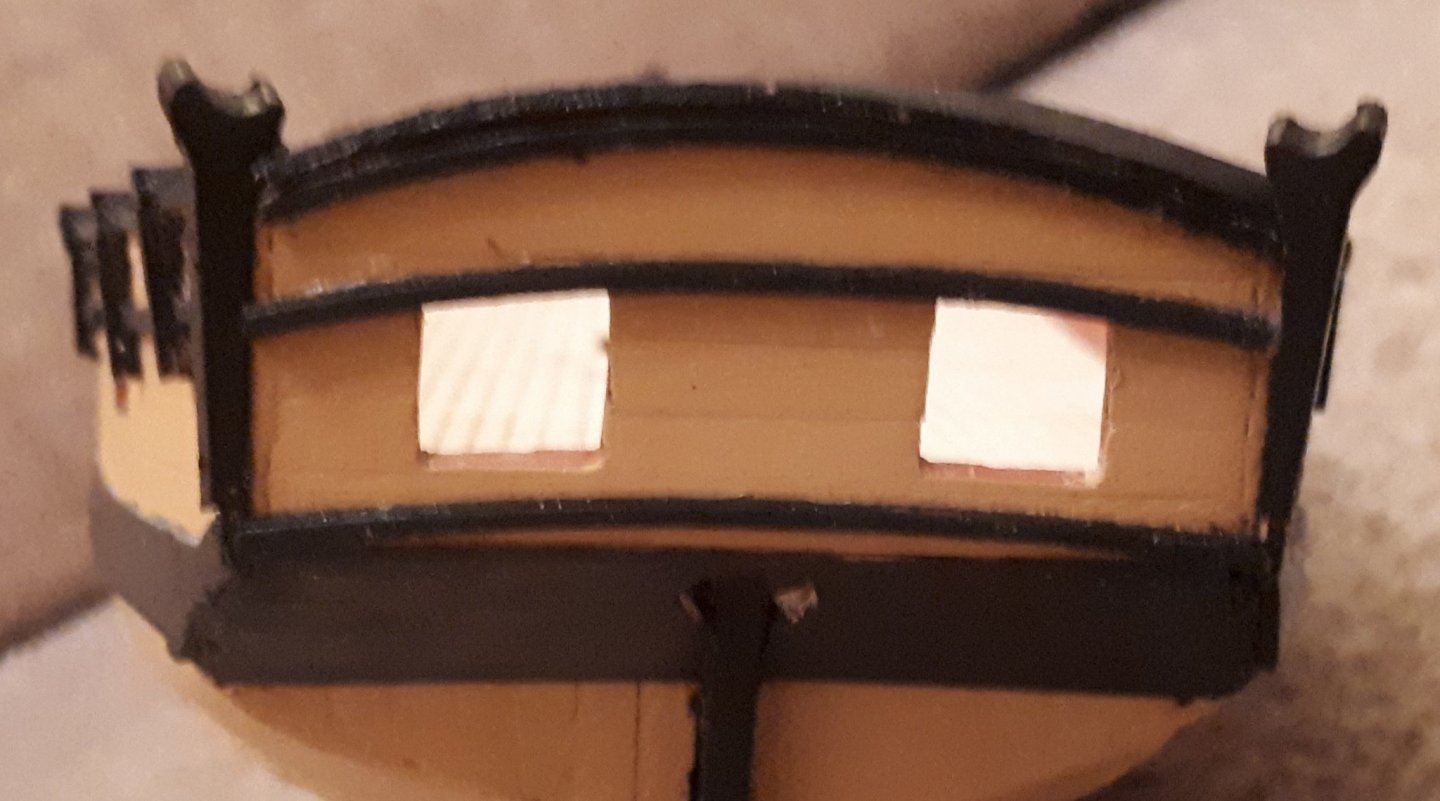
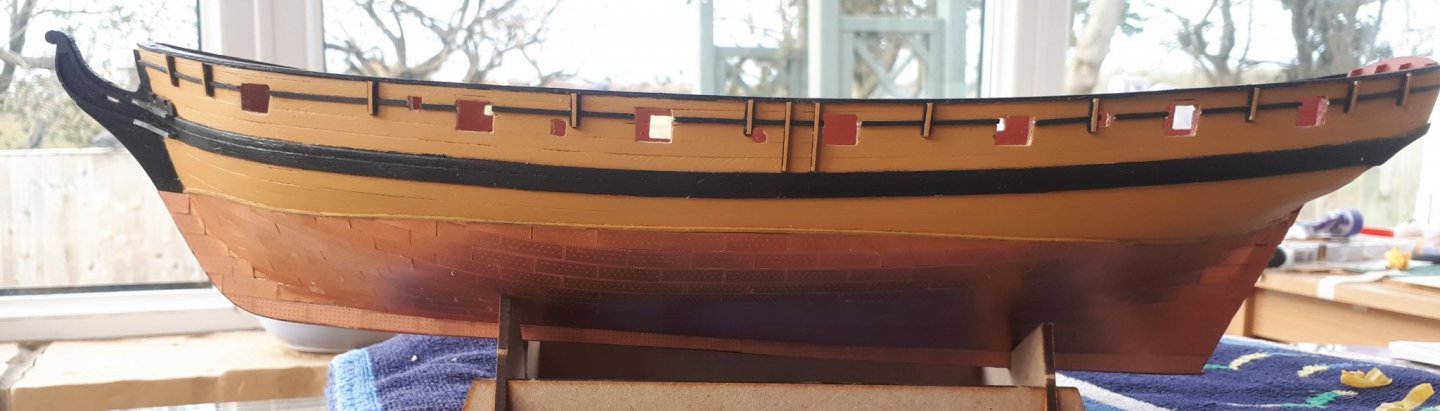
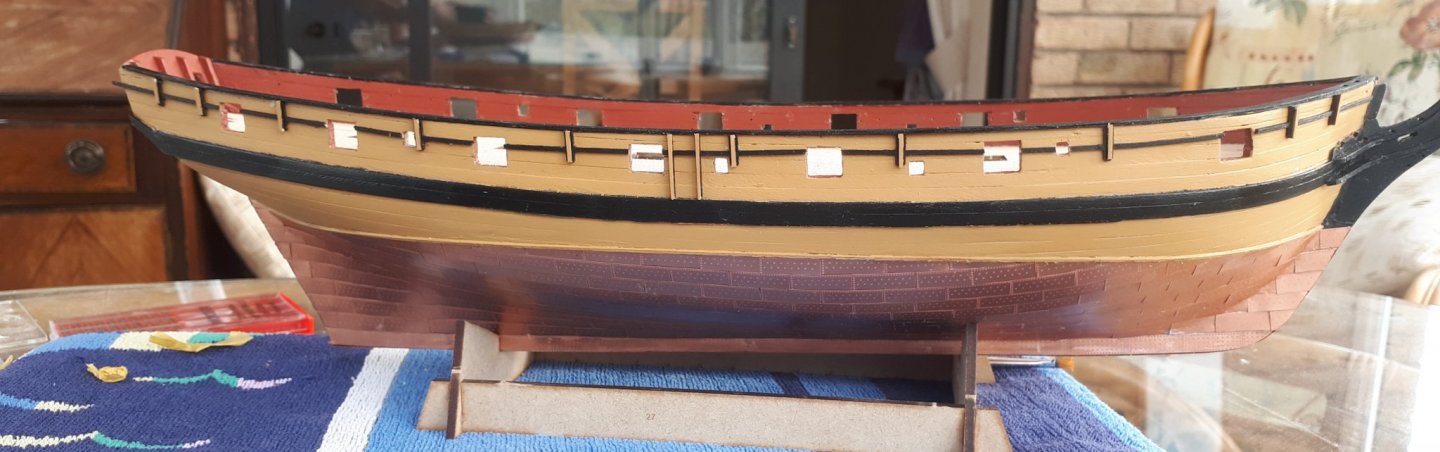
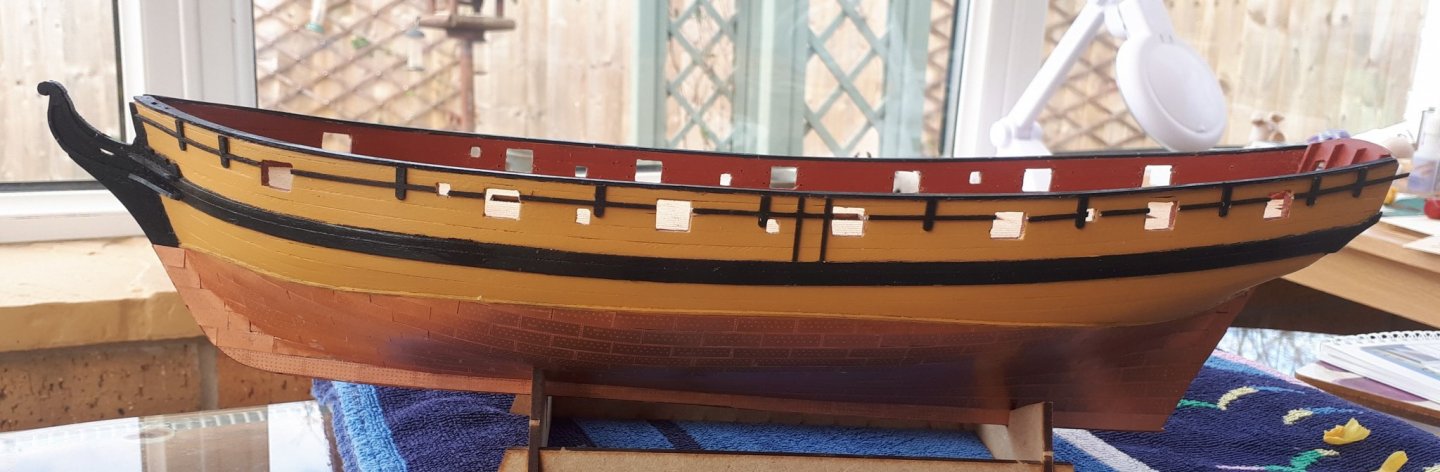
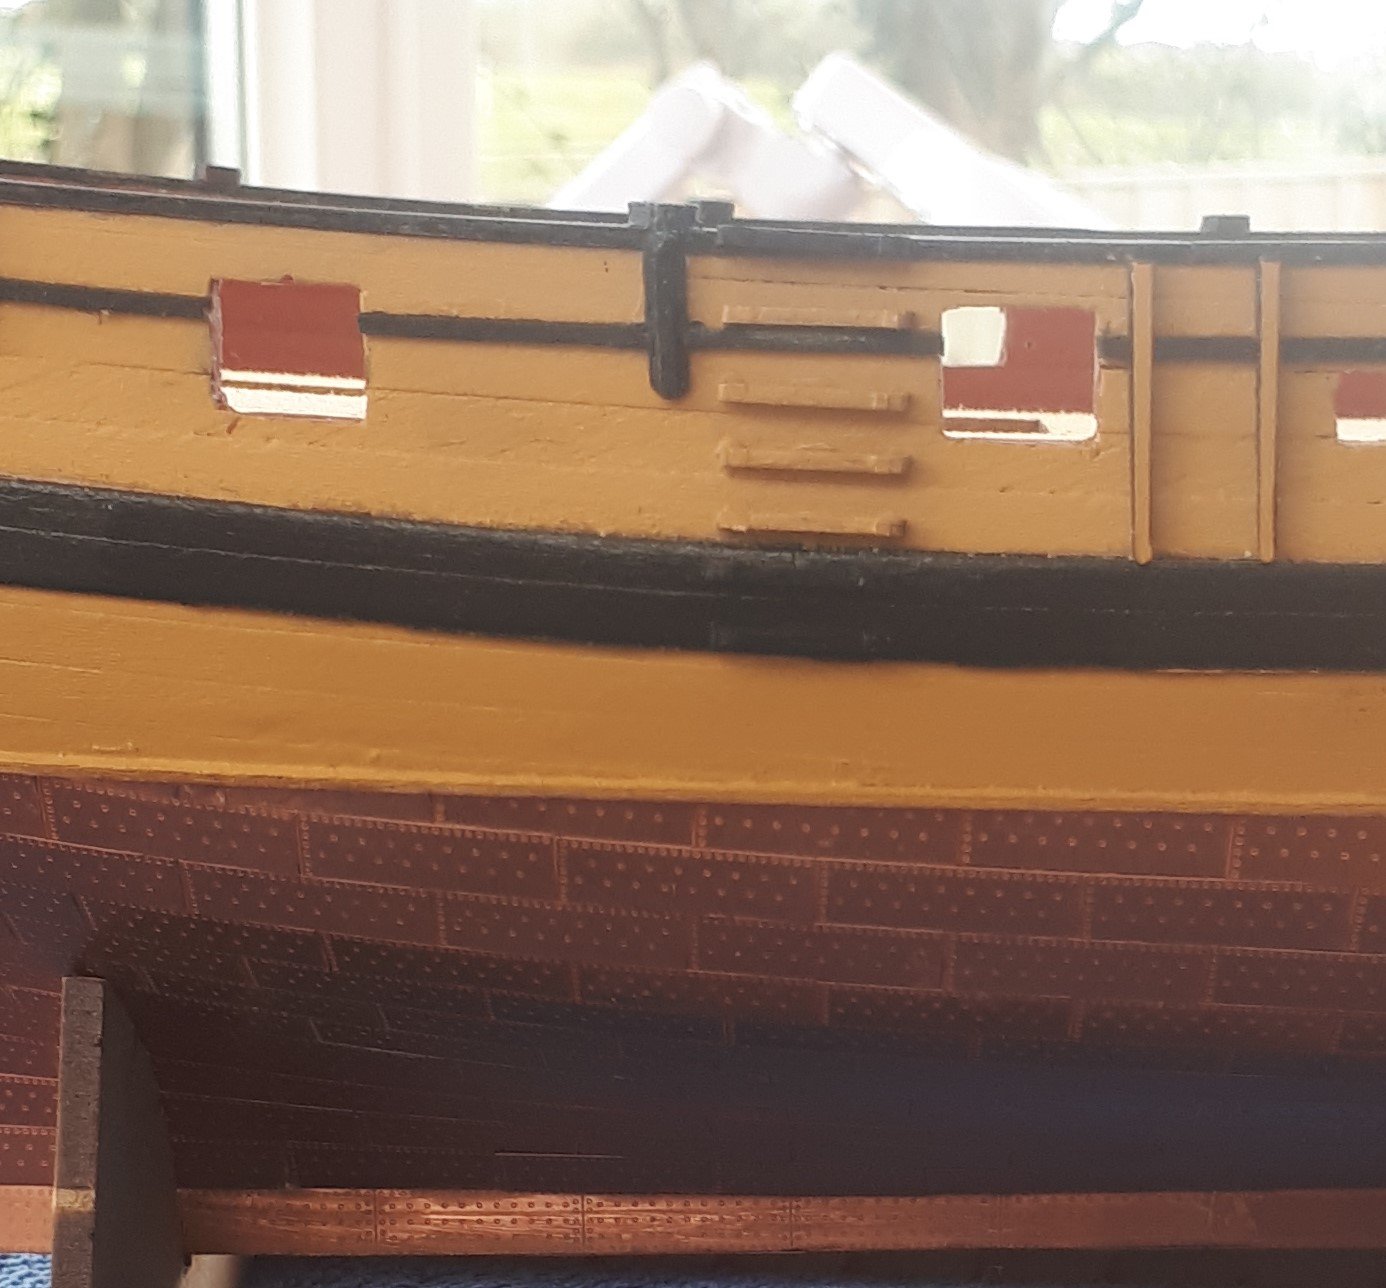
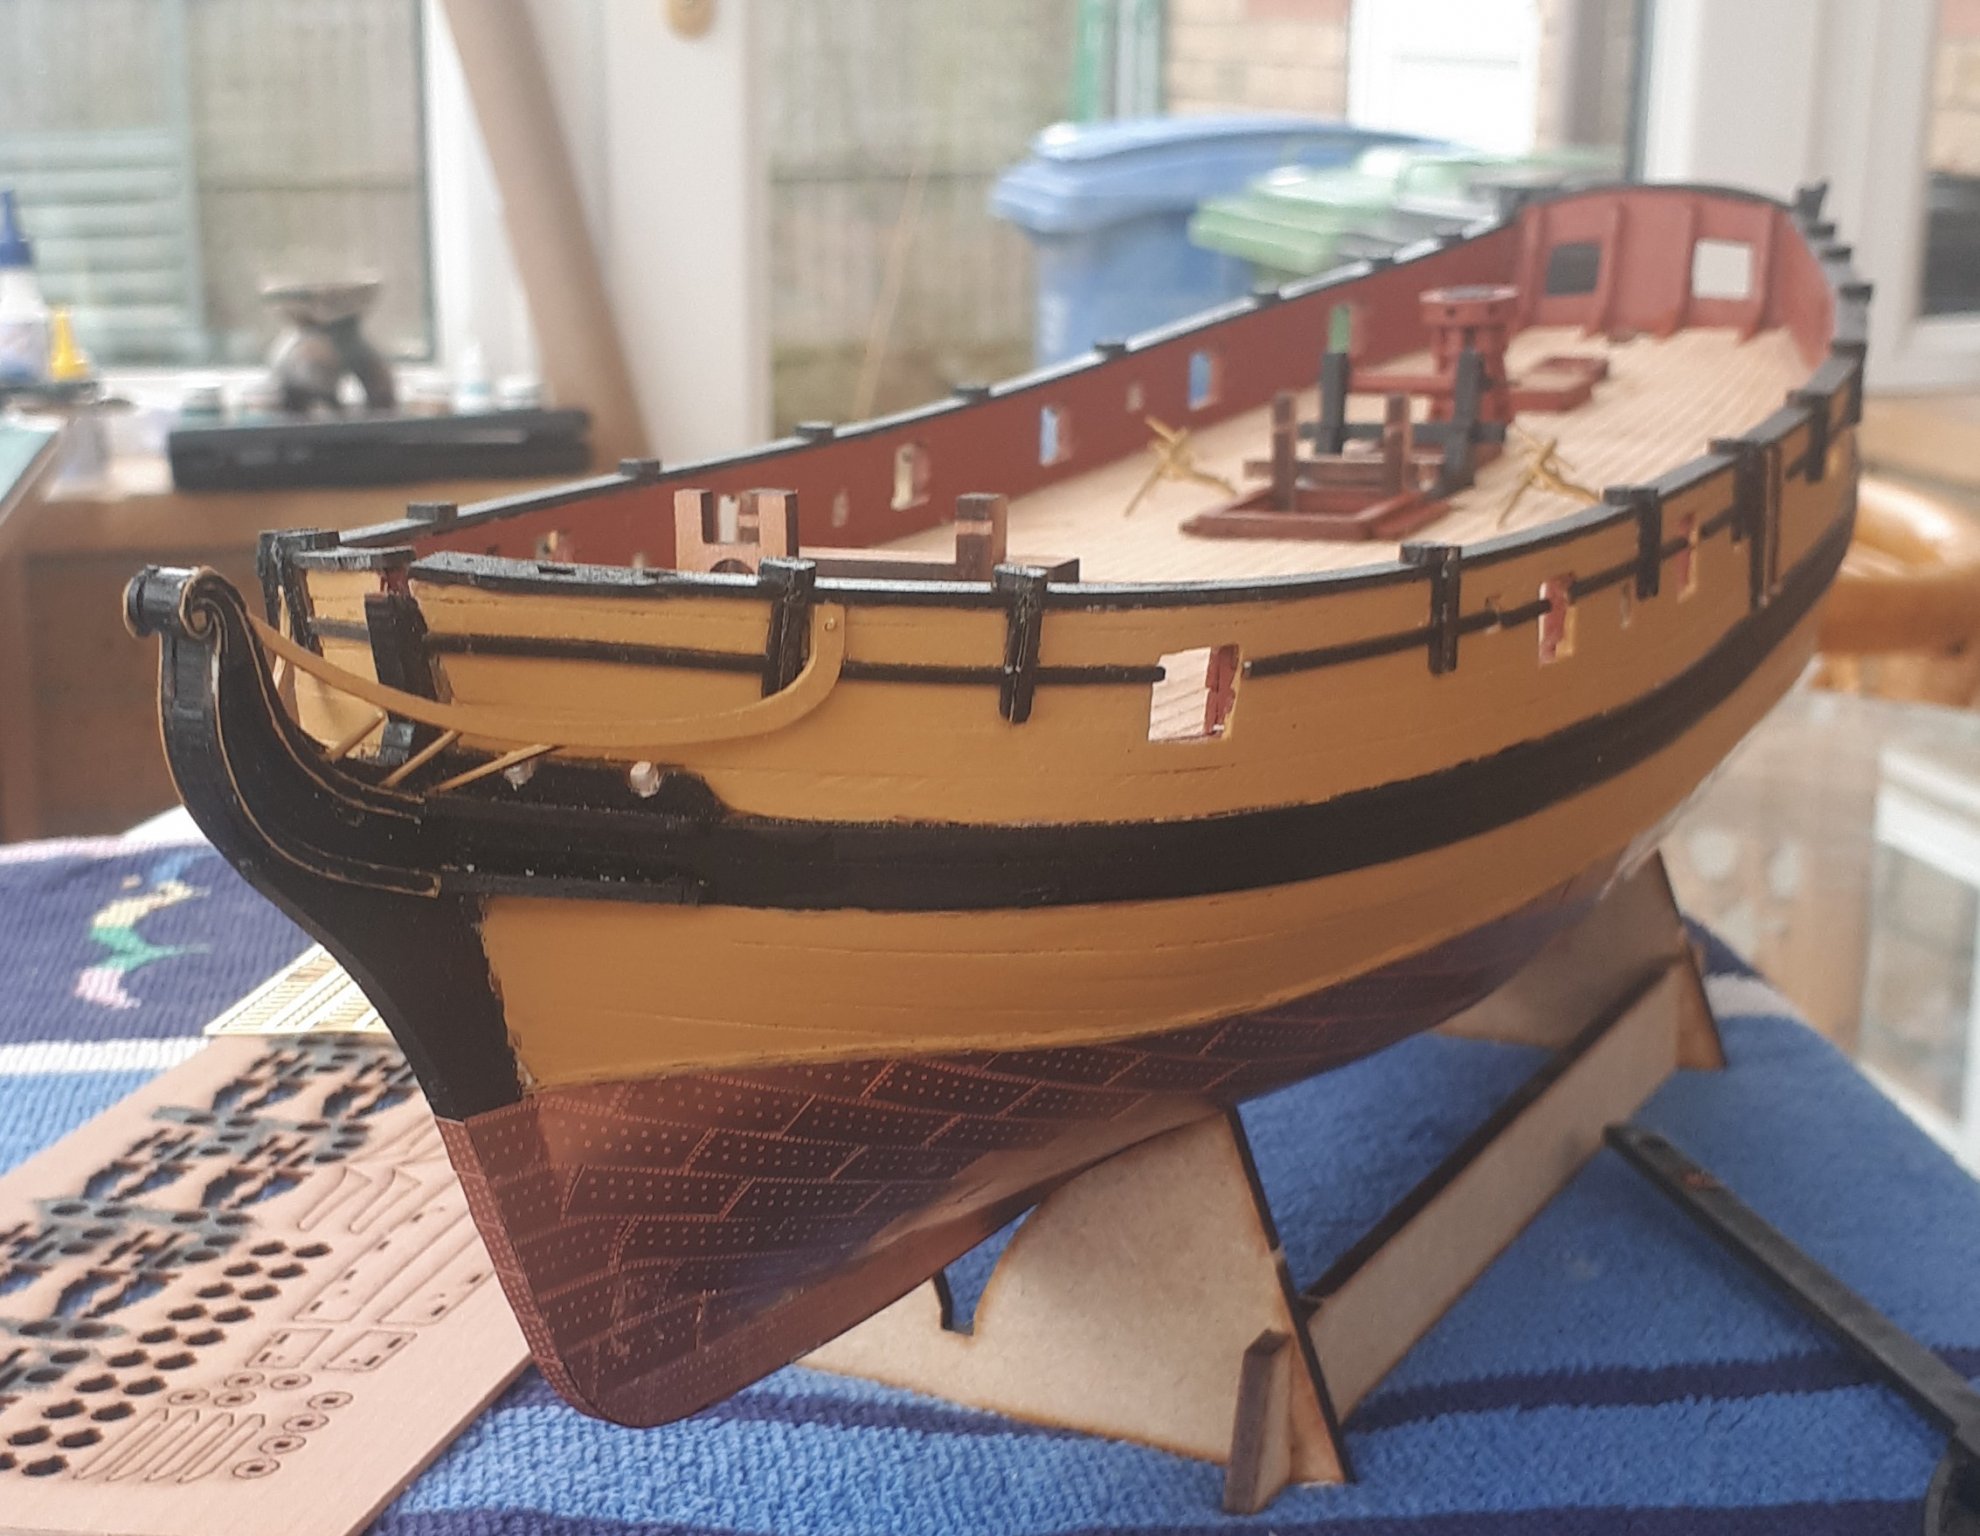
I have fitted the bow main rails and the three bow vertical rails, some of the photos were take before the vertical rails and been attached to the main rails. I would say that this was the most difficult task to date with this build, it took a while to find the best methods for painting and then fixing parts to the hull. I ended up pinning the main bow rail to the hull, noting the pin will be hidden once the catheads have been installed. I have built and painted the catheads and they will be glued in place tomorrow. I have also assembled the majority of deck items and placed in position (not glued). The two deck pumps (shown on the photos) just need to be painted and fitted to 4mm x 40mm dowels. The 4lb cannons can be seen in the first photo, on the window ledge. -tab=comments#.url


-
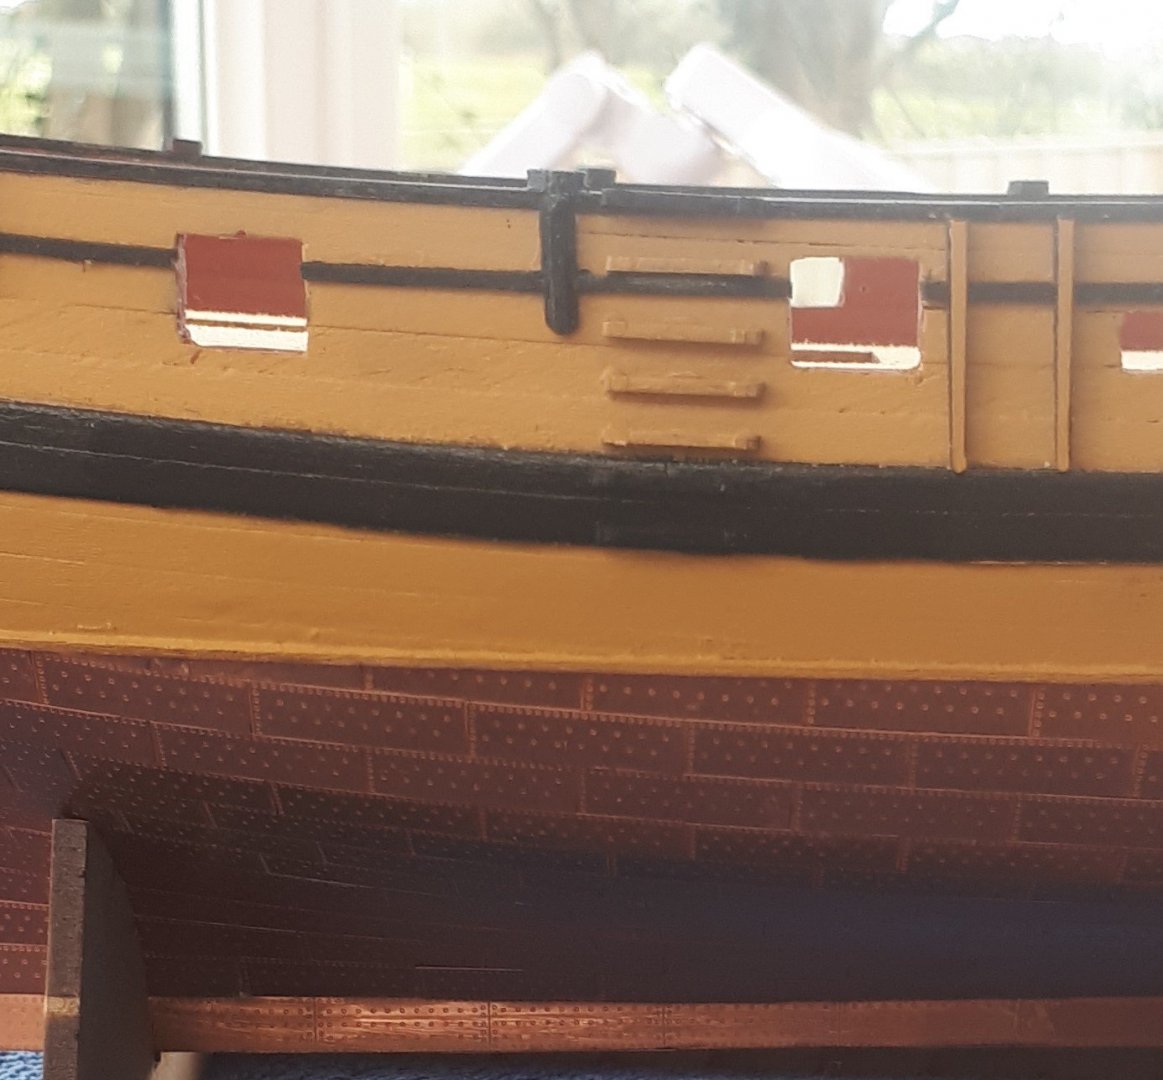
Here is an update of my progress. The first two pictures show the swivel gun bases (unpainted) fitted to the capping The next couple of pictures show the swivel gun bases painted black I initially painted the swivel gun post supports yellow, but as I had incorrectly positioned them I was not happy with the results as shown in the following picture I added some wood filler to the gaps and then painted the gun post supports black. It looks better. I have painted the stern area a mixture of yellow and black. I have filled in the hole on the bottom left of the picture I have added the 3 off stern board rails, the stern capping and the 2 stern crutch boom patterns. Finally I have checked the fitting of the 3 off bow frames. They all fitted OK. I have shown a picture with one bow frame in place during a test fit. The slots were tight and took some of the yellow paint of the bow strip. They will be repainted.


.thumb.jpg.5d61856f4d080721e23e8636967a91f9.jpg)
.thumb.jpg.c2d5f54bf74711e6742a001899988131.jpg)

-
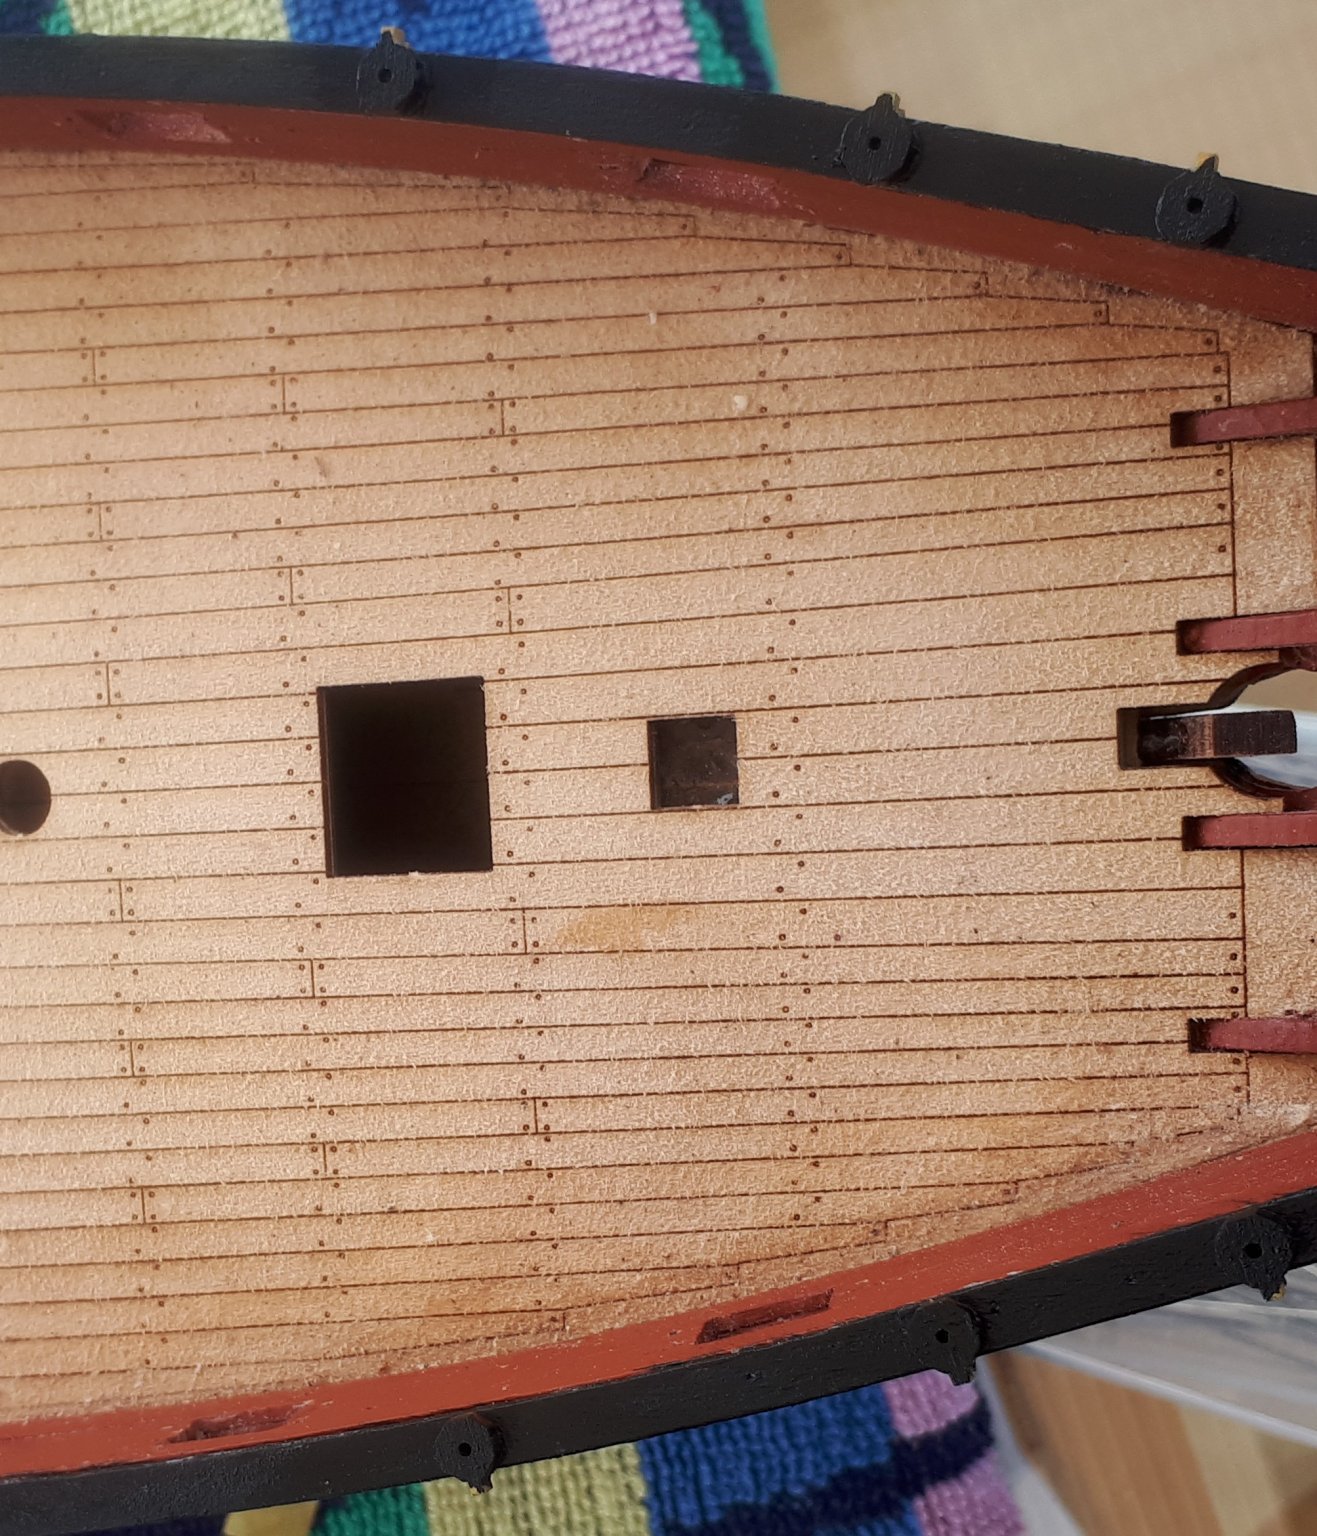
I have now added the swivel post support timbers (painted yellow ochre) to the upper rail. Having read the manual for the next part of the build I have realised the swivel posts should sit flush with the top edge of the capping. I positioned mine to be level with lower edge of the capping. I probably could remove and reposition but I think I may leave them as fitted, in case I damage them. I have also drilled the 4 off haswe holes using a 2mm drill. Next up will be the fitting of the swivel gun bases to the capping. I have just noted, looking at the photo below, a couple of copper plates with some ca glue which will need removing.

-
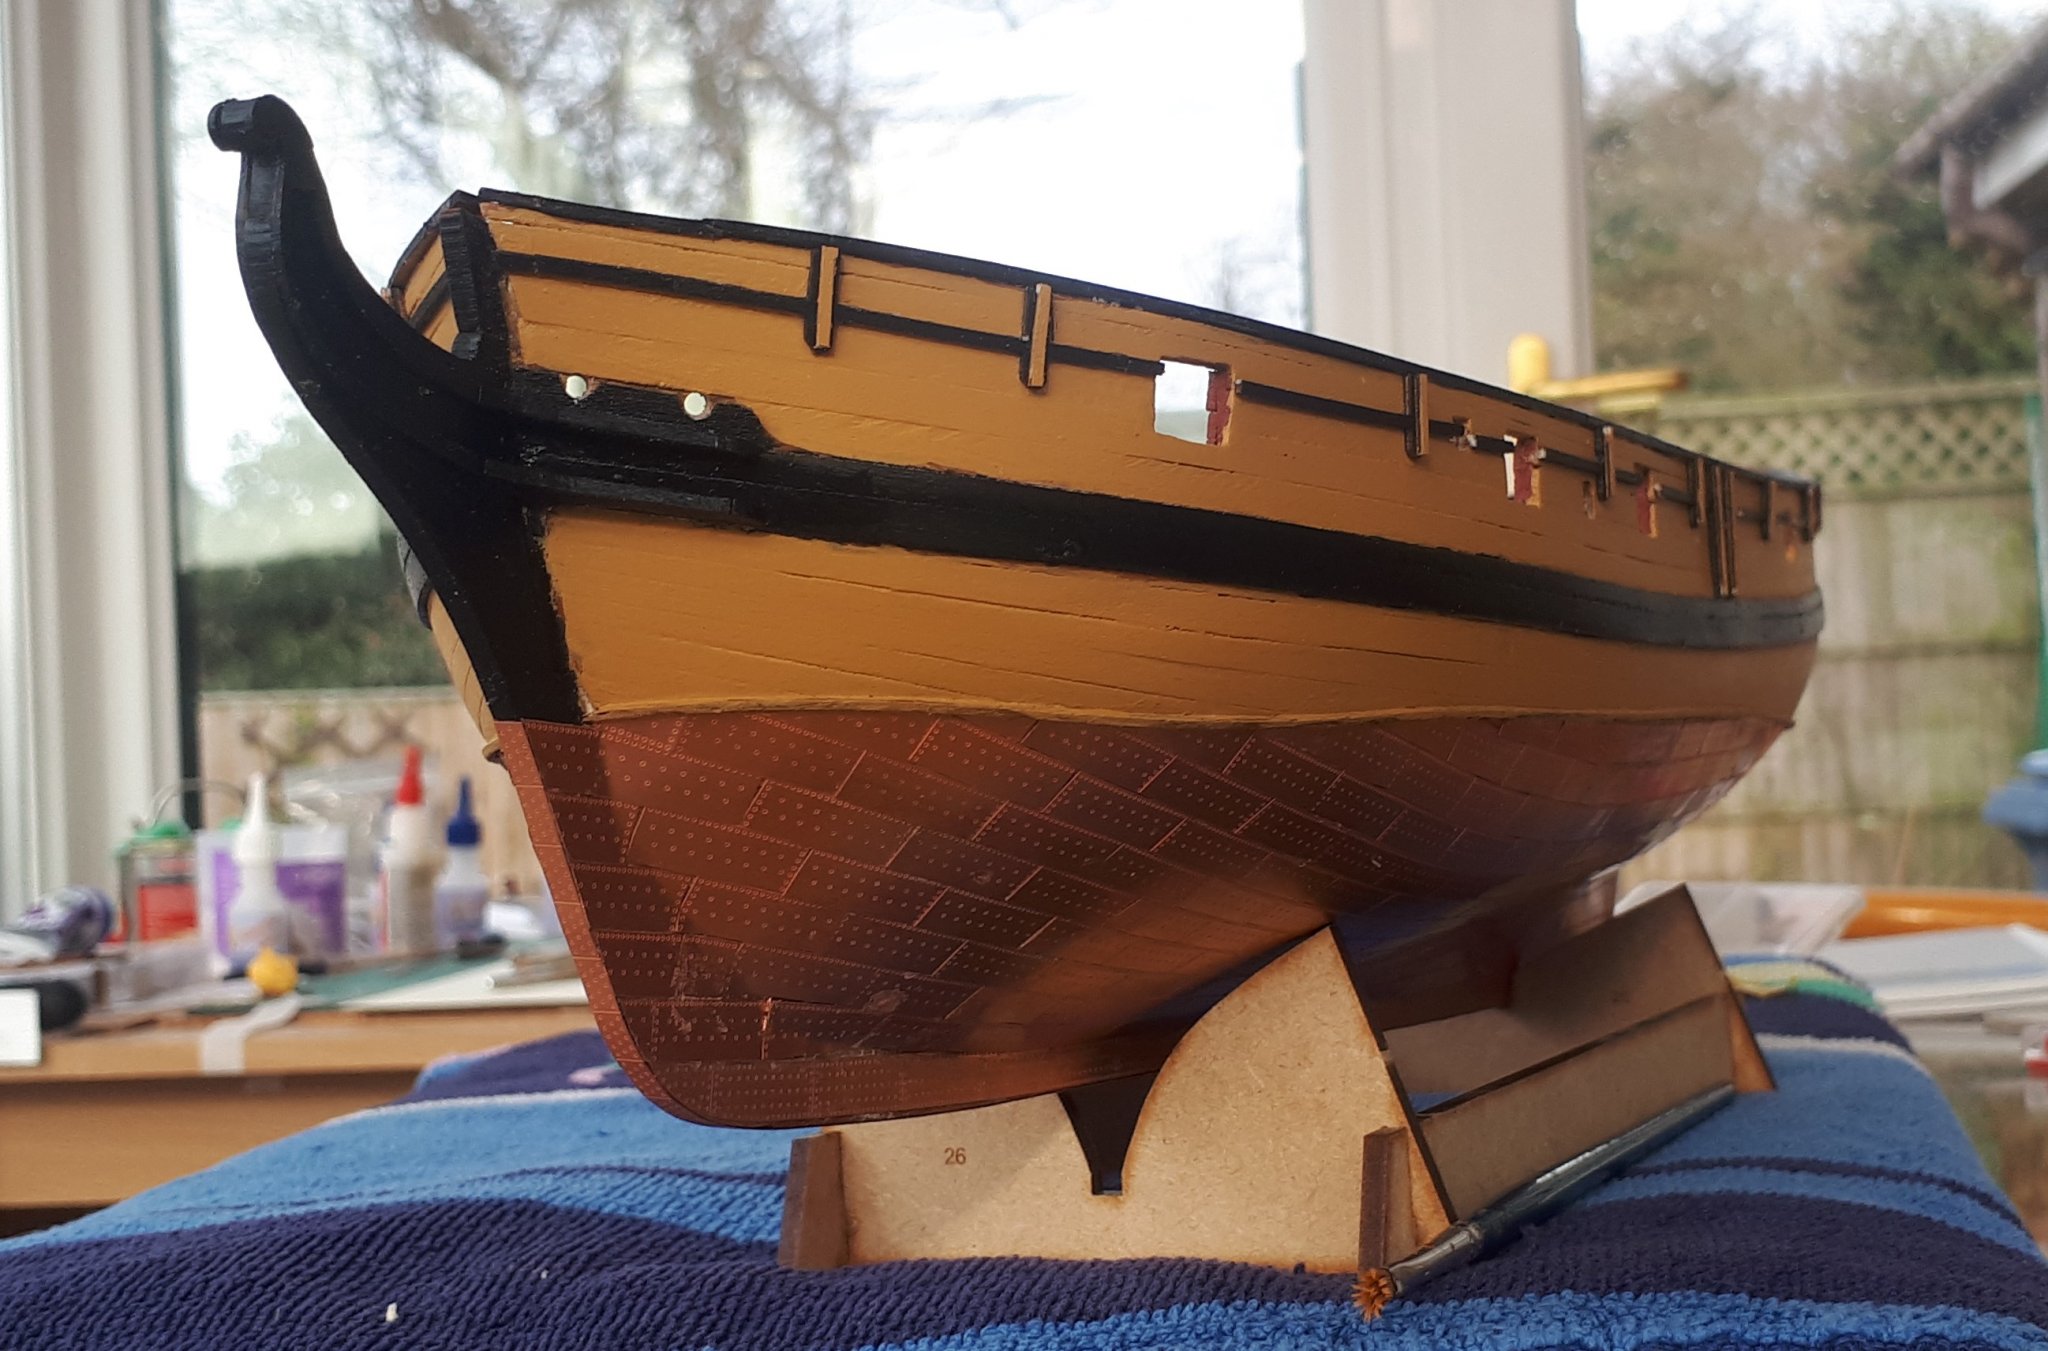
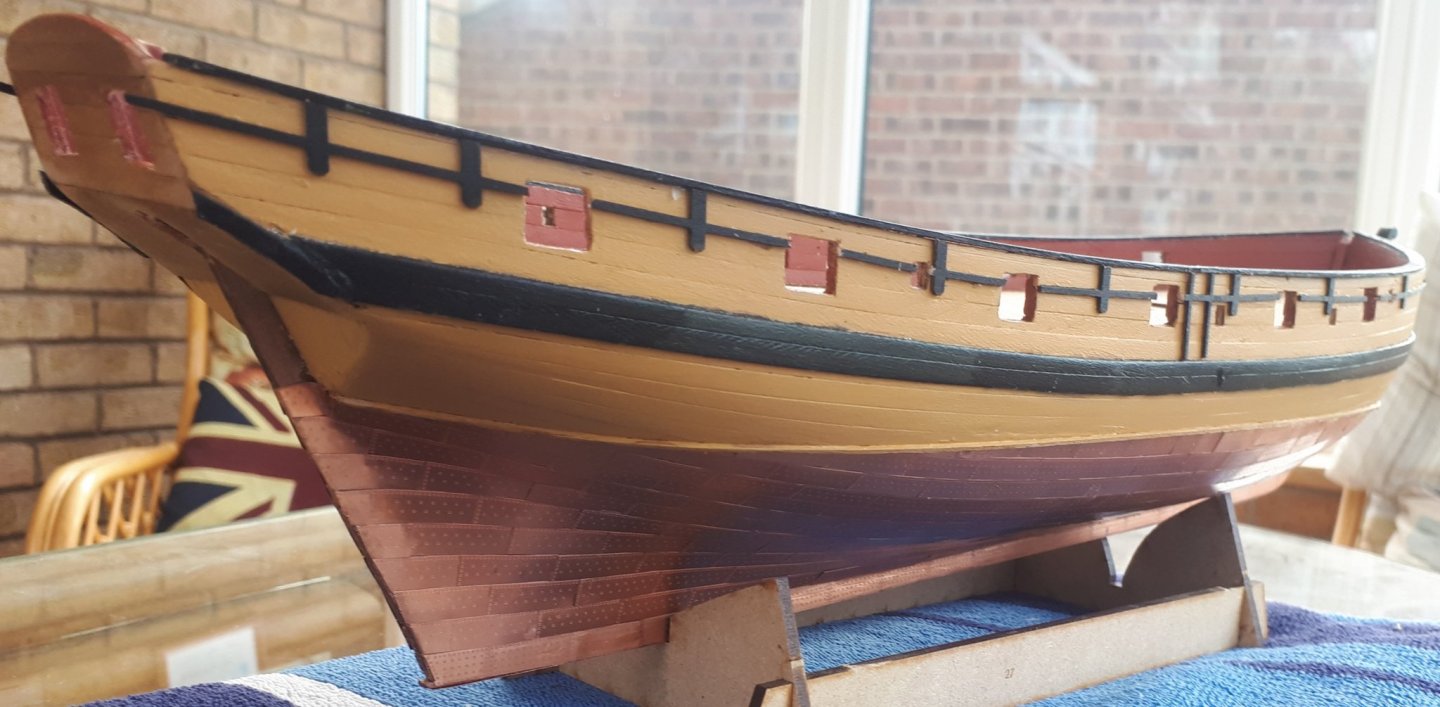
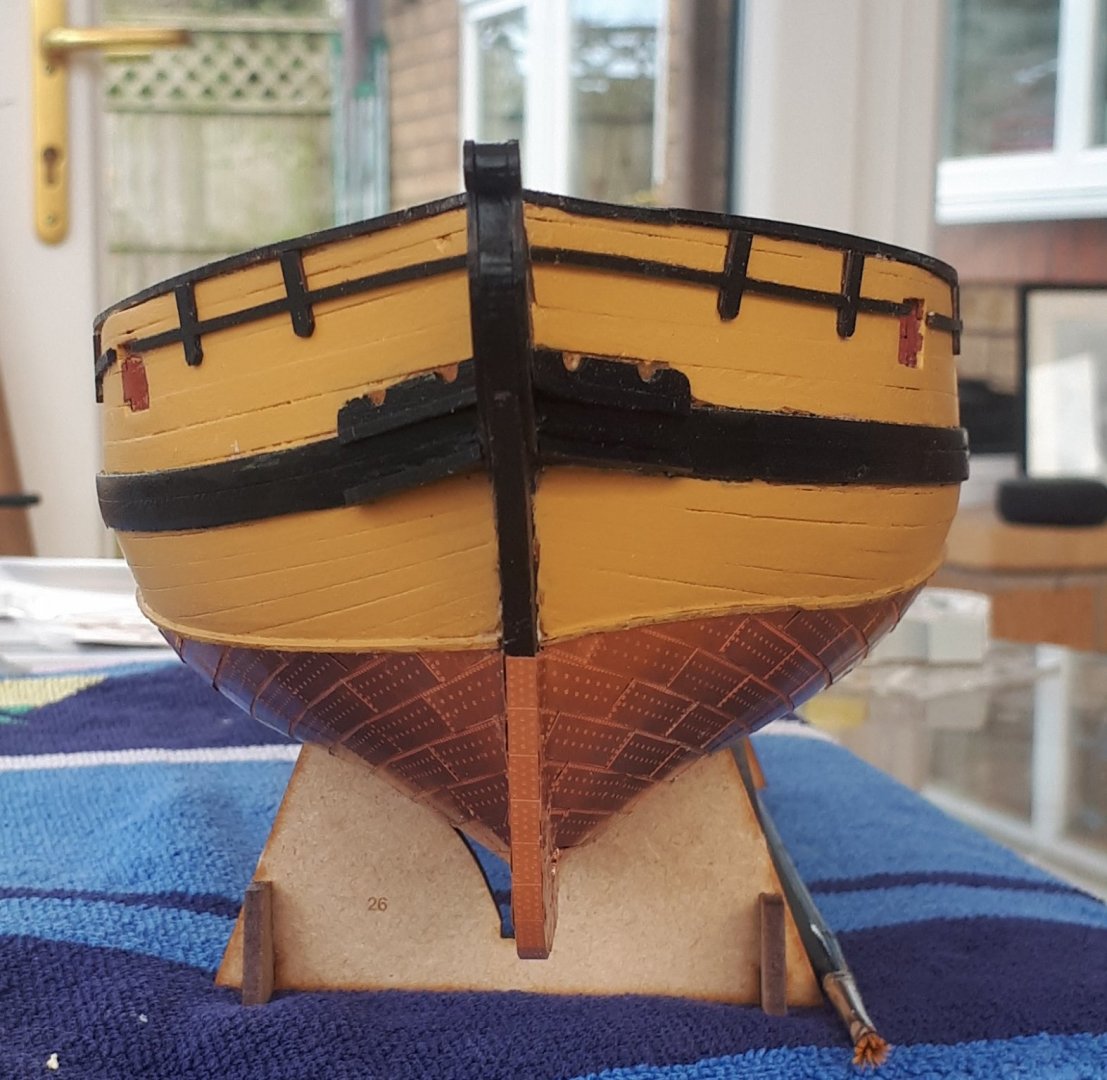
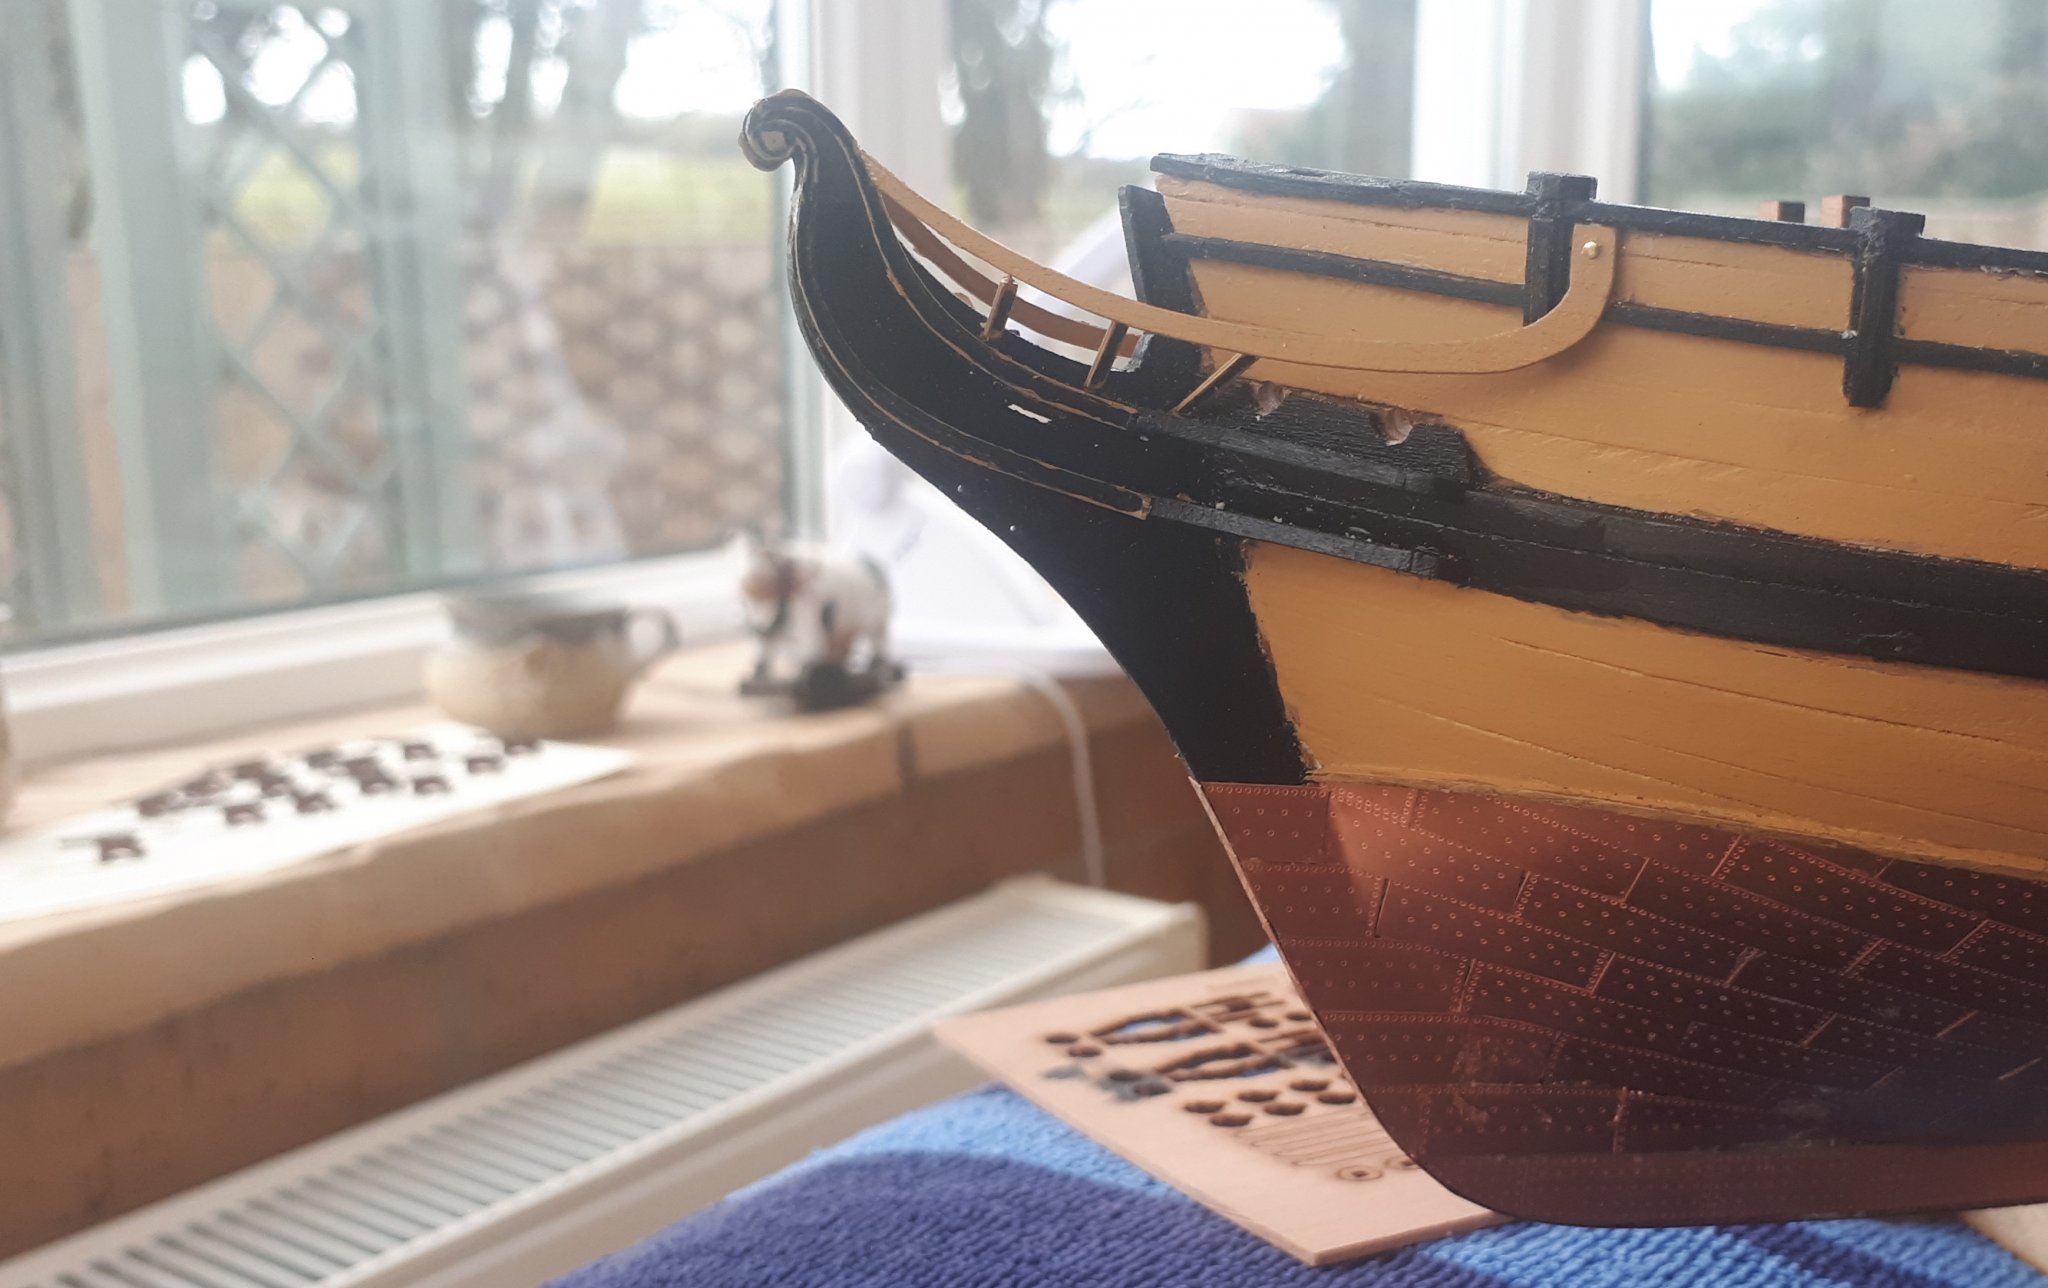
I was not totally happy with the natural wood finish of the hull above the copper plates so I applied an oak wood stain but was still not happy so I decided to paint the hull using my yellow ochre paint. I think it looks better now. I have also added the capping rail and upper support rails and the decoration looks really nice. I have already painted the fender patterns yellow ochre and I will fix them to the upper rail patterns in due course.
-
Thanks as there is great excitement about another kit on the horizon. I am currently enjoying building the Speedy kit and would welcome building another Vanguard model kit.
-
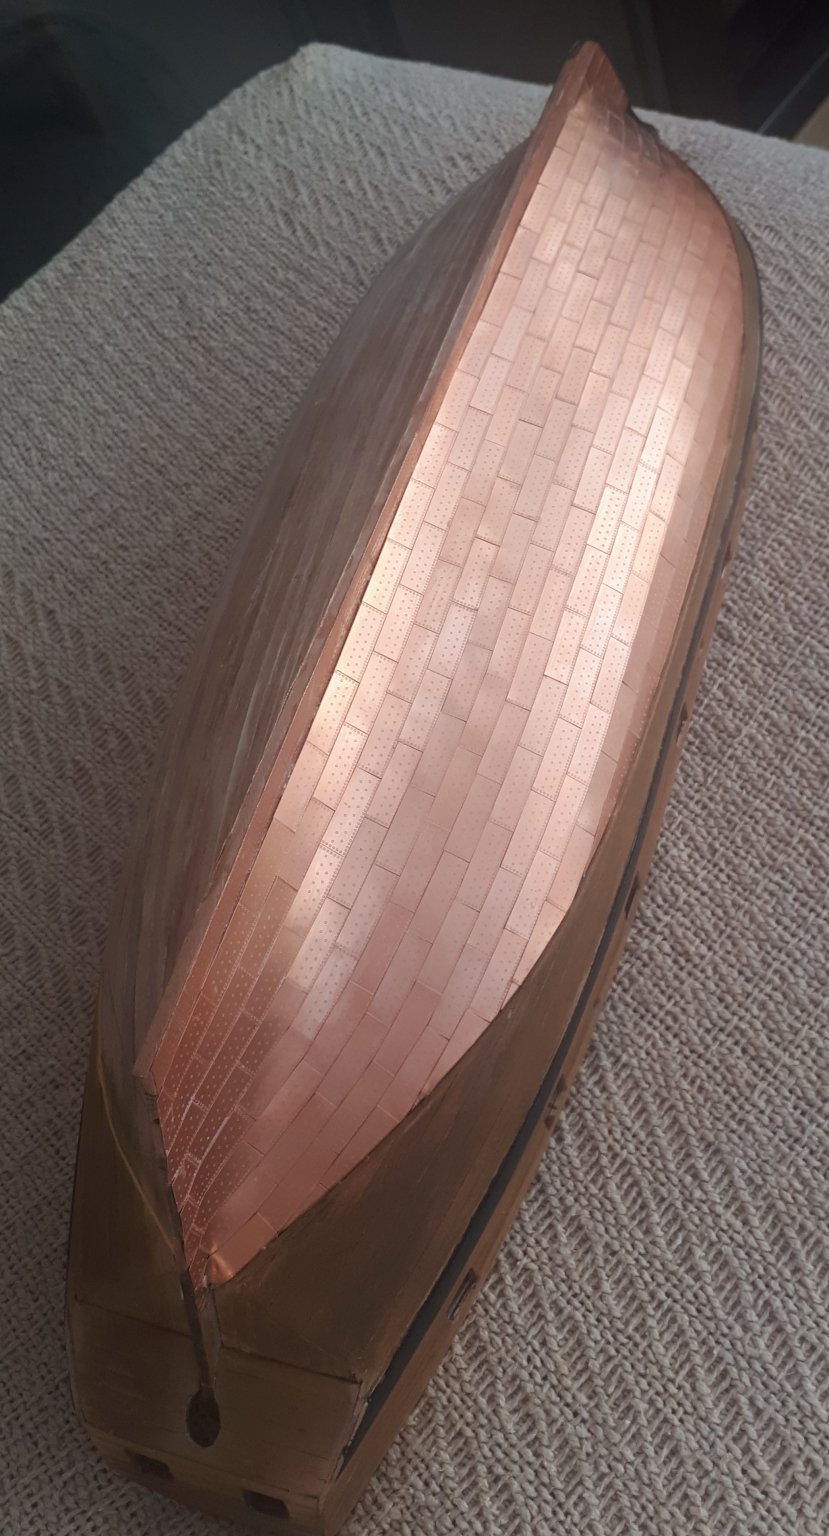
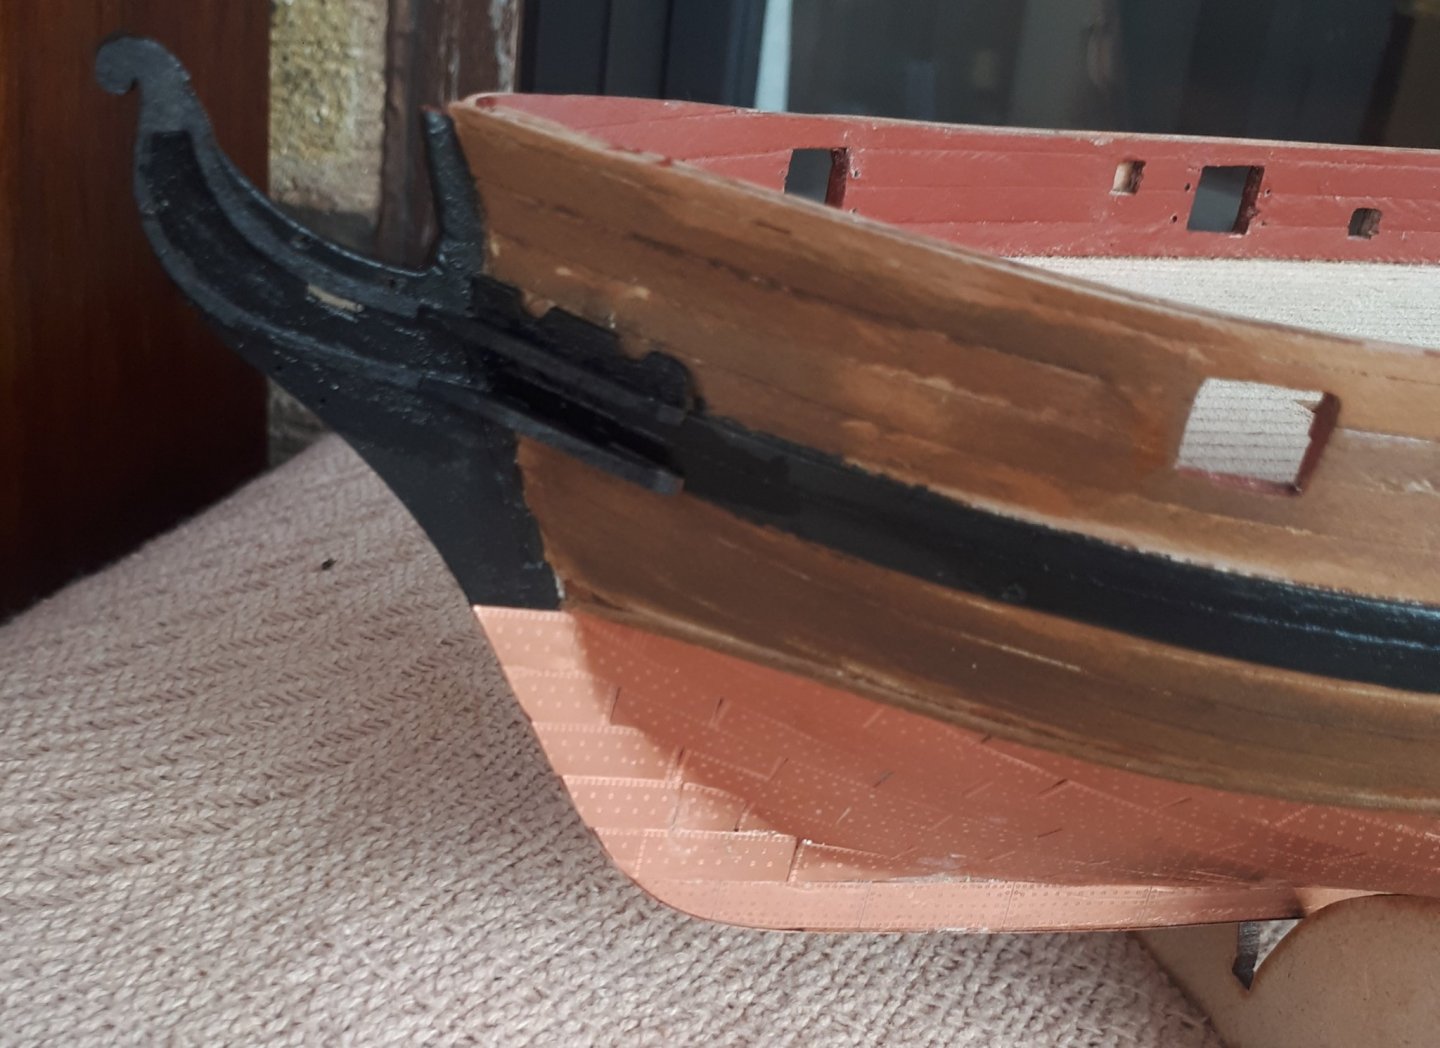
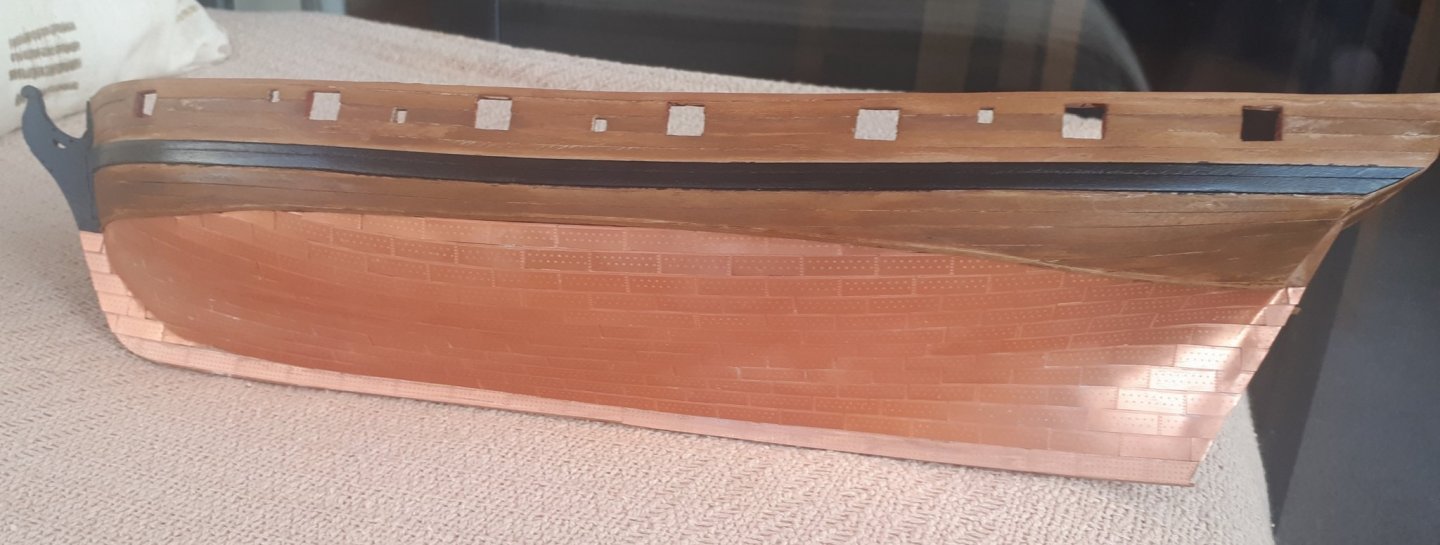
Hello Derek I found the coppering is relatively forgiving. My hull was reasonable smooth but it did have the odd lump and depression. It is important to get the area around the rudder post and keel right,, I have one plate that sits a bit proud at the keel edge, but it is not noticeable unless you have the boat in you hand and upside down. With regards to the water line I did use the rudder with the copper template fitted to get the right height at the stern and I used the picture in the manual for the bow (5 copper plates). I did find the wood strip (1mm by 1mm) a god send. I also made a 12 plate wide template to get the position for the water line at the middle. I then used my water line marker and was very pleased to find my 3 reference points all lined up as I drew the line. I opted to use ca glue in the end as the evo stick instant has a very strong odour, and harder to apply to the plates than I remembered. It took a while to find the best method. For me that was to put some ca glue in the centre of the plate, then to place the plates leading edge to the previously fitted plate and once I was happy with the alignment to gently drop the plate into position. I used a small metal pointer to move the plate, when needed before the glue stuck fast. With some plates, which I was not totally happy with, I simply lifted them, using an old craft knife blade and then tried again. If a bit of the plate edge had not stuck down, as the ca glue did not fully spread, I simply applied a drop on ca glue to a scrap piece of copper plate and then used that to apply the ca glue to the underside of the lifted edge. I used a sharp pair of scissors to trim the plates, when necessary. I worked from left to right, so one side I was working from the stern to the bow and the other side I worked from the bow to the stern. For the first row of plates I actually started in the centre as that seemed the best for me to get the "brick pattern". As the plate line does curve I did find it necessary overlap the plates leading edges a tad. I used nail polish remover (with cotton buds) to remove any excess ca glue from the plates (and fingers).
-
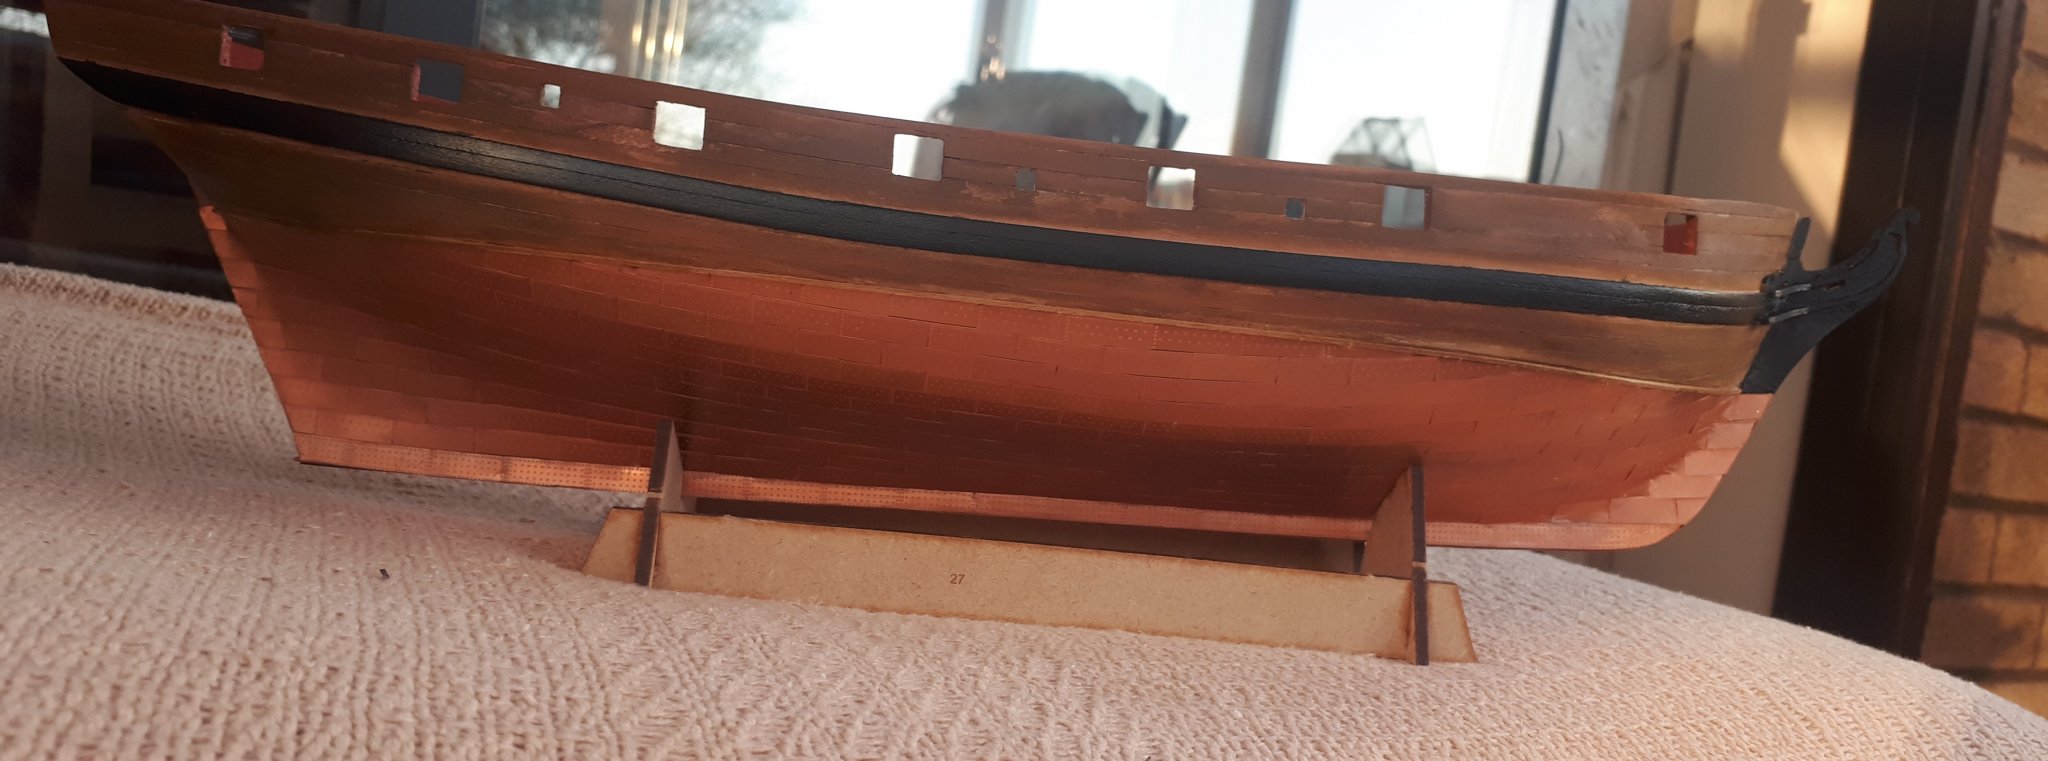
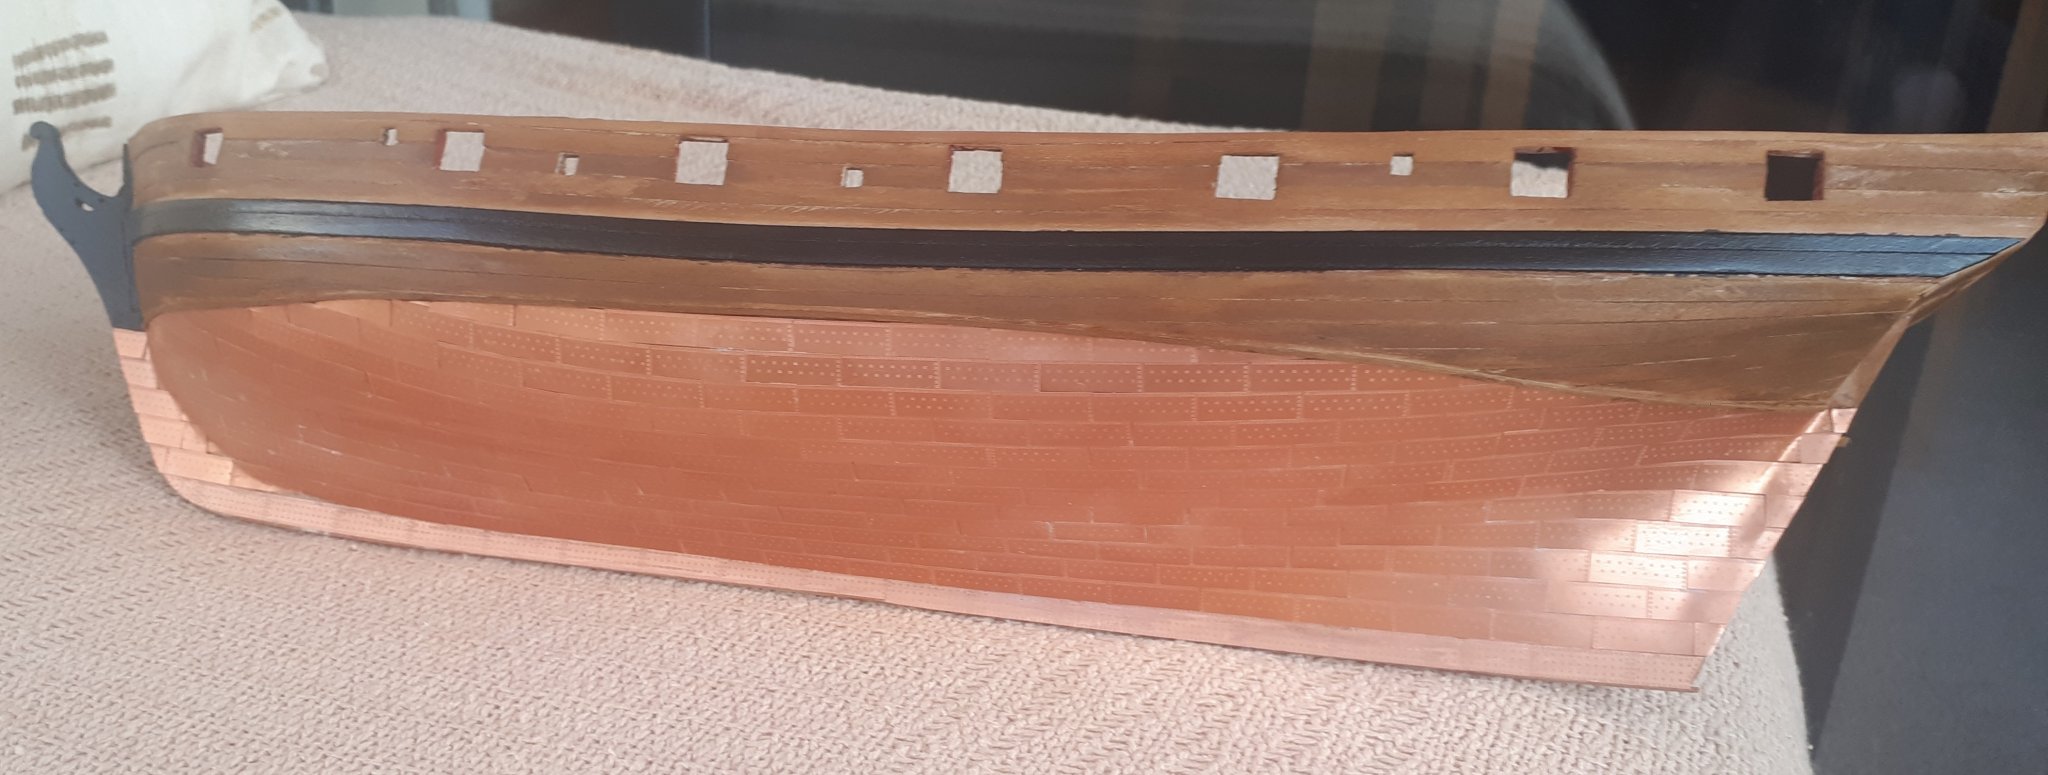
I have finally completed the copper plating task. I am reasonably happy with the end result. It took a while to find the best working method which was to add a drop of ca to the centre of the plate and then to position the leading edge against the previously fitted plate and once I was happy with the alignment I then gently dropped the plate , using a metal pointer to make any minor alignment adjustments before the ca glue cured. Once the copper plating was completed I then added the hair brackets (which required a bit of trimming) , the bow checks and the hawse bolsters. The next task will be to drill out the hawse holes with a 2mm drill and then to fit the capping rails and stern counter side timbers. This will not take took long to complete so I can also fit the upper rail and swivel gun post patterns.

-
I have now completed the copper plating of the port side (take 2). I have much happier with the results this time. I started out using the evo-stick instant for this task which I had used when for HMS Victory, however I soon reverted to using CA glue. I did add a 1mm x 1mm strip along the water line which really helped to get a neat finish.


-
Take a look at the following for my attempt to rig cannons a few years ago.
-
Yes I am planning to rig the cannons later. I rigged my HMS Victory cannons, which was quite a challenge.
-
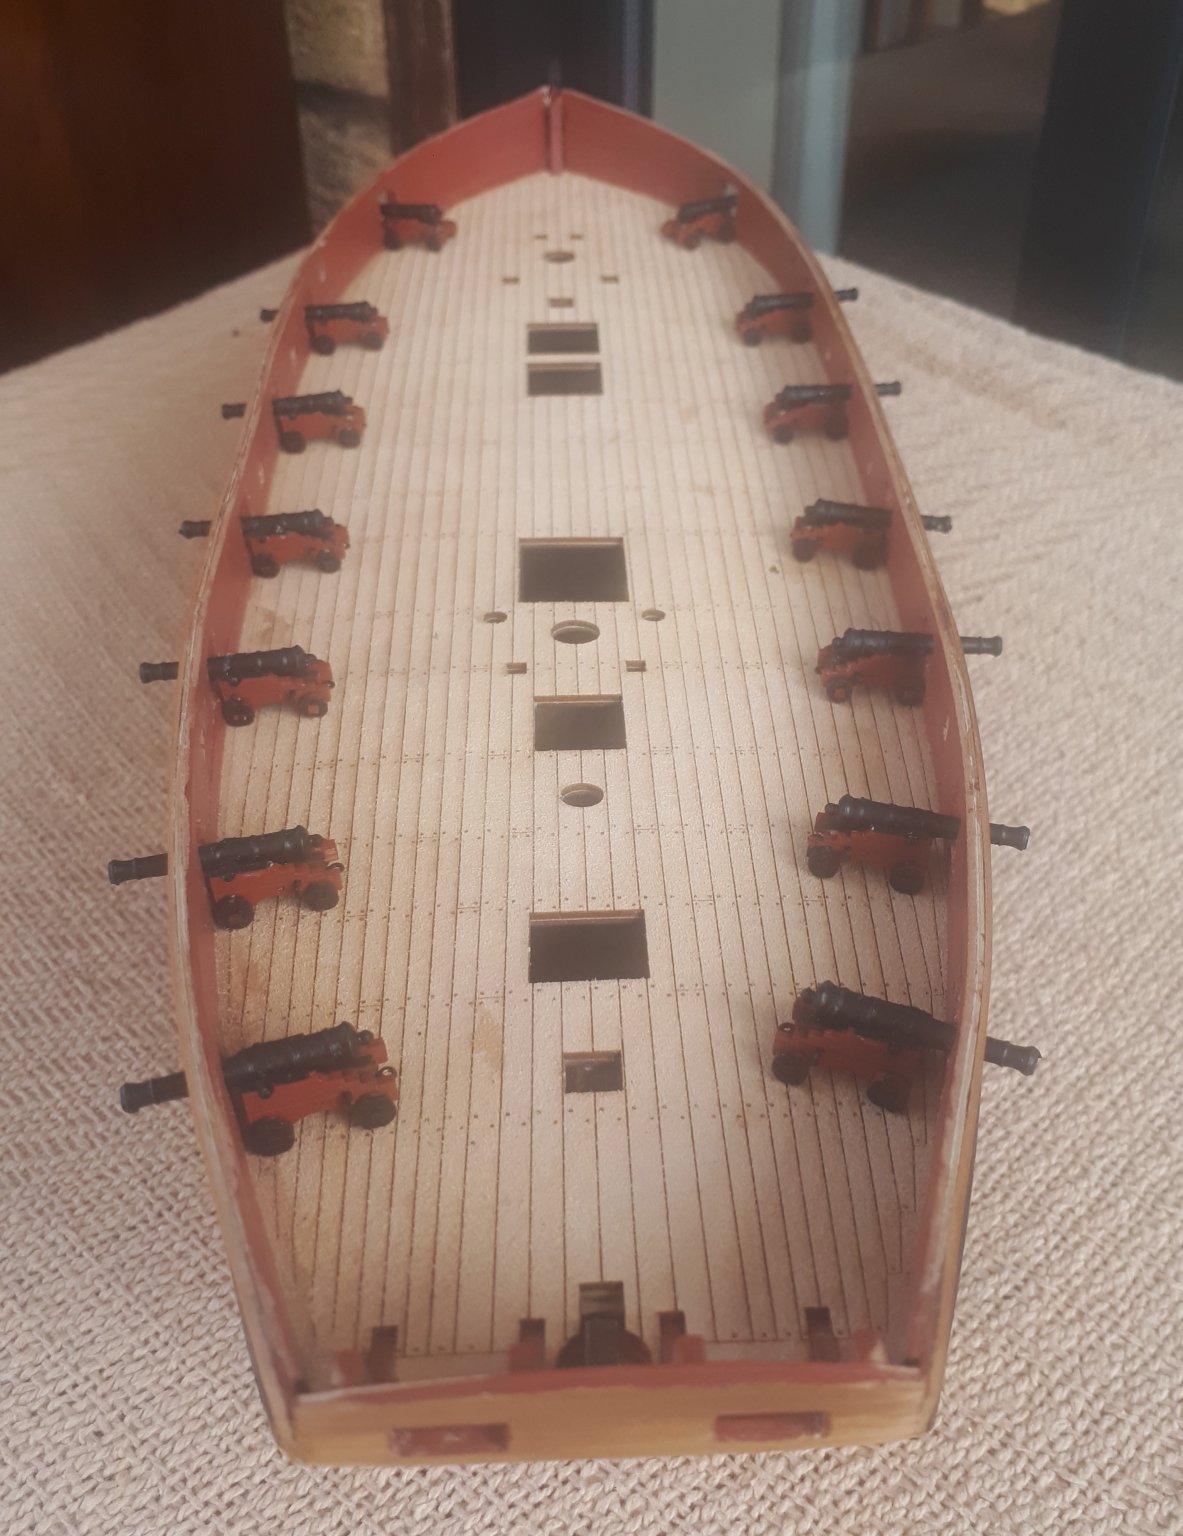
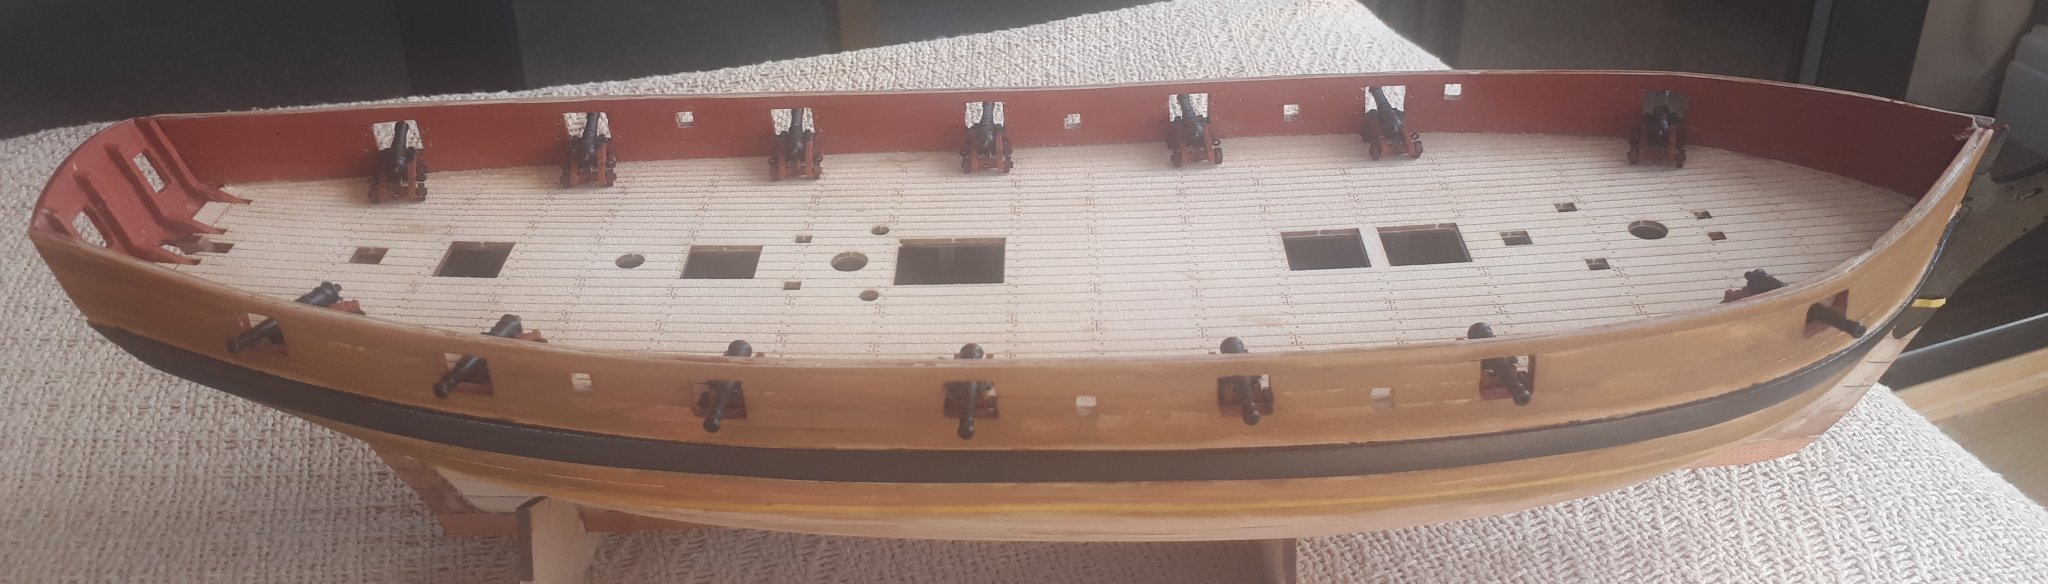
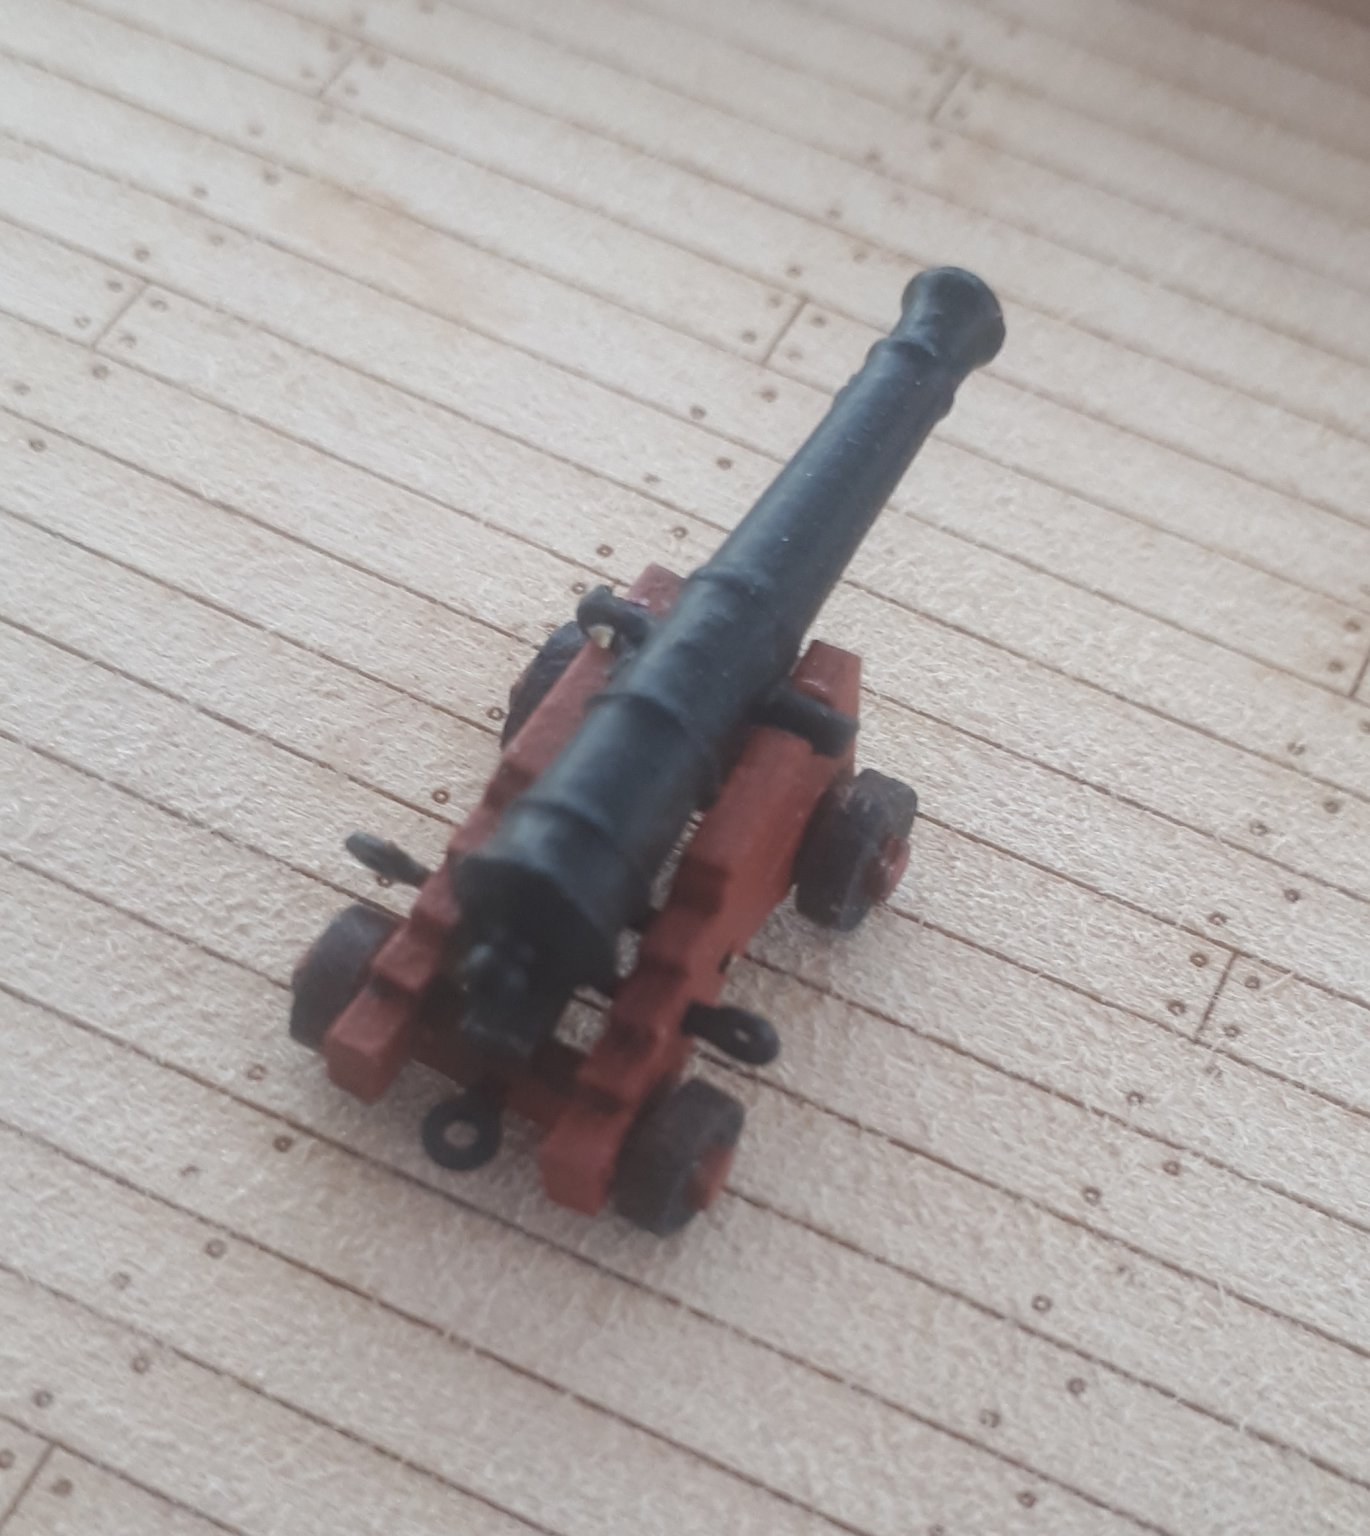
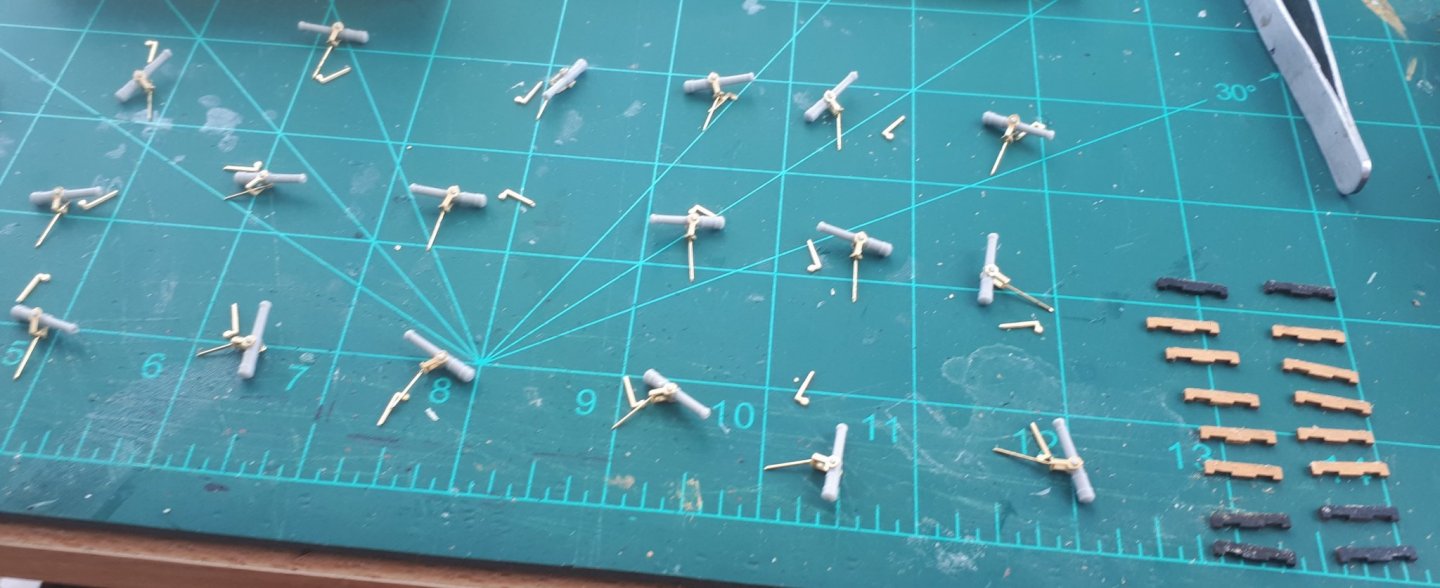
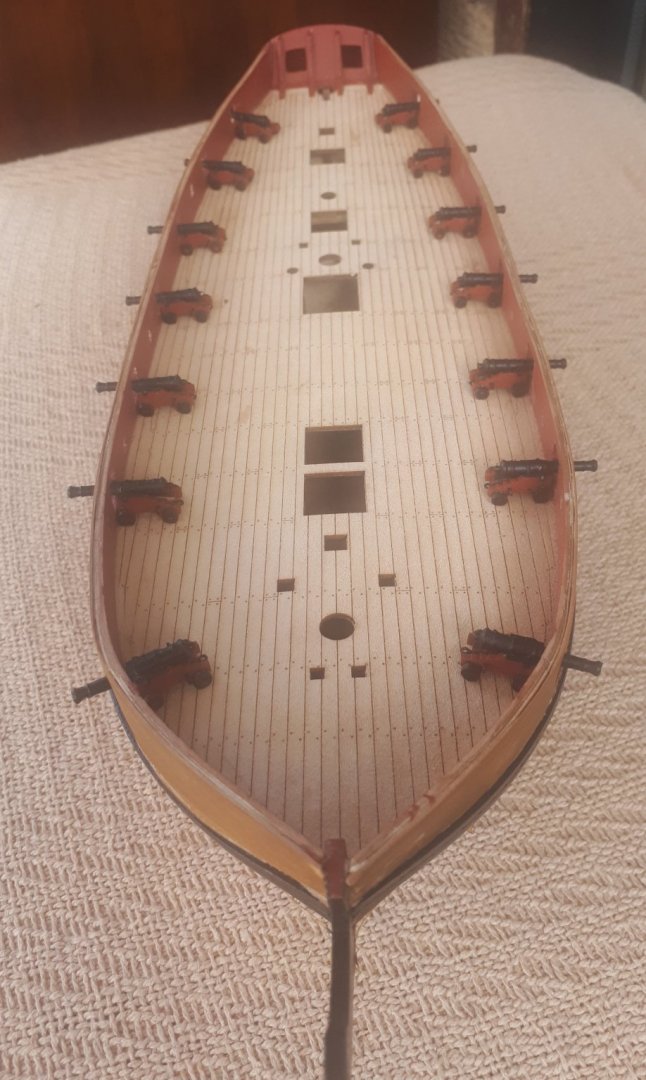
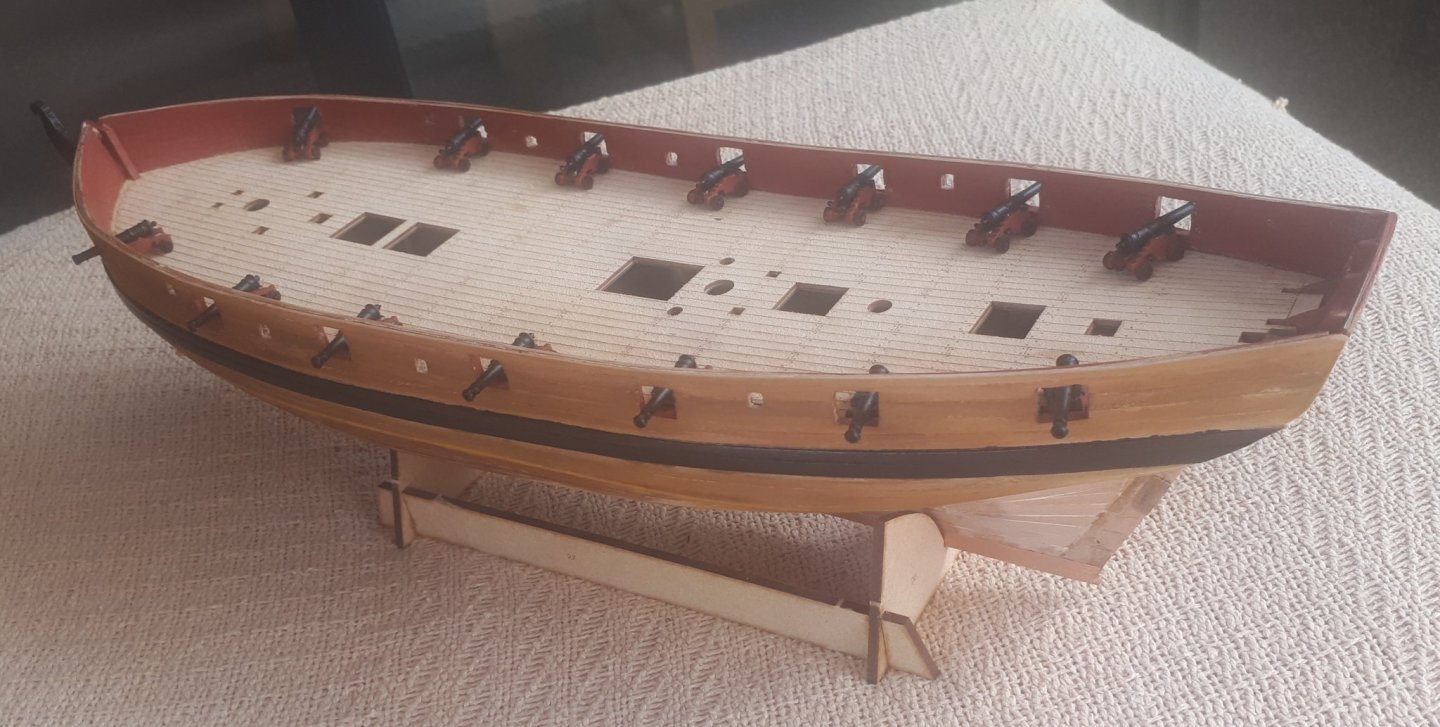
I went ahead and completed the assembly of all 14 off 4 pounder cannons. The Speedy is now armed and ready for action!! I will redo the copper plating next.


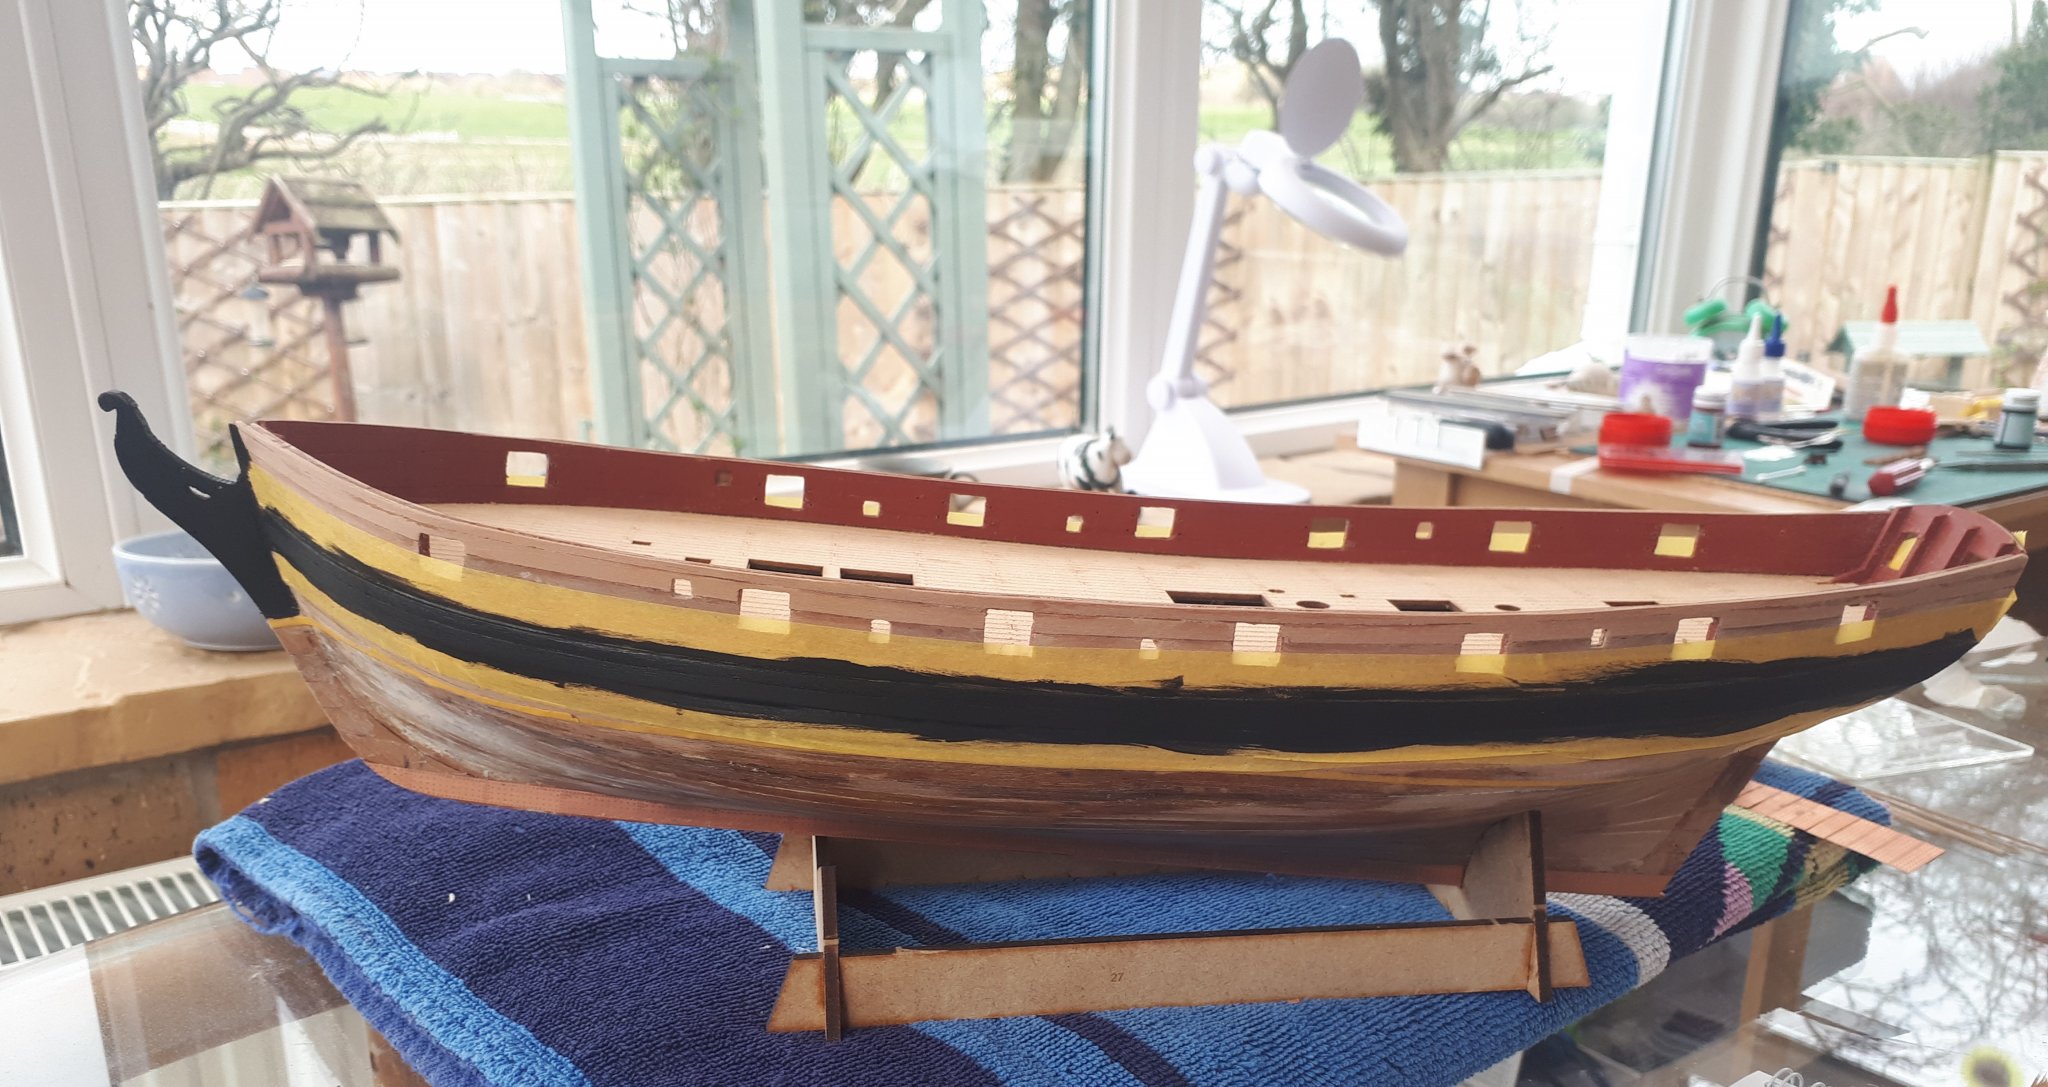
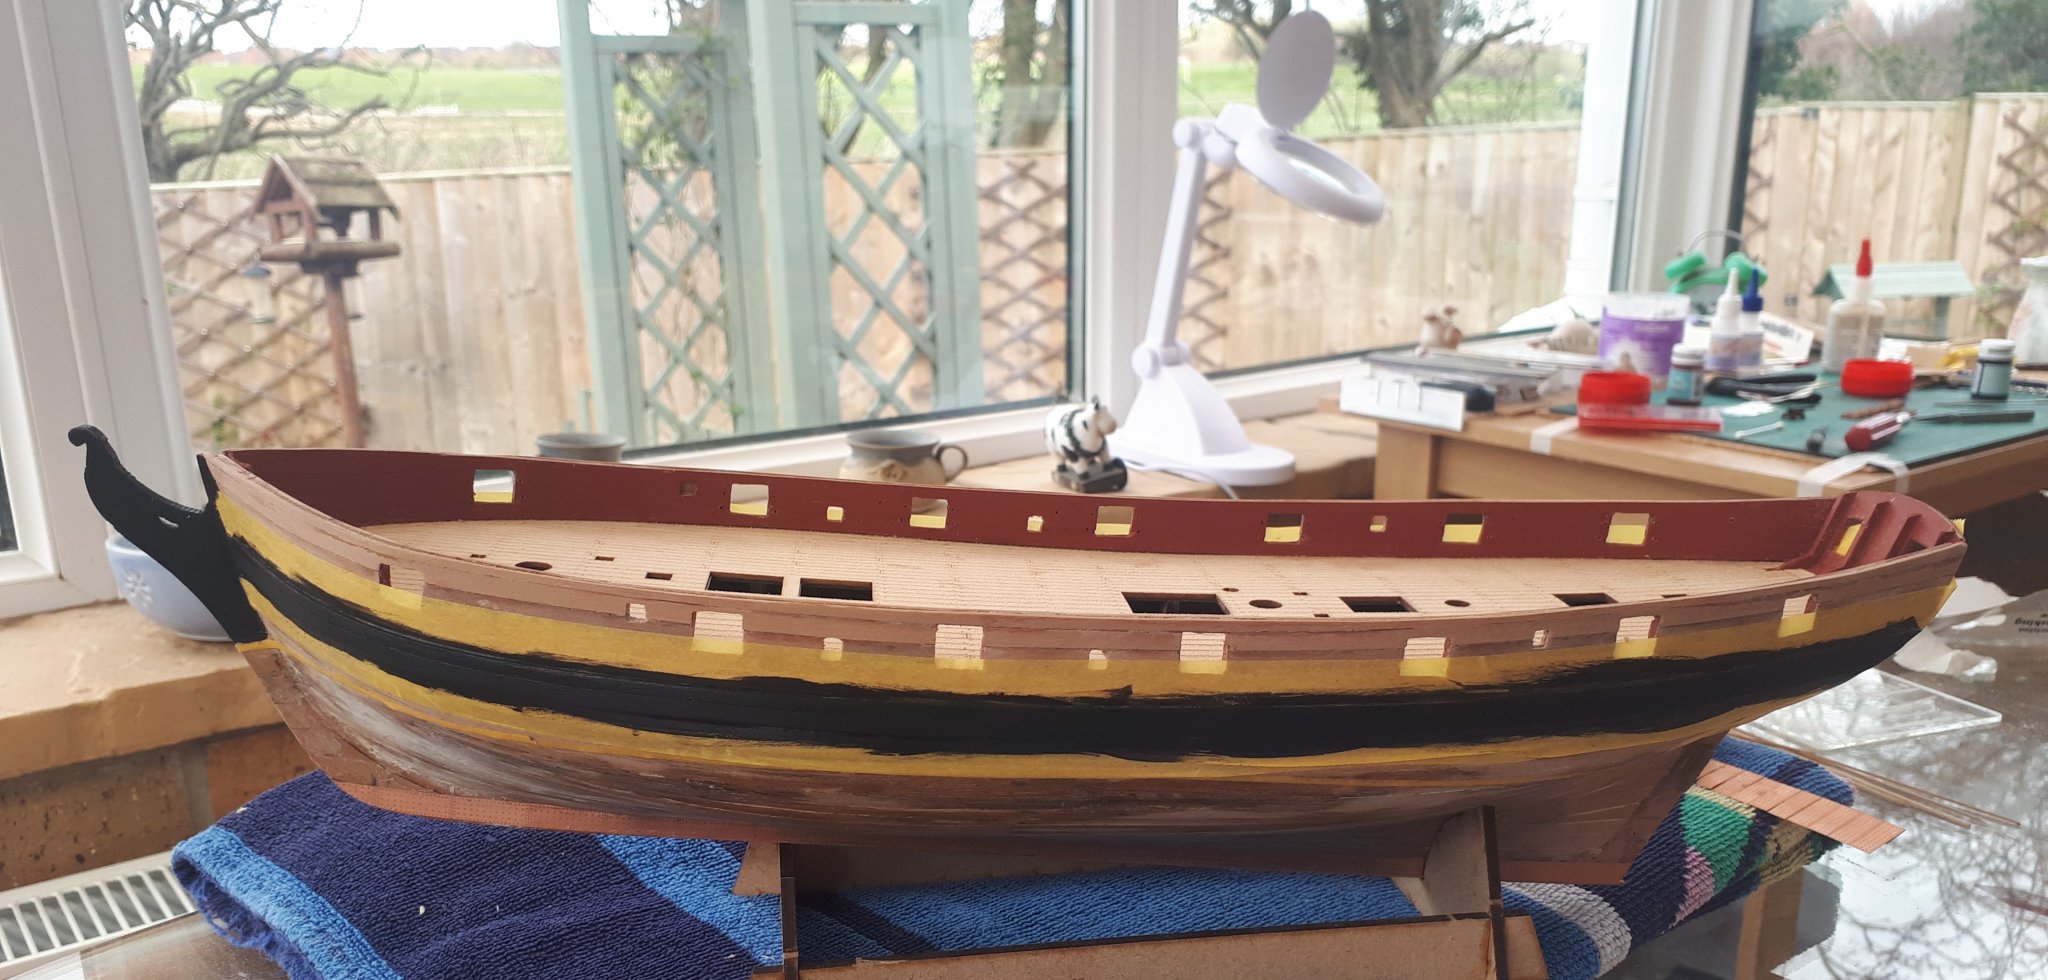
-
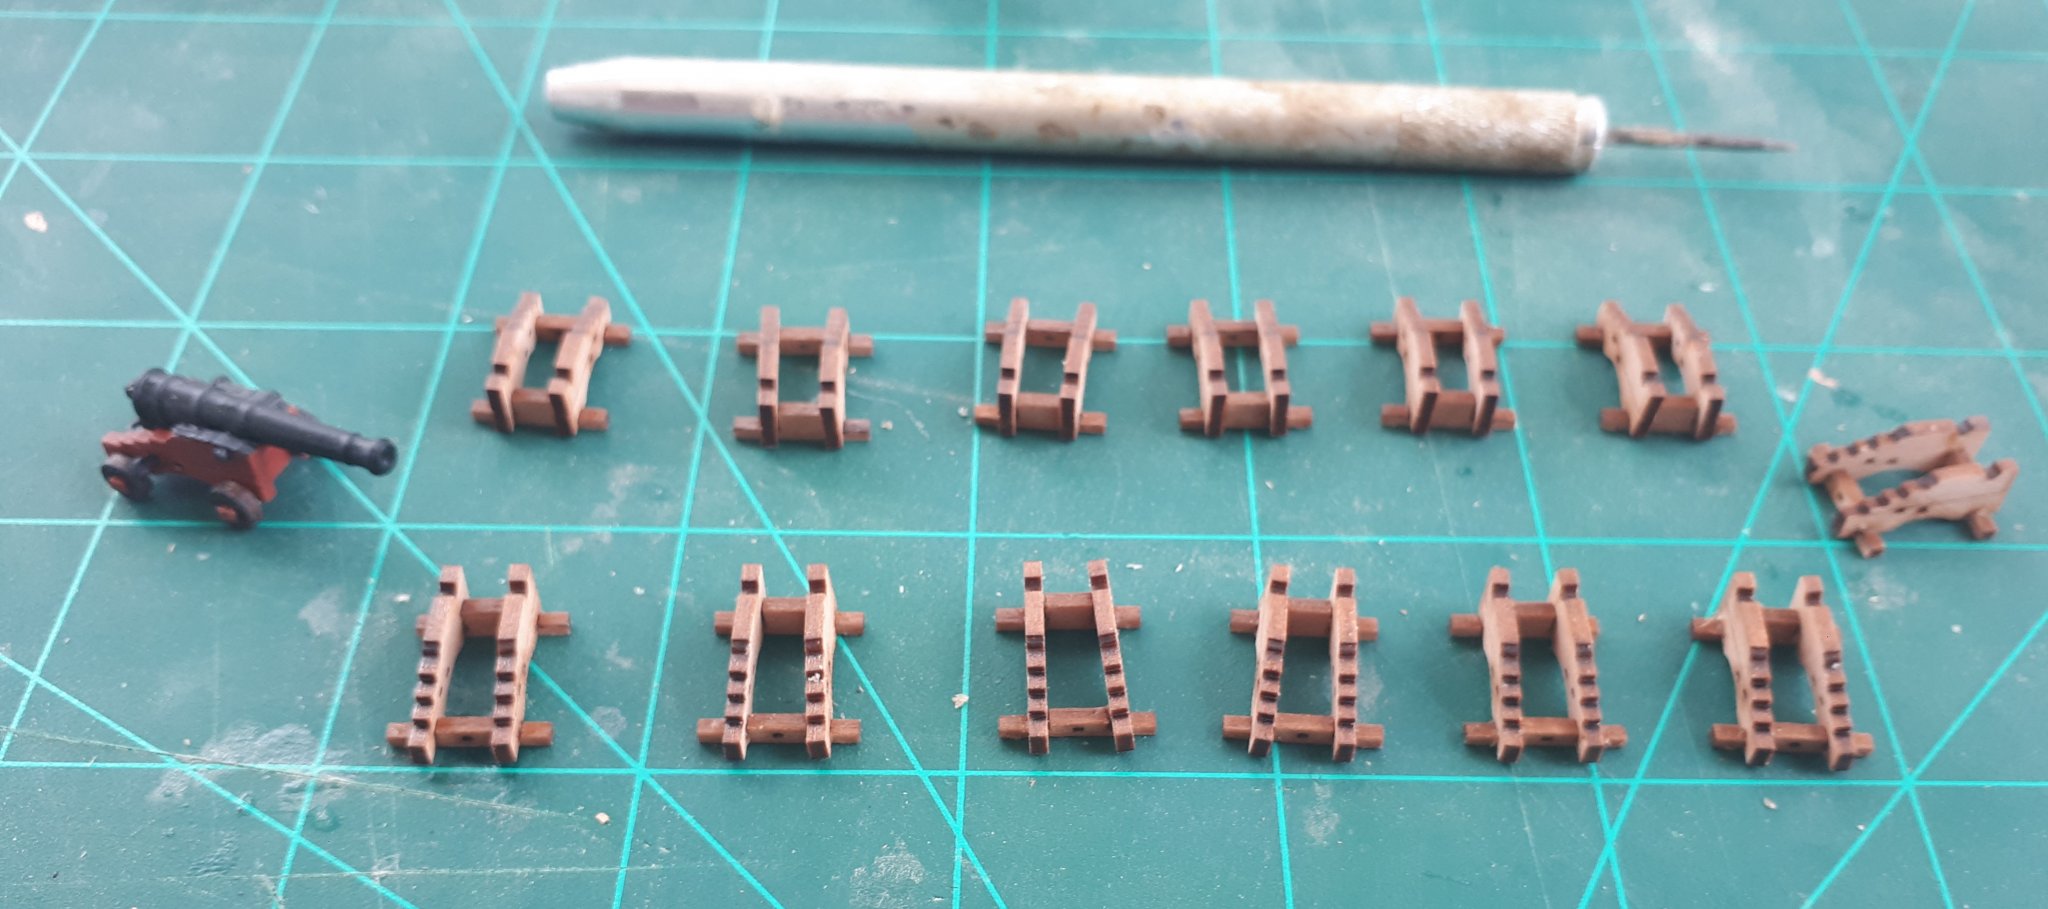
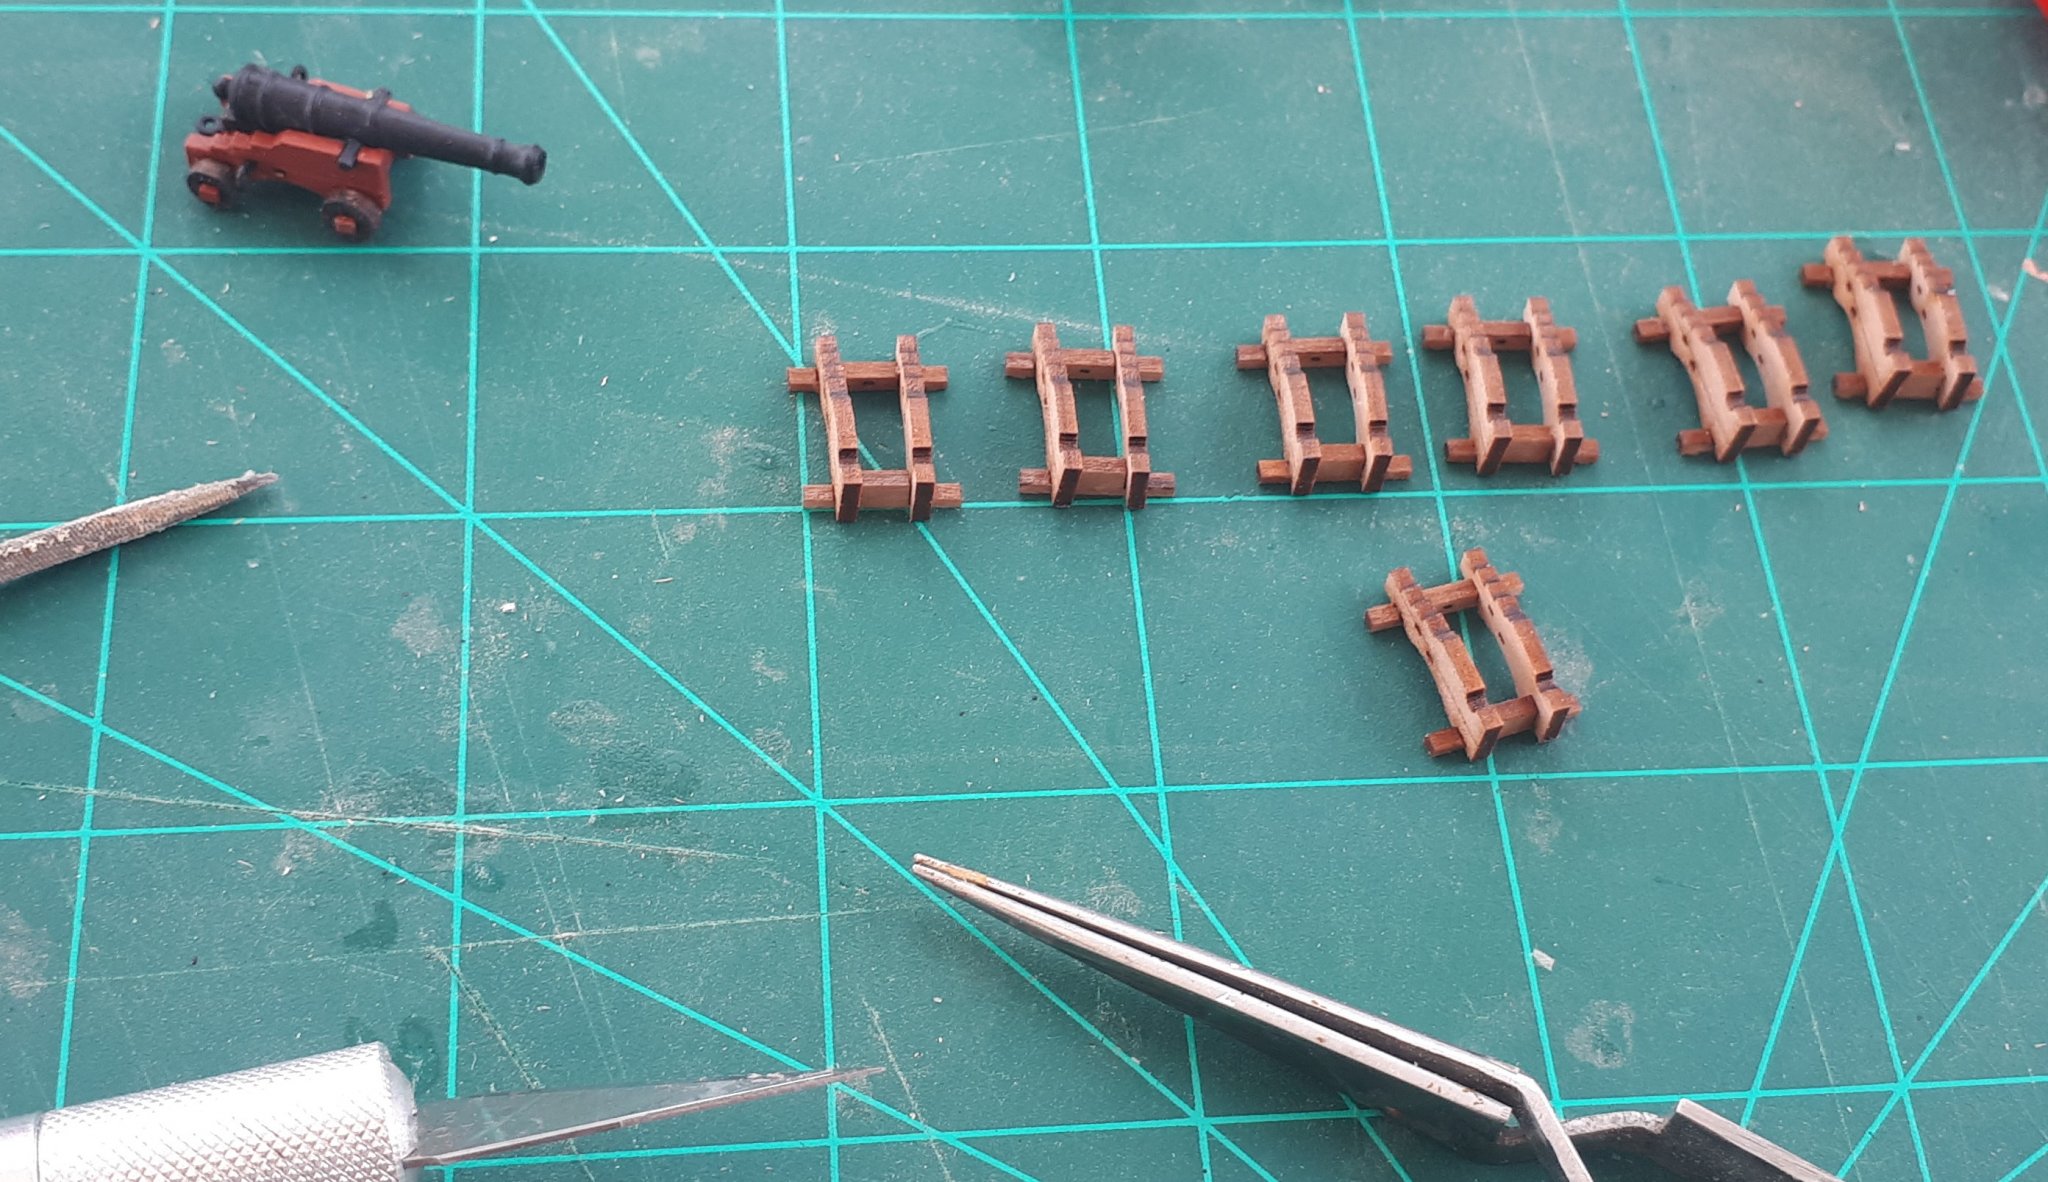
The new copper plates I have ordered have now been shipped, so they should arrive by first class post sometime tomorrow.🤞 In the meantime I decided to paint the Wales. I have applied 3 coats so far, giving the Wales a light sand between each coat. I will give it the wales a final coat later on today. In the attached pictures below you can see my work station (and working outlook) in the top right corner of the two photos. In between the coats of paint I continued with the assembly the 13 outstanding 4 pounder cannons. The gun carriages are now ready for painting with the fully completed cannon looking on, like an expected parent.

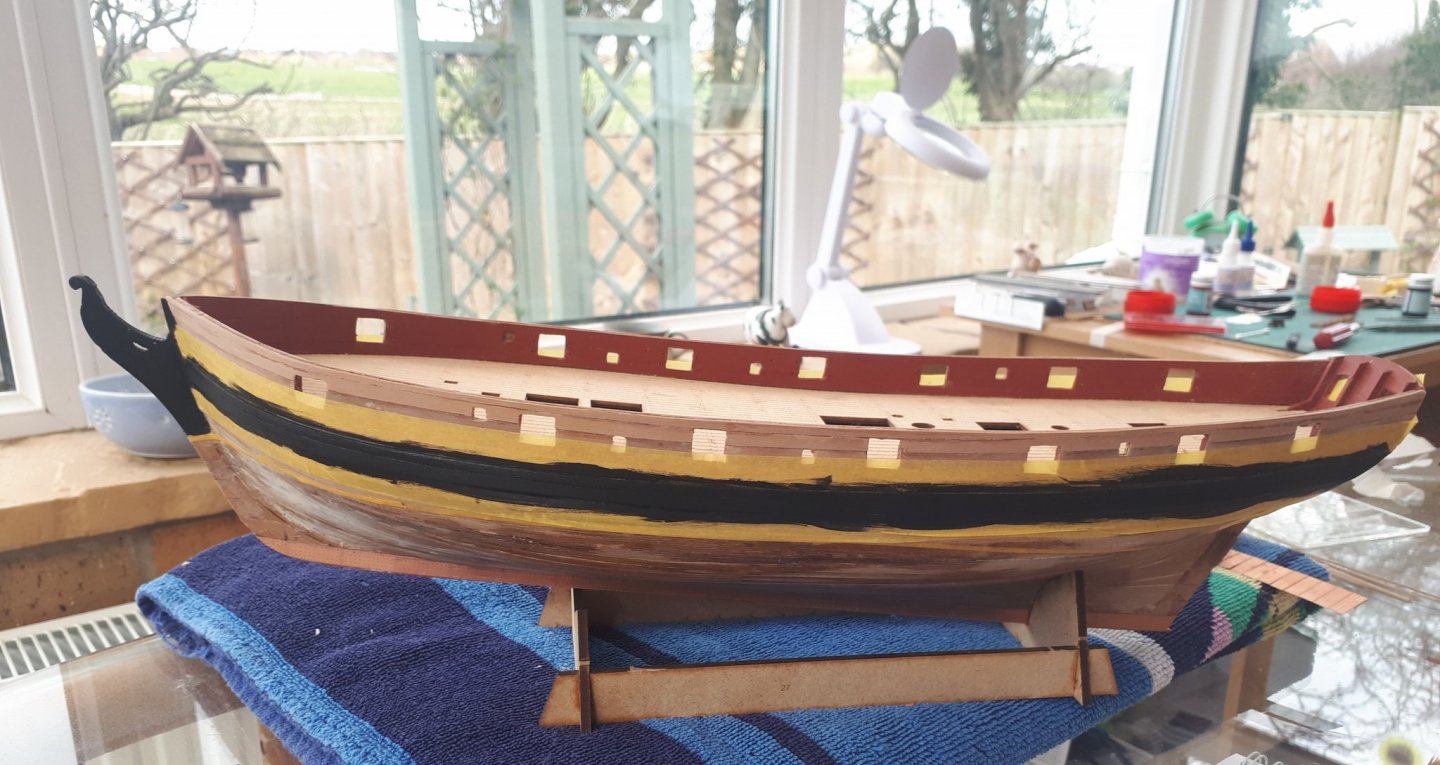

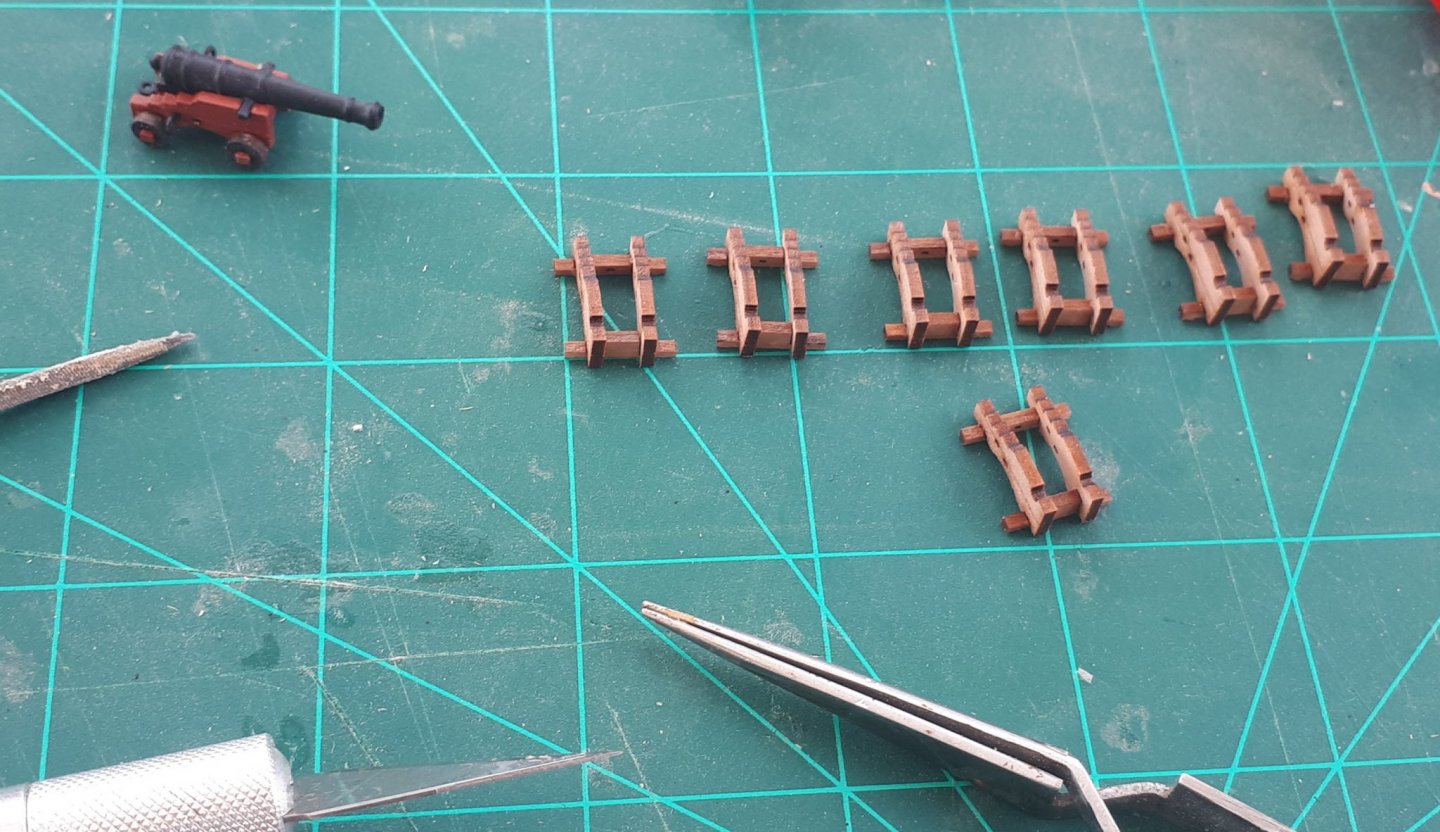
-
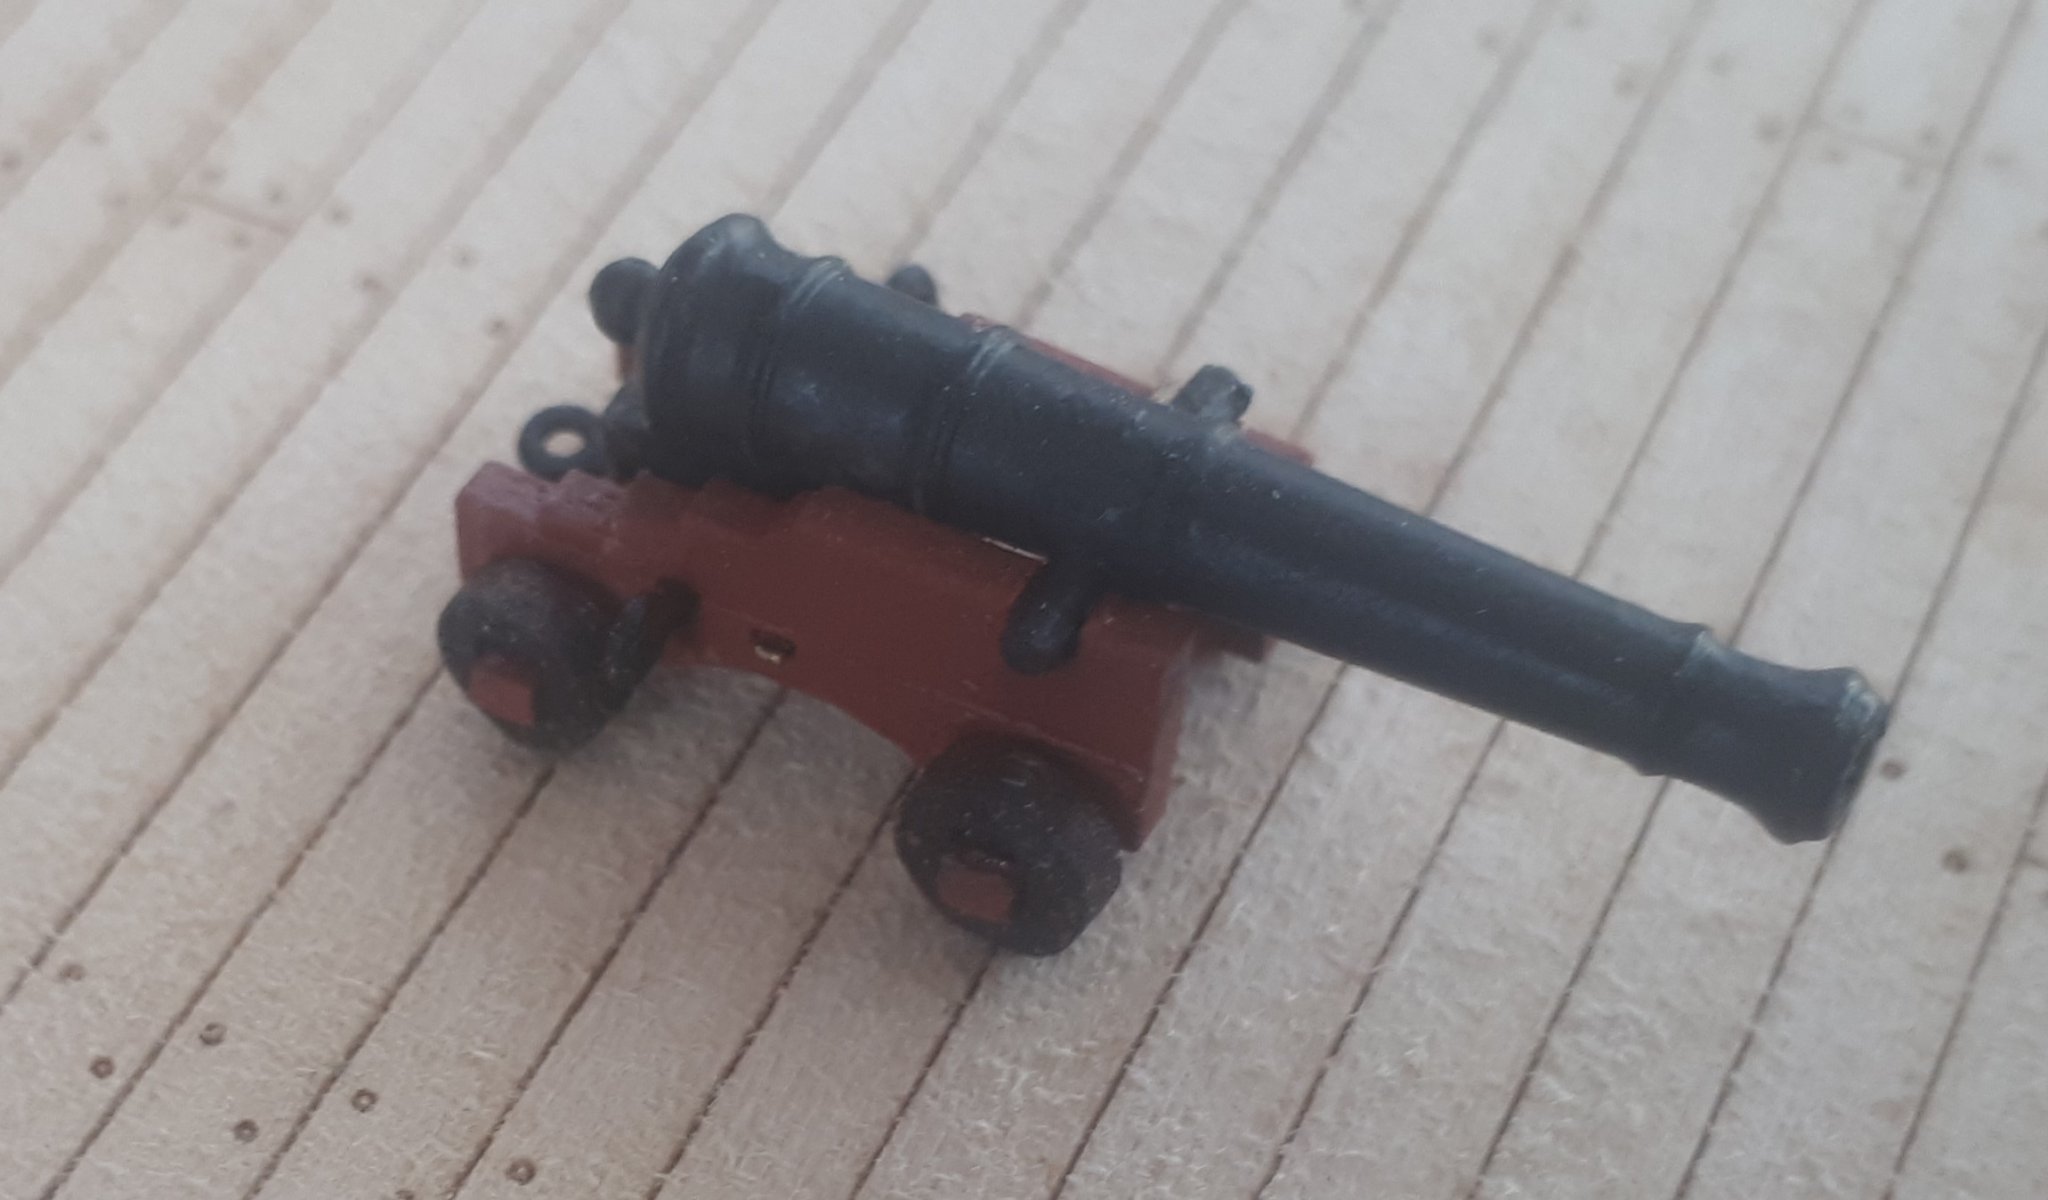
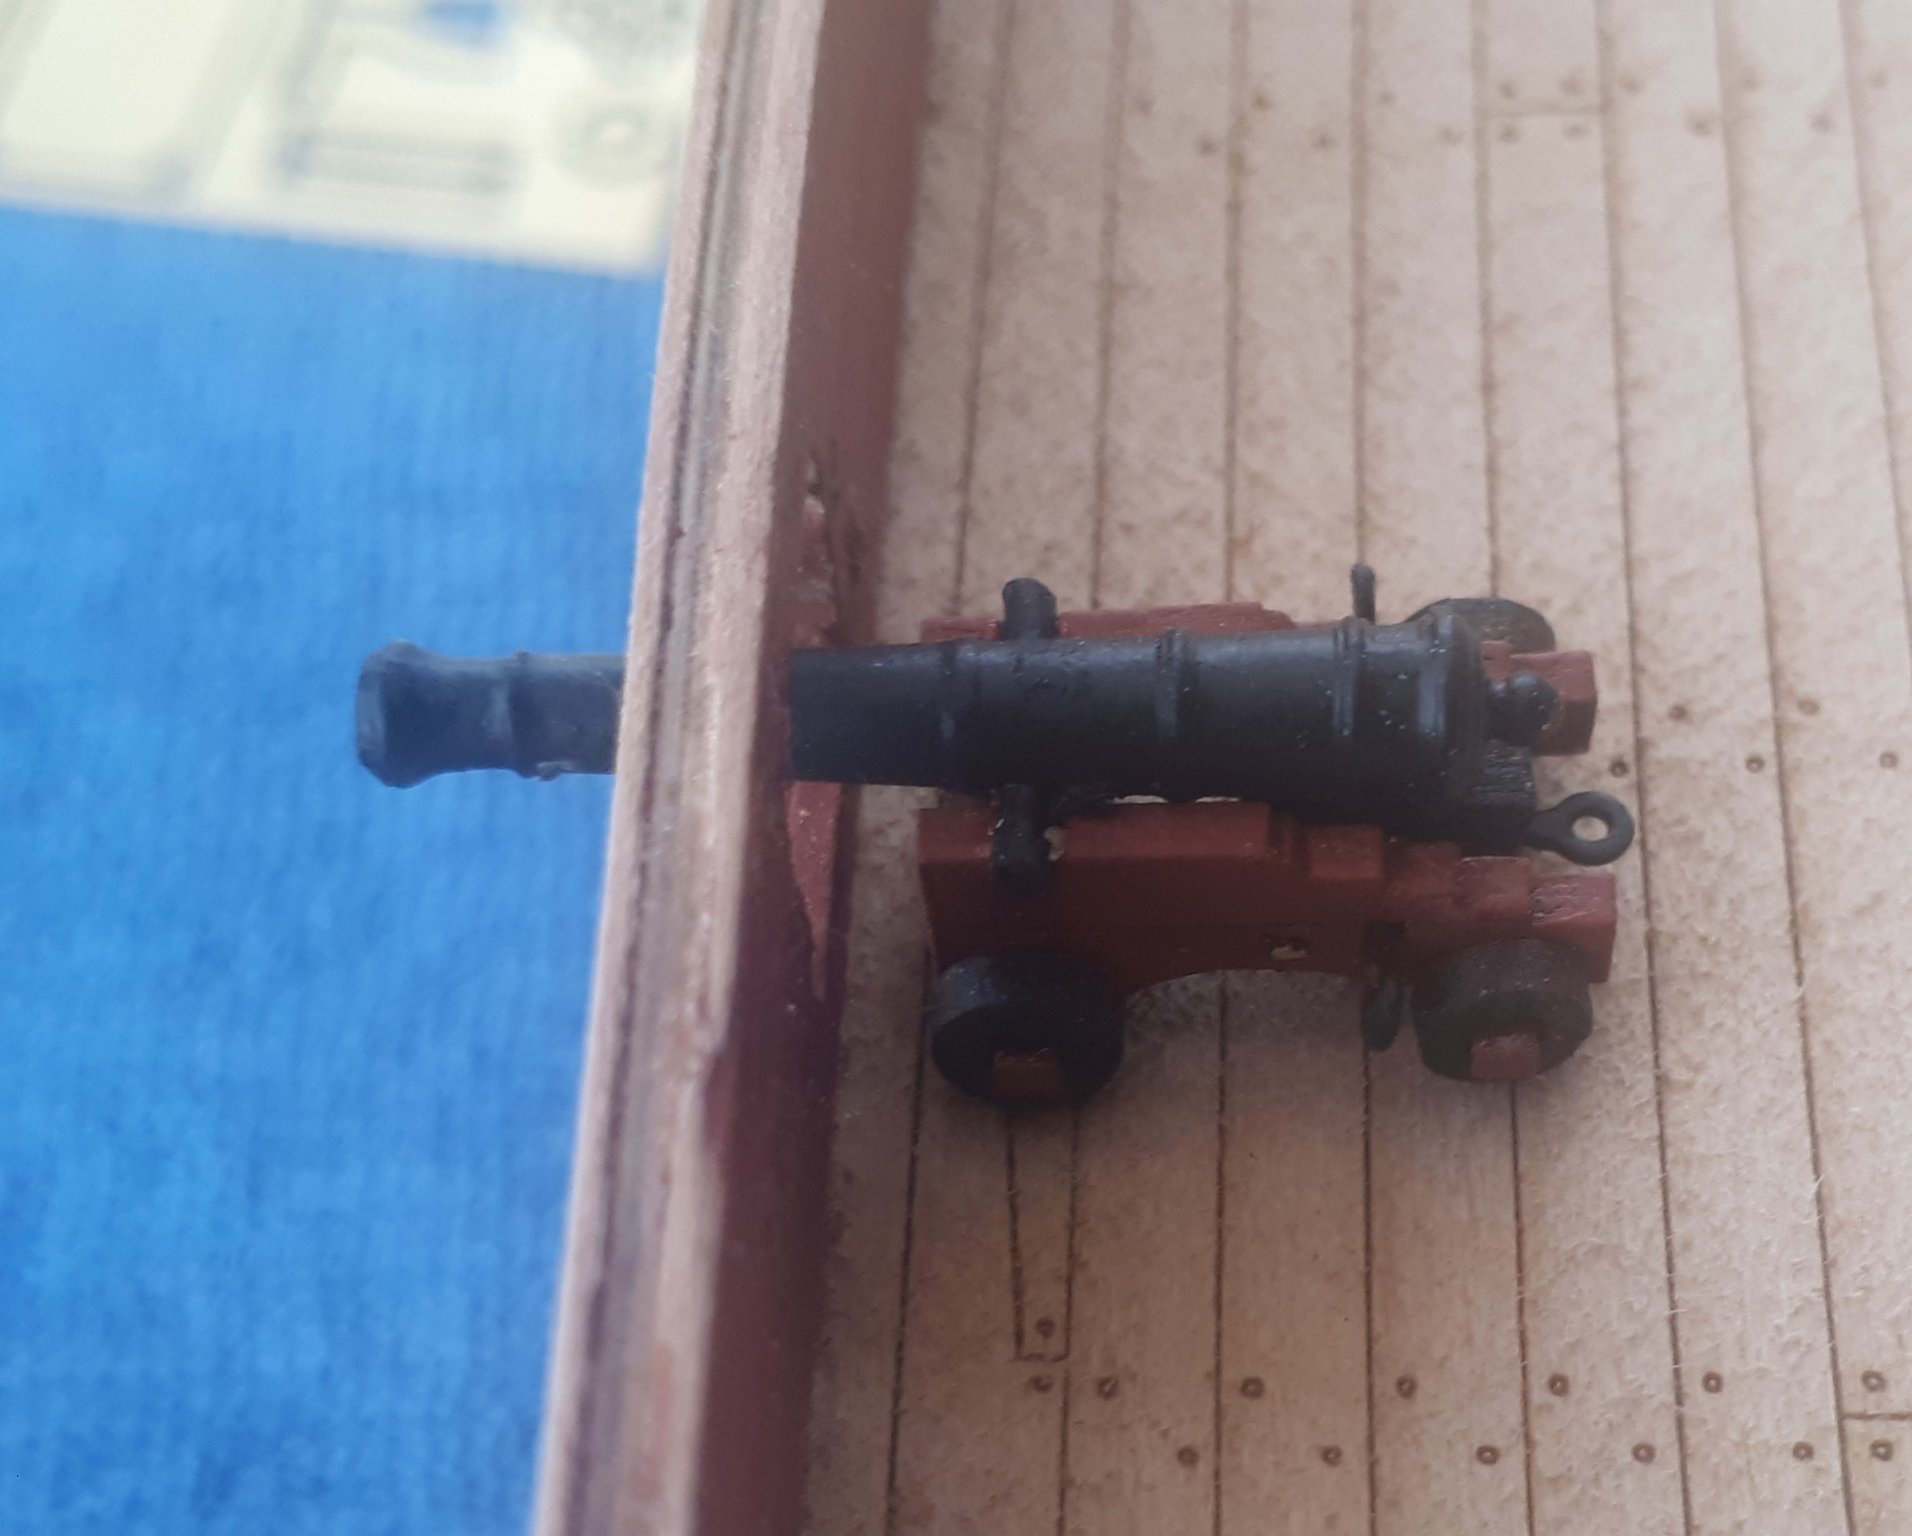
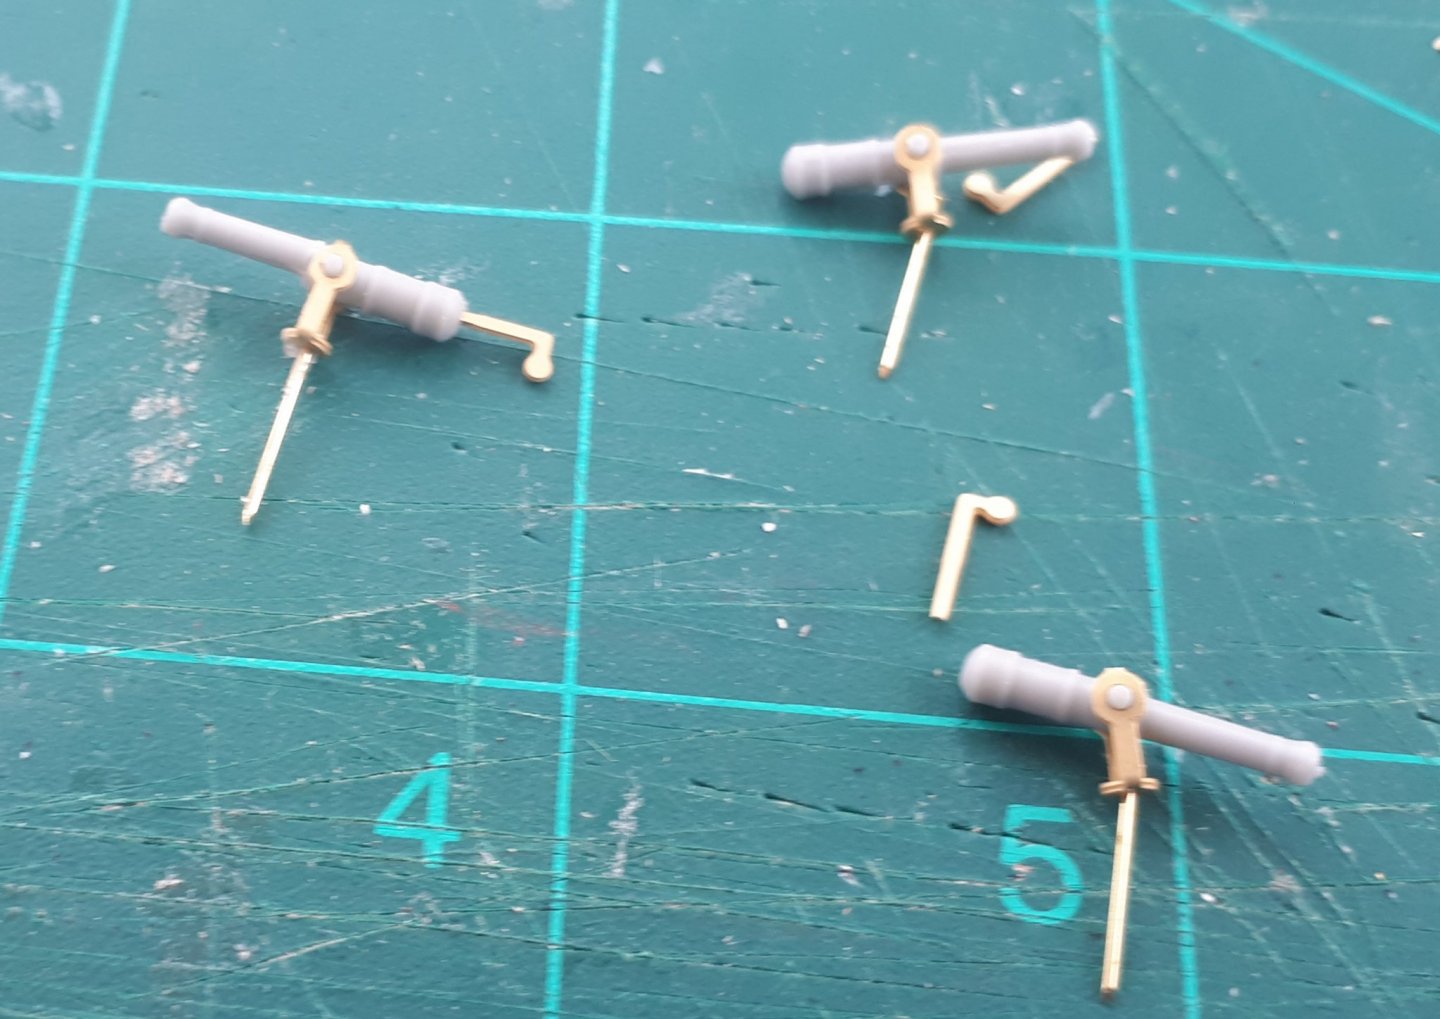
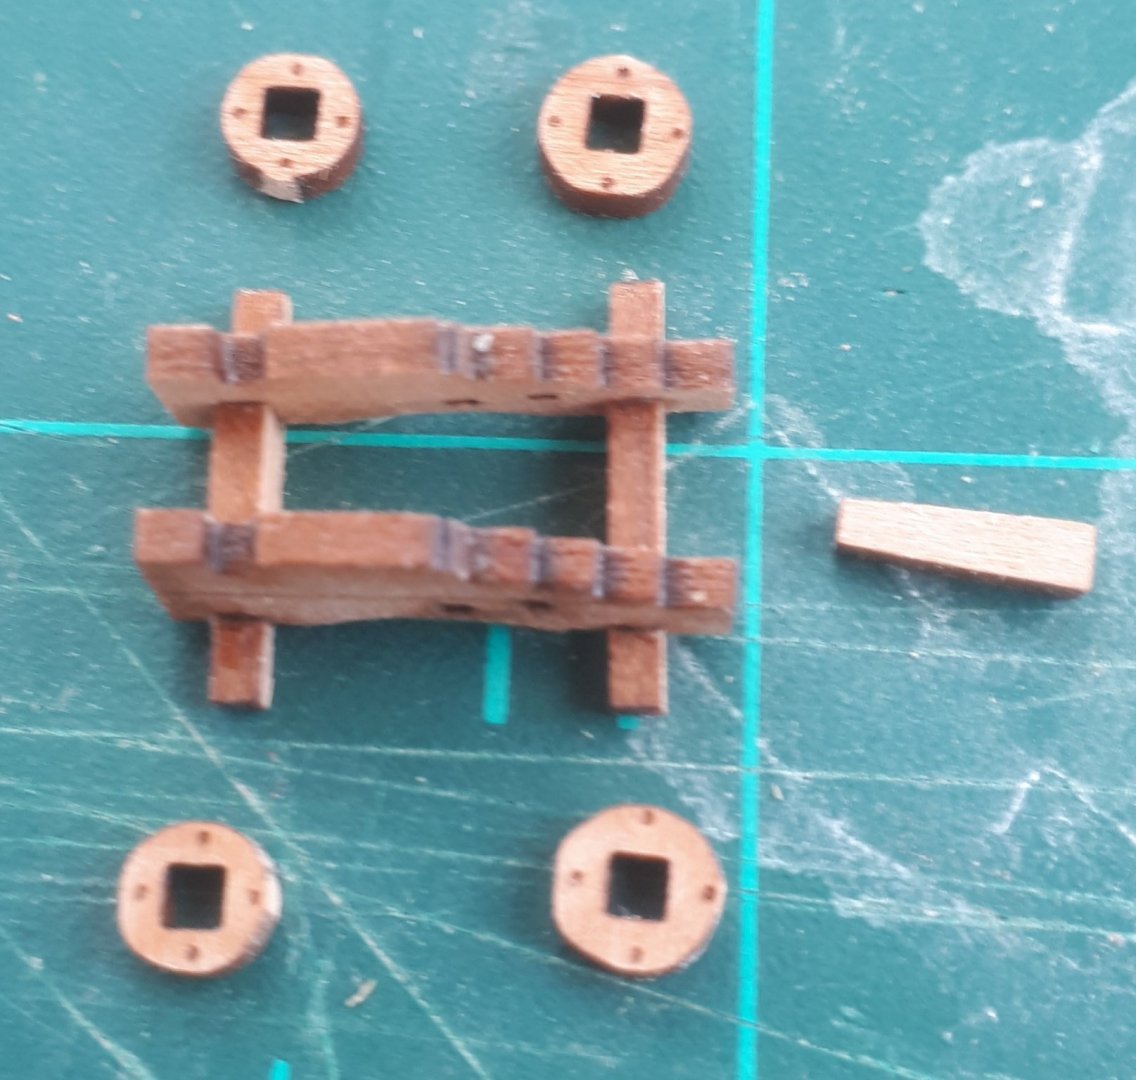
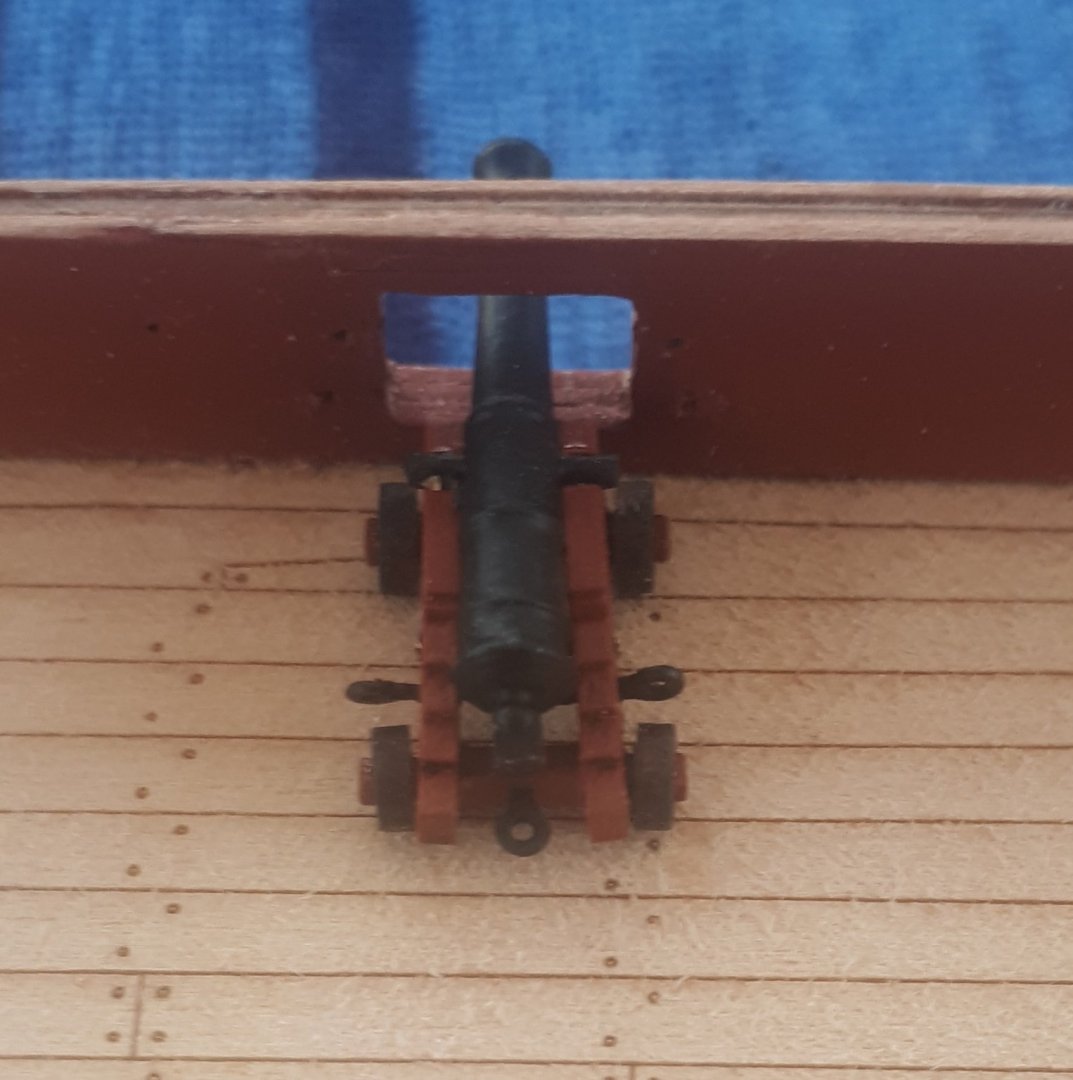
While waiting for the new copper plates to arrive I decided to build one of the 14 off 4 pounder cannons. I started with the standard dry fit. As everything was a good fit I went ahead and painted all the photo etched brass parts using my gun metal black paint along with one of the cannons. I applied a few light coats of paint and then built the first cannon. I was very happy with the end result and it looks really nice when positioned at a gun port, sitting nicely in the centre of the gun port opening.


.jpg.5f351f8f1d7900667015f7a99b88bb37.jpg)
.jpg.99cb75ca06af0d7206a7a9e1c37e914f.jpg)