Glenn-UK
-
Posts
2,630 -
Joined
-
Last visited
Content Type
Profiles
Forums
Gallery
Events
Everything posted by Glenn-UK
-
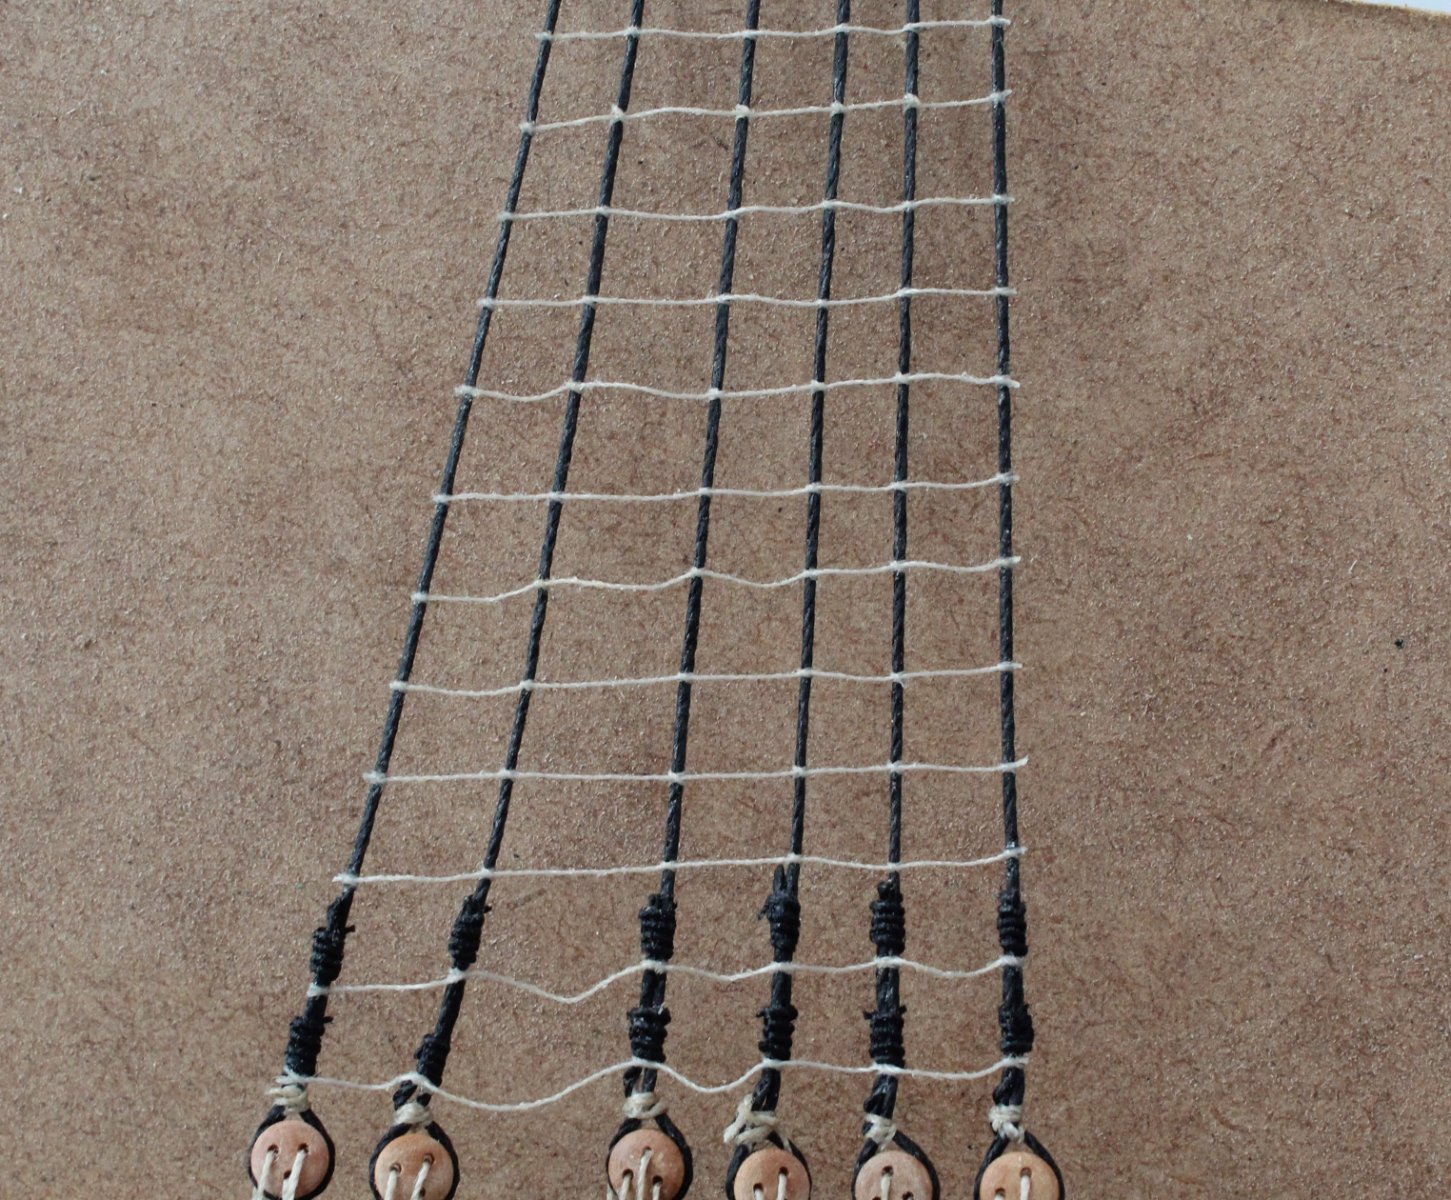
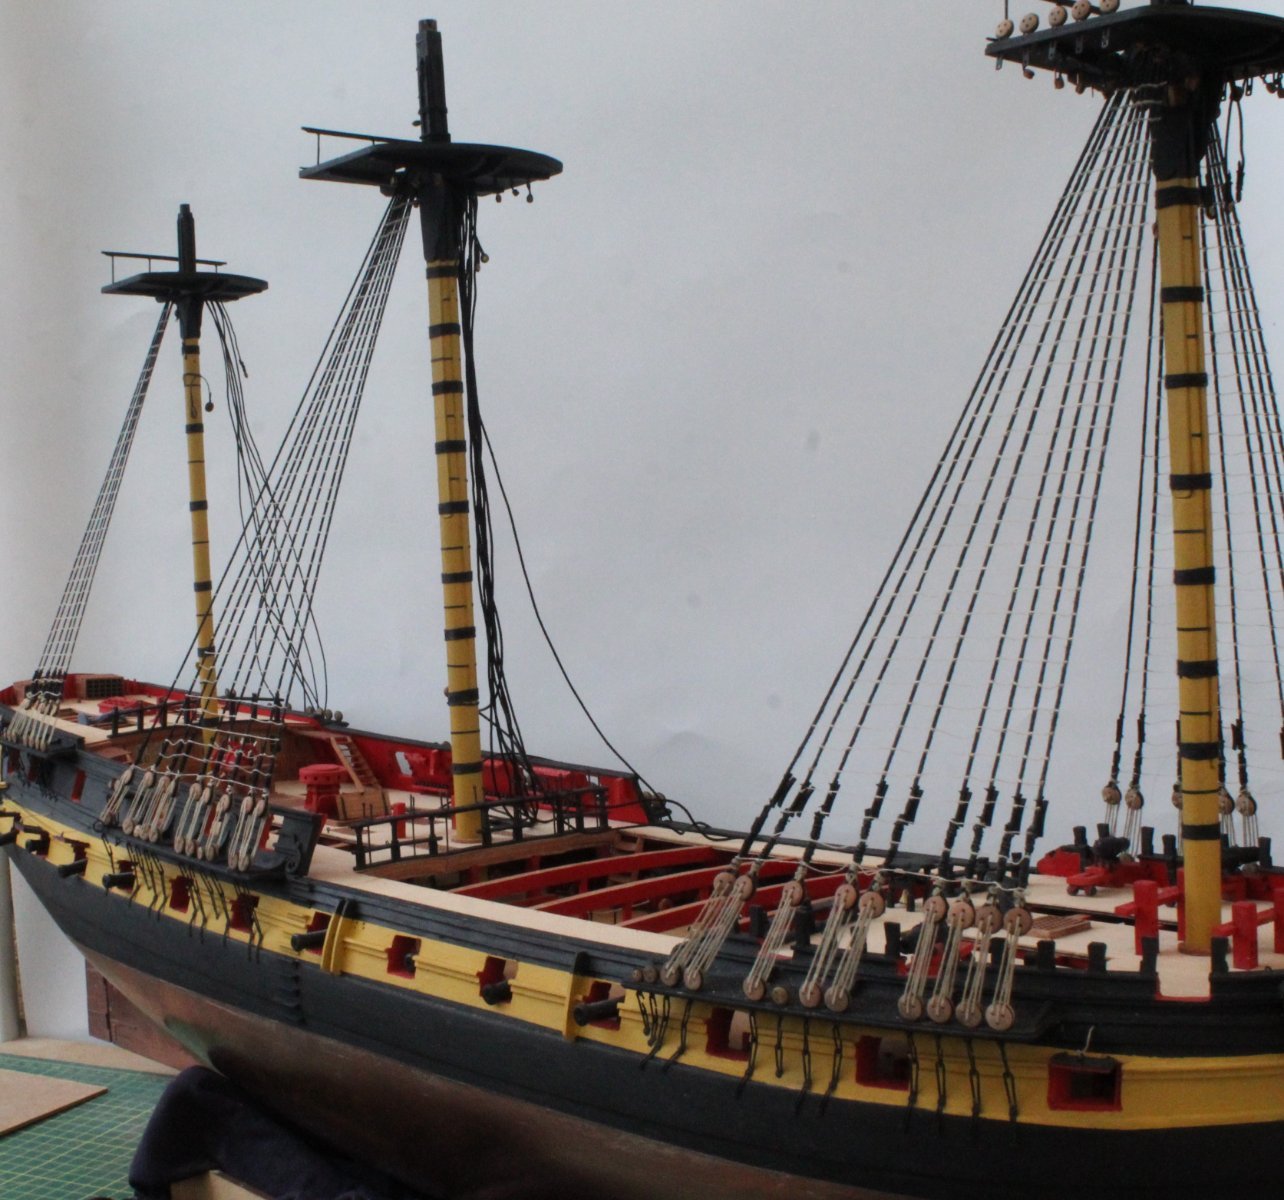
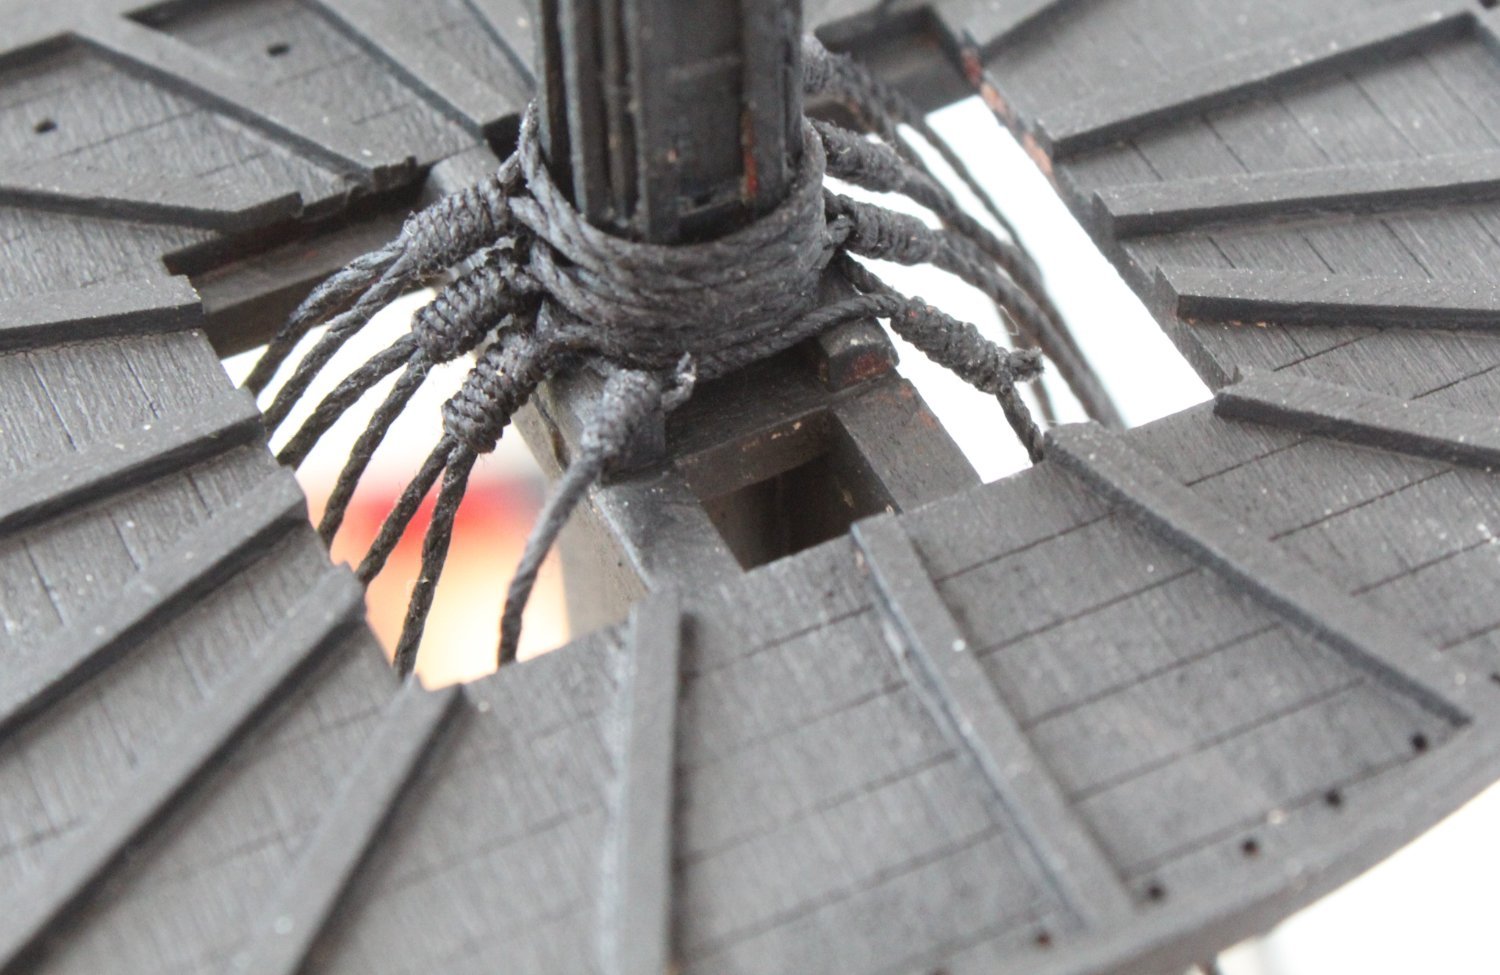
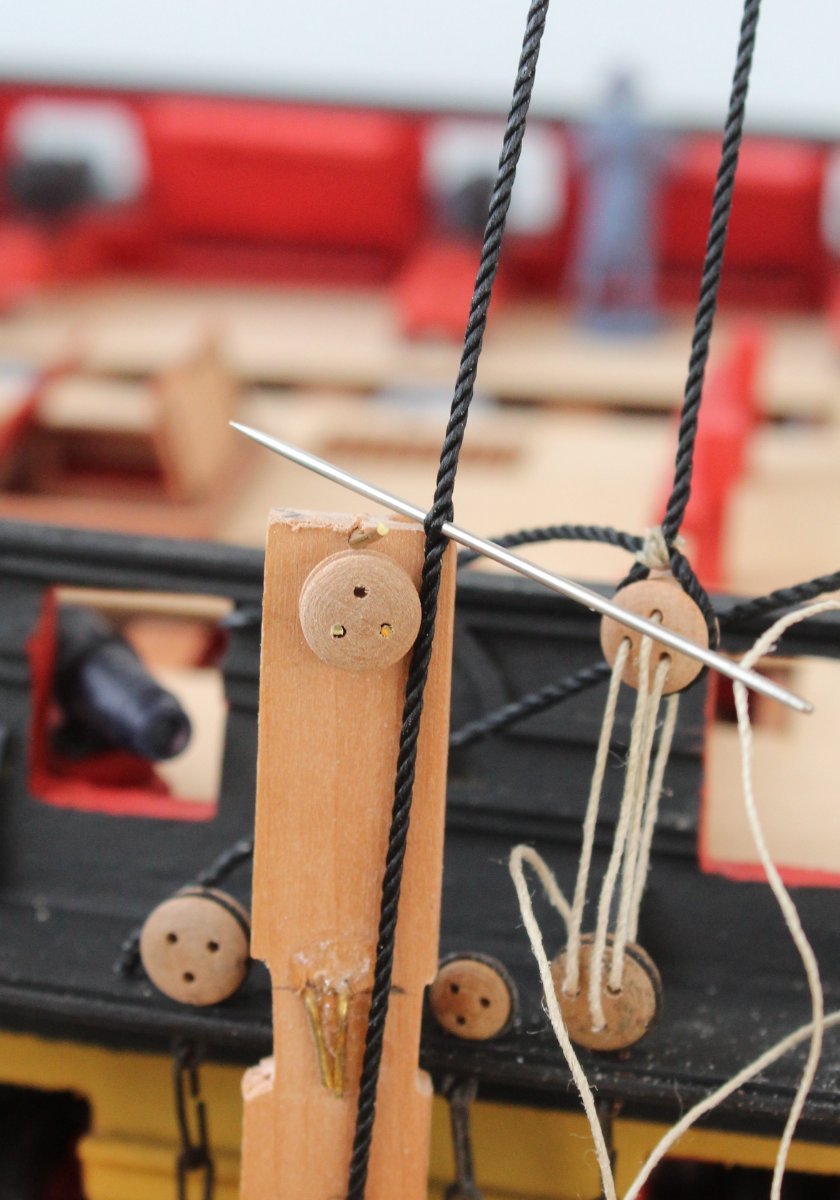
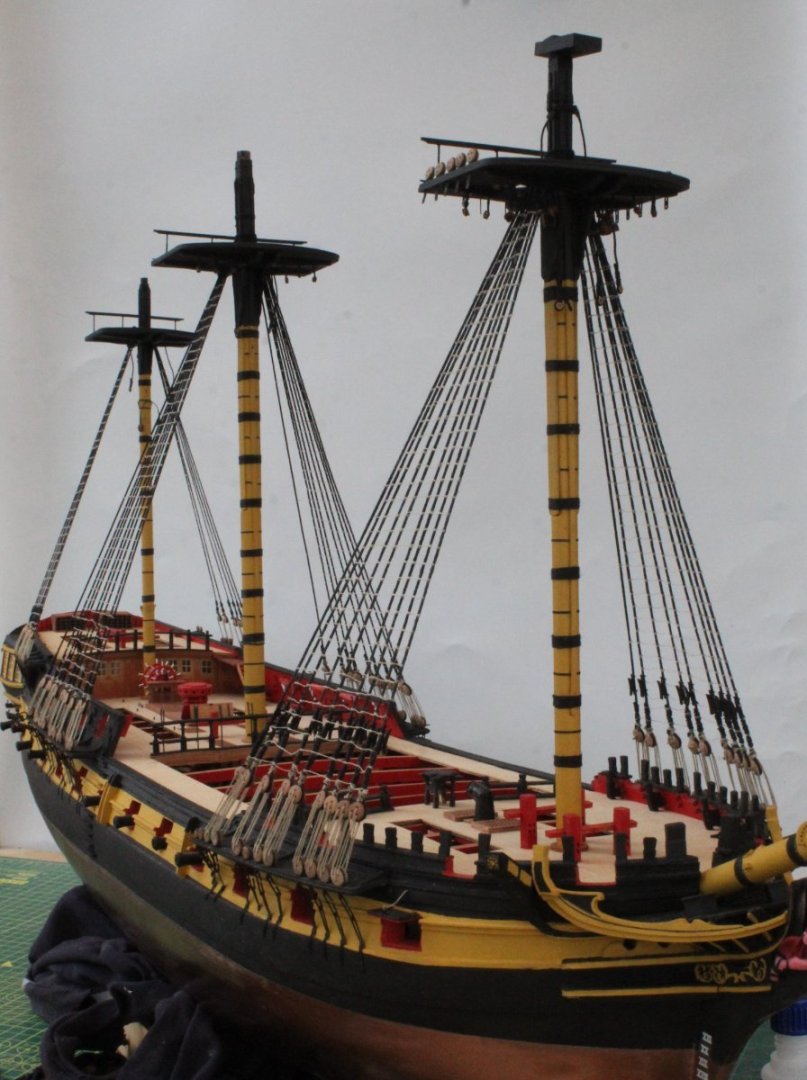
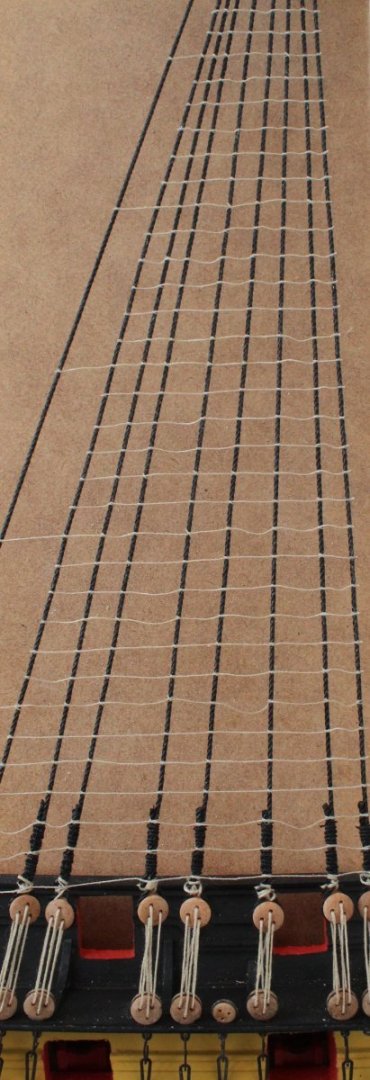
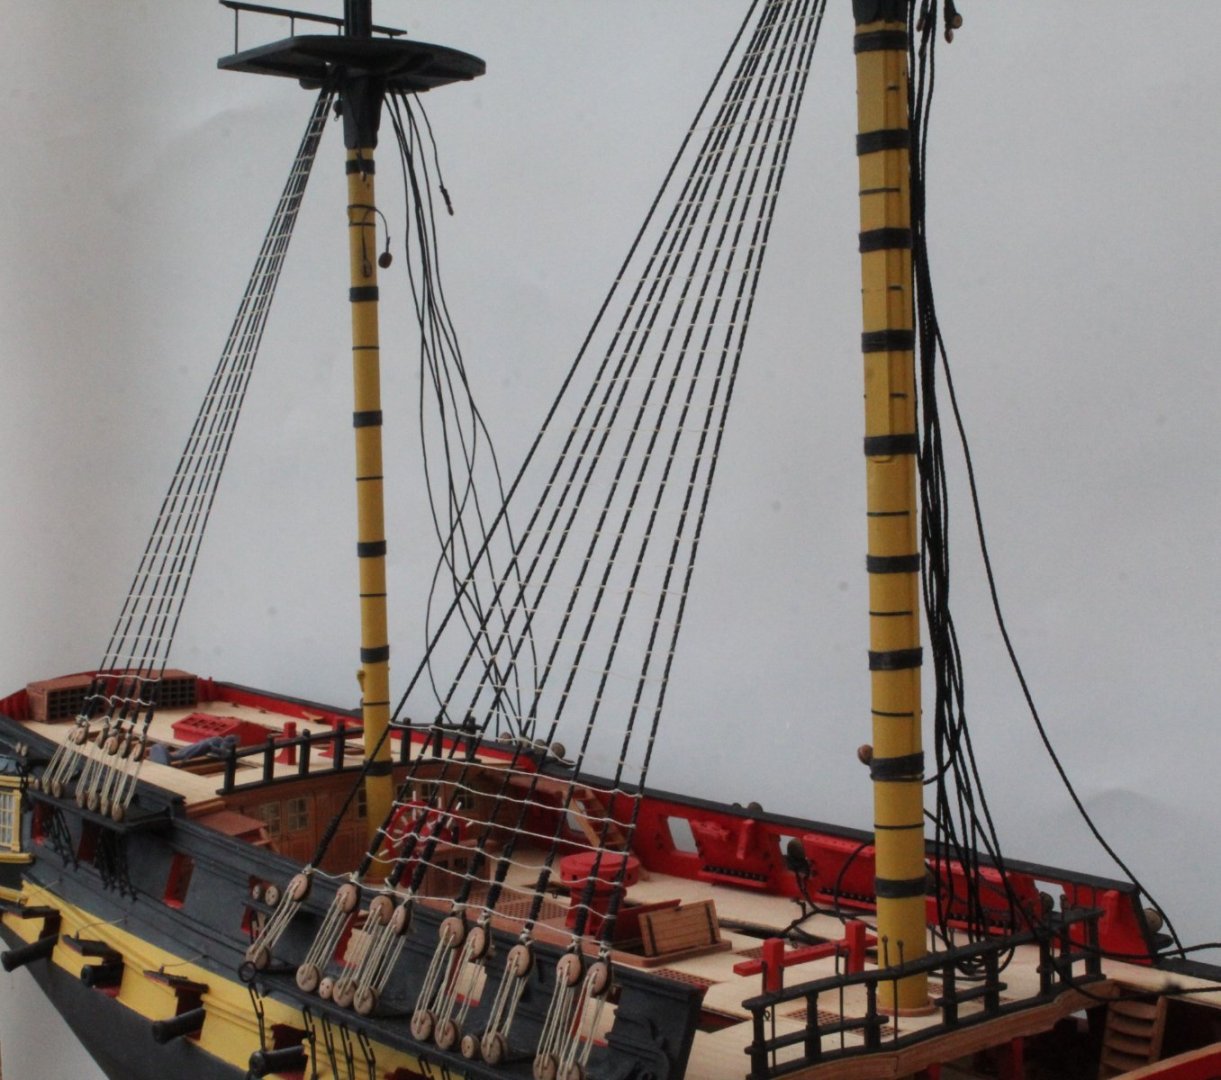
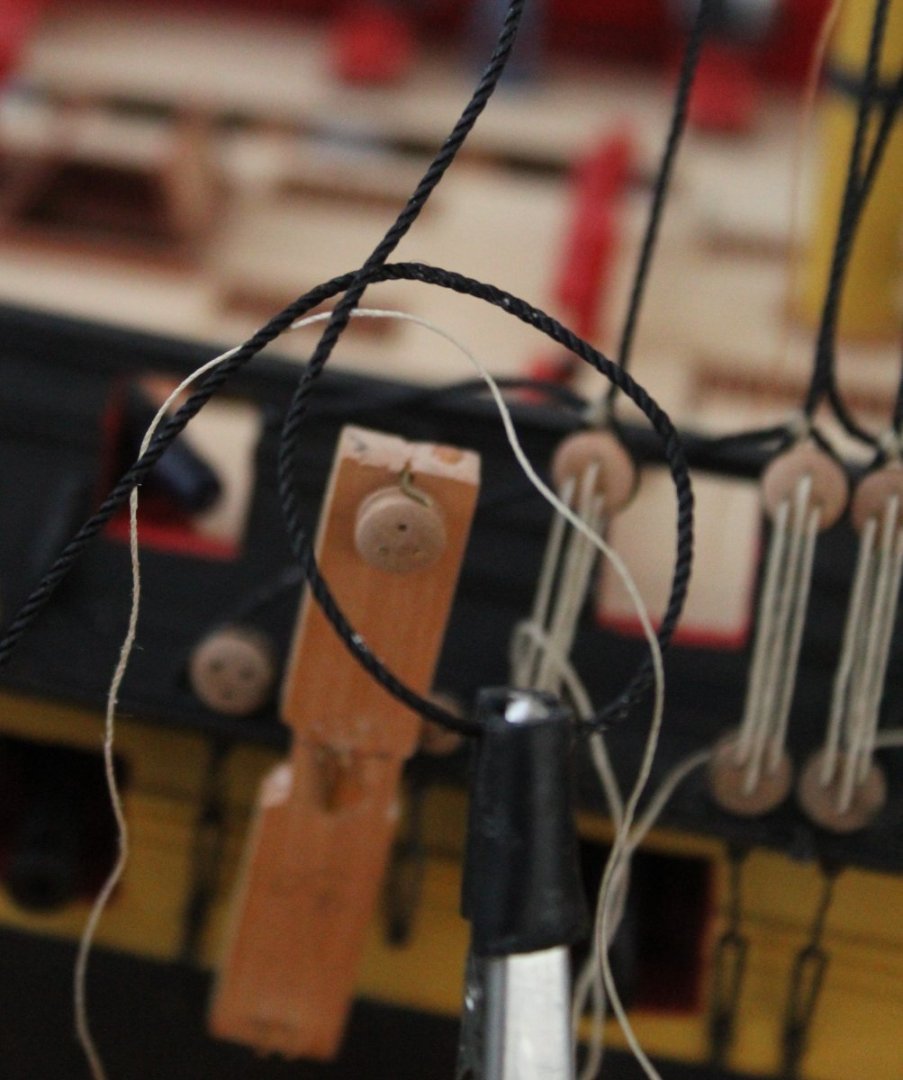
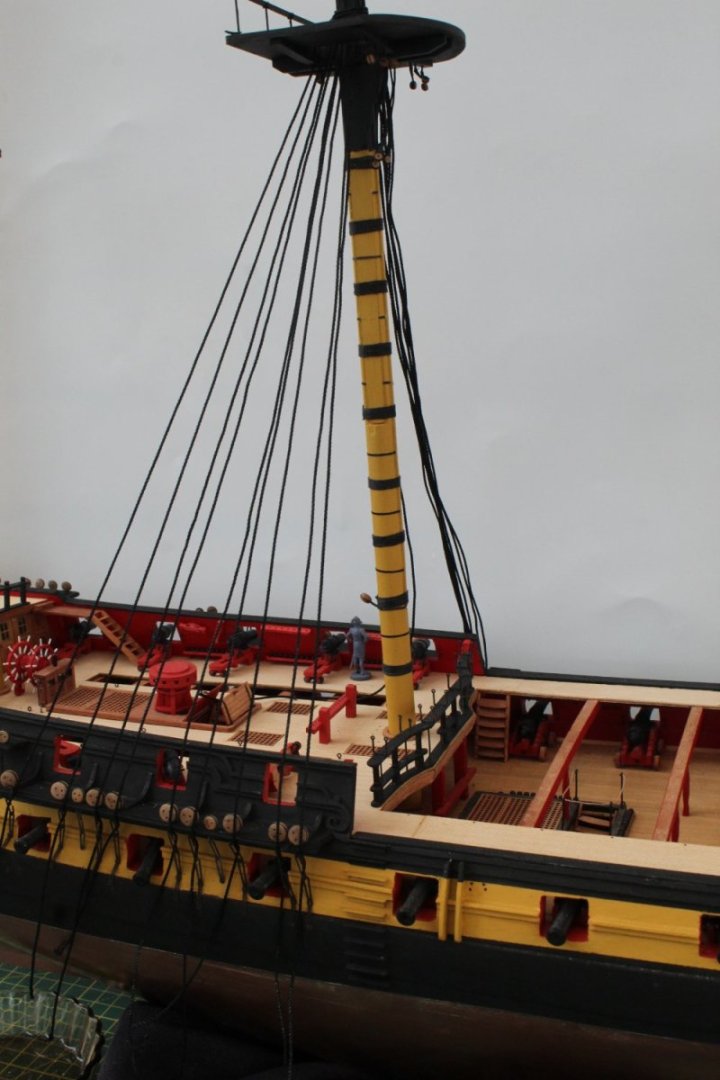
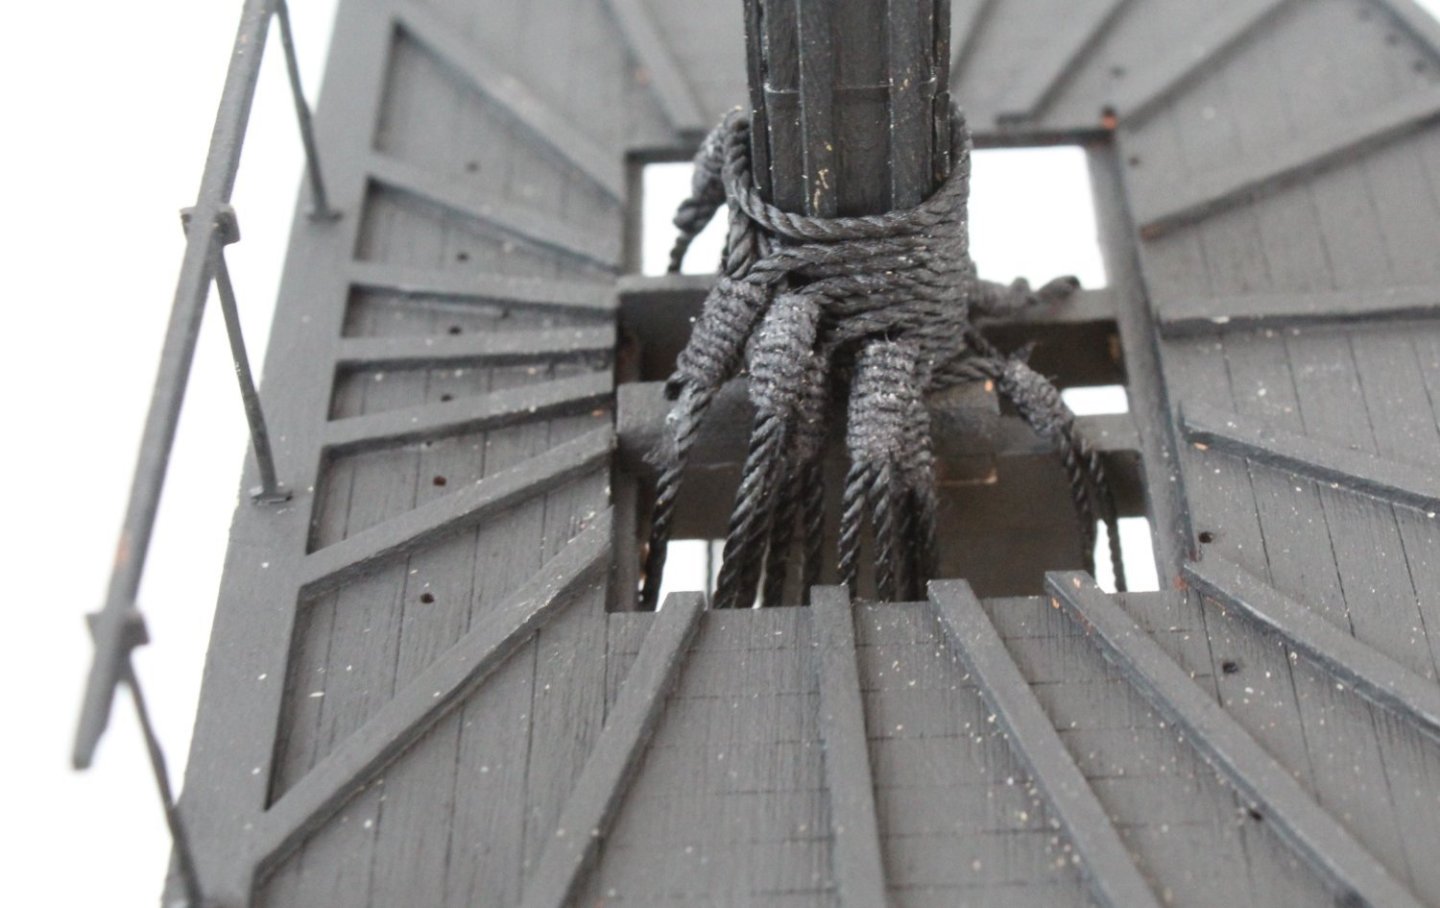
 Lower Masts Shrouds and Ratlines Completed Today I tied the final clove hitch knot required for all the lower masts ratlines. I feel like a huge weight have now been lifted of my shoulders now this task is complete. I am very happy with how the shrouds and ratlines look apart from the left-hand side main mast which has a slight kink on the lower lead edge section. I do not have the inclination or patience to remove the ratlines and redo as I suspect I will be the only one to see the defect once the model is complete. My next job is one of my least favourite rigged tasks which is to add the futtock staves and catharpins to each of the lower masts. I have been contemplating how to go about this to make it easier to complete. I have an idea with regards to adding the futtock staves which, if successful, should make it a relatively painless and simple task to complete. I also have a couple of ideas with how best to fit the catharpins which I will experiment with before trying to add them to the Indy. I have added a few photo's of the current build status.
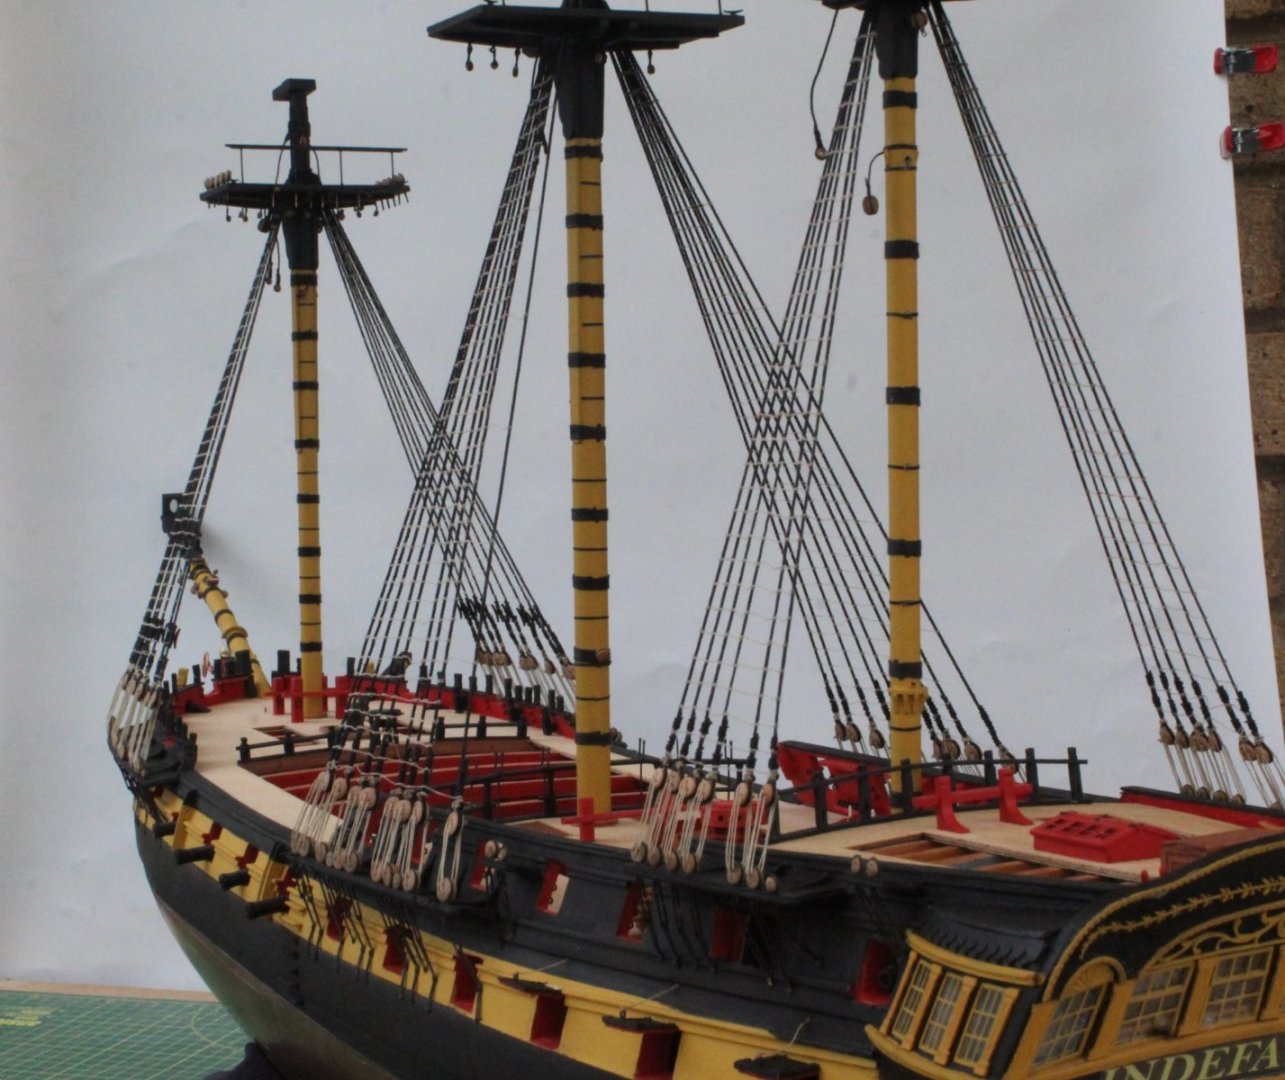
-
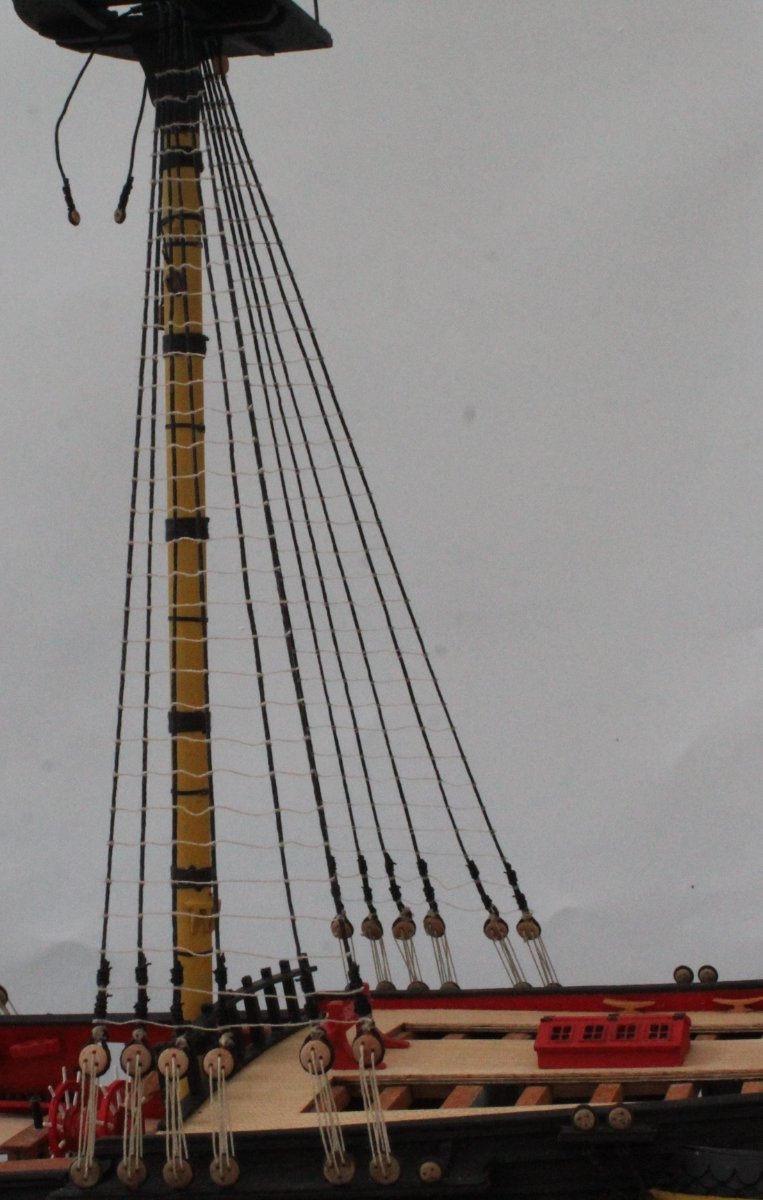
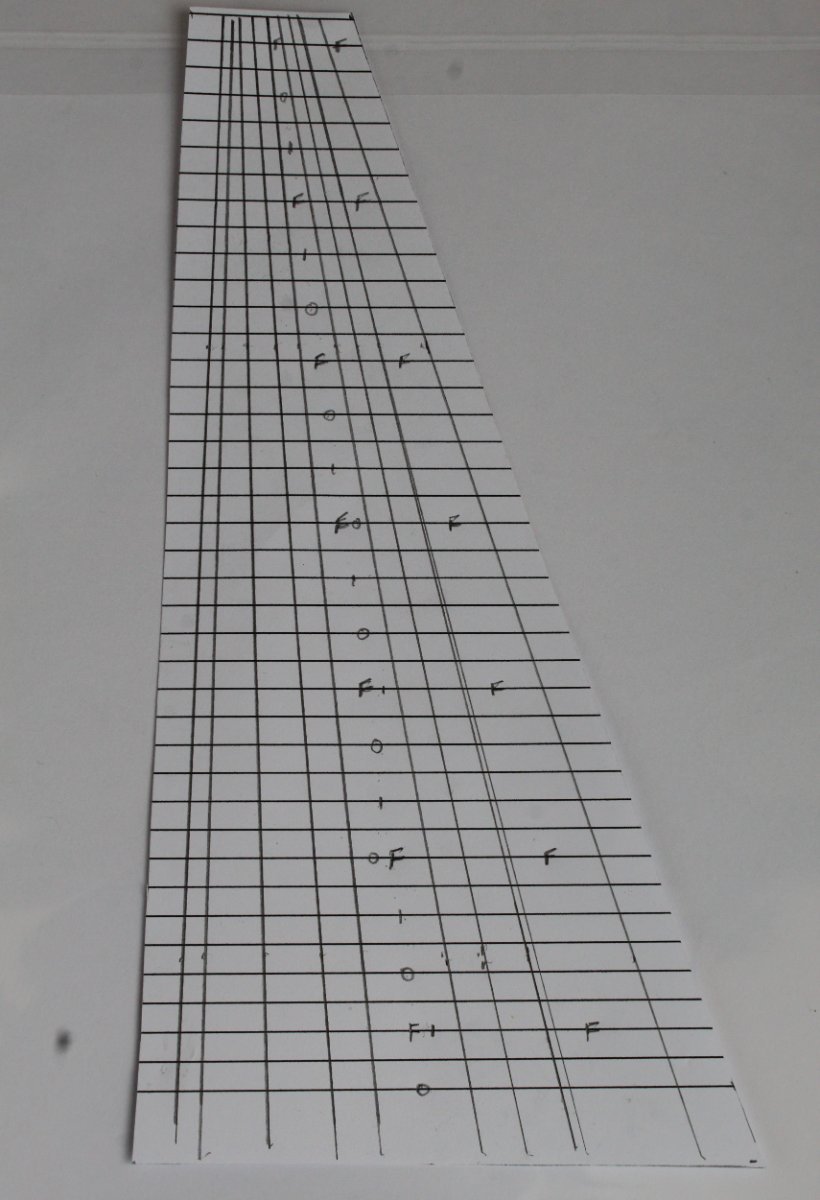
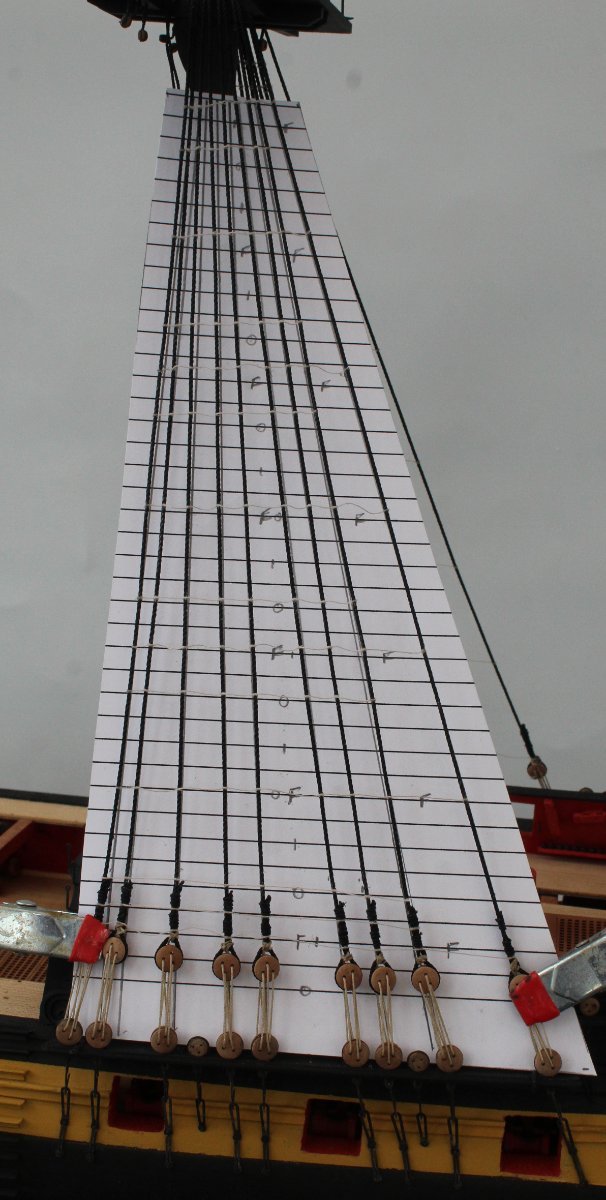
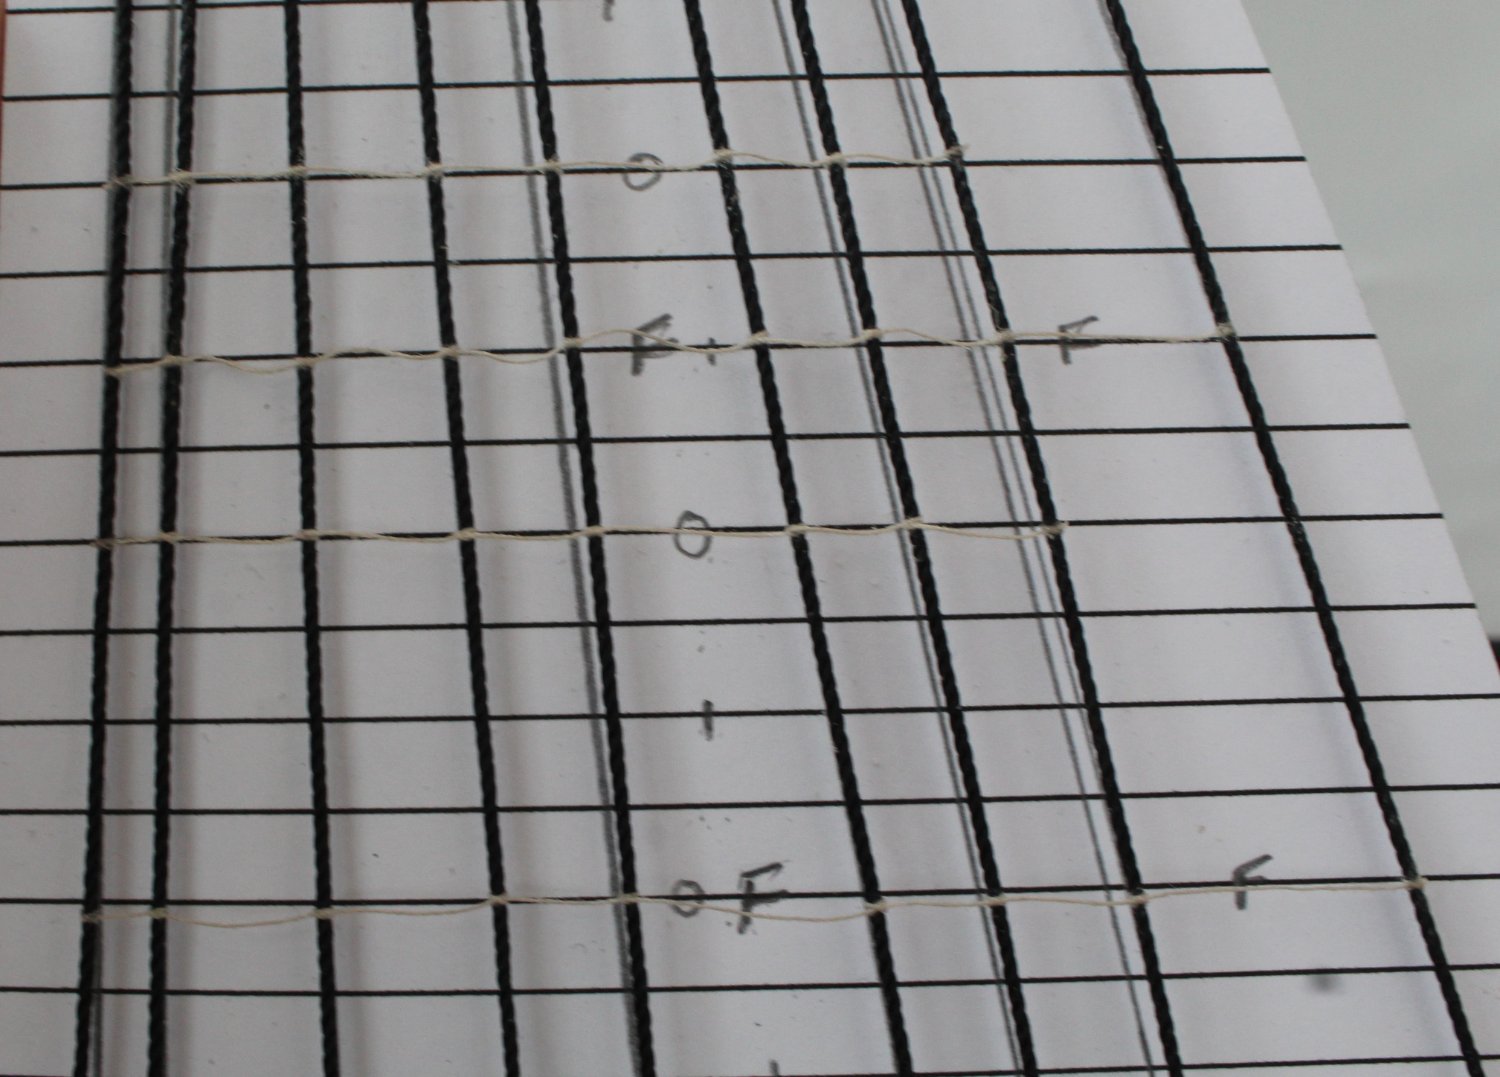
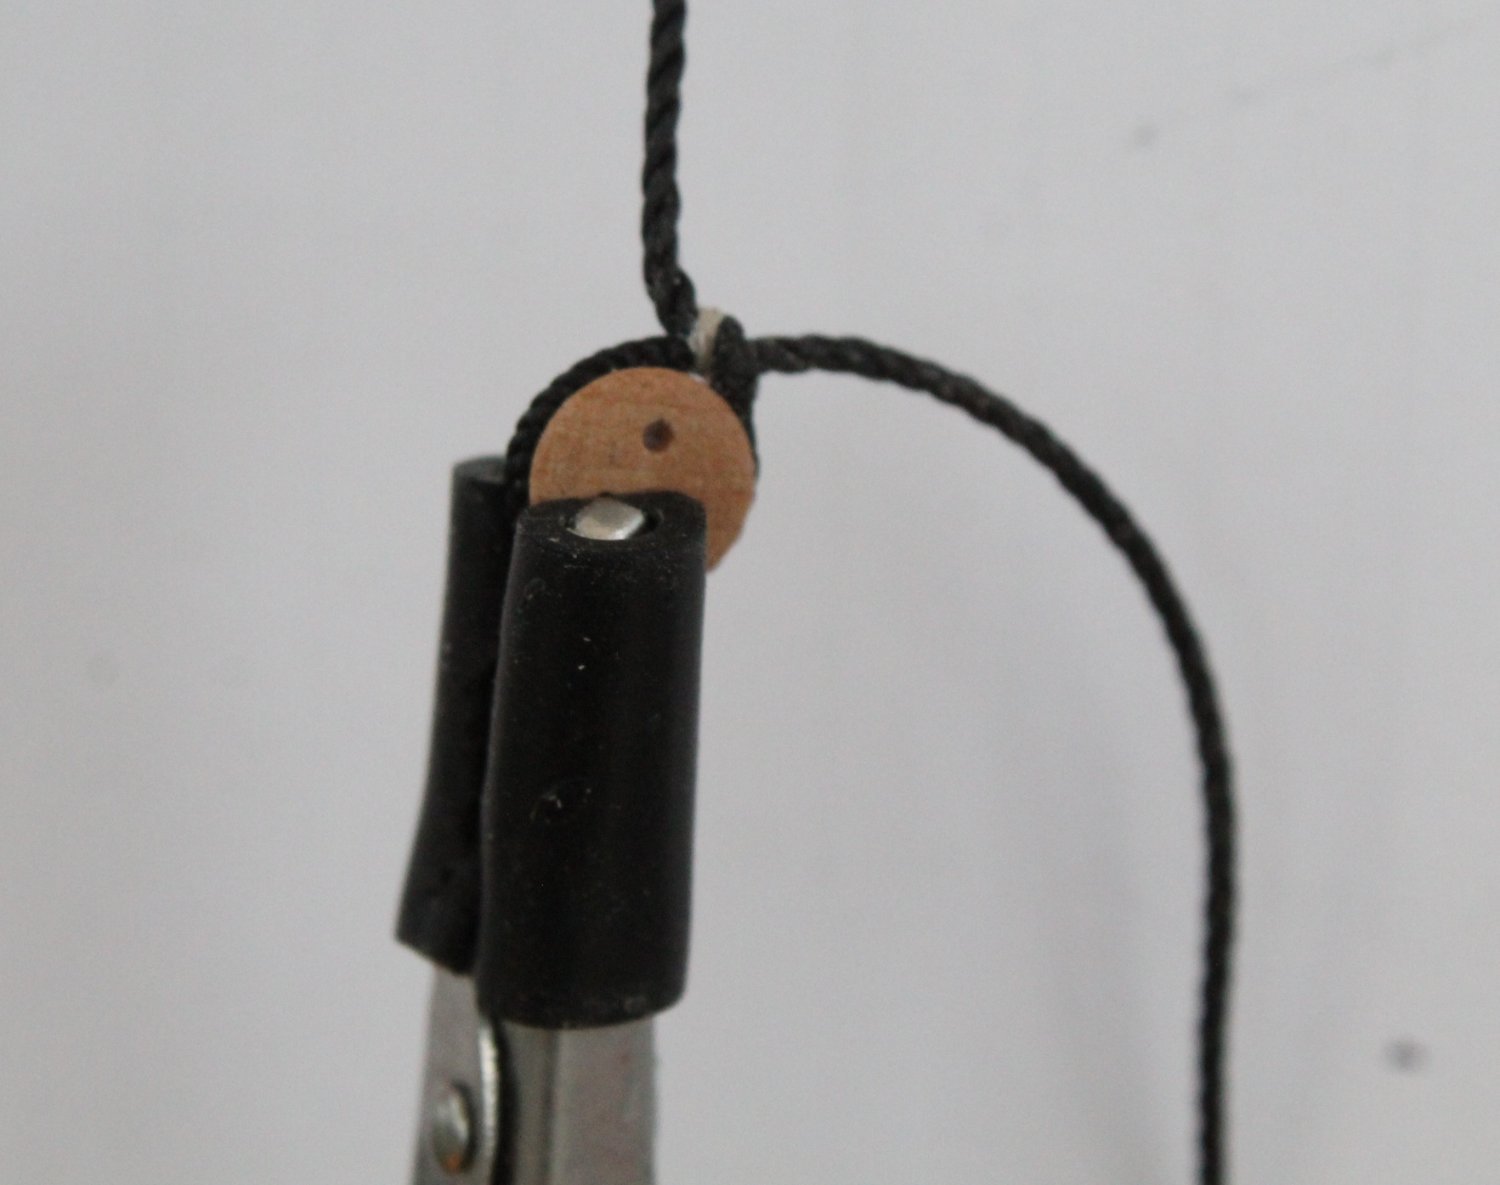
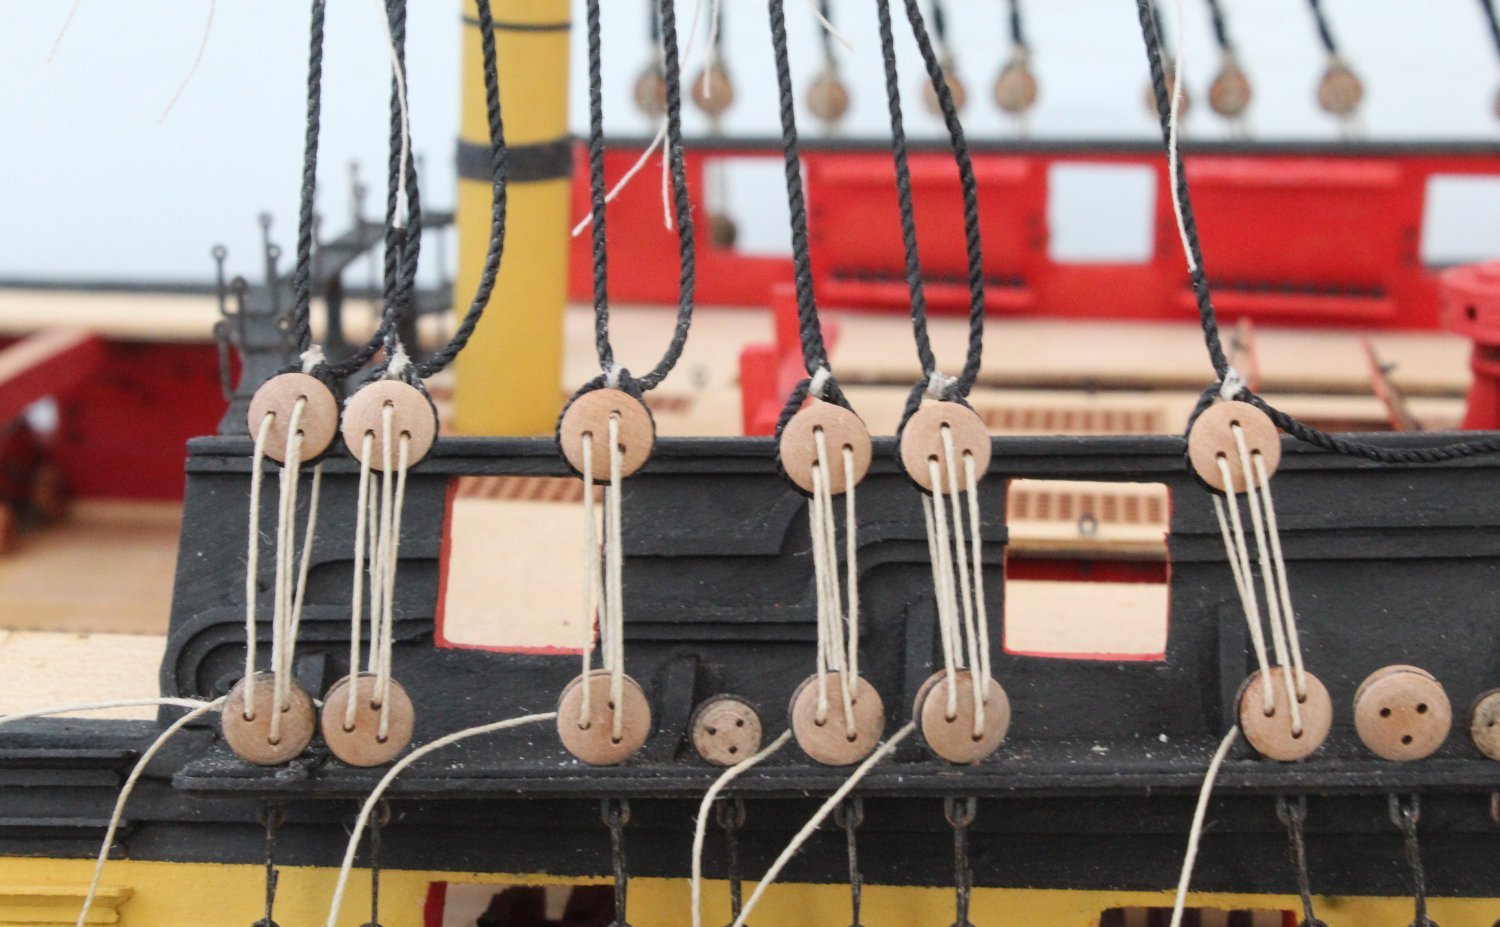
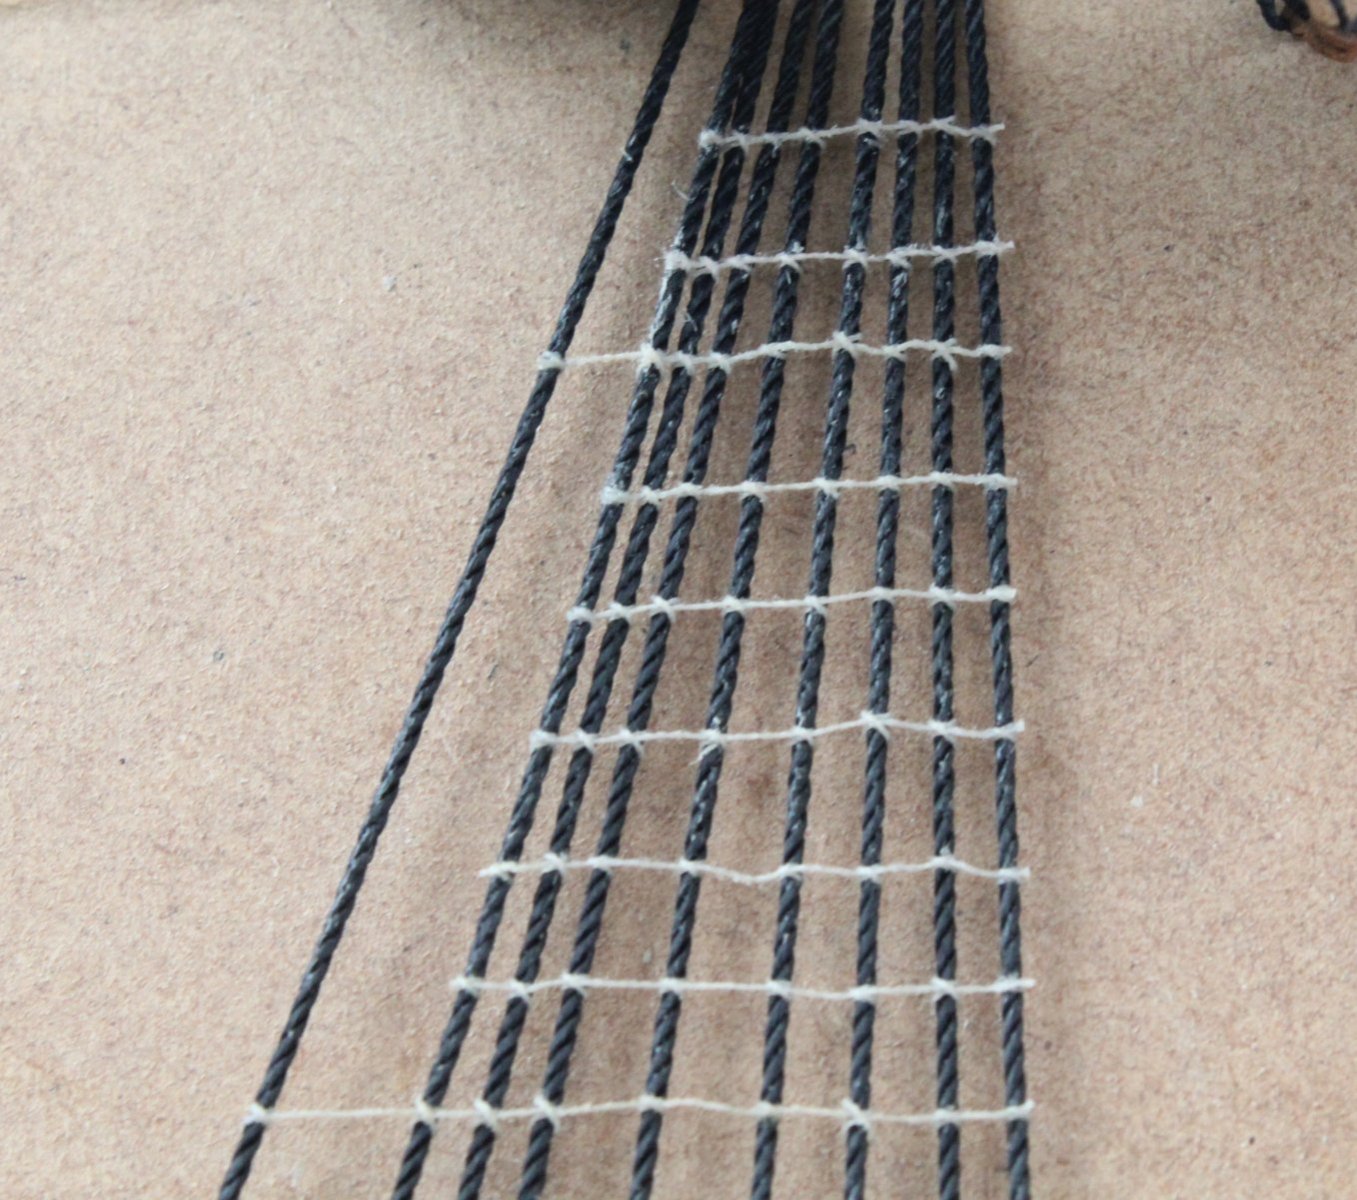
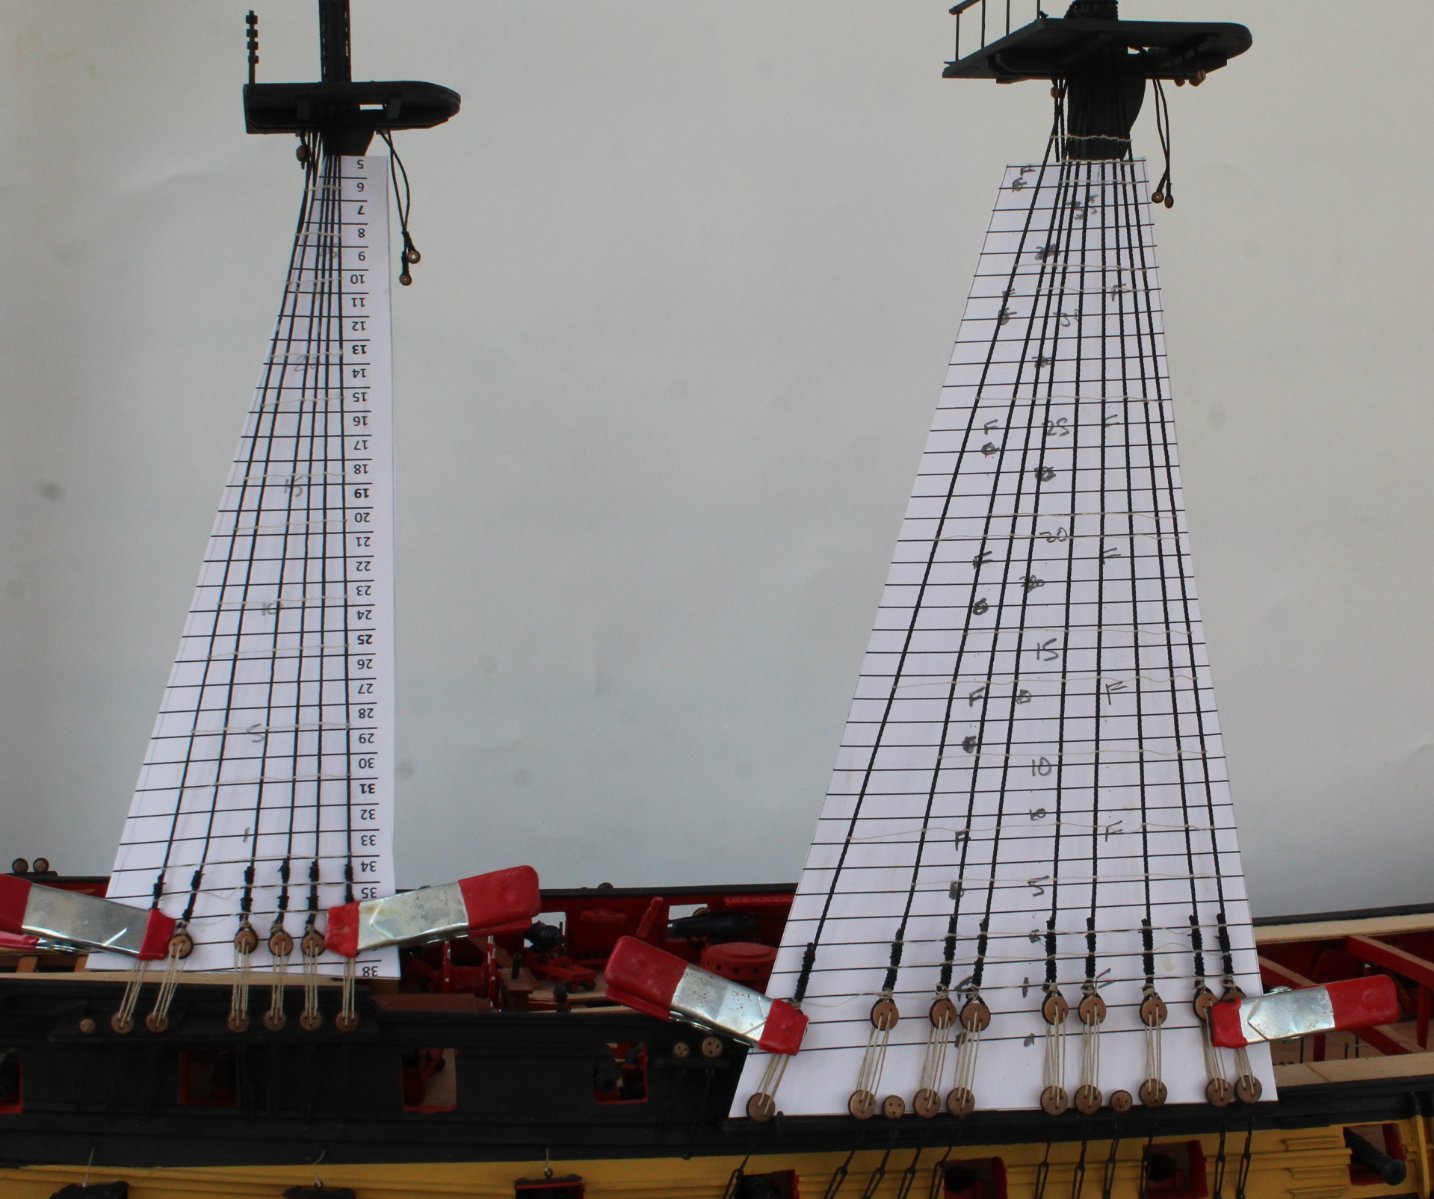
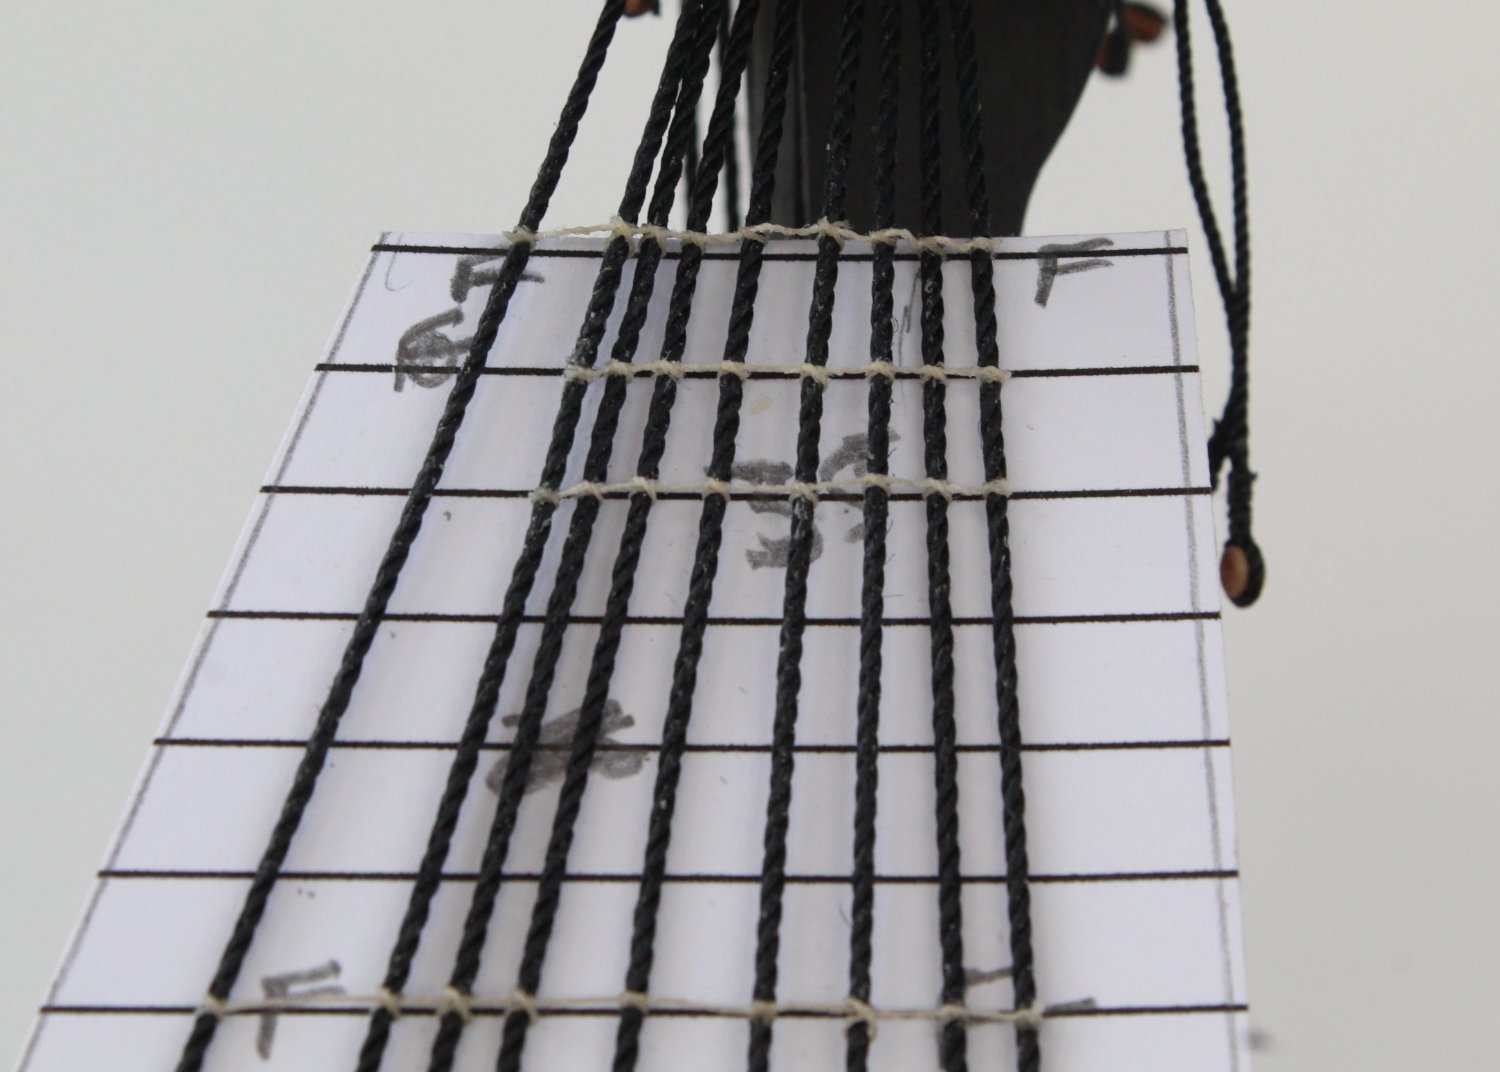
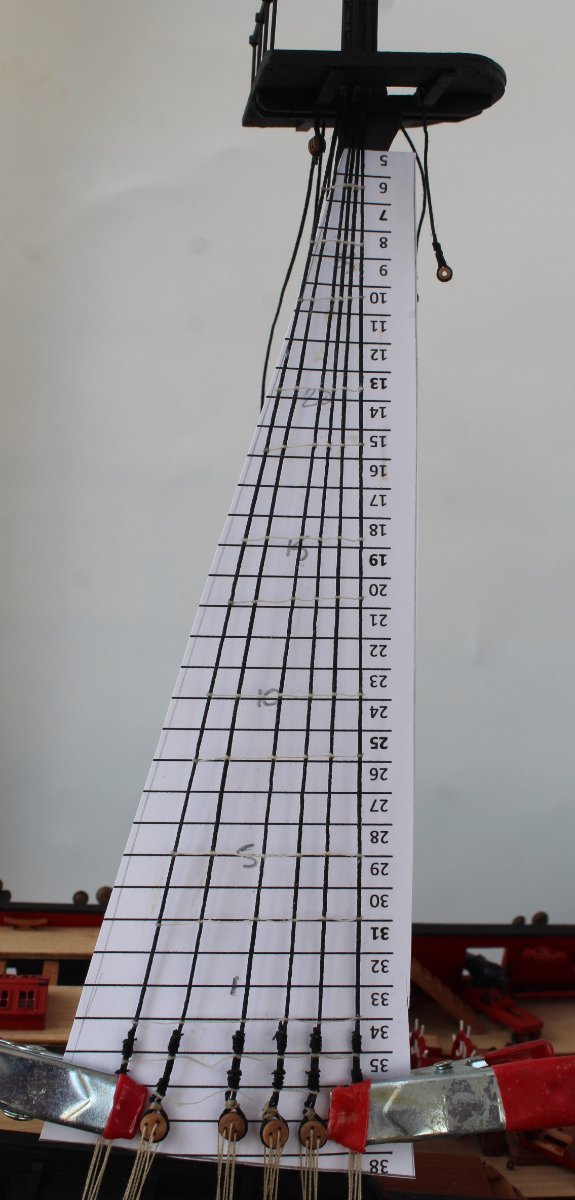
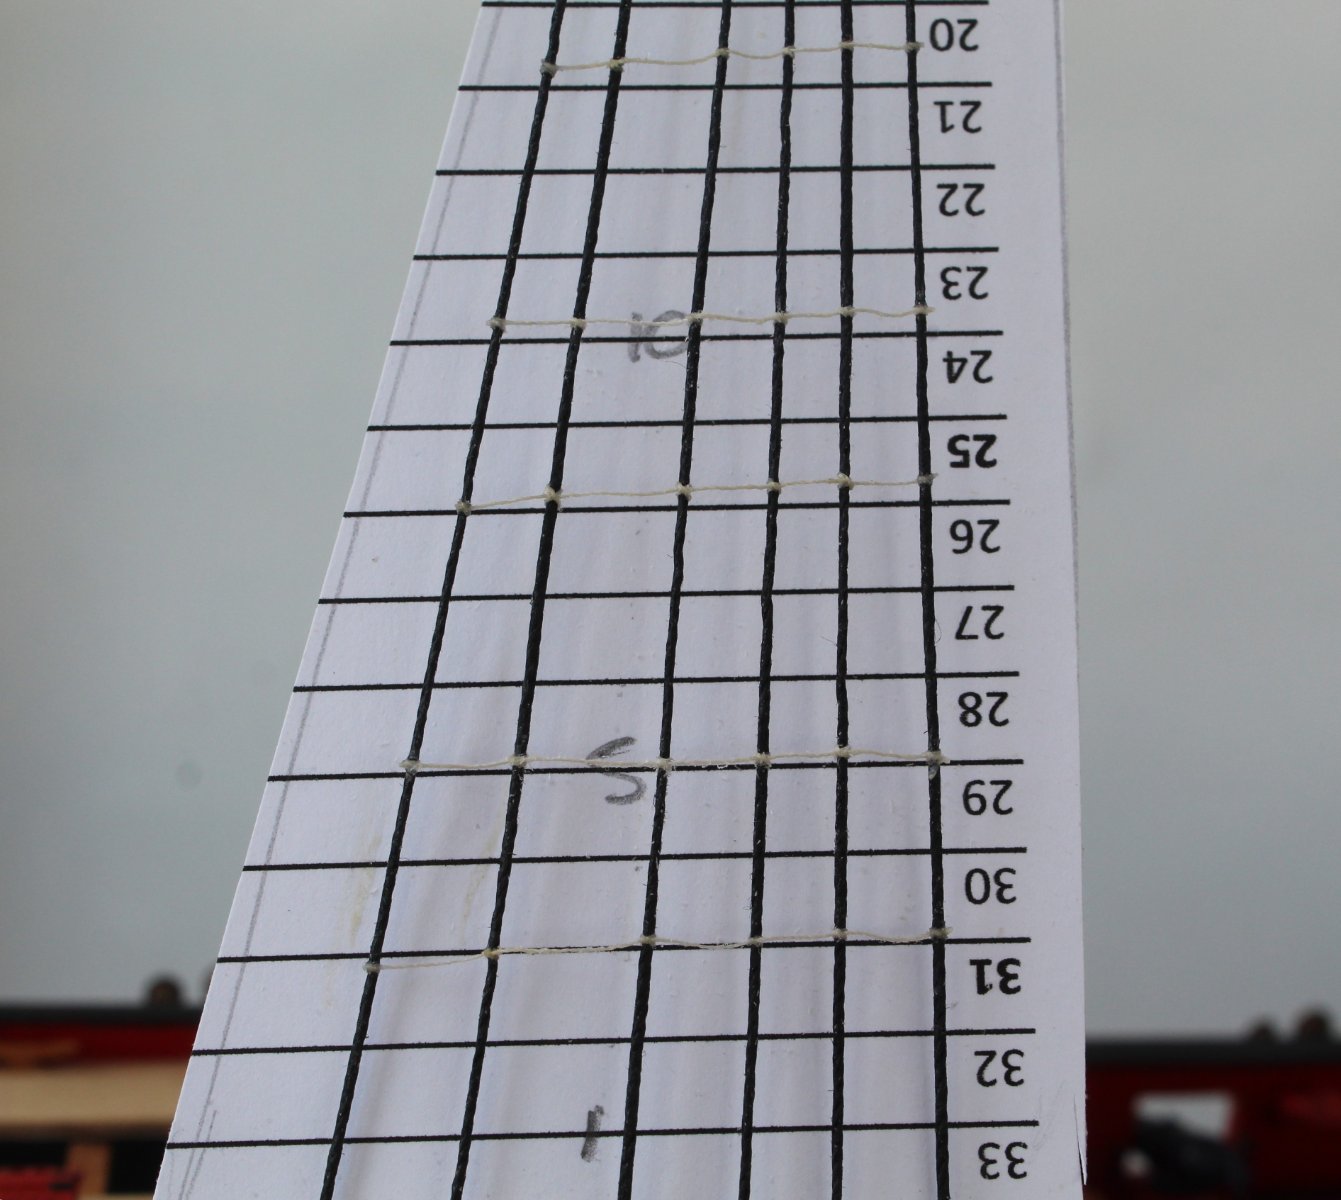
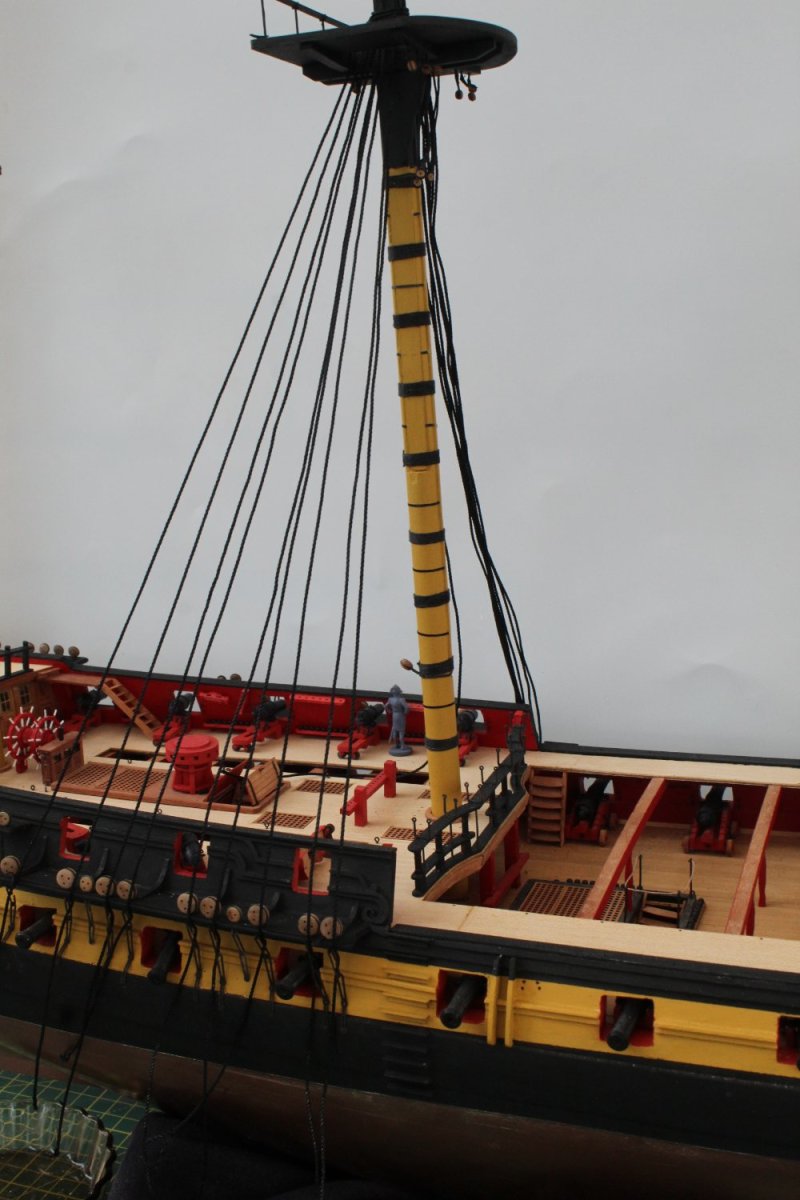
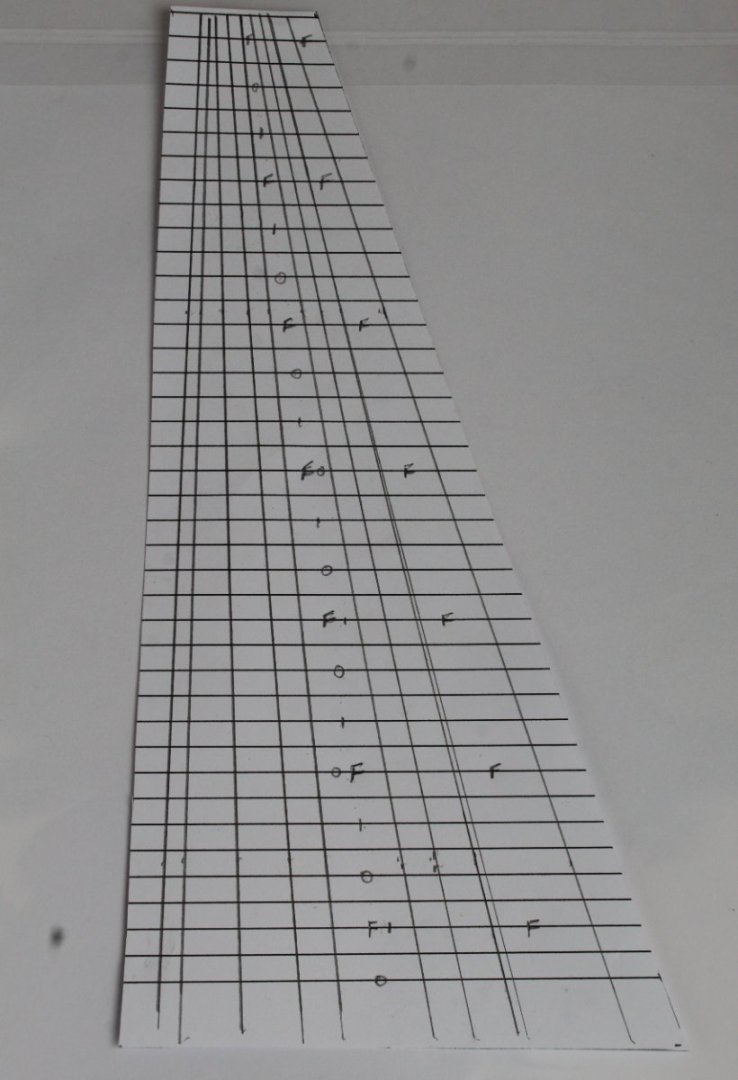
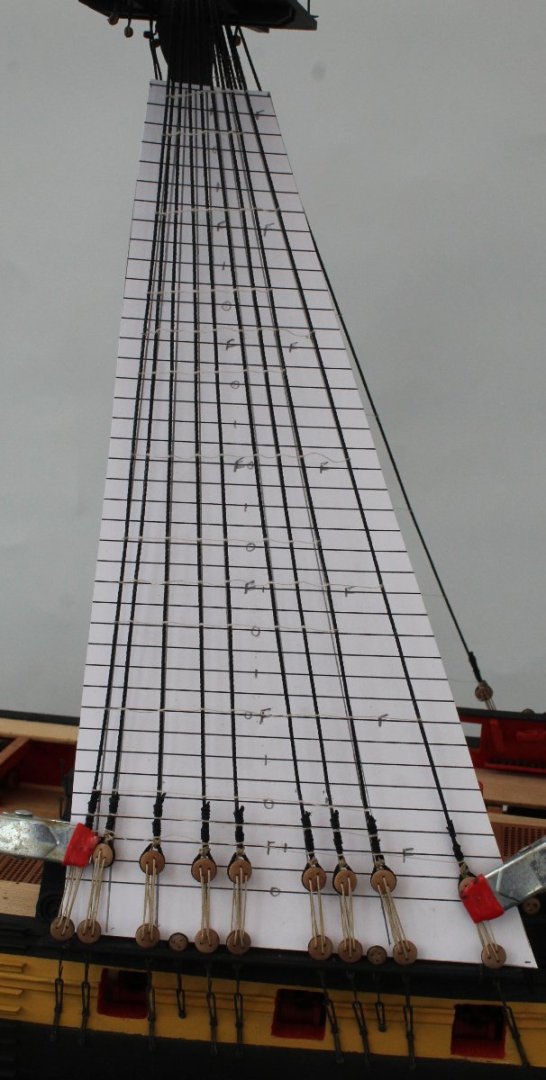
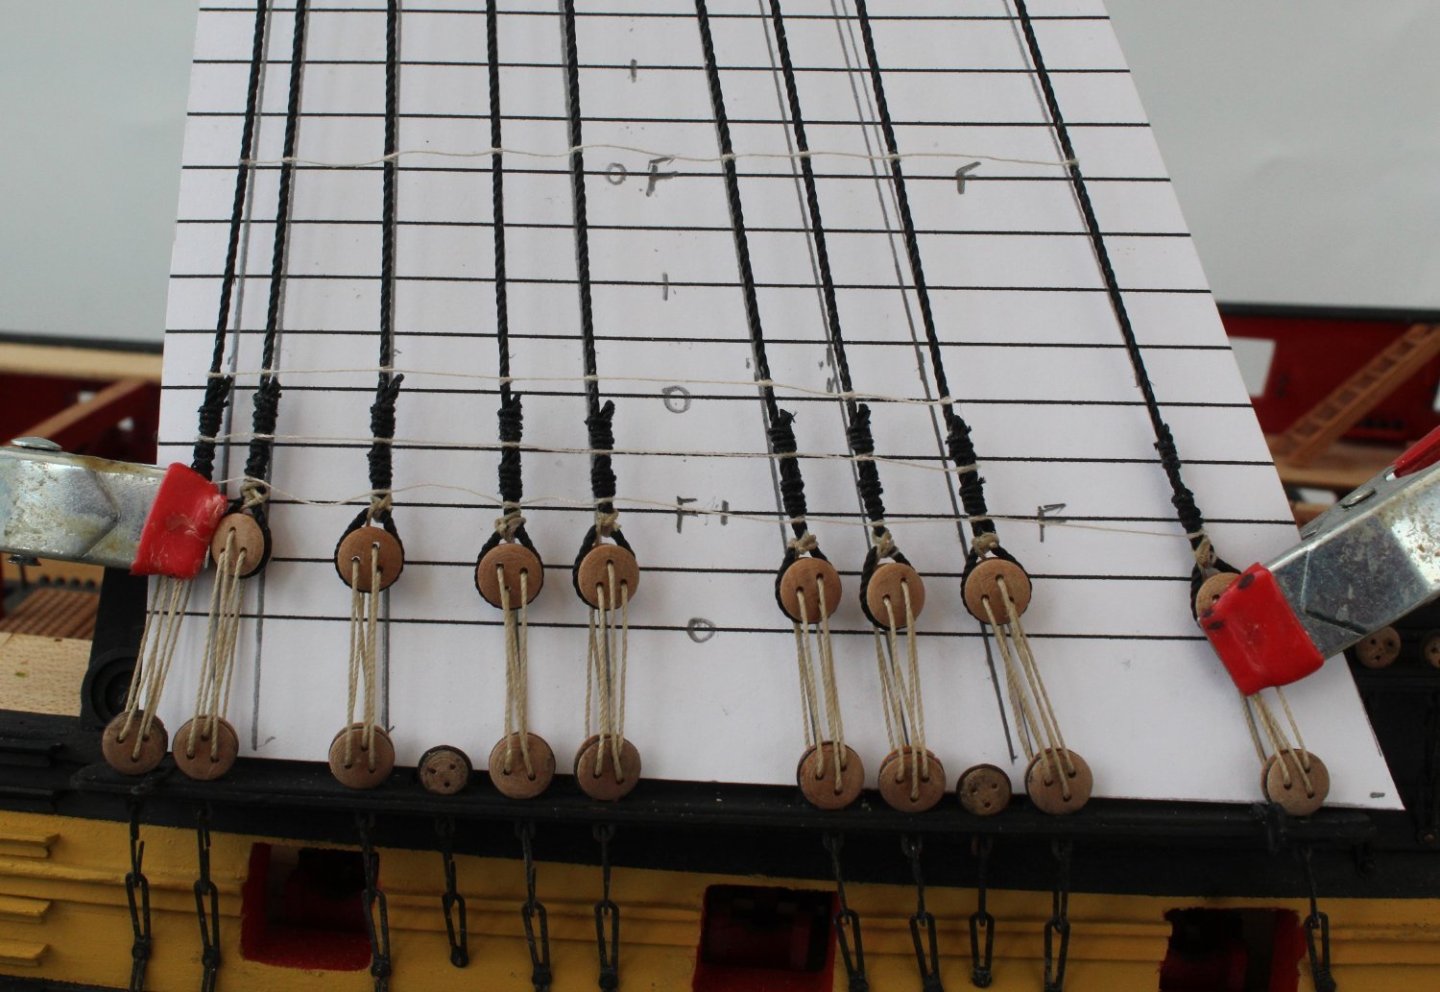
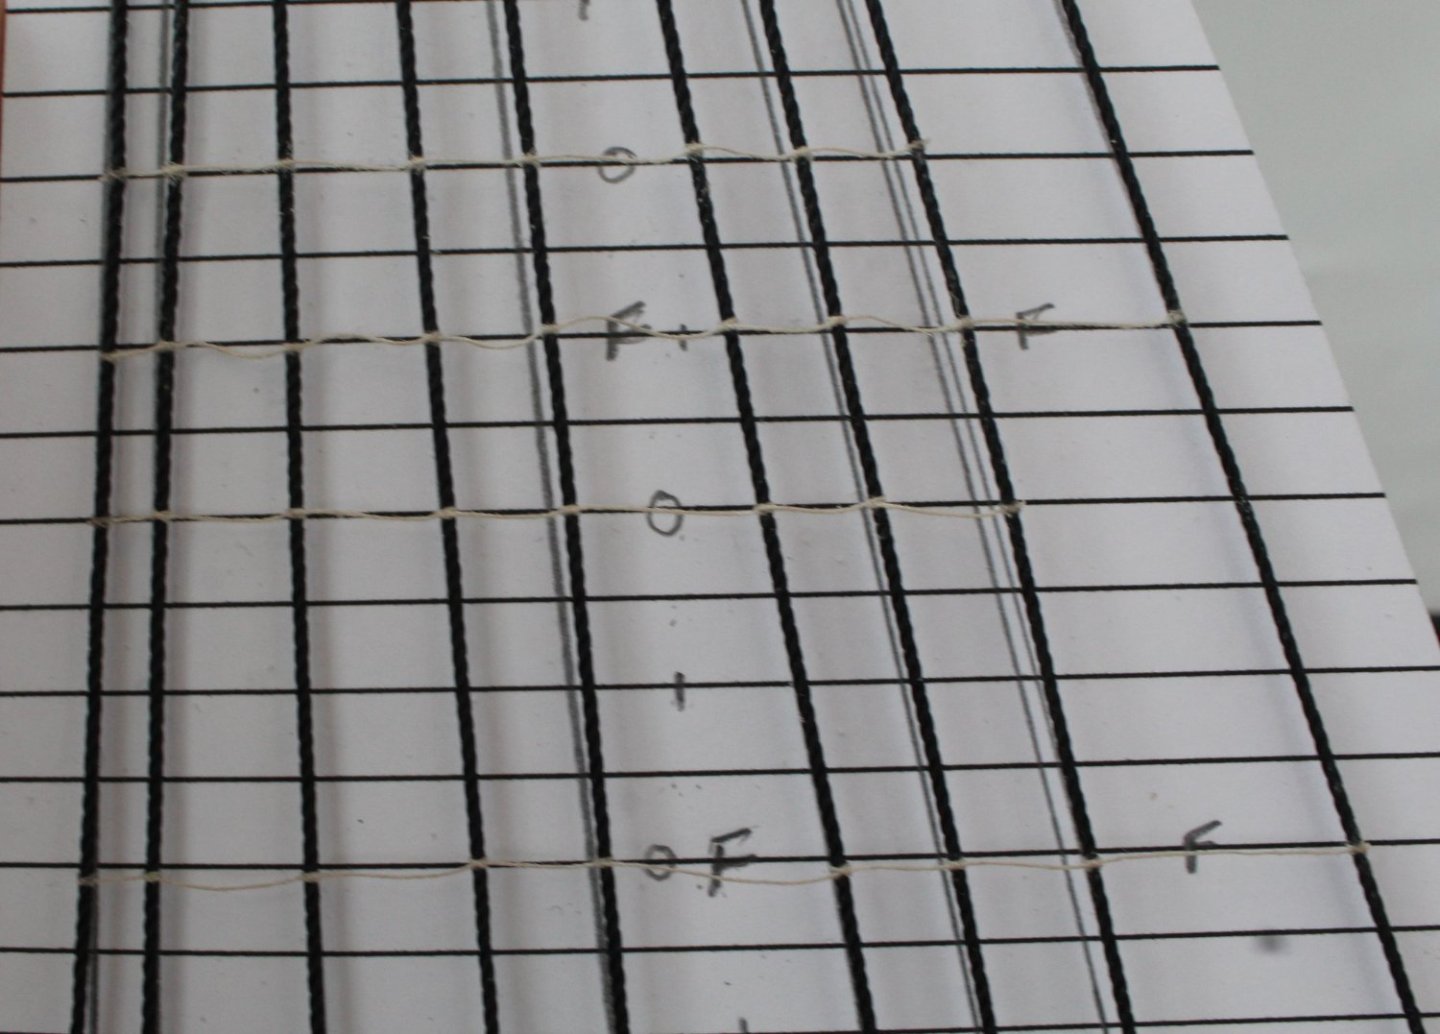
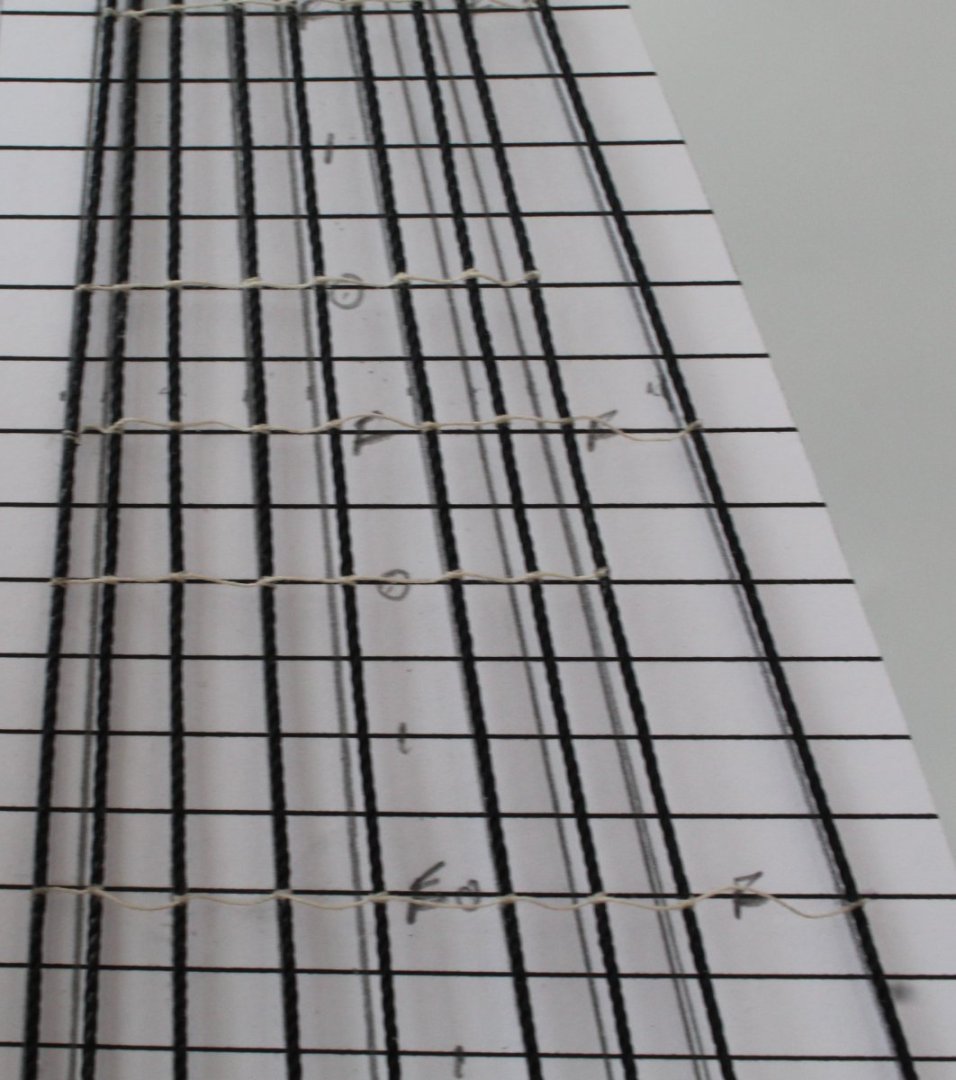
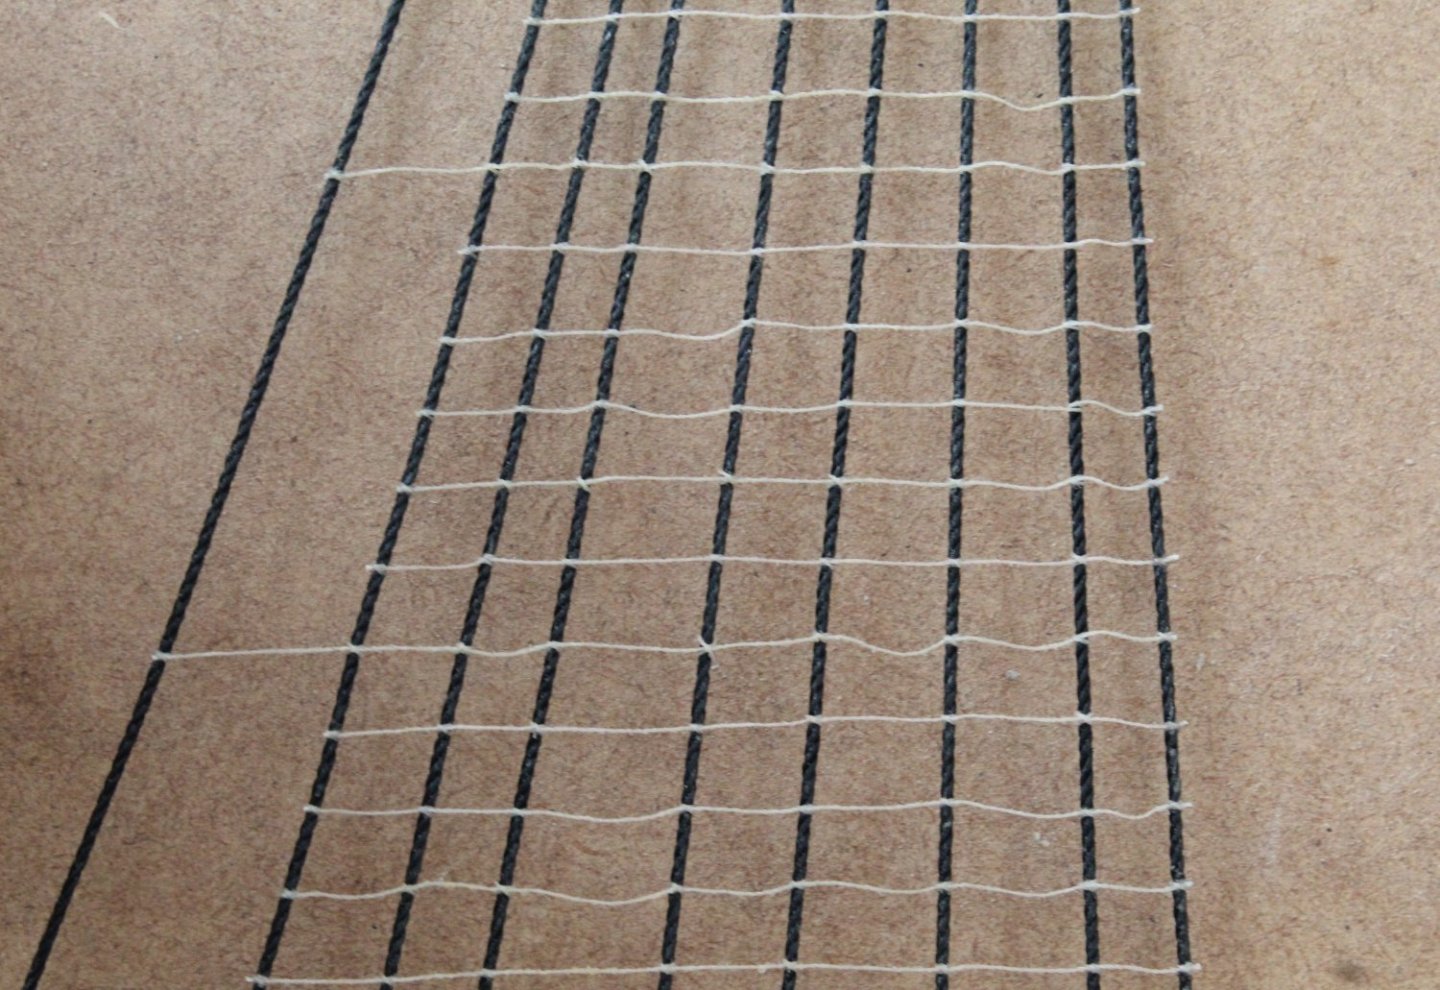
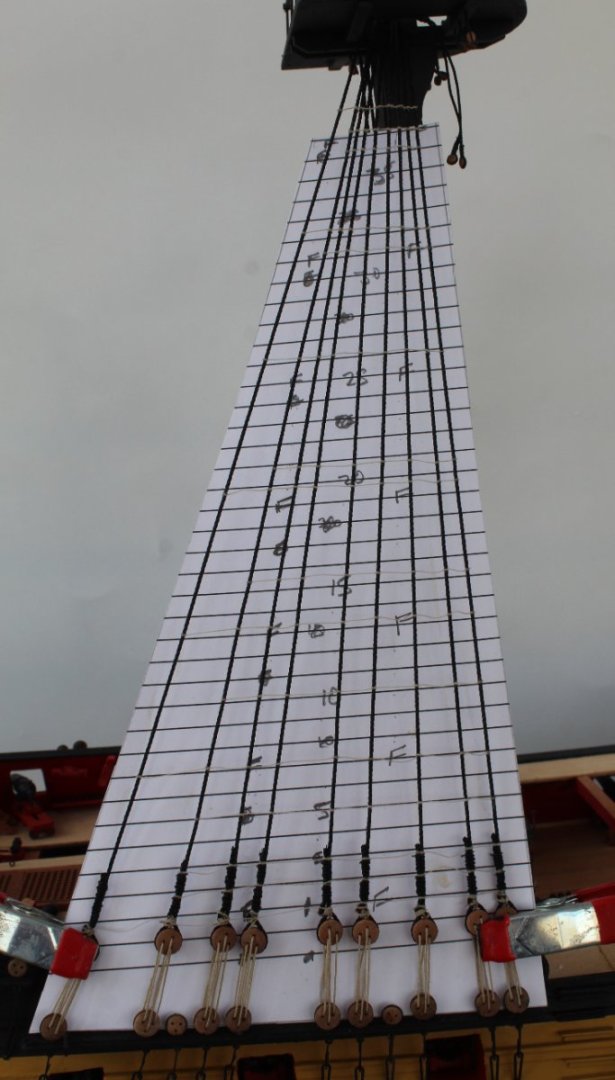
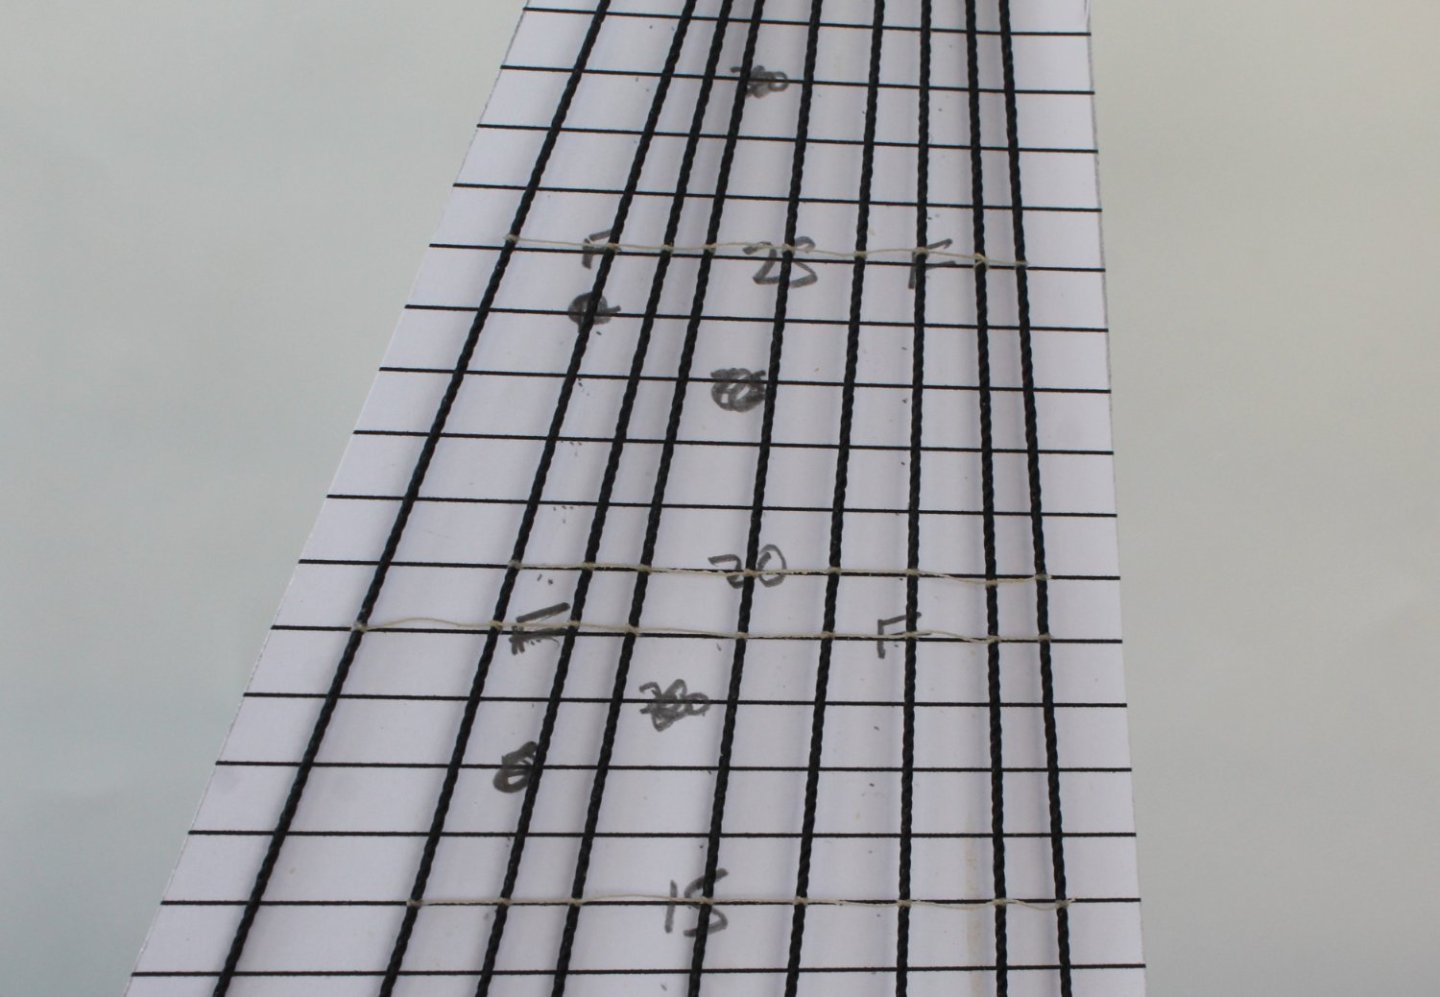
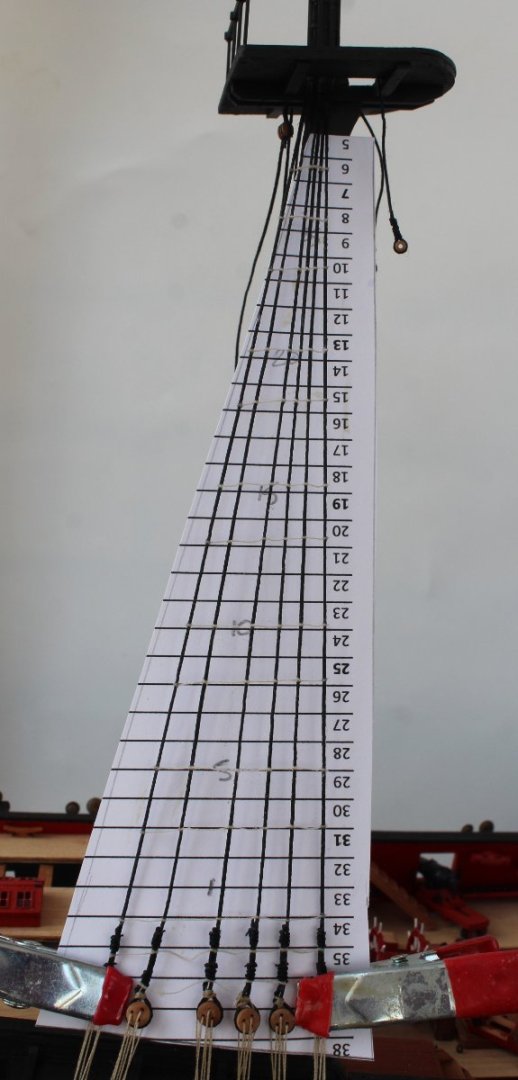
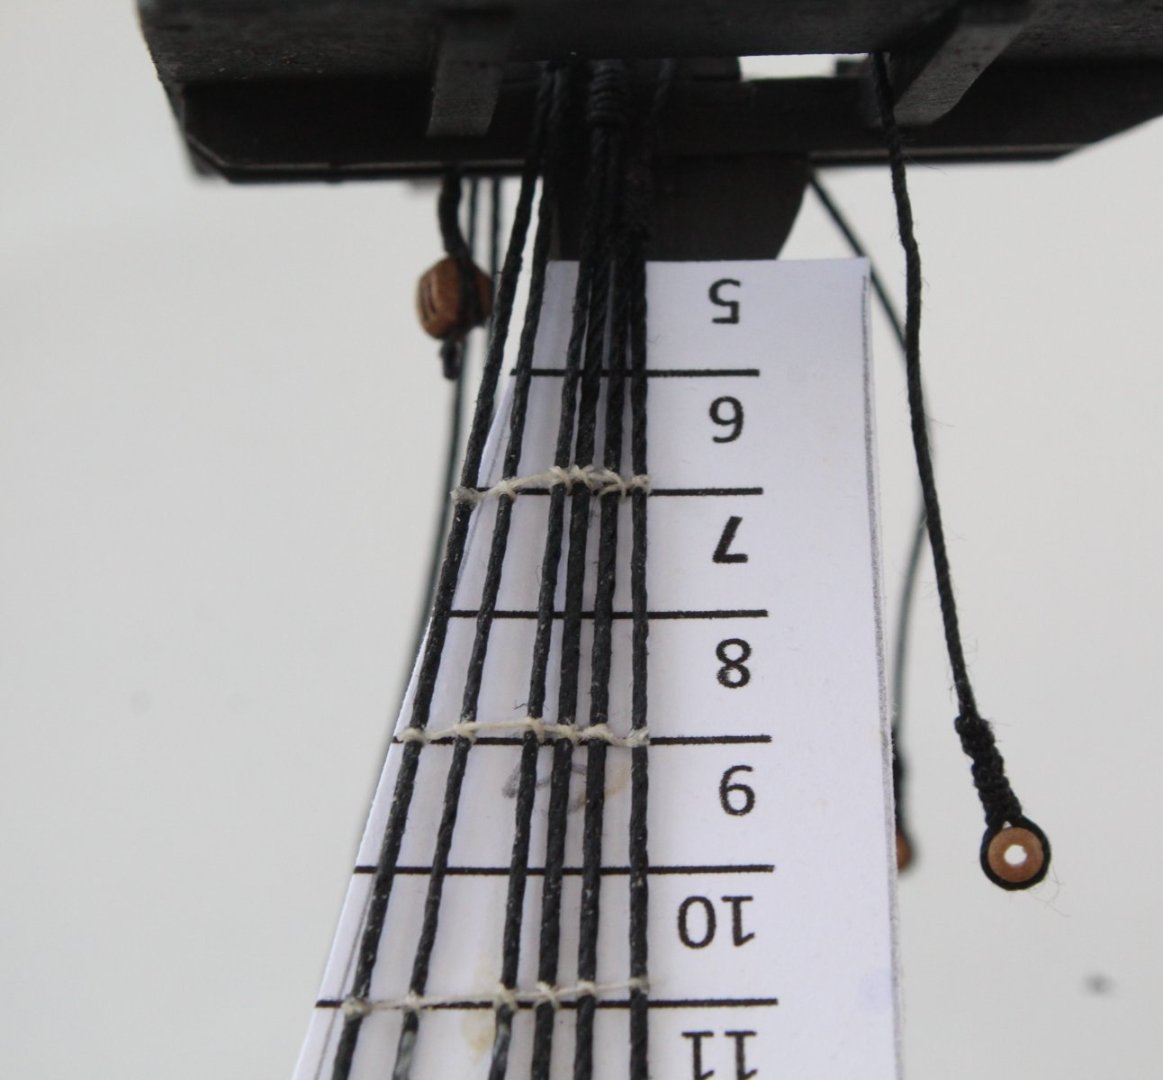
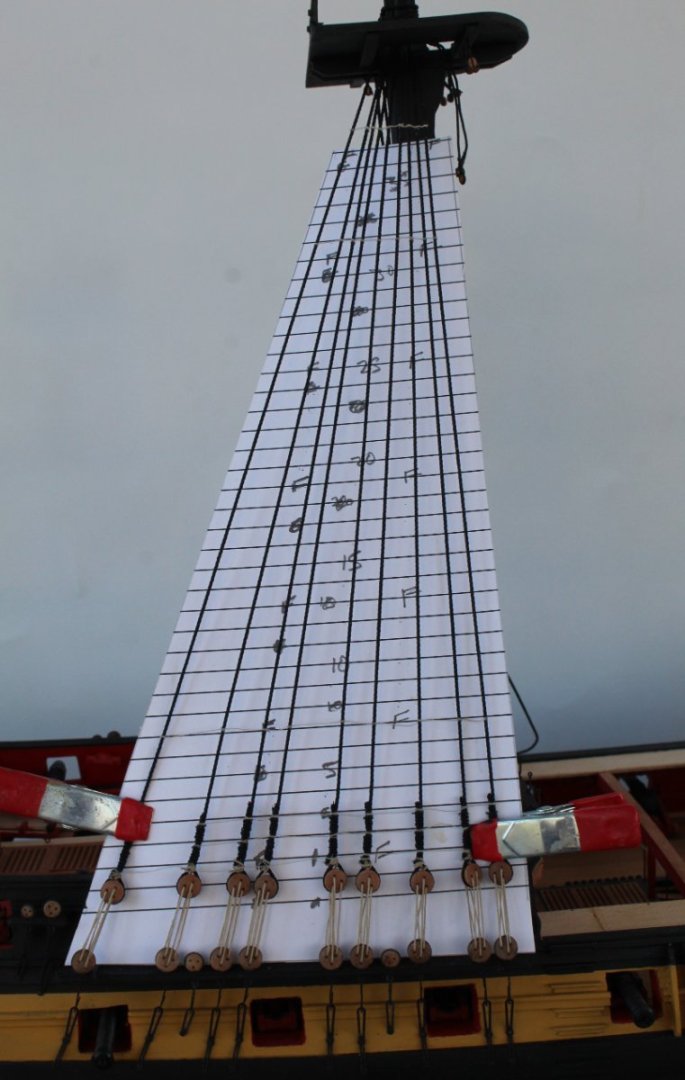
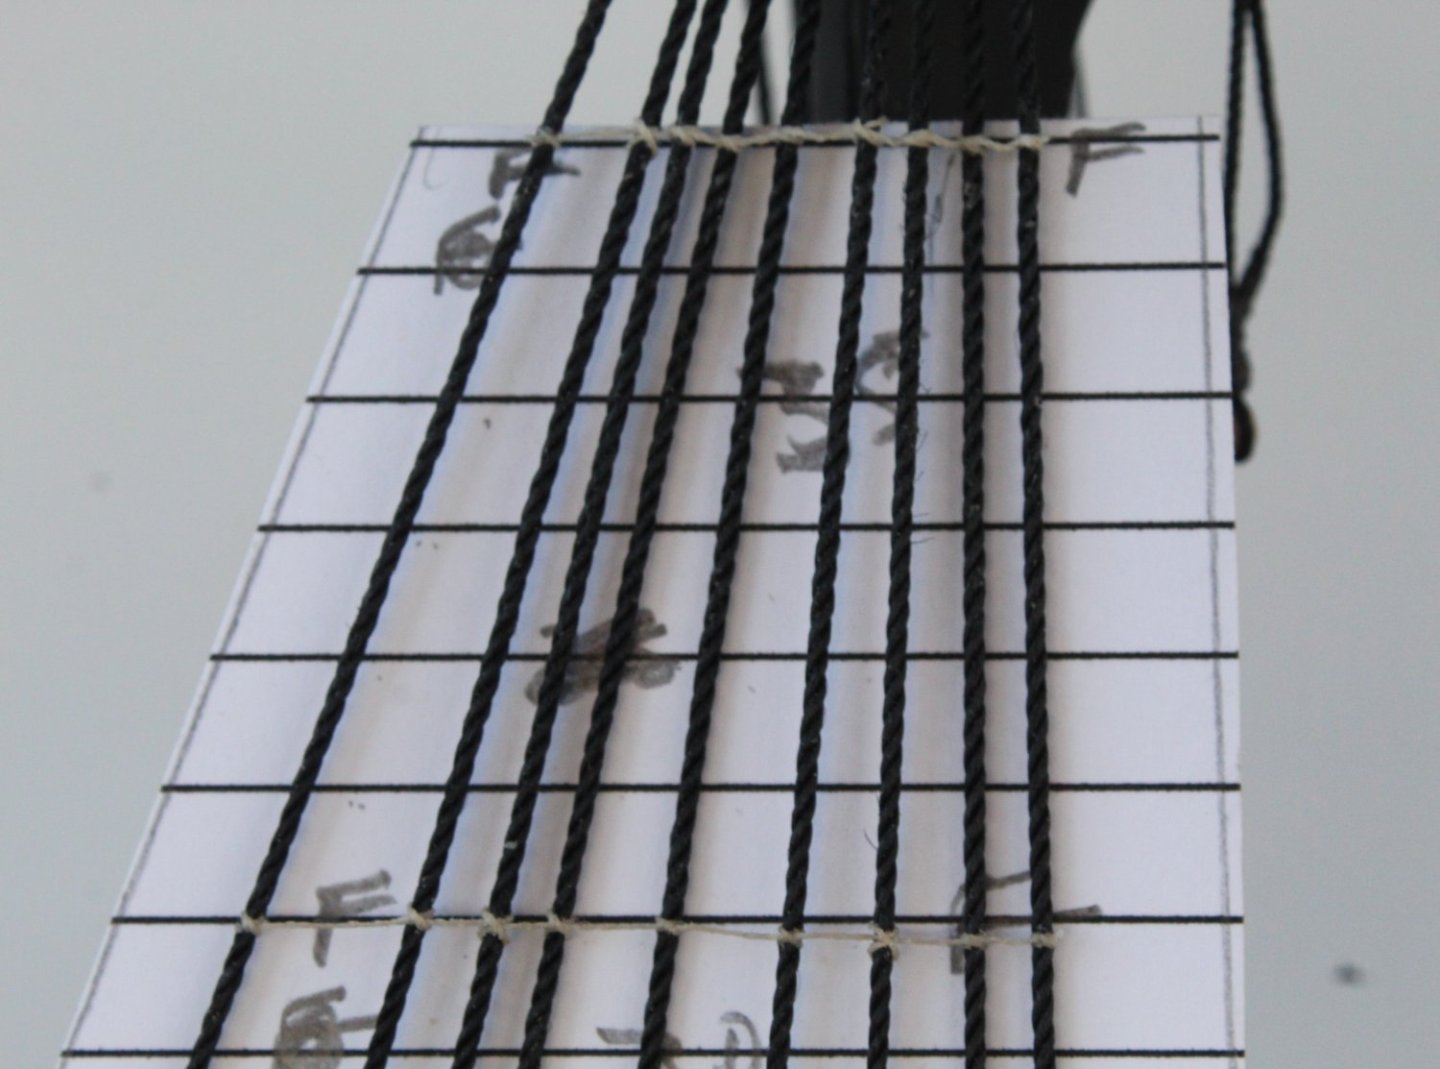
Left-Hand Side Main Mast Ratlines After a short break from the Indy, due to a visit to Manchester to see a great concert at the Lowrey plus a visit to see two of the six grandkids, I made a return to the shipyard. The lanyards were tied off and the free ends of the shrouds seized. I then prepared the template for ratlines. I marked the approx run lines of the shrouds. These are a useful guide and helps prevents the dreaded hourglass effect. As indicated in previous posts my preferred method is to start with adding all full length ratlines (every 7th one). I added a F reference on the template. Once all the F's have been added I like to add every 5th ratline, indicated by a 0 on the template. Next with the middle ratlines between every 5th one, marked with a 1 on the template. The template is then carefully aligned and clamped in position. The next photo shows the shroud seizing's and lower ratlines. You will note I have added the F and 0 ratlines. More photos of the progress of the F and 0 ratlines. They have all been added so on my next shipyard visit I can start work on the 1 ratlines.

-
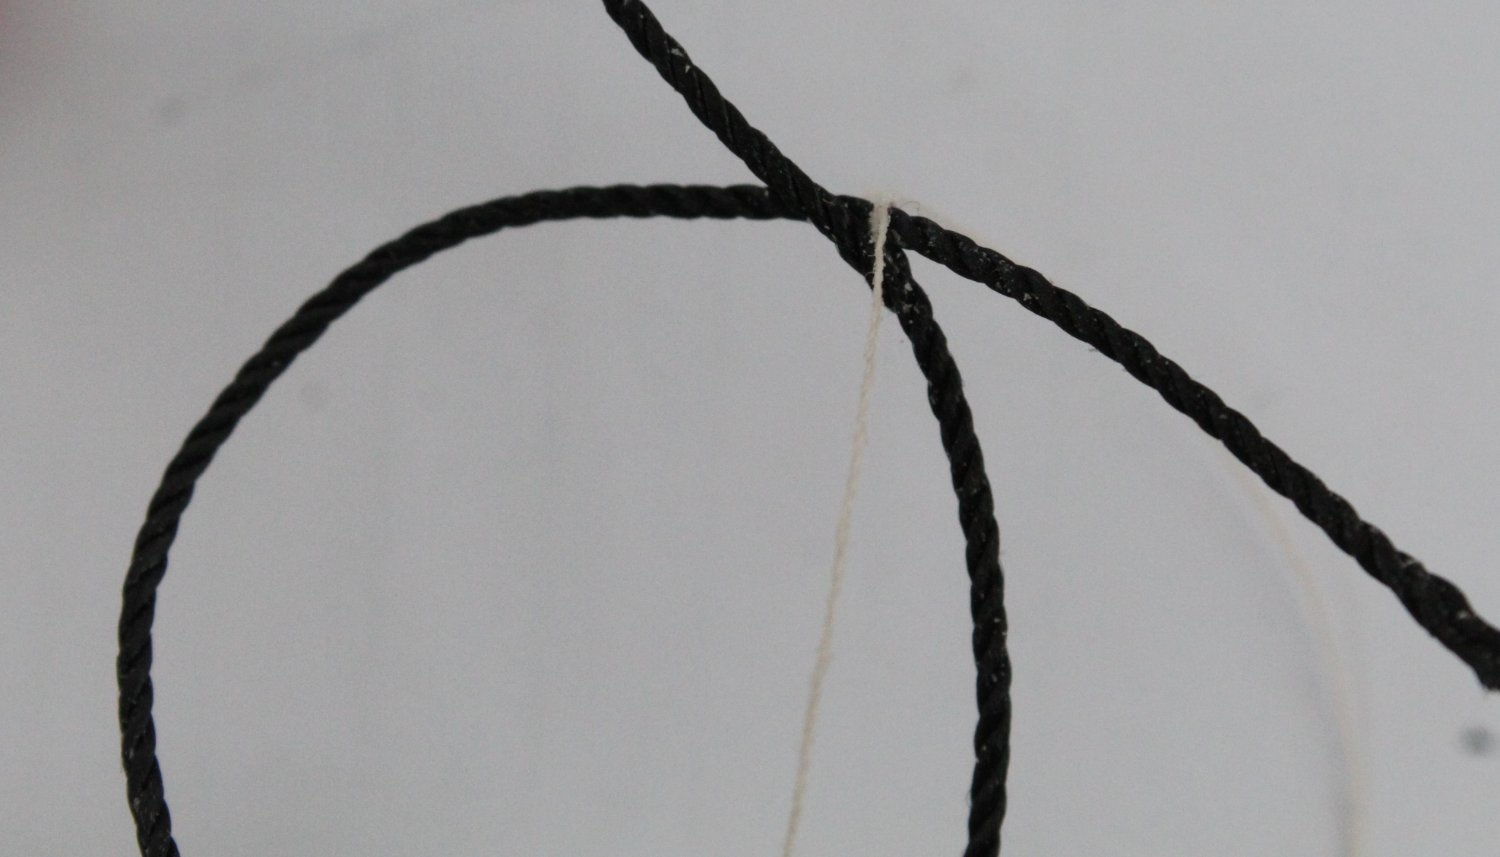
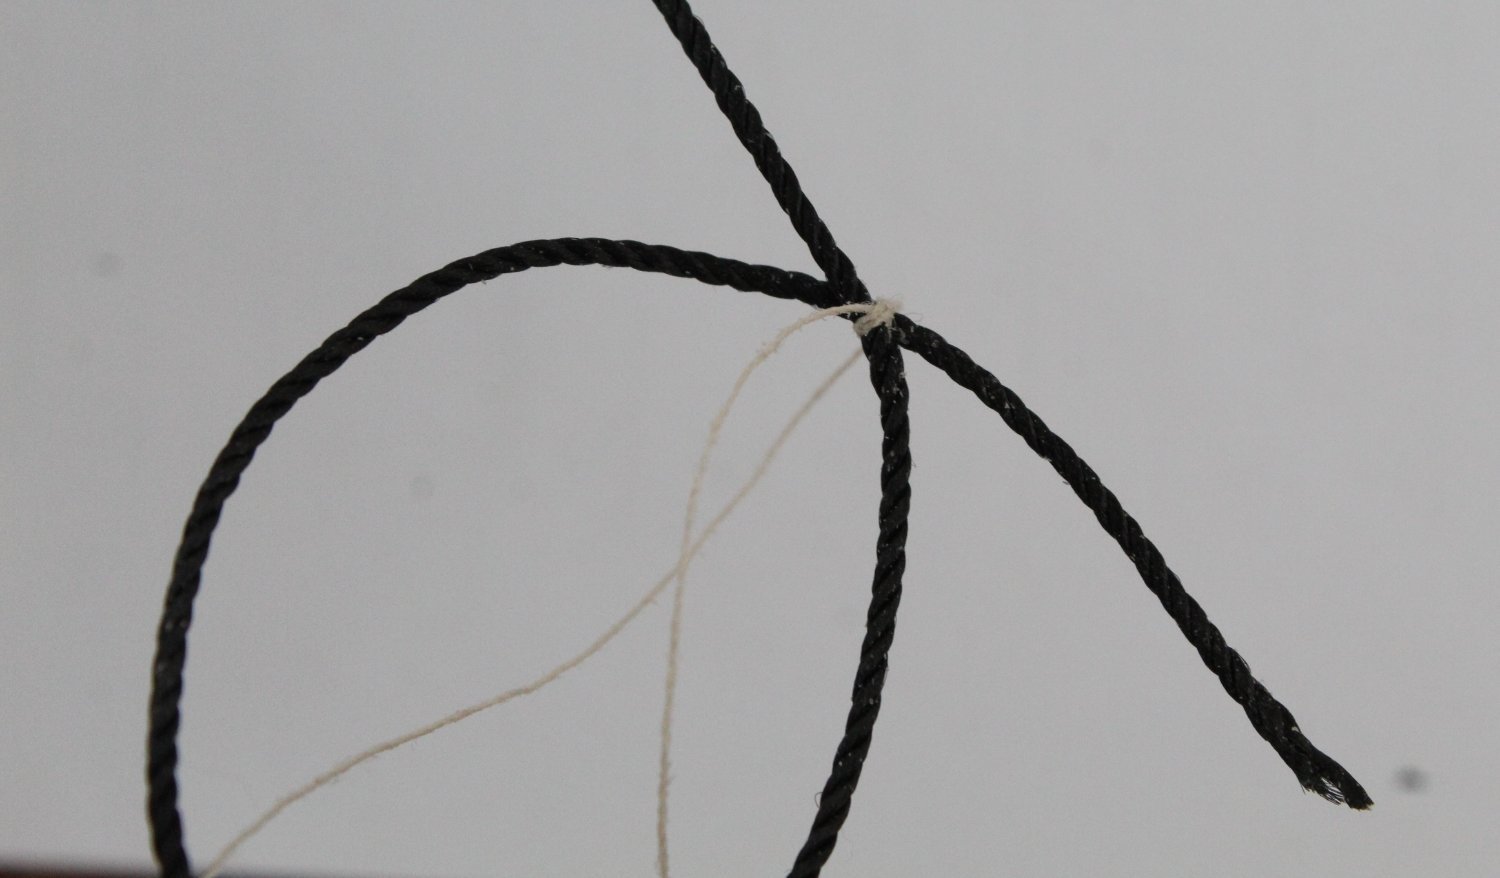
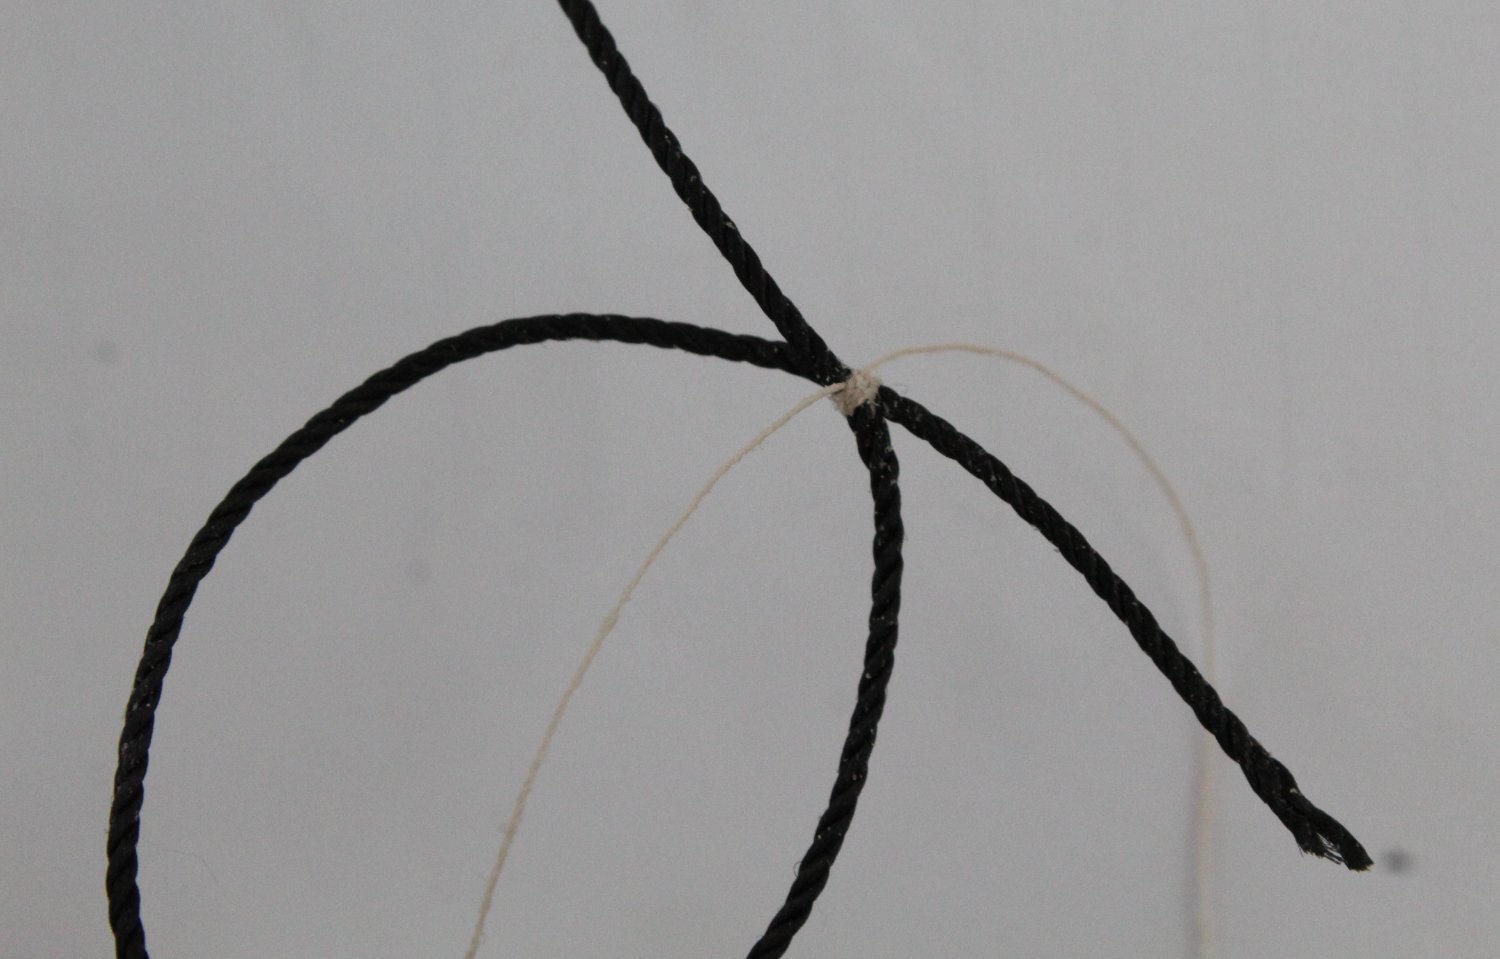
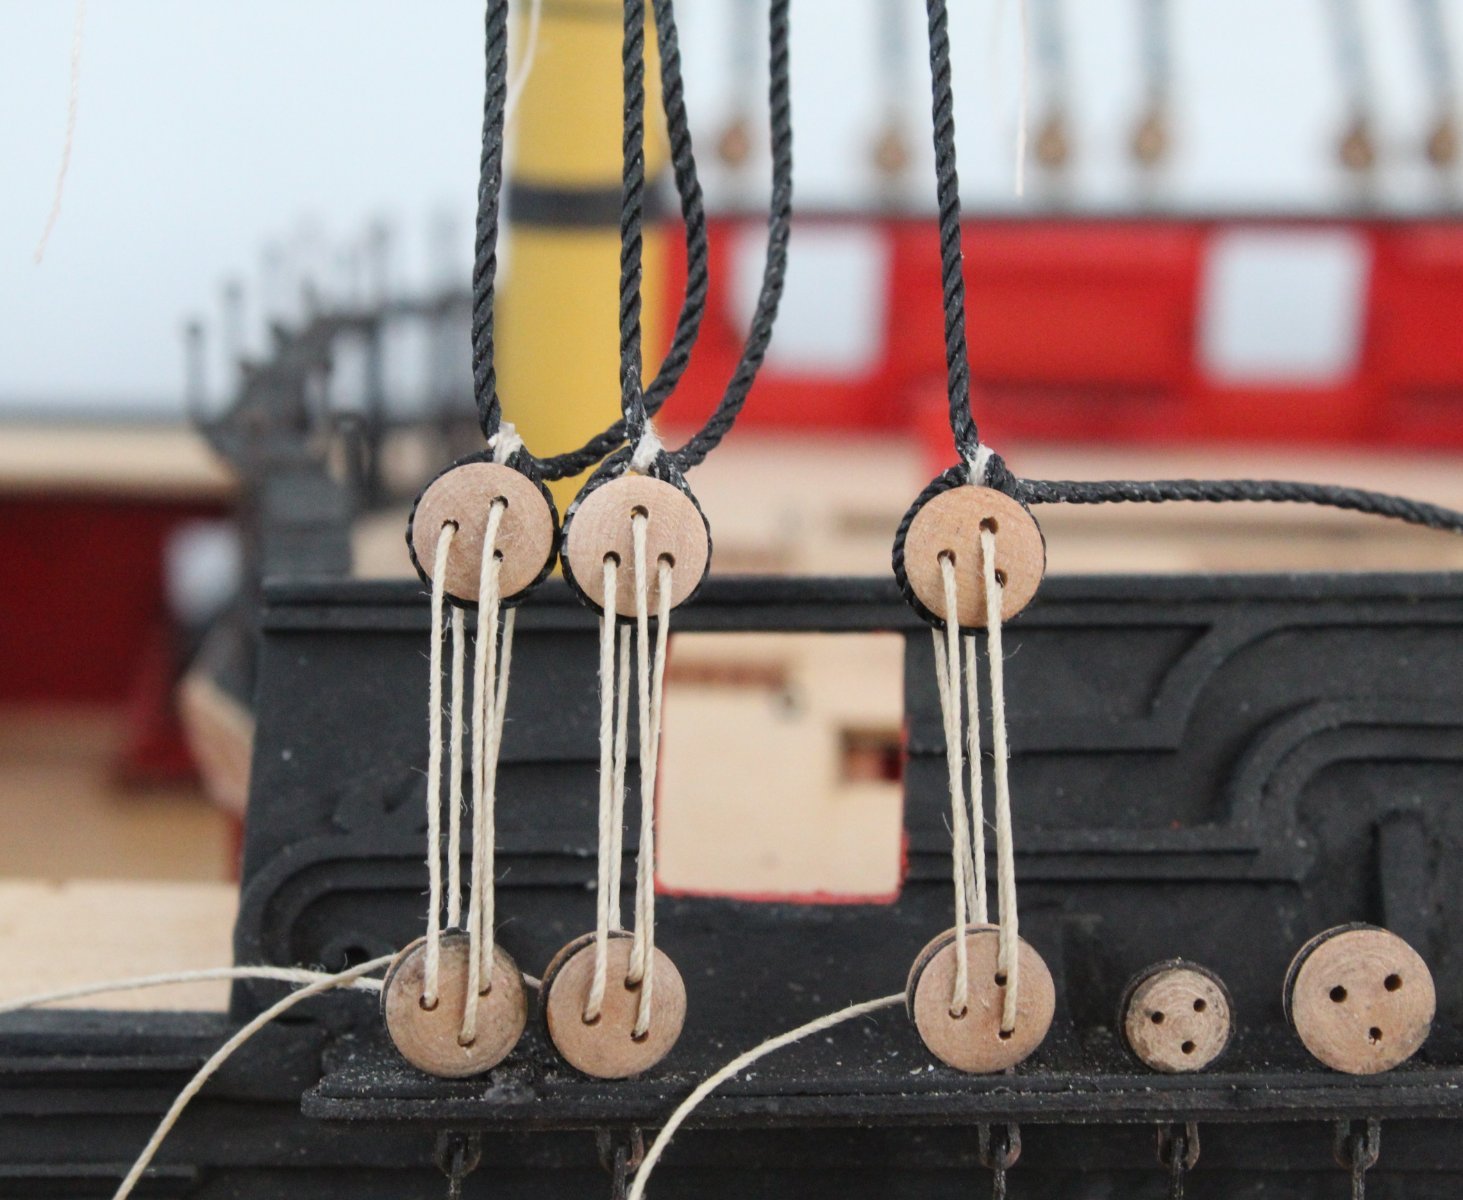
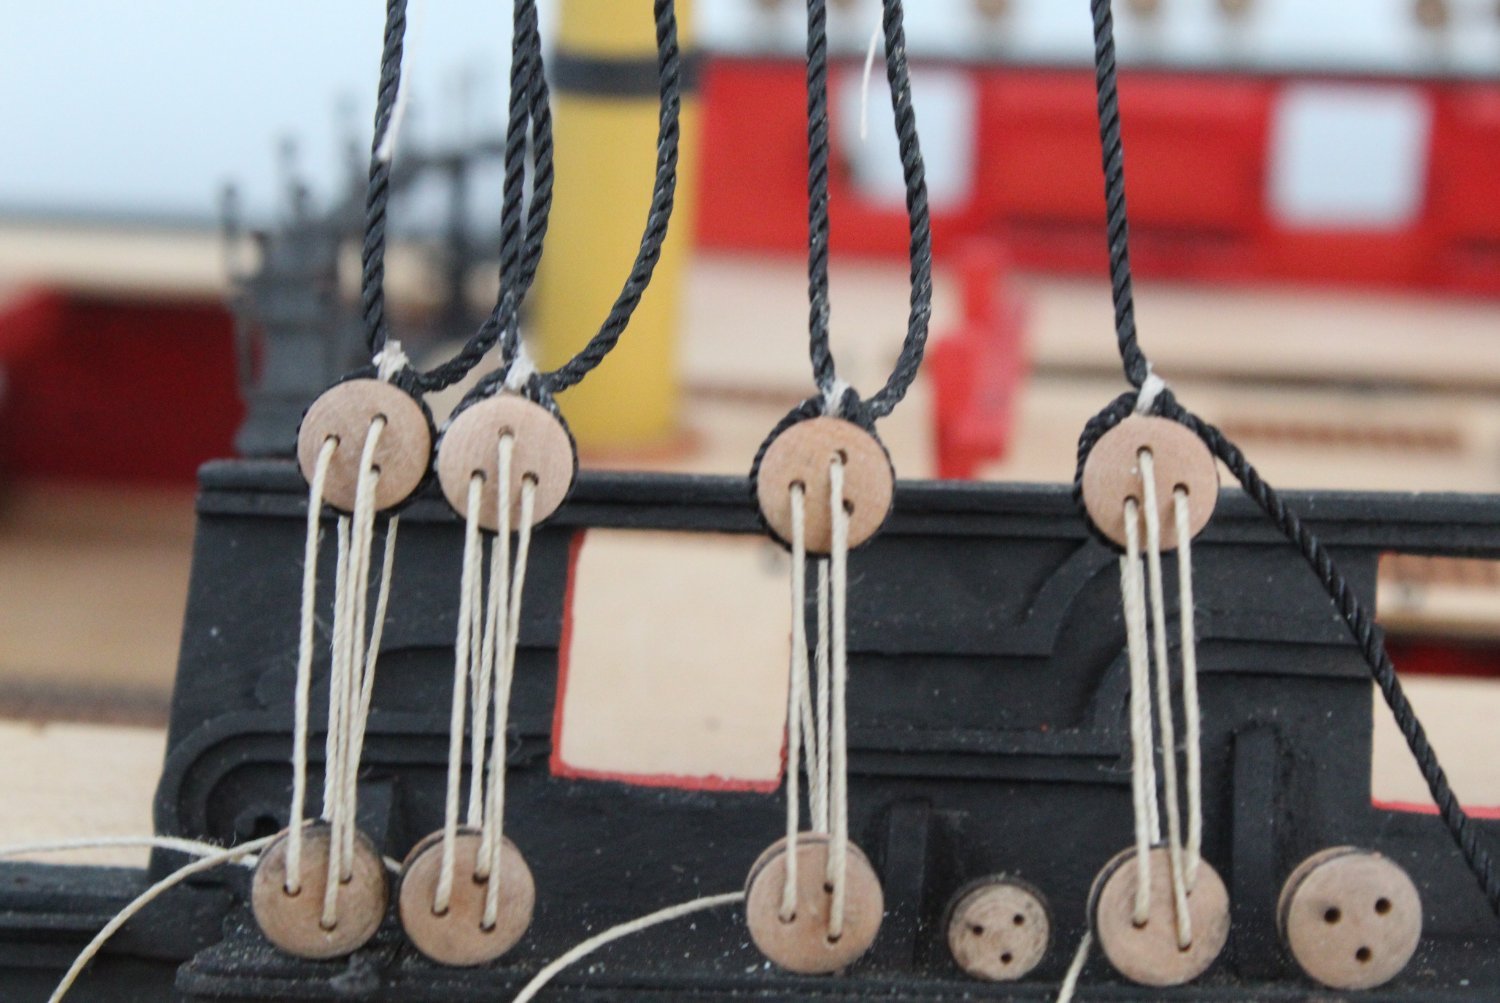
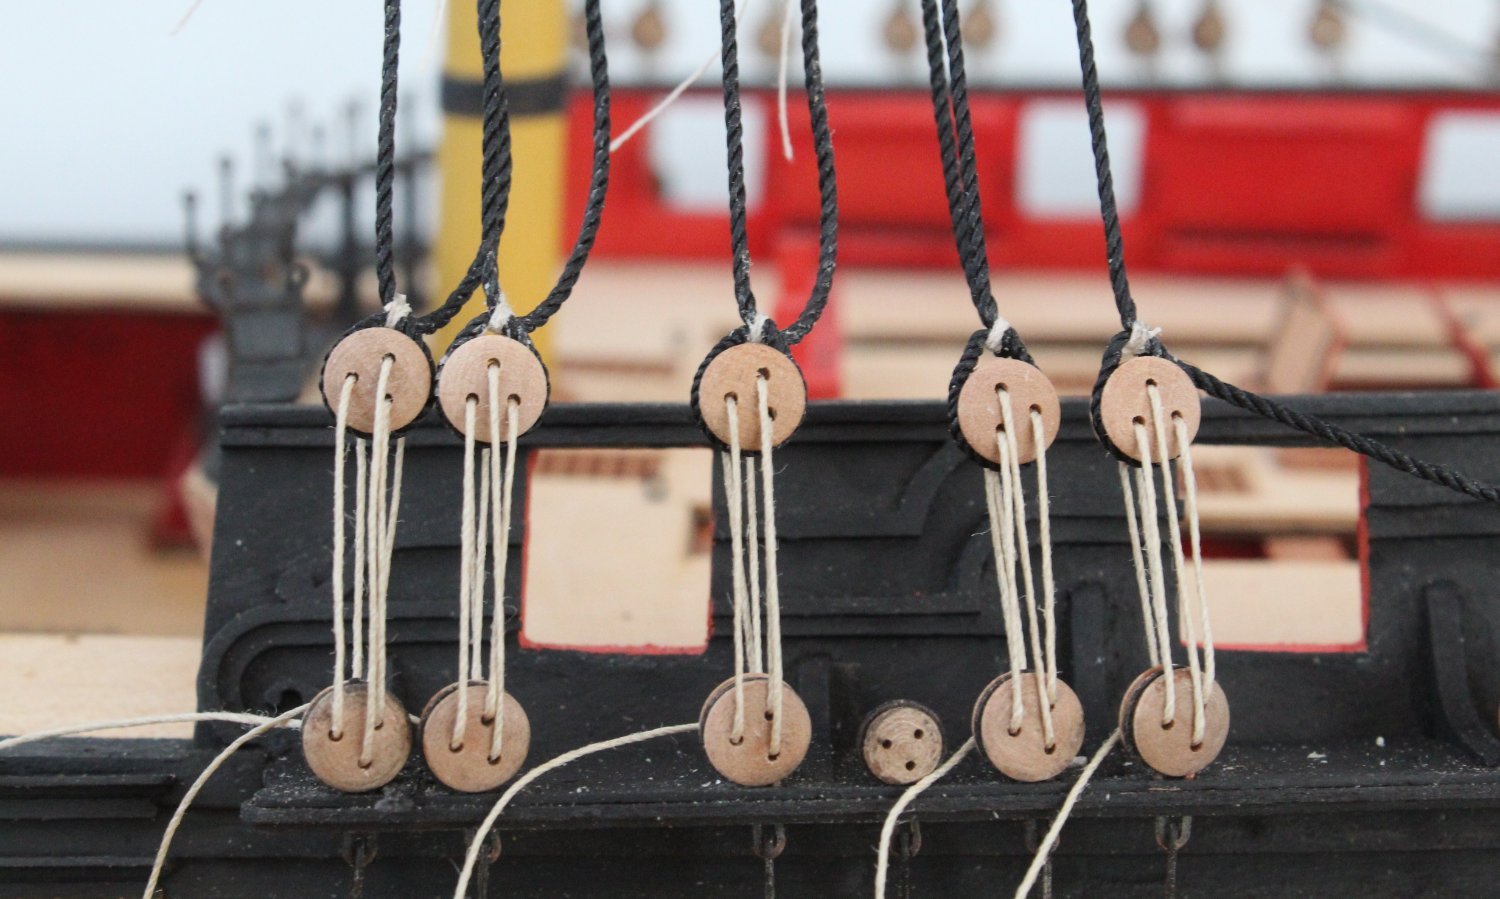
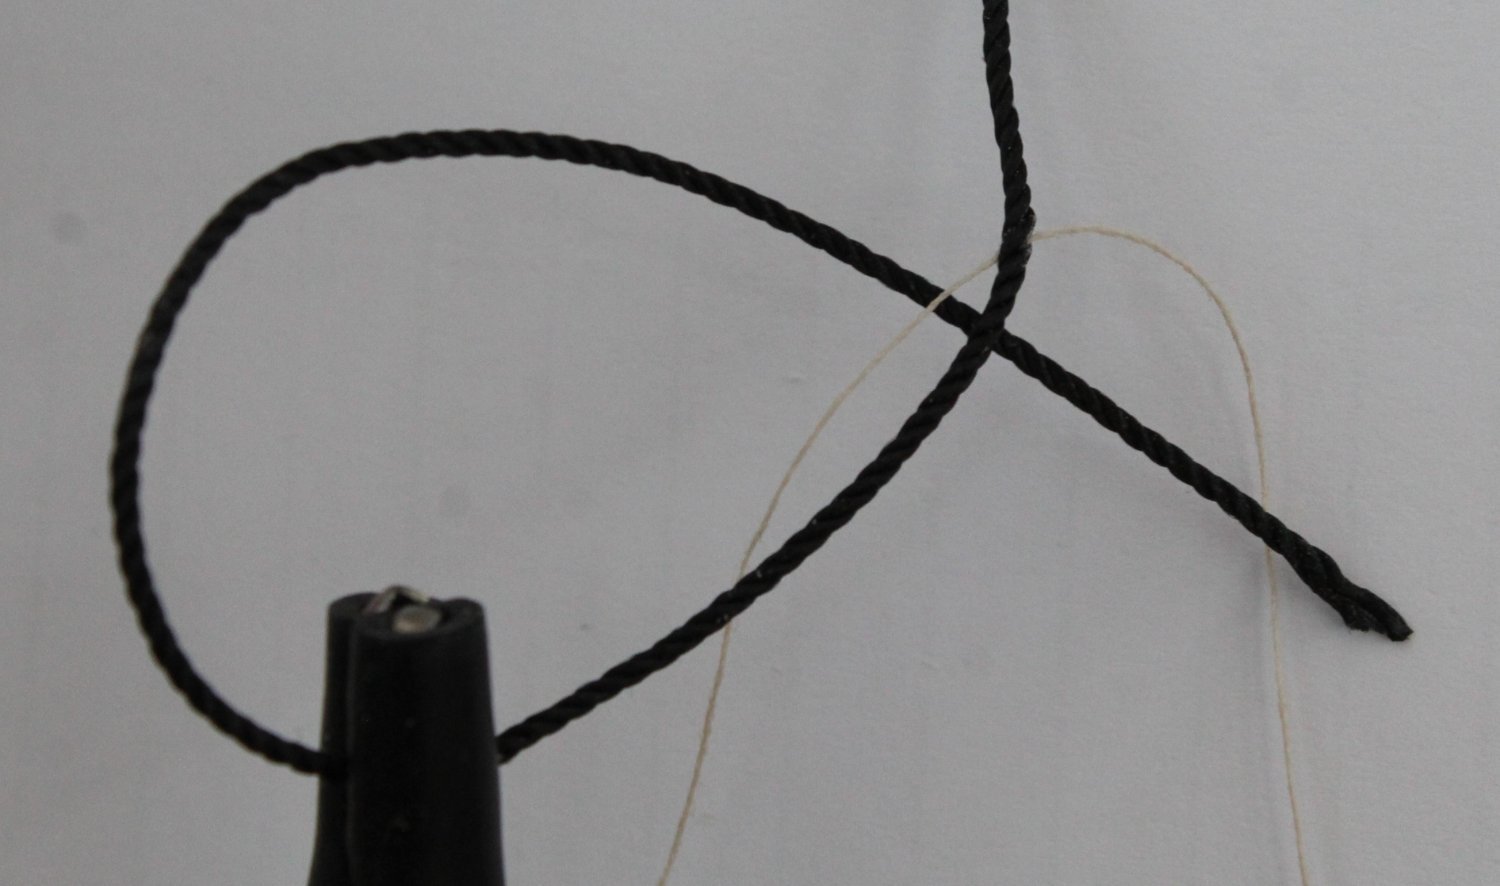
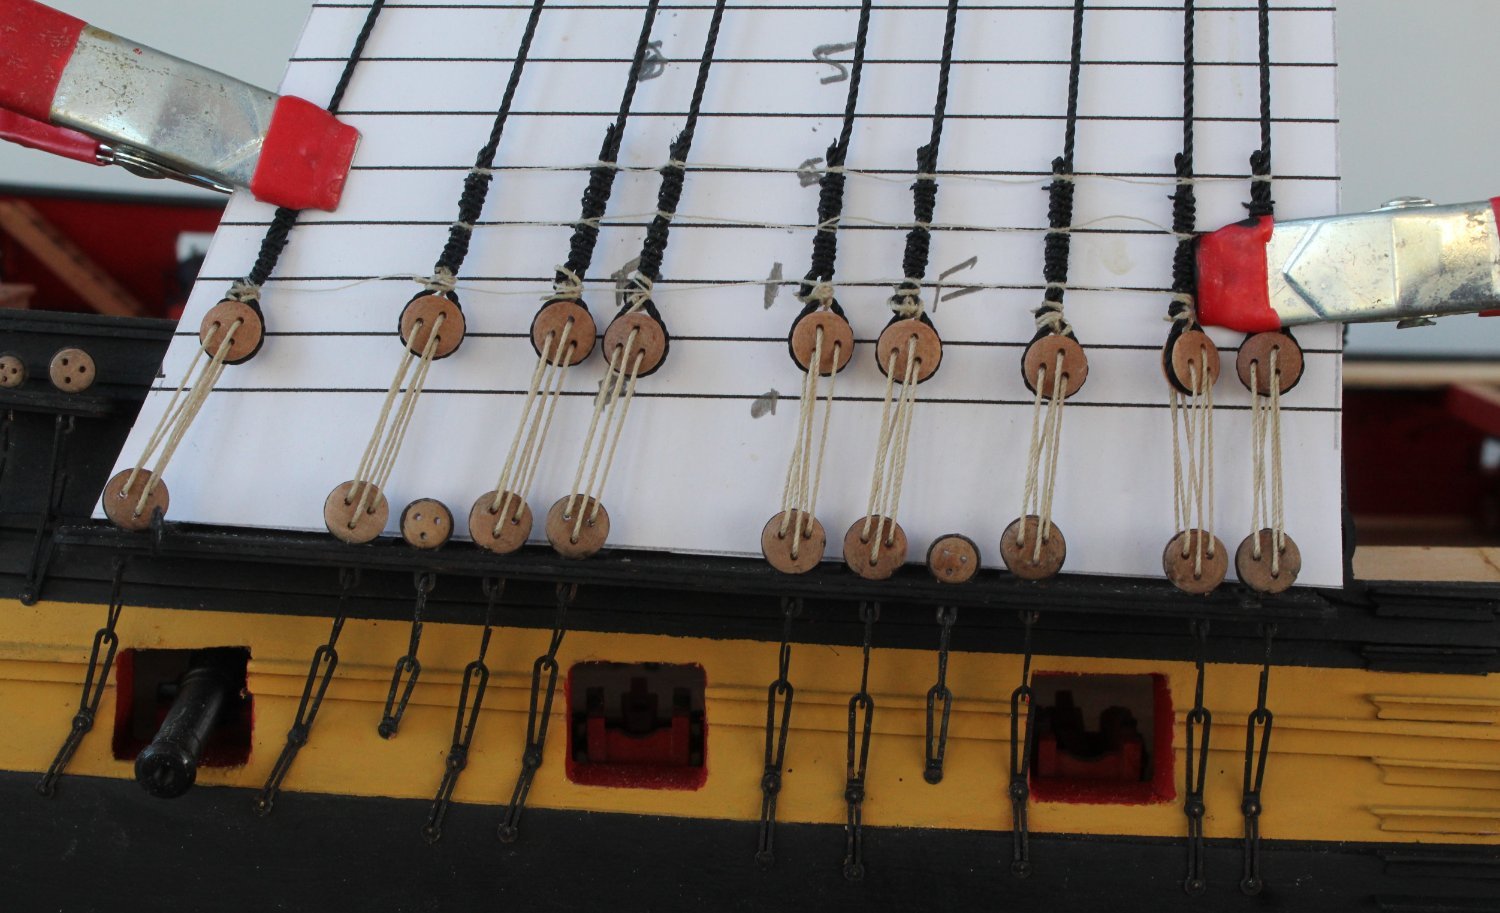
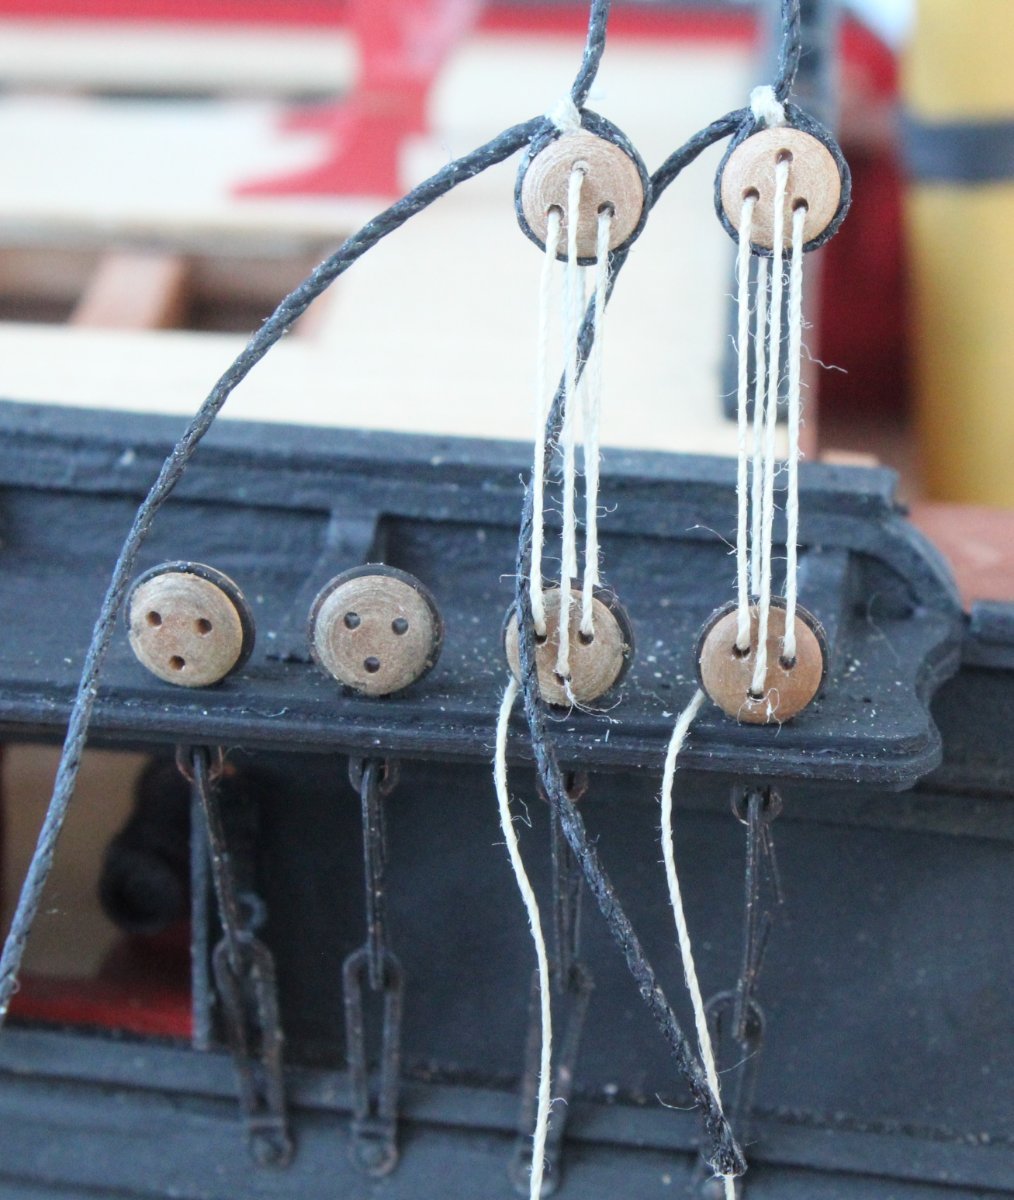
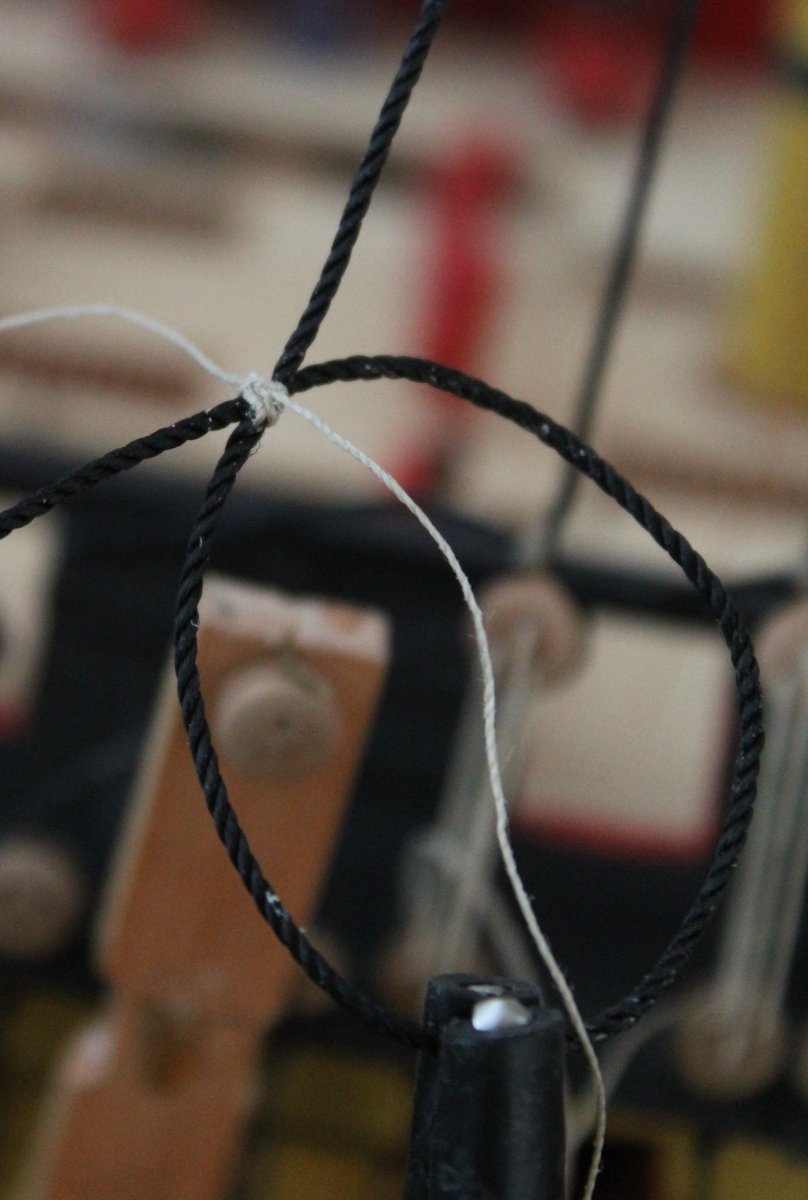
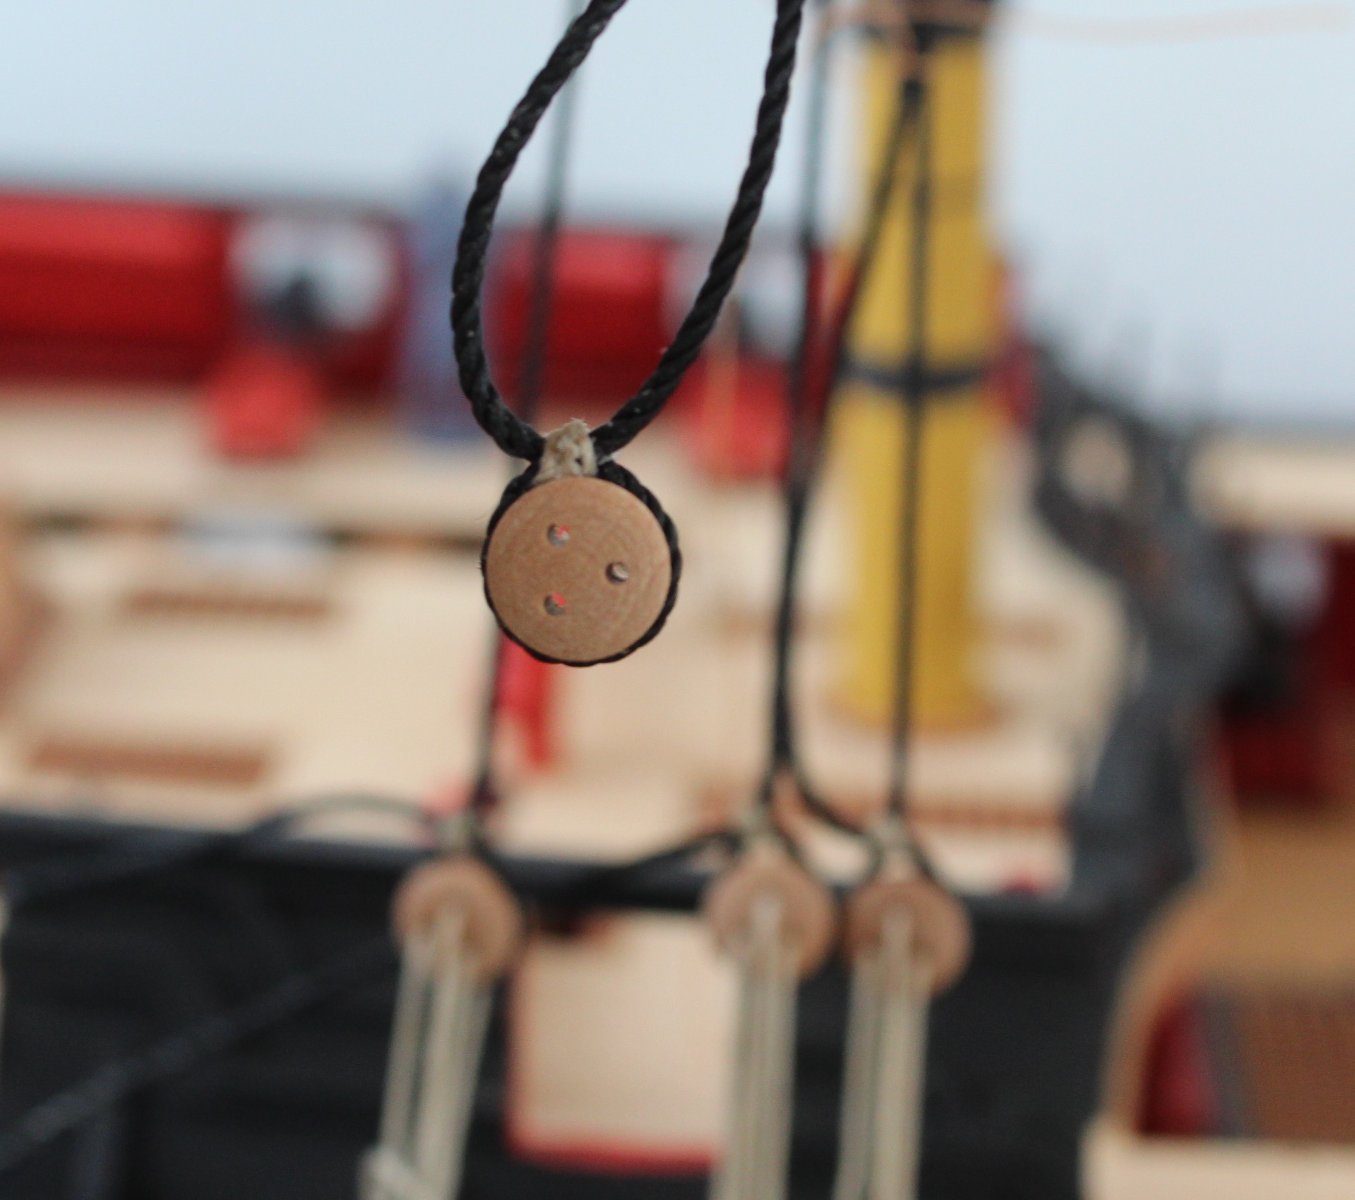
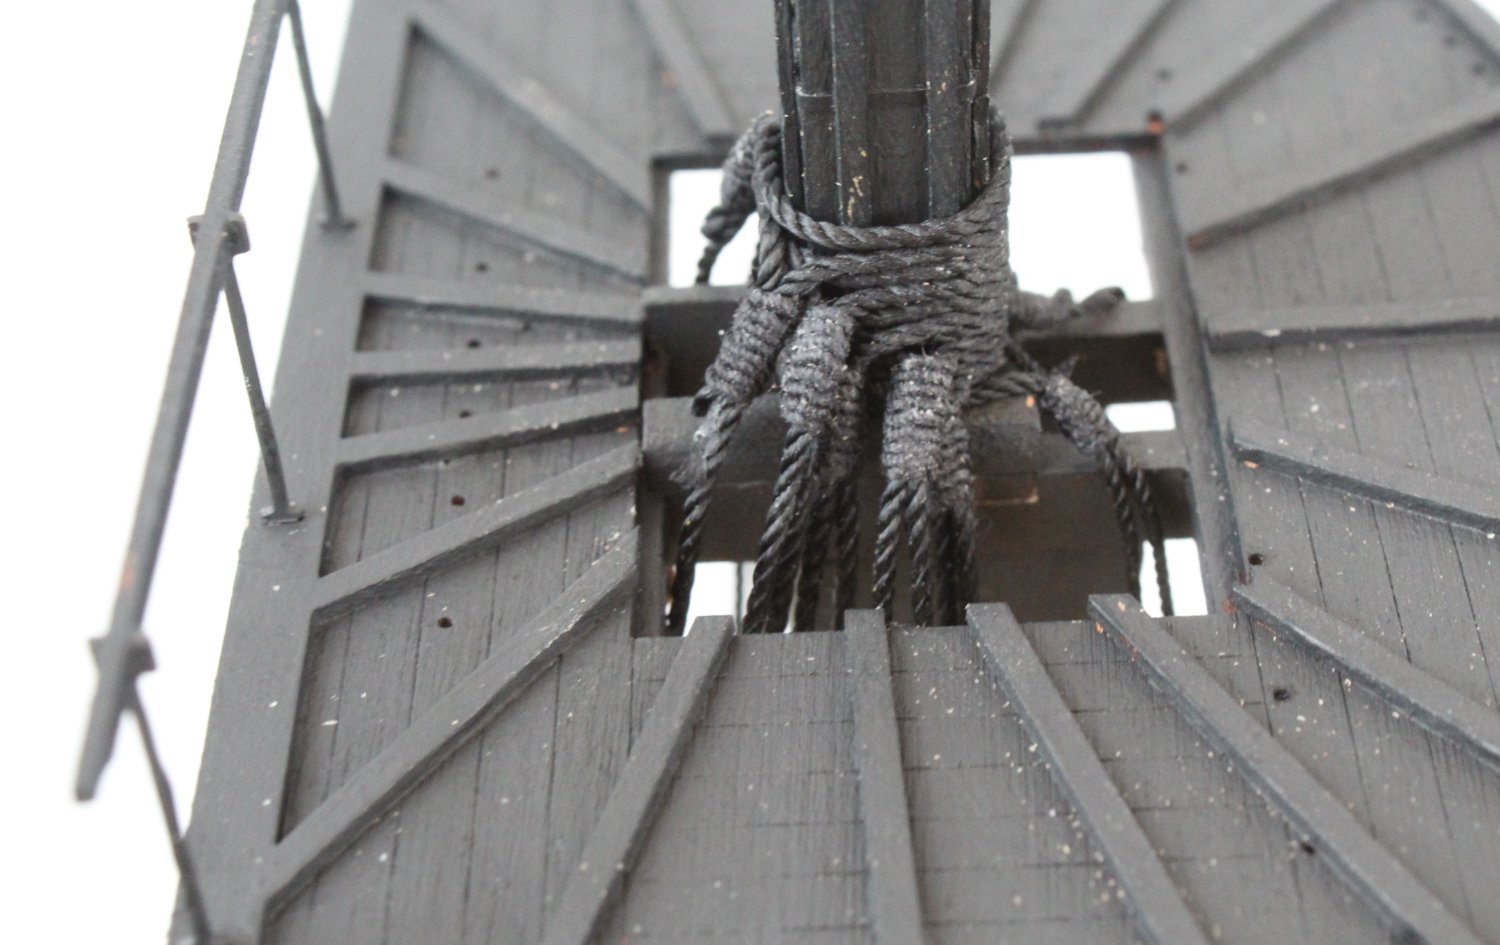
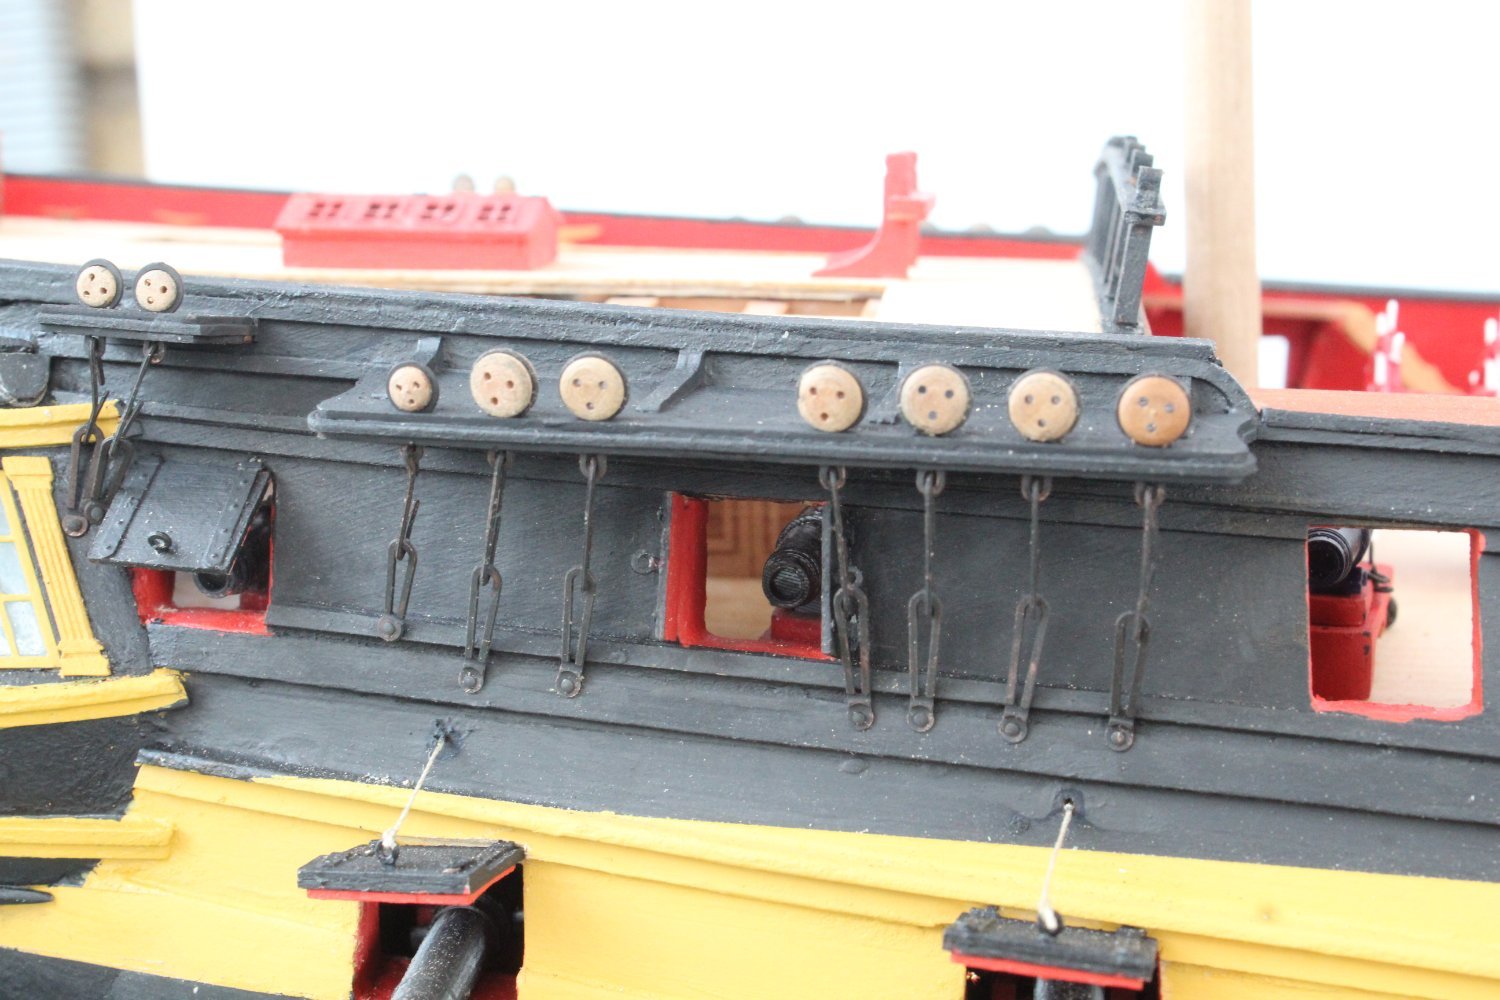
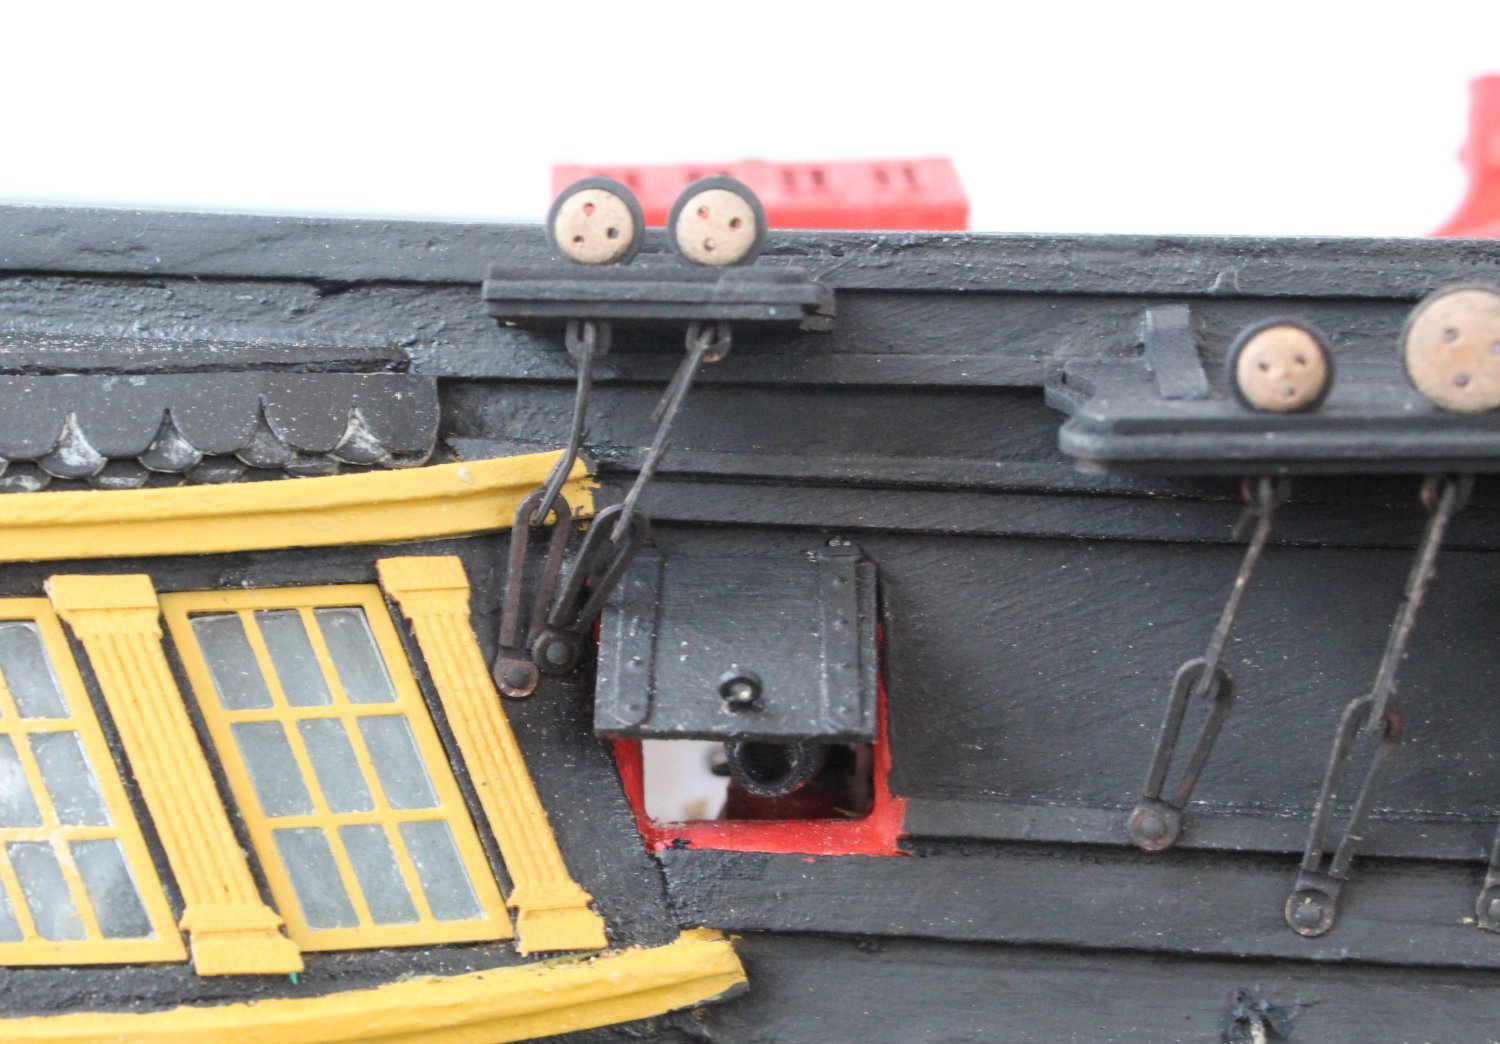
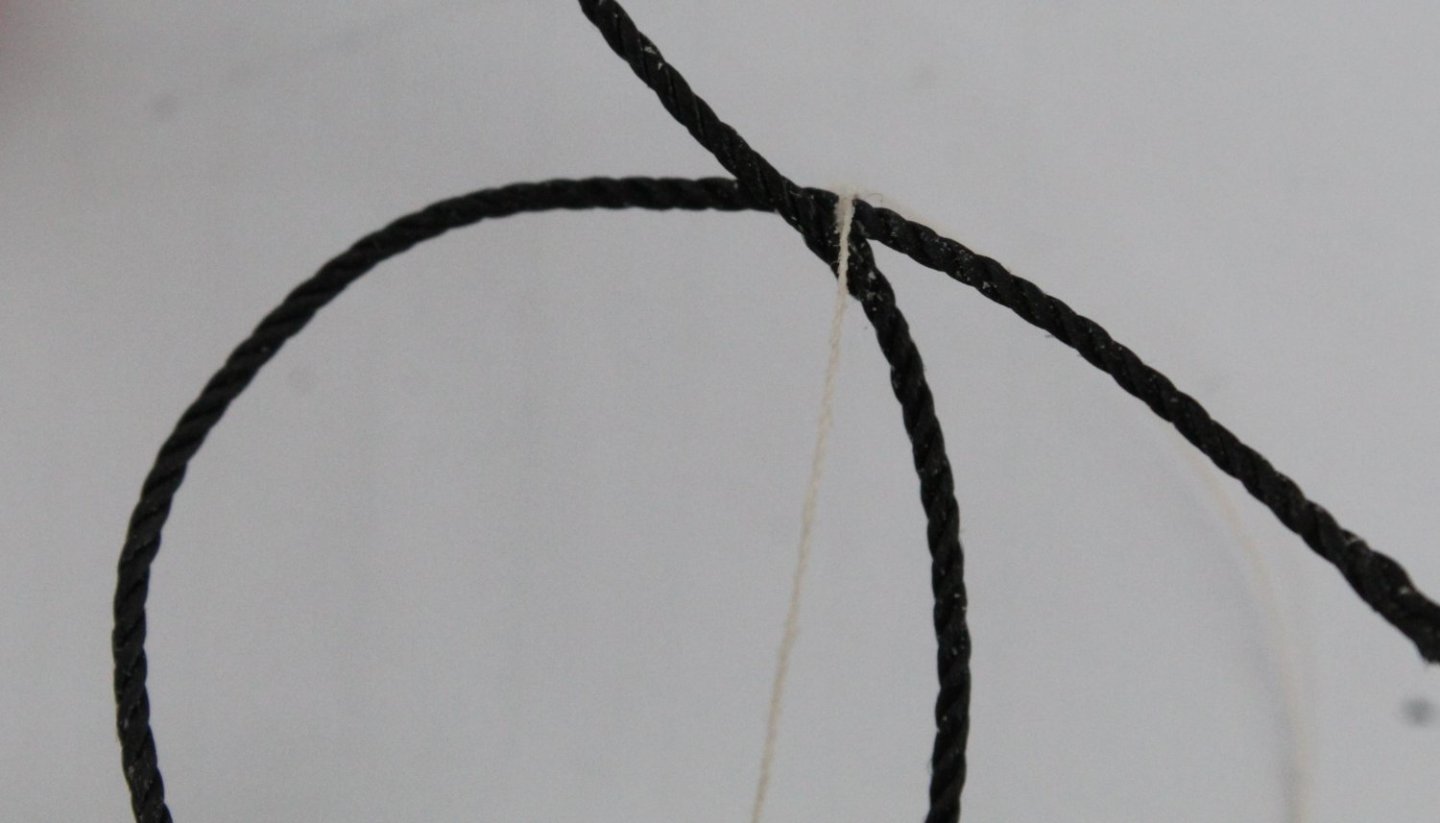
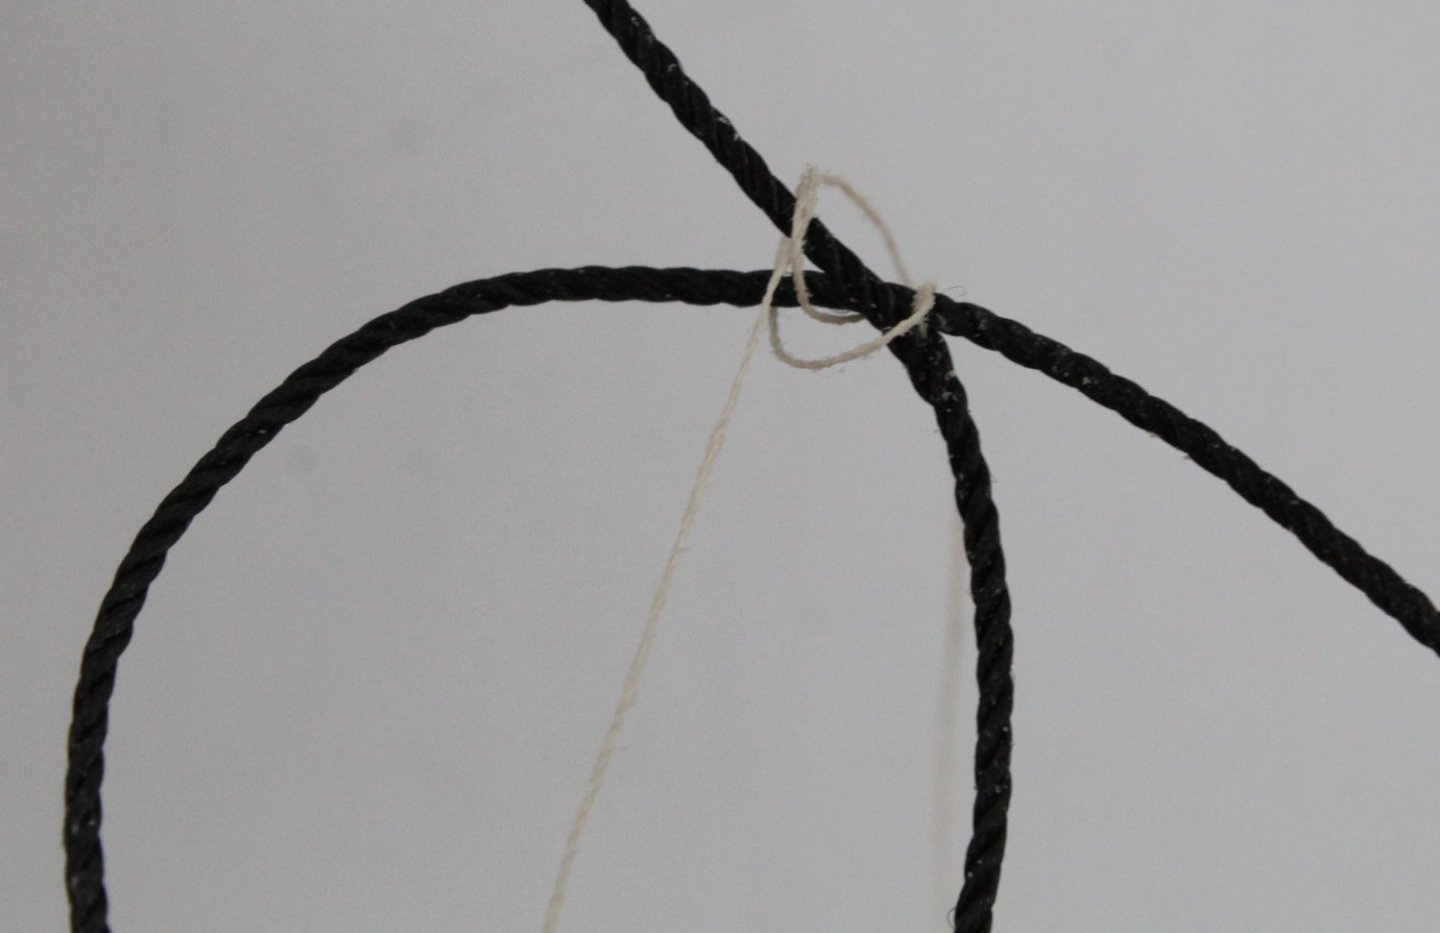
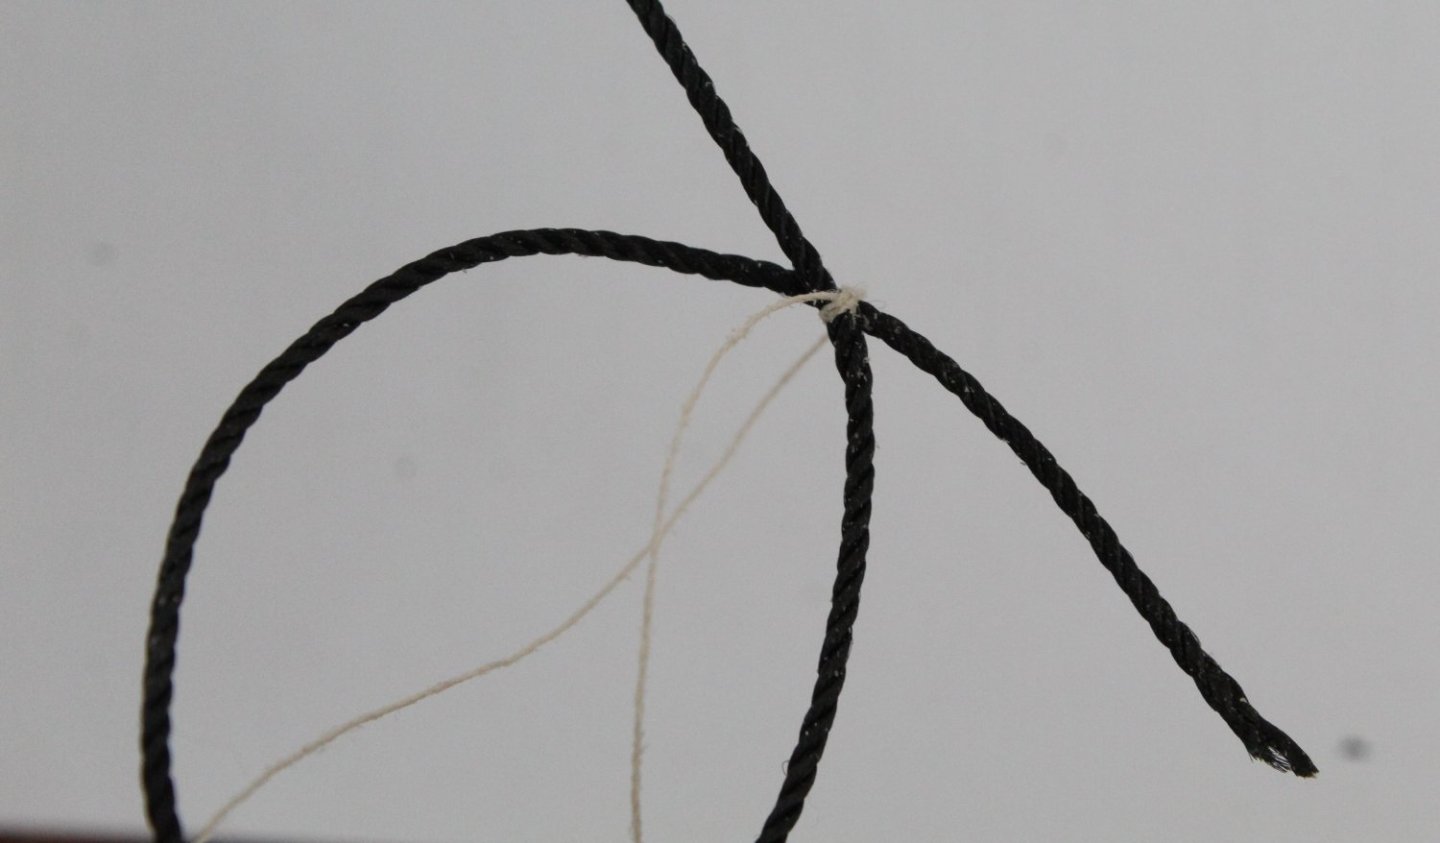
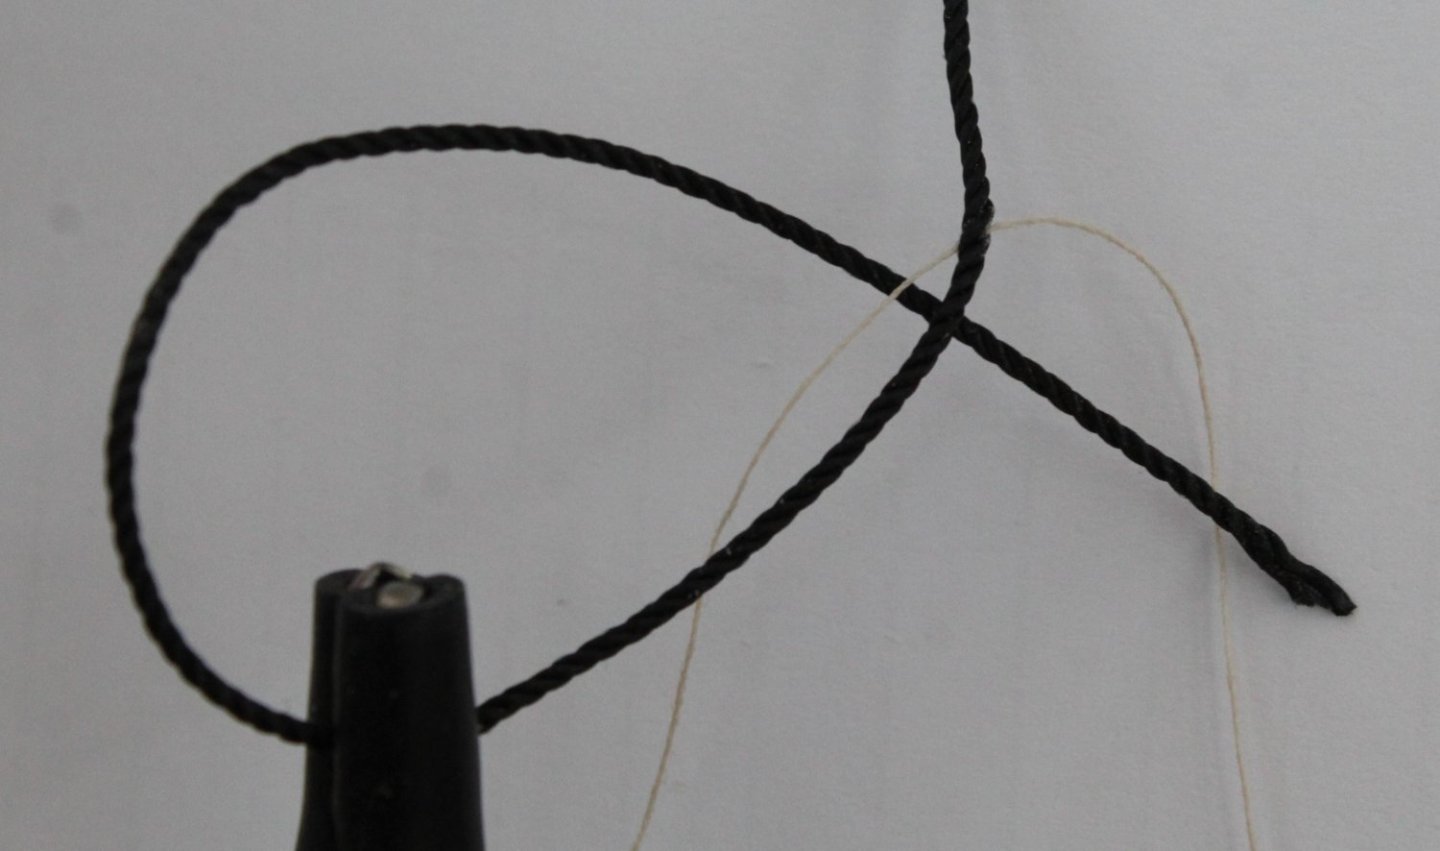
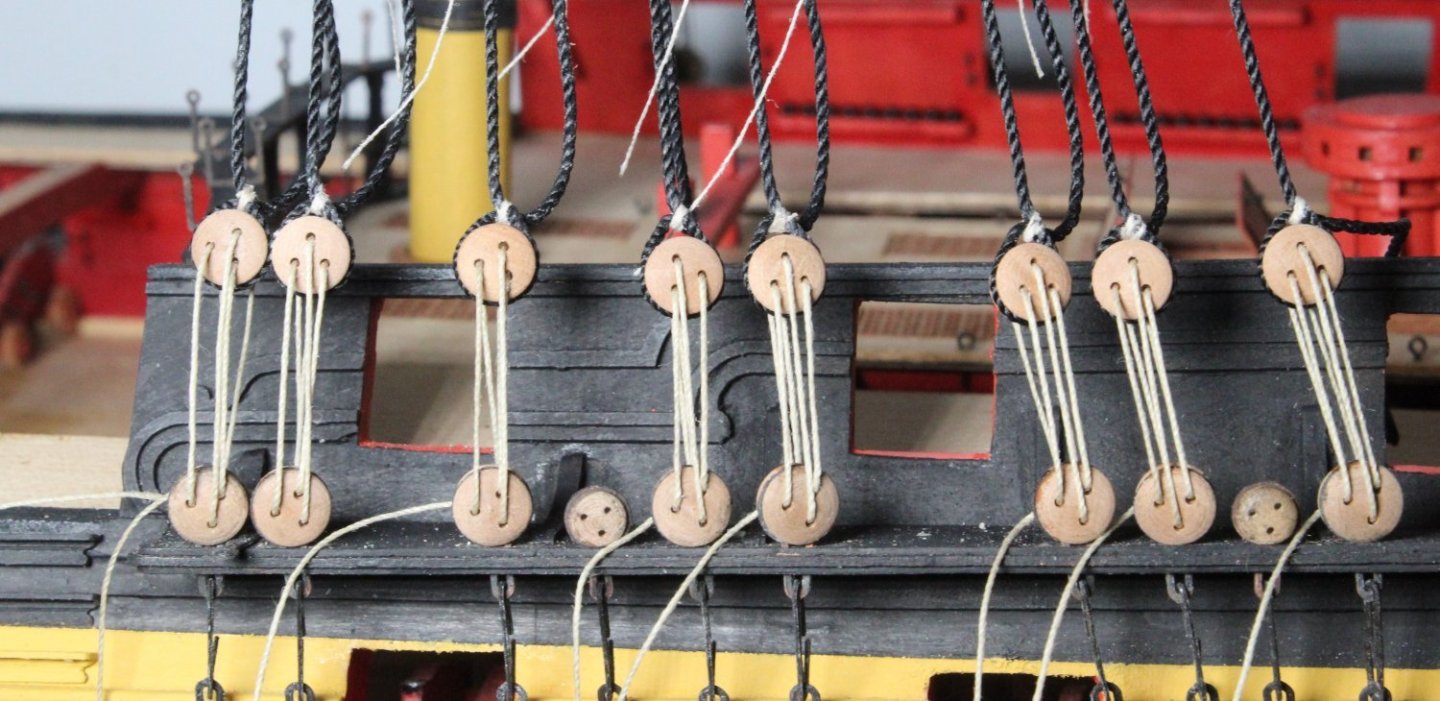
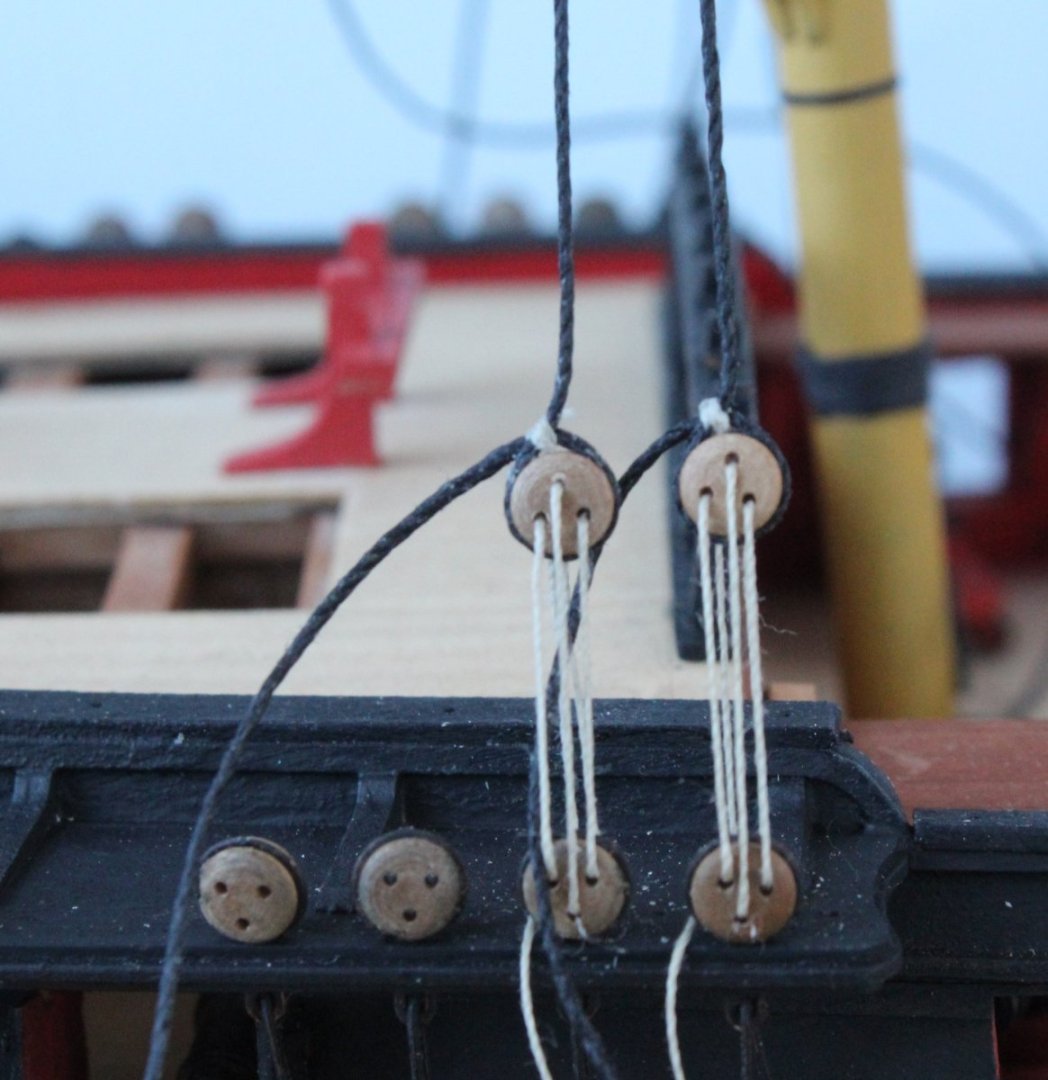
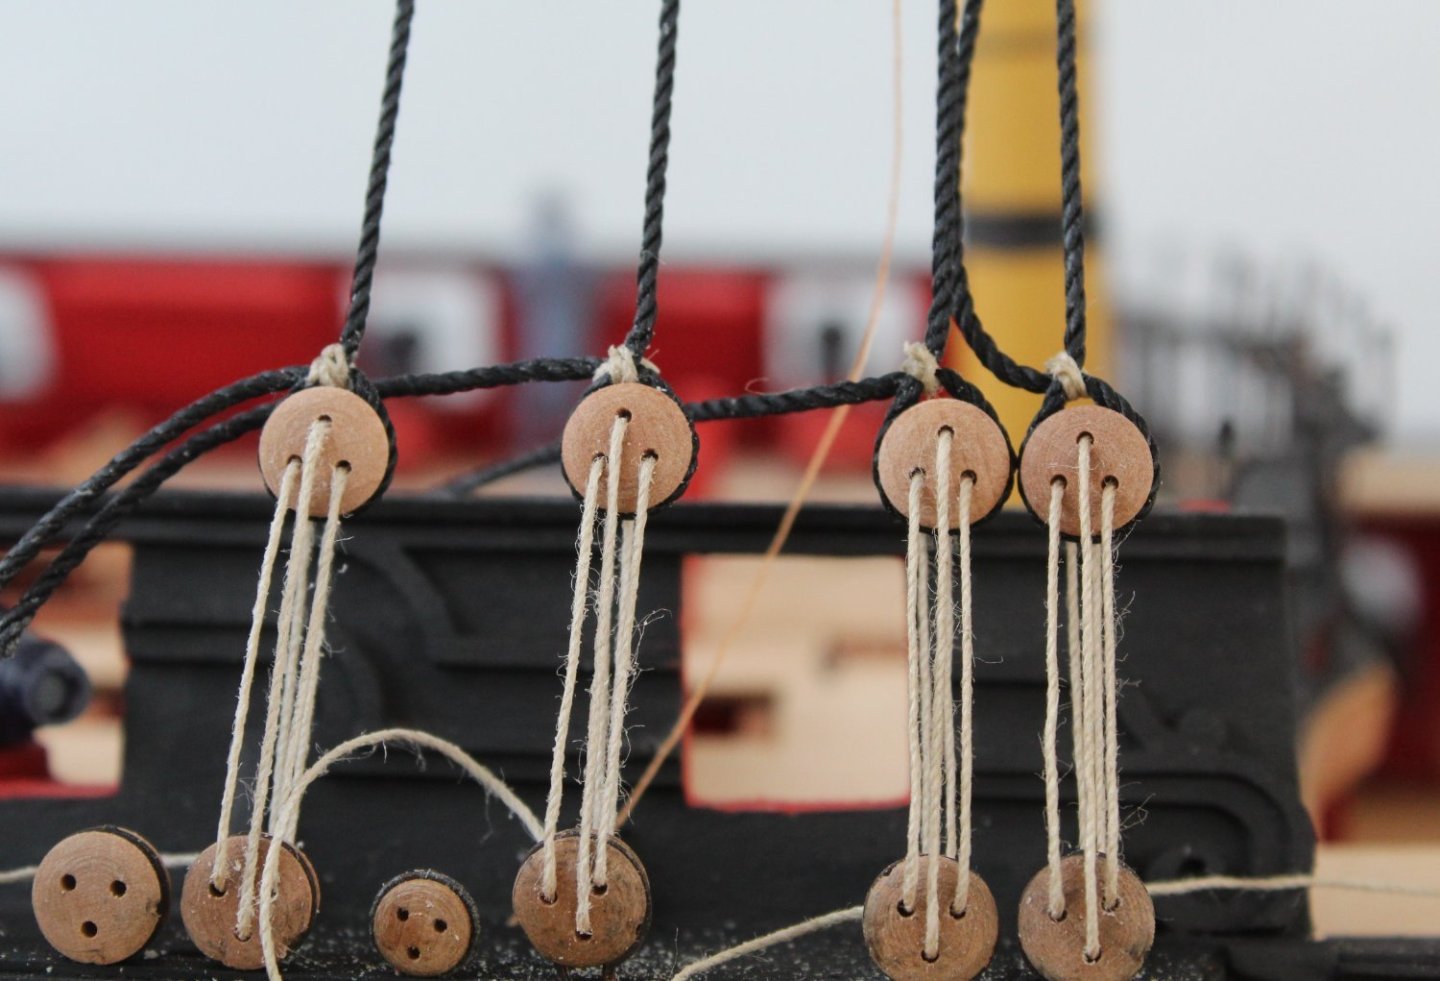
Adding deadeyes to shrouds Following on my from last post I thought I would detail how the deadeye is seized. Step 1 With the jig in play a length of seizing thread is pushed through the shroud line, with the aid of a needle. Step 2 Using the quad hands the seizing loop is formed. Step 3 Using a simple cross over knot the loop is secured. Step 4 The two free ends of the seizing thread are looped around and another simple crossover knot is formed. Step 5 The two free ends of the seizing thread are passed through the loop once again Step 6 Another simple crossover knot is used and the seizing process is complete. Step 7 Once the free ends of the seizing thread have been trimmed the loop can be pulled tight around a deadeye. Step 8 As each deadeye is seized the lanyards are added to check the alignment. As can be seen in the next series of photos the jig and seizing method has worked well as the shroud deadeyes are nicely aligned. I will adjust the rotation of some of the shroud deadeyes when it is time to tie the lanyards off.


-
Hope it works for you as it does for me.
-
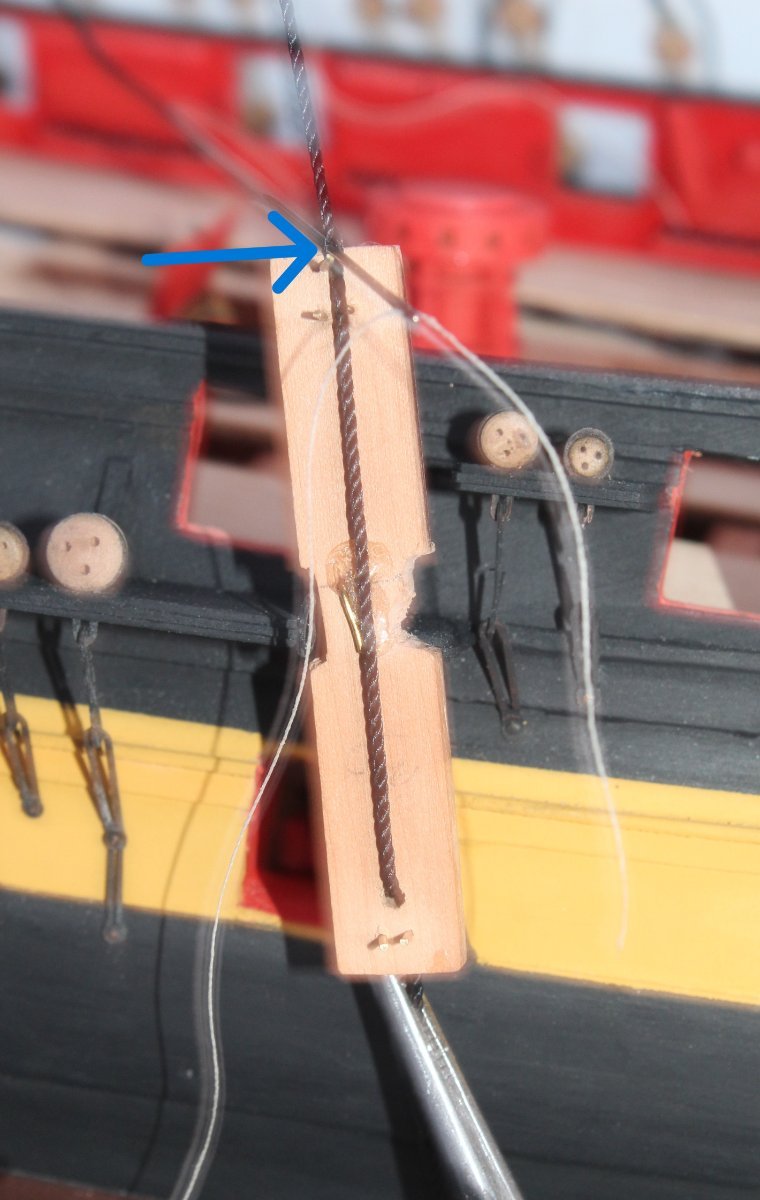
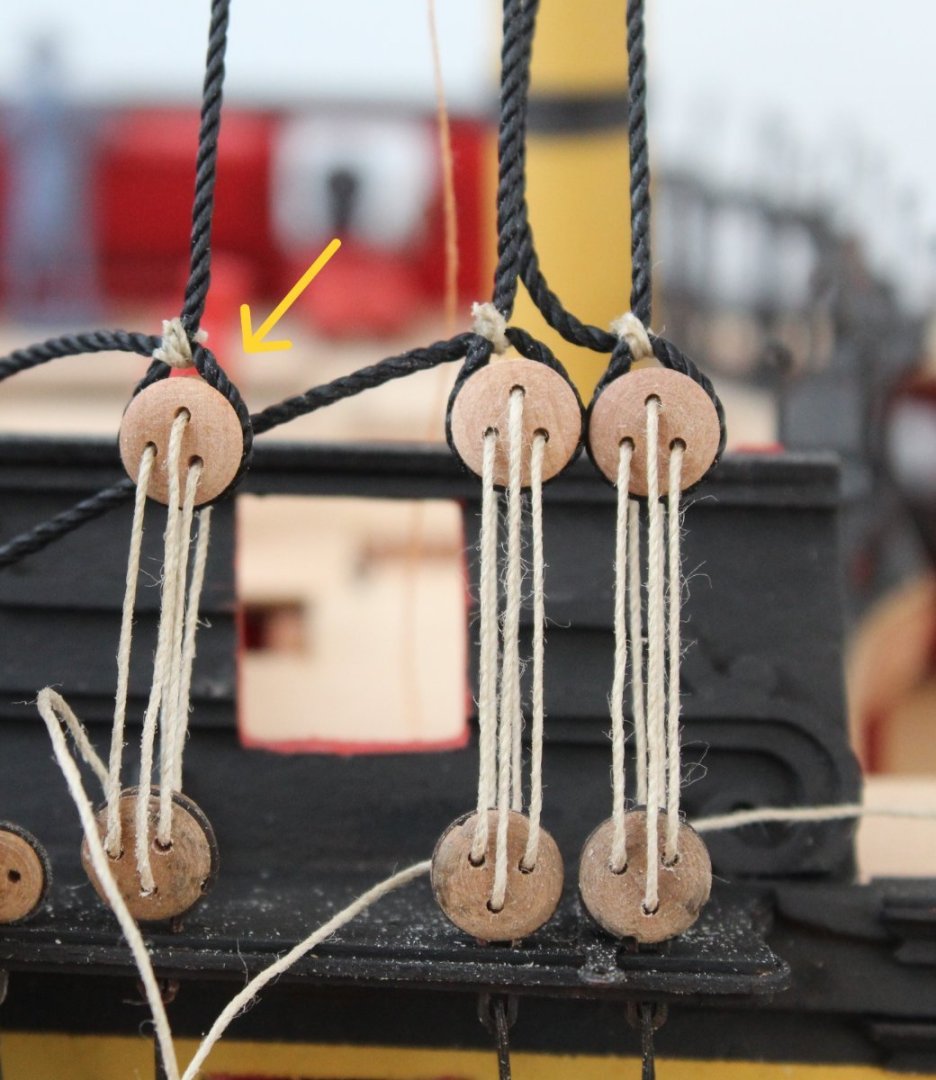
Modified Deadeye Jig Before commencing work on adding the deadeyes to the left-hand side main mast shrouds I decided to improve the jig used to set the position of said deadeyes. Using the two locating pins the jig is placed on the first channel deadeye. With reference to the blue arrow on the photo below the shroud is then brought down placed between the alignment pins. The modification to the jig was adding a hole at the bottom, as shown by the yellow arrow. The shroud is then passed through the hole and held in place with a clamp (red arrow). The addition of the hole helps to keep the tension in the line when clamped. With the shroud line in place the deadeye seizing thread is then added. Using the same reference point as per the right-hand side I am using the top edge of the jig as the reference point, as can be seen in the photo below (blue arrow). I have added the shroud deadeye seizing thread to all the main mast shrouds in readiness to creating the loops and inserting the deadeyes.


-
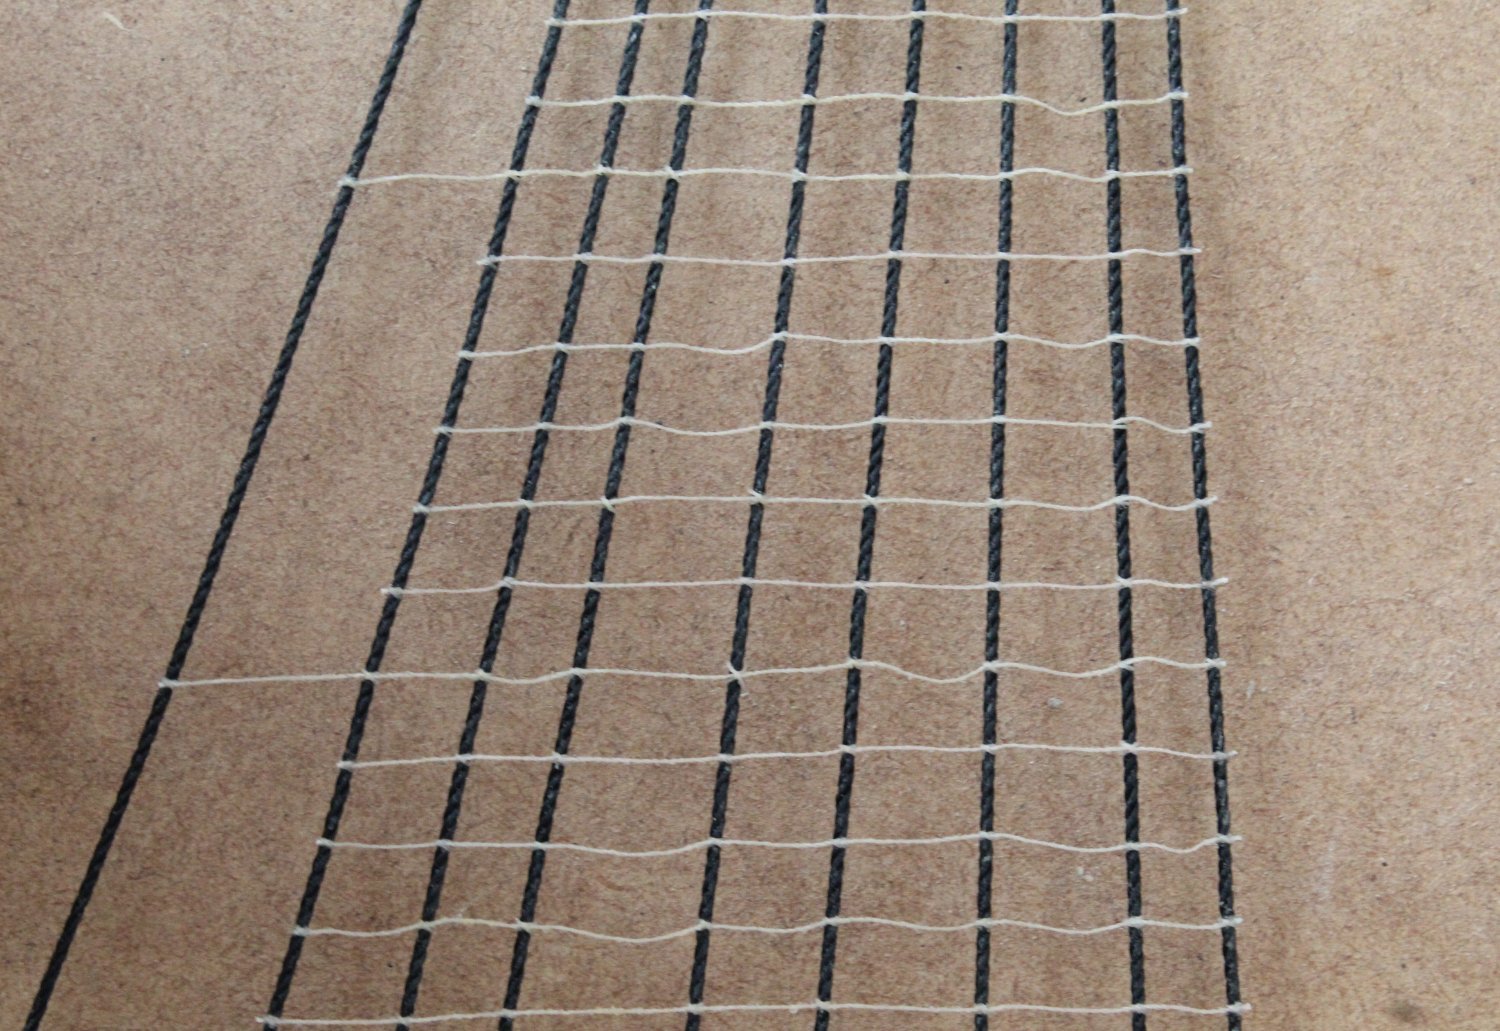
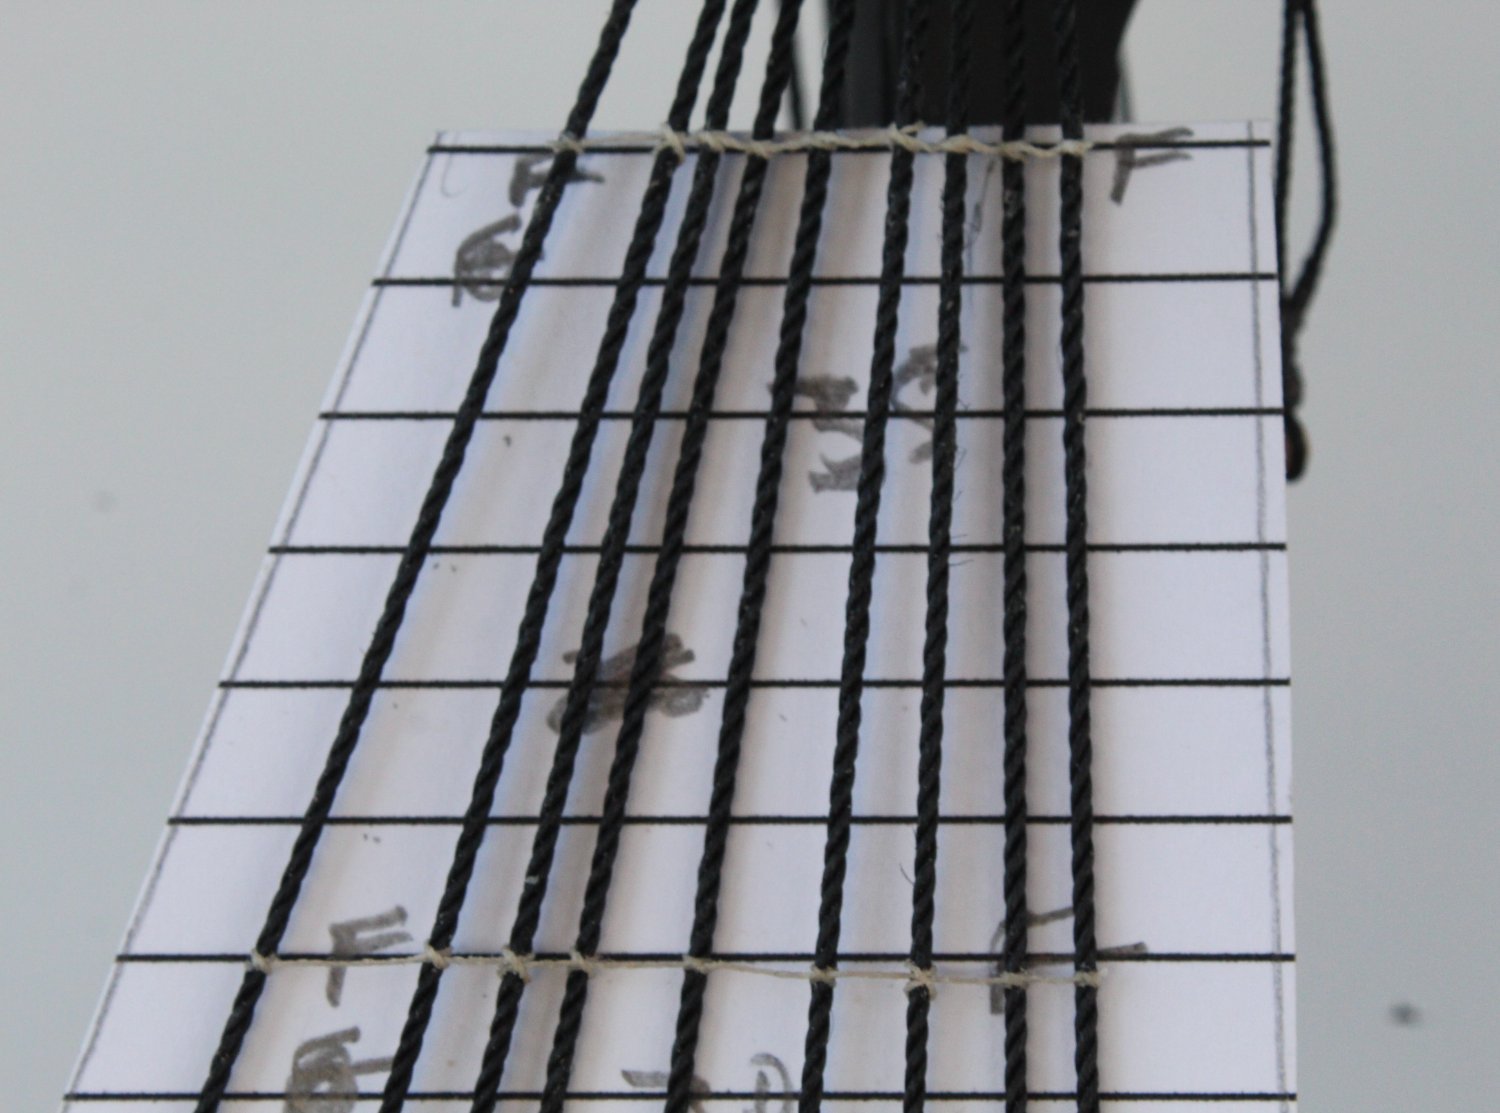
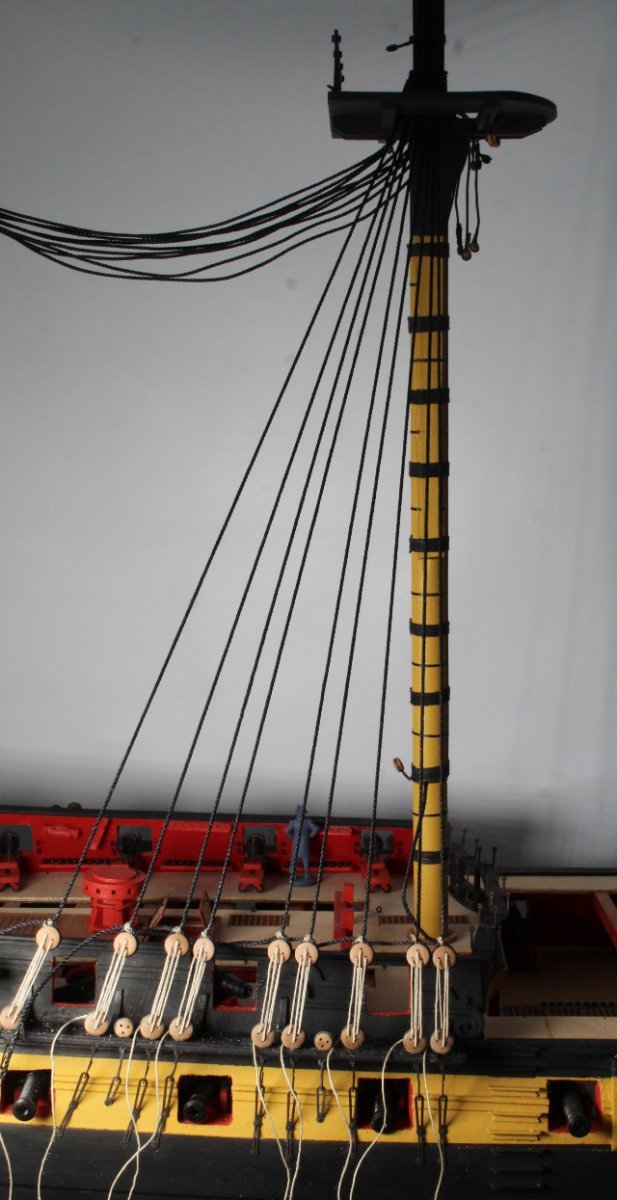
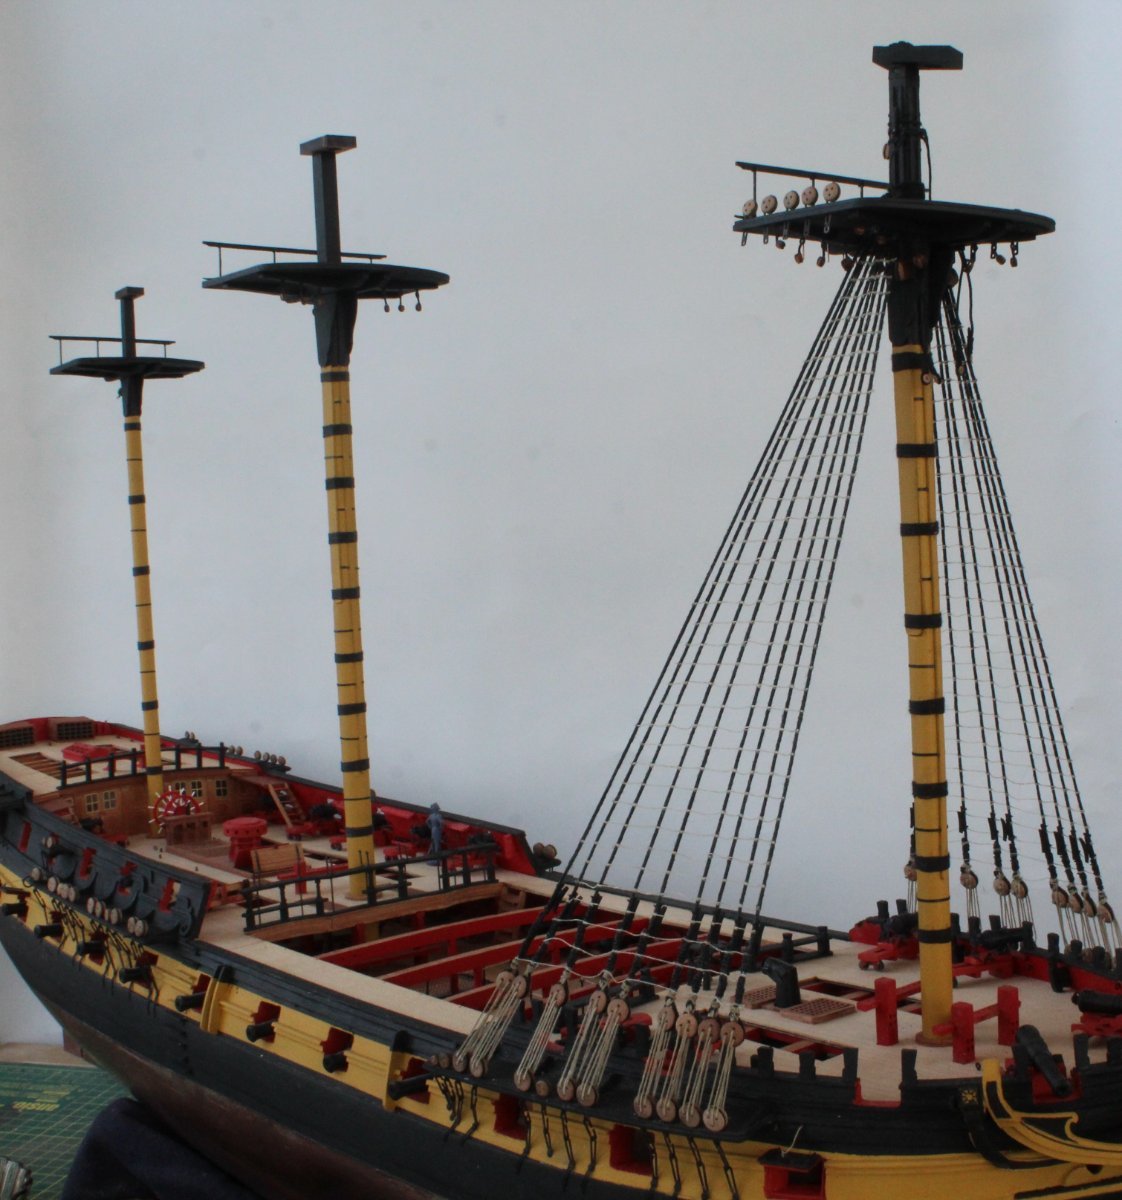
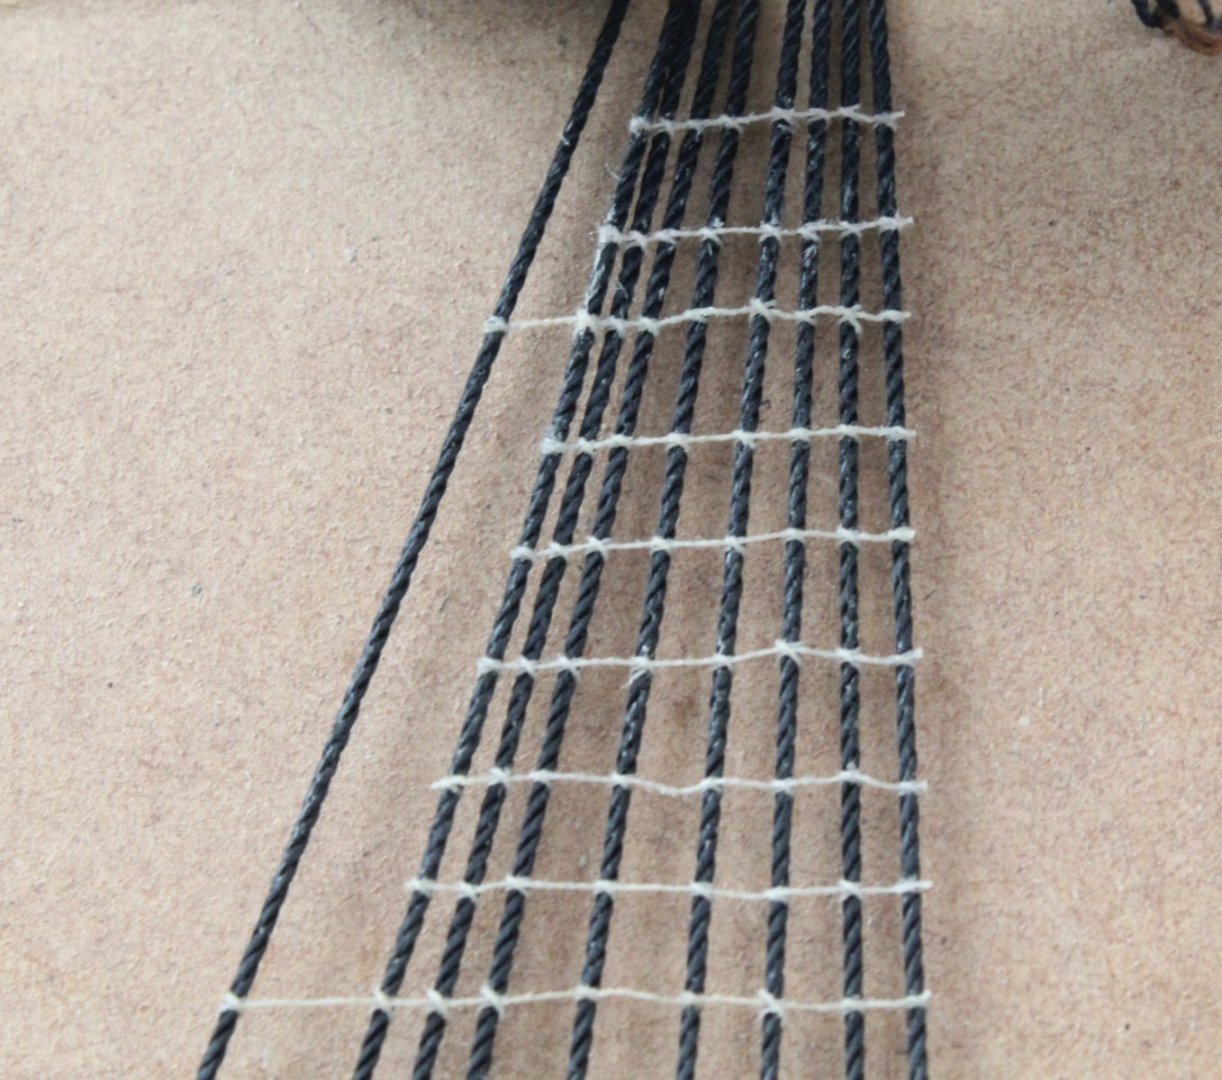
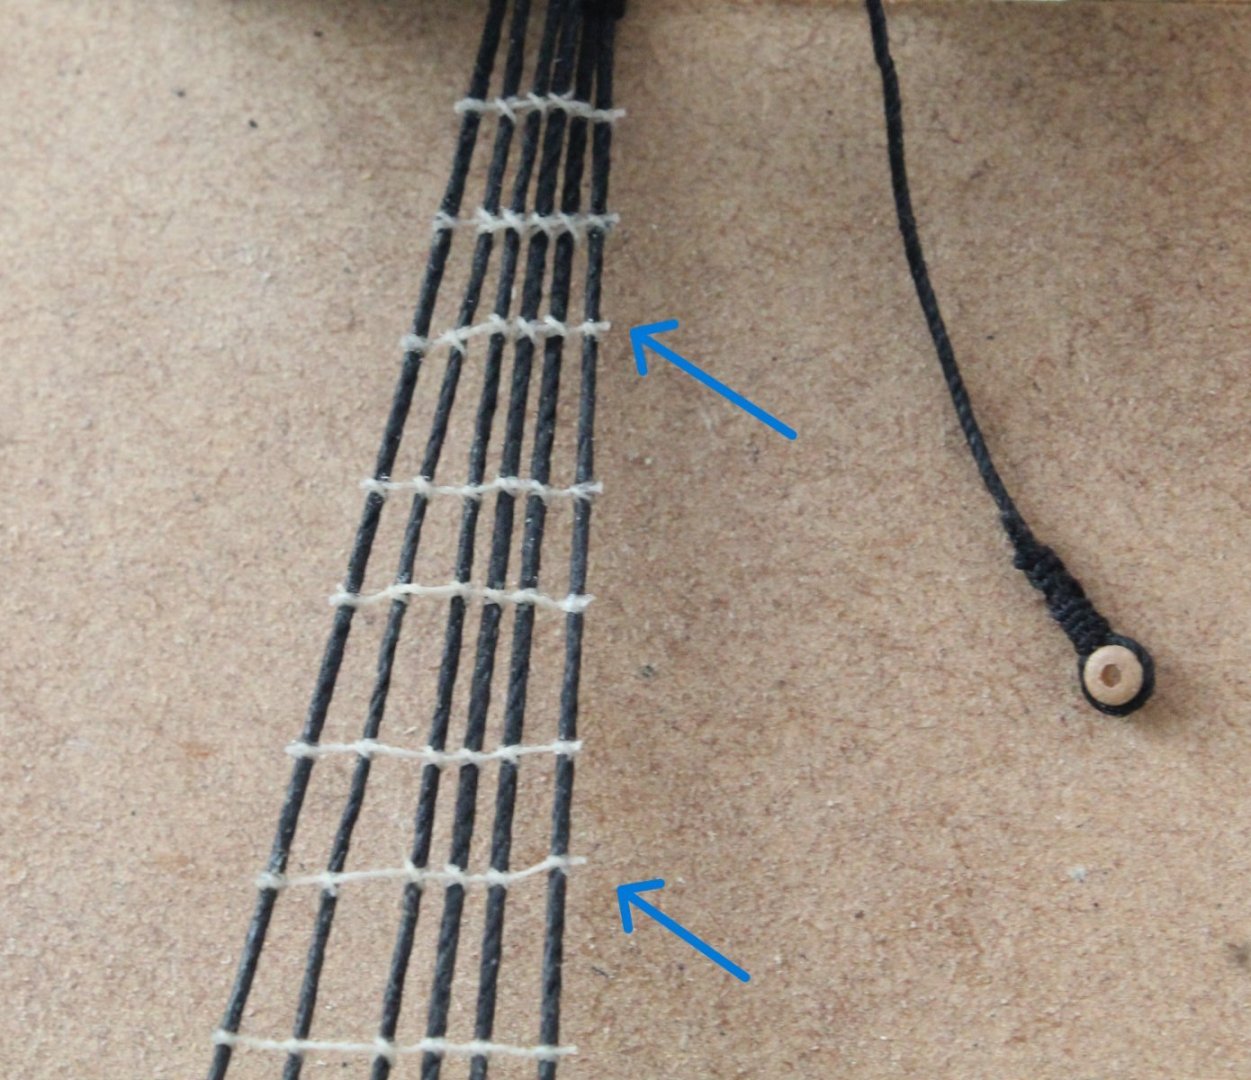
Main and Mizzen Mast Ratlines I have now completed adding the ratlines to the right-hand side of the main and mizzen lower masts. I am reasonably happy with how they look. I have managed to avoid the dreaded hourglass effect and apart from the odd one there is not a great deal of ratline droop between the adjacent shrouds. I am still undecided weather to leave the ratlines beige or to dye them black using Indian ink. I have it all to do again for the left hand side main and mizzen mast. My time in shipyard will be limited over the next few days it might be next week before I can start to make progress. When taking the photo's below I used some scrap wood to try to show the ratlines. Main Mast Upper section main mast Mid section main mast Mizzen Mast The lower section Mizzen mast top section. I have highlighted a couple of ratlines which I may redo as they do not look good. To complete this post see the following two photos


-
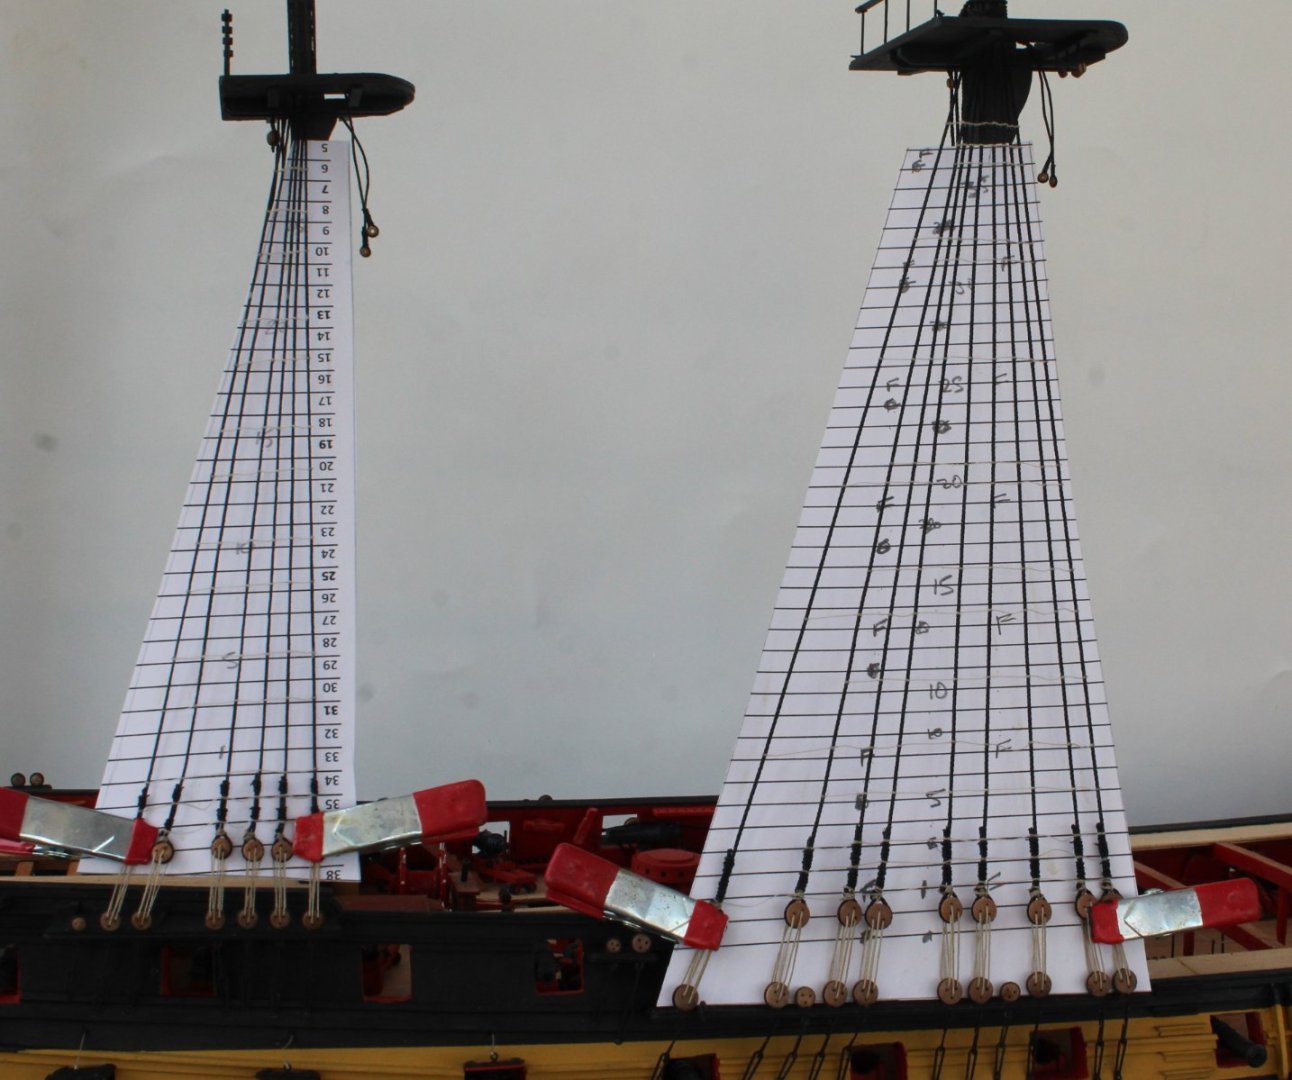
Main and Mizzen Mast Ratlines Work is progressing slow and steady with adding the ratlines to both the right-hand side main and mizzen lower mast. It seems to break the monotony of task by switching between each mast. I am using a stiff card for the templates and have found it stays in place best when clamped to the deadeyes. The photo below shows both the templates in place. I have completed adding the full length ratlines on the main main mast (F). I have also add every 5th ratlines to both masts. Main Mast The next photo shows some of the completed F and 5th ratlines I have added the ratline between the 35th and final F ratline, as can be seen in the photo below. This will help with keeping the spacing between the shrouds. Mizzen Mast Some of the completed 5th ratlines Adding a few more near the top, as this helps with retaining the spacing between the shrouds.


-
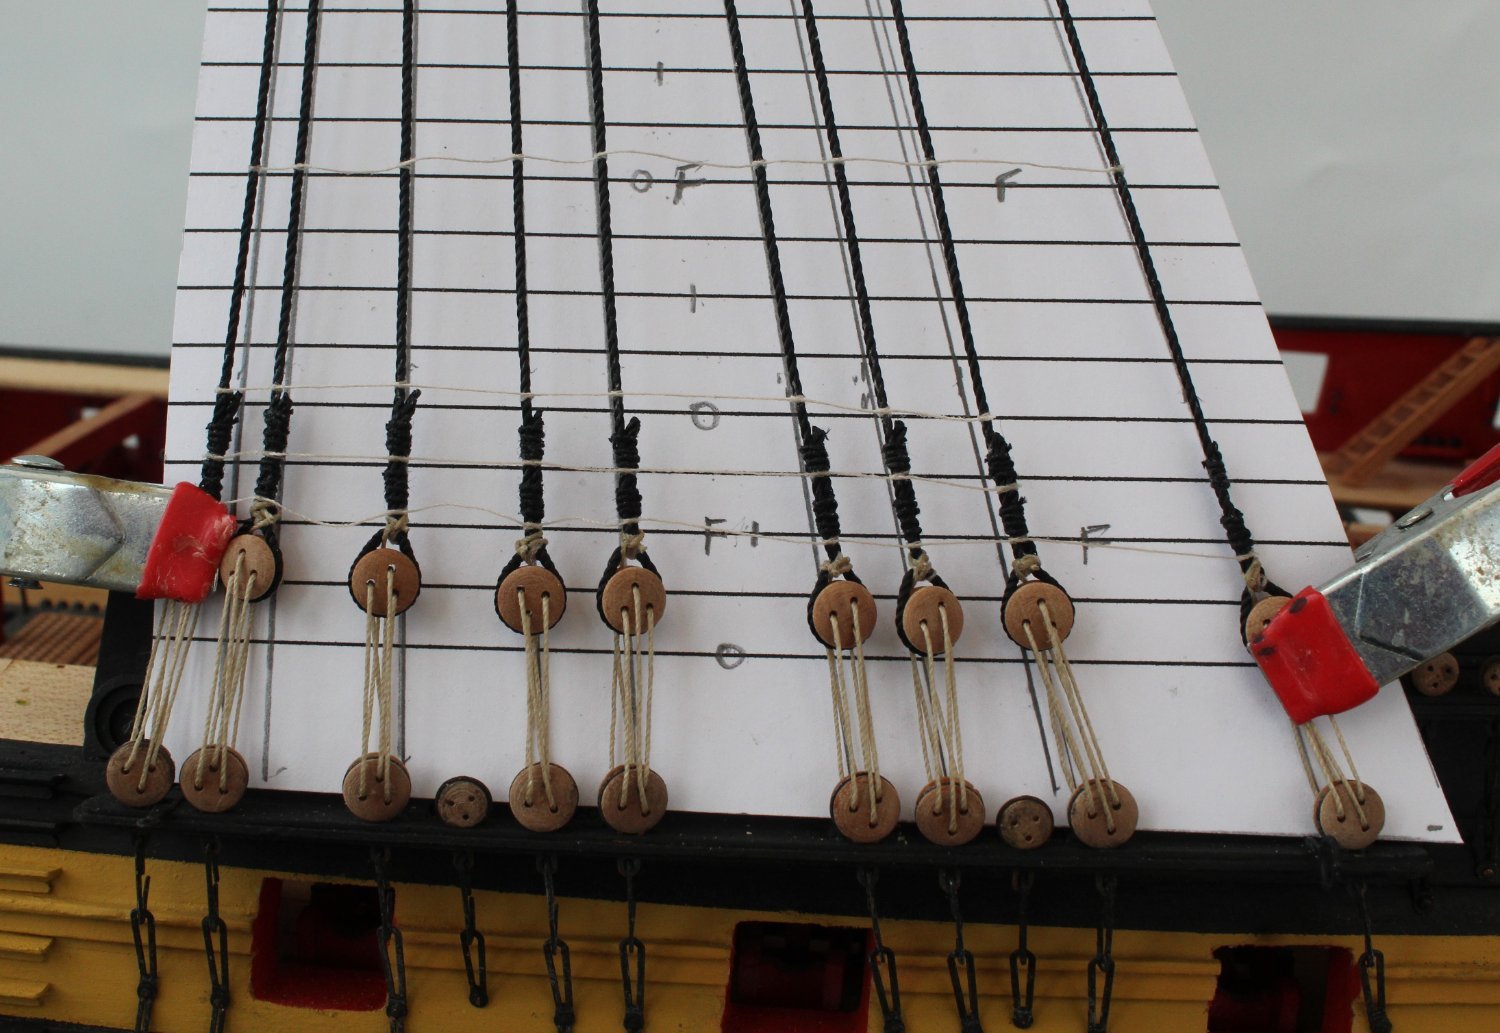
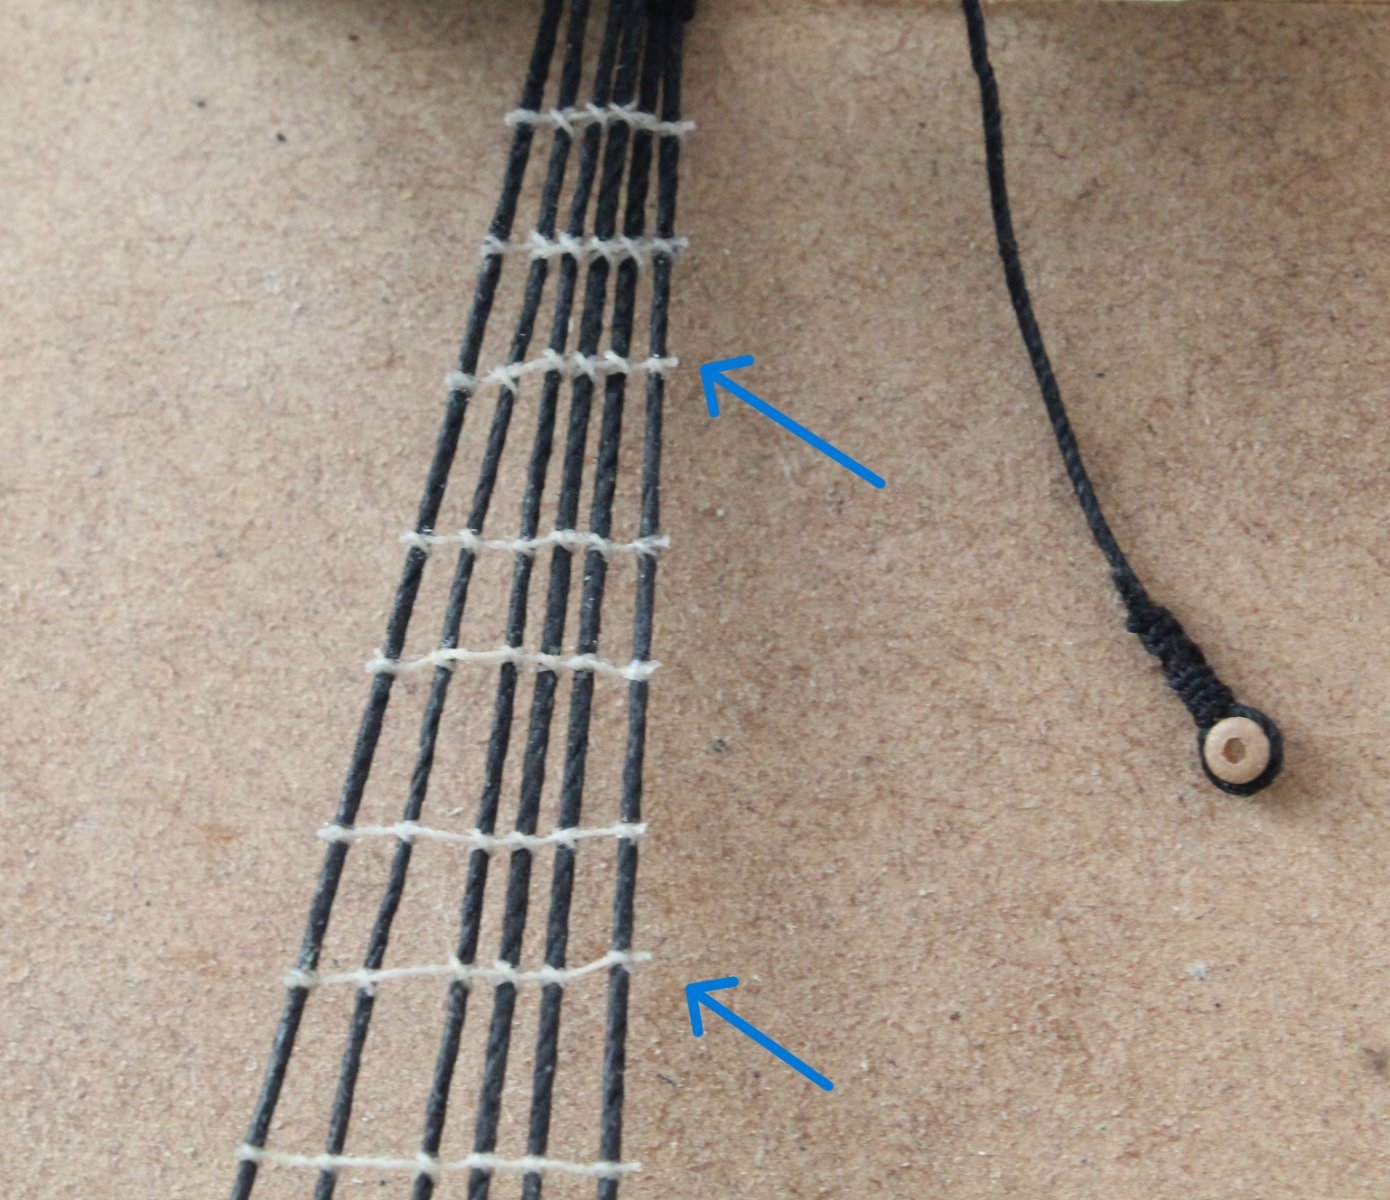
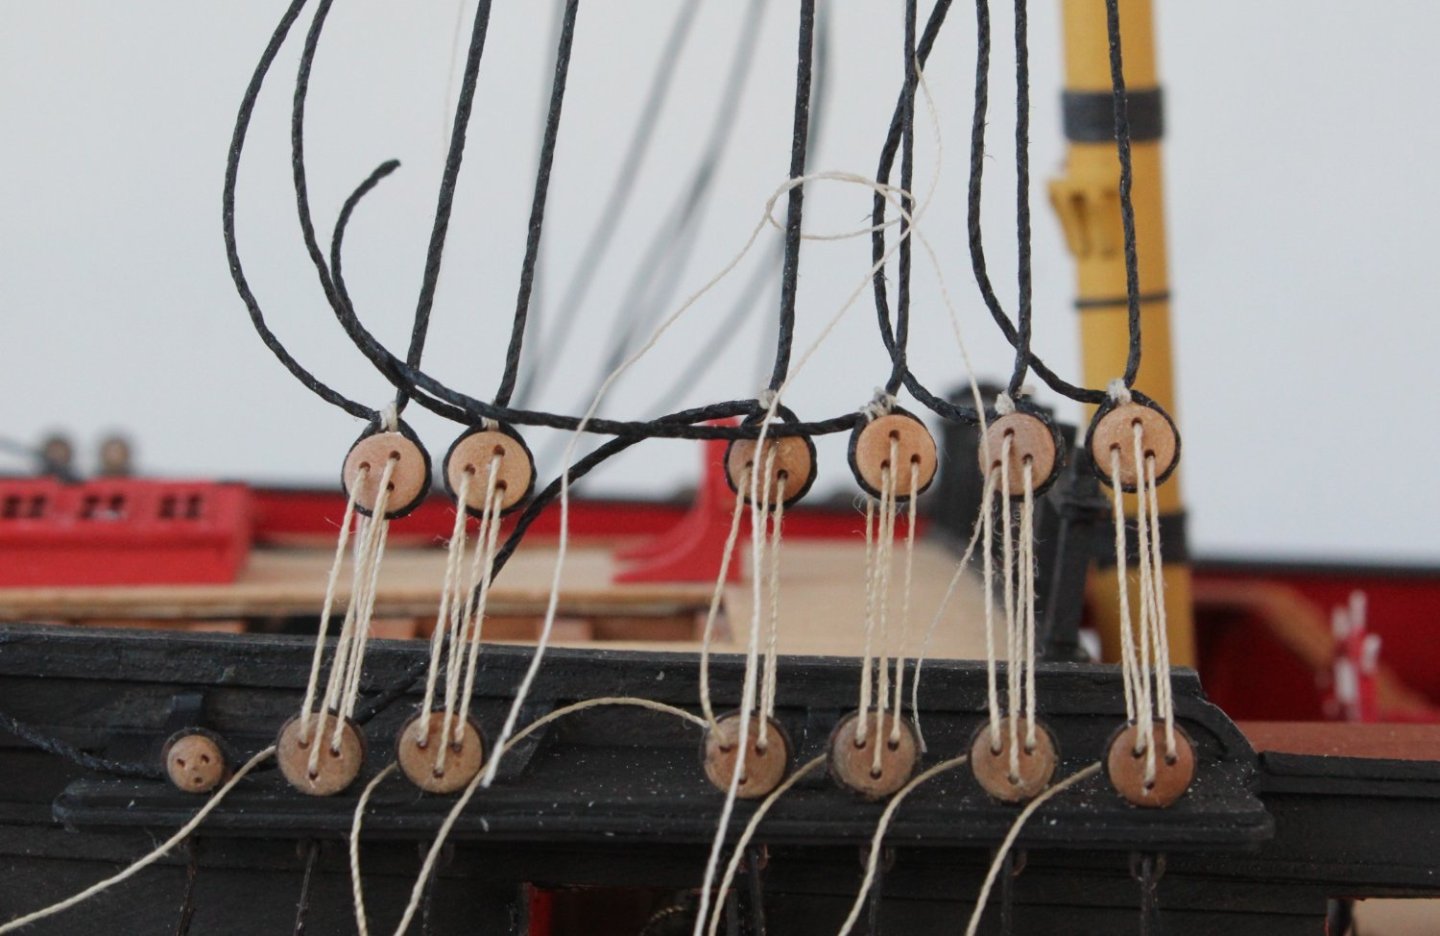
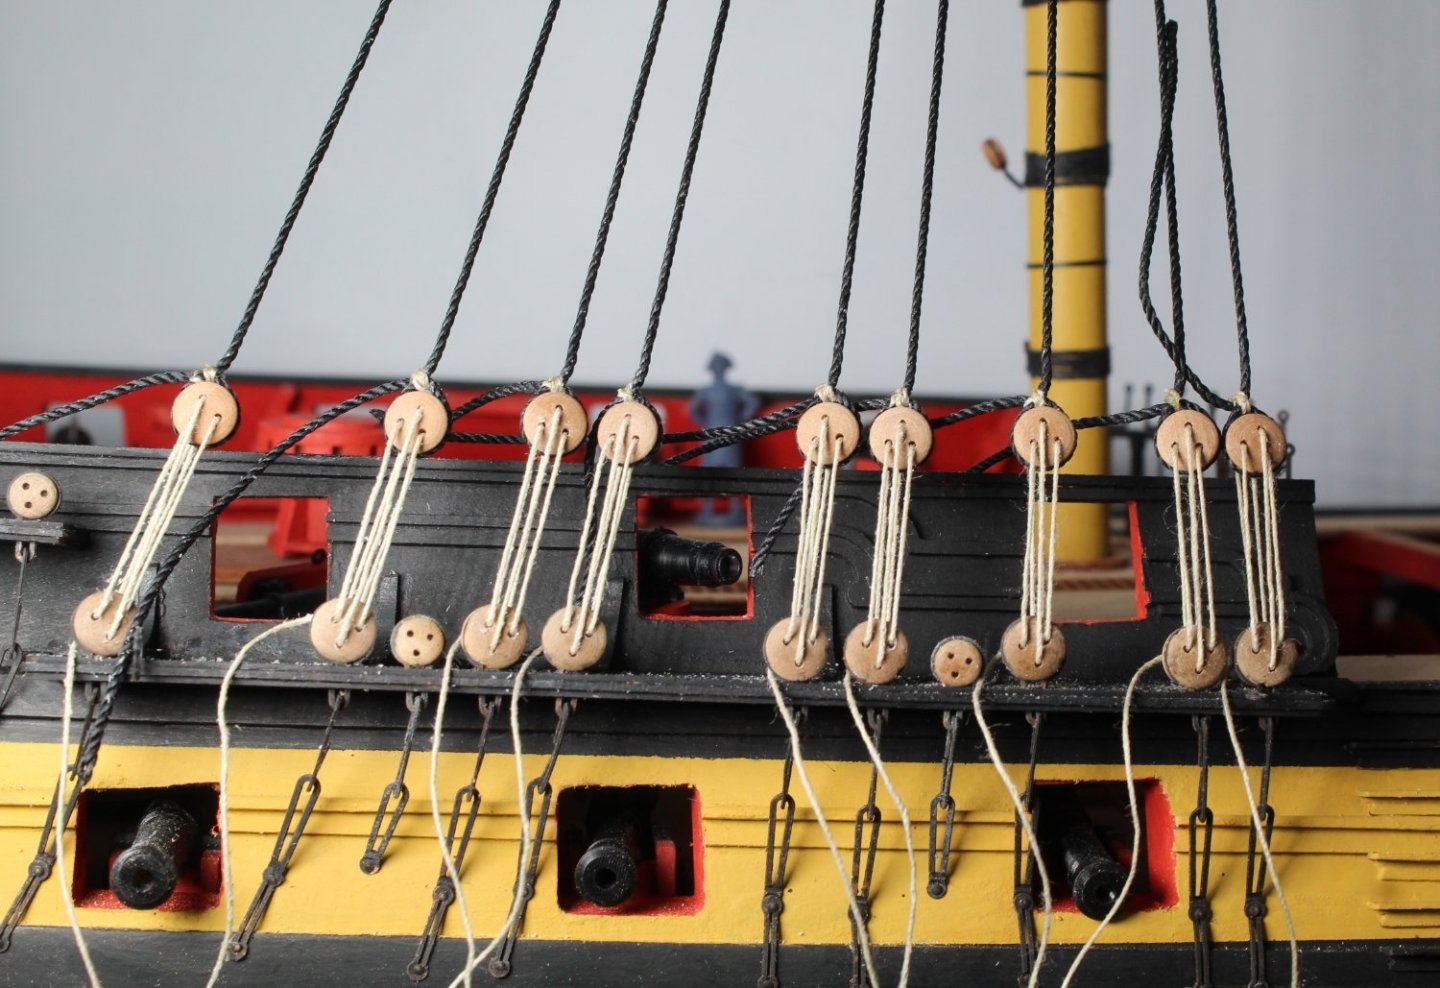
Main and Mizzen Mast Work With the shrouds tied off on the right-hand side of the main mast it was time to add a few ratlines. I created a ratline template and marked off every 5th ratline position and the positions which require the ratline to connect to all the shrouds (F). My normal working method is to add the ratlines around the shroud seizing's and then to add the full length ratlines (F) first . Once the F's have been added I will then add every 5th ratline. I find this method helps me maintain the shape of the shrouds and reduces the risk of the hour glass effect. The template is in position and the F's and 5's marked up. Close up of the shroud seizing's, noting I opted to only add two seizing's per shroud, although 4 were shown on the rigging plans. The top two main mast F ratlines have been added next to help with the shroud shaping. The apparent droop of the lower ratline toward the right hand edge is an photo optical illusion. Once the main mast F ratlines have been added I plan to move on to getting the mizzen mast ready for the ratlines. The mizzen mast shrouds have already been added and the lanyards added but not tied off. As can be seen in the final photo all the shroud deadeyes look reasonably level.

-
Thank you. With reference to the attached photo the two pins at the top and bottom of the jig are simply guides which will hold the shroud line in place before the tweezers are added to keep the tension before the needle is passed through the thread. Another option which I did consider was to feed the thread through the top hole and then to use a similar hole at the bottom to hold the thread in place but thought this would be more time consuming. The jig, as shown in the photo, works really well for me. I did have spent a bit of time perfecting the method. Hope that helps

-
My pleasure, not sure it's a master class it's just detailing the methods which work for me.
-
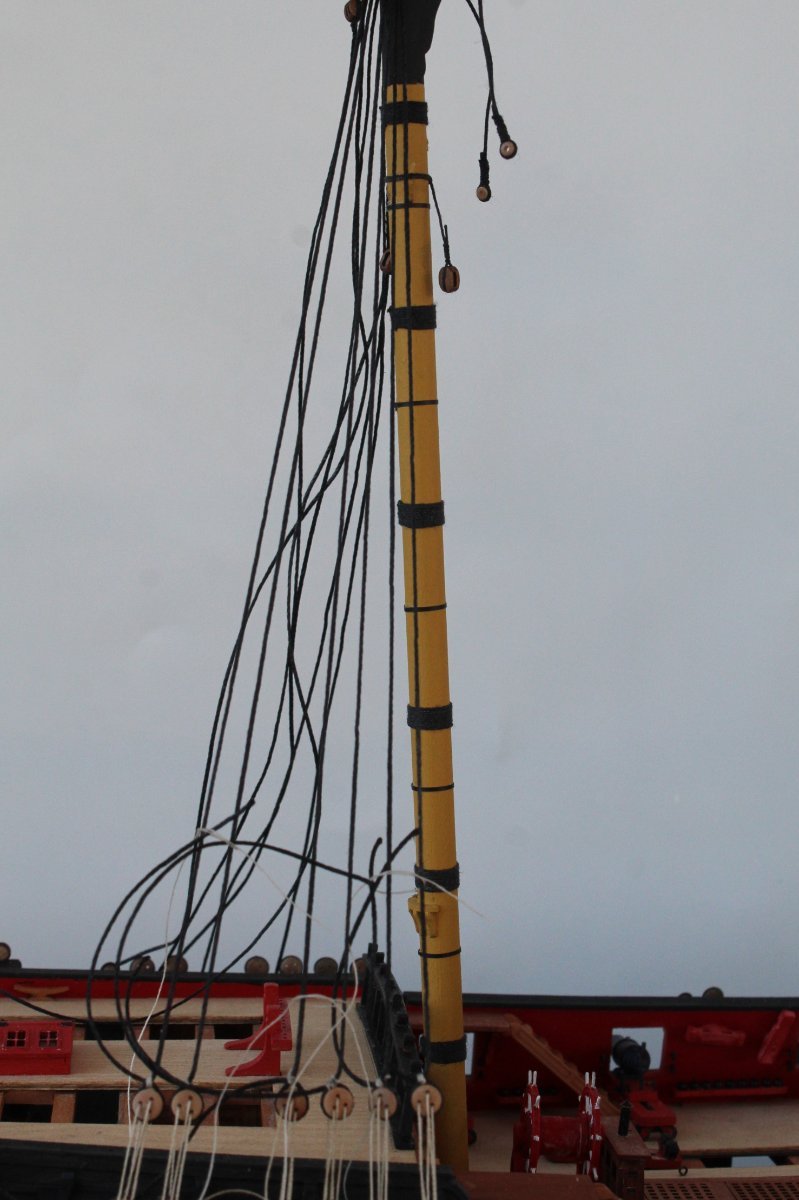
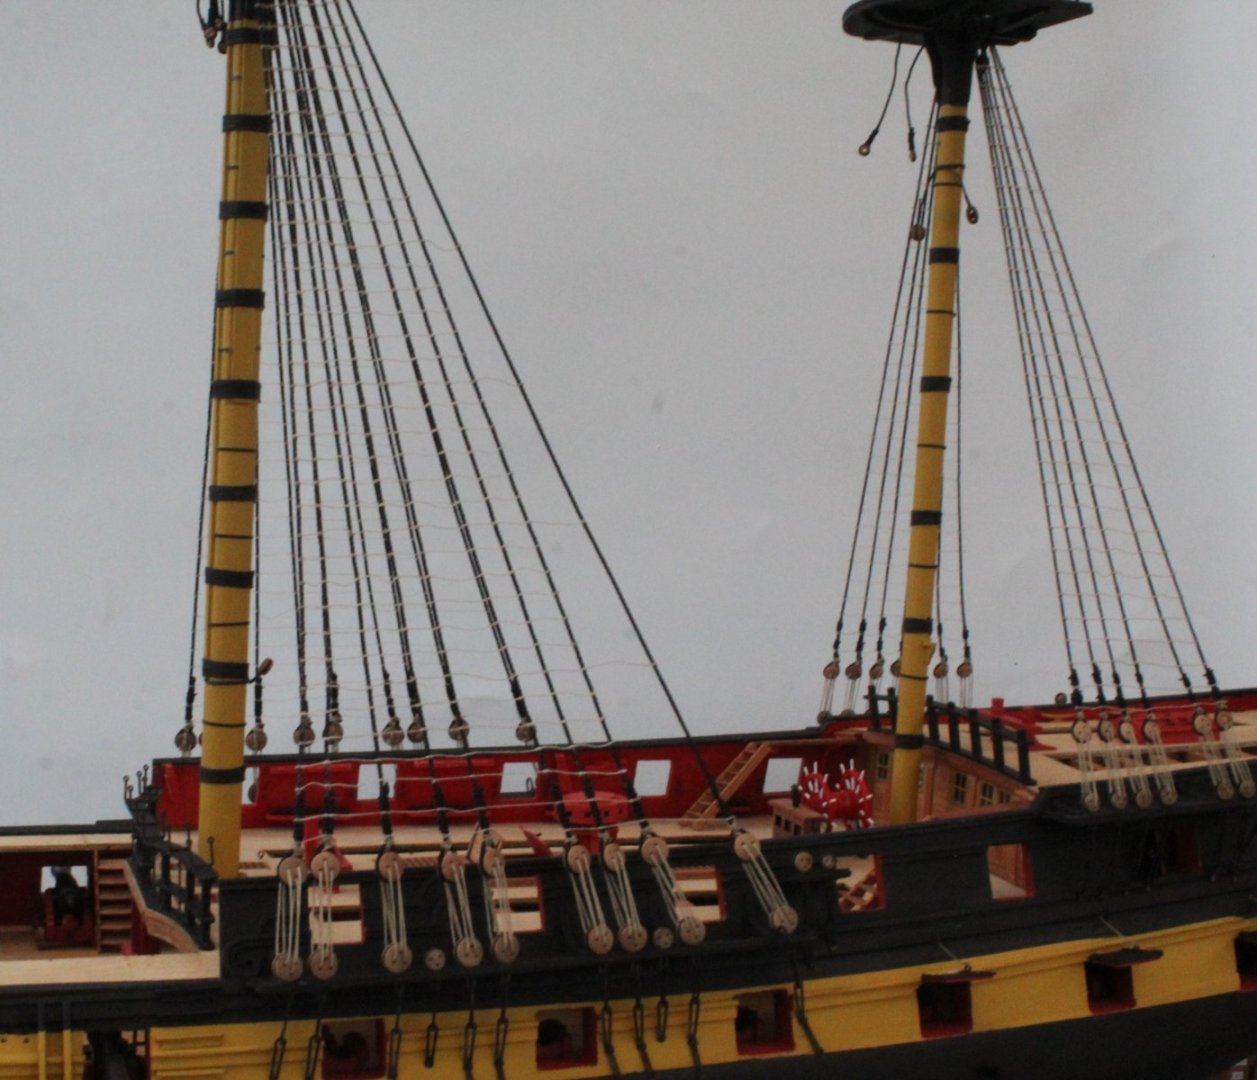
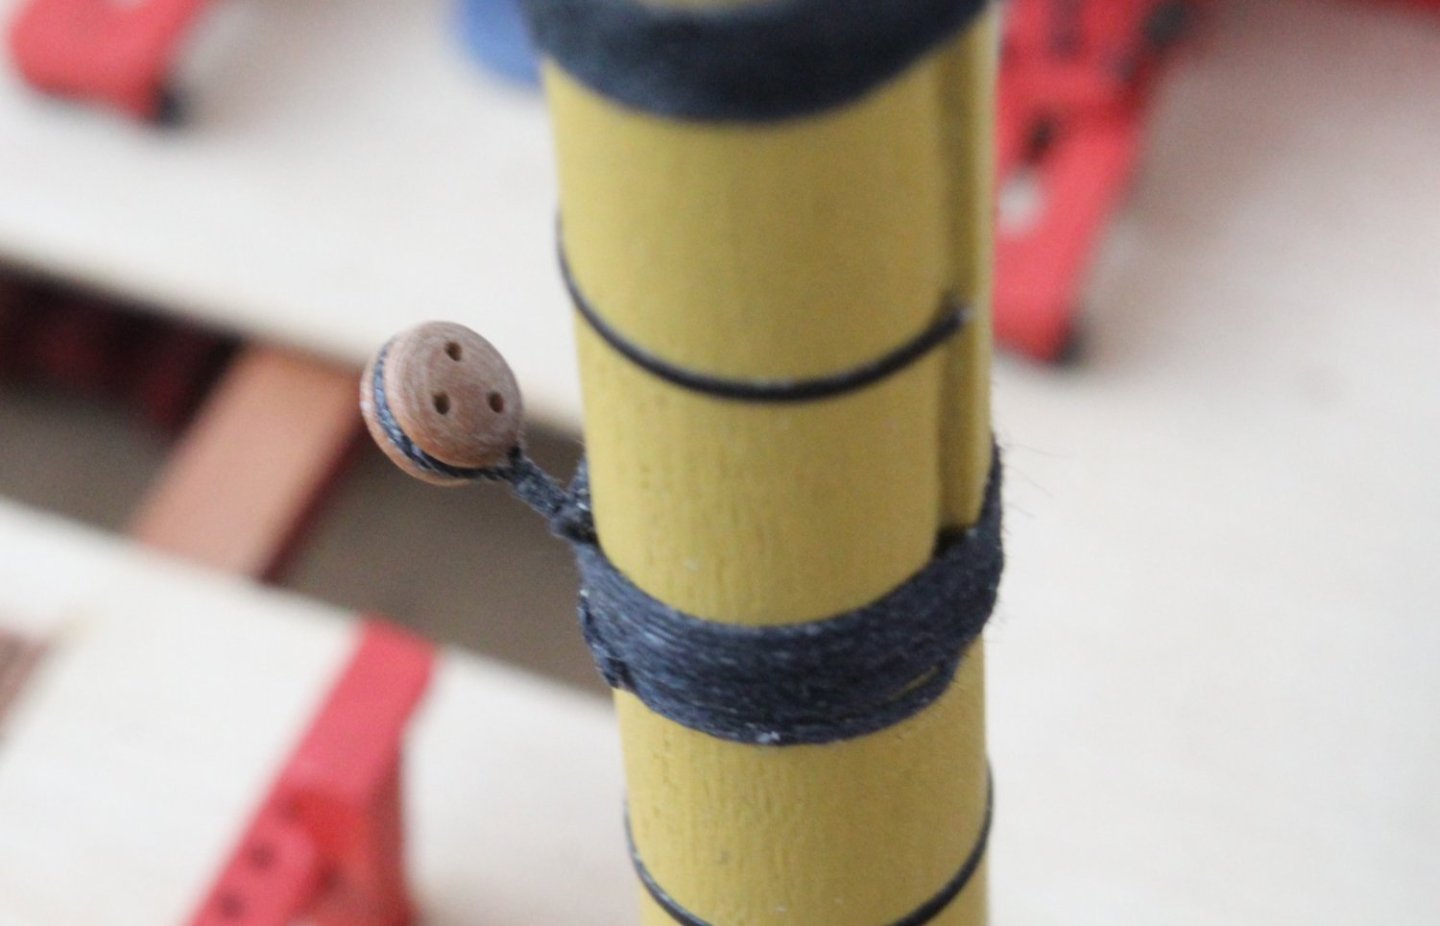
Mizzen Mast Shrouds Our new granddaughter Betsy Beau Constance finally arrived early on Monday morning which this meant there was no time in the shipyard as my wife and I had to look after one of the other grandkids for a couple of days. Returning to the shipyard this morning I started work on adding the shrouds to the mizzen mast, The first task was to add the burton pendants. There is one pendant per side required. There are 3 shroud line pairs per side required for the lower mizzen mast and these were added to the mizzen mast. The position of each shroud pair was carefully adjusted as they were installed. A jig is used to set the position of the deadeyes in the shrouds. With the jig in position a deadeye can be added to the first shroud. You will note there is a hole in the top of the jig which is there to aid the process. The purpose of the hole in the jig is to help set the position for the start of the seizing, as can be seen int he next photo. With the deadeyes added to the first shroud pair the lanyards were added. The jig seems to be working a treat as the shroud deadeyes look to be set to the same height.


-
You are making great progress and great workmanship.
-
The manual comes in English as standard. The ,build manual is also downloadable as from the web site vanguardmodels.co.uk/wp-content/uploads/2020/07/Flirt-Construction-Manual.pdf
-
Using the refined method outlined in my last post has resulted, in my opinion, a set of shroud deadeyes which are fairly well aligned with each other. A little bit of tweaking will be possible when the lanyards are tied off around their respective shrouds. I also have found that my refined method is much easier and quicker to use, compared with some of my previous methods. I am also happy with the how the chainplates and links follow the same path as their respective shrouds.

-
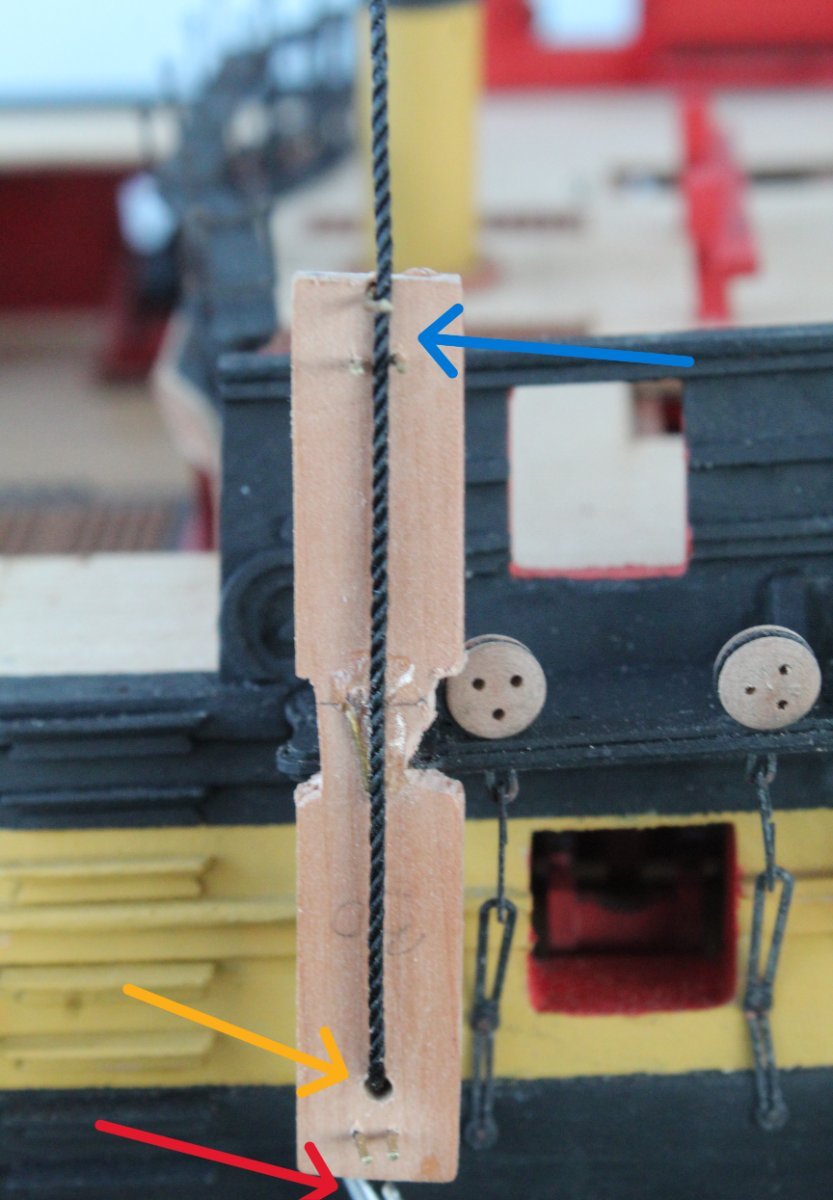
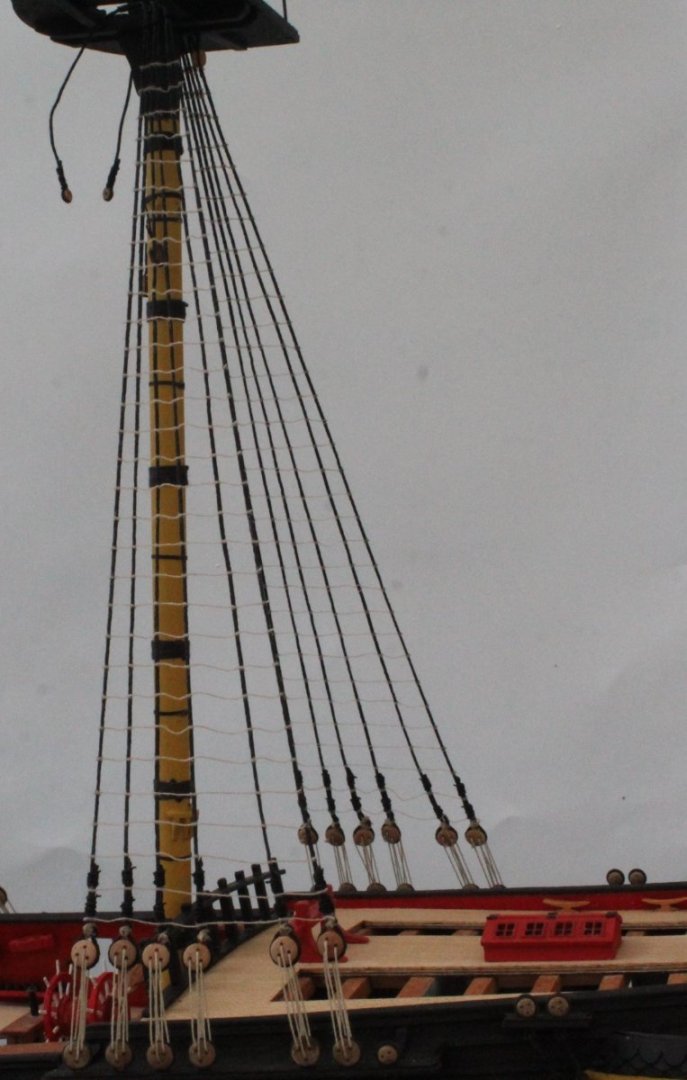
Main Mast Shrouds Our new granddaughter has decided she is quite happy where she is no rush to come out of the womb to meet her parents or brothers, etc. This means I have been able to spend a bit more time in the shipyard so I was able to started to add the deadeyes to the main mast shrouds. I was using a jig to set the deadeyes to the same height but as I added the lanyards I was not happy with the alignment. It may not be that evident when looking at the photo below but the deadeye on the left hand side (arrowed) is much lower than the other two deadeyes. The middle one is also a bit to high. I ended up removing all the deadeyes (and seizing thread) and starting again, refining my working method, so I could (hopefully) get a more consistent result. The refined method is detailed below as so far is yielding much better results. Step 1 - Position the shroud in the jig and apply a known amount of tension With the jig in place the shroud was positioned. Two pins were added to the bottom of the jig to aid the alignment. The line is held in place using reverse action tweezers. This should ensure the same amount of tension is applied to the shroud in readiness for the seizing. Step 2 - Ensure the seizing starts at the same point for each shroud Next a length of seizing thread was feed through the shroud line, whilst the line was held under tension. This should mean the seizing is set to the same height for each shroud. Step 3 - Create the loop, ready for the deadeye With the seizing thread in position the shroud could be held in the quad hands so a loop could be formed. Step 4 - Add the seizing With the shroud held in the quad hands it was a simple job to apply the seizing to the loop. Step 5 - Add the deadeye After a touch of ca glue was added to the seizing the excess seizing thread was trimmed. Next a deadeye was added and the loop could be closed up by pulling the free end of the shroud. Step 6 - Check the alignment The final task was to add the lanyards and to then check the overall alignment. So far the refined method seems to be working much better. Once the lanyards were added it was possible to look at the alignment. It is looking much better.


-
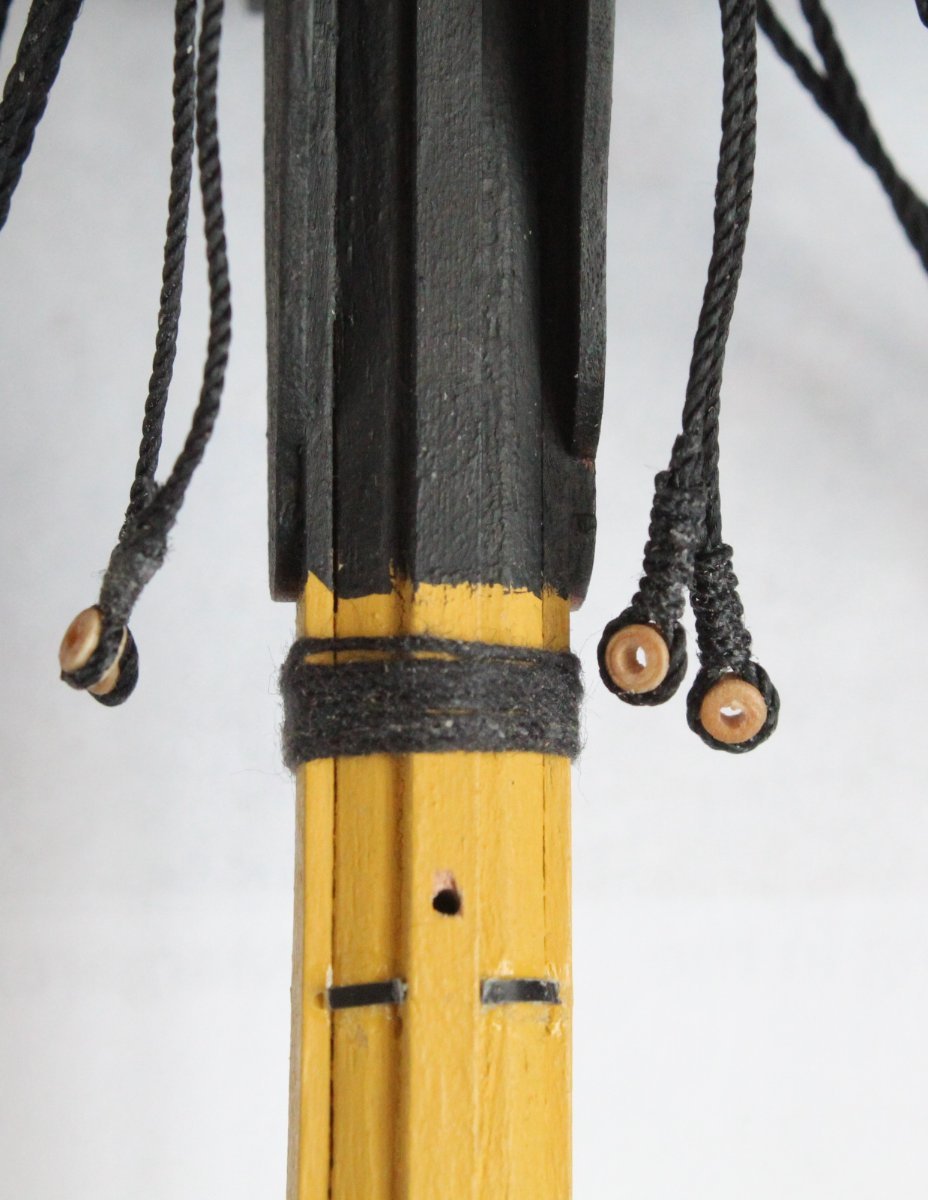
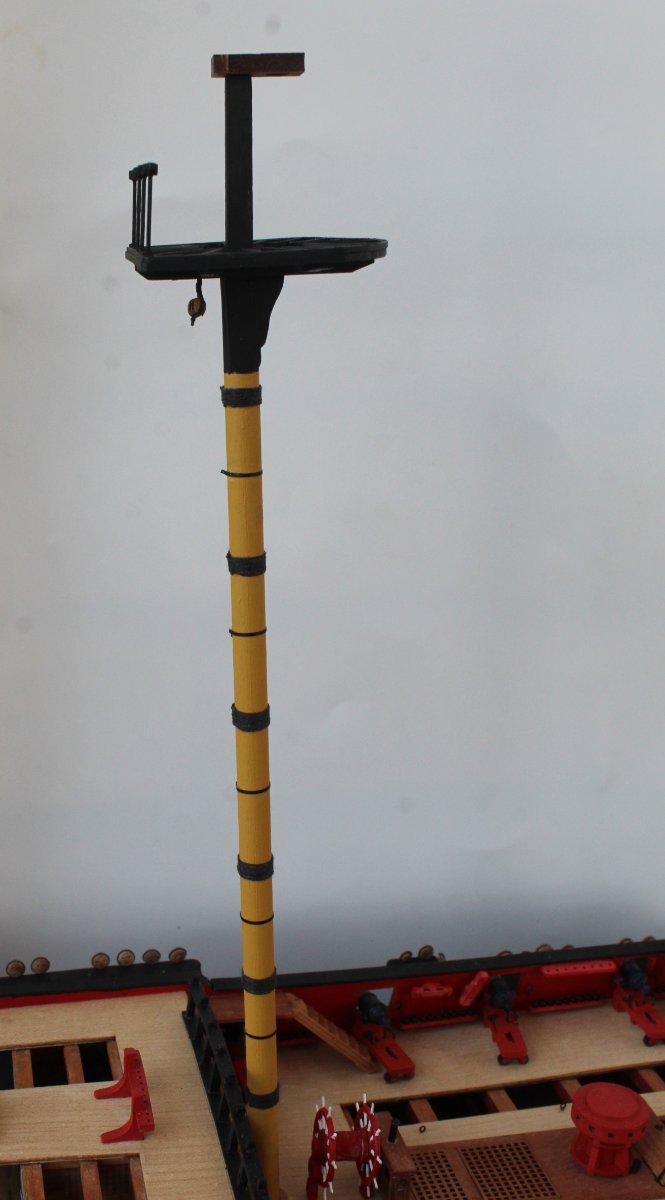
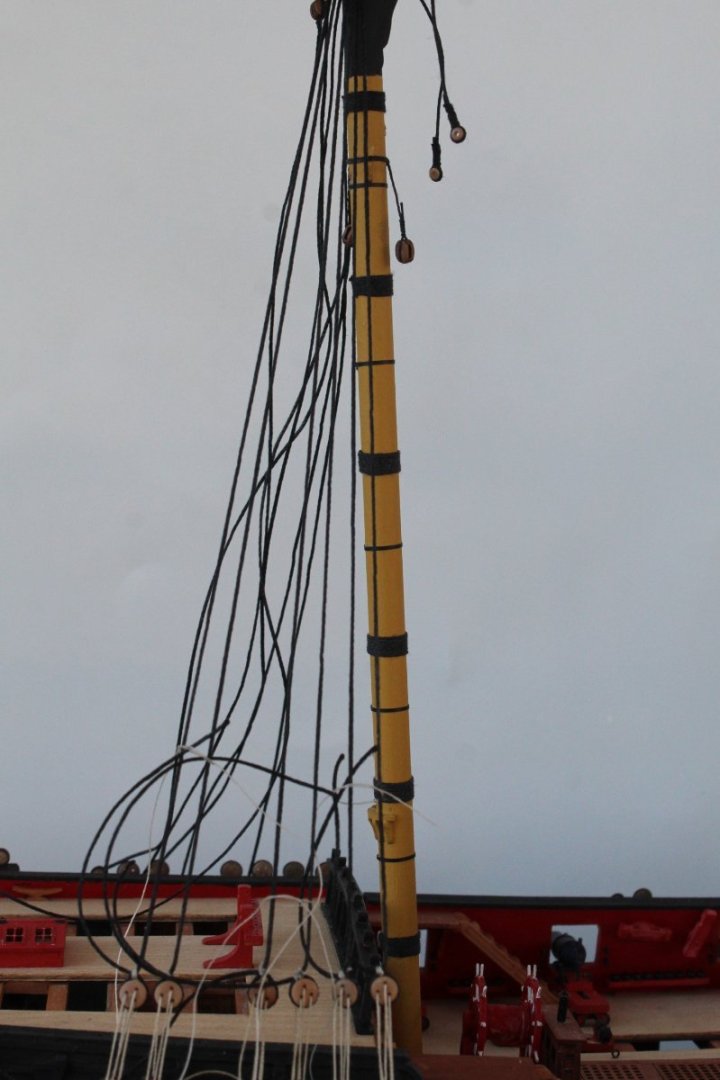
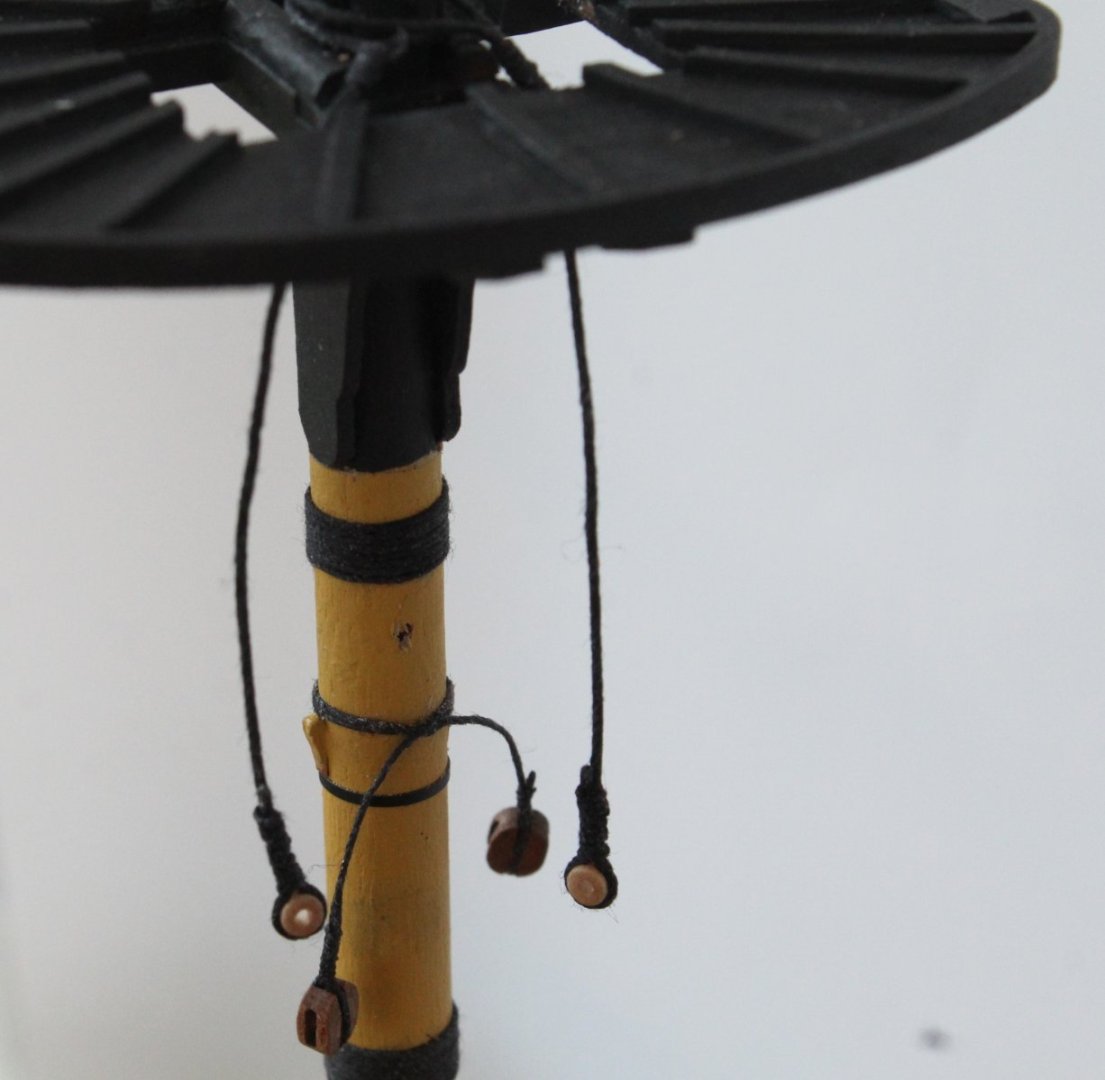
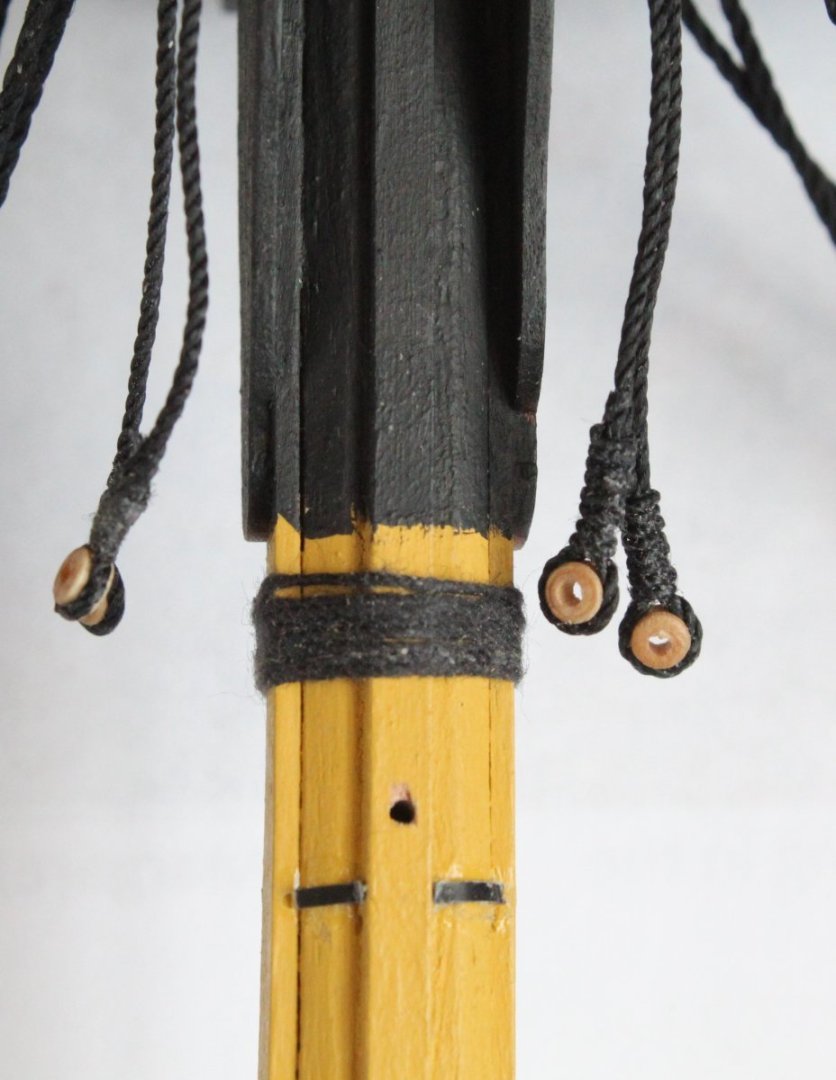
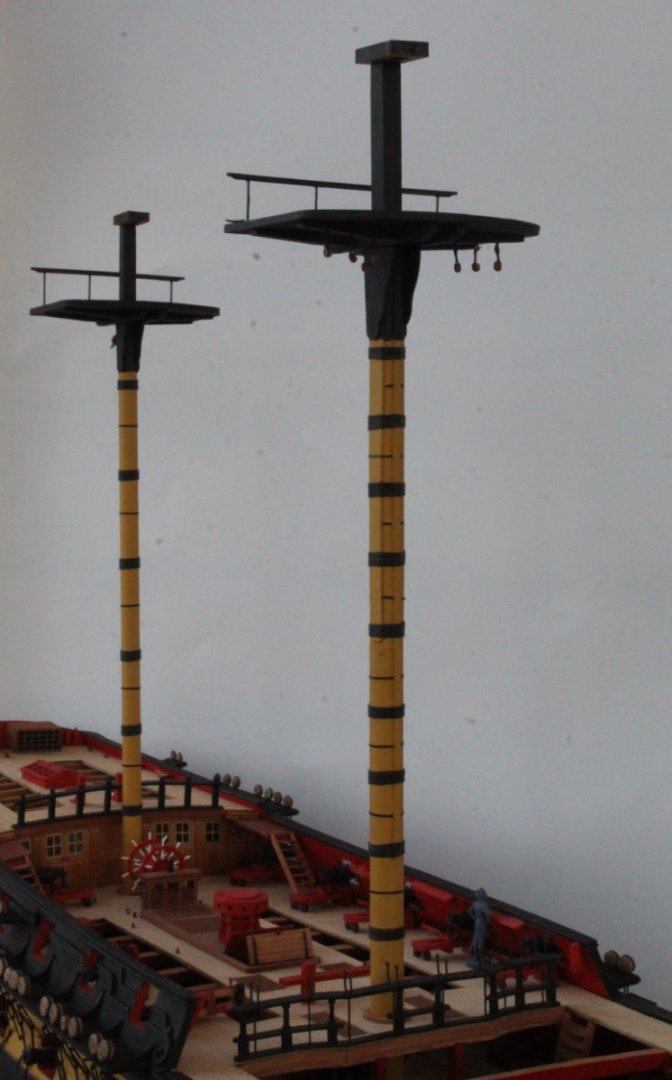
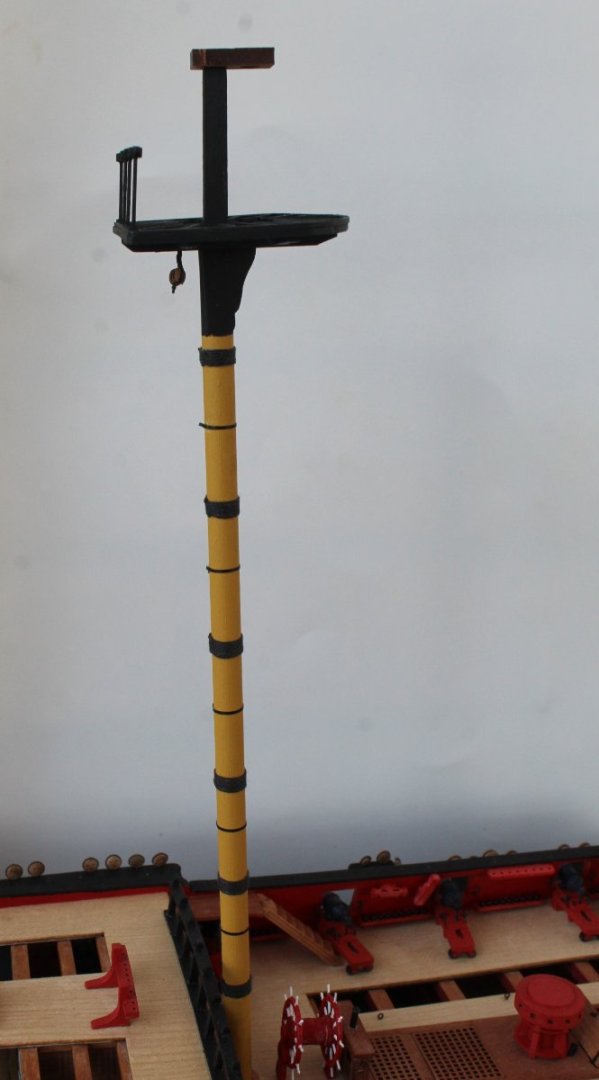
Main Lower Mast Construction Completed As my wife and I are still waiting for the birth of our newest granddaughter I have been able to spend a bit more time in the shipyard. The banding was added to the square section of the mast. I also added the banding to the the mizzen mast. I then added the deadeye to the main mast. The next job was to add the burton pendants. As can be seen in the next photo(s) I also added a hole ready for the pinning the lower main mast yard. With the burton pendants in place I then add the shroud lines to the main mast. In the photo below the shrouds are looped around the chain plates to get an impression of how they will look when rigged. The shrouds are nicely positioned around the main mast above the platform.


-
Many thanks, I am pleased with the build so far.
-
Thanks, there is still quite a few more months work left. I will be happy when she is finished also
-
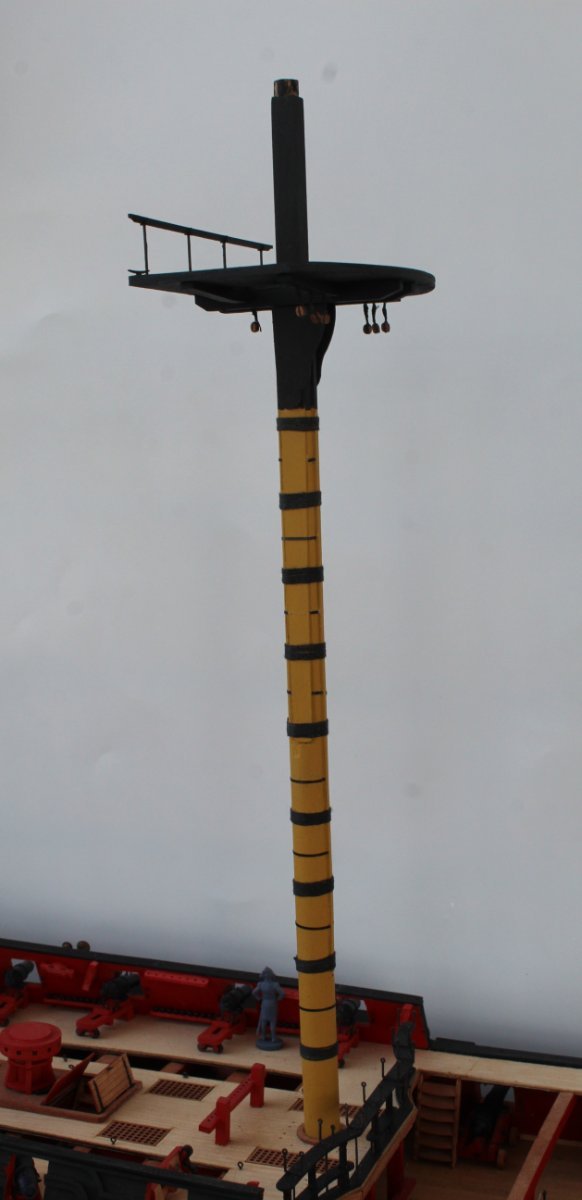
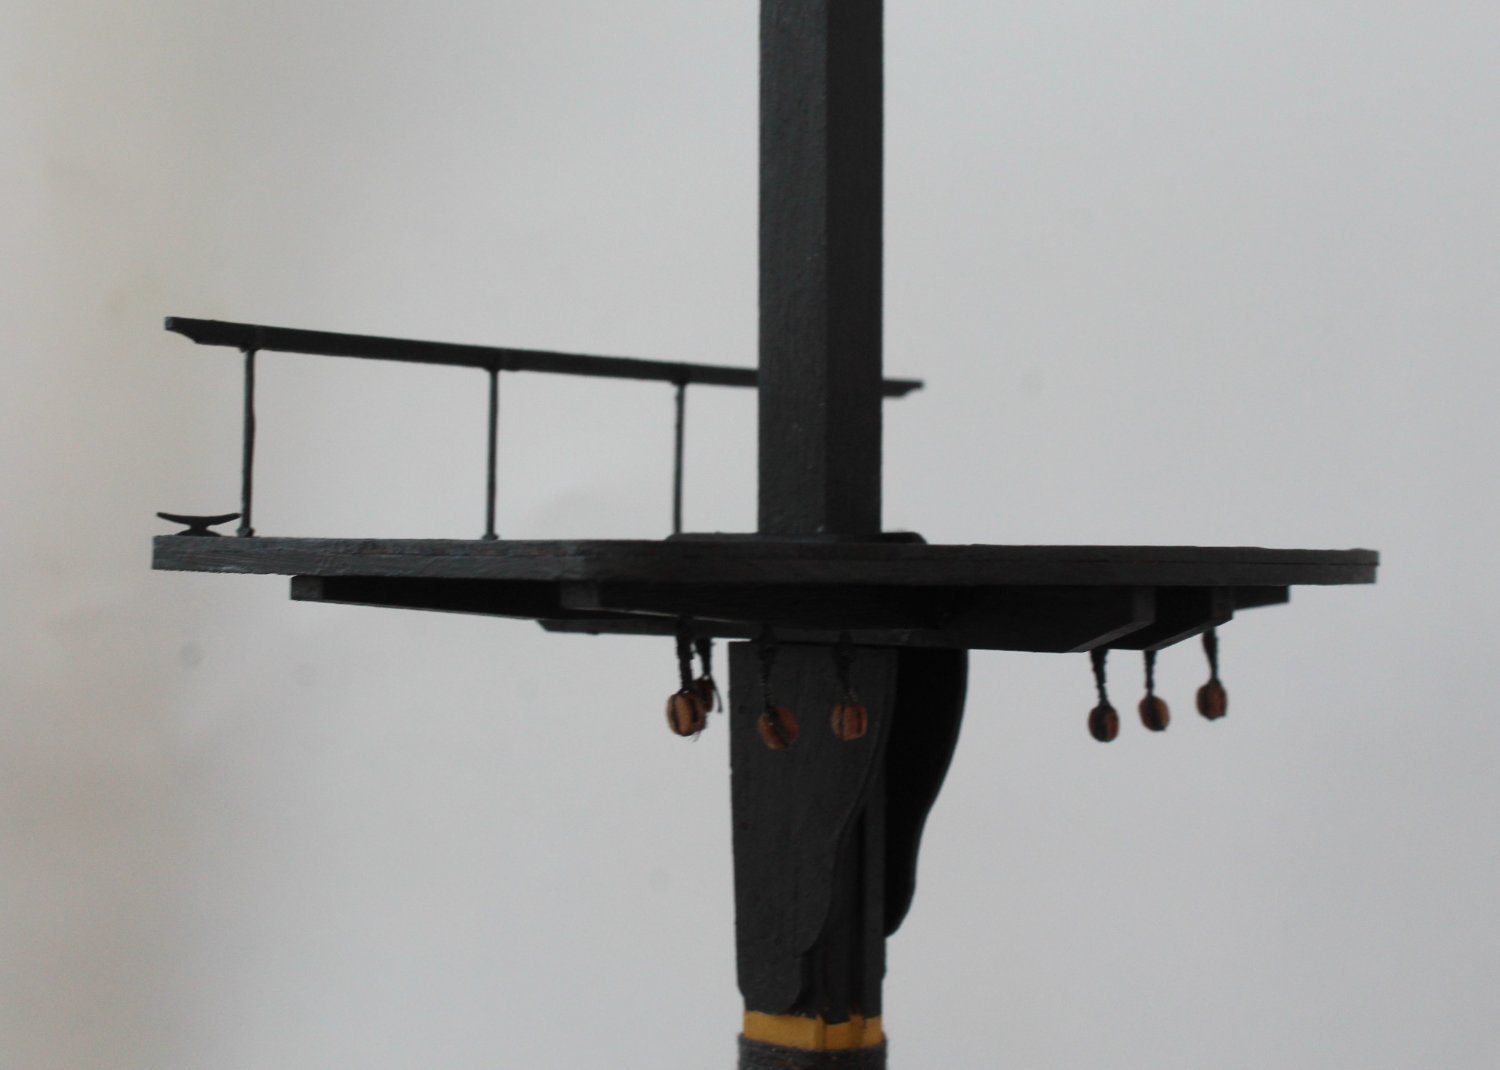
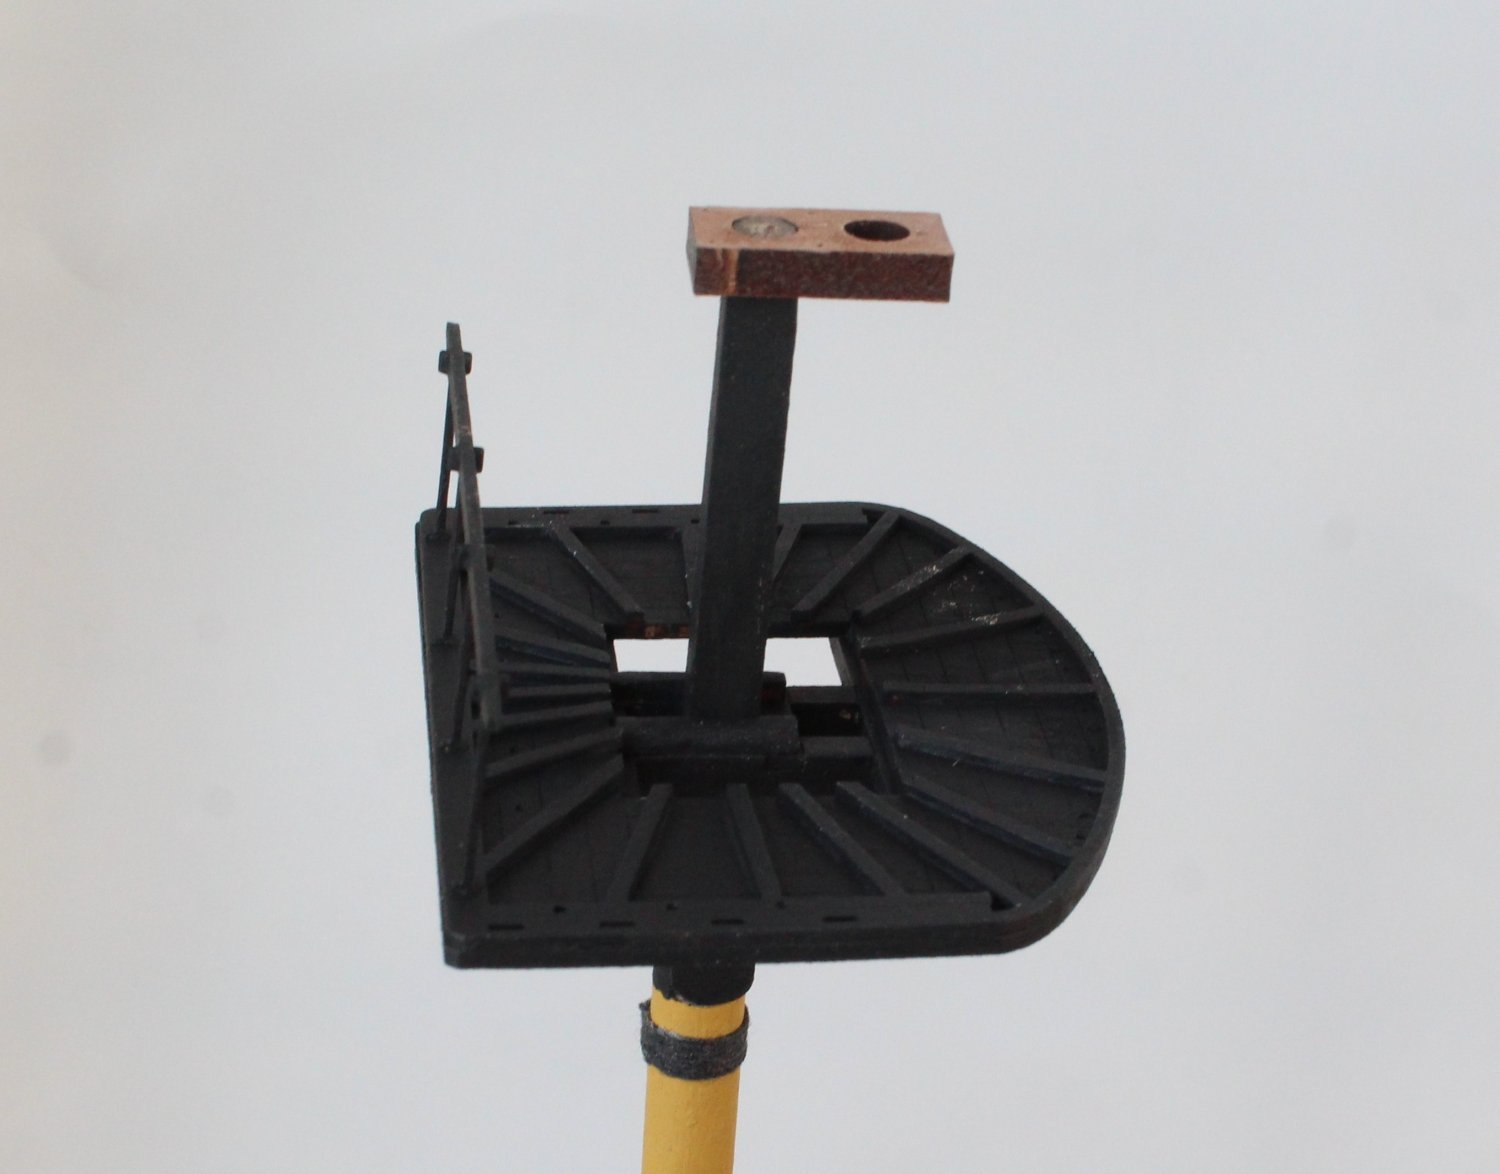
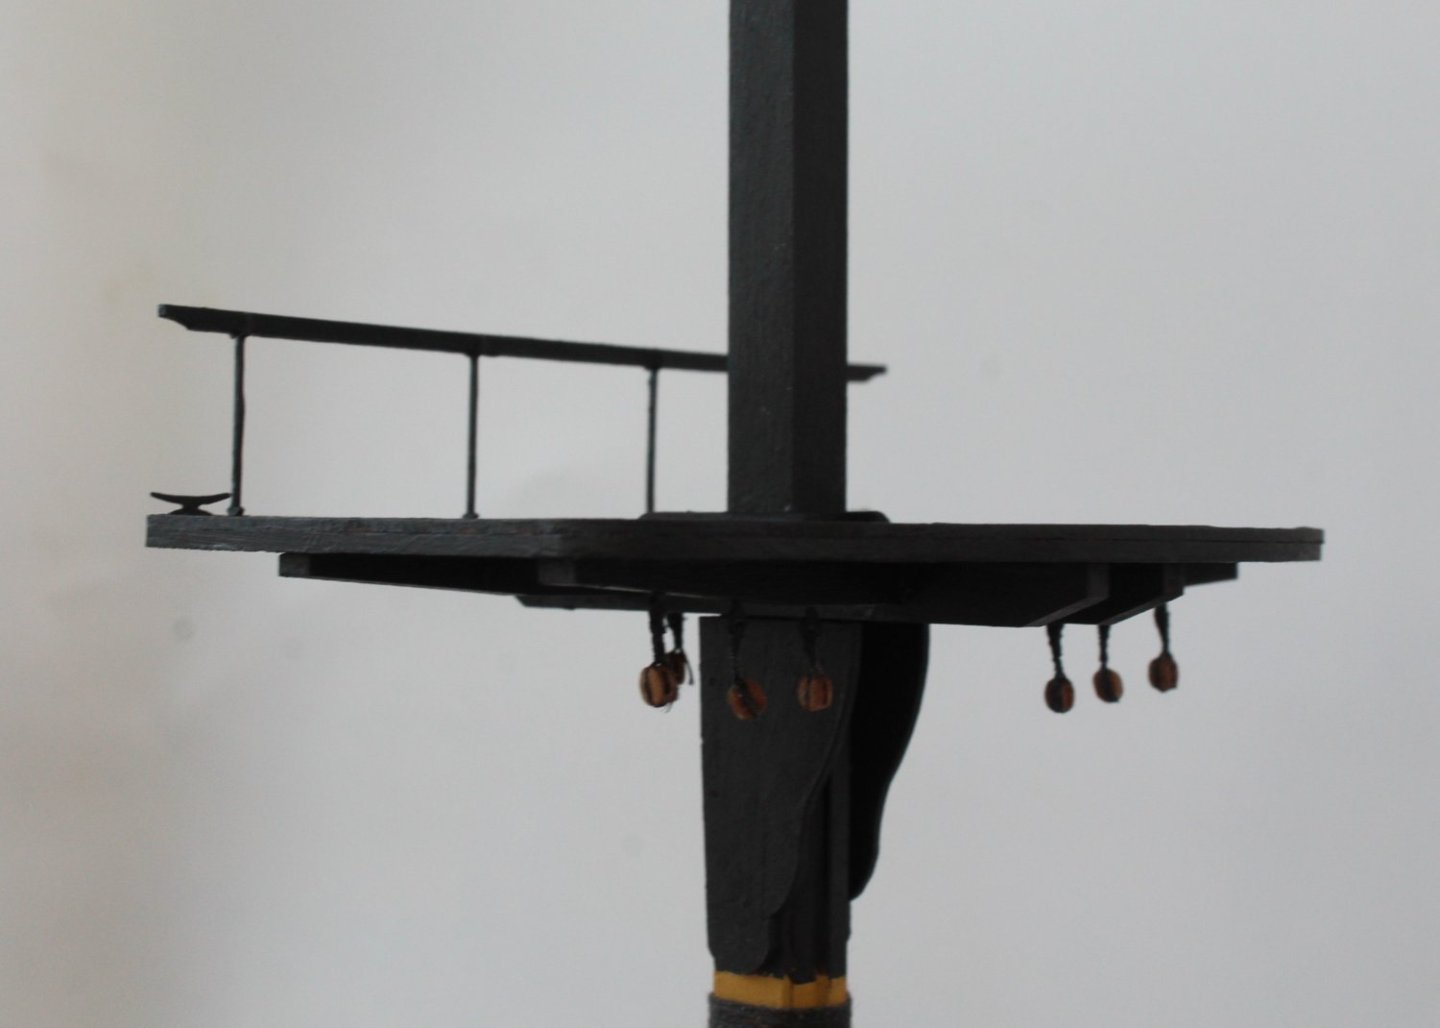
Main and Mizzen Mast Construction Over the last few days I have been constructing the main and mizzen lower masts. I still have to add some blocks / thimbles to these masts. There is some banding to add to the square sections of these masts. With the imminent birth of our 6th grandchild I am not sure when I can complete this work as my wife and I are on standby for baby sitting duties. A photo of the three lower masts is shown below Now a photo of the main and mizzen masts The main mast is shown in the next photo. The blocks have been added to the bottom of the main platform, as can be seen in the next photo The mizzen mast is shown in the next photo. And finally a photo of the mizzen mast platform.


-
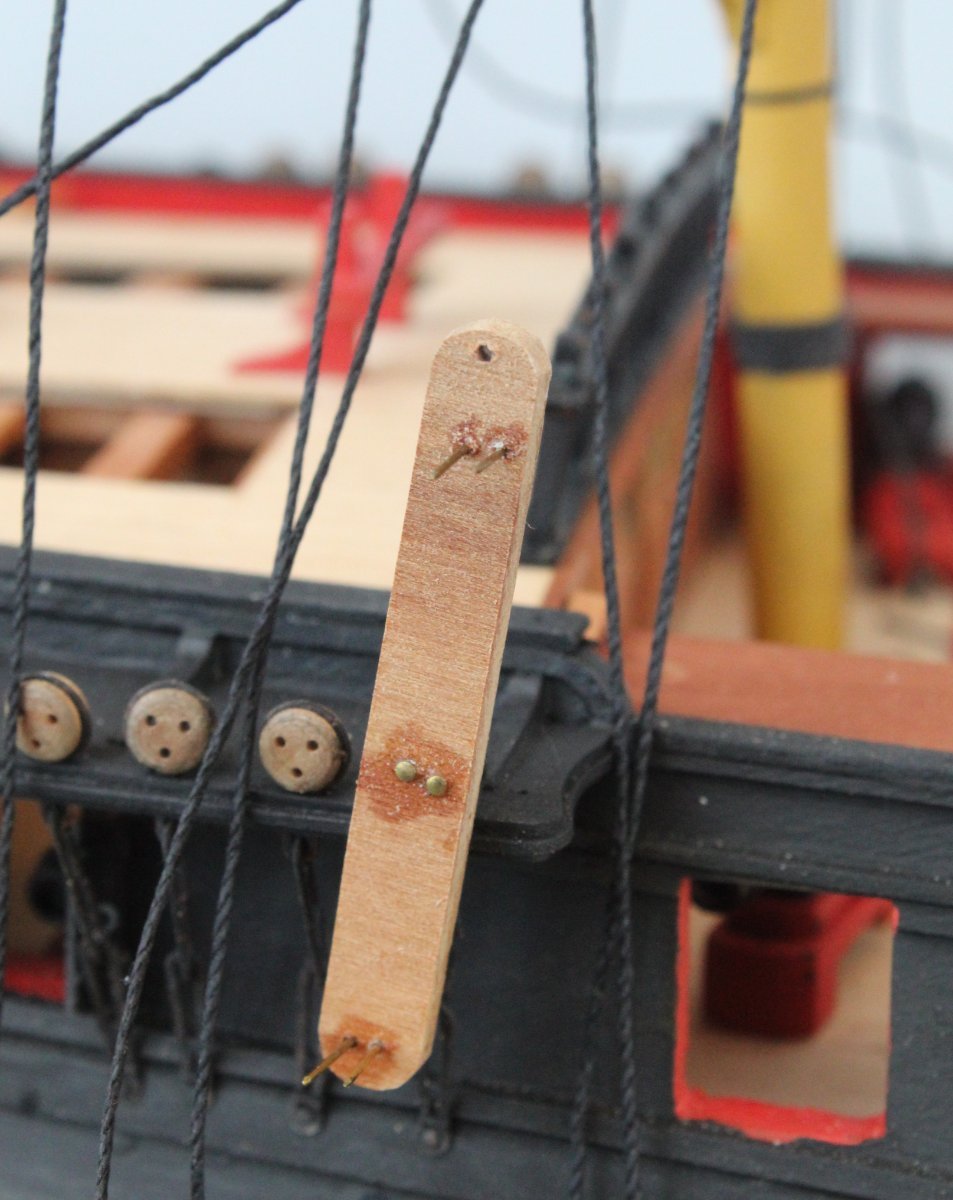
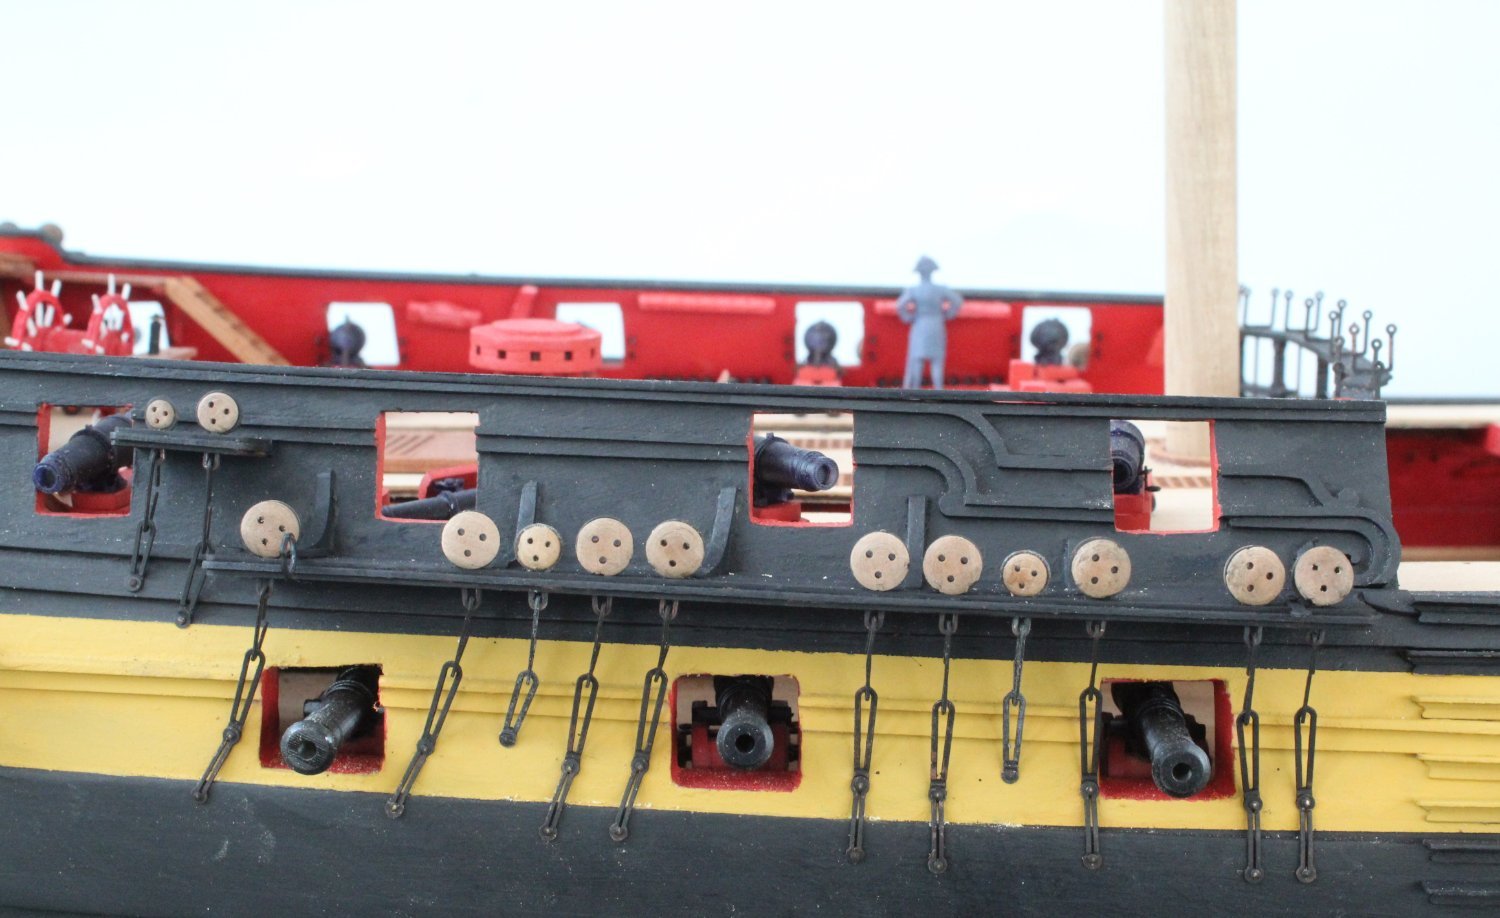
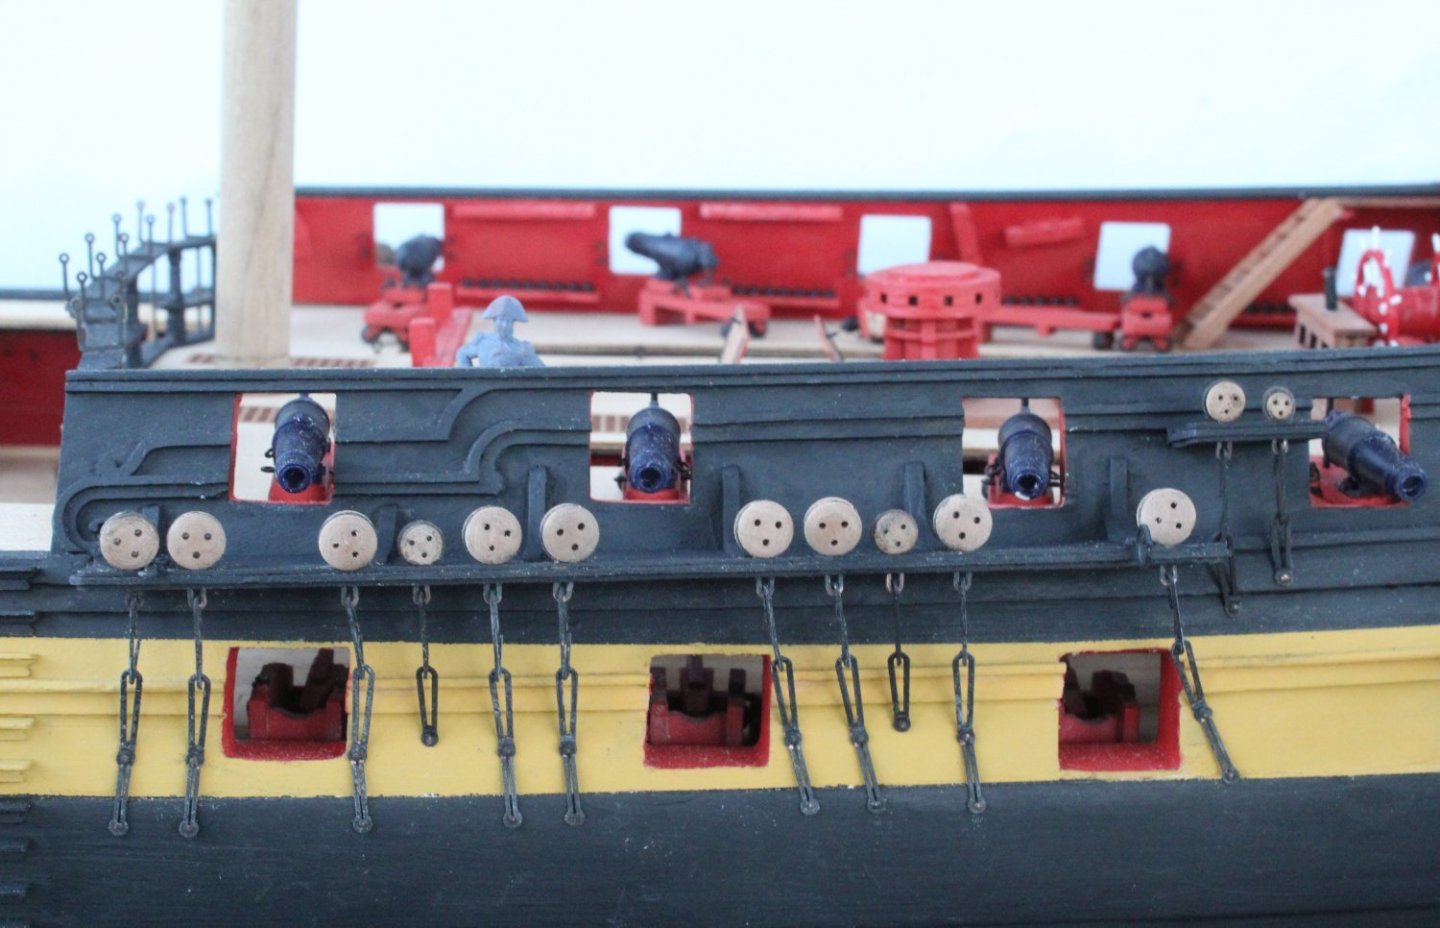
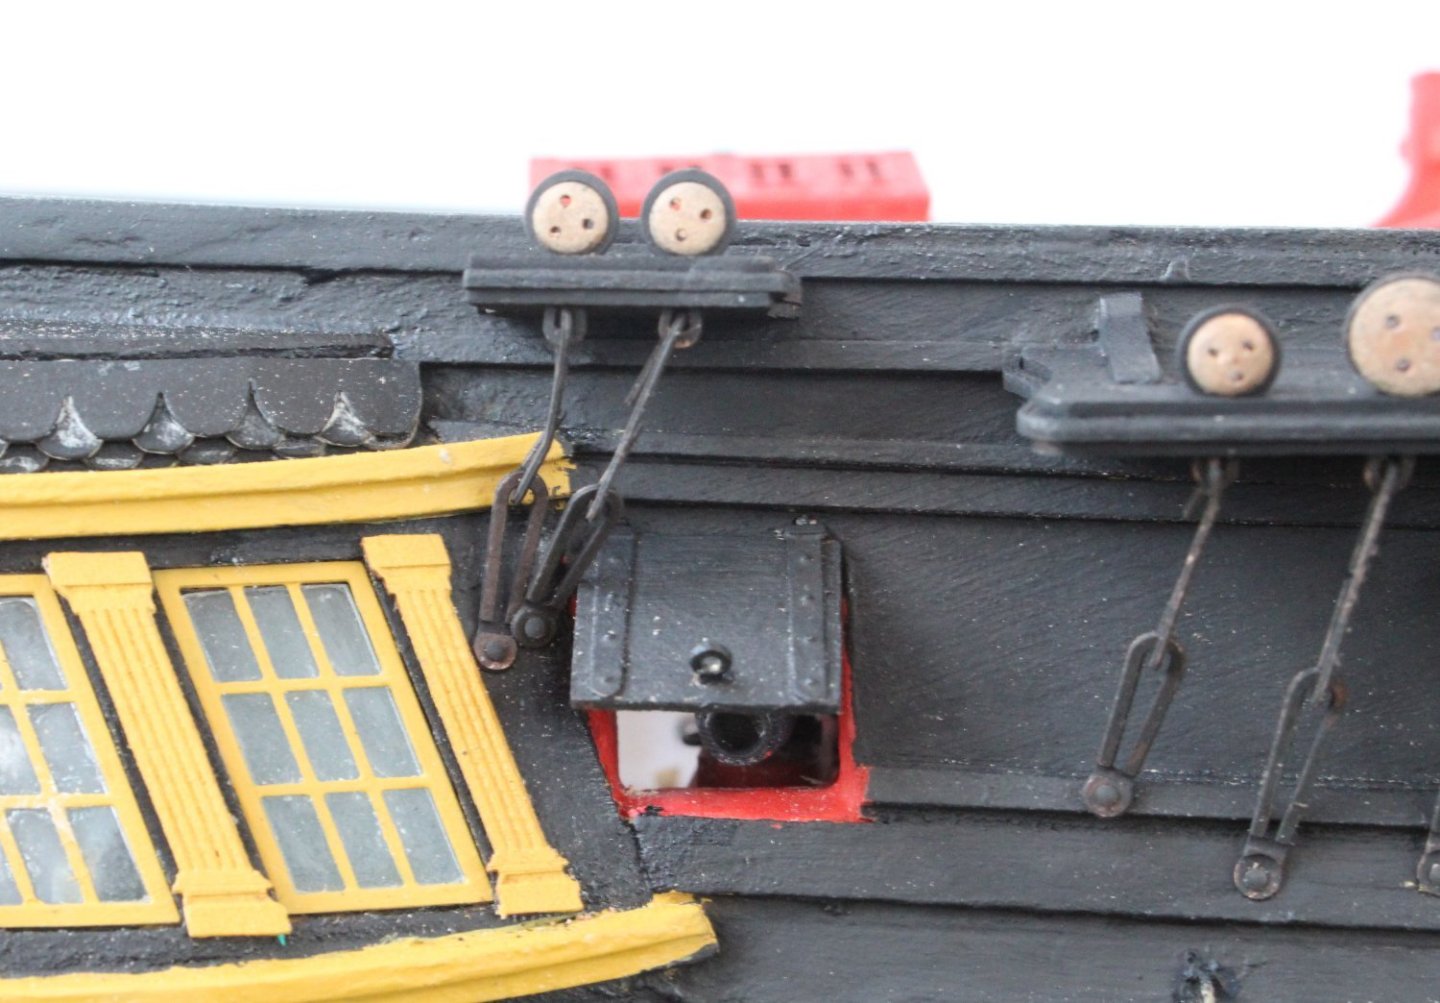
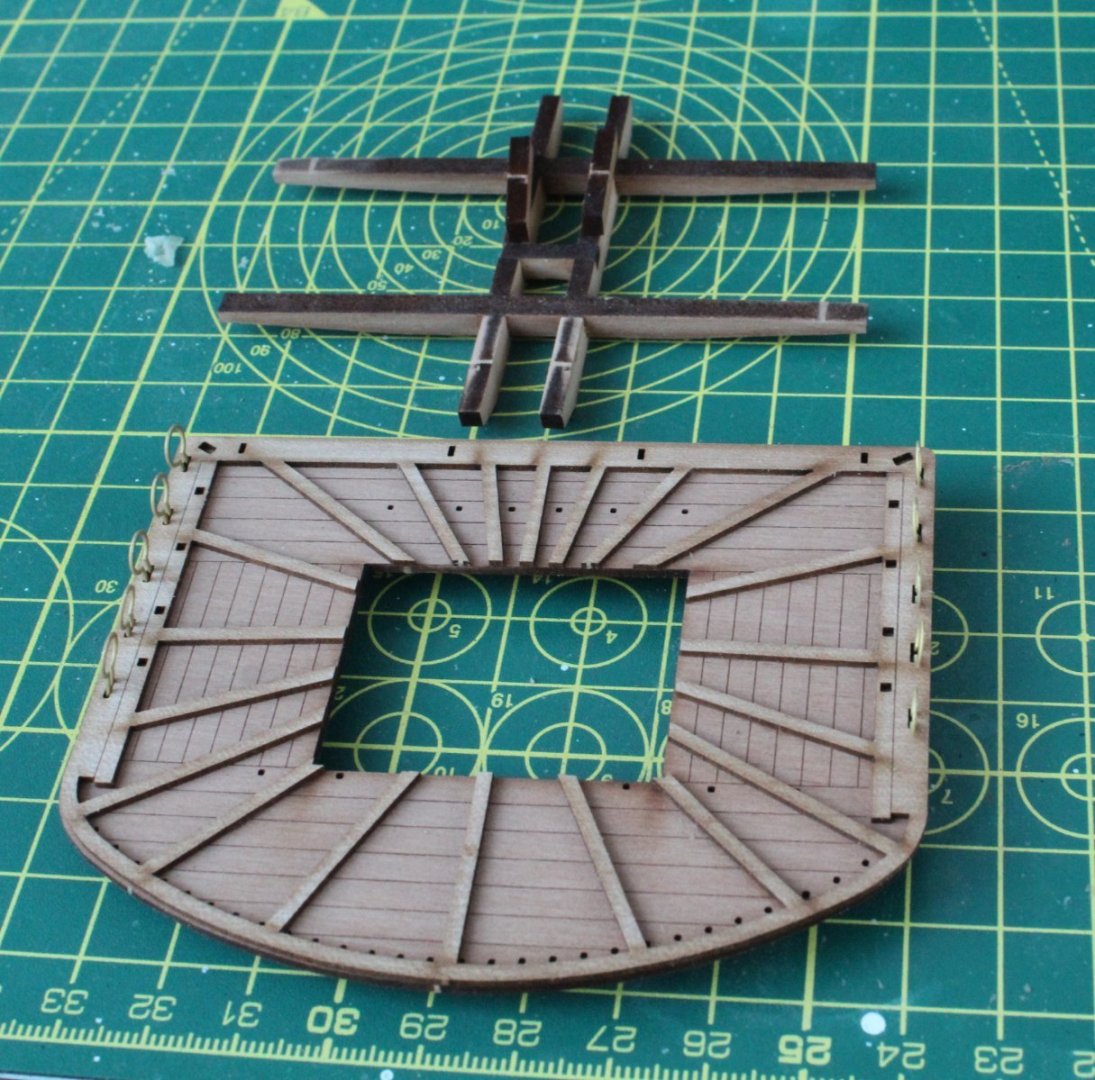
Channels. Main and Mizzen Mast After a few days work I have completed adding the deadeyes, links and chainplates. The design of these parts made it reasonable easy to fit. I have taken a few pictures. It was a little bit fiddly to fit the two links and chain plates fitted with the aft most channel. Ideally they required a much shorter link so the chainplate can be secured to the hull above the gun port. I did experiment with making shorter links but opted to use the kit supplied parts. It is not pretty but once fully rigged I don't think it will not be that noticeable and is something I can live with. I then moved to building the platforms, starting with the main mast platform. I plan to follow the same approach for the main and mizzen mast that I used when constructing the foremast whereby I joined square stock material with the mast dowel material. Therefore I cut a suitable length of 8mm square walnut material and then made a check that this would fit through the platform's square hole. The same work was also carried for the mizzen mast platform and a check that the 6mm square section would fit.


-
She is a beast.