

Karleop
-
Posts
500 -
Joined
-
Last visited
Content Type
Profiles
Forums
Gallery
Events
Posts posted by Karleop
-
-
Gracias Matti,
Yes, probably some of the errors are due to the bad built of the original builder and not the kit itself.
About the "polish", at first I tried to make like the originals you show on the picture but after several unsuccessful tries I decided to do them as in the Sergal kit.
Regarding the jacks you said: "In my opinion the jacks (knektarna) becomes to big if you follow the instructions and need to be smaller" Do you know what are the original size of them? because seeing the pictures is difficult to say. Probably I will modified them.
By the way, I tried the vinegar method to blackened the brass with no good results, so I will follow your sugestions.
Saludos, Karl
-
-
-
Thank you very much for your tips. I saw a technique using vinegar to darken the bronze and apparently is quite easy. I will try and compare your method with the vinegar one and to see how it works.
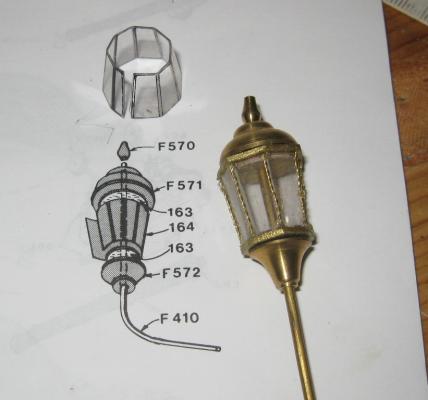
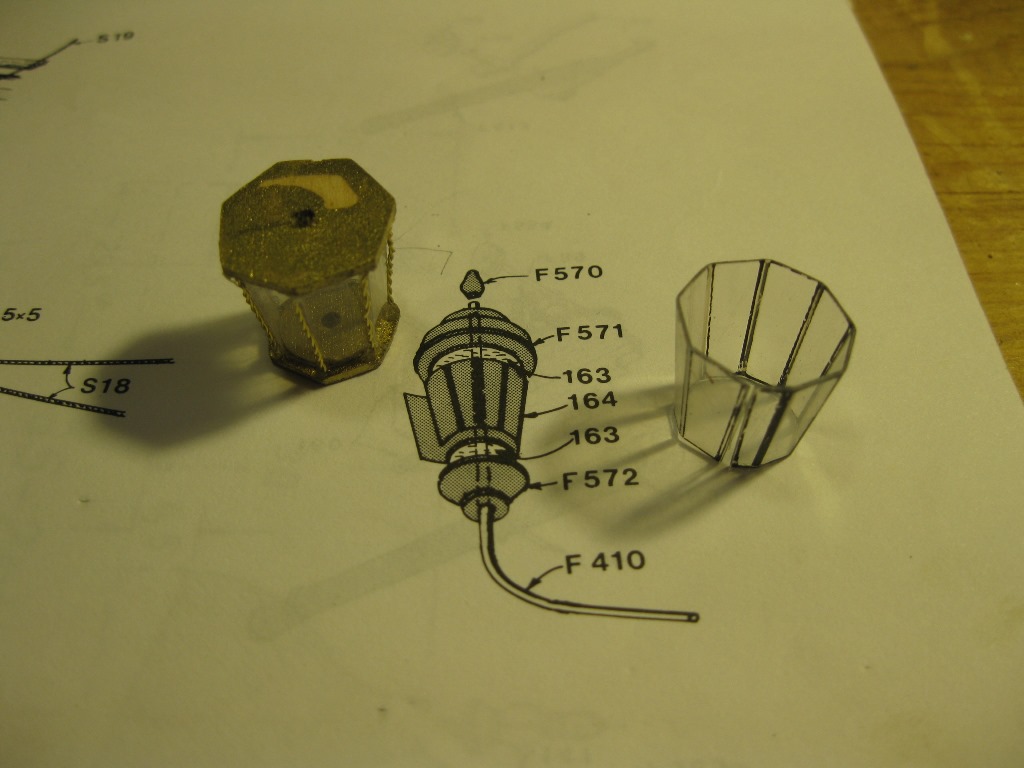
By the way, and mainly by curiosity, in the manual it appear the wire F39 to fix the cannons in the carriers but F409 fits much better, which of the two did you use? I think the kit manufacturers probably made a mistake with the wires because for the stern lantern (that I already made and you can see it in my last post) in one Manual appear as F409 but in another Manual it is F410.
Saludos, Karl
-
Hi Matti. Your cannons and carriages look very, very nice. I am in the process to begin with them but before I want you to ask something:
You write that you painted the cannons with a black/grey mix of paint, with a good sanding before. Have you tried another method as a primer, a bath of vinegar, or something else before the paint? or definetly you recommend the sanding.
Saludos, Karl
-
Nice work JanV, undoubtely you have a surgeon hand
Saludos
-
Nice painting JanV, I also use acrilic but have some trouble with the brush size. What do you use to paint the small details? Yours are awesome!
Saludos, Karl
-
Hola Ulises, it a great idea to "Use my method of just inserting the line in the hole, and then "plug" it with the pin or a temporary tooth pick." surely I will use it.
By the way, your Corel kit have the sails already done or you made it all by yourself. Mine has only the fabric and I feel that this will be a real challenge!!
Saludos
-
Hola amigos!!
From my experience in modeling ships without exception makes and models, all kits bring some mistakes in the explanations or in some cases, lack of clarity, even in cases where the instructions and drawings are plentiful. For novice modelers this is the most frustrating because they do not know what to do, for the more experienced is a challenge and part of the hobby. Regarding this specific model, I want to share some of the problems I encountered till now and how to solve them, with the hope that can be useful for other modelers who go for this kit. I must clarify that I take this kit already started by another and perhaps some of the errors are due to this and not the kit itself.
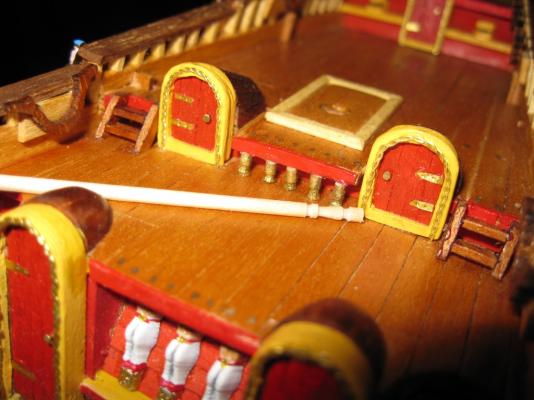
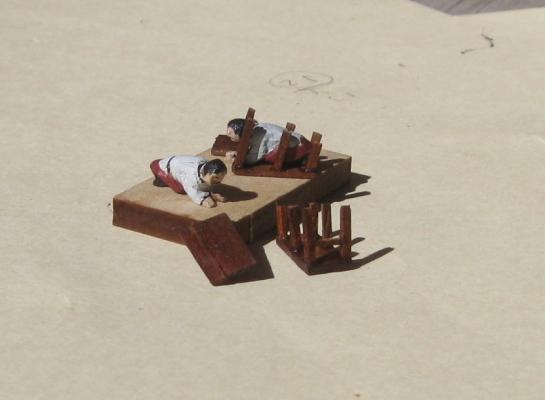
Figures between decks: or the figures are too big or the space too small. Instead of them I used pieces of toothpicks.
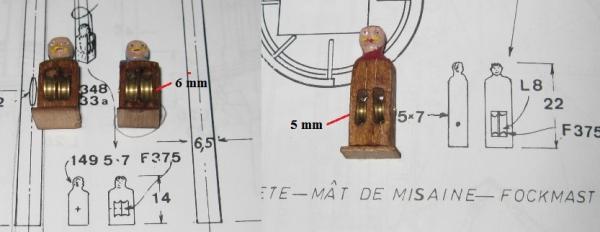
Pulleys on deck “jacks”??: In the Manual appears 3 figures with two 6mm pulleys in each one but they are only 4, so I used 5 mm pulleys for the larger figure.
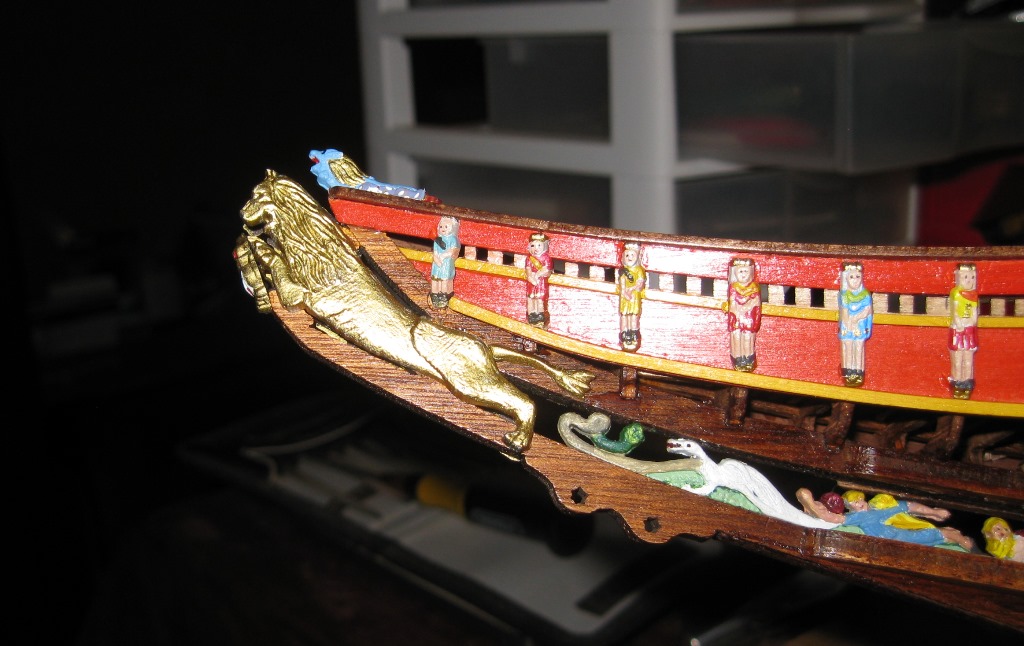
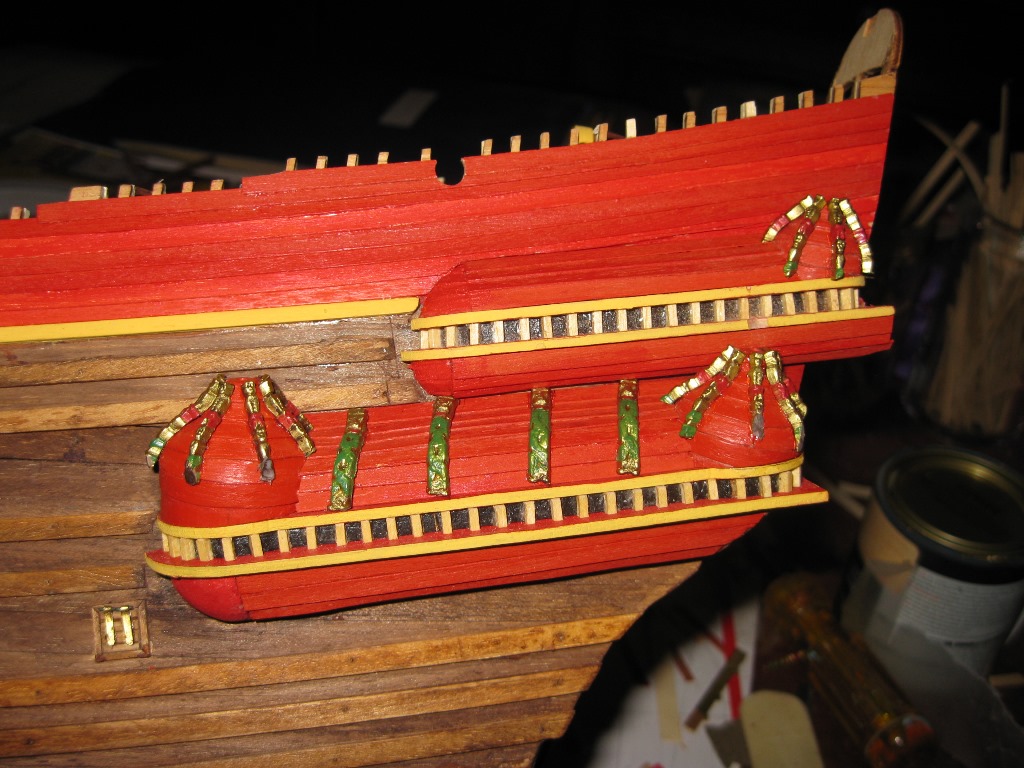
The figures in the bow rail are bigger than the space where they supposed to be, I put an extra strip to make enough space.
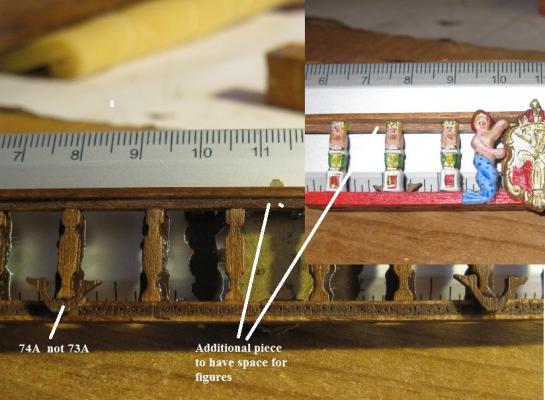
The plywood piece designed to accommodate the lateral figures had to be modified.
The Lion of the port side had no tail, so it was necessary to make one.

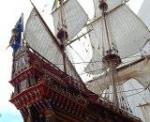
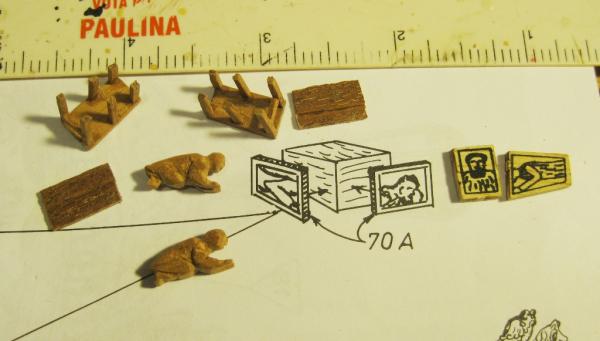
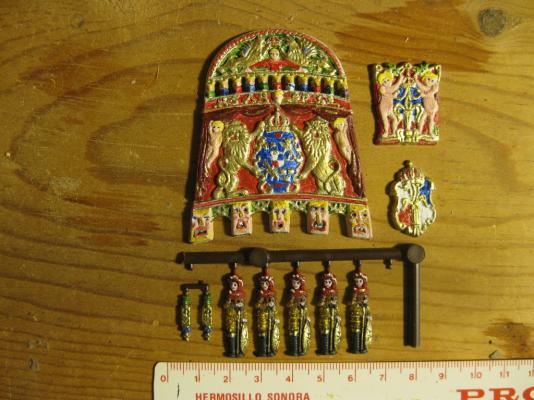
The “caged Polish” figures on the stern that come with the kit are really ugly; I prefer to do new ones, not as in the original ship that seem more difficult, but as in the Sergal kit.
Stern lantern: the plastic piece that simulates glass did not fit, I need to make a new one and I also added and upper and lower piece to accommodate vertical brass wire.

Karl
- Senior ole salt, WackoWolf, NAZGÛL and 1 other
-
 4
4
-
Hola Michael, your unpainted hull sees very nice with the natural colors of wood and similar to the original in Sweden. Initialy I doubt to paint or not to paint my Vasa and in the latter if paint it blue or red. Finally I decided to follow the original version but yours looks terrific. Congratulations

Karl
-
Hola Mark, hoping you get well very soon.
You are doing a nice work with this Sergal Vasa. It is interesting to see the how the different versions of the same ship deals with some issues: figures, materials, designs and so on.
Saludos, Karl
-
Hi Tom.
I made the San Francisco a couple years ago and have all the plans and instructions, but before anything, can you tell me where do you live? because sending things from Guaymas could be expensive. I know that there are folks that had done the San Francisco and possibly some of them are near from you.
You can check in MSW forums in general or in the album section of the Gallerie to get their names. Other possibility is to write to Model Expo (Florida) and ask if they can get you the plans.
If none of this things work, perhaps I can scan you the instructions (60 pages) and send it to you.
Saludos
-
It´s getting very nice Danny, congratulations!!
 , Karl
 -
Hi Vett, I made the San Francisco a couple of years ago and seeing some references I conclude than in those years the ships were not painted and the common way to protect the hull was to get inside rivers, where the freshwater kills the wood borers.
Saludos, Karl
-
-
Hi Denis, your flag looks very nice. I will follow the same trick, specially if it involves BEER cans!
Karl

- Bindy, DenPink and CaptainSteve
-
3
-
Hi Matti, I used to make flags (specially the complicated ones) with a ink jet computer printer (over cloth not paper) but always is a problem to shape them in a convincing form. Can you give me the specific thread of mtaylor where you got this method, its outstanding!!
Very nice work!!
Karl
-
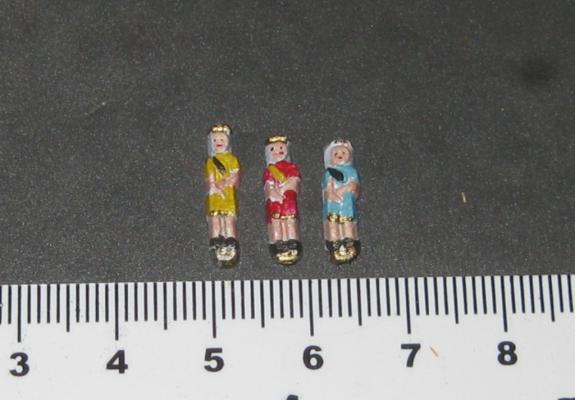
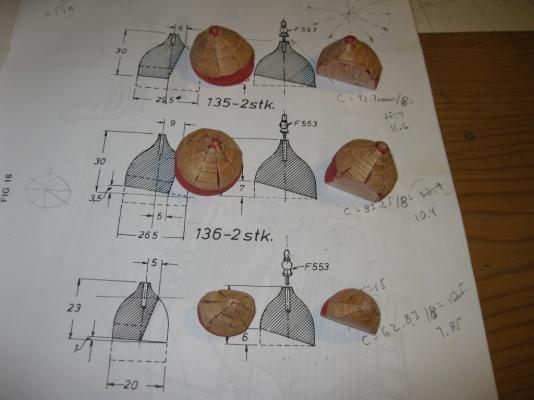
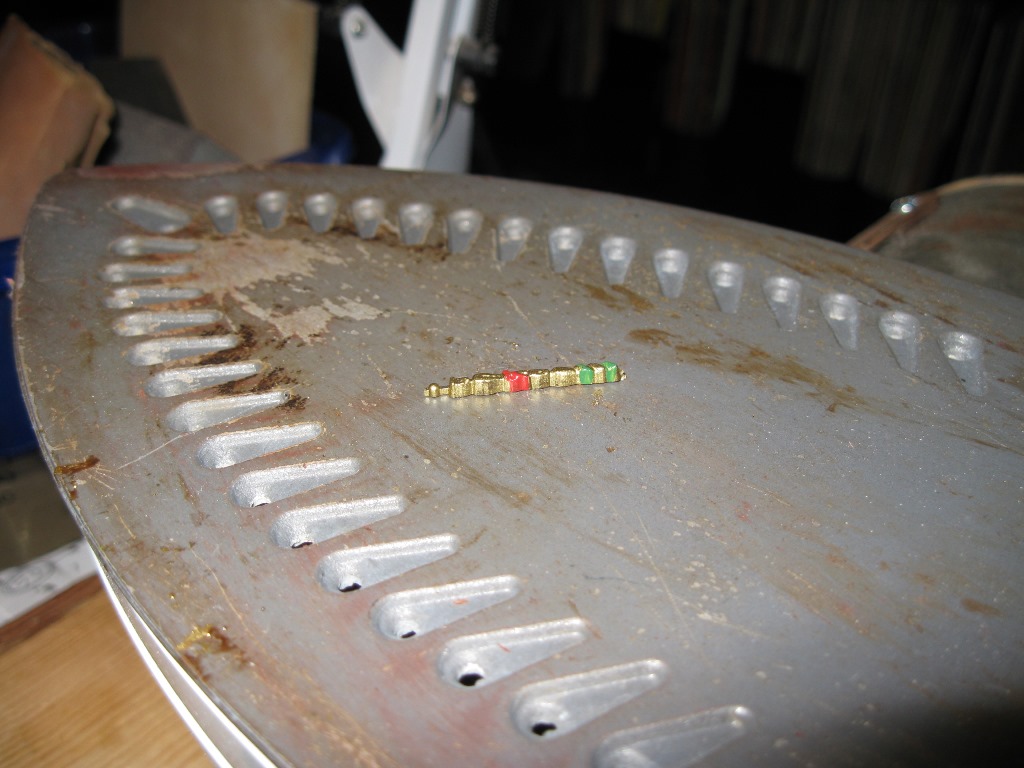
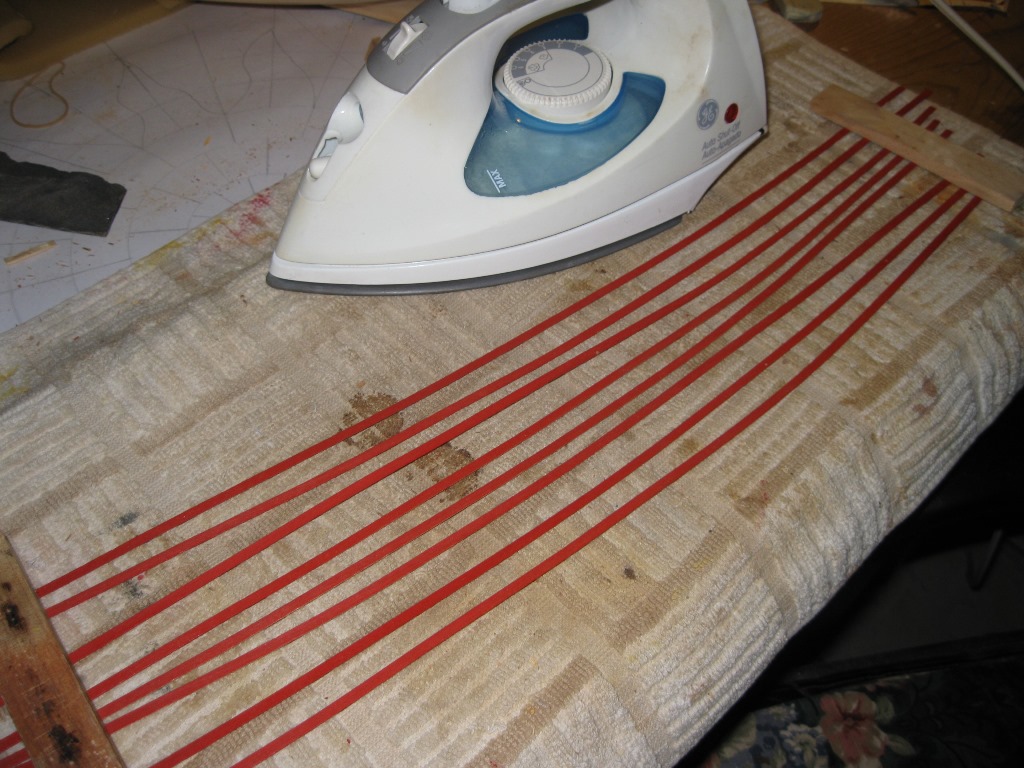
Last minute update, using the steam iron is possible to have more control over the heat and the shrinking process for a plastic figure. I used this peculiarity to shrink some of the "emperors" of the bow. In the picture you can see the original size and two pieces already shrinked in different proportion.
-
Hola Matti, I have not used the soldering iron but the steam iron (in this case with NO water) has worked very well for me. Although not show in the pictures, to prevent that the piece can adhere to the iron I used small pieces of waxed paper in between. About what is best, bending the piece first and then paint it or on the contrary, I find its easy to paint them first because you have a flat surface to work on and the heat dont alter the painting.
The steam iron has also helped me a lot to bend strips of wood. The only bad thing is I had to buy my wife a new steam iron! ! Thanks for your comment about the Akterspegeln (transom?)Karl
 -
Ulises: Thanks for your comments. Surely I will contact you later to help me with the rigging because you have shown that you are an expert in this arts.
Saludos!!
-
Hi everybody
Continuing with my Vasa I will show you some updates.
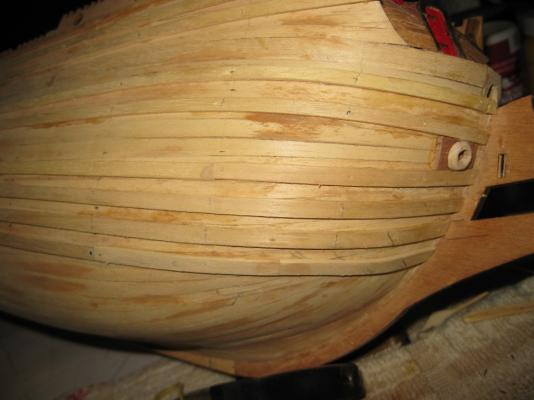
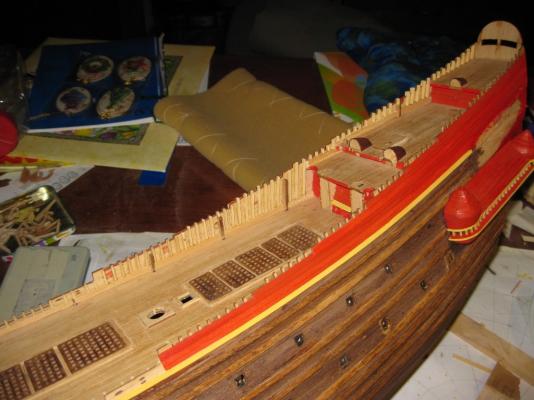
Deck planking and nailing:
After placing the domes and galleries I devoted myself to correct the deck planking. It was made with continuous strips and with no much care, also without treenailing. To correct this it was necessary to remove some planks and install new ones, and to simulate they were several shorts planks instead of single ones.
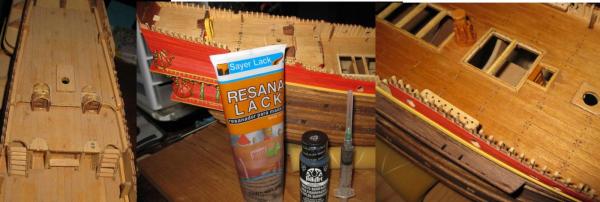
To simulate the treenails the first step was drilling the holes. Later I used a walnut color wood filler adding a little quantity of acrylic paint (to make it darker and also more liquid) and insert it with a syringe into the holes. After sanding it appears very convincing. You can see the three steps in the next picture.
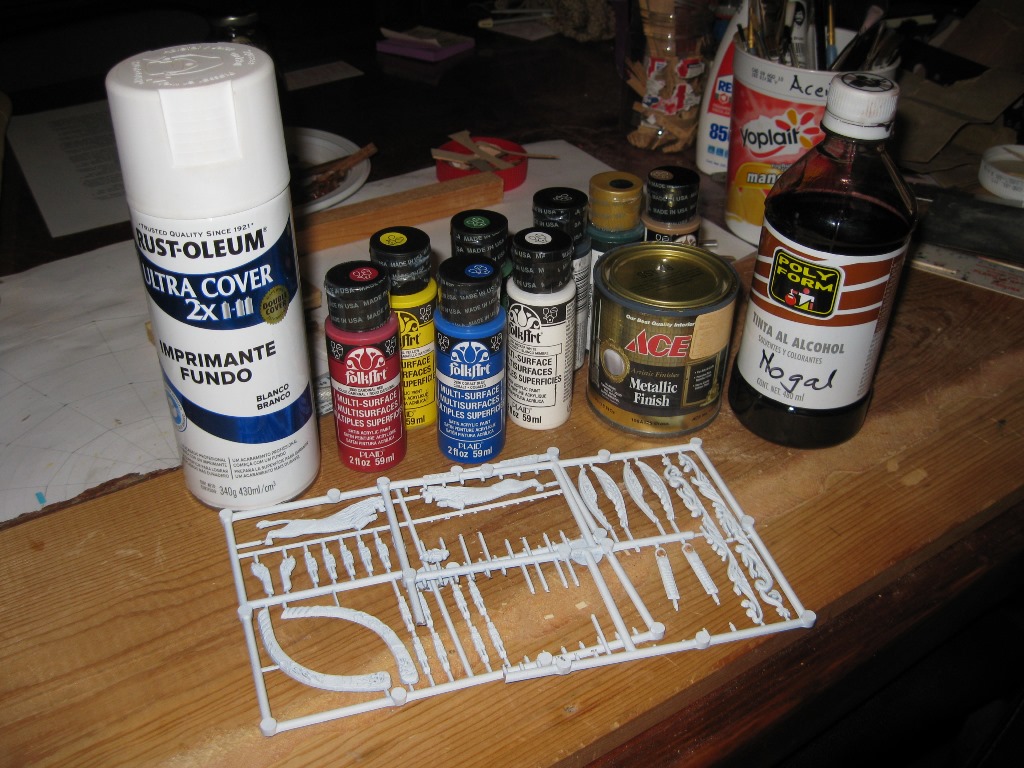
Painting and bending the plastic figures:
It was a new experience trying to color the plastic figures with detail, at first I though painting all gold, more or less as the COREL model, but seeing the marvelous work that Matti (Nazgul) did, I decided to go to the colored version, although at first sight they seem to be unreal or like a Disney version. I tried to paint the figures with the original color as can be seen in the Vasa museum page, others following Matti´s Vasa model (MSW Wazan Forum) but many others were by my own because they don’t appear in those pages.
In order to make the plastic figures more prone to acrylic painting I used a white primer, and then I colored the figures with all surface acrylic paint.

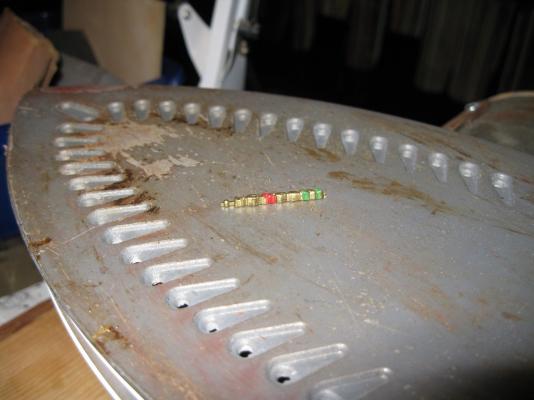
It was necessary to bend some figures to fit in certain places. In the instructions manual they mention that this can be done using a candle as a heat source, but I think this is a very risky procedure because it’s easy to overheat and damage the figure. Some recommend doing this with boiling water, also a risky process. I find that using a steam iron is much easier but it is important to calibrate the heat to the correct point, enough to make the plastic flexible but not to make it stick on the iron surface. In any case is important to remove the piece at the correct time, if not they begin to shrink.

- WackoWolf, Senior ole salt, mtaylor and 2 others
-
5
-
-
-
Update Feb 15:
Hola a todos:
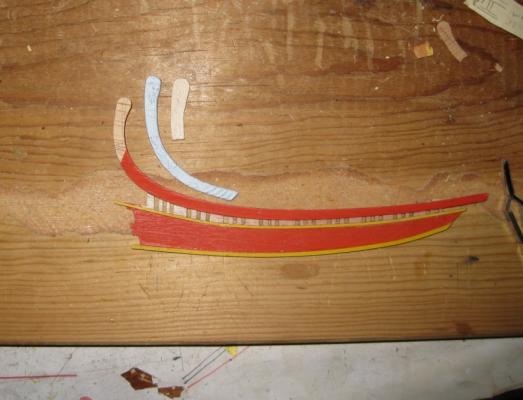
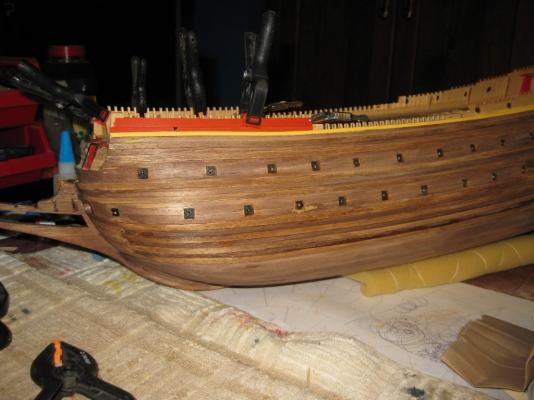
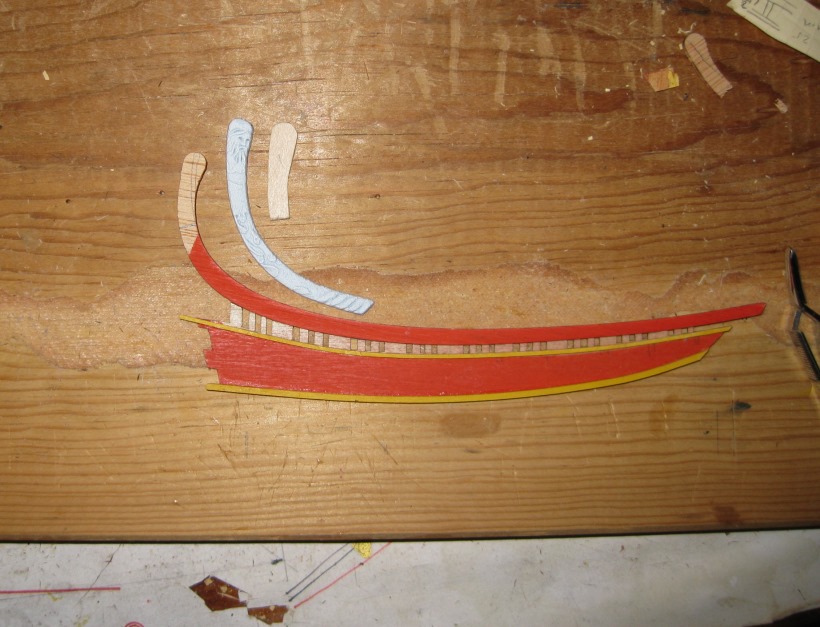
After finishing the hull planking I began to paint and bend the upper strips of the hull. For this operation I use my wife’s steam iron.

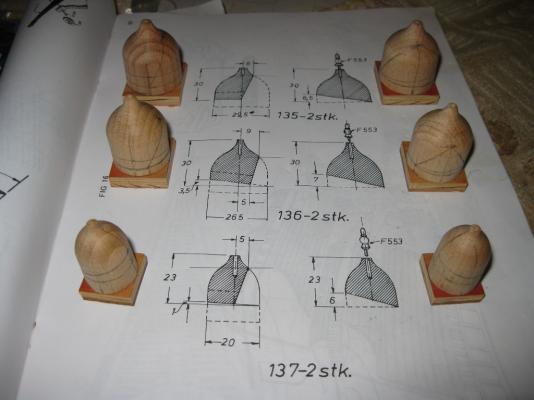
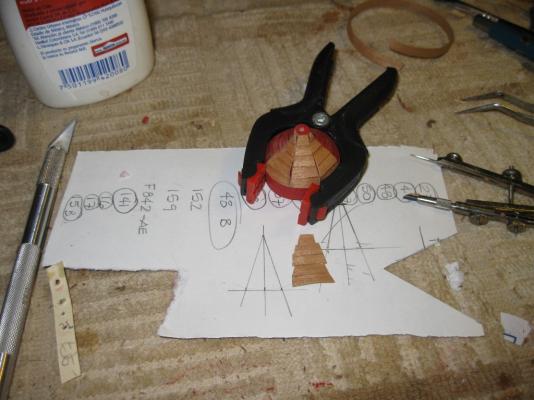
Then I begin making the galleries and domes. This was a tricky operation because they need cuts in 3 different angles. To facilitate the cuts I glue first a square piece of plywood at the base of the cylindrical pieces.
To make the model more real I decided to include the roof shingles, which cost me much work at first, until I decided to glue one over the other and then cut all together in a triangular way in order to fit over the roof.
Finally I place galleries and domes in their place.
- shipcarpenter, JanV, marktiedens and 7 others
-
10


Preparing brass parts for Blackening
in Painting, finishing and weathering products and techniques
Posted
Hola,
Take care of using Muriatic acid because the chlorine in it (HCl) corrodes de bronze and provoques de "Bronze disease" that is difficult to treat. (you can see more of this in Internet). This does not happen with vinegar that is acetic acid.
Saludos, Karl