rvchima
-
Posts
712 -
Joined
-
Last visited
Content Type
Profiles
Forums
Gallery
Events
Everything posted by rvchima
-
 I finished my Mississippi River Steamboat Robert E Lee in early October, and took a break from ships to build a TV console for my son and daughter-in-law. In the evenings I was looking for a new ship to build - something beautiful but challenging that would not need to go in a case. I found a build log for HMS Fly (Amati) built by moderator @ccoyle. Chris built his model as a hull model, no masts, yards, or rigging. What a brilliant idea! He built all the fun bits without ending up with a dust catcher. I started searching for other ships that might look good as a hull model and found the Diana by Caldercraft. I asked Chris for advice, and he told me that my taste was consistent as both models had been designed by @chris watton, owner of Vanguard models. I ordered the Sphinx and had it within a week, but haven't been able to start it until now. There are at least 18 build logs for the Sphinx on MSW, 7 finished, 3 in progress, and 8 stalled. Here are links to the finished logs for easy reference. HMS Sphinx 1775 (prototype) by James H - Vanguard Models - 1:64 - FINISHED 12 pages, 5.5 months. This is the prototype build used for photos for the beautiful manual in the kit. HMS Sphinx 1775 by Blue Ensign - FINISHED - Vanguard Models - 1:64 scale 29 pages, 16 months. Built as a hull-only model. HMS Sphinx 1775 by Glenn Shelton (glennard2523) - Vanguard Models - 1:64 10 pages, 5 months. Glenn wasn't happy with his work (which looked great to me) and stopped with a hull only model. HMS Sphinx 1775 by glennard2523 - FINISHED - Vanguard Models - 1:64 - V2 Kit by Glenn Shelton 16 pages, 11 months. Glenn started over and completed an even nicer model. HMS Sphinx 1775 by mtaylor - FINISHED - Vanguard Models - 1:64 17 pages, 10 months. Mark also stopped with a hull-only model. A very nice build. HMS Sphinx by ECK - FINISHED - Vanguard Models - 1:64 Only 3 pages, 5 months. A fast build with a short log, but the model is gorgeous. HMS Sphinx 1775 by Hollowneck - FINISHED - Vanguard Models - 1:64 19 pages, 16 months. Amazing model with full sails mounted in a diorama.
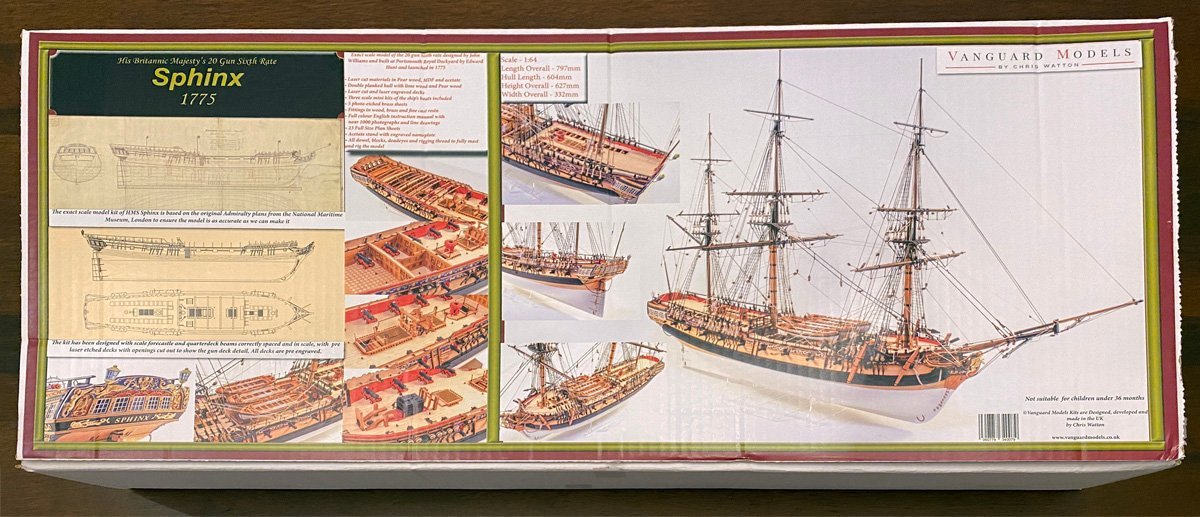
- 96 replies
-
- 13
-

-
- Sphinx
- Vanguard Models
- (and 2 more)
-
John, I have kept plans from every model that I've made since I was a teenager, so I am not interested in selling the Bismarck plans. The Amati plans comprise two full-color glossy books with 210 pages total and seven full-sized drawings. You might try to get them from Amati. There is a full set of how-to-build the Hachette Bismarck videos on YouTube. This may be enough to get it built.
-
Thank you all for the gracious comments. I enjoy the work and do appreciate all the feedback. It often surprises me how frequently I refer back to my old posts to see how I did something or what kind of paint that I used. So the build logs are a useful reference for me, and I hope that they will help other modelers in the future. I will be starting on a woodworking project, a TV console cabinet for my son, so no posts here for a while. Eric, thank you for the perspective on lifeboats. I suspected that they were impractical and maybe unnecessary on riverboats. However, Smithsonian Magazine had an interesting article, When Deadly Steamboat Races Enthralled America, with some pretty grizzly statistics about steamboat disasters, mostly due to fires or boiler explosions. It makes steamboats seem somewhat less glamorous.
- 58 replies
-
- 1
-
-
- Robert E Lee
- Amati
- (and 4 more)
-
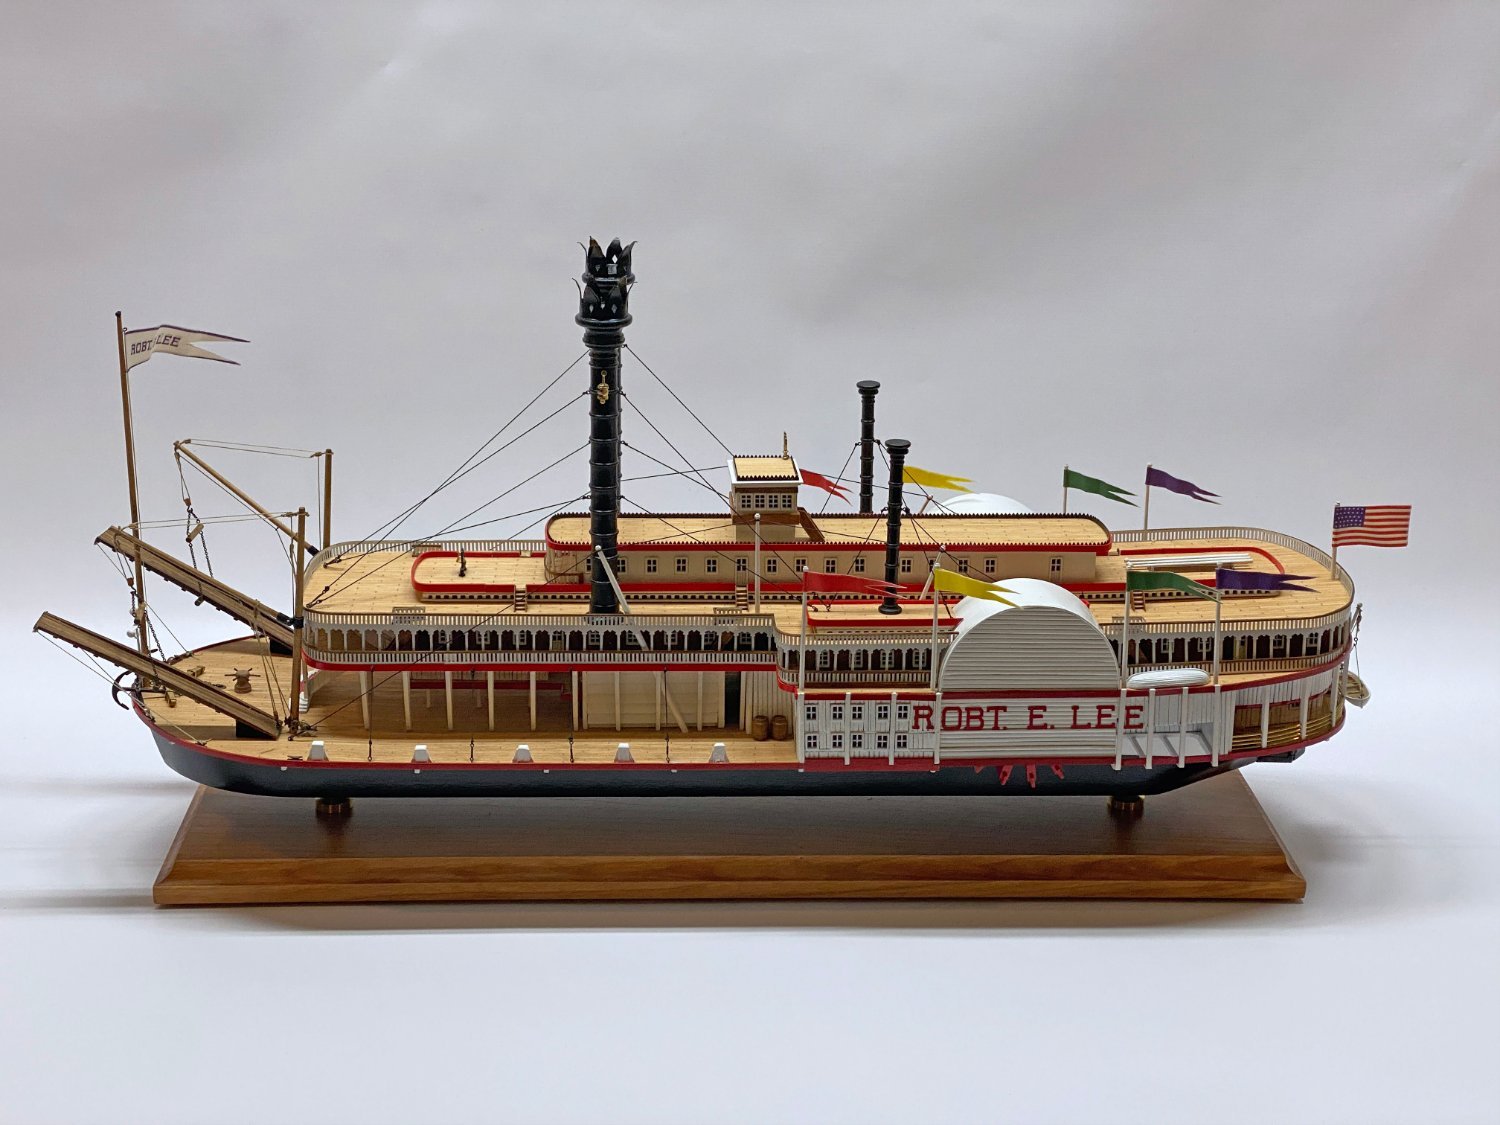
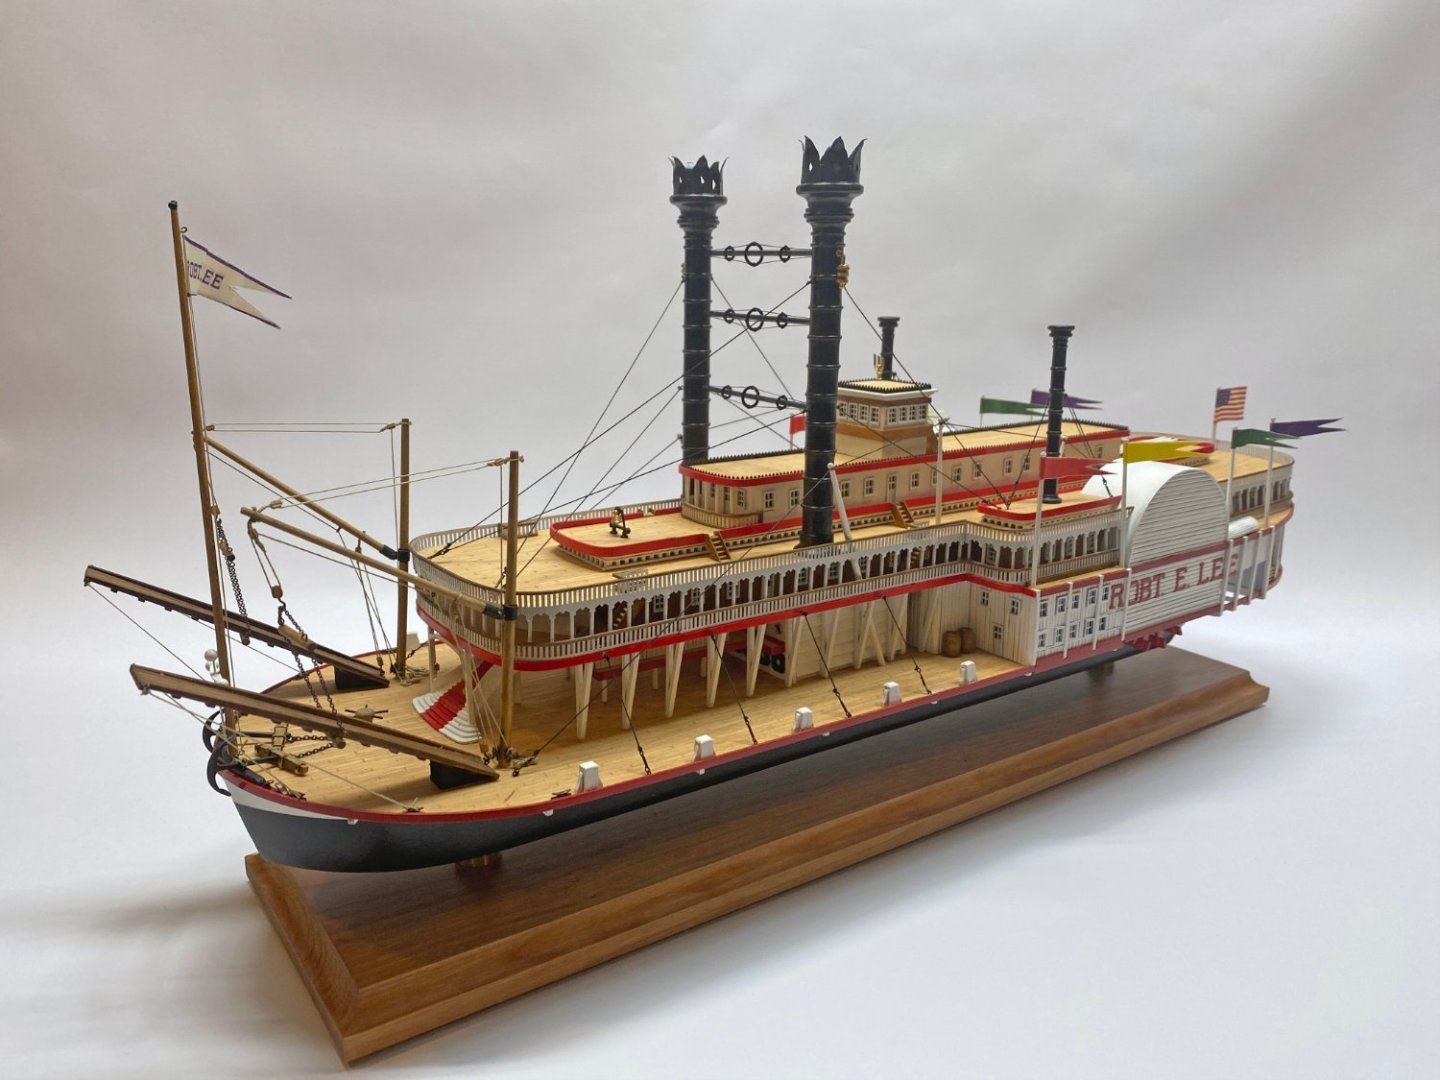
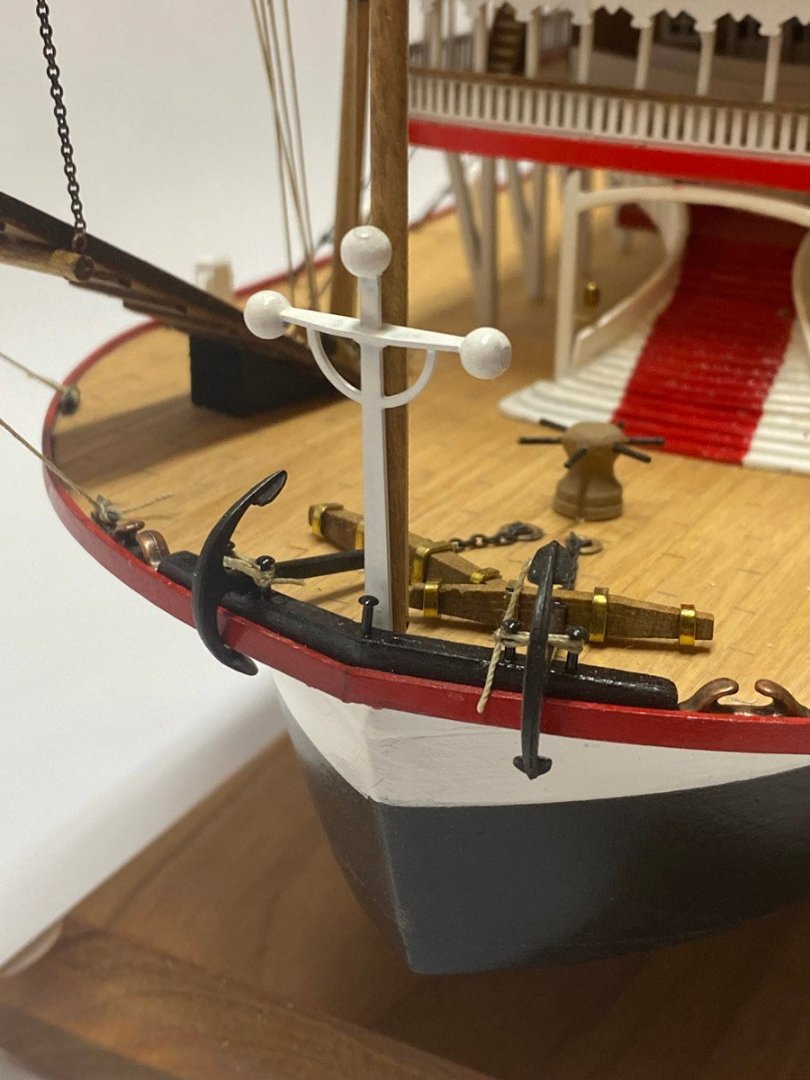
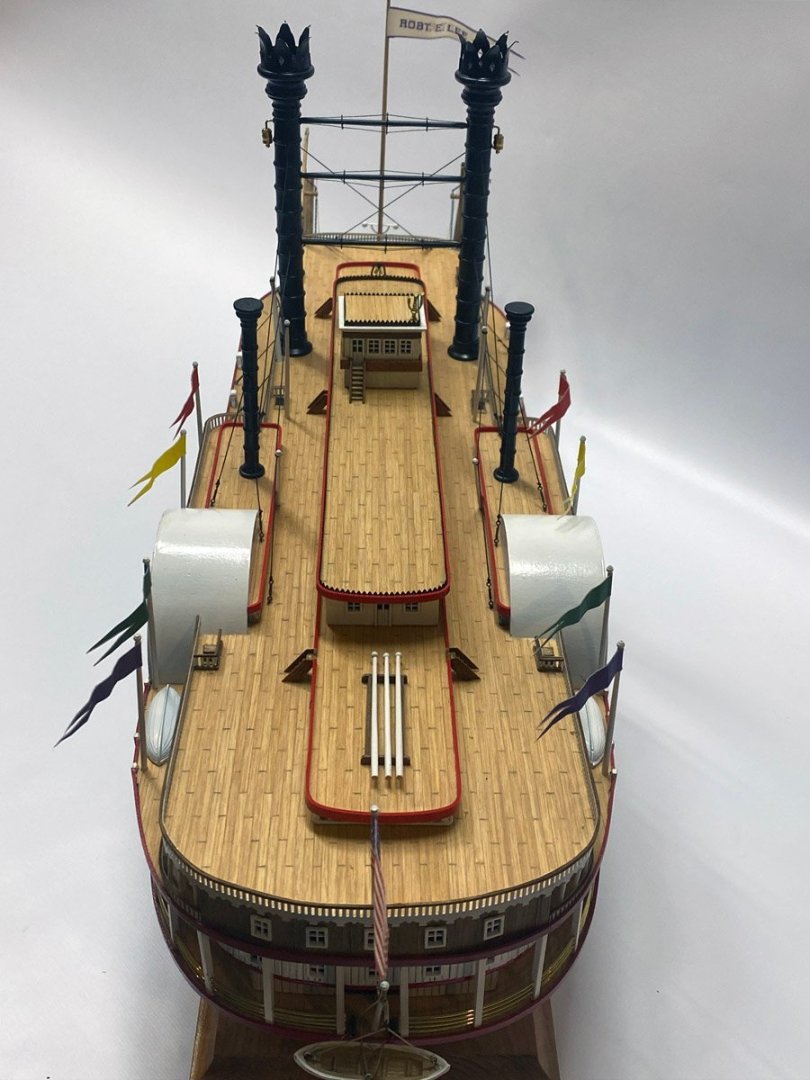
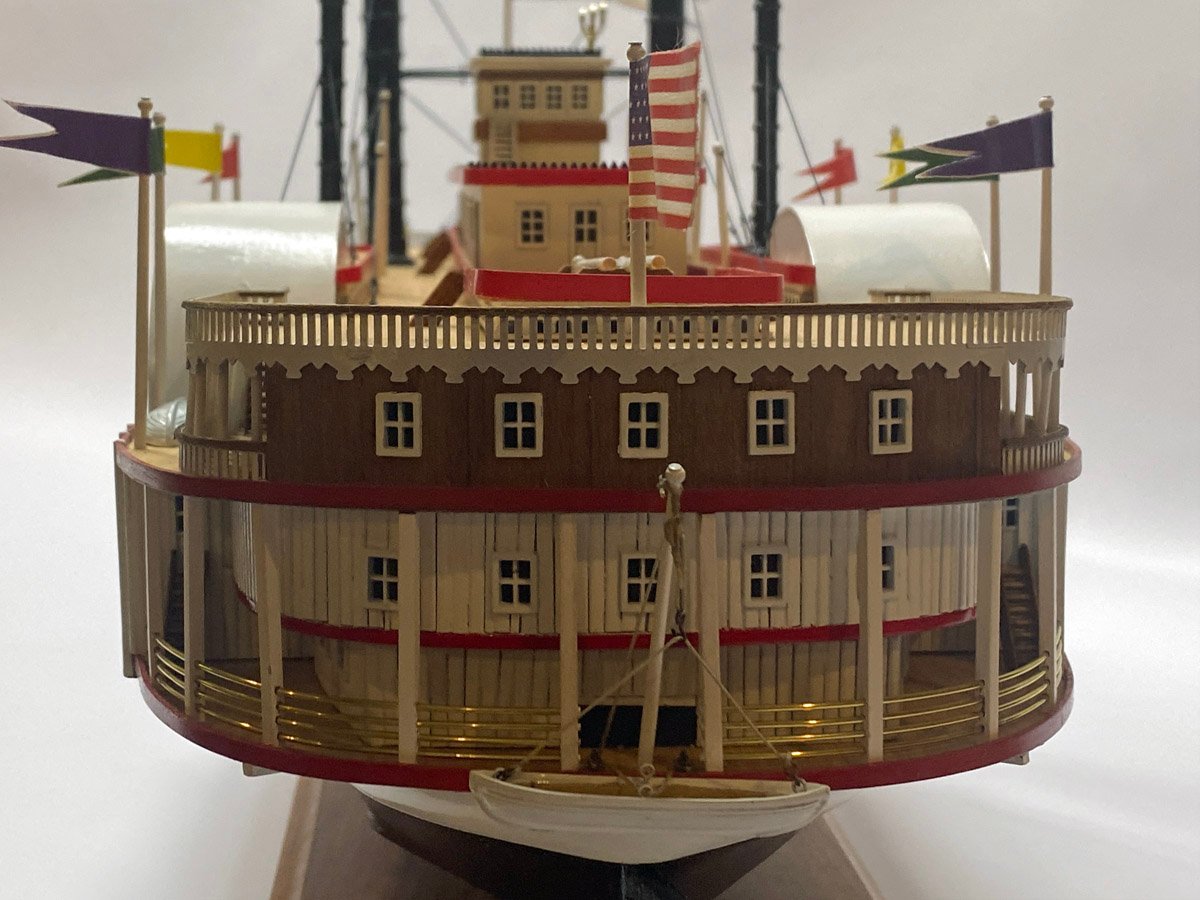
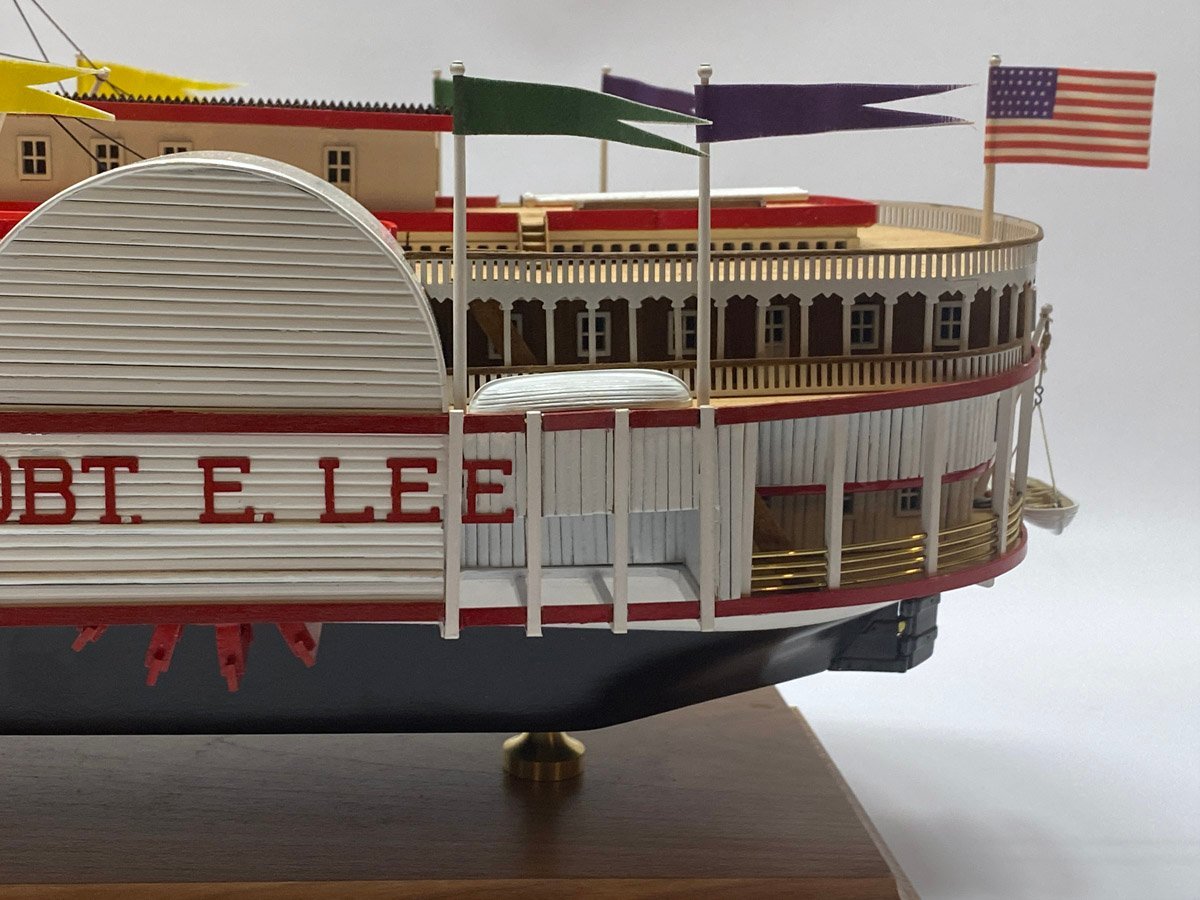
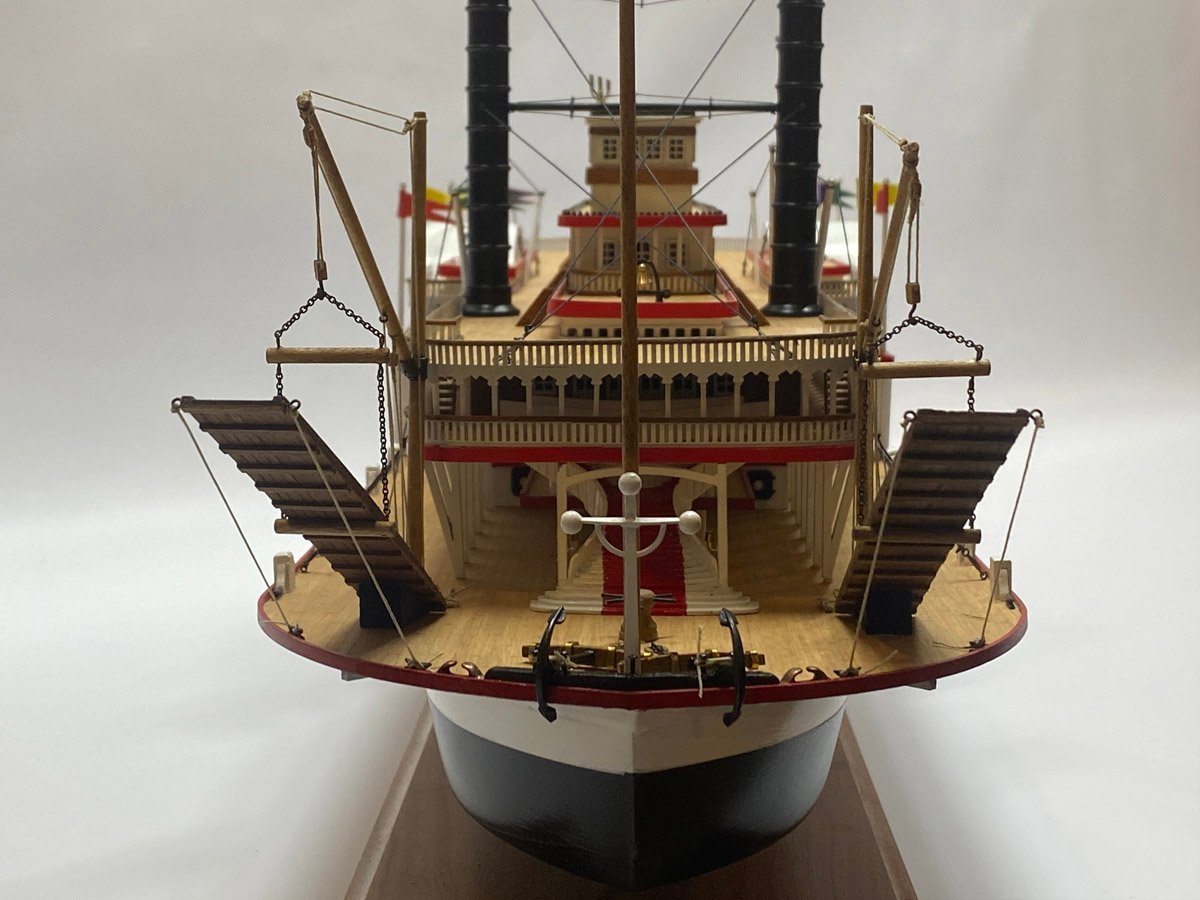
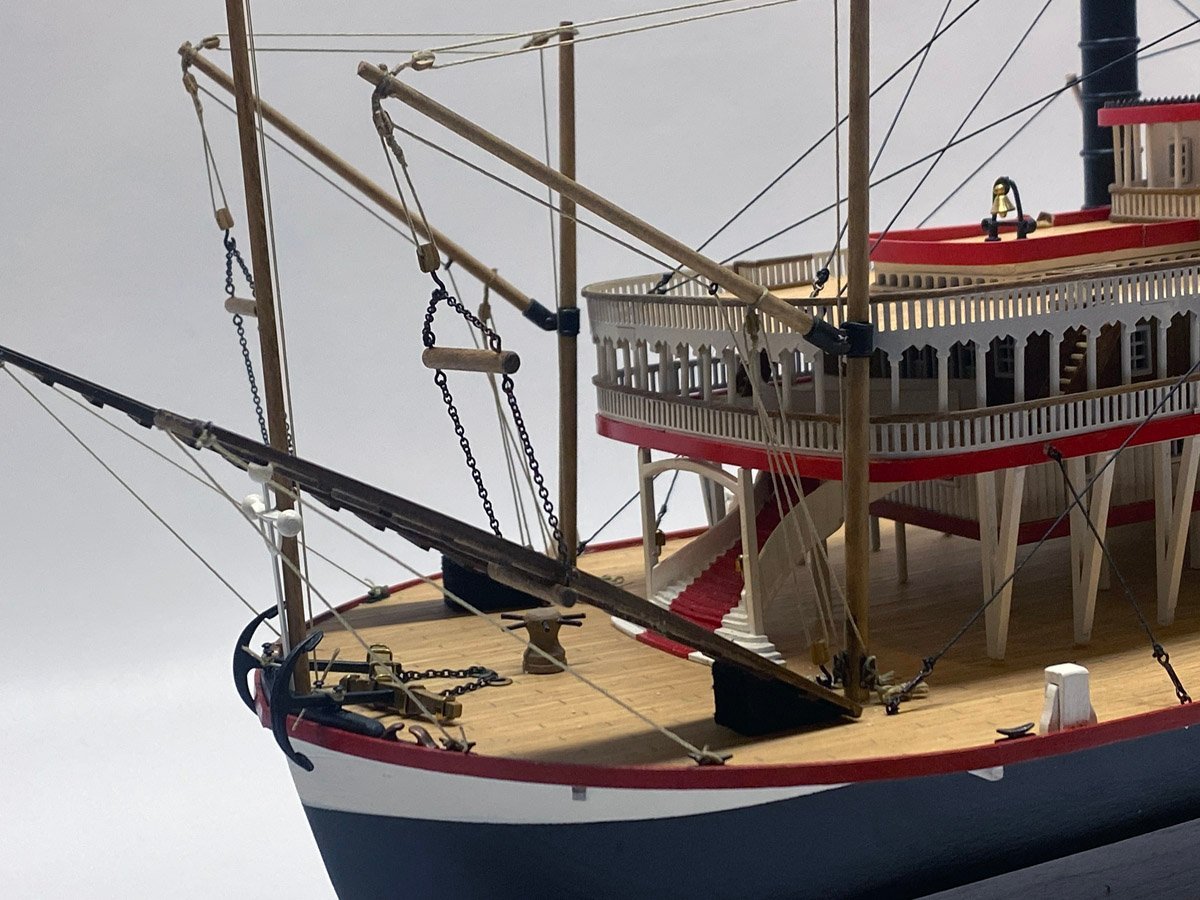
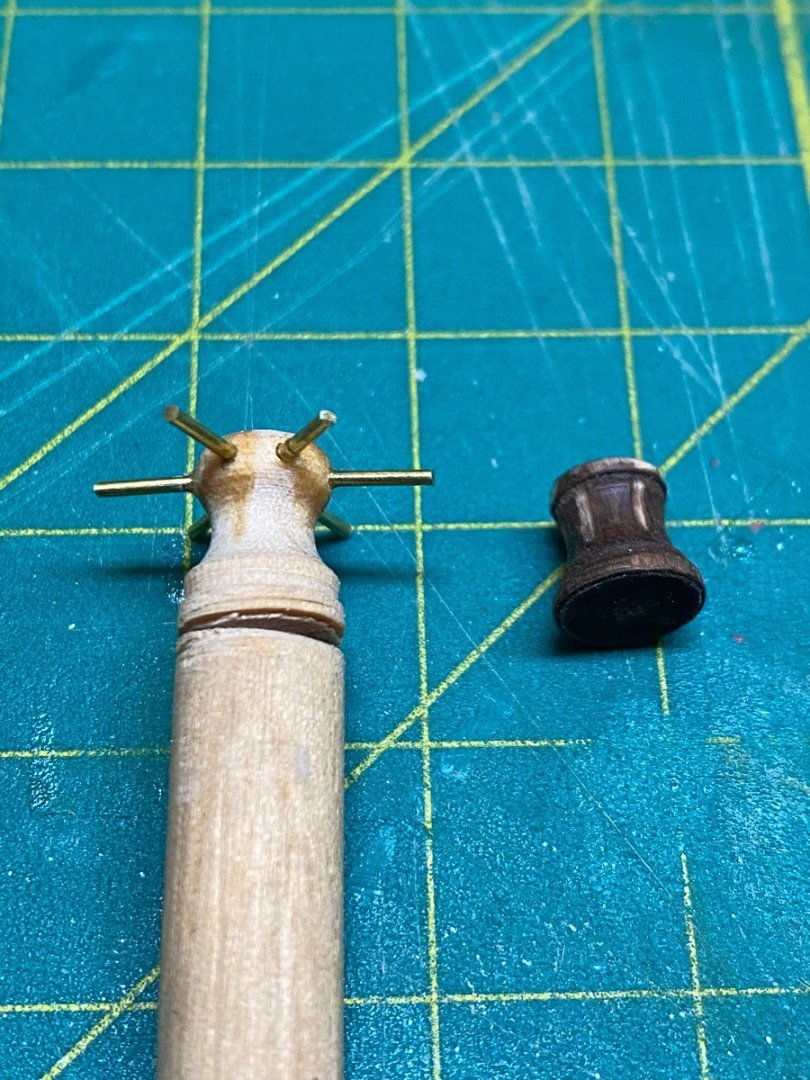
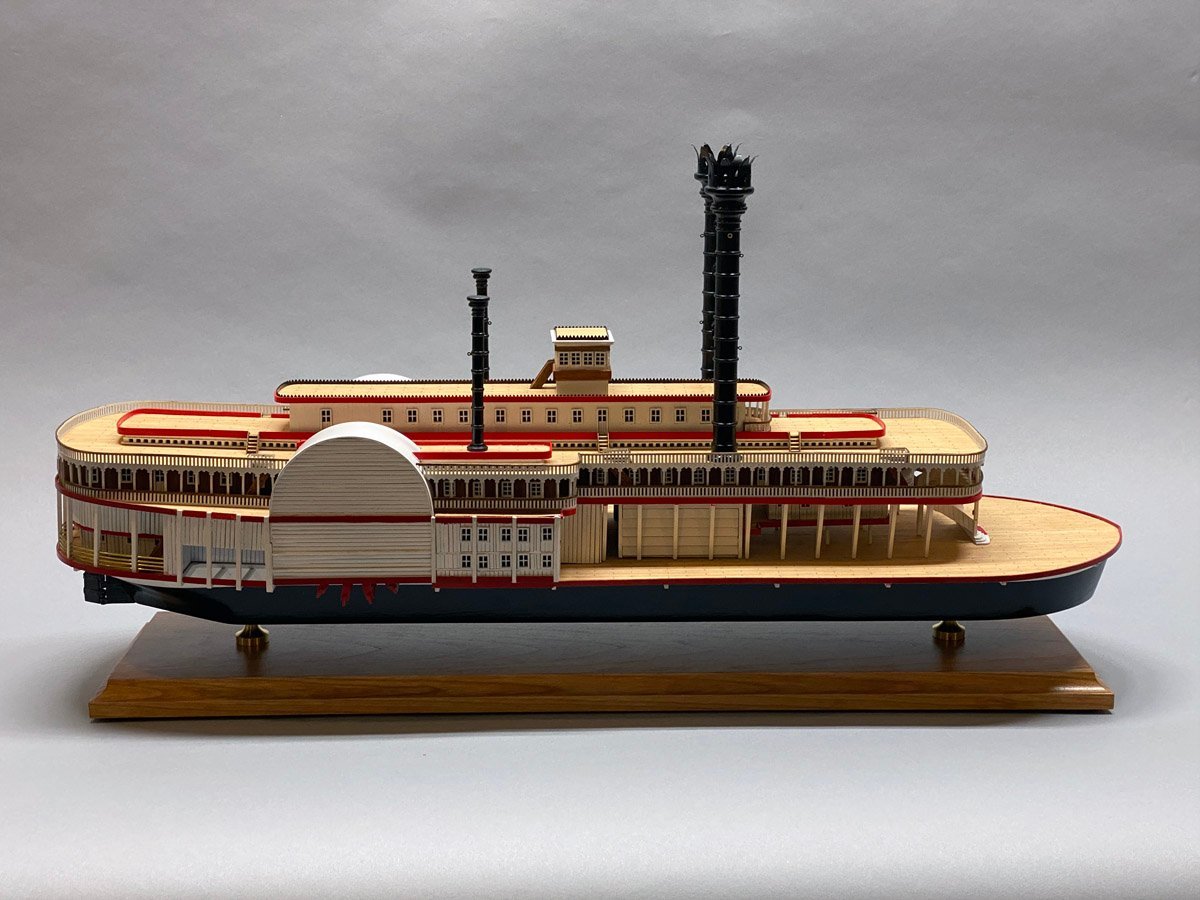
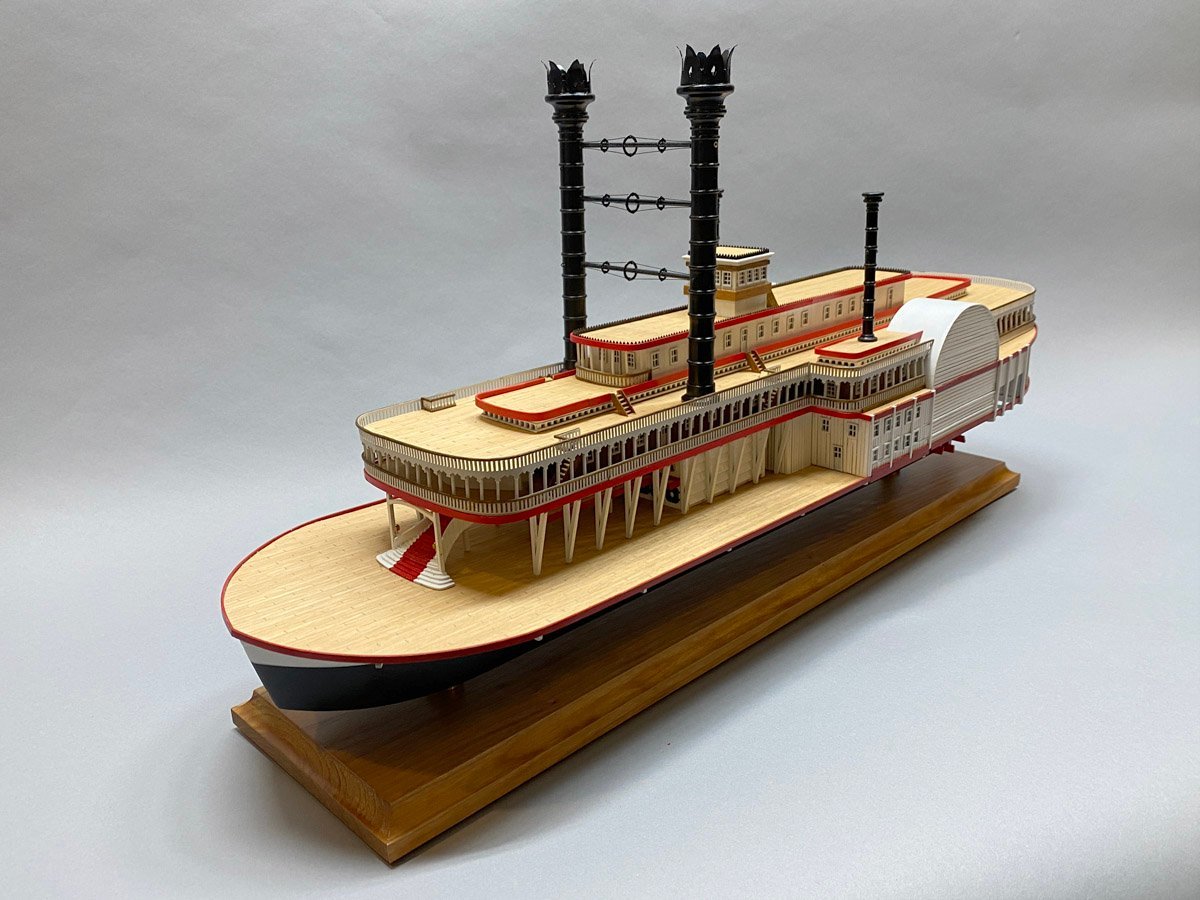
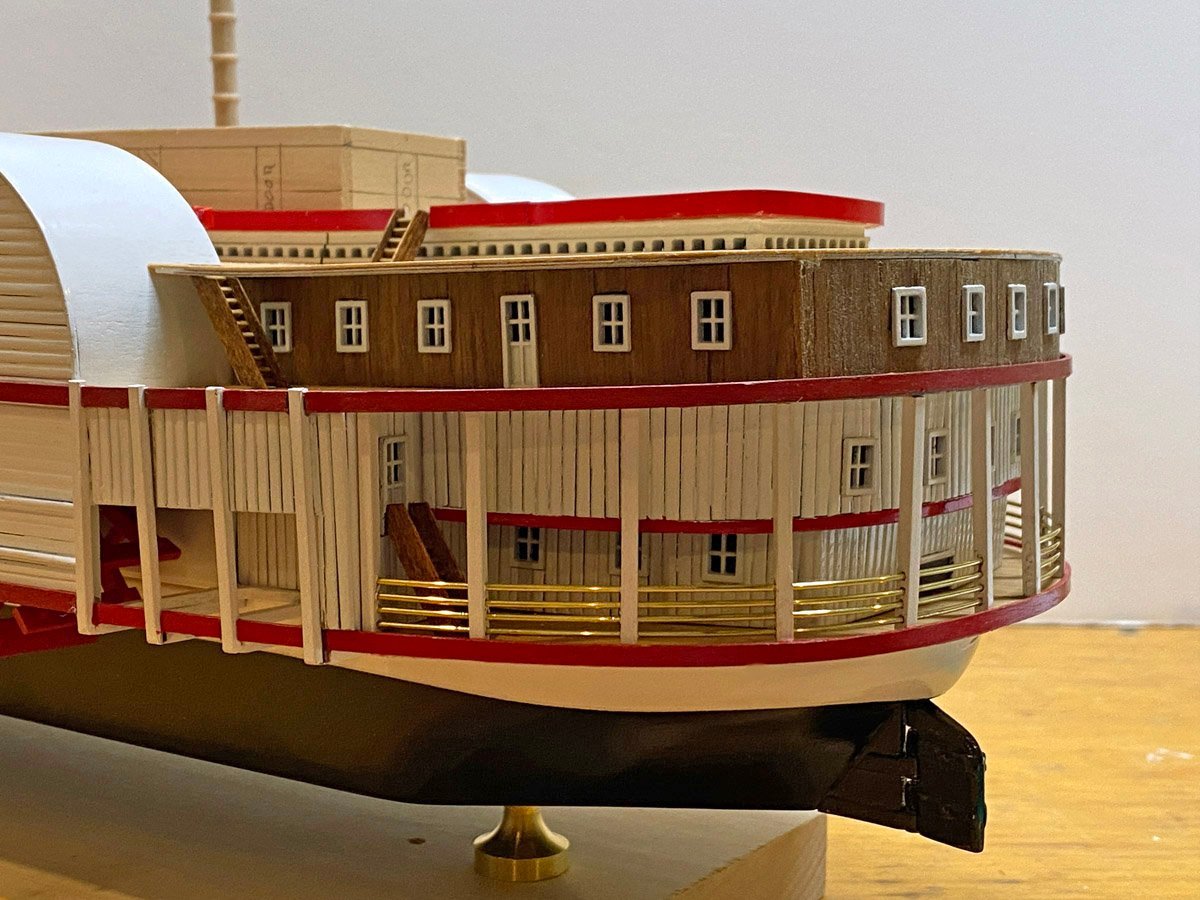
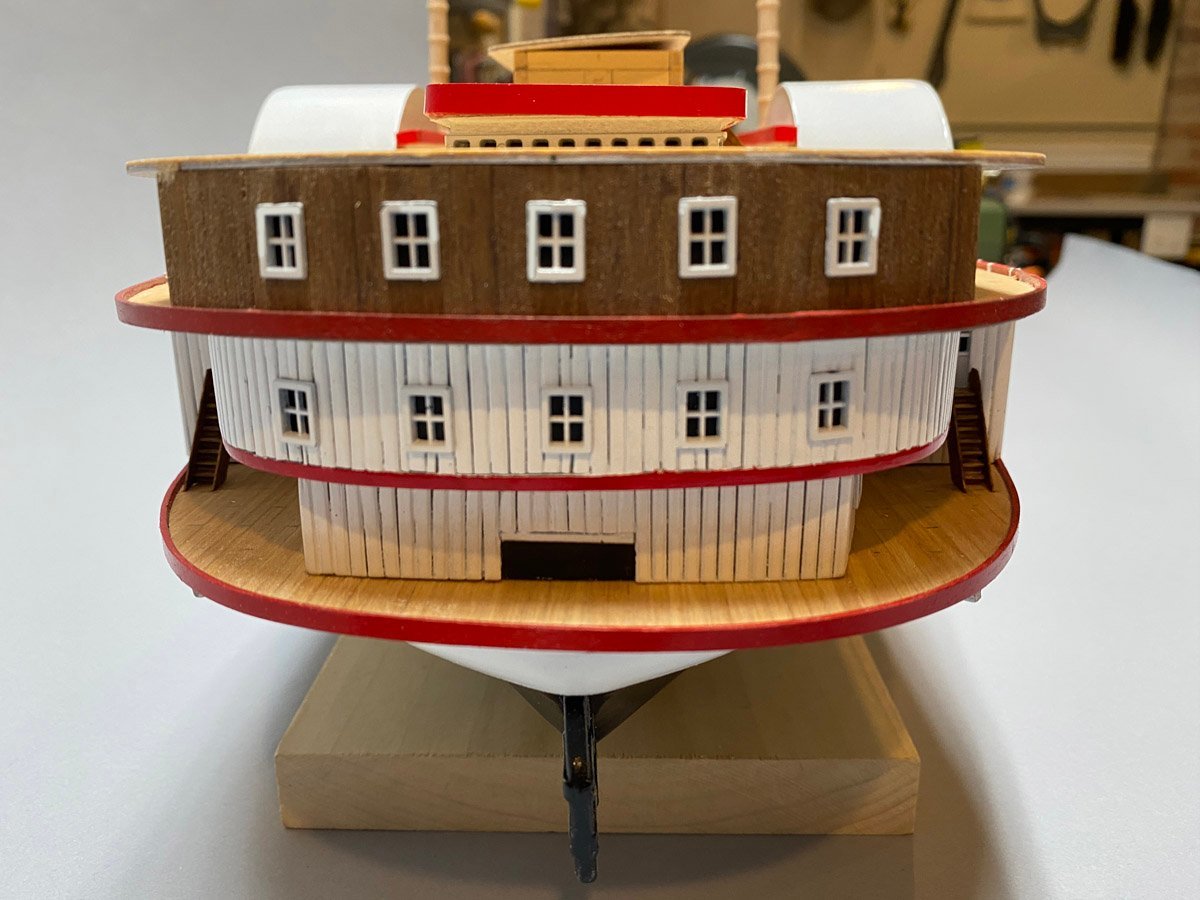
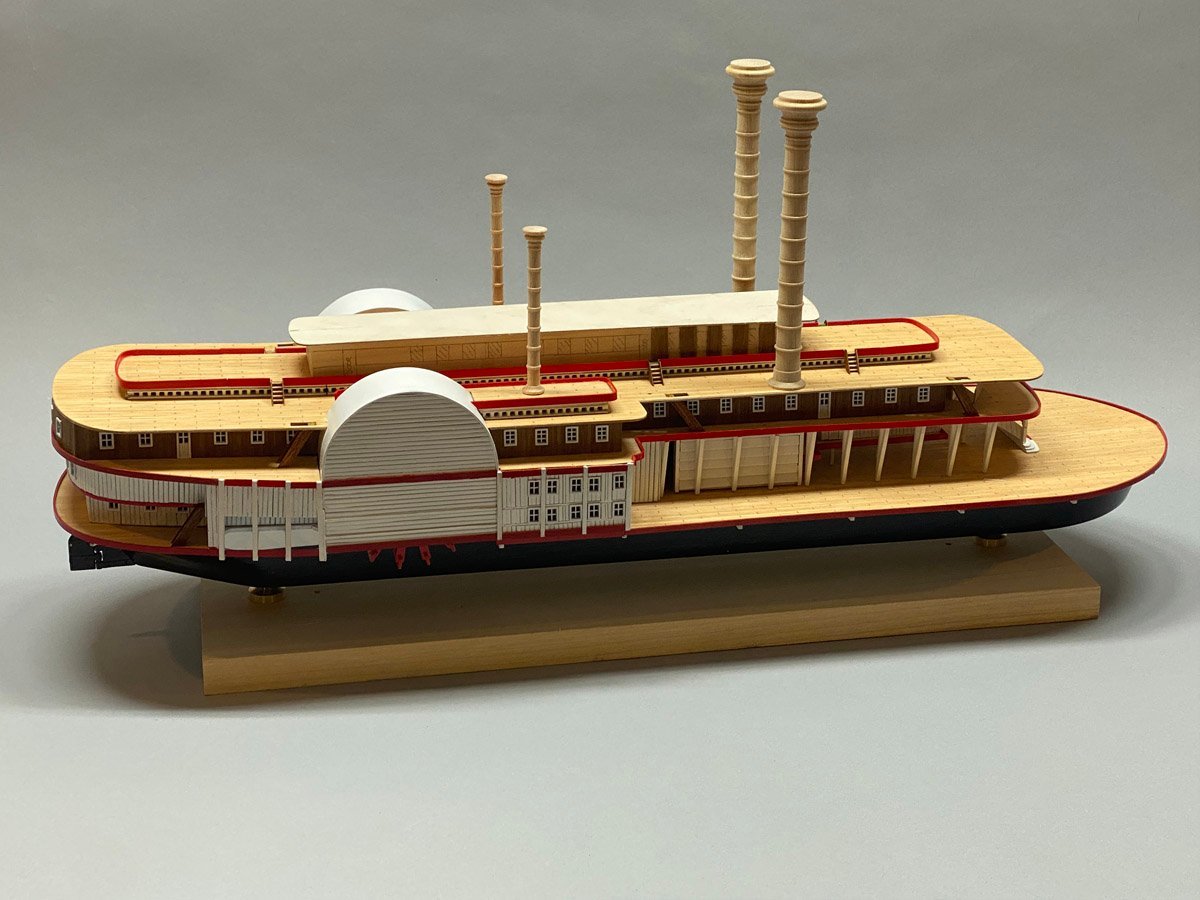
Steamboat Robert E Lee is Finished, 269 Hours, 102 Days Since returning from a trip to Utah to visit five national parks, I've put in about 40 hours to complete the rigging, accessories, and deck furniture. Here are photos of the final model. The masts and yards were fairly complicated, with the hinged joints between them made up from brass tube and sheet. The chain supplied for the gangways is tiny and required magnifiers to work with. The gangways would never hang in place by themselves so I glued small black wedges to keep them were I want them. The kit includes two very nice metal and wood anchor kits and a really cute turned capstan. The instructions said to use 1 mm wood strips for the capstan bars, but the turned base had 1 mm round holes so I used brass rod. When I clipped the rod to length after assembly the ends were rough so I touched one gently to my disk sander, and the sander grabbed it and dragged the whole thing into the gap between the spinning disk and table. That really mangled the capstan. I sure wish I had taken a photo. I ended up turning a new capstan on the end of a dowel. Here's the new one and what's left of the old one. The ship has two tiny lifeboats for 240 or more passengers, and no davits for launching them. There is one more lifeboat or ship's boat hanging from a boom at the stern. Like the gangways there is no way this would hang correctly by itself, so I pinned it to the stern. Summary You can't go wrong with a kit by Amati. They have excellent materials and detailed plans, and end up as beautiful models. The illustrated instructions for the Robert E. Lee are in Italian. An English translation is included but you need to refer back to the Italian for illustrations. The build sequence was confusing. Instead of building cabins upward from the lower deck, they are built down from the deck above. That allows you to plank and paint the cabin walls, but it makes it quite confusing to see which parts all need to line up. The instructions recommended rounding the edges of the cabin wall planks. I regret doing that on the lower decks - the paint didn't get into the joints and it makes the work look sloppy. I did not round the planks on the upper decks. You can still see hints that the walls are planked but they look much cleaner. I also found that I could pre-glue several planks to a sheet of brown paper, glue that to the cabin walls, and trim the length later. That gave a much neater look. This is not an easy model. All the planking, windows and doors, and a surprising amount of rigging add up to a lot of work. In the end, though, Amati's Robert E Lee builds into a beautiful model.

- 58 replies
-
- 14
-

-
-
- Robert E Lee
- Amati
- (and 4 more)
-
Eric, Thank you for the explanation about the "chains". I didn't think they were actual chains but I wasn't sure. Anyway I was planning to use heavy black thread with tiny, hand-made turnbuckles. Photos to follow.
- 58 replies
-
- 2
-
-
- Robert E Lee
- Amati
- (and 4 more)
-
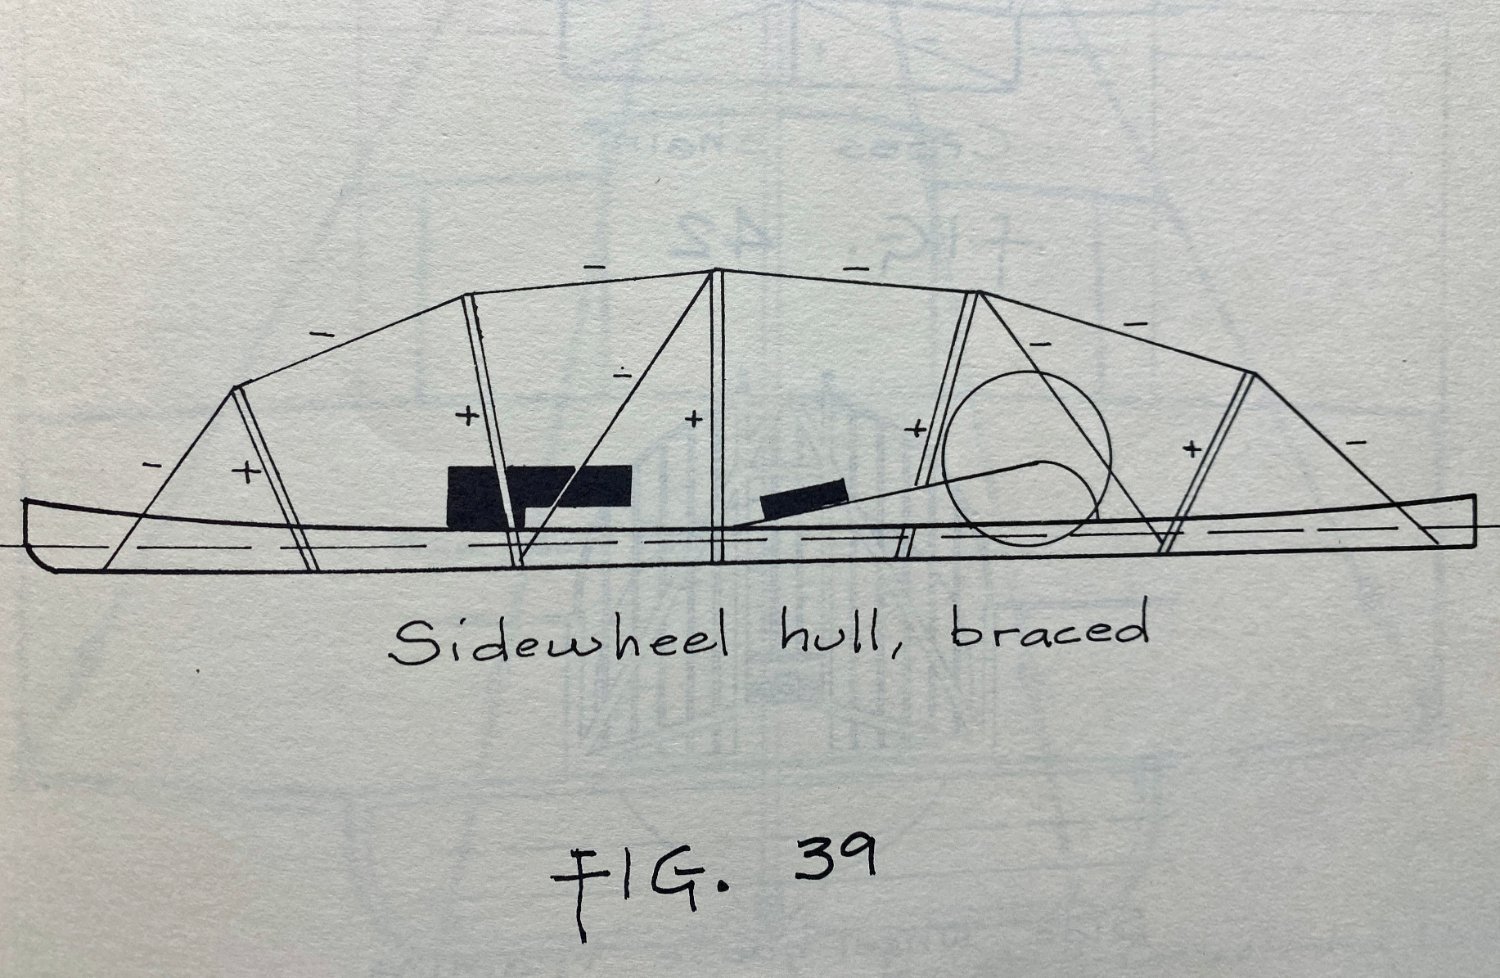
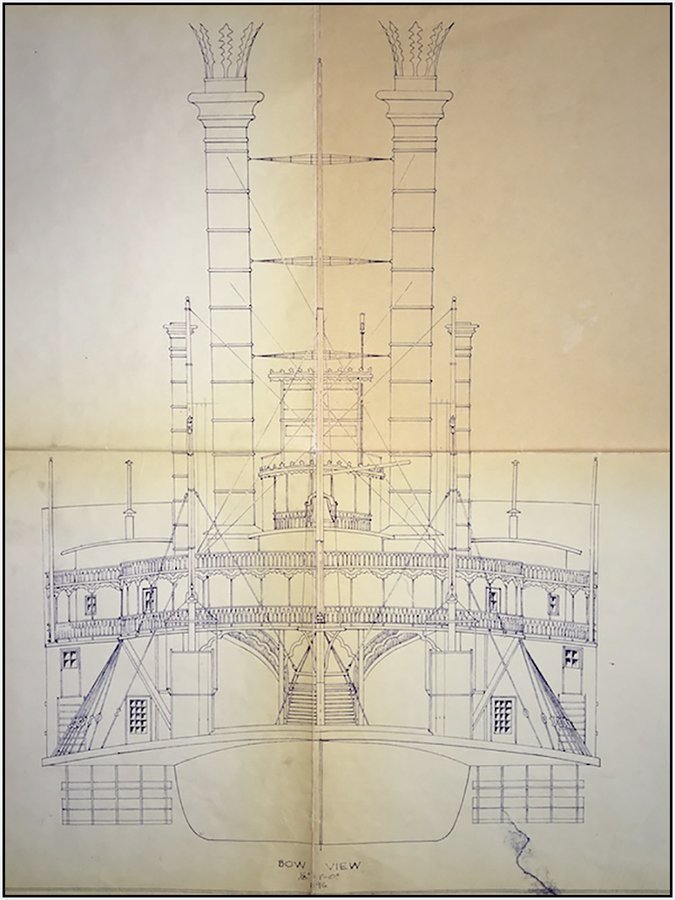
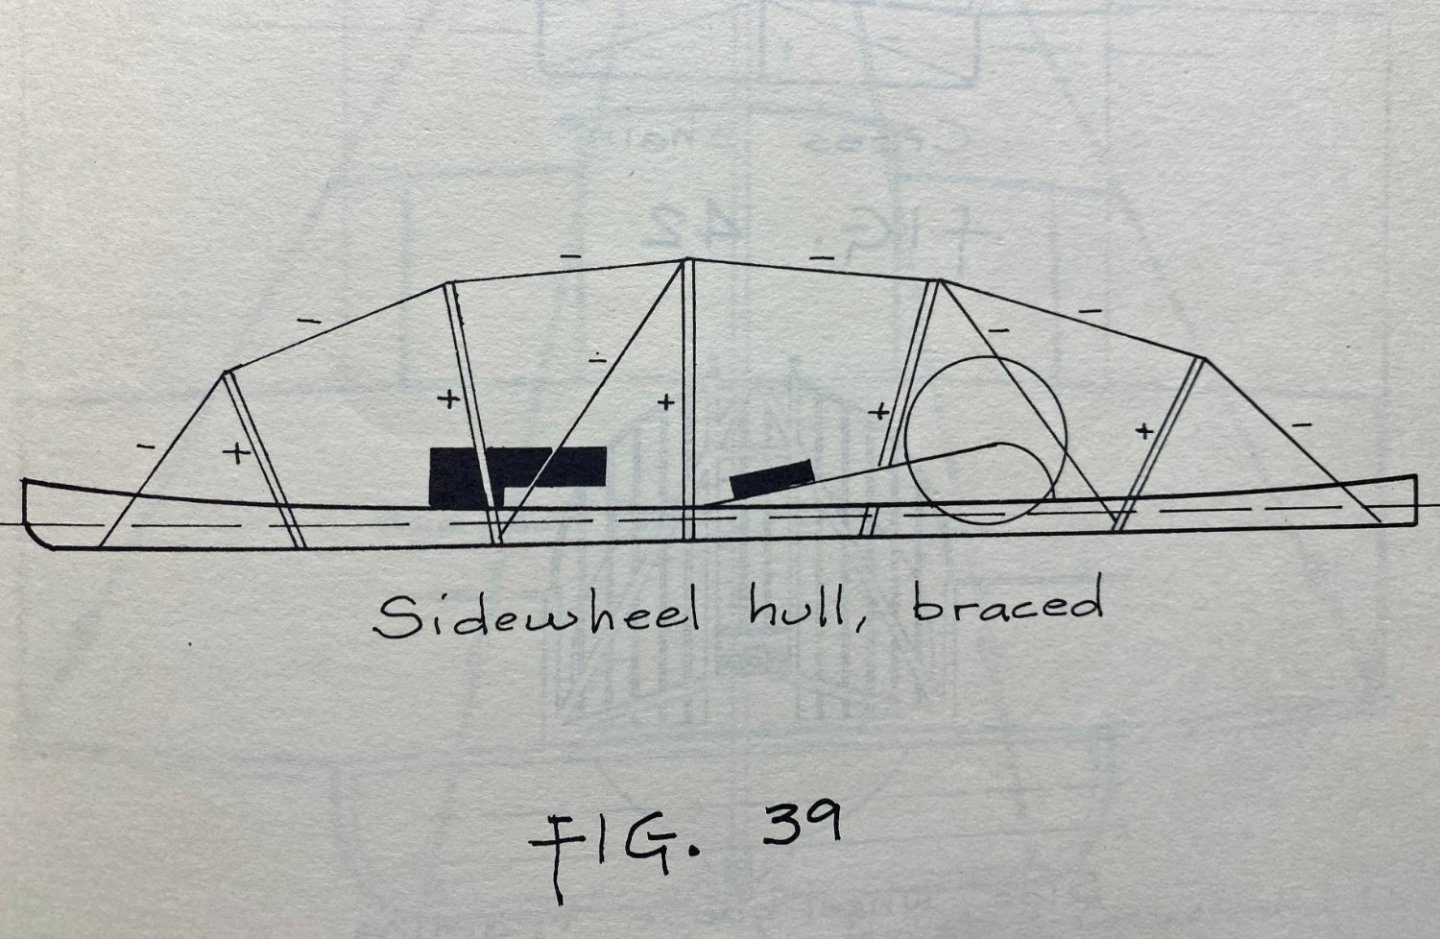
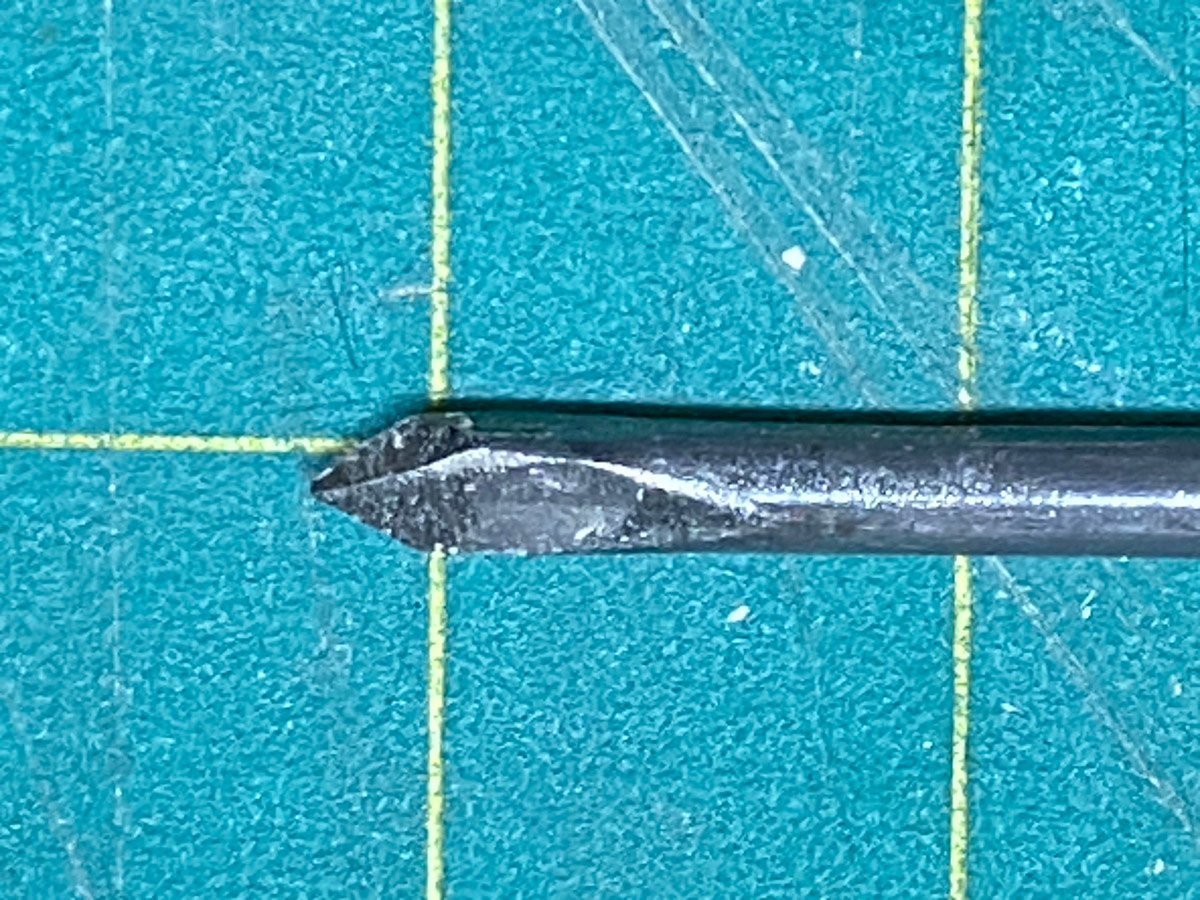
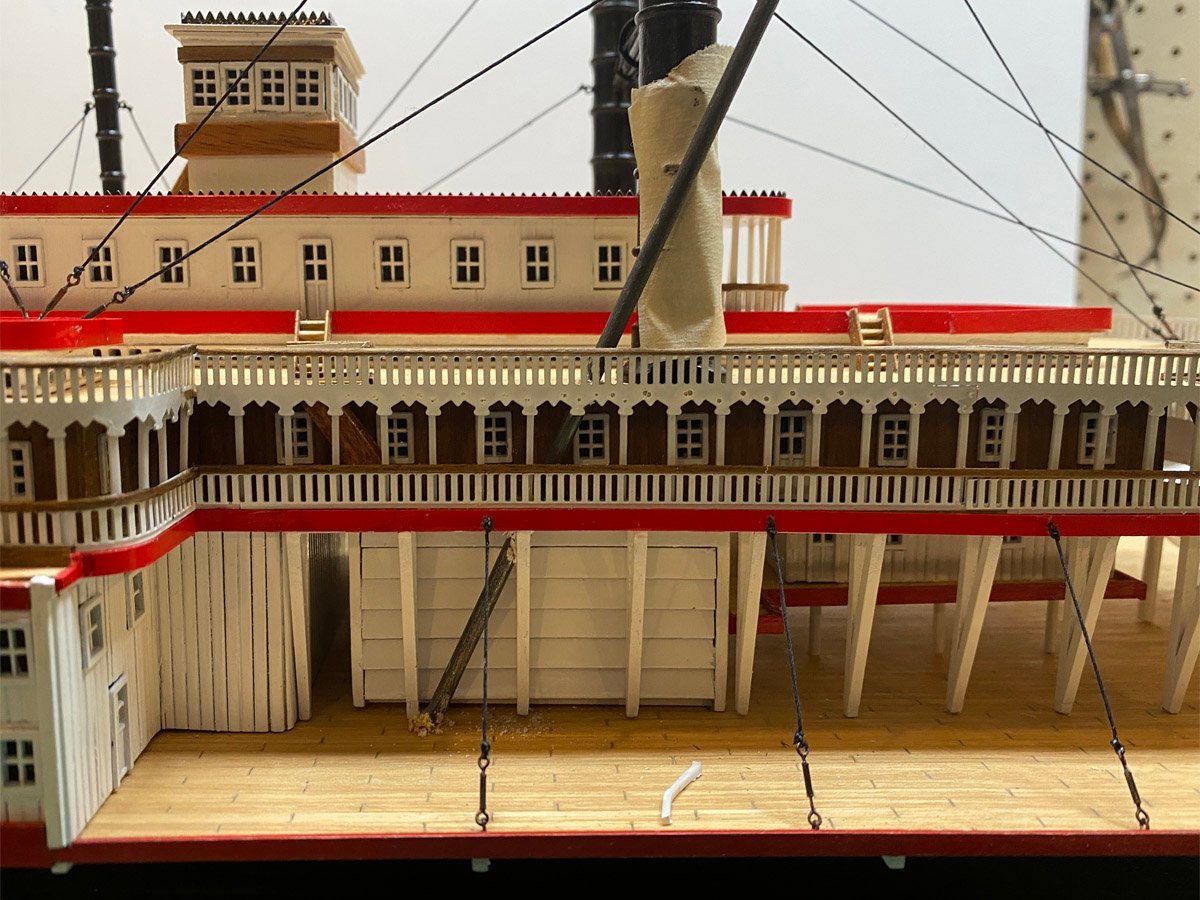
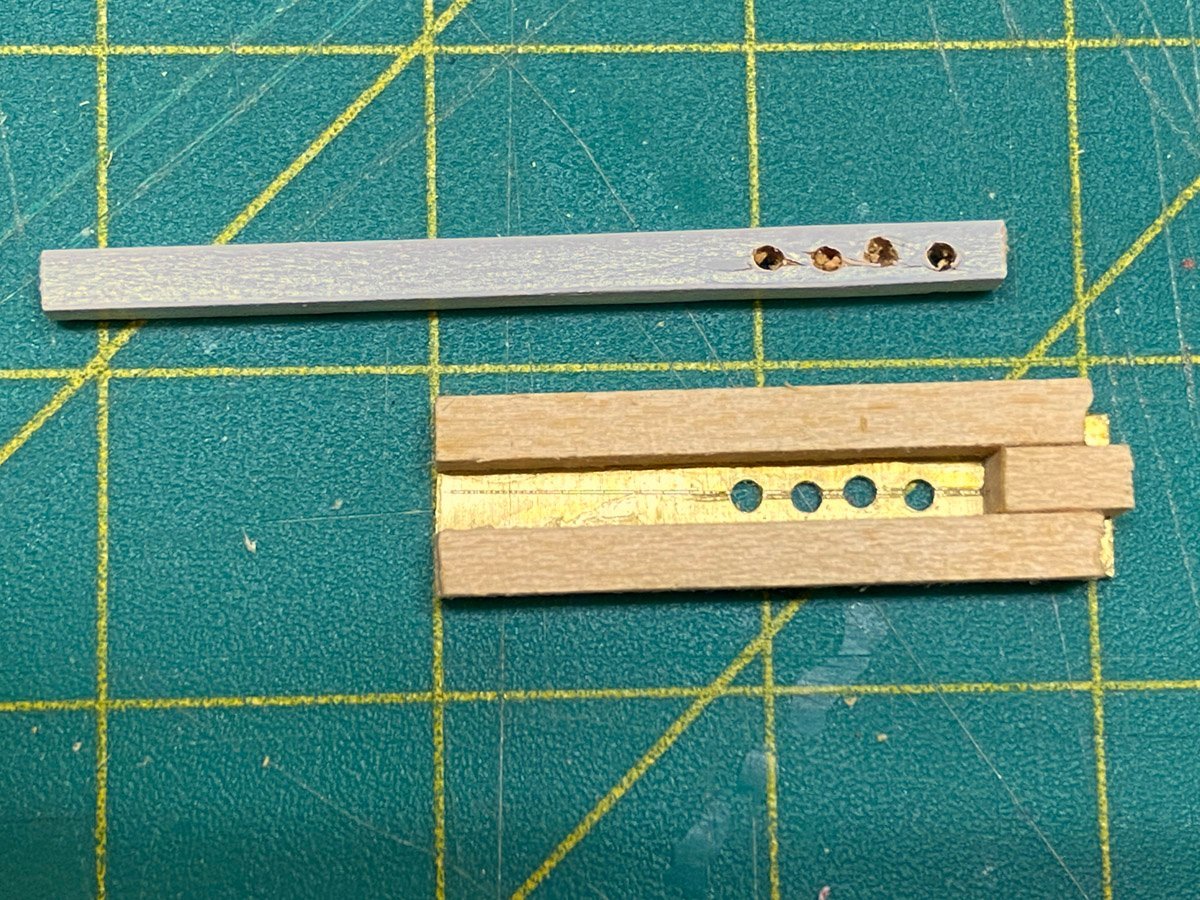
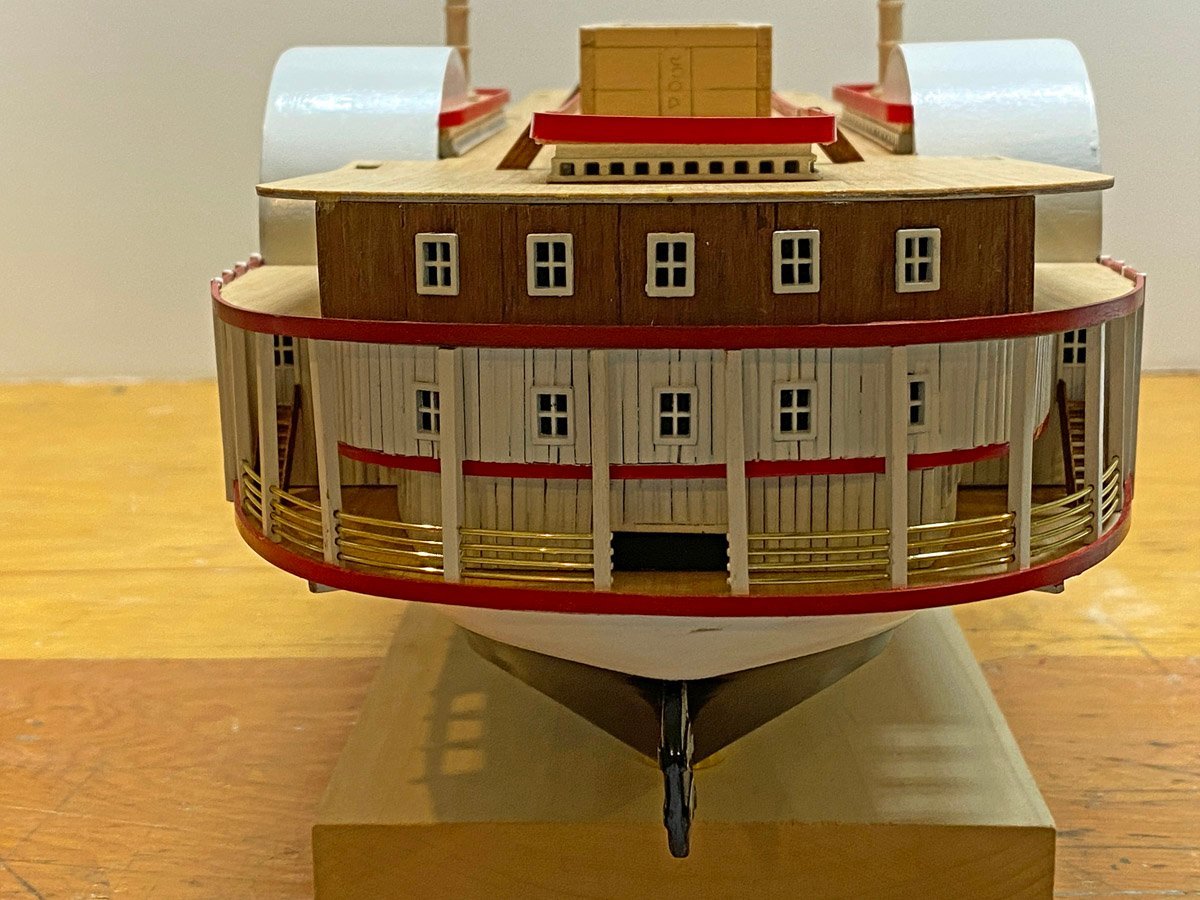
Bcochran, Thank you for the drawings of the R. E. Lee. I do wish that I had them earlier to avoid A HUGE MISTAKE The plans above show the stacks close to the cabins on the Texas deck. The kit had holes pre-drilled in the decks that I assumed were for screws for the stacks. I realized that I could never tighten screws in that location so I used short dowels to attach the stacks from above, and I built the stacks and braces to fit those holes. Turns out they are way too far apart. This is where the stacks should be. This is where my stacks are. I didn't realize my mistake until I started to attach supports for hull chains. The hulls on river steamers were so long and shallow that they tended to flex, and had to be braced with chains like a suspension bridge. This image from The Western Rivers Steamboat Cyclopaedium by Bates shows typical supports and chains. The Amati kit has the supports, although most of them stop at the top deck. The front support does go through all of the decks, right next to the stack, probably through the pre-drilled hole that I centered the stack on. Fortunately there was just enough room to place the support next to the stack. But how to drill the hole? Years ago I needed to thread an electrical wire through a wall, and made a very long 1/8" drill out of a piece of wire. It worked perfectly to drill through the decks for the support piece. Here's the drill, and the support piece in place. All the other support pieces are dummys, attached only to the upper deck. So my stacks are too far apart, but I can still squeeze the chains in place.

- 58 replies
-
- 4
-
-
- Robert E Lee
- Amati
- (and 4 more)
-
Status - 225 hours, 68 days The decks, railings, and smokestacks are all attached and the working base has been replaced with a beautiful cherry base from Bluejacket Shipcrafters. It may seem like there's not much left to do, but looking ahead in the instructions it's obvious that there is plenty. There are masts, gangways, lots of rigging, and support braces to build. There are 3 lifeboats, 2 anchors, and a capstan to build. There are flags, lanterns, a steam whistle, and other accessories to add. My wife and I are getting ready for a trip to Utah to see 5 national parks, so I won't be posting for a few weeks. Don't worry, I will finish the model eventually.
- 58 replies
-
- 7
-
-
- Robert E Lee
- Amati
- (and 4 more)
-
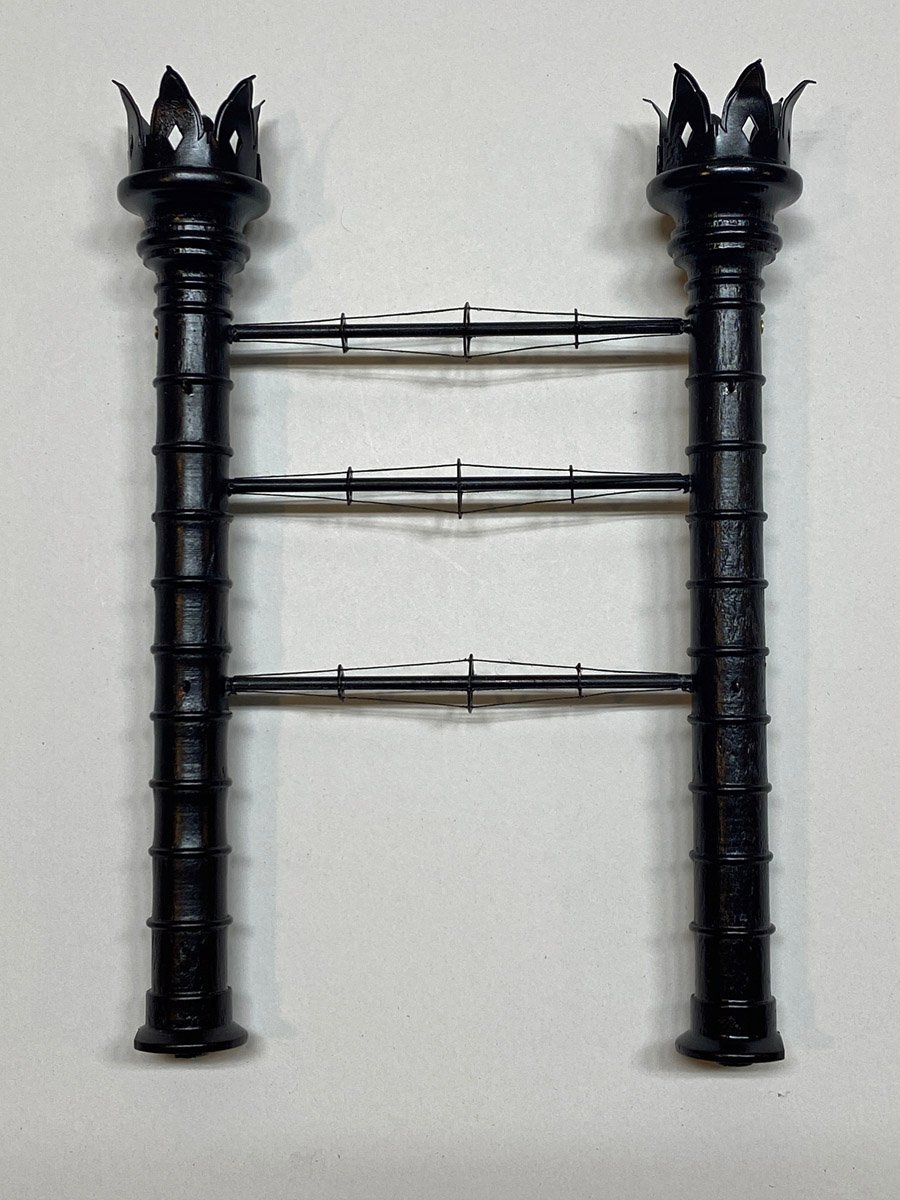
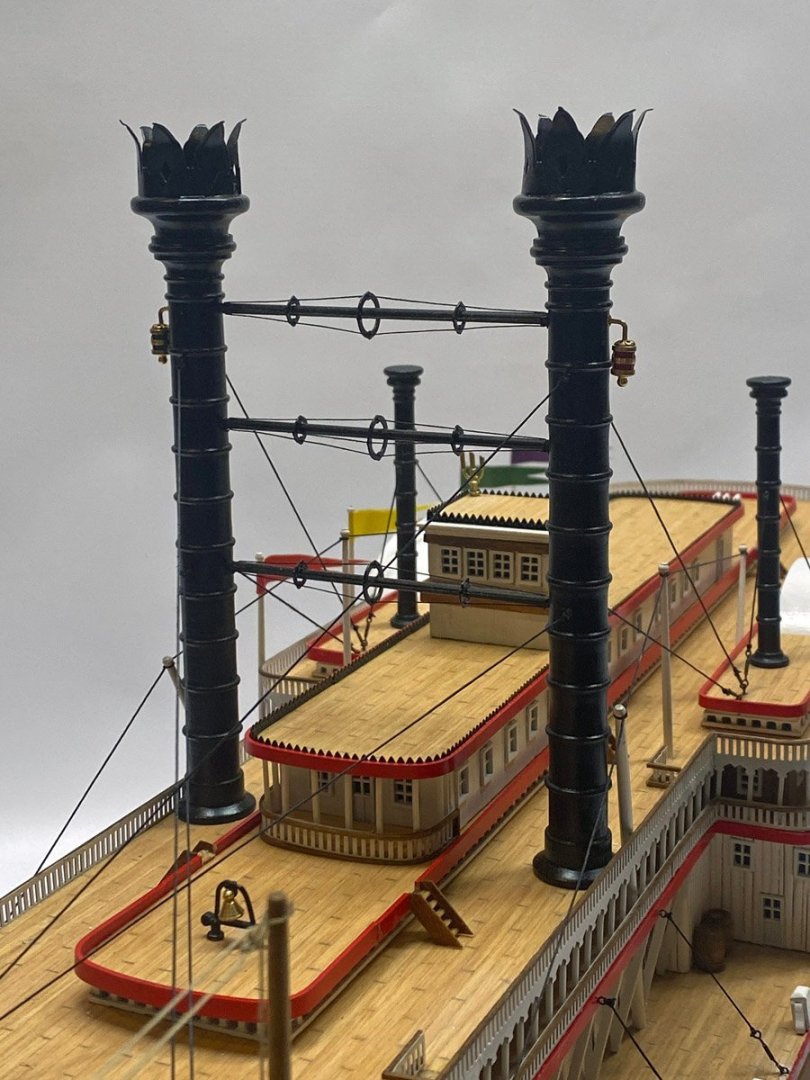
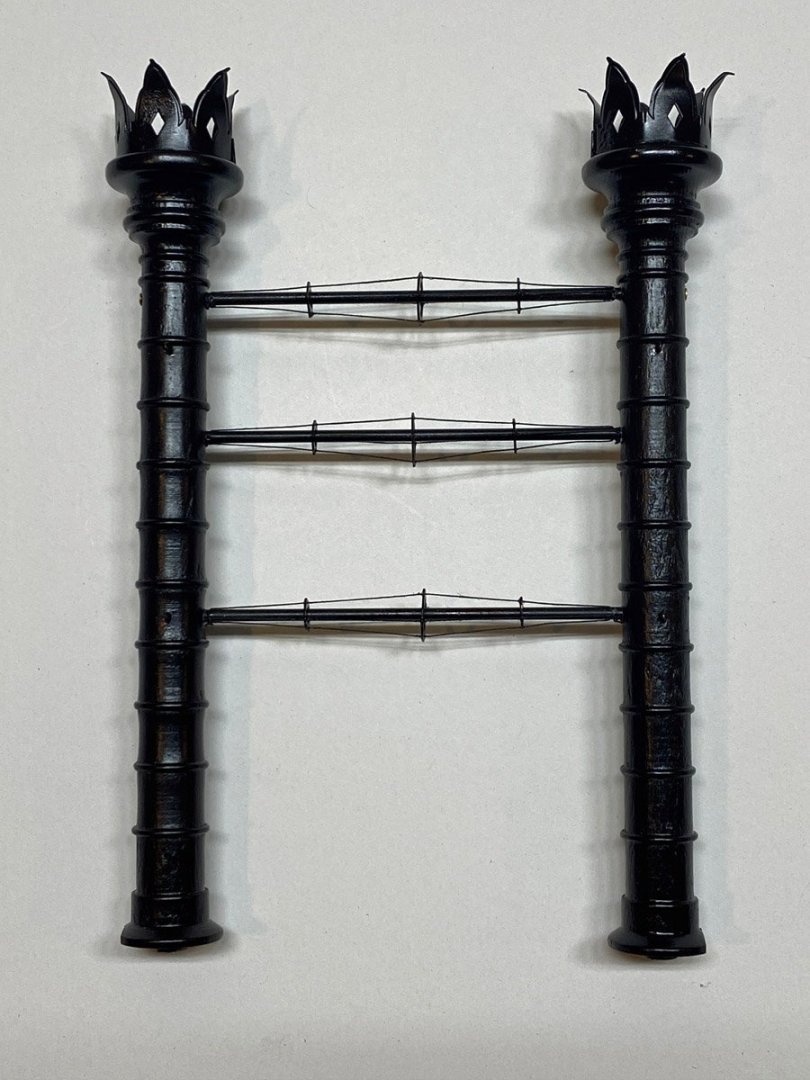
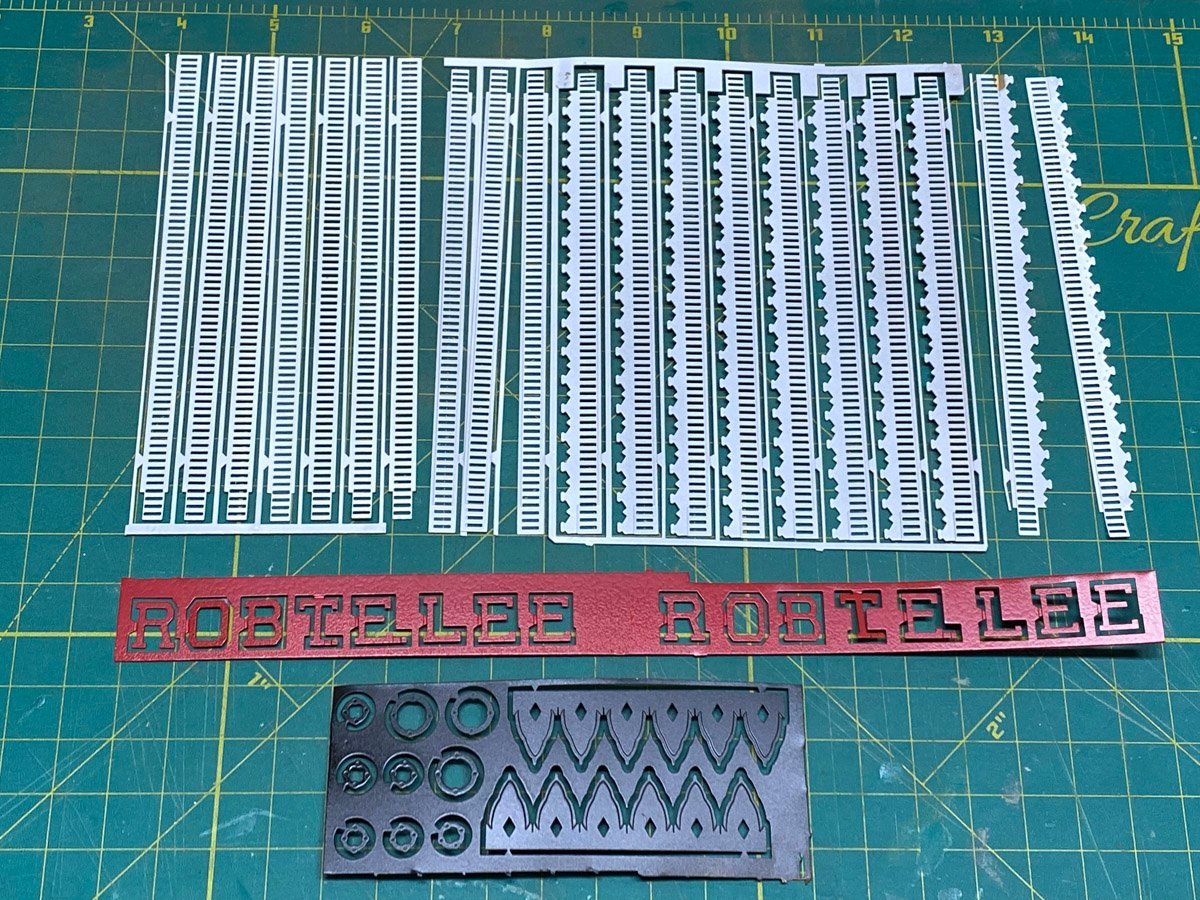
Smokestacks The forward smokestacks came nicely turned from hardwood. I curved the photo etched trim pieces and attached them to the tops. The stacks are braced side-to-side with three tubes each surrounded by 3 rings supporting 4 wires. The kit did not include the brass tubes so I substituted aluminum that I had on hand. The kit came with extremely thin brass wire so I substituted black thread. Assembly was fiddly but not impossible. I can't imagine how the rings and wires could offer and structural support, so I suppose they were purely decorative.
- 58 replies
-
- 7
-
-
- Robert E Lee
- Amati
- (and 4 more)
-
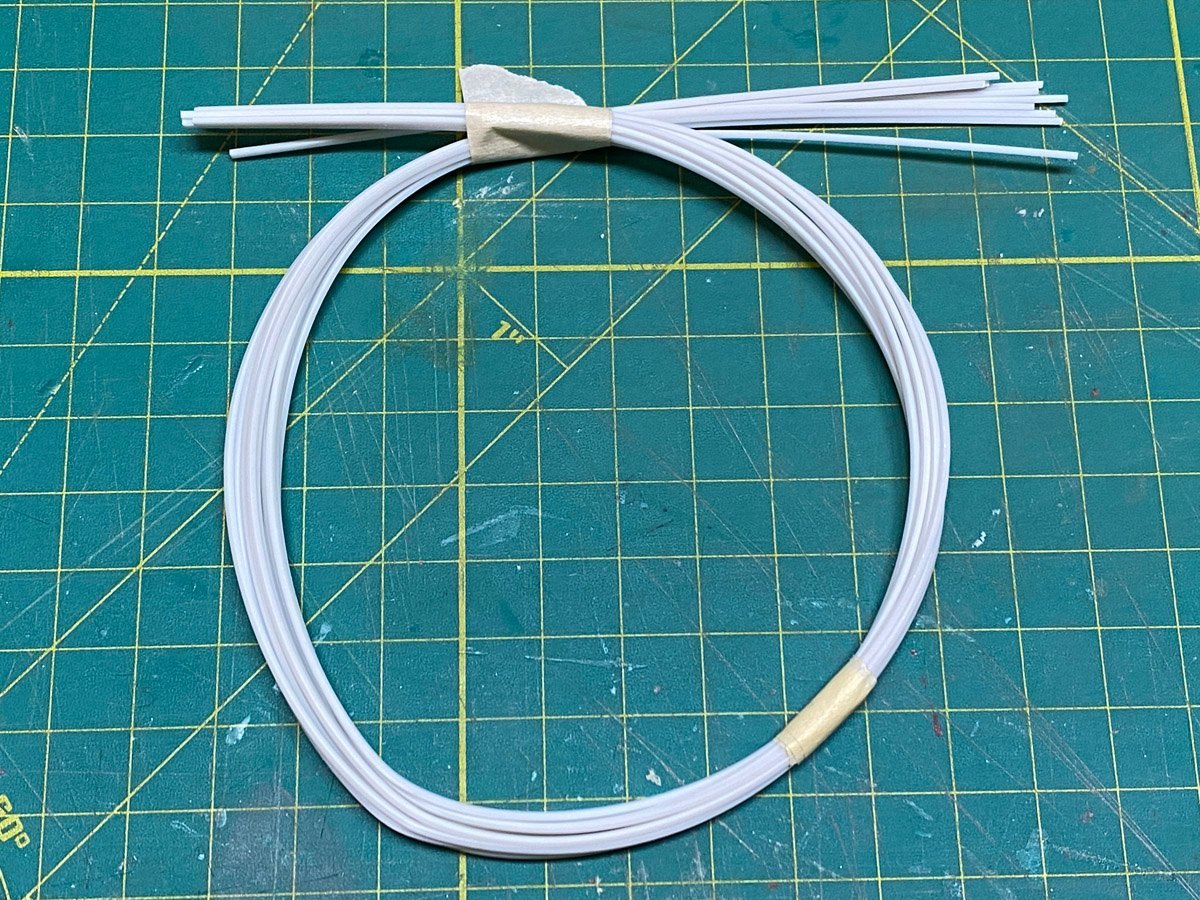
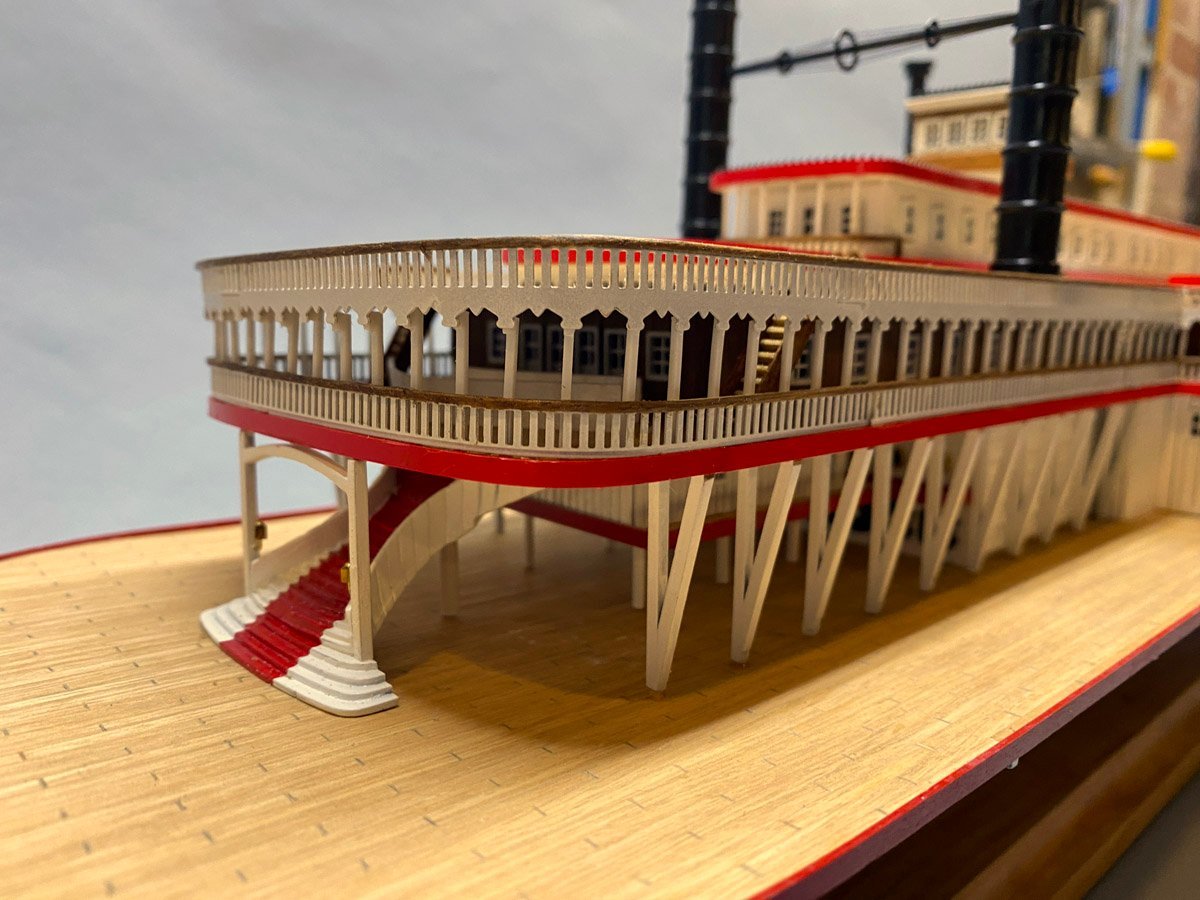
Trim and Railings The photo etched trim hangs down from the deck above and supports the tops of about 150 columns that go down to the deck below. The instructions say to use 1 mm square walnut strips, but they are hard to paint and keep smooth. I found some 1 mm square x 20" long styrene strips on Amazon that would be delivered the next day. I expected a 20" long package but received a small envelope with the strips rolled up inside. They straightened out some, and when cut to 18 mm lengths the bends didn't show. Everything got attached as follows: Glue trim around the top Glue top of column to trim Glue bottom of column to deck Glue railings to bottom of columns Glue walnut trim to railings It only took a couple of afternoons. The Texas deck got a little porch in front and railings around the top of 6 staircases.
- 58 replies
-
- 6
-
-
- Robert E Lee
- Amati
- (and 4 more)
-
Beautiful job Chris! I never paid much attention to card models - until now.
-
She's looking great Tim. I am totally impressed that you managed to waterproof everything and squeeze all that gear into that awkward hull. I hope that you will post videos of her on the water.
- 72 replies
-
- 1
-
-
- Seguin
- BlueJacket Shipcrafters
- (and 2 more)
-
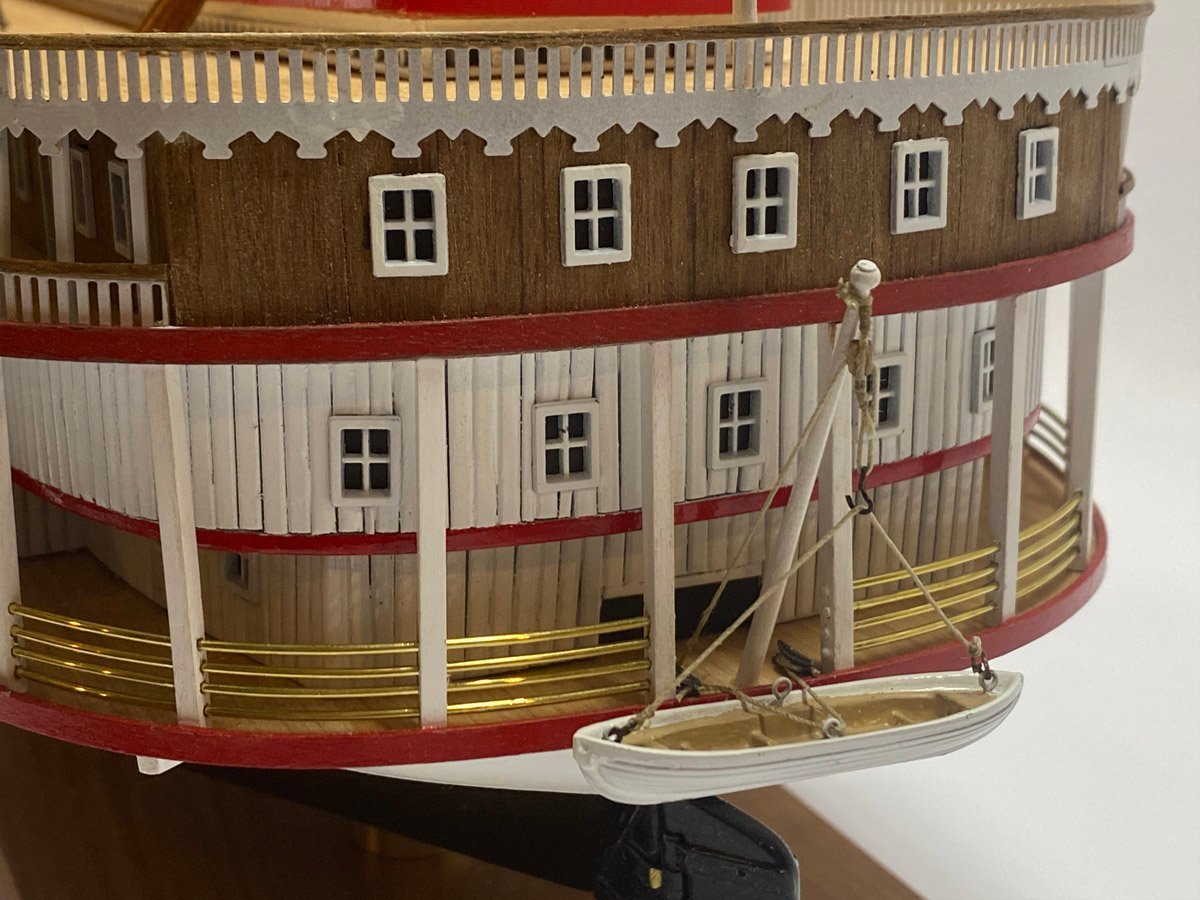
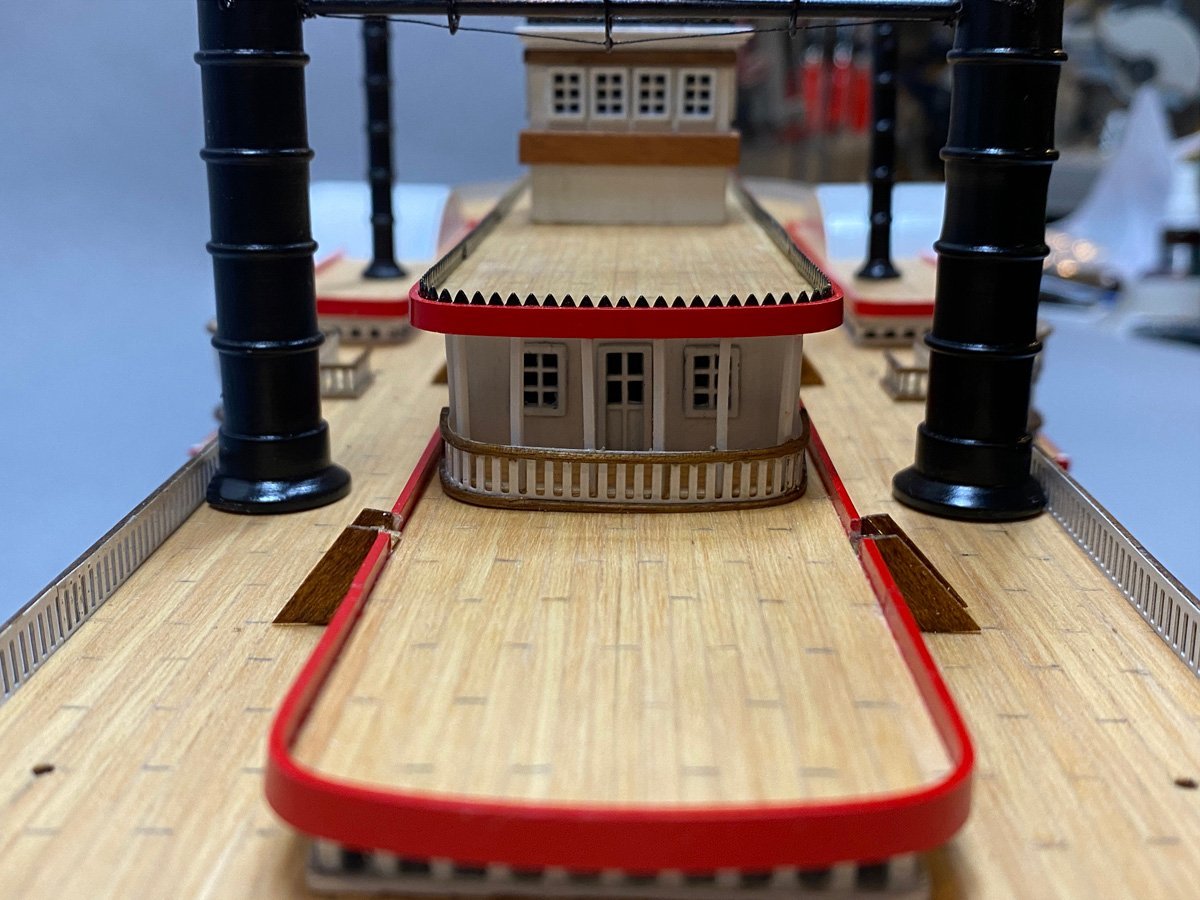
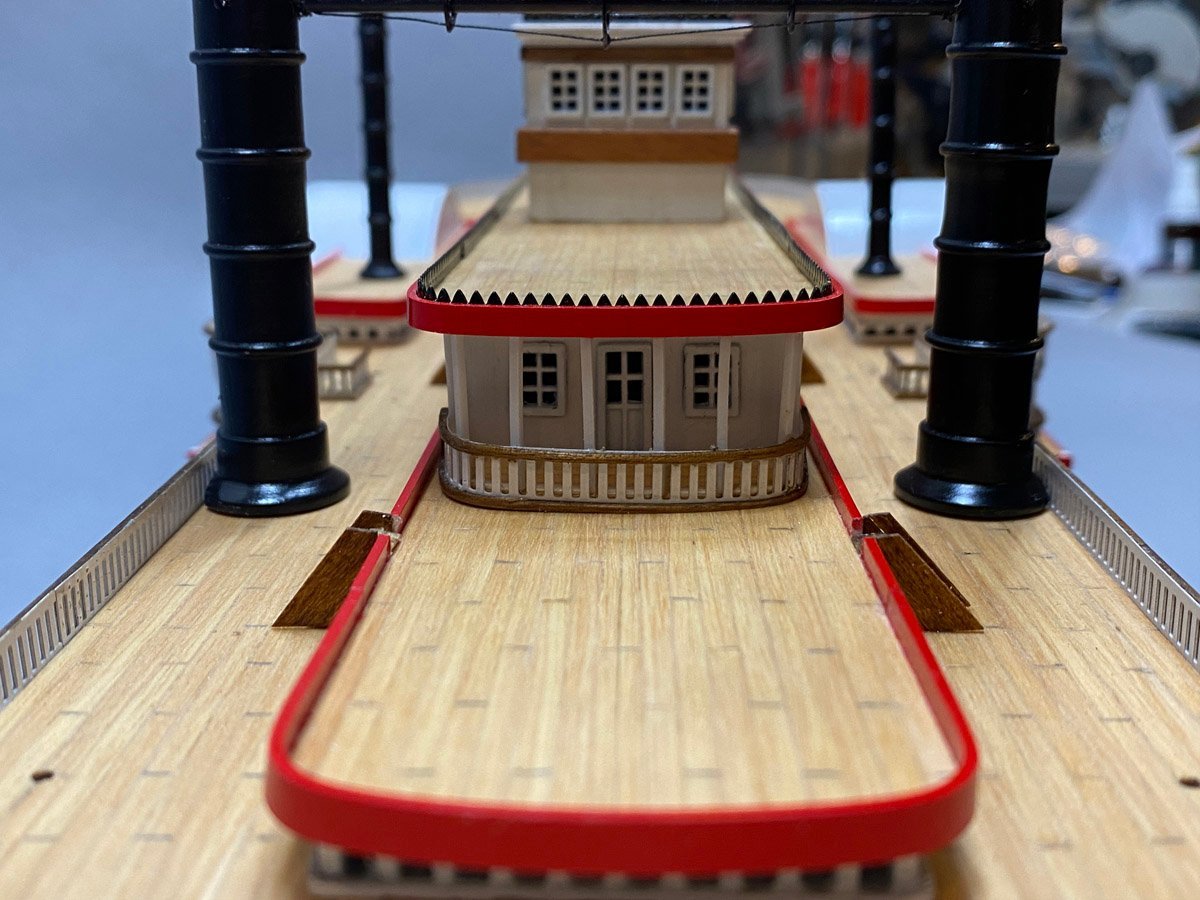
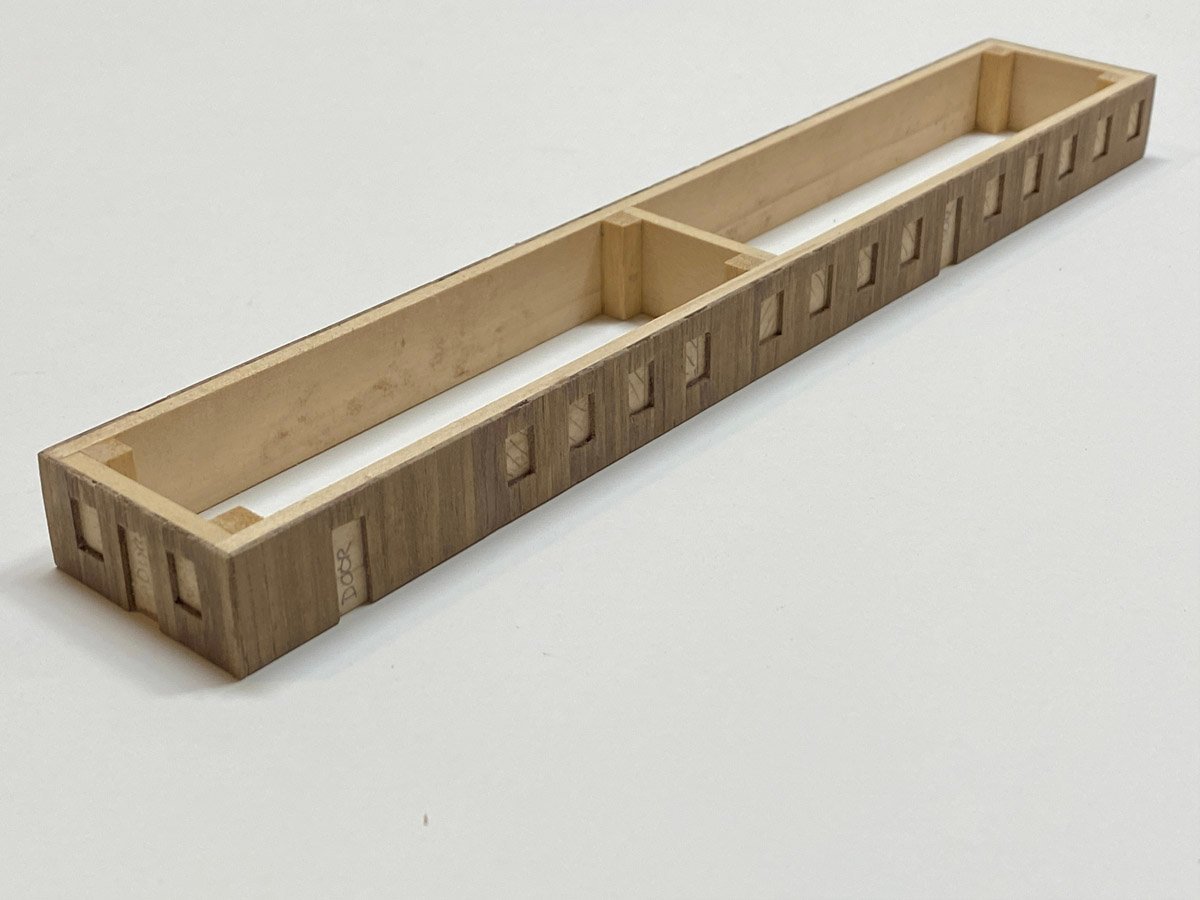
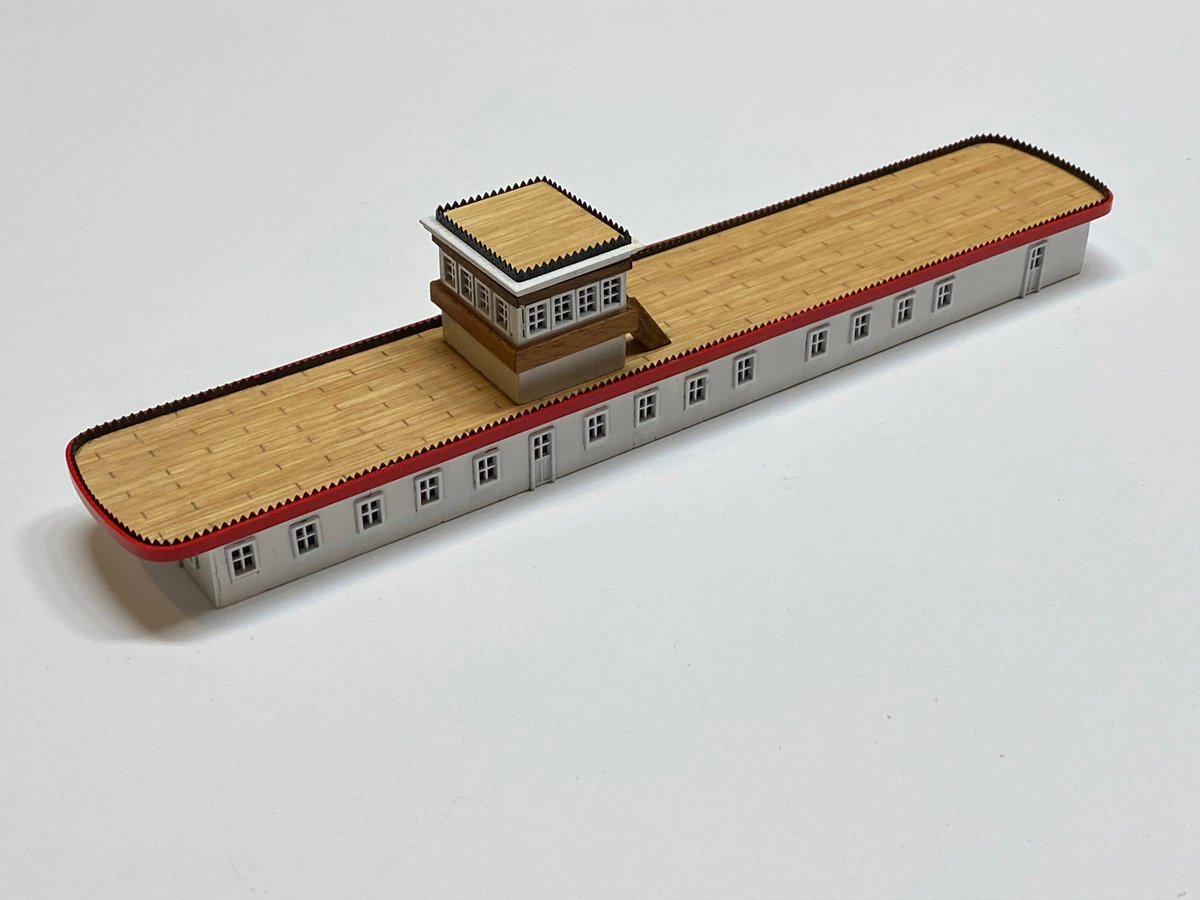
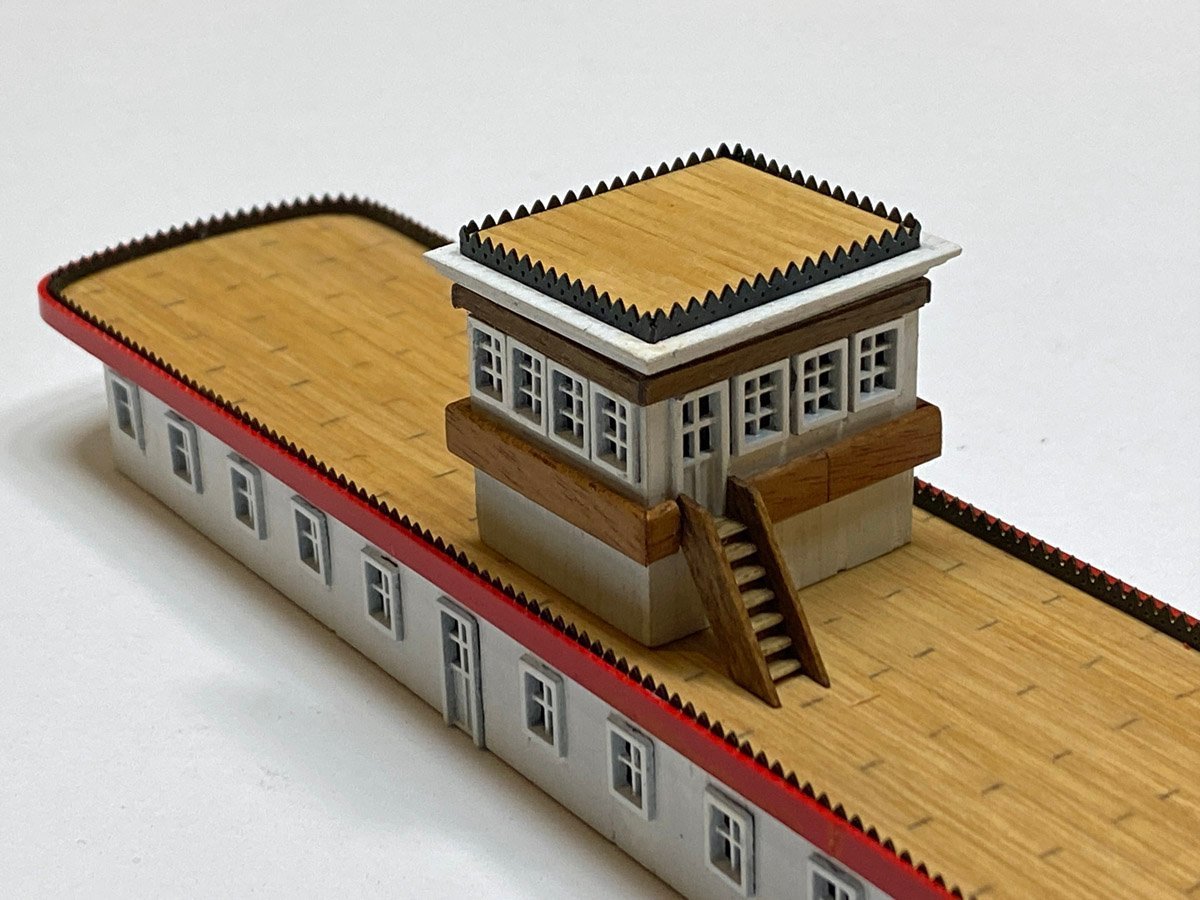
Texas Deck & Pilot House The captain's and crew's quarters were on the top deck. Since the captain had the biggest quarters the deck was called the Texas deck after the biggest state at that time. The pilot house sits on top of everything, giving the captain a commanding view of the river. Construction was the same as lower decks - basswood frame planked with walnut, leaving room for LOTS of windows and doors. The pilot house itself has 15 windows and one door. Everything was framed with red styrene, and a trim strip of photo etched gingerbread was added inside. There is still a lot of photo etched trim to go. I pre-painted it while still on the sprues.
- 58 replies
-
- 7
-
-
- Robert E Lee
- Amati
- (and 4 more)
-
Not As Bad As I Expected I started those rails yesterday about 5:00 and had them done by 9:30, including dinner and dishes. I pre-painted the column stock. The column heights varied by about 3 mm from fore to aft, so I cut each slightly over sized and sanded for a snug fit. Like Rodgerdodger, I built a brass and wood jig for drilling the columns. Masking tape on the back prevented tear out. Rodgerdodger used music wire for the rails. My instructions said that the rails were metallic thread. My kit has some very fine 0.2 mm brass wire, but also some 1 mm brass rod.* I used the brass rod, and pre-bent it to match the plans as closely as possibly. Then I threaded 4 rails through 6 columns in the proper order, arranged everything on the deck, and applied CA with a glue looper. I only broke two columns in the process. *One problem with this kit is that it includes lots of parts with no explanation as to what they are for.
- 58 replies
-
- 6
-
-
-
- Robert E Lee
- Amati
- (and 4 more)
-
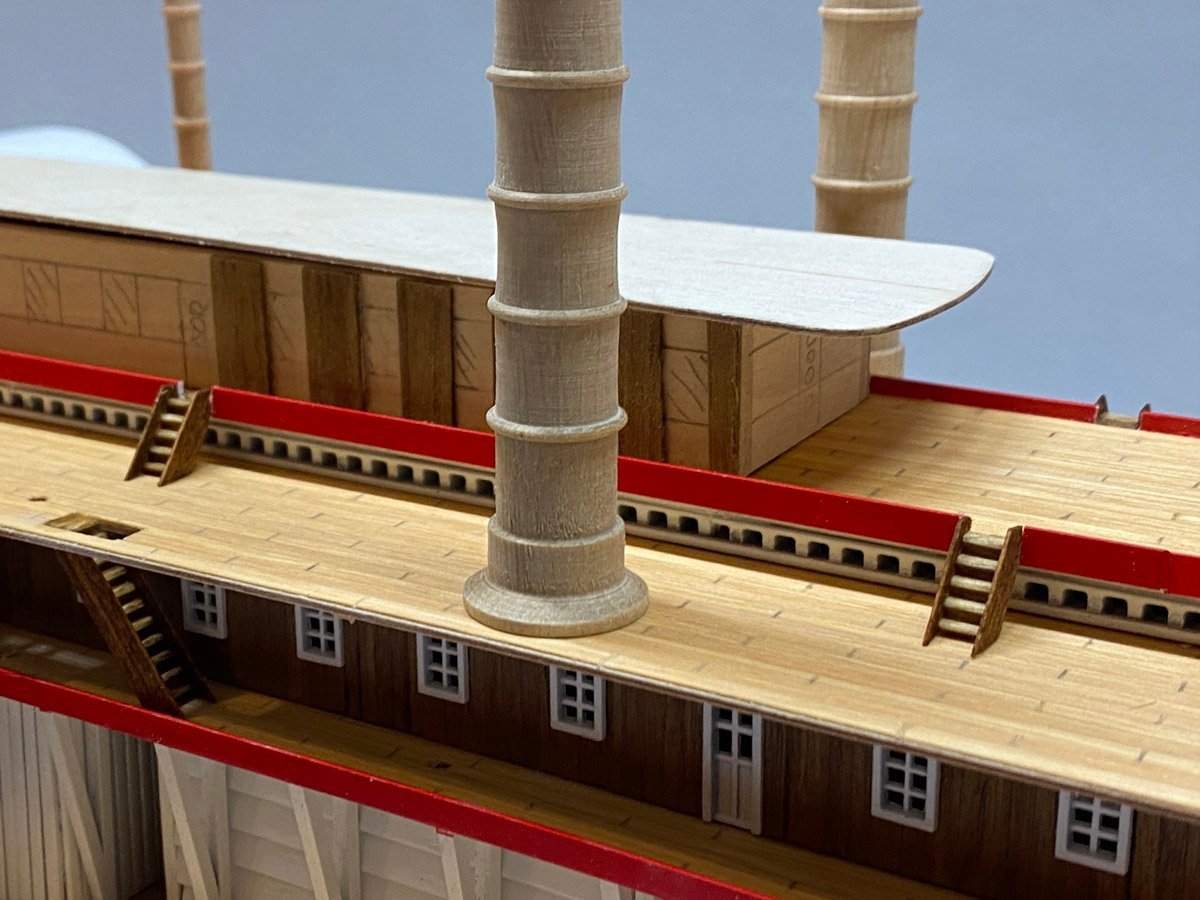
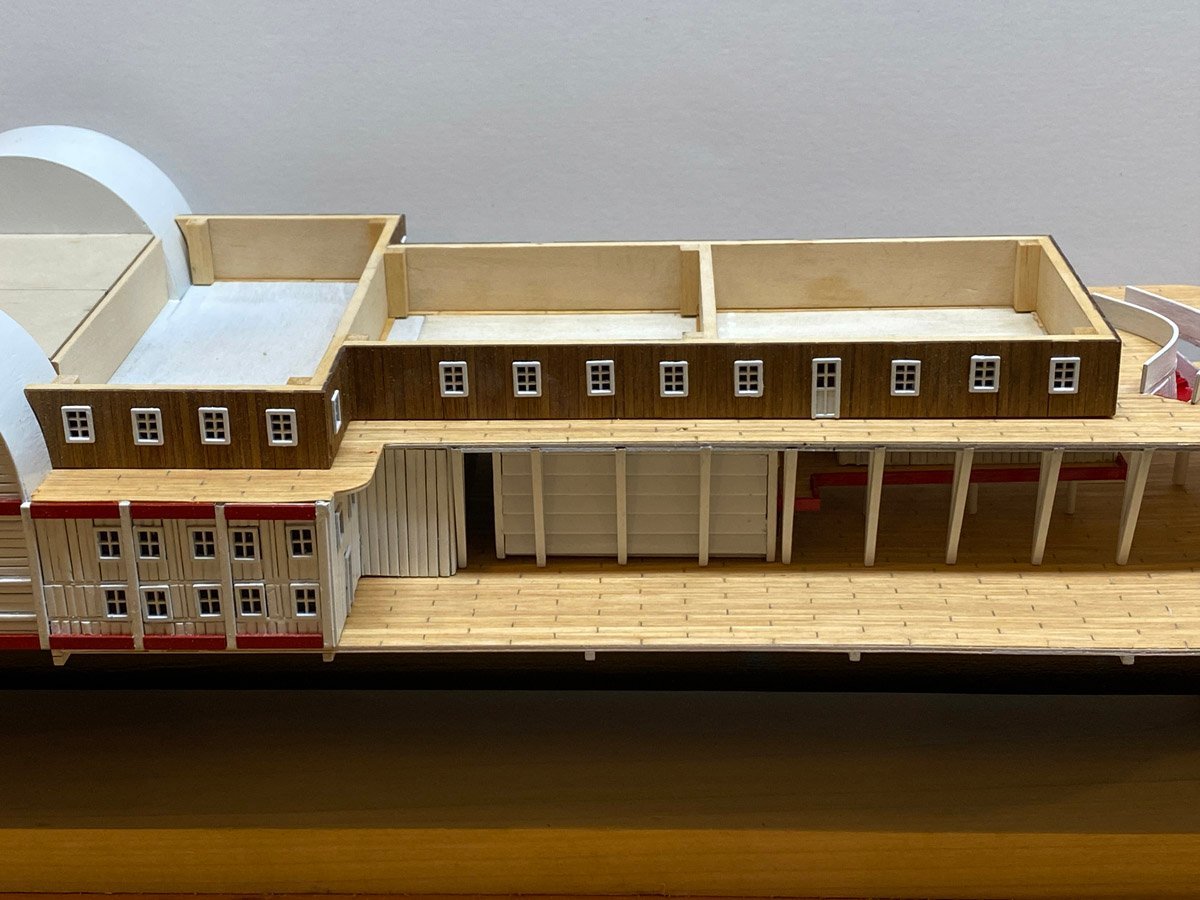
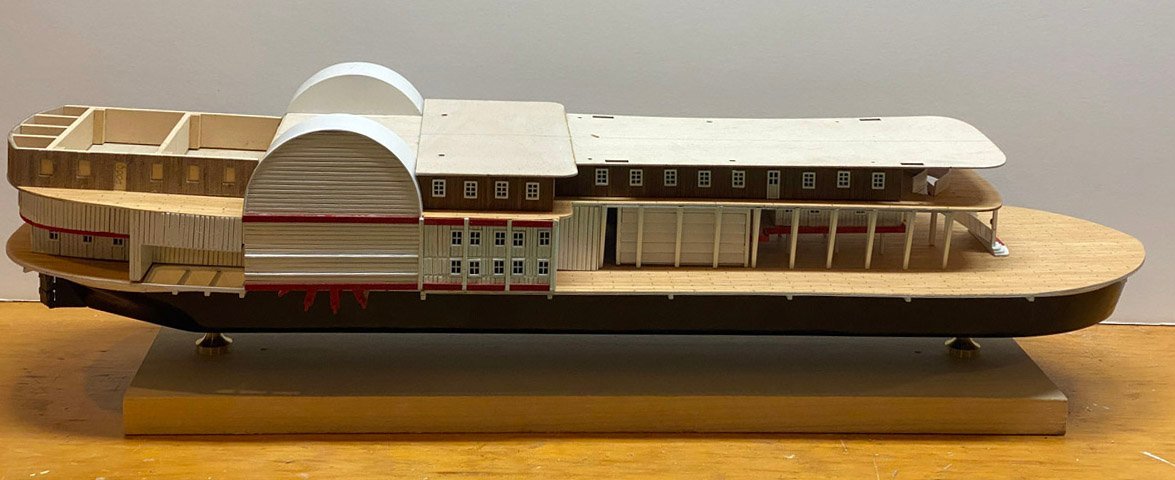
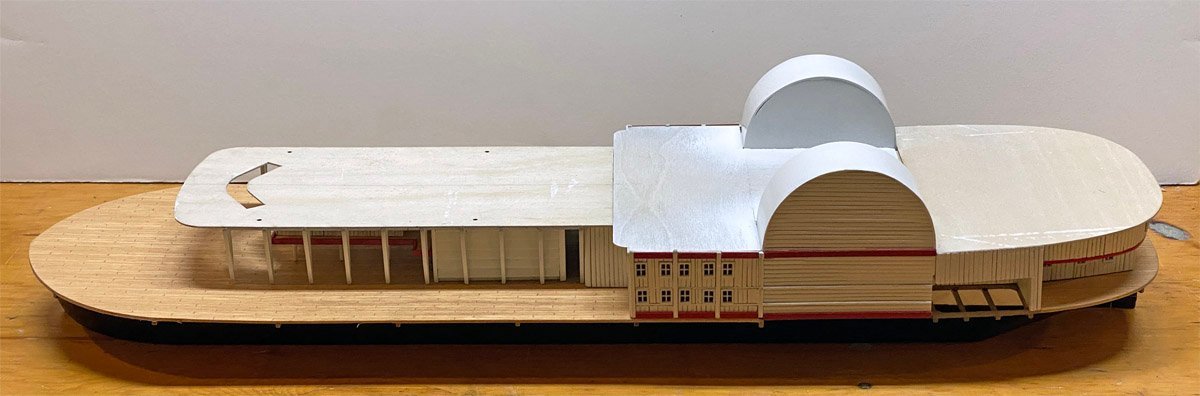
Onward and Upward Building this ship is like baking a wedding cake - you just keep adding layers on top. (Not that I've ever baked a wedding cake.) The layers from my previous post have all been attached, a layer of skylights has been added, and another layer of cabins is framed. The smokestacks are just there temporarily. There will be four brass rails going through 12 wooden columns around this rear deck. Previous builders have commented on how difficult they are to build. I am not looking forward to that. The sidelights are white metal castings about 2.5 inches long. Every little hole had to be cleaned out with a tiny square file. The red trim pieces are supposed to be made of wood, but there is no way to bend wood around those sharp corners, short of laminating thin strips. I did what other builders have done and used styrene strips. They were painted with the same red paint used elsewhere but came out shinier, brighter, and, well, plastic looking. The ship has 14 staircases made from beautiful wooden strips that must have been cut on a CNC machine. They have to be cut to length and have side rails added. I stained everything with a walnut stain.


- 58 replies
-
- 6
-
-
- Robert E Lee
- Amati
- (and 4 more)
-
Congratulations Harry, she looks great! I like the lights too.
- 118 replies
-
- 2
-
-
- sanson
- artesania latina
- (and 1 more)
-
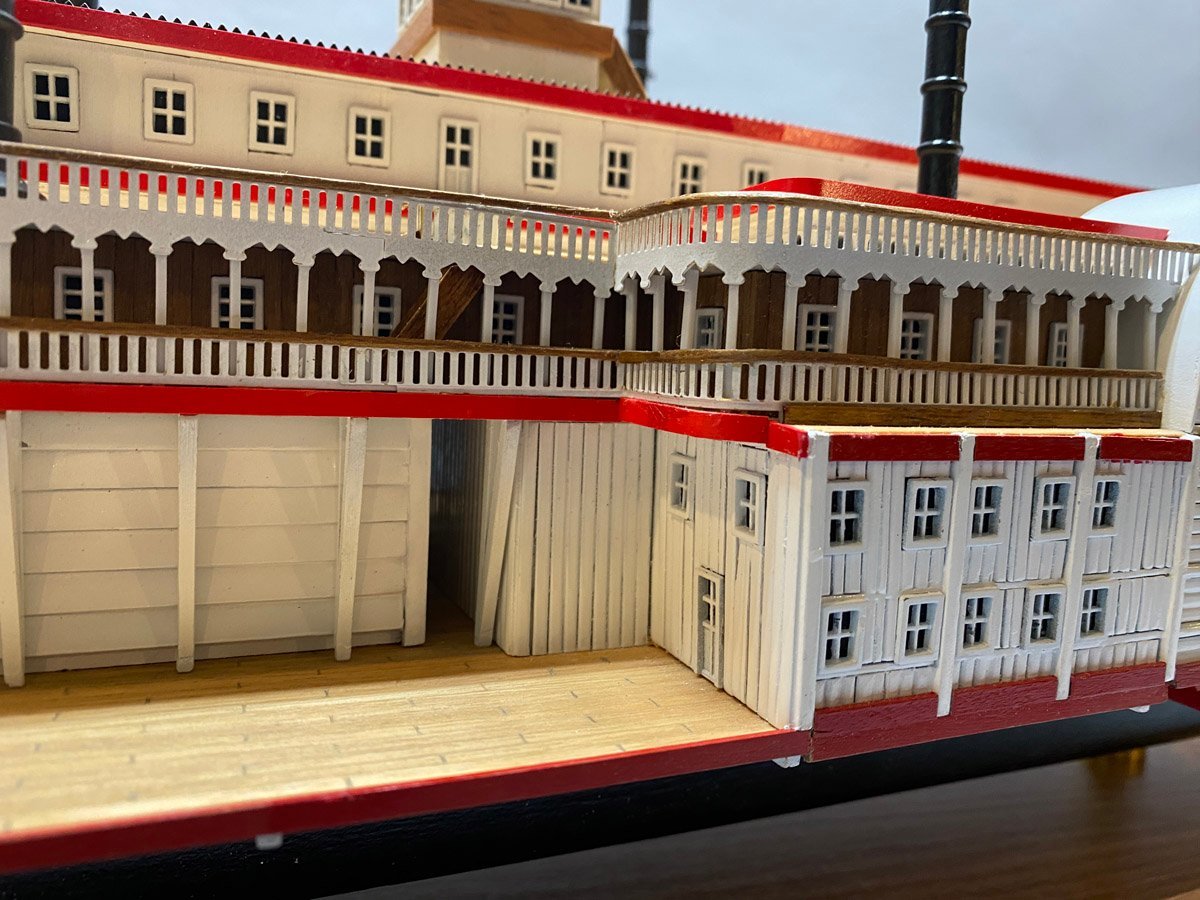
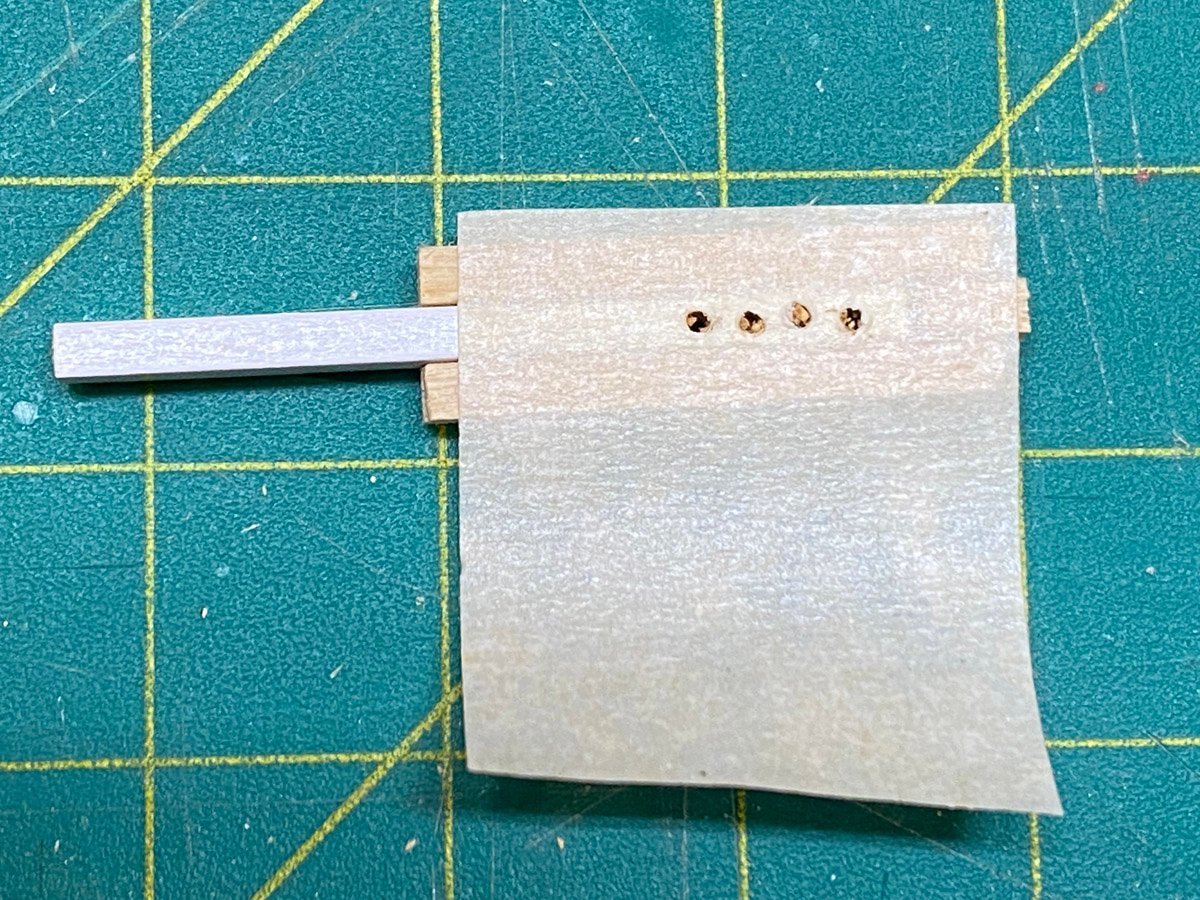
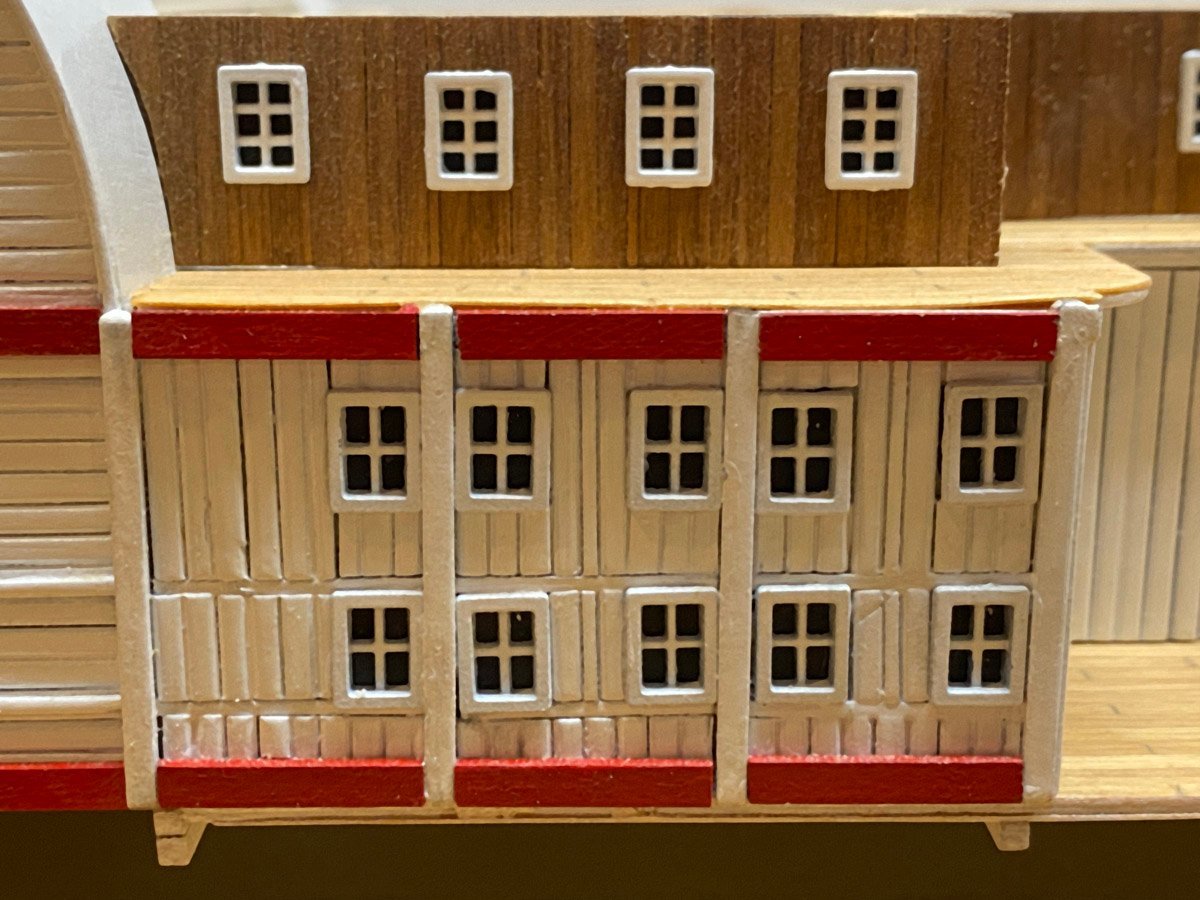
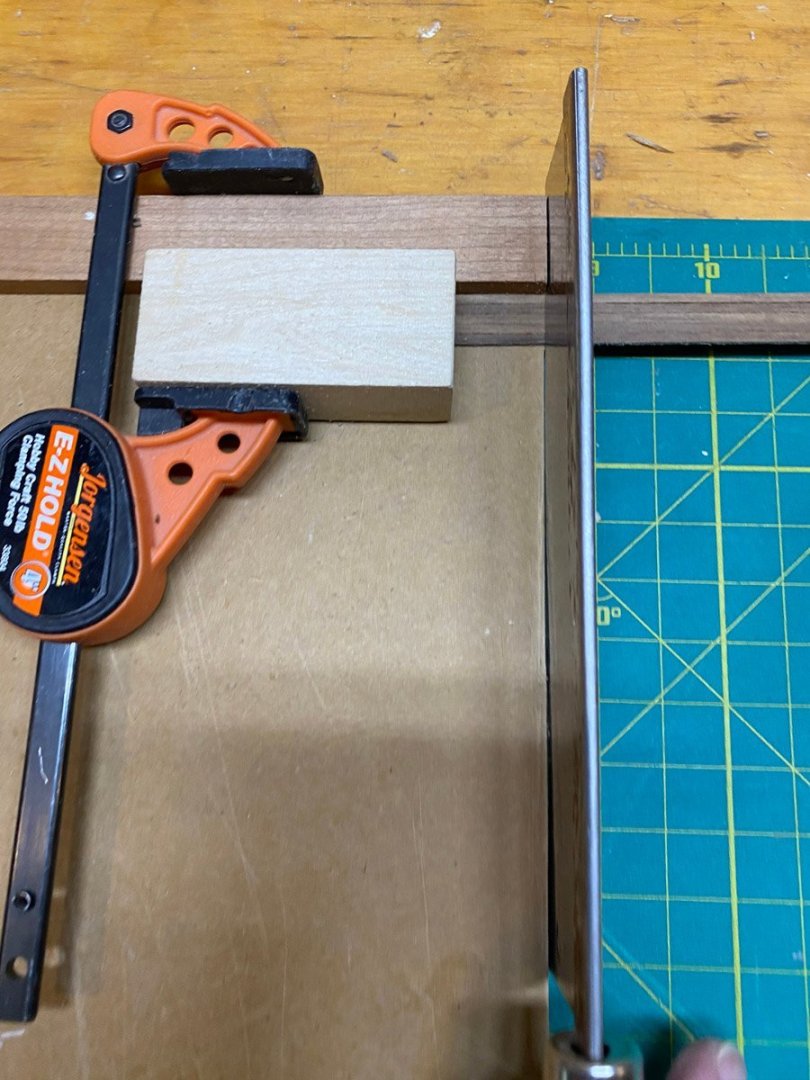
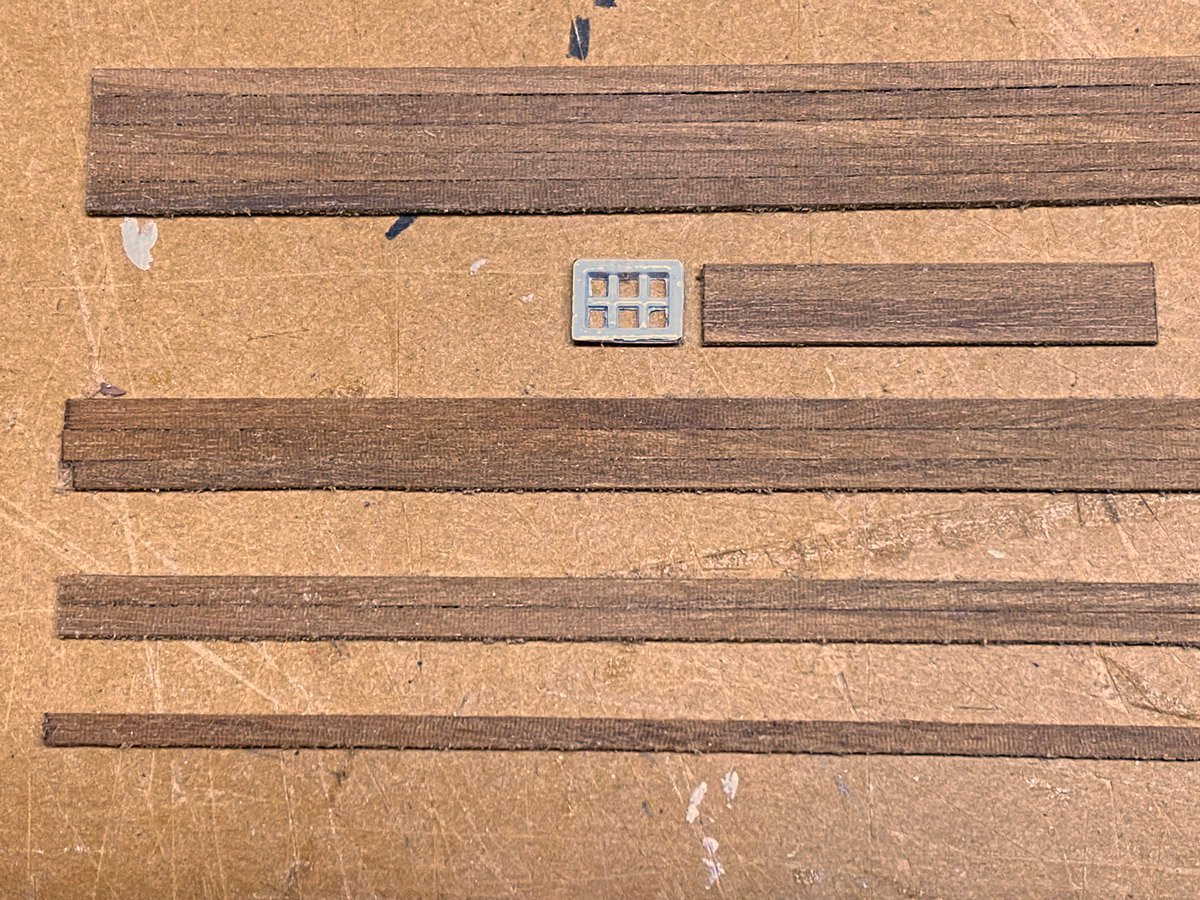
Third Deck Planking The technique of gluing planks to a paper backing is working extremely well. The 2 mm walnut strips supplied with the kit are about 20" long, and I am gluing up 10" segments of 2, 3, 4, and 5 strips, plus segments of 1+2+2+1 mm strips that fit the doors and windows. I put a stop block on my cutting board to cut pieces to the height of the cabin. I saw with paper side down so the wood doesn't tear when the saw cuts through. Another big advantage is that when I mess up and glue something crooked, it cuts off easily through the paper backing and just requires a little sanding to remove the paper. I planked the forward cabin, sanded and oiled it in two days. Then painted the window interiors and added the windows and doors in a couple more hours. The flat planks on the walnut cabins look SO much better than the chamfered planks on the painted cabins. The next deck is back to white, and I will totally forget the chamfering. I planked the aft cabin in 3 hours.
- 58 replies
-
- 10
-
-
-
- Robert E Lee
- Amati
- (and 4 more)
-
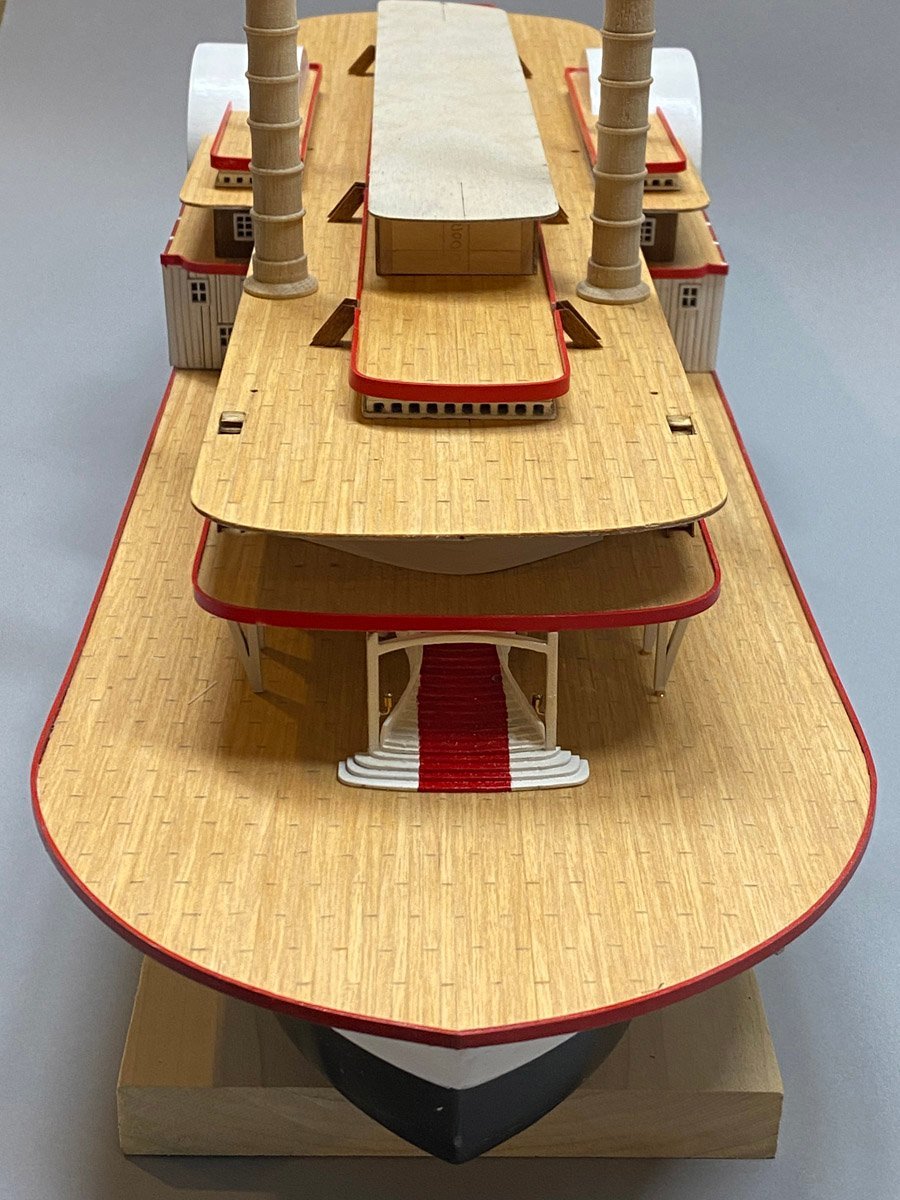
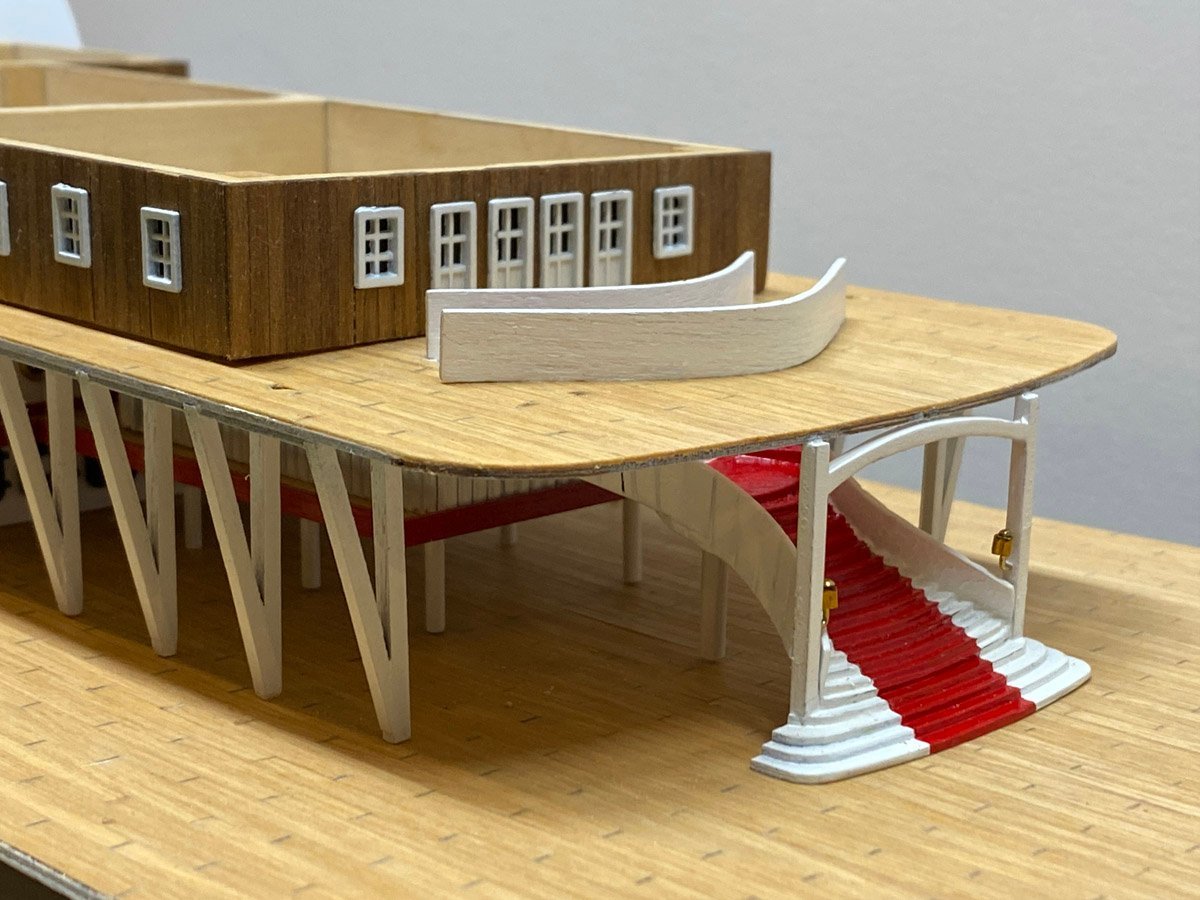
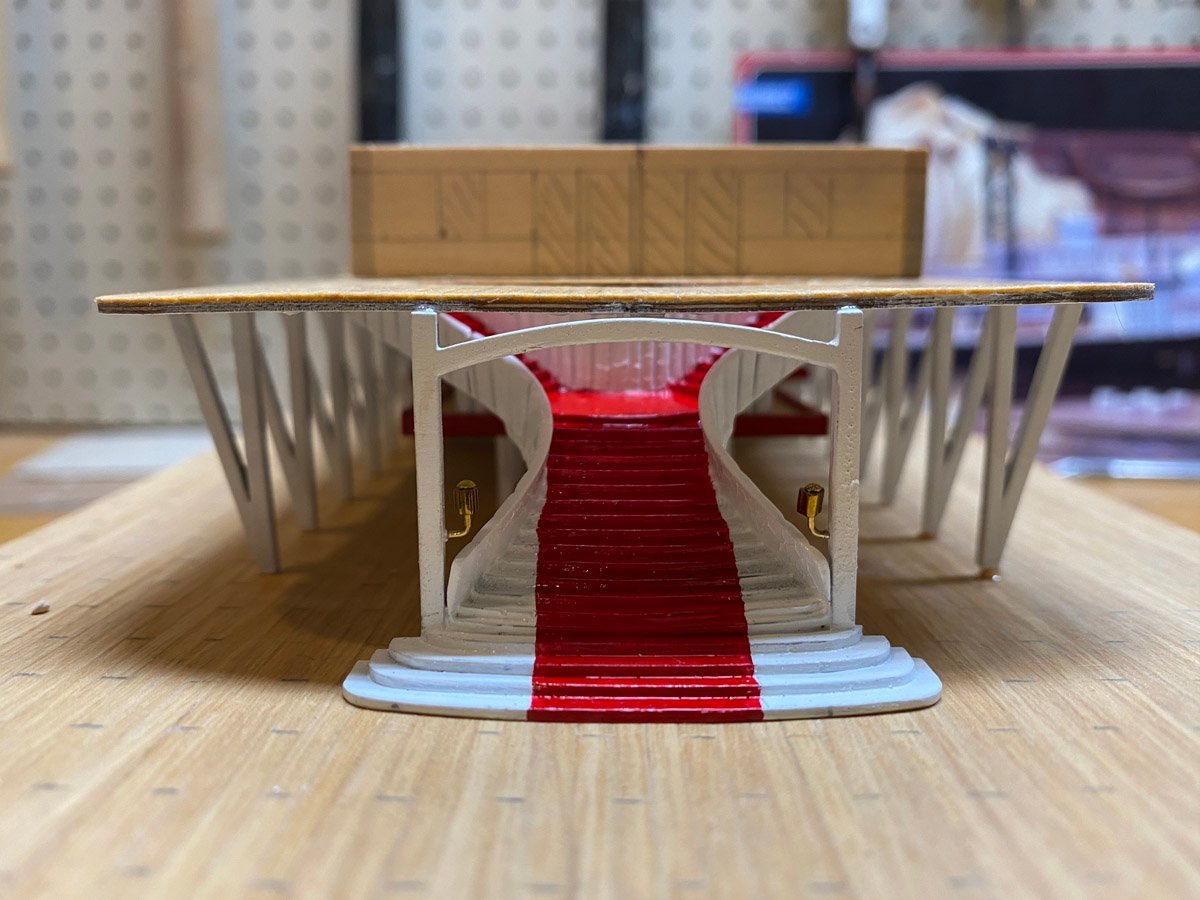
Grand Staircase The staircase is cast metal. It needed a little sanding to flatten the top, but wasn't too bad otherwise. There is a support dowel between the deck and staircase landing, so I drilled through the center of the landing to make a tight fit for the dowel. The four bottom stairs are individual pieces of plywood that are glued up and angled to fit the slope of the fore deck. I used double sided tape to hold everything in place, used a little CA to glue the bottom stairs and dowel permanently, then removed the assembly for painting. The columns and arch were built separately and glued to the staircase. The instructions called for lamps on the two columns. No lamps were included with the kit, so I made some with tiny gold beads on brass pins. I really liked rodgerdodger's red carpet treatment, so I borrowed the idea. This is the first thing that passengers would see when boarding the ship, inviting them to go upstairs. Good thing, because the next thing they would see is the boiler room.
- 58 replies
-
- 6
-
-
- Robert E Lee
- Amati
- (and 4 more)
-
Tim, I just discovered your build a few days ago and have been meaning to comment. As you mentioned, this is not an easy hull to build. There are not enough frames, and all those frame extensions and rudder support just want to break off. You've already tackled that. I think the model should be double planked for strength. You are doing a beautiful job, and I'll be following along to see her in the water.
-
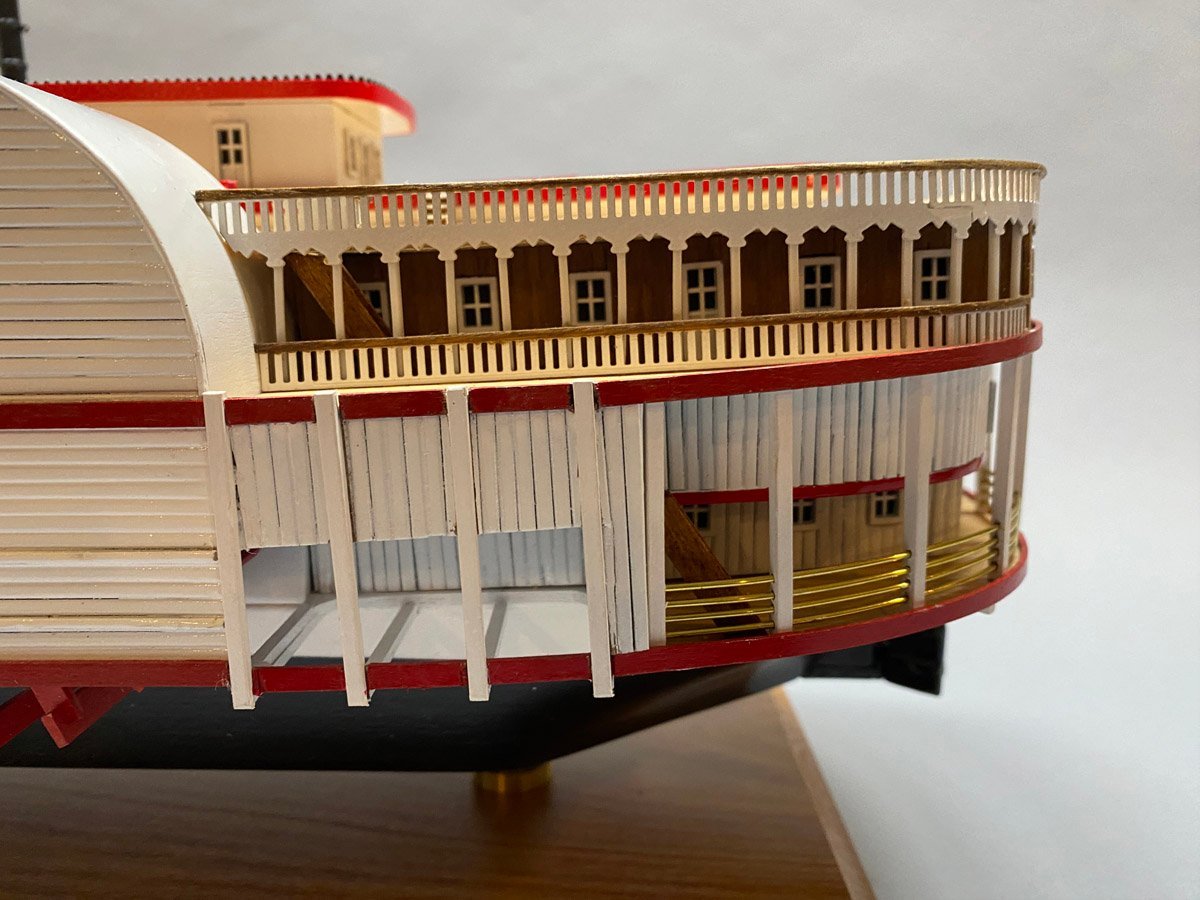
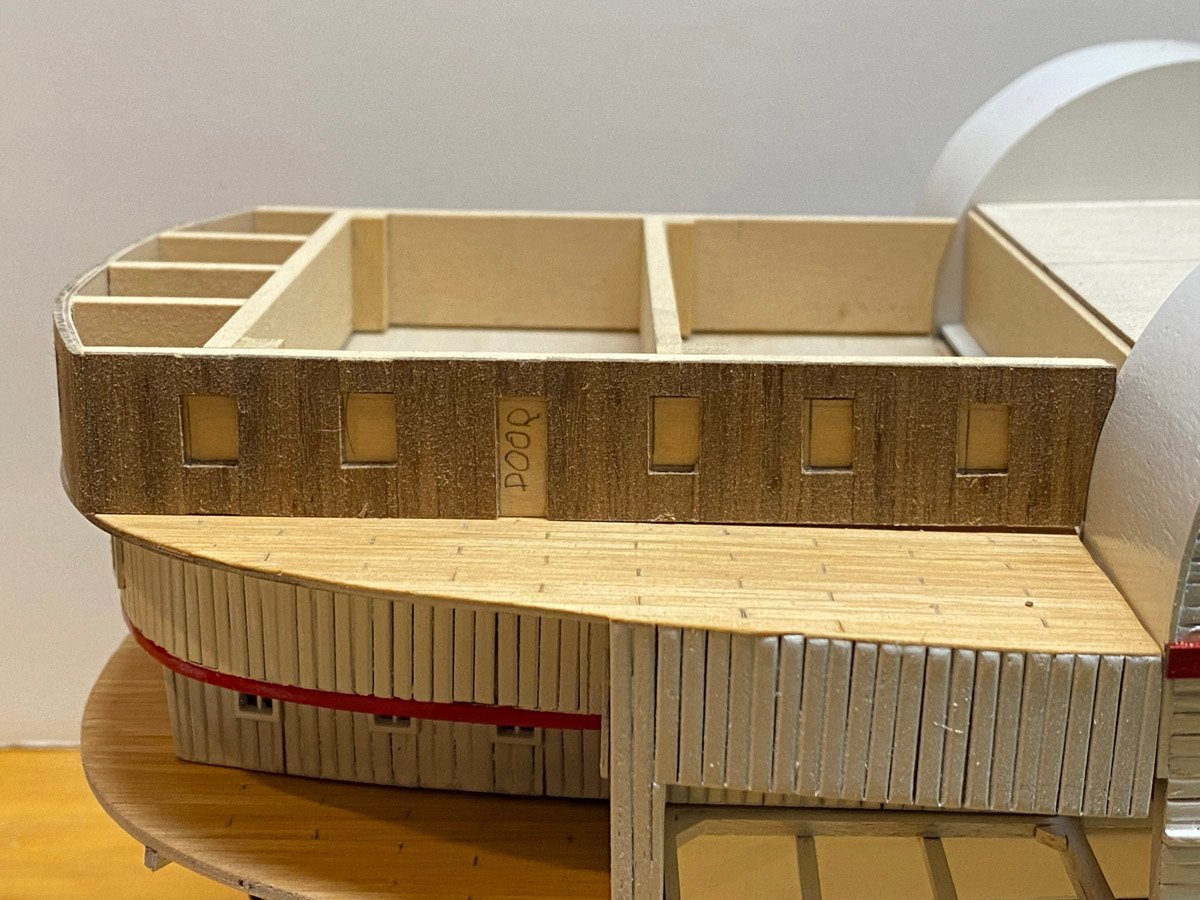
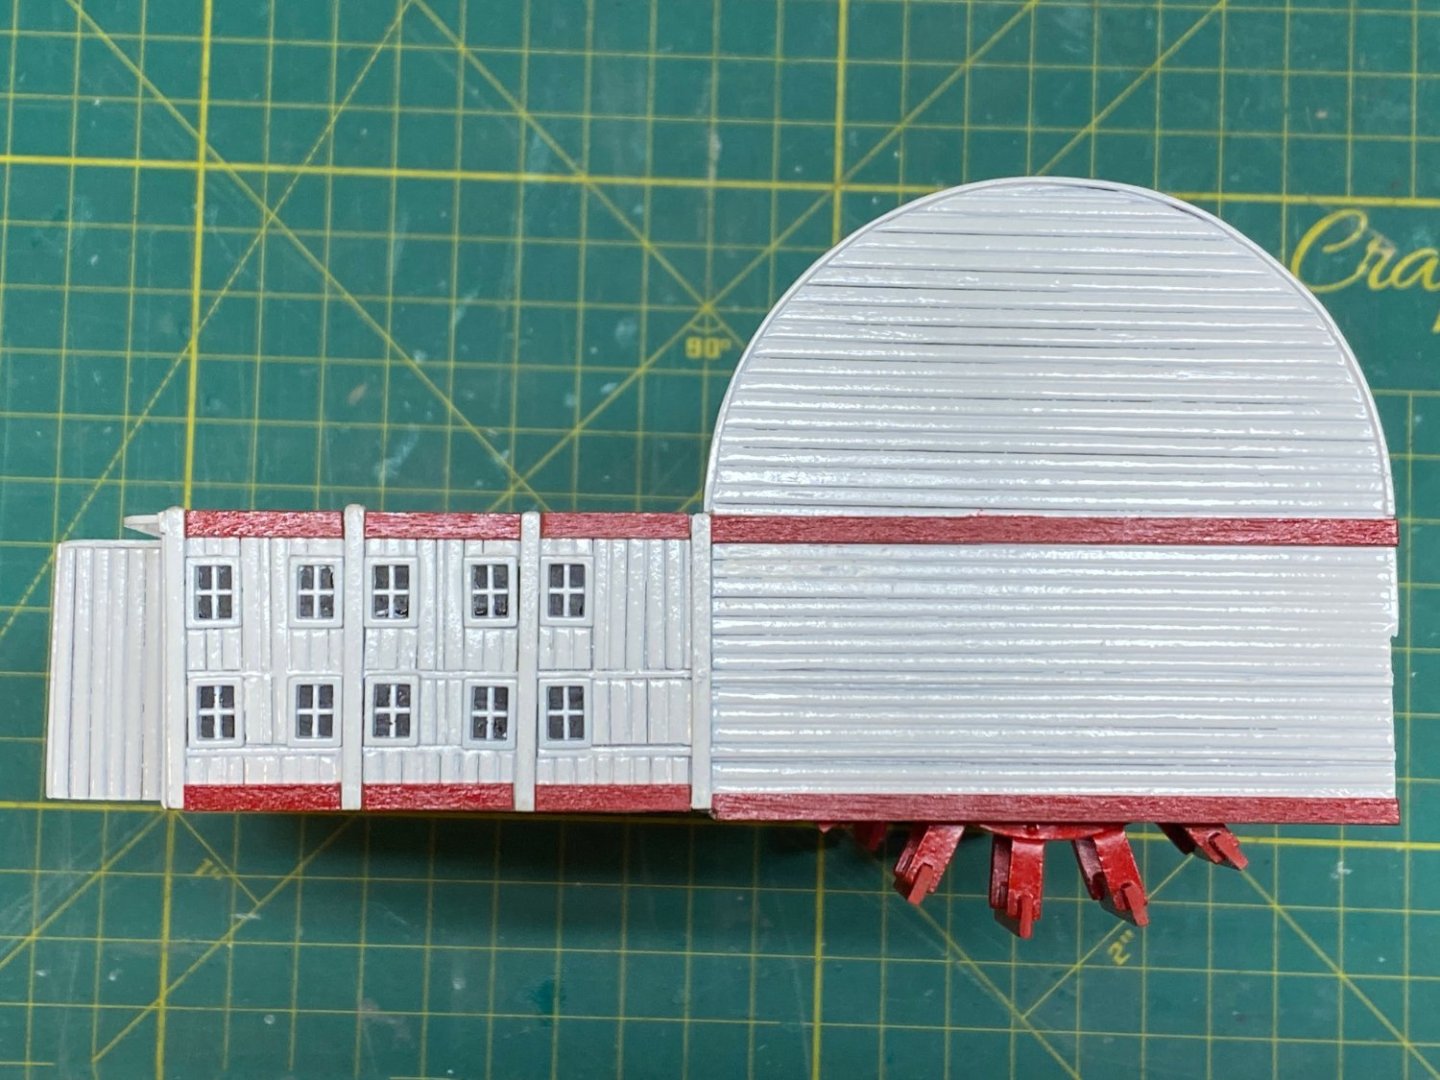
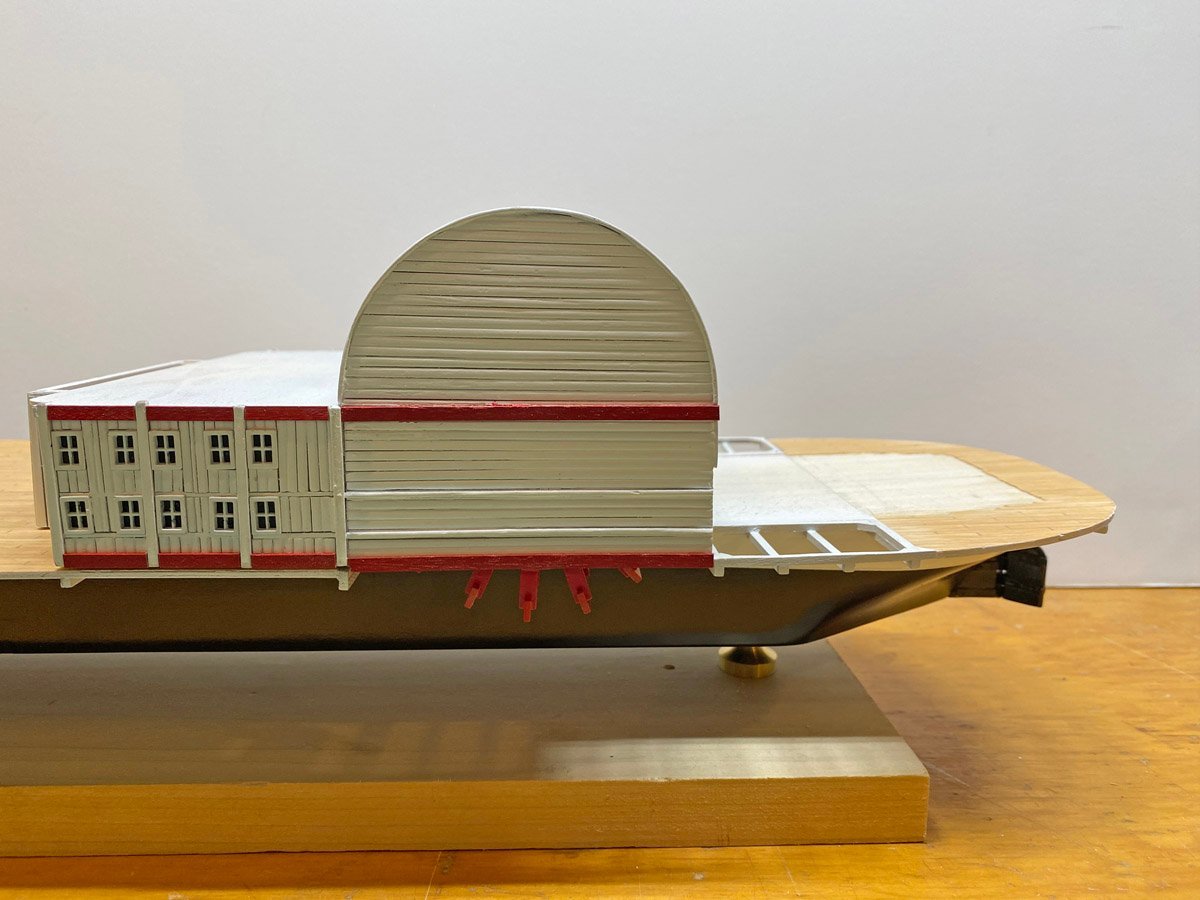
First Level Painted, Windows, Doors, and Paddle Wheels Installed - 112 hours over 36 days I painted the cabins with 2 coats of Tamiya white primer and 2 coats of Krylon gloss white, all from rattle cans. Red trim was painted in full strips with Testor's red spray, cut to length, and touched up after installation. Window backgrounds were hand-painted with black acrylic, and windows installed with a touch of medium CA. Paddle wheels installed and cabin placed back on the hull. The instructions recommended chamfering the edges of the hull planks. That leaves obvious gaps between the planks, and spray paint just doesn't get in there. The next couple of decks are natural walnut, and I think I'll leave the planks flat. Colonnade and raised cabin installed in front of boiler room. The boiler room has 8 turned brass view windows (portholes) over 8 firebox doors. One of the portholes went flying in my shop, never to be seen again. After hours of searching I made a replacement out of nested pieces of brass tubing. It looked almost perfect, and you can't see it back there anyway. I suppose firewood (or coal?) was stored under the raised cabin right in front of the firebox doors. Rear cabins installed. Everything completed so far.
- 58 replies
-
- 6
-
-
- Robert E Lee
- Amati
- (and 4 more)
-
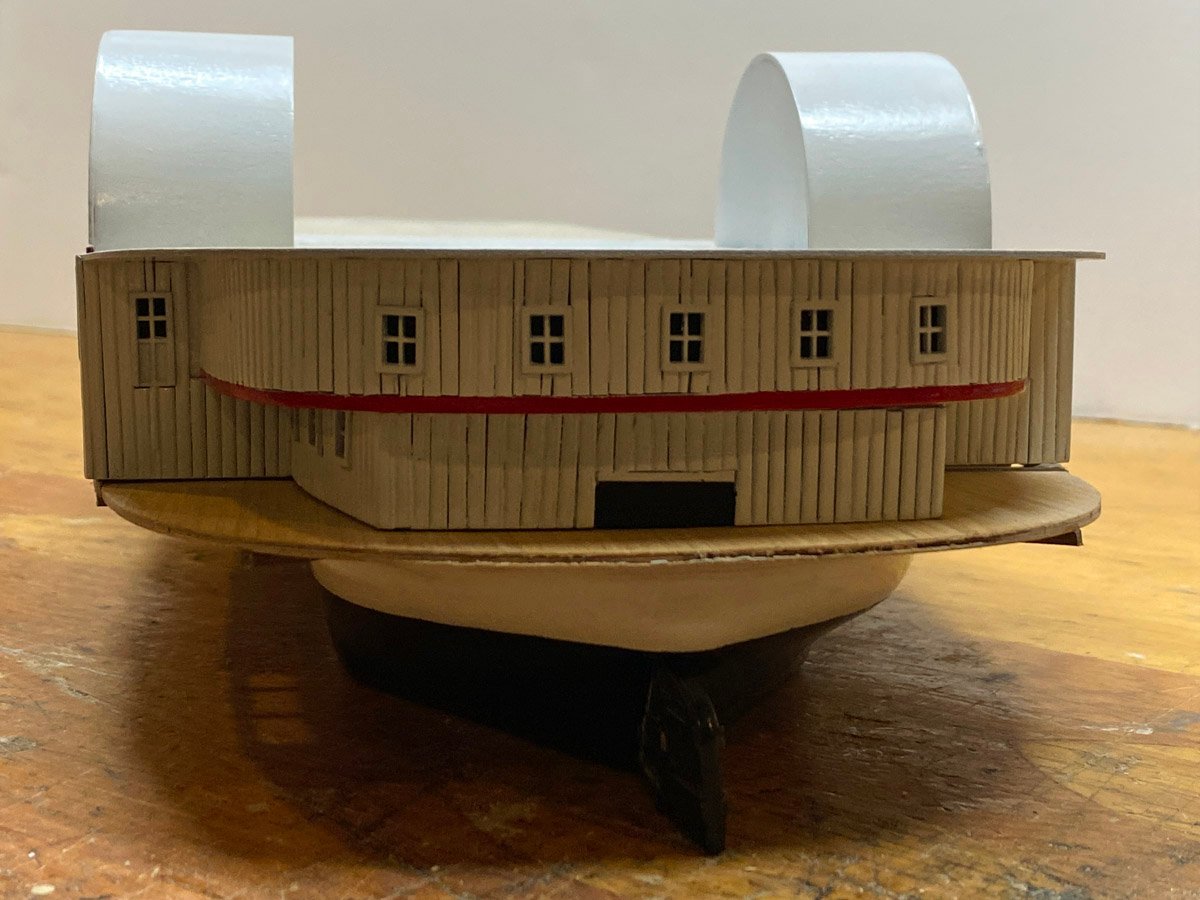
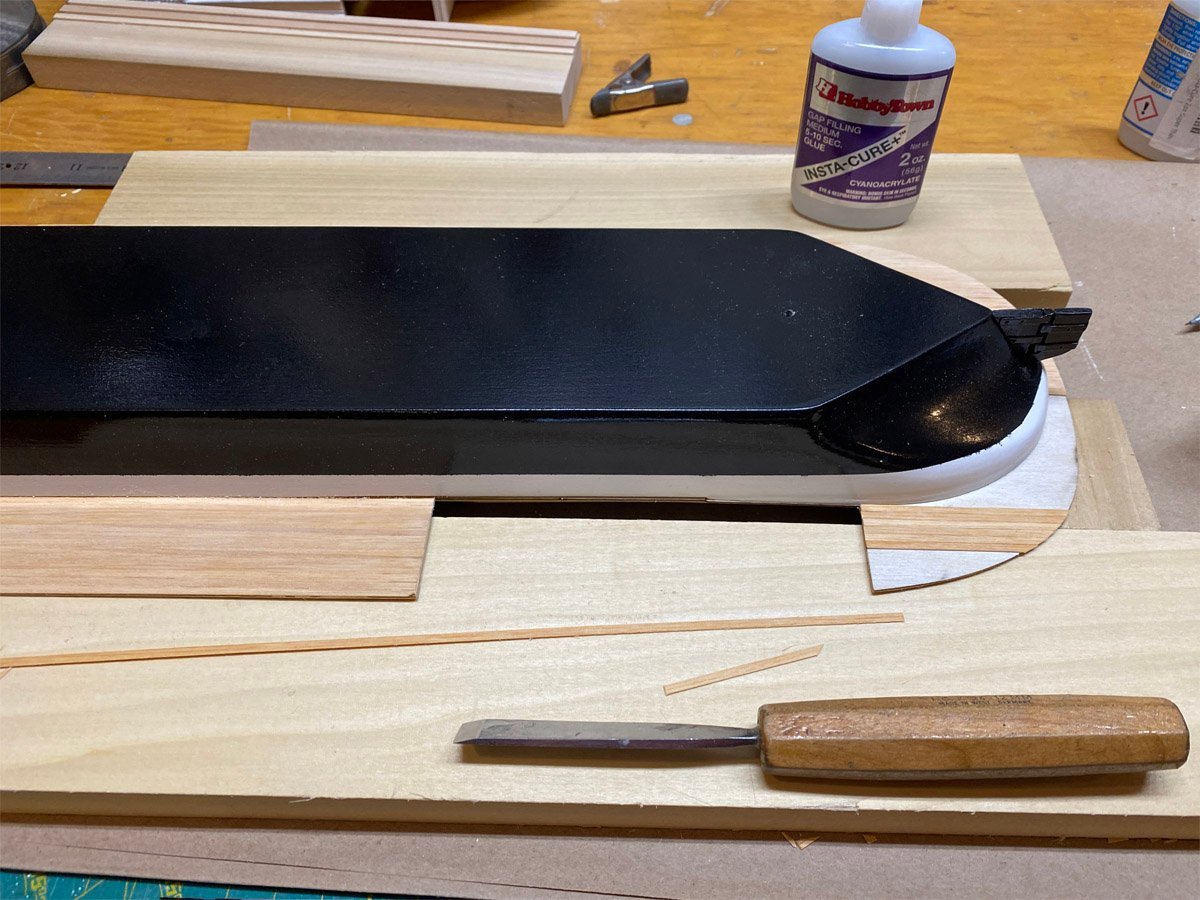
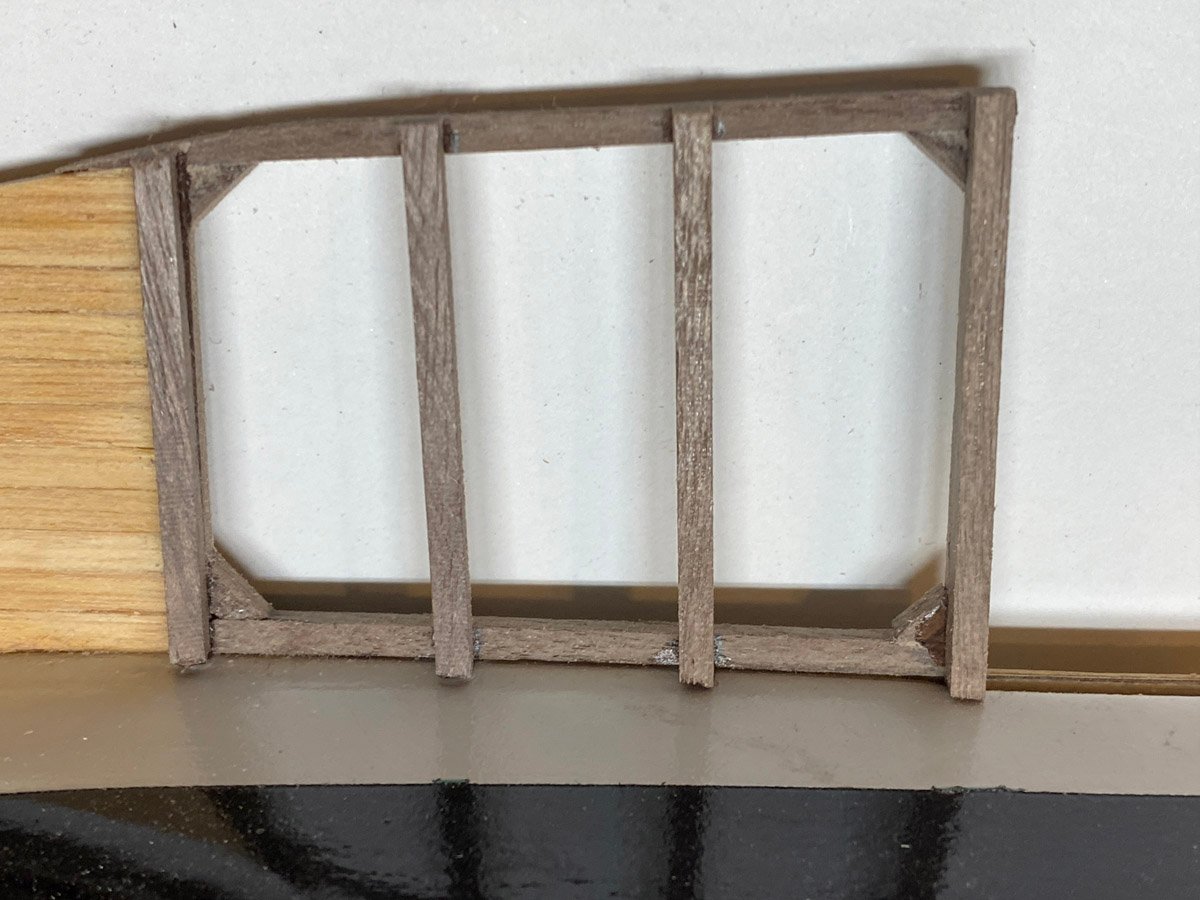
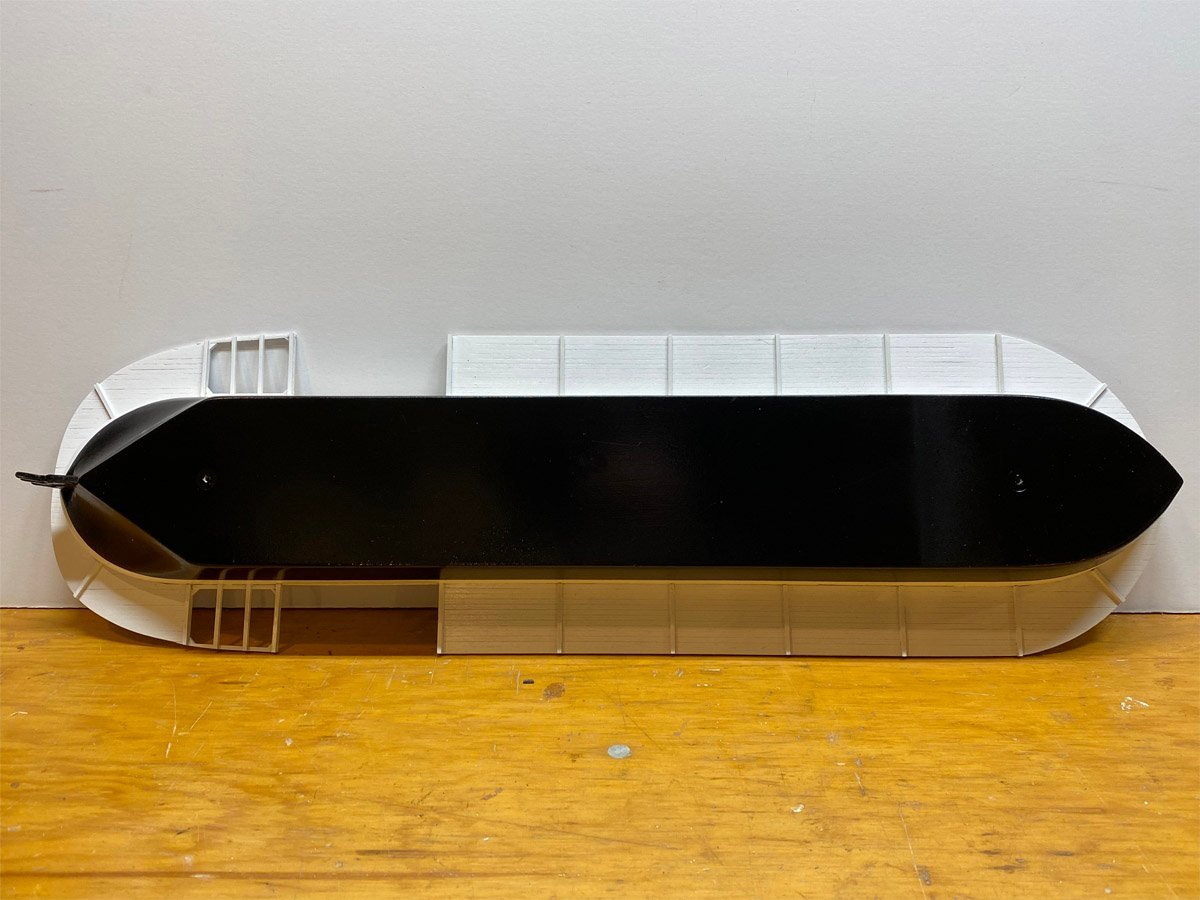
Bottom of the Hull The instructions have you attaching the lower cabins, and then flipping the model over and planking the bottom of the hull. It seemed a lot easier to do the planking while the top of the ship was flat, so that's what I did. When the ship is on its stand you can't see the bottom of the hull, so I planked it with full strips and dispensed with the fake plank joints. There are periodic braces across the planks. This grate sits behind the paddle wheels. It must have some hydrodynamic purpose, perhaps to give the water uplifted by the wheels somewhere to go. Anyone know about that? Everything gets painted white. I think that I like this look better than the chamfered edged planking on the cabins. I might dispense with the chamfers on the next layer.

- 58 replies
-
- 4
-
-
-
- Robert E Lee
- Amati
- (and 4 more)
-
Windows & Doors Now that's a lot of windows & doors to paint and install! This ship is really a floating hotel. I would love to see deck plans - does anyone know where I might find them?

- 58 replies
-
- 2
-
-
- Robert E Lee
- Amati
- (and 4 more)
-
Johnny, This is a beautiful steamer and an interesting but difficult build. I didn't appreciate how big and complicated these old ships were until I started this model. At 1:150 scale the Amati kit is pretty big, but at 1:72 your Scientific/Pyro build will be a beast!
- 58 replies
-
- 1
-
-
- Robert E Lee
- Amati
- (and 4 more)
-
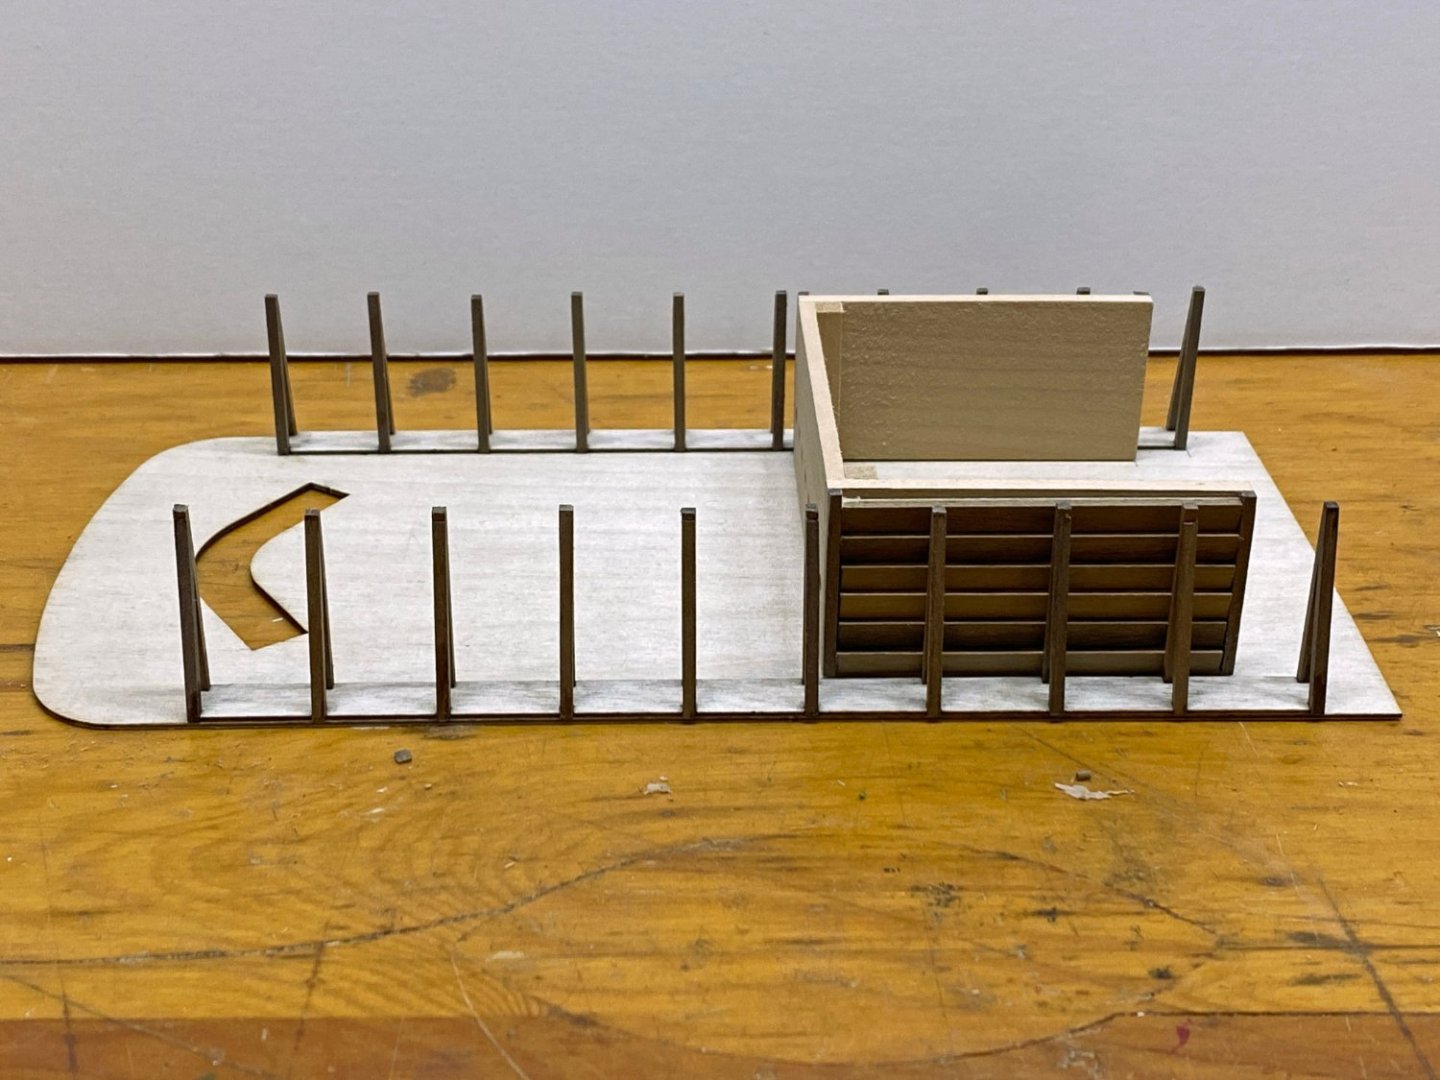
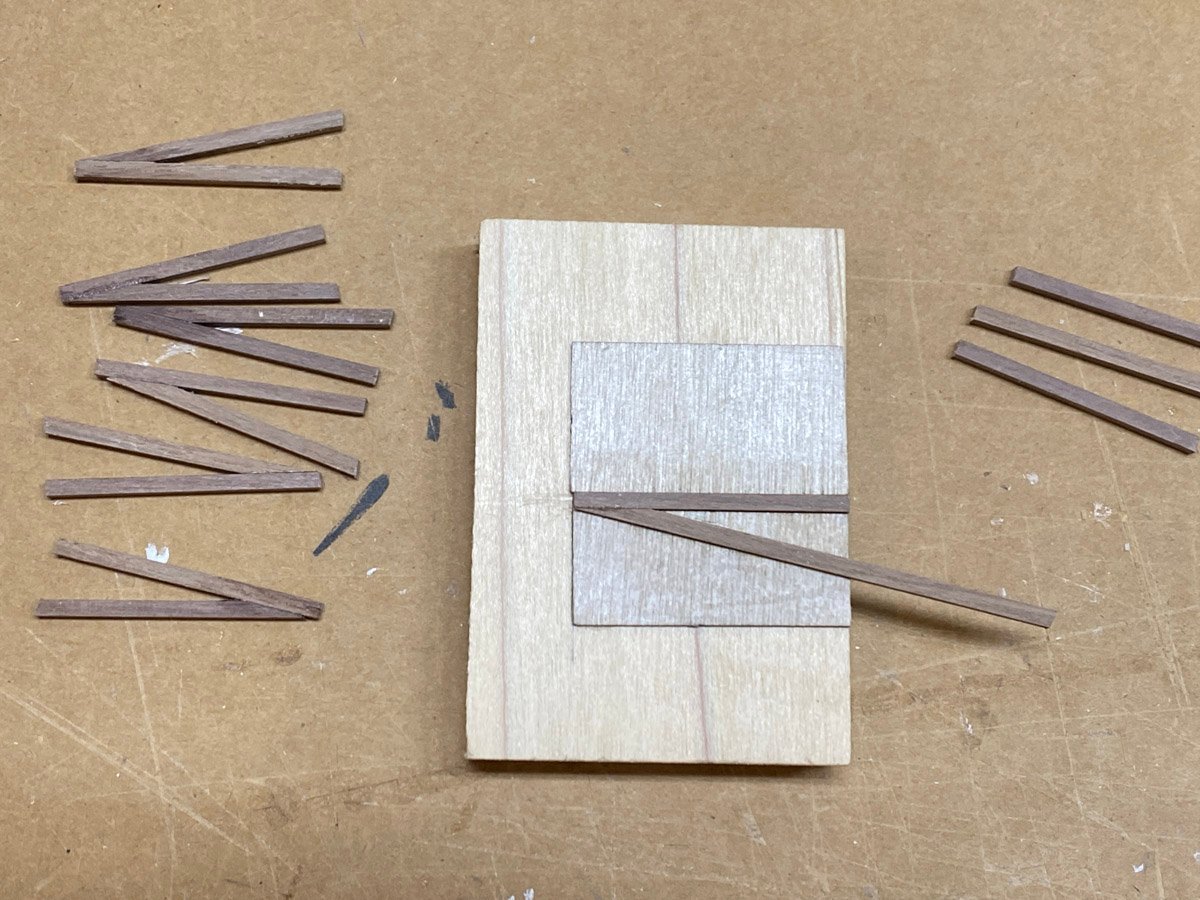
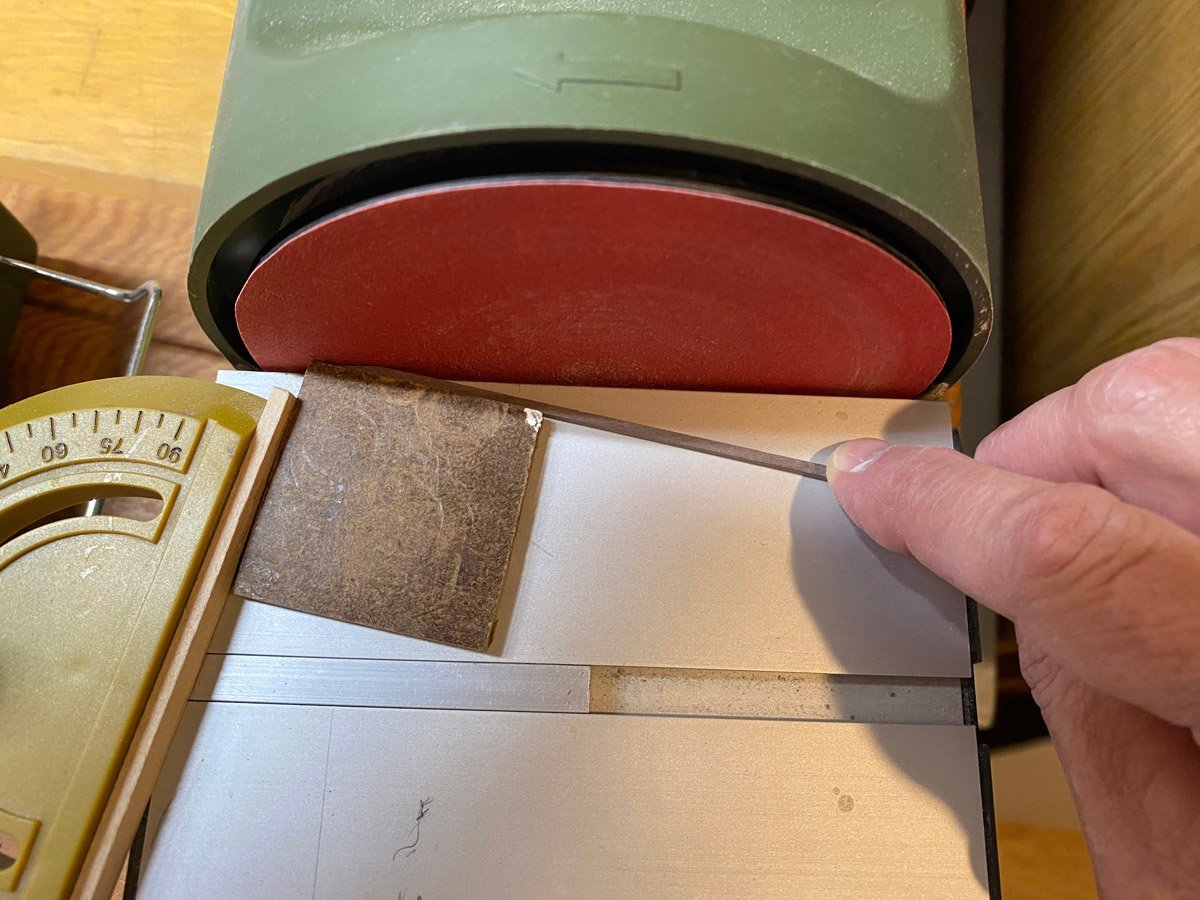
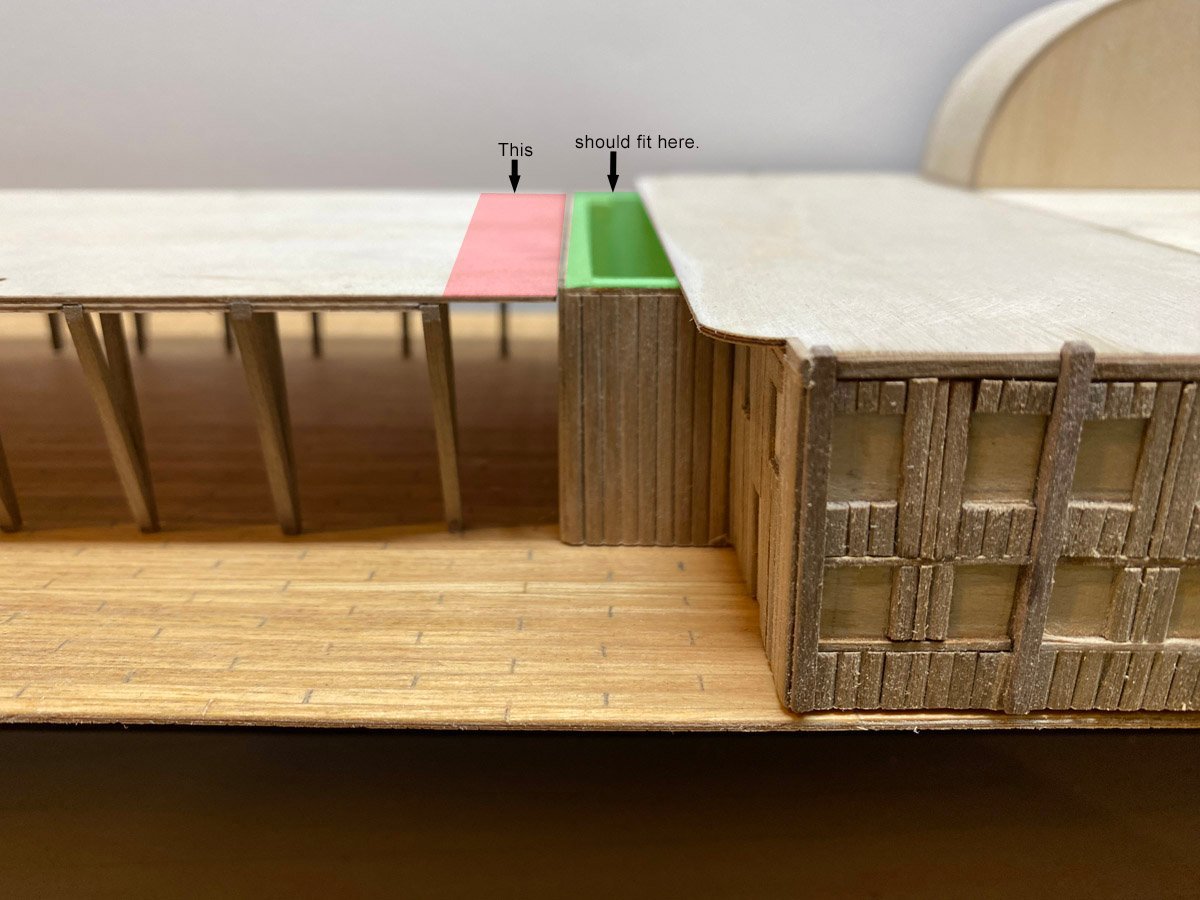
Colonnade The boiler room and raised cabin are surrounded by a colonnade that support the deck above. Like most everything else on this model, the parts are assembled upside down on the roof. That is usually quite confusing, but in this case the colonnade was easier to assemble upside down. Here's the end product. The braced columns are built in a jig made from laser cut parts. I stopped my jig flush with the base of the columns so I could flip it over and saw the legs off flush. I sanded the braces to shape on my disk sander. The angle is 14 degrees - way too small for my fence - so I set the fence to 14 degrees and attached a square block as an auxiliary fence. I could sand perfect angles in a couple of seconds. One big problem with this model is that the cabins are all made separately, upside down, using instructions in Italian with English translations, full-sized layout drawings, and a dimensioned parts list. Often the dimensions don't quite match up, and no matter how many times I look at the drawings it's never clear how the cabins are supposed to go together ... until it's too late. The roof of the colonnade is supposed to sit on top of the neighboring cabin, but mine was about 1 mm too short. I have no idea how that happened. My only recourse was to add a 1 mm square pad to the bottom of each column. It wasn't as painful as I expected, and it allowed me to shorten 2 columns at the bow to account for the slope of the deck there. Here's everything correctly aligned. Almost everything needs to be painted white before I can do much more construction so it's off to the paint booth, AKA garage.
- 58 replies
-
- 6
-
-
- Robert E Lee
- Amati
- (and 4 more)
-
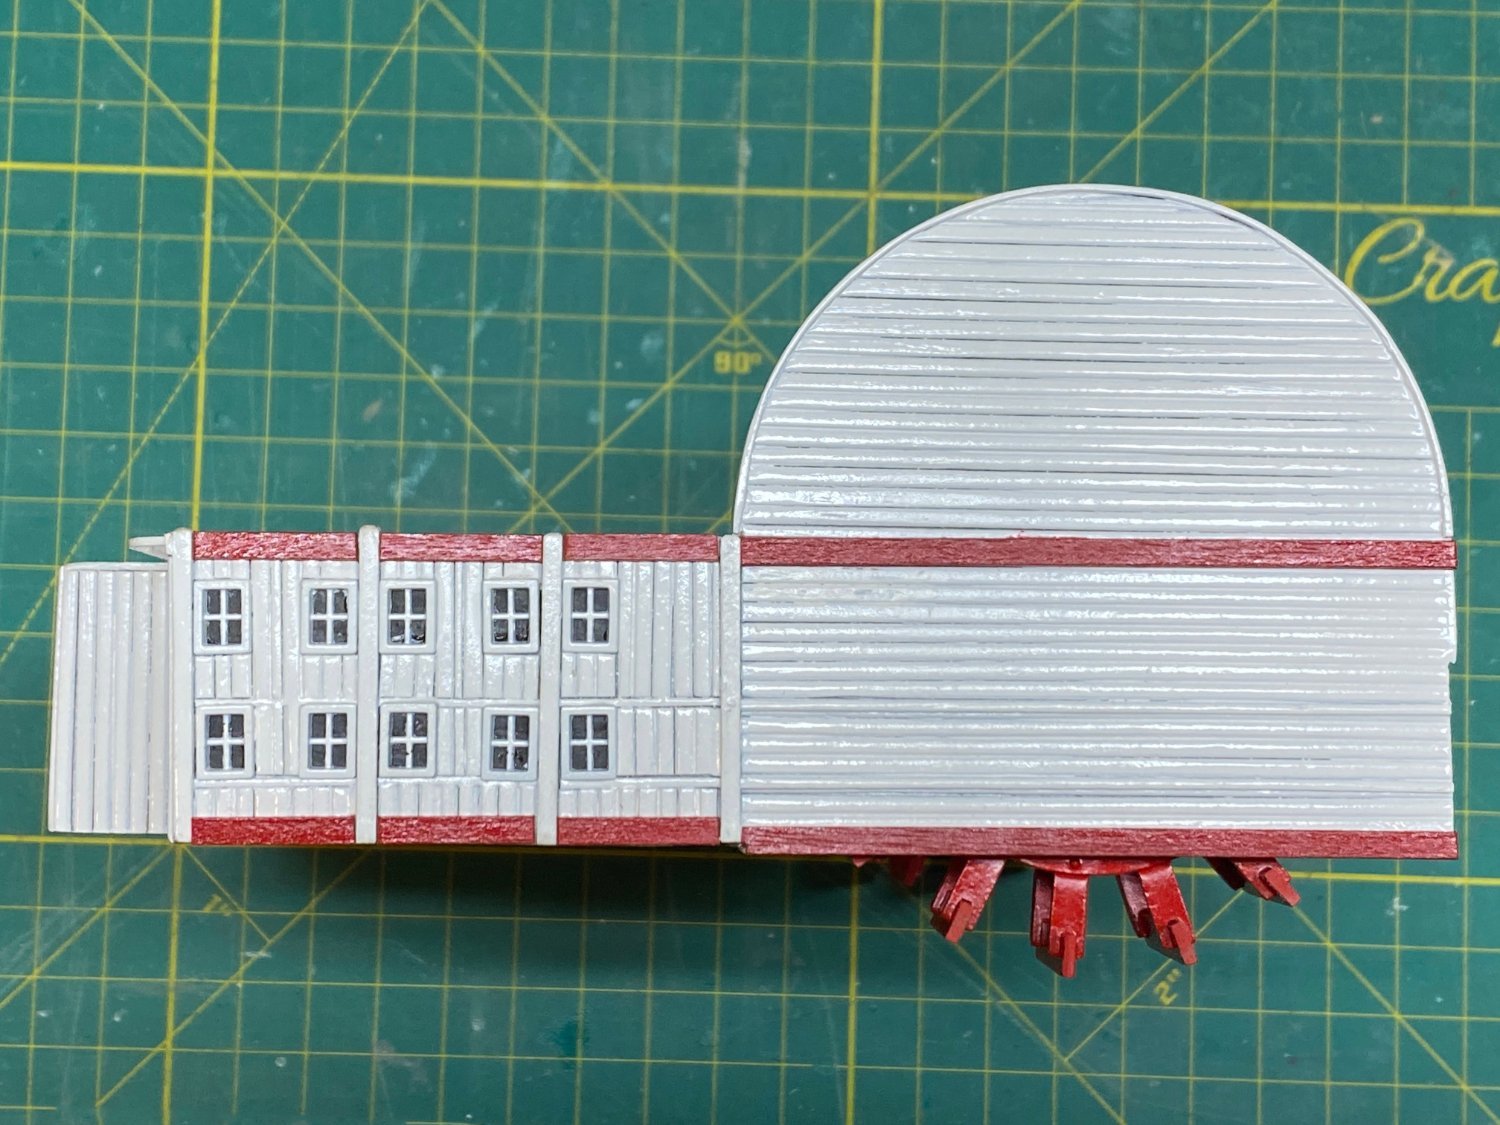
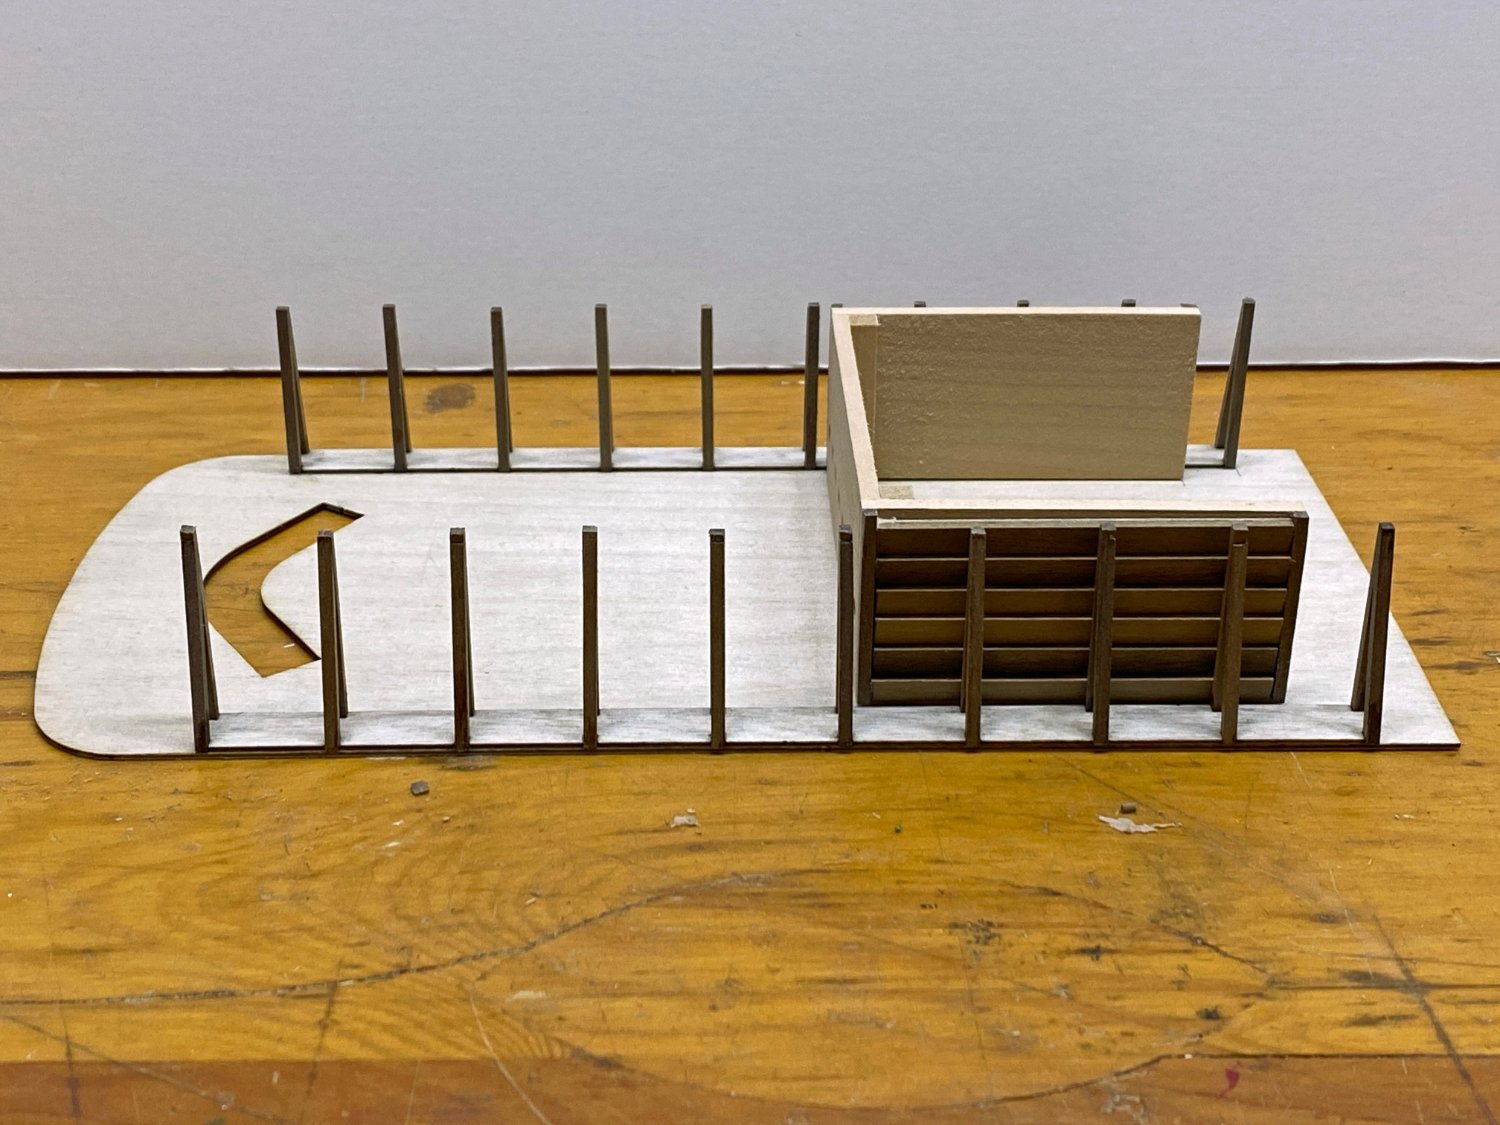
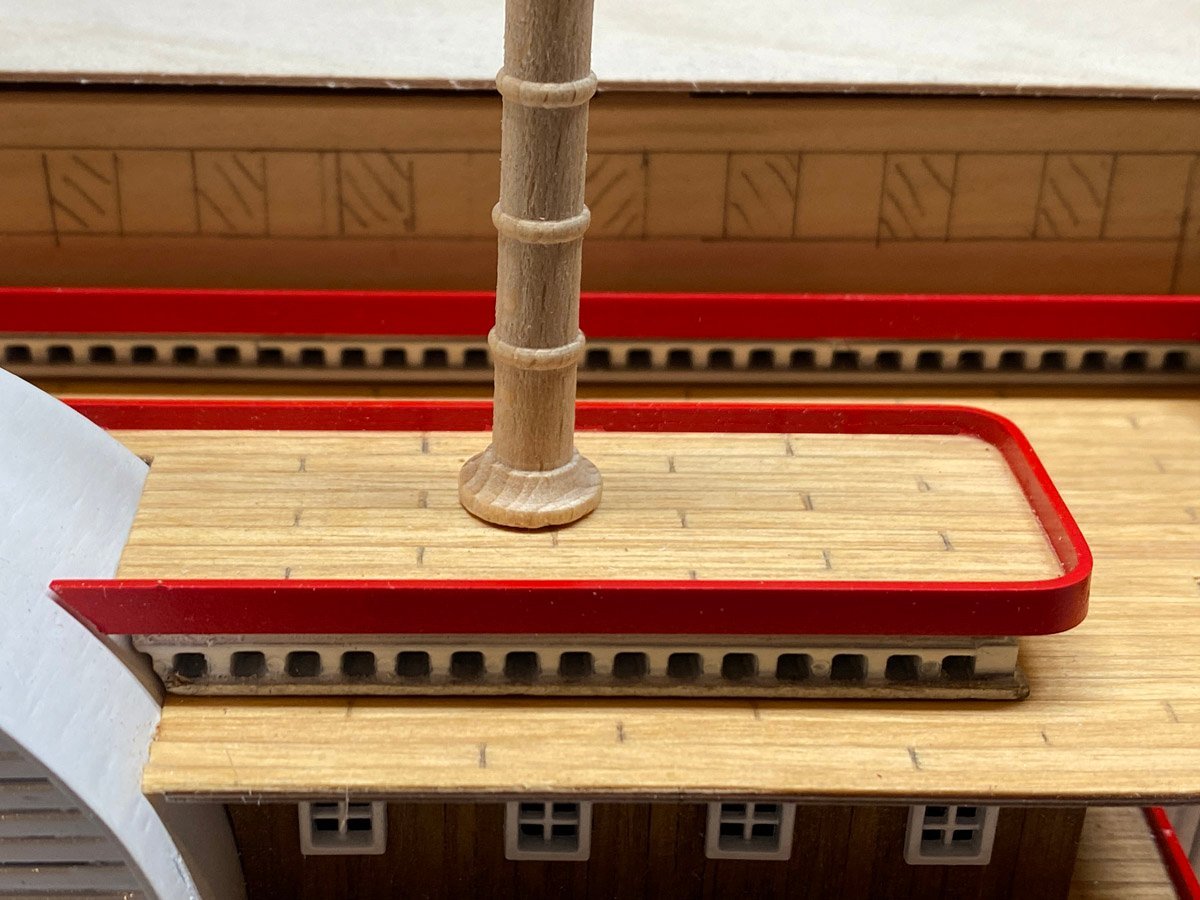
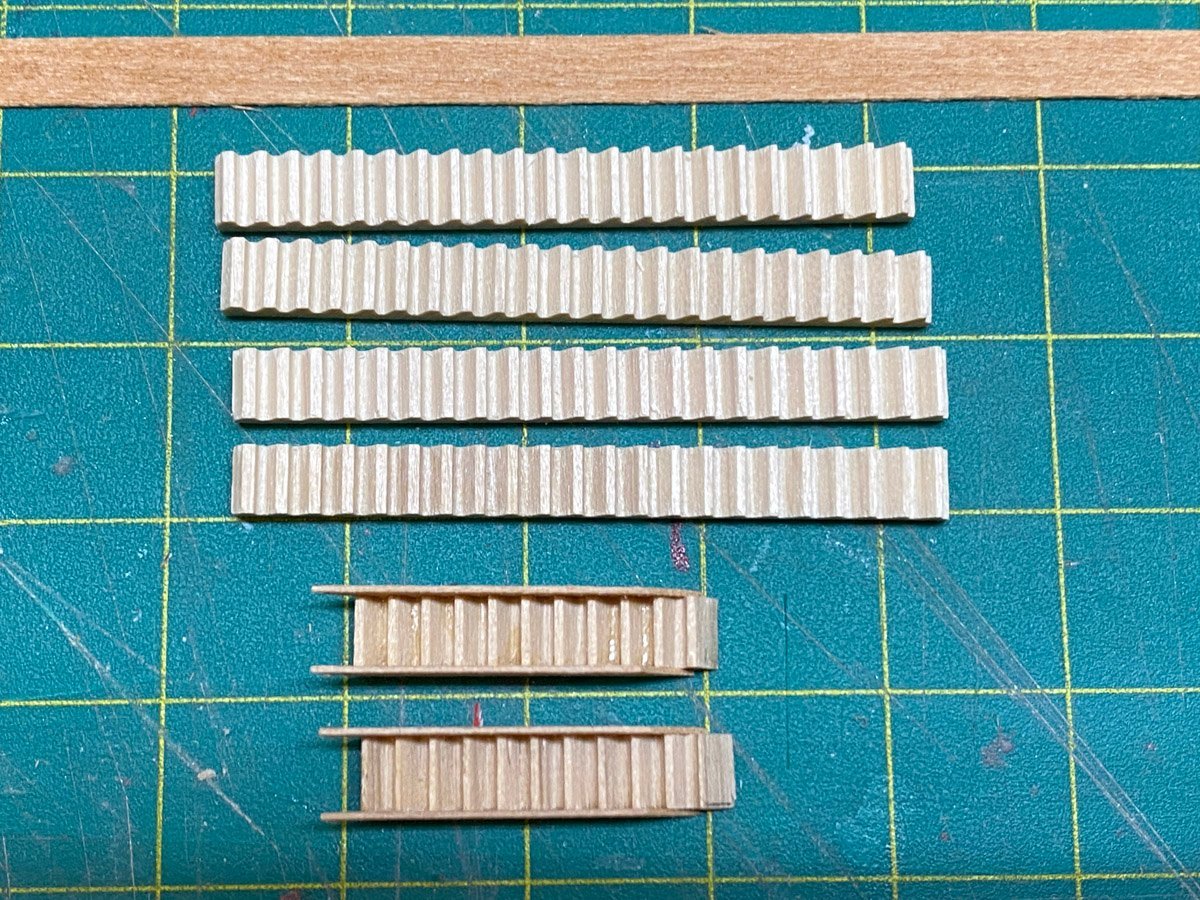
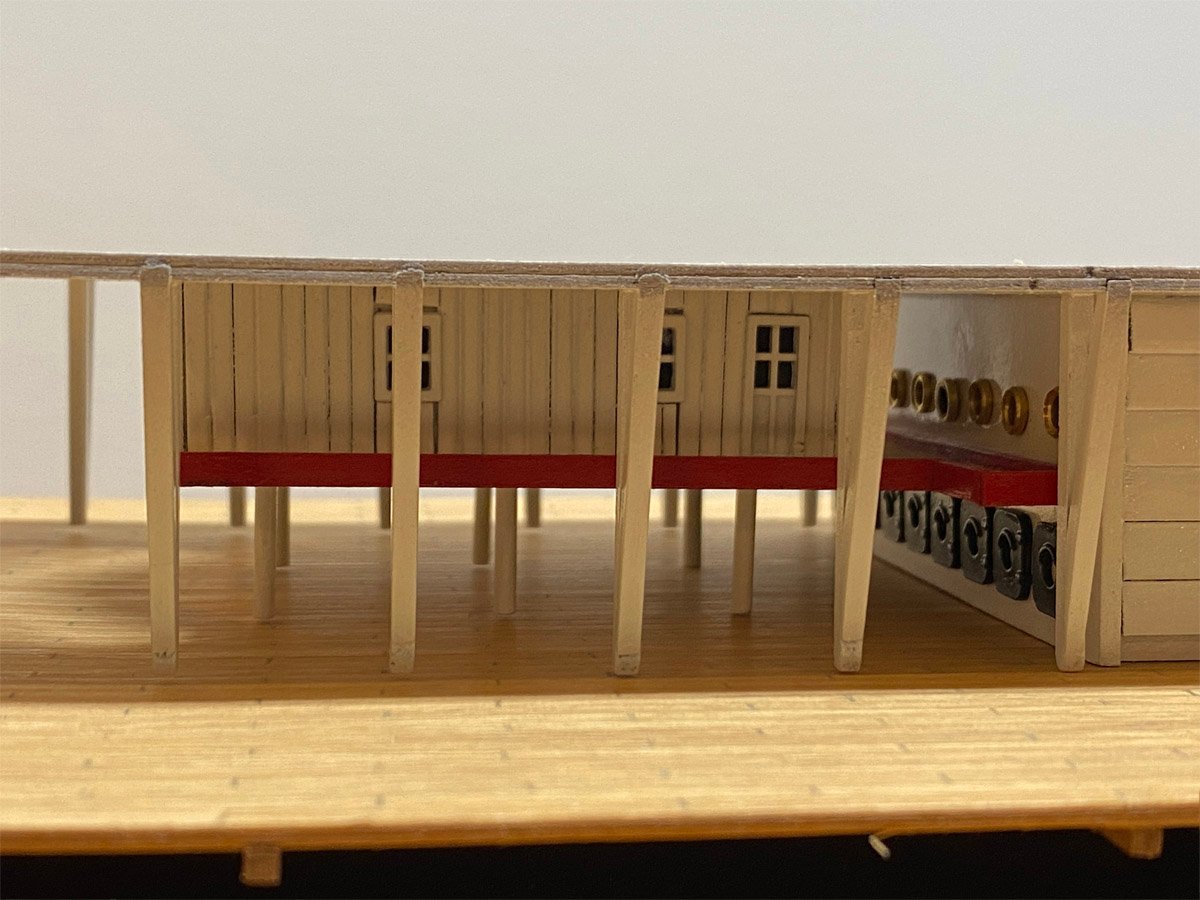
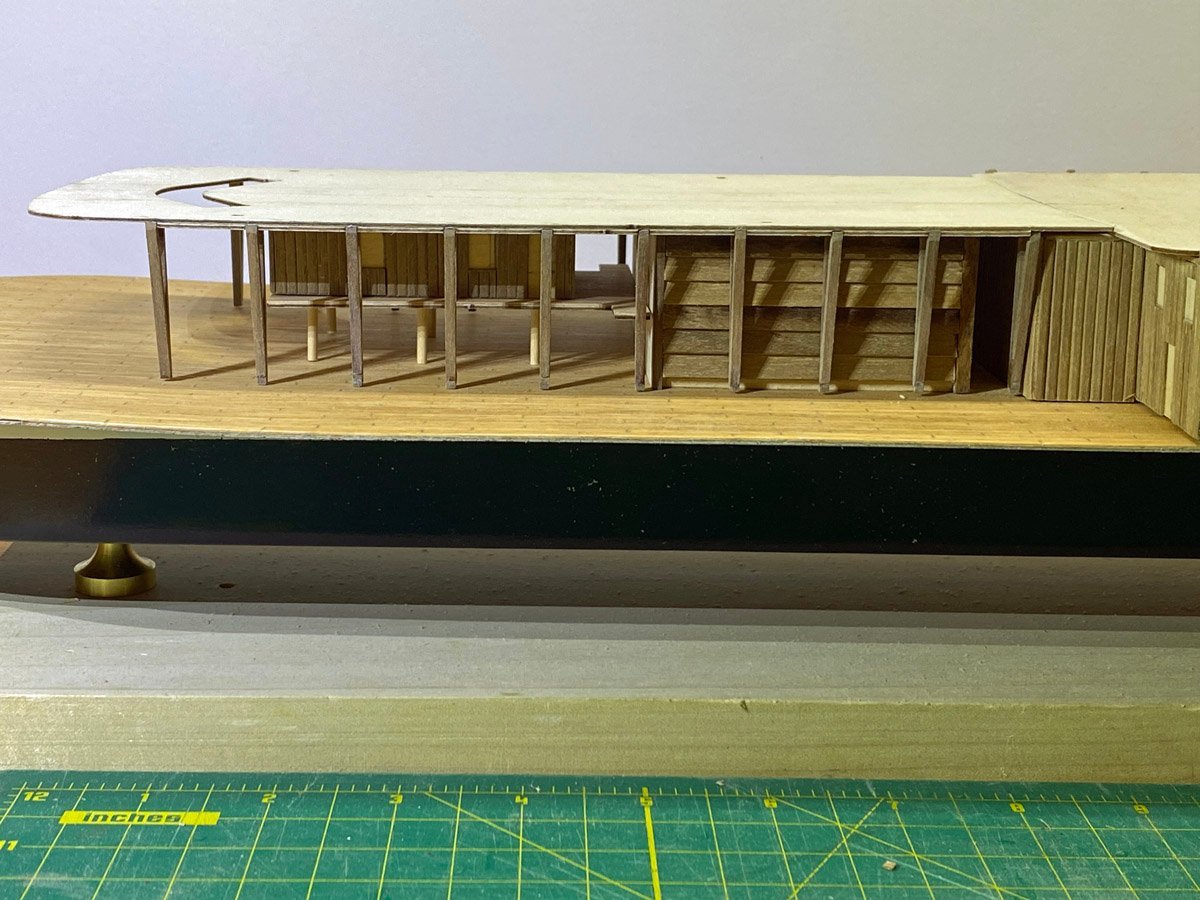
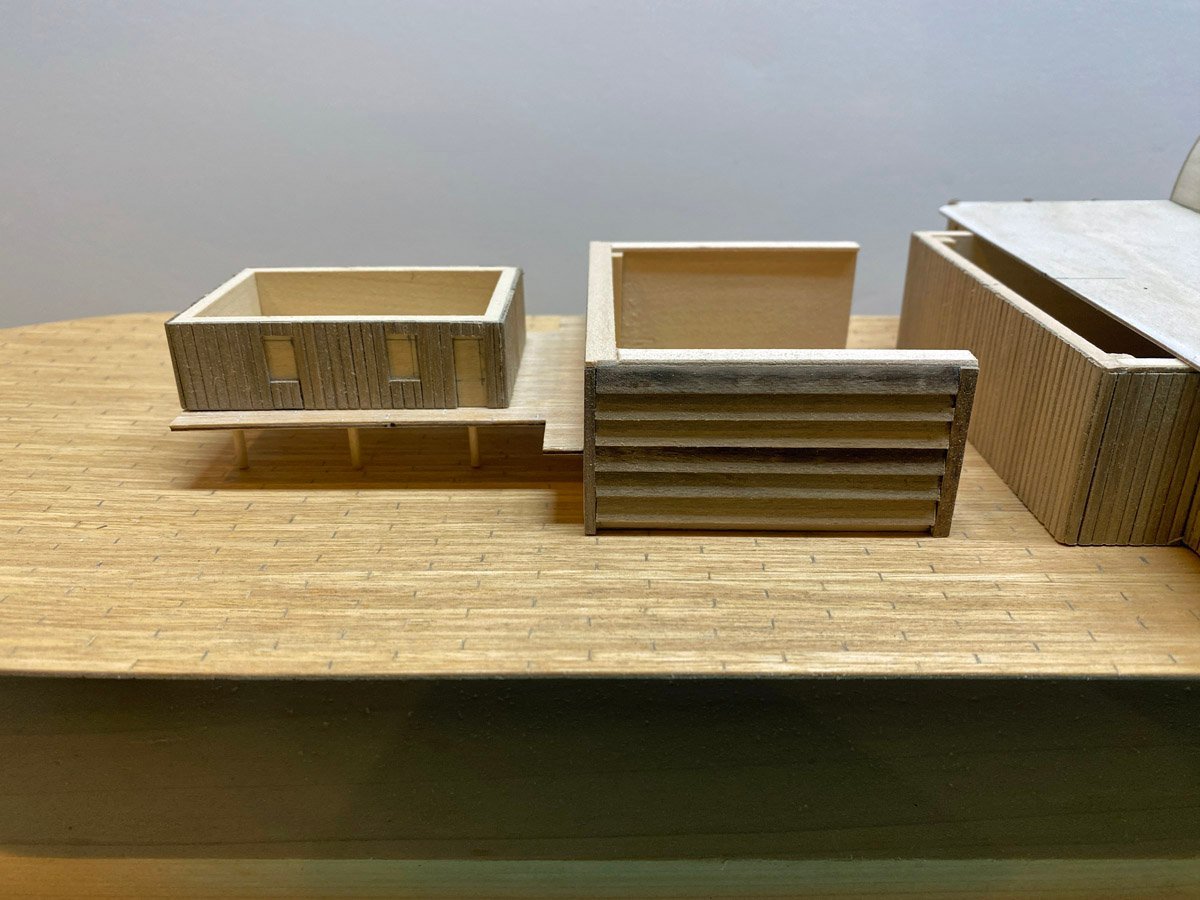
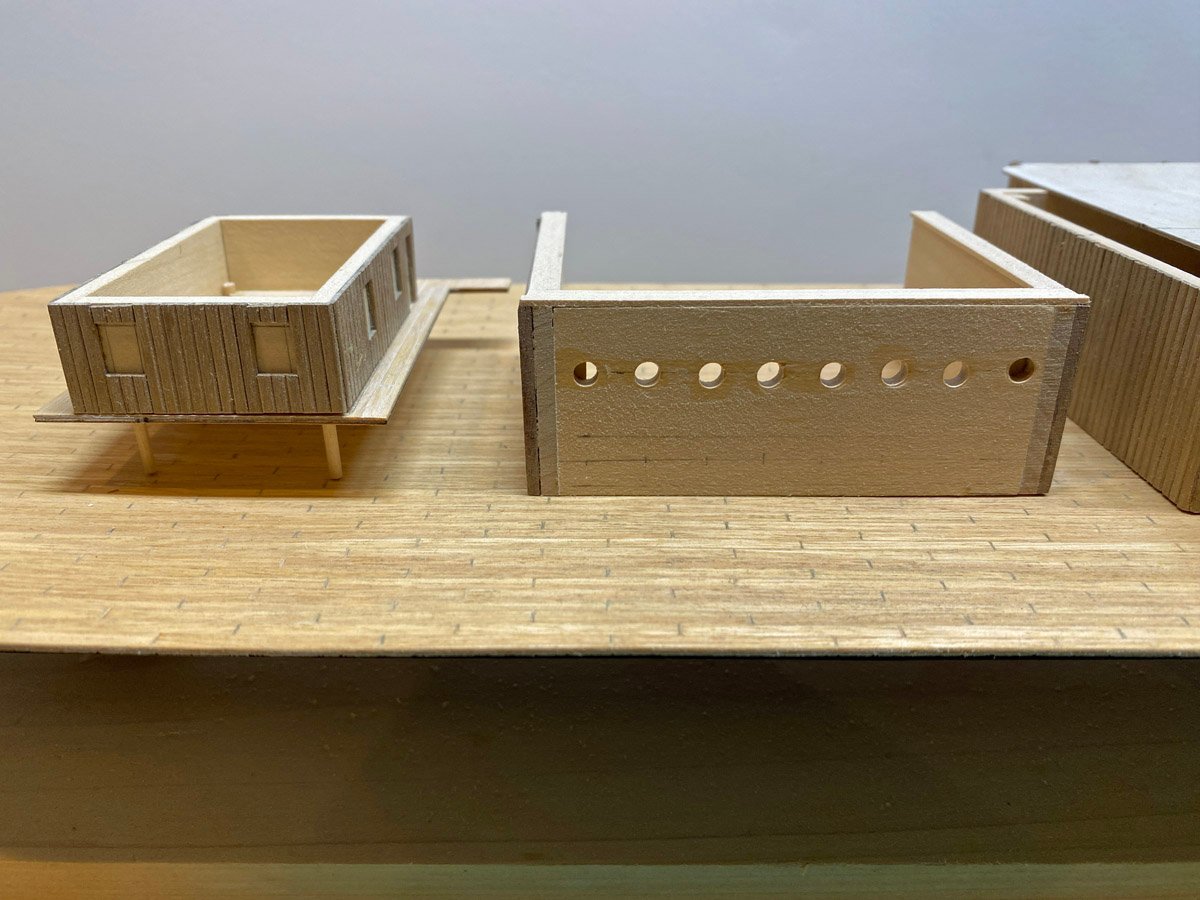
Boiler Room & Raised Cabin The boiler room is a simple 3-sided structure with 8 holes in the front for brass portholes. The louvered sides are paneled with strips with a tapered cross section, except that the taper was too subtle. I glued 0.5 mm thin strips to the high edge to accentuate the taper. The raised cabin sits in front of the boiler room with its own deck on 6 pillars. Raised cabin & boiler room in their eventual location. Front view.
- 58 replies
-
- 5
-
-
- Robert E Lee
- Amati
- (and 4 more)