HOLIDAY DONATION DRIVE - SUPPORT MSW - DO YOUR PART TO KEEP THIS GREAT FORUM GOING!
×


RMC
-
Posts
933 -
Joined
-
Last visited
Content Type
Profiles
Forums
Gallery
Events
Everything posted by RMC
-
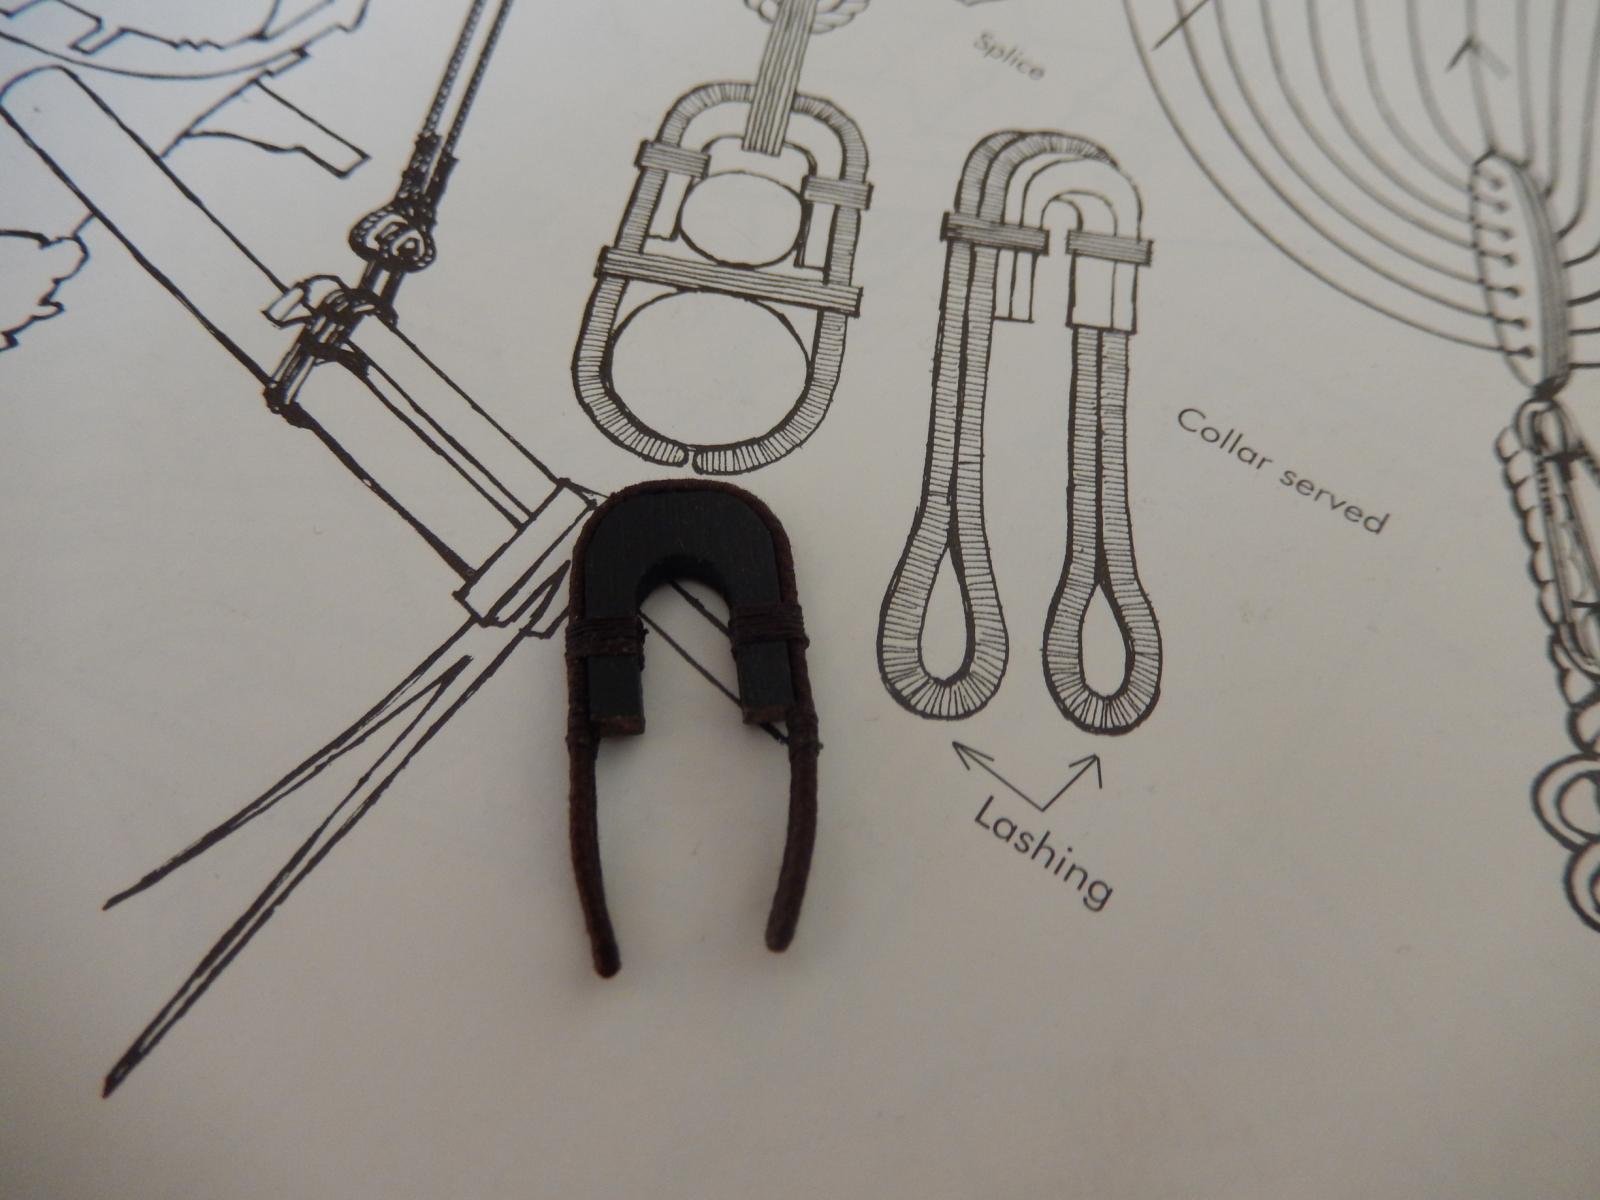
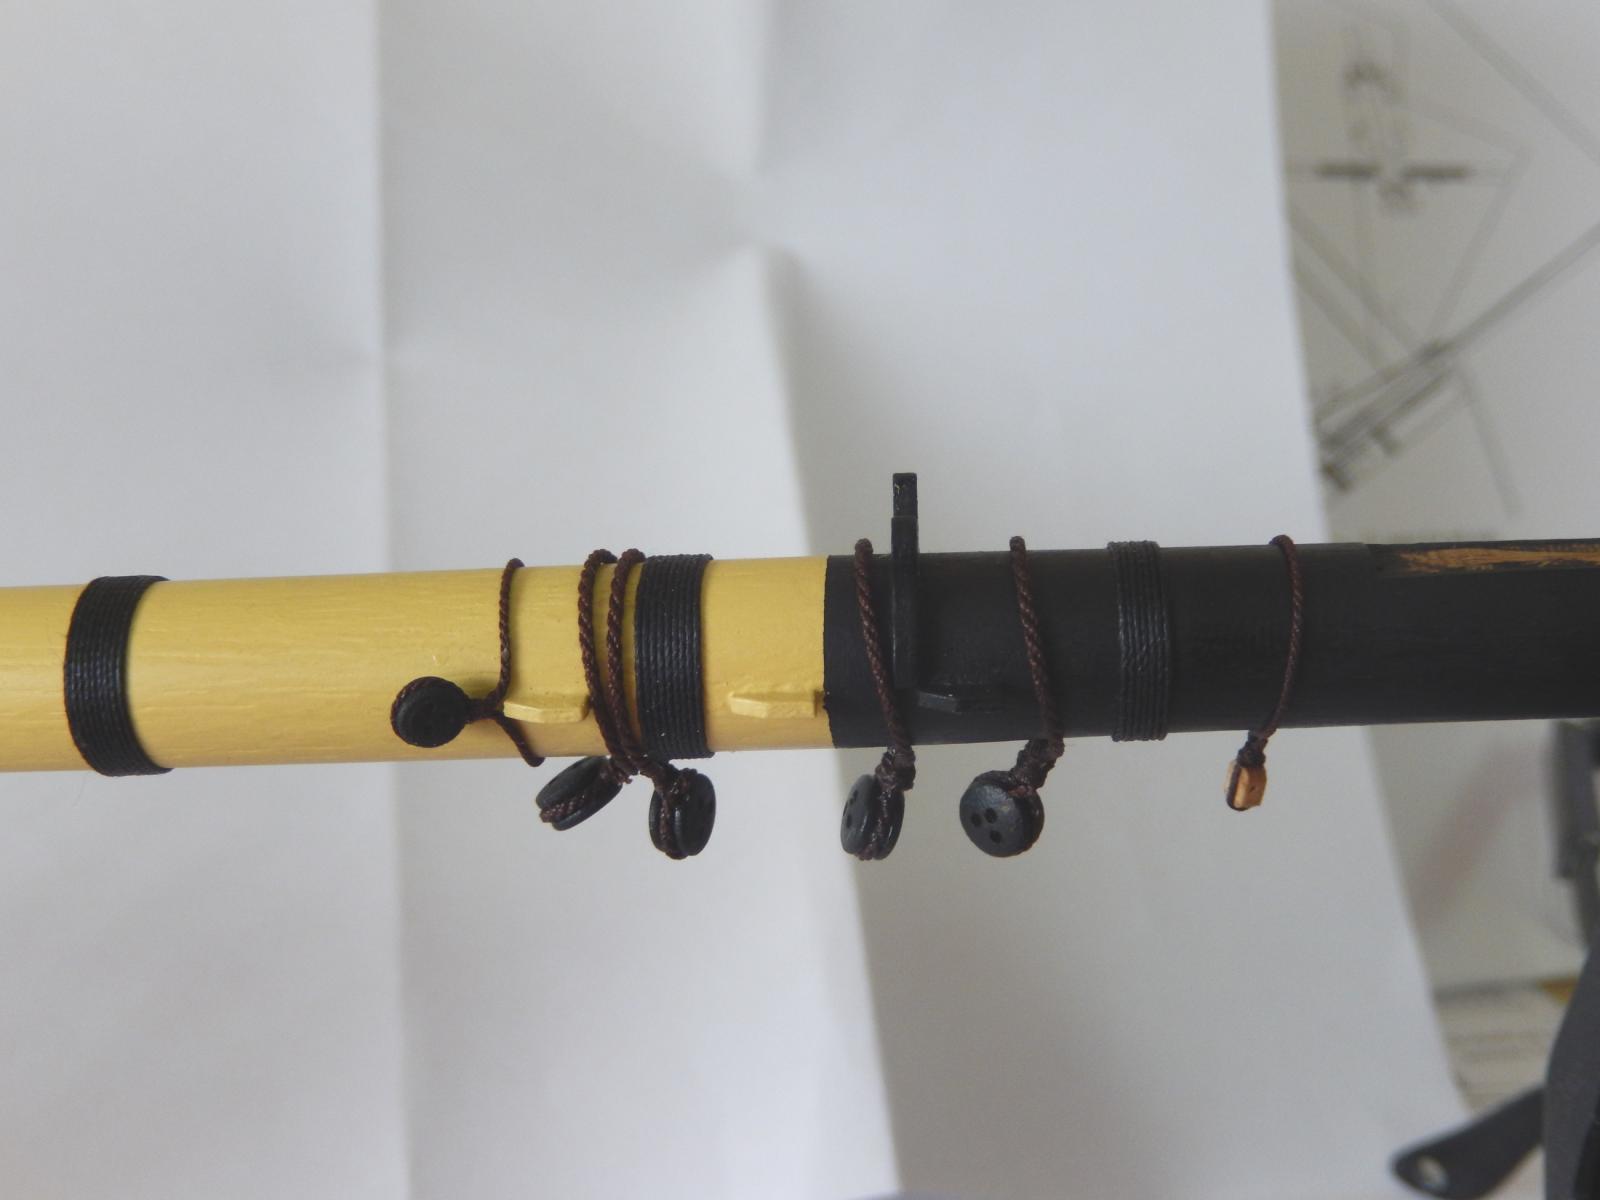
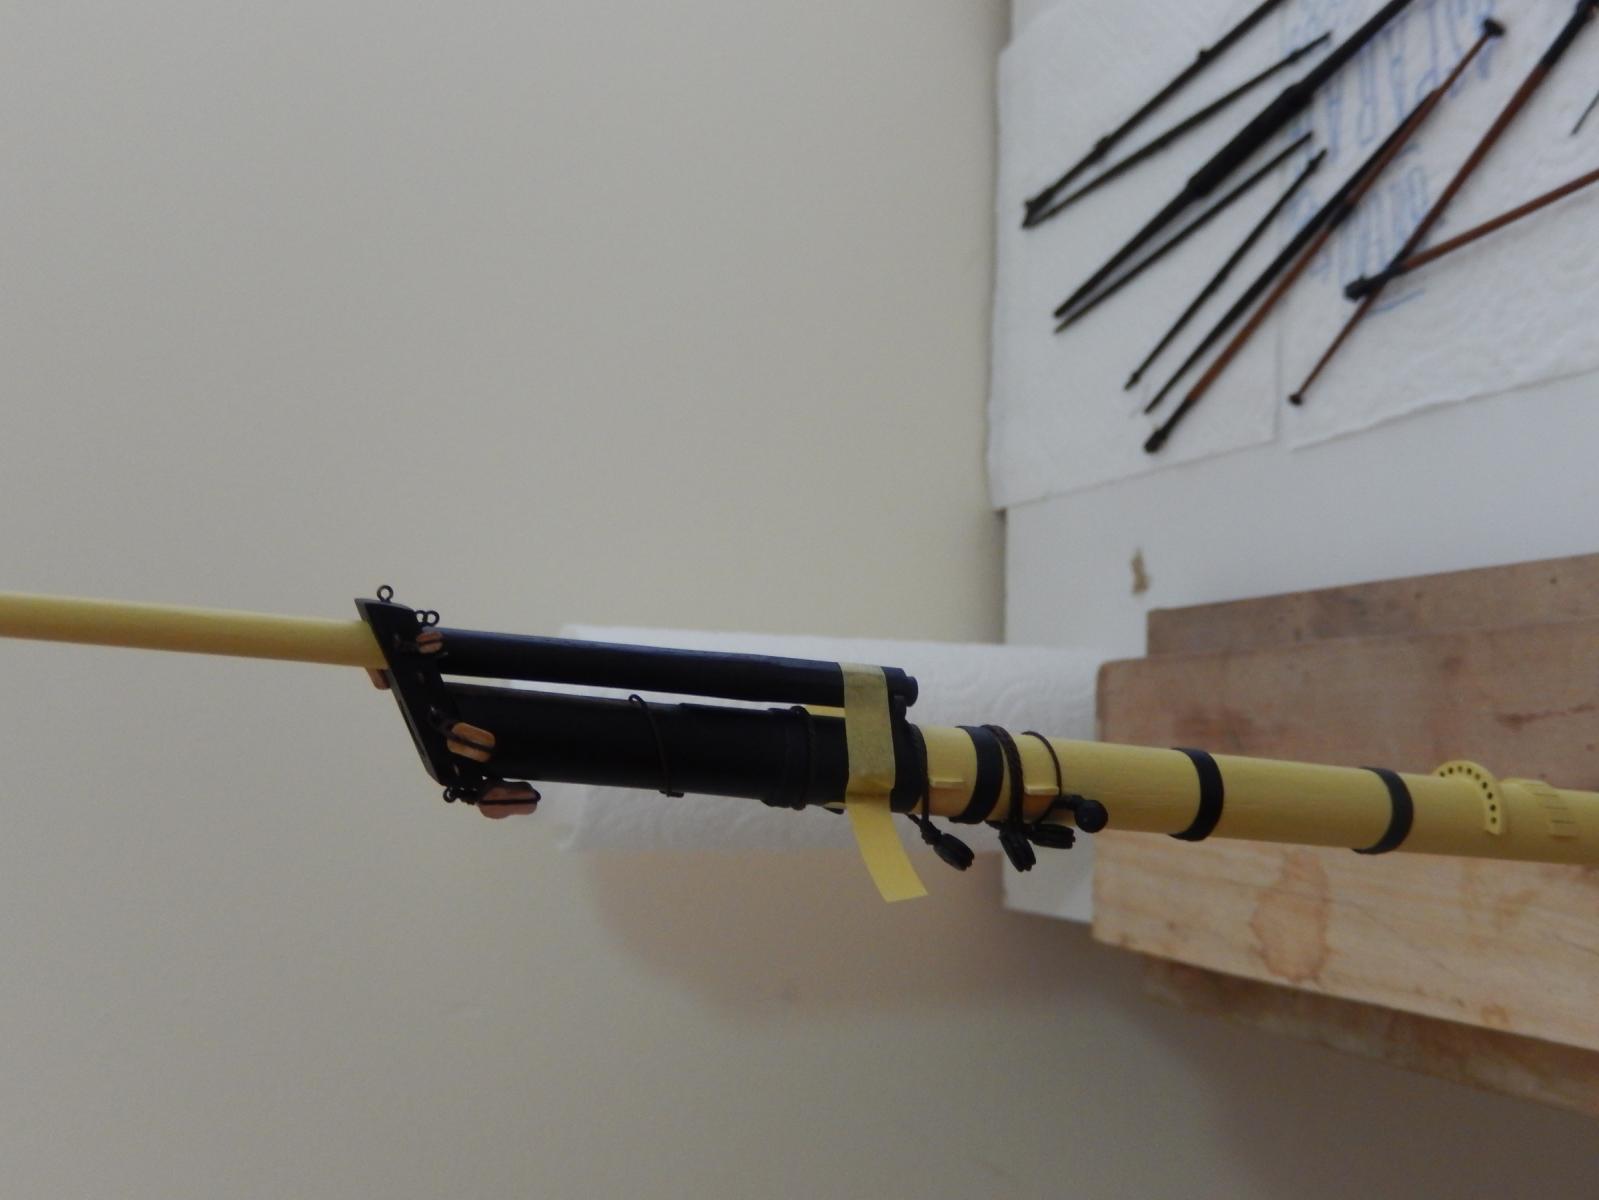
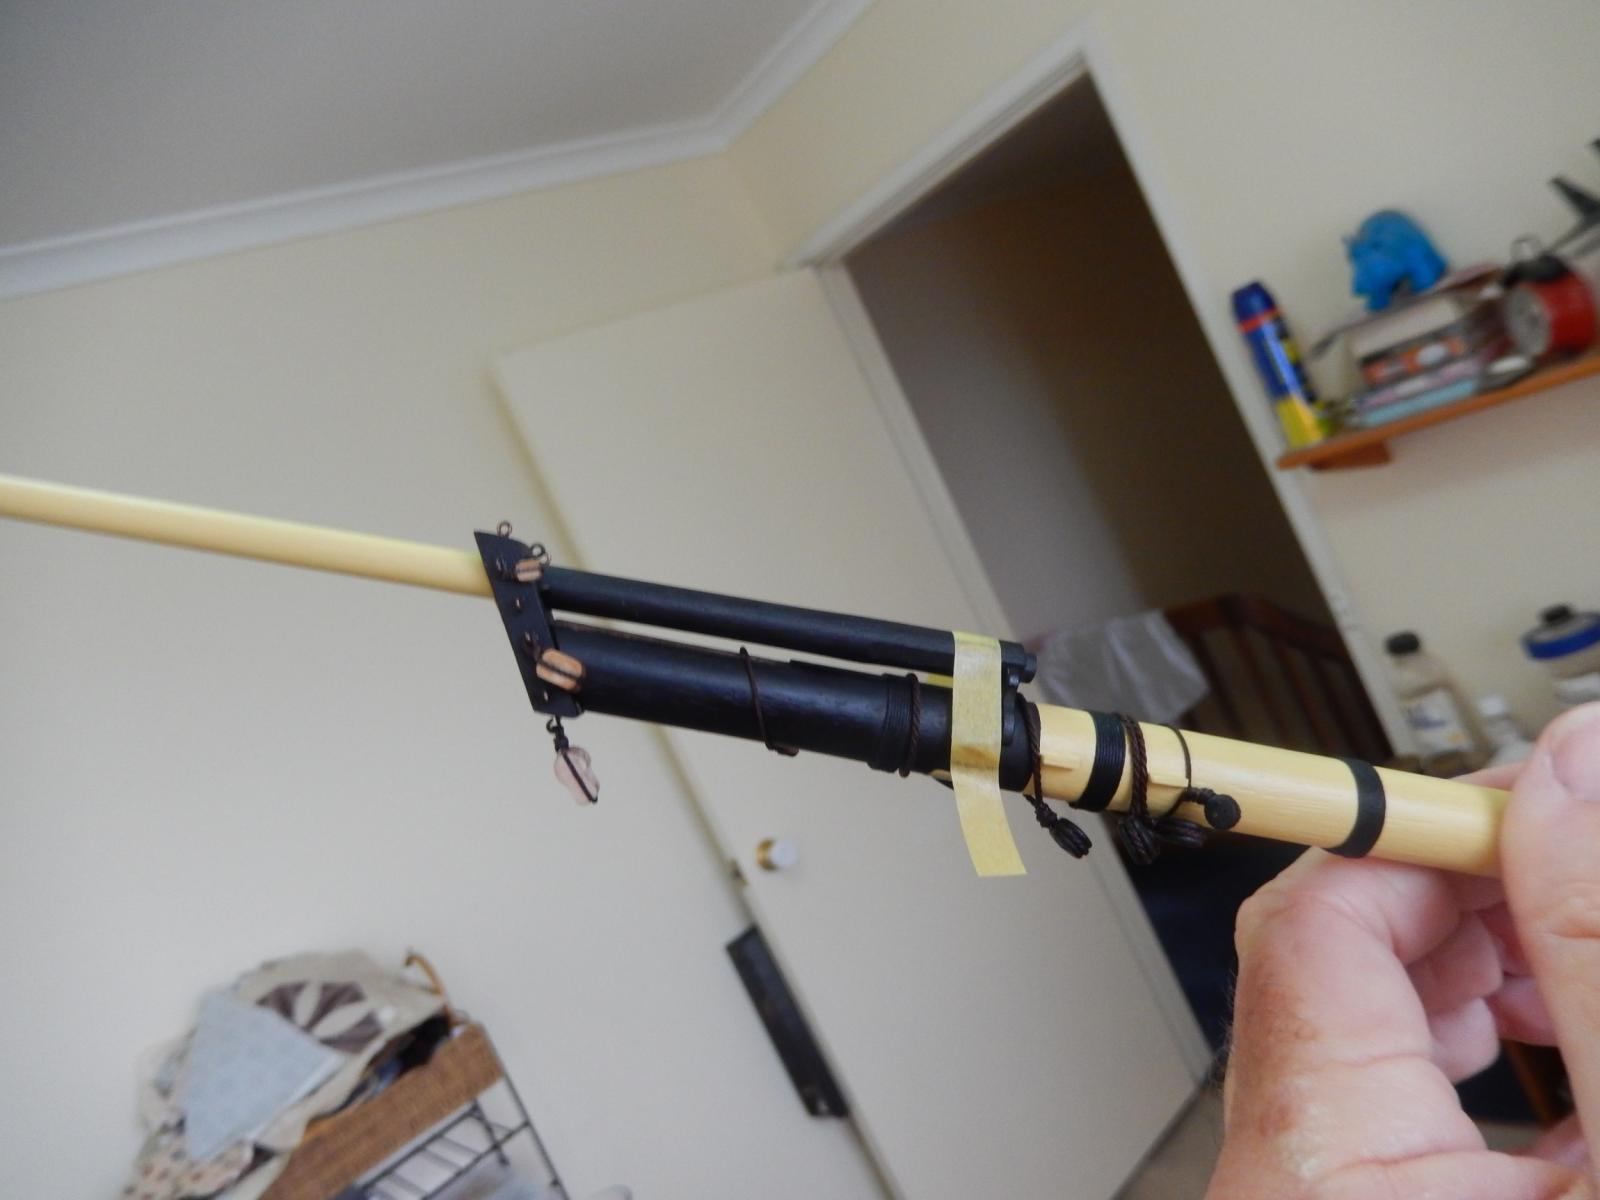
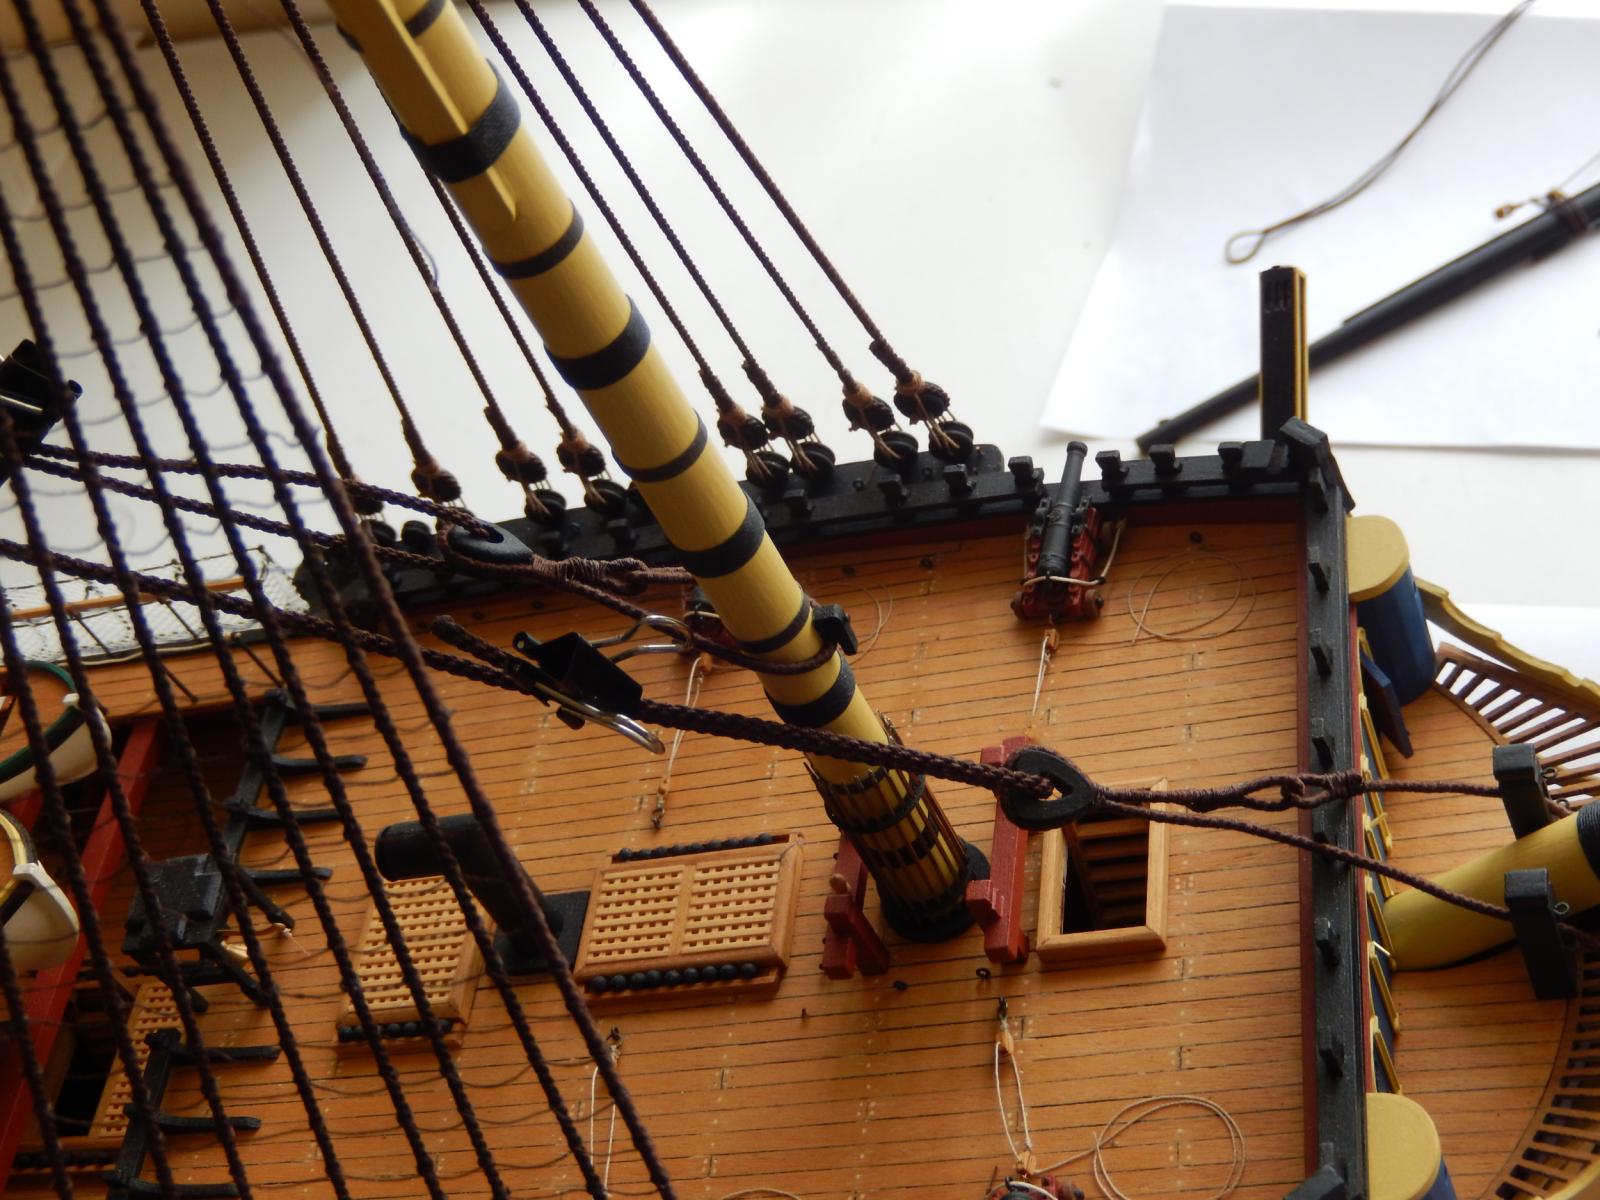
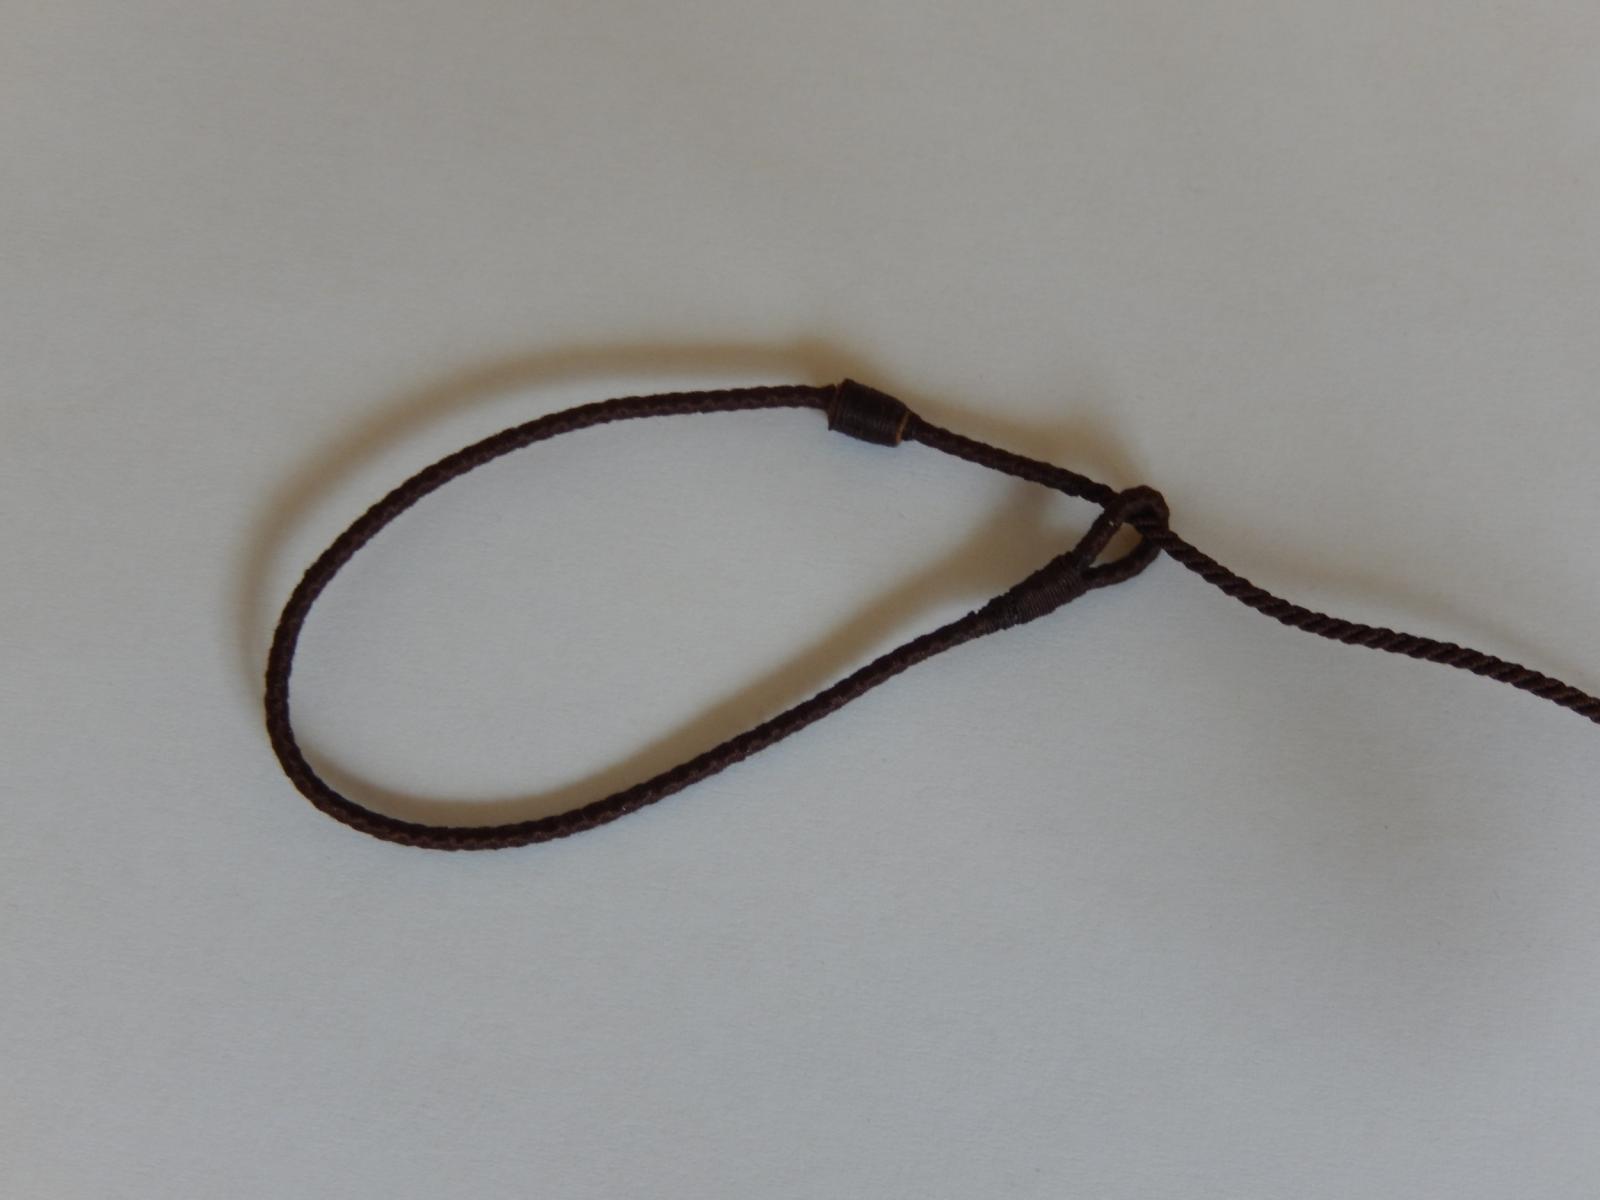
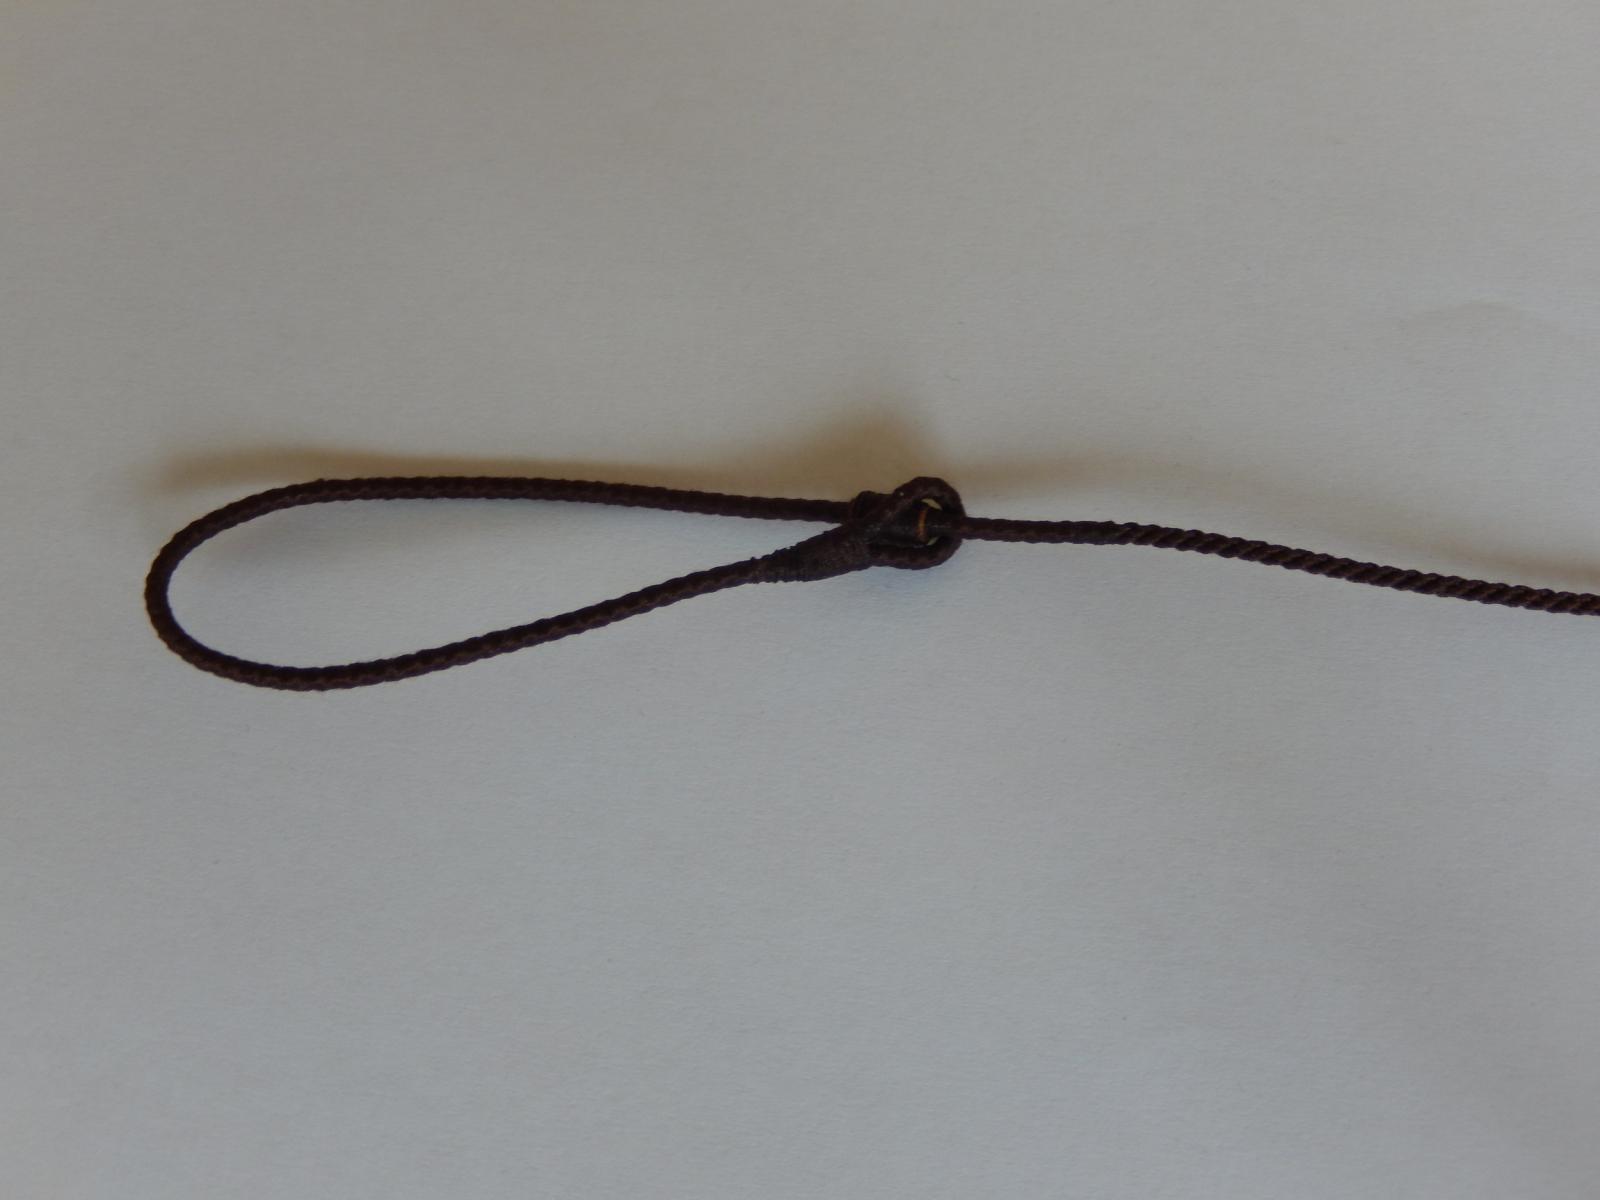
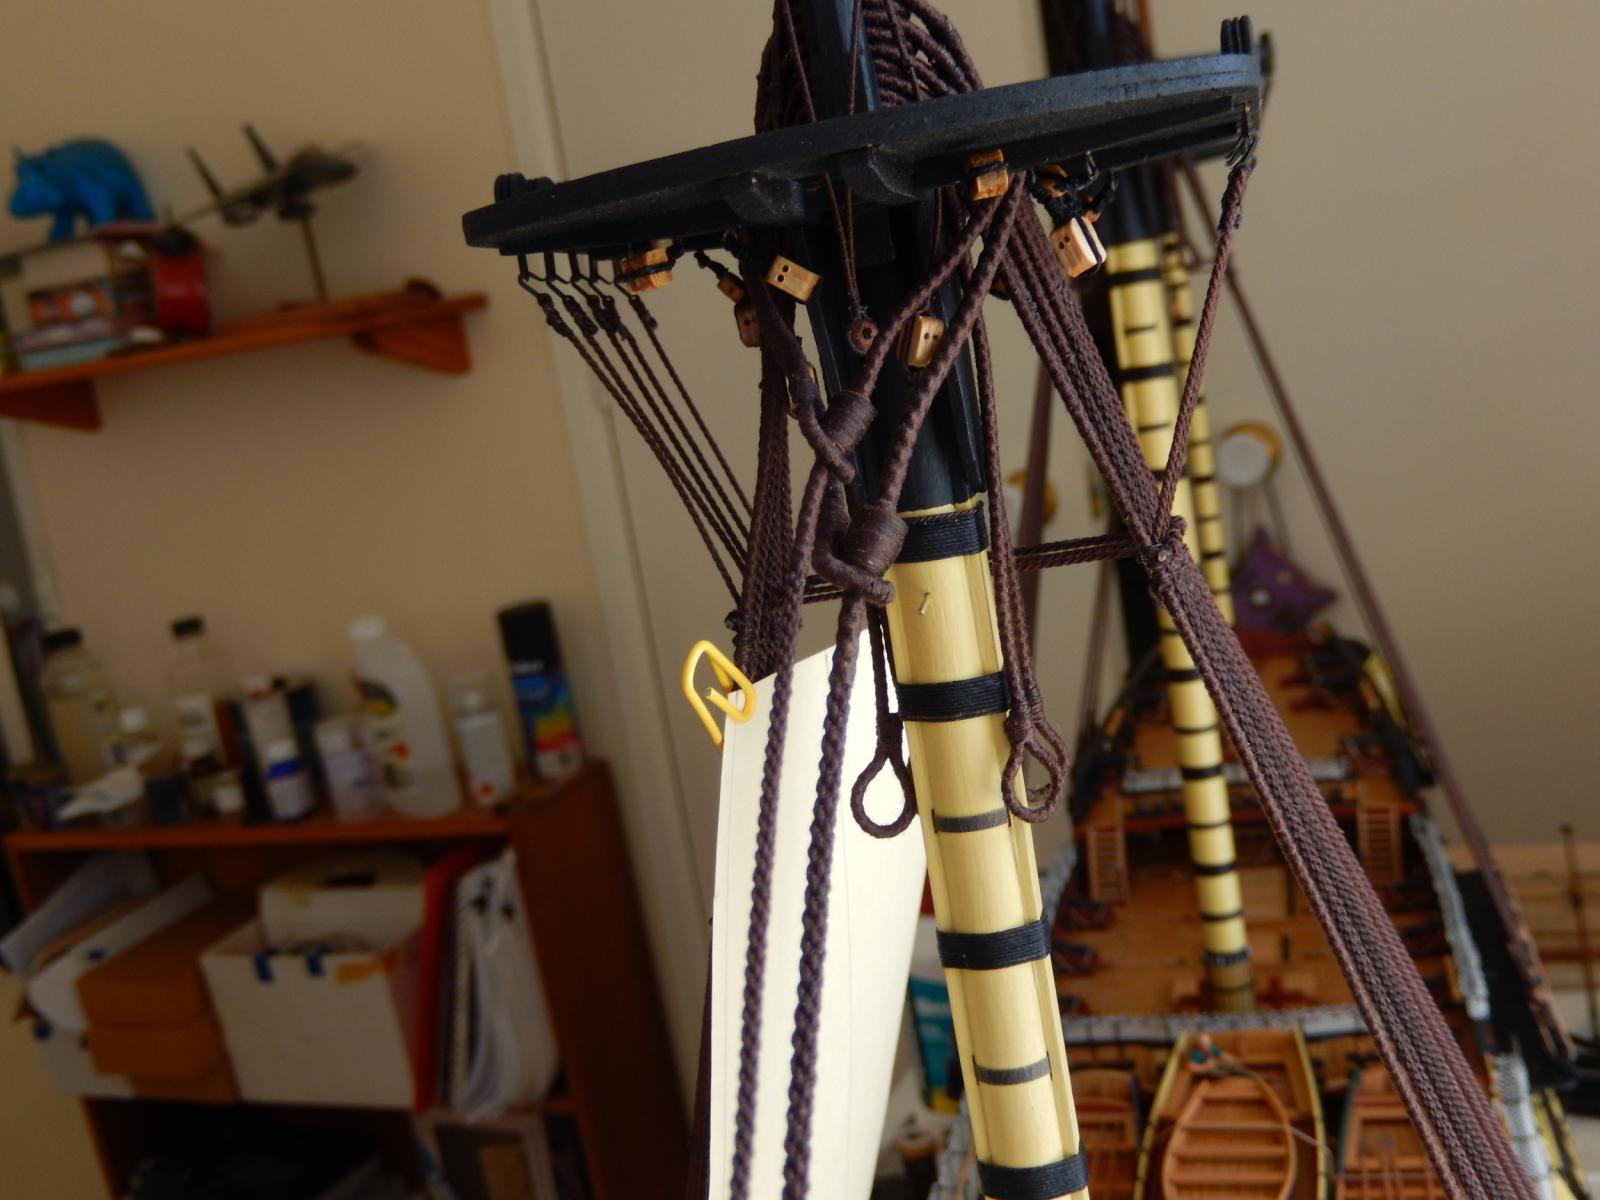
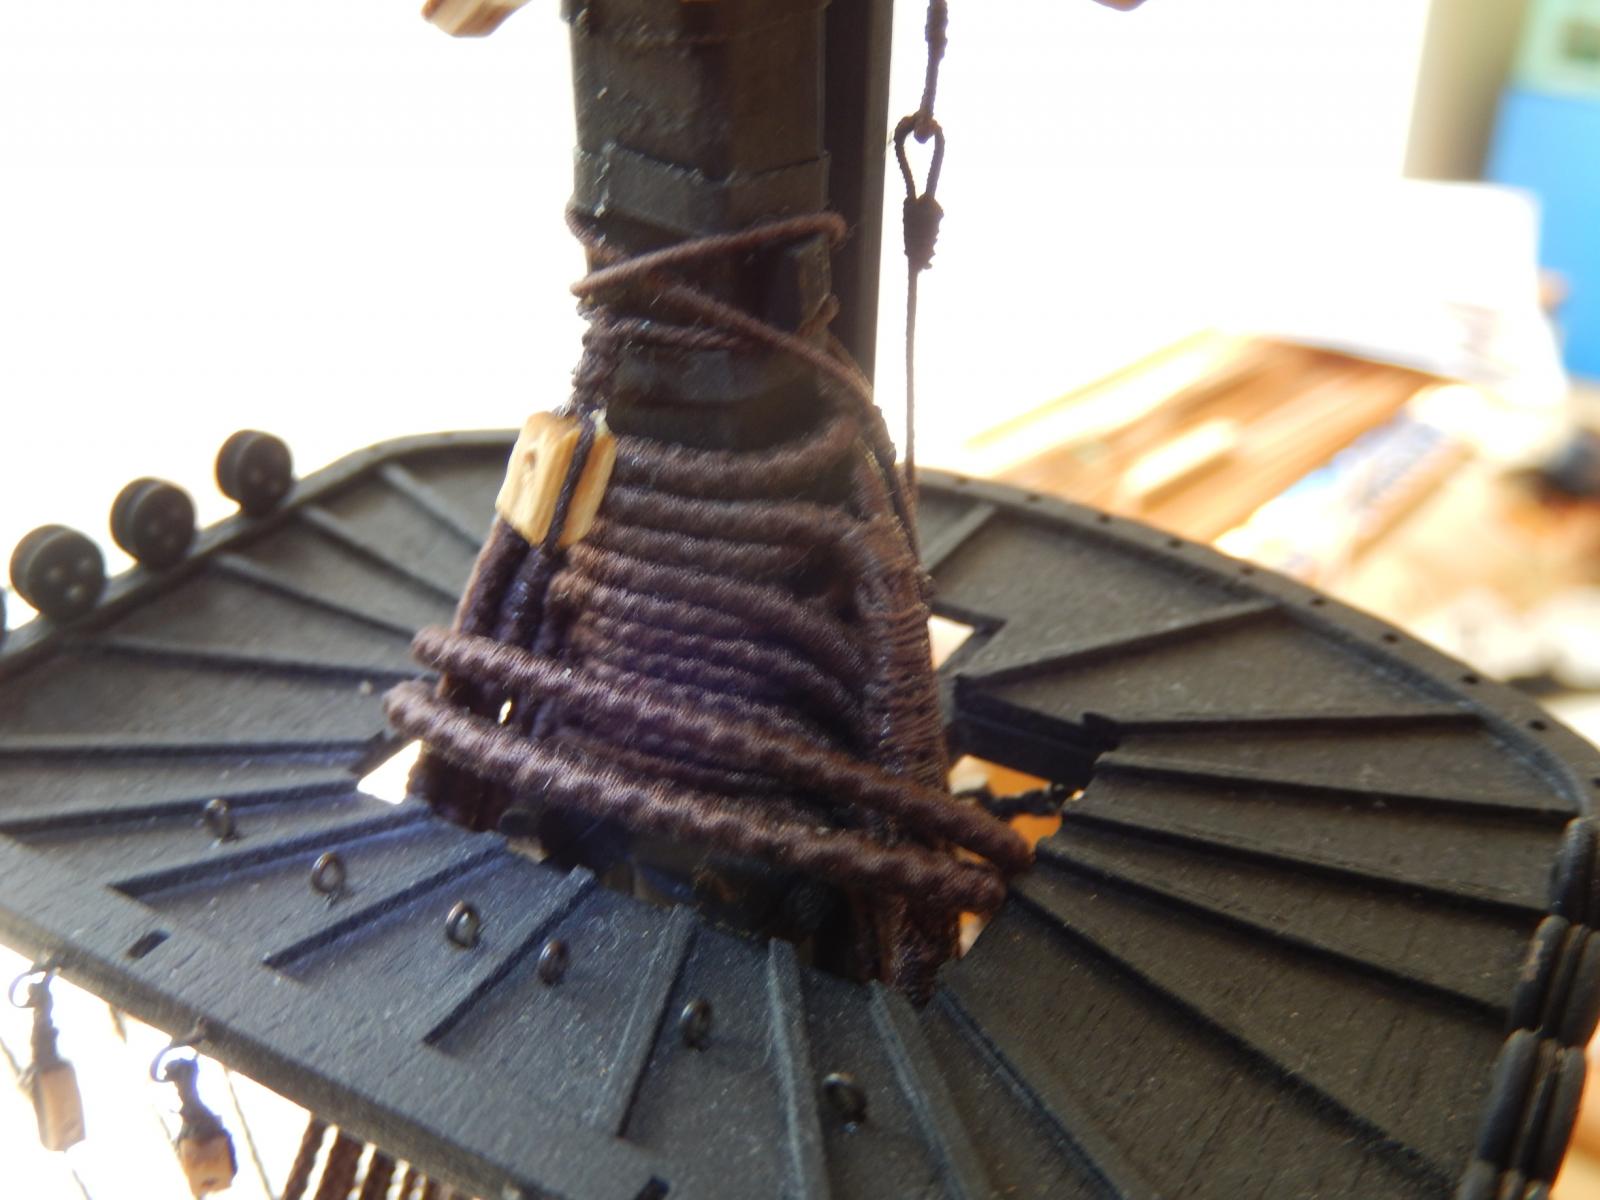
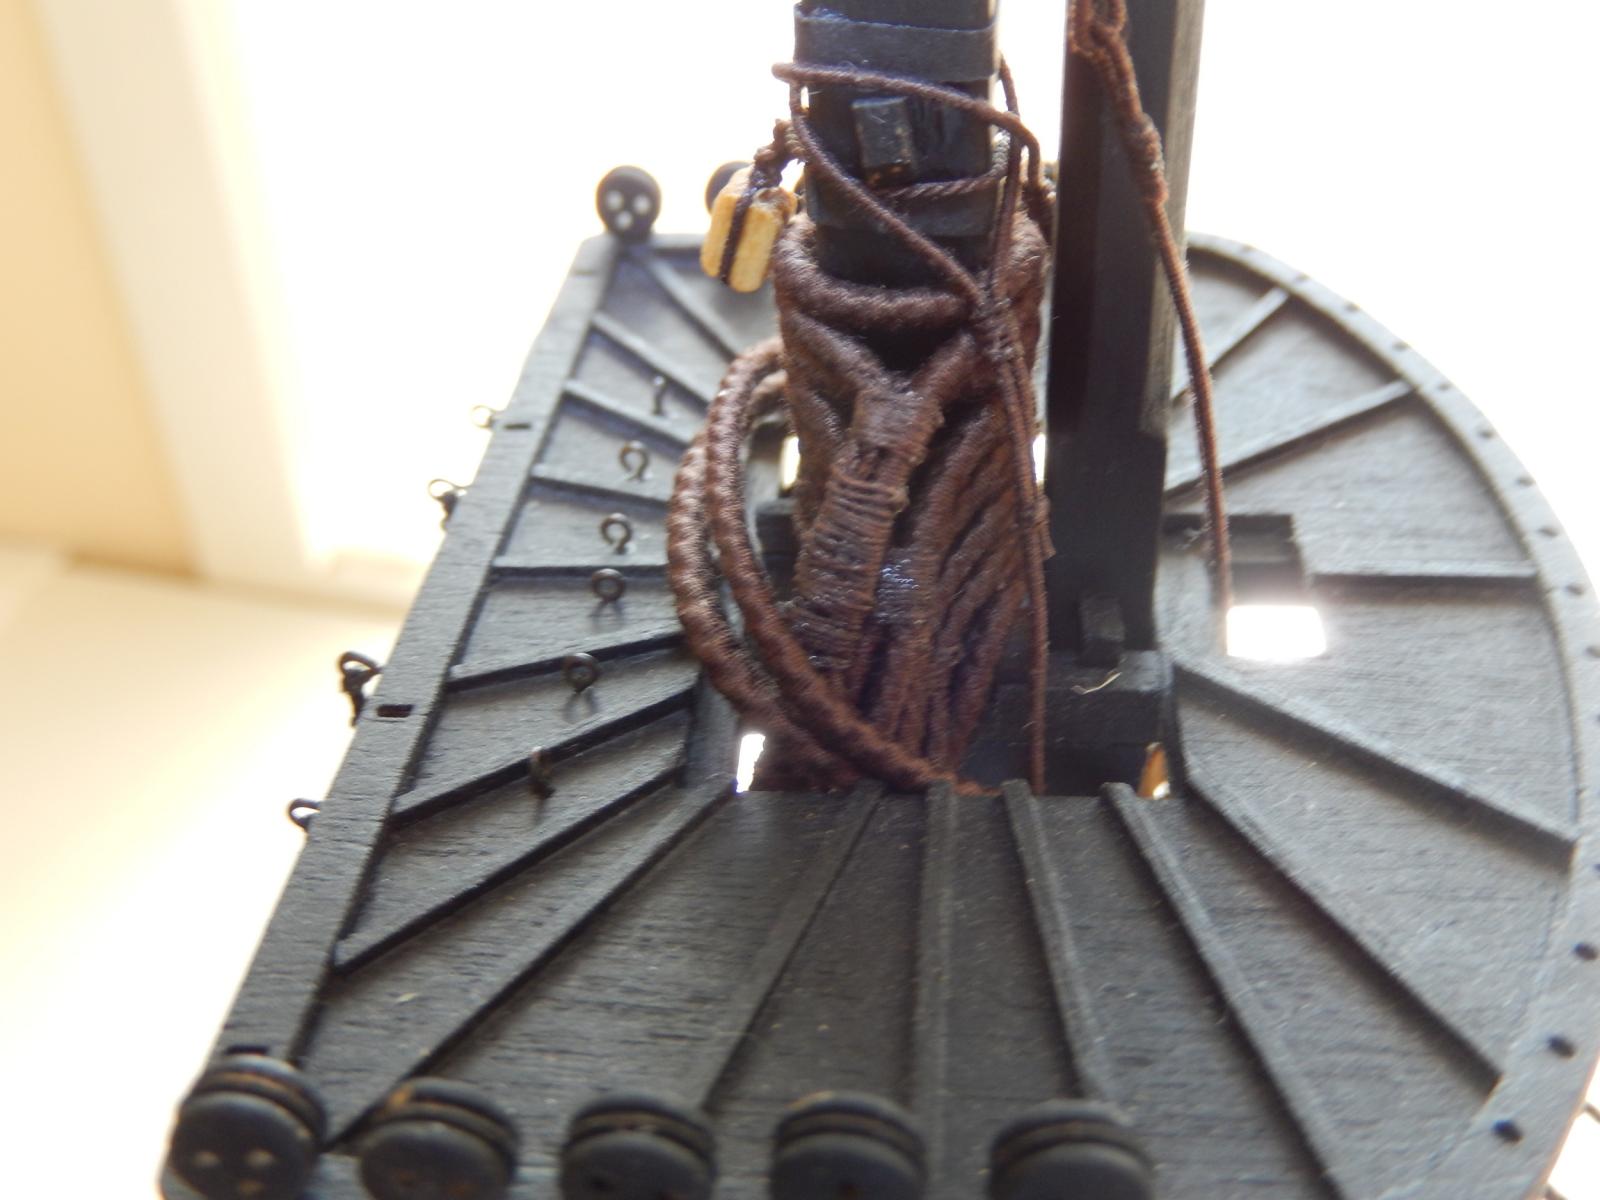
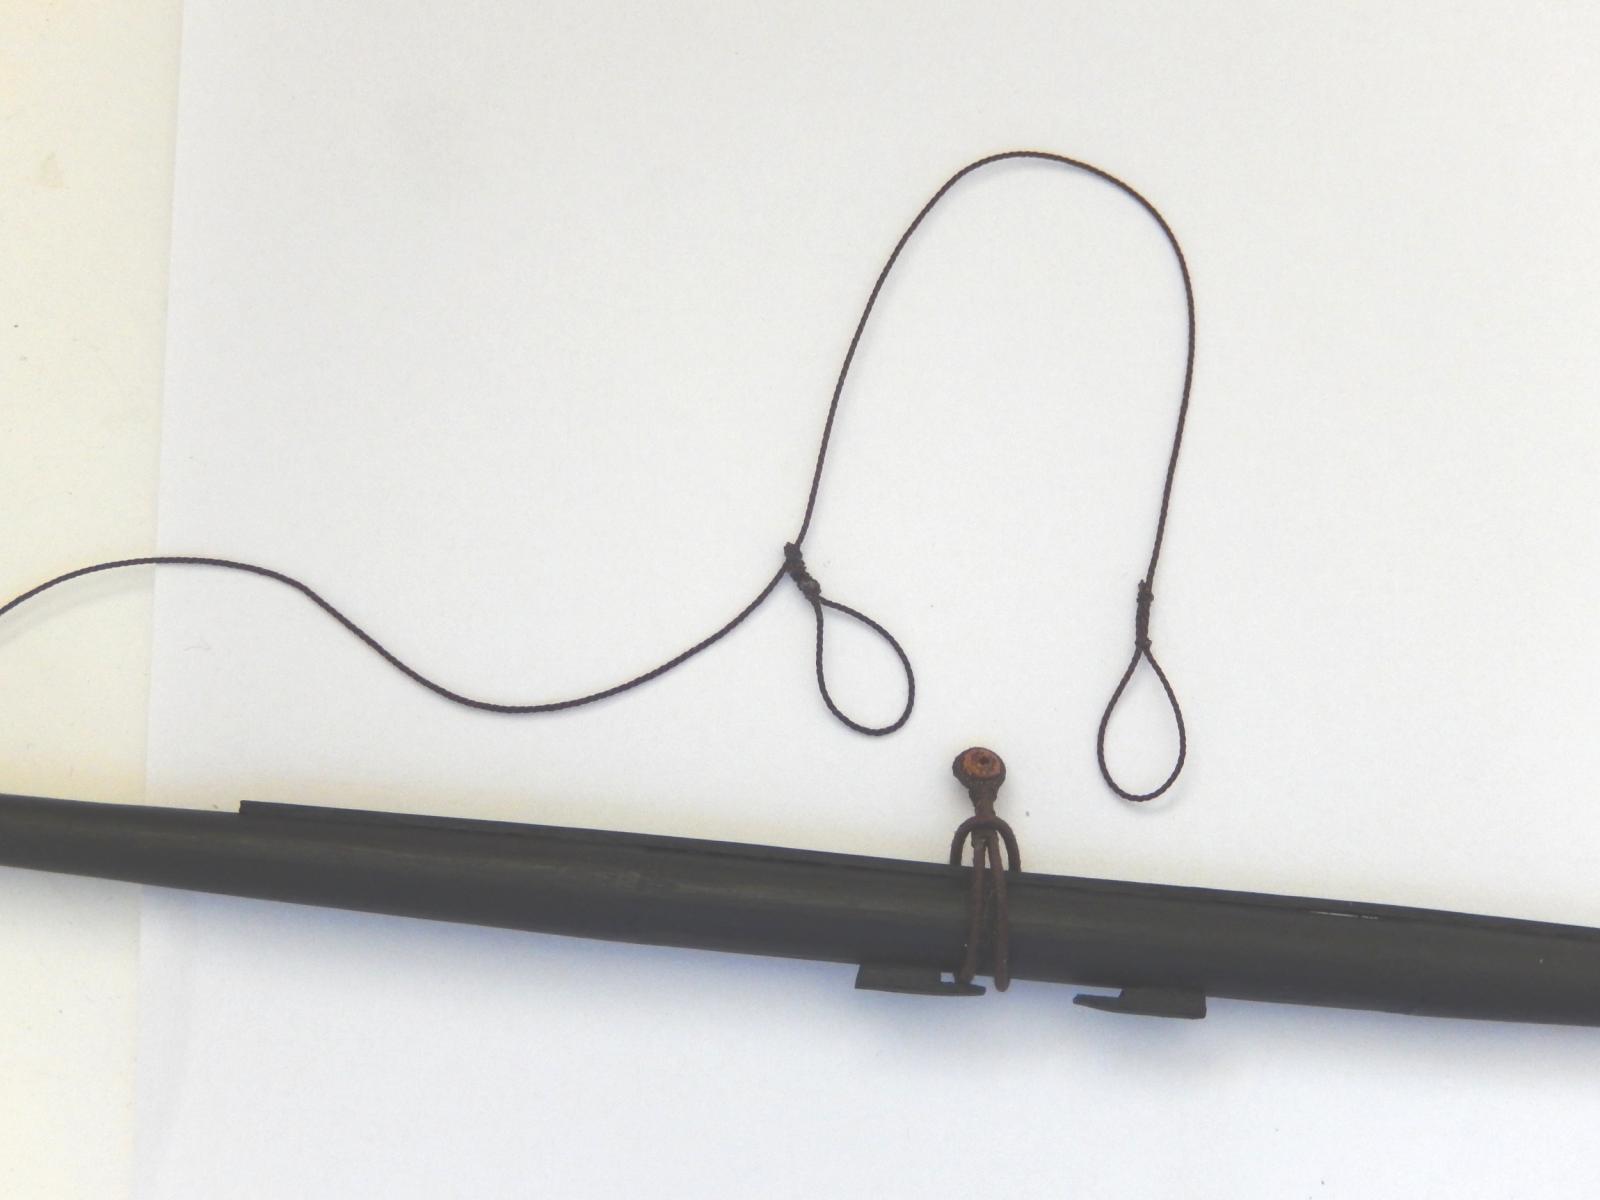
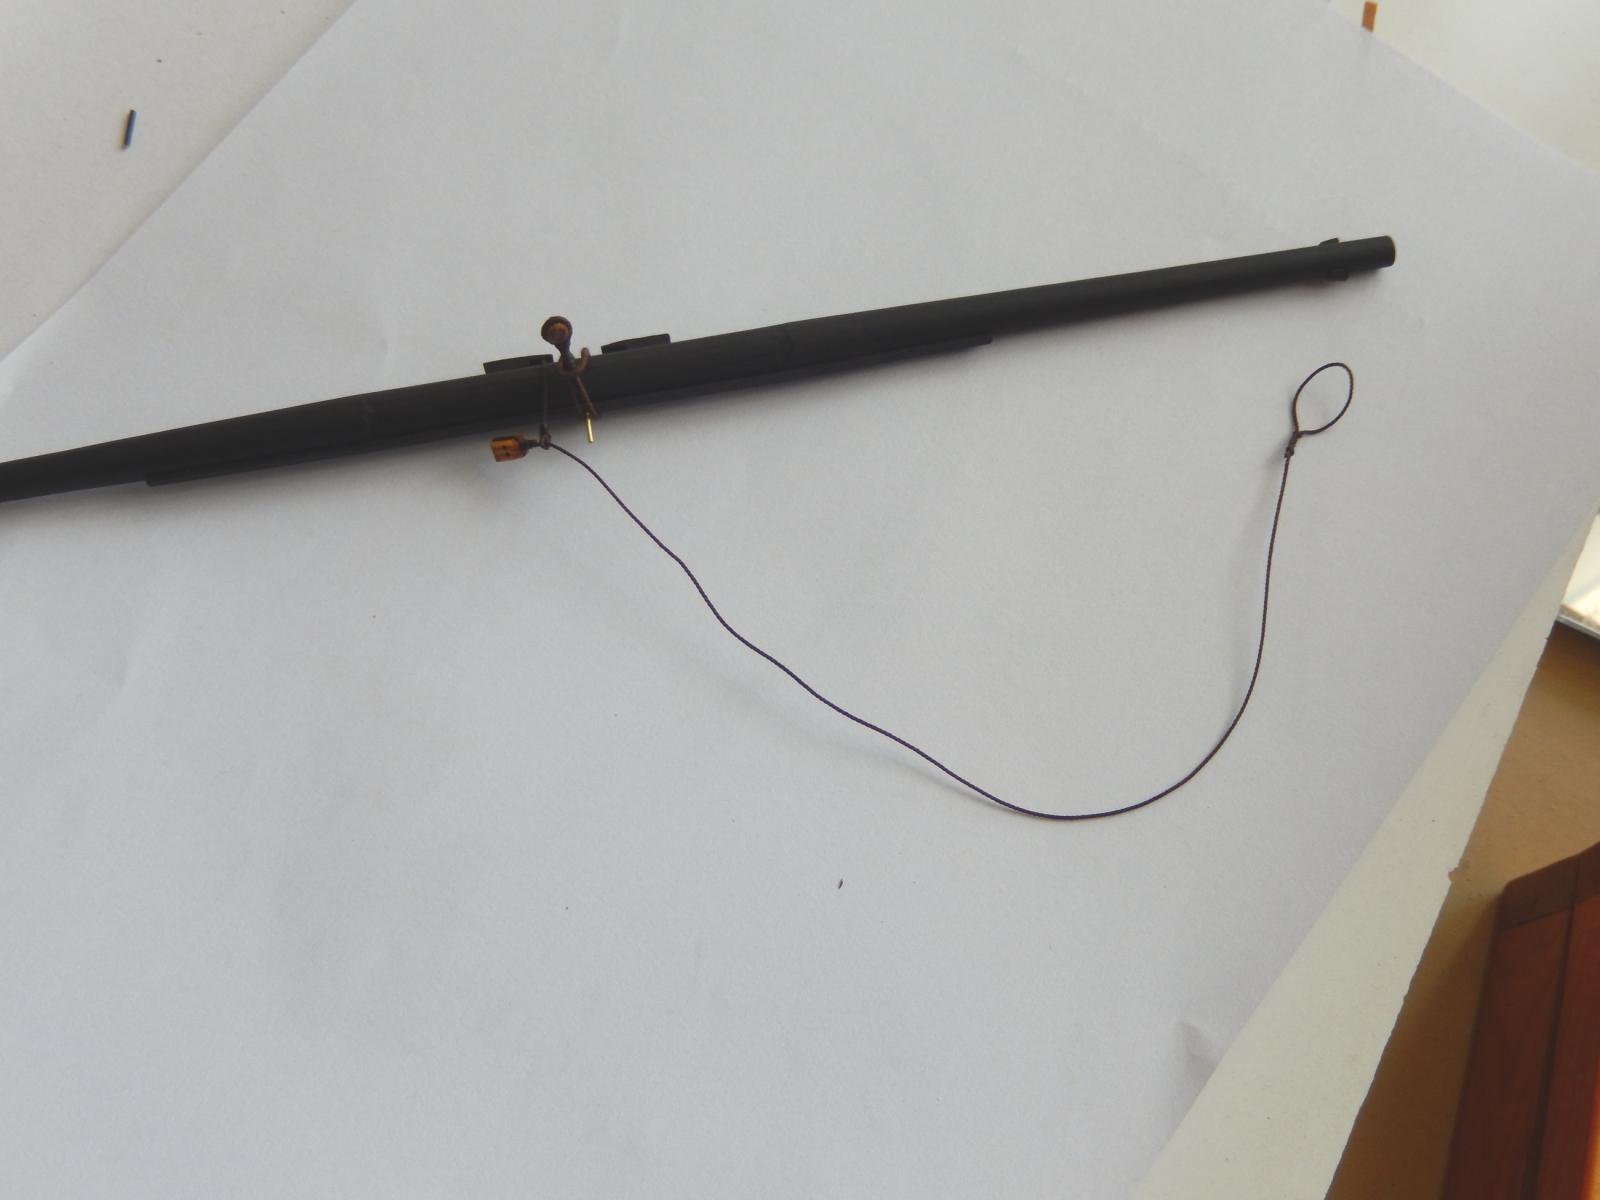
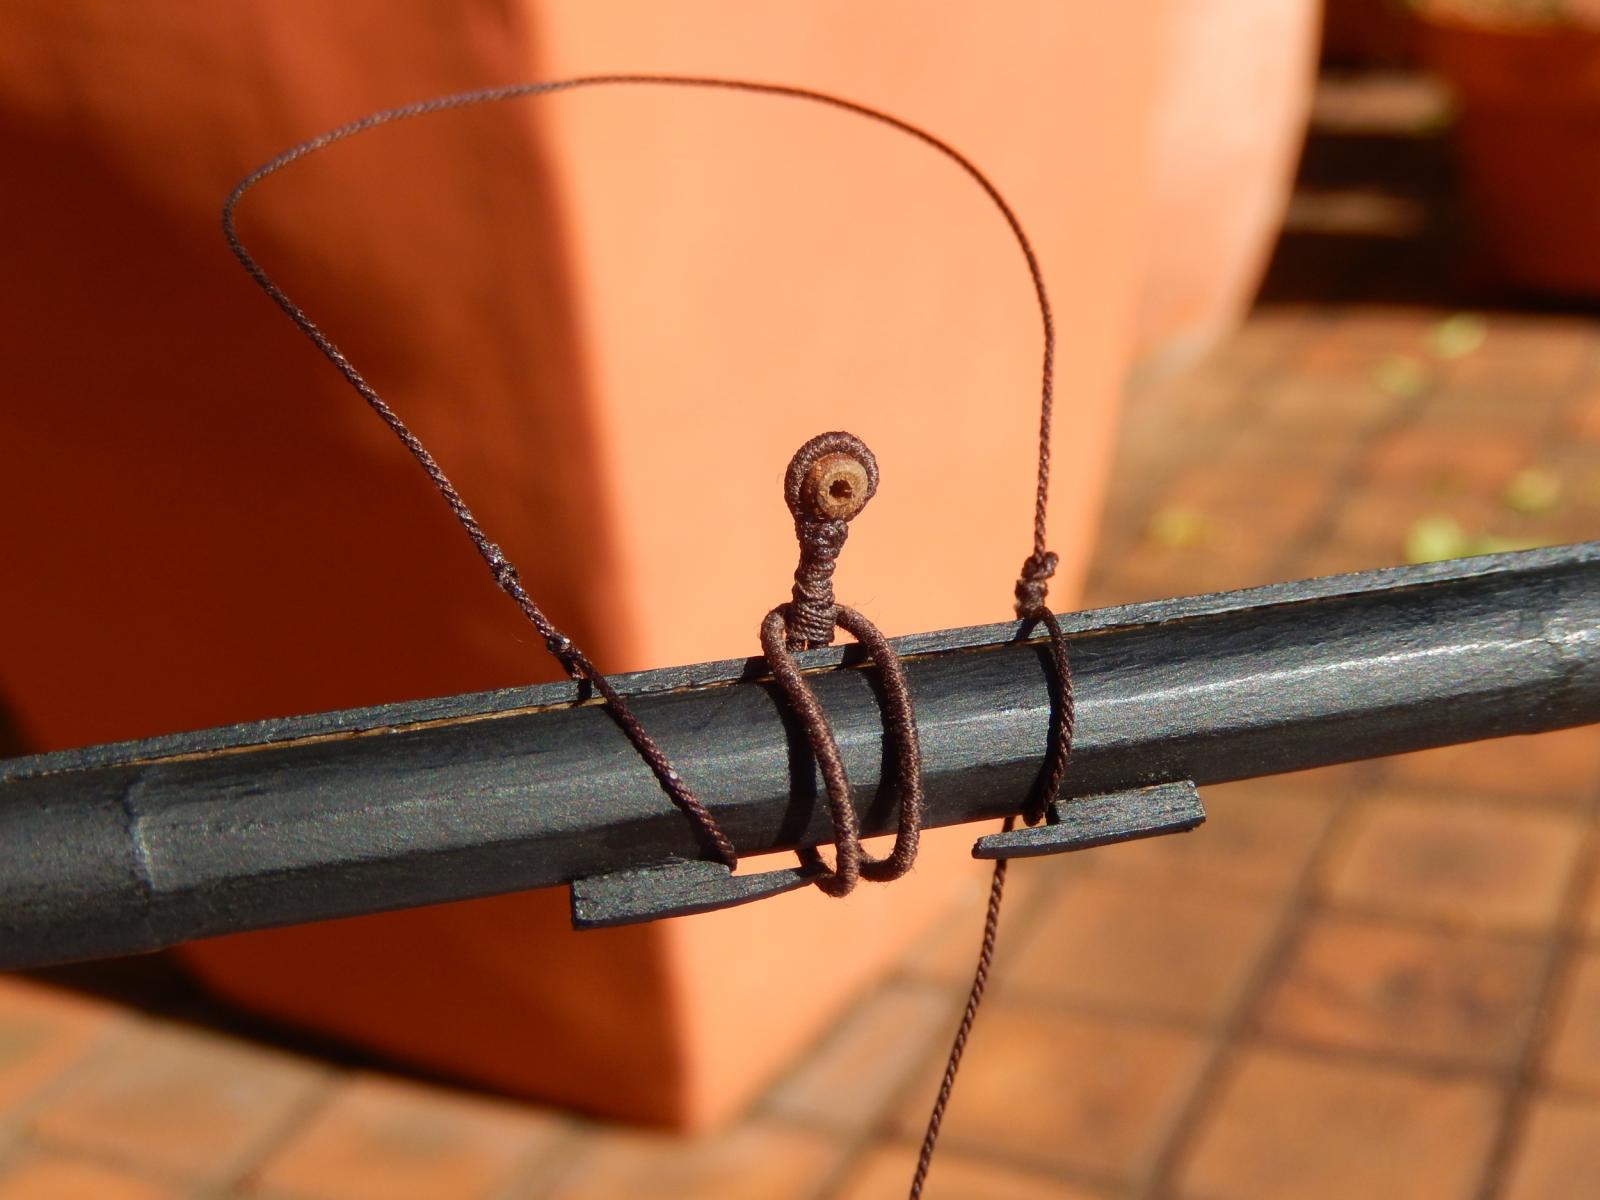
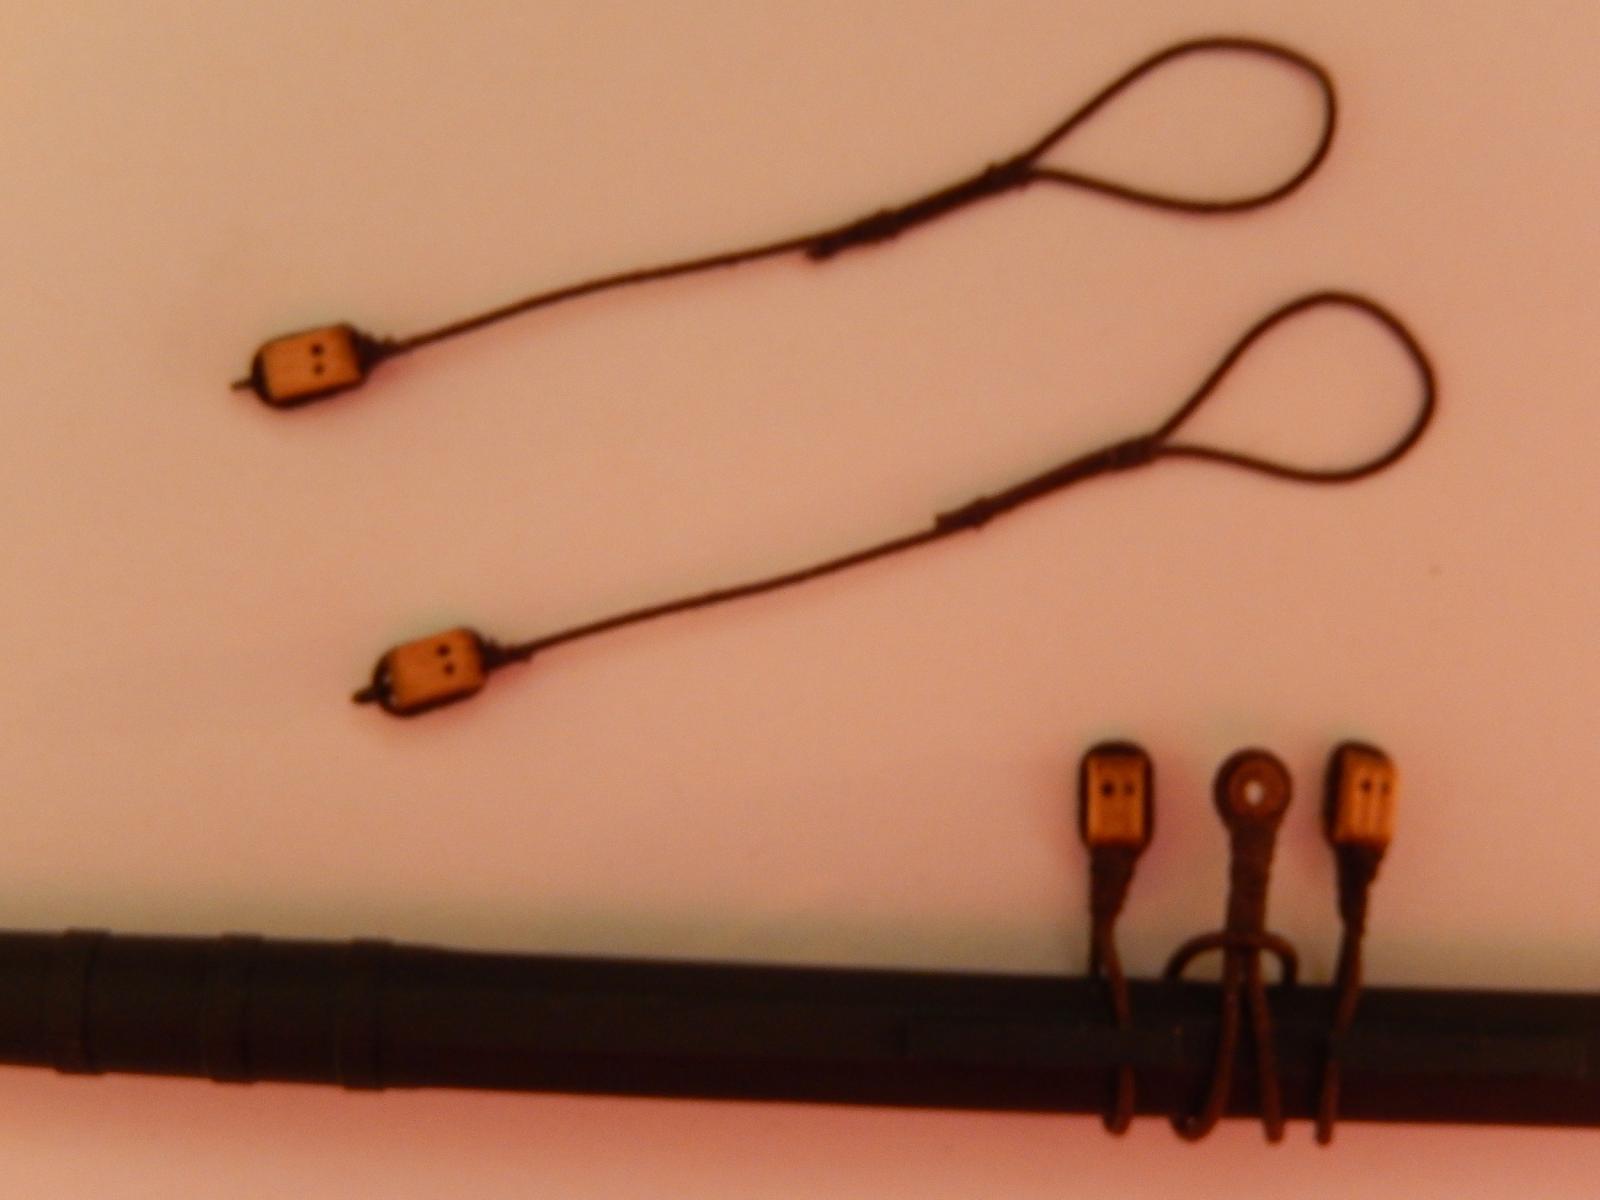
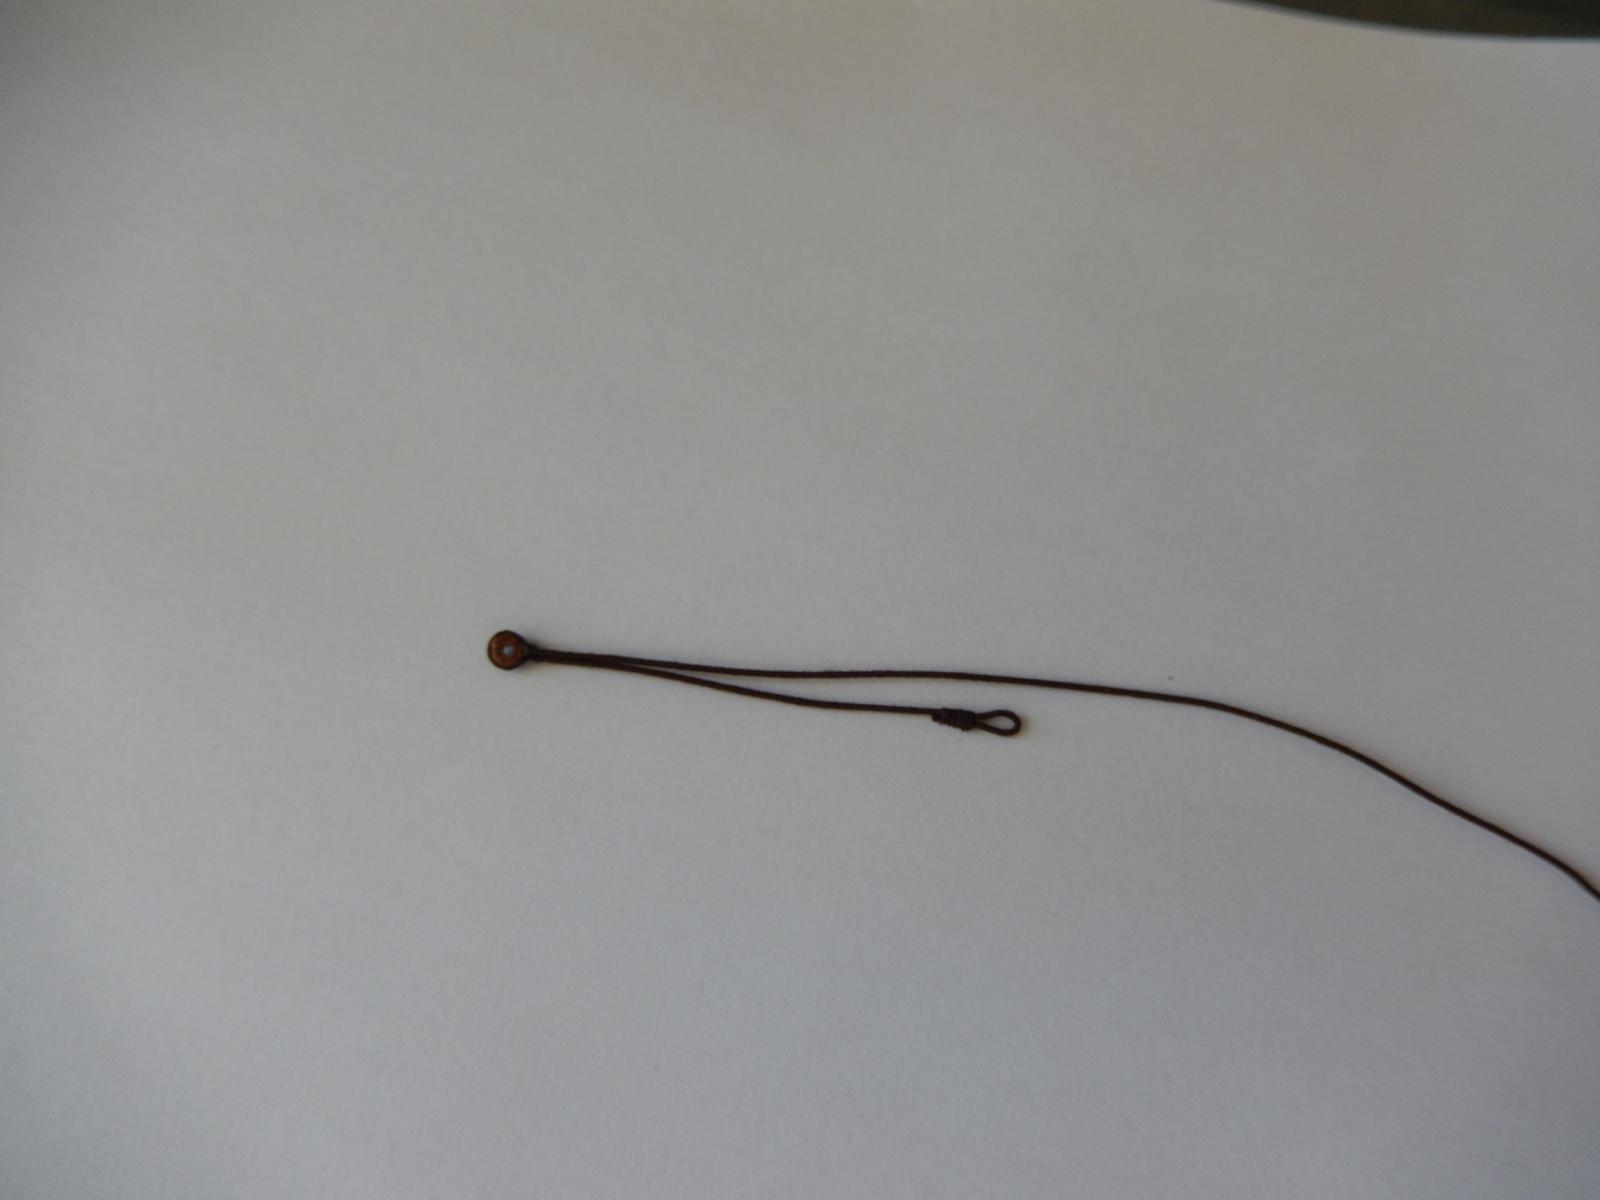
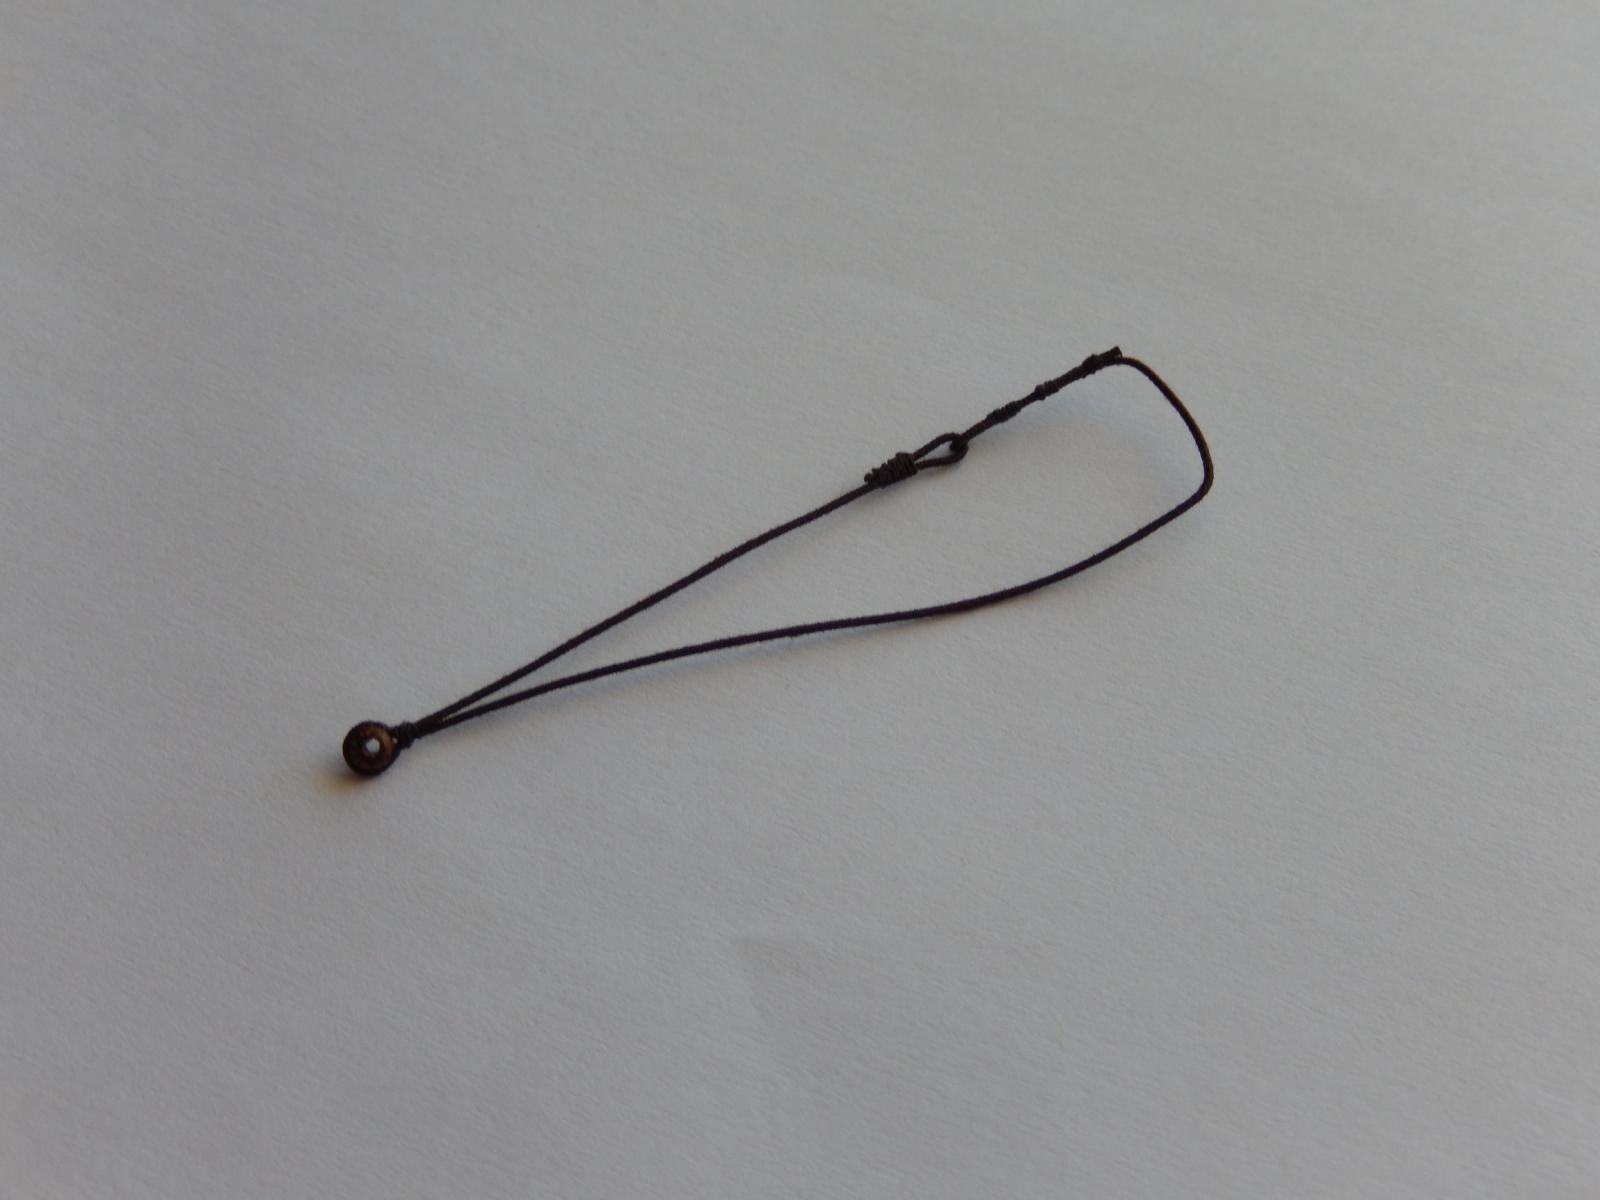
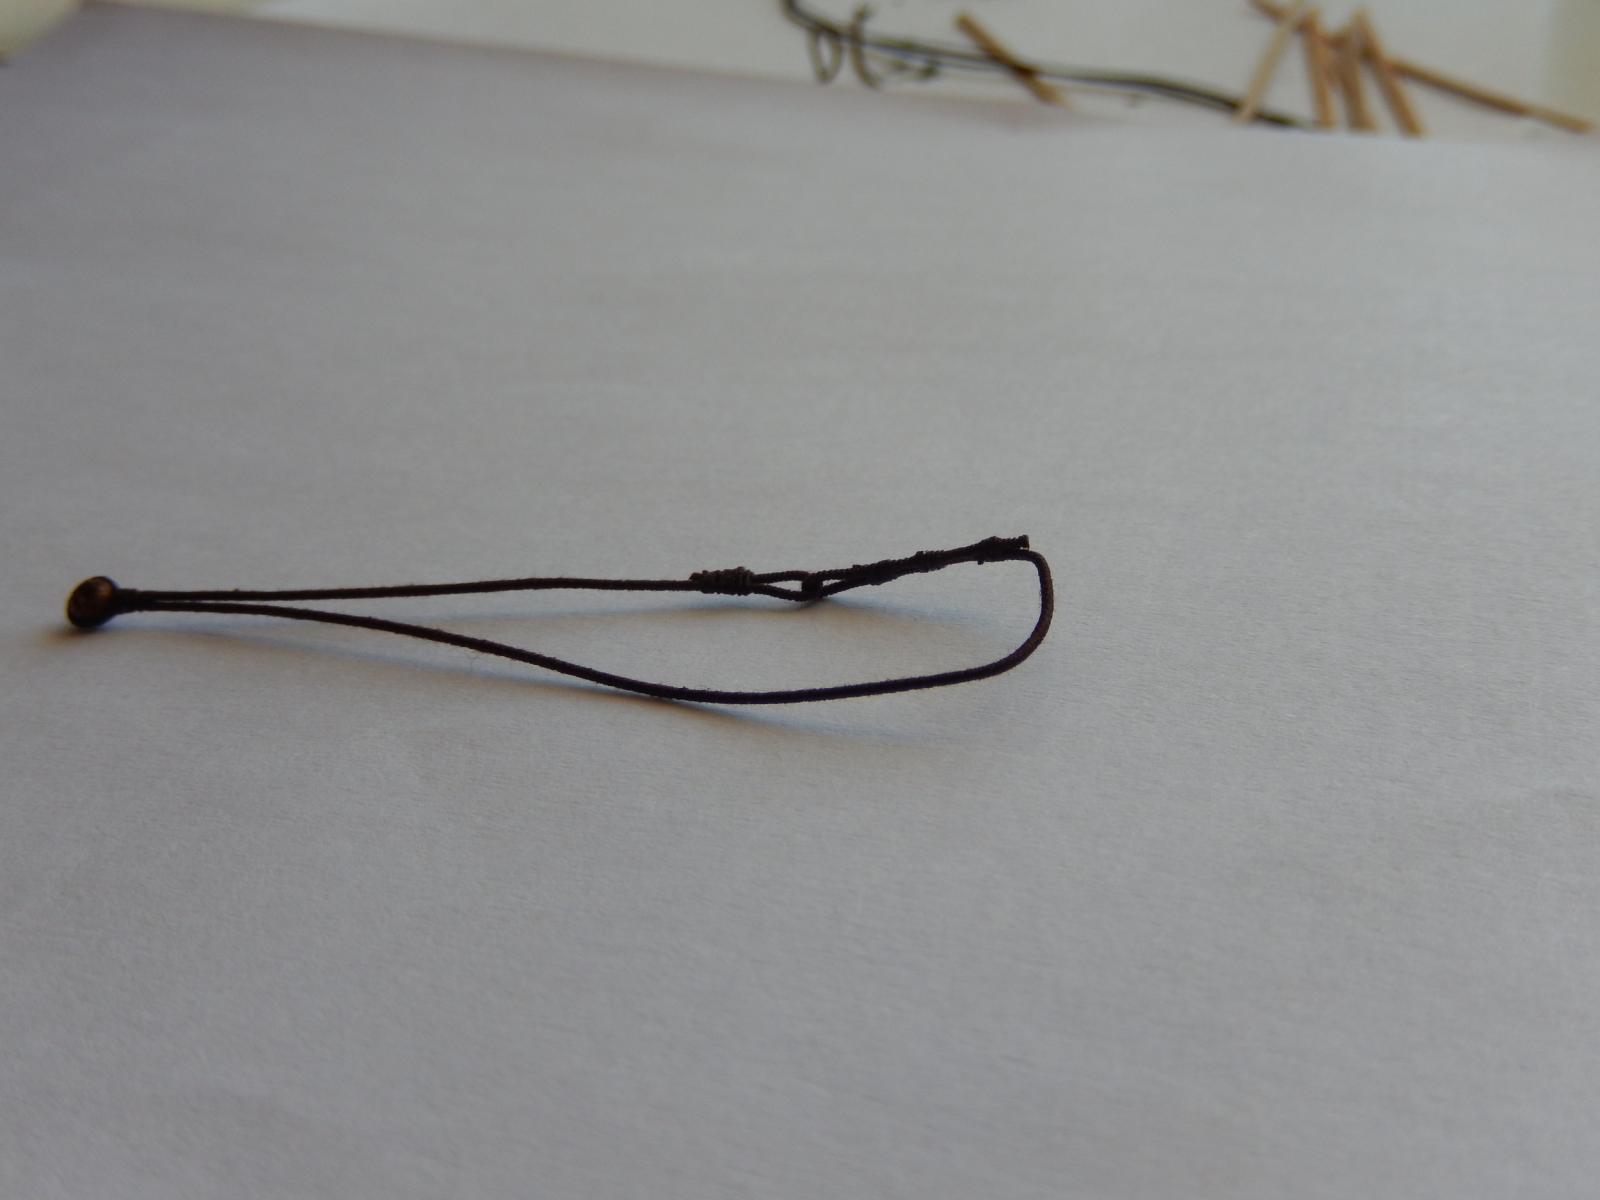
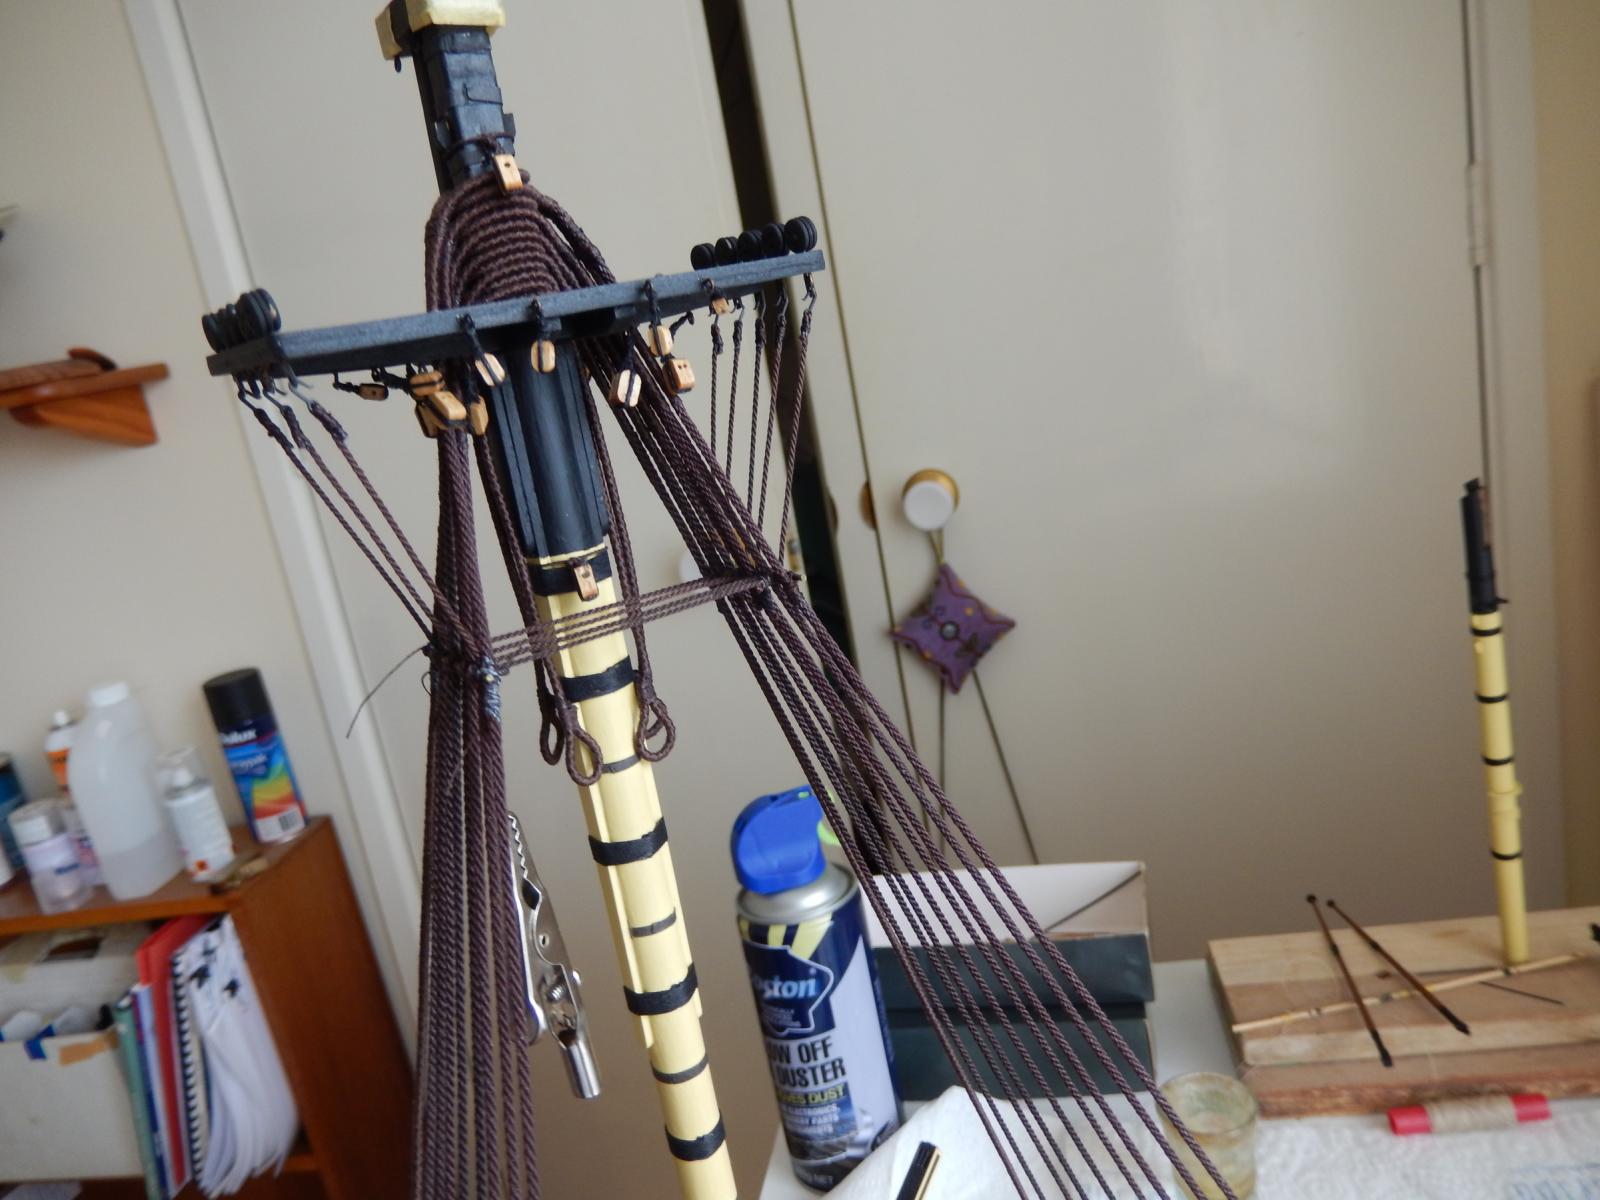
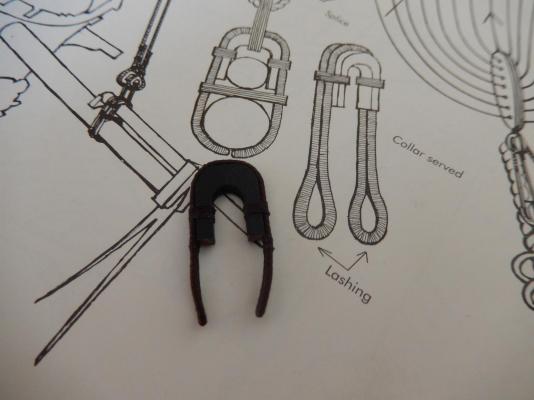
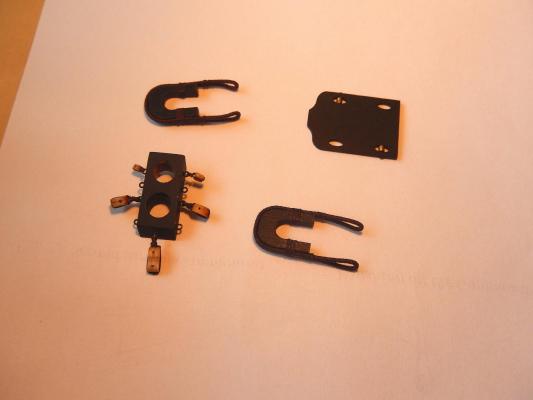
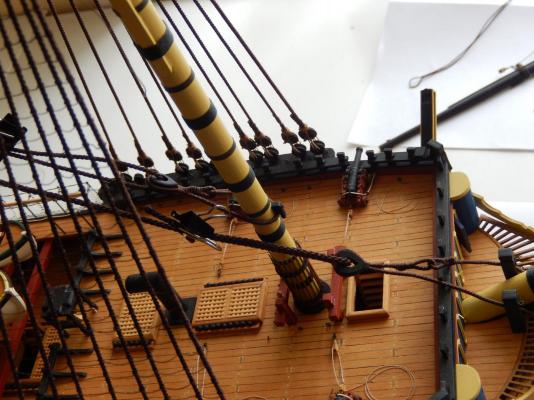
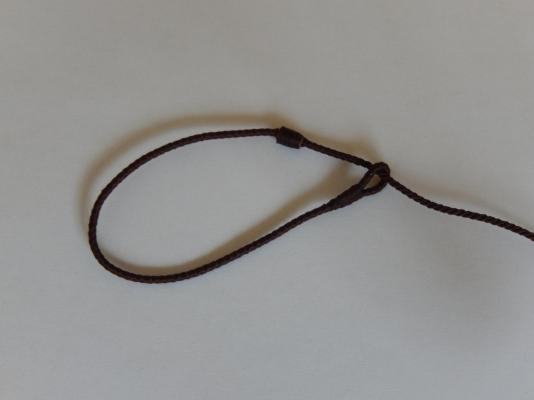
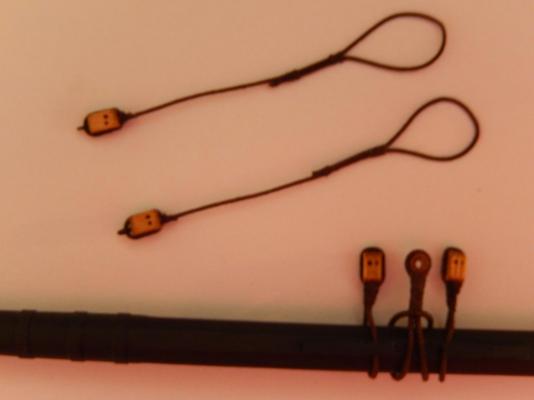
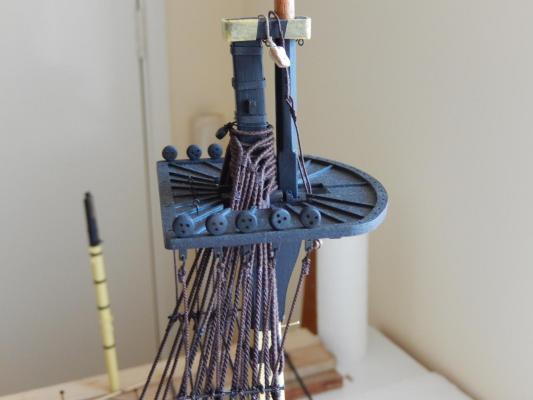
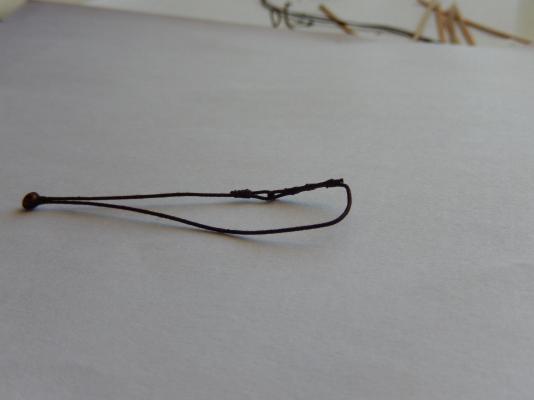
Lashing collars - help needed. I have looked fairly extensively over this website and elsewhere, and cannot find the method by which collars are lashed to the bowsprit. I have thought of putting a half hitch on one loop and winding thread through the other, then making a few turns through both loops, finally tying off with another half hitch. I guess this would work, but it doesn't seem to be very satisfactory. It results in a couple of loose ends for a start. Does anyone have suggestions? Here is the problem ... . Here is some progress on the bowsprit. The fittings are now complete. As has so often been the case, I have appropriated one of Arthur's ideas with the bees. I remembered I had some fittings left over when I used parts of Cornwall Model Boats carronades to modify the ones provided in the kit. Included were two little brass rollers that I have now used a sheaves in the bees (?). Perhaps the brass is a bit obvious and I may end up painting them brown, but the idea seems to have worked. But if I need two more there will be a problem ...... I hope I have now fixed all the dead eyes that need to be fixed on the bowsprit.. (If I haven't, please let me know.) From the plans, I found it a bit difficult to figure out just what is going on, and I'm not all that confident that I do have it right. Doing all of this off the model is likely to be easier than waiting until the bowsprit is mounted. This how things are working out. In the meantime, the ratlines march on.

-
Well Arthur, about the only thing I can say is that now, about 500 knots in, at least I'm getting slightly better at it, and a little faster. It still doesn't make it any more fun.
-
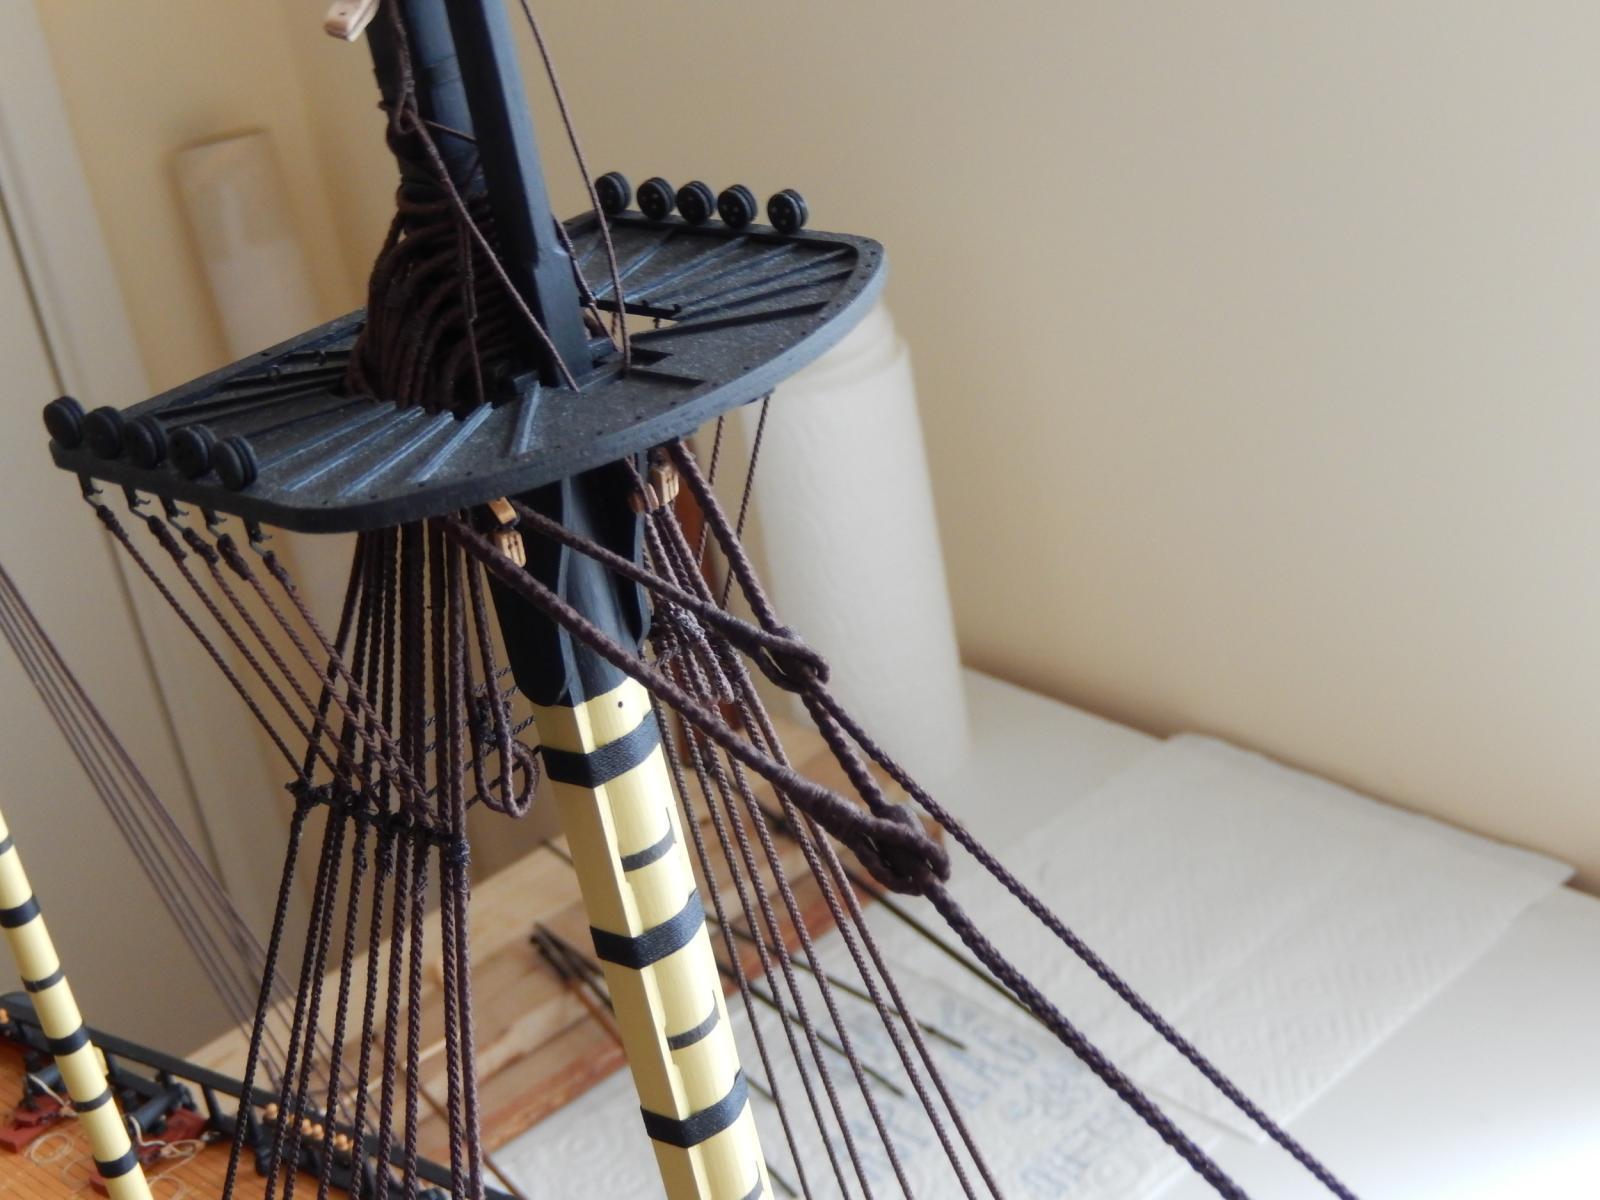
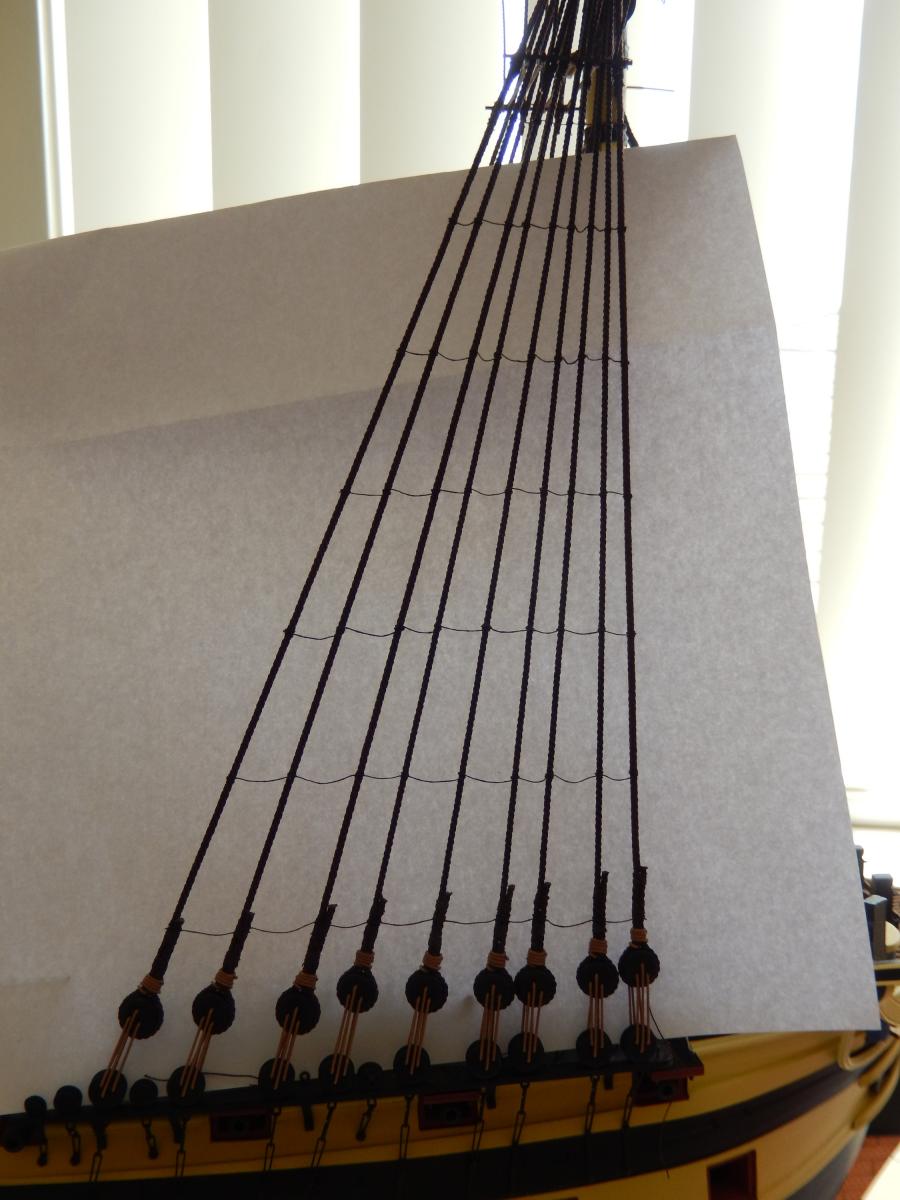
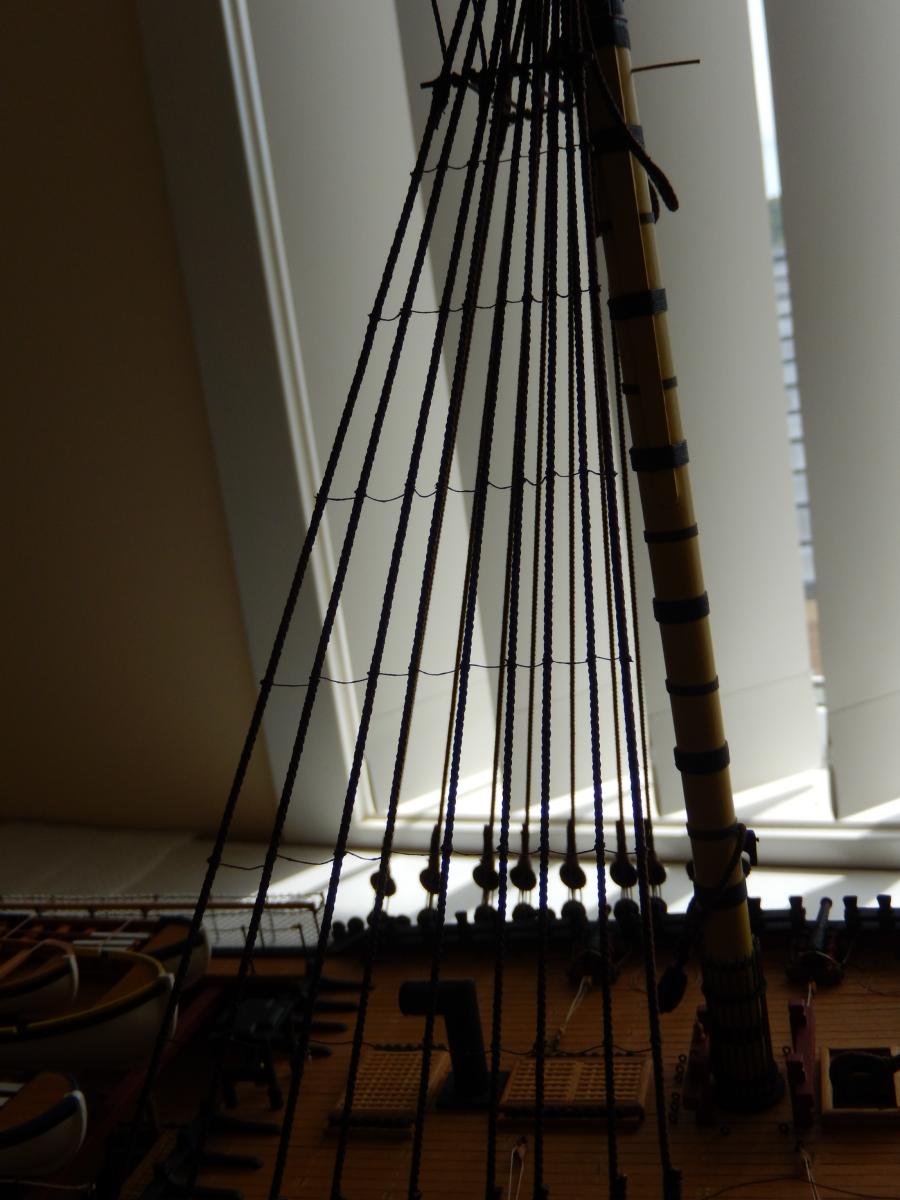
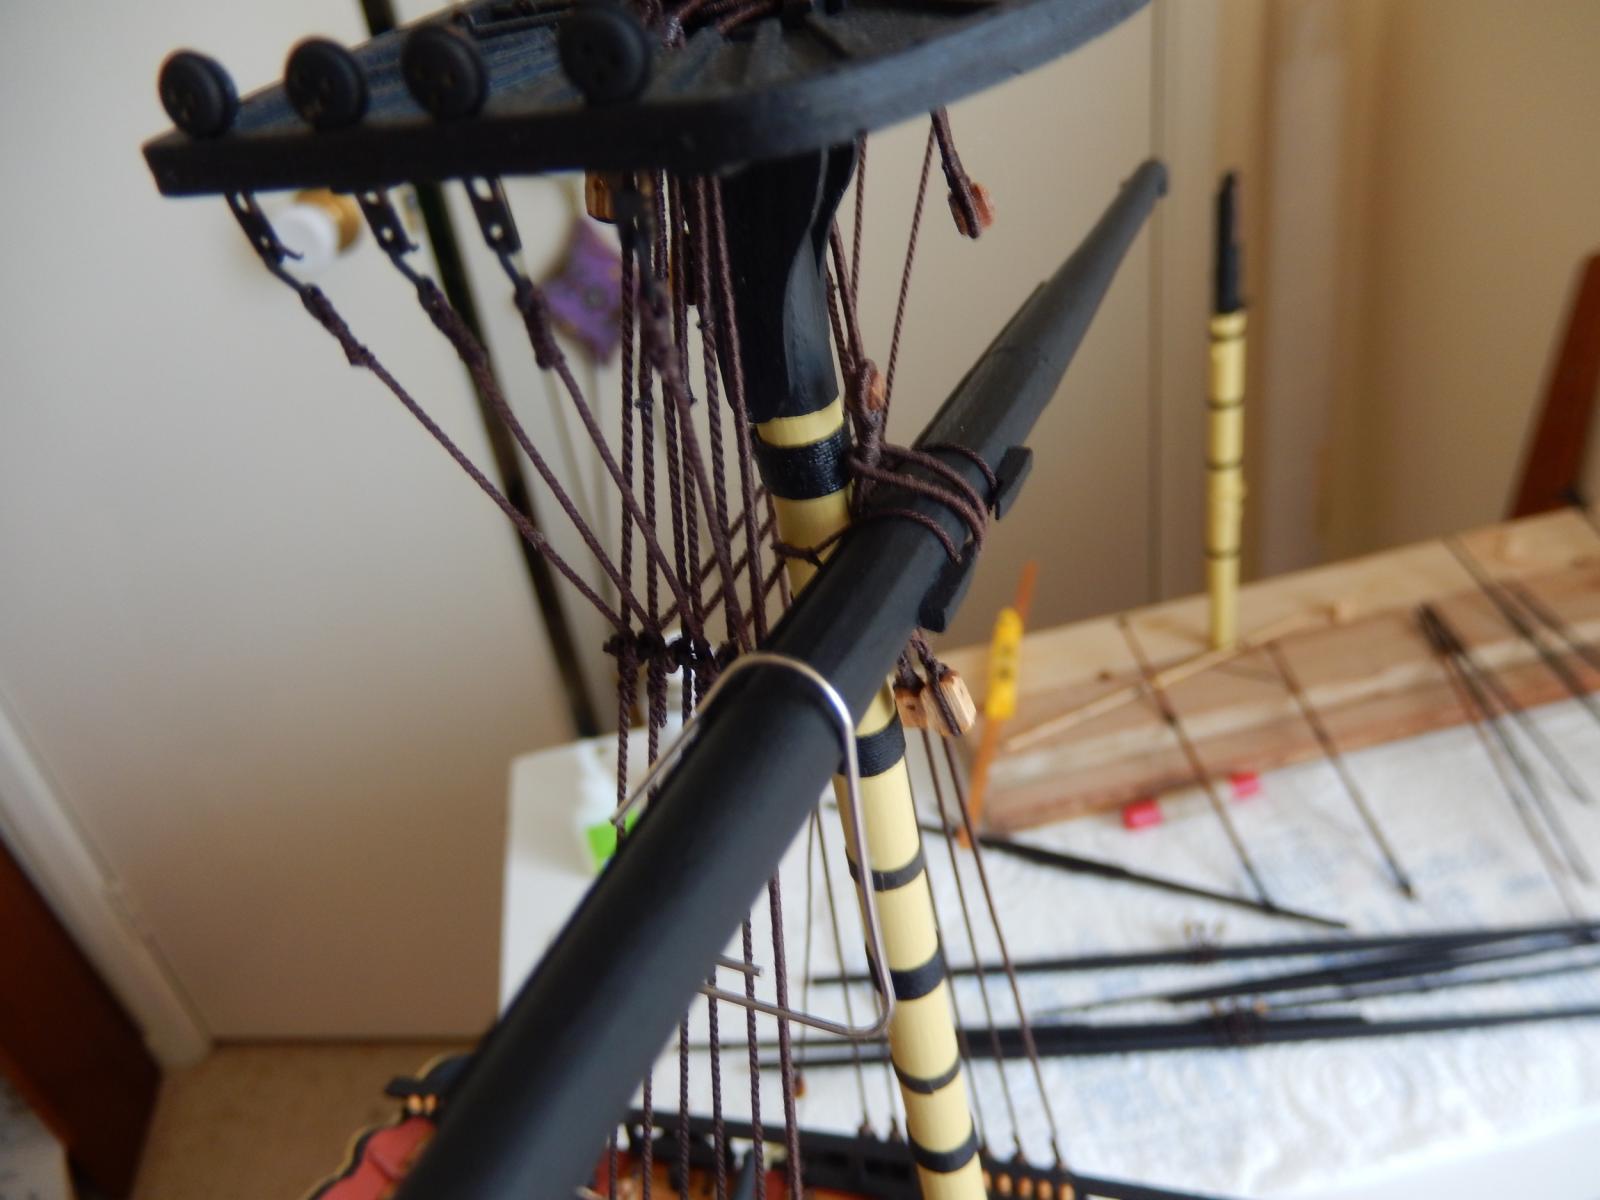
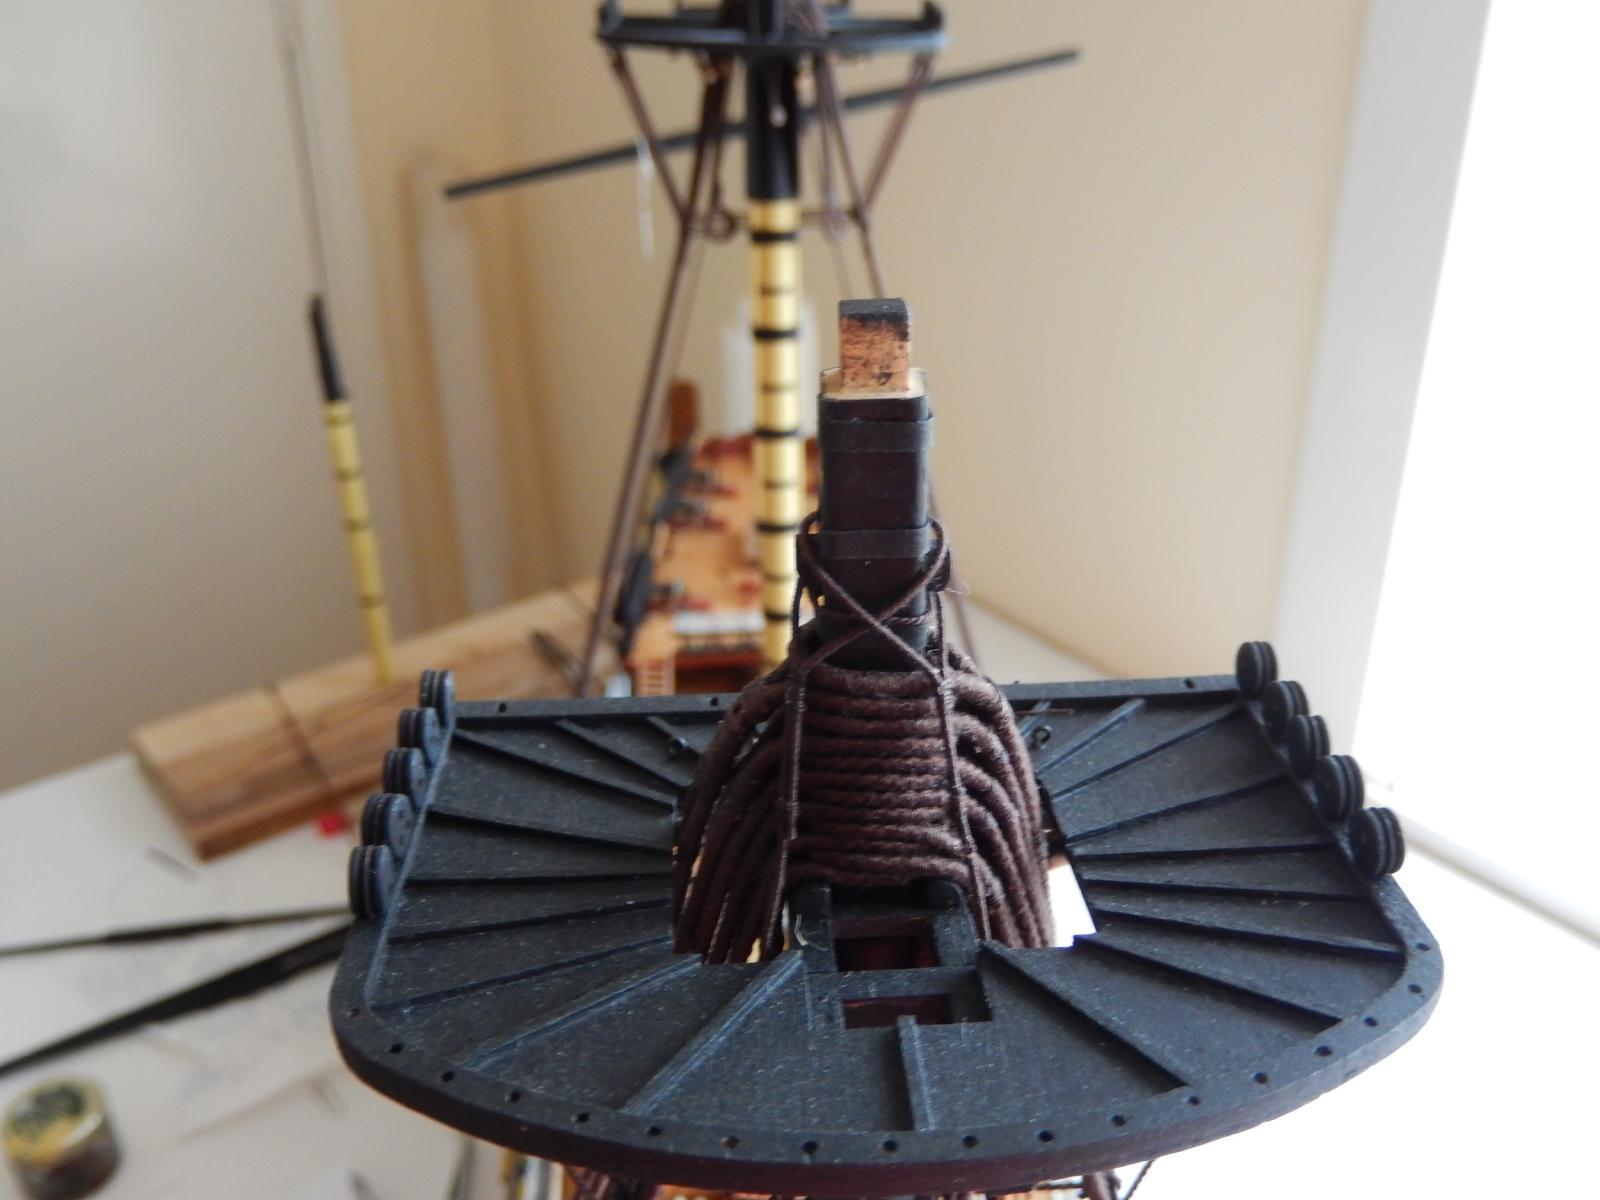
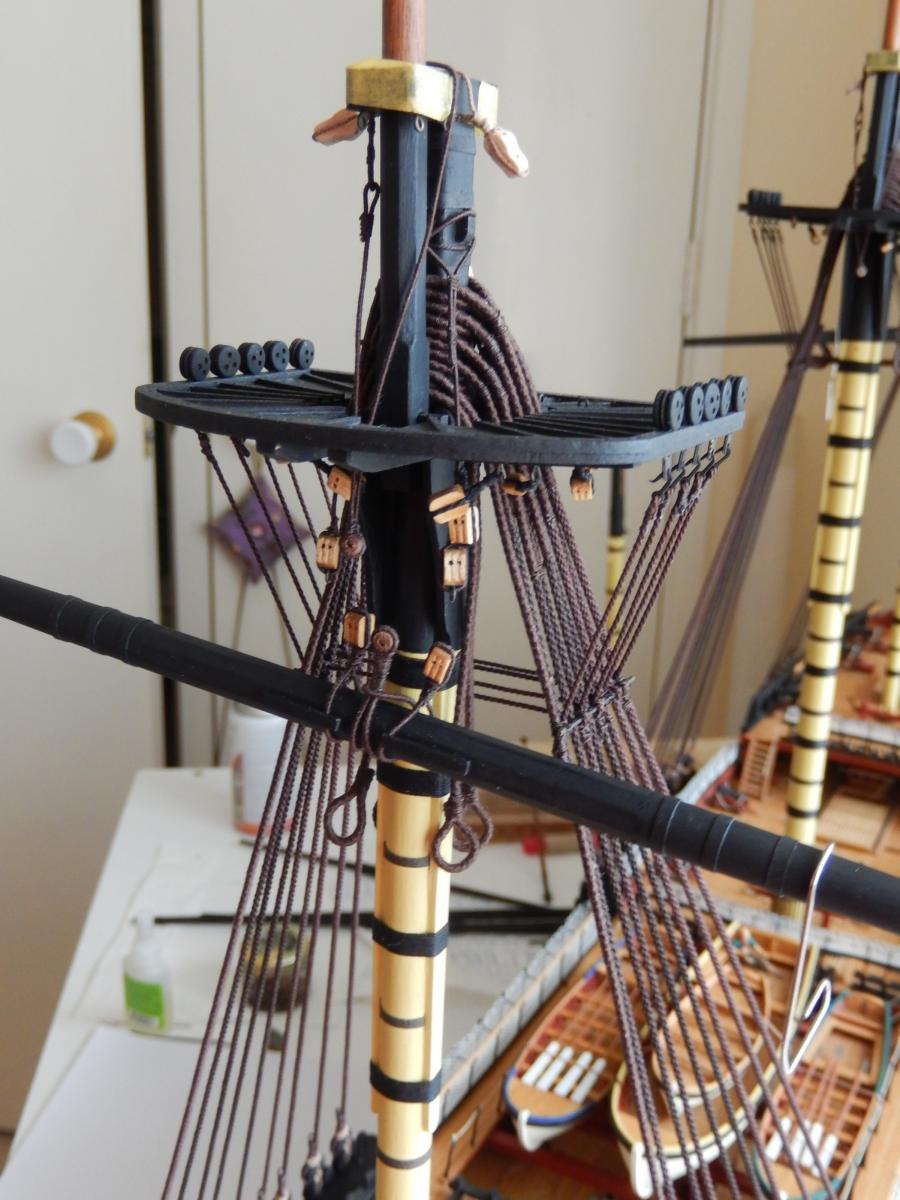
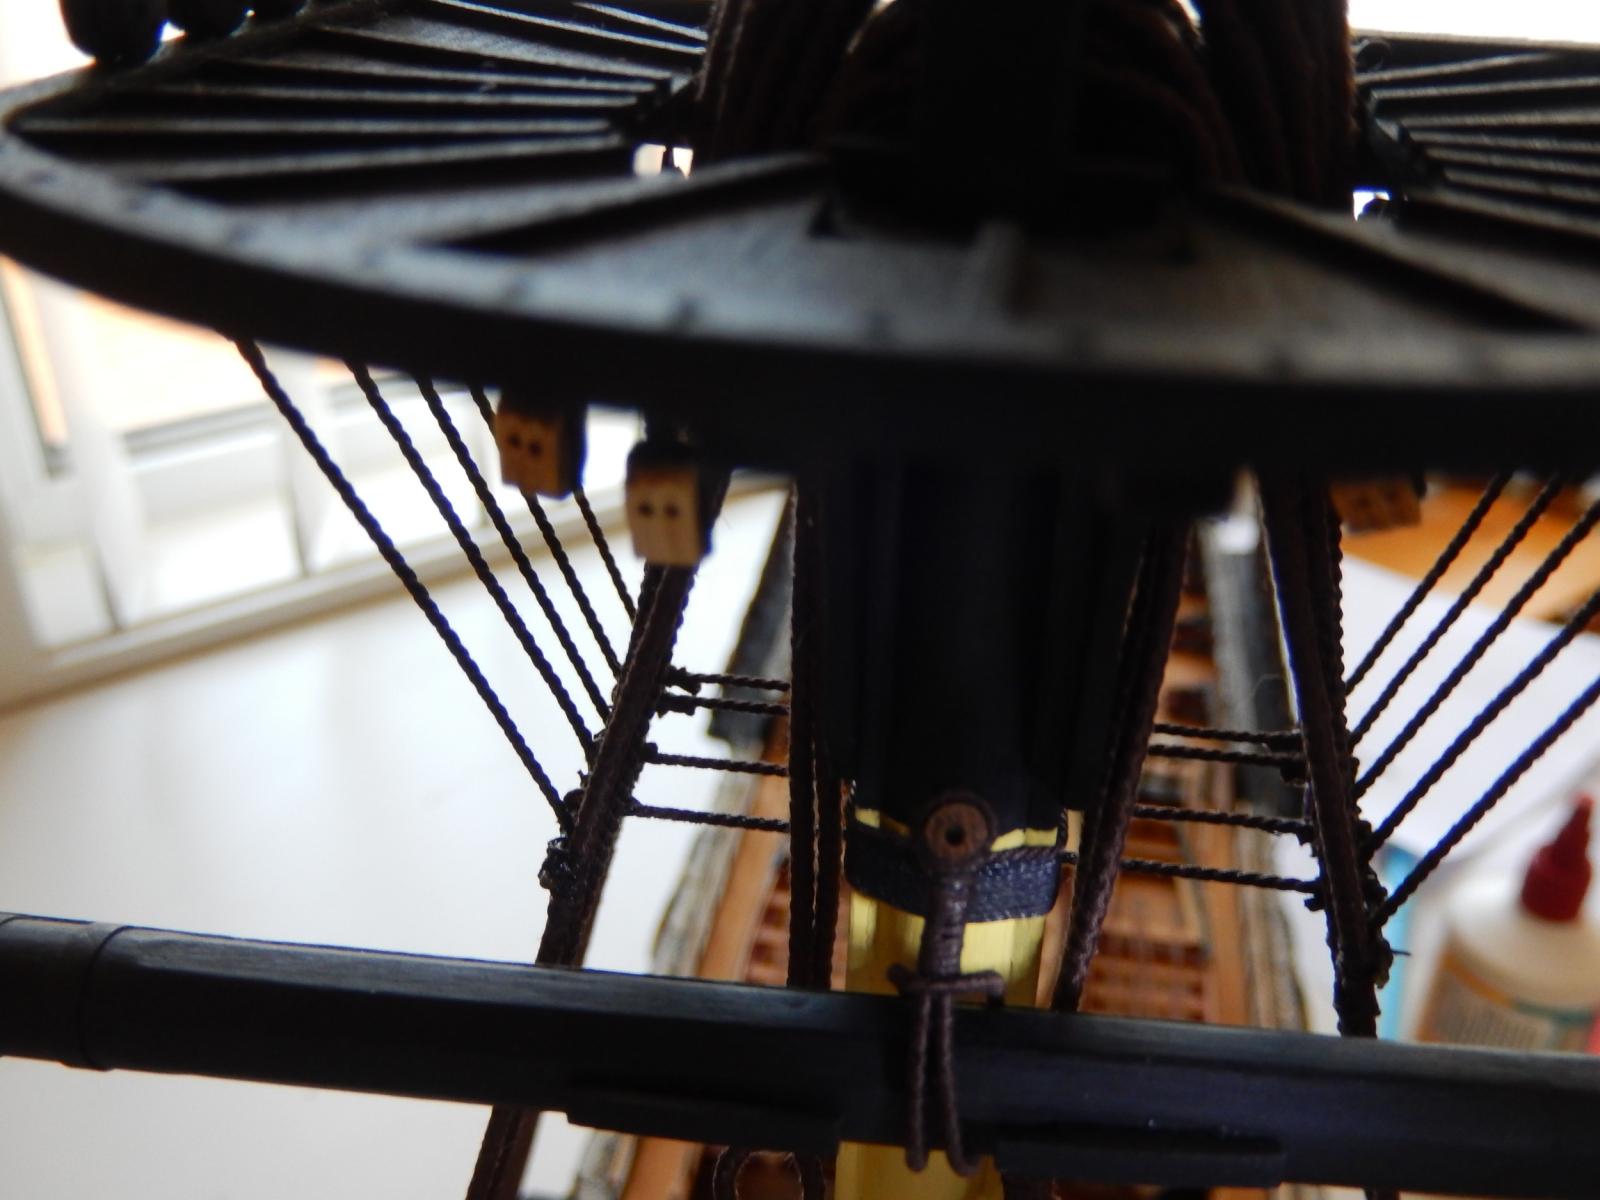
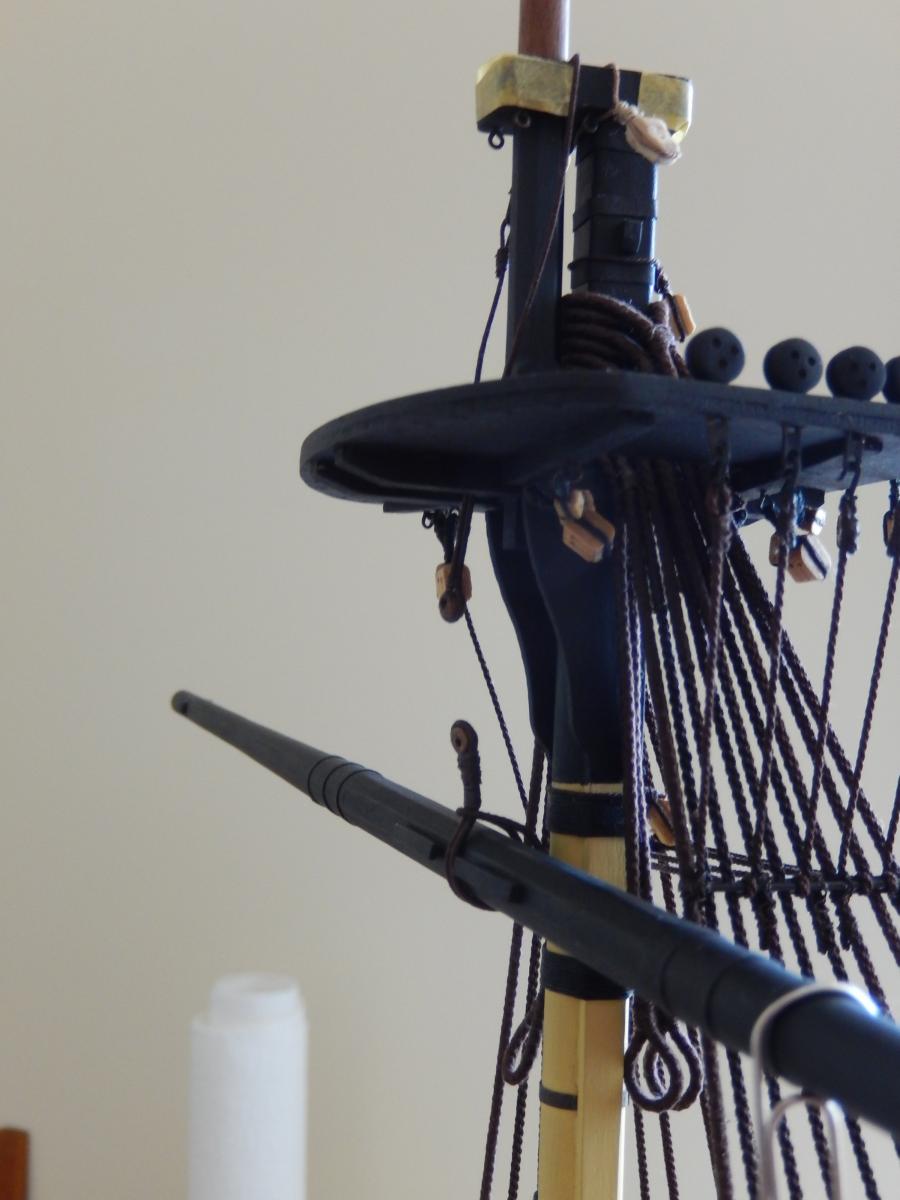
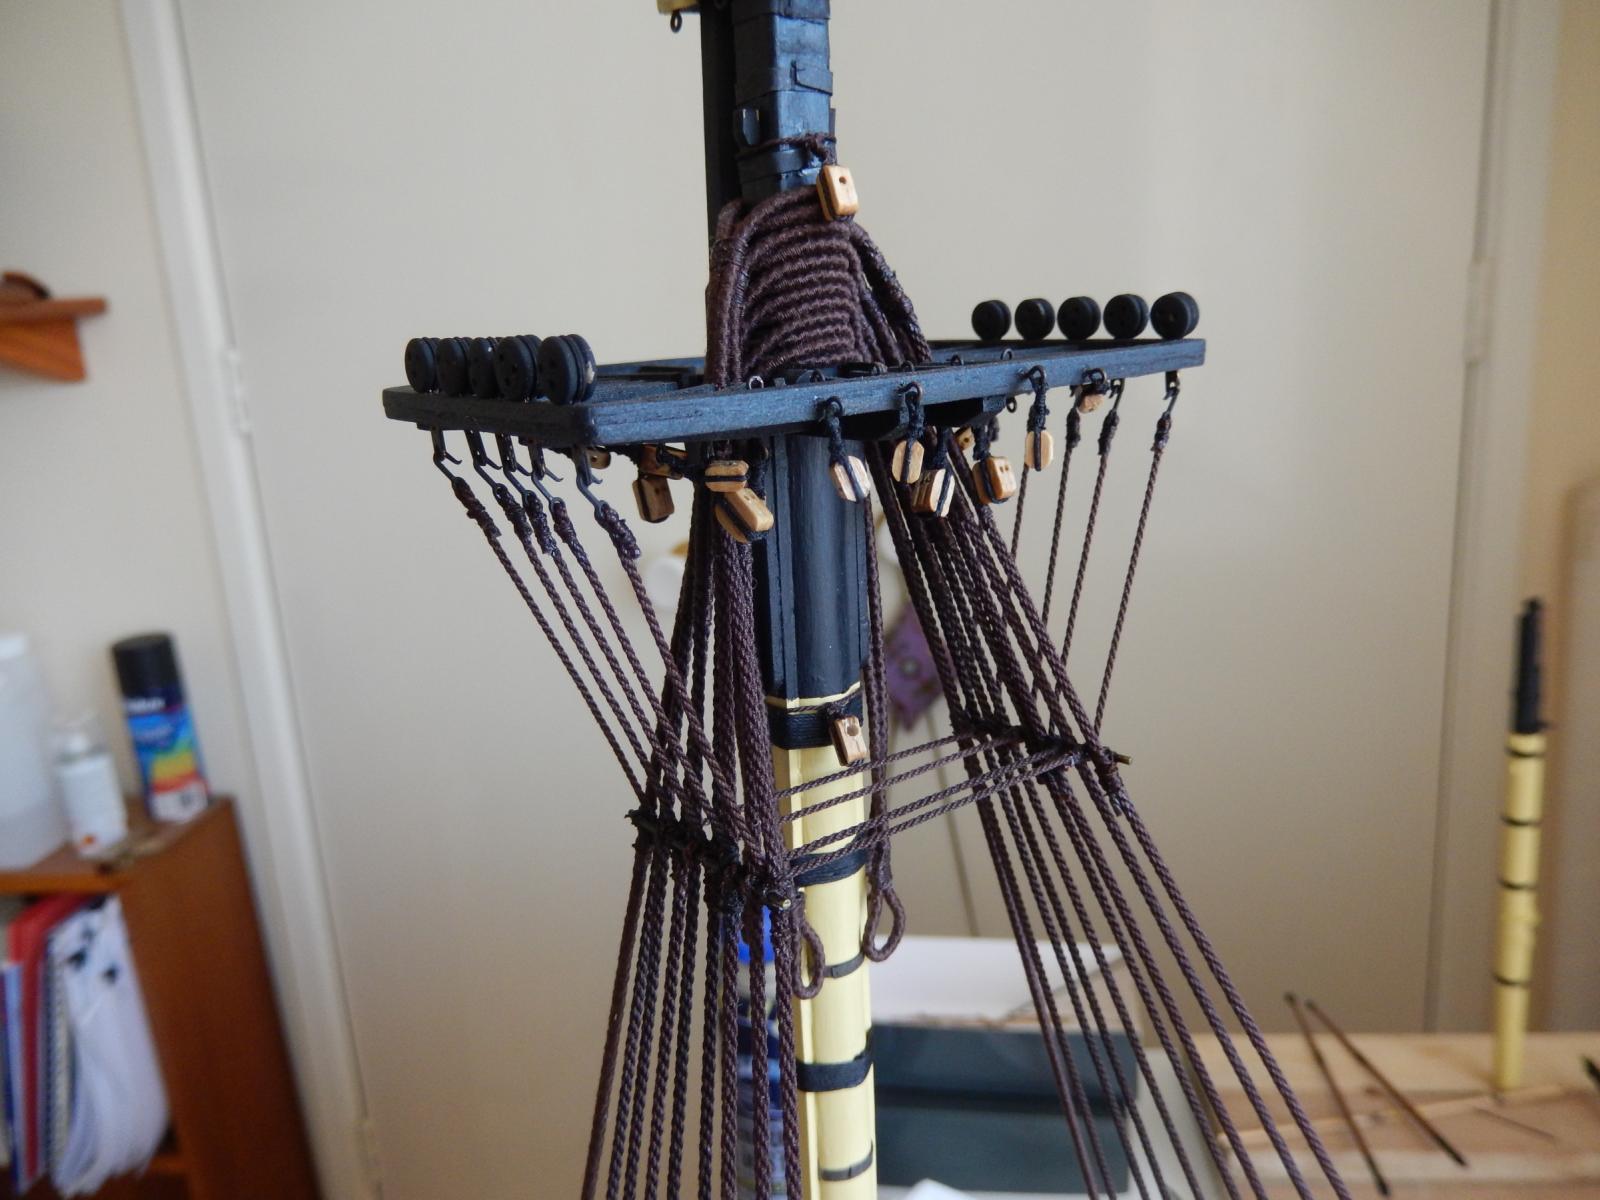
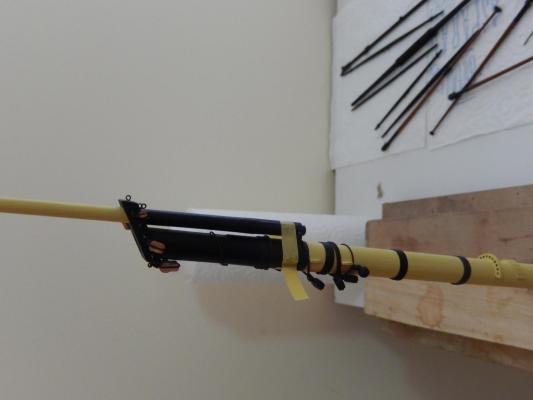
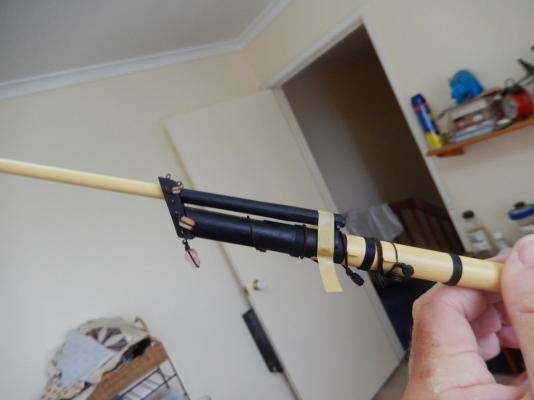
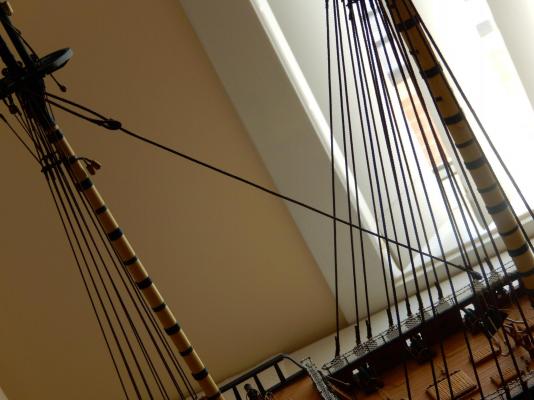
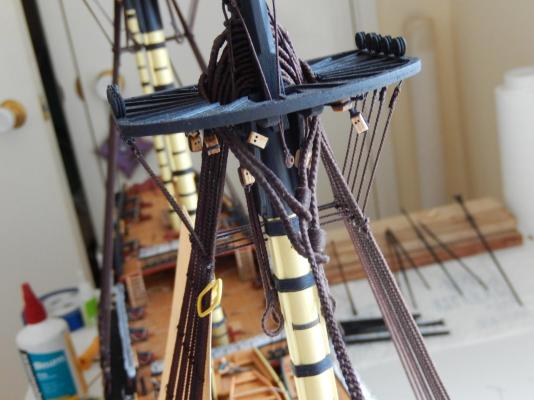
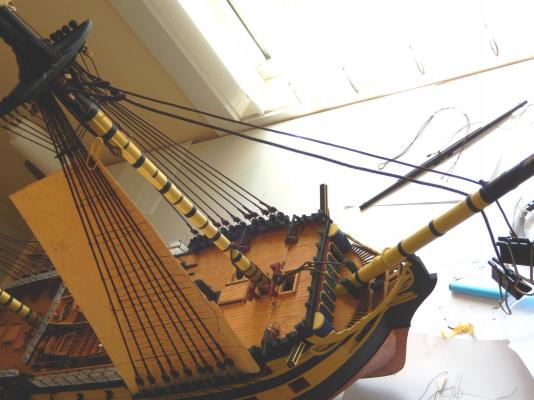
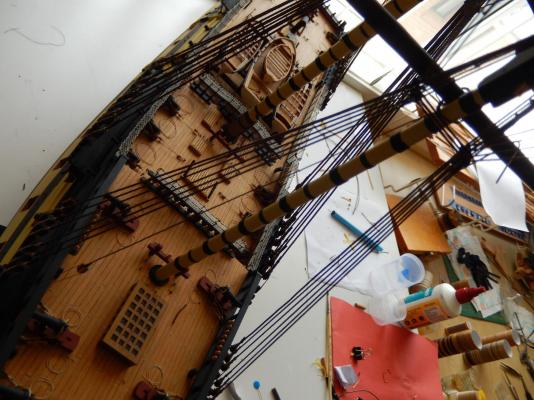
Work on the stays is now quite advanced. All the mouses are complete and all that needs to be done is to attach the various blocks and related rigging. However almost all this needs to be done on the model, and it looks to be a fairly daunting series of jobs. Here are the main stays and how they will eventually be fixed. The mizzen stay and roughly how they will all look. I have now started rigging the bowsprit. I am following Petersson - using collars for the forestays. One is complete (below). The photo shows what appears to be bubbling of the paint. It hasn't. The photo was taken in full sun and perhaps this caused the appearance. Very odd. Doing all of this has enabled me to avoid as much as possible doing the ratlines. Only a couple of thousand-odd knots to go. I can't bring myself to actually count them. Here is progress, such as it is.


-
Thanks Johann.
-
Hi Jason Yes, my point should have been clearer. The larger loops would have joined a little further down the stays. I would have preferred the join about 1cm further down, so the loop should have been 2cm longer.
-
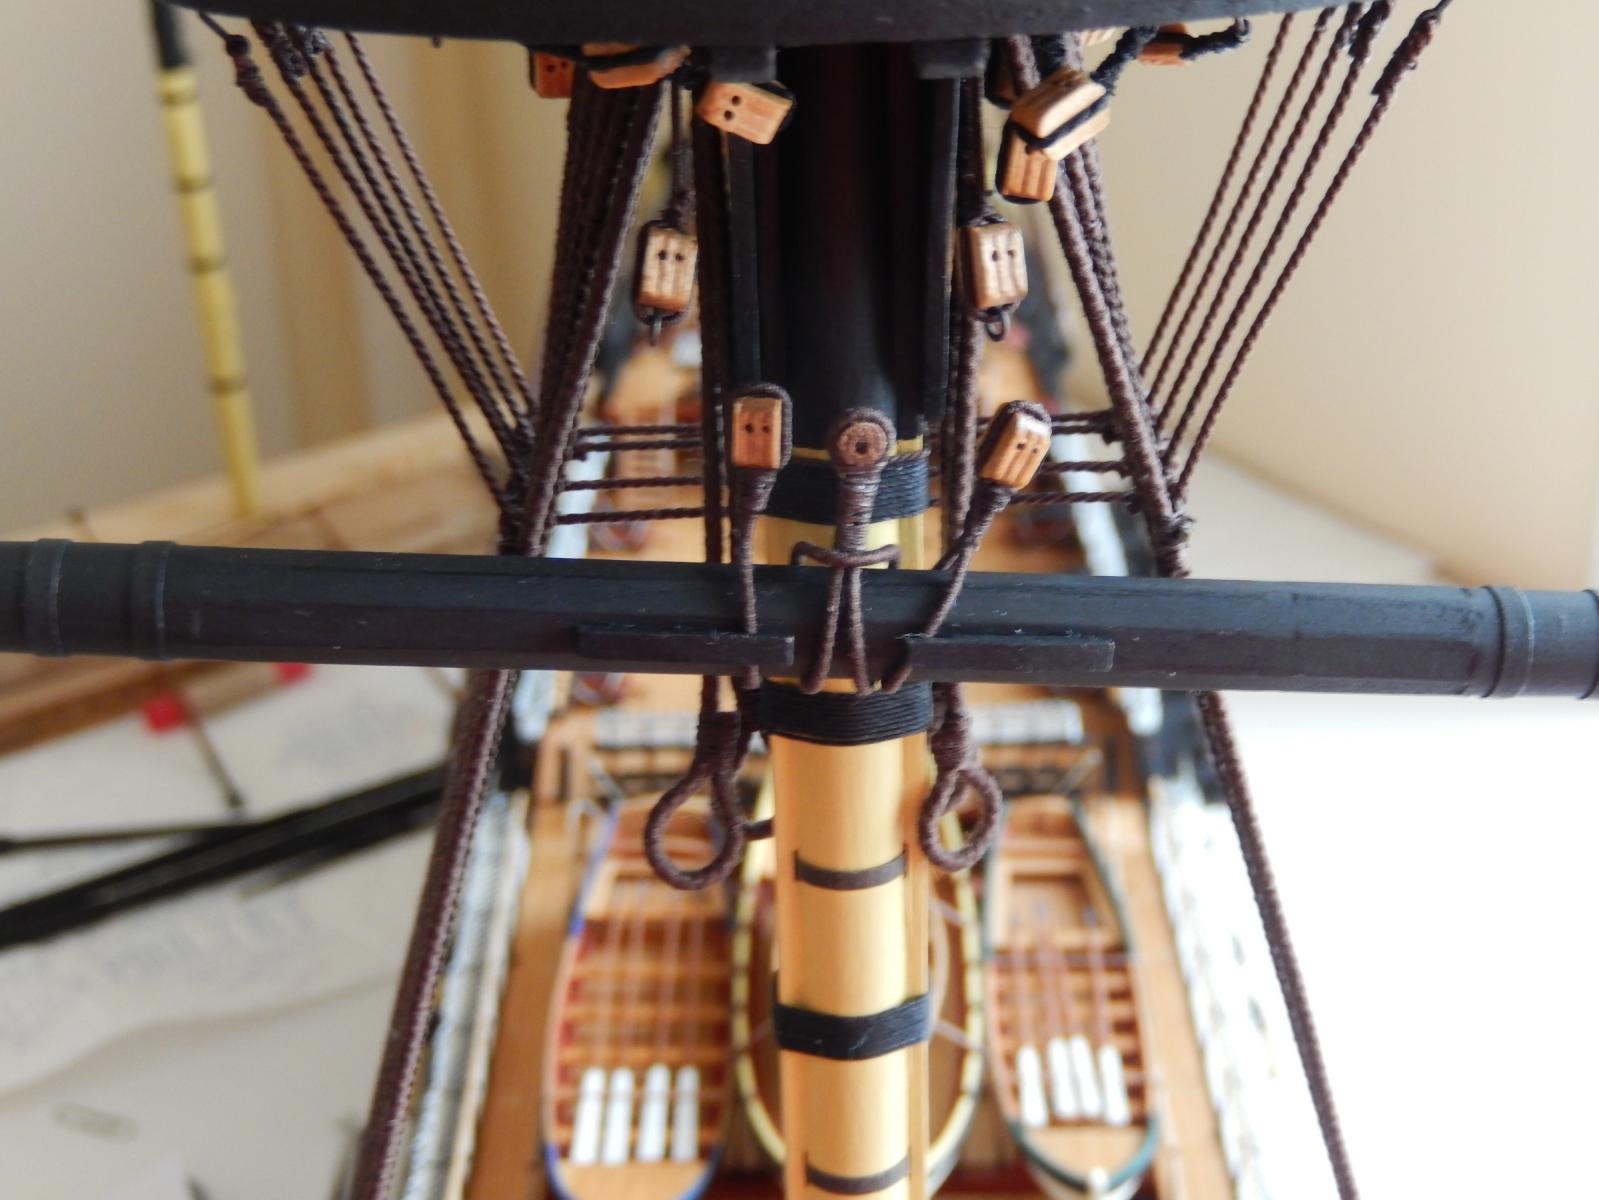
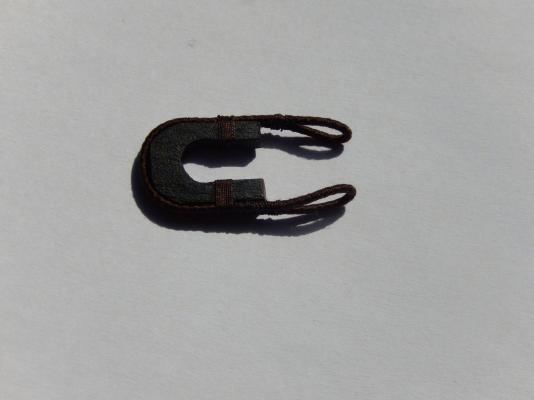
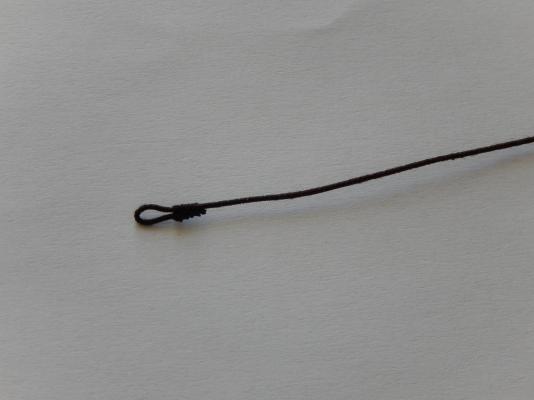
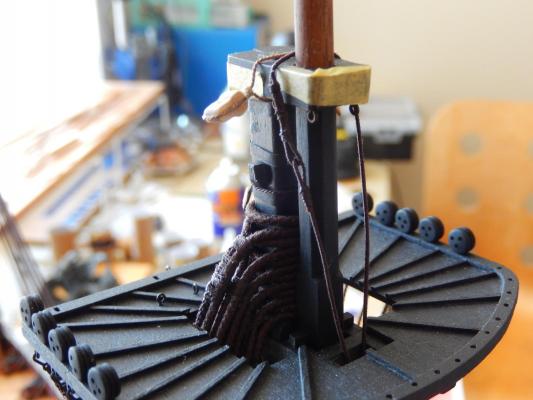
I have taken Jdieck's advice and started on the fore and main stays. This means that I will have to finish rigging the bowsprit, so I will have plenty to occupy me while (almost) avoiding the ratlines. The lops of the forestays are now done. Serving the loops with their mouses (sic?) proved to be rather fiddly and the result could have been better. At least I have learned a few things and I hope to do a better job on the main stays. Here is the mouse for the fore stay. The end with the greater taper was done with a pencil sharpener (thanks Arthur). With hindsight I should have made a greater taper on the other end. It would have made it easier to serve. Here is the loop that fits around the mast, served and with the mouse. The following photos show the fore and fore preventer stays loosely fitted around the mast. Things are obviously very crowded indeed and it is difficult to see just what is going on. It all looks like a bowl of demented spaghetti. Attaching the yards is going to be quite a job. Here are the stays looped around the mast and all the previous rigging (jeers, shrouds etc.). Is this correct? I would have preferred to have the loops slightly larger, but the result is acceptable.


-
Thanks for the encouragement Alan. Incidentally, you seem, somehow, younger. How did you do it?
-
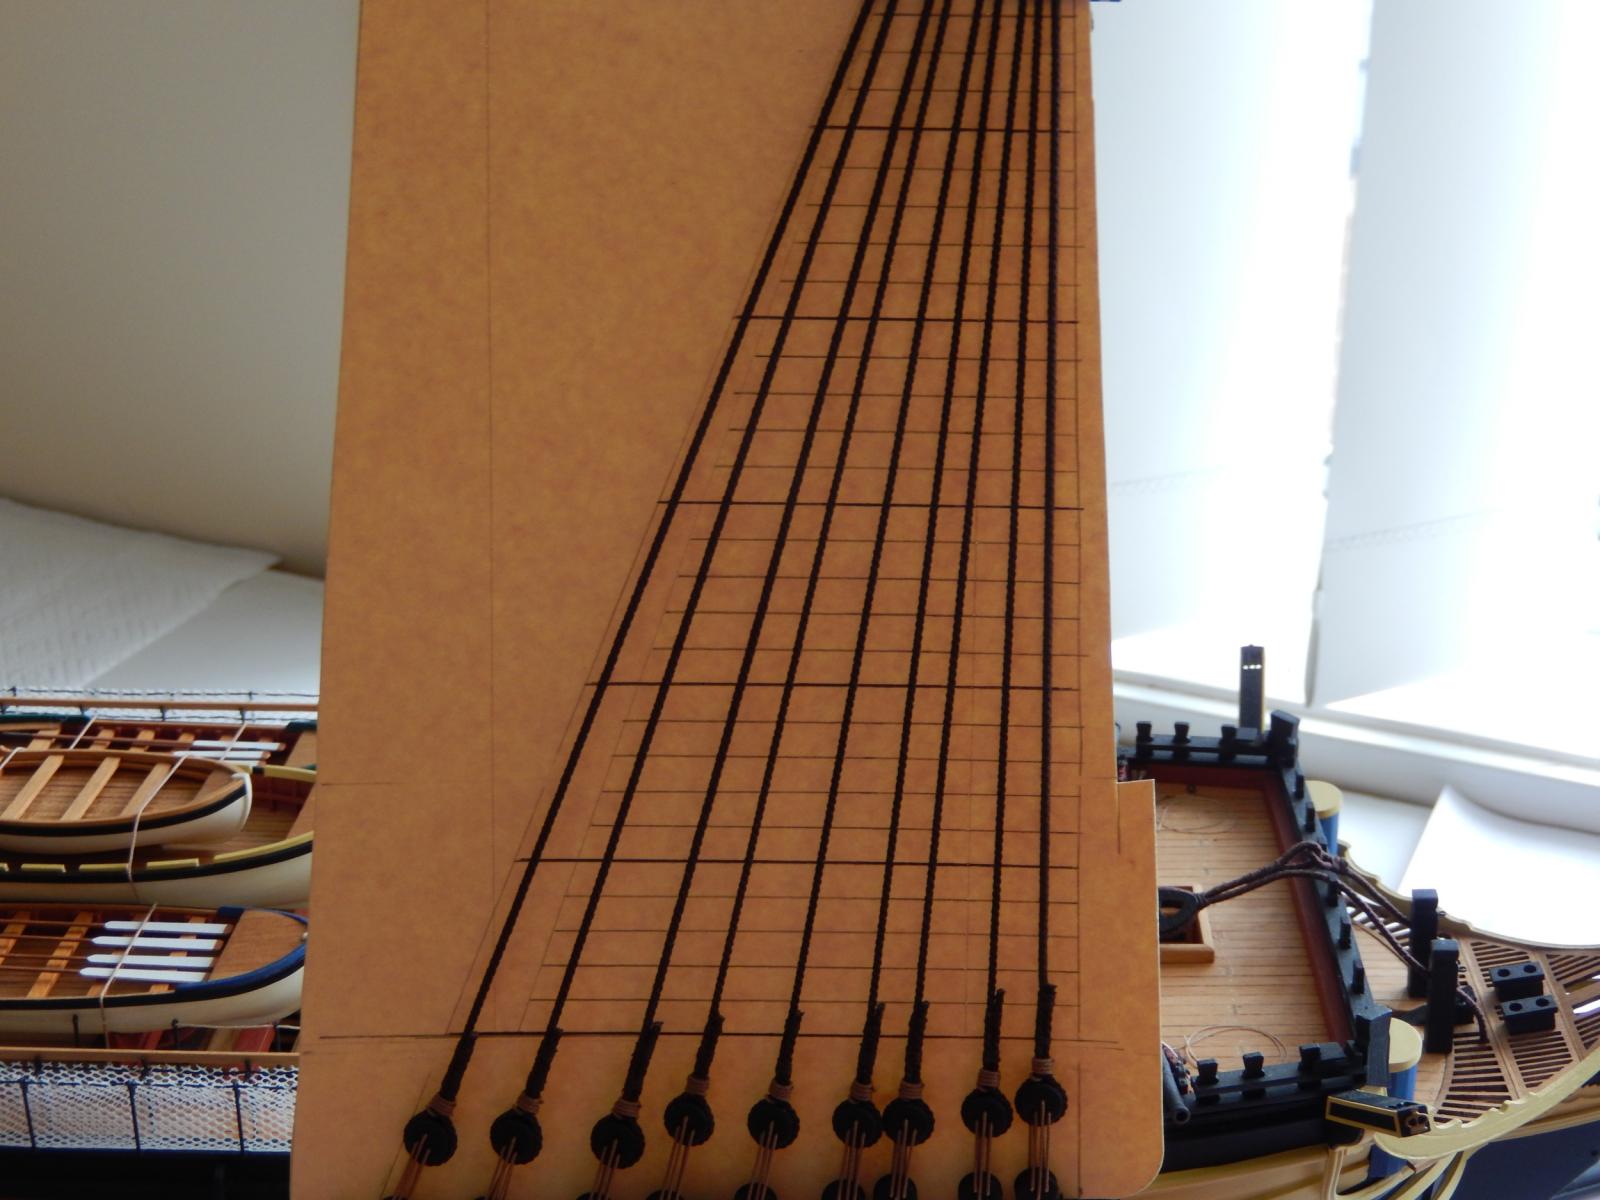
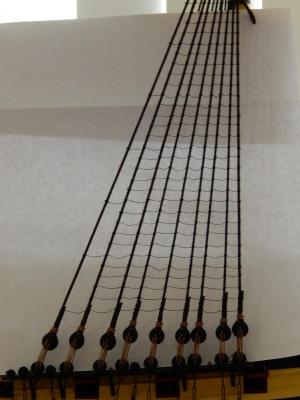
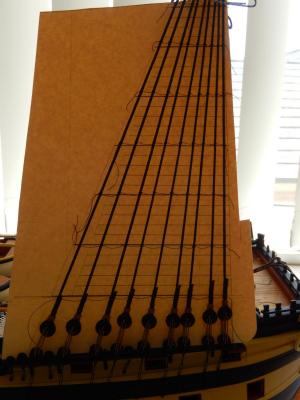
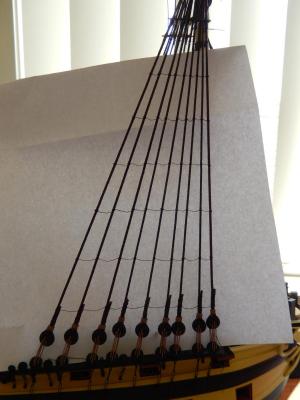
The ratlines are now started. For the lower masts there are only about 1,800 knots to go . I decided to begin with every 5 rows - the ones that stretch from the first to the last shroud. By doing this, I am hoping that the spacing of the shrouds will not be affected. According to the instructions (I had almost forgotten about them) the spacing of the ratlines should be 5 to 6mm. I chose 6mm - more for sanity than authenticity. The fewer knots the better. I began with a template and superimposed the knot-tying process over the template. Here is the template. The rows are horizontal (ie, parallel to the keel) , and the every fifth row - the longer rows - are marked heavily. The few rows completed and pictured took about 40 minutes per row - what with a couple of mistakes and a certain amount of bad temper. I found wetting the fine thread made it slightly easier to handle. The half hitches were more likely to stay tied (though not invariably) and it was easier to get the right 'hang' of the thread. Once things seemed to be about right, I applied 50:50 white glue and water and made any needed adjustments (eg, tightening knots) while the glue was still wet. That way, the adjustments stayed adjusted! The following photo makes the rows towards the top look as if they are not parallel. In fact they are (after this photo was taken, I checked to make sure). The template had just fallen back a little as I had removed one of the clips holding it. This shows things a little more clearly. The process was about as relaxing and enjoyable as playing a bad round of golf, so I will finish the job a little at a time while working on other things. I'm hoping this may preserve what remains of my good humour and make me slightly easier to live with.


-
Thanks very much for your comment and for all the likes Kevin. I thought that your finger must have been stuck on the button. PS. I just had a look at your log. You are being VERY hard on yourself. Your build certainly looks excellent to me and to the many others who have commented on it.
-
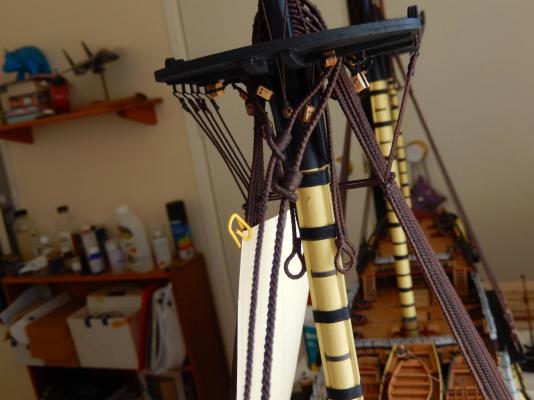
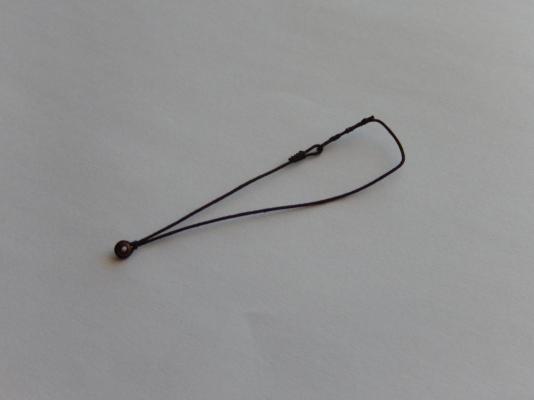
I have decided to use a truss pendant to mount the crossjack to the mizzen mast. As Arthur pointed out, the plans are ambiguous in their treatment (two drawings; two different methods). I have also followed Peterssen and hope it turns out alright in the end. The idea is simple: make a loop on the end of the thread, the length of which will reach roughly to the deck; make a second separate loop with an eye through which the length of thread passes, and on the end of which is a double block. This will eventually lead to a single block attached to one of the channels towards the stern (I haven't decided where just yet). With ropes going every which way it is difficult to see what is going on, but I hope these give the general idea. This shows the block on the end of the pendant, roughly where it will eventually be when the whole thing is finally fitted. I think my next step will be to put on the ratlines, something to which I have not been looking forward.


- 949 replies
-
- 10
-

-
Hi jdieck. Thanks for the comment. I am away at the moment and will not have chance to do much for a week or so. Your suggestion would not have occurred to me, but I think you're right.
-
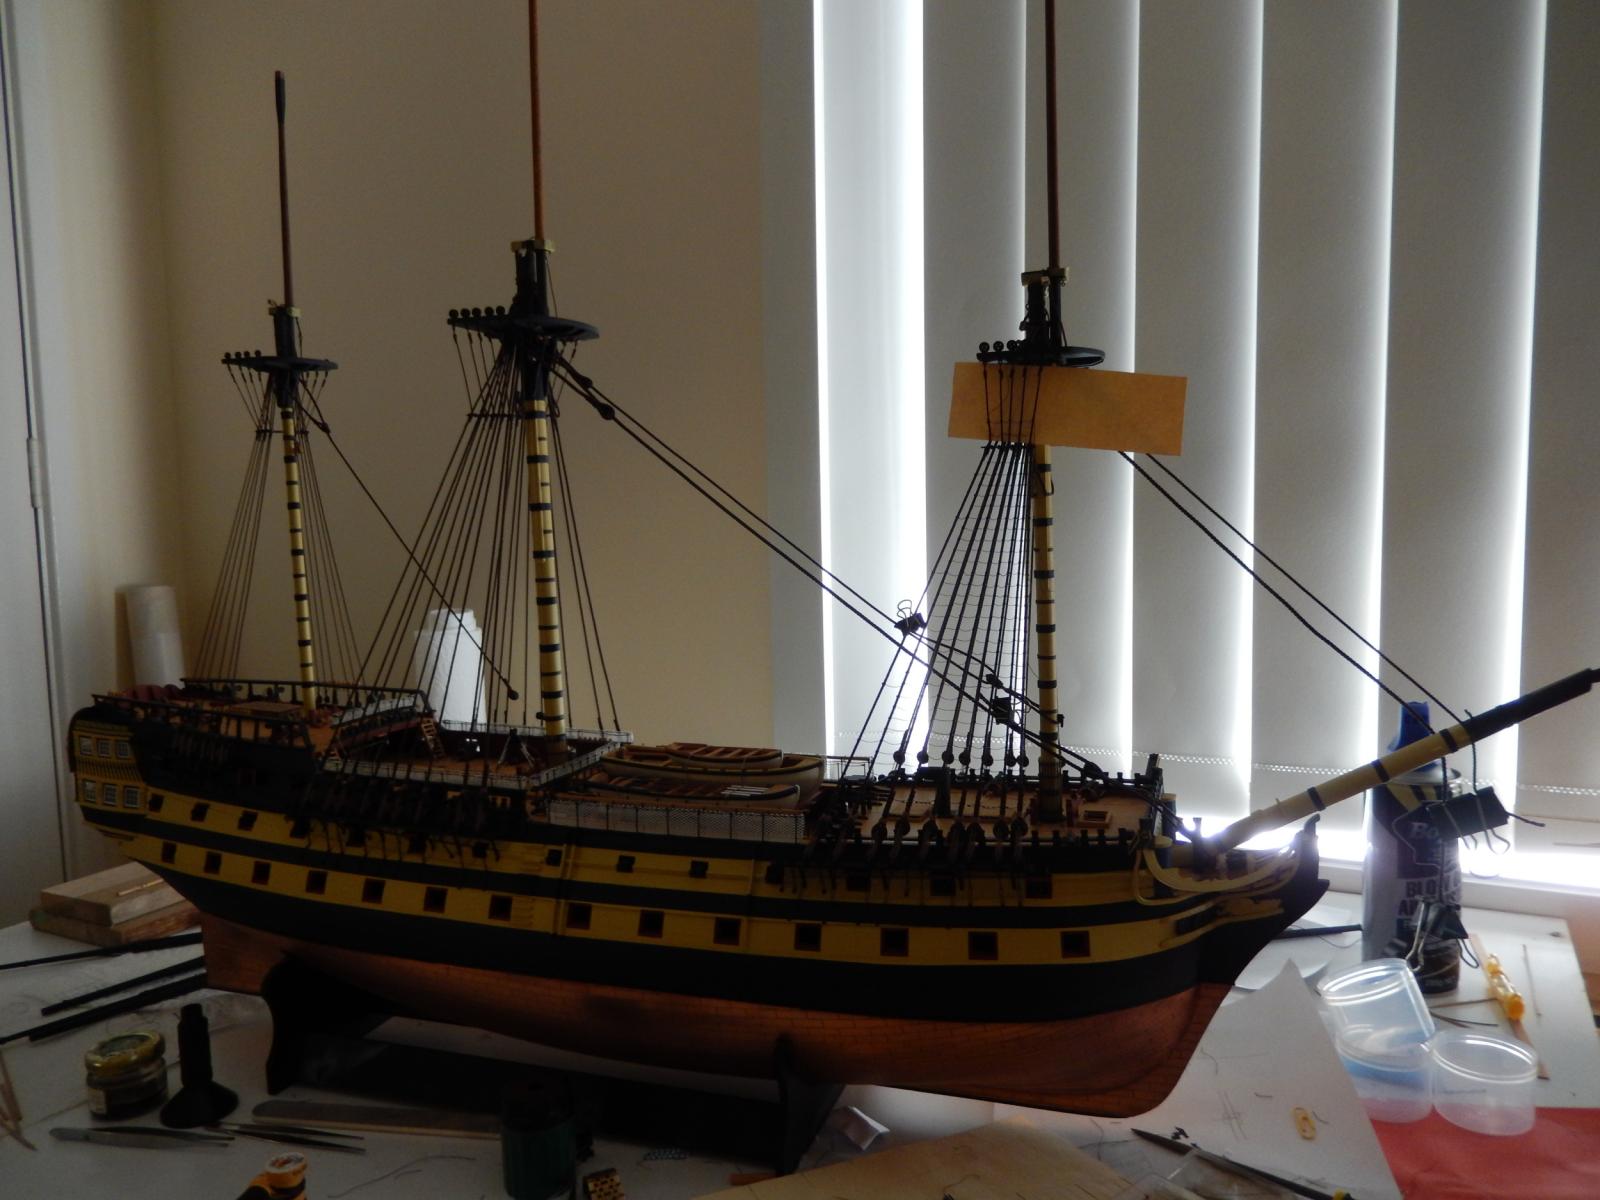
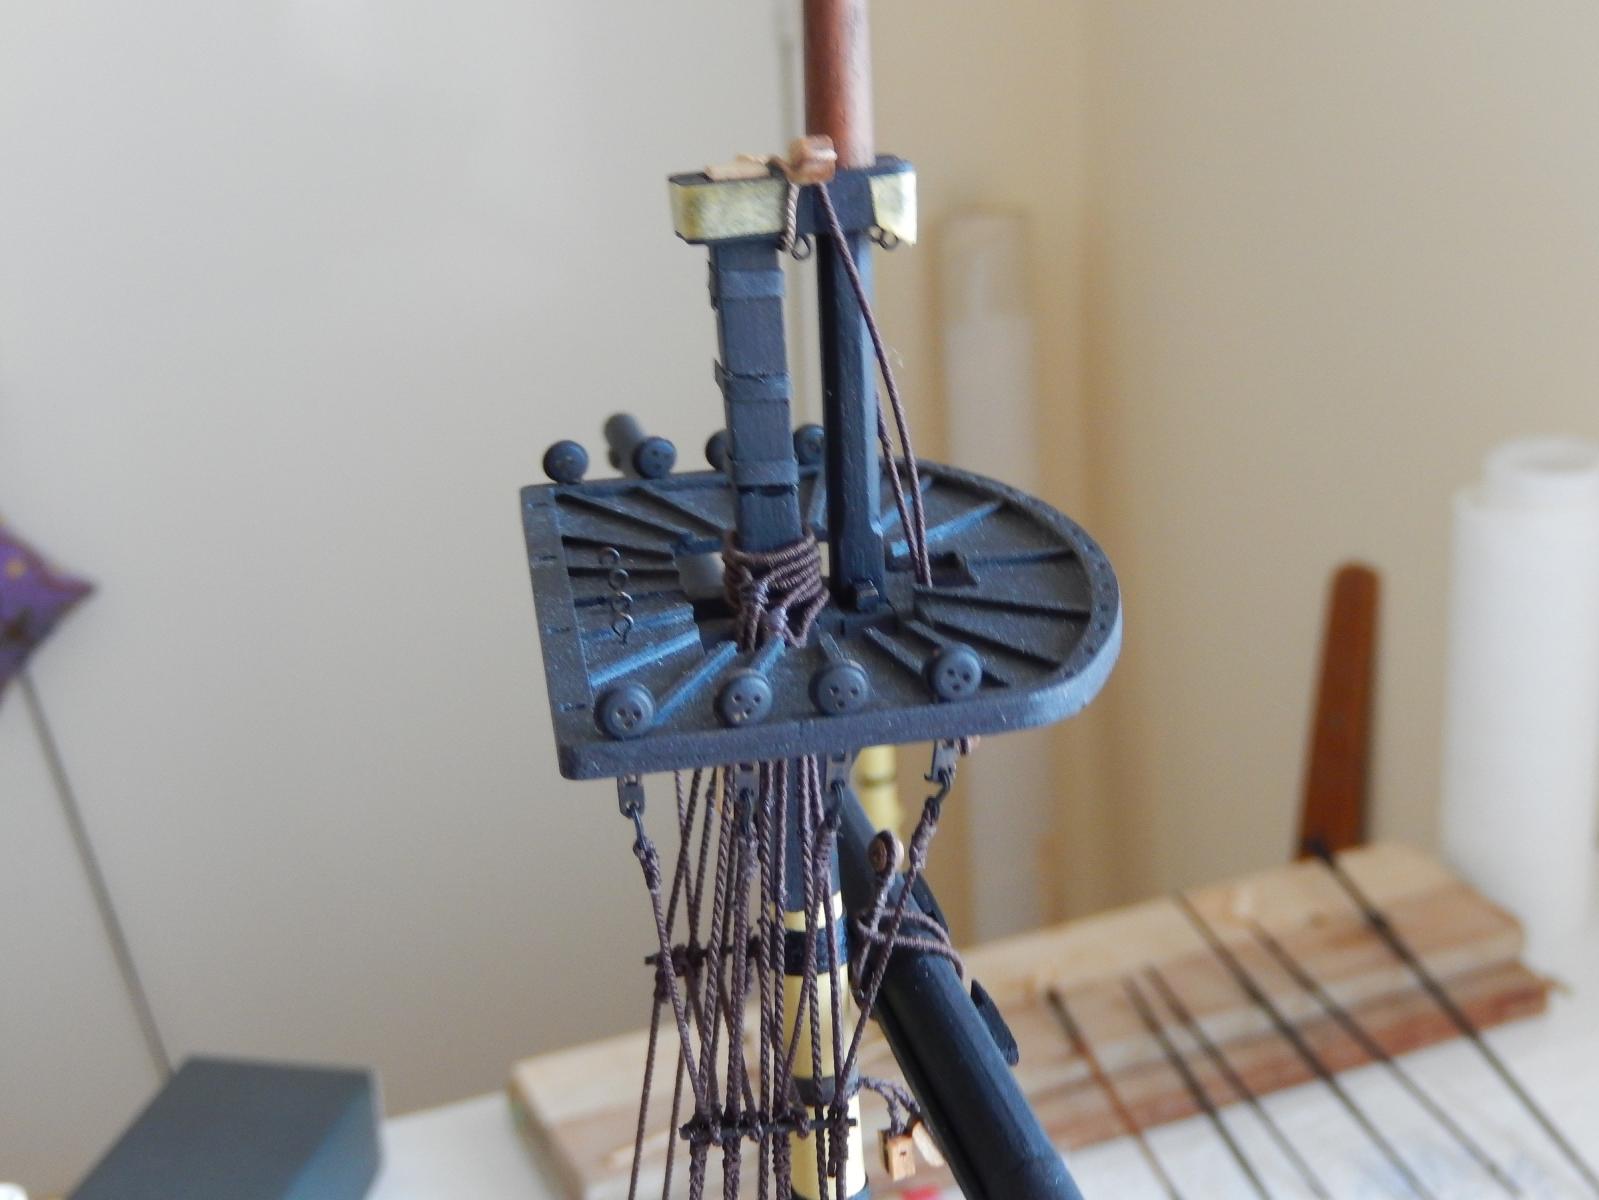
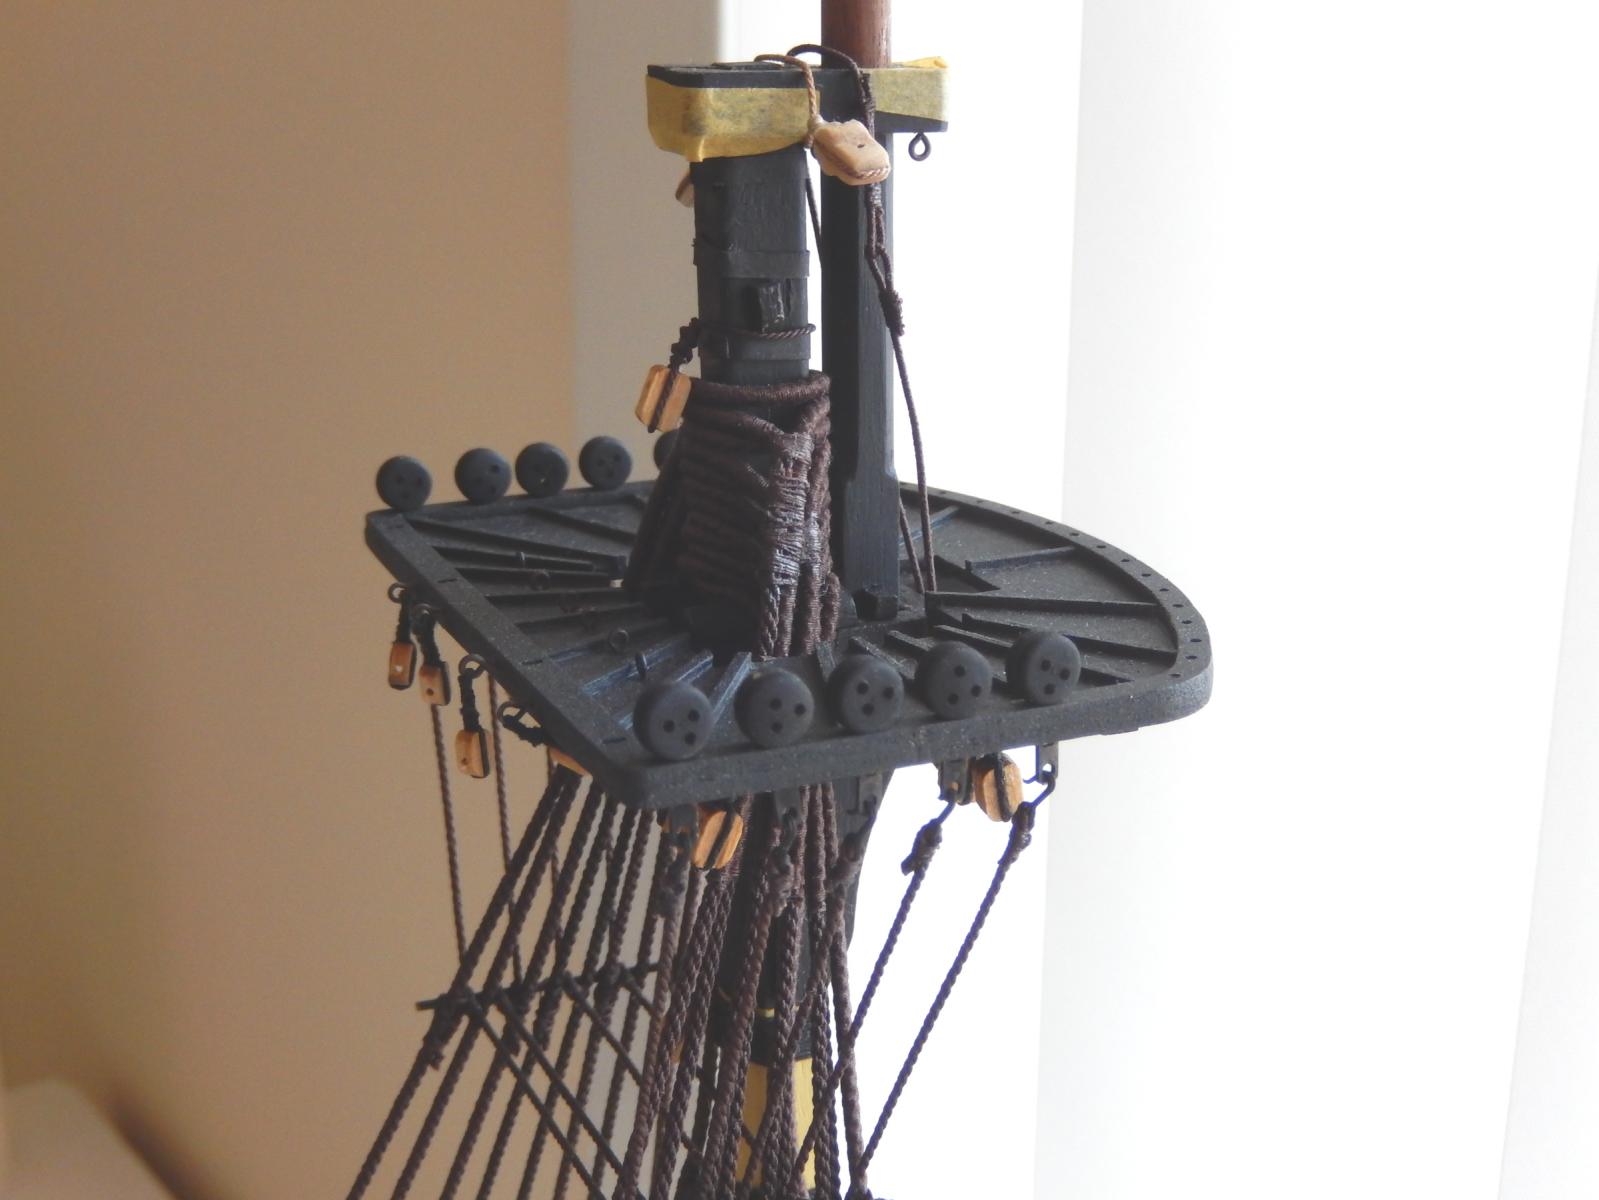
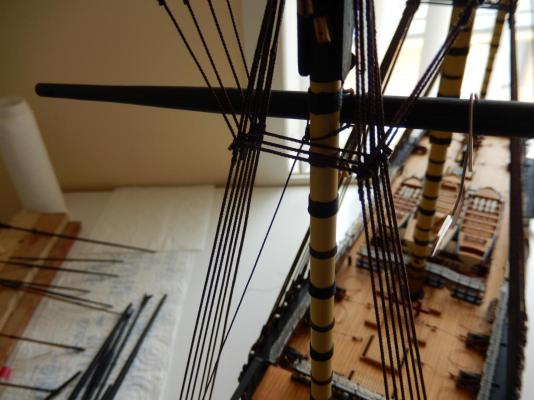
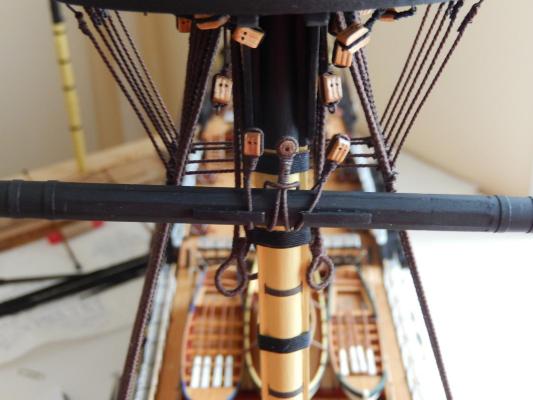
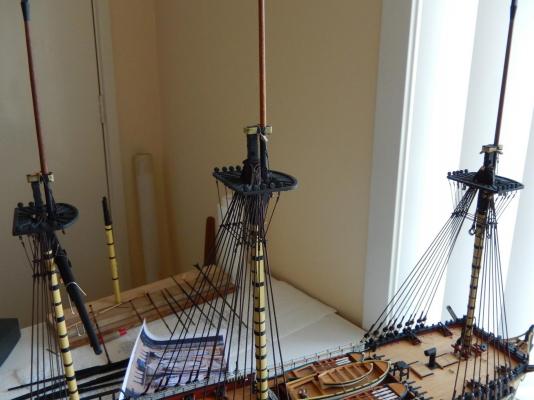
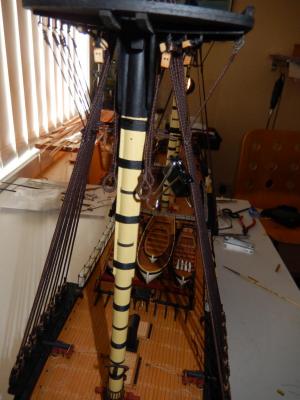
The jeers for the foremast are now done. I can't now think of a reason not to fit the fore topmast. The photo below has turned out to be quite poor, but I hope it gives the general idea. The following photos show the jeers temporarily fitted. With all the blocks hanging off the top as well, it's certainly looking rather crowded. This is how the whole thing looks ready for the topmast.


-
I'm building the Amati Vanguard. Evidently Model Shipways had some sort of arrangement with Amati to market their Vanguard in North America. From what I have seen on this website, the Model Shipways is a good quality kit, but from my observation the Amati kit has far better fittings, but is more expensive. Good luck. Bob (RMC)
-
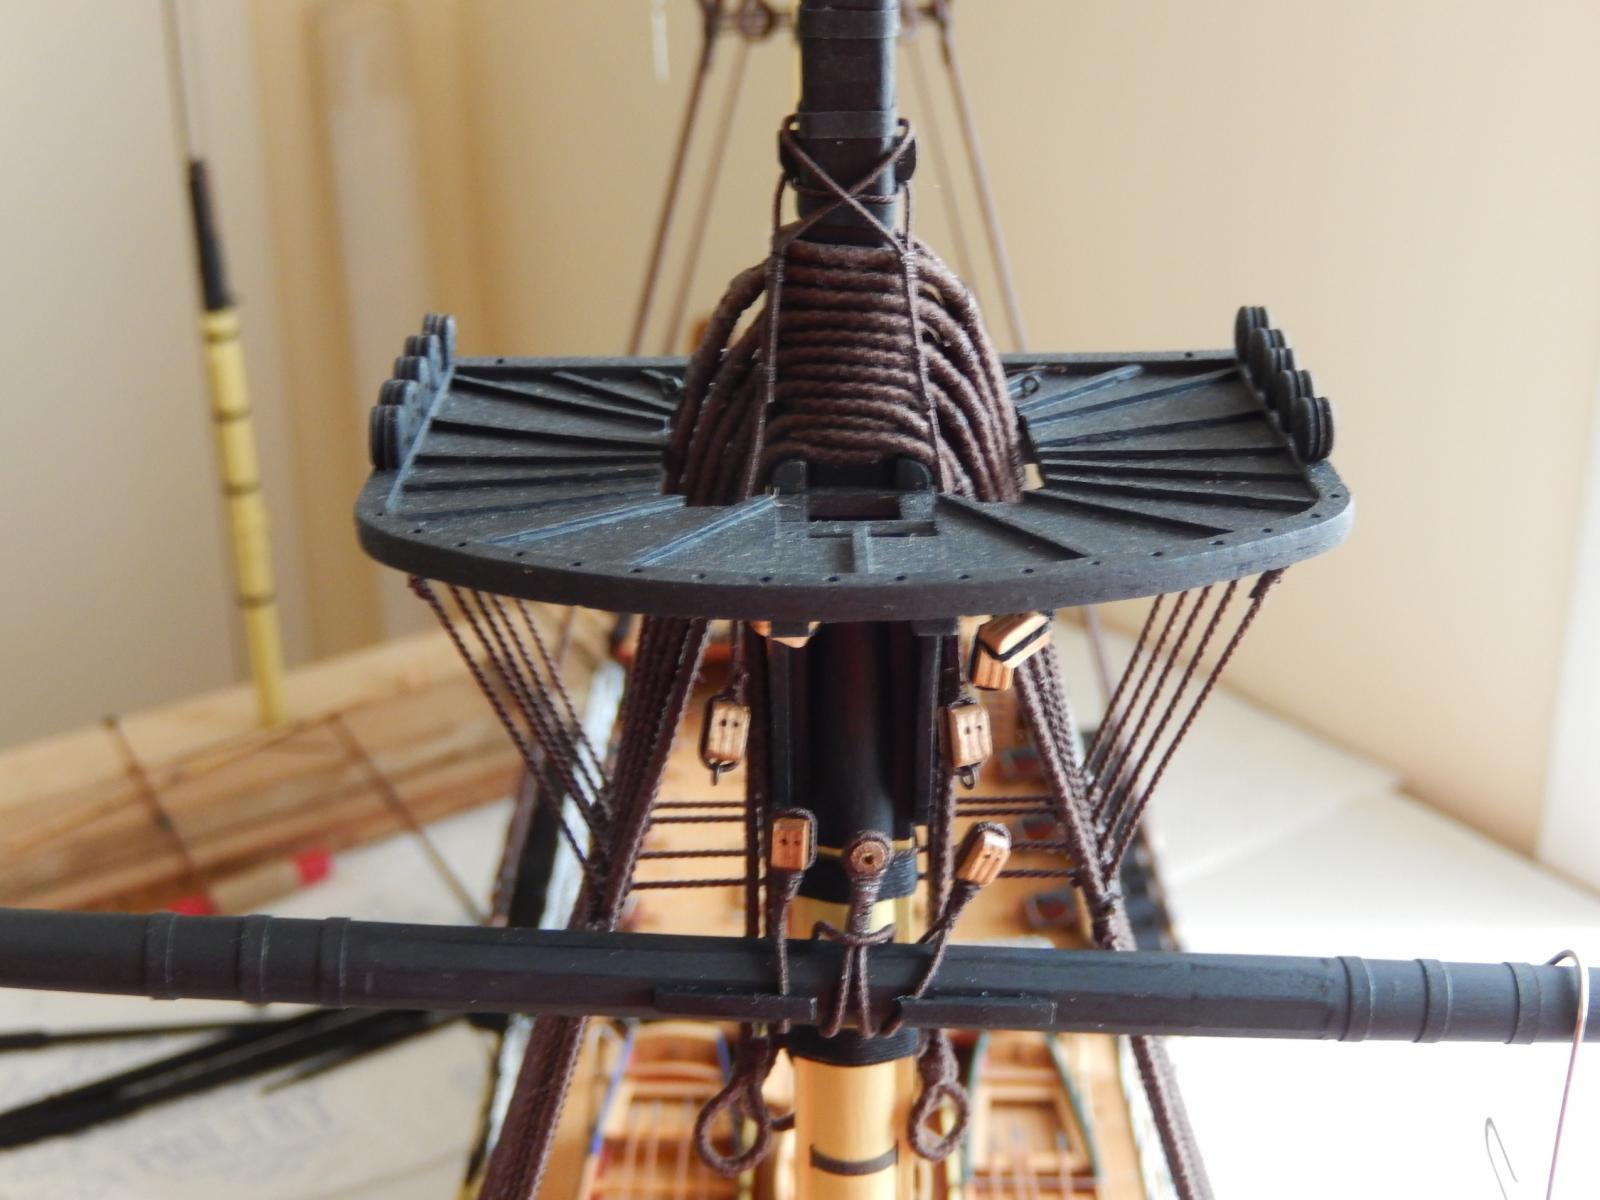
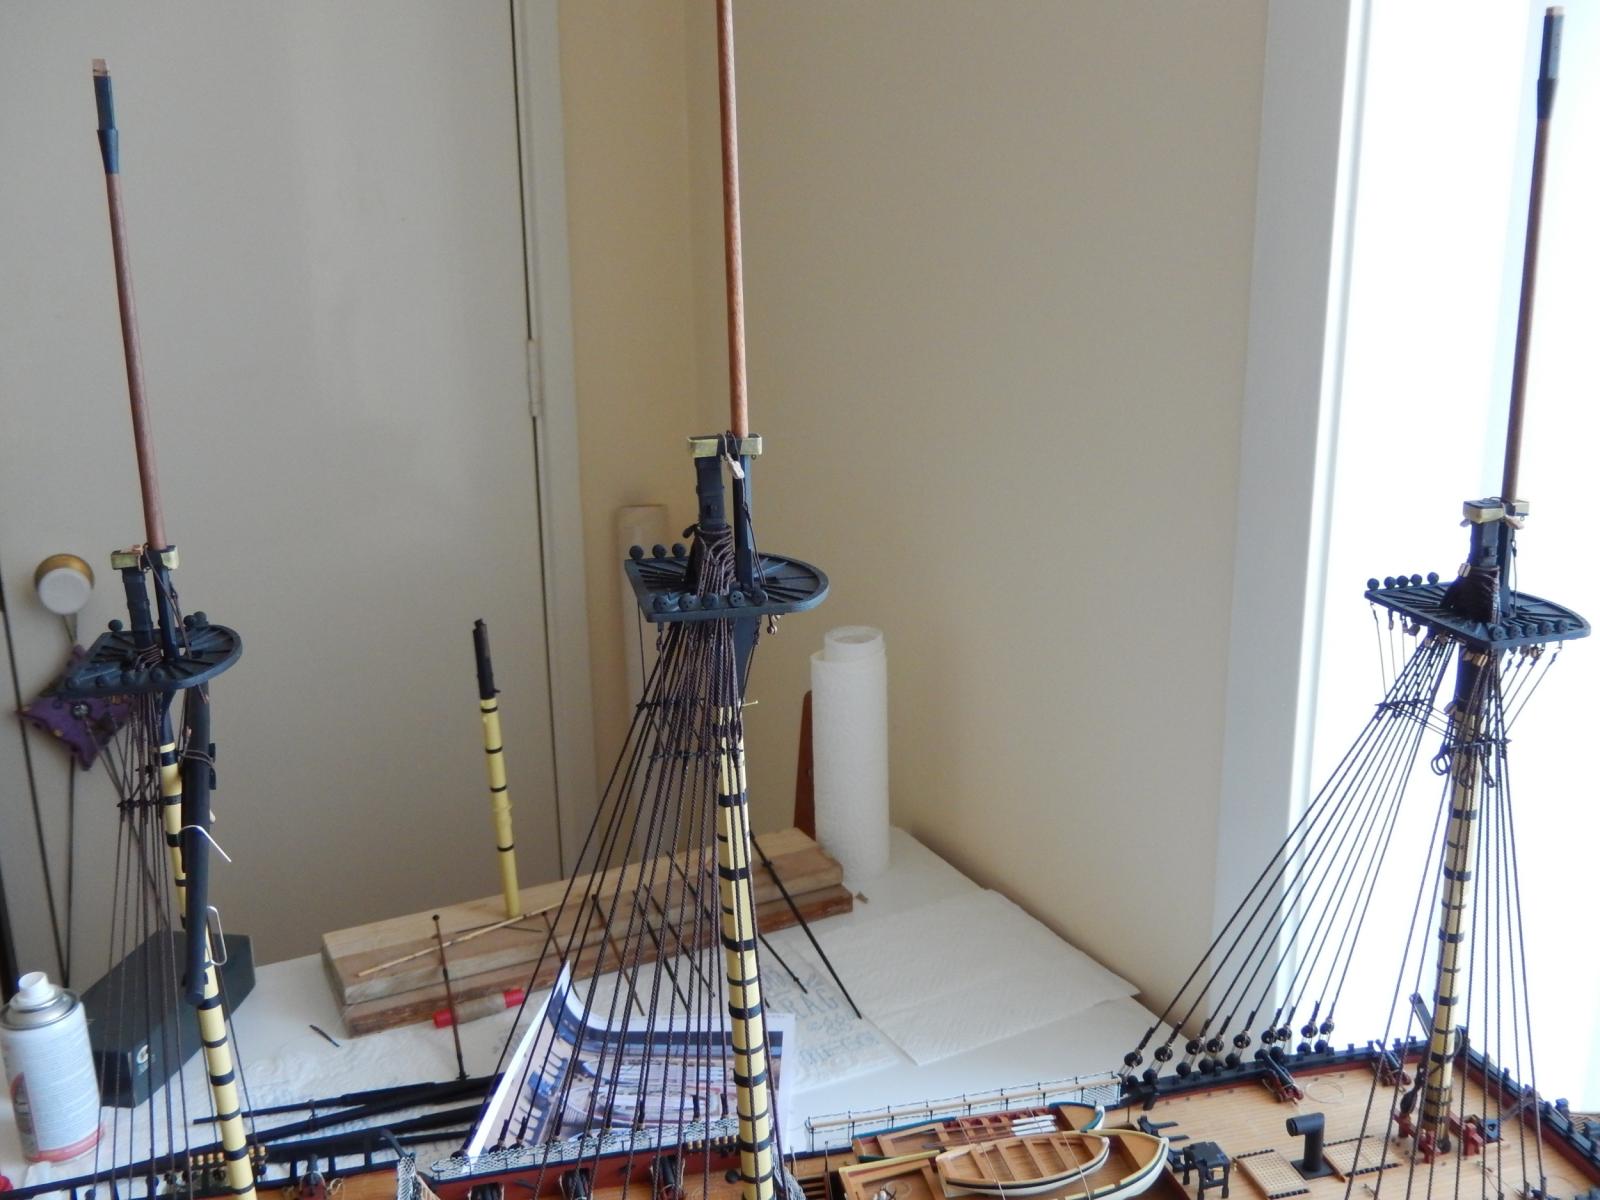
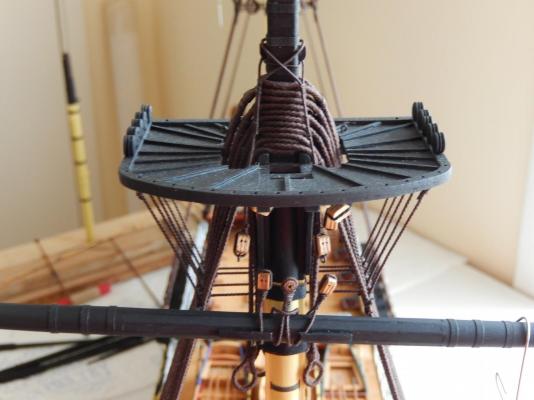
The tops are now, I hope, at a stage where I can mount the respective topmasts. The lifts for the yards are finished and the blocks on the caps are ready (at this stage I don't know what they will eventually do). These are all temporarily installed. I have not yet put on the safety railings (they look as if they will get in the way at the moment), and it may be useful to do the jeers. I have posted the following photos mainly to get some reaction regarding the readiness (or otherwise) to finally put up the topmasts. It seems to be easy to overlook some vital step that will be difficult to remedy later. The mizzen top: the main top; and the fore top. This is how it all looks. Advice is invited.


-
The fore and main slings are now completed. If there is a trick in all of this, it is to make the sling the correct length. This requires the position of the respective yards First, a loop is made. The length from the loop to the eye is determined (see below). The overall length of the sling is determined by taking the sling over the cap to join the first loop. Here, the fore yard is temporarily attached to the mast. Holes have been drilled into the yard and the mast and a pin inserted to support the yard. The length can now be measured from the cap to the eye of the sling. See second photo above. I hope I am now able to mount the fore and main topmasts. I have now received the 0.62mm Syren thread, so now the first job is to complete the futtock shrouds for the mizzen - and then make another sling.


-
Hi Jdieck: thanks for taking the time to show your work. You have done a really beautiful job on the boats and the fittings. I will certainly appropriate (ie. steal ) some of your ideas. Bob
-
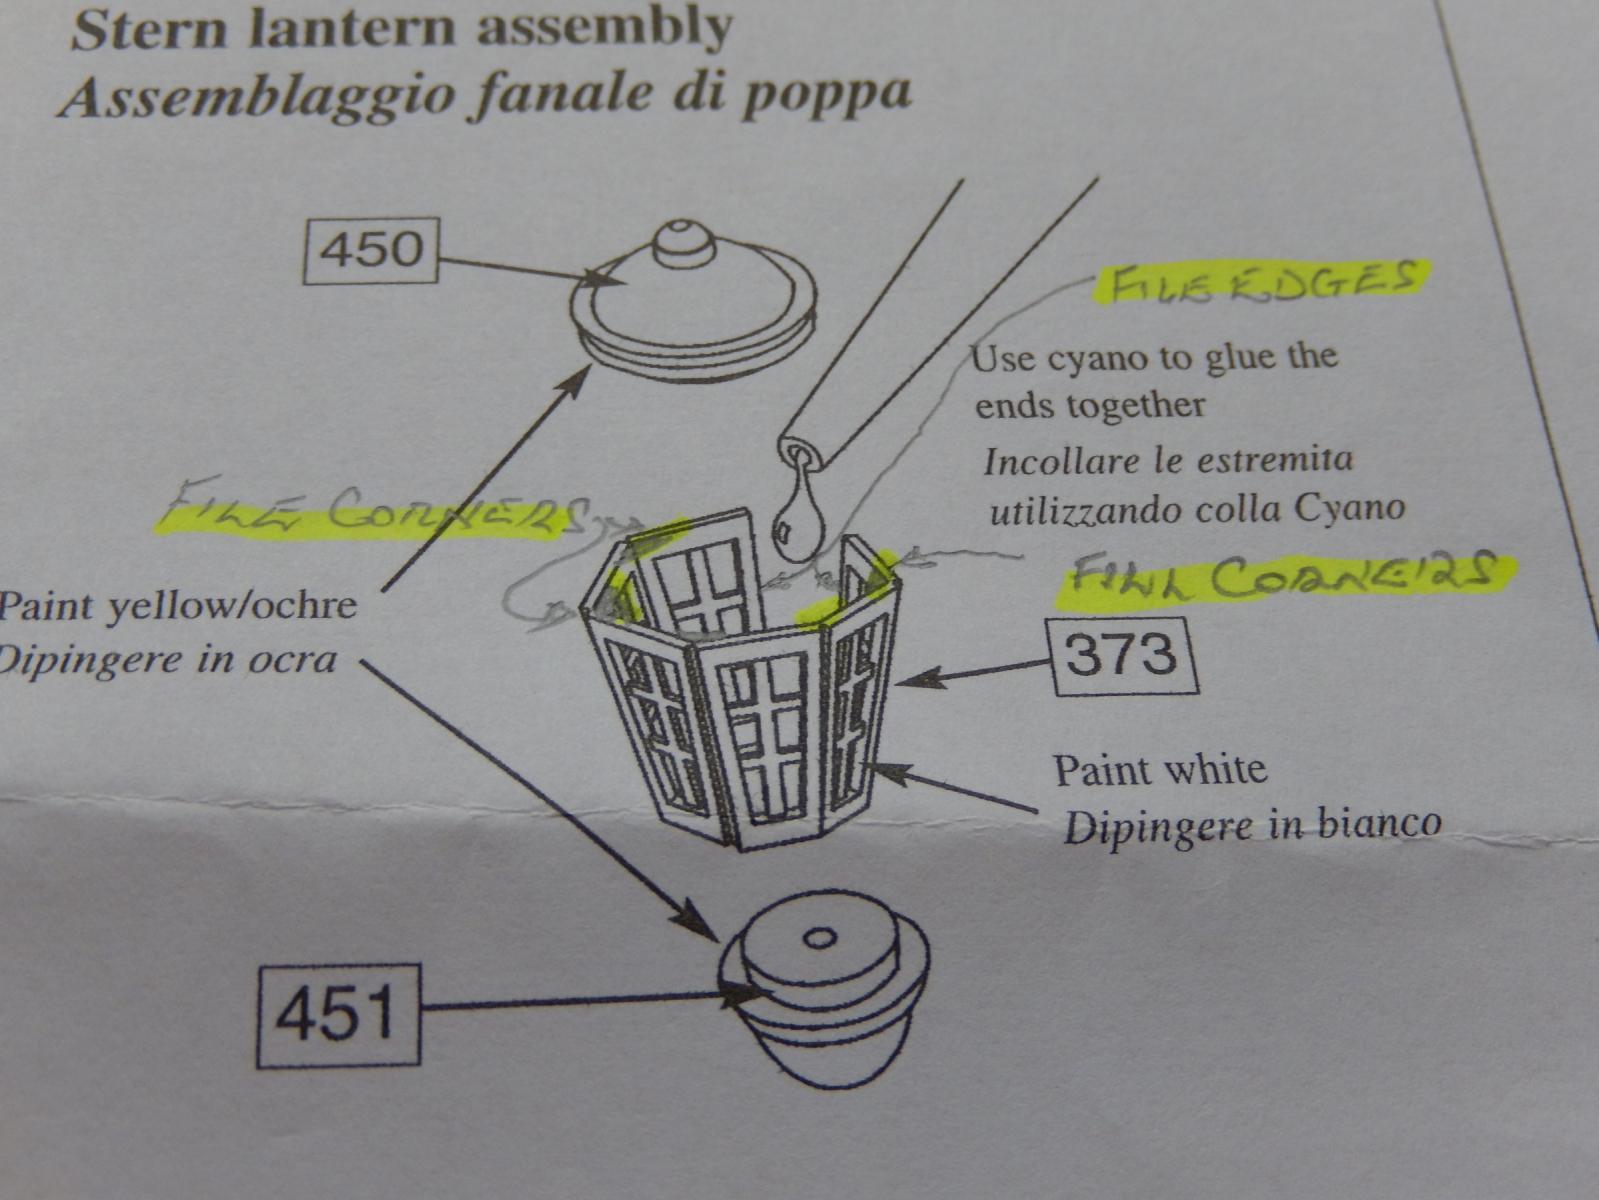
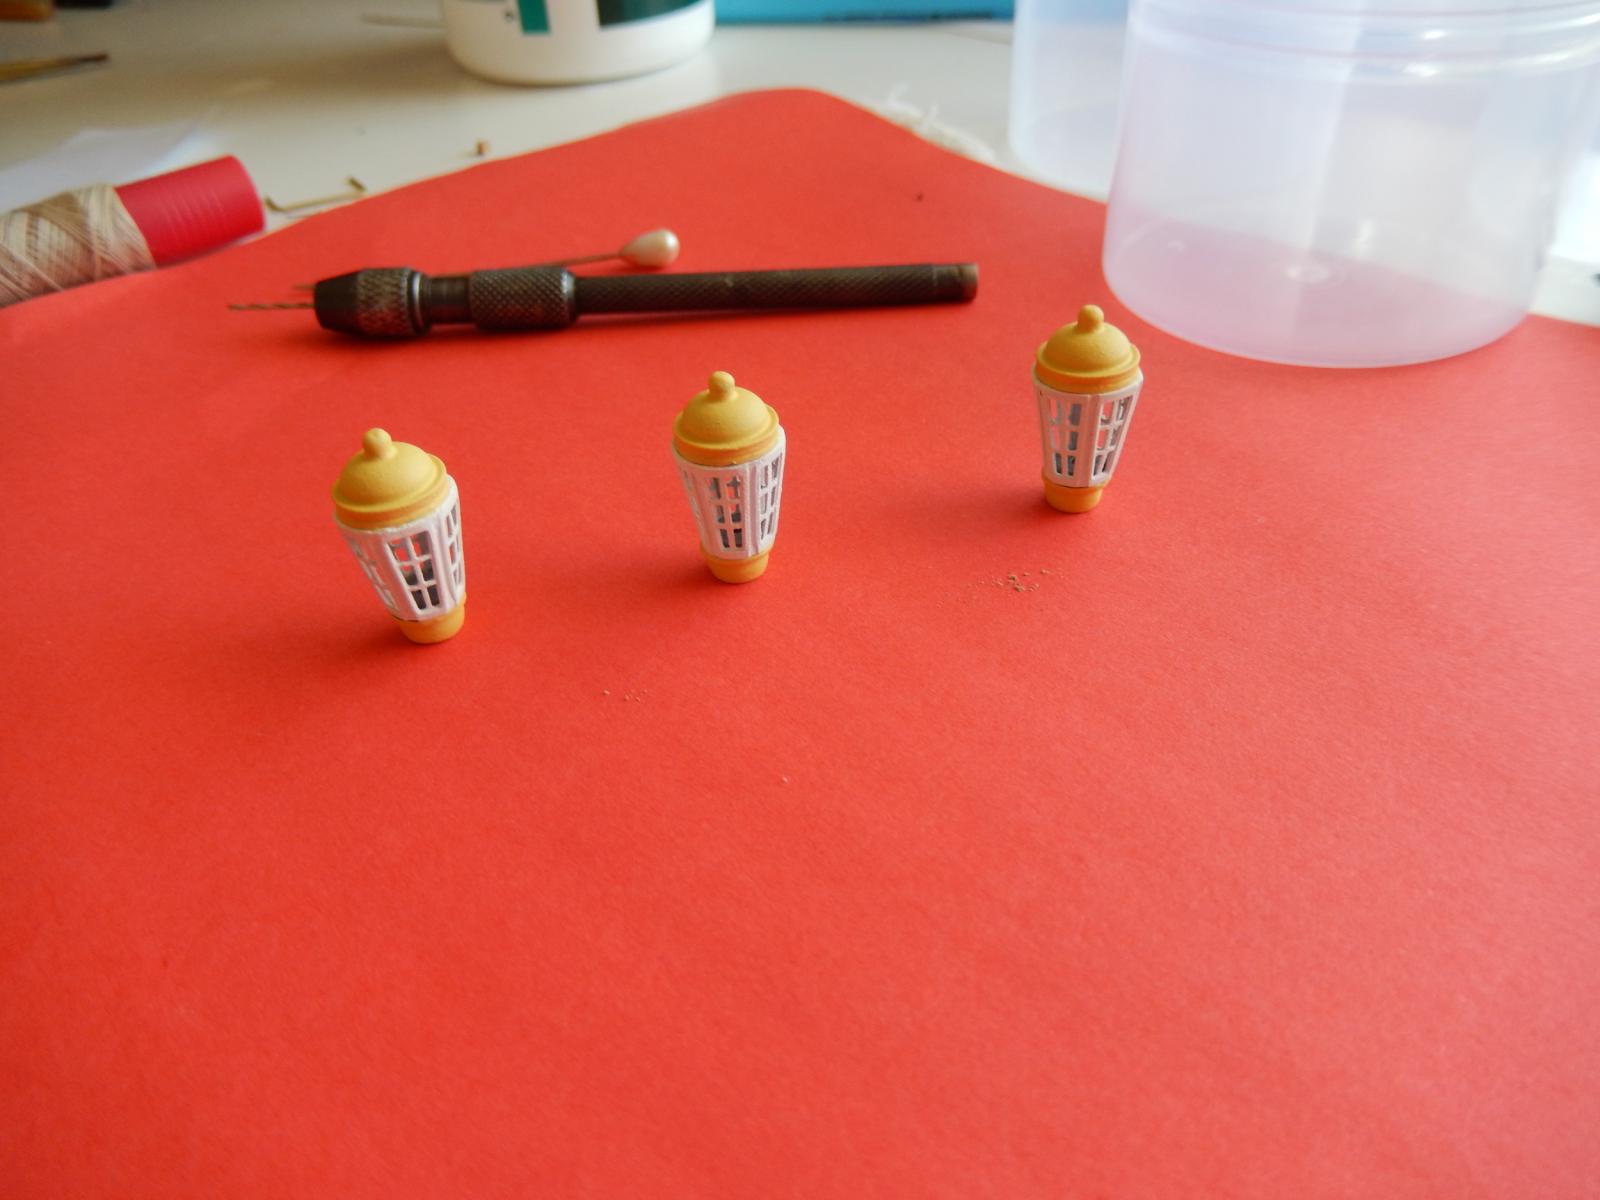
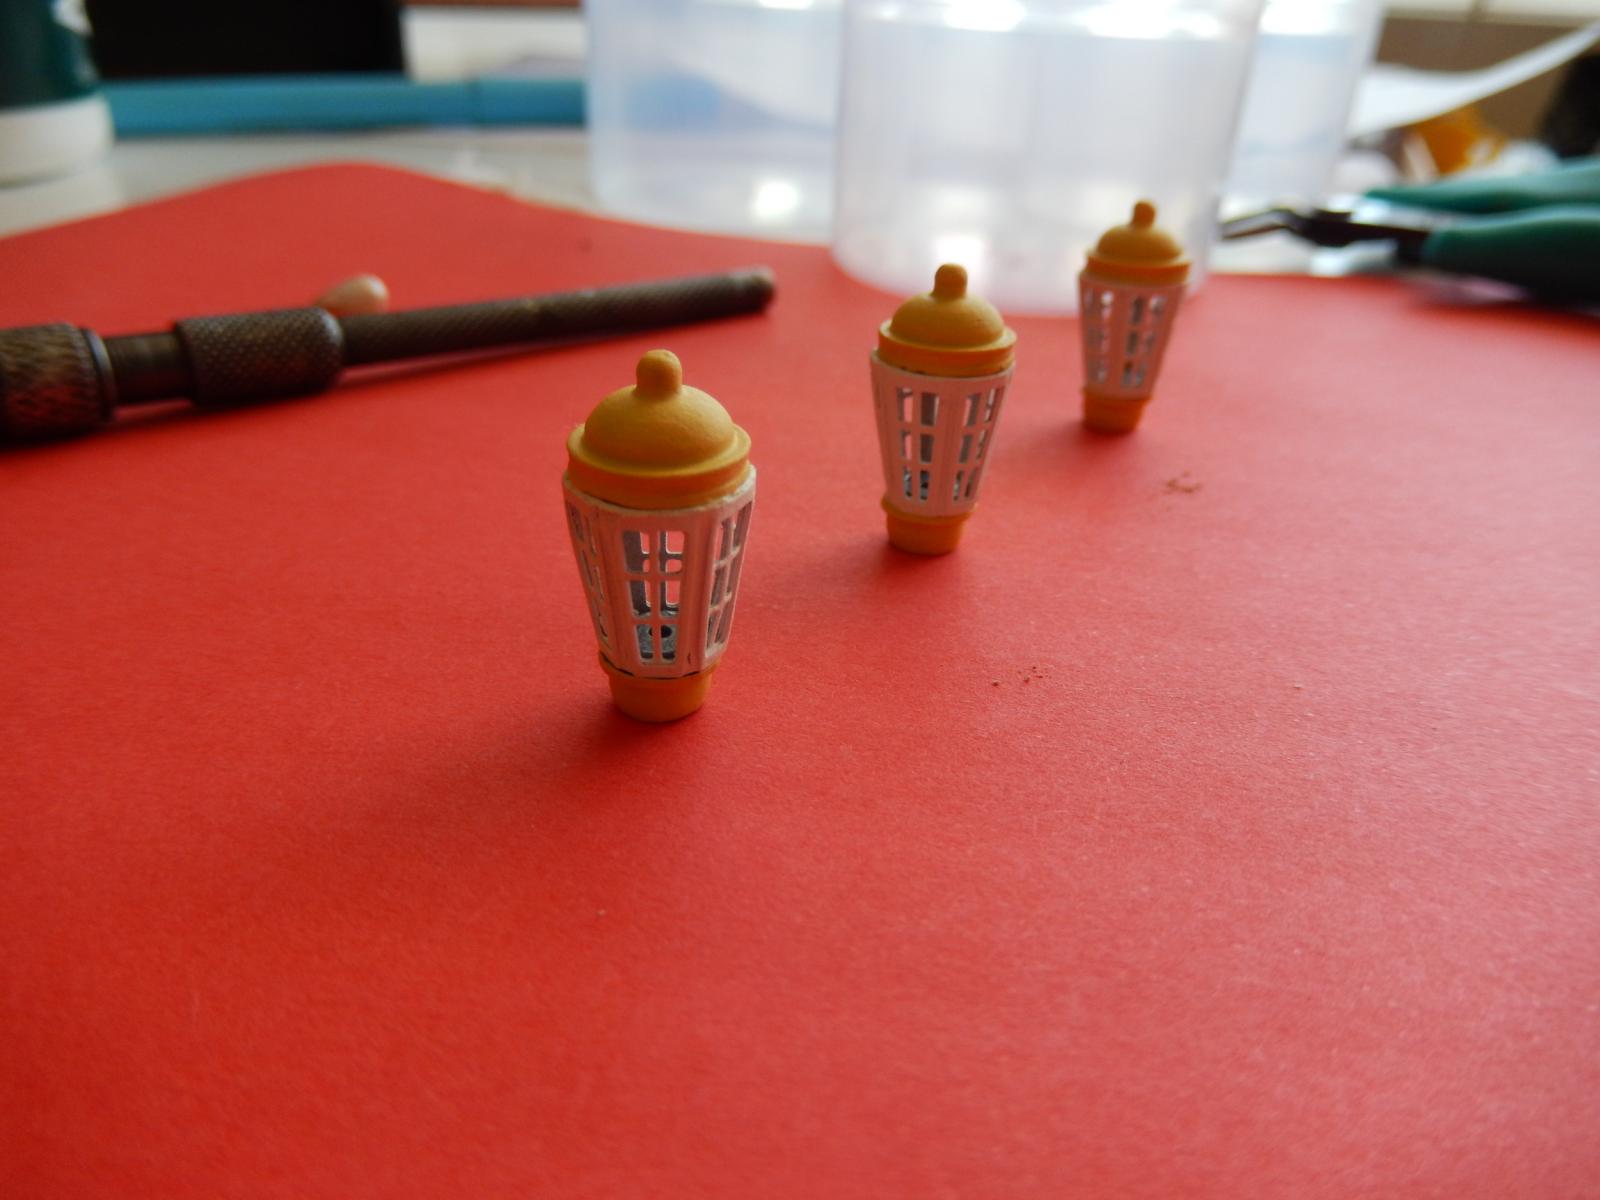
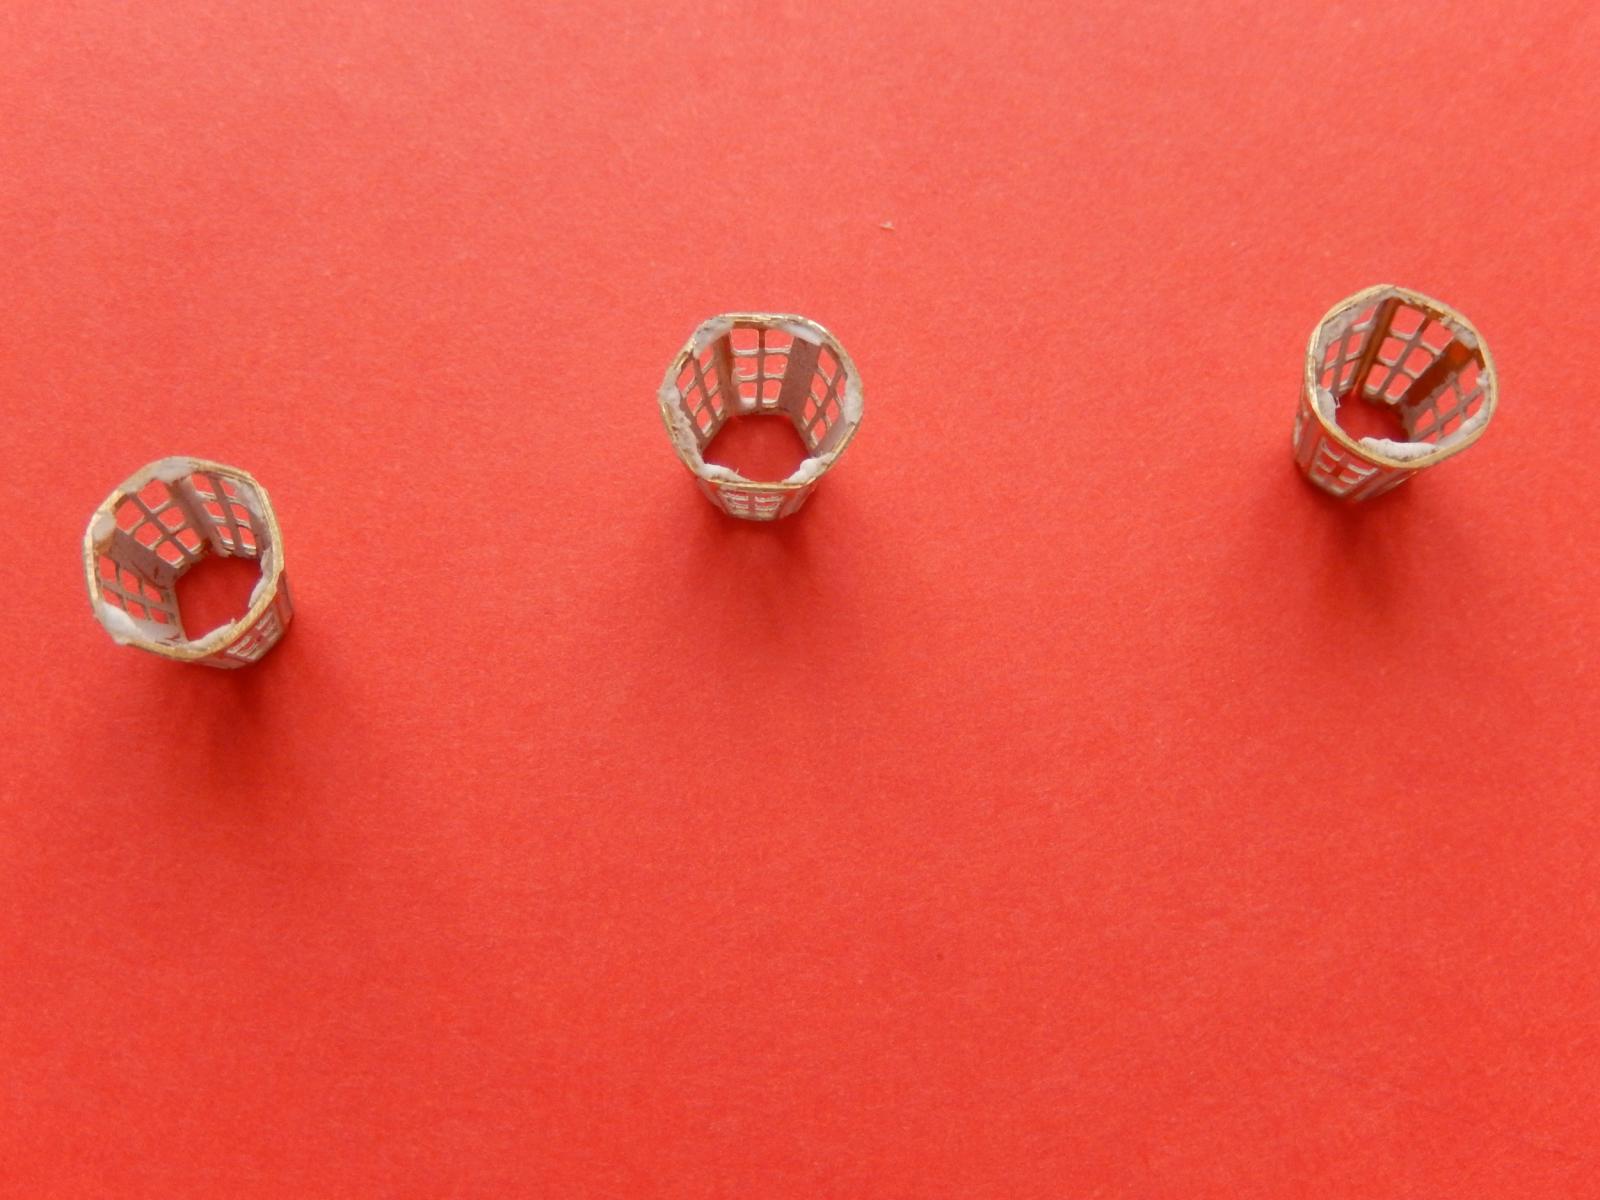
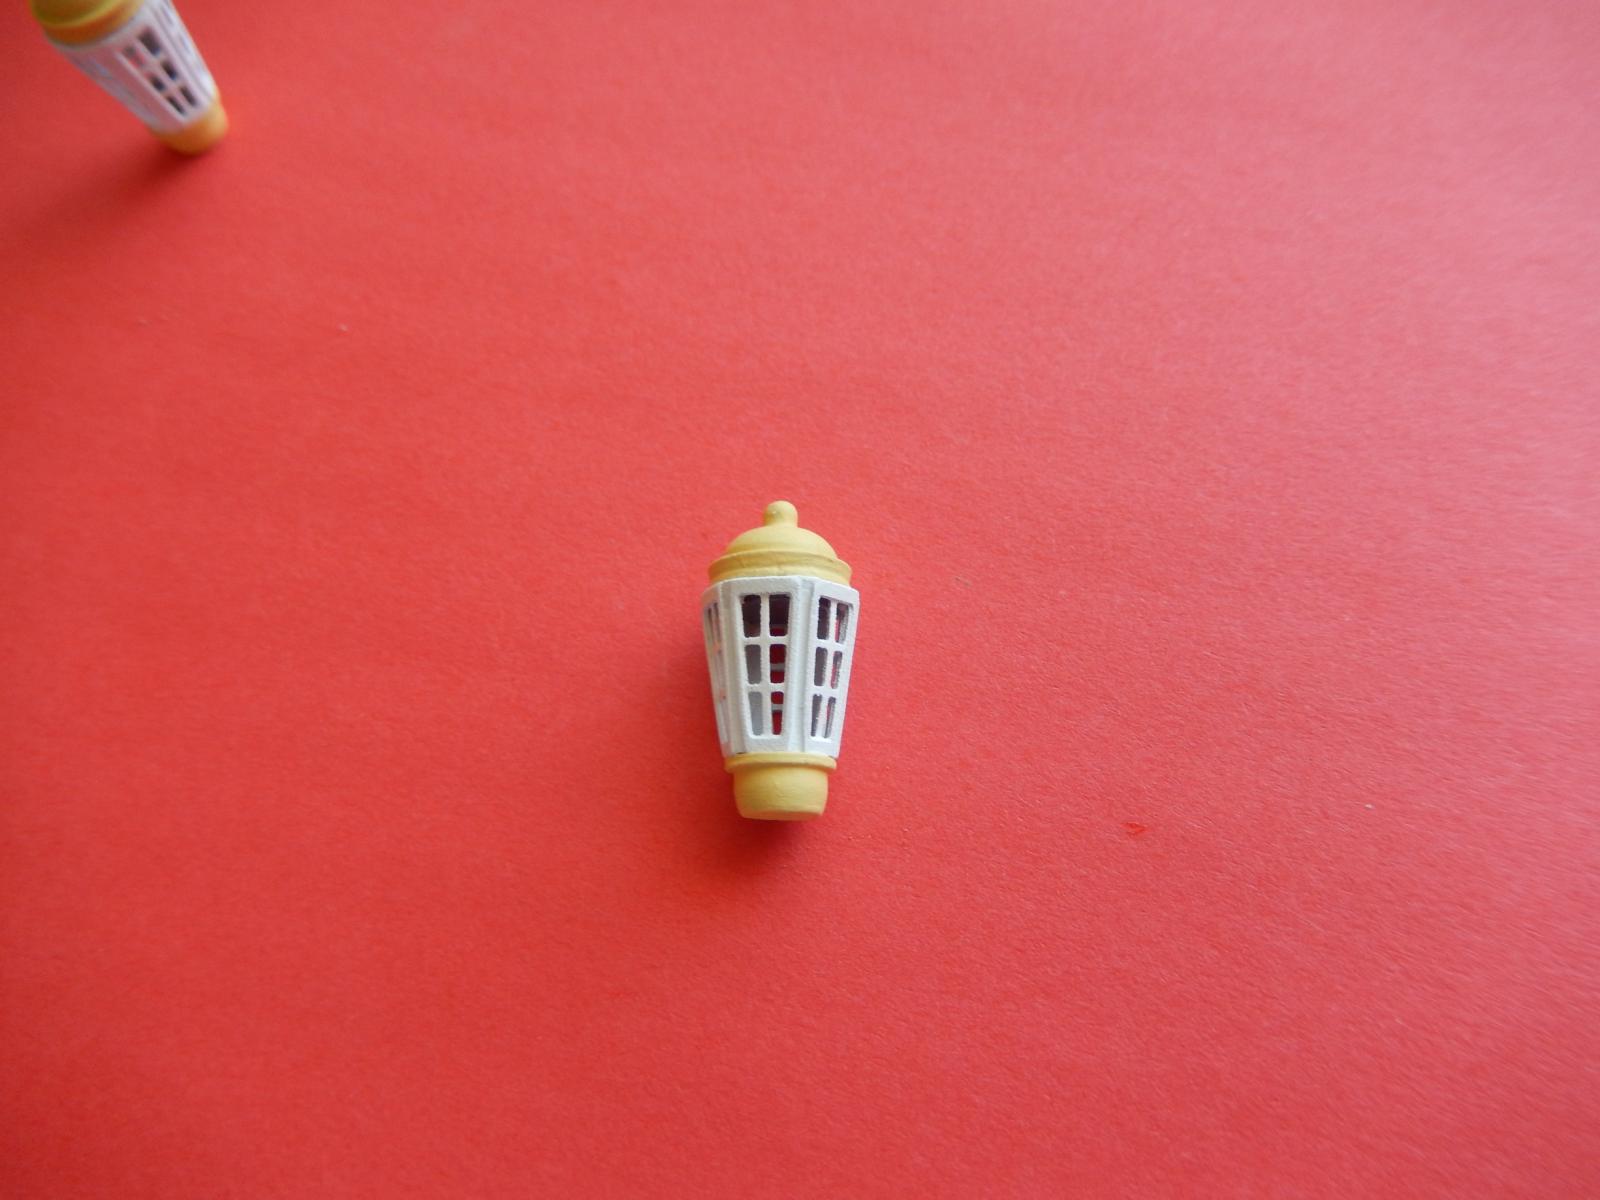
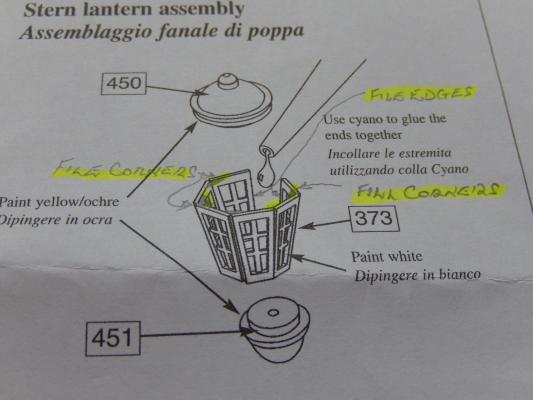
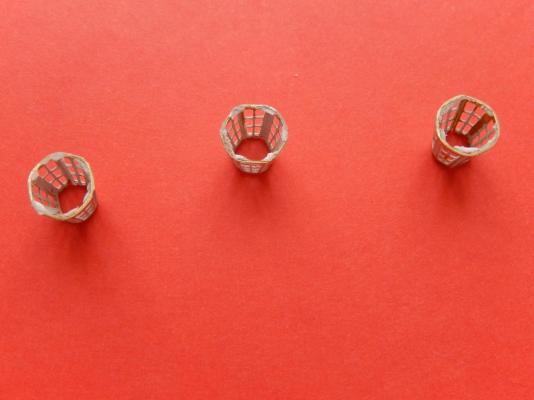
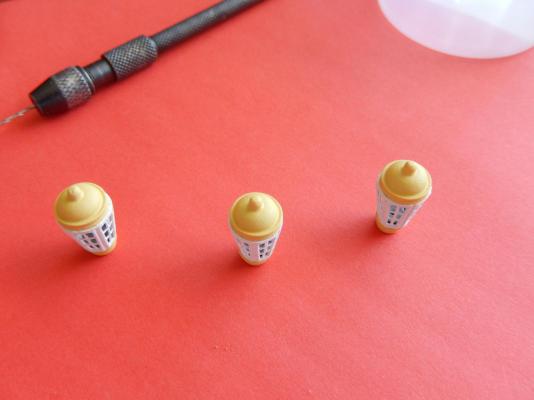
The lanterns are a bit of a problem. The castings for the lids are about 1mm in diameter smaller than they should be. Partially mitigating the problem I suggest filing the ends of the brass lantern frames. While this improved the fit of the casting over the frame, the frame still was fraction too large. So once bent to shape and glued, the exterior corners were then lightly filed, and the interior corners filled with a dab of a water-based white gap filler (For Australians, Selly's No More Gaps) Incidentally, do not paint the frames before bending as I did. It seemed like a good idea at the time, but as soon as the fitting was bent, most of the paint came off. Here are the frames filled, filed and painted. The (almost) finished lanterns. The next two photos show the frame still slightly proud of the cast lid. The following photo shows a slight gaps between the castings and the frame. I have filled the gaps with the gap filler diluted with a little water. I little on the point of a pin put on the gap, then immediately wiped off with a dampened tissue - and ... No More Gaps. The results are just acceptable, but the yellow and white colour scheme specified tends to highlight any small defects. With hindsight I would have blackened the castings, and perhaps the frames as well. In a day or two, once the fumes of the CA are gone, I will use Krystal Klear to make the windows for the frames. I have just noticed that photo 379 has been repeated, and I can't get rid of it for reasons which escape me.


-
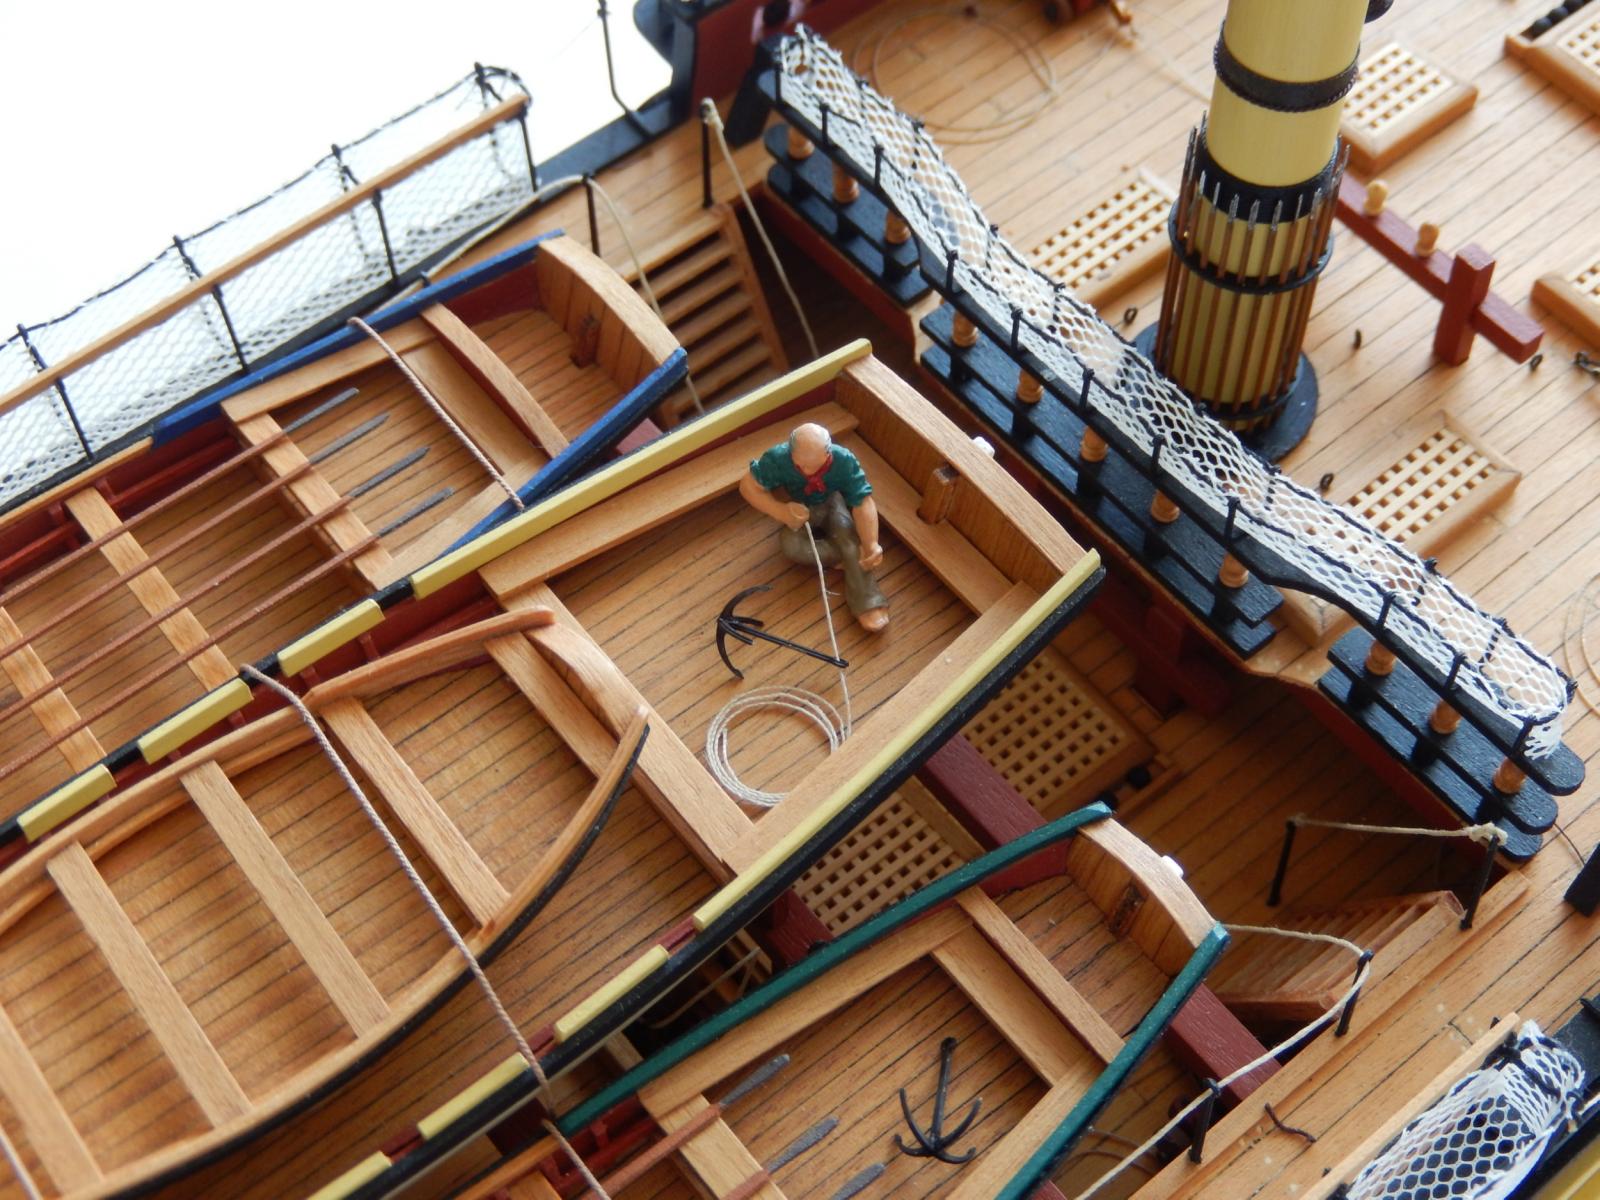
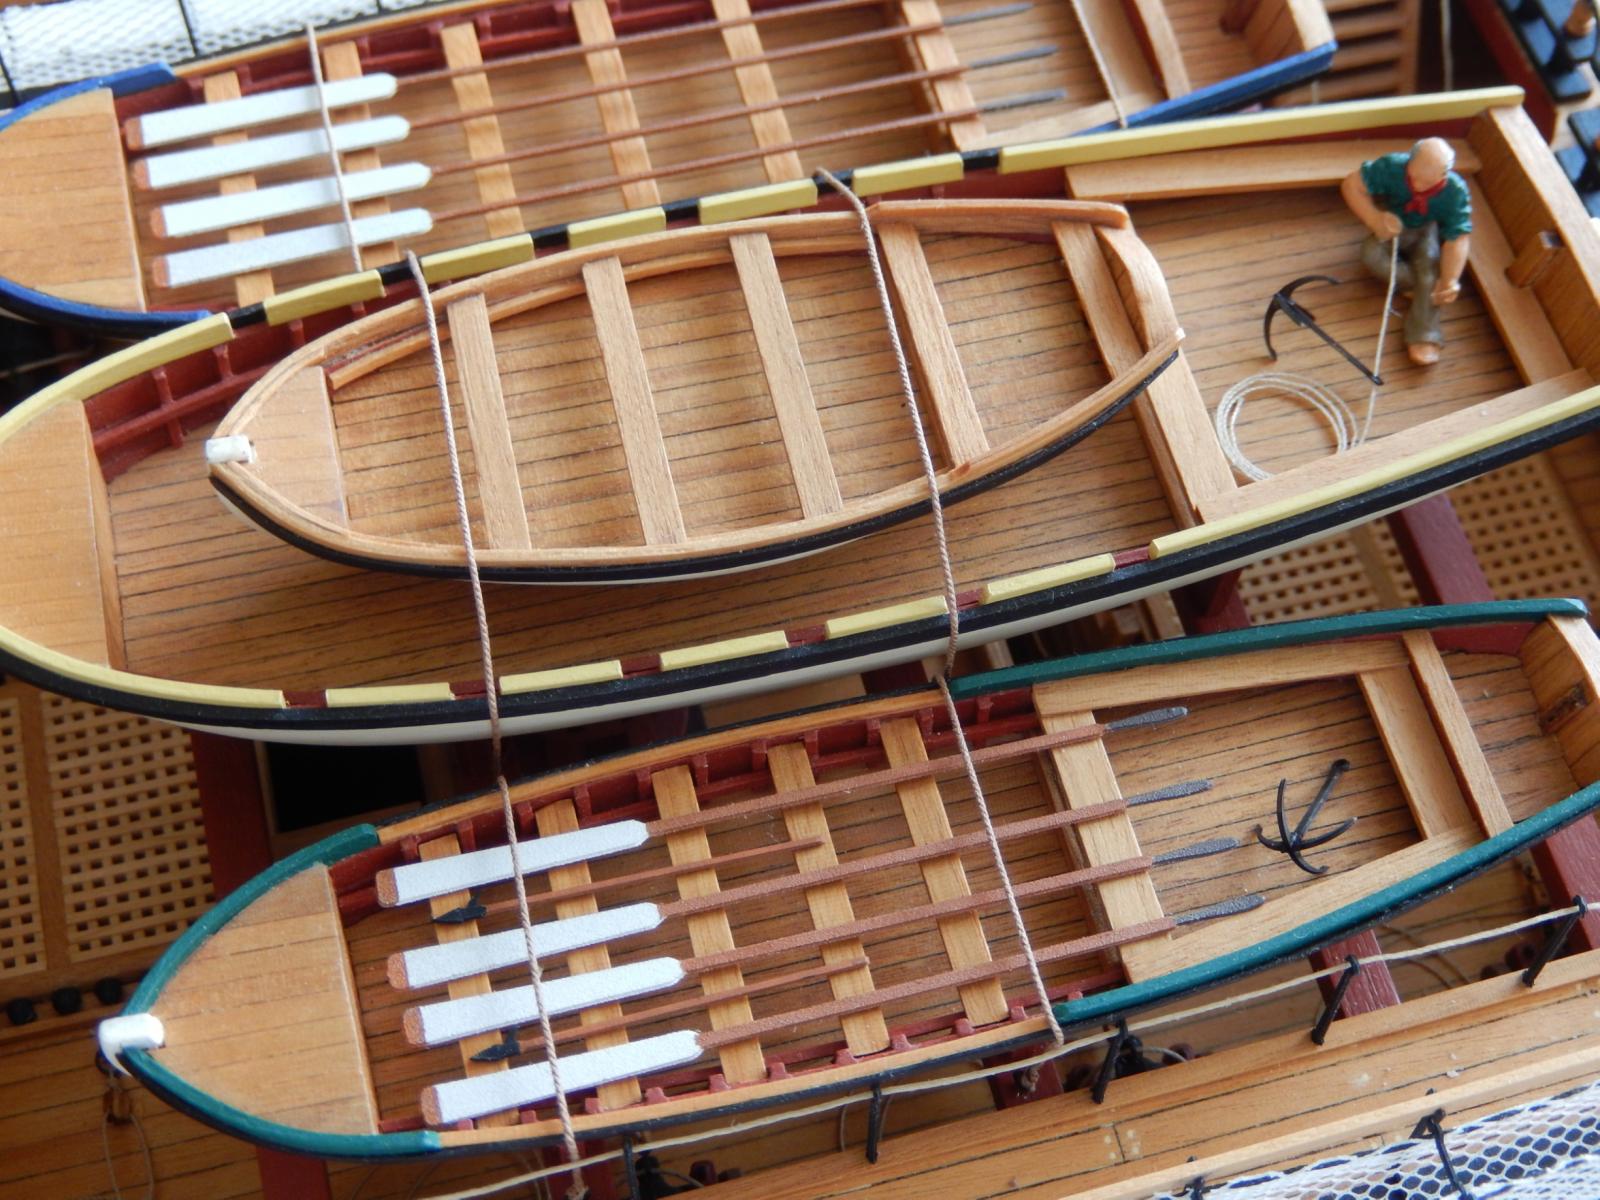
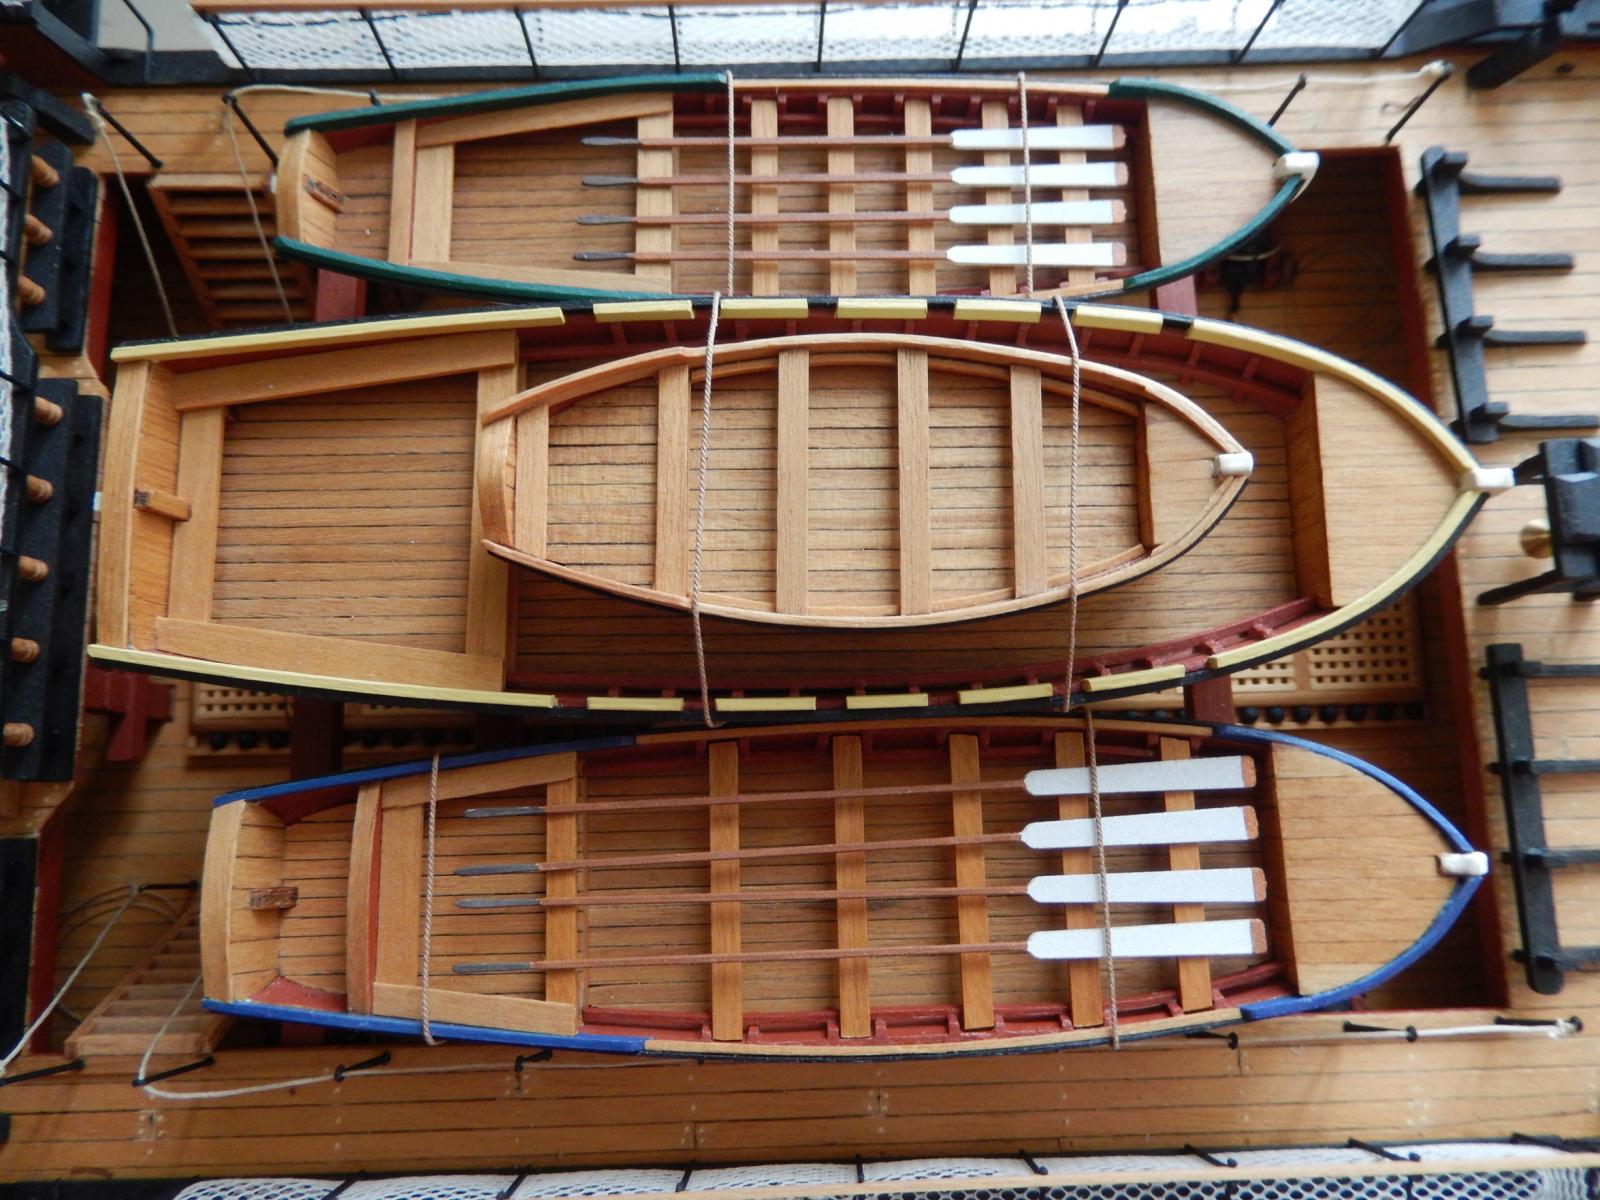
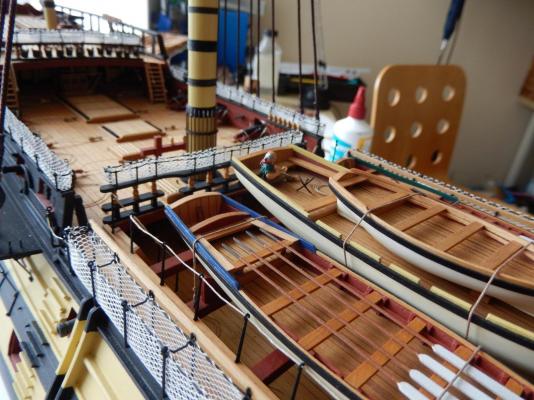
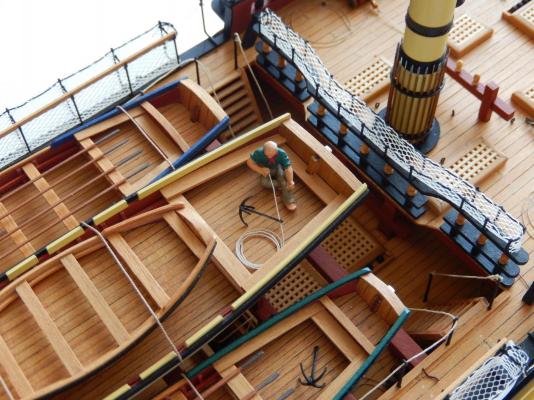
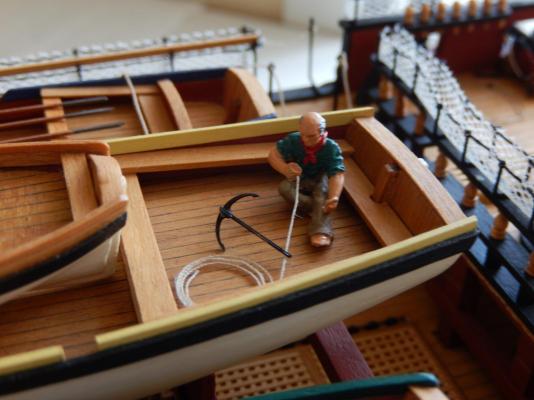
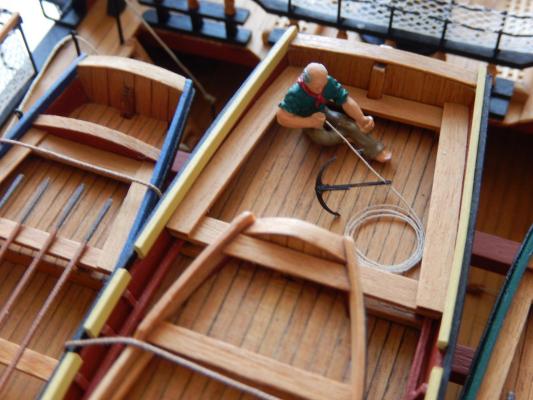
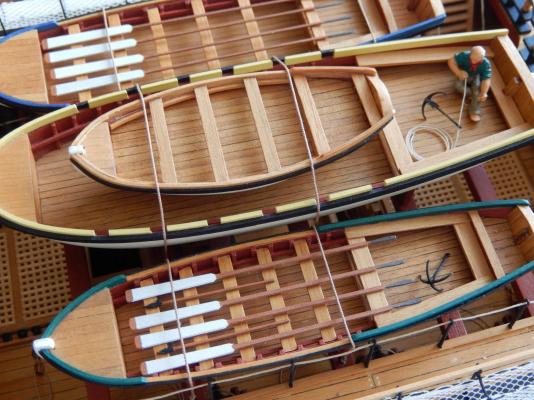
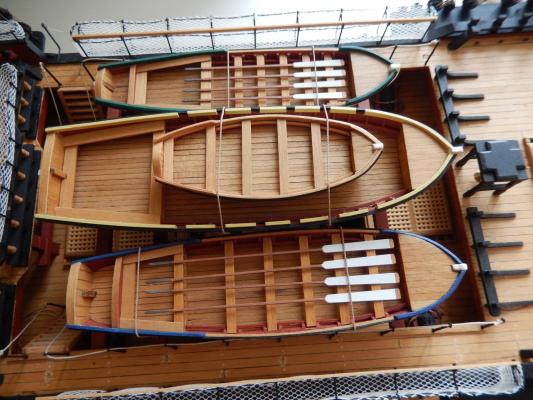
I have put one of the figures in to one of the ship's boats as an experiment. Aside from the overload of oars, the same seems to be the case for the boarding pikes (there are a couple of dozen of them) and the anchors (half a dozen). I think in this case, less really is more. At the moment, nothing is glued down, but it does seem to me that putting all the stuff provided for the boats would be considerable over-kill. Comments are welcome. This photo shows in the lower boat, four oars, two pikes and an anchor ( I hope eventually to do something a little more stylish with the anchor) - there doesn't appear to be much more that can be fitted in without appearing overly cluttered. Now I have to think about where to put the Admiral ....
-
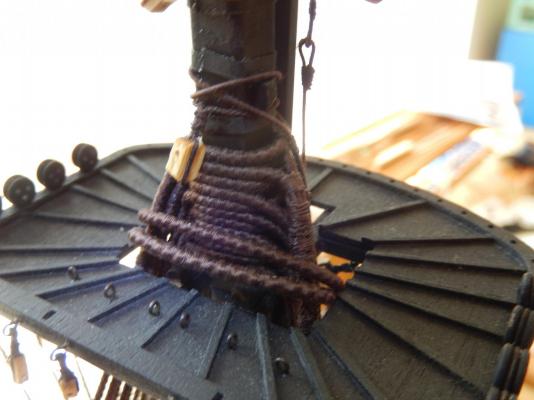
I have now finished the futtock shrouds for the fore mast. This has been a very fiddly job and the results are just adequate. I used a bulldog clip and later an alligator clip hung on the end of the shrouds too keep them taut as I tied them off. Finished. I have substituted Syren thread for the kit-supplied stuff and it has come back to bite me in a small way. The quality of the thread is excellent, but it comes in Imperial measurements (seems odd, for a republic. ) In each application I have taken the nearest metric measurement of the thread specified. In the case of the shrouds for the mizzen I have used 0.88mm Syren thread which is specified as 1mm in the kit. (In fact, if you actually measure the Syren thread it is indistinguishable from 1mm.) The futtock shrouds for the mizzen are specified to be 0.75mm thread. Alas, I only bought the 0.88 stuff (which is of course quite close to 0.75.) However to use the 0.88 for both the shouds and the futtock shrouds would not look 'right', so I am now waiting for delivery of the Syren thread which measures at 0.63mm. If there is a lesson in all of this, be careful of measurements if you specify non-kit thread.


-
Well at least my keeping the blades facing forward turned out to be right. I'll see what I can do about lashing, though it does seem a little extreme in the 21st century.
-
Fam: Thanks for that. I had tried alternating the oars, but I thought it looked a bit odd. I'll certainly try bundling the oars up to see how that turns out.
-
Alan: I'm not quite sure what a thwart is (actually I have no idea), but I'll look it up and see if I can queeze a few more in.
-
Having painted a couple of dozen oars for the ship's boats, the question then arose, how to fit them all into the boats? It seems to me you can't without the boats disappearing under a pile of oars. I have placed 4 oars in two of the boats and this seems to work reasonably well. If anyone can suggest how to fit in the remaining oars I would certainly be grateful. If not I have a heap of painted oars if anyone wants them.

-
Arthur: thanks for the picture of the dovecote. I think I have (dimly) heard the term, but have never seen one. It now shows that Cook still had his marbles when he saw the mountain. I always thought it bears a resemblance to something quite different, but that's just me. The figures are remarkably detailed and I'm quite pleased with the result. (The black eye that Nelson appears to have is a shadow) When you get around to painting them, do give them a very good clean before painting (I forgot to) as the (Humbrol) paint was not keen on adhering.