HOLIDAY DONATION DRIVE - SUPPORT MSW - DO YOUR PART TO KEEP THIS GREAT FORUM GOING!
×


RMC
-
Posts
933 -
Joined
-
Last visited
Content Type
Profiles
Forums
Gallery
Events
Everything posted by RMC
-
Here is the latest, and I hope final, iteration of the shroud saga. I certainly hope this one is right. For some reason I had trouble obtaining a clear photo. I hope these provide the general idea however.


-
Oh, well, fortunately nothing is fixed. Thanks for taking the the time to help. I really appreciate it. It's just after 10pm here, so I'll redo that lanyard tomorrow and post a photo to make sure it's OK. I have to get up at 3am tomorrow for the rugby, so tomorrow is going to be a long day.
-
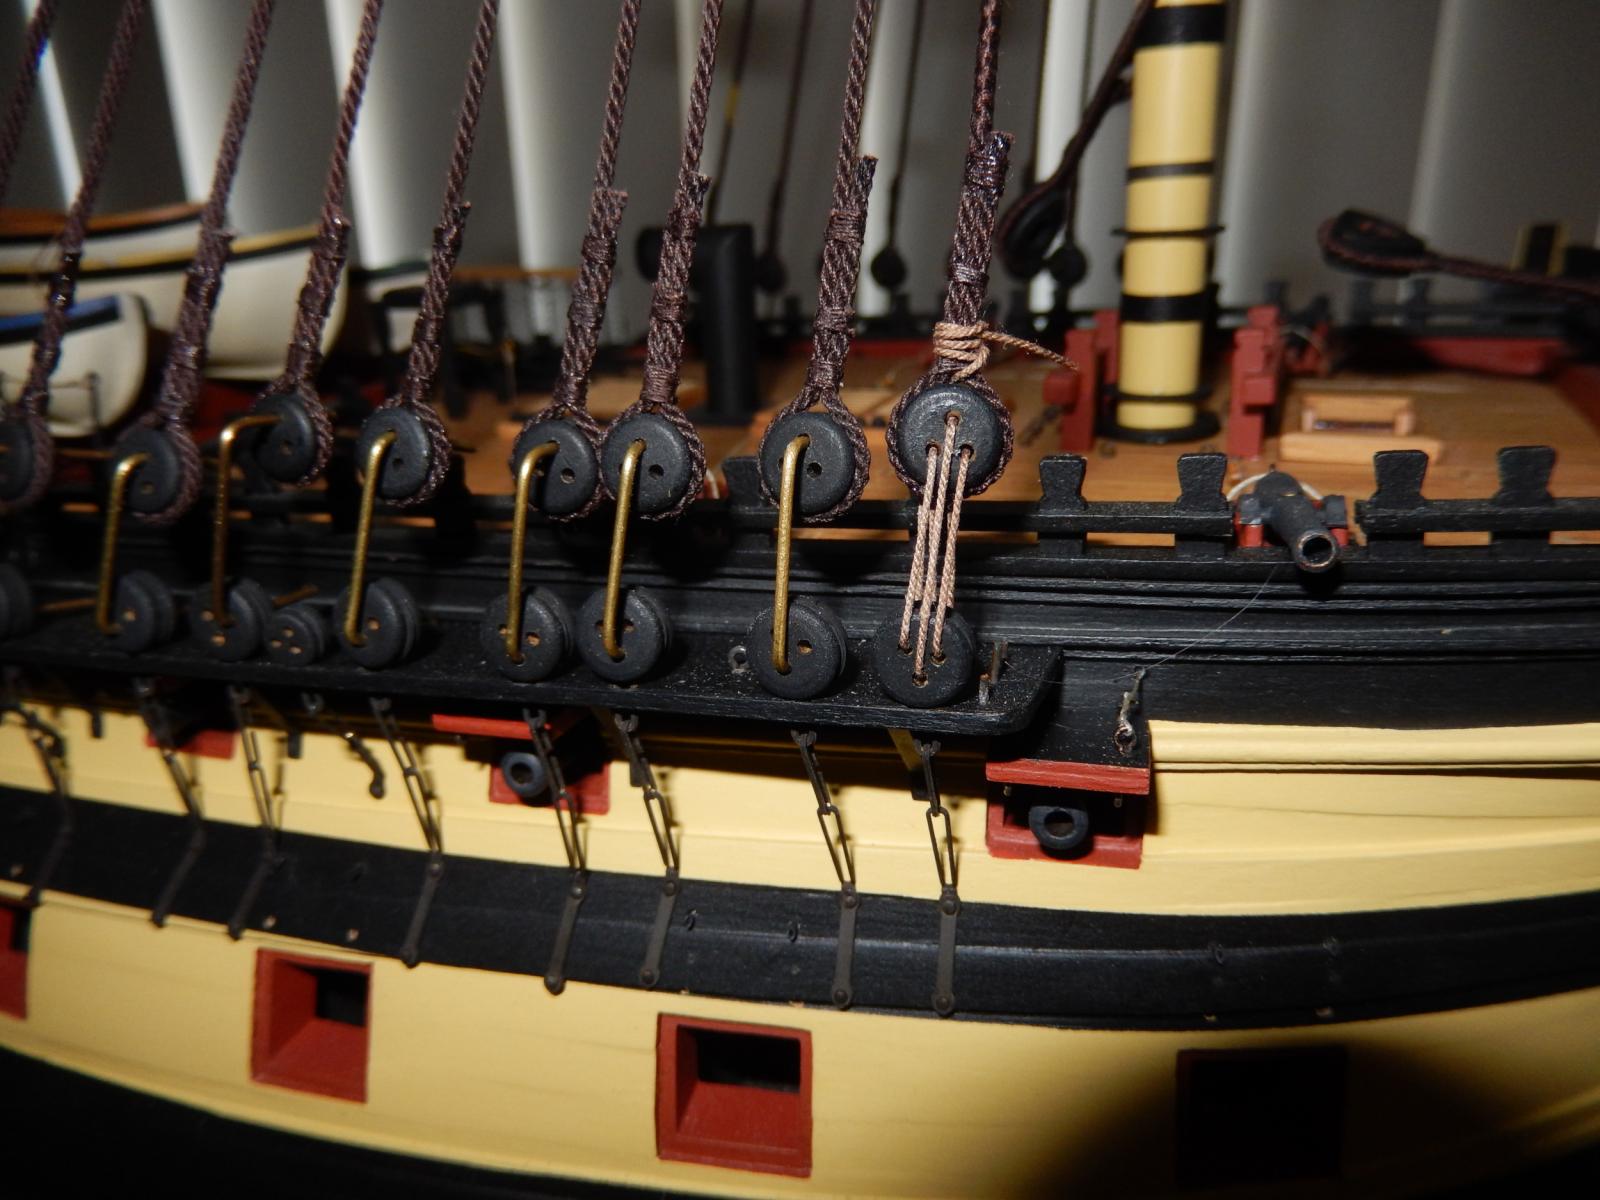
Thanks again Arthur. I hope I have followed you correctly. This is what the lanyard on the starboard side now looks like. I will not finally fix the lanyards until all are in place.

-
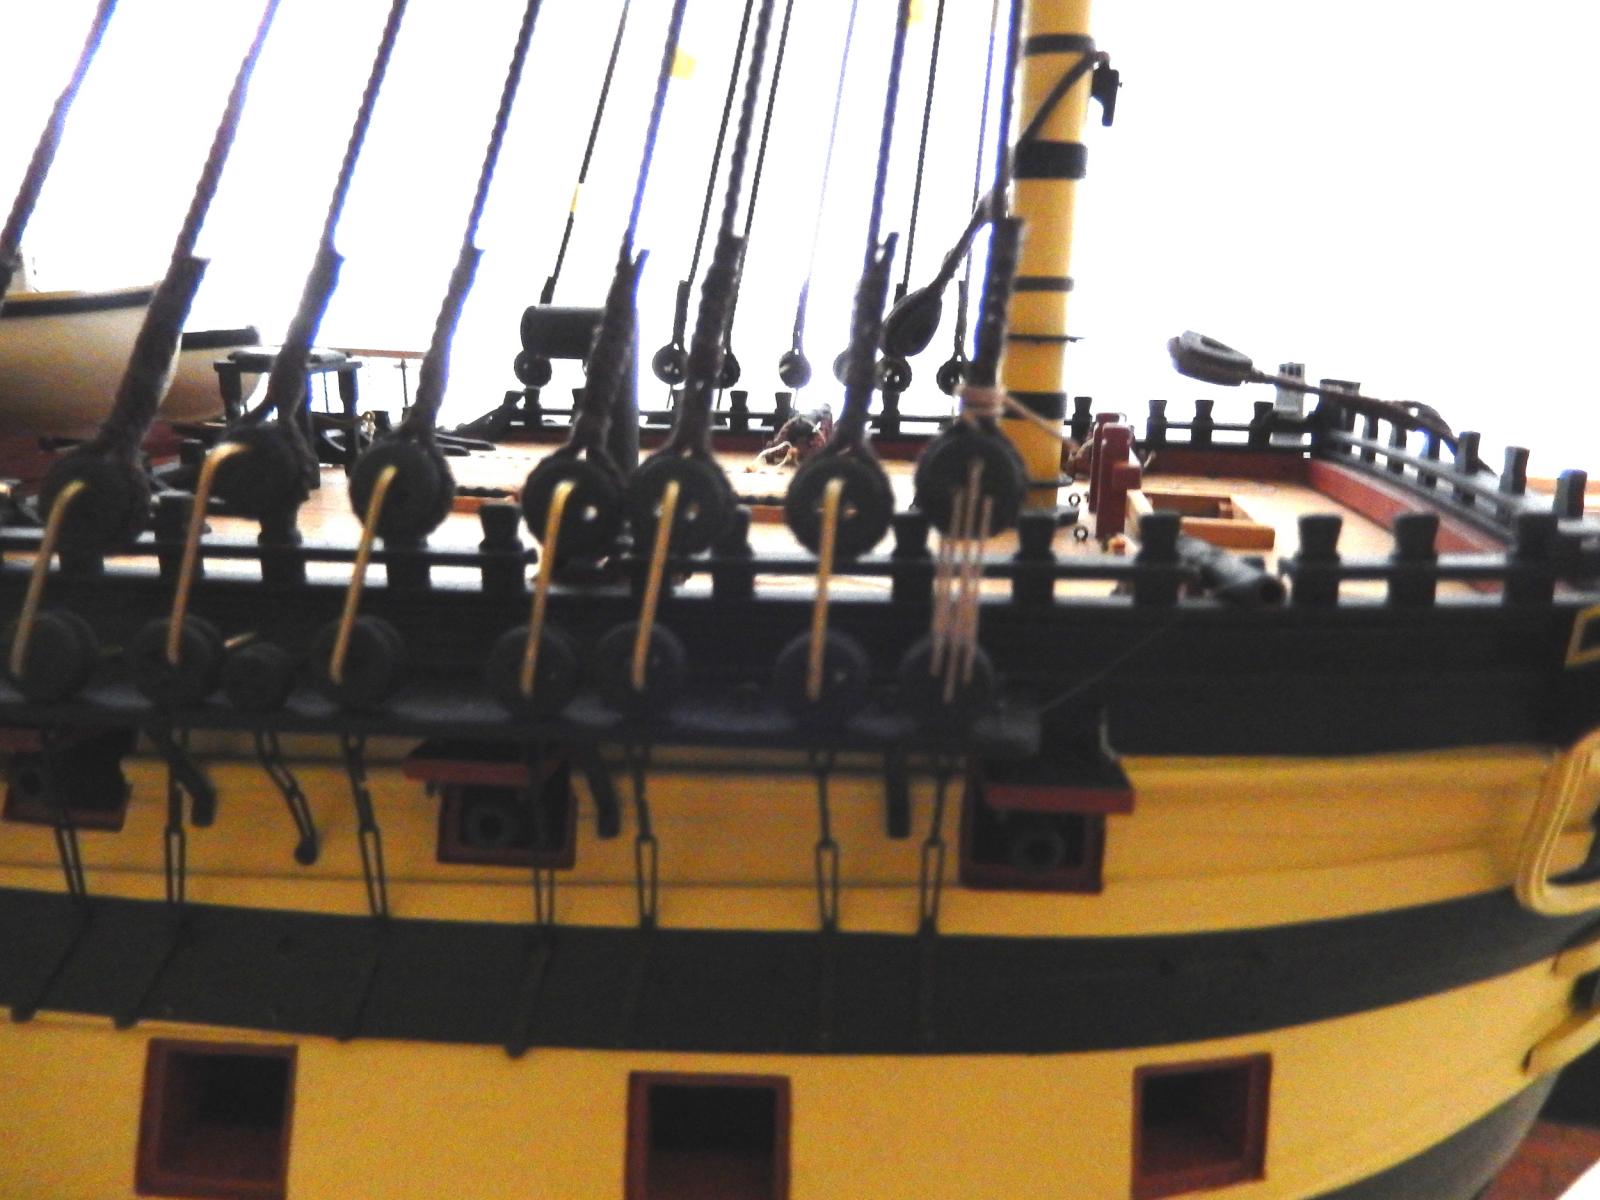
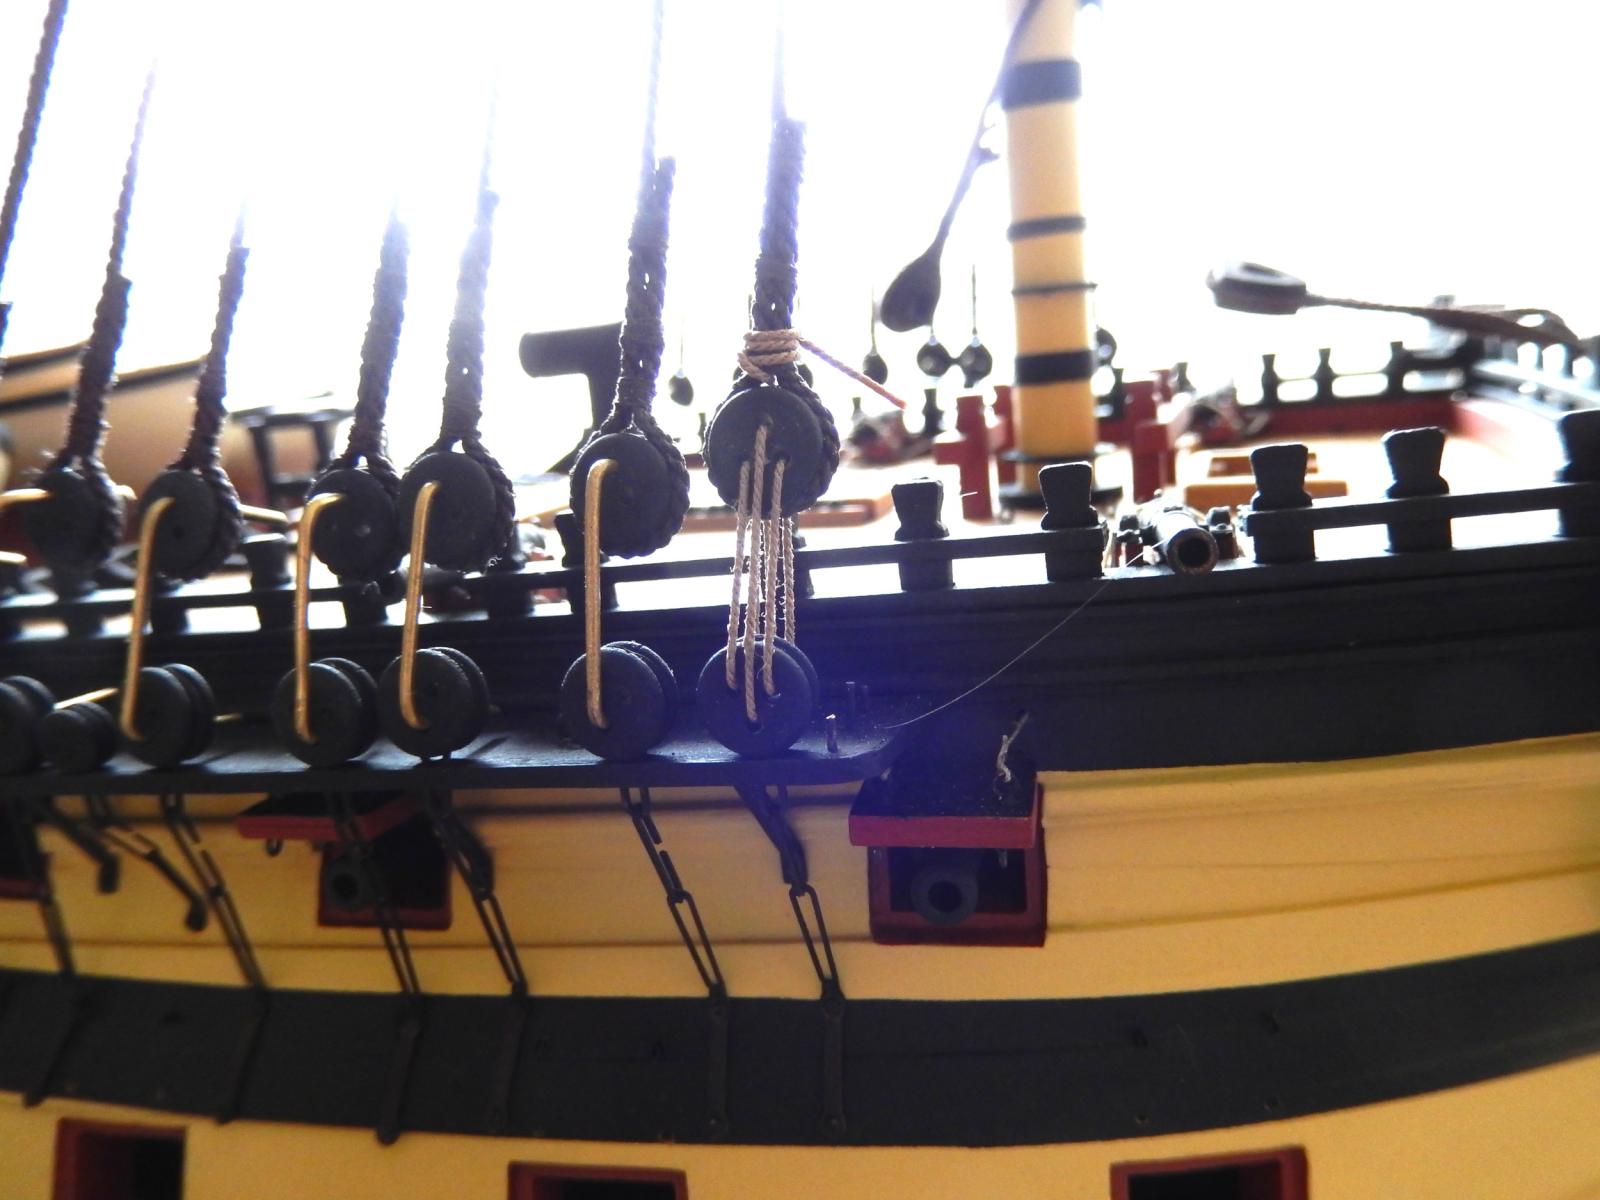
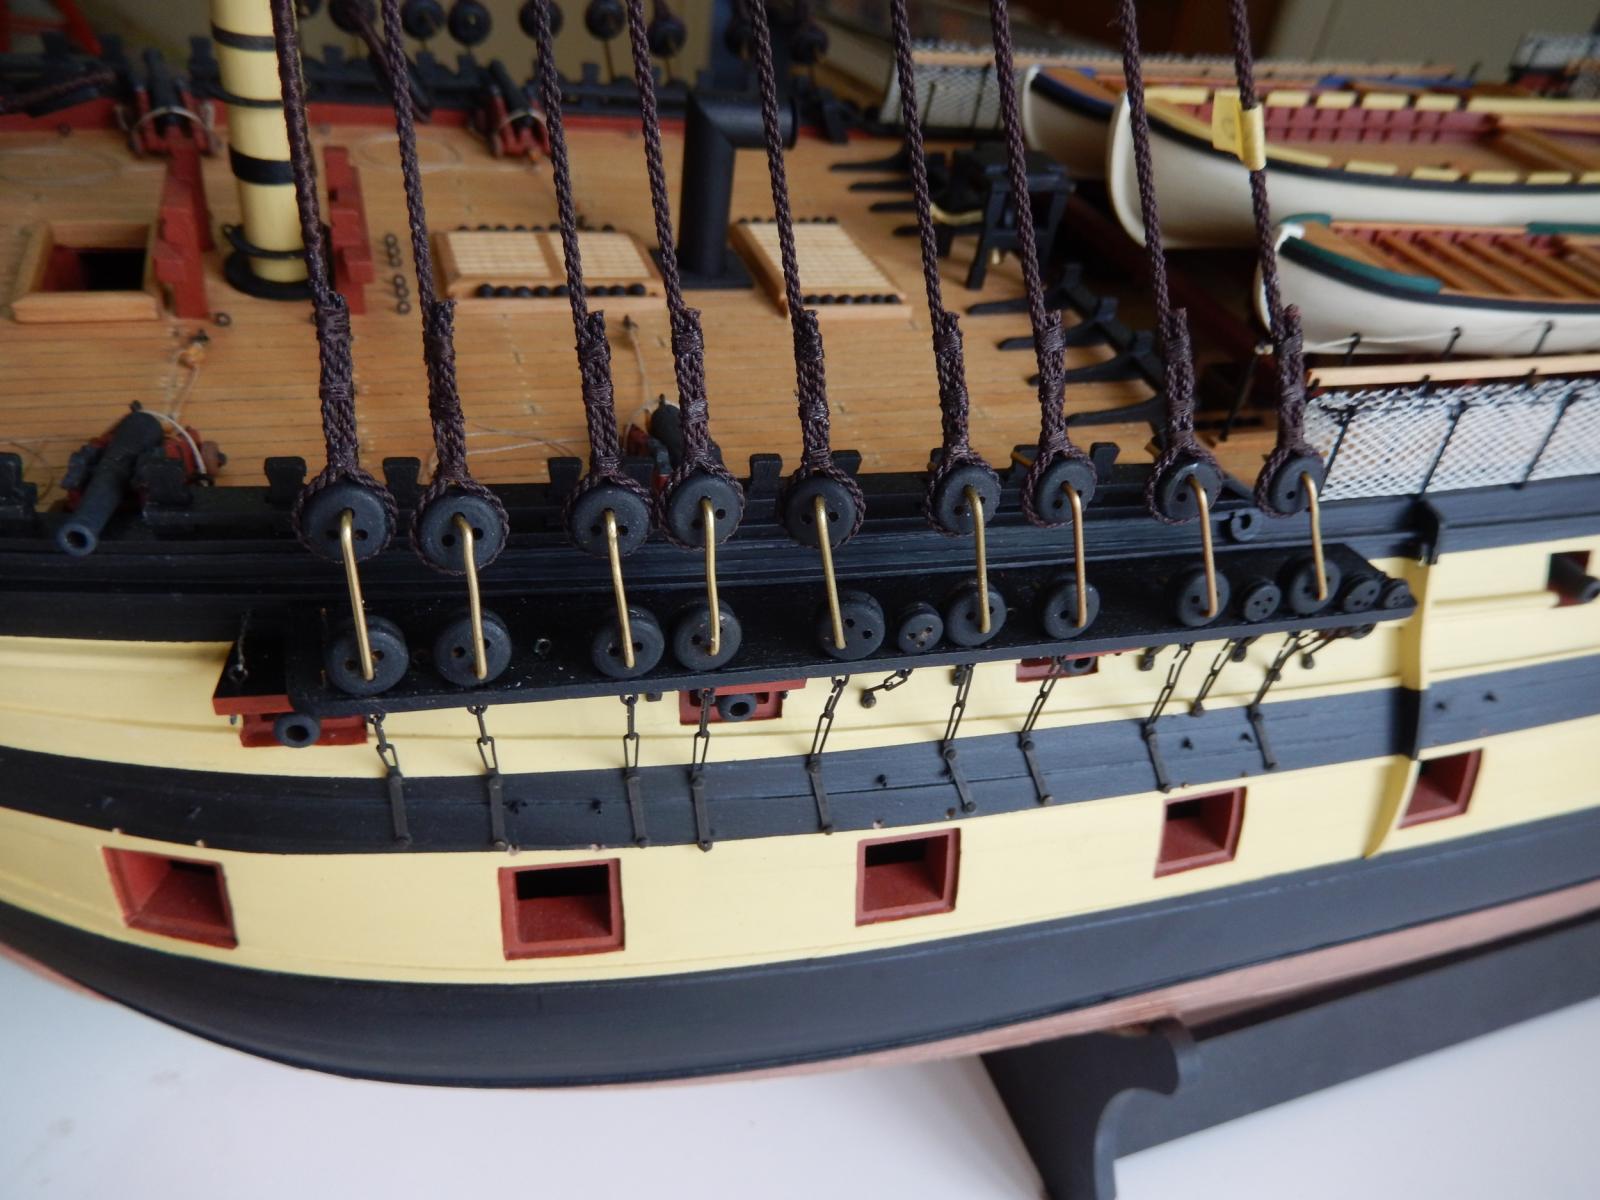
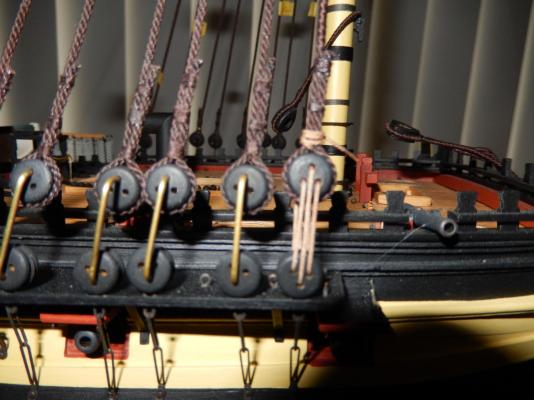
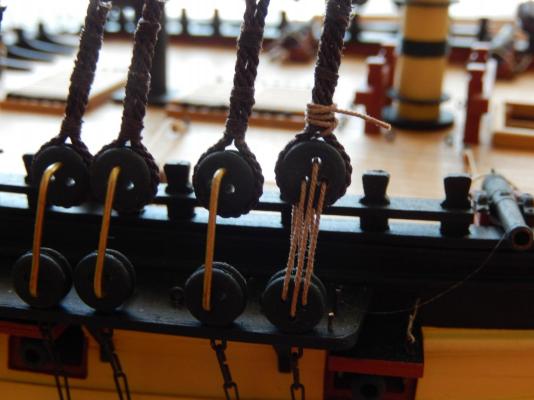
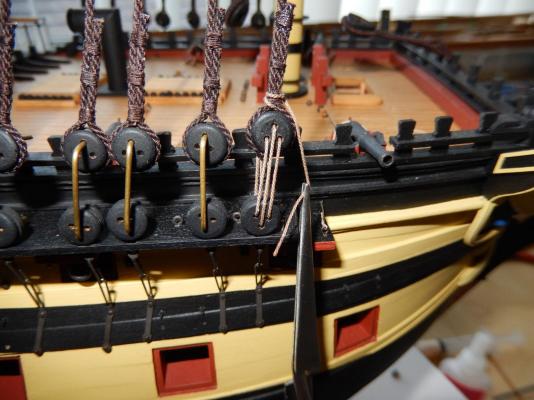
Lashing for deadeyes? Help needed. I have decided to lash the deadeyes for the foremast shrouds - though at this stage not to finally fix them. The two photos above show how I propose to do the starboard side. The knot behind the deadeye in the photos is behind the right eye facing (ie. the eye towards the stem). Is this correct? If so, on the port side would the knot be behind the eye towards the stern? (All the rope is left laying - whether this makes any difference ....) Petersson's representations (again) seem to me to be inconsistent. This whole shroud business is driving me crazy. Any assistance would be welcome. Mort. thank you for the kind comment, and thanks all for the likes.
-
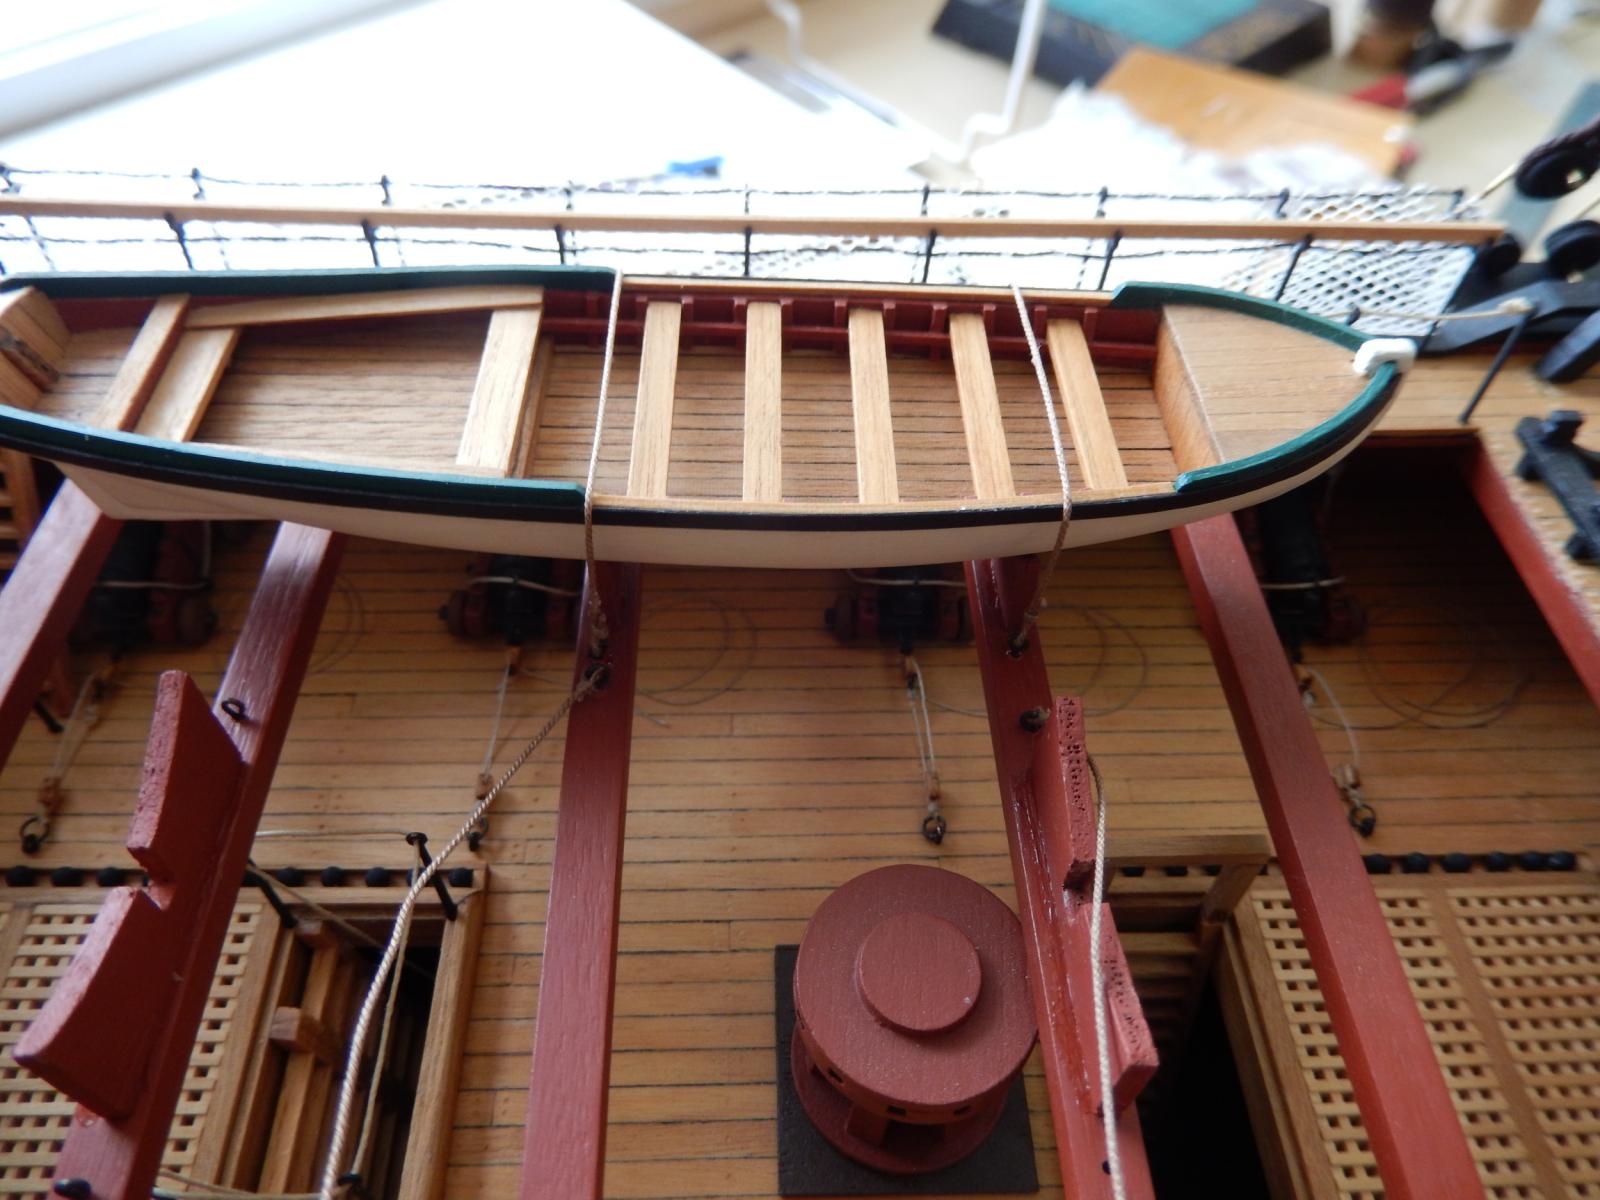
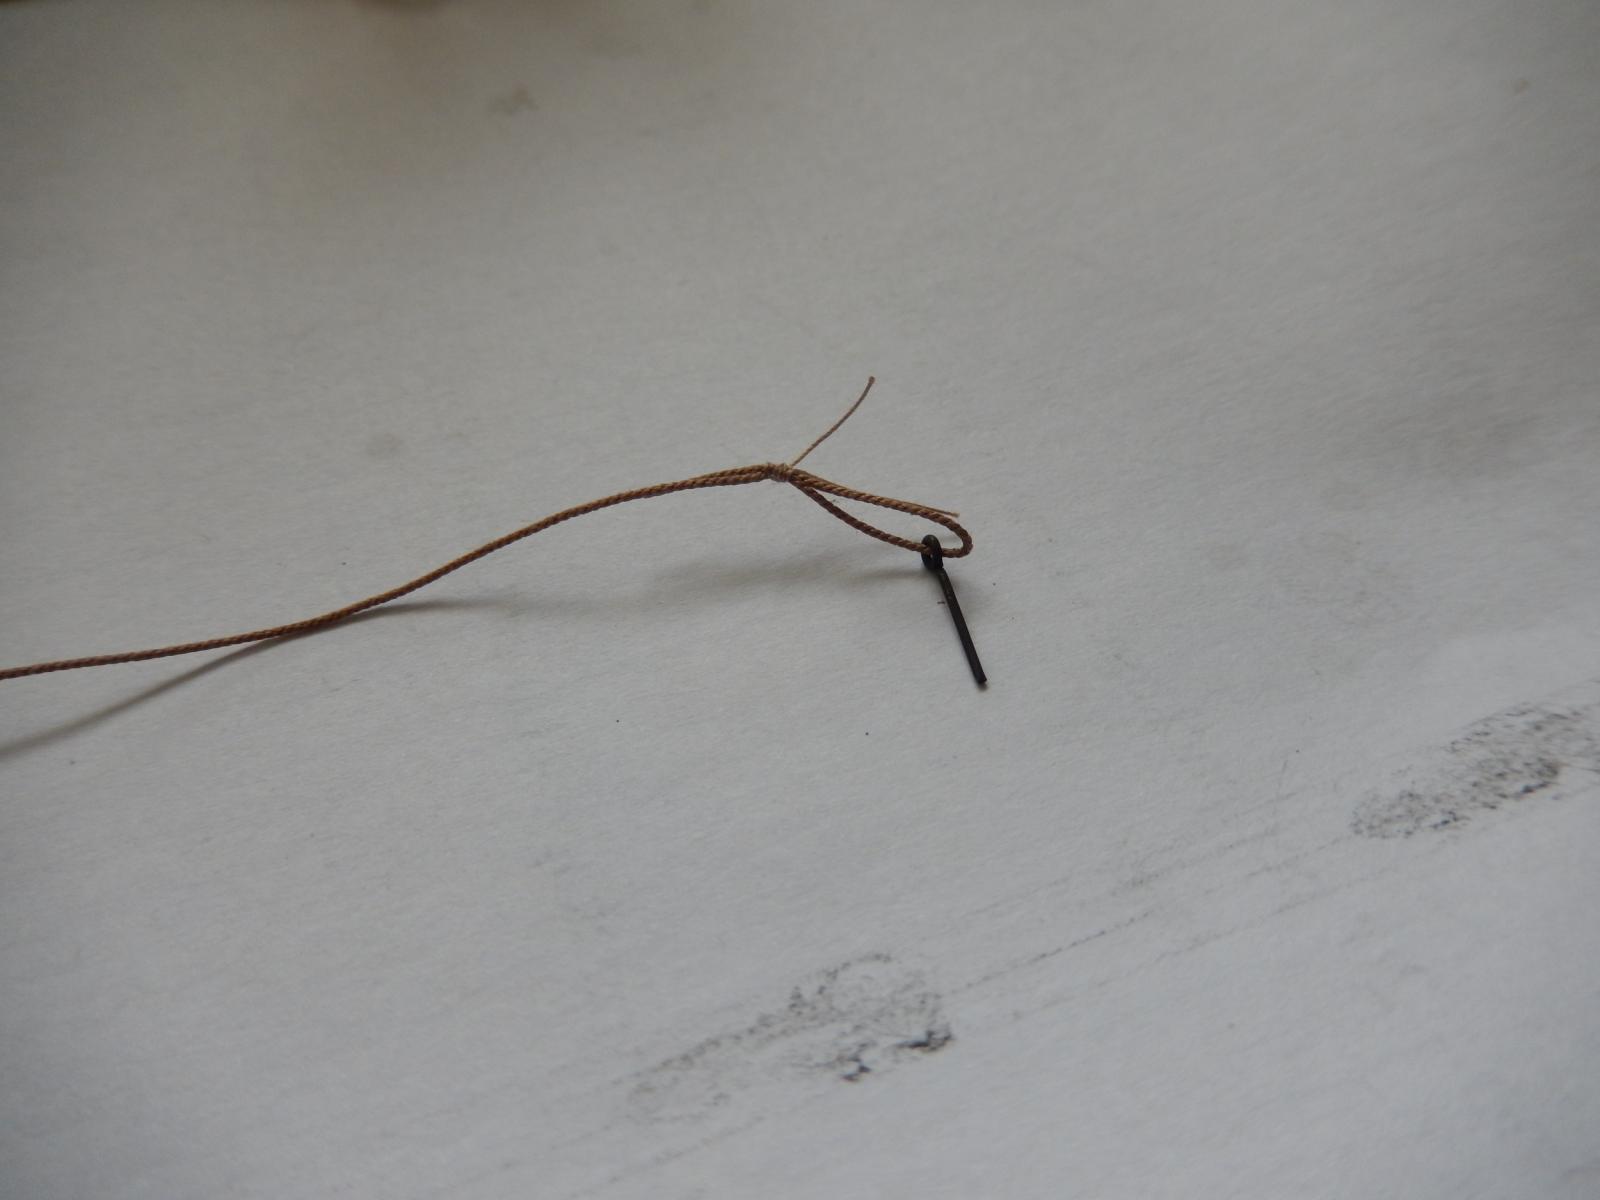
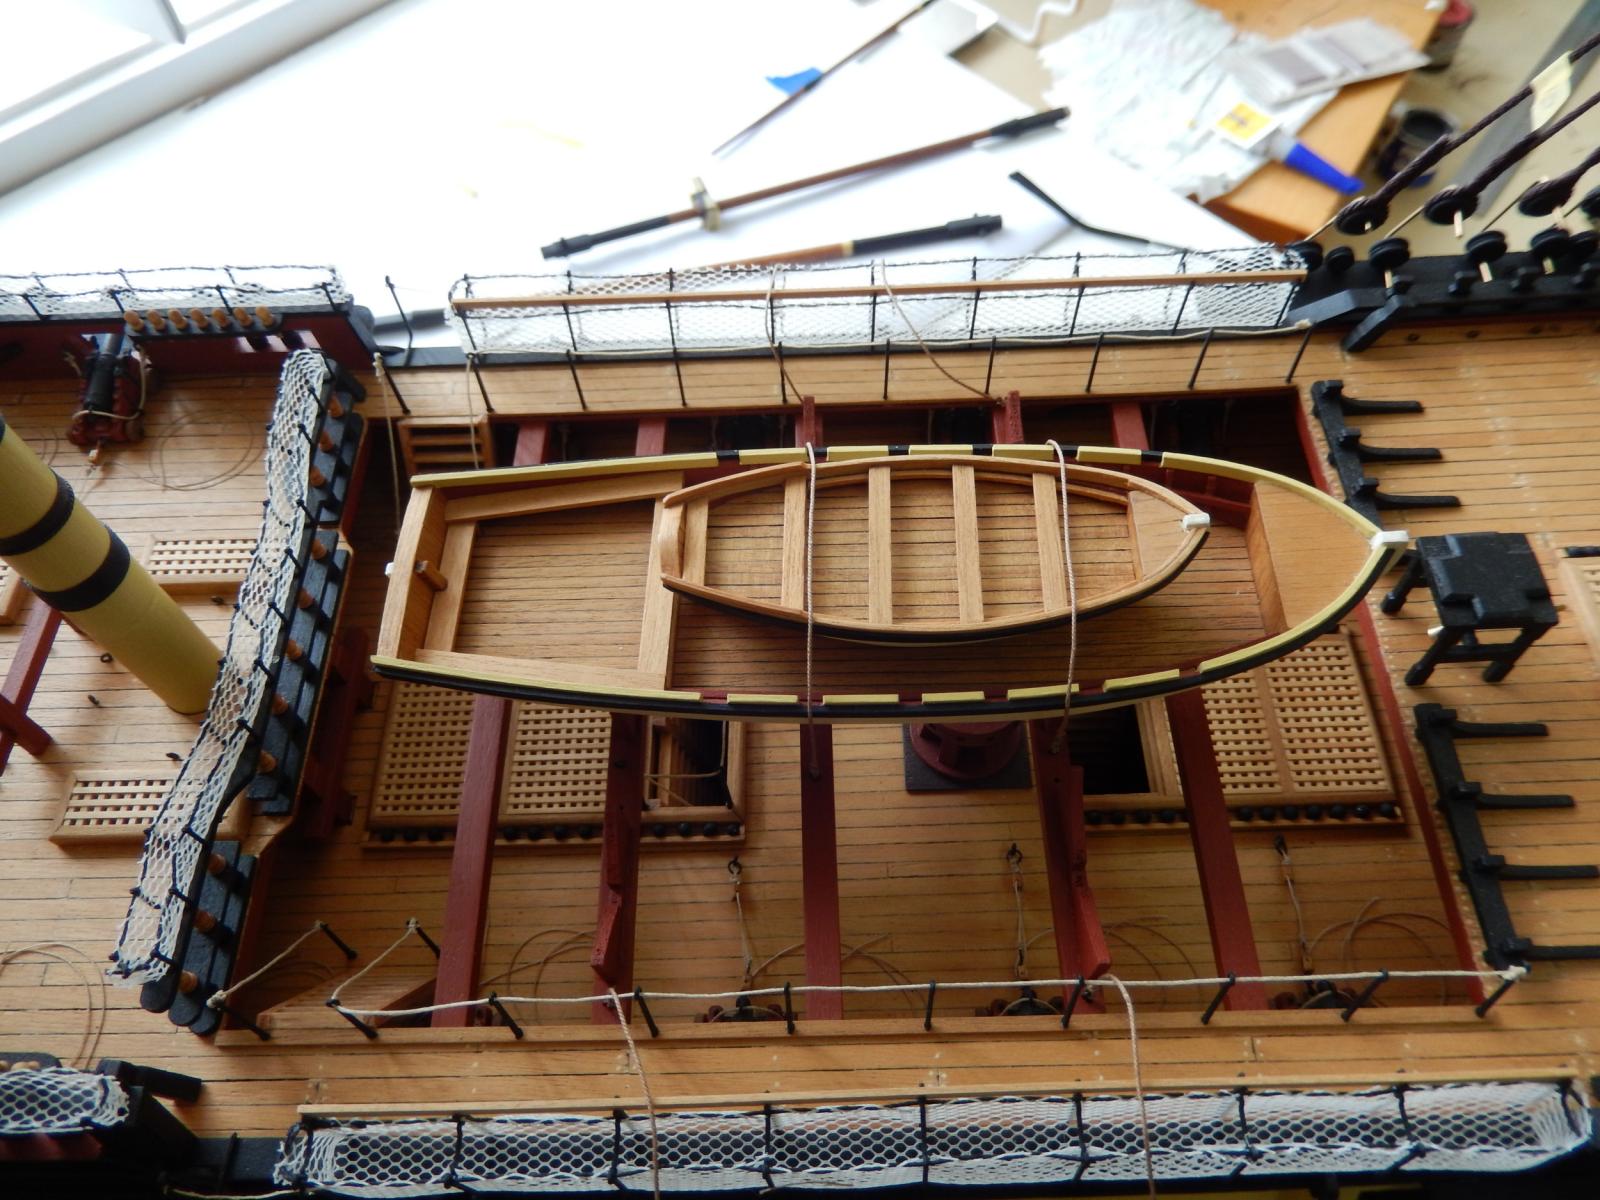
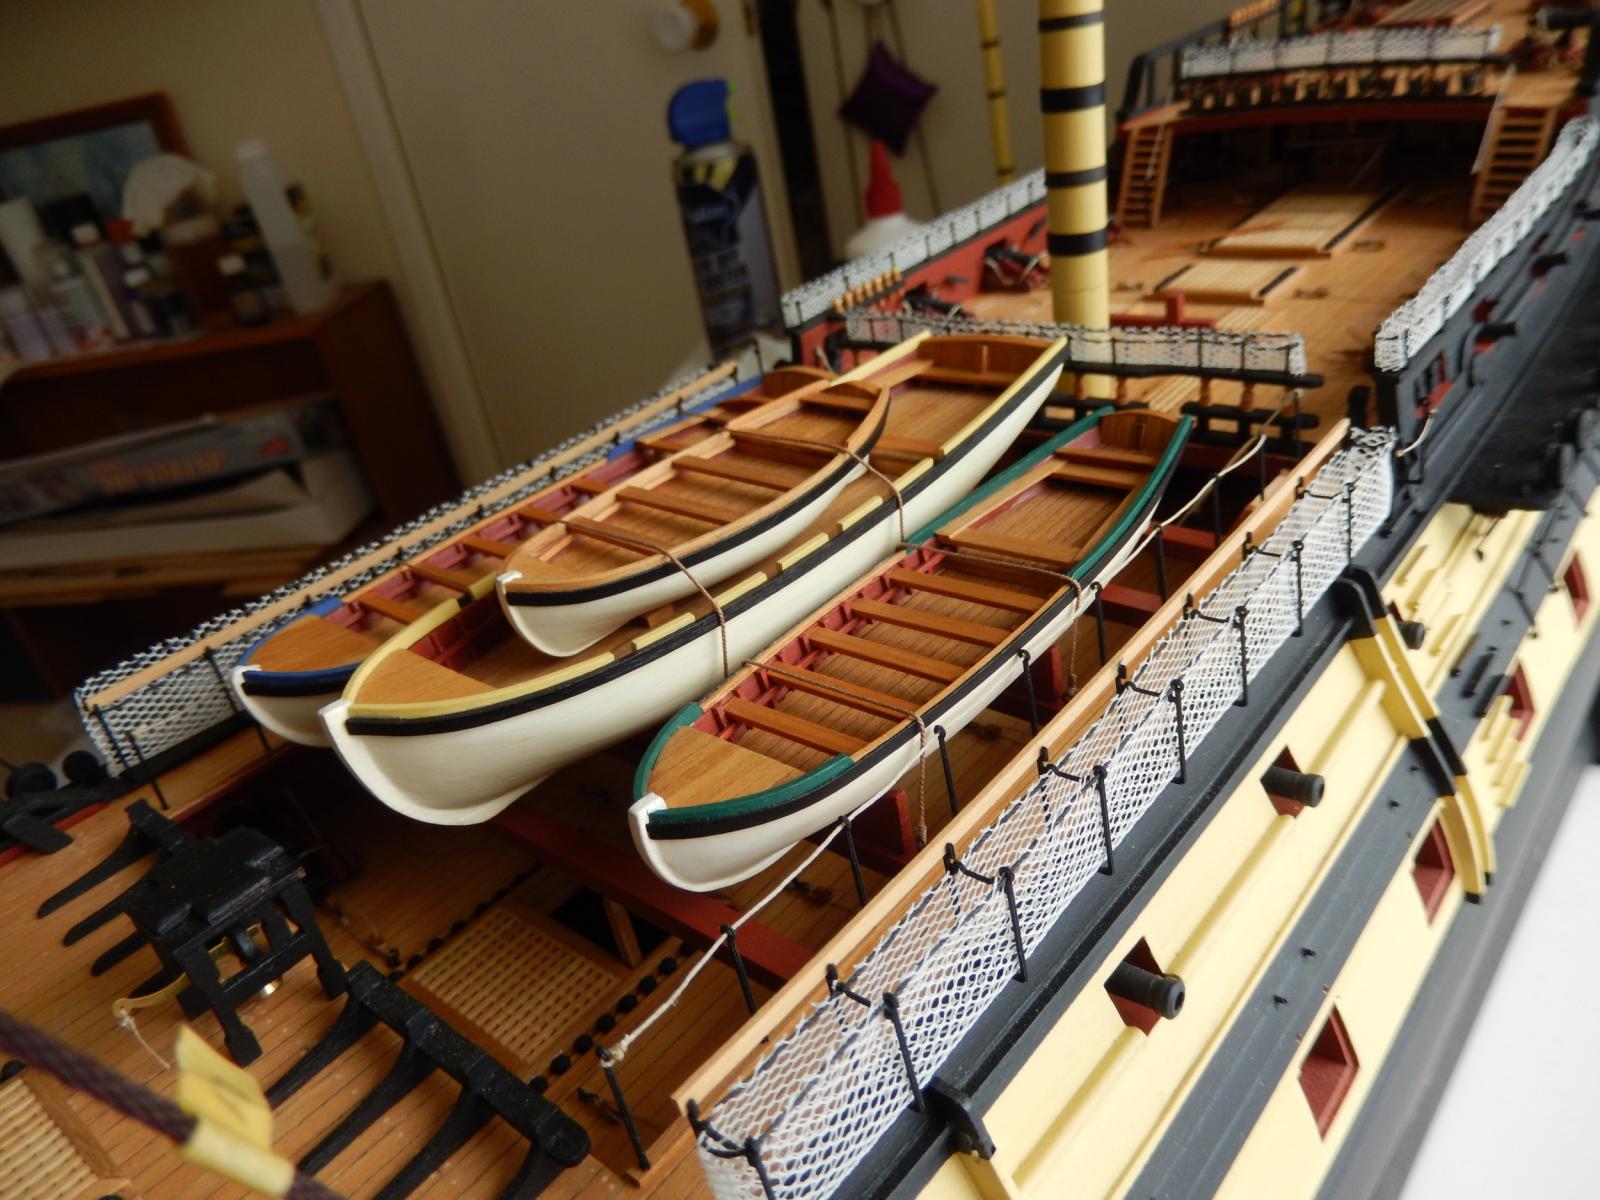
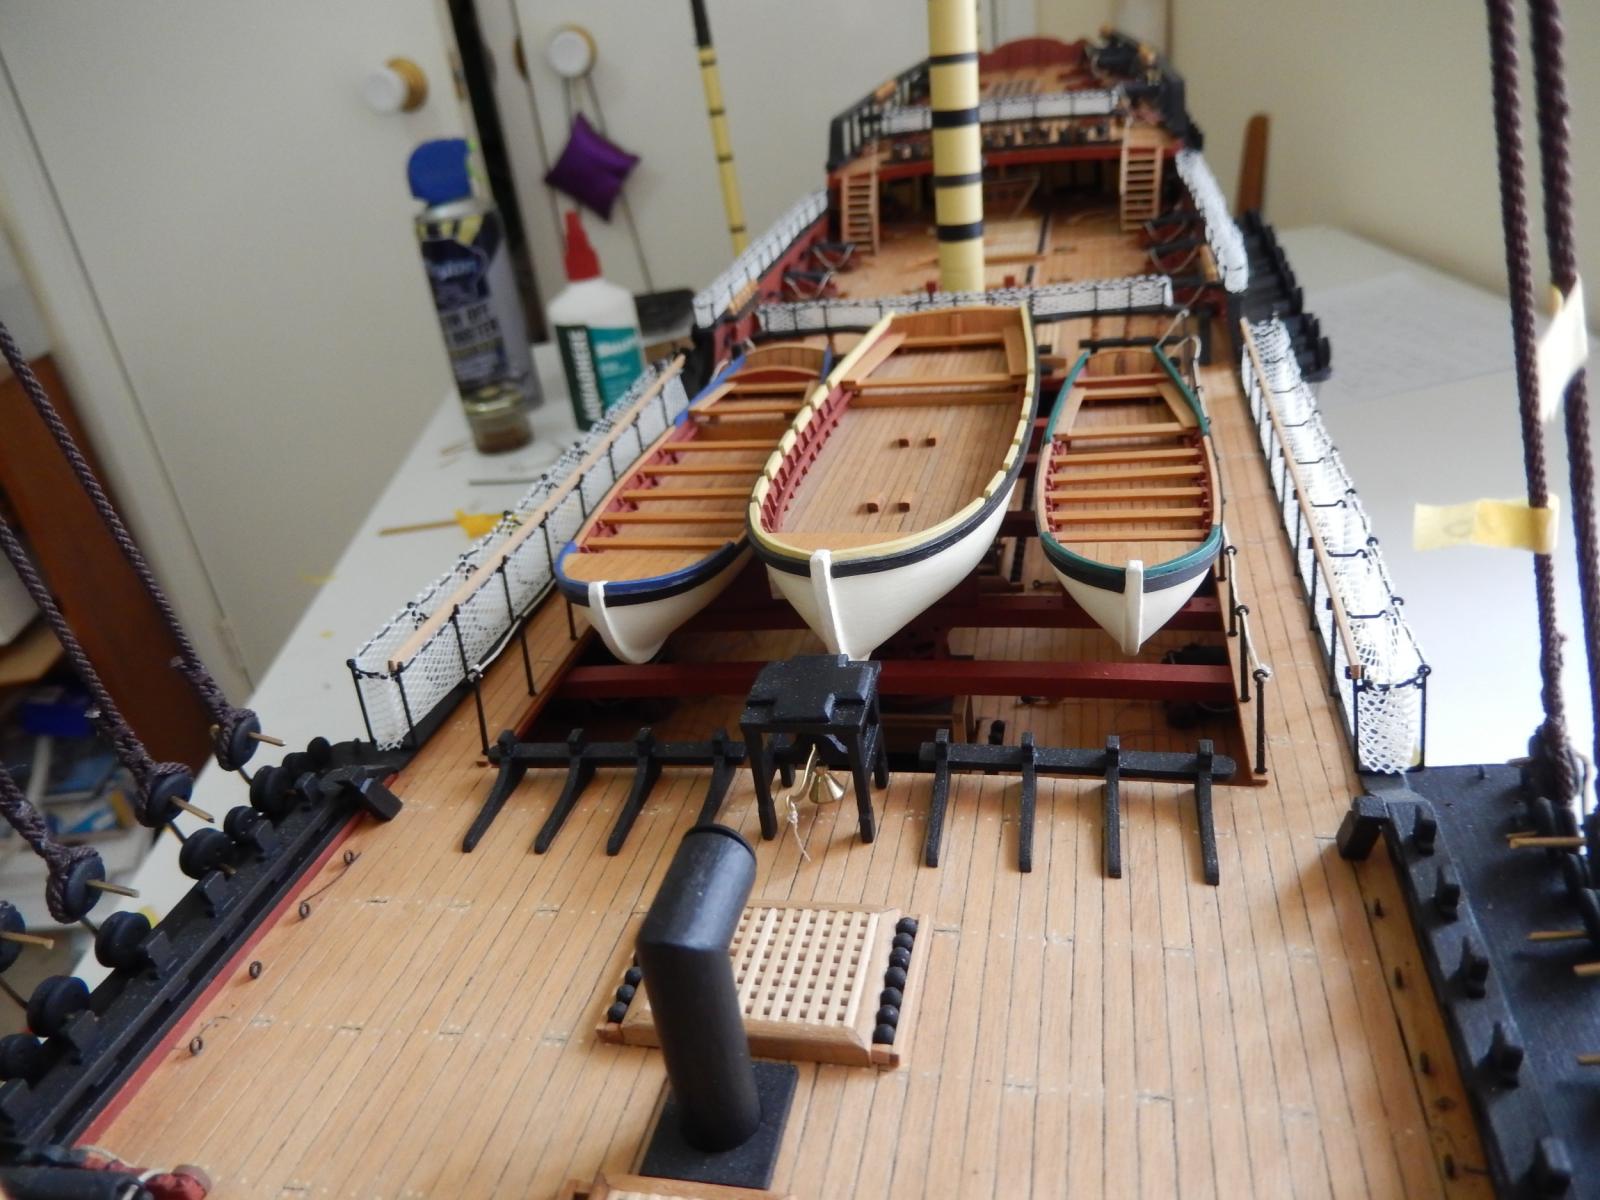
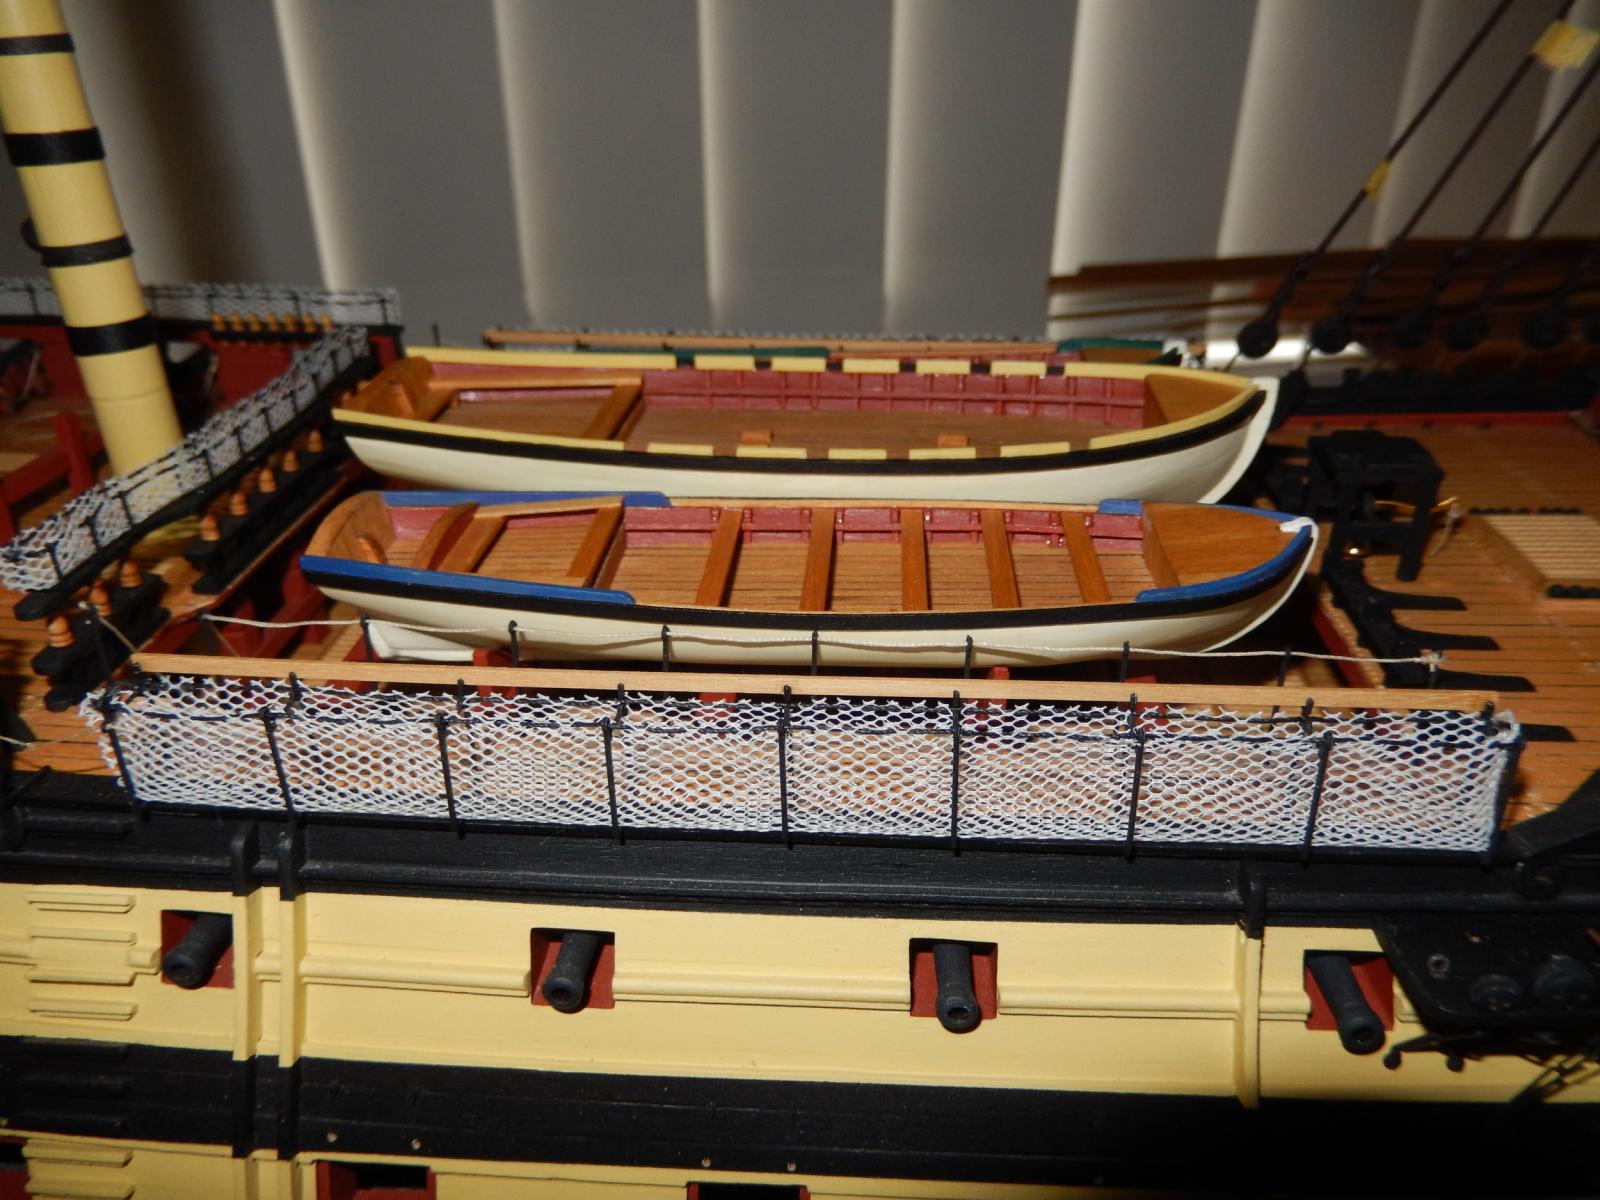
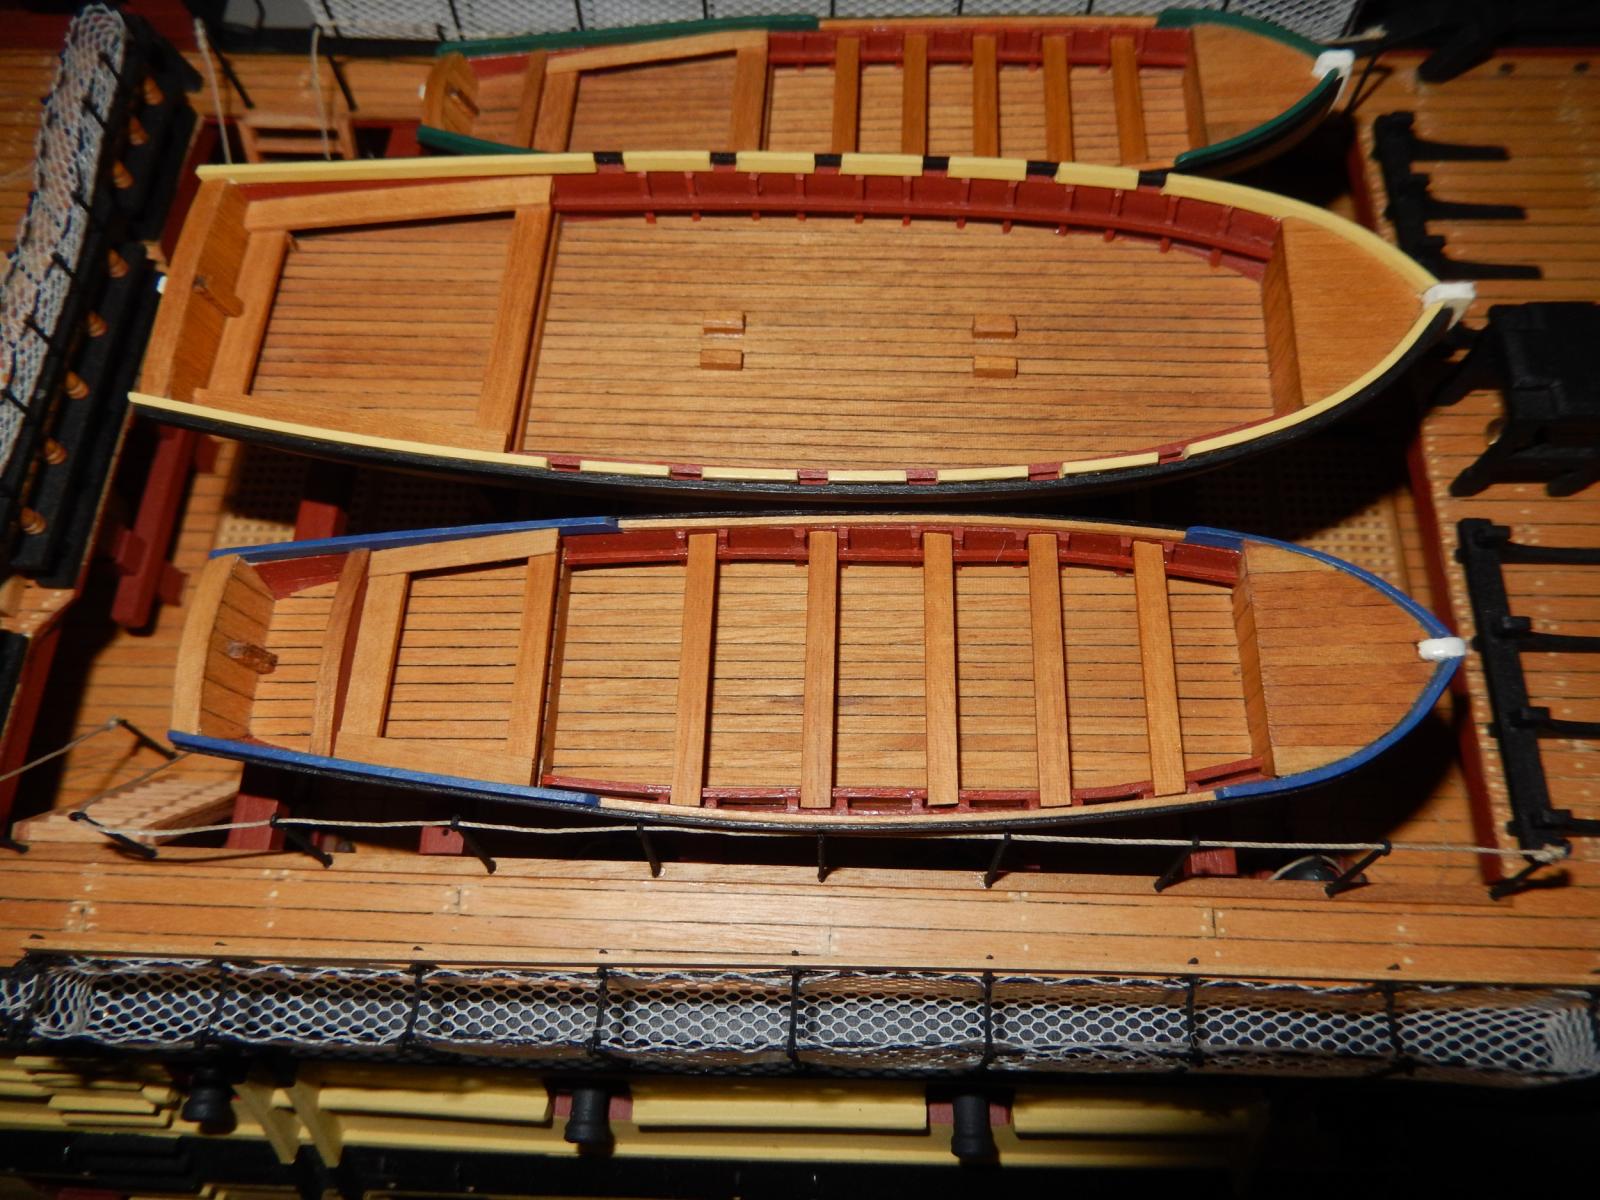
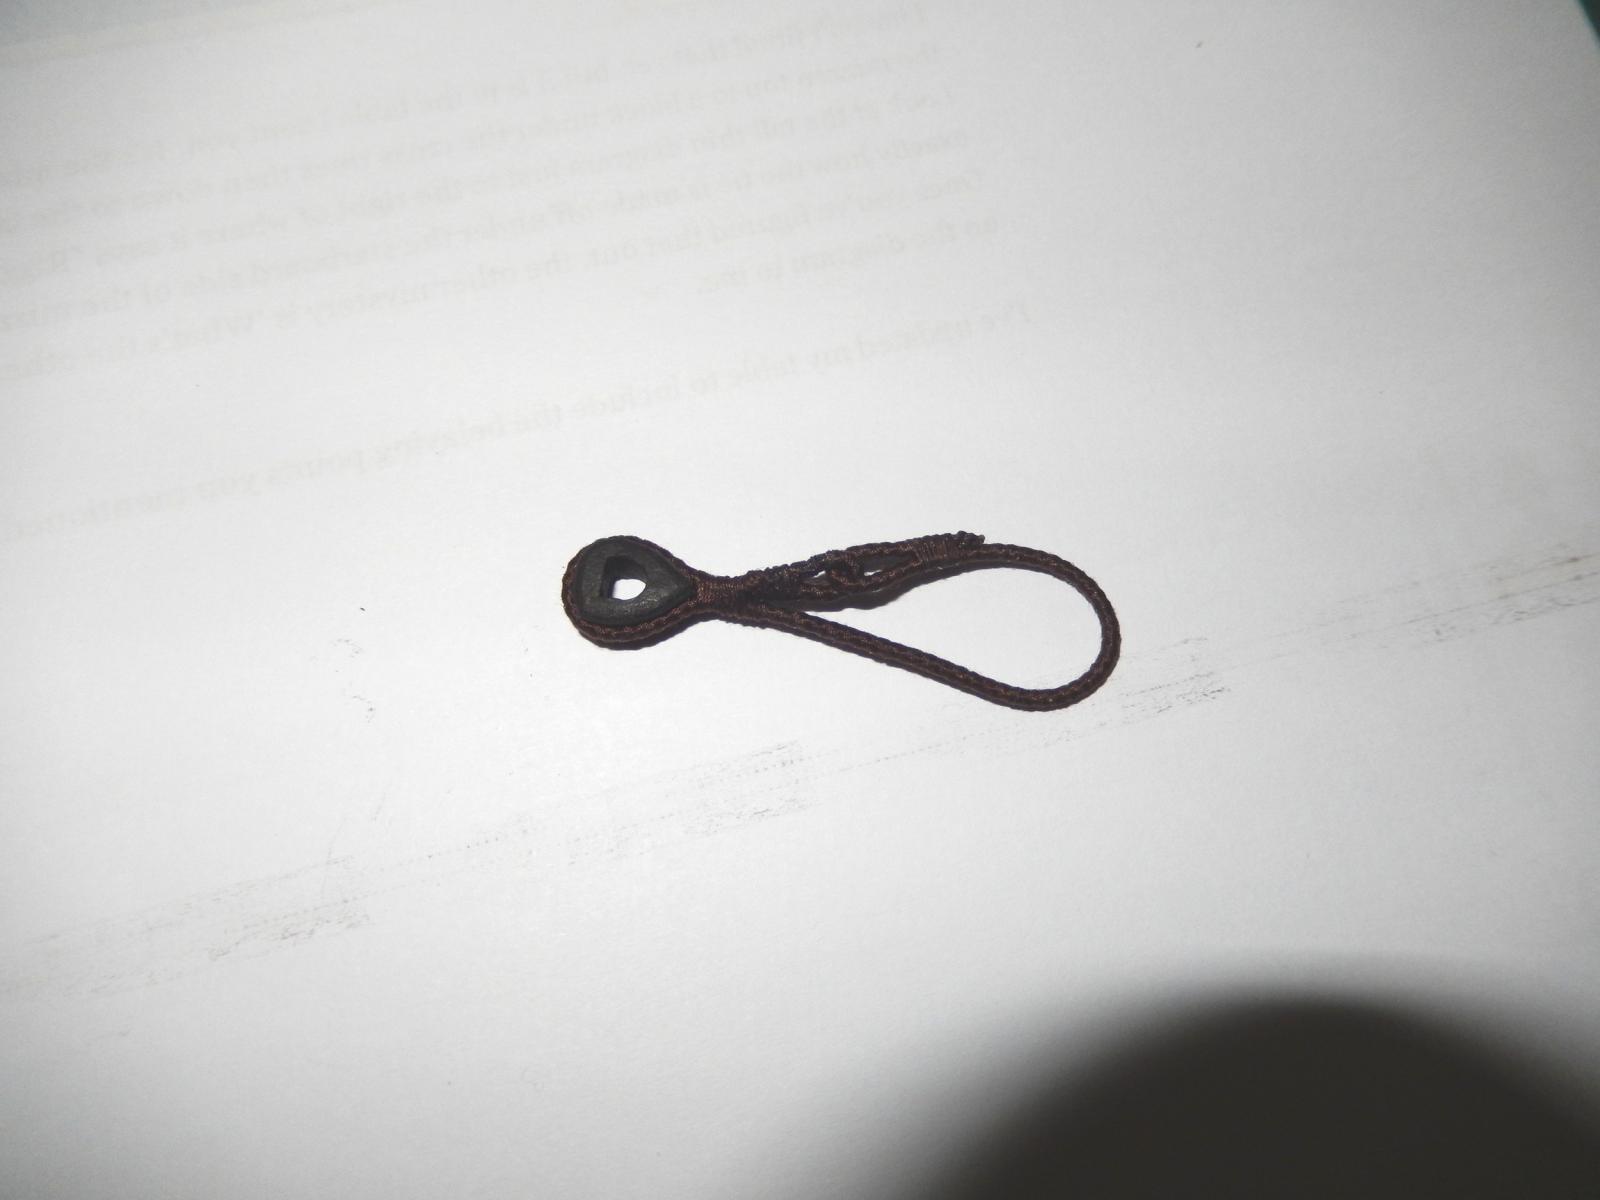
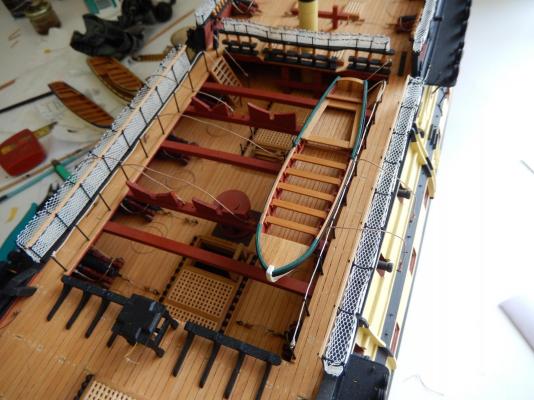
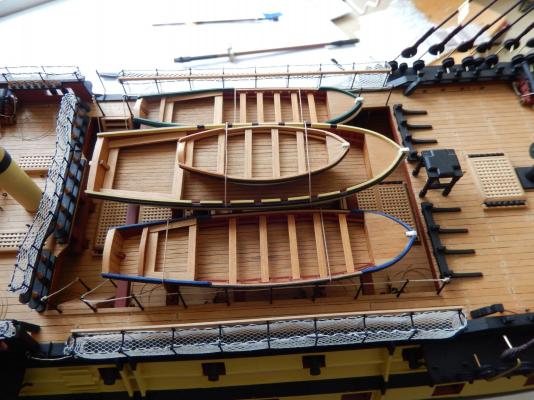
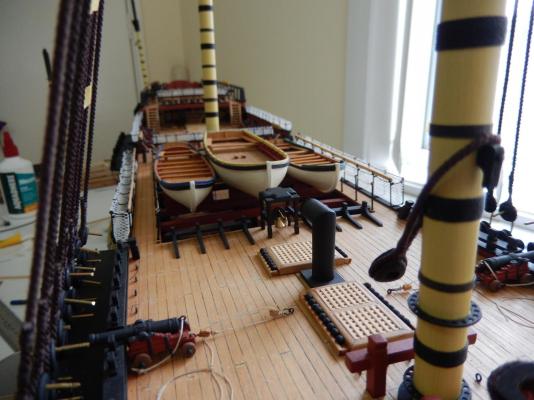
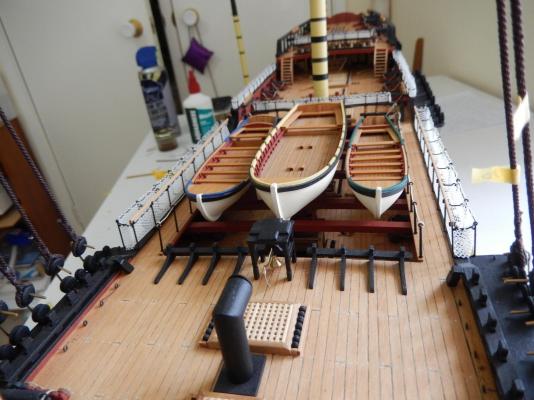
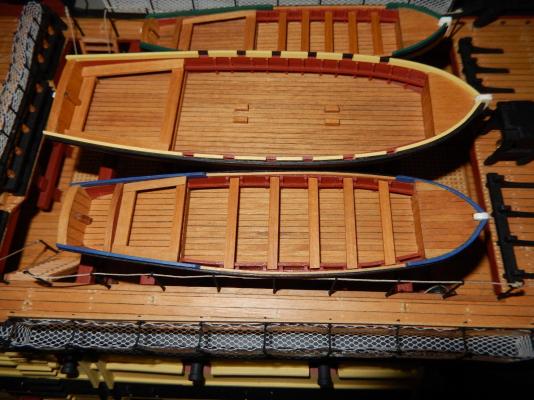
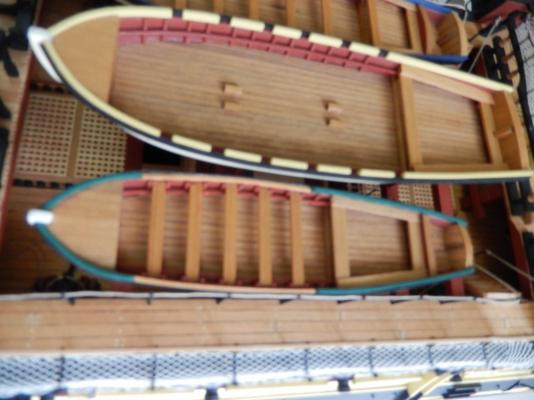
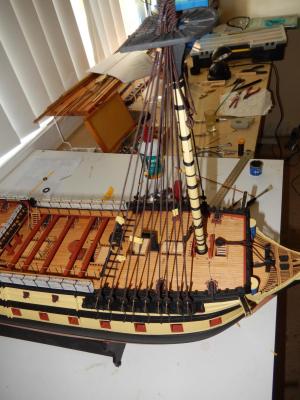
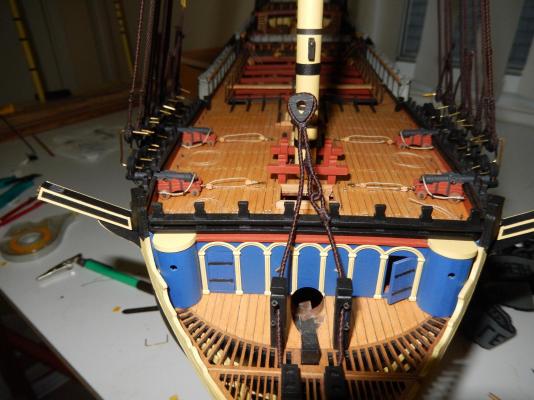
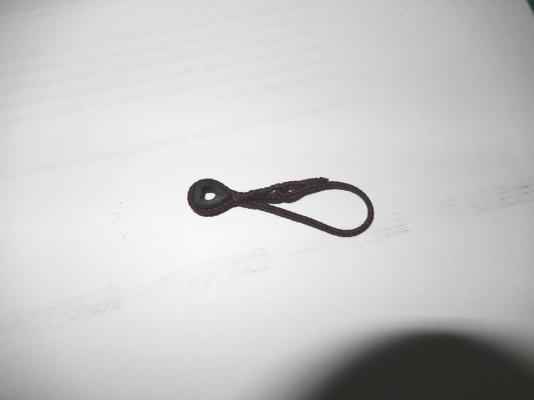
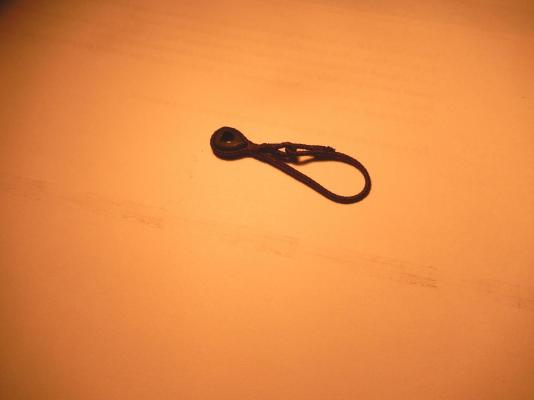
The ship's boats are finally lashed down. The result has been acceptable, though not as specified in the plans, and not without a few dramas. My modification of the position of the lashings is a result of the error I made some time ago in spacing the cross-member supports. As well, I ended up using a method different than the one I suggested to Arthur a couple of posts before this one. Anyway, this works. Each boat is fitted and lashed down separately. Do not glue all the boats down at once and then try to lash them down. It may be possible, but at the least, the lashing would be quite difficult. Before gluing each boat to its supports, lashings were prepared with an eyelet fixed to one end, and on the other, an eyelet the position of which could be adjusted. The fixed ends were glued to holes drilled beside the boats' supports on the starboard side of the model. The lashings were passed over the boat to holes drilled on the other side of the boat's support and the lengths appropriately adjusted to provide a firm fit. The boat at this stage was NOT glued down. Once the lengths of both lashings were properly adjusted, first the boat was glued down, and then the eyelets on the 'adjustable' end of the lashings were fixed to holes drilled in the cross-member supports. The first three photos, I hope will give you the idea - though I seem to have put them in the wrong order. This shows the adjustable end of the lashing. Below is the middle boat temporarily fitted and the lashings adjusted. If the boats are fitted sequentially in this manner, ready access is provided for fitting and gluing the eyelets on the right side of each boat. The following three photos show the boats complete.


-
Thanks Arthur. At least we've all learned something - well I have anyway. All of the discussion has been another example of just how helpful people are on this site. Now as far as shrouds are concerned - only about 30 or so to go.
-
Jason: thanks for the comment. The line for the shrouds is by Syren - 'brown rigging 1.37mm'. With serving it's about 1.6mm.
-
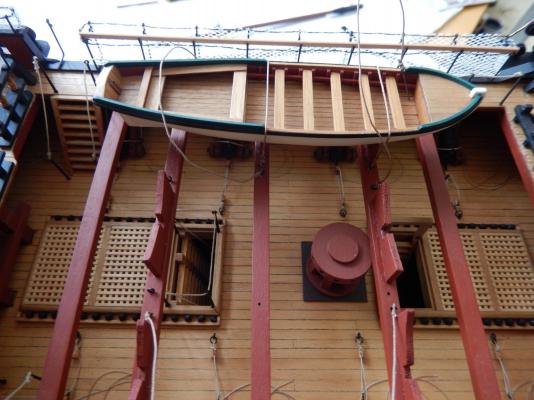
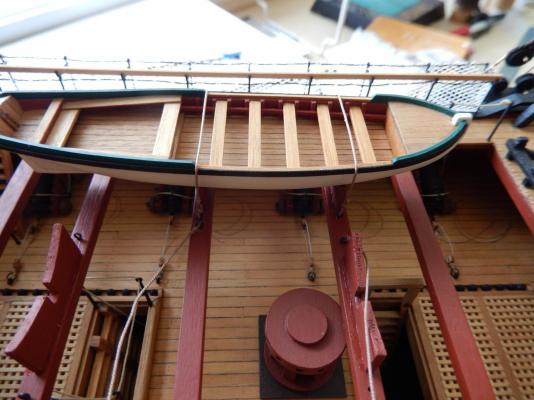
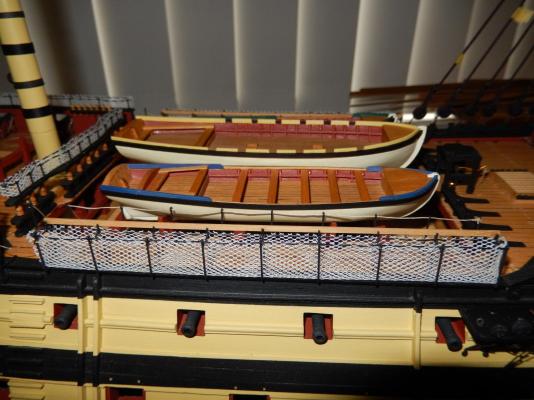
The free end of the shroud controversy is finally settled - at least as far as I am concerned. The mountings for the boats are fitted and though it is a tight squeeze, they fit The middle boat is 1mm higher than specifiied to provide a slightly bigger gap between the boats The following photos show the gap between the boats. The middle boat is about 1mm to the left of centre more than I would like. None of the boats have yet been fixed. I will attempt to lash them down in the manner described in my previous post.
-
Arthur: I hope the following will work. Each boat should be separately lashed - there will need to be two eyelets between each one. 1.Tie loose lashings around the middle boat. They should be of a length that will enable the rigging hooks to be hooked on in a manner similar to the photo on the kit box. Once the right lengths of these lashings is determined and fixed, the boat should be slipped out from under and set aside. 2. The boats on either side should then be glued down and lashed. Without the middle boat to get in the way their lashing should be fairly easy. 3. The middle boat should then be slipped under its (loose) lashing and stuck down. Obviously all of this hinges on whether the boats have already been fixed. If they have, only the middle one would need to be removed, but this would be rather fraught. Here's hoping ....
-
If I figure it out, you'll be the first to know. But at this stage, to do it looks as if each boat must be tied down separately.
-
It must be fairly close. It's certainly a liver-damaging plane ride away. Belatedly I have realised that the ship's boats have to be finally mounted before the rigging goes much further. Their supports are now fitted to the cross beams - those for the middle boat have been raised by 1mm. This now provides a little more room for the smaller boats on either side. Now they all fit quite well, though rather tightly. Lashing the boats is of course the next problem and I will follow your suggestions. (See p23 of this log). It's certainly going to be an awkward job. incidentally, I have looked closely at the photo on the kit box. As far as I can tell, the lashing of the boats shown there is inconsistent with the plan (Instructions p.17). As well the middle boat has a couple of rigging hooks lifting the lashing on the middle boat . (See plan 8.) I am inclined to do the same, but the practicalities may rule it out.
-
Yes Arthur, your first photo shows the way my thread is laid. So I am only 180 degrees out. I should have spent more time drinking and less time thinking ... Perhaps I need another holiday. I will take photos showing how it all looks from both port and starboard (though the lay of the thread may not show up well in a photo), but I am having some camera/ computer problems at the moment. It would be a pity to stuff it up up now.
-
I have just had twenty-odd hours on an aeroplane to consider the shroud problem. The thread on the shrouds appears to be left twisted* which evidently means the shrouds go clockwise around the deadeye. This will result in the free end facing the stern on the starboard side (consistent with the plan) and will face forward on the port side. I hope I now have this right, though confirmation would be welcome. * By left twisted, I presume the thread is twisted clockwise.
-
Thanks Jose now I will sleep well. The rain has even stopped here in Vancouver so I'm on a roll.
-
Thanks for the reply Jason. I have looked exhaustively on the net and am not really any the wiser. Most photos (there are hundreds) show the free end towards the stem, though there are a some exceptions. I came across a post here from: popeye2sea which says: for right hand laid rope the shroud should go around the deadeye anticlockwise; for LH laid rope it should go around clockwise. This doesn't really enlighten me much. I would have sent him a PM asking for a clarification and perhaps a source for this. However as I will be going away for about 5 weeks the day after tomorrow I will leave it for now. Another source would be Chris Watton, the designer of the Vanguard kit who is the font of all wisdom. A PM to him would be worthwhile. It would be nice to get this right, not that I'm obsessive.
-
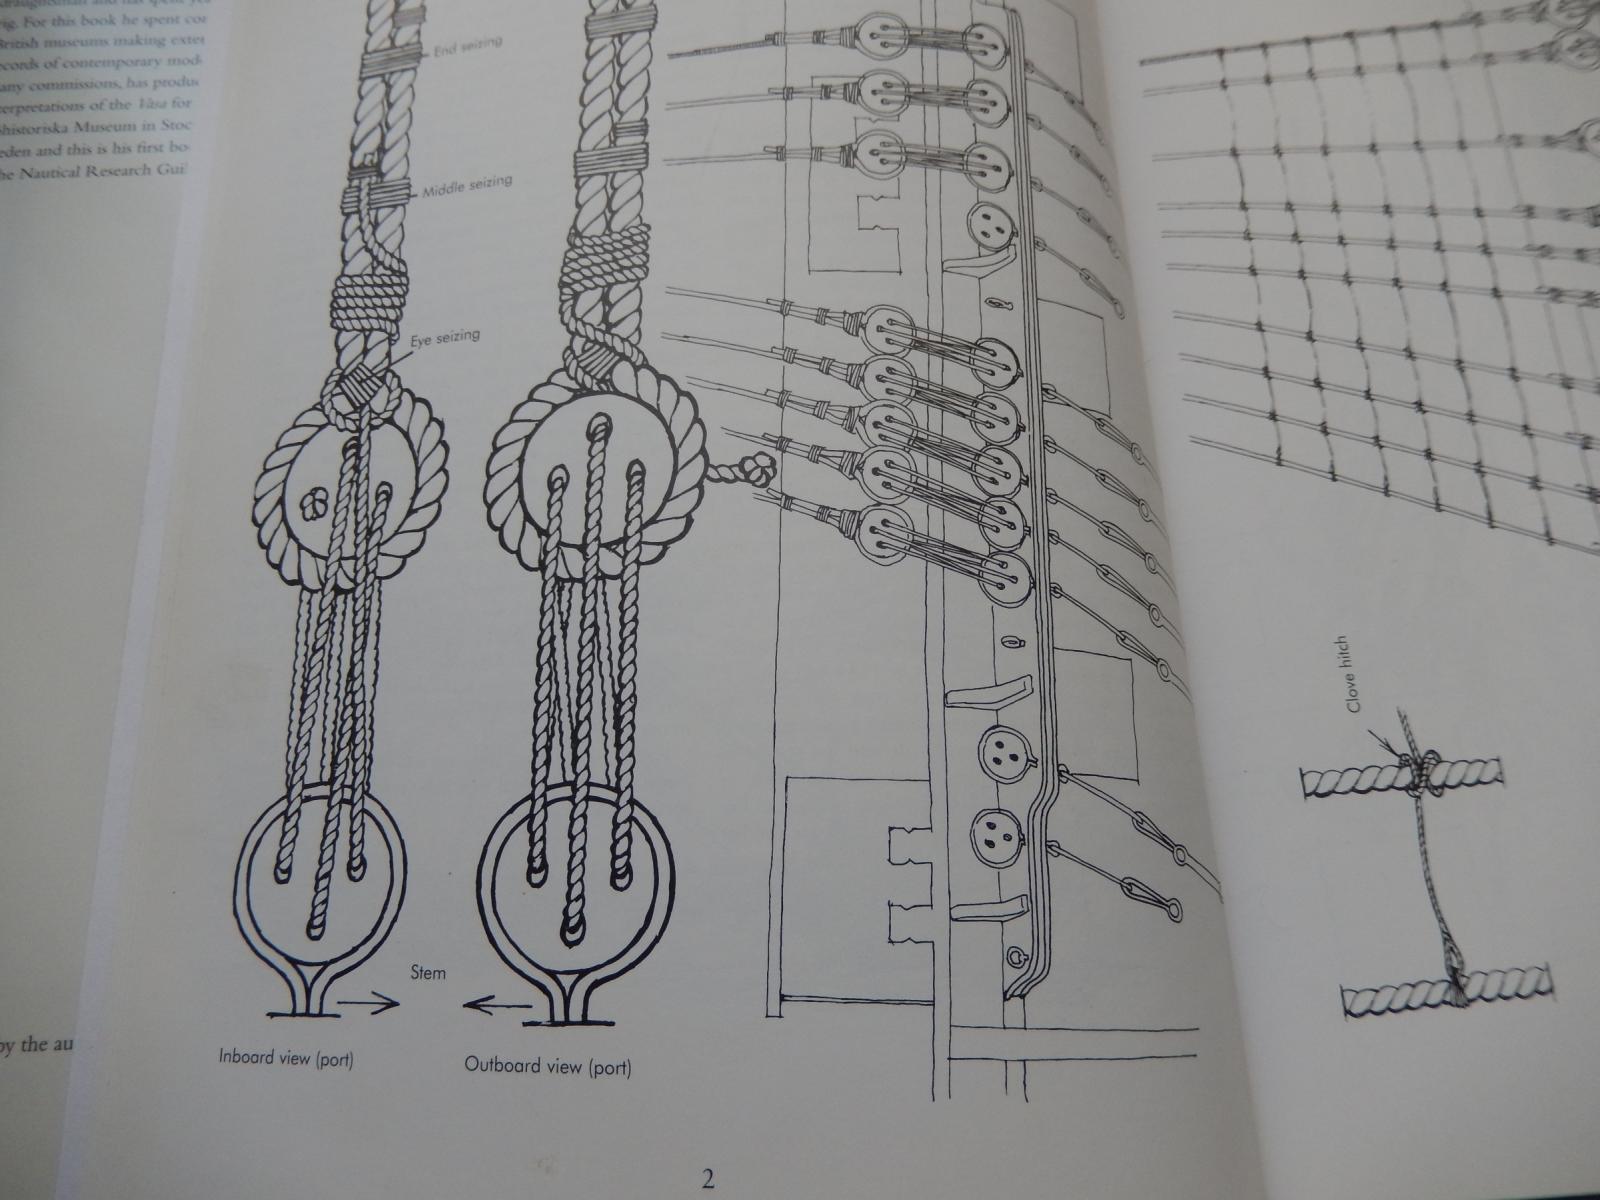
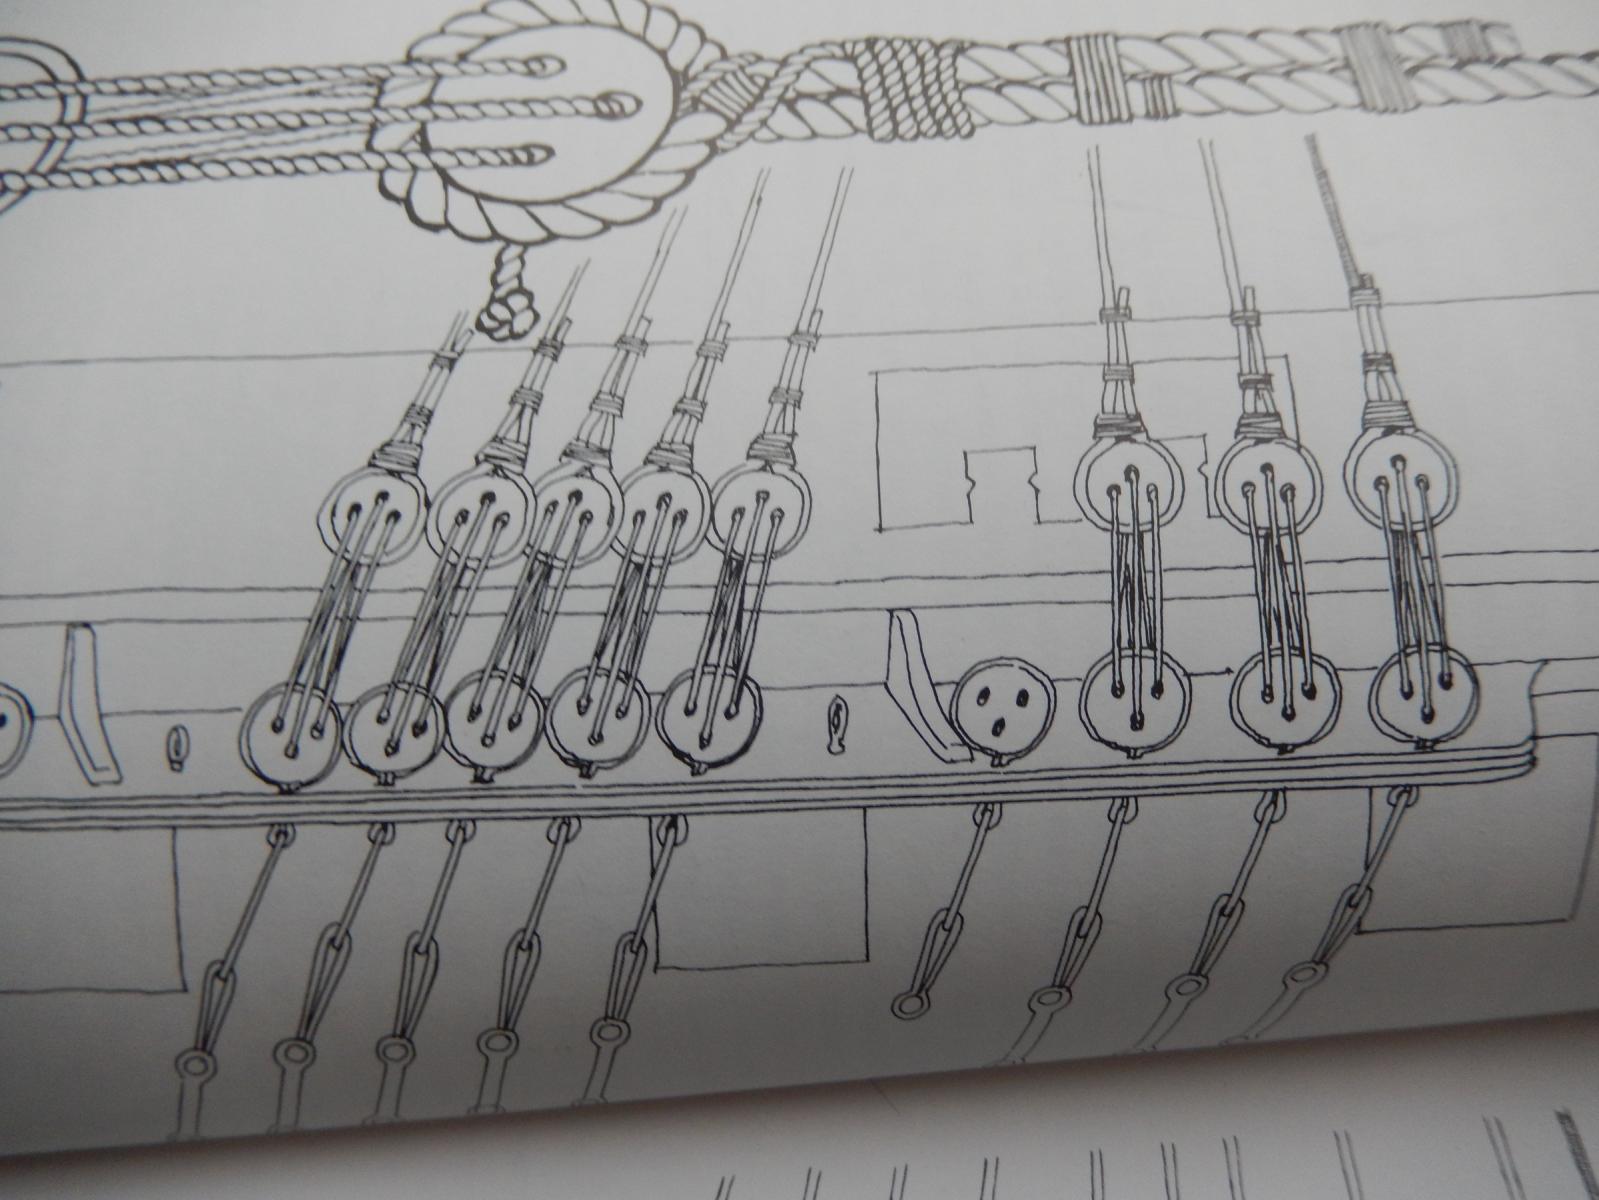
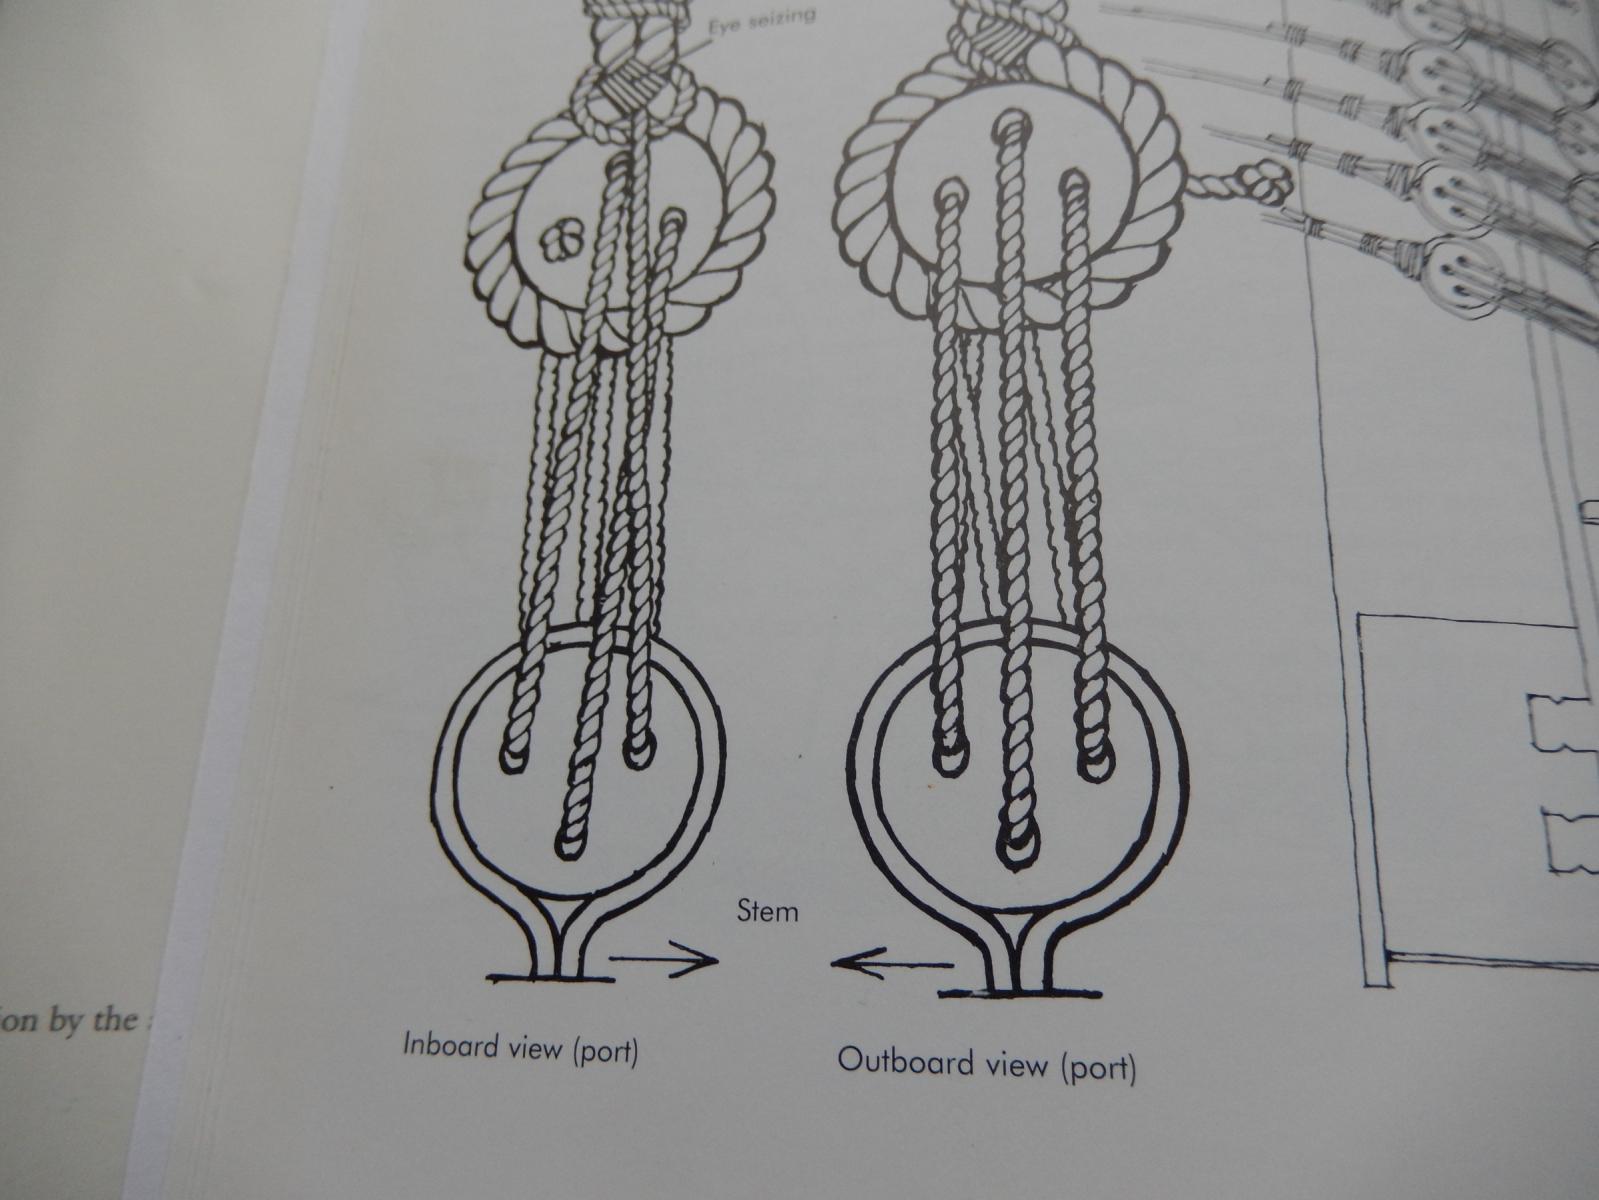
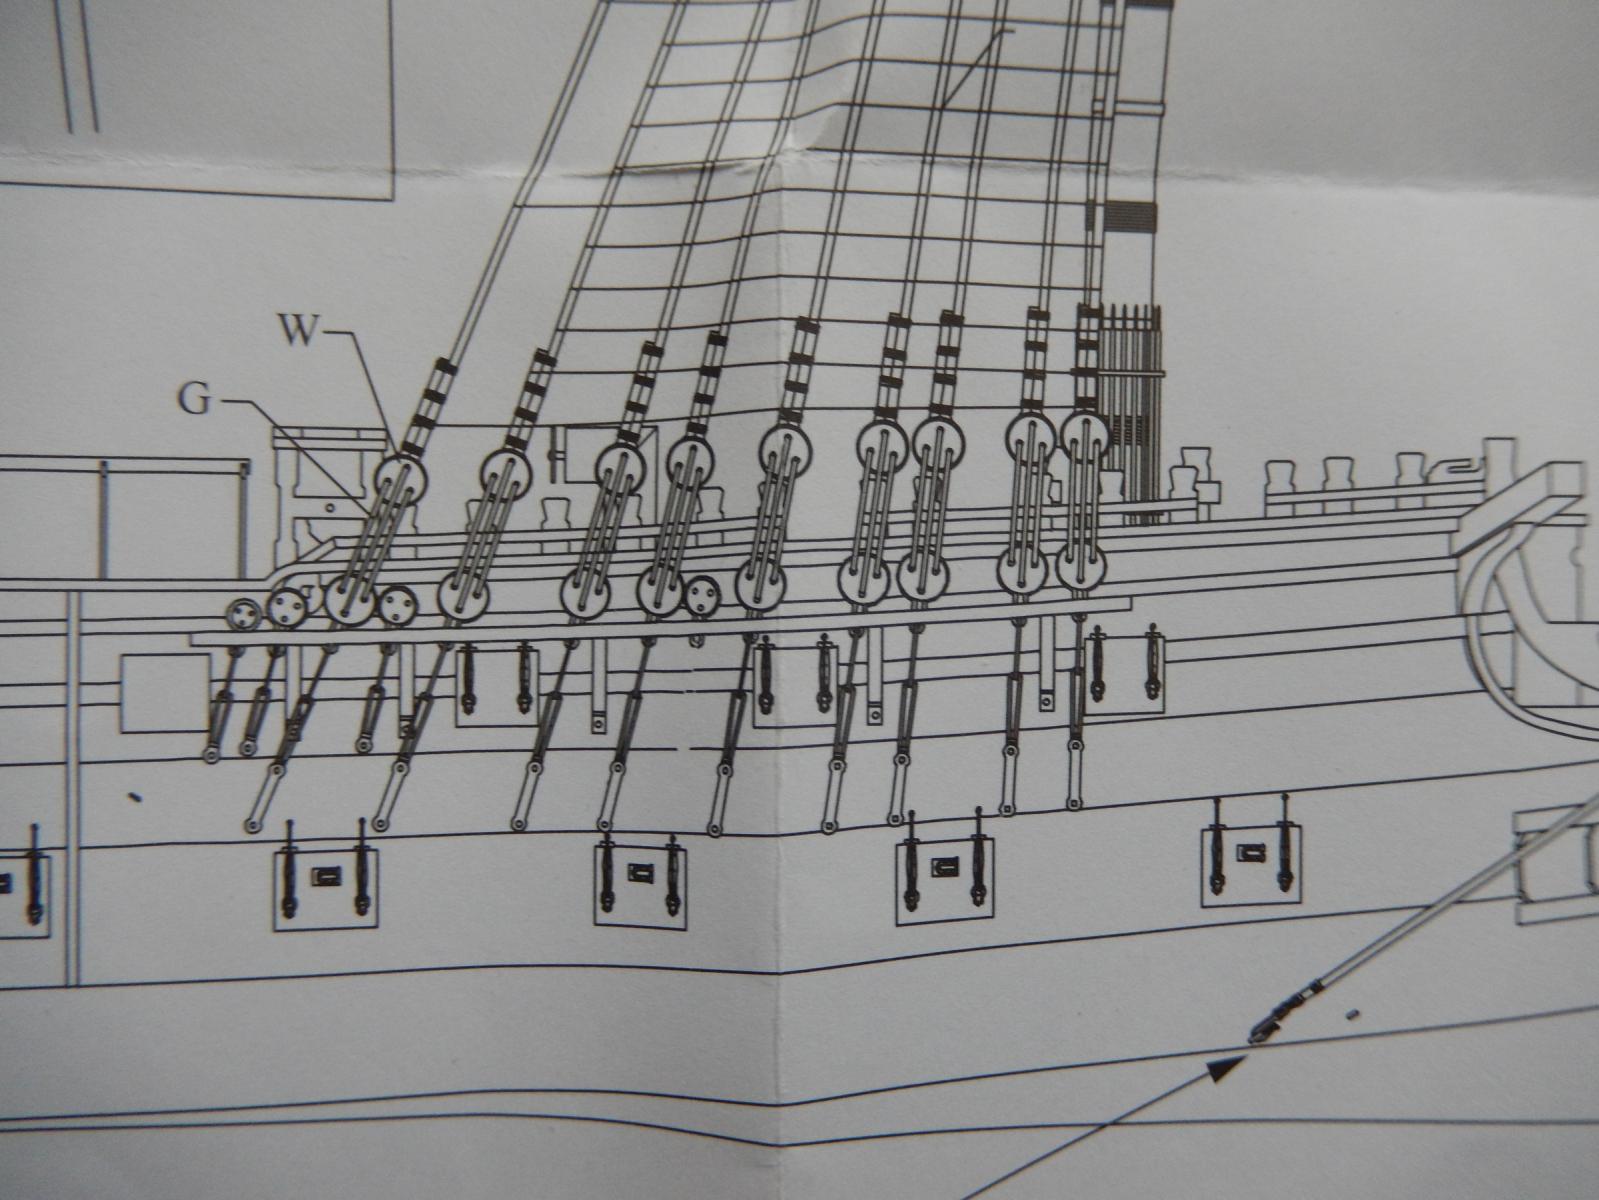
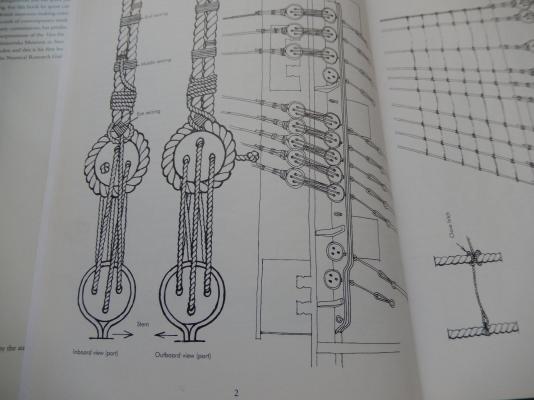
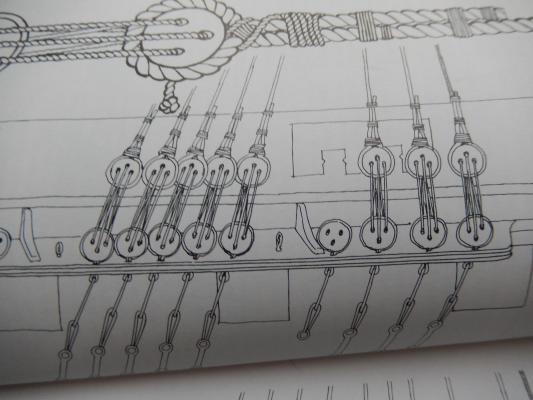
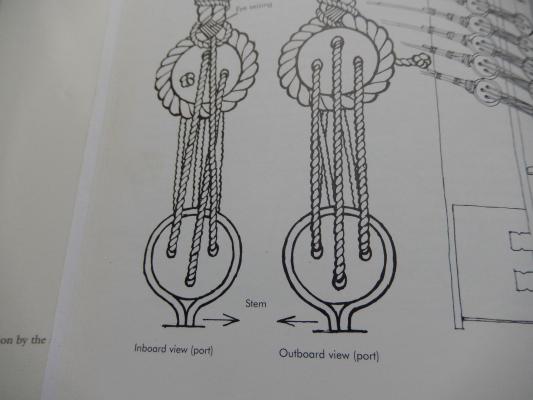
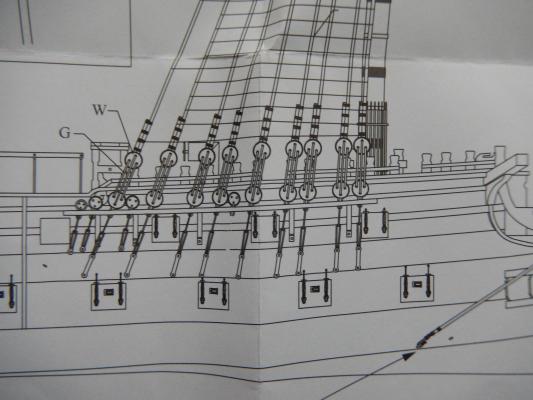
I have messaged Jason about the free end of the shrouds. I am getting mixed messages from different sources regarding the direction to the free end, though this may simply be a result of my confusion. Below are some photos of p2 of Petersson and a snap of plan 8. Petersson seems to show the free end of the shrouds towards the stem on both sides. The plan shows the free end towards aft on the starboard side, while Jason suggests this is so on the port side. Aaagh. I just noticed I cut off the top of the first and third pictures. The inboard view (port) shows the free end of the shroud towards the stem (ie, the right side), and the outboard view (port) again towards the stem (ie, the left side). This shows the starboard side with the free end towards the stem. This is the plan. At my age I'm confused enough.
-
Whoops. I didn't notice a couple of the shrouds were the wrong way around. I hope I would have corrected it when putting on the lanyards. More important, I didn't know all the shrouds are supposed to go anticlockwise around the deadeyes. I suppose it must be in Petersson somewhere. Thanks to both of you. Two winters? The winter here was more than enough. It's been (on and off) cold, windy and wet. I have just been down the coast to see if our house there is still intact. We had 320mm (about 14inches) of rain in 12 hours a couple of weeks ago. The animals were walking past two by two. We are off to Vancouver on Thursday, then Ontario, NYC and the national parks of Utah - imposing on friends. (I think of it as revenge). I just hope that it's warmer there than it has been here.
-
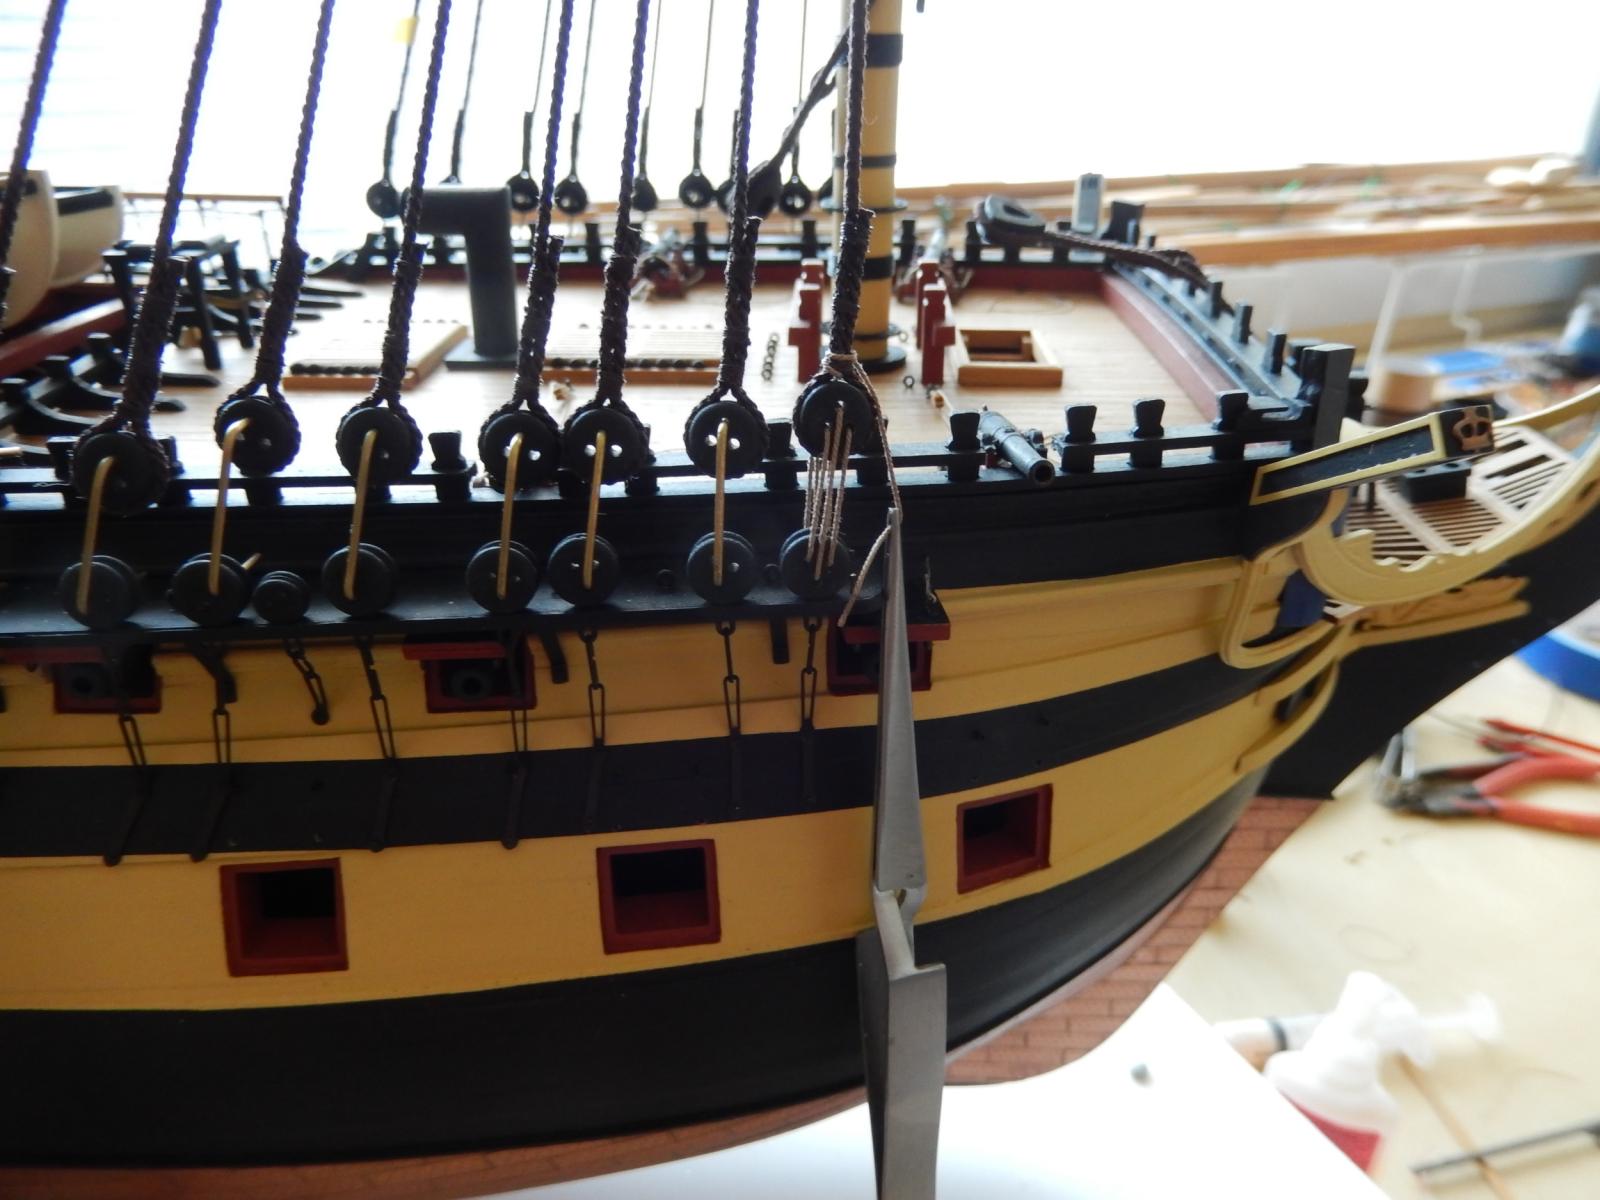
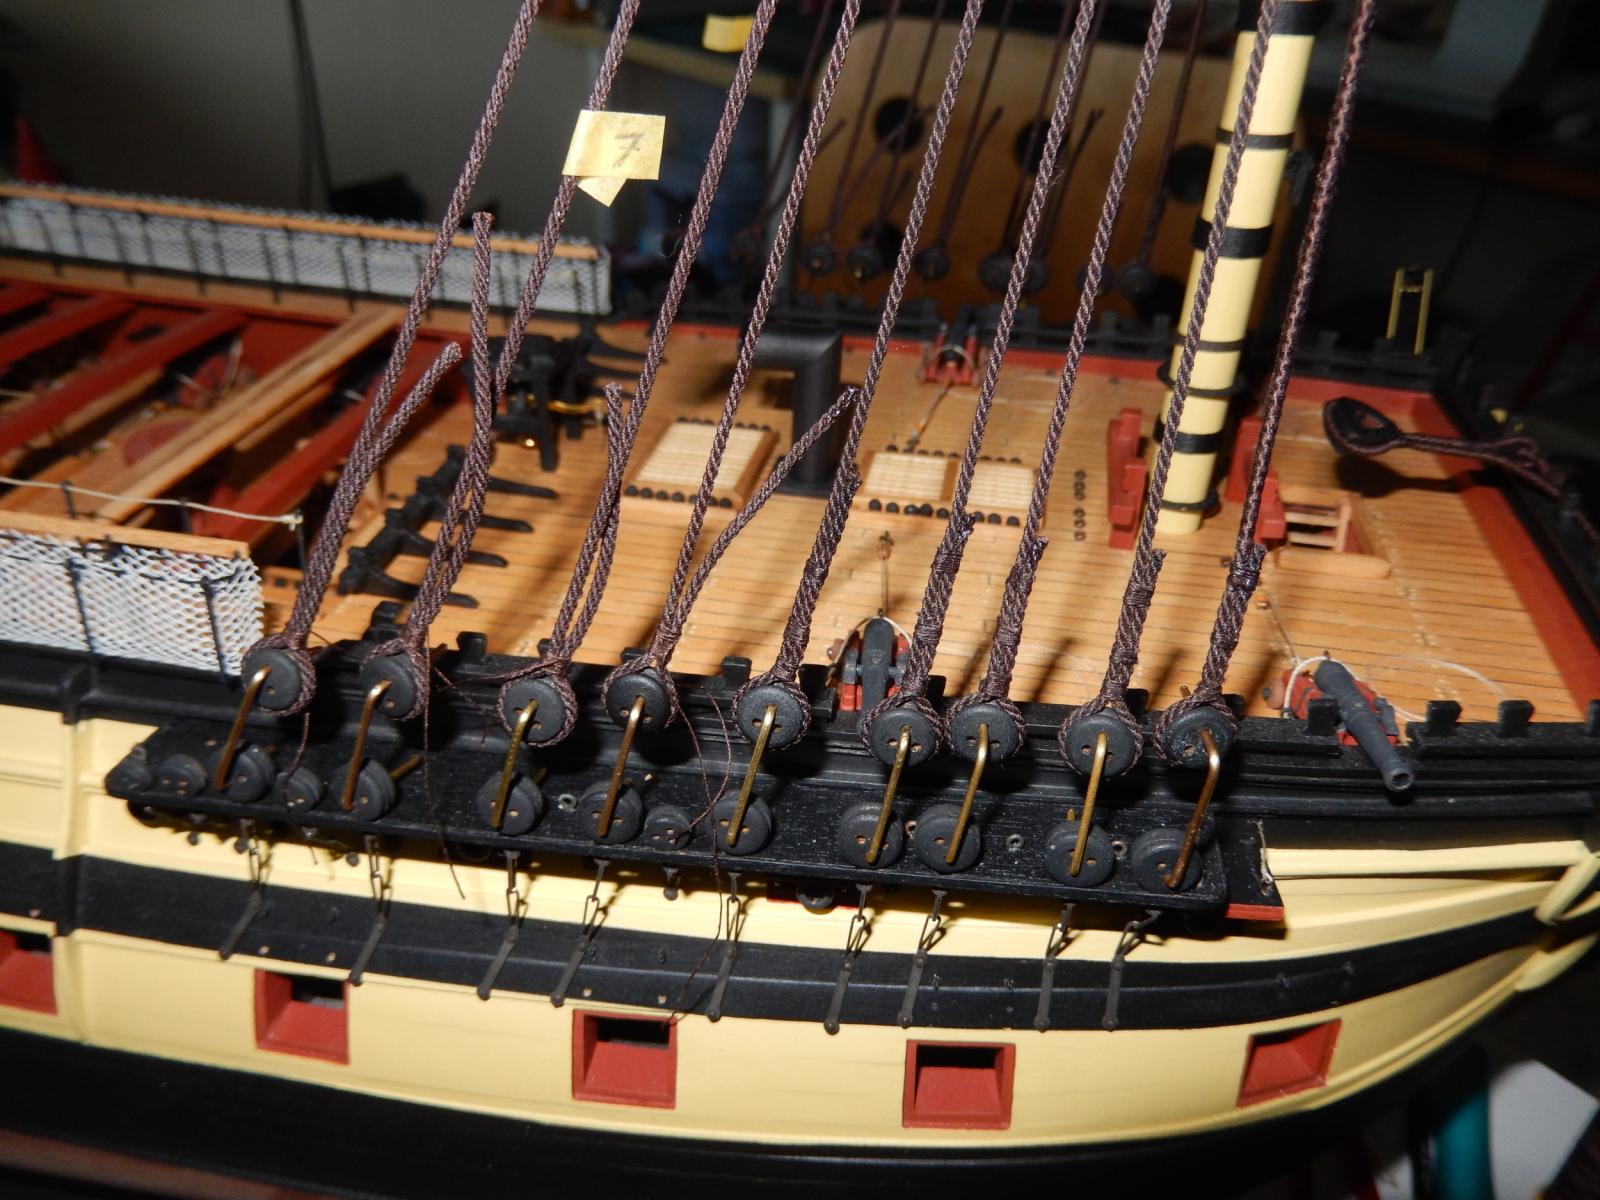
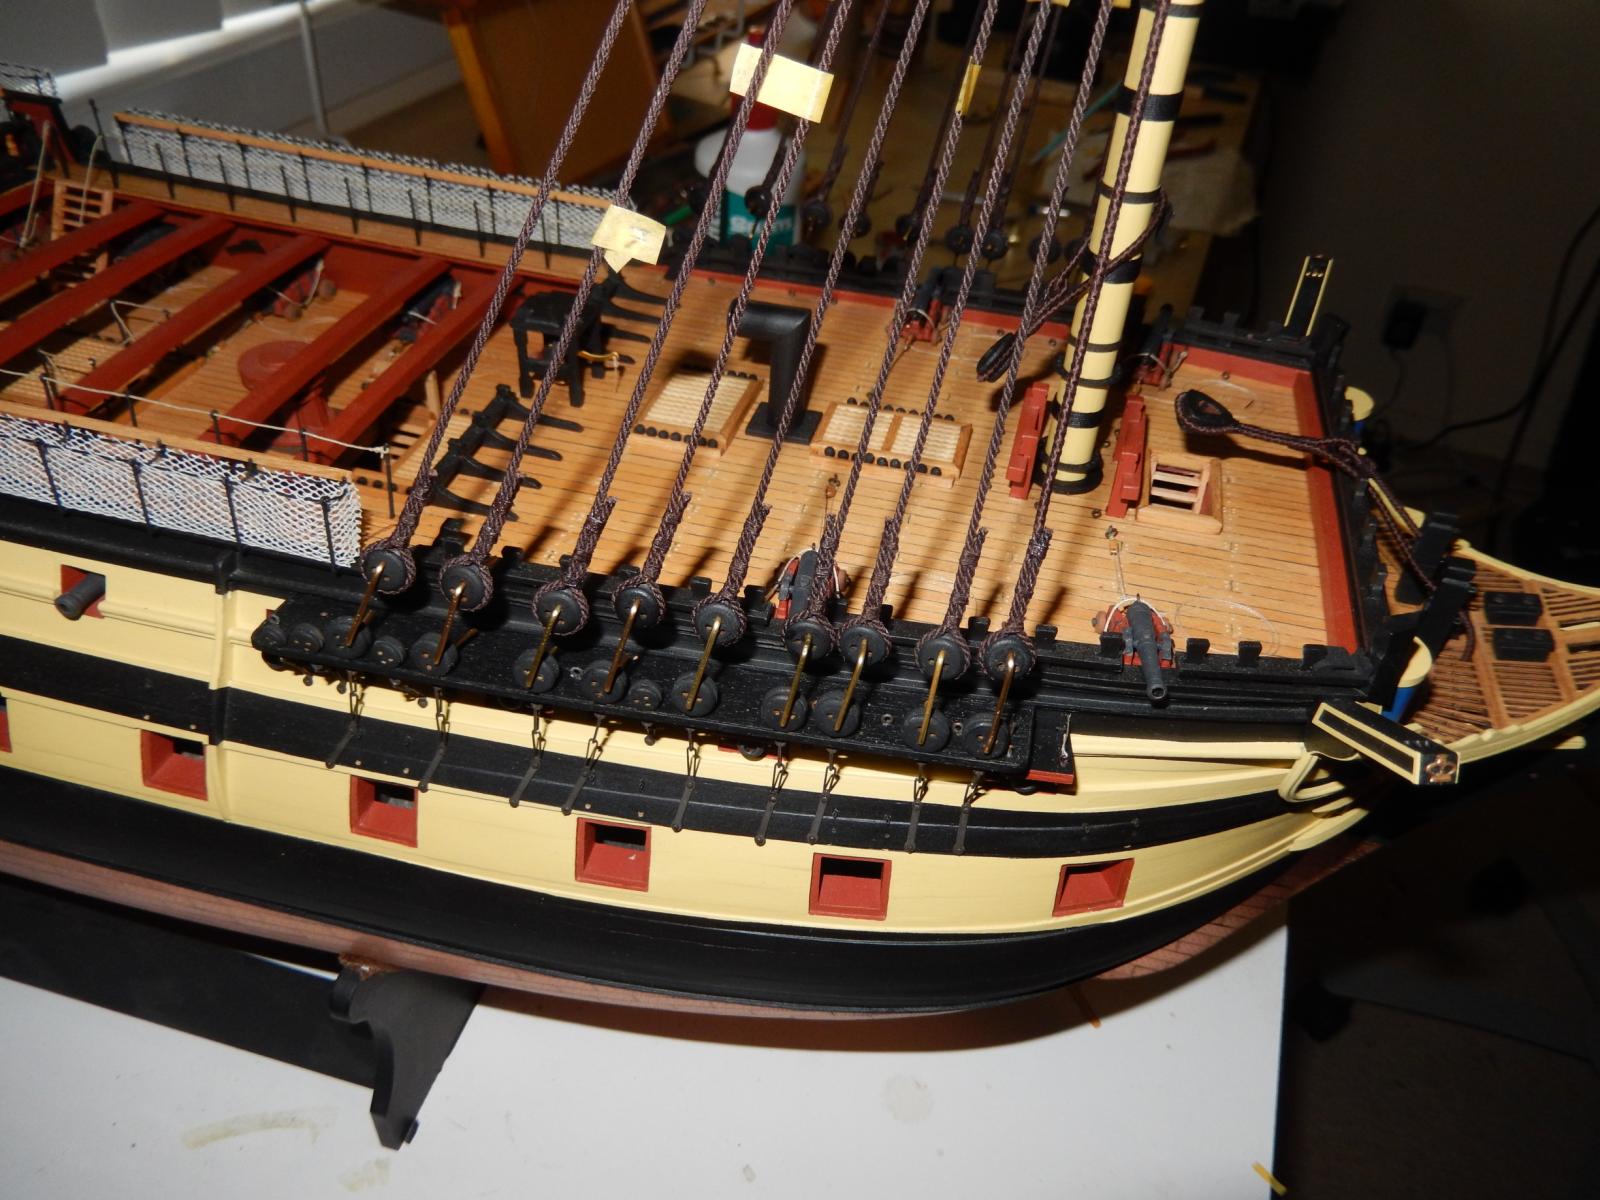
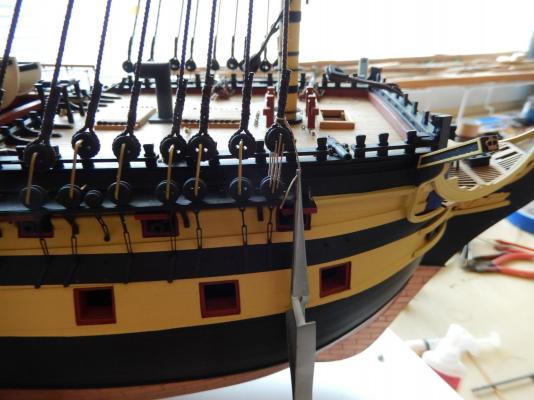
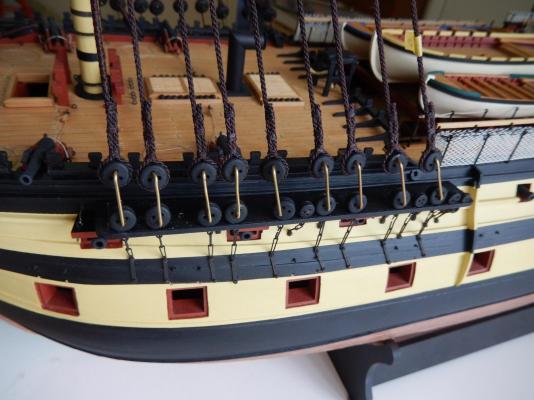
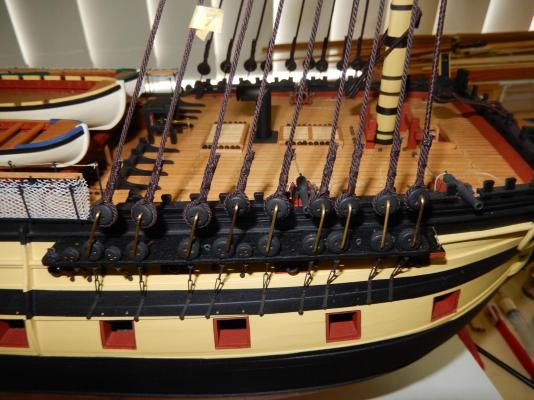
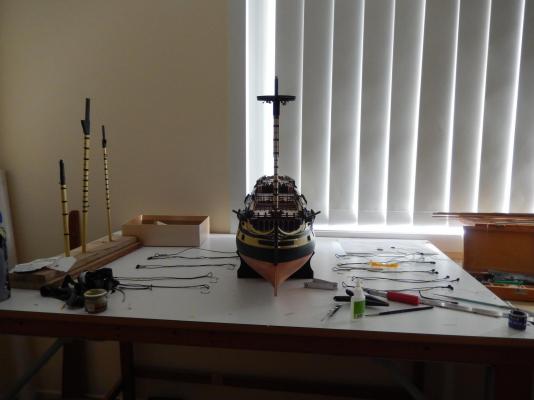
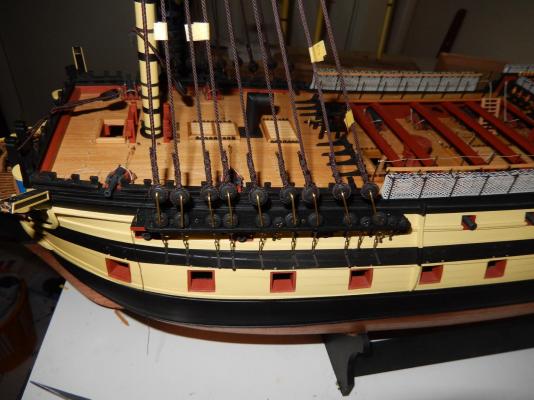
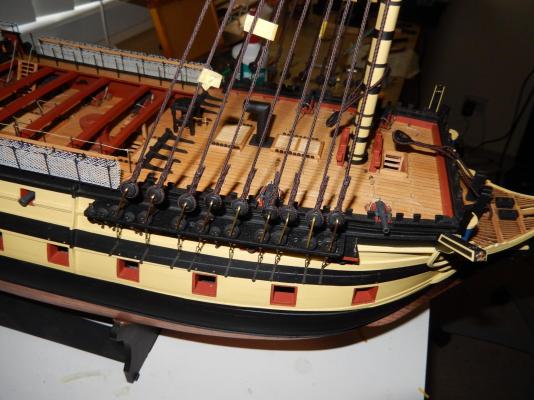
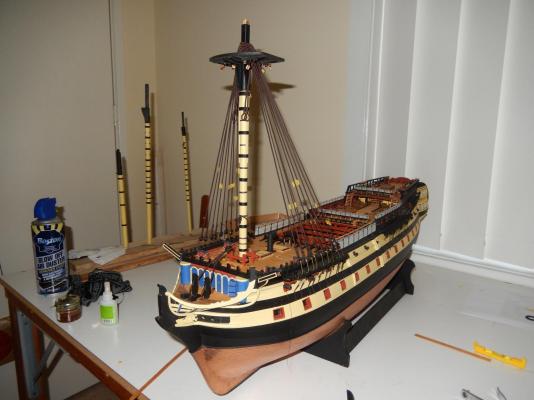
The foremast is finally stepped and has come out quite well. Adding the shrouds was time consuming and fiddly. I am reasonably happy with the way it has gone so far, but there are seemingly dozens more to do. Here is some work-in-progress. This is the first rough - before the shrouds have been finished off Some adjustments were made to the rough and the shrouds finished. I am hoping that once the lanyards are fitted and adjusted, that the heights of the deadeyes will be more consistent, though they are not too bad now. This is how it all looks now. I'm not sure of the next step. I'm inclined to fit the lanyards to the fore shouds, but Im not really sure if this is a good idea just now. (Advice is welcome.) Alternatively the main mast can be fitted and stepped. It turns out I do have some time before I invade the northern hemisphere. Those of you there will be relieved to know you have another week.....


- 949 replies
-
- 10
-

-
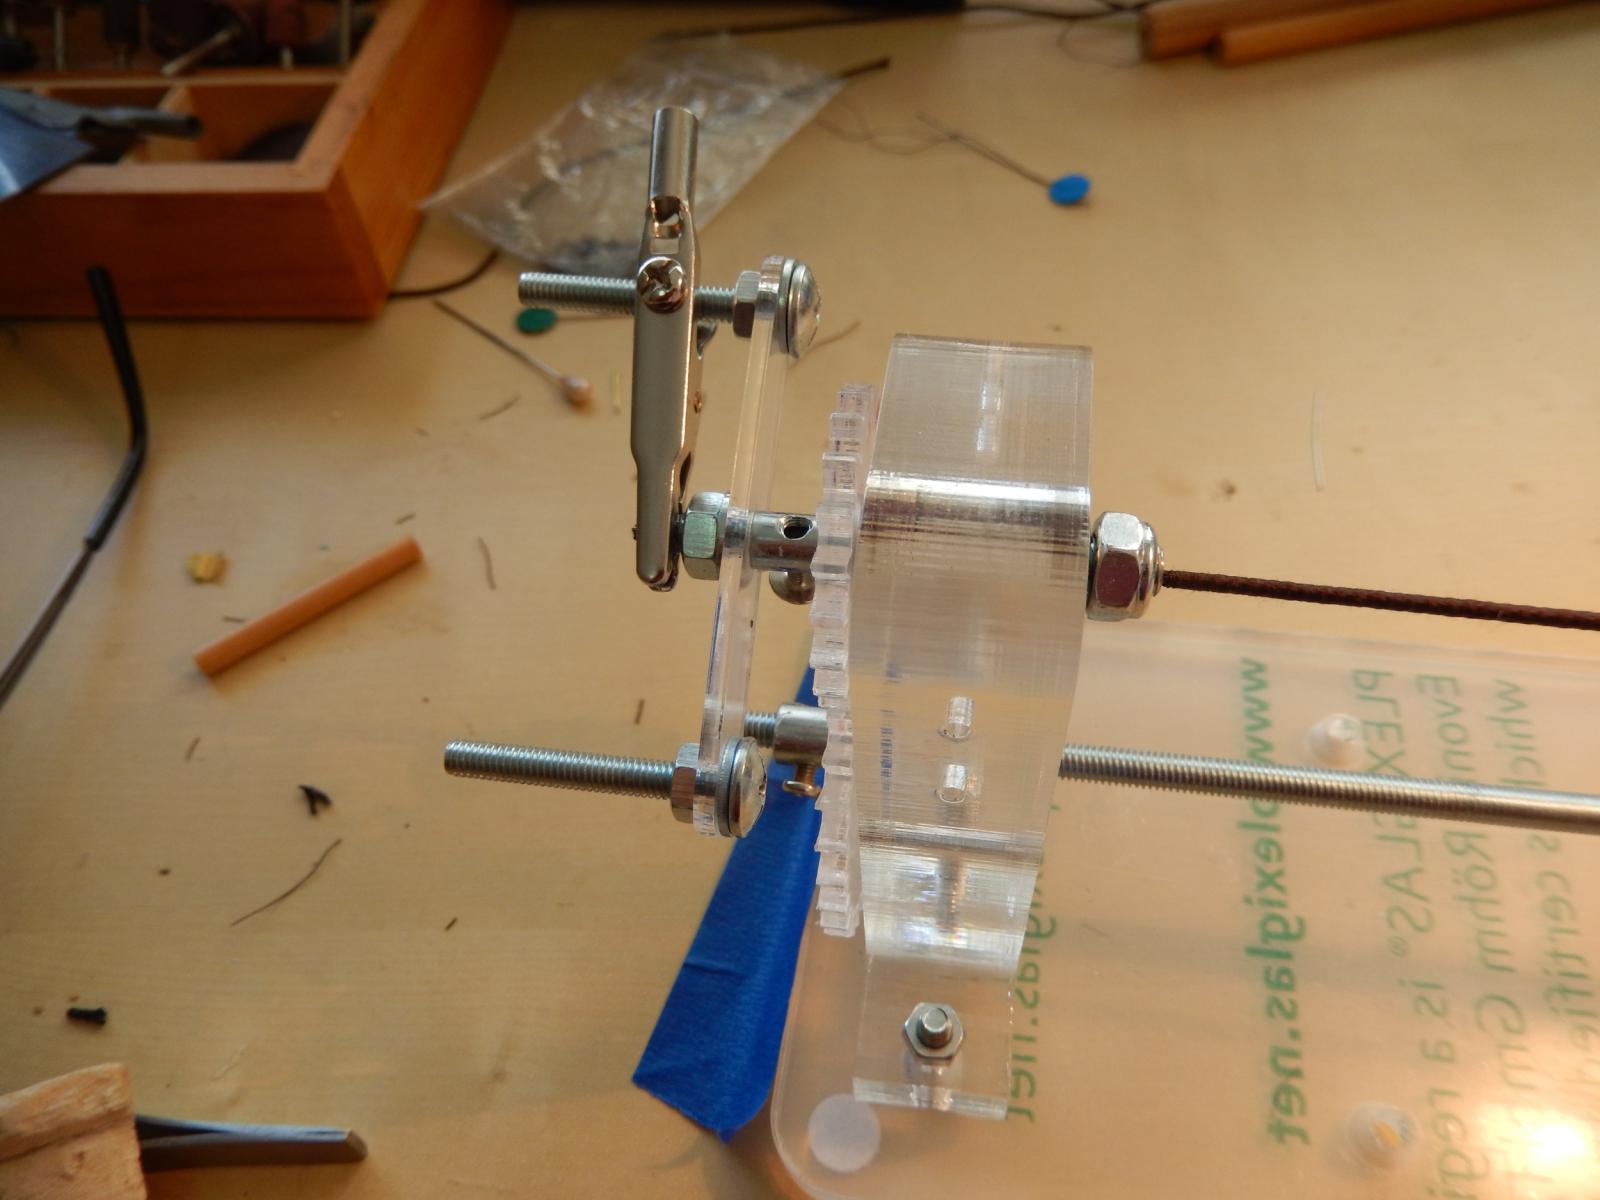
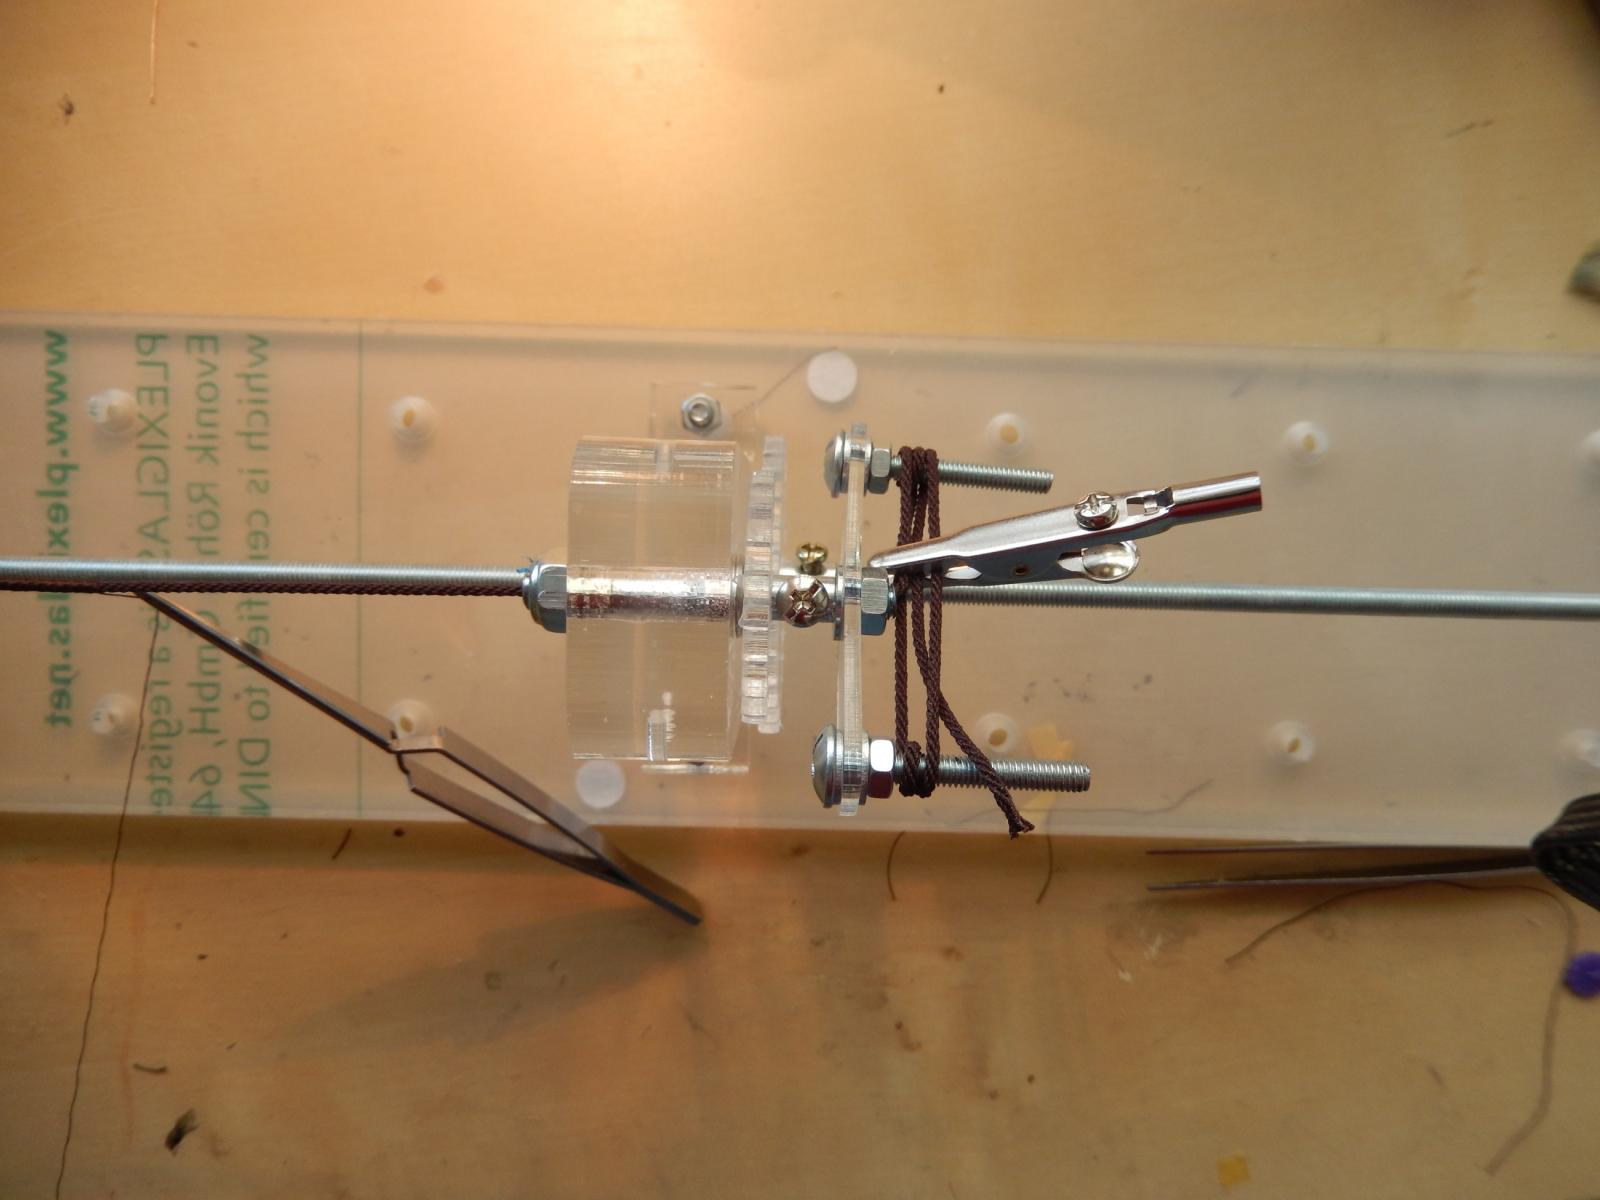
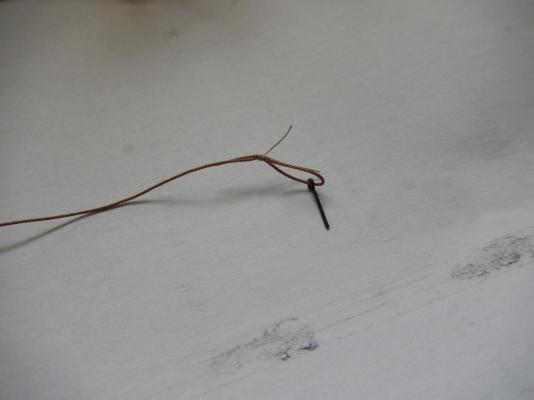
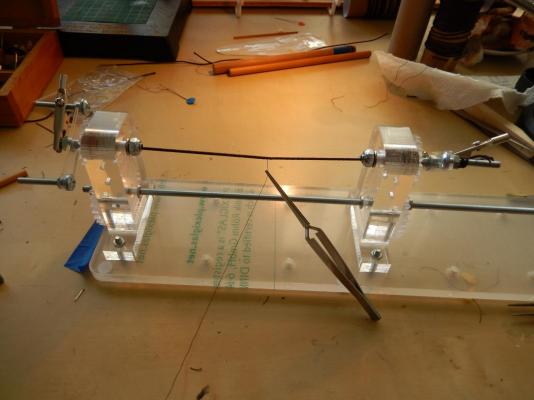
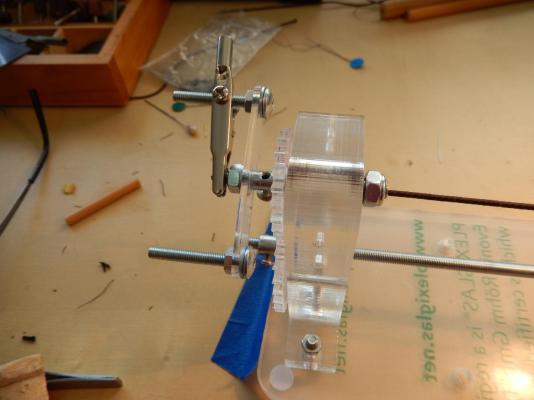
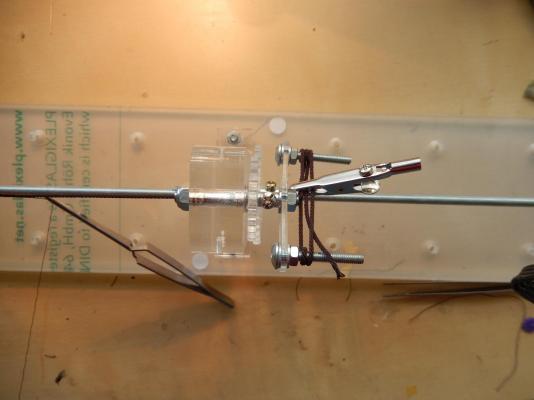
I have been working concurrently on the shrouds for the foremast, and the collar for the mainstay. The shrouds are not going especially well and I am looking to do pretty well anything else to avoid them. With a bit of luck however the foremast shrouds at least will soon be finished and I can finally step that mast. Brian's suggestion concerning the use of alligator clips for Alexey's serving machine works really well, though they are a bit cumbersome. The following photos show how I have used them though of course there may be better ways. Here I am serving one of the shrouds. At both ends a needle and thread has been passed though the shroud to fix the serving thread to the shroud. The Syren thread is quite stiff so that a little force must be used which is a bit hair-raising. Incidentally this stiffness makes threading the served thread through the stem through all the headrails quite difficult. With serving, the thread I have used is about 1.6mm. I don't think it would be possible to serve 2mm thread and get it to go where it needs to. Here is the collar for the mainstay. This follows Petersson/aew. I have just noticed it needs a little touching up, and I've missed cutting off a couple of pieces of thread properly.

-
The collar for the main preventer stay has come out acceptably. It's probably a little too long, but I'm certainly not going to redo it. I find the dark brown Syren thread takes a bit of getting used to. Earlier in this log I mentioned how some black thread I had left hanging for a couple of years had turned brown - a colour very similar to the Syren thread. I will now try the collar for the main stay and work on the shrouds for the fore mast. I will be going away for 4 or 5 weeks at the end of next week, so all of this will probably be as much (more?) as I can finish for some time.
-
Brian: Yes, I had thought of trying your method a batch at a time. I'll see how it all works out. At this stage I will work on the collar for the main preventer stay. I'm a bit sick of shrouds at the moment. I made a silly error with one of the deadeyes (eyes the wrong way around) that I picked up this morning (now fixed), which has encouraged me to do something else for a day or so.
-
Brian: I've had a look at your log. You are doing a lovely job. Your solution to the shroud problem is clever. I will give it a go, though in my case there are 9 deadeyes on each side of the fore and main masts which may make it a little more difficult.
-
I'm glad someone does as they're told. It doesn't seem to work too well around here though. PS. I've decided to do the collar for the main preventer stay before finishing the shrouds. I will then step the foremast as you suggested.
-
Brian: I have added to my post since your reply I think.. It explains as best I can what I have been up to.