


robdurant
-
Posts
843 -
Joined
-
Last visited
Content Type
Profiles
Forums
Gallery
Events
Everything posted by robdurant
-
 Sadly it looks like you've planked the wrong side of one of those superstructure sides, and you now have two very neat starboard sides 😟 Even more distressing as you've done such a lovely job of it. I hope the solution proves simple.
 -
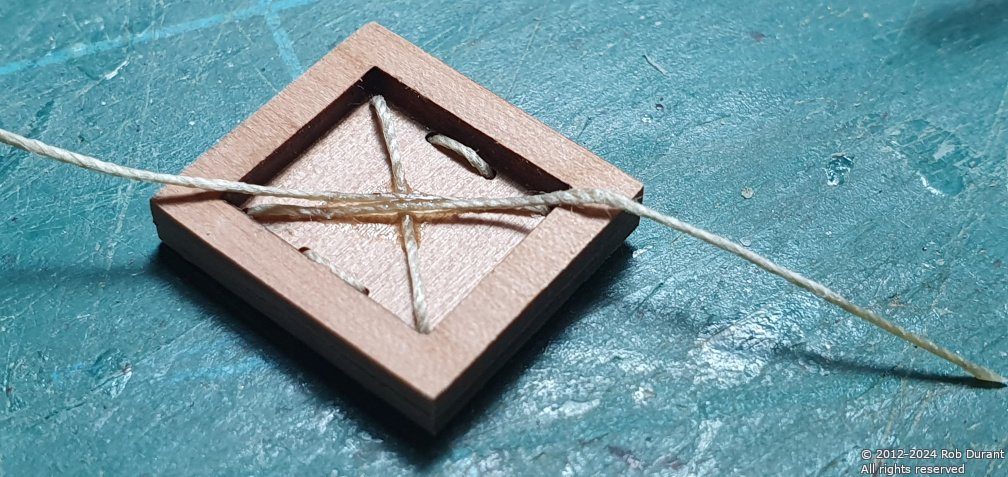
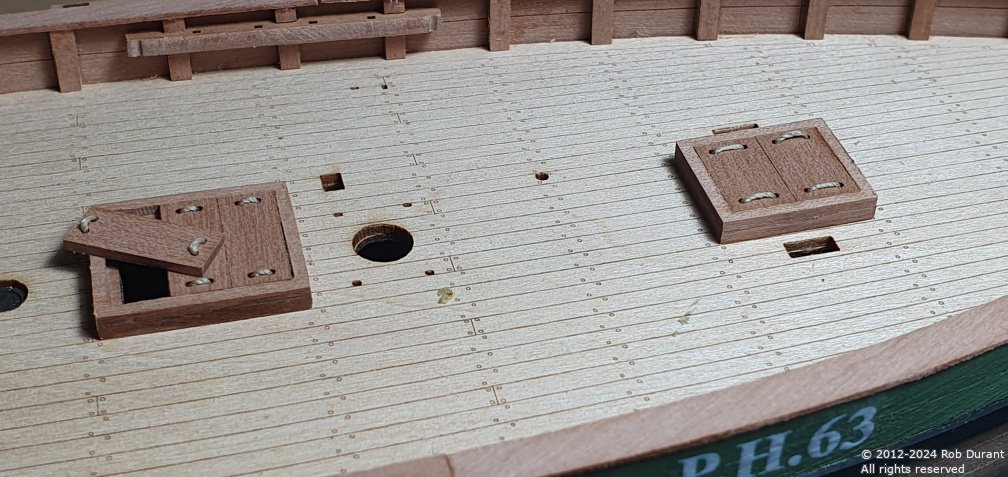
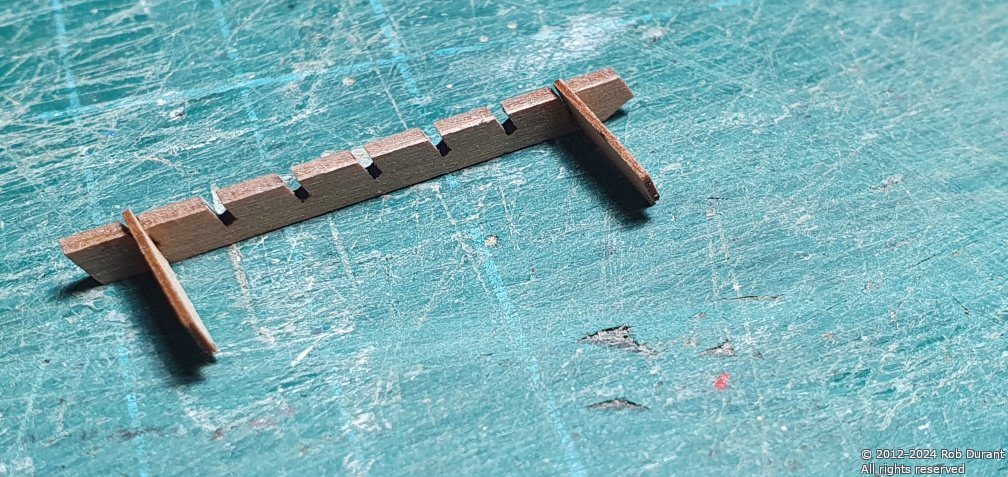
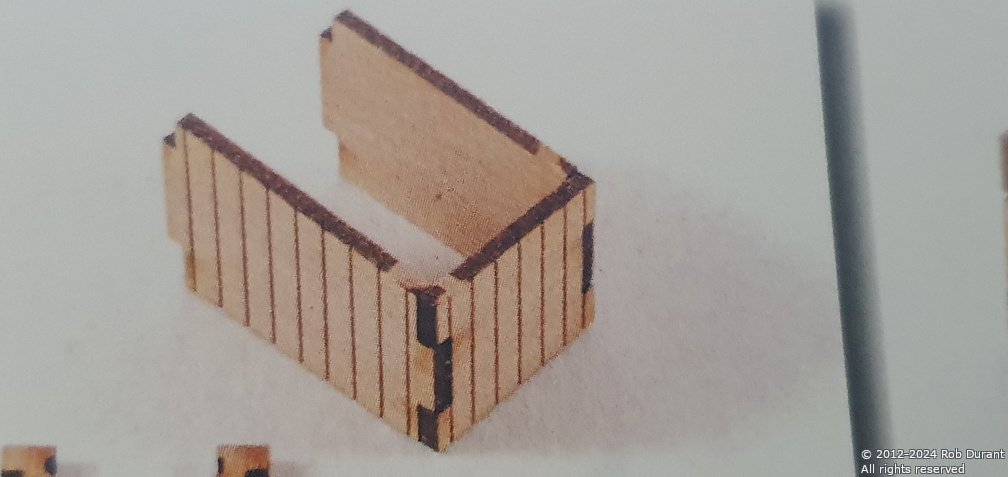
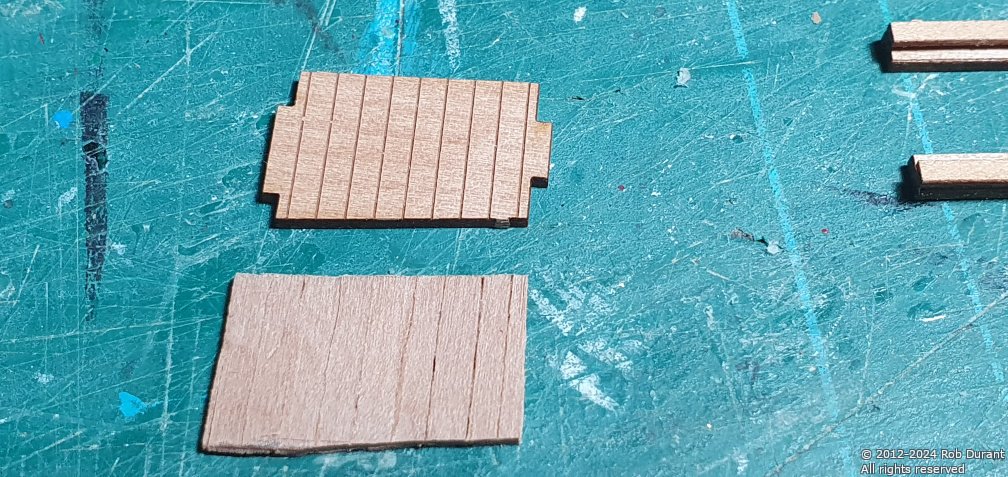
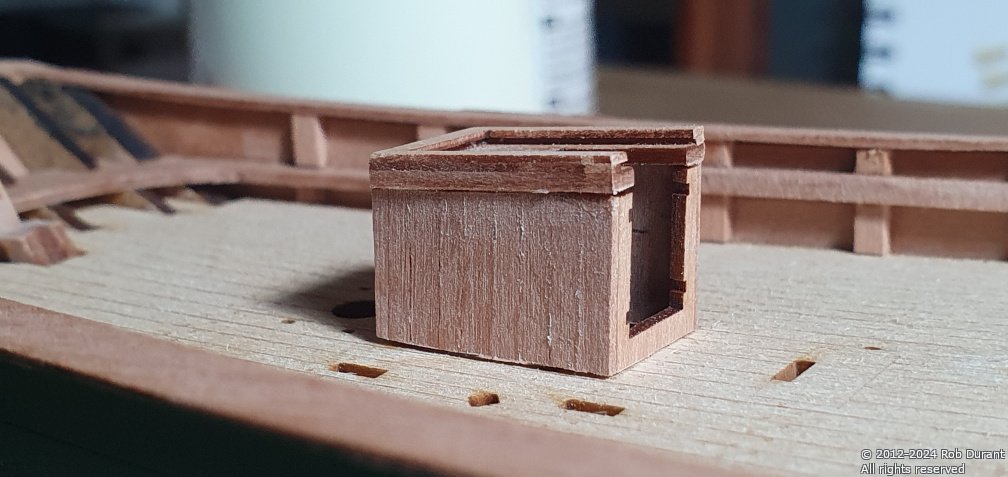
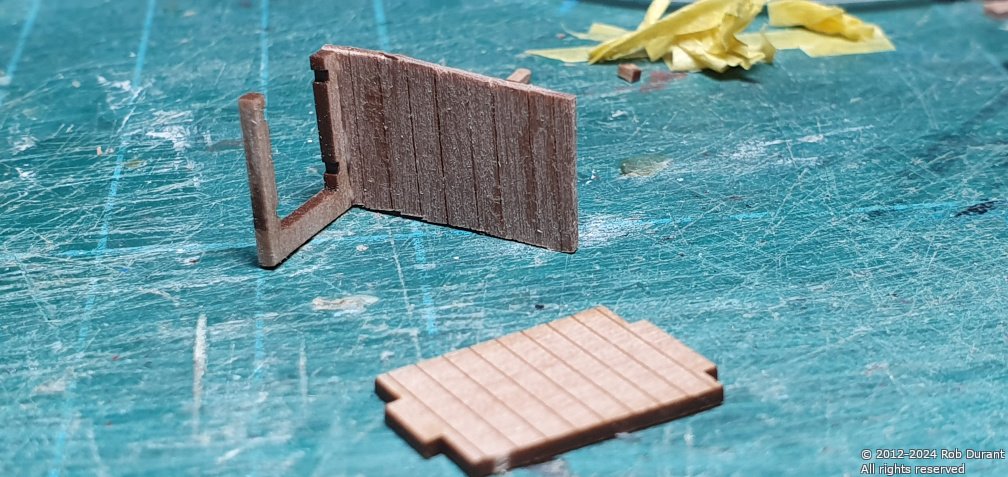
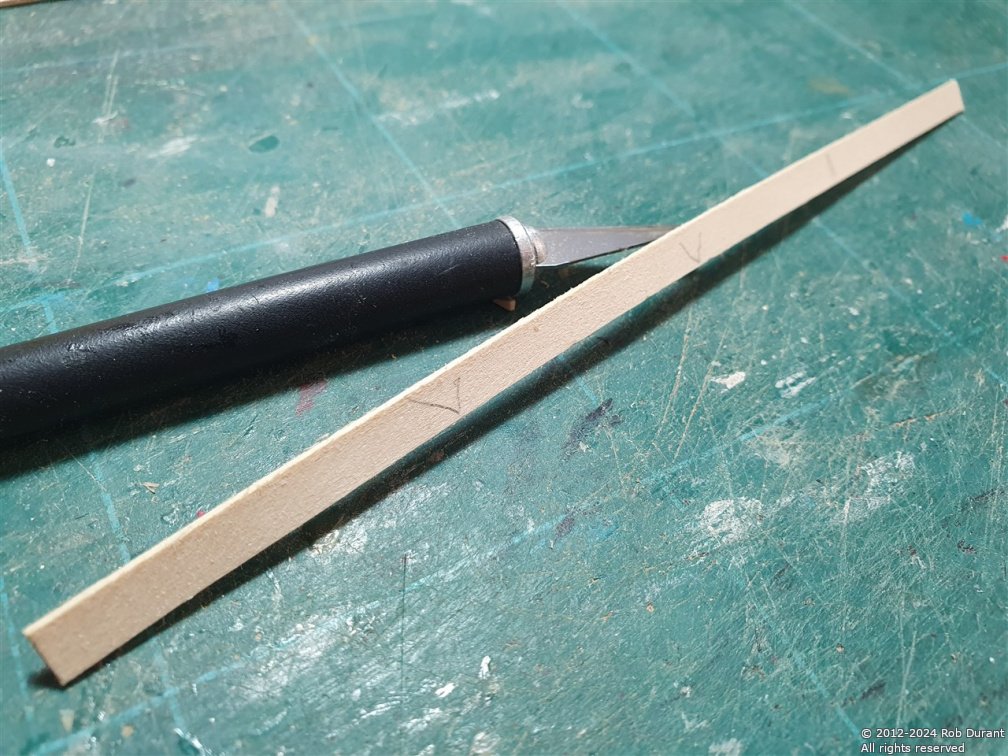
Hi all, The rope handles have been added to the hatches. A note for other builders here... and a reminder that no matter how good the kit, it's always worth reading ahead. The instructions tell you to glue the hatches down, and in the next step tell you to install the rope handles. Clearly, if you've already glued in the hatch covers, doing things in this order means you'll have no access to the bottom of the hatch covers to install the rope... SO... either don't glue the hatch covers in until after you've put on the rope handles, OR install the rope handles, and THEN glue the hatches onto the deck. Your money, your choice I chose the latter, because that way I could install the hatch covers first, and know that the loose ends of the 0.5mm thread weren't going to foul the hatch surrounds. It's a simple enough job, a little superglue was used firstly to make a hardened end to make threading it easier, and then to fasten the threads. No knots were necessary. On the removable hatch cover, the glue was added to the underside of the cover where the thread came through, and it was then clipped back flush to allow the hatch to be placed over the others. Now, an admission... I began to assemble the steps and got engrossed, and completely neglected to take an afterwards photo.... It went together quite neatly. Getting rid of the char on the steps and the uprights was a little fiddly, but nothing too bad. I painted the inside of the hole in the deck where the companionway sits black to stop the MDF and plywood showing, and installed the steps. A little sanding on each side of the steps made it a neat fit. As the instructions say - don't drop the steps into the hull! I'm glad I didn't have to find out _how_ irritating and time-consuming it would be to retrieve them. I completely understand the design intent of the companionways, but this is perhaps one of the few areas of the kit where I'm not a great fan of the look. The companionways in the kit have notched edges to aid in getting a neat lined up assembly - these are certainly helpful, but those tabs, (in my personal opinion) slightly spoil the look of the finished article... If you're painting these parts, it's a non-issue. And they don't look terrible... I'm just not a great fan. Here's the photo from the assembly manual - Again, in fairness to Chris and James, it's worth noting that these photos have the char left on - if you sand these edges back the notches will be far less noticeable. Don't take any of this as a complaint. It really isn't. This kit rocks! And as is always the case with a wooden boat model - if you don't like it, scratch build it however you like... the kit's just the starting point. So here's my effort... Pear left over from the planking was split down the middle, and then glued back together to make boards of ~2mm wide planks. The original parts were then used as templates to make full sides. Once cut and sanded to shape (leaving the spaces for the notches in place on the sides, and removing the notches on the front of the companionway), it was assembled. Using the original parts for the front (with the tables removed) and the top, it was all assembled. Thanks to the hatch top, the assembly was reasonably sturdy. Here's a shot before the bottom edge was tidied up... Overall, I'm happier with the look. Next up are hinges and handles, etc... No photos of that yet. Thanks for looking in. Rob
- 47 replies
-
- 5
-

-
- Erycina
- Vanguard Models
- (and 1 more)
-
Hope you're feeling better soon, Chris. It's draining coughing all the time. Amazing what's possible with 3d printing now. Those ship's boats look fantastic.
-
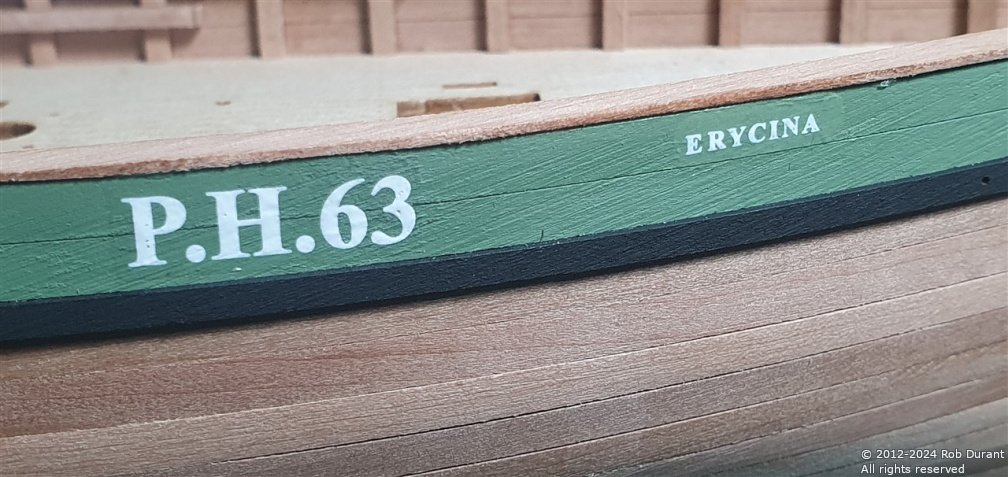
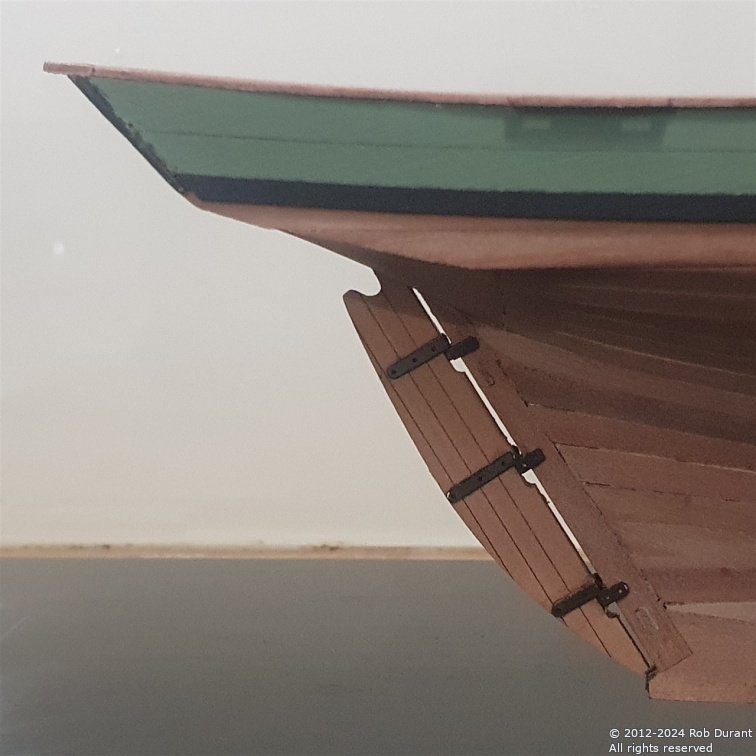
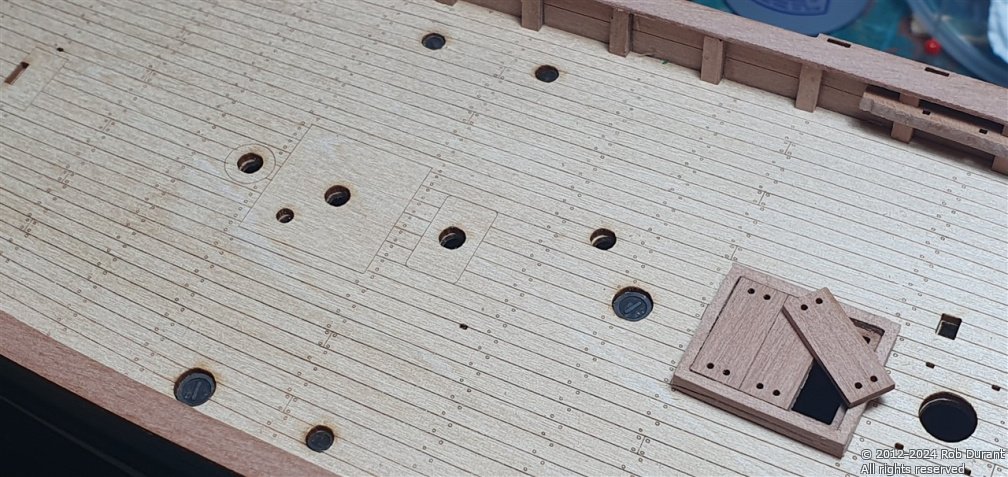
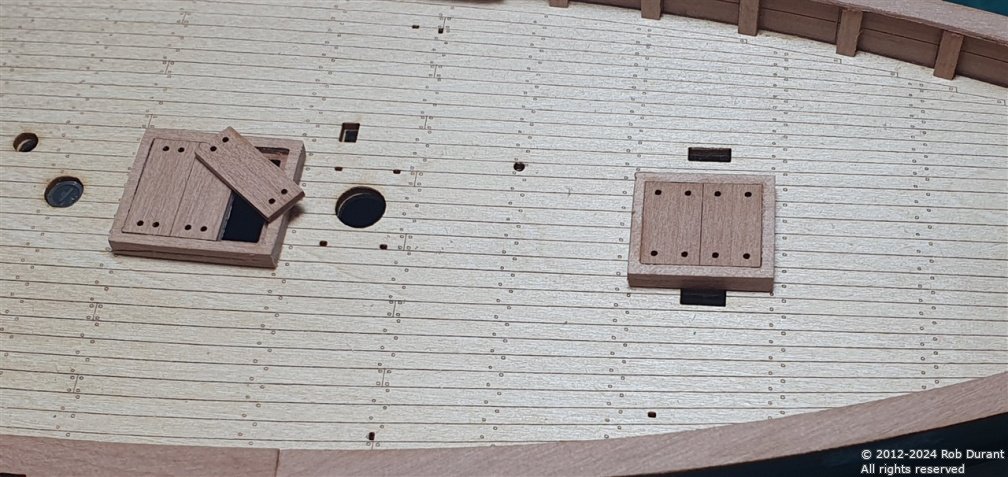
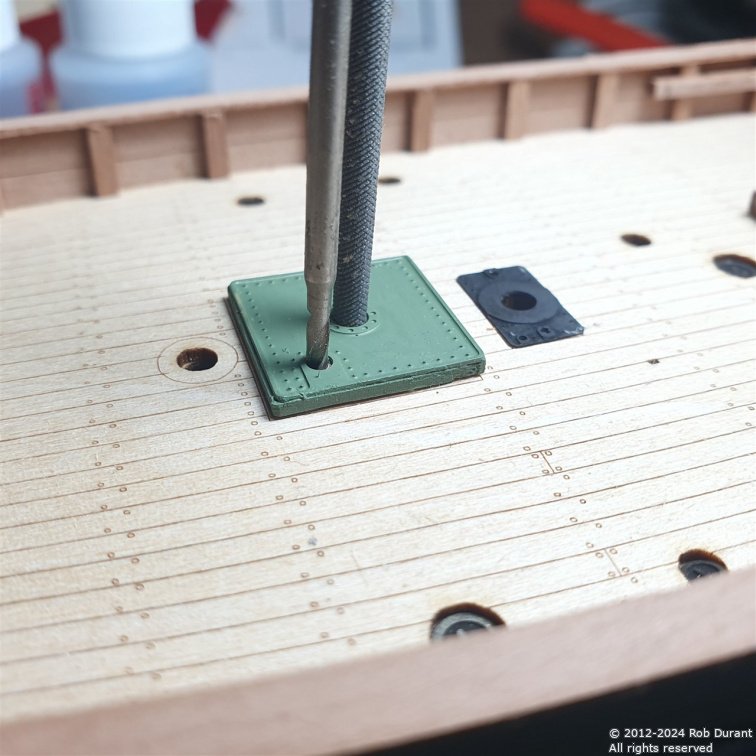
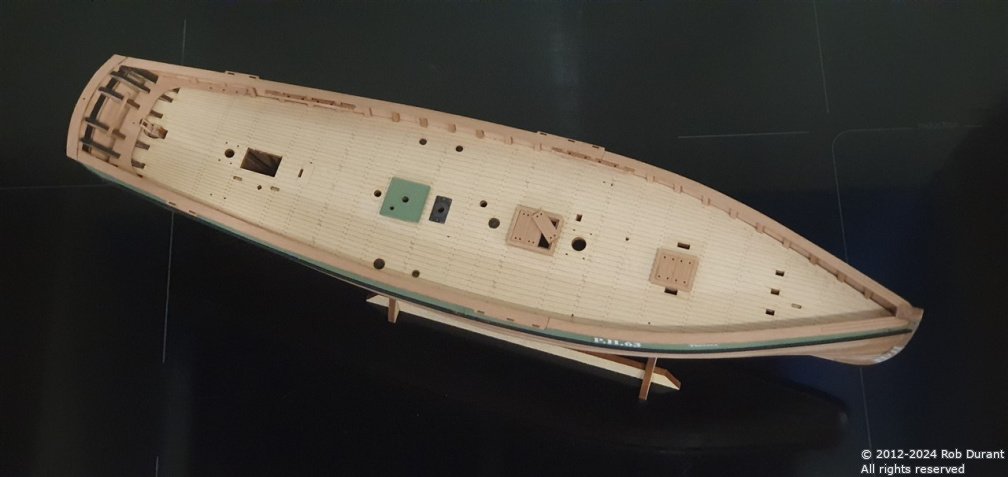
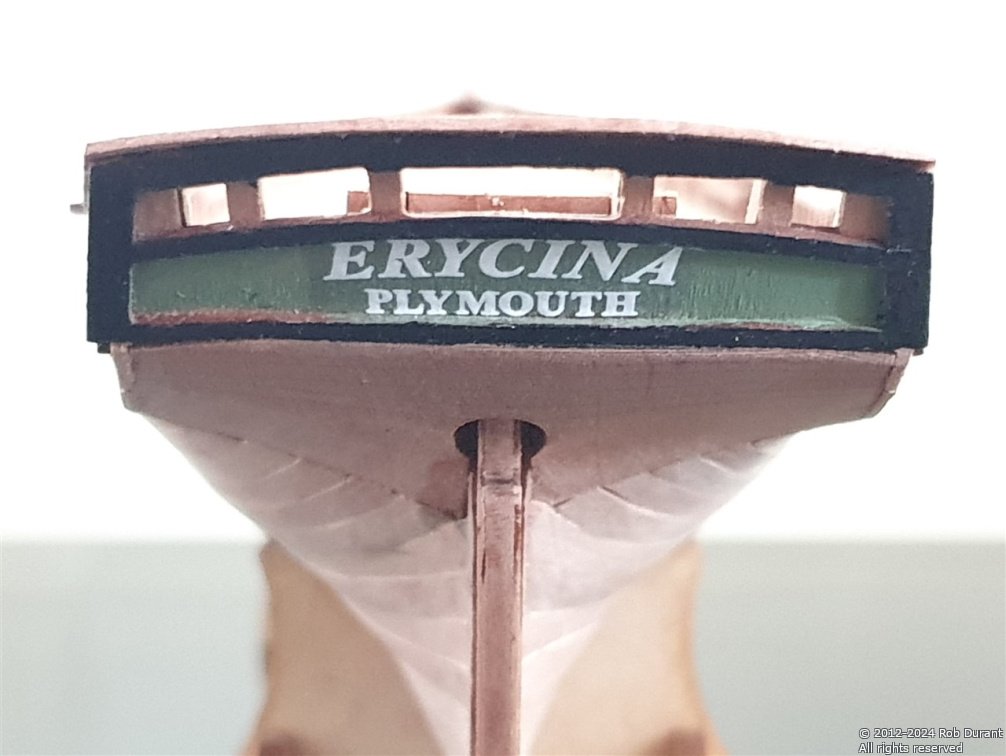
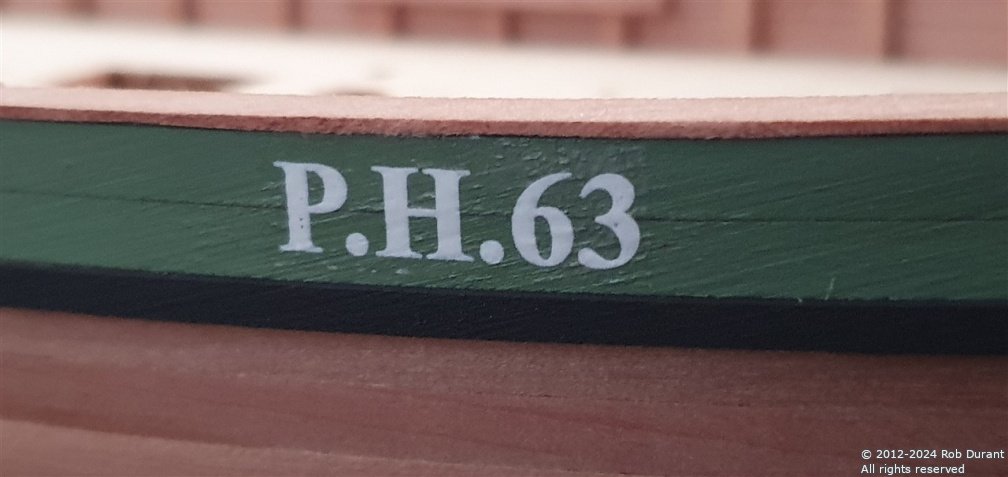
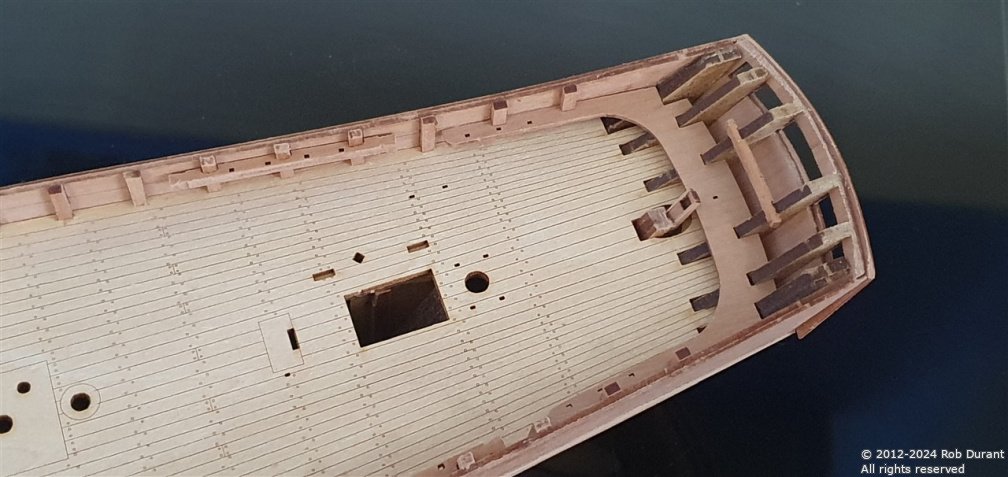
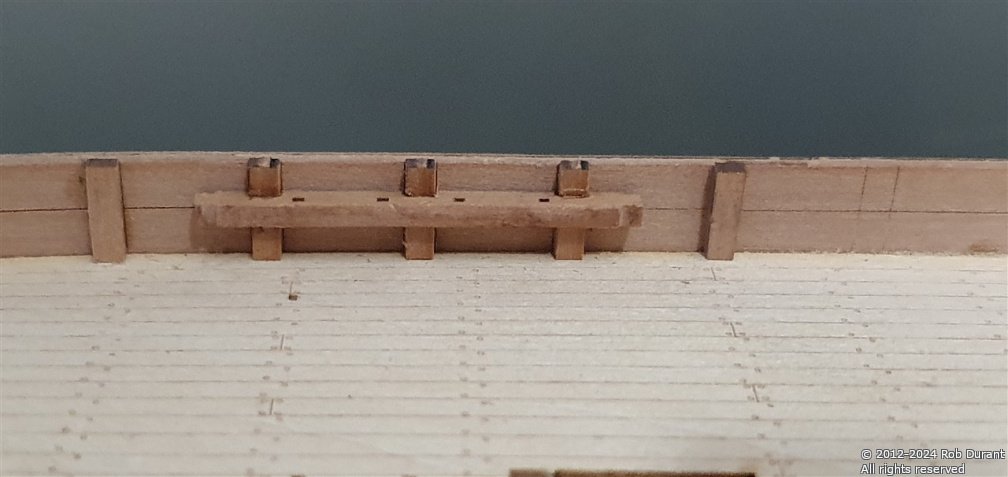
A brief update today. I realised I hadn't put on the vessel name decals yesterday... so on they went. Photo etch for the pintles and gudgeons next... (blackened using IPA to clean, "Casey's brass black", and then water to rinse) And then it was time to focus on the deck a little... Scuttles were blackened and then added... Hatches assembled... I'll leave the hatch open a little to show off the extra detail that Chris has designed in for this hatch. These are still dry-fitted at the moment, and I shall add the rope handles before gluing in place. One of the other builds I read on this forum noted that the forward hatch is offset to starboard very slightly, so hopefully I'll remember that when I come to gluing it in place. It's shown on the plans - just easy to miss. And a few more parts - the base for the steam winch, and another part - these were blackened / painted, and then glued in place making sure to line them up carefully using appropriate sized rods where they need to line up with holes in the deck. And finally... the view from above. Thanks for all the encouragement. It's so encouraging to see things moving ahead so well now, and to be spurred on by the likes. As I've said many times already, this kit really is beautifully designed, and makes the task of building a real joy. It's nice to get to the stage where you see real progress each time you work on it. Rob
- 47 replies
-
- 8
-
-
- Erycina
- Vanguard Models
- (and 1 more)
-
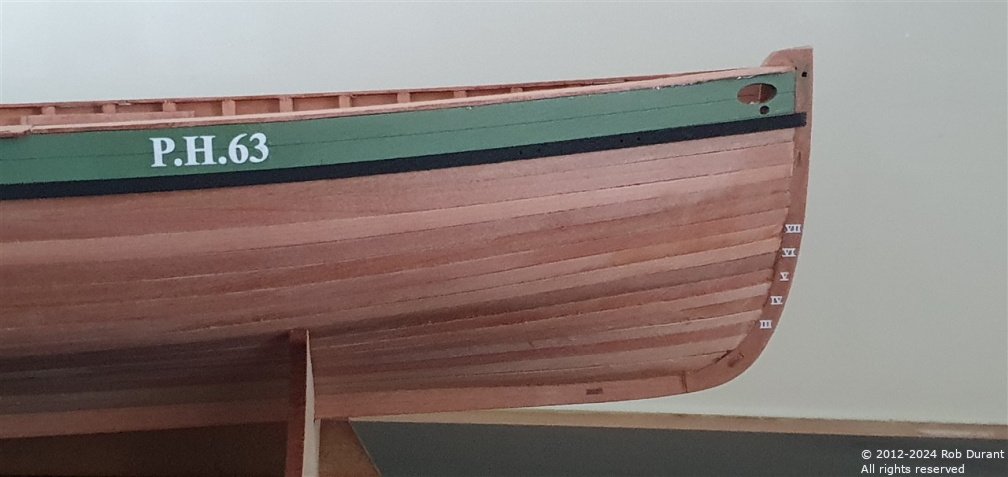
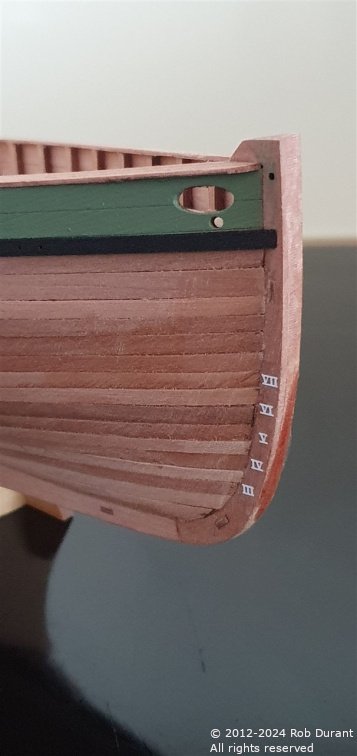
Decals on... I used Microset and then Microsol to apply the decals. This allowed me to get them to really soften round the wood grain. Thankfully, the wood seemed to take this really well, and although you can see the wet look on the wood in the last photo (from applying the depth marks to the other side of the keel, this has now dried to the same colour as it was before. A quick point of note- when you're marking out where the depth markings go, don't forget that at least some of the sheet plans aren't 1:1 scale with the model... In fact, they're about 1.3x smaller - so do factor up your measurements before you mark out where the decals are going. This becomes important again when measuring up and making the spars (which, it's worth noting, have the correct measurements written next to them.) Thanks for looking in Rob
- 47 replies
-
- 7
-
-
- Erycina
- Vanguard Models
- (and 1 more)
-
Thank you for the kind comments @JacquesCousteau @AJohnson
- 47 replies
-
- 2
-
-
- Erycina
- Vanguard Models
- (and 1 more)
-
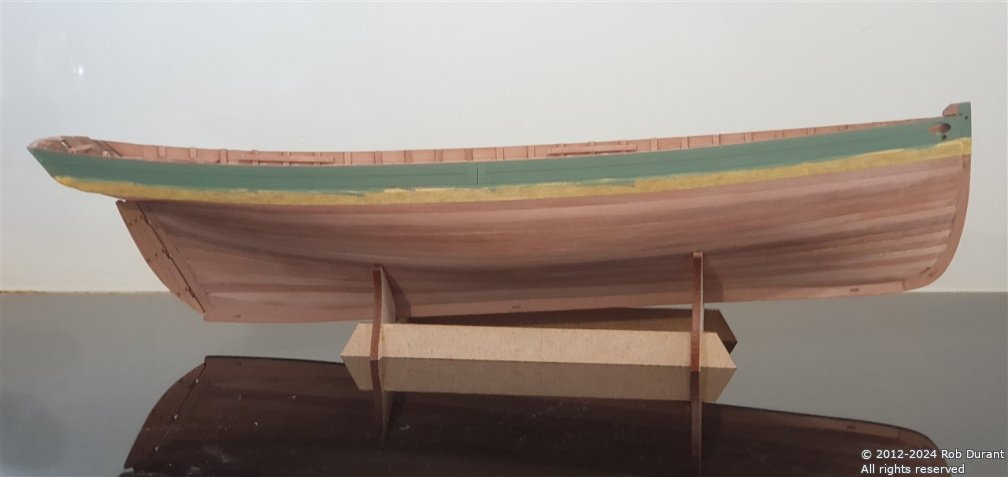
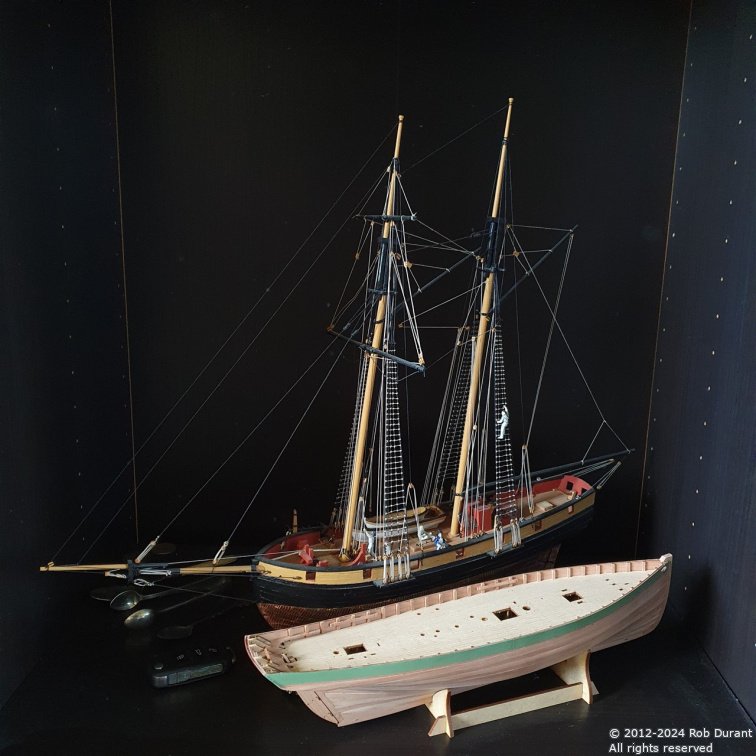
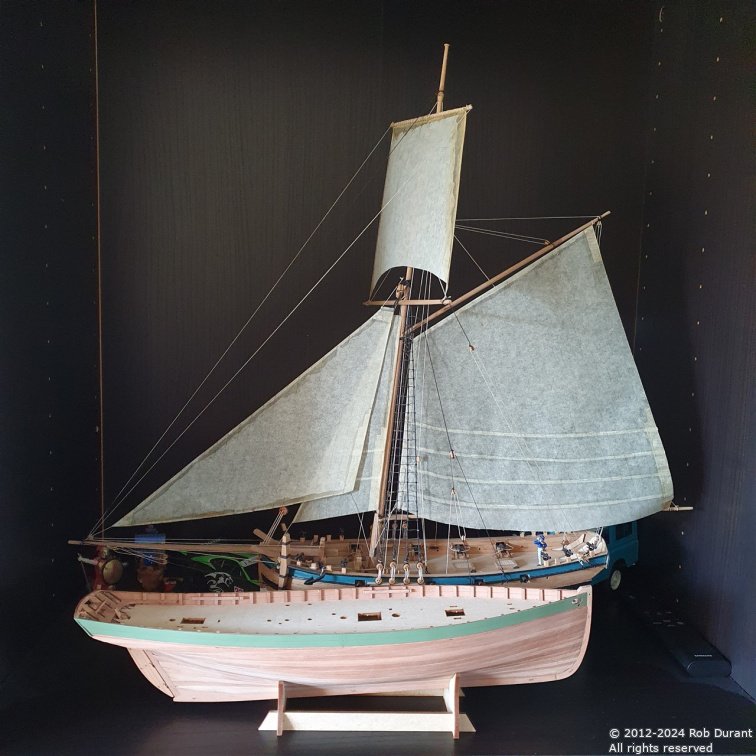
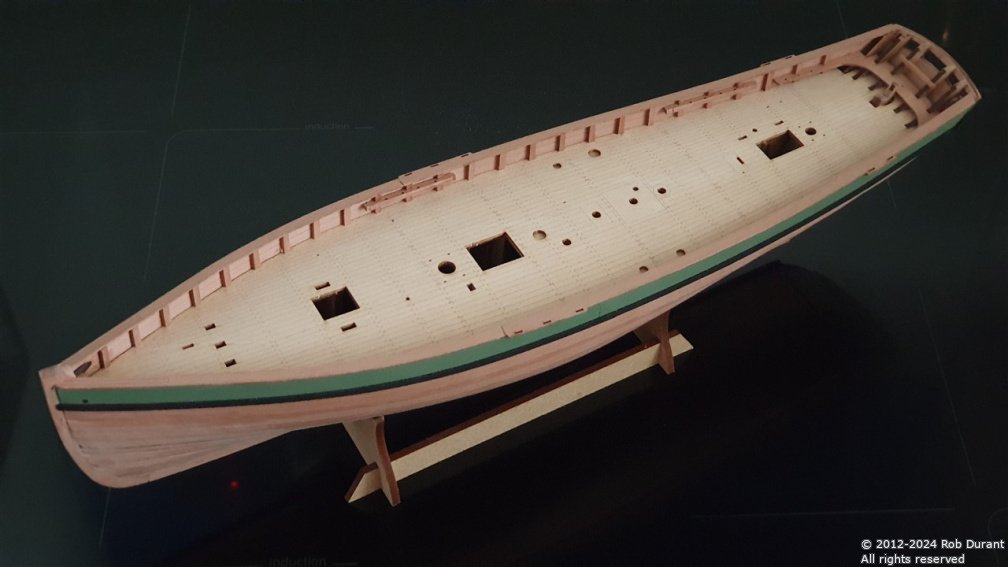
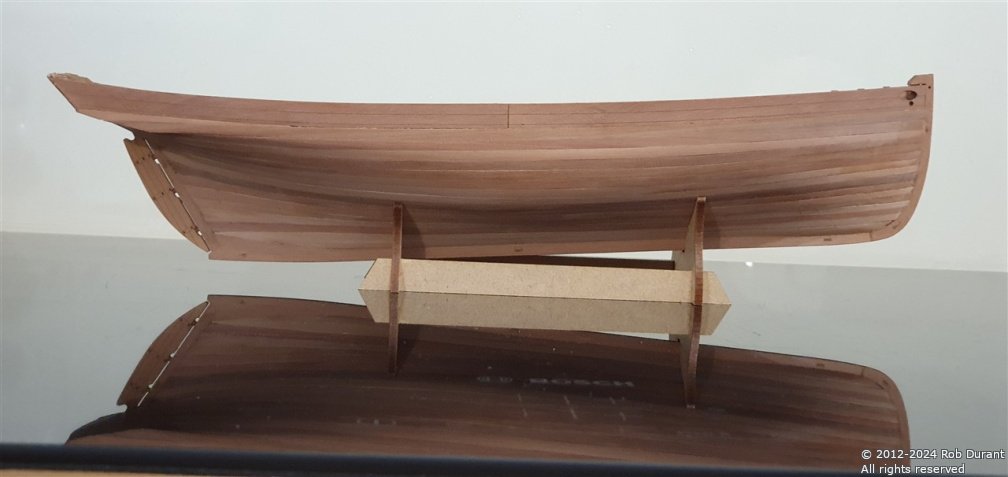
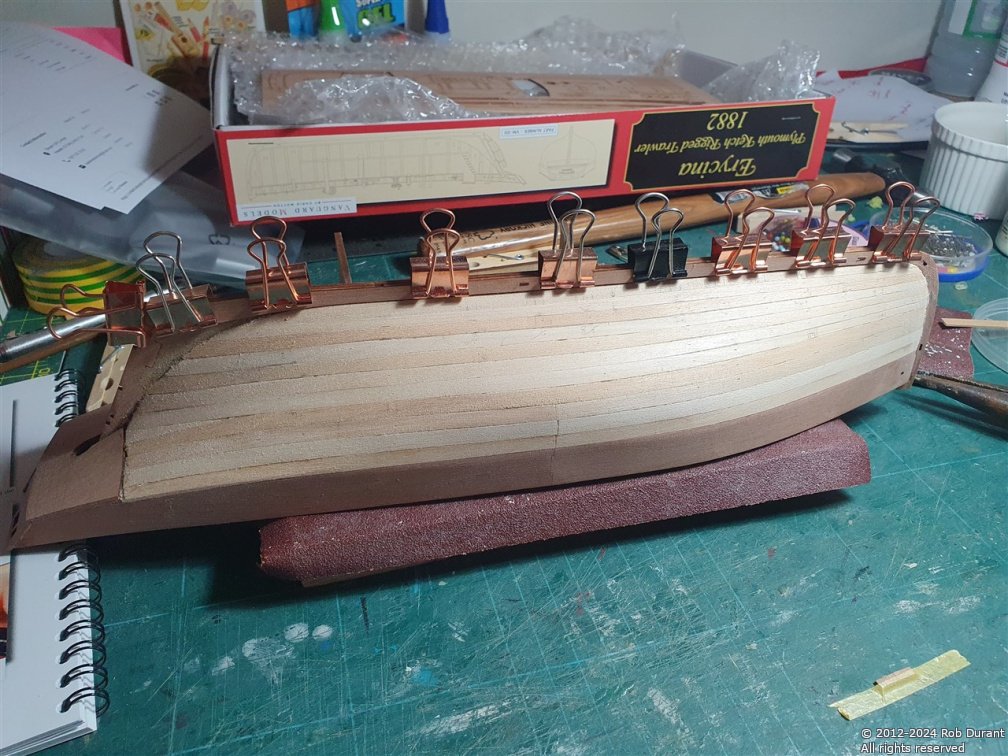
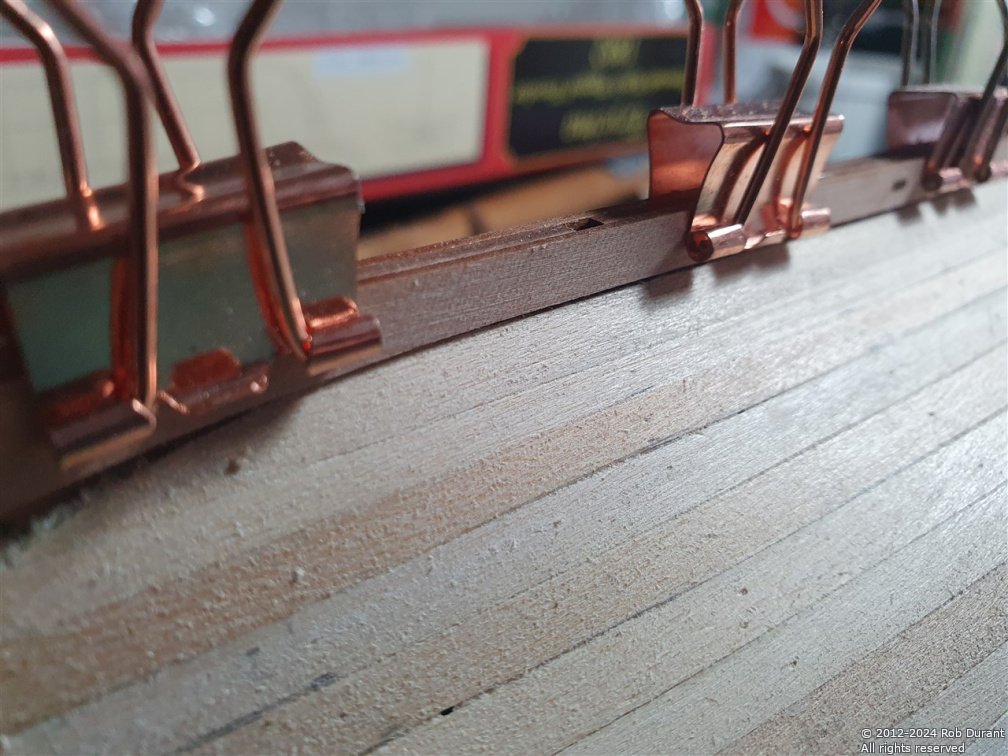
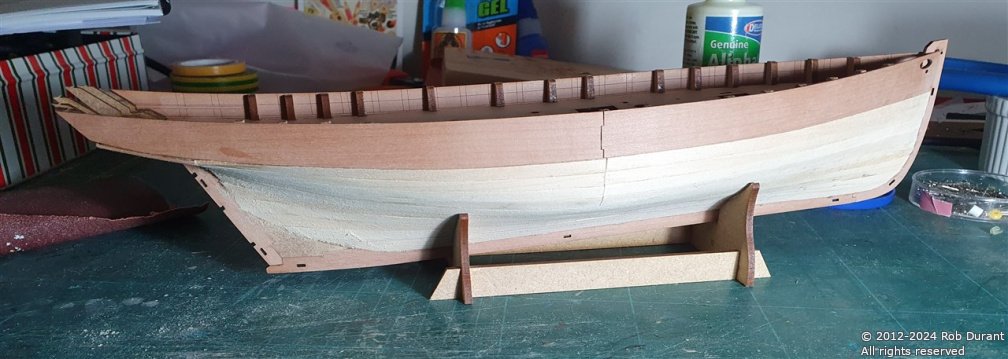
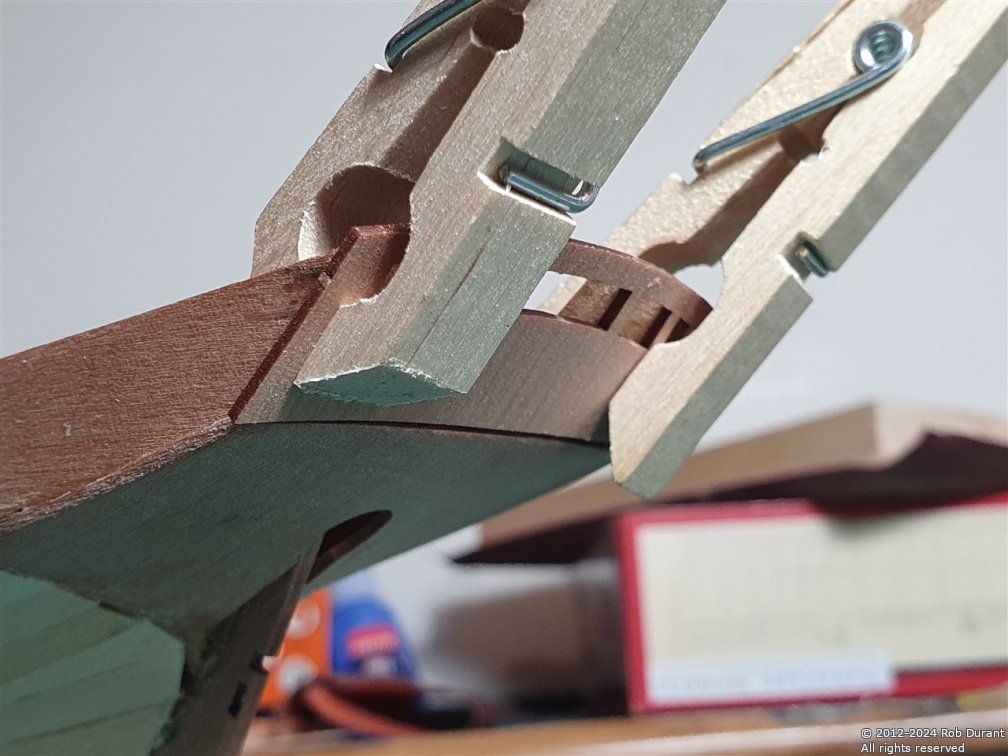
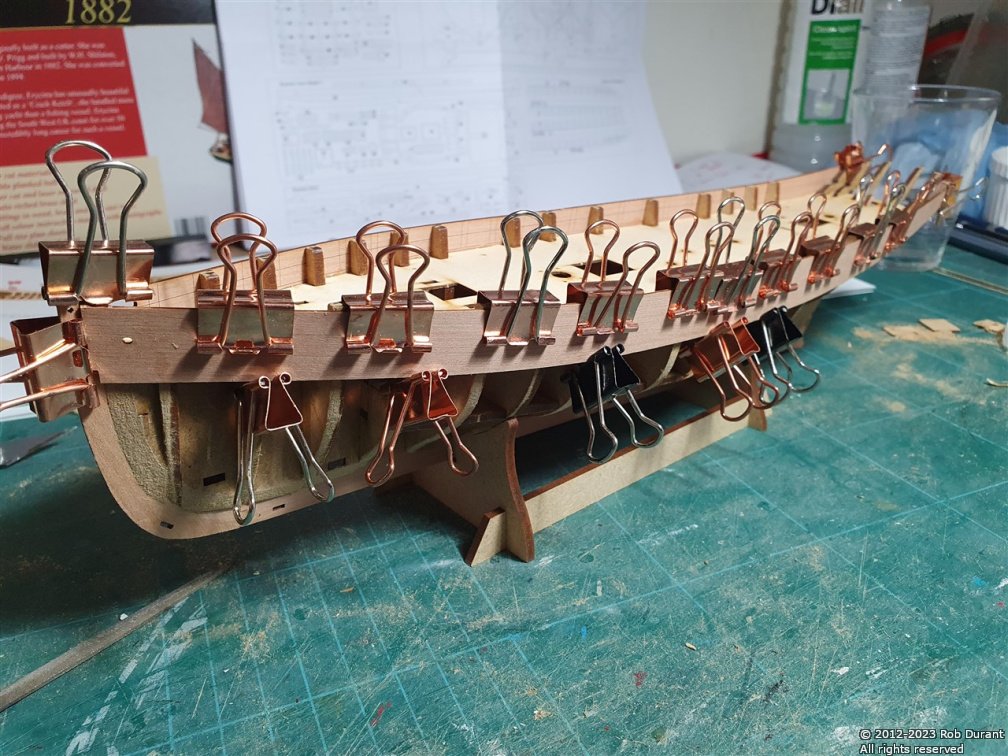
Well, what a productive day it's been... surprisingly so. Yesterday I managed to fit the remaining uprights behind the bulwarks along with the part that runs round the stern and tying off points. The hull was then masked, and painted Tamiya matt acrylic Cockpit Green (XF-71). The secret with these paints (when brush painting, as I do), is to resist at all costs the temptation to go back over a bit you've painted already until it's truly entirely dry. Any attempts to repaint an area will drag the skin that is probably already forming, and it'll turn into a hot mess (ask me how I know!)... the tamiya paints seem far less forgiving than the Vallejo acrylics that I use more often ... there are, however, colours that Tamiya simply seems to nail that I can't find anywhere else. The blue I used on Ethalion, the green I'm using here. They just have a nice scale subtlety that avoids you being slapped round the face with the colour - this is, of course entirely subjective - so, paint your model whatever colour pleases you and feel free to ignore me I do like this muted colour and how it contrasts against the pear, and I'm pleased with how it turned out. At this point, and as I put the model somewhere safe overnight, I thought a picture with the first, and third wooden boat I built would be an interesting contrast... Caldercraft's Sherborne and Pickle are of a similar size... I also painted the strips that run along the bottom of the green stripe, black. As always, Chris provides marks that show precisely where all of these things should go, which makes it really quick and easy to get these parts into place. This morning the first job was to glue these black stripes into place. I don't know what I'd do without masking tape! I figure if masking tape will hold the part in place while it glues, I've probably got it fitted reasonably well... if I'm using clamps and nails and screws and a vice, I probably haven't taken long enough to get it fitting before I glue it... I figure this approach also guards me against getting taken out when a glue joint fails somewhere down the line! 🤣 So... bulwark tops were fitted, and paint touched up... and here we are. I'm not planning to paint the bottom of the hull on this model. I've painted all of my hulls before, but I'm rather pleased with how this one has gone, and I think I shall leave it obvious that it's planked all the way down. More updates soon, I hope. Thanks as always for looking in, and for your encouragement and likes. Rob

- 47 replies
-
- 7
-
-
- Erycina
- Vanguard Models
- (and 1 more)
-
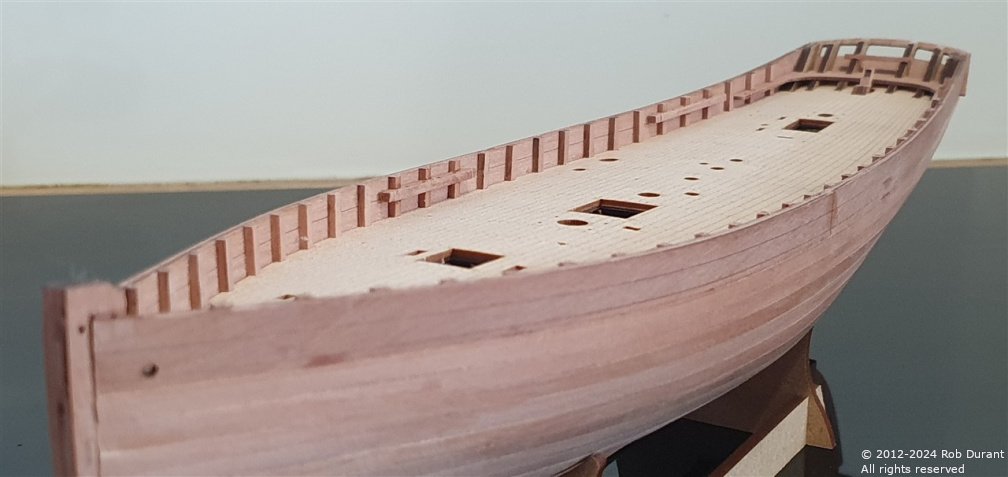
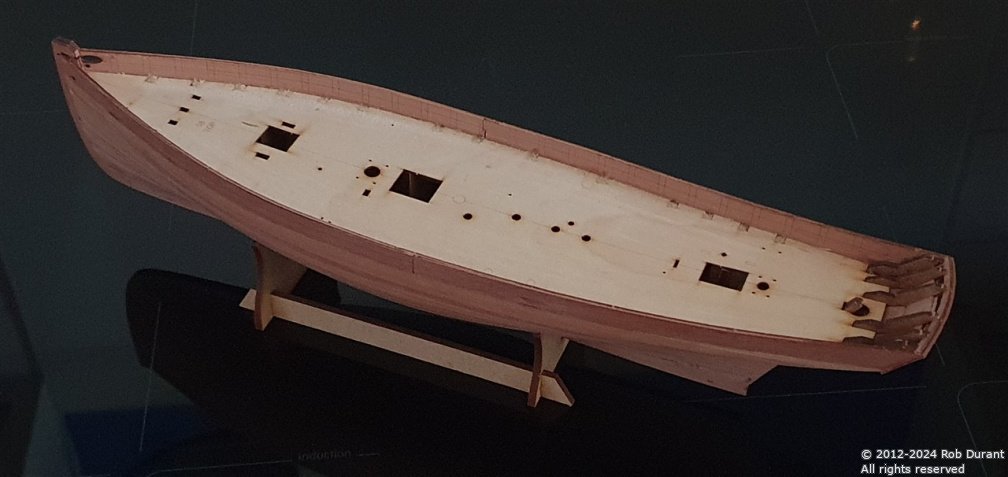
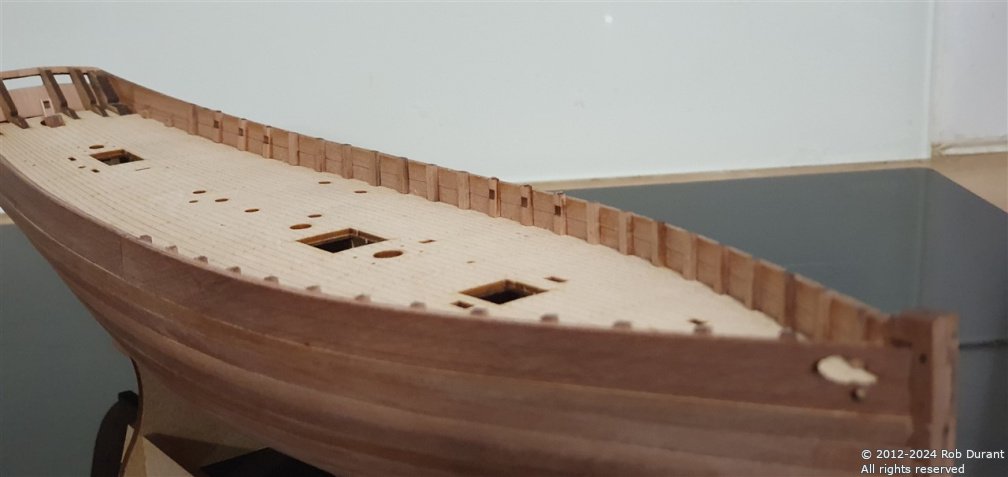
Well, half-term is finished, and with that change comes more time and space for sleep and model boat building... I finished the hull planking a couple of days ago. Whether it's my best effort, I'm not sure, but overall I'm pleased with it. I've taken off the bulkhead tabs above the false deck, fitted the deck, and begun the task of adding the uprights on the inside of the bulwarks. While some glue was drying, I assembled the wooden parts of the rudder. As always the fit of the parts is wonderful. Here are some photos of progress... (wow - close-ups are brutal!) Thanks for looking in Rob
- 47 replies
-
- 6
-
-
- Erycina
- Vanguard Models
- (and 1 more)
-
Thanks for asking. There are gradual improvements... a long road, but I'm grateful for all I can do. And it's lovely to be getting somewhere with Erycina, too.
- 47 replies
-
- 4
-
-
- Erycina
- Vanguard Models
- (and 1 more)
-
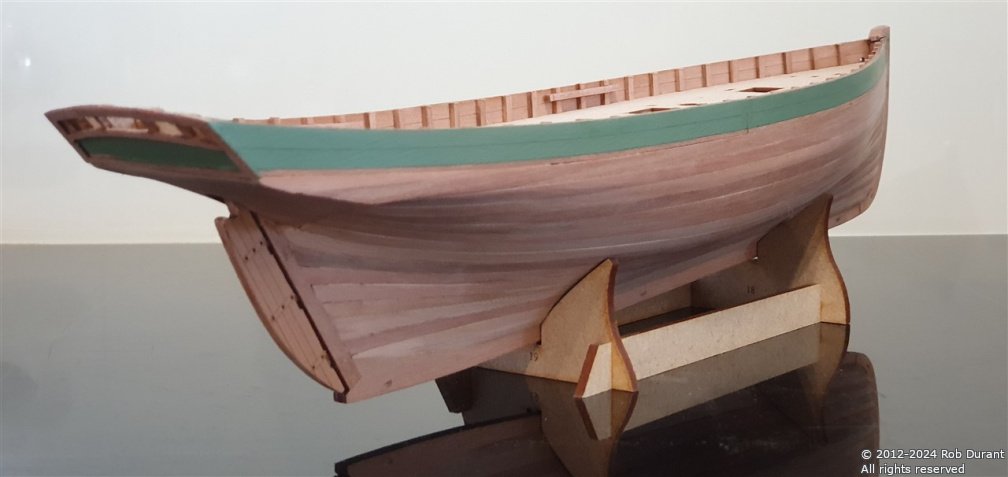
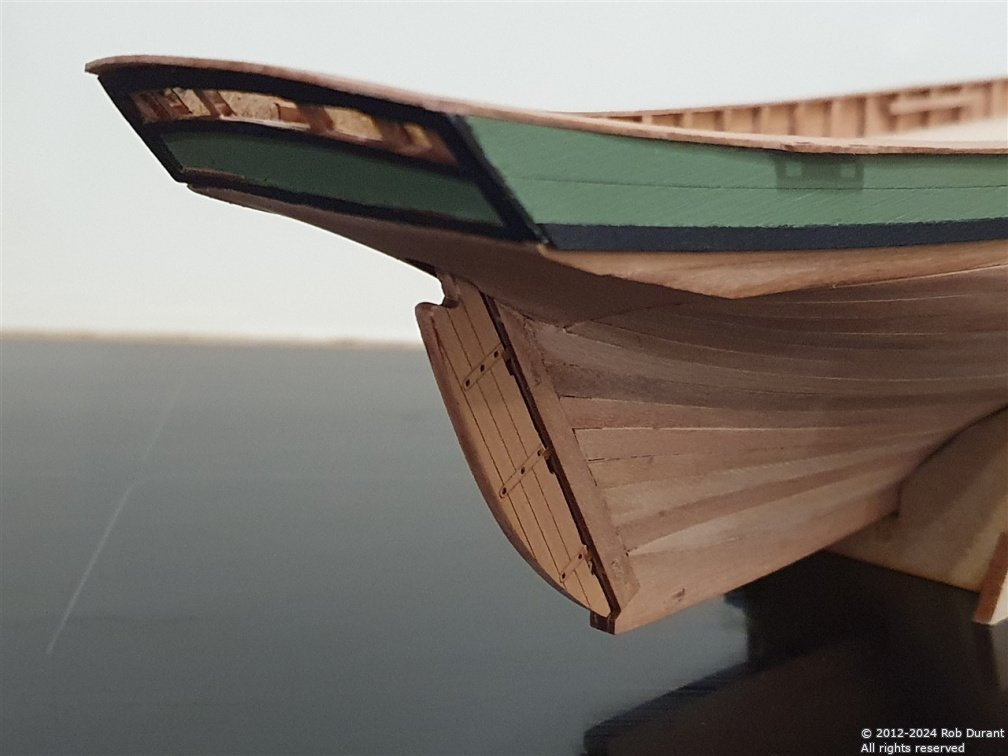
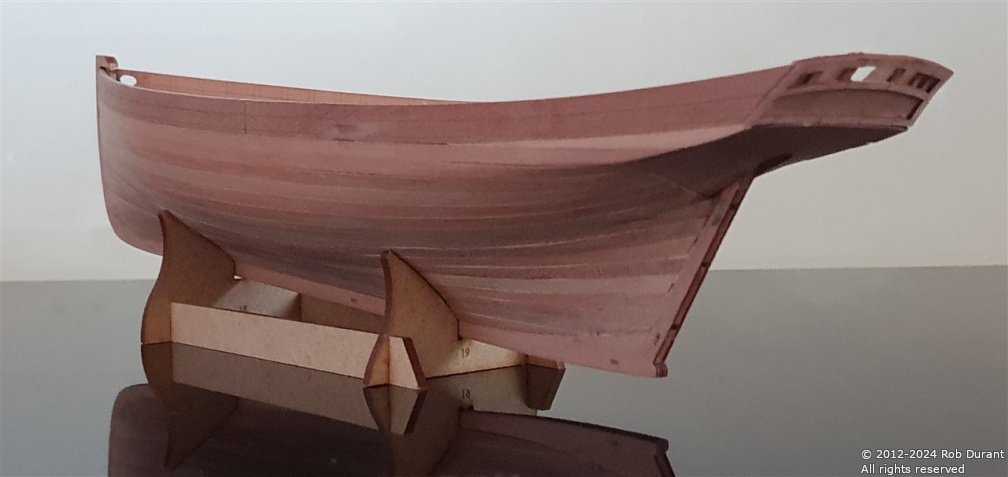
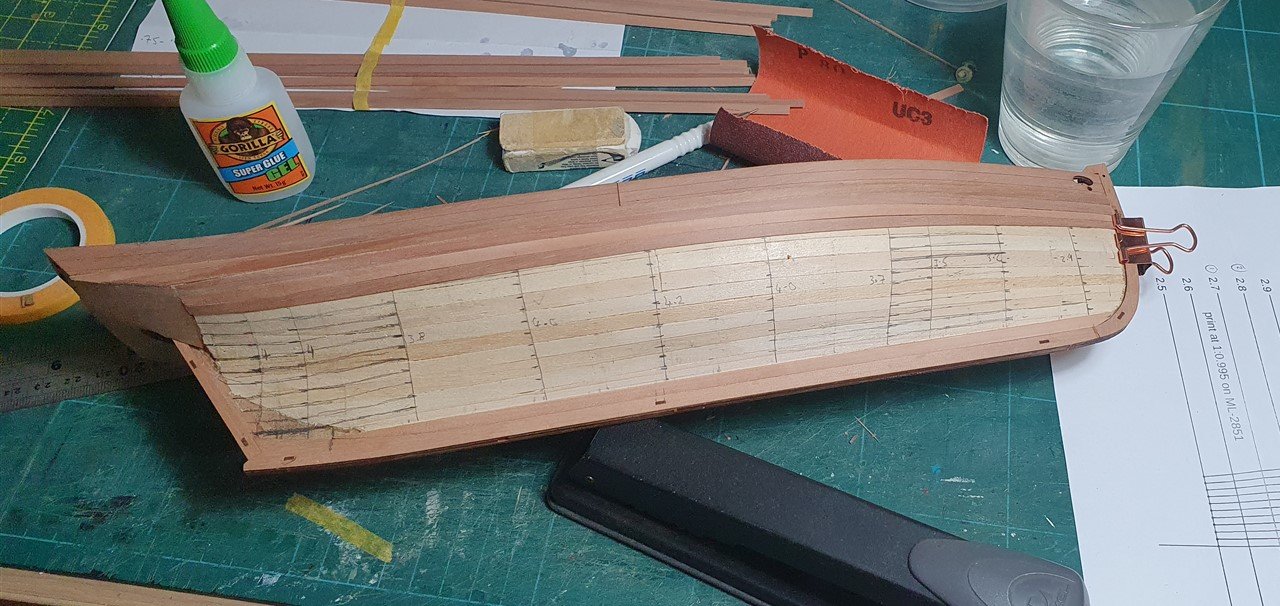
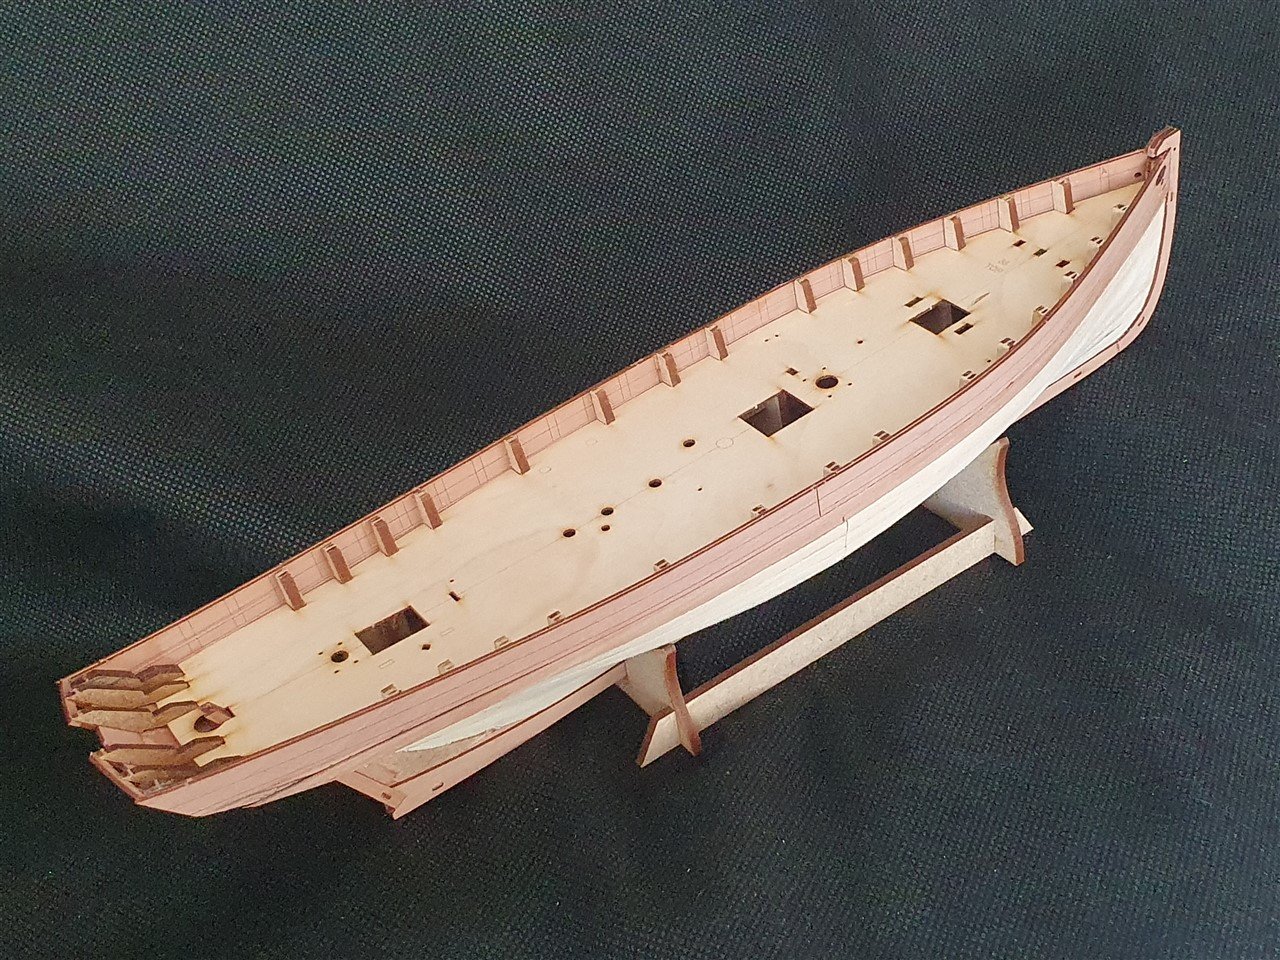
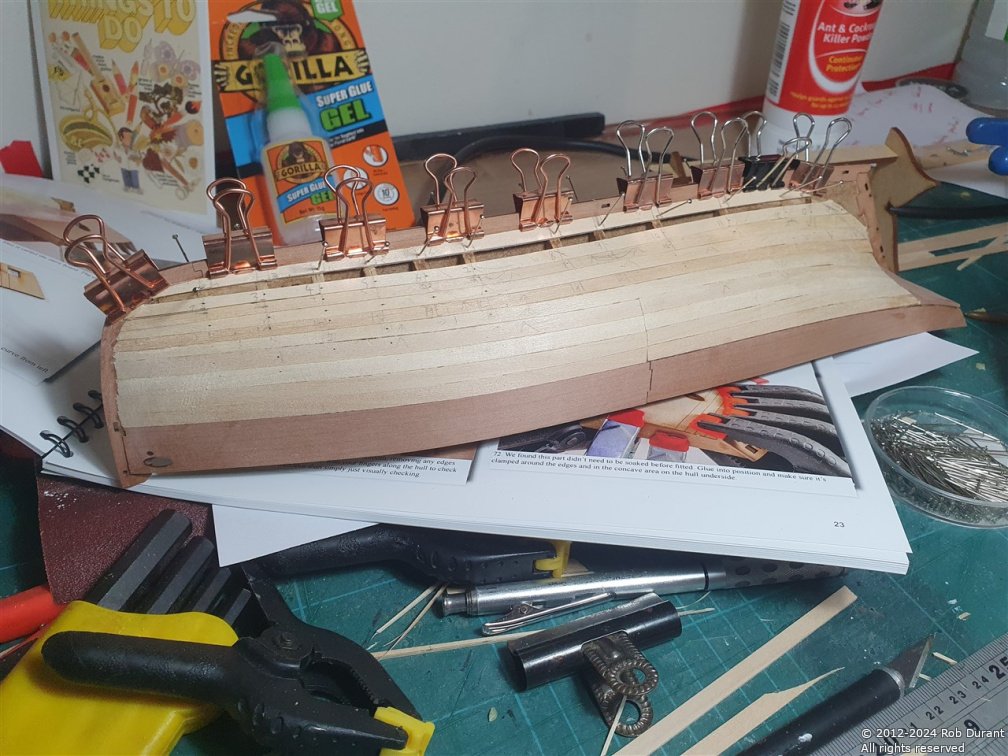
Hi all, A brief update, as there's no a huge amount to show - just the ongoing process of planking. Nevertheless, I've completed the second-planking on the starboard side, and I have six planks to add on the port. I found that the width of the false keel at the stern was a little narrow to allow the planks to come out to the same width as the keel once it had the outer pieces attached. To alleviate this, I added some card inserts with superglue. Not pretty, but no-one will know, right? With this done, I continued planking, and here are the results on the starboard side. (Who knew a hob makes such a good photo-backdrop!) The yellow is masking tape to protect the pear from muck, glue, and scratches while I man-handle the hull to get the lower planks on. To return to a question I posed myself earlier on in this build. I decided to add a stealer in at the stern, so that the planking could drop beneath the counter, rather than curving up. In retrospect, (and perhaps, predictably), if I were doing this over again, I would definitely follow Chris and James' lead and make the planking follow the curve of the rail. The alternatively leads to a slightly weird curve as the plank twists through 90 degrees to drop under the counter. Well, we live and we learn. I don't regret giving it a try, as I've learned more through the process, and I sincerely hope this won't be the last hull I shall be planking... so there's time to have another crack at it Thanks for looking in. Rob

- 47 replies
-
- 12
-
-
- Erycina
- Vanguard Models
- (and 1 more)
-
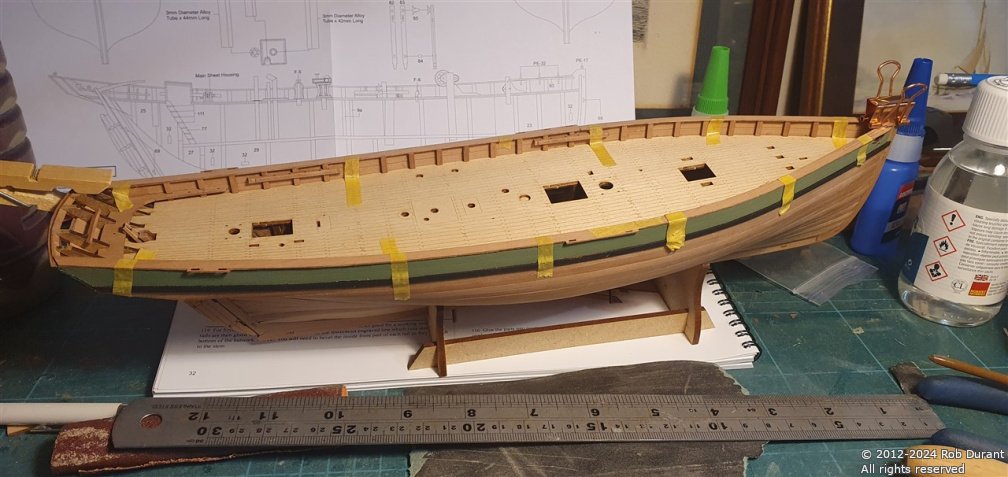
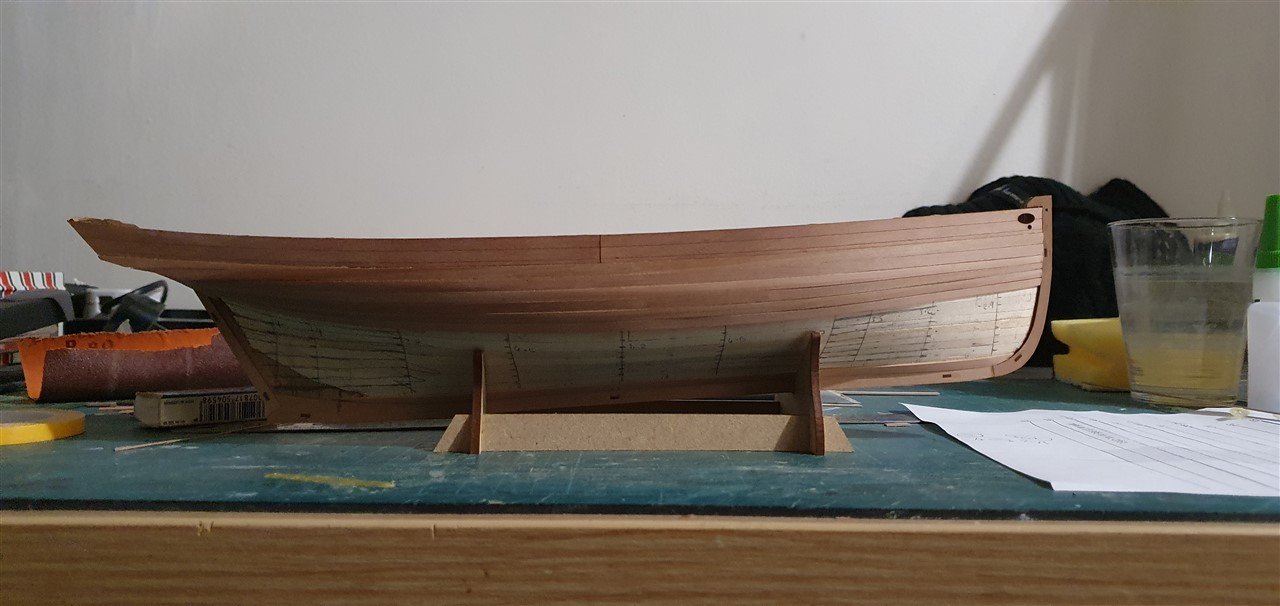
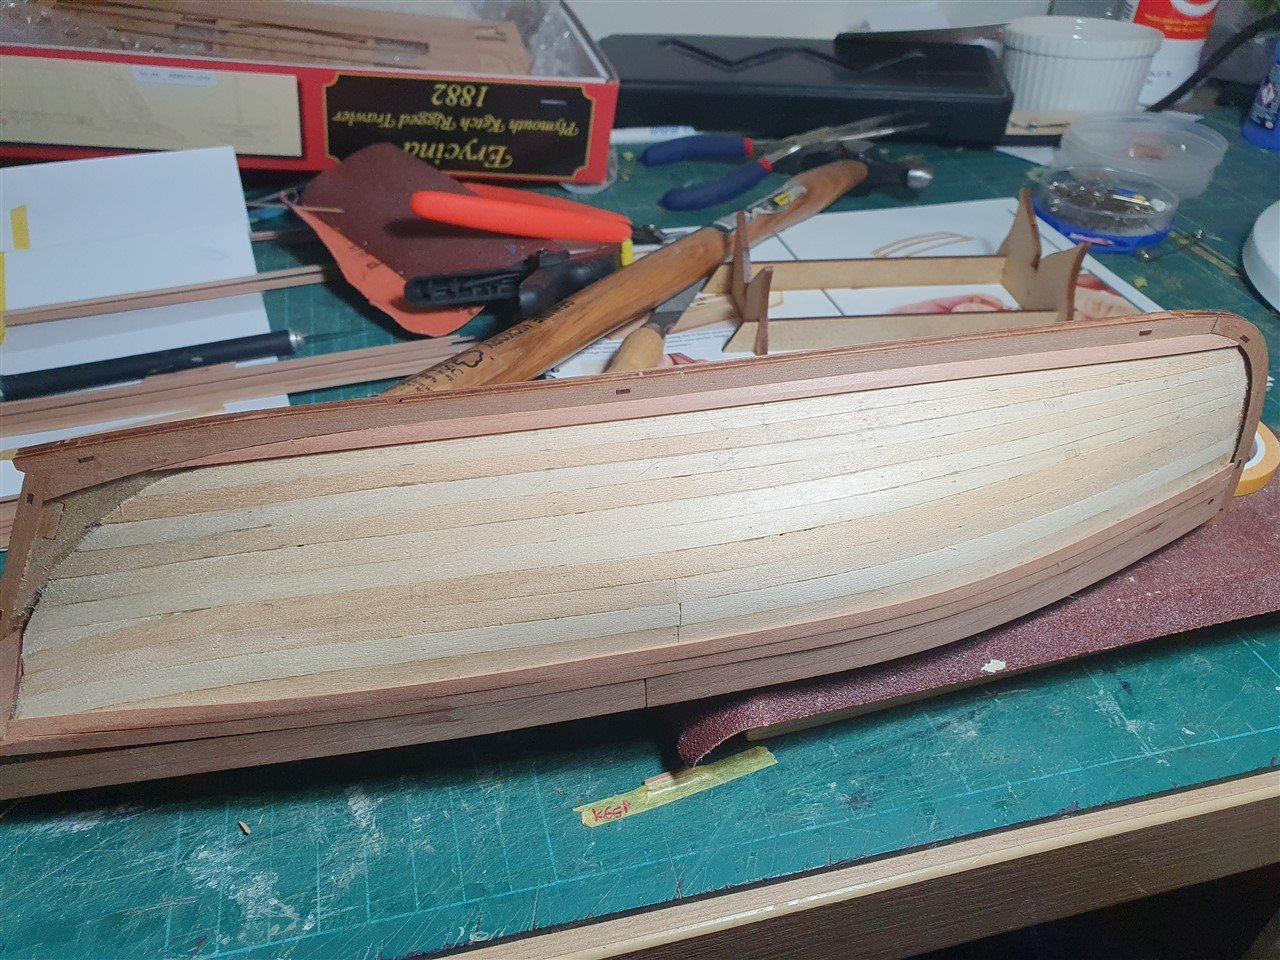
Well, the summer holidays are over, and, whilst I love the family to bits, I find myself with a much quieter house . I lined off the whole hull for this final part of the process. Four more planks have gone onto one side, and two on the other.... It's nice to make some progress again. If my plans come together (and that's a sizeable if!), I shouldn't need any more stealers. Time will tell Thanks, as always, for looking in Rob
- 47 replies
-
- 8
-
-
- Erycina
- Vanguard Models
- (and 1 more)
-
Those are certainly some serious curves at the bow. Looks like a good solid base for the second planking. Thanks for sharing.
- 66 replies
-
- 4
-
-

-
- Adder
- Vanguard Models
- (and 1 more)
-
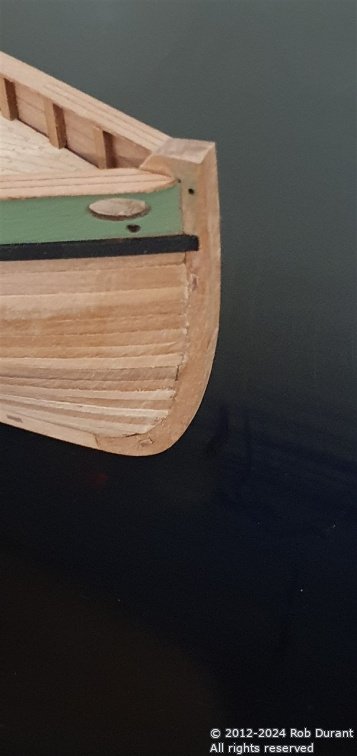
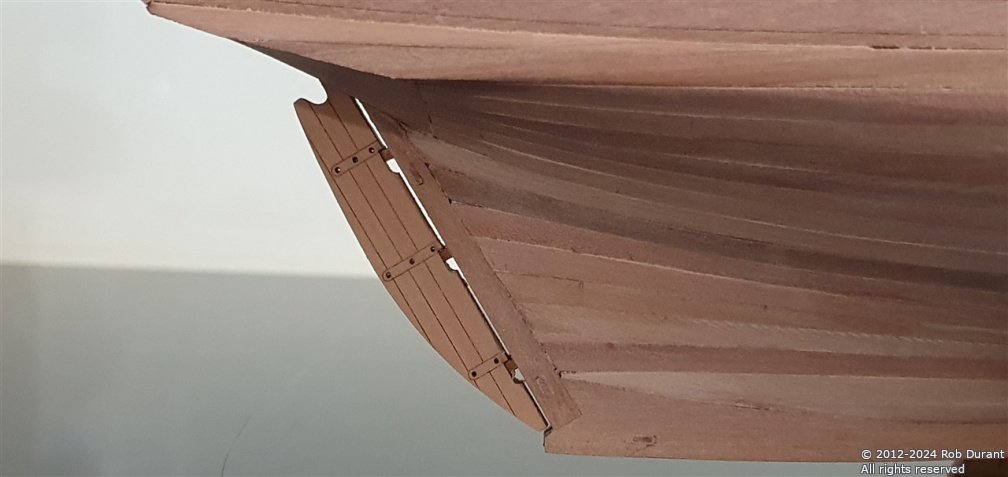
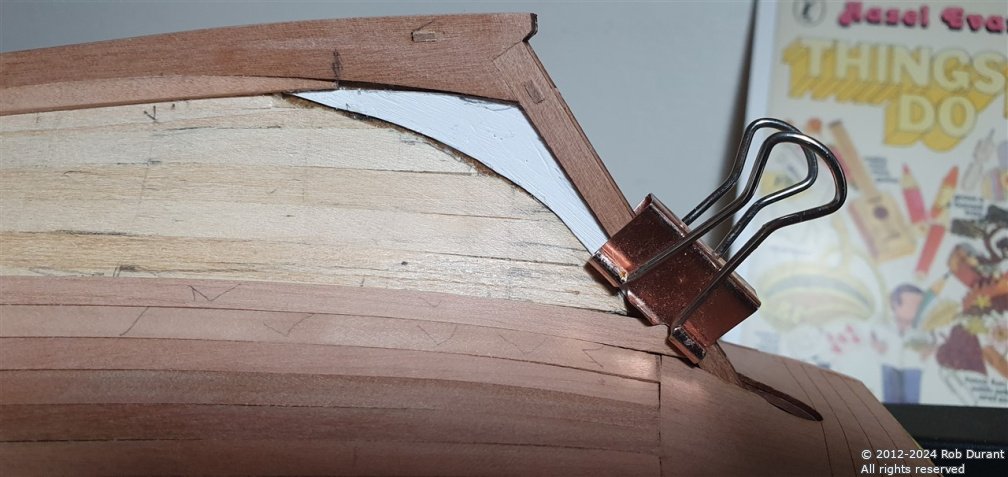
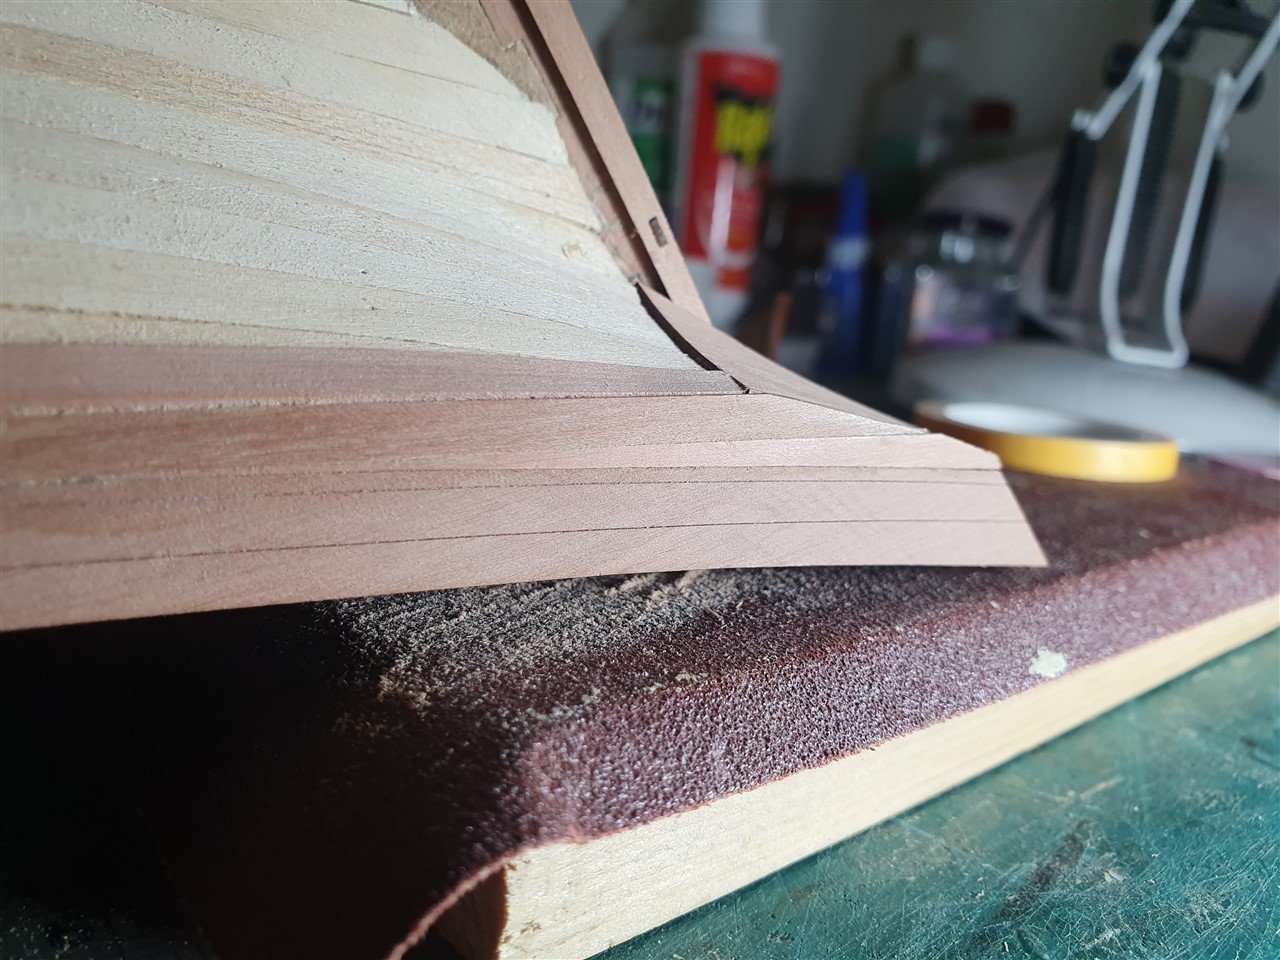
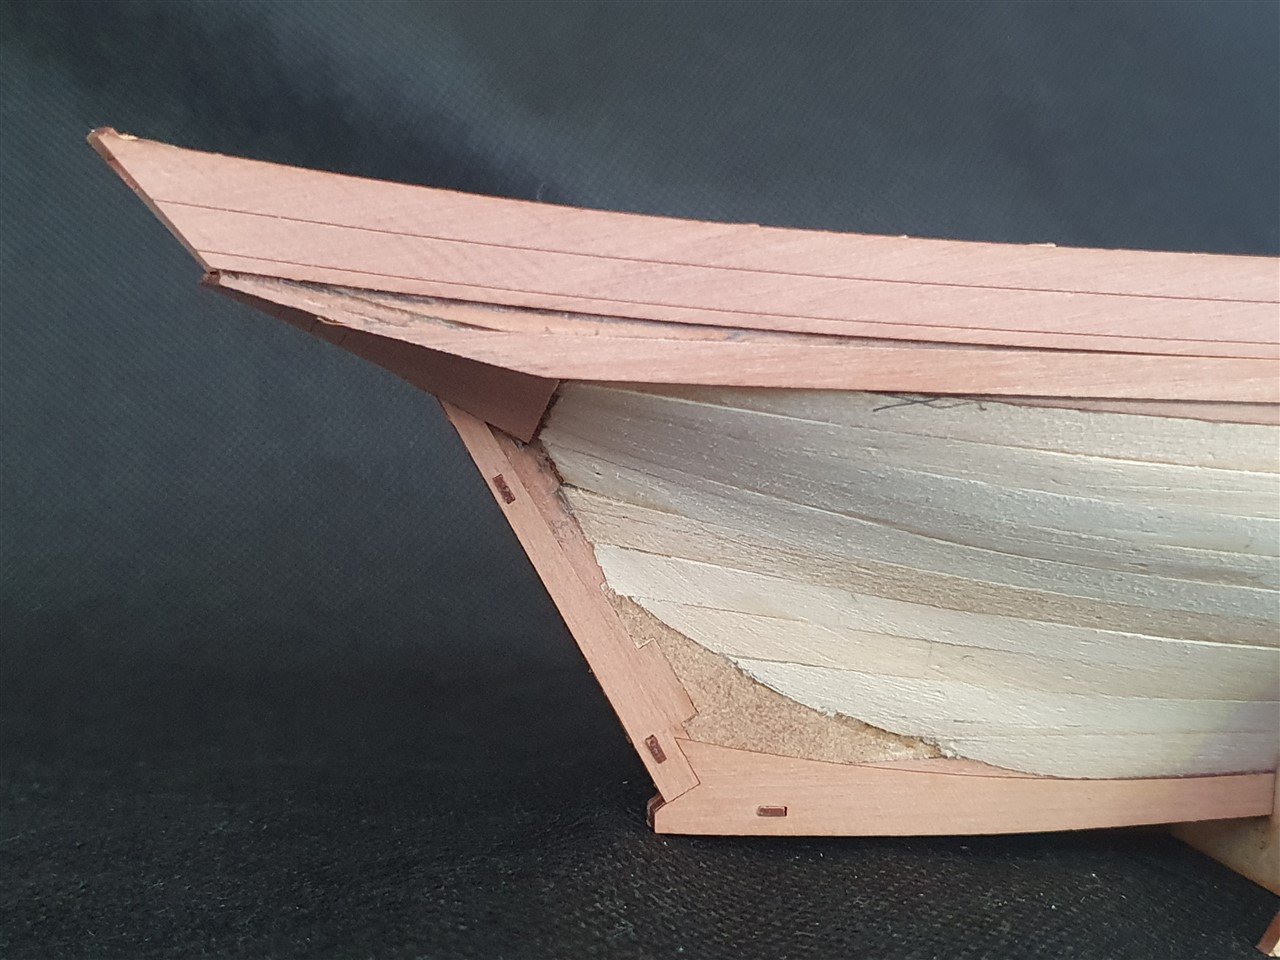
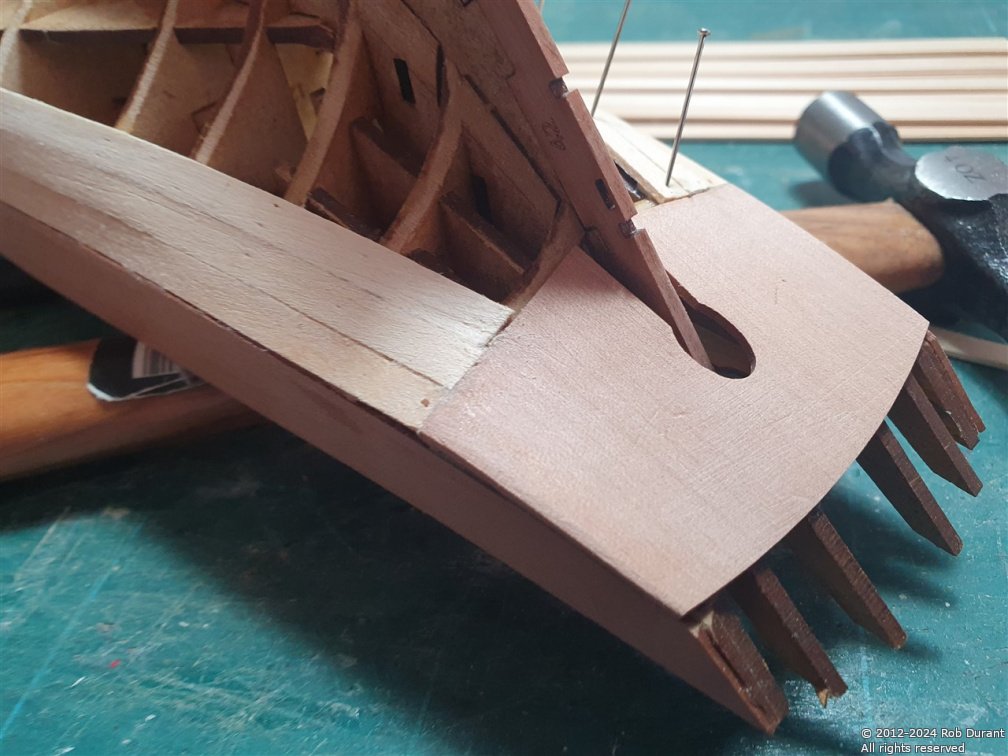
Hi. As I bring my latest update, let me see if I can explain my thinking better... but with the proviso that I may well be barking up the wrong tree, and if you see James H or Chris W doing something differently to me, there is almost certainly a good reason, and you're probably better of following their example My reasoning in bringing the first strake down at the stern to meet the lower counter was to avoid having to butt join two planks together end to end - the planks provided in the kit aren't long enough to reach right to the end if they continue to rise with the pre-fitted piece that's already been fitted above the plank (and assuming that they're fitted as single pieces - not as halves, as per the first planking ... that isn't an issue where they're hidden underneath the fittings on the side of that hull that hold the rigging, but in my head I was worried the line would be visible, and look a little odd). This way of doing it does leave a gap that needs a stealer for the last three inches or so... as in the photo below. I wasn't too worried about that, as I knew I'd need at least one stealer somewhere towards the stern. What it DOES mean, is that the stealer is then very much on show, which is perhaps less than desirable. It also means that the sweep of the planks now has to bend round the tuck under the counter - a somewhat more contorted route than simply following the row as Chris suggests, and as the photos in the manual show. Anyway - I was hoping it would look okay once the stealer was put in place, and here are the photos - you can judge for yourself... Hope that all makes sense The first photo shows the first and second planks fitted on the port side, without the stealer in place. It looks messy, but the second plank neatly tucks in behind the first to make a neat transition at the corner of the counter... The photo below shows the stealer fitted on the starboard side... It seems to me that this way of putting in the plank makes for a nice join between the planks as they meet at the counter... I haven't fitted the stealer on the port side yet, but I think I'm happy with how this is working out. The final photo shows the first plank above the keel (the garboard strake?)... now these two at the top and one at the bottom are fitted, I'll measure the gap at intervals and start fitting every plank so I hopefully get a nice run for the remainder of the planking. Thanks for following alone, and chipping in. And all the best with your build, @bigcreekdad! Are you thinking of starting a build log? We could learn from each other?

- 47 replies
-
- 4
-
-
- Erycina
- Vanguard Models
- (and 1 more)
-
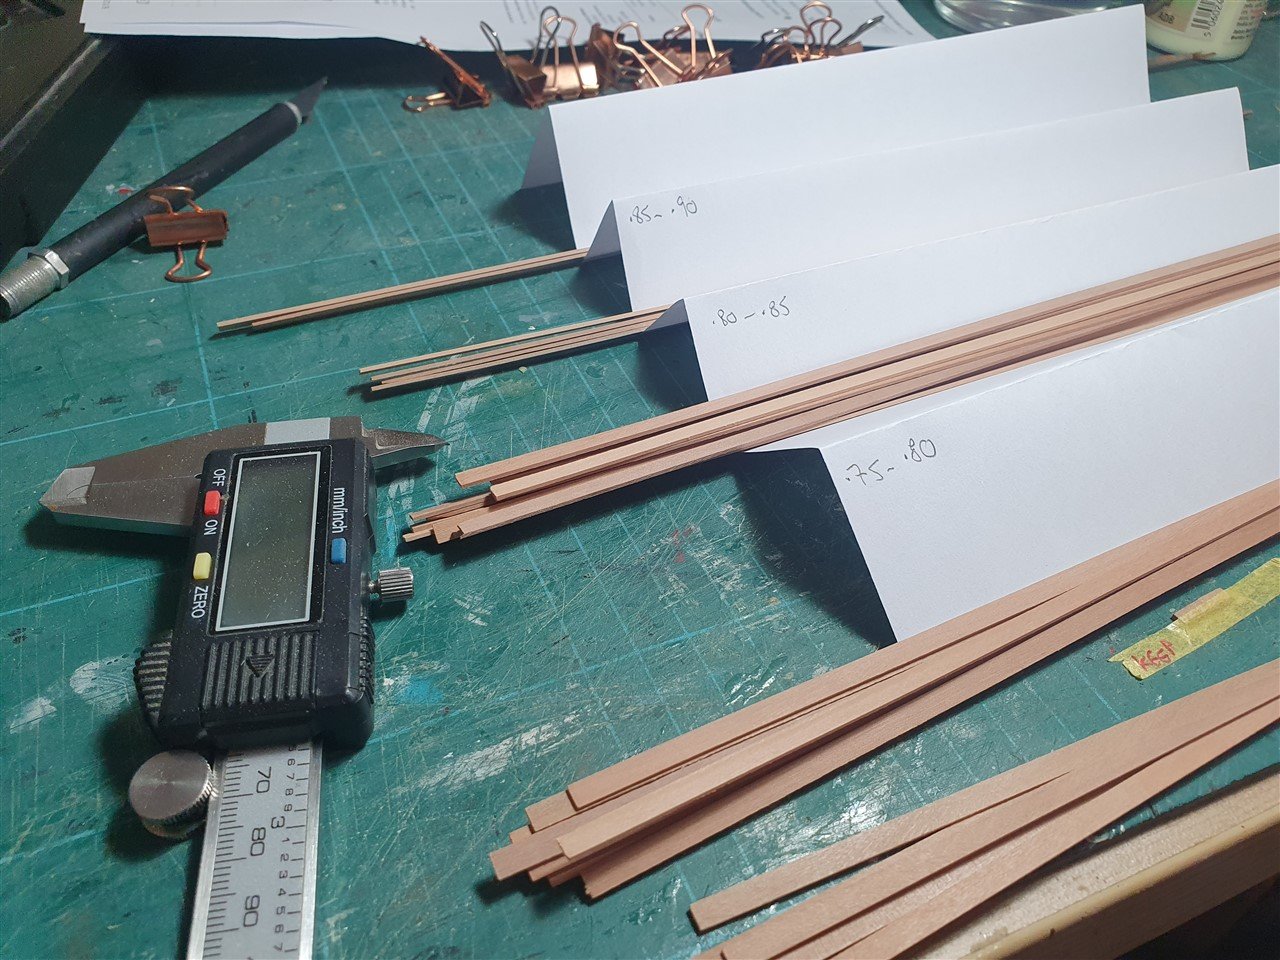
I've managed to get started on the second planking for Erycina... Here are a few shots. Before I began, I went through the planks with a digital micrometer to sort them into thickness... That way, I don't get any nasty surprises with thin planks going up against thick planks... I can grade it as I plank. There wasn't anything too dramatic, but it's nice to go into the task with a plan. The planks varied from 0.6 to 1mm thick, and some varied up to 0.2mm from end to end... As I said, nothing too dramatic, and it'll even out with scraping once done. There are a couple of strips that are perhaps a little too thin, but counting up, I should have enough without using these strips. They will be backups, then. For this planking, I use gorilla glue thick superglue - used carefully, this does a great job and removes the need for pins and clamps... The theory is that it gives a better end result... I'm realising that I'm out of practice, so we'll find out whether this model ends up getting painted, or whether the wood will look okay once done. I try to put little dots of glue along the (pre-fitted) plank before fitting to the hull... So far, I'm putting on too much glue, and it's made things a little messy. Anyway - here's the progress so far. Upper parts fitted, and the first row of planking on each side. One decision I made was to let the plank stay at the bottom end of the counter at the stern, so that there will be a filler between it and the upper outer part... this was because if it were to follow the line of the upper part (102, 103?), it would have been too short, and I wanted to avoid joins. I figure it'll look fine once I put the filler in as long as I get a good fit, but I would have preferred to keep the sweep of the planks, ideally. A different option would be to join the planks where the chain plates will be... I made my choice, and I think I'm happy with it. Time will tell how easy that tuck under the stern is... thankfully I have the rib bender, so this next plank down will need to be well fitted before I attempt to get it to stay in place with glue! PPPPPP, as they say ... (Proper Preparation Prevents "Profoundly" Poor Performance) As always, the pear strips are a simply beautiful colour, and there are no visible machining marks on them whatsoever. It's simply lovely wood to work with! Thanks for looking in. Rob

- 47 replies
-
- 7
-
-
- Erycina
- Vanguard Models
- (and 1 more)
-
Well done, good and faithful clamp. 😆It says something about the devotion you have to this wonderful build that when it's a choice between model or tool taking the hit, it's the tool... quite right, too 👏 Glad to hear both will make a good recovery. And thanks for sharing your thoughts, processes, steps (and even missteps) with us. I'm sure I'm not the only one learning a lot.
-
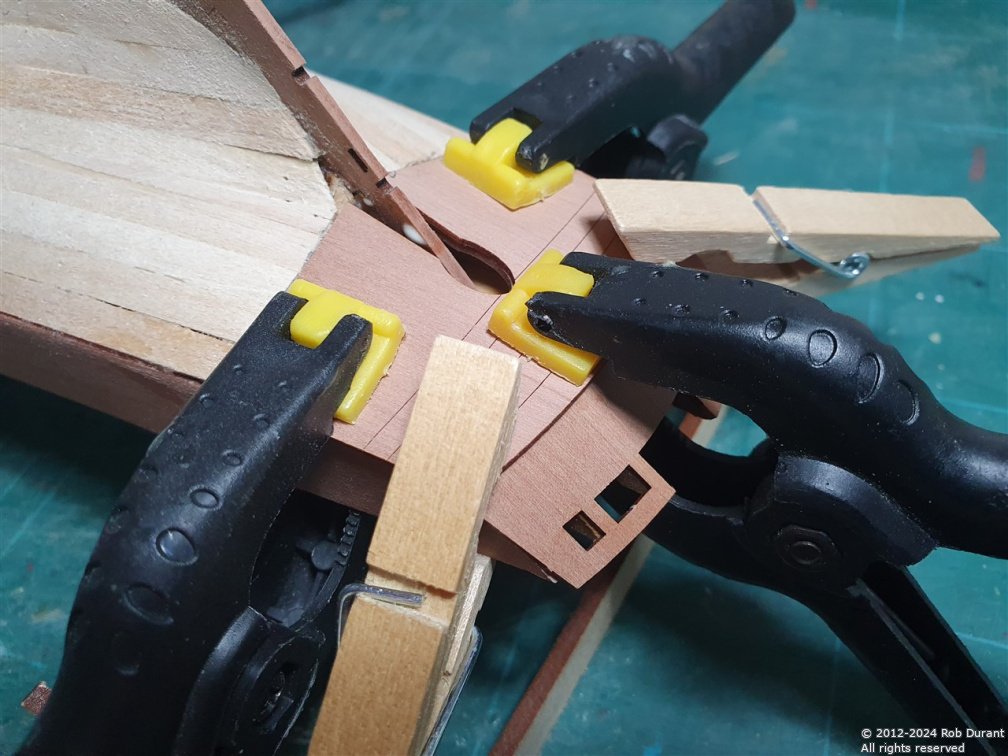
Counter added. As noted in the manual, this didn't require any soaking - it just fitted nicely. You'll notice below that I managed to break the top of the inner transom part... the grain runs vertically here, so it's almost impossible to avoid... I've tucked away these parts, and I'll refit them when I add the outer part on. In the meantime, it allowed me better access to clamp the counter. Today, the final sides have been added to the keel. This is a clever way of effectively creating a rabbet ready for the second planking... Thanks for looking in Rob
- 47 replies
-
- 8
-
-
- Erycina
- Vanguard Models
- (and 1 more)
-
Thank you for your kind words. It's been a tough year so far, and there's a long way to go yet, but I'm grateful for the friendship, prayers, kind thoughts and encouragement of yourself and others on MSW.
- 47 replies
-
- 1
-
-
- Erycina
- Vanguard Models
- (and 1 more)
-
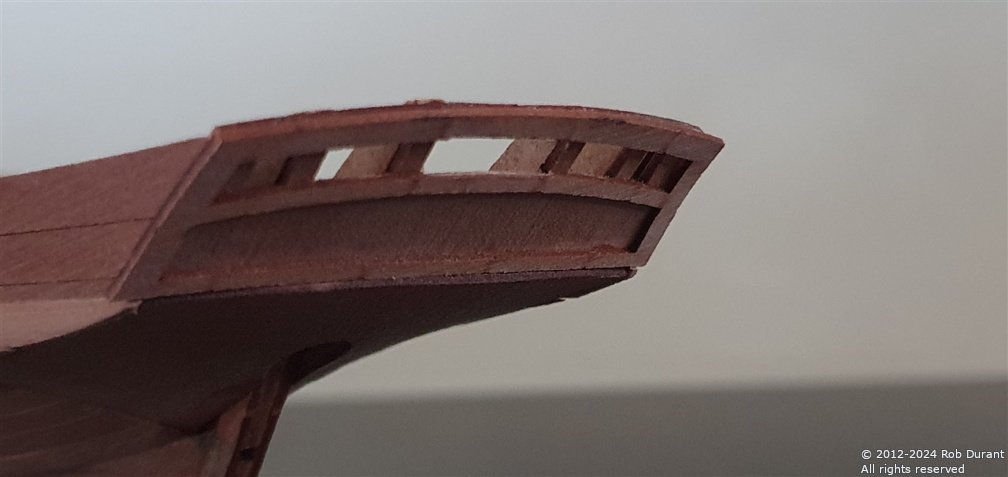
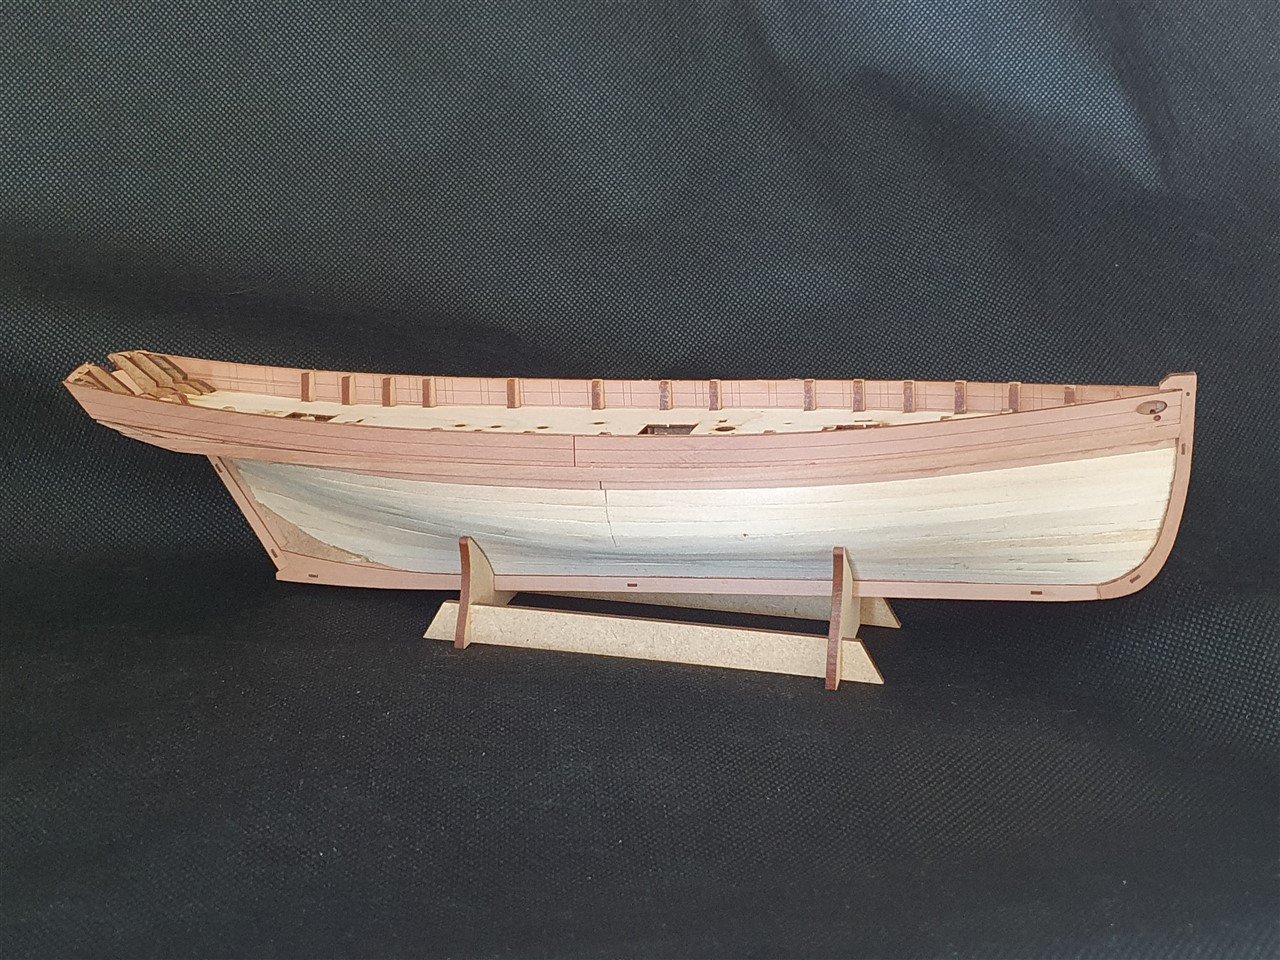
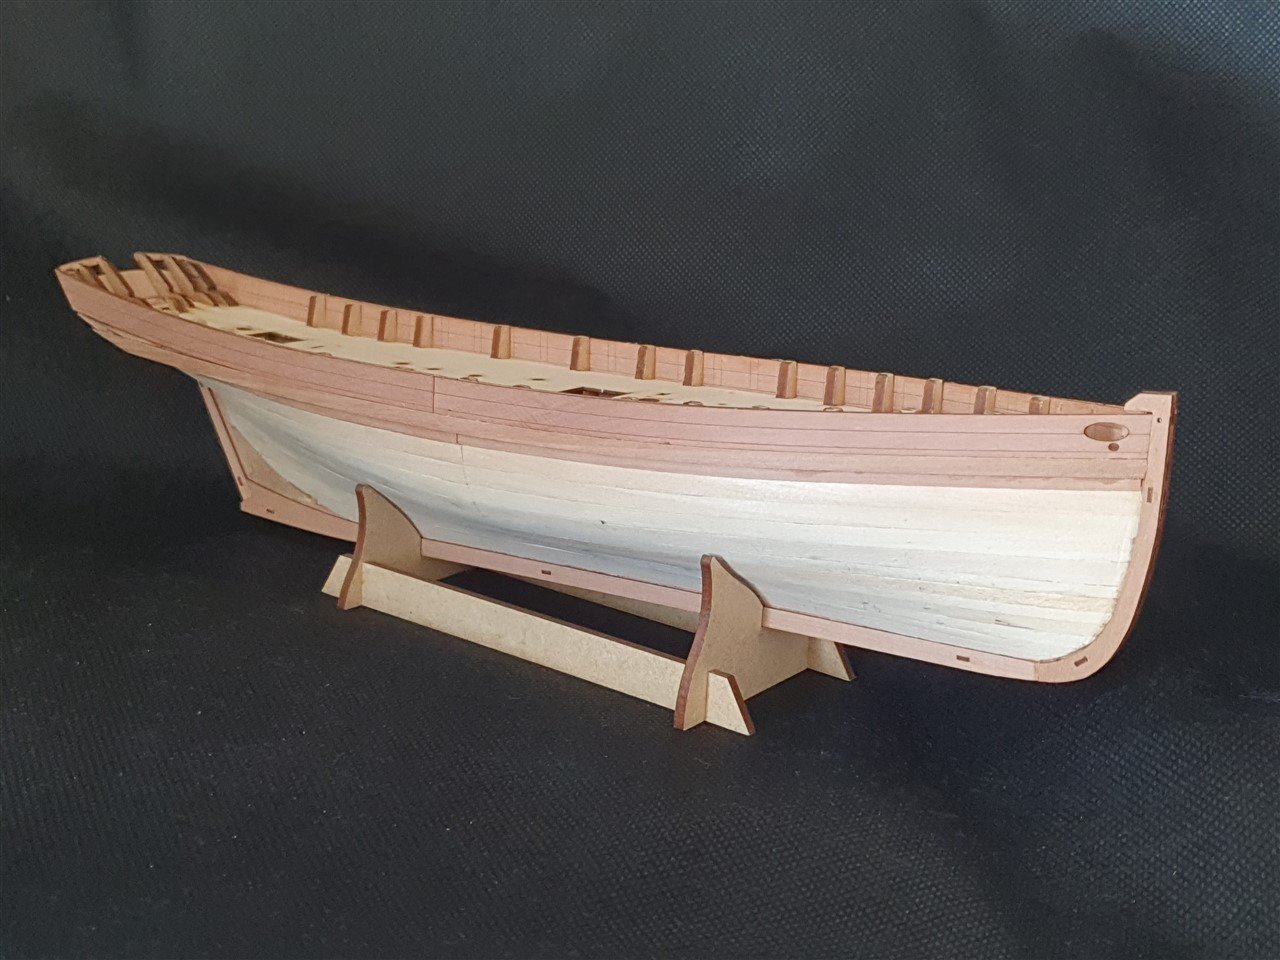
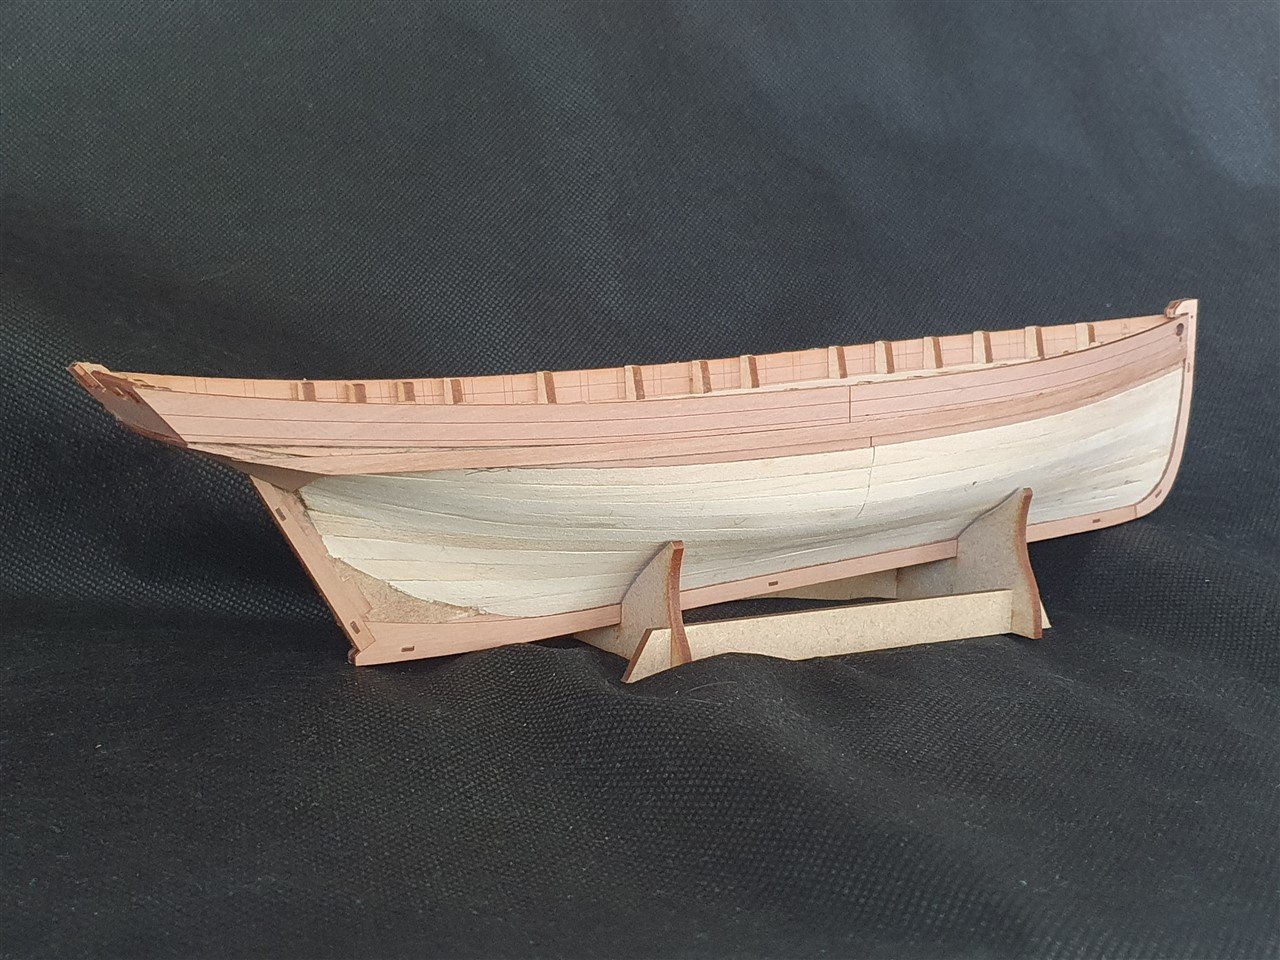
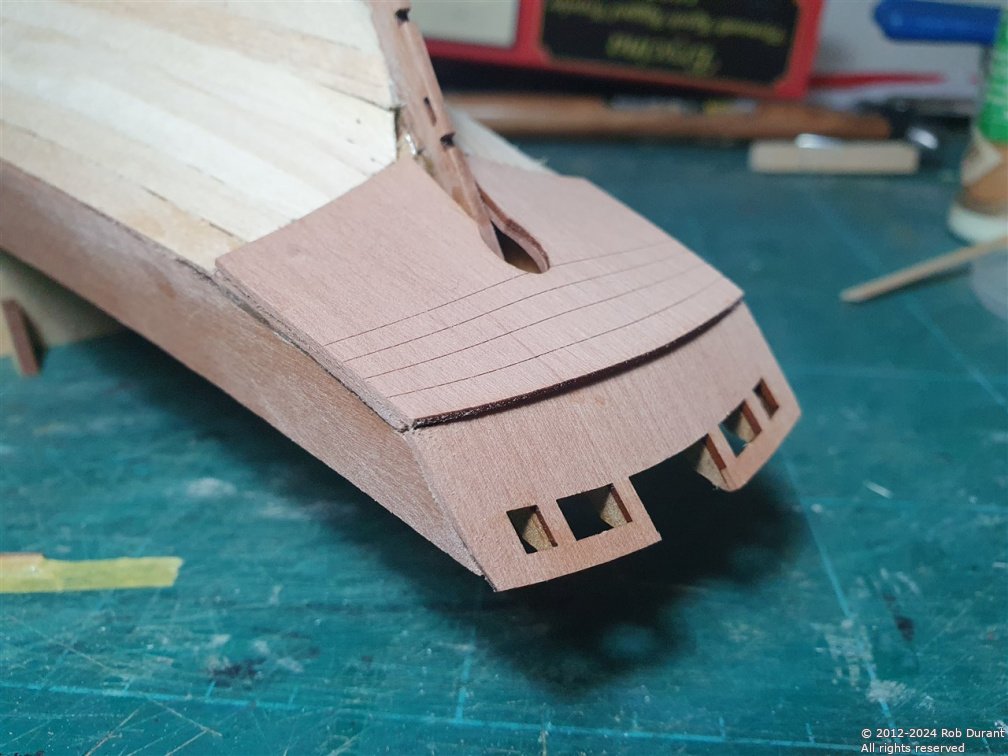
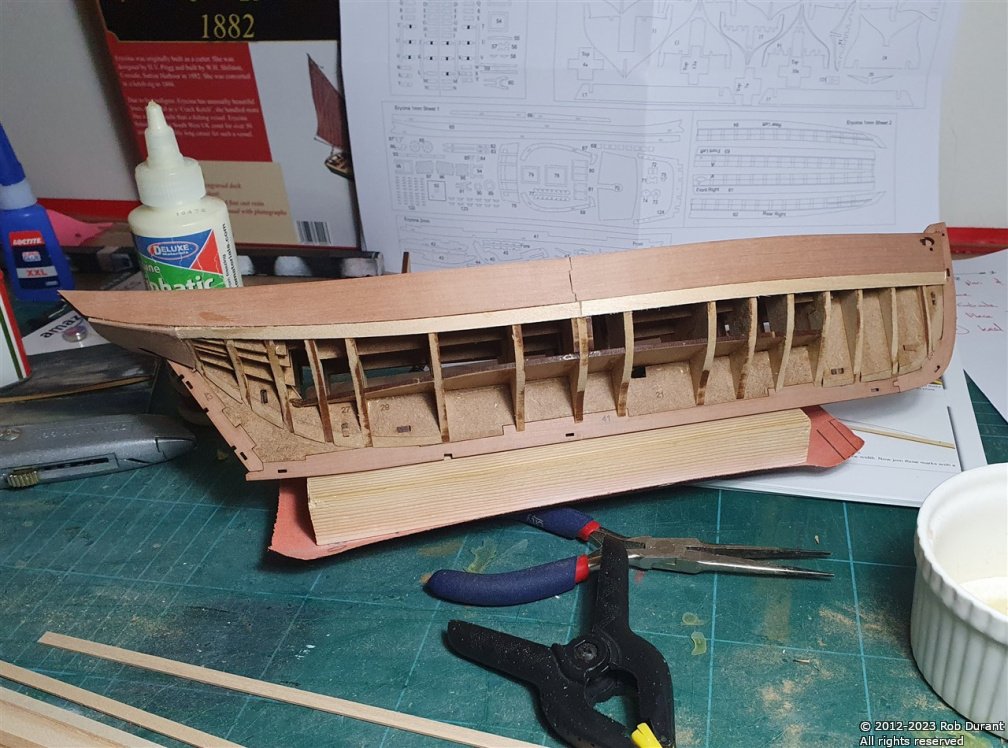
A little progress to report. I've finished the first planking. It all worked out quite nicely, with only one stealer required on each side of the hull. If the second planking goes as nicely, I shall be very pleased. I've done some sanding, today I added the inner transom piece (watch out for the pieces at the top, I had to brush on some diluted PVA as the process of removing the cutouts caused the wood to split. Not a fault of the kit, just my clumsiness, and being lazy and not switching to a new scalpel blade soon enough. Here's the last strake going in: And the hull fully planked... And here's the inner transom going on... It was a lovely fit. Very encouraging! And a shot of progress so far. Thanks for looking in. Progress will be slow with this build, but it's just good to be building again at all! Rob

- 47 replies
-
- 8
-
-
- Erycina
- Vanguard Models
- (and 1 more)
-
Not much to update, except to say that I'm pleased with how the first planking is going, and show a little evidence to that effect. (It also shows that my boat building space desperately needs a tidy!) Thanks for looking in Rob
- 47 replies
-
- 5
-
-
- Erycina
- Vanguard Models
- (and 1 more)
-
Just a brief update... progress is gradually being made. Thank you to all those who are looking in It's a true encouragement. The first shaped planks are on. I put four strakes on each side without shaping - one more than Vanguard suggest - but it seems to be turning out okay at the moment. Ultimately it's only the first planking, so if it isn't entirely neat, it'll all get covered up anyway. I figure it's good to try and do a nice job, because then I'm getting the practice. I'm sure i could do without stealers at the stern, but this feels like it will make the runs more simple. Time will tell.
- 47 replies
-
- 7
-
-
- Erycina
- Vanguard Models
- (and 1 more)
-
Beginner looking for advice on first kit
robdurant replied to O-Nurse's topic in New member Introductions
For a first kit from Caldercraft, you might want to consider HM Schooner Pickle... it's the model I started with, and as one of their later decelopments, meaning, it has more detailed instructions and goes together nicely. The older kits (Caldercraft's Sherbourne for example, which I have also built) require a lot more reading between the lines and prior experience is helpful Just my tuppence. Whichever way you decide to go, welcome to the forum. You'll find lots of help here... I know I have -
A very brief update.... three strakes on one side, and four on the other... from this point on I'll need to taper the planking, but it's making for a good solid base for the second planking. The large number of bulkheads make the planking a pleasure to do, and being able to edge bend the planks with the rib-bending iron mean very little pressure is every required. Thanks for looking in.
- 47 replies
-
- 5
-
-
- Erycina
- Vanguard Models
- (and 1 more)
-
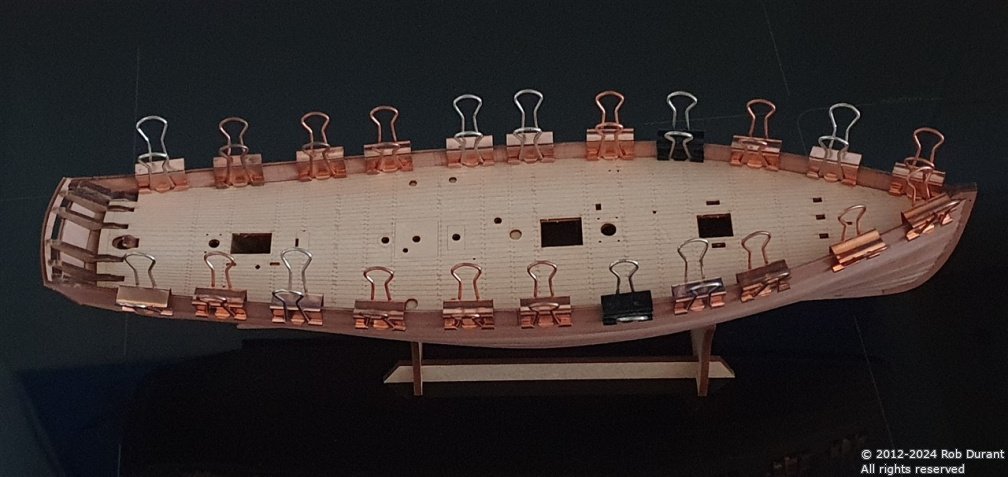
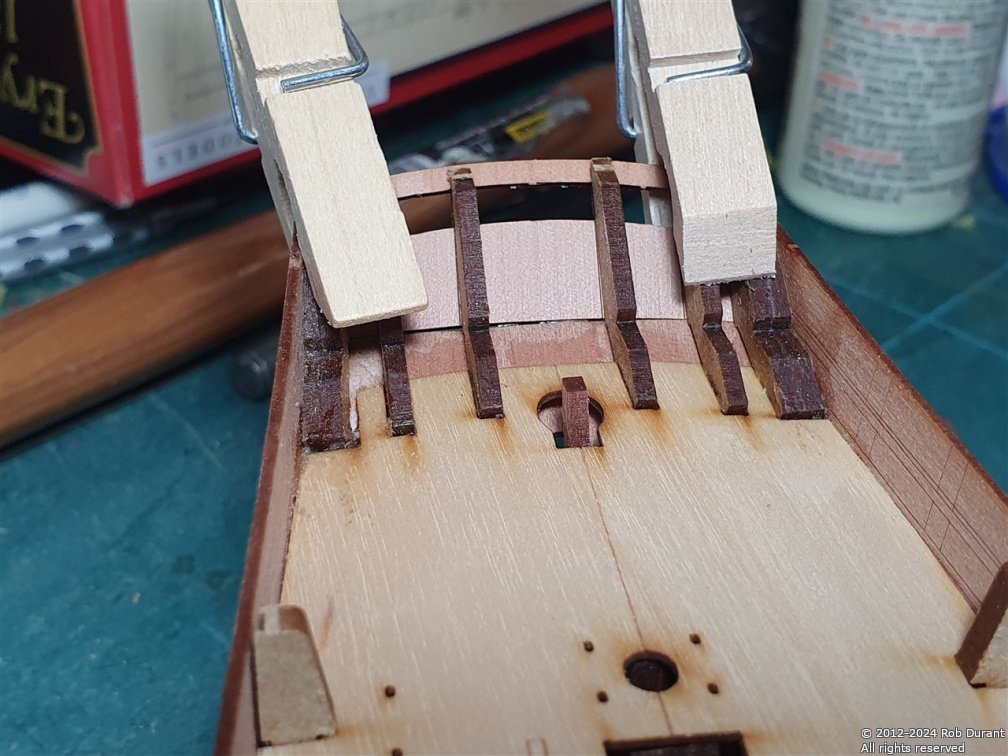
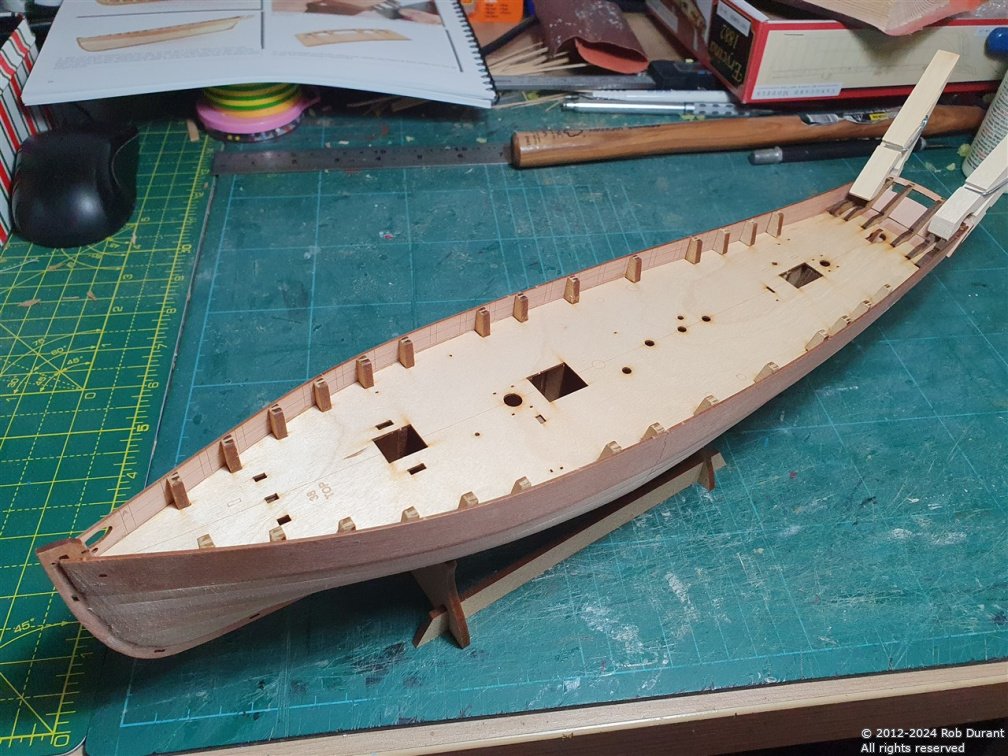
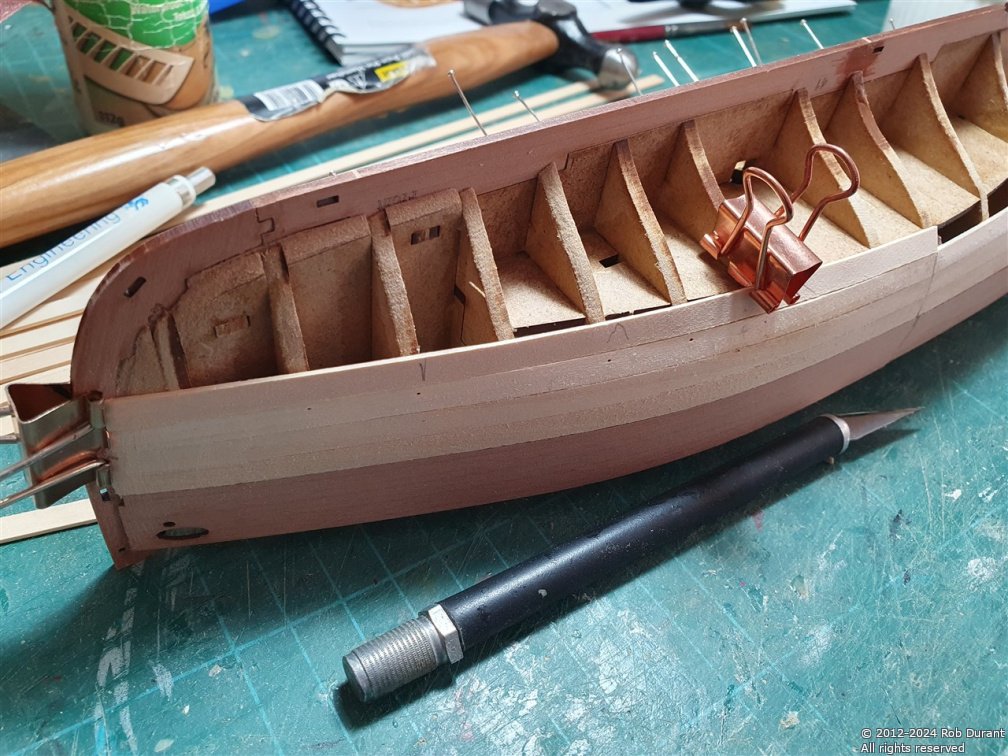
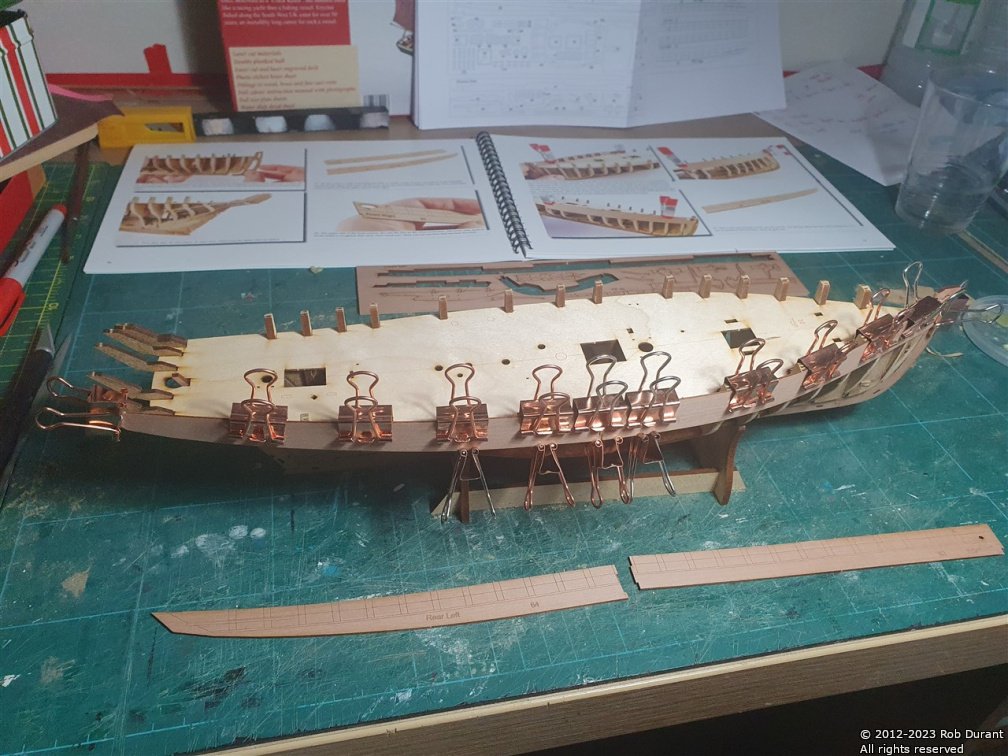
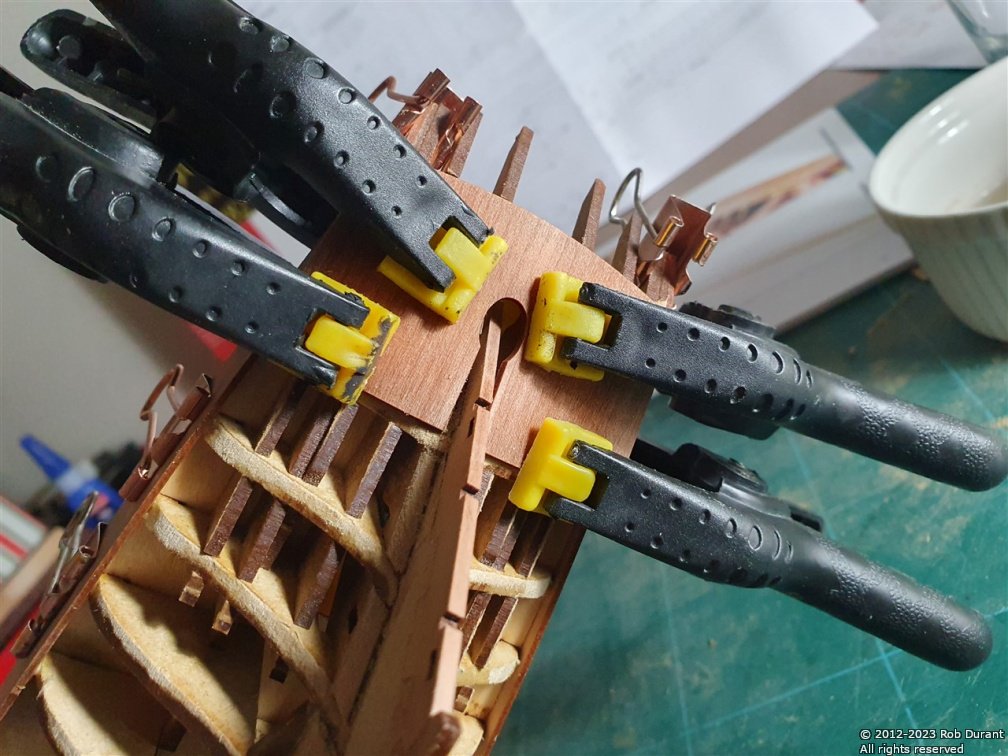
Time for an update. The sub-deck has been put in place. It clips in nicely, and once glued provides a good solid structure, Once in place, the doublers at the stern can be glued in, and I added some slightly watered down carpenter's glue to give these areas some strength before continuing with some fairing to get ready for the bulwarks. This area is quite vulnerable, but with a little care and attention it hasn't caused me any problems. After getting the fairing near to where I felt it should be, the keel parts are glued into place (thus saving them being sanded away unintentionally... I like this way of doing things. It gives you the double benefits of good access to sand, and a neat finish. Kudos, Chris! Now the bulwarks can be fitted... They aren't glued above the sub-deck, but can be clamped... Again, it all seemed to go very smoothly. Having waited again for things to dry overnight, the sub-counter was soaked, clamped in place, and allowed to dry overnight - again - and then glued in place... Then - having allowed it all to dry again - it was time to start the planking... And that's where I've got to so far... Thanks for looking in. I'm really pleased with how things are going Rob

- 47 replies
-
- 6
-
-
- Erycina
- Vanguard Models
- (and 1 more)
-
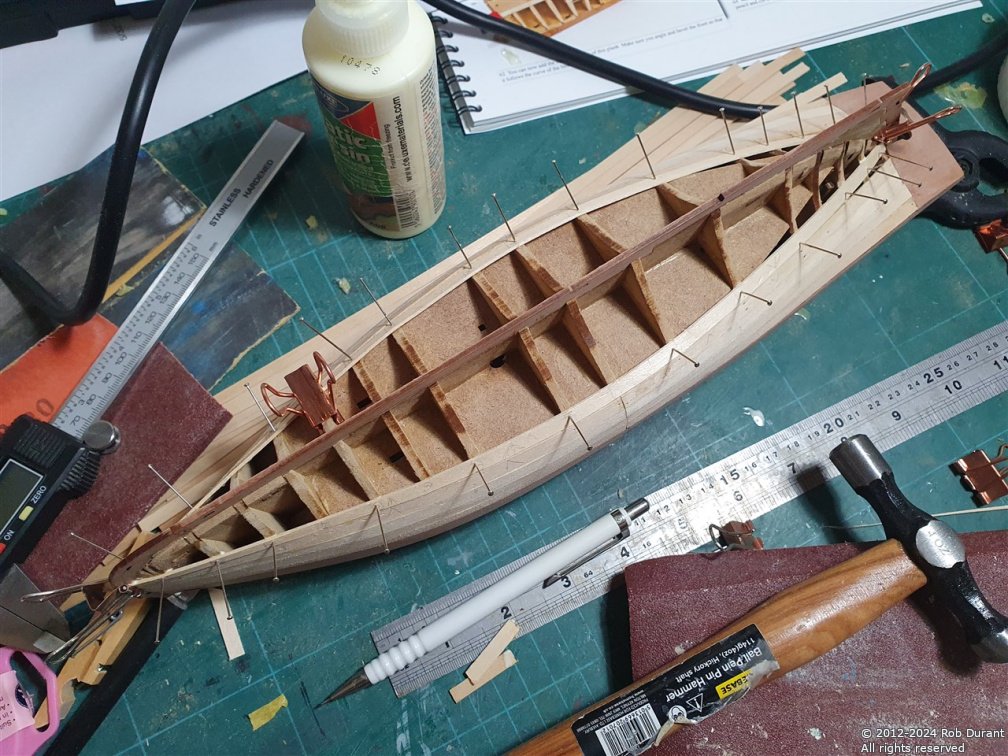
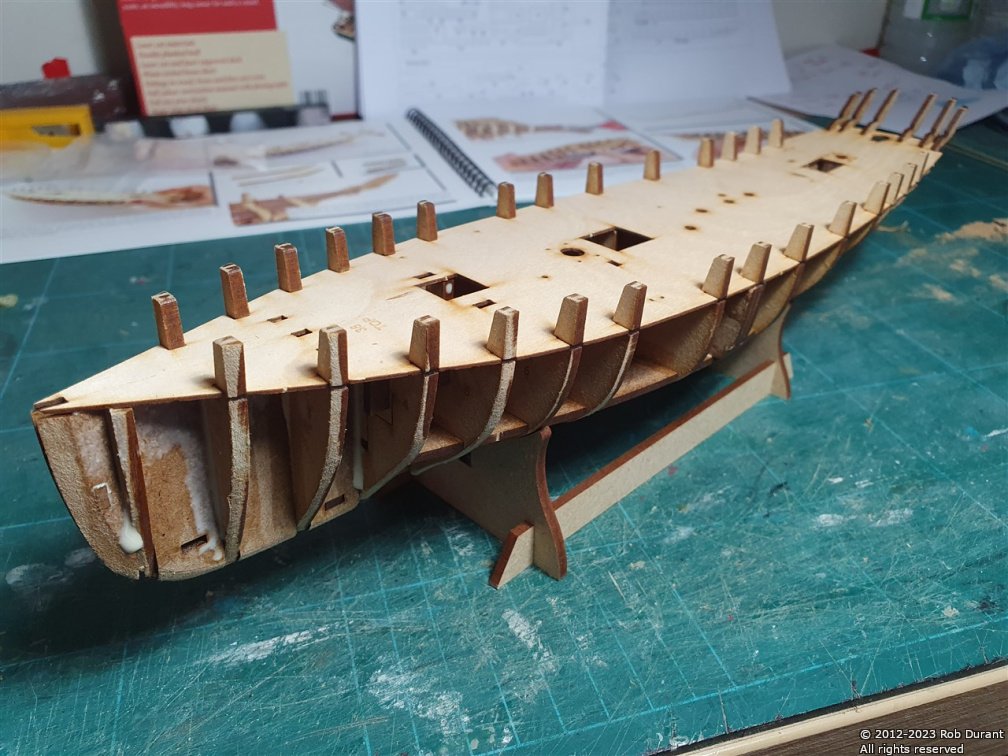
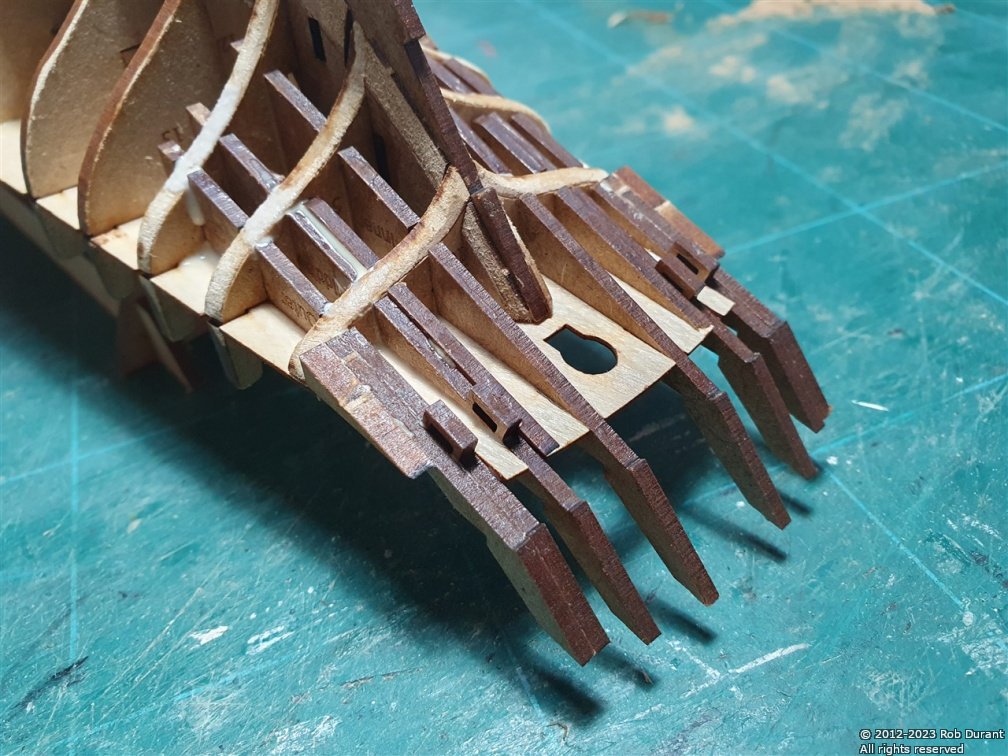
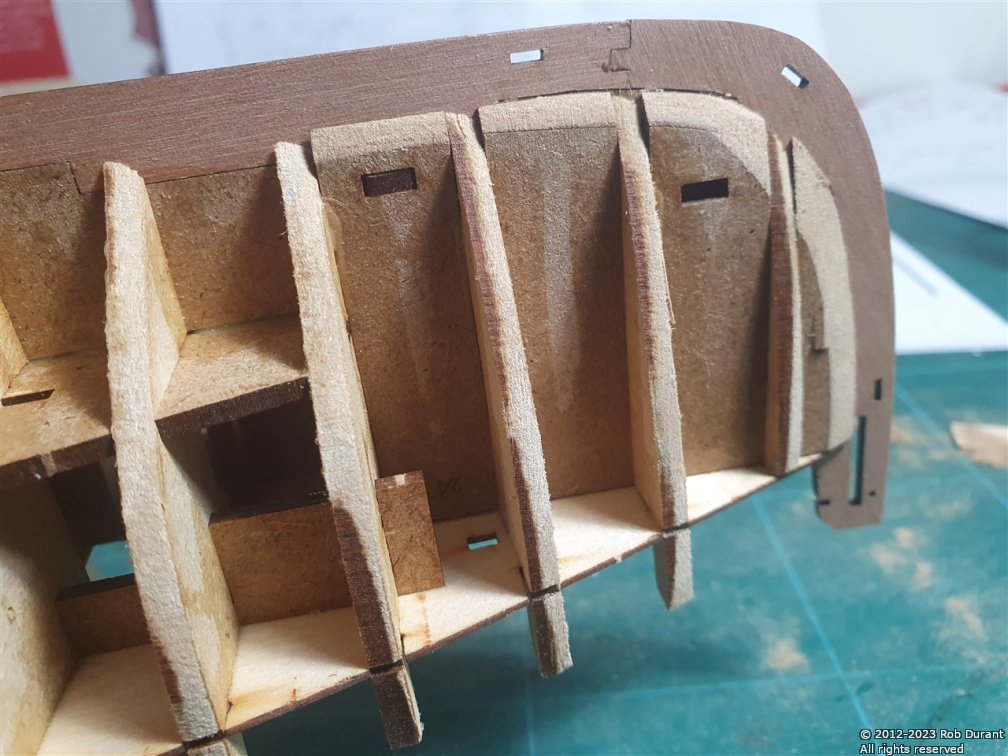
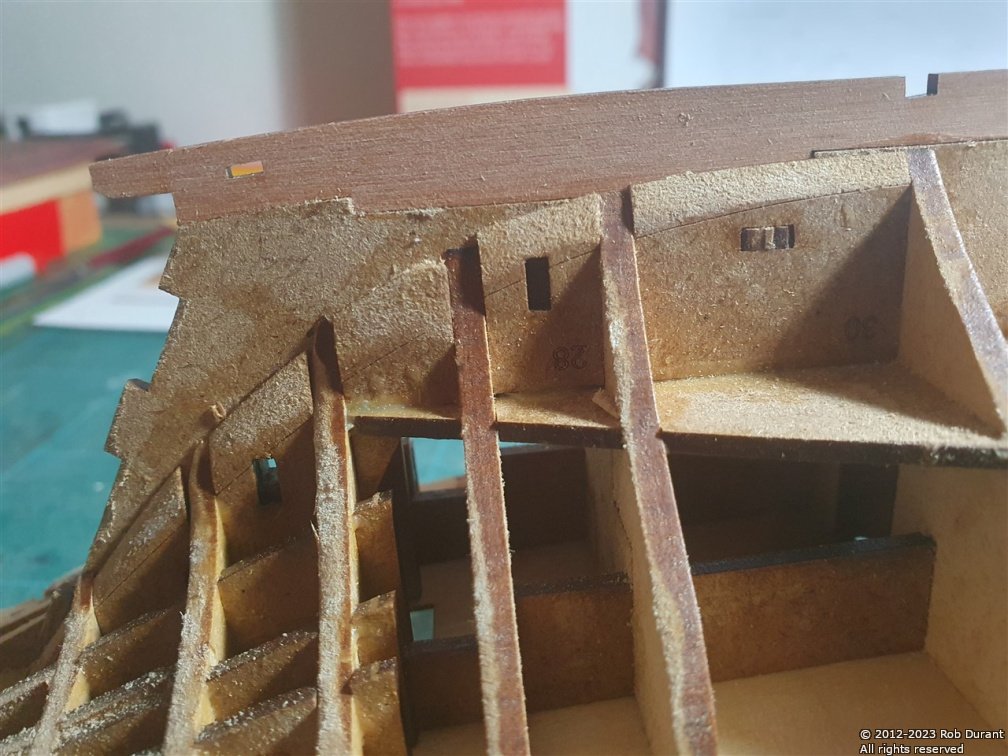
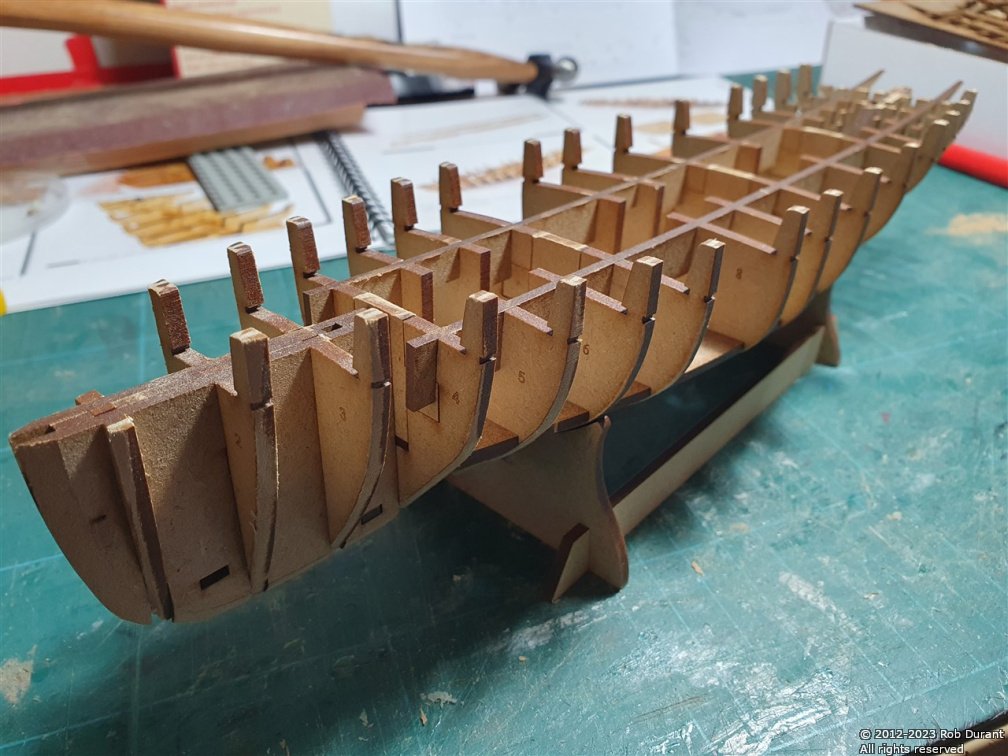
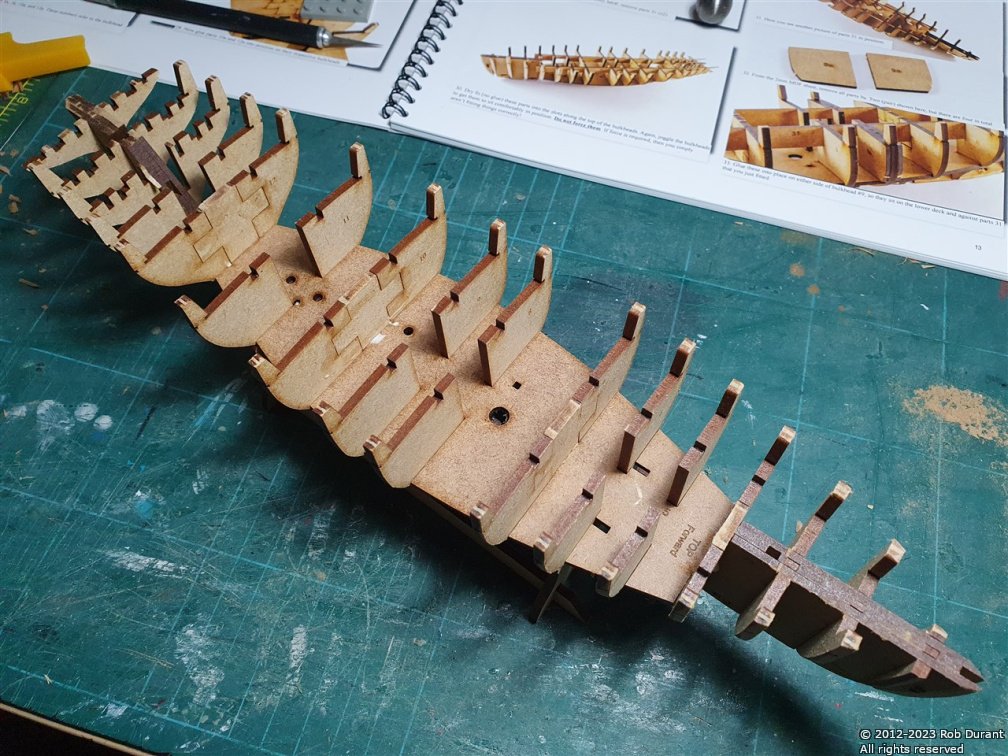
A little more progress today, putting the framework together. Lots of this goes together dry, and then diluted PVA is added later to fix the whole together. Even without the glue, it's very solid. The only potential gotcha I'd point out is step 17, where a doubling part is glued in place, but you'll want to make sure it's lined up well, because in step 19, you'll insert a positioning tab (32?) that will rely on that glued piece being in the right spot. Having built another Vanguard fishing boat I spotted that coming, and so, although I took a break between these steps, it didn't catch me out. Anyway - we're spoiled by the quality of these instructions! And if you're setting out to get started, you could do much worse than just reading through the whole instruction booklet a few times and getting familiar with the sequence before you start out. It'll help you see these things coming, and prepare you for the kits you may move onto, where your hand will not be held in the same way Thanks for looking in, and happy building Rob
- 47 replies
-
- 3
-
-
- Erycina
- Vanguard Models
- (and 1 more)