robdurant
-
Posts
792 -
Joined
-
Last visited
Content Type
Profiles
Forums
Gallery
Events
Everything posted by robdurant
-
 And a last post for today.... I've roughly shaped the bow, changed the lighting, started playing with moving the camera, and added some texture...
 -
Well, it's a bit of fun, but I'm definitely making progress learning blender now... Here's a few seconds of the hull so far at dusk... I haven't closed off the bow or stern at the moment... it's more of an experiment... Once I'm happy with it, I can up the rendering settings, and it'll look much sharper, but I thought some might be interested.
-
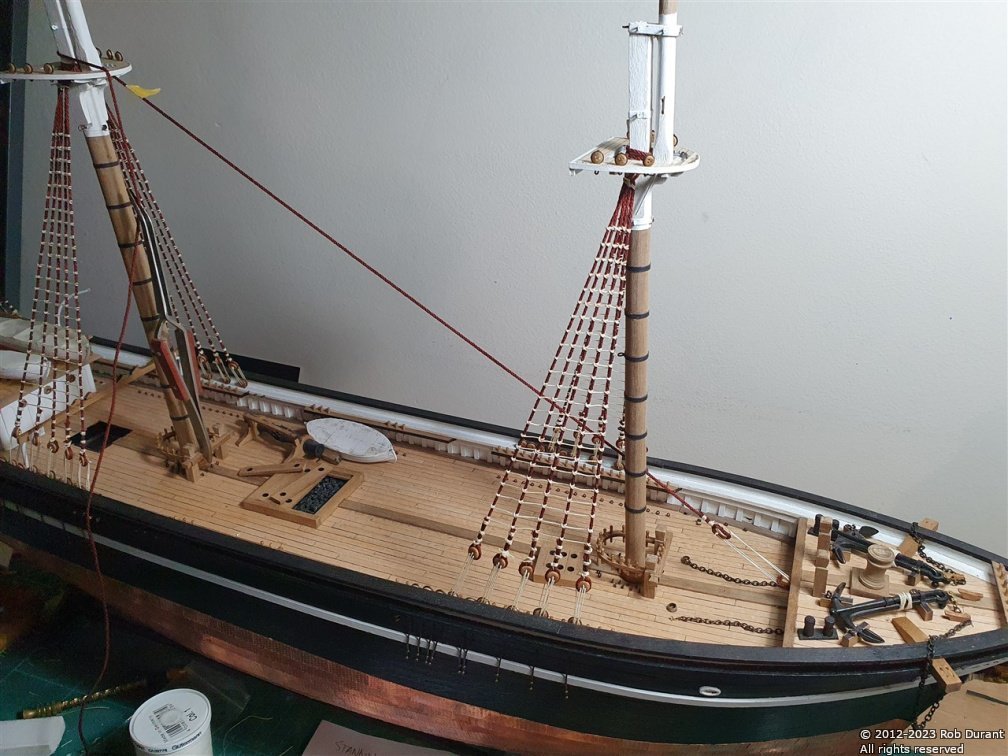
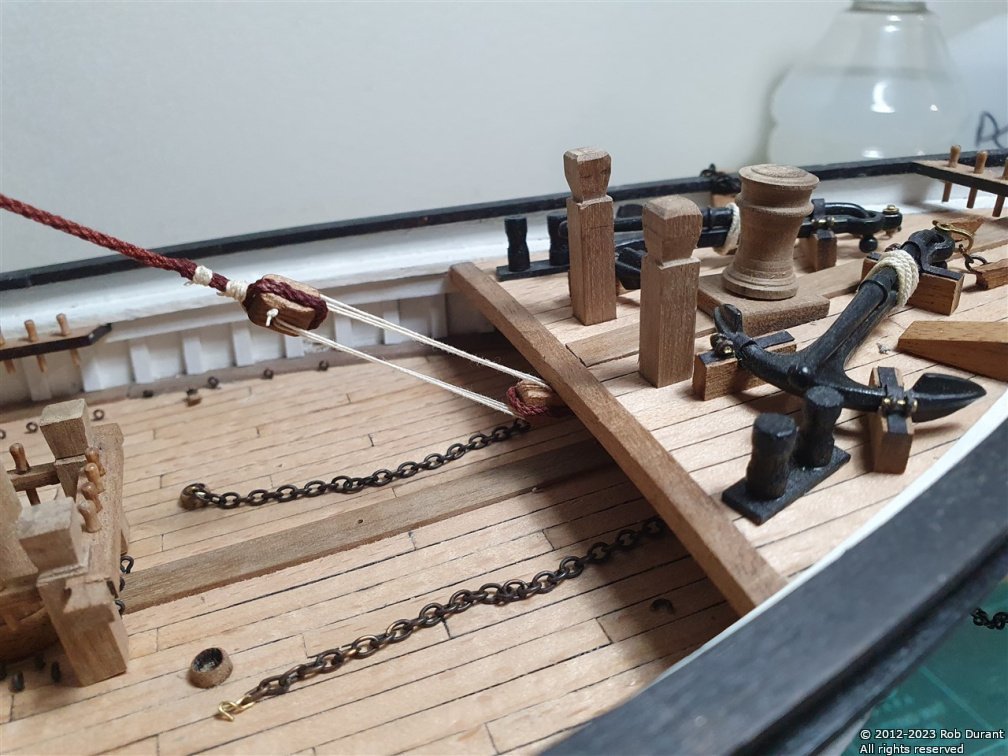
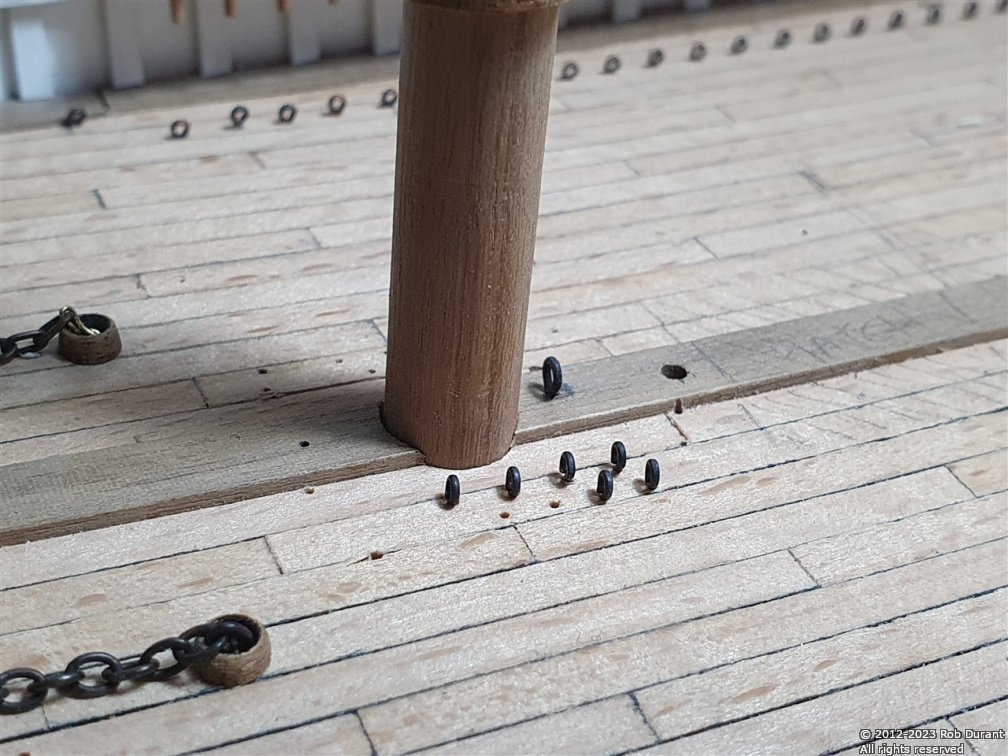
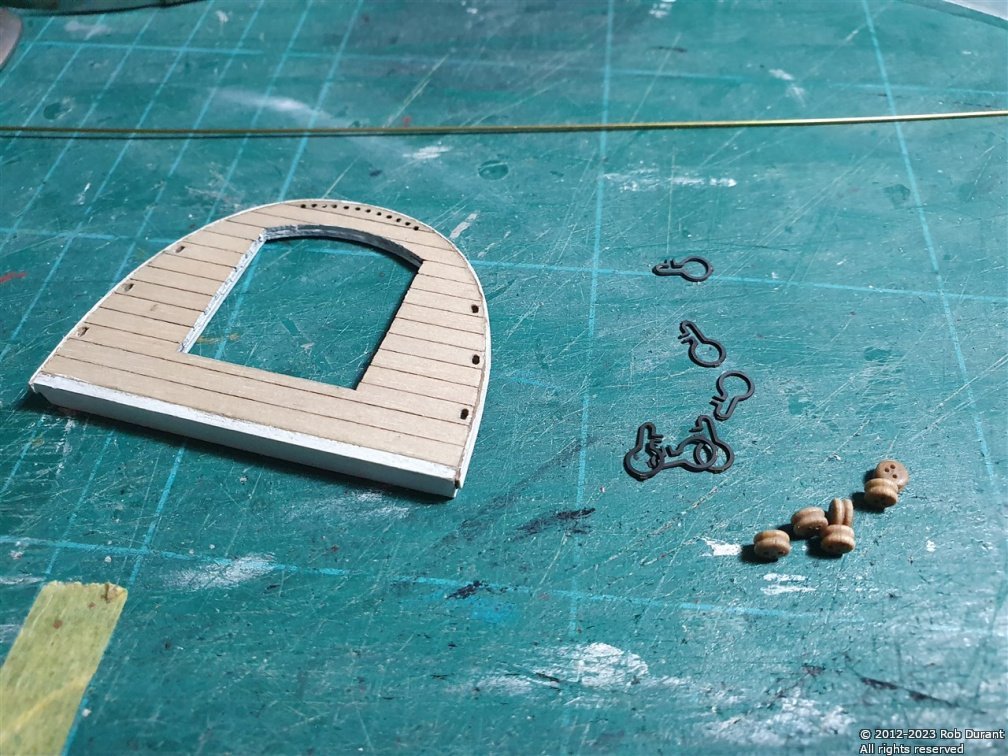
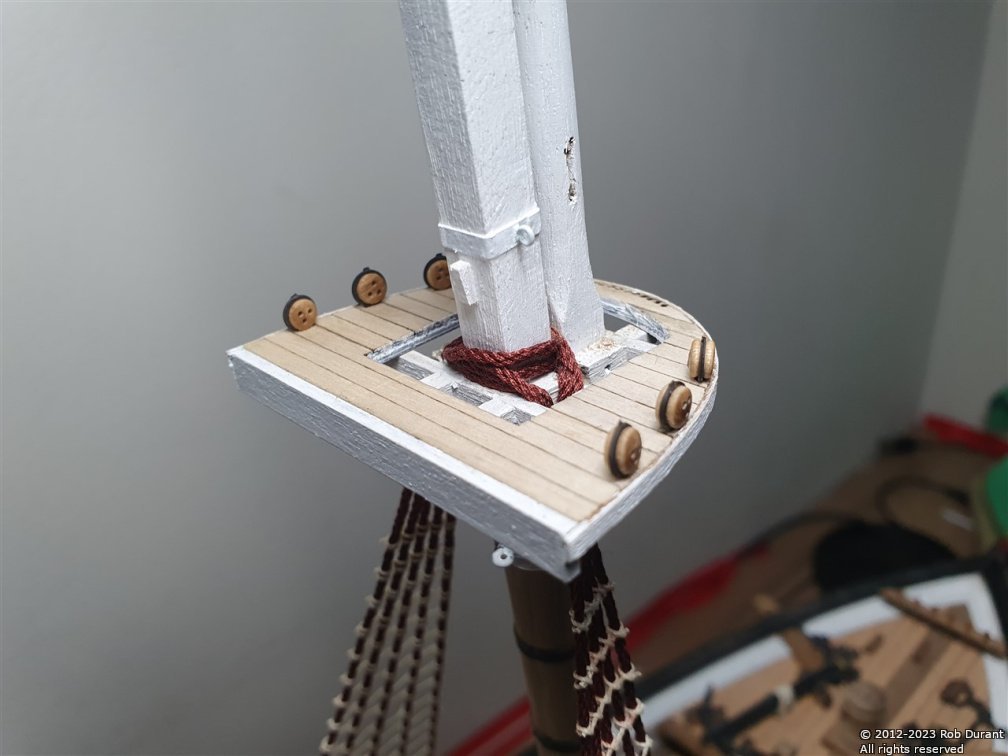
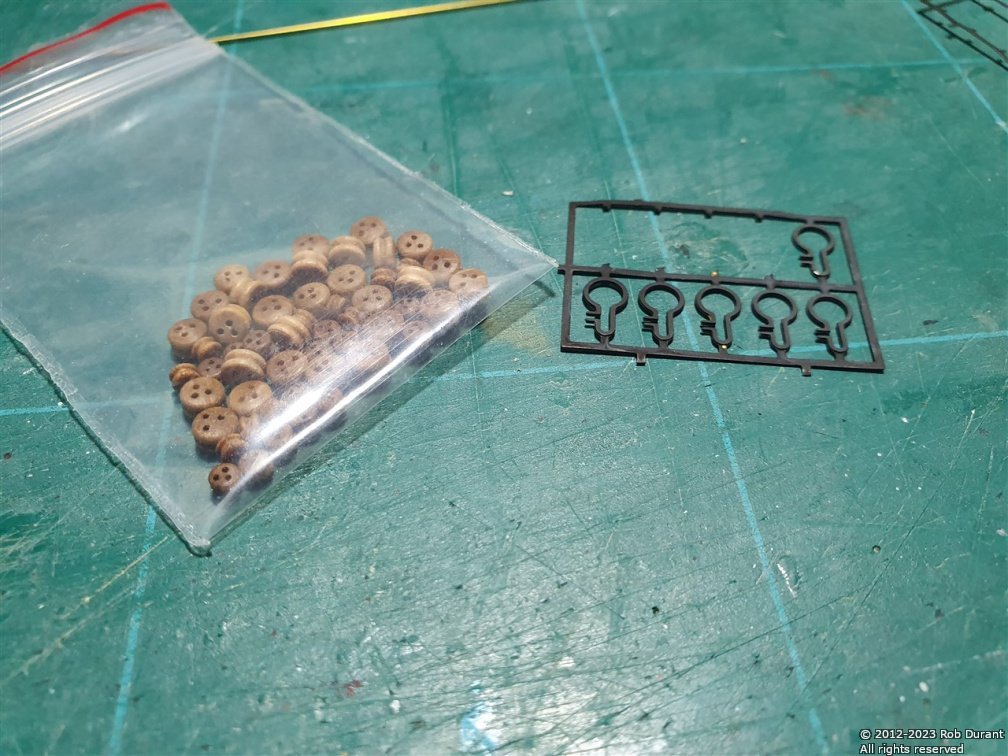
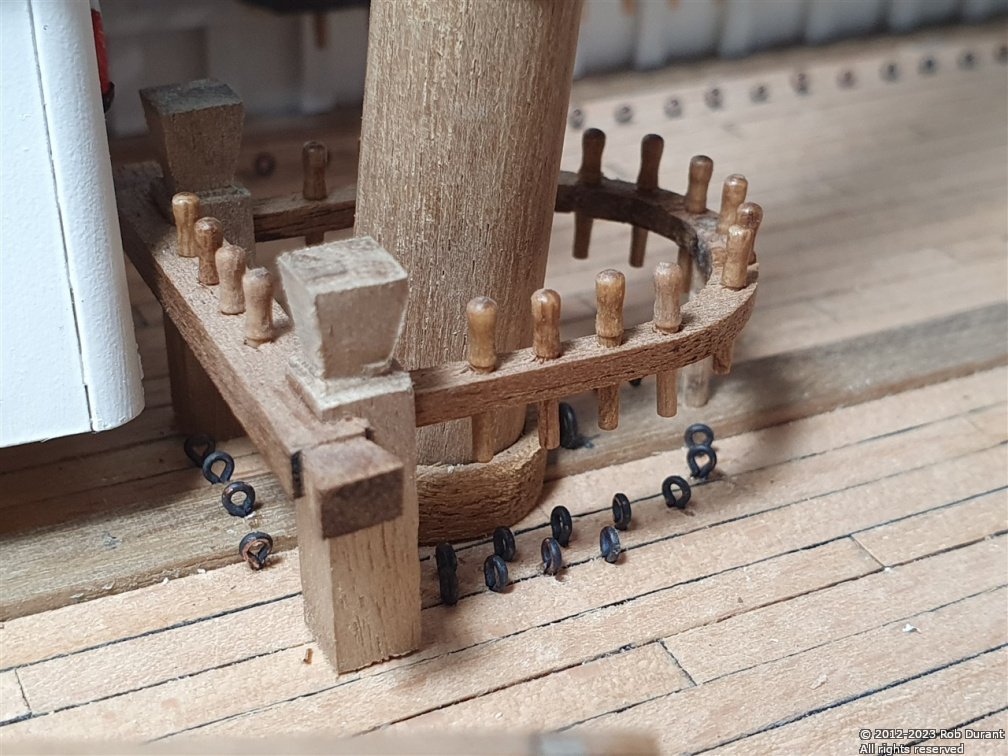
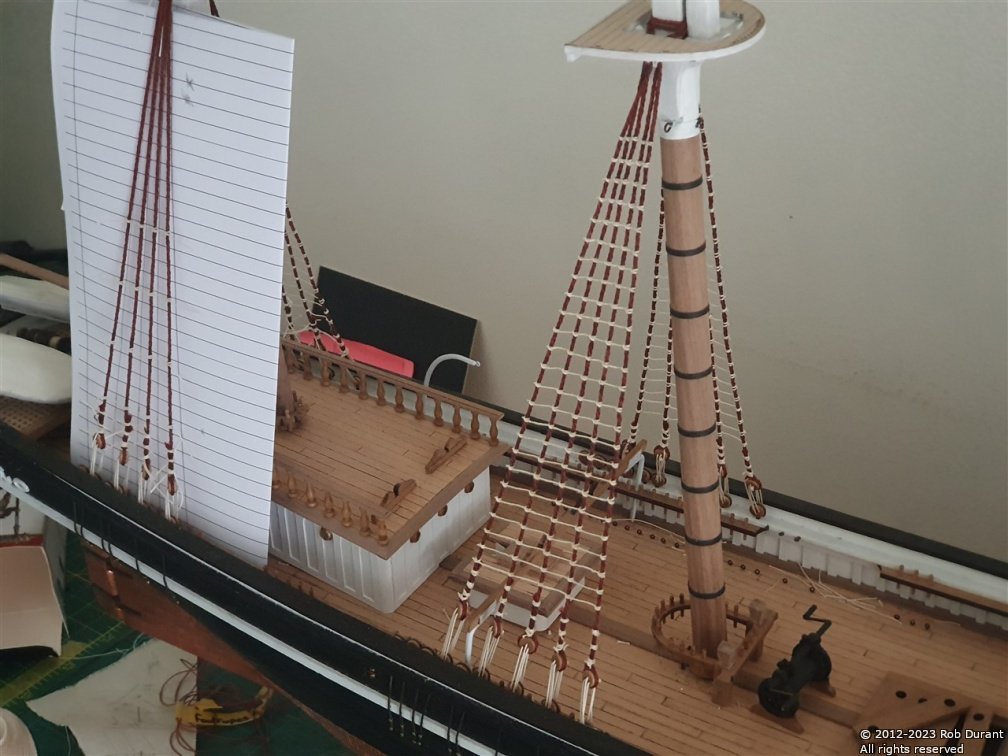
Hi all, Thanks for the likes. I've completed the main shrouds, and added the mainmast stay. This one had to go on first, as it attached to a pin inserted into the jib boom. (That was my kludge fix for gluing the foredeck down too early!). Having said that it all went together okay, and looks fine. I've finally added the deadeye strops (Caldercraft) and fixed the tops to the masts, now as well. I've also done some tidying up, gluing down the anchors, fixing the anchor chains, and removing the excess, which was just sat on the deck up till now. I've also added the eyelets underneath the pin rails round the fore and main masts. Not a lot to show, but it is progress These parts are very fragile, and I can see trouble ahead when it comes to tying things off... time will tell how much of a headache this proves to be. Happy building to you all Rob
-
Progress is being made, and confidence is growing I'm pleased to see that the flow seems to be good between each frame... Next is some work on the transom...

-
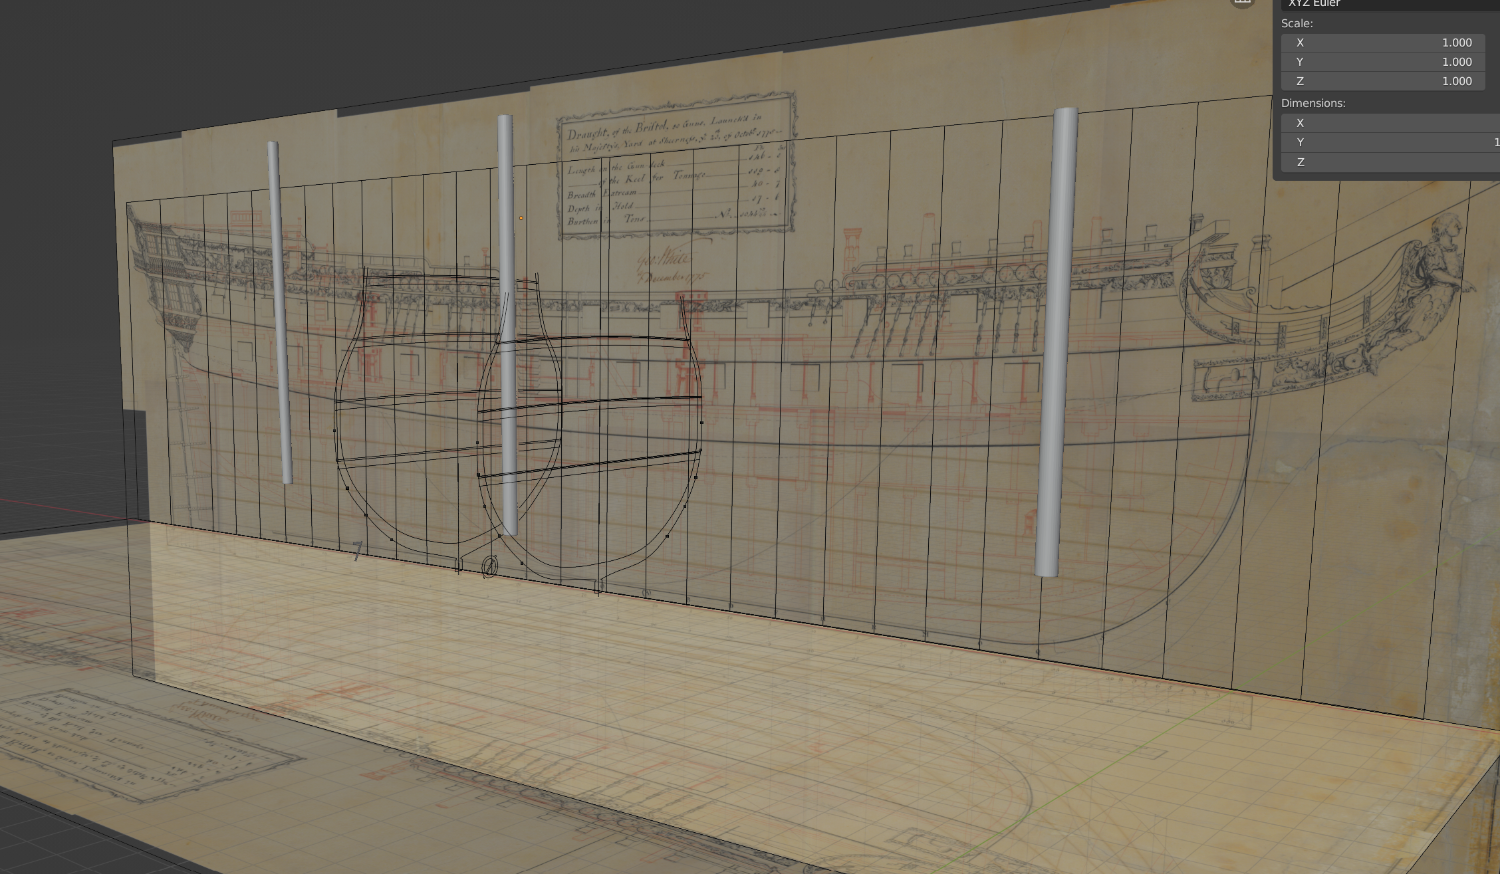
Hi all, A tiny update... I'm still working on getting this into Blender to check out the stations before I commit too heavily to real components (and working on Barque Stefano, too)... I've managed to work out how to get things neatly out of QCAD (the 2D CAD programme I use) into Blender, so progress is becoming more simple... Here's a teaser with deadcentre and '7' frames in place....

-
Rattling down continues... Work has just begun on the ratlines for the Starboard Mizzen shrouds. Port Mizzen shrouds are done, now. In retrospect I didn't tighten the shrouds enough, and it's caused them to become slightly wavy on the mizzen mast. This was my nervousness at making sure they didn't pull out the deadeyes from the rail. Not a disaster, but not quite as neat as I would have wanted... Oh well 🙄 This is all part of learning about this homemade rope... it doesn't behave quite the same was as the caldercraft rope I used on Ethalion. It's much softer and more easily stretched out of shape.
-
6mm at 1:63 is around 38cm or 14 7/8 inches - so a big step, but not crazy. Here's the 6mm guide template for anyone who wants it, in PDF and CAD (*.dxf) format 6mm Ratline Template.pdf 6mm Ratline Template.dxf
-
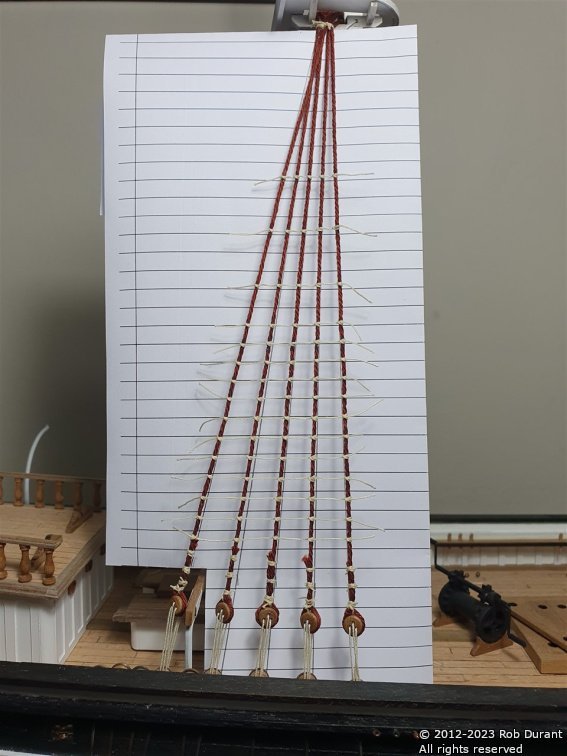
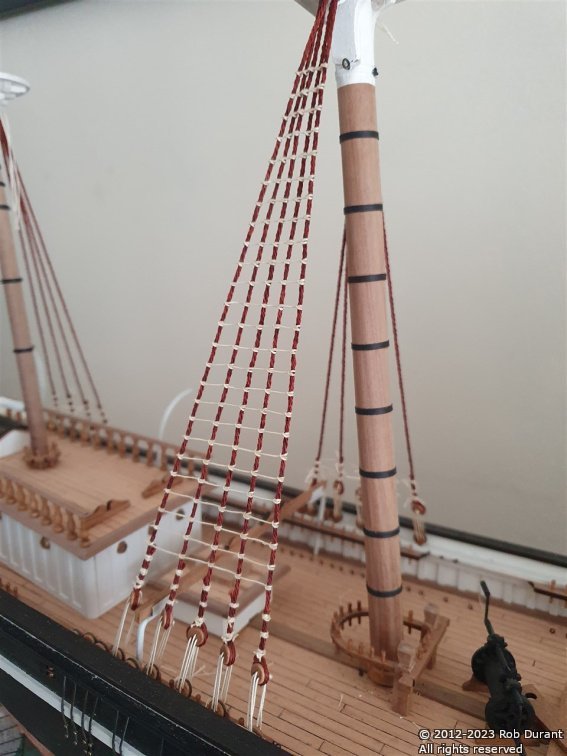
A small update today. I spent my day off yesterday beginning the ratlines for the mainmast shrouds. I was pleased to complete the starboard side. I use 6mm lines placed behind the shrouds as a guide, and begin by adding spaced out lines, then filling in the gaps, gluing each row as I complete it. The ratlines are #20 DMC Cordonnet Crochet thread... The same stuff I use to make ropes. I'm pleased with how it looks, and how easy it was to tie. As a natural thread, it takes the watered down PVA really well, and is easy to clip to length once dried. That's it for today. Happy building, all Rob
-
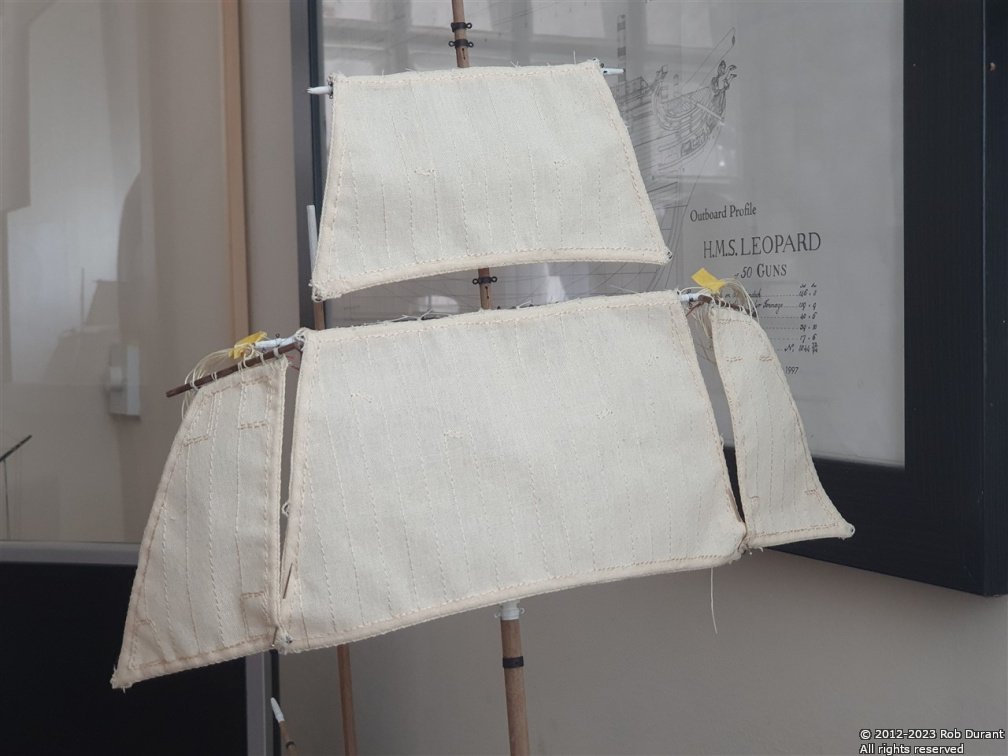
Thanks, George. Yes the work being done now all seems to make a difference to how the final model will look, which is spurring me on. It's startling how much sail these vessels can spread. Stefano must have been an amazing sight, even though she was a humble working vessel.
-
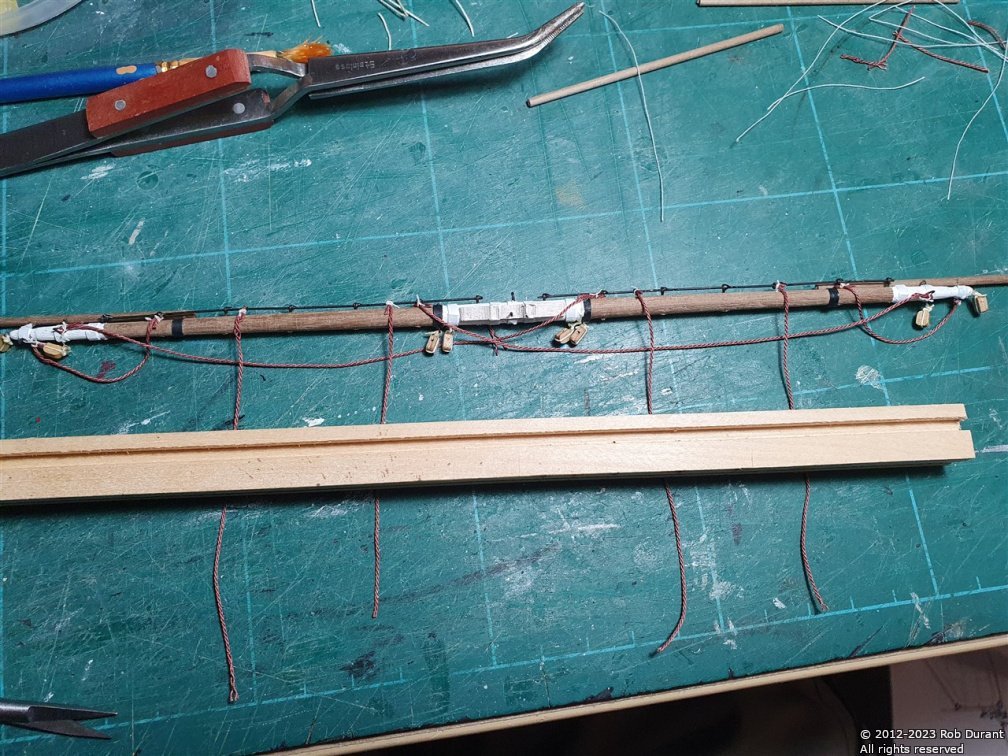
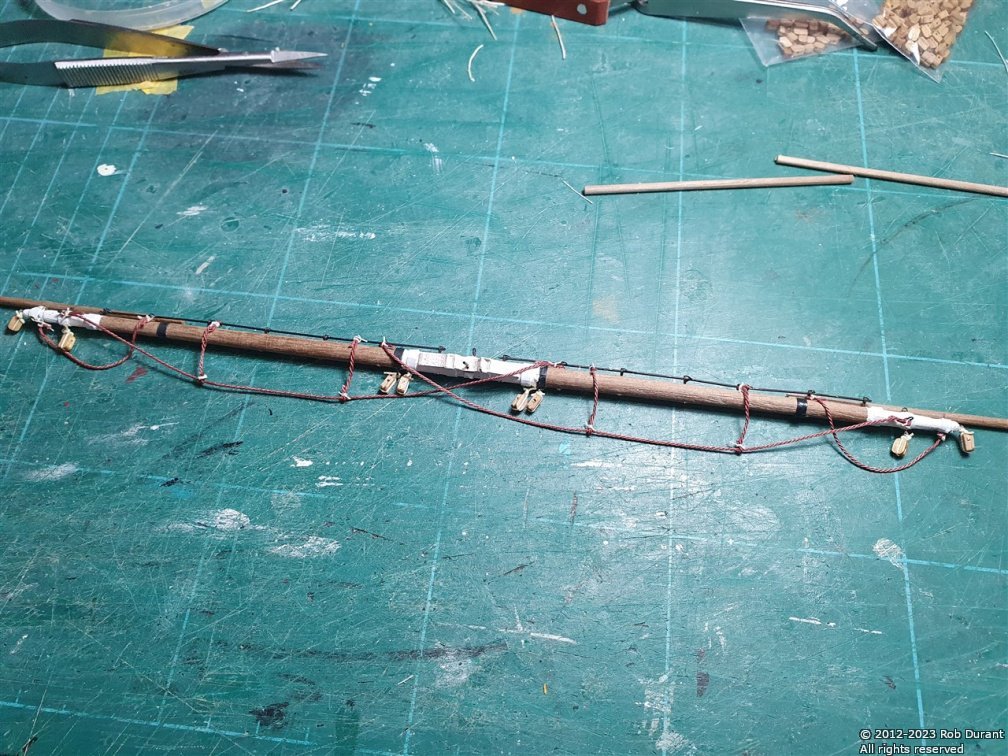
I've just finished the yards on the mainmast. It's a process of keeping the faith as you go, as it has to look like an explosion of rope before order then appears out of the chaos... Here are the footropes in process... And then completed... And here's a shot of the whole mast... the lower stunsails have had the stunsail yards attached to the tops, but haven't been rigged at all yet... None of these yards are finally attached, but are pretty much complete as units. To have a bit of a break from the yards, I think I'll do some ratlines on the lower shrouds. I think I probably need to tackle the futtock shrouds (metal bars?) first, though, otherwise they're going to be a bear to access. Thanks for looking in
-
Not much work done on this recently as I've been on a push to get Barque Stefano completed... but we're making progress. The sails are complete, and being attached to the yards... However, tomorrow I have an exciting day planned. I'm visiting the National Archives in Kew, London, to look at the Captain's and Master's logs of HMS Bristol. I'm hoping to read the logs for a few major events in Bristol's history - in particular her dismasting during the Great Hurricane in 1780, and a few other events. So... watch this space, and I'll try and share some of what I discover. I find this part of the process really helpful in building the desire to really dig into the design and build. The connection with the vessel drives me on to see the model completed. Thanks for looking in.
-
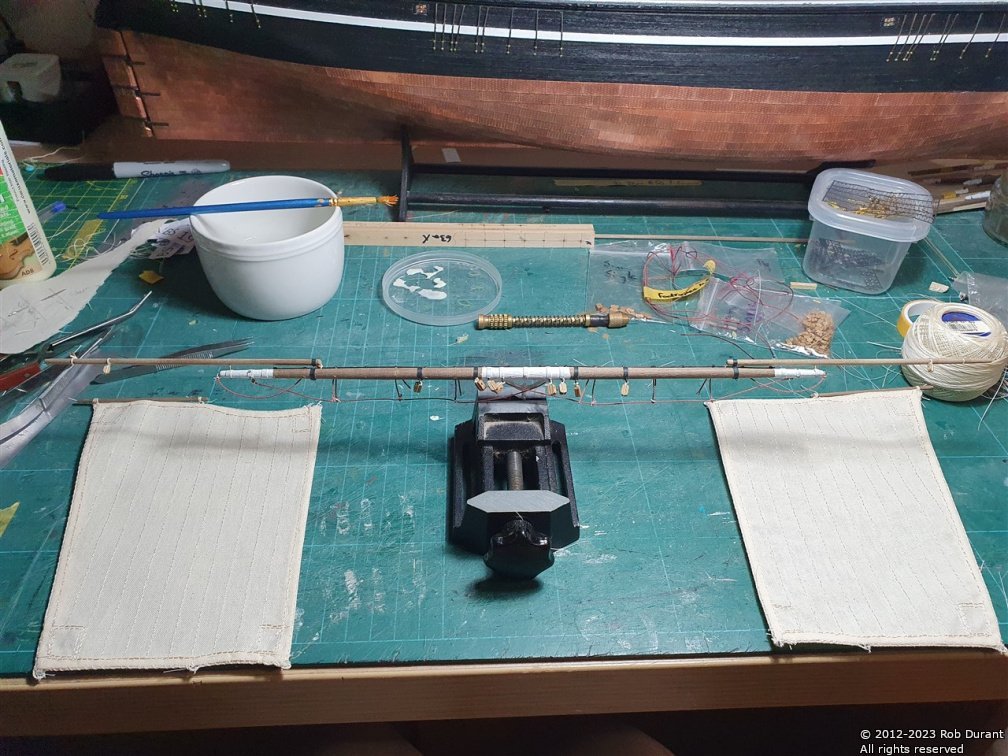
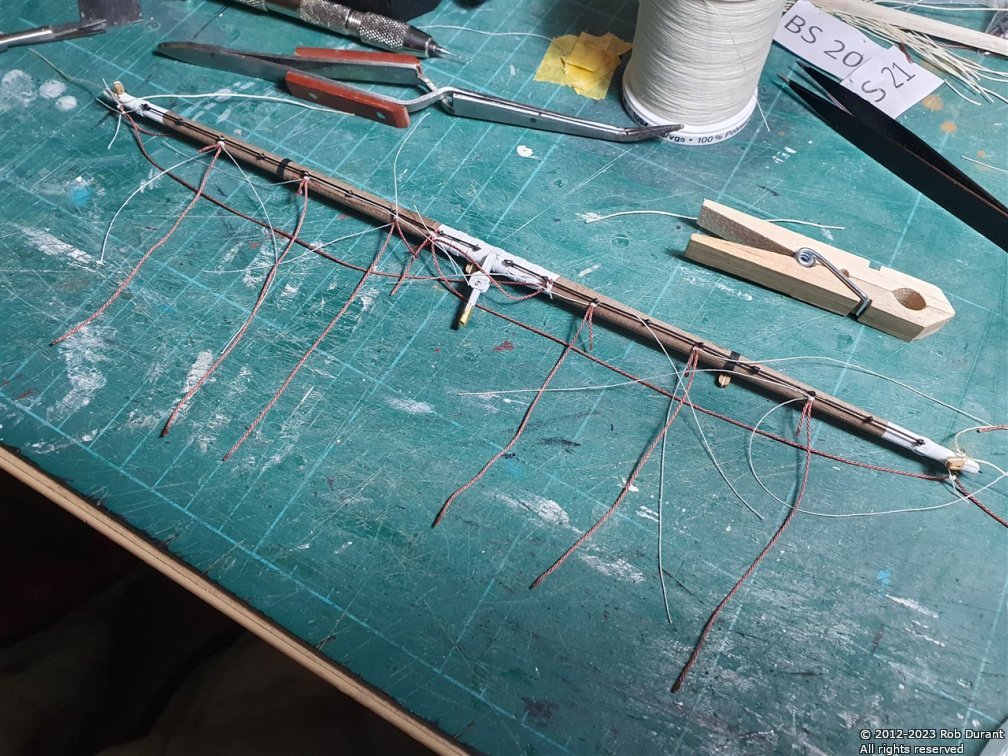
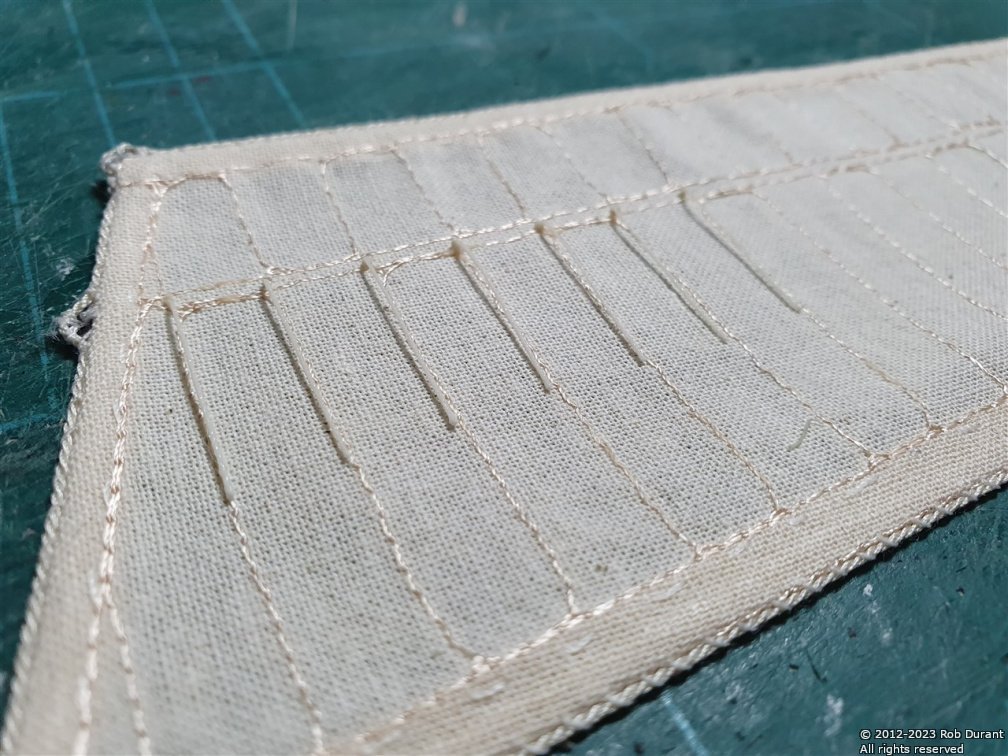
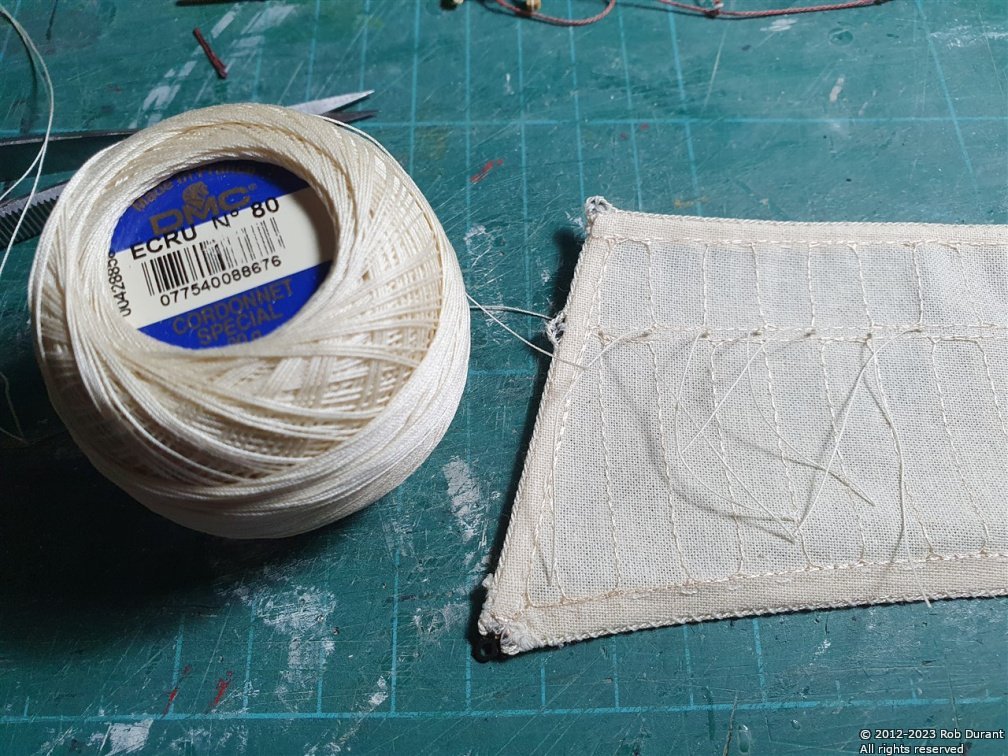
Hi all, Not much more to show, except the reefing points that are now stiffened using watered down PVA front and back. This was done before they were trimmed to length, by placing a small ruler behind the reefing points. Then they were trimmed to the bottom of the ruler giving a nice neat line.. The second photo is the progress on the mainmast lower-topsail yard with the footropes in progress.... . As always, thanks for the likes and encouragement. Rob
-
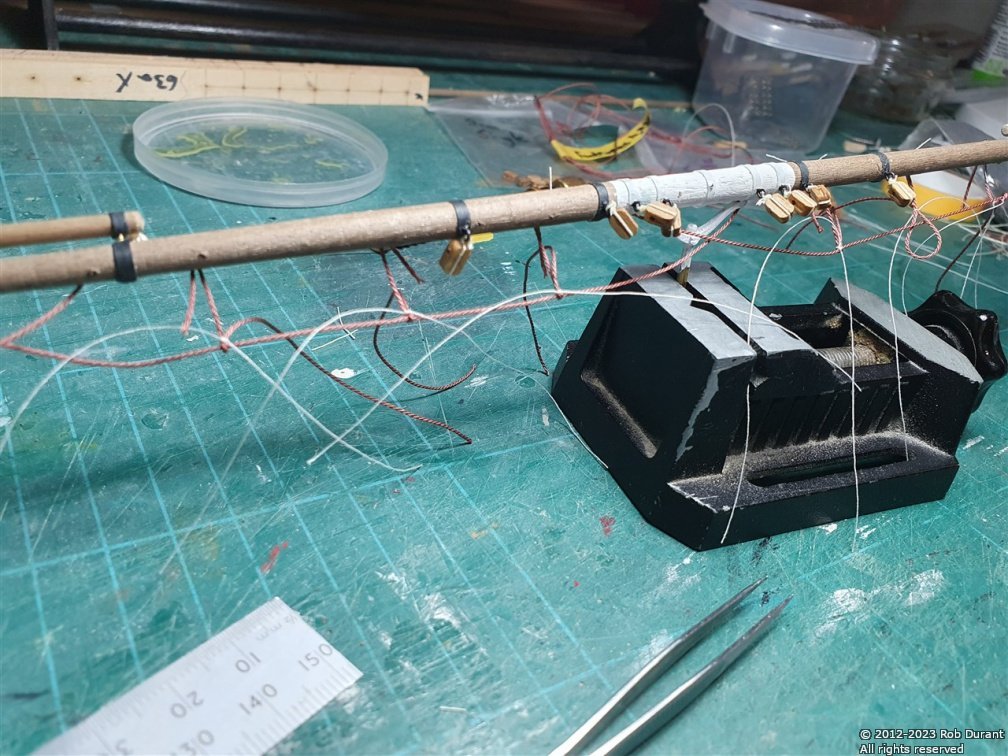
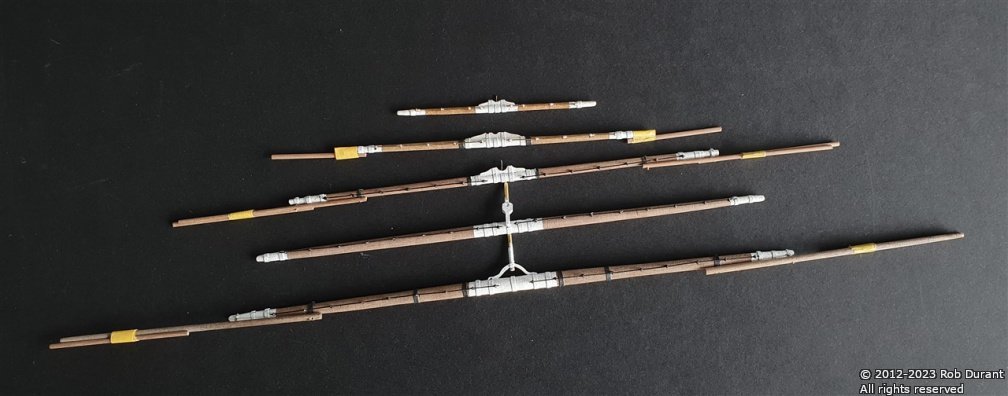
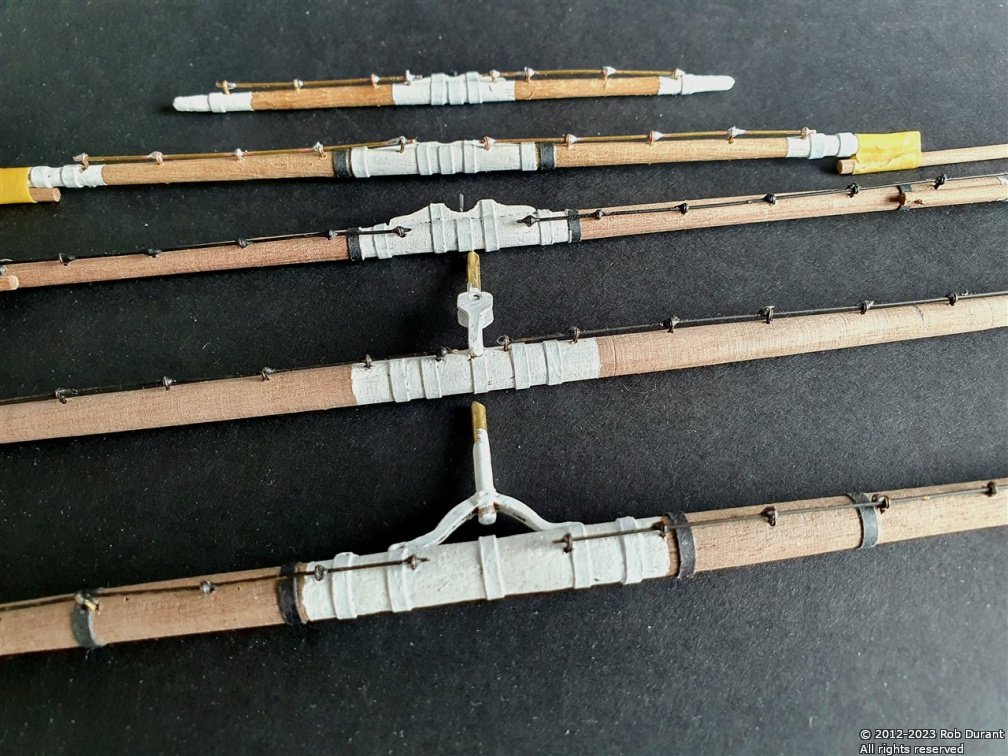
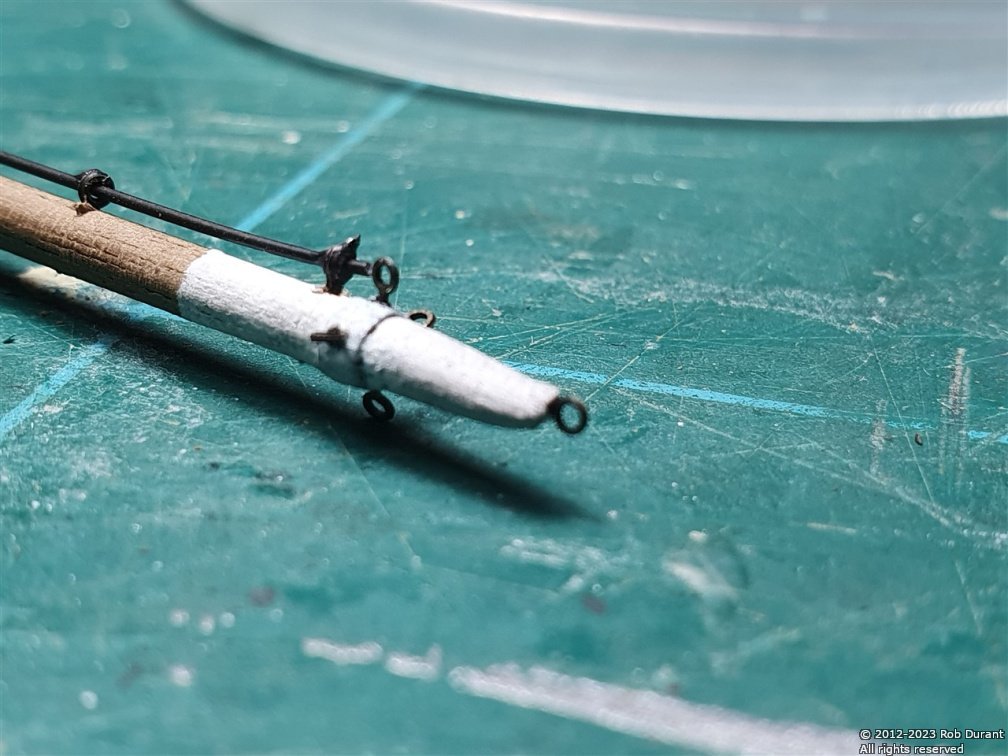
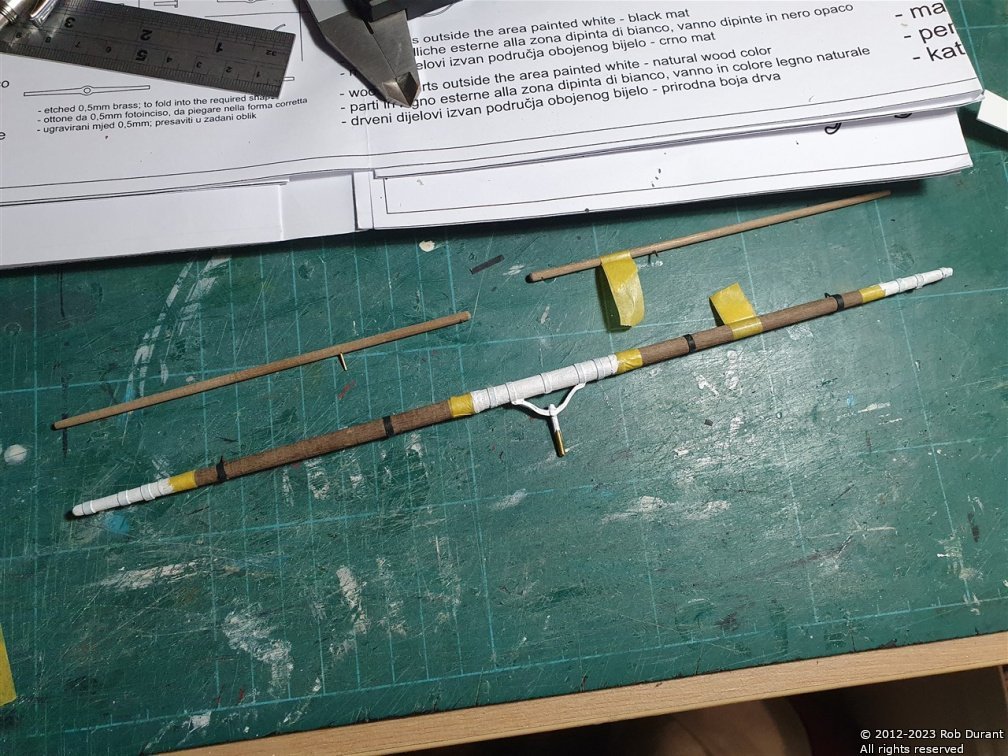
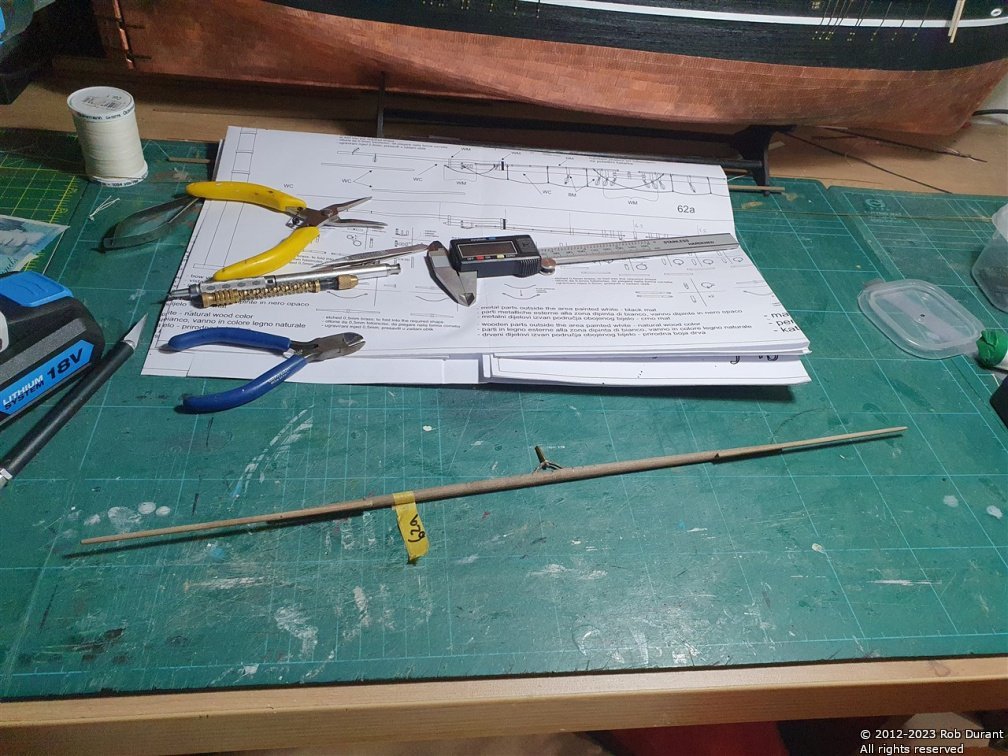
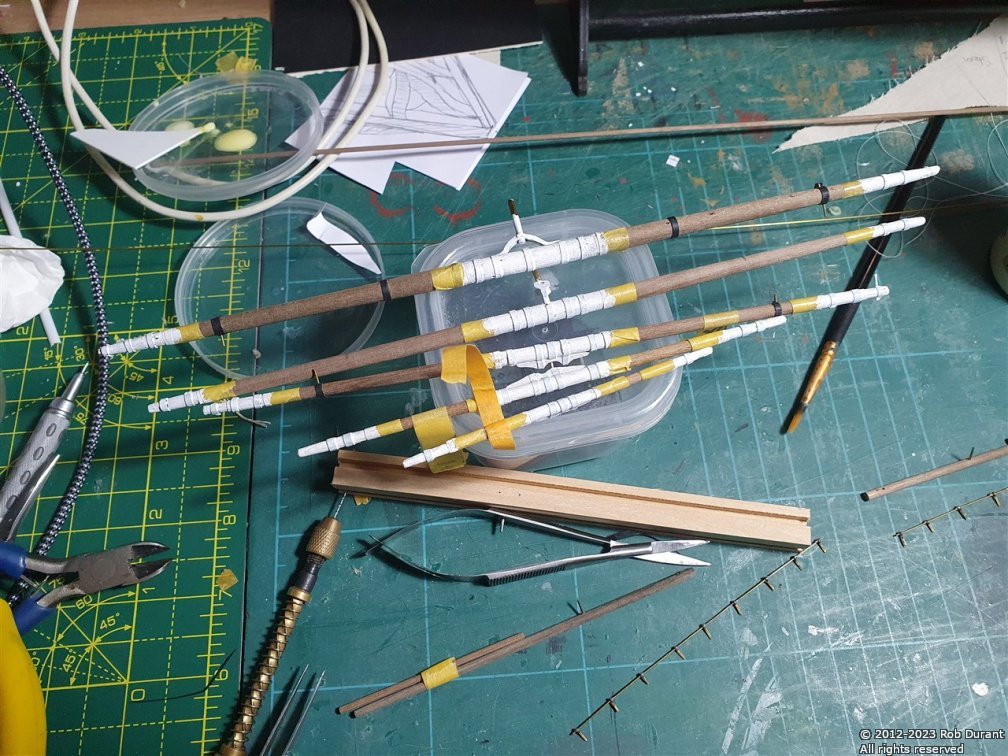
Time for an update. I've had a week off, so progress has been made. I've added all of the iron banding (black card), and painted the tips of the spars. The remaining rails for the yards were assembled using jigs, soldered, sprayed black and installed... Then I began to go through each yard individually (starting with 62, the mainmast royal yard), adding all of the eyelets, blocks and footropes (which are made from 1 strand, 3 threads per strand, ECRU #100 crochet thread, dyed to make approx a 0.5mm rope). This rope is too large for the eyelets, so it's secured to the eyelet using Gutermann sewing thread - the same thread I've used for sewing the sails. The following pictures are from the third yard I've been working on - 62c - the Mainmast upper topsail yard. The stirrups for the footrope are from the same rope. At the same time, the stunsail booms are fixed in position, and the blocks attached. I've attached the topgallant stunsails to the booms they hang from, and attached them to yard 62d (the Mainmast topgallant yard), leaving the belayed end coiled until the yards are finally attached. The Royal and TopGallant sails have then been attached to the rails on the yards, giving the following effect... I've almost ready to attach the Mainmast Upper Topsail to the Upper Topsail yard, but first, I need to put on the reefing points. These will be from #80 DMC Cordonnet crochet thread, which is thin enough to fit through the needle, and unlike the sewing thread, can be glued with watered down PVA so that I can make the reefing points hang more naturally... Time will tell whether this plan works out okay I think that brings me up to date. Thanks for all the likes and encouragment. Rob
-
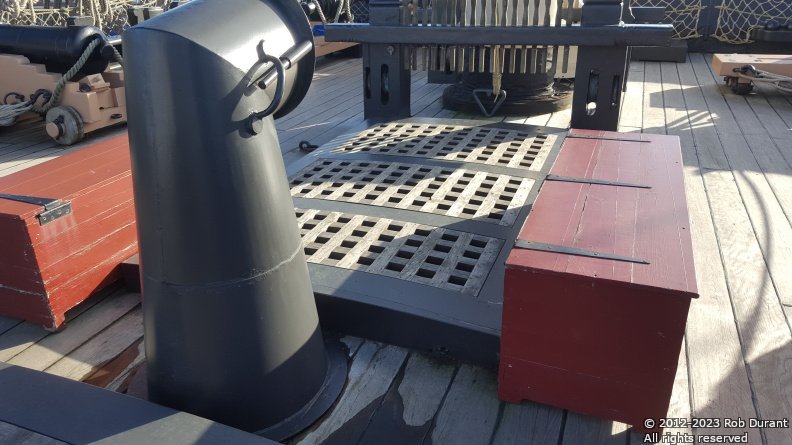
Here is the stack on Victory...
-
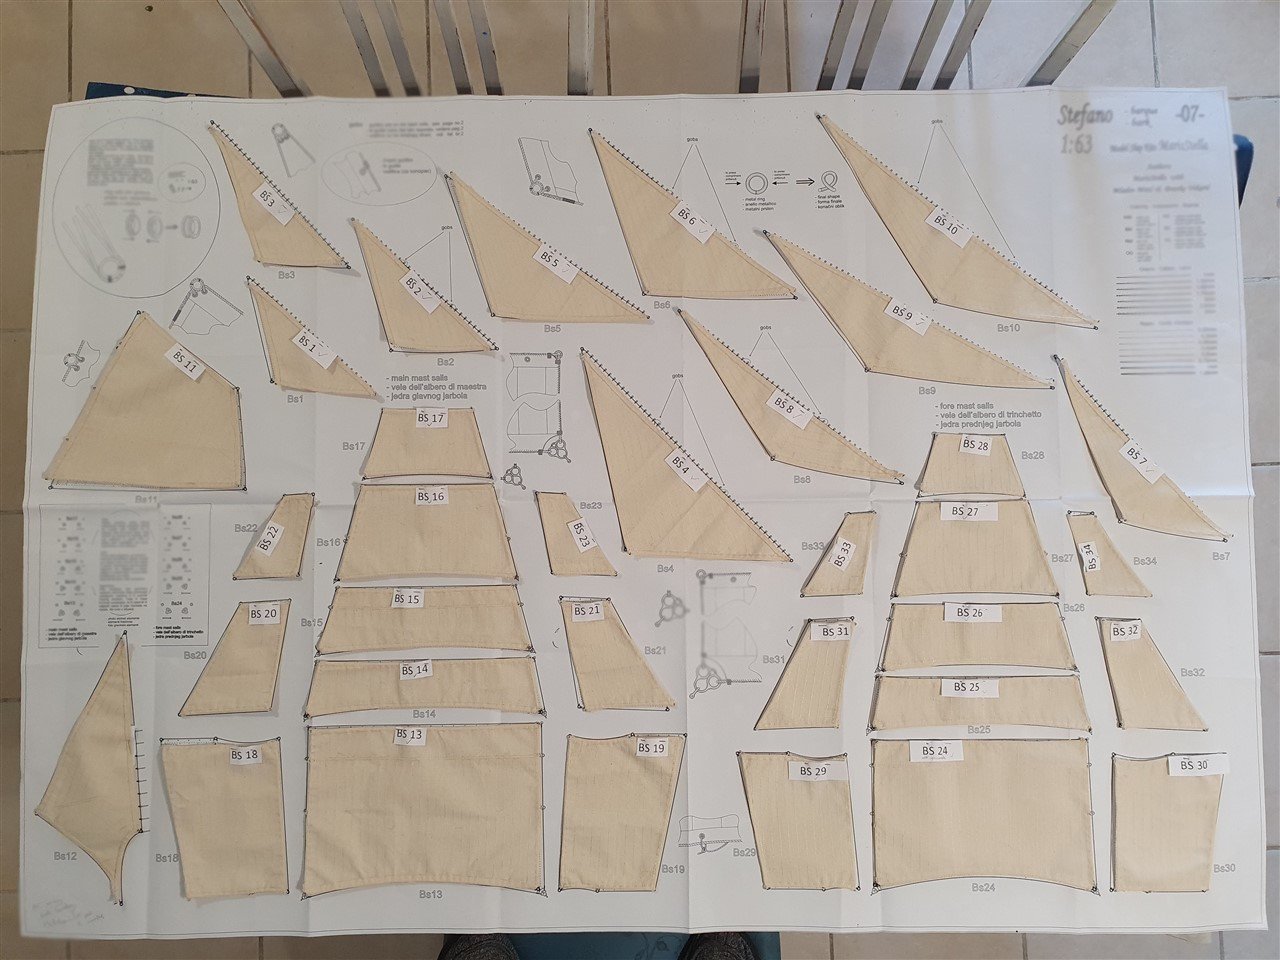
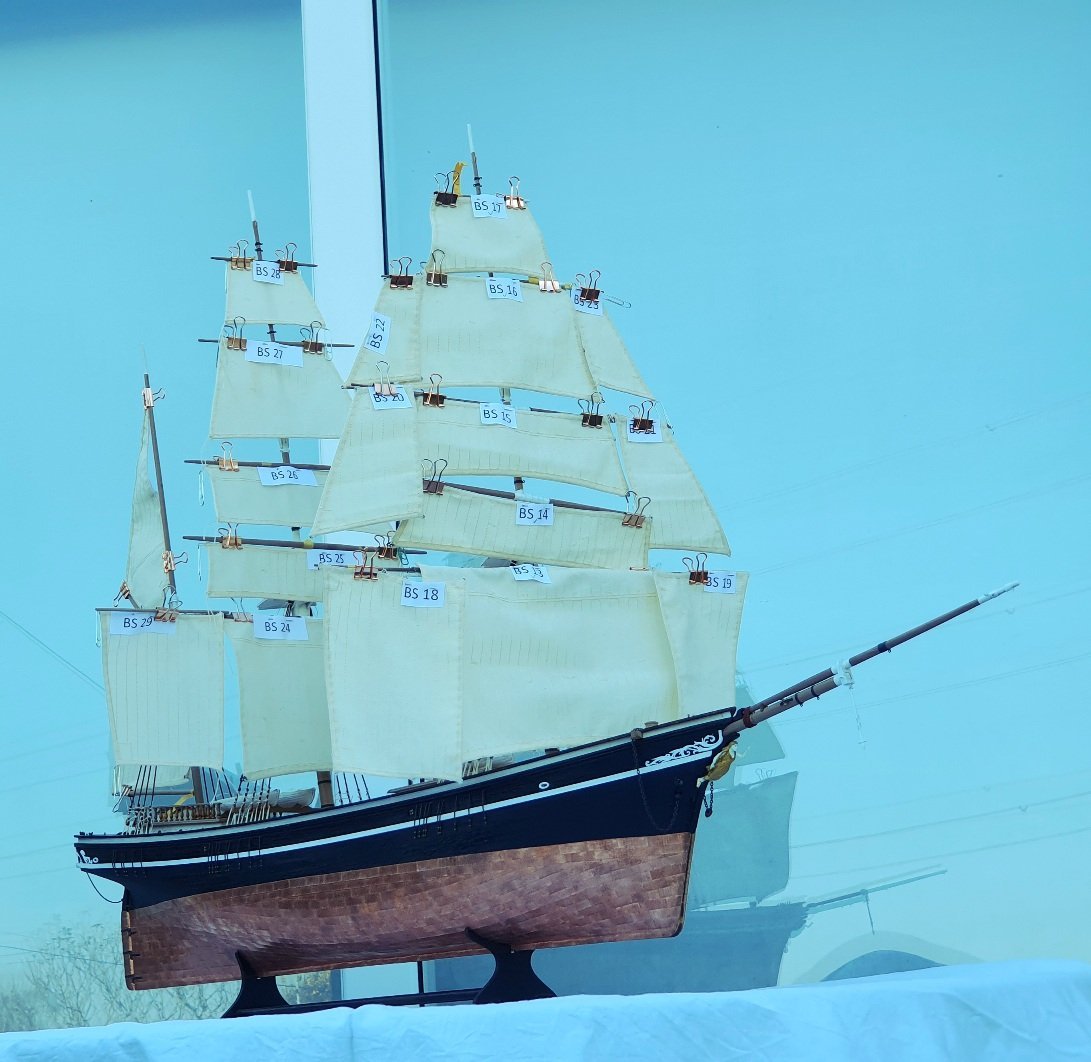
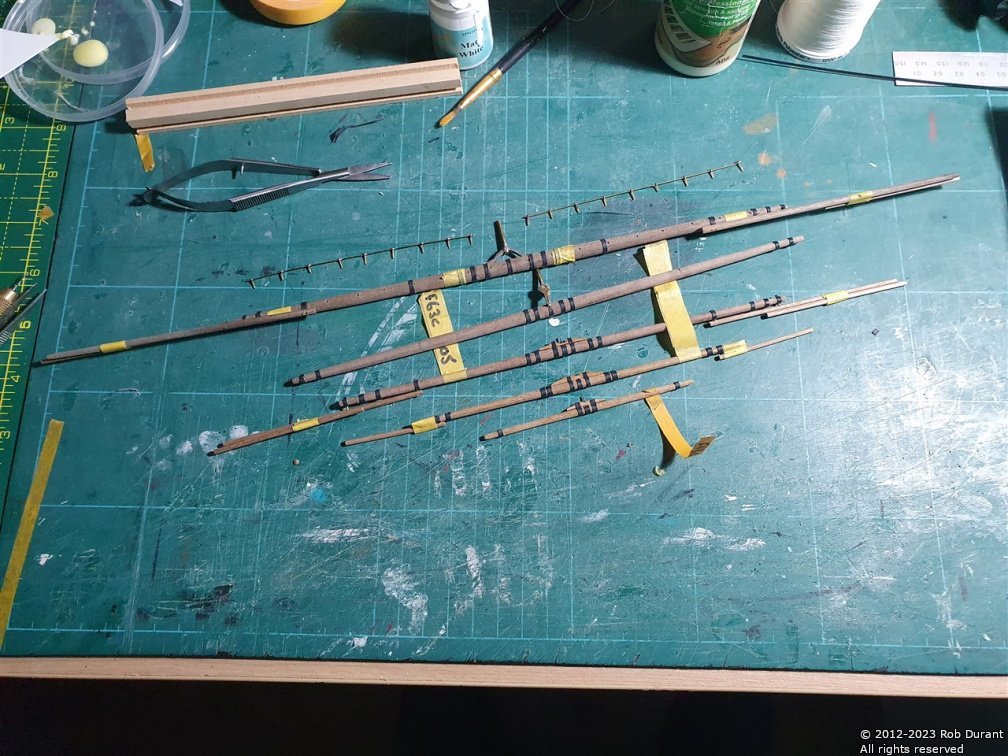
A big milestone today I've just finished sewing the bolt ropes onto the sails... Here's a photo of them all laid out on the plan Onto the reef points, now... Happy building all, and thanks for looking in Rob
-
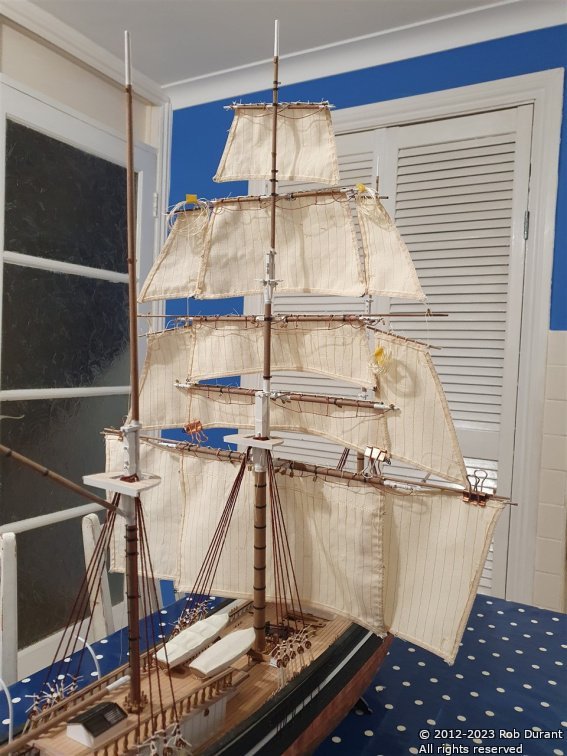
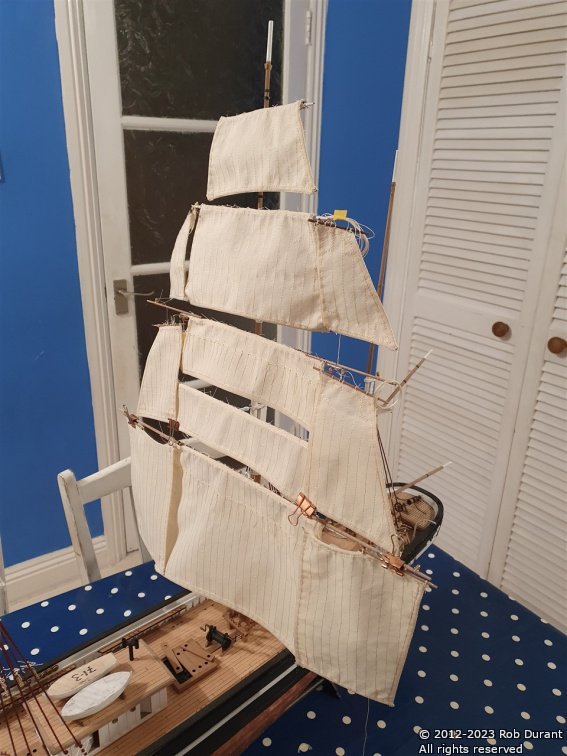
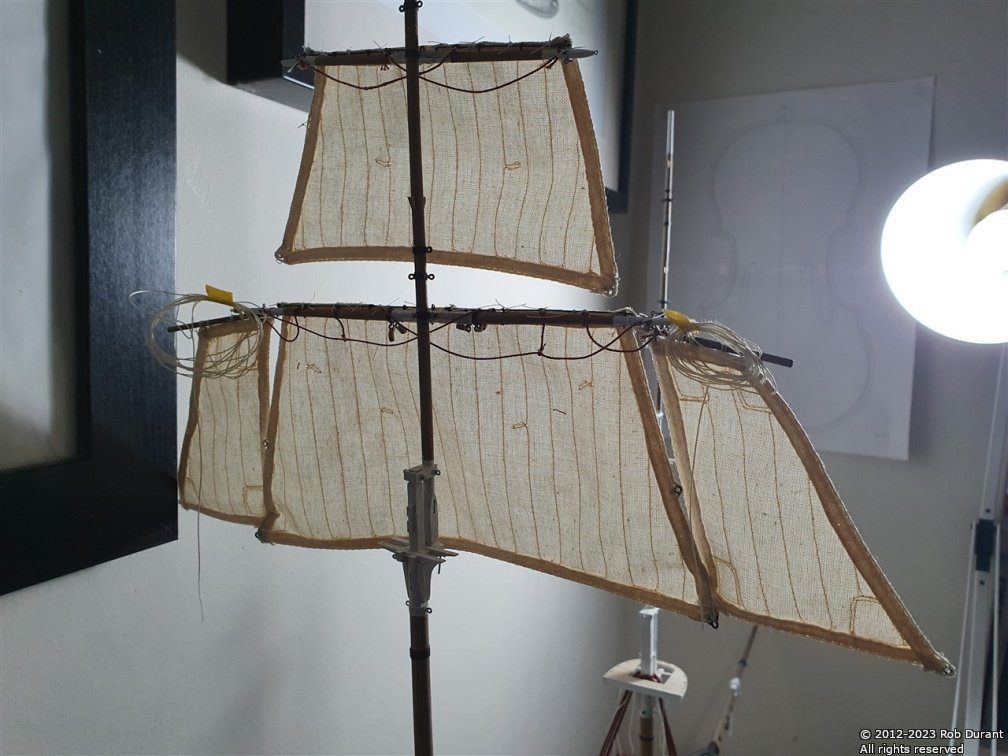
Thank you @rwiederrich and @gak1965. I finally got the model outside as spring is well underway here. Unfortunately in my excitement I hung the main mast sails on the foremast on this photo, but it gives a little idea of how the finished model will look... I haven't finished adding stunsail yards, so the stunsails are missing on the main upper topsail and main top gallant yards, too. Happy building to you all
-
Progress on the sails... I've just finished the bolt ropes on the topsail studding sails for the main mast - that's BS22 and BS23, so I'm two thirds of the way through the sails now... Once I've sewed on the bolt ropes, it'll be reefing points next... I have a plan for how to do that... No photos of this, as it looks almost identical to the many photos I've posted of the sail sewing so far... What I have also been working on is the detailing of the yards, ready for them to carry the sails. I've completed the bands and the painting on the foremast yards, and now I'm working on the mainmast yards. It makes a huge difference to the look of the model, and when I get a chance, I'll take a photo outside with all the yards squared up. Here's are the bands added to the foremast yards... They're made of black card... And here they are painted... And finally, the full width of the main mast main yard, and that same yard, with stunsail booms removed again, so that the white sections can be painted... Thank you for looking in, and for the likes and comments. Rob
-
Aah - thank you, my better half has ordered this for my birthday, so I'm looking forward to having a good look through and getting some inspiration. To return to your earlier comments, I've pondered them, and I think I'm looking to get past plank on bulkhead, but with simplified frames... so probably using the stations rather than re-lofting each frame, and with a simplified structure without cant frames at the bow and stern. I've had another crack at the transom using an angled frame (16 degrees from perpendicular) aft of station 25 - this goes out to the wale. I've re-drafted the transoms and hopefully now it is something more workable... Some pictures... It's not quite perfect yet (and I haven't drafted the inside flow of the transom pieces), but I feel like I'm making progress. It's certainly helpful to be able to make multiple designs and try them all out. Thanks again for all your help Rob
- 55 replies
-
- 11
-

-

-
Thank you Jaager for.this response, I shall take my time to read through this and digest it. Can I take it that Franklin is a book I should be looking at? Mine too, Jason, but Freecad is just that... open source and free of cost to the end user. Thank you for your kind words. It is very absorbing, and a nice change from sewing bolt ropes onto sails
-
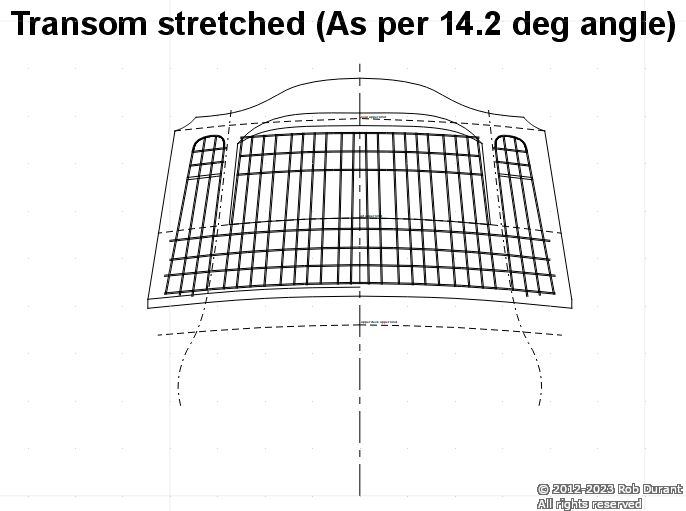
I've spent a little time working on the stern of Bristol to see how it all shapes up... here's my progress. The stern structure was drawn out from the plans, taking care to note how the balcony and accompanying cabin walls fitted, and then the transom was stretched vertically by a factor of 1/Cos(14.2) to make it fit when it was at an angle. Here's the stretched outline... And the part cut out in two parts and glued back to back - the recessed cornice over the cutout was removed on the outer layer, creating a 3d effect - this will be bevelled as well on the final 1:64 model, but as a proof of concept it works. It's also confirmed that the upper deck (third down in the photo below) comes too far back, and will interfere with the stern upper counter as it is. Happy building to you all Rob
-
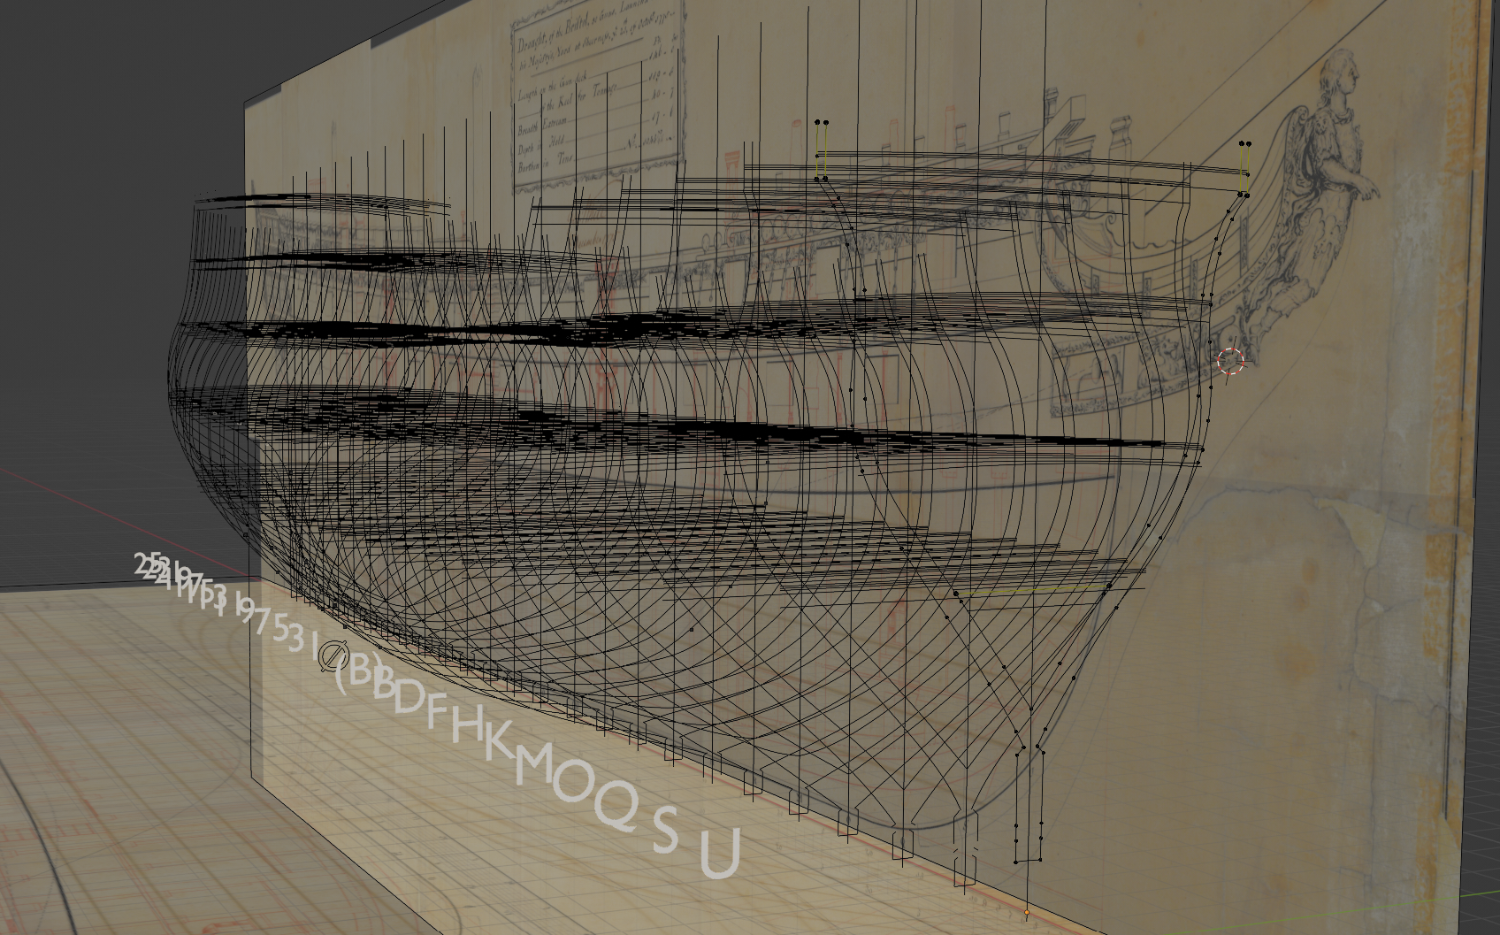
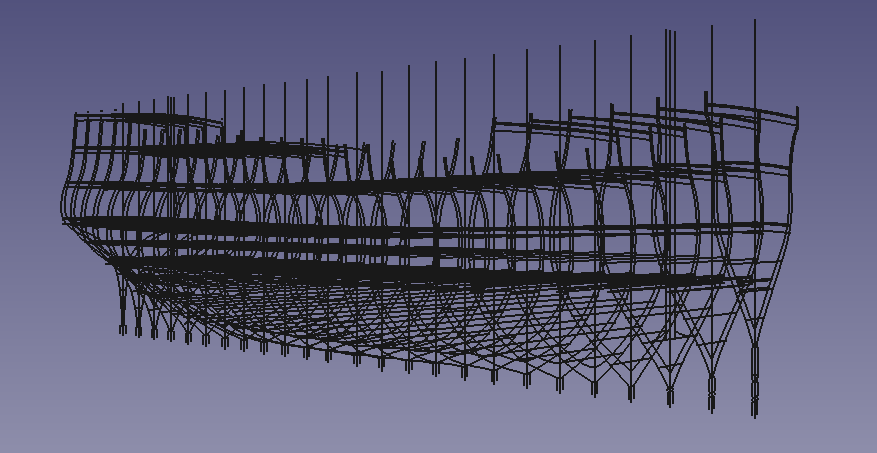
Thank you Chuck, and Druxey, and all of you for your likes and encouragement. I've been playing a little with freecad (3D cad, whereas QCAD is 2D), as I discovered I can lift the 2D cad drawings into it and line them up at the correct distances... If I can join these together, I'm hoping it might make defining the difference from front to bad of each frmae inside and out more quickly than the paper and pencil method I've used before... We'll see, but I'm in no hurry, and the learning is fun... Here's the progress so far. I need to work out how to define the frame at the Aft Perpendicular... I presume this is a case of extending the lines from frame 25 to the transom (these are on the plans) and then seeing where they interpolate. When I get a few hours, I shall make a more concerted attempt, but my battery is dying, so it won't be this evening
-
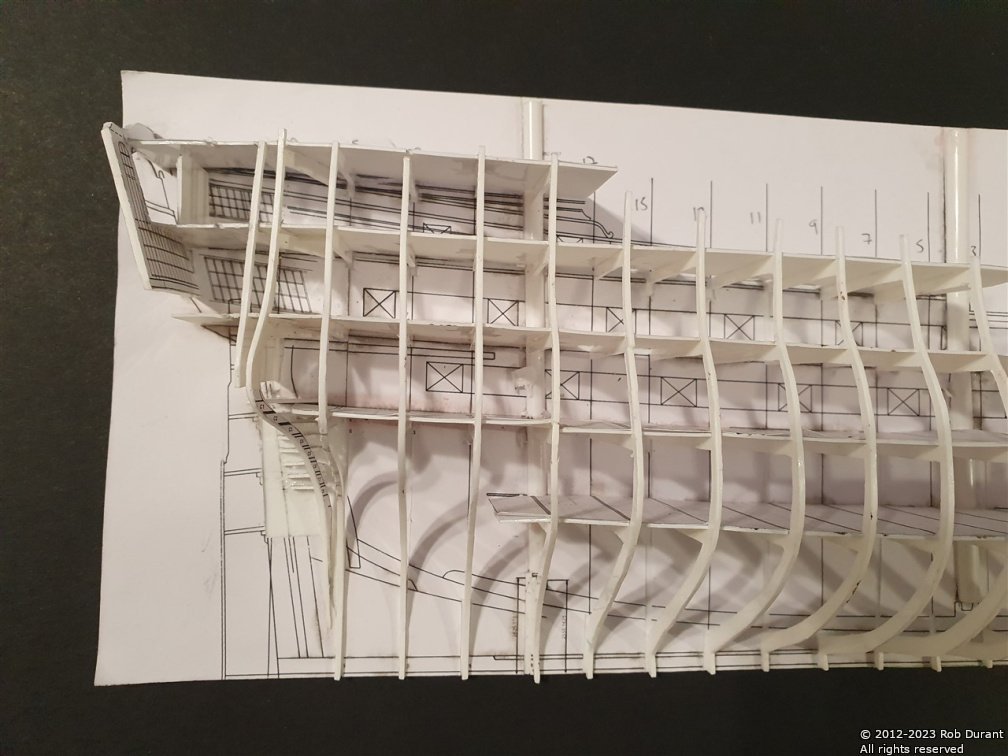
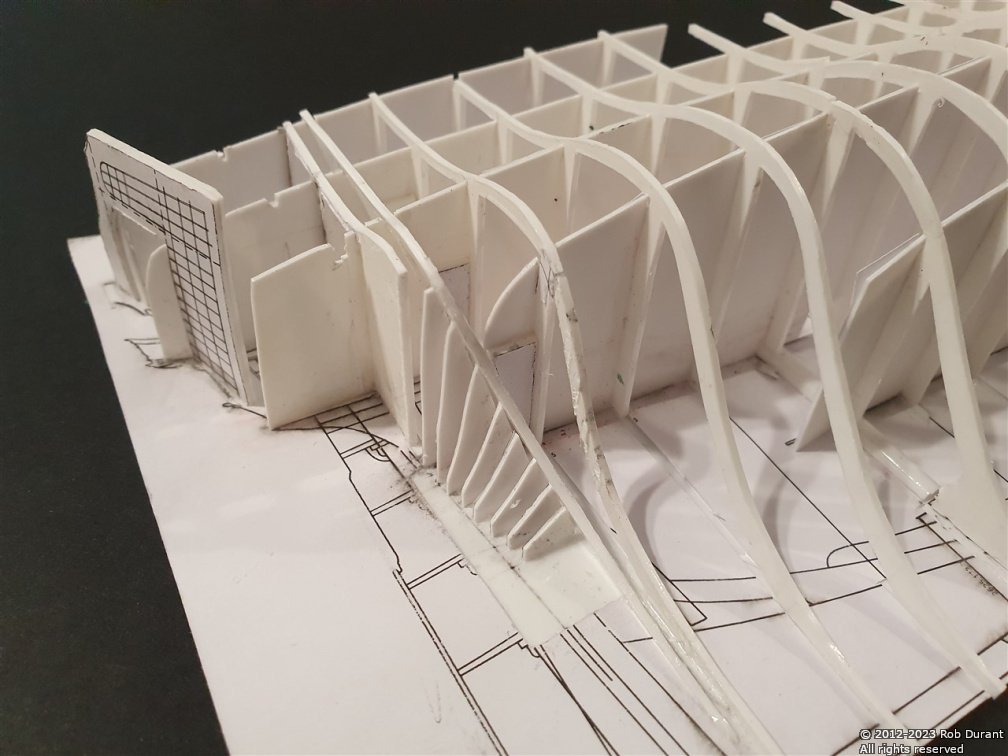
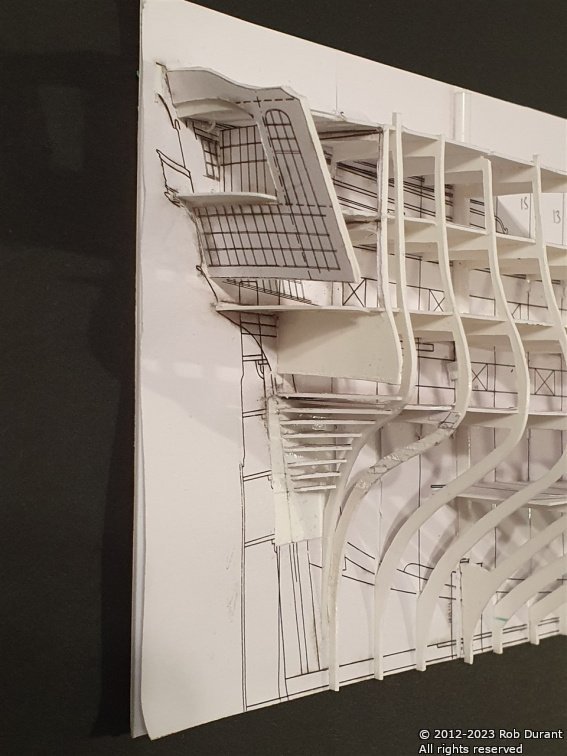
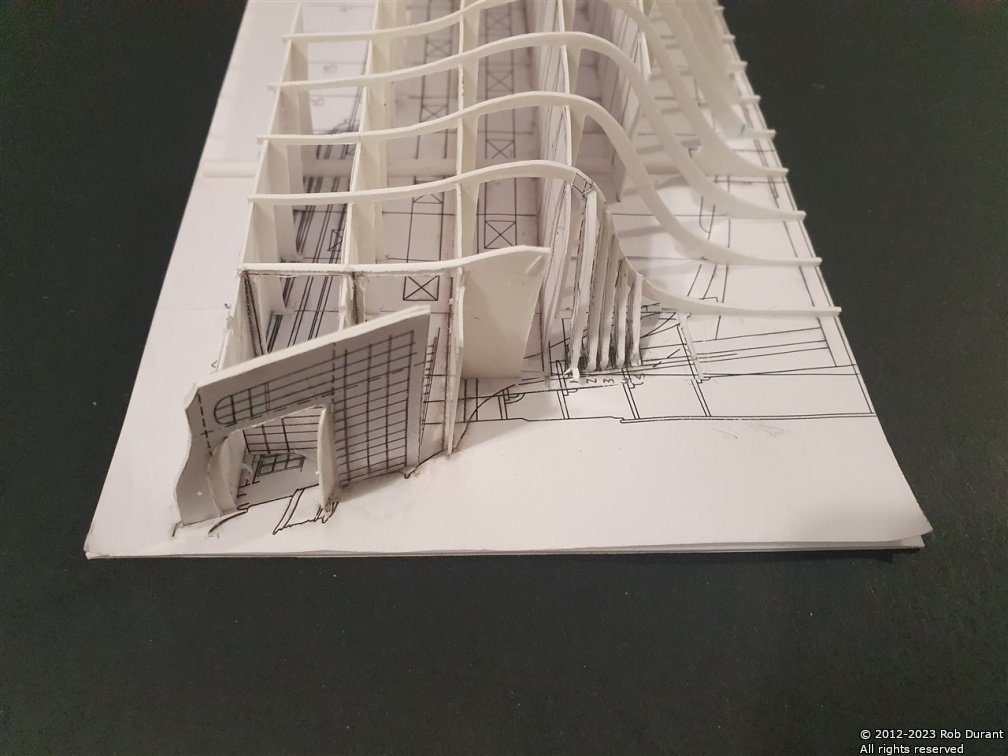
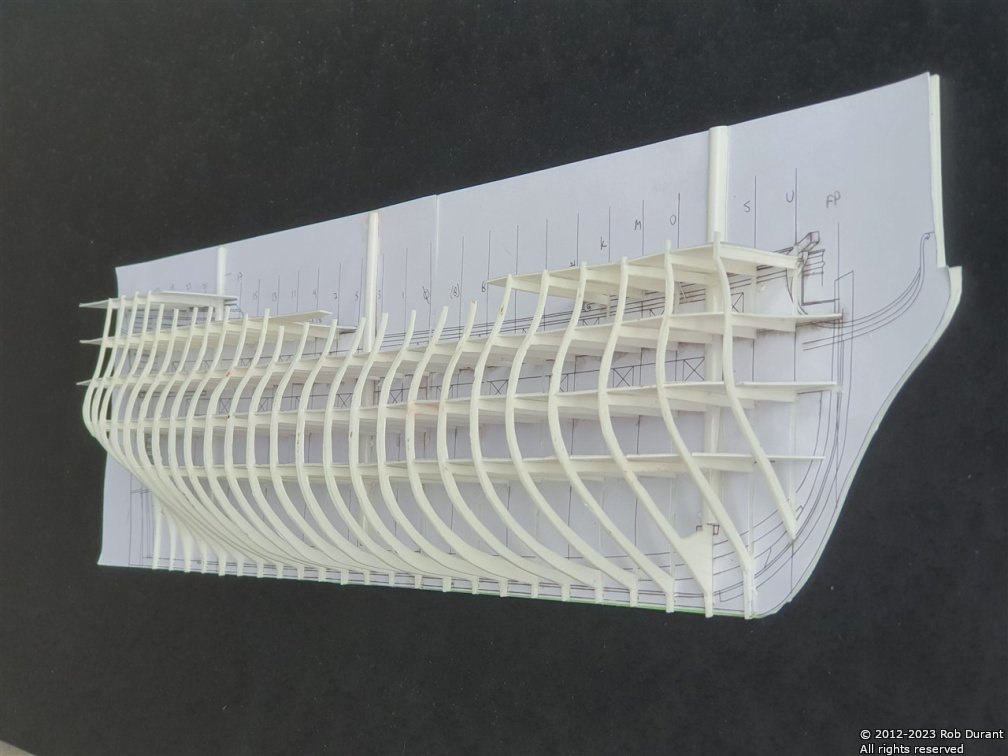
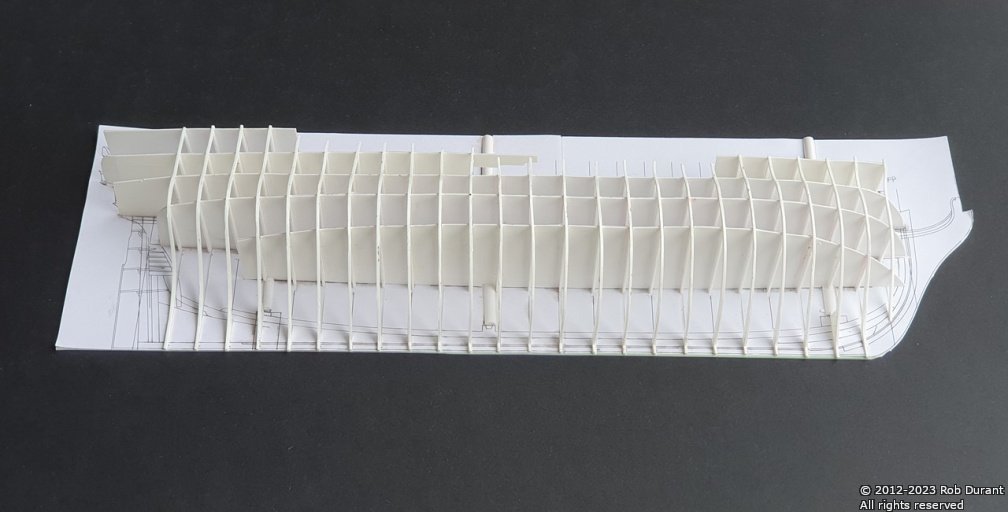
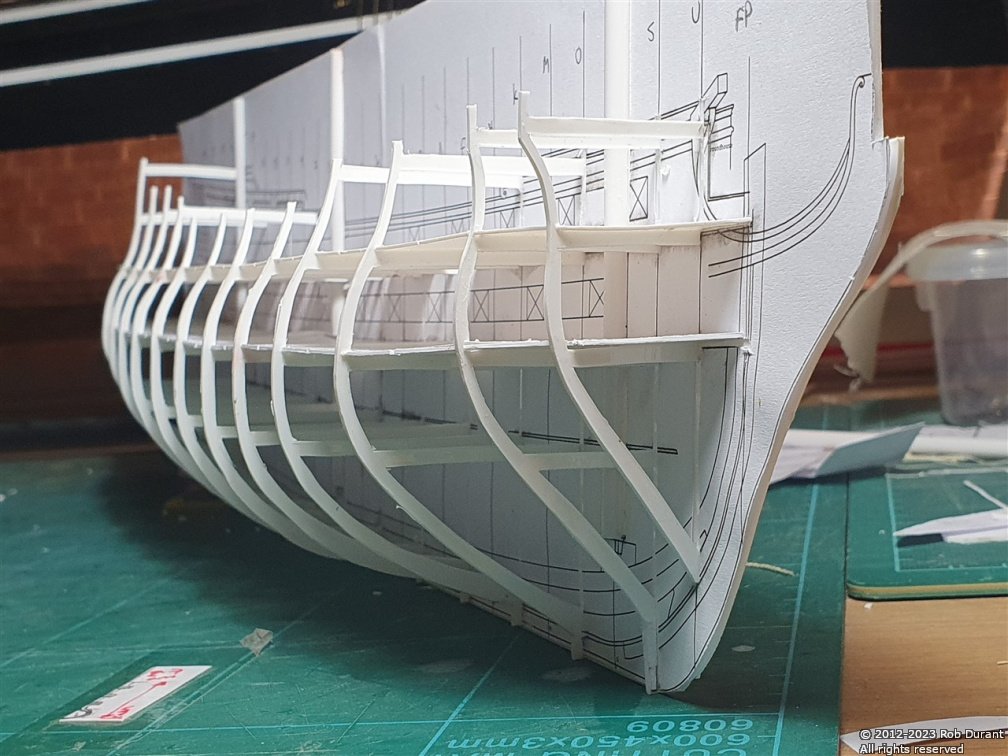
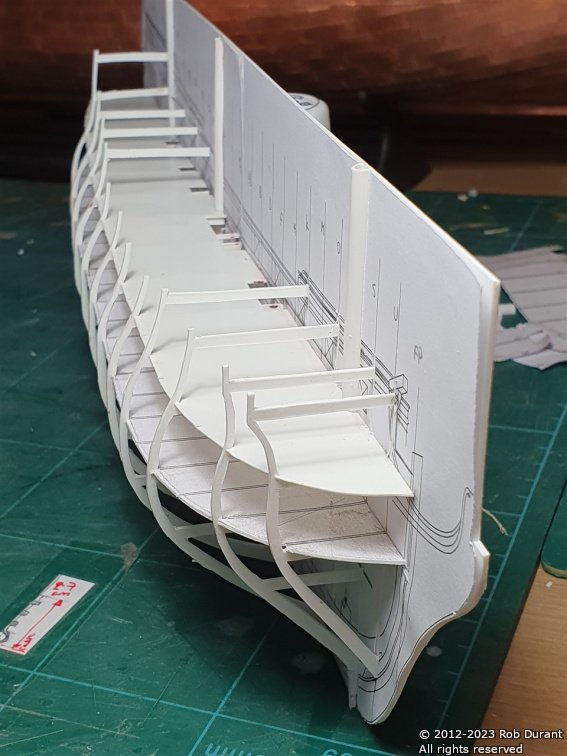
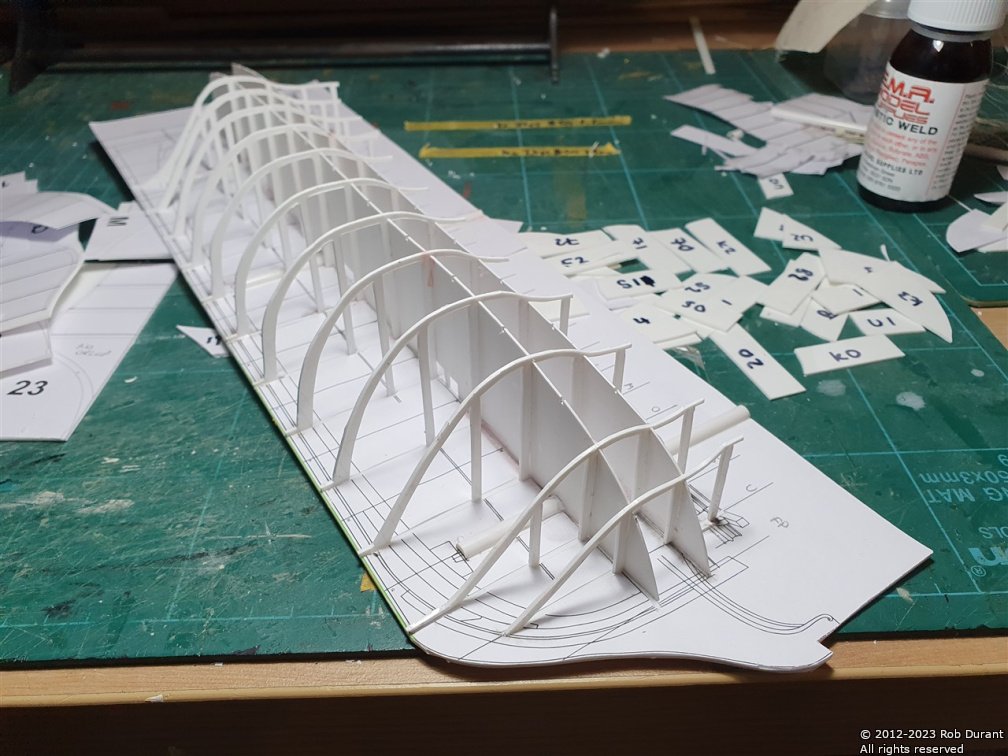
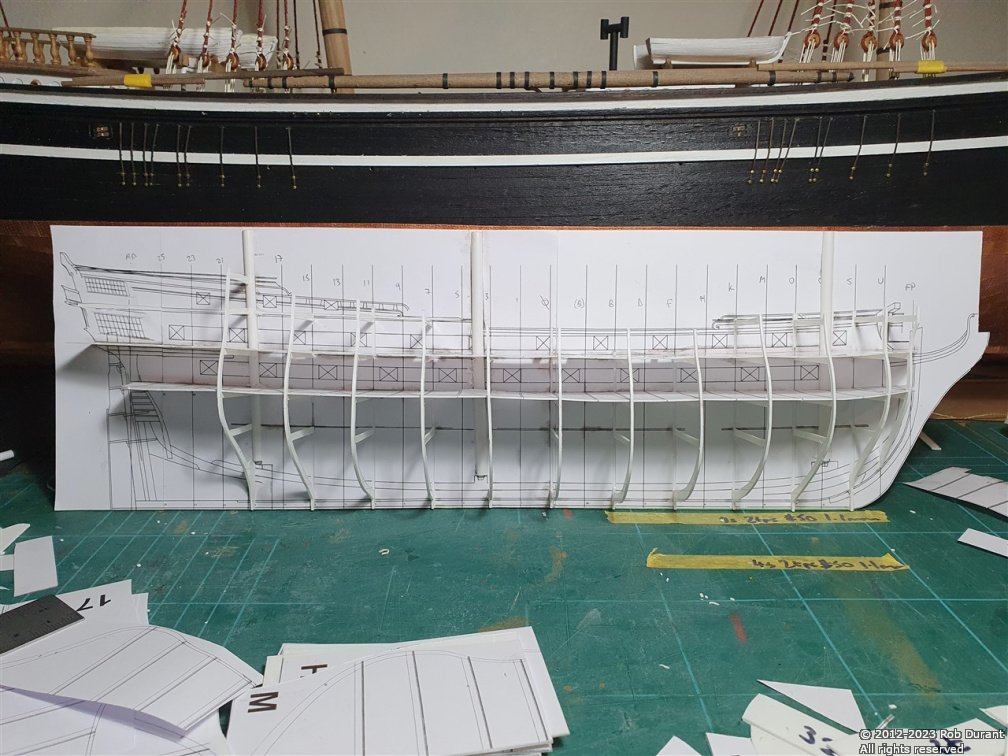
Progress on the 1:128 mockup from my CAD drawings. I've finished cutting out the stations and added the quarterdeck, fo'csle and poop. It's been a helpful exercise in seeing the lines of the vessel, any conflicts in terms of masts / deck cutouts / etc... Now, it's helping me think through how the stern will be constructed. I'm pleased to say that none of the frames look particularly out, except for one (frame 5) where I suspect I probably cut over the line a little... But now I can go back and take a look at this before I move onto the 1:64 scale version!
- 55 replies
-
- 18
-
-
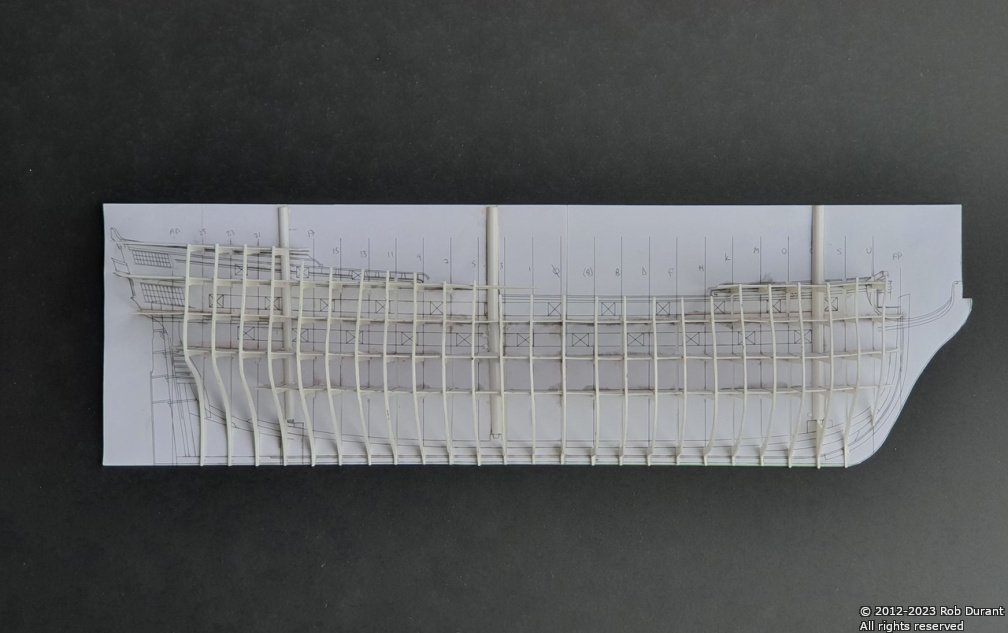
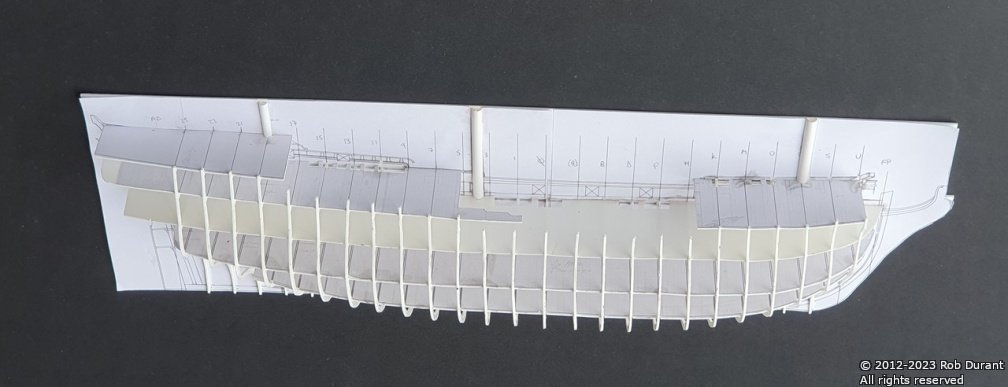
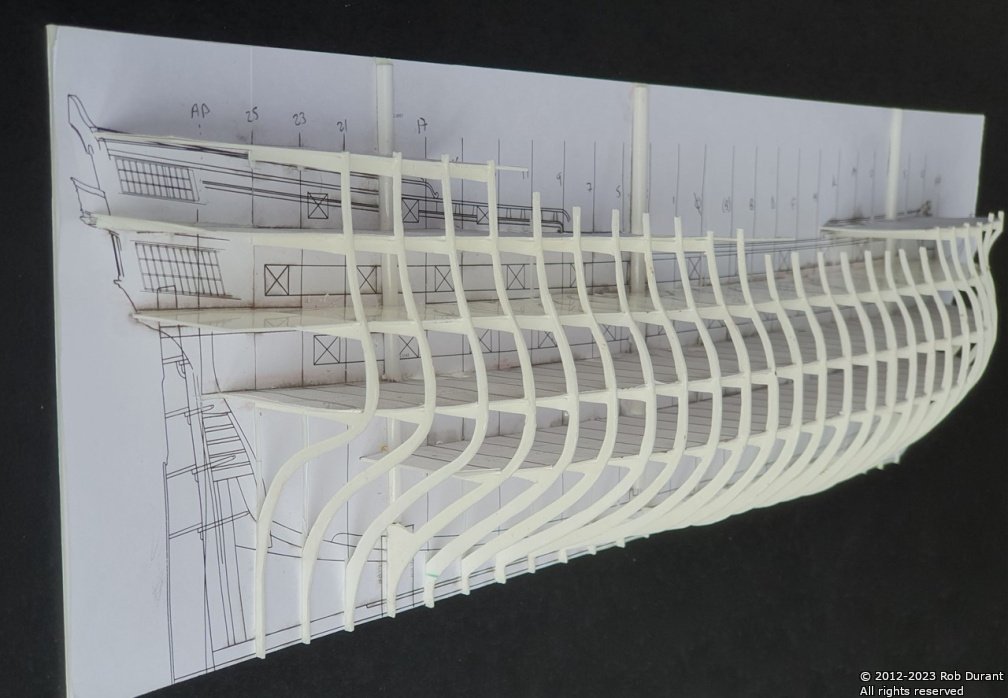
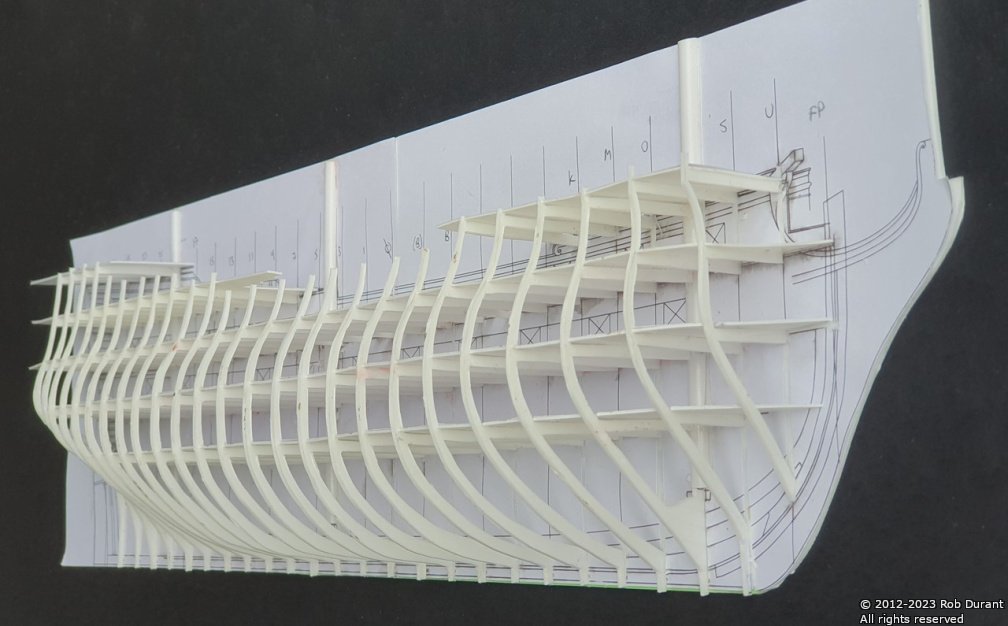
So those numbers above have been refined again by cross referencing back and forwards from the half breadth and station plans... I got to the stage where I wanted to see how things fitted together, and particularly the deck levels and openings on the decks, and where the masts land compared to the stations, etc... So here is a 1:192 styrene half hull in construction. It's only got half its stations in so far, but it's starting to give an idea of how the whole might look.
- 55 replies
-
- 16
-